
Posted on Leave a comment

Cream Cheese Pie Recipe

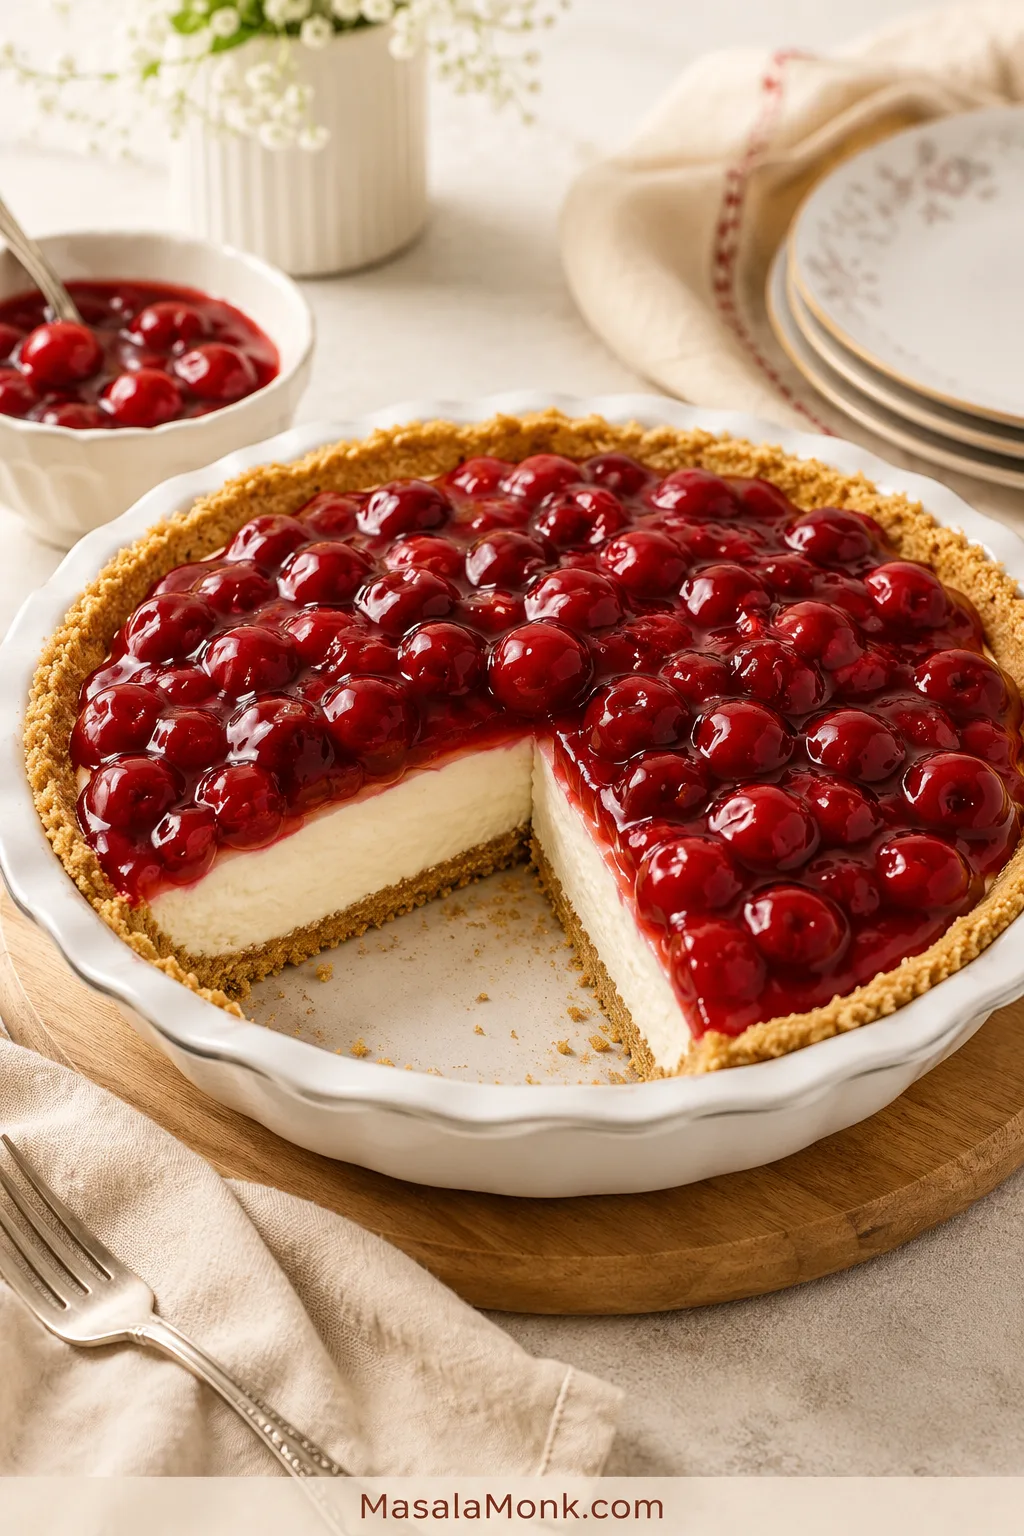
Whole cherry cream cheese pie in a pie dish with one slice removed, showing white filling and graham cracker crust.

Cream cheese pie should be cold, creamy, tangy, and soft enough to feel lighter than cheesecake — but firm enough to cut into a real slice. It is the kind of pie that looks simple in the pan, then feels special when the first chilled wedge lifts out cleanly.

This is the dessert that shows up at potlucks and family dinners, then disappears faster than the showier sweets: a buttery crumb crust, a cool creamy middle, and a glossy fruit topping everyone recognizes before the first slice is cut.

The tricky part is that the name can mean a few different desserts. Some cream cheese pies are no-bake and made with sweetened condensed milk. Others are fluffy with Cool Whip. The baked style uses eggs and sour cream, closer to a shallow cheesecake pie.

This recipe starts with the classic no-bake version: full-fat cream cheese, sweetened condensed milk, lemon juice, vanilla, a graham cracker crust, and optional cherry topping. From there, you can adjust the filling for a baked pie, a lighter whipped topping version, a fresh fruit topping, or a firmer cheesecake-style texture.

The goal is simple: a smooth cream cheese pie that sets properly, slices cleanly, and does not turn runny, lumpy, too sweet, or soggy under the topping.

Quick Answer: What Is Cream Cheese Pie?

Cream cheese pie is a creamy pie made with sweetened cream cheese filling in a graham cracker crust or pie crust. It can be no-bake and served chilled like an icebox pie, or baked like a lighter, shallower cheesecake pie.

For a taller chilled dessert with a thicker cheesecake-style set, try this no-bake cheesecake recipe instead.

The save-this rule: use full-fat brick cream cheese, soften it until smooth but still cool, keep the lemon juice, chill the pie for 6 to 8 hours, and wait to add fruit until the filling is firm.

Make This When

This is a good pie for the day before company comes, because the fridge does most of the work while you move on with the rest of the meal.

  • Cheesecake flavor sounds good, but a full cheesecake feels like too much work.
  • A make-ahead dessert would make the meal easier.
  • Dessert needs to happen without turning on the oven.
  • An old-fashioned cherry-topped pie fits the potluck, holiday, or Sunday dinner table.
  • One reliable base should work with cherry, strawberry, blueberry, lemon, or pineapple topping.

Start Here Before You Mix

Cream Cheese Pie at a Glance

Main styleNo-bake condensed milk cream cheese pie
Pan9-inch / 23 cm pie crust
Filling4 ingredients: cream cheese, condensed milk, lemon juice, vanilla
Cream cheeseFull-fat brick cream cheese
Chill time6 to 8 hours; overnight is best
Best toppingCherry pie filling added after the chilled base is firm
TextureCreamy, tangy, sliceable, softer than baked cheesecake
Best make-ahead planChill the plain pie overnight; top it before serving

No-Bake Cream Cheese Pie Recipe

This is the easy chilled pie: a 4-ingredient cream cheese filling in a graham cracker crust, finished with cherry pie filling when you want the old-fashioned fruit-topped style. The cherry version is the one many people remember from family tables: cool white filling, glossy red topping, and a buttery graham crust that somehow tastes even better the next day.

  • Yield: 8 slices
  • Prep time: 10 minutes
  • Chill time: 6 to 8 hours
  • Total time: 6 hours 10 minutes minimum
  • Pan: 9-inch / 23 cm pie crust
  • Method: No-bake
  • Best for: make-ahead holidays, potlucks, Sunday dinners, and no-bake summer desserts
  • Texture: creamy, tangy, smooth, and sliceable; softer than baked cheesecake

Before you start: for the safest first try, use the condensed milk filling, soften the cream cheese until cool-soft, chill the pie overnight, and add cherry topping only after the filling sets. In most kitchens, 30 to 45 minutes at room temperature softens cream cheese enough; in a hot kitchen, check sooner so it does not melt.

Ingredients

IngredientAmountNotes
Full-fat brick cream cheese8 oz / 226 gSoftened but still cool
Sweetened condensed milk14 oz / 397 gOne standard can; do not use evaporated milk
Fresh lemon juice⅓ cup / 80 mlBalances sweetness and helps the filling thicken
Vanilla extract1 tsp / 5 mlAdds warmth
Prepared graham cracker crust1 9-inch / 23 cm crustStore-bought or homemade
Cherry pie filling, optional20 to 21 oz / 565 to 595 gUse enough to cover the top without weighing down the filling

Instructions

  1. Beat the cream cheese first. Add the softened but still cool cream cheese to a mixing bowl. Beat until smooth and creamy, scraping the sides and bottom of the bowl so no firm pieces remain.
  2. Add the condensed milk slowly. Pour in the sweetened condensed milk gradually while mixing on low to medium speed. Scrape the bowl again.
  3. Mix in lemon juice and vanilla. Add the lemon juice and vanilla. Mix only until the cream layer is smooth and combined.
  4. Fill the crust. Spoon the mixture into the graham cracker crust and smooth the top.
  5. Chill until set. Cover and refrigerate for at least 6 hours, preferably overnight, until the center is firm enough to slice.
  6. Add the topping. Spread cherry pie filling over the chilled base after it has set. For the cleanest look, add it 1 to 2 hours before serving.
  7. Slice cold. Cut with a clean, sharp knife while the pie is cold. Wipe the knife between slices for neater wedges.

Recipe Notes

  • Use full-fat brick cream cheese, not whipped cream cheese or spreadable tub cream cheese.
  • Lemon juice helps the condensed milk mixture thicken, but chill time and full-fat cream cheese still matter.
  • If your topping is very sweet, keep the filling as written and do not add extra sugar.
  • Two to four hours may give you a soft set; 6 to 8 hours gives cleaner slices.
  • Add fruit topping after the creamy center is firm, especially for a clean white layer under the fruit.
  • Keep the pie cold until serving.

Before the detailed tips begin, this is the finished texture you are aiming for: a cold, creamy slice that holds together without feeling as dense as baked cheesecake.
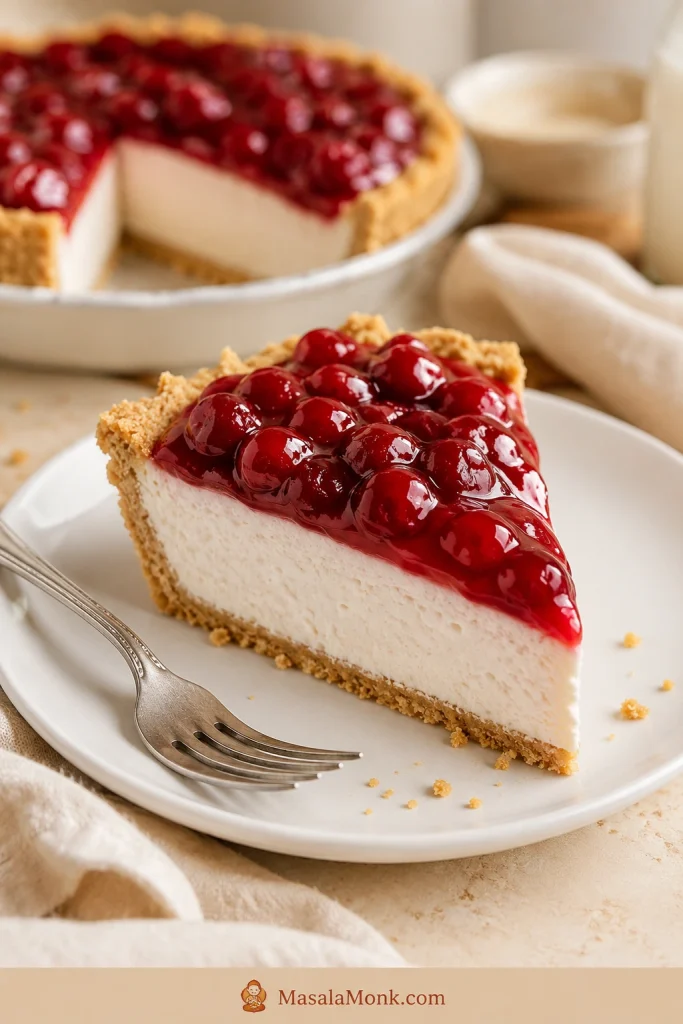
Slice of no-bake cream cheese pie on a white plate with cherry topping, white filling, and graham cracker crust.
This is the slice you are aiming for: cold enough to stand neatly, but still softer and creamier than a baked cheesecake.

Equipment You’ll Need

You do not need a springform pan, water bath, or special dessert tools. A bowl, mixer, spatula, and pie crust are enough — the important part is getting the cream cheese smooth before anything thinner goes in.

  • 9-inch / 23 cm pie plate or prepared graham cracker crust
  • Mixing bowl
  • Hand mixer or stand mixer
  • Rubber spatula
  • Measuring cups and spoons
  • Sharp knife for slicing
  • Small saucepan, only for a cooked strawberry or blueberry topping

Do This, Not That

This is still an easy pie. A few small choices simply make the difference between neat chilled wedges and a softer spoonable dessert.

Do ThisNot ThisWhy It Matters
Use full-fat brick cream cheeseUse spreadable tub cream cheeseBrick cream cheese gives the filling better body
Soften cream cheese until cool-softUse it fridge-hard or warm and greasyToo cold causes lumps; too warm can make the mixture loose
Beat cream cheese before adding condensed milkAdd everything at onceSmoothing the cream cheese first prevents hidden lumps
Use lemon juice in the condensed milk fillingSkip it and expect the same textureLemon balances sweetness and helps the filling thicken
Chill 6 to 8 hoursRush it after 2 hoursThe center needs time to firm up all the way through
Add fruit topping after the filling setsAdd watery topping before chillingThis keeps the white layer clean and helps protect the crust
Slice the pie coldLet it sit warm before cuttingThe filling softens at room temperature

Here is the visual checklist after the rule table: smooth the cream cheese first, keep the lemon juice, chill fully, and add fruit only after the filling firms.
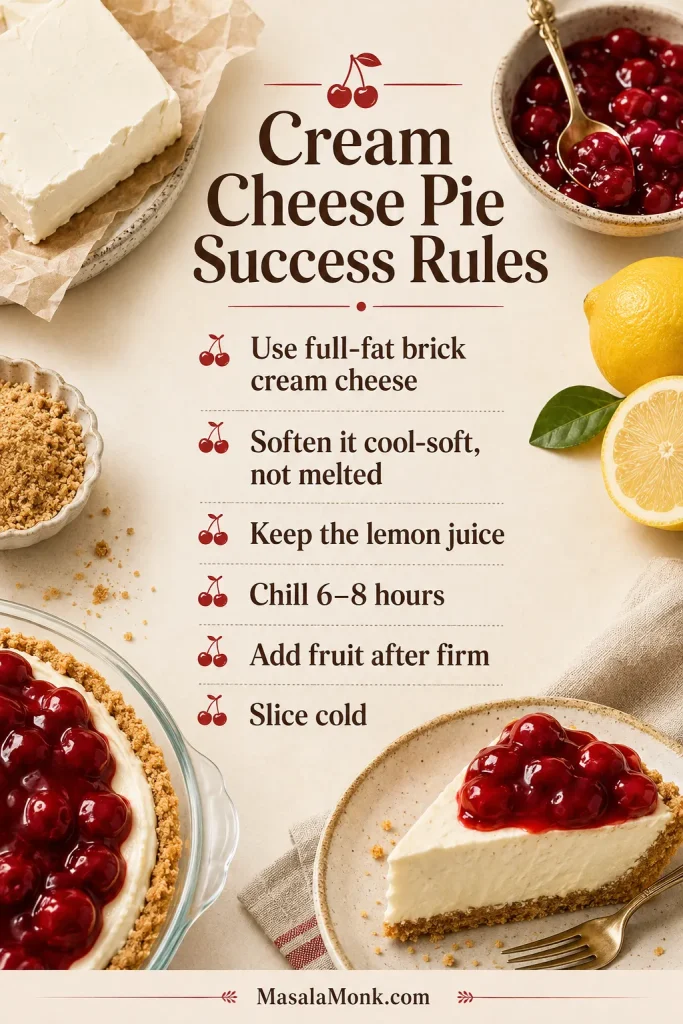
Infographic listing cream cheese pie success rules with cream cheese, lemon, graham crumbs, cherry topping, and pie details.
Use these success rules as your quick checkpoint: smooth cream cheese first, lemon for balance, full chill time, and topping after the filling firms.

Why This Recipe Works

Cream cheese gives the pie tang, richness, and body. Sweetened condensed milk adds sweetness and a thick, smooth base. Lemon juice cuts through the richness and helps the condensed milk mixture firm up as it chills. Vanilla rounds out the flavor so the filling tastes creamy, not flat.

The refrigerator finishes the job. Once the filling sits cold for long enough, the center catches up with the edges and the pie becomes sliceable. Overnight chilling is not just a waiting step; it is when the pie becomes itself.

What a Good Slice Should Look Like

A good slice should stand on the plate without slumping. Look for a smooth white cream layer, a topping that sits mostly on top, and a crust that cuts cleanly instead of turning into wet crumbs.

Before chilling, the mixture should look glossy and thick enough to hold soft waves from the spatula. After chilling, the center should feel firm when gently touched.
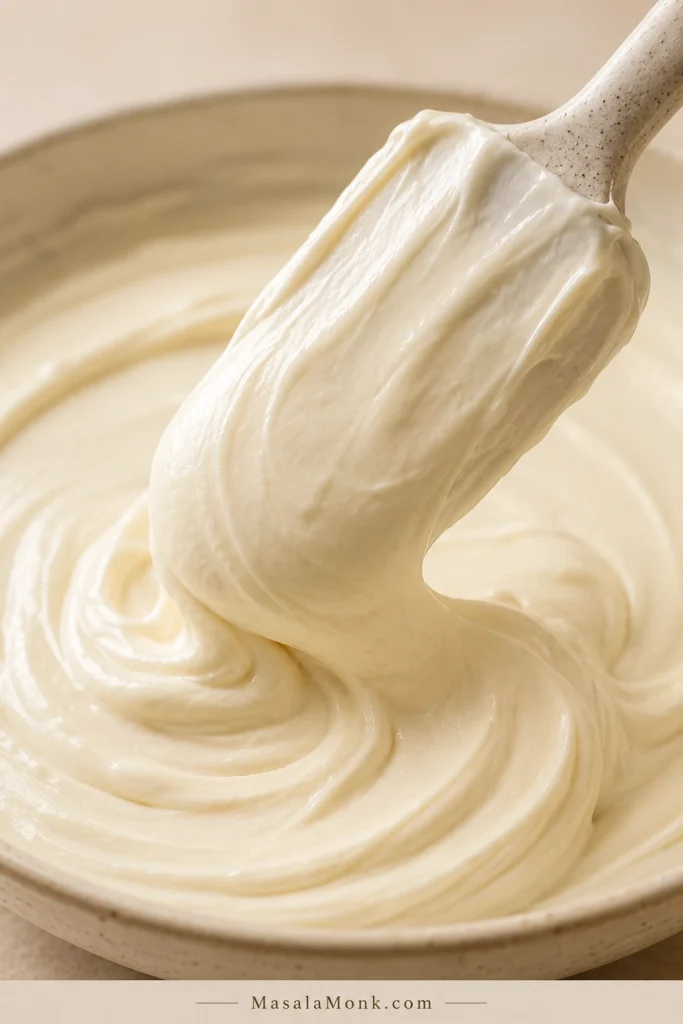
Spatula lifting smooth, glossy cream cheese pie filling from a bowl before chilling.
At this stage, look for soft waves in the filling; that texture means it is smooth enough to spread and thick enough to set.

Choose Your Version

If you have opened a few cream cheese pie recipes and they all look different, this is why: the same name can point to several different styles. Choose the one you actually want before you start mixing.

This is where the recipe becomes flexible instead of one fixed formula.
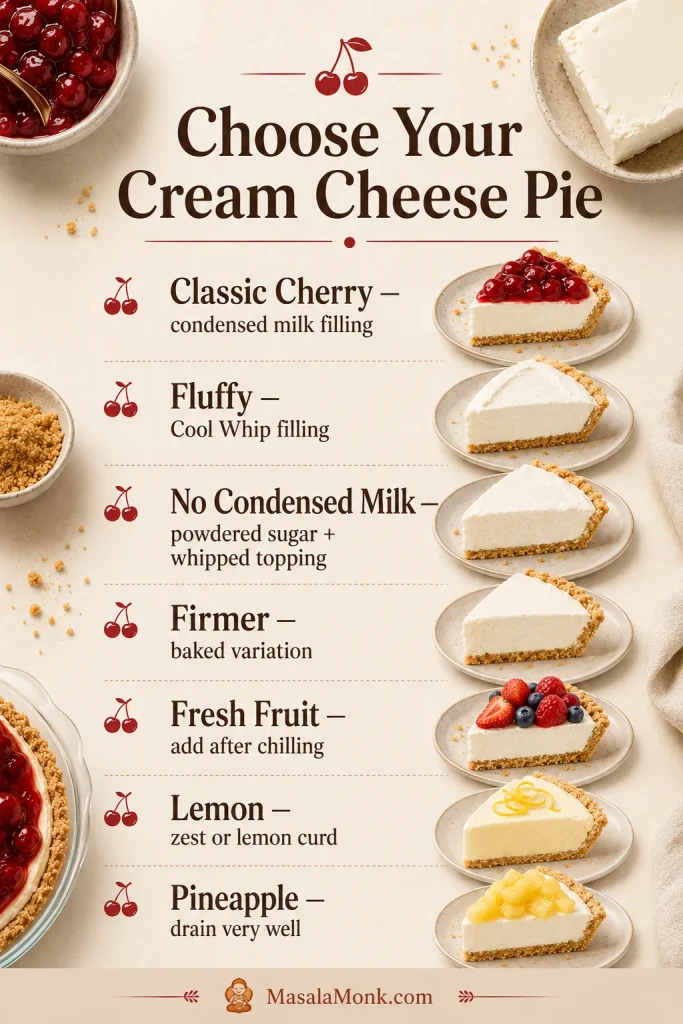
Decision chart showing cream cheese pie versions, including classic cherry, Cool Whip, baked, fresh fruit, lemon, and pineapple.
Choose the version before you mix: condensed milk makes the classic pie, Cool Whip makes it fluffier, and baking gives a firmer set.
You Want…Make This StyleWhat to Expect
Classic cherry cream cheese pieNo-bake condensed milk fillingSmooth, tangy, sweet, nostalgic
A lighter, fluffier pieCool Whip fillingSofter and mousse-like
No condensed milkCool Whip + powdered sugar fillingStill creamy, less dense
Firmer cheesecake-style pieBaked cream cheese pieRicher, firmer, custard-like
Fresh strawberry or blueberry pieNo-bake base + cooled fruit toppingBrighter and more seasonal
Pineapple cream cheese pieNo-bake base + very well-drained pineappleRetro, tropical, softer if fruit is wet
Lemon cream cheese pieNo-bake base with more lemon zest or lemon curd toppingBrighter and tangier

For a first attempt, start with the no-bake condensed milk filling. It gives the familiar flavor and is the easiest to get right when it chills long enough.

No-Bake vs Baked

The no-bake pie is softer, colder, and more like an icebox dessert. Baked cream cheese pie is firmer and closer to cheesecake. Choose no-bake for the easiest cherry-topped dessert; choose baked when you want eggs, sour cream, and a more custard-like center.
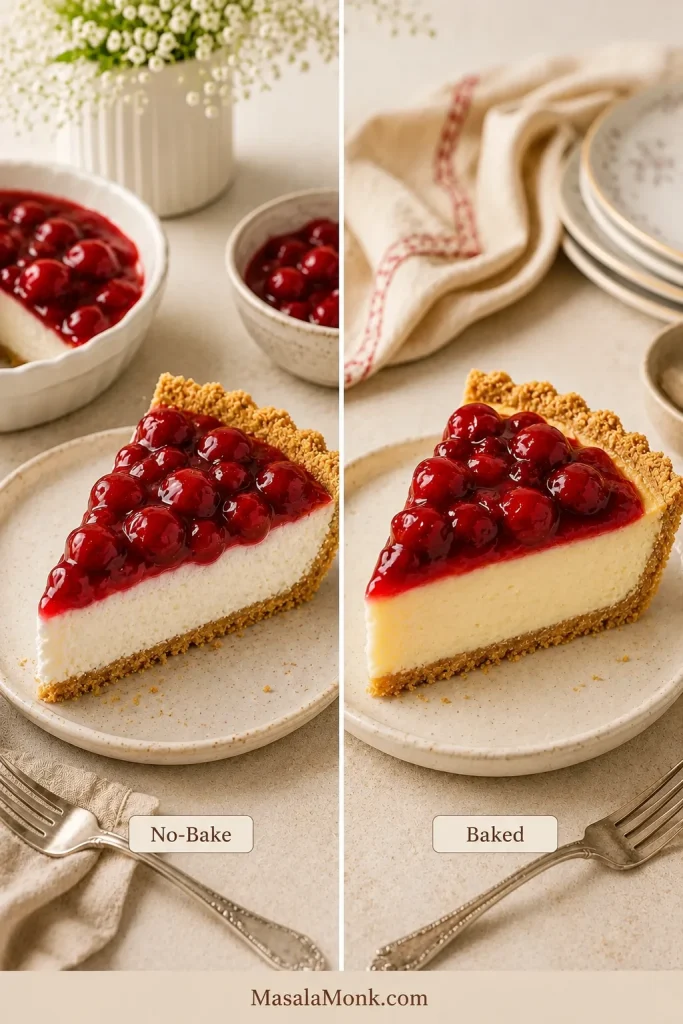
Side-by-side comparison of no-bake and baked cream cheese pie slices with cherry topping and graham crust.
No-bake cream cheese pie stays colder and creamier, whereas the baked version sets firmer with a more custard-like center.

For a full baked cheesecake with a crumb crust and denser texture, this salted caramel cheesecake recipe goes completely in that direction.

Ingredients You’ll Need

Once you know the style you want, the ingredients are simple. The main thing is using the right kind of cream cheese and giving the filling enough time to rest cold.
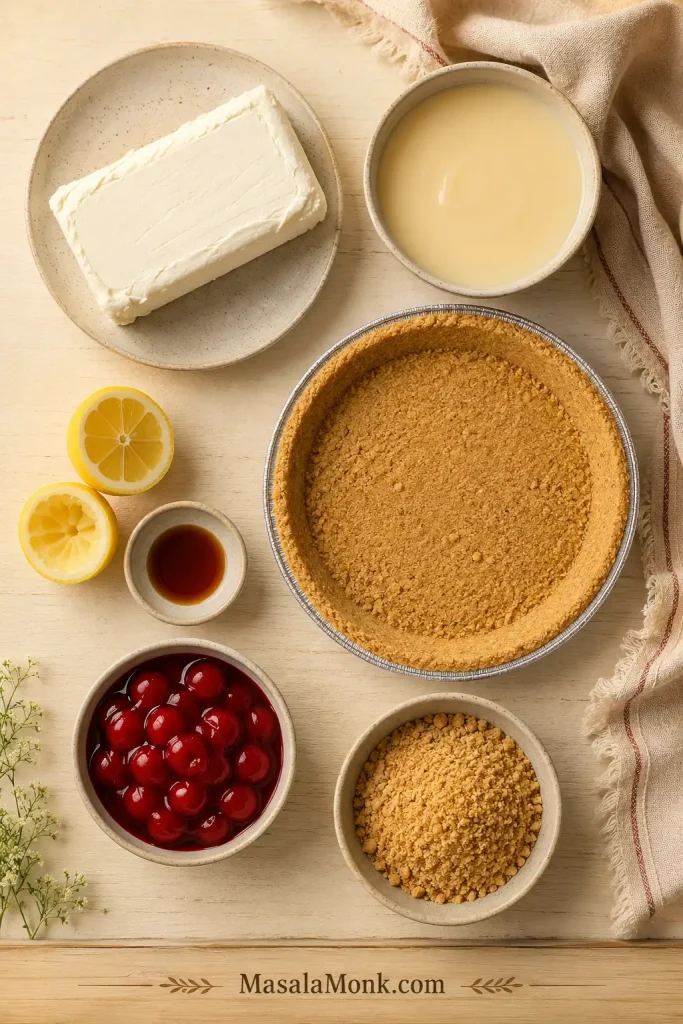
Overhead view of cream cheese pie ingredients, including cream cheese, condensed milk, lemon, vanilla, graham crust, and cherries.
Before mixing, set up the simple base: cream cheese for body, condensed milk for sweetness, lemon for brightness, and vanilla for a rounder flavor.

Cream Cheese

Use full-fat brick cream cheese for the best structure. Spreadable cream cheese from a tub is softer and can make the filling loose. Whipped cream cheese changes the density too, so it is better saved for spreading, not setting a pie.

The cream cheese should be softened but still cool. If it is too cold, it can leave lumps. When it gets too warm, it can become greasy and thin. Your finger should press into it easily, but the block should still hold its shape.
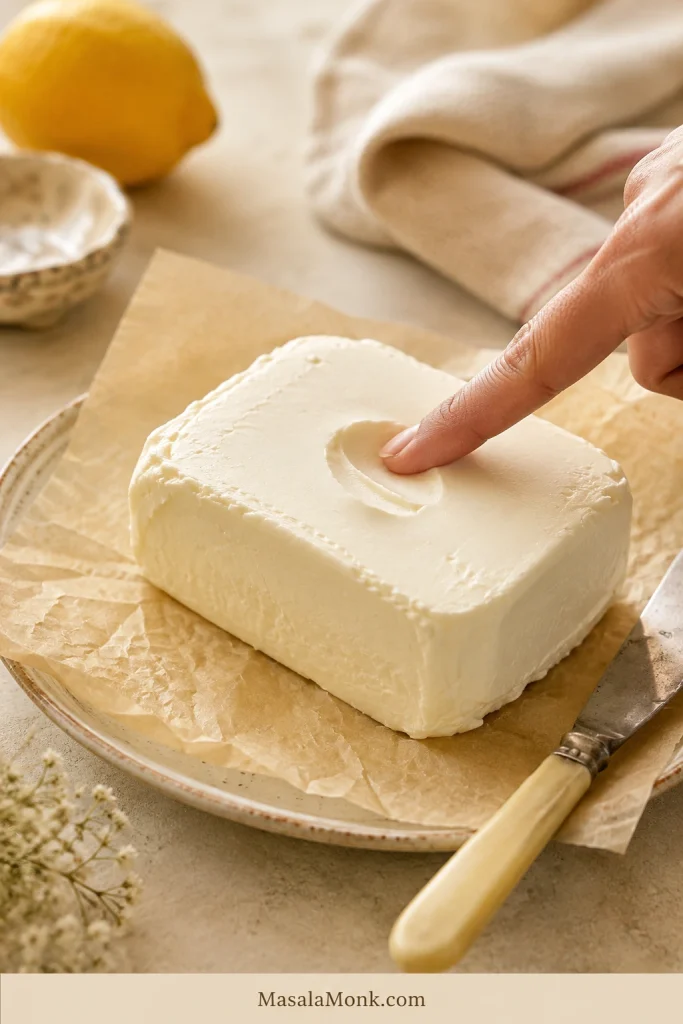
Close-up of softened cream cheese being pressed to show the right texture before making pie filling.
For fewer lumps, let the cream cheese soften until it dents under light pressure; cold blocks fight the mixer and leave tiny bits behind.

Sweetened Condensed Milk

Sweetened condensed milk gives the filling sweetness, body, and that familiar no-bake texture. Use one standard 14 oz / 397 g can.

Do not replace it with evaporated milk. Evaporated milk is unsweetened, thinner, and will not give the same structure.

Lemon Juice

Lemon juice balances the sweetness of the condensed milk and helps the filling thicken as it chills. Fresh lemon juice gives the cleanest flavor, but bottled lemon juice can work when that is what you have.

The finished pie should not taste sharply lemony. Lemon is there to brighten the filling, not to turn the whole dessert into lemon pie. For a dessert that leans fully into tart citrus, this key lime pie recipe is the brighter direction.

Vanilla Extract

Vanilla rounds out the tangy cream cheese and makes the filling taste fuller. It is a small ingredient, but the pie tastes flatter without it.

Graham Cracker Crust

Graham cracker crust is the usual choice for a no-bake cream cheese pie. Store-bought crust keeps the recipe fast, while a homemade crust gives more flavor and a firmer bite when you pre-bake it.

Cherry Pie Filling

Cherry pie filling is optional, but it is the most familiar topping for this style of pie. Add it after the creamy base has set so the red topping stays distinct from the white filling.

You may not need the entire can. Use enough to cover the top without making the pie feel heavy. If you prefer homemade topping, this cherry pie filling recipe works well here; just cool it fully before spreading it over the chilled filling.

Choose the Right Filling

Most of the confusion with cream cheese pie starts with the filling. Condensed milk gives a smooth, tangy, sliceable pie. Cool Whip makes it lighter and softer. Homemade whipped cream tastes fresher but needs a gentle hand. Baked fillings use eggs and sour cream for a firmer texture.

Now that the finished style is clear, here is what changes inside the bowl.

Filling StyleUsesResultWatch-Out
Cream cheese + condensed milk + lemon juiceClassic no-bake pieSmooth, tangy, sweet, sliceableNeeds proper chill time
Cream cheese + Cool Whip + powdered sugarNo-condensed-milk styleLight, fluffy, softerLess rich and less tangy
Cream cheese + homemade whipped creamMore homemade fluffy fillingCreamy, airy, less processedMust be folded gently so it stays light
Cream cheese + eggs + sour creamBaked cream cheese pieFirmer and cheesecake-likeNeeds baking, cooling, and chilling
Cream cheese + pudding or gelatin mixShortcut pie variationsSweeter and more stableMore processed flavor

Cool Whip Filling Without Condensed Milk

Use this route for a lighter no-bake filling or for the days when there is no sweetened condensed milk in the pantry.
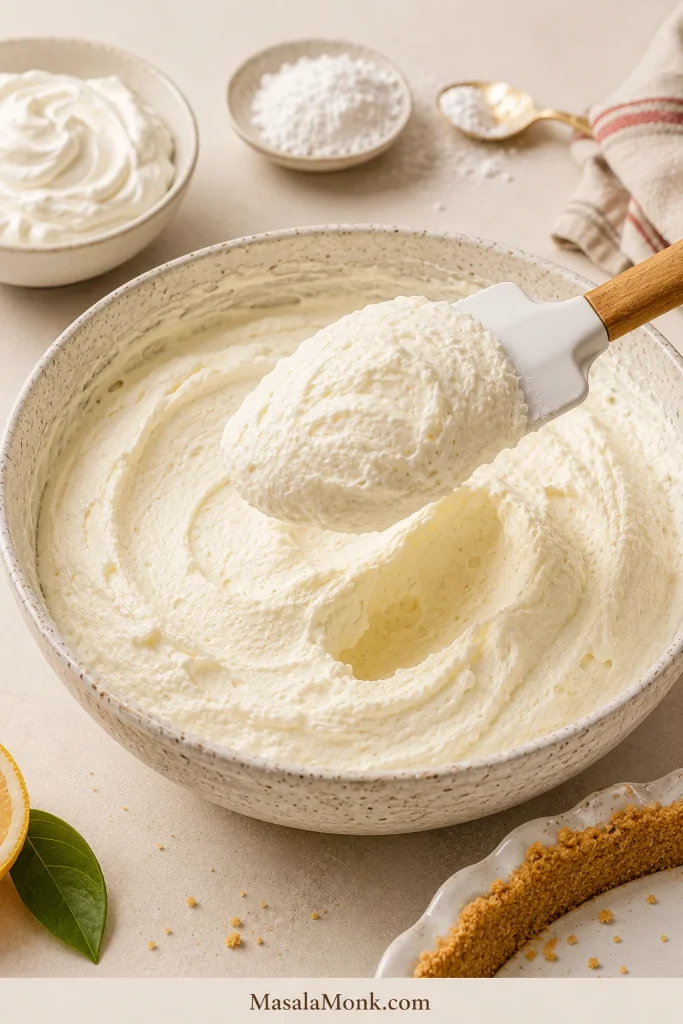
Fluffy cream cheese pie filling being lifted with a spatula, with whipped topping and powdered sugar nearby.
If you want cream cheese pie without condensed milk, the Cool Whip version gives a lighter filling, but it still needs a long chill.
IngredientAmount
Full-fat brick cream cheese8 oz / 226 g
Powdered sugar½ cup / about 60 to 65 g
Vanilla extract1 tsp / 5 ml
Lemon juice1 tbsp / 15 ml, optional
Cool Whip or whipped topping1½ to 2 cups
Graham cracker crust1 9-inch / 23 cm crust

Beat the cream cheese, powdered sugar, vanilla, and lemon juice until smooth. Fold in the whipped topping gently, spoon the filling into the crust, and chill until set. It feels lighter than the condensed milk pie, but it still needs a long cold rest for neat slices.

Start with ½ cup powdered sugar. Add more only if you want a sweeter, dessert-dip-style filling.

Homemade Whipped Cream Filling

Homemade whipped cream also works in place of Cool Whip. Beat cold heavy cream to medium-stiff peaks, then fold it gently into the sweetened cream cheese mixture. Do not beat aggressively after the whipped cream goes in.

For the right peak stage, this homemade whipped cream recipe shows when to stop while the cream still looks glossy and soft, not dry or grainy.

This filling tastes fresher than whipped topping, but it can be slightly less stable when the whipped cream is too soft. Chill it well and slice it cold.

How to Make No-Bake Cream Cheese Pie

With the filling style chosen, the method is straightforward. The main trick is beating the cream cheese smooth before adding the thinner ingredients.

1. Beat the Cream Cheese First

Add the cream cheese to a mixing bowl and beat it before adding anything else. Once the condensed milk goes in, hidden lumps are harder to smooth out.
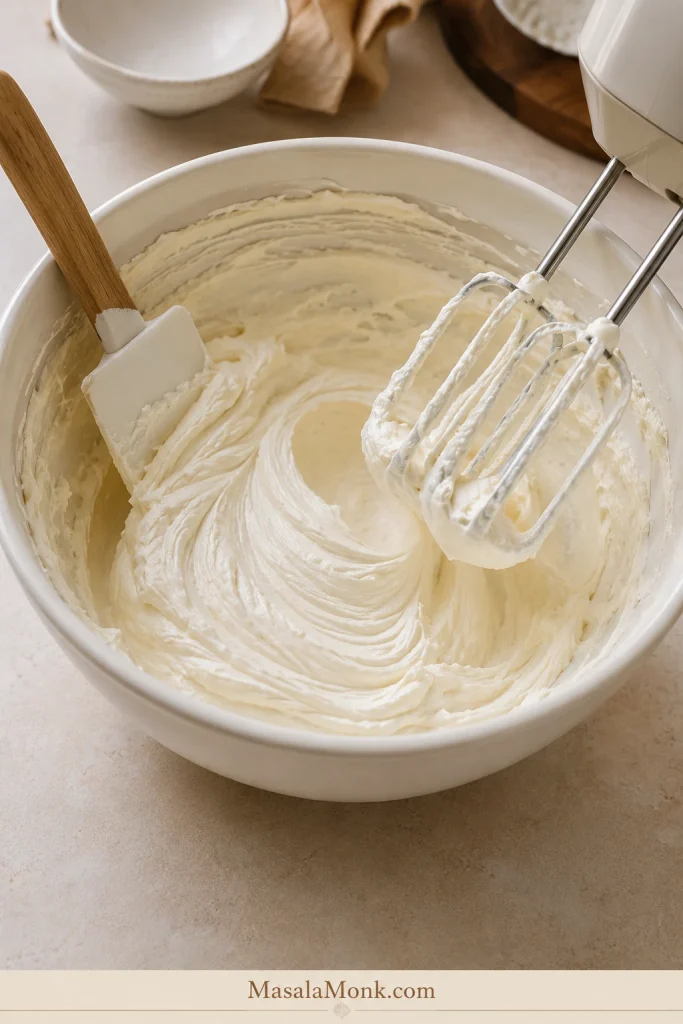
Cream cheese being beaten smooth in a mixing bowl with a spatula and mixer for no-bake pie filling.
First, beat the cream cheese by itself until smooth; once the sweetened condensed milk goes in, hidden lumps are harder to remove.

Scrape the sides and bottom of the bowl with a spatula. Cream cheese often hides there in small firm patches, and those patches can show up later in the finished pie.

2. Add the Condensed Milk Slowly

Pour in the sweetened condensed milk gradually and mix until the filling looks smooth and glossy. Keep the mixer on low to medium speed. Smooth is the goal, not overbeaten.
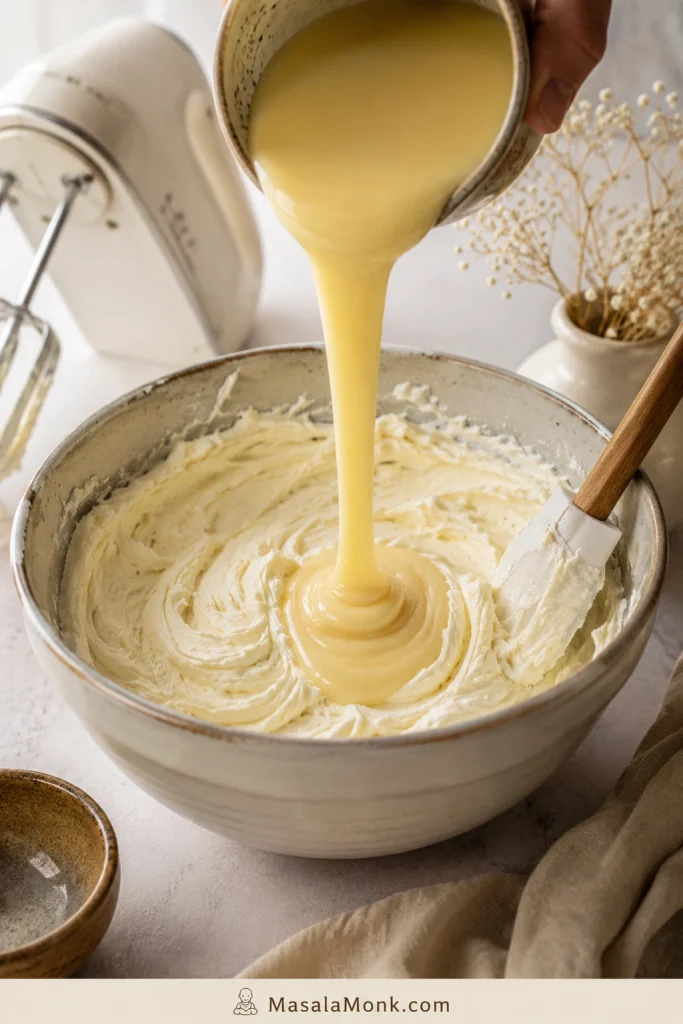
Sweetened condensed milk being poured into beaten cream cheese in a mixing bowl.
Next, pour in the condensed milk gradually so the filling stays thick, glossy, and evenly blended instead of turning loose at the edges.

3. Add Lemon Juice and Vanilla Last

Add the lemon juice and vanilla after the cream cheese and condensed milk are already smooth. Mix just until combined. The mixture may thicken slightly as the lemon juice blends in.
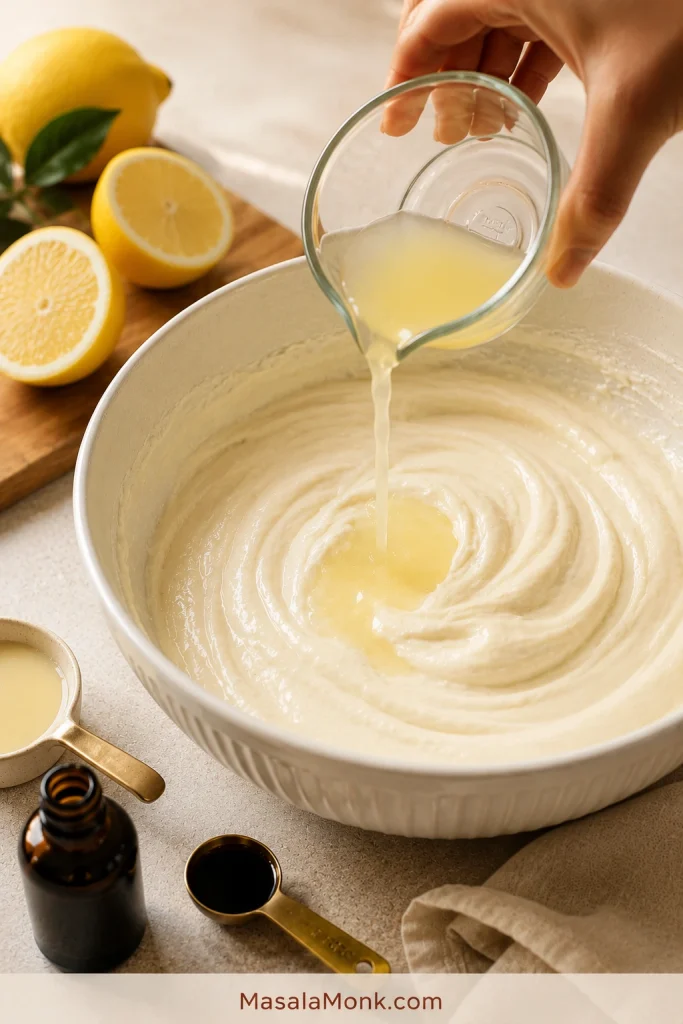
Lemon juice being added to a bowl of cream cheese and condensed milk filling with lemon and vanilla nearby.
Then add lemon juice so the filling tastes bright instead of flat; it also helps the condensed milk mixture chill into a firmer pie.

4. Fill the Crust

Spoon the filling into the graham cracker crust and smooth the top with a spatula. For the cleanest white layer, wait to add fruit topping until after the pie has chilled.
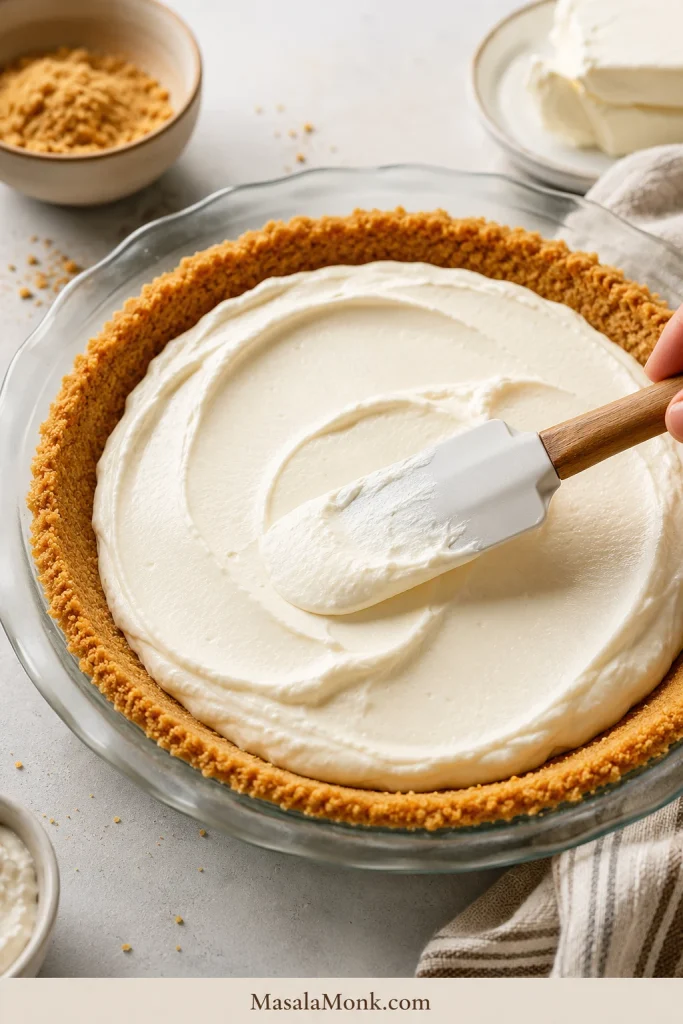
Cream cheese filling being spread into a graham cracker crust with a spatula.
Once the filling is smooth, level it inside the graham cracker crust so the cream cheese pie chills evenly from edge to center.

5. Chill Until the Center Is Firm

Cover the pie and refrigerate it for at least 6 hours. Overnight is even better. The center needs time to catch up with the edges.

6. Add the Topping and Slice Cold

Spread cherry pie filling or another topping over the chilled base. Slice while cold, using a clean, sharp knife. For neat wedges, wipe the knife between cuts.

Chill Time for Clean Slices

Give the pie enough refrigerator time for the center, not just the edges, to firm up. It may taste good after a shorter chill, but it will not always lift out in neat wedges.

Chill TimeResultUse It When
2 to 4 hoursSoft setYou do not mind softer slices
6 to 8 hoursCleaner slicesYou want the pie to hold its shape
OvernightBest textureYou are serving guests or making it ahead

Here is the saveable chill-time recap: soft set is fine for spooning, but clean cream cheese pie slices need 6 to 8 hours or overnight.
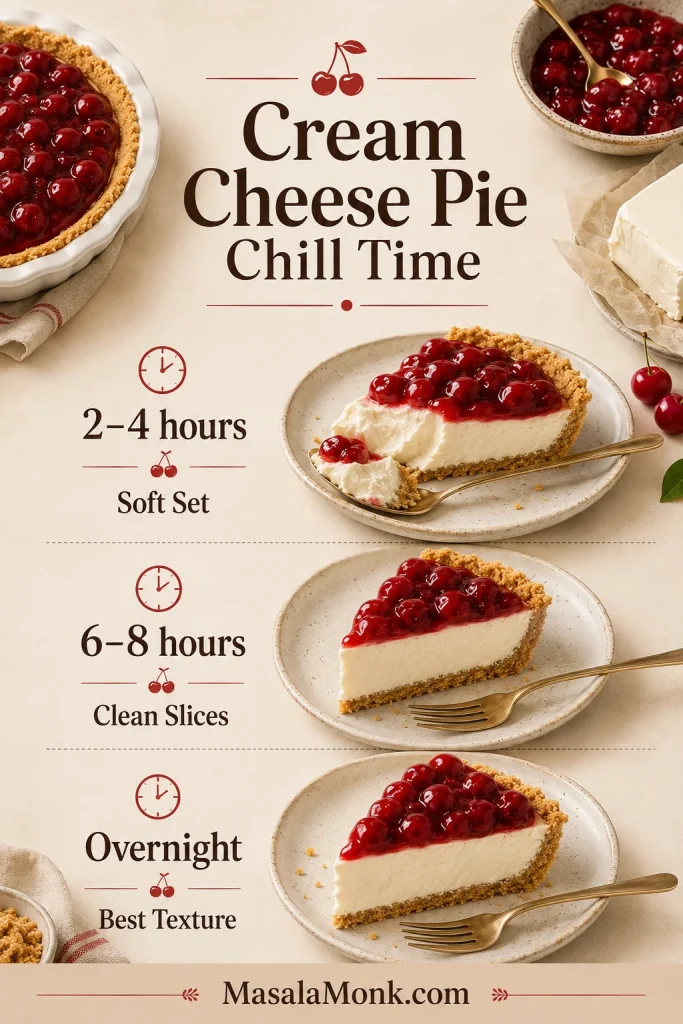
Cream cheese pie chill time guide showing soft set, clean slices, and overnight best texture stages.
Use chill time as your texture guide: soft set works for spooning, while clean cream cheese pie slices need 6 to 8 hours or overnight.

For gatherings, overnight chilling is the easiest insurance. The first slice is the test; the second is usually cleaner once the knife has opened the pie.
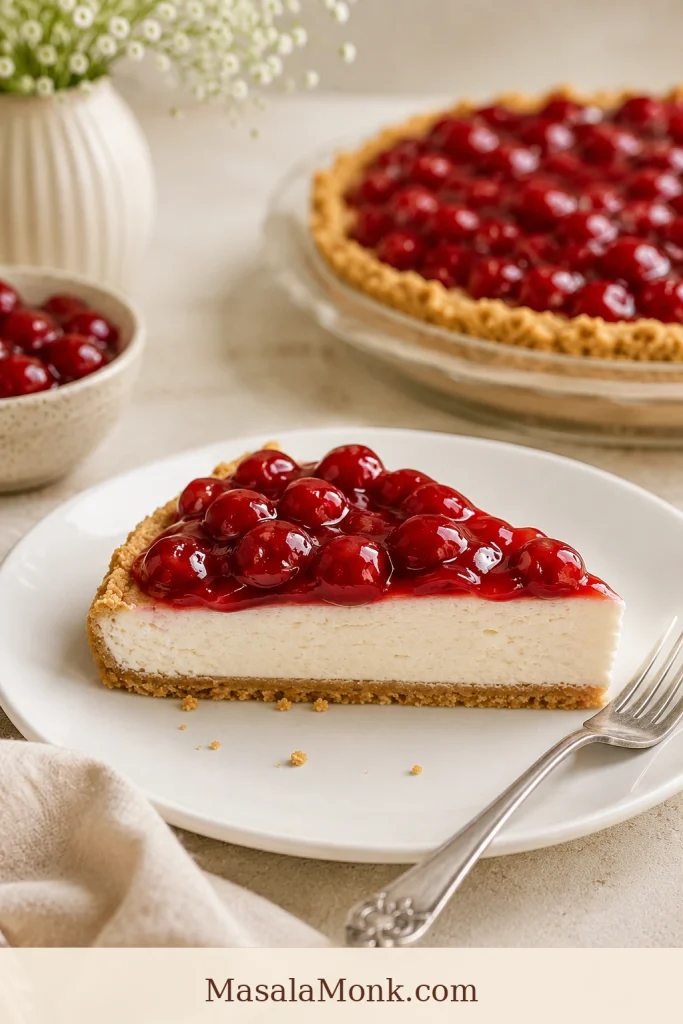
Side view of a clean slice of cherry cream cheese pie with white filling and graham cracker crust.
Overnight is the clean-slice move because the center gets time to set as firmly as the edges before slicing.

A short freezer rest can help in an emergency, but it is not a perfect shortcut. Too much freezer time can make the texture icy or change the way the filling softens later.

How to Get a Filling That Sets

If you want the cleanest slices, focus on a few things: full-fat brick cream cheese, lemon juice, enough refrigerator time, and toppings that are not watery.

  • Beat the cream cheese smooth first. This prevents hidden lumps before thinner ingredients go in.
  • Keep it cool-soft, not warm. Warm cream cheese can make the mixture loose and greasy.
  • Use the lemon juice. It balances the sweetness and helps the condensed milk filling thicken.
  • Let the center chill through. The edges firm first; the middle needs more time.
  • Keep wet toppings for later. Add cherry topping, berries, or pineapple after the creamy base is firm.

Clean-slice cue: the pie is ready when the center feels firm to a gentle touch and a knife can cut through without dragging loose cream into the crust.
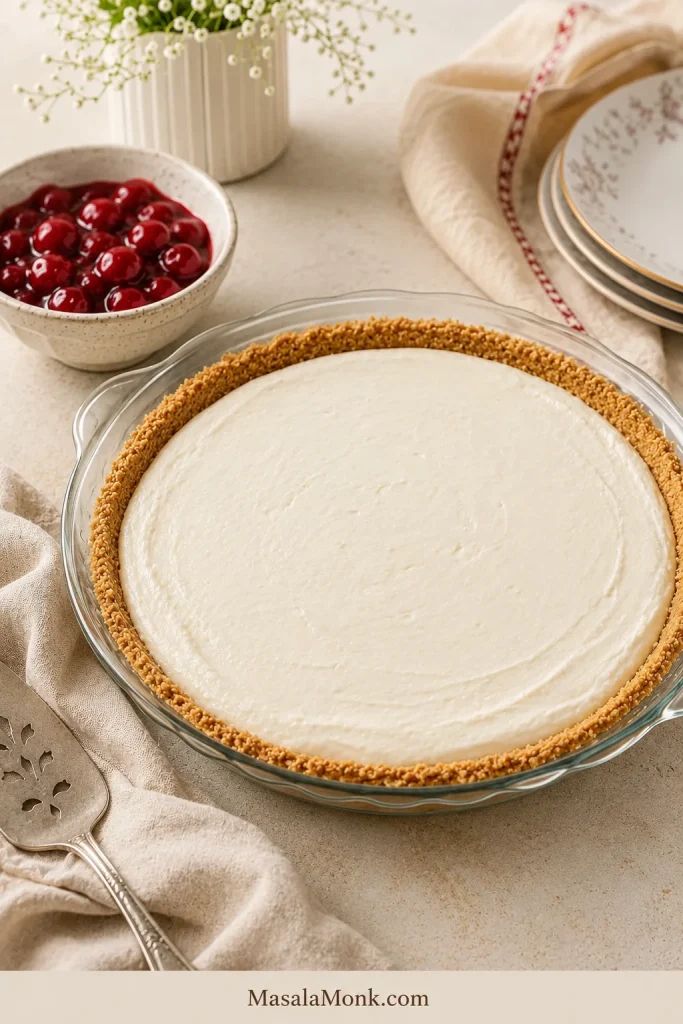
Plain chilled cream cheese pie in a graham cracker crust with cherry topping waiting in a bowl nearby.
This plain chilled stage matters: a firm base keeps cherry or fruit topping from staining the white filling too early.

Graham Cracker Crust, Pie Crust, or Cream Cheese Pie Crust?

After the filling, the crust is where texture can change most. Graham cracker crust is the easiest and most traditional choice for this recipe. It pairs well with the tangy filling and does not need a long bake.

One phrase can be confusing: “cream cheese pie” usually means a pie with cream cheese in the filling. “Cream cheese pie crust” is different. That is a pastry dough made with cream cheese. It can be delicious, but it is not the same thing as this no-bake dessert.

If you were looking for pastry dough made with cream cheese, that is a different recipe; this page focuses on the creamy pie-filling style.
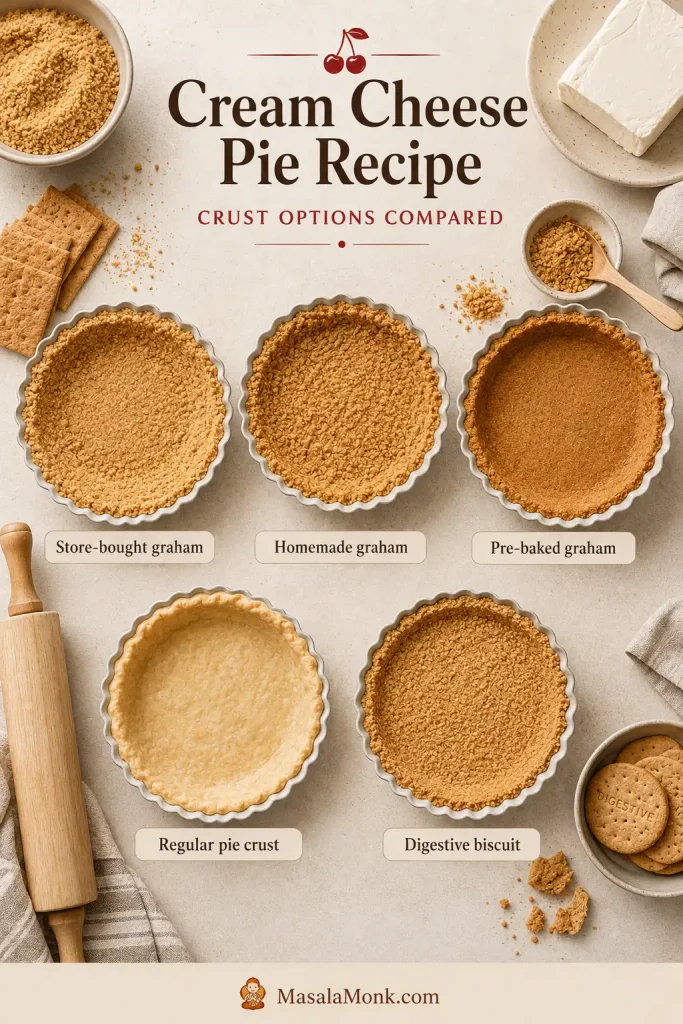
Overhead crust options board with store-bought graham, homemade graham, pre-baked graham, regular pie crust, and digestive biscuit crust.
Meanwhile, the crust changes the whole bite: graham cracker crust keeps it classic, while regular pie crust leans better for baked versions.
CrustBest ForNotes
Store-bought graham cracker crustFastest no-bake pieEasy, classic, and convenient
Homemade chilled graham crustNo-bake homemade versionSofter than pre-baked but flavorful
Pre-baked graham cracker crustCleaner slicesBake 10 minutes at 350°F / 177°C, then cool fully
Regular pie crustBaked cream cheese pieBlind bake if the filling recipe needs a pre-baked shell
Digestive biscuit crustGraham cracker substituteUseful where graham crackers are not common

Simple Homemade Graham Cracker Crust

A simple homemade graham crust only needs:

  • 1½ cups / about 170 to 180 g graham cracker crumbs
  • 2 to 4 tbsp sugar, depending on how sweet you like the crust
  • 6 to 7 tbsp / 85 to 100 g melted butter

Press the crumbs into a 9-inch / 23 cm pie plate. Chill the crust for a no-bake version, or bake it at 350°F / 177°C for about 10 minutes and cool completely before adding the cream cheese filling.
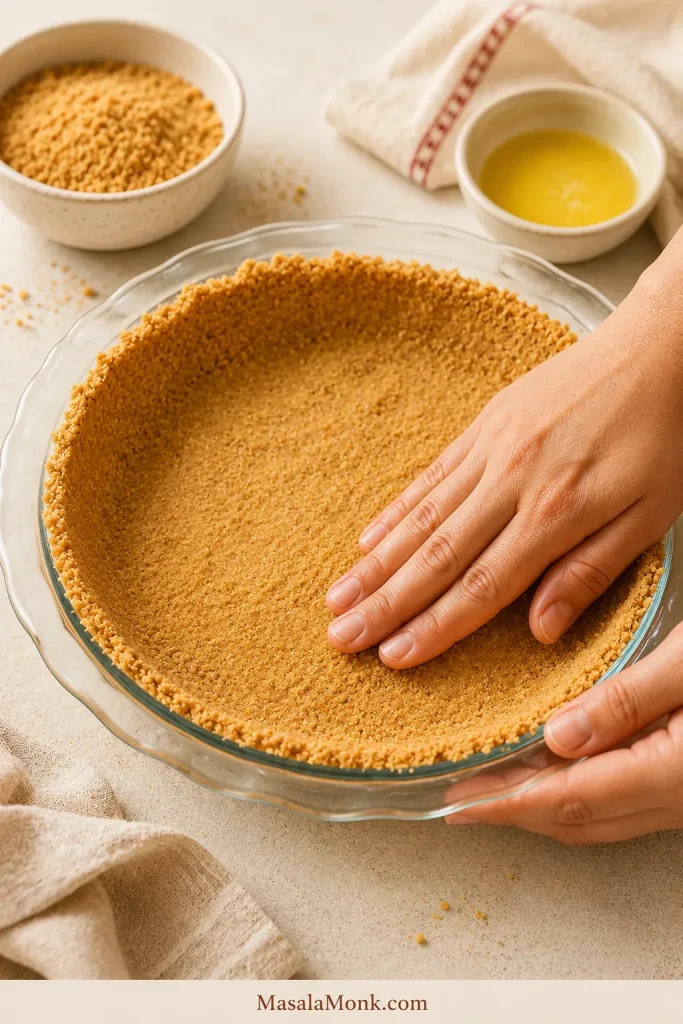
Hands pressing golden graham cracker crumbs into a pie plate to make a homemade crust.
When making your own graham crust, aim for compact, not compressed; that balance keeps the base sturdy without turning hard.

Do not pack the crust rock-hard. Press it firmly enough to hold together, but not so tightly that it becomes dense and difficult to cut. For more detail on crumb crusts, King Arthur Baking has a helpful graham cracker crust guide.

Another easy no-bake pie with a crumb crust is this banoffee pie recipe, a chilled make-ahead dessert with banana, toffee, and cream.

Cherry, Strawberry, Blueberry, Lemon, and Pineapple Toppings

After the filling and crust are settled, the topping is where the pie becomes personal. Cherry feels old-fashioned, strawberry and blueberry feel fresh and summery, lemon keeps it bright, and pineapple turns it retro and tropical.
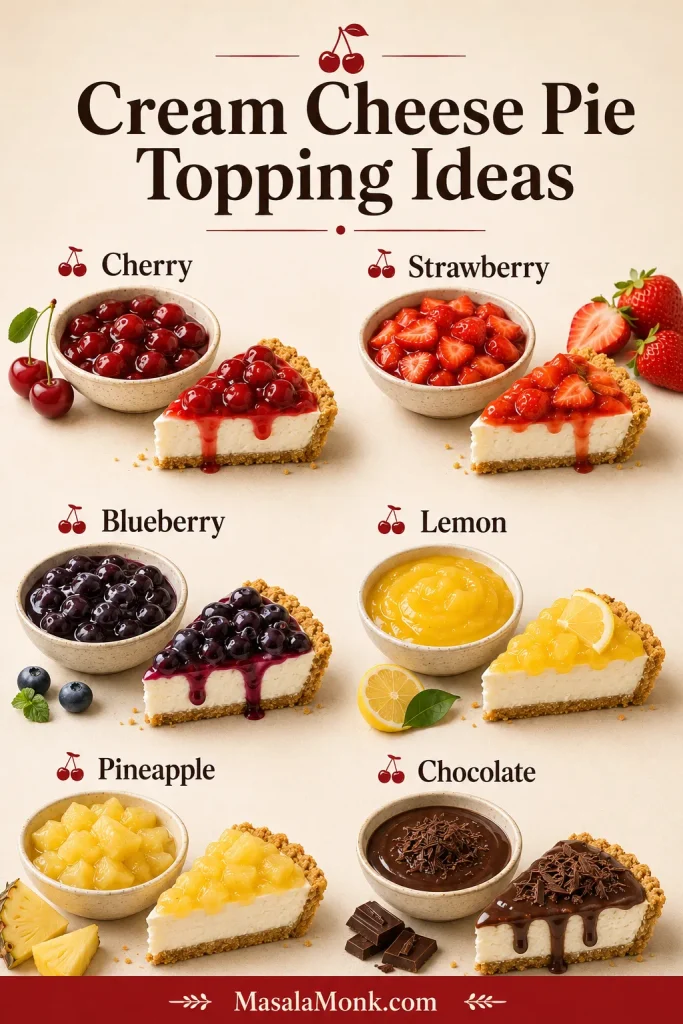
Topping ideas board for cream cheese pie with cherry, strawberry, blueberry, lemon, pineapple, and chocolate options.
Once the base is chilled, one cream cheese pie can turn into cherry, strawberry, blueberry, lemon, pineapple, or chocolate dessert.
ToppingHow to Use ItBest Note
Cherry pie fillingSpread over the chilled fillingThe familiar old-fashioned topping
Strawberry toppingUse fresh sliced strawberries or a cooked strawberry glazeBest for spring and summer
Blueberry toppingUse cooked blueberry sauce, cooled before addingExcellent with a little lemon zest
Lemon curdSpread a thin layer over the set pieBright, tangy, and less heavy
PineappleDrain very well before usingToo much liquid can loosen the filling or soften the crust
Chocolate or OreoUse cookie crumbs, ganache, or chocolate drizzleBest when you want a richer, sweeter pie
PumpkinUse as a fall cheesecake-pie style variationBest for fall or holiday baking

When to Add Cherry Pie Filling

For the cleanest look, chill the creamy base first and add cherry pie filling 1 to 2 hours before serving. This keeps the white layer distinct and prevents the topping from bleeding into the filling too much.
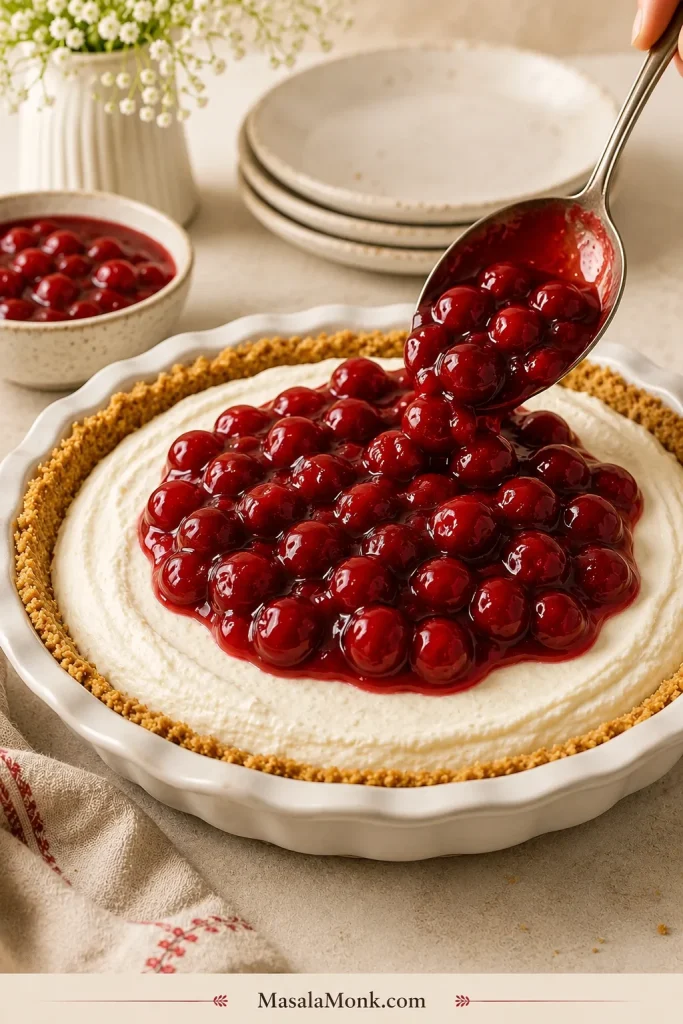
Cherry pie filling being spooned over a chilled cream cheese pie in a graham cracker crust.
After the filling firms, add cherry topping with a light hand; the goal is a glossy red layer that stays on top.

For convenience, the cherry topping can go on earlier and the whole pie can be refrigerated. It will still taste good, but the topping may stain the cream cheese layer slightly.

A baked fruit pie is a different dessert altogether. This cherry pie recipe that sets is the fuller baked-pie route when you want deep ruby filling inside a flaky crust.

How to Use Fresh Fruit Without Making the Pie Watery

Fresh fruit gives the pie a brighter, more seasonal feel; it just needs better timing because berries and pineapple release juice as they sit.

  • Strawberries: add sliced fresh berries close to serving, or cook part of the berries into a thicker glaze and cool it completely before adding.
  • Blueberries: use a cooked topping with a little lemon juice and cornstarch because it holds better than loose fresh berries.
  • Pineapple: drain it extremely well, and press out extra liquid when needed.
  • Lemon curd: use a thin layer so it brightens the pie without overpowering the cream cheese.
  • Mixed fruit: add it close to serving unless it has been cooked into a thicker topping.

For another fresh-strawberry dessert where timing matters, this strawberry shortcake recipe keeps the berries and cream separate until serving so the texture stays fresh.

No matter which topping you use, let the filling firm first. Cold filling underneath and cooled topping on top give the cleanest slice.
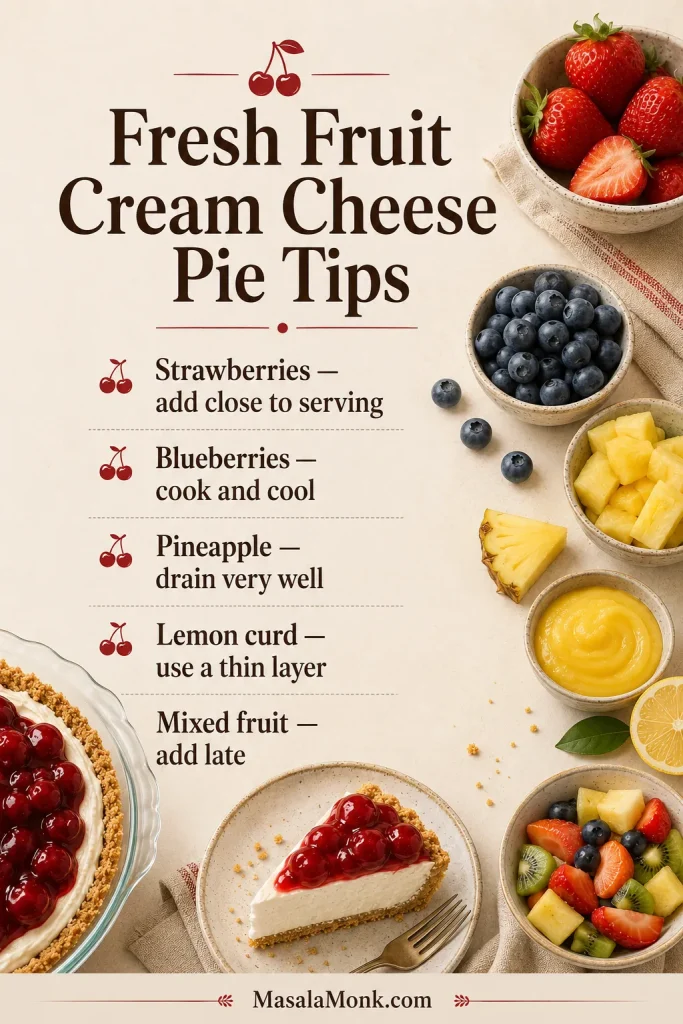
Fresh fruit cream cheese pie tips guide with strawberries, blueberries, pineapple, lemon curd, and mixed fruit.
For fresh fruit toppings, timing matters: add strawberries late, cook blueberries first, drain pineapple well, and keep lemon curd thin.

Baked Cream Cheese Pie Variation

Choose this baked route for a firmer old-fashioned pie that tastes closer to cheesecake. It uses eggs and sour cream for a richer, custard-like texture.

Baked Version Ingredients

IngredientAmount
Full-fat brick cream cheese16 oz / 452 g
Granulated sugar½ cup / 100 g
Sour cream¼ cup / 60 g
Large eggs2
Vanilla extract1 tsp / 5 ml
Lemon juice1 tsp / 5 ml
Graham cracker crust1 9-inch / 23 cm crust

How to Bake It

  1. Pre-bake the graham cracker crust at 350°F / 177°C for about 10 minutes. Cool slightly.
  2. Lower the oven to 325°F / 163°C.
  3. Beat the cream cheese and sugar until smooth.
  4. Mix in sour cream, vanilla, and lemon juice.
  5. Add the eggs one at a time, mixing gently after each addition.
  6. Pour the filling into the crust.
  7. Bake for about 30 to 35 minutes, or until the edges are set and the center has a gentle wobble.
  8. Cool at room temperature for 1 hour.
  9. Refrigerate for at least 2 hours, preferably longer, before slicing.

The center should wobble slightly, not ripple like liquid. It will firm more as it cools and chills.

For a retro sour cream topping, spread a thin sweetened sour cream layer over the baked pie near the end of baking or after the filling has set, depending on the style you prefer. Keep the layer light so it complements the cream cheese instead of overwhelming it.

Texture Cues at Every Stage

Use this as a visual check before serving. The filling changes as it chills, so do not judge the pie by the first hour in the fridge.

StageWhat You SeeWhat It Means
Before chillingSmooth, glossy filling with soft spatula wavesGood. It should spread easily but not look watery.
Before chillingLoose, pourable fillingIt may be too warm, overmixed, or made with the wrong ingredient.
After a short chillEdges are firmer but center is still softNormal. Give it more time before expecting clean slices.
After a full chillCenter feels cold and firm to a gentle touchReady to slice while cold.
After toppingFruit sits mostly on topGood. The creamy base was firm before topping.
After toppingRed streaks or watery edgesTopping may have been added too early, too warm, or too wet.

Troubleshooting

Most cream cheese pie problems are easy to read once you know what stage caused them. If your pie is softer than expected, do not panic; it may need more time, colder filling, or a different serving plan.

Why Is My Cream Cheese Pie Runny?

The most common reason is not enough chill time. After a couple of hours, the top may look set while the center is still too soft to slice.

Other possible causes are cream cheese that was too warm, low-fat or spreadable cream cheese, not enough lemon juice in the condensed milk filling, overmixing, or adding a watery fruit topping too early.
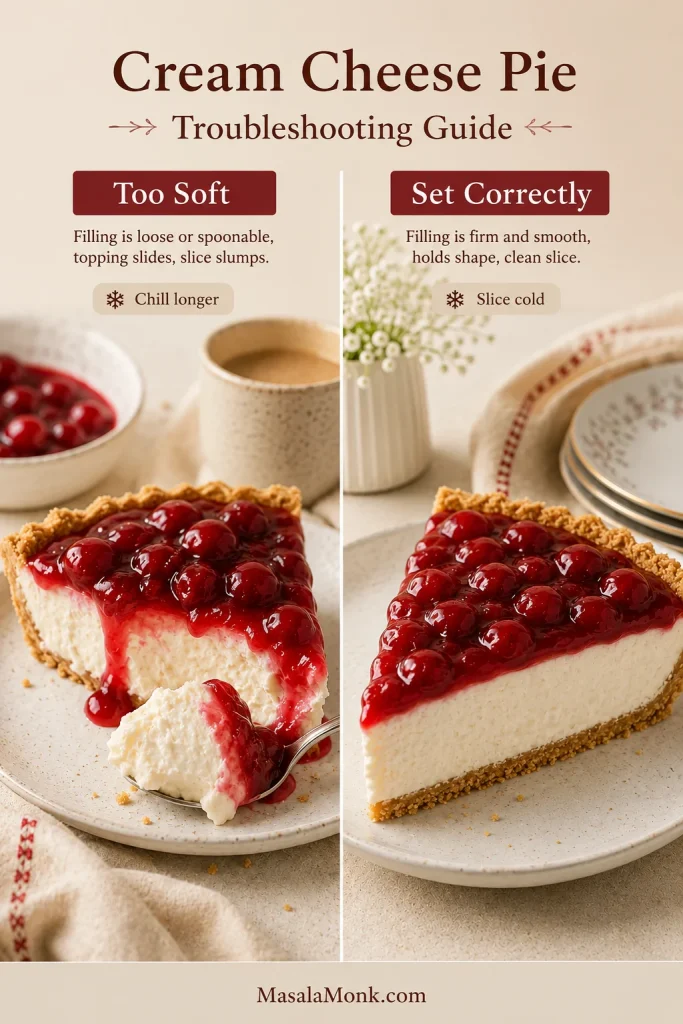
Troubleshooting guide comparing a too-soft cream cheese pie slice with a properly set cream cheese pie slice.
If your cream cheese pie is too soft, start with more chill time; a properly set filling should hold a clean slice when served cold.

What to do now: when the pie is only slightly soft, refrigerate it longer. When it is very loose, serve it as an icebox-style dessert with extra graham crumbs and fruit instead of forcing neat slices.

Why Is My Filling Lumpy?

The cream cheese was probably too cold or not beaten smooth before the condensed milk was added. Beat the cream cheese first, scrape the bowl well, and only then add the thinner ingredients.

Why Did My Crust Get Soggy?

The topping may have been too wet, added too early, or left on the pie for too long. Homemade graham crust can also become soft when it was not pressed firmly enough or did not chill or bake long enough before filling.

Can I Freeze Cream Cheese Pie to Make It Set Faster?

In an emergency, a short freezer rest can help, but it is not a full replacement for refrigerator chilling. If the filling is loose because of ingredient balance, freezing only hides the problem temporarily.

Why Does the Slice Collapse?

The pie probably needs more chill time, or it sat at room temperature too long before slicing. Slice it cold and keep it refrigerated until shortly before serving.

Can I Fix a Pie That Did Not Set?

When the filling is only a little soft, give it more refrigerator time. Very loose filling is better served as a soft icebox dessert with fruit and crumbs rather than forced into neat wedges.

Make Ahead, Storage, and Freezing

This is one of those desserts that rewards patience, which is why making it ahead is usually the better plan.
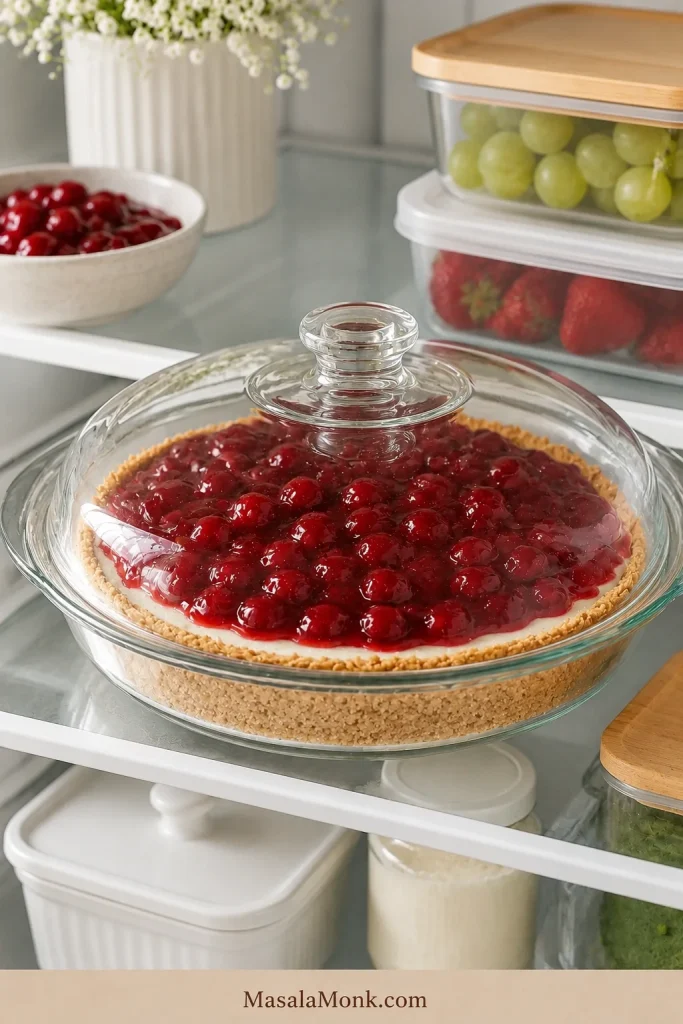
Covered cherry cream cheese pie stored on a clean refrigerator shelf with fruit containers nearby.
Keep it covered and cold after making it ahead; cream cheese pie slices cleanest when it stays chilled until serving.

Best Make-Ahead Timing

Prepare the cream cheese layer the day before, then add the topping closer to serving for the cleanest look. This gives the pie time to firm up while keeping the fruit layer fresh.

How Long It Keeps in the Fridge

Store the pie covered in the refrigerator for 3 to 4 days. During the first day or two, the crust will be firmest, especially when fruit topping is added later.

Freezing: What Happens to the Texture?

Freeze the pie preferably without the fruit topping. Wrap it well, freeze until firm, and thaw in the refrigerator before serving. The texture may be slightly softer after thawing, but it will still taste good.

How Long It Can Sit Out

Because this pie contains cream cheese, keep it chilled until serving. For food safety, follow the general FoodSafety.gov guidance for perishable foods: do not leave cream cheese desserts out for more than 2 hours, or 1 hour in very hot weather. Return leftovers to the refrigerator promptly.

What to Serve With Cream Cheese Pie

Serve cream cheese pie with coffee after dinner, iced tea for a summer meal, or fresh berries when you are keeping the topping simple. A little lemon zest is especially good with blueberry topping, while a spoonful of whipped cream works best when the pie is plain, lemon-topped, or lightly fruited.
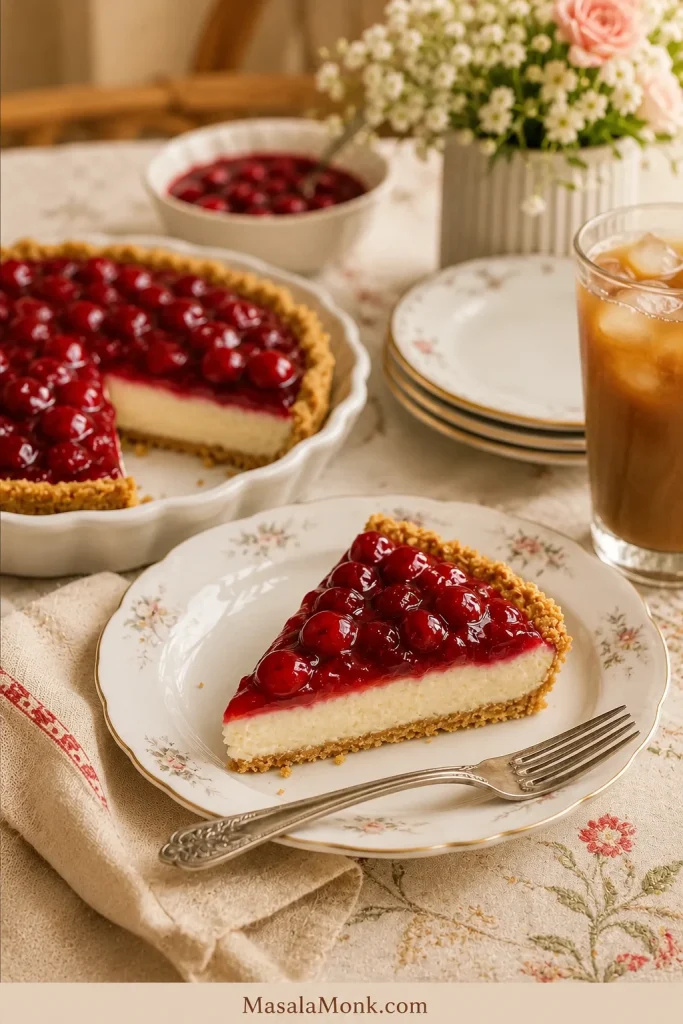
Slice of cherry cream cheese pie on a vintage plate with fork, iced tea, flowers, and the remaining pie in the background.
Finally, serve the pie cold with coffee or iced tea; this is the simple make-ahead dessert people return to for a second slice.

If a pie turns out softer than planned, serve it in small bowls or cups with extra graham cracker crumbs and fruit. It will feel intentional instead of like a failed slice.

On a dessert table, this pie works best beside sharper fruit desserts, chocolate bakes, or something crisp, because its own texture is cool and creamy.

FAQ

Cream Cheese Pie vs Cheesecake: What Is the Difference?

Cream cheese pie is usually easier, shallower, and softer than cheesecake. The no-bake version is chilled in a pie crust, while cheesecake is usually denser and often baked in a springform pan.

Baked or No-Bake: Which One Should I Make?

Choose the no-bake pie for the easiest chilled dessert. Make the baked pie when you want a firmer, more cheesecake-like texture.

What Kind of Cream Cheese Is Best?

Full-fat brick cream cheese is best. Spreadable tub cream cheese, whipped cream cheese, and low-fat versions can make the pie softer and less stable.

Why Lemon Juice Matters

In the condensed milk filling, lemon juice balances the sweetness and helps the mixture thicken as it chills. The pie should taste bright, not sharply lemony.

Can I Make Cream Cheese Pie Without Lemon Juice?

You can, but the condensed milk version may taste sweeter and set less firmly. If you skip lemon juice, use a Cool Whip-style filling or another recipe designed without it.

How Long Does It Take to Set?

Give it at least 6 hours for clean slices. Overnight is best. A 2 to 4 hour chill usually gives a softer set.

Best Substitute for Sweetened Condensed Milk

Use the Cool Whip filling with cream cheese, powdered sugar, vanilla, optional lemon juice, and whipped topping. It will be lighter and fluffier than the condensed milk version.

Does Cool Whip Work?

Yes. Cool Whip makes a lighter, fluffier no-bake filling. Fold it in gently after beating the cream cheese with powdered sugar and flavorings.

Best Time to Add Cherry Pie Filling

Add cherry pie filling after the pie has chilled and the filling is firm. For the cleanest look, add it 1 to 2 hours before serving.

Fresh Fruit or Canned Pie Filling: Which Is Better?

Canned pie filling is easier and more stable. Fresh fruit tastes brighter, but it can release juice, so add it close to serving or cook it into a thicker topping first.

Can I Use a Store-Bought Graham Cracker Crust?

Yes. A store-bought graham cracker crust works well for no-bake cream cheese pie and keeps the recipe fast. For a firmer crust, use a homemade crust and pre-bake it before adding the filling.

Graham Cracker Crust or Regular Pie Crust?

Graham cracker crust is the traditional choice for no-bake cream cheese pie. Regular pie crust works better for baked cream cheese pie or a more pastry-style dessert.

Making It the Day Before

Making the pie the day before is ideal. Chill the plain pie overnight, then add fruit topping closer to serving.

Does It Freeze Well?

It can be frozen, especially without topping. Thaw it in the refrigerator and expect a slightly softer texture after thawing.

Final Thoughts

The best cream cheese pie does not need to be fancy. It just needs to be cold, smooth, lightly tangy, and firm enough that the slice holds together on the plate.

Make the no-bake condensed milk pie when you want something easy and nostalgic, use the Cool Whip filling when you want it lighter, or bake the old-fashioned variation when you want a firmer cheesecake-style dessert. However you top it, the goal is the same: a cold, creamy slice that disappears quickly once it reaches the table.

It is humble in the best way: a crumb crust, a cold creamy middle, and a topping that makes the whole table notice. Try the classic cherry topping first, then change the fruit the next time. This is one of those pies that becomes a house version quickly.

Posted on Leave a comment

Key Lime Pie Recipe

A pale yellow baked key lime pie in an ivory ceramic dish with whipped cream, lime garnish, and one slice removed from a graham cracker crust.

A good key lime pie should feel cold, creamy, tart, and clean from the first forkful. The crust should cut without collapsing into crumbs, the filling should hold a soft wedge without turning stiff, and the lime flavor should taste bright instead of sugary, bitter, or artificially green.

This version is built for the little worries that make key lime pie stressful: a loose filling, a soggy or brittle graham cracker crust, weak lime flavor, too much sweetness, and slices that slump because the pie was cut before it had fully chilled.

Unlike no-bake cheesecake-style pies, this is a baked bakery-style key lime pie with sweetened condensed milk, egg yolks, lime juice, zest, and a graham cracker crust. A short bake, a gently set center, and enough fridge time give you a taller pie that serves beautifully without becoming heavy.

The actual work is simple: press the crust, whisk the filling, bake briefly, and chill. It is especially good after food with heat or spice, when the first cold bite resets the table: sharp lime, soft cream, buttery crumbs, and no heavy frosting.

Make this pie first: use a 9-inch pie plate, pre-bake the graham cracker crust, bake the filling at 350°F / 177°C until the edges are set and the center moves gently, then chill for at least 4 hours. Overnight chilling gives the neatest wedges.

Quick Answer

Key lime pie is a chilled lime custard pie made with sweetened condensed milk, egg yolks, lime juice, and a graham cracker crust. This easy baked key lime pie bakes briefly at 350°F / 177°C, then rests in the refrigerator until the filling becomes creamy and sliceable.

Use fresh key limes for aroma, bottled key lime juice for ease, or regular limes with zest when that is what you have. The real win is a pie that bakes gently, chills fully, and cuts into a clean, creamy wedge.

The cold-wedge test: a good key lime pie should be cold all the way through, hold its shape when sliced, cut through a buttery crumb crust, and still taste creamy instead of stiff. For the bake, use visual cues: set edges, a softly moving center, no slosh, and no browning.

A tall slice of pale yellow key lime pie on a cream plate with smooth filling, graham cracker crust, whipped cream, and lime garnish.
After a long chill, a tall key lime pie slice should stand cleanly while still looking creamy, not stiff or dry.

Ready to bake now? Jump to the recipe card, or keep reading if you want the visual cues that make the pie easier to judge.

Key Lime Pie Recipe Card

Description

Make this easy baked key lime pie when you want a buttery graham cracker crust, tart condensed-milk filling, a softly set center, and a slice that holds without turning stiff.

Prep time25 minutes
Bake time26 to 30 minutes total
Cooling time30 to 45 minutes
Chill timeAt least 4 hours
Total timeAbout 5 hours 30 minutes, including cooling and chilling
YieldOne 9-inch pie, about 8 slices
Oven350°F / 177°C
Doneness cueSet edges, softly moving center

Why two cans? This taller 9-inch pie uses a deliberate ratio: 2 cans sweetened condensed milk, 1 cup lime juice, and 4 egg yolks. The extra volume gives you a higher bakery-style slice, but it also means a deeper pie plate and full chill time matter. If your pie plate looks close to full before all the filling is added, stop pouring and bake any extra filling separately in a small ramekin.

Equipment

  • 9-inch pie plate, preferably at least 1¼ inches deep
  • Mixing bowls
  • Whisk
  • Food processor, blender, or rolling pin for crushing crackers
  • Measuring cup or flat-bottomed glass for pressing the crust
  • Citrus zester
  • Citrus juicer
  • Wire rack

Ingredients

For the Graham Cracker Crust

  • 1½ cups graham cracker crumbs, about 150g
  • ¼ cup granulated sugar, 50g
  • 6 tablespoons unsalted butter, melted, 85g
  • Pinch of fine salt

For the Key Lime Filling

  • 2 cans sweetened condensed milk, 14 ounces each, 28 ounces total / about 793g
  • 4 large egg yolks
  • 1 cup key lime juice, 240ml
  • 1 tablespoon finely grated lime zest
  • Pinch of fine salt

For the Whipped Cream Topping

  • 1 cup cold heavy cream, 240ml
  • 1 to 2 tablespoons powdered sugar, 8 to 16g
  • ½ teaspoon vanilla extract
  • Extra lime zest or thin lime slices, optional

For a deeper guide to soft peaks, sweetness, and keeping the topping fluffy, use MasalaMonk’s whipped cream recipe before finishing the pie.

Instructions

Crust

1. Heat the oven. Preheat the oven to 350°F / 177°C. Place a rack in the center of the oven.

2. Make the crust mixture. Stir the graham cracker crumbs, sugar, melted butter, and salt together until the mixture looks like damp sand. When you squeeze a little in your hand, it should hold together.

3. Press the crust. Tip the crumbs into a 9-inch pie plate. Press the crumbs up the sides first, then press the remaining crumbs across the base. Use the bottom of a measuring cup or glass to even it out, but avoid packing it so hard that it becomes dense.

4. Pre-bake the crust. Bake for 8 to 10 minutes, until the crust smells toasted and looks slightly dry. Set it on a wire rack while you make the filling.

Filling, Bake, and Chill

5. Mix the filling. In a medium bowl, whisk the egg yolks and lime zest for about 1 minute, until slightly lighter and fragrant. Add the sweetened condensed milk, key lime juice, and salt. Whisk until smooth and slightly thickened. The filling should look glossy and pour slowly, not thin like milk.

6. Fill the crust. Pour the filling into the warm crust and smooth the top gently. Tap the pie plate once or twice on the counter to release large air bubbles. If your pie plate is shallow, hold back extra filling rather than overfilling.

7. Bake the pie. Bake for 18 to 20 minutes, until the edges look set and the middle moves gently when you nudge the pan. The filling should not slosh, the top should not brown, and the pie should smell like warm lime and toasted crumbs rather than browned custard.

8. Cool, then chill. Let the pie cool on a wire rack until it is no longer hot, about 30 to 45 minutes. Refrigerate for at least 4 hours, or overnight for the best texture.

9. Make the whipped cream. Before serving, beat the cold heavy cream, powdered sugar, and vanilla until soft or medium peaks form.

10. Finish and serve. Spread or pipe the whipped cream over the chilled pie. Add lime zest or thin lime slices if you like. Slice with a sharp knife, wiping the blade between cuts for tidy pieces.

Success Notes

  • Use sweetened condensed milk, not evaporated milk.
  • Use the full 1 cup / 240ml lime juice for a properly tart pie. If your bottled juice tastes extremely sharp, use ¾ cup / 180ml for a softer flavor.
  • A deeper 9-inch pie plate gives this bakery-style filling enough room. With a shallow plate, hold back extra filling.
  • A center that moves softly is not automatically underdone. That movement helps protect the filling from turning rubbery after chilling.
  • Add whipped cream after chilling for the freshest texture and neatest top.

That taller slice comes from the two-can filling ratio. The extra volume gives the pie height, while the full chill gives it the clean cut.

Two cans of sweetened condensed milk, one cup of lime juice, four egg yolks, and lime zest arranged for key lime pie filling.
Because this is a two-can condensed milk filling, the pie bakes taller than a classic version and needs both a deeper plate and patient chilling.

If this is your first key lime pie, do not judge it by how it looks hot from the oven. Judge it after it has cooled and chilled.

Key Lime Pie Cues at a Glance

Once the pie is in motion, these are the small signs that tell you everything is going right.

CueWhat to Look For
Crust mixtureDamp sand that holds when squeezed
Baked crustLightly dry, fragrant, and not dark
Filling before bakingSmooth, glossy, and slightly thickened
DonenessSet edges, softly moving center, no slosh
ColorPale yellow, not bright green
ChillCold all the way through before slicing
SliceHolds shape but still tastes creamy

Why This Recipe Works

The filling works because the ingredients do more than add flavor. Lime juice thickens the sweetened condensed milk mixture and cuts through its sweetness. Egg yolks add custard structure. Gentle oven heat finishes the set, and chilling gives the pie time to become cleanly sliceable.

The crust has a different job: it needs to stay crisp under a cold filling. Pre-baking dries and toasts the graham crumbs, while a little salt keeps the condensed milk filling from tasting flat.

That is why this pie does not need extra food coloring, complicated flavorings, or a long list of add-ins. The flavor comes from contrast: buttery crumbs, smooth lime custard, a little salt, and a cool cream finish.

That contrast is the whole charm: the pie tastes rich for a second, then the lime pulls it back into something clean and refreshing.

Ingredients for Key Lime Pie

The ingredient list is short, so every item matters. The filling should taste bright and balanced, not heavy, harsh, or candy-sweet.

Why no sour cream, Greek yogurt, or cream cheese? Those ingredients can make a delicious softer or tangier pie, but they move the texture toward cheesecake or cream pie. This version stays in the baked custard-style lane, using sweetened condensed milk, egg yolks, lime juice, and chill time for body.

Graham Cracker Crumbs

Fine graham cracker crumbs make the crust easier to press and slice. A few slightly larger crumbs are fine, but avoid a mix that is half powder and half chunks. The crust should feel sandy and buttery, not dry.

Outside the US, digestive biscuits or plain tea biscuits can work in the crust. Use the same crumb weight and adjust the butter only if the mixture does not hold when squeezed.

A store-bought 9-inch graham cracker crust works for a shortcut, but check the depth before filling. This is a generous bakery-style filling, so use a deep-dish crust if available, or hold back a little filling instead of overfilling.

Sweetened Condensed Milk

Sweetened condensed milk gives the filling its creamy body, sweetness, and smooth texture. Evaporated milk is not a good swap because it does not have the same thickness, sugar, or structure. It is what makes the filling feel lush instead of watery.

If you like condensed milk desserts, MasalaMonk’s banoffee pie recipe is another rich, chilled pie-style dessert to try.

Egg Yolks

Egg yolks help the filling cut like custard instead of spooning like pudding. They also give the pie its natural pale yellow color.

The same gentle-heat logic shows up in MasalaMonk’s crème brûlée recipe, where the custard should set softly instead of turning firm.

Key Lime Juice

Key lime juice gives the pie its sharp, bright flavor. Fresh key limes have a fragrant, floral tartness, but bottled key lime juice is useful and reliable when fresh key limes are hard to find. Regular limes can also work, especially when you use enough zest.

Lime Zest

Zest is what makes the pie smell like lime before the first bite even lands. Grate only the colored outer layer of the lime; the white pith underneath can taste bitter in a smooth custard filling.

Zest the limes before you juice them. Whole limes are easier to hold, and you are less likely to scrape into the bitter white pith.

Salt

A small pinch of salt keeps the filling from tasting flat. It should not make the pie taste salty; it simply sharpens the lime and balances the condensed milk.

Whipped Cream

Lightly sweetened whipped cream softens the tartness of the pie and gives each slice a cool finish. Heavy cream, a little powdered sugar, and vanilla are enough.

Once the basics are set, the lime choice is where most bakers hesitate. That is also where this recipe is more flexible than it may seem.

Fresh Key Limes, Bottled Juice, or Regular Limes?

Fresh key limes give the most aromatic version, but they are not the only way to make a good pie. Bottled key lime juice is useful when fresh key limes are hard to find, and regular Persian limes work well when you use enough fresh zest.

Fresh key limes, regular Persian limes, and bottled key lime juice arranged as options for making key lime pie.
For lime flavor, think in layers: fresh key limes bring aroma, bottled key lime juice brings consistency, and regular limes need zest for brightness.

For 1 cup / 240ml juice, expect about 20 to 30 small key limes, sometimes more if they are dry. Regular Persian limes are much larger, so 6 to 8 may be enough. Zest before juicing so the fruit is easier to hold.

Fresh key limes are lovely, but they are not a test you have to pass. The better test is the bite: clean, tart, aromatic, and balanced against the condensed milk.

No Key Limes? Use Regular Limes This Way

Regular limes work best when you treat zest as part of the flavor, not just a garnish. The juice brings tartness; the zest brings back the lime aroma.

A regular Persian lime being zested with a microplane, with fine green lime zest visible on a light surface.
When zesting regular limes, stop at the colored peel so the pie gets fragrance without the bitterness of the white pith.

Choose Your Lime Path

What You HaveWhat to DoBest Sign
Fresh key limesUse them for the most aromatic versionExpect a tart, floral filling
Bottled key lime juiceUse ¾ to 1 cup depending on sharpnessTaste first; it should be clean and tart
Regular limesUse the juice plus plenty of fresh zestZest gives back aroma
Very sharp bottled juiceStart closer to ¾ cup / 180mlUse zest for lime fragrance
Mild or weak limesUse the full juice amount and extra zestChill overnight for better flavor

With regular limes, fresh zest matters even more because it brings back the citrus aroma. With bottled key lime juice, taste it before mixing. It should be tart and clean, not stale or bitter.

A natural key lime pie is usually pale yellow because of the egg yolks and lime juice. Bright green pie may look playful, but it is not a sign of better lime flavor. Skip green food coloring unless you specifically want that look; it does not improve the pie.

A natural pale yellow key lime pie slice compared with an artificial neon green pie slice.
Instead of judging by green color, look for a soft pale yellow filling; that is the natural look of lime juice, yolks, and condensed milk.

Classic vs Bakery-Style Key Lime Pie

This is a taller bakery-style key lime pie, but the flavor stays classic: condensed milk, egg yolks, lime juice, zest, and a graham cracker crust. The difference is volume. A taller filling gives you a more generous slice, but it also needs a deeper 9-inch pie plate, careful doneness cues, and enough chill time to cut cleanly.

A classic-style key lime pie slice compared with a taller bakery-style key lime pie slice on cream plates.
A bakery-style key lime pie slice gets its height from extra filling volume, but the clean cut comes from proper baking and chilling.

Bakery-style does not mean greener, sweeter, or heavier. The pie should still taste tart, creamy, pale yellow, and balanced.

Key lime pie is also Florida’s official state pie, but that does not change the home-baking test: crisp crust, pale lime filling, and a chilled slice that holds. Florida Senate official state pie reference.

After the filling style, the crust is what makes the slice feel complete.

Graham Cracker Crust for Key Lime Pie

You are looking for a crust that is crisp, buttery, and strong enough to hold the chilled filling. It should not crumble into dust when sliced, but it should not be so tightly packed that it turns hard.

Crust Texture

The best cue is texture. Once the crumbs, sugar, butter, and salt are mixed, the crumbs should look like damp sand. Squeeze a small amount in your hand. If it holds together, the crust has enough butter. If it falls apart immediately, it may need a little more melted butter.

A hand squeezing graham cracker crumb mixture over a glass bowl to show the damp sand texture for key lime pie crust.
Before the crust goes into the dish, squeeze the crumbs once; they should clump lightly without leaving butter on your fingers.

Pressing and Pre-Baking

When pressing the crust into the pie plate, build the sides first. Then press the base flat. This gives you a more even edge and helps prevent the sides from collapsing. A measuring cup or flat-bottomed glass makes the job easier.

Hands pressing graham cracker crumbs up the sides of an ivory pie dish with a measuring cup to form the crust wall.
Next, press the sides before the base so the crust wall can support the taller lime filling instead of collapsing.

The crust is not just a container; it is the buttery, salty crunch that keeps the lime filling from tasting one-note. The best bite should give you a little sandy crunch before the lime custard melts.

A lightly pre-baked graham cracker crust in an ivory ceramic pie dish resting on a cooling rack.
Once pre-baked, the graham cracker crust should smell toasted and feel dry on top, which helps prevent a soggy chilled slice.

You see the same crust logic in MasalaMonk’s salted caramel cheesecake recipe, where the base has to stay crisp under a rich filling.

Crust ProblemLikely ReasonFix
Crust crumblesToo little butter or not pressed enoughAdd a little more butter next time and press firmly
Crust is too hardPressed too aggressivelyPress firmly, but do not crush it into a compact shell
Crust tastes flatNo saltAdd a small pinch of salt
Crust gets soggyNot pre-baked or filling added to a weak crustPre-bake until lightly dry and fragrant
Sides slump downLoose crumbs or thin sidesPress the sides first and make them even

Method Overview: How to Make Key Lime Pie

Think of the method in four stages: set the crust, thicken the filling, bake only until the center moves softly, then let the refrigerator finish the texture.

The crust gets a short pre-bake so it smells toasted and feels lightly dry. The filling should look smooth, glossy, and slightly thickened before it goes into the crust. After baking, the pie should cool at room temperature before it chills deeply in the refrigerator.

Pale yellow key lime pie filling in a bowl with a whisk trail, showing a smooth glossy texture with tiny lime zest flecks.
When the filling turns glossy and leaves soft whisk trails, the condensed milk, egg yolks, lime juice, and zest are blended enough to bake smooth.

Once the filling looks glossy and slow-pouring, add it to the warm crust gently so the surface stays smooth.

Pale yellow key lime pie filling being poured from a bowl into a pre-baked graham cracker crust in an ivory ceramic dish.
If the filling pours slowly rather than splashing thin, it has the body needed for a creamy baked key lime pie.

How to Know Key Lime Pie Is Done

Key lime pie is done when the edges look set and the center has a soft wobble. It should not slosh like liquid, but it should not look firm like a cheesecake either. Think of the center as gently jiggly, not loose.

A baked key lime pie in an ivory dish with labels pointing to set edges, a soft center, and no browning.
Pull the pie when the edges are set and the center still wobbles softly; the custard finishes as it cools and chills.

Keep the top pale; browning is a sign the pie has gone too far. A few tiny bubbles near the edges are fine, but a browned surface usually means the oven was too hot or the bake went too long.

A split image comparing a correct pale key lime pie top with an overbaked browned and cracked top.
Browning, puffing, or cracking are warning signs that the key lime custard has moved past creamy and into overbaked.

Done means: for this pie, your eyes are more helpful than a thermometer: set edges, a center that still moves softly, no slosh, no large bubbling, and a pale top with no browning.

After the bake, the next useful checks are chilling time and clean slicing.

How Long to Chill Key Lime Pie

Chill key lime pie for at least 4 hours before slicing. Overnight is better if you want the smoothest texture and the neatest wedges. The filling needs time to firm all the way through, not just cool on the surface.

Let the pie cool at room temperature first, then refrigerate it. If the pie is still warm, avoid sealing it tightly right away because condensation can drip onto the filling. Once cold, cover it loosely or place it in an airtight container.

When it is right, the fork should slide through cold lime custard, hit the buttery crumb crust, and bring up a bite that is tart first, creamy second, and sweet only at the end.

How to Get Clean Slices

For tidy wedges, use a sharp knife and cut straight down through the custard and crust. Wipe the blade between slices so each piece lifts cleanly.

A clean slice of key lime pie being lifted with a pie server while a hand wipes a sharp knife nearby.
For clean slices, chill first, cut with a sharp knife, and wipe between cuts so graham crumbs do not streak the filling.
  • For extra-clean cuts, dip the knife in hot water and dry it before slicing.
  • Add whipped cream after chilling, especially if you want a neat top.
  • Use a thin pie server instead of a spoon to lift each piece.

If the first piece comes out messy but the rest of the pie looks set, the pie is probably fine. Slices that slump across the whole pie usually needed more fridge time or a slightly longer bake.

When the pie still looks loose after slicing, check the troubleshooting table before changing the recipe.

How to Make It Less Sweet or More Tart

Key lime pie should be sweet, but it should not taste flat or sugary. The best balance comes from enough lime juice, fresh zest, a little salt, and a simple topping.

The best version should make your mouth water a little before the sweetness catches up. That is the difference between a pie that tastes bright and one that only tastes sweet.

A four-part board showing lime juice, lime zest, salt, whipped cream, and a key lime pie slice for flavor balance.
To make the pie taste brighter without breaking the filling, adjust zest, salt, and topping before changing the condensed milk ratio.
What You WantWhat to Adjust
Less sweetUse lightly sweetened whipped cream and avoid adding extra sugar to the filling
More tartUse the full 1 cup / 240ml lime juice
More lime aromaAdd a little extra zest, avoiding the white pith
Softer flavorUse ¾ cup / 180ml lime juice instead of 1 cup / 240ml
Better balanceAdd a pinch of salt and chill the pie overnight

Sweetened condensed milk is not only a sweetener; it also gives the filling its body. For a less sweet result, adjust the lime, zest, salt, and topping before changing the structure of the filling.

Whipped Cream, Meringue, or Plain?

Whipped cream is the easiest and most balanced topping for key lime pie. It softens the tartness of the filling and gives each slice a creamy finish without making the pie feel heavy.

Whipped cream should feel like a soft finish, not a second dessert on top of the pie. A little sweetness is enough because the filling already has condensed milk.

Soft whipped cream being piped onto a pale yellow key lime pie in an ivory dish with lime zest on top.
A light whipped cream finish softens the tart lime edge, while a little zest keeps the flavor fresh instead of heavy.

Meringue is more dramatic and can be beautiful, especially if lightly toasted. It also uses the egg whites left over from the filling. The tradeoff is that meringue needs more care, and it can weep if stored too long.

Serving the pie plain is also completely fine. If you want the lime flavor to feel sharper and cleaner, skip the topping or add only a small spoonful of whipped cream on each slice.

After topping, the other big choice is texture: classic baked custard or a softer no-bake pie.

Baked vs No-Bake Key Lime Pie

Baked and no-bake key lime pies both have their place. Choose baked when you want a classic chilled custard slice; choose no-bake when you want something softer, creamier, and closer to cheesecake or icebox pie.

A split comparison showing baked key lime pie as custardy and no-bake key lime pie as softer.
Choose baked key lime pie for a custardy slice; choose no-bake when you want a softer chilled dessert with a creamier set.
TypeTextureBest ForMain Caution
Baked key lime pieCustardy, creamy, sliceableClassic flavor and tidy wedgesDo not overbake
No-bake key lime pieCreamy, soft, cheesecake-likeHot weather and no-oven dessertsNeeds enough chill time
Frozen key lime pieFirm, cold, refreshingSummer serving and make-ahead dessertsNeeds thawing time before slicing

This recipe is baked because it gives the most reliable classic texture. The bake is short, and the oven does not need to stay on for long. Most of the total time is chilling time, not active cooking time.

If you want the same chilled-dessert comfort without turning on the oven, MasalaMonk’s no-bake mango cheesecake recipe is a natural next stop because it also focuses on clean setting, chill time, and a creamy fruit filling.

Key Lime Pie Variations

Make the baked pie once as written, then use these ideas when you want the same tart-creamy flavor in a different shape.

Mini key lime pies and square key lime pie bars arranged on light boards with pale yellow filling and graham crusts.
For parties or trays, mini pies and bars keep the same graham crust and lime filling but make serving cleaner and easier.

Mini Key Lime Pies

Mini key lime pies are great for parties and individual servings. Use a muffin tin or mini graham cracker crusts, press the crust firmly, and reduce the bake time because smaller pies set faster.

Key Lime Pie Bars

For bars, use a square pan lined with parchment so the slab lifts out cleanly. Bars need a slightly sturdier structure because they are cut into handheld pieces.

Gluten-Free Key Lime Pie

The filling is naturally gluten-free as long as your ingredient labels are safe. Use gluten-free graham crackers or gluten-free digestive-style biscuits for the crust, then follow the same butter, sugar, pressing, and pre-baking method.

Dairy-Free or Vegan Key Lime Pie

A dairy-free or vegan key lime pie needs a dedicated formula. Sweetened condensed milk and egg yolks are structural ingredients in this baked version, so simple one-for-one swaps can turn the filling loose or grainy.

For a coconut-based frozen dessert comparison, MasalaMonk’s coconut ice cream recipe is useful because it separates coconut milk, coconut cream, and texture control clearly.

Regular Lime Pie

Regular limes make a bright, delicious pie. The flavor is slightly different from fresh key limes, but fresh zest brings back more citrus aroma.

No-Bake Key Lime Pie

No-bake key lime pie usually uses cream cheese, whipped cream, whipped topping, or another chilled structure instead of egg yolks. It is useful when you want a cold summer dessert without turning on the oven, but it is not the same texture as this baked custard-style pie. For the no-oven setting logic, see MasalaMonk’s no-bake cheesecake recipe.

Master the baked version first; it is the one that rewards a night in the fridge.

Make-Ahead Key Lime Pie

Key lime pie is one of the easiest desserts to make ahead because it needs refrigerator time anyway. Make the pie the day before you plan to serve it, chill it overnight, and add the whipped cream close to serving time.

That is the quiet advantage of this pie: dessert is already finished before anyone sits down to eat. All that is left is cream, a clean knife, and cold slices on plates.

If you are making the pie ahead for guests, bake and chill the pie the day before, but whip and add the cream on the day you serve it.

For a summer dessert table, this pie also sits well beside something cold and fruit-forward like MasalaMonk’s homemade mango ice cream.

Best make-ahead plan: bake and chill the pie one day ahead, keep it covered in the refrigerator, then whip the cream and garnish the pie shortly before serving.

A chilled key lime pie in an ivory dish inside a refrigerator with limes, a covered slice, and whipped cream nearby.
For the best make-ahead result, chill the pie deeply first, then add whipped cream close to serving so the topping stays fresh.

Storage and Freezing

Because this is a dairy-and-egg dessert, it belongs in the refrigerator whenever it is not being served. Keep it cold, slice it cold, and return leftovers to the fridge once everyone has had a piece.

Storage MethodHow LongBest Practice
Refrigerator3 to 4 daysCover after fully chilled
Freezer, if you choose to freeze1 to 2 months for best textureFreeze fully chilled pie tightly wrapped; thaw in the refrigerator
Room temperatureUp to 2 hours while servingReturn leftovers to the refrigerator promptly

For refrigerator timing, FoodSafety.gov’s cold food storage chart lists custard and chiffon-style pies at 3 to 4 days refrigerated. Treat freezing as a texture-quality choice for this pie rather than a refrigerator-storage guideline. If you freeze it, wrap it tightly, thaw it in the refrigerator, and expect the crust or filling to be slightly softer after thawing.

A key lime pie storage guide showing fridge for 3 to 4 days, serving up to 2 hours, and freezer for 1 to 2 months with texture softening.
Refrigerate for the best texture, serve briefly at room temperature, and freeze only when planning ahead because thawing can soften the filling.

If possible, add whipped cream after thawing rather than before freezing. Fresh whipped cream has the best texture.

Troubleshooting Key Lime Pie

Most key lime pie problems come from three places: the wrong milk, too little bake time, or not enough chill time. Use the table below to fix the most common issues.

Loose or Runny Filling

If the pie is already baked but still looks loose, chill it longer before cutting. A slightly underbaked pie may firm up with extra refrigerator time. After overnight chilling, liquid filling usually points to the wrong milk type or a changed filling ratio.

Most key lime pie failures are not disasters; they are timing problems. More fridge time fixes more pies than people think, and a little patience can turn a nervous-looking pie into a slice you are happy to serve.

A troubleshooting board showing correct key lime pie texture beside runny, cracked, curdled, and crumbly crust examples.
Use the problem panels as diagnosis: runny needs more bake or chill, cracked needs gentler heat, and crumbly crust needs better binding.

Common Problems and Fixes

ProblemLikely ReasonFix Next Time
Pie did not setUnderbaked, sliced too soon, or wrong milk usedBake until edges set, chill fully, and use sweetened condensed milk
Filling is runnyPie was warm inside or filling ratio changedChill at least 4 hours and avoid reducing structural ingredients
Filling tastes harshBottled juice was bitter, stale, or too sharpUse a cleaner bottled key lime juice, reduce to ¾ cup / 180ml, or add more fresh zest
Filling looks curdled or grainyOverbaked, oven too hot, or acidic filling cooked too aggressivelyPull the pie while the center still moves softly and avoid browning or large bubbling
Pie tastes too sweetNot enough lime, zest, or saltUse the full lime juice amount, add zest, and include a pinch of salt
Pie tastes bitterToo much white pith in the zestZest only the colored outer layer
Crust crumblesToo little butter or not enough pressureUse enough melted butter and press the crust firmly
Crust is too hardCrust was overpackedPress evenly but not aggressively
Filling crackedPie was overbaked or cooled too aggressivelyRemove it while the center still moves softly; cover small cracks with whipped cream
Top brownedOven too hot or bake time too longBake just until set; the filling should stay pale
Slices are messyPie was not fully chilledChill overnight and wipe the knife between cuts

Need exact amounts again? Return to the recipe card, or continue to the FAQs for quick answers.

Key Lime Pie FAQs

What is key lime pie made of?

Key lime pie is made with a graham cracker crust, sweetened condensed milk, egg yolks, key lime juice, and lime zest. It is baked briefly, chilled until set, and often topped with whipped cream or meringue.

What temperature do you bake key lime pie?

Bake key lime pie at 350°F / 177°C. In this recipe, the crust bakes first for 8 to 10 minutes, then the filling bakes for 18 to 20 minutes.

How do you know when key lime pie is done?

Key lime pie is done when the edges are set and the center has a soft wobble. It should not slosh, brown, or look completely firm. Visual cues are more useful than temperature for this pie.

Why is my key lime pie runny?

Key lime pie can be runny if it is underbaked, sliced before it is fully chilled, or made with evaporated milk instead of sweetened condensed milk. Chill it for at least 4 hours before slicing.

How long should key lime pie chill before slicing?

Chill key lime pie for at least 4 hours. Overnight is better if you want the smoothest texture and neatest slices.

Fresh key limes or bottled key lime juice: which is better?

Fresh key limes are best for aroma, but bottled key lime juice works well in baked key lime pie. Choose a bottled juice that tastes clean and tart, not bitter or stale.

Do regular limes work in key lime pie?

Yes, regular Persian limes work in key lime pie. Use fresh zest along with the juice so the filling tastes bright and aromatic instead of flat.

What can I use instead of graham crackers?

Digestive biscuits or plain tea biscuits can work instead of graham crackers. Use the same crumb weight, then adjust the butter only if the crumb mixture does not hold when squeezed.

Can I use a store-bought graham cracker crust?

Yes. Use a deep-dish 9-inch graham cracker crust if possible. This recipe has a generous filling, so hold back a little filling if the packaged crust is shallow.

Can I make this with one can of sweetened condensed milk?

Not with the same measurements. This taller bakery-style pie is built around two cans of sweetened condensed milk. For a one-can pie, use a smaller filling formula.

Should key lime pie be green or yellow?

Key lime pie should usually be pale yellow, not bright green. The yellow color comes from egg yolks and lime juice; green color usually comes from food coloring.

Why did my key lime pie crack?

Key lime pie usually cracks when it is overbaked or cooled too aggressively. Pull it when the edges are set and the center still moves softly. A cracked pie is usually still edible; cover it with whipped cream and chill fully before slicing.

How far ahead can you make key lime pie?

You can make key lime pie one day ahead. Bake it, cool it, chill it overnight, and add whipped cream shortly before serving.

Does key lime pie need to be refrigerated?

Yes. Key lime pie needs to be refrigerated because it contains a dairy-and-egg-based filling. Keep it cold until serving and refrigerate leftovers promptly.

Can you freeze key lime pie?

You can freeze key lime pie for texture-quality convenience, but the crust and filling may soften slightly after thawing. Freeze it fully chilled and tightly wrapped, then thaw in the refrigerator. Add whipped cream after thawing.

How do you get clean slices?

Chill the pie thoroughly, preferably overnight. Cut straight down with a sharp knife, wipe the blade between slices, and add whipped cream after chilling for the neatest top.

Whipped cream or meringue: which is better?

Whipped cream is best for an easy key lime pie because it is soft, creamy, and reliable. Meringue is more dramatic, but it needs more care and can weep during storage.

What is the difference between baked and no-bake key lime pie?

Baked key lime pie is custardy and sliceable because it uses egg yolks and condensed milk. No-bake key lime pie is softer and more cheesecake-like, often using cream cheese or whipped cream.

Final Thought

The best key lime pie gives you contrast in one clean forkful: cold lime custard, buttery crumbs, a little salt, a little cream, and enough tartness to wake everything up.

Once you know the cues, it stops feeling risky and becomes the dessert you make ahead, chill deeply, and bring to the table already calm, cold, and ready to slice.








