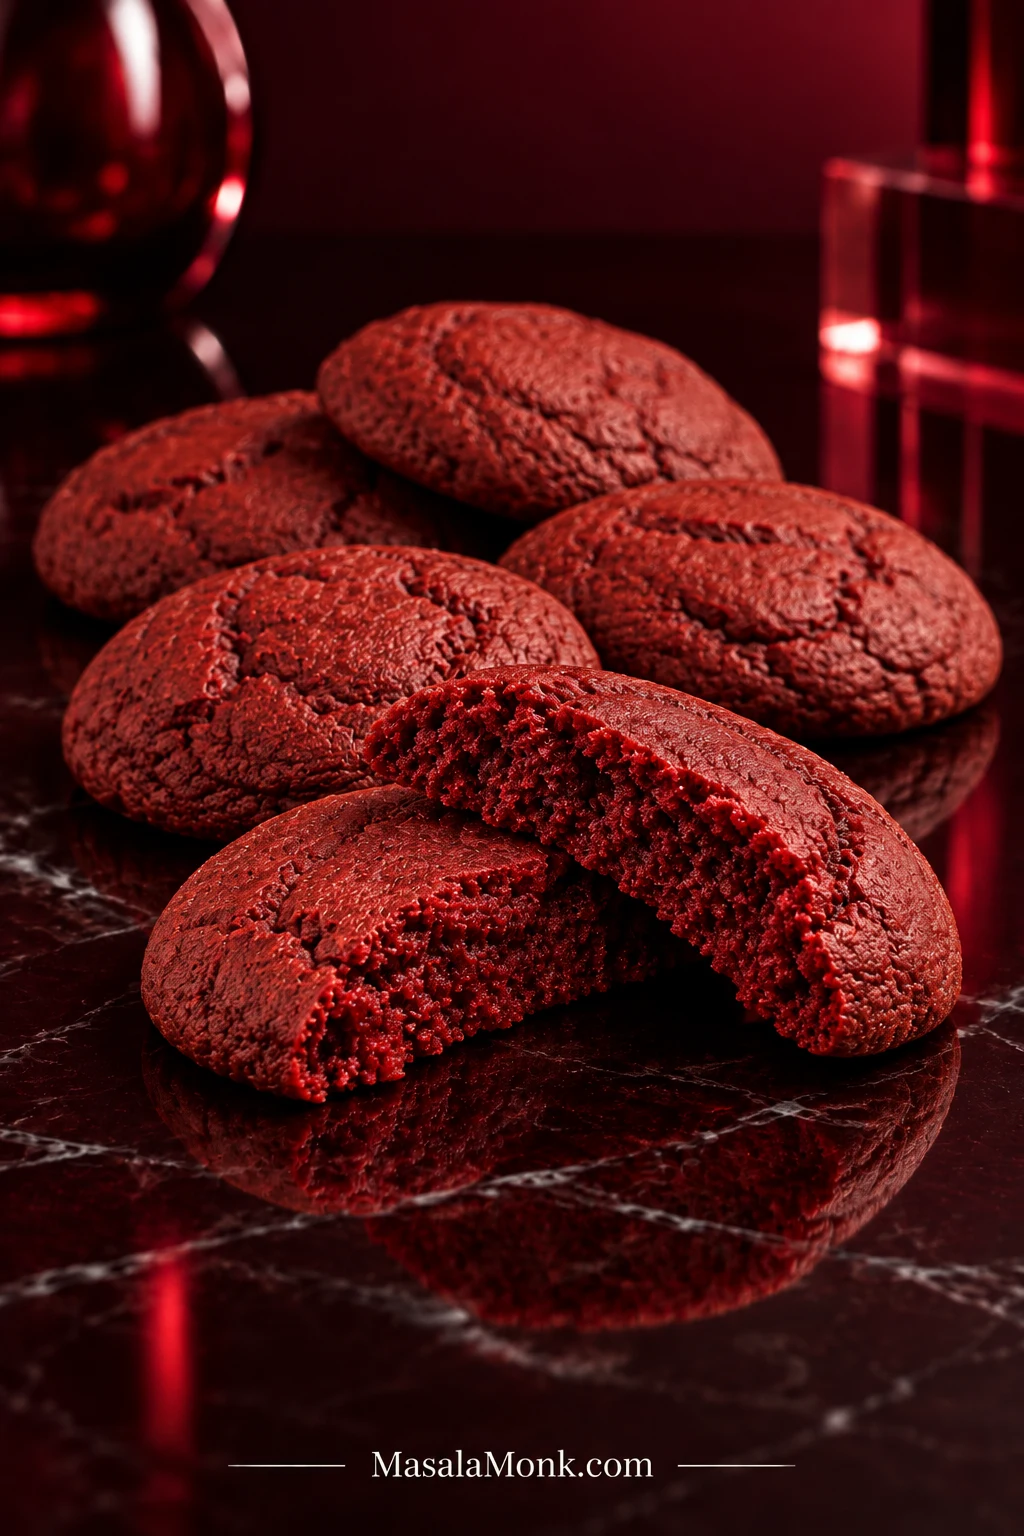
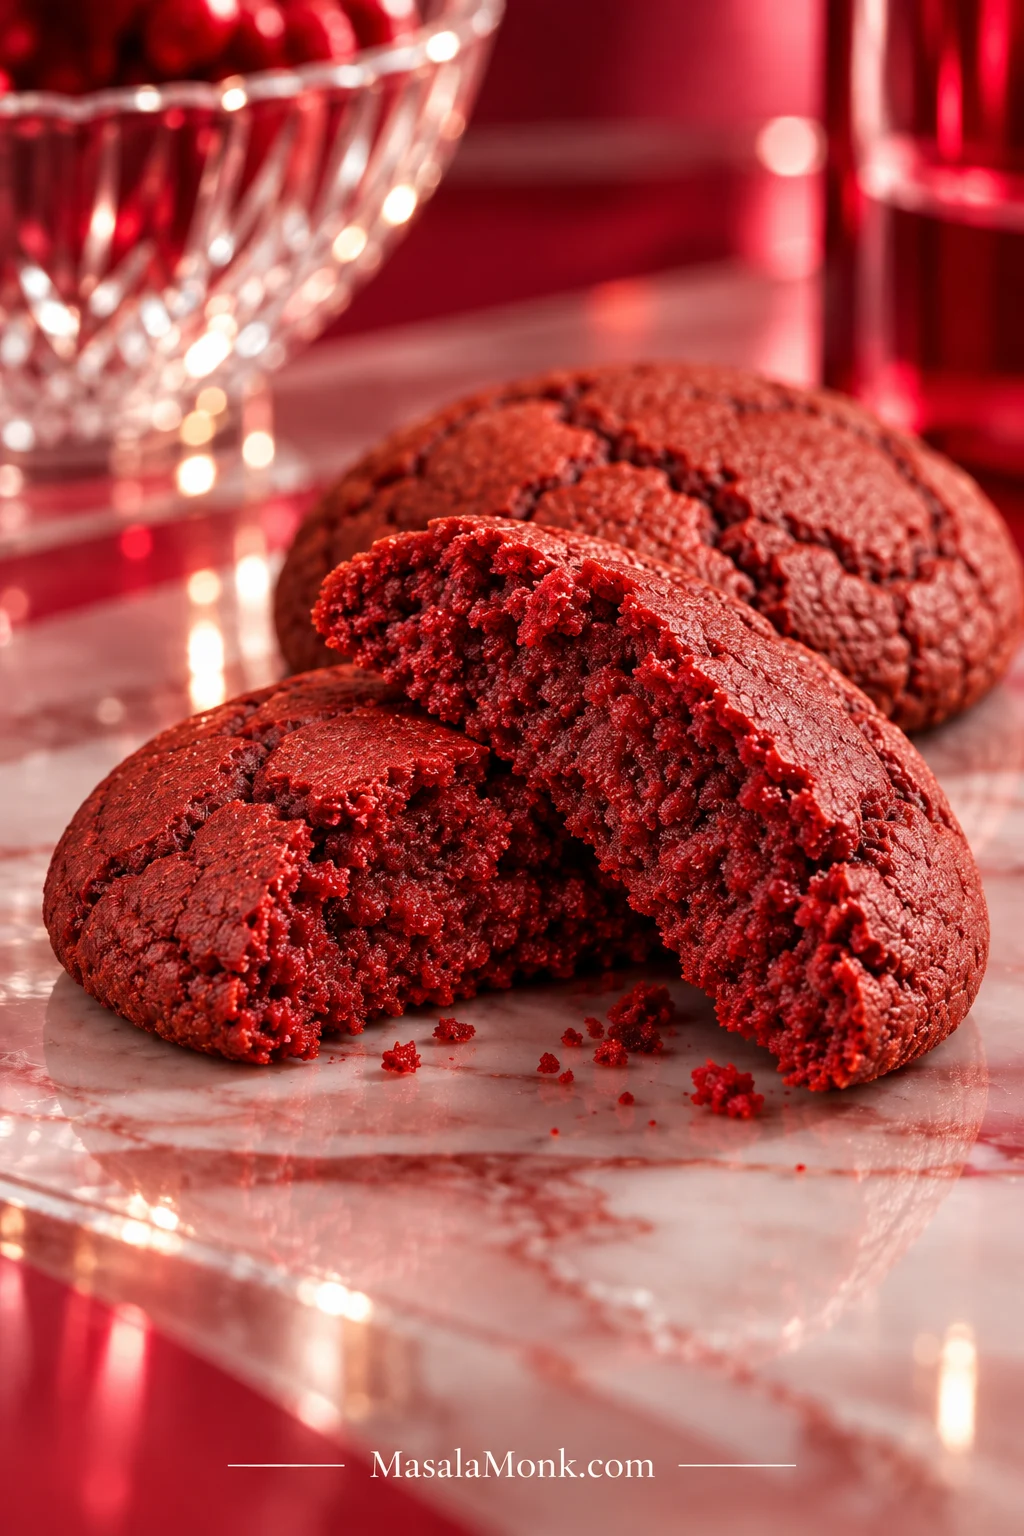
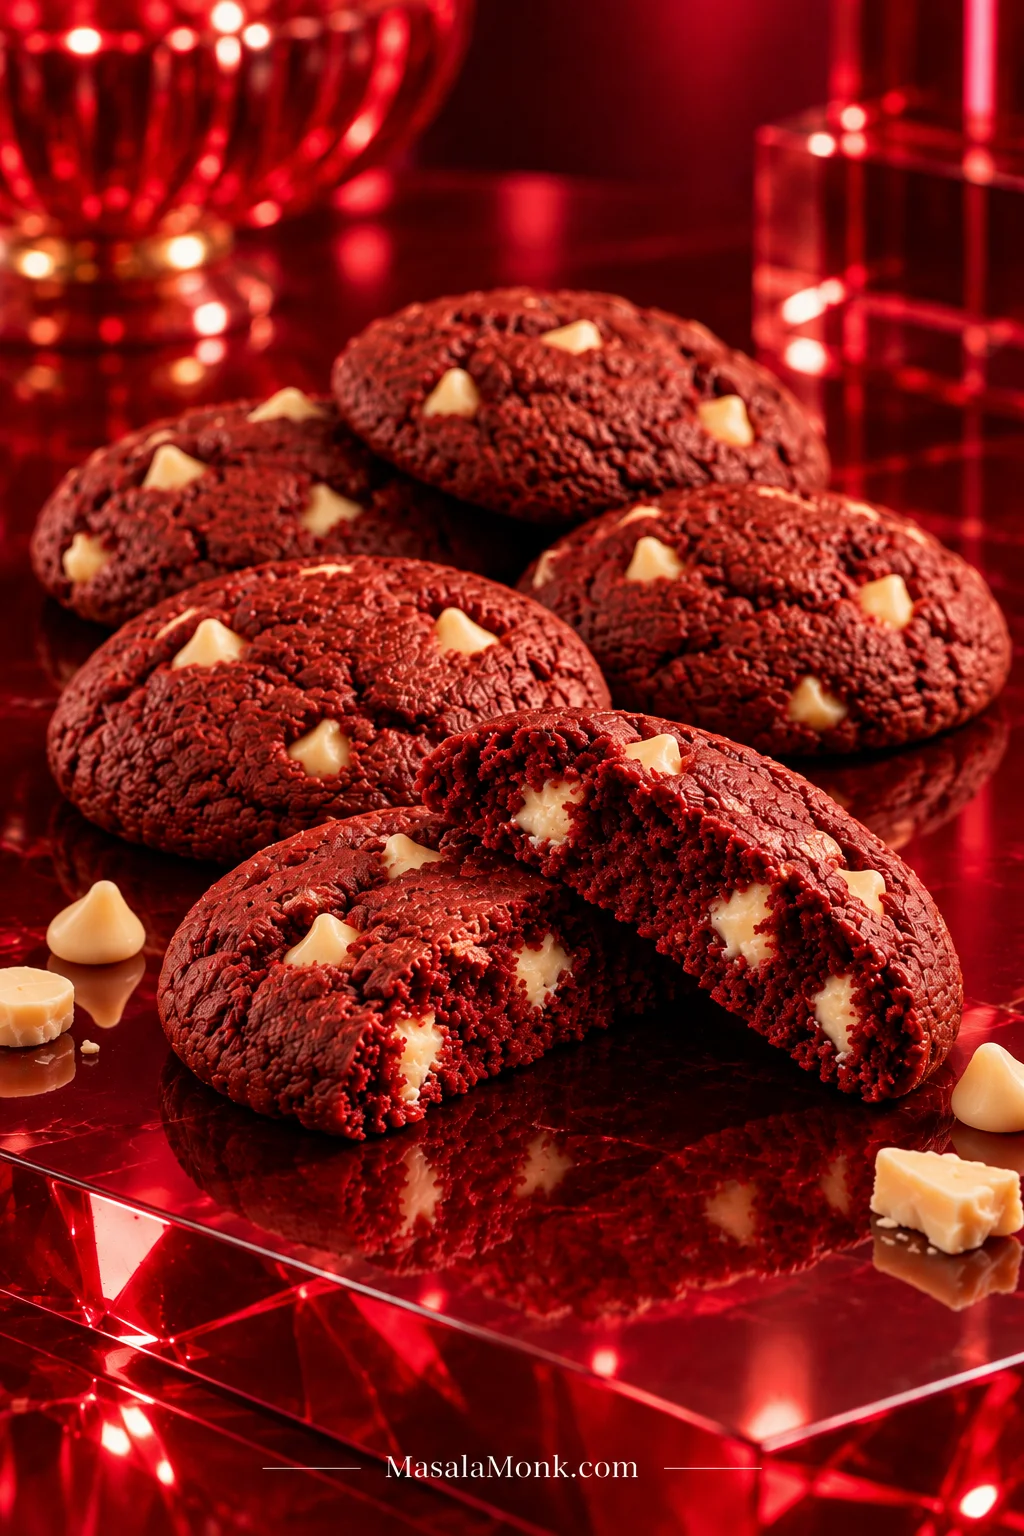
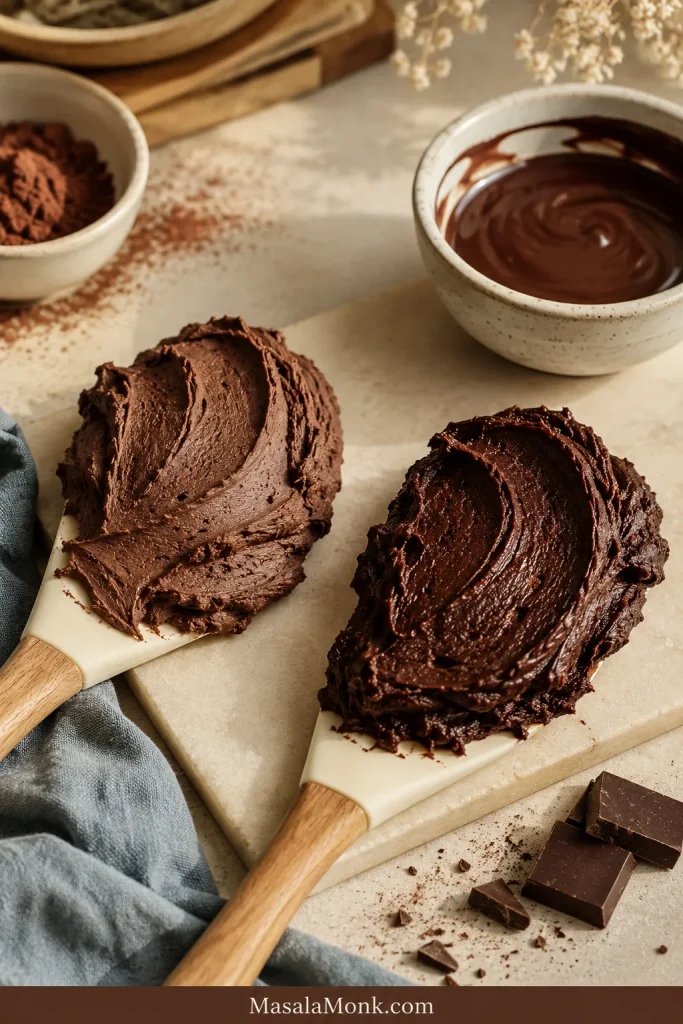
Break one open after it has had a few minutes to settle and the middle still bends before it breaks: soft through the center, lightly chewy around the edge, with vanilla and butter coming through before the cocoa.
These from-scratch red velvet cake cookies carry the cake’s vanilla-first flavor, mild cocoa, faint tang, and deep red color into a chewy drop cookie. White chocolate is optional.
Deep-red cookies with lightly set edges, a soft, chewy middle, mild cocoa and plenty of vanilla. Add white chocolate for extra sweetness, or leave it out and let the red velvet flavor lead.
Active Time About 20 minutes
Chill Time 30 minutes
Bake Time 10–13 minutes per tray
Total Time About 1 hour 20 minutes
Yield About 15 cookies
Oven 350°F / 177°C conventional
Useful Equipment
Hand mixer or stand mixer
Light-colored baking sheets
Parchment paper
Cookie scoop, optional
Digital kitchen scale, recommended
Ingredients
1 2/3 cups all-purpose flour, spooned and leveled (200 g / 7.1 oz)
1/4 cup natural unsweetened cocoa powder (20 g / 0.7 oz)
3/4 teaspoon baking soda
1/2 teaspoon fine salt
1/2 cup unsalted butter (113 g / 4 oz), softened but still cool
2/3 cup lightly packed light brown sugar (135 g / 4.8 oz)
1/4 cup granulated sugar (50 g / 1.8 oz)
1 large egg, ideally at room temperature
2 teaspoons vanilla extract (10 ml)
1 tablespoon buttermilk (15 ml)
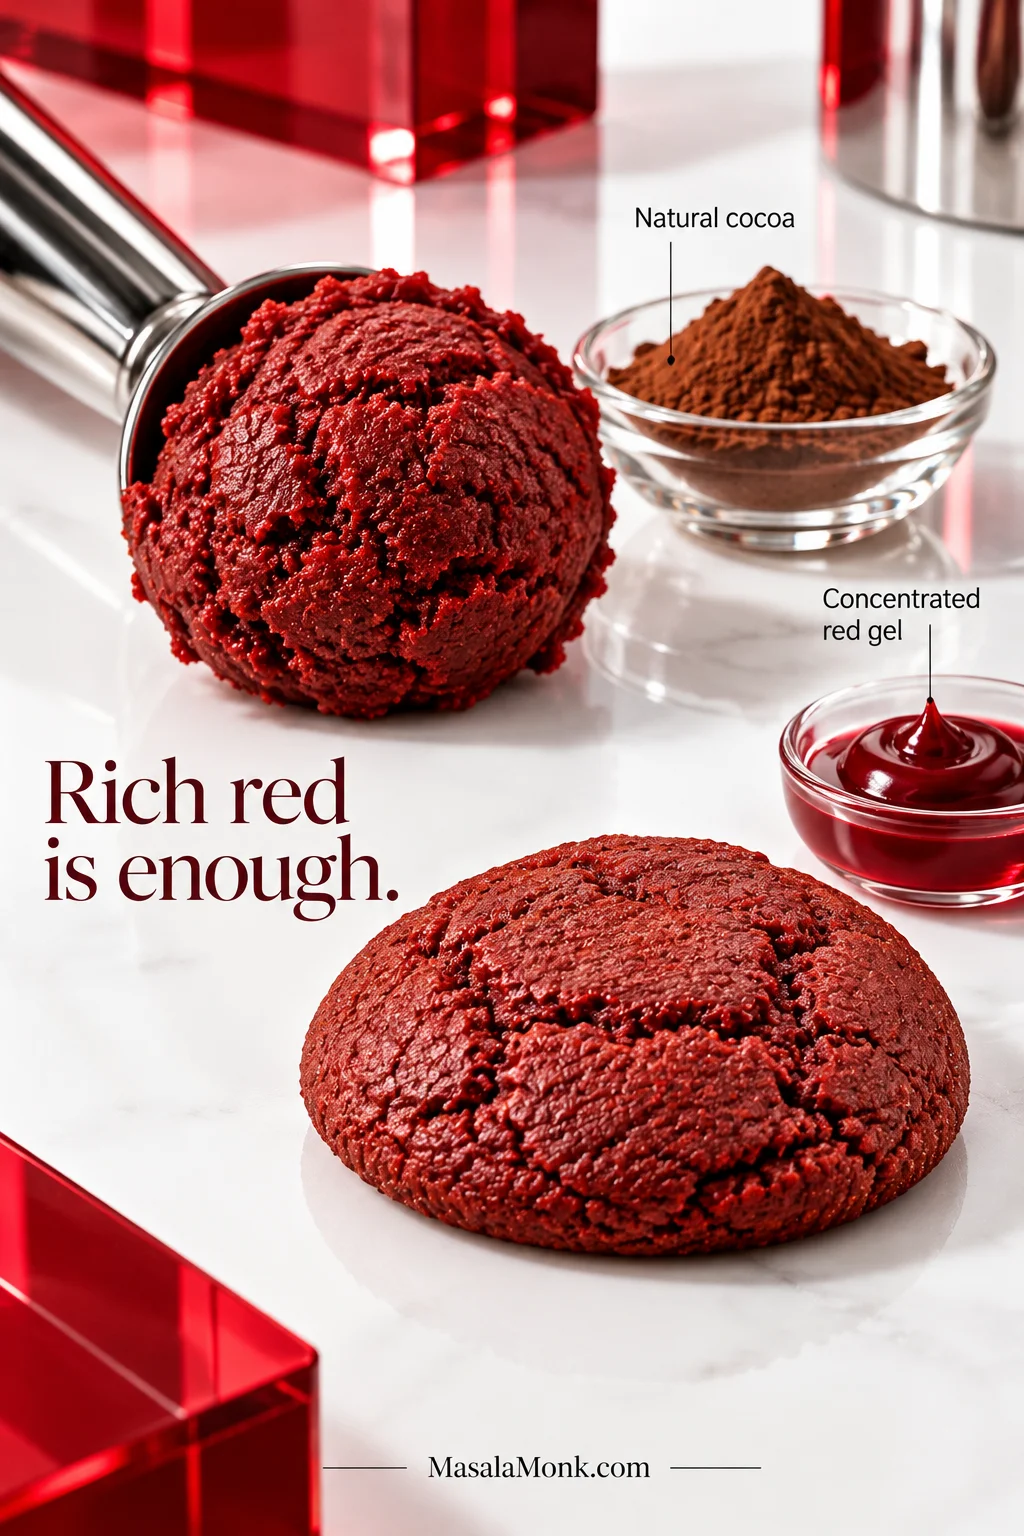
1/2 teaspoon concentrated red gel food coloring, plus up to another 1/4 teaspoon if needed for your brand
1/2 cup white chocolate chips or chopped white chocolate (85 g / 3 oz), optional
Four things make the biggest difference: natural cocoa, concentrated gel color, a 30-minute chill, and pulling the tray while the centers still look soft. Brown sugar helps hold moisture in the middle, while a smaller amount of white sugar encourages the edges to spread and set.
Method
Prepare the baking sheets. Line light-colored baking sheets with parchment paper. Hold off on preheating the oven for now; the dough will chill before baking.
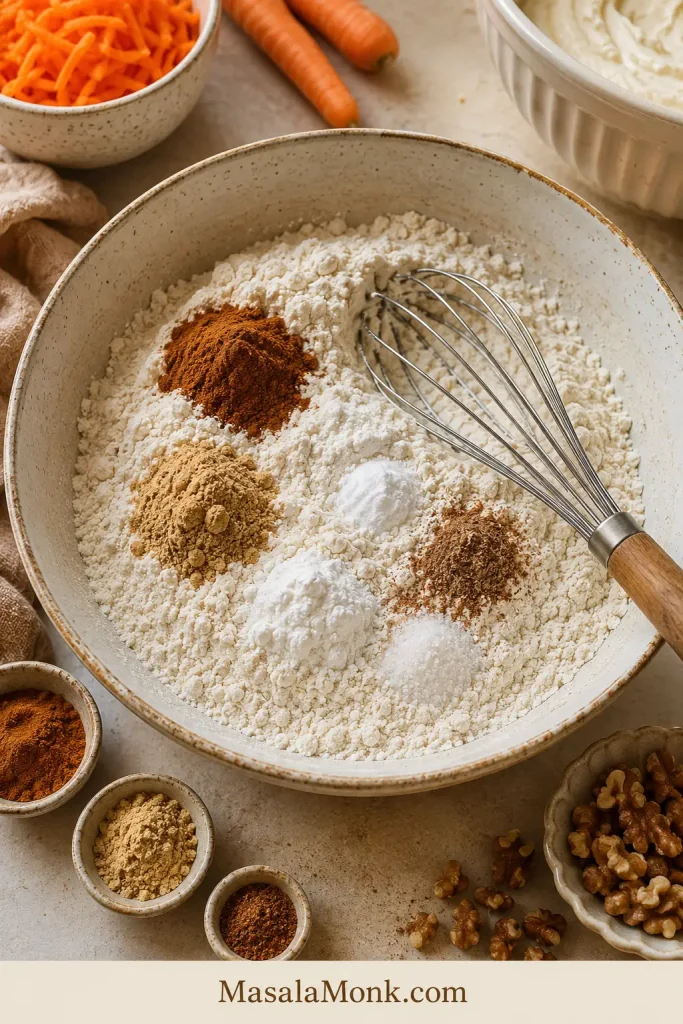
Mix the dry ingredients. Whisk the flour, natural cocoa, baking soda, and salt until the cocoa is evenly distributed and no obvious lumps remain.
Cream the butter and sugars. Use butter that indents easily with a finger but still looks matte rather than shiny or partly melted. Beat it with the brown sugar and granulated sugar for about 2 minutes, until smooth and creamy.
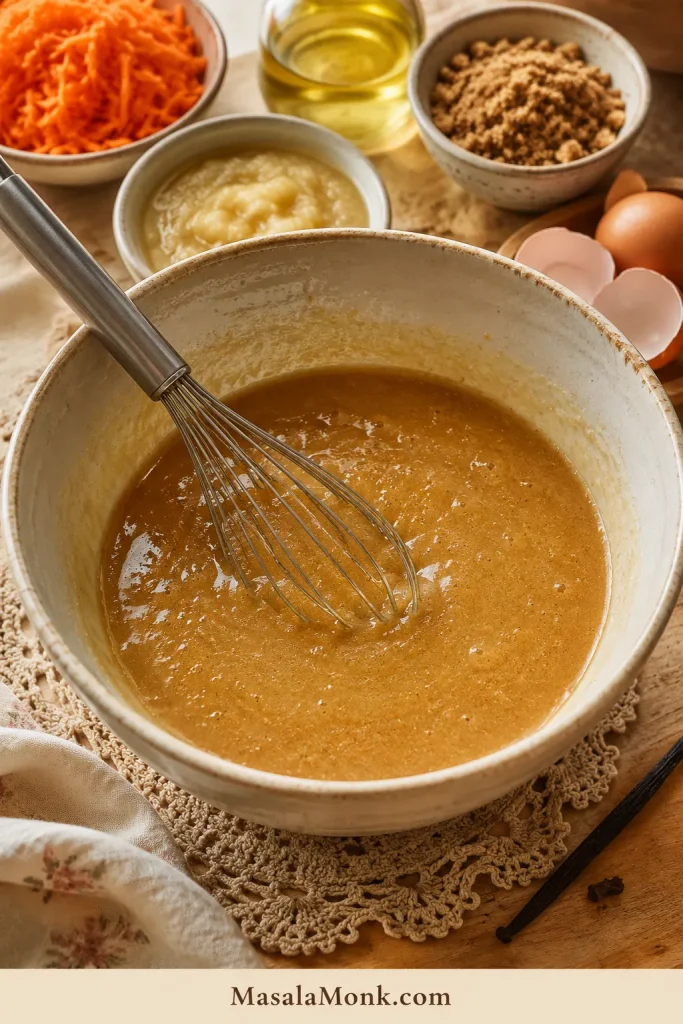
Add the egg, vanilla, buttermilk, and color. Beat in the egg until incorporated. Add the vanilla, buttermilk, and 1/2 teaspoon red gel coloring. Mix until the color is even, scraping down the bowl as needed.
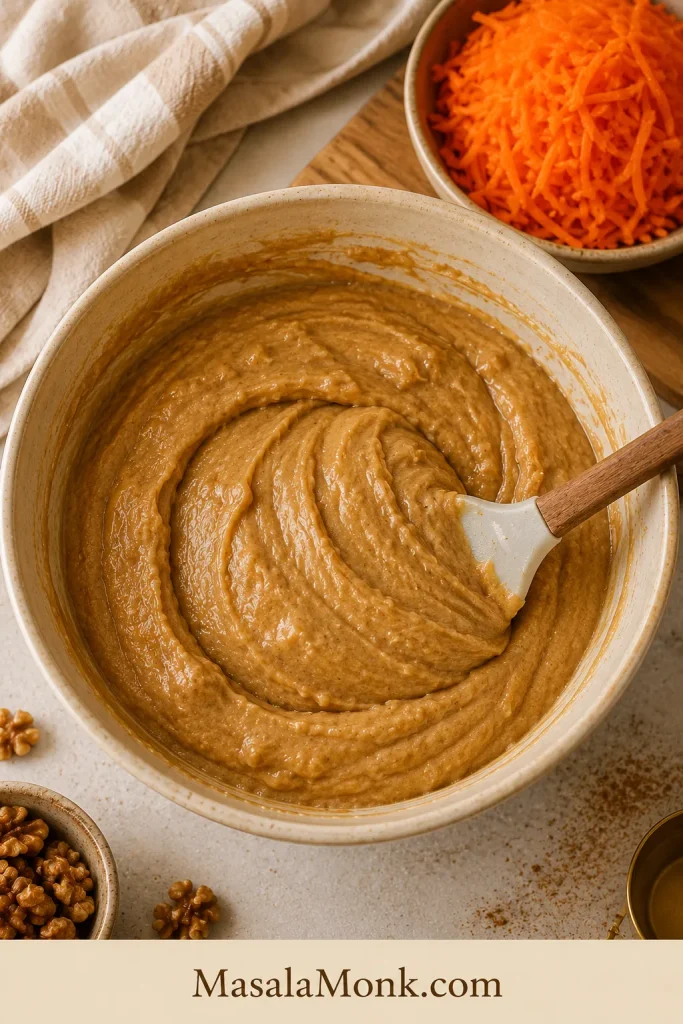
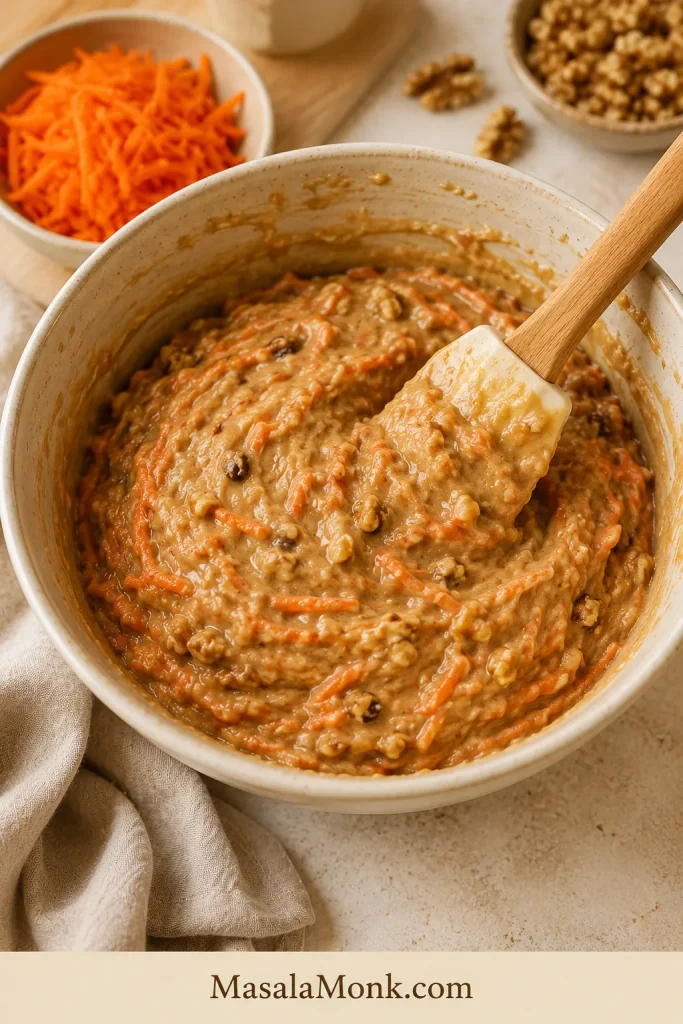
Finish the dough gently. Add the dry ingredients and mix on low only until most of the flour disappears. Switch to a spatula for the last streaks of flour, adding the white chocolate at the same time if using. The finished dough will be tacky but still sit in a mound.
Check the final color. Cocoa will darken the dough once it is fully incorporated. For a deeper red, fold in a tiny extra amount of gel, up to 3/4 teaspoon total depending on the brand. A rich red or burgundy is enough. If the shade still seems off, see how to get the red right without loosening the dough.
Chill, Portion & Bake
Chill for 30 minutes. Cover and refrigerate the dough. After it has chilled for 10–15 minutes, heat a conventional oven to 350°F / 177°C. For fan/convection, start around 325°F / 165°C.
Check the chilled dough. The dough is ready when it feels cool and pliable and holds a rounded scoop on the tray. If it slowly relaxes outward, chill it another 10–15 minutes. Very firm dough can sit at room temperature for a few minutes before portioning. If the first tray behaves differently than expected, use the spread guide before changing the formula.
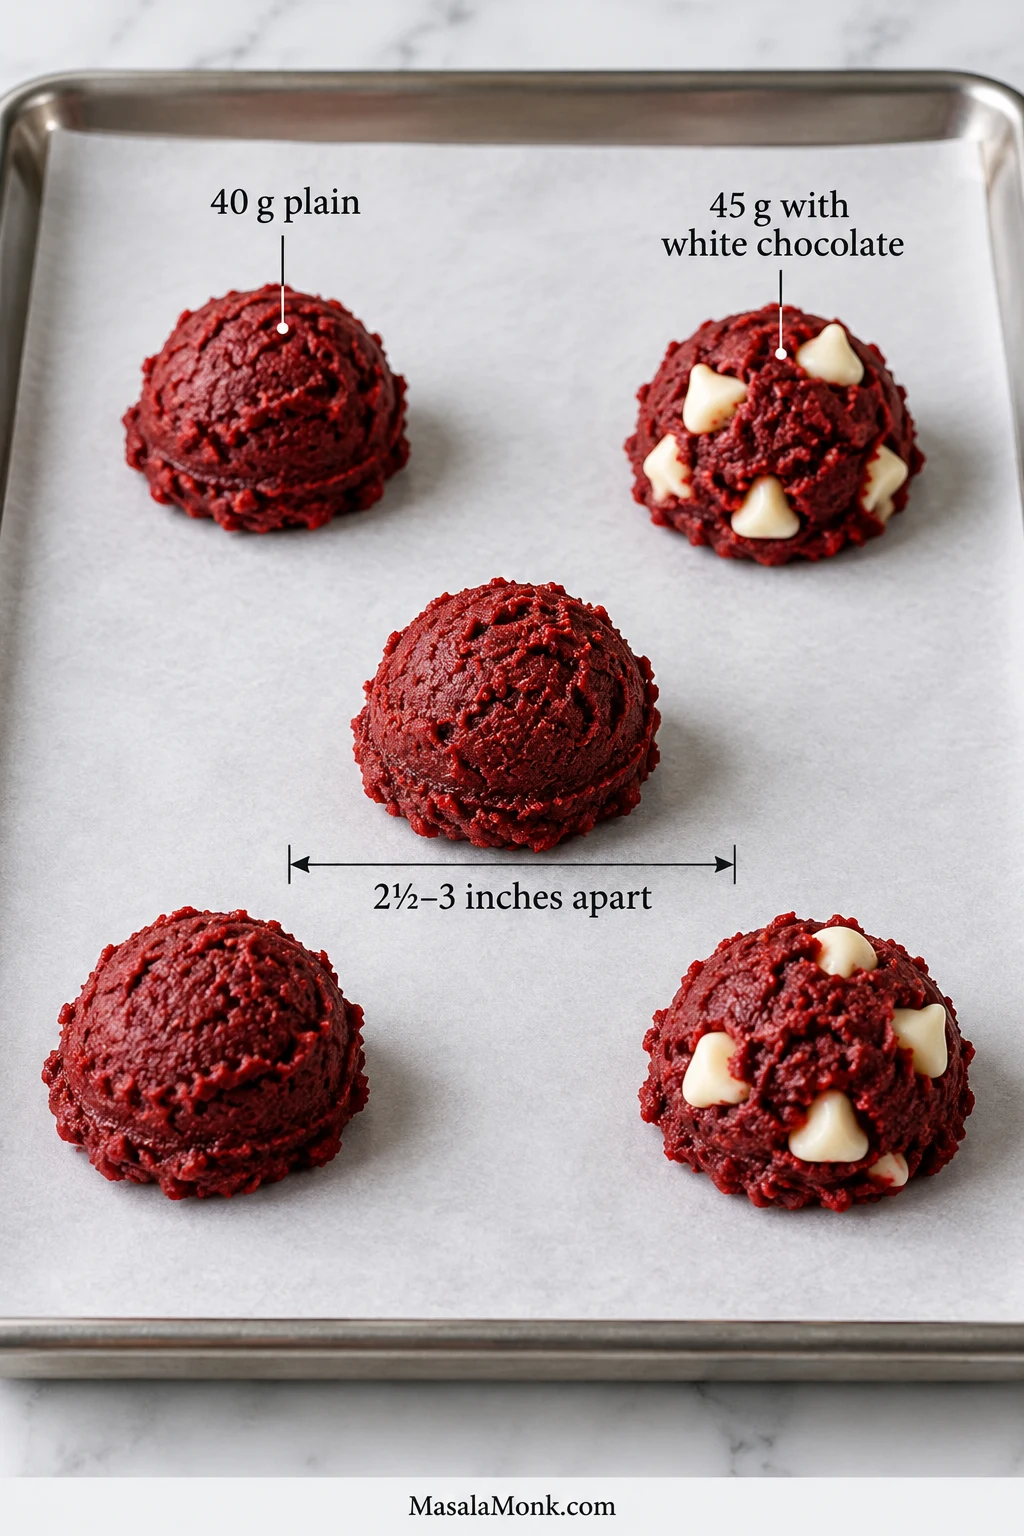
Portion without flattening. Use about 40 g / 1.4 oz dough for plain cookies or 45 g / 1.6 oz with white chocolate. Space the mounds 2 1/2 to 3 inches apart and leave them rounded. They will spread in the oven.
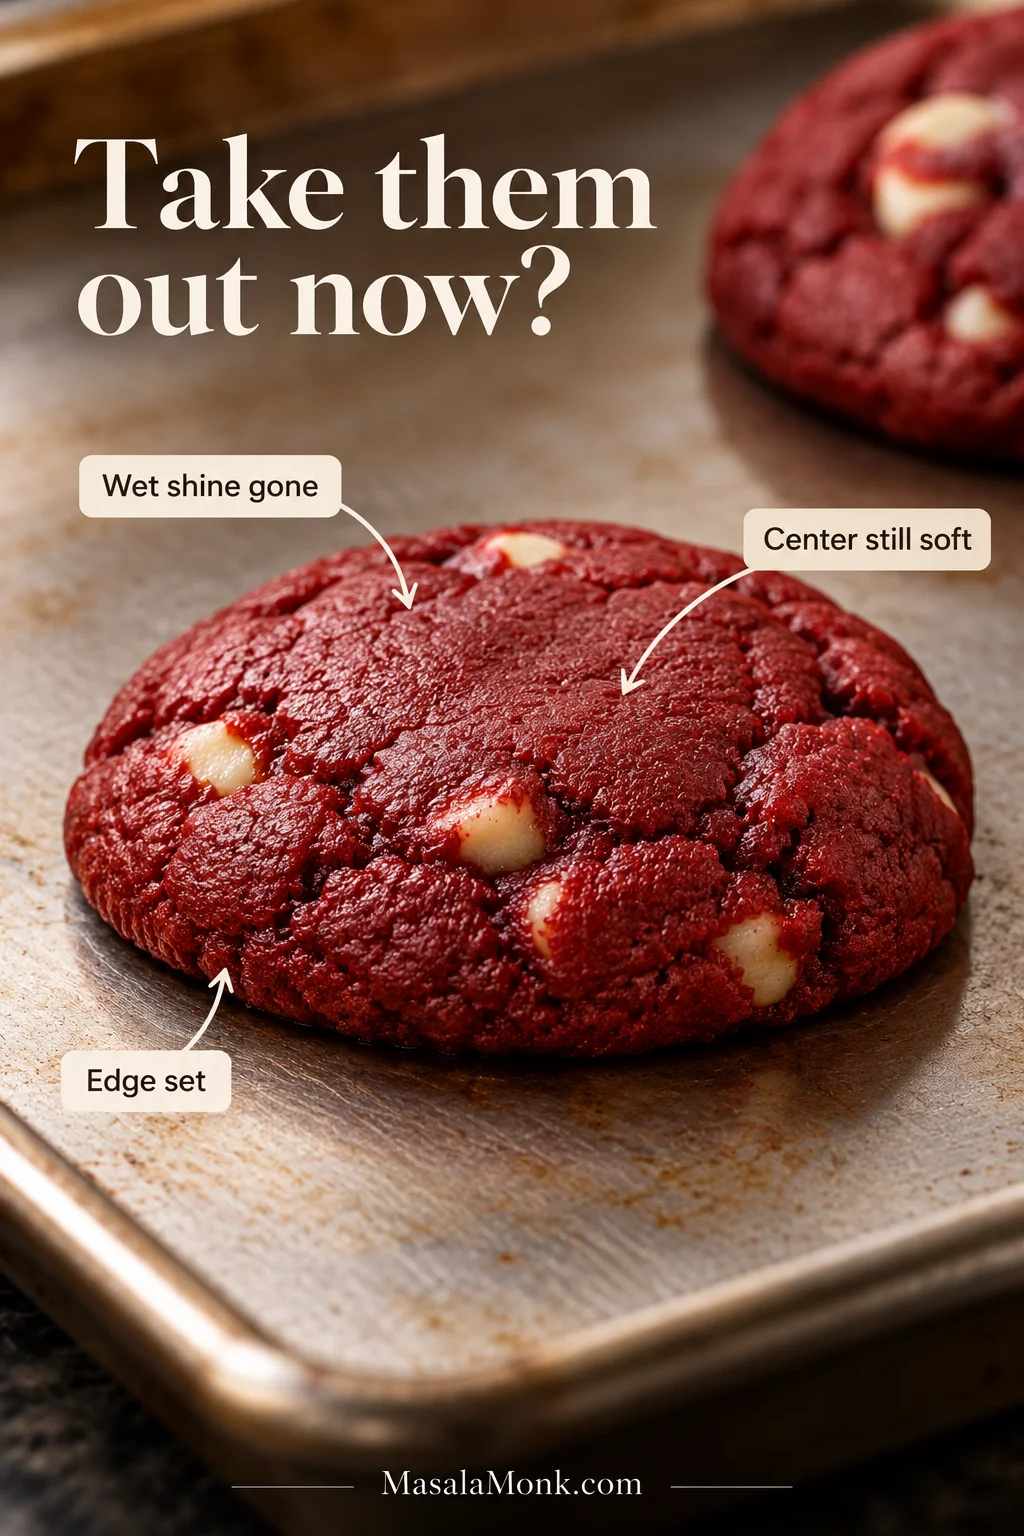
Bake until the edges set. When possible, bake one tray at a time near the center of the oven. Start checking at 10 minutes and expect most trays to take 10–13 minutes. Look for a set outer edge, no wet raw shine, and a center that still looks soft. For a visual check, see the doneness cues below.
Let the hot pan finish the center. Leave the cookies on the baking sheet for 5 minutes, then move them to a rack. Once cool, expect some chew at the edges with a soft, dense middle.
Recipe Notes
No buttermilk? Use 1 tablespoon plain full-fat yogurt, or sour cream loosened with a few drops of milk. You only need a subtle cultured-dairy note here.
Gel color: Brands vary in strength. Start with 1/2 teaspoon and judge the shade only after the cocoa has been fully mixed in.
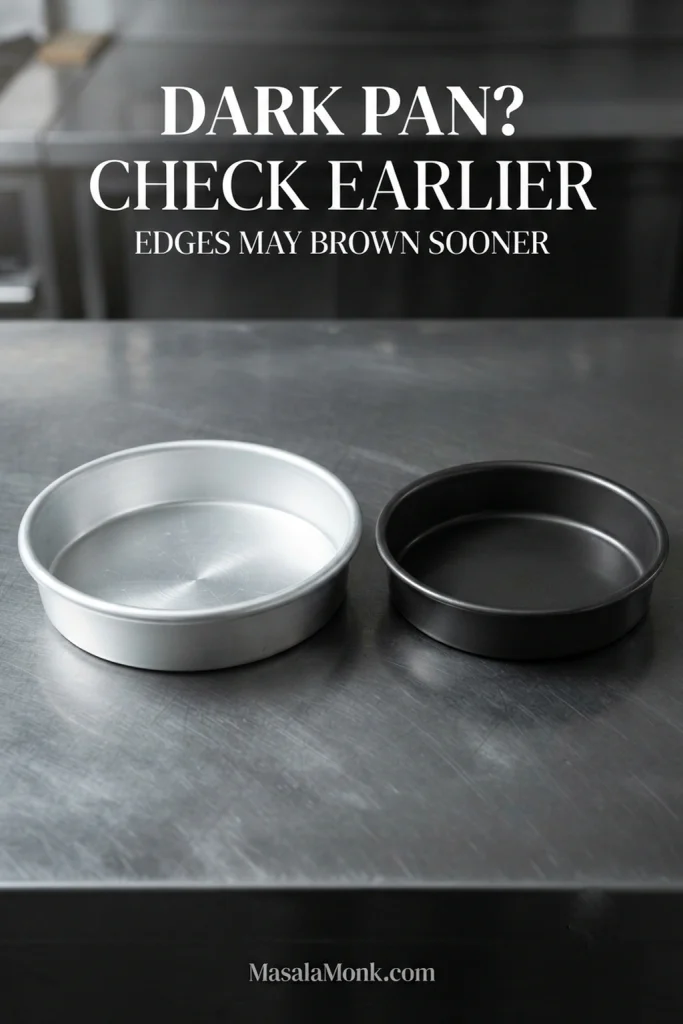
Dark baking sheet? Nonstick pans with dark surfaces can brown the bottoms faster. Use parchment and begin checking toward the early end of the bake range.
Want cut-out cookies instead? This dough is designed to spread. For hearts, stars, and decorated shapes, use our soft sugar cookie recipe.
Using almond flour? Don’t swap it cup for cup here; it changes both structure and spread. Use our almond flour cookies recipe instead.
Here, butter and vanilla come first, followed by mild cocoa and a faint tang from the buttermilk. Think buttery vanilla cookie dough with cocoa in it, not brownie batter.
That same cocoa-vanilla balance matters in our red velvet cake recipe, though cookie dough reacts much faster to changes in flour, cocoa, and temperature.
Once broken open, a chewy red velvet cookie should show a compact, moist crumb with small irregular pockets—not a fluffy, cake-like interior. That cross-section is one of the easiest ways to tell whether the texture stayed dense rather than bready.
Get the Red Right Without Wrecking the Cookie
Red velvet is a balance, not a shade. Cocoa darkens the dough while food coloring brings the red forward. Neither needs to take over.
It’s easy to keep adding color because the bowl never looks quite as bright as the cookie in your head. A rich red is enough. The baked cookie does not need to glow.
Because cocoa changes the shade as soon as it goes in, make the final color call only after the dry ingredients are fully mixed. Adding more red gel earlier can make the red velvet cookie dough overshoot once the cocoa is incorporated.
Why Did My Red Velvet Cookies Turn Brown?
With this style of red velvet cookie, a muddy brown-red color usually points first to very dark cocoa, too much cocoa, or too little coloring. For the color, spread, and flavor described here, use natural unsweetened cocoa.
Twenty grams gives the dough a clear cocoa note without pushing it into chocolate-cookie territory. Dutch-process cocoa is darker and smoother, so it tends to produce a deeper burgundy or brown-red cookie with more obvious chocolate flavor.
Concentrated gel gives strong color with very little added moisture. Ordinary liquid coloring often needs much more volume, which can loosen the dough before you realize what’s happening.
The common chain is simple: weak liquid color → wetter dough → extra flour → tougher cookie. If coloring has noticeably softened the dough, more refrigerator time is usually a better fix than more flour.
You can also skip the food coloring. The cookies will bake cocoa-brown, but the butter, vanilla, mild cocoa, and buttermilk flavor stay essentially the same.
Start With a 30-Minute Chill
Does red velvet cookie dough need to chill? For this dough, yes. Thirty minutes is the baseline: it firms the butter enough to help control the spread while keeping the dough easy to scoop.
After chilling, the dough will feel cool and pliable. Drop a mound onto the tray and it should stay where you put it instead of slowly relaxing outward.
Dough from a warm kitchen may need another 10–15 minutes in the refrigerator. Very cold dough can sit on the counter briefly before portioning. You’re there when it scoops cleanly without fighting you.
Portion & Space the Dough Consistently
Here a scale earns its place: keeping each version close to its target weight helps the cookies bake at a similar pace, especially when white chocolate makes each scoop slightly heavier.
Before diagnosing spread, keep the scoops consistent. A 40 g plain mound and a 45 g white-chocolate mound are intentionally different; if individual cookies vary much more than that, differences in bake time and spread become harder to read from the first tray.
Did They Spread the Way You Wanted?
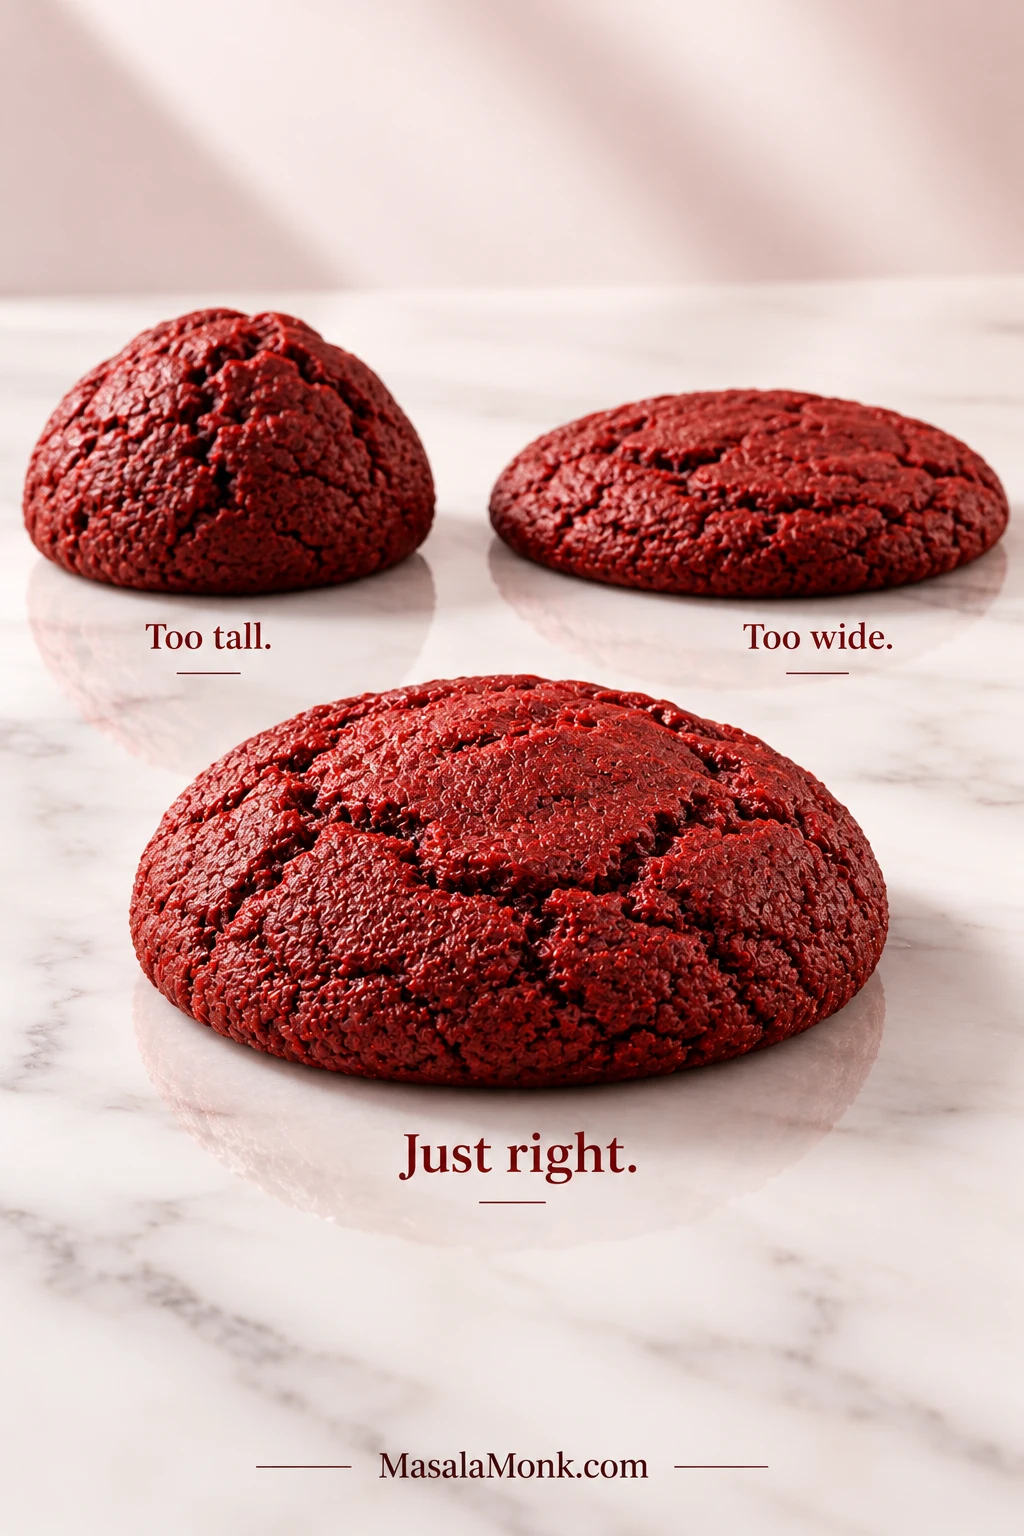
The first tray is useful information, not a final exam. If the cookies spread into thick rounds with soft centers, you’re in good shape. Don’t worry about perfectly round edges; drop cookies naturally vary.
The first tray is easiest to read by shape: very tall cookies barely moved, while very wide cookies relaxed too far. Compare your batch here, then use the table below to decide what to change next.
First-tray result
What to try next
Stayed very tall
The dough may simply be very cold. Give the next portions a few minutes on the counter; if they still barely move, double-check the flour measurement.
Thick with a soft center
Keep the remaining dough cool and use a cooled baking sheet.
Spread very wide
Chill the remaining portions. Warm dough, too little flour, or a large amount of liquid color are the usual suspects.
How Do You Know When Red Velvet Cookies Are Done?
Red velvet cookies are done when the edges are set, the wet shine has disappeared, and the centers still look soft.
On white-chocolate red velvet cookies, melted pieces can stay glossy even when the dough itself is done. Read the red cookie around them instead: the structure should be set at the edge while the middle still looks tender.
This is the moment that feels wrong the first time. The center looks slightly under-set, and the instinct is to give the tray another two minutes. Usually, that’s the two minutes you didn’t need.
The edge may deepen toward burgundy as it sets; that darker rim is expected. Give the cookies 5 minutes on the hot sheet before moving them. Residual heat finishes the middle gently.
With red velvet cookies, texture tells you more than color. A center that looks slightly underdone on the tray can settle into a dense, yielding middle once the cookies rest.
Fix This Batch: Red Velvet Cookie Troubleshooting
Most first-tray problems are useful clues. Make one adjustment at a time and the next tray usually tells you whether you found the cause.
What happened
What to change next tray
Dry or crumbly
Too much flour or cocoa, or too long in the oven. Weigh the dry ingredients and pull the next tray sooner.
Cakey or bready
Check the flour measurement and bake time first. Major substitutions can change the texture too.
Tough after fixing sticky dough
Extra flour may be the culprit. Warm, tacky dough usually benefits more from chilling.
Bitter or tastes of food coloring
The color was pushed too far. Use concentrated gel and stop once the dough reaches a rich red or burgundy.
Greasy or genuinely raw after cooling
Check for under-measured flour, oversized portions, or underbaking. A soft center should still hold together once cool.
When the bake is right, the edge has a little chew while the middle stays dense and yielding, with vanilla first and cocoa underneath.
Fold 1/2 cup white chocolate chips or chopped white chocolate (85 g / 3 oz) into the dough before chilling.
In white chocolate red velvet cookies, the chocolate works best as contrast rather than the main event. Keeping plenty of red cookie between the creamy pieces lets the vanilla, mild cocoa and tang still read as red velvet instead of turning every bite into a generic chocolate-chip cookie.
Chopped white chocolate gives irregular pools and shards, while chips stay neater. Reserve a few pieces and press them into the tops just after baking if you want more visible chocolate.
Prefer semisweet chocolate? Use the same amount. The cookies will taste more chocolate-forward and lose some of the red-and-white contrast, but the swap is straightforward.
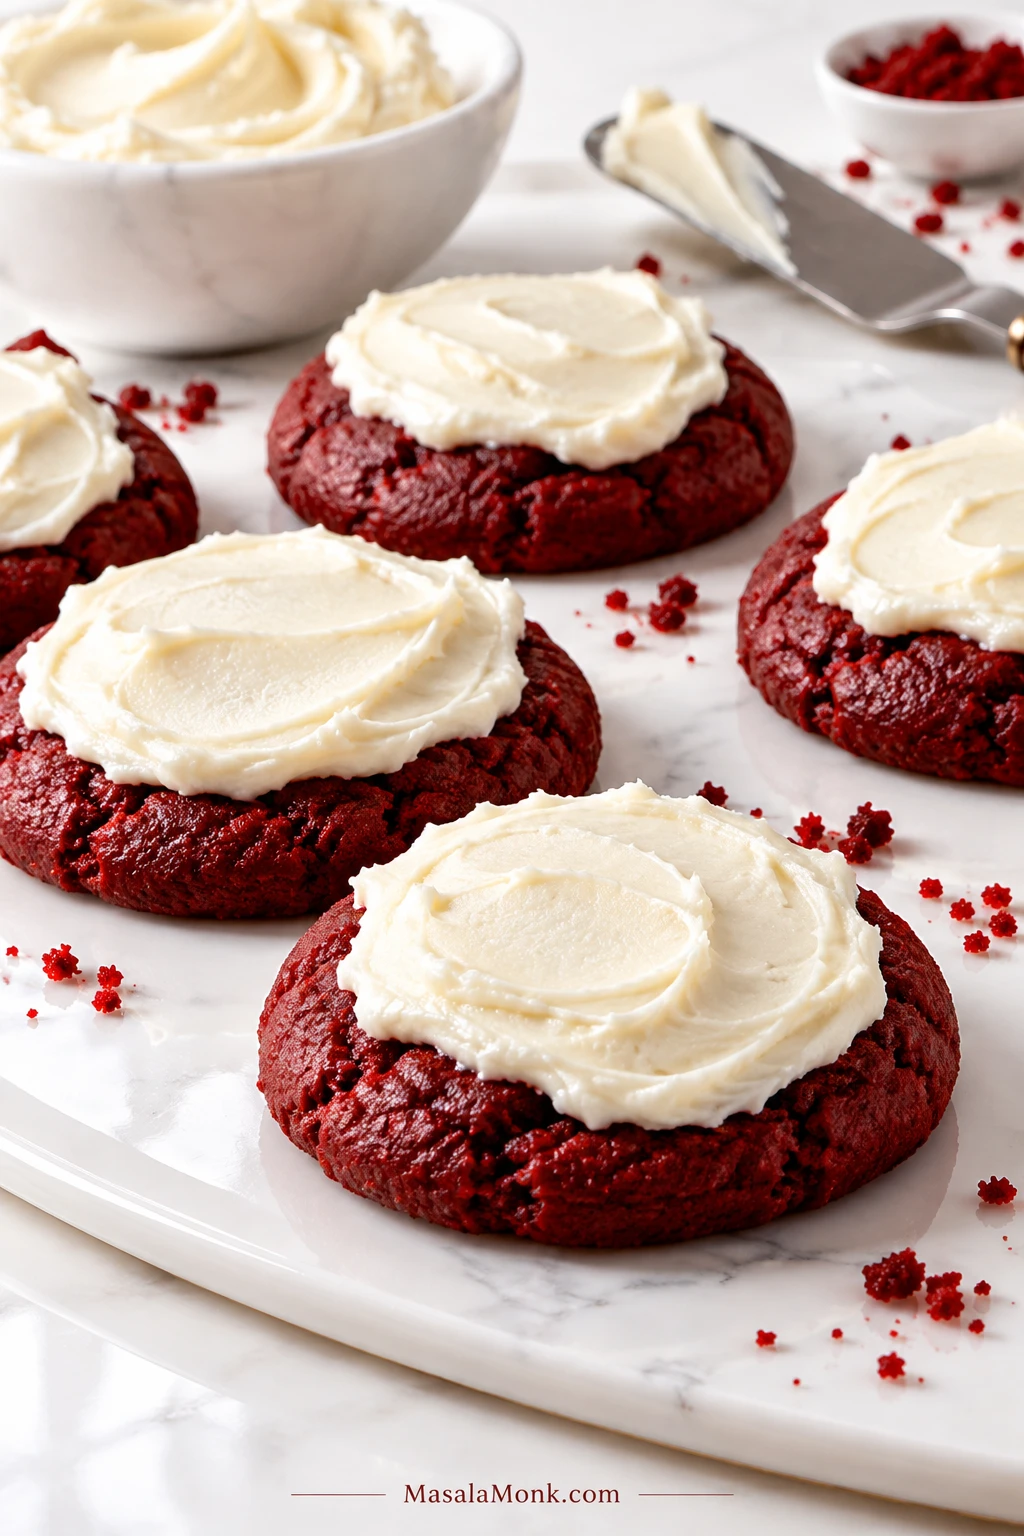
Red Velvet Cookies with Cream Cheese Frosting
This version keeps the frosting on top, so the cookie dough and bake stay exactly the same.
With cream cheese frosting, restraint helps the cookie stay a cookie. A lighter layer keeps the chewy red velvet base noticeable, while the tangy topping brings the familiar cake-style contrast without overwhelming the edge.
For a light layer over one batch, use:
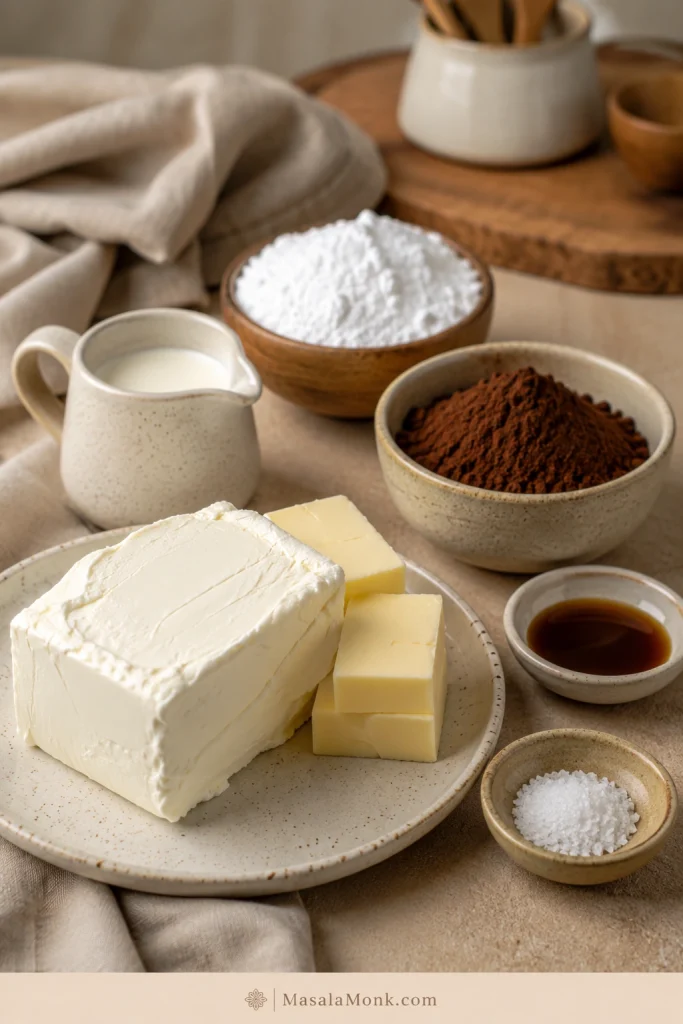
2 oz full-fat block cream cheese (56 g), cool but pliable
2 tablespoons unsalted butter (28 g), softened
1/2 cup powdered sugar (about 60 g)
1/4 teaspoon vanilla extract
A small pinch of salt
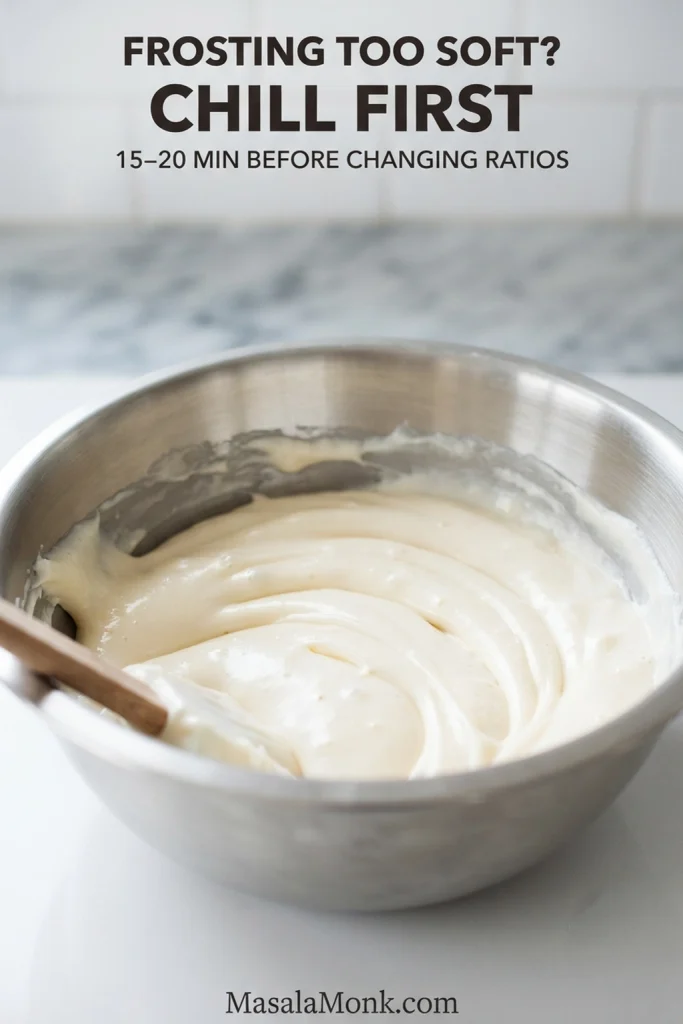
Beat the butter, powdered sugar, vanilla, and salt until creamy. Add the cream cheese last and mix on low only until smooth. If the frosting feels loose, chill it for 15–20 minutes before spreading.
Wait until the cookies are completely cool. The cool, tangy frosting against the cocoa-vanilla center is the whole appeal. For a darker topping, our chocolate cream cheese frosting takes the pairing further into chocolate.
Stuffed cream-cheese cookies are a different project: cold filling, chilled dough and careful sealing all matter. Save that version for a recipe designed around a cream-cheese filling.
Can I Make These Into Red Velvet Crinkle Cookies?
You can get a light crinkle by chilling the dough until easy to handle, rolling each portion first in granulated sugar and then generously in powdered sugar, and keeping the remaining dough cold. Expect a softer crackle rather than deep fissures; for that dramatic crinkle-cookie finish, use a recipe designed specifically for crinkling.
If You Came Here for Red Velvet Cake-Mix Cookies
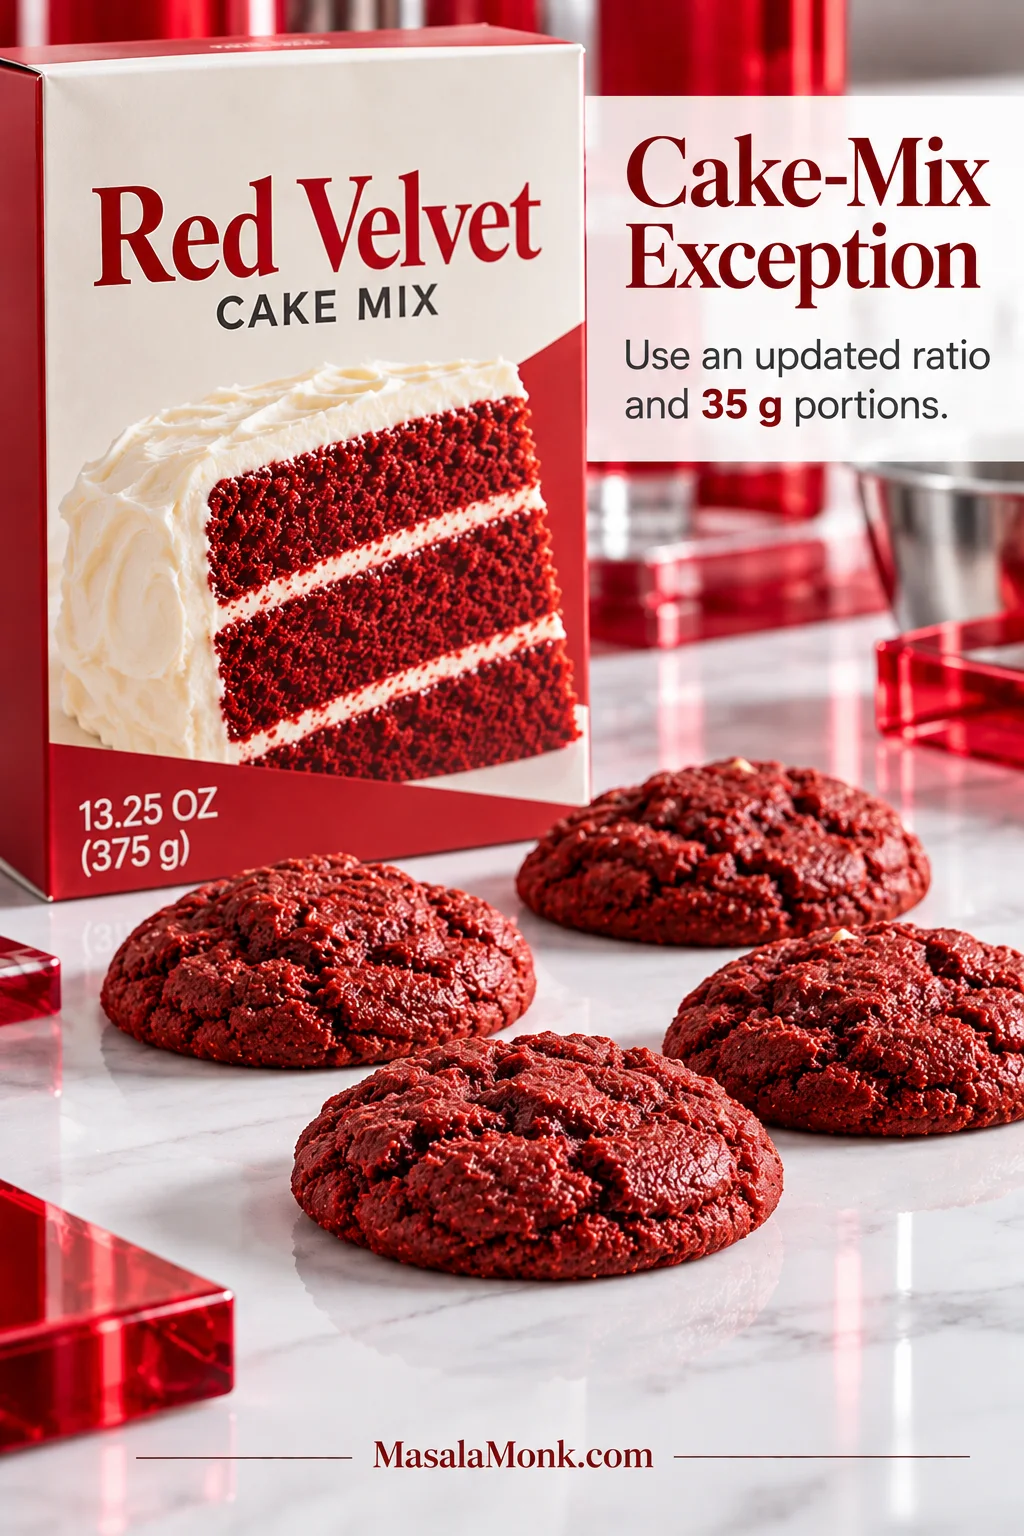
If cake mix is what you have—or speed is the priority—this version gets you there with far fewer ingredients.
Check the package weight before you start. Older American recipes were often written around 15.25 oz or larger boxes, while smaller boxes are common now. That difference changes the ratio of dry mix to oil and eggs.
The boxed mix already supplies the flour, sugar, cocoa and leavening, which is why this shortcut needs only oil, eggs and vanilla before optional white chocolate.
Quick Cake-Mix Version for a 13.25 oz / 375 g Box
Yield: about 16–18 cookies
1 box red velvet cake mix (13.25 oz / 375 g)
1/3 cup neutral oil (80 ml)
2 large eggs
1 teaspoon vanilla extract
1/2 cup white chocolate chips (85 g), optional
Mix until the dough is thick and sticky enough to hold a scoop. If it slowly relaxes on the tray, refrigerate it for 15–20 minutes.
Portion about 35 g per cookie, leave the mounds unflattened, and bake at 350°F / 177°C for 9–11 minutes. Pull them when the edges are set and the centers still look soft, then leave them on the hot pan for 5 minutes.
The dough can be covered and refrigerated for up to 48 hours. Portioning it before a long chill makes later baking easier, and very cold portions may need a few minutes on the counter before they spread normally.
For longer storage, freeze portioned dough on a tray until firm, then transfer it to an airtight freezer container for up to 2 months.
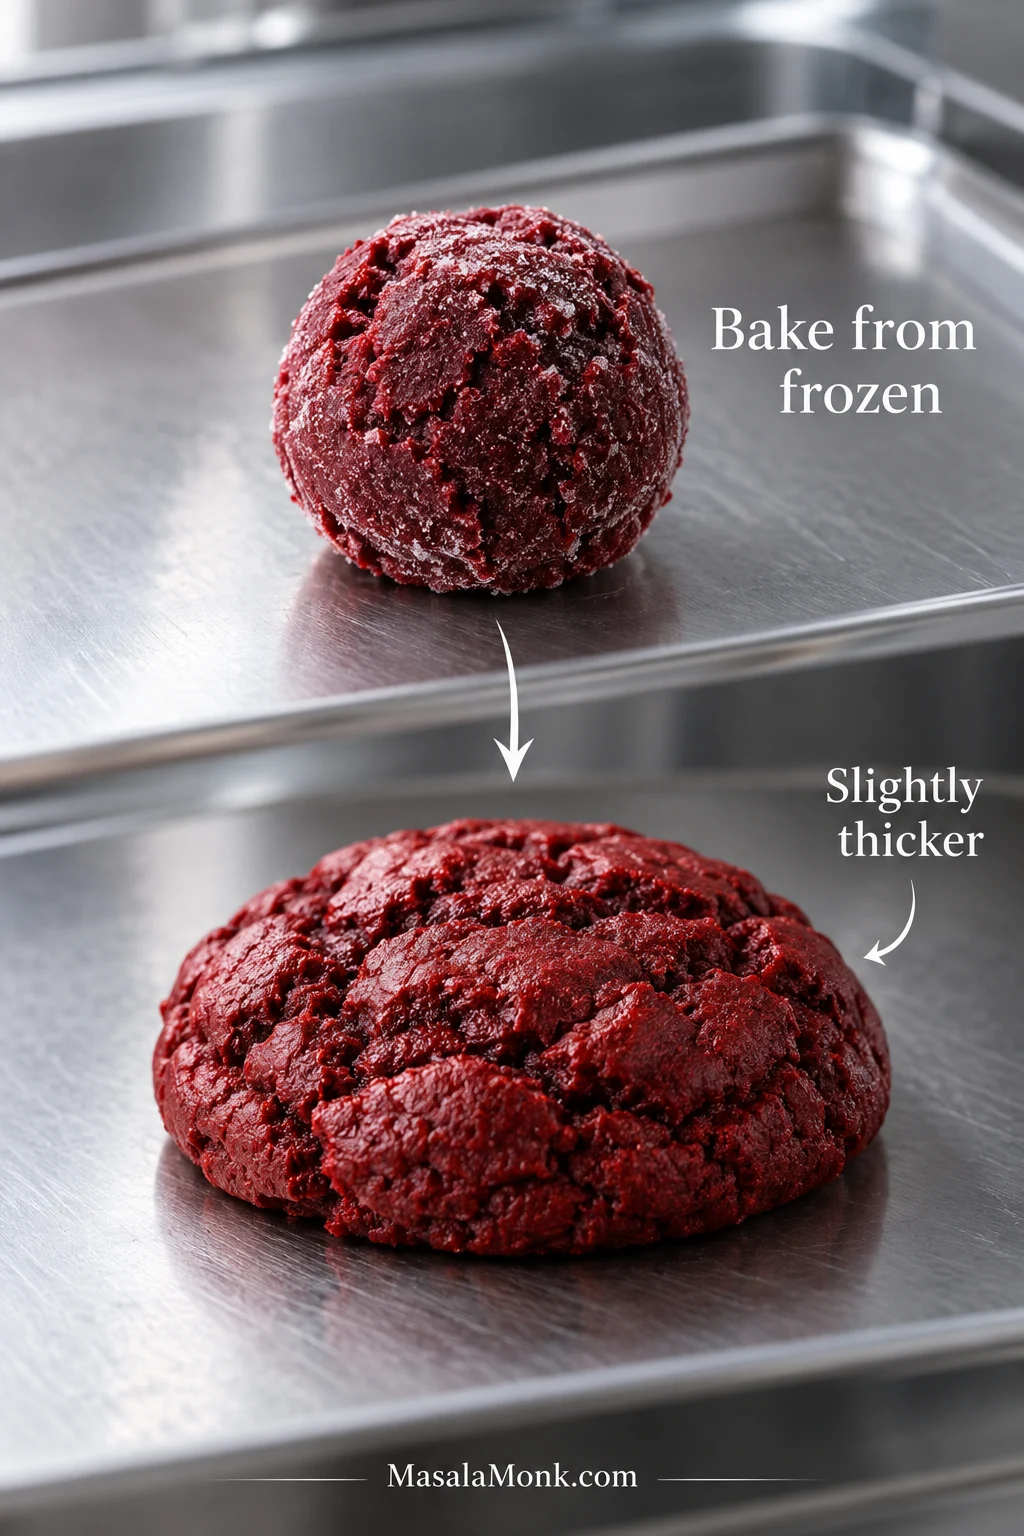
Frozen portions can go straight into the oven for a slightly thicker cookie; keep the oven at the same temperature and add 1–2 minutes as needed. For spread closer to a freshly chilled batch, let them sit at room temperature for 10–15 minutes while the oven heats.
A slightly thicker red velvet cookie from frozen dough is expected: the colder center has less time to relax and spread before the edges set. It is a normal make-ahead result, not a sign that the dough formula has changed.
Cream-cheese-frosted cookies should be refrigerated.
Plain baked cookies keep in an airtight container at room temperature for 3–4 days and freeze well for up to 2 months.
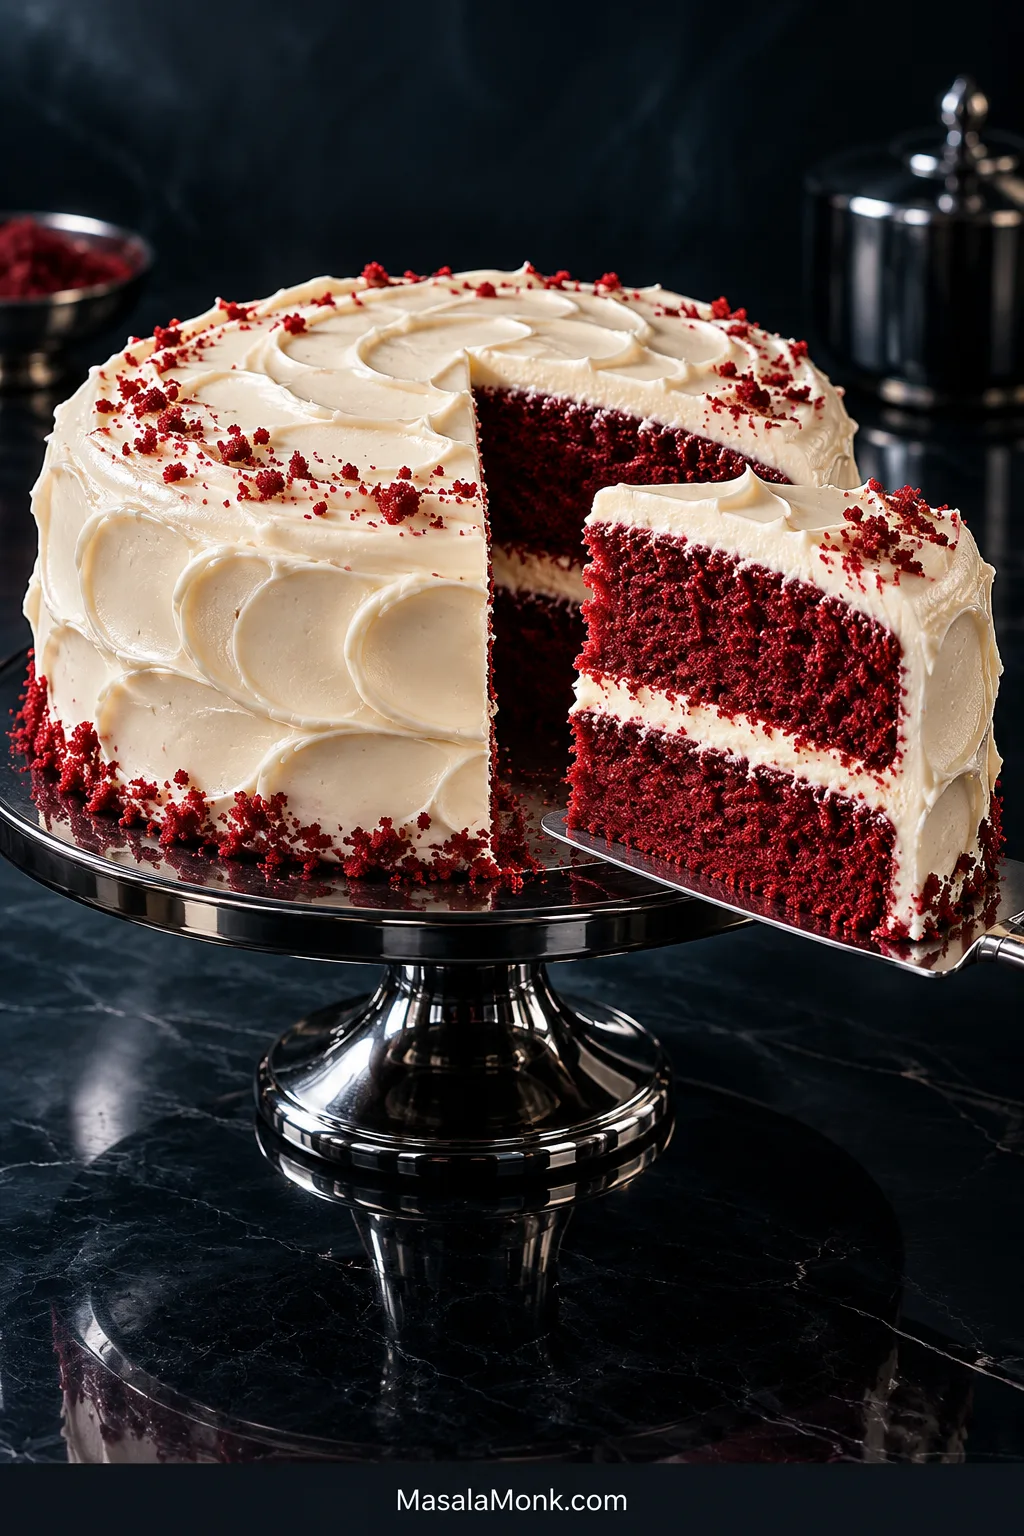
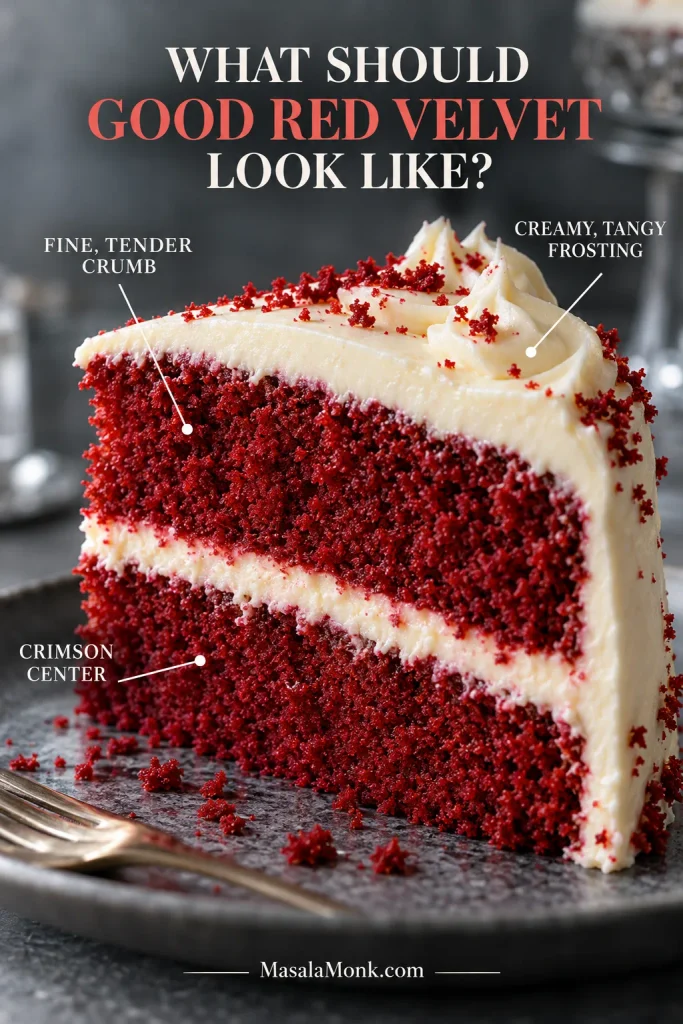
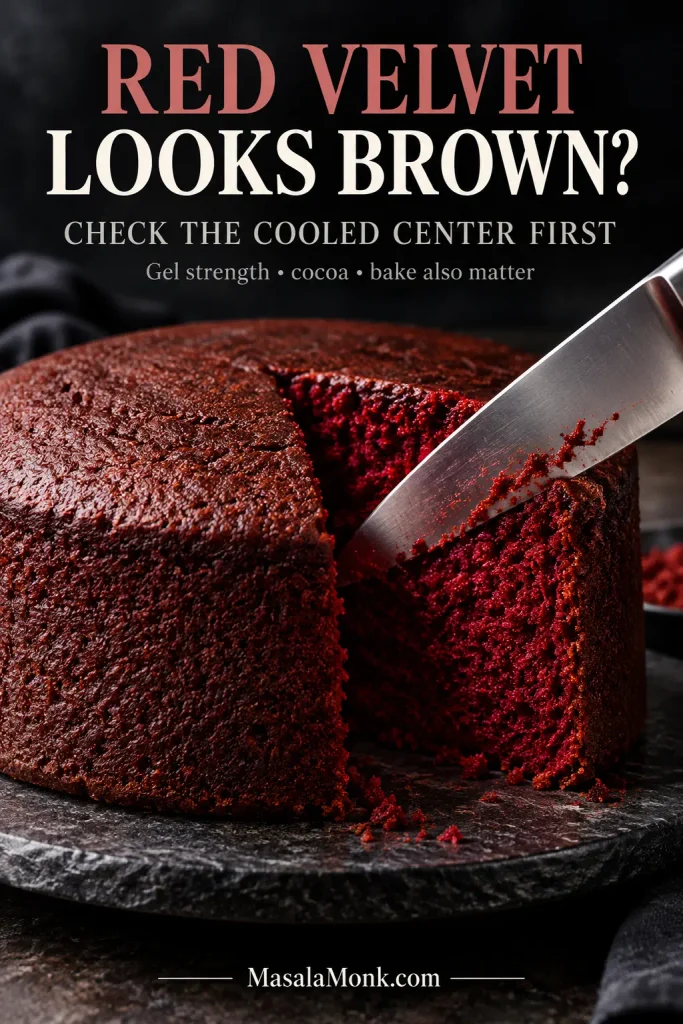
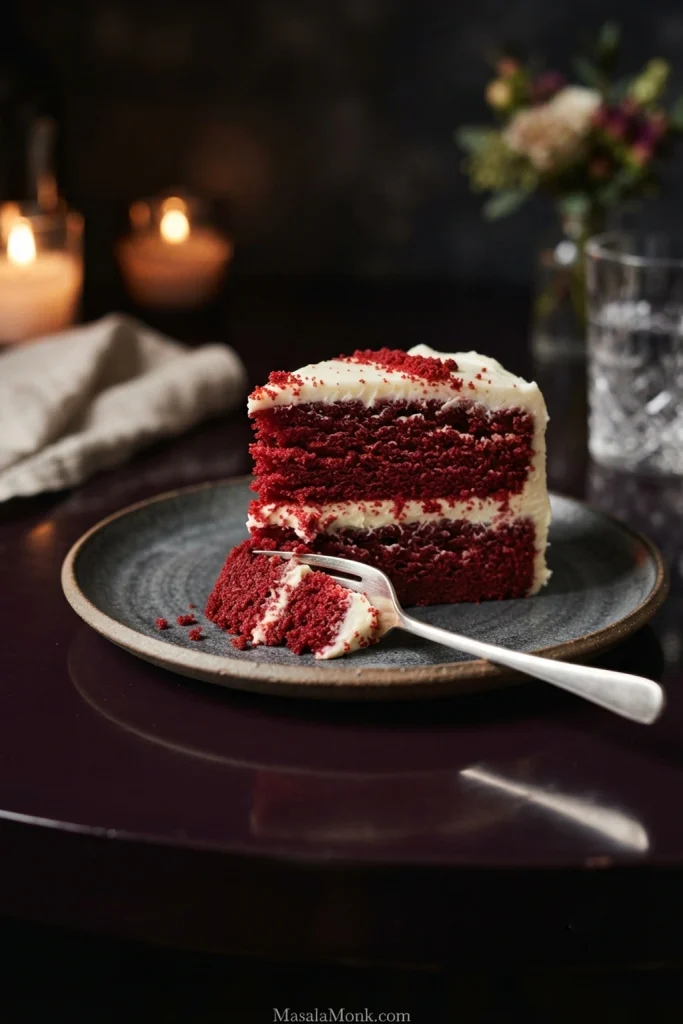
The first cut tells you almost everything about a good red velvet cake. A knife should pass through creamy white frosting into a deep crimson cake with a fine, tender crumb. Once plated, the slice should stand neatly while the cake itself stays soft under the fork.
This red velvet cake recipe gets there without turning a from-scratch layer cake into a project. There are no separately whipped egg whites, and the decoration can be as simple as soft frosting swirls. Butter brings the richness, while a little neutral oil keeps the crumb soft after chilling. Cultured buttermilk supplies the familiar tang, and the cocoa stays deliberately mild so vanilla and buttermilk remain just as important to the flavor.
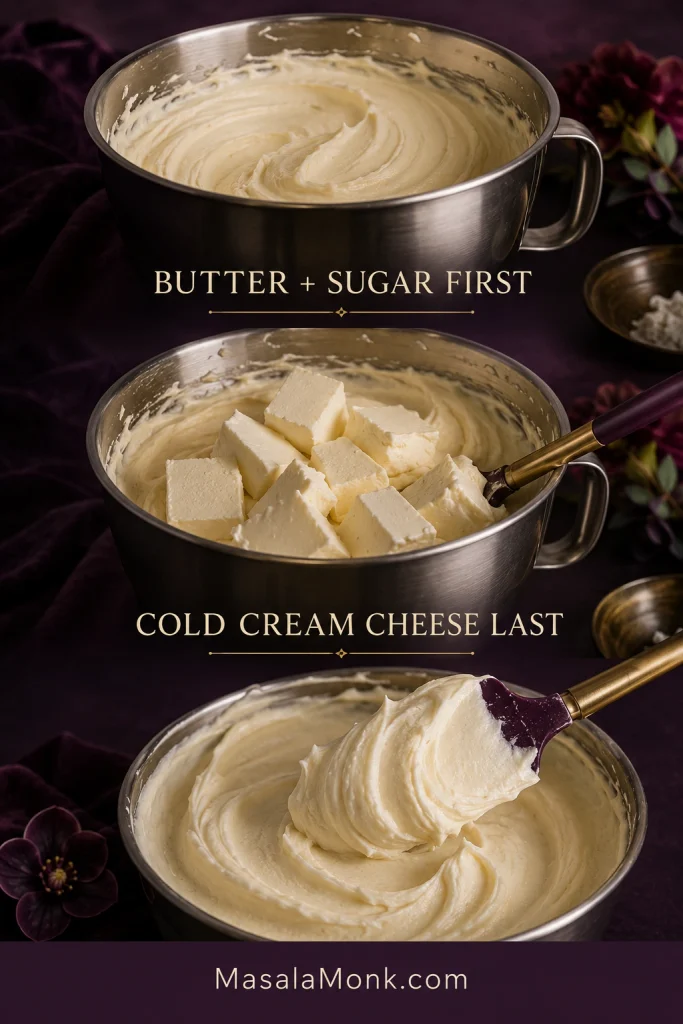
The cream cheese frosting is tangy and creamy, with plenty for filling and finishing the cake. Keep the cream cheese cool and add it late in the mixing. Kept cool—and briefly chilled if needed—it has enough body to stay between the layers and give you clean slices.
½ cup / 1 stick (4 oz / 113 g) unsalted butter, softened but not greasy
1¾ cups (350 g) granulated sugar
½ cup (120 ml) neutral oil, such as canola, vegetable or grapeseed oil
2 large eggs, room temperature
1 large egg yolk, room temperature
1 cup (240 ml) cultured buttermilk, room temperature
2 teaspoons (10 ml) pure vanilla extract
1 teaspoon (5 ml) white distilled vinegar
1 teaspoon (5 ml) concentrated red gel food coloring, plus more as needed, up to 2 teaspoons (10 ml) depending on brand strength
For the cream cheese frosting — about 5 cups
1 cup / 2 sticks (8 oz / 226 g) unsalted butter, softened but still cool
4½ cups (500 g) powdered sugar, sifted if lumpy
2 teaspoons (10 ml) pure vanilla extract
¼ teaspoon fine salt
16 oz (454 g) full-fat brick-style cream cheese, kept refrigerated until frosting time
Before you start, bring the butter for the cake, eggs and buttermilk toward cool room temperature. Keep the cream cheese refrigerated while the cake cools. When you begin the frosting, cut it into pieces and let it lose just enough refrigerator chill to become firm but pliable while you beat the butter and sugar.
For tiny amounts such as baking soda and baking powder, use the spoon measure as the practical reference unless your scale reads very small weights accurately.
Why this cake uses baking soda, baking powder and vinegar: Baking soda reacts with the acidic buttermilk and vinegar. The small amount of baking powder adds extra lift without relying on more baking soda, which would also shift the batter’s alkalinity. At this amount, the vinegar should not be noticeable in the finished cake.
Make the red velvet batter
Prepare the oven and pans. Heat the oven to 350°F / 175°C with a rack in the center. Lightly grease two light-colored 9 × 2-inch (23 × 5-cm) metal cake pans, line the bottoms with parchment rounds, then lightly grease the parchment.
Combine the dry ingredients. Whisk the flour, natural cocoa, baking soda, baking powder and salt until the cocoa is evenly dispersed and no obvious lumps remain.
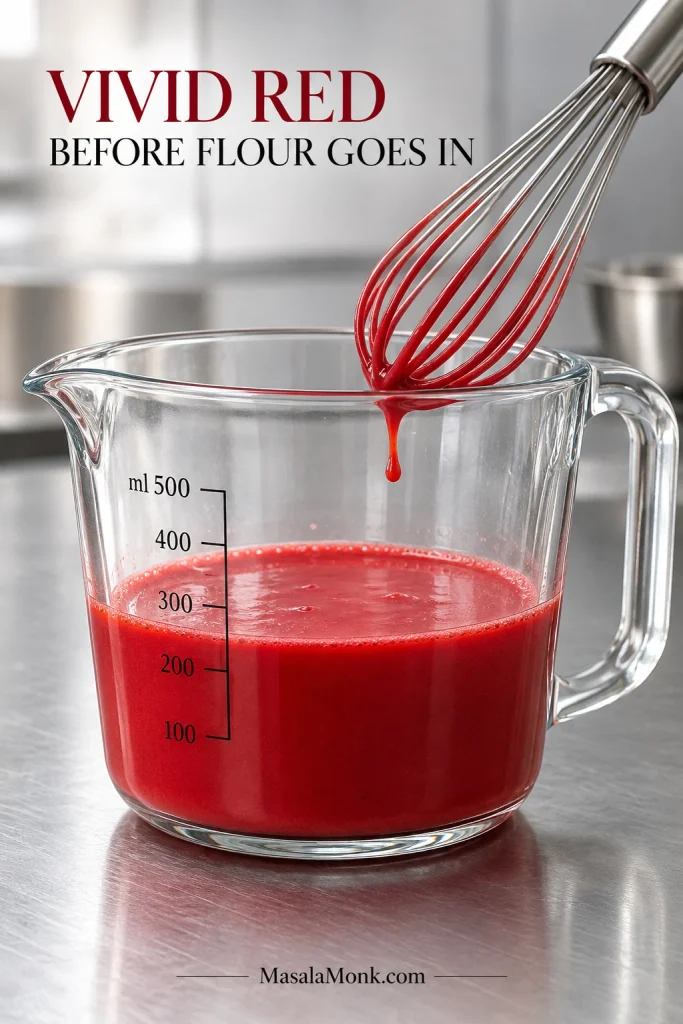
Mix the buttermilk and color. Whisk together the cultured buttermilk, vanilla, vinegar and 1 teaspoon red gel coloring. Look for an even, vivid red with no dark streaks. If your gel is weaker and the mixture still looks muted, add a little more, up to 2 teaspoons total.
Color checkpoint before the flour
Because gel colors vary in strength, treat the wet mixture as your color checkpoint rather than relying on the teaspoon count alone. It should still move like buttermilk—the gel changes the color, not the consistency.
Build the butter base. Beat the butter and sugar on medium-high for 2–3 minutes, scraping down the bowl once or twice, until the mixture looks noticeably paler and fluffier. Slowly mix in the oil. Add the eggs one at a time, followed by the yolk, stopping once each has disappeared into the mixture.
Finish the batter. Turn the mixer to low. Add about one-third of the dry ingredients, then half of the red buttermilk. Repeat, then finish with the remaining dry ingredients. Stop when the final flour streaks disappear. One or two folds with a spatula are enough to catch anything hiding at the bottom of the bowl.
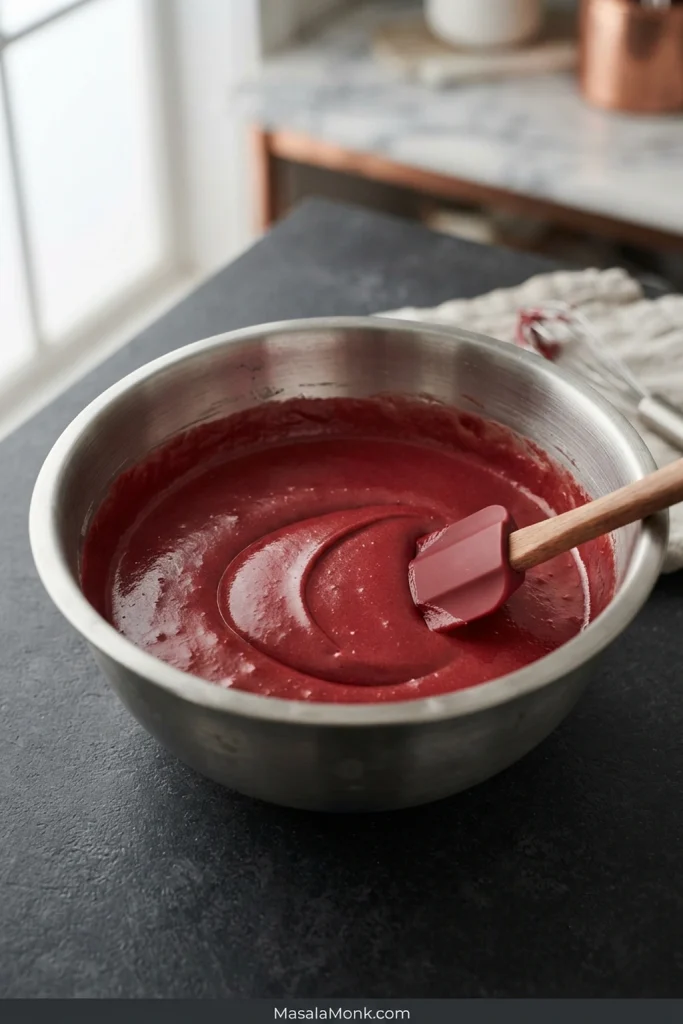
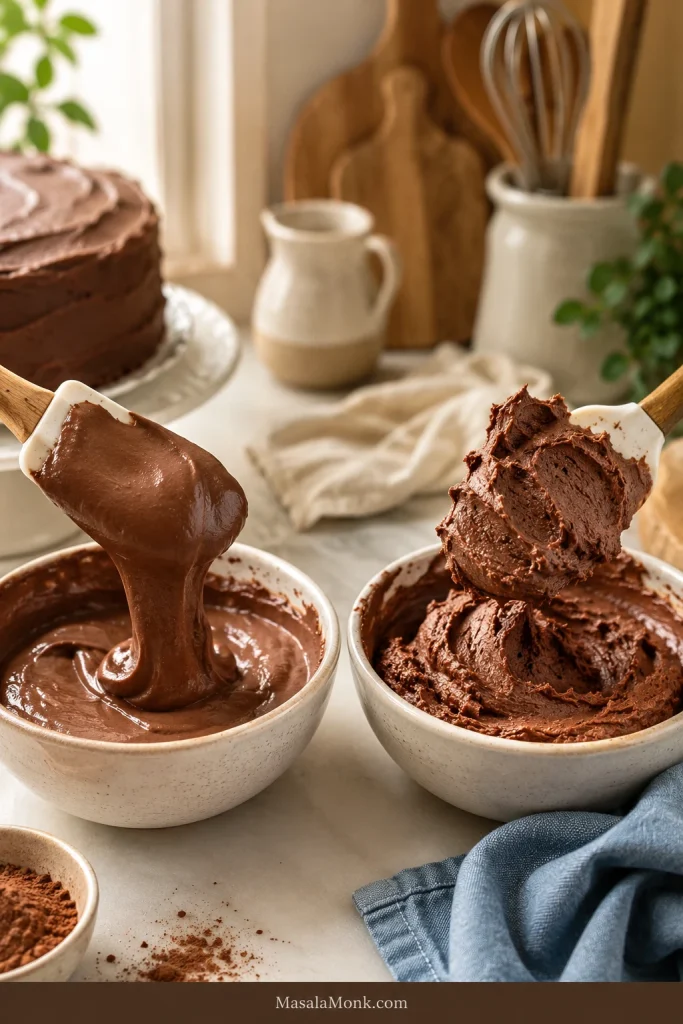
The finished batter should be smooth, moderately thick and evenly crimson.
Tip the bowl slightly and the finished red velvet cake batter should move and settle on its own. If it behaves more like frosting and needs to be spread firmly into the pan, it is stiffer than the texture pictured here.
Bake and cool the layers
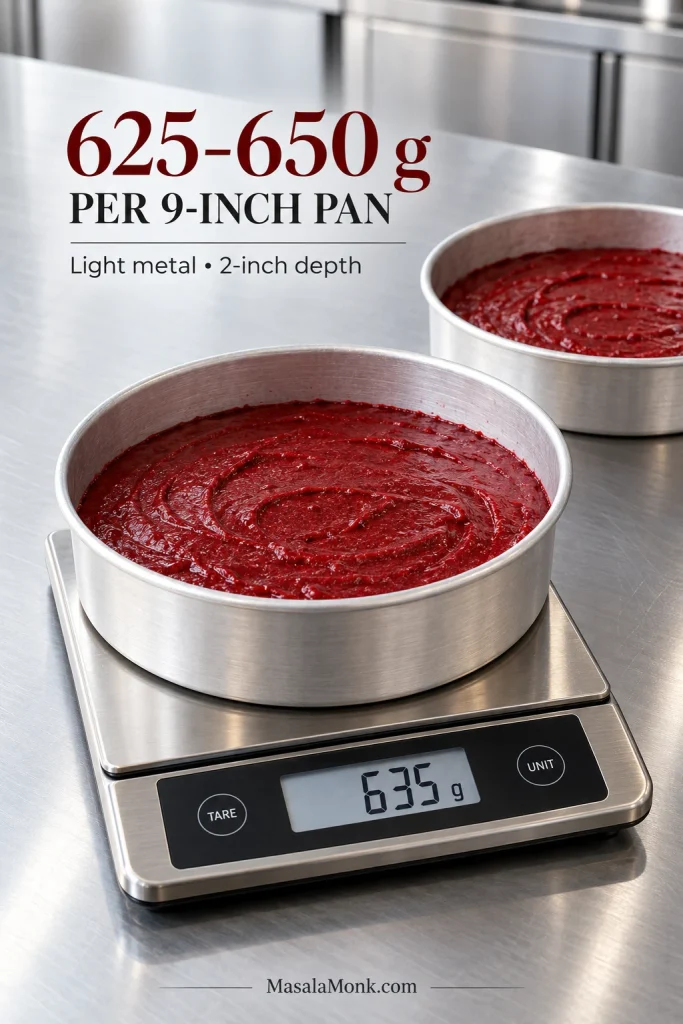
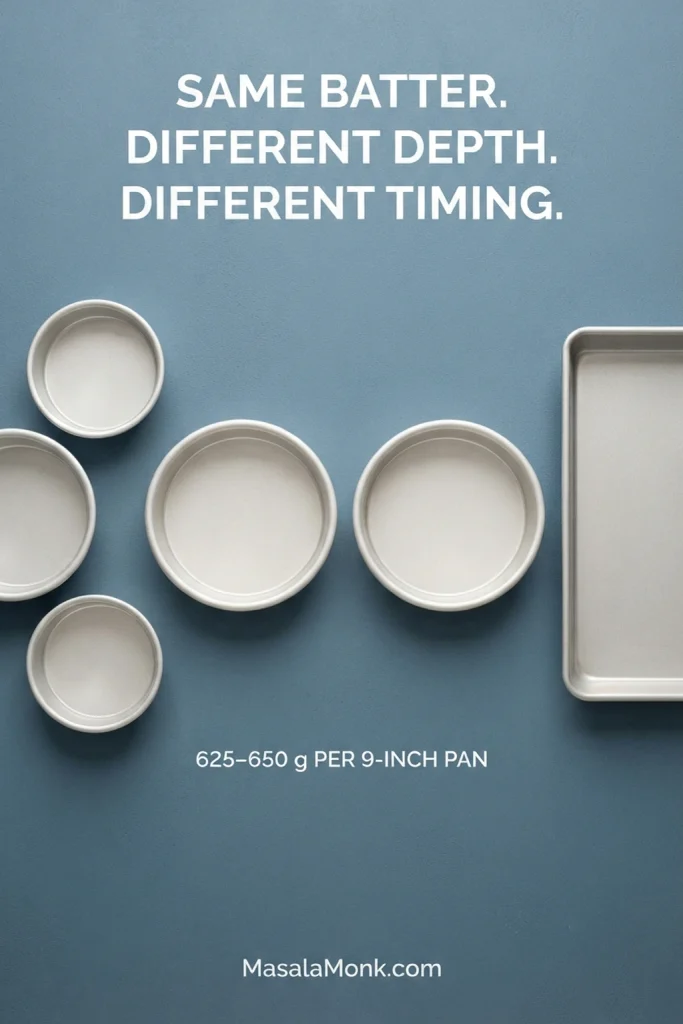
Divide the batter. Expect 1,250–1,300 g total, or 625–650 g per pan. If your cake layers never seem to come out the same height, weighing the batter removes the guesswork.
Equal batter weight is really equal batter depth. Keeping each 9-inch pan around 625–650 g makes it easier for both red velvet cake layers to rise and set at a similar rate.
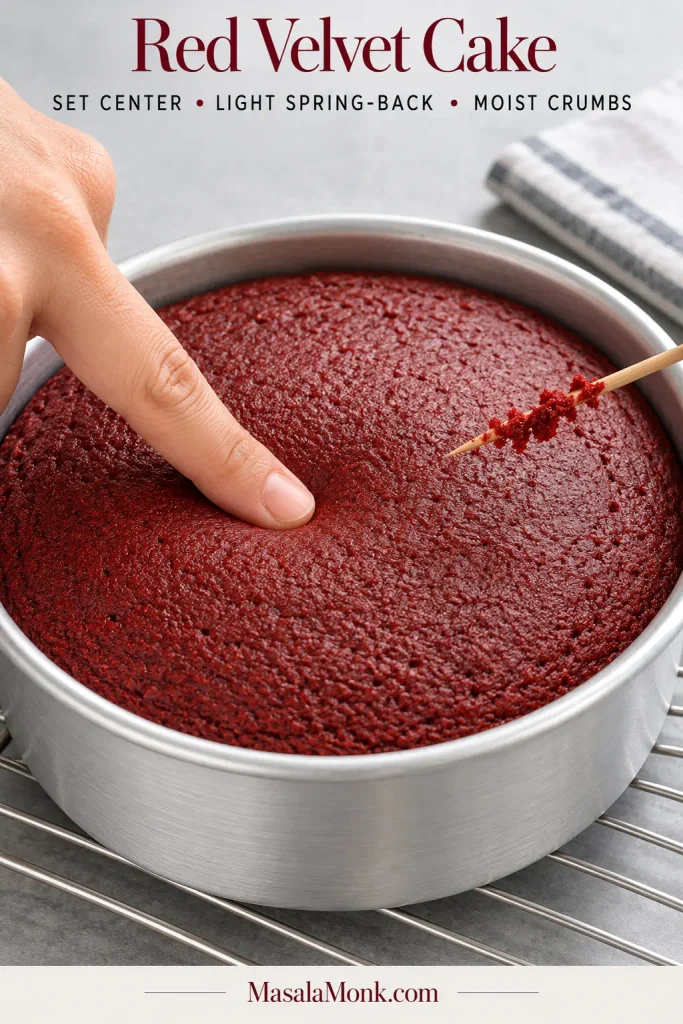
Bake for 27–31 minutes. Start checking at 27 minutes. As the layers near done, the kitchen should smell more buttery and vanilla-rich than intensely chocolatey. The centers should look set and spring back lightly under a fingertip. A toothpick should carry a few moist crumbs, with no liquid batter. A bone-dry tester is not the goal.
Check the middle of the layer, not the darker perimeter. The edge sets first, so a deeply colored rim can look finished while the center still needs another few minutes.
Cool for 15 minutes in the pans, then turn the layers onto wire racks and peel away the parchment. Run a thin knife around the edge first only if the cake needs help releasing.
Let the layers cool all the way through. Warm cake softens cream cheese frosting surprisingly quickly, even when the outside already feels cool.
Make the cream cheese frosting
Start with the butter. Take the cream cheese from the refrigerator, cut it into pieces and set it aside. Beat the butter on medium for about 1 minute until creamy. It should dent easily under a fingertip without looking shiny or greasy.
Add the powdered sugar. Work in three additions, beginning on low speed each time. Once incorporated, beat for about 2 minutes, then mix in the vanilla and salt.
Add the cream cheese last. It should now feel firm but pliable rather than refrigerator-hard. With the mixer on low, add it a few pieces at a time. Stop as soon as the frosting is smooth and uniform. Scrape the bowl once and mix again only if you find an unmixed patch.
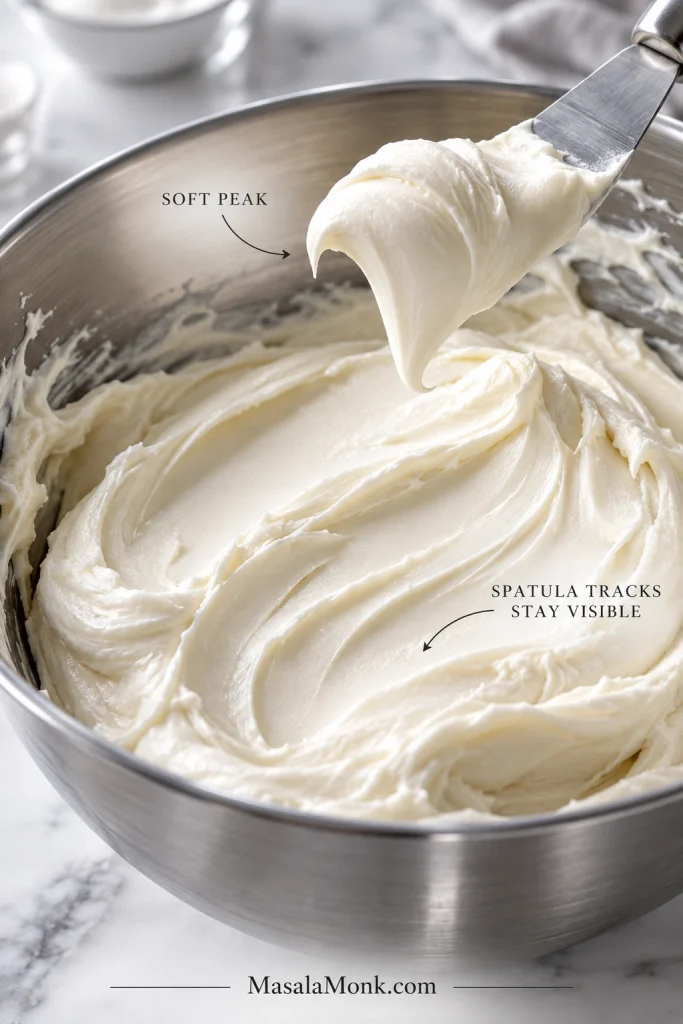
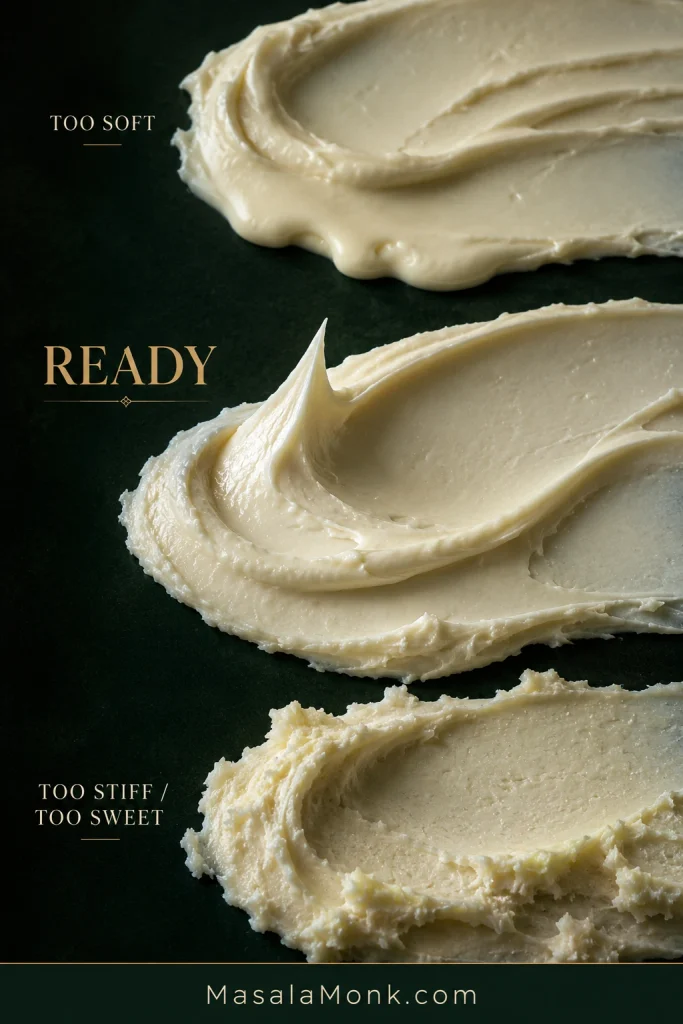
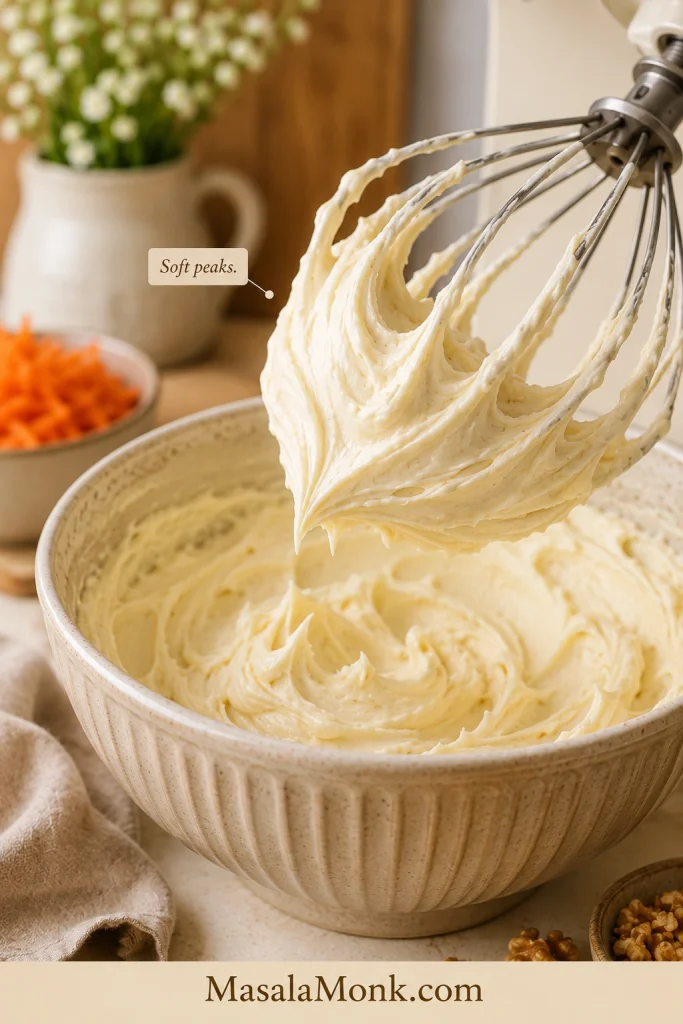
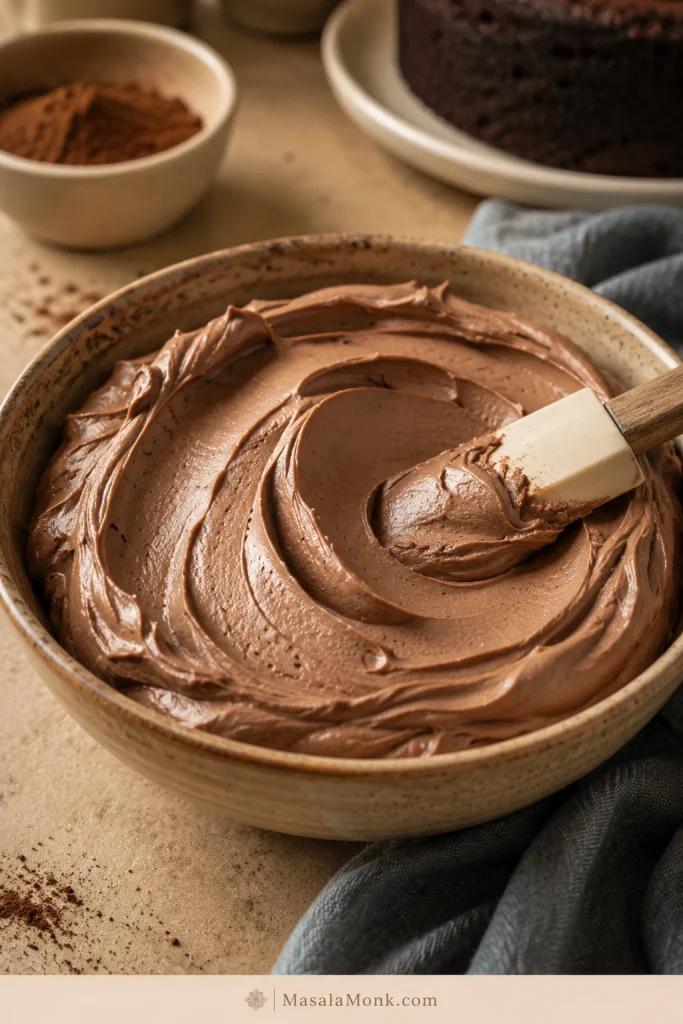
Drag a spatula through the bowl. The trail should remain visible, and a lifted spoonful should make a soft peak. Frosting that quickly levels itself needs chilling before it goes onto the cake.
For cake assembly, track retention matters more than a tall frosting peak. The cream cheese frosting should hold the groove from a spatula long enough to support the filling while still spreading without pulling at the cake.
Fill, crumb-coat and finish
Level only if needed. A slight dome is fine. Trim only enough to give the second layer a stable seat.
Add the filling. Spread roughly 1 to 1¼ cups frosting over the first layer, then set the second layer on top.
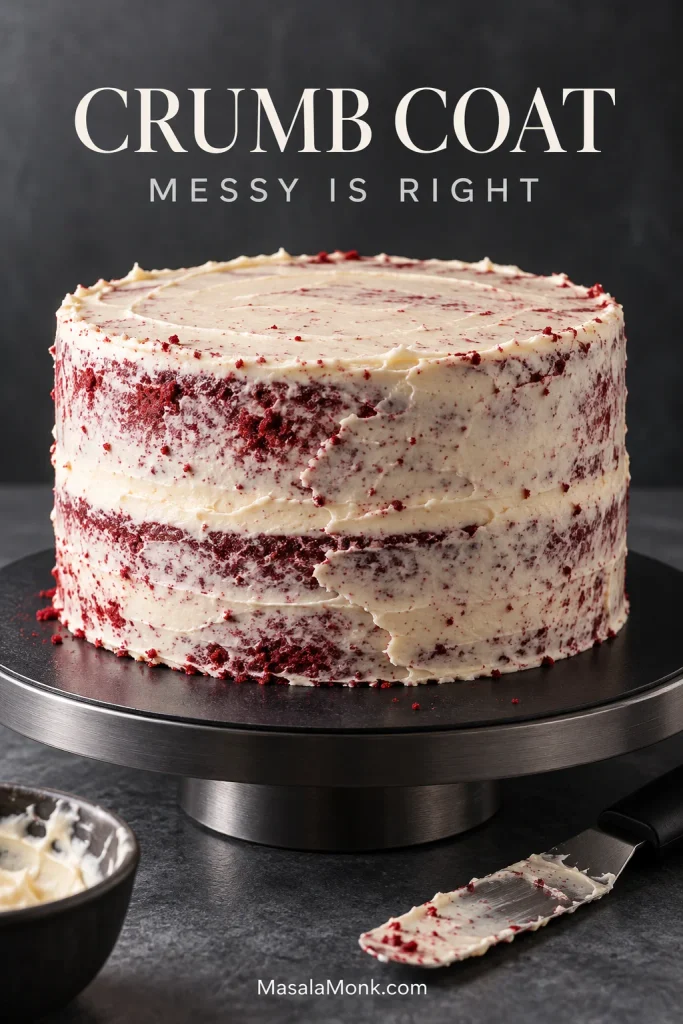
Crumb-coat and chill. Cover the cake with a very thin layer of frosting to catch the red crumbs. It will probably look messy. That’s exactly what this coat is for. Refrigerate for 20–30 minutes, until the surface feels firm rather than tacky.
Think of the crumb coat as an adhesive layer rather than the first half of the final frosting. Use just enough to trap the loose red crumbs; extra thickness here only makes the cake softer to handle.
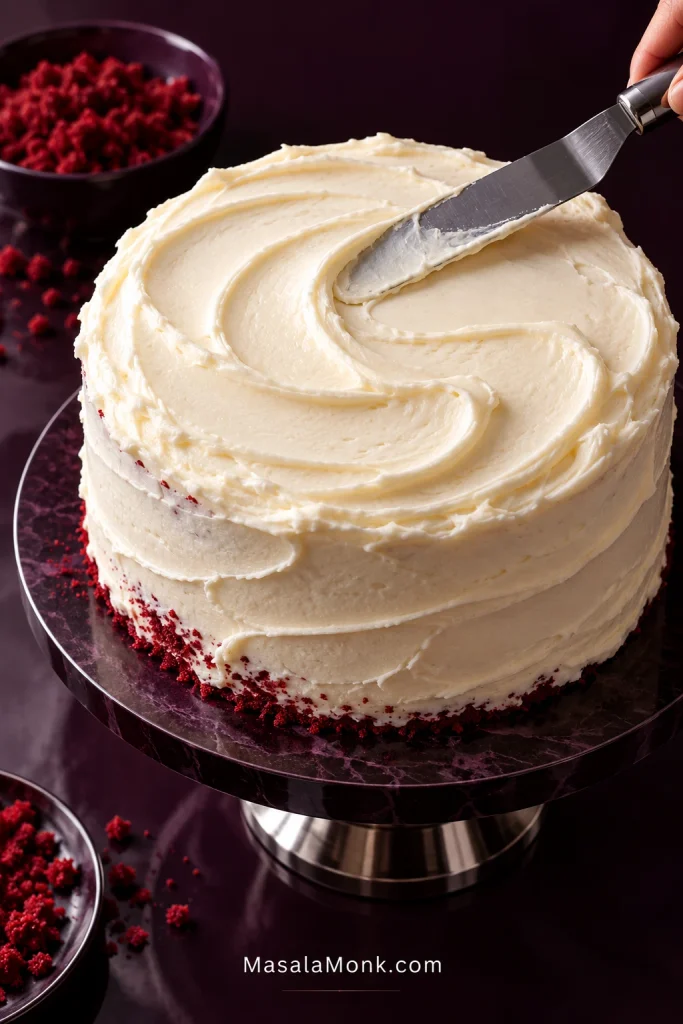
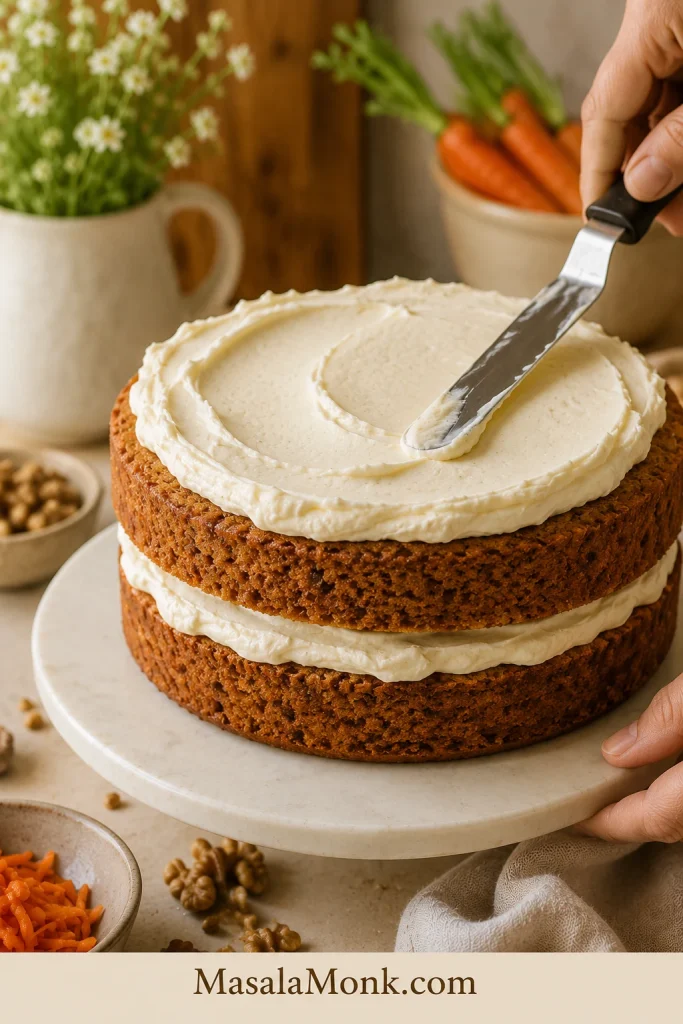
Finish with the remaining frosting. Once the clean white layer goes on, the cake suddenly looks finished. Soft swirls suit red velvet beautifully, although you can smooth the sides with an offset spatula if you prefer. Cake trimmings can be crumbled over the top for the familiar red-and-white finish.
Cream cheese frosting becomes softer as it warms during handling, so fewer confident finishing passes usually give a cleaner result. Once the chilled cake is covered and the swirls hold their shape, stop working the surface.
Once the cake is chilled and cut, the slice gives you one last set of clues. The crumb, color and frosting should all tell the same story. If something looks wetter, darker or softer than expected, the guide below will help you work out why.
Read the Slice: what good red velvet should tell you
A cut slice often tells you more than the timer did. Start with the middle. A well-baked crumb is fine and tender, with enough moisture that it feels soft under the fork and still breaks into recognizable cake crumbs.
Look for fine, evenly colored crumb in both layers, with a clear boundary between the cake and frosting. A moist slice should hold together under the knife without a compressed or gummy band through the middle.
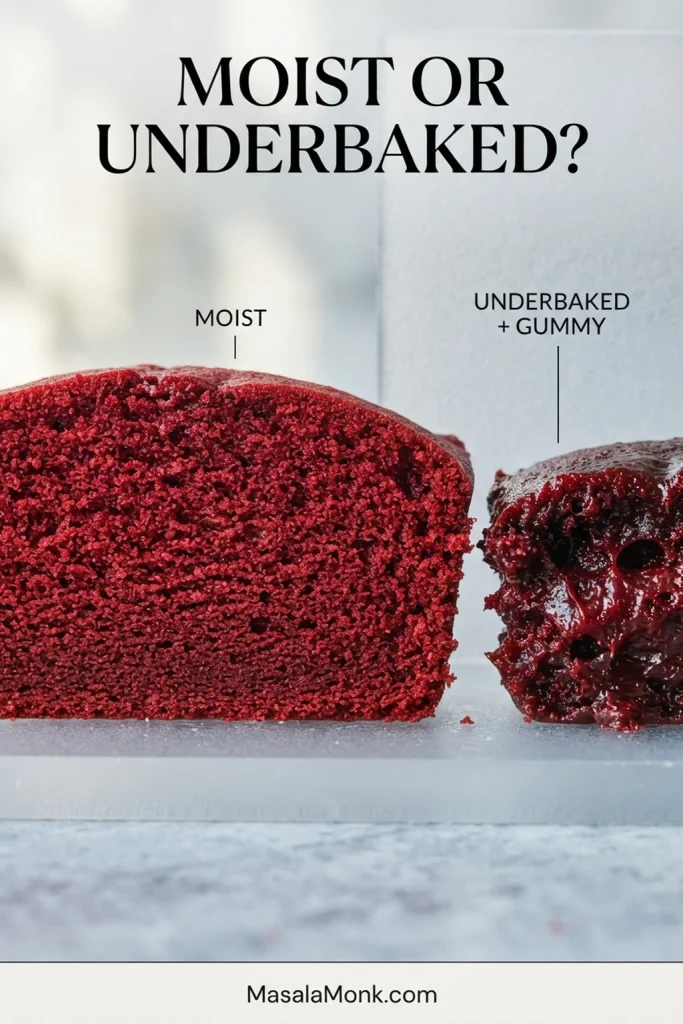
A glossy center is different. So is a compressed wet band through the middle or batter smearing onto the knife. Those signs usually mean the cake needed longer in the oven. Softness is welcome; a gummy center is not.
The knife can help distinguish moist from underbaked: a tender red velvet crumb leaves recognizable crumbs, while a gummy center is more likely to compress or smear along the cut.
The outside may surprise you too. Red velvet darkens where the batter gets the most oven heat, so the top and edges can look reddish-brown while the cut center remains crimson or burgundy. Let the layer cool before deciding that the color failed.
Use the cooled cut interior as your color reference before deciding to add more red gel next time. Direct oven heat naturally darkens the exposed crust more than the protected center.
What does red velvet cake taste like?
Red velvet cake tastes buttery and vanilla-forward, with mild cocoa, a gentle buttermilk tang and sweet-tangy cream cheese frosting. The cocoa sits underneath rather than dominating, and food coloring should not have a detectable taste.
Red velvet is not simply chocolate cake colored red. It contains much less cocoa than a chocolate cake, so vanilla, cultured buttermilk and the tangy frosting remain just as important to the finished flavor. The “velvet” matters as much as the red: the crumb should be fine, soft and tender rather than coarse. The cocoa stays restrained too, giving the cake depth without making chocolate the dominant flavor.
For a stronger chocolate finish, increasing the cocoa in the layers changes more than flavor. A chocolate cream cheese frosting is an easier way to push the finished cake toward chocolate while leaving the red velvet crumb alone.
Getting red velvet red without chasing the dye bottle
Seeing brown in red velvet can make it tempting to keep squeezing in more color. Before you do, look at the cocoa, the strength of the gel and which part of the cake you are judging.
Why did my red velvet cake turn brown?
Coloring: weak gel or too little pigment can leave the baked crumb muted.
Cocoa: darker cocoa pushes the batter and finished cake further toward brown.
Bake: excess heat or too much oven time darkens the cake, especially around the edges.
Check before changing anything: cut a cooled layer. The exposed crust naturally looks darker than the center.
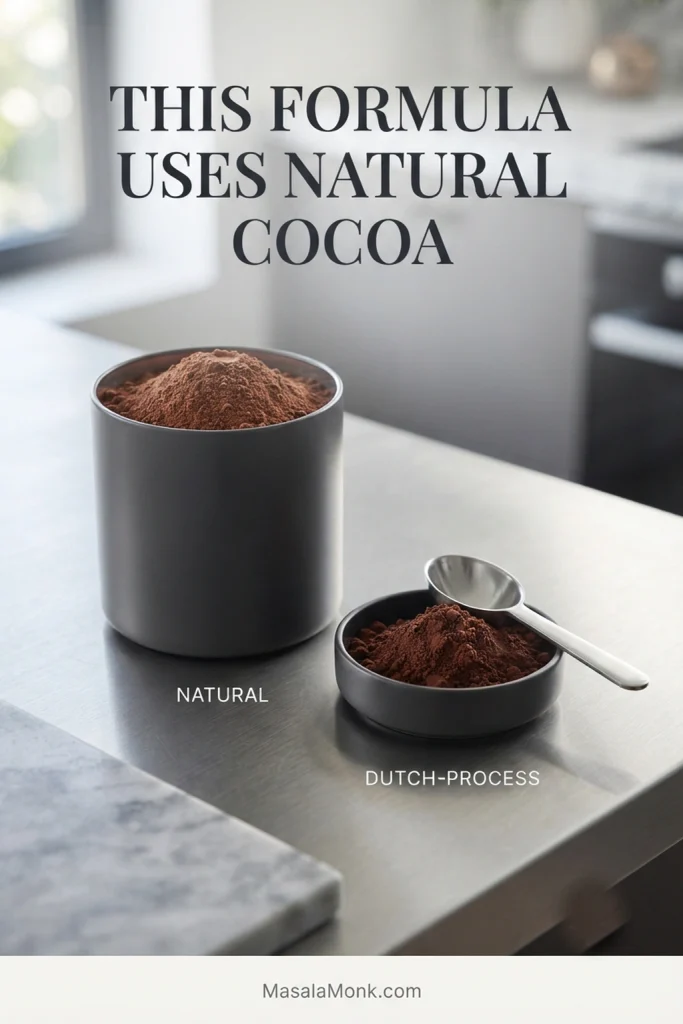
Natural and Dutch-process cocoa differ in acidity and color. Other red velvet cakes can be formulated with Dutch cocoa, but these layers use natural unsweetened cocoa. Its lighter color also makes it easier to get a vivid red crumb without piling in unnecessary coloring.
Check the cocoa package as well as the color: wording such as “alkalized” or “processed with alkali” identifies Dutch-process cocoa. This red velvet cake formula calls for natural unsweetened cocoa instead.
Concentrated gel is useful because a small amount gives strong color without adding much extra liquid. Brand strength varies, so start with 1 teaspoon. Once whisked into the buttermilk, the mixture should look evenly and unmistakably red. Add a little more at that stage if your particular gel is weak.
Can I leave out the food coloring?
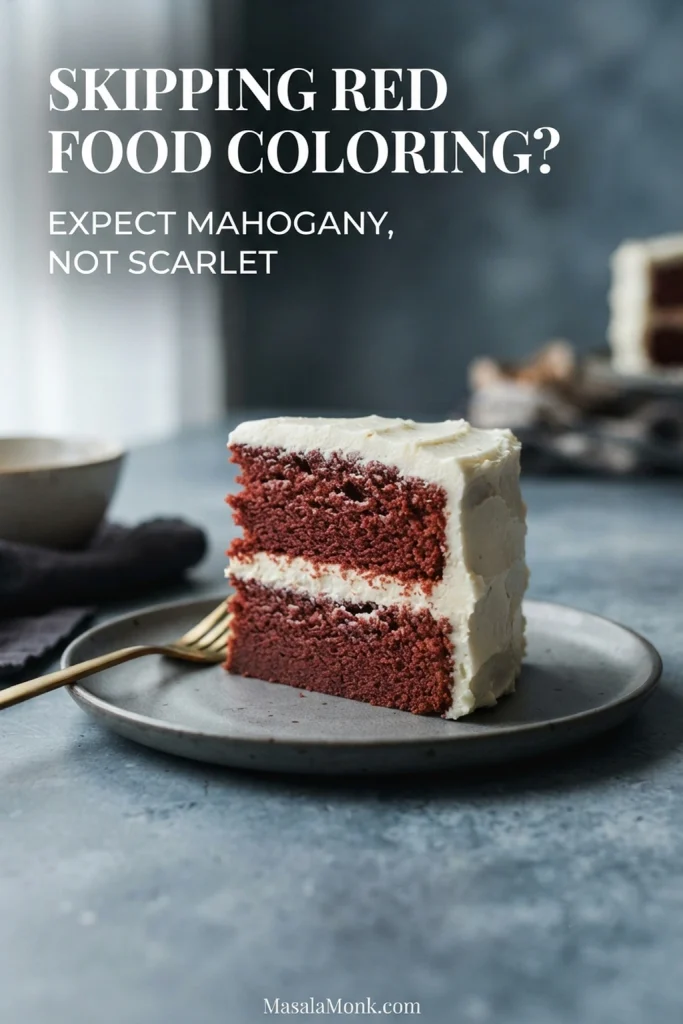
Yes. The vanilla, cocoa and buttermilk flavor will still be there. Without added color, expect a muted mahogany or cocoa-red cake instead of modern scarlet.
If you skip red food coloring, do not compensate by adding extra cocoa just to deepen the shade. More cocoa pushes the cake browner and more chocolate-forward rather than recreating the red that gel provides.
Beet puree and large quantities of beet powder are a different project. They bring their own moisture, flavor and acidity, so they need a cake balanced around them rather than a straight swap for gel.
Why this red velvet cake stays moist and tender
Butter carries much of the flavor, while neutral oil stays fluid when chilled and helps the crumb remain soft. Cultured buttermilk adds moisture and acidity, and the restrained amount of cocoa gives the cake its mild chocolate character without taking over the batter.
Mixing matters just as much. Once the flour goes in, beat only until the batter comes together. Continued mixing develops more gluten and works against the fine, tender crumb you want in the finished layers.
Together, those choices help a chilled slice soften back under the fork instead of staying firm and crumbly.
Cream cheese frosting that stays put between the layers
This frosting has a pronounced cream-cheese tang and a soft finish. Chilling gives it the body needed for a two-layer cake, but it is not meant to behave like stiff piping buttercream.
Use firm full-fat cream cheese
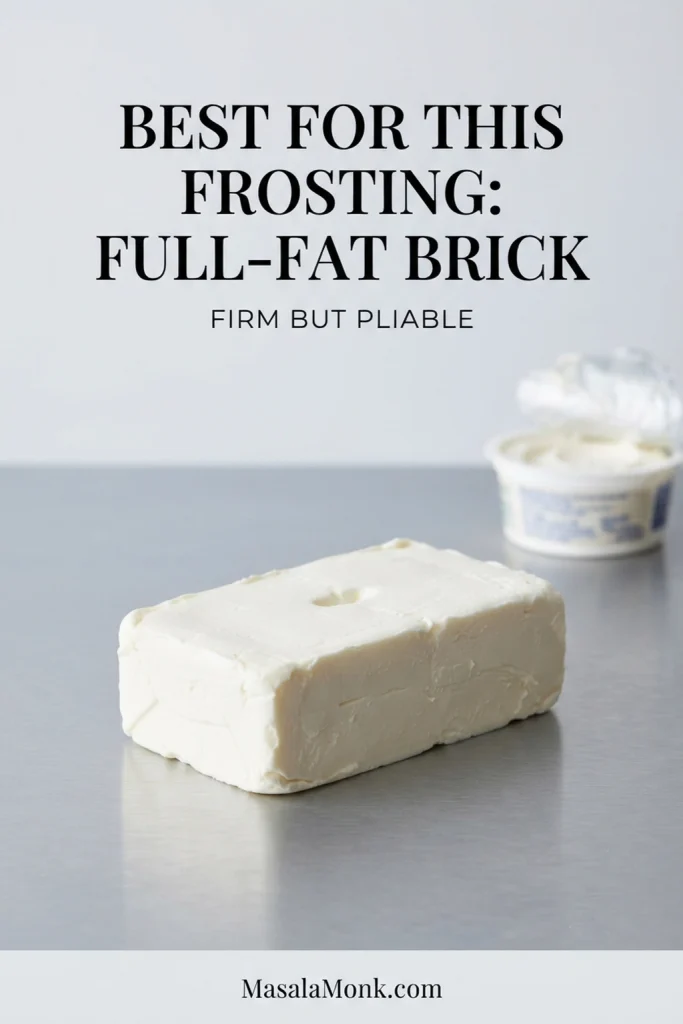
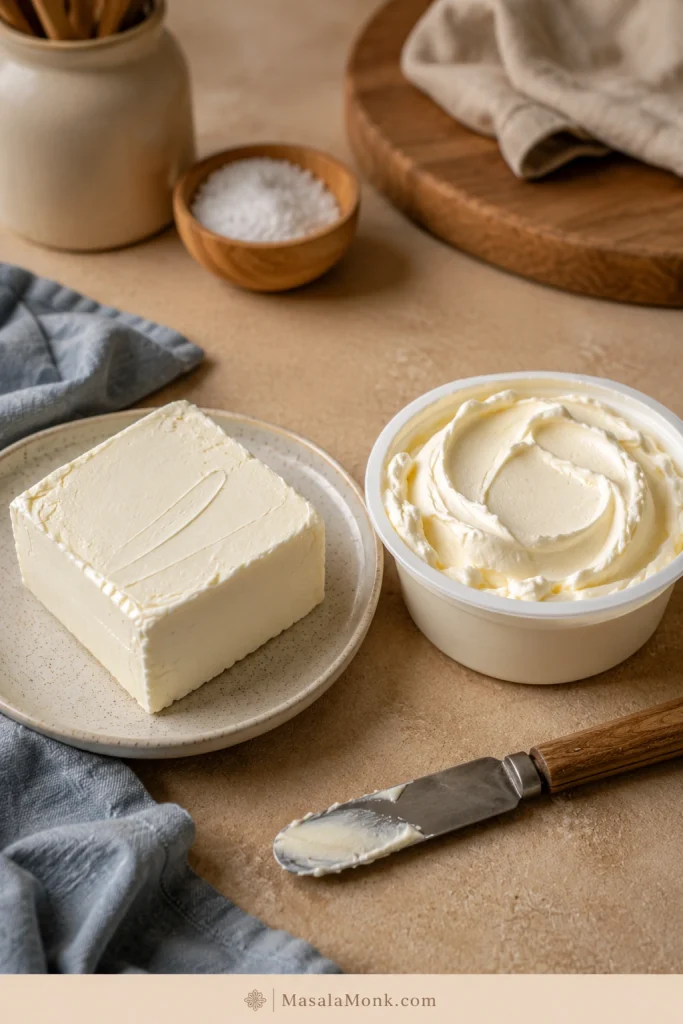
Brick-style cream cheese is the most reliable choice here. Whipped and spreadable tub products usually carry more moisture, which becomes a problem once sugar is mixed in.
Cream cheese texture varies by country and package style too. A product that is loose and easily spreadable while refrigerator-cold will usually produce a softer frosting.
A useful cream cheese check is how the block behaves before mixing: it should cut cleanly and hold its shape, yet yield slightly when pressed. Spreadable tubs change the moisture balance, not merely the package shape.
Keep it smooth without making it loose
The butter should dent easily without looking greasy. The cream cheese should remain cooler—firm enough to hold its shape, but pliable enough to blend without prolonged beating.
Beat the butter and powdered sugar first, then bring in the cream cheese near the end. Cream cheese contains considerably more water than butter, and prolonged mixing—especially once sugar is involved—can loosen the frosting. Stop as soon as it is smooth.
How to fix cream cheese frosting that’s too soft
Ready: a soft peak stands up and spatula tracks remain visible.
Too soft: the surface quickly levels itself or the frosting slides from the spatula.
Too cold: it drags over the cake and lifts crumbs.
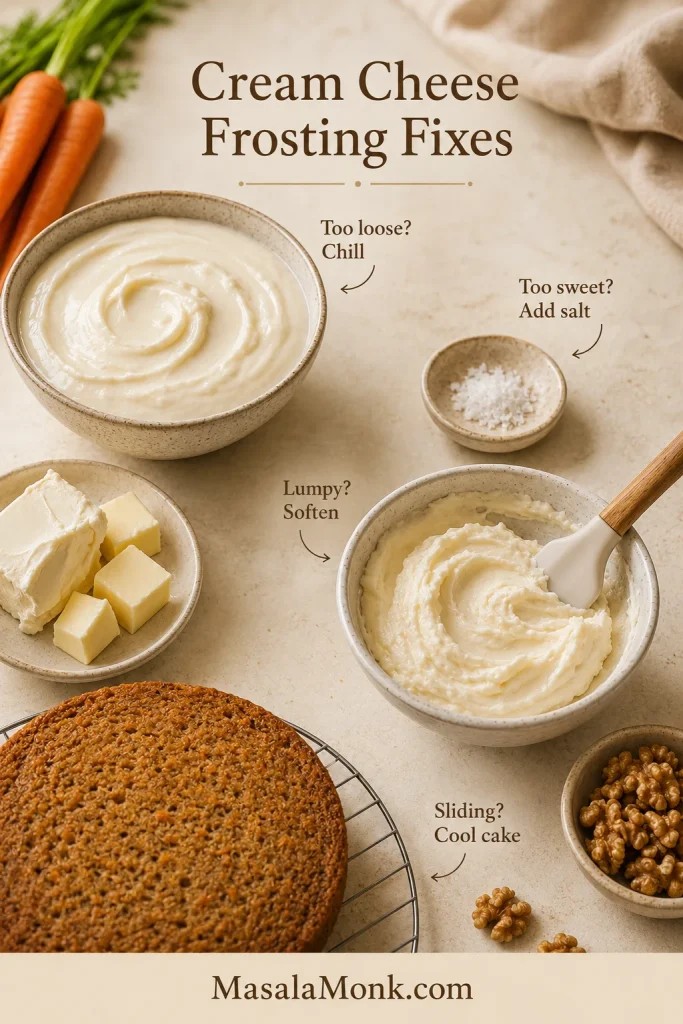
Frosting that is too soft should go into the refrigerator for 15–20 minutes before you change the recipe. Check it again once cold. Chilling is a better first move than adding cup after cup of powdered sugar and burying the cream-cheese tang.
Smooth frosting is not necessarily stable frosting. If a spoonful or spatula ridge quickly spreads into a flatter puddle, chill the cream cheese frosting before deciding that the recipe needs more sugar.
If it is still almost pourable after chilling and you started with tub-style cream cheese, more sugar probably will not turn it into the frosting described here. Use it as a softer finish, or start again with firmer block cream cheese.
Ermine starts with cooked milk and flour, then gets whipped with butter and sugar into a lighter, less tangy frosting. It makes sense if you want something soft and not overly sweet. For sharper piping and firmer decorative details, a classic buttercream frosting is easier to control.
Diameter isn’t the whole story: pan depth and material matter too. For the most predictable result here, use two light-colored 9 × 2-inch (23 × 5-cm) metal round pans. A pan that’s too shallow can overflow, while a deeper batter fill needs longer to set through the middle.
The times below assume light-colored metal. Dark pans absorb heat more aggressively, so the crust and edges may brown sooner; begin checking several minutes early if yours are very dark.
Dark metal absorbs more radiant heat at the pan surface, which can widen the doneness gap between the edge and center. If the rim is racing ahead, start checking sooner rather than assuming the batter is the problem.
Pan
Batter + first check
Two 9 × 2-inch (23 × 5-cm) rounds
625–650 g per pan; begin checking at 27 minutes.
Three 8 × 2-inch (20 × 5-cm) rounds
415–430 g per pan; begin checking around 20 minutes.
One 9 × 13-inch (23 × 33-cm) pan
Use all the batter; begin checking around 30 minutes.
The alternate times are first-check estimates. Your oven and pan still decide the real finish. Check the middle, not just the clock.
Pan conversions change the geometry of the bake, not just its shape. Spreading the same batter across more surface area creates shallower layers that set sooner, while deeper batter takes longer for heat to reach the center.
Cupcakes and Bundt cakes deserve their own baking directions. Their depth and exposed surface area change enough that this table should not be treated as a shortcut for either one.
Red velvet cake troubleshooting
Start with what you can actually see. Treat the crumb, color and frosting as separate clues.
Problem
Likely cause + what to do
Dry crumb
Too much flour, overbaking or a hot oven. Weigh the flour, begin checking early and stop when moist crumbs remain but wet batter is gone.
Dense cake
Overmixing after the flour, measurement error or weak leavener. Mix only until the flour disappears and measure the baking soda and powder carefully.
Wet or gummy middle
The center was underbaked. If you notice a glossy, unset middle while the cake is still baking, give it more time. If you discover it after cooling, use the cue to adjust the next bake.
Sunken center
The center may not have fully set, the pan may be overfilled or the pan depth may differ. Use the stated pan size and wait for the center to spring back lightly before removing it.
Brown-looking cake
The crust may have darkened normally, the coloring may be weak, the cocoa may be darker, the pan may be dark or the cake may be overbaked. Check the cut interior first.
Hard or very dark edges
The oven may be running hot or the pan may be dark and transferring heat aggressively. Use light-colored metal pans for the stated timing and check the oven with an independent thermometer if the problem continues.
Runny frosting
Spreadable cream cheese, warm ingredients, prolonged mixing or wetter cream cheese are common causes. Use block cream cheese, keep it cool and chill the frosting before changing the ratios.
Layers sliding
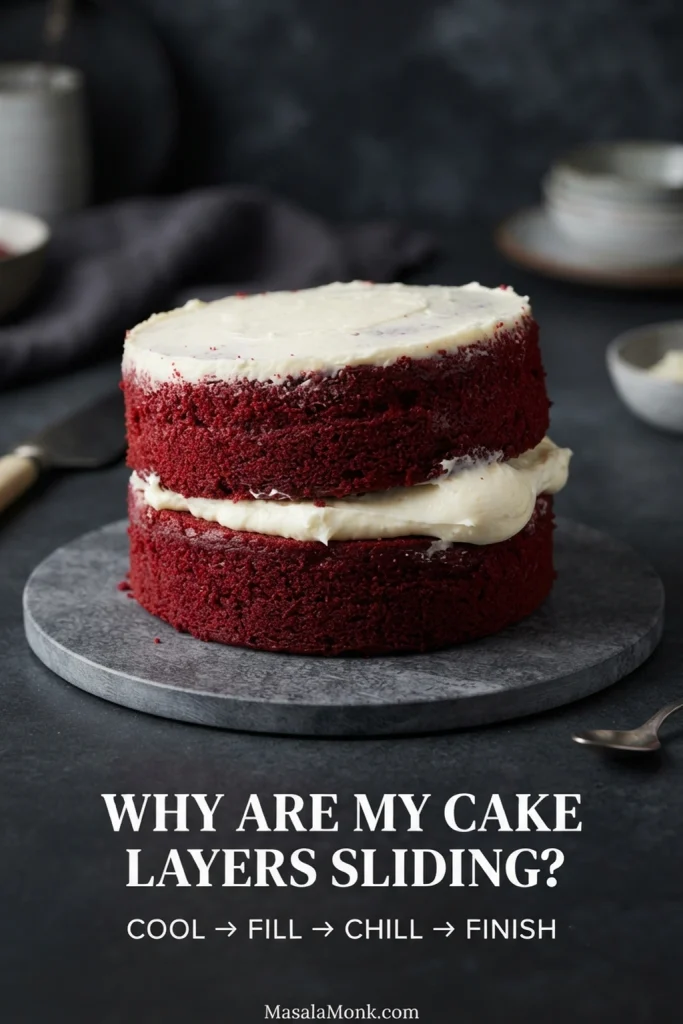
The cake may still be warm, the frosting too soft, the filling layer too deep or the crumb-coat chill too short. Cool the layers completely, use a controlled amount of filling and chill before the final coat.
Why red velvet cake layers slide
If the upper layer starts shifting as soon as you set it down, pause before adding the outer coat. Warm cake, a generous filling layer or soft frosting can make the stack move; remove excess filling if needed and chill the assembled cake until it is stable.
Catch a sliding cake early: if the filling begins bulging as soon as the top red velvet cake layer goes on, remove a little excess before chilling instead of repeatedly pushing the layer back into position.
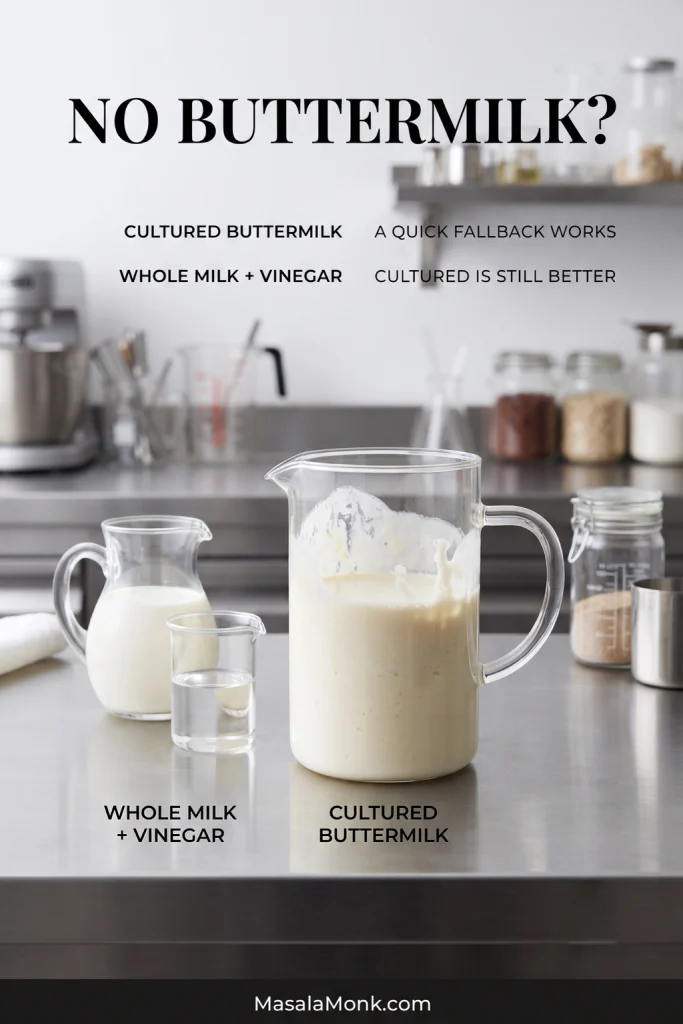
In a pinch, add 1 tablespoon (15 ml) white vinegar or lemon juice to a measuring cup, then add enough whole milk to reach 1 cup (240 ml). Stir and leave it for 5–10 minutes before using.
This substitutes for the cultured buttermilk only; still add the separate 1 teaspoon (5 ml) white vinegar listed in the cake ingredients. Cultured buttermilk is still the better choice when you have it: it is thicker and gives the cake a fuller cultured flavor.
Acidulated whole milk is a functional buttermilk substitute, not a visual texture match. It stays thinner than cultured buttermilk, so do not wait for the milk-and-vinegar mixture to become equally thick before using it.
Can I use Dutch-process cocoa?
Not in this formula. Use natural unsweetened cocoa; this formula’s acidity, color and leavening are balanced around it.
Red food coloring: Liquid coloring made for baking can work, but concentrated gel is easier to control because it delivers more pigment with less extra liquid.
Neutral oil: Canola, vegetable and grapeseed oil all work well. Choose something mild enough to disappear behind the butter, vanilla and cocoa.
Eggless, vegan or gluten-free: these changes affect the cake’s structure, so a purpose-built formula is more reliable than treating them as one-for-one substitutions.
Make ahead, store, freeze and transport
Make the cake a day ahead
You can bake the layers, make the frosting, or assemble the entire cake 1 day ahead. Cool baked layers completely before wrapping them tightly and refrigerating them. A fully frosted cake can also be covered and refrigerated overnight.
If you make the frosting ahead, keep it covered in the refrigerator overnight. Let it soften only until spreadable, then stir it or mix on the lowest speed just long enough to restore an even texture.
Refrigerator storage
Store the finished cake covered in the refrigerator for up to 3 days for best quality. This cream cheese frosting has not been formulated or tested as a shelf-stable frosting, so keep it chilled. Kansas State’s food-safety guidance for frostings and fillings explains why room-temperature safety depends on the specific formulation rather than on the frosting’s name alone.
Straight from the refrigerator, the crumb and frosting will both taste firmer. Give an individual slice 15–20 minutes at a cool room temperature. The crumb relaxes, and the butter, vanilla and cocoa come through much more clearly.
Freezing red velvet cake
Well-wrapped unfrosted layers can be frozen for up to 2 months for best quality. Thaw them while still wrapped so most condensation collects on the wrapping rather than directly on the cake.
Individual frosted slices can also be frozen in airtight containers. Thaw them in the refrigerator first, then let the serving piece soften briefly before eating.
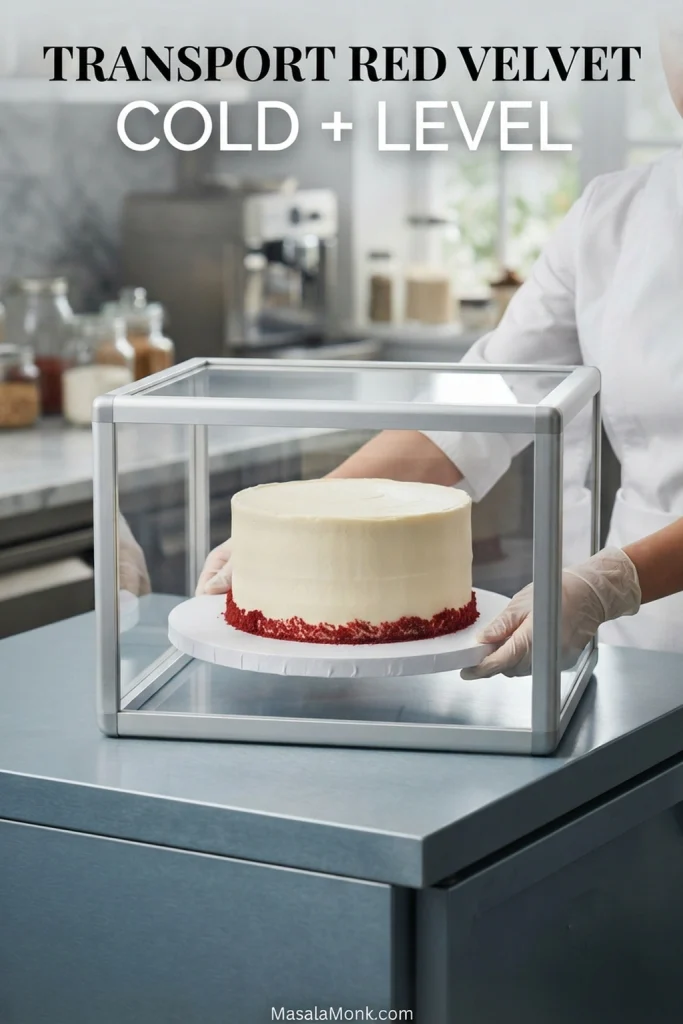
Transport red velvet cake
For transport, chill the assembled cake until the frosting feels firm, keep it level and keep it cool. Cream cheese frosting is not a good match for hours in strong summer heat or direct sun.
Chilling firms the cream cheese frosting, but cold alone cannot stop sideways movement. A rigid cake board, non-slip base and adequate lid clearance each solve a different transport problem.
Cut and serve red velvet cake
For clean red-and-white layers, use a sharp knife and wipe the blade between slices. Let each serving sit on the plate for a few minutes so the refrigerator chill begins to lift and the crumb softens.
Cold red velvet cake gives you the neatest red-and-white slices; slightly warmer cake gives you the softer eating texture. Cut while chilled, then let only the serving piece lose some refrigerator chill.
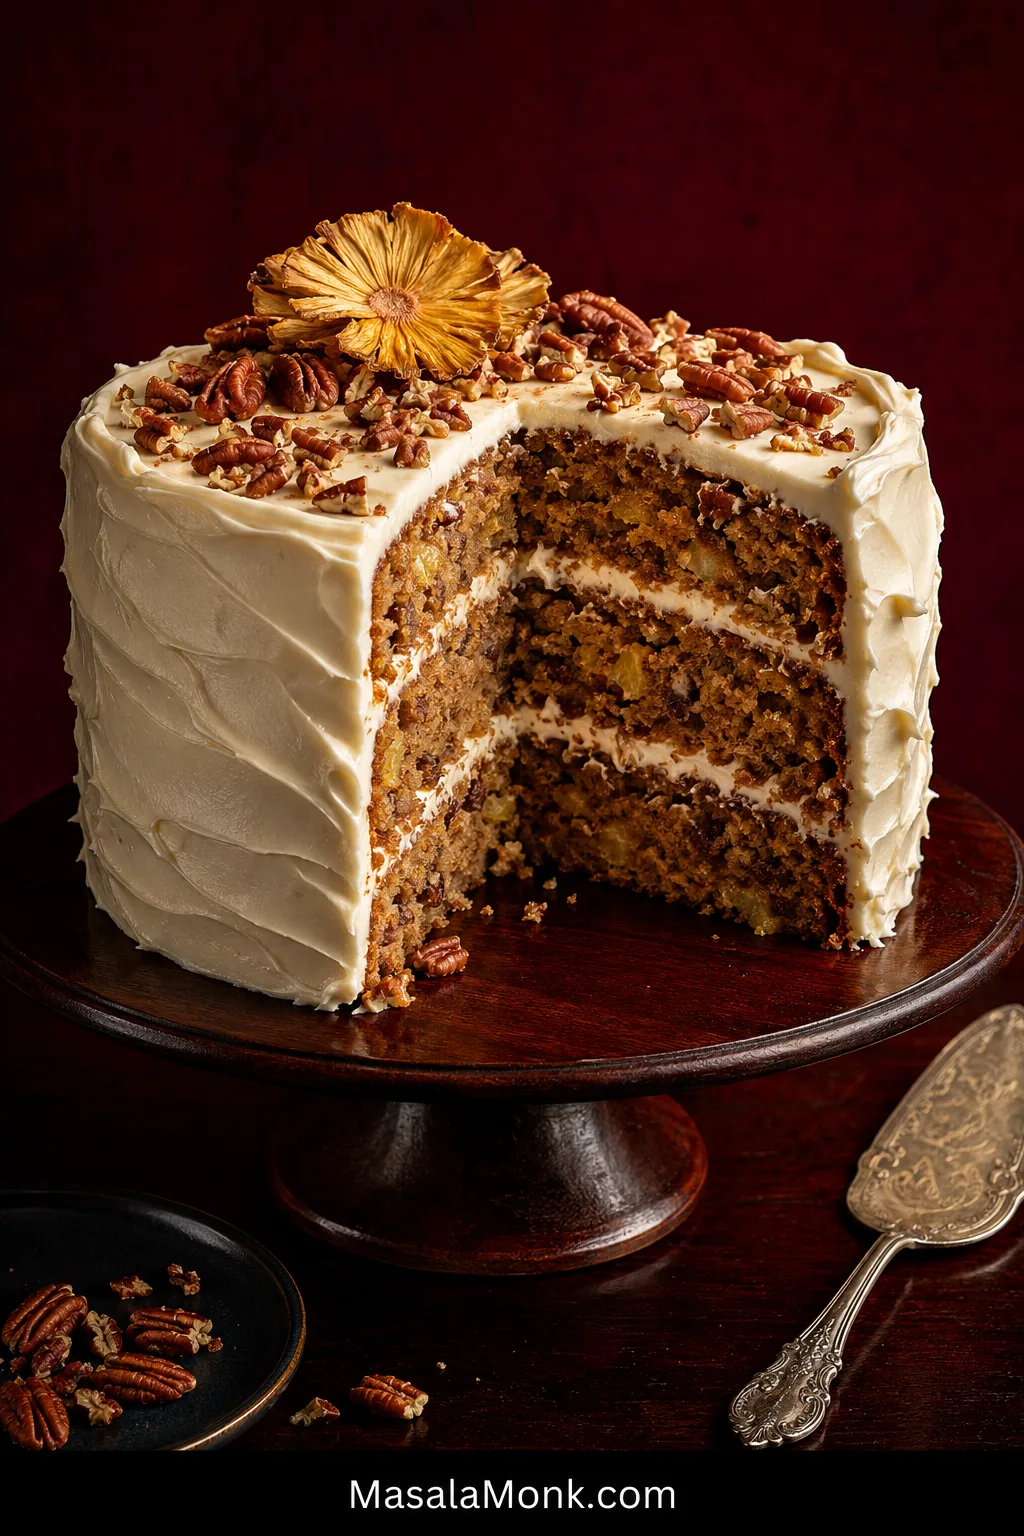
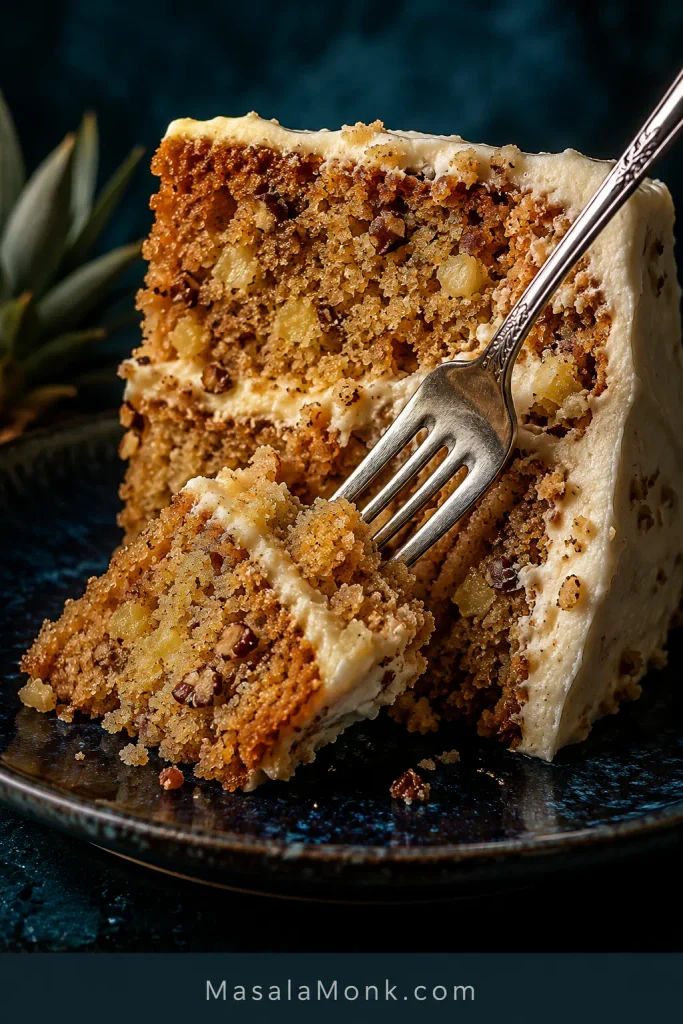
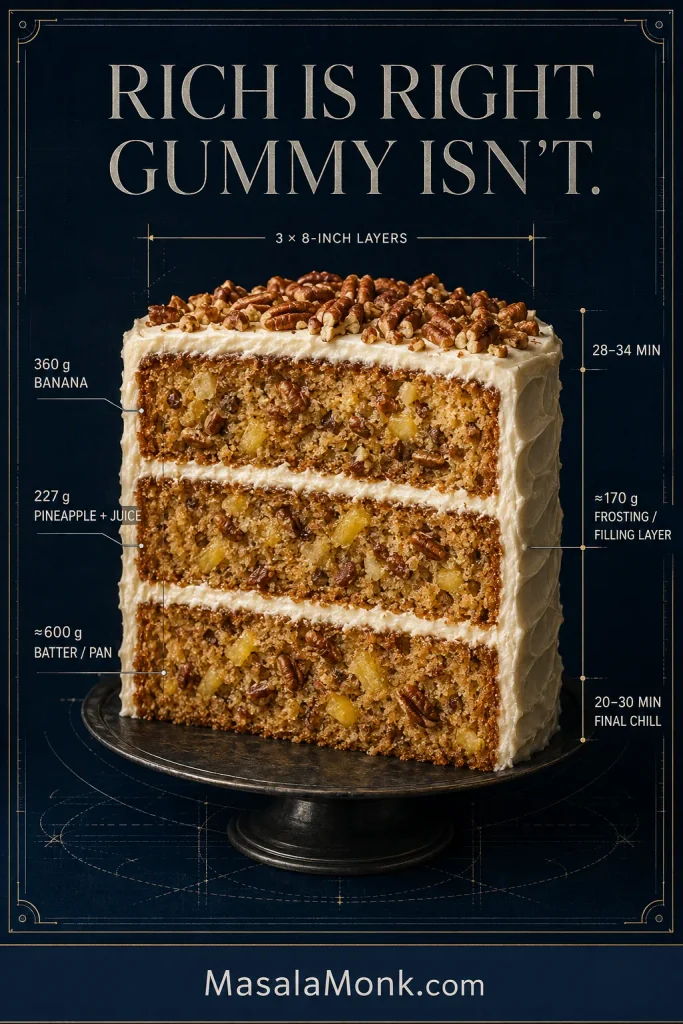
Hummingbird Cake has a delicate name for a decidedly generous cake. Beneath the cream cheese frosting are three fruit-rich layers where ripe banana leads, pineapple brings a little brightness, and toasted pecans break up the moist crumb with roasted crunch.
All that fruit is part of the appeal. It also leaves less room for guesswork: extra banana, too much free pineapple liquid, very deep pans or an underbaked center can take the crumb from lush to sticky. What you want is an abundant old-fashioned cake that stands tall enough to slice cleanly.
Rich is right. Gummy isn’t.
What Does Hummingbird Cake Taste Like?
Hummingbird Cake is a banana-and-pineapple spice layer cake with pecans and cream cheese frosting, now a Southern classic with roots in Jamaica’s Doctor Bird Cake.
Banana is usually the first flavor you notice, but it shouldn’t flatten everything else. Pineapple gives the crumb a brighter fruitiness, toasted pecans add little pockets of crunch, and cinnamon stays comfortably in the background. Cream cheese frosting brings the tang that keeps a generous slice from feeling simply sweet.
Carrot cake is an easy comparison, although the two eat quite differently. Carrot cake gets much of its character from grated carrot and a stronger spice profile; Hummingbird Cake is fruitier and more tropical, with banana and pineapple doing most of the work. If spice cake is your other reference point, Hummingbird Cake is its fruitier, less spice-led cousin.
A moist pocket beside pineapple is normal; a wet, paste-like center is not. Judge the crumb around the fruit.
The Short Version
Despite the three layers, the cake batter itself is straightforward: two bowls, mixed by hand, no mixer needed. Most of the roughly four-hour total is waiting for the cake to bake, cool and firm up; the hands-on work is much shorter.
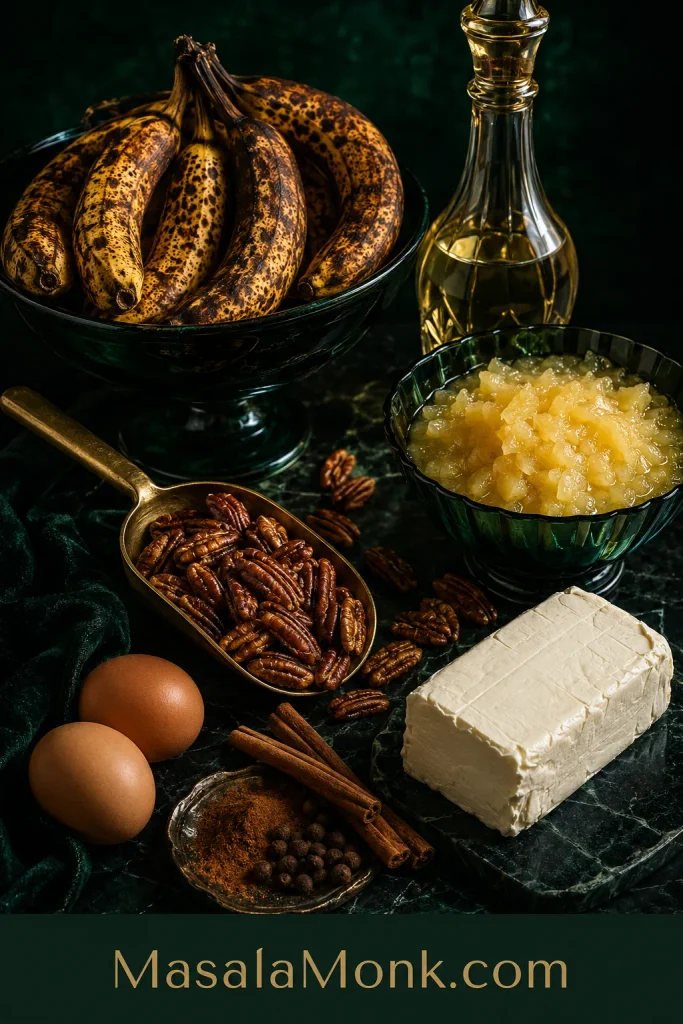
Use 360 g mashed very ripe banana, one 8-ounce / 227-g can crushed pineapple with its juice, neutral oil, cinnamon and toasted pecans. Divide the batter between three 8-inch / 20-cm pans and bake at 350°F / 177°C conventional / about 160°C fan. Start checking at 28 minutes; expect a bake somewhere around 28–34 minutes, depending on your pans and oven.
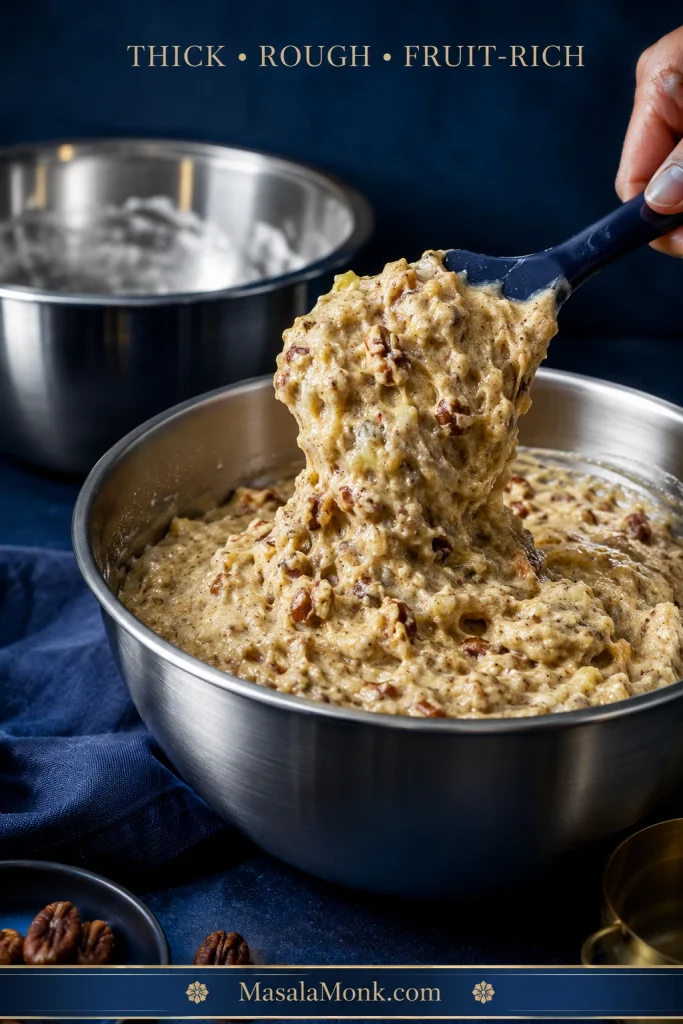
The batter should look thick, rough and visibly full of fruit. Stop folding once the flour disappears. The layers are ready when the centers look set, spring back gently under a fingertip and a skewer comes out without wet batter. Once cool, the crumb should be moist and tender, not glossy, gluey or pudding-like.
Three-Layer Hummingbird Cake: The Recipe
What this version is aiming for: the rich, fruit-heavy character that makes Hummingbird Cake distinctive, with a clear line between deeply moist and gummy. The banana is weighed, one small can of pineapple goes in with its juice, and the batter is spread across three relatively shallow layers. The cream cheese frosting relies on butter and cool handling for much of its structure, so its tang doesn’t have to disappear under a mountain of powdered sugar.
Yield
One three-layer 8-inch / 20-cm cake
Serves
12 generous or about 16 smaller slices
Active time
About 50 minutes
Bake
28–34 minutes; begin checking at 28
Total time
About 4 hours, including cooling and chilling
Oven
350°F / 177°C conventional / about 160°C fan
Make ahead
Excellent prepared a day before serving
Ingredients
Use the gram amounts if you have a kitchen scale. Cup measurements are included for convenience, but flour and mashed banana are both easy to misjudge by volume.
For the Cake
150 g chopped pecans — about 1⅓ cups, divided
375 g all-purpose flour — 3 cups, spooned and leveled
1 teaspoon baking soda
1 teaspoon baking powder
¾ teaspoon fine salt
1½ teaspoons ground cinnamon
¼ teaspoon ground allspice
3 large eggs, preferably at room temperature
1 cup / 240 ml neutral oil, such as vegetable or canola oil
1 cup / 200 g granulated sugar
125 g packed light brown sugar — about ½ cup + 2 tablespoons
2 teaspoons vanilla extract
360 g mashed very ripe banana — about 1½ cups or roughly 3 large bananas after peeling; use bananas that are soft, deeply spotted and fragrant
1 x 8-ounce / 227-g can crushed pineapple in juice, undrained; with a larger can, weigh out 227 g of fruit and juice together
For the Cream Cheese Frosting
300 g unsalted butter — about 1⅓ cups, softened but still cool
300 g confectioners’ / powdered sugar — about 2½ cups, sifted if lumpy
2 teaspoons vanilla extract
¼ teaspoon fine salt
16 ounces / 452 g full-fat block-style cream cheese, chilled and cut into small pieces
The frosting amount is enough for two sensible filling layers and a comfortable rustic coat over the top and sides. Make extra only if you want an unusually thick coat or elaborate piping.
Equipment: three 8-inch / 20-cm round cake pans, parchment, two large bowls, a whisk, flexible spatula, cooling racks and preferably a kitchen scale. The batter is mixed by hand; use a hand or stand mixer for the frosting.
Weigh the mashed banana when you can; fruit count varies too much to be a reliable moisture measure.
Method
Prepare the Batter
Heat the oven and prepare the pans. Preheat to 350°F / 177°C conventional / about 160°C fan. Grease three 8-inch / 20-cm round pans, line the bottoms with parchment and lightly grease the parchment.
Toast the pecans. Spread the chopped pecans on a baking sheet and toast for 5–7 minutes, starting to watch closely at 5. Stir or shake the tray once. Take them out when they smell deeply nutty and have darkened slightly. Cool completely. Reserve about 30 g for the finished cake and use the remaining 120 g in the batter.
Mix the dry ingredients. Whisk the flour, baking soda, baking powder, cinnamon, allspice and salt in a large bowl, breaking up any obvious flour lumps.
Mix the wet ingredients. In another large bowl, whisk the eggs and oil together. Add both sugars and the vanilla, then stir in the mashed banana and crushed pineapple with all of its measured juice.
Fold the batter gently. Pour the wet mixture into the flour mixture and fold with a flexible spatula. Add the 120 g toasted pecans while a few dry streaks remain, then stop as soon as the flour disappears. The finished batter should look thick, rough and crowded with fruit.
Divide it evenly. The batch makes roughly 1.8 kg of batter, so aim for about 600 g per pan. Exact grams are not important; similar layer depths are.
Before the pans go in, scrape the bowl once more. Thick batter can hide dry flour at the bottom.
Bake and Cool the Layers
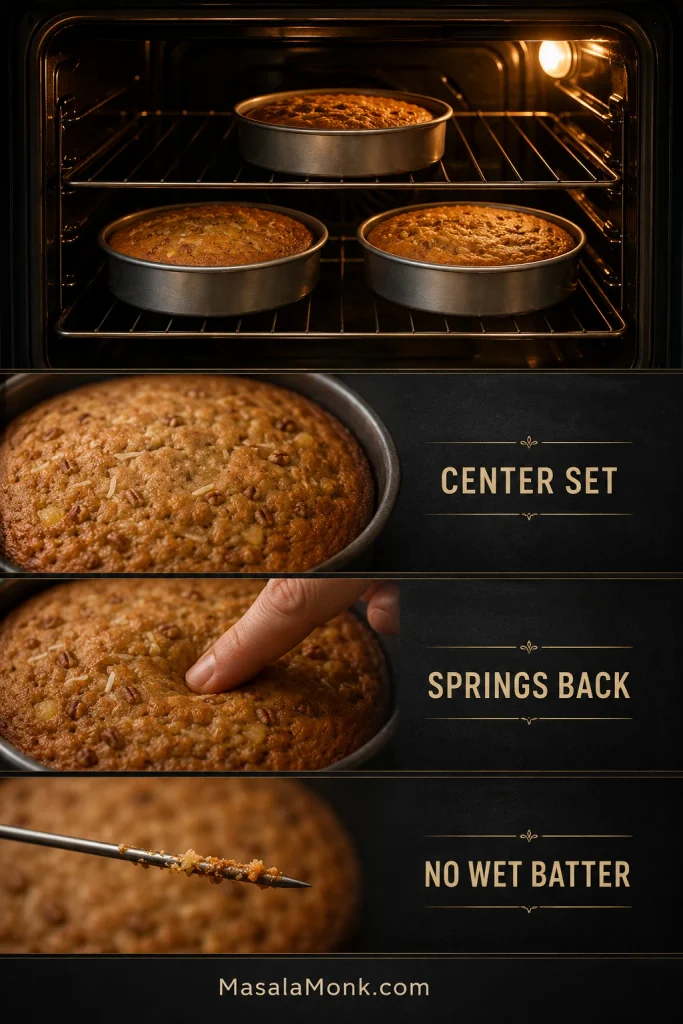
Bake the layers. Put all three pans on one rack near the center of the oven when they fit with some air around them. Otherwise stagger them across two racks. Begin checking at 28 minutes; expect the bake to fall somewhere around 28–34 minutes. Using two racks? Leave the pans alone during the early bake. Once the centers have visibly begun to set, swap the upper and lower pans if your oven is browning unevenly. They’re done when: the wet shine in the center has disappeared, a light fingertip press springs back and a thin skewer comes out without wet batter. A few moist crumbs are fine.
Cool completely. Leave the layers in their pans for about 10 minutes, then turn them onto wire racks and peel away the parchment. Let them cool fully before frosting. A 30–60 minute chill afterward can make the layers easier to handle and stack, but it isn’t a substitute for cooling them first.
Matching pans can finish a few minutes apart. Check each center for set, springback and no wet batter.
Make the Cream Cheese Frosting
Make the frosting base. Beat the slightly cool butter until smooth. Gradually beat in the powdered sugar, then add the vanilla and salt.
Add the cream cheese last. Take the cream cheese from the refrigerator when you begin making the frosting. Add it to the finished butter-sugar base a few pieces at a time on low to medium-low speed. Stop once the frosting is smooth. Longer beating can make cream cheese frosting softer.
Check the consistency. Lift your spatula. A soft peak should hold and a swipe of frosting should stay where you put it. When the frosting slowly slumps, refrigerate it for 20–30 minutes before deciding it needs more sugar.
Smaller pieces of cold block cream cheese incorporate faster, limiting mixer time and helping the frosting stay thick.
Stack and Finish the Cake
Stack the cake. Put the first layer on a cake plate or board and spread about 170 g frosting over the top. Repeat with the second layer, then add the third. Should the stack begin drifting sideways, refrigerate it for about 20 minutes before continuing.
Frost and finish. Cover the top and sides with the remaining frosting. A relaxed coat suits Hummingbird Cake; nothing has gone wrong because the sides are not ruler-straight. Scatter over the reserved pecans, or add dried pineapple flowers for a more celebratory finish.
Refrigerate the assembled cake for about 20–30 minutes, or until the frosting feels firm enough for a clean first cut. For the best eating texture, give chilled slices about 15–20 minutes at a comfortable room temperature before eating.
The structural numbers matter most: fruit, batter depth, bake cues and frosting consistency. Perfectly straight sides do not.
If your pans are ready, that’s everything you need to bake the cake. The rest is here for the moment you cut into it and wonder whether the crumb looks right, where the pineapple went, or why the frosting isn’t behaving the way you expected.
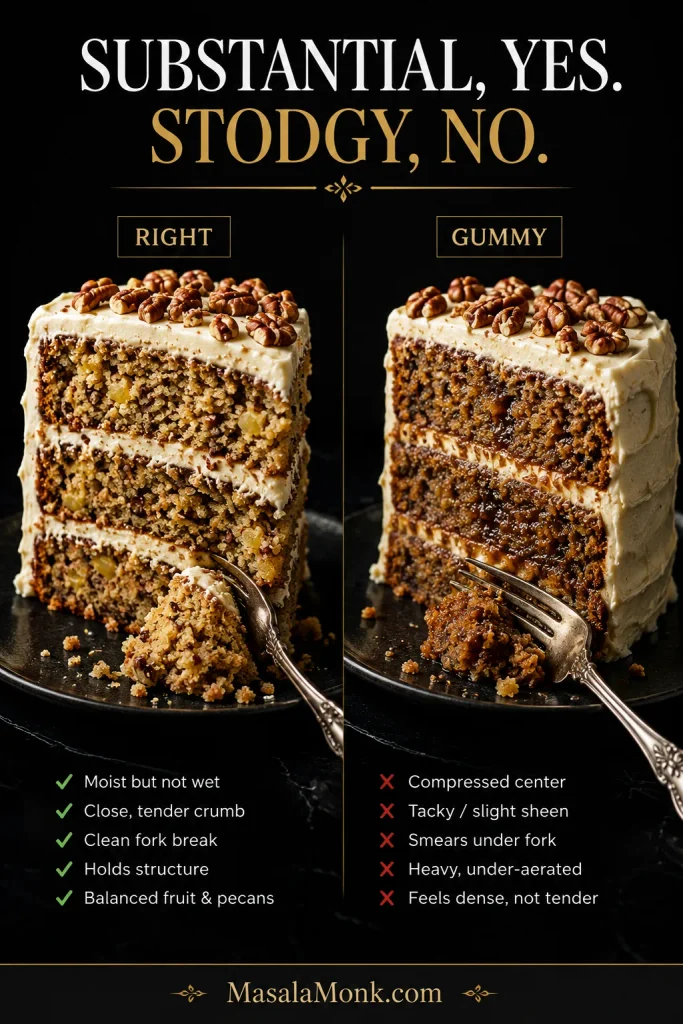
Substantial, yes. Stodgy, no. Hummingbird Cake naturally has more heft than a fluffy vanilla butter cake. Banana, pineapple, oil, eggs and pecans all contribute to a richer, closer crumb.
A good slice looks moist without looking shiny. Press a fork through the center and a piece comes away cleanly, with the occasional bit of pineapple or toasted pecan along the way. That’s the texture worth aiming for: generous and substantial, but still unmistakably cake.
A center that smears into paste is different. So is a rubbery, compressed crumb. Wetness usually points back toward bake time, fruit quantity or layers that were too deep; a tight, rubbery texture can point toward excess flour or too much mixing. A substantial layer that slices neatly and tastes good needs no fixing.
That’s the reassuring part of this cake: a layer can look lower and richer than the sponge cakes you may know and be exactly as it should be. The fork should meet cake, not wet paste.
Let the cake cool before diagnosing it. Warm fruit-heavy crumb can feel wetter than the same layer once settled.
Why Does Hummingbird Cake Sometimes Taste Like Banana Bread?
Banana is the loudest fruit in the room. It brings aroma, sweetness, moisture and fruit solids all at once, which makes it easy for the pineapple to disappear into the background.
Hummingbird Cake shouldn’t simply eat like frosted banana bread. A wet or underbaked crumb can push it in that direction even when the banana quantity is reasonable, and extra banana makes the effect stronger.
Weigh the mashed banana and stop at 360 g. Any extra is better used in banana bread, where a strongly banana-forward crumb is exactly the point.
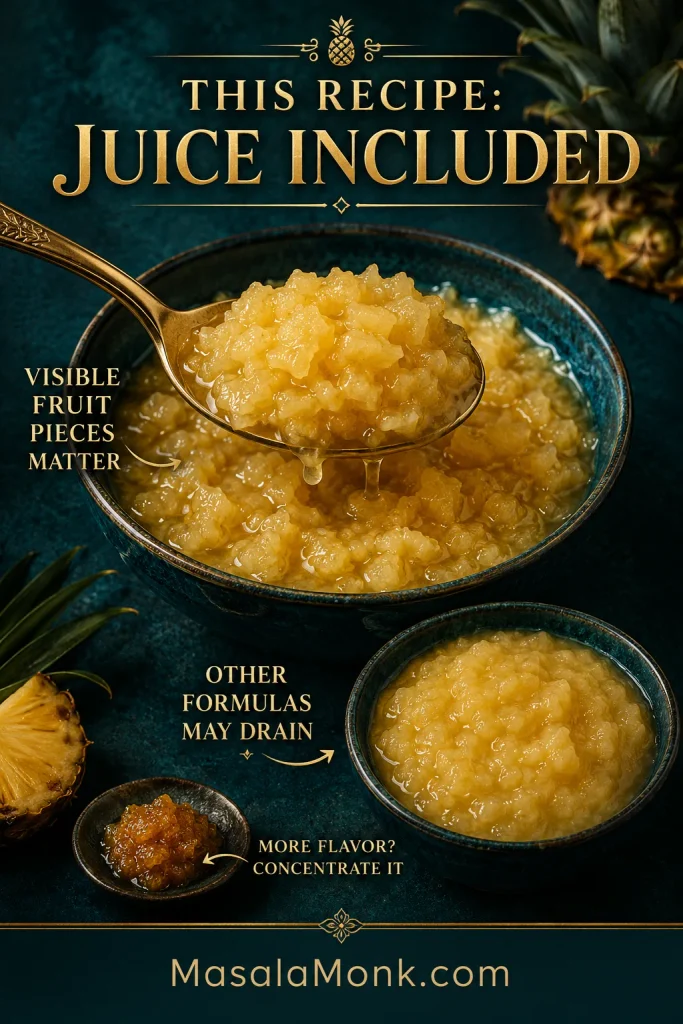
Pineapple in Hummingbird Cake: Drain It or Don’t?
Use all 227 g here, juice included.
That isn’t a universal Hummingbird Cake rule. A wetter formula or one with more fruit may need the pineapple drained.
The stranger problem is putting a whole can of pineapple into a cake and barely tasting it afterward. Choose crushed pineapple that still resembles tiny pieces of fruit instead of smooth pulp. Those fragments have a better chance of surviving the bake as something you can actually notice in a slice.
For stronger pineapple flavor, concentrate it instead of making the batter wetter. A very thin layer of thick pineapple jam or pineapple curd between the layers gives you a brighter burst of fruit. Keep the filling restrained so the layers still stack comfortably.
The pineapple doesn’t need to dominate. Finding a small piece here and there against banana and toasted pecan is enough to keep the slice changing as you eat it.
Fresh pineapple: use it in a recipe designed for it. Chopped fresh pineapple does not bring exactly the same balance of fruit and liquid as canned crushed pineapple with juice, so canned remains the predictable choice for this batter.
Using a larger can? Stir fruit and juice together before weighing 227 g so the moisture ratio stays consistent.
Cream Cheese Frosting Should Taste Like Cream Cheese
Hummingbird Cake is already sweet and fruit-rich, so the frosting needs contrast. Its cream-cheese tang should be obvious when you eat it with the cake.
Runny frosting often sends bakers straight to the powdered-sugar bag. Temperature is a better first lever here. The generous amount of butter and cool cream cheese give the frosting the body it needs for a layer cake while letting the cream-cheese flavor remain clear.
Getting the Consistency Right
Too soft: a swipe slowly slumps or the frosting creeps down the bowl. Refrigerate it for 20–30 minutes.
Ready: a lifted spatula leaves a soft peak that holds, and the frosting spreads across a cooled layer without tearing it.
Too stiff or too sweet: it becomes very firm or grainy and powdered sugar starts drowning out the cream-cheese flavor.
Ready frosting should spread over a cool layer without tearing crumbs or losing the ridges you leave behind.
Firm American block cream cheese is easiest to work with. Where only softer spreadable cream cheese is available, choose the firmest full-fat version you can find and keep the frosting cool. Sometimes twenty minutes in the refrigerator is all a loose bowl needs.
The finished frosting should feel creamy against the fruit-rich crumb, not like a thick layer of sweetness sitting on top of it. For detailed piping or sharp edges that must hold for a long time at room temperature, a more structured buttercream is the better choice.
Hummingbird Cake Pan Sizes: Why Layer Depth Matters
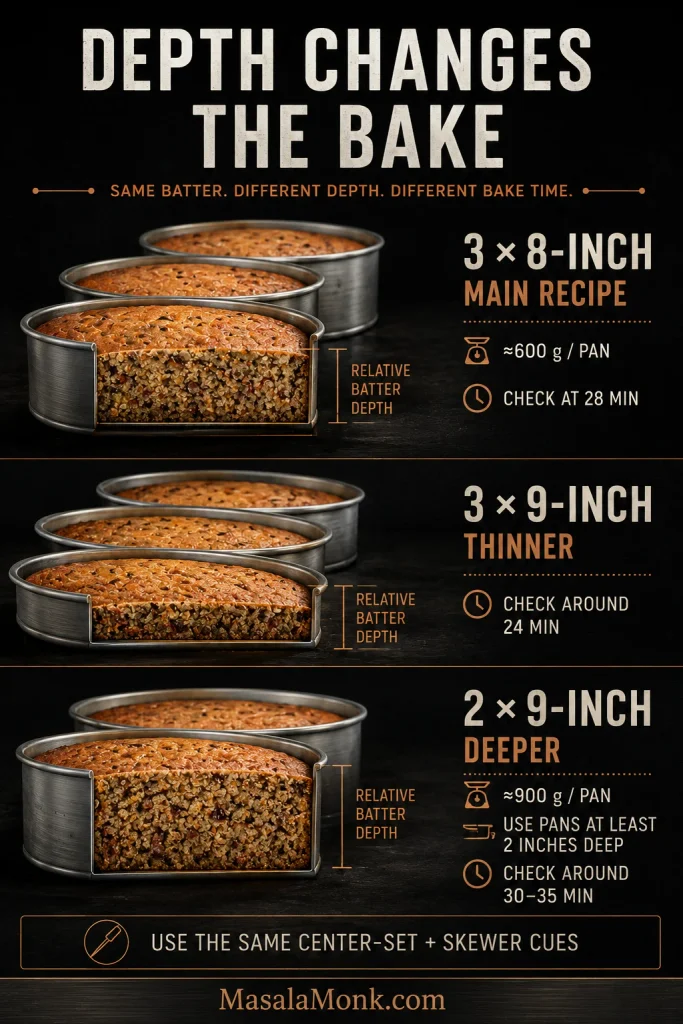
Three layers aren’t only about appearance. They keep this fruit-heavy batter relatively shallow, allowing the center to set before the outside has spent too long in the oven.
Pan setup
What to expect
3 x 8-inch / 20-cm rounds
Main recipe. About 600 g batter per pan; begin checking at 28 minutes.
3 x 9-inch / 23-cm rounds
Thinner layers. Begin checking around 24 minutes and use the same center-set and skewer cues.
2 x 9-inch / 23-cm rounds
Use pans at least 2 inches deep. Begin checking around 30–35 minutes and rely on the center-set cues for the endpoint.
A 9×13 sheet cake, Bundt cake, cupcakes or a smaller 6-inch cake changes the layer depth enough to deserve directions written for that format instead of a guessed conversion.
The timer tells you when to start looking. Batter depth and the cake tell you when to stop baking.
When changing pans, compare batter weight and depth—not fill lines alone. Shallower layers usually reach the center sooner.
If you’ve already cut the cake and something looks wrong, start here. The longer sections explain the details; this table is for the ten-second diagnosis.
Problem
Most likely cause
Try this
Tastes like banana bread
Banana dominates or crumb is too wet
Weigh the banana; choose pineapple with visible fruit pieces
Dense but tender
Often normal
Judge the crumb, not the height
Gummy or stodgy
Underbaked, too wet, too deep or overmixed
Check fruit amounts, pan depth and doneness
Wet center
Needs more baking or batter is too deep
Keep baking until the center sets
Dry and heavy
Too much flour or oven time
Weigh flour; check earlier
Pineapple disappears
Fruit is mild or too finely processed
Use visible fruit pieces or concentrated filling
Bland
Unripe banana, weak pineapple, untoasted nuts or low seasoning
Use deeply spotted bananas and toast the pecans
Tastes too much like carrot cake
Spices are crowding out the fruit
Keep secondary spices restrained
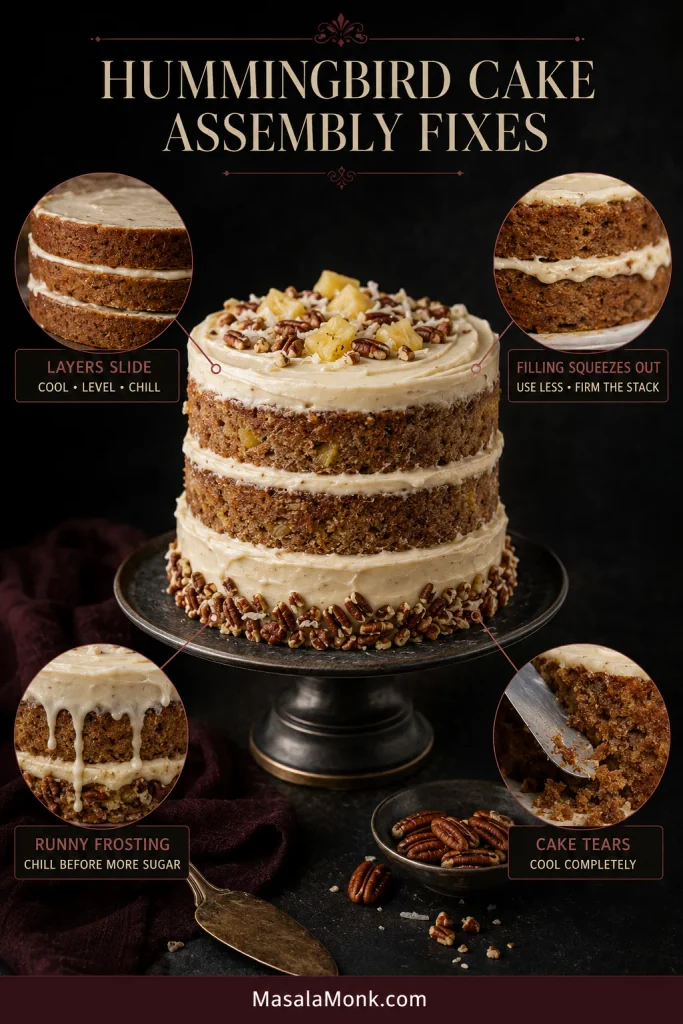
Runny frosting
Warm/soft cream cheese, warm room or overmixing
Refrigerate before adding more sugar
Filling squeezes out
Too much loose frosting
Use less filling; firm the stack before continuing
Layers slide
Warm cake/frosting, domes or overfilling
Cool, level if needed, then continue
Cake tears while frosting
Layers are too warm or delicate
Cool completely; chill briefly if needed
Outside done, center raw
Deep batter or hot oven
Check pan setup; tent a browning top if needed
Assembly Problems: Fix the Stack First
A warm layer can soften frosting, which squeezes outward and lets the stack slide. Fix the earliest problem first.
Walnuts: swap them for the pecans in the same amount and toast them first.
No nuts: leave them out. Nothing structural needs replacing.
Coconut: common in some versions, but not essential to the classic banana-pineapple-pecan cake.
Frozen bananas: thaw completely, mash them with the liquid they release, then weigh out 360 g.
Butter instead of oil: use a recipe built around butter or a butter-oil blend. Neutral oil is one reason these refrigerated layers remain moist.
More pineapple: put concentrated fruit between the layers instead of another can of liquid-heavy pineapple in the batter.
Gluten-free, vegan and substantially reduced-sugar Hummingbird Cakes change the structure enough to deserve recipes of their own. At some point a substitution list simply becomes a different cake.
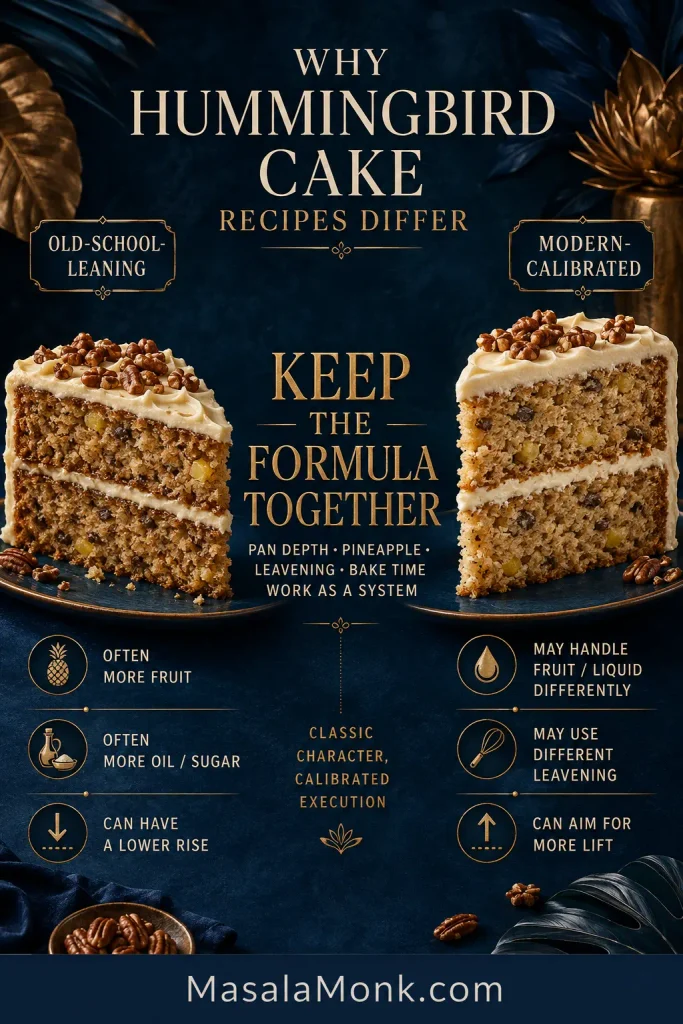
Why Hummingbird Cake Recipes Differ
Hummingbird Cake recipes can look surprisingly different because they aren’t all working with the same balance of fruit, fat and liquid. Some old-school versions are exceptionally rich, with more banana, oil and sugar and sometimes no baking powder. Others pull back a little and rise somewhat higher.
The 1978 Hummingbird Cake made famous by Southern Living belongs firmly to that lavish old-school tradition. Modern versions may handle the pineapple, leavening or pans differently because the rest of the recipe changed too.
Keep the formula together. Pineapple handling, leavening, pan depth and bake time only make sense alongside the rest of the recipe they belong to. Borrow one instruction from a very different version and an otherwise sensible piece of advice can suddenly work against you.
Different pineapple instructions often reflect different formulas. Compare fruit, liquid, flour and batter depth before borrowing one rule.
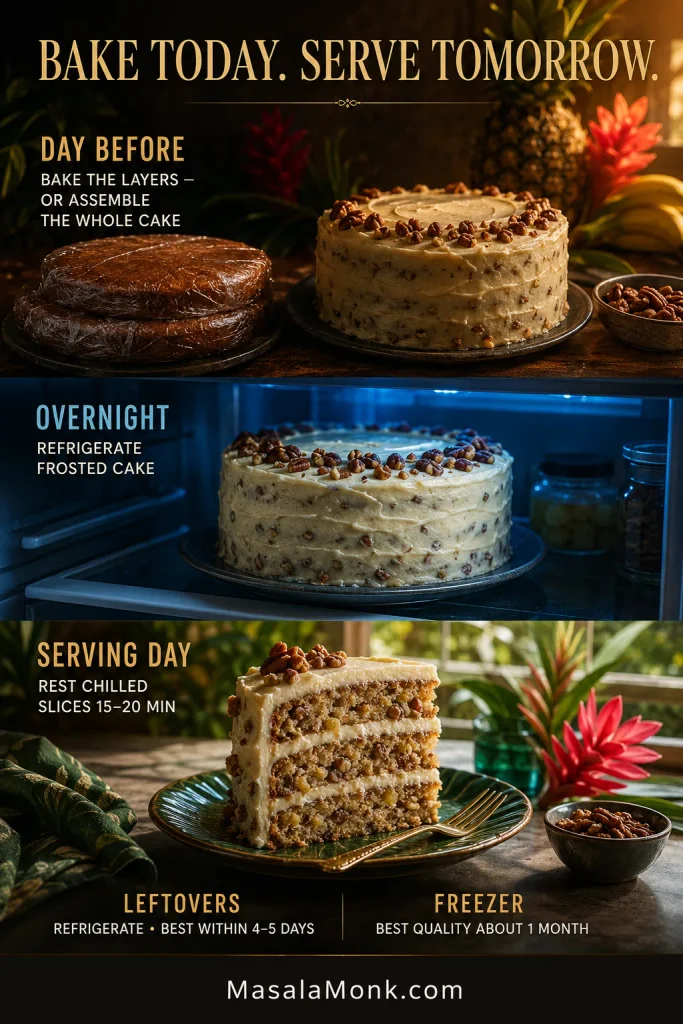
Bake It Today, Serve It Tomorrow
Hummingbird Cake is unusually friendly for a three-layer celebration cake. The oil and fruit help the crumb stay moist, and an overnight rest does it no harm. That’s useful when the cake is for a birthday, holiday table or gathering and serving day already gives you plenty to think about.
Does Hummingbird Cake need to be refrigerated? Once it is covered with cream cheese frosting, yes. Keep the finished cake refrigerated and give chilled slices about 15–20 minutes at room temperature before serving.
Storage, Freezing and Serving
The day before: bake and cool the layers completely, wrap them well and refrigerate. Or assemble and frost the entire cake, cover it and refrigerate overnight.
Serving day: keep the cake cool until you need it, especially in a warm room. That short rest before eating brings the crumb and frosting back to a much better texture.
Leftovers: cover and refrigerate. For the best texture and flavor, aim to finish the cake within about 4–5 days.
Freezing: unfrosted layers are easiest. Cool them, wrap tightly and freeze, then thaw in the refrigerator while still wrapped. Firm chilled slices of frosted cake can also be wrapped and frozen. For best quality, use frozen cake or slices within about 1 month.
This is one of those celebration cakes that does not punish you for getting ahead. There is a great deal to be said for opening the refrigerator the next day and finding the difficult part already done.
Cold keeps the cake stable; a short room-temperature rest restores a softer crumb and creamier frosting before serving.
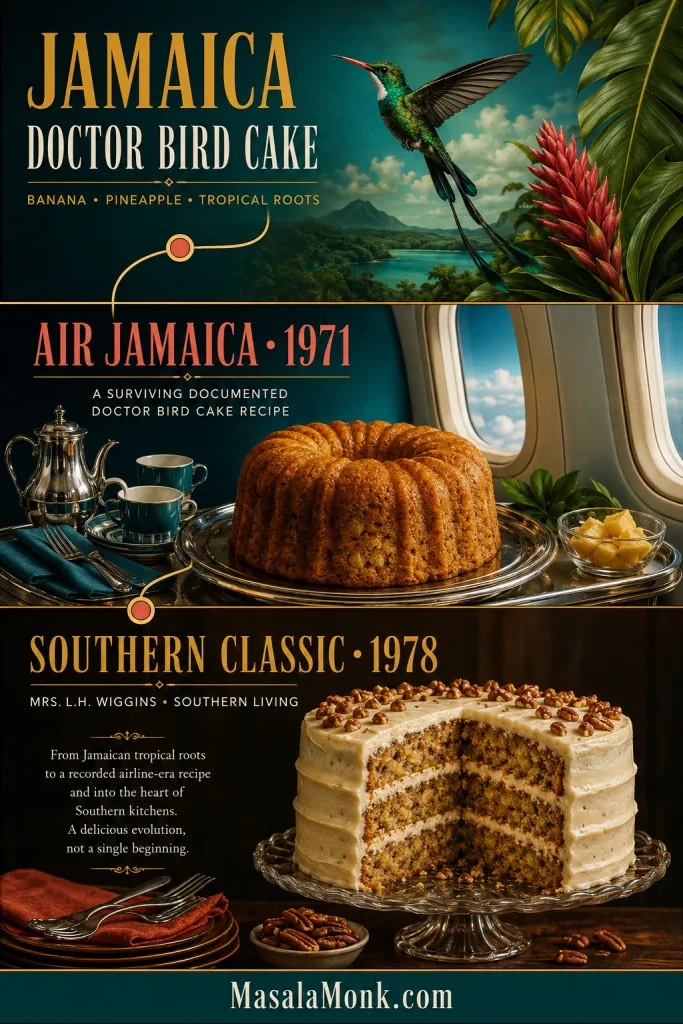
Why Is It Called Hummingbird Cake? The Jamaican Doctor Bird Story
For a cake now so strongly associated with Southern baking, the earlier trail is wonderfully tropical. Its name points back to Jamaica and its national bird, the red-billed streamer-tail hummingbird known as the Doctor Bird.
The Jamaican Doctor Bird Cake
Versions of Doctor Bird Cake were already circulating in Jamaica-related promotional material by the late 1960s. Visit Jamaica’s archival account preserves an Air Jamaica recipe published in The Daily Gleaner on February 4, 1971. The feature covered dishes served on the airline’s in-flight menu, and the cake took its name from the Doctor Bird — both Jamaica’s national bird and a symbol used by Air Jamaica.
That version was described as a rich pineapple-and-banana dessert loaf. It’s a wonderful contrast with the cake many people picture today: the tropical fruit was already there, but the towering American layer cake came later.
The 1978 Southern Living Cake
In 1978, Mrs. L.H. Wiggins of Greensboro, North Carolina, submitted her Hummingbird Cake to Southern Living. The three-layer recipe became one of the magazine’s best-known desserts and helped turn Hummingbird Cake into a fixture of Southern celebration tables.
That gives the cake an identity that is hard to squeeze into one place. Its name and tropical fruit reach back toward Jamaica; the towering cream-cheese-frosted layer cake became deeply Southern. Both histories are sitting in the same slice.
The Jamaican Doctor Bird trail predates the Southern layer cake; the tall cream-cheese-frosted version came later.
For a cake named after something as tiny as a hummingbird, there is nothing timid about it. Three generous layers, soft under a fork and sturdy enough to stand proudly on the plate. Then someone cuts the first slice, and suddenly the cake doesn’t look quite so enormous after all.
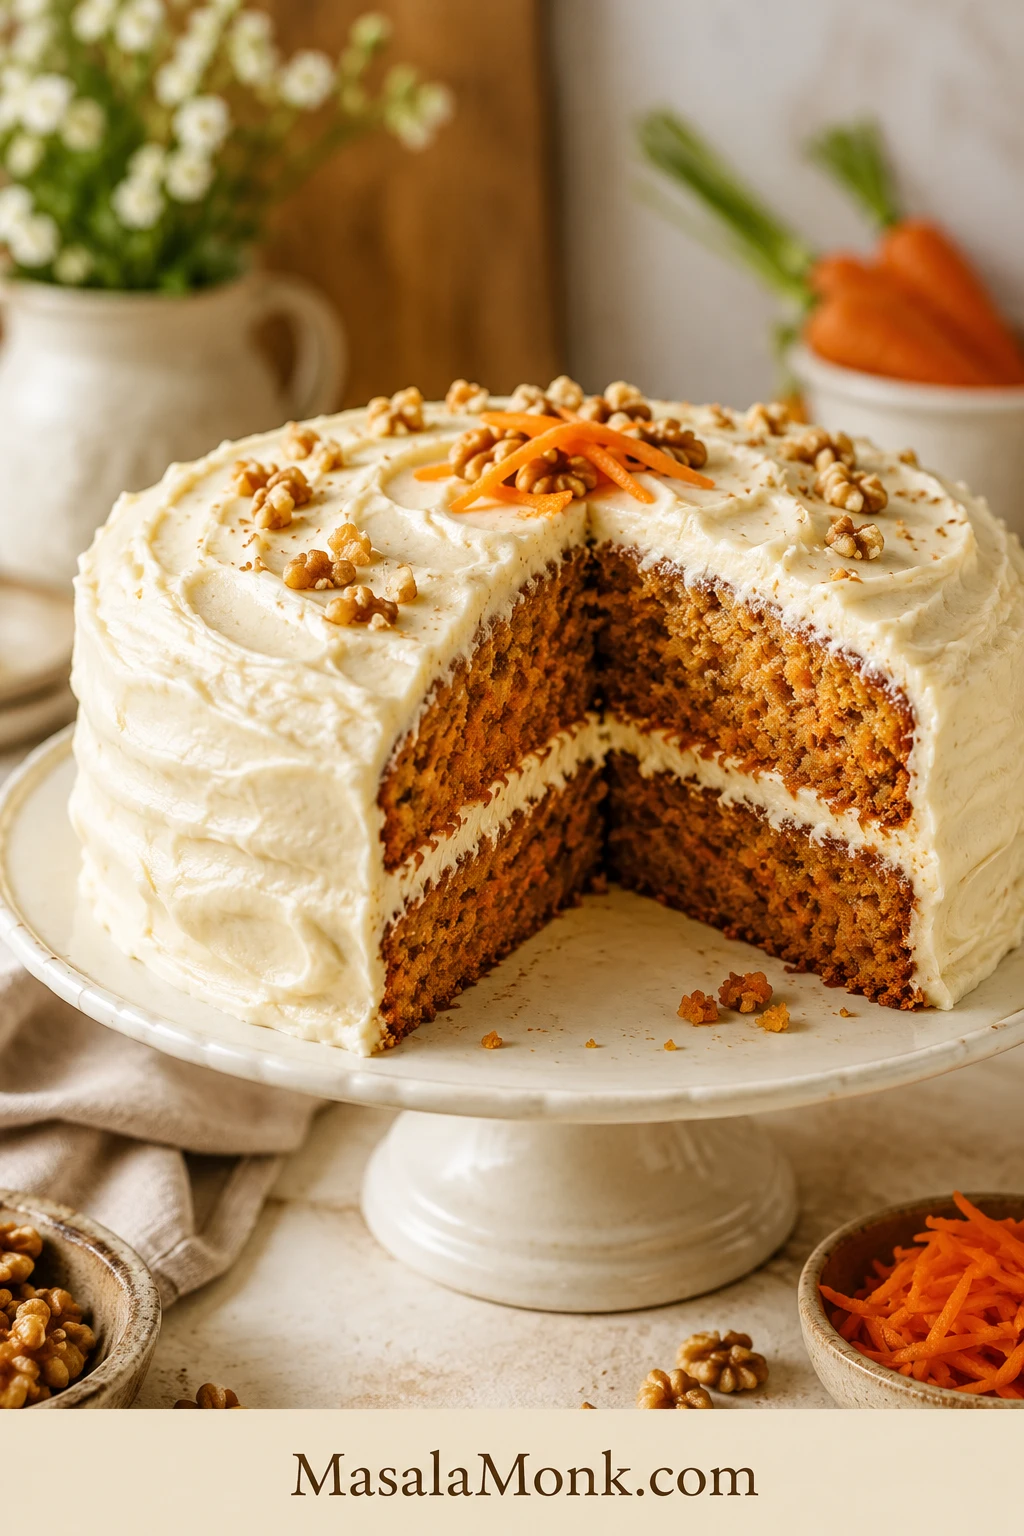
Carrot cake should be soft under the fork, warmly spiced, full of carrot, and rich with cream cheese frosting. It should not be greasy, dry, heavy, or so crowded with add-ins that the carrot disappears.
The best version gives you a fork-tender crumb, little orange flecks in every slice, warm spice that does not bully the carrot, and frosting thick enough to stay where you put it. This carrot cake recipe is built around those details: fresh grated carrots, oil for softness, brown sugar for depth, a little applesauce or yogurt for a tender crumb, and a classic cream cheese frosting that slices cleanly.
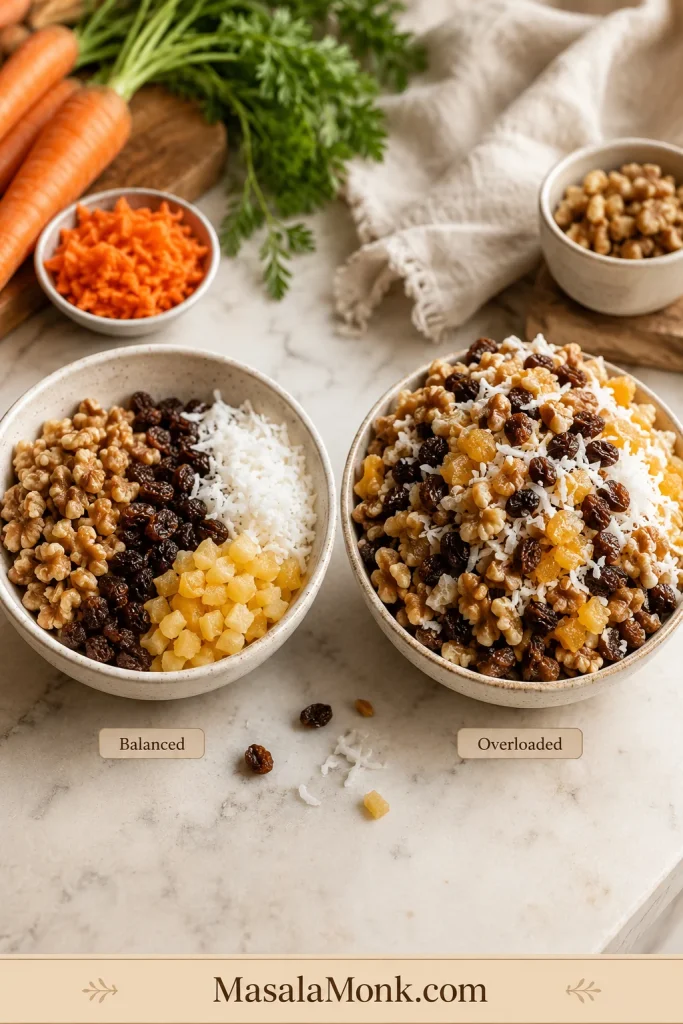
Carrot cake people rarely agree on everything, so this recipe starts with the classic cake and then helps you choose the pineapple, nuts, raisins, pan size, and frosting texture that fit your table.
Make it as a two-layer cake, a simple 9×13 sheet cake, or cupcakes. Add nuts, skip raisins, bake it a day ahead, chill it overnight, or freeze the layers for later. A slightly rustic carrot cake is still a beautiful carrot cake. The frosting does not need to be perfect; it just needs to be thick, tangy, and spread over fully cooled layers.
Moist carrot cake comes from oil, brown sugar, fresh grated carrots, careful flour measurement, and the right bake time. This recipe also uses applesauce or plain yogurt to keep the crumb soft without making the cake oily.
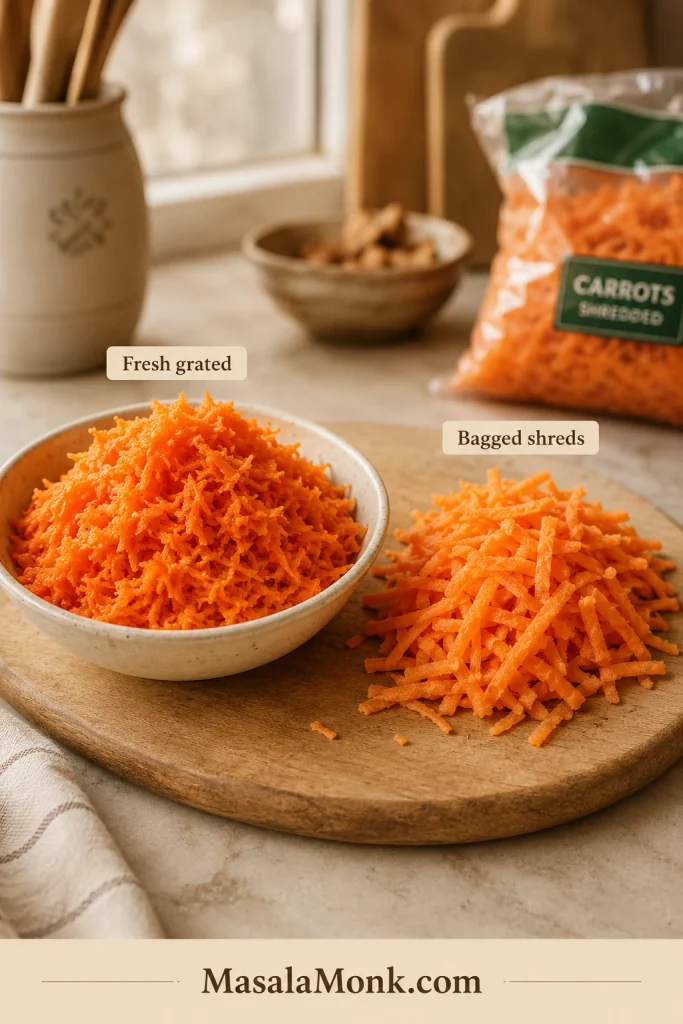
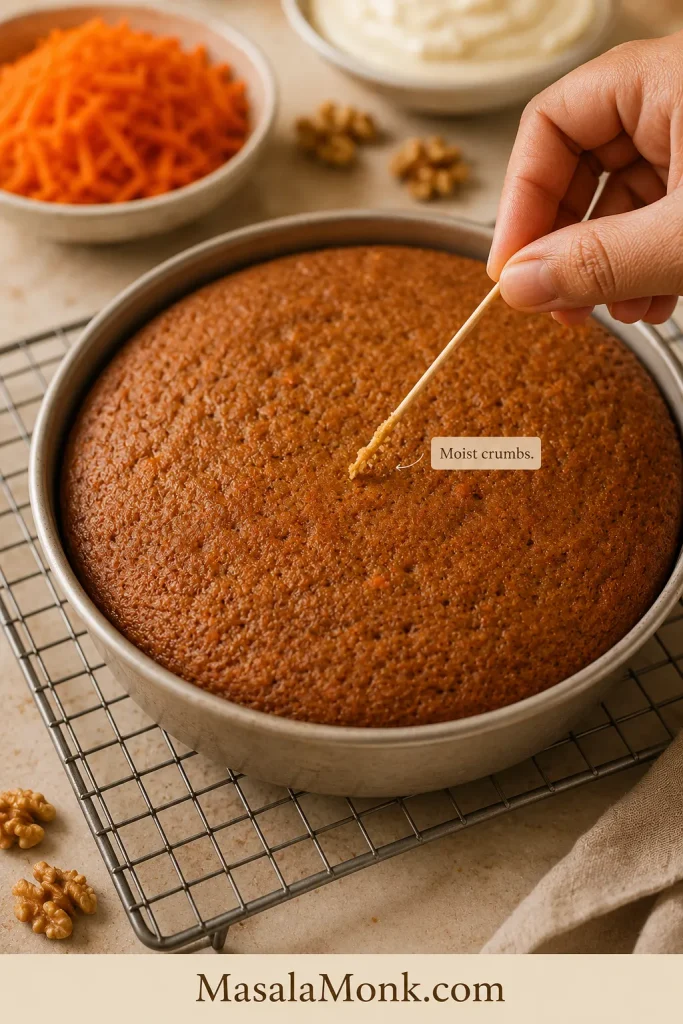
Grate the carrots yourself; dry bagged shreds do not soften into the crumb the same way. Fold the batter gently once the flour goes in. Bake until the center springs back and a toothpick shows clean crumbs or a few moist crumbs. A clean toothpick is good; a bone-dry toothpick is a warning.
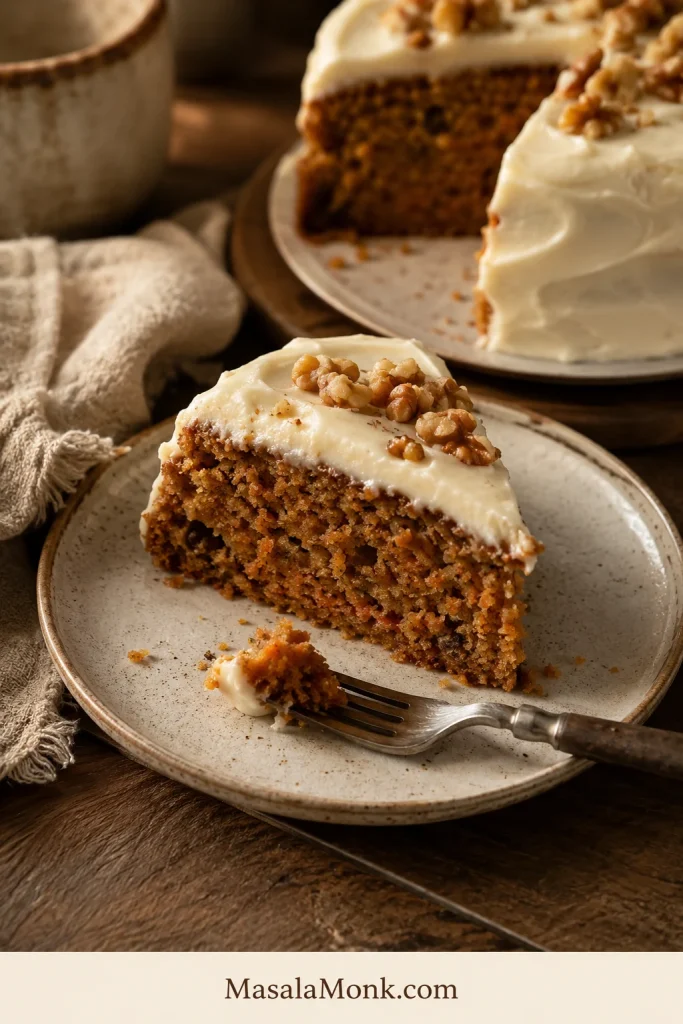
Texture cue: Fork pressure should show tenderness without collapse.
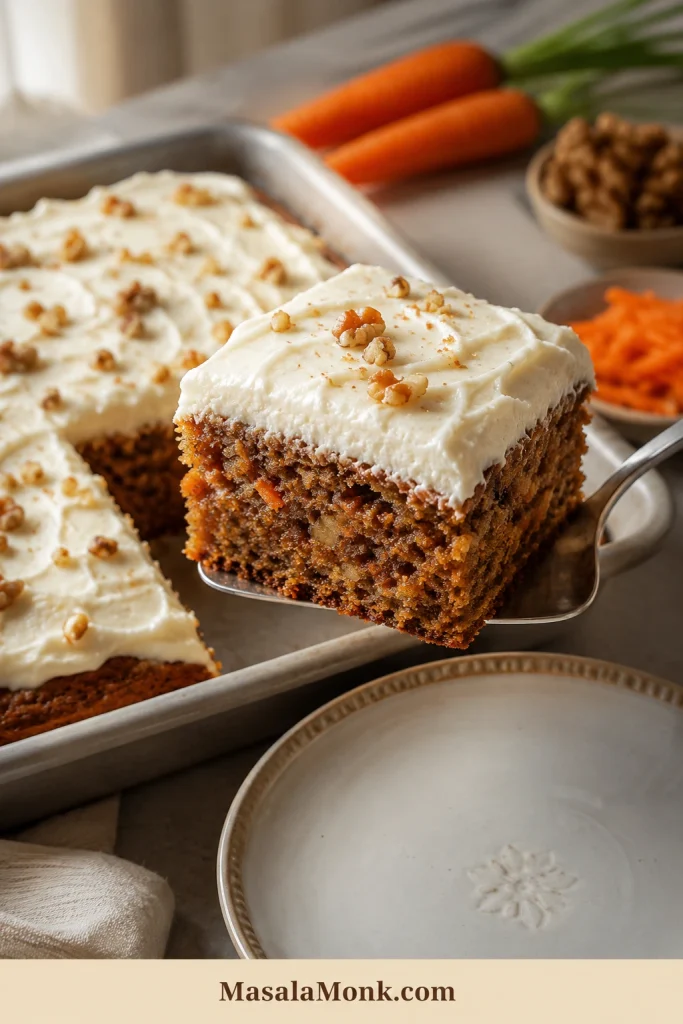
A fork should move through carrot cake easily, but the slice should not collapse. That tender bite comes from fresh grated carrots, enough fat for softness, and pulling the cake before the crumb dries out.
This is a classic two-layer carrot cake made with fresh grated carrots, brown sugar, oil, warm spices, and thick cream cheese frosting. The classic version does not rely on pineapple, but an old-fashioned pineapple variation is included in the notes. New to layer cakes? Use the same batter in a 9×13 pan and frost only the top.
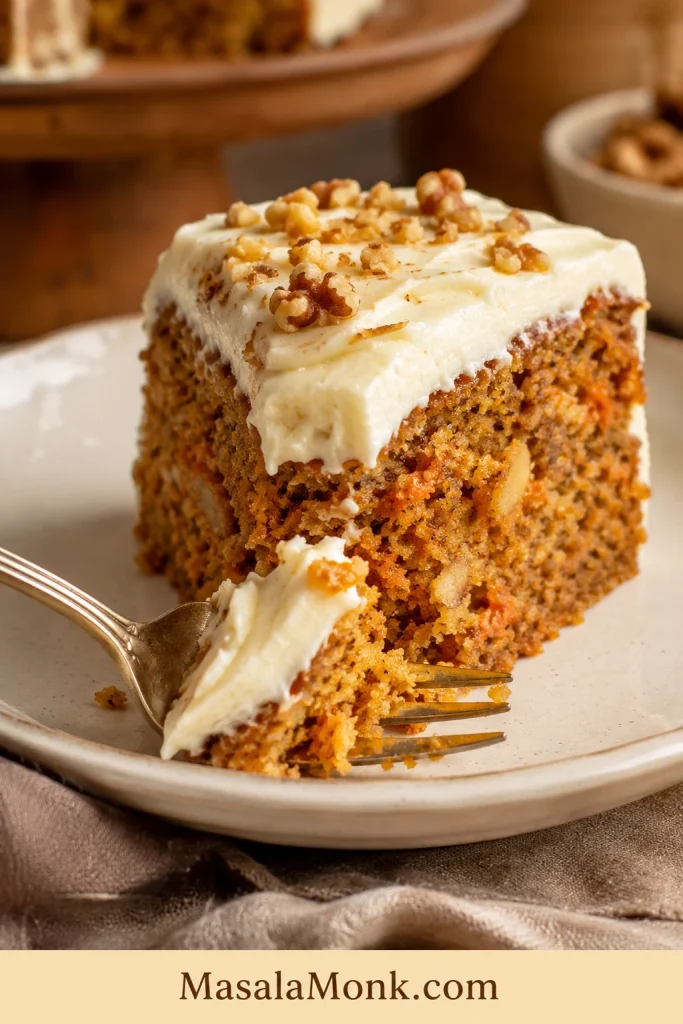
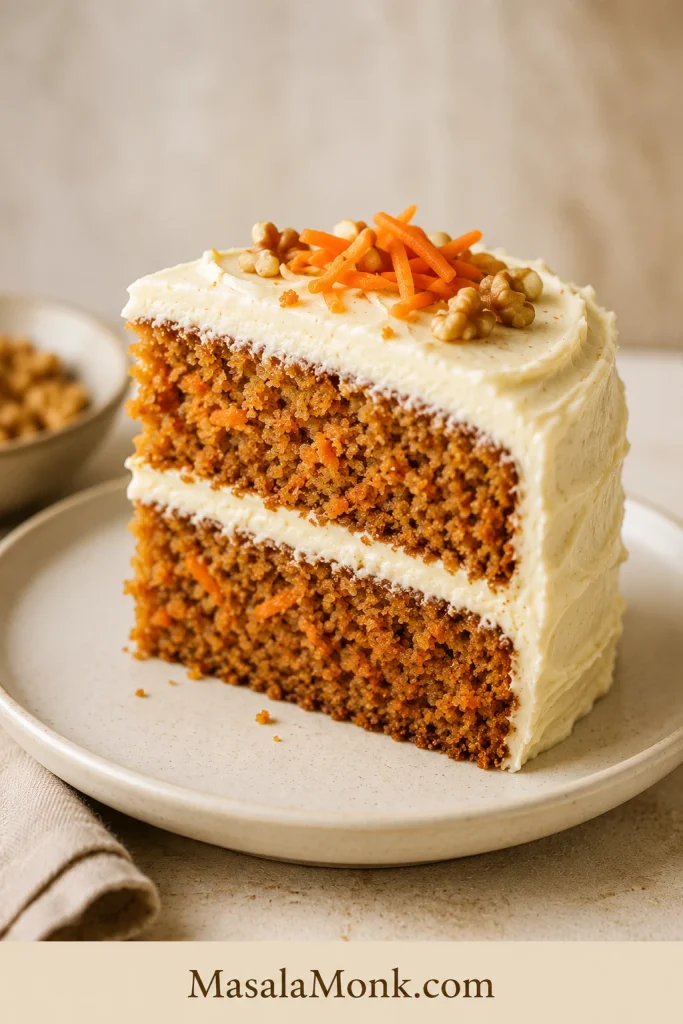
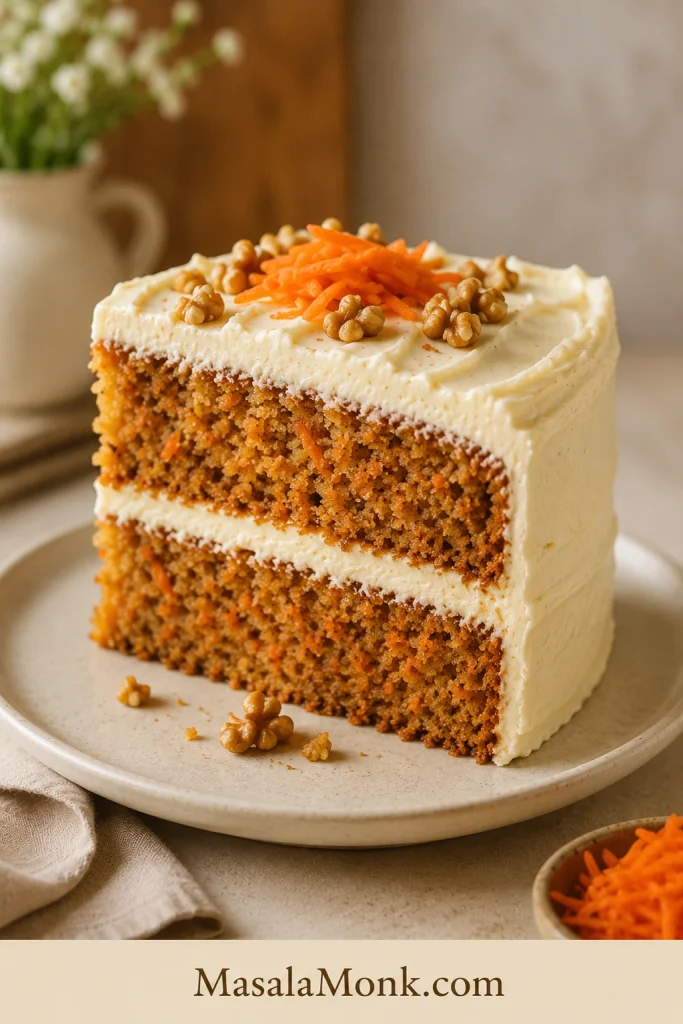
Layer cue: Use this slice to check tidy layers after chilling.
This slice shows the classic carrot cake structure clearly: two cake layers, a creamy middle, and frosting on top. After the cake chills, the layers cut cleaner while the crumb still looks tender and full of carrot.
Prep Time
30 minutes
Cook Time
28–35 minutes
Cooling and Frosting Time
1 hour 30 minutes
Total Time
About 2½ hours
Yield
12 slices
Difficulty
Easy to moderate
Main Pan
Two 9-inch round cake pans
Beginner Pan
9×13 sheet cake pan
Oven Temperature
350°F / 180°C / 160°C fan
Doneness Cue
Center springs back; toothpick shows clean or moist crumbs
Equipment
Two 9-inch round cake pans or one 9×13 pan
Parchment paper
Box grater or food processor with grating disc
Large mixing bowls
Whisk
Rubber spatula
Electric hand mixer or stand mixer for frosting
Cooling rack
Offset spatula or butter knife
Cake Ingredients
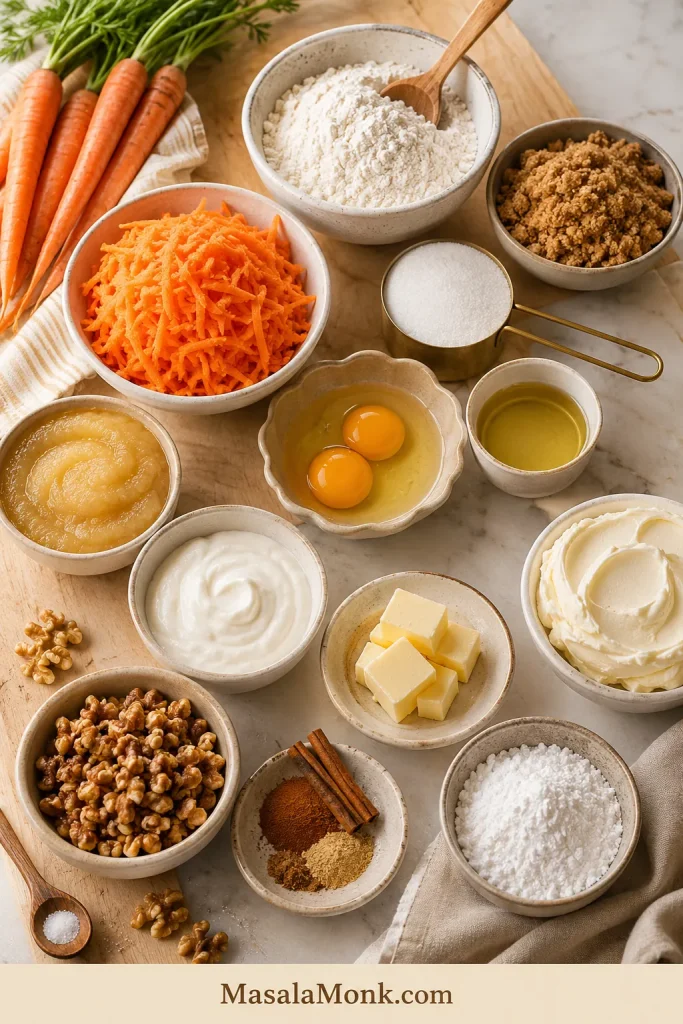
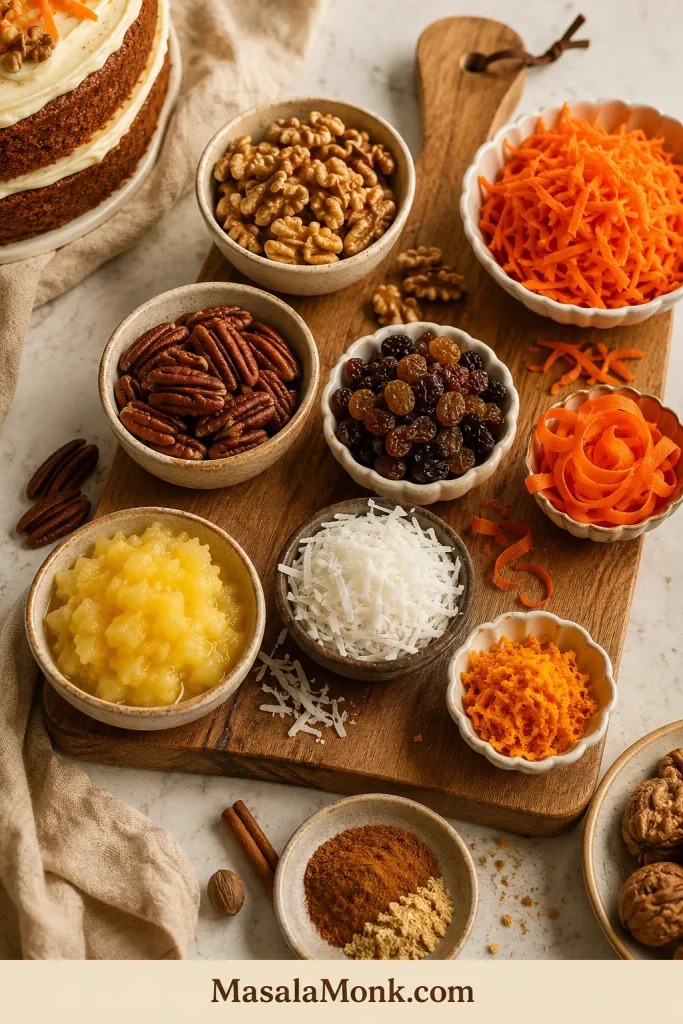
Ingredient cue: These ingredients carry moisture, spice, structure, and frosting stability.
These are the ingredients that make carrot cake work: fresh carrots for texture, brown sugar for depth, warm spices for aroma, and full-fat cream cheese for frosting with structure.
Ingredient
Amount
All-purpose flour / maida
2¼ cups / 270g
Baking powder
2 teaspoons
Baking soda
1 teaspoon
Fine salt
¾ teaspoon
Ground cinnamon
2 teaspoons
Ground ginger
¾ teaspoon
Ground nutmeg
¼ teaspoon
Ground cloves or allspice
Pinch, optional
Light brown sugar, packed
1¼ cups / 250–260g
Granulated sugar
½ cup / 100g
Neutral oil
1 cup / 240ml / 8 fl oz
Unsweetened applesauce or plain yogurt
½ cup / 120g
Large eggs, room temperature
4
Vanilla extract
2 teaspoons
Freshly grated carrots
3 cups / 300g / 10.5 oz
Chopped walnuts or pecans
¾ cup / 85–100g, optional
Raisins
½ cup / 70–80g, optional
Cream Cheese Frosting Ingredients
Ingredient
Amount
Full-fat block cream cheese, softened
16 oz / 454g
Unsalted butter, softened
¾ cup / 170g / 6 oz
Powdered sugar / icing sugar, sifted
3 to 4 cups / 360–480g
Vanilla extract
2 teaspoons
Fine salt
Pinch
Instructions
Prepare the pans. Preheat to 350°F / 180°C. Grease two 9-inch round pans and line the bottoms with parchment.
Whisk the dry ingredients. In a large bowl, combine the flour, baking powder, baking soda, salt, cinnamon, ginger, nutmeg, and optional cloves or allspice.
Whisk the wet ingredients. In another bowl, whisk the sugars, oil, applesauce or yogurt, eggs, and vanilla until smooth and glossy.
Combine gently. Add the dry ingredients to the wet ingredients. Fold with a spatula until only a few flour streaks remain. Do not beat.
Add carrots and mix-ins. Fold in grated carrots, then nuts, raisins, or well-drained pineapple if using. The batter should look thick, glossy, and evenly loaded.
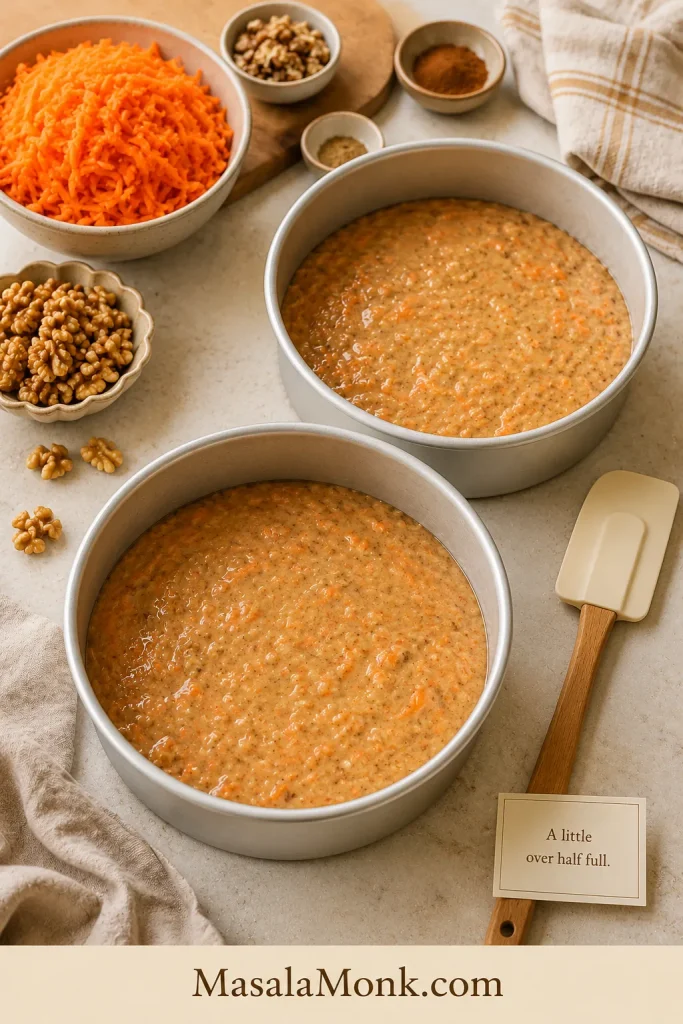
Bake. Divide the batter between the pans. Each 9-inch pan should be a little over half full. Bake for 28 to 35 minutes, until the centers spring back and a toothpick shows clean or moist crumbs.
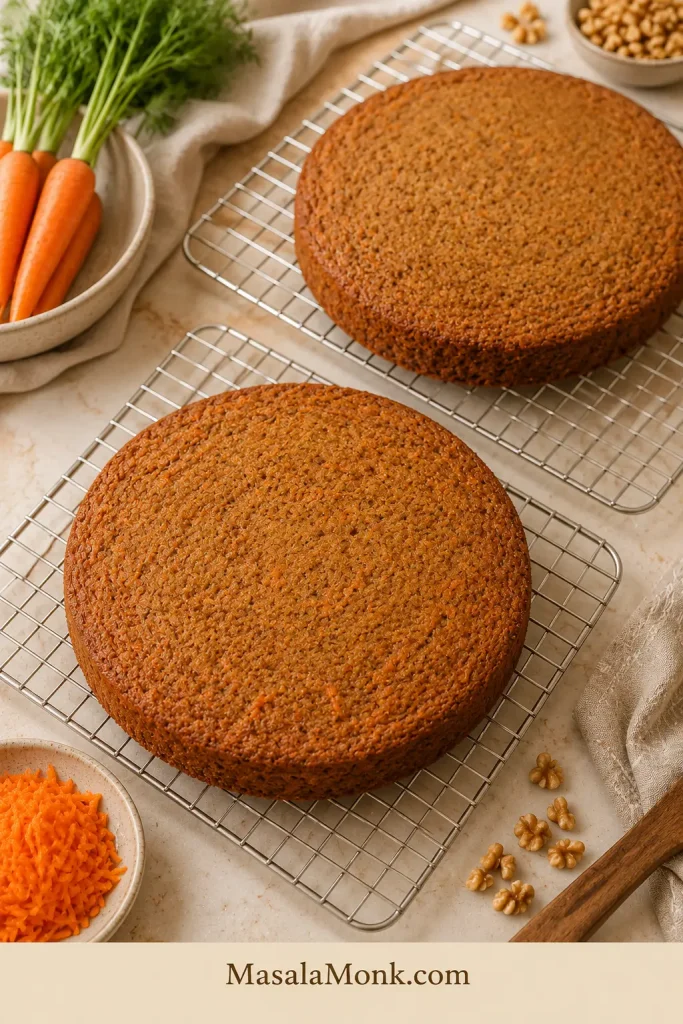
Cool fully. Let the layers sit in the pans for 15 minutes, then turn them onto a rack. Wait until completely cool before frosting.
Make the frosting. Beat the butter until smooth. Mix in cream cheese. Add 3 cups powdered sugar, vanilla, and salt, then beat until thick and fluffy. For firmer frosting, add more sugar.
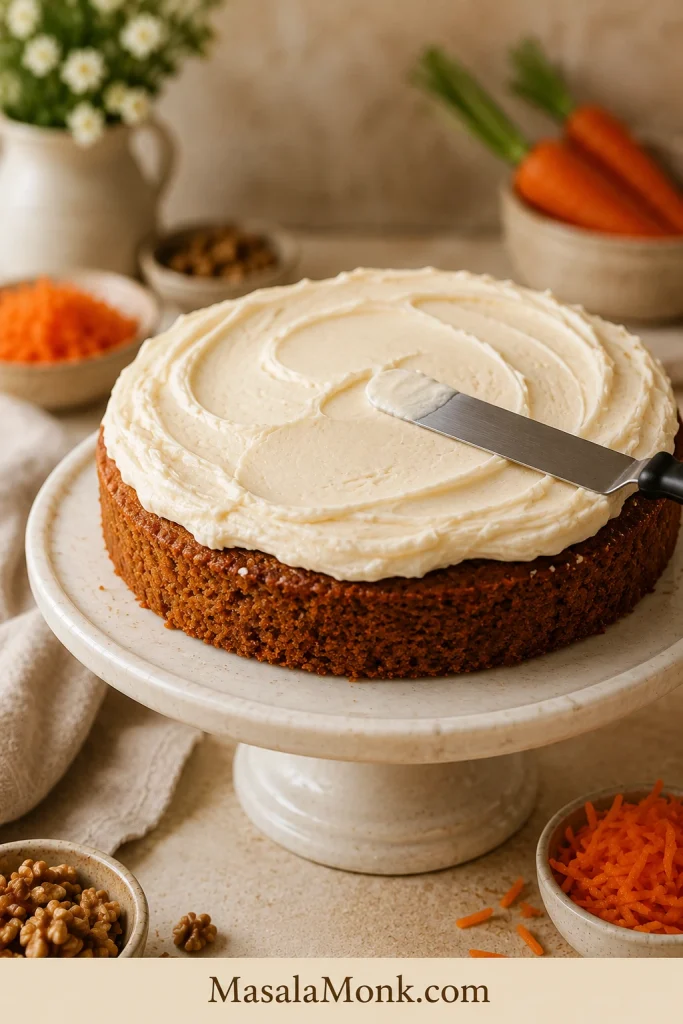
Frost the cake. Place one cooled layer on a stand. Spread frosting over the top, add the second layer, then frost the top and sides.
Chill before slicing. Refrigerate the frosted cake for about 30 minutes. Wipe the knife between cuts for neat slices.
Recipe Notes
No mixer needed for the cake: Use a whisk and spatula for the batter. A mixer is only helpful for the frosting.
Best beginner version: Bake this as a 9×13 sheet cake if you do not want to stack and frost layers.
Pineapple carrot cake: Add ½ cup / 120g well-drained crushed pineapple and reduce applesauce or yogurt to ¼ cup / 60g. Drain well so the center does not turn gummy.
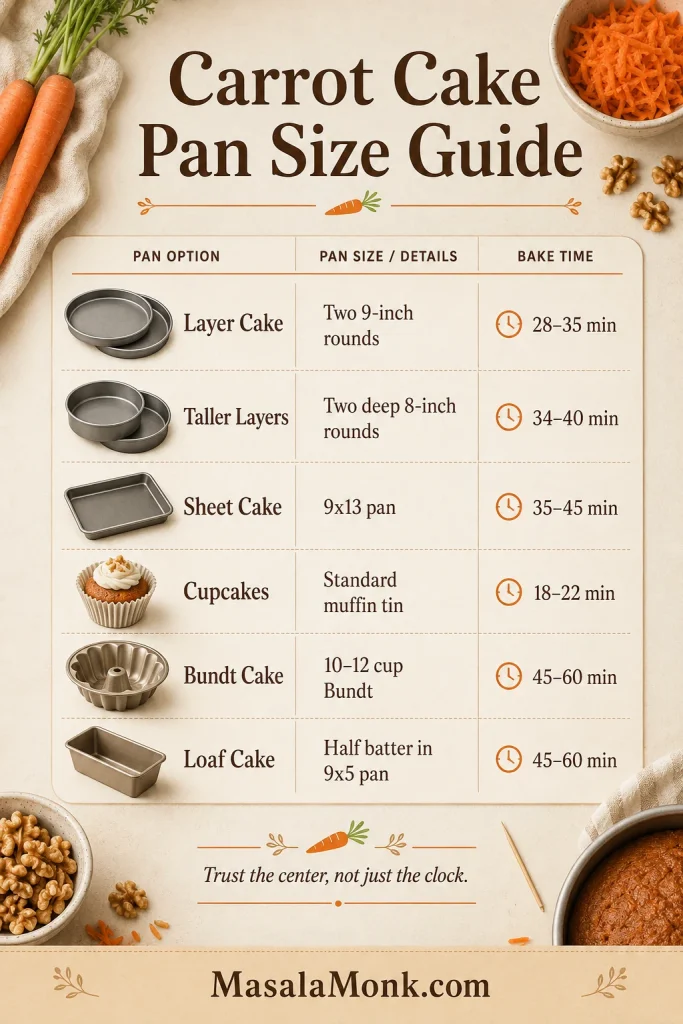
9×13 sheet cake: Bake at the same temperature for about 35 to 45 minutes.
Sheet cake frosting: Use all the frosting for a thick bakery-style top, or hold some back for a lighter layer.
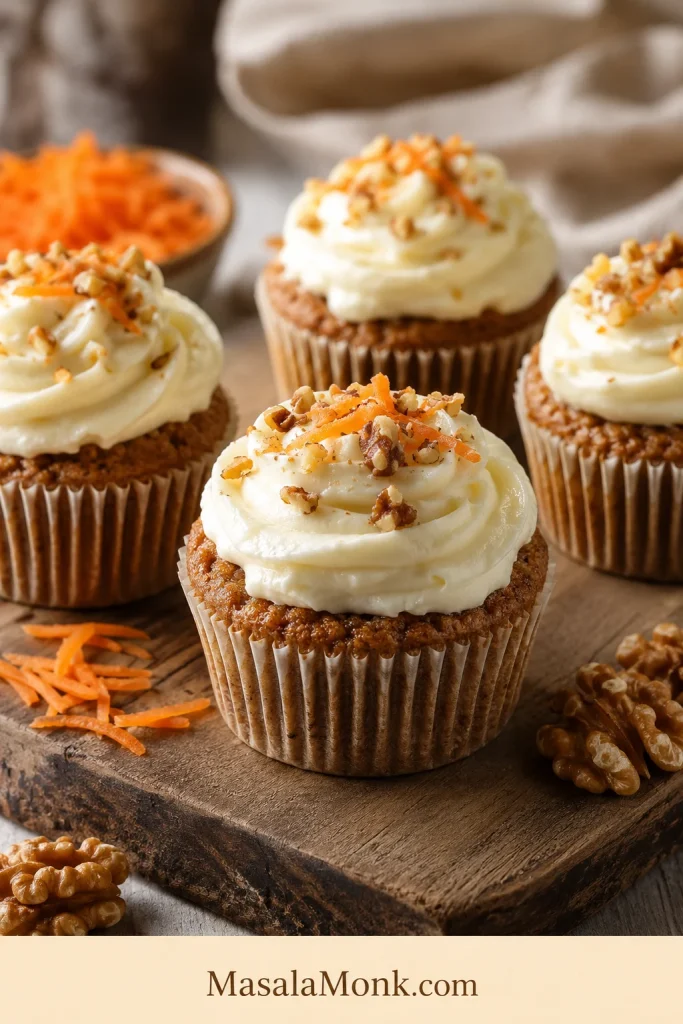
Cupcakes: This full batch makes about 24 standard cupcakes. Fill liners about ⅔ full and bake for 18 to 22 minutes.
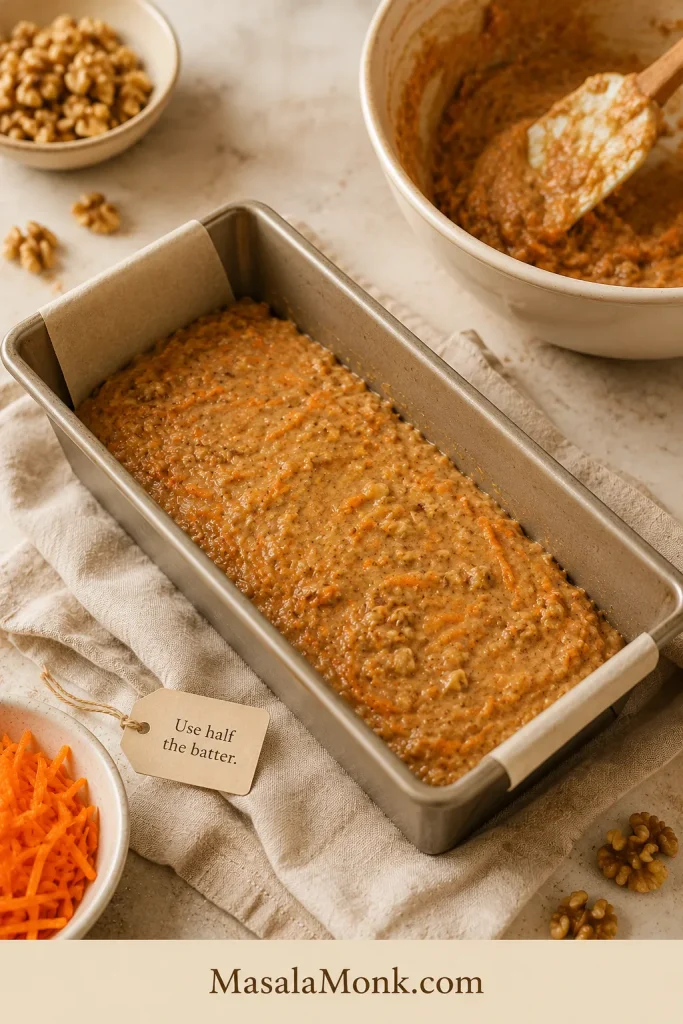
Loaf cake: Do not pour the full batch into one 9×5 pan. Use about half the batter in one loaf pan, or divide the full batch between two loaf pans.
Frosting sweetness: Use 3 cups powdered sugar for a tangier frosting and 4 cups for a firmer, sweeter finish.
Best crumb: Grate the carrots fresh and do not squeeze them dry.
Do not frost warm cake: Warm layers will loosen the frosting and can make the cake slide.
Make-ahead: Bake and frost the cake 1 day ahead, then refrigerate. Let slices sit out briefly before serving.
What to expect: the batter will be thick enough to mound slightly in the bowl but loose enough to spread into the pans with a spatula. Baked layers feel tender while warm, and chilled cake slices more cleanly than a freshly frosted one. The crumb should be soft and moist, not wet or oily.
Make This Carrot Cake When
This is the cake for the person who wants carrot cake to taste like carrot cake: soft, spiced, tangy on top, and still good from the fridge the next day.
Classic carrot cake, but moist without a greasy crumb.
A carrot-spice cake that can go pineapple or no pineapple.
No mixer needed for the batter.
Clear choices for nuts, raisins, pan size, make-ahead baking, and frosting texture.
A gathering cake that can rest in the fridge overnight.
Fresh carrot flavor, not just spice cake with a few shreds mixed in.
It is the kind of cake that feels at home on an Easter table, a birthday stand, a potluck tray, or under foil in the fridge waiting for tomorrow’s second slice.
Make-ahead cue: Chilled cake slices cleaner once the frosting sets.
Carrot cake is a useful make-ahead dessert because the spices mellow and the frosting firms as it rests. Therefore, baking it a day ahead can make serving easier and the flavor more rounded.
If you like this kind of easy, cozy fruit cake but want something unfrosted, this fresh apple cake is a softer, simpler bake for another day.
The Easiest Way to Make This Carrot Cake
If layer cakes make you nervous, start with the 9×13 version. It is not a lesser cake; it is the same soft, spiced carrot cake with the pressure removed.
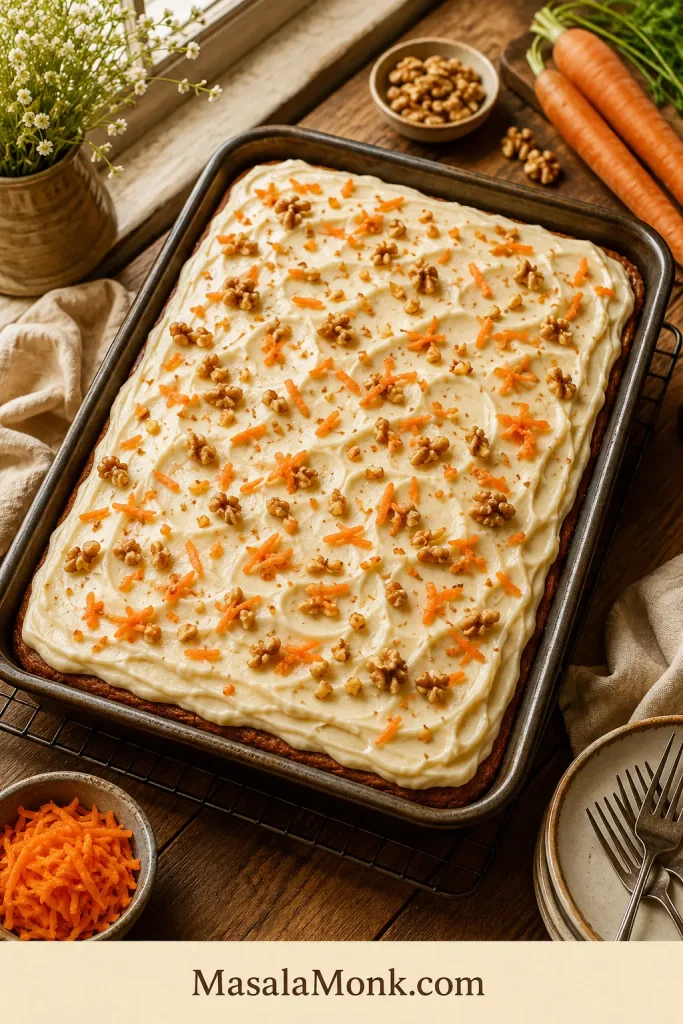
Sheet cake cue: Same batter, one pan, frosting only on top.
The 9×13 carrot cake version keeps the same cozy flavor while removing the pressure of stacking layers. It is the format to choose when you want easy slicing, transport, and serving.
You use the same batter, bake it in one pan, spread frosting over the top, and skip the stacking, side-frosting, and layer-sliding worries. A sheet cake is not the backup plan. It is the low-stress version.
Beginner path: make the batter by hand, bake it in a 9×13 pan, cool completely, spread frosting over the top, chill, and slice. No layer cake skills needed.
Serving cue: A sheet cake square should show cake texture, not just frosting.
A good sheet cake square should still show a tender carrot-flecked crumb under the frosting. Since it serves neatly from one pan, this version works especially well for potlucks and make-ahead desserts.
I like this cake best without pineapple first, because the carrot and spice stay clearer. That gives you a soft, sliceable carrot cake with a classic cream cheese frosting finish.
Pineapple carrot cake is not better or worse. It is a different mood: sweeter, softer, fruitier, and more old-fashioned. If that is what you want, use a small amount of well-drained crushed pineapple and reduce the applesauce or yogurt so the batter does not become too wet.
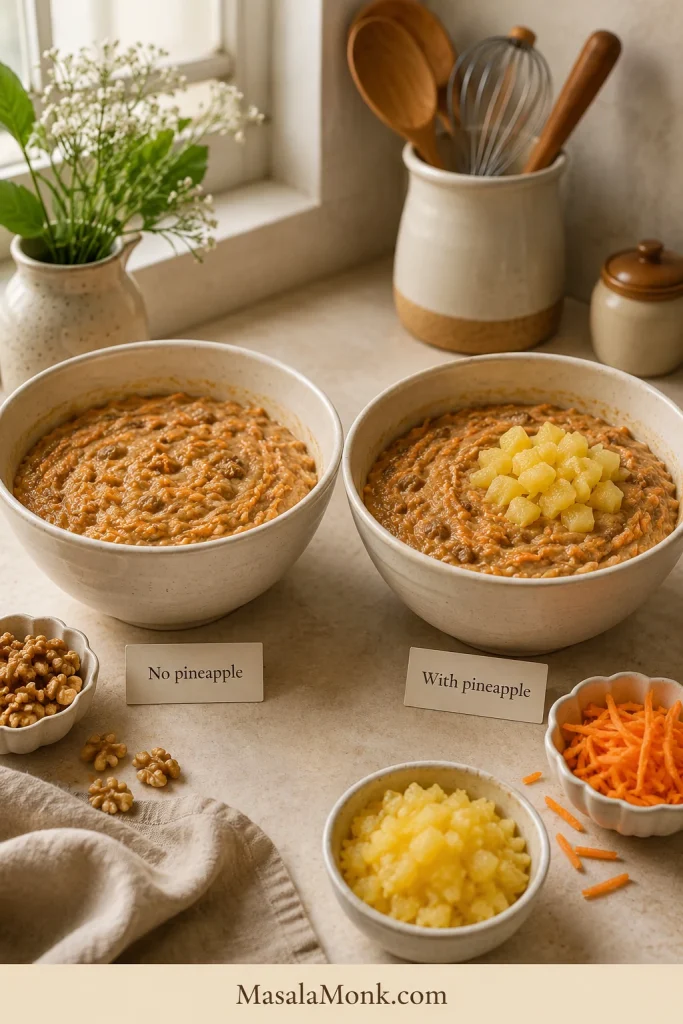
This is the carrot cake fork in the road: cleaner carrot-spice flavor, or fruitier old-fashioned comfort. Pineapple can make the cake softer and fruitier, but it should not turn the batter into a puddle.
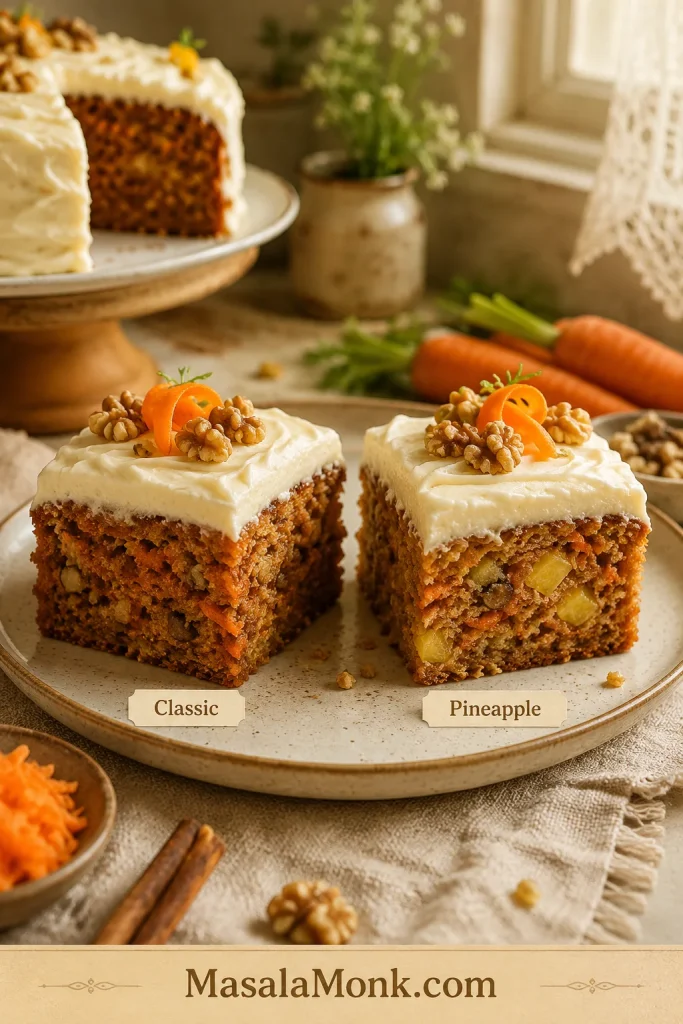
Choice cue: Compare classic carrot-spice flavor with the softer pineapple version.
Pineapple makes carrot cake sweeter, softer, and more old-fashioned in style. If you add it, drain it well first so the batter stays thick enough to bake evenly.
Choice
Best For
What to Do
No pineapple
Classic carrot-spice flavor
Make the recipe as written
With pineapple
Old-fashioned, fruitier cake
Add ½ cup / 120g drained crushed pineapple and reduce applesauce/yogurt to ¼ cup / 60g
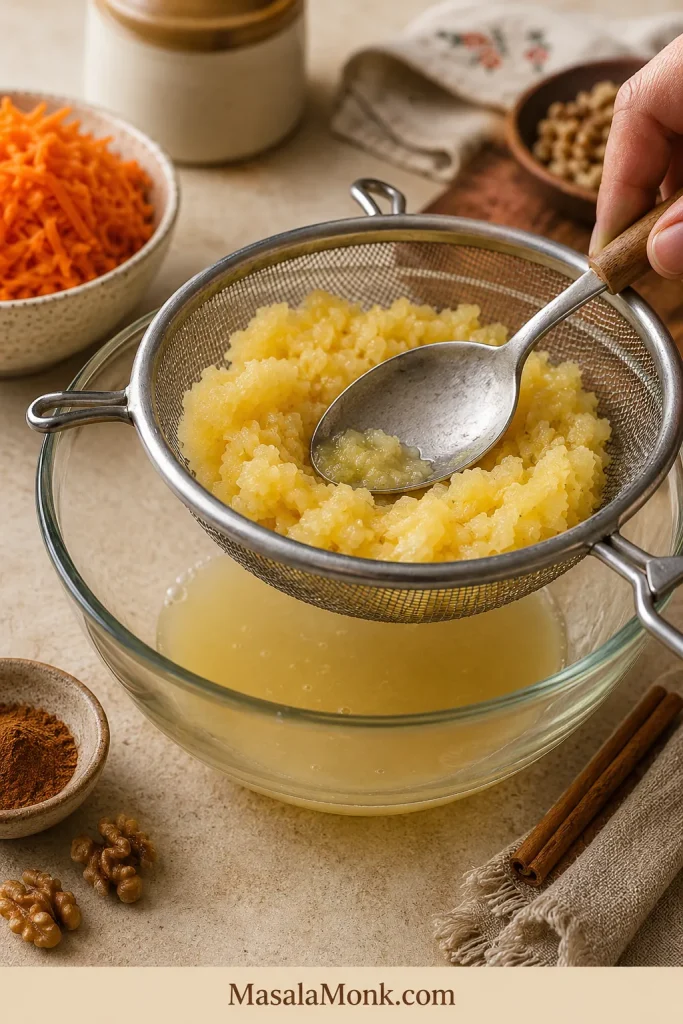
Use canned crushed pineapple for the easiest result. Drain it well. Leave the pineapple juice out here; this batter is balanced for drained fruit, not extra liquid.
Moisture cue: Drain pineapple so flavor stays and excess juice leaves.
Draining crushed pineapple protects the center of the cake. The fruit should add flavor and tenderness, but excess juice can make carrot cake gummy or slow to bake through.
Carrot cake has to do something many cakes do not: taste good cold from the fridge and soft again once it sits out. That is why this recipe leans on oil, brown sugar, carrots, and a little applesauce or yogurt.
A full oil-only carrot cake can be very soft, but sometimes greasy. Reducing the oil too much makes the crumb feel lighter at first and drier later. This version uses oil for softness, then applesauce or yogurt for extra moisture without pushing the cake into oily territory.
Oil Keeps the Crumb Soft
Butter gives cakes flavor, but oil keeps carrot cake softer once it is cold. That matters because a frosted carrot cake should be refrigerated, and a good slice should still taste tender the next day.
Brown Sugar Makes It Deeper
Brown sugar brings moisture and a gentle caramel flavor. White sugar keeps the sweetness clean, but brown sugar gives the crumb its warmer bakery-style depth.
The Carrots Do Real Work
The carrots are not decoration here. They soften into the crumb, leave little orange flecks in every slice, and help the cake stay tender long after it cools.
Applesauce or Yogurt Keeps the Texture Balanced
Applesauce gives a slightly sweeter, softer crumb. Plain yogurt brings gentle tang and tenderness. Both help the cake stay soft without asking oil to do all the work.
If you like the soft apple-spice side of that moisture trick, this applesauce cake uses applesauce more directly in a simple 9×13 cake.
The Frosting Balances the Spice
Carrot cake needs tang. Cream cheese frosting cuts through the sweetness, softens the spice, and makes the cake feel complete instead of just sweet.
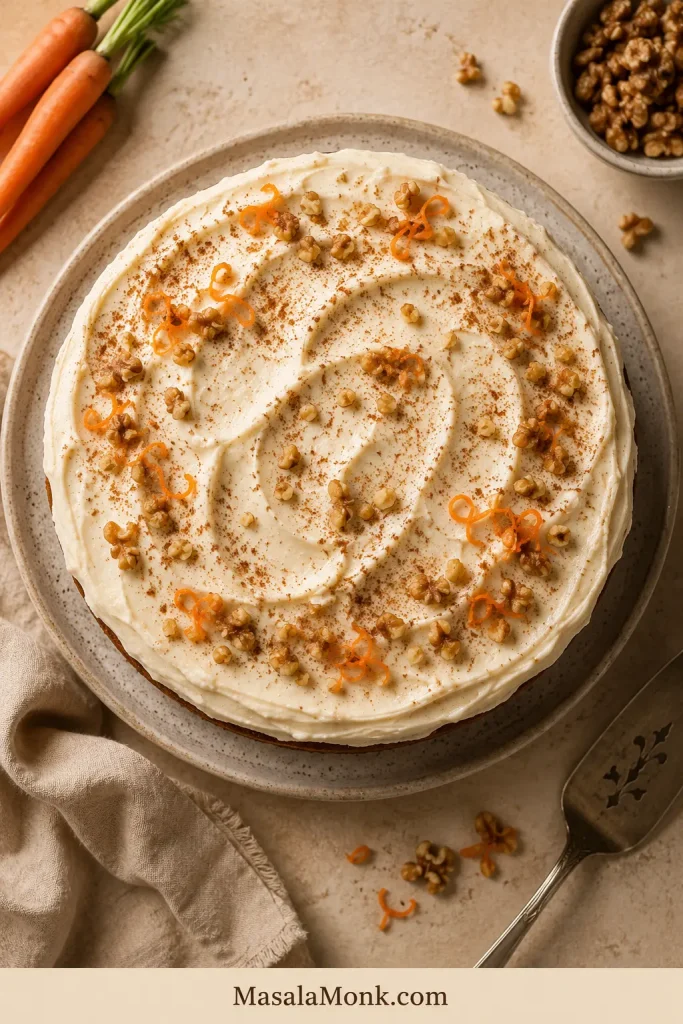
Simple frosting swirls give carrot cake a polished finish without making it look overworked. Instead of heavy decoration, let the cream cheese frosting, warm spice color, and soft crumb do the work.
Ingredients That Matter
Carrots
Fresh carrots are worth the few extra minutes. Use medium-fine shreds and do not squeeze them dry.
Oil
A neutral oil keeps the flavor classic. Sunflower, canola, vegetable, avocado, or light olive oil all work. Strong olive oil can be used if you enjoy the flavor, but it will make the cake taste less traditional.
Applesauce or Plain Yogurt
Use unsweetened applesauce for a slightly softer, sweeter crumb. Use plain yogurt if you want a little more tang. Both work, so choose the one that fits your pantry.
Sugar
Use more brown sugar than white sugar. Brown sugar gives depth, while the smaller amount of white sugar keeps the sweetness from tasting heavy.
Spices
Cinnamon is the base. Ginger adds warmth, nutmeg adds depth, and a tiny pinch of clove or allspice makes the cake taste rounder. Keep the stronger spices light so the carrot does not get buried.
Eggs
Room-temperature eggs blend more easily into the oil and sugar, so use them if you have time. Cold eggs will still work; just whisk the wet mixture a little longer until it looks smooth.
Flour
Too much flour is one of the easiest ways to make carrot cake dry. Weigh it if you can, or use the spoon-and-level method instead of scooping straight from the bag. King Arthur Baking’s guide to measuring flour is useful if you want a quick refresher.
Cream Cheese
Use full-fat block cream cheese for frosting. If block cream cheese is hard to find, choose the firmest full-fat cream cheese available and avoid very soft spreadable tubs. Soft cream cheese can make frosting loose, especially in warm kitchens.
Freshly Grated Carrots vs Pre-Shredded Carrots
Freshly grated carrots are one of the biggest success details in carrot cake. Bagged shreds save a few minutes, but they ask the cake to do too much work. They are often dry and thick, so they can stay chewy instead of melting into the crumb.
Fresh carrots and bagged shreds can change the final texture. Freshly grated carrots usually soften into the cake, while thick packaged shreds may stay chewy unless chopped smaller.
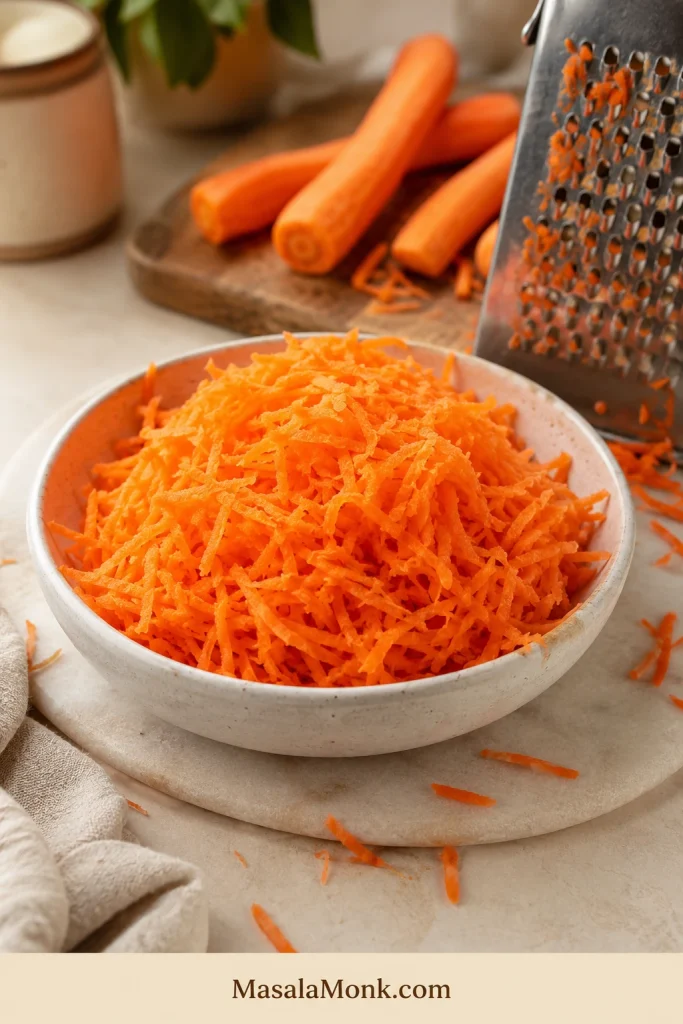
Grate the carrots on the medium or fine holes of a box grater. A food processor with a grating disc also works, but if the shreds are very long or thick, pulse them once or twice so they distribute more evenly.
Carrot cake rule: the carrot should feel moist and tender before it goes into the batter. Do not squeeze it dry; that moisture is part of the cake’s softness.
For this recipe, you need about 3 cups, 300g, or 10.5 oz of grated carrots. That is usually about 4 to 5 medium carrots, depending on size.
Carrot cue: Medium-fine shreds add moisture and visible orange flecks.
Fresh grated carrots are one of the easiest ways to improve homemade carrot cake. Because the shreds are moist and fine, they blend into the batter instead of staying tough in the crumb.
This is where carrot cake can get crowded fast. The cake still needs to taste like carrot, spice, and cream cheese frosting — not like a crowded trail mix cake.
Mix-in cue: Let nuts, raisins, coconut, or pineapple support the carrot.
Add-ins should bring contrast, not crowd the batter. Choose walnuts, pecans, raisins, coconut, orange zest, or pineapple with restraint so the carrot and spice flavor still lead.
Keep total add-ins, not counting the carrots, to about 1½ cups. Walnuts or pecans add crunch, raisins add chewy sweetness, orange zest brightens the spice, shredded coconut makes the cake more old-fashioned, and pineapple makes it fruitier. Choose the two or three that actually make sense for your table.
When using pineapple, choose either nuts or raisins, or keep both modest, so the batter does not become overloaded. The carrot should lead; the add-ins should behave.
Balance cue: Keep add-ins controlled so the crumb stays light.
Balanced add-ins keep carrot cake interesting without making it heavy. However, an overloaded mix can steal moisture, interrupt the crumb, and make the cake feel dense.
If your family has strong opinions about raisins, believe them. Raisins are optional. Family peace is not.
If you are baking for a group, the safest path is nuts optional, raisins optional, and pineapple optional. Those three choices divide carrot cake people more than almost anything else.
How to Make Carrot Cake
The cake batter does not need a mixer. The frosting is the only part where an electric mixer helps.
1. Prepare the Pans
Grease two 9-inch round cake pans and line the bottoms with parchment paper. Carrot cake is soft and moist, so parchment helps the layers release cleanly.
2. Whisk the Dry Ingredients
Whisk the flour, baking powder, baking soda, salt, cinnamon, ginger, nutmeg, and optional clove or allspice. This spreads the leavening and spices evenly before the wet ingredients go in.
Spice cue: Whisk dry ingredients so spice and leavening spread evenly.
Whisking the dry mix first helps the flour, spices, salt, and leavening distribute evenly. That way, the carrot cake bakes with consistent flavor and lift from edge to center.
3. Whisk the Wet Ingredients
In another bowl, whisk the brown sugar, white sugar, oil, applesauce or yogurt, eggs, and vanilla. The mixture should look glossy, smooth, and slightly thick. If the eggs are cold, whisk a little longer so everything blends evenly.
Wet mix cue: A glossy base makes gentle folding easier.
The wet mixture should look smooth and glossy before the dry ingredients are added. Once this base is cohesive, the flour can be mixed in briefly without overworking the batter.
4. Fold the Batter Gently
Add the dry ingredients to the wet ingredients and fold gently. Stop when only a few flour streaks remain. Add the carrots, nuts, raisins, or drained pineapple if using, then fold just until evenly combined.
Batter base cue: Thick, unified batter is ready for carrots.
Before the carrots go in, the batter should already look thick and unified. Then, as the grated carrots are folded through, they loosen the mixture slightly and add the texture carrot cake needs.
Look for a thick, glossy batter. After the carrots go in, it will look fuller and heavier than a vanilla cake batter. That is normal. Carrot cake batter is supposed to look loaded, but it should still spread easily into the pans.
Folding cue: Loaded but spreadable is the right final batter texture.
After the carrots and add-ins are folded in, the batter should look loaded but still spreadable. Stop once everything is evenly distributed so the finished cake stays tender.
5. Bake Until the Center Is Set
Divide the batter between the pans and bake at 350°F / 180°C for 28 to 35 minutes. The edges should look set, the center should spring back lightly, and the kitchen should smell like cinnamon, brown sugar, and warm carrots.
Pan fill cue: A little over half full leaves room for rise.
Do not fill carrot cake pans to the rim. A little over half full gives the layers room to rise, which helps prevent overflow and uneven doming.
Do not wait for a bone-dry toothpick. Clean crumbs or a few moist crumbs mean the cake is ready. Wet batter on the toothpick means the center needs more time.
Doneness cue: Moist crumbs are done; wet batter needs more time.
The toothpick should come out with a few moist crumbs, not wet batter. In contrast, waiting for a completely dry tester can push carrot cake toward overbaking.
6. Cool Completely Before Frosting
Let the cakes cool in the pans for 15 minutes, then turn them out onto a rack. Warm carrot cake layers are tender and a little fragile, so give them time. Cooling is not dead time here; it is part of getting clean slices.
Layer rest cue: Fully cooled layers protect the frosting and structure.
Cooling is part of the recipe, not dead time. Fully cooled carrot cake layers are easier to stack, frost, and slice because warm cake can soften the frosting too quickly.
If the warm layers feel soft, do not panic. Carrot cake firms as it cools, especially once it has been frosted and chilled.
7. Frost, Chill and Slice
Spread frosting between the layers, then cover the top and sides. Chill the frosted cake for about 30 minutes before slicing if you want cleaner cuts and neater layers.
Filling cue: An even middle layer keeps the cake level.
An even filling layer helps the stacked cake stay level. Spread the frosting to the edges, but keep the layer controlled so it does not squeeze out heavily when the top layer is added.
The main recipe is written for two 9-inch round cake pans. You can use the same batter in other formats, but the bake time changes because the depth of the batter changes.
The clock matters, but the center of the cake matters more. Use the times below as a guide, then trust the spring-back and toothpick cues.
Timing cue: Use pan times, then trust the center.
Pan Times by Format
Pan size changes how quickly carrot cake bakes because batter depth changes. Use the guide for timing, but still check the center, spring-back, and toothpick crumbs before removing the cake.
Format
Pan
Oven
Approx. Time
Best Doneness Cue
Layer cake
Two 9-inch rounds
350°F / 180°C
28–35 min
Center springs back; toothpick has moist crumbs
Taller layer cake
Two deep 8-inch rounds
350°F / 180°C
34–40 min
Center should not wobble
Sheet cake
9×13-inch pan
350°F / 180°C
35–45 min
Middle springs back lightly
Cupcakes
Standard muffin tin
350°F / 180°C
18–22 min
Tops spring back; tester has crumbs
Bundt cake
10–12 cup Bundt pan
350°F / 180°C
45–60 min
Long tester comes out clean
Loaf cake
One 9×5 pan with half batter, or two 9×5 pans for full batter
350°F / 180°C
45–60 min
Deep center fully set
Cupcake cue: Fill liners two-thirds full for neat rise.
Carrot cake cupcakes bake faster and portion easily for parties. For the best rise, fill the liners about two-thirds full, then leave room for a thick swirl of cream cheese frosting.
Loaf, Bundt and Deep-Pan Notes
Do not pour the full batch into one 9×5 loaf pan. It is too much batter for one standard loaf and can overflow or bake unevenly. Use half the batter for one loaf, or divide the full batch between two loaf pans. Start checking around 45 minutes, then keep baking until the deep center is fully set.
Loaf cue: Use half the batter for one 9×5 loaf.
For one 9×5 loaf, use only about half the batter. Otherwise, the loaf can overflow or look done on the edges while the deep center stays underbaked.
If using 8-inch round pans, choose deep pans and do not fill them to the rim. Taller layers need more time in the center, so check for spring-back instead of relying only on the clock.
For a Bundt cake, grease the pan very well, dust it lightly with flour, and let the cake cool for 15 to 20 minutes before turning it out. A soft carrot cake needs a little help releasing cleanly from a detailed pan.
Bundt cue: Grease well, cool briefly, then release gently.
A Bundt carrot cake gives the recipe a more dramatic shape, but the pan needs careful prep. Grease the grooves well, cool briefly after baking, and release gently so the cake keeps its shape.
For a simpler carrot-based tea cake rather than a frosted layer cake, this wholewheat carrot orange tea cake is a lighter direction.
Good cream cheese frosting is tangy, thick, and spreadable. It should hold soft ridges, cover the cake generously, and stay in place when you cut into it.
Frosting texture cue: Soft peaks show the frosting is ready.
Cream cheese frosting should hold soft peaks before it touches the cake. If it looks loose, chill it briefly; then it will spread more cleanly and grip the layers better.
The biggest rule is to use full-fat block cream cheese, or the firmest full-fat cream cheese you can find. Tub-style cream cheese is softer and can make the frosting runny. The butter and cream cheese should be softened, but not melted or greasy.
Assembly cue: Frost cool layers slowly; chill if they shift.
Frosting the outside is easier when the cake is cool and steady. Use slow strokes with an offset spatula, and if the layers shift, chill the cake before finishing.
How to Keep Cream Cheese Frosting Thick
Use full-fat block cream cheese or the firmest full-fat cream cheese available.
Avoid whipped, spreadable, or very soft tub-style cream cheese.
Let butter and cream cheese soften, but do not let them melt.
Sift powdered sugar before adding it.
Add powdered sugar gradually until the frosting is thick enough.
Chill the frosting for 15 to 20 minutes if it feels loose.
Cool the cake completely before frosting.
Chill the frosted cake before slicing for the cleanest layers.
Cream cheese frosting is softer than buttercream, so do not try to force it to behave on a warm counter. If the frosting slumps, chill it for a few minutes and come back to it. That is not a failure; that is just cream cheese being cream cheese.
Quick Frosting Fixes
Runny frosting: chill it for 15 to 20 minutes, then beat again. Use firmer full-fat cream cheese next time.
Too sweet: add a pinch of salt or a little more cream cheese.
Lumpy: the butter or cream cheese was probably too cold. Let it soften slightly, then beat again.
Sliding layers: the cake or frosting is too warm. Cool the cake fully and chill before slicing.
Too stiff: let the frosting sit briefly, then beat until spreadable.
Frosting cue: when you lift the beater, the frosting should hold soft peaks for a few seconds before relaxing. If it looks shiny, loose, or slumps quickly, it is asking for the fridge.
Cream cheese frosting can usually be rescued with small adjustments. Chill it if loose, soften ingredients if lumpy, add salt if too sweet, and frost only after the cake is cool.
Once you understand the texture, the same idea works in other flavors. For a chocolate version for cupcakes, brownies, or a different cake, this chocolate cream cheese frosting follows the same thick, spreadable idea.
Prefer a sweeter butter-based frosting without cream cheese? See this buttercream frosting guide. On carrot cake, though, cream cheese frosting is still the classic finish.
If the frosting is loose or the layers are sliding, jump to troubleshooting. Otherwise, go back to the recipe card.
How to Make It Taste Like Bakery Carrot Cake
A good bakery-style carrot cake is not only sweet. It has a soft crumb, enough spice to smell warm before the first bite, visible carrot flecks, and frosting that feels generous without sliding everywhere.
Grate the carrots fresh. This gives the cake better moisture and texture than dry bagged shreds.
Use the full amount of salt and spice. Under-spiced carrot cake tastes flat once frosting is added.
Do not under-frost it. Cream cheese frosting is part of the classic carrot cake experience.
Chill before slicing. A cold, set cake gives cleaner bakery-style slices.
Make it a day ahead. The spice settles and the frosting firms, especially if the cake is refrigerated overnight.
Add nuts for texture. Walnuts or pecans make the cake feel more like a traditional bakery slice.
Add pineapple only if you want that old-fashioned style. It makes the cake fruitier and sweeter, not automatically better for every version.
Resting time is the quiet detail. The cake is good the day it is made, but the spice and frosting taste more settled after a night in the fridge. A chilled slice cuts cleanly, then softens back into that tender carrot-cake texture as it sits on the plate.
Slicing cue: Chilling firms frosting for cleaner cuts.
Chilling the frosted cake before slicing helps the layers settle and the frosting firm up. As a result, you get cleaner pieces without sacrificing the tender texture people expect from carrot cake.
Make Ahead, Storage and Freezing
Carrot cake is a very good make-ahead cake. The spices settle, the crumb stays soft, and the frosting firms enough for cleaner slices.
Make Ahead
You can bake the cake layers 1 day ahead. Cool them completely, wrap them well, and keep them at room temperature if unfrosted. If your kitchen is hot or humid, refrigerate the wrapped layers instead.
You can also frost the whole cake 1 day ahead and refrigerate it. Let slices sit out briefly before serving so the crumb and frosting soften.
Storage
Because of the cream cheese frosting, frosted carrot cake should be stored in the refrigerator. Keep it covered so the cut edges do not dry out. The FDA food-safety guidance also lists cakes with cream cheese frosting among creamy desserts that should be kept refrigerated.
For the best texture, let slices sit at room temperature for 20 to 30 minutes before serving. The frosting softens slightly and the cake tastes more tender.
Freezing
Unfrosted carrot cake layers freeze well. Wrap each cooled layer tightly in plastic wrap, then in foil or a freezer-safe bag. Freeze for up to 2 months. Thaw overnight in the refrigerator before frosting.
Frosted slices can also be frozen. Freeze the slices until firm, wrap them well, then thaw in the refrigerator. Let them sit out briefly before eating so the crumb and frosting soften.
If something goes wrong, it is usually fixable next time. Most carrot cake problems come from dry carrots, too much flour, overmixing, overbaking, wet add-ins, or frosting while the cake is still warm.
Troubleshooting cue: Match each problem to the likely cause and fix.
Most carrot cake problems come from flour, mixing, wet add-ins, bake time, or frosting temperature. This troubleshooting chart turns dry, dense, oily, gummy, or sliding results into specific fixes.
Problem
Likely Reason
Fix
Cake is dry
Too much flour, overbaking, or dry carrot shreds
Weigh flour, check early, use moist medium-fine carrot shreds
Cake is dense
Overmixed batter or too many add-ins
Fold gently and keep add-ins controlled
Cake is oily
Too much oil or wet pineapple
Measure oil carefully and drain pineapple well
Middle sank
Underbaked cake or oven opened early
Bake until the center springs back lightly
Carrots stayed chunky
Shreds were too thick or too dry
Use medium-fine fresh grated carrots
Frosting is runny
Tub cream cheese, warm butter, or not enough powdered sugar
Use firm full-fat cream cheese and chill the frosting
Layers are sliding
Cake or frosting too warm
Cool fully and chill before slicing
Cake tastes flat
Not enough salt or spice
Use the full salt and spice amounts
Cake is gummy
Too much wet add-in or underbaking
Drain pineapple, do not overdo applesauce/yogurt, bake until set
Carrot Cake vs Pineapple Carrot Cake vs Hummingbird Cake
A lot of carrot cake confusion comes from recipes that overlap with other cakes. If you are here for carrot cake, the carrot should still be the main flavor. Pineapple, coconut, raisins, and nuts should support the cake, not turn it into a different dessert.
Think of it this way: classic carrot cake is carrot and spice first; pineapple carrot cake is the fruitier old-fashioned cousin; hummingbird cake belongs to banana and pineapple. They can all be wonderful, but they are not the same craving.
Classic carrot cake tastes more spice-forward, while pineapple carrot cake leans fruitier and sweeter. Both can work beautifully, so the best choice depends on the flavor profile you want.
Usually better with a slightly lighter cupcake structure
The carrot should lead; the pineapple, nuts, and raisins should only back it up. This recipe stays in the classic carrot cake lane first.
Choose the Version That Fits What You Need
Some carrot cake cravings need a different recipe, not just a different pan. This batter handles layers, sheet cake, cupcakes, Bundt, and careful loaf baking, but eggless, vegan, gluten-free, keto, and baked-oat versions need their own structure.
Need
Best Version
Why
Easiest beginner bake
9×13 carrot cake sheet cake
No stacking, trimming, or side frosting
Party portions
Carrot cake cupcakes
Faster baking and easier serving
Tea-time cake
Carrot cake loaf
Smaller cake, easier storage, better with a loaf-specific formula
Breakfast-style option
Carrot cake muffins
Less frosting, easier to portion
No eggs
Eggless carrot cake
Needs a different binding and rising structure
No dairy or eggs
Vegan carrot cake
Needs egg-free batter and vegan frosting logic
No gluten
Gluten-free carrot cake
Gluten-free flour absorbs moisture differently
Low sugar or low carb
Keto or sugar-free carrot cake
Needs a separate flour and sweetener system
Meal prep breakfast
Carrot cake baked oats
Different intent, texture, and ingredients
Old-fashioned fruitier cake
Pineapple carrot cake
Crushed pineapple changes the flavor and moisture
Egg-free and dairy-free cakes behave differently. This vegan chocolate cake guide shows how much the structure changes once eggs and dairy leave the batter.
If you need eggless, vegan, gluten-free, keto, or sugar-free, start with a recipe built for that need. Those cakes rely on different structure, and they turn out better when they are designed that way from the start.
Carrot Cake Recipe FAQ
What is the secret to moist carrot cake?
Use oil, brown sugar, fresh grated carrots, careful flour measurement, and the right bake time. Applesauce or yogurt adds extra softness without making the cake greasy.
Should carrots be grated fine or coarse for carrot cake?
Medium-fine grated carrots work best. Very coarse carrots can stay chunky, while very fine carrots can disappear too much. Freshly grated carrots are better than bagged pre-shredded carrots.
Do I need to peel carrots before grating them?
Peeling is optional if the carrots are clean and tender. If the skins are rough, dirty, or bitter, peel the carrots first.
Is carrot cake better with oil or butter?
Oil is usually better for carrot cake because it keeps the crumb soft after refrigeration. Butter adds flavor, but it can make chilled cake feel firmer.
Does carrot cake need pineapple?
No. This version stays moist without pineapple. Add it only if you want a fruitier, old-fashioned cake.
Can I leave out raisins or nuts?
Yes. Raisins and nuts are optional. Leave either one out without changing the batter. If you remove both, the cake will taste cleaner and softer, with more focus on carrot, spice, and frosting.
Why did my carrot cake turn out dense?
Dense carrot cake usually comes from overmixing, too much flour, too many add-ins, or underbaking. Fold gently and bake until the center springs back.
Why is my cream cheese frosting runny?
Runny cream cheese frosting usually comes from very soft cream cheese, overly warm butter, or not enough powdered sugar. Use firm full-fat cream cheese and chill the frosting briefly if it feels loose.
Does carrot cake need to be refrigerated?
Yes, frosted carrot cake should be refrigerated because of the cream cheese frosting. Let slices sit out for 20 to 30 minutes before serving for the best texture.
Can carrot cake be made ahead?
Yes. Bake the layers 1 day ahead or frost the whole cake 1 day ahead and refrigerate it.
Can I bake this as cupcakes or a sheet cake?
Yes. For cupcakes, fill liners ⅔ full and bake for 18 to 22 minutes. A 9×13 sheet cake takes about 35 to 45 minutes.
Can I bake this carrot cake in a loaf pan?
Yes, but do not put the full batter in one loaf pan. Use about half the batter in one 9×5 loaf pan, or divide the full batter between two loaf pans. Bake until the deep center is fully set.
Can I make this carrot cake eggless, vegan or gluten-free?
For best results, use a dedicated eggless, vegan, or gluten-free carrot cake recipe. Those versions need different binding, moisture, and structure than the classic recipe.
Carrot cake rewards small details: fresh carrots, enough spice, measured flour, a gentle hand with the batter, and frosting that is thick enough to hold. Get those right and the cake becomes soft, cozy, sliceable, and reliable enough for birthdays, Easter, holidays, potlucks, or any day that needs a proper slice of cake.
This is not a fussy cake. It is a generous one — the kind that tastes even better after a quiet night in the fridge and somehow disappears one thin “just a little” slice at a time.
A good carrot cake wins quietly: warm spice, soft crumb, tangy frosting, orange flecks in every slice, and the kind of second piece people go back for after they said they were full.
If you make this carrot cake, leave a comment with your version — layer cake or sheet cake, pineapple or no pineapple, nuts or no nuts, raisins or no raisins — and how it turned out. Carrot cake people have strong opinions, and your notes help the next baker choose their version.
Frosting is the part everyone sees first, which is why it can make even a simple cake feel a little high-pressure. This chocolate cream cheese frosting keeps that final step calm: smooth enough to spread, thick enough to chill and pipe, and chocolatey without tasting like straight sugar.
The finished topping is thick and creamy, with deep cocoa flavor, a gentle cream cheese tang, and a soft matte finish. At its best, each bite tastes like chocolate first, cream cheese second, and sugar last.
This version is built for the frosting problems people actually run into: cream cheese that turns loose, chocolate that tastes flat, cupcake swirls that slump, and “not-too-sweet” frosting that still needs enough structure to behave.
It is not sugar-free, and it is not trying to be. It is balanced instead of candy-sweet: less sugary than classic chocolate buttercream, with enough powdered sugar to stay smooth, spreadable, and pipeable.
Use it right away when you want a spreadable frosting. A short chill turns the same bowl from creamy and spreadable to swirl-ready. The recipe itself takes about 10 minutes; the extra time is only for cleaner cupcake swirls or a firmer layer-cake finish.
It is especially useful for birthday cupcakes, simple sheet cakes, bake-sale brownies, red velvet cake, and casual layer cakes where you want chocolate frosting that tastes rich but not candy-sweet.
This recipe makes a smooth, chocolatey cream cheese frosting for cupcakes, brownies, 9×13 cakes, and simple layer cakes. It spreads as soon as it is mixed and becomes firm enough for soft swirls after 15 to 30 minutes in the refrigerator.
The mixing is quick; the chill is only there when you want cleaner piping. For a generously frosted 9-inch layer cake or bakery-style cupcake swirls, make extra because piping always uses more than it looks like.
Choose your texture: 3 cups powdered sugar gives a softer, tangier frosting. 3½ cups gives firmer swirls. Chill before piping, and reach for milk or cream only when the frosting is truly too thick. For visual checkpoints, see the Success Cues.
Recipe Ingredients
8 oz / 226 g full-fat brick cream cheese, softened but still cool
½ cup / 113 g unsalted butter, softened but not melted
3 to 3½ cups / 360 to 420 g powdered sugar / icing sugar, sifted if lumpy
½ cup / about 50 g unsweetened cocoa powder, natural or Dutch-process
1 teaspoon vanilla extract
¼ teaspoon fine salt, plus a tiny pinch more to taste
1 to 4 teaspoons milk or cream, only when the mixture is too thick; many batches need none
Note: Depending on the brand and how tightly it is packed, ½ cup cocoa powder may weigh around 45 to 55 g. About 50 g is a reliable working amount here.
Optional: For a fudgier version, beat in 3 to 4 oz / 85 to 115 g cooled melted dark chocolate after the base is smooth.
Before Mixing Checkpoint
The cream cheese should press in but still hold its block shape. The butter should dent but not shine. If either one looks greasy, chill it briefly before starting.
Before mixing, the cream cheese should press in but still hold shape, while the butter should dent without looking greasy.
Recipe Instructions
Add the softened cream cheese and softened butter to a large mixing bowl. Beat on medium speed until completely smooth and creamy, about 1 to 2 minutes. Scrape down the sides and bottom of the bowl.
Add the cocoa powder, 3 cups powdered sugar, salt, and vanilla. Mix on low speed until the dry ingredients are mostly absorbed.
Increase to medium-low or medium speed and beat just until smooth. Scrape again so no cocoa, sugar, or cream cheese is hiding at the bottom or sides.
Beat until the cocoa and sugar disappear and the mixture turns creamy. Add milk or cream only when it still feels too thick.
Taste before adding the last ½ cup powdered sugar. Add it only for a sweeter or stiffer texture. When the mixture tastes sweet but flat, add a tiny pinch more salt.
Use it right away when you want a spreadable frosting. To pipe soft swirls, chill it for 15 to 30 minutes before filling the bag.
To make the optional fudgy version, mix in the cooled melted chocolate after the base is smooth. Beat briefly, just until combined.
If the mixture is fridge-firm, let it sit for 10 to 15 minutes so it softens enough to mix smoothly before re-beating.
Recipe Notes
Full-fat block-style cream cheese gives the frosting its most reliable structure.
Sift cocoa powder and powdered sugar when they look lumpy, especially for piping.
Milk or cream should go in slowly. Most batches need little or no added liquid.
The mixture is ready when it looks smooth, thick, and holds soft ridges from the beaters.
On a spatula, it should mound softly instead of running off.
Let cakes, cupcakes, and brownies cool completely so the chocolate layer sits on top instead of melting in.
When spread thinner over brownies or sheet cakes, some bakers call this chocolate cream cheese icing. In everyday use, frosting usually means a thicker topping that can be spread or piped, while icing often means something thinner. This recipe sits on the frosting side, but the same creamy, tangy topping may be called icing when it is spread over a pan dessert.
Before You Start
This is a simple recipe, but texture matters. Soft frosting is not a disaster. Most of the time, you are adjusting temperature, not rescuing a ruined batch.
The biggest difference in testing was not the cocoa or the mixer. It was temperature. When the cream cheese and butter were cool-soft, the frosting turned thick and smooth without much help. When either one was warm, the same recipe softened quickly and needed chilling before it behaved again.
The mixture should look thick before you decide it needs liquid. Many batches look too stiff at first and then turn creamy once the sugar and cocoa fully mix in.
The Thick Swoop Test
Before you decide the frosting needs more sugar or liquid, lift a small amount with a spatula. A good batch should mound softly and hold a clean swoop for a moment.
Before you spread or pipe, look for a thick frosting swoop that lifts cleanly instead of sliding back into the bowl.
The Texture Rule: Spread, Chill, or Fix
Chocolate cream cheese frosting changes with temperature. Before adding more sugar or liquid, look at the bowl and decide what you need it to do next.
When the frosting mounds softly on the spatula, it is usually ready for spreading, filling, or a short chill before piping.
If it looks like this
Do this
Why it works
Thick, creamy, and mounds on a spatula
Use it for spreading
It is ready for brownies, sheet cakes, and simple cakes
Smooth but too soft for swirls
Chill 15 to 30 minutes
Cold firms the butter and cream cheese without adding sweetness
Dry or stiff after mixing
Add milk or cream 1 teaspoon at a time
Small amounts loosen the texture without making it runny
Loose even after chilling
Add powdered sugar or cocoa gradually
Only adjust after temperature has had a chance to help
The whole recipe comes down to one rhythm: mix until smooth, pause before adding liquid, chill before fixing softness, and stop once it holds its shape.
Is This the Right Frosting for You?
Think of it as the middle ground between chocolate buttercream and cheesecake: richer than whipped cream, tangier than buttercream, and softer than ganache.
It is made for soft swirls, creamy layers, and tangy chocolate balance. For sharp decorative edges, tiny detailed piping, or long room-temperature display cakes, a firmer buttercream or ganache will be easier to manage.
Use this frosting for cupcakes, brownies, sheet cakes, yellow cake, chocolate cake, red velvet cake, and casual layer cakes.
Choose buttercream frosting when you want a sweeter, firmer, classic birthday-cake topping.
Use homemade whipped cream when pies, fruit desserts, hot chocolate, or no-bake desserts need something lighter.
Reach for ganache when you need a glossy drip or smooth cake covering.
Pick royal icing when cookie icing needs to dry hard for stacking.
Ingredients You Need
Good frosting starts before the mixer turns on. The texture is mostly decided by the cream cheese, butter, and how quickly you add liquid.
Start with firm cream cheese, cool-soft butter, sifted dry ingredients, and only a small amount of liquid when needed.
Cream Cheese for Frosting
Full-fat brick cream cheese gives the topping body and stability, mixes smoothly with butter and powdered sugar, and helps the finished texture hold after chilling.
Outside the US, look for full-fat block-style cream cheese or the firmest full-fat cream cheese available. Avoid whipped, spreadable, low-fat, or very soft cream cheese when you want piping.
Block-style cream cheese gives better structure; in contrast, softer tub cream cheese can make frosting loosen faster.
If your cream cheese comes in a tub but feels firm and dense rather than airy or spread-like, keep it cold, skip extra liquid, and chill the frosting before piping. The issue is moisture and structure: spreadable cream cheese is usually softer, so the mixture can loosen before it ever gets cold enough to hold a swirl.
The same full-fat cream cheese logic shows up in chilled desserts too. This no bake cheesecake recipe is a good example of how cream cheese structure and chilling decide the final texture.
Butter
Butter makes the mixture smoother, richer, and more stable. It should dent when pressed but should not look oily. Overly warm butter makes the bowl soft before you even start.
Unsalted butter gives you the cleanest control over flavor. If using salted butter, reduce the added salt to a small pinch and taste before adding more.
Powdered Sugar / Icing Sugar
Powdered sugar, also called icing sugar in many countries, does more than sweeten here. It helps the cream cheese hold a swirl, gives the chocolate layer body, and keeps the finished texture from sliding.
Three cups gives a tangier, less sweet result. Closer to 3½ cups gives firmer cupcake swirls, borders, or layer-cake decorating. Sift it first when it looks clumpy.
Cocoa Powder
Unsweetened cocoa powder gives the chocolate flavor and helps thicken the texture. Natural cocoa gives a familiar, slightly sharper flavor and a lighter brown color. Dutch-process cocoa tastes smoother, darker, and less sharp.
Both work here because this is frosting, not cake batter. The more important step is sifting the cocoa when it looks lumpy. Cocoa lumps can hide in the bowl and show up later as dry specks.
Vanilla, Salt, and Liquid
Vanilla rounds out the chocolate. Salt makes the chocolate taste stronger and keeps the sweetness from feeling flat. Milk or cream is optional and should be added only after the mixture has fully come together.
Heavy cream gives a richer finish, while milk thins the texture more quickly. Sweetened whipped topping and non-dairy topping belong to a different frosting style.
Equipment You Need
A hand mixer or stand mixer gives the smoothest texture, but you can still make this with a sturdy spatula if the ingredients are properly softened and the dry ingredients are sifted.
Electric mixer: Best for the smoothest result.
Rubber spatula: Essential for scraping the bowl.
Fine-mesh sieve: Helpful for cocoa and powdered sugar.
Offset spatula or piping bag: Use for spreading or soft swirls.
When using a stand mixer, choose the paddle attachment over the whisk. It keeps the mixture creamy without whipping in too much extra air.
Why This Frosting Works
This frosting works because it balances water, fat, sugar, and temperature. Cream cheese gives tang, but it also brings softness. Butter adds body. Cocoa thickens while deepening the chocolate flavor. Powdered sugar stabilizes the mixture, but too much can make the taste flat and overly sweet.
That is why this recipe uses enough powdered sugar to hold shape, then relies on cocoa, salt, and chilling for balance. You get a frosting that tastes chocolate-first and cream-cheese-tangy, not one that is dominated by powdered sugar.
The most reliable batches came from controlling temperature before changing ingredients. Cool-soft cream cheese mixed smoothly without turning loose; butter that dented but did not look oily gave the frosting body; and waiting before adding milk kept the mixture from thinning too early.
Cocoa Powder vs Melted Chocolate
Use cocoa powder for the easiest, steadiest batch. Add cooled melted chocolate when you want a deeper, fudgier version.
Cocoa powder keeps the base simple, stable, and deeply chocolatey. Melted chocolate makes the topping silkier and richer, but the chocolate needs to be cool enough that it does not melt the butter.
Chocolate Option
Result
Best For
Cocoa powder only
Quick, stable, chocolatey, easy to pipe after chilling
Everyday cupcakes, cakes, brownies
Melted chocolate only
Smooth, silky, richer, slightly more delicate
Bakery-style frosting and fillings
Cocoa powder + melted chocolate
Deepest and fudgiest chocolate flavor
Special cakes, brownies, richer desserts
Compared with cocoa powder, cooled melted chocolate gives a darker, fudgier frosting, while cocoa keeps the texture steadier.
For the most reliable version, make the cocoa powder base first. For a darker, fudgier finish, add cooled melted dark chocolate at the end. A 55% to 70% dark chocolate works well; very bitter chocolate can taste harsh, while very sweet chocolate can push the frosting closer to buttercream sweetness. Want the richer path? Use the dark chocolate variation below.
Need something pourable instead of creamy? This 3-minute homemade chocolate syrup is better for drizzling over cake, ice cream, pancakes, or dessert plates.
How to Make Chocolate Cream Cheese Frosting
For the smoothest frosting, beat the cream cheese and butter first, then mix in the cocoa, powdered sugar, salt, and vanilla before making any texture adjustments.
Not sure whether to chill, thicken, or loosen it? Use the Texture Rule before changing the ingredients.
1. Beat the Cream Cheese and Butter First
Add the softened cream cheese and softened butter to a mixing bowl. Beat on medium speed until smooth before adding anything else. Scrape more than you think you need to; cream cheese likes to hide under the paddle and along the sides of the bowl.
The base should look creamy, pale, and smooth before you move on.
A smooth cream cheese and butter base keeps tiny lumps from hiding once the cocoa and powdered sugar go in.
2. Add Cocoa Powder and Powdered Sugar Gradually
Add the cocoa powder, powdered sugar, salt, and vanilla. Start the mixer on low speed so the dry ingredients do not puff out of the bowl.
If it looks dusty for a minute, stay with it. That dry stage is normal before the frosting turns creamy. Keep mixing on low, scrape the bowl, and give it a moment before adding liquid.
At this stage, the mixture can look dry and dusty; keep mixing before deciding it needs milk or cream.
3. Mix Until Smooth
Once the dry ingredients disappear, increase to medium-low or medium speed and beat only until smooth.
Once the dry ingredients disappear, look for smooth chocolate frosting with soft ridges and no dusty cocoa streaks.
4. Adjust the Texture Carefully
Once the base is made, the rest is adjustment. Use the Texture Rule above: spread it when it mounds, chill it when it is too soft, loosen it only when it is truly stiff, and thicken it only after temperature has had a chance to help.
A soft, spreadable finish works best with 3 cups powdered sugar and little or no chill.
Cleaner swirls usually need closer to 3½ cups powdered sugar plus a short chill.
Cooled melted dark chocolate makes the texture darker, smoother, and more fudgy.
Dutch cocoa, salt, and the lower sugar amount create a more balanced, less sugary result.
To thicken the frosting, add powdered sugar 2 tablespoons at a time.
To soften the frosting, add milk or cream 1 teaspoon at a time.
At the right texture, the frosting should look like soft chocolate cheesecake filling: creamy, cool, and thick enough to sit in a mound on the spatula.
Use teaspoons of milk or cream only after the frosting is fully mixed, because extra liquid softens cream cheese frosting quickly.
Success Cues
This is the section to check when you are staring into the bowl wondering if it looks right.
Stage
What you should see
After beating cream cheese and butter
Smooth, pale, creamy, with no visible lumps
After adding cocoa and powdered sugar
Dry at first, then creamy as it mixes
Ready to spread
Thick, smooth, and mounding on a spatula
Ready to pipe
Cool, firm but squeezable, and holding soft ridges
Too soft
Glossy, loose, and sliding off the spatula
Use these visual cues to decide whether your chocolate cream cheese frosting needs more mixing, chilling, or piping time.
How to Make It Pipeable
For soft, reliable swirls, use full-fat block-style cream cheese, the higher amount of powdered sugar, and chill the frosting for 15 to 30 minutes before piping.
This is a soft-swirl frosting, not a sharp-edge decorating buttercream. After chilling, it works well for cupcake swirls, simple borders, filling a casual layer cake, and generous swoops.
It is not the best choice for flowers, tiny detailed piping, or a cake that has to sit warm for hours. For tall cupcake swirls, sift the cocoa and sugar well, and choose a large star tip, open star tip, or large round tip.
When it is ready to pipe, the bag should feel cool in your hands and the frosting should move with pressure, not pour. A short chill gives you soft matte swirls that look finished without turning stiff or crusty.
Before piping, the filled bag should feel cool, full, and steady, with frosting that moves under pressure but does not flow.
Once the mixture looks smooth and holds soft ridges, stop mixing. It can look perfect, then loosen if you keep beating.
How the Frosting Should Pipe on Cupcakes
Use a large star tip or large round tip for soft swirls. The frosting should move with steady pressure and keep rounded ridges after you lift the tip.
After chilling, the frosting pipes into rounded cupcake swirls that look finished without turning stiff, crusty, or overly sweet.
How to Make It Less Sweet
This is not a low-sugar frosting. It is less sugary than classic chocolate buttercream because cream cheese, cocoa, and salt keep the sweetness balanced.
Adjustment
What it changes
Add salt first
Makes chocolate taste fuller without changing the texture
Add 1 to 2 tablespoons cocoa
Deepens flavor and slightly thickens the mixture
Use Dutch-process cocoa
Makes the chocolate taste smoother and darker
Use 3 cups powdered sugar
Tangier, softer, less sweet
Use 3½ cups powdered sugar
Firmer, sweeter, better for tall swirls
For tall cupcake swirls, avoid reducing the powdered sugar too far. Powdered sugar is not only for sweetness; it also gives structure.
How Much Frosting Do You Need?
The right amount depends less on the cake and more on how generous you want the finished dessert to look. If you love big cupcake swirls, make more than you think; piping always eats frosting faster than spreading.
This recipe makes about 3½ to 4 cups of chocolate cream cheese frosting, depending on how much powdered sugar you use and whether you add melted chocolate.
Dessert
Amount Needed
Notes
12 cupcakes with tall swirls
3 to 3½ cups
One batch works well
24 cupcakes with light swirls
3½ to 4 cups
Pipe modestly
9×13 sheet cake
About 3 cups
Spread with an offset spatula
8×8 or 9×9 brownies
1½ to 2 cups
Half batch is usually enough
8-inch 2-layer cake
3½ to 4 cups
Enough for filling and outside
9-inch 2-layer cake
4 to 5 cups
Make 1.25x when decorating heavily
3-layer cake
4½ to 5 cups
Make extra for safety
Use a half batch for brownies, a small cake, or 6 to 8 cupcakes. Use the full batch for 12 tall cupcake swirls, 24 lighter cupcake swirls, or a 9×13 sheet cake. Make 1.25x for a 9-inch two-layer cake with decoration, or 1.5x for a heavily frosted layer cake.
Where This Frosting Tastes Best
Use this frosting when you want chocolate flavor without the heavy sweetness of buttercream. It works especially well on desserts that are already sweet and need a little tang to balance them.
The best matches are soft cakes, fudgy brownies, and cupcakes that need a cool, creamy swoop instead of a stiff sugar crust.
Chocolate Cupcakes
On chocolate cupcakes, the tang keeps the cocoa from feeling heavy. The swirl should taste like a cool chocolate cheesecake cap on top of soft cake, not a pile of powdered sugar.
From modest swirls to taller chilled swirls, this is the realistic range for pipeable cream cheese frosting on cupcakes.
What the Frosting Should Feel Like on a Cupcake
The best bite is cool, creamy, and lightly tangy against the cake. It should feel like a soft cap of chocolate cheesecake, not a hard sugar crust.
Because cream cheese adds tang, the frosting should taste like a cool chocolate cheesecake cap rather than a hard sugar crust.
Yellow Cake with Chocolate Cream Cheese Frosting
This is where the frosting really shines: soft yellow cake, cool tangy chocolate, and just enough cocoa bitterness to keep the bite from turning candy-sweet.
Yellow cake works especially well because tangy chocolate cream cheese frosting balances the sweet, buttery crumb.
Chocolate Layer Cake with Chocolate Cream Cheese Frosting
Use it on chocolate cake when you want a deeper, less sugary finish than chocolate buttercream. The cream cheese tang keeps the cocoa from feeling too heavy, so the slice still tastes rich without becoming overwhelming.
A moderate frosting layer keeps chocolate layer cake rich and creamy without making the slice feel heavy.
Red Velvet or Spice Cake
Cream cheese already belongs with red velvet, and cocoa makes it a stronger chocolate version. That same tang works beautifully with warm spices too. This spice cake recipe uses cream cheese frosting to balance brown sugar and baking spices.
Brownies with Chocolate Cream Cheese Frosting
On brownies, it tastes like a thin chocolate cheesecake layer over a fudgy base. Let the pan cool fully before frosting, because brownies hold heat longer than they look.
Here, the frosting sets into a smooth chocolate cheesecake-style layer over the dense fudgy base.
Sheet Cake with Chocolate Cream Cheese Frosting
A 9×13 sheet cake is one of the easiest places to use this frosting. It spreads smoothly, chills into clean slices, and gives a simple pan cake enough tang to balance the sweetness. For another soft pan cake that benefits from cream cheese frosting, this applesauce cake recipe is a better match than a delicate sponge.
Spread the frosting into soft swoops, then chill until the top settles into a neat sliceable layer.
How Much Filling to Use in a Layer Cake
For a casual layer cake, chill the frosting and use a moderate filling. It gives the cake a creamy chocolate layer that cuts through sweetness without making the slice feel heavy.
Keep the filling moderate and level so the cake stacks cleanly instead of squeezing frosting out the sides.
Make sure the cake layers are completely cool.
Chill the frosting for 15 to 30 minutes before filling if it feels soft.
Add a moderate layer between the cakes. Very thick, soft filling can squeeze out when the top layer goes on.
For a taller cake, pipe a thicker ring around the edge before filling the center.
Apply a thin crumb coat, chill for 20 to 30 minutes, then add the final coat.
Refrigerate the finished cake until closer to serving.
For cleaner slices, chill the finished cake before cutting, then let slices sit briefly before serving so the texture becomes creamy again.
Cookies
This frosting works for soft sandwich cookies or chilled frosted cookies, but it does not dry hard like royal icing. Use it when the cookies will be served chilled or kept in a single layer.
Troubleshooting
If something looks off, start with temperature before assuming the recipe has gone wrong. Cream cheese frosting often looks loose before chilling brings it back.
Quick fix: when the texture is too soft, refrigerate the bowl for 20 minutes before changing anything else.
Use this order when the texture feels off: chill first, re-beat briefly, add powdered sugar for structure, add cocoa for thickness and chocolate flavor, and add liquid only when the mixture is too stiff.
Problem
Likely Cause
Fix
Runny texture
Tub cream cheese, warm butter, overmixing, too much liquid, or warm melted chocolate
Chill 20 to 30 minutes, then re-beat briefly. Add powdered sugar only when needed.
Lumps
Cream cheese was too cold or cocoa/sugar was not sifted
Beat cream cheese and butter smooth before adding dry ingredients. Sift cocoa and powdered sugar next time.
Grainy texture
Powdered sugar lumps, overmixing, or melted chocolate added badly
Sift powdered sugar. When using melted chocolate, cool it before adding.
Too thick
Too much powdered sugar or cocoa
Add milk or cream 1 teaspoon at a time.
Too sweet
Too much powdered sugar or weak cocoa flavor
Add a pinch of salt or a little more cocoa.
Not chocolatey enough
Mild cocoa or too little cocoa
Add 1 to 2 tablespoons more cocoa, or add cooled melted dark chocolate.
Will not hold piping
Too warm, too soft, or not enough powdered sugar
Chill the mixture and piping bag. Add more powdered sugar only when chilling does not help.
Split or loosened
Overbeaten cream cheese or warm melted chocolate
Chill until firmer, then re-beat gently on low speed.
Why Did My Frosting Turn Runny?
Chocolate cream cheese frosting usually turns runny because the cream cheese or butter was too warm, the cream cheese was too soft, too much liquid was added, or the mixture was overbeaten. Start with chilling before changing the recipe.
Instead of adding more sugar right away, chill soft frosting first; temperature often fixes the texture without making it too sweet.
How to Thicken It Without Making It Too Sweet
To thicken chocolate cream cheese frosting without making it too sweet, chill it first, then add a little cocoa powder before adding more powdered sugar. Add powdered sugar 2 tablespoons at a time only when the frosting still feels too soft after chilling.
How to Fix Lumps for a Smoother Texture
Lumps usually start at the beginning. Cream cheese that is too cold does not beat smoothly, and once powdered sugar and cocoa are added, the lumps become harder to remove. Beat the cream cheese and butter until completely smooth before adding anything else, and sift dry ingredients when they look clumpy.
6 Small Mistakes That Make Frosting Soft
Using tub cream cheese when you want clean piping.
Letting the butter become oily or melted.
Adding milk or cream before the mixture has fully come together.
Adding warm melted chocolate.
Keeping the mixer running after the texture is smooth.
Frosting warm cakes, cupcakes, or brownies.
Storage, Freezing, and Making Ahead
Because this has cream cheese in it, keep the frosting and frosted desserts refrigerated. It tastes best cool but not cold-hard.
How to Store Chocolate Cream Cheese Frosting
As a practical rule, do not leave it at room temperature for more than about 2 hours, or more than about 1 hour when the room is very warm, such as above 90°F / 32°C. The FDA’s two-hour rule for refrigerated foods is a good safety reference here.
For leftovers, transfer the mixture to an airtight container and refrigerate for up to 5 days. Before using, let it sit at cool room temperature until it softens slightly, then re-beat gently until smooth.
For frosted cakes, cupcakes, or brownies, refrigerate the finished dessert in a covered container. Cover it well so the surface does not dry out or pick up fridge odors.
Covered cupcakes stay fresher in the refrigerator, but the best bite comes after the frosting loses its hard chill.
Serve cool, not cold-hard. For the best texture, take frosted cupcakes or cake slices out of the refrigerator about 15 to 25 minutes before serving, depending on room temperature.
You can make the frosting 1 to 2 days ahead. On decorating day, let it soften slightly, re-beat gently, and chill again if it feels too soft for piping. The chocolate flavor often tastes a little more rounded after a night in the fridge.
Decorating in a warm kitchen? Use the chill reset whenever the bag or swirls start to soften.
Can You Freeze It?
Yes. Chocolate cream cheese frosting freezes well in an airtight container for up to 2 to 3 months. Thaw overnight in the refrigerator, then let it soften slightly and re-beat gently before spreading or piping.
Warm Weather Chill Reset
Warm hands, warm rooms, and sunny tables soften this frosting faster than the recipe itself does.
Start with chilled frosting before piping.
Rest the filled piping bag in the refrigerator when it starts feeling soft in your hands.
Keep frosted cake or cupcakes cold until closer to serving.
Avoid direct sunlight and long outdoor buffet conditions.
Transport cakes cold when possible.
Choose a firmer chocolate buttercream or ganache when a cake must sit outside for hours.
A short chill helps pipeable chocolate cream cheese frosting hold soft ridges again when hands or the room are warm.
Variations
Dark Chocolate Version for Rich Cakes
Choose this when you want the frosting to taste more like a bakery chocolate layer than a simple cocoa frosting. Add 3 to 4 oz / 85 to 115 g melted dark chocolate, cooled until barely warm.
Chocolate bars usually melt more smoothly than chocolate chips, but chips work when melted gently. Compound chocolate also works in a pinch, though the flavor and texture will be slightly different from real dark chocolate.
Mocha Version for Deeper Chocolate Flavor
Use this when the frosting tastes chocolatey but a little flat. Espresso powder makes the cocoa taste deeper without turning the frosting into coffee frosting. Add ½ to 1 teaspoon instant espresso powder with the cocoa.
Extra Tangy Version for Sweet Cakes
This version works best with yellow cake, vanilla cake, red velvet cake, or very sweet cupcakes that need balance. Use the lower amount of powdered sugar and skip extra liquid.
Stiffer Version for Cupcake Swirls
Choose this when looks matter as much as flavor: birthday cupcakes, party trays, or anything that needs to hold a soft swirl. Use the full 3½ cups powdered sugar, skip extra milk or cream, and chill for 20 to 30 minutes before piping.
Softer Brownie Frosting
Choose this when you want the frosting to eat like a creamy chocolate layer, not a tall decoration. Use 3 cups powdered sugar and add 1 to 2 teaspoons cream only when needed. Make sure the brownies are completely cool before frosting.
A whipped chocolate cream cheese frosting is a different style made with cream. It is lighter and softer. This butter-based version is the one to use when you want a topping that spreads cleanly, chills well, and holds soft swirls. For that softer spreadable style in a natural context, this cinnamon roll recipe shows how cream cheese icing behaves when it is meant to be looser.
Save watery flavorings and fruit purees for another frosting style; they can loosen this one faster than you expect.
FAQs
Can chocolate cream cheese frosting be piped?
Yes. Use full-fat block-style cream cheese, softened butter, enough powdered sugar, and chill for 15 to 30 minutes before piping. A large star tip works especially well for cupcakes.
Why did my frosting turn runny?
Usually, it is too warm, overmixed, made with very soft cream cheese, or loosened with too much liquid. Chill first; add powdered sugar only when it still feels loose after 20 to 30 minutes.
What is the fastest way to thicken it?
Chill it for 20 to 30 minutes first. If it is still soft, beat briefly and add powdered sugar 2 tablespoons at a time. For a less sweet fix, add a little cocoa powder first.
Is tub cream cheese okay?
Tub cream cheese is not ideal when you want piping because it is usually softer. If it is firm and dense, keep it cold, skip extra liquid, and chill before piping.
Can I make it without an electric mixer?
You can, but the texture will be smoother with a mixer. If mixing by hand, use very soft but not warm butter, cool-soft cream cheese, sifted cocoa and powdered sugar, and a sturdy spatula. Beat the cream cheese and butter completely smooth before adding dry ingredients.
Does it need to be refrigerated?
Yes. Because it contains cream cheese, store it in the refrigerator. Let refrigerated cake or cupcakes sit briefly before serving so the topping tastes creamy, not fridge-hard.
How long can frosted cupcakes sit out?
Keep them out for no more than about 2 hours, or about 1 hour in very warm conditions above 90°F / 32°C. Refrigerate covered cupcakes until closer to serving.
When should I add melted chocolate?
Add melted chocolate only after the base is already smooth. Cool it until barely warm first, because warm chocolate can loosen the texture.
What happens if I skip the butter?
You can make a softer spread-style version without butter, but it will not behave like this recipe. Butter is strongly recommended for piping or holding shape.
Can I make it less sweet and still pipe it?
Yes, but do not reduce the powdered sugar too far if you want tall swirls. Use 3 cups powdered sugar for a tangier, less sweet frosting, then rely on Dutch cocoa, salt, and chilling for balance. For the firmest cupcake swirls, use closer to 3½ cups.
What happens without powdered sugar?
Powdered sugar thickens and stabilizes this style of frosting. Granulated sugar can make it gritty; for a no-powdered-sugar chocolate frosting, use a cooked ermine-style frosting instead.
How well does it freeze?
It freezes well in an airtight container for up to 2 to 3 months. Thaw overnight in the refrigerator, then let it soften slightly and re-beat gently before using.
If you make it, I’d love to know where you used it: cupcakes, brownies, a sheet cake, or a layer cake. Also tell me whether you stayed with cocoa only or added melted chocolate for the fudgier version.
The best version of this frosting comes from not rushing the bowl. Let the cream cheese and butter stay cool-soft, let the dry stage turn creamy before adding liquid, and let a short chill do its work before you reach for more sugar.
Once you know that rhythm, chocolate cream cheese frosting becomes easy to trust: creamy, tangy, chocolate-first, and firm enough to sit where you put it.