Posted on Leave a comment

Almond Cake Recipe

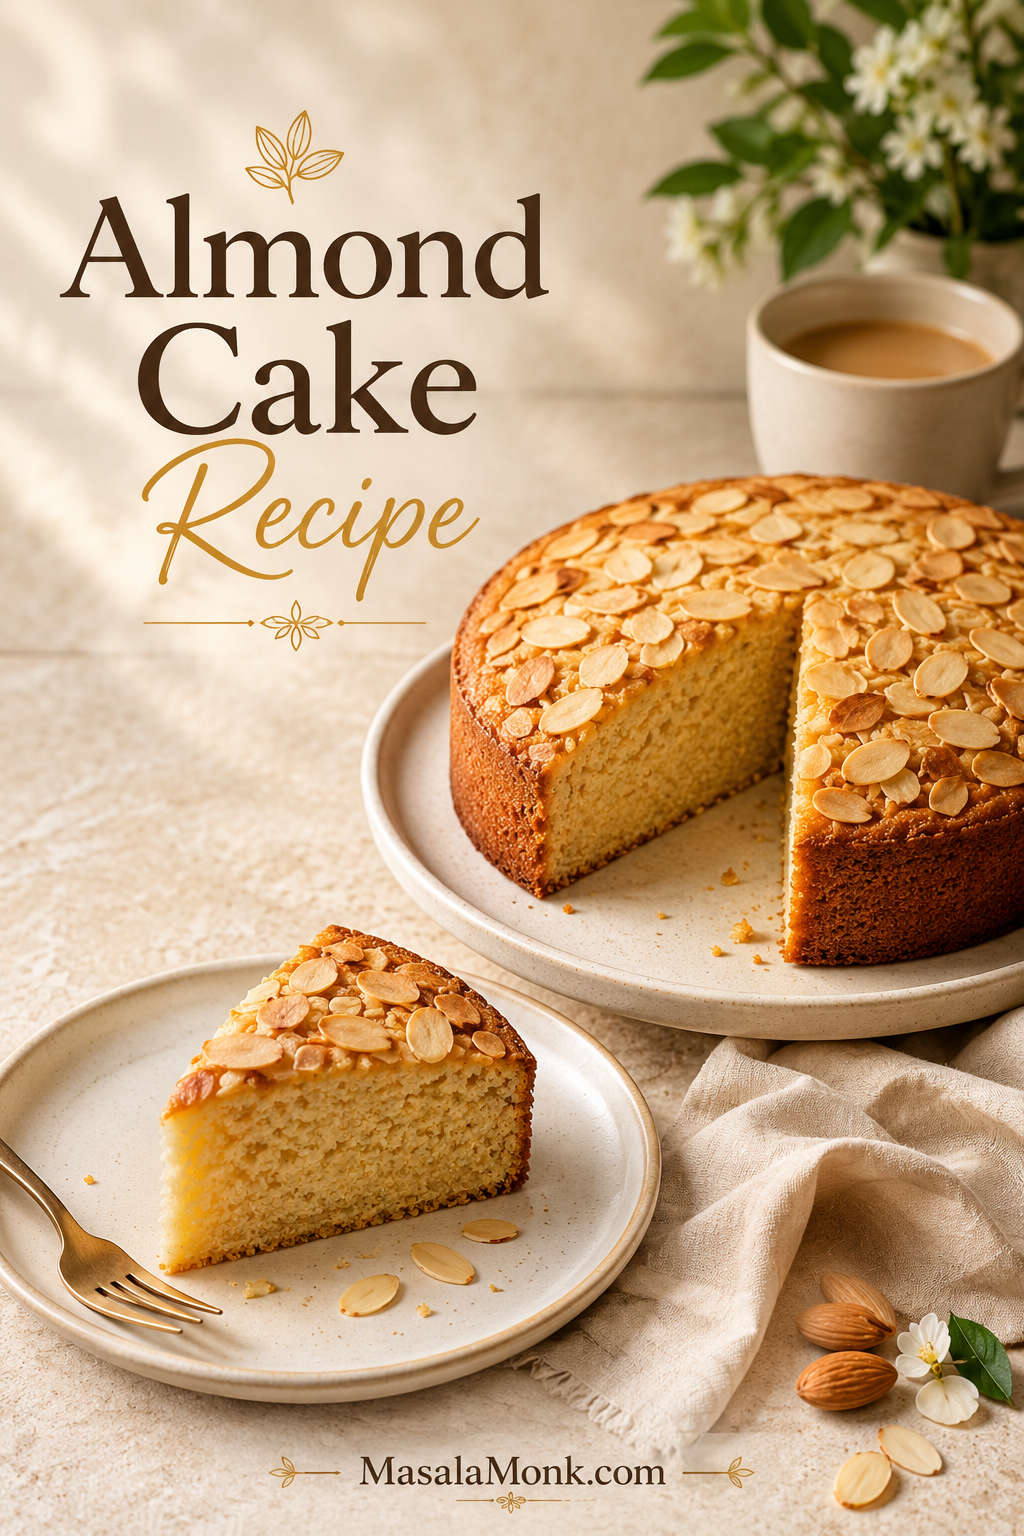
Whole almond cake with sliced almonds on top and one slice removed on a cream plate.

This almond cake recipe is for the moment when you want a golden, tender dessert that feels elegant without frosting. It has a sliced-almond top, a gently rich middle, and just enough lemon or orange zest to keep every bite bright. Once cooled, it cuts cleanly and looks simple, polished, and special on the table without needing much decoration.

Almond flour cakes can be beautiful, but they reward a lighter hand than wheat cakes. Packed flour makes the batter heavy. Cold eggs do not whip as well. A thin pan can brown the edges before the middle is ready. And if you cut the cake while it is still warm, the slice can look damp even when the bake was close.

This version is built around those common almond cake problems: dense centers, oily texture, gritty almond meal, overheated edges, weak egg whites, and cakes that look golden before they are fully baked. The goal is a single-layer almond flour cake that is naturally gluten-free when made with certified gluten-free ingredients, easy enough for tea or brunch, and reliable enough for a guest dessert with berries and cream.

Quick warning for Indian shoppers: if your packet says badam powder, check the label carefully. This recipe needs plain ground almonds, not sweetened badam drink mix, malted almond powder, or milk-powder blends. For the full comparison, see almond flour vs almond meal vs badam powder.

The finished cake should smell like toasted almonds and citrus, feel delicate without falling apart, and settle into clean slices after a few hours. It is the kind of cake that works with powdered sugar, coffee, fruit, cream, or nothing at all.

Quick Answer: How to Make a Tender Almond Flour Cake

To make a tender almond flour cake, use fine blanched almond flour, room-temperature eggs, sugar, baking powder, salt, vanilla, a little almond extract, and lemon or orange zest. Separate the eggs, beat the yolks with sugar, fold in the almond flour, then fold in softly whipped egg whites. Bake in a lined 8-inch / 20 cm round pan at 180°C / 350°F until the top is golden, the middle no longer wobbles, and a toothpick shows moist crumbs rather than wet batter.

The two most important success points are measuring the almond flour lightly, preferably by weight, and letting the cake cool before slicing. Those two details prevent most dense, oily, or fragile results.

QuestionBest answer for this recipe
Best ground almond productFine blanched almond flour for the cleanest, most delicate result.
Almond mealWorks by weight, but the cake will be darker, nuttier, and more rustic.
Almond powderUse only plain unsweetened ground almonds, never badam drink mix.
Best pan8-inch / 20 cm round for a taller cake; 9-inch / 23 cm for a thinner cake.
Oven temperature180°C / 350°F conventional or OTG; 160°C / 320°F fan.
Bake time26–32 minutes in an 8-inch pan; 23–28 minutes in a 9-inch pan.
Gluten-free statusNaturally gluten-free if every ingredient is certified gluten-free.
Eggless swapNot a direct swap; this batter needs eggs to rise, set, and slice cleanly.

Quick success cue: the batter will be thicker than wheat cake batter, the top should bake to a soft gold, and the toothpick should show moist crumbs, not shiny wet batter. Near the end, the cake should smell lightly toasty and citrusy.

Need help choosing the right ground almond product? Jump to almond flour vs almond meal before mixing.

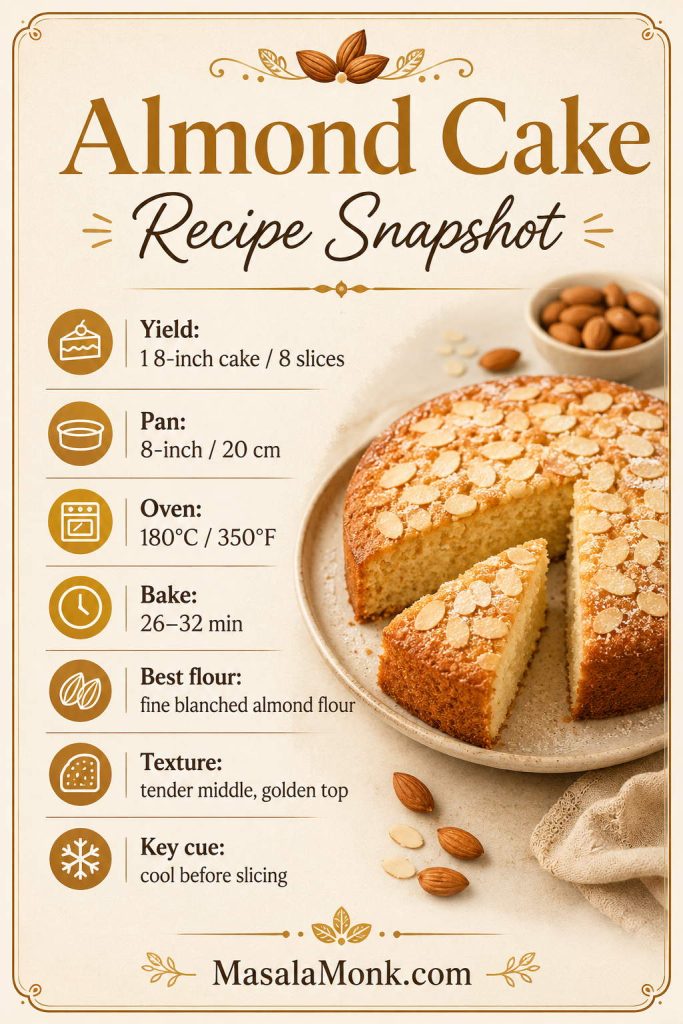
Almond Cake Recipe Snapshot
Best for
Tea, coffee, brunch, or a simple gluten-free dessert
Best first pan
8-inch / 20 cm light-colored metal round pan
Best flour
Fine blanched almond flour
Oven
180°C / 350°F conventional; 160°C / 320°F fan
Make-ahead note
Flavor and texture improve after resting
Texture target
Tender middle, golden top, clean-cut slices
Watch out for
Packed flour, weak whites, hot pans, early slicing
Flavor choice
Choose lemon for brightness, orange for warmth
Almond cake recipe snapshot board with yield, pan size, oven temperature, bake time, flour choice, texture target, and cooling cue.
Use this almond cake snapshot as a pre-bake check: pan size, oven temperature, flour choice, and cooling time all affect the final texture.

Keep these details in mind before you start. The safest first bake uses fine almond flour, a sturdy 8-inch pan, and a full cooling time. For ingredient confusion, jump to flour vs meal; for timing doubts, use the doneness cues.

What Kind of Almond Cake Is This?

This is a simple, single-layer almond flour cake made mainly with ground almonds instead of wheat flour. It is closer to a tender tea cake than a tall sponge cake or frosted celebration cake.

If you want…This recipe gives you…
A simple almond flour cakeYes — a single-layer cake with a tender, clean-cut center.
A naturally gluten-free dessertYes, when all ingredients are certified gluten-free.
A tea cake, brunch cake, or coffee cakeYes — this is where the recipe works best.
A frosted birthday-style almond cakeUse a bakery-style layer cake instead.
A whole-orange almond cakeUse a whole-orange method with boiled oranges and a longer bake.
An eggless almond cakeUse a separate eggless formula rather than removing the eggs here.

Almond cake can mean several different things. Some versions are wheat cakes flavored with almond extract; others use boiled oranges, yogurt, or mixed flours. This one stays focused on a dependable almond flour base, so the final texture is easier to predict.

What This Almond Cake Tastes Like

The slice should feel tender and gently rich, not airy like a sponge cake and not dense like almond paste. Almond flour gives the middle a plush, nutty texture, while the sliced almonds on top add a light crackle. Lemon zest makes the cake brighter and more tea-cake-like; orange zest makes it warmer and more dessert-like.

Almond Cake Slice Texture

The slice should bend tender rather than crumble apart. If it looks wet in the center, the cake may be underbaked or cut too warm; if it falls apart, the batter may have been overmeasured, overbaked, or sliced before cooling.
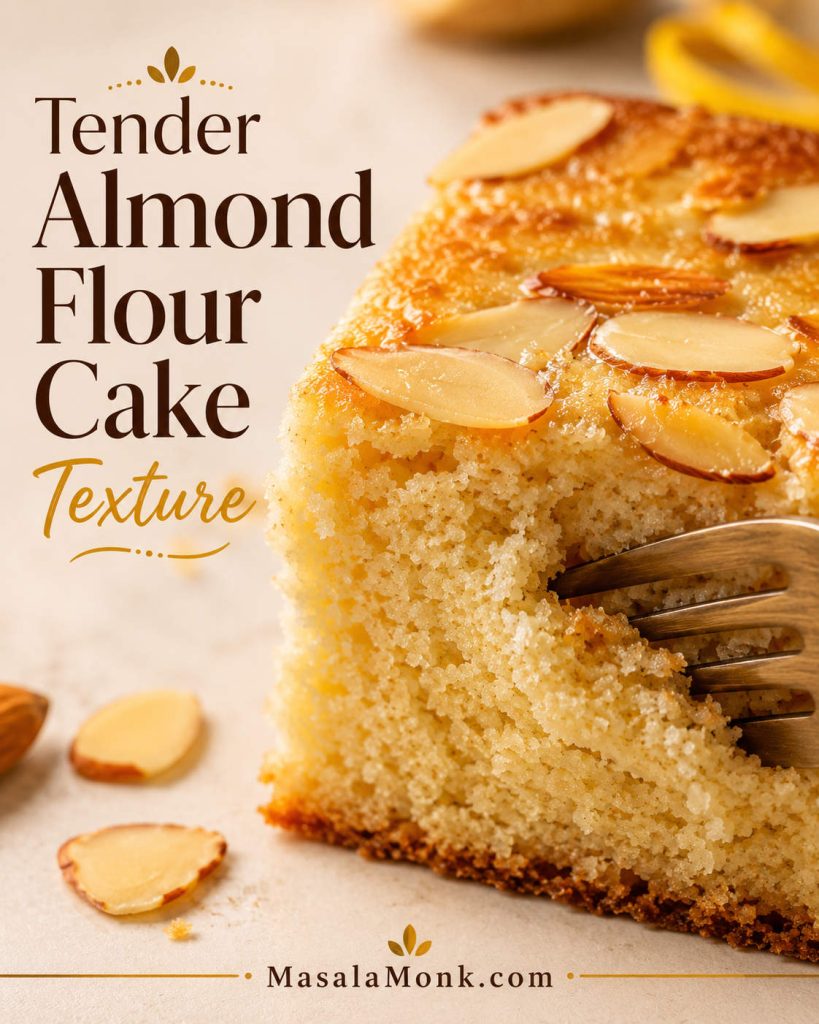
Close-up almond flour cake slice with sliced almonds on top, browned edge, and fork near the crumb.
The best almond flour cake slice should feel gently rich, not wet or pasty; the cut edge should still look neat enough to serve cleanly.

Texture Target for Almond Flour Cake

As the cake cools, the center settles and the flavor rounds out. That resting time is part of why the slice cuts neatly instead of crumbling. The best bite has a fragrant almond top, a clean-cut center, and enough citrus lift to keep the richness from feeling heavy.
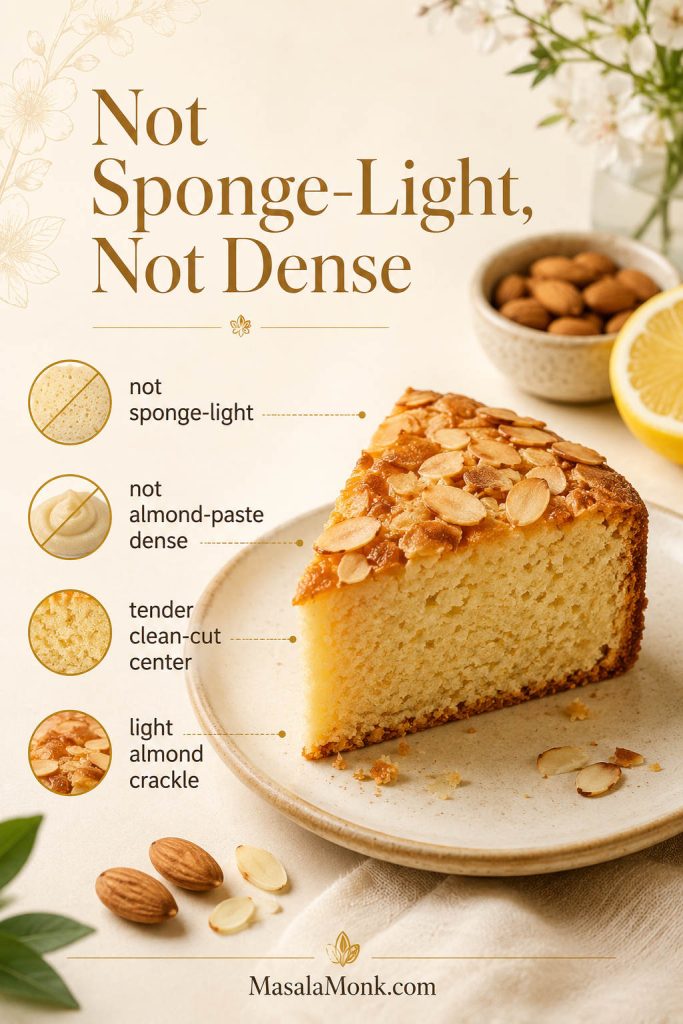
Almond cake texture guide showing a slice with notes about tender center, almond top, and not-too-dense texture.
Almond flour naturally makes cake richer than wheat flour; therefore, the goal is a plush tea-cake bite, not a heavy almond-paste dessert.

A light dusting of powdered sugar is enough. Add berries and cream if you want dessert, or serve it plain with coffee and let the toasted almond top do the work.

When to Make This Almond Cake

Make it when you need a cake that feels special without frosting: a weekend coffee slice, a brunch cake with berries, or a simple gluten-free dessert that does not taste like a compromise. It is also a good choice when frosting feels like too much work but you still want something polished enough for guests.

This is a useful make-ahead cake because it slices better after resting. Bake it in the morning, carry it without worrying about frosting, and serve it later with powdered sugar, fruit, yogurt, or cream. It works for quiet tea, a dessert plate, or the kind of table where you want the cake to look pretty without needing much decoration.
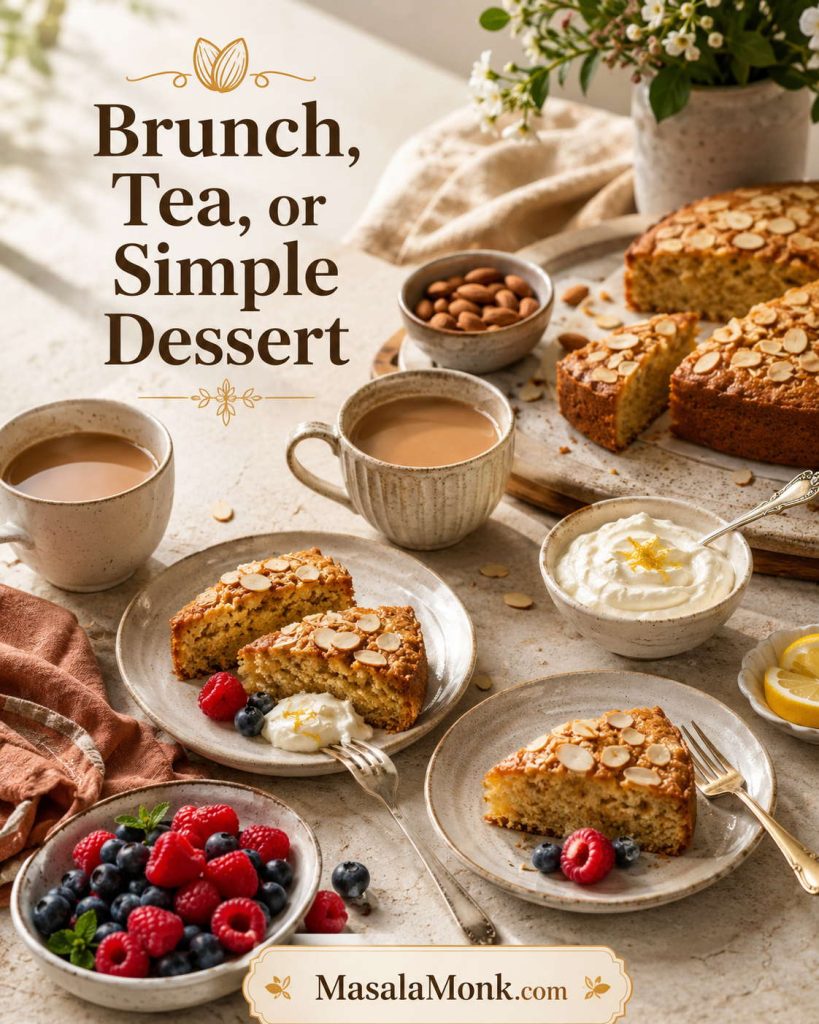
Almond cake served with tea, berries, and cream on a warm table setting.
This is a useful make-ahead cake for brunch, tea, coffee, or a gluten-free dessert plate because it feels finished with only fruit or cream.

Before You Bake: 5 Things That Matter

  1. Weigh the almond flour if you can. If using cups, spoon it lightly and level it.
  2. Use room-temperature eggs. They whip better and blend more smoothly.
  3. Keep the egg-white bowl clean and grease-free. Even a little yolk or oil can stop the whites from whipping properly.
  4. Line the pan with parchment. Almond cakes are delicate and need help releasing cleanly.
  5. Cool before slicing. The center firms as it rests, so warm slices can look damp or broken.

Think of cooling as part of the recipe, not just waiting. A lined pan, a steady oven, and a full rest make the difference between a fragile cake and one that lifts, cuts, and serves cleanly. Already worried about timing or pan size? Check pan size and bake time before you preheat.

Recipe Card: Tender Almond Flour Cake

A tender almond flour cake with a golden sliced-almond top, clean-cut center, and bright lemon or orange zest. This cake is naturally gluten-free when made with certified gluten-free ingredients.

Yield
1 8-inch cake / 8 slices
Prep Time
15 minutes
Bake Time
26–32 minutes
Total Time
About 1 hour 30 minutes, including cooling

Equipment

  • 8-inch / 20 cm light-colored metal round cake pan
  • Parchment paper
  • Two mixing bowls
  • Hand mixer or balloon whisk
  • Flexible spatula
  • Kitchen scale, strongly recommended
  • Wire rack

Ingredients

  • 150 g / 5.3 oz fine blanched almond flour, about 1 1/2 cups lightly spooned and leveled
  • 1 teaspoon / 4 g baking powder
  • 1/4 teaspoon fine salt
  • 4 large eggs, room temperature, separated
  • 100 g / 3.5 oz granulated sugar, about 1/2 cup
  • 1 teaspoon / 5 ml vanilla extract
  • 1/4 teaspoon / 1.25 ml almond extract, optional but useful
  • 1 tablespoon finely grated lemon zest or orange zest
  • 25 g / 0.9 oz sliced almonds, about 1/4 cup, for topping
  • 1 tablespoon powdered sugar, optional, for serving

Method

  1. Preheat the oven to 180°C / 350°F. For fan or convection ovens, use 160°C / 320°F. Grease an 8-inch / 20 cm round cake pan, line the base with parchment paper, and lightly grease the sides.
  2. Whisk together the almond flour, baking powder, salt, and citrus zest. Break up any clumps so the mixture looks loose, not packed.
  3. Separate the eggs. Put the yolks in one large bowl and the whites in a clean, dry, grease-free bowl.
  4. Beat the yolks with the sugar, vanilla, and almond extract for 2–3 minutes, until paler, creamy, and slightly thickened.
  5. Fold the almond flour mixture into the yolk mixture. The batter will look thick, almost like a soft almond paste. That is normal.
  6. Beat the egg whites until they hold soft peaks. They should look glossy, and the peaks should bend slightly when you lift the whisk.
  7. Fold one-third of the whites into the almond batter first to loosen it. Gently fold in the remaining whites in two additions. The final batter should be thick, airy, and spreadable, with no large white streaks.
  8. Spread the batter into the prepared pan and smooth the top. Scatter sliced almonds over the surface.
  9. Bake for 26–32 minutes, until the top is golden, the center feels set, and a toothpick inserted into the middle comes out with moist crumbs but no wet batter.
  10. Cool in the pan for 15 minutes, then remove carefully and cool fully on a wire rack before slicing. A slight settling on top is normal.
  11. Dust lightly with powdered sugar before serving, if you like.

Recipe Notes

  • For a 9-inch / 23 cm pan, start checking around 23 minutes. The cake will be thinner.
  • Almond meal can be used by weight, but the result will be coarser and more rustic.
  • If using an instant-read thermometer, the center should be about 93–96°C / 200–205°F.
  • This batter makes about 9–10 standard cupcakes; bake them for 13–17 minutes.
  • If the sliced almonds brown too quickly, tent the cake loosely with foil near the end of baking.

For visual cues while baking, use the step-by-step method and doneness guide below.

Why This Almond Cake Recipe Works

Almond flour brings flavor, tenderness, and natural richness, but it does not bring gluten. That means the cake depends on eggs, gentle folding, the right pan, and cooling time to hold a clean slice.

  • Almond flour keeps the middle tender without needing a butter-heavy batter.
  • Egg yolks add richness, while the whites help lighten the batter.
  • Whipped egg whites prevent the center from feeling heavy when they are folded in gently.
  • Sugar supports browning and texture, not just sweetness.
  • Lemon or orange zest lifts the almond flavor so the cake does not taste flat or oily.

Added fat stays low on purpose. Ground almonds already contain natural oils, so extra butter or oil can push the texture toward greasy. In this recipe, moisture comes from the almonds and eggs; lightness comes from the whipped whites; and the clean slice comes from baking the center fully, then letting it rest.

What shaped this version: the structure is built around the places almond flour cakes usually go wrong — packed flour, cold eggs, weak whites, hot pans, and slicing before the center has settled. That is why the recipe focuses less on adding more liquid or fat and more on measurement, egg structure, pan heat, and cooling time.

If you enjoy almond flour in other bakes, almond flour cookies are a useful comparison because the same ingredient can turn crisp, chewy, tender, or heavy depending on the formula.

Ingredients for Almond Cake

The ingredient list is short, so each item has a real job. Keep the base steady on the first bake; once you know how the batter should feel, the flavor variations are easier.

Almond Cake Ingredients at a Glance

Before you start, check that your almond flour is plain and finely ground, your eggs are at room temperature, and your citrus zest is ready. With a short ingredient list, small details affect the final cake more than they would in a heavier wheat-flour batter.
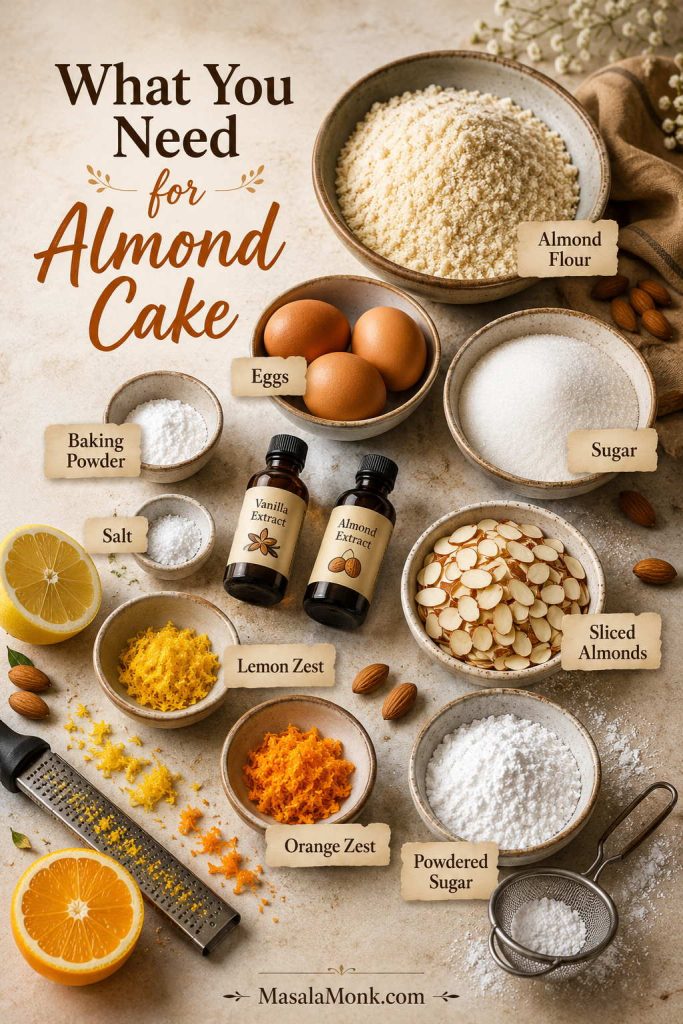
Almond cake ingredients in bowls, including almond flour, eggs, sugar, citrus zest, extracts, baking powder, salt, and sliced almonds.
Short ingredient lists need more precision, not less: each bowl here affects lift, browning, almond flavor, or how neatly the cake slices.

Almond Flour

Fine blanched almond flour gives the most delicate result. It is made from almonds without skins and is usually ground more finely than almond meal. If measuring by volume, spoon it lightly into the cup and level it rather than scooping from the bag. For a broader baking reference, King Arthur Baking’s ingredient weight chart lists almond flour and almond meal separately.

If you have extra almond flour after making this cake, use it in almond flour pancakes, where the same ingredient gives a softer breakfast-style texture.

Eggs

Eggs do the main structural work here. They help the cake rise, set, and hold together without wheat flour. Room-temperature eggs whip more easily; if you forget to take them out early, place the whole eggs in a bowl of warm water for 5–10 minutes before cracking them.
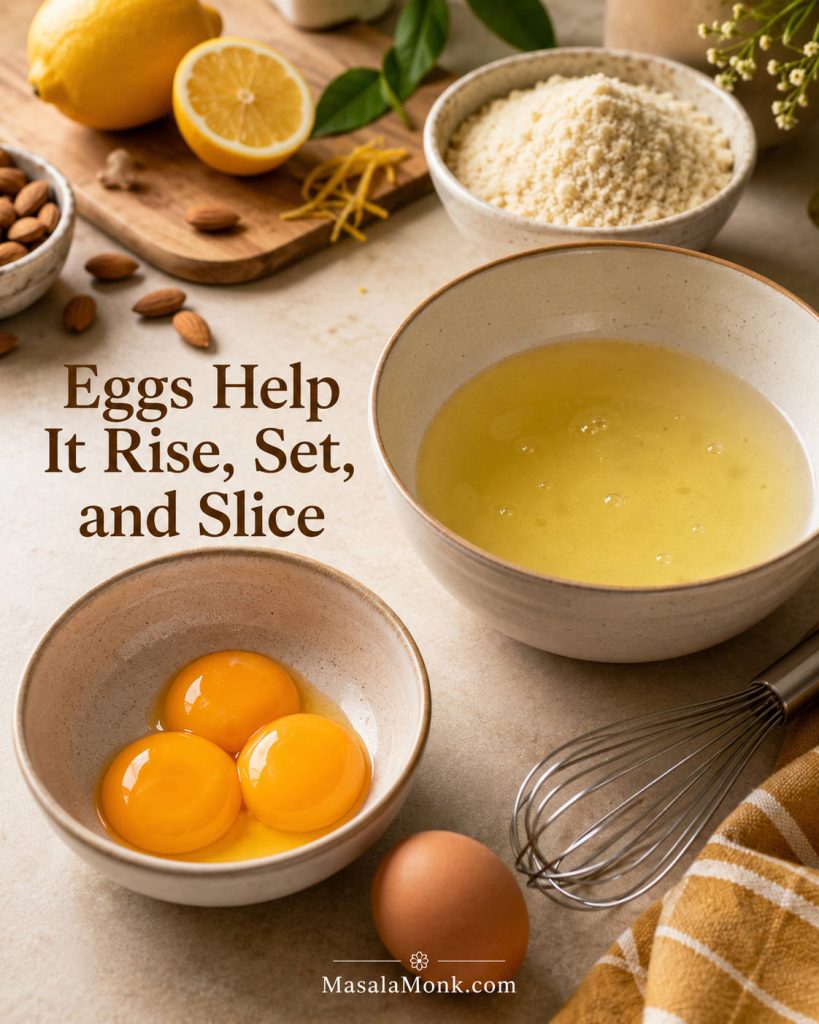
Separated egg yolks and egg whites in bowls with a whisk and almond flour nearby.
In this almond flour cake, separated eggs are doing structure work: yolks enrich the base, while whipped whites help the batter lift.

Need an egg-free version? Read the eggless almond cake note before trying a flax, chia, or yogurt swap.

Sugar

Sugar is not only for sweetness. It helps the top brown, supports the texture, and keeps the cake from tasting flat. Coconut sugar or light brown sugar can work, although the cake will bake darker and taste more caramel-like. Honey or maple syrup need a different formula because liquid sweeteners change the moisture balance.

Vanilla and Almond Extract

Vanilla makes the flavor rounder. Almond extract is optional, but a tiny amount makes the almond note more noticeable. Use it carefully; a few drops can taste bakery-like, while too much can turn bitter, artificial, or perfume-like.

Lemon Zest or Orange Zest

Use lemon zest for a brighter tea-cake flavor or orange zest for a warmer dessert-style cake. In both cases, zest only the colored part of the peel, not the bitter white pith underneath.

Lemon and orange zest flavor board for almond cake with citrus halves and small cake slices.
Lemon keeps the almond cake brighter and tea-friendly; orange makes the same base warmer and more dessert-like.

Baking Powder and Salt

Baking powder supports the lift from the eggs. Salt balances the sweetness and makes the almond flavor taste fuller. If you need a strictly gluten-free cake, check that your baking powder is labeled gluten-free.

Sliced Almonds

Sliced almonds give the top a classic look and a delicate crunch. They also make the cake feel finished without frosting. If they brown too quickly, loosely tent the pan with foil near the end of baking.

Almond Flour vs Almond Meal vs Almond Powder for Almond Cake

Almond flour, almond meal, ground almonds, and almond powder are often used loosely, but they do not always behave the same way in cake.
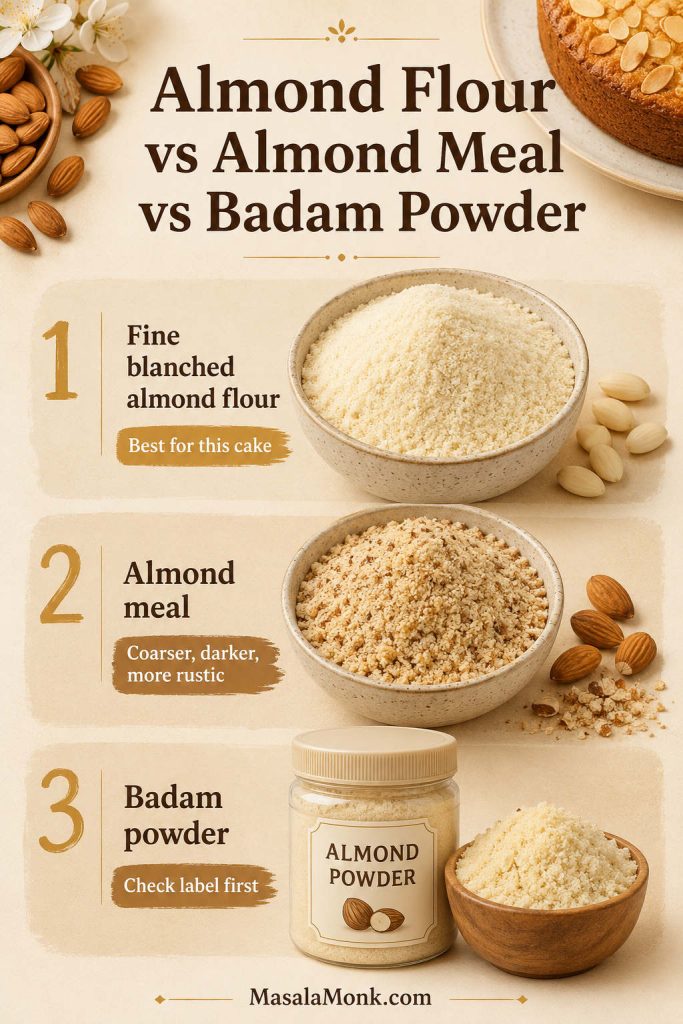
Comparison board showing fine blanched almond flour, almond meal, and badam powder for almond cake.
For almond cake, the grind matters as much as the name; fine flour bakes smoother, almond meal bakes heartier, and badam powder needs checking.
IngredientWhat it usually meansBest use in this cakeTexture result
Fine blanched almond flourAlmonds without skins, ground finelyBest choice for the recipeLightest, most delicate result
Almond meal / ground almondsOften coarser; may include almond skinsWorks by weight, but gives a rustic cakeDarker, nuttier, slightly grainier texture
Almond powder / badam powderCan mean ground almonds, but sometimes means sweetened drink mixUse only if unsweetened and finely groundDepends on grind; sift if clumpy

For the cleanest first bake, use fine blanched almond flour. If you use almond meal, use the same weight, not a packed cup-for-cup swap. Almond meal is often heavier by volume, and it may include skins, so the finished cake will be darker and more textured.

Badam Powder Check for Almond Cake

Almond powder needs extra caution. If you are in India and buying “badam powder,” read the label carefully. You want plain unsweetened ground almonds, not badam milk mix, malted almond drink powder, milk-powder blend, or sweetened beverage mix. Those mixes can make a warm badam drink taste rich, but they do not behave like plain ground almonds in cake batter.
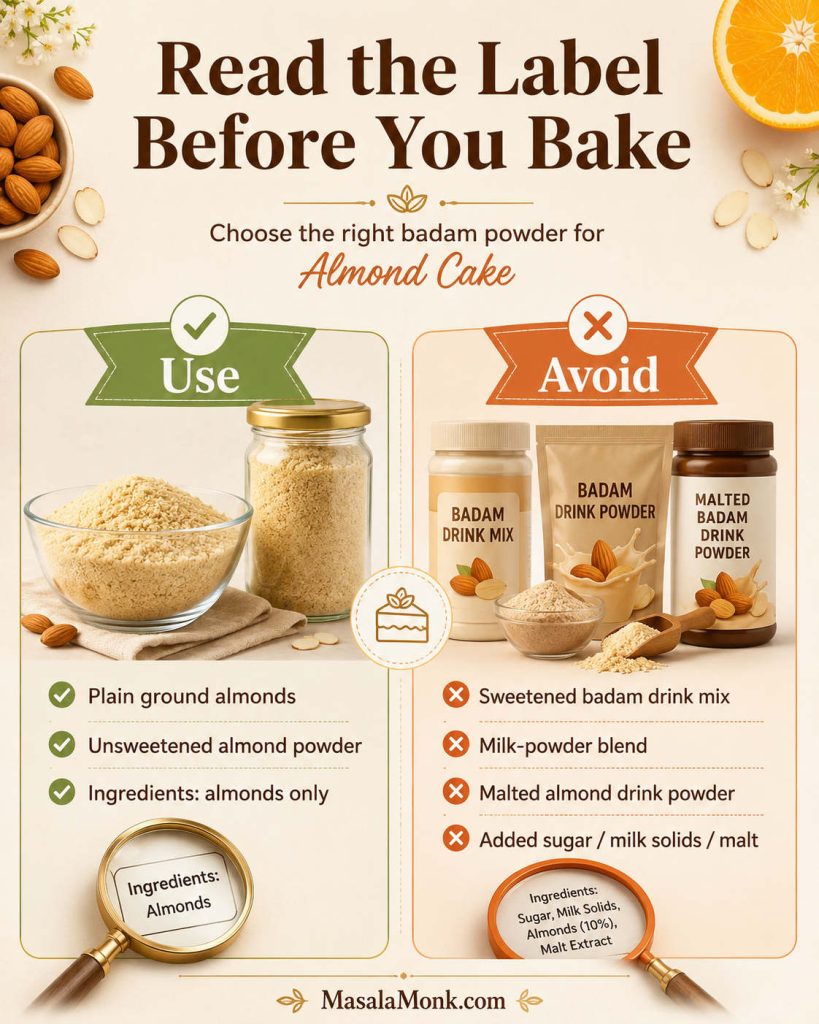
Guide showing plain ground almonds to use and sweetened badam drink mixes to avoid for almond cake.
Before using badam powder in almond cake, check that almonds are the main ingredient; otherwise, sugar, milk solids, or malt can throw off the batter.

Simple rule: fine almond flour gives the cleanest cake. Almond meal gives a rustic cake. Sweetened badam drink mix does not belong in this recipe.

How to Make Almond Cake

The recipe card gives the short method. These cues show what the mixture should look and feel like at each stage, which matters more with almond flour than with a regular wheat batter.

1. Prepare the pan first

Grease the pan and line the base with parchment before you start mixing. A light-colored metal 8-inch / 20 cm round pan gives the most even result. Glass and ceramic hold heat differently and may need extra time, so metal is the safest first choice.
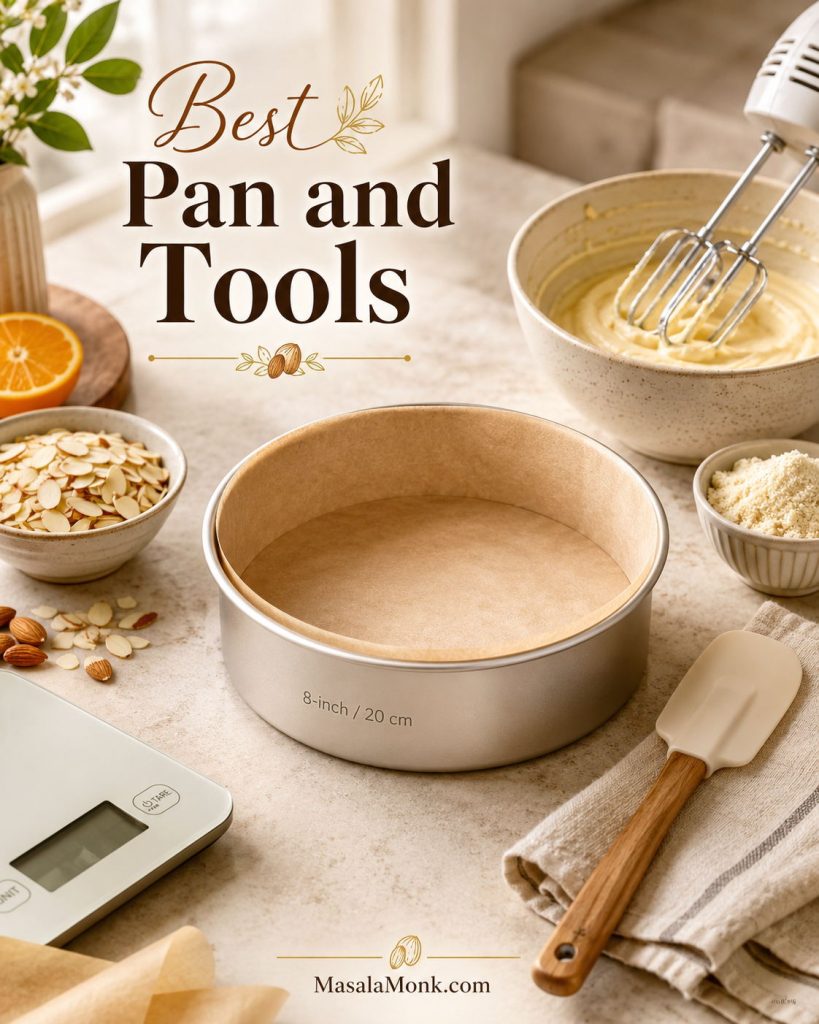
Almond cake equipment with parchment-lined round pan, whisk, spatula, bowls, kitchen scale, and sliced almonds.
A lined metal pan is not just cleanup insurance; it helps this delicate almond cake release cleanly after the edges set.

2. Mix the dry ingredients

Whisk almond flour, baking powder, salt, and citrus zest together. The mixture should look loose and clump-free, not compacted. If the flour has small lumps, break them up now so the finished texture is smoother.
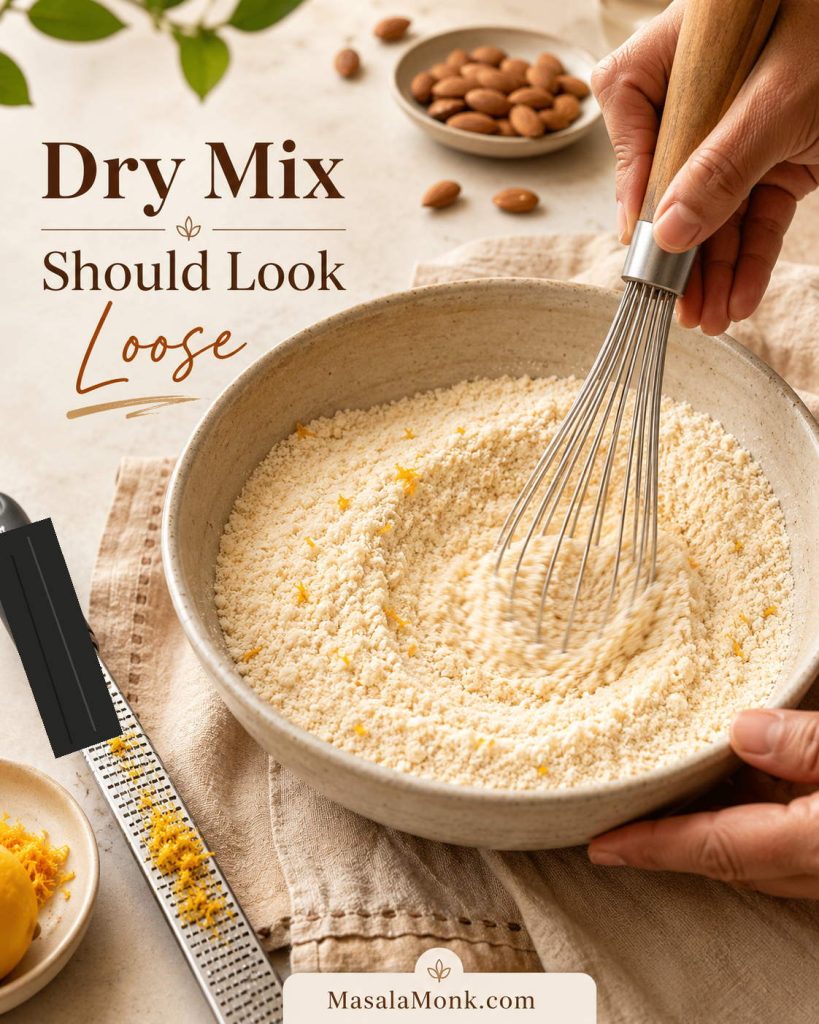
Almond flour dry mixture being whisked with citrus zest until loose and clump-free.
Break up almond flour clumps while the mix is still dry; once wet ingredients go in, those clumps are harder to smooth out.

3. Beat the yolks with sugar

Beat the egg yolks with sugar, vanilla, and almond extract for 2–3 minutes, until the mixture looks paler, creamy, and slightly thick. It does not need to be fluffy like whipped cream, but it should no longer look dry or grainy.
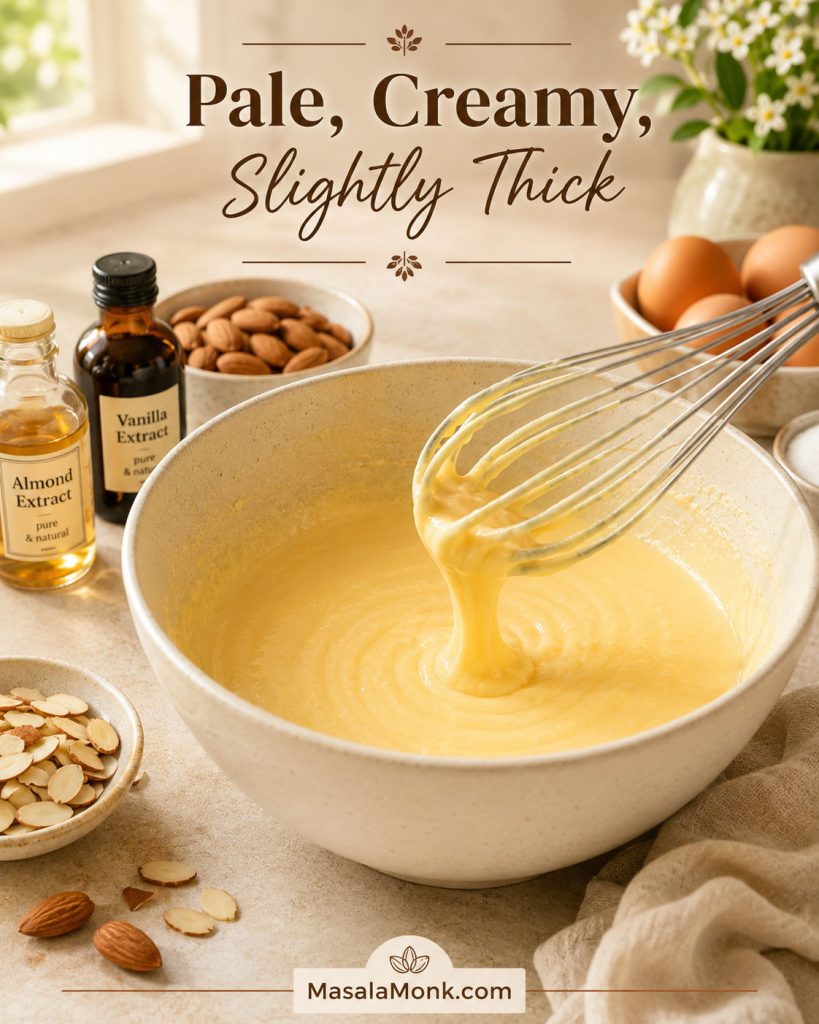
Pale creamy egg yolk and sugar mixture in a bowl with a whisk.
The yolk mixture should look pale and creamy before the almond flour goes in, so the batter starts smoother and blends more evenly.

4. Fold in the almond flour

Add the dry mixture to the yolks and fold until combined. The batter will look thick, almost like a soft almond paste. That is normal; do not loosen it with milk or water. The egg whites will lighten it in the next step.
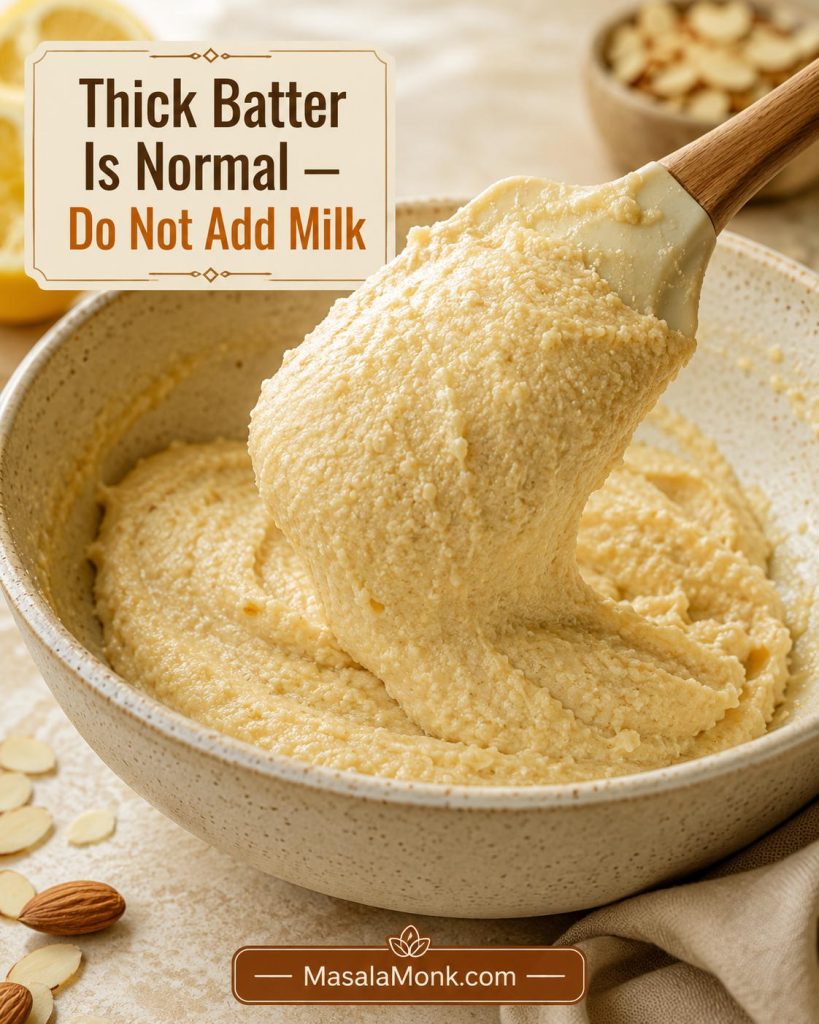
Thick almond cake batter lifted with a spatula before whipped egg whites are folded in.
Thick batter is expected with almond flour, so resist adding milk or water; the next fold with egg whites is what loosens it properly.

5. Whip the egg whites to soft peaks

Beat the egg whites until they hold soft peaks. The whites should look glossy, and the peak should bend slightly when you lift the whisk. Stop before the whites become stiff, dry, or clumpy.
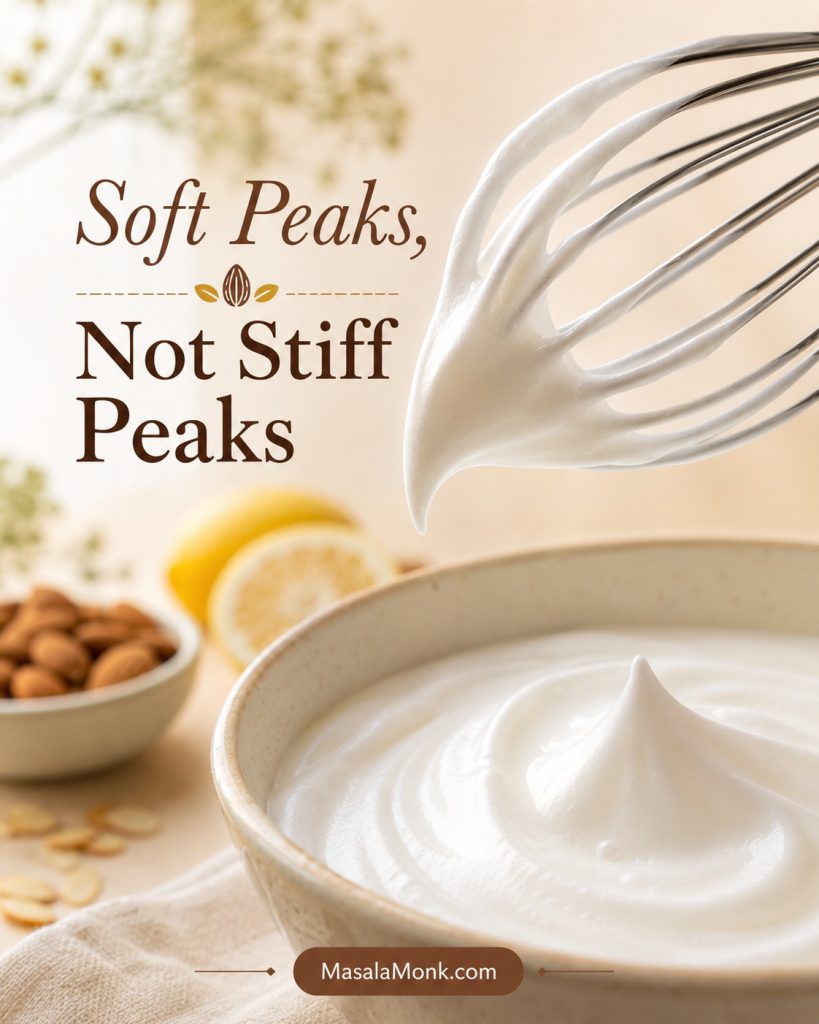
Glossy whipped egg whites holding a soft bending peak on a whisk.
Stop at soft peaks because they fold into almond cake batter more easily than stiff whites and help prevent dry, clumpy pockets.

6. Fold until the batter is thick, airy, and spreadable

Fold one-third of the whites into the thick batter first; it should visibly loosen. Then fold in the rest gently until the mixture is thick, airy, and spreadable, with no large white streaks. Do not beat the batter at this point.
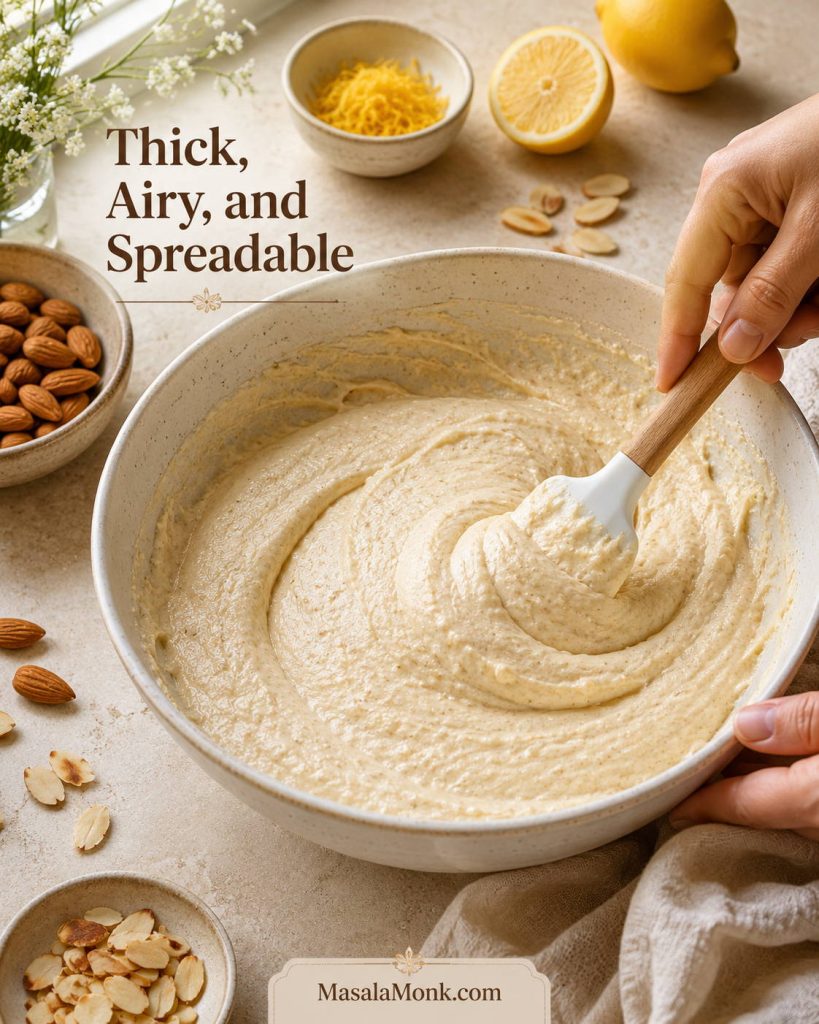
Final almond cake batter being folded with a spatula until thick, airy, and spreadable.
After folding, the batter should look lighter but not runny; that balance helps the almond cake rise while still keeping its rich texture.

7. Fill the pan and bake

Spread the batter into the pan, add sliced almonds, and bake on the middle rack. The top may settle slightly as the cake cools; that is normal. Let it rest in the pan for 15 minutes, then move it to a wire rack. The slice will be cleaner once the center has fully settled.
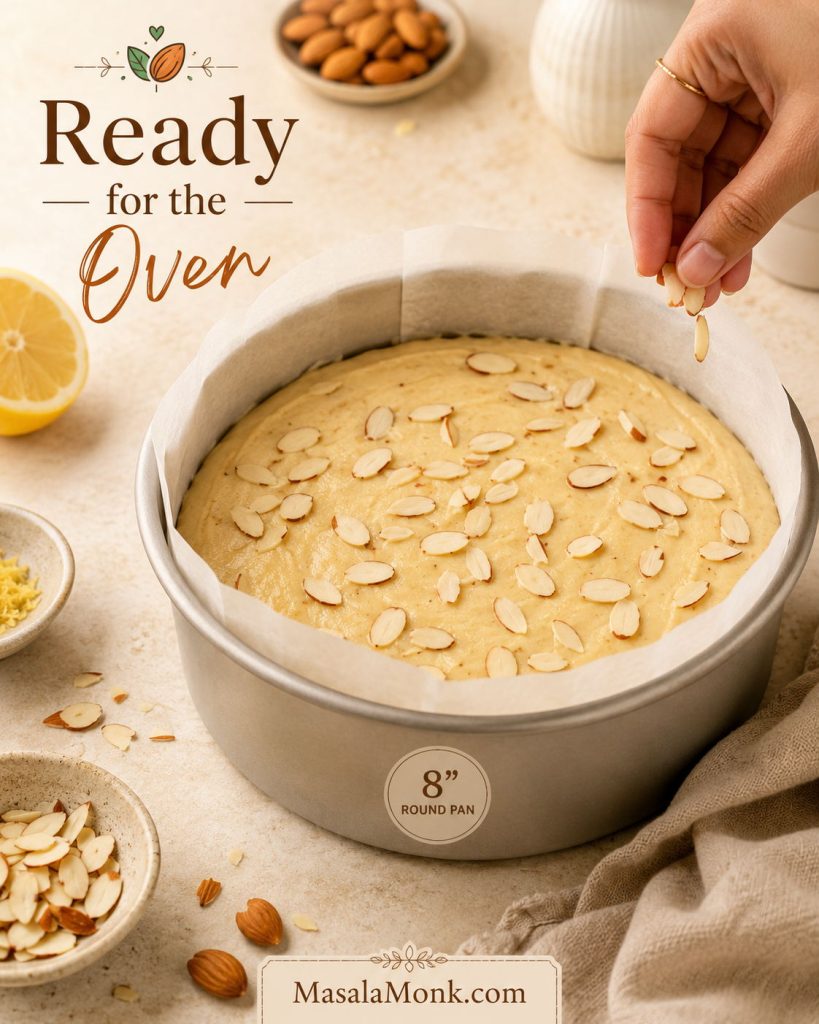
Almond cake batter in a parchment-lined round pan topped with sliced almonds before baking.
Scatter the sliced almonds after smoothing the batter so they toast on the surface instead of disappearing into the cake.

Pan Size, Oven Temperature, and Bake Time

Pan size matters because the edges can brown before the center finishes baking. A deeper cake needs more time; a wider cake bakes faster and can dry out if you use the same timing.

8-Inch vs 9-Inch Pan for Almond Cake

The 8-inch pan is the safest first choice because it gives the cake a little height. A 9-inch pan still works, but it spreads the batter thinner, so the cake finishes sooner and needs earlier checking.
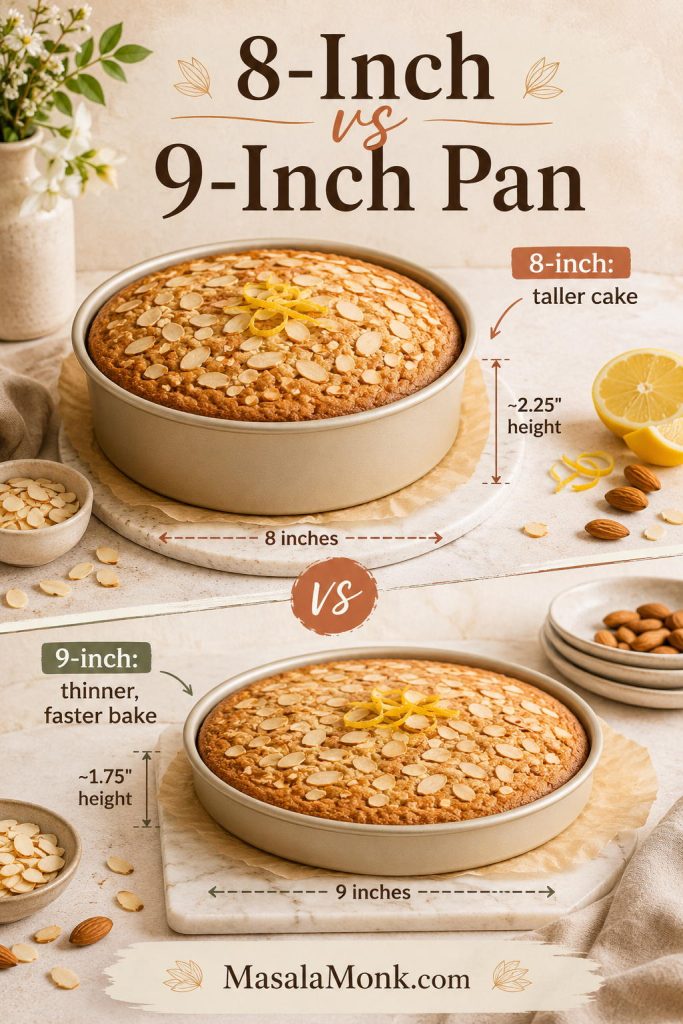
Comparison of almond cake baked in 8-inch and 9-inch pans, showing taller and thinner results.
A 9-inch pan spreads the batter thinner, so the cake bakes faster. Start checking earlier than you would with an 8-inch pan.

Best first pan: use an 8-inch / 20 cm light-colored metal round pan. A 9-inch pan works, but the cake will be thinner and will bake faster.

PanResultApproximate bake timeNotes
8-inch / 20 cm roundTaller cake with a tender center26–32 minutesBest default for this recipe.
9-inch / 23 cm roundThinner cake, slightly faster bake23–28 minutesStart checking early.
8-inch squareEasy square slices24–30 minutesGood for snack-cake style serving.
Cupcake panAbout 9–10 small cakes13–17 minutesFill cups about two-thirds full.
Loaf panDeeper centerNot ideal for this exact batterHigher risk of dark edges and underbaked middle.

For a conventional oven or OTG, use 180°C / 350°F. For fan or convection ovens, use 160°C / 320°F and start checking early. Bake on the middle rack so the top does not brown before the center is ready.

If you use a springform pan, choose a sturdy one. Very thin pans can overbake the edges while leaving the middle slightly underdone. If your oven runs hot or the almond topping browns too fast, loosely tent the cake with foil for the final 5–10 minutes.

Once you choose the pan, use the doneness section rather than bake time alone.

How to Know Almond Cake Is Done

The top may look golden before the middle is fully baked, so use more than color as your guide.
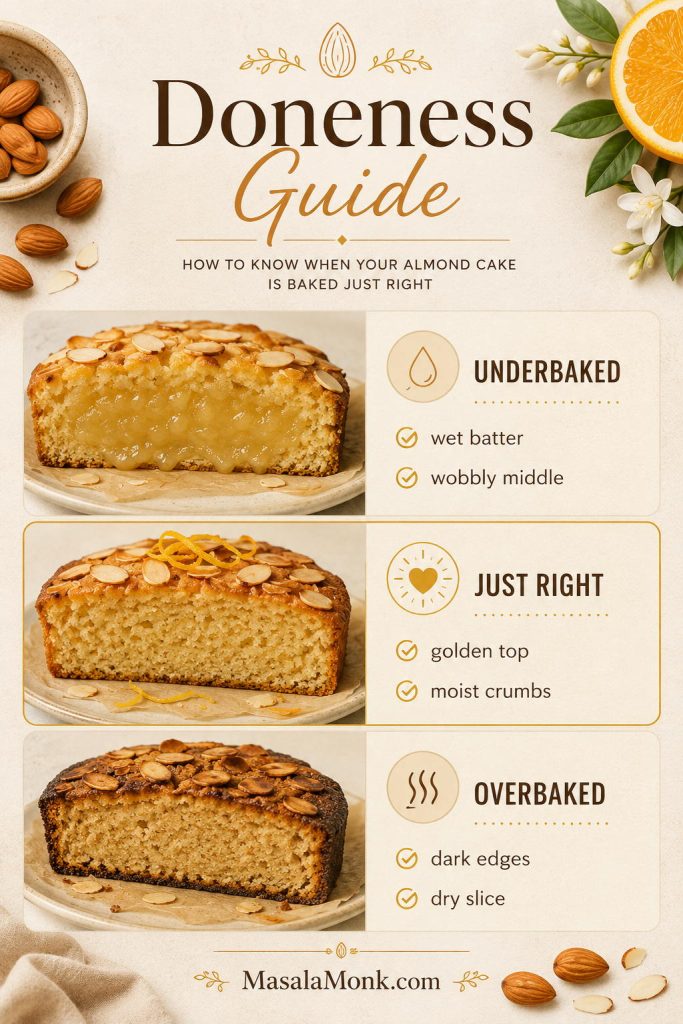
Doneness guide comparing underbaked, just-right, and overbaked almond cake slices with toothpick cues.
Almond cake can look golden before the center is ready, so use the toothpick and the middle of the cake together, not color alone.
  • The top is golden and the sliced almonds are lightly toasted.
  • The center feels set when touched gently.
  • The edges pull slightly away from the pan.
  • A toothpick inserted into the center comes out with moist crumbs, not shiny batter.
  • The cake does not wobble in the middle when the pan is gently moved.

A few damp-looking crumbs are fine. Shiny wet batter means the cake needs more time. If the top is already brown, tent it loosely with foil and continue baking. For extra precision, the center should be about 93–96°C / 200–205°F on an instant-read thermometer.

Toothpick Test for Almond Cake

Insert the toothpick into the center, not the edge. The edge sets first, so it can make the cake seem done while the middle still needs a few more minutes.
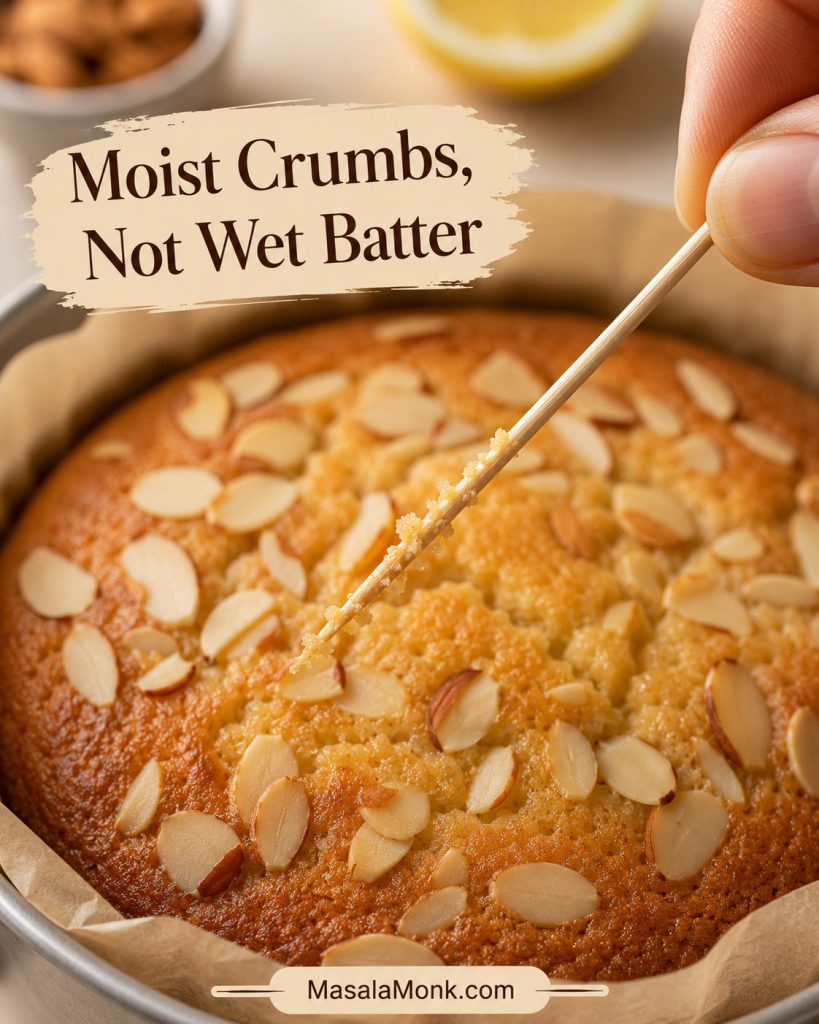
Toothpick pulled from almond cake with moist crumbs and no wet batter.
Moist crumbs on the toothpick are the sweet spot. Shiny batter means underbaked; a bone-dry toothpick can mean overbaked.

The cake does not need to look dramatic when it comes out of the oven. A softly golden surface, lightly toasted almonds, and a middle that no longer wobbles are enough. The finished texture shows after cooling, when the center has had time to settle.

Almond Cake Variations

Keep the first bake simple, then change flavorings and toppings in small ways. That way the cake stays familiar even when you shift the flavor.
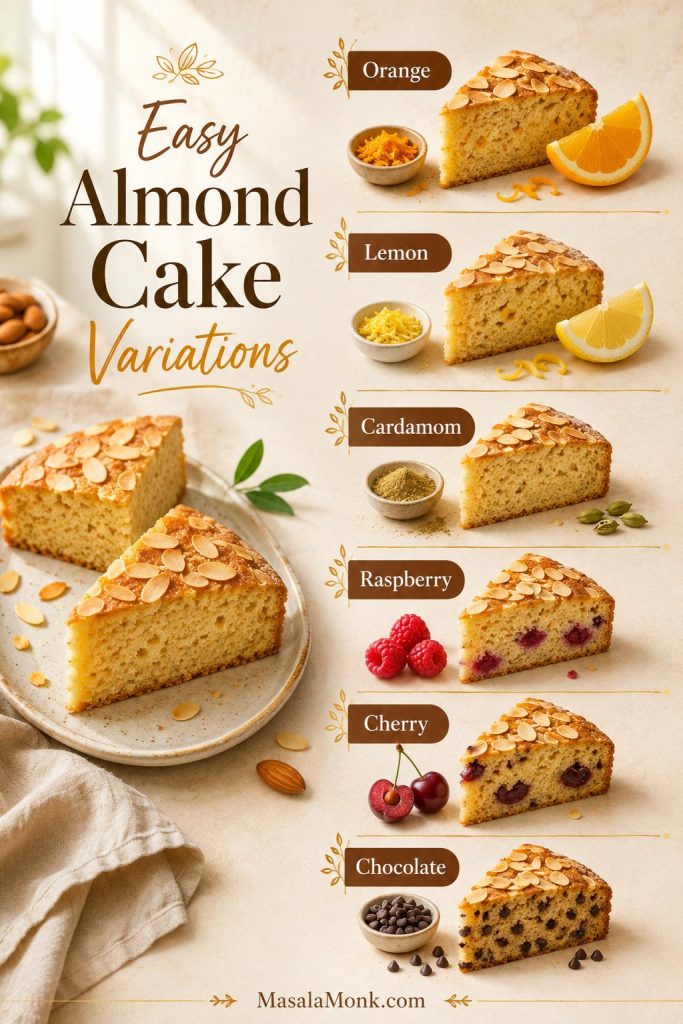
Almond cake variation board with orange, lemon, cardamom, raspberry, cherry, and chocolate options.
Once the base almond cake is reliable, small add-ins work best; start with zest, spice, berries, cherries, or a few chocolate chips rather than changing the whole formula.
VariationHow to do itImportant note
Orange almond cakeUse 1 tablespoon orange zest. Optional glaze: 60 g powdered sugar + 1–2 teaspoons orange juice.Warmer and more dessert-like than lemon.
Lemon almond cakeUse 1 tablespoon lemon zest. Optional glaze: 60 g powdered sugar + 1–2 teaspoons lemon juice.Best first variation because it adds brightness without much moisture.
Cardamom almond cakeAdd 1/4 teaspoon ground cardamom with the dry ingredients.Good for a badam-style note; do not overdo it.
Raspberry almond cakeScatter 1/3 cup raspberries over the top before baking.Too many berries can make the center sink.
Cherry almond cakeUse 1/3 cup pitted, halved cherries on top of the batter.Keep cherries near the top because they release moisture.
Chocolate almond cakeFold in 1/4 cup mini chocolate chips after the egg whites are mostly incorporated.For a true chocolate cake, use a separate cocoa-based formula.
Almond meal cakeUse 150 g almond meal instead of fine almond flour.Expect a darker, nuttier, more rustic result.
Olive oil almond cakeAdd 1 tablespoon mild olive oil to the yolk mixture.Do not add more on the first attempt; ground almonds already contain fat.

Orange Almond Cake Variation

For orange almond cake, use orange zest instead of lemon zest. A very light glaze can work after cooling, but do not cover the sliced-almond top so heavily that the cake turns sticky.
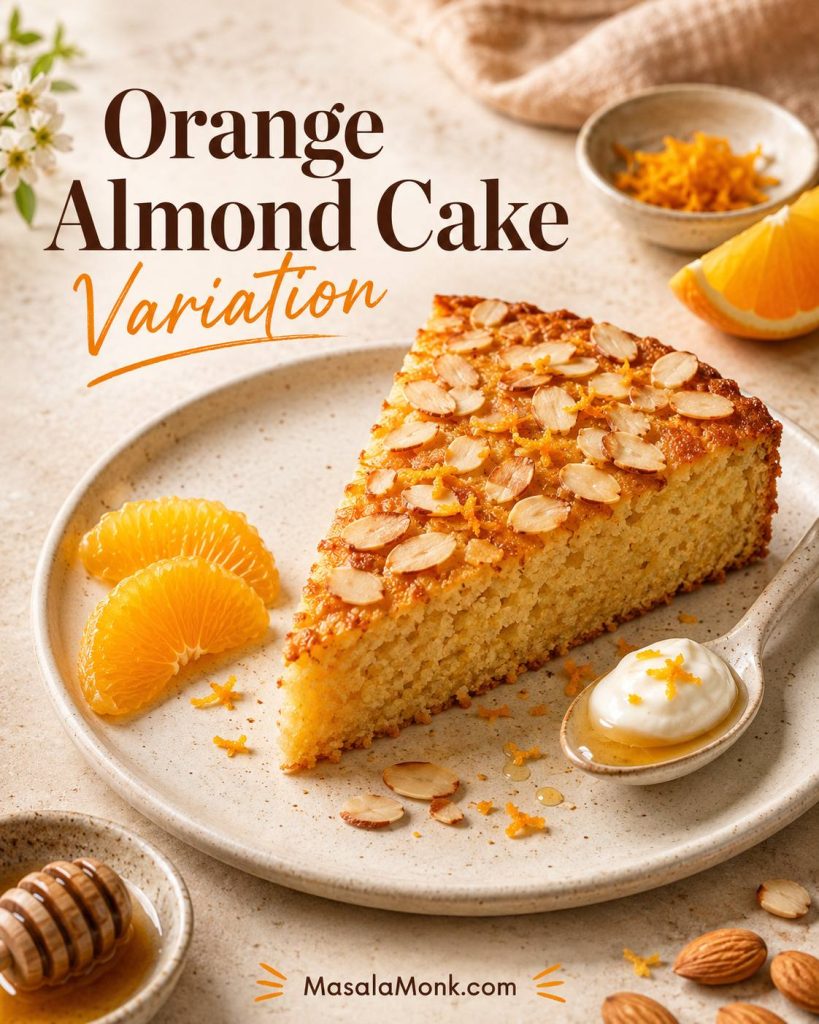
Orange almond cake slice with sliced almonds, orange zest, orange segments, honey, and yogurt.
Orange almond cake works best when the citrus stays fragrant, not heavy; a little honey or yogurt adds dessert energy without covering the almond top.

Lemon Almond Cake with Berries

For lemon almond cake, use lemon zest and keep the serving style bright. Berries and cream make the cake feel fresh without adding extra moisture to the batter itself.
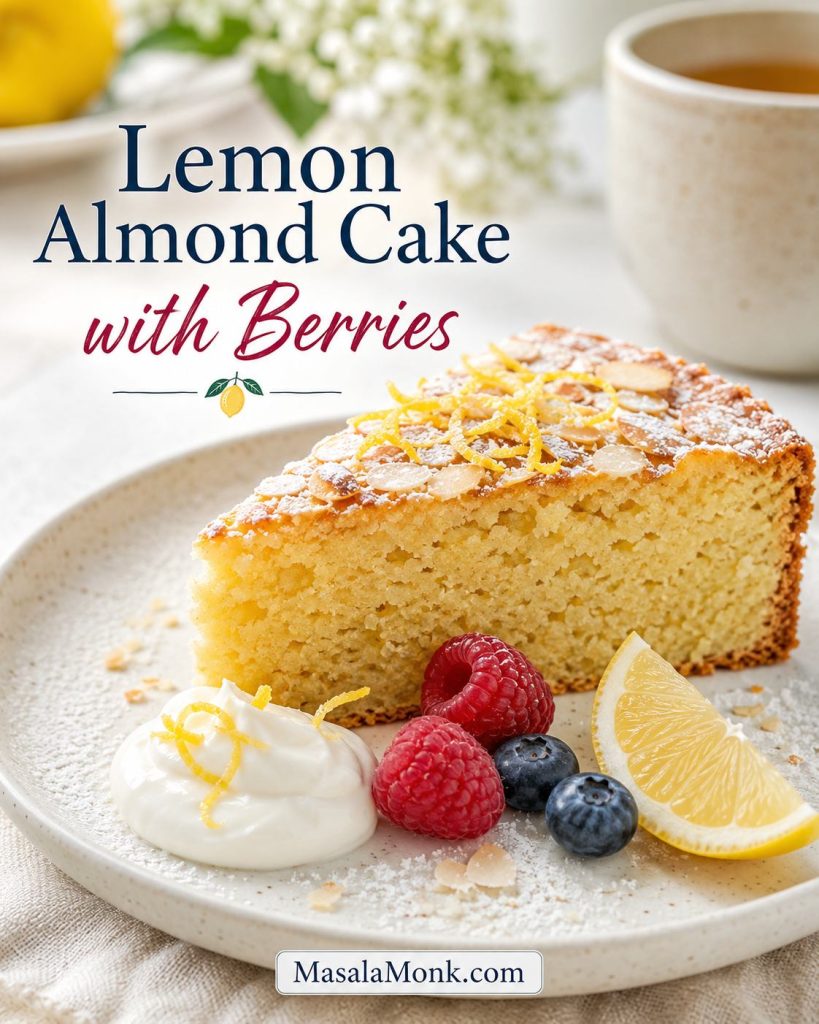
Lemon almond cake slice with berries, cream, lemon zest, and a lemon wedge.
Lemon almond cake with berries is the brightest serving route, especially when you want a slice that feels fresh enough for brunch.

Whole-orange almond cake is different: that style usually uses boiled whole oranges, almond meal, eggs, sugar, and a longer, lower bake. It has a damp, marmalade-like texture and often needs a blender or food processor.

Can This Almond Cake Be Made Eggless?

For this exact cake, eggs are structural. They help the almond flour rise, set, and hold a clean slice, so flax eggs, chia eggs, or only yogurt will not behave like a simple one-for-one swap.

Eggless almond cake usually needs a recipe built differently from the start. It often uses yogurt, all-purpose flour or a gluten-free flour blend, extra leavening, and sometimes milk or oil to help the cake rise, set, and cut cleanly. A 100% almond flour eggless cake is especially difficult because ground almonds do not have enough starch or gluten-like binding on their own.

Honest baking note: if you need an eggless almond cake, use a recipe built for that job. A yogurt-based version with some flour support will usually perform better than removing the eggs from this batter.

Is This a Keto Almond Cake?

This recipe uses almond flour, but it is not a keto cake because it uses regular sugar. Almond flour lowers the wheat-flour load, but sugar still makes this a standard dessert. Sugar also affects browning, moisture, and structure, so a keto version needs its own sweetener formula rather than a direct cup-for-cup swap.

For low-carb baking context, this guide to keto-friendly flours explains how almond flour behaves compared with other low-carb flour options. If blood sugar is a concern, dessert still needs portion awareness; this guide on almond flour and diabetes covers the ingredient side in more detail.

How to Serve Almond Cake

This cake does not need frosting. A light dusting of powdered sugar is enough for a simple tea cake, but you can dress it up depending on the occasion.
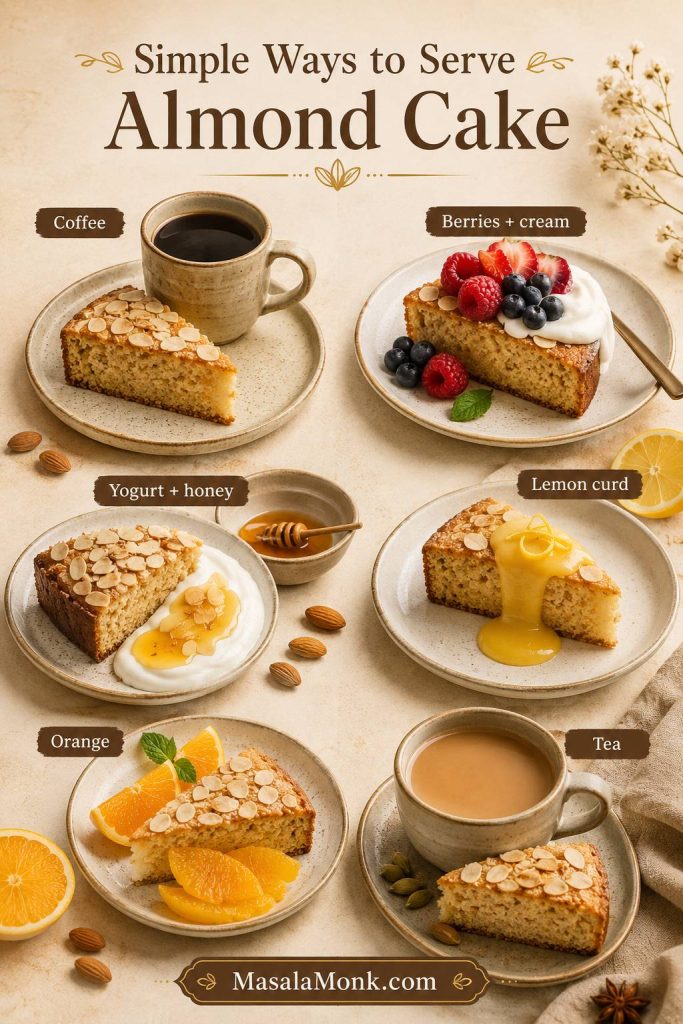
Serving ideas board for almond cake with coffee, berries and cream, yogurt and honey, lemon curd, orange segments, and tea.
Pair almond cake with light toppings instead of heavy frosting; coffee, tea, fruit, yogurt, honey, citrus, and lemon curd all support the almond flavor.
  • Serve plain with tea, coffee, or masala chai.
  • Add powdered sugar and fresh berries.
  • Serve with Greek yogurt or lightly whipped cream.
  • Add orange segments and a little honey for an orange almond dessert plate.
  • Pair lemon almond cake with lemon curd.
  • Serve cardamom almond cake with saffron cream or vanilla ice cream.
  • Toast leftover slices lightly and serve with homemade almond milk or coffee.

Because the middle is already rich and tender, keep toppings light. A little cream, fruit, citrus, or honey works better than heavy frosting and keeps the toasted almond flavor in front. Choose lemon with berries and cream for a brighter tea-cake finish; choose orange with honey or yogurt for a warmer dessert plate.

Choosing between lemon and orange? The variation table gives the easiest flavor adjustments.

How to Store Almond Cake

Almond cake keeps well because ground almonds naturally hold moisture. In fact, the cake often tastes better after a few hours of resting because the texture settles and the flavor becomes rounder.
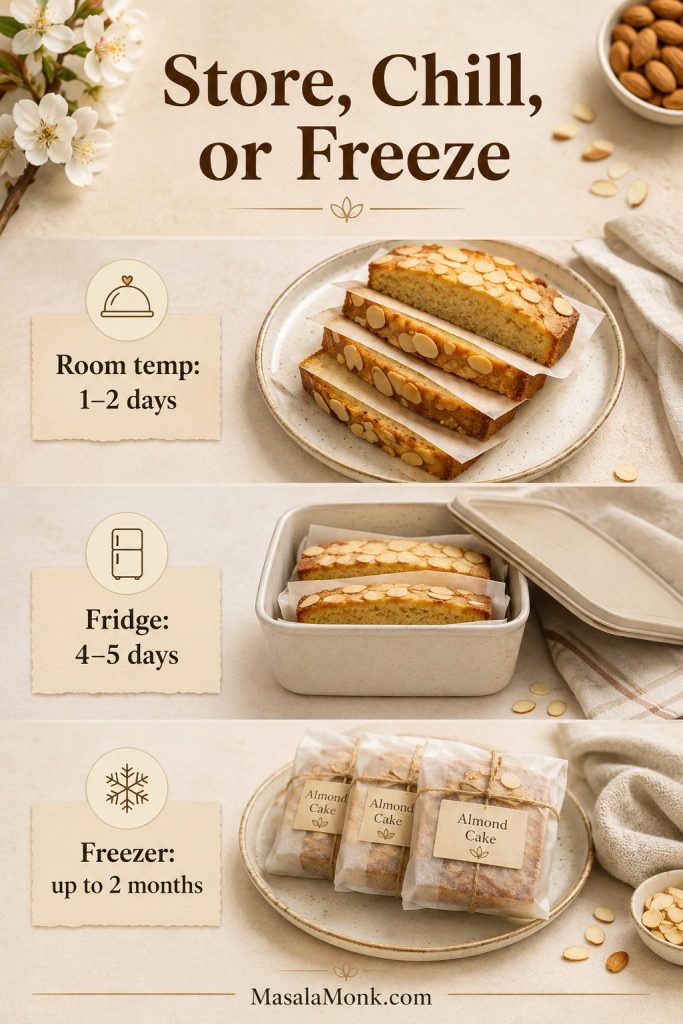
Almond cake storage guide showing room temperature slices, fridge container, and freezer-wrapped portions.
Store almond cake only after it cools completely; then parchment between slices keeps make-ahead portions clean, separate, and easy to serve.
  • Room temperature: store in an airtight container for 1–2 days.
  • Fridge: store for 4–5 days. Bring slices to room temperature before serving.
  • Freezer: freeze slices for up to 2 months. Place parchment between slices so they do not stick together.
  • Make-ahead: bake the cake one day ahead, cool completely, wrap well, and dust with powdered sugar just before serving.

If the cake has been refrigerated, let it sit at room temperature for 20–30 minutes before serving. Cold almond cake can taste firmer and less fragrant than a room-temperature slice.

If a stored slice tastes dry, the troubleshooting guide has quick serving fixes.

Almond Cake Troubleshooting

Most almond cake problems come from too much almond flour, an underbaked center, or cutting the cake before the middle has settled. If you are still mixing, check the step-by-step cues; if the cake is already in the oven, go straight to doneness.
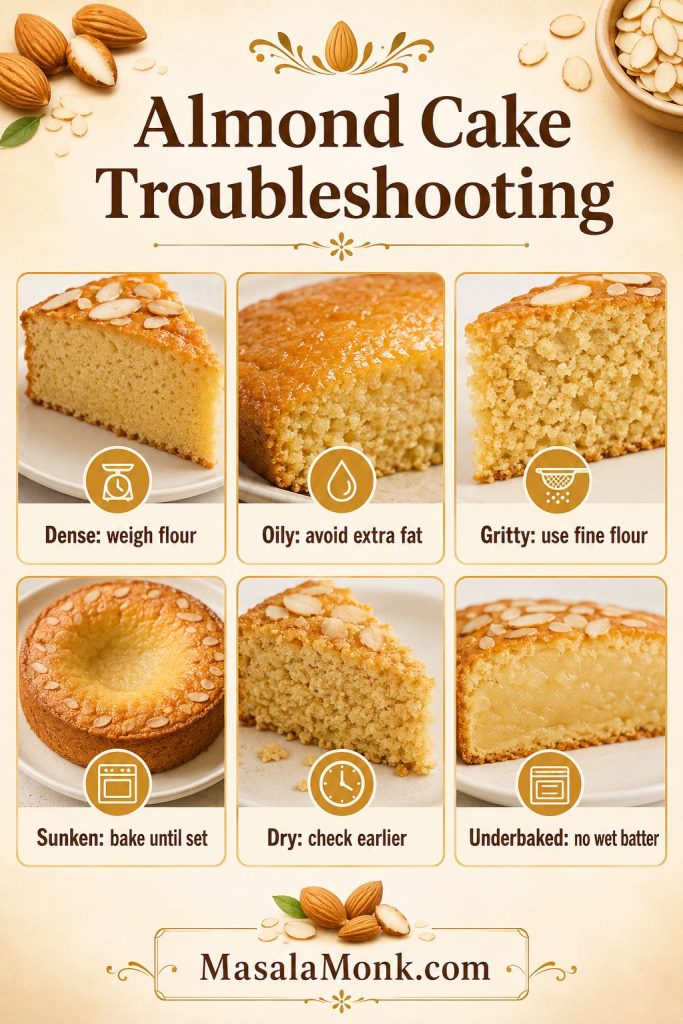
Almond cake troubleshooting board showing dense, oily, gritty, sunken, dry, and underbaked cake problems with fixes.
When almond cake fails, start with the basics first: flour weight, egg-white structure, pan heat, bake time, and cooling before slicing.

Fix-now mindset: if the cake is already baked, cool it fully, dust with powdered sugar, serve with yogurt or cream, or cut smaller slices. For the next bake, focus on flour weight, egg whites, pan size, oven heat, and cooling time.

Texture Problems: Dense, Oily, Gritty, or Dry Almond Cake

ProblemLikely reasonFix nowFix next time
Cake is denseToo much almond flour, deflated whites, or overmixed batter.Serve thin slices with cream, yogurt, or berries.Weigh the flour, whip whites to soft peaks, and fold gently.
Cake is oilyCoarse/oily almond flour, packed flour, or too much added fat.Chill briefly and serve small slices.Use fresh fine almond flour and avoid extra oil in the base recipe.
Cake is grittyCoarse almond meal or clumpy almond powder.Serve with whipped cream or yogurt to soften the bite.Use fine blanched almond flour or sift almond powder before mixing.
Cake is dryOverbaked, too wide a pan, or fan oven too hot.Serve with yogurt, cream, honey, or fruit.Check earlier, use an 8-inch pan, and reduce fan oven temperature.
Cake smells eggySlightly underbaked, weak flavor balance, or served too warm.Cool fully and serve with citrus or cream.Bake fully, use zest and vanilla, and cool before serving.
Cake tastes bitterToo much almond extract, citrus pith, old almond flour, or burnt sliced almonds.Serve with sweetened cream or powdered sugar.Use only 1/4 teaspoon almond extract, zest lightly, and tent the top if needed.

Baking and Cooling Problems: Sunken, Raw, Cracked, or Stuck Cake

ProblemLikely reasonFix nowFix next time
Center sankUnderbaked center, early oven opening, or overmixed batter.Dust with powdered sugar or cover with berries.Bake until the middle is set and avoid opening the oven too soon.
Edges browned but center stayed rawPan too thin, oven too hot, or cake baked too high in the oven.Return to oven loosely covered with foil if still very wet.Use a sturdy pan, bake on the middle rack, and tent with foil if needed.
Almond slices burnedOven runs hot or cake was baked too high.Brush off the darkest almonds before serving.Bake on the middle rack and tent once the top is golden.
Top crackedOven heat was strong or batter rose quickly.Dust with powdered sugar; a small crack is normal.Use the correct temperature and avoid overbeating the whites.
Cake is too flatWide pan, deflated whites, or old baking powder.Serve as a thin tea cake.Use an 8-inch pan, fresh baking powder, and fold gently.
Cake stuck to the panNo parchment or cake was removed too hot.Serve rustic pieces with cream or fruit.Line the base with parchment and cool 15 minutes before removing.
Bottom feels wetUnderbaked, cooled too long in the pan, or stored before fully cool.Let slices air out briefly before serving.Bake until set, cool 15 minutes in pan, then move to a wire rack.

FAQs About Almond Cake

Is almond cake the same as almond flour cake?

Often, yes. In this recipe, almond cake means a cake made mainly with almond flour instead of wheat flour. Some bakery-style almond cakes use wheat flour and almond extract, so they have a different texture.

Almond meal instead of almond flour: what changes?

Use the same weight of almond meal, but expect a darker, nuttier, more rustic cake. Fine blanched almond flour gives the most delicate result.

Is almond powder the same as almond flour?

Sometimes. Plain finely ground almonds can work. Sweetened badam drink mix, malted almond powder, or milk-powder blends should not be used for this cake.

Is this almond cake gluten-free?

It is naturally gluten-free if every ingredient is gluten-free. Check baking powder, extracts, toppings, and cross-contact if you are baking for someone with strict gluten-free needs. The Celiac Disease Foundation’s gluten-free foods guide is a helpful reference.

Why did my almond cake sink in the middle?

The center was likely underbaked, the oven was opened too early, or the egg whites deflated during mixing. Bake until the middle feels set and the toothpick shows moist crumbs, not wet batter.

Why is my almond cake oily?

Almond flour contains natural fat, so the cake can feel oily if the flour is packed, the almond meal is coarse, or extra fat is added. Use fresh fine almond flour, avoid extra oil in the base recipe, and measure by weight when possible.

Why eggs matter in this almond flour cake

Eggs are doing the structure work here. They help the almond flour batter lift, set, and hold a clean slice. That is why a flax, chia, or yogurt swap will not behave the same way.

How to turn this into orange almond cake

Use orange zest instead of lemon zest for a simple orange almond cake. You can also drizzle the cooled cake with a light orange glaze. A whole-orange almond cake is a different recipe with a longer bake time.

Best pan size if you do not have an 8-inch pan

A 9-inch pan works, but the cake will be thinner and bake faster. Start checking around 23 minutes and remove it when the center is set.

Freezing almond cake without drying it out

Freeze the cake only after it has cooled completely. Slice it first, place parchment between the slices, and store airtight for up to 2 months.

Back to top

Final Notes

Once the cake has cooled, the reward is in its simplicity: a golden almond top, a clean slice, and a citrus-almond flavor that works with coffee, berries, cream, or nothing at all. It does not need frosting or complicated decoration to feel finished.

Give the batter a light hand, give the cake enough time to settle, and the result is a tender almond flour cake that feels special without trying too hard.
Posted on Leave a comment

Buttercream Frosting Recipe

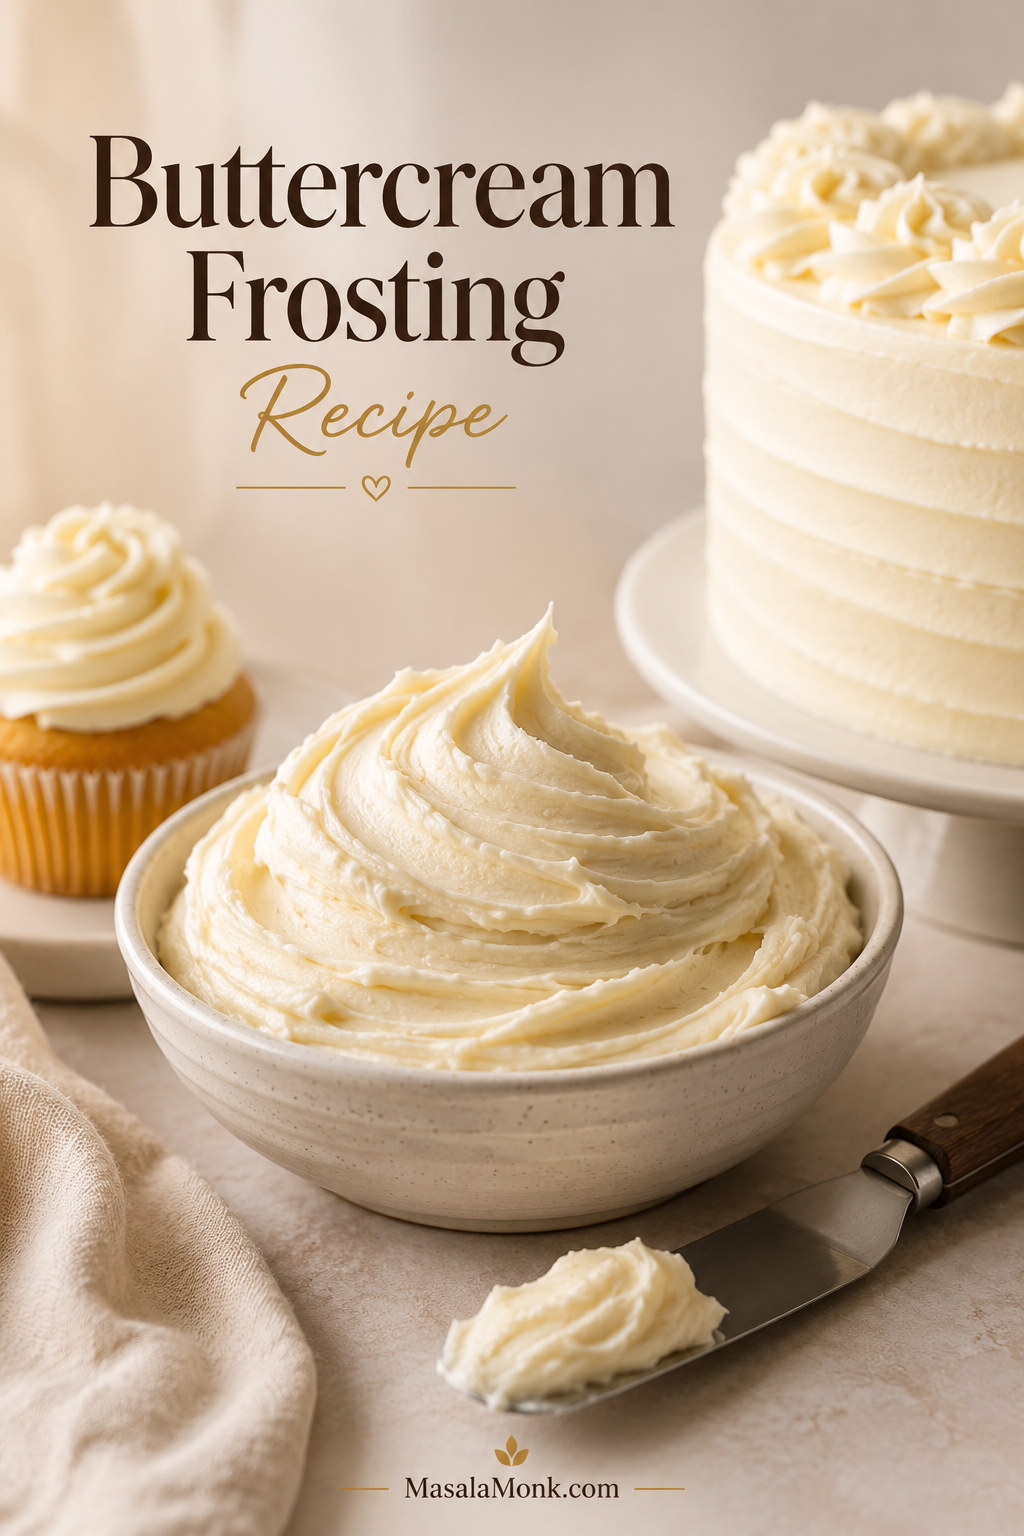
Bowl of fluffy vanilla buttercream frosting with a frosted cupcake, partial cake, and offset spatula in a warm bakery setting.

This buttercream frosting recipe is the one to make when the cake is cooling, the cupcakes are waiting, and you need frosting that will behave. It is classic American vanilla buttercream: fluffy, creamy, sweet, stable enough to pipe, and soft enough to spread.

The ingredients are simple — butter, powdered sugar, vanilla, cream or milk, and a little salt — but the real difference comes from butter temperature, gradual mixing, and knowing what the bowl is telling you.

This guide gives you the base recipe first, then the texture cues, quantity guide, piping help, storage notes, and practical fixes for the moments when the frosting looks too thick, too soft, or not quite right.

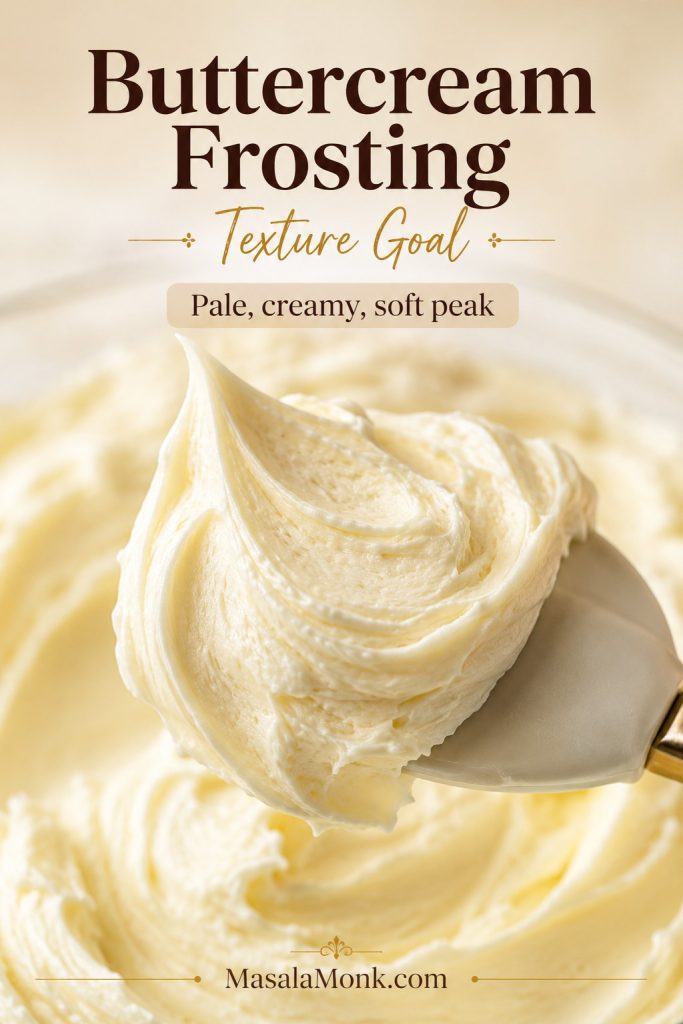
What finished buttercream should look like

Finished buttercream should look pale and creamy, feel soft but not loose, and hold a gentle swirl without slumping. That visual target matters more than the exact minute count on the mixer.

Close-up of pale vanilla buttercream on a spatula with smooth ridges and a soft peak.
Use this soft peak as your visual target; the frosting should look creamy and lifted, not shiny, wet, dry, or jagged.

Quick Answer: The Best Buttercream Frosting Ratio

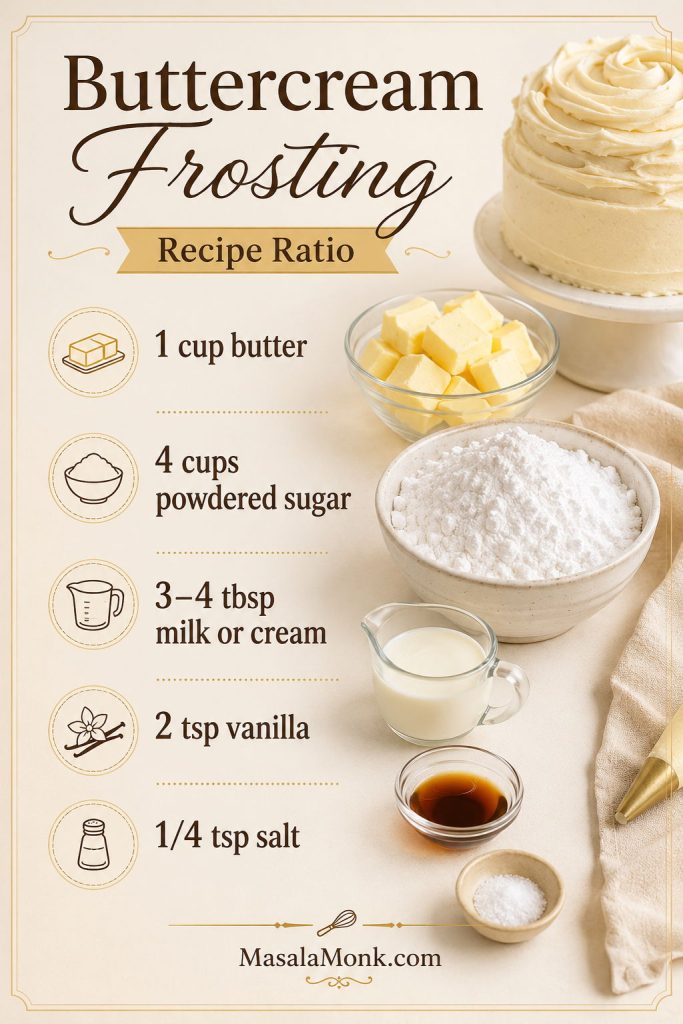
The easiest American buttercream ratio to remember is 1 cup butter to 4 cups powdered sugar, with just enough milk or cream to make it smooth. That gives you a classic homemade buttercream frosting that is fluffy, stable, and strong enough for cakes and cupcakes.

Quick ratio: Beat 1 cup / 226g softened butter with 4 cups / 480g powdered sugar, then add 3–4 tablespoons / 45–60ml milk or heavy cream, 2 teaspoons vanilla extract, and 1/4 teaspoon fine salt. This makes about 2.5–3 cups of fluffy frosting.

The buttercream ratio at a glance

Use this as the base batch, then adjust the final spoonfuls of milk or cream for spreading, piping, or decorating.

Buttercream frosting ratio board with butter, powdered sugar, milk or cream, vanilla, and salt measured for the recipe.
Think of this as the base batch: butter and powdered sugar build structure, while milk or cream turns it into frosting you can actually spread or pipe.

That ratio gives you a frosting that tastes rich, pipes cleanly, and still spreads without tearing soft cake.

Ingredient Amount Why it matters
Unsalted butter 1 cup / 2 sticks / 226g / 8 oz Gives the frosting richness, body, and buttery flavor.
Powdered sugar / icing sugar 4 cups / 480g / about 1 lb Sweetens and thickens the frosting so it can hold shape.
Milk or heavy cream 3–4 tbsp / 45–60ml / 1.5–2 fl oz Loosens the texture so the frosting can spread or pipe smoothly.
Vanilla extract 2 tsp / 10ml Adds the classic vanilla buttercream flavor.
Fine salt 1/4 tsp Balances the sweetness and makes the flavor taste fuller.

One base batch is enough for about 12 cupcakes with generous swirls, 18 cupcakes with a spread finish, or the top of one 9×13 sheet cake. For a full layer cake or heavy piping, check the quantity guide before you start.

Buttercream Frosting at a Glance

Quick recipe overview

Here is the practical snapshot before you start mixing.

StyleAmerican vanilla buttercream
Time10 minutes
YieldAbout 2.5–3 cups
Best forCakes, cupcakes, piping
Main controlCool-soft butter
Texture targetSoft peak, no oily shine
Best fixesLiquid, sugar, or chill time
DifficultyBeginner-friendly

What Is American Buttercream Frosting?

American buttercream is a thick, creamy frosting made by beating butter and powdered sugar together, then loosening the mixture with milk or cream and flavoring it with vanilla and salt. It is the simplest buttercream style because it does not need egg whites, sugar syrup, cooking, a double boiler, or a thermometer.

You may also see similar recipes called buttercream icing, butter icing, butter frosting, vanilla frosting, or cake frosting. The wording changes by region and habit, but home bakers are usually looking for the same thing: a simple, sweet, fluffy frosting that works for cakes and cupcakes.

American buttercream is sweet by design. Powdered sugar does more than sweeten the batch; it also gives the frosting structure, stability, and pipeable body. That sweetness is why a little salt, good vanilla, and a careful layer matter so much.

Good to know: This is not Swiss meringue buttercream, Italian buttercream, ermine frosting, whipped cream frosting, or cream cheese frosting. It is the easiest American-style version made with butter, powdered sugar, vanilla, milk or cream, and salt.

If you actually need a lighter topping for pies, fruit desserts, hot chocolate, pancakes, or no-bake desserts, MasalaMonk’s whipped cream recipe is a better fit than buttercream.

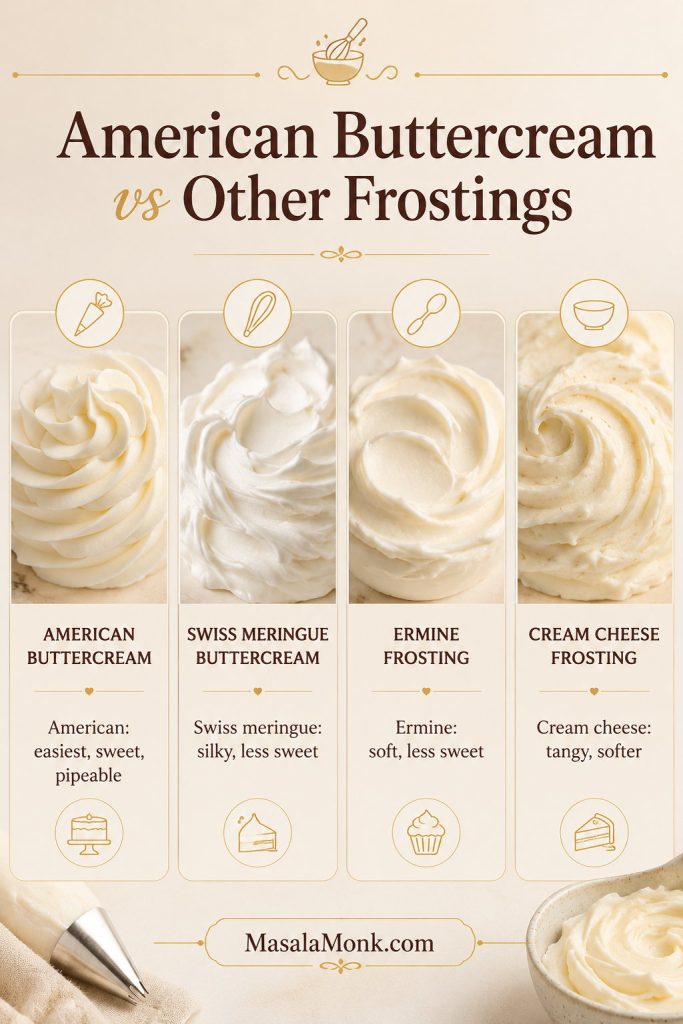
How American buttercream compares to other frostings

Use American buttercream when you need something fast, dependable, and easy to pipe. Choose another frosting family when the main goal is a silkier texture, lower sweetness, or tangy flavor.

Comparison board of American buttercream, Swiss meringue buttercream, ermine frosting, and cream cheese frosting.
American buttercream is the quick, pipeable choice; however, Swiss meringue or ermine may suit you better when a silkier, less-sweet frosting is the priority.
Frosting style Best for Sweetness Difficulty
American buttercream Quick cakes, cupcakes, piping, sheet cakes High Easy
Swiss meringue buttercream Silky layer cakes, less-sweet finish Medium Medium
Ermine frosting Soft, less-sweet cakes Medium-low Medium
Cream cheese frosting Carrot cake, red velvet, spice cake Medium Easy

Start here when you need something fast and dependable. Choose Swiss meringue buttercream or ermine frosting when you want a silkier, less-sweet finish and do not mind a more involved method.

Before You Start: 4 Things That Matter

Buttercream is forgiving, but a few small choices make the whole process easier.

  • Use cool-soft butter, not greasy butter. The butter should press easily with a finger but still hold its shape.
  • Add powdered sugar gradually. This keeps the frosting smoother and stops sugar from flying around the bowl.
  • Sift only if the sugar is lumpy. Fresh powdered sugar usually mixes in fine, but clumpy icing sugar can leave tiny dry pockets.
  • Do not add all the liquid at once. Start with less milk or cream, then add more only after the frosting has come together.

A calm buttercream is usually a better buttercream: slow sugar, small liquid additions, and short chill breaks beat panic-fixing almost every time.

Buttercream Frosting Ingredients

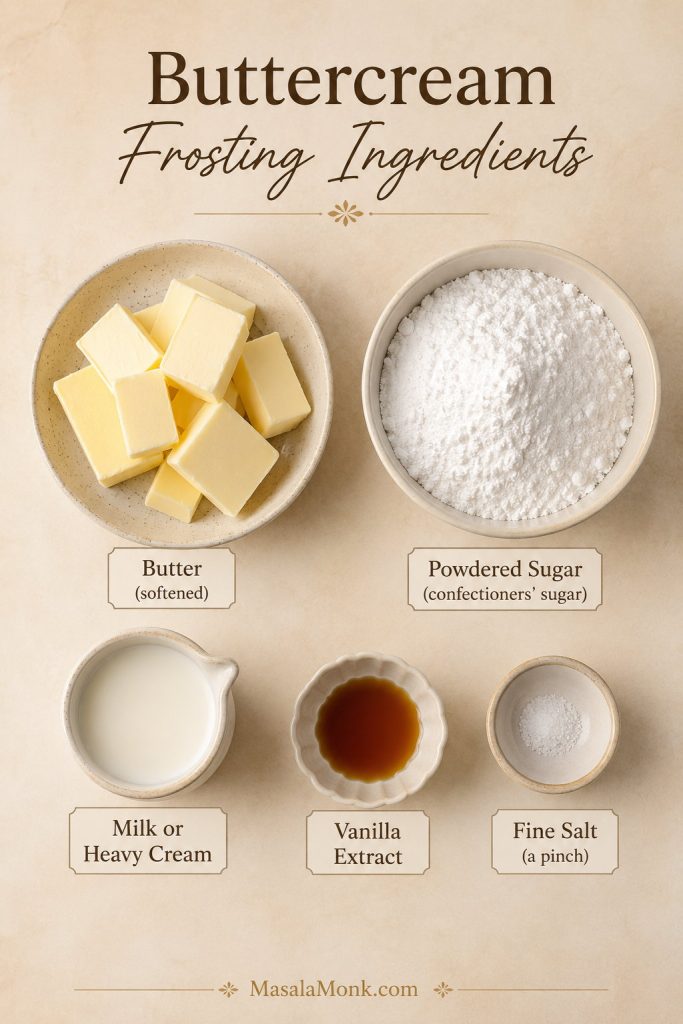
The ingredient list is short, so the recipe has nowhere to hide: butter texture, sugar texture, and liquid control do most of the work.

Overhead board of buttercream frosting ingredients: butter, powdered sugar, milk or heavy cream, vanilla extract, and fine salt.
The ingredient list is short, so each choice matters: soft butter, smooth powdered sugar, good vanilla, and a little salt all shape the final flavor.

Butter

Use unsalted butter if possible. It gives you better control over the final flavor because you can add salt separately. Salted butter can still work, but different brands vary in saltiness, so reduce or skip the added salt if your butter already tastes salty.

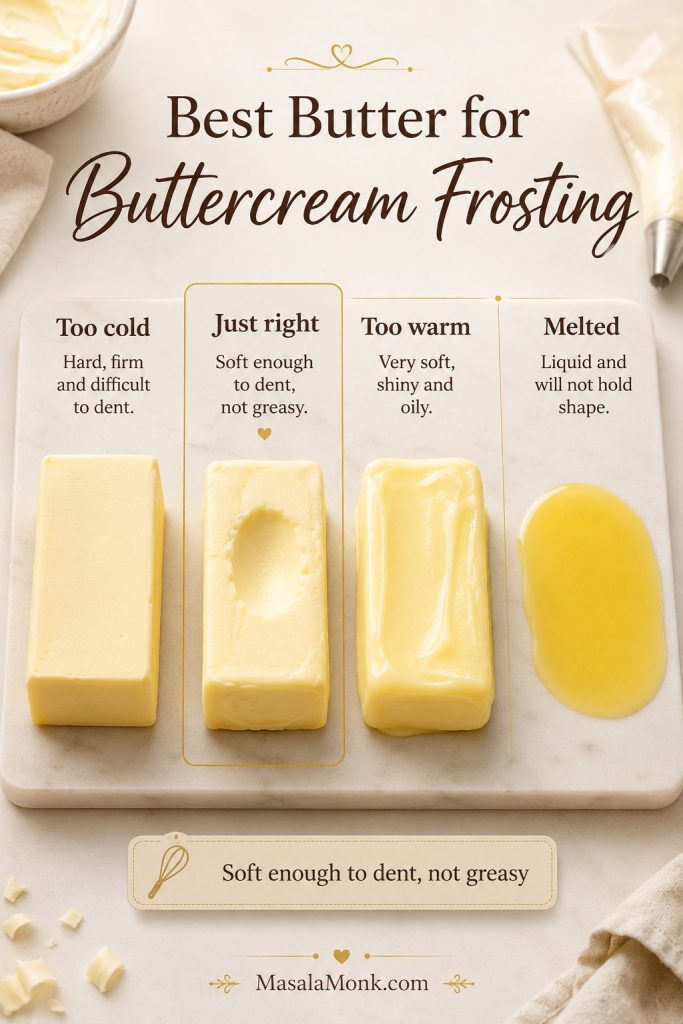
The butter should be softened, not melted. It should press easily when touched, but it should not look shiny, oily, or greasy. Cold butter can leave lumps; overly warm butter can make the frosting loose, greasy, or weak for piping.

Comparison of butter states for buttercream frosting, showing too cold, just right, too warm, and melted butter.
Butter sets the tone for the whole bowl; too cold makes frosting heavy, while too warm makes it loose, greasy, and harder to rescue.

If you are not sure whether your butter has gone too far, use the butter-temperature guide before mixing the batch.

Powdered Sugar / Icing Sugar

Use powdered sugar, confectioners’ sugar, or icing sugar. It gives American buttercream its sweetness and structure. If it looks lumpy, sift it before adding it to the butter.

For the most consistent texture, weigh the powdered sugar if you can. Cups are fine for everyday baking, but packed or very fluffy cups can change how stiff the frosting feels.

Do not use granulated sugar in this recipe. It will not dissolve the same way and can leave the frosting gritty. Frosting without powdered sugar is a different style and needs a different method.

Milk or Heavy Cream

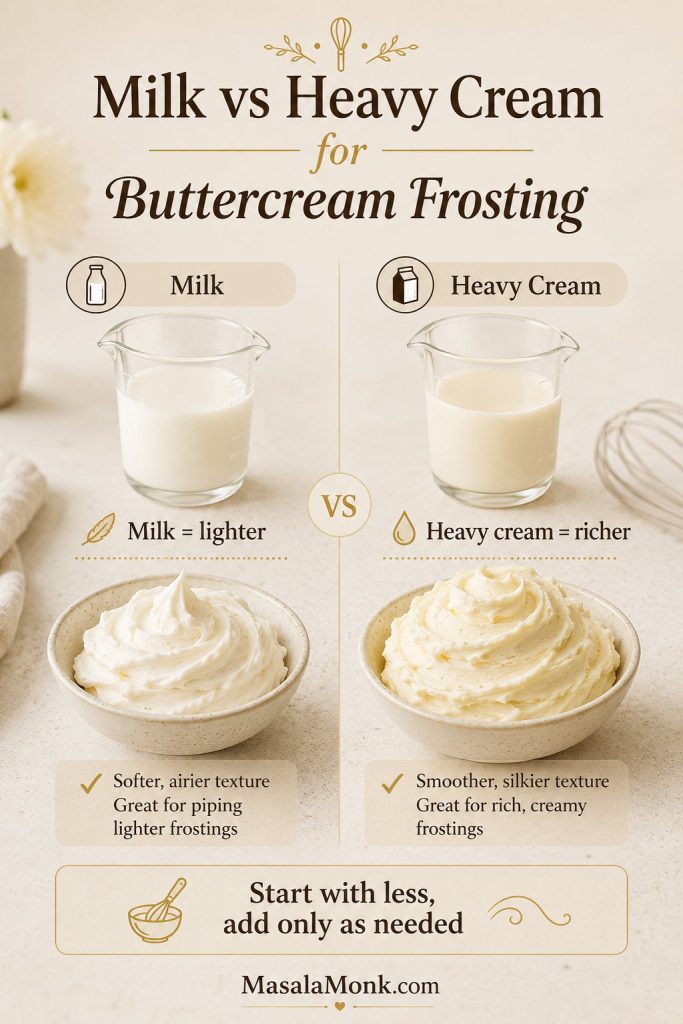
Both milk and heavy cream work. Heavy cream makes the frosting a little richer and fuller. Milk keeps it lighter and is easier if you do not keep cream at home.

Start with 3 tablespoons, then add more only if needed. The mixture loosens quickly, so it is better to add liquid slowly at the end than to pour in too much at the beginning.

Split board comparing milk and heavy cream for buttercream frosting with lighter and richer texture cues.
Milk gives a lighter finish, whereas heavy cream makes buttercream fuller and richer; either way, small additions keep the texture under control.

For spreadable, pipeable, and stiffer uses, use the texture guide before adding more liquid.

Vanilla

Vanilla gives this frosting its classic flavor. Use a good vanilla extract if you can because vanilla is one of the main flavors in a plain buttercream. Vanilla bean paste can also work if you like visible vanilla specks.

If you want a very white frosting, use clear vanilla. Regular vanilla extract often tastes better, but it can add a slightly beige tint.

Salt

Do not skip the salt. A small amount balances the sweetness and makes the butter and vanilla taste more rounded. Without salt, American buttercream can taste flat and sugary.

Equipment You Need

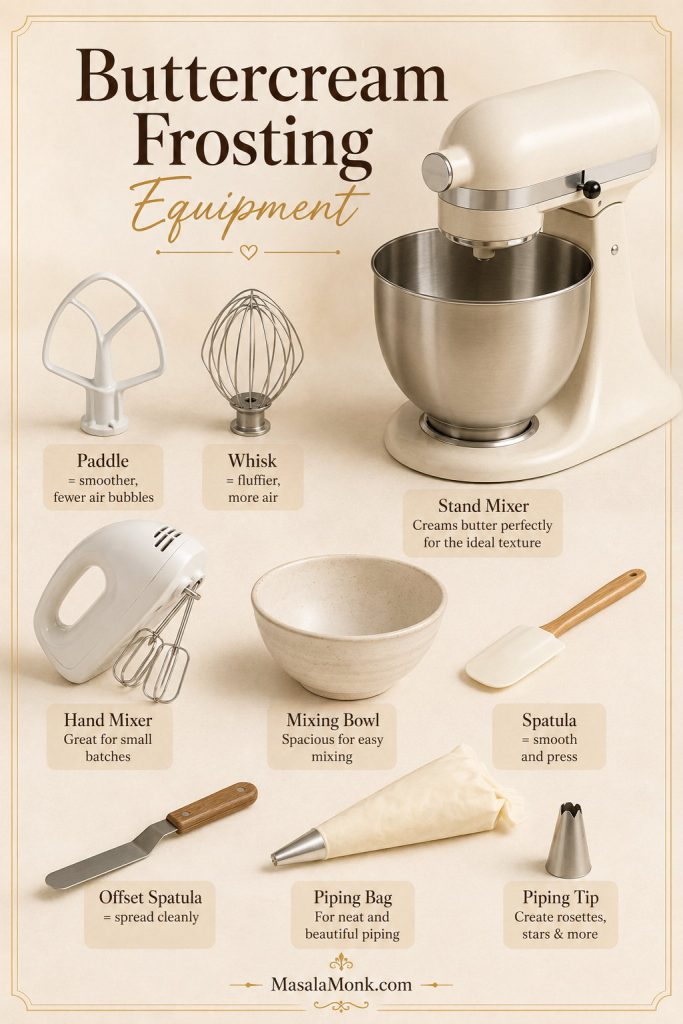
You do not need fancy tools, but the right mixer attachment can make the frosting smoother and less bubbly. A stand mixer with a paddle attachment is easiest, especially for a larger batch. A hand mixer works well for one batch, but you will need to scrape the bowl more often.

Buttercream equipment board with a stand mixer, paddle, whisk, hand mixer, spatulas, piping bag, piping tip, and bowl.
The right tool changes the finish: a paddle helps reduce air bubbles, while a spatula lets you press, fold, and polish the frosting before decorating.
Tool Best use
Stand mixer with paddle attachment Best for smooth, fluffy frosting with fewer air bubbles.
Hand mixer Works well for a single batch; scrape the bowl often.
Large mixing bowl Prevents powdered sugar from flying everywhere.
Rubber spatula Useful for scraping the bowl and pressing out air bubbles.
Piping bag and star tip Optional, but helpful for cupcake swirls, rosettes, and borders.
Offset spatula Helpful for spreading frosting over cakes and sheet cakes.
Paddle or whisk? Use the paddle attachment if you have one. A whisk can make the frosting fluffy, but it also adds more air. The paddle gives better control and usually creates a smoother finish for spreading and piping.

The Butter Temperature That Makes or Breaks Buttercream

If your frosting has ever turned greasy, lumpy, or strangely loose, the butter was probably the reason. “Room temperature” is not always clear because kitchens vary. In a warm kitchen, butter can move from perfectly soft to too greasy faster than expected.

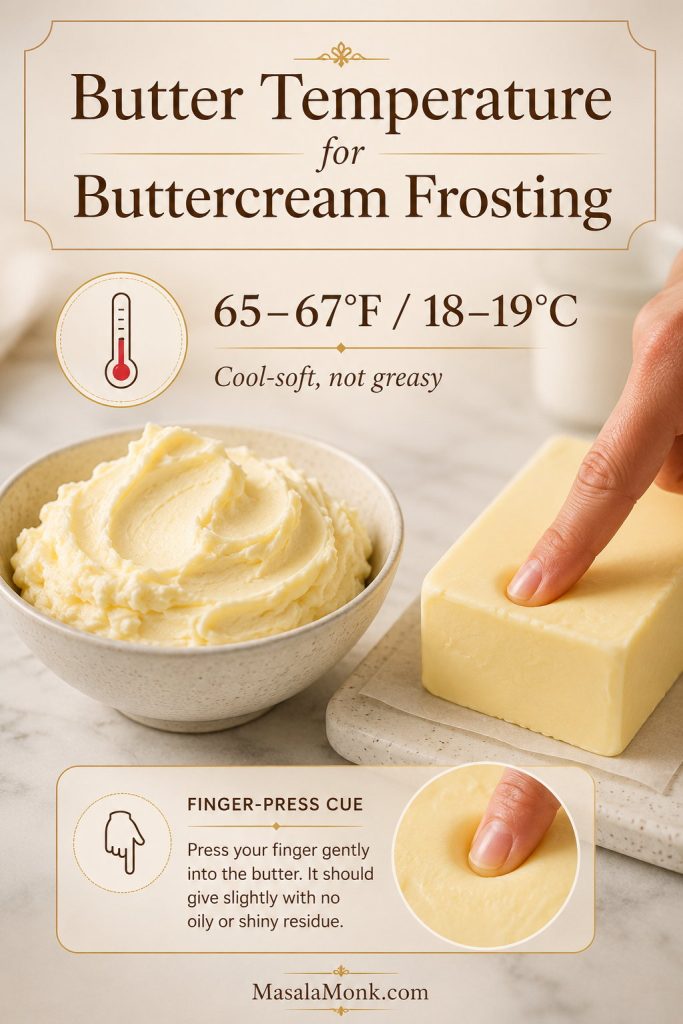
If you like numbers, aim for about 65–67°F / 18–19°C: cool to the touch, easy to dent, but not shiny or greasy. If you remember only one thing from this section, remember this: soft butter is good, greasy butter is not. Buttercream needs butter that bends, not butter that melts.

Butter temperature guide with softened butter, thermometer cue, and finger-press test showing 65 to 67 degrees Fahrenheit.
Cool-soft butter around 65–67°F gives you the best starting point because it blends smoothly without melting into a greasy frosting.

The butter should be soft enough to press with a finger, but not shiny, oily, or melted. It should still hold its shape. If it slumps, looks greasy, or has oily edges, it is too warm.

Butter state What happens What to do
Too cold Frosting can turn lumpy, hard to mix, or grainier. Let the butter sit longer, or cut it into small cubes to soften faster.
Just right Butter blends smoothly and holds enough structure for piping. Use it now.
Too warm The frosting can become greasy, loose, or weak. Cool the butter briefly until it is soft-solid again.
Melted The frosting will not hold properly. Do not use melted butter. Chill until it becomes soft-solid again.

In a warm kitchen, keep an eye on the bowl as you mix. Even a good batch can soften if the mixer, bowl, or your hands warm it too much. When that happens, pause and let the frosting cool before continuing.

How to Make Buttercream Frosting

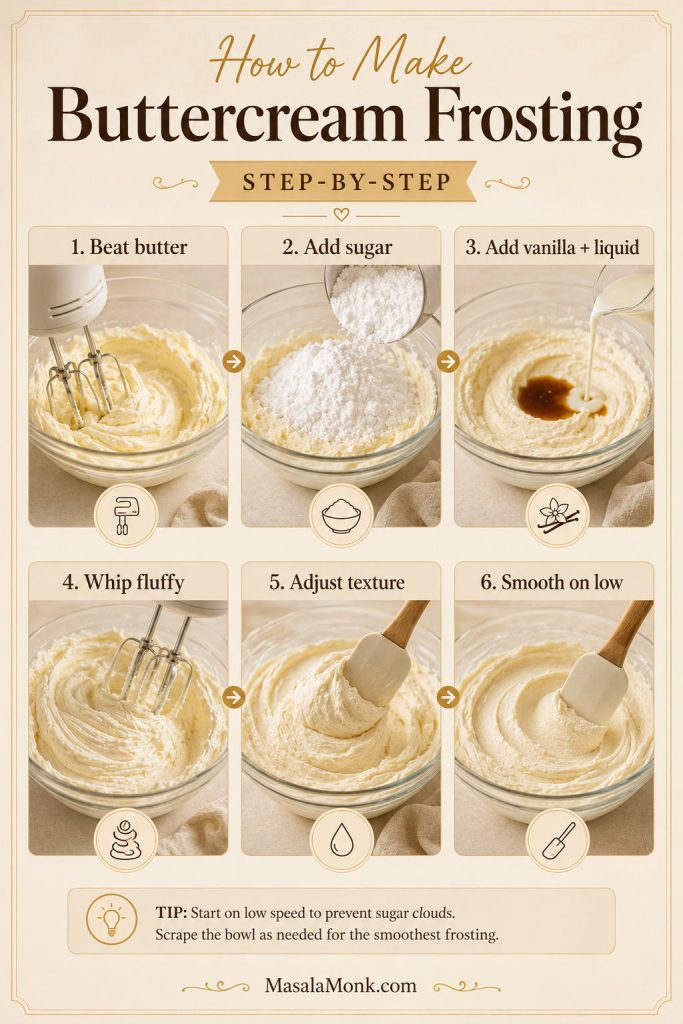
This is the point where buttercream gets easier: once the butter is right, the rest is mostly small adjustments. The method is simple, but the order matters: cream the butter first, add sugar slowly, whip only once the mixture is combined, then smooth it down at the end.

Texture target: Finished buttercream should look pale and creamy, hold a soft peak, spread without tearing cake, and pipe without slumping. It should not look shiny, oily, wet, or stiff and jagged.
Step-by-step buttercream frosting process showing butter being beaten, sugar added, liquid added, frosting whipped, adjusted, and smoothed.
Build the frosting in stages: cream the butter, bring in the sugar, loosen only as needed, then finish gently so the bowl turns smooth instead of bubbly.

Step 1: Beat the Butter

Add the softened butter to a large mixing bowl. Beat for 2–3 minutes until it looks creamy, smooth, and slightly paler. This first step removes lumps and creates a better base.

Step 2: Add Powdered Sugar Gradually

Add the powdered sugar in 3–4 additions, mixing on low speed after each addition. Do not dump it all in at once. Gradual mixing keeps the texture smoother and prevents powdered sugar from flying out of the bowl.

Step 3: Add Vanilla, Salt, and Liquid

Add vanilla, salt, and 3 tablespoons of milk or cream. Mix on low until everything comes together. It may look thick at first; that is normal. Wait until the sugar is fully mixed in before deciding whether it needs more liquid.

Step 4: Whip Until Fluffy

Increase to medium speed and beat for about 2 minutes, or until the frosting looks lighter, creamier, and softer around the edges of the bowl. Scrape the sides and bottom so no butter or sugar pockets are left behind.

Step 5: Adjust the Texture

If the frosting is too thick, add milk or cream a little at a time. If it is too loose, add powdered sugar in small additions. Make one correction, mix, then check the bowl again before adding more. For use-by-use consistency, see the texture guide.

Step 6: Smooth on Low Speed

Mix on low speed for 1–2 minutes at the end. This helps knock out some air bubbles and gives the frosting a smoother finish. For an even cleaner texture, press and fold it with a rubber spatula before spreading or piping. If the bowl still looks wrong, jump to troubleshooting.

Why This Buttercream Frosting Works

The formula works because nothing is there by accident. Butter gives the frosting richness and body. Powdered sugar thickens it, sweetens it, and helps it hold shape for spreading or piping. Milk or cream loosens the texture just enough to make it workable. Vanilla gives the familiar bakery-style flavor, while salt keeps the sweetness from tasting flat.

Once you understand those jobs, the recipe stops feeling fragile. You can look at the bowl and know whether it needs more structure, more softness, or just a few minutes to cool down.

The real goal: Do not chase one perfect texture for every use. Make the base frosting first, then adjust it softer for spreading, medium for cupcake swirls, or stiffer for sharper decorating.

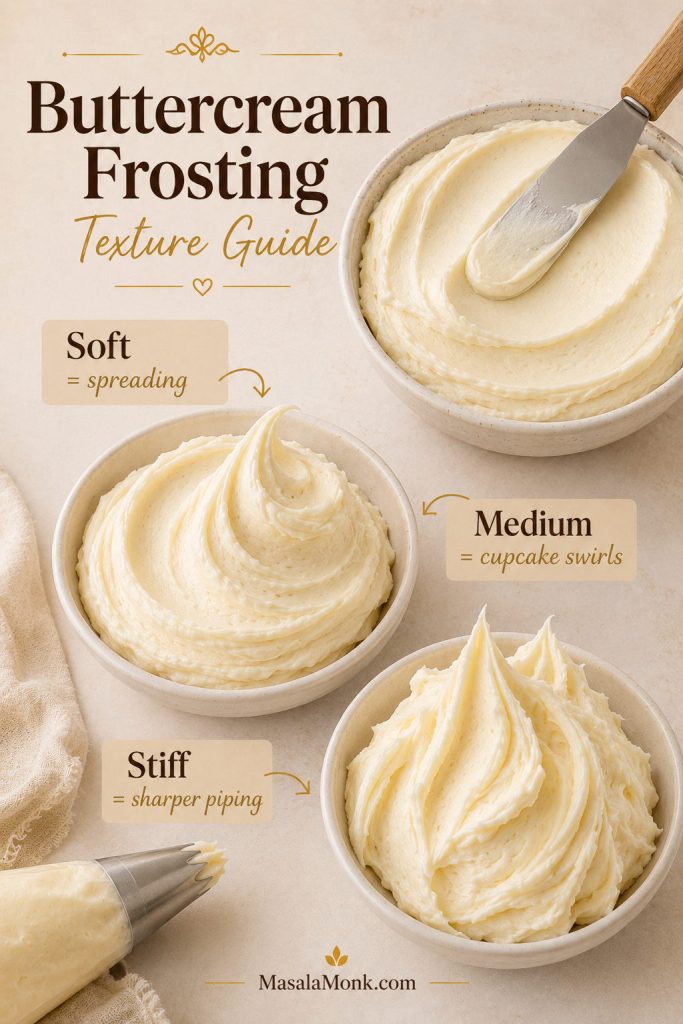
Buttercream Texture Guide: Spreadable, Pipeable, and Stiff

This is where buttercream becomes less mysterious: the same bowl can be adjusted for spreading, piping, or sharper decorating. The trick is not to keep fixing everything at once, but to match the texture to the job in front of you.

One batch can be made softer for spreading, medium for cupcake swirls, or stiffer for borders and simple decorations. Use this table as a control panel rather than a strict rulebook.

Buttercream texture guide showing soft, medium, and stiff frosting consistencies for spreading, cupcake swirls, and sharper piping.
One buttercream batch can do several jobs once you choose the right consistency: softer for sheet cakes, medium for swirls, and firmer for sharp details.
Texture Best for How to adjust
Soft and spreadable Sheet cakes, simple layer cakes, crumb coats Add milk or cream in tiny amounts.
Medium and pipeable Cupcake swirls, rosettes, borders Use the recipe as written, then test with a spatula.
Stiff Flowers, sharper borders, more defined piping Add powdered sugar in small additions.
Extra smooth Cake sides, clean spreading, polished finish Mix on low with the paddle, then press with a spatula.

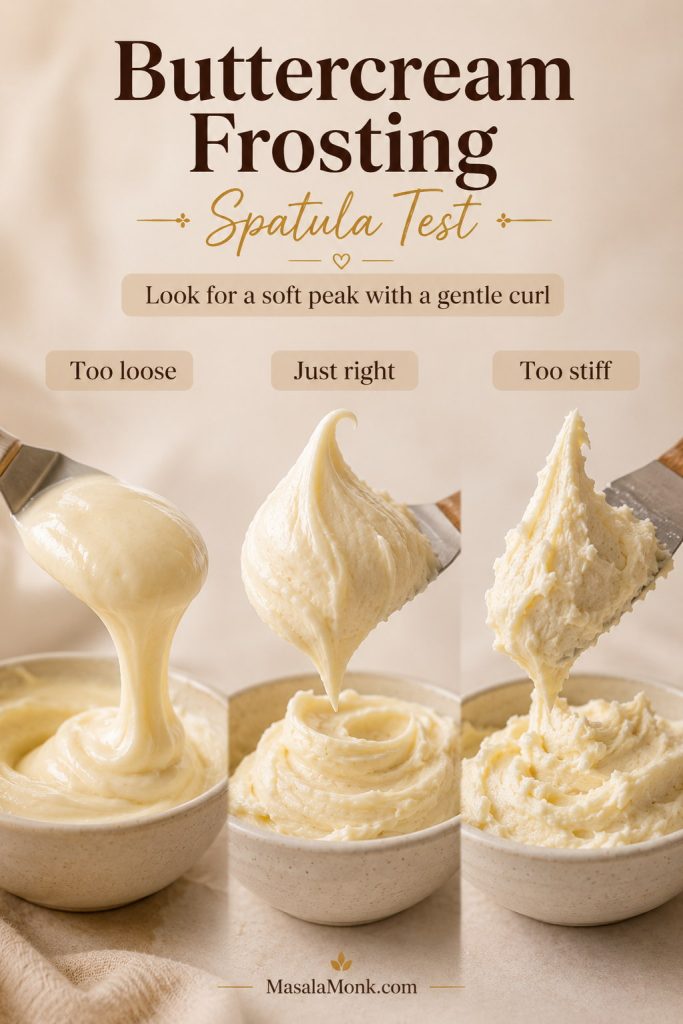
Use the spatula test before piping

A quick lift from the bowl shows whether the frosting is loose, pipeable, or too stiff before it goes into a piping bag.

Spatula test showing buttercream frosting that is too loose, just right, and too stiff.
A spatula lift is a quick reality check; ideal buttercream holds a gentle curl instead of sliding off or breaking into stiff peaks.
Spatula test: For pipeable buttercream, lift some frosting on a spatula. It should hold a peak with a soft curl. If it collapses, it is too loose. If it stands stiff and jagged, it may be too thick for smooth cupcake swirls.

For cake decorating, do not thin the whole bowl immediately. Set aside a portion and adjust only what you need. A softer texture spreads more easily over a cake, while a slightly stiffer one gives cleaner piping. For exact cake and cupcake amounts, use the quantity guide.

Once you move into borders, rosettes, writing, and thin cake coverage, consistency matters more than the base recipe itself. Wilton’s buttercream frosting guide is useful here because it shows how stiff, medium, and thin frosting behave differently.

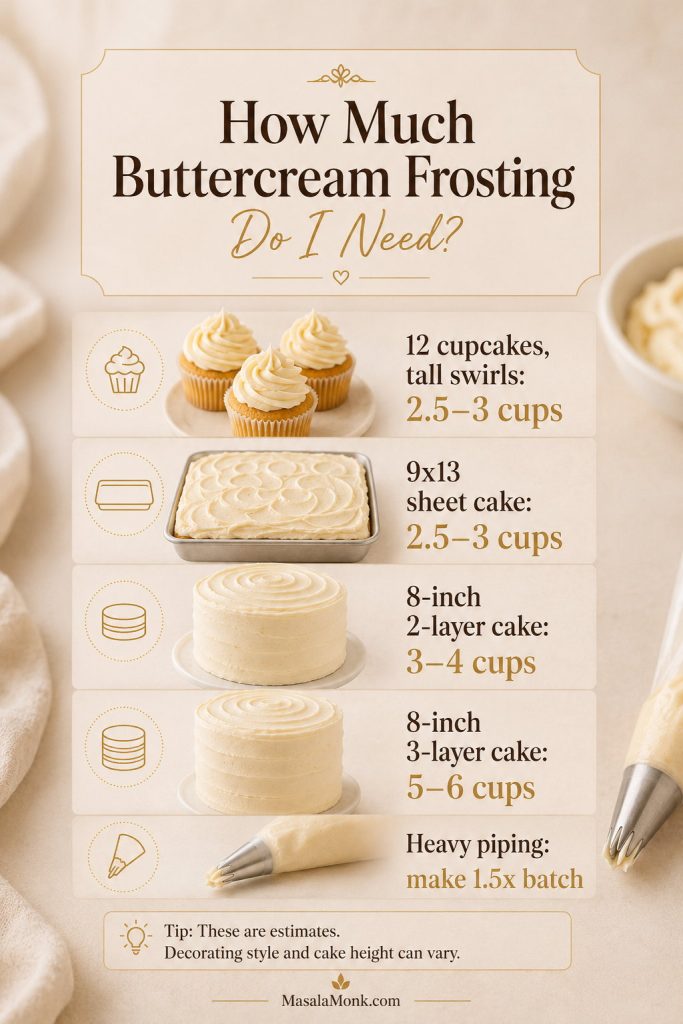
How Much Buttercream Frosting Do You Need?

A single batch gives you about 2.5–3 cups, which is plenty for cupcakes or a simple sheet cake but not always enough for a fully decorated layer cake.

Frosting amounts are not a test of precision. They are a planning tool, and it is almost always safer to have a little extra. Tall cupcake swirls, thick cake filling, and decorative borders all use more frosting than a simple spread layer.

Buttercream quantity guide for cupcakes, sheet cakes, two-layer cakes, three-layer cakes, and heavy piping.
Quantity planning saves the cake later; tall cupcake swirls, thick borders, and taller layer cakes all use more frosting than a thin spread.
Use Approximate buttercream needed
12 cupcakes, spread or low swirl 1.5–2 cups
12 cupcakes, tall swirls 2.5–3 cups
18 cupcakes, spread generously About 3 cups
24 cupcakes, modest swirl 3–4 cups
9×13 sheet cake, top only 2.5–3 cups
8-inch 2-layer cake, light filling and outside 3–4 cups
8-inch 2-layer cake with piping 4–5 cups
8-inch 3-layer cake 5–6 cups
Heavy piping or decorating Make 1.5x batch

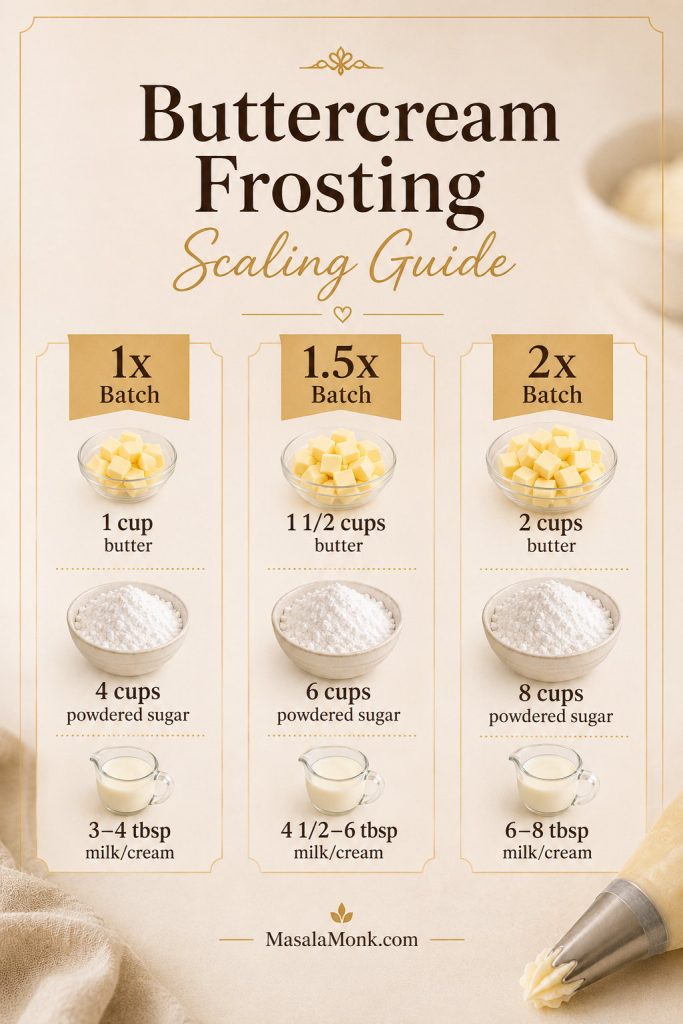
How to Scale This Buttercream Recipe

Scaling is where a lot of frosting stress happens. It is better to make a slightly larger batch than to scrape the bowl halfway through a cake. Half a cup extra feels much better than frosting the final side too thin.

Scaling guide for 1x, 1.5x, and 2x buttercream frosting batches with butter, powdered sugar, and milk or cream amounts.
When scaling buttercream, increase the butter and sugar together first; after that, use the liquid as the final texture adjustment.
Batch size Butter Powdered sugar Milk or cream Best for
1x batch 1 cup / 2 sticks / 226g 4 cups / 480g / about 1 lb 3–4 tbsp / 45–60ml 12 cupcakes with tall swirls or one 9×13 top layer
1.5x batch 1 1/2 cups / 3 sticks / 339g 6 cups / 720g / about 1.5 lb 4 1/2–6 tbsp / 67–90ml Layer cake with some piping
2x batch 2 cups / 4 sticks / 452g 8 cups / 960g / about 2 lb 6–8 tbsp / 90–120ml Tall cakes, extra piping, or make-ahead frosting

If you are unsure, make a little extra. Running out halfway through a cake is more frustrating than having leftover frosting to freeze. Extra buttercream can also be used on cookies, brownies, cinnamon rolls, cupcakes, or a small snack cake.

Using Buttercream Frosting for Cakes and Cupcakes

Cakes and cupcakes do not all need the same buttercream texture. A cupcake swirl needs lift, a sheet cake needs glide, and a layer cake needs enough structure to hold filling, crumb coat, and final coat.

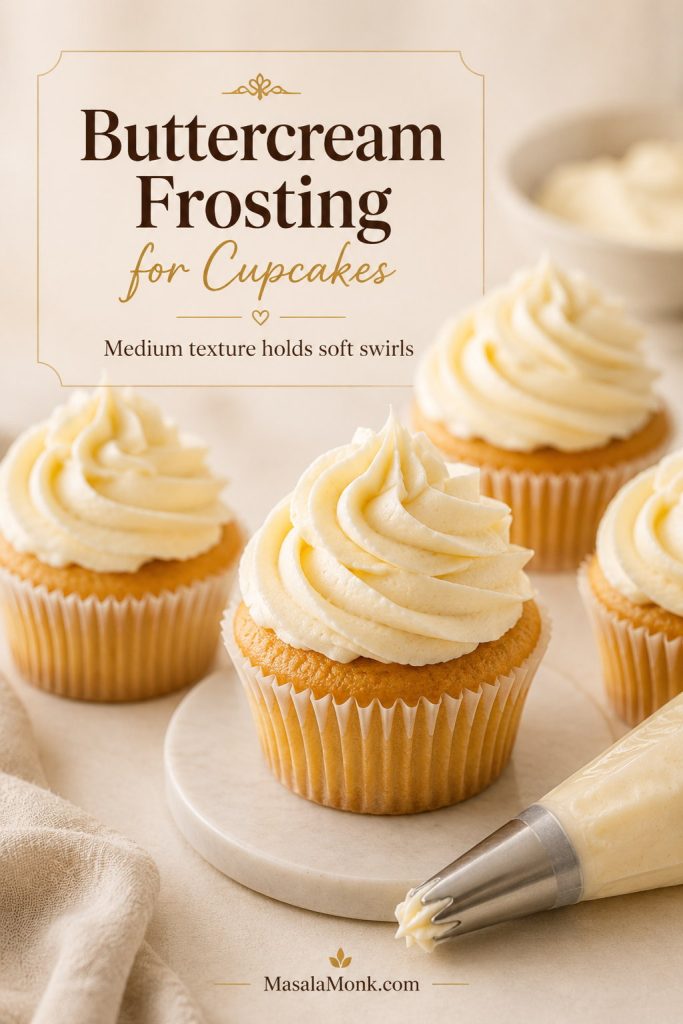
Buttercream for cupcakes

For cupcakes, the goal is a medium buttercream that holds ridges but still looks soft and creamy. If the swirl breaks at the edges, the frosting is probably too stiff. If the ridges melt into each other, it is probably too soft.

Cupcakes topped with pale vanilla buttercream swirls beside a piping bag and piping tip.
Cupcake swirls need a middle-ground texture: loose enough to pipe smoothly, yet firm enough for the ridges to stay defined.

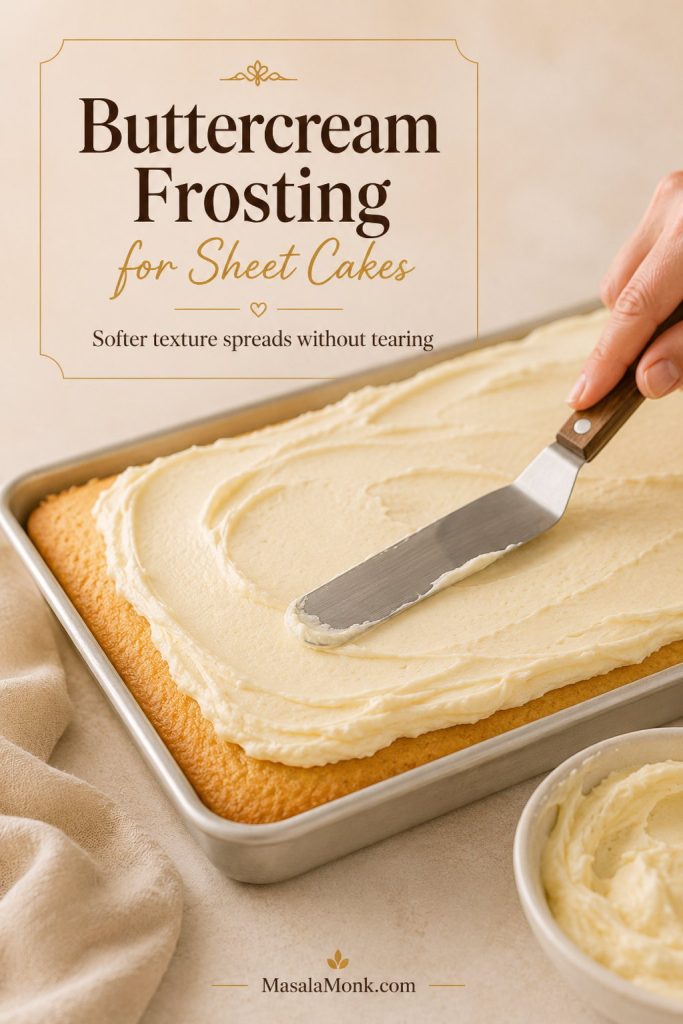
Buttercream for sheet cakes

For sheet cakes, use a slightly softer texture so the frosting glides instead of dragging crumbs across the top. If the cake is tender, stiff frosting can tear the surface before it spreads.

Offset spatula spreading pale buttercream frosting over a rectangular sheet cake.
A sheet cake benefits from slightly softer frosting because it glides over the crumb instead of pulling up bits of tender cake.

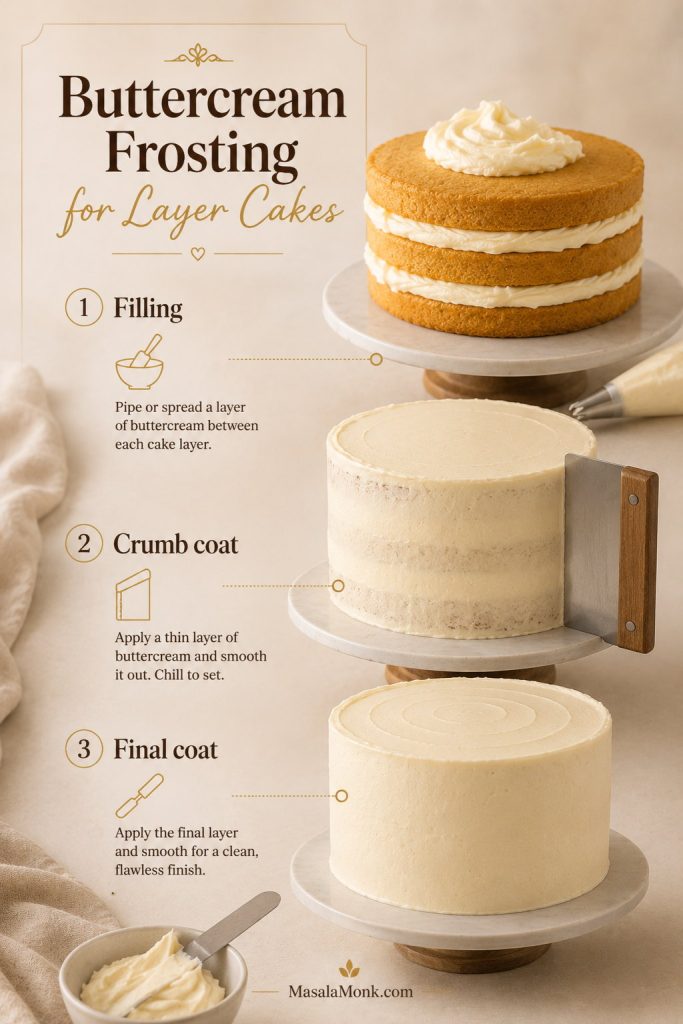
Buttercream for layer cakes

For layer cakes, think in stages: medium frosting for filling, slightly softer frosting for the crumb coat, and medium-smooth frosting for the final coat. A short chill after the crumb coat helps trap loose crumbs and makes the final layer easier to spread.

Layer cake guide showing buttercream filling, crumb coat, and final coat stages with cake-decorating tools.
Layer cakes look cleaner when you work in stages; first fill, then crumb coat, chill briefly, and only then add the final buttercream coat.

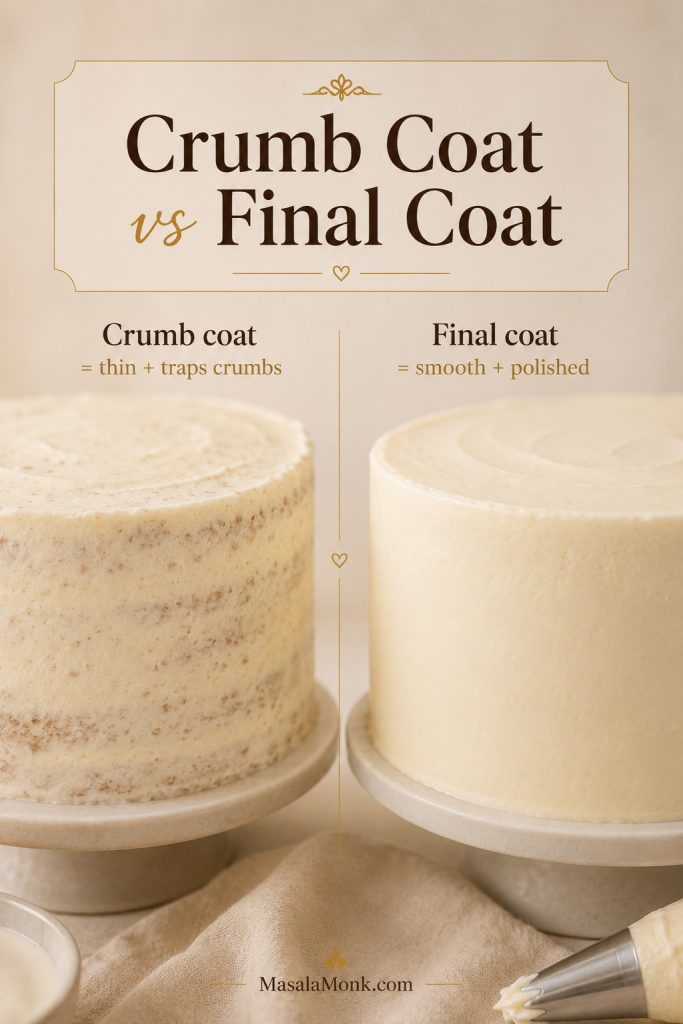
Crumb coat vs final coat

The crumb coat is not meant to be pretty. It is a thin working layer that traps crumbs, so the final coat can look cleaner and smoother.

Side-by-side cake comparison showing a thin crumb coat and a smooth final buttercream coat.
A crumb coat does not need to look perfect; its job is to trap crumbs so the final coat can go on smoother, cleaner, and more polished.

For a fruit-forward cake direction, MasalaMonk’s mango cake guide is useful because mango buttercream shows how fruit puree changes frosting flavor and texture. If you are decorating with swirls or borders, go to the piping section before filling the bag.

The table below is not meant to make frosting feel fussy. It simply helps you choose the texture that matches the job in front of you.

Use Best texture Tip
Cupcake swirls Medium / pipeable The frosting should hold a soft peak without collapsing.
Sheet cake Soft / spreadable Add liquid slowly so it spreads without tearing the cake.
Layer cake filling Medium Do not overfill or the layers may slide.
Crumb coat Slightly soft A softer texture spreads thinly and traps crumbs more easily.
Final cake coat Medium-smooth Mix on low and press with a spatula to reduce air bubbles.

Buttercream Frosting for Piping and Decorating

Good piping texture sits in the middle: firm enough to hold shape, but soft enough that you are not fighting the bag. If the frosting breaks at the edges of the swirl, it is usually too stiff. If the ridges melt into each other, it is usually too soft.

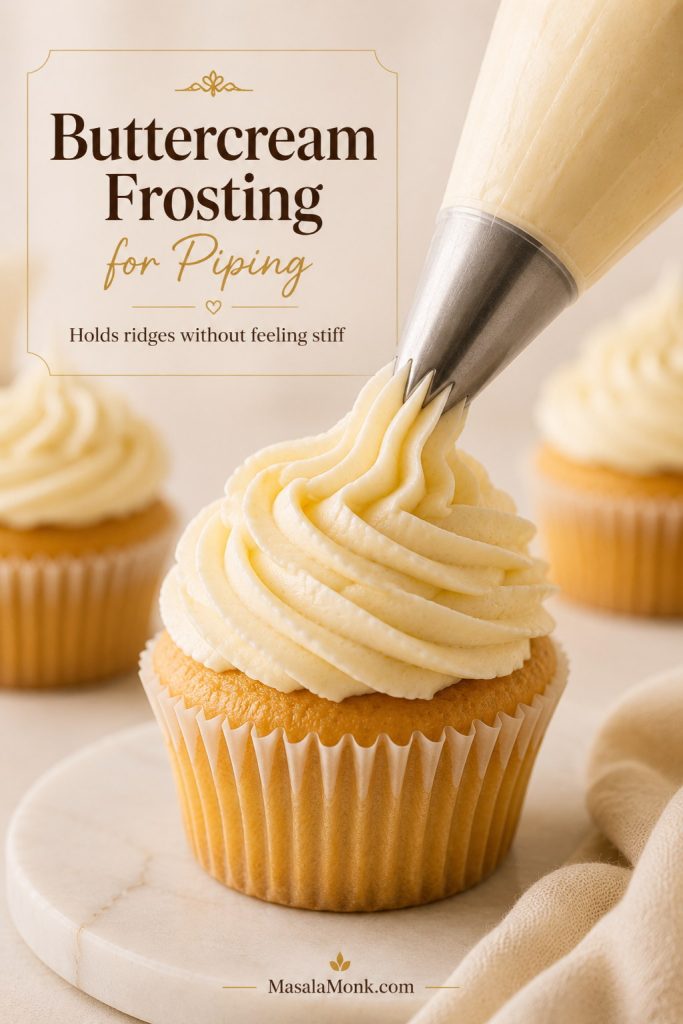
Piping bag forming a ridged buttercream swirl with pale frosting that holds its shape.
Good piping texture should feel cooperative, not forceful: the frosting holds ridges, but still moves through the tip without cracking.

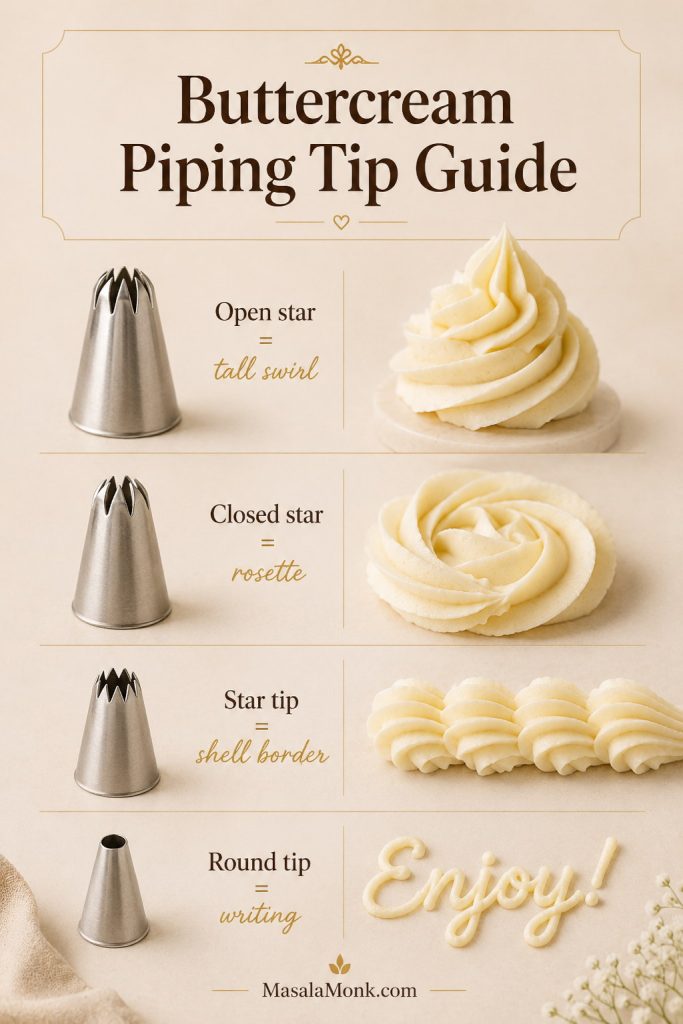
Which piping tip should you use?

The same buttercream can look very different depending on the tip. Use the table and image together to choose a shape before you fill the bag.

Look Piping tip Best consistency
Tall cupcake swirl Open star Medium
Rosettes Closed star Medium
Shell border Star tip Medium-stiff
Writing Small round tip Slightly softer
Piping tip guide showing open star, closed star, star tip, and round tip results in buttercream frosting.
The piping tip changes the design more than the recipe does; stars build swirls and borders, while a round tip gives cleaner writing.
Warm hands and warm rooms: If the frosting softens in the piping bag, place the filled bag in the refrigerator for 5–10 minutes. For very warm kitchens, outdoor parties, or sharp decorating, all-butter buttercream may soften; if the bag already feels too soft, use the troubleshooting guide before adding more sugar. Chill the cake, avoid direct sun, and consider a dedicated crusting or partial-shortening buttercream for heat-heavy decorating.

For smoother piping, mix on low speed before filling the bag. Air bubbles can cause broken lines, uneven swirls, or small holes in piped frosting. Pressing the batch with a spatula before filling the bag also helps.

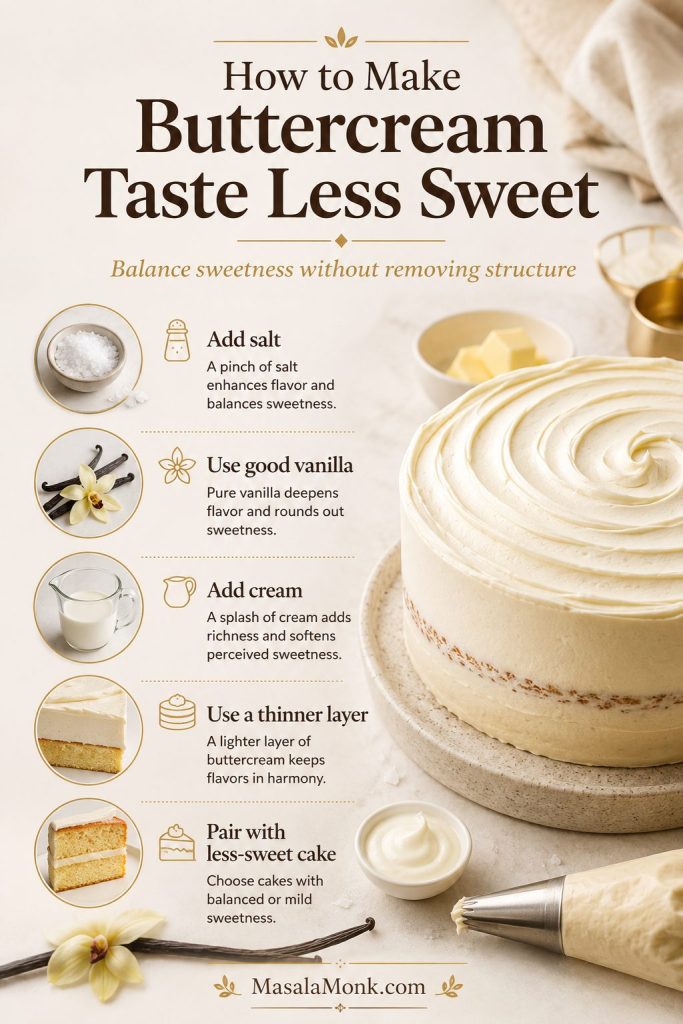
How to Make Buttercream Less Sweet

American buttercream is naturally sweet because powdered sugar is not just there for flavor; it gives the frosting body and helps it hold shape. You can make it taste more balanced, but you cannot remove most of the sugar and expect the same structure.

That said, a few small choices make a big difference:

Board showing salt, vanilla, cream, thinner frosting layers, and cake pairing ideas for making buttercream taste less sweet.
American buttercream needs powdered sugar for structure, but salt, vanilla, cream, thinner layers, and balanced cakes can make it taste less flatly sweet.
  • Add salt. Even 1/4 teaspoon helps reduce the flat sugary taste.
  • Use good vanilla. Better vanilla makes the flavor fuller.
  • Use cream instead of only milk. Cream gives a rounder, richer finish.
  • Whip the butter properly. A fluffy texture tastes lighter than a dense one.
  • Use a thinner layer. A sweet cake plus thick sweet frosting can feel heavy.
  • Pair it with less-sweet cake. Dark chocolate, coffee, citrus, spice, or lightly sweet cakes balance buttercream well.
Honest answer: Balance this version when you need speed, stability, and easy piping. Choose ermine or Swiss meringue buttercream when your real goal is a softer, less-sweet frosting.

If you know you dislike sweet buttercream, it may be kinder to choose a different frosting instead of fighting this one. RecipeTin Eats has a less-sweet fluffy vanilla frosting that shows why some bakers move away from American buttercream when they want a softer, less sugary finish.

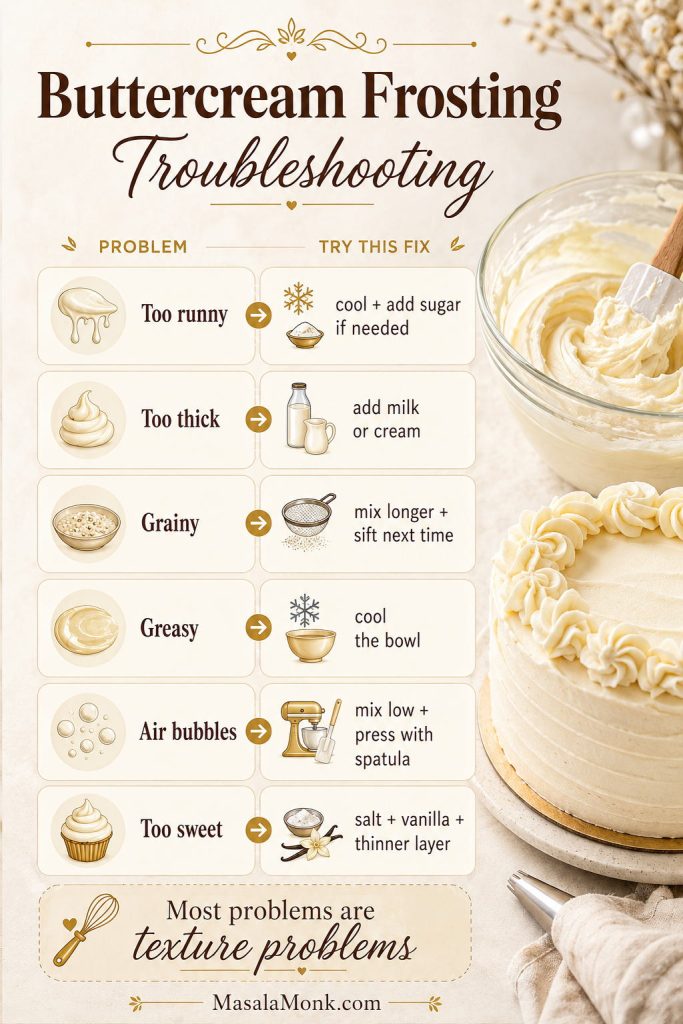
Buttercream Frosting Troubleshooting

A bad-looking bowl is not always a failed bowl. Most buttercream problems are texture problems, and texture can usually be brought back.

Troubleshooting board for runny, thick, grainy, greasy, bubbly, and too-sweet buttercream frosting problems.
Troubleshooting works best when you name the problem first; once you know the texture issue, the fix is usually simple and controlled.

First, check the temperature

Before adding more sugar or liquid, check whether the frosting is simply too warm or too cold. Warm buttercream can look loose, greasy, or weak. Cold buttercream can look stiff, heavy, or slightly rough. If you are unsure, let the bowl sit for a few minutes, then mix again before making a bigger correction. If you are reviving a chilled batch, use the storage and make-ahead section instead.

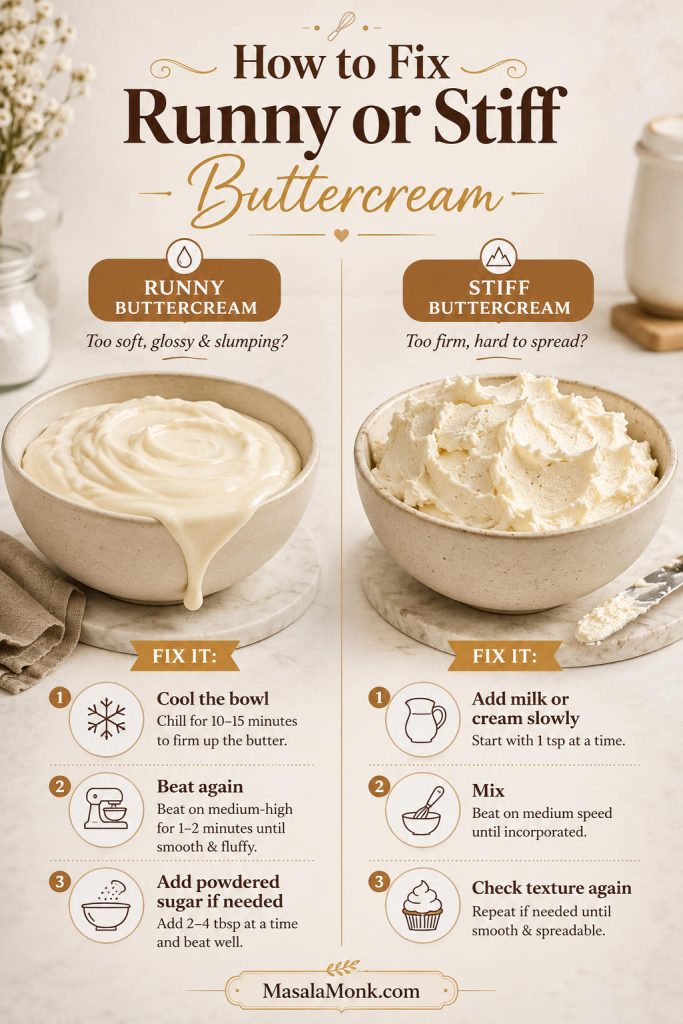
How to fix runny or stiff buttercream

Runny and stiff buttercream are the two most common texture problems, but they need opposite fixes. Check temperature first, then adjust the bowl in small steps.

Two-column guide showing runny buttercream and stiff buttercream with fixes using cooling, powdered sugar, milk, or cream.
Runny frosting often needs cooling before more sugar, while stiff frosting needs tiny splashes of milk or cream before another texture check.

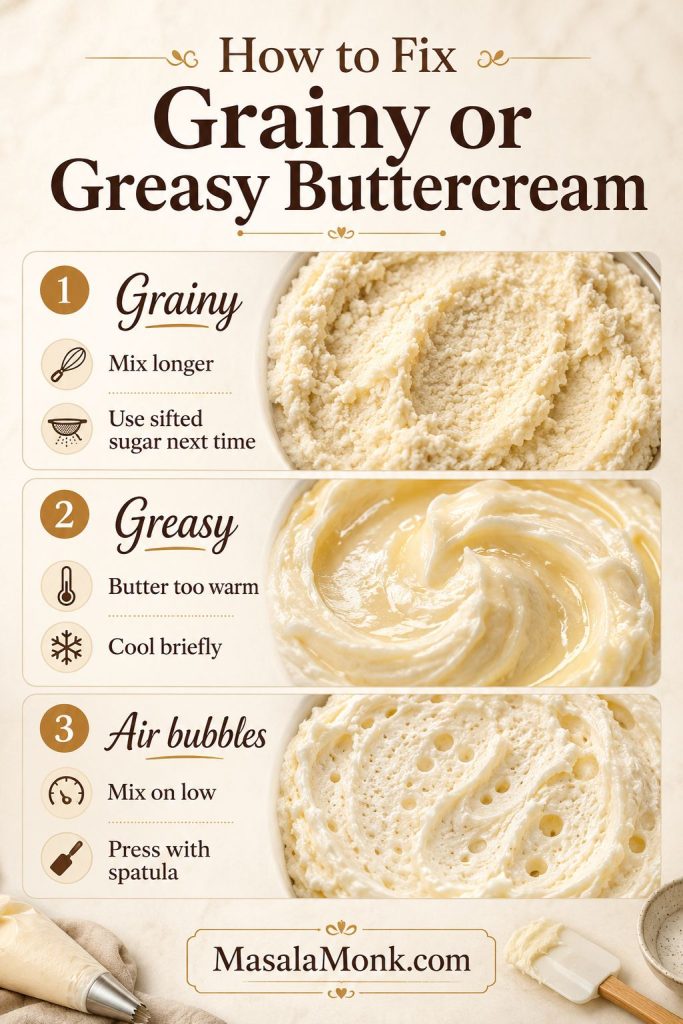
How to fix grainy, greasy, or bubbly buttercream

Grainy, greasy, and bubbly frosting can look dramatic, but they are usually signs of mixing, temperature, or air — not a ruined batch.

Rescue board showing grainy, greasy, and airy buttercream textures with fixes for mixing, cooling, and pressing with a spatula.
Grainy, greasy, and bubbly buttercream are not the same problem; matching the fix to the texture helps you avoid overcorrecting the batch.

Common buttercream problems and fixes

Start with the symptom you see in the bowl, then make one small correction at a time. Big fixes often create a second problem.

ProblemWhy it happensHow to fix it
Too runnyButter is too warm, or too much liquid was added.Cool the bowl briefly and mix again. If needed, add powdered sugar in small additions.
Too thickToo much powdered sugar or not enough liquid.Loosen with milk or cream, adding only a little at a time.
GrainyLumpy sugar, cold liquid, or not enough mixing.Sift powdered sugar next time. For this batch, mix longer on low and add a small splash of room-temperature milk.
GreasyButter is too warm or the kitchen is hot.Cool briefly, then mix again. Avoid adding more liquid.
Air bubblesToo much high-speed mixing or whisk attachment use.Mix on low with the paddle and press/fold with a rubber spatula.
Too sweetAmerican buttercream is powdered-sugar based.Add salt, vanilla, or cream. Use a thinner layer, or choose a less-sweet frosting style.
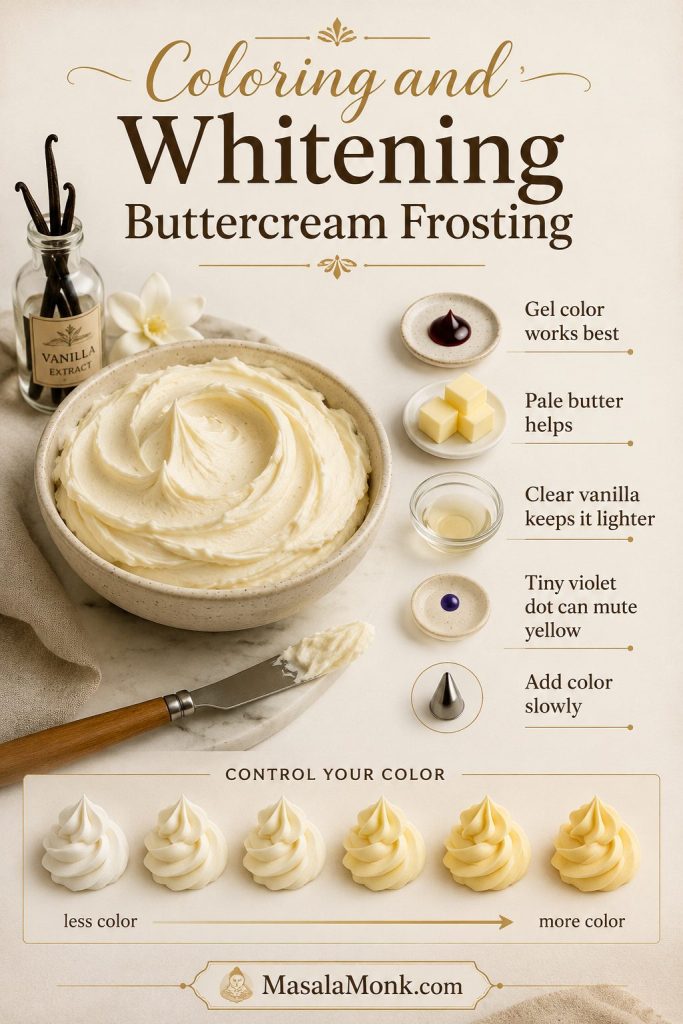
Yellow colorButter and vanilla both add color.Use pale butter, clear vanilla, and whip longer. A tiny dot of violet gel can neutralize yellow, but add it cautiously.
Will not hold pipingToo soft, too warm, or over-thinned.Add powdered sugar gradually, cool briefly, and avoid holding the piping bag too long.
Split or curdledTemperature mismatch or ingredients too cold/warm.Let it come to cool room temperature and mix again. If it is very cold, wait before mixing more.

After fixing, smooth the frosting

If the frosting still tastes good, it is usually worth saving. Once the texture looks close, mix on low speed for 1–2 minutes and press it with a spatula to remove extra air bubbles. Texture problems often look worse than they are before the batch has been cooled, softened, or smoothed.

Coloring and whitening buttercream

Color is easiest to control once the texture is right. Use gel color for strong shades, and start with pale butter and clear vanilla when you want the cleanest white base.

Coloring and whitening buttercream guide with pale frosting, gel color, clear vanilla, pale butter, violet correction, and color swatches.
Gel color gives stronger color with less liquid, while pale butter and clear vanilla help when you want a cleaner white buttercream base.

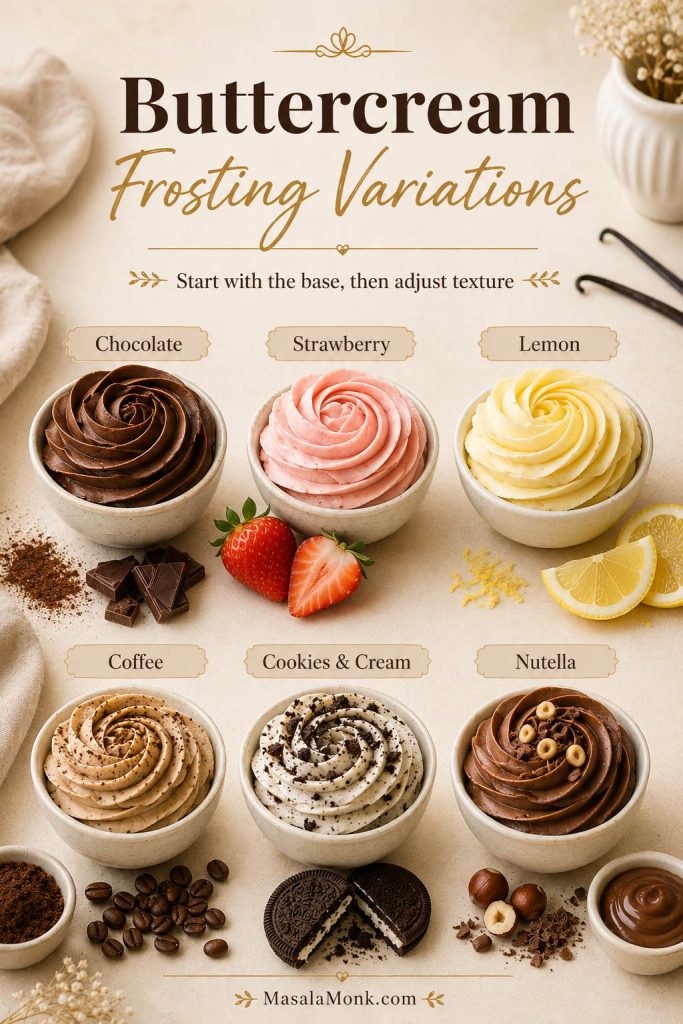
Buttercream Frosting Variations

Once you know the base recipe, you can turn it into many flavors. Think of these as direction changes, not full new recipes. Once you add cocoa, fruit, cookies, or Nutella, the texture may need a little rebalancing.

Six buttercream frosting variations in bowls labeled chocolate, strawberry, lemon, coffee, cookies and cream, and Nutella.
Flavor comes after texture; once the base is right, cocoa, fruit powder, coffee, cookie crumbs, or spreads can be added and adjusted.
Variation What to add Texture note
Chocolate Start with 1/3–1/2 cup unsweetened cocoa powder For a thicker chocolate frosting, add cocoa on top of the base. For a slightly less sweet version, replace part of the powdered sugar with cocoa. Either way, add cream as needed.
Strawberry Freeze-dried strawberry powder or very thick reduced puree Freeze-dried powder is best for piping. Reduced puree gives fruit flavor but can loosen the frosting if it is not thick enough.
Lemon Lemon zest first, then a little lemon juice Zest gives flavor without thinning; juice should be minimal and added slowly.
Coffee Espresso powder dissolved in cream or milk Dissolve espresso before adding it so the frosting tastes smooth instead of gritty.
Cookies & Cream Very finely crushed dark sandwich cookies Crush finely if piping so the tip does not clog.
Nutella Nutella beaten into the butter Adjust sugar and liquid because Nutella adds sweetness and fat.
Vegan Firm vegan butter and dairy-free milk Best treated as its own recipe because vegan butter behaves differently.
Swiss meringue Egg whites, sugar, and butter Silkier and less sweet, but more technical.

If you want a dairy-free chocolate dessert to pair with a future vegan or chocolate frosting, MasalaMonk’s vegan chocolate cake recipes are a natural next stop.

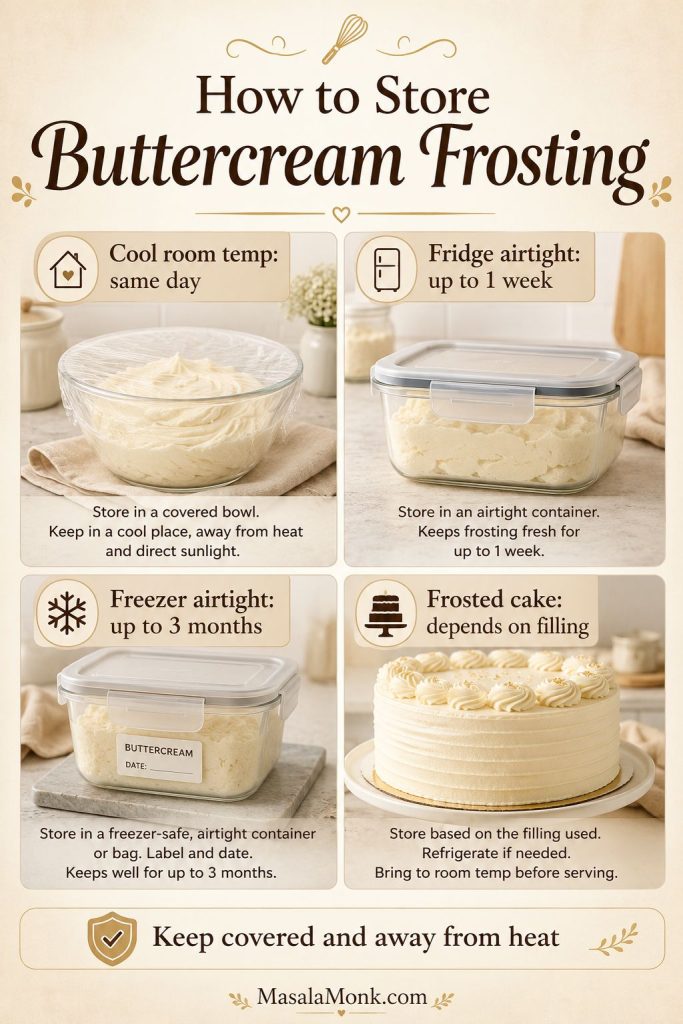
How to Store, Freeze, and Make Buttercream Ahead

Buttercream can be made ahead, which makes it useful for birthdays, parties, cupcakes, and layered cakes. The important thing is to separate storage time from serving texture: cold buttercream is safe and sturdy, but it needs time before it feels creamy again.

Storage guide showing covered buttercream at room temperature, an airtight fridge container, freezer storage, and a frosted cake.
Storage depends on both the frosting and the cake; plain buttercream is flexible, but fillings, heat, and serving time can change the best plan.
Storage situation How long What to do before serving or using
Plain buttercream, covered at cool room temperature Same day Stir smooth if needed. In a warm kitchen, refrigerate instead.
Plain buttercream, refrigerated airtight Up to 1 week Bring to room temperature, then beat again until creamy.
Plain buttercream, frozen airtight Up to 3 months Thaw in the fridge, soften at room temperature, then beat smooth.
Frosted cake in a cool room Same day Keep covered and away from heat. Refrigerate if the filling is perishable.
Chilled frosted cake Depends on the cake and filling Let it sit briefly before serving so the buttercream softens again.

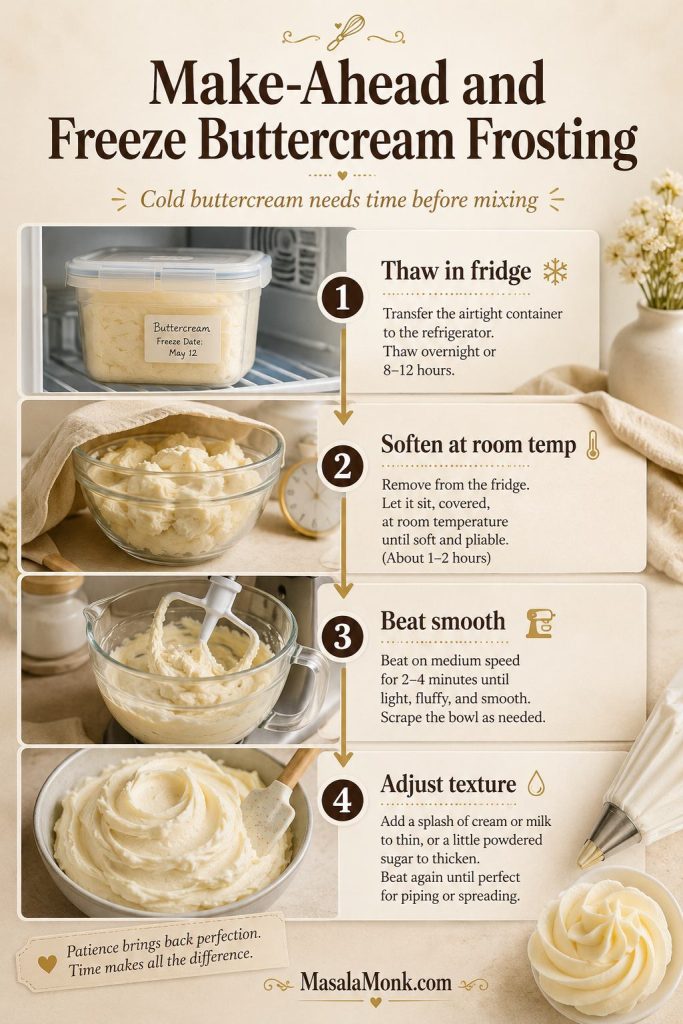
How to revive make-ahead or frozen buttercream

For the easiest make-ahead plan, refrigerate the buttercream airtight, then let it soften before mixing. If it looks firm, rough, or slightly uneven straight from the fridge, wait before judging it; the texture usually comes back once it softens and gets mixed again.

Make-ahead workflow showing buttercream thawing in the fridge, softening at room temperature, beating smooth, and adjusting texture.
Make-ahead buttercream usually comes back beautifully, but only after it thaws, softens, and gets beaten smooth before final adjusting.

For the base batch and exact amounts, return to the recipe card.
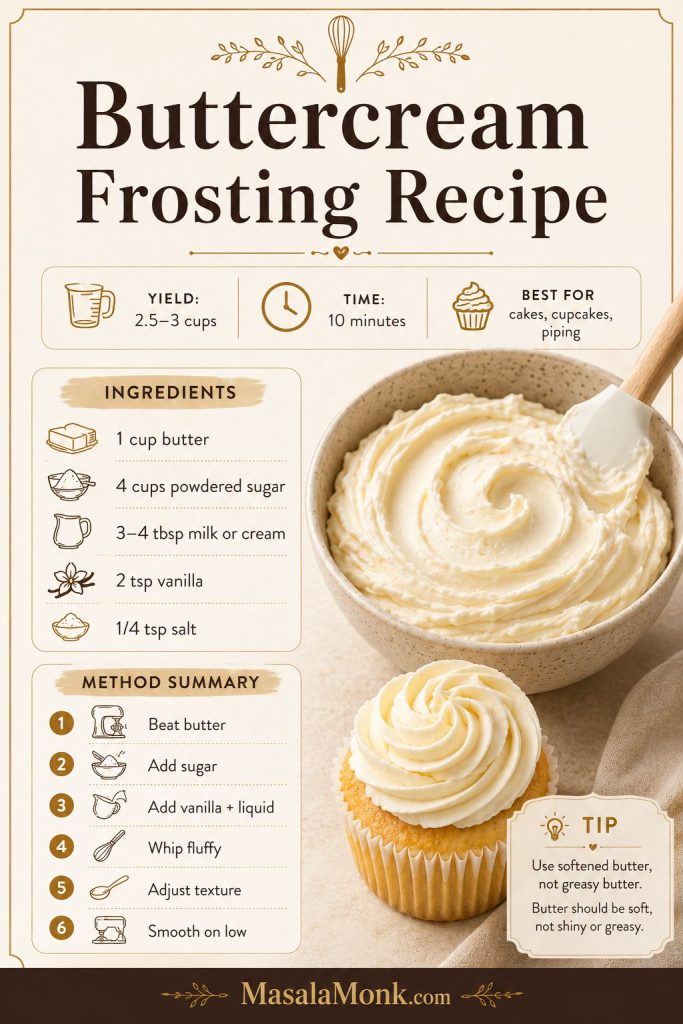
Buttercream Frosting Recipe Card

Once you understand the butter temperature, the ratio, and the small fixes, this becomes the kind of frosting you can make without second-guessing every spoonful.

Saveable buttercream frosting recipe card with yield, time, ingredients, method summary, a bowl of frosting, and a frosted cupcake.
Save this base recipe for future cakes and cupcakes; once the butter is soft but not greasy, the frosting is easy to whip, correct, and use.

Buttercream Frosting Recipe

Easy American vanilla buttercream for cakes, cupcakes, piping, and decorating. This frosting is fluffy, stable, spreadable, and easy to adjust softer or stiffer.

Prep Time10 minutes
Cook Time0 minutes
Total Time10 minutes
YieldAbout 2.5–3 cups

Best for: 12 cupcakes with generous swirls, 18 cupcakes with a spread finish, or the top of one 9×13 sheet cake.

Method: Mixing / whipping

Category: Dessert, frosting

Cuisine: American

Ingredients

  • 1 cup / 2 sticks / 226g / 8 oz unsalted butter, softened but not greasy
  • 4 cups / 480g / about 1 lb powdered sugar, sifted if lumpy
  • 3–4 tablespoons / 45–60ml / 1.5–2 fl oz heavy cream or milk
  • 2 teaspoons / 10ml vanilla extract
  • 1/4 teaspoon fine salt

Instructions

  1. Beat the softened butter for 2–3 minutes until creamy, smooth, and slightly paler.
  2. Add the powdered sugar in 3–4 additions, mixing on low speed after each addition.
  3. Add vanilla, salt, and 3 tablespoons milk or cream. Mix on low until combined.
  4. Beat for about 2 minutes on medium speed until fluffy and creamy.
  5. Adjust the texture. Add more milk or cream a little at a time to loosen, or powdered sugar in small additions to thicken.
  6. Mix on low speed for 1–2 minutes to smooth the frosting and reduce air bubbles.
  7. Use immediately, or store airtight and re-whip before using.

Notes

  • Butter should be soft enough to press with a finger, but not oily or melted.
  • If using a thermometer, aim for about 65–67°F / 18–19°C butter.
  • Finished frosting should look pale and creamy, hold a soft peak, and spread smoothly without oily shine.
  • Use heavy cream for richer frosting and milk for a lighter finish.
  • For whiter frosting, use pale butter and clear vanilla.
  • For less-sweet frosting, add salt and good vanilla, but do not remove too much powdered sugar or the frosting will lose structure.
  • For stiffer decorating buttercream, add more powdered sugar gradually.

FAQs

These are the questions that usually come up once the frosting is mixed, the texture is close, and the cake is waiting.

What is the best butter for buttercream frosting?

Unsalted butter gives the best control over flavor and salt. Salted butter can work, but reduce or skip the added salt so the frosting does not become too salty.

How do I make buttercream frosting fluffy?

Start by beating the butter until it looks creamy and slightly paler, then add powdered sugar gradually. Once everything is combined, beat for about 2 minutes on medium speed, then finish on low speed to smooth the frosting after whipping.

How do I make buttercream frosting thicker?

Powdered sugar thickens buttercream. Add it in small amounts until the frosting holds the texture you need. For piping, stop when it holds a peak with a soft curl.

How do I make buttercream frosting softer?

Milk or cream softens the texture. Add only a little at a time because buttercream can loosen quickly.

Why is my buttercream frosting grainy?

Graininess usually comes from lumpy powdered sugar, cold liquid, or not enough mixing. Sift the sugar if needed, use room-temperature milk or cream, and mix on low until the texture becomes smoother.

Can I color buttercream frosting?

Gel food coloring works better than liquid coloring because it gives stronger color without thinning the frosting too much. Start with a small amount, mix well, and let the color deepen for a few minutes before adding more.

How do I make buttercream frosting whiter?

Use pale butter, clear vanilla, and beat the butter well before adding powdered sugar. A tiny dot of violet gel can help neutralize yellow, but add it carefully because too much can tint the frosting.

Can I use milk instead of heavy cream?

Milk works well and gives a slightly lighter finish than heavy cream. Heavy cream makes the frosting richer and fuller. Start with the smaller amount either way, then add more only if the frosting needs loosening.

Does buttercream frosting harden?

American buttercream firms up when chilled and may form a light crust as it sits, but all-butter buttercream does not harden like royal icing. For a firmer crusting finish, use a dedicated crusting buttercream with shortening.

Can I make buttercream frosting with margarine?

Butter gives the best flavor and structure. Margarine can make frosting softer, looser, or less stable because it often contains more water and less fat than butter. If you use it, expect a softer frosting and avoid heavy piping.

Is buttercream frosting good for cupcakes?

Cupcakes are one of the easiest uses for this recipe because the frosting is fluffy enough to pipe but stable enough to hold a swirl.

Is buttercream frosting good for layer cakes?

Layer cakes work well with this buttercream as long as you make enough for filling, crumb coating, and covering. For tall cakes or heavy piping, scale the batch up.

Does buttercream frosting need to be refrigerated?

For same-day use in a cool kitchen, it can usually stay covered at room temperature. For longer storage, warm kitchens, or cakes with perishable fillings, refrigerate it airtight and bring it back to room temperature before using.

Can buttercream frosting be frozen?

Buttercream freezes well in an airtight container for up to 3 months. Thaw it in the refrigerator, bring it to room temperature, and re-whip before spreading or piping.

How do I make buttercream less sweet?

Salt, good vanilla, cream, and a thinner layer can make American buttercream taste more balanced. For a truly less-sweet frosting, compare buttercream styles above and choose Swiss meringue buttercream or ermine frosting instead.

What is the difference between buttercream frosting and icing?

Buttercream frosting is thick, creamy, and spreadable. Icing is usually thinner, glossier, and more likely to set firm. Many home bakers use “buttercream frosting” and “buttercream icing” to mean the same thing.

Back to top

Posted on Leave a comment

Easy Peanut Butter Fudge Recipe

Stacked peanut butter fudge squares on parchment with smooth cut edges and a creamy interior.

This easy peanut butter fudge recipe is built for creamy, sliceable squares without a candy thermometer, bubbling sugar syrup, or a long ingredient list. The goal is simple: rich peanut butter flavor, a smooth bite, and a slab that sets firmly without turning dry, greasy, or crumbly.

The result is deeply peanut-buttery, buttery, and sweet in that old-school homemade candy way, but still sturdy enough to cut into neat little pieces. You melt, stir, press, chill, and slice — no guessing at candy stages and no hovering over a bubbling pot.

The mixture thickens into a soft peanut butter dough before it goes into the pan, so you can see when it is ready instead of hoping it sets later.

It is the kind of fudge that works for holiday tins, bake-sale boxes, office trays, or the small after-dinner square that somehow disappears from the fridge. Cut it small, and it feels rich instead of heavy.

Start here if you want the simple version first. When you are ready to compare condensed milk, marshmallow fluff, old-fashioned, frosting, or keto versions, MasalaMonk’s full peanut butter fudge methods guide walks through those separately.

Quick Answer: Easy Peanut Butter Fudge

For easy peanut butter fudge, melt 1 cup creamy peanut butter with 1 cup butter, stir in 3 cups powdered sugar, press the thick mixture into a lined 8×8-inch pan, and refrigerate for 2–3 hours, until firm enough to cut. Vanilla and salt are optional, but they make the flavor rounder and less one-note.

Because this is a no-bake peanut butter fudge, the only heat you need is enough to melt the peanut butter and butter together. Powdered sugar gives the mixture body, butter keeps the bite smooth, and peanut butter brings the salty-sweet richness.

The best pieces should taste like the peanut butter center of a peanut butter cup: salty-sweet, dense, smooth, and rich enough that one small square feels satisfying.

Best first batch: Use regular creamy no-stir peanut butter, sift the powdered sugar if it is clumpy, and chill until the slab lifts cleanly from the pan before slicing.
At-a-glance peanut butter fudge guide with peanut butter, butter, powdered sugar, pan size, chill time, yield, and no thermometer note.
When you want the quick version, this is the whole easy peanut butter fudge formula: three core ingredients, an 8×8 pan, and a full chill before slicing.

Ready to make it? Jump to the full recipe card for the exact measurements, method, notes, and storage details.

At a Glance

DetailBest Answer
Main ingredientsPeanut butter, butter, powdered sugar
Optional flavor helpersVanilla extract and fine salt
Best pan8×8-inch / 20 cm square pan
Backup pan9×9-inch / 23 cm works, but the pieces will be thinner
TextureCreamy, firm, smooth, and sliceable
Chill time2–3 hours in the refrigerator
Candy thermometerNot needed
YieldAbout 36 small squares

A 9×9-inch pan also works, but the pieces will be thinner and may firm up a little faster. For thicker, gift-style squares, use an 8×8-inch pan.

For party trays, 36 small squares is usually better than 16 large pieces. Peanut butter fudge is dense, so smaller pieces look neater and eat better.

What Good Peanut Butter Fudge Texture Looks Like

Use this texture cue before you start: the finished fudge should look smooth and dense inside, with clean edges that hold their shape once chilled.

Close-up of peanut butter fudge squares showing smooth interiors, clean edges, and firm texture.
Before you make a batch, notice the texture goal: dense and smooth in the center, firm at the edges, and never dry, greasy, or crumbly.

Why This Peanut Butter Fudge Works

This fudge sets because powdered sugar thickens the warm peanut butter-butter mixture while the refrigerator firms the slab enough to slice. You get a creamy bite without boiling sugar or trying to catch a candy stage at the exact right moment.

Powdered sugar helps the fudge hold together. It blends more smoothly than granulated sugar, especially when you add it while the mixture is still warm.

Butter gives the fudge richness and a softer bite. It makes the peanut butter base glossy and smooth before the powdered sugar goes in.

Creamy no-stir peanut butter gives the most predictable result. Natural peanut butter can work if it is thick and very well stirred, but it can change the set because some jars are oily, loose, or dry at the bottom.

The balance matters. Too little powdered sugar gives a soft slab, but too much pushes the texture toward dry candy instead of creamy fudge. This recipe gives a base amount first, then a small adjustment range if your mixture needs it.

Chilling finishes the texture. The mixture may look thick as soon as you press it into the pan, but it needs time in the refrigerator to hold its shape for tidy pieces.

Ingredients You Need

This recipe has a short ingredient list, so the details matter. The image below shows the base ingredients and the two optional flavor helpers that make the fudge taste more balanced.

Peanut butter fudge ingredient guide showing creamy peanut butter, butter, powdered sugar, optional vanilla, and optional salt.
Because the ingredient list is short, there is not much room to hide mistakes; the peanut butter, butter, and powdered sugar each need to pull their weight.

Creamy Peanut Butter

Use creamy peanut butter for the smoothest fudge. A regular no-stir peanut butter gives the most reliable texture because it is already stable and well blended. If you like making pantry staples from scratch, MasalaMonk’s homemade peanut butter guide is useful, but for this recipe, make sure any homemade or natural peanut butter is thick, smooth, and extremely well stirred before measuring.

Butter

Unsalted butter gives you the most control. Salted butter also works; just skip or reduce the added salt. Cut the butter into pieces so it melts evenly with the peanut butter.

Why This Peanut Butter Fudge Uses Powdered Sugar

Powdered sugar is what turns the warm peanut butter mixture into fudge. If it is clumpy, sift it first so you do not get dry spots or grainy pockets in the finished candy.

Powdered sugar guide for peanut butter fudge showing a sieve, measuring cup, peanut butter mixture, and tips for amount and texture.
Since powdered sugar gives this no-thermometer fudge its structure, start with 3 cups and add more only if the mixture still looks loose.

This version uses 3 cups / 360 g powdered sugar as the base because it keeps the fudge creamy while still giving the slab enough body to set. If the mixture still looks loose after resting for 2 minutes, increase the powdered sugar by 2 tablespoons at a time, up to 3 1/4 cups / about 390 g.

If you measure by cups, spoon the powdered sugar into the cup and level it instead of packing it down. This style is sweet by design because powdered sugar is part of the structure, not just the flavor; salt, vanilla, and smaller pieces make it taste more balanced without weakening the set.

If your fudge turns soft, crumbly, oily, or grainy, the troubleshooting section walks through the most common causes and fixes.

Vanilla and Salt

Vanilla and salt are optional, but they make the candy taste more complete. The vanilla rounds out the sweetness, while a small pinch of salt sharpens the peanut butter flavor. For a true 3 ingredient peanut butter fudge, leave both out; for the best-tasting version, use them.

Best Peanut Butter to Use for Fudge

The peanut butter you choose changes the bite more than almost anything else in this recipe. For a first batch, choose regular creamy no-stir peanut butter. It gives the best balance of smoothness, body, and neat cutting.

Peanut butter comparison board showing creamy no-stir, crunchy, natural, and fresh-ground peanut butter for fudge.
For the most reliable peanut butter fudge texture, creamy no-stir peanut butter is the safest first choice because it blends smoothly and sets predictably.

Natural peanut butter is not impossible, but it often explains those “same recipe, different result” batches. One jar may be thick and stable, while another may be oily, loose, or dry at the bottom.

Peanut Butter TypeUse It?What to Expect
Regular creamy no-stir peanut butterBest choiceSmooth, stable, creamy, and reliable for tidy squares.
Crunchy peanut butterYesWorks well, but the pieces will have a textured bite instead of a smooth finish.
Natural stir peanut butterUse carefullyCan work if thick and fully stirred, but may turn oily, softer, or crumbly.
Fresh-ground peanut butterNot idealOften too coarse or oily for the neatest fudge texture.
Salted peanut butterYesUse it, but reduce or skip the added salt.
Peanut butter tip: For your first batch, avoid runny natural peanut butter, fresh-ground peanut butter, dry bottom-of-the-jar peanut paste, and very oily separated jars. If your peanut butter has visible oil, stir it completely smooth before measuring; do not pour off all the oil or scoop only the dry paste.

No-Stir vs Natural Peanut Butter for Fudge

Natural peanut butter can work, but the jar-to-jar variation is exactly why some batches turn soft, oily, or crumbly.

Split comparison of no-stir peanut butter and natural peanut butter showing reliable smooth fudge versus softer or oilier results.
When two batches behave differently, the peanut butter is often the reason; natural jars can vary in oil, thickness, and bottom-of-jar dryness.

Once your peanut butter is chosen, use the success cues to check whether the mixture looks ready before chilling.

Success Cues: What Peanut Butter Fudge Should Look Like Before It Sets

Before chilling, the mixture should look thick, matte, and scoopable, almost like a soft peanut butter dough. It should not pour like sauce. After chilling, the slab should lift from the pan in one piece and cut without smearing through the center.

Three-panel texture guide showing peanut butter fudge mixture that is too loose, just right, and too dry before chilling.
Before chilling, the mixture should look thick, matte, and scoopable; if it pours like sauce or cracks into dry clumps, adjust before pressing it into the pan.
Good sign: If the mixture gathers around the spatula and presses into the pan without spreading back out, you are on the right track.

How to Make Easy Peanut Butter Fudge

The method is simple, and the order is what keeps it easy. Measure the powdered sugar before you start so you can stir it in while the peanut butter mixture is still warm.

Using the microwave instead? Go straight to the microwave peanut butter fudge method.

Step-by-step peanut butter fudge process showing melting, mixing, adding powdered sugar, pressing into a pan, chilling, and slicing.
Once the peanut butter and butter are melted, work while the mixture is warm so the powdered sugar blends in smoothly before the fudge firms up.

Step 1: Line the Pan

Line an 8×8-inch square pan with parchment paper, leaving overhang on two sides. This gives you a sling so you can lift the whole slab out later for cleaner cutting.

Step 2: Melt the Peanut Butter and Butter

Add the peanut butter and butter to a medium saucepan over low heat. Stir often until the butter melts and the mixture looks smooth and glossy. Do not boil it. You only want to melt and combine.

Step 3: Add Vanilla and Salt

Remove the pan from the heat. Stir in the vanilla and salt if using. The mixture should still be warm and fluid.

Step 4: Mix in the Powdered Sugar

Add the powdered sugar in batches, stirring after each addition. The mixture will thicken quickly. Keep stirring until no dry streaks remain. It should look like a thick, soft dough.

At this point, the mixture should no longer pour like a sauce. It should gather into a thick, matte, scoopable mass that can be pressed into the pan. If it still looks glossy and loose after all the sugar is mixed in, let it sit for 2 minutes and stir again before adding more sugar.

Step 5: Press Into the Pan

Transfer the fudge mixture to the lined pan. Press it firmly into the corners and smooth the top with a spatula. If it sticks, place a small piece of parchment over the top and press gently with your hands.

Do not worry if the top is not perfectly smooth yet. Once the slab chills, small spatula marks are much less noticeable, and you can always trim the edges before serving or gifting.

Step 6: Chill Until Firm

Refrigerate for 2–3 hours, or until the slab is sturdy enough to lift and slice. For faster setting, you can use the freezer for 45–60 minutes, but the refrigerator gives a more even texture.

Step 7: Slice

Lift the fudge out using the parchment overhang. Use a sharp knife to cut it into 36 small squares. For extra-neat edges, warm the knife under hot water, wipe it dry, cut, then wipe between cuts.

Microwave Peanut Butter Fudge Method

You can also make this peanut butter fudge in the microwave when you want the quickest no-stove version. Use a large microwave-safe bowl and short bursts instead of one long microwave time, because microwave strength varies and overheating can make the mixture oily.

Microwave peanut butter fudge guide showing a large bowl, melted peanut butter mixture, powdered sugar, and finished fudge.
Although the microwave method is fast, short bursts matter because overheating can make the peanut butter mixture oily before the powdered sugar goes in.
  1. Add peanut butter and butter to a large microwave-safe bowl.
  2. Microwave for 30 seconds, then stir.
  3. Repeat in 30-second bursts until the butter is melted and the mixture is smooth.
  4. Stir in vanilla and salt if using.
  5. Add the powdered sugar in batches and mix until thick.
  6. If the mixture looks loose, let it rest briefly and stir again before adding more powdered sugar.
  7. Press into the lined pan and chill until firm.
Most common mistake: Judging the fudge while it is still warm. Let it cool briefly before adding extra sugar, and stop heating as soon as the peanut butter and butter are smooth.

3 Ingredient Peanut Butter Fudge

To make this as a true 3 ingredient peanut butter fudge, use only:

  • 1 cup creamy peanut butter
  • 1 cup butter
  • 3 cups powdered sugar
Three ingredient peanut butter fudge board showing peanut butter, butter, powdered sugar, and finished fudge squares.
Even a true 3 ingredient peanut butter fudge depends on balance: peanut butter for flavor, butter for smoothness, and powdered sugar for structure.

Peanut butter brings the flavor, butter softens the bite, and powdered sugar helps the mixture hold together once it chills.

If you are not strictly trying to keep the ingredient count at three, add vanilla and salt. They do not change the method, but they make the fudge taste more balanced. Without them, the candy is still good, just simpler and sweeter.

If you like short ingredient-list peanut butter desserts, MasalaMonk’s peanut butter cookies are another easy option, with classic, 3-ingredient, chocolate chip, and oatmeal variations.

4 Ingredient Peanut Butter Fudge

For most readers, the best version is technically a 4 ingredient peanut butter fudge: peanut butter, butter, powdered sugar, and vanilla. Vanilla does not help the fudge set, but it makes the sweetness taste warmer and less flat.

Four ingredient peanut butter fudge board showing peanut butter, butter, powdered sugar, vanilla, optional salt, and finished squares.
With 4 ingredient peanut butter fudge, vanilla is the quiet upgrade that makes the sweetness taste warmer and less flat.

If you count salt as a fifth ingredient, use it as a flavor adjuster rather than a structural ingredient. Vanilla makes the fudge taste warmer; salt makes it taste more peanut-buttery. Neither one helps the fudge set, so the base ratio stays the same.

How Long Does Peanut Butter Fudge Take to Set?

The slab usually needs 2–3 hours in the refrigerator before it is ready to cut. It may look finished sooner, but slicing too early can make the edges smear and the center slump.

Peanut butter fudge setting time guide showing refrigerator, freezer shortcut, and room temperature options with fudge slabs.
Although the top may look firm sooner, the center needs enough chill time for clean slices and a stable peanut butter fudge texture.
Setting MethodApproximate TimeBest Use
Refrigerator2–3 hoursBest texture and neatest slices.
Freezer shortcut45–60 minutesUseful when you are in a hurry, but do not forget it there.
Room temperatureSeveral hoursNot ideal for a quick, firm set.

For the best pieces, chill the fudge until firm, slice it, then let the squares sit at room temperature for a few minutes before serving. That gives you sharp edges and a softer bite.

Serving tip: Cold fudge cuts neatly, but slightly softened fudge tastes creamier. Store it chilled, then let the squares sit out for 5–10 minutes before serving.

Best Serving Temperature for Peanut Butter Fudge

Cut the fudge while it is cold, then give the squares a few minutes at room temperature if you want the creamiest bite.

Comparison of cold peanut butter fudge with clean edges and slightly softened fudge with a creamier bite.
Cold fudge cuts cleanly; however, a few minutes at room temperature makes each square taste creamier and less stiff.

Once the slab is fully chilled, the clean-cutting tips will help you get neater squares for trays and gifts.

Why Didn’t My Peanut Butter Fudge Set?

If your peanut butter fudge is too soft, crumbly, grainy, or oily, the issue is usually one of four things: peanut butter type, powdered sugar amount, mixing temperature, or chill time.

Most problems are easier to fix than they look. If the fudge tastes good but feels too soft, start with more chill time before changing the recipe.

How to Fix Soft Peanut Butter Fudge

Start with the least disruptive fix first. Many soft batches only need more time in the refrigerator before you change the ratio.

Soft peanut butter fudge rescue guide showing unset fudge, sifted powdered sugar, and corrected firm fudge squares.
If peanut butter fudge is too soft, chill it longer first; after that, use only a small amount of sifted powdered sugar if the slab still will not firm up.
ProblemLikely CauseHow to Fix It
Fudge is too softNot enough powdered sugar, oily peanut butter, or not enough chill time.Chill longer first. If it is still too soft after several hours, let it soften at room temperature, scrape it back into a bowl, and work in a little more sifted powdered sugar. Press it back into the pan and chill again.
Fudge is crumblyToo much powdered sugar, dry peanut butter, or over-chilling.Let it sit at room temperature for 10 minutes before cutting. Next time, reduce the powdered sugar slightly or use creamier peanut butter.
Fudge is grainyClumpy powdered sugar or sugar added after the mixture cooled too much.Sift powdered sugar and add it while the peanut butter mixture is still warm.
Fudge looks oilyNatural peanut butter separated, or the mixture was overheated.Use no-stir peanut butter for the most reliable batch. Melt gently and avoid boiling.
Fudge will not cut cleanlyNot chilled enough, or the knife is dragging through the fudge.Chill longer. Use a warm, dry knife and wipe between cuts.

Peanut Butter Fudge Troubleshooting Guide

Use the visual guide below to match the texture problem to the most likely cause before making a bigger adjustment.

Troubleshooting guide for peanut butter fudge with examples of soft, crumbly, grainy, oily, and messy-cut fudge.
Rather than guessing, match the problem to the texture: soft, crumbly, grainy, oily, and messy-cut fudge each points to a different fix.
Most common fix: If the fudge is soft but tastes good, give it more fridge time before changing anything. Warm fudge often seems failed before it has actually finished setting.

If you are starting a fresh batch, the recipe card keeps the base ratio and method in one place.

How to Cut Clean Peanut Butter Fudge Squares

Neat squares make homemade fudge look more polished, especially if you are gifting it. The trick is to chill the slab fully, lift it from the pan, and cut with a warm, dry knife instead of dragging a dull blade through the fudge.

Hand using a knife to cut chilled peanut butter fudge into neat squares with clean edges.
For clean peanut butter fudge squares, chill the slab fully, cut straight down, and wipe a warm dry knife between slices.
  1. Chill the fudge until fully firm.
  2. Lift the slab out of the pan using the parchment overhang.
  3. Place it on a cutting board.
  4. Use a long, sharp knife.
  5. Warm the knife under hot water and wipe it dry.
  6. Cut straight down instead of sawing back and forth.
  7. Wipe the knife between cuts.

If the slab feels rock-hard straight from the refrigerator, let it sit for 5–10 minutes before cutting. Very cold fudge can crack at the edges, while slightly softened fudge cuts more neatly.

For 36 pieces, cut the slab into a 6×6 grid. For smaller holiday-box pieces, cut it into a 7×7 grid for 49 smaller squares.
Best Cutting Grid for Peanut Butter Fudge

Use the cutting grid based on how you plan to serve the fudge: slightly larger pieces for dessert plates, smaller pieces for tins, trays, and gifts.

Top-down peanut butter fudge cutting grid showing 6x6 and 7x7 portion options for small squares.
Because peanut butter fudge is rich, smaller squares usually look better on trays, fit better in tins, and feel easier to serve.
Gifting tip: The center pieces are the prettiest for tins and boxes. Save the trimmed edges for snacking.

Easy Peanut Butter Fudge Recipe

A creamy, no-thermometer peanut butter fudge made with peanut butter, butter, and powdered sugar. Use regular creamy no-stir peanut butter for the smoothest, most reliable texture.

Saveable peanut butter fudge recipe card showing peanut butter, butter, powdered sugar, chill time, yield, and short method.
Use this recipe card as the quick memory version: melt gently, mix while warm, press firmly, chill fully, and slice once the slab holds.
Prep Time10 minutes
Melt Time3–5 minutes
Chill Time2–3 hours
Yield36 squares

Total Time: About 2 hours 15 minutes, including chill time.

Texture: Creamy, firm, smooth, and sliceable without smearing.

Equipment

  • 8×8-inch / 20 cm square pan
  • Parchment paper
  • Medium saucepan or microwave-safe bowl
  • Heatproof spatula or wooden spoon
  • Fine-mesh sieve, optional but useful for clumpy powdered sugar
  • Sharp knife

Ingredients

  • 1 cup creamy no-stir peanut butter, 250 g
  • 1 cup unsalted butter, 226 g / 2 sticks
  • 3 cups powdered sugar, sifted if clumpy, 360 g
  • 1–2 teaspoons vanilla extract, optional, 5–10 ml
  • 1/4 teaspoon fine salt, optional

Instructions

  1. Line an 8×8-inch square pan with parchment paper, leaving overhang on two sides.
  2. Add peanut butter and butter to a medium saucepan over low heat.
  3. Stir until the butter is melted and the mixture is smooth. Do not boil.
  4. Remove from the heat. Stir in vanilla and salt if using.
  5. Add powdered sugar in batches, stirring until no dry streaks remain. The mixture will become thick.
  6. If the mixture still looks loose, rest 2 minutes, stir again, then add 1–2 tablespoons more powdered sugar only if needed.
  7. Transfer to the lined pan and press firmly into an even layer.
  8. Refrigerate for 2–3 hours, or until sturdy enough to slice.
  9. Lift from the pan, cut into 36 squares, and serve chilled or slightly softened at room temperature.

Microwave Method

Add peanut butter and butter to a large microwave-safe bowl. Microwave in 30-second bursts, stirring after each burst, until smooth. Stir in vanilla and salt, then mix in powdered sugar. Press into the lined pan and chill until firm.

Notes

  • Serving size is 1 small square when cut into 36 pieces.
  • A 9×9-inch / 23 cm pan works, but the pieces will be thinner and may chill faster.
  • To double the recipe, use a 9×13-inch pan. The pieces will be close to the same thickness as the 8×8-inch batch.
  • For true 3 ingredient peanut butter fudge, skip vanilla and salt.
  • For firmer gift-box squares, add powdered sugar 2 tablespoons at a time, up to 3 1/4 cups / about 390 g total.
  • If the fudge is too soft, chill it longer before adding more sugar.
  • For neat cuts, use a warm knife and wipe between slices.

Storage

Store in an airtight container in the refrigerator for about 1 week, or freeze well-wrapped pieces for 2–3 months. Place parchment between layers if stacking.

How to Store Peanut Butter Fudge

Store peanut butter fudge in an airtight container. Place parchment between layers if stacking. The refrigerator is the best everyday storage choice because it keeps the squares firm and tidy.

Peanut butter fudge storage guide showing airtight containers, parchment layers, refrigerator storage, and freezer-safe pieces.
In storage, parchment between layers is the small step that keeps peanut butter fudge squares from sticking, smearing, or losing their clean edges.
Storage MethodHow LongNotes
Room temperature1–2 days in a cool roomBest only if your kitchen is not warm.
RefrigeratorAbout 1 weekBest everyday storage for a firmer texture.
Freezer2–3 monthsWrap well, then thaw in the fridge before serving.

How to Gift Peanut Butter Fudge

This is one of the easiest homemade candies to gift because the pieces look polished without frosting, sprinkles, or extra decoration. Chill the slab well, cut it small, and it feels instantly giftable.

Peanut butter fudge packed in a parchment-lined tin with small squares, parchment layers, and a gift tag.
For gifting, small squares packed between parchment layers look tidier, travel better, and feel more polished than oversized blocks.

It is also the kind of treat that looks more impressive than the work it takes. Small, tidy pieces tucked between layers of parchment feel like a proper homemade gift without making the process fussy.

A small tin of peanut butter fudge feels personal without being fragile, which is why it works so well for neighbors, teachers, office trays, or a last-minute holiday sweet.

For a second make-ahead peanut butter sweet on the same dessert tray, these peanut butter rice crispy treats bring a softer, chewy contrast to the richer fudge squares.

  • Cut into small squares rather than large blocks.
  • Let the pieces firm fully before packing.
  • Use parchment between layers.
  • Pack in a tin, box, or airtight container.
  • Keep chilled if the weather is warm.

If you are packing the fudge ahead, check the storage guide first so the pieces stay firm and tidy.

For a cleaner gift box, trim the edges of the slab first and save the trimmings for snacking. The center pieces will look the neatest.

Which Peanut Butter Fudge Method Should You Choose?

Use this powdered sugar method when you want the easiest sliceable fudge without boiling sugar. Choose another method only if you want a different texture, a different sweetener, or a shortcut built around condensed milk, frosting, or marshmallow creme.

Peanut butter fudge method chooser comparing powdered sugar, condensed milk, old-fashioned, marshmallow fluff, and sugar-free versions.
Once you know the difference between powdered sugar, condensed milk, old-fashioned, marshmallow fluff, and sugar-free fudge, choosing the right method gets easier.
MethodBest ForTradeoff
Powdered sugar peanut butter fudgeEasy, sliceable, no-thermometer fudgeSweet and rich, so small pieces are best.
2 ingredient peanut butter fudgeThe fastest shortcut versionUsually uses frosting or condensed milk, so the flavor is sweeter and less classic.
Condensed milk peanut butter fudgeCreamier shortcut fudgeUsually needs chocolate, white chocolate, peanut butter chips, or another setting partner. See MasalaMonk’s sweetened condensed milk fudge recipes.
Old-fashioned peanut butter fudgeNostalgic cooked-candy textureMore temperature-sensitive because it depends on cooked sugar concentration and crystallization.
Marshmallow fluff peanut butter fudgeSofter, plush holiday-style fudgeSweeter and made by a different method.
Chocolate peanut butter fudgePeanut-butter-cup flavorBest as a swirl or chocolate layer unless you are following a dedicated chocolate fudge formula.
Sugar-free peanut butter fudgeLow-carb or keto needsRequires a recipe built for sugar-free sweeteners; do not swap powdered sugar 1:1.

For keto, frosting, marshmallow creme, corn syrup, peanut-free, and other peanut butter fudge variations, MasalaMonk’s full peanut butter fudge methods guide is the better next step.

If you want to understand the cooked-candy difference behind old-fashioned fudge, the Exploratorium’s candy-making stages guide explains the soft-ball stage used for traditional fudge.

FAQs

Do you need a candy thermometer for peanut butter fudge?

No. This recipe does not use boiled sugar syrup, so there is no candy stage to measure. Powdered sugar helps the peanut butter mixture thicken and hold its shape once chilled.

What are the 3 ingredients in peanut butter fudge?

The three core ingredients are creamy peanut butter, butter, and powdered sugar. Vanilla and salt are optional flavor helpers.

Does natural peanut butter work in fudge?

It can, but it is less predictable. Natural peanut butter must be very well stirred before measuring. If it is oily, runny, coarse, or dry, the fudge may turn soft, oily, grainy, or crumbly.

Why is my peanut butter fudge soft?

It may need more chill time, or the mixture may not have enough powdered sugar. Oily peanut butter can also make fudge softer. Chill it longer first; if it still does not firm up, mix in a little more sifted powdered sugar.

Why did my peanut butter fudge turn crumbly?

Crumbly fudge usually has too much powdered sugar or peanut butter that is too dry. Let it sit at room temperature for 10 minutes before cutting. Next time, reduce the powdered sugar slightly or use creamier peanut butter.

Microwave or stovetop: which method is easier?

The microwave method is fastest, but the stovetop gives you more control. Either works as long as you heat gently, stop once the mixture is smooth, and avoid overheating.

Is condensed milk a direct swap for powdered sugar?

No. Condensed milk peanut butter fudge is a different method and usually needs chocolate, white chocolate, or peanut butter chips to help it set.

How do you double peanut butter fudge?

Double all ingredients and press the mixture into a 9×13-inch pan. The slab will be close to the same thickness as the 8×8-inch version, which makes it useful for holiday trays, parties, or gifting.

Pan size comparison showing a single batch of peanut butter fudge in an 8x8 pan and a double batch in a 9x13 pan.
When you double the recipe, a 9×13 pan keeps the fudge close to the same thickness as the original 8×8 batch.

Freezing peanut butter fudge: what works best?

Wrap the pieces well, place them in an airtight container, and freeze for 2–3 months. Thaw in the refrigerator before serving.

How do you make peanut butter fudge less sweet?

Use the optional salt, choose unsalted butter, and avoid frosting-based shortcut versions. This style will always be sweet because powdered sugar helps it hold together, but salt, vanilla, and smaller pieces make the richness feel more balanced.

Back to top

Posted on Leave a comment

Banana Bread with Applesauce Recipe

Sliced banana bread with applesauce on parchment, showing a soft set crumb with ripe bananas and applesauce nearby.

This banana bread with applesauce recipe is for the moment when the bananas on the counter are almost too soft for the fruit bowl but perfect for baking. The loaf comes out moist, sliceable, and a little lighter than classic banana bread, while still holding together after it cools.

The texture comes down to balance. Applesauce is wonderful in banana bread because it adds moisture and lets you use less fat, but it also brings water into the batter. With the wrong ratio, the top can look beautifully baked while the center stays heavy, damp, or gummy.

The goal is a loaf that smells like ripe bananas and cinnamon, slices without dragging, and feels plush rather than damp when you pick up a piece.

Quick Answer: Banana Bread with Applesauce

For one moist loaf, the sweet spot is 1½ cups mashed ripe banana plus ½ cup unsweetened applesauce, with 3 tablespoons oil or melted butter to keep each slice from feeling rubbery or fragile. Bake it in a 9×5-inch loaf pan at 350°F / 175°C until the middle bakes through and the crumb looks even, not shiny or wet.

This is not a fully no-oil loaf by default because applesauce replaces moisture better than it replaces tenderness. The small amount of fat keeps the crumb softer, cleaner, and easier to slice neatly.

This version is built around the texture problem applesauce banana bread often has: plenty of moisture, but not enough structure to slice cleanly. That is why the banana and applesauce are measured, a little fat stays in the batter, and the loaf gets time to bake through and cool before slicing.

At a glance: For one 9×5-inch loaf, use 1½ cups mashed ripe banana, ½ cup unsweetened applesauce, 2 cups flour, 2 eggs, and 3 tablespoons oil or melted butter. Bake at 350°F / 175°C for 55–65 minutes, until the center reaches about 200–205°F / 93–96°C.

For the first bake, make the recipe as written before reducing the oil, cutting the sugar further, or swapping in more whole wheat flour. Once you know how the batter should look and how the cooled loaf should slice, the variations become much easier to control.

Quick answer ratio board for banana bread with applesauce showing mashed banana, applesauce, oil or butter, bake temperature, and time.
Make the first loaf with the full ratio before tweaking. Once you know this baseline, lower-fat and variation decisions become much easier.

What This Loaf Tastes Like

This is a banana-forward loaf first, with gentle apple sweetness in the background. It does not taste like apple cake. The applesauce mostly shows up in the texture: an even crumb, a little extra moisture, and slices that still taste pleasant the next day.

Cinnamon, vanilla, and brown sugar make the banana flavor warmer. If you add walnuts or pecans, the loaf becomes more classic and bakery-style. If you skip them, it stays simple, easy to slice, and lunchbox-friendly.

It should taste like a cozy banana loaf with a softer crumb, not like applesauce trying to take over. It is still a quick bread, so expect a soft, sturdy crumb rather than an airy cake texture.

Close-up of banana bread slices showing an even, moist crumb with no gummy center or shiny wet line.
Look for a crumb that is evenly baked from edge to middle. That is the difference between fruit-rich banana bread and underdone banana bread.

Why You’ll Love This Recipe

  • Moist without the gummy middle: the banana, applesauce, flour, fat, and bake time are balanced so the loaf sets properly.
  • Still tastes like real banana bread: applesauce lightens the loaf, but a small amount of oil or butter keeps each slice from feeling rubbery or fragile.
  • Uses the bananas you were about to lose: heavily speckled bananas give the deepest flavor and natural sweetness.
  • Easy to adjust after the first bake: make it nuttier, less sweet, lower fat, dairy-free, vegan, or muffin-style without starting from scratch.

Why Applesauce Works in Banana Bread

Banana bread already depends on fruit puree, so applesauce fits naturally into the batter. It adds gentle sweetness and helps the loaf stay fresh-tasting for longer.

The catch is that applesauce is not the same as butter or oil. Fat helps coat the flour, which gives the crumb a softer bite. Applesauce brings extra water and fruit solids, which is why the batter needs the right balance. When the batter gets too wet, quick breads can turn dense, chewy, or gummy.

For that reason, this recipe keeps a small amount of oil or melted butter in the batter. It still feels lighter than a classic loaf, but it slices more cleanly once cooled.

You see the same idea in a good applesauce cake, where the applesauce keeps the crumb moist and even without making the cake feel wet.

Ingredients for Banana Bread with Applesauce

The ingredients are familiar, but measuring them makes the loaf much more reliable. A little too much banana or applesauce can make the crumb feel compressed instead of tender.

Labeled ingredients for banana bread with applesauce, including ripe bananas, applesauce, eggs, flour, brown sugar, oil, spices, and nuts.
The ingredient list is simple, but the recipe depends on balance: ripe bananas for flavor, applesauce for moisture, and a little fat for tenderness.

Very Ripe Bananas

Use bananas that are heavily speckled or mostly brown on the outside. They mash easily, taste sweeter, and give the loaf its deep banana flavor. If the bananas are still too yellow, use the ripening shortcuts before you start.

Banana ripeness guide showing bananas from too firm to heavily speckled and mostly brown for banana bread.
Heavily speckled bananas give banana bread the deepest flavor. However, measuring the mashed fruit still keeps the applesauce loaf from getting too wet.

If a banana looks too far gone for eating out of hand, it may be exactly right for this batter. For this recipe, measure 1½ cups mashed banana, which is usually about 3 large bananas or 4 smaller ones. Too little banana gives a bland loaf, while too much can make the middle heavy, especially with applesauce in the batter. Using freezer bananas? Drain them before measuring.

Mashed banana measured to 1½ cups in a glass measuring cup with ripe bananas and a fork nearby.
Banana size changes from bunch to bunch, so measure after mashing. This one step makes banana bread with applesauce much more reliable.

Frozen bananas also work. Thaw them first, drain off excess liquid, then mash and measure. They can release a lot of moisture, so measuring is even more important if you are using bananas from the freezer.

Frozen banana process guide showing thawed bananas, drained liquid, mashed banana, and 1½ cups measured for banana bread.
Frozen bananas work well, but they release extra liquid. Drain first, then mash and measure so the loaf stays soft instead of gummy.

How to Ripen Bananas Faster

If your bananas are yellow but not soft yet, place them in a paper bag and leave them at room temperature until the peels become heavily speckled. For a same-day option, bake unpeeled bananas on a lined baking sheet at 300°F / 150°C until the peels darken and the fruit softens, then cool before mashing.

This shortcut helps with texture, but it does not create the same deep flavor as bananas that ripen naturally over several days. Use it when you need banana bread today, not when you are chasing the strongest banana flavor.

If the bananas release liquid as they cool, leave that liquid behind before measuring so you do not add extra water to the batter.

Two-method guide for ripening bananas faster, showing the paper bag method and oven-ripened bananas at 300°F.
A paper bag is better when you have time; meanwhile, the oven shortcut helps when banana bread needs to happen today.

Unsweetened Applesauce

Plain unsweetened applesauce is best because it adds moisture without making the loaf too sweet. Homemade or store-bought both work, as long as the applesauce is smooth enough to blend evenly into the batter.

Sweetened applesauce is fine, but reduce the brown sugar slightly if you prefer a less sweet loaf. Cinnamon applesauce works too, especially if you want a warmer, spiced flavor.

A Small Amount of Oil or Melted Butter

The few tablespoons of fat are not there by accident. You can make a no-oil version, but the texture is usually more fragile. Three tablespoons of neutral oil or melted butter give the crumb a better bite while keeping the recipe lighter than a traditional butter-heavy loaf.

Use neutral oil when you want the banana flavor to stay clean and simple, with a softer next-day slice. Use melted butter if you want a richer, more classic banana bread flavor and a slightly firmer bite once the loaf cools. Trying to reduce more fat? Compare the applesauce-oil options later in the post.

Oil versus melted butter comparison for banana bread with applesauce, showing texture and flavor differences.
Oil keeps the banana flavor cleaner and softer the next day, while melted butter gives the loaf a richer, more classic banana bread taste.

Flour, Eggs, Sugar, and Leavening

All-purpose flour gives the most reliable loaf. You can replace up to half of it with whole wheat flour for a heartier flavor, but using all whole wheat flour will make the bread denser and may need a little extra moisture.

Whole wheat flour swap guide showing all-purpose flour, whole wheat flour, and a banana bread slice.
A partial whole wheat swap adds heartier flavor without taking over the loaf. Start with half so the crumb still stays tender.

If you want a banana loaf built around oats instead of regular flour, try this healthy banana bread with oat flour for a more oat-forward version.

Brown sugar is doing more than sweetening here. It brings a light caramel note that makes the banana taste rounder, especially when the applesauce is plain and unsweetened. Eggs help the batter set, and a mix of baking soda plus a little baking powder helps lift the fruit-heavy batter.

Walnuts, Pecans, or Chocolate Chips

Walnuts and pecans turn this into banana nut bread with applesauce. Use ½ cup for a lighter crunch or up to ¾ cup for a more classic banana nut loaf. Chocolate chips also work, but they make the bread sweeter and more dessert-like.

Mix-in chooser for banana bread with applesauce showing plain, walnuts, pecans, and chocolate chips.
Mix-ins change the personality of the loaf. Still, keep them under 1 cup so the banana-applesauce batter stays balanced and sliceable.

Equipment for This Loaf

You do not need a mixer for this loaf. In fact, mixing by hand is better because it helps prevent a rubbery crumb. A few small banana lumps are fine; beaten batter is not what you want here.

  • 9×5-inch loaf pan
  • Large mixing bowl
  • Medium bowl for dry ingredients
  • Fork or potato masher for the bananas
  • Whisk
  • Flexible spatula
  • Parchment paper, optional
  • Cooling rack
  • Digital thermometer, optional

The important part is not special equipment. It is gentle mixing, the right pan, and enough cooling time before slicing. A digital thermometer removes the guesswork from fruit-heavy loaves, where the top can brown before the center is ready.

Equipment for banana bread with applesauce, including loaf pan, bowls, fork, whisk, spatula, parchment, rack, and thermometer.
A bowl, whisk, spatula, and loaf pan are enough. The thermometer is the only optional tool that can save an uncertain center.

What Kind of Applesauce Should You Use?

The applesauce you use changes more than sweetness. It can change how loose the batter feels and how quickly the middle bakes through. If you are trying to avoid a damp center, this is one of the easiest places to stay in control.

Applesauce chooser board with smooth unsweetened, sweetened, cinnamon, chunky, and watery applesauce options.
Smooth unsweetened applesauce is the safest choice. If your applesauce is chunky or watery, adjust it before mixing so the crumb bakes evenly.
Applesauce Type Works? What to Adjust
Unsweetened smooth applesauce Best choice No change needed
Sweetened applesauce Yes Reduce the brown sugar slightly if you want a less sweet loaf
Cinnamon applesauce Yes Reduce or skip the extra cinnamon if needed
Homemade applesauce Yes Use smooth applesauce that is not watery
Chunky applesauce Sometimes Mash or blend first for a more even crumb
Very watery applesauce Risky Drain slightly or use 1–2 tablespoons less

If your applesauce looks loose and watery, hold back a little instead of adding extra. The batter may seem thick at first, but extra water shows up later in the baked crumb. The finished batter should mound softly in the pan, not pour like pancake batter.

Best Banana-to-Applesauce Ratio

The best starting ratio for one standard loaf is 1½ cups mashed banana to ½ cup applesauce. That gives enough banana flavor and enough applesauce moisture without flooding the batter.

Applesauce is not the problem. The problem is stacking too much banana and applesauce without giving the loaf enough flour, eggs, bake time, and cooling time.

Loaf Style Mashed Banana Applesauce Result
Balanced classic 1½ cups ½ cup Moist and sliceable
More banana-forward 1⅔ cups ⅓ cup Stronger banana flavor with slightly less added moisture
Lower-fat style 1½ cups ½ cup Lighter and more delicate, especially if you reduce the oil
Risky wet loaf 2 cups or more ½ cup or more More likely to bake up dense or gummy in the center

When the balance is right, the loaf tastes fruit-rich without feeling heavy. The first slice should smell warm, hold together, and look set rather than damp or compressed.

Banana and applesauce ratio guide showing balanced, banana-forward, lower-fat, and risky wet loaf options.
The banana-to-applesauce ratio controls moisture before the loaf ever reaches the oven. Too much fruit can make the crumb slow to set.

That balance is what keeps the loaf tasting like real banana bread, not like a lighter version where the texture feels like a compromise.

Best Pan Size and Pan Type for Banana Bread with Applesauce

Pan size changes how deep the batter sits, which changes how quickly the center sets. For this fruit-rich batter, a 9×5-inch loaf pan is the safest default.

Pan What Changes How to Bake It
9×5-inch loaf pan Best default; bakes most evenly 55–65 minutes at 350°F / 175°C
8½x4½-inch loaf pan Taller loaf; center takes longer Start checking around 55 minutes, but expect extra time
8×5-inch loaf pan Works, but the center can be slower Use a thermometer if possible and avoid pulling early
Dark metal loaf pan Browns faster on the outside Check early, tent if needed, and reduce the oven by 25°F / about 15°C if it over-browns
Glass or ceramic loaf pan Can bake more slowly through the center Expect extra time and use a thermometer; tent if the top browns before the middle is done
Mini loaf pans Smaller loaves bake faster Start checking around 30–35 minutes
Muffin tin Fastest bake with more edges 20–25 minutes at 350°F, or 18–20 minutes at 375°F
Pan size and pan type guide for banana bread with applesauce, including loaf pans, dark metal, glass, mini loaves, and muffin tin.
Pan size and material change how the middle bakes. Because this batter is fruit-rich, the safest default is a 9×5-inch loaf pan.

If the top browns before the middle is done, tent the loaf loosely with foil and continue baking. This is especially useful with smaller loaf pans, dark metal pans, glass pans, ceramic pans, or very ripe bananas.

Dark metal versus glass or ceramic loaf pan comparison for banana bread, with browning and center-baking cues.
Dark metal browns faster, while glass and ceramic can bake more slowly through the center. As a result, doneness cues matter more than color alone.

How to Make Banana Bread with Applesauce

Once the fruit and applesauce are measured, the method is simple. The main thing is to mix gently and give the center enough time to bake through. If you are unsure near the end, use the doneness guide instead of judging by color alone.

Step-by-step process for banana bread with applesauce, showing pan prep, mashed banana, wet ingredients, dry ingredients, folding, baking, and cooling.
The method is simple, but the order helps: measure the fruit, mix wet and dry separately, fold gently, then let the loaf cool before slicing.

1. Prepare the Pan

Heat the oven to 350°F / 175°C. Grease a 9×5-inch loaf pan and line it with parchment if you want to lift the loaf out easily.

2. Mash and Measure the Bananas

Mash the ripe bananas with a fork, then measure 1½ cups. A few small banana lumps are fine. They make the loaf feel homemade and keep the crumb from becoming too uniform.

3. Mix the Wet Ingredients

Whisk the mashed banana, applesauce, eggs, brown sugar, oil or melted butter, and vanilla until combined. The mixture will look loose and glossy.

4. Mix the Dry Ingredients Separately

In another bowl, whisk the flour, baking soda, baking powder, cinnamon, and salt. This helps the leavening spread evenly through the thick fruit-based batter.

5. Fold Gently

Add the dry ingredients to the wet ingredients and fold with a spatula until no dry flour remains. A mixer is not needed here; overmixing is one of the easiest ways to make the crumb rubbery.

The batter should be thick enough to mound on the spatula. If it looks loose before it goes into the oven, the finished crumb is more likely to feel heavy.

Batter texture guide showing banana bread batter mounding on a spatula compared with batter that is too loose.
The batter should mound instead of pour. If it spreads too easily, the baked banana bread is more likely to feel compressed.

6. Add Nuts if Using

Fold in walnuts or pecans at the end. For a prettier top, save a small handful and scatter them over the batter before baking.

7. Bake Until the Center Is Set

Spread the batter into the prepared pan and bake for 55 to 65 minutes. A browned top is only part of the story; this fruit-heavy batter still needs time for the center to finish baking.

Near the end, the loaf should smell deeply banana-rich, and the center should look set rather than glossy. The bread is done when a toothpick inserted into the center comes out with moist crumbs but no wet batter. For the most reliable check, use a digital thermometer; the center should register about 200°F to 205°F / 93°C to 96°C. King Arthur Baking also recommends this internal-temperature range for banana bread doneness in its banana bread doneness guide.

Doneness guide for banana bread with applesauce showing toothpick crumbs, a thermometer reading, and a set center.
A few moist crumbs are fine, but wet batter is not. For extra confidence, check for 200–205°F in the center before cooling the loaf.

8. Cool Before Slicing

Let the loaf cool in the pan for 10 to 15 minutes, then move it to a rack. Banana bread continues to set as it cools, especially when applesauce is in the batter.

Cutting too early can make a properly baked loaf look underdone, because the crumb has not had time to settle. Waiting is annoying, but it is one of the easiest ways to get clean slices.

Once cooled, the slices should look even and plush, with tiny banana flecks through the crumb instead of a shiny wet line in the center.

Cooling timeline for banana bread showing cooling in the pan, cooling on a rack, and clean slices after resting.
Cooling is part of the recipe, not an afterthought. Once the crumb settles, the slices cut cleaner and hold their shape.

Before you use the recipe card, remember the three texture cues that matter most: measured banana, batter that mounds instead of pours, and a fully cooled loaf before the first cut.

Clean slices of banana bread with applesauce showing an even crumb and no wet line.
This is the texture to look for after cooling: even crumb, clean edges, and slices that hold together without crumbling.

Banana Bread with Applesauce Recipe

This fruit-rich loaf is lighter than classic banana bread but still soft, fragrant, and sturdy enough to slice cleanly once cooled.

Yield1 standard loaf
Prep Time15 minutes
Cook Time55–65 minutes
Total TimeAbout 1 hour 20 minutes, plus 45–60 minutes cooling

Pan: 9×5-inch loaf pan
Oven: 350°F / 175°C

Ingredients

  • 1½ cups mashed very ripe banana, about 340 g
  • ½ cup unsweetened applesauce, about 120 g
  • 2 large eggs
  • ½ cup packed light brown sugar, about 105 g
  • 3 tablespoons neutral oil, about 45 ml, or 3 tablespoons melted butter, about 42 g
  • 2 teaspoons vanilla extract
  • 2 cups all-purpose flour, 240 g
  • 1 teaspoon baking soda
  • ½ teaspoon baking powder
  • 1 teaspoon ground cinnamon
  • ½ teaspoon fine salt
  • ½ cup chopped walnuts or pecans, optional, about 55–65 g

Method

  1. Heat the oven to 350°F / 175°C. Grease a 9×5-inch loaf pan and line it with parchment if you want easier lifting.
  2. Mash the bananas, then measure 1½ cups. Banana size varies so much that measuring gives you a more reliable loaf than counting bananas alone.
  3. In a large bowl, whisk the mashed banana, applesauce, eggs, brown sugar, oil or melted butter, and vanilla.
  4. In a separate bowl, whisk the flour, baking soda, baking powder, cinnamon, and salt.
  5. Add the dry ingredients to the wet ingredients and fold gently until no dry flour remains. The batter should be thick enough to mound on the spatula, not runny.
  6. Fold in walnuts or pecans if using.
  7. Spread the batter into the prepared pan. Bake for 55–65 minutes, or until a toothpick inserted in the center comes out with moist crumbs but no wet batter. For the most reliable check, the center should read about 200–205°F / 93–96°C.
  8. If the top browns before the center is done, tent the loaf loosely with foil and keep baking.
  9. Cool in the pan for 10–15 minutes, then move to a rack. Let the loaf cool for at least 45–60 minutes before slicing so the crumb can finish setting.

Notes

  • For your first loaf, use the full 3 tablespoons oil or melted butter. Once you know the texture, you can reduce it to 2 tablespoons for a lighter but more delicate loaf.
  • Use up to ¾ cup nuts, about 85 g, if you want a more classic banana nut loaf.
  • For a less sweet loaf, reduce the brown sugar to ⅓ cup if your bananas are very ripe.
  • If using frozen bananas, thaw and drain off excess liquid before measuring.
  • For the cleanest slices, cool the loaf fully before cutting.

After the first loaf, the best tweak is personal: richer with butter, cleaner with oil, crunchier with walnuts, softer as muffins, or lighter with a little less fat. The sections below help you adjust without losing the clean-slicing texture.

How to Avoid Gummy Banana Bread with Applesauce

A good slice should hold together, with an even crumb and a set center. If your last loaf looked beautiful on top but cut into a compressed middle, you probably do not need a completely different recipe. You usually need better measurement, a little more bake time, and enough cooling before cutting.

Most gummy loaves come from a combination of too much wet fruit, heavy mixing, not enough time in the oven, or slicing before the crumb has set. The good news is that it usually does not mean you are bad at banana bread; it comes down to one of a few fixable choices.

Troubleshooting board for gummy banana bread, showing fixes for gummy middle, rubbery crumb, fast browning, dense loaf, wet slices, and dry edges.
Most gummy banana bread problems come from moisture, mixing, bake time, or cooling. Once you know the cause, the fix is usually simple.

Texture Problems and Fixes

Problem Likely Cause How to Fix It
Gummy middle Too much banana or applesauce, or the loaf was underbaked Measure the banana, keep applesauce to ½ cup, and bake until the middle no longer looks shiny or wet
Rubbery texture The batter was overmixed Fold gently by hand and stop when the flour disappears
Top browns too fast The outside is browning before the center finishes Tent loosely with foil and continue baking
Dense loaf Too much wet ingredient or weak leavening Use fresh baking soda and baking powder, and follow the banana-to-applesauce ratio
Wet-looking slices The loaf was sliced too hot Cool at least 45 minutes before slicing
Dry edges Dark pan, overbaking, or too little wet ingredient Check earlier, use parchment, and try a lighter pan next time if the edges keep drying out
Side-by-side comparison of gummy compressed banana bread crumb and properly set sliceable crumb.
A compressed crumb is a clue, not a disaster. Next time, check the fruit amount, bake time, and cooling window.

Wet Center vs Fully Baked Crumb

A clean toothpick is not always the best goal for banana bread. A few soft crumbs on the toothpick are fine. Wet batter, shiny streaks, or a sunken center mean the loaf needs more time.

Banana bread center guide showing wet batter, shiny streaks, and a fully set crumb.
Moist crumbs are normal in banana bread, but shiny streaks or wet batter mean the center still needs more time.

What to Do If the Top Browns Too Fast

If the top is dark but the center still has wet batter, lay a loose piece of foil over the loaf and continue baking. This keeps the crust from getting too dark while the middle finishes.

Foil tent sequence for banana bread showing a darkening top, loose foil over the loaf, and continued baking.
If the top browns early, do not pull the loaf too soon. Tent it loosely with foil so the crust is protected while the center finishes.

Can Applesauce Replace Oil or Butter in Banana Bread?

Applesauce can lighten banana bread beautifully, but it cannot do everything butter or oil does. It brings moisture; fat brings richness, tenderness, and a cleaner bite.

Because banana bread already contains mashed fruit, it handles applesauce better than many cakes or cookies. Even so, a small amount of oil or melted butter helps prevent the loaf from becoming springy, tough, or too delicate in the middle.

Think of applesauce as a helper, not a perfect stand-in for every bit of fat. Bon Appétit explains this tradeoff in its guide to using applesauce instead of oil or butter.

Version What to Use Texture
Best balanced ½ cup applesauce + 3 tablespoons oil or melted butter Moist, rich enough, and sliceable
Lower-fat ½ cup applesauce + 1–2 tablespoons oil Lighter and more delicate
No-oil ½ cup applesauce and no added fat Moist but more delicate, with a higher risk of a soft center
Richer loaf ⅓ cup applesauce + ¼ cup melted butter or oil More classic banana bread texture

After the first loaf, you can reduce the oil slightly if you prefer a softer, lower-fat version.

Applesauce instead of oil decision board showing balanced, lower-fat, no-oil, and richer banana bread options.
Applesauce adds moisture, but fat adds tenderness. That is why the best banana bread with applesauce usually keeps a small amount of oil or butter.

Banana Bread with Applesauce and Yogurt

Yogurt works best as a small swap, not a big extra addition, because banana, applesauce, and yogurt all bring moisture. For a tangier, softer loaf, replace 2 tablespoons of the applesauce with plain Greek yogurt or regular plain yogurt.

Yogurt variation for banana bread with applesauce showing yogurt, applesauce, measuring spoon, and a loaf slice.
Use yogurt as a swap, not an add-on. A small amount adds tang, while too much extra moisture can slow the center.

It gives the loaf a little tang and softness without turning it into a completely different bake.

Adding a full extra ½ cup yogurt can make this batter too wet unless you also adjust the flour or bake time. The flavor may be good, but the center can turn heavy.

Banana Nut Bread with Applesauce

For banana nut bread with applesauce, fold ½ to ¾ cup chopped walnuts or pecans, about 55–85 g, into the batter just before baking. Walnuts make the loaf taste more old-school; pecans make it a little softer and sweeter.

Banana nut bread with applesauce showing sliced loaf with walnuts, pecans, applesauce, and toasted nut cues.
Toast the nuts, cool them, then fold them in last. That keeps the crunch clear without overworking the batter.

This is the version to make when you want the loaf to feel more classic and bakery-style, with a little crunch against the soft fruit-rich crumb.

Toasting the nuts first gives deeper flavor without changing the recipe. Warm them in a dry skillet for 3–5 minutes, or on a baking sheet for 6–8 minutes at 350°F / 175°C, then cool before folding them into the batter.

Too many nuts can make the loaf crumbly and weigh down an already-moist batter. Keep it under 1 cup if you want neat slices.

No Added Sugar Banana Bread with Applesauce

A no-added-sugar version works best when the bananas are deeply ripe, but it will taste more like a breakfast loaf than a dessert loaf. The bananas carry most of the sweetness, so this is not the place for pale, barely ripe fruit.

This version is not truly sugar-free because bananas and applesauce contain natural sugars. However, you can skip the brown sugar or reduce it to 2 to 3 tablespoons if your bananas are very sweet and heavily speckled.

No added sugar banana bread with applesauce showing ripe bananas, a sliced loaf, cinnamon, vanilla, and reduced sugar cue.
For a no-added-sugar version, very ripe bananas do the heavy lifting. However, the loaf will taste more breakfast-style than dessert-like.

For better flavor in a no-added-sugar loaf, use extra cinnamon, vanilla, and a pinch more salt. These small touches make the banana flavor taste fuller even without much added sugar.

Eggless or Vegan Banana Bread with Applesauce

For a vegan version, use neutral oil instead of butter and replace the eggs with 2 flax eggs. To make 2 flax eggs, mix 2 tablespoons ground flaxseed with 5 tablespoons water and let it thicken for about 10 minutes before adding it to the batter.

Eggless or vegan banana bread with applesauce showing flax egg, neutral oil, applesauce, and a sliced loaf.
Flax eggs help bind the batter, but the crumb is more delicate. Let the loaf cool fully before slicing for the cleanest texture.

It is a helpful option when the loaf needs to work for more people at the table, but full cooling matters even more because the crumb is more delicate.

Applesauce helps with moisture and a little binding, but it does not behave exactly like eggs. An eggless loaf will usually be more delicate and slightly denser, so let it cool completely before slicing.

If you only need the recipe to be dairy-free, the fix is easier: use neutral oil instead of melted butter. The rest of the main recipe can stay the same.

Banana Muffins with Applesauce

This batter also works as banana muffins with applesauce. Divide it into a lined muffin tin, filling each cup about ¾ full. Bake at 350°F / 175°C for about 20 to 25 minutes, or until the tops spring back and a toothpick comes out with moist crumbs.

Banana muffins with applesauce in a lined muffin tin, with bake times, fill level, cooling cue, and split muffins showing crumb.
The same banana-applesauce batter can become muffins. Because they bake faster than a loaf, check early and let them rest briefly in the pan.

Muffins are the better choice when you want faster cooling, easy freezing, or smaller grab-and-go portions with the same banana-applesauce flavor. Overbaking while waiting for a dark top can dry the edges, so look for tops that are set and spring back lightly.

For slightly taller muffin tops, bake at 375°F / 190°C and start checking around 18 to 20 minutes. Muffins bake faster than a loaf, so watch them closely near the end.

This recipe usually makes about 12 standard muffins. Let them sit in the pan for 5 minutes, then move them to a rack so the bottoms do not steam and turn damp.

For a more filling meal-prep bake, these high protein muffins are a good next step.

Storage and Freezing

How to Store the Loaf

Because this loaf is fruit-rich, storage matters almost as much as baking. Wrap it too soon and the outside can turn sticky; cool it fully and the slices keep beautifully. Want smaller portions instead? Use the muffin conversion.

  • Room temperature: keep tightly wrapped or in an airtight container for 2–3 days once fully cool.
  • Refrigerator: store for 5–6 days if your kitchen is warm, though the crumb may firm slightly.
  • Freezer: freeze slices for up to 3 months with parchment between them for easier thawing. For the cleanest setup, use the slice-freezing method below.
Storage guide for banana bread with applesauce showing wrapped loaf, fridge container, and freezer bag.
Cool the loaf fully before storing. Otherwise, trapped steam can soften the crust and make the slices feel sticky.

How to Freeze Slices

To serve frozen slices, thaw at room temperature or warm gently. A quick warm-up makes the banana flavor taste fresher and softens the crumb again.

Freezing guide for banana bread slices showing parchment between slices, a freezer container, a freezer bag, and a warmed slice.
Freeze slices with parchment between them so you can thaw one piece at a time. Then warm gently to bring back the soft crumb.

It is especially good the next day, when the banana flavor has had time to settle into the crumb.

If you are baking through ripe bananas often, this sourdough banana bread recipe is another good make-ahead loaf for the same breakfast-and-snack lane.

The Next-Day Slice

Once you know the texture cues, this becomes the kind of banana bread you stop overthinking: ripe bananas, a measured scoop of applesauce, a thick batter, and enough cooling time for clean slices. The first slice is soft and fragrant, but the next-day slice may be even better — more settled, more banana-rich, and exactly the reason those spotted bananas were worth saving.

Next-day banana bread slices on a plate with coffee, applesauce, bananas, and warm morning light.
The next-day slice is often the reward for waiting: the banana flavor deepens, the crumb settles, and the loaf feels even easier to enjoy.

After the first bake, pay attention to your favorite version: oil for a cleaner banana flavor, melted butter for a richer slice, walnuts for a classic banana bread feel, or plain for a softer breakfast loaf. That little preference is what turns the recipe into your house version.

FAQs About Banana Bread with Applesauce

How much applesauce belongs in one loaf of banana bread?

For one standard 9×5-inch loaf, ½ cup applesauce is the best starting point. It adds moisture without making the batter too loose, especially when paired with about 1½ cups mashed banana.

Does applesauce replace all the oil or butter?

Applesauce can replace some of the fat, but the best texture usually comes from keeping a small amount of oil or melted butter in the batter. A fully no-oil loaf can work, although it will be more delicate.

Why did my applesauce banana bread turn gummy?

The usual causes are too much wet ingredient, overmixing, underbaking, or slicing while the loaf is still hot. Measure the banana, keep the applesauce to ½ cup, fold gently, and bake until the middle no longer looks shiny or wet.

Do frozen bananas work?

They do, but thawing and draining matter. Frozen bananas release extra liquid, so drain off the excess, mash the fruit, and then measure the 1½ cups.

How much whole wheat flour can I use?

Up to half is the safest swap. Replacing all the all-purpose flour with whole wheat flour makes the loaf heartier and denser, so start with a partial swap before changing the whole recipe.

What happens if I skip the added sugar?

The loaf will taste more breakfast-style than dessert-style. Very ripe bananas help, but bananas and applesauce still contain natural sugars, so “no added sugar” is the more accurate description.

How do I make this into banana nut bread?

Fold ½ to ¾ cup chopped walnuts or pecans into the batter before baking. Toasted walnuts give the most classic banana nut bread flavor.

Which applesauce types work best?

Unsweetened smooth applesauce is the easiest choice. Sweetened applesauce works if you reduce the sugar slightly, cinnamon applesauce adds warmth, and chunky applesauce should be mashed or blended first.

How do I make it eggless or vegan?

For a vegan loaf, use neutral oil instead of butter and replace the eggs with 2 flax eggs. The loaf will be more delicate and slightly denser, so cool it completely before slicing.

Where does yogurt fit into the recipe?

A small amount works best. Replace 2 tablespoons of the applesauce with plain yogurt for a tangier loaf, but avoid adding much more unless you adjust the flour or bake time.

How do I know the middle is fully baked?

A toothpick should come out with moist crumbs, not wet batter or shiny streaks. For a more precise check, the center should register about 200°F to 205°F / 93°C to 96°C on a digital thermometer.

Back to top ↑

{ “@context”: “https://schema.org”, “@graph”: [ { “@type”: “Organization”, “@id”: “https://masalamonk.com/#organization”, “name”: “MasalaMonk.com”, “url”: “https://masalamonk.com/”, “logo”: { “@type”: “ImageObject”, “@id”: “https://masalamonk.com/#logo”, “url”: “https://masalamonk.com/wp-content/uploads/2018/04/masala-monk-logo.png”, “contentUrl”: “https://masalamonk.com/wp-content/uploads/2018/04/masala-monk-logo.png” } }, { “@type”: “WebSite”, “@id”: “https://masalamonk.com/#website”, “url”: “https://masalamonk.com/”, “name”: “MasalaMonk.com”, “publisher”: { “@id”: “https://masalamonk.com/#organization” }, “inLanguage”: “en-US” }, { “@type”: “ImageObject”, “@id”: “https://masalamonk.com/banana-bread-with-applesauce-recipe/#primaryimage”, “url”: “https://masalamonk.com/wp-content/uploads/2026/05/banana-bread-with-applesauce-recipe.jpg”, “contentUrl”: “https://masalamonk.com/wp-content/uploads/2026/05/banana-bread-with-applesauce-recipe.jpg”, “caption”: “Banana bread with applesauce sliced to show a soft, set crumb.” }, { “@type”: “WebPage”, “@id”: “https://masalamonk.com/banana-bread-with-applesauce-recipe/#webpage”, “url”: “https://masalamonk.com/banana-bread-with-applesauce-recipe/”, “name”: “Banana Bread with Applesauce Recipe”, “headline”: “Banana Bread with Applesauce Recipe”, “description”: “A moist banana bread with applesauce recipe that uses ripe bananas, measured applesauce, and a little oil or butter for tender slices without a gummy center.”, “isPartOf”: { “@id”: “https://masalamonk.com/#website” }, “publisher”: { “@id”: “https://masalamonk.com/#organization” }, “primaryImageOfPage”: { “@id”: “https://masalamonk.com/banana-bread-with-applesauce-recipe/#primaryimage” }, “mainEntity”: { “@id”: “https://masalamonk.com/banana-bread-with-applesauce-recipe/#recipe” }, “datePublished”: “2026-05-28”, “dateModified”: “2026-05-28”, “isAccessibleForFree”: true, “inLanguage”: “en-US” }, { “@type”: “Recipe”, “@id”: “https://masalamonk.com/banana-bread-with-applesauce-recipe/#recipe”, “mainEntityOfPage”: { “@id”: “https://masalamonk.com/banana-bread-with-applesauce-recipe/#webpage” }, “url”: “https://masalamonk.com/banana-bread-with-applesauce-recipe/”, “name”: “Banana Bread with Applesauce Recipe”, “headline”: “Banana Bread with Applesauce Recipe”, “description”: “Moist banana bread with applesauce, ripe bananas, and a small amount of oil or butter for tender slices without a gummy center.”, “image”: [ { “@type”: “ImageObject”, “@id”: “https://masalamonk.com/banana-bread-with-applesauce-recipe/#image-finished-loaf”, “url”: “https://masalamonk.com/wp-content/uploads/2026/05/banana-bread-with-applesauce-recipe.jpg”, “contentUrl”: “https://masalamonk.com/wp-content/uploads/2026/05/banana-bread-with-applesauce-recipe.jpg”, “caption”: “Sliced banana bread with applesauce showing a soft, set crumb.” }, { “@type”: “ImageObject”, “@id”: “https://masalamonk.com/banana-bread-with-applesauce-recipe/#image-slice-texture”, “url”: “https://masalamonk.com/wp-content/uploads/2026/05/banana-bread-with-applesauce-slice-texture-683×1024.jpg”, “contentUrl”: “https://masalamonk.com/wp-content/uploads/2026/05/banana-bread-with-applesauce-slice-texture-683×1024.jpg”, “caption”: “Close-up of banana bread with applesauce slices showing an even crumb.” }, { “@type”: “ImageObject”, “@id”: “https://masalamonk.com/banana-bread-with-applesauce-recipe/#image-clean-slices”, “url”: “https://masalamonk.com/wp-content/uploads/2026/05/clean-slices-of-banana-bread-with-applesauce-683×1024.jpg”, “contentUrl”: “https://masalamonk.com/wp-content/uploads/2026/05/clean-slices-of-banana-bread-with-applesauce-683×1024.jpg”, “caption”: “Clean slices of banana bread with applesauce showing no wet line.” }, { “@type”: “ImageObject”, “@id”: “https://masalamonk.com/banana-bread-with-applesauce-recipe/#image-next-day-slice”, “url”: “https://masalamonk.com/wp-content/uploads/2026/05/banana-bread-with-applesauce-next-day-slice-683×1024.jpg”, “contentUrl”: “https://masalamonk.com/wp-content/uploads/2026/05/banana-bread-with-applesauce-next-day-slice-683×1024.jpg”, “caption”: “Next-day banana bread with applesauce served as a breakfast slice.” } ], “thumbnailUrl”: “https://masalamonk.com/wp-content/uploads/2026/05/banana-bread-with-applesauce-recipe.jpg”, “author”: { “@id”: “https://masalamonk.com/#organization” }, “publisher”: { “@id”: “https://masalamonk.com/#organization” }, “datePublished”: “2026-05-28”, “dateModified”: “2026-05-28”, “inLanguage”: “en-US”, “prepTime”: “PT15M”, “cookTime”: “PT1H5M”, “totalTime”: “PT2H20M”, “recipeYield”: “1 standard loaf (about 10 slices)”, “recipeCategory”: [ “Quick Bread”, “Breakfast”, “Snack” ], “recipeCuisine”: “American”, “keywords”: “banana bread with applesauce, applesauce banana bread, moist banana bread, banana bread recipe, banana nut bread with applesauce, no added sugar banana bread, eggless banana bread, vegan banana bread, banana muffins with applesauce”, “recipeIngredient”: [ “1½ cups mashed very ripe banana, about 340 g”, “½ cup unsweetened applesauce, about 120 g”, “2 large eggs”, “½ cup packed light brown sugar, about 105 g”, “3 tablespoons neutral oil, about 45 ml, or 3 tablespoons melted butter, about 42 g”, “2 teaspoons vanilla extract”, “2 cups all-purpose flour, 240 g”, “1 teaspoon baking soda”, “½ teaspoon baking powder”, “1 teaspoon ground cinnamon”, “½ teaspoon fine salt”, “½ cup chopped walnuts or pecans, optional, about 55–65 g” ], “recipeInstructions”: [ { “@type”: “HowToStep”, “@id”: “https://masalamonk.com/banana-bread-with-applesauce-recipe/#prepare-the-pan”, “position”: 1, “name”: “Prepare the pan”, “url”: “https://masalamonk.com/banana-bread-with-applesauce-recipe/#prepare-the-pan”, “text”: “Heat the oven to 350°F / 175°C. Grease a 9×5-inch loaf pan and line it with parchment if you want easier lifting.”, “image”: “https://masalamonk.com/wp-content/uploads/2026/05/how-to-make-banana-bread-with-applesauce-step-by-step-683×1024.jpg” }, { “@type”: “HowToStep”, “@id”: “https://masalamonk.com/banana-bread-with-applesauce-recipe/#mash-and-measure-bananas”, “position”: 2, “name”: “Mash and measure the bananas”, “url”: “https://masalamonk.com/banana-bread-with-applesauce-recipe/#mash-and-measure-bananas”, “text”: “Mash the bananas, then measure 1½ cups. Banana size varies, so measuring gives you a more reliable loaf than counting bananas alone.”, “image”: “https://masalamonk.com/wp-content/uploads/2026/05/measure-mashed-bananas-for-banana-bread-683×1024.jpg” }, { “@type”: “HowToStep”, “@id”: “https://masalamonk.com/banana-bread-with-applesauce-recipe/#mix-wet-ingredients”, “position”: 3, “name”: “Mix the wet ingredients”, “url”: “https://masalamonk.com/banana-bread-with-applesauce-recipe/#mix-wet-ingredients”, “text”: “In a large bowl, whisk the mashed banana, applesauce, eggs, brown sugar, oil or melted butter, and vanilla.”, “image”: “https://masalamonk.com/wp-content/uploads/2026/05/how-to-make-banana-bread-with-applesauce-step-by-step-683×1024.jpg” }, { “@type”: “HowToStep”, “@id”: “https://masalamonk.com/banana-bread-with-applesauce-recipe/#mix-dry-ingredients”, “position”: 4, “name”: “Mix the dry ingredients”, “url”: “https://masalamonk.com/banana-bread-with-applesauce-recipe/#mix-dry-ingredients”, “text”: “In a separate bowl, whisk the flour, baking soda, baking powder, cinnamon, and salt.”, “image”: “https://masalamonk.com/wp-content/uploads/2026/05/how-to-make-banana-bread-with-applesauce-step-by-step-683×1024.jpg” }, { “@type”: “HowToStep”, “@id”: “https://masalamonk.com/banana-bread-with-applesauce-recipe/#fold-gently”, “position”: 5, “name”: “Fold the batter gently”, “url”: “https://masalamonk.com/banana-bread-with-applesauce-recipe/#fold-gently”, “text”: “Add the dry ingredients to the wet ingredients and fold gently until no dry flour remains. The batter should be thick enough to mound on the spatula, not runny.”, “image”: “https://masalamonk.com/wp-content/uploads/2026/05/banana-bread-batter-texture-guide-683×1024.jpg” }, { “@type”: “HowToStep”, “@id”: “https://masalamonk.com/banana-bread-with-applesauce-recipe/#add-nuts-if-using”, “position”: 6, “name”: “Add nuts if using”, “url”: “https://masalamonk.com/banana-bread-with-applesauce-recipe/#add-nuts-if-using”, “text”: “Fold in walnuts or pecans if using.”, “image”: “https://masalamonk.com/wp-content/uploads/2026/05/mix-ins-for-banana-bread-with-applesauce-683×1024.jpg” }, { “@type”: “HowToStep”, “@id”: “https://masalamonk.com/banana-bread-with-applesauce-recipe/#bake-until-center-is-set”, “position”: 7, “name”: “Bake until the center is set”, “url”: “https://masalamonk.com/banana-bread-with-applesauce-recipe/#bake-until-center-is-set”, “text”: “Spread the batter into the prepared pan. Bake for 55–65 minutes, or until a toothpick inserted in the center comes out with moist crumbs but no wet batter. For the most reliable check, the center should read about 200–205°F / 93–96°C.”, “image”: “https://masalamonk.com/wp-content/uploads/2026/05/banana-bread-doneness-guide-683×1024.jpg” }, { “@type”: “HowToStep”, “@id”: “https://masalamonk.com/banana-bread-with-applesauce-recipe/#foil-tent-banana-bread”, “position”: 8, “name”: “Tent with foil if needed”, “url”: “https://masalamonk.com/banana-bread-with-applesauce-recipe/#foil-tent-banana-bread”, “text”: “If the top browns before the center is done, tent the loaf loosely with foil and keep baking.”, “image”: “https://masalamonk.com/wp-content/uploads/2026/05/top-browning-too-fast-banana-bread-fix-683×1024.jpg” }, { “@type”: “HowToStep”, “@id”: “https://masalamonk.com/banana-bread-with-applesauce-recipe/#cool-before-slicing-step”, “position”: 9, “name”: “Cool before slicing”, “url”: “https://masalamonk.com/banana-bread-with-applesauce-recipe/#cool-before-slicing-step”, “text”: “Cool in the pan for 10–15 minutes, then move to a rack. Let the loaf cool for at least 45–60 minutes before slicing so the crumb can finish setting.”, “image”: “https://masalamonk.com/wp-content/uploads/2026/05/cool-banana-bread-before-slicing-683×1024.jpg” } ] } ] }
Posted on Leave a comment

Cream Puff Recipe

Golden cream puffs filled with vanilla cream and dusted with powdered sugar on an ivory plate.

Cream puffs look like bakery-case magic, but the dough is built from simple ingredients: water, milk, butter, flour, eggs, and a little patience. The best cream puffs feel light and crisp when you pick them up, then give way to soft vanilla cream inside. The real secret is knowing what the choux pastry should look like before it goes into the oven.

This cream puff recipe gives you golden choux pastry shells, a vanilla cream filling, and the practical cues that help the puffs rise, hollow out, and stay crisp enough to fill. You will learn when the dough is ready, how dark the shells should bake, what cream to use inside, why cream puffs collapse, and how to make them ahead without ending up with soggy pastry.

The reward is the contrast: a crisp, airy shell on the outside and cool vanilla cream tucked into the center. The method may feel strange the first time, especially when the dough looks rough, then smooth, then briefly broken after the eggs go in. That is normal. Once you understand the texture cues, cream puffs become much less intimidating.

Quick Answer: How to Make This Cream Puff Recipe

Cream puffs are made from choux pastry, a cooked dough that rises because steam expands inside it. To make them, cook water, milk, butter, sugar, salt, and flour into a thick paste, then beat in eggs gradually until the dough is glossy, smooth, and ready for the piping bag.

Pipe the dough into small mounds, bake until the shells puff and turn golden, then vent and dry them so they stay hollow. Once the shells cool completely, fill them with whipped cream, pastry cream, diplomat cream, custard, or ice cream.

The biggest mistake is underbaking. The shells need enough time to dry and set, not just enough time to puff. If they come out pale and soft, they may look done for a moment, then collapse as they cool.

Quick success cue: cream puff shells should be golden, light for their size, hollow inside, and dry enough to hold their shape before you add the filling.

Cream Puff Recipe Snapshot

Yield:
24–28 medium cream puffs
Prep time:
35–45 minutes
Bake time:
30–35 minutes
Cooling and drying:
30–45 minutes
Total with whipped cream:
About 1 hour 45 minutes to 2 hours, depending on cooling time
Total with pastry cream:
About 4 hours, including chilling
Main technique:
Choux pastry
Easiest first filling:
Vanilla whipped cream

Whipped cream is the easiest filling for a first batch because it takes only a few minutes. Pastry cream gives a more classic pastry-shop result. Diplomat cream, which is pastry cream folded with whipped cream, tastes richer while still feeling soft and airy.

What Are Cream Puffs?

Cream puffs are round pastry shells made from choux pastry and filled after baking. Unlike cake batter or cookie dough, choux pastry is first cooked on the stovetop. That cooked flour paste is mixed with eggs, piped into mounds, and baked.

In the oven, the moisture in the dough turns into steam. That steam pushes the dough outward, creating a hollow center. Once the outside sets and dries, the shell can hold cream inside.

Cream puffs are often filled with sweetened whipped cream, vanilla pastry cream, custard, diplomat cream, chocolate cream, strawberry cream, or ice cream. The shell itself is only lightly sweet, so the filling gives the dessert most of its flavor.

Cream Puffs vs Profiteroles vs Éclairs

These desserts are closely related because they all use choux pastry, but they are not exactly the same.

Comparison of round cream puffs, small profiteroles with chocolate sauce, and long chocolate-glazed éclairs.
Cream puffs, profiteroles, and éclairs all start with choux pastry; however, their shape, filling, and finish decide whether they feel like a cream-filled dessert, an ice cream dessert, or a glazed pastry.
Dessert Shape Usual Filling Common Finish
Cream puffs Round, medium shells Whipped cream, pastry cream, diplomat cream Powdered sugar, chocolate, or ganache
Profiteroles Small round puffs Ice cream, pastry cream, or whipped cream Chocolate sauce
Éclairs Long choux shells Pastry cream Chocolate glaze
Croquembouche Stacked cream puffs Usually pastry cream Caramel or spun sugar

For this recipe, we are focusing on classic round cream puffs. However, once you understand the dough, the same choux pastry technique opens the door to profiteroles, éclairs, gougères, and croquembouche.

In other words, this is the base skill. Learn the shell once, and a whole family of bakery-style desserts becomes easier.

Are Cream Puffs Made with Puff Pastry?

Classic cream puffs are made with choux pastry, not puff pastry.

The names are easy to confuse, but the doughs behave very differently. Choux pastry is cooked on the stovetop, mixed with eggs, piped into mounds, and baked into hollow shells. Puff pastry is a laminated dough made with many layers of butter and dough, so it bakes into flaky layers instead of hollow centers.

Hollow choux pastry cream puff shell compared with flaky puff pastry layers.
Classic cream puffs use choux pastry, not puff pastry, because choux bakes into hollow shells while puff pastry separates into flaky layers.

If you came here expecting flaky pastry filled with cream, you may be thinking of cream horns, mille-feuille, cream slices, or puff pastry danish. For classic bakery-style cream puffs, use choux pastry. For a different kind of buttery pastry dough, this apple pie crust recipe is a useful cold-butter comparison.

Cream Puff Recipe Ingredients

Cream puffs use everyday ingredients, but the measurements and order matter. Choux pastry is less forgiving than a casual cake batter because too much moisture or too much egg can make the shells spread instead of rise.

Ingredients for cream puffs including flour, eggs, butter, milk, water, sugar, salt, heavy cream, powdered sugar, and vanilla.
These simple cream puff ingredients become reliable only when the flour paste is cooked well, the eggs are added gradually, and the shells bake long enough to dry.

For the Choux Pastry Shells

  • ½ cup / 120 ml water
  • ½ cup / 120 ml whole milk
  • ½ cup / 113 g unsalted butter, cut into pieces
  • 1 tsp granulated sugar
  • ¼ tsp fine salt
  • 1 cup / 125 g all-purpose flour, spooned and leveled if using cups
  • 4 large eggs, room temperature, beaten and added gradually

The water helps create steam, the milk adds flavor and color, and the eggs help the shells puff and set. The flour weight matters, so use a scale if you can. A loosely scooped cup and a packed cup can behave very differently in choux pastry, which is why 125 g is the safest target.

The egg amount also needs judgment. Egg size, flour measurement, and how much moisture cooks out of the paste can all change the final texture. Start with the recipe amount, but add the final egg slowly. You may not need every drop if the dough already passes the V-shape test.

If you are unsure where to stop, use the V-shape dough cue before adding the last bit of egg.

For the Whipped Cream Filling

  • 2 cups / 480 ml cold heavy cream
  • 3–4 Tbsp powdered sugar
  • 1–2 tsp vanilla extract
  • Pinch of salt, optional

Powdered sugar dissolves quickly and gives a smooth filling. Granulated sugar also works, but the cream may need a little more whipping time.

For the Pastry Cream Option

For a richer custard-filled version, make pastry cream ahead and chill it fully before piping.

  • 2 cups / 480 ml whole milk
  • 4 large egg yolks
  • ½ cup / 100 g granulated sugar
  • ¼ cup / 30 g cornstarch
  • 2 Tbsp / 28 g unsalted butter
  • 2 tsp vanilla extract or vanilla bean paste
  • Pinch of salt

This gives a thick, pipeable custard-style filling. Pastry cream needs time to cool, so make it before the shells or several hours ahead.

Optional Toppings

  • powdered sugar
  • melted chocolate
  • chocolate ganache
  • caramel drizzle
  • fresh berries
  • sliced strawberries
  • toasted almonds

For the cleanest first version, dust the filled puffs with powdered sugar just before they go to the table.

Equipment You Need

You do not need bakery equipment to make cream puffs, but a few tools make the process easier.

Must-Have Equipment

  • medium saucepan
  • wooden spoon or sturdy silicone spatula
  • mixing bowl or stand mixer
  • baking sheet
  • parchment paper
  • wire rack

Helpful Equipment

  • piping bag
  • ½-inch round piping tip or large star tip
  • zip-top bag as a backup piping bag
  • skewer, toothpick, or small knife for venting
  • small scoop for even mounds

A piping bag gives the neatest shape, but you can still make cream puffs with a zip-top bag or two spoons. The shape may be less even, but the recipe will work as long as the dough texture and bake are right.

Best Cream for Cream Puffs

The shell gets the most attention, but the filling is what most people remember. The right cream for cream puffs depends on whether you want easy, classic, stable, rich, or light.

Filling chooser for cream puffs with whipped cream, stabilized cream, pastry cream, diplomat cream, and ice cream.
The best cream for cream puffs depends on timing: whipped cream is easiest, pastry cream is classic, diplomat cream feels balanced, and stabilized cream holds better for serving trays.
Filling Best For Texture Make-Ahead Strength
Whipped cream First batch, easiest version Light and airy Short hold
Stabilized whipped cream / mascarpone cream Parties and dessert trays Light but firmer Better hold
Pastry cream Classic custard-filled cream puffs Rich and custardy Very good
Diplomat cream Most balanced filling Creamy, light, stable Good
Pudding shortcut Emergency easy filling Sweet and thick Decent
Ice cream Profiterole-style dessert Cold and creamy Fill right before serving

For a first batch, whipped cream is the easiest choice because it is quick, light, and does not need cooking. For a more classic pastry-shop result, pastry cream works better. When you want something rich but still soft and airy, diplomat cream is the best middle ground.

Still deciding? The cream puff filling comparison below shows how whipped cream, pastry cream, and diplomat cream behave differently.

Cream Puff Filling: Whipped Cream vs Pastry Cream vs Diplomat Cream

Keep the shell technique the same, then choose the filling based on the dessert you want. Whipped cream makes the puffs feel light and delicate; pastry cream gives them a richer bakery-style center.

Whipped cream, pastry cream, and diplomat cream shown as different cream puff filling textures.
Once the choux shells are baked, the filling changes the whole dessert: whipped cream keeps it light, pastry cream makes it richer, and diplomat cream gives a softer middle ground.

Whipped Cream Filling

Start with whipped cream when you want the simplest filling. It tastes light, sweet, and clean, and you can make it in a few minutes while the shells cool.

It is best for first-time cream puffs, light desserts, same-day serving, cut-and-fill cream puffs, berries, and powdered sugar finishes. Plain whipped cream softens faster than pastry cream, so assemble the puffs near serving time. A strawberry shortcake has the same serve-soon logic because whipped cream and fresh fruit soften as they sit.

Mascarpone or Cream Cheese Whipped Cream

For a cream filling that still tastes light but holds better, beat 2 cups / 480 ml cold heavy cream with 3–4 Tbsp powdered sugar, 1 tsp vanilla, and 4 oz / 113 g softened mascarpone or cream cheese. Beat the mascarpone or cream cheese first until smooth, then slowly add the cold cream and whip until the filling holds medium-stiff peaks.

Mascarpone gives a cleaner, creamier flavor. Cream cheese adds a light tang and a slightly thicker texture.

Mascarpone whipped cream and cream cheese whipped cream compared as stabilized cream puff fillings.
Mascarpone gives stabilized whipped cream a clean, creamy taste, while cream cheese adds gentle tang and a firmer texture for cream puffs that need to sit longer.

This is not as classic as pastry cream, but it is very practical for parties because it pipes well and holds longer than plain whipped cream.

Pastry Cream Filling

Pastry cream is a cooked custard-style filling made with milk, egg yolks, sugar, cornstarch, butter, and vanilla. It gives cream puffs a richer center and holds better than plain whipped cream.

To make it, heat the milk until steaming. In a separate bowl, whisk egg yolks, sugar, cornstarch, and salt until smooth. Slowly whisk some hot milk into the yolk mixture, then return everything to the saucepan. Cook, whisking constantly, until thick and bubbling. Off the heat, whisk in butter and vanilla. Cover with plastic wrap directly on the surface and chill until cold.

For more pastry cream technique, Sally’s Baking Addiction has a detailed pastry cream guide.

Diplomat Cream Filling

Diplomat cream is pastry cream folded with whipped cream. It tastes rich without feeling heavy, which makes it one of the nicest fillings for cream puffs you plan to share.

For a practical filling, use 2 cups chilled pastry cream and 1 cup / 240 ml cold heavy cream whipped to medium peaks. Whisk the chilled pastry cream until smooth, then gently fold in the whipped cream. The filling should be soft, creamy, and pipeable, not loose or runny.

Pudding Shortcut Filling

For the easiest shortcut, use thick vanilla pudding, chill it well, then fold in a little whipped cream for a lighter texture. It will not taste as fresh as homemade pastry cream, but it works when you need a fast, kid-friendly filling.

Cream Puff Filling Texture Guide

Before choosing a filling, look at how each option holds shape. Thicker fillings are easier to pipe and help the choux shells stay crisp longer.

Cream puff filling texture guide with whipped cream, pastry cream, diplomat cream, and pudding shortcut.
Texture matters as much as flavor here; a cream puff filling should hold a spoon or piping line without running into the shell.

Which Filling Should You Choose?

  • Easiest first batch: whipped cream
  • Classic custard-style center: pastry cream
  • Most balanced texture: diplomat cream
  • Party tray: mascarpone whipped cream, stabilized whipped cream, or pastry cream
  • Kid-friendly shortcut: whipped cream or pudding filling
  • Profiterole-style dessert: ice cream
Most balanced choice: whipped cream is easiest, pastry cream is classic, but diplomat cream gives the strongest mix of lightness, richness, and stability.

How to Make Choux Pastry for Cream Puffs

Choux pastry is the heart of this recipe. The dough starts on the stovetop, where the flour is cooked with hot liquid and butter. After that, eggs are added gradually to create a glossy, slow-moving dough. For a deeper technical look at why choux rises with steam, Serious Eats has a useful guide to choux pastry.

The method feels unusual the first time, but every stage has a clear cue.

Step 1: Melt the Butter with Water, Milk, Sugar, and Salt

Add the water, milk, butter, sugar, and salt to a medium saucepan. Warm over medium heat until the butter melts completely and the liquid reaches a boil.

Do not rush this step with high heat. You want the butter fully melted before the flour goes in, so the dough forms evenly.

Step 2: Add the Flour All at Once

Add the flour in one go and start stirring immediately. The mixture will look rough and lumpy at first. Keep stirring. Within a short time, it will come together into a thick paste.

This paste is called the panade. It should pull away from the sides of the pan and begin forming a ball.

Step 3: Cook the Flour Paste

Keep cooking and stirring the paste for 1–3 minutes. A thin film may form on the bottom of the pan, and the dough should look cohesive rather than wet or greasy.

Cooking the paste for another minute or two drives off extra moisture before the eggs go in. If the paste stays too wet, the dough may become too loose and spread on the tray instead of puffing upward.
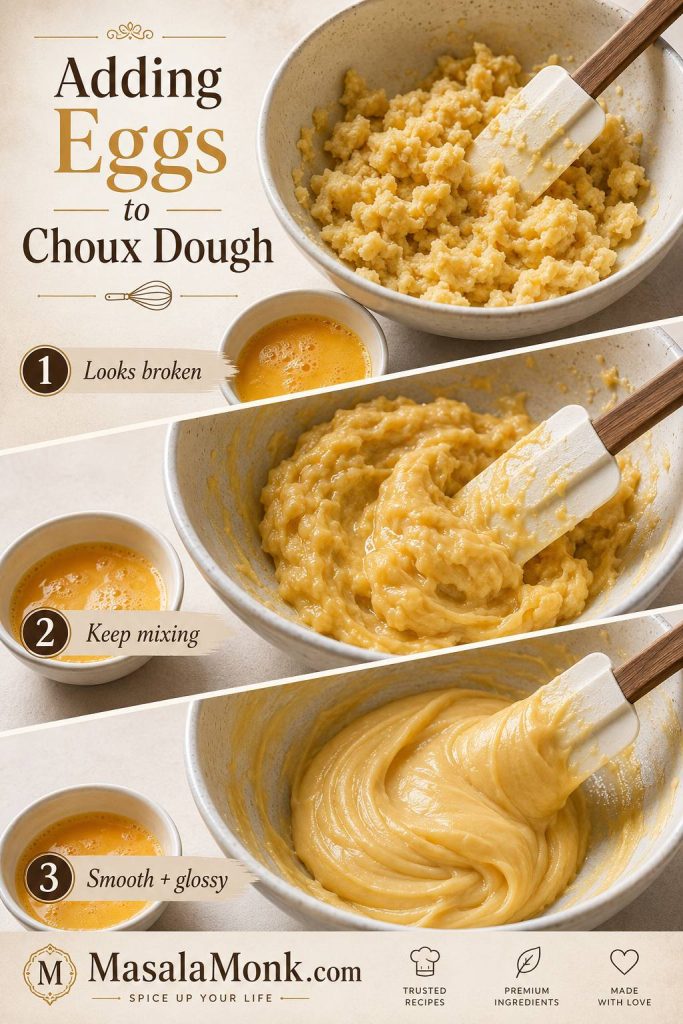
The panade is ready when it forms a smooth ball, pulls away from the sides, leaves a light film on the bottom, no longer looks wet with loose butter, and feels thick when stirred. At this point, the dough should feel sturdy and slightly resistant, not loose or oily.
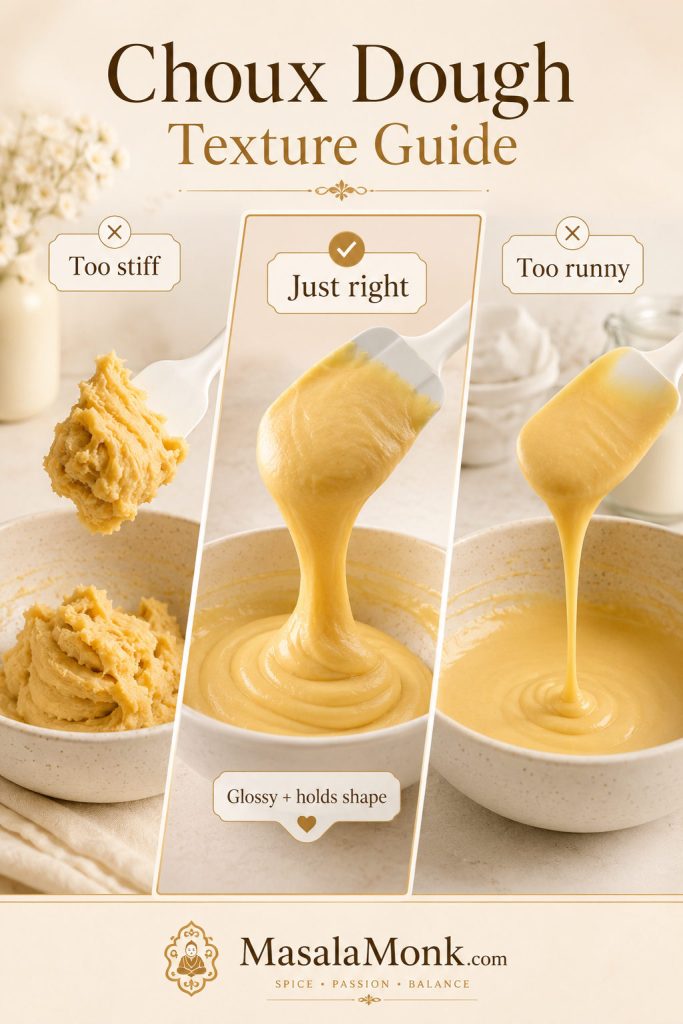
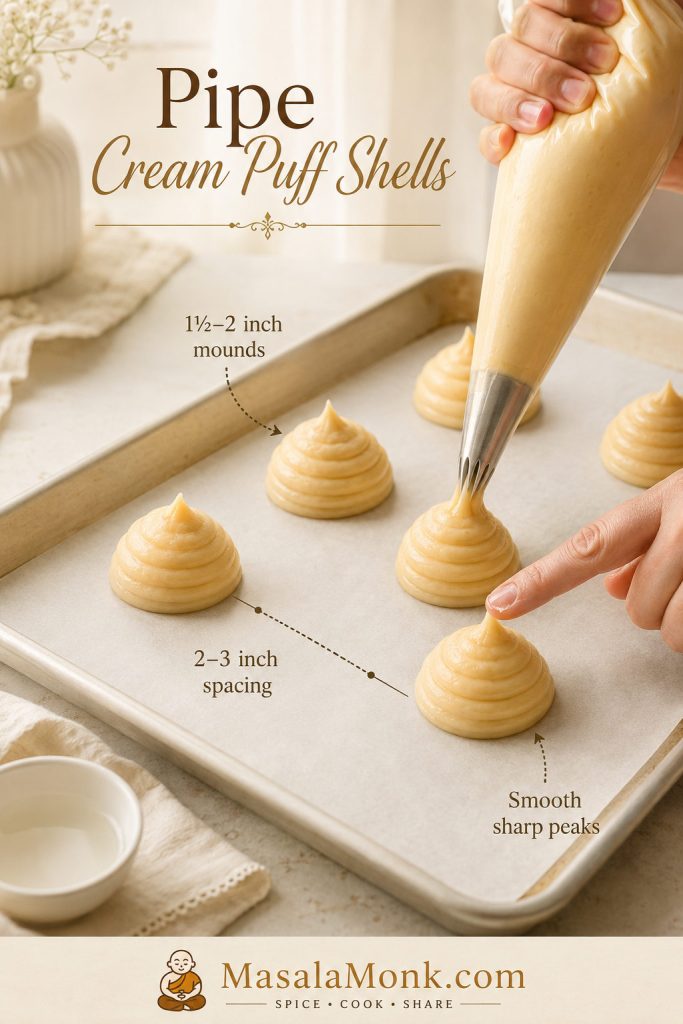
Choux panade in a saucepan pulling away from the sides and leaving a thin film on the pan.
When the choux panade pulls away from the saucepan and leaves a thin film, it has cooked off enough moisture to give the eggs a stronger base.

Step 4: Cool Slightly Before Adding Eggs

Transfer the hot paste to a mixing bowl or the bowl of a stand mixer. Let it cool for a few minutes until it is warm but no longer steaming hot.

If the dough is too hot, it can scramble the eggs. You do not need it cold; just let the harsh heat come down.

Step 5: Add the Eggs Gradually

Beat the eggs lightly in a separate bowl if you want maximum control. Add about three eggs first, one at a time or in several additions, mixing well after each addition. Then add the final beaten egg a spoonful at a time.

At first, the dough may look broken, slippery, or curdled. Do not panic. Keep mixing and it will come back together. This is where patience matters more than speed.

Three stages of adding eggs to choux dough, from broken-looking dough to smooth glossy dough.
Choux dough can look broken when the eggs first go in; however, steady mixing brings it back to the smooth, glossy texture needed for cream puff shells.

The final egg is where the texture can change quickly. You may not need every drop, so stop when the dough is glossy, smooth, thick, and able to hold a piped shape.

Before you pipe, check the V-shape dough cue; it is the easiest way to avoid loose cream puff dough.

Important: do not blindly add all the egg if the dough already looks right. Choux pastry is ready when it falls from the spatula in a thick V shape and still holds its shape when piped.

How to Know Choux Dough Is Ready

This is the checkpoint that saves cream puffs from turning flat.

Finished choux dough should be smooth, glossy, thick, soft enough to fall slowly from a spatula, and firm enough to hold height on the baking sheet.

Choux Dough V-Shape Test

The best cue is the V-shape test. Lift the spatula from the dough. The dough should slowly fall and leave a thick V-shaped ribbon hanging from the spatula. Once you see that ribbon, the dough suddenly feels less mysterious.

Glossy choux dough falling from a spatula in a thick V-shaped ribbon.
The V-shape test shows when choux dough is ready: thick enough to pipe, glossy enough to expand, and not so loose that it spreads.

If the dough stands in a stiff peak and refuses to fall, it needs a little more egg. If it puddles or runs off the spatula like batter, it has gone too far.

Choux Dough Texture Guide

Use the visual differences below before adding more egg. The goal is dough that moves slowly, shines lightly, and still holds a mound when piped.

Choux dough texture guide showing too stiff, just right, and too runny dough in separate bowls.
Choux dough should be glossy and pipeable while still holding shape; too stiff can limit rise, while too runny can make the shells spread.

Just Right

The dough is glossy, smooth, and slow-moving. When piped, the mound holds its height and only relaxes slightly.

Too Stiff

The dough looks dry, rough, or heavy. It may hold a sharp peak and resist falling from the spatula. Add more beaten egg, one spoonful at a time.

Too Runny

The dough spreads quickly and cannot hold a piped mound. This usually means too much egg was added, the flour paste was not cooked enough, or the flour measurement was too low.

Runny choux is hard to fix perfectly. You can bake it, but the puffs may spread more. Next time, save the final egg for texture adjustment and stop at the V-shape stage.

Once the dough holds shape, move on to piping the cream puff shells.

How to Pipe Cream Puff Shells

Line your baking sheets with parchment paper. Transfer the choux dough to a piping bag fitted with a ½-inch round tip or large star tip.

Pipe mounds about 1½–2 inches wide, leaving 2–3 inches of space between them. Cream puffs expand as they bake, and crowded dough can merge together.

If the tops have sharp peaks, smooth them gently with a damp fingertip. Peaks can burn before the rest of the shell finishes baking.

After the mounds are evenly spaced and the peaks are smoothed, the next important cue is baking the shells until they set.

Piping cream puff shells on parchment with spacing marks and a fingertip smoothing a sharp peak.
Even piping helps cream puff shells bake at the same rate; meanwhile, enough spacing and smoothed peaks prevent crowded, uneven, or burnt-tipped puffs.

No Piping Bag?

Use a zip-top bag with one corner snipped off, or use a small scoop and spoon. The puffs may look more rustic, but even mounds will still bake well.

The main goal is consistency. Similar-size puffs bake at the same rate. If some are tiny and others are huge, the small ones may dry out before the larger ones are fully hollow.

How to Bake Cream Puff Shells So They Rise and Stay Hollow

Cream puffs need heat for lift and enough time for structure. A shell that puffs beautifully but comes out too early can still collapse as it cools.

Before and After Baking Cream Puff Shells

Use the transformation from soft piped dough to puffed golden shells as a quick check that the oven heat is doing its job.

Piped choux dough mounds shown beside baked golden cream puff shells.
Choux pastry transforms in the oven as steam expands inside the dough, turning soft piped mounds into light, hollow cream puff shells.
  1. Preheat the oven to 425°F / 218°C.
  2. Bake the piped shells for 10 minutes.
  3. Reduce the oven to 325°F / 163°C without opening the oven door.
  4. Bake for 20–25 minutes more, until the shells are golden, firm, and dry.
  5. Turn the oven off.
  6. Poke or slit each shell to release steam.
  7. Return the shells to the turned-off oven with the door cracked for 10–20 minutes.
  8. Cool completely before filling.

Do not open the oven during the early rise. A sudden drop in heat can collapse the structure before the outside sets.

Cream Puff Shell Color Guide

The shells are ready when they feel light, firm, dry, and hollow. If they still look pale or feel soft, give them more time. A properly baked shell usually has a deeper golden color than many first-time bakers expect.

Cream puff shell color guide showing too pale, just right, and too dark baked shells.
Color is a doneness clue in cream puff shells; if they stay pale, the structure may not be dry enough to hold after cooling.

If the shells look pale, check this color guide before taking them out; underbaked choux is one of the most common reasons cream puffs collapse.

Remember: the goal is not only puffing. The goal is puffing, setting, and drying. That is what keeps the shells hollow after cooling.

How to Check One Hollow Cream Puff Shell

If you are unsure, sacrifice one shell before removing the whole tray. Split it open. The inside should be mostly hollow and not wet or doughy. A little soft webbing is normal, but the shell should not feel raw.

If the center looks damp, bake a little longer or give the shells more drying time in the turned-off oven.

Split cream puff shell showing a hollow, dry interior ready for filling.
A hollow cream puff shell means the choux pastry rose and dried properly, giving you enough space for whipped cream, pastry cream, or diplomat cream.

Once the shells are hollow and cool, continue to filling the cream puffs.

What Successful Cream Puffs Look and Feel Like

Successful cream puff shells should feel light when you lift them. The outside should be firm and dry, the inside should be hollow enough for filling, and the color should be golden rather than pale.

Tray of successful cream puff shells with callouts for golden color, light texture, hollow center, and dry structure.
This tray shows the visual standard to aim for: golden shells that feel light, hold their shape, and are ready for a cool vanilla cream center.

This is the moment where the recipe starts feeling like a real bakery project: a tray full of airy shells, ready for cold cream and a dusting of powdered sugar. Fill one, dust it, and taste it before serving the rest. That first crisp shell and cool cream center is the payoff for all the careful dough cues.

How to Fill Cream Puffs

Only fill cream puffs after the shells are fully cool. Warm shells melt the filling and create steam, which can make the pastry soft.

Cut-and-fill and bottom-fill methods for adding cream to cream puff shells.
Cut-and-fill is the easiest method for home bakers, while bottom-filling gives cream puffs a cleaner pastry-shop look.

Cut-and-Fill Method

This is the easiest and prettiest method for home serving. Slice off the top third of each shell, pipe or spoon cream into the hollow center, then place the top back on. Dust with powdered sugar or drizzle with chocolate.

This method works especially well with whipped cream, diplomat cream, berries, and decorative swirls.

Bottom-Fill Method

For a cleaner pastry-shop look, make a small hole in the bottom of each shell with a knife, skewer, or piping tip. Pipe pastry cream or diplomat cream into the shell until it feels slightly heavier.

This method is best for pastry cream, custard, or thicker fillings.

When Should You Fill Cream Puffs?

For the crispest bite, wait until the shells are cool and the filling is ready before assembling. Once filled, they soften in the refrigerator because the cream slowly releases moisture into the pastry.

Planning for a party? Use the make-ahead cream puffs timeline so the shells stay crisp.

Timeline showing bake, cool, fill, and serve steps for cream puffs.
The best filling window comes after the shells cool completely and before the tray sits too long, so the pastry keeps its crisp edge.

If you need to work ahead, bake the shells ahead and fill them later.

Mini Cream Puffs

Mini cream puffs use the same dough, but they are piped smaller and bake a little faster. They are perfect for parties, dessert trays, birthdays, brunch spreads, and bite-size holiday desserts.

Mini cream puffs arranged on a dessert tray with powdered sugar and visible vanilla cream filling.
Mini cream puffs use the same choux pastry technique, but their bite-size shape makes them especially useful for parties, dessert trays, and make-ahead serving.
  • Use the same dough and oven temperature.
  • Pipe 1-inch mounds.
  • Leave room between them.
  • Start checking 4–6 minutes earlier than regular puffs.
  • Keep the venting and drying step, even if the drying time is slightly shorter.
  • Fill from the bottom with a small round tip.
  • Assemble when you are ready to serve.
  • Expect about 40–50 mini cream puffs, depending on size.

Mini puffs can dry faster because they are small, but they can also overbrown faster. Look for the same signs: golden color, firm sides, light weight, and a hollow interior.

Do not skip the drying step just because they are small. A mini puff can still collapse if it is underbaked or trapped with steam inside.

Cream Puff Variations

Once you understand the basic shell, the filling and topping can change easily.

Cream puff variations guide showing strawberry, apple, chocolate, profiteroles, and craquelin versions.
Once you can make hollow choux shells, the same base can become strawberry cream puffs, chocolate puffs, apple-topped puffs, profiteroles, or craquelin-style pastries.

Strawberry Cream Puffs

Add sliced strawberries inside the cream puffs or fold finely chopped strawberries into whipped cream. You can also use strawberry pastry cream or strawberry diplomat cream. Fresh strawberries release juice, so assemble these just before the tray goes out.

Chocolate Cream Puffs

Fill the shells with chocolate pastry cream, chocolate whipped cream, or vanilla cream with a chocolate ganache topping. Chocolate cream puffs are especially good with bottom-filled shells and a glossy chocolate finish.

Chocolate cream puffs filled with chocolate cream and topped with glossy ganache.
Chocolate cream puffs bring a richer finish to the same golden choux shell, with glossy ganache and soft cream for a more indulgent dessert direction.

Apple Cream Puffs

For an apple dessert version, keep the choux shells crisp and use a small spoonful of thick, cooled apple pie filling as a topping or plate sauce rather than packing the shell with wet fruit. Add the cream first, then spoon the apple filling over just before serving.

Choux au Craquelin

Choux au craquelin has a thin cookie-like dough placed on top of each choux mound before baking. It creates a crackly, more polished top and can help the puffs rise more evenly.

This is optional. You do not need craquelin for the base recipe, but it is a beautiful upgrade once you are comfortable with the dough.

Choux au craquelin pastries with golden crackly tops on a parchment-lined tray.
Choux au craquelin adds a thin cookie-like topping to choux pastry, giving the shells a more even rise and a crisp bakery-style surface.

Ice Cream Puffs / Profiteroles

Fill cooled shells with small scoops of ice cream and top with warm chocolate sauce. Serve immediately, because the ice cream will soften the shells quickly. For a dairy-free tropical version, coconut ice cream makes a fun profiterole-style filling.

Profiteroles filled with vanilla ice cream and topped with glossy chocolate sauce.
Profiteroles are closely related to cream puffs, but they are often filled with ice cream and finished with warm chocolate sauce.

Croquembouche

Croquembouche is a tower of cream puffs held together with caramel. It is a separate advanced dessert, but it starts with the same basic choux pastry skill.

Cream Puff Recipe Troubleshooting

Most cream puff problems come back to moisture, egg quantity, oven timing, or assembling too early. Start with this quick diagnosis, then use the detailed fixes below.

Cream puff troubleshooting guide showing collapsed puffs, runny dough, doughy centers, soggy shells, no rise, and eggy taste fixes.
This troubleshooting guide turns common cream puff failures into visual checks: dough texture, shell color, steam release, and filling timing.
Problem Likely Cause Fix Next Time
Cream puffs collapsed Underbaked shells, oven opened early, trapped steam, or dough too wet Bake until firm and dry, do not open early, vent shells, and dry in the turned-off oven
Dough is runny Too much egg, panade not cooked enough, or too little flour Save the final egg for texture adjustment and stop at the V-shape test
Puffs did not rise Oven not hot enough, dough too loose, or panade too wet Preheat fully, cook the paste properly, and use visual dough cues
Centers are doughy Underbaked, shells too large, or not dried after baking Bake longer, pipe evenly, vent, and dry in the oven
Shells are soggy after filling Filled too early, filling too loose, or shells not fully cooled Fill near serving time and use pastry cream or stabilized cream for longer hold
Shells taste eggy Underbaked shells, too much egg, or pale pastry Bake until dry and golden, and use the dough test before adding all the egg

If your issue is dough texture, start with the choux dough test. If the shells collapse or taste eggy, go back to the shell color guide and baking cues.

Why Did My Cream Puffs Collapse?

Cream puffs usually collapse because they were underbaked, the oven was opened too early, the dough was too wet, or the shells were not vented and dried.

Fix it by baking until the shells are firm and dry, not just lightly colored. Vent steam with a small slit or hole, then let the shells dry in the turned-off oven with the door cracked.

A pale shell is usually an unstable shell.

Why Didn’t My Cream Puffs Rise?

If cream puffs do not rise, the dough may have been too runny, the panade may not have been cooked enough, or the oven may not have been hot enough at the start.

Make sure the liquid reaches a boil before adding flour, cook the flour paste for 1–3 minutes, and preheat the oven fully before baking. The piped dough should hold its mound shape before it goes into the oven.

Why Is My Choux Dough Runny?

Runny choux dough usually means too much egg was added or the flour paste stayed too wet. Egg size, humidity, and flour measurement can all affect the final texture.

The fix is prevention: add the last egg in small spoonfuls and stop when the dough is glossy, thick, and able to hold shape. If the dough already passes the V-shape test, do not force in the rest of the egg.

Why Are My Cream Puffs Doughy Inside?

Doughy centers mean the shells need more baking or drying time. Large puffs can also stay moist inside if they brown too quickly on the outside.

Bake until the shells feel light and firm, then vent and dry them in the turned-off oven. If one shell looks questionable, break it open and check the interior before removing the whole batch.

Why Are My Cream Puffs Soggy After Filling?

Filled cream puffs soften because cream adds moisture to the shell. This happens faster with plain whipped cream than with pastry cream or stabilized cream.

Fill near serving time, cool the shells fully before filling, and use a thicker filling if you need them to sit longer.

Why Do My Cream Puffs Taste Eggy?

An eggy taste often comes from underbaked shells, too much egg in the dough, or not enough filling balance. Cream puff shells should be baked until dry and golden, not pale and soft.

Adding vanilla to the filling and using the right amount of sugar also helps balance the egg-rich dough.

Make-Ahead, Storage, and Freezing for Cream Puffs

Cream puffs are best assembled close to serving, but the shells are very make-ahead friendly. The key is to store shells and filling separately whenever possible.

Best Make-Ahead Timeline for Cream Puffs

When What to Do
1 day ahead Bake the shells, cool them fully, and store them airtight.
Several hours ahead Make pastry cream, diplomat cream, or stabilized whipped cream and chill it.
30–60 minutes before serving Re-crisp shells if needed, then let them cool completely.
Right before serving Fill, dust with powdered sugar, and serve.
Make-ahead cream puff timeline showing baked shells, filling, re-crisping, cooling, and final filling.
Make-ahead cream puffs work best when the shell, filling, re-crisping, and final dusting happen as separate steps instead of one rushed assembly.

Making Cream Puff Shells Ahead

This is the best way to work ahead. Bake the shells, cool them completely, and store them in an airtight container for up to 1 day. If they soften, re-crisp them briefly in the oven, then cool again before filling.

Making Choux Dough Ahead

Freshly piped and baked choux gives the most reliable rise. You can refrigerate the dough briefly, but it may stiffen and become harder to pipe evenly.

For best results, especially if you are new to choux pastry, bake the dough soon after mixing. If you want to work farther ahead, freezing piped mounds is usually more reliable than holding a bowl of finished dough in the fridge.

Freezing Cream Puff Shells and Piped Choux Dough

Piped unbaked choux can be frozen on a tray, then transferred to a freezer bag or container. Bake from frozen, adding a few extra minutes as needed.

This is useful for future batches, but the first time you make cream puffs, bake them fresh so you can learn how the dough behaves.

Freezing guide with unfilled cream puff shells in a container, piped choux dough on a tray, and baked shells cooling on a rack.
Unfilled cream puff shells and piped choux dough freeze better than filled cream puffs, because cream softens the pastry once it is added.

Refrigerating Filled Cream Puffs

Filled cream puffs should be refrigerated, but they taste best the same day. The longer they sit, the more the shells soften.

Pastry cream and diplomat cream hold better than plain whipped cream, but even those fillings will eventually soften the pastry.

Freezing Cream Puff Shells

Unfilled shells freeze better than filled cream puffs.

Freeze cooled, unfilled shells in an airtight container. Thaw at room temperature, re-crisp briefly in the oven if needed, cool completely, then fill.

How to Re-Crisp Cream Puff Shells

Place unfilled shells in a low oven until they feel dry again. Let them cool fully before filling. Do not fill warm shells, or the cream may melt and loosen.

Cream Puff Recipe

Recipe at a Glance

Cream Puff Recipe

Description: Golden choux pastry shells filled with vanilla cream. These cream puffs are crisp outside, hollow inside, and beginner-friendly when you follow the dough and baking cues.

Yield
24–28 cream puffs
Prep Time
40 minutes
Bake Time
30–35 minutes
Cooling/Drying Time
30–45 minutes
Total Time
About 1 hour 45 minutes to 2 hours with whipped cream, depending on cooling time
Method
Baked choux pastry
Cream puff recipe card with yield, baking temperatures, shell cues, filling options, and key ingredients beside a filled cream puff.
Keep this cream puff recipe card nearby for the decisions that matter most: egg texture, oven timing, hollow shells, and the right filling for your schedule.

Ingredients

For the Choux Pastry Shells

  • ½ cup / 120 ml water
  • ½ cup / 120 ml whole milk
  • ½ cup / 113 g unsalted butter, cut into pieces
  • 1 tsp granulated sugar
  • ¼ tsp fine salt
  • 1 cup / 125 g all-purpose flour, spooned and leveled if using cups
  • 4 large eggs, room temperature, beaten; add gradually and use only as much as needed

For the Whipped Cream Filling

  • 2 cups / 480 ml cold heavy cream
  • 3–4 Tbsp powdered sugar
  • 1–2 tsp vanilla extract
  • Pinch of salt, optional
  • Optional for a sturdier filling: 4 oz / 113 g mascarpone or softened cream cheese

Optional Pastry Cream Filling

  • 2 cups / 480 ml whole milk
  • 4 large egg yolks
  • ½ cup / 100 g granulated sugar
  • ¼ cup / 30 g cornstarch
  • 2 Tbsp / 28 g unsalted butter
  • 2 tsp vanilla extract or vanilla bean paste
  • Pinch of salt

Optional Topping

  • Powdered sugar, for dusting
  • Melted chocolate or ganache, optional

Instructions

Make the Choux Dough

  1. Preheat the oven. Preheat to 425°F / 218°C. Line baking sheets with parchment paper.
  2. Start the choux base. Add water, milk, butter, sugar, and salt to a medium saucepan. Warm over medium heat until the butter melts and the liquid reaches a boil.
  3. Add the flour. Add the flour all at once and stir immediately with a wooden spoon or sturdy spatula.
  4. Cook the paste. Keep stirring for 1–3 minutes, until the dough forms a ball, pulls from the sides, and leaves a light film on the pan.
  5. Cool slightly. Transfer the dough to a mixing bowl or stand mixer bowl. Let it cool for a few minutes until warm but not steaming hot.
  6. Add most of the eggs. Mix in about 3 beaten eggs gradually, mixing well after each addition. The dough may look broken at first, then smooth out.
  7. Adjust with the last egg. Add the last beaten egg a spoonful at a time. Stop when the dough is smooth, glossy, thick, and falls from the spatula in a thick V shape. You may not need every drop.

Pipe and Bake the Shells

  1. Pipe the shells. Transfer dough to a piping bag and pipe 1½–2 inch mounds, spacing them 2–3 inches apart. Smooth sharp peaks with a damp fingertip.
  2. Bake hot first. Bake at 425°F / 218°C for 10 minutes. Do not open the oven.
  3. Lower the heat. Reduce oven temperature to 325°F / 163°C without opening the oven. Bake 20–25 minutes more, until shells are golden, firm, and dry.
  4. Vent and dry. Turn the oven off. Poke or slit each shell to release steam, then return shells to the turned-off oven with the door cracked for 10–20 minutes.
  5. Cool completely. Transfer shells to a wire rack and cool fully before filling.

Make the Filling

  1. Make the whipped cream filling. Beat cold heavy cream, powdered sugar, vanilla, and optional salt until medium-stiff to stiff peaks form. For a sturdier version, beat the mascarpone or cream cheese smooth first, then slowly add the cold cream and whip to medium-stiff peaks.
  2. Or make pastry cream. Heat milk until steaming. Whisk egg yolks, sugar, cornstarch, and salt in a bowl. Slowly whisk in some hot milk, then return everything to the saucepan. Cook, whisking constantly, until thick and bubbling. Off heat, whisk in butter and vanilla. Cover directly on the surface and chill fully before piping.
  3. For diplomat cream. Whisk 2 cups chilled pastry cream until smooth, then fold in 1 cup whipped cream until light and ready to pipe.

Fill and Serve

  1. Fill the cream puffs. Slice shells and pipe cream inside, or fill from the bottom with a piping bag.
  2. Finish and serve. Dust with powdered sugar or drizzle with chocolate. Serve soon after filling for the crispest texture.

Notes

  • Do not open the oven during the early rise.
  • Use the last egg as a texture adjustment. You may not need every drop.
  • Golden, firm, dry shells hold better than pale shells.
  • Assemble near serving time for the best texture.
  • Use whipped cream for the easiest filling, pastry cream for classic custard-filled puffs, or diplomat cream for a richer but still airy center.
  • For a more stable whipped cream filling, beat in 4 oz / 113 g mascarpone or softened cream cheese before slowly adding the cold cream.
  • You may have a little pastry cream left over depending on how generously you fill the shells.

FAQs

What is the secret to good cream puffs?

Good cream puffs come from properly cooked choux dough, gradual egg addition, a hot oven start, and enough baking time for the shells to dry and set. The dough should be glossy and able to hold shape before baking, and the shells should be firm before cooling.

Why do cream puffs collapse after baking?

They usually collapse because they were underbaked, the oven was opened too early, the dough was too wet, or the shells were not vented and dried. Bake until the shells are firm, release steam, and let them dry before cooling fully.

Is whipped cream or pastry cream better for beginners?

Whipped cream is easier for a first batch because it does not need cooking. Pastry cream tastes more classic and holds better, but it needs extra time to cook and chill.

What should a baked cream puff look like inside?

The inside should be mostly hollow, dry enough to hold filling, and not wet or doughy. A little soft webbing inside the shell is normal, but it should not feel raw.

How far ahead can I fill cream puffs?

For the crispest texture, fill them just before the tray goes out. If you need to work ahead, bake the shells and prepare the filling separately, then assemble closer to the time you plan to serve them.

How do I keep cream puffs crisp for a party?

Bake and cool the shells ahead, store them airtight, re-crisp them if needed, and fill them shortly before the tray goes out. Pastry cream or stabilized whipped cream will hold better than plain whipped cream.

Can I make cream puffs without a piping bag?

A zip-top bag with the corner snipped works, and you can also use a spoon or scoop. A piping bag gives cleaner, more even shells, but the recipe can still work without one.

Are cream puffs and profiteroles the same?

They are closely related because both use choux pastry. Cream puffs are usually larger and filled with cream, while profiteroles are often smaller and served with ice cream or chocolate sauce.

Freezing Cream Puff Shells

Unfilled cream puff shells freeze well. Thaw them at room temperature, re-crisp briefly in the oven if needed, cool fully, then fill.

Why is my cream puff dough too runny?

Runny choux dough usually means too much egg was added, the flour paste was not cooked long enough, or the flour measurement was too low. Use the final egg as a texture adjustment and stop when the dough forms a thick V from the spatula.

Can I use puff pastry for cream puffs?

Classic cream puffs use choux pastry, not puff pastry. Puff pastry creates flaky layers, while choux pastry creates hollow shells that can be filled with cream.

Final Thoughts

Cream puffs feel intimidating until you understand the texture cues. Cook the dough long enough to remove extra moisture, add the eggs gradually, and give the shells enough oven time to dry and hold their shape.

Once the choux shells are hollow and dry, the rest is flexible. Fill them with whipped cream for the easiest version, pastry cream for a classic custard center, or diplomat cream when you want something light, rich, and stable.

Serve them soon after filling, and you get exactly what a good cream puff should be: crisp pastry, soft cream, and a dessert that feels far more impressive than the ingredient list suggests. Once you can make one batch of hollow choux shells, you can change the filling, size, topping, and finish without relearning the whole recipe.

That is the quiet confidence this recipe gives you: one reliable shell, many possible desserts.

Back to top ↑