Posted on 17 Comments

How to Make Churros (Authentic + Easy Recipe)

Person dipping a cinnamon-sugar churro into thick chocolate, with churro cheesecake and dips on a tray—cover image for how to make churros.

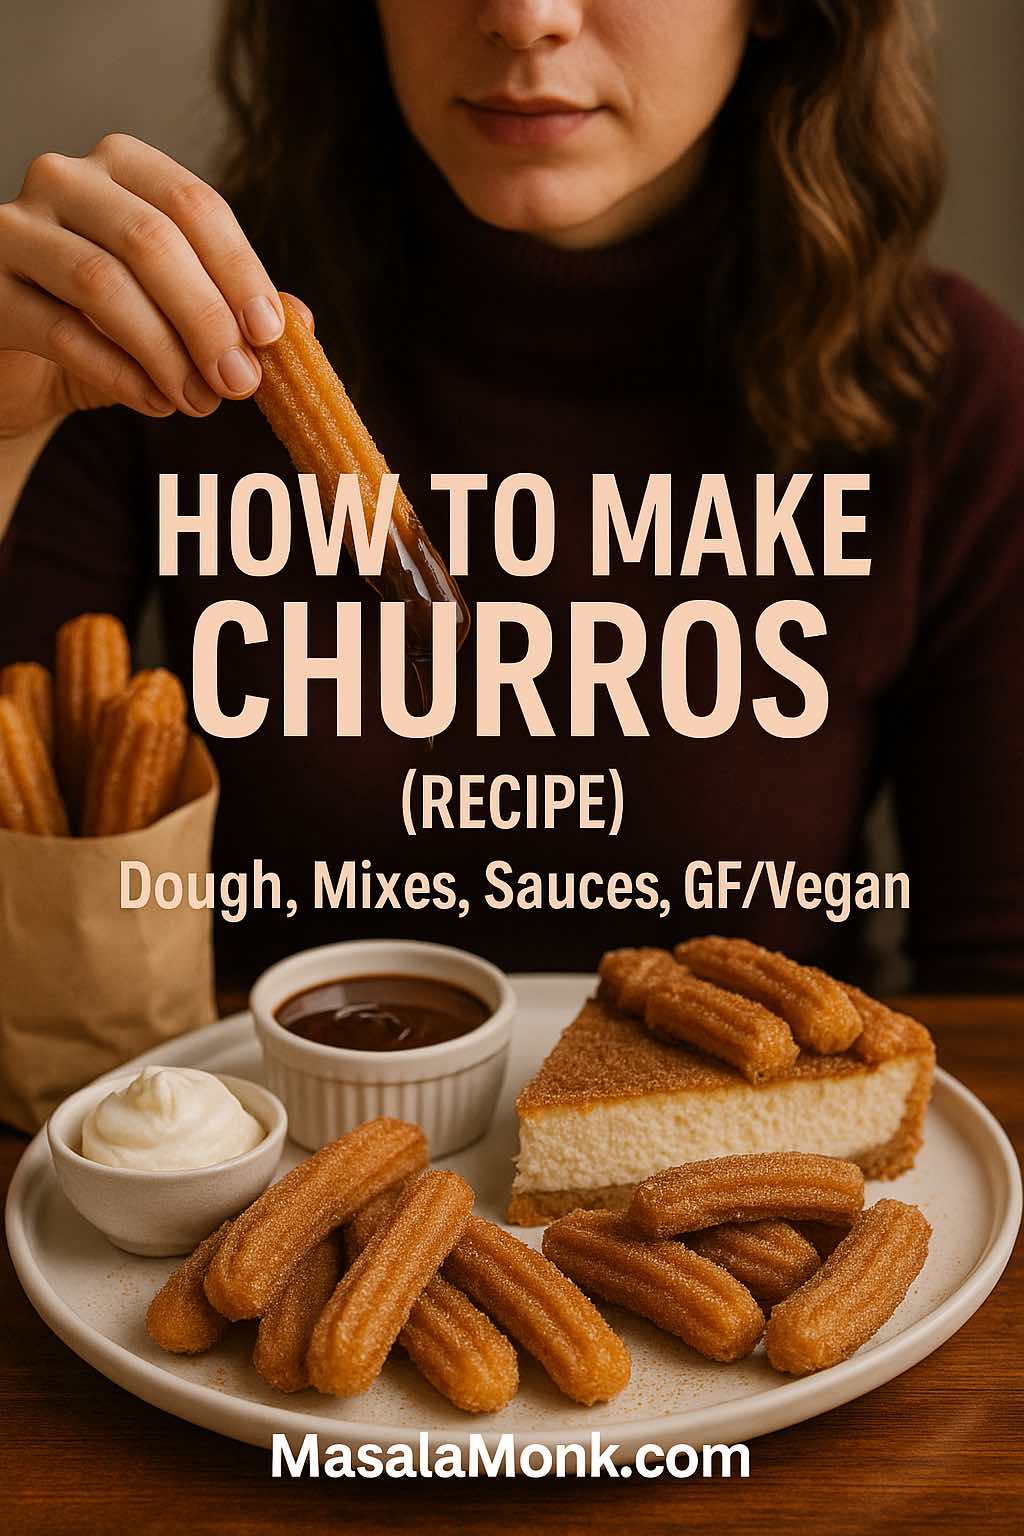
If the thought of crisp, cinnamon-sugar ridges dunked into warm chocolate makes you grin, you’re in the right kitchen. Today you’ll learn how to make churros from start to finish—no stress, no special machine, and plenty of variations so you can serve a crowd or spoil yourself on a quiet evening. We’ll move from the classic egged dough most home cooks adore to the iconic egg-free style you’ll find in Spanish churrerías. Along the way, we’ll fold in sauces, swaps for vegan and gluten-free eaters, reheating that actually works, and party strategies so everyone gets a hot, snappy bite.

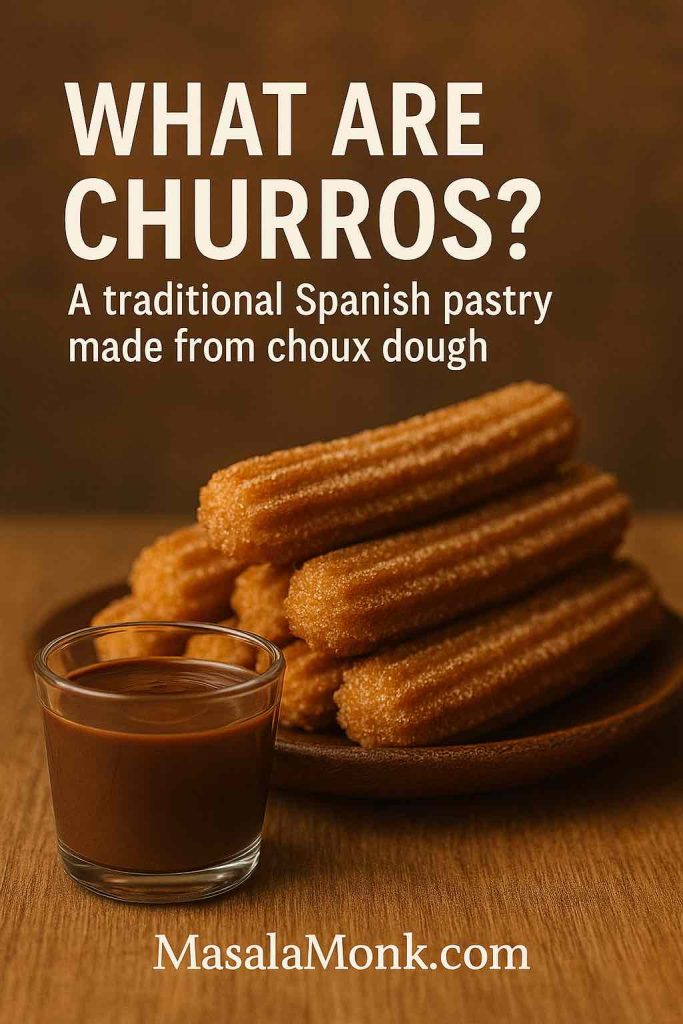
Before we heat the oil, a quick bit of context. Churros are a beloved fried-dough pastry with deep Spanish and Portuguese roots, typically paired with a thick hot chocolate for dunking. If you enjoy a brief origin story, you can peek at a balanced overview of the tradition here: what churros are and how they’re served. That heritage explains why texture matters so much: ridges for crunch, a tender center for contrast, and a dip that clings.

Meanwhile, because you’ll want a sauce the instant the first batch comes out, it helps to make one now. For pure convenience, whisk up this quick, glossy homemade chocolate syrup (dairy- and gluten-free); it’s ready in minutes and happens to suit most dietary preferences. Alternatively, for a richer, classic pairing that nods to Spain, a simple ganache-style dip such as this reliable churros + chocolate sauce method stays silky on the table and feels wonderfully old-world.

Also Read: 10 Creative Chia Pudding Recipes for Every Taste


The Ingredients That Build Crunch and Contrast

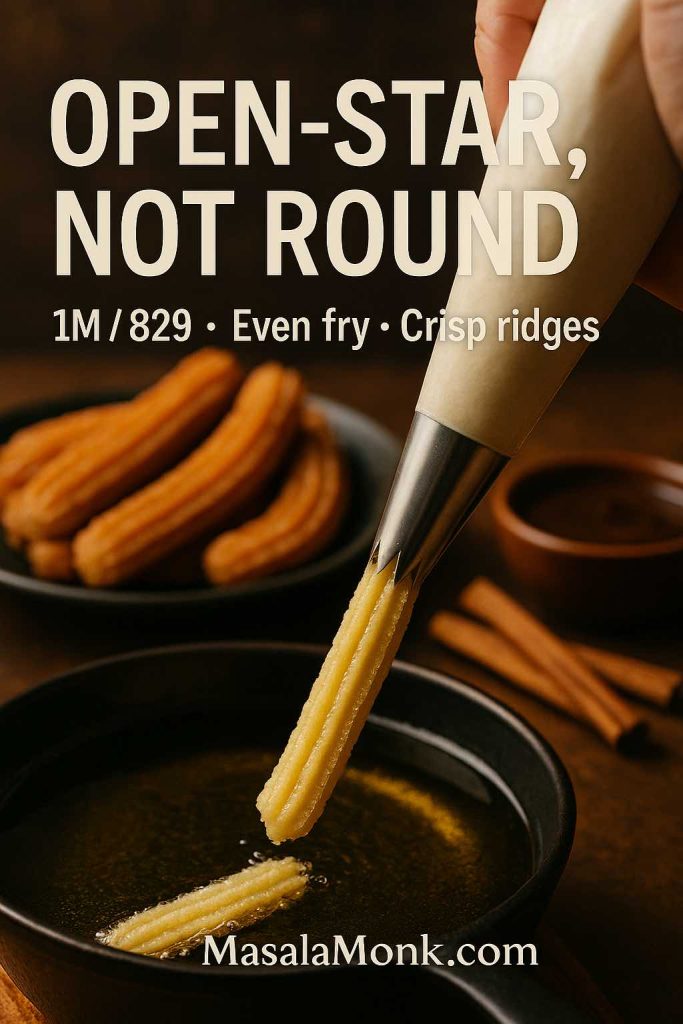
Although churros are famously uncomplicated, little details swing the result from “fine” to “can’t stop eating.” You’ll use water, butter (or oil), flour, and eggs for the plush home-style dough. You’ll also mix cinnamon sugar so it’s ready the moment draining finishes; coating while warm ensures every ridge gets a sparkly jacket. In addition, you’ll want a large open-star tip because the sharp edges carve channels into the dough as you pipe, increasing the surface area that crisps in the oil. If you’ve ever wondered why that tip matters, this brief, practical recipe explainer shows the benefit clearly: why a star tip improves texture. For an exact model, here’s the spec page for a sturdy favorite, the Ateco 829 open-star tip.

Stack of cinnamon-sugar churros on a plate with a small glass of thick chocolate; “What Are Churros?” cover graphic.
Churros are a Spanish fried-dough classic—crisp ridges for crunch, a tender center for contrast, and traditionally served with thick hot chocolate.

As for sugar and spice, classic cinnamon never fails. Still, you can nudge the flavor profile in gentle, memorable ways—cardamom for warmth, a whisper of clove for depth, or even chai-leaning blends inspired by riffs like these aromatic Indian-style waffle ideas. Those seasonings ride beautifully on fried dough.

Also Read: How to Cook Bacon in the Oven (Crispy, No-Mess, Crowd-Ready Recipe)


How to Make Churros: The Reliable Step-by-Step

You’ll start with a simple panade, cool it briefly, beat in eggs, and then fry in a steady temperature window. That’s all. Nevertheless, paying attention to two visual cues—the ribbon test and the color of the crust—takes your results from “good” to “repeatable and great.”

1) Simmer and stir (the panade). In a medium saucepan, bring water, sugar, salt, and butter to a gentle simmer. Remove from the heat, dump in the flour in one go, and stir with a firm spoon until the mixture becomes a smooth, cohesive ball and leaves a thin film on the bottom of the pan. That film tells you the starches have gelatinized enough to hold structure.

2) Cool just enough. Spread the dough up the sides of the pan to vent steam. The goal is warm—not hot—so the eggs incorporate without scrambling. Five minutes usually does it.

Hands performing the ribbon test, lifting glossy churro dough from a mixing bowl with a spatula so it falls in a slow V-shaped ribbon.
Stop mixing when the dough falls in a slow, glossy ribbon—too stiff causes splitting; too loose leads to greasy, faint ridges.

3) Beat in eggs to the right texture. Add eggs one at a time, beating thoroughly after each addition. The moment the dough turns glossy and falls from the spatula in a slow V-shaped ribbon that eventually “snaps,” you’re there. If it’s too stiff to pipe, a teaspoon or two of water relaxes it; if it’s slumping, a spoonful of flour tightens things.

4) Heat the oil to a dependable window. Aim for 350–375°F (180–190°C). That range is forgiving: too cool and the dough drinks oil; too hot and the ridges scorch while the center lags. This approach tracks with test-kitchen guidance you’ll see in solid technique pieces like this practical step-by-step churros guide.

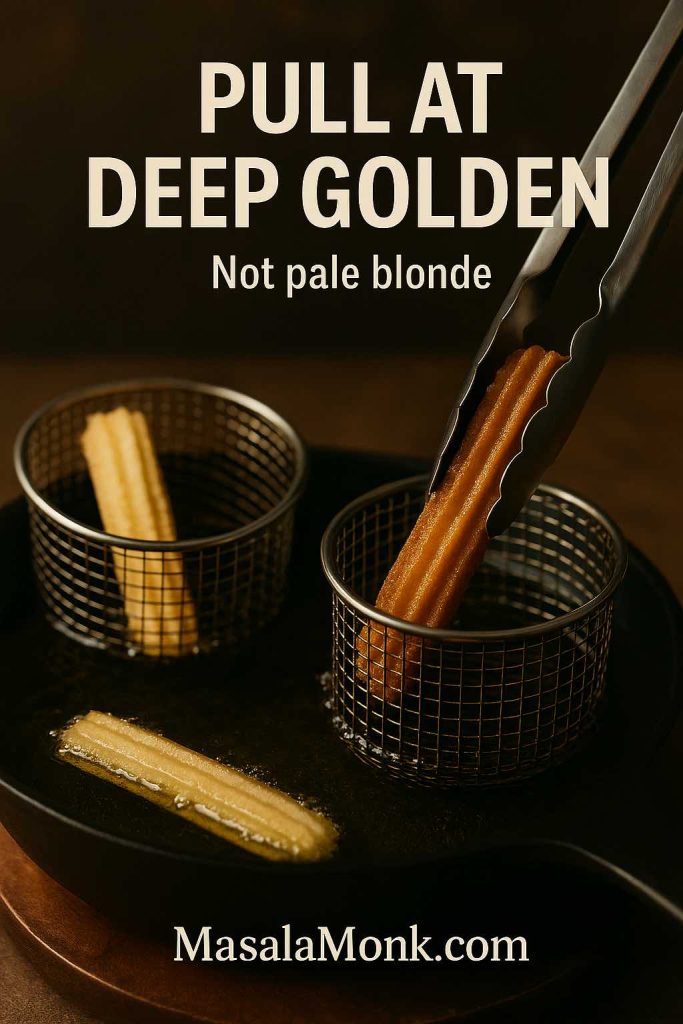
5) Pipe and fry with control. Fit your piping bag with the open-star tip and load it with warm dough. Pipe 15–18 cm (6–7 in) lengths directly into the oil and snip cleanly with kitchen shears. Keep batches modest so the temperature doesn’t plunge. Turn once; pull when they’re deep golden, not pale. The ridges should look distinctly crisp.

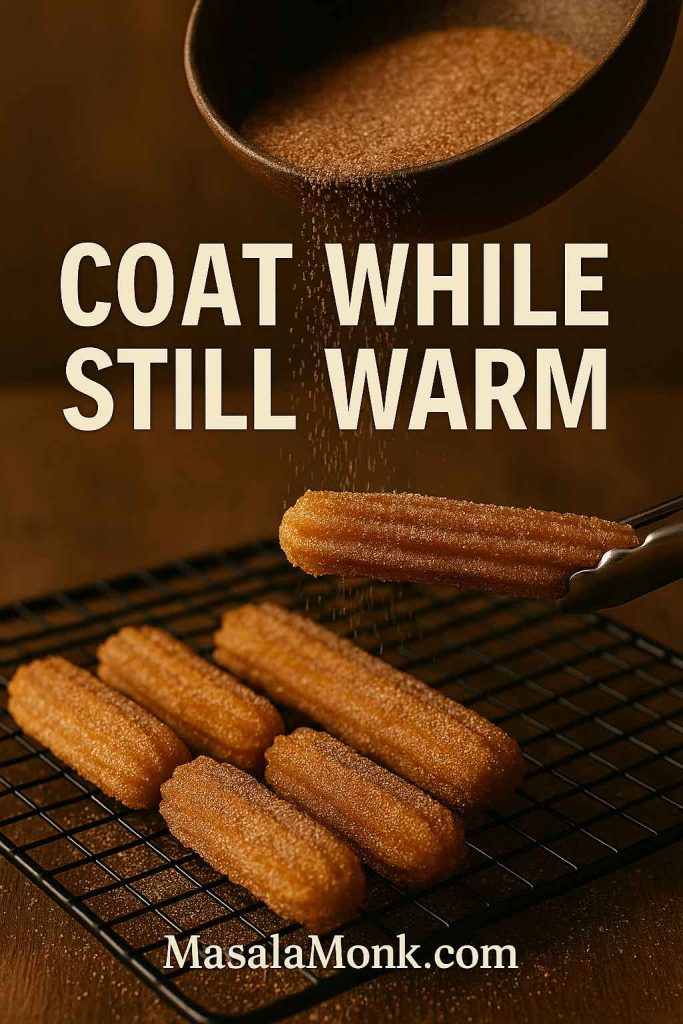
6) Drain and coat while warm. Give each batch a quick rest on a rack, then toss in cinnamon sugar before heat fully leaves the crust. Serve at once, while the contrast between crackle and tenderness is dramatic.

Close-up of a large open-star piping tip (1M/829) extruding churro dough into hot oil with plated churros and chocolate in the background.
Pipe with a large open-star tip (1M/829) for sharp grooves—faster, even frying and better cinnamon-sugar adhesion with fewer splits.

At this point, you’ve made celebratory churros. However, there’s more to explore—authentic dough variations, sauces, desserts that borrow churro flavors, and methods that take the pressure off when you’re hosting.

Also Read: Baked Jalapeño Poppers (Oven) — Time, Temp & Bacon Tips


Authentic vs Easy: Two Ways to Shape Your Style

In many home kitchens, the egged method above wins on reliability and texture; it’s soft-centered without being cakey, and it pipes effortlessly. Conversely, the authentic egg-free style travels closer to what you’ll find in Madrid and beyond. Without eggs, the water-flour dough is firmer to pipe and fries to an even snappier crust with a slightly drier interior—perfect for dunking in sip-able chocolate.

To switch tracks, skip the eggs and increase the water slightly in the panade so it’s pipeable while still warm. Because this dough relies entirely on gelatinized starch for structure, it benefits from assertive ridges, which you’ll get from the same open-star tip mentioned earlier. For the dip, the more classic, thick chocolate aligns with the cultural pairing; a trustworthy rendition sits here: traditional-leaning churros with chocolate. If you’re serving a late-night crowd, that rich sauce keeps spirits high long after the platter is empty.

Comparison of pale and deep golden churros in hot oil with tongs lifting the correctly fried stick.
Pull when ridges are deep golden; pale blonde fries up greasy and soft.

Also Read: 10 Best Chicken Sandwich Recipes (BBQ, Parm, Buffalo & More)


Dough, Batter, and Mixes: Getting the Feel Right

Although recipes give grams and cups, churros reward cooks who watch consistency. Imagine the finished dough as thick, glossy, and obedient: it holds the ridges the tip creates yet flows just enough to avoid seams or splits. Should you be using a store-bought mix, no problem—simply fry a miniature test churro first. If it bulges oddly or bursts along the sides, the dough is likely too stiff; add a teaspoon of water and test again. If it emerges greasy with soft ridges, add a tablespoon of flour to strengthen the structure. The “test and tweak” approach pays off quickly.

On equipment, you genuinely don’t need much: a heavy pot or countertop fryer, a thermometer, and a star tip. The quiet hero, of course, is the open-star. For a quick rationale and home-cook visuals, this short explainer shows how the edges help heat penetrate evenly: star-tip texture basics. If you’re buying a single tip that will do the job for years, you can check dimensions and sizing on the Ateco 829 product page.

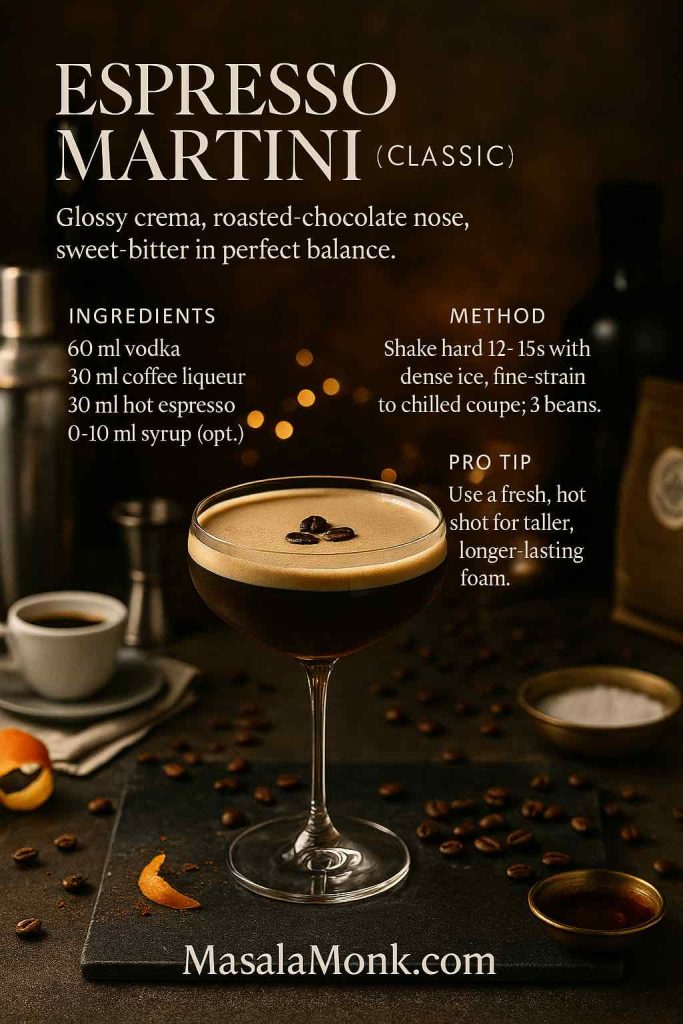
Also Read: 10 Best Espresso Martini Recipe Variations (Bar-Tested)

Fresh churros tossed in cinnamon sugar while warm on a rack.
Coat while still warm so the cinnamon sugar adheres to every ridge—wait too long and it slides off.

Sauces and Seasonings: From Classic to Playful

Once you nail how to make churros, sauces become the playground. Start with one dependable chocolate and then add something bright or creamy so every plate gets choice.

Fast and glossy. If you’re chasing speed without sacrificing shine, this ultra-quick chocolate syrup is a winner. It happens to be dairy- and gluten-free, which is convenient when guests are reading labels.

Ganache-style richness. For a sit-down dessert with candles on the table, ganache offers a silkier cling. The method is low-stress and consistent, as shown in this reliable chocolate dip approach.

Spice sugar, not just cinnamon. Cardamom delivers perfume without heat, while a little clove deepens the aroma. You can take even more cues from Indian-leaning flavors—masala chai, saffron, pistachio—using these playful waffle spice riffs as a starting point and adapting them to your sugar bowl.

Three churro dips on a wooden board: quick syrup, silky ganache, and thick Spanish-style chocolate with a spoon.
Pick your dip: quick pourable syrup for speed, silky two-ingredient ganache for gloss, or thick Spanish chocolate for classic dunking.

A quick dipping bar. For relaxed hosting, place two chocolates and one fruit-forward sauce on the counter. If you need shelf-stable helpers because your stovetop is busy, browse a few jars from the Sauces, Spreads & Dips shop selection and let guests choose their path.

Also Read: Macaroni & Cheese Recipe: Creamy Stovetop, Baked & Southern


Variations and Desserts: More Than One Way to Churro

Because the dough is so versatile, you can remold it into snacks, plated desserts, and party bites. Furthermore, you can borrow the churro profile—cinnamon, sugar, chocolate—and apply it to other forms when frying isn’t practical.

Churro bites. Pipe 2–3 cm nuggets directly into the oil for snackable, one-bite pieces. They fry quickly and hold beautifully in a warm oven while you cycle batches.

Churro waffles. Prefer less oil or serving brunch? Press the egged dough in a hot, lightly greased waffle iron until crisp, then shower with cinnamon sugar. The spirit matches clever “no deep-fry” approaches that trade crunch for convenience; if you like reading about technique, this broader churros walk-through offers smart frying cues you can adapt for waffle-iron timing too.

Churros and ice cream. Fry short sticks, let them cool just enough to avoid melt-down, and assemble ice-cream sandwiches. Vanilla and dulce de leche are obvious; mango ice cream with cardamom sugar is electric.

Festival twists. Embrace warm spices and garnish with pistachios or rose petals. For flavor inspiration, raiding the chai-and-saffron ideas in those Indian-style waffle riffs gives you a shortcut to a spectacular dessert board.

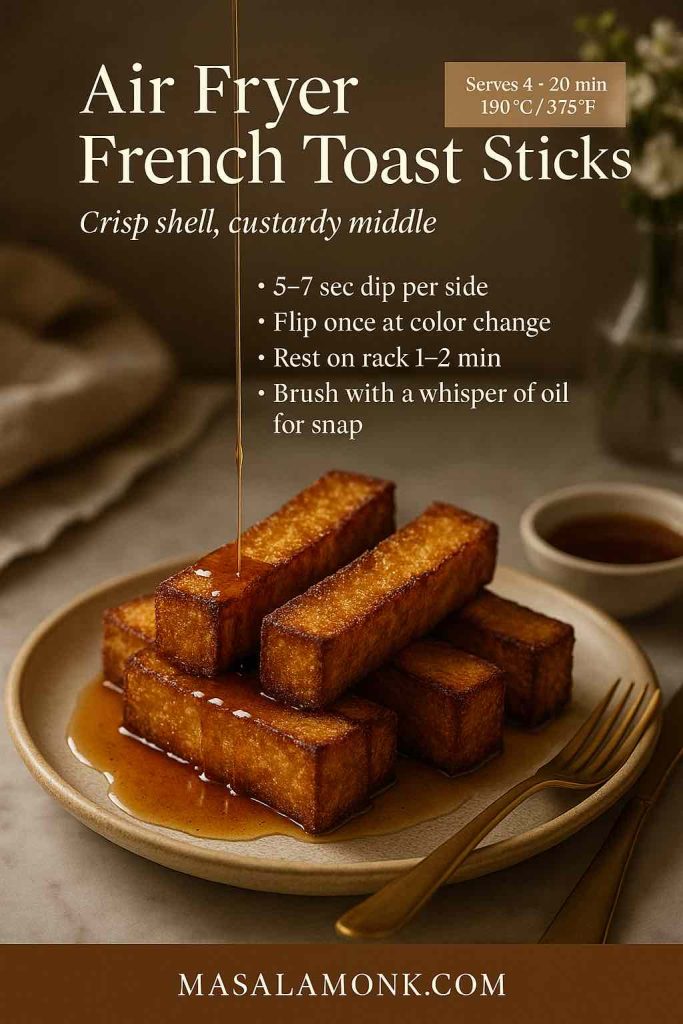
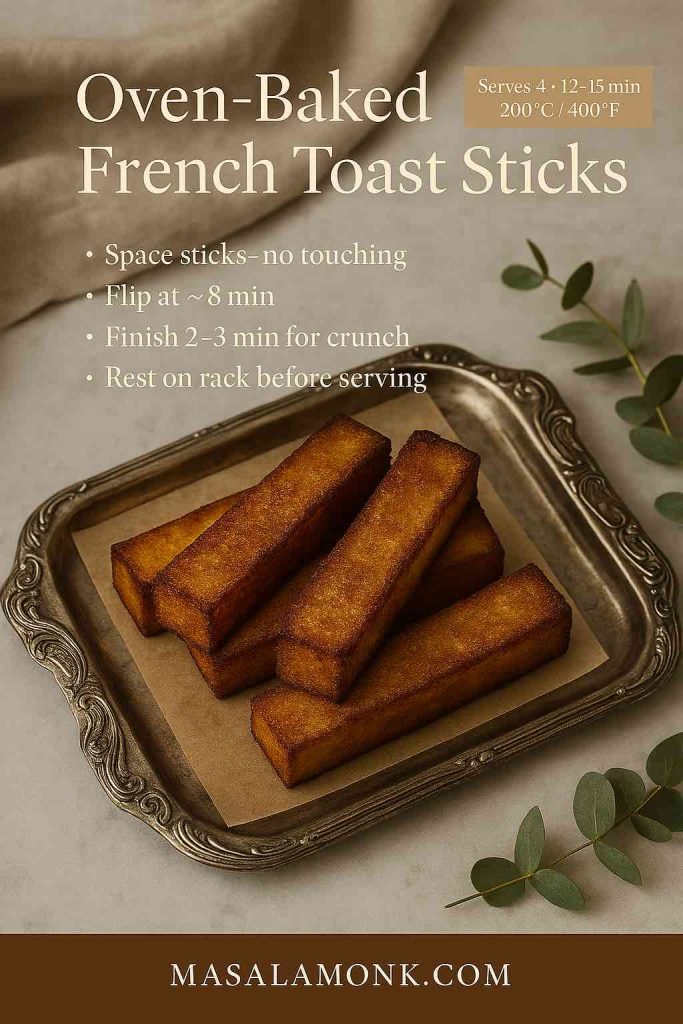
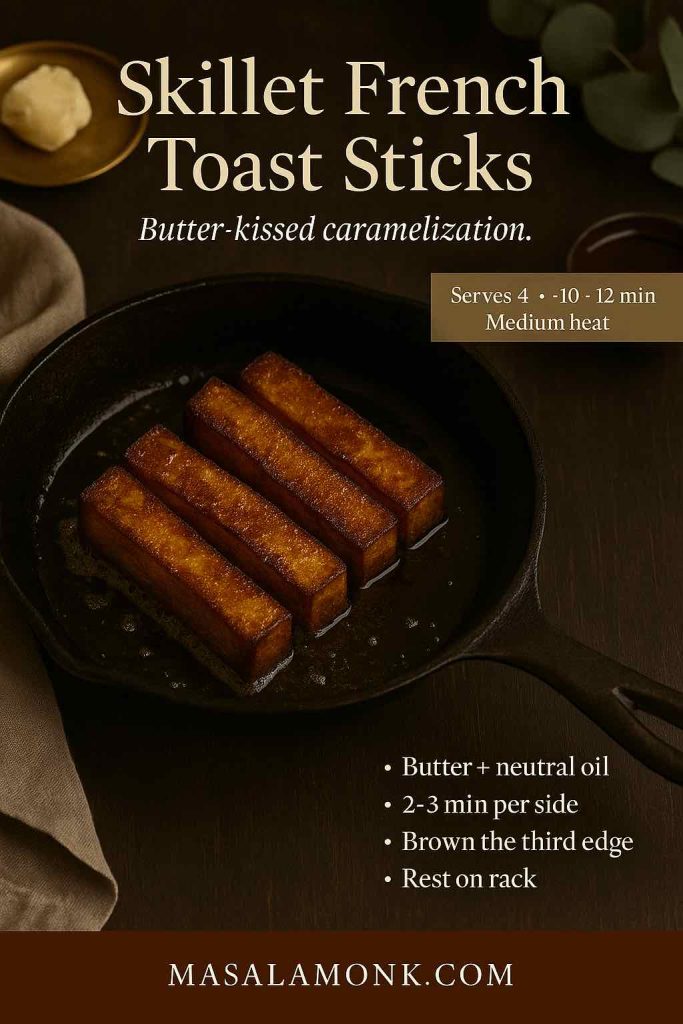
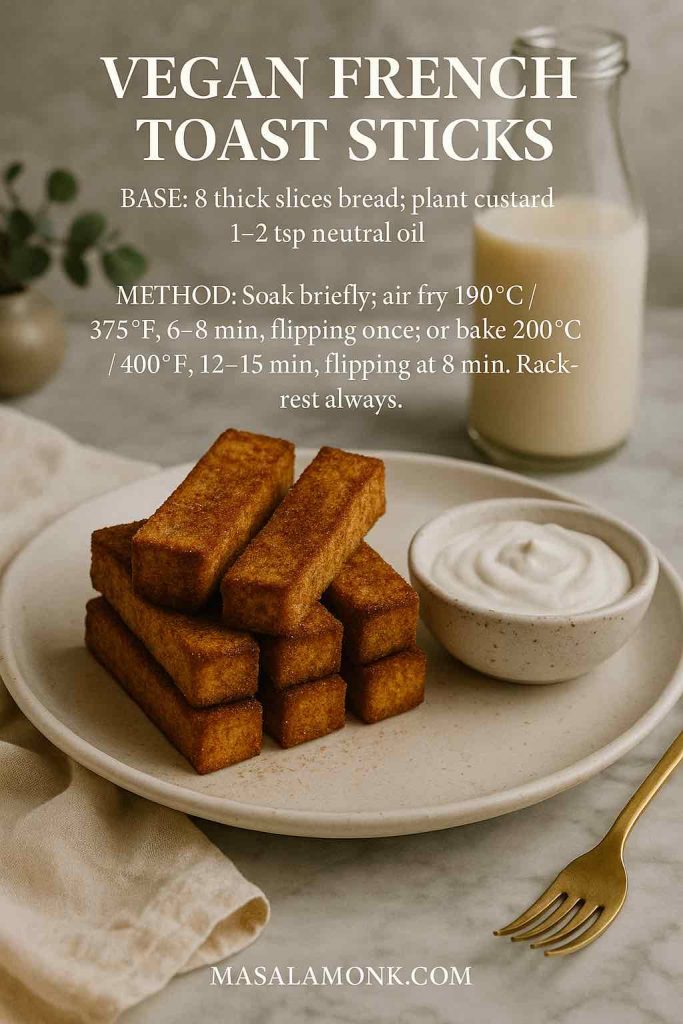
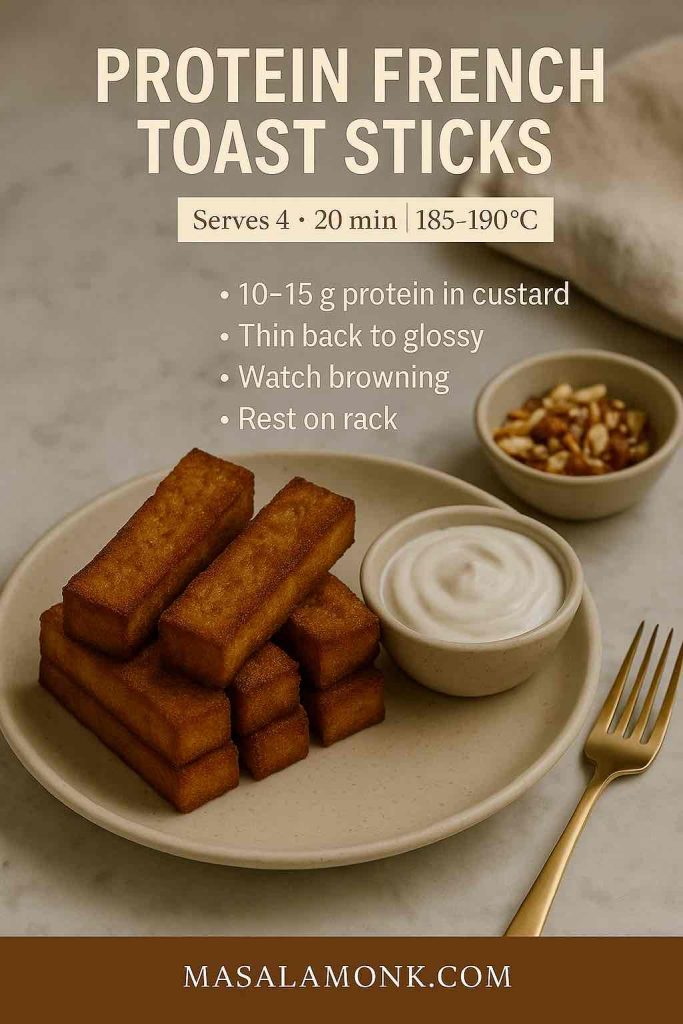
Party-table alternates. When you need an additional tray that eats like a cousin to churros, these finger-friendly French Toast Sticks (Air Fryer + Oven) echo the same cinnamon-sugar joy and pace perfectly with a chocolate dip.

Also Read: Vegan French Toast: 6 Easy Recipes (Pan, Air Fryer, GF & High-Protein)


Dietary Swaps -How to make GF and Vegan Churros

Delicious churros don’t need to exclude anyone. With a couple of adjustments, the signature texture and flavor can shine just as brightly for gluten-free and vegan eaters.

Gluten-free. A straightforward mix of rice flour and tapioca starch produces a crisp exterior and a tender crumb. Because gluten-free dough tends to brown more quickly, stay on the lower end of the temperature window and test a mini first. For dairy-free pairing, that quick chocolate syrup is both shiny and dependable. If you want more plant-based dessert ideas—especially fruity sauces that love cinnamon sugar—flip through this sunny collection of vegan dessert recipes with mango at the center; several of the sauces double as churro dips.

Vegan. The authentic, egg-free path is tailor-made for vegan churros. Use neutral oil instead of butter in the panade, and pipe while the dough is still warm and pliable. If you’re curious about techniques that replace eggs in sweet dishes, this friendly set of swaps—silken tofu, aquafaba, and plant milks—translates well into batter and coating ideas: vegan French toast strategies. Borrowing those tricks makes the rest of your menu harmonize.

Also Read: Pumpkin Spice, Your Way: Master Blend, Variations & Real-World Recipes


How to Make Churros for a Party (Scaling, Holding, Reheating)

Whether it’s a movie night or a birthday, how to make churros at scale comes down to organization. You’ll portion accurately, stagger batches, and keep everything crisp without frantic multitasking.

Plan quantities without guesswork. Count on 2–3 full-size churros per adult or 3–4 minis per kid. If you’re mixing ages and appetites, minis offer the most flexibility—guests take what they want and dips go further.

Stage the sugar and the rack. Set two sheet trays: one with a wire rack for draining, one with a deep bowl of cinnamon sugar. Churros hop from oil to rack to sugar in about a minute; you never want to be searching for bowls while the first batch cools.

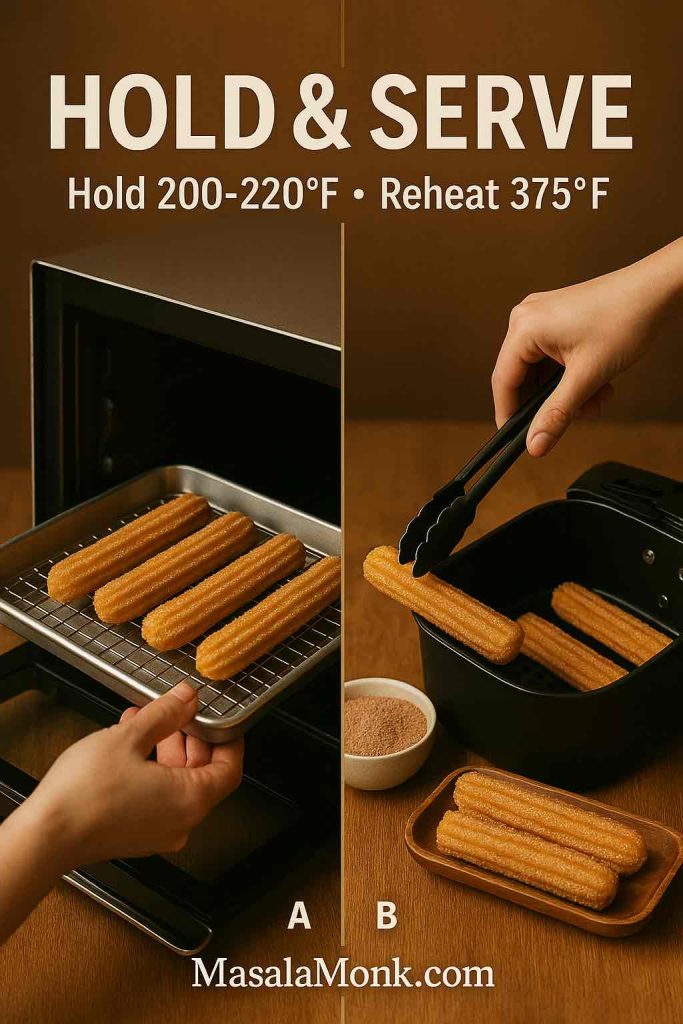
Hold smart, not long. Keep finished churros on a rack in a 95–105°C / 200–220°F oven for up to 15 minutes. Right before serving, toss briefly in fresh cinnamon sugar for that sparkling finish. Holding any longer softens the crust.

Reheat efficiently. If you’re cooking earlier in the day, refrigerate loosely covered, then return to snappy in an air fryer at 190°C / 375°F for 2–3 minutes. Oven reheating at a similar temperature works as well; just spread them on a rack-lined tray so air circulates.

Split image showing churros held on a rack in a warm oven and reheated in an air fryer; “Hold 200–220°F, Reheat 375°F.”
For parties, hold churros on a rack at 200–220°F to keep them crisp, then reheat at 375°F in the air fryer just before serving.

Build a small dipping station. Put out two chocolates—one classic, one bittersweet—and one fruit option. If your schedule is packed, let a couple of jars do the heavy lifting; the Sauces, Spreads & Dips collection makes setup painless.

Offer an alternate tray for balance. A second, cinnamon-sugar-friendly option such as these French Toast Sticks slots in seamlessly and keeps guests nibbling while you finish the last batch of churros.

Also Read: Lemon Drop Martini Recipe (Classic, 3-Ingredient, & More)


Texture Cues and Troubleshooting While You Learn How to Make Churros

Even confident cooks appreciate a quick triage guide. If something looks off, small tweaks usually snap everything back into line.

Greasy or pale. The oil is cooler than you think, or the pot is overcrowded. Reduce batch size and keep the thermometer honest. You’ll see guidance around the 350–375°F / 180–190°C window echoed in solid testing like this practical churros walkthrough.

Scorched ridges, raw centers. That’s the flip side: oil too hot or pieces too thick. Drop back toward 350°F / 180°C and pipe slightly thinner lengths.

Splitting along the sides. Typically the dough is too stiff or your bag is too flimsy. Add a teaspoon of water to the dough and use a sturdy piping bag with a sharp-edged star tip. If you want a quick nudge on why the star matters, revisit this clear, home-cook-friendly explainer; for a durable tool, check the Ateco 829 open-star tip details.

Sugar won’t stick. Coating relies on warmth. If you’ve held churros in the oven, give them a whisper of moisture (a barely damp pastry brush works) and re-toss in sugar just before serving.

Bland sweetness. Cinnamon is standard, yet you can deepen flavor with cardamom or a tiny dash of clove. For delightfully fragrant spins, borrow ideas from these chai-inspired waffle notes and pull them into your sugar mix.

Also Read: Piña Colada: Classic Recipe + 10 Variations (Virgin & On the Rocks)


A Smooth Kitchen Flow From Prep to Plate

A graceful service feels almost like choreography. First, measure sugar and cinnamon into a large bowl; whisk to combine and set beside the stove. Next, assemble your piping bag and tip before turning on the burner. Then, as the panade cools, set your thermometer and line the sheet trays—one with a rack, one for sugaring. After that, pipe your first test churro to confirm oil temperature and dough texture. Immediately you’ll know whether to tweak with a teaspoon of water or a touch of flour. Consequently, every subsequent batch behaves.

If you’re cooking solo for guests, it helps to alternate between piping and sugaring rather than trying to do both at once. In practice, you’ll pipe six or seven lengths, snip them quickly, then rest the bag, flip the frying batch, and ready the sugar bowl. Because churros move from oil to rack to sugar in a rhythm, you’ll find your cadence by the time the second batch lands. Ultimately, you end up with a platter that looks abundant without the cook looking flustered.

Also Read: 6 Wellness Shot Recipes to Boost Your Immune System


Flavor Roadmap: Small Changes, Big Personality

Once you’ve mastered how to make churros, you can tweak elements like you would a favorite brownie recipe—tiny changes, outsized delight.

Sugars. Swap some white sugar for light brown to bring in a hint of molasses. Alternatively, pulse granulated sugar briefly to fine it down; a finer grain coats more evenly and glitters.

Citrus. Toss in zest to the sugar bowl. Orange is classic with chocolate; lime surprises in the best way, especially if your dip leans toward dark, bittersweet notes like the BBC Good Food chocolate sauce.

Nuts. Dust the finished churros with finely chopped pistachio or almond for texture and color. If you’ve leaned into saffron or rose in your sugar, pistachio makes the whole board look composed.

Fruit dips. Mango purée folded into chocolate is sunshine on a spoon. For vegan gatherings, several sauces in this mango-forward dessert collection double as gorgeous churro dips.

Caramel. Salted caramel is both expected and irresistible. To keep service smooth, warm it gently until it ribbons rather than gloops. A caramel next to a darker chocolate lets guests mix dips to taste.

Also Read: Coconut Water Cocktails: 10 Easy, Refreshing Drinks


From Brunch to Late-Night: When and How to Serve

Churros aren’t just a dessert; they’re a mood. Serve them at brunch with strong coffee and a fruit salad; plate them after dinner with candlelight and a thick chocolate; bring them out at midnight during a game and watch the platter disappear.

For brunch, the waffle direction might suit your stove space more generously. If you’d like to stick with the fried version, present minis in paper cones for easy munching. For dinner parties, line them up on a warm platter, dust with fresh sugar at the table, and pass two dips in small pitchers. When the clock pushes late, an effortless sauce keeps things moving; that’s where the quick chocolate syrup earns its place. If you’re populating a dessert buffet, a balancing tray of cinnamon-sugar cousins—these French Toast Sticks—spreads the work and keeps the energy lively.

Also Read: How to Cook Bacon in the Oven (Crispy, No-Mess, Crowd-Ready Recipe)


A Gentle Nod to Tradition

Although we’re cooking at home with practical gear, it’s gratifying to remember that churros are part of a larger ritual: late-night stops at a chocolatería; mornings begun with coffee and a twist of dough; conversations around a shared plate. If that spirit appeals to you, a single classic reference grounds your table in that world—start with this concise cultural sketch: what churros are and how they’re served. Then bring that feeling into your kitchen by serving your chocolate in small cups, not just bowls, so the first dunk feels ceremonial.

Also Read: Easy and Healthy Oat Cookies- No Sugar | No Butter | No Refined Flour


Recap: How to Make Churros, Your Way

Make the panade, cool briefly, beat in eggs until the ribbon falls slowly, and keep the oil heat honest as you fry. Pipe through a large open-star tip for pronounced ridges—a detail championed in approachable guides like this one—and drain on a rack before sugaring while warm. Choose the style: plush egged dough for ease or crisp, egg-free authenticity for that old-world snap. Pair with something simple and shiny, perhaps the 3-minute chocolate syrup, or luxuriate with a thick, classic dip like this ganache-style sauce. For flavor play, follow your nose—chai-spiced sugar, citrus zest, pistachio dust, mango-kissed chocolate—and for the table, balance the platter with a friendly alternate such as French Toast Sticks.

Once you see how easily the dough comes together and how quickly batches cycle, churros shift from “special project” to “Why don’t we?” dessert. And that’s the real secret to how to make churros at home: a short list of ingredients, a handful of trustworthy cues, and a kitchen full of people ready to dunk, laugh, and reach for just one more.

Also Read: Mango Martini + 5 Variants of Classic Cocktail

FAQs

1) How to make churros at home step-by-step?

To begin with, simmer water, sugar, salt, and fat, then stir in flour off heat to form a smooth panade. After that, cool slightly, beat in eggs until the dough ribbons, and pipe with a star tip into 180–190°C oil. Finally, fry to deep golden, drain briefly, and coat in cinnamon sugar.

2) How do you make churros from scratch without eggs (authentic)?

Conversely, for an authentic, egg-free version, increase the water a touch, work the warm dough through a sturdy star nozzle, and fry immediately. Thus, you’ll get extra-crisp ridges and a drier crumb perfect for thick chocolate.

3) What is the easiest way to make churros for beginners?

Notably, the easiest route is the egged dough: it pipes smoothly, tolerates small mistakes, and stays tender inside. Moreover, keep batches small and the thermometer honest, and success follows.

4) What’s the best churros recipe temperature and timing?

Importantly, aim for 350–375°F (180–190°C). Subsequently, most sticks cook in 2–3 minutes per batch; pull when the ridges are deep golden rather than pale blonde.

5) Which piping tip is best for churros?

Likewise, a large open star works beautifully—think Ateco 829 or Wilton 1M. Hence, sharp ridges increase surface area, reduce splitting, and hold cinnamon sugar better.

6) What’s the best piping bag for churros?

Beyond that, pick a heavy-duty disposable or a reinforced cloth bag. Otherwise, thinner bags may burst under the warm, stiff dough’s pressure.

7) Can I use a churro piping nozzle, pastry tip, or star nozzle interchangeably?

Indeed, you can; they’re simply different ways of saying “open-star tip.” Nevertheless, wider openings create sturdier ridges and a more classic look.

8) How to make churros dough (and fix it if it’s off)?

For starters, target a thick, glossy dough that falls in a slow ribbon. If too stiff (splits when frying), add 1–2 teaspoons water; if too loose (greasy, faint ridges), knead in a spoon of flour.

9) Is churro batter the same as churro dough?

Meanwhile, recipes often say “batter,” but churros rely on a cooked dough (panade) similar to pâte à choux. Therefore, expect a pipeable paste, not a pourable batter.

10) Can I use a churro mix or churro batter mix?

Absolutely. However, mixes vary; consequently, always fry one tester, then adjust with a teaspoon of water or flour until the ridges hold and the centers set.

11) How to make churros easy in the oven or air fryer?

Instead of deep-frying, pipe onto parchment and bake at 220°C until golden, brushing with butter before sugaring. Alternatively, air-fry at 200°C until crisp; texture is lighter but still delightful.

12) What chocolate sauce for churros pairs best?

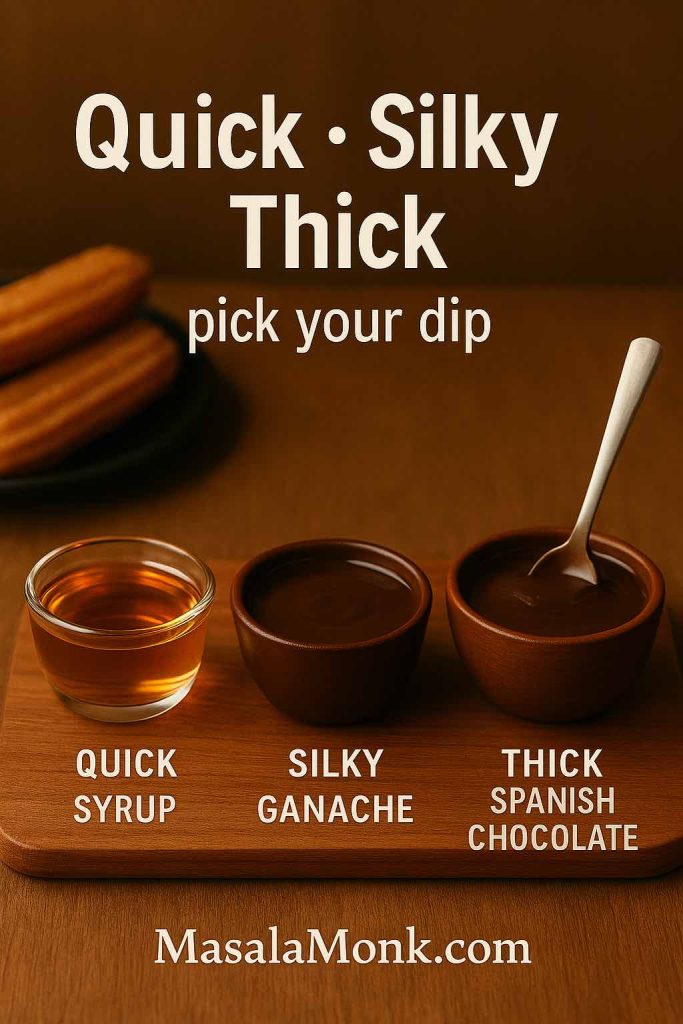
Generally, three styles shine: a quick syrup for speed, a ganache for silk, and a thick, Spanish-style cocoa for nostalgia. Consequently, keep one dark and one milk/bittersweet to please everyone.

13) How to make cinnamon churros extra fragrant?

Subsequently, bloom the cinnamon in warm sugar by stirring while the churros fry. Additionally, a whisper of cardamom or clove adds depth without stealing the spotlight.

14) How to keep churros crispy for a party?

Crucially, drain on a rack, hold in a 95–105°C oven for up to 15 minutes, then re-toss in fresh cinnamon sugar just before serving. Ultimately, avoid covering tightly, which traps steam.

15) How many churros for a crowd?

As a rule, plan 2–3 full-size per adult or 3–4 minis per child. Consequently, for 20 guests, budget ~45 full-size or ~60 minis.

16) What are churro minis, churro bites, and churro twists?

Broadly, minis are shortened sticks, bites are 2–3 cm nuggets, and twists are spiraled lengths. Furthermore, each fries faster; test at 60–90 seconds per side for bites.

17) Can churros be stuffed?

Certainly. After frying, inject pastry cream, dulce de leche, or chocolate using a filling tip. Alternatively, wrap dough around a dowel to create a hollow before frying.

18) How to reheat churros without turning them soggy?

Preferably, air-fry at 190°C for 2–3 minutes or bake at 190°C on a rack-lined tray for 5–7 minutes. In short, skip the microwave, which softens ridges.

19) Are gluten free churros possible?

Yes. Use a blend such as rice flour plus tapioca, and add a pinch of binder if needed. Additionally, keep to the lower end of the fry range because GF dough browns quickly.

20) What about churro gluten free mixes?

Go ahead; just expect different water ratios. Hence, fry a tester, then tweak hydration so the star-cut ridges remain defined.

21) Are vegansk churros (vegan churros) different?

Functionally, vegan churros mirror authentic egg-free ones: water, flour, oil, and salt. Moreover, pipe while warm for easier shaping and a clean snap.

22) How to make churros at home with minimal gear?

Fortunately, a heavy pot, thermometer, sturdy piping bag, and star tip are enough. Apart from that, kitchen shears and a wire rack streamline the workflow.

23) What’s a good churro dessert recipe beyond the classic sticks?

Consider churro waffles, cupcake churros, churro cake layers dusted with cinnamon sugar, or churro cheesecake bars topped with mini sticks. Thus, the flavor profile stretches across formats.

24) Is churro cheesecake worth the effort?

Undoubtedly. Build a cinnamon-sugar base, pour in a creamy filling, and finish with a churro crumble or mini churro garnish. Consequently, texture and aroma sing together.

25) Can I make churros and ice cream as sandwiches?

Absolutely; fry short sticks, cool slightly, and sandwich with vanilla or dulce de leche. Additionally, roll edges in pistachios for crunch.

26) What is a snowy churro or sweet churro?

Colloquially, “snowy” refers to a powdered-sugar finish, while “sweet” often just means cinnamon-sugar heavy. Nevertheless, both benefit from pronounced ridges for better adhesion.

27) What’s the difference between churros and cream vs. churro cream?

Typically, “churros and cream” means pairing with whipped or pastry cream, whereas “churro cream” can be a cinnamon-sugar custard used for filling. Consequently, choose based on serving style.

28) Are frozen churros, pre made churros, or churros to buy worth it?

They’re convenient for volume. However, reheating properly—in a hot oven or air fryer on a rack—matters; otherwise, texture suffers.

29) Where do frozen churros show up most often?

Frequently, supermarkets and warehouse clubs carry them; product names vary by region. Additionally, bakeries sometimes sell par-fried sticks you can finish at home.

30) What’s the simplest churro seasoning beyond cinnamon sugar?

Besides the classic, try cardamom-vanilla sugar, orange-zest sugar, or espresso sugar for moody, late-night boards. Consequently, a small tweak transforms the whole plate.

31) What size star tip for churros yields the best ridges?

Generally, larger open stars (around 8–12 mm opening) create bold grooves. Furthermore, wider tips reduce internal pressure, which helps prevent splitting.

32) Do I need a churros fryer machine, churro cooker, or churros making kit?

Not necessarily. Instead, a heavy pot and thermometer do the job. Kits can be handy for frequent batches, yet they aren’t required for excellent results.

33) How to pipe churros neatly if I’m new?

Firstly, hold the bag at a slight angle, squeeze steadily, and snip with shears for a clean end. Secondly, practice over parchment before piping into oil for confidence.

34) How to make churros easy with kids helping?

Safest of all, let kids roll warm churros in sugar and measure ingredients, while adults handle frying. Consequently, everyone participates without worry.

35) What’s a good churro dessert lineup for parties?

Ideally, serve cinnamon churros, churro bites, a churro cheesecake tray, and a chocolate-plus-caramel dip duo. Moreover, add a fruit sauce to brighten the spread.

36) How to package a bag of churros or churros in a bag?

Prefer paper over plastic so steam escapes. Additionally, sugar just before bagging and keep the top slightly open to preserve crunch.

37) Can I make cupcake churros or cake churros?

Certainly; fold cinnamon sugar into a simple batter, then crown cupcakes with mini fried sticks. Consequently, you get bakery-style drama without fuss.

38) What are churro chips or churro twists?

They’re thin, crunchy variations—either cut from dough or made from flat extrusions—dusted with cinnamon sugar. Meanwhile, they store better than classic sticks for snacking.

39) How to choose a good churro mix or churro mixture at the store?

Look for clear directions, a star-tip recommendation, and consistent reviews about crispness. Additionally, prioritize mixes that specify oil temperature ranges.

40) What qualifies as the best churros recipe for me?

Ultimately, the one that fits your kitchen flow: egged for plush interiors and easy piping, or egg-free for classic snap and dunk-able texture. Thus, pick based on mouthfeel, not hype.

Posted on 16 Comments

French Toast Sticks (Air Fryer + Oven Recipe) — Crispy Outside, Custardy Inside

French toast sticks recipe cover with maple syrup poured over a crispy stack; air fryer and oven methods with vegan and gluten-free options.

There are breakfasts you make on autopilot and there are breakfasts that pull everyone to the table. This french toast sticks recipe sits firmly in the second camp: shatteringly crisp edges, a custardy middle that stays tender, and dippable batons that feel festive on a Tuesday and right at home on a holiday brunch board. The method is wonderfully forgiving once you understand three levers—custard ratio, heat management, and evaporation. We’ll walk through air fryer and oven paths, then branch into vegan, gluten-free, and protein-forward variations, plus copycat crunch coats, batch-freezing, and precise reheating. Along the way, when you need a plant-based base that already works, reach for the tried-and-true guide to Vegan French Toast: 6 Easy Recipes; it adapts to sticks beautifully with only a couple of tweaks.

Before we begin, a quick but important food-safety reminder: the center of an egg-based custard should reach about 71°C / 160°F; when you want belt-and-braces certainty, the USDA safe minimum temperature chart explains the number succinctly. With that in mind, let’s get cooking.


Core Ingredients (and Why They Work)

  • Bread (8 thick slices): Brioche, challah, or Texas toast excel because their enriched crumb absorbs custard without collapsing. Standard sandwich bread will do in a pinch if you lightly dry it first.
  • Eggs (3 large): Structure, gloss, and gentle richness.
  • Milk (¾ cup / 180 ml): Whole milk yields plush centers; almond or oat milk keep things dairy-free without losing crispness. If you love making your own nut milk, you can follow this simple primer on how to make almond milk at home for a clean, neutral base.
  • Sugar (1 tbsp): Quickens browning; keep it modest so the crust doesn’t scorch.
  • Vanilla (1 tsp) & Cinnamon (½ tsp): Aroma that plays well with maple, chocolate, or fruit.
  • Salt (pinch): Brightens everything.
  • Butter or neutral oil (1–2 tbsp): A whisper on the basket or pan dramatically boosts crunch.

As a north star for technique and proportions, the explainer at Serious Eats is an evergreen reference; we’ll echo the spirit while tuning for stick geometry and the speed of convection.


Classic French Toast Sticks Recipe — Air Fryer Method

Yield: 4 generous servings (20–24 sticks)
Active time: about 20 minutes

Air Fryer French Toast Sticks stacked on a stoneware plate as maple syrup drips—crisp edges, custardy centers; MasalaMonk recipe card.
Air Fryer French Toast Sticks—shatteringly crisp outside, custardy middle. Dip each stick 5–7 seconds per side, air-fry at 190°C / 375°F for 6–8 minutes, flip once when the color deepens, then rest 1–2 minutes on a rack. Brush a whisper of oil before the flip for extra snap; serve immediately with warm maple.

Step 1: Cut and Dry

Stack each slice and cut into thirds to form batons. Set them on a wire rack for 5–10 minutes while you mix the custard. Alternatively—and especially if the bread is very fresh—give the slices 2–3 minutes in a low oven to drive off a little surface moisture. This brief drying is your first insurance policy against sogginess.

Step 2: Whisk the Custard

In a shallow dish, whisk 3 eggs, ¾ cup (180 ml) milk, 1 tbsp sugar, 1 tsp vanilla, ½ tsp cinnamon, and a pinch of salt until perfectly smooth. The custard should coat the back of a spoon and leave a clean trail when you draw a finger through it.

Step 3: Quick Soak

Dip 6–8 sticks at a time for 5–7 seconds per side. Let excess drip until the coating thins to a glossy film. Because sticks have more edge area, they don’t need a deep soak; brevity yields better texture.

Step 4: Air Fry for Crunch

Preheat to 190°C / 375°F. Lightly brush or spray the basket with butter or oil. Arrange sticks with space between them—hot air needs room to circulate. Air fry 6–8 minutes total, flipping at the halfway point when the color deepens from gold to amber. For a dramatic shell, brush the exposed sides with a trace of oil just before the flip.

Step 5: Rest, Then Serve

Transfer to a wire rack for 1–2 minutes. That brief rest vents steam and sets the crust. Serve immediately with warm maple syrup, or go playful with a small bowl of 3-minute homemade chocolate syrup that turns glossy on contact.


Sheet-Pan French Toast Sticks — Oven Method (Batch-Friendly)

When you’re cooking for a crowd or stocking the freezer, the oven delivers consistency without babysitting.

Oven-baked French toast sticks on an antique silver tray with parchment—golden, crisp edges and soft centers; MasalaMonk recipe card.
Oven-Baked French Toast Sticks—perfect for batches. Bake at 200°C / 400°F for 12–15 min on a lined rack, flip at ~8 min, then give 2–3 min extra for crunch. Space the sticks so they don’t touch and rest on a wire rack before serving for crisp bottoms.
  1. Heat oven to 200°C / 400°F. Line a rimmed sheet with parchment or set a rack over the sheet; brush with melted butter.
  2. Dip sticks as above and lay them out so they don’t touch.
  3. Bake 12–15 minutes, flipping around 8 minutes, until deeply golden.
  4. For extra crunch, give them 2–3 minutes more after the flip.
  5. Rest on a rack before plating or freezing.

Although times vary with ovens, color and feel tell the truth: crisp edges, bouncy centers. If the center indents and stays wet, a minute or two more will finish the set.


Stovetop Skillet Variation — When You Want Pan Caramelization

Sometimes you crave the scent of butter browning in a pan. In that case:

Skillet French toast sticks browning in a cast-iron pan with butter—golden, crisp edges and custardy centers; MasalaMonk stovetop recipe card.
Skillet French Toast Sticks—deep caramel notes from the pan. Heat medium with butter + a little neutral oil, cook 2–3 min per side, then brown the third edge. Work in small batches, wipe and refresh fat between rounds, and rest on a wire rack to keep bottoms crisp. Serve immediately with warm maple.
  • Heat a large nonstick or well-seasoned cast-iron skillet over medium.
  • Film the pan with a mix of butter and oil.
  • Cook sticks 2–3 minutes per side, turning to brown the third “edge” as needed.
  • Slide finished sticks onto a rack so the bottoms don’t steam.

This route gives you a slightly deeper caramel note and a touch more flexibility if your air fryer is busy with bacon or potatoes.


Vegan French Toast Sticks — Plant-Forward with Crisp Edges

If you’re cooking for vegans, egg allergies, or you simply like the flavor of plant-based custard, swap in the method from Vegan French Toast: 6 Easy Recipes and adapt it for sticks with two small upgrades:

Vegan French toast sticks stacked on a stoneware plate with coconut yogurt and an almond-milk bottle—golden, crisp; MasalaMonk recipe card.
Vegan French Toast Sticks—crisp edges, tender middle without eggs. Enrich the plant custard with 1–2 tsp neutral oil, give each stick a brief soak, then air-fry at 190°C / 375°F for 6–8 min (flip once) or bake at 200°C / 400°F for 12–15 min (flip at 8). Rest on a wire rack to set the crust. Tip: use a tight-crumb loaf and keep the dip quick for best structure.
  • Add 1–2 tsp neutral oil directly to the vegan custard to enhance browning.
  • Keep the soak short (as above) so structure holds.
  • Air fry at 190°C / 375°F for 6–8 minutes total, flipping once, or bake per the oven method and extend a minute if edges look pale.

Because plant custards can set more gently, the rack rest is doubly important; it locks in crunch while the interior finishes.


Gluten-Free French Toast Sticks — Crisp Without Crumble

Gluten-free breads vary substantially, so choose a loaf with a close crumb and assertive structure—brioche-style GF loaves or thicker sandwich slices perform best. Dry the sticks slightly longer before dipping, and keep the soak short. Follow either the air fryer or oven timing above; add 1–2 minutes after the flip if the surface looks soft.

Gluten-free French toast sticks on a stoneware plate with a maple-syrup ramekin—golden, crisp edges and tender centers; MasalaMonk recipe card.
Gluten-Free French Toast Sticks—crisp without crumble. Pick a sturdy, tight-crumb GF loaf (brioche-style or thick sandwich). Dry 5–10 min, then brief soak so the sticks hold structure. Cook: Air fryer 190°C / 375°F, 6–8 min (flip once) or oven 200°C / 400°F, 12–15 min (flip at ~8). If the surface looks soft, finish 1–2 min more. Rest on a wire rack for crisp bottoms.

If gluten is new territory for you or your readers, a quick primer like What is Gluten? helps demystify labels. For a naturally GF side that complements sticks, consider a spoon of millet porridge or these ideas in millets as a gluten-free superfood—they round out the plate without competing on sweetness.


Protein French Toast Sticks — Higher Satiety, Same Crunch

For a more filling breakfast without leaning on syrup, whisk 10–15 g unflavoured whey or plant protein into the custard, then thin with milk until it returns to that glossy, spoon-coating texture. Because added protein browns quickly, watch color closely and lower the air fryer temperature to 185°C / 365°F if necessary. Serve with thick yogurt and chopped nuts, or keep it light and pair a few sticks with keto chia pudding with almond milk so everyone at the table gets what they prefer.

Protein French toast sticks on a stoneware plate with yogurt dip and chopped nuts—golden and crisp; MasalaMonk high-protein recipe card.
Protein French Toast Sticks—more satiety, same crunch. Whisk 10–15 g unflavoured whey or plant protein into the custard, then thin with milk until glossy. Cook 185–190°C / 365–375°F for 6–8 min in the air fryer, flip once, and rest on a rack. Protein speeds browning—watch color and reduce sugar slightly. Serve with thick yogurt and toasted nuts.

Crunch Coats & Copycat Textures — From Churro Sugar to Cornflake Crust

Now and then, you want that fairground crunch or a drive-thru echo at home. Happily, sticks invite embellishment:

  • Cinnamon Sugar “Churro” Finish: Toss just-cooked sticks in a blend of 3 tbsp sugar + 1 tsp cinnamon. Do this while they’re still hot so the sugar clings.
  • Cornflake Crust: After dipping, press each stick into lightly crushed cornflakes. Air fry as usual. The shards add audible crunch without deep-frying.
  • Graham Dust: Blitz plain grahams into coarse crumbs; press on as with cornflakes for a cookie-like halo.
  • Nutty Edge: Roll one long side in finely chopped, lightly toasted almonds or pecans before cooking; it creates a textural contrast without overwhelming the custard.

For inspiration and a sense of what diners expect from a fast-food take, a quick skim of the Sonic Drive-In menu will reveal how they pair sticks and dips. You’ll find that a simple vanilla-maple dip (equal parts maple syrup and thick yogurt, scented with vanilla) outshines most chain versions at home.


Sauces, Dips, and Fruit — Keep the Party on the Plate

Maple syrup is non-negotiable for purists; nevertheless, little jars of toppings make breakfast feel abundant:

  • Warm Chocolate Spoon Sauce: Drizzle a ribbon of 3-minute homemade chocolate syrup over a stack and watch it set into a gloss as the sticks cool.
  • Cinnamon Apples: Spoon over stewed cinnamon apples for a diner-style plate without the cloying sweetness.
  • Yogurt-Maple Dip: Whisk ½ cup thick yogurt with 2 tbsp maple and a pinch of salt.
  • Berry Smash: Crush berries with a touch of sugar and lemon; strain or leave rustic.
  • Orange Zest Sugar: Microplane zest into sugar with a whisper of nutmeg; toss hot sticks lightly for a holiday finish.

Because sauces add sweetness, you can reduce sugar in the custard slightly and lean on caramelization for flavor.


Freezer-Friendly: How to Batch, Store, and Reheat Perfectly

Sticks freeze and reheat better than whole slices thanks to their surface area. Here’s the straightforward route:

  • Cook completely and rest on a rack until room-temp.
  • Freeze in a single layer on a parchment-lined sheet until firm.
  • Bag & label, pressing out air.
  • Reheat from frozen:
    • Air fryer 180°C / 356°F for 3–5 minutes (shake once).
    • Oven 200°C / 400°F for 6–8 minutes on a rack set over a sheet.

If you keep a box of store-bought sticks as a back-pocket option, use these ranges as a starting point and adjust by brand. For context, you can glance at Eggo French Toaster Sticks or Farm Rich French Toast Sticks to see packaging guidance, then dial toward your preferred crispness. Either way, trust color and firmness more than labels.


Ratio Sense — Cook by Feel When Measuring Cups Vanish

Holiday rentals and late-night cravings share one trait: missing measuring cups. Fortunately, this recipe scales by intuition:

  • For 2 slices (6 sticks): 1 large egg + a scant splash of milk (about 60–80 ml).
  • For 4 slices (12 sticks): 2 eggs + ~150 ml milk.
  • For 8 slices (24 sticks): 3 eggs + 180 ml milk (our base).

Aim for a custard that’s thicker than milk and thinner than cream, glossy, and clingy. If it runs like water, add part of another egg; if it clumps, thin with a splash of milk. This single cue—how the custard coats the back of a spoon—unlocks consistency regardless of brand or bread.


Troubleshooting French Toast Sticks Recipe

  • Edges browned, center wet: Shorten the soak next time; for this batch, give the sticks 1–2 extra minutes on a rack in a hot oven to finish.
  • Pale even after time: Preheat longer and add a teaspoon more sugar to the custard; sugar fuels browning.
  • Eggy streaks: Whisk the custard more thoroughly and avoid letting sticks lounge in the liquid.
  • Soft after resting: Always move finished sticks to a wire rack; the air gap prevents steam from softening the bottom.
  • GF bread crumbling: Choose a denser loaf, cut slightly thicker, and keep the dip brisk.
  • Overly sweet: Reduce sugar in the custard and switch to yogurt-maple dip for balance.

For doneness anxiety, an instant-read thermometer ends the guesswork; custard-based dishes earn their melt-in-the-middle texture right around that 71°C / 160°F sweet spot highlighted by the USDA chart.


Flavor Variations That Behave Well in Stick Form

Because the format is stable, you can dress it up or down without losing structure:

  • Orange–Cardamom: Zest one orange into the custard and add a pinch of cardamom; finish with icing sugar.
  • Maple–Brown Butter: Brown 1–2 tbsp butter; brush it on hot sticks and drizzle maple.
  • Coconut: Stir a spoon of coconut cream into the custard; sprinkle toasted coconut to finish.
  • Hazelnut: Thin chocolate-hazelnut spread with warm milk for a pourable gloss.
  • Spiced Sugar: Combine cinnamon, a hint of ginger, and nutmeg; toss lightly while hot.

If you lean into crunchy coats (cornflake or graham), reduce custard sugar slightly to avoid tipping into brittle sweetness.


Scaling Up or Down French Toast Sticks Recipe

  • For one: 1 egg + 60–80 ml milk + 2 slices (6 sticks) → air fryer 6–7 minutes total.
  • For two: 2 eggs + ~150 ml milk + 4 slices (12 sticks) → same heat; cook in two rounds.
  • For a crowd: Double the base and use two sheet pans on convection; rotate pans and flip at the 8-minute mark.

Meanwhile, if you’re running a mixed table—vegan, dairy-free, and classic—cook the vegan batch first, followed by gluten-free if needed, then the standard custard last. Separate racks keep everything crisp and tidy.


A Note on Bread, Moisture, and Timing

Bread is a living variable. Even within the same brand, dryness swings with storage and climate. Consequently, your soak time is the dial you turn most. Fresh, soft brioche? Dry slightly longer and dip quickly. Day-old challah? Dip a hair longer. Very dry loaf? Add a tablespoon of milk and extend the soak by a second or two. Ultimately, color and feel tell you more than the clock: aim for caramel edges and a buoyant middle that springs back when pressed.

If you enjoy tinkering, the classic ratio outlined by pros—roughly one egg per ¼–⅓ cup milk—gives you leeway; the granular reasoning in the Serious Eats overview is a useful mental model as you experiment.


Serving Boards and Balanced Plates

Because sticks are sweet-leaning, anchor the plate with freshness or creaminess. Citrus segments and mint keep things bright; a small bowl of salted yogurt reins in syrup. For a sweet-savory spread, add salty nuts or crisp bacon; for a fully plant-based board, go with fruit, maple, and a side of millet ideas for texture variety. If dessert-for-breakfast is the vibe, a warm ribbon of house chocolate syrup and cinnamon apples earns applause every single time.


Quick Reference Cards (Copy/Paste Friendly)

Air Fryer French Toast Sticks Recipe

  • Ingredients (serves 4): 8 thick slices bread; 3 eggs; ¾ cup (180 ml) milk; 1 tbsp sugar; 1 tsp vanilla; ½ tsp cinnamon; pinch salt; butter/oil.
  • Method: Cut each slice into thirds; dry briefly. Whisk custard smooth. Dip 5–7 s/side. Air fry 190°C / 375°F, 6–8 min, flipping halfway. Rest on a rack. Serve immediately.

Oven-Baked French Toast Sticks Recipe

  • Ingredients: Same as above.
  • Method: Heat oven 200°C / 400°F. Line/rack pan; butter lightly. Dip quickly; arrange with space. Bake 12–15 min, flip at 8 min; add 2–3 min for extra crunch. Rest and serve.

Vegan French Toast Sticks (No Egg, No Dairy)

  • Base: Use plant custard from this vegan guide; add 1–2 tsp neutral oil to the mix.
  • Method: Soak briefly; air fry 190°C / 375°F, 6–8 min (flip once) or bake as above; extend a minute if pale. Rack-rest always.

Gluten-Free French Toast Sticks

  • Bread: Choose a sturdy GF loaf with a tight crumb.
  • Method: Dry a touch longer; soak briefly; follow air fryer/oven timings; finish 1–2 min more if needed.

Make-Ahead & Reheat

  • Freeze fully cooked sticks in a single layer; bag when firm.
  • Reheat from frozen: Air fryer 180°C / 356°F, 3–5 min; Oven 200°C / 400°F, 6–8 min on a rack.

Closing Thoughts

Once you’ve made this french toast sticks recipe a couple of times, you’ll feel the controls in your hands: how quickly to dip, when to flip, and exactly how deep a golden you prefer. From there, variations are easy—vegan when you need it, gluten-free for guests, a protein twist for longer mornings, a churro dust when nostalgia calls. And because the methods scale without drama, you can cook a few sticks for a sleepy kiddo or line up two trays for a party brunch without changing anything but the pan.

When you want the plant-based path that just works, lean on Vegan French Toast: 6 Easy Recipes. If you’re curious about the science of ratios and why small tweaks matter, browse the Serious Eats technique explainer for clarity. And whenever you want precise safety numbers, the USDA chart is the last word. Beyond that, trust your senses: the scent of browning butter, the feel of a springy center, and the sound of a crisp edge snapping are the only cues you really need.

FAQs

1) How long do I air fry french toast sticks, and at what temperature?

For a classic french toast sticks recipe, preheat the air fryer to 190°C / 375°F; cook 6–8 minutes total, flipping halfway. Moreover, if the bread is extra thick, add 1–2 minutes until edges are deeply golden and the center springs back.

2) What’s the best oven time and temperature for french toast sticks?

Bake at 200°C / 400°F for 12–15 minutes, turning at the 8-minute mark. Additionally, for an extra-crisp shell, finish 2–3 minutes more; the interior should feel bouncy rather than wet.

3) What is the ideal egg-to-milk ratio for the custard?

Generally, aim for about 1 large egg per ¼–⅓ cup (60–80 ml) milk. Conversely, if using very stale bread, increase milk slightly so the custard stays silky. This balance keeps the french toast sticks recipe tender without turning soggy.

4) How do I keep french toast sticks crispy instead of soggy?

Firstly, dry the bread briefly before dipping. Secondly, dip quickly (5–7 seconds per side), allowing excess custard to drip off. Furthermore, cook with space between sticks and rest them on a wire rack for a minute before serving.

5) Which bread works best for a french toast sticks recipe?

Brioche, challah, and Texas toast consistently shine thanks to sturdy crumbs and gentle sweetness. Nevertheless, thick-cut sandwich bread succeeds if you dry it slightly beforehand.

6) Can I make french toast sticks without eggs?

Yes. Use a vegan custard base (e.g., plant milk plus thickener and flavorings) and proceed with the same timings. Importantly, add a teaspoon of neutral oil to the batter to encourage browning.

7) How do I make dairy-free french toast sticks?

Simply replace milk with almond, oat, or coconut milk at a 1:1 ratio. Additionally, brush or spray the basket/pan lightly with oil to enhance crisp edges, since non-dairy custards brown a touch slower.

8) What if I have no vanilla or cinnamon?

Omit both and rely on butter browning and maple for aroma. Alternatively, use orange zest, cardamom, or a whisper of nutmeg. Notably, the french toast sticks recipe still tastes great with just salt and sugar.

9) How many eggs per slice (or per batch) should I plan?

As a rule of thumb, 1 egg covers 1–2 slices (3–6 sticks) depending on thickness. Accordingly, for 8 slices (about 24 sticks), 3 eggs plus ¾ cup milk is a dependable starting point.

10) How long should french toast sticks cook on each side in a skillet?

Use medium heat and cook about 2–3 minutes per side. Meanwhile, rotate briefly to brown the “third edge”; transfer to a rack so the bottoms don’t steam.

11) Can I freeze french toast sticks? How do I reheat them later?

Absolutely. Freeze fully cooked sticks in a single layer, then bag. Subsequently, reheat from frozen: air fryer 180°C / 356°F for 3–5 minutes, or oven 200°C / 400°F for 6–8 minutes on a rack.

12) What internal cues tell me the sticks are done?

Look for deep golden edges and a springy center that rebounds with a gentle press. Additionally, the custard should not ooze when cut; if it does, cook 1–2 minutes more.

13) How do I scale this french toast sticks recipe for one person or for a crowd?

For one, use 1 egg + 60–80 ml milk and 2 slices (6 sticks). For a crowd, double or triple the base; use two sheet pans and rotate them, flipping at 8 minutes. Likewise, hold finished sticks on a rack in a warm oven.

14) Can I add protein powder without making the texture chalky?

Yes—whisk in 10–15 g unflavoured whey or plant protein per 1–2 eggs, then thin with milk until the custard coats a spoon. However, because added protein browns faster, reduce heat slightly or watch carefully.

15) What are smart gluten-free adaptations?

Choose a dense GF loaf with a tight crumb, dry the sticks a bit longer, and keep the soak brisk. Moreover, add 1–2 minutes after the flip if the surface looks soft; the extra time sets structure.

16) How do I get a “crunch coat” like churro or cereal-crusted sticks?

Immediately after dipping, press sticks lightly into crushed cornflakes or graham crumbs. Afterward, air fry or bake as usual. Gently dust hot sticks with cinnamon sugar to finish if desired.

17) Can I make the custard richer with cream or half-and-half?

Certainly. Replace up to half the milk with heavy cream or half-and-half. Nevertheless, to prevent a greasy feel, keep cook temperature moderate and avoid over-soaking.

18) What’s the easiest way to avoid eggy streaks in the batter?

Whisk thoroughly until the custard is homogenous and glossy. Additionally, stir between batches, since spices can settle; a smooth custard gives even browning.

19) How do I keep the flavor balanced if I’m using very sweet dips?

Reduce sugar in the custard by a teaspoon and rely on caramelization for depth. Ultimately, the french toast sticks recipe should taste gently sweet on its own, with sauces providing the accent.

20) Can I make french toast sticks ahead for brunch service?

Yes. Cook completely, cool on a rack, and refrigerate up to 4 days. Then, just before serving, re-crisp: air fryer 180°C / 356°F for 3–4 minutes or oven 200°C / 400°F for 5–7 minutes.

21) What pan fat is best—butter or oil?

Butter delivers aroma and browning; a small blend with neutral oil raises the smoke point. Consequently, use butter for flavor and a touch of oil for resilience, especially on the second batch.

22) How do I adapt the french toast sticks recipe for very fresh, soft bread?

Dry the slices lightly in a low oven for 2–3 minutes per side, cool 1 minute, then dip quickly. Conversely, if the loaf is quite dry, increase milk slightly and extend the soak by a second or two.

23) What toppings pair well without overwhelming the texture?

Thick yogurt with a pinch of salt, warm berries, cinnamon apples, peanut-maple, or a restrained chocolate drizzle. Additionally, finish with citrus zest to brighten richer combinations.

24) How do I know I’ve nailed the texture every time?

Color, feel, and sound guide you: amber edges, a gentle spring in the center, and a faint crackle after a brief rack rest. In short, when those cues align, your french toast sticks recipe is spot on.

Posted on 20 Comments

10 Best Espresso Martini Recipe Variations (Bar-Tested)

Bartender pouring an espresso martini from a stainless shaker into a coupe—thick crema with three coffee beans—premium portrait cover for an espresso martini recipe.

Craving an espresso martini recipe that pours glossy, smells like roasted chocolate, and hits the sweet-bitter balance just right? You’re in the perfect place. Below you’ll find a bar-tested classic plus nine high-demand riffs—Baileys + Kahlúa, Nespresso, salted caramel, citrus with Cointreau, Mr Black/cold brew, Licor 43, peanut-butter whiskey, vegan, and low-cal. Along the way, we’ll use simple ratios you can memorize, practical shaker tips that actually improve foam, and smart substitutions so you can make a great drink with the coffee gear you already own. For festive ideas, circle back to MasalaMonk’s seasonal riffs like the fragrant lineup in 5 Spiced Espresso Martini Recipe Ideas.


Espresso Martini Recipe (Classic, 3-Ingredient)

Why begin here: every variation hangs on this structure. Nail the classic once, then riff with confidence.

Ingredients (one cocktail)

  • 60 ml (2 oz) vodka
  • 30 ml (1 oz) coffee liqueur (Kahlúa for round sweetness; Mr Black for roastier, drier; Galliano Ristretto for intensity)
  • 30 ml (1 oz) fresh hot espresso or 30 ml strong cold-brew concentrate
  • Optional: 5–10 ml (¼–⅓ oz) simple syrup (1:1) to taste
Recipe card: Classic Espresso Martini—vodka, coffee liqueur, hot espresso; shake 12–15s, fine-strain; glossy crema with three coffee beans.
Classic Espresso Martini (3 ingredients). 2:1:1—60 ml vodka, 30 ml coffee liqueur, 30 ml hot espresso. Shake hard 12–15 s, fine-strain, garnish with 3 beans. Pro tip: a fresh hot shot builds taller, longer-lasting foam. — MasalaMonk.com

Method, step-by-step

  1. Chill glassware. A coupe or Nick & Nora helps the foam dome stand tall.
  2. Pull espresso last. Add spirits to a shaker filled with firm, fresh ice; pull the shot now so it’s still lively.
  3. Shake like you mean it. 12–15 vigorous seconds. You want the tins frosty outside and roaring inside.
  4. Fine-strain into your chilled glass to catch ice shards that can pop the foam.
  5. Garnish with three beans for the traditional “health, wealth, happiness” nod.

Texture & balance, explained
Hot espresso carries emulsifiers and suspended oils that whip into foam more willingly; if the shot sits, crema collapses and you lose that café-style head. Meanwhile, the coffee liqueur sets sweetness; adjust syrup in 2–3 ml nudges until the finish reads silky rather than sticky.

Dial-ins (quick wins)

  • Drier profile: choose Mr Black; skip syrup.
  • Softer edges: stick with Kahlúa; keep 5 ml syrup for roundness.
  • Extra body: 1 barspoon demerara syrup (1:1) adds cocoa-molasses depth.
  • Salt, barely there: a micro dash of 4:1 saline solution heightens perceived sweetness without more sugar.

For a canonical checkpoint: compare your spec to the IBA espresso martini. If you prefer granular technique talk—hot shots, optional saline, and foam logic—skim Difford’s Guide and adopt what suits your palate.


Espresso Martini Recipe with Baileys & Kahlúa

Now, for something plush. Here, cream meets coffee in a way that reads dessert-adjacent yet still cocktail-clean if you manage dilution thoughtfully.

Ingredients

  • 45 ml (1½ oz) vodka
  • 30 ml (1 oz) Baileys
  • 15 ml (½ oz) Kahlúa
  • 30 ml (1 oz) espresso (fresh and hot)
Recipe card: Baileys & Kahlúa Espresso Martini—45 ml vodka, 30 ml Baileys, 15 ml Kahlúa, 30 ml espresso; shake, fine-strain, cocoa dust or 3 beans.
Baileys & Kahlúa Espresso Martini (creamy, balanced). Build is 45 ml vodka · 30 ml Baileys · 15 ml Kahlúa · 30 ml espresso. Shake hard, fine-strain, garnish with cocoa or three beans. Pro tip: for extra plush texture, add +15 ml Baileys and reduce vodka by 15 ml. — MasalaMonk.com

Method
Shake harder than you think—15 to 18 seconds—to emulsify dairy and espresso, then fine-strain. The head should sit thick, and the sip should feel like velvet rather than milkshake.

Why it works
Baileys contributes dairy sweetness and vanilla; Kahlúa fills the coffee mid-palate so you don’t need to drown the drink in syrup. For proportion benchmarks and shake cadence, cross-check the Baileys espresso martini and the Kahlúa method. Then, trim sugar until your finish is clean.

Variations you can pour immediately

  • Extra-creamy: +15 ml Baileys, −15 ml vodka.
  • Mocha dessert: +5–10 ml crème de cacao; dust cocoa through a fine sieve.
  • No-vodka comforter: +15 ml Baileys, +15 ml Kahlúa; shake colder to maintain structure.

While you’re plotting pairings, hop into MasalaMonk’s mix-match guides—What Can You Mix with Kahlúa? and What Mixes Well with Baileys?—for easy flavor ladders you can climb without a grocery run.


Nespresso Espresso Martini Recipe (No Machine, No Problem)

Not everyone has a portafilter at home; nevertheless, pod machines can be stellar. In fact, their crema and consistency are gifts to the shaker.

Ingredients

  • 60 ml (2 oz) vodka
  • 30 ml (1 oz) coffee liqueur
  • 40 ml (1⅓ oz) Nespresso lungo or double espresso, cooled 2–3 minutes (dark pods shine)
Recipe card: Nespresso Espresso Martini—60 ml vodka, 30 ml coffee liqueur, 40 ml pod lungo; shake hard, fine-strain; glossy crema in coupe.
Nespresso Espresso Martini (no machine). Build: 60 ml vodka · 30 ml coffee liqueur · 40 ml Nespresso lungo/double. Pull pod, cool 2–3 min, then shake aggressively and fine-strain to a chilled coupe. Pro tip: choose dark pods (ristretto/arpeggio style) for cacao-leaning flavor and a richer crema. — MasalaMonk.com

Method
Meanwhile, chill the glass. Pull your pod, give it a short cool, then shake vigorously with the other ingredients and dense ice. Fine-strain for that lacquered surface.

Pod talk, briefly
Darker capsules (Ristretto/Arpeggio-style) push chocolate, toasted nuts, and low fruit; consequently, they sit beautifully with a little sugar and ethanol. If you rely on moka pots or cold-brew concentrate some nights, you’re still golden—MasalaMonk’s coffee walkthroughs compare strengths, grinds, and extraction styles so your espresso martini recipe remains balanced even when your gear changes.


Salted Caramel Espresso Martini Recipe

Here’s the cozy showstopper: sweet-salty, aromatic, and richly textural without becoming cloying.

Ingredients

  • 45 ml (1½ oz) caramel or vanilla vodka
  • 20 ml (⅔ oz) coffee liqueur
  • 30 ml (1 oz) espresso
  • 10–15 ml (⅓–½ oz) salted-caramel syrup
Recipe card: Salted Caramel Espresso Martini—caramel/vanilla vodka, coffee liqueur, espresso, salted-caramel syrup; toffee rim, sea salt on foam.
Salted Caramel Espresso Martini. Build: 45 ml caramel/vanilla vodka · 20 ml coffee liqueur · 30 ml espresso · 10–15 ml salted-caramel syrup. Shake, fine-strain, finish with a whisper of flaky sea salt. Pro tip: sweetness blooms when cold—start light on syrup and adjust to taste. — MasalaMonk.com

Method
Shake briskly; fine-strain; crown with a faint pinch of flaky salt over the foam. Optionally, half-rim with crushed toffee for celebratory sparkle.

Keep it elegant, not sugary
Caramel leans sweet; accordingly, lean on espresso bitterness and a touch of salt to keep shape. For a brand-tested frame of reference, study proportions on the Kahlúa espresso martini page and then scale syrup down until your finish snaps.

Holiday spinoffs

  • Gingerbread: swap salted-caramel syrup for gingerbread syrup; grate nutmeg.
  • Maple-sea salt: 10 ml maple + micro-pinch salt; express orange over the cap.
  • Spiced warmth: infuse your vodka with a cinnamon stick for 2 hours; pull it out before it dominates, and then shake as usual.

Also Read: Mango Martini + 5 Variants of Classic Cocktail


Cointreau (Orange) Espresso Martini Recipe

Chocolate-orange fans, this one’s for you. With citrus oils dancing over a dark foam, the nose alone sells the first sip.

Ingredients

  • 45 ml (1½ oz) vodka
  • 20 ml (⅔ oz) coffee liqueur
  • 15 ml (½ oz) Cointreau (go Grand Marnier for oakier depth)
  • 30 ml (1 oz) espresso
Recipe card: Cointreau Orange Espresso Martini—45 ml vodka, 20 ml coffee liqueur, 15 ml Cointreau, 30 ml espresso; shake, express orange peel.
Cointreau (Orange) Espresso Martini. Build: 45 ml vodka · 20 ml coffee liqueur · 15 ml Cointreau · 30 ml espresso. Shake hard, fine-strain, then express an orange peel over the foam and discard. Pro tips: swap Grand Marnier for a richer, oak-tinged profile; add 5–10 ml crème de cacao for a “dark-chocolate orange” vibe. — MasalaMonk.com

Method
Shake assertively; fine-strain; express a wide swath of orange peel over the surface and discard. The aromatic mist lands on the foam and blooms throughout the sip.

Flavor geometry, quickly
Cointreau is drier; thus the drink stays snappy. Grand Marnier reads richer, so trim any added syrup by 5 ml. For a “jaffa cake” vibe, add 5–10 ml crème de cacao; for a slightly bitter chocolate edge, toss in 2 dashes mole bitters.

Variants to slot under this heading

  • Amaro lift: replace 10 ml of coffee liqueur with Averna; you’ll get cola-cocoa depth.
  • Tequila twist: swap vodka for reposado; the orange plays beautifully with oak and vanilla.
  • Burnt-orange finish: flame a peel (carefully) over the cap for caramelized aromatics.

Also Read: Vodka with Lemon: Easy Cocktails, Martini Twist & DIY Infusion


Mr Black Cold Brew Espresso Martini Recipe

When you want coffee to speak loudly and sugar to step back, Mr Black is the obvious lever. Their guidance also nails foam mechanics without fuss.

Ingredients (brand-style)

  • 30 ml (1 oz) Mr Black Coffee Liqueur
  • 30 ml (1 oz) vodka or reposado tequila for a drier, spicier frame
  • 30 ml (1 oz) espresso or cold-brew concentrate
  • 10–15 ml (⅓–½ oz) simple syrup, as needed
Recipe card: Mr Black Cold Brew Espresso Martini—30 ml Mr Black, 30 ml vodka or reposado tequila, 30 ml espresso/cold-brew; shake hard, fine-strain.
Mr Black / Cold Brew Espresso Martini (coffee-first). Build: 30 ml Mr Black · 30 ml vodka (or reposado tequila) · 30 ml espresso or cold-brew concentrate · 0–15 ml syrup to taste. Shake aggressively with dense ice and fine-strain. Pro tip: using cold-brew? Shake even harder to whip up crema; choose tequila for a drier, roasty finish. — MasalaMonk.com

Method
Shake decisively; fine-strain; garnish with three beans or a coffee dust heart if you’re feeling fancy.

Practical notes
Cold-brew concentrate softens bitterness; consequently, you may want to reduce syrup so the finish stays crisp. For visual and method cues, peek at Mr Black’s espresso martini—their “shake hard for crema” mantra is exactly what brings this pour to life at home.

Variants to file

  • Agave route: tequila base + orange express for a café de olla echo.
  • Cocoa edge: 2 dashes chocolate bitters; serves like a mocha that grew up.
  • Split base: 20 ml rye + 20 ml vodka; the spice peeks through gently.

Also Read: Daiquiri Recipe (Classic, Strawberry & Frozen Cocktails)


Licor 43 Espresso Martini Recipe (Spanish Vanilla)

Silky vanilla, bright citrus whispers, and a honeyed line through the middle—this riff drinks like a well-lit café at dusk.

Ingredients

  • 30 ml (1 oz) Licor 43
  • 30 ml (1 oz) vodka
  • 40 ml (1⅓ oz) hot espresso
  • Optional: 10–15 ml (⅓–½ oz) coffee liqueur for deeper roast
Recipe card: Licor 43 Espresso Martini—30 ml Licor 43, 30 ml vodka, 40 ml hot espresso; shake, double-strain; orange peel and micro-dash saline tip.
Licor 43 Espresso Martini—vanilla-citrus glow. Build: 30 ml Licor 43 · 30 ml vodka · 40 ml hot espresso. Shake with ice, double-strain to a chilled coupe. Pro tip: express an orange peel over the foam and add a micro-dash of 4:1 saline—it brightens vanilla, trims bitterness, and boosts perceived sweetness without extra sugar. — MasalaMonk.com

Method
Shake hard; double-strain into a chilled coupe; float a delicate orange twist and discard. The aroma cues vanilla, then the espresso anchors the sip.

Where to benchmark
Start with the structure and sweetness targets of Espresso 433; then decide whether you prefer “lean vanilla” (no added coffee liqueur) or “round café” (+15 ml).

Spin-offs

  • Golden rum swap: trade vodka for a light aged rum; the vanilla threads feel seamless.
  • Oat-vanilla cream: 10 ml unsweetened oat creamer in the shaker; shake longer for a silkier cap.
  • Cinnamon touch: a single small stick infused in vodka for 60–90 minutes, then removed; build the drink as usual.

Also Read: Coconut Water Cocktails: 10 Easy, Refreshing Drinks


Peanut Butter Whiskey Espresso Martini Recipe

Decadent without being heavy, this one reads like a peanut-butter truffle kissed by espresso. It’s playful, memorable, and wildly “one more round” friendly.

Ingredients

  • 45 ml (1½ oz) peanut-butter whiskey (Skrewball-style)
  • 20 ml (⅔ oz) vodka or bourbon for oak and spice
  • 20 ml (⅔ oz) coffee liqueur
  • 25–30 ml (¾–1 oz) espresso
  • Optional: 5 ml simple if your PB whiskey runs dry (rare)
Recipe card: Peanut-Butter Whiskey Espresso Martini—45 ml PB whiskey, 20 ml vodka/bourbon, 20 ml coffee liqueur, 25–30 ml espresso; shake; chocolate garnish.
Peanut-Butter Whiskey Espresso Martini. Build: 45 ml PB whiskey · 20 ml vodka/bourbon · 20 ml coffee liqueur · 25–30 ml espresso. Shake until tins sweat, fine-strain, garnish with shaved chocolate or crushed roasted peanuts. Pro tip: PB whiskey is sweet—let a dark roast espresso and a pinch of saline keep the finish clean, not cloying. — MasalaMonk.com

Method
Shake until your tins sweat; fine-strain; garnish with grated chocolate or a light ring of crushed roasted peanuts (keep it minimal so it doesn’t drink like a sundae).

Balance pointers
PB whiskey is typically sweet; therefore, hold back on syrup and let espresso’s bitterness draw a clean perimeter. If you need a starting line, scan PB-centric riffs on coffee-liqueur recipe hubs (Kahlúa’s is an easy one to browse), then subtract sugar until the finish behaves.

Variants

  • Cookie shop: +5 ml Frangelico (hazelnut); garnish with micro-zested nutmeg.
  • Salty-sweet: a tiny saline dash plus chocolate bitters = “sea-salt brownie” energy.
  • Bourbon bakery: swap vodka for a soft, vanilla-leaning bourbon; lower syrup to zero.

Also Read: Mango Vodka Cocktail: The Perfect Base + 7 Must-Try Variations


Vegan Espresso Martini Recipe (No Dairy, Big Foam)

You don’t need dairy to pour a towering cap. With the right technique, plant foams are terrific and—better yet—stable.

Ingredients

  • 50 ml (1⅔ oz) vodka
  • 25 ml (¾–1 oz) coffee liqueur (Mr Black if you want drier; Kahlúa if you prefer softer)
  • 30 ml (1 oz) espresso
  • 20 ml (⅔ oz) aquafaba or 15 ml vegan foamer
Recipe card: Vegan Espresso Martini—vodka, coffee liqueur, espresso, aquafaba; dry-shake, then ice-shake; tall glossy foam with three coffee beans.
Vegan Espresso Martini (no dairy, big foam). Build: 50 ml vodka · 25 ml coffee liqueur · 30 ml espresso · 20 ml aquafaba (or 15 ml vegan foamer). Dry-shake 10 s, then add ice and shake 12–15 s; fine-strain. Pro tip: a fresh, hot shot plus aquafaba’s proteins/saponins yields a taller, longer-holding head than the dairy classic. — MasalaMonk.com

Method

  1. Dry-shake (no ice) for 10 seconds to pre-whip proteins.
  2. Add ice and shake vigorously for 12–15 seconds.
  3. Fine-strain; let the foam set for 10–15 seconds before garnishing.

Why aquafaba excels
Chickpea water brings proteins and saponins that trap air and stabilize bubbles; as a result, your vegan espresso martini recipe keeps that bar-style crown without egg whites. If you miss creaminess, you can also reach for non-dairy liqueurs or creamers; still, aquafaba remains the simplest pantry hack with dramatic payoff.

Plant-based variants

  • Maple-cinnamon: 10 ml maple syrup + a dusting of Ceylon cinnamon.
  • Chocolate silk: 5 ml crème de cacao + 2 dashes chocolate bitters; keep sweetness restrained.
  • Orange blossom: a delicate spritz of orange blossom water over the foam—one pump is plenty.

Also Read: What to Mix with Jim Beam: Best Mixers & Easy Cocktails


Low-Cal Espresso Martini Recipe (Keto-Friendly)

Lean, aromatic, and still foamy, this build proves you can keep calories in check without sacrificing ceremony.

Ingredients

  • 60 ml (2 oz) vodka
  • 30 ml (1 oz) cooled espresso
  • 5–10 ml (¼–⅓ oz) 1:1 allulose or erythritol syrup or a tiny dash of liquid stevia
  • 2–3 dashes coffee or chocolate bitters (optional)
Recipe card: Low-Cal Espresso Martini—60 ml vodka, 30 ml cooled espresso, 5–10 ml allulose/erythritol or stevia; shake, lemon peel express; keto-friendly.
Low-Cal Espresso Martini (keto-friendly). Build: 60 ml vodka · 30 ml cooled espresso · 5–10 ml 1:1 allulose/erythritol syrup (or liquid stevia) · 2–3 dashes coffee/chocolate bitters (opt.). Shake hard, fine-strain to a chilled coupe; finish with an expressed lemon peel and discard. Pro tip: a pinch of saline boosts perceived sweetness without sugar; for extra body, shake in 15 ml unsweetened almond-coconut creamer. — MasalaMonk.com

Method
Shake very hard to aerate; fine-strain. Express a lemon peel across the surface and discard to lift the nose without adding sugar.

Taste management
If the sip reads hollow, add two things before you reach for more sweetener: a saline micro-dash (which increases perceived sweetness) and a stronger coffee shot (which adds structure). Conversely, if the drink feels sharp, introduce 5 ml demerara syrup or 10 ml unsweetened almond-coconut creamer and shake a beat longer.

Keto-friendly riffs

  • Vanilla-cocoa: ¼ tsp unsweetened cocoa, shaken in; 2 dashes vanilla extract.
  • Orange-bright: 2 dashes orange bitters + orange express; no change in macros.
  • Amaro-lite: 10 ml low-sugar amaro to add herbaceous depth; maintain sweetener as is.

Also Read: Whiskey and Warmth: 5 Cinnamon-Spiced Iced Tea Cocktails to Get You through Wednesday


How to Batch Any Espresso Martini Recipe (Entertaining Shortcut)

After the fifth order, shaking to order stops being charming. Batching preserves sanity while still delivering foam—if you mimic dilution strategically.

Scaling formula (serves ~8)

  • Multiply any spec ×8.
  • Add 200–240 ml cold water (this pre-dilution mimics the water your ice would add).
  • Chill at least 2 hours (overnight is better).
  • For service, shake each ~120 ml portion with fresh ice for 8–10 seconds; fine-strain.

Why this works
Most shaken cocktails dilute ~20–25%. Without compensating, a batched espresso martini recipe tastes hot and syrup-heavy. Pre-dilution lands you near your target texture before the finishing shake re-aerates for foam.

Flavor lanes for parties

  • Spiced holiday tray: split your coffee liqueur with crème de cacao; express orange over each pour.
  • Coffee-first crowd: go Mr Black as the sole liqueur; offer simple syrup on the side for guests to tailor.
  • Dessert finale: run the Baileys + Kahlúa spec; rim half the glass with micro-grated chocolate for drama.

Also Read: Punch with Pineapple Juice: Guide & 9 Party-Perfect Recipes


Ingredient & Technique Notes You’ll Actually Use

Because the build is simple, tiny choices have outsized impact. Therefore, consider the following your pocket checklist.

Espresso temperature
Shake with a fresh, hot shot whenever possible. Cooling collapses crema and steals foam. If you’re troubleshooting thin caps, this single change solves half the cases.

Ice quality
Use dense cubes—slushy, hollow ice under-aerates and over-dilutes. Moreover, don’t overshake to compensate; instead, shake with real intent for a shorter, more forceful window.

Sweetness control
Think in 5 ml moves. Each nudge is noticeable in a small, spirit-forward drink. If your palate leans dry, use a roastier liqueur like Mr Black and rely on espresso oils for mouthfeel.

Saline, respectfully
Keep a 4:1 water-to-salt dropper. One micro-dash can focus flavors like magic, yet two will taste like soup—so proceed judiciously.

Citrus oils
Express lemon for lift or orange for warmth, ideally over the foam so aromatic droplets ride the cap into each sip. It’s a tiny flourish that reads “bar-quality” instantly.

When you want sources to cross-check, quickly:


Flavor Map: Choosing the Right Espresso Martini Recipe Tonight

Because the differences are small but consequential, here’s how to steer without second-guessing:

  • Want timeless and taut? Pour the Classic; match your sweetness to your liqueur; crown with three beans; optionally check the IBA reference if you’re a spec purist.
  • Hosting dessert lovers? The Baileys + Kahlúa riff wins rapidly; if you need ideas for complementary garnishes or side sips, browse What Mixes Well with Baileys? and grab a chocolate-orange note or two.
  • No espresso machine today? Pod crema is your friend; shake like a drum solo and fine-strain.
  • Leaning cozy and festive? Salted caramel with a micro-pinch of salt and an orange express; for deeper winter vibes, tap 5 Spiced Espresso Martini Recipe Ideas and let cardamom or clove peek through.
  • Coffee-first minimalism? Mr Black + vodka + espresso; adjust syrup downward; serve brisk.
  • Vanilla-citrus glow? Licor 43 with a bright orange express; sanity-check sweetness against Espresso 433.
  • Playful dessert-bar energy? Peanut-butter whiskey with a whisper of chocolate bitters; keep the finish clean.
  • Plant-based crowd? Aquafaba dry-shake first; then ice; then fine-strain—towering cap, zero dairy.
  • Counting macros? The Low-Cal pathway with bitters and lemon oil keeps things lifted without sugar creep.

Troubleshooting, Rapid-Fire (Fix It Mid-Service)

  • Foam too thin: pull a fresh shot; shake with conviction; fine-strain.
  • Over-sweet: skip syrup; choose a drier liqueur; add a micro-dash saline.
  • Harsh finish: use a darker, chocolate-leaning coffee; add 5 ml demerara; shake 2 seconds longer.
  • Watery: your ice is soft or your shake is timid and long—swap cubes; shake shorter but harder.
  • No machine nights: moka, pods, or cold-brew concentrate are not compromises; they’re alternate routes.

One More Round (Interlinking for curious readers)

If you’re in the groove and want a different citrus-kissed classic for the next round, pop over to MasalaMonk’s Lemon Drop Martini for a bright palate reset between richer pours. And whenever you’re planning a holiday board, keep What Can You Mix with Kahlúa? and What Mixes Well with Baileys? open—those suggestions translate directly into simple, delicious espresso-martini garnishes and side sippers.


The Last Sip

Mastering the espresso martini recipe unlocks a flexible canvas. With a hot shot, a decisive shake, and sweetness in measured nudges, you can glide from taut and timeless to creamy and celebratory—or pivot into citrus-perfumed elegance, vanilla-glow warmth, plant-based lift, or low-cal clarity—without restocking half the bar. Consequently, you get repeatable results and room to play. And as your seasons change, your pantry will keep up: a different syrup here, a dash of bitters there, an orange express when you need polish. From intimate nightcaps to bustling parties, this family of recipes gives you structure first, then freedom—exactly what a modern classic should.

FAQs

1. What is in a classic espresso martini recipe?

A timeless build includes vodka, coffee liqueur, and fresh hot espresso; optionally, a touch of simple syrup balances bitterness. Consequently, shaking hard with dense ice creates the glossy foam cap people love.

2. How do I get a thick, long-lasting foam on my espresso martini recipe?

Use a fresh, hot espresso shot, shake vigorously for 12–15 seconds, and fine-strain into a chilled coupe. Moreover, dense ice and a decisive shake trap air, while a brief rest (10 seconds) lets the foam set before garnishing.

3. Can I make an espresso martini recipe without an espresso machine?

Absolutely. Alternatively, use a strong Nespresso double shot, moka pot concentrate, or robust cold-brew concentrate (1:1 to espresso volume). Nevertheless, shake with conviction to build comparable crema.

4. What’s the best coffee for an espresso martini recipe—light, medium, or dark?

Choose medium-dark to dark roasts for chocolate, caramel, and nut notes. Conversely, very light roasts can taste citrusy and thin once chilled and sweetened.

5. Do I need simple syrup, and how much should I add?

Not always. Start at 0–10 ml per drink; subsequently, adjust in 5 ml steps until the finish feels balanced rather than sugary. Importantly, sweeter liqueurs may require no added syrup at all.

6. Which vodka is best for an espresso martini recipe?

A clean, mid-to-high proof vodka with minimal burn is ideal. Furthermore, chill the bottle to improve texture and reduce perceived sharpness.

7. Can I swap vodka for gin, tequila, or rum in an espresso martini recipe?

Yes. Gin adds juniper lift; reposado tequila brings vanilla-oak warmth; aged rum contributes caramel depth. Likewise, reduce any added syrup by 5 ml if the base spirit tastes naturally sweet.

8. What’s the difference between Kahlúa, Mr Black, and Licor 43 here?

Kahlúa skews sweeter and rounder; Mr Black reads roastier and drier; Licor 43 layers vanilla-citrus. Consequently, the sweeter the liqueur, the less extra syrup you’ll need.

9. How do I make a Baileys and Kahlúa espresso martini recipe without it becoming heavy?

Keep Baileys at 30 ml, Kahlúa at 15 ml, and shake colder and harder. Additionally, fine-strain to remove ice chips that can collapse the foam and muddy the texture.

10. Can I make a vegan espresso martini recipe with real foam?

Definitely. Use 20 ml aquafaba and dry-shake first, then shake with ice. Notably, aquafaba’s proteins and saponins stabilize bubbles, yielding a tall, silky cap.

11. Is egg white okay in an espresso martini recipe?

It’s optional. Egg white increases foam density and softness; however, it slightly mutes aromatics. If used, dry-shake first to pre-whip, then ice-shake to finish.

12. How do I batch an espresso martini recipe for a party?

Multiply your spec, then add 20–25% cold water to mimic dilution. Subsequently, chill at least 2 hours. To serve, shake each portion briefly with ice for fresh foam.

13. How long will a batched espresso martini recipe keep in the fridge?

Up to 24 hours for best flavor. Meanwhile, keep coffee and spirits mixed but add dairy (if any) just before serving; otherwise, separation and dull flavors creep in.

14. What glass should I use—and does it affect foam?

A chilled coupe or Nick & Nora is perfect. Importantly, cold, clean glassware helps the foam dome hold shape and aroma longer.

15. Why does my espresso martini recipe taste bitter or hollow?

Bitter: your coffee is too light or over-extracted; add 5 ml demerara or a micro-dash saline. Hollow: your coffee is weak; strengthen the shot or reduce water in concentrate. Ultimately, balance emerges with small 5 ml tweaks.

16. Can I use instant coffee in an espresso martini recipe?

Yes, in a pinch. Mix 1 tsp quality instant coffee with 30 ml hot water for a quick “espresso.” Additionally, consider 5 ml extra syrup to tame potential harshness.

17. What are the best garnishes for an espresso martini recipe?

Three coffee beans are classic; alternatively, try an orange peel express, a cocoa dusting, or shaved dark chocolate. Likewise, keep garnishes light so they don’t sink the foam.

18. How do I keep the drink from tasting too sweet with flavored syrups (salted caramel, vanilla)?

Start with 10 ml syrup and taste; consequently, reduce or add salt (a tiny pinch) to sharpen definition. Conversely, increase espresso by 5 ml if flavors feel candy-like.

19. Can I make a low-calorie or keto espresso martini recipe?

Yes. Use vodka, espresso, and a zero-cal sweetener syrup (5–10 ml). Moreover, add 2–3 dashes chocolate or coffee bitters and a lemon-peel express to boost perceived sweetness without sugar.

20. What’s the ideal shake time and technique?

Aim for 12–15 seconds with dense ice; shake with big arcs and firm snaps to maximize aeration. Subsequently, fine-strain immediately while the foam is lively.

21. Should espresso be hot or cooled before shaking?

Prefer hot, freshly pulled espresso for superior foam; however, Nespresso or moka shots can cool 1–3 minutes to avoid over-dilution. Notably, don’t let crema collapse entirely.

22. Can I make an espresso martini recipe without coffee liqueur?

You can, though flavor changes. Use vodka, espresso, and demerara syrup; then add chocolate or coffee bitters for depth. Conversely, expect a leaner, less rounded profile.

23. What’s the best ratio for an espresso martini recipe if I like it drier?

Try 60 ml vodka, 20–25 ml coffee liqueur, 30 ml espresso, and 0–5 ml syrup. Additionally, a micro-dash saline can enhance perceived sweetness without sugar.

24. How do I avoid watery or thin results?

Use solid, large ice; shake decisively but not excessively long. Furthermore, pre-chill glassware and spirits, and fine-strain to keep tiny shards from melting on the surface.

25. Can I use decaf and still get great foam?

Yes—choose a full-bodied decaf espresso or concentrate. Likewise, keep the shake energetic; foam depends more on technique and freshness than caffeine content.

26. What’s the easiest way to switch flavors without changing the whole espresso martini recipe?

Swap liqueurs (e.g., Licor 43 for vanilla, Mr Black for roasty), trade bases (gin, tequila, rum), or change syrup (salted caramel, maple, gingerbread). Consequently, adjust sweetness and garnish to match the new direction.

27. How much salt is safe to add to an espresso martini recipe?

Use a 4:1 water-to-salt saline and add a single small drop. Importantly, salt should be invisible—enhancing sweetness and rounding bitterness without tasting salty.

28. Why fine-strain an espresso martini recipe?

Fine-straining removes micro-ice that can puncture the foam and over-dilute the drink. Additionally, it leaves a smooth, glossy surface for consistent presentation.

29. Can I serve an espresso martini recipe over ice (“on the rocks”)?

You can, though it changes the style. Subsequently, expect faster dilution and softer foam; therefore, reduce syrup slightly and consider a large clear cube to slow melt.

30. What calorie range should I expect?

Generally 130–220 kcal per serving depending on liqueur sweetness and cream additions. Conversely, low-cal versions with zero-cal sweeteners and no cream trend toward the lower end.

31. Any quick fixes if the foam collapses at the table?

Gently “wake” the glass by tapping the stem to re-settle bubbles; meanwhile, serve immediately after shaking, and avoid over-pouring—shallower fill heights keep the cap intact.

32. How do I choose between Kahlúa, Mr Black, and Licor 43 for my crowd?

For dessert-leaning palates, pick Kahlúa; for coffee purists, choose Mr Black; for vanilla-citrus lovers, pour Licor 43. Ultimately, align liqueur personality with your guests’ dessert preferences.

33. Can I add cream or oat creamer to an espresso martini recipe?

Yes, sparingly (10–15 ml). Additionally, shake longer to re-emulsify; otherwise, texture turns flabby. Oat versions remain lighter while still plush.

34. What’s the simplest “best espresso martini recipe” starting ratio?

As a baseline: 60 ml vodka, 30 ml coffee liqueur, 30 ml hot espresso, 0–10 ml syrup. Thereafter, tweak sweetness in tiny steps and lock your house spec.

Posted on 13 Comments

Vegan French Toast: 6 Easy Recipes (Pan, Air Fryer, GF & High-Protein)

Hand dusting powdered sugar over golden vegan French toast on a cooling rack; cover for 6 recipe variations including air fryer, gluten-free, and high-protein. How to make Vegan French Toast Recipes Post.

If you’ve been craving vegan french toast (Dairy and Egg Free) that delivers diner-level crisp edges and a plush, custardy center—without eggs or dairy—you’re exactly where you need to be. This guide starts with a reliable base batter and then branches into five more variations that cover air fryer convenience, freezer-friendly sticks, gluten-free tweaks, chickpea-powered protein, and a beautifully silky tofu custard. Along the way, you’ll pick up small adjustments that transform “pretty good” slices into the ones everybody fights over. Moreover, you’ll find helpful links to deepen your understanding—whether you want to make your own almond milk, understand browning, or choose better gluten-free bread.

Before we cook, a quick mindset: french toast isn’t only a recipe; it’s a tiny set of decisions—bread, batter thickness, soak time, and heat. Tweak those four, and breakfast turns into brunch. Consequently, this page is organized to help you see exactly which lever to pull for your situation, so you can enjoy a stack that’s crisp outside, custardy inside, and absolutely worth repeating.


Core Vegan French Toast Recipe (Pan Method)

A classic slice needs a custard that clings. Here, eggs are replaced with a plant-milk base and a spoon of starch, which acts as a gentle thickener. Once the dipped bread hits the pan, that thin coating sets into a delicate shell while the interior remains soft. As a result, you get structure and tenderness without scrambling a single egg.

Ingredients (serves 2)

  • 1 cup unsweetened oat or almond milk
  • 1 Tbsp cornstarch (or 1½ Tbsp arrowroot)
  • 1½ Tbsp sugar or maple syrup
  • 1 tsp vanilla extract
  • ½ tsp ground cinnamon
  • Pinch of fine salt
  • 4 slices day-old thick bread (vegan)
  • 1 tsp neutral oil + 1 tsp vegan butter
Crisp vegan french toast in a pan with berries, brushed steel knife and linen napkin in a classy, moody kitchen setting.
Pan-seared vegan french toast with maple and berries. A quick custard, a steady medium heat, and a minute on a rack—that’s the formula.

Method for Dairy and Egg Free French Toast

First, whisk the cornstarch with a splash of plant milk until lump-free. Then add the remaining milk, sugar, vanilla, cinnamon, and salt; whisk again until the mixture looks smooth and lightly thickened. Meanwhile, set a nonstick pan or griddle over medium and add the oil plus vegan butter; let the fats mingle and shimmer. Next, dip each slice for 10–20 seconds per side (or 30–60 seconds if you’re using thick-cut bread), let the excess drip, and lay it into the hot pan. Cook 2–3 minutes per side for regular slices or 3–4 minutes for thick ones, turning once, until each face turns deep golden and the edges feel crisp. Finally, transfer the slices to a wire rack for a minute so steam escapes and the underside doesn’t soften.

Why this works

Put simply, starch helps keep the recipe egg free and delivers the grip that eggs usually provide. It gelatinizes as it heats, which helps the custard hug the bread instead of sliding off. At the same time, a little sugar encourages browning, while vanilla and cinnamon do the aromatic heavy lifting. Importantly, the rack rest is not negotiable; by elevating the slice even briefly, you preserve that fragile crispness you just created.

Browning, briefly

Oat or soy milk often brown more readily than very lean almond milk because they typically carry more natural sugars and a touch more protein—two participants in the Maillard reaction (the chemistry that gives you that rich, toasty flavor). However, if almond milk is your favorite, you can absolutely get great color: keep the batter’s small dose of sugar, preheat thoroughly, and avoid crowding the pan. Prefer to control ingredients from the start? Try making your own with this straightforward tutorial for homemade almond milk (clean flavor, short ingredient list, and pleasantly affordable).


Vegan French Toast — Ingredients & Ratios

For consistent results, keep this pocket rule close: per 4 standard slices, use 1 cup plant milk + 1 Tbsp starch. If you’re cooking for a crowd, double everything; if your bread is especially thick, extend the soak rather than thinning the batter. Conversely, if your loaf is very fresh and soft, lightly pre-toast the slices for a sturdier crumb that holds its shape. Moreover, remember that sweetness in the bread itself counts; cinnamon-raisin and similar loaves brown faster and need a touch lower heat.

Also Read: Easy Homemade Oats Milk with just One Ingredient- Non Slimy, at last


Vegan French Toast — Step-by-Step & Browning Tips

To avoid sogginess, let the custard cling and then drip cleanly; don’t send it into the pan dripping rivers of batter. Next, keep the heat at medium—hot enough to brown, gentle enough to set the interior. In addition, rotate slices if your pan has hot spots, and, if needed, nudge the heat down for sugar-rich breads so the exterior doesn’t darken before the center firms. Curious about the science behind that gorgeous color? A friendly primer on the Maillard reaction shows why proteins plus sugars under heat equal deep flavor and golden edges.

As a tiny flourish, dust one face of the dipped slice with a whisper-thin veil of cornstarch just before it hits the pan, then cook that side first. Consequently, you’ll get a glassier, extra-crisp crust without altering the interior at all.


How to make Vegan French Toast in Air Fryer

Some mornings, hands-off wins. The air fryer delivers consistent browning, less stovetop babysitting, and easy batching.

Two slices of vegan french toast from the air fryer on a wire rack over a tray, maple drizzle and linen.
The air fryer takes over while you pour coffee—375°F, a mid-cook flip, and a brief rack rest for that diner-style crunch.

Whole slices

Preheat to 190°C / 375°F and lightly coat the basket. Meanwhile, dip and drain the slices, then lay them in a single layer—no touching corners. Cook 6–8 minutes total, flipping at 4 minutes. Because space equals crispness, work in batches and resist stacking. To keep the first batch snappy, set finished slices on a rack instead of a plate. For a helpful benchmark that lives in the same temperature neighborhood (even though it uses sticks), this air-fryer range for french toast sticks is a useful reference you can adapt to whole slices.

If your air fryer runs hot, reduce the temperature by 10–15 degrees and add a minute to the total time; if it runs cool, go the other way. Furthermore, if the underside looks pale after flipping, mist lightly with oil and continue—little adjustments like that make a visible difference to this Egg and Dairy Free French Toast Recipe.

Also Read: 5 Delicious High-Protein Vegan Meal Prep Ideas Using an Air Fryer


Vegan French Toast Sticks (Air Fryer)

These are a guaranteed hit: easy to hold, perfect for dunking, and surprisingly freezer-friendly.

How to

After dipping, slice each piece into 3–4 sticks. Next, for a snack-shop crunch, roll the wet sides in fine panko or lightly crushed cornflakes. Subsequently, arrange in a single layer and air-fry 7–9 minutes, shaking or flipping at 4 minutes. Finally, rest the sticks for 1 minute; the coating sets as it cools, so patience pays off.

Air-fried vegan french toast sticks with light cornflake crunch cooling on a tray, tongs and linen beside a maple ramekin.
Cut, coat, air-fry. A quick dunk, a light crumb, and a brief rack rest turn simple sticks into a snack-shop classic.

Make-ahead, the simple way

Bake or air-fry a full tray, cool completely, and freeze the sticks in a single layer on a sheet pan. Then bag them. Later, reheat straight from frozen—no thawing—in a hot air fryer or toaster oven until the edges sing. If you prefer a clear workflow, this tutorial on freezing and speedy reheats lays out the steps in a way that’s easy to adapt to vegan batter.

For packed-lunch convenience, include a small lidded container of maple or a quick cinnamon-sugar dip. Notably, sticks travel better than whole slices; they keep their texture longer and fit neatly into bento-style boxes.


Gluten-Free Vegan French Toast

Gluten-free french toast can be crisp and custardy—no compromises—if you start with the right bread and thicken the custard slightly.

Choose sturdier breads

Seek out GF loaves that use psyllium husk (often with xanthan). In practice, psyllium forms a gel that mimics gluten’s elasticity, which helps slices survive a quick soak and a decisive flip. If you enjoy the “why,” this clear baking overview of psyllium’s role in structure explains how it strengthens doughs, while this sandwich loaf example shows the concept in a trustworthy recipe. Additionally, Bon Appétit’s take on psyllium for gluten-free baking is a handy companion read if you love nerdy kitchen notes.

Crisp gluten-free vegan french toast with powdered sugar on a stone counter; gluten-free loaf blurred in the background.
Structure first: choose a psyllium-supported GF loaf, dip briefly, then let the surface set before you flip for that deep golden finish.

Small tweaks, big payoff

  • Shorten the soak to 8–12 seconds per side; gluten-free crumb hydrates quickly.
  • Add ½ Tbsp extra cornstarch per cup of plant milk to the batter for a firmer set.
  • Prefer oat or soy milk when you want deeper browning on GF loaves.
  • If slices feel a touch dry after cooking, brush the edges with melted vegan butter just before serving.

Because readers often ask “who needs gluten-free, anyway?”, a concise explainer helps. This friendly overview—what is gluten—frames the basics without getting preachy. Consequently, you can give context without derailing the recipe.


High-Protein Vegan French Toast Recipe with Chickpea Flour

On days you want more protein and a gentle “eggy” vibe, chickpea flour (besan) shines.

Dairy and Egg Free Custard swap (serves 2)

  • 1 cup plant milk
  • 2 Tbsp chickpea flour
  • 1–2 Tbsp sugar or maple
  • 1 tsp vanilla, ½ tsp cinnamon, pinch salt
  • Optional ⅛ tsp baking powder for a soft lift
High-protein vegan french toast made with chickpea flour, crisp exterior and custardy interior on a ceramic plate.
Whisk plant milk with besan, cook gently, then rest on a rack: the result is crisp edges and a protein-rich, custardy bite.

Whisk until perfectly smooth and proceed exactly like the base recipe. Because chickpea flour binds so well, thick slices flip confidently and come off the pan with crisp, tidy edges. Moreover, the gram-flour aroma leans subtly savory in a way that many people associate with classic diner toast—especially if you stir in a pinch of kala namak (black salt) for that faint eggy aroma.

If you enjoy seeing how gram-flour batters behave in other cuisines, Meera Sodha’s beloved Pondicherry toast is a delightful read; although it’s a savory cousin, it demonstrates how crisp and golden a chickpea batter can be.

Also Read: 5 Facts about Besan (Chickpea Flour) and Its Place in the Keto Diet


Silken-Tofu Vegan French Toast Recipe (Blended Custard)

Prefer a silkier, richer bite? Silken tofu emulsifies into a creamy custard that sets like a dream.

Blend this (serves 2)

  • 150 g silken tofu
  • ½ cup plant milk
  • 1–2 Tbsp sugar or maple
  • 1 tsp vanilla, ½ tsp cinnamon, pinch salt
Hand dusting powdered sugar over golden vegan French toast on a cooling rack; cover for 6 variations including air fryer, gluten-free, and high-protein.
Blend silken tofu into the custard, cook low and steady, then rest briefly on a rack for a crisp edge and a velvet-soft middle.

Blend until completely smooth and glossy. Then dip briefly—this mixture clings—and cook over medium to medium-low so the surface doesn’t over-brown before the center sets. In addition, rest the slices on a rack for one minute to maintain that tender perimeter crunch.

If you’re currently avoiding soy, swing back to the starch-based master batter; it delivers excellent crispness with pantry staples and zero legumes. On the other hand, if you adore creamier centers, tofu delivers that “custard pull” when you cut the slice.

Also Read: ‘Tofu’ Instead of ‘Eggs’: 5 High Protein Plant-Based Breakfast Ideas


Flavor Add-Ins & Vegan Toppings

Once the base is set, it’s time to play. Because the batter is intentionally balanced, it welcomes many directions without seizing or splitting.

  • Vanilla-cinnamon classic: keep the base ratios as written.
  • Brown sugar + nutmeg: add 1 Tbsp brown sugar and a scant ⅛ tsp nutmeg to the custard.
  • Banana custard: mash ½ ripe banana into the mix and reduce plant milk by ¼ cup; consequently, you’ll get banana-bread vibes without going overly sweet.
  • Chocolate-hazelnut swirl: dot a dairy-free spread over hot slices so it melts into rivulets.
  • Bananas Foster topping: caramelize banana with a little vegan butter and brown sugar; optionally, finish with a splash of rum.
  • Ice-cream sundae breakfast: crown warm slices with a scoop of vegan vanilla and a ribbon of maple.

Meanwhile, if you like to prep a second dish the night before, a jar of creative chia puddings offers an effortless, dairy-free counterpoint—cool and creamy against hot and crisp. Alternatively, when you want a heartier plate, this roundup of quinoa breakfast and prep ideas delivers extra protein without crowding the skillet.


Bread Choices, Soak Times, and Crispness

Bread thickness, dryness, and sugar content steer results more than almost anything else, regardless of the custard you choose.

  • Thick, enriched loaves (vegan brioche or Texas-style sandwich bread) love a 30–60 second soak and 3–4 minutes per side. As a result, you’ll get that spoon-tender center people rave about.
  • Standard sandwich slices prefer a 10–20 second dip and 2–3 minutes per side cook—fast, tidy, weeknight-friendly.
  • Very fresh bread tends to go soft; therefore, pre-toast briefly to add backbone.
  • Cinnamon-raisin or sweeter breads brown faster; thus, reduce the heat slightly and lengthen the cook by 30–60 seconds.
  • Gluten-free loaves need shorter soaks and slightly thicker batter (see the GF section above).

Crucially, let slices rest on a wire rack rather than stacking them on a plate; otherwise, trapped steam softens the crust you carefully built. Additionally, if you want a glassier finish, dust one face of a dipped slice with cornstarch right before searing and cook that side first. Conversely, if you prefer a softer exterior, skip the dusting and cover the pan for the final minute to create a gentle steam.

Read More: Why is modern sandwich bread different from ‘real’ bread?


Plant Milks for Vegan French Toast (Oat vs Almond)

To keep Recipe of French Toast Vegan and free from dairy, choosing the milk is really important, as it shapes both flavor and color. By contrast with very lean almond milk, oat milk typically brings more carbohydrates—and sometimes a smidge more protein—which can deepen browning and enhance aroma. Nevertheless, almond milk has a wonderfully clean taste and keeps sweetness in check. Therefore, if you use almond milk, keep that small measure of sugar in the batter and preheat the pan until a drop of custard sizzles on contact. Furthermore, barista-style oat milks may be sweeter than you expect; if yours tastes notably sweet, reduce the added sugar by a teaspoon to maintain balance.

Prefer to skip additives and minimize packaging? Here’s a practical, step-by-step on almond milk from scratch you can keep on hand. Beyond that, consider experimenting with soy milk when you want extra browning; its protein content often nudges the Maillard reaction along.

Also Read: Coconut Milk Nutrition Facts & Glycemic Index Impact


Make-Ahead, Freezer-Friendly, and Crowd Service

If you’re cooking for more than two, organization beats speed. First, heat the oven to 95–120°C / 200–250°F and place a wire rack over a sheet pan. As each slice finishes, transfer it to the rack so it stays crisp while you finish the batch. Secondly, for brunch service, keep the pan at medium and rotate slices through in an even rhythm; it’s calmer than cranking the heat and hoping.

For weekly planning, the stick format is your friend. Prepare a double batch on Sunday, freeze them flat, and reheat on weekday mornings. Not only do they keep beautifully, but they also return to crisp with minimal fuss—especially in an air fryer. Meanwhile, if your family prefers whole slices, you can cool them on a rack, freeze between sheets of parchment, and reheat directly from frozen in a toaster oven.


Serving Ideas & Natural Pairings

Because the pan is already hot, you can build a small spread without extra stress. For instance, a bowl of berries and a spoonful of coconut yogurt turn a couple of slices into a complete breakfast. Alternatively, a wedge of citrus brightens heavier toppings like banana and brown sugar. Moreover, a sprinkle of toasted nuts or seeds adds welcome contrast—walnuts with maple, pistachios with rose syrup, almonds with cinnamon.

If you enjoy putting something make-ahead on the table, assemble a jar of chia pudding ideas the night before. For a higher-protein side, a warm quinoa breakfast bowl with fruit and nuts sits comfortably beside cinnamon-forward toast. And if you’re celebrating, vegan ice cream on hot slices never fails; it melts into the ridges like a sauce you didn’t have to make.


Troubleshooting on the Fly

  • Center still wet? Shorten the soak next time and add ½ Tbsp more starch per cup of plant milk. Also, give the slices another minute in a low oven on a rack; that gentle finish works wonders.
  • Edges burn before the interior sets? Lower the heat a notch and extend the cook by 30–60 seconds per side. Additionally, consider whether the bread is very sugary; if so, dial back batter sugar by a teaspoon.
  • Pale color? Preheat properly, avoid crowding (steam is the enemy of browning), and use oat or soy milk when you want deeper color. A dab more sugar in the custard can also help.
  • Slices fall apart when flipping? Reduce the soak, choose sturdier bread, and, for gluten-free, pick loaves with psyllium; the structure matters more than you think.
  • Texture too dry? Brush the edges lightly with melted vegan butter right before serving, or shorten the rack rest to 30 seconds instead of a minute.

Also Read: Vegan Keto Smoothie Kick-Start: 5 Macadamia Nut Recipes for Nutrient-Packed Mornings


The Six Vegan French Toast Recipes, At a Glance

For quick reference, here are compact summaries. Each follows the bread guidance above; timings assume medium heat on the stove or a preheated 190°C / 375°F air fryer.

1) Vegan French Toast — Pan (Base)

  • Batter: 1 cup plant milk + 1 Tbsp cornstarch + 1½ Tbsp sugar + 1 tsp vanilla + ½ tsp cinnamon + pinch salt.
  • Dip: 10–20 sec/side (30–60 sec for thick slices).
  • Cook: 2–3 min/side (3–4 for thick), then rest on a rack.

2) Vegan French Toast — Air Fryer (Whole Slices)

  • Batter: same as base.
  • Cook: 6–8 min total at 190°C / 375°F; flip at 4 min.
  • Note: leave space between slices for crispness; mist lightly with oil if needed.

3) Vegan French Toast Sticks — Air Fryer

  • Batter: base batter.
  • Form: cut each dipped slice into 3–4 sticks; optionally coat in fine panko or crushed cornflakes.
  • Cook: 7–9 min at 190°C / 375°F; shake/flip at 4 min.
  • Freeze & reheat: cool completely, freeze flat, then bag; reheat directly from frozen.

4) Gluten-Free Vegan French Toast

  • Batter: base batter + ½ Tbsp extra cornstarch per cup.
  • Bread: sturdier GF loaf with psyllium.
  • Dip: 8–12 sec/side.
  • Cook: 2–3 min/side; rest on a rack.

5) High-Protein Vegan French Toast — Chickpea Flour

  • Batter: 1 cup plant milk + 2 Tbsp chickpea flour + sugar + vanilla + cinnamon + salt (optional ⅛ tsp baking powder).
  • Dip/Cook: as base; go slightly lower/slower for thick bread.
  • Aroma tweak: a pinch of kala namak adds that classic breakfast note.

6) Silken-Tofu Vegan French Toast — Blended Custard

  • Batter: blend 150 g silken tofu + ½ cup plant milk + sugar + vanilla + cinnamon + salt until silky.
  • Dip: brief; this custard clings well.
  • Cook: medium to medium-low so it sets before over-browning.

Parting thought

Above all, remember that vegan french toast is more technique than trick. With a clingy batter, a measured soak, steady heat, and a short rest on a rack, you’ll serve stacks that taste as indulgent as anything from your favorite brunch spot—only friendlier to your pantry and your routine. Now pass the maple, pour the coffee, and enjoy the kind of breakfast that makes the whole day feel easier.

Also Read: Eggless French Toast Recipe – Crispy, Fluffy & Totally Irresistible!

FAQs

1) What is the best plant milk for vegan French toast?

Oat milk usually browns faster and tastes fuller; almond milk stays cleaner and less sweet; soy milk boosts Maillard browning thanks to protein. Choose based on flavor and color goals.

2) How do I get crisp edges and a custardy center without eggs?

Use a clingy batter (about 1 cup plant milk + 1 Tbsp starch for 4 slices), dip just long enough for the crumb to hydrate, cook over steady medium heat, then rest slices on a wire rack for one minute.

3) Why is my vegan French toast soggy?

Excess batter and overcrowding trap steam. Let slices drip cleanly, keep space in the pan, and avoid ultra-fresh bread unless lightly pre-toasted.

4) How long should I soak the bread?

Standard sandwich slices: 10–20 seconds per side. Thick vegan brioche or Texas toast: 30–60 seconds. Gluten-free slices: 8–12 seconds since the crumb hydrates quickly.

5) Which bread works best?

Day-old, sturdy loaves hold shape and deliver structure. Enriched vegan brioche gives a plush interior; plain sandwich bread is weeknight-friendly; psyllium-based gluten-free loaves flip reliably.

6) Can I make gluten-free vegan French toast?

Absolutely. Slightly thicken the batter (+½ Tbsp starch per cup of milk), shorten the soak, and choose a GF loaf with psyllium for elasticity and resilience.

7) What’s the ideal pan temperature?

Medium. Too hot scorches edges before the center sets; too low dries the slice without browning. A faint sizzle on contact signals you’re in the sweet spot.

8) How do I keep the exterior from burning on sweeter breads?

Dial the heat down a notch and extend cooking by 30–60 seconds per side. Cinnamon-raisin and similar loaves caramelize quickly, so patience pays off.

9) Can I use an air fryer for vegan French toast?

Yes. Preheat to 190°C / 375°F, arrange slices in a single layer, flip at the halfway point, and rest on a rack. For sticks, cut each slice into 3–4 pieces and cook a touch longer.

10) How can I add more protein?

Swap the starch for 2 Tbsp chickpea flour (besan) per cup of milk, or blend silken tofu into the custard. Optionally add a pinch of kala namak for a classic breakfast aroma.

11) What if my slices tear when flipping?

Reduce soak time, pick sturdier bread, and slide a thin spatula under the crust side first. For gluten-free, the psyllium crumb matters more than thickness alone.

12) How do I boost browning without over-sweetening?

Maintain a small amount of sugar in the batter, preheat thoroughly, and prefer oat or soy milk. Alternatively, dust one dipped face very lightly with cornstarch and cook that side first.

13) Can I meal-prep or freeze vegan French toast?

Definitely. Air-fry or bake sticks, cool completely, freeze flat, then bag. Reheat from frozen in an air fryer or toaster oven until crisp at the edges.

14) What toppings match vegan French toast?

Fresh berries, citrus wedges, toasted nuts, coconut yogurt, or a drizzle of maple keep balance; dairy-free chocolate-hazelnut spread or quick caramelized banana leans indulgent.

15) How do I adjust sweetness across milks and breads?

Taste your milk first—barista-style oat can be sweeter—then trim added sugar by 1 teaspoon if needed. Conversely, lean almond milk benefits from keeping the full measure for flavor and color.

16) What’s the quick ratio I should memorize?

Per 4 slices: 1 cup plant milk + 1 Tbsp starch + 1½ Tbsp sweetener + 1 tsp vanilla + ½ tsp cinnamon + pinch salt. Dip, sear over medium, then rack-rest to finish.

Posted on Leave a comment

Low Histamine Diet: Food List, Easy Meals & 7-Day Plan

low-histamine-diet-cover-food-list-7-day-meal-plan-portrait-masalamonk

If you’re exploring a low histamine diet, you’re likely looking for calm, clear direction—not another rabbit hole of contradicting charts. To make this practical, let’s anchor the essentials in simple cooking habits, walk through a flexible meal pattern, and, importantly, call out where evidence sits today. For balance and credibility, you can skim neutral overviews from the American Academy of Allergy, Asthma & Immunology, check the clinician handout from Johns Hopkins Medicine, and review patient-friendly pages from Allergy UK and the British Dietetic Association as you go. Meanwhile, when you want a concise consumer explainer, the Cleveland Clinic overview is a solid quick read.


Low Histamine Diet Basics: What It Is—and What It Isn’t

To begin with, a low histamine diet is a short-term elimination and re-challenge strategy that reduces foods high in histamine (and some that may liberate histamine) while you observe your own symptoms. Crucially, this approach is not the same as a classic IgE-mediated food allergy. Instead, you’re aiming to lower dietary histamine intake, tighten up food handling, and separate triggers from safe choices by testing them one at a time. In short, you create a peaceful baseline for two to four weeks and then, step by step, you bring foods back.

Furthermore, because histamine levels fluctuate with time and storage, freshness matters as much as the ingredient list. Consequently, simple habits—buying smaller amounts more often, cooking promptly, rapid-chilling leftovers, and rotating meals—do much of the heavy lifting. On balance, you may find the diet less about restriction and more about logistics.

Download the Low Histamine Diet Interactive Tracker (free PDF)—7-day meal plan, fillable shopping list, daily log, and re-intro worksheet—right here.


What to Eat on a Low Histamine Diet (Core “Yes” List)

Proteins (fresh is everything). Choose fresh chicken, turkey, lamb, and eggs; likewise, opt for very fresh white fish cooked the day you buy it. Even so, individual tolerance varies, so you’ll still reintroduce cautiously later.

Carbs & grains (gentle, steady energy). Reach for rice, quinoa, buckwheat, oats, rice noodles, and rice cakes. If you want context about buckwheat’s versatility, scan this short primer on buckwheat benefits—it’s naturally gluten-free and easy to slot into bowls or breakfast porridge.

Vegetables (crisp, quick-cooking choices). Lean on zucchini, carrots, green beans, cucumbers, bok choy, lettuce, and other mild greens (many people sidestep spinach during the elimination phase). Because quick heat helps you avoid long simmer times, sautéing or steaming works beautifully.

Fruit (light and predictable). Apples, pears, and blueberries usually fit early; nevertheless, trial citrus later since it can act as a liberator for some.

Fats (simple and stable). Olive oil is your everyday staple; avocado oil is fine for many, although some people prefer to test avocado itself later.

Drinks (keep it calm). Plain water and gentle herbal teas—ginger, rooibos, peppermint if tolerated—keep hydration easy without complicating the elimination phase.

For a concise, public-facing cross-check, compare your cart with the Histamine Intolerance Food List; and for a helpful “what to expect” overview, see Cleveland Clinic’s guide as well. Meanwhile, if you want a mainstream media digest that echoes many of these items, BBC Good Food’s low-histamine picks are straightforward.


What to Limit First (and Why)

Fermented or aged foods. Soy sauce, vinegar, kombucha, sauerkraut/kimchi, aged cheeses, and cured meats rise to the top of the “hold for later” list.

Alcohol. Wine and beer are frequent irritants during the elimination window.

Seafood that’s canned, smoked, or not cooked promptly. Since histamine can accumulate post-harvest, storage becomes a major factor; fish kept too long, even when cooked later, is a common issue.

Produce commonly flagged as potential liberators. Tomatoes, spinach, eggplant, avocado, and citrus often move into mid-to-late reintroduction instead of day one.

Long-simmered dishes and bone broth. Because amines build with time and temperature, short, bright cooking methods generally suit the elimination phase better than all-day simmering.

All told, the idea is not to demonize foods forever; rather, you’re reducing confounders temporarily. Afterwards, you’ll add items back with intention.


Low Histamine Diet Breakfasts: Fast, Cozy, and Repeatable

To set the tone, start mornings with warm, simple textures and minimal ingredients. In particular:

  • Oats with pear and chia. Cook rolled oats in water or a mild non-dairy base; top with diced pear and a spoon of chia. When you want more control over ingredients, consider making your own non-dairy options—this quick explainer on coconut milk nutrition and glycemic impact gives you a sense of how it fits.
  • Eggs with sautéed zucchini on toast. Keep the pan hot, cook fast, and season with herbs.
  • Chia pudding with apple. For an adaptable method, peek at this chia pudding how-to and simply swap the fruit for something you tolerate early on (e.g., apple or pear).
  • Puffed rice “cereal.” Use coconut milk and a sprinkle of pumpkin seeds for crunch without leaning on additives.

Moreover, you’ll notice how often breakfast success comes from short cooking times and rapid cooling. That’s not accidental; those mechanics help you keep amine accumulation low while still eating familiar food.


Snacks, Sweets & “Fun Food” on a Low Histamine Diet

Because snacks can derail plans quickly, it helps to pre-commit to two or three options you actually enjoy:

  • Rice cakes with pumpkin-seed butter. Smooth and salty works; add sliced pear if you want contrast.
  • DIY oat bars you fully control. This template for healthy oat protein bars is easy to adapt, and when you’re in a rush, these oat bars in 5 minutes keep ingredients tight.
  • Light granola. Combine rolled oats, coconut flakes, and pumpkin seeds; toast lightly; store briefly.
  • Simple desserts. Baked apples, pears with a hint of olive oil and cinnamon, or a coconut-rice pudding when you want comfort without complexity.

Incidentally, chocolate tends to split audiences during reintroduction, so if you trial it later, do so in tiny amounts and document how you feel.


Low Histamine Diet Cooking & Storage: Tiny Tweaks, Big Wins

Now for the logistics that quietly make the diet work:

Buy smaller amounts more often. Instead of massive shops, pick up just enough meat or fish for a day or two. That way, you’ll naturally cook promptly rather than parking proteins for days.

Cook promptly and cool rapidly. Transfer cooked food into shallow containers and move it into the refrigerator as soon as steam subsides; then, ideally, eat within 24 hours or freeze.

Favor quick methods. Searing, steaming, sautéing, roasting en papillote, and short simmering keep both time and ingredient lists short.

Label and rotate. Even when you’re meticulous, unlabeled containers sabotage the plan. A marker and a roll of tape keep you honest.

Why so fussy? Because histamine is a small, heat-stable molecule—cooking doesn’t reliably destroy it—so your best lever is handling. For a plain-language reminder about storage and histamine formation (especially relevant to fish), skim histamine toxicity basics and you’ll see why these habits matter.


Low Histamine Diet: 7-Day Meal Plan (Mix & Match)

Although individual tolerance differs, this pattern keeps flavors bright and prep times short. Feel free to swap proteins and vegetables across days, and, of course, keep portions aligned to your energy needs.

Day 1
Breakfast: Oats with pear and chia.
Lunch: Poached chicken, quinoa, zucchini and carrot bowl.
Dinner: Pan-seared fresh cod, sweet potato mash, green beans.
Snack ideas: Rice cakes with pumpkin-seed butter; apple slices.

Day 2
Breakfast: Buckwheat porridge with blueberries.
Lunch: Turkey lettuce wraps with cucumber and herbs.
Dinner: Baked lamb meatballs with rice and roasted carrots.
Snack ideas: Coconut yogurt alternative; oat bar square.

Day 3
Breakfast: Scrambled eggs with sautéed courgette; slice of toast (gluten-free if needed).
Lunch: Rice-noodle chicken soup (short simmer; add bok choy at the end).
Dinner: Stir-fried chicken or very fresh prawns with rice and pak choi.
Snack ideas: Pear; rice crackers.

Day 4
Breakfast: Chia pudding (coconut milk) with diced apple.
Lunch: Chicken and rice salad with zucchini ribbons and fresh herbs.
Dinner: Herb-rubbed chicken thighs, quinoa, steamed greens (avoid spinach for now).
Snack ideas: Blueberries; pumpkin seeds.

Day 5
Breakfast: Puffed rice with coconut milk and pumpkin seeds.
Lunch: Lamb and sweet potato bowl with green beans.
Dinner: White fish en papillote with rice and carrot coins.
Snack ideas: Rice cakes; cucumber slices with olive oil and salt.

Day 6
Breakfast: Oat pancakes (trial banana later if you suspect it’s a trigger).
Lunch: Egg fried rice with finely diced zucchini (use day-old rice that was chilled promptly).
Dinner: Roast turkey breast, buckwheat, and a leafy salad (choose non-spinach greens).
Snack ideas: Baked apple; small oat bar.

Day 7
Breakfast: Eggs, rice cakes, and cucumber.
Lunch: Quinoa “tabbouleh-style” (skip tomato for now), plus sliced chicken.
Dinner: Quick chicken stew (short simmer), sweet potato, tender carrots.
Snack ideas: Pear; a few pumpkin seeds.

Naturally, you’ll adjust seasoning to taste—think fresh parsley, chives, dill, or a squeeze of non-citrus brightness (e.g., a splash of mild vinegar only during reintroduction if tolerated). Until then, rely on herbs, garlic-infused oil if whole garlic bothers you, and a confident hand with salt.

Grab the Low Histamine Diet Interactive Tracker (free PDF) with a 7-day meal plan, fillable shopping list, and re-introduction log – Download Here.


Low Histamine Diet × Anti-Inflammatory Eating: How to Blend Without Stress

Because many readers are also trying to reduce background inflammation, it helps to build plates around lean protein + colorful vegetables + gentle carbs + olive oil. Beyond that, consider polyphenol-rich fruit such as blueberries if you tolerate them. Notably, while fermentation can improve nutrient availability in some contexts, the early days of a low histamine diet emphasize unfermented choices first. Later—once you’ve stabilized—you’ll reintroduce candidates gradually and keep what loves you back.

For newcomers who want a conventional medical voice alongside this plan, the Cleveland Clinic introduction is a handy companion; and for a concise checklist you can cross-verify, the Histamine Intolerance UK food list is easy to scan. Meanwhile, keep your own notes—what you ate, when you stored it, how you felt—since your tolerance is the final referee.


Low Histamine Diet Breakfast Variations (So You Never Get Bored)

Even with a tight ingredient set, breakfast can feel fresh day after day. Consider these rotations:

  • Oats three ways. Classic porridge; oven-baked oat squares; or overnight oats in a non-dairy base. For a controlled approach to snacks that double as breakfast, tweak healthy oat protein bars to your tolerance.
  • Eggs beyond scrambled. Poached on quick-sautéed greens; omelettes with fine-diced zucchini; or frittata cups baked for 12–15 minutes for fast weekday reheats.
  • Buckwheat porridge and pancakes. Soft, nutty, and easy to digest, buckwheat performs well in both sweet and savory directions; for background, skim this buckwheat overview and adapt freely.
  • Chia pudding two ingredients at a time. A spoon of chia plus a mild base and a small fruit portion—this chia method is a template you can strip down and rebuild without fuss.

Meanwhile, remember that repetition in structure doesn’t mean monotony in taste; herbs, textures, and plating can carry variety even before you reintroduce more adventurous items.


Low Histamine Diet: Smart Flavor Without Ferments

At first glance, removing ferments looks like removing flavor. Nevertheless, you can still cook boldly:

  • Fresh herb pastes. Blend parsley, dill, or cilantro with olive oil and a pinch of salt; freeze in small portions for instant brightness.
  • Allium strategy. If whole garlic or onion bothers you, use garlic-infused oil for aroma without the same compounds that trouble some people.
  • Crunch and contrast. Pair soft grains with crisp vegetables; add pumpkin seeds or cucumber ribbons to keep each bite interesting.
  • Heat control. Sear meats quickly for browning, then finish gently to avoid extended cook times.

In practice, these techniques make “simple” food taste restaurant-level, which makes adherence easier while you figure out your unique tolerance.


Low Histamine Diet: How to Re-Introduce Foods Confidently

Once you’ve had a quiet baseline for two to four weeks, reintroduce foods one by one. To that end:

  1. Pick one candidate (e.g., tomato). Eat a small portion at one meal.
  2. Wait 48–72 hours, noting symptoms as well as sleep, stress, and storage variables.
  3. Increase portion if day one went well.
  4. Decide: keep, limit, or postpone.

To stay grounded in cautious, evidence-aware advice while you test, a neutral synthesis from the British Dietetic Association helps temper expectations, and the Allergy UK explainer offers practical reminders. Notably, divergent opinions in the literature are normal; your day-to-day response trumps theory.


DAO, Supplements & “Foods That Help”: A Balanced View

Your small intestinal enzyme diamine oxidase (DAO) degrades dietary histamine; thus, you’ll see supplements marketed as a quick fix. However, while some people report benefits, formal evidence and testing standards are still evolving. Accordingly, treat supplements as adjuncts, not anchors. If you want to read an allergy specialist’s cautionary note in plain language, try this DAO Q&A from AAAAI; then, if you experiment, change only one variable at a time so you can tell what helped.

As for “antihistamine foods,” nutrients like vitamin C and polyphenols are interesting, and yet, the basics still win: fresh food, tidy storage, short cooking times, and consistent meal patterns. Consequently, the plan above does more good than hunting for a magic ingredient.


Low Histamine Diet Troubleshooting: When Something Feels Off

Despite best efforts, you may hit snags. If symptoms persist, widen the lens:

  • Check storage and timing. Even a “safe” food can feel unsafe if it lingered too long.
  • Evaluate stress and sleep. Mast-cell behavior isn’t isolated from the rest of your life.
  • Consider overlap with other GI patterns. Some people run a low histamine diet alongside low-FODMAP for a short, supervised window; if that’s you, a cautious, clinician-guided approach is wise.
  • Rule out mimickers. True food allergy, celiac disease, and inflammatory bowel disease deserve medical evaluation when symptoms are significant.

Parallel to this, precise, trustworthy resources keep you grounded. Keep Cleveland Clinic’s overview and the BDA guidance bookmarked for readers who want a conventional lens.


Closing Thoughts: Calm Food, Clear Decisions

Ultimately, a low histamine diet is less about memorizing an encyclopedic list and more about running a clean, fair experiment. First, simplify meals and tighten storage. Next, listen to your body for two to four quiet weeks. Finally, bring foods back systematically and keep the ones that love you back. Meanwhile—and this is the part many people skip—stay flexible. Your goal isn’t a permanent cage; it’s a personal map.

If you keep that spirit, you’ll find this way of eating not only tolerable but surprisingly freeing: fewer variables, fewer surprises, and more breakfasts, lunches, and dinners that feel like you—steady, satisfying, and refreshingly uncomplicated.

Ready to use? Download the Low Histamine Diet Interactive Tracker (free PDF)—7-day meal plan, fillable shopping list, daily log, and re-intro worksheet—right here.

FAQs

1) What is a low histamine diet?

A low histamine diet is a short-term elimination and re-challenge approach that reduces high-histamine foods and potential “liberators,” then gradually reintroduces them to identify personal tolerance.

2) How long should I follow a low histamine diet before reintroducing foods?

Typically 2–4 weeks of a calm baseline works well; subsequently reintroduce one item every 2–3 days while tracking symptoms, sleep, stress, and storage habits.

3) Which foods are best to eat on a low histamine diet?

Emphasize fresh chicken or turkey, eggs, very fresh white fish, rice, quinoa, buckwheat, oats, zucchini, carrots, green beans, lettuce, apples, pears, blueberries, and olive oil.

4) Which foods should I avoid at first on a low histamine diet?

Initially sidestep fermented and aged items (soy sauce, vinegar, sauerkraut, aged cheese, cured meats), alcohol, canned or smoked fish, long-simmered stews, and common liberators like tomato, spinach, eggplant, avocado, and citrus.

5) What are histamine liberating foods?

They’re foods that may prompt your body to release histamine even if the food itself isn’t high in histamine; examples often include citrus, tomato, spinach, eggplant, and avocado.

6) What does a simple low histamine diet meal plan look like?

Build each plate with fresh protein, a gentle carb (rice, quinoa, buckwheat, oats), half a plate of mild vegetables, and olive oil; rotate options through seven days to keep variety.

7) What are easy low histamine breakfast ideas?

Think warm oats with pear, eggs with sautéed zucchini, chia pudding with apple, and puffed rice with a non-dairy base and pumpkin seeds.

8) Are bone broth and long-simmered soups okay on a low histamine diet?

Generally not during elimination; as cooking time lengthens, biogenic amines tend to rise. Prefer quick soups or short simmers, then test longer cooks later.

9) Can I have yogurt, cereal, crackers, granola, or protein bars?

Fermented dairy yogurts are usually high; consider non-dairy alternatives first. Choose plain oats or puffed rice for cereal, simple rice/oat crackers, light DIY granola, and homemade bars with minimal additives.

10) How should I handle leftovers to keep histamine lower?

Cook promptly, cool rapidly in shallow containers, refrigerate early, and eat within 24 hours or freeze. Moreover, label dates so rotation stays tight.

11) Can a low histamine diet be combined with low FODMAP?

Yes, for a short, guided window. Select overlapping “safe” foods from both patterns, keep recipes simple, and stage reintroductions to avoid confounding results.

12) Do DAO supplements or “DAO foods” help on a low histamine diet?

They might assist some people, though evidence is mixed. Treat them as optional adjuncts; first optimize freshness, storage, and structured reintroductions.

13) Are there “antihistamine foods” that reduce symptoms?

Nutrients like vitamin C and polyphenols are discussed, yet no single food is a cure. Consistently low-histamine patterns plus careful prep tend to matter more.

14) What about chocolate, coffee, and tea?

Chocolate often triggers people and is best tested later in tiny amounts. Coffee and tea vary by individual; trial cautiously and note dose, timing, and any symptoms.

15) How do I reintroduce foods on a low histamine diet without confusion?

Select one food, try a small portion once, wait 48–72 hours, then increase if tolerated. Keep notes, avoid adding two new items together, and decide to keep, limit, or pause.

16) What are good low histamine snacks and sweets?

Rice cakes with pumpkin-seed spread, fruit like apples or pears, light oat bars you control, simple granola, baked apples, and coconut-rice pudding are reliable starters.

17) Is fish allowed, and if so, which types?

Yes—choose very fresh white fish and cook the same day. Conversely, avoid canned, smoked, or long-stored fish during elimination.

18) Can I follow a vegetarian or vegan low histamine diet?

Absolutely, though protein variety requires planning. Center plates on eggs (if included), quinoa, buckwheat, oats, rice, and tolerated seeds; then stage legumes later if needed.

19) Will a low histamine diet help mast-cell–related symptoms?

It may help some people by reducing dietary triggers; nevertheless, consider it supportive, not curative, and coordinate with your clinician for comprehensive care.

20) What’s the single most important success tip for a low histamine diet?

Prioritize freshness over perfection: buy smaller quantities, cook quickly, cool fast, and reintroduce foods with intention so your long-term pattern fits your life.