In the age of mindful living and clean eating, it’s no surprise that nature’s original electrolyte drink—coconut water—has captured the world’s attention. From athletes to wellness enthusiasts, everyone seems to be sipping this tropical drink. But is the hype deserved?
In this post, we’ll dive into what makes coconut water unique, its science-backed benefits, real-world applications, and what to watch out for—so you can decide how to make the most of this natural hydrator.
🥥 What Exactly Is Coconut Water?
Coconut water is the clear, slightly sweet liquid inside young, green coconuts (around 6–7 months old). Unlike coconut milk, which is extracted from grated coconut flesh and rich in fat, coconut water is low-calorie and fat-free, but rich in electrolytes and phytonutrients.
As coconuts mature, this water gets absorbed into the meat, so younger coconuts yield the most liquid.
📊 Nutritional Snapshot (Per 240 ml / 8 oz)
Nutrient
Approx. Amount
Calories
45–60
Carbohydrates
9g (natural sugars)
Protein
<2g
Fat
<1g
Potassium
~600 mg (13% RDI)
Sodium
~250 mg (10% RDI)
Magnesium
~60 mg (15% RDI)
Calcium
~55 mg (6% RDI)
Antioxidants
Flavonoids, cytokinins, vitamin C
📌 Note: Composition may vary depending on the coconut’s age, origin, and processing method.
💪 Why Coconut Water Is More Than Just a Trend
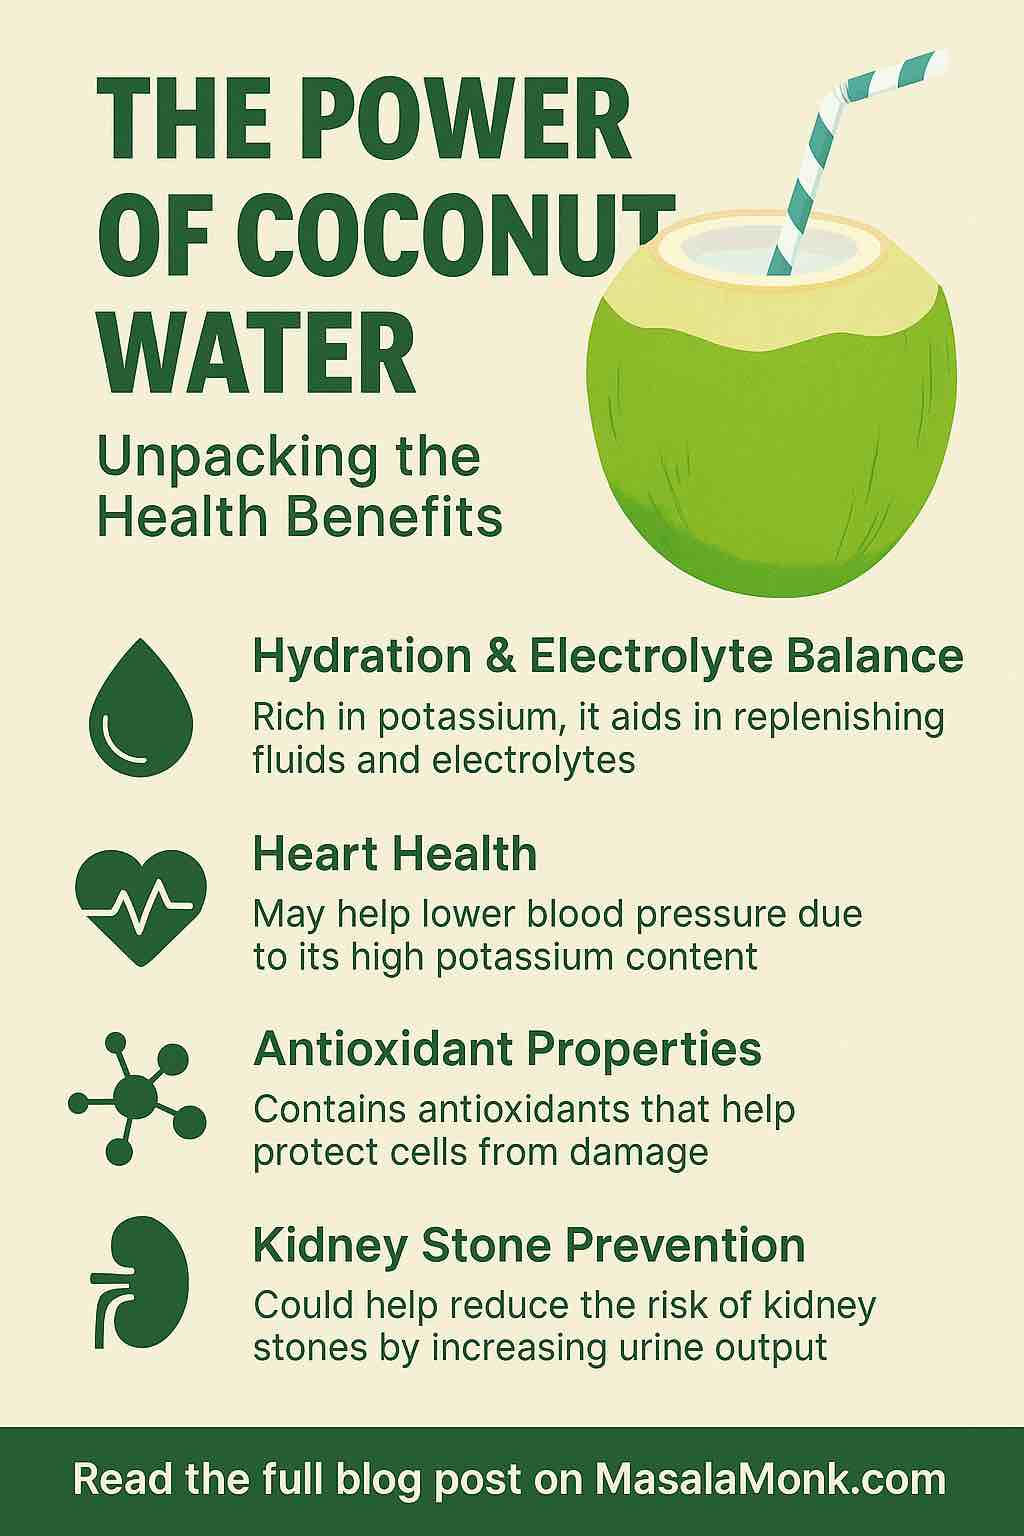
1. Hydration with a Natural Edge
Thanks to its electrolyte content—especially potassium and sodium—coconut water supports:
Rehydration after workouts or heat exposure
Muscle cramp prevention
Fluid balance during illness or travel
A 2012 study by the Journal of the International Society of Sports Nutrition found that coconut water rehydrated athletes just as effectively as commercial sports drinks—without the added sugar and coloring.
🧴 Practical Tip: Drink fresh coconut water within 30–60 minutes post-exercise for optimal recovery.
2. Supports Heart Health and Blood Pressure
Potassium plays a central role in regulating blood pressure. Most people consume too much sodium and too little potassium—a combination linked to hypertension. Coconut water delivers a significant potassium boost, helping to:
Lower blood pressure (modestly)
Reduce stroke risk
Support heart muscle function
One animal study even showed coconut water reduced blood pressure better than water or potassium chloride alone. Human studies remain limited, but the potential is promising.
❤️ Best For: People with mild hypertension looking for natural support alongside a balanced diet.
3. Antioxidant & Anti-Inflammatory Action
Coconut water contains natural compounds like cytokinins (e.g., kinetin) and flavonoids (e.g., catechin, kaempferol), which:
Fight free radicals
Support cell repair
May delay skin aging and internal inflammation
A 2025 metabolomics study showed that young coconuts (2 months old) had the highest concentration of these protective compounds.
✨ Beauty Insight: Choose younger coconut water for maximum antioxidant punch—fresh is better than bottled.
4. Helps Prevent Kidney Stones
Thanks to its high water content and potassium, coconut water can increase urine volume and reduce crystal-forming substances like calcium and oxalate.
A 2018 study in Evidence-Based Complementary and Alternative Medicine showed coconut water reduced the number of crystals in urine of rats prone to stones.
💧 Pro Tip: Regularly including coconut water in your diet may offer natural protection—especially when paired with good hydration habits.
5. Friendly for Blood Sugar (In Moderation)
Coconut water has a low glycemic load and is mostly composed of simple sugars and fiber. While not carb-free, unsweetened coconut water has been shown in animal studies to:
Improve blood glucose levels
Enhance insulin sensitivity
Recent advice from dietitians (2025, EatingWell) suggests that coconut water, especially unsweetened, is safe and helpful for short-term hydration in people with diabetes.
🍬 Caution: Avoid flavored or sweetened coconut water if managing blood sugar.
⚠️ What to Watch Out For
⚠️ Consideration
Details
Sugar content
Natural sugars are still sugars—avoid brands with added sweeteners.
Sodium inconsistency
Commercial brands often don’t contain enough sodium for athletes.
Potassium overload
Not ideal for people with kidney disease or those on potassium-restricted diets.
Nutrient loss
Pasteurization and long shelf life can reduce antioxidant and vitamin content.
🛒 Choosing the Right Coconut Water
✔️ Look For:
“100% coconut water”
“No added sugar or preservatives”
Cold-pressed or HPP (High Pressure Processing)
Harvested from young green coconuts
❌ Avoid:
“From concentrate” products
Flavored or sweetened options
Shelf-stable versions with a long ingredient list
🧃 When and How to Use Coconut Water
Situation
How to Use It
Post-workout
1 cup to replenish electrolytes
Hot weather or sauna
Sipped cold to cool and hydrate
Travel/jet lag
Drink ½ cup on arrival
Fasting or detoxing
Light hydration without heavy calories
Mild hangovers
Replaces lost fluids and minerals
🥤 Pro Tip: Blend it into smoothies or freeze into cubes for tropical flavor enhancers.
🧬 What’s New in 2025: Cutting-Edge Findings
Flavonoid Mapping (China, 2025): Confirmed antioxidant profiles vary by coconut age and variety. Young coconuts (2 months old) = highest antioxidant activity.
Clinical Endorsements: RDs now recommend coconut water as a go-to option for diabetics and those seeking natural hydration.
Shelf-Life Innovation: New cold-chain preservation methods aim to retain more nutrients in packaged options.
📝 Final Thoughts: Should You Drink It?
Coconut water is more than a fad—it’s a natural, functional beverage with solid nutritional benefits. It may not be a miracle cure, but when used smartly, it supports hydration, heart health, antioxidant defenses, and more.
✔️ Best For:
Active individuals
People in hot/humid climates
Mildly hypertensive or health-conscious consumers
Those wanting a soda alternative
❌ Not Ideal For:
High-intensity athletes needing more sodium
People with advanced kidney disease
Those expecting dramatic medical benefits
🌿 Bottom line: Nature packaged this hydration booster perfectly—just be sure you’re choosing wisely, drinking in moderation, and using it for the right reasons.
👋 Your Turn
Do you drink coconut water regularly? Have you noticed a difference in your energy or hydration? Drop your experiences and favorite brands in the comments below, and share this article with someone who needs a tropical hydration boost.
FAQs
1. Is coconut water better than plain water for hydration?
Answer: Coconut water hydrates well due to its electrolytes like potassium and magnesium. It’s especially beneficial after sweating or mild dehydration, but plain water is still best for everyday hydration unless you’ve lost electrolytes through heat, exercise, or illness.
2. Can I drink coconut water every day?
Answer: Yes, 1 cup (240ml) daily is generally safe for most people. It’s a healthy beverage when unsweetened and consumed in moderation, but overconsumption may lead to excessive potassium intake, especially for those with kidney issues.
3. Is coconut water good for weight loss?
Answer: Coconut water is low in calories and can replace sugary drinks, making it helpful in weight loss strategies. However, it’s not a fat-burning drink—its benefit lies in being a healthier alternative, not a direct weight loss agent.
4. Does coconut water help with hangovers?
Answer: Yes. Its electrolyte and fluid content can ease hangover symptoms by rehydrating the body and replenishing minerals lost through alcohol-induced dehydration.
5. Can people with diabetes drink coconut water?
Answer:Yes, in moderation. Choose unsweetened varieties and limit to small servings (½–1 cup) to avoid blood sugar spikes. It’s generally considered safe and hydrating for people with controlled blood sugar.
6. What’s the difference between coconut water and coconut milk?
Answer: Coconut water is the clear liquid from young coconuts—low in fat and calories. Coconut milk is made from grated mature coconut flesh and is high in fat and calories, used mostly in cooking.
7. Is it safe during pregnancy?
Answer: Yes. Coconut water is safe during pregnancy and may help with hydration, digestion, and mild blood pressure support. However, as with any food or drink, it should be consumed in moderation.
8. Can I drink it before or during a workout?
Answer: Yes. Coconut water is a good pre- or post-workout drink for light to moderate activity. For high-intensity workouts, especially in hot environments, you may need a beverage with more sodium.
9. How do I choose the best coconut water?
Answer: Look for:
100% coconut water
No added sugar or flavors
Cold-pressed or not from concentrate Avoid shelf-stable brands with additives or “from concentrate” labeling.
10. Can coconut water spoil?
Answer: Yes. Fresh coconut water spoils quickly and should be refrigerated and consumed within a day or two. Packaged varieties have longer shelf lives but still expire—always check the date and storage instructions.
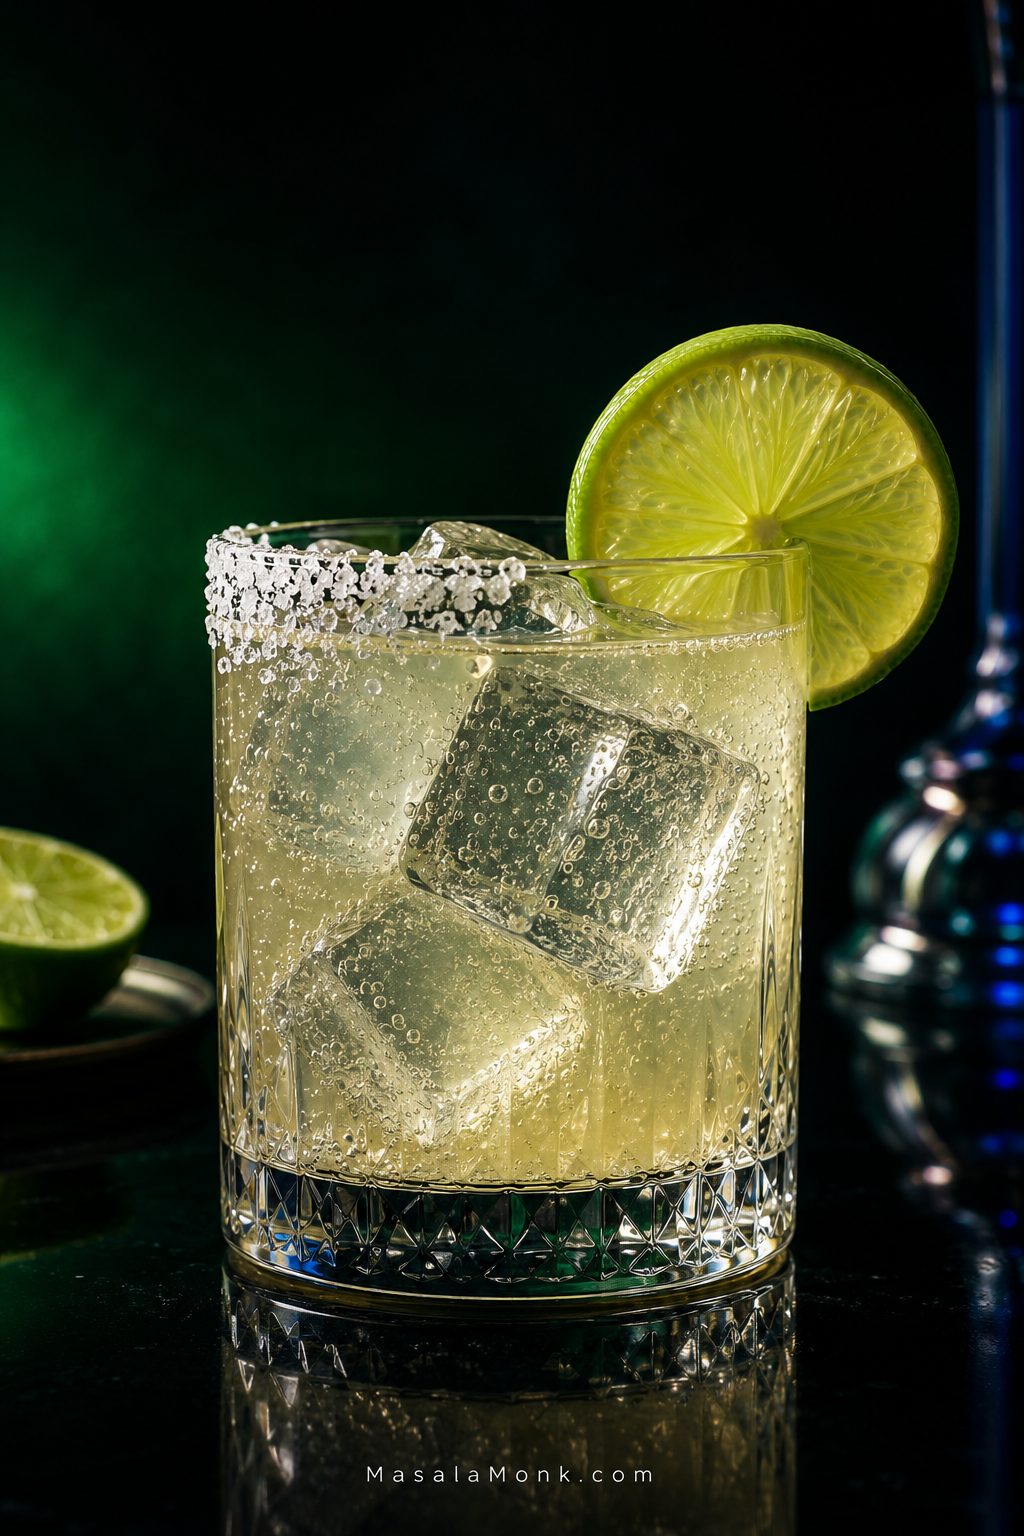
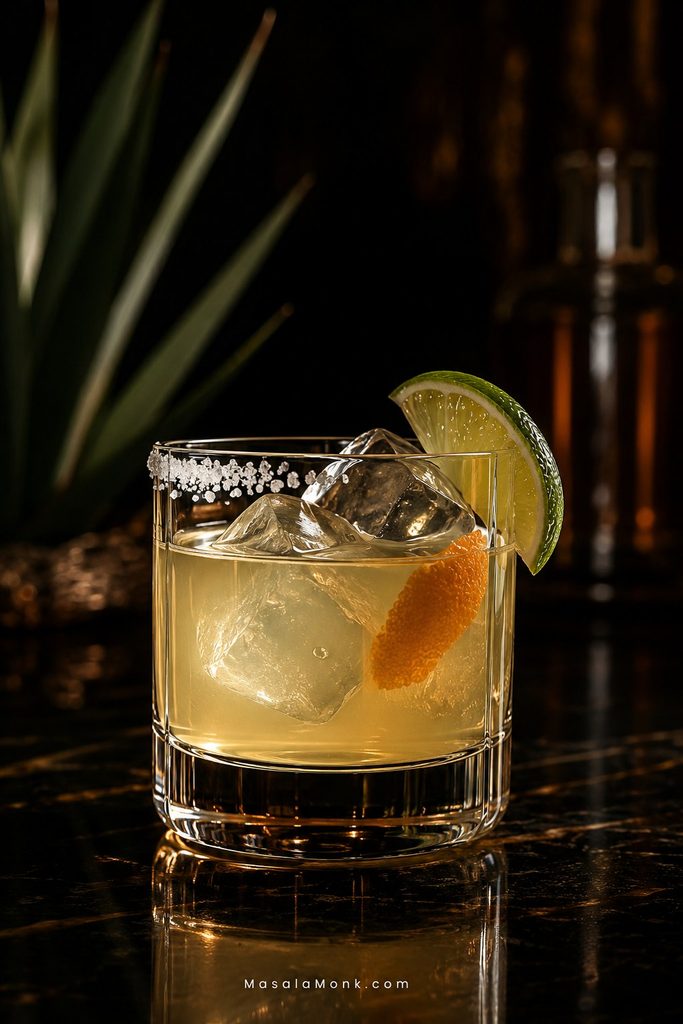
A good margarita mocktail should taste like something you would choose to drink, not limeade wearing a salt rim.
Whatever the reason tequila is out of the glass, the margarita itself should not feel like an afterthought. You still want cold lime first, a salty edge, enough sweetness to soften the acidity, and enough character that the drink is worth lingering over.
That is where many virgin margaritas go wrong. Take tequila and orange liqueur out of a classic margarita and you lose more than alcohol: aroma, body, bitterness and some of the bite disappear with them.
You do not need a shelf full of zero-proof bottles to put those qualities back. Start with the five-minute margarita mocktail recipe below. If you like it exactly that way, you’re done. If you want it drier, spicier, frozen, fruitier or closer to a classic margarita, the rest of the guide shows you what to change and why.
The rule to remember: lime first, sweetness second, complexity third, bubbles last.
Quick Answer: How to Make a Margarita Mocktail
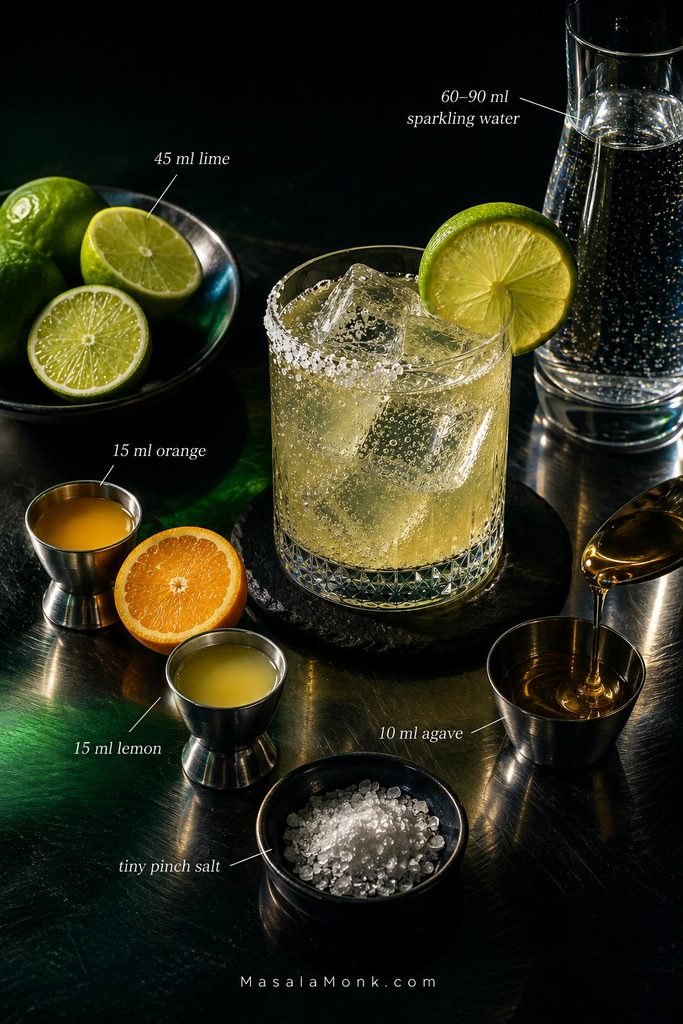
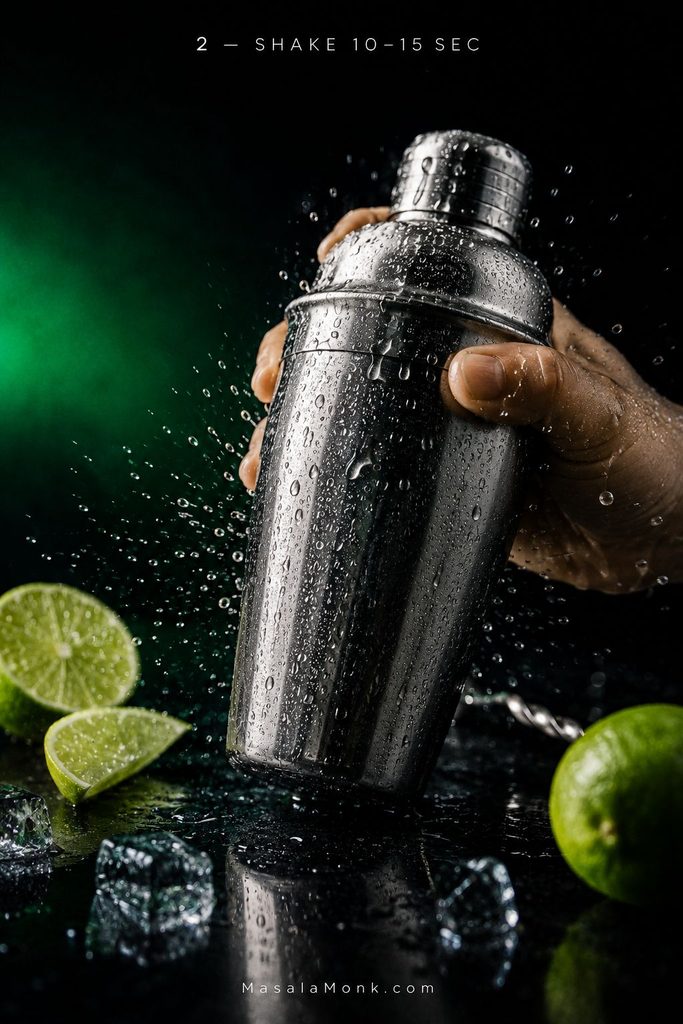
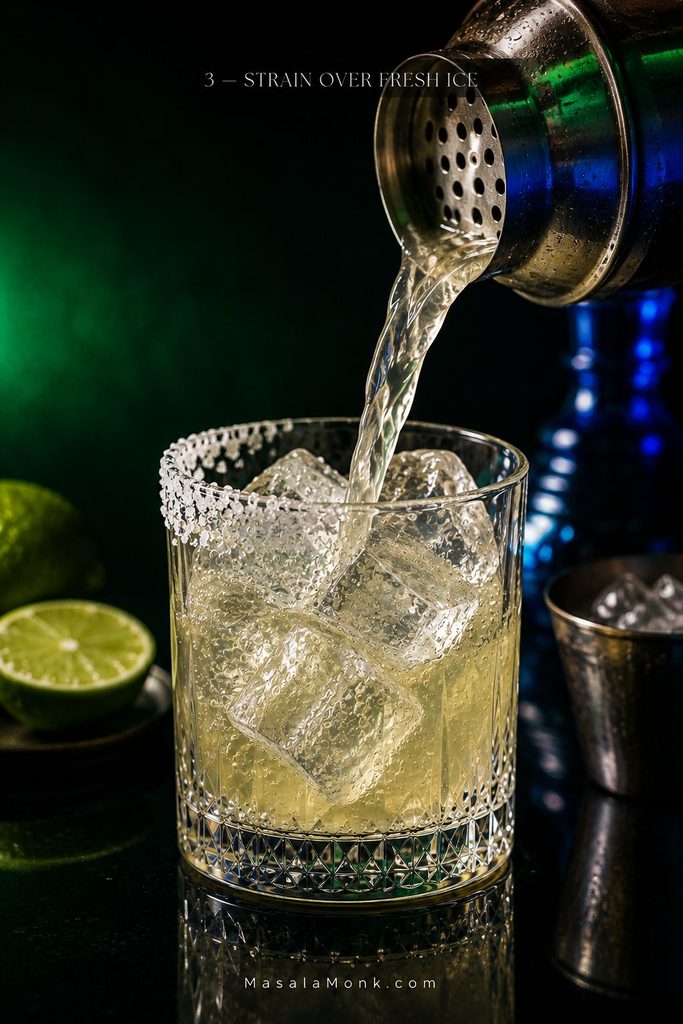
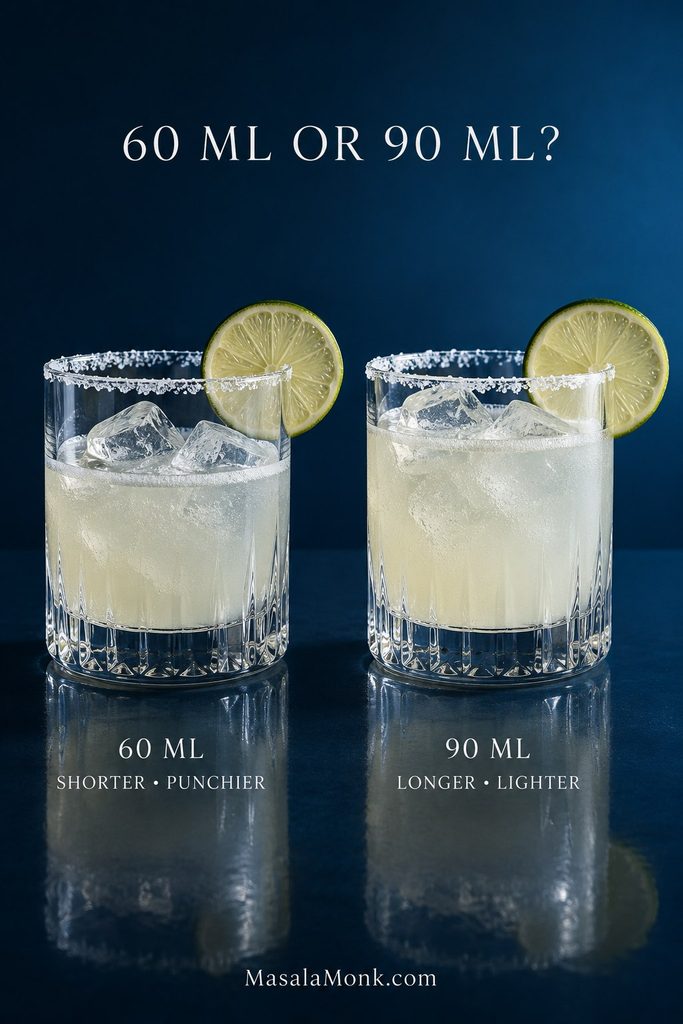
Shake 1½ oz (45 ml) fresh lime juice, ½ oz (15 ml) orange juice, ½ oz (15 ml) lemon juice, 2 teaspoons (10 ml) agave nectar and a tiny pinch of salt with ice for 10–15 seconds. Strain over fresh ice in a half salt-rimmed glass, then add 2 oz (60 ml) sparkling water for a punchier drink or 3 oz (90 ml) for a longer, lighter one. Fresh citrus varies from fruit to fruit, so make small adjustments only after the first sip.
Margarita Mocktail Recipe
Prep time: 5 minutes Total time: 5 minutes Yield: 1 drink Method: Shaken Best glass: 8–10 oz (240–300 ml) rocks glass; a margarita glass of similar capacity also works
Equipment
8–10 oz (240–300 ml) rocks glass or similarly sized margarita glass
cocktail shaker or clean lidded jar
jigger or measuring spoons
small plate for the salt rim
Ingredients
1½ oz (45 ml) fresh lime juice
½ oz (15 ml) fresh orange juice
½ oz (15 ml) fresh lemon juice
2 teaspoons (10 ml) agave nectar, straight from the bottle
tiny pinch fine salt
2–3 oz (60–90 ml) chilled sparkling water or club soda
plenty of ice
coarse salt, kosher salt or margarita salt, for the rim
lime wedge or wheel, for serving
Keep the sparkling water refrigerator-cold. Starting with a cold mixer slows immediate ice melt once the margarita is built.
Method
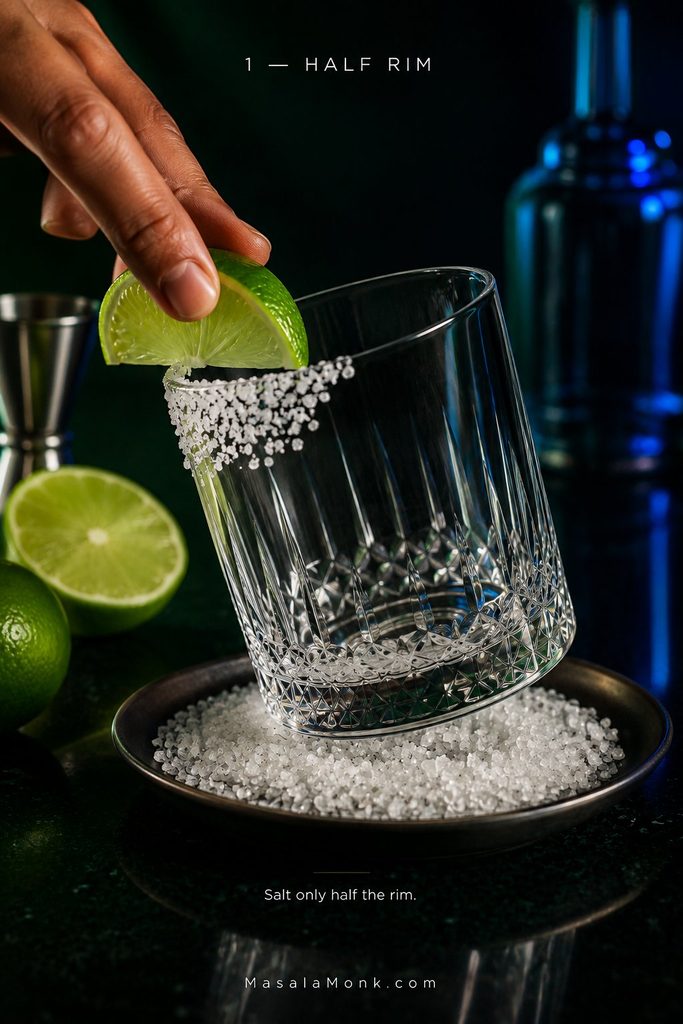
Salt half the rim. Put salt on a small plate. Run a lime wedge around half of the outside edge of the glass and press that section into the salt. Fill the glass generously with fresh ice.
Wet only the outside half of the rim. That keeps loose salt out of the drink while still letting you rotate between salted and unsalted sips.
Shake the citrus base. Add the lime juice, orange juice, lemon juice, agave nectar and tiny pinch of salt to a shaker with ice.
Shake for 10–15 seconds. The shaker should feel thoroughly cold. Shaking chills the drink, works the thick agave into the citrus and adds enough dilution to soften the acidity.
If cold agave clings to the jigger or spoon, rinse it into the shaker with a little citrus so the amount you measured actually reaches the drink.
Strain over fresh ice. The shaker ice has already begun melting; fresh serving ice keeps the drink colder and slows further dilution.
Large fresh serving cubes expose less surface area than small broken shaker ice, so they slow further dilution once the virgin margarita reaches the glass.
Add the bubbles last. Pour in 2 oz (60 ml) sparkling water for a shorter, punchier drink or 3 oz (90 ml) for a lighter one. Stir gently once or twice.
Take the first sip. If lime overwhelms everything else, add another teaspoon (5 ml) agave. Sweetness getting there first calls for a small squeeze of lime. When sweet and sour already feel right but the drink seems strangely empty, the answer is usually contrast rather than more syrup.
A Few Useful Notes
Add sparkling water only after shaking. Shaking a carbonated mixer makes a mess and wastes the bubbles you want in the finished drink.
Err slightly dry at first. Another teaspoon of agave is easy to add; excess sweetness is harder to undo.
A half rim gives you a choice. Some sips get the salty edge and some do not.
Keep the glass reasonably small. Filling an oversized tumbler with extra soda turns the drink into something much closer to a citrus spritz.
If you’re making one beside traditional margaritas, start with the 60 ml soda pour. It keeps the drink closer to their shorter, more concentrated feel instead of giving the alcohol-free glass twice the volume.
More sparkling water dilutes acidity and sweetness together, so it changes the margarita mocktail’s intensity and length more than its underlying sweet-sour ratio.
What a Good Margarita Mocktail Should Taste Like
The first sip should be properly cold and unmistakably lime-led. Orange and lemon sit underneath rather than announcing themselves as separate juices.
The agave should smooth the sharper edges without making sweetness the main event. A little salt makes the lime seem fuller, while the sparkling water lifts the finish without washing the flavor away.
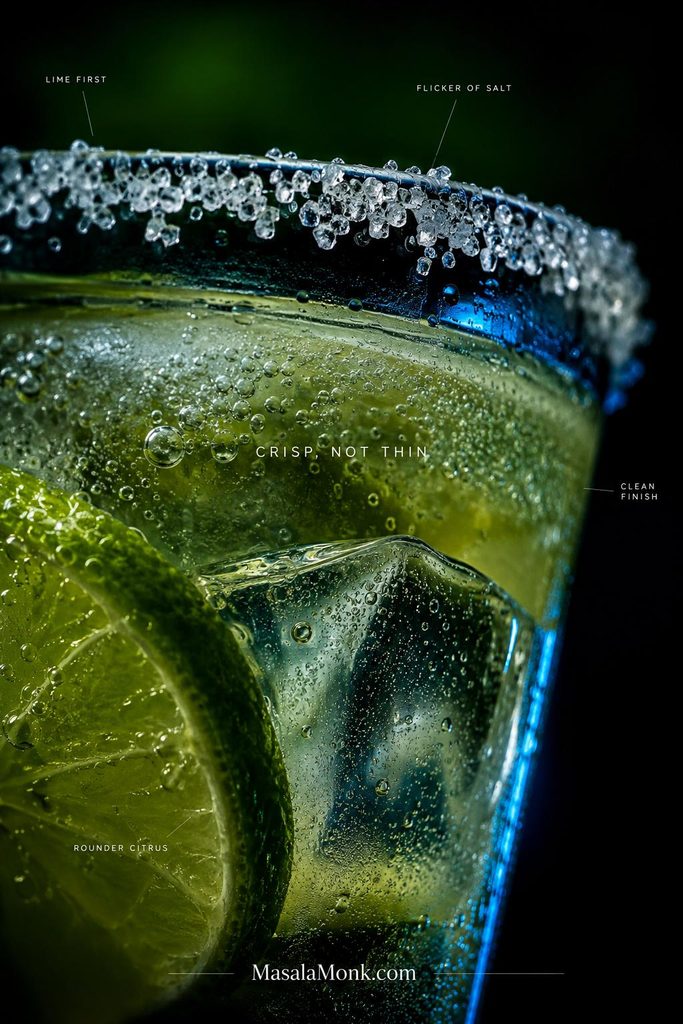
It should feel crisp rather than thin. The short shake and measured amount of soda matter to that texture just as much as they matter to the flavor.
When the balance lands, you get bright lime, a flicker of salt, rounder citrus through the middle and a clean finish that makes another sip sound good.
Bring the fresh lime garnish close to the rim: its aroma reaches your nose with each sip and makes the citrus seem brighter before you taste it.
There is no single universal margarita target. Some people want a short, sharply lime-forward drink; others are trying to recreate the sweeter, longer margaritas they know from restaurants. Use the margarita you actually enjoy as the reference point. Once you know what each adjustment changes, you can steer the glass in that direction.
Making it right now? You can stop here. The recipe above is complete. If you’re curious about why it works—or why yours didn’t—the rest of the guide is here when you need it.
Why Margarita Mocktails Sometimes Taste Like Limeade
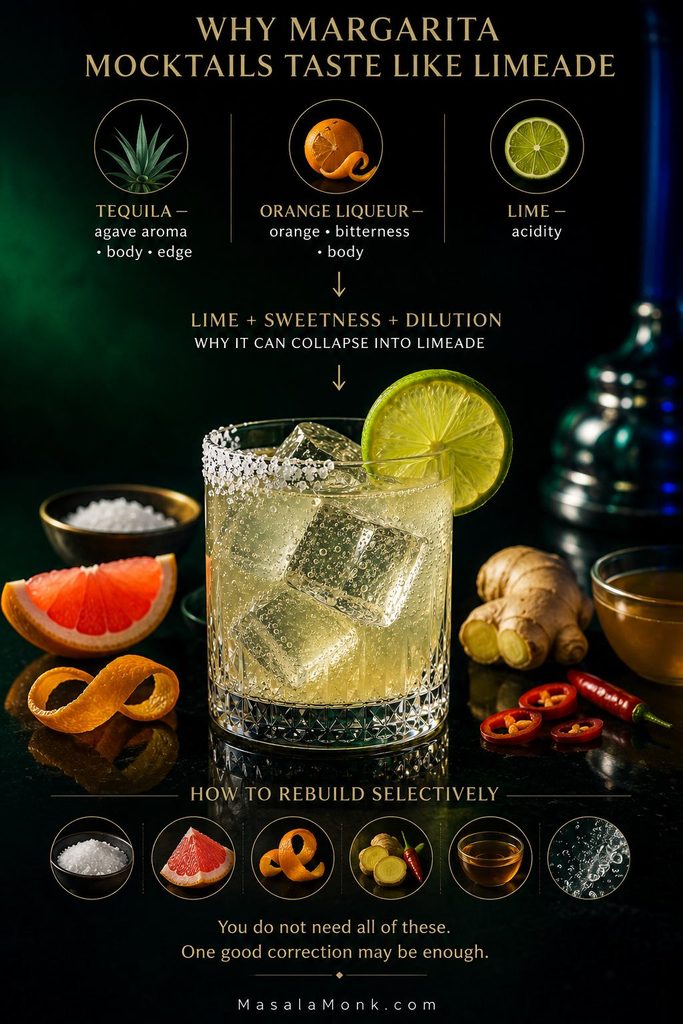
A classic margarita is doing more work than its short ingredient list suggests. Tequila supplies agave aroma, body and a peppery or vegetal edge. Orange liqueur brings concentrated orange aroma, sweetness and some bitterness.
You can see those roles clearly in a richer Cadillac Margarita, where tequila, lime and orange liqueur each have a distinct job.
Remove both alcoholic ingredients, keep the lime and sweetener, then stretch everything with water and the drink can collapse into lime + sugar + bubbles. More lime makes it sharper and more agave makes it sweeter, but neither necessarily makes it more interesting.
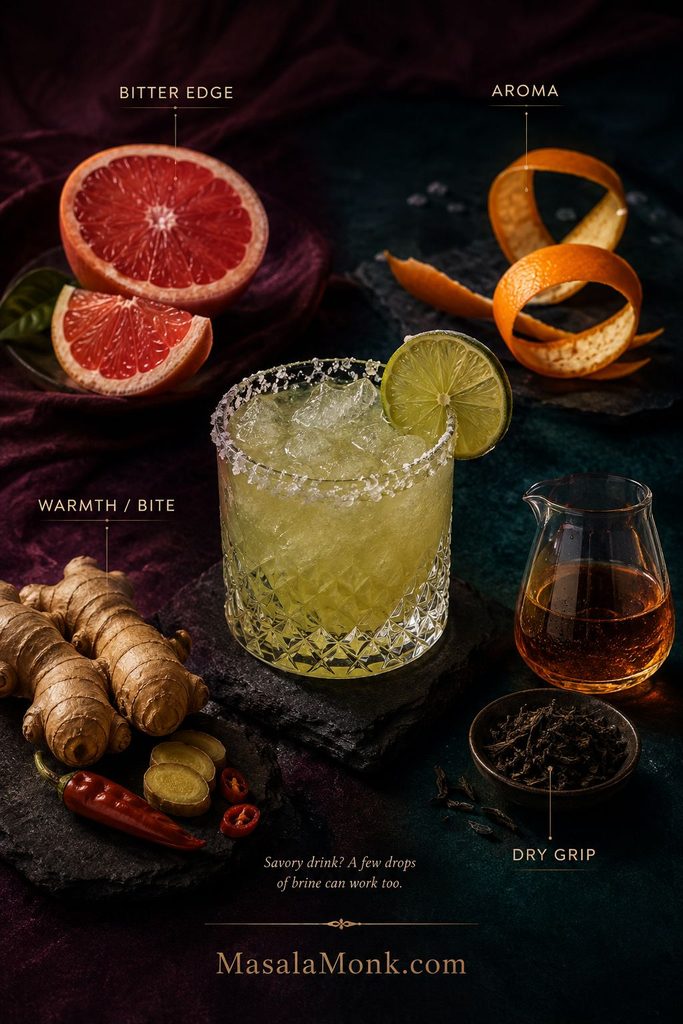
What is usually missing is some kind of contrast: a bitter edge, aromatic peel, a little heat, a faint dry grip, more concentration or simply the savory lift of salt. One well-chosen correction is usually enough.
A hollow drink can be both sweet and sour at once. Adding more of either will not create the aroma, bitterness or dry grip that is actually missing.
How to Balance a Margarita Mocktail
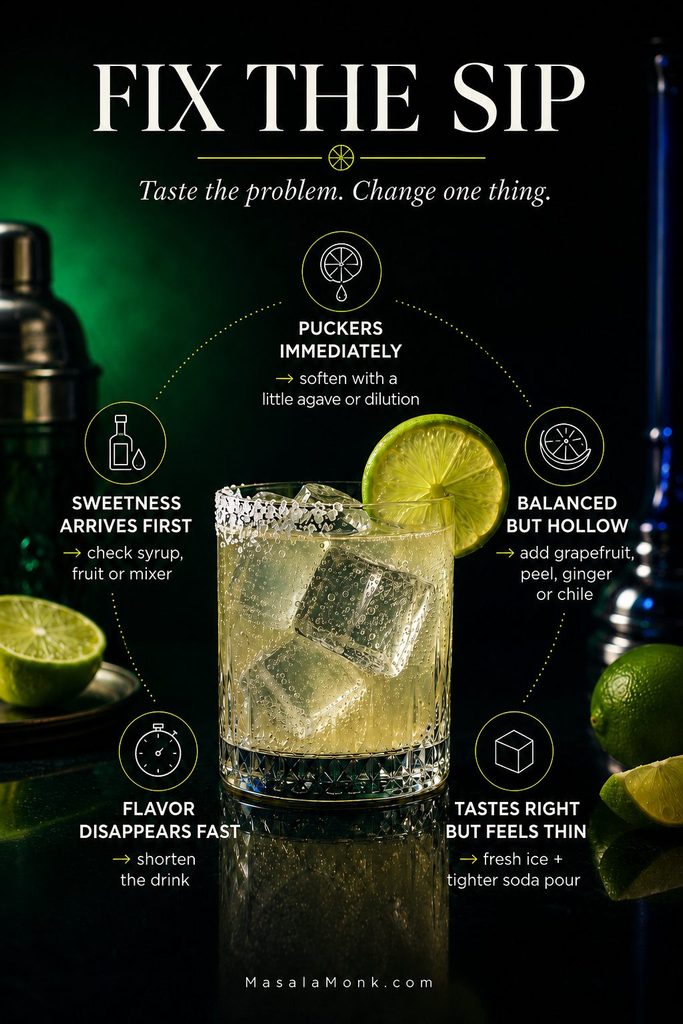
Forget the theory for a moment and pay attention to the sip in front of you.
If it makes you pucker immediately, the acidity is outrunning everything else. A little agave or controlled dilution will usually help more than another juice.
If sweetness arrives before lime, look first at the syrup, fruit or mixer. Tonic, Sprite, ginger beer and ripe fruit all bring sweetness of their own.
If sweet and sour seem balanced but the drink still feels hollow, give the finish something to hold onto. Grapefruit leaves bitterness after the lime; orange peel adds aroma before the sip; ginger or chile gives the finish a little bite.
If the flavor is good but disappears almost immediately, shorten the drink. Sometimes a perfectly good margarita base has simply been stretched too far.
If it tastes right but feels thin, fresh ice, a proper shake and a 60 ml rather than 90 ml soda top-up can make more difference than another ingredient.
Fix the sensation that is actually bothering you instead of changing three ingredients at once.
When diagnosing balance, taste from the unsalted side first; the rim changes how the lime registers and can make the baseline harder to judge.
What the Ingredients Actually Change
Lime Does Most of the Work
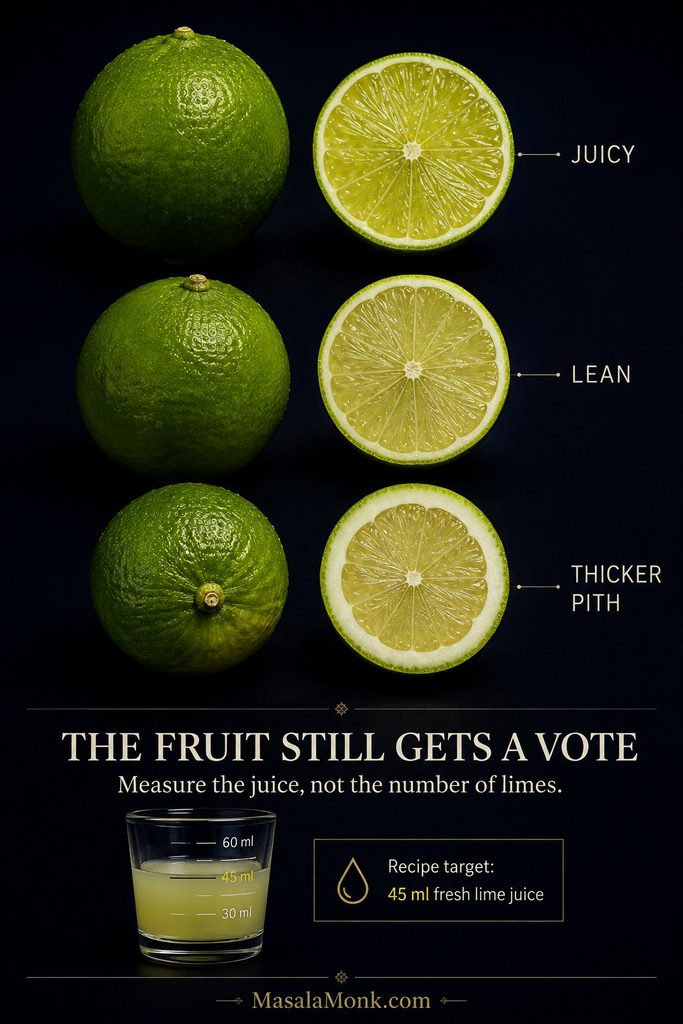
The base recipe uses 1½ oz (45 ml) fresh lime juice, enough to keep the drink unmistakably lime-led after ice and sparkling water are added.
Limes are unpredictable. One can be fragrant and juicy; the next can be lean, bitter or fiercely tart. Measuring gives you a useful starting point, but the fruit still gets a vote.
If one lime falls short of 45 ml, reach for another lime rather than replacing the missing volume with lemon or orange; those juices change the profile.
Fresh lime gives the cleanest flavor, though bottled lime juice can still make a useful drink when that is what you have. Bottled products vary considerably, so start with the recipe rather than trying to compensate in advance.
Orange and Lemon Stay in the Background
The small amount of orange rounds the lime and restores some of the citrus character lost with orange liqueur. Too much turns the drink orange-forward. Lemon broadens the acidity; if your limes are already especially sharp, use less lemon before reaching for more sweetener.
Agave Is Less Standard Than It Looks
The recipe uses 2 teaspoons (10 ml) agave nectar straight from the bottle. Bartender-style agave syrup is sometimes diluted with water, so the same volume may taste less sweet. That is one reason apparently identical margarita recipes can land differently.
Salt is doing something different again. The rim gives individual sips a salty edge; the tiny pinch inside the drink quietly makes the lime seem fuller. Sparkling water is mostly about length: 60 ml keeps the drink tight, 90 ml makes it lighter, and much more begins to move toward spritz territory.
Sparkling Water, Tonic, Sprite or Ginger Beer?
Mixer
What it adds
Best when you want…
Sparkling water
Clean fizz, no added sweetness
The easiest all-purpose version
Club soda
Fizz plus light mineral character
A similarly crisp drink
Sparkling mineral water
Mineral character, often with lively bubbles
A drier-feeling margarita
Tonic water
Bitterness plus sweetness
A finish with more grip
Sprite or 7-Up
Fizz plus substantial sweetness
A softer, sweeter convenience version
Ginger beer
Sweetness plus ginger bite
A warmer, punchier drink
Grapefruit sparkling water
Citrus aroma with little sweetness
A drier, fruitier direction
A classic margarita isn’t carbonated. The International Bartenders Association’s Margarita is built from tequila, triple sec and lime. Bubbles are useful in this pantry version because they replace some of the lost volume and add lift. A margarita built around a full pour of zero-proof agave spirit may need little or none.
Tonic is especially good when the lime already feels bright but the finish disappears too quickly. Its bitterness hangs around after the citrus. Because tonic is also sweet, reduce the agave rather than simply swapping it one-for-one with sparkling water.
Want Your Margarita Mocktail Drier or Less Sweet?
A drier drink is not automatically a better drink. Some margaritas are meant to be sharp and salty; others are softer and a little sweeter. The useful target is the amount of sweetness that still lets you notice lime, salt and the finish instead of tasting syrup first.
If you are using…
Start here
Sparkling water or club soda
2 tsp (10 ml) agave nectar
Tonic water
About 1 tsp (5 ml) agave or less
Sprite or 7-Up
No added agave initially
Sweet mango, pineapple or berries
Add the fruit before deciding whether syrup is needed
Non-alcoholic tequila
Account for any sweetness already in the spirit
Grapefruit, orange peel, chilled tea and unsweetened fizzy mixers are often more useful than piling in extra citrus. They can make the drink feel less sweet without simply making it more sour.
Taste an unfamiliar mixer before adding it. Tonic, ginger beer and lemon-lime soda vary in sweetness and bitterness, which can change how much agave the glass needs.
How to Add More Margarita Character Without Zero-Proof Tequila
The pantry version is complete on its own. The ideas below change the personality of the drink rather than “improve” it. Pick the direction that actually sounds good to you.
When you want more aroma without extra sugar or volume, expressed orange peel is a low-impact adjustment: it changes the nose more than the drink’s balance.
Grapefruit
Add about ½ oz (15 ml) fresh grapefruit juice and reduce the orange or lemon by roughly the same amount. The lime still arrives first, but grapefruit leaves a pleasantly bitter edge behind it.
If that bitter grapefruit finish is exactly what you wanted, a Paloma puts grapefruit, lime, salt and fizz at the center of the drink.
Orange Peel
Express a strip over the finished margarita. You smell orange before the first sip without adding another layer of juice or sugar. It is a small change, but it makes the glass feel noticeably more aromatic.
Ginger or Chile
A tiny amount of fresh ginger juice, ginger syrup or chile gives the finish some warmth. This is the direction to take when you want a margarita that lingers a little instead of finishing clean and disappearing.
Chilled Tea
Replace ½–1 oz (15–30 ml) of the mixer with strong chilled green tea or Earl Grey. At that amount it should not announce itself as a tea drink; it simply leaves a faint dry grip after the citrus.
If you already enjoy savory drinks, a few drops of unsweetened dill-pickle brine or olive brine can work too. Start around ⅛ teaspoon or less. This is a small adjustment, not a new main ingredient.
Margarita Mocktail With Non-Alcoholic Tequila
If what you miss is specifically the agave aroma, body and bite of tequila, a zero-proof agave spirit can be useful. This is also the version that sits most naturally beside traditional margaritas at the same table: same short-drink idea, just built around a different bottle.
If you add soda to a zero-proof agave build, remember the spirit already contributes 60 ml of volume; start shorter and lengthen only after tasting.
For 1 drink
2 oz (60 ml) non-alcoholic agave or tequila-style spirit
1 oz (30 ml) fresh lime juice
½ oz (15 ml) fresh orange juice or non-alcoholic orange liqueur
¼ oz (7.5 ml) agave nectar, then adjust if needed
tiny pinch salt
ice
salt for the rim
Shake with ice for 10–15 seconds and strain over fresh ice. Hold back any extra agave or sparkling water until you know what the spirit has already contributed.
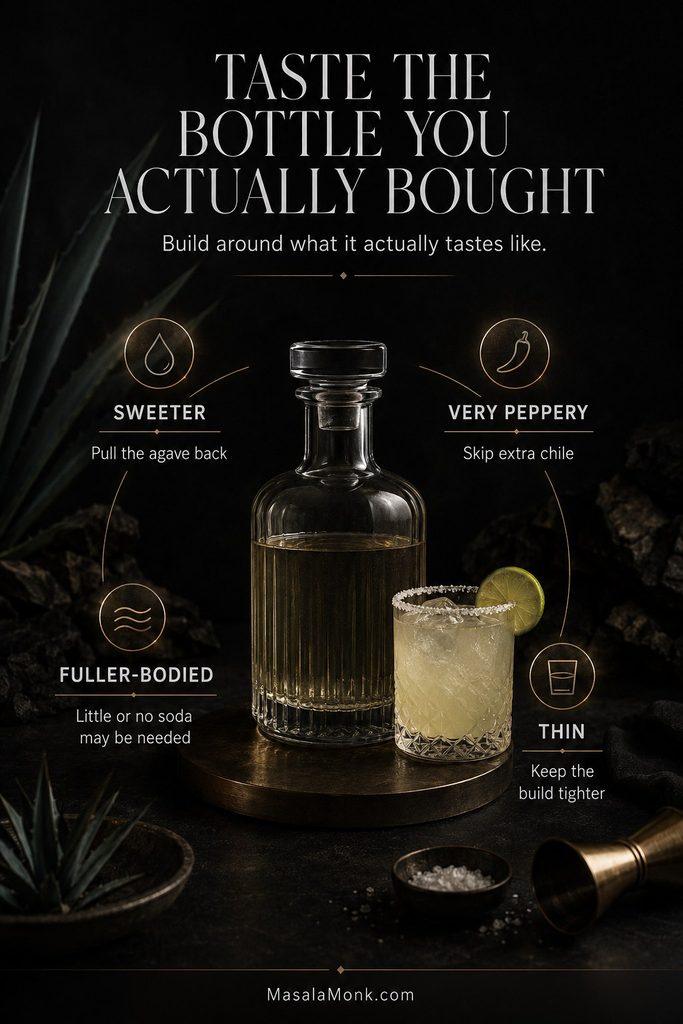
Taste the Bottle You Actually Bought
Zero-proof agave spirits vary enormously. Some are sweet, some thin, and some lean heavily on pepper or capsicum to imitate alcoholic burn. Others are grassy, smoky or aromatic.
Some bottles also taste stranger neat than they do in a margarita. Lime, salt and a little sweetness can pull those flavors together, so a spirit you would never sip by itself may still work surprisingly well once mixed.
A sweeter bottle needs less agave. Strong pepper or capsicum probably means you can skip extra chile. Fuller-bodied products may give you enough structure that soda becomes unnecessary. Work around the bottle in front of you rather than assuming every zero-proof tequila behaves the same way.
Opening an unfamiliar zero-proof bottle? Make a half-size trial drink before batching so you can learn whether it pushes sweet, peppery or thin without wasting ingredients.
What Can Replace Orange Liqueur?
The substitutes do not all do the same job. Orange juice brings flavor, sweetness and water. A strip of orange peel gives you mostly aroma. Orange blossom water is intensely floral, so think drops rather than splashes. A non-alcoholic orange liqueur is the closest single replacement, though its sweetness will depend on the bottle.
If you need the finished drink to be strictly 0.0% alcohol, check the stated alcohol content on every specialty spirit, bitters or bottled cocktail ingredient you use. The simple citrus-agave-sparkling-water recipe avoids those products entirely.
Spicy Margarita Mocktail
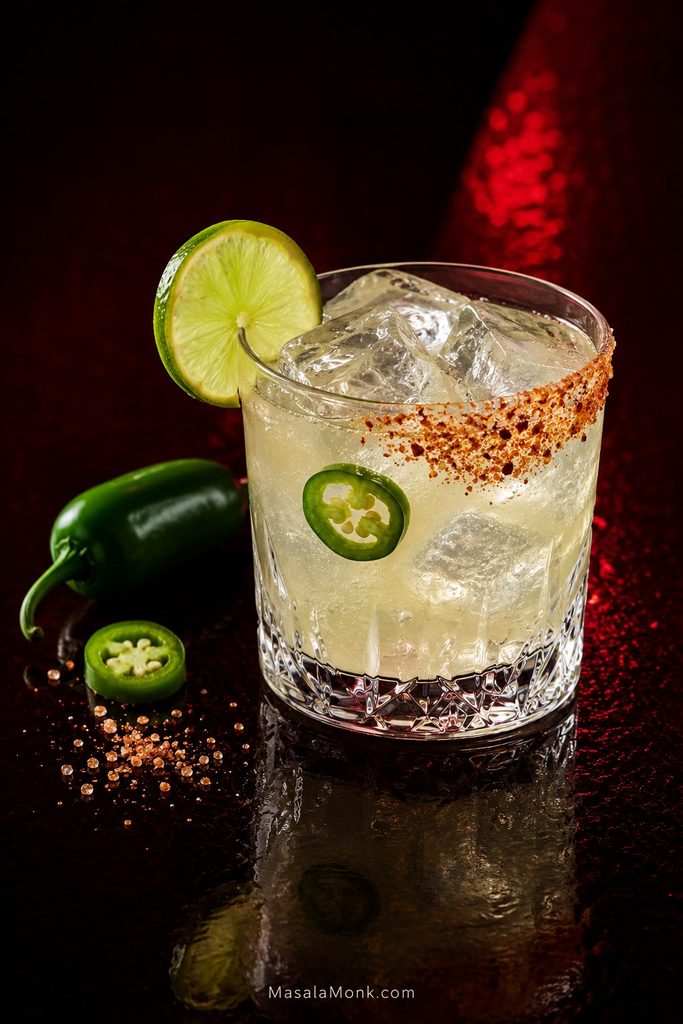
Jalapeño works especially well here because it brings fresh green-pepper flavor as well as heat. The best version gives you cold lime and salt first; the warmth catches up a moment later and lingers through the finish.
A chile-salt rim makes heat optional from sip to sip, whereas jalapeño infused into a spicy margarita mocktail changes the character of the entire glass.
For 1 drink
1½ oz (45 ml) fresh lime juice
½ oz (15 ml) fresh orange juice
½ oz (15 ml) fresh lemon juice
2 tsp (10 ml) agave nectar
1–3 thin jalapeño slices
tiny pinch salt
2–3 oz (60–90 ml) sparkling water
Tajín or chile salt, for the rim
Add the citrus, agave, salt and jalapeño to the shaker.
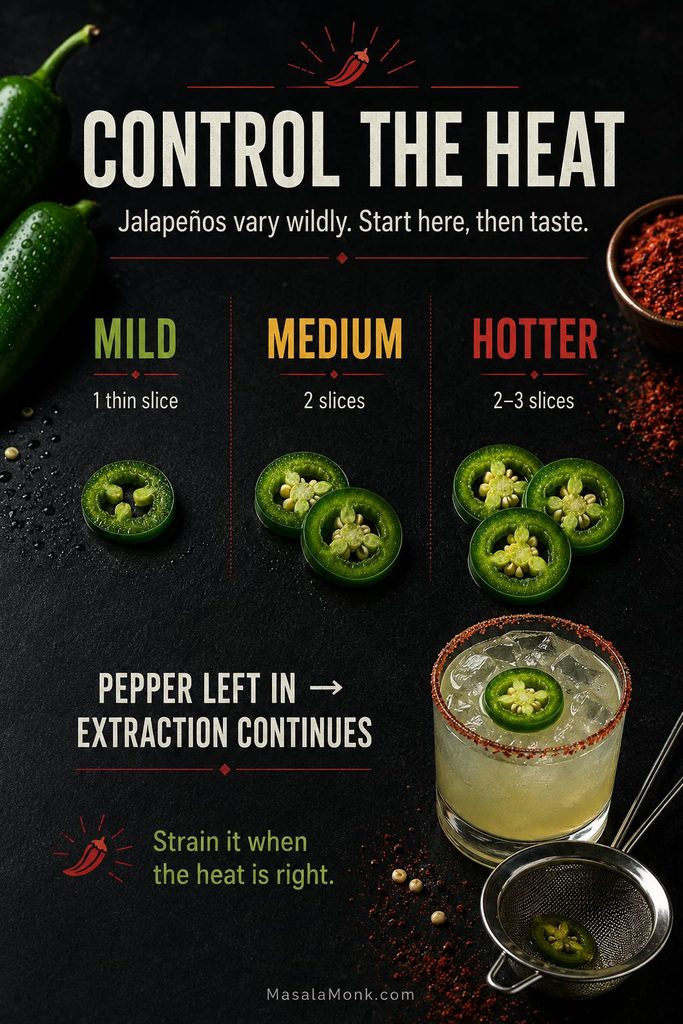
Mild: 1 thin slice, lightly muddled
Medium: 2 slices
Hotter: 2–3 slices with a firmer muddle
Jalapeños vary wildly in heat, so those counts are starting points rather than guarantees. Shake with ice, strain over fresh ice and add the sparkling water last.
Fine-straining also stops pepper pieces from sitting in the drink and continuing to release heat. Leave them in and the last sip can be considerably hotter than the first.
Keep the jalapeño slices similarly thin when comparing heat levels; otherwise, slice thickness becomes another variable alongside the number of pieces.
If chile is the part you want to emphasize, the Spicy Margarita gets much more specific about jalapeño intensity, Tajín and heat control.
Hot Honey Shortcut
Hot honey makes a rounder, warmer spicy margarita than plain agave. Thin it with a little warm water, let the syrup cool, then use it instead of agave. Straight honey is much harder to incorporate evenly into an ice-cold drink.
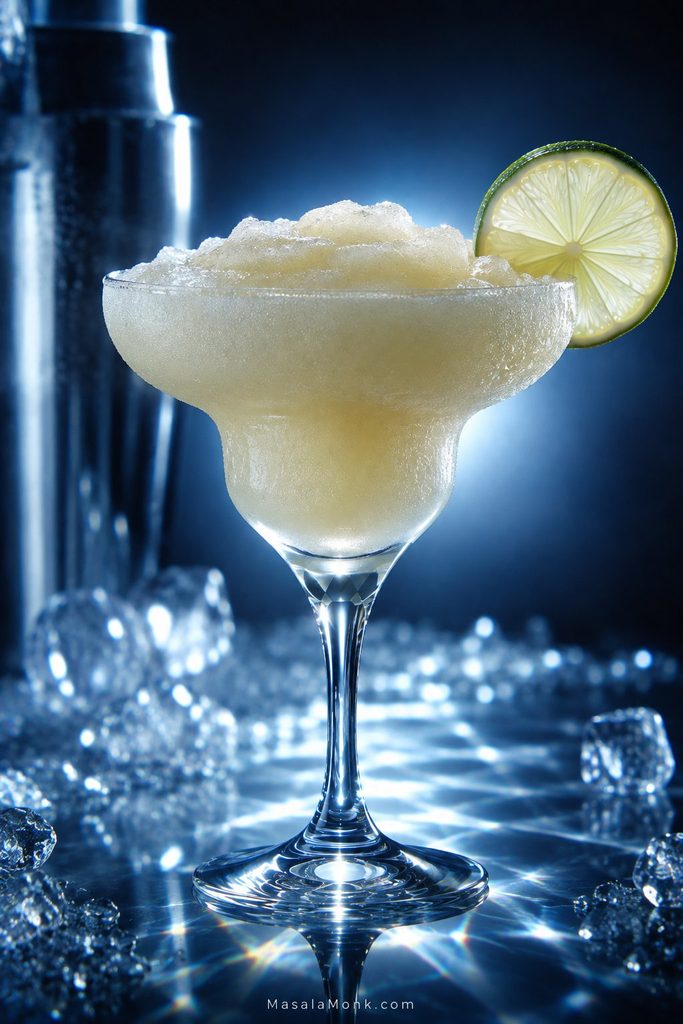
A frozen margarita needs its own formula because blended ice is a major ingredient, not merely a way to chill the drink. As that ice breaks down, it adds water to every other flavor.
Judge a frozen margarita mocktail by how the slush moves, not by a fixed blender time: machine power and ice size can change how quickly the right texture appears.
For 1 generous frozen margarita
1½ oz (45 ml) fresh lime juice
¾ oz (22 ml) fresh orange juice
½ oz (15 ml) fresh lemon juice
½ oz (15 ml) agave nectar
tiny pinch salt
about 1½ cups standard ice cubes
up to 1 tbsp (15 ml) cold water, only if the blender needs it
Add the liquids and salt first, then the ice. Blend only until smooth and slushy, then stop. Once the texture is right, leaving the blender running only gives the mixture more time to warm and the ice more time to melt.
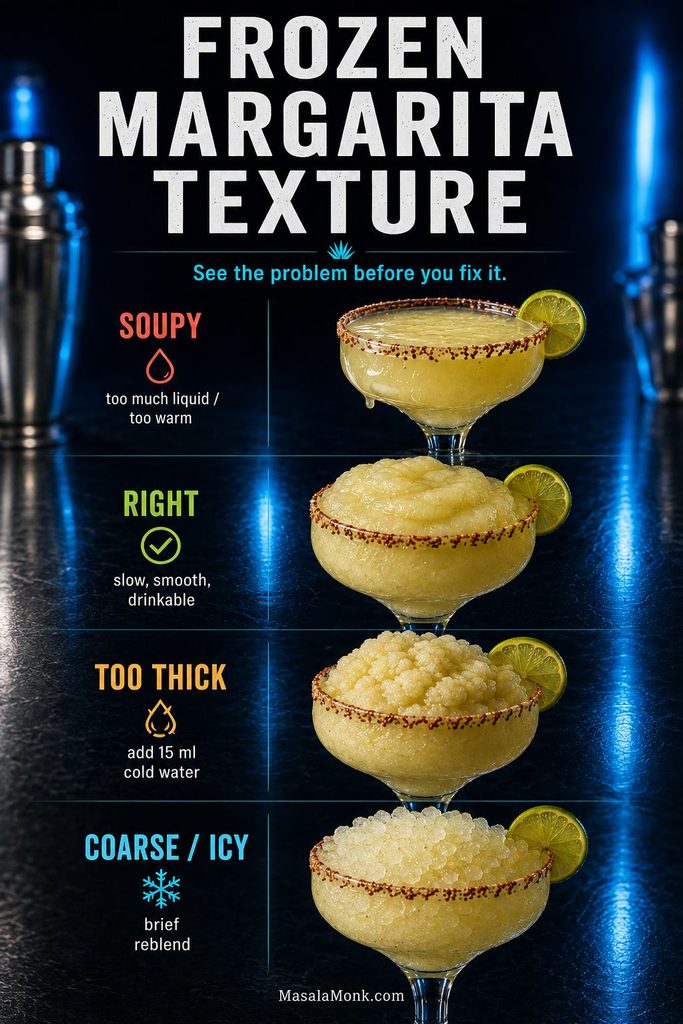
The right texture should look almost a little too thick when it first leaves the blender, then relax into a smooth slush as you drink it. It should move slowly in the glass without becoming spoonable.
Start Cold
Fridge-cold citrus, cold agave and a chilled glass give you a head start. Warm ingredients force more ice to melt before the margarita is properly cold, making a thin texture more likely.
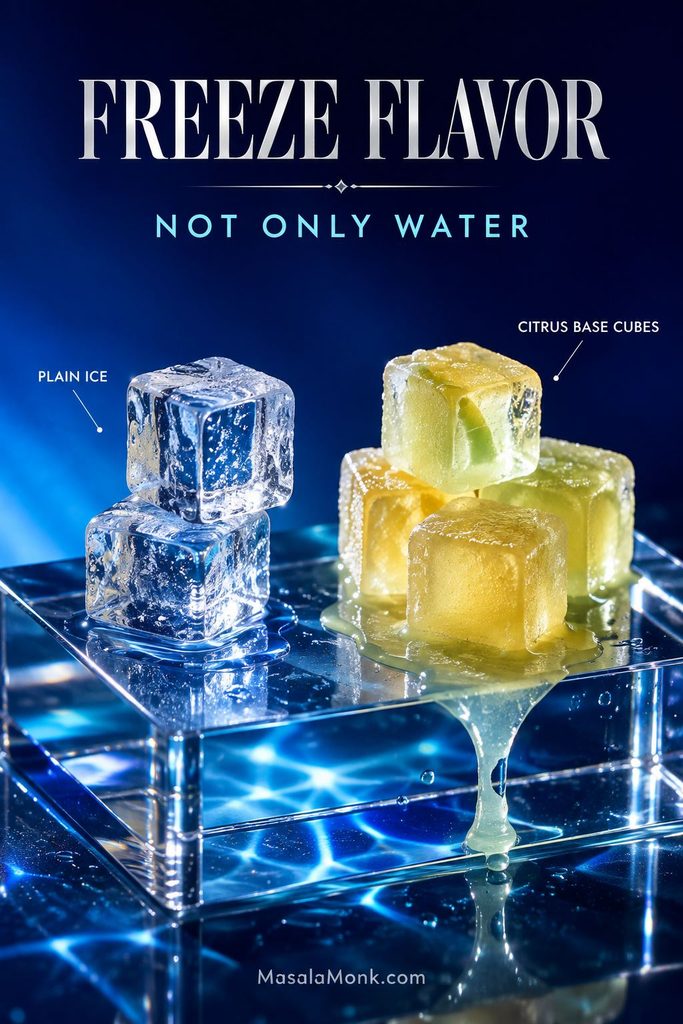
Freeze Flavor, Not Only Water
Freeze some of the citrus base into cubes and replace part of the plain ice with them. As those cubes melt, they add margarita rather than plain water.
Freeze the citrus base in small, repeatable portions; then you can replace plain ice consistently instead of guessing how much concentrated flavor went into the blender.
Frozen mango brings body as well as sweetness; in a Mango Margarita, enough lime keeps that richness lively rather than heavy.
Frozen Margarita Troubleshooting
It is soupy
There is too much liquid for the amount of ice, or everything started too warm. Before blending, the ice should sit substantially above the liquid rather than floating freely in a large pool.
Add a modest amount of ice and pulse briefly. Getting close to the right ratio from the beginning works better than repeatedly feeding fresh ice into a mixture that has already warmed.
It is too thick or the blender will not move
Add 1 tablespoon (15 ml) cold water and blend briefly. Repeat only if the mixture still refuses to move.
It tastes watery
Try a squeeze of lime and a tiny pinch of salt before reaching for more syrup. Next time, make the base stronger or replace some plain ice with frozen citrus or fruit cubes.
It is coarse and icy
The ice may not be breaking down finely enough, or the mixture may need a little more liquid to settle into a smooth slush. Blend again briefly, adding liquid a tablespoon at a time if necessary.
The ice and liquid separate quickly
Frozen margaritas naturally begin separating as they warm. Start colder, use enough ice and serve promptly. Fruit purée can add useful body in fruit versions too.
Fix texture before sweetness. Extra juice or syrup adds more liquid, so adjusting flavor first can make an already loose frozen margarita even looser.
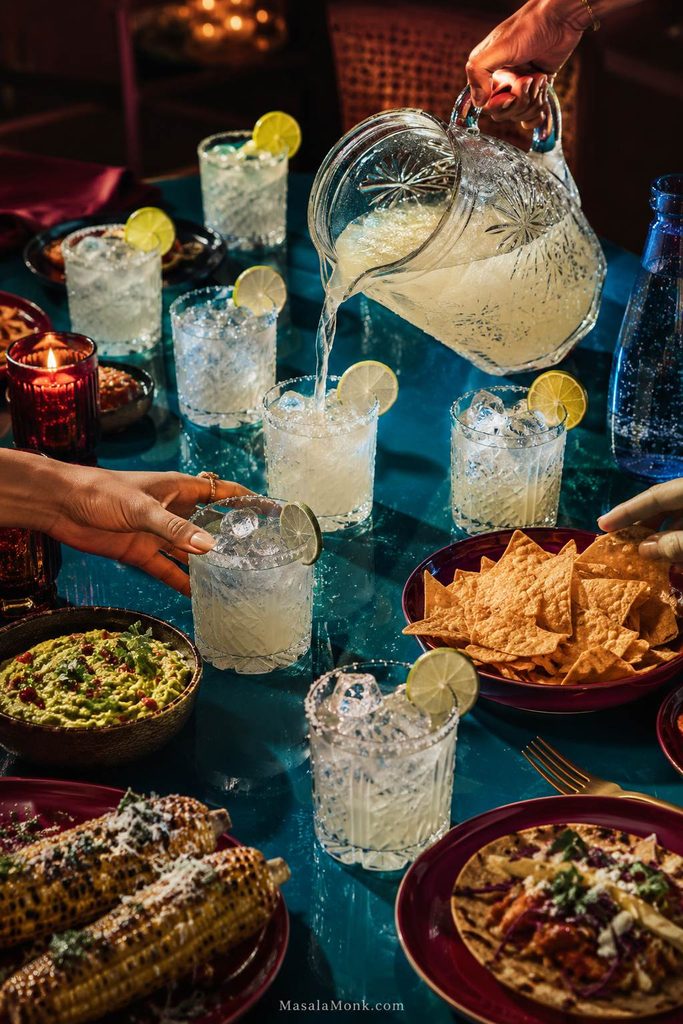
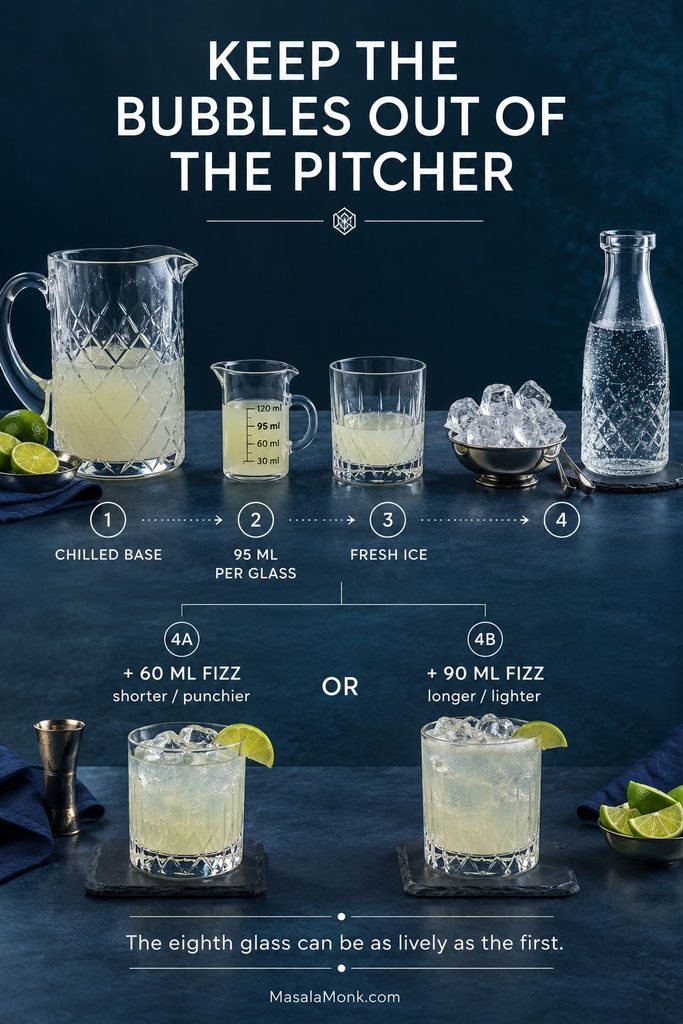
For a party, make the still base ahead with a little cold water to replace some of the dilution you would normally get from shaking eight individual drinks. Keep the sparkling water and serving ice separate until you’re actually pouring glasses.
Chill the empty pitcher before adding the margarita base. That protects serving temperature without quietly adding more water to the batch through extra ice.
Chilled Base for 8 Drinks
12 oz (360 ml) fresh lime juice
4 oz (120 ml) fresh orange juice
4 oz (120 ml) fresh lemon juice
⅓ cup (80 ml) agave nectar
⅓ cup (80 ml) cold water
⅛ teaspoon fine salt to start, with up to ¼ teaspoon total if needed
Whisk thoroughly, cover and refrigerate until very cold. You’ll have about 26 oz (760 ml) of base, enough for eight pours of roughly 3¼ oz (95 ml) each.
The chilled base should taste a little concentrated because every glass still has ice and sparkling water ahead of it. Lime can be assertive without feeling punishing, while the salt should stay in the background.
To Serve Each Glass
Rim the glass close to serving time and fill it with fresh ice.
Pour in about 3¼ oz (95 ml) chilled margarita base.
Add 2–3 oz (60–90 ml) chilled sparkling water.
Stir gently and garnish with lime.
Open the sparkling water near serving time and stir only gently; extra agitation spends carbonation before the margarita mocktail even reaches the table.
Keeping the carbonation separate means the eighth glass can be as lively as the first. That matters even more when some people want the short 60 ml top-up and others prefer the lighter 90 ml version—you do not have to commit the whole table to one margarita.
If getting ahead makes hosting easier, prepare the citrus base up to about 24 hours before serving. Keep it covered and refrigerated; save the ice and bubbles for the glasses.
For a spicy batch, add jalapeño to the still base and monitor the heat. Remove the pepper when it reaches the level you want because it will keep extracting while it sits.
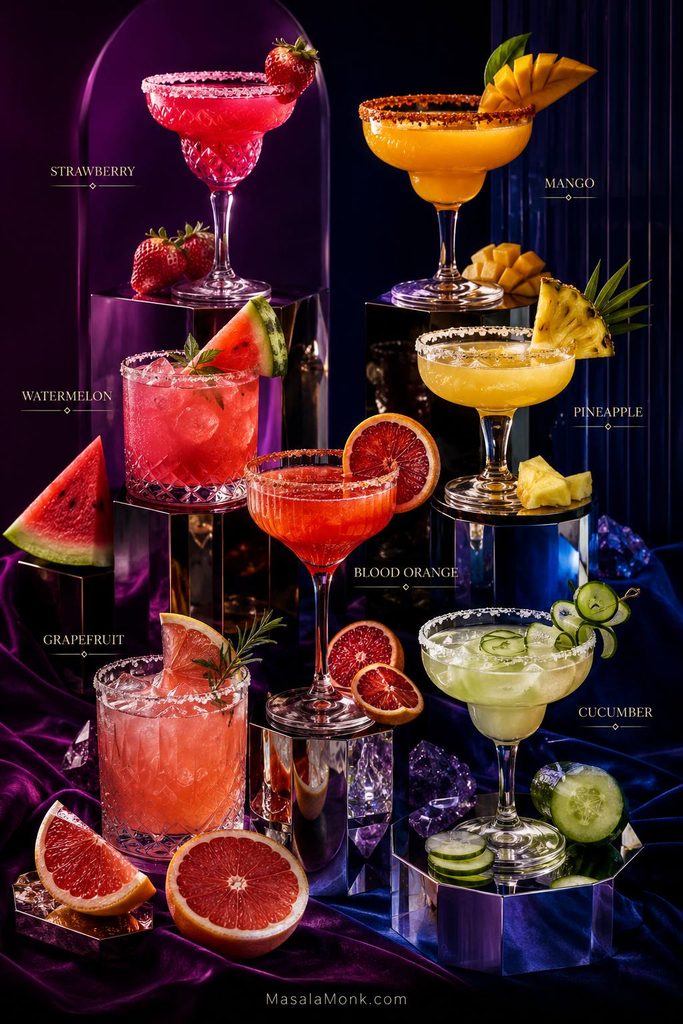
Fruit Margarita Mocktails
Fruit versions change the personality of the drink quickly: strawberry makes it softer, mango fuller, watermelon lighter and grapefruit drier. The method barely changes; the balance does.
Variation
Add
Watch for
Strawberry
2–3 muddled ripe berries
Very ripe berries may make extra agave unnecessary
Mango
1½–2 oz (45–60 ml) mango nectar or purée
Keep enough lime to stop mango overwhelming the citrus
Watermelon
3–4 oz (90–120 ml) fresh watermelon juice
Use less soda because watermelon contributes plenty of water
Pineapple
1–2 oz (30–60 ml) pineapple juice
Extra agave may not be necessary
Blood orange
Replace regular orange with blood orange
Keep lime clearly in front
Grapefruit
½–1 oz (15–30 ml) fresh grapefruit juice
Reduce another citrus component rather than simply adding more juice
Cucumber
3–4 muddled slices
Fine-strain if you want a cleaner texture
Fruit changes texture as well as flavor. Fine-strain fruit margarita mocktails for a cleaner sip, or keep some pulp when extra body is part of the appeal.
Watermelon is particularly easy to wash out because the fruit contributes so much liquid of its own. A Watermelon Margarita works best when the lime stays assertive and the final fizz stays under control.
Margarita Mocktail With Sprite
This is the easy, sweeter version. If that is the margarita you actually want, there is no need to apologize for it—just let the soda supply the sugar instead of adding agave on top.
1½ oz (45 ml) fresh lime juice
½ oz (15 ml) fresh orange juice
tiny pinch salt
3–4 oz (90–120 ml) chilled lemon-lime soda
ice
Shake the lime, orange and salt with ice, strain over fresh ice and add the soda last. Fresh lime matters especially here because it stops the sweet mixer from becoming the whole drink.
Margarita Mocktail Without Orange Juice
If orange is the part you do not want, leave it out rather than trying to hide it under more lime. The result is leaner, sharper and more lime-forward.
1½ oz (45 ml) fresh lime juice
2 teaspoons (10 ml) agave nectar
½ oz (15 ml) grapefruit juice, optional
tiny pinch salt
2 oz (60 ml) sparkling water
Shake the still ingredients with ice, strain over fresh ice and add the sparkling water. A strip of orange peel expressed over the top gives you orange aroma without putting orange juice back into the drink; skip the peel too if you want the cleanest lime-only direction.
Practical Shortcuts & Ingredient Swaps
A margarita is not a test of how well stocked your kitchen is. Fresh citrus and a shaker help, but neither is worth abandoning the drink over.
Using Bottled Margarita Mix
First check the label and make sure you’re holding an alcohol-free margarita mixer rather than a premixed alcoholic margarita. Then see whether it is a concentrate that needs diluting or a ready-to-use mixer that is already quite sweet.
With a concentrate, follow the label’s dilution instructions first, then add fresh lime, ice and a salt rim before deciding it needs anything else.
For a sweet ready-to-use mix, replacing roughly one-third of the pour with unsweetened sparkling water is a useful first move. Fresh lime can sharpen it from there. Brands vary too much for that ratio to be a law.
No Cocktail Shaker?
A clean jar with a secure lid works well: shake the citrus, agave, salt and ice, strain into the glass, then add sparkling water.
You can also build the drink directly in the glass. Stir the citrus, agave and salt together first, add plenty of ice and stir until cold, then finish with sparkling water. You lose a little aeration, not the entire drink.
Swap by Function
Need sweetness? Simple syrup, honey syrup or cooled hot-honey syrup can replace agave.
Need orange aroma? Try orange peel, zest, a few drops of orange blossom water or non-alcoholic orange liqueur.
Need a drier finish? Tonic, grapefruit or strong chilled tea can help.
Need fizz? Club soda, mineral water, tonic, grapefruit sparkling water, ginger beer and lemon-lime soda all work, but they do not contribute the same sweetness.
Need bite? Use a little ginger, jalapeño, hot honey or a peppery zero-proof spirit.
Margarita Mocktail Troubleshooting
Come back here when the drink is close but not quite right. Fix the problem you can actually taste first rather than changing several things at once.
Problem
First fix
Too sour
Add 1 tsp (5 ml) agave
Too sweet
Add a small squeeze of fresh lime
Tastes like limeade
Add contrast with tonic, grapefruit, ginger, a tiny salt adjustment or a zero-proof spirit
Orange dominates
Reduce orange juice and use peel for aroma instead
Mostly tastes like soda
Use less carbonated mixer
Watery
Use less mixer and fresh serving ice
Flat
Use fresh carbonation; a tiny pinch of salt may also help the flavor
Too bitter
Work out whether tonic, grapefruit, lime pith, brine or the zero-proof spirit is responsible before adding sugar
Too salty
Drink from the unsalted side or dilute/rebuild the glass
Non-alcoholic tequila tastes too peppery
Use less, rebalance around it or make the pantry version instead
Not enough bite
Add a very small amount of ginger or chile
Far too spicy
Remove or strain the pepper and dilute the drink
Pitcher has gone flat
Keep carbonation separate and add it per glass
Spicy pitcher keeps getting hotter
Strain the jalapeño once the heat is right
Sour and Bitter Are Not the Same Problem
Sour is mostly acidity. When lime makes your mouth pucker before anything else gets a chance to register, a little sweetness or controlled dilution can bring the glass back into balance.
Bitter can come from tonic, grapefruit, lime pith, a strongly flavored zero-proof spirit or too much brine. Adding syrup to that problem can leave you with a drink that is both sweet and bitter, so find the source first.
Is a virgin margarita the same as a margarita mocktail?
In everyday use, virgin margarita, non-alcoholic margarita and margarita mocktail usually describe the same broad idea: a margarita-style drink made without tequila or orange liqueur. Recipes range from simple citrus-and-soda drinks to versions built with zero-proof agave spirits.
Does this margarita mocktail contain alcohol?
The basic citrus-agave-sparkling-water recipe uses no alcoholic ingredient. Specialty products sold as non-alcoholic spirits, bitters or cocktail substitutes can vary, so check the stated alcohol content on the individual product whenever an exact 0.0% drink matters to you.
Can I leave out the lemon juice?
Yes. Lemon broadens the citrus, but the drink still works without it. Leave it out, make the lime-and-orange base, and change something only if the finished glass actually needs it.
How much juice is in one lime?
It varies considerably. A medium juicy lime may give roughly 1 oz (30 ml), while another may give much less. Measuring the juice is more reliable than building the recipe around a fixed number of limes.
What to Serve With a Margarita Mocktail
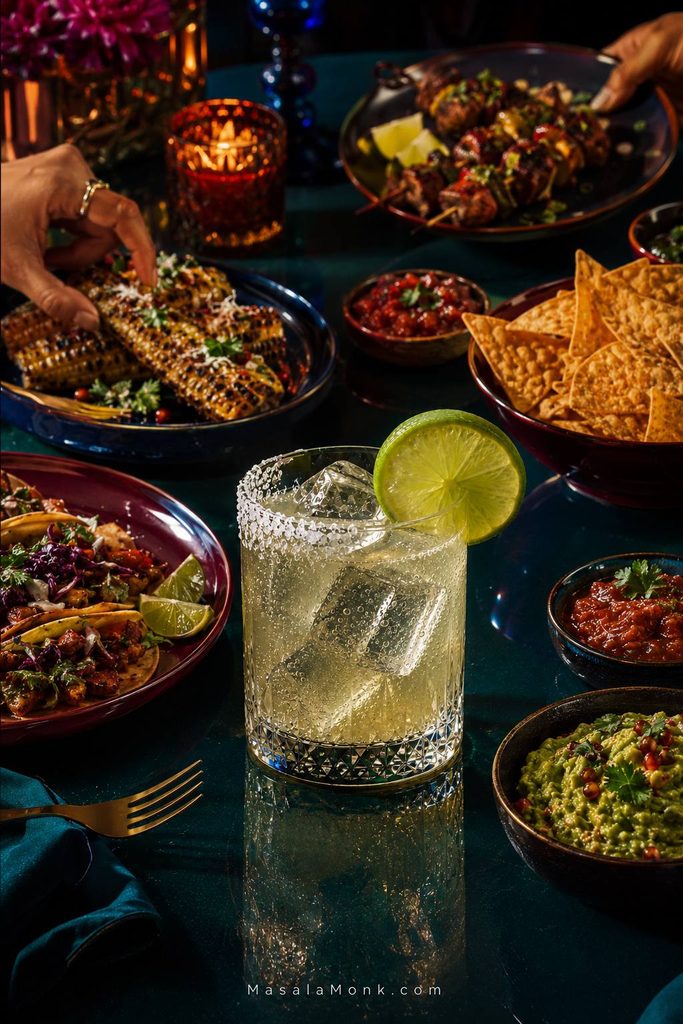
Part of the pleasure of a margarita is the table around it: something salty, something spicy, a cold glass that lasts long enough to eat with. Creamy guacamole with tortilla chips is one of the simplest pairings because lime and salt already connect the food and drink.
Quesadillas, grilled corn, nachos, grilled vegetables, spicy chicken, shrimp, bean dips and fruit salsas fit naturally too. A chile-and-Tajín rim is particularly good when the food brings a little sweetness.
For dinner, Fish Tacos are an easy match: flaky fish, cabbage, lime crema and jalapeño give the cold margarita plenty of richness and spice to cut through.
At the table, use the half-salted rim strategically: sip from the unsalted side with salty chips, then rotate toward salt alongside sweeter or richer bites.
A margarita mocktail does not have to convince anyone that tequila is hiding in the glass. It needs to give you the part you came for: bright lime, a salty edge, enough character to slow down and enjoy it, and a second sip that sounds better than the first. Once you know which adjustment changes which part of that experience, you can make the glass your own.
Made it your own? Tell me what made the difference for you—less agave, tonic, extra grapefruit, jalapeño, a frozen version, or something completely different.
Nuts are one of nature’s most powerful—and underutilized—ingredients. Packed with nutrients, flavor, and texture, they are a culinary multitool that can add health and depth to nearly any dish. From your morning smoothie to your evening dinner plate, and every snack in between, nuts can bring variety, satisfaction, and nourishment. Here’s a practical, creative, and engaging guide on how to make nuts a staple in your daily eating routine.
Why Nuts Matter: A Nutritional Powerhouse
Nuts like almonds, walnuts, pistachios, and cashews are rich in healthy fats, plant protein, fiber, and essential micronutrients including magnesium, vitamin E, selenium, and calcium. A single ounce (30g) of almonds, for example, contains about 6g of protein and 80mg of calcium. Regular consumption is linked to improved heart health, better weight management, and reduced inflammation. Despite their small size, they can make a big impact on your diet and overall well-being.
Morning Boosters: Start Your Day Right
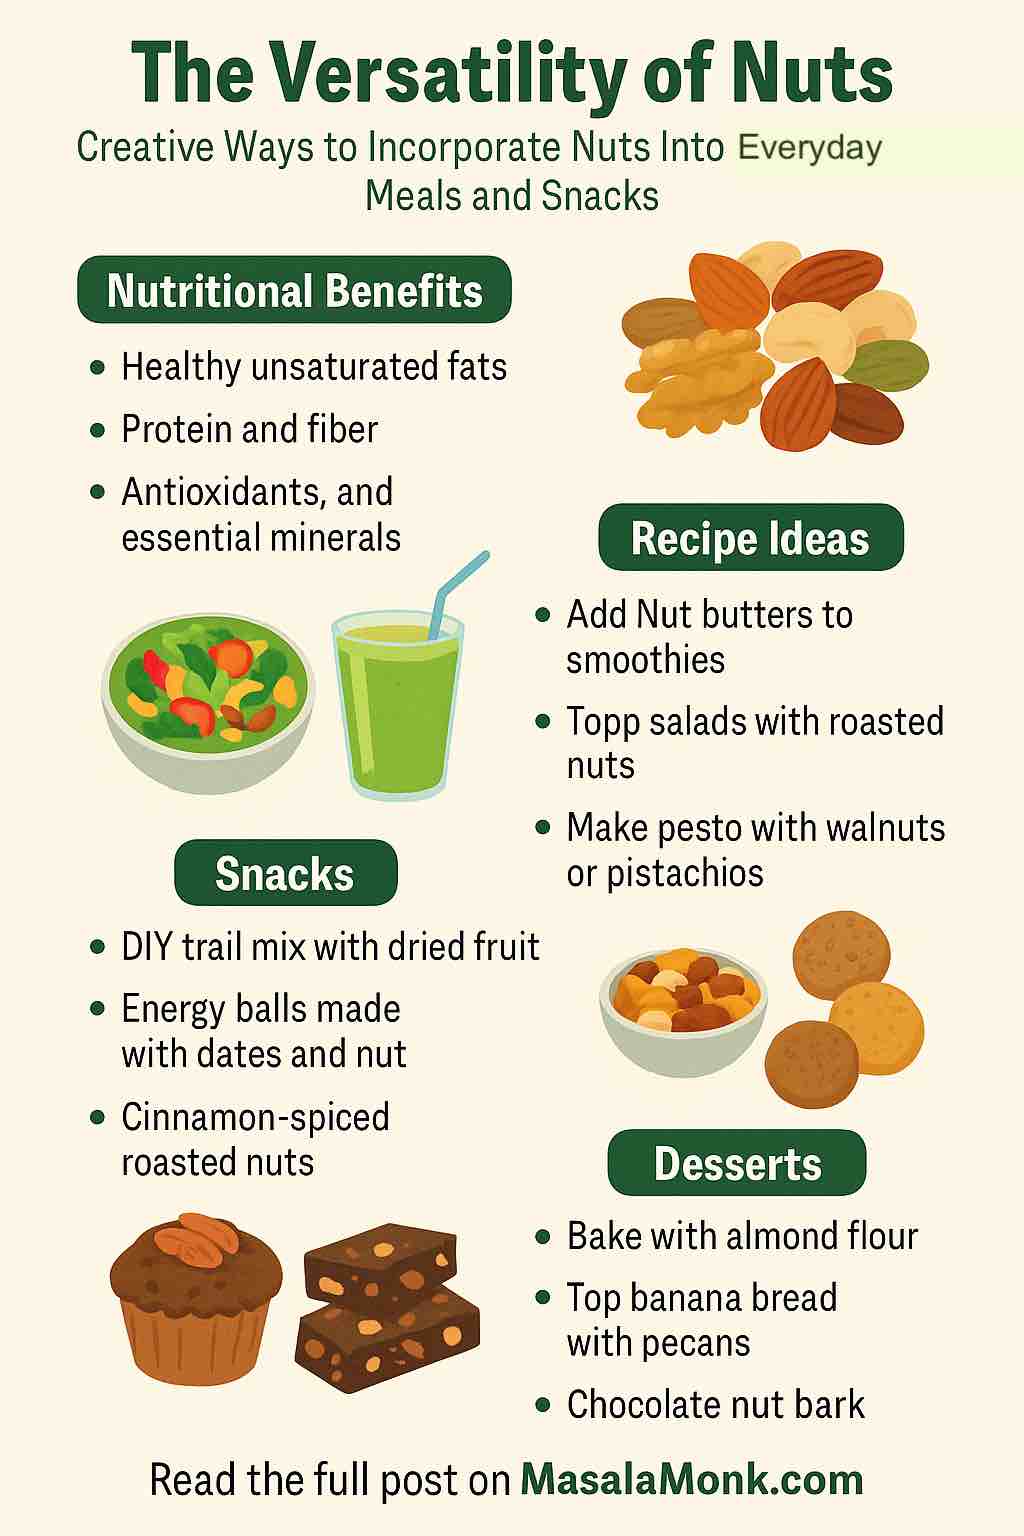
1. Nut-Infused Smoothies Blend nut butters like almond, peanut, or cashew into smoothies for added creaminess, protein, and richness. Combine with banana, spinach, dates, and a milk of your choice for a nutritious start.
2. Yogurt & Smoothie Bowls Top bowls with chopped nuts, chia seeds, and a drizzle of nut butter. Try pistachios with strawberries or walnuts with apple slices and cinnamon.
3. Homemade Nut Granola Bake a mix of rolled oats, honey, olive oil, and your favorite nuts for a crunchy, customizable granola.
4. Savory Nut Toasts Spread cashew cream cheese or almond ricotta on whole grain toast. Add avocado, smoked paprika, or sliced tomatoes for a gourmet touch.
Midday & Main Meal Marvels
1. Nutty Salads with Texture Toss roasted pecans, pine nuts, or almonds into salads. Combine with arugula, goat cheese, and citrus segments for a flavorful twist.
2. Stir-fries and Curries Add cashews to Thai or Indian curries, or ground peanuts in Indonesian sauces. They soak up spices beautifully and offer hearty texture.
3. Nut-Crusted Proteins Coat chicken, tofu, or salmon in crushed pistachios, almonds, or hazelnuts for a crunchy finish.
4. Innovative Pesto & Sauces Swap traditional pine nuts for walnuts or pistachios in your pesto. Create creamy peanut or cashew sauces for noodles, wraps, or dipping.
5. Rice & Grain Upgrades Sprinkle toasted slivered almonds or pine nuts over couscous, quinoa, or brown rice to add layers of flavor and crunch.
Snacks That Travel Well
1. DIY Trail Mix Build your own mix with roasted nuts, dried fruits, dark chocolate chips, and seeds like pumpkin or sunflower.
2. Energy Balls and Bars Blend dates, oats, and nut butters with extras like cocoa nibs, coconut, or protein powder. Roll into balls or press into bars for a grab-and-go option.
3. Spiced & Roasted Nuts Roast nuts with bold flavors—sweet (cinnamon-honey), savory (rosemary-garlic), or spicy (chili-lime). Perfect for snacks, salads, or cocktails.
4. Portable Nut Dips Make muhammara (roasted red pepper and walnut dip) or use almond butter as a dip for sliced apples, carrots, or celery.
Sweet but Smart: Nut-Based Desserts
1. Nut Flours for Baking Use almond flour or hazelnut meal in gluten-free baking recipes for cookies, muffins, and cakes.
2. Nut Toppings Sprinkle crushed nuts on banana bread, oatmeal cookies, or fruit crisps to elevate texture and flavor.
3. Chocolate Nut Barks & Clusters Melt dark chocolate and mix with nuts and seeds. Spread into thin bark or form clusters for a simple, satisfying dessert.
4. Stuffed Dates Fill Medjool dates with nut butter and dip in dark chocolate. Finish with a pinch of sea salt for a luxurious treat.
Global Inspirations for Everyday Variety
Middle Eastern: Add pine nuts to hummus, or make classic baklava with layers of phyllo and crushed walnuts or pistachios.
Asian: Use peanuts in satay sauce or sprinkle chopped cashews over Thai noodle bowls.
Mediterranean: Blend walnut pesto for pasta or spread almond dips on flatbread.
Western Vegetarian: Make a hearty nut roast for a meatless dinner centerpiece.
Tips for Storage, Substitutes & Safety
Storage: Keep nuts in airtight containers; refrigerate or freeze to prevent rancidity.
Portion Control: Stick to about 30g/day to balance calorie intake and health benefits.
Low-Sodium Option: Choose raw or unsalted nuts for heart-friendly snacking.
Allergy Alternatives: Try sunflower seed butter, pepitas, or coconut flakes as substitutes.
Final Thoughts: Small Changes, Big Impact
Whether you’re upgrading your breakfast, adding crunch to your salad, or experimenting with global flavors, nuts can play a delicious and meaningful role in your meals. They’re not just a snack—they’re an ingredient that bridges convenience, flavor, and wellness. Start small, mix and match, and you’ll soon discover that a handful of nuts can go a long way.
Ready to get nutty in the kitchen? Start today with a new recipe or a fresh twist on an old favorite.
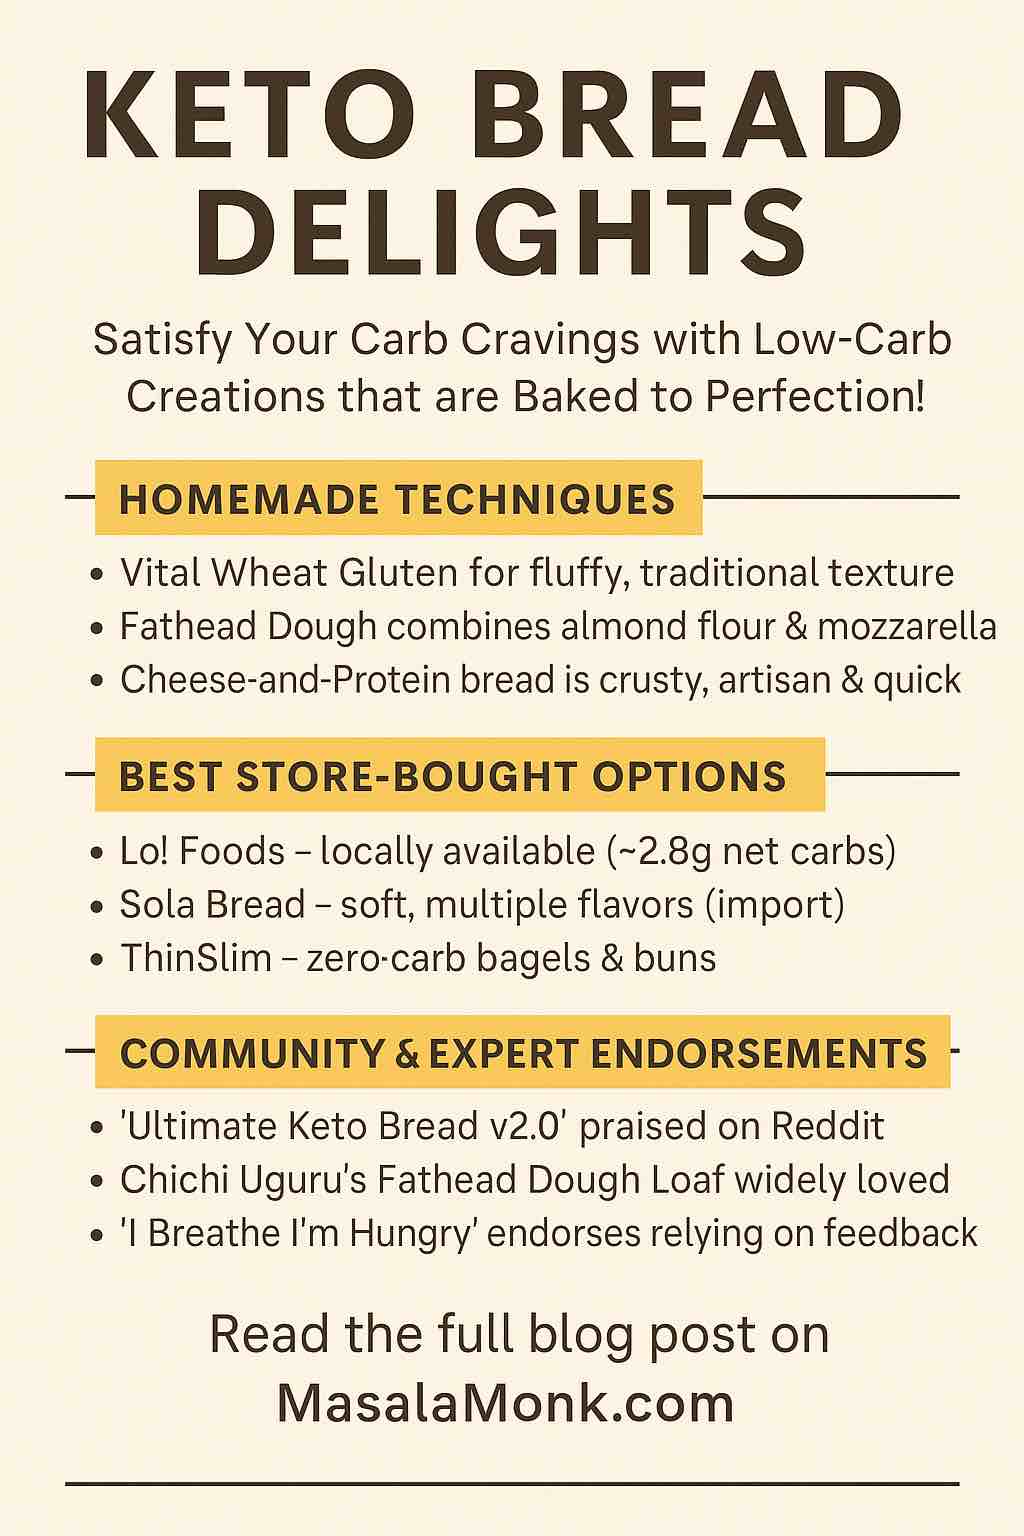
For anyone walking the low-carb or ketogenic path, bread often feels like the first and most painful sacrifice. That warm, crusty slice of sourdough or the perfect base for a sandwich seems like a distant dream. But keto bread has come a long way, and today, it’s not just about compromising—it’s about crafting low-carb creations that genuinely satisfy.
In this blog post, we’ll dive deep into the world of keto bread: from the science behind the ingredients to the best homemade recipes and the most loved store-bought brands. Whether you’re a seasoned keto baker or just dipping your toes into the lifestyle, this guide will arm you with everything you need to bake, buy, and love your keto bread.
Why Keto Bread?
Traditional bread is carbohydrate-heavy—loaded with refined flours that spike blood sugar and derail ketosis. Keto bread flips the formula on its head: low in carbs, high in fiber, protein, and healthy fats, making it a perfect fit for the ketogenic diet.
But the best keto breads do more than meet macro goals—they offer real satisfaction. The goal is to achieve a bread-like structure, taste, and mouthfeel without relying on traditional grains. Enter a world of almond flour, oat fiber, psyllium husk, eggs, cheese, and more.
Key Ingredients to Understand
1. Almond Flour
A staple in keto baking. It’s naturally low in carbs and rich in fats and protein. Ideal for quick breads and muffins.
2. Coconut Flour
Highly absorbent and rich in fiber. Use in smaller quantities, often paired with eggs or other binders.
3. Oat Fiber
A zero-carb flour substitute made purely from the fibrous husk of oats. Adds lightness and improves texture.
4. Psyllium Husk Powder
Essential for gluten-free elasticity. Gives structure and a chewy texture to keto bread.
5. Vital Wheat Gluten
While not gluten-free, this ingredient mimics traditional bread elasticity and rise. Often used in hybrid keto loaves.
6. Eggs & Cheese
Used in fathead doughs and cloud bread, they add richness, structure, and protein.
Ingredients: Almond or coconut flour, egg, butter, baking powder.
Texture: Spongy, great for a quick sandwich fix.
Tip: Slice and toast for better texture.
5. Psyllium Husk Yeast Bread (Egg-Free)
Ingredients: Almond flour, psyllium husk, yeast, apple cider vinegar, water.
Texture: Firm, chewy, sandwich-ready.
Tip: Bake in a preheated cast iron loaf pan for a better crust.
Best Store-Bought Keto Bread Brands
International:
Sola Bread – 1-2g net carbs, multiple flavors.
ThinSlim Foods – Zero net carb bread and bagels.
Hero Seeded Bread – Tastes like whole wheat, only 1g net carb.
Base Culture – Gluten- and grain-free; paleo friendly.
India-Based:
Lo! Foods – 2.8g net carbs, clean label, delivered pan-India.
Khhet – Artisanal mini-loaves and low-carb tortillas.
Get Sorted – Keto roti and wraps with 3-4g net carbs.
These options are perfect for busy lifestyles or when baking isn’t an option. Just be sure to check the label for true net carbs and avoid brands that sneak in maltodextrin or modified starches.
How to Store and Serve Keto Bread
Storage: Keto bread has fewer preservatives. Store in an airtight container in the fridge (up to 1 week) or freeze in slices.
Reheating: Always toast or warm before eating—this revives texture and flavor.
Serving Ideas:
Avocado toast with hemp seeds
Keto French toast with erythritol syrup
Sandwiches with sugar-free deli meats and cheeses
Grilled cheese using fathead dough bread
Final Tips for Keto Bread Success
Use precise measurements – Keto flours behave differently.
Let the bread rest after baking – Texture improves as it cools.
Toast it – Especially with mug breads or low-moisture loaves.
Experiment – Try combinations like lupin flour and whey for high-protein versions.
Conclusion
Keto bread is no longer a compromise—it’s a craft. With a little experimentation and the right ingredients, you can enjoy bread that’s as good as (if not better than) its high-carb counterpart. Whether you’re baking from scratch or grabbing a trusted loaf off the shelf, keto bread delights are here to stay—crisp, golden, satisfying, and oh-so-keto.
FAQs
1. Is keto bread really low in carbs? Yes, authentic keto bread typically contains 0–3 grams of net carbs per slice, depending on the ingredients. The key is using low-carb flours like almond flour, coconut flour, oat fiber, or psyllium husk.
2. Can I eat keto bread daily? Absolutely—in moderation. It’s great for maintaining variety and satisfaction on a keto diet. Watch your total daily carb limit (usually 20–50g net carbs) and check the ingredients to avoid hidden sugars or starches.
3. What’s the best flour substitute for wheat in keto bread? It depends on your dietary goals:
Almond flour: Nutty flavor, higher in fat.
Coconut flour: Very absorbent, use less.
Oat fiber: Zero-carb, adds volume.
Vital wheat gluten: High protein, bread-like elasticity (not gluten-free).
4. Why does my homemade keto bread taste eggy? Too many eggs or insufficient balancing ingredients (like vinegar or psyllium) can cause this. Whipping egg whites separately and using fewer yolks helps neutralize the flavor.
5. Can I make keto bread without eggs or dairy? Yes! Use psyllium husk, apple cider vinegar, and yeast for binding and rising in egg-free versions. Coconut cream or nut milk can replace dairy.
6. Is keto bread gluten-free? Some recipes are, especially those made with almond, coconut, or flaxseed flour. However, bread using vital wheat gluten is not gluten-free, so check recipes or packaging accordingly.
7. How should I store keto bread? Homemade keto bread should be stored in the fridge for up to 7 days or frozen in slices for longer life. Always toast before eating to restore texture.
8. Can I use a regular bread machine for keto bread? Yes, with some recipes. Ensure the dough cycle is manual or programmable, and use recipes designed for low-gluten development (e.g., no long kneading needed).
9. What’s the best store-bought keto bread brand? Top-rated include:
Sola Bread (1–2g net carbs)
ThinSlim Foods (zero net carbs)
Lo! Foods (India-based, ~2.8g net carbs) Always verify nutrition labels and ingredients.
10. Can I lose weight eating keto bread? Yes, if it fits within your macronutrient goals. Keto bread is lower in carbs and often higher in fiber and fat, promoting satiety and helping maintain ketosis.
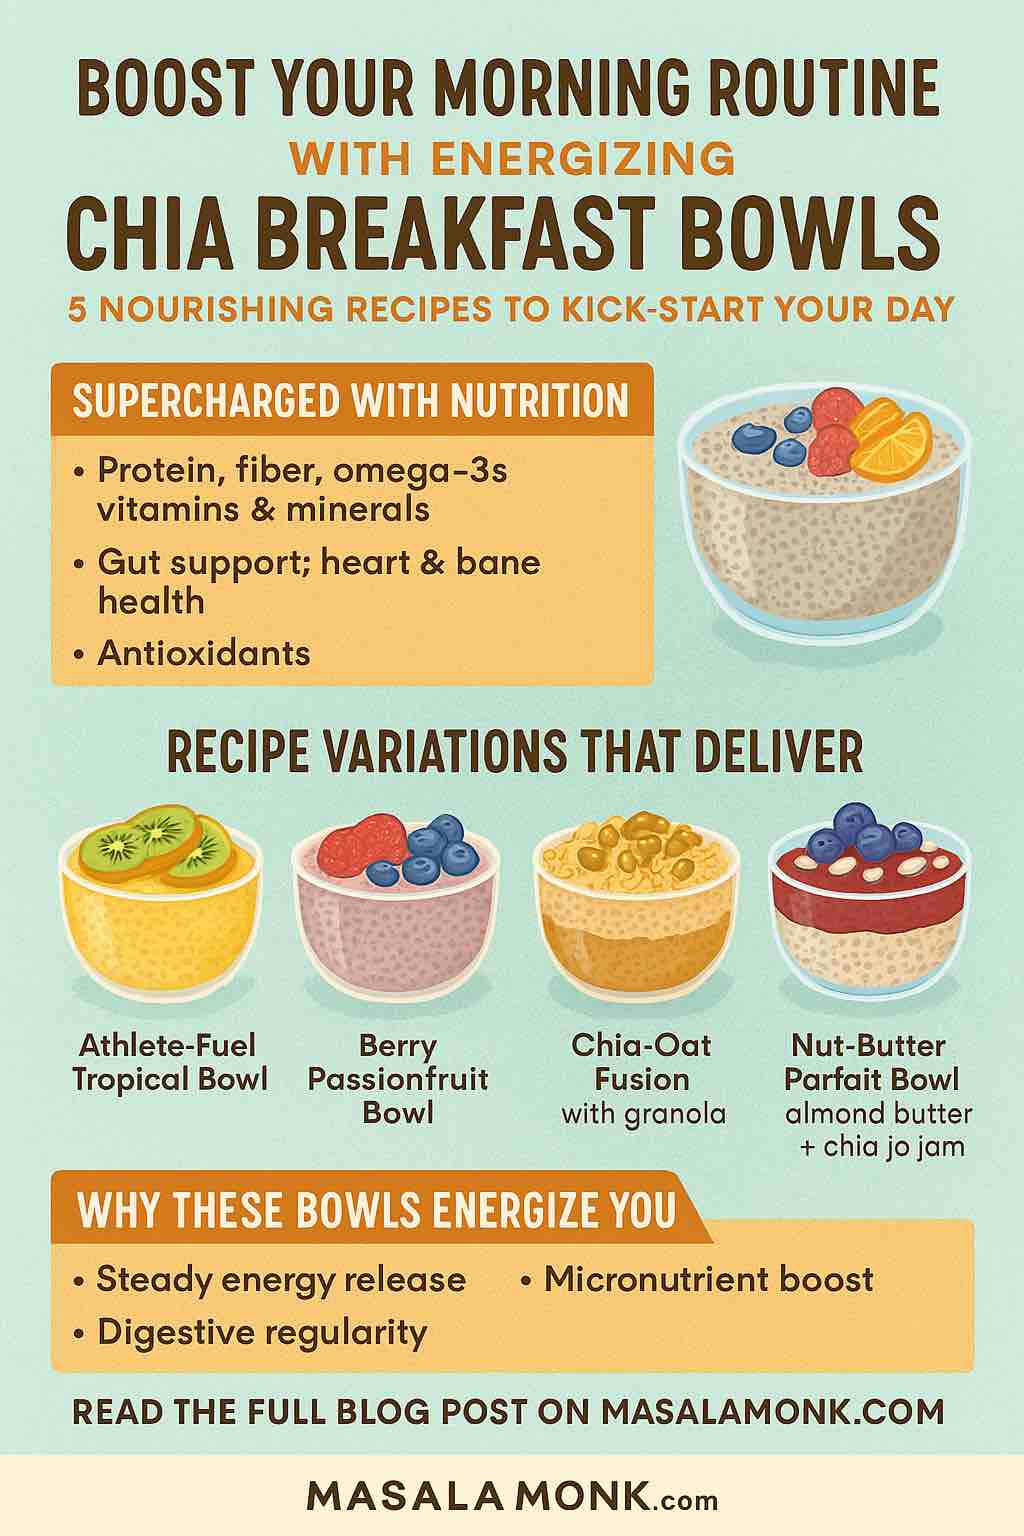
Looking for a morning routine upgrade that fuels your body, sharpens your mind, and delights your taste buds? Say hello to chia breakfast bowls—a powerful combination of convenience, nutrition, and endless flavor options. This blog post dives into the benefits of chia seeds, practical preparation tips, and five energizing recipes that will transform your mornings.
Why Chia Seeds Deserve a Spot in Your Breakfast
Chia seeds may be tiny, but they pack a punch when it comes to health benefits:
Nutrient Dense: Just 2 tablespoons of chia seeds provide ~10g of fiber, 4.7g of protein, omega-3 fatty acids, and essential minerals like calcium, magnesium, and iron.
Sustained Energy: The blend of protein, healthy fats, and complex carbohydrates helps maintain energy levels and avoid mid-morning crashes.
Gut-Friendly: High fiber content supports digestive health and regularity.
No-Cook Convenience: Mix, soak, top, and go. No stove required.
Whether you’re a busy professional, a fitness enthusiast, or someone exploring plant-based nutrition, chia breakfast bowls offer a customizable and satisfying start to your day.
How to Prepare the Perfect Chia Bowl
Step 1: Soak Your Chia
Mix 3 tablespoons of chia seeds with 1 cup of your favorite milk (plant-based or dairy). Let it soak for at least 2 hours, or preferably overnight in the refrigerator.
Step 2: Choose a Base
Creamy: Add Greek yogurt or plant-based yogurt for extra protein and creaminess.
Oaty: Mix in overnight oats for a more substantial bowl.
Fruity: Blend in mashed banana, mango puree, or applesauce.
Step 3: Add Your Toppings
Aim for a mix of textures and nutrients:
Fruits: Berries, sliced banana, kiwi, or citrus segments
Sweeteners (optional): Honey, maple syrup, or dates
5 Nourishing Chia Bowl Recipes to Jumpstart Your Day
1. Berry & Passionfruit Sunrise Bowl
Base: Chia soaked in almond milk Toppings: Muddled berries, passionfruit pulp, toasted coconut, pepitas Why You’ll Love It: Antioxidant-rich and visually stunning, this bowl is a tropical wake-up call.
2. High-Protein Tropical Delight
Base: Chia + almond milk + Greek yogurt Toppings: Diced mango, kiwi, shredded coconut Nutrition Boost: ~18g of protein and 12g of fiber per serving. Ideal for post-workout recovery or long workdays.
3. Chia-Oatmeal Energy Bowl
Base: Rolled oats and chia seeds soaked in soy or oat milk overnight Toppings: Granola, blood orange slices, blackberries Power-Up: Combines slow-releasing carbs with high fiber for all-morning energy.
4. Yogurt-Chia Crunch Bowl
Base: Chia mixed with vanilla-flavored Greek yogurt Toppings: Fresh berries, kiwi slices, crunchy granola Best For: A fast and filling breakfast that feels like dessert but fuels like a power meal.
5. Apple-Cinnamon Comfort Bowl
Base: Chia in cinnamon-spiced oat milk Toppings: Sliced apples, a pinch of nutmeg, raisins, and almond slivers Why It Works: Cozy and warming, this bowl is perfect for autumn mornings or comfort cravings.
Smart Prep Tips for Busy Mornings
Batch It: Prepare 3-4 jars of chia pudding at once and store them in the fridge.
Pre-Cut Toppings: Keep containers of chopped fruit and toasted nuts ready for easy assembly.
On-the-Go Friendly: Use mason jars or meal prep containers to make your breakfast grab-and-go.
Customize Your Bowl
Want to make it your own? Try these fun variations:
Green Power: Add matcha or spirulina
Chocolate Fix: Mix in cacao powder or top with dark chocolate chips
Indian Inspired: Infuse with cardamom, rosewater, or turmeric
Savory Twist: Top with avocado, tomatoes, and a drizzle of olive oil
Final Thoughts
Energizing, delicious, and endlessly adaptable, chia breakfast bowls are a game changer. Whether you prep them the night before or whip them up in the morning, they deliver on taste, texture, and nutrition. Start small, experiment often, and you’ll soon have a chia bowl that’s as unique as your morning routine.
Ready to make the switch? Try one of these recipes this week and see how your mornings transform.
🔍 FAQs
1. How long should chia seeds soak before eating? Chia seeds should soak for at least 2 hours, but overnight soaking is ideal for full hydration and a creamy texture.
2. Can I use water instead of milk for soaking chia seeds? Yes, but using milk or plant-based alternatives improves taste, texture, and nutrition. Water works in a pinch but is less flavorful.
3. Are chia bowls good for weight loss? Absolutely. Chia bowls are high in fiber and protein, helping you feel full longer and reduce unnecessary snacking.
4. Can I prep chia bowls in advance? Yes. You can prep 3–4 servings at once and refrigerate them for up to 5 days, making them perfect for meal prepping.
5. Are chia bowls safe for kids? Yes, but for young children, ensure seeds are fully hydrated to avoid choking hazards. Adjust toppings for age-appropriate textures.
6. What’s the best liquid-to-chia seed ratio? A good rule of thumb is 1 tablespoon chia seeds to 1/4 cup liquid. For a thicker pudding, reduce the liquid slightly.
7. Can I eat chia seeds without soaking them? While safe in small amounts, dry chia seeds absorb liquid and can swell in your throat or stomach. Always soak them when making bowls.
8. How can I make chia bowls more protein-rich? Add Greek yogurt, nut butters, protein powder, or cottage cheese to increase protein content.
9. Are chia bowls suitable for diabetics? Yes, when made without added sugars. Chia’s fiber helps regulate blood sugar, especially when paired with protein and healthy fats.
10. Can I freeze chia pudding bowls? Yes, though texture changes slightly. Freeze in small portions and thaw in the fridge overnight before eating.