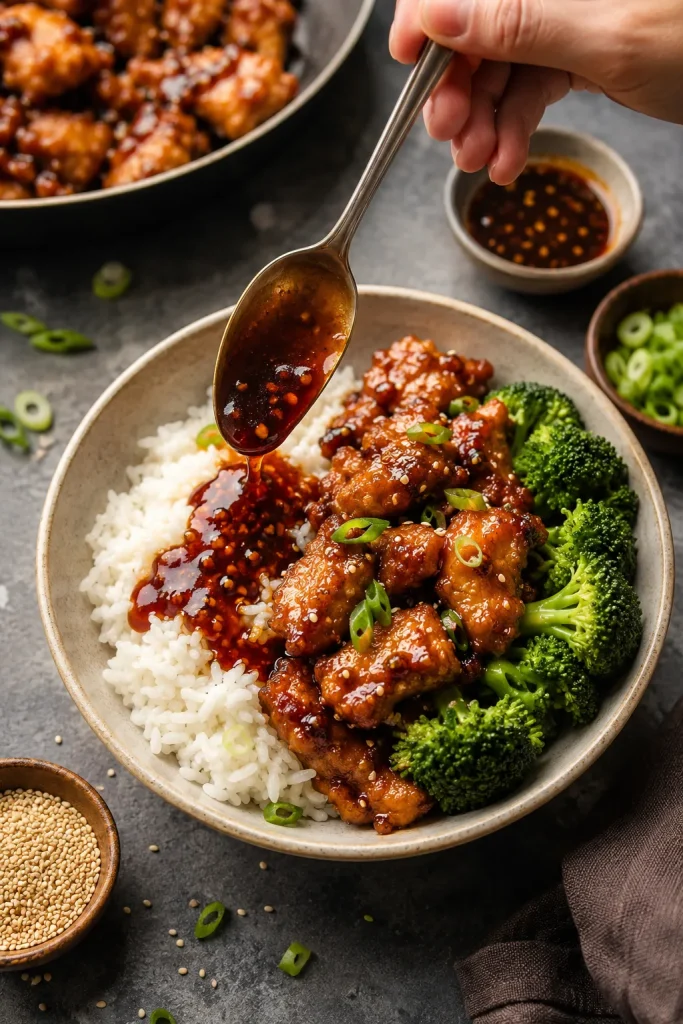
If you have ever dipped hibachi shrimp, steak, or fried rice into that sharp brown ginger sauce and wished you had a jar at home, this is the one to make.
This hibachi ginger sauce is pourable, tangy, salty, lightly sweet, and full of fresh ginger-onion bite. It is the brown dipping sauce from the little Japanese steakhouse cup — not creamy yum yum sauce and not the orange ginger dressing from the salad.
The first spoonful should taste like the dip you remember: salty at the start, bright in the middle from lemon and rice vinegar, and warm with ginger at the end. Blend it in 5 minutes, chill it if you can, and serve it with shrimp, steak, chicken, fried rice, noodles, vegetables, dumplings, tofu, or rice bowls.
Before You Blend
- Use fresh ginger if possible. Ginger paste works in a pinch, but fresh ginger gives the cleanest bite.
- Choose low-sodium soy sauce. Regular soy sauce can make this dip too salty after it rests.
- Pulse, don’t fully puree. Tiny ginger and onion flecks are part of the steakhouse-style texture.
- Let it chill when you can. One hour in the fridge softens the raw onion and makes the sauce taste more rounded.
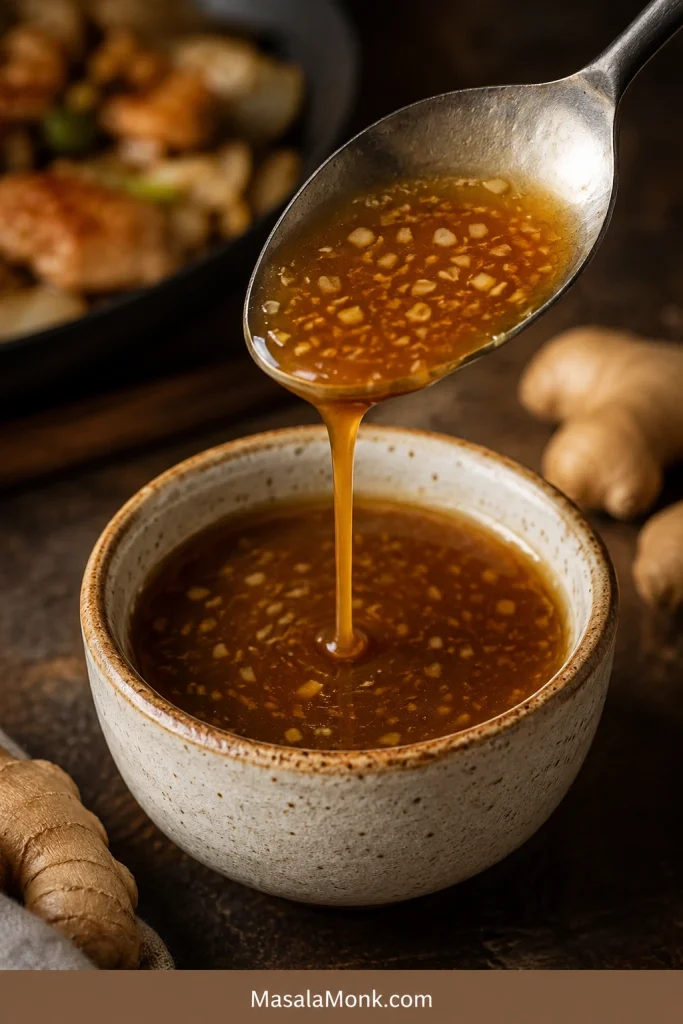
Quick Answer: What Is Hibachi Ginger Sauce?
Hibachi ginger sauce is a Japanese steakhouse-style dipping sauce made with fresh ginger, onion, soy sauce, rice vinegar, lemon juice, and a little sugar. It is usually served with grilled meats, seafood, vegetables, noodles, and fried rice.
When people ask for the brown sauce from hibachi restaurants, they usually mean this ginger-soy dipping sauce. Yum yum sauce is the creamy pink-orange one. On salad, the orange or tan sauce is usually Japanese ginger dressing.
It is especially good with shrimp fried rice, steak bites, grilled chicken, sautéed mushrooms, zucchini, dumplings, spring rolls, tofu, salmon, and rice bowls.
Hibachi Ginger Sauce Recipe
A 5-minute no-cook Japanese steakhouse-style ginger sauce made with fresh ginger, onion, soy sauce, rice vinegar, and lemon juice. The flavor is salty-tangy first, then bright and gingery, with a little onion bite that mellows after chilling.
| Prep Time | 5 minutes |
| Cook Time | 0 minutes |
| Optional Chill Time | 1 hour |
| Total Time | 5 minutes, or 1 hour 5 minutes with chilling |
| Yield | About 1 cup / 240 ml |
| Servings | 8 |
| Serving Size | 2 tablespoons / 30 ml |
| Texture | Pourable, lightly textured |
Ingredients
- 2 tablespoons fresh ginger, peeled and grated or finely chopped, about 15 g
- ½ cup chopped yellow onion, about 70–80 g
- ⅓ cup low-sodium soy sauce or tamari, 80 ml
- 3 tablespoons rice vinegar, 45 ml
- 2 tablespoons fresh lemon juice, 30 ml
- 1 teaspoon sugar or brown sugar, 4 g
- ½ teaspoon lemon zest, optional
- 1 small garlic clove, optional
Equipment
- Blender, food processor, or mini chopper
- Microplane, grater, or sharp knife
- Cutting board
- Measuring cups and spoons
- Small jar or airtight container
No blender? Grate the ginger, mince the onion as finely as possible, then shake everything hard in a jar. The dip will be chunkier and more intense, but it still works for dipping.
Instructions
- Peel the ginger and grate it, or chop it finely so it blends easily.
- Chop the onion into small pieces. Smaller pieces help the mixture blend faster without turning foamy.
- Add the ginger, onion, soy sauce, rice vinegar, lemon juice, sugar, and optional lemon zest or garlic to a blender or food processor.
- Pulse until the sauce is loose and spoonable. Stop while tiny pieces of ginger and onion are still visible.
- Taste before you change anything. Add more lemon juice if it tastes flat, a tiny pinch of sugar if it tastes too strong, or 1–2 tablespoons water if it tastes too salty.
- Serve right away, or cover and chill for 1 hour so the flavor tastes smoother and more rounded.
Recipe Notes
- Do not judge the sauce in the first minute after blending. Raw onion and ginger taste loud at first; chilling is part of the recipe if you want a smoother restaurant-style flavor.
- Start with 2 tablespoons fresh ginger. Very mild ginger can take another ½ tablespoon after blending. Older, woody, or very hot ginger should rest in the sauce before you add more.
- Low-sodium soy sauce keeps the sauce from becoming too salty.
- Use a food processor for a slightly textured sauce and a blender for a smoother one.
- The dip may separate in the fridge. Stir or shake before serving.
- Yield may vary slightly depending on how finely the onion is chopped and blended.
- Store in an airtight jar in the refrigerator and use within 5 days.
Choose Your Version
The main recipe is balanced for home cooking: bold enough for hibachi-style plates, but not so salty that it overwhelms rice, vegetables, or dumplings. Use this quick guide before you add more soy sauce, sugar, or lemon.

| Want This Result? | Do This |
|---|---|
| Closest steakhouse bite | Add extra soy sauce, rice vinegar, lemon, and ginger from the stronger restaurant-style adjustment below. |
| Less salty everyday sauce | Stay with the main recipe and use low-sodium soy sauce. |
| Best for dumplings | Add the optional garlic and a few drops of toasted sesame oil. |
| Best for fried rice | Keep it loose and bright. Do not thicken it. |
| Best texture | Pulse until tiny ginger and onion flecks remain. |
| No blender version | Grate the ginger, mince the onion finely, and shake everything in a jar. |
Already made the sauce? Jump to adjustments after blending or troubleshooting. Still deciding how you want it to taste? Start with why the balance works.
Table of Contents
Why This Ginger Sauce Recipe Works
Some restaurant-style ginger sauces lean hard on soy sauce and vinegar. They taste bold with grilled steak or shrimp, but they can become too salty for home dinners. This version keeps the familiar ginger-onion base and balances it with lemon, rice vinegar, and a small amount of sugar.
The finished sauce should hit salty first, then tangy, then gingery. It should not taste creamy, oily, syrupy, or thick. If the onion tastes raw right away, chill the sauce before changing the recipe.
Quick Taste Check
The dip should taste balanced, not sweet or heavy. Flat sauce needs lemon, a too-strong batch needs chill time, and salty sauce needs water 1 tablespoon at a time. When one bite of rice makes you want another, the balance is right.

That balance is why the dip works with a whole plate, not just one bite. It cuts through butter, soy, and seared edges without covering up the shrimp, steak, rice, or vegetables. Use it as a dip, a spoon-over sauce for fried rice, or a brighter alternative when a thicker stir fry sauce would feel too heavy.
What Is Hibachi Ginger Sauce?
The easiest way to understand hibachi ginger sauce is by where it sits on the plate: beside grilled food, not on salad. It cuts through richness, wakes up rice, and adds a fresh ginger bite to shrimp, steak, chicken, vegetables, and noodles.
You may see it called Japanese steakhouse ginger sauce, Benihana-style ginger sauce, hibachi brown sauce, or simply ginger sauce. Most of those names point to the same ginger-soy dipping cup sauce.
Ingredients You’ll Need
The goal is not to make the strongest sauce possible. Aim for that familiar first dip: bright, salty, gingery, and balanced enough that you keep going back for one more bite of rice.

Fresh Ginger
Fresh ginger is the main flavor. It gives the sauce its clean bite, gentle heat, and bright fragrance. Peel it first, then grate or finely chop it so it blends evenly.
Two tablespoons gives the sauce a clear ginger flavor without overwhelming everything else. Use 1½ tablespoons for a milder dip or 2½ tablespoons for a stronger one.
Yellow Onion
Onion is what keeps the dip from tasting like soy sauce with ginger stirred in. Yellow onion gives the best balance; white onion tastes sharper, and red onion changes the color and flavor too much for this style.
Soy Sauce or Tamari
Soy sauce brings salt, color, and savory depth. Low-sodium soy sauce is the safest choice because this is a dipping sauce, and salt builds quickly.
Tamari works well for a deeper flavor or a gluten-free version. Coconut aminos can work for a soy-free version, but it is sweeter and less salty, so reduce or skip the sugar and brighten the sauce with extra vinegar or lemon if needed.
For a sweeter cooked soy-ginger glaze instead of a fresh dipping sauce, this teriyaki sauce recipe is the better direction.
Rice Vinegar
Rice vinegar gives the sauce a clean tang without making it harsh. Unseasoned rice vinegar gives you the most control. If using seasoned rice vinegar, blend first, then add sugar only if the sauce still needs rounding.
Lemon Juice
Fresh lemon juice lifts the ginger, keeps the soy sauce from tasting heavy, and gives the dip a clean finish. Lemon zest is optional; use only a little because too much can make the sauce bitter.
Sugar
The sugar is not there to make the sauce sweet. It just rounds off the raw onion, vinegar, lemon, and ginger so the dip tastes balanced instead of harsh. Brown sugar tastes rounder; white sugar keeps the flavor cleaner.
Garlic, Optional
Garlic pushes the dip away from the clean steakhouse flavor and toward a stronger dumpling or noodle sauce. Add one small clove for that version, or leave it out for a cleaner ginger-onion base.
Fresh Ginger vs Ginger Paste vs Ground Ginger
Fresh ginger is best here because the sauce is supposed to taste lively. Dried ginger cannot give the same clean bite.
| Ginger Option | Does It Work? | How to Use It |
|---|---|---|
| Fresh ginger | Best choice | Use 2 tablespoons / about 15 g for the main recipe. |
| Ginger paste | Works in a pinch | Start with 1½ tablespoons, blend, then add more after tasting. |
| Ground ginger | Emergency only | Start with ¼ teaspoon. The flavor will be warmer and duller. |
Check the label on ginger paste. Some brands include salt, vinegar, oil, or preservatives, and those can change the balance.
How to Make Ginger Sauce
No cooking needed here — just chop, blend, taste, and rest. A blender or food processor gives the cleanest texture, but a hand-chopped jar version still works when you want the sauce quickly.
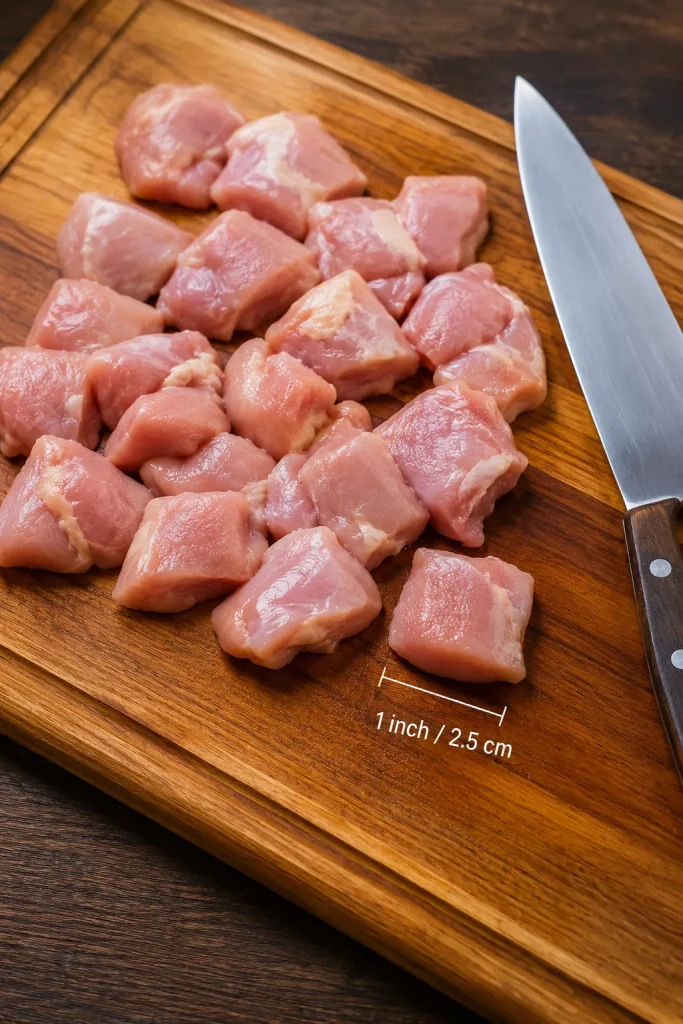
1. Prep the ginger and onion
Peel the ginger and grate it, or chop it finely. Cut the onion into small pieces so it breaks down quickly.

2. Add the sauce ingredients
Add the ginger, onion, soy sauce, rice vinegar, lemon juice, sugar, and optional lemon zest or garlic to a blender or food processor.

3. Pulse until spoonable
Pulse until the sauce is loose and easy to pour. Stop before it becomes a creamy puree. Tiny visible bits of ginger and onion are a good sign.

4. Taste and adjust
Taste before you change anything, and do not panic if it feels loud at first. This sauce can swing from perfect to too salty quickly, so small adjustments are better than big ones. Add lemon if it tastes flat, a tiny pinch of sugar if it tastes too strong, or 1–2 tablespoons water if it tastes too salty.
5. Chill for smoother flavor
You can serve the sauce right away, but it tastes better after resting. After about an hour in the fridge, the onion relaxes, the ginger settles, and the sauce starts tasting more like the restaurant cup.
Blender vs Food Processor: What Texture Should Ginger Sauce Have?
Both tools work, but they give slightly different results.

| Tool | Best For | Texture |
|---|---|---|
| Blender | Smoother sauce | More even, less textured, easy to pour. |
| Food processor | Steakhouse-style texture | Lightly textured, with tiny ginger and onion flecks. |
| Mini chopper | Small batches | Works well, but scrape the sides once or twice. |
| No blender | Quick hand-chopped version | Chunkier and stronger, but still useful for dipping. |
The ideal texture is pourable and lightly flecked. It should not look like mayonnaise, salad dressing, or a thick glaze.
If the sauce turns pale or foamy after blending, let it sit for a few minutes and stir. Air can lighten the color temporarily; after resting, the sauce usually settles into a deeper brown.
Taste and Texture Target
You’ll know the sauce is right when it smells gingery, pours easily from a spoon, tastes bright but not biting, and leaves tiny flecks behind in the cup. It should be brighter than salad dressing and lighter than teriyaki sauce.
How to Adjust the Sauce After Blending
Once the dip is blended, change it slowly. A spoonful of water, lemon, sugar, or soy sauce can move the whole batch.
| Goal | What to Do |
|---|---|
| More restaurant-style | Add 1–2 tablespoons soy sauce, 1 tablespoon rice vinegar, and a little extra grated ginger. |
| Less salty | Add 1–2 tablespoons water after blending, or use a little less soy sauce next time. |
| Less intense | Chill for 1 hour and add ½ teaspoon sugar if needed. |
| More gingery | Add ½ tablespoon more fresh grated ginger. |
| More textured | Use a food processor and stop while tiny pieces are visible. |
| Smoother | Use a blender and blend a little longer, but stop before it turns foamy. |
| Gluten-free | Use tamari or certified gluten-free soy sauce. |
| Soy-free | Use coconut aminos, reduce or skip the sugar, and add extra vinegar or lemon to balance the sweetness. |
| Better for dumplings | Add the optional garlic and a few drops of toasted sesame oil. |
Benihana-Style Notes
Think of this as Benihana-style, not a claim that it is the restaurant’s exact formula. Benihana’s own ginger sauce notes emphasize fresh ginger, onion, rice vinegar, lemon juice, and low-sodium soy sauce, which lines up with the flavor profile people expect from the brown dipping sauce.
This version keeps that profile but adjusts the balance for a home kitchen. Use the stronger adjustment below when the sauce in your memory was sharper, saltier, and more intense. For a dip you can spoon over rice and use all week, stay with the main recipe.

For a Stronger Restaurant-Style Sauce
After blending the main recipe, make it sharper and more soy-forward by adding:
- 1–2 extra tablespoons soy sauce
- 1 extra tablespoon rice vinegar
- ½ tablespoon extra lemon juice
- ½ tablespoon extra grated ginger
Add these slowly and taste as you go. It is easier to make the sauce stronger than to rescue a sauce that has become too salty or too sour.
Ginger Sauce vs Ginger Dressing vs Yum Yum Sauce
These sauces often get mixed up because they all show up around hibachi and Japanese steakhouse meals. The easiest way to tell them apart is to look at where they show up on the table: ginger sauce is for the dipping cup, ginger dressing is for salad, and yum yum sauce is the creamy one people spoon over shrimp and fried rice.

| Sauce | Texture | Main Flavor | Best Use |
|---|---|---|---|
| Hibachi ginger sauce | Brown, pourable, lightly textured | Ginger, onion, soy, vinegar, lemon | Shrimp, steak, chicken, vegetables, fried rice |
| Japanese ginger dressing | Orange or tan, dressing-like | Carrot, onion, ginger, oil, vinegar | Green salad |
| Yum yum sauce | Creamy, pale pink or orange | Mayo, tomato or ketchup, sugar, spices | Shrimp, chicken, fried rice, vegetables |
| Hibachi mustard sauce | Smooth, mustard-forward | Mustard, soy, sesame, or cream depending style | Steak and chicken |
| Ginger scallion sauce | Oil-based and spoonable | Ginger, scallions, hot oil | Rice, noodles, poached chicken, tofu |
For salad, ginger dressing is usually the better match. Beside hibachi shrimp, steak, chicken, vegetables, or fried rice, this brown ginger sauce is the right one.
What to Eat With Ginger Sauce
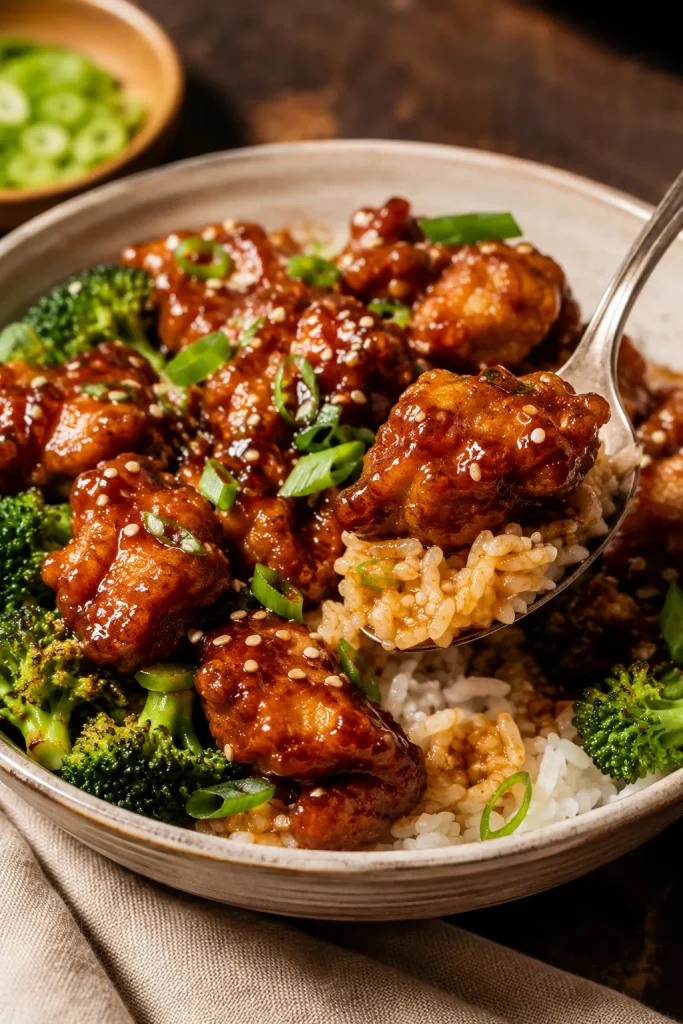
Use this sauce beside something rich: buttery mushrooms, seared shrimp, fried rice, grilled steak, or chicken thighs. It makes rice taste brighter, shrimp taste sweeter, and steak feel less heavy after a few bites.
Hibachi-style favorites
- Hibachi shrimp
- Steak bites or grilled steak
- Chicken thighs or chicken breast
- Salmon or tuna
- Grilled zucchini, onion, mushrooms, and broccoli
- Fried rice
- Hibachi noodles
Takeout-style snacks
- Dumplings
- Potstickers
- Egg rolls
- Spring rolls
- Lettuce wraps
For a creamier dip beside spring rolls or noodles, keep this ginger sauce as the bright option and add a bowl of peanut sauce for contrast.

Everyday bowls and meals
- Rice bowls
- Noodle bowls
- Tofu
- Roasted vegetables
- Leftover grilled chicken
- A flexible salmon bowl when you want the sauce with fish
Complete Your Hibachi Night
For a full hibachi-style plate, serve this ginger sauce with fried rice or steamed rice, sautéed zucchini and mushrooms, shrimp or chicken, and one creamy sauce on the side. The ginger sauce brings the bright tang; the creamy sauce brings richness.

Cold leftover rice works especially well because the sauce cuts through the salty, savory flavor. For a fresh base, use this how to cook rice guide before adding shrimp, steak, chicken, tofu, or vegetables.
Optional Warm Drizzle for Bowls and Noodles
Classic hibachi ginger sauce is served cold or at room temperature. But if you want a warmer drizzle for noodles, bowls, or stir-fried vegetables, you can thicken a small portion.
Quick thickened version
- Mix ½ teaspoon cornstarch with 1 tablespoon water.
- Add ½ cup ginger sauce to a small pan.
- Warm over medium-low heat.
- Stir in the cornstarch slurry.
- Cook for 1–2 minutes, stirring, until lightly thickened.
Heating changes the personality of the sauce. It becomes more of a warm bowl drizzle, and the fresh ginger-onion bite softens. Thicken only what you plan to use right away and keep the rest cold for dipping.
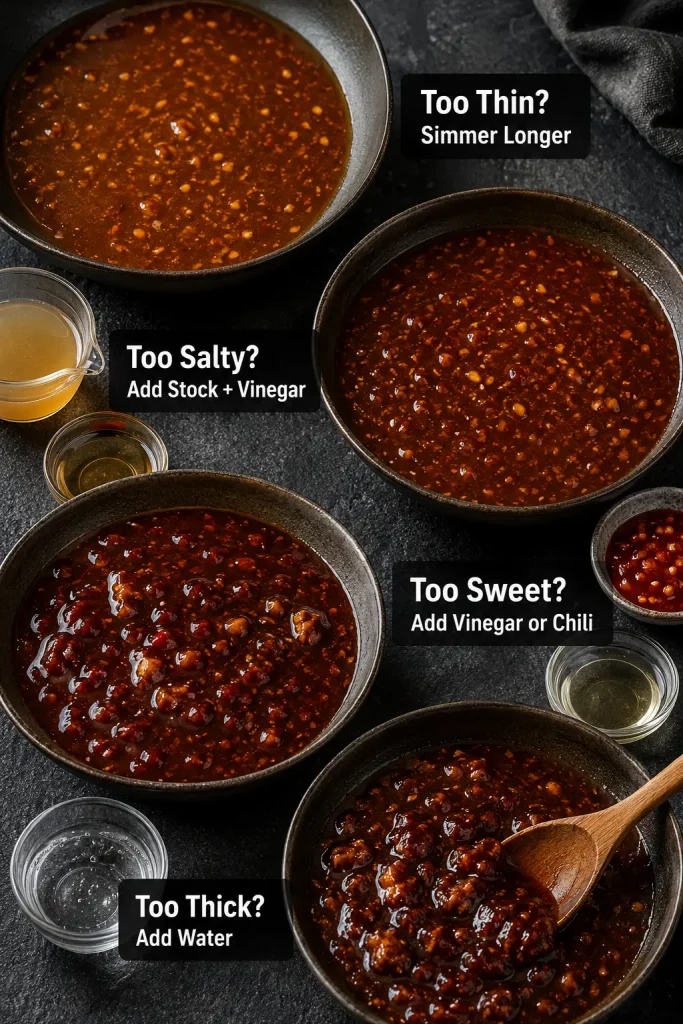
Troubleshooting Ginger Sauce
Fresh ginger and onion can taste strong before they rest. Most problems are easy to fix with a small adjustment.

| Problem | Why It Happened | How to Fix It |
|---|---|---|
| Too oniony | Too much raw onion or not enough resting time | Chill for 1 hour. Add a small splash of soy sauce or lemon juice. Use less onion next time. |
| Overly salty | Regular soy sauce or too much soy sauce | Add 1–2 tablespoons water, a little more onion, or a squeeze of lemon. |
| Sharp or sour | Too much vinegar or lemon juice | Add ½–1 teaspoon sugar and a small splash of soy sauce. |
| Flavor feels intense | Ginger, onion, vinegar, and lemon are all strong | Chill the sauce. Add a tiny bit more sugar. Dilute with 1 tablespoon water if needed. |
| Bitter | Too much lemon zest or old ginger | Skip zest next time. Add a little sugar to round out the bitterness. |
| Runny texture | Classic ginger sauce is naturally loose | Serve as-is, or use the warm drizzle variation for bowls and noodles. |
| Chunky texture | Not blended enough | Pulse 10–20 seconds more, or strain only if you prefer a cleaner pour. |
| Smooth or foamy | Over-blended | Let it settle and stir. Next time, pulse instead of blending continuously. |
| Separated in the fridge | Normal for a fresh blended sauce | Shake or stir before serving. |
Storage and Make-Ahead
Store the sauce in an airtight jar in the refrigerator and use it within 5 days for the freshest flavor.

The flavor is loudest right after blending. After 1 hour in the fridge, the onion and ginger settle down and the soy, vinegar, and lemon taste more balanced. By the next day, the sauce feels rounder, and it is the kind of small jar you end up spooning over leftover rice, cold chicken, or roasted vegetables without planning to.
Shake or stir before serving because the sauce can separate as it sits.
Can you freeze ginger sauce?
You can freeze it in small portions, but the texture will not be as fresh after thawing. The onion and ginger can become slightly watery. For the best dipping texture, make it fresh and refrigerate it instead.
Can you use ginger sauce as a marinade?
Yes, but it is best as a dipping sauce first and a quick marinade second. Use it for shrimp, chicken, tofu, or vegetables when you want a fast ginger-soy flavor.
Because it contains vinegar and lemon juice, do not marinate delicate seafood for too long. Shrimp or fish only needs 10–15 minutes; chicken or tofu can sit for 15–30 minutes.
FAQ
What is the brown sauce at hibachi restaurants?
It is usually ginger sauce: a soy-based dipping sauce made with fresh ginger, onion, vinegar, and lemon. Restaurants commonly serve it with shrimp, steak, chicken, vegetables, noodles, and fried rice.
Is this the same as Benihana ginger sauce?
It is Benihana-style, not the restaurant’s exact formula. The recipe keeps the fresh ginger, onion, soy, vinegar, and lemon profile while using a balanced home-kitchen ratio. Benihana says its signature ginger sauce is prepared fresh and is not sold in stores or bottles. Read Benihana’s note here.
Is ginger sauce the same as yum yum sauce?
No. Ginger sauce is brown, tangy, and soy-based. Yum yum sauce is creamy, usually mayo-based, and pale pink or orange.
Is hibachi ginger sauce the same as ginger salad dressing?
No. Hibachi ginger sauce is a dipping sauce for grilled food and rice. Japanese ginger dressing is usually smoother, often made with carrot, onion, ginger, oil, vinegar, and soy sauce, and served on salad.
Do you serve ginger sauce hot or cold?
Serve it cold, chilled, or at room temperature. It can sit beside hot steak, shrimp, chicken, vegetables, or fried rice, but the sauce itself does not need to be heated.
How long does homemade ginger sauce last?
Use it within 5 days for the freshest flavor. Keep it in an airtight jar in the refrigerator and stir or shake before serving.
Fresh ginger, paste, or powder — which is best?
Fresh ginger is best. Ginger paste can work as a shortcut, but it may contain salt or vinegar. Ground ginger is not recommended because it does not give the same lively flavor.
Can I make ginger sauce without a blender?
Yes. Grate the ginger, mince the onion very finely, add the remaining ingredients to a jar, and shake hard. The sauce will be chunkier and stronger, but it still works for dipping.
Why does my ginger sauce taste too oniony?
Raw onion can taste strong right after blending. Chill the sauce for 1 hour before judging it. If it still tastes too oniony, add a little soy sauce, lemon juice, or sugar to balance it. Next time, use slightly less onion.
What can I serve with ginger sauce?
Serve it with hibachi shrimp, steak, chicken, fried rice, noodles, grilled vegetables, dumplings, spring rolls, tofu, salmon, rice bowls, or roasted vegetables.
Final Tip
The sauce should taste like the first bright bite at the hibachi table: salty, tangy, gingery, and fresh enough to make you want another spoonful of rice or another piece of shrimp. Blend it, chill it if you can, and keep the texture lightly flecked. That little bit of ginger and onion is the whole point.