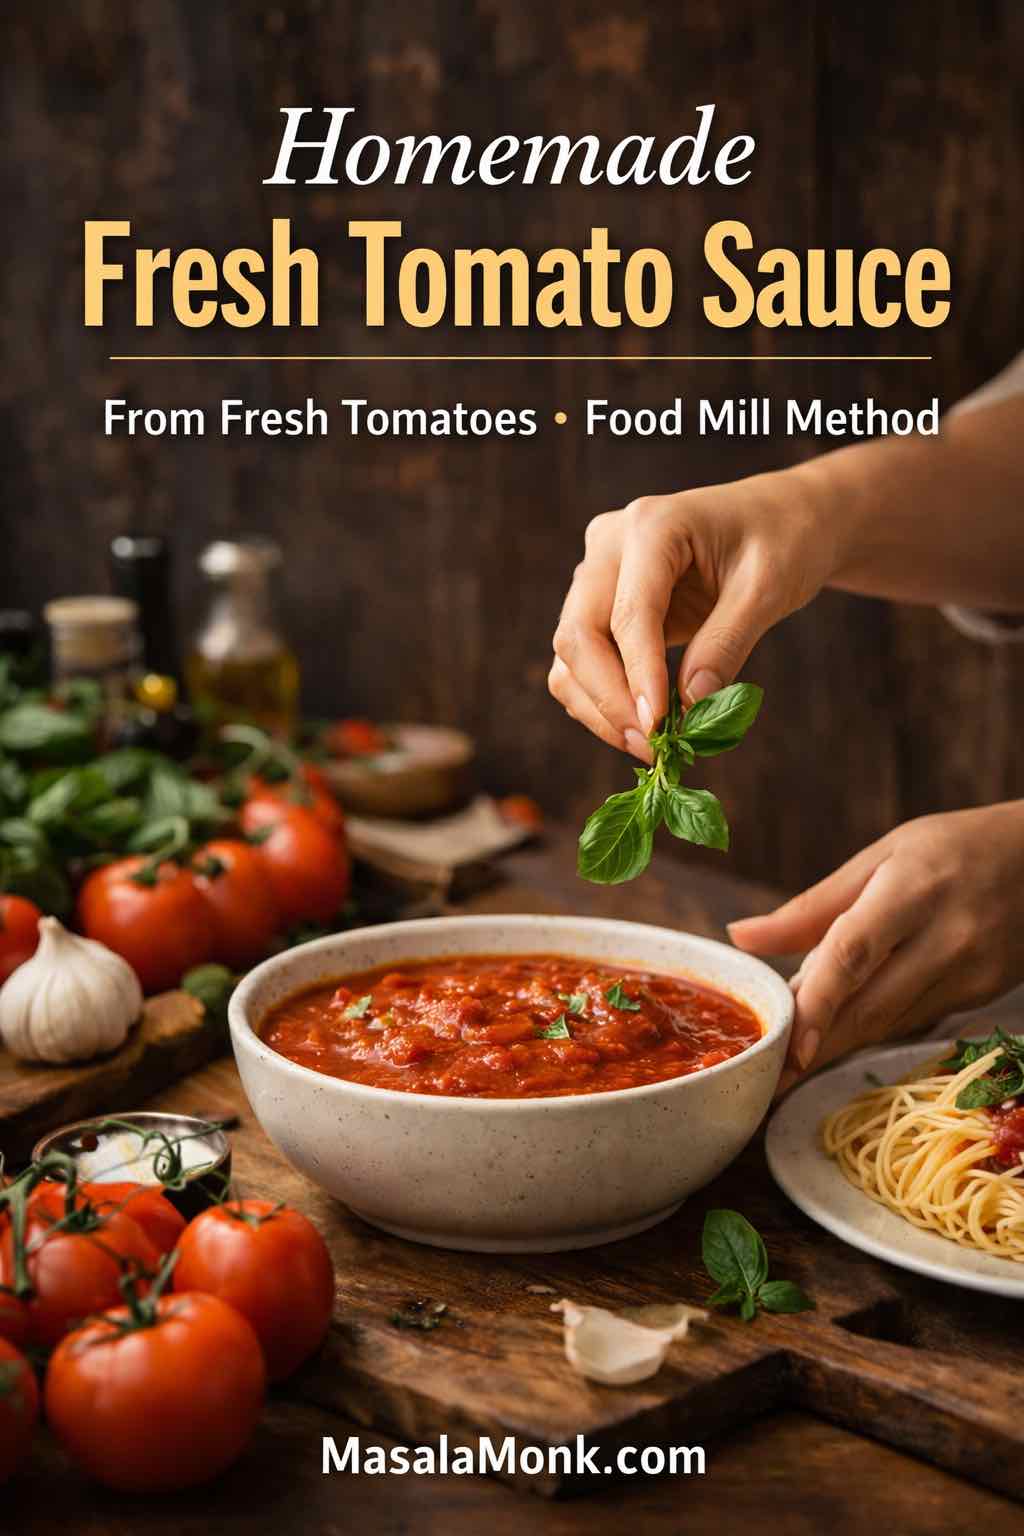
A pot of tomatoes simmering on the stove has a way of making the whole day feel softer. The kitchen smells warm and familiar, the bubbling is gentle instead of loud, and dinner suddenly feels inevitable—in a good way. That’s the quiet power of making tomato sauce from fresh tomatoes: it turns something simple into something steady. You start with raw tomatoes and end with a sauce that tastes like actual tomatoes—bright, a little sweet, slightly tangy, and far more alive than anything that’s been sitting on a shelf.
This fresh tomato sauce recipe is built around one idea: keep the tomato flavor clean, then make the texture as smooth—or as rustic—as you like. The method I prefer most is the food mill approach, because food mill tomato sauce hits a sweet spot: it feels traditional, it tastes fresh, and it saves you from the most annoying parts of sauce-making (peeling, seeding, and picking at skins). Even so, if you don’t own a food mill yet, you’re still covered. You can make a beautiful tomato sauce recipe with fresh tomatoes without fancy tools; it’s simply a different route.
What you’ll get at the end is a sauce that works in multiple directions: spaghetti sauce from fresh tomatoes that clings to strands, pasta sauce using fresh tomatoes that coats penne, and a flexible tomato pasta sauce with fresh tomatoes you can spoon into other meals when you want variety. Most importantly, it’s a sauce you’ll want to make again—because it feels doable on a normal day, not just on an ambitious one.
Tomato sauce from fresh tomatoes: the style we’re making
Tomato sauce names get messy. People look for tomatoes sauce, sauce tomato sauce, recipe with spaghetti sauce, marinara sauces, red sauce, italian red sauce, pizza red sauce—often meaning slightly different things. Some sauces are cooked for hours, some are barely cooked at all, and some are thickened until they’re almost spreadable. Because of that, it helps to be clear about what this recipe is aiming for.
This is an Italian tomato sauce from fresh tomatoes style that stays tomato-forward. Closer to sauce pomodoro or a simple sugo recipe than a long-simmered spaghetti sauce bolognese, it keeps the spotlight on the tomatoes. Unlike tomato and cream sauce, it isn’t meant to be rich and silky. Rather than leaning into a tomato cream sauce for alla vodka pasta, it stays clean and bright. It also skips the built-in heat you’d expect from an arrabbiata sauce recipe. Ultimately, it’s a flexible base you can enjoy as-is or spin into those variations later.
In other words, you’re making the sauce you’ll want on hand—because it’s the one you can reshape depending on the night.
Also Read: Blueberry Pancakes (6 Recipes) + Homemade Pancake Mix
Ingredients for a fresh tomato sauce recipe that tastes like tomatoes
When the tomatoes are good, you don’t need much else. That’s why this homemade tomato sauce stays intentionally simple.
You’ll need:
- Fresh ripe tomatoes
- Olive oil
- Salt
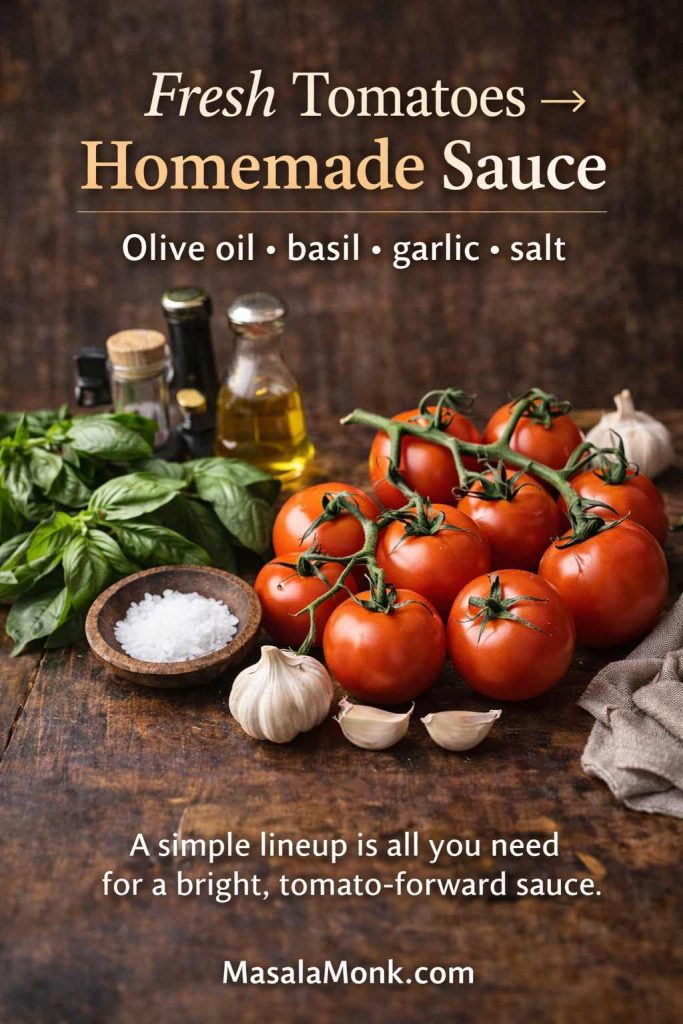
Optional, yet worth considering:
- Onion (adds sweetness and body)
- Garlic (adds aroma)
- Fresh basil (for a fresh finish)
- Black pepper
- Chili flakes (if you want a gentle heat)
That’s enough to create a homemade tomato sauce that reads as “complete” without tasting heavy. It also keeps you far away from the sweetness people associate with some jarred sauces—helpful if you’ve ever looked up sugar free pasta sauce, low sugar pasta sauce, or healthy tomato sauce and felt like everything tasted oddly sweet. Here, the balance comes from tomatoes and technique, not from added sugar.
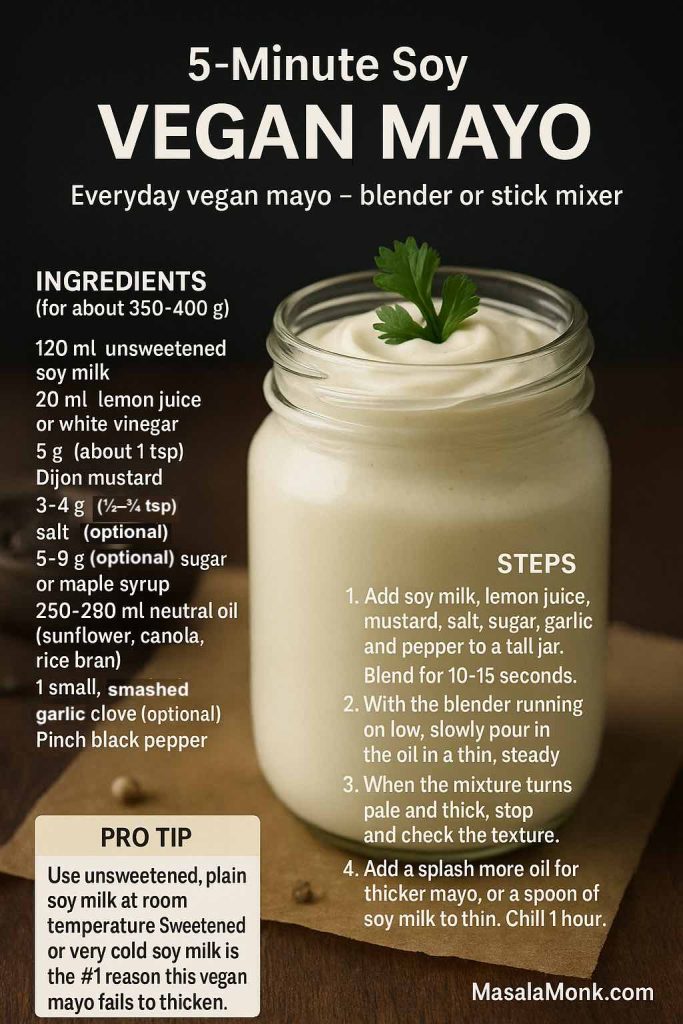
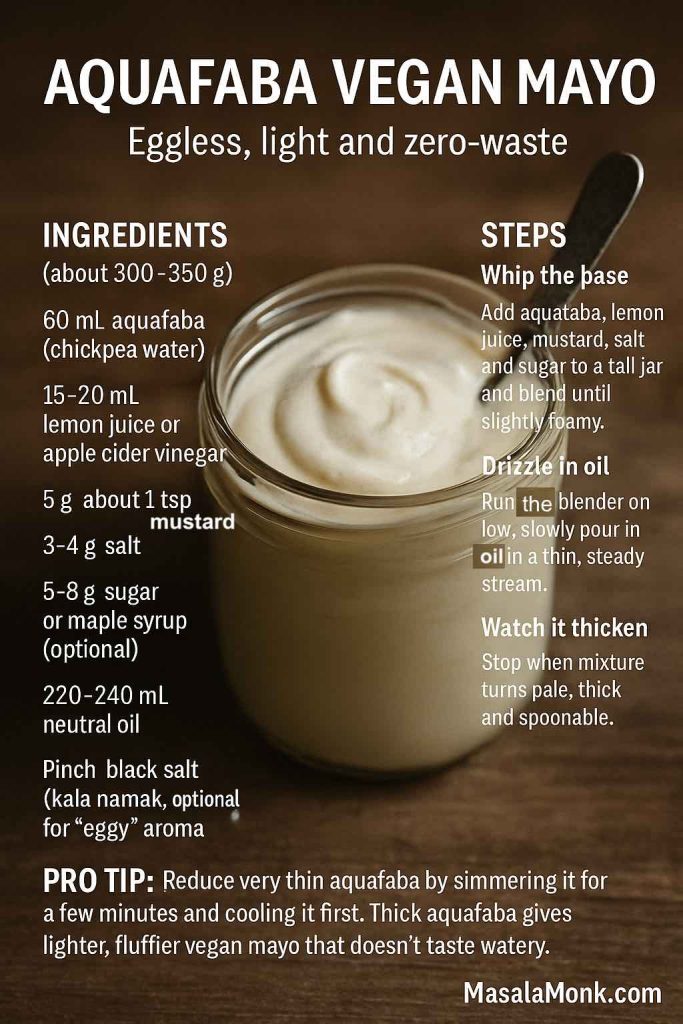
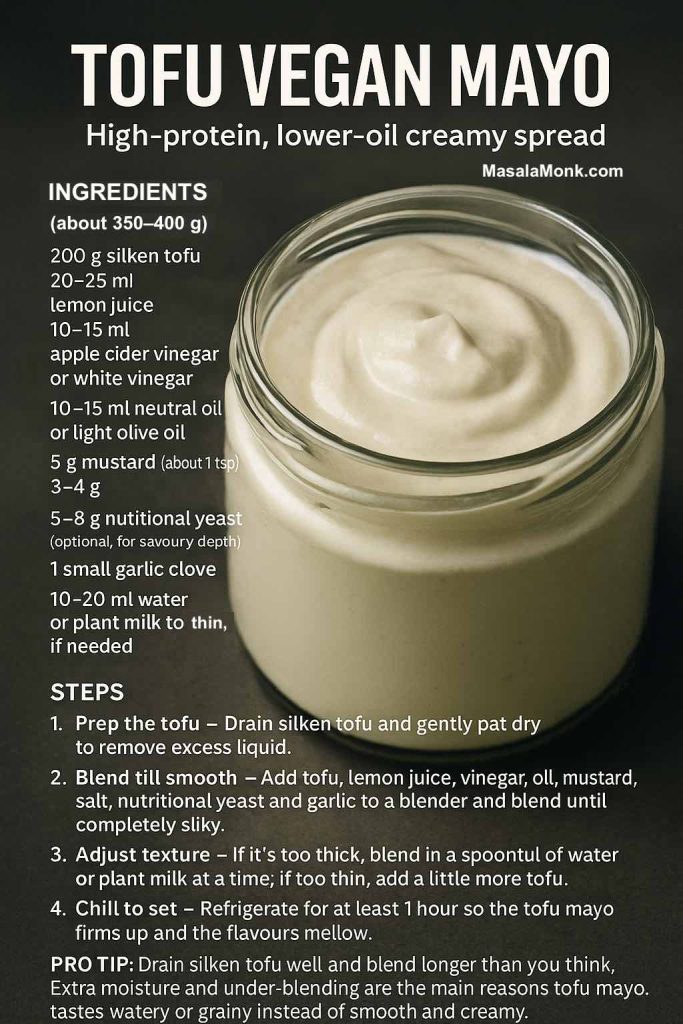
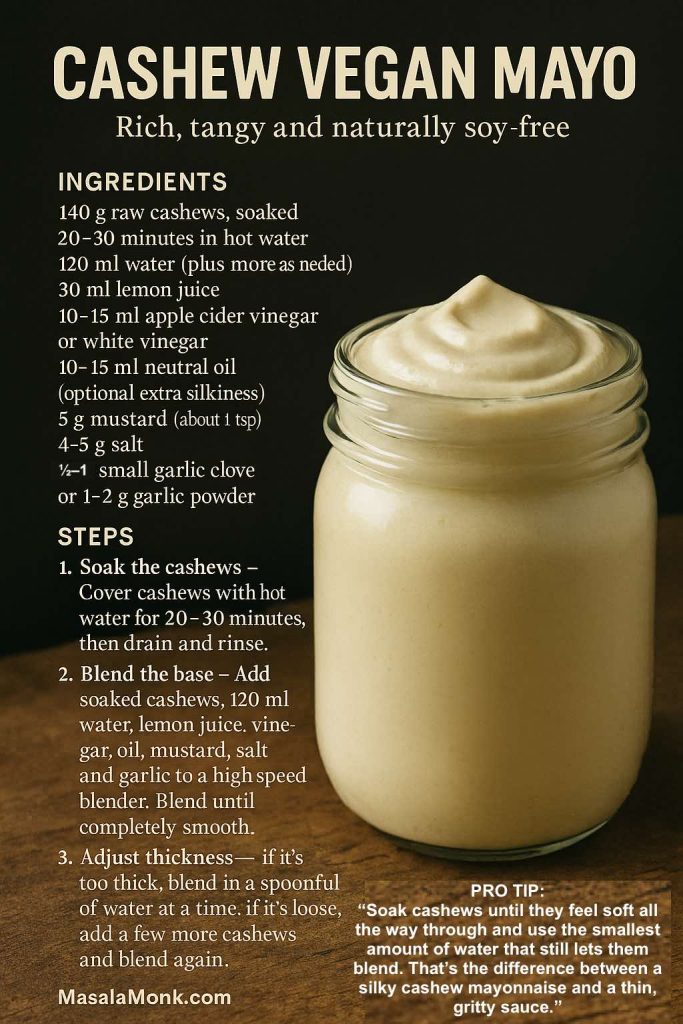
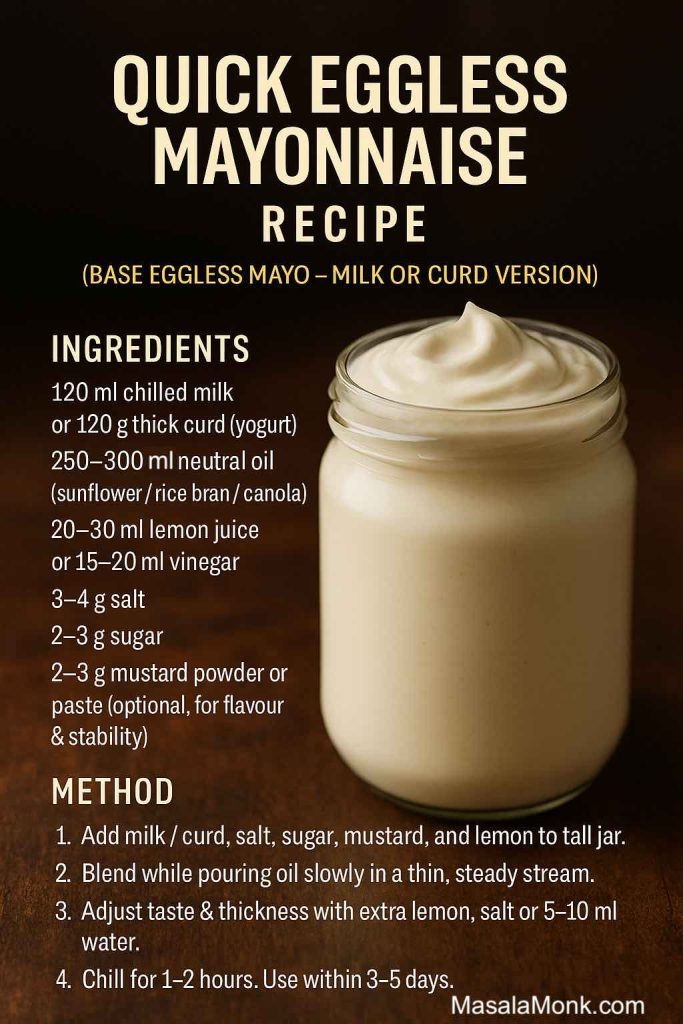
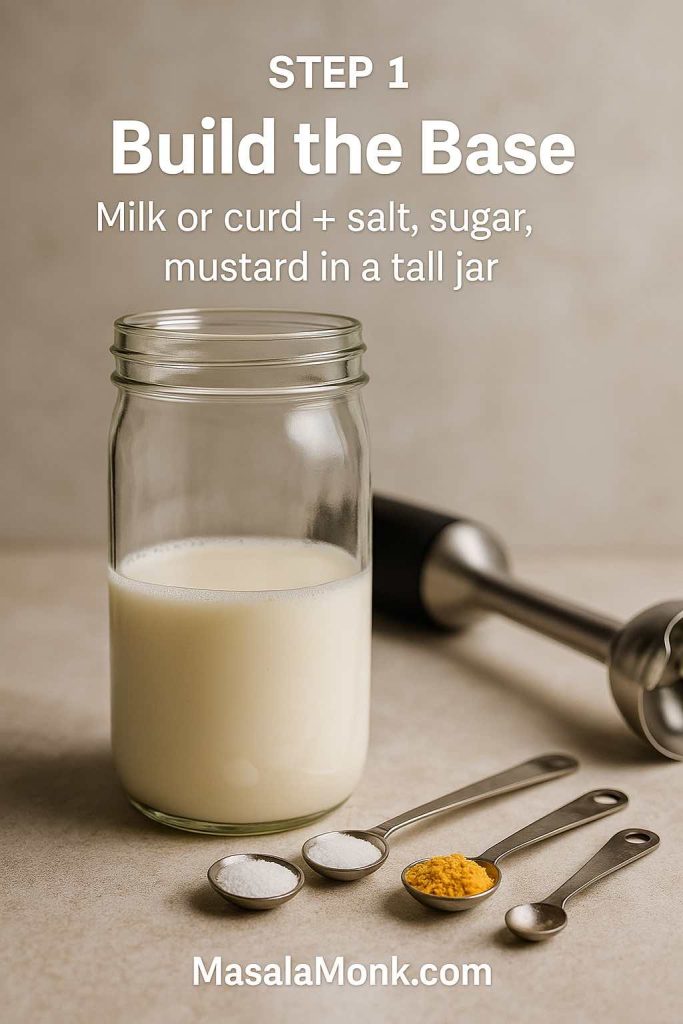
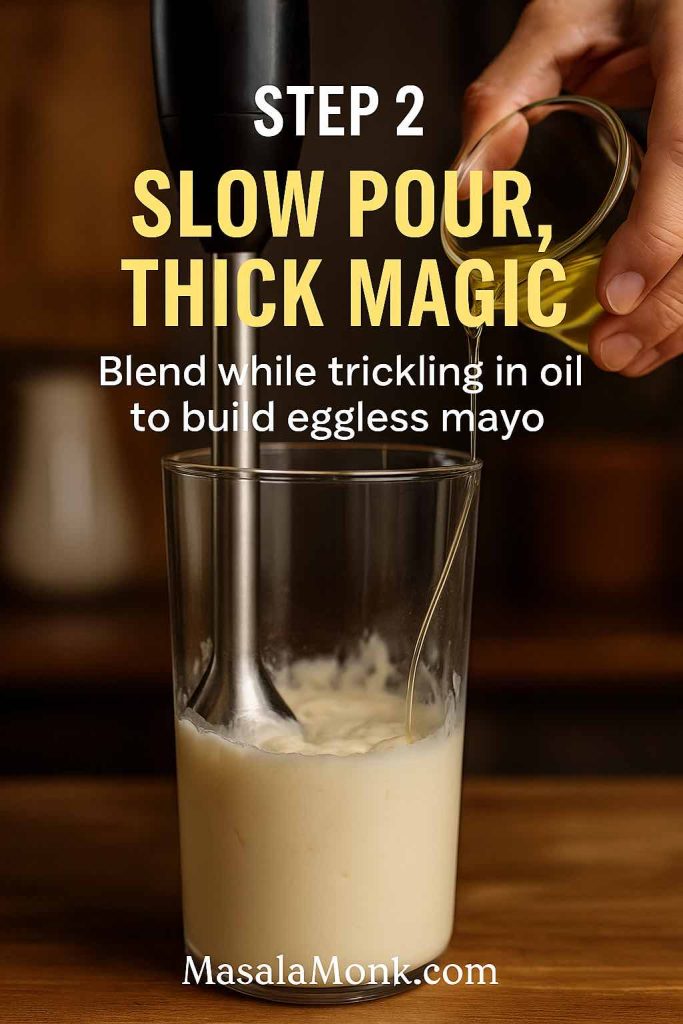
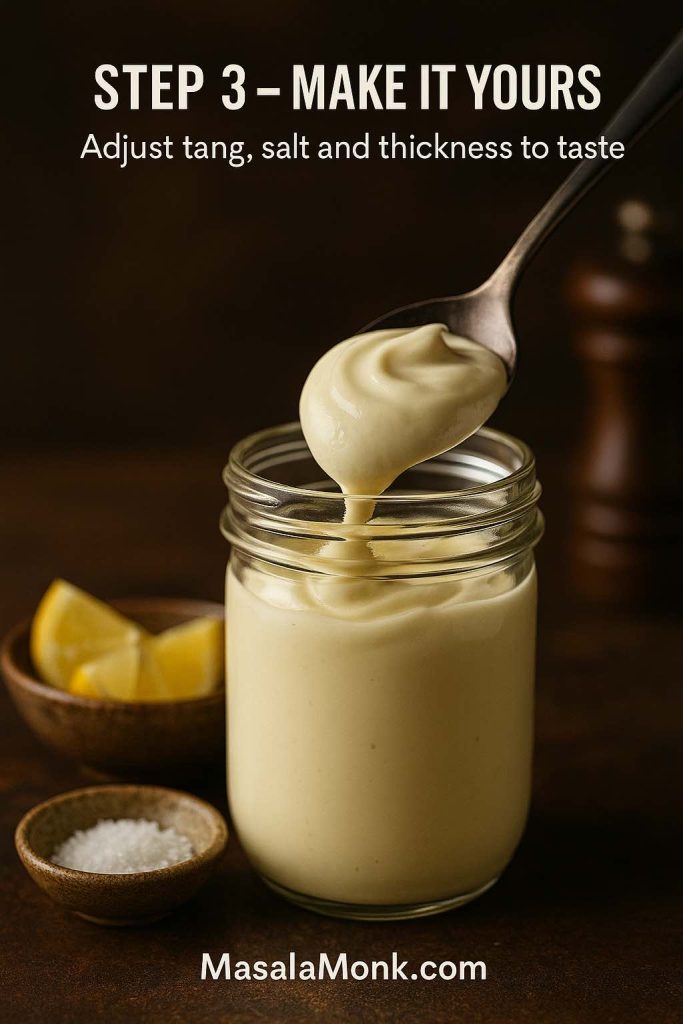
Also Read: How to Make Eggless Mayo at Home (Egg Free Mayonnaise Recipe)
Choosing tomatoes for tomato sauce from tomatoes (what matters and what doesn’t)
You can turn almost any tomato into sauce, yet the flavor ceiling depends on the tomato you start with. Consequently, choosing well pays off more than adding extra ingredients later.
Best tomatoes for pasta sauce from fresh tomatoes
- Roma / plum tomatoes: Meaty, fewer seeds, less water—great for thickening into red pasta sauce.
- Vine-ripened tomatoes: Fragrant and juicy—excellent, though they may need a longer reduction.
- Cherry tomatoes: Small but intense—great for a bright, slightly sweeter sauce.
About San Marzano (and why people chase it)
San Marzano tomatoes—most often found canned—are prized for their balanced flavor, with a natural sweetness and a gentler bite. If you’re using fresh tomatoes instead, chase that same idea: choose tomatoes that smell deeply tomato-like and taste great straight from the cutting board.
Passata tomato as a seasonal backup (and why it’s related to this method)
Passata is essentially strained tomato puree—smooth, seedless, and skinless. It’s often made by cooking tomatoes briefly and running them through a milling process. That’s why, later, a tomato passata recipe or passata pasta sauce post can connect directly to what you’re learning here.
If you want the clearest explanation in plain language, Serious Eats has a practical guide to passata and why it’s useful: Italian passata gives you fresh tomato flavor all year long.
Why food mill tomato sauce is worth it (texture and taste, both)
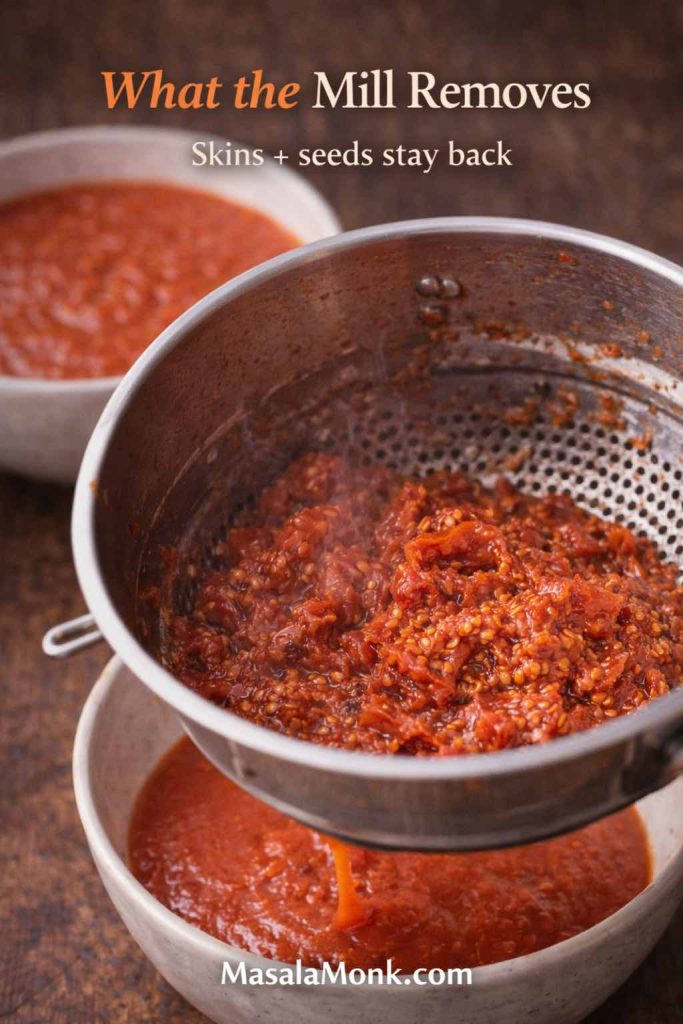
A blender is fast, but it can also change the sauce in ways you might not want. It whips air into the tomatoes, which makes the sauce feel lighter and sometimes slightly frothy. Moreover, when seeds are pulverized, they can contribute bitterness and a gritty edge. A food mill avoids those problems. It presses soft tomato flesh through holes while holding back skins and seeds. As a result, you get a smoother sauce without turning it into foam.
If you want to see a reliable, tomato-forward version of this approach from an established cooking publication, Serious Eats lays out the logic clearly in their method for a fresh tomato pasta sauce: The best fresh tomato sauce for pasta.
Even so, don’t treat a food mill as a gatekeeping tool. You can absolutely make tomato sauce from fresh tomatoes without one. The food mill method is simply the easiest path to a clean texture.
Tomato sauce from fresh tomatoes (food mill method): step-by-step recipe
This is the core method. It’s straightforward; nonetheless, a few small choices make the finished sauce taste noticeably better.
1) Wash, core, and rough-chop the tomatoes
Rinse the tomatoes well. Remove the stem area and any tough core. Chop into rough chunks. Uniformity doesn’t matter because everything will soften and collapse.
If the tomatoes are very juicy, you can chop them in a bowl so you keep the juices. Then, when those juices go into the pot too, the flavor stays with the sauce rather than disappearing into the sink.

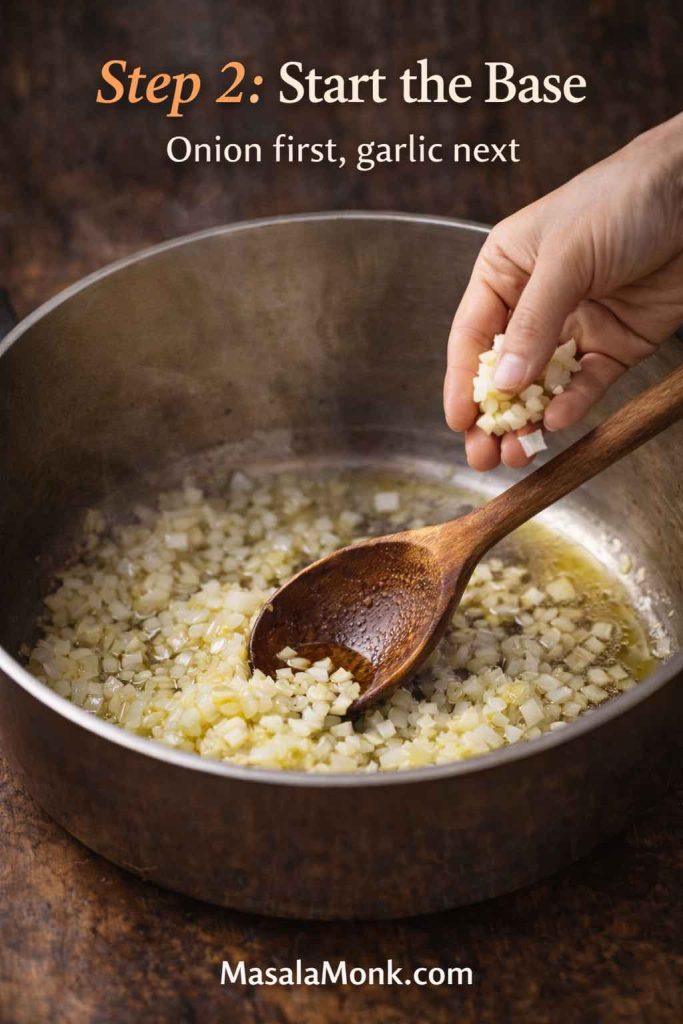
2) Start a gentle base (optional, but helpful)
Set a wide pot over medium heat. Add olive oil.
If using onion, add it first with a pinch of salt. Let it soften until translucent and sweet-smelling. Don’t rush browning here; instead, aim for gentle cooking that supports the tomatoes without overtaking them.
Add garlic next, if using, and cook briefly until fragrant. Then move on quickly—garlic can go from fragrant to bitter if it browns too hard.
If you like having a reference from a mainstream test kitchen, Bon Appétit’s approach to a simple base tomato sauce follows a similar rhythm: Basic tomato sauce.
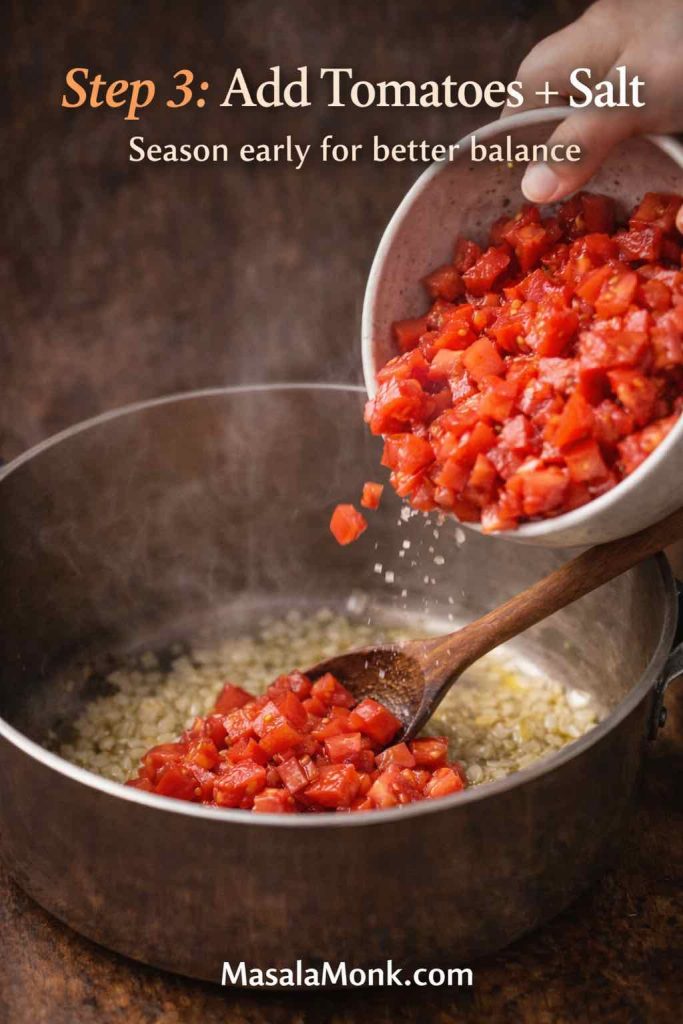
3) Add tomatoes and salt early
Add the chopped tomatoes to the pot. Salt them right away. Early salting helps pull out liquid and starts building flavor from the start. Stir well and let the tomatoes begin to heat through.
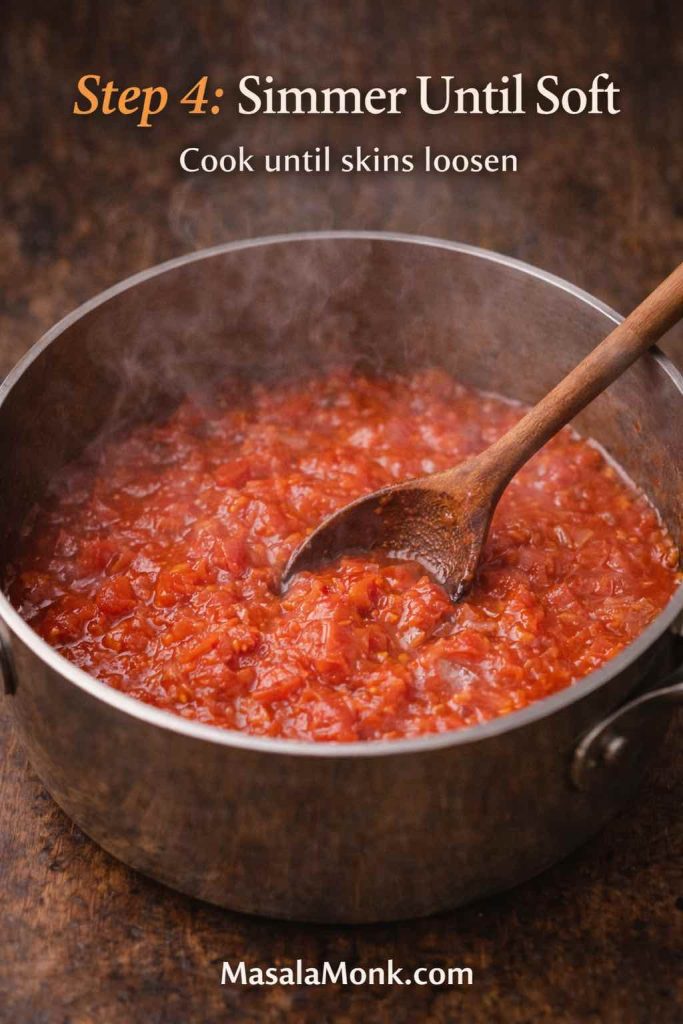
4) Simmer until the tomatoes break down completely
Lower the heat so the pot stays at a steady simmer. Stir occasionally.
You’re ready for milling when:
- the tomatoes look collapsed and soft,
- the mixture resembles a loose, chunky tomato stew,
- and the skins have loosened.
Timing depends on the tomatoes. Cherry tomatoes break down quickly; larger tomatoes can take longer. Either way, let texture lead your decisions instead of the clock.
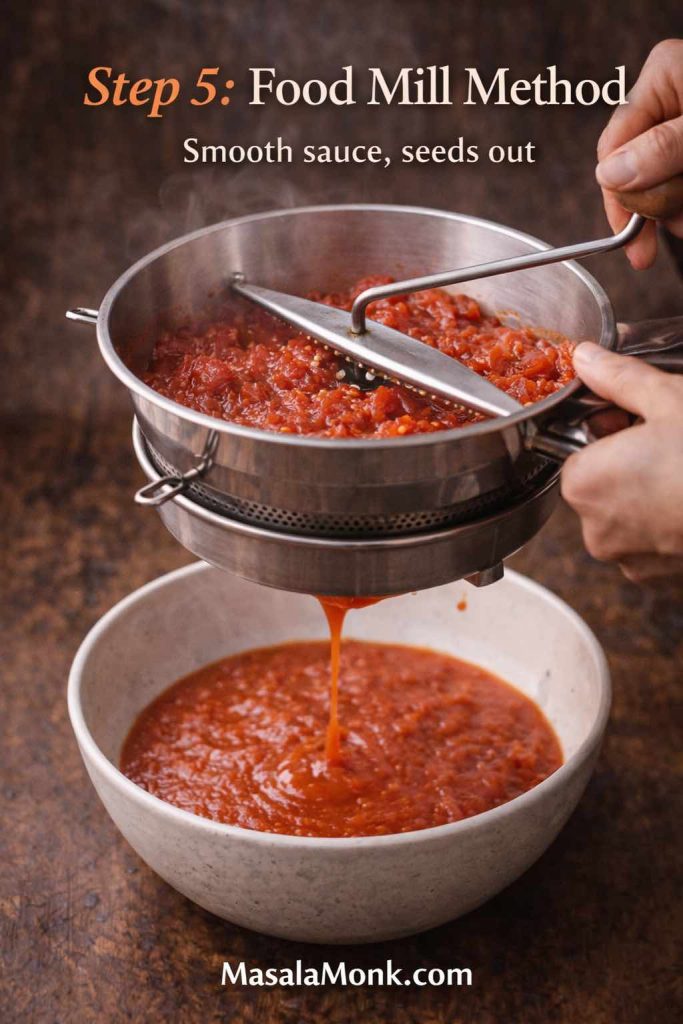
5) Mill the tomatoes
Set your food mill over a bowl or a clean pot. Ladle the softened tomatoes into the mill and crank.
This step is satisfying for a reason: underneath, you get smooth tomato puree; above, you’re left with skins and seeds that would otherwise interrupt the texture. It’s one of the cleanest ways to get a smooth tomato sauce from fresh tomatoes without a blender.
6) Reduce the sauce to your preferred thickness
Return the milled sauce to the pot and simmer uncovered. Now you choose what kind of sauce this becomes.
- For a lighter, more “pomodoro” feel, reduce lightly.
- For a thicker tomato pasta sauce with fresh tomatoes that clings to ridged pasta, reduce longer.
- For a sauce that can hold up in a bake, reduce until it falls from a spoon in thicker ribbons.
Meanwhile, keep the heat gentle. A rolling boil can dull the fresh flavor and push the sauce into an overly cooked taste.

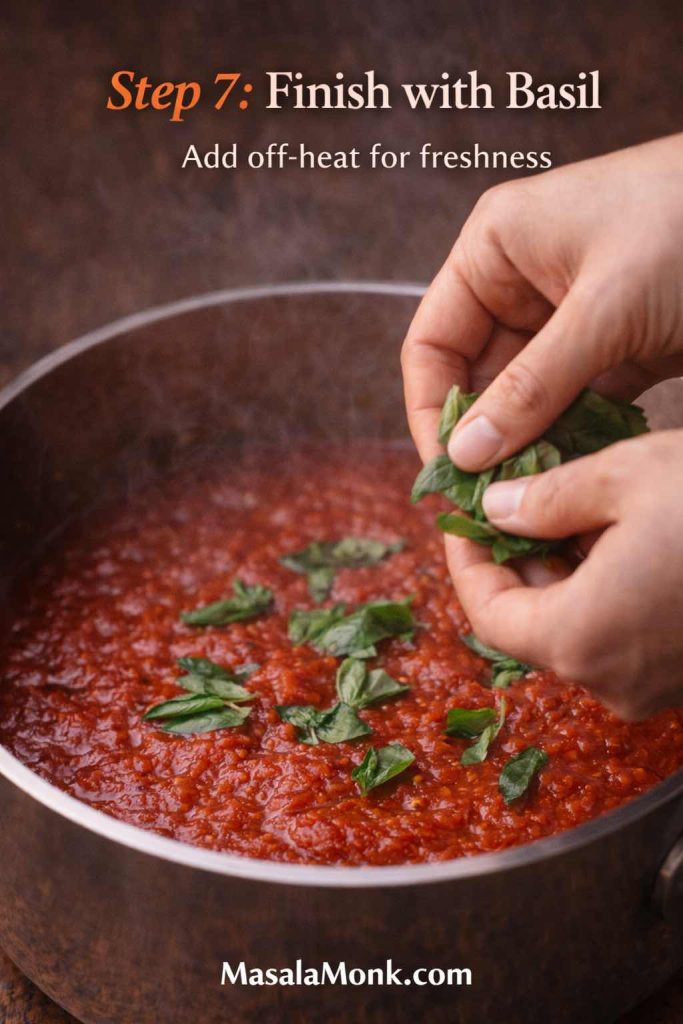
7) Finish with basil (and adjust seasoning)
Turn off the heat. Stir in torn basil. Taste and adjust salt. Add black pepper if you like.
Now you have a fresh tomato sauce recipe that stands on its own—yet it can also become tomato sauce for spaghetti, a base for lasagna, or the start of a bigger sauce later.
Also Read: 10 Best Espresso Martini Recipe Variations (Bar-Tested)
Tomato sauce recipe with fresh tomatoes (no food mill): two good paths
If you don’t have a food mill, you can still make a great sauce. You’ll simply choose between a smoother route and a rustic route.
Option A: Peel tomatoes for a smoother fresh tomato sauce
Peeling helps a lot when you want a clean texture without milling. The classic blanch-and-slip method is straightforward: score an “X,” blanch briefly, shock in cold water, then peel.
If you want a clear, step-by-step explanation from a dependable cooking site, Serious Eats breaks it down neatly: How to peel tomatoes.
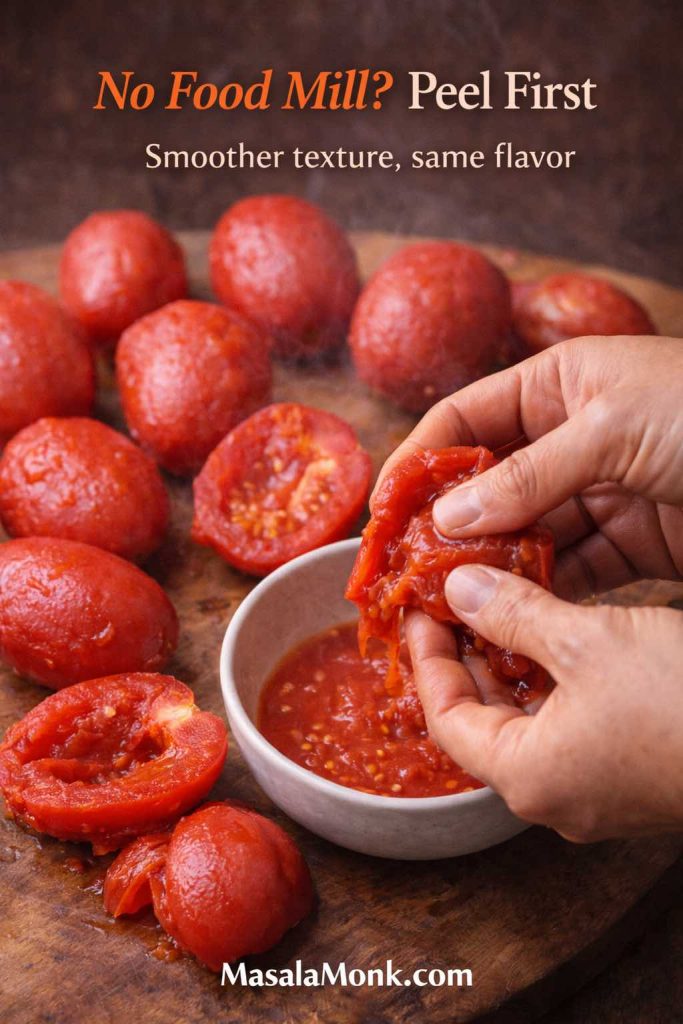
After peeling:
- Cut tomatoes and remove seeds if you want a smoother sauce.
- Chop the flesh and simmer.
- Mash with a spoon or blend briefly.
- Reduce to thicken.
This is close to tomato concasse prep, where tomatoes are peeled, seeded, and chopped for refined sauces.
Option B: Keep it rustic (and still delicious)
If you don’t mind bits of tomato and occasional peel texture, skip peeling entirely. Simmer until the tomatoes are soft, then crush with a spoon and reduce. You’ll get a chunkier, homestyle sauce that’s excellent on short pasta.
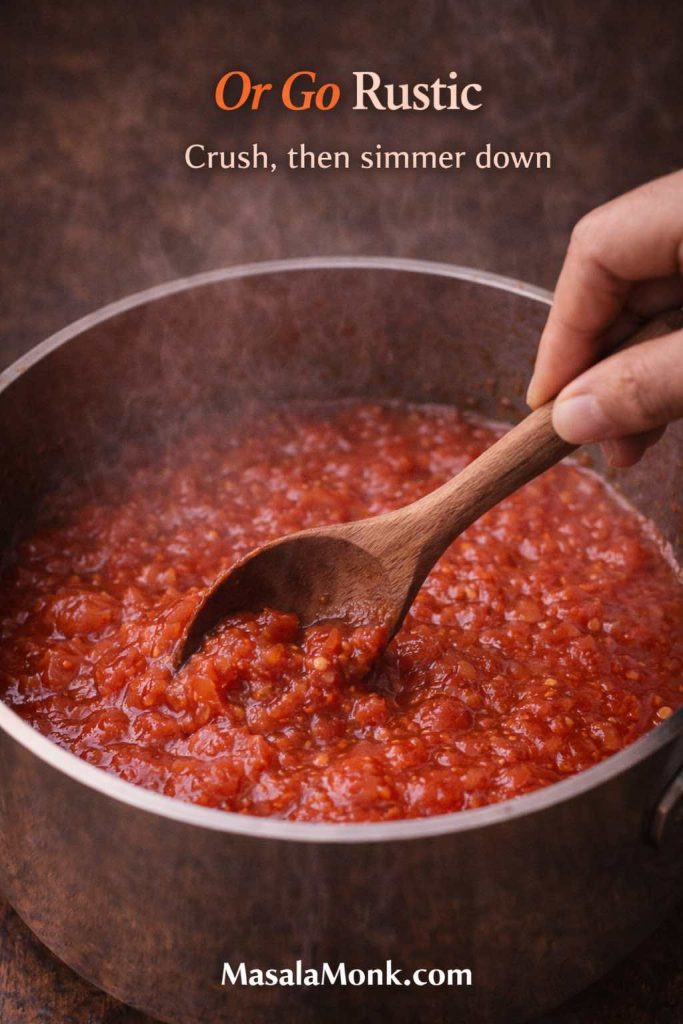
In fact, for some kitchens, this becomes the default “home made spaghetti sauce” texture because it feels honest and hearty.
Also Read: Double Chocolate Chip Cookies – Easy Recipe with 7 Variations
Spaghetti sauce from fresh tomatoes vs pasta sauce from fresh tomatoes
The same sauce can behave differently depending on how you finish it. That’s why people seek spaghetti sauce from fresh tomatoes and pasta sauce using fresh tomatoes separately—they want a specific eating experience.
Spaghetti sauce from fresh tomatoes (for long noodles)
For spaghetti, you usually want a sauce that’s smooth enough to coat strands and loose enough to toss easily.
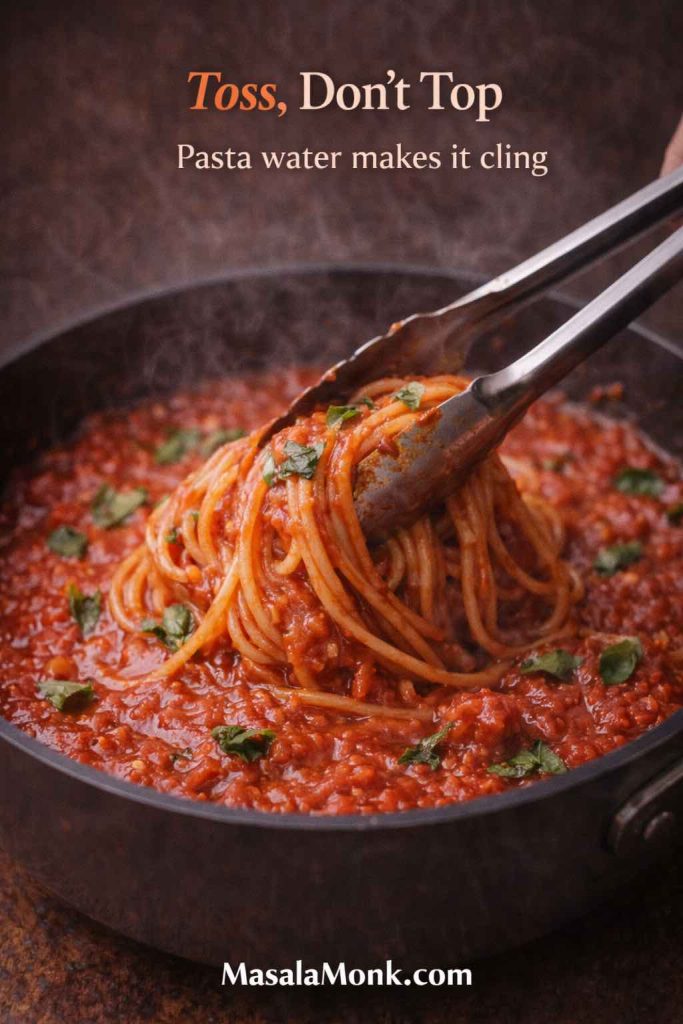
Cook spaghetti until just shy of done. Warm the sauce in a pan. Add spaghetti and a splash of pasta water, then toss vigorously. As the starch meets the sauce, it turns glossy and clings to noodles instead of sliding off.
This is the detail that turns “spaghetti and tomato sauce” into something that tastes cohesive.
Pasta sauce from fresh tomatoes (for short shapes)
For penne, rigatoni, fusilli, and other shapes designed to hold sauce, reduce the sauce a little more. The thicker consistency settles into ridges and pockets, so each bite tastes balanced without drowning in sauce.
If you’re ever building toward penne vodka pasta or penne alla vodka pasta later, this base is still useful—you’d simply add cream and finish differently. For now, keeping it clean highlights the tomato.
Also Read: Avocado, Basil, and Grilled Tomato Sandwich: A Perfect Breakfast Option
Italian tomato sauce from fresh tomatoes: keeping the flavor bright
Fresh tomato sauce is at its best when it tastes lively. Accordingly, the method matters more than a long list of seasonings.
Keep the simmer steady, not aggressive
A gentle simmer preserves brightness. A hard boil can flatten flavor.
Season gradually
Salt early, then adjust at the end. That way, you don’t over-salt before the sauce reduces.
Don’t bury the tomato
A sprinkle of herbs is fine, but a heavy hand can make the sauce taste like “herb sauce with tomatoes,” rather than tomato sauce from tomatoes.
Finish with basil at the end
Basil tastes fresher when added off heat. It brings a green perfume that makes the sauce feel instantly more Italian.
Also Read: Healthy Tuna Salad – 10 Easy Recipes (Avocado, Mediterranean, No Mayo & More)
Tomato sauce from fresh tomatoes: ways to use it beyond pasta
Once you have a pot of sauce, dinner options multiply. In other words, this is one of those recipes with tomato sauce that keeps paying you back.
Build a meat sauce night (without forcing it into this recipe)
If you want a heartier dinner, use this sauce as a base and build from there.
When you’re ready for a true ragù-style sauce, MasalaMonk’s bolognese sauce recipe is a natural next step, because it shows how a tomato base becomes a deep, satisfying meat sauce without losing balance.
Layer it into lasagna (tomato + white sauce = perfect balance)
Fresh tomato sauce pairs beautifully with a creamy white layer. For a classic approach, pair it with MasalaMonk’s béchamel sauce for lasagna. The contrast matters: the béchamel is rich, so the tomato layer stays bright and keeps the dish from feeling heavy.
If you want a different lasagna direction, MasalaMonk’s cottage cheese lasagna recipe is another excellent path—especially when you want a protein-forward bake that still feels comforting.
On colder days, when you want “lasagna flavor” with far less effort, MasalaMonk’s crock pot lasagna soup is a cozy alternative that fits beautifully with a tomato base.
Serve it with arancini (a restaurant-feeling snack at home)
Warm tomato sauce as a dip is an easy way to make something feel special. Crispy rice balls dipped into a bright sauce are hard to beat. If you want the method for rice balls, MasalaMonk’s arancini balls guide makes it approachable. Then you simply ladle your sauce into a bowl and dip generously.
Turn it into a chicken parm-style sandwich night
Tomato sauce plus crispy chicken and melted cheese is a reliable crowd-pleaser. If you want inspiration, MasalaMonk’s chicken sandwich recipes includes ideas that naturally pair with a homemade red sauce—either as the main component or as a dipping side.
Make it spicy without changing the whole pot
If you want to lean toward spicy tomato sauce, add chili flakes at the end. Alternatively, stir in a spoon of a bright pepper sauce to add heat and tang at once. MasalaMonk’s pepper sauce recipe is a great place to explore heat styles if you enjoy experimenting.
Tomato sauce from tomatoes: balancing flavor without making it sweet
Many store-bought sauces lean on added sugar to round out acidity and boost flavor. Homemade sauce doesn’t need that shortcut—you can create balance by gently reducing the tomatoes, seasoning thoughtfully, and finishing with the right touch of fat and herbs.
If the sauce tastes too sharp
First, simmer longer. Acidity often softens as the sauce reduces.
If it still tastes sharp, a small knob of butter can mellow the edges and add a smoother mouthfeel. If you want a clear explanation of why this works, Simply Recipes (a long-running home-cooking publication) talks through easy ways to improve tomato sauce flavor, including richness and balance: How to make store-bought tomato sauce taste better. The idea applies just as well to homemade sauce—especially when tomatoes are a little tart.
If the sauce tastes watery
Reduce uncovered in a wide pot. The wider the surface area, the faster water evaporates. Consequently, the sauce thickens without needing starches or tricks.
If the sauce tastes flat
It almost always needs salt. Add a small pinch, stir, and taste again. After that, finish with basil or a drizzle of olive oil to bring it to life.
Also Read: Peanut Butter Cookies (Classic Recipe & 3 Variations)
Tomato pasta sauce with fresh tomatoes: texture choices that change the meal
Two people can follow the same recipe and end up with two very different sauces—simply because they reduced to different thicknesses. That’s not a mistake; it’s a feature.
For a light sauce (best for tossing with pasta water)
Reduce just until the sauce coats a spoon. It should still flow easily.
For a clingy red sauce (best for short pasta and baked dishes)
Reduce longer until the sauce falls in thicker ribbons. This version sits on pasta instead of pooling underneath.
For a thicker base
If you reduce even further, the sauce can hold up for layering in casseroles. That’s one reason this is such a useful pasta sauce from fresh tomatoes: you can steer the texture to match the meal.
Also Read: Healthy Oat Protein Bars – 5 Easy No Sugar Recipes for Snacks
Homemade tomato sauce: scaling up without making it complicated
Tomato sauce from fresh tomatoes scales well, but the workflow stays smoother if you respect a few realities.
- Use a wide pot so reduction doesn’t take forever.
- Salt in stages: early, then adjust late.
- Mill in batches if you’re making a large pot.
If you double the tomatoes, you don’t need to double your attention—just your pot size and your patience. Eventually, you’ll find your personal rhythm: simmer while you tidy the kitchen, mill while the pasta water heats, and finish while dinner plates come out.
Storage: fridge, freezer, and a careful word about canning tomato sauce
Fridge
Cool the sauce, then store in an airtight container. Reheat gently so the flavor stays bright.
Freezer
Freeze in small portions so you can thaw exactly what you need. This is the easiest way to keep tomato sauce for spaghetti nights effortless later.
If you plan to can it
Canning tomato products is absolutely doable, but it’s also an area where tested guidance matters. Tomato acidity varies, and safe canning depends on correct acidification and proven methods.
If you want reliable sources:
- The National Center for Home Food Preservation (a University of Georgia–hosted resource) explains the essential safety step here: Tomato acidification directions.
- They also provide broader context in their overview: Canning tomatoes introduction.
- For additional guidance from a university extension program, University of Minnesota Extension has clear, practical safety notes: Canning tomato products safety guidelines.
- Michigan State University Extension also addresses the same issue in a straightforward way: Acidifying your home-canned tomatoes.
If you’re not canning, freezing is the simplest long-term option—less stress, less equipment, and still excellent results.
When you want a different sauce night (still pasta, just a new mood)
Fresh tomato sauce is a cornerstone. Still, variety keeps cooking exciting.
If you want to switch gears:
- MasalaMonk’s pesto recipes are a great way to pivot into something herby and bright.
- If you prefer a lighter pesto direction, MasalaMonk’s fresh basil pesto (vegan) is another easy next step.
- For creamy comfort with no tomato at all, MasalaMonk’s carbonara recipe is a classic alternative.
- Likewise, if you’re craving a rich bowl on another night, MasalaMonk’s chicken alfredo pasta is a strong companion read.
Meanwhile, your homemade tomato sauce can sit in the freezer, ready for the next time you want dinner to feel simple and excellent.
Tomato sauce from fresh tomatoes, made once—used again and again
Once you’ve made tomato sauce from fresh tomatoes using the food mill method, it stops feeling like a special project and starts feeling like a skill you own. On days when market tomatoes look especially good, you’ll reach for this fresh tomato sauce recipe without overthinking it. When you want something clean and reliable, it naturally becomes your go-to pasta sauce using fresh tomatoes. And when the craving hits on an ordinary weeknight, it turns into the spaghetti sauce from fresh tomatoes you’ll be glad you already know how to make.
And because it’s flexible, it fits different moods. Keep it simple and you get a bright sauce that tastes like summer. Reduce it more and you get a clingy tomato pasta sauce with fresh tomatoes that feels comforting and rich. Build on it and you get a base for bigger dishes—bakes, sandwiches, even hearty meat sauces—without needing a separate starting point.
So when you spot tomatoes that smell sweet and look truly ripe, don’t save them only for salads. Put a pot on the stove, let the kitchen smell incredible, and make a sauce you’ll be happy to have—tonight, and many meals from now.
Also Read: 10 Creative Chia Pudding Recipes for Every Taste
FAQs
1) How do I make tomato sauce from fresh tomatoes without a food mill?
Start by cooking chopped tomatoes with a little salt until they fully collapse. Afterward, peel and seed first (for a smoother result) or keep it rustic, then mash well and simmer until it reaches the thickness you want for pasta.
2) What’s the easiest tomato sauce from fresh tomatoes method for beginners?
A simple approach is to simmer chopped tomatoes with salt (plus onion or garlic if you like) until soft, then reduce uncovered until the flavor concentrates. Finally, finish with basil for a fresh, Italian-style taste.
3) Can I use this tomato sauce for spaghetti?
Absolutely. For tomato sauce for spaghetti, keep the sauce slightly looser, then toss it with cooked spaghetti and a splash of pasta water so it coats the noodles instead of pooling underneath.
4) How do I turn tomato sauce into spaghetti sauce?
To shift tomato sauce to spaghetti sauce, simmer a bit longer for deeper flavor, then adjust texture with pasta water at the end. Additionally, you can add sautéed onion/garlic or herbs for a more “spaghetti sauce” profile.
5) How do I make spaghetti sauce from fresh tomatoes that isn’t watery?
Choose meatier tomatoes when possible, then simmer uncovered to evaporate excess liquid. If needed, widen the pot surface area to speed up reduction while keeping the simmer gentle.
6) What tomatoes are best for tomato sauce from tomatoes?
Roma or plum tomatoes are ideal because they’re less watery and have more flesh. Still, vine-ripened tomatoes work well too, especially if you’re willing to reduce longer for a richer tomato taste.
7) Is fresh tomato sauce the same as marinara sauce?
Not always. Fresh tomato sauce is often lighter and more tomato-forward, whereas marinara sauces usually include a more defined seasoning profile and can be slightly thicker, depending on the style.
8) How do I make a marinara sauce recipe from this fresh tomato base?
Begin with your fresh tomato sauce, then add garlic, herbs, and a longer simmer for a more classic marinara feel. In many cases, a pinch of oregano plus basil moves it firmly into marinara territory.
9) What’s the difference between sauce pomodoro and regular tomato sauce?
Sauce pomodoro typically stays bright, simple, and basil-forward, with a clean tomato flavor. By comparison, “tomato sauce” can range from quick and fresh to longer-simmered and more robust.
10) What is sugo recipe style tomato sauce?
Sugo generally refers to an Italian-style sauce that’s often tomato-based and used broadly for pasta. Depending on the region, it can be simple like pomodoro or richer with longer cooking and added ingredients.
11) Can I make tomato pasta sauce with fresh tomatoes ahead of time?
Yes. Let the sauce cool completely, then refrigerate for a few days or freeze in portions. Later, reheat gently to keep the flavor lively and the texture smooth.
12) How long should I simmer homemade tomato sauce?
Simmer just until the tomatoes break down, then reduce until the sauce tastes concentrated and coats a spoon. The exact time varies by tomato type, batch size, and how thick you want your red pasta sauce.
13) How do I thicken pasta sauce from fresh tomatoes quickly?
Use a wide pot, keep it uncovered, and maintain a steady simmer to drive off moisture faster. Alternatively, start with less-watery tomatoes to reduce thickening time.
14) How do I fix fresh tomato sauce that tastes too acidic?
First, reduce a bit longer because acidity often softens with cooking. If it still tastes sharp, add a small knob of butter or a tiny pinch of sugar—just enough to round the edges, not sweeten the sauce.
15) Can I make low sugar pasta sauce with fresh tomatoes?
Yes—fresh tomato sauce is naturally low sugar when you skip sweeteners. Focus on good tomatoes, proper salt, and reduction for balanced flavor without added sugar.
16) How do I make sugar free marinara sauce?
Use tomatoes, olive oil, salt, and herbs—then avoid any added sweeteners. For extra depth, sauté onion gently; it boosts perceived sweetness naturally without adding sugar.
17) What’s the best way to season Italian tomato sauce from fresh tomatoes?
Salt early, then adjust at the end. Beyond that, basil is a classic finish, while onion and garlic provide depth; keep dried herbs modest so the tomato flavor stays front and center.
18) Can I use this as pizza tomato sauce?
You can, especially if you reduce it until it’s thick enough to spread. However, pizza tomato sauce is often uncooked or paste-based, so expect a slightly different flavor and texture.
19) How do I make pizza sauce using tomato paste instead?
Whisk tomato paste with water, olive oil, salt, and herbs until spreadable. Then adjust thickness and seasoning to taste; it’s a fast option when fresh tomatoes aren’t available.
20) Can I make roasted tomato sauce from fresh tomatoes?
Definitely. Roast tomatoes until caramelized, then simmer briefly and blend or mill for texture. Roasting adds sweetness and depth, creating a richer roasted tomato spaghetti sauce.
21) What’s the difference between fresh tomato sauce and red sauce?
“Red sauce” is a broad label that can include marinara, longer-simmered Italian-American sauces, and other tomato-based sauces. Fresh tomato sauce is typically lighter, quicker, and more tomato-forward.
22) Can I turn this into arrabbiata sauce pasta?
Yes. Add chili flakes (or fresh chilies) and simmer briefly so the heat infuses. Then toss with pasta for an easy arrabbiata sauce pasta style dinner.
23) How do I make arrabbiata sauce recipe style from scratch?
Start with olive oil and garlic, add chili flakes, then pour in tomato sauce and simmer. Finish with salt and basil or parsley, then serve immediately with pasta.
24) Can I make puttanesca sauce using this tomato base?
Yes. Add olives, capers, garlic, and chili, then simmer briefly to meld flavors. As a result, you get a bold puttanesca sauce without needing a separate tomato foundation.
25) How do I make tomato cream sauce from this base?
Warm the tomato sauce, then stir in heavy cream or a splash of milk and simmer gently. This creates a creamy tomato sauce that’s ideal for pasta.
26) Is this the same as penne alla vodka pasta sauce?
Not exactly. Penne alla vodka pasta uses a tomato base plus vodka and cream for a silky finish. Still, this sauce is the perfect starting point for a penne alla vodka recipe later.
27) Can I use passata tomato instead of fresh tomatoes?
Yes. Passata is strained tomato puree, so it behaves like a smooth base right away. Simmer it with aromatics and finish like you would a fresh tomato sauce recipe.
28) How do I make tomato sauce using tomato paste if I’m out of tomatoes?
Combine tomato paste with water (or broth), olive oil, and seasonings, then simmer briefly. After that, adjust salt and herbs until it tastes balanced and full.
29) What’s the best way to store homemade tomato sauce?
Cool it fully, store in airtight containers, and refrigerate for short-term use. For longer storage, freeze in smaller portions so you can thaw just what you need.
30) How do I use this for meatballs in tomato sauce?
Simmer meatballs directly in the sauce until cooked through, allowing the sauce to pick up their flavor. Then serve over spaghetti or with bread for a classic meatballs and tomato sauce meal.