Posted on Leave a comment

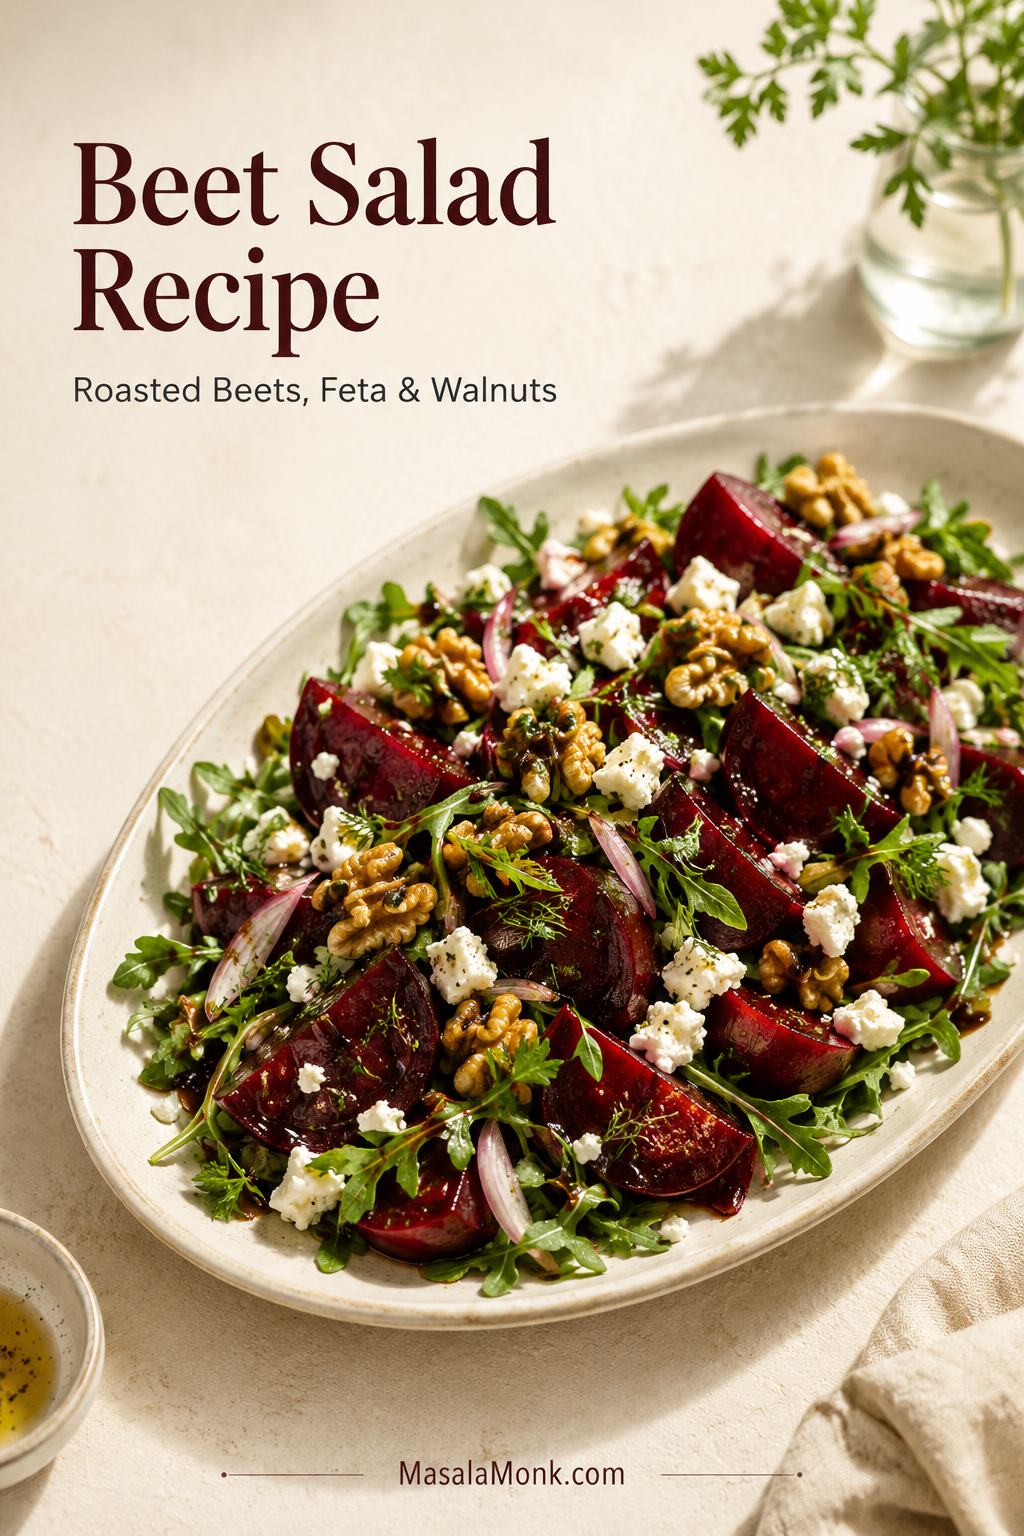
Beet Salad Recipe with Roasted Beets, Feta & Walnuts

This roasted beet salad stands out because it combines sweet beet wedges with salty feta, toasted walnuts, peppery greens, herbs, and a bright lemon-balsamic finish.

A good beet salad recipe should be more than earthy beets with cheese sprinkled on top. It should feel bright, crisp, salty, sweet, and fresh in the same bite: tender roasted beets, briny feta, toasted walnuts, peppery greens, fresh herbs, and a lemon-balsamic dressing that keeps everything lively.

It should look as good as it tastes too: ruby beet wedges, white feta, green herbs, toasted walnuts, and glossy greens that still look fresh.

This version looks like a special-occasion salad, but most of the work is simple: roast the beets, cool and peel them, dress the greens lightly, then layer everything so the salad stays colorful instead of wet, muddy, or fully pink.

Beets are dramatic. They stain the board, tint the vinaigrette, and can turn feta pink if the salad is tossed too hard. They can also taste muddy without enough acid, salt, herbs, and crunch. This recipe gives them a fair chance: roasted until sweet, dressed until bright, and finished with enough contrast to make every bite lively. If you know them as beetroot, same idea: roasted beetroot, feta, walnuts, greens, herbs, and a tangy vinaigrette.

Quick Answer: Beet Salad at a Glance

Fast recipe snapshot: Roast whole beets at 400°F / 200°C until tender, cool and peel, then layer with arugula or rocket, feta, toasted walnuts, herbs, shallot, and lemon-balsamic Dijon dressing. For a 15-minute version, use cooked, canned, vacuum-packed, or leftover roasted beets.

Go-to beet methodRoasted whole beets for the deepest, sweetest flavor
Roast time35–45 minutes for small beets, 45–60 minutes for medium, 60–75 minutes for large
Serves4 as a side, or 2 as a larger salad
GreensArugula / rocket for peppery bite; spinach for a milder salad
DressingLemon-balsamic Dijon vinaigrette
Make-ahead planRoast beets and make dressing ahead; assemble close to serving

The image below shows the bite this salad is built around: beet, feta, walnut, greens, herbs, and just enough dressing to bring everything together.
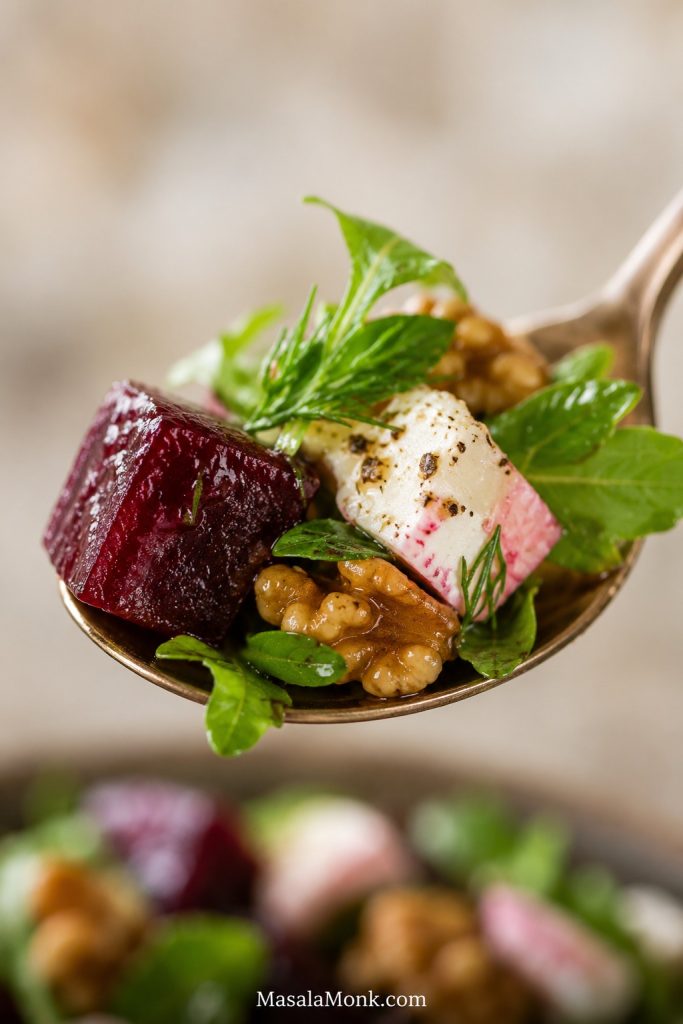
Close-up of a spoon holding roasted beet, feta, walnut, greens, herbs, and glossy dressing.
For the best bite, aim for sweetness, salt, crunch, freshness, and a little dressing together. That balance keeps beet salad lively instead of earthy or heavy.

The Beet Salad Balance Formula

Once you know the balance, you can change the salad without losing the point. Great beet salad needs five things: sweet beets, salty contrast, bright acid, crisp texture, and something fresh. Miss one, and the salad can taste flat, earthy, too soft, too sweet, or heavy.

  • Sweet: roasted beets or beetroot
  • Salty: feta, goat cheese, capers, olives, or salted seeds
  • Acid: lemon, orange, balsamic, vinegar, or pickled beets
  • Crunch: walnuts, pecans, pistachios, pumpkin seeds, apple, or cucumber
  • Freshness: arugula, rocket, parsley, mint, dill, basil, spinach, or kale

The trick is not making beets less like beets. It is giving them enough contrast to make their sweetness work. When those pieces are in place, the salad tastes bright instead of muddy, crisp instead of soft, and fresh instead of heavy.

What the finished salad should taste like: sweet roasted beets, salty-creamy feta, crisp toasted nuts, fresh herbs, lightly dressed greens, and a clean lemony finish.

Ingredients You’ll Need

You do not need many ingredients, but quality and timing matter. Medium beets roast more evenly, block feta stays creamier than pre-crumbled feta, toasted walnuts taste far better than raw walnuts, and fresh herbs make the salad feel brighter.
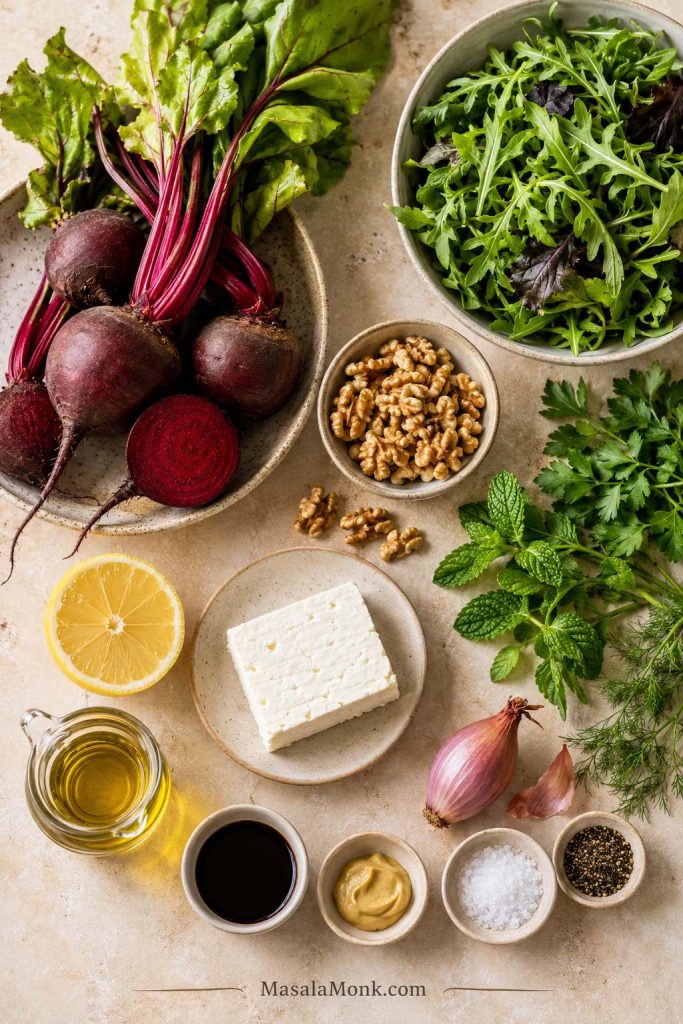
Raw beets, feta, walnuts, greens, herbs, lemon, balsamic vinegar, Dijon mustard, olive oil, salt, and pepper.
Start with a short ingredient list, but make each part count: tender beets, something salty, something crisp, fresh herbs, greens, and a sharp dressing.

Beets / Beetroot

Use 600–700 g / 1⅓–1½ lb raw beets, about 4 medium beets. Red beets are classic and easy to find. Golden beets are milder, stain less aggressively, and look beautiful mixed with red beets. Not starting with raw beets? The beet options section explains how to use cooked, canned, pickled, boiled, or raw beets.

Choose beets that feel firm and heavy for their size. Small to medium beets usually have the nicest texture for salad. Very large beets can take longer to roast and may be a little woody in the center.

Feta

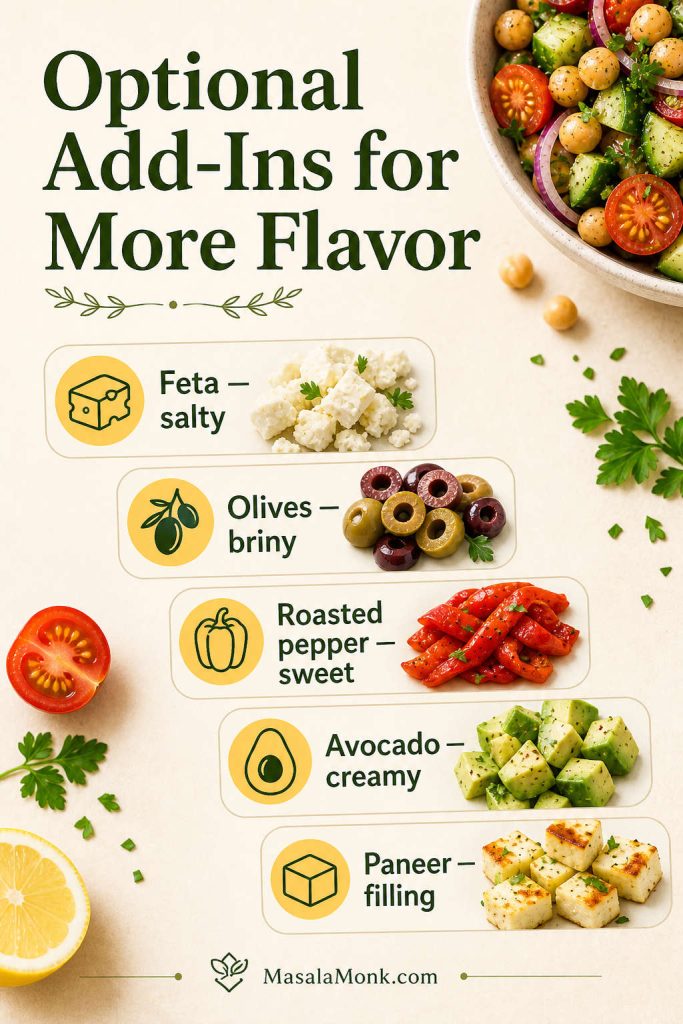
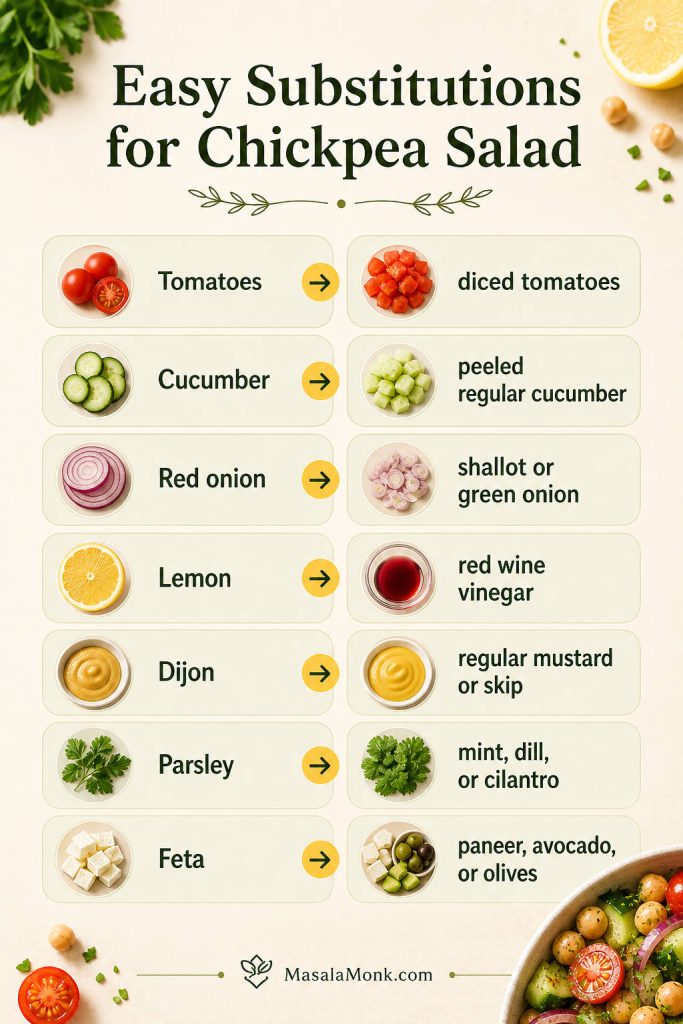
Use 85–100 g / 3–3½ oz feta, crumbled into small pieces. Block feta is creamier and less dry than pre-crumbled feta, so it is the better choice when you have it. Goat cheese gives a softer, creamier salad; blue cheese is stronger and works best with pear, walnuts, and bitter greens. For a dairy-free version, skip the cheese and add avocado, toasted seeds, capers, olives, or tahini-lemon dressing.

Walnuts

Use 50–60 g / ½ cup walnuts, toasted. This is one place not to skip the pan: toasted walnuts taste deeper, crisper, and much better against sweet beets than raw walnuts. Pecans, pistachios, almonds, or pumpkin seeds also work.

Greens, herbs, and shallot

Use 120–140 g / 4–5 oz arugula/rocket, baby spinach, or mixed greens. Arugula is best when you want peppery contrast; spinach is softer and milder; kale works better for lunch bowls with grains or chickpeas.

Use one or two fresh herbs, not every herb at once. Parsley keeps it clean, mint makes it brighter, dill is excellent with cucumber or pickled beets, and basil works well with orange or balsamic. A little shallot or red onion gives the salad bite; soak it in cold water for 10 minutes if it tastes too sharp.

How to Roast Beets for Salad

Roasting beets is mostly hands-off. I get the cleanest flavor from medium beets roasted whole, then peeled after cooling. Very large beets work, but they take longer and can taste less sweet in the center. Skipping the oven? Use the 15-minute shortcut with cooked, canned, or vacuum-packed beets.
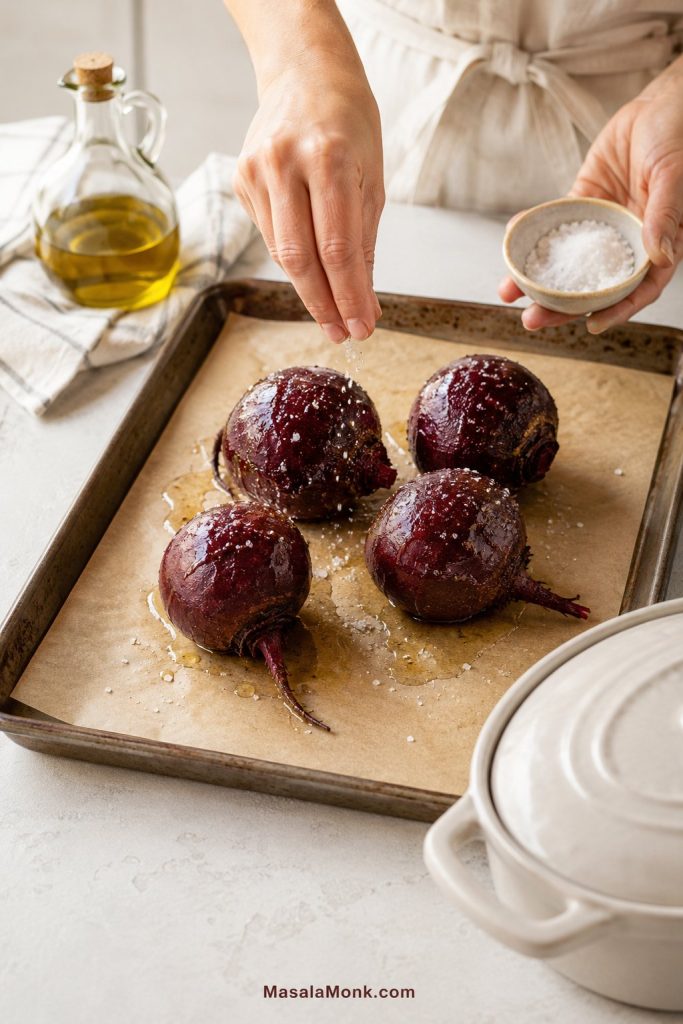
Whole beets on a parchment-lined tray being seasoned with olive oil and salt before roasting.
Before roasting, coat the beets with olive oil and salt. This simple step helps build flavor and makes the skins easier to remove later.

Whole roasted beets

  1. Heat the oven to 400°F / 200°C.
  2. Scrub the beets well. Trim the greens, leaving about 1 inch of stem if attached. This helps reduce bleeding while roasting.
  3. Rub the beets with 1 tbsp / 15 ml olive oil and a pinch of salt.
  4. Wrap the beets in foil, or place them in a covered baking dish. Set foil packets on a rimmed baking sheet in case any juices leak.
  5. If using red and golden beets together, wrap or roast them separately so the red beets do not stain the golden ones.
  6. Roast until tender: 35–45 minutes for small beets, 45–60 minutes for medium beets, and 60–75 minutes for large beets.
  7. The beets are done when a small knife slides into the center of the largest beet with little resistance.
  8. Let the beets cool for 10–15 minutes, or until comfortable to handle.
  9. Rub off the skins with paper towels or gloved hands.
  10. Slice into wedges, half-moons, cubes, or ¼-inch rounds.

Check, peel, and slice

Use the knife test on the largest beet in the batch, because smaller beets may be tender before the biggest one is ready. This is the simplest way to avoid firm centers.
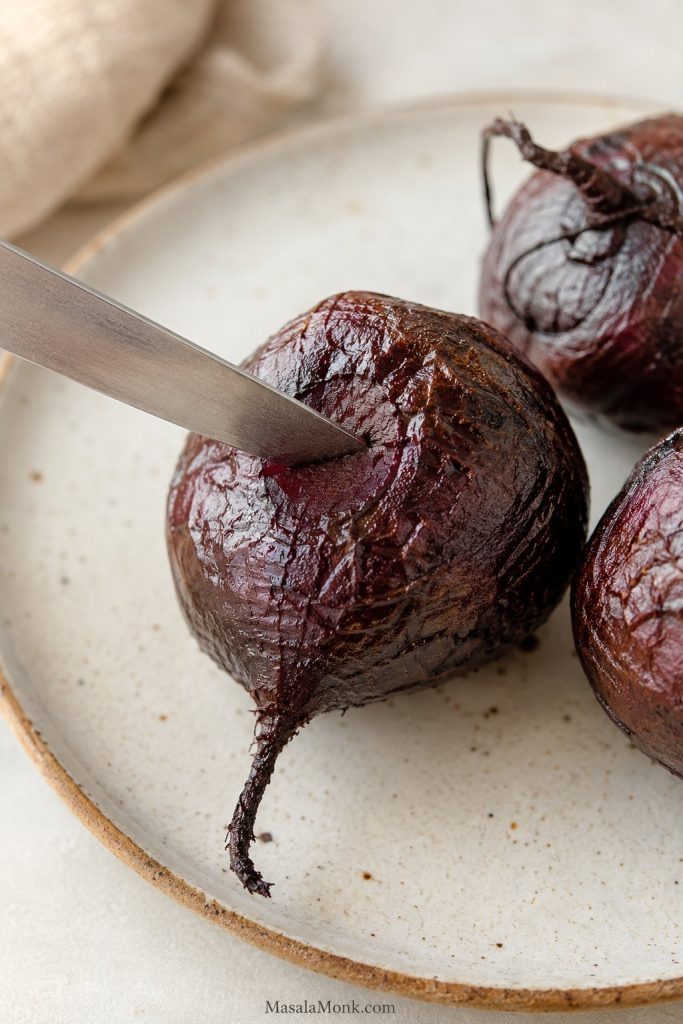
Knife inserted into the center of a roasted beet to test tenderness.
Next, check the largest beet, not the smallest one. When a knife slides into the center easily, the whole batch is ready.

For whole roasted beets, peel after roasting. The skins slip off more easily, the beets stay juicier, and the prep is less messy. If the skins do not rub off easily, the beets may need a little more time in the oven.
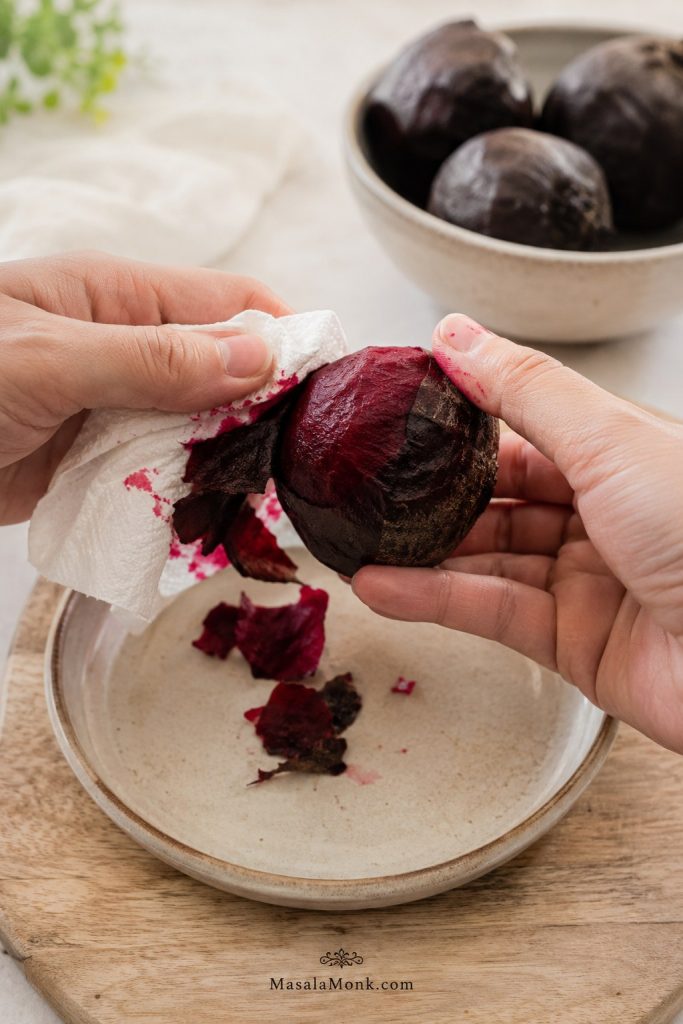
Hands peeling the skin from a roasted beet with a paper towel on a light plate.
Once the beets are cool enough to handle, rub the skins off with a paper towel or gloves. If they resist, roast them a little longer next time.

After slicing, taste one beet. If it tastes flat, sprinkle the sliced beets lightly with salt or toss them with 1 teaspoon of the vinaigrette before adding them to the salad.
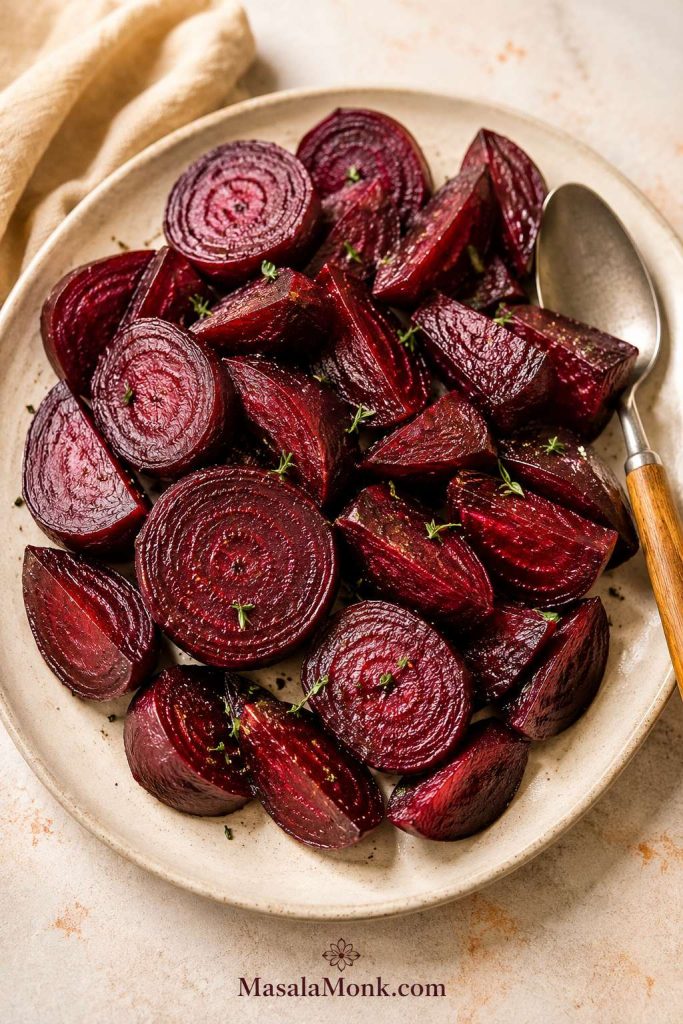
Sliced roasted beets in wedges and rounds on a cream plate with a spoon beside them.
After peeling, cut the beets into wedges, half-moons, or rounds. They should look tender and glossy, not watery, dry, or mushy.

Sliced roasted beets

If you want more roasted edges and a shorter cooking time, peel the beets first and slice them into wedges or ¼-inch rounds. Toss with olive oil and salt, spread on a lined baking sheet, and roast at 425–450°F / 220–230°C for about 25–35 minutes, turning once.

This route is faster, but it is messier because you peel and cut the beets while raw. It is helpful when you want a stronger roasted flavor and do not mind a stained cutting board.

Foil vs no foil

Foil traps steam around whole beets, which helps them cook evenly and makes the skins easier to rub off. A covered baking dish works in a similar way and is the most reliable no-foil option. Uncovered roasting gives more caramelization, but it can dry out whole beets before the centers are tender. Use uncovered roasting mainly for sliced beets.

No-foil method: Place scrubbed beets in a small covered baking dish with a splash of water and a little olive oil. Cover tightly and roast until tender. The goal is to trap enough steam for easy peeling while still concentrating the beet flavor.

How to Make Beet Salad

Once the beets are roasted, the rest is assembly. Start with less vinaigrette than you think you need, then add more only after tasting. Beet salad should look glossy, not wet.

  1. Roast, cool, peel, and slice the beets. If using cooked or canned beets, drain and pat them dry.
  2. Toast the walnuts. Warm them in a dry skillet for 3–5 minutes, stirring often, until fragrant. Let them cool so they stay crisp.
  3. Make the vinaigrette. Shake or whisk together olive oil, balsamic vinegar, lemon or orange juice, Dijon, honey or maple syrup, salt, and pepper.
  4. Dress the greens lightly. Toss the greens with 1–2 tablespoons of vinaigrette before adding the beets.
  5. Add the beets gently. Arrange them over the greens, then drizzle with a little more if needed.
  6. Finish with feta, walnuts, herbs, and shallot. Add these at the end so the salad keeps its texture and color.
  7. Taste a complete bite. Try beet, feta, walnut, greens, and dressing together. Adjust with lemon, salt, pepper, or herbs before serving.

Dress the greens first and keep the beets out until the leaves are lightly coated. This gives the salad flavor from underneath without turning the greens heavy.
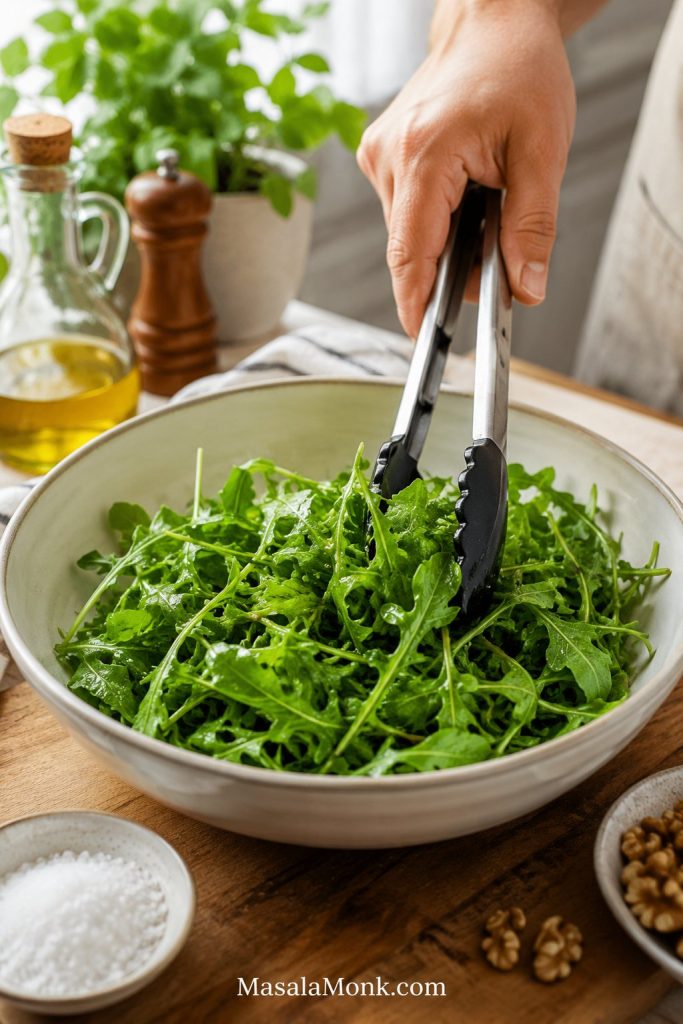
Tongs tossing arugula and mixed greens with a small amount of dressing in a shallow bowl.
First, dress the greens lightly before adding the beets. This gives the salad a flavorful base without soaking the leaves or staining everything pink.

Platter vs Bowl

Use a platter when presentation matters. Dress the greens lightly, layer the beets, then finish with feta, walnuts, herbs, and a final drizzle. A wide platter keeps the feta white, the walnuts crisp, and the beets from staining every leaf before serving.
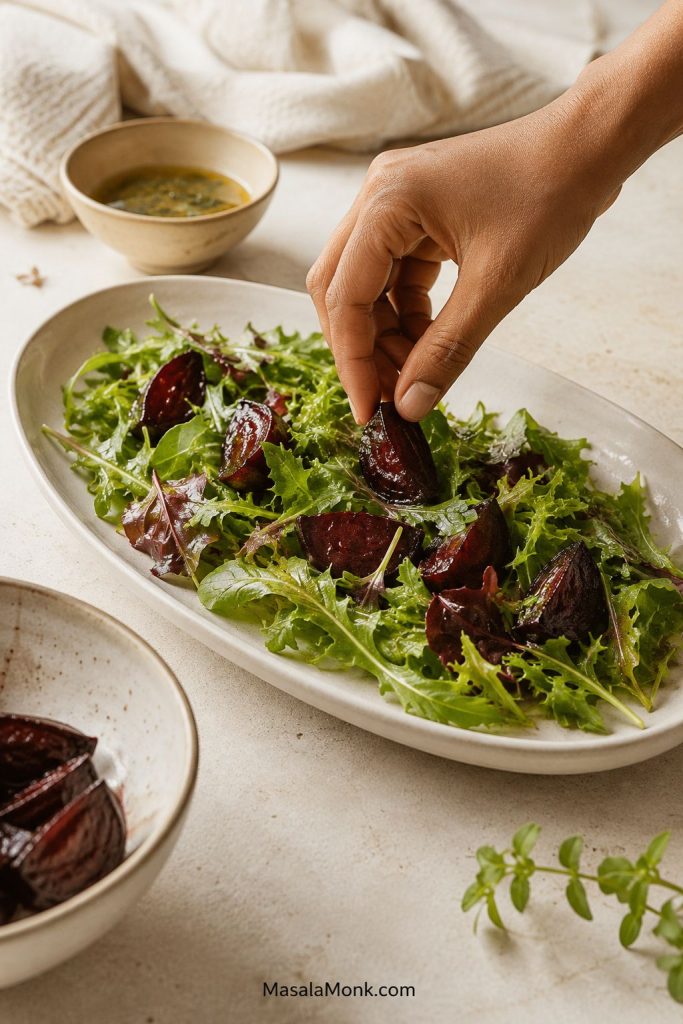
Hand placing roasted beet wedges over lightly dressed greens on a cream platter.
Then layer the beets over the greens instead of tossing hard. As a result, the salad stays cleaner, fresher-looking, and easier to serve.

Once the beets are arranged, add the delicate toppings at the end. This is the easiest way to keep the salad bright instead of fully stained pink.
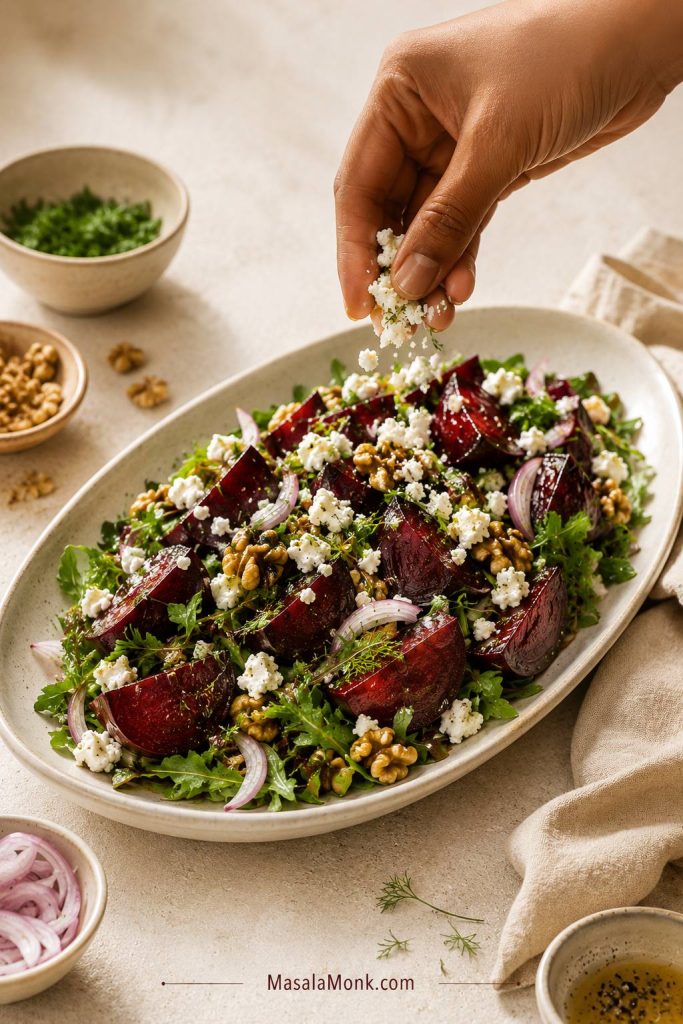
Hand sprinkling feta over roasted beet salad with walnuts, herbs, and greens on a cream platter.
Finish with feta, walnuts, herbs, and shallot at the end. That way the toppings stay bright, crisp, and visually fresh.

Use a bowl when you are adding quinoa, chickpeas, lentils, beans, eggs, chicken, or salmon. Cut the beets into cubes or half-moons so every forkful gets a little sweetness, salt, acid, and crunch.

Avoid these beet salad mistakes: Let the beets cool, dress lightly, add feta near the end, use enough salt and acid, and give soft canned beets something crisp.

The Best Dressing for Beet Salad: Lemon-Balsamic Dijon

With beets, the vinaigrette is what keeps the salad from tasting heavy. Think of it as the no-muddy-beets dressing: balsamic for depth, lemon for lift, Dijon for body, and just enough sweetness to round the edges without making the salad sugary.
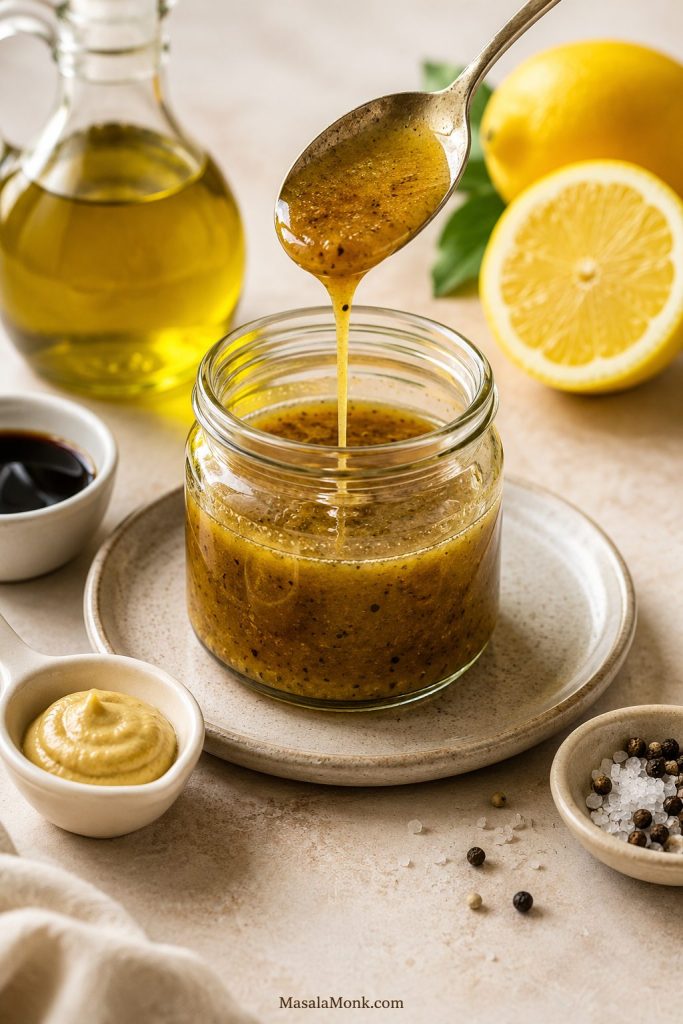
Lemon-balsamic Dijon dressing dripping from a spoon into a glass jar with lemon, mustard, olive oil, vinegar, salt, and pepper nearby.
The dressing should taste slightly sharper than you want at first. Once it coats the sweet beets and salty cheese, the flavor settles into balance.
IngredientAmountWhy it is there
Extra-virgin olive oil3 tbsp / 45 mlGives body and carries the flavor
Balsamic vinegar1 tbsp / 15 mlMatches the sweetness of roasted beets
Lemon juice or orange juice1 tbsp / 15 mlLifts the salad and reduces earthiness
Dijon mustard1 tsp / 5 mlHelps emulsify the dressing and adds bite
Honey or maple syrup1–2 tsp / 5–10 mlRounds the sharp edges without making the salad sweet
Fine salt¼ tsp, plus more to tasteBalances the beets without over-salting the feta
Black pepperTo tasteAdds warmth and contrast

Use 1 teaspoon honey or maple for a sharper vinaigrette, or 2 teaspoons if your vinegar is harsh or your beets taste especially earthy. Skip the sweetener for very sweet roasted beets or pickled beets.

How Much Dressing to Use

Dressing rule: Start with 1–2 tablespoons on the greens, then add more only after the beets are on the salad. If the salad tastes flat, add salt first; if it tastes earthy, add lemon and herbs; if it tastes too sweet, add vinegar, lemon, or peppery greens.

The easiest visual cue is the surface of the salad. The beets and greens should shine lightly, but the plate should not have dressing pooling at the bottom.
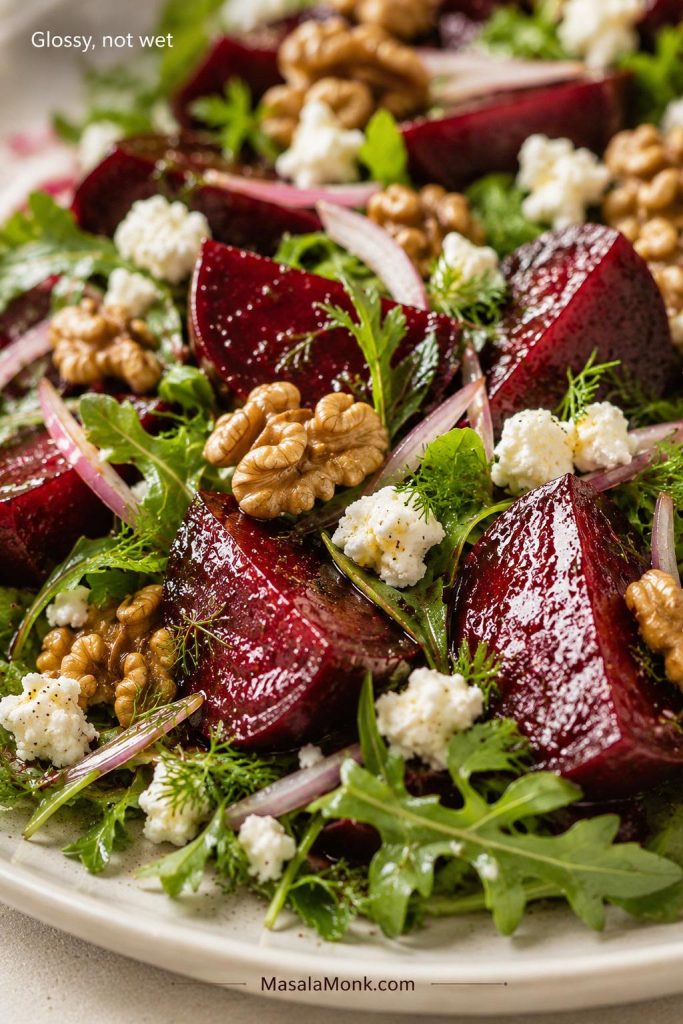
Close-up of roasted beet salad with glossy beets, greens, feta, walnuts, herbs, and the words “Glossy, not wet.”
The finished salad should look glossy, not wet. If liquid starts pooling, stop adding dressing and adjust with salt or lemon instead.

How to Change the Vinaigrette

Use orange vinaigrette when fruit is involved, lemon-herb dressing when the salad has cucumber or chickpeas, and honey-Dijon when you switch from feta to goat cheese. For a deeper dinner-party version, add roasted garlic or finely chopped toasted walnuts to the vinaigrette.

Recipe Card: Roasted Beet Salad with Feta & Walnuts

Sweet roasted beets, briny feta, toasted walnuts, greens, herbs, and a lemon-balsamic dressing come together in a colorful salad that works as a side dish or a larger salad with lunch add-ins.

Prep Time15 minutes
Roast Time45–60 minutes for medium beets
Cooling Time15 minutes
Total TimeAbout 1 hour 15–30 minutes for medium beets

Timing note: Small beets may roast in 35–45 minutes. Large beets can take 60–75 minutes.

Shortcut time: 15 minutes if using cooked, canned, vacuum-packed, or leftover roasted beets.

Yield: 4 side servings, or 2 larger salad servings. For a fuller lunch, add quinoa, chickpeas, lentils, eggs, beans, or another protein.

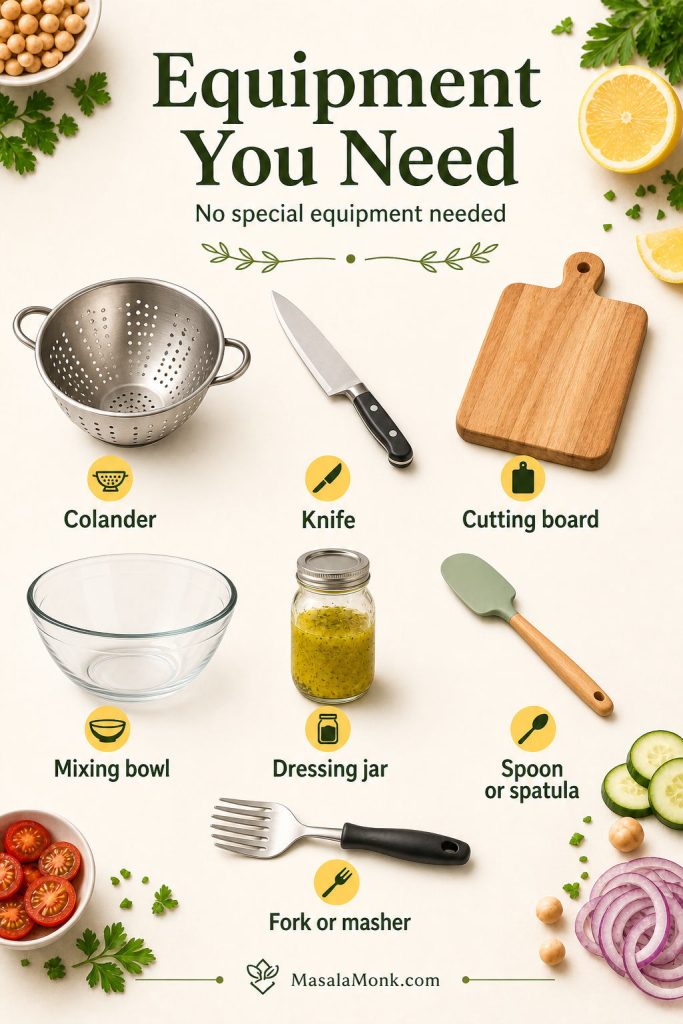
Equipment: rimmed baking sheet or small covered baking dish, foil or lid, sharp knife, cutting board, small skillet, small jar or bowl for dressing, paper towels or gloves, salad bowl or platter.

Ingredients

For the beets and salad

  • 600–700 g / 1⅓–1½ lb raw beets, about 4 medium
  • 1 tbsp / 15 ml olive oil, for roasting
  • Pinch of salt, for roasting
  • 120–140 g / 4–5 oz arugula/rocket, baby spinach, or mixed greens
  • 85–100 g / 3–3½ oz feta, crumbled
  • 50–60 g / ½ cup walnuts, toasted
  • 1 small shallot or ¼ small red onion, thinly sliced or minced
  • 2–3 tbsp chopped fresh parsley, mint, dill, or basil
  • Optional: 1 orange, segmented; 1 crisp apple, sliced; or a mix of red and golden beets

For the lemon-balsamic Dijon dressing

  • 3 tbsp / 45 ml extra-virgin olive oil
  • 1 tbsp / 15 ml balsamic vinegar
  • 1 tbsp / 15 ml lemon juice or orange juice
  • 1 tsp / 5 ml Dijon mustard
  • 1–2 tsp / 5–10 ml honey or maple syrup
  • ¼ tsp fine salt, plus more to taste
  • Freshly ground black pepper, to taste

Method

  1. Roast the beets. Heat the oven to 400°F / 200°C. Scrub the beets, rub with olive oil and a pinch of salt, then wrap in foil or place in a covered baking dish. Roast until a knife slides easily into the center: 35–45 minutes for small beets, 45–60 minutes for medium beets, or 60–75 minutes for large beets.
  2. Cool and peel. Let the beets cool for 10–15 minutes, or until comfortable to handle. Rub off the skins with paper towels or gloved hands. Slice into wedges, half-moons, cubes, or ¼-inch rounds.
  3. Toast the walnuts. Place walnuts in a dry skillet over medium-low heat for 3–5 minutes, stirring often, until fragrant. Cool before adding to the salad.
  4. Make the vinaigrette. In a jar or small bowl, combine olive oil, balsamic vinegar, lemon or orange juice, Dijon, honey or maple syrup, salt, and pepper. Shake or whisk until combined. Taste; it should be tangy and lightly salty before it goes on the salad.
  5. Dress the greens lightly. Toss the greens with 1–2 tablespoons of dressing before adding the beets. You may not need all of it.
  6. Add the beets. Arrange the sliced beets over the greens. Drizzle with another spoonful if needed.
  7. Finish the salad. Add feta, toasted walnuts, shallot or red onion, and herbs. Add orange or apple if using.
  8. Taste and serve. Taste a bite with beet, feta, walnut, greens, and dressing together. Adjust with lemon, salt, pepper, or herbs before serving.

Shortcut Version

Use about 3 cups cooked beets, or 500–600 g / 18–21 oz cooked, canned, vacuum-packed, or leftover roasted beets. Drain and pat dry, then slice and assemble the salad with the same dressing and remaining salad ingredients. Total time: about 15 minutes.

Notes

  • Cool beets fully and add feta last for the cleanest presentation.
  • Start with 1–2 tablespoons dressing; beet salad should be glossy, not wet.
  • For canned beets, use two standard 14–15 oz / 400 g cans, drain, rinse if needed, and pat very dry.
  • For pickled beets, reduce or skip the balsamic vinegar and use more lemon, dill, cucumber, and red onion.
  • Store roasted beets and dressing separately for 3–4 days. Assemble close to serving.

Use the recipe card above for the main roasted beet version. The sections below help you adapt it if you are starting with canned, cooked, pickled, raw, or boiled beets, or if you want a lunch bowl, no-greens version, storage plan, or quick fix.

Roasted, Raw, Canned, Pickled, or Boiled Beets?

Roasted beets give the fullest flavor, but this salad does not fall apart if you start with cooked, canned, pickled, boiled, or raw beets. The key is knowing what each type needs before it goes into the bowl.
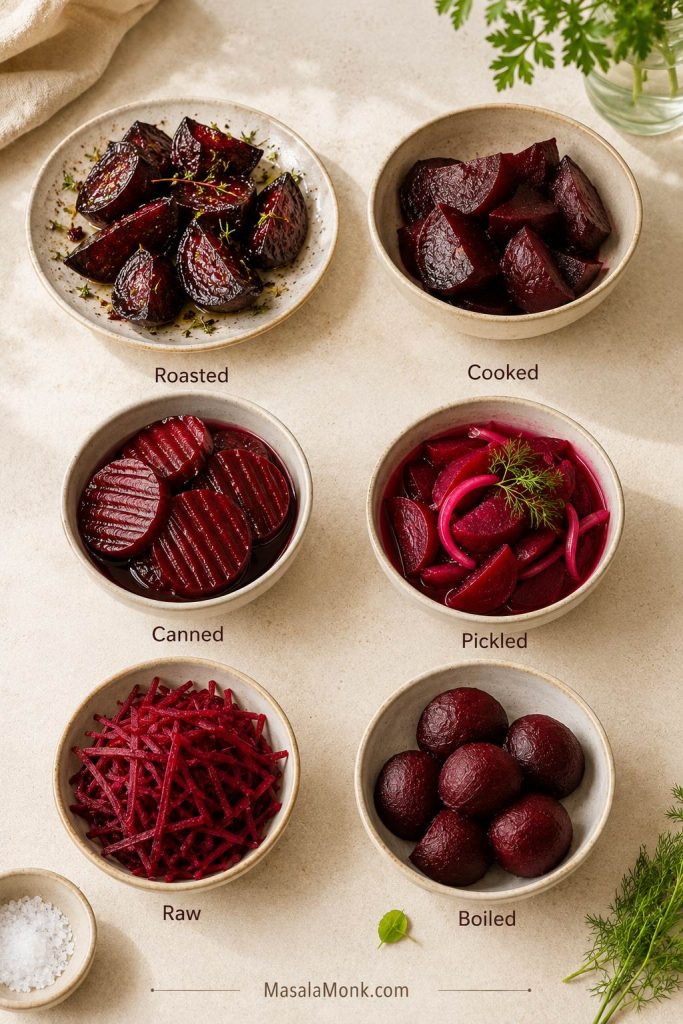
Six labeled bowls showing roasted, cooked, canned, pickled, raw, and boiled beets for beet salad.
Choose the beet style based on what you need: roasted for depth, canned for speed, pickled for tang, raw for crunch, and boiled for a softer bite.
Beet optionBest forWhat to know
Roasted beetsFullest flavorSweet, deep, tender, and less watery than boiled beets.
Vacuum-packed cooked beetsFastest no-roast optionClosest shortcut to roasted texture. Pat dry before using.
Canned beetsPantry shortcutDrain, rinse if needed, and pat very dry. Add extra crunch because canned beets are soft.
Pickled beetsTangy no-cook saladUse less vinegar in the dressing because the beets already bring acidity.
Raw beetsCrunchy slaw-style saladPeel, grate, julienne, or slice very thin. Thick raw beet pieces are too hard for this style.
Boiled beetsAlready cooked beetsSofter and often wetter than roasted beets. Dry them well and use a punchy dressing.

The shortcut versions are not second-best if you build them well. They just need more drying, more crunch, and a brighter finish.

If you are shopping specifically for this recipe, buy raw medium beets for the fullest flavor or vacuum-packed cooked beetroot for the easiest shortcut. Use canned or pickled beets when they are what you already have.

15-Minute Beet Salad with Cooked, Canned, or Vacuum-Packed Beets

For a fast beet salad, use about 3 cups cooked beets, or 500–600 g / 18–21 oz cooked, canned, vacuum-packed, or leftover roasted beets. Slice into wedges, half-moons, or cubes, then pat dry before adding dressing.
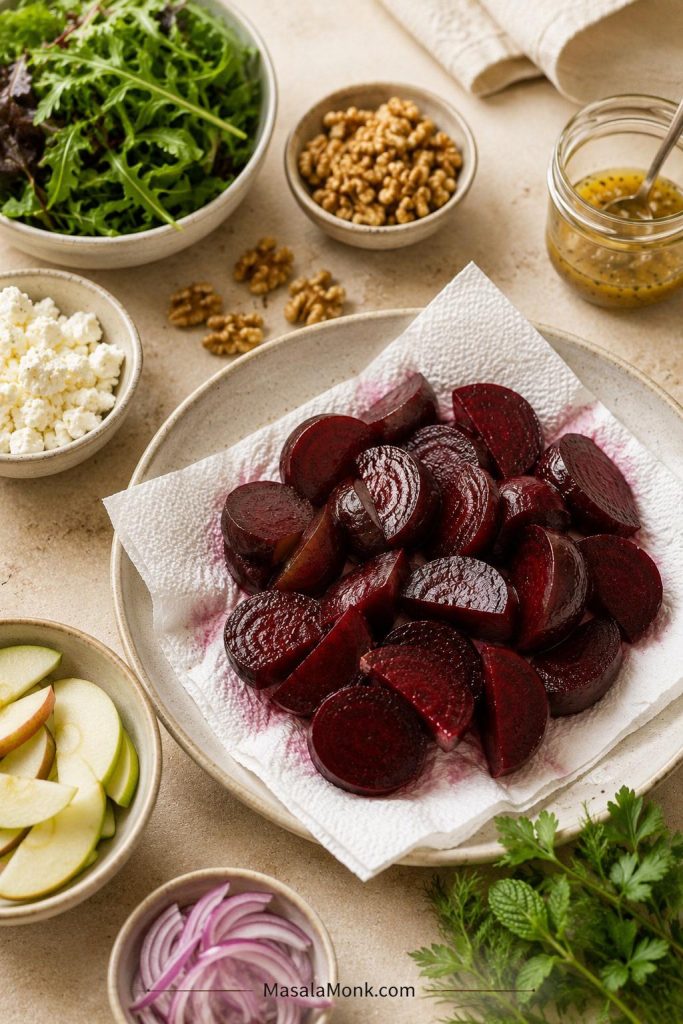
Cooked beet slices on paper towel with feta, walnuts, greens, apple slices, herbs, onion, and dressing nearby.
For canned or cooked beets, drying matters most. Pat them well, then add crunch, herbs, cheese, and a sharper dressing to keep the salad fresh.
  • Vacuum-packed cooked beets: The closest no-roast option to roasted beets. Drain, pat dry, slice, and build the salad the same way.
  • Canned beets: Use two standard 14–15 oz / 400 g cans, drained, or about 3 cups sliced canned beets. Rinse if they taste metallic, salty, or too sweet, then pat very dry and add extra texture.
  • Pickled beets: Use less balsamic or skip it. Pair with cucumber, red onion, dill, feta, walnuts or pistachios, olive oil, and lemon.

If I am using canned beets, I am more generous with walnuts, cucumber, or apple because canned beets are softer and need more crunch.

For pickled beets, a good quick combination is: 2 cups sliced pickled beets + 1 cucumber + ¼ red onion + ½ cup feta + ⅓ cup walnuts or pistachios + fresh dill + olive oil + lemon juice.
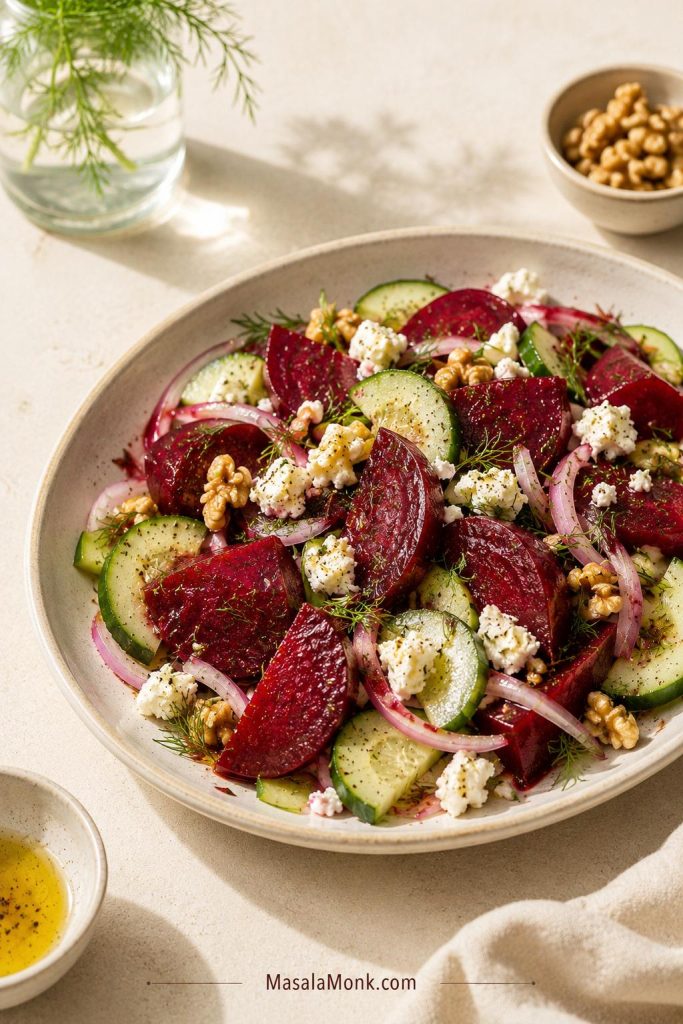
Pickled beet salad with cucumber slices, dill, red onion, feta, walnuts, and light dressing in a shallow bowl.
Because pickled beets already bring acid, pair them with cooling cucumber, dill, onion, and feta instead of a heavy balsamic-style finish.

How to Keep Beet Salad from Turning Everything Pink

Beets will always share some color. The goal is not to stop the color completely; it is to keep the salad from becoming one flat pink bowl before it reaches the table.

  • Cool the beets fully before adding them to greens or feta.
  • Pat cooked, canned, or pickled beets dry before slicing or tossing.
  • Dress the greens first instead of tossing everything together at once.
  • Add the beets gently and avoid aggressive mixing.
  • Add feta last so the white pieces stay visible.
  • Use a platter instead of a deep bowl when presentation matters.
  • Add walnuts right before serving so they stay crisp.
  • Roast red and golden beets separately if you want clean color contrast.

If leftovers turn pink, they are still good. Beet, feta, walnut, and herb salad without delicate greens can taste even better after sitting; it simply becomes more of a marinated beet side.

Beet Salad Variations

Use the variations by need: grains or legumes when it has to be lunch, orange or apple when it needs brightness, cucumber or raw beet when you want crunch, and no greens when it needs to sit.

To make beet salad a meal: Add 1½ cups cooked quinoa, 1 can chickpeas, 1½ cups lentils, boiled eggs, white beans, salmon, chicken, or tofu. Use sturdier greens like kale, arugula, or spinach, and keep the walnuts separate until serving.
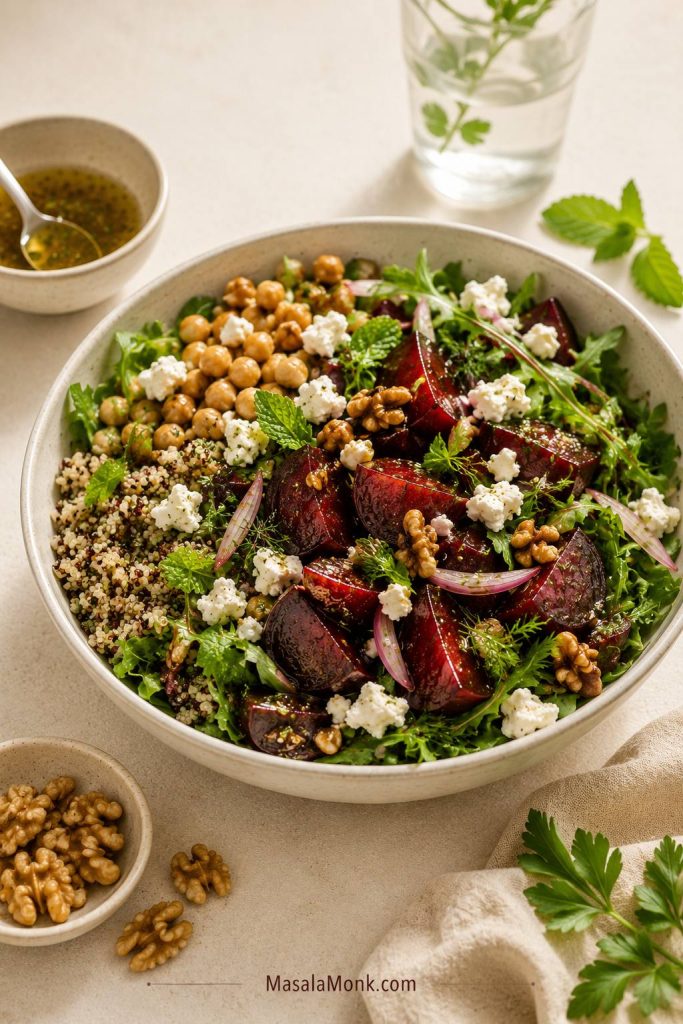
Beet salad lunch bowl with quinoa, chickpeas, roasted beets, feta, and walnuts.
To make beet salad filling enough for lunch, add quinoa or chickpeas. The extra base turns a side salad into a proper meal.

Turn it into lunch

Beet and quinoa salad: Fold in 1½ cups cooked and cooled quinoa and use a little extra dressing. Arugula, spinach, or finely chopped kale hold up best.

Beet and chickpea salad: Add 1 can chickpeas, drained and rinsed. Chickpeas make the salad more filling and work especially well with lemon, parsley, mint, cucumber, and feta. If you want another fresh, protein-friendly salad, this chickpea salad recipe is a useful next stop.

Beet and lentil salad: Add 1½ cups cooked green or brown lentils. Use extra lemon, vinegar, feta, and herbs so the salad stays bright instead of heavy.

Make it brighter

Beet and orange salad: Add 1–2 oranges, segmented or sliced. Use orange juice in the dressing and finish with mint or basil. Pistachios are especially good here.
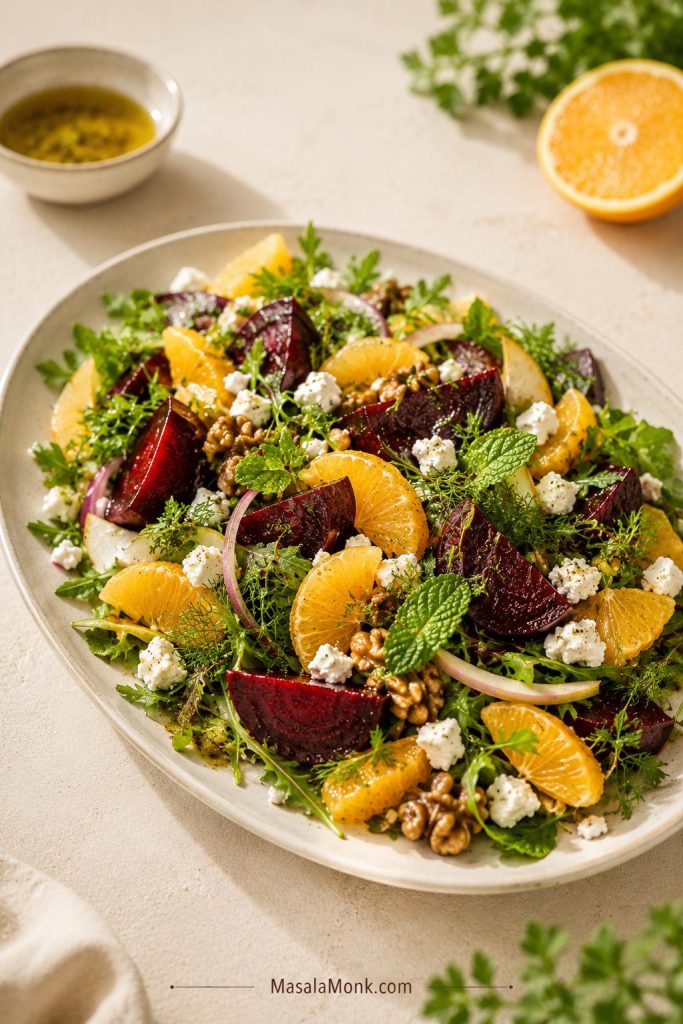
Beet and orange salad with roasted beet wedges, orange segments, greens, feta, and walnuts.
For a brighter variation, add orange segments. Citrus makes roasted beet salad juicier and helps cut through the earthy sweetness.

Apple beet salad: Add 1 crisp apple, thinly sliced just before serving. It gives the salad a sweet-tart snap that works well with walnuts, feta, and lemon.

Pear and beet salad: Add 1 ripe but firm pear when you want a softer, dinner-party style salad. Goat cheese, walnuts, and honey-Dijon are the best match here.

Make it crunchier

Raw beet salad: Peel 1–2 raw beets, then grate, julienne, or slice very thin. Toss with lemon or orange juice and salt, rest for 10 minutes, then add apple, carrot, herbs, seeds, or feta. Use a mandoline guard if slicing thinly.
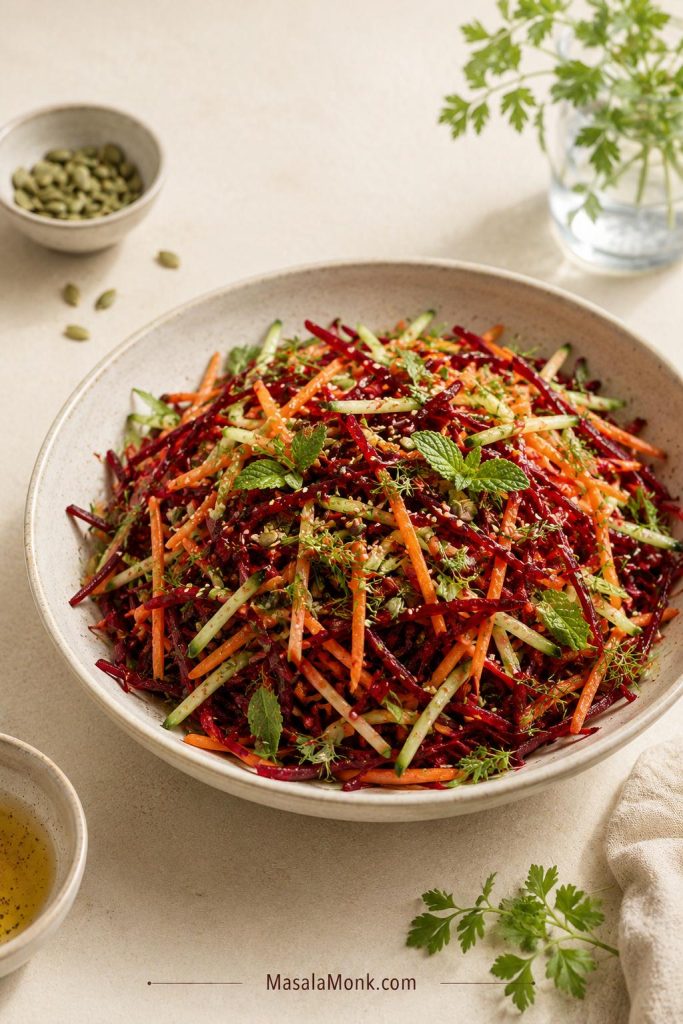
Raw beet salad with shredded beet, carrot, cucumber, herbs, seeds, and light dressing.
For raw beet salad, cut the beets thin. Shredding or julienning keeps the texture crisp and pleasant instead of hard or bulky.

Beet and carrot salad: Grate 1 raw beet + 1 large carrot, then add lemon juice, olive oil, parsley or mint, salt, and toasted seeds. This eats more like a beet slaw than a roasted beet salad.

Beet and cucumber salad: Combine 2 cups cooked or pickled beets + 1 cucumber, sliced. Add dill, feta, red onion, lemon, olive oil, and walnuts or pistachios. If cucumber is the part you love most, this crisp cucumber salad recipe is a good companion.

Make it ahead

No-greens beet salad: Make it more like a marinated beet side with 3 cups cooked beets + ½ cup feta + ½ cup walnuts + 2–3 tbsp herbs + 1 small shallot + enough dressing to coat. It is less delicate, more make-ahead friendly, and good for holiday or picnic tables. It will turn pink as it sits, but the flavor holds well for 2–3 days.
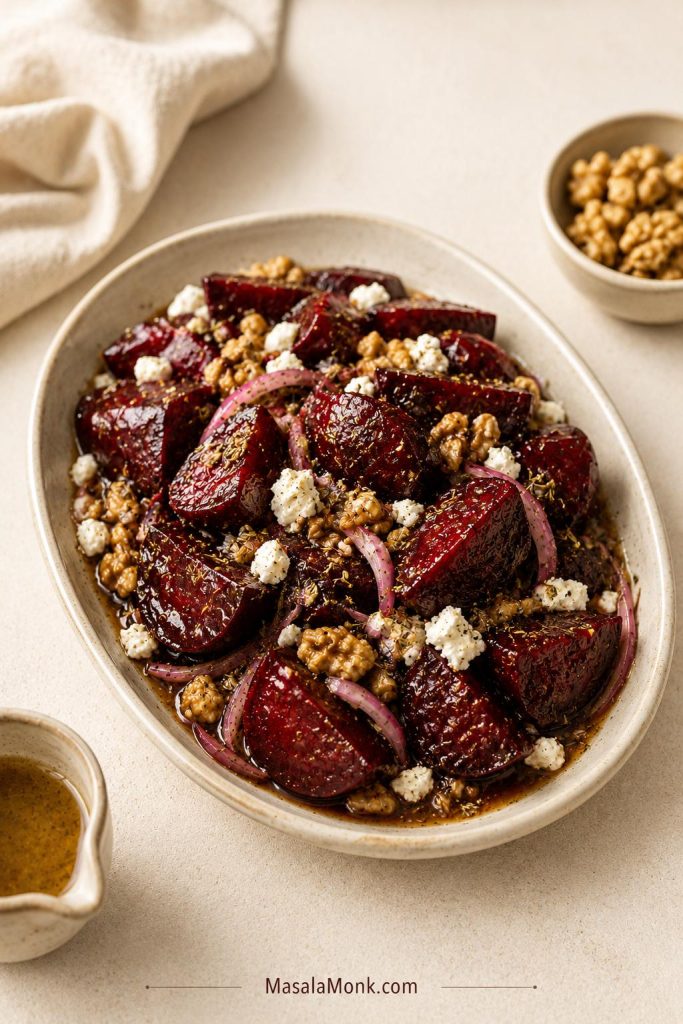
No-greens beet salad with roasted beet wedges, feta, walnuts, herbs, and shallot.
For a make-ahead beet side, skip the leafy greens. Marinate the beets first, then add feta, walnuts, and herbs closer to serving.

Change the cheese

Goat cheese beet salad: Use soft goat cheese instead of feta when you want a creamier salad, especially with honey-Dijon, walnuts, arugula, and pear.

Blue cheese beet salad: Use less cheese because the flavor is stronger. Add pear, walnuts, and bitter greens for balance.

Dairy-free beet salad: Skip the cheese and add avocado, toasted seeds, capers, olives, or tahini-lemon dressing. Increase salt slightly because feta normally provides much of the seasoning.

What to Serve with Beet Salad

Use this salad when the rest of the meal is simple and you need one dish that brings color, freshness, and a little drama. It is especially good next to anything rich or beige: roast chicken, salmon, steak, lentils, grains, or creamy soups.

  • With rich mains: serve it with roast chicken, steak, lamb, salmon, or trout. For a simple chicken plate, this baked chicken breast recipe keeps the protein easy and meal-prep friendly.
  • With simple soups: pair it with lentil soup, bean soup, tomato soup, or vegetable soup for a colorful lunch.
  • With grains: serve it over quinoa, farro, barley, rice, or couscous and add chickpeas or lentils.
  • For holiday or summer meals: use a wide platter, red and golden beets, feta, walnuts, herbs, cucumber, dill, or pickled beets.

If you bought a big bag of beets and still have a few left, use the extras in this beet juice recipe with carrot, apple, lemon, and ginger.

Make-Ahead and Storage

Beet salad is make-ahead friendly if you store the parts separately. Delicate greens and walnuts are best added close to serving. For a version that holds better after assembly, use the no-greens beet salad variation above.
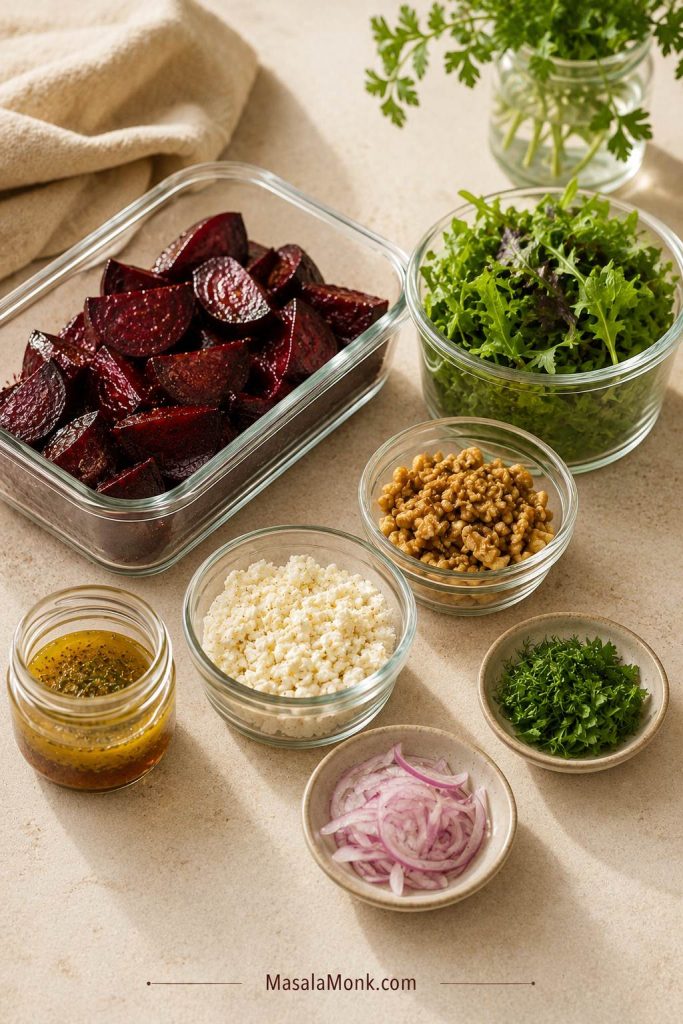
Separate containers of roasted beets, greens, feta, walnuts, herbs, red onion, and dressing.
Store the parts separately for the best texture: beets, greens, feta, walnuts, herbs, and dressing all hold better on their own.
ComponentHow long it keepsHow to store it
Roasted peeled beets3–4 daysRefrigerate in an airtight container
Dressing3–4 daysRefrigerate in a jar; shake before using
Toasted walnutsUp to 1 weekStore airtight at room temperature once cool
Washed greens2–3 daysKeep dry in a lined container or bag
Fully assembled salad with greensBest same dayServe soon after dressing
Beet, feta, walnut, and herb salad without greens2–3 daysRefrigerate, but expect the color to bleed

For entertaining, roast the beets the day before, make the dressing ahead, toast the walnuts, and wash the greens. Shortly before serving, slice the beets, dress the greens lightly, arrange everything on a platter, and finish with feta, walnuts, herbs, and a final drizzle.

For broader storage questions beyond this salad, the FoodSafety.gov cold food storage chart is a helpful reference for refrigerated prepared foods.

Troubleshooting Beet Salad

If the salad is not quite landing, do not start over. Beet salad is easy to correct once you know whether it needs salt, acid, texture, or gentler assembly.

Quick Fix Guide
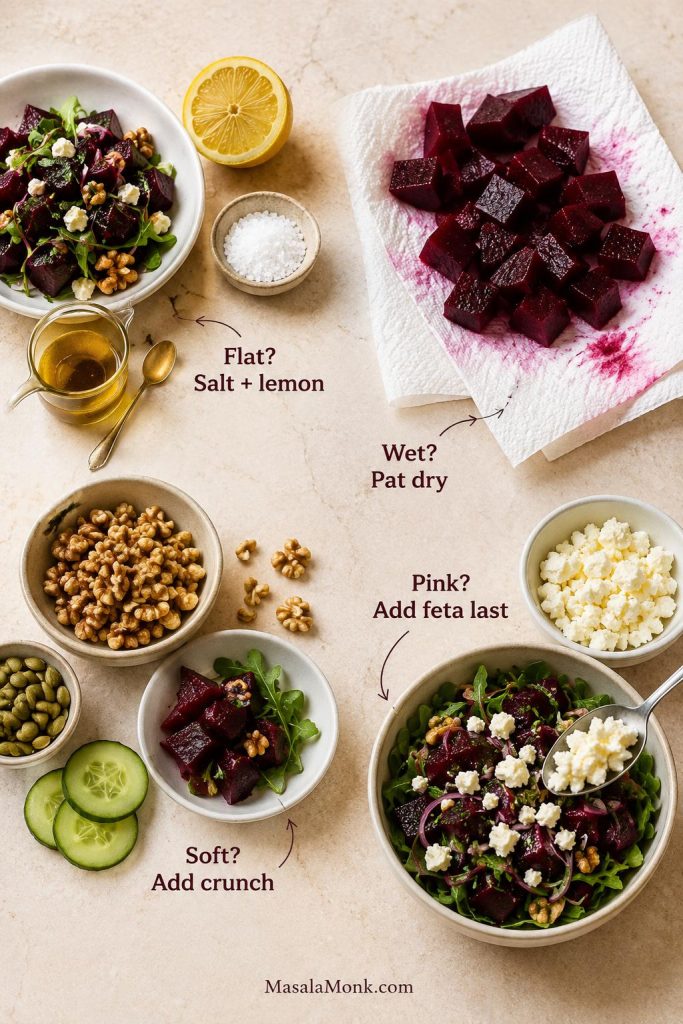
Beet salad troubleshooting guide showing lemon and salt, patted dry beets, walnuts and cucumber for crunch, and feta added last.
Flat salad usually needs salt and lemon. For a wet salad, dry the beets before adding more greens. When the texture feels soft, bring in crunch. If the feta turns pink, add it last next time.

Problem-by-Problem Fixes

ProblemFix nowFix next time
Salad tastes earthy or muddyAdd lemon juice, salt, feta, herbs, or a little extra vinegarRoast the beets longer and use smaller, fresher beets
Salad tastes blandAdd salt first, then acid and herbsTaste the dressing before tossing and season the beets lightly
Salad is too sweetAdd lemon, vinegar, peppery greens, black pepper, or more fetaUse less honey/maple and avoid sweetened canned beets
Salad is too acidicAdd olive oil, feta, walnuts, or a few more beetsBalance the dressing before adding it to the salad
Salad is wateryDrain excess liquid and add more greens or walnutsPat cooked or canned beets dry and avoid overdressing
Greens are soggyAdd fresh greens if availableDress close to serving and store components separately
Feta turned pinkIt is still fine to eatAdd feta last and arrange the salad instead of tossing heavily
Beets are too firmRoast or steam them longer until tenderTest the largest beet with a knife before cooling
Beets are too softUse them in a bowl-style salad with grains or beansRoast whole beets and avoid overcooking sliced pieces
Walnuts taste bitterUse fewer or swap with pecans, pistachios, or pumpkin seedsToast gently and avoid old walnuts
Raw beet salad is too hardLet grated beets rest with lemon and salt for 10 minutesGrate or julienne raw beets instead of cutting thick pieces

Most of the time, the fix is small: a little more lemon, a pinch of salt, a handful of herbs, or something crisp on top. If the salad tastes flat, add salt and lemon before adding more oil. For cleaner color next time, use the layering method and add feta last.

FAQs About Beet Salad

What cheese goes best with beet salad?

Feta is the easiest choice because it is salty, tangy, and crumbly. Goat cheese is creamier and more restaurant-style. Blue cheese is stronger and works best with pear, walnuts, and bitter greens.

Are roasted beets better than boiled beets for salad?

Roasted beets usually taste better because they are sweeter, deeper, and less watery. Boiled beets can work, but they need extra drying, salt, lemon, and herbs.

Should I peel beets before or after roasting?

For whole roasted beets, peel after roasting because the skins slip off more easily and the beets stay juicier. For sliced roasted beets, peel before cutting.

Should beet salad be served warm or cold?

Beet salad is best cool or at room temperature. Warm beets can wilt greens and stain feta faster, so let them cool before assembling.

Why does my beet salad taste muddy?

It usually needs more acid, salt, herbs, or contrast. Add lemon juice, balsamic vinegar, feta, parsley, mint, peppery greens, or toasted nuts.

What dressing works best with beets and feta?

A lemon-balsamic Dijon vinaigrette works well because balsamic matches the sweetness of beets, lemon lifts the salad, and Dijon gives the dressing body.

What nuts go with beet salad?

Walnuts are classic. Pistachios are excellent with orange, pecans work well with goat cheese or pear, almonds add clean crunch, and pumpkin seeds are a good nut-free option.

What herbs go with beet salad?

Parsley, mint, dill, and basil all work. Use parsley for an everyday salad, mint with orange, dill with cucumber or pickled beets, and basil with summery versions.

Is it okay to use canned beets?

Yes. Drain, rinse if needed, and pat canned beets very dry. Since they are softer than roasted beets, add crunch with walnuts, cucumber, apple, red onion, or seeds.

How do raw beets work in salad?

Raw beets work best grated, julienned, or sliced very thin. Toss with lemon or orange juice and salt, rest for 10 minutes, then add apple, carrot, herbs, feta, nuts, or seeds.

Can I make beet salad the day before?

Yes, but store the parts separately. You can roast and peel beets 3–4 days ahead. Keep beets, dressing, greens, feta, and walnuts separate, then assemble close to serving.

Should I toss beet salad or layer it?

Layer it when you want the salad to look pretty. Toss the greens lightly with dressing first, then arrange the beets, feta, walnuts, herbs, and shallot on top.

You do not need to make beet salad the same way every time. Roast the beets when flavor matters, use cooked beets when speed matters, and taste one complete bite before serving. If the beets are sweet, the feta is salty, the walnuts are crisp, and the last bite still tastes lemony and fresh, the salad is doing exactly what it should.
Posted on Leave a comment

Coleslaw Recipe

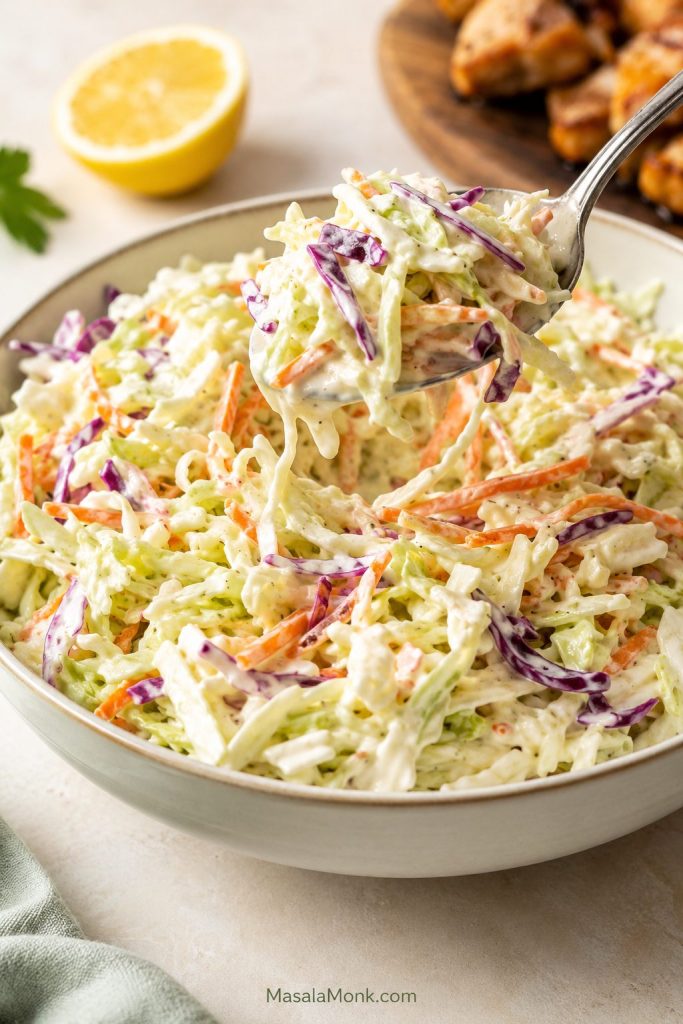
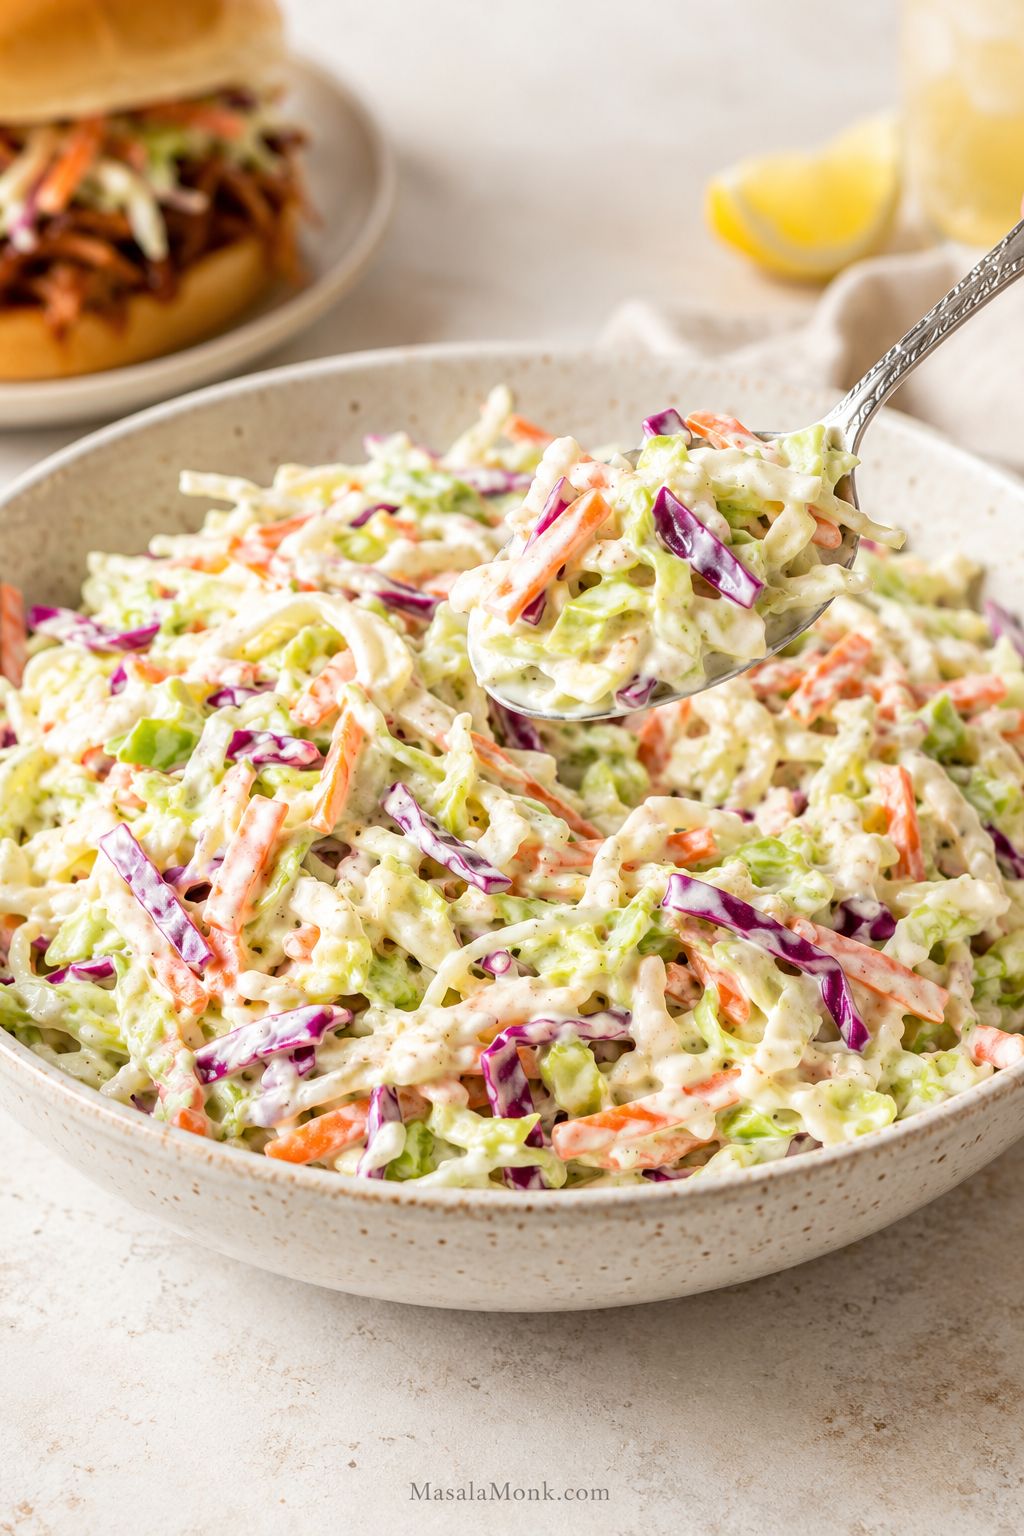
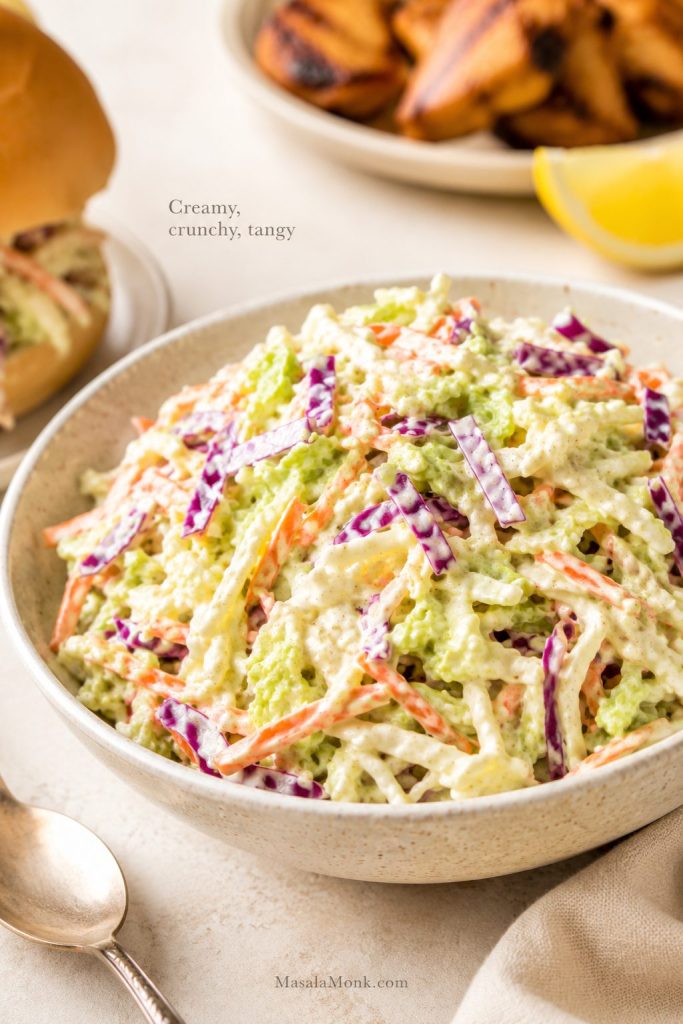
Creamy coleslaw in a bowl with shredded green cabbage, red cabbage, carrots, and a spoon lifting a serving.

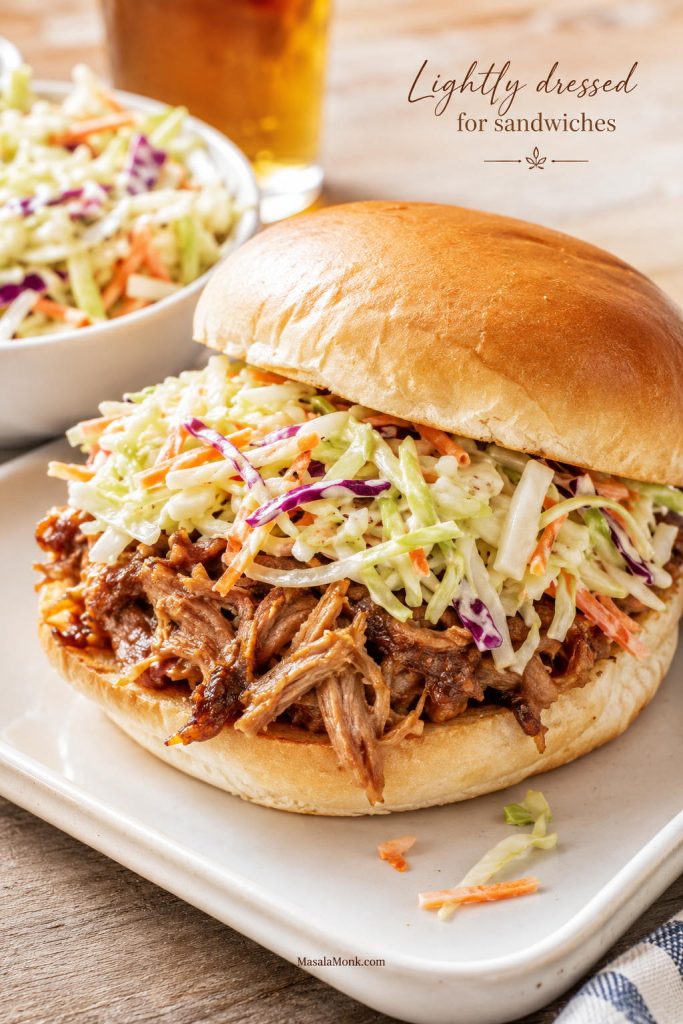
This coleslaw recipe is the cold, crunchy side that makes a cookout plate feel complete. It is creamy without being heavy, lightly sweet without tasting sugary, and tangy enough to cut through BBQ, burgers, fried chicken, fried fish, hot dogs, tacos, and pulled pork sandwiches.

The best version gives you that cold snap of cabbage, a creamy-tangy coating, and just enough sweetness to make smoky, salty, fried, or saucy food taste even better.

Easy creamy coleslaw recipe served as a cold crunchy BBQ side with cabbage, carrots, and creamy dressing.
Because coleslaw brings cold crunch to smoky, fried, and saucy foods, it works especially well with BBQ plates, burgers, fried chicken, and pulled pork.

The recipe is simple — shredded cabbage, carrot, and a creamy dressing — but the little choices matter. Shred the cabbage fine enough, mix the dressing separately, chill the bowl, and hold back some dressing until the end. That is how you get homemade coleslaw that tastes fresh, not watery — and the full watery coleslaw fix is below if that is the problem you are trying to avoid.

You can make it with fresh cabbage when you want the strongest crunch, or with bagged coleslaw mix when you need a fast weeknight side. Either way, this is everyday creamy coleslaw: cool, crisp, bright, and sturdy enough to work as a side dish or a sandwich topping.

Coleslaw at a Glance

  • Best for: BBQ plates, burgers, fried chicken, fried fish, hot dogs, tacos, and pulled pork sandwiches
  • Texture: cold, crunchy, creamy, lightly sweet, and tangy
  • Prep time: 15 minutes
  • Chill time: 30–60 minutes
  • Servings: 8 side servings
  • Yield: about 8–9 cups
  • Shortcut: use bagged coleslaw mix; one 14–16 oz bag makes a smaller batch, while 20–24 oz gives the full recipe yield
  • Most important tip: start with part of the dressing, chill, toss again, then add more only if the slaw needs it

What You’ll Find in This Coleslaw Guide

This guide helps you make classic creamy coleslaw that tastes balanced, stays crisp, and works whether you are serving it in a bowl, beside grilled food, or inside a sandwich.

Quick Answer: The Best Easy Coleslaw Recipe

The best easy coleslaw recipe starts with finely shredded cabbage, grated carrot, and a creamy dressing made with mayonnaise, apple cider vinegar, a little lemon juice or mustard, sugar or honey, salt, pepper, and optional celery seed. The simple trick is to dress the cabbage lightly at first, let it chill, then add more dressing only if it needs it.

For a reliable balance, use about 8 cups of shredded cabbage and carrot mixture for every ⅔ cup of mayonnaise-based dressing. That gives you coleslaw that is glossy and lightly coated, not soupy at the bottom of the bowl. It should taste cool, crunchy, tangy, and just sweet enough. For the exact creamy-tangy balance, see the coleslaw dressing section before you adjust the mayo, vinegar, lemon, or mustard.

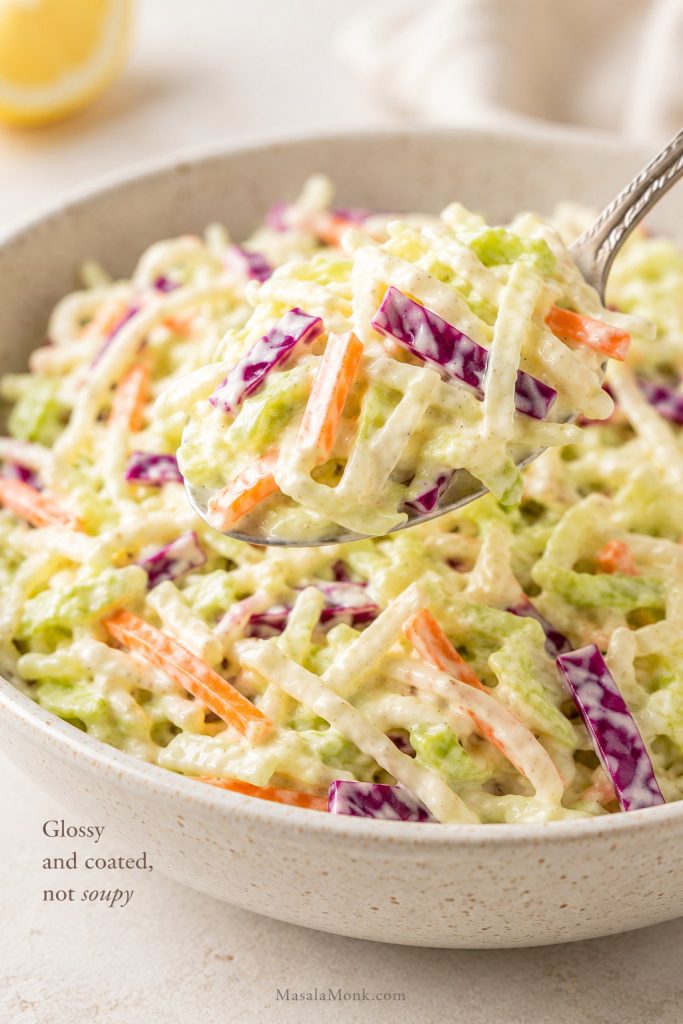
Close-up spoonful of creamy coleslaw with glossy dressing coating shredded cabbage and carrots.
The best easy coleslaw should show contrast in one bite: creamy dressing on the outside, crisp cabbage underneath, and no thin liquid collecting below.
Using bagged coleslaw mix? One 14–16 oz / 400–450 g bag makes a smaller batch than this full recipe. For one bag, start with about half to two-thirds of the dressing. If you are in a hurry, you can serve the slaw after 10–15 minutes, though the texture and flavor are better after 30–60 minutes in the fridge. For the full bagged-mix math, see the bagged coleslaw mix conversion below.

Coleslaw Recipe Card

Coleslaw Recipe

This easy coleslaw recipe is made with crisp cabbage, grated carrot, and a sweet-tangy dressing. It is the kind of cold, crunchy side that works on a cookout plate, inside a sandwich, or beside fried food.

Prep Time
15 minutes
Chill Time
30–60 minutes
Total Time
45–75 minutes
Servings
8 side servings
Yield
about 8–9 cups

Equipment

  • Large mixing bowl
  • Medium bowl
  • Whisk
  • Tongs
  • Sharp knife or mandoline
  • Box grater
  • Airtight container
  • Optional: colander or salad spinner for make-ahead cabbage

Ingredients

For the slaw:

  • 6 loosely packed cups finely shredded green cabbage, about 420–450 g
  • 2 loosely packed cups finely shredded red cabbage or more green cabbage, about 140–150 g
  • 1 large carrot, grated, about 75–100 g
  • 2–4 tablespoons thinly sliced scallion or red onion, optional

For the creamy coleslaw dressing:

  • ⅔ cup mayonnaise, about 150 g
  • 2 tablespoons apple cider vinegar, 30 ml
  • 1 tablespoon lemon juice, 15 ml, or 2 teaspoons Dijon mustard, 10 ml
  • 1 tablespoon sugar, about 12 g, or honey, about 20 g
  • ½ teaspoon celery seed, optional
  • ½ teaspoon fine salt, plus more to taste
  • ¼ teaspoon black pepper

Instructions

  1. Shred the cabbage. Slice the cabbage finely with a sharp knife or mandoline. Grate the carrot and add it to a large mixing bowl with the cabbage and optional scallion or red onion.
  2. Mix the dressing. In a medium bowl, whisk together the mayonnaise, apple cider vinegar, lemon juice or Dijon mustard, sugar or honey, celery seed, salt, and black pepper until smooth.
  3. Dress lightly first. Pour about two-thirds of the dressing over the cabbage mixture. Toss well until the cabbage is lightly coated.
  4. Chill. Cover and refrigerate for 30 to 60 minutes so the cabbage relaxes slightly and the flavors blend.
  5. Finish before serving. Toss again. If the slaw looks dry, add more dressing a spoonful at a time. A little salt will wake it up if the flavor feels flat. When it tastes too sweet or heavy, sharpen it with vinegar or lemon juice. If the cabbage tastes bitter or the dressing feels too sharp, balance it with a tiny pinch of sugar.

Notes

  • One 14–16 oz / 400–450 g bag of coleslaw mix makes a smaller batch. For the full 8–9 cup yield, use about 20–24 oz / 560–680 g mix, or add extra shredded cabbage and carrot.
  • If using one 14–16 oz bag, start with about half to two-thirds of the dressing. Chill, toss, then add more only if needed.
  • Do not add all the dressing at once. Cabbage releases moisture as it sits, so the slaw becomes creamier after chilling; the two-thirds dressing rule explains how to control that texture.
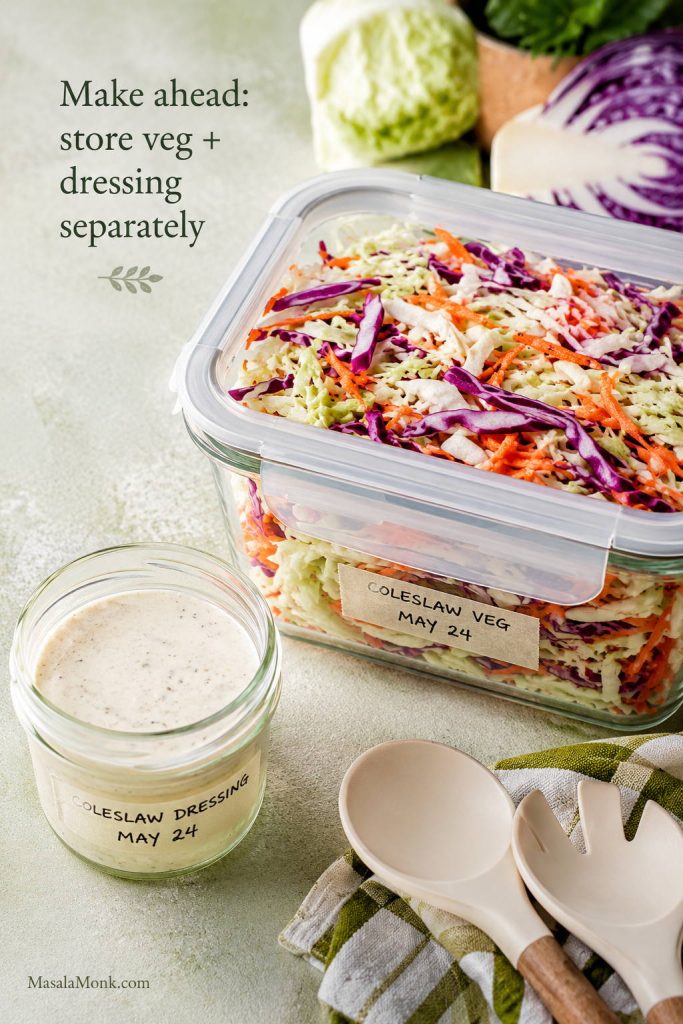
  • For make-ahead coleslaw, store the dressing and vegetables separately until a few hours before serving; see the make-ahead and storage tips for timing.
  • If you salt the cabbage first, reduce the dressing salt to ¼ teaspoon or leave it out until the final taste adjustment.
  • Serve cold or well chilled. Toss again and drain any excess liquid before serving if the slaw has been refrigerated for several hours.

If you make it, try it once as written, then adjust it sweeter, tangier, creamier, or crunchier for your table. Coleslaw is one of those recipes where small preferences matter.

Are you team creamy coleslaw or vinegar slaw? Share how you serve it — as a BBQ side, on pulled pork, with fried chicken, or piled onto hot dogs.

Why This Coleslaw Recipe Works

Good coleslaw is all about contrast. The cabbage should still crunch, the dressing should cling instead of pooling at the bottom, and the flavor should wake up the rest of the plate. When coleslaw is too wet, too sweet, or too mayo-heavy, it stops doing its job.

This is the version to make when you want classic creamy coleslaw that still tastes fresh after chilling. It is not overloaded with dressing, not sugary, and not watery at the bottom of the bowl.

Although this coleslaw recipe keeps the ingredient list classic, the method gives you more control. The cabbage is shredded finely enough to soften as it chills, but not so finely that it turns limp. The dressing has enough vinegar and lemon or mustard to balance the mayonnaise. Finally, the dressing is added in stages because cabbage changes as it sits.

That last part matters most. A bowl that looks slightly underdressed right after mixing can become perfectly creamy after 30 minutes in the fridge. Hold back some dressing at the beginning, let the slaw settle, then finish it right before serving.

The texture goal

The dressing should cling to the cabbage in a light, glossy coat. You want crunch in every bite, not a puddle of thin dressing at the bottom of the bowl.

Coleslaw Recipe Ingredients

A good bowl of coleslaw does not ask for much: crisp cabbage, sweet carrot, a creamy dressing, enough acidity to brighten it, and enough salt to make the vegetables taste like themselves. Once those pieces are balanced, the bowl tastes crisp and fresh instead of heavy.

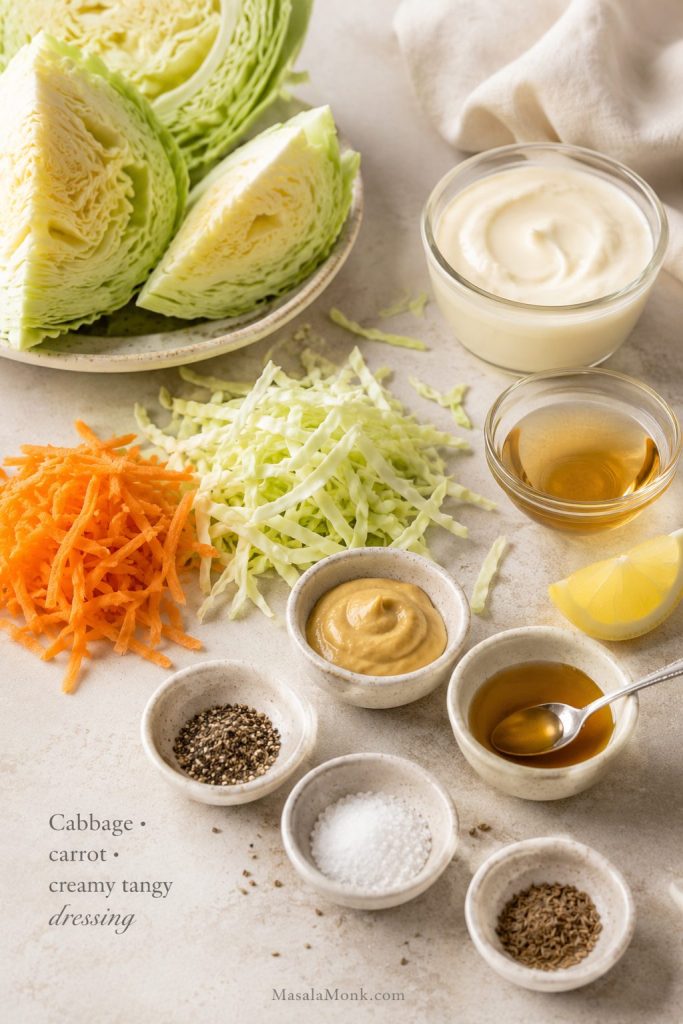
Coleslaw ingredients including cabbage, carrot, mayonnaise, vinegar, lemon, mustard, sugar, celery seed, salt, and pepper.
Classic coleslaw ingredients are simple, yet the balance matters: cabbage gives crunch, carrot adds sweetness, and vinegar or lemon keeps the creamy dressing bright.

Best Cabbage for Coleslaw

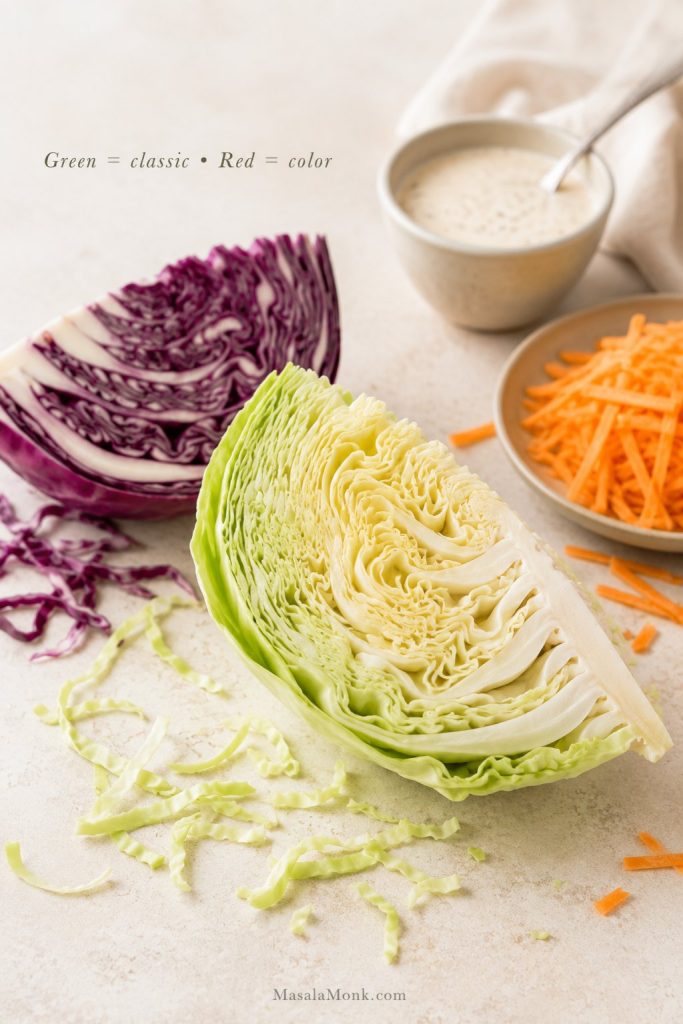
Green cabbage is the most reliable everyday cabbage for coleslaw. It is crisp, sturdy, mild, and strong enough to hold a creamy dressing without collapsing. Red cabbage adds color and extra crunch, but it can tint the dressing pink as the slaw sits.

Green cabbage, red cabbage, carrots, and creamy dressing arranged for making coleslaw.
Green cabbage is the best base for classic creamy coleslaw because it stays crisp, while red cabbage adds color and a slightly sharper bite.

A classic bowl can be made with only green cabbage and carrot. If you want more color, use mostly green cabbage with a smaller amount of red cabbage. The flavor will still be familiar, and the bowl will look brighter on the table.

Ingredient What It Does Notes
Green cabbage Gives the slaw its main crunch Mild, classic, sturdy, and easy to dress.
Red cabbage Adds color and a peppery bite Use less than green cabbage if you want a pale creamy dressing.
Carrot Brings sweetness and color Grate it finely so it spreads through the bowl.
Scallion or red onion Adds optional sharpness Use a light hand because raw onion can take over quickly.

Fresh Cabbage vs Bagged Coleslaw Mix

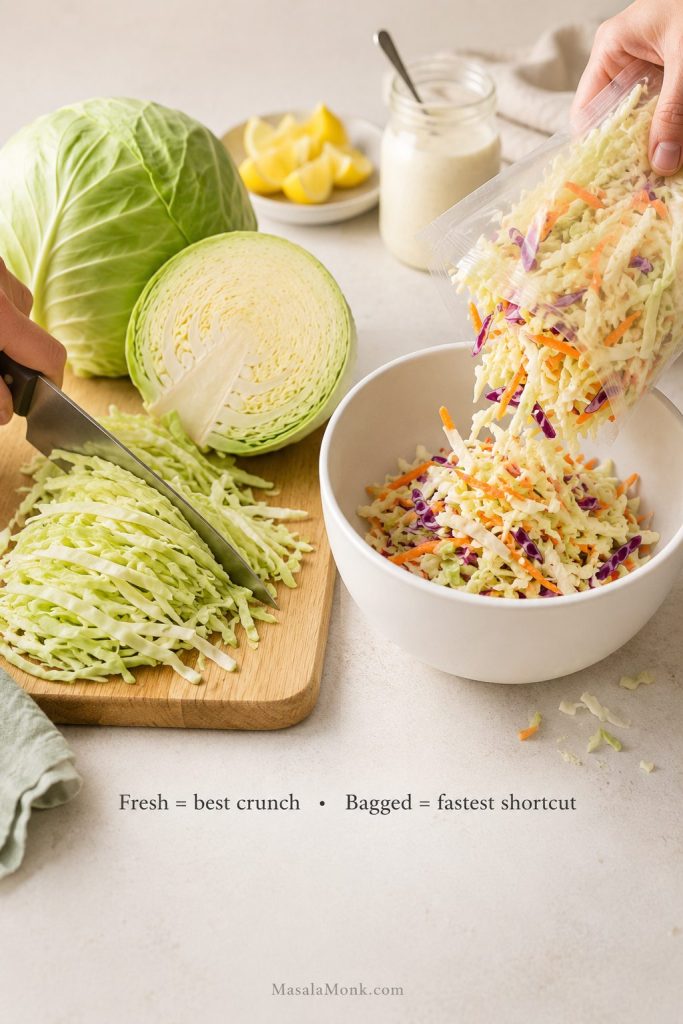
For this coleslaw recipe, fresh cabbage gives you the strongest crunch and the most control over shred size. It is the better choice when coleslaw is one of the main sides at a cookout or when you want it to hold up on sandwiches.

Fresh cabbage being sliced next to bagged coleslaw mix poured into a bowl.
Fresh cabbage lets you choose the crunch and cut, while bagged coleslaw mix saves time as long as the dressing is added with a lighter hand.

However, bagged coleslaw mix is still worth using. It is fast and weeknight-friendly, though the cut and moisture level can vary from bag to bag. Because pre-cut cabbage can range from dry and sturdy to very fine and soft, dress it lightly first and give it a few minutes before deciding whether it needs more. If you are using a bag, the bagged coleslaw mix conversion will help you scale the dressing and yield correctly.

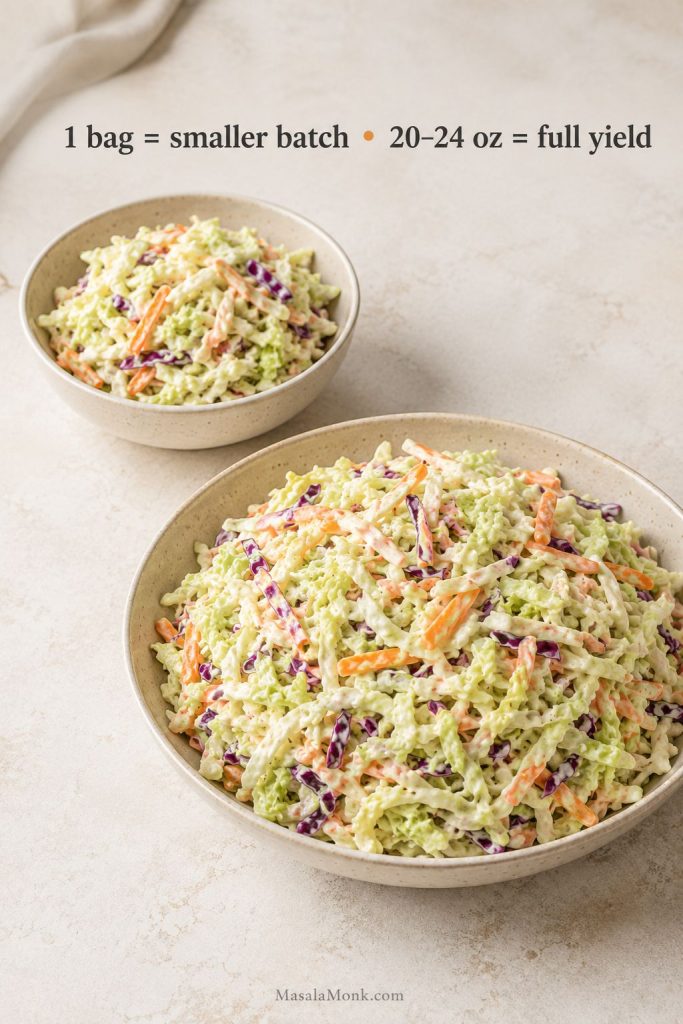
Bagged mix conversion: One 14–16 oz / 400–450 g bag of coleslaw mix makes a smaller batch, about 5–6 side servings. For the full 8–9 cup yield, use about 20–24 oz / 560–680 g coleslaw mix, or add extra shredded cabbage and carrot.
Two bowls showing a smaller batch from one bag of coleslaw mix and a larger full-yield batch.
One 14–16 oz bag of coleslaw mix makes a smaller batch, so use 20–24 oz or add extra cabbage and carrot when you want the full recipe yield.
Shredded vs Chopped Coleslaw

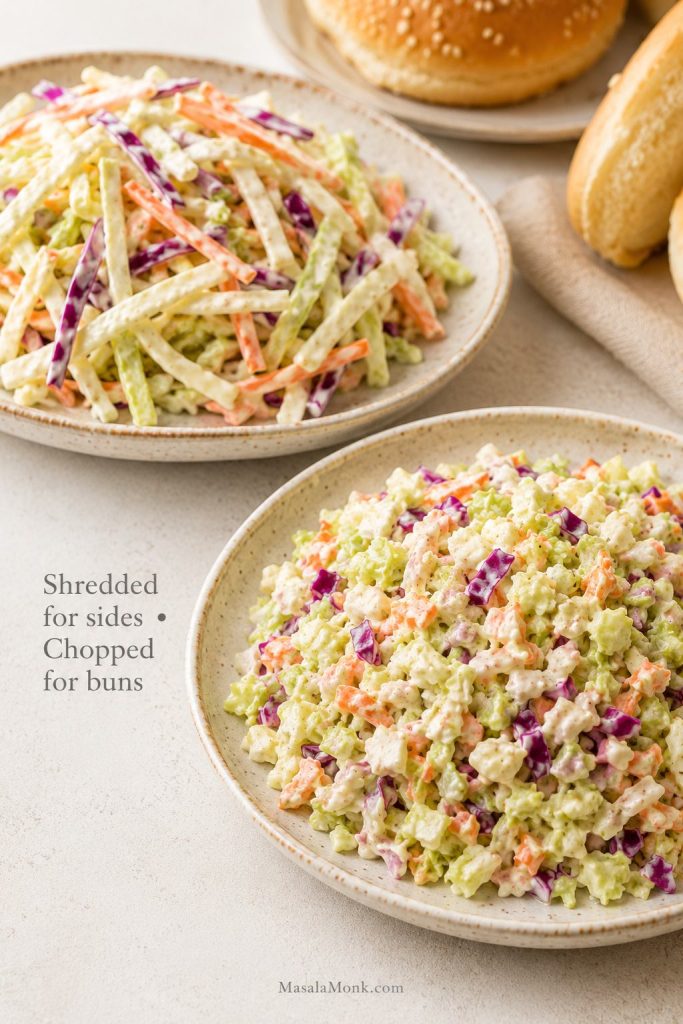
Thinly shredded cabbage gives you the classic creamy coleslaw texture: long, crisp strands that hold dressing and still crunch. This is the best cut when you are serving coleslaw as a side dish.

Long shredded coleslaw beside finer chopped coleslaw for comparing side-dish and sandwich textures.
Shredded coleslaw gives side dishes that classic forkful texture, while chopped slaw stays neater on burgers, hot dogs, and pulled pork sandwiches.

Burgers, hot dogs, pulled pork sandwiches, and slaw dogs need a neater slaw. A finer chop keeps the cabbage from sliding out of the bun. Grated cabbage is softer and wetter, so use it only if you want a very fine deli-style texture.

Cut Works Well With Texture Goal
Thin shreds Classic side dish coleslaw Crisp, creamy, and traditional
Fine chop Burgers, hot dogs, pulled pork sandwiches Compact and bun-friendly
Thicker shreds Crunchier slaw bowls and BBQ plates More bite, needs more chilling time
Grated cabbage Very soft deli-style slaw Softens quickly and releases more liquid

Carrots, Onion, and Optional Add-Ins

Carrot is almost always worth adding because it brings sweetness and color. Grate it on the large holes of a box grater or use the shredding blade on a food processor.

Onion is optional. Scallions are gentler and fresher. Red onion is sharper and works best when sliced very thinly. If you are making coleslaw for kids, a mixed crowd, or a long cookout table, keep the onion light or leave it out.

Parsley, celery seed, chopped apple, or a little extra mustard can be useful, but the main recipe should stay clean. Too many extras turn classic coleslaw into a different salad.
Creamy Coleslaw Dressing

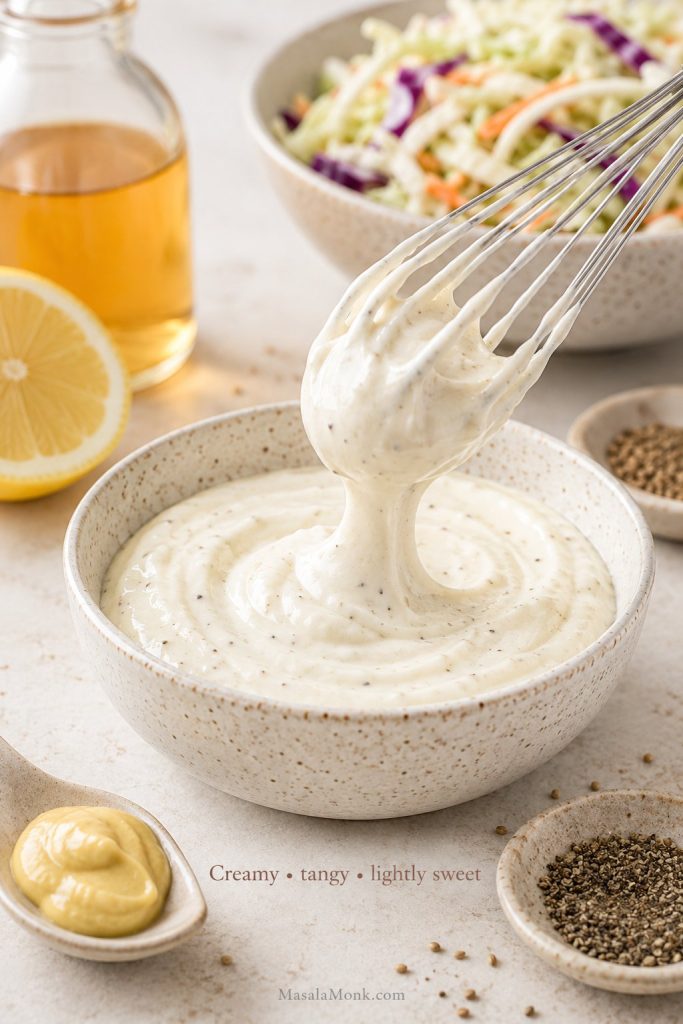
The dressing should make the cabbage taste brighter, not bury it. Mayonnaise gives the slaw its creamy body, vinegar brings the snap, lemon juice or mustard sharpens the edges, and a little sugar or honey rounds out the raw cabbage bite.
Creamy coleslaw dressing being whisked with lemon, vinegar, mustard, pepper, and cabbage nearby.
A creamy coleslaw dressing should taste slightly bold before mixing because the cabbage will mellow the vinegar, lemon, salt, and sweetness.

If you make your own mayonnaise, this is a good place to use it. A thick homemade mayo gives the dressing a richer texture and a cleaner flavor. You can use this homemade mayonnaise recipe as the creamy base.

The Sweet-Tangy Dressing Ratio

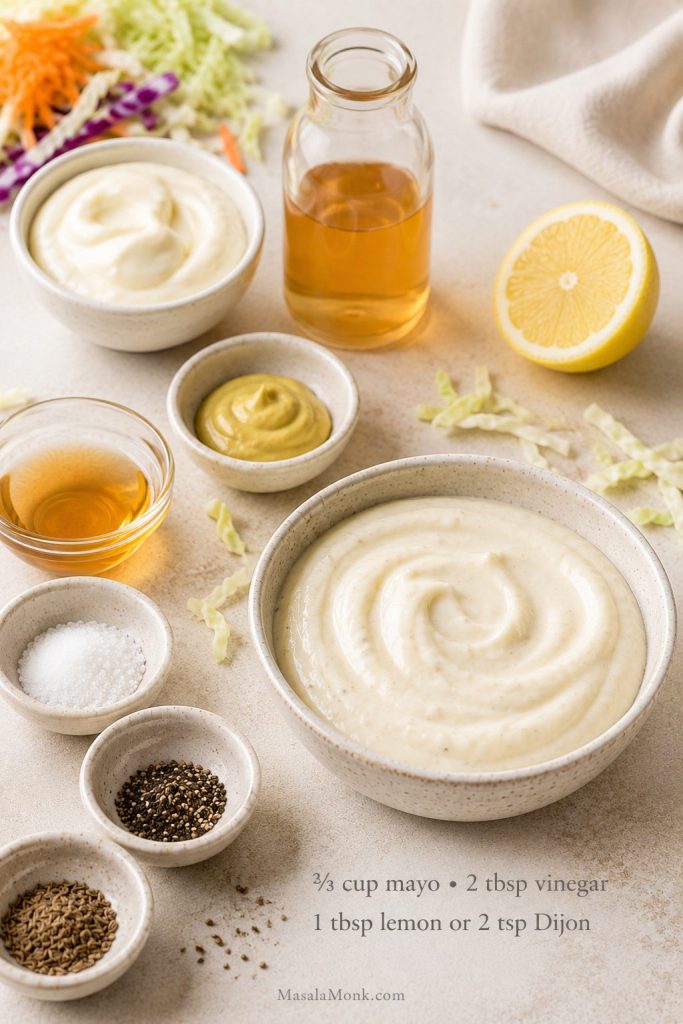
For this coleslaw recipe, about 8 cups of shredded cabbage and carrot works well with ⅔ cup mayonnaise, 2 tablespoons apple cider vinegar, 1 tablespoon lemon juice or 2 teaspoons Dijon mustard, and 1 tablespoon sugar or honey. For example, use lemon juice when you want a brighter dressing, or Dijon mustard when you want a sharper, more savory one.

Ingredients for creamy coleslaw dressing arranged with mayonnaise, vinegar, lemon, Dijon mustard, sugar, celery seed, and pepper.
This coleslaw dressing ratio gives enough creaminess to coat the cabbage, while vinegar, lemon, or Dijon keeps the finished slaw from tasting flat.

This gives you a dressing that is creamy but not bland, tangy but not harsh, and sweet enough to taste classic without turning sugary. If your family likes a sweeter cookout-style slaw, use the sugar or honey. If you want something sharper for pulled pork, fried fish, or tacos, lean a little harder on vinegar and lemon.

Flavor Goal Adjustment Works Well With
More tangy Add 1–2 teaspoons extra vinegar or lemon juice Fried chicken, fish, BBQ, pulled pork
Sweeter Add 1–2 teaspoons sugar or honey Classic cookout slaw, hot dogs, kids’ plates
Creamier Add 1–2 tablespoons mayo Potlucks, side dish bowls, BBQ plates
Lighter Replace part of the mayo with Greek yogurt or buttermilk Weeknight sides, lighter sandwiches

The Two-Thirds Dressing Rule

Do not drown the cabbage right away. Start with about two-thirds of the dressing, toss well, chill, then add more only if the slaw still looks dry. Cabbage relaxes and releases moisture as it sits, so a bowl that seems slightly underdressed at first often becomes just right after a short rest.

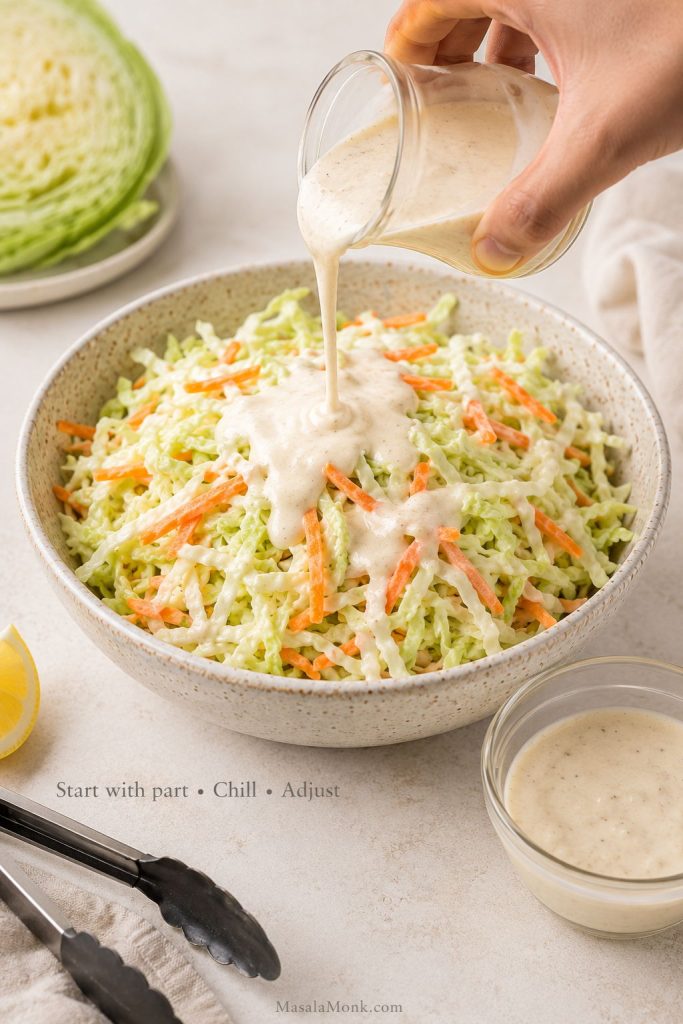
Creamy dressing being poured over shredded cabbage with extra reserved dressing in a small bowl beside it.
The reserved dressing is the safety net: once the cabbage relaxes in the fridge, you can finish the bowl without making it soupy.

As a result, this one habit prevents the two most common coleslaw problems: dry cabbage right after mixing and watery coleslaw later.

How Much Dressing to Use

The right amount of dressing depends on how finely the cabbage is cut and how long the bowl will sit. Thin shreds need less dressing because they soften quickly. Thicker shreds need a little more time and may need a touch more dressing after chilling. If your bowl often turns loose after chilling, the watery coleslaw section explains when to drain, salt, or hold back dressing.

After that, toss thoroughly, let the bowl settle, then taste again. If the slaw looks glossy and lightly coated, stop there. If it still looks dry after chilling, add the remaining dressing a spoonful at a time.

Spoonful of creamy coleslaw showing glossy dressing coating cabbage without liquid pooling in the bowl.
A glossy coating is the goal; if liquid is pooling underneath, the slaw will taste heavier and lose its crunch faster.
Taste after chilling, not only before. Cold cabbage dulls flavor slightly, and the dressing loosens as the slaw rests.

Mayo, Buttermilk, Sour Cream, or Greek Yogurt?

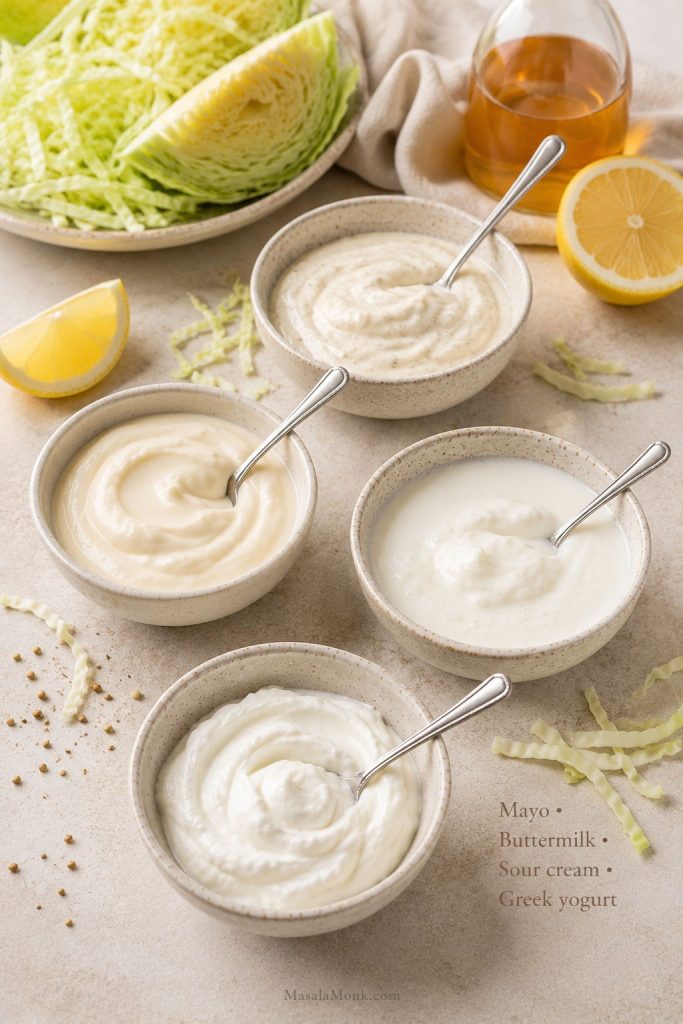
Mayonnaise is the classic choice because it gives coleslaw body and a smooth coating. Buttermilk makes the dressing looser and tangier. Sour cream adds richness with a gentle tang. Greek yogurt makes the dressing lighter and sharper, although it can taste more tart than classic mayo-based slaw.

Four bowls of creamy dressing bases for coleslaw: mayonnaise, buttermilk, sour cream, and Greek yogurt.
Mayonnaise gives the most classic coleslaw texture, while buttermilk, sour cream, or Greek yogurt can make the dressing tangier, lighter, or richer.

The safest first version is mayonnaise. Once you understand the texture, you can replace 2–4 tablespoons of the mayo with buttermilk, sour cream, or Greek yogurt depending on the kind of slaw you want.

Need an egg-free version? Use a thick eggless mayo and keep the rest of the recipe the same. This eggless mayonnaise recipe works well when you want the same creamy texture without eggs.

How to Make Coleslaw

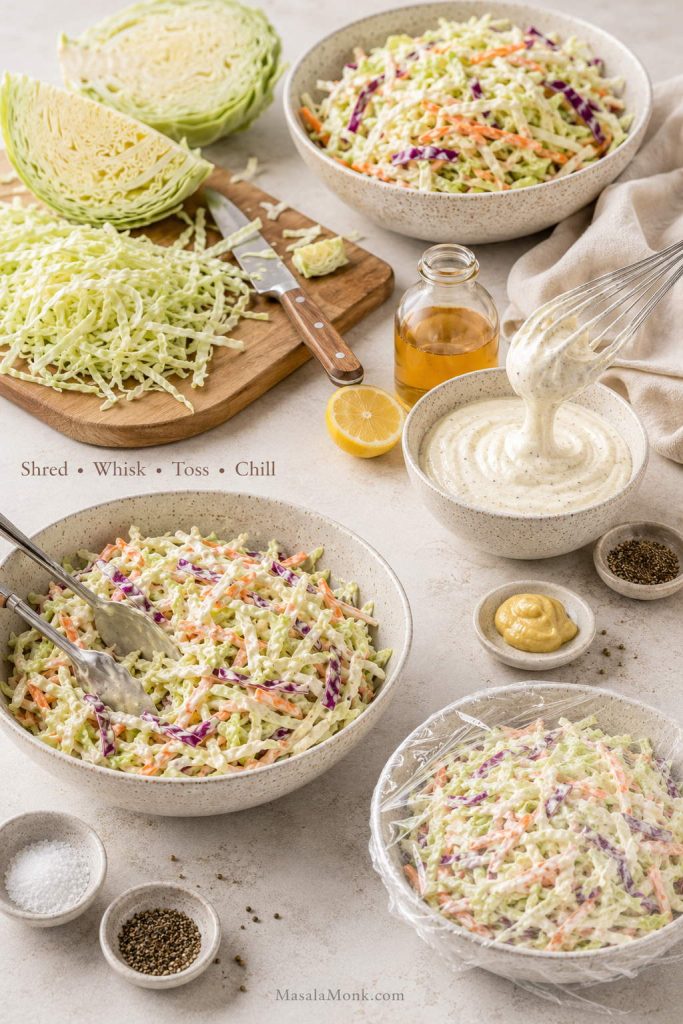
Coleslaw is easy, but the order helps. Shred the vegetables first, whisk the dressing separately, dress lightly, chill, then finish the bowl after it has had time to settle.

Step-by-step coleslaw process showing cabbage shredding, dressing whisking, tossing, and chilling.
Once the cabbage is shredded and the dressing is mixed separately, the key is to toss lightly, chill, and finish the coleslaw after the vegetables settle.

Shred the Cabbage

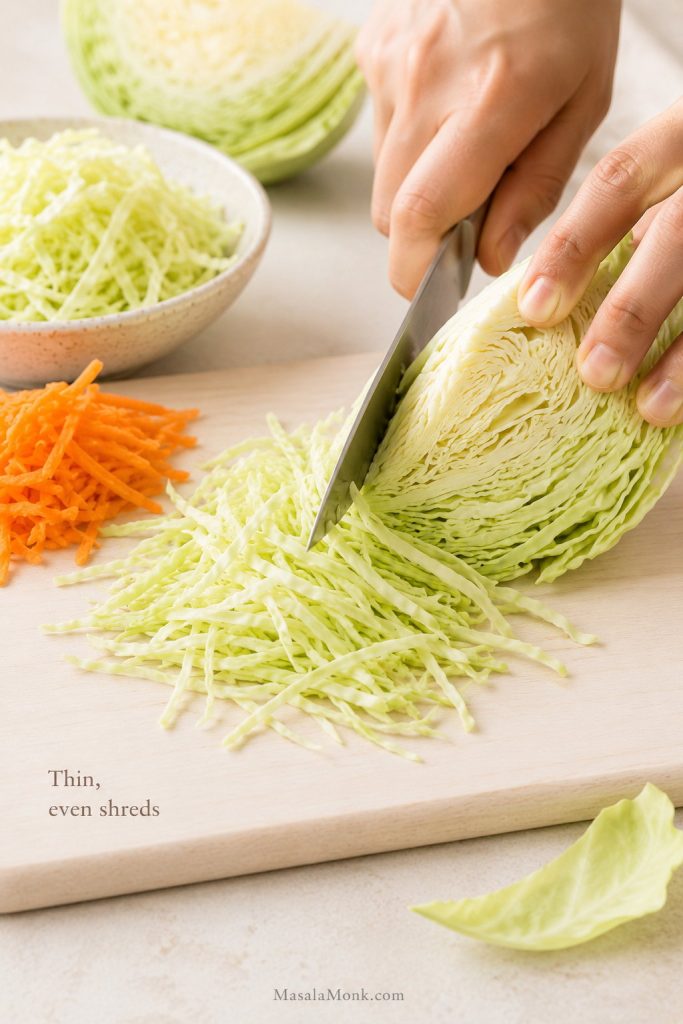
Cut the cabbage into quarters, remove the hard core, then slice it thinly with a sharp knife. A mandoline gives you very fine, even shreds. A food processor with a slicing blade is the fastest method when you are making a bigger batch.

Hands slicing green cabbage into thin shreds on a cutting board for homemade coleslaw.
Thin, even cabbage shreds soften evenly in the dressing, which helps homemade coleslaw stay creamy while keeping its crunch.

Side-dish coleslaw can handle longer shreds. Sandwich slaw should be finer or lightly chopped so it stays where you put it.

Mix the Dressing

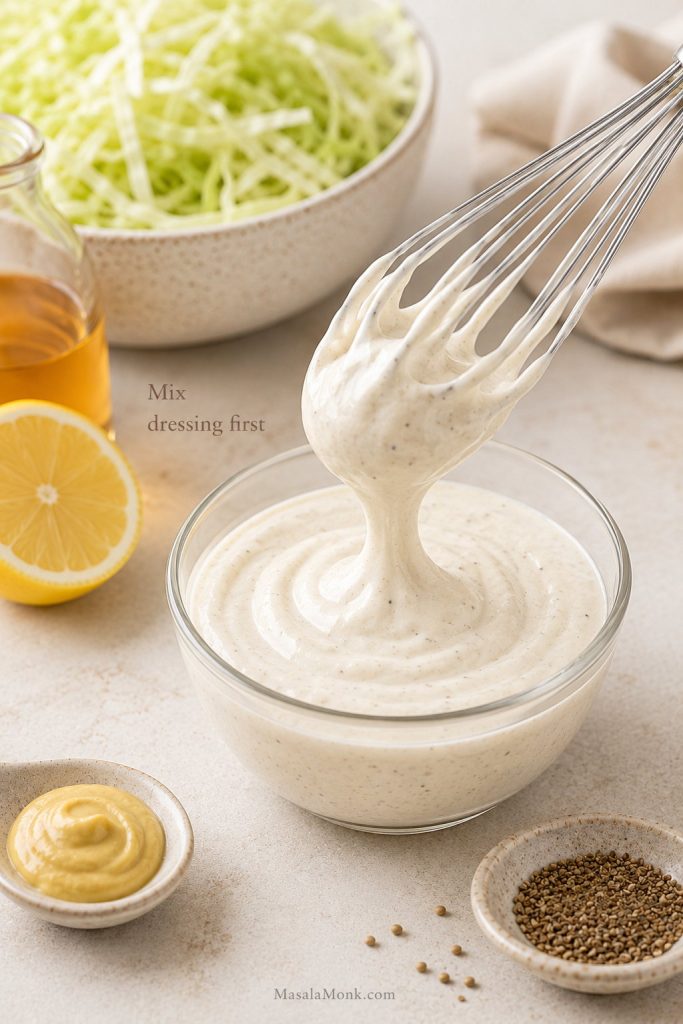
Whisk the mayonnaise, apple cider vinegar, lemon juice or Dijon mustard, sugar or honey, celery seed, salt, and black pepper in a separate bowl. This gives you a smoother dressing and keeps one part of the slaw from getting too salty, too sweet, or too sharp.

Creamy coleslaw dressing being whisked in a bowl before it is added to shredded cabbage.
Mixing the coleslaw dressing separately prevents uneven flavor, so one bite does not taste too salty, too sweet, or too sharp.

Taste the dressing before adding it to the cabbage. It should taste a little stronger than you want the finished coleslaw to taste because the cabbage will soften and mellow it.

Toss, Chill, and Adjust

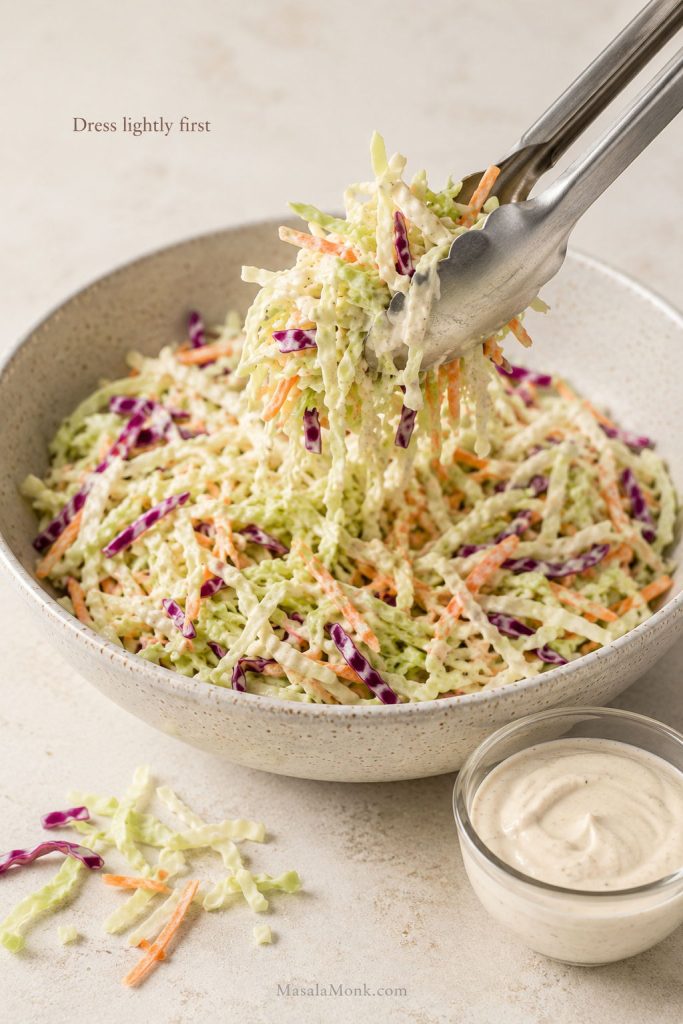
Add about two-thirds of the dressing to the cabbage and carrot mixture. Toss with tongs or clean hands until the vegetables are evenly coated. Cover and chill for 30 to 60 minutes.

Tongs lifting lightly dressed coleslaw from a bowl with extra dressing set aside.
Light tossing gives the cabbage room to settle; after resting, you can add more dressing only where the bowl actually needs it.

Before serving, toss again and taste. If the slaw looks dry, add more dressing a spoonful at a time. A little salt will wake it up if the flavor feels flat. When it tastes too sweet or heavy, sharpen it with vinegar or lemon juice. If the cabbage tastes bitter or the dressing feels too sharp, balance it with a tiny pinch of sugar.

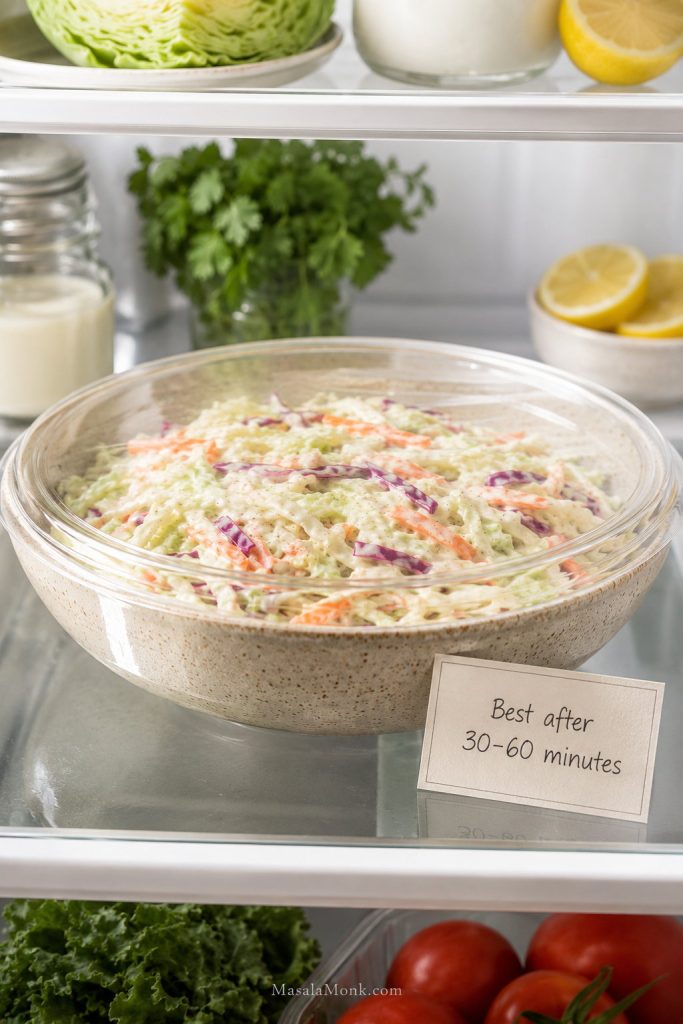
Best flavor window: Coleslaw tastes best after 30 minutes to 2 hours in the fridge. It is still good the next day, but the cabbage will be softer and the dressing thinner.
Bowl of creamy coleslaw chilling before serving with a note about resting for 30 to 60 minutes.
After 30–60 minutes in the fridge, the dressing clings better and the cabbage softens slightly without losing the cold crunch that makes coleslaw refreshing.

How to Keep Coleslaw from Getting Watery

Watery coleslaw usually comes from cabbage releasing moisture after it is dressed. The bowl may look good when you mix it, then an hour later the dressing has thinned out and liquid has collected at the bottom. That does not mean you ruined it. It just means the cabbage did what cabbage does.

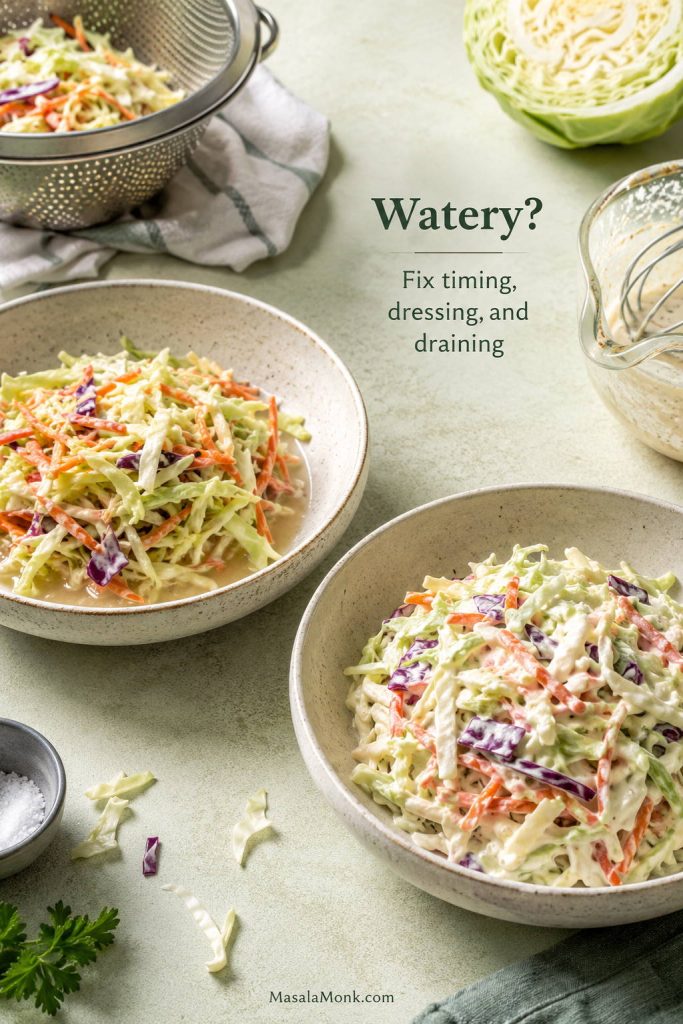
Two bowls comparing watery coleslaw with properly dressed coleslaw that is creamy and not soupy.
Watery coleslaw is usually a timing problem, not a ruined batch; draining, reserved dressing, and final seasoning can bring the bowl back.

Fortunately, the fix is not always “less dressing.” It is better timing. Start with part of the dressing, chill, toss again, then decide whether the bowl needs more dressing, more acid, a pinch of salt, or a quick drain.

Should You Salt the Cabbage?

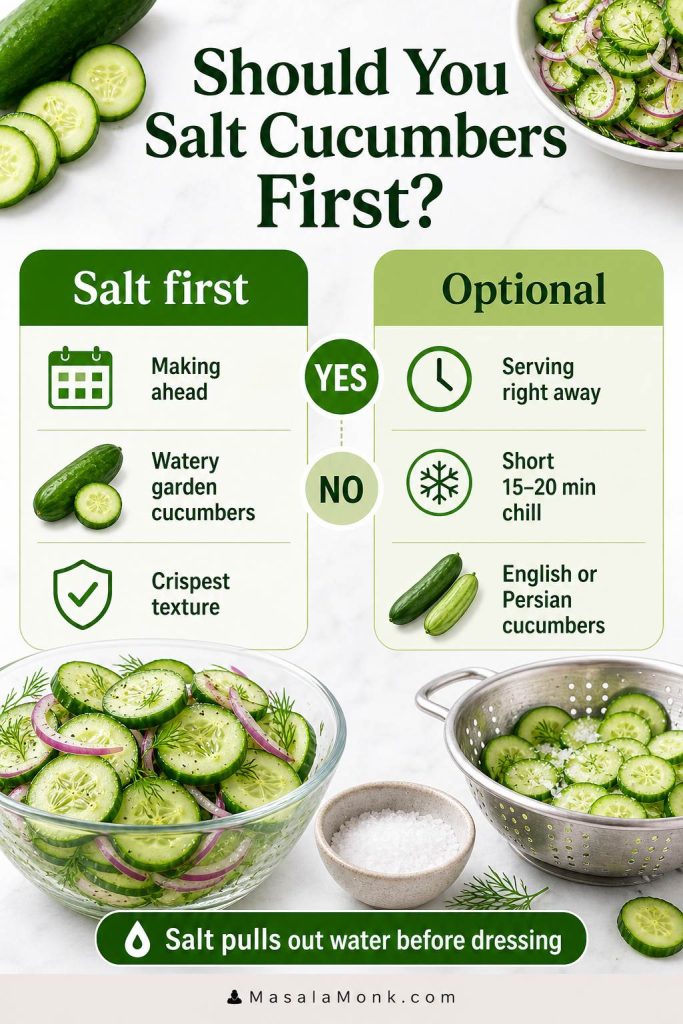
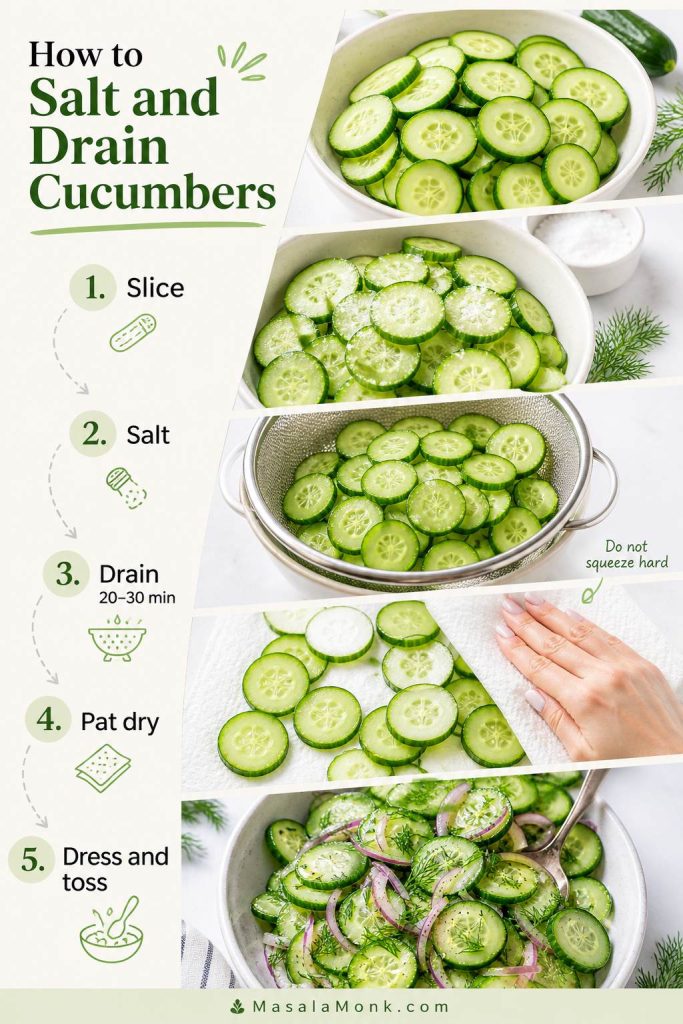
Salting is optional, not mandatory. Skip it for quick same-day coleslaw. Use it when you need the slaw to hold longer, sit neatly on buns, or avoid watering down the dressing at a cookout.

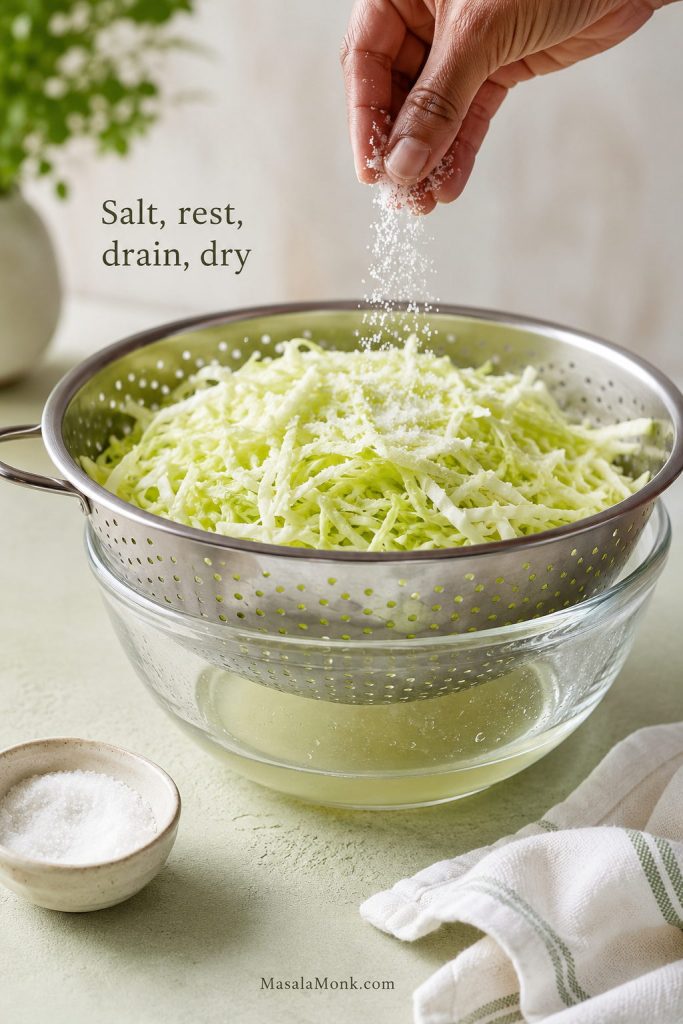
Hand sprinkling salt over shredded cabbage in a colander set over a bowl to drain moisture.
Salting cabbage is optional for same-day coleslaw, but it helps make-ahead slaw stay crisper by drawing out extra moisture before dressing.

To salt cabbage for make-ahead coleslaw, toss the shredded cabbage with 1 teaspoon fine salt, or up to 1½ teaspoons if the cabbage is especially wet or you are using a larger head. Let it sit in a colander for 20 to 30 minutes. Rinse lightly if it tastes too salty, then dry it very well with a clean towel or salad spinner before adding the dressing. If you are prepping for tomorrow, pair this with the make-ahead storage method so the cabbage stays crisp.

If you salt the cabbage first, reduce the salt in the dressing to ¼ teaspoon or leave it out until the final taste adjustment.

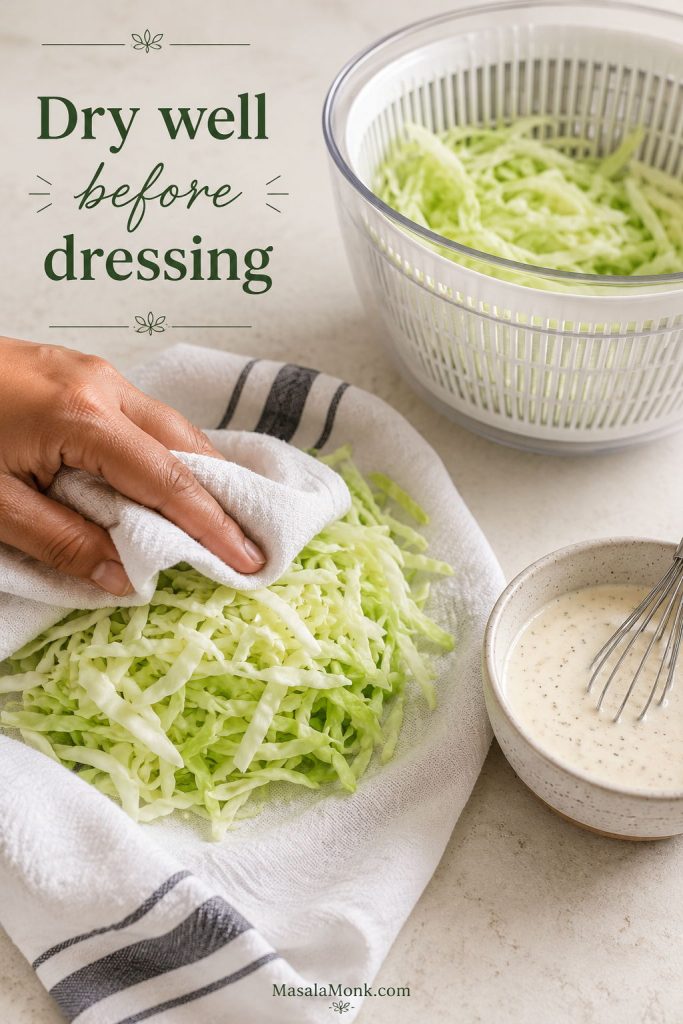
Important: Dry the cabbage well after salting. Wet cabbage plus creamy dressing will still make watery coleslaw.
Shredded cabbage being dried with a clean towel before creamy dressing is added.
After salting or rinsing cabbage, dry it well before adding dressing; otherwise, even a thick creamy coleslaw dressing can turn watery.

Same-Day vs Make-Ahead Coleslaw

The best method depends on whether the slaw is for tonight’s dinner, tomorrow’s cookout, or a sandwich tray. A quick weeknight bowl does not need the same prep as a tray of sandwich slaw for a crowd.

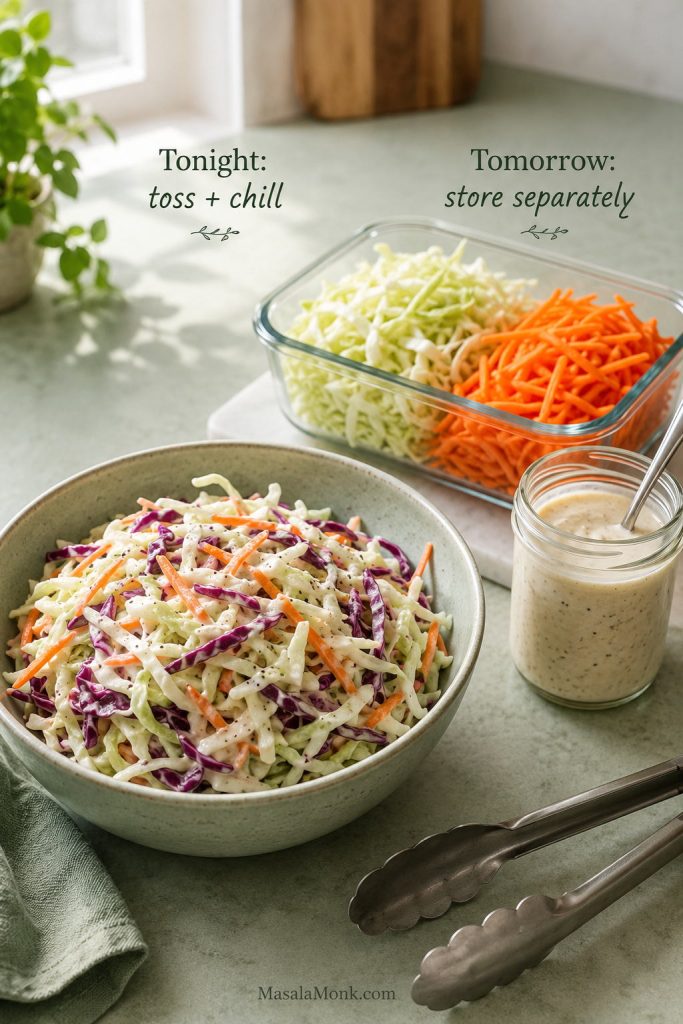
Dressed coleslaw for same-day serving beside separate containers of cabbage and dressing for make-ahead prep.
Same-day slaw can be dressed early enough to relax, while tomorrow’s slaw stays crisper when the cabbage and dressing wait apart.
Situation Should You Salt? Best Move
Serving within 30–60 minutes No Dress lightly, chill, toss, and adjust
Making it tomorrow Yes, or store dressing separately Salt, drain, dry well, then dress later
Using bagged coleslaw mix Usually no Start with part of the dressing because bagged mix varies
Putting it on pulled pork, burgers, or hot dogs Optional Use a lighter hand with dressing and drain before adding to buns
Taking it to a cookout Optional, but helpful Salt only if prepping early; otherwise keep cold and dress close to serving

Coleslaw Troubleshooting

If the bowl tastes a little off, do not start over. Coleslaw is forgiving. Most problems need one small adjustment: a splash of vinegar, a pinch of salt, a spoonful of dressing, a few minutes of chilling, or a handful of fresh cabbage.

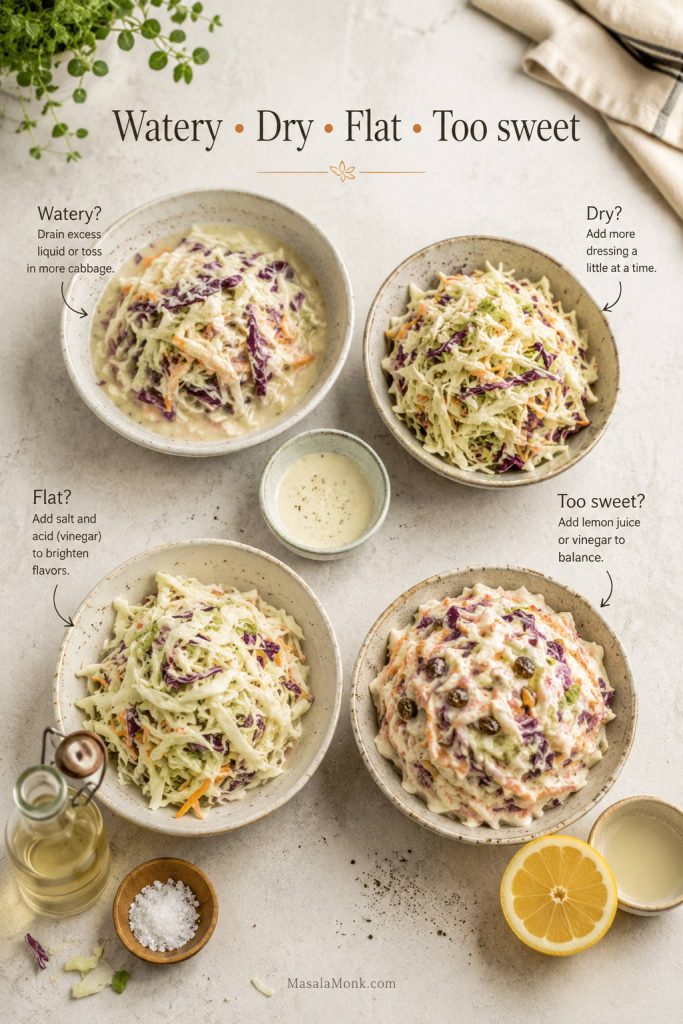
Four bowls showing watery, dry, flat, and too-sweet coleslaw with vinegar, salt, lemon, and dressing nearby.
Most coleslaw problems need a small correction, not a new batch; drain watery slaw, add dressing gradually to dry slaw, and use salt or acid for flat flavor.

Quick Fixes for Common Coleslaw Problems

Use the table below to fix the most common coleslaw texture and flavor problems without starting over.

Problem Likely Cause Quick Fix
Coleslaw is watery Too much dressing, cabbage released liquid, or cabbage was not dried Drain excess liquid, toss, and refresh with a small spoonful of mayo if needed
Coleslaw is dry Not enough dressing or very thick cabbage shreds Add more dressing 1 tablespoon at a time after chilling
Coleslaw tastes flat Not enough salt or acid Add a pinch of salt and a splash of vinegar or lemon juice
Coleslaw is too sweet Too much sugar, honey, or sweet mayo Add vinegar, lemon juice, or mustard to sharpen it
Coleslaw is too sharp Too much vinegar, lemon, or mustard Add a small spoonful of mayo or a pinch of sugar
Coleslaw tastes too much like mayo Dressing needs acid, salt, or sweetness Add vinegar or lemon juice first, then a small pinch of sugar if needed
Cabbage is too stiff Shreds are thick or slaw has not rested long enough Chill 30–60 minutes longer, or slice thinner next time
Cabbage is too soft Overdressed, over-salted, or stored too long Drain well and fold in a handful of fresh shredded cabbage
Red cabbage turned the dressing pink Red cabbage released color as it sat Use mostly green cabbage, or add red cabbage close to serving
Bagged mix tastes flat Pre-cut cabbage can taste dry or dull Add extra vinegar, lemon, salt, or a handful of fresh herbs

Make-Ahead and Storage Tips for Coleslaw

This coleslaw recipe can be made ahead, but there is a tradeoff. In general, a short chill makes it taste better because the dressing has time to settle into the cabbage. A long chill makes it softer. The trick is deciding whether you want maximum crunch or maximum convenience.

Shredded cabbage and carrots stored in a container with creamy dressing stored separately in a jar.
Separate containers protect the crunch; once the dressing touches the cabbage, the countdown to softer, wetter slaw begins.

Best Flavor Window

The sweet spot is 30 minutes to 2 hours before serving. The cabbage softens just enough, the dressing clings better, and the bowl still tastes fresh.

A fully dressed bowl can still taste good the next day, but it will be softer and the dressing will be thinner. When crunch matters, store the vegetables and dressing separately.

How Far Ahead to Make Coleslaw

Use this table as a practical planning guide, especially if the slaw is going to a party, sitting beside grilled food, or going inside sandwiches.

When You Need It Best Method Why
Serving in 30–60 minutes Dress now, chill, toss again Best balance of flavor and crunch
Serving in 2–3 hours Dress with two-thirds first, hold cold, adjust before serving Prevents watery slaw
Serving tomorrow Store vegetables and dressing separately Keeps cabbage crisper
Serving on sandwiches Use a lighter hand with dressing and drain before serving Prevents soggy buns
Taking to a cookout Chill well and keep over ice Protects texture and food safety

A Simple Make-Ahead Plan

  • 1 day ahead: shred cabbage and carrots; make the dressing separately.
  • 2–3 hours before serving: toss with two-thirds of the dressing.
  • Right before serving: toss again and adjust with more dressing, salt, or vinegar.

How Long Coleslaw Lasts in the Fridge

Dressed coleslaw is best within 2 to 3 days. Keep it refrigerated in an airtight container, and discard it if it smells off, has changed texture noticeably, or has been left out too long.

If liquid collects at the bottom, drain it before serving leftovers. A small spoonful of mayo or a splash of vinegar can refresh the texture and flavor.

Do not freeze creamy coleslaw. The cabbage turns watery after thawing, and mayonnaise-based dressing can split.

Cookout and Potluck Safety

Because creamy coleslaw is served cold, keep it chilled until serving. For outdoor cookouts, place the serving bowl inside a larger bowl filled with ice if it will sit out for a while.

As a general food-safety rule, cold perishable foods should not sit out for more than 2 hours, or more than 1 hour when the outdoor temperature is above 90°F / 32°C. You can read more about the cold food safety window from the USDA food safety guidance.

How Much Coleslaw Per Person?

Coleslaw is one of those sides that disappears fast when sandwiches are involved, but sits longer when the table is full of other BBQ sides. If you are planning a full menu, the serving ideas section shows where coleslaw works best.

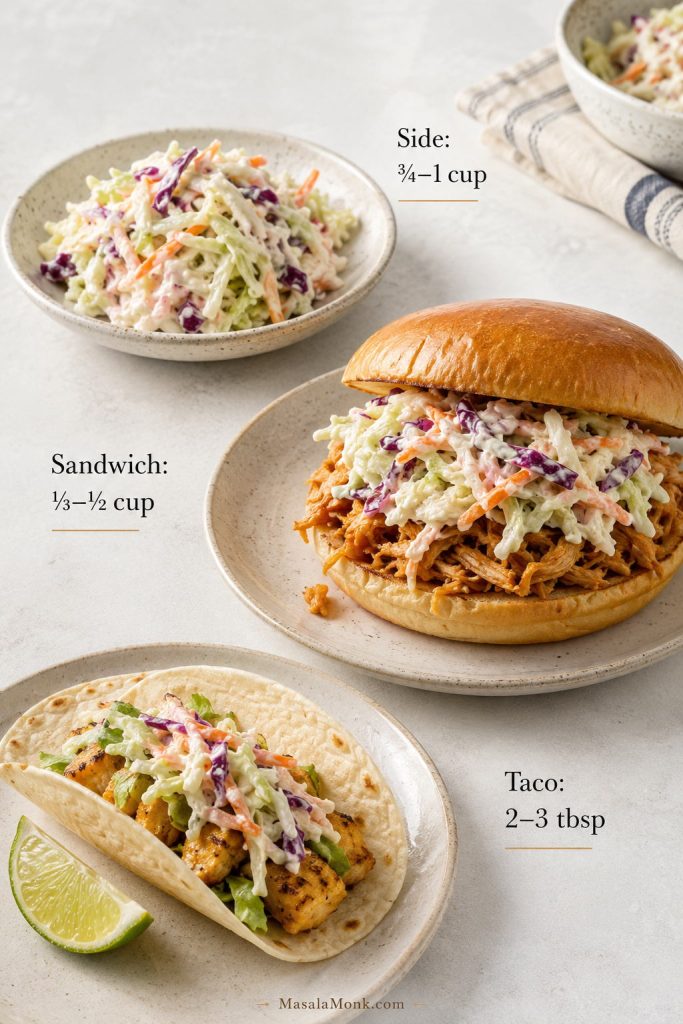
Coleslaw portions shown as a side dish, a sandwich topping, and a taco topping with serving amounts.
Plan more coleslaw for sides and less for toppings; a sandwich usually needs about ⅓–½ cup, while tacos only need a few tablespoons.

For a side dish, plan on about ¾ to 1 cup per person. If coleslaw is one of several sides, ½ to ¾ cup per person is usually enough. For sandwiches, burgers, hot dogs, or pulled pork, plan on ⅓ to ½ cup per sandwich.

As written, this recipe makes about 8–9 cups, so it serves 8 people generously as a side dish or more if you are using it as a topping. These amounts are approximate because finely chopped slaw packs more tightly than long shredded cabbage.

Use Amount to Plan Texture Goal
Side dish ¾–1 cup per person Creamy, chilled, and lightly coated
Large BBQ spread ½–¾ cup per person Tangy and not too heavy
Pulled pork sandwich ⅓–½ cup per sandwich Finely shredded and not too wet
Burgers or hot dogs ¼–⅓ cup per bun Finely chopped or thinly shredded
Tacos or wraps 2–3 tablespoons per piece Lightly dressed and crunchy

What to Serve with Coleslaw

Coleslaw earns its place because it makes the rest of the meal easier to enjoy. A spoonful of cold crunch beside smoky meat, a bright layer inside a pulled pork sandwich, or a creamy bite next to fried fish can change the whole plate. For larger BBQ plates or sandwich trays, check the coleslaw per person guide before scaling the batch.

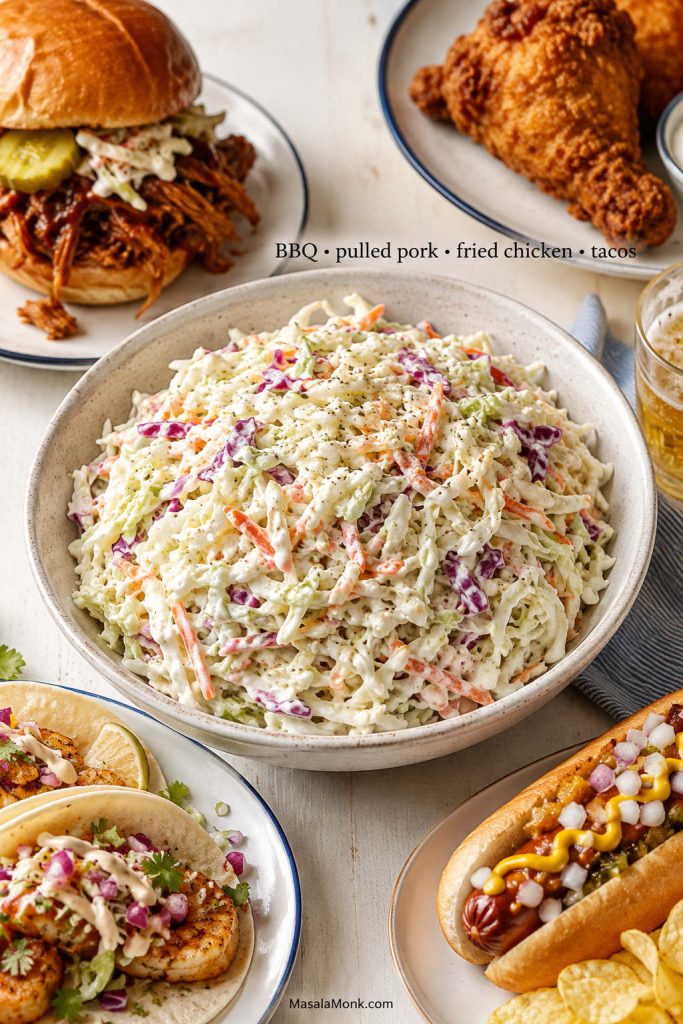
Bowl of creamy coleslaw served with pulled pork, fried chicken, tacos, and a hot dog.
Coleslaw earns its place on cookout plates because cold crunch and tangy creaminess balance rich foods like pulled pork, fried chicken, tacos, and hot dogs.

Coleslaw for BBQ Plates

On a BBQ plate, coleslaw should cool the palate between bites of smoky, saucy, or grilled food. Keep it creamy, crisp, and slightly tangy. A little extra vinegar or lemon juice helps the slaw cut through ribs, grilled chicken, brisket, pulled pork, sausages, or other cookout mains.

If the rest of the plate is already sweet or saucy, avoid making the slaw too sweet. A balanced sweet-tangy dressing tastes fresher.

Coleslaw for Pulled Pork Sandwiches

For pulled pork sandwiches, the slaw has one job: add crunch and brightness without soaking the bun. Keep it finely shredded, lightly dressed, and a little tangier than you would for a side dish.

Pulled pork sandwich topped with lightly dressed coleslaw on a soft bun.
For pulled pork sandwiches, keep the coleslaw finely shredded and lightly dressed so it adds crunch without making the bun soggy.

Long cabbage strands can pull out of the sandwich, and watery dressing can make the bread soggy. Chill the slaw, drain off any extra liquid, and add it right before serving.

This same logic works for chicken sandwiches too. A creamy, tangy slaw is especially good with BBQ chicken, crispy chicken, and grilled chicken sandwiches. For more sandwich ideas, see these chicken sandwich recipes.

Coleslaw for Burgers and Hot Dogs

For burgers and hot dogs, chop the slaw a little finer so it stays inside the bun and gives every bite some crunch. Hot dogs can handle a slightly sweeter dressing, while richer burgers usually taste better with a sharper, tangier slaw. Either way, drain off extra liquid before adding it to bread.

Coleslaw for Fried Chicken, Fish, Tacos, and Wraps

Fried chicken and fried fish need coleslaw that is bright and cold. If the main dish is already rich and crisp, the slaw should bring freshness. Add a little extra vinegar or lemon juice before serving.
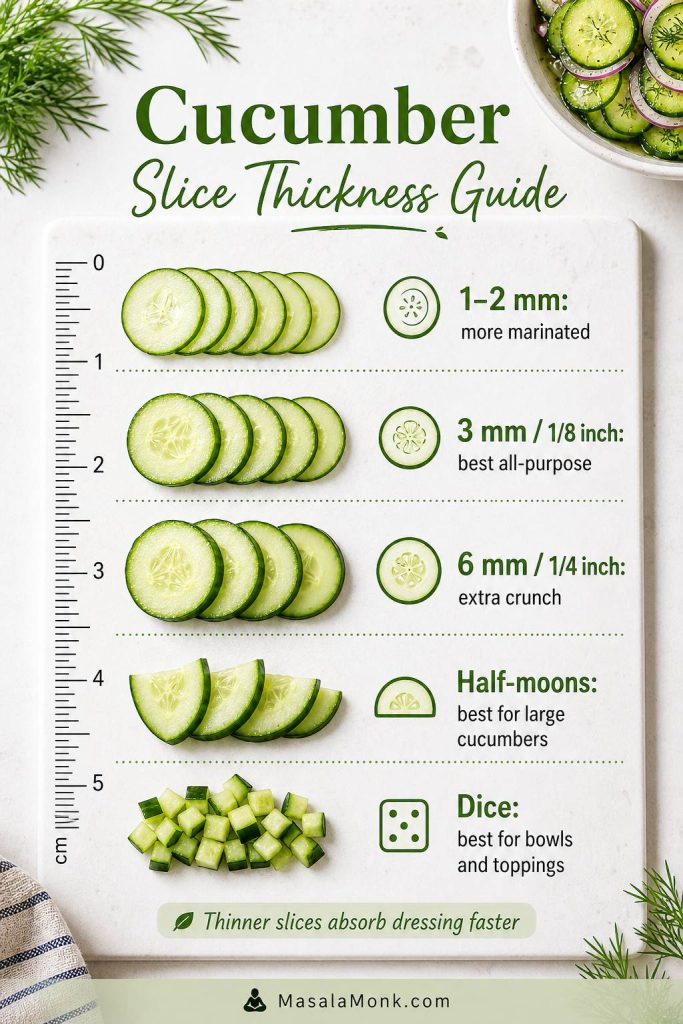
Taco slaw should be lighter than a classic creamy BBQ side. Use this recipe as a starting point, then thin the dressing with extra lime or vinegar and use less mayo if you want a taco-style slaw.

For a lighter taco-style slaw, see the cabbage slaw approach in these fish tacos. The shrimp tacos use a similar fresher direction with creamy sauce and crunch.

Coleslaw also works beside fried fish and chips because the cool cabbage balances the hot, crisp batter. For that style of plate, keep the slaw cold and a little more acidic. You can pair it with this fish and chips recipe.

Easy Coleslaw Variations

Once the classic creamy version is working, you can adjust the dressing and vegetables to match the meal. Choose the version that fits the plate instead of loading one bowl with too many ideas.

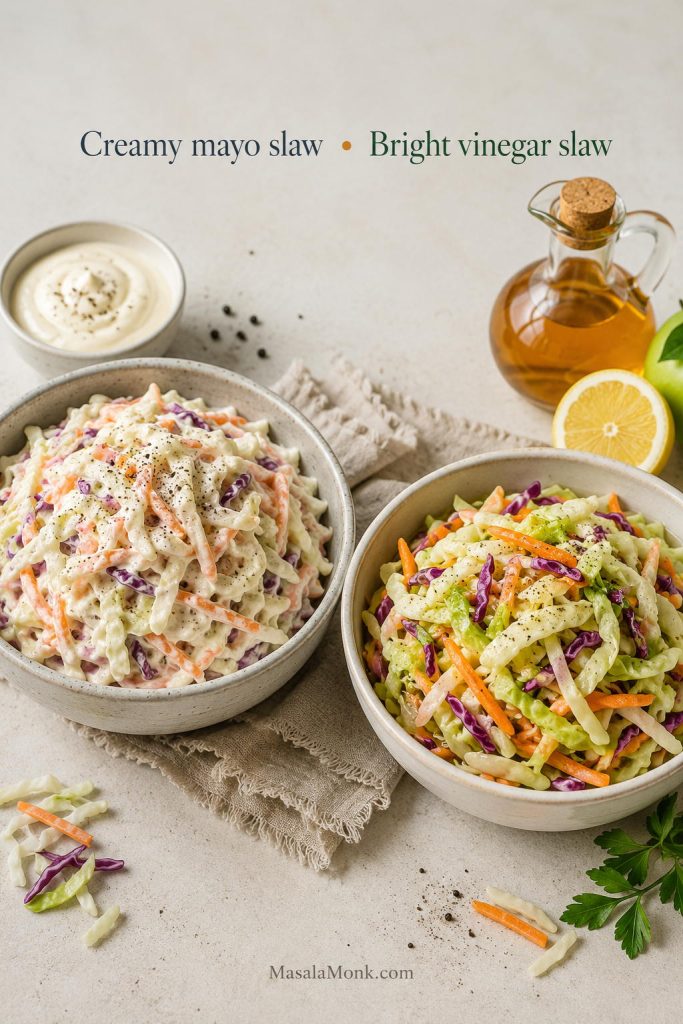
No-Mayo Coleslaw

A no-mayo version works best when the dressing is sharp, glossy, and well-seasoned. Use apple cider vinegar, olive oil, a little Dijon mustard, honey or sugar, salt, pepper, and optional celery seed. This style is lighter, brighter, and especially good with pulled pork, tacos, fried food, and picnic plates where you want crunch more than creaminess. For a quick comparison, see the mayo vs vinegar coleslaw answer in the FAQs.
Two bowls comparing creamy mayo coleslaw with a brighter vinegar-style no-mayo coleslaw.
Choose mayo slaw when you want creamy comfort, and choose vinegar slaw when the plate needs a sharper, lighter bite.

Greek Yogurt Coleslaw

To make the dressing lighter, replace part of the mayonnaise with thick Greek yogurt. Start by replacing ¼ cup of the mayo, then taste before swapping more. Greek yogurt is tangier than mayo, so you may need a little more honey or sugar to balance it.

This version is useful for weeknight dinners, meal prep bowls, wraps, and lighter sandwiches.

Sweeter or Tangier Coleslaw

If you like a sweeter cookout-style slaw, add sugar or honey 1 teaspoon at a time. If you want it sharper, add apple cider vinegar, lemon juice, or mustard in small amounts.

Always adjust after the slaw has chilled. The flavor changes as the cabbage softens and the dressing loosens. If the bowl tastes bland, do not automatically add more mayo. Add a pinch of salt first, then a little acid.

Other Slaw Styles to Try Later

Apple slaw, broccoli slaw, red cabbage slaw, vegan coleslaw, keto coleslaw, and Asian slaw are all useful variations, but they each need their own balance. Apple needs enough acid so the bowl does not taste too sweet. Broccoli slaw needs a dressing that can soften firmer shreds. Red cabbage slaw often works better with a brighter vinaigrette. Asian slaw usually moves away from classic mayo dressing and toward sesame, ginger, soy, rice vinegar, lime, or herbs.

Keep this classic coleslaw recipe as the creamy base, then use those ideas when you want a different style of slaw.

Vegan or Egg-Free Coleslaw

Vegan coleslaw needs a thick vegan mayo and enough vinegar or lemon juice to keep the dressing bright. The dressing should taste slightly bold before it hits the cabbage because the vegetables will mellow it.

This vegan mayo recipe is a useful base for a plant-based version. For egg-free but not necessarily vegan coleslaw, use eggless mayo and keep the rest of the recipe the same.

How did you adjust it?

If you made this coleslaw sweeter, tangier, creamier, sharper, or more sandwich-friendly, share your version in the comments so other readers can try it too.

Once you understand the dressing balance, coleslaw becomes easy to adjust. Keep it creamier for cookouts, sharper for pulled pork, lighter for tacos, and colder than you think before serving. That is the difference between a bowl people ignore and a bowl that disappears.

Coleslaw FAQs

What is coleslaw made of?

Classic coleslaw is made with shredded cabbage, grated carrot, and a creamy or vinegar-based dressing. A creamy coleslaw dressing usually includes mayonnaise, vinegar, sugar or honey, salt, pepper, and sometimes mustard or celery seed.

What is the best cabbage for coleslaw?

Green cabbage is the most reliable choice because it is crisp, mild, and sturdy. Red cabbage adds color and crunch, but it can tint the dressing pink as it sits. Green cabbage alone is enough for a classic creamy slaw; red cabbage is mainly for color and extra crunch.

Can I use bagged coleslaw mix?

Bagged coleslaw mix works well, especially for weeknights. One 14–16 oz / 400–450 g bag makes a slightly smaller batch, so start with about half to two-thirds of the dressing. For the full 8–9 cup yield, use about 20–24 oz / 560–680 g mix or add extra shredded cabbage and carrot.

What is the difference between slaw and coleslaw?

Coleslaw usually means a cabbage-based slaw, often with carrots and a creamy or vinegar dressing. Slaw is broader and can include other shredded vegetables such as broccoli, Brussels sprouts, kale, apple, or red cabbage.

How do you keep coleslaw from getting watery?

Watery coleslaw usually happens when cabbage releases moisture after dressing. Start with part of the dressing, chill, toss again, and then decide whether the bowl needs more dressing, a quick drain, or a little extra seasoning. For make-ahead coleslaw, lightly salt the shredded cabbage, let it drain, dry it very well, and then dress it.

Should I salt cabbage before making coleslaw?

Quick same-day coleslaw does not need salted cabbage. Salting helps when you are making the slaw ahead, serving it outdoors, or using it on sandwiches where extra liquid can make the bread soggy. If you salt the cabbage, reduce the salt in the dressing and adjust at the end.

How long should coleslaw chill before serving?

For this coleslaw recipe, a 30 to 60 minute chill gives the cabbage time to soften slightly and lets the dressing flavor the vegetables. If you are in a hurry, even 10 to 15 minutes helps, but the texture is better with a longer rest.

Can I make coleslaw the night before?

You can, but the texture will be softer. For the best crunch, store the shredded vegetables and dressing separately, then combine them a few hours before serving.

How far ahead can I make coleslaw?

The freshest window is 30 minutes to 2 hours before serving. For parties, shred the vegetables and mix the dressing one day ahead, store them separately, and combine them on the day you plan to serve.

How long does coleslaw last in the fridge?

Dressed coleslaw is best within 2 to 3 days. It softens and releases liquid as it sits, so drain off excess liquid before serving leftovers.

Can you freeze coleslaw?

Creamy coleslaw does not freeze well. The cabbage turns watery after thawing, and mayonnaise-based dressing can separate. If you need to prep ahead, keep the shredded vegetables and dressing separate in the refrigerator.

Why does my coleslaw taste bland?

Bland coleslaw usually needs salt or acid, not more mayo. Add a pinch of salt and a small splash of vinegar or lemon juice, toss, and taste again.

Why did my red cabbage turn the dressing pink?

Red cabbage naturally releases color into creamy dressing as it sits. Use mostly green cabbage with a smaller amount of red cabbage if you want a classic pale dressing.

Is coleslaw better with mayo or vinegar?

Mayo coleslaw gives you the classic creamy cookout bowl. Vinegar slaw is sharper, lighter, and better when the main dish is rich, smoky, fried, or piled into a sandwich.

Is coleslaw gluten-free?

Most homemade coleslaw is naturally gluten-free if the mayonnaise, mustard, vinegar, and seasonings are gluten-free. Always check labels if you are cooking for someone with celiac disease or strict gluten sensitivity.

How much coleslaw do I need for pulled pork sandwiches?

Plan on ⅓ to ½ cup coleslaw per sandwich. Keep it finely shredded, lightly dressed, and well drained so it adds crunch without making the bun soggy.

What goes well with coleslaw?

Coleslaw goes well with BBQ, ribs, burgers, hot dogs, fried chicken, fried fish, fish tacos, shrimp tacos, wraps, and pulled pork sandwiches. It works especially well anywhere you want a cold, crunchy contrast to something smoky, sauy, fried, or spicy.

Posted on 1 Comment

Chickpea Salad Recipe

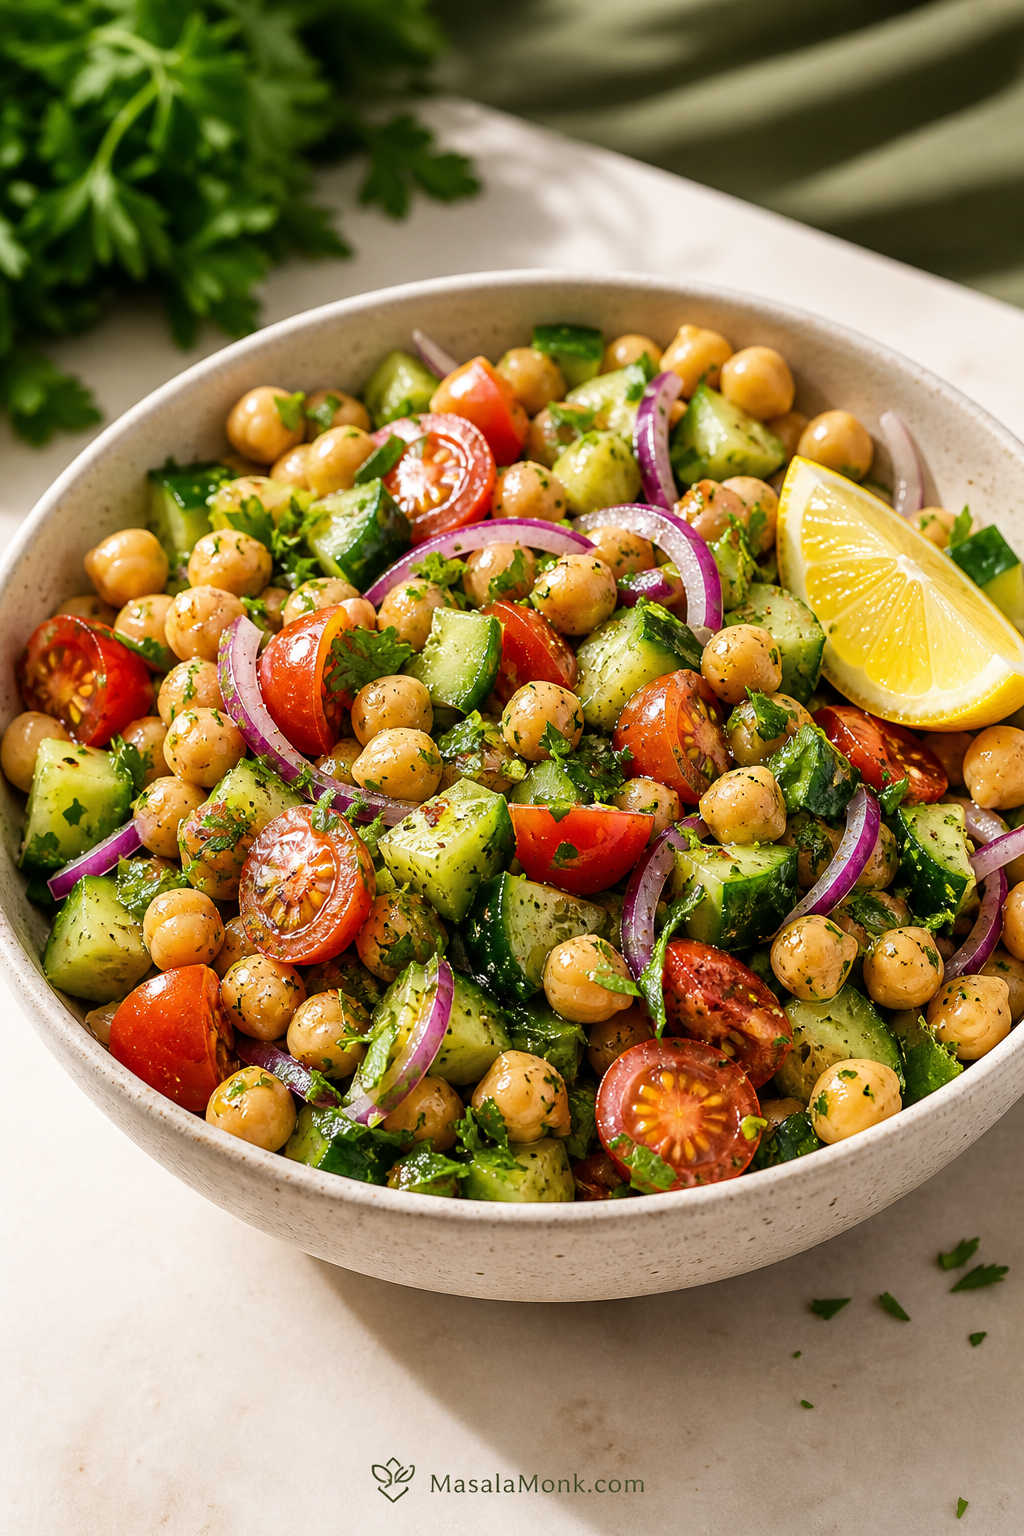
Bowl of chickpea salad with cucumber, cherry tomatoes, red onion, parsley, and lemon dressing on a light surface.

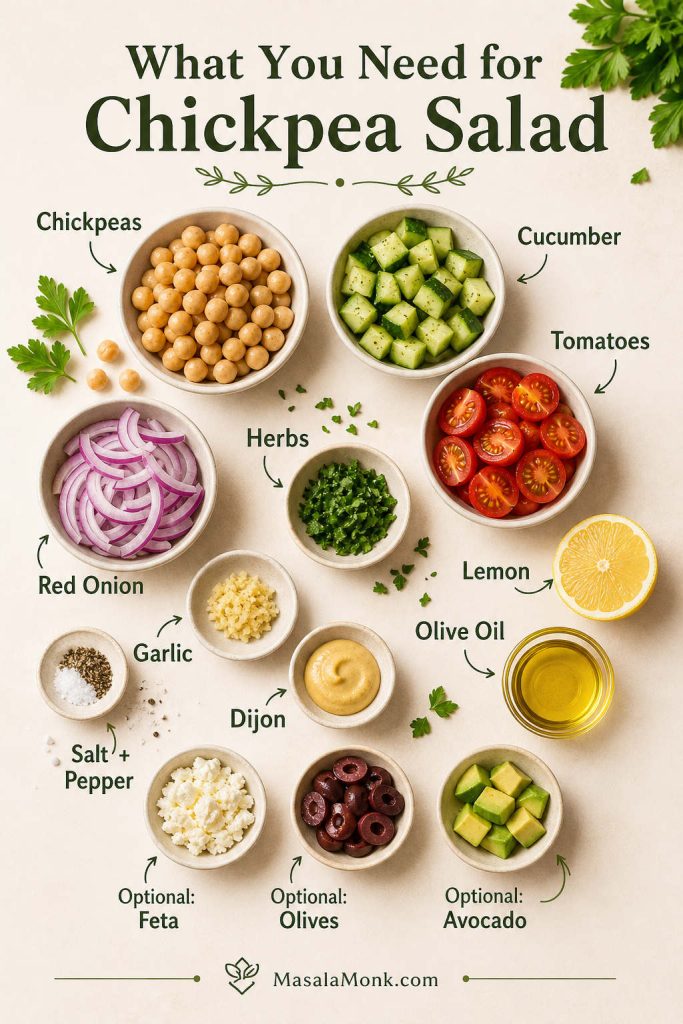
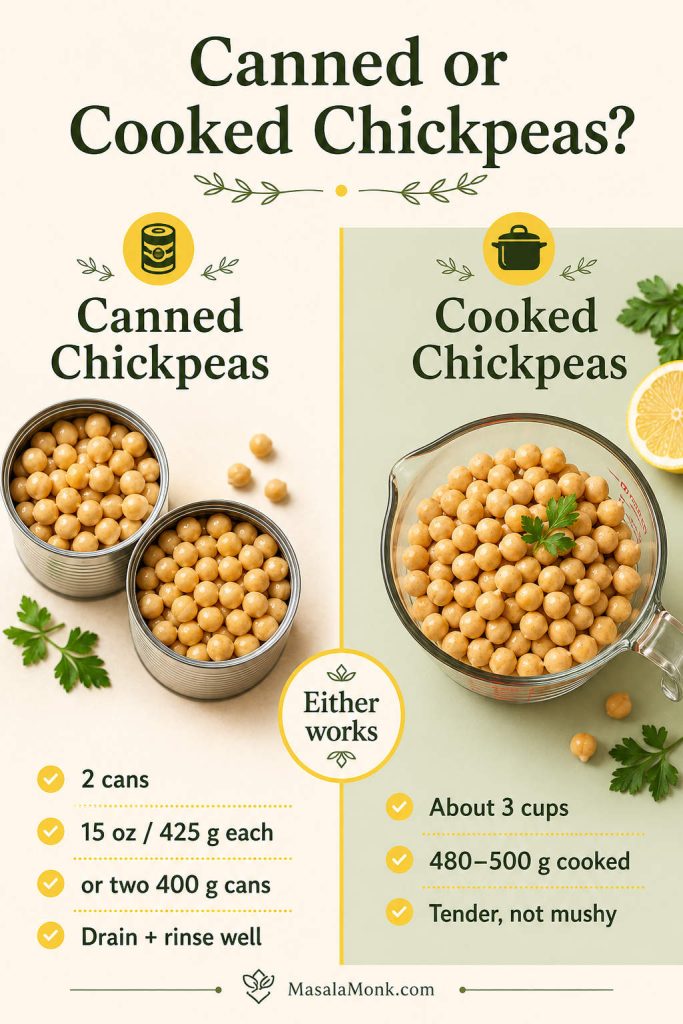
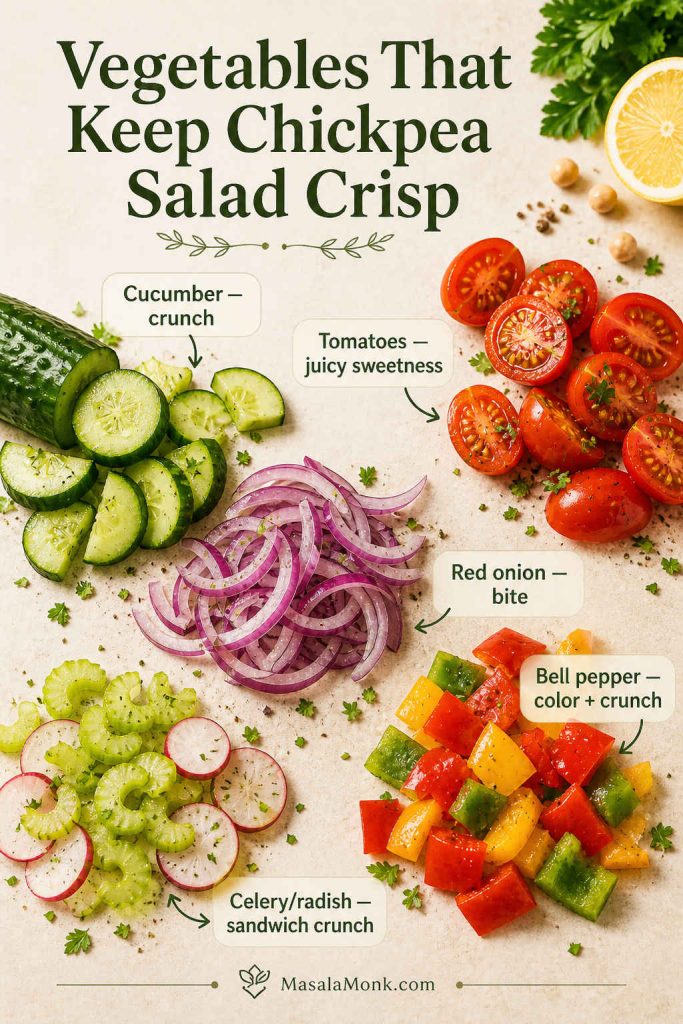
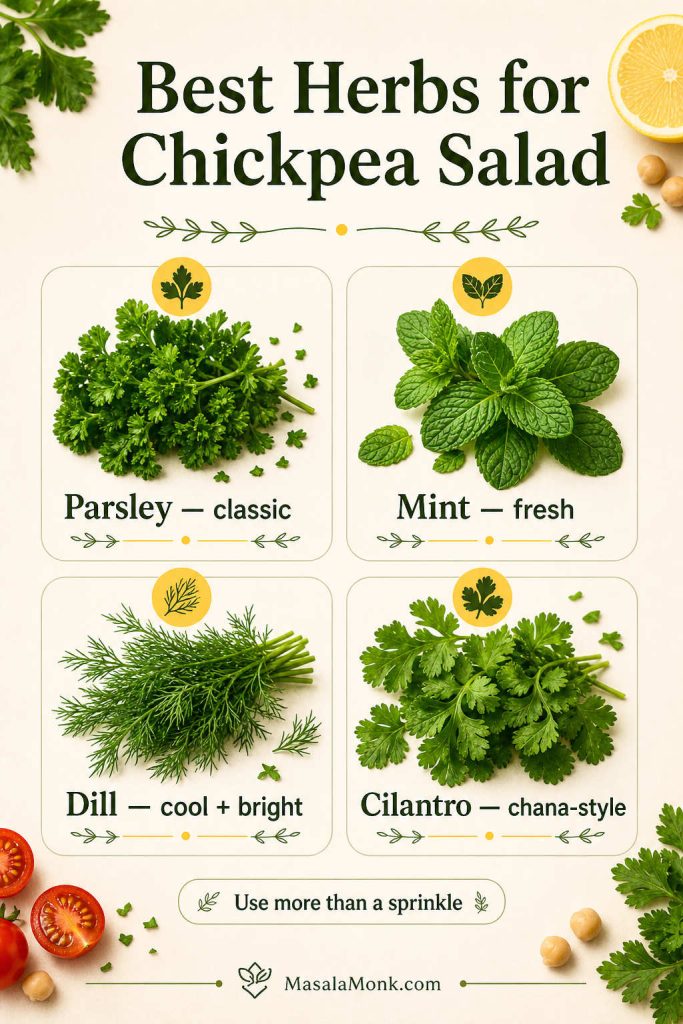
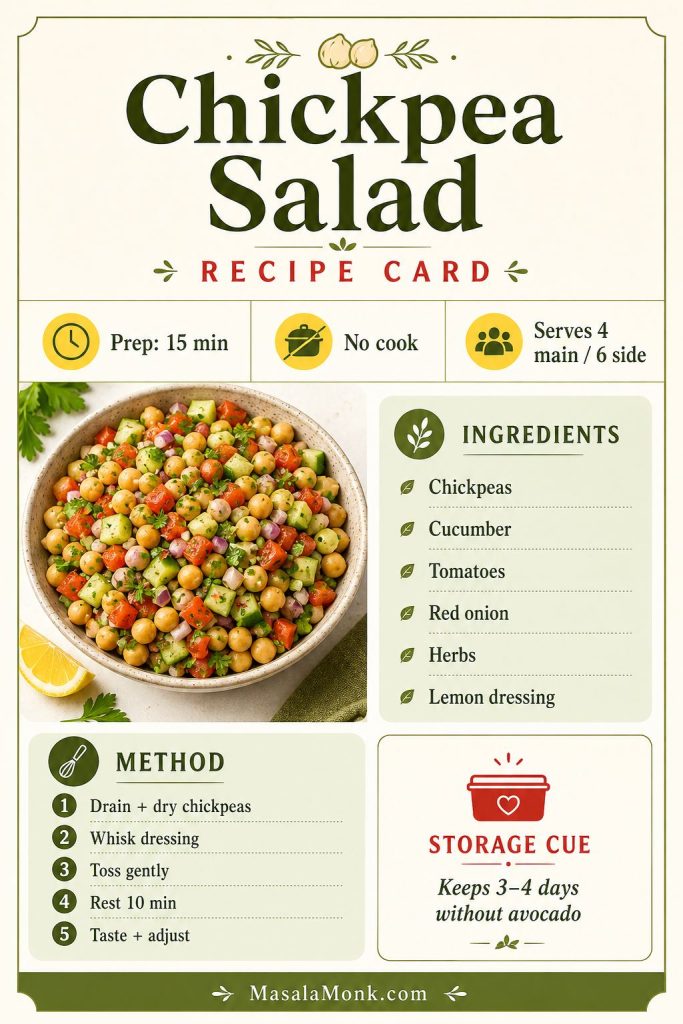
This chickpea salad recipe turns canned chickpeas into a fresh no-cook salad with cucumber, tomatoes, red onion, herbs, and lemon dressing in about 15 minutes. It is bright enough for a side dish, filling enough for lunch, and sturdy enough for meal prep.

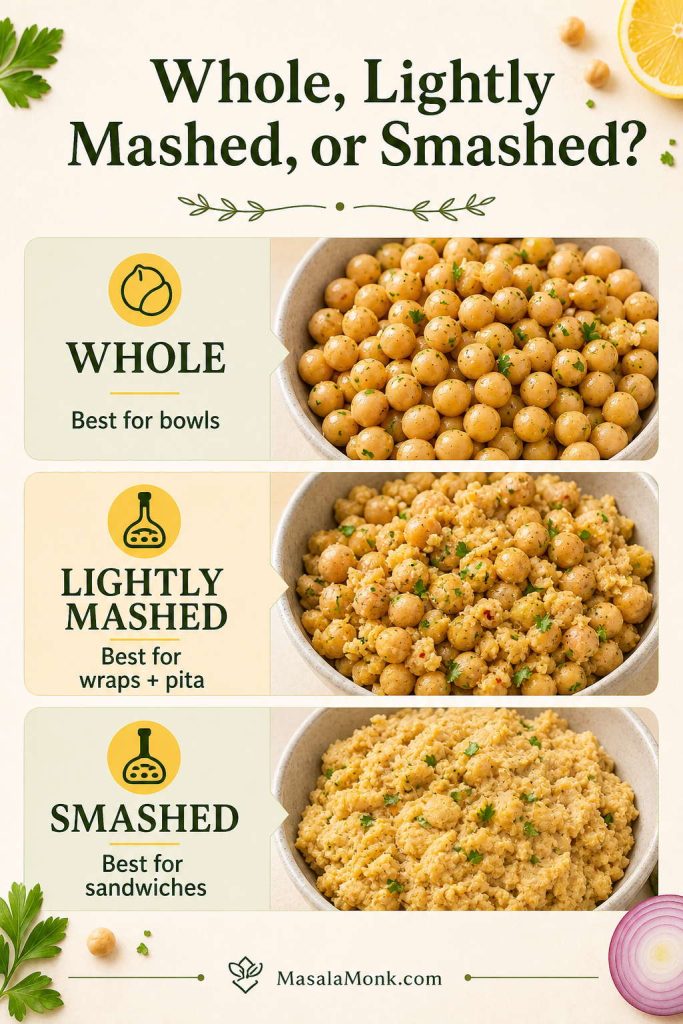
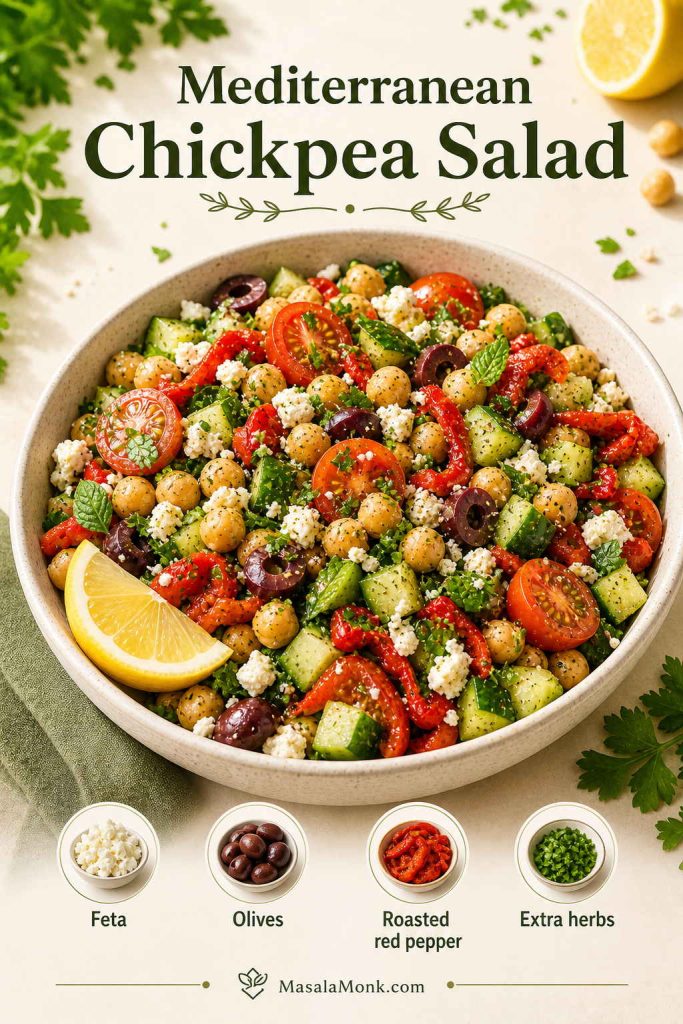
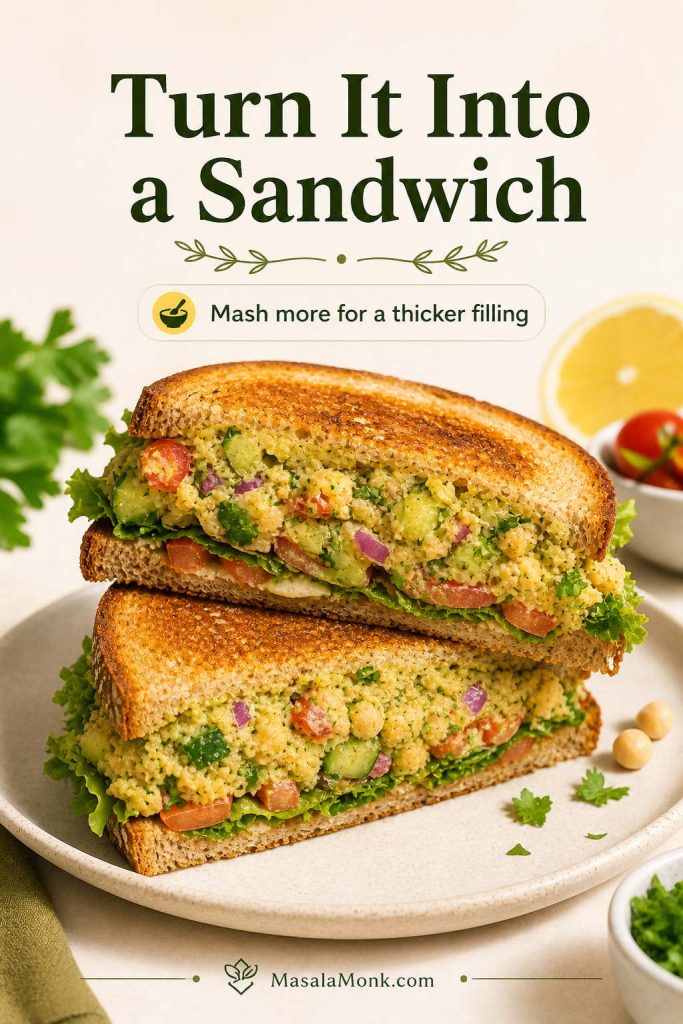
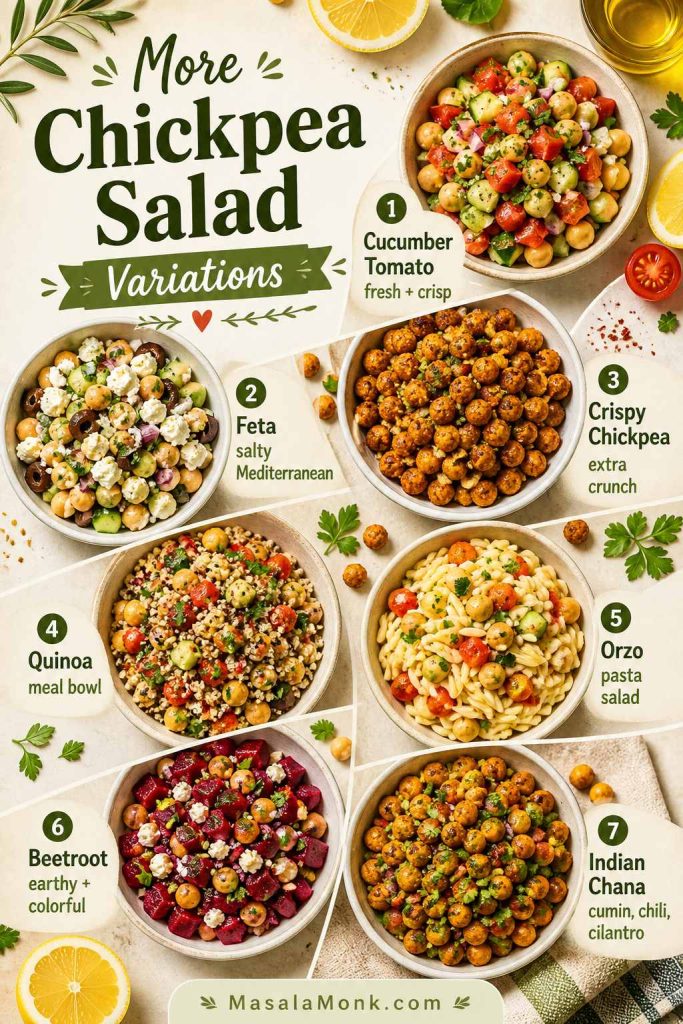
Keep the chickpeas whole for a crisp salad bowl, lightly mash them for wraps or pita pockets, or smash them more deeply for a creamy chickpea salad sandwich. The same recipe can lean Mediterranean with feta and olives, vegan with avocado or tahini, or Indian-style with cilantro, cumin, chili, and lemon.

Chickpeas and garbanzo beans are the same ingredient, so this also works as a garbanzo bean salad recipe. The key is simple: drain the chickpeas well, season them boldly, and use enough lemon, salt, herbs, and crunch so the salad tastes fresh instead of flat.

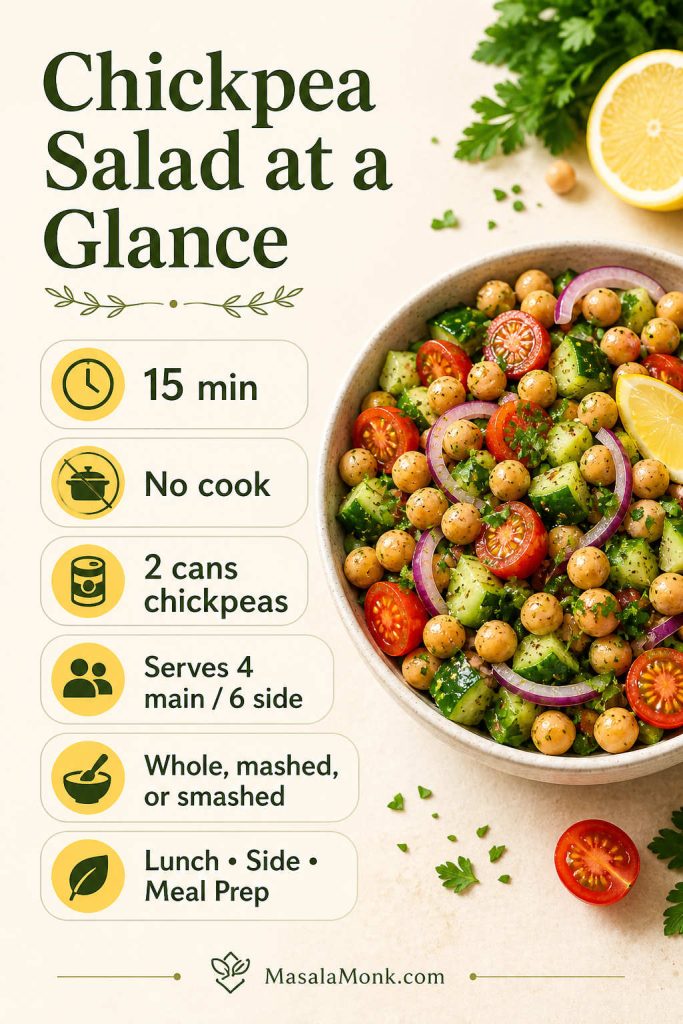
At a glance: This recipe takes about 15 minutes, uses 2 cans of chickpeas, serves 4 as a main or 6 as a side, and needs no cooking. Keep it whole for a salad bowl, lightly mash it for wraps, or smash it for sandwiches.
Why this version is easy to use: The base salad stays simple, but you also get dressing ratios, substitution options, storage cues, and texture choices. As a result, the same chickpeas can become a bowl, wrap, pita filling, sandwich, or meal-prep lunch without starting over.

Quick Answer: 15-Minute Chickpea Salad

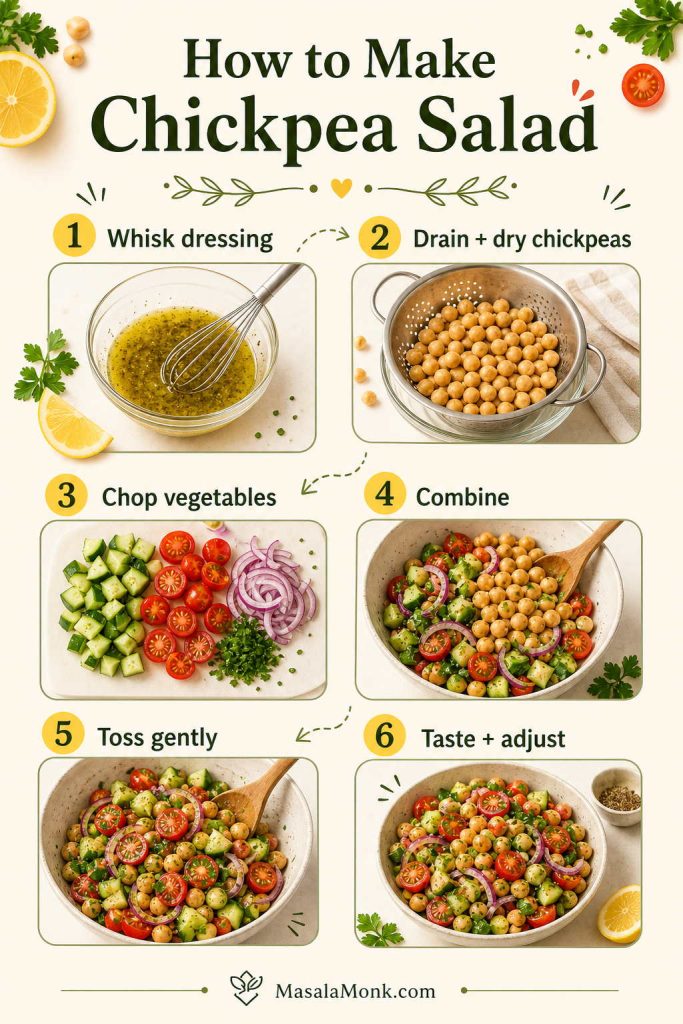
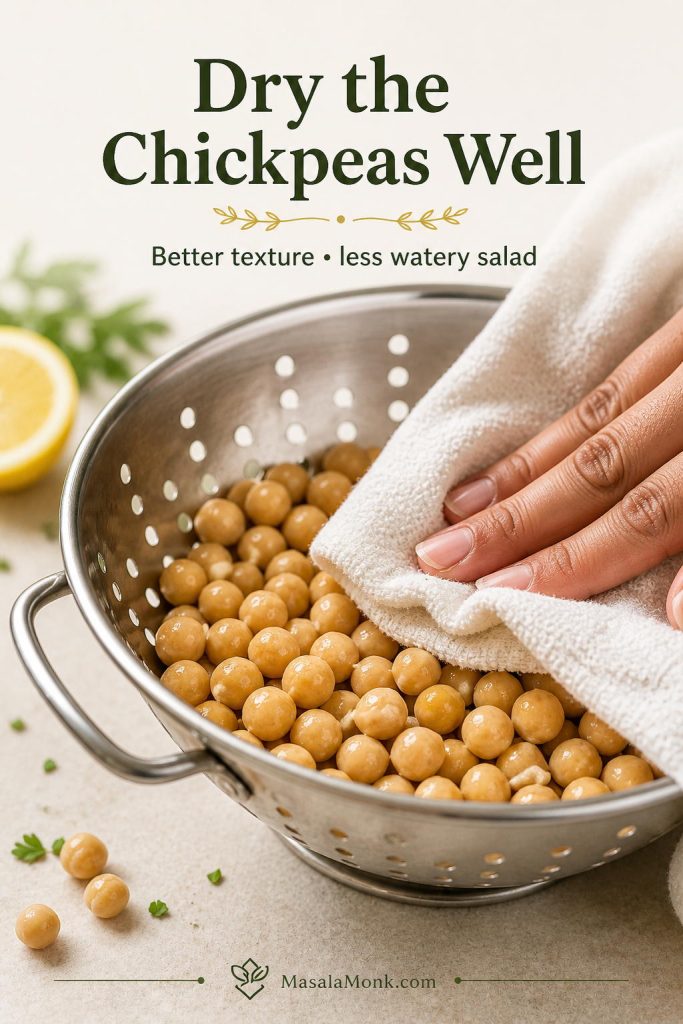
Canned chickpeas make this a fresh salad with cucumber, tomatoes, herbs, and lemon dressing in about 15 minutes. Make the dressing first, drain and rinse the chickpeas, chop the vegetables, toss everything together, and let the bowl sit for 10 minutes if you have time.

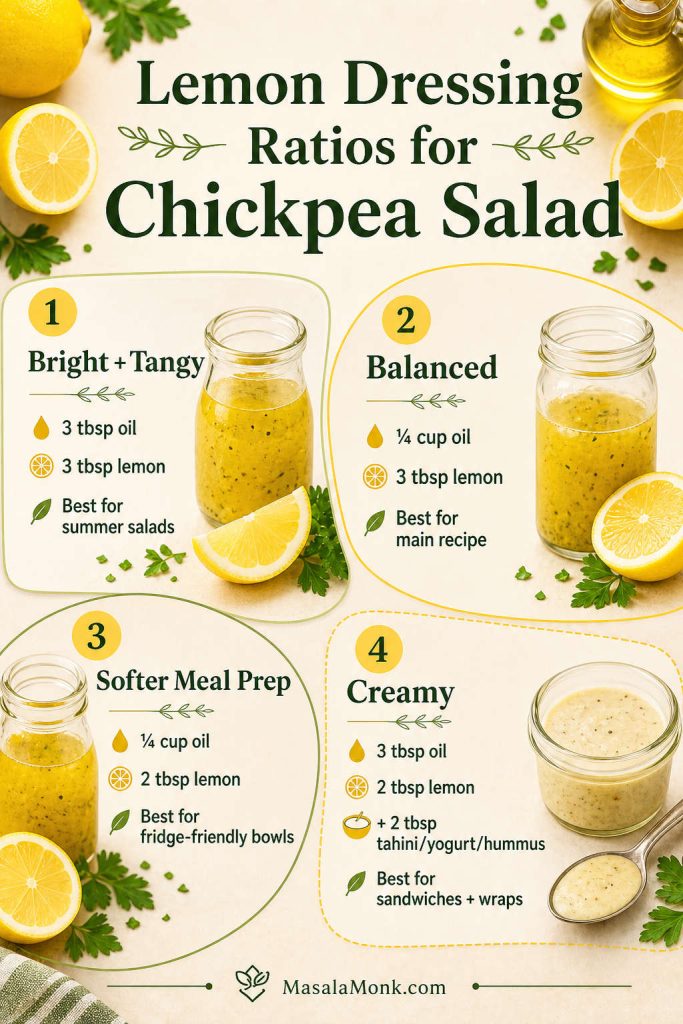
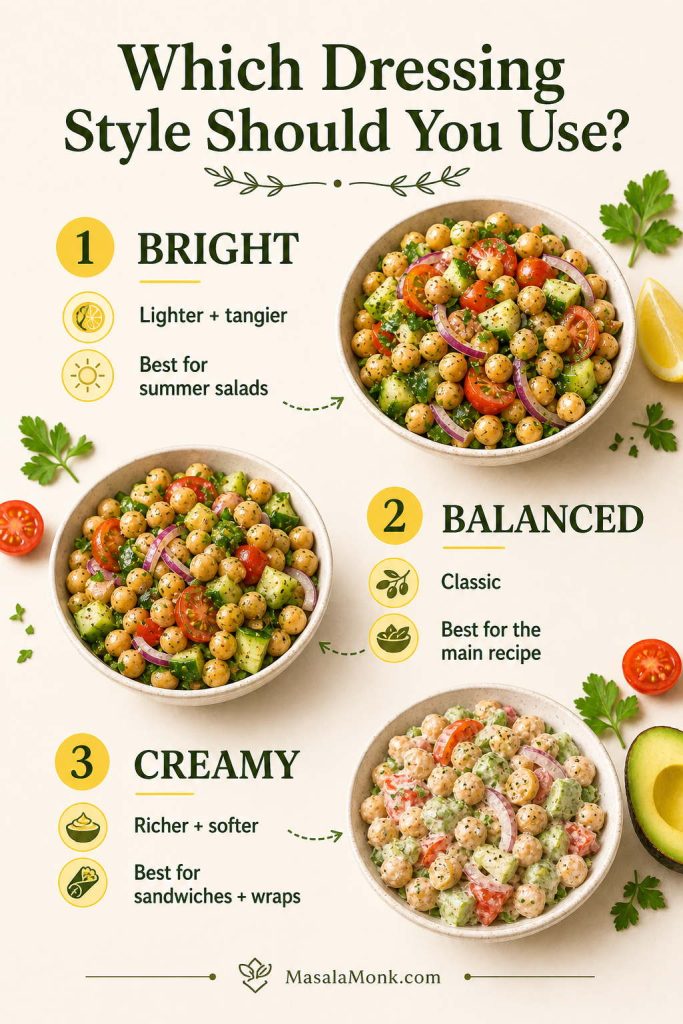
The salad can be served cold or at room temperature. For a side salad or lunch bowl, leave the chickpeas whole. However, if you are making wraps or pita pockets, lightly mash some of them so the filling holds together. When you want a thicker sandwich filling, smash most of the chickpeas instead.

First time making it? Start with chickpeas, cucumber, tomatoes, red onion, parsley, lemon, olive oil, garlic, salt, and pepper. Once the base tastes good, add feta, olives, avocado, paneer, or extra spices.
Infographic showing chickpea salad facts including 15 minutes, no-cook method, two cans of chickpeas, serving size, and texture options.
Before you start, note the useful basics: this chickpea salad takes about 15 minutes, needs no cooking, and works as a bowl, wrap, sandwich filling, or meal-prep lunch.

Ingredients for Chickpea Salad

You only need a few ingredients, so each one should add something useful. The chickpeas make the salad filling, cucumber and tomatoes keep it fresh, herbs lift the flavor, and lemon dressing pulls this recipe together.

Labeled ingredient board for chickpea salad with chickpeas, cucumber, tomatoes, red onion, herbs, lemon, olive oil, garlic, Dijon mustard, and optional add-ins.
A good chickpea salad needs contrast, so chickpeas make it filling, cucumber adds crunch, tomatoes bring juiciness, herbs lift the flavor, and lemon dressing keeps everything bright.

Chickpeas or Garbanzo Beans?

Chickpeas and garbanzo beans are the same ingredient, so this recipe works no matter which name is on the can or how the salad is labeled. Use two cans of chickpeas or garbanzo beans, drain and rinse them well, and treat them the same way in the bowl.

Why Canned Chickpeas Work in This Salad Recipe

Canned chickpeas are already cooked, which makes this recipe quick enough for a weekday salad or lunch bowl. Use two 15-ounce / 425 g cans, or two 400 g cans, drained and rinsed. Once drained, that usually gives you about 480–500 g chickpeas total, or about 3 cups cooked chickpeas.

Rinsing matters because it removes excess canning liquid and gives the salad a cleaner flavor. After rinsing, let the chickpeas drain well. If they still look wet, pat them lightly with a clean towel so the dressing does not get diluted.

Using Cooked Chickpeas Instead of Canned

If you cook chickpeas from dry, use about 3 cups / 480–500 g cooked chickpeas. They should be tender enough to eat cold in the salad, but not so soft that they collapse when tossed.

Cooked-from-dry chickpeas can taste nuttier than canned ones. However, canned chickpeas are still the easiest choice when you want a fast salad.

Comparison image showing canned chickpeas on one side and cooked chickpeas on the other for use in chickpea salad.
Canned chickpeas are the easiest choice when you want a fast chickpea salad recipe; however, cooked chickpeas work just as well if they are tender, well-drained, and not too soft.

Fresh Vegetables That Keep the Salad Crisp

For this recipe, chickpeas give the salad body, so the vegetables should bring crunch, juice, and freshness. Cucumber adds crispness, cherry or grape tomatoes bring sweetness, red onion gives bite, and bell pepper adds color if you want extra crunch.

Vegetable guide for chickpea salad featuring cucumber, cherry tomatoes, red onion, bell pepper, and celery with short usage notes.
For the freshest texture, choose vegetables that add contrast: cucumber brings crunch, tomatoes add juiciness, red onion adds bite, and bell pepper adds extra color as well as crispness.

If you like fresh no-cook sides, this pairs well with MasalaMonk’s cucumber salad recipe. That one leans lighter and tangier, while this chickpea version is more filling.

Herbs That Make Chickpea Salad Taste Fresher

Parsley is the most classic choice, but mint, dill, and cilantro all work. For a Mediterranean-style salad, pair parsley with mint. For a cooler, brighter bowl, add dill. If you want the recipe to lean closer to Indian chana salad, go with cilantro, cumin, and chili.

Be generous with the herbs. Chickpeas are dense, so a small sprinkle can disappear in the bowl.

Herb comparison board for chickpea salad showing parsley, mint, dill, and cilantro with flavor notes.
Herbs can shift the whole direction of a chickpea salad, so parsley keeps it classic, mint makes it brighter, dill makes it cooler, and cilantro pushes it toward a chana-style version.

Optional Add-Ins for This Recipe

Olives, feta, roasted red pepper, avocado, and paneer all work, but they change the salad in different ways. Olives and feta make it more Mediterranean. Avocado makes it creamy. Paneer adds a firmer vegetarian protein option. Roasted red pepper brings sweetness and color.

If you are making this recipe ahead, add avocado just before serving. It tastes great with chickpeas, but it browns and softens quickly once mixed into the salad.

Guide to optional add-ins for chickpea salad including feta, olives, avocado, paneer, and roasted red pepper.
Once the base tastes balanced, add-ins can change the whole mood: feta and olives make it more Mediterranean, avocado makes it creamier, and paneer makes it more filling.

Easy Substitutions

This salad is flexible, so you do not need every optional ingredient. As long as you keep the chickpeas, something crisp, something juicy, enough herbs, and a bright dressing, the recipe still works. Then you can adjust with what you have.

If you do not have… Use this instead
Cherry tomatoes Diced regular tomatoes, drained if they are very juicy
English or Persian cucumber Regular cucumber, peeled if the skin is tough and seeded if watery
Red onion Shallots, green onion, or white onion soaked in cold water for 10 minutes
Fresh lemon Red wine vinegar or apple cider vinegar, added to taste
Dijon mustard A small spoon of regular mustard, or skip it and whisk the dressing well
Parsley Mint, dill, cilantro, or a mix of fresh herbs
Feta Paneer, avocado, olives, toasted seeds, or simply leave it out
Substitutions guide for chickpea salad showing ingredient swaps for tomatoes, cucumber, onion, lemon, mustard, herbs, and feta.
Missing one ingredient should not stop the recipe, because a good chickpea salad still works when you keep the same balance of chickpeas, crunch, herbs, acidity, and seasoning.

The Lemon Dressing That Makes the Salad Work

The dressing should taste bright, salty, and slightly sharp before it touches the chickpeas. Once everything is tossed together, the chickpeas, cucumber, and tomatoes soften that intensity, so the dressing needs enough lemon, garlic, mustard, and salt to season the whole salad.

Dressing ratio guide for chickpea salad showing bright, balanced, softer, and creamy lemon dressing options.
A small change in oil, lemon, or creamy binder can shift the whole bowl, so this dressing guide helps you choose the best chickpea salad texture for bowls, meal prep, wraps, or sandwiches.

Balanced Lemon Dressing

For the main recipe, use ¼ cup / 60 ml olive oil and 3 tablespoons / 45 ml fresh lemon juice. Add Dijon mustard, garlic, salt, black pepper, and either cumin or oregano. This gives the salad a balanced flavor without making it oily or sour.

A Brighter Lemon Dressing

If your chickpeas taste a little flat or your vegetables are very juicy, use equal parts olive oil and lemon juice. This sharper version works well for summer salads, cucumber-heavy bowls, and versions served with pita or grilled foods.

Creamy Dressing for Chickpeas and Sandwiches

When the recipe is going toward wraps or sandwiches, add 2 tablespoons of tahini, Greek yogurt, hummus, vegan mayo, or mashed avocado. A creamy dressing helps the chickpeas hold together instead of rolling out of the bread.

Indian-Style Lemon Dressing

For a chana salad variation, use lemon juice, olive oil, roasted cumin powder, black pepper, chopped cilantro, chili flakes or green chili, and salt. A tiny pinch of chaat masala can work if you want a sharper snack-style flavor, but keep it light so it does not overpower the chickpeas.

Bright, Balanced, and Creamy Dressing Guide

Dressing style Olive oil Lemon or vinegar Best for
Bright and tangy 3 tbsp / 45 ml 3 tbsp / 45 ml Summer salad, cucumber-heavy versions
Balanced ¼ cup / 60 ml 3 tbsp / 45 ml Main recipe
Softer meal-prep ¼ cup / 60 ml 2 tbsp / 30 ml Fridge-friendly version
Creamy 3 tbsp / 45 ml 2 tbsp / 30 ml plus 2 tbsp tahini, yogurt, hummus, or vegan mayo Sandwiches, wraps, and bowls
Comparison board showing bright, balanced, and creamy dressing styles for chickpea salad with short notes about each style.
Choose a brighter dressing when you want a sharper summer salad, a balanced dressing for the classic version, and a creamy dressing when the chickpea salad is headed for wraps or sandwiches.

Equipment You Need

You do not need special equipment for this salad. A colander, cutting board, sharp knife, large mixing bowl, small bowl or jar for the dressing, and a spoon or spatula are enough. For the sandwich version, keep a fork or potato masher nearby so you can lightly smash the chickpeas.

Equipment board for chickpea salad showing a colander, knife, cutting board, mixing bowl, dressing jar, spoon or spatula, and fork or masher.
This chickpea salad recipe stays practical because it only needs a few everyday tools, so you can make it easily without special equipment or unnecessary cleanup.

How to Make Chickpea Salad

Because this is a no-cook recipe, making the salad is mostly about dressing the chickpeas well, chopping the vegetables, tossing gently, and tasting at the end.

  1. Make the dressing first. Whisk olive oil, lemon juice, Dijon, garlic, salt, pepper, and cumin or oregano in a large bowl. You can also shake it in a jar.
  2. Drain, rinse, and dry the chickpeas. Let them sit in a colander for a minute, then pat them lightly with a clean towel if they still look wet. Drier chickpeas hold the lemon dressing better and keep the salad from turning watery.
  3. Chop the vegetables. Dice the cucumber, halve the tomatoes, and finely chop the onion or shallot.
  4. Add everything to the bowl. Add chickpeas, vegetables, herbs, and sturdy add-ins to the dressing.
  5. Toss gently. Coat everything without crushing the chickpeas.
  6. Rest briefly. Let the salad sit for 10 minutes if you have time.
  7. Check the bowl. The chickpeas should look lightly glossy, not oily, and the salad should taste bright before it tastes salty.
  8. Taste and adjust. Add more lemon, salt, pepper, herbs, or olive oil as needed.
Step-by-step board showing how to make chickpea salad by whisking dressing, drying chickpeas, chopping vegetables, combining, tossing, and adjusting seasoning.
The method matters more than it first seems: whisk the dressing first, dry the chickpeas well, toss gently, and then taste again so the salad stays bright instead of bland or watery.
Avoid bland chickpeas: rinse them well, season the dressing boldly, and let the salad rest for 10 minutes before judging the flavor.
Avoid a watery salad: drain the chickpeas well, dry them if needed, do not over-salt cucumber and tomatoes too early, and add avocado only when you are close to serving.

Dry the Chickpeas Before Making Salad

Close-up of rinsed chickpeas being patted dry with a clean towel before making chickpea salad.
Drying the chickpeas is one of the easiest upgrades because it helps the dressing cling better and, in turn, keeps the chickpea salad from turning loose or watered down.

Recipe Card

Chickpea Salad Recipe

A 15-minute no-cook salad made with chickpeas, cucumber, tomatoes, herbs, and lemon dressing. Serve it whole as a fresh salad bowl, lightly mashed in wraps or pita, or smashed into a creamy chickpea salad sandwich filling.

Prep Time15 minutes
Cook Time0 minutes
Total Time15 minutes
Servings4 main or 6 side servings

Optional rest time: 10 minutes
Course: Salad, Lunch, Side Dish
Cuisine: Mediterranean-inspired
Diet: Vegetarian; vegan if feta or paneer is omitted

Ingredients

Salad

  • 2 cans chickpeas, 15 oz / 425 g each, or two 400 g cans, drained and rinsed
  • Or use about 3 cups / 480–500 g cooked chickpeas
  • 1 large English cucumber or 3 Persian cucumbers, diced
  • 2 cups cherry or grape tomatoes, halved
  • 1 small red onion or 2 shallots, finely chopped
  • ½ cup olives, sliced, optional
  • ½ cup roasted red pepper, chopped, optional
  • ¾–1 cup chopped fresh herbs: parsley, mint, dill, cilantro, or a mix
  • ½ cup feta or paneer cubes, optional
  • 1 avocado, diced, optional and best added just before serving

Lemon Dressing

  • ¼ cup / 60 ml extra-virgin olive oil
  • 3 tbsp / 45 ml fresh lemon juice
  • 1 tsp Dijon mustard
  • 1 garlic clove, grated or minced
  • ½ tsp fine salt, plus more to taste
  • ½ tsp black pepper
  • ½ tsp ground cumin or dried oregano
  • ½–1 tsp sumac or lemon zest, optional
  • Pinch chili flakes or Aleppo pepper, optional

Instructions

  1. Whisk olive oil, lemon juice, Dijon mustard, garlic, salt, pepper, cumin or oregano, and sumac or lemon zest if using in a large bowl.
  2. Drain and rinse the chickpeas well. Let them sit in a colander for a minute, then pat dry if needed so the salad does not turn watery.
  3. Add chickpeas, cucumber, tomatoes, onion, olives, roasted red pepper, and herbs to the dressing. Toss gently.
  4. Add feta, paneer, or avocado only if serving soon.
  5. Let the salad rest for 10 minutes if possible.
  6. Taste and adjust with more lemon, salt, pepper, herbs, or olive oil.
  7. Serve cold or at room temperature as a salad, side dish, wrap filling, pita filling, or sandwich base.

Notes

  • For the cleanest flavor, rinse canned chickpeas well and let them drain before mixing.
  • If the chickpeas still look wet after draining, pat them lightly with a clean towel before mixing.
  • For a vegan version, skip feta and paneer. Use olives, avocado, roasted pepper, tahini, or extra herbs for richness.
  • For sandwiches, mash 60–70% of the chickpeas and add 2–4 tablespoons of a creamy binder.
  • For meal prep, add avocado, crispy chickpeas, and delicate herbs right before serving.
  • If using dried chickpeas, cook them until tender and use about 3 cups / 480–500 g cooked chickpeas.
Recipe card graphic for chickpea salad with prep time, servings, core ingredients, method steps, and storage note.
Keep this recipe card handy when you need the short version: drain and dry the chickpeas, whisk the lemon dressing, toss gently, rest briefly, and adjust before serving.

Why This Recipe Works

The salad works because chickpeas make it filling without any cooking, while cucumber, tomatoes, onion, herbs, and lemon keep it fresh. The dressing is bright enough to season the chickpeas properly, and the same base can stay whole for bowls, lightly mashed for wraps, or smashed for sandwiches.

Whole, Lightly Mashed, or Smashed Chickpeas?

A small change in texture changes how you can use the salad. Whole chickpeas make the best fresh bowl. Lightly mashed chickpeas help the salad sit better in wraps or pita. Smashed chickpeas turn the same ingredients into a sandwich filling that holds together instead of rolling out of the bread.

Texture What to do Best use
Whole chickpeas Toss gently and do not mash Fresh salad bowls and side salads
Lightly mashed Press ¼–⅓ of the chickpeas Wraps, pita pockets, and lunch bowls
Smashed Mash 60–70% of the chickpeas Chickpea salad sandwiches
Creamy Mash deeply and add mayo, yogurt, tahini, hummus, or avocado Vegan tuna-style chickpea salad
Texture comparison board showing whole chickpeas, lightly mashed chickpeas, and smashed chickpeas with suggested uses.
Texture changes how the recipe works, so whole chickpeas suit salad bowls, lightly mashed chickpeas hold better in wraps, and smashed chickpeas make the most reliable sandwich filling.
Need the base recipe? Jump to recipe card · Main method · Recipe guide

Mediterranean-Style Chickpea Salad

To make this recipe more Mediterranean, add olives, feta, roasted red pepper, parsley, mint, oregano, and extra lemon. Keep the cucumber, tomato, and red onion because they give the salad the fresh chopped texture that works so well with chickpeas.

This version is especially good with pita, hummus, grilled vegetables, rice bowls, roasted chicken, fish, or a simple soup. If you like herb-heavy Mediterranean salads, it also sits well next to MasalaMonk’s tabbouleh recipe, especially when serving pita, hummus, grilled vegetables, or mezze-style plates.

Mediterranean chickpea salad with feta, olives, roasted red pepper, cucumber, tomatoes, herbs, and lemon.
For a Mediterranean chickpea salad, feta, olives, roasted red pepper, and extra herbs deepen the flavor while still keeping the recipe fresh, colorful, and easy to serve.

Turn This Recipe Into a Chickpea Salad Sandwich

For a sandwich, mash most of the chickpeas and add a creamy binder. Greek yogurt, vegan mayo, tahini, hummus, mashed avocado, or a mix of mayo and yogurt all work. Then add something crunchy, such as celery, cucumber, onion, radish, or pickles.

Toasted bread, pita, wraps, and lettuce cups all work. If you are packing lunch, store the filling separately and assemble the sandwich later so the bread stays firm. This is also a useful plant-based alternative when you want a creamy, tangy sandwich filling. For a non-vegetarian comparison, see MasalaMonk’s chicken salad sandwich recipe.

Sandwich formula: 2 cups chickpea salad + 2–4 tbsp creamy binder + ¼ cup crunchy vegetables + lemon, mustard, herbs, salt, and pepper to taste.

If you want a cooler, yogurt-based sauce for wraps or pita, MasalaMonk’s Greek tzatziki sauce recipe is a natural fit with cucumber, herbs, chickpeas, and toasted bread.

Toasted chickpea salad sandwich cut in half, showing a thick filling of mashed chickpeas, vegetables, and herbs.
Turning chickpea salad into a sandwich works best when you mash more of the chickpeas, because the filling becomes thicker, creamier, and much easier to hold together.
Need the base recipe? Jump to recipe card · Main method · Recipe guide

Chickpea Tuna Salad and Vegan Tuna-Style Version

This base can move in two directions. To make a real chickpea tuna salad, add drained tuna, celery, lemon, herbs, and a little Greek yogurt or mayo. If you want a vegan tuna-style version, skip the tuna, mash the chickpeas more deeply, and add celery, lemon, pickles or capers, herbs, and a creamy binder such as vegan mayo, tahini, hummus, or avocado.

A more sea-like vegan flavor can come from finely crushed nori or a tiny pinch of kelp flakes. Keep it optional; the mashed chickpea version still works as a creamy salad filling without any sea flavor.

Comparison board showing chickpea tuna salad on one side and vegan tuna-style chickpea salad on the other.
For a chickpea tuna salad, add real tuna for a chunkier, savory version; for a vegan tuna-style salad, mash the chickpeas more and use capers, pickles, or nori for extra depth.
Need the base recipe? Jump to recipe card · Main method · Recipe guide

Meal Prep and Storage for This Salad

Chickpea salad is good for meal prep because chickpeas hold their shape better than leafy greens, so the salad stays useful for lunches over several days. However, a few ingredients are better added fresh. For example, avocado browns, crispy chickpeas soften, and delicate herbs taste brighter when added closer to serving.

Storage guide for chickpea salad with airtight containers, meal-prep jars, dressing jar, and notes about keeping avocado and crunchy toppings separate.
Chickpea salad is meal-prep friendly; however, it stores best when avocado, crispy toppings, and delicate herbs are added later instead of being mixed in too early.
Need the base recipe? Jump to recipe card · Main method · Recipe guide

For the best make-ahead version, store the base salad without avocado and add delicate toppings just before serving. If you are making lunch jars, put the dressing at the bottom, then chickpeas and firmer vegetables, then herbs or greens near the top.

If you are making the salad more than a few hours ahead, keep some of the herbs fresh for serving and go lighter on the salt at first. Salt draws water from cucumber and tomatoes, so a final pinch right before serving keeps the salad fresher.

How to Store This Recipe Without Making the Salad Watery

Drain and dry the chickpeas well, avoid over-salting watery vegetables too early, and keep avocado or crispy toppings separate. If the salad sits overnight, refresh it with a little lemon juice, olive oil, and fresh herbs before serving.

Infographic showing tips to keep chickpea salad from getting watery, including drying chickpeas, salting vegetables later, and adding avocado fresh.
If your chickpea salad turns watery, the fix usually starts earlier: dry the chickpeas well, salt juicy vegetables later, and add avocado or crunchy toppings closer to serving time.
Version Fridge life Best method
Plain chickpea salad, no avocado 3–4 days Store in an airtight container
With avocado Same day best Add avocado fresh just before serving
With feta or paneer 2–3 days best Add fresh if you want the cleanest texture
Dressing mixed in 2–3 days best texture Stir before serving and refresh with lemon or herbs
Dressing only 7–10 days Keep in a sealed jar in the fridge
Sandwich filling 3–4 days Store filling separately from bread
Crispy chickpeas Same day best Keep separate and add just before eating
Meal-prep jars 4–5 days Dressing bottom, chickpeas and vegetables middle, herbs top

Recipe Variations with Chickpeas

Once the base recipe is balanced, the same chickpeas can move in several salad directions. Keep lemon, salt, and herbs as the anchor, then change the add-ins based on how you want to serve it.

Lunch, Meal Prep, and Sandwich Versions

If you want… Make this version What to add
A dairy-free lunch Vegan chickpea salad Avocado, olives, roasted red pepper, extra herbs, toasted seeds, or tahini dressing
A more filling meal High-protein salad with chickpeas Quinoa, tofu, paneer, boiled eggs, Greek yogurt dressing, feta, grilled chicken, or extra chickpeas
A lunchbox or picnic salad Meal-prep chickpea salad Keep avocado and crispy toppings separate, use a slightly softer dressing, and add fresh herbs before serving
A sandwich filling Smashed chickpea salad Mash most of the chickpeas and add yogurt, tahini, hummus, vegan mayo, or avocado
A creamier bowl or wrap Avocado chickpea salad Diced avocado added just before serving, or a little mashed avocado in the dressing
Variation guide for chickpea salad showing vegan, high-protein, meal-prep, smashed sandwich, and avocado versions.
The same base recipe can become a vegan lunch, higher-protein bowl, meal-prep container, smashed sandwich filling, or avocado chickpea salad with only a few targeted changes.
Need the base recipe? Jump to recipe card · Main method · All variations

For more ways to build filling vegetarian bowls around legumes, grains, and seeds, see MasalaMonk’s guide to plant-based protein sources for high-protein meal prep.

Fresh, Crunchy, and Bigger-Flavor Versions

If you want… Make this version What to add
A clean summer side Cucumber tomato chickpea salad Extra cucumber, tomatoes, red onion, parsley, lemon, olive oil, salt, and pepper
A saltier Mediterranean side Feta chickpea salad Feta, olives, oregano, and lemon zest; taste before adding extra salt
A crunchy topping Crispy chickpea salad Add roasted or air-fried chickpeas right before serving so they stay crisp
A meal-prep grain bowl Quinoa chickpea salad Cooked and cooled quinoa plus extra dressing because grains absorb liquid
A pasta salad direction Orzo chickpea salad Cooked and cooled orzo, cucumber, tomato, herbs, feta, and extra lemon dressing
An earthy, colorful bowl Beetroot chickpea salad Cooked and cooled beetroot, feta or paneer, cumin, herbs, lemon, and red onion
An Indian-style side Indian chana salad Use kabuli chana for the closest chickpea salad texture, or kala chana for a firmer, earthier Indian-style version with cilantro, lemon, cumin, chili, onion, cucumber, and tomato
Second variation guide for chickpea salad showing cucumber tomato, feta, crispy chickpea, quinoa, orzo, beetroot, and Indian chana versions.
For more variety, the chickpea salad can turn crisp with cucumber and tomato, salty with feta, hearty with quinoa or orzo, earthy with beetroot, or spicier as Indian chana salad.
Need the base recipe? Jump to recipe card · Main method · All variations

Crispy Chickpeas for Salad

For crispy chickpeas, dry the drained chickpeas very well, toss them with a little oil, salt, cumin, paprika, or garlic powder, and roast at 425°F / 220°C for about 20–30 minutes, shaking the pan once or twice. Add them to the salad right before serving so they stay crisp.

Roasted crispy chickpeas on a sheet pan with seasonings and notes about oven temperature, roasting time, and serving.
Crispy chickpeas add the most texture when they are roasted until dry and added right before serving, so they stay crunchy instead of softening in the salad.

Troubleshooting This Salad

Because this recipe is not cooked, most chickpea salad problems can be fixed before serving. If the chickpeas taste bland, watery, sour, or dry, adjust the dressing first. Then give the salad a few minutes to settle before judging it again.

Problem Likely cause Fix
Salad tastes bland Not enough salt, acid, or herbs Add salt first, then lemon, then more herbs
Salad is watery Chickpeas or vegetables were too wet Drain and dry chickpeas well, and add tomatoes closer to serving
Chickpeas taste canned They were not rinsed well or not seasoned enough Rinse thoroughly and let them sit in dressing for 10 minutes
Onion is too sharp Raw onion is too strong Soak chopped onion in cold water for 10 minutes, then drain
Salad is too sour Too much lemon or vinegar Add olive oil, chickpeas, avocado, or feta to soften it
Salad is too dry Chickpeas absorbed the dressing Add a splash of olive oil and lemon juice before serving
Avocado browned It was added too early Add avocado fresh, or toss it with lemon before mixing
Sandwich filling is too loose Too much dressing or not enough mashing Mash more chickpeas and add a thicker binder
Crispy chickpeas went soft They sat in the wet salad Keep them separate and add just before eating
Troubleshooting guide for chickpea salad showing common problems such as bland, watery, too sour, too dry, sharp onion, and loose sandwich filling with quick fixes.
Before starting over, fix the bowl: bland salad usually needs salt, lemon, and herbs; watery salad needs better draining; and loose sandwich filling needs more mashed chickpeas.

What to Serve with Chickpea Salad

Serve chickpea salad with pita, hummus, grilled vegetables, rice, quinoa, soup, roasted potatoes, grilled chicken, fish, or paneer. It also works inside wraps, lettuce cups, toasted sandwiches, or meal-prep bowls. To make a fuller chickpea-based mezze plate, add MasalaMonk’s falafel recipe on the side.

A lighter plate can be as simple as cucumber salad, tomato soup, or a green salad. For a sharper Middle Eastern-style plate, serve it with pita and a spoon of MasalaMonk’s amba sauce recipe for a tangy mango-chili contrast.

Serving ideas board for chickpea salad with pita, hummus, falafel, soup, rice or quinoa, wraps, grilled vegetables, and paneer, chicken, or fish.
Chickpea salad becomes a fuller meal more easily when you pair it with pita, hummus, soup, falafel, grains, or grilled vegetables, rather than serving it as a plain side alone.

Chickpea Salad Mezze Plate

Chickpea salad served as part of a mezze plate with pita, hummus, falafel, olives, tomatoes, and lemon.
Serving chickpea salad as part of a mezze plate adds variety and makes the recipe more useful for lunch or dinner, especially when paired with hummus, pita, and falafel.

Final Serving Texture

Close-up serving image of chickpea salad in a bowl with cucumber, tomatoes, herbs, and a spoon lifting a portion.
A final serving image highlights the texture that makes this recipe work so well: chickpeas stay distinct, vegetables stay crisp, and the dressing coats the salad without drowning it.
Ready to make it? Jump to recipe card · Main method · Recipe guide

FAQs About This Recipe

Are chickpeas and garbanzo beans the same?

Chickpeas and garbanzo beans are the same ingredient. “Chickpea” is more common in many recipe titles, while “garbanzo bean” often appears on cans and packaging. Use either one for this salad.

What kind of chickpeas work best for this salad?

Canned chickpeas are the easiest choice because they are already cooked and ready to use. Drain and rinse them well, then let them sit in a colander for a minute so extra water does not dilute the dressing.

Do canned chickpeas need to be cooked first?

No cooking is needed. Canned chickpeas are already cooked, so this recipe only needs draining, rinsing, chopping, dressing, and tossing.

How long does this chickpea salad recipe last in the fridge?

This chickpea salad recipe keeps well for about 3–4 days without avocado. Store it in an airtight container, then add avocado, crispy chickpeas, or delicate herbs closer to serving for the best texture.

How do you keep chickpea salad from getting watery?

Drain and dry the chickpeas well, use tomatoes that are not overly watery, and go lighter on salt if you are making the salad ahead. Salt pulls moisture from cucumber and tomatoes, so a final pinch before serving keeps the salad fresher.

Is this chickpea salad vegan?

The base salad is vegan when you skip feta, paneer, yogurt, and any dairy-based creamy add-ins. For richness, use olives, avocado, tahini, hummus, vegan mayo, roasted red pepper, toasted seeds, or extra herbs.

Is chickpea salad healthy?

Chickpea salad can be a nourishing meal or side because chickpeas provide plant-based protein and fiber, while the vegetables and herbs add freshness. Keep the dressing balanced and use richer add-ins like feta, paneer, avocado, or creamy binders according to how filling you want the salad to be. For more general chickpea nutrition background, see the Harvard Nutrition Source guide to chickpeas.

What can I use instead of lemon juice?

Red wine vinegar or apple cider vinegar can replace lemon juice. However, start with a little less than the recipe calls for, then taste and add more only if the salad needs extra brightness.

How do I make chickpea salad without mayo?

The base salad uses lemon and olive oil dressing, so it does not need mayo. For a creamy no-mayo version, use tahini, hummus, Greek yogurt, or mashed avocado.

How do I turn this into chickpea salad sandwiches?

Mash 60–70% of the chickpeas, add 2–4 tablespoons of a creamy binder, and keep the filling thick. Toasted bread, pita, wraps, and lettuce cups all work, but the filling should be stored separately from bread until serving.

What goes well with chickpea salad?

Pita, hummus, grilled vegetables, soup, rice, quinoa, roasted potatoes, paneer, grilled chicken, fish, and simple green salads all pair well with chickpea salad. It also works inside wraps, lettuce cups, and meal-prep bowls.

How can I make the salad higher in protein?

Add quinoa, paneer, tofu, boiled eggs, Greek yogurt dressing, feta, grilled chicken, or extra chickpeas. For a vegan version, use tofu, quinoa, hummus, tahini, seeds, or another legume.

Should you freeze chickpea salad?

Freezing is not worth it for this recipe. Cucumber, tomatoes, herbs, and dressing lose their fresh texture after thawing. If you want to prep ahead, freeze cooked chickpeas separately and make the salad fresh.

Posted on 1 Comment

Tabbouleh Recipe: Fresh Lebanese Tabouli Salad with Bulgur

A dark bowl of parsley-heavy tabbouleh with tomato pieces, mint, lemon wedges, romaine leaves, and a small amount of fine bulgur.

This tabbouleh recipe is fresh, lemony, parsley-heavy, and built around the detail that matters most: tabbouleh should taste like a chopped herb salad, not a bowl of bulgur with a few herbs mixed in.

Also spelled tabouli, this Lebanese-style salad is made with finely chopped parsley, tomato, mint, green onion, fine bulgur, lemon juice, olive oil, salt, and pepper. Although the bulgur adds texture, parsley is the star.

To keep the recipe no-cook, the method below soaks fine bulgur directly in the lemon-olive oil dressing while you chop the herbs. As a result, the bulgur gets more flavor, the salad stays bright, and you avoid the watery, grain-heavy tabbouleh that often happens at home.

Table of Contents

Use this guide to make fresh tabbouleh, choose the right bulgur, keep it from turning watery, and adapt it for quinoa, cauliflower, or couscous versions.

Quick Answer: What Is Tabbouleh?

Tabbouleh is a fresh Middle Eastern parsley salad made with finely chopped parsley, tomato, mint, green onion, fine bulgur wheat, lemon juice, olive oil, salt, and pepper. In a good tabbouleh recipe, the herbs should lead and the bulgur should support.

Classic tabbouleh is usually served as part of a mezze spread with pita, hummus, falafel, grilled meats, or lettuce leaves. It is naturally vegan and dairy-free, though it is not gluten-free because bulgur is made from wheat.

Quick ratio: For a parsley-first tabbouleh, use about 3 packed cups finely chopped parsley with only 1/3 cup fine bulgur. That keeps the salad fresh and herb-heavy instead of turning it into a grain salad.

Tabbouleh Recipe at a Glance

This tabbouleh recipe is built for a fresh, parsley-heavy texture with fine bulgur, bright lemon dressing, and no cooking required when you use the right grain.

Best bulgur Fine #1 bulgur wheat
Cook time 0 minutes for fine bulgur
Total time About 40 minutes
Yield 6 servings, about 5–6 cups
Flavor Fresh, lemony, herb-heavy, lightly juicy
Best texture Finely chopped herbs, tender bulgur, no puddle of dressing
Make-ahead Best same day; leftovers keep 2–3 days
A tabbouleh recipe overview graphic with a finished salad, parsley, lemon, fine bulgur, and text showing no-cook method, 40 minutes, 6 servings, and parsley-first.
This tabbouleh recipe uses fine bulgur, needs no cooking, and takes about 40 minutes. The main texture goal is simple: plenty of parsley with just enough bulgur to support it.

Tabbouleh vs Tabouli: Same Salad, Different Spelling

Tabbouleh and tabouli usually refer to the same salad. The spelling changes because the Arabic word is transliterated into English in different ways.

You may see it written as tabbouleh, tabouli, tabouleh, tabouli salad, or tabbouleh salad. The spellings vary by region, family tradition, and how the Arabic word is transliterated into English.

Here, the salad follows a Lebanese-style direction: finely chopped parsley, tomato, mint, green onion, fine bulgur, lemon juice, and olive oil.

A spelling comparison graphic showing one bowl of tabbouleh labeled with both “Tabbouleh” and “Tabouli.”
Tabbouleh and tabouli usually mean the same salad. The spelling changes, but the base stays familiar: parsley, tomato, mint, fine bulgur, lemon juice, and olive oil.

Why This Tabbouleh Recipe Works

Homemade tabbouleh usually goes wrong in a few predictable ways: too much bulgur, wet herbs, bland dressing, hard grains, or a watery bowl after 20 minutes. To avoid those problems, this version uses a parsley-first ratio, fine bulgur, careful draining, and a simple dressing that seasons the grain as it softens.

  • It is parsley-first. The salad tastes fresh and green, not heavy or grainy.
  • Fine bulgur keeps it no-cook. Fine #1 bulgur softens in lemon juice and olive oil while you chop the herbs.
  • The tomatoes are drained if needed. That keeps the salad juicy without turning soupy.
  • The dressing is simple. Lemon juice, olive oil, salt, and pepper are enough when the herbs are fresh.
  • The amounts are precise. Cups, grams, and milliliters are included so the parsley-to-bulgur balance stays right.

Best Parsley-to-Bulgur Ratio for Tabbouleh

The easiest way to keep tabbouleh fresh is to use a lot of parsley and only a small amount of bulgur. The bulgur should soften the bite and absorb flavor, but it should not make the salad heavy.

Style Parsley Bulgur Result
Parsley-heavy Lebanese-style 3 packed cups 1/4 to 1/3 cup fine bulgur Fresh, green, herb-led tabbouleh
Balanced everyday style 3 packed cups 1/2 cup fine bulgur Still fresh, but slightly more filling
Grain-heavy style 2–3 cups 3/4 cup or more More like bulgur salad than classic tabbouleh
A ratio comparison graphic with three tabbouleh bowls showing parsley-heavy, balanced, and grain-heavy versions.
For a Lebanese-style tabbouleh ratio, start with about 3 packed cups of chopped parsley and only ¼ to ⅓ cup fine bulgur. More bulgur makes the salad heavier and less herb-led.

Tabbouleh Ingredients

For tabbouleh, this recipe keeps the ingredient list simple but pays close attention to texture: dry herbs, firm tomatoes, fine bulgur, fresh lemon, and enough olive oil to round everything out.

A dark ingredient board with parsley, mint, tomatoes, green onions, fine bulgur, lemon, olive oil, salt, pepper, and optional cucumber for tabbouleh.
The best tabbouleh ingredients are simple, but prep matters. Dry the herbs, use firm tomatoes, choose fine bulgur, and rely on fresh lemon juice rather than bottled citrus.

Parsley

Because parsley is the main ingredient, its texture matters. You can use curly parsley or flat-leaf parsley, but the leaves need to be very dry before chopping. Wet parsley is one of the main reasons tabbouleh becomes watery.

Chop the parsley finely with a sharp knife. A food processor can bruise the herbs and turn them wet or pasty if you overdo it.

Tomatoes

Use firm Roma tomatoes or another firm, meaty tomato. Chop them small, then drain off extra liquid if they are very juicy. You want tomato freshness, not a pool of tomato water at the bottom of the bowl.

Mint

Fresh mint gives tabbouleh its cooling lift. Do not use dried mint as a full replacement here; it will not give the same fresh, bright finish.

Green Onions or Scallions

Green onions add mild onion flavor without overpowering the herbs. Slice them finely so they disappear into the salad rather than standing out in large pieces.

Fine Bulgur

Fine #1 bulgur is best for Lebanese-style tabbouleh. It softens quickly and blends into the herbs without making the salad feel heavy.

Lemon Juice and Olive Oil

Fresh lemon juice gives tabbouleh its sharp, clean brightness. Extra-virgin olive oil rounds out the dressing and helps soften the bulgur. Bottled lemon juice is not ideal because the salad depends on a fresh citrus flavor.

Cucumber, Optional

Cucumber is optional. It adds crunch and freshness, especially in modern tabouli salad versions, but the salad still works beautifully without it. If you use cucumber, dice it small and drain it if it is watery.

If cucumber is the part you love most, you may also like this crisp cucumber salad recipe with vinegar, dill, and onion.

Tabbouleh Dressing

In this tabbouleh recipe, the dressing is simple: fresh lemon juice, extra-virgin olive oil, salt, and black pepper. It should lightly coat the herbs, season the tomatoes, and soften the fine bulgur without drowning the salad.

Lemon juice and olive oil being whisked into a tabbouleh dressing with salt, pepper, lemon halves, and fine bulgur nearby.
Tabbouleh dressing is not a thick vinaigrette. Lemon juice, olive oil, salt, and pepper should lightly coat the herbs and help fine bulgur soften without drowning the salad.

Here, the fine bulgur sits in the lemon-olive oil dressing while you chop the parsley, mint, tomatoes, and green onions. That gives the bulgur better flavor than soaking it in plain water.

Once the salad rests, taste before adding anything else. A pinch of salt usually fixes flat flavor, extra lemon brings brightness, and a small drizzle of olive oil softens a sharp edge.

Best Bulgur for Tabbouleh

The best bulgur for tabbouleh is fine #1 bulgur. It is small enough to soften without boiling and delicate enough to stay in the background. That matters because tabbouleh should taste like a fresh herb salad, not a bulgur bowl.

Bulgur is wheat that has already been parboiled, dried, cracked, and sorted by size. That is why fine bulgur can soften quickly in dressing instead of needing a full boil. For more background, see the Whole Grains Council guide to bulgur and freekeh.

If your bulgur is medium or coarse, you can still use it, but the texture will be different and it usually needs hot water before mixing.

Bulgur or Swap Best For How to Prepare It
Extra-fine / #1 bulgur Best choice for Lebanese-style tabbouleh Soak in the lemon-olive oil dressing for 20–30 minutes. No cooking needed.
Fine bulgur Good everyday choice Soak until tender. Drain if you use water.
Medium bulgur Usable, but less delicate Soak in hot water, drain well, and cool before mixing.
Coarse bulgur More of a grain-salad texture Cook or hot-soak until tender, then cool completely. Use less than you would in a grain salad.
Cracked wheat Depends on grind and processing Usually needs longer soaking or cooking. Check texture before adding.
Quinoa Gluten-free tabbouleh variation Cook, cool completely, then mix with the herbs and dressing.
Cauliflower rice Grain-free variation Use raw or lightly salted and drained. Keep the pieces small and dry.
Couscous Quick variation, not classic tabbouleh Steam or soak, fluff, cool completely, then mix.
A bulgur comparison graphic showing fine, medium, and coarse bulgur, with fine bulgur marked as the best choice for tabbouleh.
Fine #1 bulgur is best for tabbouleh because it softens quickly and stays delicate. Medium or coarse bulgur can work, but it usually needs hot soaking and gives a heavier texture.
Do not overuse bulgur. If you add too much, the salad shifts from tabbouleh into a bulgur salad. For this recipe, 1/3 cup fine bulgur is enough for 6 servings.

What If You Only Have Medium or Coarse Bulgur?

If you only have medium or coarse bulgur, you can still make tabbouleh, but the texture will be less delicate. Put the medium or coarse bulgur in a bowl, cover it with hot water, and let it sit until tender. Drain it very well, press out excess moisture, and cool it completely before adding it to the herbs.

Use a smaller amount than you would in a grain salad. The goal is still a parsley-forward tabbouleh, not a heavy bulgur salad.

How to Buy Bulgur for Tabbouleh

When shopping, look for fine #1 bulgur, extra-fine bulgur, or fine burghul. It is often easier to find in Middle Eastern grocery stores, international aisles, or natural-food stores than in the regular grain aisle. If the package says it must be boiled, treat it like medium or coarse bulgur and cool it before mixing.

A shopping guide graphic with bags or jars labeled fine #1 bulgur, extra-fine bulgur, and fine burghul for tabbouleh.
When buying bulgur for tabbouleh, look for fine #1, extra-fine bulgur, or fine burghul. If the package says it must be boiled, treat it like a coarser grain.

Equipment You’ll Need

You do not need special equipment, but a few basic tools make a big difference in the final texture.

  • Sharp chef’s knife: for finely chopping parsley without bruising it.
  • Large cutting board: tabbouleh uses a lot of herbs, so space helps.
  • Salad spinner or clean towels: for drying parsley and mint thoroughly.
  • Large mixing bowl: gives you room to toss without crushing the herbs.
  • Small bowl or measuring jug: for the lemon-olive oil dressing.
  • Fine-mesh strainer or colander: useful for draining tomatoes, cucumber, or soaked bulgur.

How to Make Tabbouleh

Good tabbouleh is mostly about prep. Although the ingredients are simple, the herbs need to be dry, the chopping needs to be fine, and the bulgur needs enough time to soften.

A step-by-step tabbouleh method graphic showing washing herbs, soaking bulgur, chopping parsley, chopping vegetables, and tossing the salad.
The tabbouleh method is mostly about order: dry the herbs first, soak fine bulgur in dressing, chop everything small, toss gently, then rest before the final seasoning check.

Step 1: Wash and Dry the Herbs

Wash the parsley and mint, then dry them very well. A salad spinner is helpful, but you can also spread the herbs on clean towels and pat them dry.

This step matters because wet herbs dilute the dressing and make the salad watery faster.

Fresh parsley and mint being washed, drained, and dried on a towel and in a salad spinner before making tabbouleh.
Dry parsley and mint thoroughly before chopping. Even a little extra water on the herbs can dilute the lemon-olive oil dressing and make tabbouleh turn watery.

Step 2: Soak the Fine Bulgur in the Dressing

In a large mixing bowl, whisk together the lemon juice, 1/4 cup olive oil, salt, and pepper. Stir in the fine bulgur and let it sit for 20–30 minutes while you chop the herbs and vegetables.

The bulgur should soften but not become mushy. If it still tastes hard after resting, add 1 tablespoon of warm water or lemon juice, stir, and wait another 10 minutes.

Fine bulgur soaking in lemon and olive oil dressing in a dark bowl, with lemon and olive oil nearby.
Fine bulgur does not need boiling for this tabbouleh recipe. Let it sit in the lemon-olive oil dressing for 20–30 minutes so it becomes tender and better seasoned.

Step 3: Chop the Parsley Finely

Gather the dry parsley into small bunches and chop it finely with a sharp knife. You want small, even pieces, not large leaves and not a wet green paste.

Tender stems are fine if they are chopped very small. Thick stems should be removed.

A parsley chopping guide showing finely chopped parsley on a cutting board and an inset warning against overprocessed wet parsley.
Hand-chopped parsley gives tabbouleh a lighter texture. A food processor can work only if pulsed carefully, but overprocessing turns the herbs wet, dark, and pasty.

Step 4: Chop the Tomatoes, Mint, and Green Onions

Finely chop the tomatoes, mint, and green onions. If the tomatoes release a lot of juice, drain them briefly before adding them to the bowl. If using cucumber, dice it small and drain it too.

Finely chopped tomatoes, mint, and green onions arranged on a dark cutting board for tabbouleh.
Chop tomatoes, mint, and green onions small enough to blend into every bite. If the tomatoes are juicy, drain them before mixing so the salad stays fresh instead of soupy.

Step 5: Toss, Rest, and Adjust

Add the parsley, mint, tomatoes, green onions, and optional cucumber to the soaked bulgur. Toss gently until everything is evenly coated, but do not crush the herbs.

Let the tabbouleh rest for 10 minutes, then taste and adjust. Start with salt if the flavor feels flat, brighten it with lemon if needed, or round it out with a little olive oil if the salad tastes too sharp. Add the remaining olive oil only if the salad needs a softer finish.

Hands gently tossing parsley-heavy tabbouleh with a spoon in a dark bowl.
Once the herbs, tomatoes, and softened bulgur are combined, toss gently and let the salad rest for about 10 minutes. After that, adjust salt, lemon, or olive oil.

How to Keep Tabbouleh from Getting Watery

Watery tabbouleh usually comes from wet herbs, juicy tomatoes, too much dressing, or bulgur that has not been drained properly. The best fix is to control moisture before everything goes into the bowl.

Drain Juicy Tomatoes and Cucumber First

If your tomatoes or cucumber are very juicy, sprinkle them with a small pinch of salt and let them sit in a strainer for 10 minutes while you chop the herbs. After 10 minutes, drain the liquid before mixing. This keeps the salad fresh and juicy without creating a puddle at the bottom of the bowl.

A watery tabbouleh prevention graphic showing dry herbs, drained tomatoes, gradual dressing, and a finished bowl of tabbouleh.
Watery tabbouleh usually comes from wet herbs, juicy tomatoes, or too much dressing. Fix it before mixing by drying the herbs, draining the tomatoes, and adding dressing gradually.

Quick Fixes for Watery Tabbouleh

Problem Likely Cause Best Fix
Tabbouleh is watery Wet parsley, juicy tomatoes, or too much dressing Dry herbs thoroughly, drain tomatoes, and add dressing gradually.
Bulgur is hard Bulgur is too coarse or under-soaked Add 1–2 tablespoons warm water or lemon juice and rest 10–15 minutes.
Bulgur is soggy Too much soaking liquid Drain or blot if possible, then add more parsley, mint, or tomato.
Salad tastes flat Not enough salt or lemon Add salt first, then lemon juice in small amounts.
Salad tastes too sharp Too much lemon juice Add a little olive oil and extra tomato to round it out.
Parsley tastes harsh Pieces are too large or salad has not rested Chop finer next time and let the salad rest 10–20 minutes before serving.
Herbs look mushy Food processor overuse or wet herbs Chop by hand and dry herbs well before cutting.

What the Finished Tabbouleh Should Look Like

For the best texture, serve tabbouleh the same day it is made. Although it keeps well for a couple of days, the herbs soften as they sit.

Best texture target: The finished tabbouleh should be finely chopped, glossy, lemony, and lightly juicy, but there should not be a puddle of dressing at the bottom of the bowl.

Do not worry if the herbs darken slightly after dressing. Proper tabbouleh should look moist and glossy, not dry and fluffy. The warning sign is excess liquid pooling underneath, not a lightly dressed herb texture.

A tabbouleh texture guide comparing too dry, just right, and too watery versions of the salad.
Finished tabbouleh should be glossy and lightly juicy, not dry and not puddled. If liquid collects at the bottom, lift the salad out with a slotted spoon and drain juicier vegetables next time.

Authentic Lebanese-Style Tabbouleh Tips

Lebanese-style tabbouleh is usually much more herb-heavy than many restaurant or grocery-store versions. Parsley should be the main ingredient, while the bulgur should add texture in the background rather than making the salad feel like a grain bowl.

A Lebanese-style tabbouleh tips graphic showing a mostly green parsley-heavy bowl with lemon wedges and romaine leaves.
Lebanese-style tabbouleh is usually much more herb-led than many store-bought versions. Use fine bulgur sparingly so the salad stays light, fresh, and finely chopped.
  • Use more parsley than bulgur. A small amount of fine bulgur is enough to give texture without taking over.
  • Chop everything finely. The parsley, tomatoes, mint, and green onions should feel evenly mixed in every bite.
  • Use fine bulgur if possible. Fine #1 bulgur gives the most delicate texture and does not need boiling.
  • Keep cucumber optional. Cucumber is common in many modern tabouli salad versions, but the salad still works beautifully without it.
  • Serve it fresh. Tabbouleh can be stored, but the brightest flavor and best herb texture are usually the same day.
Texture cue: If the bowl looks mostly green with small flecks of tomato, mint, onion, and bulgur, you are close to a Lebanese-style tabbouleh texture. If it looks mostly grain-based, there is probably too much bulgur.
A comparison graphic with a green parsley-heavy tabbouleh bowl beside a beige grain-heavy bulgur salad bowl.
A parsley-heavy tabbouleh bowl looks green, fresh, and finely chopped. When the bowl looks beige or grain-led, the recipe has moved closer to bulgur salad.

Tabbouleh Recipe Card

Tabbouleh Recipe: Fresh Lebanese Tabouli Salad with Bulgur

This fresh tabbouleh recipe is parsley-first, lemony, and no-cook. Fine bulgur softens in the lemon-olive oil dressing while you chop the herbs, keeping the salad bright instead of watery.

Prep Time40 minutes
Cook Time0 minutes
Total Time40 minutes
Yield6 servings, about 5–6 cups

Ingredients

  • 1/3 cup fine #1 bulgur wheat, about 50g
  • 1/4 cup fresh lemon juice, 60ml
  • 1/4 to 1/3 cup extra-virgin olive oil, 60–80ml
  • 3/4 teaspoon fine salt, plus more to taste
  • 1/4 teaspoon black pepper
  • 3 packed cups finely chopped parsley, about 90–120g chopped leaves and tender stems
  • 2–3 firm Roma tomatoes, finely chopped and drained, about 250–300g
  • 3–4 green onions or scallions, finely chopped, about 45–60g
  • 1/4 to 1/3 cup finely chopped fresh mint, about 10–15g
  • 1 cup finely diced English cucumber, about 120–150g, optional
  • Romaine lettuce leaves, optional, for serving

Instructions

  1. Wash and dry the herbs. Wash the parsley and mint, then dry very well in a salad spinner or with clean kitchen towels.
  2. Soak the bulgur. In a large bowl, whisk lemon juice, 1/4 cup olive oil, salt, and pepper. Stir in the fine bulgur and let it sit for 20–30 minutes while you chop the herbs and vegetables.
  3. Chop the parsley. Finely chop the parsley by hand. Remove thick stems, but tender stems are fine if chopped small.
  4. Prepare the vegetables. Finely chop the tomatoes, green onions, mint, and optional cucumber. Drain tomatoes and cucumber if they release a lot of liquid.
  5. Mix the tabbouleh. Add the parsley, tomatoes, green onions, mint, and cucumber to the soaked bulgur. Toss gently until evenly combined.
  6. Rest and adjust. Let the salad rest for 10 minutes. Taste and adjust with more salt, lemon juice, or olive oil as needed. Use the remaining olive oil only if the salad needs a softer finish.
  7. Serve. Serve chilled or at room temperature, with romaine leaves, pita, hummus, falafel, or grilled dishes.

Notes

  • Fine #1 bulgur gives the best no-cook texture for tabbouleh.
  • If using medium or coarse bulgur, soak it separately in hot water, drain very well, and cool completely before mixing.
  • Dry the parsley thoroughly before chopping. Wet herbs make watery tabbouleh.
  • Drain juicy tomatoes and cucumber before adding them to the bowl.
  • For a stricter parsley-heavy version, skip the cucumber.
  • For gluten-free tabbouleh, use cooked and cooled quinoa or finely riced cauliflower instead of bulgur.
  • Best texture is the same day, but leftovers keep 2–3 days in the fridge.
A visual tabbouleh recipe card with a finished salad, 6 servings, 40 minutes, no-cook fine bulgur, key ingredients, and method steps.
This tabbouleh recipe card keeps the essentials together: 6 servings, about 40 minutes, no-cook fine bulgur, fresh herbs, lemon dressing, and a short rest before serving.

Make-Ahead and Storage

Although tabbouleh can be made ahead, it is best when the herbs still taste fresh and lively. If you want to prepare it early, wash and dry the herbs first, then chop and mix closer to serving.

For the freshest texture, keep the chopped herbs, drained tomatoes, and soaked bulgur separate until close to serving, then toss and adjust the seasoning. This is especially helpful if you are making tabbouleh for guests.

  • Best same day: Tabbouleh has the brightest texture and flavor within a few hours of mixing.
  • Best for guests: Mix the salad within 30–60 minutes of serving for the freshest herb texture.
  • Best for leftovers: Store dressed tabbouleh in an airtight container for 2–3 days, knowing the herbs will soften over time.
  • Make-ahead tip: Wash and dry parsley up to 1 day ahead. Keep it wrapped in towels in the fridge.
  • Do not freeze: The tomatoes and herbs turn limp and watery after thawing.
A make-ahead tabbouleh guide showing dried parsley, dried mint, drained tomatoes, fine bulgur soaked in dressing, and finished tabbouleh in a container.
For make-ahead tabbouleh, prep the herbs, tomatoes, and fine bulgur separately. Then mix close to serving and store leftovers in the fridge for 2–3 days.

If the salad tastes dull after sitting, refresh it with a small squeeze of lemon juice, a pinch of salt, and a drizzle of olive oil before serving. This brings back brightness without needing a full new batch of dressing.

What to Serve with Tabbouleh

Tabbouleh works as a salad, side dish, or part of a mezze spread. Its bright lemon and herb flavor makes it especially good beside richer dishes.

  • Hummus and warm pita
  • Falafel
  • Grilled chicken, kebabs, or kofta
  • Lentil soup
  • Stuffed pita wraps
  • Roasted eggplant or grilled vegetables
  • Romaine lettuce leaves for scooping
  • Rice bowls or grain bowls
A mezze spread with tabbouleh, pita, hummus, falafel, pickles, grilled vegetables, lemon, and lettuce leaves.
Tabbouleh works well with mezze because its lemony herbs cut through richer foods. Serve it with pita, hummus, falafel, grilled dishes, pickles, or crisp lettuce leaves.

For a full mezze-style meal, serve tabbouleh with warm pita, hummus, pickles, and homemade falafel. If you are building a falafel, shawarma, or pita spread, a spoon of amba sauce adds a sharp, tangy contrast beside the fresh herbs.

For grilled chicken, wraps, or pita plates, tabbouleh also works well with a cooling tzatziki sauce. You can also spoon it into pita pockets with hummus, cucumber, and crisp vegetables, similar to this hummus veggie sandwich.

For a lighter plate, serve tabbouleh with hummus, raw vegetables, olives, and pita. For a fuller dinner, pair it with grilled chicken or lamb and a creamy yogurt sauce.

Tabbouleh Variations

Once you understand the base recipe for tabbouleh, the variations are easy. For example, you can swap bulgur for quinoa, cauliflower rice, or couscous while keeping the herbs generous, the pieces small, and the lemon-olive oil balance bright.

A tabbouleh variations graphic showing classic bulgur, quinoa, cauliflower, and couscous versions in separate bowls.
Once the parsley-heavy base is clear, tabbouleh variations are easy. Use quinoa for gluten-free tabbouleh, cauliflower rice for grain-free tabbouleh, or couscous for a quick variation.

Quinoa Tabbouleh

Use cooked and fully cooled quinoa instead of bulgur. Quinoa tabbouleh is the best gluten-free version because quinoa has a small grain size and absorbs lemon dressing well. Keep the parsley generous so it still tastes like tabbouleh, not just quinoa salad.

If you are using quinoa for meal prep, this quinoa and chickpea salad idea shows how well quinoa works with cucumber, tomatoes, red onion, and lemon-tahini dressing.

Cauliflower Tabbouleh

Use finely riced cauliflower instead of bulgur for a grain-free version. Raw cauliflower rice works well if it is chopped small and not watery. For a softer texture, salt it lightly, let it sit for a few minutes, then squeeze out extra moisture before mixing.

Couscous Tabbouleh

Couscous tabbouleh is a quick variation, but it is not the traditional version. Cook or soak the couscous, fluff it, cool it completely, then mix with the herbs, tomato, lemon, and olive oil.

No-Bulgur Tabbouleh

You can skip the bulgur for a lighter herb salad. The texture will be less traditional, but it works if you want a very fresh salad with parsley, tomato, mint, lemon, and olive oil.

Extra-Lemony Tabbouleh

If you like a sharper salad, add another tablespoon of lemon juice after the salad rests. Add it gradually because too much lemon can overpower the herbs.

Tabbouleh FAQs

Is tabbouleh the same as tabouli?

Yes. Tabbouleh and tabouli usually mean the same parsley, tomato, mint, bulgur, lemon, and olive oil salad. The difference is mostly spelling.

What is tabbouleh made of?

Tabbouleh is made with parsley, tomatoes, mint, green onions, fine bulgur, lemon juice, olive oil, salt, and pepper. Some versions also include cucumber.

What kind of bulgur is best for tabbouleh?

Fine #1 bulgur is best for tabbouleh because it softens quickly and does not overpower the parsley. Medium or coarse bulgur can work, but it usually needs hot water and gives the salad a heavier texture.

Do you cook bulgur for tabbouleh?

You do not need to cook fine bulgur for tabbouleh. In this recipe, it softens in the lemon-olive oil dressing while you chop the herbs and vegetables. Medium or coarse bulgur should be hot-soaked or cooked, then cooled before mixing.

Can I make tabbouleh without bulgur?

Yes. You can leave out the bulgur for a lighter parsley salad, but the texture will be less traditional. If you want a gluten-free version with a similar small-grain feel, cooked and cooled quinoa is the best swap.

Is tabbouleh gluten-free?

Classic tabbouleh is not gluten-free because bulgur is made from wheat. For a gluten-free version, use cooked quinoa or cauliflower rice instead of bulgur.

Is tabbouleh vegan?

Yes. Traditional tabbouleh ingredients are plant-based, so the salad is naturally vegan and dairy-free.

Is tabbouleh healthy?

Tabbouleh is a fresh, herb- and vegetable-heavy salad made with parsley, tomatoes, mint, lemon juice, olive oil, and a small amount of bulgur. It can fit well into a balanced Mediterranean-style meal with vegetables, legumes, whole grains, and olive oil. For broader context, Harvard’s Nutrition Source has a useful overview of the Mediterranean diet pattern.

Why is my tabbouleh watery?

Tabbouleh becomes watery when the parsley is wet, the tomatoes are too juicy, the cucumber is not drained, or too much dressing is added. Dry the herbs well, drain juicy vegetables, and let the salad rest before adjusting the final seasoning.

Should tabbouleh be served cold?

Tabbouleh can be served chilled or at room temperature. It tastes best after a short rest, but it should not sit out for too long because the herbs soften and the tomatoes release more liquid.

How long should tabbouleh rest before serving?

Let tabbouleh rest for about 10–30 minutes after mixing. That gives the bulgur time to finish softening and lets the lemon, olive oil, herbs, and tomatoes settle into a brighter flavor.

Can I make tabbouleh ahead of time?

Yes, but it tastes freshest the same day. You can wash and dry the herbs ahead of time, then chop and mix the salad closer to serving. Leftovers keep 2–3 days in the fridge.

Can I freeze tabbouleh?

No. Tabbouleh does not freeze well because the herbs and tomatoes become limp and watery after thawing.

Can I use quinoa instead of bulgur?

Yes. Use cooked and cooled quinoa instead of bulgur for a gluten-free quinoa tabbouleh. Keep the herbs generous so the salad still tastes fresh and parsley-forward.

Can I use couscous instead of bulgur?

Yes, but couscous tabbouleh is a quick variation rather than the classic version. Cook or soak the couscous, cool it completely, then mix with the herbs, tomatoes, lemon, and olive oil.

Can I use cauliflower rice instead of bulgur?

Yes. Finely riced cauliflower makes a grain-free tabbouleh variation. Use it raw for crunch or salt and drain it lightly for a softer texture.

Should I use curly parsley or flat-leaf parsley?

Both can work. Curly parsley gives a fluffy, traditional-looking texture, while flat-leaf parsley has a stronger flavor and is easier to chop. Whichever you use, dry it very well before chopping.

Can I chop parsley in a food processor?

You can, but hand-chopping gives better texture. If using a food processor, pulse carefully and stop before the parsley becomes wet or pasty.

A close serving image of fresh parsley-first tabbouleh with a spoon, pita wedges, lemon, and romaine leaves.
Before serving, taste the rested tabbouleh one last time. Salt fixes flat flavor, lemon adds brightness, and a small drizzle of olive oil softens sharp edges.

Tabbouleh Recipe Tips to Remember

For the best tabbouleh, keep the salad parsley-first, use fine bulgur, dry the herbs thoroughly, drain juicy tomatoes, and taste after the salad rests. Those small details make the difference between a fresh, bright herb salad and a watery, grain-heavy bowl.

Posted on 4 Comments

Cucumber Salad Recipe with Vinegar, Dill, and Onion

Bowl of cucumber salad with thin cucumber slices, red onion, fresh dill, black pepper, and a light vinegar dressing.

This cucumber salad recipe is cold, crisp, tangy, and exactly the kind of no-cook side dish you want when a meal needs something fresh. Thin cucumber slices, red onion, fresh dill, and a bright vinegar dressing come together quickly, without mayo, heavy cream, or cooking.

Ideally, the finished salad should taste cool and snappy, with enough vinegar to wake up the cucumbers but not so much that every bite feels sharp.

Because the method is flexible, you can make it in 10 minutes when dinner is already on the table, chill it for 15–20 minutes when the dressing needs time to settle into the cucumbers, or salt and drain the slices first for a crisper make-ahead version.

Although the simple version is refreshing on its own, the recipe gets better when you understand the small details: which cucumbers to choose, how thin to slice them, when to peel or seed them, what vinegar tastes best, and how to keep the salad from turning watery in the fridge.

Table of Contents

Use the quick sections to make the salad now, then use the deeper notes to adjust the dressing, keep the cucumbers crisp, and make it ahead without losing texture.

Quick Answer: How to Make Cucumber Salad

At a glance: Start with 2 large cucumbers, ½ red onion, ¼ cup vinegar, 1 tablespoon sugar or honey, ½ teaspoon salt, black pepper, and fresh dill. Toss and serve right away for speed, chill 15–20 minutes for better flavor, or salt and drain the cucumbers first for the crispest make-ahead version.

To make an easy cucumber salad recipe, thinly slice 2 large English cucumbers and ½ red onion. Toss them with ¼ cup vinegar, 1 tablespoon sugar or honey, ½ teaspoon salt, black pepper, and 2–3 tablespoons fresh dill. Serve the salad right away for maximum crunch, or chill it for 15–20 minutes for better flavor.

Quick guide showing how to make cucumber salad three ways: serve immediately, chill briefly, or salt and drain first.
If you need speed, toss and serve right away; for better flavor, chill briefly, and for the crispest make-ahead cucumber salad, salt and drain the slices first.

For the crispest version, especially when making the salad ahead, salt the cucumber slices first. Let them drain for 20–30 minutes, pat them dry, and then add the dressing. This removes excess water before it can thin out the vinegar dressing.

Version Best for Total time
Fast cucumber salad Last-minute side dish 10 minutes
Best-flavor cucumber salad Fresh salad with better dressing absorption 25–30 minutes
Crispest make-ahead cucumber salad Parties, picnics, meal prep, less watery texture 40–50 minutes

Why This Cucumber Salad Works

This recipe works because the flavor stays clean and balanced. Thin cucumber slices soak up the dressing quickly, while red onion adds bite, dill brings freshness, and a little sweetness softens the vinegar without making the salad taste sugary.

Explainer board showing thin cucumber slices, red onion, fresh dill, and balanced vinegar dressing as the main reasons the salad works.
Thin slices absorb the dressing quickly, while onion, dill, and a little sweetness keep the vinegar bright without making the salad harsh.

The recipe also gives you control over texture. For the fastest version, toss and serve. For better flavor, chill the salad briefly. When you need a snappier make-ahead texture, salt and drain the cucumber slices before dressing them.

That flexibility matters because cucumbers naturally release water after slicing. Instead of letting the dressing turn diluted, you can choose the method that fits your timing.

Cucumber Salad Ingredients

Cucumbers, onion, vinegar, dill, salt, pepper, and a small amount of sweetener do most of the work here. Still, each ingredient affects the final bite, so it helps to choose carefully.

Ingredients for cucumber salad arranged on a light surface: cucumbers, red onion, vinegar, dill, sugar or honey, salt, pepper, and optional olive oil.
Since the ingredient list is short, each choice matters: the cucumber brings crunch, the vinegar brings tang, and the dill keeps everything fresh.

Cucumbers

English cucumbers and Persian cucumbers are the easiest choices because they have thin skins, fewer seeds, and a clean crunch. Regular garden cucumbers also work, but they may need peeling, seeding, and salting when the skin is thick or the center is watery.

For the coldest, crunchiest salad, use chilled cucumbers straight from the fridge. Room-temperature cucumbers still work, though the finished salad will taste fresher after a short chill.

Onion

Red onion gives cucumber salad color and bite. Sweet onion or Vidalia onion tastes softer and more old-fashioned. White onion works especially well in cucumbers and onions in vinegar, while scallions are useful when you want a milder onion flavor.

If raw onion tastes too strong, soak the slices in cold water for 10 minutes, then drain them well. Alternatively, let the onion sit in the vinegar dressing for a few minutes before adding the cucumbers.

Vinegar

White wine vinegar is the best balanced first choice. Rice vinegar is milder and lightly sweet, while apple cider vinegar tastes fruitier and distilled white vinegar gives a sharper old-fashioned flavor. If you use distilled white vinegar, dilute it with a little water so the dressing does not overpower the cucumbers.

Sweetener

A small amount of sugar or honey balances the vinegar. In most batches, one tablespoon is enough. For no-sugar cucumber salad, skip the sweetener or use rice vinegar, which tastes gentler on its own.

Dill and Herbs

Fresh dill is the classic herb for cucumber dill salad. It tastes cool, grassy, and bright. Chives, parsley, or a little basil can also work, but dill gives this version its most familiar flavor.

If you only have dried dill, start with 1 teaspoon. Although fresh dill tastes brighter, dried dill is useful when you need a pantry-friendly version.

Salt and Pepper

Salt seasons the salad and helps manage water. For the fast version, use ½ teaspoon salt in the dressing. For the crispest version, salt the cucumbers separately, drain them, and season lightly at the end.

Optional Olive Oil

This cucumber vinegar salad is best without oil when you want the lightest, sharpest, most refreshing version. However, 1 tablespoon olive oil gives the dressing a rounder vinaigrette feel for a softer bite.

Cucumber Salad Dressing

The dressing should coat the cucumber slices lightly, so the salad tastes tangy, lightly sweet, and fresh rather than wet or heavy.

If you are not sure which vinegar to choose, start with white wine vinegar for balance, rice vinegar for a milder salad, or apple cider vinegar for a fruitier bite. The full vinegar comparison below gives you more options.

Simple Cucumber Salad Dressing Ratio

For every 2 large English cucumbers or 5–6 Persian cucumbers, use this simple dressing ratio:

Dressing ratio guide for cucumber salad with cucumbers, vinegar, sugar or honey, salt, pepper, dill, and optional olive oil.
Start with this cucumber salad dressing ratio, then fine-tune it after tossing because the cucumbers naturally soften the vinegar and loosen the seasoning balance.
Ingredient Amount Metric
Vinegar ¼ cup 60 ml
Sugar or honey 1 tablespoon 12–13 g sugar or about 21 g honey
Fine sea salt ½ teaspoon if not pre-salting about 3 g
Black pepper ¼ teaspoon, or to taste about 0.5 g
Fresh dill 2–3 tablespoons about 3–6 g, loosely packed
Optional olive oil 1 tablespoon 15 ml

How to Adjust the Dressing

Problem Fix
Sharp dressing Balance it with 1–2 teaspoons sugar or honey.
Sweet dressing Brighten it with 1–2 teaspoons vinegar.
Watery salad First, drain excess liquid; then serve with tongs or a slotted spoon.
Salty salad Add more sliced cucumber. If needed, briefly rinse drained cucumbers and pat them dry.
Flat flavor Finish with more dill, black pepper, a splash of vinegar, or a squeeze of lemon.
Troubleshooting board showing fixes for cucumber salad dressing that is too sharp, too sweet, too watery, too salty, or too flat.
Instead of starting over, fix the dressing in small steps: add sweetness for sharpness, vinegar for sweetness, or fresh dill and pepper when the salad tastes flat.

Equipment You Need

You do not need special equipment for this cucumber salad recipe, but the right tools make the texture easier to control, especially when you want very even slices or plan to salt and drain the cucumbers first.

Basic tools for making cucumber salad, including a knife, mandoline, cutting board, mixing bowl, dressing jar, colander, and tongs.
You do not need special equipment, although a mandoline, colander, and tongs make even slicing, draining, and serving much easier.
  • Sharp knife or mandoline
  • Cutting board
  • Large mixing bowl
  • Small bowl or jar for the dressing
  • Colander or fine mesh strainer if salting the cucumbers
  • Tongs or a slotted spoon for serving

Use this base recipe when you want cucumber salad for a quick dinner, a picnic table, or a make-ahead meal. Keep the formula as your starting point, then adjust the vinegar, herbs, onion, and salting method as needed.

Saveable cucumber salad recipe card with prep time, chill time, servings, ingredients, method steps, and a salt-and-drain note.
Use this recipe card when you want the full cucumber salad recipe in one glance, especially if you need the ingredient amounts, short method, and make-ahead note together.

Cucumber Salad Recipe Card

A crisp, no-cook cucumber salad with thin cucumbers, red onion, fresh dill, and a tangy vinegar dressing. Serve it right away, chill it briefly for better flavor, or salt the cucumbers first for the crispest make-ahead version.

Prep Time 10 minutes
Cook Time 0 minutes
Chill Time 15–20 minutes
Total Time 25–30 minutes
Servings 4 side servings or 6 small servings

Ingredients

  • 2 large English cucumbers, about 600–680 g / 21–24 oz, thinly sliced, or 5–6 Persian cucumbers, about 600 g / 21 oz
  • ½ small to medium red onion, about 50–75 g / 1.8–2.6 oz, very thinly sliced
  • ¼ cup / 60 ml white wine vinegar, rice vinegar, or apple cider vinegar
  • 1 tablespoon sugar, or 1 tablespoon honey
  • ½ teaspoon fine sea salt, plus more to taste
  • ¼ teaspoon black pepper, or to taste
  • 2–3 tablespoons chopped fresh dill, loosely packed
  • Optional: 1 tablespoon / 15 ml olive oil for a softer vinaigrette
  • Optional: 1–2 tablespoons chopped chives or parsley

Salt note: Use ½ teaspoon salt for the regular version. If you salt and drain the cucumbers first, use 1 teaspoon salt for draining, then add extra salt to the dressing only after tasting.

Instructions: Best-Flavor Version

  1. Slice the cucumbers about ⅛ inch / 3 mm thick. Slice the red onion very thinly.
  2. In a small bowl or jar, mix the vinegar, sugar or honey, salt, black pepper, and dill. Add olive oil only if using.
  3. Add the cucumbers and onion to a large bowl. Pour the dressing over the top.
  4. Toss gently until the cucumber slices are evenly coated.
  5. Chill for 15–20 minutes so the cucumbers absorb the dressing.
  6. Toss once more, then taste and adjust with more vinegar, salt, pepper, or dill if needed.
  7. Serve with tongs or a slotted spoon, leaving excess liquid behind in the bowl.

Fast 10-Minute Version

Slice the cucumbers and onion, mix the dressing, toss everything together, and serve immediately. The salad will taste lighter and crunchier, but less marinated.

Crispest Make-Ahead Version

  1. Toss the sliced cucumbers with 1 teaspoon fine sea salt.
  2. Place them in a colander or fine mesh strainer for 20–30 minutes.
  3. Pat them dry with a clean towel or paper towels.
  4. Mix the dressing without adding the extra ½ teaspoon salt at first.
  5. Toss the drained cucumbers with onion, dressing, dill, and pepper.
  6. Taste and add salt only if needed.
  7. Do not add the full dressing salt automatically after pre-salting; the cucumbers will already carry some salt.

Notes

  • This amount makes about 4 generous side servings or 6 smaller picnic-style servings.
  • Use English or Persian cucumbers for the easiest texture.
  • Use chilled cucumbers for the coldest, crunchiest salad.
  • Use white wine vinegar for the cleanest balanced flavor.
  • Use rice vinegar for a milder, slightly sweeter salad.
  • Use distilled white vinegar only if you like a sharper old-fashioned style; dilute it with water if needed.
  • For no-sugar cucumber salad, skip the sweetener or use rice vinegar.
  • For low-calorie cucumber salad, skip the optional oil.
  • Best eaten the same day, but leftovers keep 2–3 days in the fridge.

How to Make Cucumber Salad Step by Step

This recipe gives cucumber salad the best balance of speed, flavor, and texture because a short rest seasons the slices without turning them limp. You get a brighter salad without needing a long marinade.

Step-by-step board showing seven steps for cucumber salad: slice cucumbers, slice onion, mix dressing, toss, chill, taste, and serve.
This step overview helps you see the whole cucumber salad recipe at once, so the timing, chilling, and final serving steps make sense before you begin.

Step 1: Slice the Cucumbers

Wash and dry the cucumbers, then slice them about ⅛ inch / 3 mm thick. A mandoline gives the most even slices, although a sharp knife works well too. If you are using large garden cucumbers, peel them first if the skin is thick, then cut them lengthwise and scrape out the seeds if the center looks watery.

Thin cucumber rounds being sliced evenly on a clean surface for cucumber salad.
Even cucumber slices season more consistently; as a result, every bite has the same crunch, tang, and freshness.

Even slices matter because they help the salad marinate evenly. Very thin slices absorb flavor faster, while slightly thicker slices stay firmer.

Step 2: Slice the Onion Thinly

Thinly slice the red onion so it blends into the salad rather than overpowering it. If raw onion tastes too strong to you, soak the slices in cold water for 10 minutes, then drain and pat dry before adding them.

Thinly sliced red onion for cucumber salad, with cucumber and dill nearby.
Thin onion slices blend into the salad better, whereas thick pieces can taste sharp and dominate the cucumbers.

That way, the onion keeps its crunch while losing some of its harsh bite.

Step 3: Mix the Dressing

In a small bowl or jar, combine the vinegar, sugar or honey, salt, black pepper, and fresh dill. Stir or shake until the sweetener is dissolved. If you prefer a rounder dressing, add the optional olive oil here.

Light vinegar dressing being mixed with dill, pepper, salt, and sweetener for cucumber salad.
Taste the dressing before tossing because it should seem slightly sharper at first; the cucumbers will soften it as they sit.

Taste the dressing before adding it to the vegetables. Ideally, it should taste slightly sharper and saltier than you want the finished salad to taste, because the cucumbers will dilute it a little as they rest.

Step 4: Toss the Cucumbers and Onion with the Dressing

Add the sliced cucumbers and onion to a large bowl, pour the dressing over the top, and toss gently until everything is evenly coated. Use your hands, salad tongs, or two large spoons so the slices stay intact.

Cucumber slices, red onion, dill, and vinegar dressing being gently tossed in a bowl.
Toss gently so the dressing coats the slices without bruising them or turning the salad watery too quickly.

At this point, the salad is already good enough to serve when you need a very fast version.

Step 5: Chill Briefly for Better Flavor

For the best everyday version, chill the salad for 15–20 minutes. That short rest helps the cucumber slices absorb the dressing and lets the onion mellow slightly.

Bowl of cucumber salad chilling briefly with a 15 to 20 minute timing cue.
A short 15–20 minute chill lets the vinegar dressing settle in, yet the cucumber salad still keeps its fresh crunch.

If you are in a rush, you can skip this and serve the salad right away. The texture will be a little crisper, while the flavor will be a little lighter.

Step 6: Taste and Adjust Before Serving

After the salad has rested, toss it once more and taste it again. Add a splash more vinegar if it needs brightness, a small pinch of salt if it tastes flat, or more dill if you want a fresher herbal note.

Cucumber salad being tasted and adjusted with extra vinegar, dill, pepper, and salt nearby.
Once the salad rests, taste it again because the cucumbers release water and the balance may need a small final adjustment.

This second taste matters because the cucumber slices release water as they sit, which can change the balance of the dressing before serving.

Step 7: Serve with a Slotted Spoon or Tongs

Lift the salad out of the bowl with tongs or a slotted spoon instead of pouring everything out at once. That way, you leave behind excess liquid and the finished serving looks cleaner and tastes brighter.

Cucumber salad being lifted from a bowl with tongs or a slotted serving utensil.
Use tongs or a slotted spoon when serving so the salad tastes fresh on the plate instead of sitting in extra liquid.

Serve cold, ideally on the same day, for the best crunch.

Quick tip: If you are making this salad for dinner right now, the short-chill method is enough. If you are making it for a party or later in the day, salt and drain the cucumbers first.

Best Cucumbers for Cucumber Salad

The best cucumbers for cucumber salad are English cucumbers and Persian cucumbers. They are crisp, thin-skinned, and less seedy, so they can usually be sliced without peeling or seeding.

Garden cucumbers and regular slicing cucumbers can still make a good salad. However, because they are often thicker-skinned and more watery, they may need a little extra prep before they go into the bowl.

Guide comparing English, Persian, mini, garden, and Kirby cucumbers for cucumber salad.
English and Persian cucumbers are the easiest for cucumber salad, although garden cucumbers still work when you peel, seed, or salt them to control excess water.
Cucumber type Use it? Peel? Seed? Salt/drain?
English cucumber Best first choice Usually no No Optional
Persian cucumber Best crisp choice No No Optional
Mini cucumber Good choice Usually no No Optional
Garden cucumber Good if handled well If thick or waxy If seedy or watery Yes, for best texture
Regular slicing cucumber Works Often yes Often yes Yes, especially for make-ahead
Kirby or pickling cucumber Works, but firmer Usually no No Optional

Should You Peel or Seed Cucumbers?

You do not need to peel English or Persian cucumbers unless the skin tastes bitter. Their skins are usually tender enough for salad.

Regular garden cucumbers are different. First, remove the peel if it feels thick, waxy, or tough. Next, if the center looks watery or full of large seeds, cut the cucumber lengthwise and scrape out the seeds with a small spoon. Then, slice the cucumber into half-moons.

Decision guide showing when to peel or seed English, Persian, garden, or regular cucumbers for salad.
Usually, thin-skinned cucumbers need little prep; however, thick-skinned or watery garden cucumbers may need peeling or seeding.

If a cucumber tastes very bitter, peeling can help slightly, but it may be better to use another cucumber. A harsh cucumber can overpower the clean vinegar dressing.

How Thin Should You Slice Cucumbers?

Slice thickness changes the whole salad. Very thin slices taste more marinated. Slightly thicker slices stay crunchier. For the best all-purpose cucumber salad, aim for about ⅛ inch / 3 mm.

Measurement guide showing cucumber slices at 1 to 2 millimeters, 3 millimeters, 6 millimeters, half-moons, and dice.
Slice thickness changes the whole cucumber salad: thinner slices taste more marinated, while thicker slices stay crunchier.
Slice style Approximate thickness Best for
Paper-thin 1–2 mm Quick marinated cucumber salad
Thin slices ⅛ inch / 3 mm Best all-purpose cucumber salad
Crunchy slices ¼ inch / 6 mm Immediate serving and extra crunch
Half-moons ⅛–¼ inch / 3–6 mm Large garden cucumbers
Cubes Small dice Lunch bowls and less traditional versions

Mandoline note: A mandoline gives even slices, but always use the guard. Cucumbers become slippery once they start releasing moisture.

Should You Salt Cucumbers First?

You do not always need to salt cucumbers before making cucumber salad. For example, if you are serving the salad right away or chilling it for only 15–20 minutes, you can usually skip this step, especially with English or Persian cucumbers.

However, salting is worth it when you are making cucumber salad ahead, using watery garden cucumbers, or trying to keep the dressing from becoming diluted. Salt pulls excess water from the cucumber slices before they go into the salad, so the finished bowl tastes brighter instead of watered down. For a deeper look at the technique, see this guide on how to drain cucumbers.

Salt-or-skip guide showing when to salt cucumbers first and when salting is optional.
Salting first matters most for make-ahead cucumber salad or watery cucumbers, whereas a quick same-day version often does fine without it.

How to Salt Cucumbers for Salad

  1. Slice the cucumbers.
  2. Toss them with 1 teaspoon fine sea salt.
  3. Place them in a colander or fine mesh strainer.
  4. Let them drain for 20–30 minutes.
  5. Pat them dry with a clean towel or paper towels.
  6. Toss with dressing, then taste before adding more salt.
Process board showing cucumber slices being salted, drained for 20 to 30 minutes, patted dry, and dressed.
For a crisper make-ahead cucumber salad, salt the slices, drain them for 20–30 minutes, and pat them dry before dressing so the bowl stays bright instead of diluted.

After salting, do not squeeze the cucumber slices aggressively. Pat them dry instead, since pressing too hard can bruise the slices and make the texture less pleasant.

Situation Salt first?
Serving immediately Optional
Chilling 15–20 minutes Optional
Making ahead Yes
Using garden cucumbers Yes
Using English or Persian cucumbers Optional
Wanting the crispest texture Yes

How to Keep Cucumber Salad from Getting Watery or Soggy

Cucumber salad gets soggy when the cucumber slices release too much water into the dressing. Fortunately, the fix is simple: manage the water before serving, especially if the salad needs to sit.

Troubleshooting board showing ways to keep cucumber salad from getting watery, including salting, draining, serving with tongs, and keeping dressing separate.
Watery cucumber salad is usually a timing or cucumber-choice issue, so draining well, serving with tongs, and keeping the dressing separate can all help preserve texture.
Problem Best fix
Watery cucumbers Salt and drain the sliced cucumbers before dressing.
Too much liquid in the bowl Serve with tongs or a slotted spoon, leaving liquid behind.
Making cucumber salad ahead Keep the dressing separate or salt/drain the cucumbers first.
Using garden cucumbers Peel if thick-skinned, seed if watery, and salt before dressing.
Leftovers softened overnight Drain excess liquid and refresh with dill, pepper, or a splash of vinegar.
Salad became too salty Add more cucumber, or briefly rinse drained cucumbers and pat them dry.

Common Cucumber Salad Mistakes to Avoid

  • Slicing too thick for a quick salad: thick slices need more time to absorb dressing.
  • Dressing too early for make-ahead: cucumbers release water as they sit, so keep dressing separate if making the salad the day before.
  • Adding all the salt twice: if you pre-salt the cucumbers, taste before salting the dressing.
  • Pouring all the bowl liquid onto the plate: serve with tongs or a slotted spoon for a cleaner salad.
  • Using harsh vinegar without balancing it: dilute strong white vinegar or add a little sweetener.
Mistakes guide showing fixes for thick slices, dressing too early, double salting, too much liquid, and harsh vinegar.
Small technique changes make a big difference: slice thinner, salt only once, and serve without pouring all the liquid onto the plate.

How Long Should Cucumber Salad Sit Before Serving?

Cucumber salad can be eaten right away, but a short rest improves the flavor. As it sits longer, it becomes more marinated and less crunchy.

Timing guide showing how cucumber salad changes from immediate serving to 15–20 minutes, 1 hour, overnight, and the next day.
The longer cucumber salad sits, the more marinated it becomes, so serve it sooner for crunch or later for a softer, more vinegary bite.
Timing Result
Serve immediately Crispest bite, lighter flavor
15–20 minutes Best fresh-salad balance
1 hour More marinated, stronger vinegar flavor
Several hours Good if cucumbers were salted and drained first
Overnight Softer texture, still usable for vinegar-style salad
Next day Good flavor, less crunch

Best Vinegar for Cucumber Salad

The best vinegar for cucumber salad depends on whether you want the dressing balanced, mild, fruity, or old-fashioned. White wine vinegar is the safest first choice because it tastes bright without becoming too sharp.

Vinegar guide comparing white wine vinegar, rice vinegar, apple cider vinegar, distilled white vinegar, champagne vinegar, and lemon juice for cucumber salad.
White wine vinegar gives the most balanced classic flavor, while rice vinegar is softer and distilled white vinegar tastes sharper and more old-fashioned.
Vinegar Flavor Best use
White wine vinegar Clean, bright, balanced Best first choice for classic cucumber salad
Rice vinegar Mild, lightly sweet Gentler salad and no-sugar versions
Apple cider vinegar Fruity, sharper Rustic tangy cucumber salad
Distilled white vinegar Strong, sharp, old-fashioned Cucumbers and onions in vinegar; best diluted with water
Champagne vinegar Delicate, elegant Lighter premium variation
Lemon juice Fresh and citrusy Works, but tastes less like classic vinegar cucumber salad

Old-Fashioned Cucumbers and Onions in Vinegar

Old-fashioned cucumbers and onions in vinegar are slightly different from the fresh cucumber salad recipe above. Instead of a light toss, the cucumbers and onions sit in a vinegar-water-sugar brine until they taste more marinated.

Think of this as a brinier, more marinated cucumber onion salad, not a shelf-stable pickle. It still belongs in the fridge and is best eaten within a few days.

Glass bowl of old-fashioned cucumbers and onions in clear vinegar brine with dill and a slotted spoon.
This old-fashioned cucumber onion salad is brinier than the fresh version, but it still belongs in the fridge and is not a shelf-stable pickle.

This version is especially good with barbecue, pulled pork, burgers, sandwiches, grilled chicken, and summer cookout meals. It is also useful when you want a sharper, pickle-like cucumber side.

Old-Fashioned Vinegar Cucumber Salad Formula

  • ½ cup distilled white vinegar
  • ½ cup water
  • 1–2 tablespoons sugar
  • 1 teaspoon salt
  • 2 large cucumbers or 5–6 small cucumbers, sliced
  • ½ sweet onion or white onion, thinly sliced
  • Optional: garlic, dill, celery seed, or mustard seed

Mix the vinegar, water, sugar, and salt until dissolved. Add the cucumbers and onion, then refrigerate for at least 1 hour. Serve with a slotted spoon because this style is intentionally brinier than the fresh cucumber salad recipe.

For the best texture, eat this old-fashioned version within 2–3 days. The flavor gets stronger as it sits, but the cucumber slices soften over time.

Easy Cucumber Salad Variations

Once you know the basic cucumber salad formula, you can adjust it in several directions without losing the fresh, cooling character of the dish. Use the table as a quick map, then read the notes below for the variations that need extra handling.

Variation board showing cucumber onion, cucumber tomato, creamy, Asian, Korean, Japanese sunomono, Chinese smashed, Thai, ranch, low-calorie, and old-fashioned vinegar cucumber salads.
Once the base cucumber salad works for you, it becomes easy to branch into creamy, tomato, sesame, spicy, ranch, or old-fashioned vinegar versions.
Variation How to adjust it
Cucumber onion salad Use extra red onion, sweet onion, or white onion.
Cucumber dill salad Increase fresh dill to 3–4 tablespoons.
Cucumber vinegar salad Skip the oil and keep the dressing vinegar-forward.
No-sugar cucumber salad Skip sweetener or use mild rice vinegar.
Low-calorie cucumber salad Use no oil and reduce or skip the sugar.
Creamy cucumber salad Use sour cream, yogurt, or mayo.
Cucumber tomato salad Add tomatoes shortly before serving because they release juice.
Asian cucumber salad Use rice vinegar, sesame, soy sauce, ginger, and scallions.
Spicy cucumber salad Add chili flakes, fresh chili, chili crisp, or chili oil.
German cucumber salad / Gurkensalat Use dill and either a vinegar dressing or a creamy sour cream-style dressing.

Cucumber Onion Salad

For a stronger cucumber onion salad, increase the onion to ¾ cup and use red onion for bite, sweet onion for a softer flavor, or white onion for an old-fashioned vinegar version. Slice the onion very thinly so it blends into the cucumbers instead of taking over the bowl.

If the onion tastes too sharp, soak the slices in cold water for 10 minutes or let them sit in the vinegar dressing for a few minutes before adding the cucumbers.

Cucumber Tomato Salad

For cucumber tomato salad, add 1½–2 cups halved cherry tomatoes or chopped ripe tomatoes to the base salad. Add them shortly before serving because tomatoes release juice quickly and can soften the dressing.

This version works best with red onion, dill, parsley, or basil. If the tomatoes are very juicy, serve with a slotted spoon and refresh the bowl with a little extra vinegar, salt, and pepper.

Creamy Cucumber Salad

For creamy cucumber salad, replace the vinegar dressing with ½ cup sour cream, Greek yogurt, or a yogurt-mayo mix. Then add 1 tablespoon vinegar or lemon juice, 1 small grated garlic clove, 2–3 tablespoons dill, salt, and black pepper.

Because creamy dressings loosen as cucumbers release water, salt and drain the slices first for the best texture. For a yogurt-cucumber direction, see this Greek tzatziki sauce recipe.

Asian Cucumber Salad

For Asian cucumber salad, use rice vinegar instead of white wine vinegar, then add 1 tablespoon soy sauce, 1 tablespoon toasted sesame oil, 1 teaspoon grated ginger, 1 small garlic clove, scallions, and sesame seeds.

This variation works best with Persian or English cucumbers and a short chill. If you want a spicy cucumber salad, add chili oil, chili crisp, or red pepper flakes after tossing.

Spicy Cucumber Salad

For spicy cucumber salad, keep the base vinegar dressing and add red pepper flakes, sliced fresh chili, chili oil, or chili crisp. Start small, then taste again after 10 minutes because the heat spreads as the cucumbers sit.

For a more savory version, use rice vinegar, soy sauce, sesame oil, garlic, scallions, and sesame seeds instead of the classic dill dressing.

Korean Cucumber Salad

For Korean cucumber salad, use rice vinegar, sesame oil, soy sauce, garlic, scallions, sesame seeds, and gochugaru. Because the dressing is bold, keep the cucumber slices slightly thicker so the salad stays crunchy after tossing.

This version works especially well with rice bowls, grilled meats, tofu, noodles, and spicy meals because the cucumber keeps the salad cool while the dressing brings heat.

Japanese Cucumber Salad / Sunomono

For Japanese cucumber salad, keep the dressing lighter: rice vinegar, a small amount of sugar, a pinch of salt, and optional sesame seeds. Then slice the cucumbers very thinly and let them rest briefly so they soften just enough to absorb the dressing.

This version is cleaner and more delicate than spicy Asian or Korean cucumber salad. For that reason, avoid heavy garlic, chili oil, or strong herbs here.

Chinese Smashed Cucumber Salad

For Chinese smashed cucumber salad, lightly smash the cucumbers before cutting them into bite-size pieces. The cracked edges catch more dressing than smooth slices, which makes the salad taste bolder.

Use rice vinegar, soy sauce, sesame oil, garlic, a little sugar, chili oil, and sesame seeds. Serve this version soon after tossing so the cucumber pieces stay crisp.

Thai Cucumber Salad

For Thai cucumber salad, use rice vinegar, lime juice, a little sugar, sliced shallot or red onion, fresh chili, cilantro, and crushed roasted peanuts. If you are not keeping the salad vegetarian, a small splash of fish sauce can add depth.

This version works especially well with grilled foods, satay-style meals, fried snacks, rice bowls, and spicy mains because the salad tastes sweet, sharp, crunchy, and fresh at the same time.

Ranch Cucumber Salad

For ranch cucumber salad, toss sliced cucumbers with a creamy ranch-style dressing, extra dill, black pepper, and red onion or scallions. Serve it soon after mixing because creamy dressings loosen as cucumbers release water.

For a lighter ranch-style recipe, use Greek yogurt, lemon juice, garlic powder, onion powder, dill, parsley, salt, and pepper instead of bottled dressing.

German Cucumber Salad / Gurkensalat

For German cucumber salad, keep the dill but choose either a light vinegar dressing or a creamy sour cream-style dressing. Slice the cucumbers thinly, salt and drain them first if possible, then toss with dill, onion, vinegar or sour cream, salt, pepper, and a small amount of sugar if needed.

This version tastes softer and more old-fashioned than the Asian or spicy variations, so keep the seasoning simple and let the cucumber, dill, and tangy dressing lead.

Low-Calorie Cucumber Salad

For low-calorie cucumber salad, skip the olive oil and reduce or omit the sugar. Because rice vinegar tastes naturally milder, the dressing does not need as much sweetener to feel balanced.

Instead, add more dill, black pepper, lemon juice, scallions, or chili flakes when you want bigger flavor without making the dressing heavier.

If you want a more snack-style Indian salad with cucumber, onion, tomato, roasted peanuts, lemon, cumin, and chaat masala, try this crunchy tangy spicy salad.

Classic Add-Ins for Cucumber Salad

These add-ins keep the salad close to the classic cucumber salad lane. Use one or two at a time instead of crowding the bowl.

Add-ins for cucumber salad arranged in small bowls, including garlic, celery seed, mustard seed, Dijon mustard, chives, parsley, red pepper flakes, and sesame seeds.
Add-ins work best in small amounts because garlic, chives, sesame, or mustard can deepen the flavor without covering up the cucumber itself.
  • Garlic: for a sharper dressing.
  • Celery seed: for old-fashioned deli-style flavor.
  • Mustard seed: for a pickle-like note.
  • Dijon mustard: for a more vinaigrette-style dressing.
  • Chives: for mild onion flavor.
  • Parsley: for a cleaner herbal flavor.
  • Red pepper flakes: for gentle heat.
  • Sesame seeds: for light crunch, though the flavor starts leaning Asian.

What to Serve with Cucumber Salad

Cucumber salad works especially well next to rich, spicy, smoky, grilled, or fried foods because it brings coolness and acidity. It can also act like a quick pickle-style topping when you want crunch without making actual pickles.

Serving ideas board showing cucumber salad with burgers, grilled chicken, barbecue, sandwiches, falafel, rice bowls, spicy meals, and picnic sides.
Because cucumber salad is cool, crisp, and tangy, it balances richer foods like burgers, barbecue, grilled chicken, falafel, and spicy meals.

For example, it works especially well beside air fryer burgers, where the cool vinegar crunch balances the richness of the patty and cheese. It also makes sense with sandwiches, including a chicken salad sandwich, because the tangy cucumbers cut through creamy fillings.

For a fuller cookout or picnic table, pair this crisp cucumber salad with a heartier side from MasalaMonk’s potato salad recipe guide. The fresh vinegar crunch also works well beside other cold picnic sides.

It also works well with pita meals, wraps, and homemade falafel.

  • Grilled chicken
  • Salmon or other fish
  • Barbecue and pulled pork
  • Rice bowls
  • Spicy curries
  • Dal and rice
  • Roti or paratha meals
  • As a pickle-like topping for sandwiches

How to Store Cucumber Salad

This recipe tastes best the day the cucumber salad is made because the slices soften as they sit in the dressing. For whole cucumbers before you slice them, Purdue Extension has practical cucumber storage guidance; once the salad is sliced and dressed, however, it is best eaten sooner for texture.

Storage guide for cucumber salad showing airtight containers, same-day best texture, up to 2 days for leftovers, up to 3 days for vinegar style, and do not freeze.
Cucumber salad is best on day one, although airtight storage and a quick drain before serving can still keep leftovers worth eating for another day or two.
Storage need Best guidance
Best texture Eat the same day.
Good leftovers Store up to 2 days in the fridge.
Still usable Up to 3 days for vinegar cucumber salad, though softer.
Container Use an airtight container.
Before serving leftovers Drain excess liquid and refresh with dill, pepper, or vinegar.
Freezing Do not freeze; cucumbers turn mushy.

Can You Make Cucumber Salad Ahead?

Yes, you can make cucumber salad ahead, but the best method depends on how far ahead you are preparing it. For the crispest texture, keep the cucumbers and dressing separate until shortly before serving. It can also work as a fresh side for high-protein Indian vegetarian meal prep, especially when you want something cool and sharp beside richer components.

Make-ahead guide showing sliced cucumbers, red onion, dressing in jars, airtight containers, and final tossed cucumber salad.
For the best make-ahead cucumber salad, prep the cucumbers and dressing separately, then toss them closer to serving so the slices stay crisp longer.
Make-ahead need Best method
1–2 hours ahead Salt and drain cucumbers if possible, then dress.
Same day Dress and chill, then serve with tongs or a slotted spoon.
Next day Keep sliced cucumbers/onion and dressing separate.
Meal prep Slice cucumbers and onion, store dressing separately, and toss before eating.
Dressing ahead Mix vinegar, sweetener, salt, pepper, and optional oil in a jar 4–5 days ahead. Add dill closer to serving.

Diet Notes: Low-Calorie, Keto, Vegan, Gluten-Free, and No Sugar

This vinegar cucumber salad is naturally light because it is built around cucumbers, herbs, and a simple dressing instead of mayo or cream. A few small swaps can also make it fit different preferences without changing the basic recipe.

Diet notes board for cucumber salad showing low-calorie, no sugar, vegan, gluten-free, keto or low-carb, and no-mayo options.
This cucumber salad stays flexible because you can skip oil, adjust the sweetener, or keep it mayo-free while still holding onto the same fresh, crisp texture.
  • Low-calorie cucumber salad: skip the optional olive oil and reduce or skip the sugar.
  • No-sugar cucumber salad: use rice vinegar and leave out the sweetener, or add only a tiny pinch.
  • Vegan cucumber salad: use sugar, maple syrup, or agave instead of honey.
  • Gluten-free cucumber salad: the recipe is naturally gluten-free if you use plain vinegar and check packaged ingredients.
  • Keto or low-carb cucumber salad: use a keto-friendly sweetener such as monk fruit or erythritol, or skip the sweetener.
  • No-mayo cucumber salad: this recipe is already mayo-free.

For more on why cucumbers are such a light, hydrating ingredient, read MasalaMonk’s guide to cucumber nutrition and weight loss.

FAQs About Cucumber Salad

Cucumber salad being served from a large bowl onto a small plate with thin cucumber slices, red onion, dill, and a light vinegar sheen.
This is the texture to aim for: glossy cucumber slices, fresh dill, thin onion, and just enough dressing to coat the salad without pooling at the bottom.

Do you peel cucumbers for cucumber salad?

You do not need to peel English or Persian cucumbers because their skins are thin. Peel regular garden cucumbers if the skin is thick, waxy, tough, or bitter.

What cucumber is best for cucumber salad?

English cucumbers are the best all-purpose choice. Persian cucumbers are also excellent because they are small, crisp, and thin-skinned. Garden cucumbers work well if you peel, seed, and salt them when needed.

Should you seed cucumbers for cucumber salad?

Seed cucumbers if the center is watery or full of large seeds. English and Persian cucumbers usually do not need seeding, but regular garden cucumbers often benefit from it.

How thin should cucumbers be sliced?

For the best all-purpose cucumber salad, slice cucumbers about ⅛ inch / 3 mm thick. Slice them thinner for a more marinated salad, or thicker if you want more crunch.

Should you salt cucumbers before making cucumber salad?

Salt cucumbers first if you are making the salad ahead, using watery garden cucumbers, or trying to prevent a diluted dressing. If you are serving it right away, salting is optional.

How do you keep cucumber salad from getting watery?

Salt and drain the cucumber slices for 20–30 minutes, then pat them dry before adding dressing. Also, serve the salad with tongs or a slotted spoon so extra liquid stays behind in the bowl.

What vinegar is best for cucumber salad?

White wine vinegar is the best balanced choice. Rice vinegar is milder, apple cider vinegar is fruitier, and distilled white vinegar gives a sharper old-fashioned flavor when diluted with water.

Can I make cucumber salad without sugar?

Yes. Skip the sugar completely or use rice vinegar for a milder dressing. You can also use a small amount of monk fruit, erythritol, maple syrup, or agave depending on your preference.

Can I use dried dill instead of fresh dill?

Yes, but use less. Start with 1 teaspoon dried dill for this recipe, then add more only if needed. Fresh dill tastes brighter and is better when available.

How long does cucumber salad last in the fridge?

This salad is best the day it is made. However, the cucumbers can still hold up for about 2 days, and leftovers may be usable up to 3 days, although the texture softens over time.

Can cucumber salad be made ahead?

Yes. For the best make-ahead cucumber salad, keep the dressing separate or salt and drain the cucumbers before dressing them. Toss everything 15–20 minutes before serving when possible.

Can you freeze cucumber salad?

No. Cucumber salad does not freeze well because cucumbers become soft and watery after thawing.

What onion is best for cucumber salad?

Red onion is best for color and bite. Sweet onion is best for a milder old-fashioned cucumber salad. White onion works well in cucumbers and onions in vinegar.

Is cucumber salad healthy?

Vinegar cucumber salad is a light, hydrating side dish, especially when made without oil or mayo. To keep it lighter, reduce the sugar and skip the optional olive oil.

Is cucumber salad the same as pickled cucumbers?

No. Cucumber salad is usually a fresh side dish tossed with vinegar dressing and eaten soon. Pickled cucumbers sit in a stronger brine and are meant to taste more preserved or pickle-like.