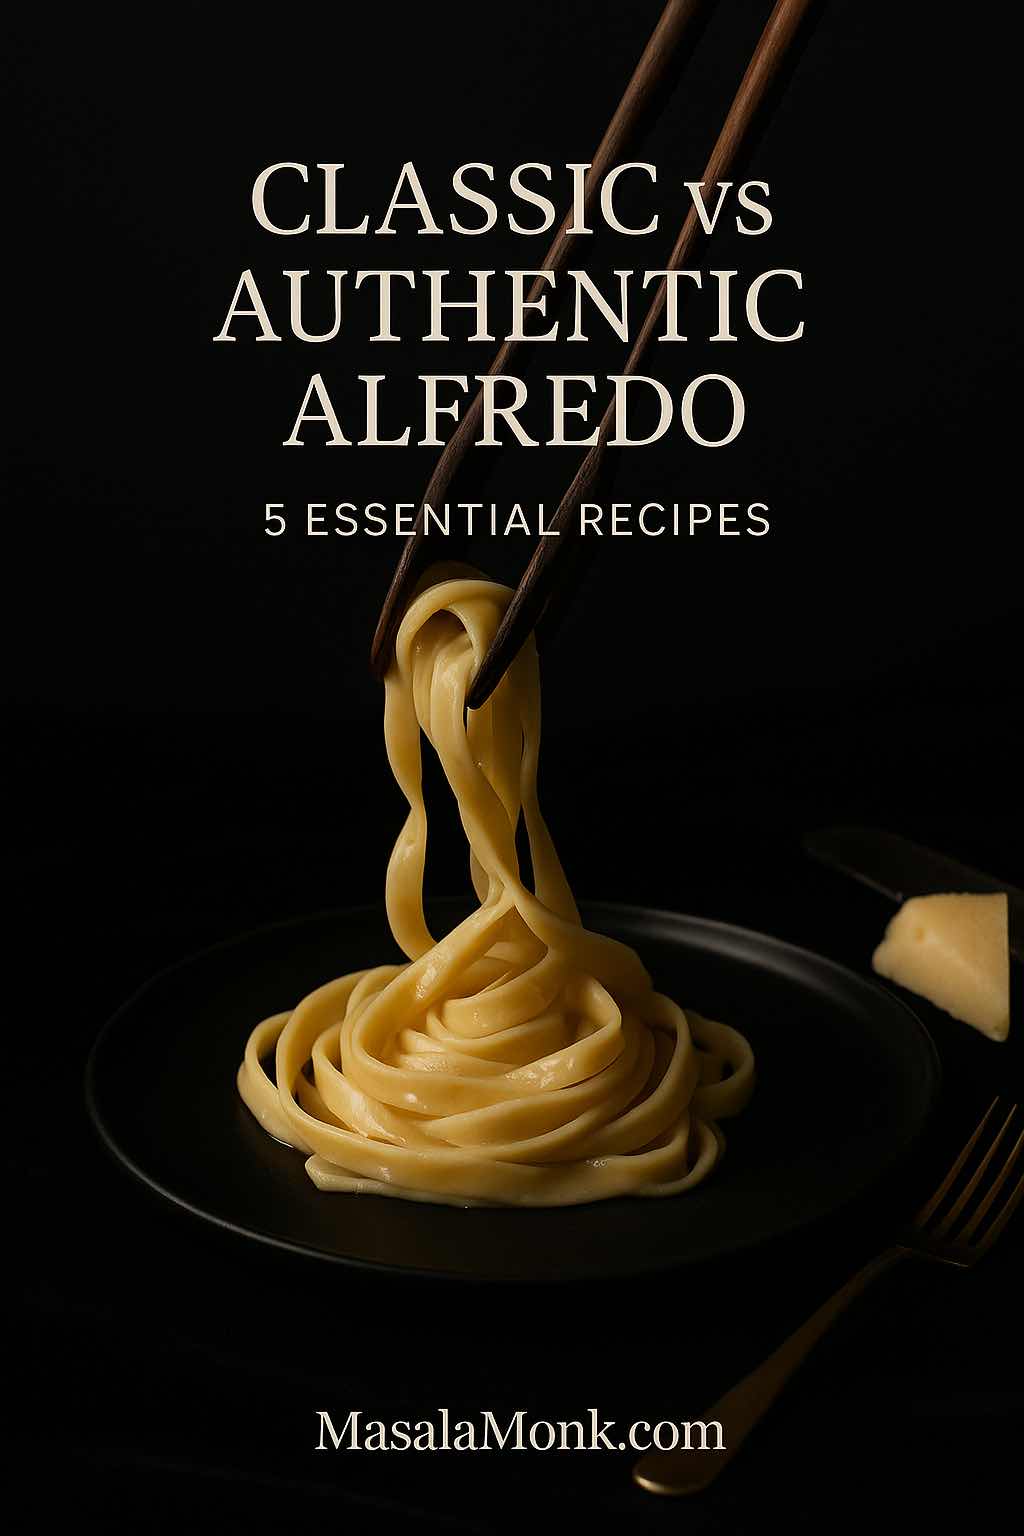
When classic fettuccine alfredo is done well, the sauce doesn’t merely coat the noodles; it becomes them. The ribbons look lacquered, not drowned. The cheese tastes like satin, not grit. And as you twirl, a glossy ribbon trails off the fork and back into the bowl. That’s the bowl we’re chasing—one that balances richness with clarity, and comfort with control.
There are two equally valid roads to that shine. First, the Roman original: pasta, cold butter, and finely grated Parmigiano, brought together with starchy water into a supple emulsion. Second, the American route: a little cream, a whisper of garlic, and a steadier, plush result that holds on the plate (and in the fridge) a touch longer. Once you can move easily between them, you can steer classic fettuccine alfredo toward your life—weeknight-swift, restaurant-creamy, or bright and “better-for-you” without losing the soul of the dish.
Along the way, you’ll find a few quiet helpers. For instance, when you want aromatic detours that still respect the sauce, see our Indian-inspired Alfredo twists. When you need a lighter night, lean on low-carb pasta alternatives for timings and textures that won’t compromise that signature gloss.
The Small Choices That Make Classic Fettuccine Alfredo Shine
Before we cook, a few principles elevate both authentic alfredo and the creamy style.
- Grate Parmigiano ultra-fine. A microplane turns it snow-soft so it melts into a seamless sauce instead of speckling it. (If you care about buying the real thing, the official rind markings are explained by the consortium here: Parmigiano Reggiano – seals & marks.)
- Work warm-to-warm. A warmed bowl keeps the Roman emulsion supple; a wide, preheated skillet steadies the cream-based version; warm plates prevent the sauce from tightening prematurely.
- Save and use pasta water deliberately. Add it like a seasoning—first to form the emulsion, then to tune the texture. For a crisp explanation of why this matters, see how pasta water helps sauce emulsify and cling.
- Keep heat gentle. Cheese wants warmth, not aggression. Cream wants a soft simmer, not a boil. This is how classic fettuccine alfredo stays glossy rather than greasy.
1) Authentic Roman Fettuccine Alfredo (No Cream)
This is the minimalist master class; it’s also your fastest route to dinner.
Serves: 4 Time: 20 minutes
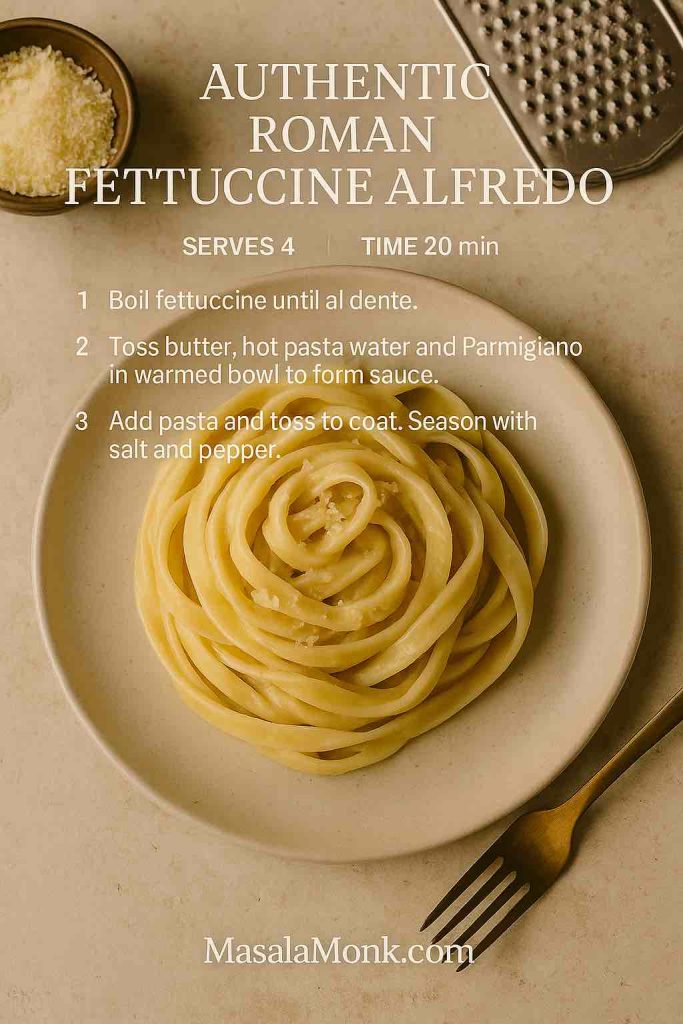
Ingredients
- 12 oz (340 g) fresh fettuccine (or excellent dry)
- 6 Tbsp (85 g) cold unsalted butter, cut into small cubes
- 1¼ cups (300 ml) very hot pasta water (reserved)
- 1¼ cups (100–120 g) very finely grated Parmigiano Reggiano
- Fine sea salt
- Black pepper (optional, not traditional)
Method
- Bring a large pot of well-salted water to a rolling boil. Add fettuccine and cook until just shy of al dente. Meanwhile, warm a wide mixing bowl with hot water; dry it thoroughly.
- Slip the butter into the warmed bowl and add about ½ cup of the hottest pasta water. Whisk until the mixture looks pale and slightly creamy—this is your emulsion base.
- Lift the pasta directly from the pot into the bowl so a little water clings to the noodles. Toss steadily with tongs so the heat stays in the bowl and the butter doesn’t firm up.
- Sprinkle in the Parmigiano in three or four delicate additions, tossing after each until it melts. If the mixture tightens, spoon in more hot pasta water; if it feels slack, pause and keep tossing as the cheese hydrates and thickens.
- Taste and season with salt; add pepper only if you like.
Texture Cues (for quick fixes)
- Too thick? Add 1 Tbsp hot pasta water and toss vigorously for 10 seconds.
- Too thin? Toss off heat for 20–30 seconds; the sauce will tighten as the cheese absorbs moisture.
- Grainy? The cheese may be too coarse or the bowl too cool; add a splash of hot water and toss briskly to smooth it.
Benchmark for pace and feel: the Roman no-cream method captures the texture you’re aiming for.
2) Classic Creamy Fettuccine Alfredo (With Cream)
This is the dependable crowd-pleaser—still elegant, just a touch more plush.
Serves: 4 Time: 25 minutes

Ingredients
- 12 oz (340 g) fettuccine
- 2 Tbsp unsalted butter
- 1 cup heavy cream
- 1 small garlic clove, finely grated (or ½ tsp garlic powder)
- 1 cup (85–100 g) finely grated Parmigiano Reggiano
- ¼ tsp kosher salt, plus more to taste
- A pinch of black or white pepper
- 2 Tbsp chopped parsley (optional)
Method
- Cook the pasta in generously salted water until al dente; reserve ¾ cup pasta water.
- In a wide skillet over medium-low heat, melt the butter. Stir in the cream and garlic; bring to a gentle simmer for 2–3 minutes so the flavors meet without boiling.
- Lower the heat and whisk in the Parmigiano until the sauce turns smooth and satiny.
- Add the pasta and toss, loosening with spoonfuls of pasta water until every ribbon shines and the sauce clings lightly.
- Taste for salt; finish with pepper. Add parsley if you like a little green.
Make-It-Yours Notes
- Lighter night? Swap in some vegetables for part of the pasta—the timings in low-carb pasta alternatives are dependable.
- Why pasta water still matters: serious but approachable science here—saucing pasta the right way—which explains why even creamy sauces benefit from pasta water’s starch.
3) Creamy Garlic Alfredo (Restaurant-Style, with Bright Finish)
This version is about aroma and lift; it’s the one that impresses without shouting.
Serves: 4 Time: 25 minutes
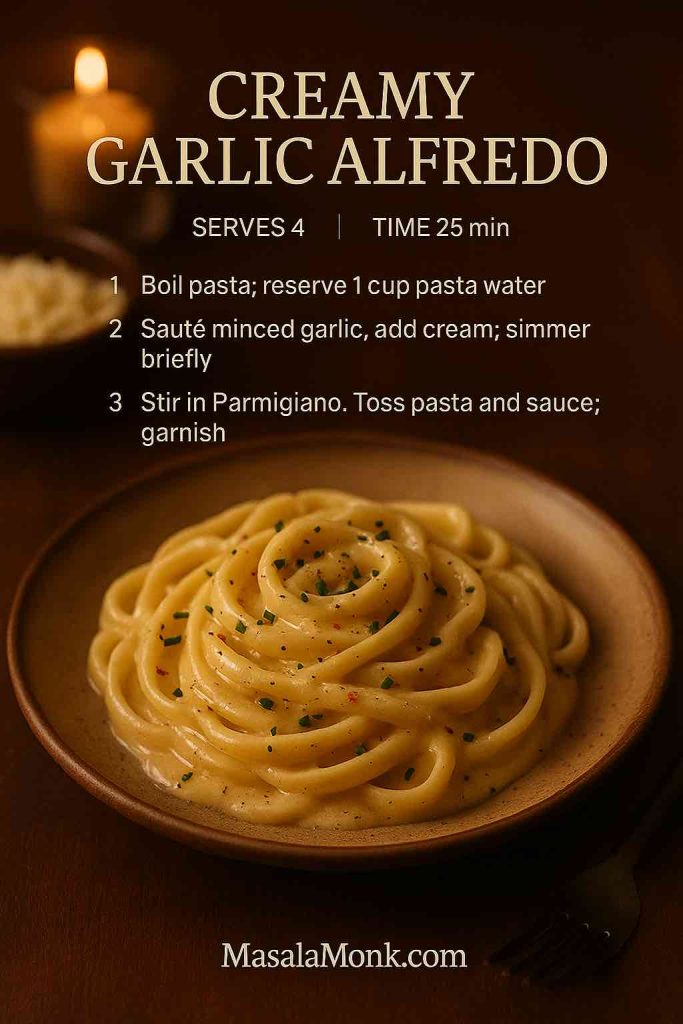
Ingredients
- 12 oz (340 g) fettuccine (or spaghetti for a silkier twirl)
- 2 Tbsp unsalted butter
- 3–4 garlic cloves, minced
- 1 cup heavy cream
- ¾ cup (60–70 g) finely grated Parmigiano
- ½ tsp kosher salt
- ¼ tsp black pepper
- Optional finishes: pinch red pepper flakes, zest of ½ lemon, or 1 Tbsp chopped chives
Method
- Boil the pasta; reserve 1 cup pasta water.
- In a skillet over medium heat, melt the butter until foamy. Stir in the garlic and cook to just-blonde—about 45 seconds—so it smells sweet, not sharp.
- Pour in the cream and let it simmer softly for 2 minutes.
- Drop the heat, add the Parmigiano, and stir until perfectly smooth.
- Fold in the pasta with a modest splash of pasta water; toss until the sauce clings with a gentle sheen.
- Taste; then decide whether your bowl wants warmth (pepper flakes), lift (lemon zest), or a cool green edge (chives).
For aromatic detours that still respect the sauce, explore our Indian-inspired Alfredo twists—they’re playful yet weeknight-friendly.
4) Lighter Alfredo (Lower Butter/Cream, Still Silky)
Here the trick is body without weight; starch does the quiet heavy lifting.
Serves: 4 Time: 25 minutes
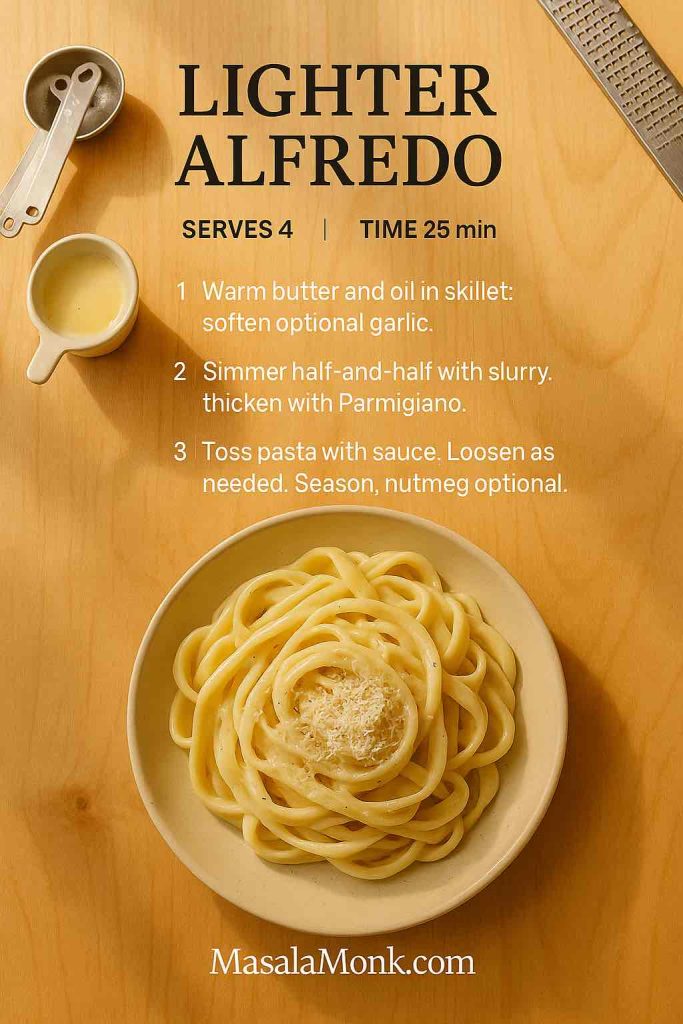
Ingredients
- 12 oz (340 g) fettuccine
- 1 Tbsp unsalted butter
- 1 tsp olive oil
- 1 garlic clove, minced (optional)
- 1¼ cups half-and-half (or ¾ cup milk + ½ cup cream)
- 1 tsp cornstarch mixed with 1 Tbsp cold water
- ¾ cup (60–70 g) finely grated Parmigiano
- ½ tsp kosher salt
- Black pepper
- A bare pinch of nutmeg (optional)
Method
- Cook the pasta; reserve 1 cup pasta water.
- Warm the butter and oil in a skillet; soften the garlic for 30 seconds without browning.
- Add the half-and-half and bring it to the quiet edge of a simmer. Whisk in the slurry; let it thicken lightly—about a minute.
- Lower the heat, then stir in the Parmigiano until smooth.
- Add the pasta and loosen with small spoonfuls of pasta water until the sauce slides silkily over the noodles. Season; nutmeg if it suits.
Smart Swaps (that still look great in snippets)
- More protein, same comfort: choose chickpea or lentil shapes; pairings and make-ahead ideas live in plant-based high-protein pasta dishes and our lentil pasta guide.
- Another angle on keeping it light yet glossy: a tested approach to a lighter Alfredo technique is here (Serious Eats).
5) Better-for-You Alfredo (Choose Greek Yogurt or Cauliflower)
Different evenings call for different comforts; both paths feel bright and modern while staying recognizably Alfredo.
Greek Yogurt Alfredo
Serves: 4 Time: 25 minutes
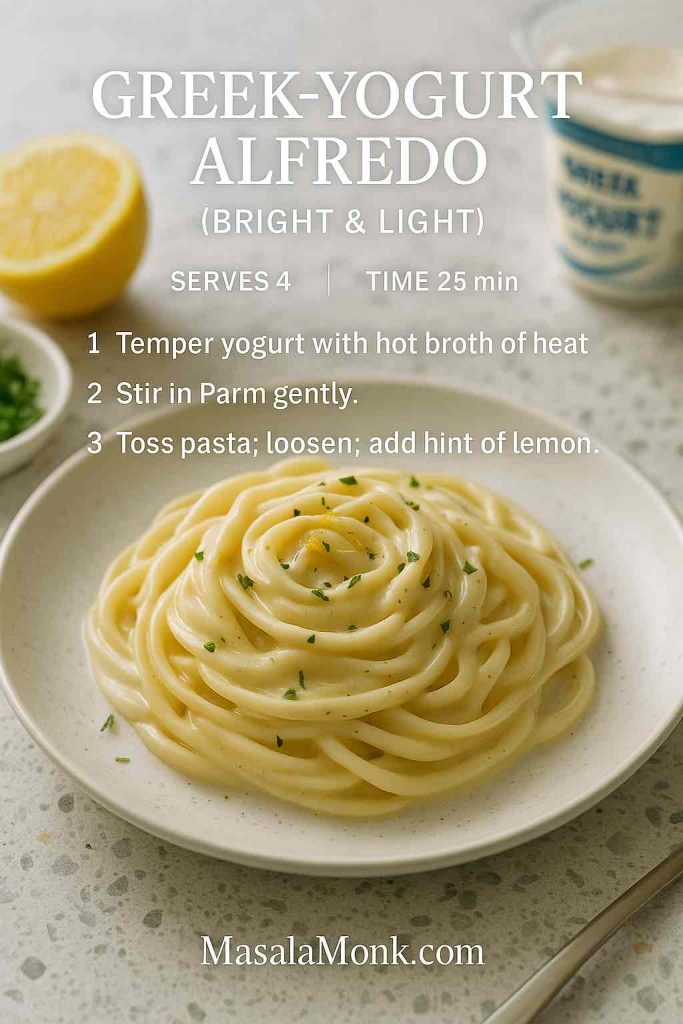
Ingredients
- 12 oz (340 g) pasta (fettuccine or penne)
- 1 Tbsp olive oil
- 1 small shallot, minced (optional)
- ¾ cup hot low-sodium broth
- ¾ cup plain Greek yogurt (whole-milk for best texture)
- ½ cup (40–45 g) finely grated Parmigiano
- ½ tsp kosher salt
- Black pepper
- A small squeeze of lemon (optional)
Method
- Cook the pasta; reserve ¾ cup pasta water.
- Soften the shallot in the oil for 2–3 minutes.
- Take the pan off the heat; whisk in the hot broth, then the yogurt—tempering prevents curdling.
- Return to low heat; whisk in the Parmigiano until smooth.
- Add the pasta; relax with pasta water to a satin finish, and season. A dot of lemon brightens without turning it into “lemon Alfredo.”
Cauliflower Alfredo
Serves: 4 Time: 30 minutes
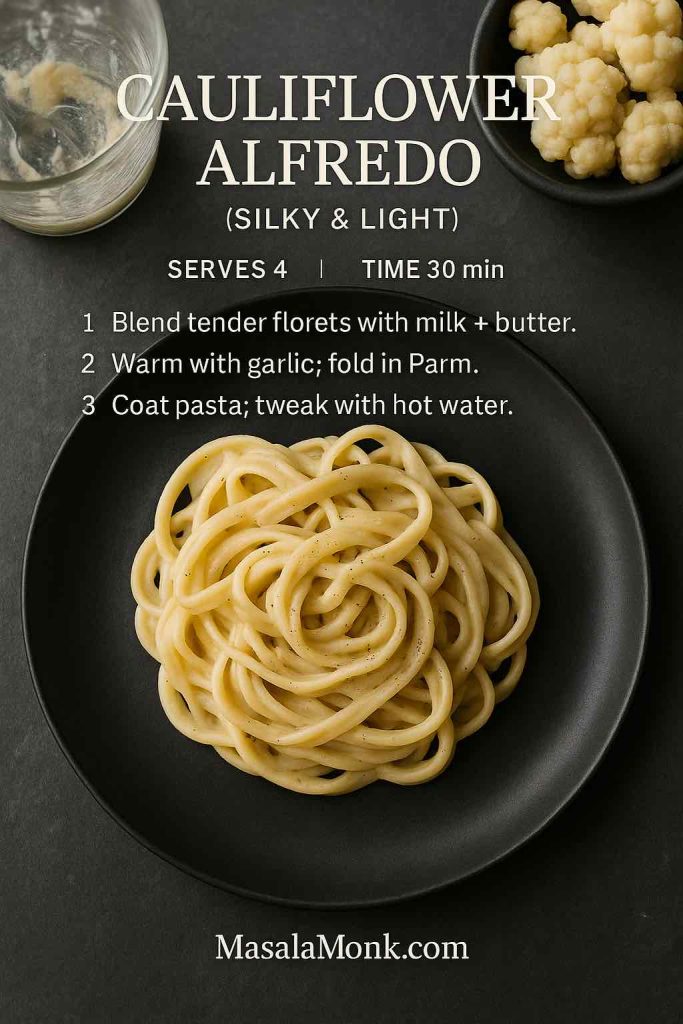
Ingredients
- 12 oz (340 g) pasta
- 2 cups cauliflower florets
- 1 Tbsp butter or olive oil
- 1 garlic clove, minced
- ¾ cup milk (dairy or unsweetened plant milk)
- ½ cup (40–45 g) finely grated Parmigiano (or nutritional yeast for a dairy-lighter profile)
- ½ tsp salt
- Black pepper
Method
- Steam the cauliflower until very tender.
- Blend with the milk and butter until completely smooth—really let the blender run; the silk is in the blending.
- Warm the garlic for 30 seconds; pour in the puree and stir in the Parmigiano. Let it barely simmer for a minute.
- Toss with the pasta, loosen with pasta water, and season.
Plant-leaning tonight? There’s a clever tofu-based idea tucked into our tofu meal-prep guide. And if shellfish is off the table, vegan substitutes for shrimp keep texture and satisfaction in play.
What to Serve Alongside Your Classic Fettuccine Alfredo
- Greens that cut through: lemony arugula, roasted asparagus, or shaved fennel.
- Proteins that tuck in neatly: sautéed shrimp, grilled chicken, or seared mushrooms; when seafood’s a no-go, those vegan shrimp alternatives above are convincing.
- Bread, judiciously: warm focaccia fingers or slender garlic toasts—enough to swipe the plate, not enough to steal the show.
Quick Answers (the kind readers actually need)
- How do I keep classic fettuccine alfredo from clumping? Work warm-to-warm; add finely grated cheese gradually over low heat; and loosen with small spoonfuls of hot pasta water while tossing.
- How can I reheat Alfredo without breaking it? Warm gently over low heat with a splash of hot water or milk, stirring until glossy again; reheat only what you’ll eat. For safety, follow USDA leftover guidance via Leftovers & Food Safety.
- Is authentic alfredo really made without cream? Yes—Roman style is pasta, butter, Parmigiano, and pasta water; the cream-based version is the American adaptation.
- Which cheese should I buy? Look for Parmigiano Reggiano with PDO markings; the consortium’s page on seals & marks helps you spot the real thing.
A Graceful Ending: Choosing the Right Alfredo Tonight
For weeknights that still feel like an occasion, authentic alfredo offers speed and purity; for company dinners, classic fettuccine alfredo brings plush comfort and a steady hold. Meanwhile, the garlic version provides aroma and lift, the lighter one slides into the week without effort, and the Greek yogurt or cauliflower paths keep the spirit of Alfredo while trimming weight. Then, as always, twirl. If the ribbons shine and the fork draws a clean line through the bowl, you’ve done exactly enough—and not a bit more.
More from MasalaMonk (to explore after you plate up)
If you’re in the mood to wander a little, these pieces extend the same spirit as your classic fettuccine alfredo—just in different directions.
- Indian-inspired Alfredo riffs: curious about warmth and perfume? This guide layers gentle spice and aromatics into Alfredo so the sauce stays silky while the flavor blooms.
- Low-carb pasta alternatives: when dinner needs to feel lighter, this walkthrough shows how to time zoodles, squash noodles, and other swaps so the sauce still clings.
- High-protein pasta ideas: if you’d rather finish satisfied than stuffed, these pairings help you build more staying power into an Alfredo night.
- Lentil pasta guide: meanwhile, if you want extra fiber without losing that glossy finish, this primer explains how lentil shapes behave in creamy sauces.
- Vegan shrimp substitutes: no shellfish? No worries—this list offers convincing stand-ins that play beautifully with Alfredo’s texture.
- Tofu Zoodle Alfredo idea: finally, if you prefer a lighter, plant-leaning bowl, this tidy idea folds tofu and zoodles into a sauce that still feels luxurious.
Quiet, trustworthy sources (for the cooks who like to know why)
Because technique is half the pleasure, these references offer calm, useful context—nothing fussy, just the right details at the right moment.
- Roman no-cream method: for pace, heat, and the feel of the toss, this is a clear baseline when you’re aiming for authentic Alfredo.
- Why pasta water matters: moreover, if you’ve ever wondered how a ladle of starchy water can transform a sauce, this explainer shows the chemistry in plain language.
- Parmigiano markings — how to spot the real thing: before you shop, look here; the PDO seals and dotted rind tell you you’re buying cheese that will melt cleanly and taste bright.
- USDA leftovers & reheating: finally, when you save a portion, reheat gently and, for safety, follow this straightforward guidance.
FAQs
1) What exactly is “authentic Alfredo,” and how is it different from classic fettuccine alfredo?
Authentic Alfredo (the Roman style) is simply hot pasta tossed with cold butter and finely grated Parmigiano, brought together with starchy pasta water—no cream, no garlic. By contrast, classic fettuccine alfredo uses a little cream (and sometimes garlic) for extra plushness and stability. For a clear technique template, see this Roman no-cream method from Serious Eats.
2) How do I keep classic fettuccine alfredo from clumping or turning grainy?
First, grate Parmigiano ultra-fine so it melts instantly; then, work warm-to-warm and add cheese gradually over gentle heat. If it tightens, loosen with a spoonful of hot pasta water and toss until glossy. If you want the “why,” this primer on how pasta water helps sauce emulsify and cling is excellent.
3) What pasta shape works best—and can I swap in others without ruining the texture?
Although fettuccine is the namesake, spaghetti, tonnarelli, penne, and even farfalle all work. However, you may need a touch more pasta water with ridged or tubular shapes to keep that silk. If you’re reducing carbs, consider the timings and textures in low-carb pasta alternatives.
4) Which cheese should I buy for the smoothest Alfredo?
Use real Parmigiano Reggiano and grate it very fine. Moreover, look for PDO seals and dotted rind marks so you know it’s authentic; the Parmigiano consortium’s guide to seals & marks shows exactly what to spot.
5) Can I make a lighter Alfredo that still feels luxurious?
Yes—absolutely. You can use half-and-half plus a tiny slurry, or go brighter with our Greek-yogurt or cauliflower approaches in the post. If you’d like even more staying power (without heaviness), skim our high-protein pasta ideas and the lentil pasta guide for easy pairings.
6) Is there a plant-forward or dairy-lighter way to enjoy Alfredo?
Certainly. Try the Greek-yogurt version, a cauliflower-based sauce, or (when you want a playful detour) the Tofu Zoodle Alfredo idea tucked inside our tofu meal-prep guide. And if shellfish is off the table, these vegan shrimp substitutes keep texture and satisfaction in play.
7) Do I salt the pasta water heavily for authentic alfredo—and how much should I save?
Yes—season the water so the noodles taste good on their own (think “well-seasoned soup”). Then, before draining, reserve at least 1 cup of very hot pasta water. Add it gradually: first to jump-start the emulsion, then to fine-tune the gloss. Here’s the science-backed explanation of why pasta water matters.
8) How do I reheat leftovers without breaking the sauce?
Gently does it. Warm the pasta over low heat with a splash of hot water or milk, stirring until glossy again. Reheat only what you’ll eat; for safety, follow the USDA’s leftovers & reheating guidance (aim for 165°F).
9) When should I choose authentic Alfredo over the creamy version?
Choose authentic Alfredo when you want weeknight elegance with minimal ingredients and maximum cheese clarity. Alternatively, choose the creamy route when you need a steadier sauce that travels well to the table and reheats more predictably. If you’re feeling adventurous, drift toward Indian-inspired Alfredo riffs for aromatic warmth.
10) What’s the single most common mistake home cooks make?
Too much heat, too little patience. Instead, keep the flame gentle, add cheese gradually, and use pasta water as your texture dial. With that rhythm, classic fettuccine alfredo stays glossy rather than greasy.
11) Can I add chicken, shrimp, or vegetables without losing that silky finish?
Yes—add quickly cooked proteins (grilled chicken or sautéed shrimp) and blanched vegetables (broccoli, asparagus) at the toss stage, then adjust with pasta water until the sauce re-coats everything. When shrimp isn’t an option, lean on vegan shrimp alternatives that mimic the bite without the shellfish.
12) I love Alfredo but prefer a fresher, spiced profile—any ideas that still respect the sauce?
Try a garlic-forward base finished with lemon zest and chives, or (for something playful yet balanced) explore our Indian-inspired Alfredo twists. They keep the silky core intact while the aromatics bloom around it—perfect for dinner guests who want familiar comfort with a graceful nudge.