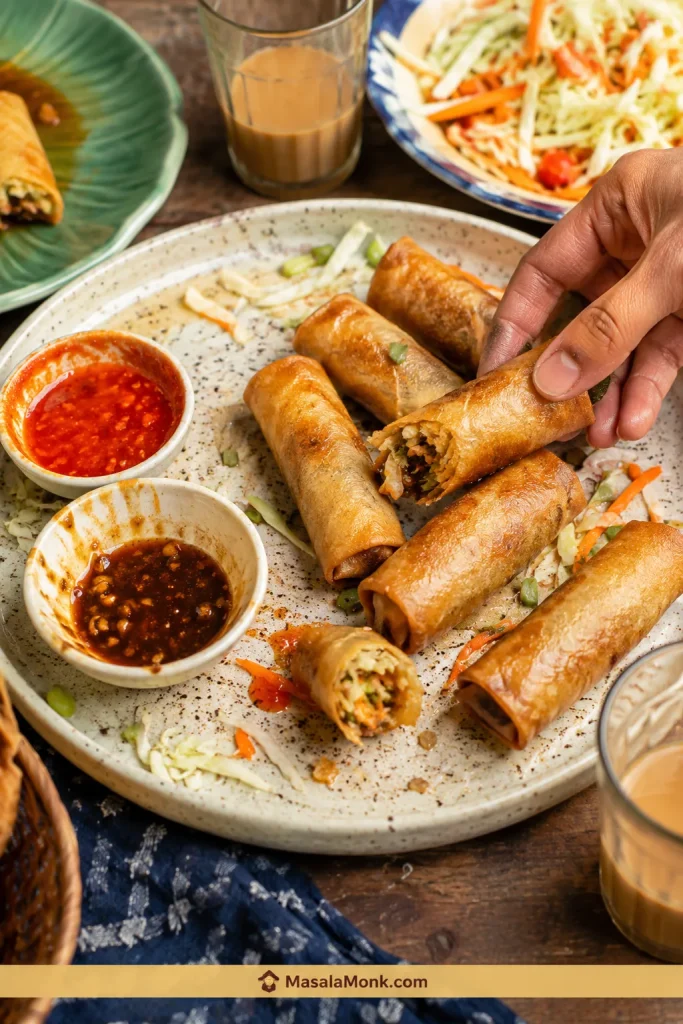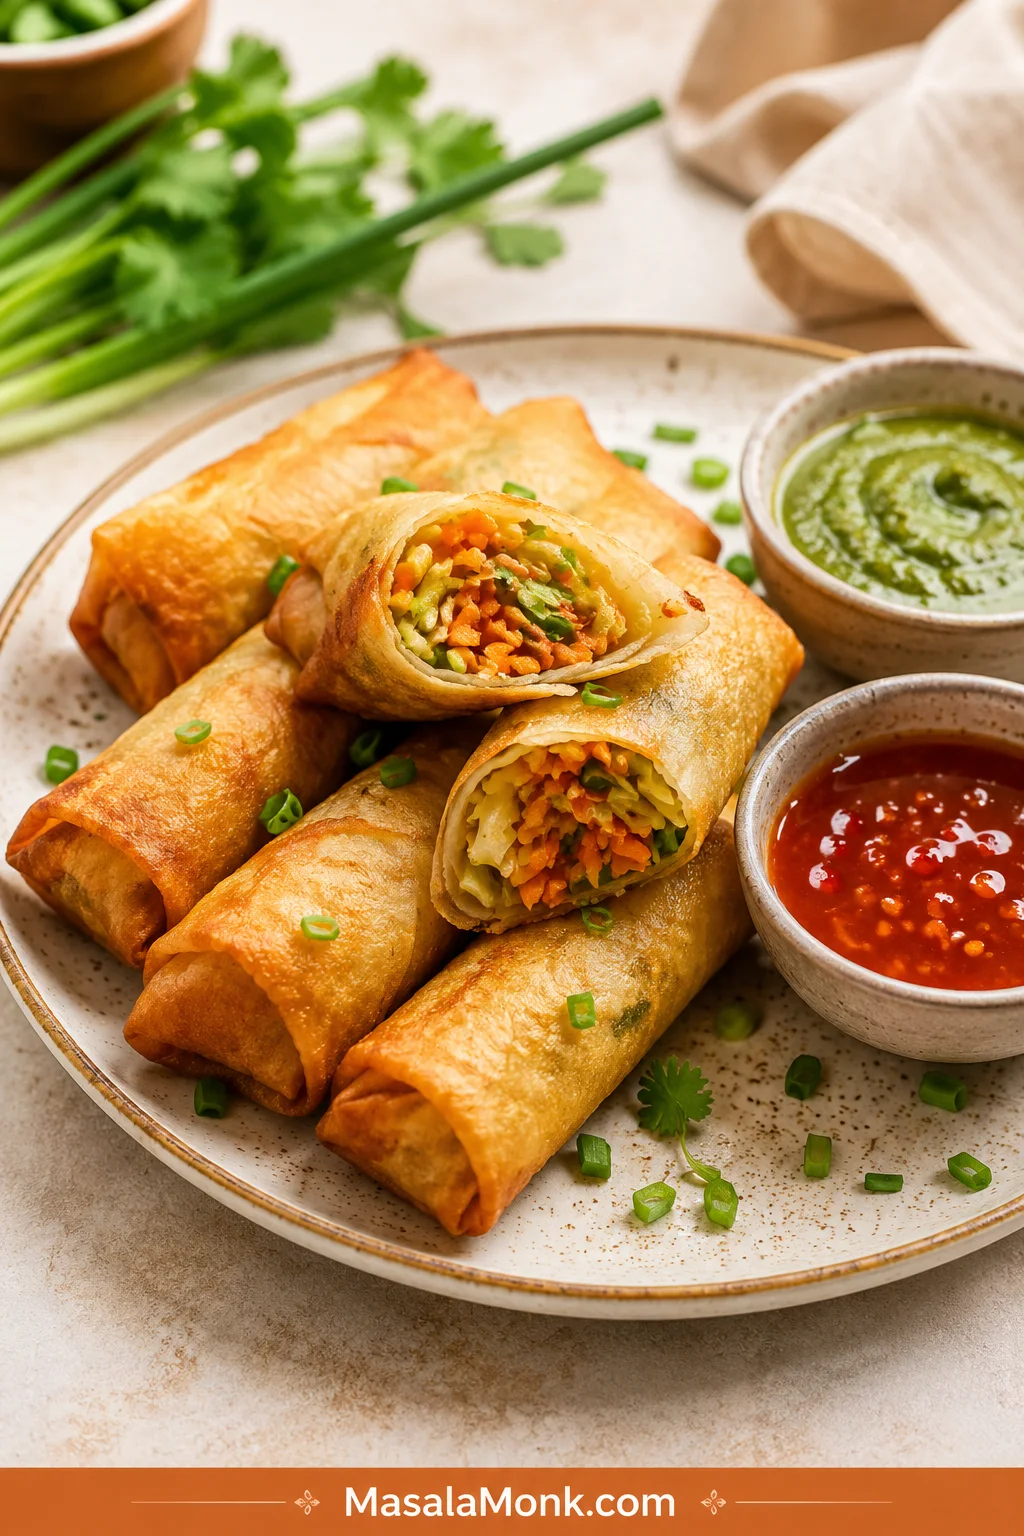
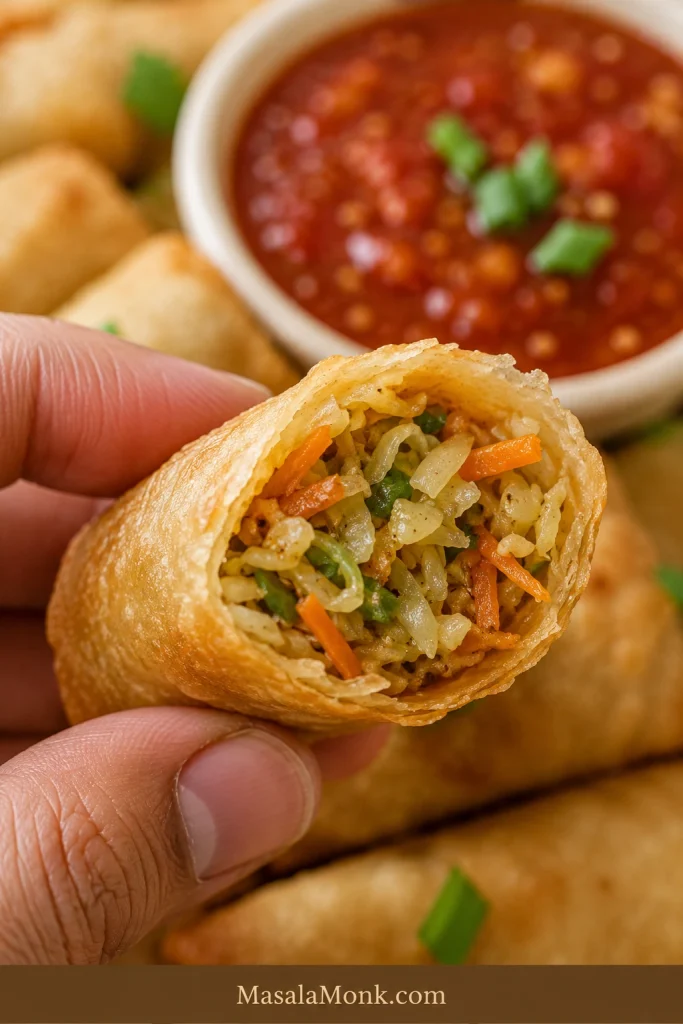
These spring rolls are for the moment you want that crackly first bite: a thin golden wrapper, hot vegetable filling, and a bright little dip waiting on the side. The goal is simple: crisp, not greasy; full, not bursting; flavorful, not watery.
They feel easy until you are standing there with wet filling, wrappers drying at the edges, and oil getting hotter by the second. The good news is that they are not difficult once you know what usually goes wrong. This recipe keeps the process steady with five checks: dry filling, thin wrappers, snug fold, thick seal, and steady hot oil.
This repeatable home method uses store-bought thin wrappers, ginger-garlic vegetables, clear wrapping cues, and a light golden shell that cracks when served hot.
When the wrapper is right, it breaks before it bends. The filling stays hot and savory inside, the edges stay crisp for those first few minutes, and the dip makes the next bite feel brighter.
Dry filling, covered wrappers, steady oil — that is the whole spring roll game.
Quick Answer: How to Make Crispy Spring Rolls
A spring roll is a filled roll made with a thin wrapper and vegetables, noodles, tofu, meat, or seafood. In this recipe, spring roll means the crispy fried version made with thin wheat wrappers and a cooked vegetable filling.
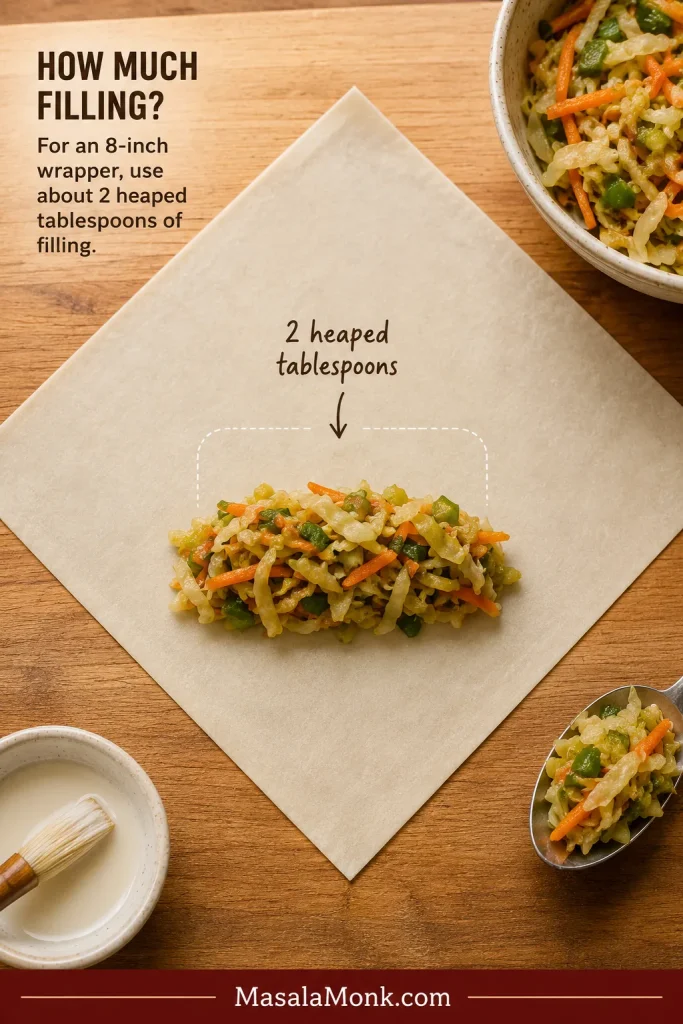
For crisp rolls, use thin spring roll wrappers and a cooked vegetable filling that is glossy, cooled, and free of loose liquid. Add about 2 heaped tablespoons filling to each standard 8-inch wrapper, roll snugly, seal with flour or cornstarch paste, and fry at 175–185°C / 350–365°F until golden and lightly blistered.
The most important thing is not perfect rolling. It is starting with filling that has stopped steaming, wrappers that stay covered, and oil that bubbles steadily. Get those right, and the rest becomes much easier.
- Wrapper: thin frozen spring roll sheets or wheat spring roll wrappers.
- Filling cue: glossy vegetables, no puddle in the pan, and no heavy steam.
- Frying range: 175–185°C / 350–365°F for freshly wrapped rolls.
- Filling amount: about 2 heaped tablespoons for an 8-inch / 20–22 cm wrapper.
- Make-ahead: freeze homemade uncooked rolls on a tray, then cook from frozen.
That is the whole rhythm: dry filling, flexible sheets, a firm seal, and oil hot enough to crisp before the wrapper can soak.
Texture cue: The finished roll should crack before it bends, with filling that stays tucked inside instead of steaming the wrapper soft.
Ready to cook now? Jump to the recipe card. Still choosing wrappers? Jump to wrappers.
Recipe: Crispy Veg Spring Rolls
This Indo-Chinese style vegetable spring rolls recipe makes 18–22 crispy rolls with a savory cooked filling and thin golden wrappers. Keep the filling cool, the wrappers covered, and the oil steady. After the first few rolls, your hands find the rhythm and the batch moves quickly.
The filling is vegetarian as written and can also be vegan if your wrappers and sauces are vegan.
| Prep time | 30 minutes |
| Cook time | 20 minutes |
| Cooling time | 10–15 minutes |
| Total time | 60–65 minutes |
| Yield | 18–22 spring rolls |
| Serves | 4–6 as a snack or appetizer |
| Style | Crispy veg spring rolls / Indo-Chinese inspired |
| Main method | Deep fried |
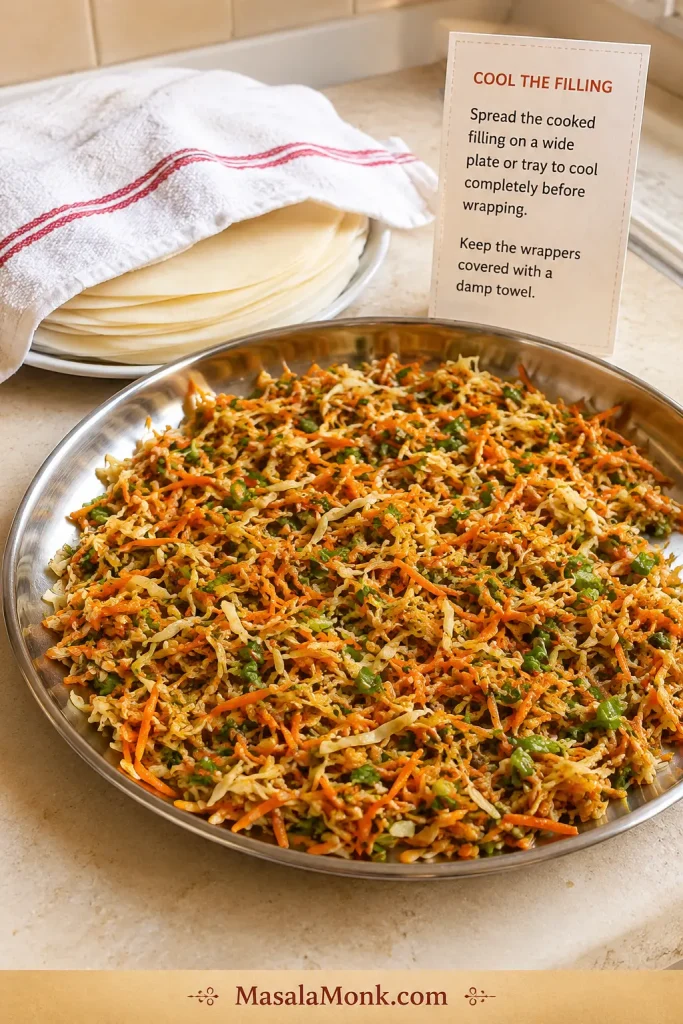
The timing above includes cooling. Spread the filling on a wide plate or tray so steam escapes faster and the wrappers stay dry.
Cook’s Notes for the Best Texture
- Cool the filling fully before wrapping.
- Keep unused wrappers covered with a damp towel.
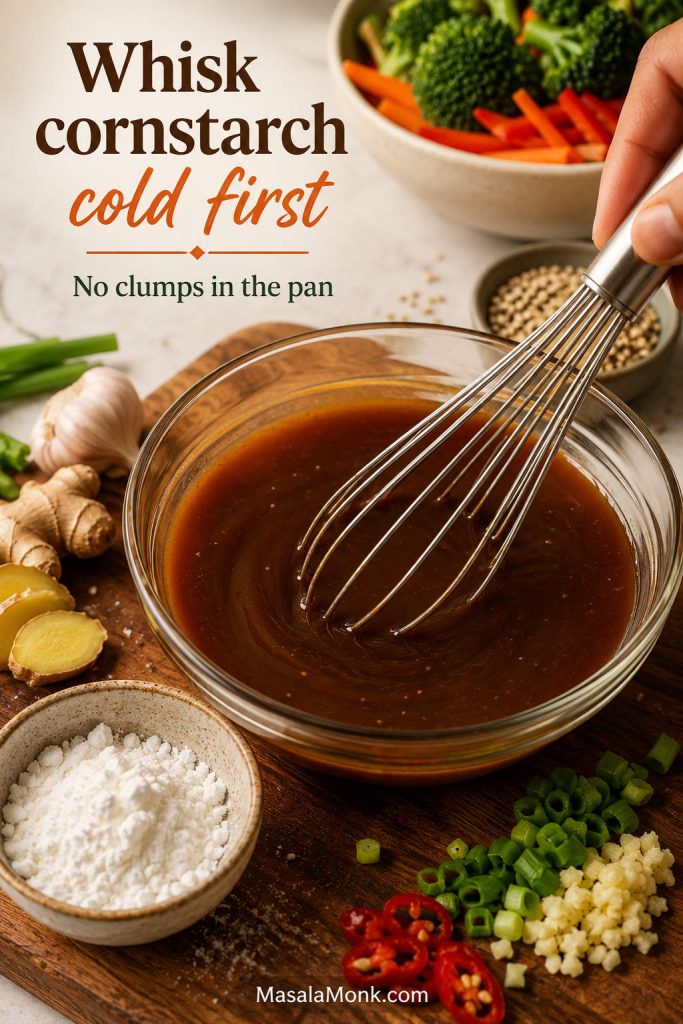
- Seal with a thick flour or cornstarch paste, not a watery one.
- Fry one test roll first if unsure, then cook in small batches and drain on a rack.
Ingredients
For the spring roll filling
- 20 thin spring roll wrappers, about 8 inches / 20–22 cm square, plus a few extra if your pack has them
- 200g cabbage, finely shredded, about 3 packed cups
- 80–100g carrot, julienned or thickly grated, about ¾–1 cup
- ½ cup capsicum / bell pepper, thinly sliced
- ½ cup finely sliced French beans or bean sprouts
- ½ cup spring onions, whites and greens separated
- 3–4 garlic cloves, finely minced
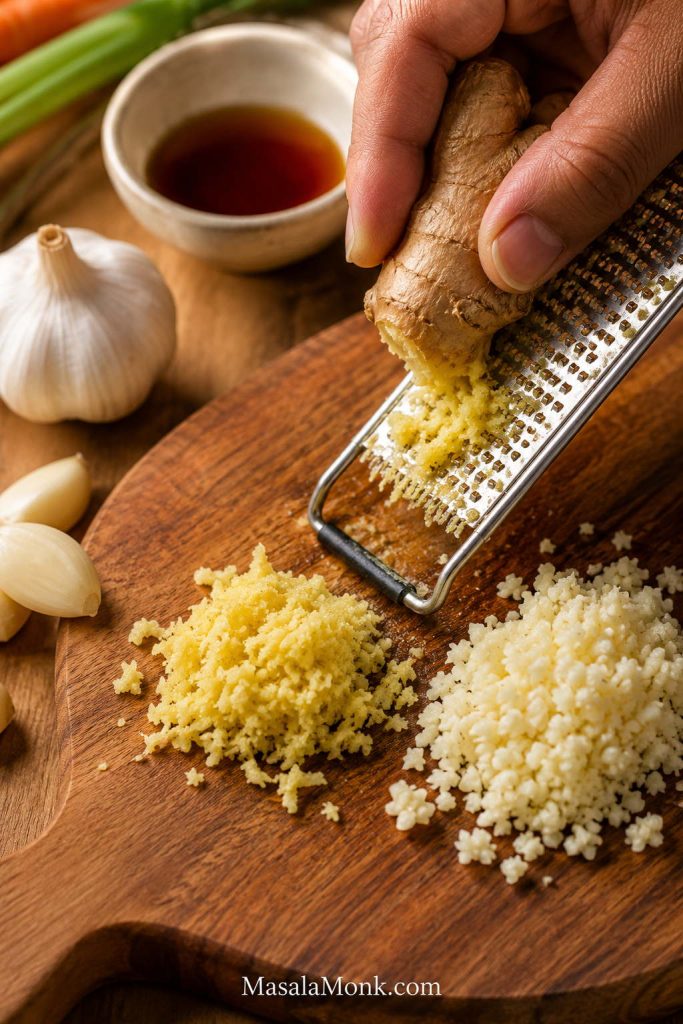
- 1 tablespoon ginger, finely minced
- 1 tablespoon neutral oil for stir-frying the filling
- 1½–2 tablespoons soy sauce
- 1–1½ tablespoons vinegar
- 1–2 teaspoons red chili sauce or green chili sauce, optional
- ½ teaspoon white pepper or black pepper
- ½–1 teaspoon sugar, optional, to balance the seasoning
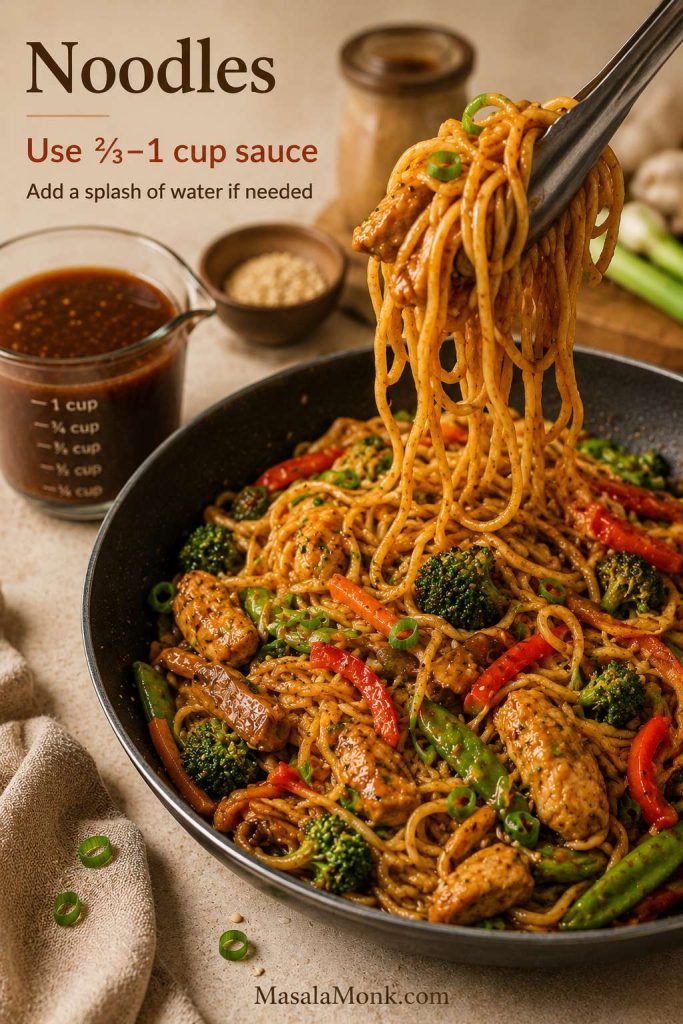
- ½–1 cup cooked, cooled, roughly chopped noodles, optional
- Salt only after tasting, because soy sauce, wrappers, and dipping sauces already add salt
The yield depends on wrapper size and filling amount. With the full 1 cup noodles, you may get closer to 22 rolls.
For sealing
- 2 tablespoons all-purpose flour or cornstarch
- 2–3 tablespoons water, or enough to make a thick paste
For frying
- Neutral oil for deep frying, such as sunflower, peanut, canola, rice bran, or another suitable high-heat frying oil
Avoid strongly flavored oils for frying because they can overpower the ginger, garlic, soy, and vegetable filling.
Method
1. Make the sealing paste
Mix the flour or cornstarch with water to make a thick, smooth paste. It should be spreadable, not runny. Keep it nearby while wrapping. Plain water can work with some wrappers, but paste is safer for fried rolls.
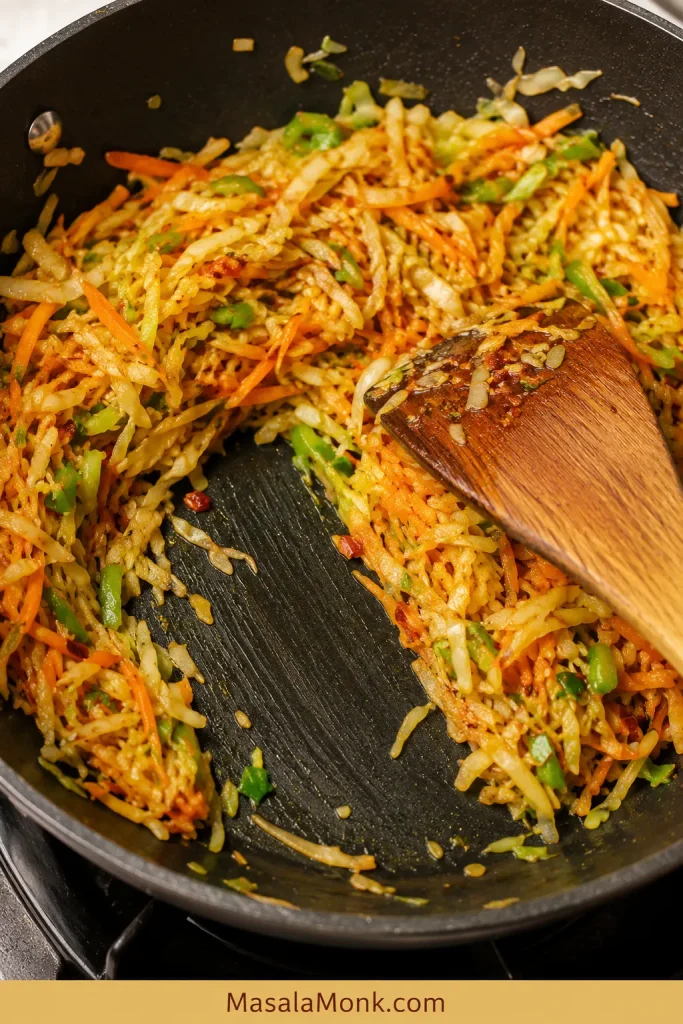
2. Cook the filling
Heat 1 tablespoon oil in a wok, kadai, or wide pan over medium-high to high heat. Add the garlic, ginger, and spring onion whites. Stir for a few seconds until aromatic, but do not let the garlic brown too much.
Add the cabbage, carrot, capsicum, and beans or sprouts. Stir-fry on high heat for 2–4 minutes, just until the vegetables soften slightly but still keep some crunch.
Add soy sauce, vinegar, chili sauce if using, pepper, and sugar if needed. Toss well. Add cooked noodles now, if using. Chop long noodles roughly before adding them so they do not pull the filling out when you bite.
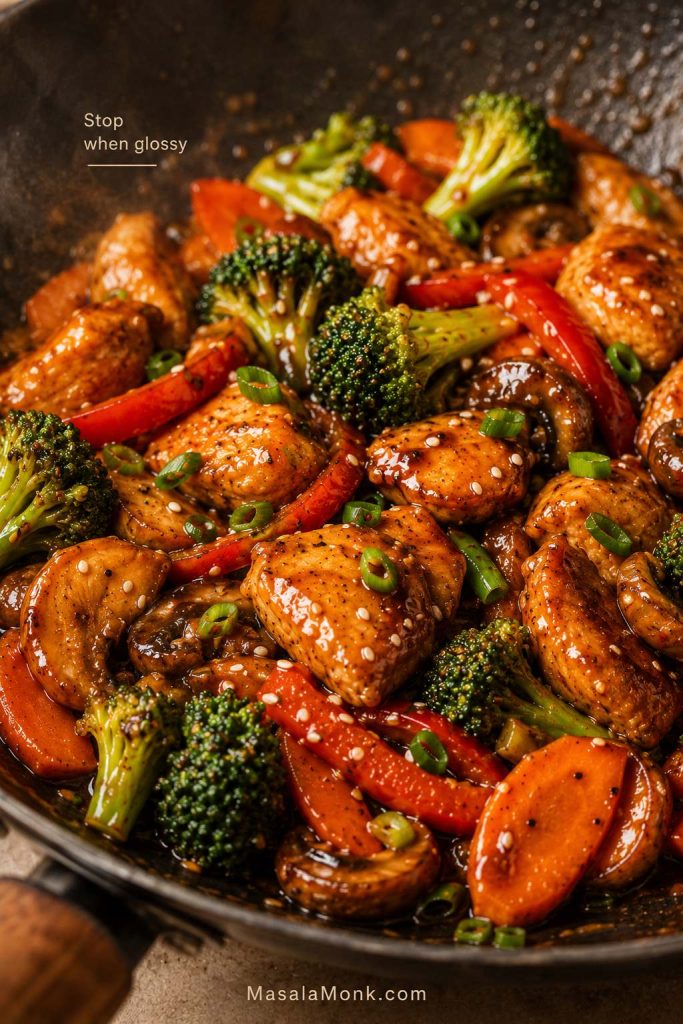
Continue cooking until the vegetables smell savory and gingery and there is no visible liquid at the bottom of the pan. Drag a spatula through the filling; if liquid runs back into the space, cook it a little longer. The filling should be glossy and flavorful, not saucy.
Taste and adjust the seasoning. Go light on extra salt because the wrappers and dipping sauces add more. Add spring onion greens at the end. Transfer the filling to a plate or tray and let it cool to room temperature before wrapping.
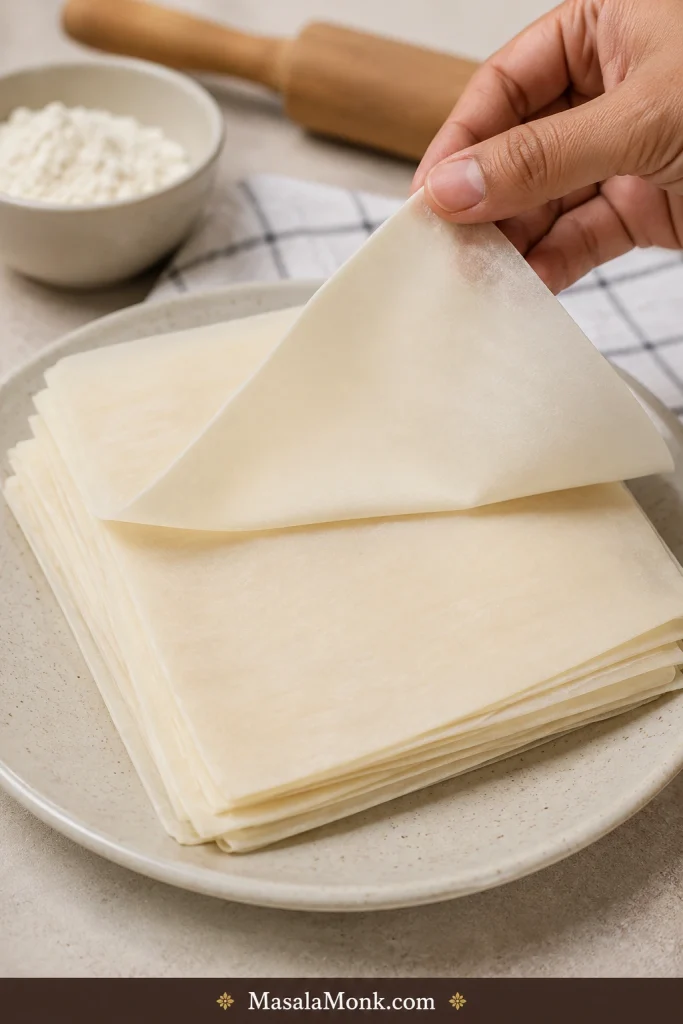
3. Prepare the wrappers
Thaw frozen spring roll wrappers according to the package instructions. Keep the wrapper stack covered with a clean damp towel while you work; this one small habit prevents most cracking and tearing.
The sheets should feel soft and flexible, not dry, cracked, or sticky. If they stick together, wait a few more minutes after thawing instead of pulling hard. Avoid microwaving frozen wrappers unless the package says it is safe, because they can turn steamy, sticky, and easier to tear.
4. Fill and fold
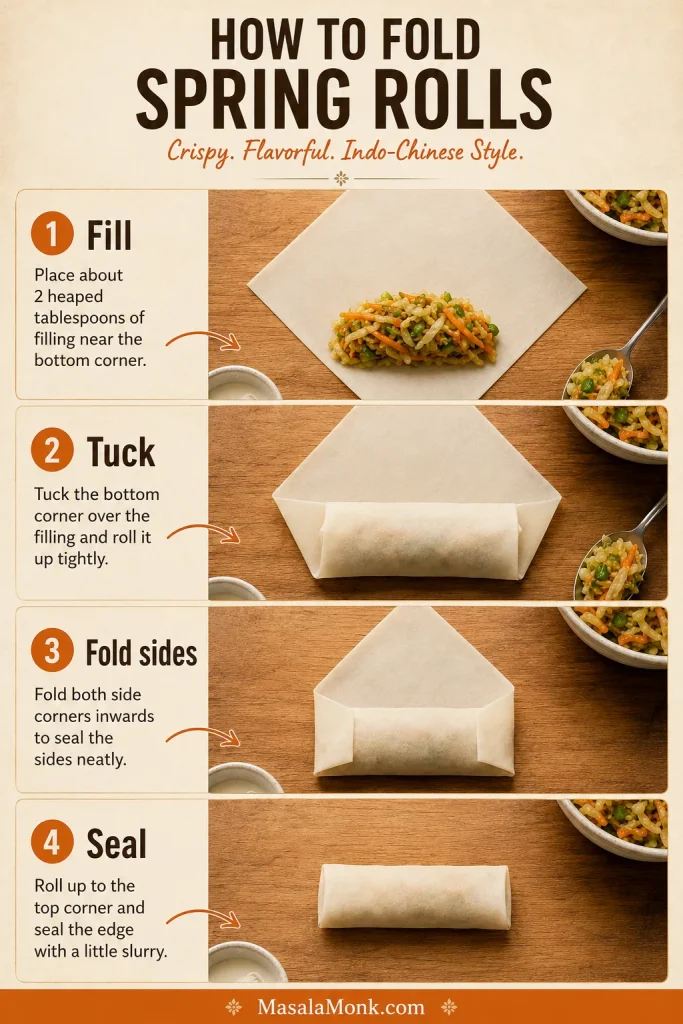
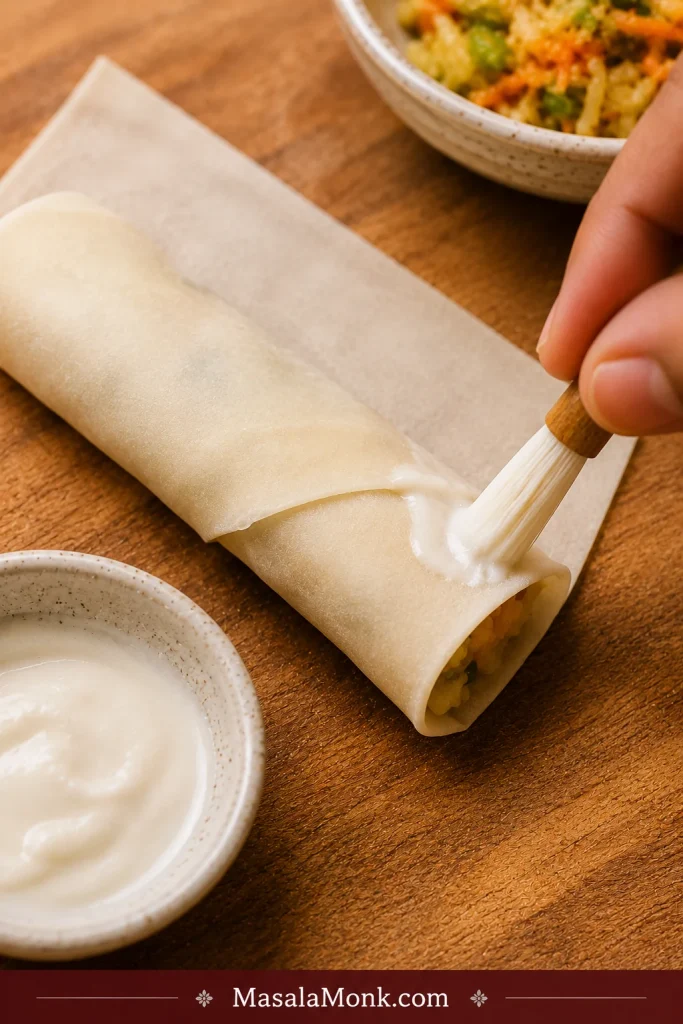
Place one wrapper on the counter like a diamond, with one corner pointing toward you. Add about 2 heaped tablespoons of cooled filling just below the center. Fold the bottom corner over the filling, tuck gently, fold the left and right corners inward, then roll tightly toward the top corner. Brush the final corner with sealing paste and press to close. Place the roll seam-side down.
The first roll is allowed to look a little awkward. Keep going; the next few usually get neater.
Keep finished rolls covered while you wrap the rest. Exposed wrappers dry quickly, especially in a warm kitchen.
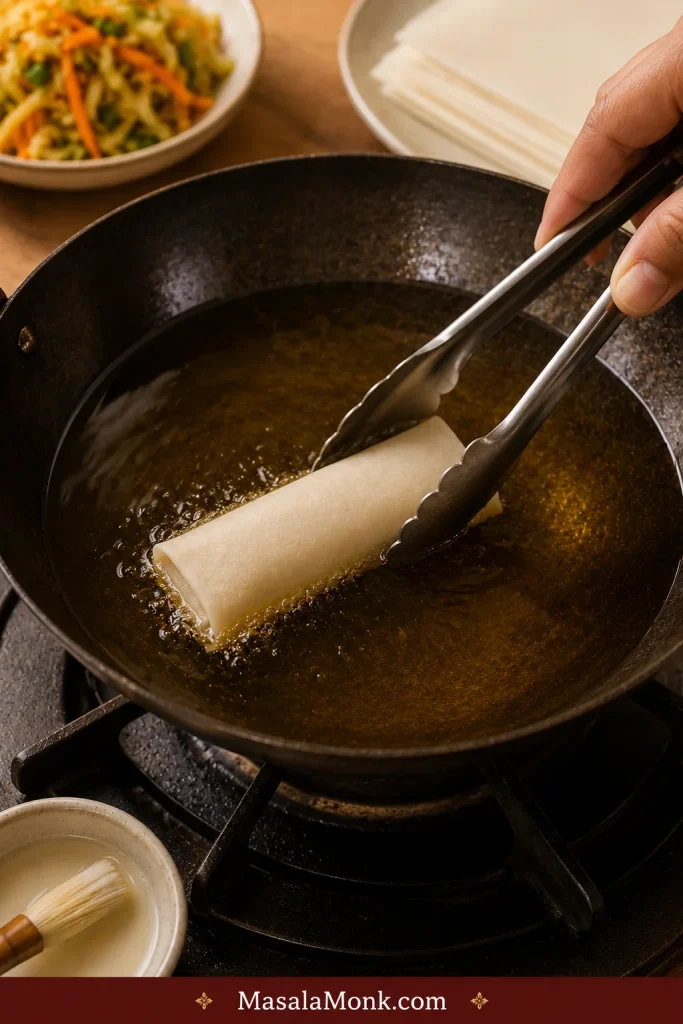
5. Fry until crisp
Heat 2–3 inches of oil in a deep pan to 175–185°C / 350–365°F. Lower the rolls gently into the oil, away from your body. Fry one test roll first if you want to check the seal and oil temperature before committing the whole batch. If it browns evenly and stays closed, the rest of the batch is ready.
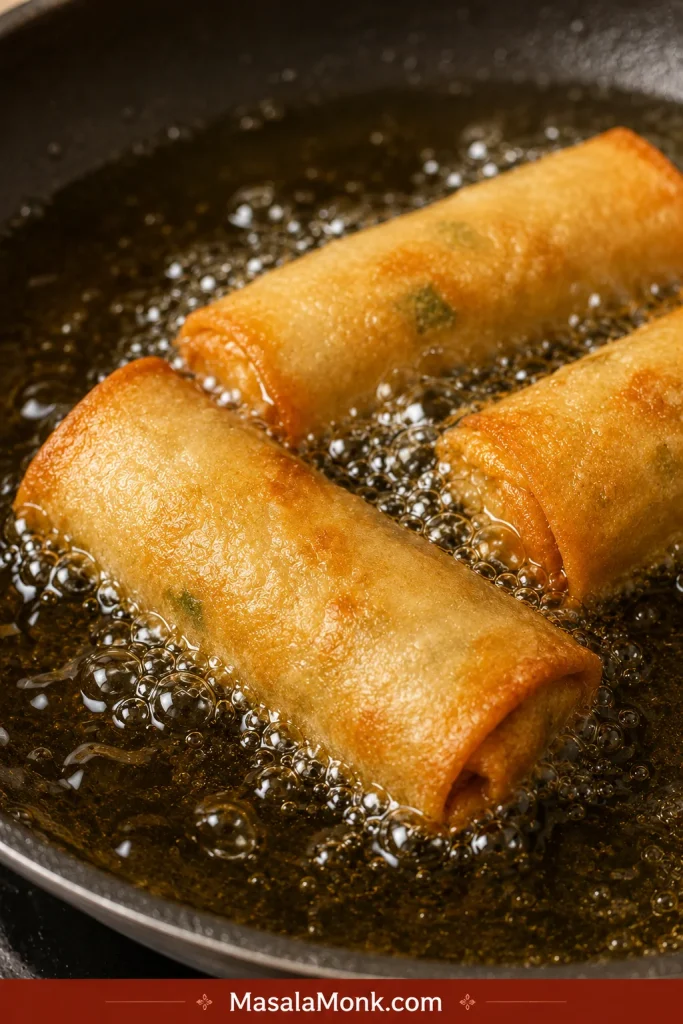
Fry 3–5 rolls at a time, depending on pan size. Do not crowd the pan; too many rolls drop the oil temperature and can make the wrappers oily. Turn gently and fry until golden, crisp, and lightly blistered, about 3–5 minutes.
The oil should sizzle steadily. When the rolls brown too slowly, let the oil move closer to 185°C / 365°F before adding more. If they brown too fast, lower the heat and give the oil a moment to settle. Homemade frozen rolls that have not been cooked yet should start closer to 190°C / 375°F, because they drop the oil temperature quickly. When frozen rolls brown before the center is hot, lower the heat slightly after the first minute.
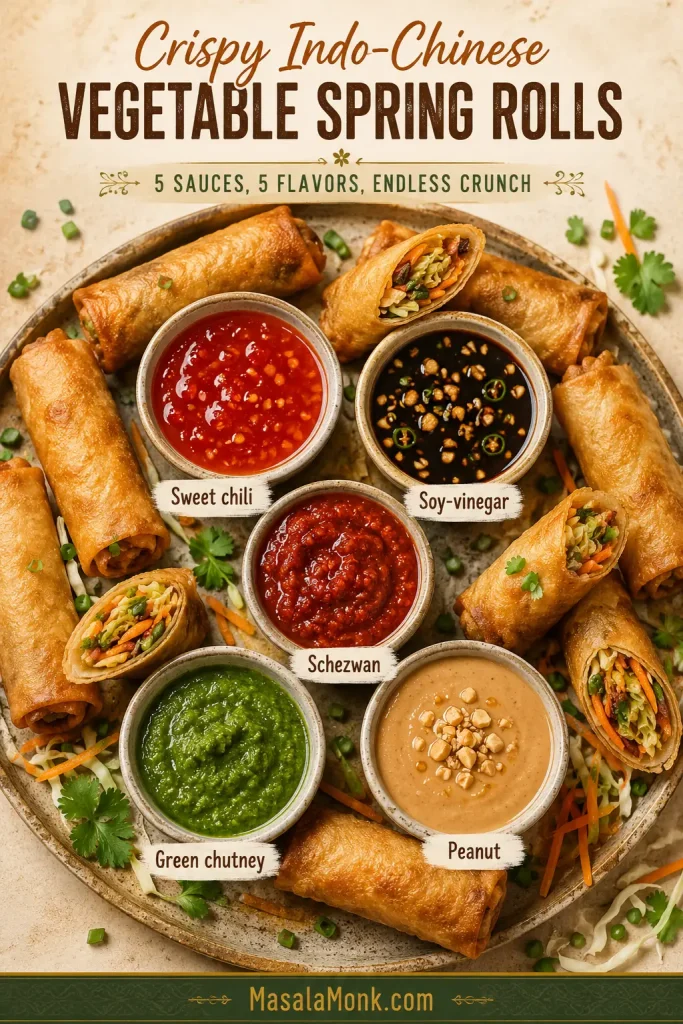
Remove with tongs or a slotted spoon and drain on a wire rack or paper towel-lined plate. The best rolls feel light when you lift them and sound crisp when they touch the rack. Serve hot with sweet chili sauce, soy-vinegar dip, Schezwan-style sauce, green chutney, peanut chutney, or another spring roll dipping sauce.
Success cue: Most spring roll problems trace back to five details: dry filling, thin wrappers, snug folding, thick paste, and steady oil.

What Kind of Spring Rolls Are These?
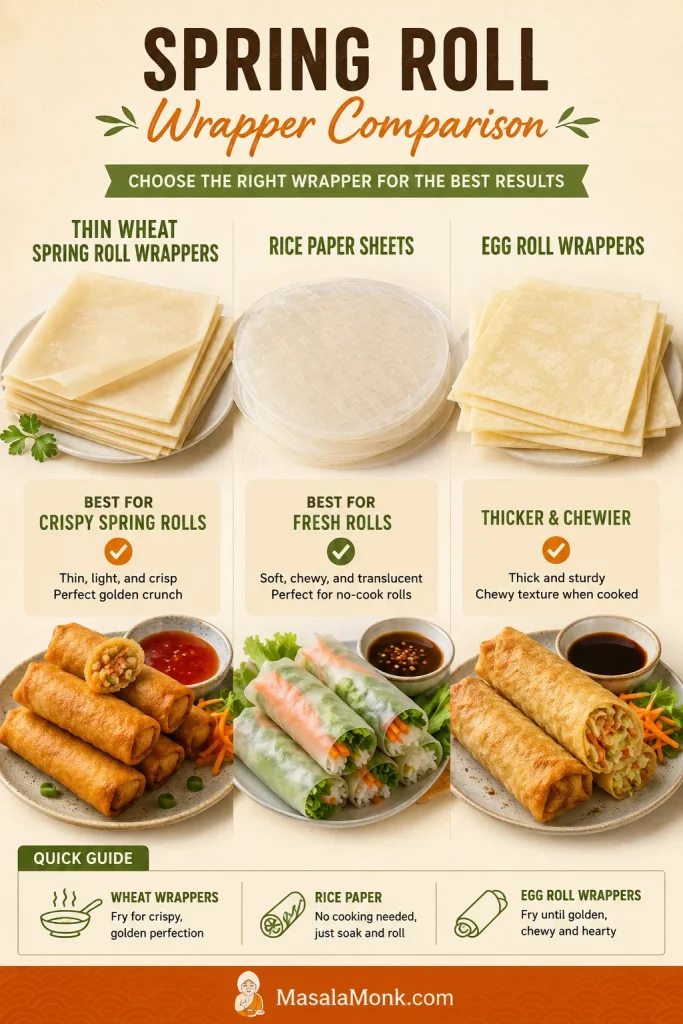
This recipe is for the crispy, fried kind of spring roll: thin wheat wrappers, cooked vegetable filling, and a golden shell that cracks when hot. It is not the soft fresh rice paper version.
For this recipe, choose thin wheat spring roll wrappers or frozen spring roll sheets. Rice paper is better for fresh rolls, and egg roll wrappers make a thicker, chewier roll. The important thing is not only the name on the packet; it is how the wrapper behaves once it hits heat.
Wrapper cue: Use the wrapper that matches the roll you want. Thin wheat wrappers give the crisp fried version in this recipe.
| Type | Wrapper | Cooked? | Best for |
|---|---|---|---|
| Crispy spring rolls | Thin wheat spring roll wrappers | Fried, air fried, or baked | Crunchy snacks, appetizers, party food |
| Fresh rice paper rolls / summer rolls | Rice paper sheets | No | Fresh rolls with herbs, noodles, vegetables, shrimp, tofu, or peanut sauce |
| Egg rolls | Thicker egg roll wrappers | Usually fried | Heavier American-Chinese style rolls |
| Lumpia | Thin lumpia wrappers | Usually fried | Filipino-style crisp rolls |
If the names still feel confusing, this spring roll vs summer roll vs egg roll explainer gives a simple comparison.
Why This Spring Roll Recipe Works
Now that the recipe path is clear, the rest of the guide is about making each step easier: the filling, the wrapper, the fold, and the heat.
A good spring roll is not only about ingredients. It is a balance of three small things: filling that does not steam, wrappers that stay flexible, and oil hot enough to set the shell before it turns greasy.
The best rolls are not just crunchy. They have contrast: a thin shell that cracks, vegetables that still have bite, and a dip sharp enough to make the next roll tempting.
The filling dries out before it goes inside
Loose moisture is the enemy of that crackly shell. Quick stir-frying cooks off extra water while keeping the vegetables lightly crunchy.
Cooling stops the wrapper from steaming
Warm filling creates steam. Steam trapped inside a sealed wrapper can soften the roll or make it burst in the oil. Letting the filling rest gives you a cleaner wrap.
Thin wrappers create the crackly shell
For this crispy version, thin wheat spring roll wrappers are not optional — they are what give the roll its light, crackly shell. Thicker egg roll wrappers work differently and give a chewier, heavier result.
A snug fold keeps the roll calm in hot oil
A neatly folded roll fries more evenly and is less likely to open in the oil. Snug is better than squeezed; too much pressure can tear the wrapper.
Helpful Tools for Crisp Spring Rolls
Use what you have. Spring rolls do not need fancy equipment; the useful tools simply help with the three real jobs: cooking moisture out, keeping wrappers flexible, and letting steam escape after frying.
- Wok, kadai, or wide pan: for cooking moisture out of the filling quickly.
- Deep heavy pan: for steadier frying heat.
- Frying thermometer: the easiest way to stay around 175–185°C / 350–365°F.
- Wire rack: keeps fried rolls crisp by letting steam escape.
- Damp towel: keeps wrappers flexible while you work.
Spring Roll Ingredients and Filling Formula
The filling should taste bright and savory on its own, because the wrapper only adds crunch; it does not fix a flat filling. You should smell ginger, garlic, soy, and vinegar before you turn off the heat. If the filling tastes dull now, it will taste dull inside the wrapper too.
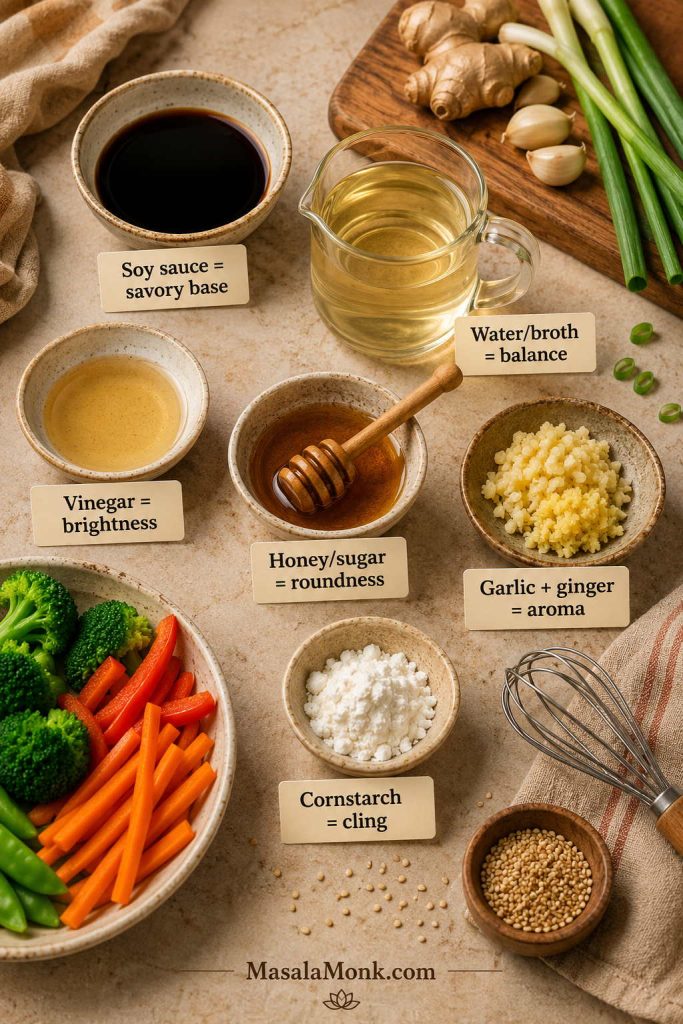
The formula is simple: crunch, aroma, salt, acid, heat, and a little body. Cabbage and carrot bring texture, ginger and garlic build aroma, soy sauce adds depth, vinegar keeps the fried wrapper from feeling heavy, pepper and chili sauce add bite, and optional noodles make the filling fuller.
Ingredient cue: Build the filling around crunch, aroma, salt, acid, and heat so the rolls taste bright before they reach the dip.
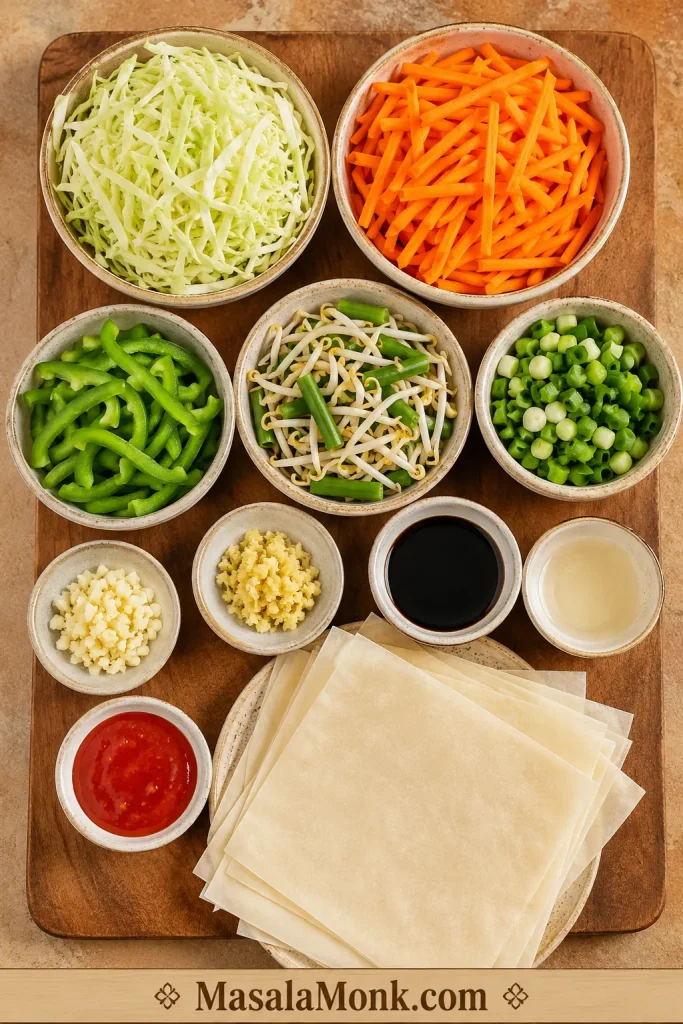
- Crunch: cabbage, carrot, capsicum, beans, sprouts, and spring onions.
- Aroma: ginger, garlic, and spring onion whites.
- Umami: soy sauce for depth and salt.
- Brightness: vinegar to balance the fried shell.
- Heat: pepper and optional chili sauce for Indo-Chinese snack-shop flavor.
- Body: a small amount of cooked, cooled, roughly chopped noodles, if you want a fuller filling.
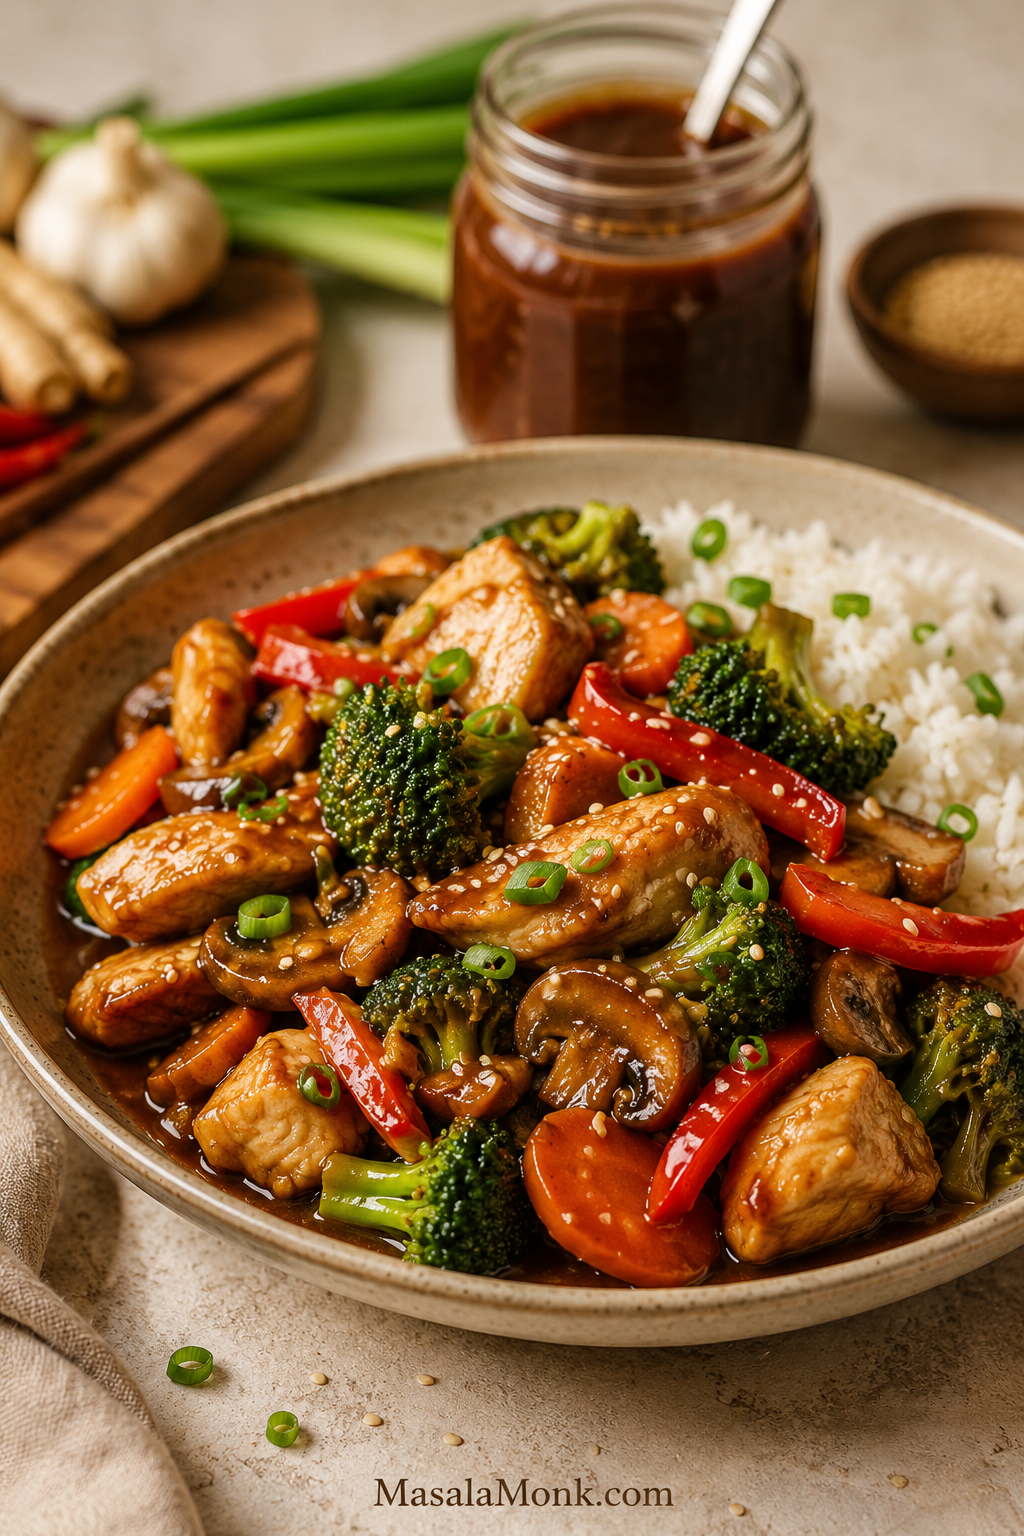
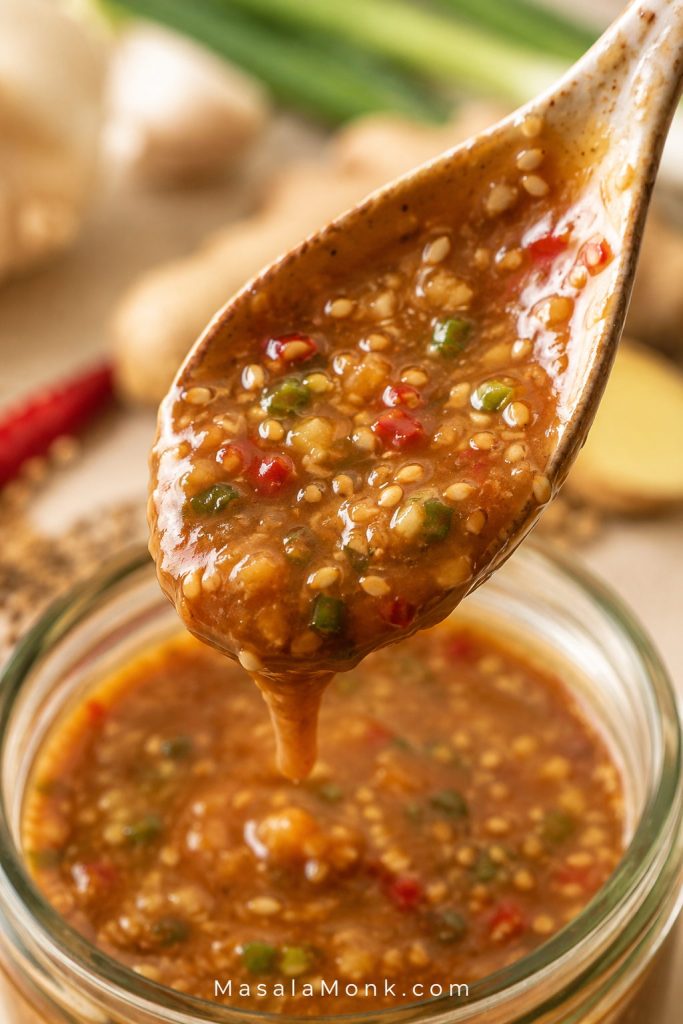
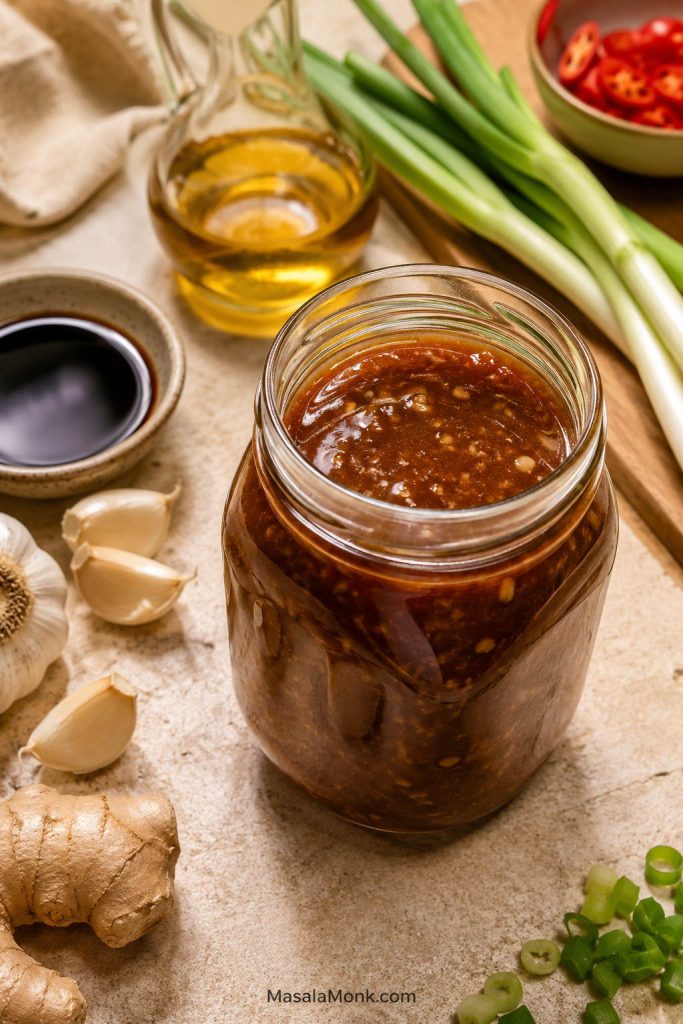
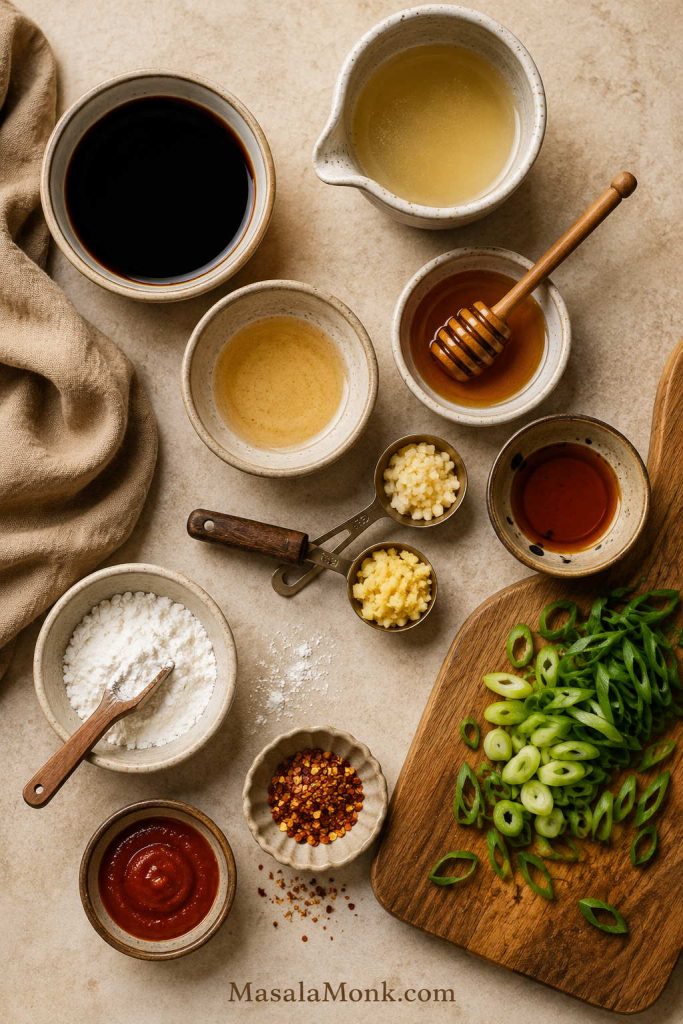
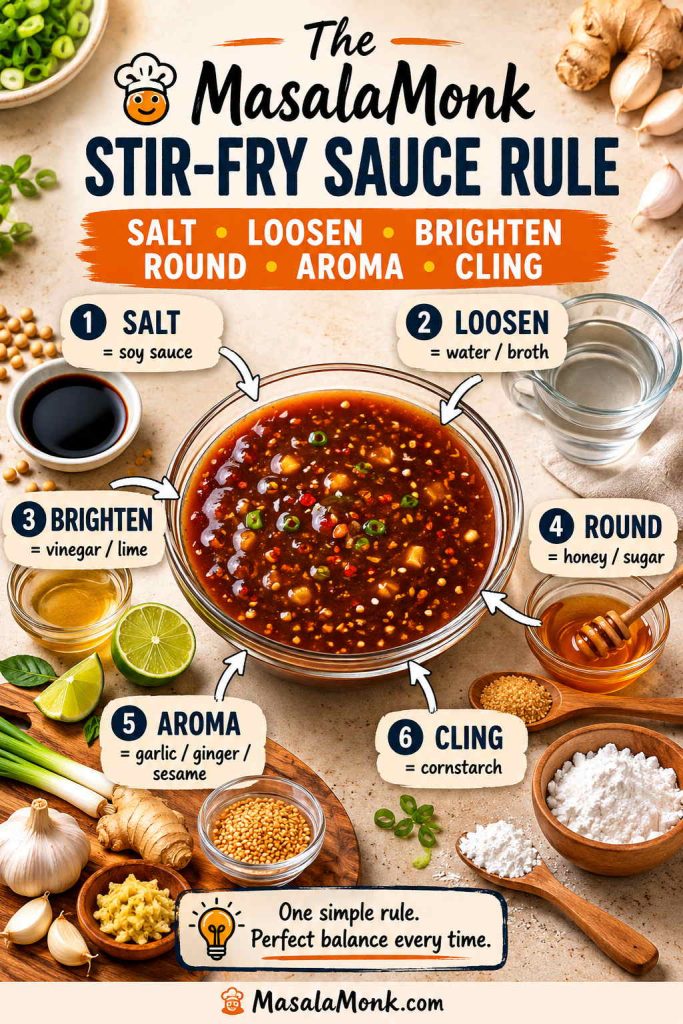
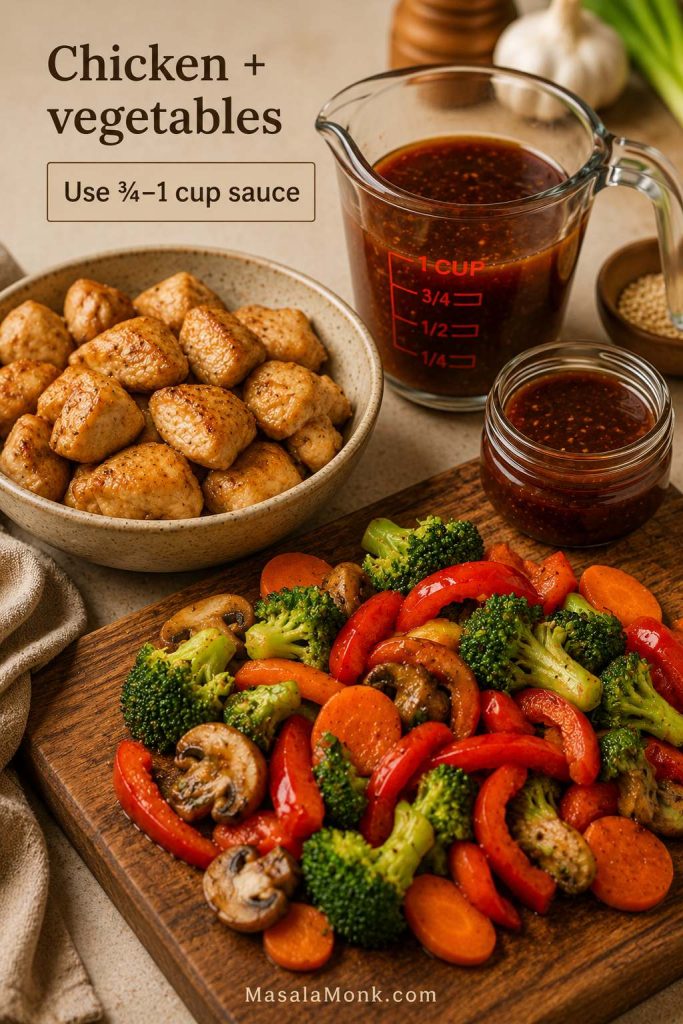
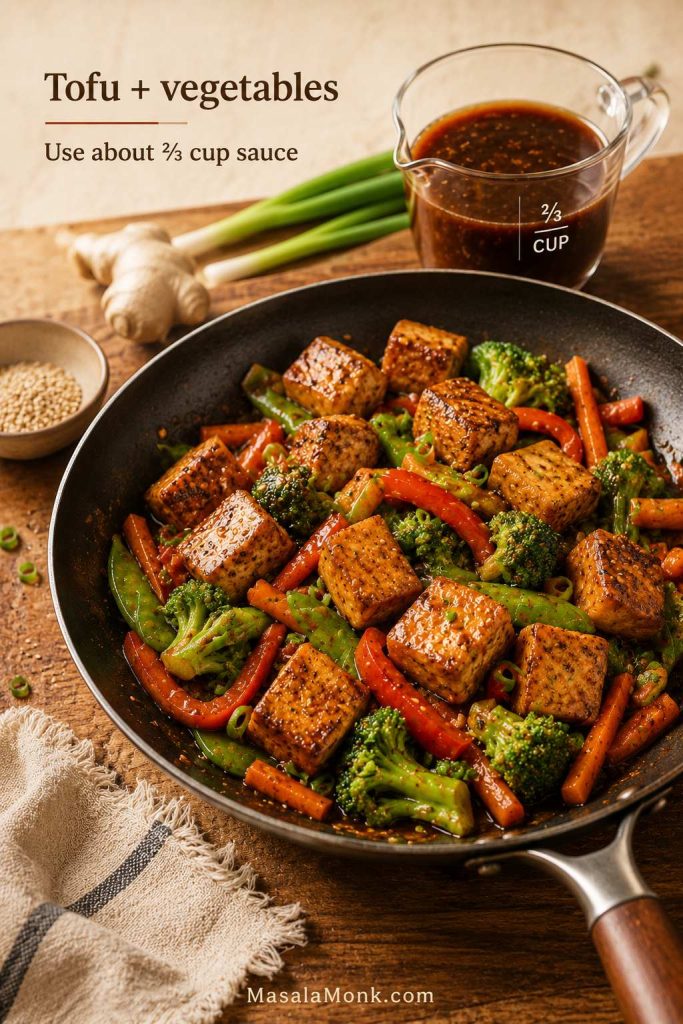
The same soy-garlic-ginger balance is useful beyond this recipe too; this stir fry sauce recipe works well for noodles, vegetables, tofu, chicken, shrimp, and quick weeknight bowls.
Best Wrappers for Crispy Spring Rolls
Once you know which kind of roll you are making, wrapper choice becomes simple. Use thin wheat spring roll wrappers or frozen spring roll sheets for this recipe. Rice paper is for fresh rolls, and egg roll wrappers make a thicker, heavier roll.
Thin sheets give a delicate shatter; thicker wrappers make the roll heavier and chewier.
| Wrapper type | Use for this recipe? | What to know |
|---|---|---|
| Thin wheat spring roll wrappers | Yes | Best choice for crispy fried spring rolls. |
| Frozen spring roll sheets | Yes | Common in Indian and Asian grocery stores. Thaw while sealed. |
| Lumpia wrappers | Yes, when available | Thin and crisp, though size and texture may vary. |
| Rice paper | Not for this main method | Best for fresh summer rolls. Fried rice paper rolls need a different technique. |
| Egg roll wrappers | Not ideal | Thicker, heavier, and chewier than spring roll wrappers. |
| Homemade spring roll sheets | Possible | Useful if already made thin and flexible. |
Homemade spring roll sheets can work when they are thin and flexible, but they are a separate project. For this recipe, store-bought frozen sheets are easier and more reliable.
If you cannot find spring roll wrappers, lumpia wrappers are the closest substitute. Thaw frozen wrappers while they are still sealed so they do not dry out. Once opened, cover the stack with a clean damp towel, separate one sheet at a time, and cover the rest again immediately.
How to Tell If Wrappers Are Ready
A good wrapper should feel easy in your hands: soft enough to bend, dry enough to separate, and strong enough to roll without splitting. If the sheet fights you, wait. A wrapper that is still too cold or too dry will tear before it rolls.
Readiness cue: A wrapper should separate cleanly and bend easily. If it cracks, it is too dry or still too cold.
For a deeper look at why rice paper packages are sometimes confusingly labeled as “spring roll skin,” Viet World Kitchen has a helpful rice paper buying guide.
Wrappers sorted? Move to the filling, where moisture matters most.
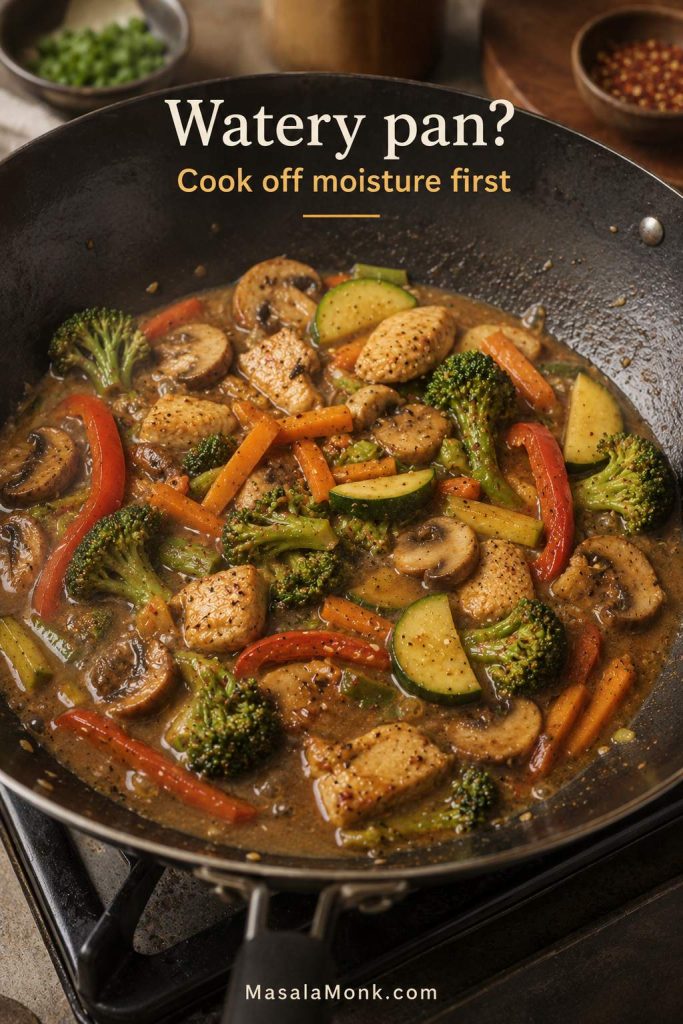
How to Make Spring Roll Filling That Is Not Watery
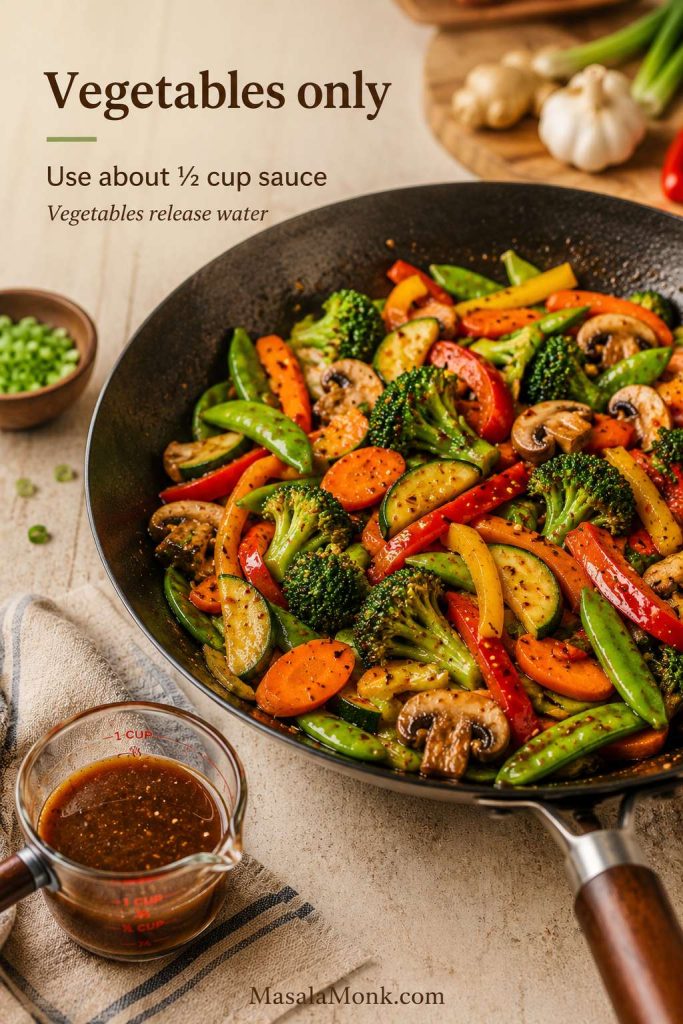
After the wrapper, the filling is the next place the recipe succeeds or fails. Raw vegetables release water inside the wrapper, which is why the filling is cooked first. When that moisture stays trapped, the rolls can burst, leak, or turn oily while frying.
Moisture Cues Before Wrapping
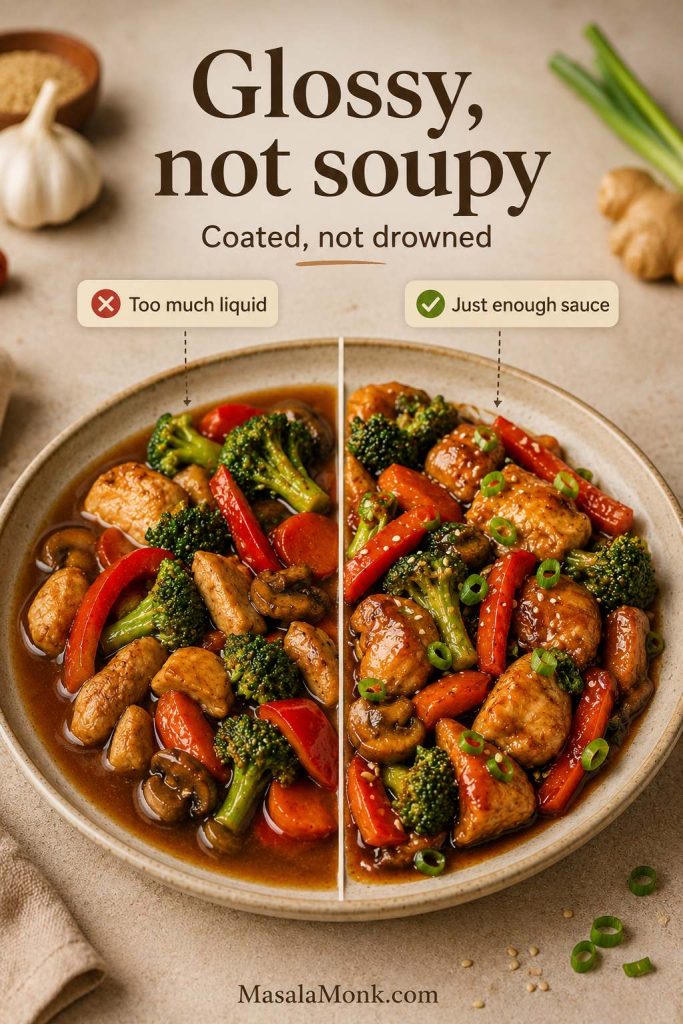
Moisture cue: The filling can be bold and glossy, but it should never be wet enough to leave a puddle.
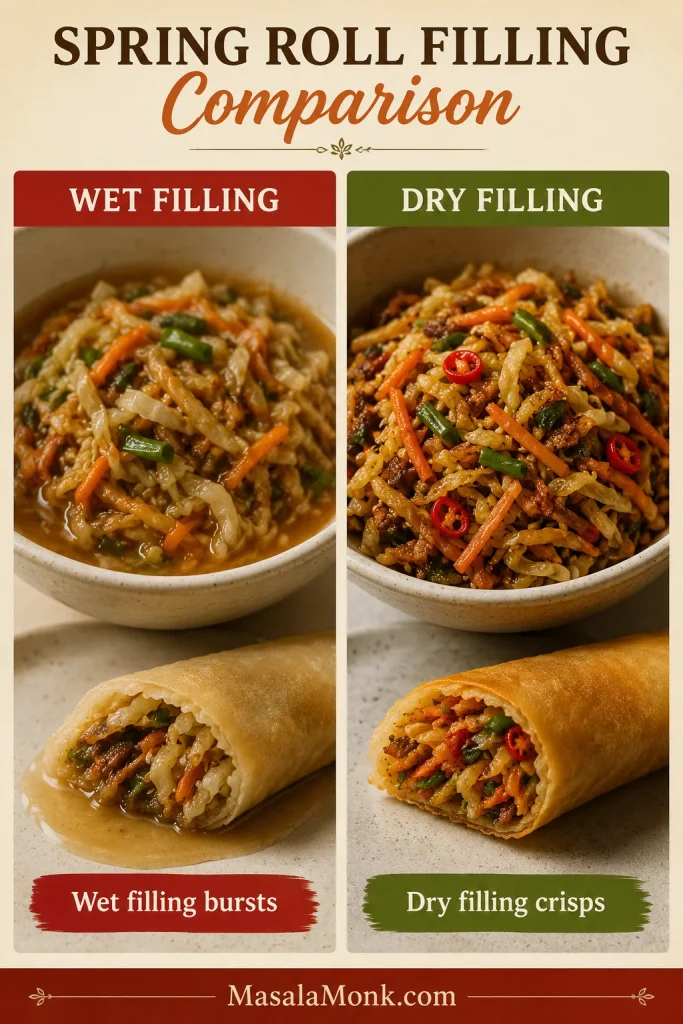
Cook the filling quickly over high heat. The vegetables should soften slightly but not collapse. Once the sauces go in, keep tossing until the pan looks almost clean when you push the filling aside. Flavor can be bold, but the mixture should not be saucy.
Visual cue: The filling is ready when it looks glossy but not saucy. Push it aside in the pan before wrapping.
Slightly wet filling needs another minute over high heat. A tiny pinch of cornstarch can help bind moisture, but the better fix is usually cooking the liquid off.
When the filling is right, it smells sharp from vinegar, warm from ginger and garlic, and savory enough that it tastes good before it ever reaches the wrapper.
After cooking, spread the mixture on a plate or tray and let the steam escape. Do not wrap while it is still warm. Trapped steam can soften the wrapper and make the rolls burst during frying.
Cooling cue: Spread the filling out instead of leaving it piled up, so steam escapes before the wrappers touch it.
Before You Wrap, Check This
- The filling is cool, not warm.
- There is no liquid at the bottom of the plate or tray.
- The wrappers bend without cracking.
- The sealing paste is thick, not runny.
- A damp towel is ready for the unused wrappers.
When all five are true, you are ready to wrap. Anything off? Fix it now; this is much easier than rescuing rolls in hot oil.
Checklist passed? Check how much filling to add before folding.
How Much Filling Goes in Each Spring Roll?
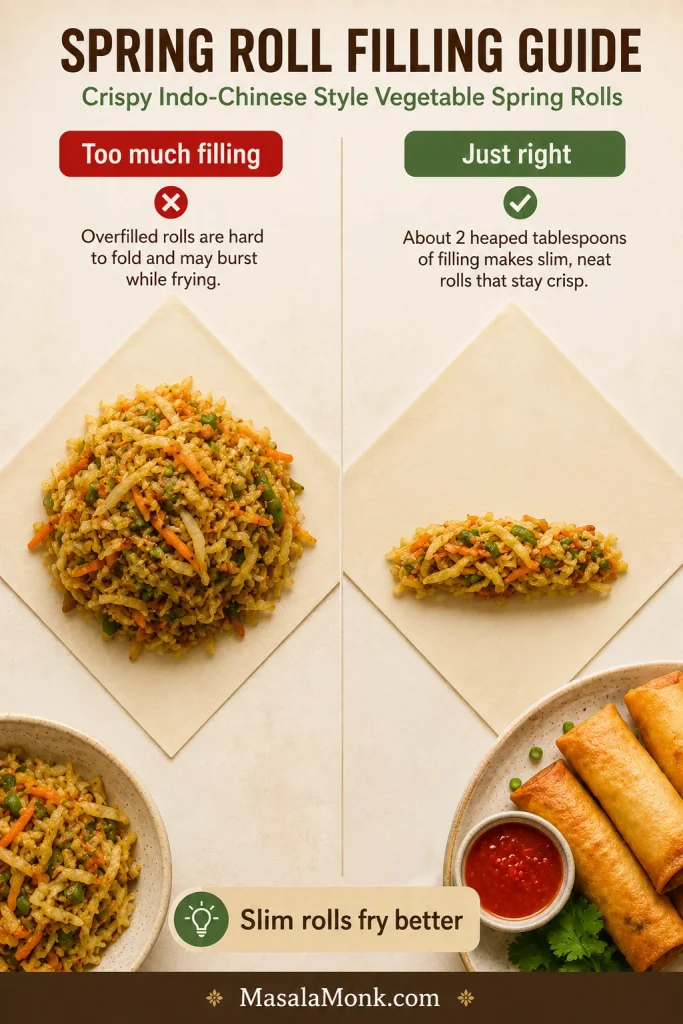
Overfilling is tempting, but it causes rolls to split. Underfilling makes them hollow and oily. Each one should feel like a small firm parcel, not a stuffed pillow.
| Wrapper size | Filling amount |
|---|---|
| 6-inch wrapper | About 1–1½ tablespoons |
| 8-inch / 20–22 cm wrapper | About 2 heaped tablespoons |
| 10-inch wrapper | About 3 tablespoons |
For standard 8-inch wrappers, about 2 heaped tablespoons of cooled filling is usually enough. When in doubt, underfill the first two rolls. A slightly slimmer roll fries better than a swollen one that splits.
Correct Filling Amount
Amount cue: The filling should sit below the center of the wrapper with enough empty space left for folding and sealing.
Shape cue: A roll that looks swollen before frying is usually too full. Slimmer rolls fry cleaner and split less.
Amount looks right? Move to folding.
How to Fold Spring Rolls
Folding is easier when the filling is cool and the wrapper is soft. Work with one sheet at a time and keep the rest covered.
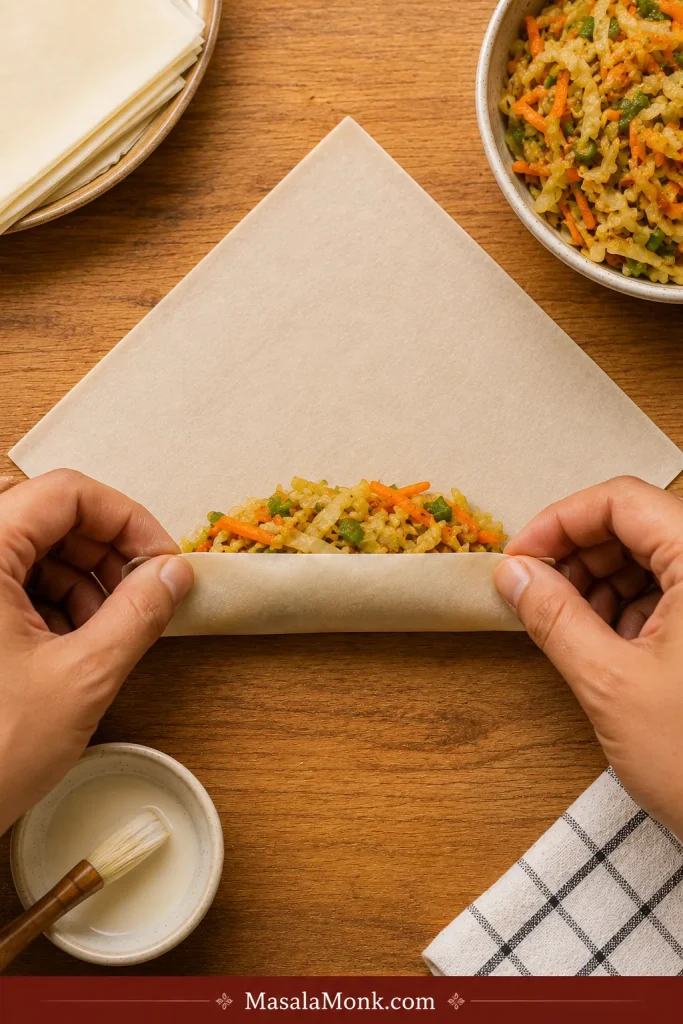
- Place one wrapper on the counter like a diamond, with one corner pointing toward you.
- Add the filling just below the center.
- Fold the bottom corner over the filling.
- Tuck gently once so the filling sits snugly inside.
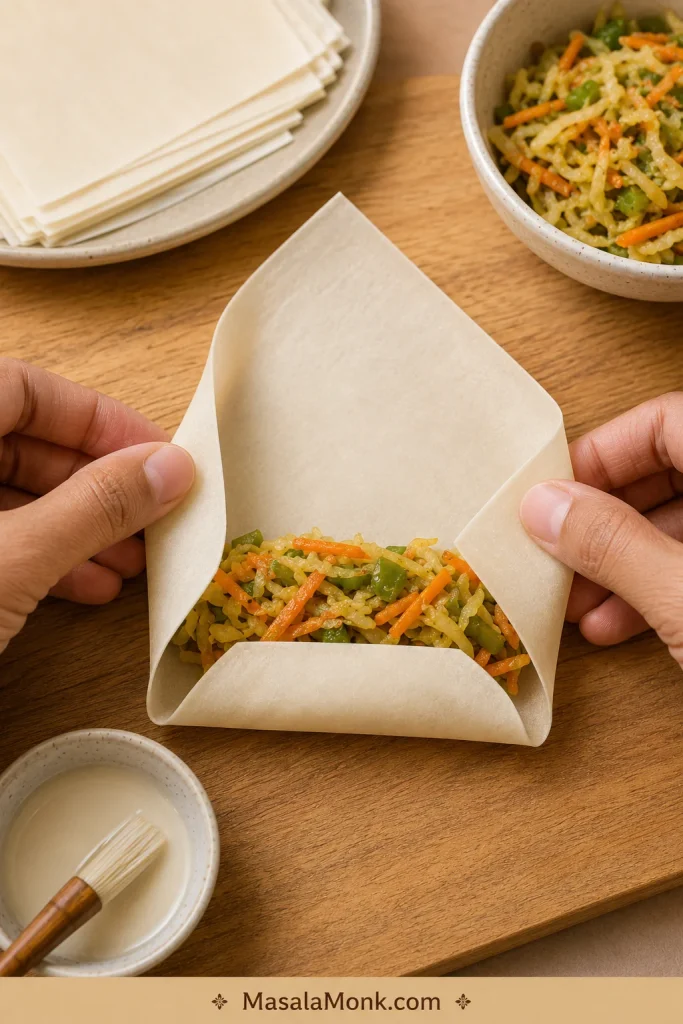
- Fold the left and right corners inward.
- Roll tightly toward the top corner.
- Brush the final corner with sealing paste.
- Press to seal and place the roll seam-side down.
Folding Sequence
First fold cue: Start with a gentle tuck, not a hard squeeze, so the wrapper stays smooth and the filling stays compact.
Side fold cue: Bring the corners in evenly so there are fewer open edges for oil to find.
Folding cue: Once the fold pattern makes sense, repeat the same light-fill, firm-tuck, neat-fold rhythm for the whole tray.
The roll should feel snug but not stretched. If the wrapper is pulling tight before you seal it, there is too much filling.
Torn wrapper? Patch it with a small scrap and paste, then use that roll as the test piece. The first one is allowed to look a little awkward. A secure seal matters more than a perfect shape, and the next few usually get neater as your hands find the rhythm.
Sealing and Resting Before Frying
Seal cue: The paste should be thick enough to hold the final edge closed without running down the wrapper.
Resting cue: Keep each wrapped roll seam-side down while the rest of the batch is finished.
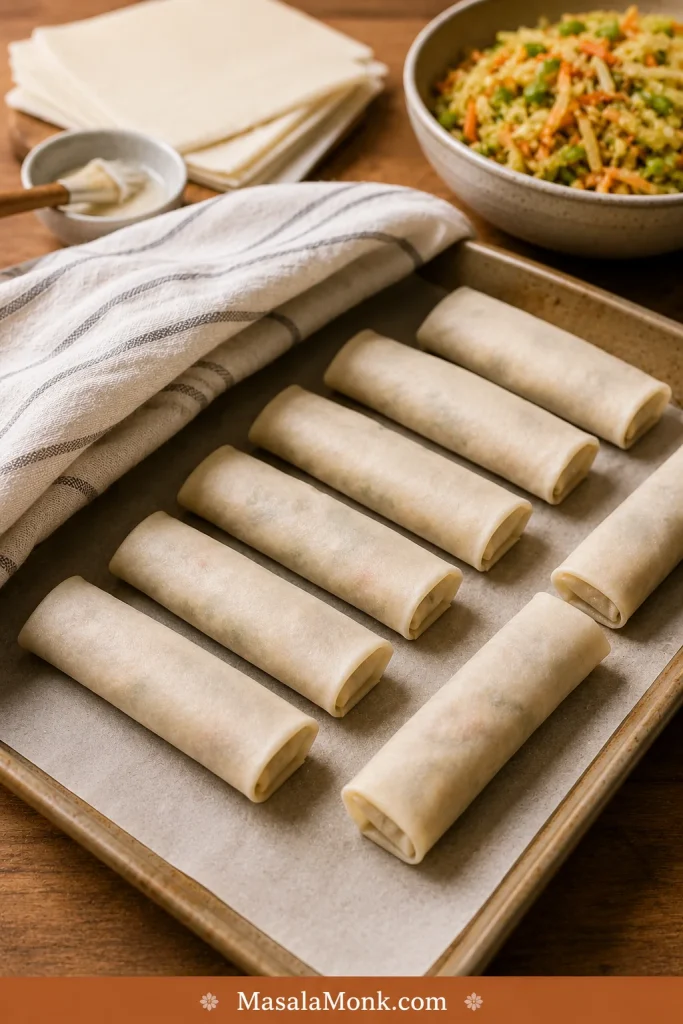
After the first few, the motion becomes simple: fill, tuck, fold, seal, repeat. The tray starts filling up, the rolls look neater, and the frying suddenly feels much less intimidating.
Wrapped and sealed? Go to frying while the wrappers are still flexible.
How to Fry Spring Rolls So They Stay Crispy
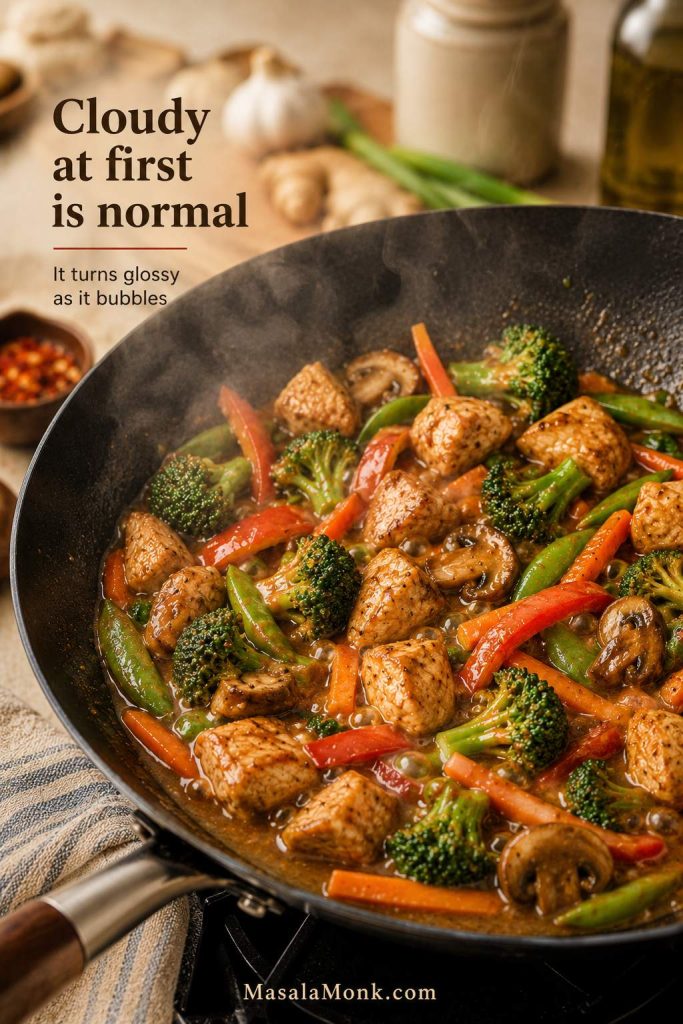
This is the part where the rolls change from neat little parcels into the snack everyone starts reaching for. Once they are wrapped, the oil temperature decides whether they turn crackly or greasy. They need hot oil, but not smoking oil. Cool oil makes wrappers absorb oil before they crisp. Oil that is too hot browns the outside before the center heats evenly.
Use the temperature range as your guardrail, then watch the oil and listen to the sizzle. It should sound active but not angry. Rolls should sizzle steadily, not sit quietly and soak, and not brown the second they touch the oil.
| Situation | Temperature | What it means |
|---|---|---|
| Freshly wrapped spring rolls | 175–185°C / 350–365°F | Best range for crisp, golden rolls. |
| Homemade frozen rolls, uncooked | About 190°C / 375°F | The frozen rolls drop the oil temperature quickly. |
| Too cool | Below 170°C / 340°F | Rolls can become oily and pale. |
| Too hot | Above 190°C / 375°F | Wrappers brown too fast and may blister aggressively. |
Temperature and Bubble Cues While Frying
Temperature cue: Use 175–185°C / 350–365°F for fresh rolls so the wrapper crisps before it absorbs too much oil.
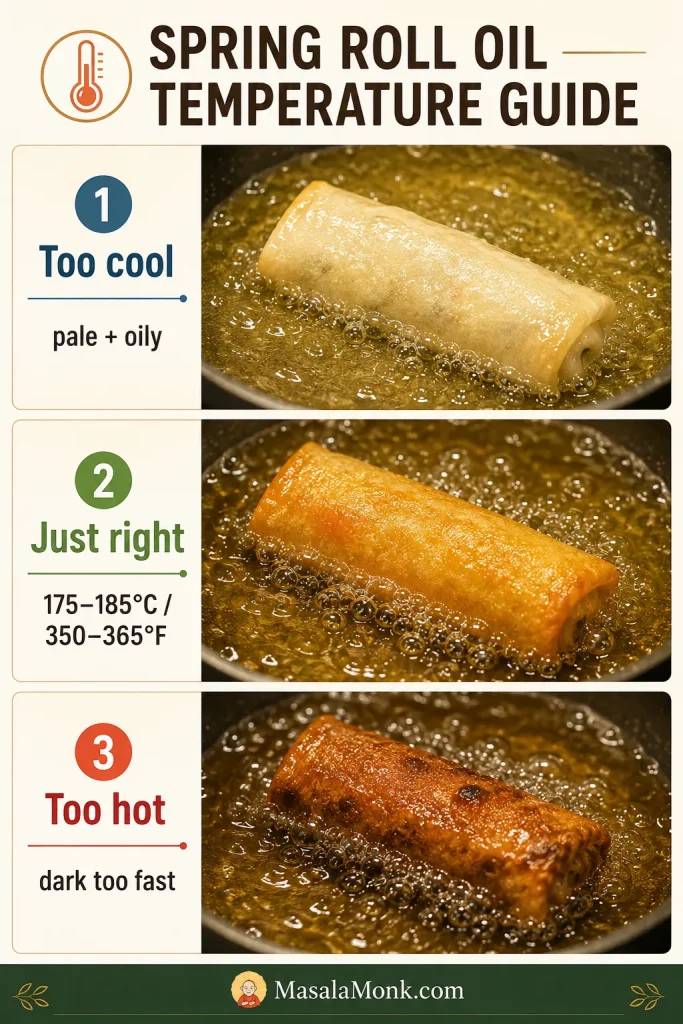
Bubble cue: Look for steady bubbling around the wrapper, not a quiet soak and not an angry boil.
Use 2–3 inches of oil or enough for the rolls to float. Fry in small batches and turn gently. In a medium pan, 3–5 at a time is usually safer than a crowded batch.
A thermometer is best. Without one, dip the handle of a wooden spoon or a chopstick into the oil. Small, steady bubbles around it usually mean the oil is ready. Violent bubbling or smoke means the oil is too hot.
What the First Test Roll Tells You
- Opens in oil: the seal is weak or the paste is too thin.
- Browns too fast: the oil is too hot.
- Turns pale and oily: the oil is too cool.
- Bursts: the filling is wet, warm, or overpacked.
That first roll tells you everything: whether the seal holds, whether the oil is hot enough, and whether the filling stayed dry. Once it comes out crisp, the rest of the batch feels easy.
Test cue: One roll can save the batch by showing whether the seal holds and the oil is in range.
Drain fried rolls on a wire rack when possible. A rack lets steam escape and keeps the wrappers crisp. Paper towels also work, but avoid stacking hot rolls on top of each other. Give them a minute on the rack, then serve while the shell still sounds crisp when you move it.
Drain and Check the Shell
Draining cue: Airflow matters after frying too. A rack lets steam escape instead of trapping it under the rolls.
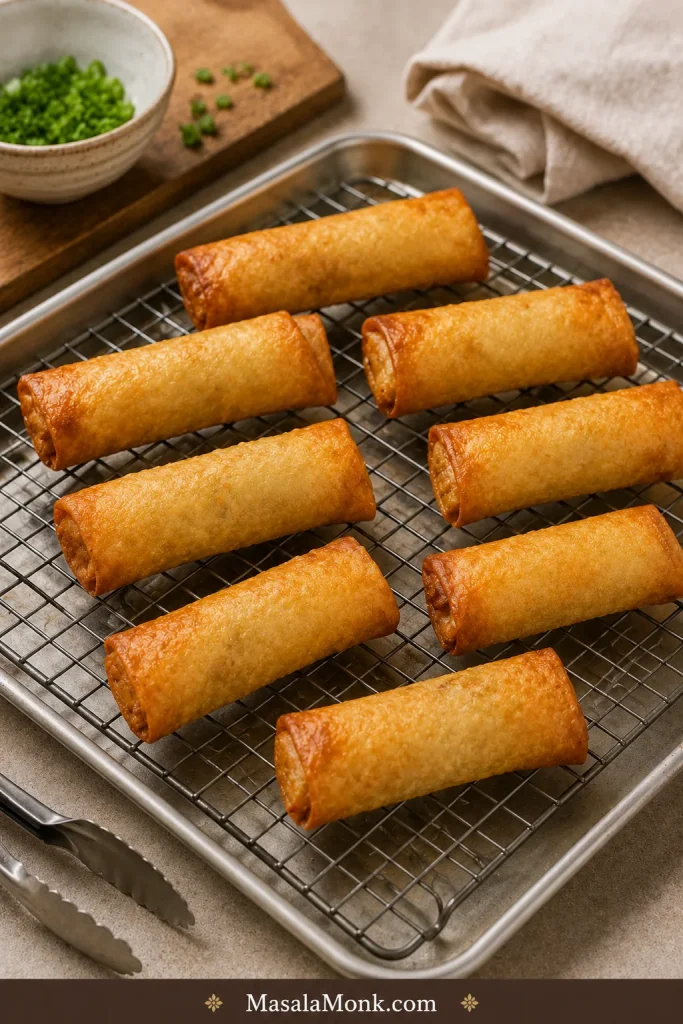
Texture cue: The best shell looks thin, golden, and lightly blistered rather than thick, smooth, or oily.

Want a lighter version? See air fryer spring rolls.
Air Fryer Spring Rolls and Baked Spring Rolls
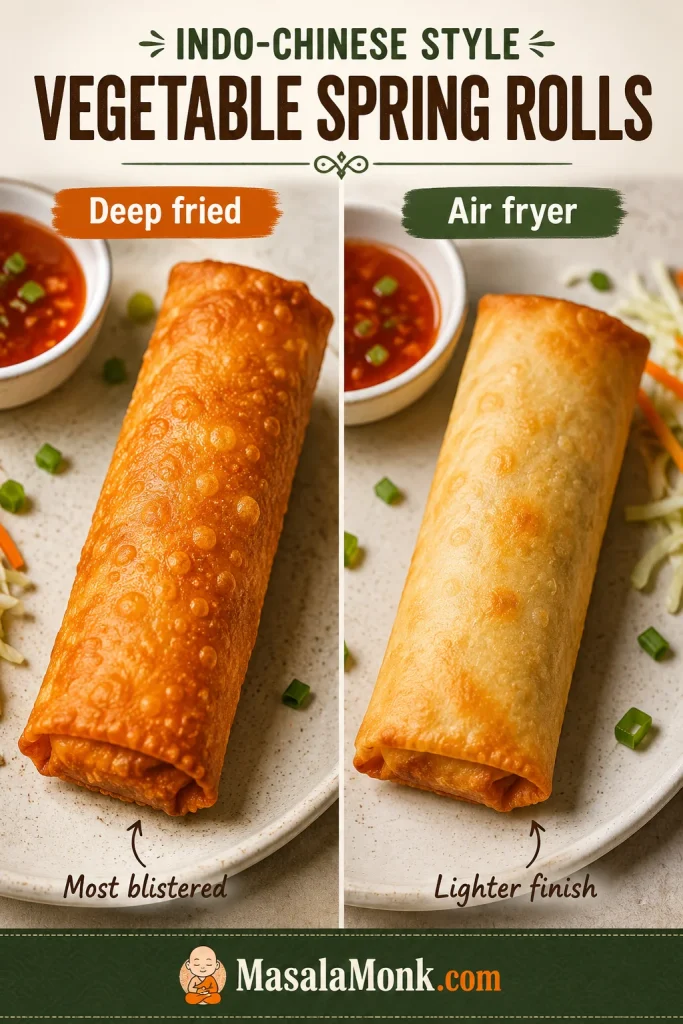
Deep frying gives the crispiest, most delicate result. Think of the air fryer version as a lighter, weeknight-friendly roll, not an exact copy of the deep-fried one. It can still be crisp, but it will not have the same delicate blistered shell.
Deep Fried vs Air Fryer Texture
Texture comparison: Deep frying gives the most blistered shell, while the air fryer trades some delicacy for convenience.
Preheat the air fryer if your model recommends it. A hot basket helps the wrapper start crisping sooner instead of drying out slowly.
| Method | Temperature | Time | Best cue |
|---|---|---|---|
| Deep fry | 175–185°C / 350–365°F | 3–5 minutes | Golden, crisp, lightly blistered wrapper. |
| Air fryer, standard rolls | 190–200°C / 375–400°F | 10–15 minutes | Crisp outside, lightly browned, flipped halfway. |
| Air fryer, thicker rolls | 180°C / 355°F | 16–20 minutes | Cooked through without burning outside. |
| Oven-baked | 200°C / 400°F | 20–25 minutes | Crisp edges and golden patches. |
| Homemade frozen rolls, uncooked | 200°C / 400°F | 12–16 minutes, plus more if needed | Hot center and crisp wrapper. |
Store-bought frozen spring rolls are often smaller or partially cooked, so they may air fry faster. Follow the package timing and use the same cues: hot center, crisp wrapper, and no cold spots.
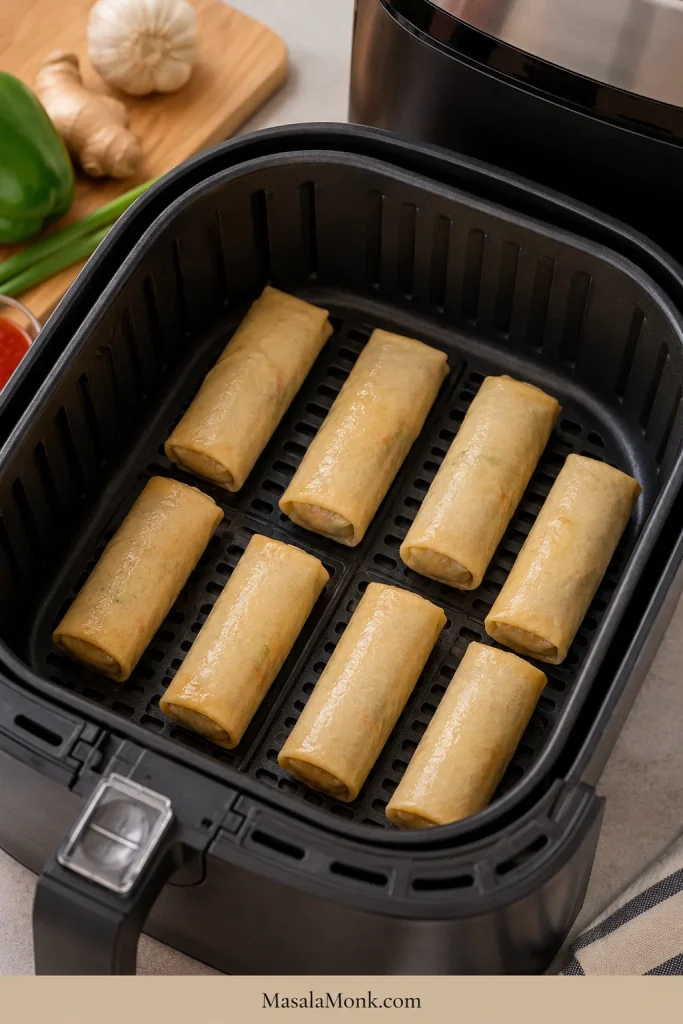
Air Fryer Setup That Crisps Evenly
For the air fryer, brush or spray the rolls lightly with oil on all sides. Arrange them in a single layer with space between each one. Flip halfway through cooking. Dry-looking wrappers usually need a little more oil coating.
Air fryer cue: Arrange rolls in one layer with space between them, then use a light oil coating for better browning.
For the most blistered shell, use the deep-fry method.
If air-fried rolls brown unevenly or stay soft in patches, this guide to common air fryer mistakes is worth checking, especially for crowding, airflow, and oil coating.
For baked rolls, place them on a rack set over a tray when available. Brush or spray with oil and bake until crisp-edged and golden. Turn once for more even browning.
Best Sauces for Spring Rolls
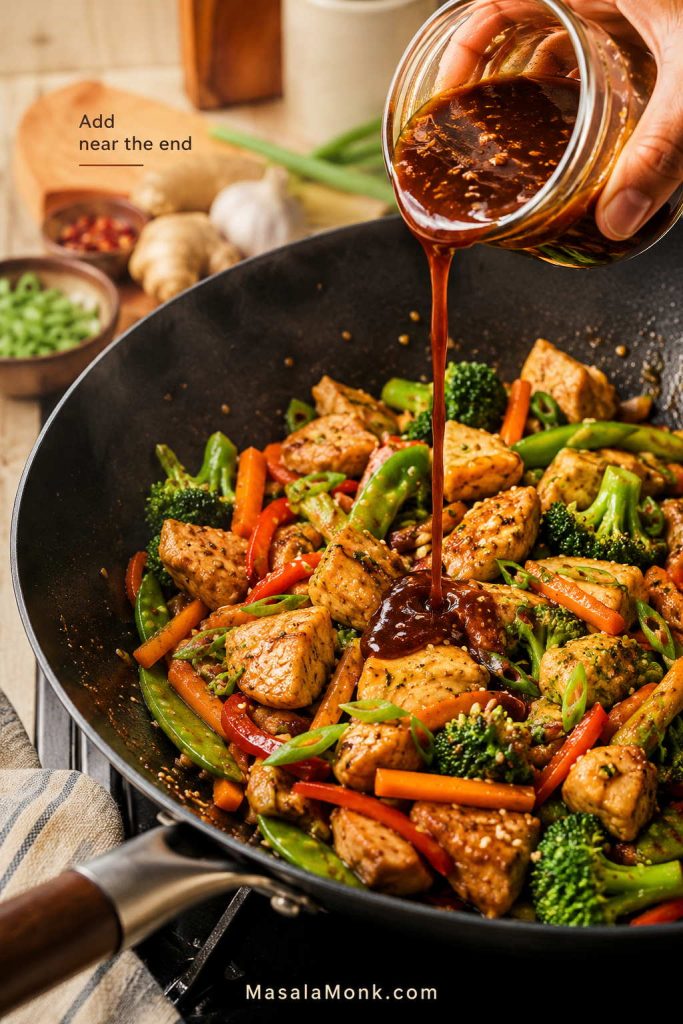
The dip is not just extra. It is what makes the second bite as exciting as the first. A good dip resets the bite: it cuts the oil, wakes up the filling, and makes the next roll feel lighter than the last.
Put the sauce close to the platter, because the first few rolls usually disappear before the next batch is out of the oil.
| Mood | Dip | Best with |
|---|---|---|
| Street-style sweet heat | Sweet chili sauce | Crispy vegetable spring rolls |
| Sharp and salty | Soy-vinegar-garlic dip | Chinese-style spring rolls |
| Indo-Chinese spicy | Schezwan-style sauce | Veg, chicken, or noodle rolls |
| Indian snack plate | Green chutney | Fried snacks and veg rolls |
| Creamy and rich | Peanut chutney or peanut sauce | Tofu rolls, fresh rice paper rolls, and some vegetable rolls |
Sauce cue: Pick a dip that cuts through the fried shell instead of making the bite feel heavier.
Quick soy-vinegar dipping sauce
For a quick soy-vinegar dipping sauce, mix 2 tablespoons soy sauce, 1 tablespoon vinegar, 1 small grated garlic clove, ½ teaspoon sugar, chili oil or chili flakes to taste, and 1 tablespoon finely chopped spring onion. Taste and add more vinegar if you want it sharper.
Fresh chutney option
For an Indian-style fresh dip, green chutney brings coriander, mint, chili, lemon, and ginger brightness that cuts beautifully through fried spring rolls.
Peanut sauce note
Peanut sauce is excellent with fresh rice paper rolls, tofu rolls, and summer rolls. With crispy spring rolls, it works best when you want a richer, creamier dip rather than a sharp chili sauce. For a thicker Indian-style peanut dip, this tangy spicy peanut chutney gives the rolls a creamy, nutty, slightly sharp contrast without needing a heavy mayo-style sauce.
Making these ahead? Jump to freezing and reheating.
Spring Roll Variations
Once you understand the dry-filling rule, variations stop feeling risky. The filling can change; the moisture rule does not. Cook the filling, let excess liquid evaporate, cool it, then wrap.
- Vegan spring rolls: use vegan wrappers and keep the filling vegetable, mushroom, tofu, or noodle-based.
- Mushroom spring rolls: add sliced mushrooms, but cook them until their moisture evaporates.
- Chicken spring rolls: add cooked shredded chicken or cooked minced chicken; do not add wet gravy.
- Shrimp or prawn spring rolls: use chopped cooked shrimp or prawns, pat dry if needed, and avoid wet sauce.
- Tofu spring rolls: press the tofu first, then brown it lightly or crumble it into the vegetable mixture.
- Noodle spring rolls: use cooked, cooled, roughly chopped noodles. Too many noodles make the filling heavy.
- Fresh rice paper rolls: use rice paper, fresh herbs, noodles, vegetables, tofu, shrimp, or chicken. Do not fry this version.
Meat, seafood, or tofu should be cooked before wrapping unless a specific recipe is designed for raw filling. Spring rolls fry quickly, so the wrapper can brown before a raw filling cooks safely and evenly.
Make Ahead, Freezing, and Reheating
These are good for prep, but timing matters. The filling can be made ahead. Wrapped uncooked rolls should either be cooked soon or frozen, because moisture from the filling can soften the wrappers over time.
This is the part that makes spring rolls party-friendly: the messy work can happen earlier, and the crisping can happen when everyone is ready to eat. Frying from frozen also keeps the wrappers from sitting around and slowly softening.
- Filling only: refrigerate for 1 day once cool. Bring closer to room temperature before wrapping and drain off any collected moisture.
- Wrapped uncooked rolls: refrigerate for 2–4 hours if needed, but cook them soon for the best texture.
- Wrapped uncooked frozen rolls: freeze on a tray until firm, then transfer to a freezer-safe bag or container.
- Cooked leftovers: reheat in an air fryer or oven at 180–200°C / 350–400°F until hot and crisp.
Freezing cue: Freeze uncooked rolls separately first, then bag or box them once firm.
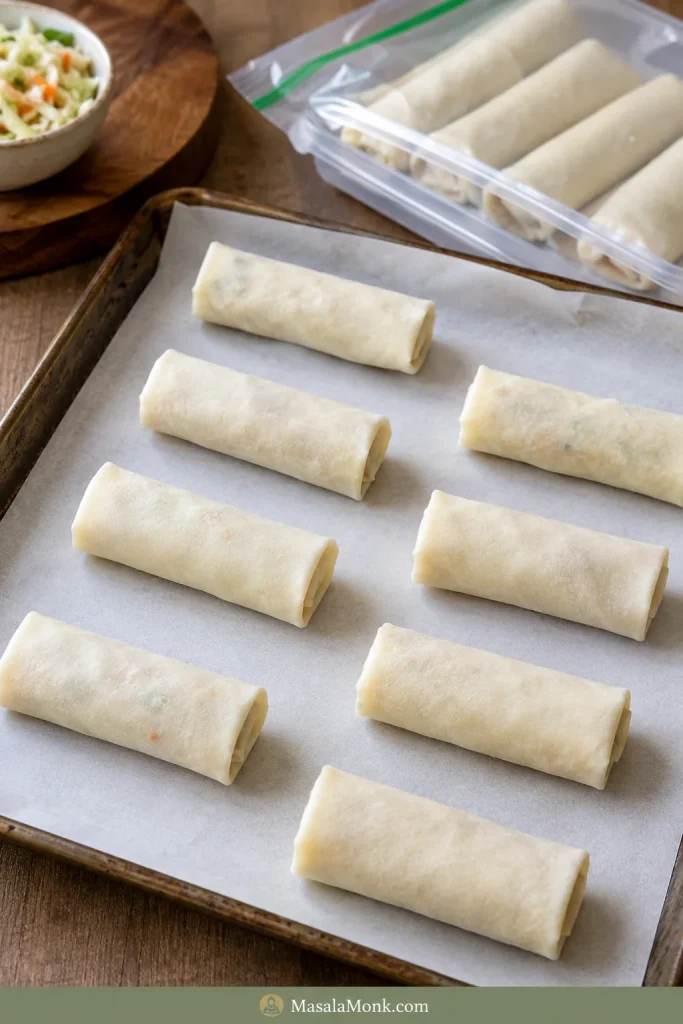
Freeze homemade uncooked rolls for up to 2–3 months for best quality. If stacking, use parchment between layers so they do not stick together. Fry or air fry from frozen without thawing, because thawing can make the wrappers wet and sticky.
Use the microwave only when crunch does not matter. It heats the filling, but it softens the wrapper.
Spring Roll Substitutions and Method Swaps
Most swaps are safe once you know what they change: wrapper texture, moisture level, or cooking method.
| Swap | Works? | What changes |
|---|---|---|
| Rice paper | Not for this main method | Use it for fresh rolls unless following a separate fried rice paper technique. |
| Egg roll wrappers | In a pinch | The rolls will be thicker, heavier, and chewier. |
| Frozen vegetables | Only if cooked dry | They release more moisture and can make the filling soggy. |
| Air fryer | Yes | Lighter result, less blistered shell, needs oil coating. |
| Homemade spring roll sheets | Yes, if thin and flexible | More work and less predictable than store-bought frozen wrappers. |
The safest swap is the one that keeps the roll thin, dry, and quick-cooking. Once the wrapper gets thicker or the filling gets wetter, the texture changes too.
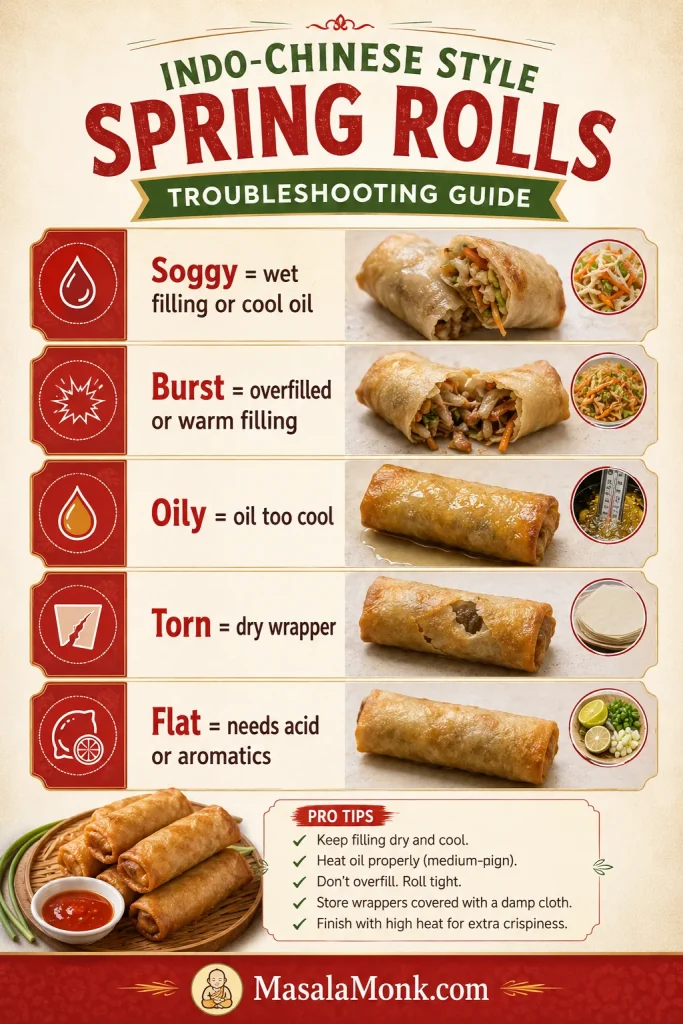
Spring Roll Troubleshooting
Most spring roll problems are not mysterious. They usually come from moisture, filling amount, sealing, or oil temperature. A soggy or burst roll does not mean the recipe failed. Do not judge the whole batch by one bad roll; the first failure usually tells you exactly what to change.
| Problem | Likely cause | Fix |
|---|---|---|
| Spring rolls are soggy | Wet filling, warm filling, or cool oil | Cook filling until the pan looks dry, let it cool, and fry hotter. |
| Rolls burst while frying | Overfilled roll, trapped steam, or loose wrapping | Use less filling, let it stop steaming first, and roll more securely. |
| Wrappers tear | Wrappers dried out or were handled roughly | Keep wrappers covered and use gentle pressure. |
| Rolls open in the oil | Weak seal or watery paste | Use a thicker paste and place rolls seam-side down. |
| Spring rolls are oily | Oil too cool or pan overcrowded | Fry fewer at a time and keep oil in the correct range. |
| Outside browns too fast | Oil too hot | Lower heat slightly and keep the oil below 190°C / 375°F. |
| Air fryer rolls look dry | Not enough oil on the wrapper | Brush or spray lightly with oil before air frying. |
| Filling tastes flat | Not enough acid, pepper, or aromatics | Add vinegar, pepper, chili sauce, garlic, or spring onion. |
Troubleshooting cue: Match the symptom to the cause before changing the whole recipe.
Need the full method again? Jump back to the recipe card.
Spring Roll Recipe FAQs
Are spring rolls the same as rice paper rolls?
No. These crispy rolls use thin wheat-based wrappers and are cooked. Rice paper rolls are softer, fresh rolls made with soaked rice paper sheets.
What wrappers are best for crispy spring rolls?
Thin wheat spring roll wrappers or frozen spring roll sheets are best. Rice paper is for fresh rolls, while egg roll wrappers make a thicker, chewier fried roll.
How do you keep spring rolls from getting soggy?
Cook the filling until there is no loose liquid, let it cool before wrapping, avoid overfilling, fry in hot oil, and do not stack the rolls while hot.
Why did my spring rolls burst while frying?
They usually burst because the filling was too wet, too warm, or packed too tightly. Weak sealing can also make rolls open in the oil.
What temperature should oil be for spring rolls?
Freshly wrapped rolls do best around 175–185°C / 350–365°F. Homemade frozen rolls that have not been cooked yet can start closer to 190°C / 375°F.
How long do you fry spring rolls?
Freshly wrapped crispy spring rolls usually take 3–5 minutes at 175–185°C / 350–365°F, depending on wrapper thickness, filling amount, and batch size.
Can you pan fry spring rolls instead of deep frying?
Yes, but use enough oil to coat the bottom of the pan generously and turn the rolls carefully. They can still crisp, but the browning will usually be less even than deep frying.
Do you cook the filling before wrapping spring rolls?
Yes. Raw vegetables release too much water inside the wrapper. A quick stir-fry seasons them and keeps the finished rolls crisper.
How long do spring rolls take in the air fryer?
Standard homemade air fryer spring rolls usually take 10–15 minutes at 190–200°C / 375–400°F. Brush or spray them lightly with oil and flip halfway.
Should spring rolls be frozen before or after frying?
Freeze homemade spring rolls before frying for the best make-ahead texture. Fry or air fry them from frozen without thawing.
What sauce goes best with spring rolls?
Sweet chili sauce is the easiest match. Soy-vinegar-garlic dip, Schezwan-style sauce, green chutney, and peanut chutney also work well.
Before You Fry Your Next Batch
Once the filling is dry, the wrappers stay covered, and the oil is steady, the recipe becomes simple.
The first batch may not look perfect. That is fine. As you understand the filling, wrapper, fold, and oil, every batch gets cleaner, crisper, and easier.
A good batch rarely waits politely on the platter. Serve the spring rolls while the wrappers still crackle, with a bright dip close by. That contrast — hot filling, crisp shell, sharp sauce — is the reason they disappear so quickly from the plate.
Serving cue: Serve the rolls while the shell still crackles and the sauce is close enough for every bite.