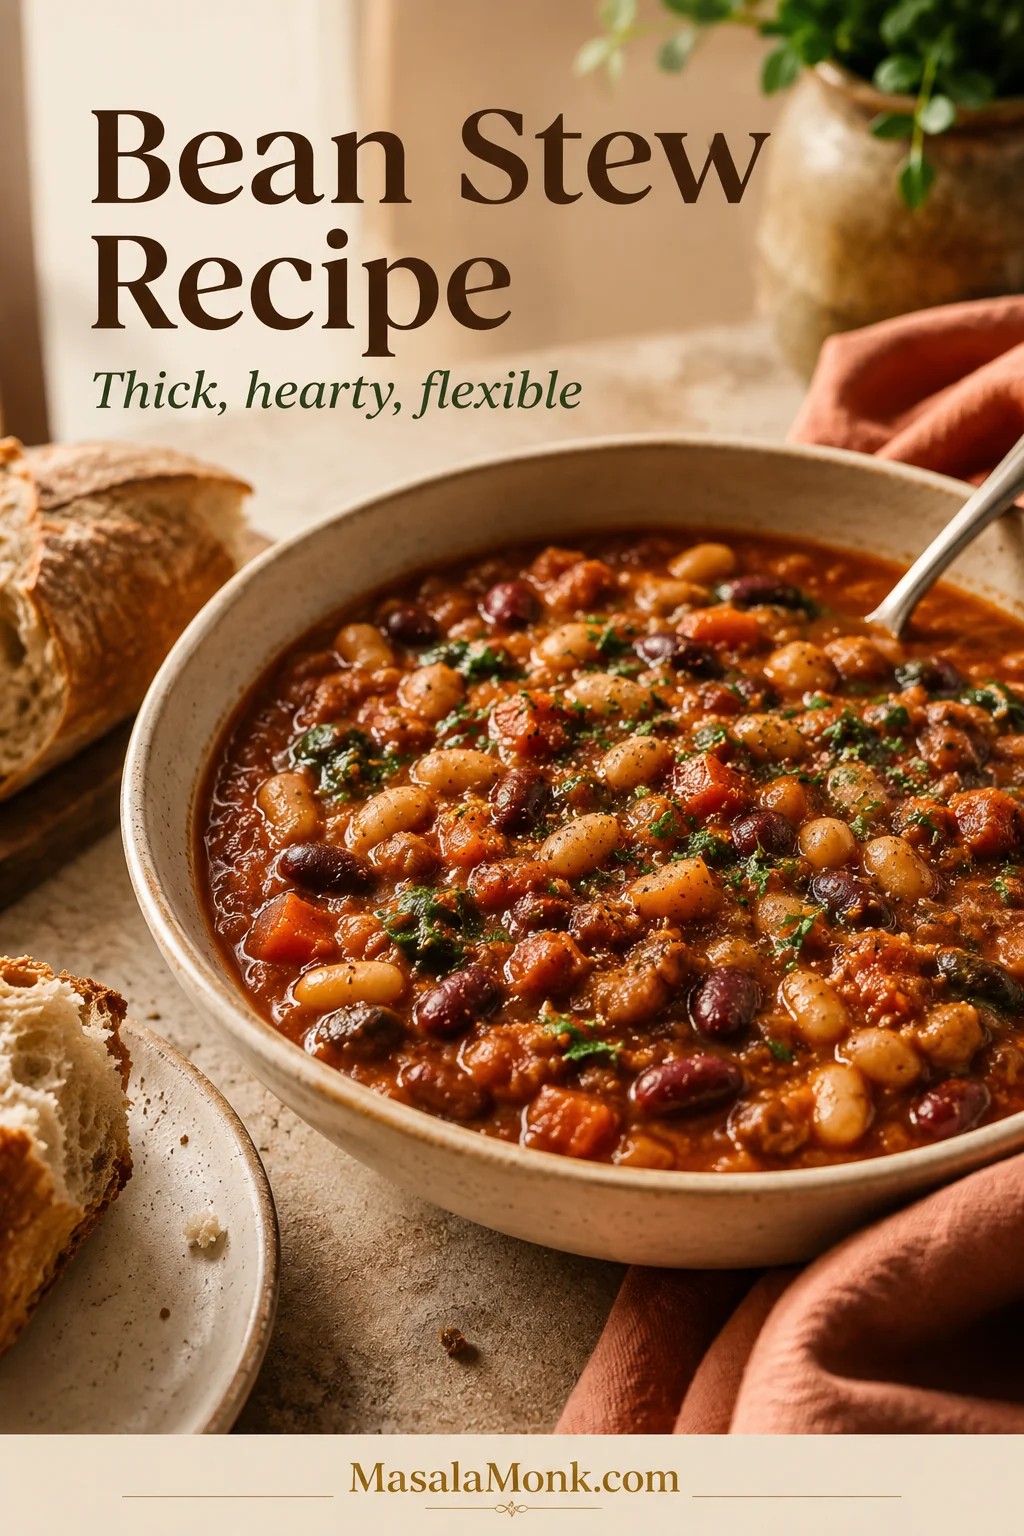
This bean stew turns three cans of beans into a thick, hearty one-pot dinner in about 50 minutes. Onion, carrot, celery, garlic, tomato paste, tomatoes, broth, and a small mash of beans cook down into a glossy tomato-bean sauce that is scoopable instead of thin.
It is especially useful on the nights when the pantry is not empty, just awkward: a few cans of beans, one onion, the last carrot in the drawer, and enough broth to pull everything together. Because the beans carry most of the meal, rice, bread, potatoes, or polenta can stretch the pot into more servings without making it feel like less dinner.
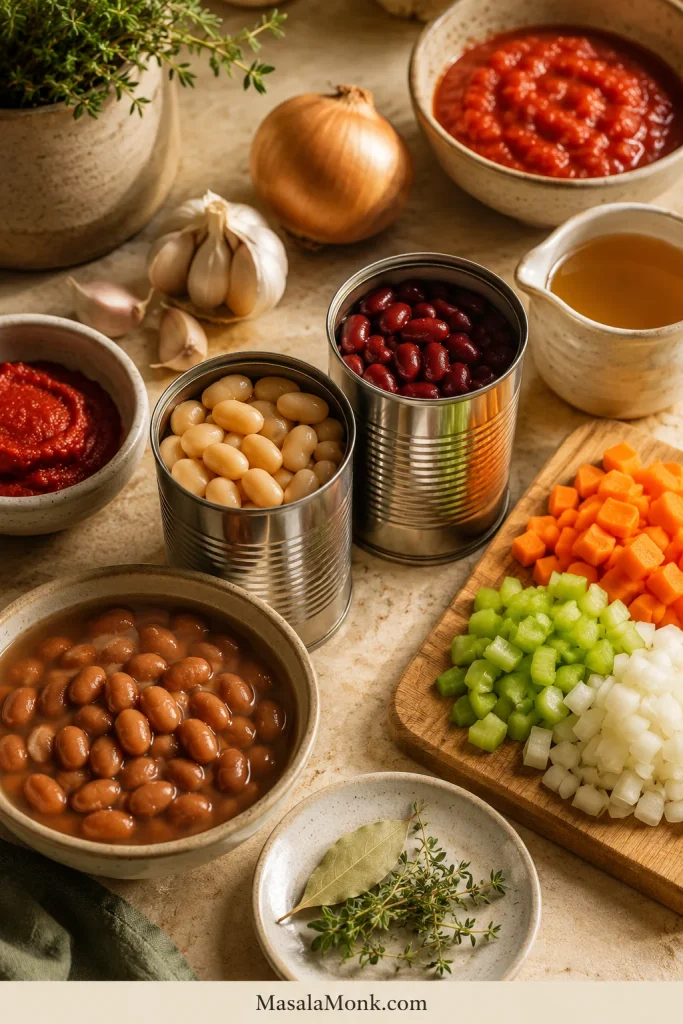
The base is simple: beans, aromatics, tomato paste, tomatoes, broth, herbs, and a bay leaf.
The main recipe is tomato-based, gently smoky, full of soft-edged beans and sweet vegetables, and finished with lemon juice or vinegar so the final bowl tastes lively instead of heavy.
Most bean stew recipes ask you to choose one bean or one flavor direction first. This one gives you one base method for almost any cooked beans: cannellini beans, butter beans, black beans, pinto beans, chickpeas, kidney beans, or mixed pantry beans.
Bean stew is a hearty one-pot meal made with cooked beans, aromatics, tomatoes or broth, herbs, vegetables, and optional meat. It has less liquid than bean soup, so it sits on rice, clings to bread, and feels more like a full dinner. It is also less narrowly seasoned than chili, which usually has a stronger chili powder, pepper, and spice profile.
For the easiest version, use three cans of beans, a savory tomato base, and 1½–2 cups of broth. Simmer until the sauce reduces, mash a small portion of the beans into the pot, stir in greens if you like, and finish with lemon juice, vinegar, herbs, or olive oil. The bowl should be spoonable, glossy, and filling without cream.
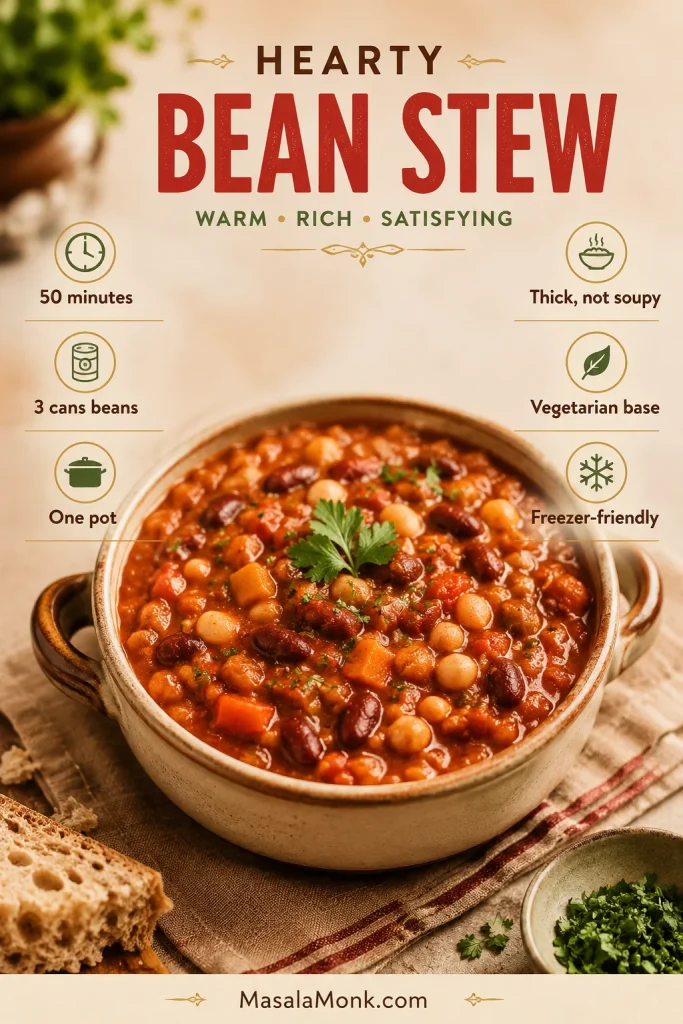
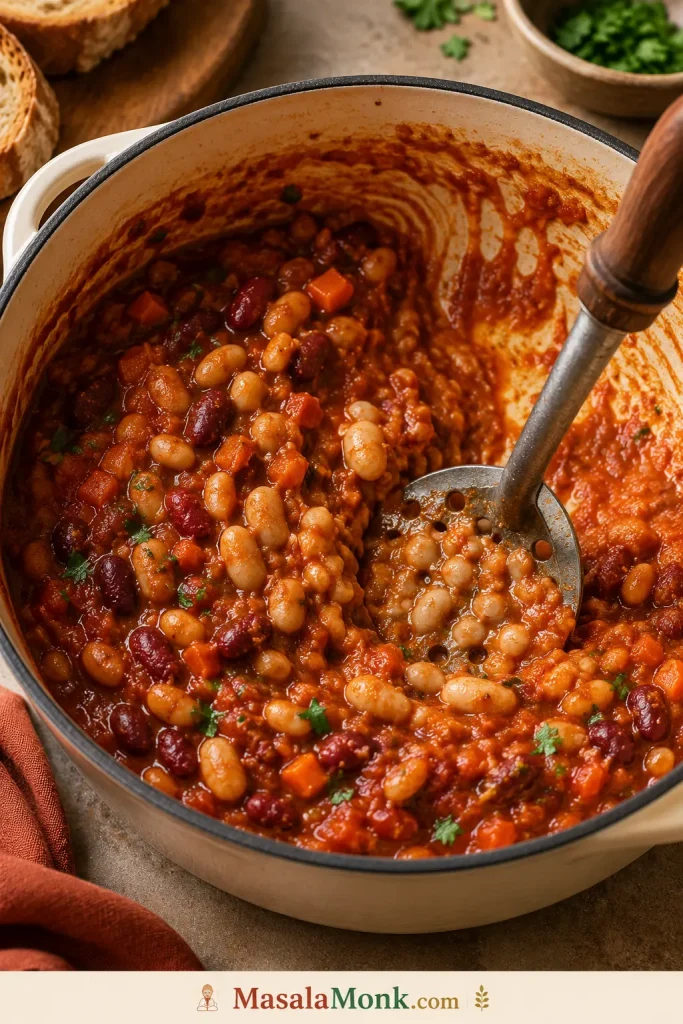
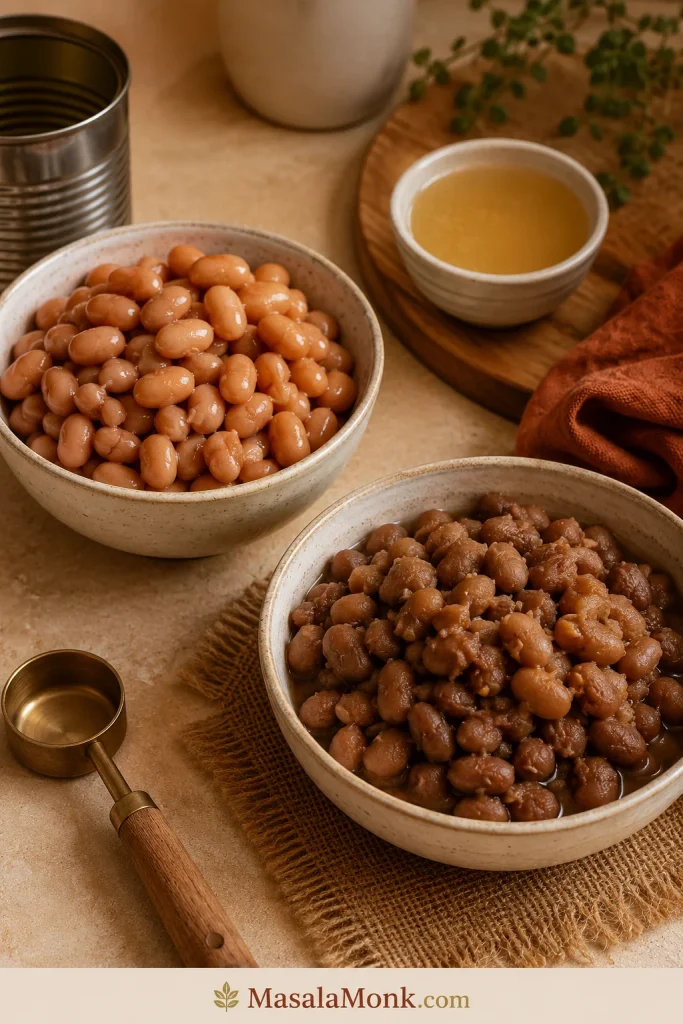
This visual summary shows the promise of the recipe: one pot, three cans of beans, a thick spoonable texture, and leftovers that still feel useful the next day.
The exact measurements are in the recipe card, and the thickening cues below show when to reduce, mash, or loosen the pot.
Recipe Snapshot
Main method
Stovetop, one pot
Prep time
15 minutes
Cook time
35–40 minutes
Total time
50–55 minutes
Servings
6 bowls, or 8 smaller servings with rice/bread
Stretch-it side
Rice, bread, potatoes, polenta, or another sauce-catching base
Best beans
Cannellini, butter beans, black beans, pinto beans, kidney beans, chickpeas, navy beans, Great Northern beans, or mixed beans
Easiest option
Canned beans
Budget option
Dried beans, cooked separately first
Finished texture
Glossy tomato-bean sauce that clings to the spoon
Diet
Vegetarian base; vegan-friendly; meat-flexible
Freezer-friendly
Yes
Before You Start: Beans and Ratio
This stew works best with cooked, starchy beans that can simmer, soften at the edges, and help thicken the sauce. Sweet baked beans, refried beans, and green beans behave differently, so they are better treated as separate recipes or add-ins. Green beans can be added as a vegetable, but they will not make this kind of cooked-bean stew on their own.
The Simple Ratio Behind a Good Pot
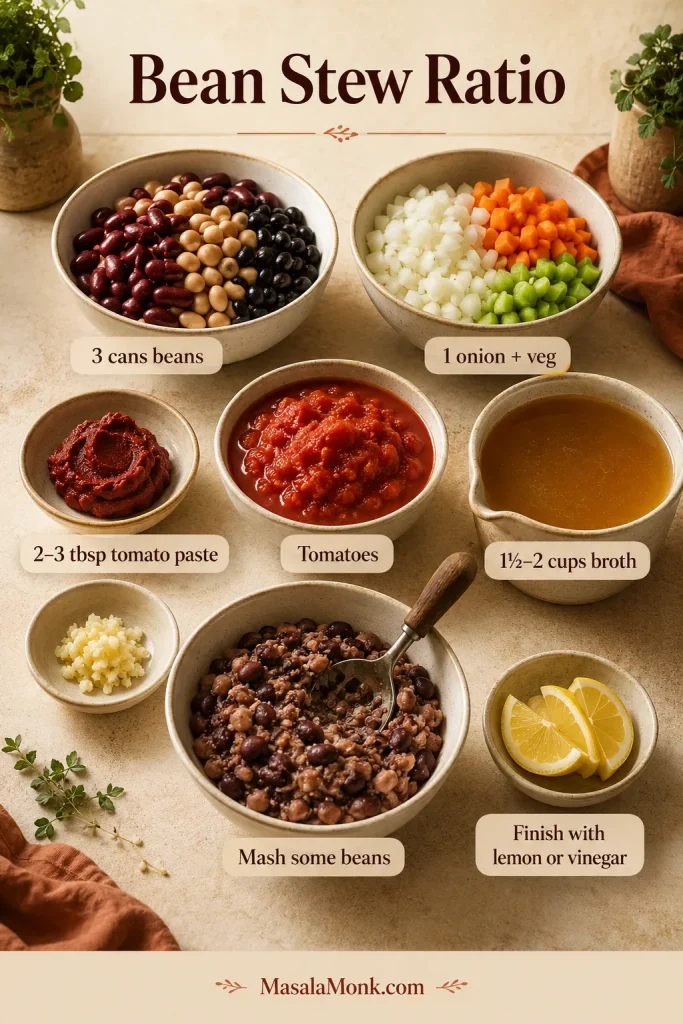
Once you know this ratio, you can make a good bean stew without needing the same cans twice. It is the kind of formula that saves dinner when the pantry looks random but not empty.
3 cans cooked beans, 14–15 oz / 400–425 g each, or about 4½ cups cooked beans
1 large onion plus carrot, celery, and garlic
2–3 tbsp / 30–45 g tomato paste
1 can crushed tomatoes, 28 oz / 800 g, or 14 oz / 400 g for a lighter tomato version
1½–2 cups / 360–480 ml broth, added gradually
10–15 minutes uncovered simmering to reduce the liquid
½–1 cup mashed beans to thicken naturally
1 tbsp / 15 ml lemon juice or vinegar to finish
This bean stew ratio is the saveable formula: beans for body, vegetables for sweetness, tomato paste for depth, broth for looseness, and mashed beans for a thicker finish.
The stew may look thick before it has simmered, but wait 10–15 minutes before adding more broth. Beans release starch, tomatoes loosen, and vegetables soften as they cook. It is easier to loosen a thick pot than to rescue one that started too watery.
Why This Works with Almost Any Beans
The base recipe works because it does not ask every bean to behave the same way. Creamy beans help the sauce; firmer beans stay visible; mixed beans give you contrast. Start with cooked beans, keep the broth controlled, use tomato paste for depth, and mash a small portion of beans for body.
Choose Your Path
Start with the row that matches your pantry today; the main recipe is complete as written.
Canned or cooked beans: Follow the main recipe. Drain canned beans first, then simmer until the sauce tightens around the beans.
Dried beans: Cook them until tender first, then use about 4½ cups cooked beans.
Different bean styles: Use rosemary and lemon for white beans, lime and cumin for black beans, and herbs or vinegar for mixed beans.
Meat or slow cooker version: Brown meat first if using it. For slow cooker stew, use cooked/canned beans and less broth.
Cooking dried beans instead of opening cans? Check the canned vs dried bean notes before the pot starts so the beans are already tender when they meet the tomato base.
Ingredients, Swaps, and What Each One Does
The ingredients are simple, but the base matters. Let the onion, carrot, celery, garlic, and tomato paste smell sweet, savory, and cooked before the beans go in; that is what makes canned beans taste like a real stew instead of beans stirred into tomato sauce.
Main Ingredients
Olive oil: Softens the vegetables and gives the stew a rounder finish. Use less if adding sausage or chorizo.
Onion, carrot, and celery: The flavor base. Cook them until sweet-smelling and softened.
Garlic: Adds savory depth. Add it after the vegetables soften so it does not burn.
Tomato paste: Makes the stew taste deeper and more slow-cooked.
Smoked paprika, oregano or thyme, bay leaf, and pepper: A flexible seasoning base that works with many beans.
Crushed tomatoes: Create the main sauce. The full 28 oz / 800 g gives a tomato-rich pot. Use 14 oz / 400 g if you want the beans and broth to lead.
Broth: Low-sodium vegetable broth keeps the base vegetarian and easier to season.
Beans: Use three cans drained and rinsed, or about 4½ cups cooked beans.
Greens: Spinach, kale, chard, or collards add color. Use closer to 60 g for spinach and closer to 100 g for chopped kale, chard, or sturdier greens.
Lemon juice, vinegar, or balsamic: Adds a fresh lift after simmering.
Pantry Swaps
The recipe can still work if you are missing celery, using a smaller can of tomatoes, or trying to stretch two cans of beans into dinner.
If you are missing
Use instead
Celery
Extra carrot, bell pepper, leek, fennel, or skip it.
Carrot
Sweet potato, squash, bell pepper, or extra onion.
Tomato paste
Simmer the tomatoes longer, or add a very small splash of soy sauce for depth if it fits your version.
Crushed tomatoes
Passata, diced tomatoes, tomato sauce, or 14 oz / 400 g tomatoes plus more broth for a lighter stew.
Broth
Water plus bouillon, or water with extra herbs, pepper, and olive oil.
Fresh herbs
Dried herbs in the base, then lemon or vinegar at the end.
Greens
Frozen spinach, chopped cabbage, kale, chard, collards, or skip them.
Third can of beans
Add diced potato, cooked lentils, rice, extra vegetables, or use the small-batch notes below.
Salt tip: Start with ¾ tsp fine salt if using regular broth, salted canned beans, sausage, chorizo, parmesan, bouillon, or salty toppings. Use up to 1½ tsp only when your broth and beans are low-sodium or unsalted. Taste again after the stew reduces.
How to Cook It
The recipe is simple, but the pot tells you a few things as it cooks: the tomato paste should smell deeper, the sauce should slow down, and the spoon should come up with beans, not broth.
1. Soften the Vegetables
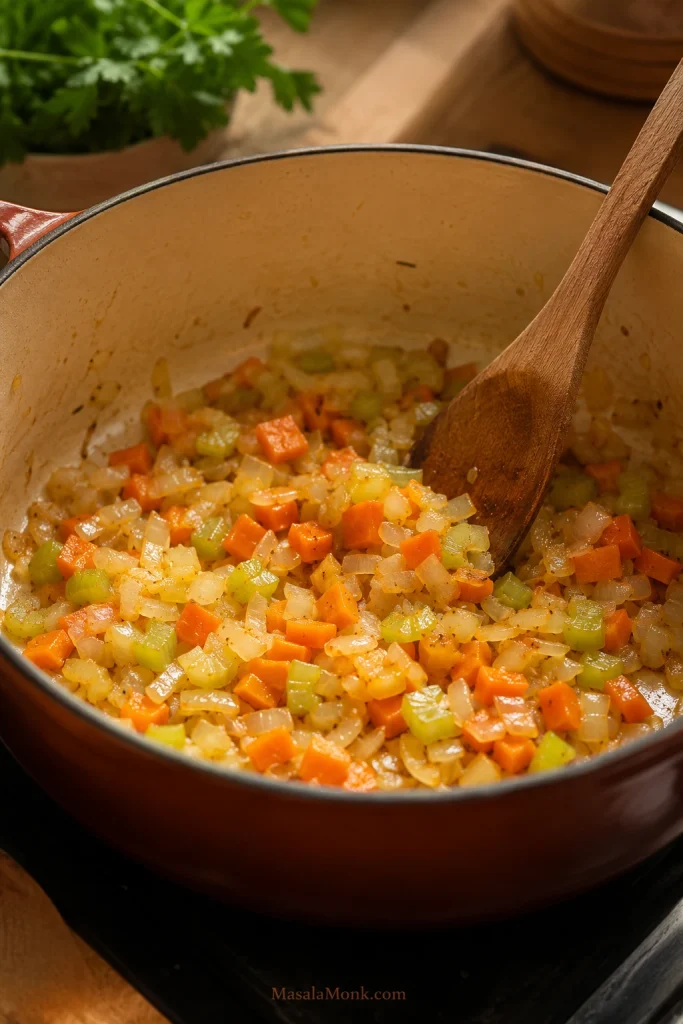
Heat olive oil in a large Dutch oven or heavy-bottomed pot over medium heat. Add onion, carrot, celery, and a pinch of salt. Cook for 7–10 minutes, stirring occasionally, until the onion looks translucent, the carrot has started to soften, and the pot smells sweet rather than raw.
First, soften the onion, carrot, and celery until glossy and sweet-smelling so the stew starts with a real cooked base, not just beans in tomato sauce.
2. Cook the Garlic, Tomato Paste, and Spices
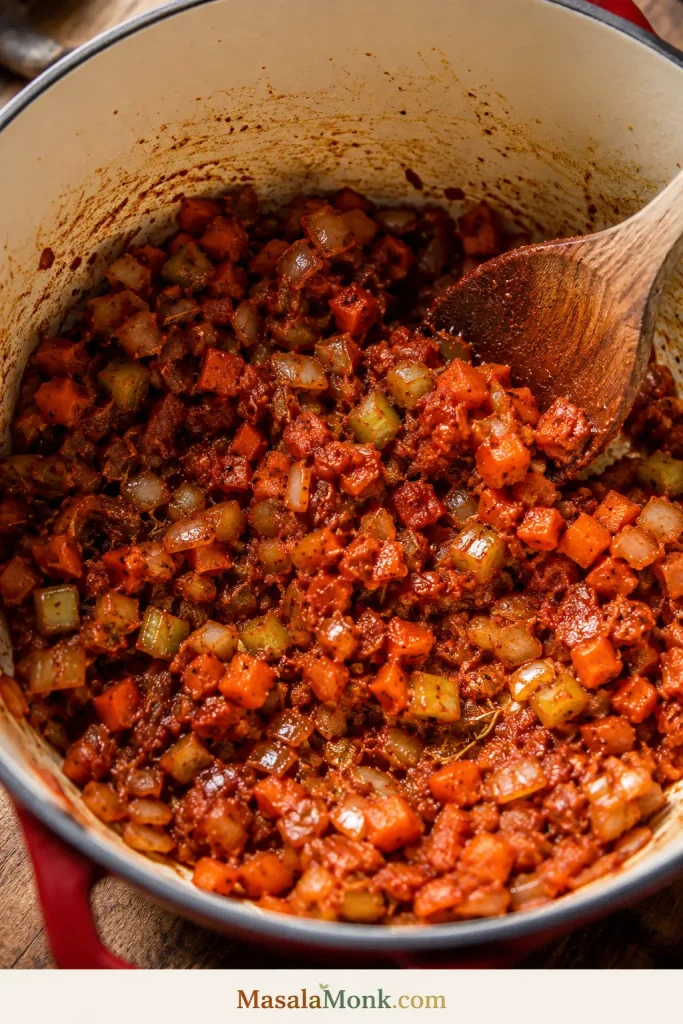
Add garlic, tomato paste, smoked paprika, oregano or thyme, cumin if using, chili flakes if using, and black pepper. Stir for 1–2 minutes. The tomato paste should darken slightly and coat the vegetables. This is the step that makes the stew taste slow-cooked even when the beans came from cans.
Next, let the tomato paste darken slightly with the garlic, herbs, and spices; that small step gives canned or cooked beans a deeper stew flavor.
3. Add Tomatoes, Broth, Beans, and Bay Leaf
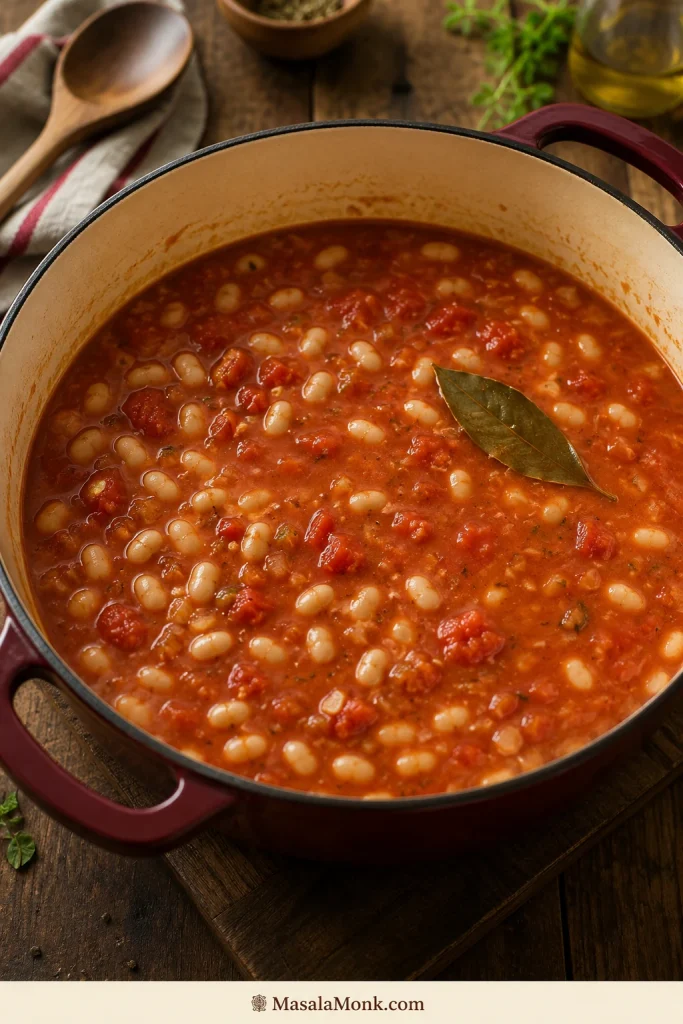
Add crushed tomatoes, 1½ cups / 360 ml broth, drained beans, and bay leaf. Stir well and scrape the bottom of the pot. If the mixture is too thick to bubble gently, add another ½ cup / 120 ml broth. Hold back extra liquid until the stew has simmered for at least 10 minutes.
After the beans, tomatoes, broth, and bay leaf go in, the pot should look a little loose; simmering uncovered is what turns it into stew.
At this stage, a loose-looking pot is normal; the thickening cues below explain when to wait, reduce, mash, or add more liquid.
4. Simmer Covered
Bring the pot to a gentle boil, then reduce the heat and cover. Simmer for 15–20 minutes. The beans should absorb the garlic-tomato flavor, and the vegetables should become fully tender.
5. Simmer Uncovered
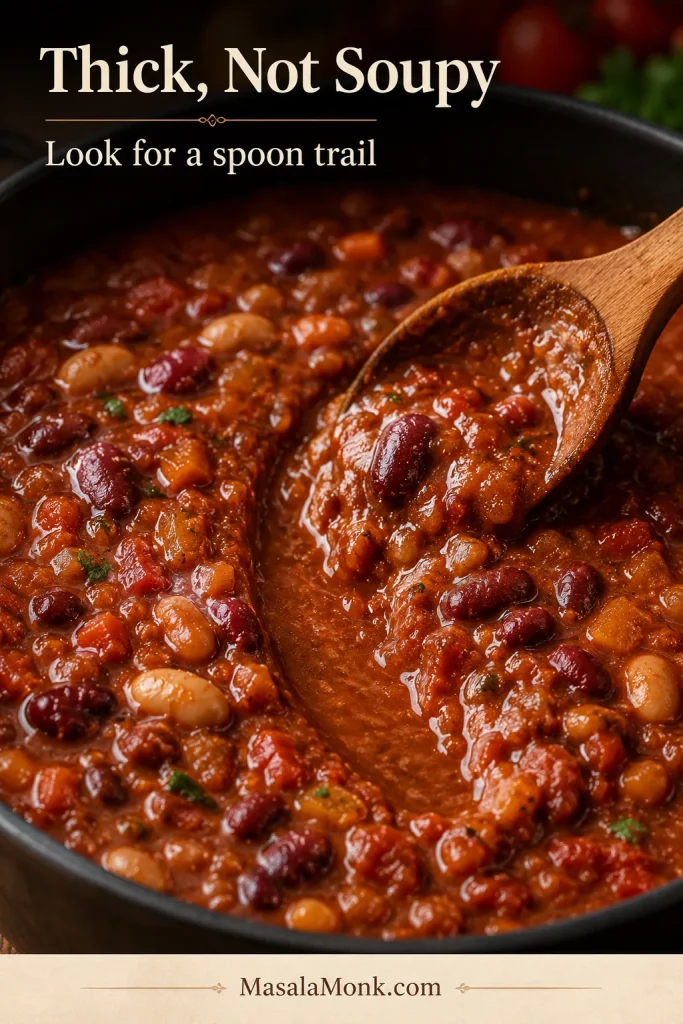
Remove the lid and simmer for 10–15 minutes more. Stir occasionally so the bottom does not catch. The bubbles should slow down, the sauce should look glossier, and a spoon should leave a brief trail through the stew before the sauce flows back. If you plan to serve it over rice, keep it slightly saucier.
6. Mash a Small Portion of the Beans
Mash ½–1 cup of beans against the side of the pot with a spoon, ladle, or potato masher. Do not puree the stew. You want enough broken beans to make the sauce creamy while most beans stay whole. Chickpeas will stay firmer than white beans, so mash a little more if using mostly chickpeas.
Instead of adding cream or flour, mash a small portion of the beans into the sauce while leaving plenty of whole beans for texture.
When the stew stays thinner than you want after mashing, use the troubleshooting table before adding extra ingredients.
7. Add Greens and Finish
Stir in spinach, kale, chard, or other greens. Spinach needs 2–3 minutes; kale and chard may need 4–5 minutes. Turn off the heat, remove the bay leaf, then stir in lemon juice, vinegar, or balsamic. If the stew tastes dull even after salt, it probably needs acid, not more spices.
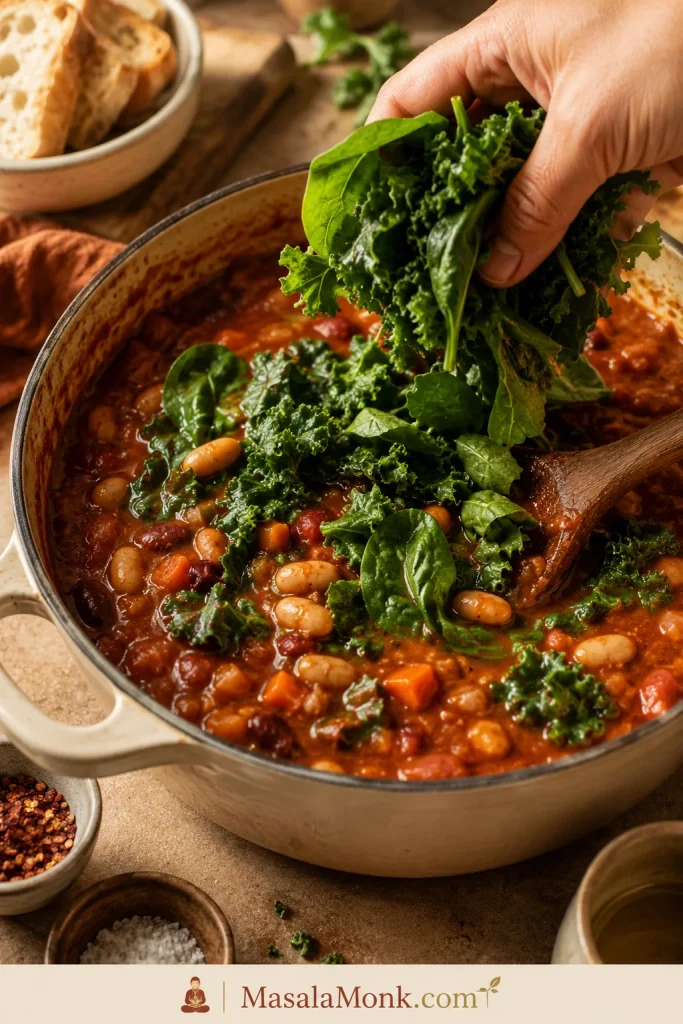
Toward the end, fold in spinach, kale, or chard so the greens soften into the hot stew while still adding freshness and color.
8. Rest Before Serving
Let the stew rest for 10 minutes before serving. The beans settle, the sauce tightens, and the bowl becomes more balanced. If it gets too thick, loosen it with broth or water ¼ cup / 60 ml at a time.
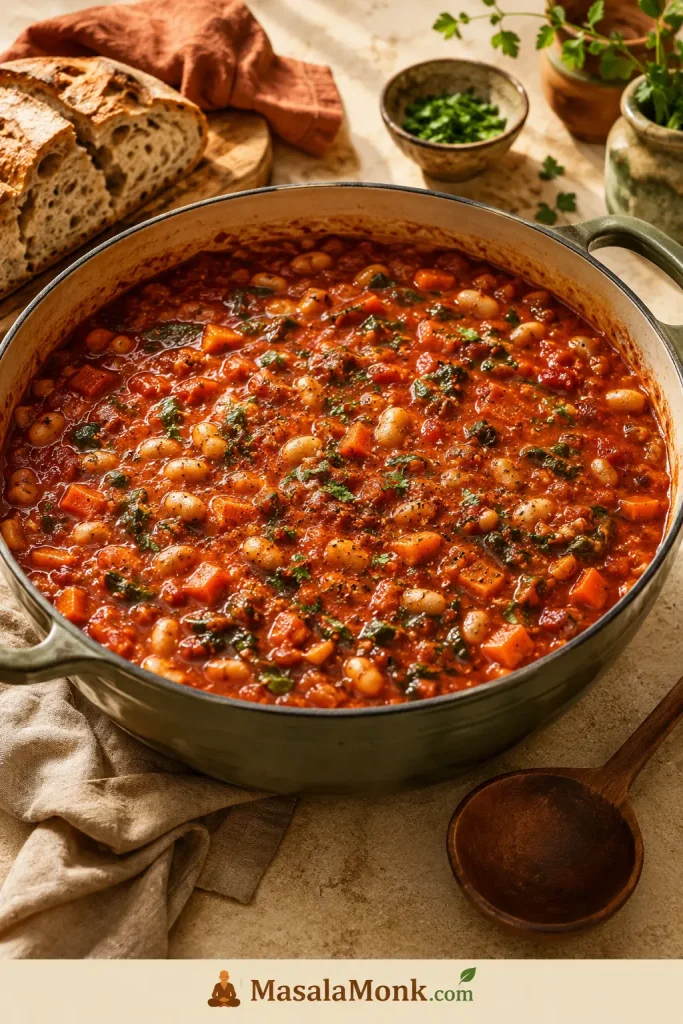
After resting, the stew should look settled and glossy in the pot before it ever reaches the bowl.
How to Keep It Thick, Not Soupy
If the stew looks too loose at first, give it a few minutes uncovered before adding fixes.
Start with less broth. For three cans of beans, begin with 1½ cups / 360 ml broth and add more only if needed.
Wait before adding liquid. Tomatoes loosen and beans release starch as they simmer.
Simmer uncovered near the end. This reduces extra liquid and concentrates flavor.
Mash some beans. Breaking down ½–1 cup beans thickens the sauce naturally.
Use tomato paste. Cooked tomato paste adds body and depth.
Choose creamy beans. Cannellini, butter beans, pinto beans, and white beans make a thicker pot.
Blend a small amount. You can blend 1 cup of stew and stir it back in, but do not blend the whole pot unless you want a bean puree.
Rest before serving. The stew thickens slightly as it cools.
Texture cue: after the uncovered simmer, a spoon should leave a short trail through the stew before the sauce slowly flows back. The stew should sit on rice instead of flooding it, and bread should be able to drag through the sauce.
The best texture cue is the spoon trail: when the sauce clings to the beans and slowly settles back, the stew is thick enough without becoming dry.
Recipe Card
Thick and Hearty Bean Stew
This thick bean stew turns canned or cooked beans into a hearty tomato-based dinner with garlic, herbs, soft vegetables, greens, and a bright lemon or vinegar finish. Mash a small amount of beans into the pot so the sauce turns glossy and spoonable without cream.
Prep Time 15 minutes
Cook Time 35–40 minutes
Total Time 50–55 minutes
Servings 6 bowls
Equipment
Large Dutch oven or heavy-bottomed pot, 5–6 quart / 5–6 liter
Wooden spoon
Measuring cups and spoons
Can opener
Potato masher or ladle, optional
Ingredients
2 tbsp / 30 ml olive oil
1 large onion, diced, about 150–180 g
2 medium carrots, diced, about 160–200 g
2 celery ribs, diced, about 100 g
4 garlic cloves, minced, about 12–16 g
2–3 tbsp / 30–45 g tomato paste
Smoked paprika, 1 tsp
Dried oregano or thyme, 1 tsp
½ tsp ground cumin, optional
¼–½ tsp chili flakes, optional
Bay leaf, 1
Crushed tomatoes, 1 can, 28 oz / 800 g
Low-sodium vegetable broth, 1½–2 cups / 360–480 ml, plus more as needed
3 cans beans, 14–15 oz / 400–425 g each, drained and rinsed; about 4½ cups cooked beans
2 cups / 60–100 g spinach, kale, chard, or other greens
1 tbsp / 15 ml lemon juice, red wine vinegar, or balsamic vinegar
2–3 tbsp chopped fresh parsley or basil
¾ tsp fine salt to start, plus more to taste; use up to 1½ tsp if using low-sodium broth and unsalted beans
½ tsp black pepper
Extra olive oil for serving, optional
Instructions
Soften the vegetables. Heat olive oil in a large Dutch oven or heavy pot over medium heat. Add onion, carrot, celery, and a pinch of salt. Cook for 7–10 minutes, stirring occasionally, until softened and sweet-smelling.
Add garlic and tomato paste. Stir in garlic, tomato paste, smoked paprika, oregano or thyme, cumin if using, chili flakes if using, and black pepper. Cook for 1–2 minutes, stirring often, until the tomato paste darkens slightly.
Add tomatoes, broth, beans, and bay leaf. Add crushed tomatoes, 1½ cups / 360 ml broth, the drained beans, and bay leaf. Stir well. If the stew looks too thick to simmer, add another ½ cup / 120 ml broth.
Simmer covered. Bring to a gentle boil, reduce heat, cover, and simmer for 15–20 minutes.
Simmer uncovered. Remove the lid and simmer for 10–15 minutes, stirring occasionally, until the liquid reduces and clings to the beans.
Mash some beans. Mash ½–1 cup of beans into the sauce with a spoon, ladle, or potato masher. Keep most beans whole.
Add greens. Stir in spinach, kale, or chard. Cook for 2–5 minutes, depending on the green, until tender.
Finish the stew. Remove the bay leaf. Stir in lemon juice, vinegar, or balsamic, plus fresh herbs. Taste and adjust salt, pepper, and balance.
Rest and serve. Let the stew rest for 10 minutes before serving. Add broth or water ¼ cup / 60 ml at a time if it becomes too thick.
Notes
Taste after simmering before adding more salt; broth reduces and canned beans vary.
For a thicker stew, start with 1½ cups / 360 ml broth and mash more beans near the end.
Prefer a looser stew? Use the full 2 cups / 480 ml broth and add more as needed.
For a lighter, less tomato-heavy version, use 14 oz / 400 g crushed tomatoes and add broth only as needed.
If using cooked dried beans, some good-tasting bean cooking liquid can replace part of the broth.
If using kidney beans, use canned kidney beans or dried kidney beans that have already been properly cooked.
For sausage, brown 12–16 oz / 340–450 g sausage first and reduce the olive oil.
For a vegan version, use vegetable broth and finish with olive oil, lemon, and herbs.
Best Beans for Stew
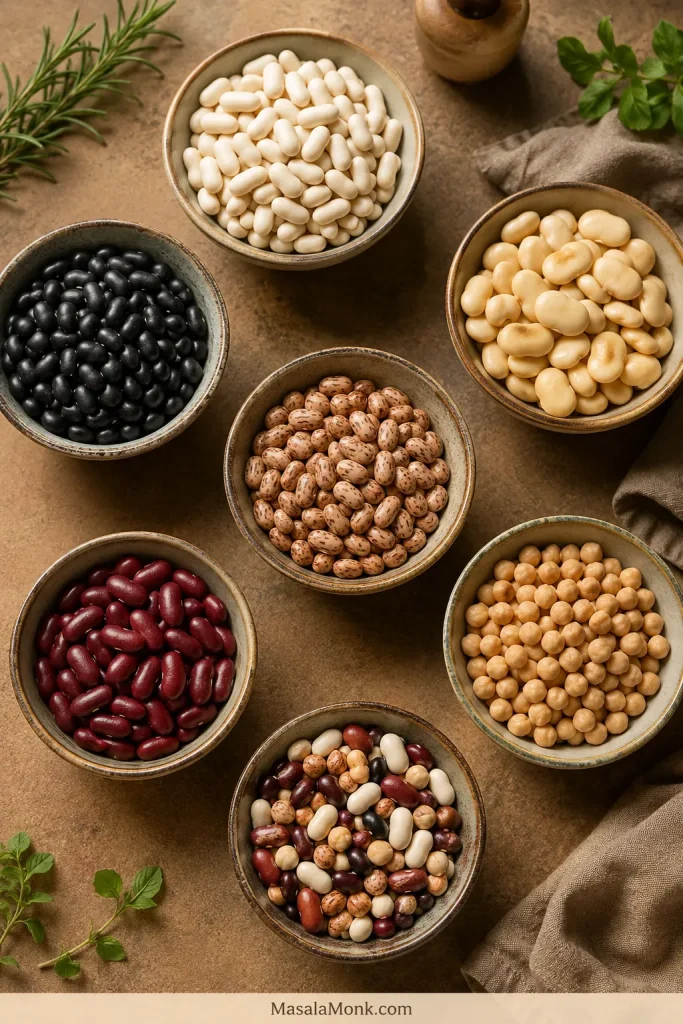
The bean mix changes the whole bowl: creamy beans soften the sauce, firmer beans stay visible, and mixed beans make the stew feel more like a pantry dinner than a planned recipe.
Different beans bring different texture: creamy white beans, butter beans, chickpeas, kidney beans, black beans, pinto beans, or a mixed-bean blend can all work here.
Bean
Best for
Texture
Notes
Cannellini beans
White bean stew, Tuscan-style stew
Creamy but holds shape
Best all-purpose choice for the main version.
Butter beans
Thick, soft, comforting stew
Large, tender, buttery
Excellent with tomatoes, smoked paprika, rosemary, mushrooms, or chorizo.
Great Northern or navy beans
White bean stew
Small to medium, creamy
Best when you want the stew creamy and gentle.
Black beans
Smoky or Latin-style stew
Earthy and creamy-firm
Use cumin, smoked paprika, chili, lime, cilantro, and rice.
Pinto beans
Mexican-style or pantry stew
Soft and creamy
They break down nicely and help thicken the sauce.
Kidney beans
Mixed bean stew, beef bean stew
Firm
Use canned or properly cooked kidney beans.
Chickpeas / garbanzo beans
Mediterranean, Spanish, or Moroccan-style stew
Nutty and firm
Good with tomato, cumin, coriander, paprika, greens, and lemon.
Mixed beans
Budget stew, pantry cleanout stew
Varied
Mash some creamy beans into the sauce to bring the textures together.
Once you know which beans you are using, the variation table below shows how to season white beans, black beans, chickpeas, butter beans, and mixed pantry beans.
If you were looking for a green bean side dish instead of a cooked-bean stew, MasalaMonk’s green bean casserole recipe is the better place to start.
Canned vs Dried Beans
For speed, canned beans get dinner on the table faster; dried beans give you more control, economy, and often excellent texture. Once they simmer with the garlic-tomato base, canned beans still taste like they belong.
Use the comparison as a measuring cue: 3 cans of beans usually give about 4½ cups cooked / about 720 g drained beans, while about 1½ cups dried beans can replace them after cooking.
For this recipe, 3 cans of beans, 14–15 oz / 400–425 g each, gives about 4½ cups cooked beans once drained, or roughly 720 g drained beans. To replace them with dried beans, start with about 1½ cups dried beans, cook them until tender, then measure about 4½ cups cooked beans for the stew. The exact yield varies by bean type, size, and age.
If your cooked dried-bean liquid tastes good and is not overly salty, use some of it in place of broth. It adds body and keeps the stew even more budget-friendly.
Very old dried beans may take much longer to soften or stay firm even after extended cooking. When cooking dried beans, keep tomatoes, lemon juice, and vinegar out until the beans are tender. Acidic ingredients can slow softening.
Planning to use the slow cooker? Read the slow cooker notes before using dried beans, especially kidney beans.
Kidney bean note: Canned kidney beans are the easiest choice here. If starting with dried kidney beans, cook them properly before adding them to stew, especially before slow cooking. For food-safety details, see the FDA’s guidance on kidney bean toxins and Utah State University Extension’s guide to storing and cooking dry beans.
Variations
Think of these as directions for the next pot, not decisions you need to make before the first one. The main recipe is complete as written; choose only the path that matches what you have today.
Vegetarian or vegan bean stew: The main recipe is vegetarian with vegetable broth. For a fully vegan pot, skip parmesan, yogurt, sour cream, and other dairy toppings; olive oil, mushrooms, smoked paprika, nutritional yeast, lemon, and herbs can still make the finish rich and lively.
Sausage: Brown 12–16 oz / 340–450 g sausage in the pot for 5–7 minutes before adding the vegetables. Spoon off excess fat, reduce the olive oil to 1 tablespoon / 15 ml, and build the stew in the same pot. White beans, butter beans, and pinto beans work especially well. For a more sausage-forward slow-cooker dinner, MasalaMonk’s slow cooker sausage casserole recipe follows that comfort-food direction more fully.
Chorizo: Use 4–6 oz / 115–170 g chorizo. Cured Spanish-style chorizo should be sliced or diced and gently rendered. Fresh Mexican-style chorizo should be cooked until browned and crumbly. Reduce the added oil and taste before adding more salt.
Chicken: Cooked shredded chicken is the simplest route. Stir in 2 cups / 280–320 g during the last 10 minutes of simmering. For raw chicken, use boneless thighs or breasts cut into large pieces, simmer until cooked through, then shred and return to the pot.
Beef: Beef turns this into a longer-cooked stew, not a 50-minute variation. Brown 1 lb / 450 g stew beef first, then simmer it with tomatoes and broth until mostly tender before adding canned beans. Depending on the cut, this may take 1½–2 hours.
Best Bean Mixes and Flavor Versions
This is where the recipe becomes useful for real pantry cooking: two half-used cans can make a better stew than one perfect bean. Keep the same method, then change the herbs, spices, finish, and side.
Version or mix
Change these ingredients
Finish with
Serve with
Cannellini + butter beans
Use mostly white beans with rosemary, thyme, and greens.
Lemon, olive oil, parsley
Bread or sautéed greens
Black beans + pinto beans
Use cumin, chili, smoked paprika, and less Italian herb.
Lime, cilantro, avocado
Rice
Chickpeas + cannellini
Use cumin, coriander, paprika, tomato, and greens.
Lemon, parsley, yogurt if desired
Flatbread or couscous
Butter beans + mushrooms or chorizo
Use smoked paprika, rosemary, mushrooms, or rendered chorizo.
Vinegar, parsley, black pepper
Potatoes or bread
Mixed pantry cans
Use any cooked beans and mash the creamier ones into the sauce.
Vinegar, herbs, olive oil
Rice or bread
If you want chickpeas in a fresher, no-cook direction instead, MasalaMonk’s chickpea salad recipe turns canned chickpeas into a bright lemony lunch or side.
Fresh Tomato, No-Tomato, and Small-Batch Notes
Fresh tomato version: Fresh tomatoes work, but they need more time to cook down than canned tomatoes. Use them when they are ripe and flavorful, simmer longer, and expect a slightly looser, brighter sauce. MasalaMonk’s guide to tomato sauce from fresh tomatoes shows how reduction changes both texture and flavor.
Lighter no-tomato version: Skip the crushed tomatoes and tomato paste. Use 2½–3 cups / 600–720 ml broth, white beans, rosemary or thyme, garlic, greens, and lemon. Mash about 1 cup of beans into the pot so the broth becomes creamy.
Small batch with 2 cans of beans: Use 1 tbsp / 15 ml olive oil, 1 small onion, 1 carrot, 1 celery rib, 2 garlic cloves, 1½ tbsp / about 22 g tomato paste, 14 oz / 400 g tomatoes, ¾–1 cup / 180–240 ml broth, and 2 cans of beans. This makes about 3–4 bowls.
Adding Beans to Another Stew
Already have a pot of stew going? Use cooked or canned beans. Raw dried beans should not be added to an existing stew unless the recipe was designed for that timing.
Canned or cooked beans: Add during the final 15–20 minutes.
Delicate white beans or butter beans: Add later if you want them to stay whole.
Kidney, black, or pinto beans: Add a little earlier if you want them to absorb more flavor.
To thicken another stew: Mash some beans into the liquid.
Slow Cooker and Instant Pot Notes
The stovetop gives the best control over thickness. Choose the slow cooker for convenience, not the glossiest texture, and use the Instant Pot when speed matters more than deep reduction.
Slow Cooker
The slow cooker version will usually be softer and less glossy than the stovetop version, but it is excellent for a hands-off, make-ahead dinner. Use canned beans or beans that have already been safely cooked, and sauté the onion, carrot, celery, garlic, tomato paste, and spices first if you can.
Sauté the vegetables, garlic, tomato paste, and spices in a skillet or in the slow cooker insert if it has a sauté function.
Add tomatoes, cooked/canned beans, bay leaf, herbs, and 1¼–1½ cups / 300–360 ml broth.
Cook on high for 3–4 hours or low for 5–6 hours. Timing depends on bean type and how soft you want the stew.
Add greens near the end.
Mash some beans after cooking. If the stew is still thin, transfer to a pot and simmer uncovered for a few minutes.
Slow cooker kidney bean warning: Do not cook raw dried kidney beans from scratch in the slow cooker. Use canned kidney beans or dried kidney beans that have already been boiled and cooked properly.
Instant Pot with Canned Beans
The Instant Pot is best when you want speed, not deep reduction. The sauté step and final simmer are what keep it from tasting flat. This version works best with cooked or canned beans unless you are following a bean-specific dried-bean pressure-cooking method.
Use the sauté function to soften the onion, carrot, celery, garlic, tomato paste, and spices.
Deglaze thoroughly with a splash of broth, scraping until the bottom feels smooth before adding beans and tomatoes.
Add drained beans, 1 cup / 240 ml broth, bay leaf, and crushed tomatoes on top.
Pressure cook for 5 minutes.
Let the pressure release naturally for 10 minutes, then release the remaining pressure.
Mash some beans after cooking. If the stew is thin, use sauté mode for a few minutes to reduce it.
Add greens, lemon or vinegar, and herbs after pressure cooking.
What to Serve with Bean Stew
The best sides are the ones that catch the sauce: rice, bread, potatoes, polenta, or anything sturdy enough for a thick spoonful. Serve it thick enough for bread, or just saucy enough to settle into rice. A final drizzle of olive oil and a squeeze of lemon can make the bowl feel richer, brighter, and more intentional than the ingredient list suggests.
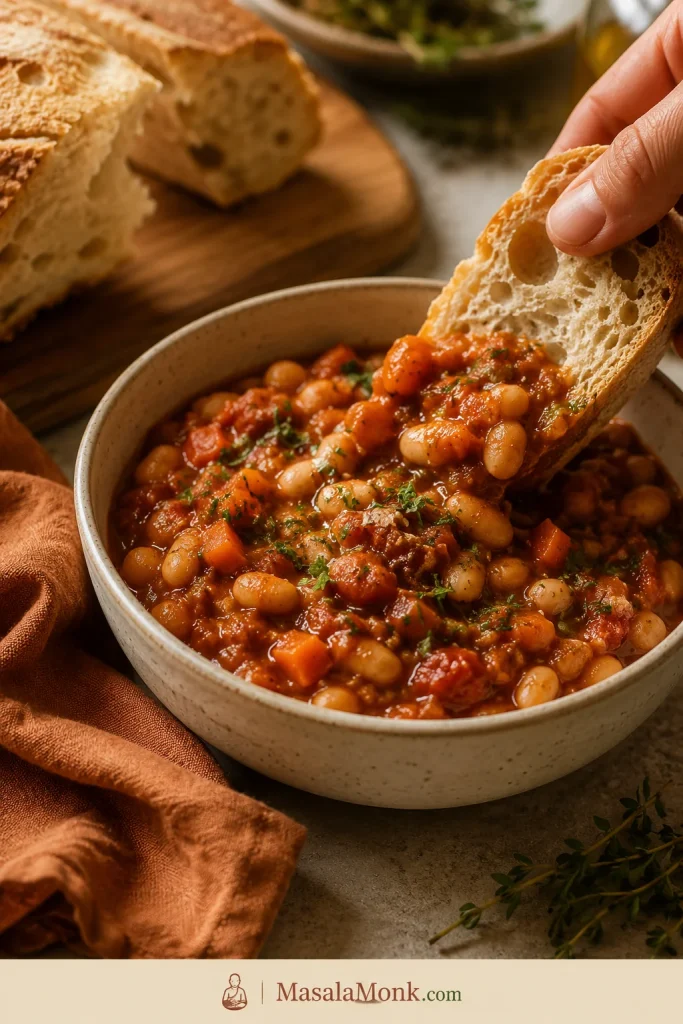
Serve the stew with crusty bread when you want the sauce to be part of the meal; one scoop should catch beans, herbs, and tomato base together.
To Make It More Filling
Crusty bread or garlic bread
Steamed rice
Polenta
Cornbread
Baked potatoes
Quinoa, bulgur, or couscous
Buttered toast
A pot of plain rice is one of the easiest ways to stretch the stew. MasalaMonk’s guide on how to cook rice covers stovetop, rice cooker, and Instant Pot methods so the base comes out right before you spoon the stew over it.
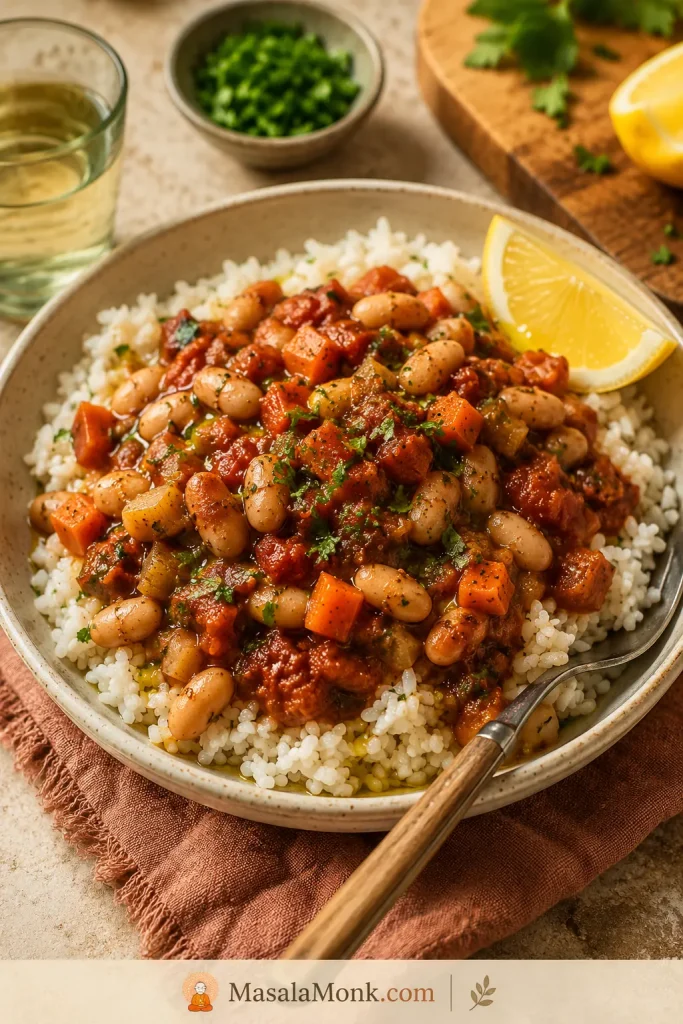
For a bigger dinner, spoon the bean stew over rice; the rice catches the tomato sauce and stretches the pot without making the meal feel thin.
The storage section explains why extra stew is worth planning for: it thickens overnight and loosens easily when reheated gently.
To Add Freshness
Because the stew is rich and hearty, the best toppings either brighten it, cool it, or add contrast.
Lemon or lime wedges
Fresh parsley, basil, cilantro, or dill
Pickled onions
Green salad
Sautéed greens
Avocado for black bean versions
Yogurt or sour cream, if not vegan
For another bean-and-rice dinner with a Louisiana-style flavor base, MasalaMonk’s red beans and rice recipe is a heartier, smokier route.
Make-Ahead, Storage, Freezing, and Reheating
Bean stew thickens and deepens as it rests, which means tomorrow’s bowl may taste even better than tonight’s. The leftovers are part of the reward here; the beans keep soaking up flavor as they sit. If you are making it ahead, keep it slightly looser than you want. It will thicken as it cools and again in the fridge.
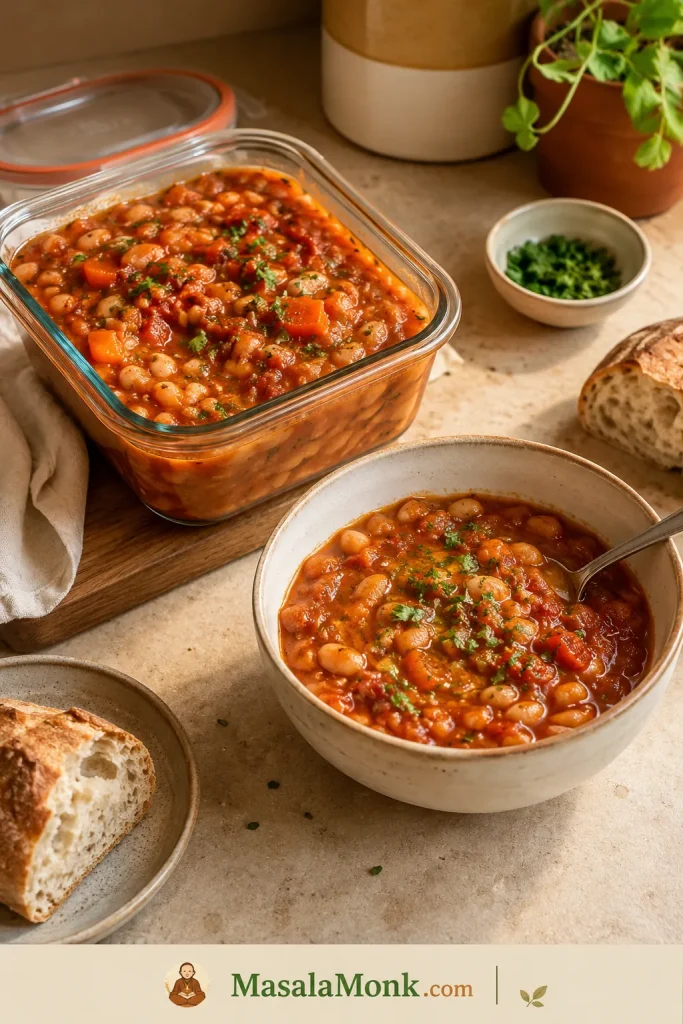
Leftover bean stew usually thickens as it rests; store it in glass if you can, then loosen it with a splash of broth or water when reheating.
Make ahead: Make the stew 1–2 days ahead if you want the flavor to settle.
Refrigerator: Store in an airtight container for 4–5 days.
Freezer: Freeze for up to 3 months.
Greens: If freezing, consider adding fresh greens after reheating rather than before freezing.
Reheating: Warm on the stovetop over low-medium heat with a splash of broth or water.
Brighten after reheating: Add lemon juice, herbs, or olive oil at the end.
The troubleshooting table below covers reheated stew that turns too thick, too loose, or flat-tasting.
Mistakes That Make It Watery or Bland
Most disappointing bean stews fail in the same few ways: too much liquid, not enough base flavor, or no fresh finish. Fix those, and the pot usually comes back.
Adding too much broth at the start. Begin with less, simmer, then adjust.
Skipping the vegetables. Beans need onion, garlic, herbs, and seasoning to taste like dinner.
Not cooking the tomato paste. Raw tomato paste can taste sharp and flat.
Adding tomatoes or vinegar before dried beans are tender. Acidic ingredients can slow softening.
Forgetting the fresh finish. A small splash of vinegar or lemon at the end keeps the stew from tasting heavy.
Ignoring salt from broth, canned beans, sausage, or chorizo. Taste before adding the full amount of salt.
Troubleshooting
Most bean stew problems are fixable because beans are forgiving. When the pot is watery, give it time uncovered. Flat flavor usually needs salt first, then a small splash of vinegar or lemon juice. A too-thick pot should be loosened slowly and tasted again.
Problem
Fix now
Fix next time
Too watery
Simmer uncovered and mash ½–1 cup beans into the sauce.
Start with less broth and add more only after simmering.
Too thick
Add broth or water ¼ cup / 60 ml at a time.
Reduce for less time or use the full 2 cups / 480 ml broth.
Bland beans
Add salt first, then a small splash of vinegar or lemon juice, herbs, olive oil, or chili.
Season the vegetables and cook the tomato paste properly.
Flat flavor
Add a small splash of vinegar or lemon juice, fresh herbs, black pepper, or olive oil.
Do not skip the final balance.
Too acidic
Add more beans, a splash of broth, olive oil, or a small pinch of sugar.
Use fewer tomatoes or cook tomato paste longer.
Bitter tomato paste
Add tomatoes, broth, and beans to soften the flavor.
Cook tomato paste until darkened, but do not let it burn.
Firm beans
Simmer longer with extra broth until tender.
Use canned beans or cook dried beans fully before adding.
Too salty
Add unsalted beans, potato, tomatoes, or low-sodium broth.
Use low-sodium broth and season gradually.
Thin slow cooker version
Mash beans at the end or transfer to a pot and simmer uncovered.
Use less broth in the slow cooker.
FAQs
What beans are best for bean stew?
Cannellini beans and butter beans are the easiest all-purpose choices for bean stew because they turn creamy without disappearing. Black beans make it smoky, chickpeas keep it firmer, pinto beans help thicken the sauce, and mixed beans are best when you want to use what is already open.
Is bean stew the same as bean soup?
No. Bean stew is thicker than bean soup. Soup has more broth and a looser texture, while this stew is reduced, spoonable, and sturdy enough to serve with bread, rice, polenta, or potatoes as a full meal.
How is bean stew different from chili?
Bean stew is usually less chili-spice focused than chili. This version leans on aromatics, tomatoes, herbs, beans, and a flexible finish rather than a heavy chili-powder base.
Can I use canned beans for bean stew?
Yes, canned beans work very well for bean stew. Drain and rinse three 14–15 oz cans, then simmer them in the tomato base until the sauce clings to the beans.
Should I drain canned beans?
Usually, yes. Draining and rinsing gives you more control over salt and texture. If the can liquid tastes clean and you want extra body, add a small splash, but do not use it as the main liquid.
Can I use dried beans?
Yes, dried beans work well if they are cooked until tender first. Use about 4½ cups cooked beans to replace three cans; the stew should be where they absorb flavor, not where they struggle to soften.
How do I thicken bean stew?
To thicken bean stew, simmer uncovered and mash ½–1 cup of beans into the sauce. Starting with less broth and cooking the tomato paste properly also helps the finished bowl become glossy and scoopable.
Can I make bean stew without tomatoes?
Yes, bean stew can be made without tomatoes. Use broth as the base, add extra aromatics and herbs, mash more beans for body, and finish with olive oil and a little acidity so it still tastes complete.
Can this bean stew be vegan?
Yes, this bean stew can be vegan. Use vegetable broth, skip dairy toppings, and finish with olive oil, herbs, mushrooms, or nutritional yeast for extra richness.
Can I make bean stew in a slow cooker?
Yes, bean stew can be made in a slow cooker with canned beans or beans that have already been cooked. Use less broth than the stovetop version, and expect a softer, less glossy stew that is still excellent for a hands-off dinner.
Does bean stew freeze well?
Yes, bean stew freezes well for up to 3 months. It usually looks thicker after thawing, so reheat it gently with a splash of broth or water, then brighten it at the end so it tastes fresh again.
What should I serve with bean stew?
Serve bean stew with crusty bread, rice, polenta, cornbread, baked potatoes, quinoa, couscous, or a green salad. Bread is best when the stew is extra thick; rice is best when you want to stretch the pot into more servings.
Final Thoughts
A good bean stew is not fancy food. It is the kind of recipe that makes three cans of beans, one onion, and the last carrot in the drawer feel like dinner for tonight and lunch tomorrow.
Once the method clicks, you stop needing one exact bean. Try white beans and rosemary when you want something soft and cozy. Go with black beans, cumin, and lime when you want a smoky bowl over rice. Choose chickpeas with paprika and lemon, butter beans with chorizo, or mixed beans when the pantry needs clearing out.
If you make this with a different bean mix, leave a comment with the exact cans or cooked beans you used and what you served it with — especially if you tried black beans, butter beans, chickpeas, or a mixed pantry batch. It helps the next person staring at the same random cans.
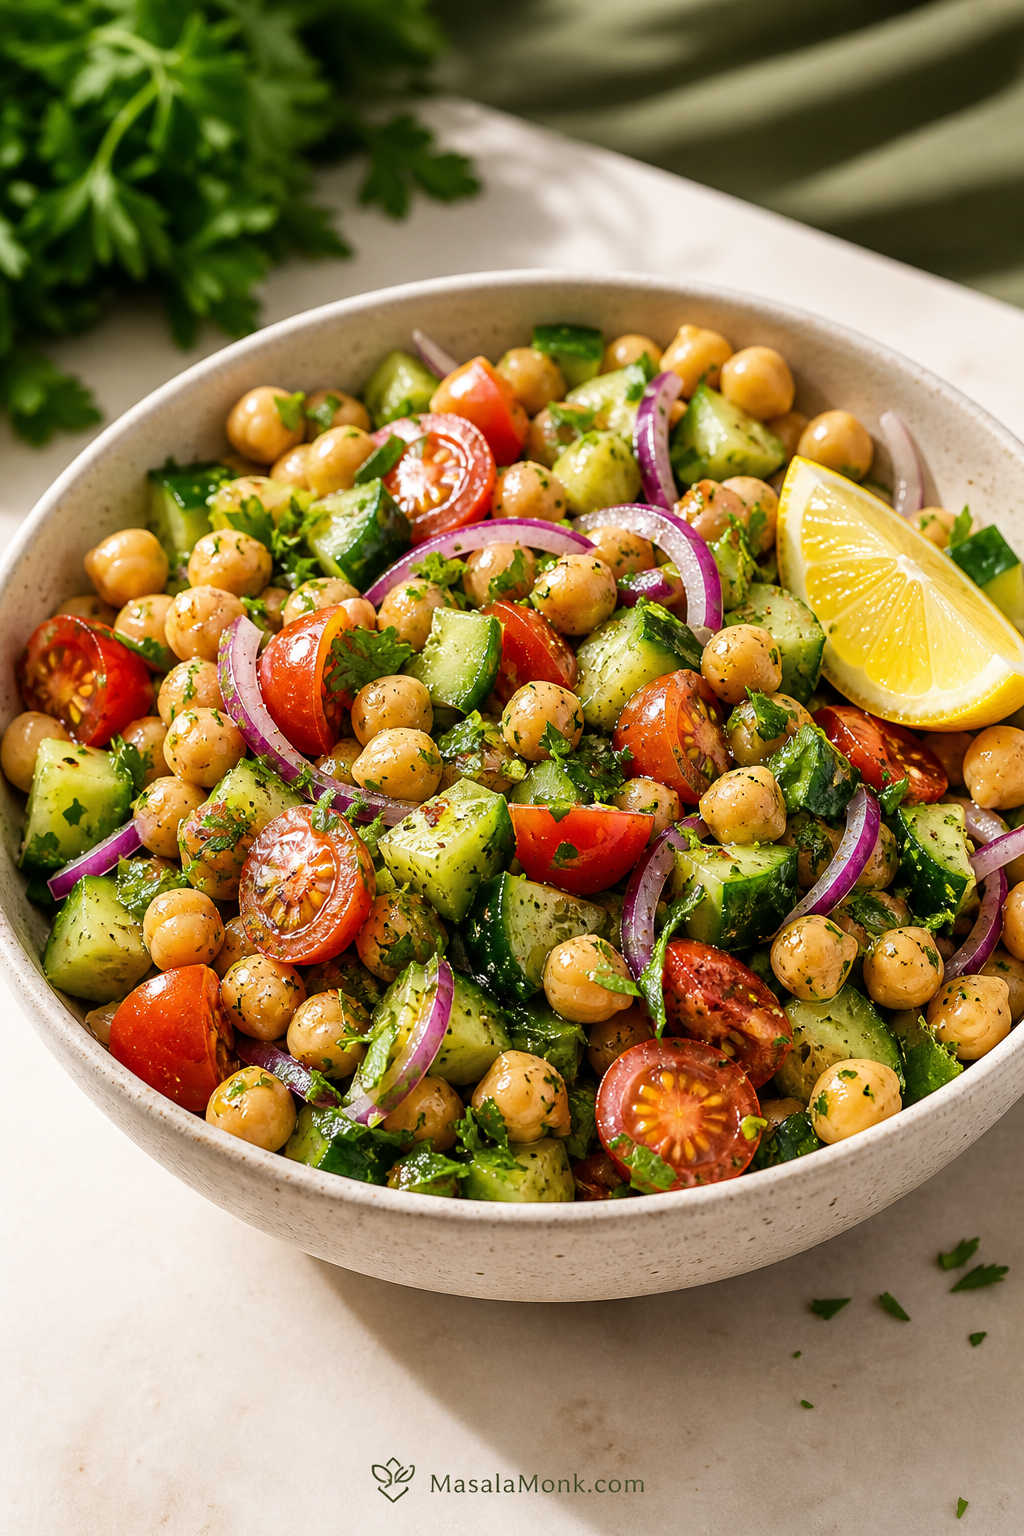
This chickpea salad recipe turns canned chickpeas into a fresh no-cook salad with cucumber, tomatoes, red onion, herbs, and lemon dressing in about 15 minutes. It is bright enough for a side dish, filling enough for lunch, and sturdy enough for meal prep.
Keep the chickpeas whole for a crisp salad bowl, lightly mash them for wraps or pita pockets, or smash them more deeply for a creamy chickpea salad sandwich. The same recipe can lean Mediterranean with feta and olives, vegan with avocado or tahini, or Indian-style with cilantro, cumin, chili, and lemon.
Chickpeas and garbanzo beans are the same ingredient, so this also works as a garbanzo bean salad recipe. The key is simple: drain the chickpeas well, season them boldly, and use enough lemon, salt, herbs, and crunch so the salad tastes fresh instead of flat.
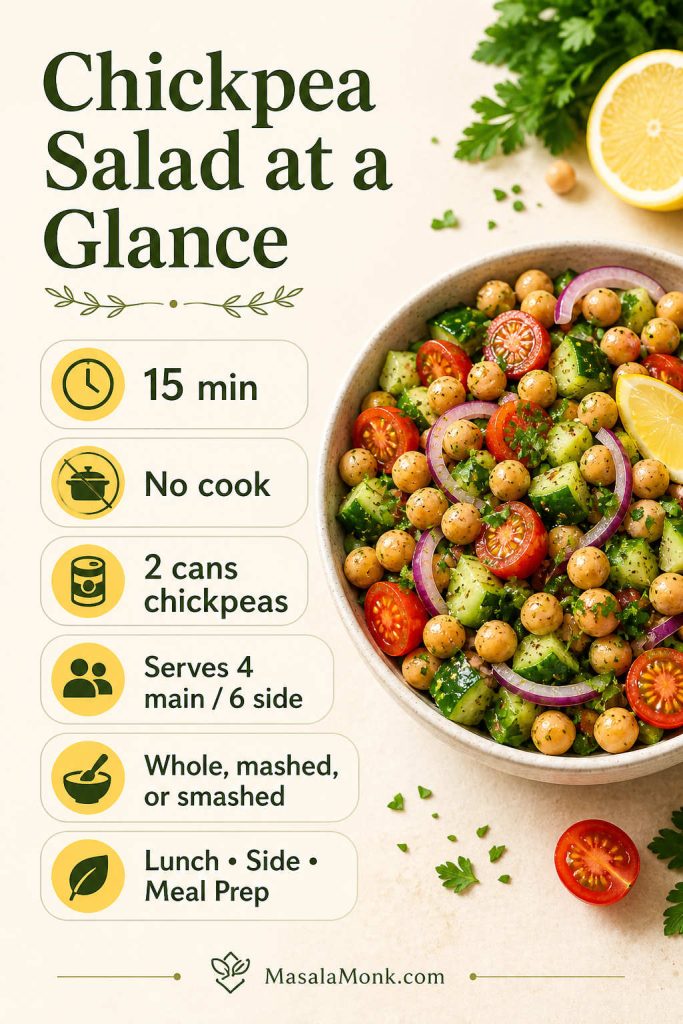
At a glance: This recipe takes about 15 minutes, uses 2 cans of chickpeas, serves 4 as a main or 6 as a side, and needs no cooking. Keep it whole for a salad bowl, lightly mash it for wraps, or smash it for sandwiches.
Why this version is easy to use: The base salad stays simple, but you also get dressing ratios, substitution options, storage cues, and texture choices. As a result, the same chickpeas can become a bowl, wrap, pita filling, sandwich, or meal-prep lunch without starting over.
Canned chickpeas make this a fresh salad with cucumber, tomatoes, herbs, and lemon dressing in about 15 minutes. Make the dressing first, drain and rinse the chickpeas, chop the vegetables, toss everything together, and let the bowl sit for 10 minutes if you have time.
The salad can be served cold or at room temperature. For a side salad or lunch bowl, leave the chickpeas whole. However, if you are making wraps or pita pockets, lightly mash some of them so the filling holds together. When you want a thicker sandwich filling, smash most of the chickpeas instead.
First time making it? Start with chickpeas, cucumber, tomatoes, red onion, parsley, lemon, olive oil, garlic, salt, and pepper. Once the base tastes good, add feta, olives, avocado, paneer, or extra spices.
Before you start, note the useful basics: this chickpea salad takes about 15 minutes, needs no cooking, and works as a bowl, wrap, sandwich filling, or meal-prep lunch.
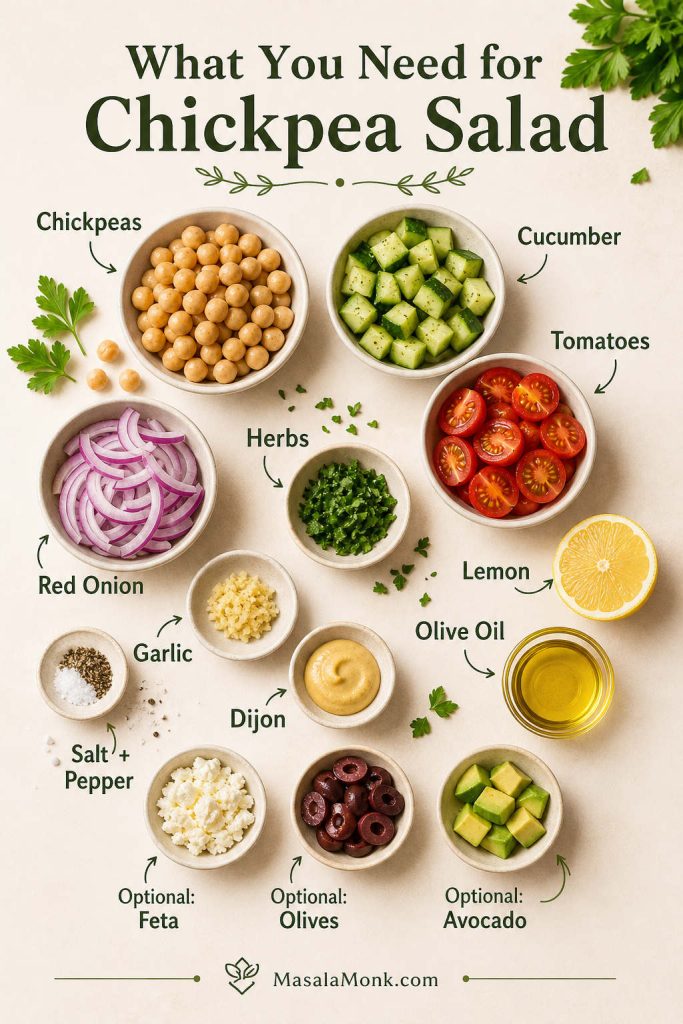
Ingredients for Chickpea Salad
You only need a few ingredients, so each one should add something useful. The chickpeas make the salad filling, cucumber and tomatoes keep it fresh, herbs lift the flavor, and lemon dressing pulls this recipe together.
A good chickpea salad needs contrast, so chickpeas make it filling, cucumber adds crunch, tomatoes bring juiciness, herbs lift the flavor, and lemon dressing keeps everything bright.
Chickpeas or Garbanzo Beans?
Chickpeas and garbanzo beans are the same ingredient, so this recipe works no matter which name is on the can or how the salad is labeled. Use two cans of chickpeas or garbanzo beans, drain and rinse them well, and treat them the same way in the bowl.
Why Canned Chickpeas Work in This Salad Recipe
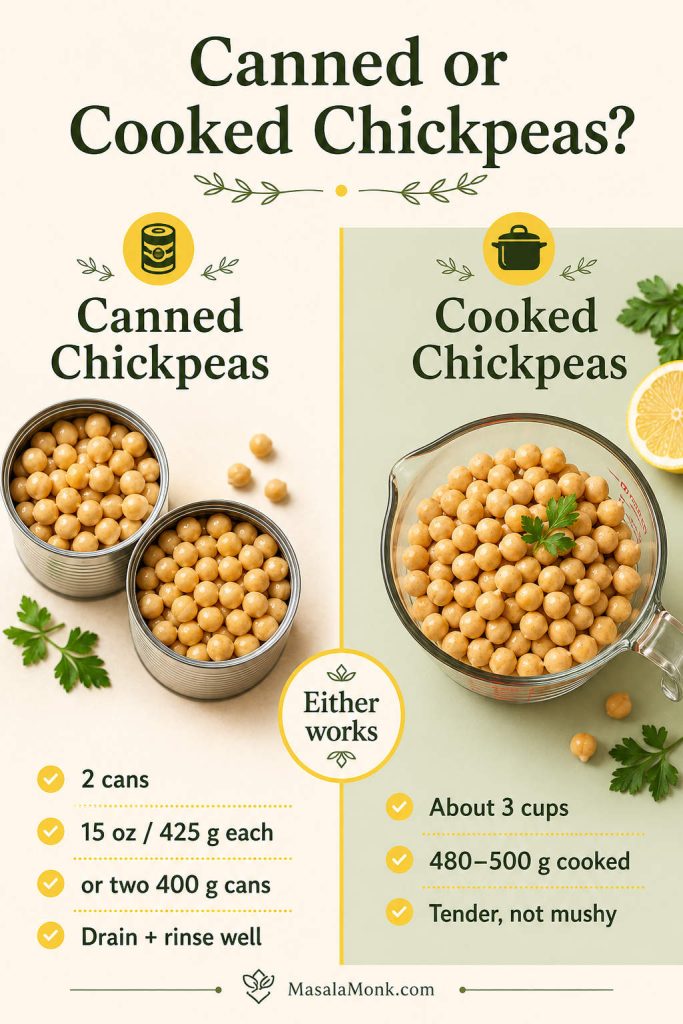
Canned chickpeas are already cooked, which makes this recipe quick enough for a weekday salad or lunch bowl. Use two 15-ounce / 425 g cans, or two 400 g cans, drained and rinsed. Once drained, that usually gives you about 480–500 g chickpeas total, or about 3 cups cooked chickpeas.
Rinsing matters because it removes excess canning liquid and gives the salad a cleaner flavor. After rinsing, let the chickpeas drain well. If they still look wet, pat them lightly with a clean towel so the dressing does not get diluted.
Using Cooked Chickpeas Instead of Canned
If you cook chickpeas from dry, use about 3 cups / 480–500 g cooked chickpeas. They should be tender enough to eat cold in the salad, but not so soft that they collapse when tossed.
Cooked-from-dry chickpeas can taste nuttier than canned ones. However, canned chickpeas are still the easiest choice when you want a fast salad.
Canned chickpeas are the easiest choice when you want a fast chickpea salad recipe; however, cooked chickpeas work just as well if they are tender, well-drained, and not too soft.
Fresh Vegetables That Keep the Salad Crisp
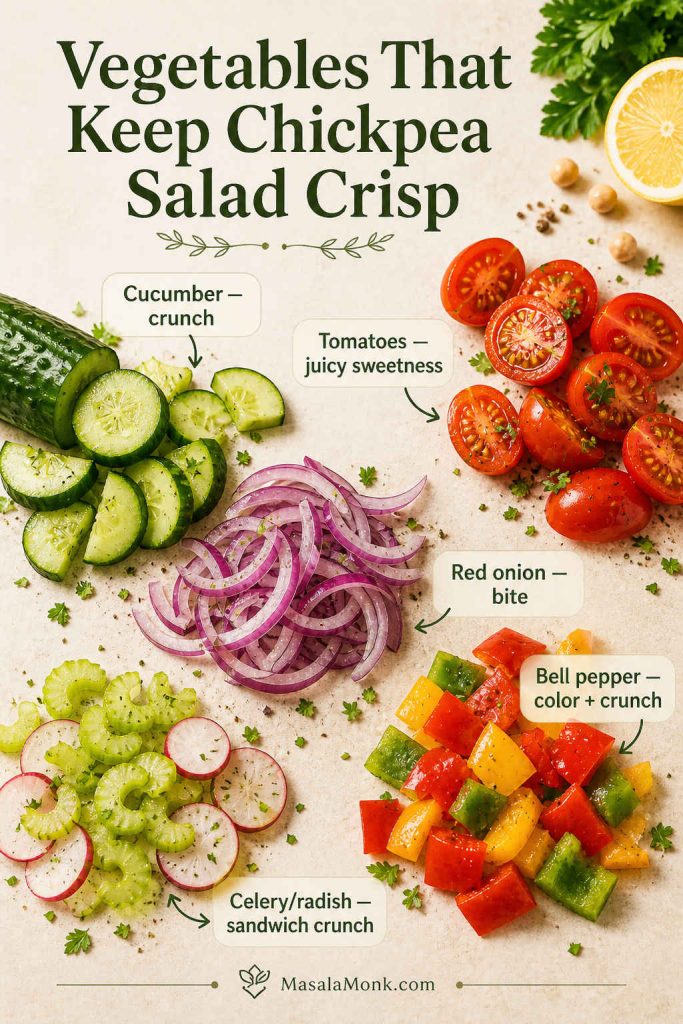
For this recipe, chickpeas give the salad body, so the vegetables should bring crunch, juice, and freshness. Cucumber adds crispness, cherry or grape tomatoes bring sweetness, red onion gives bite, and bell pepper adds color if you want extra crunch.
For the freshest texture, choose vegetables that add contrast: cucumber brings crunch, tomatoes add juiciness, red onion adds bite, and bell pepper adds extra color as well as crispness.
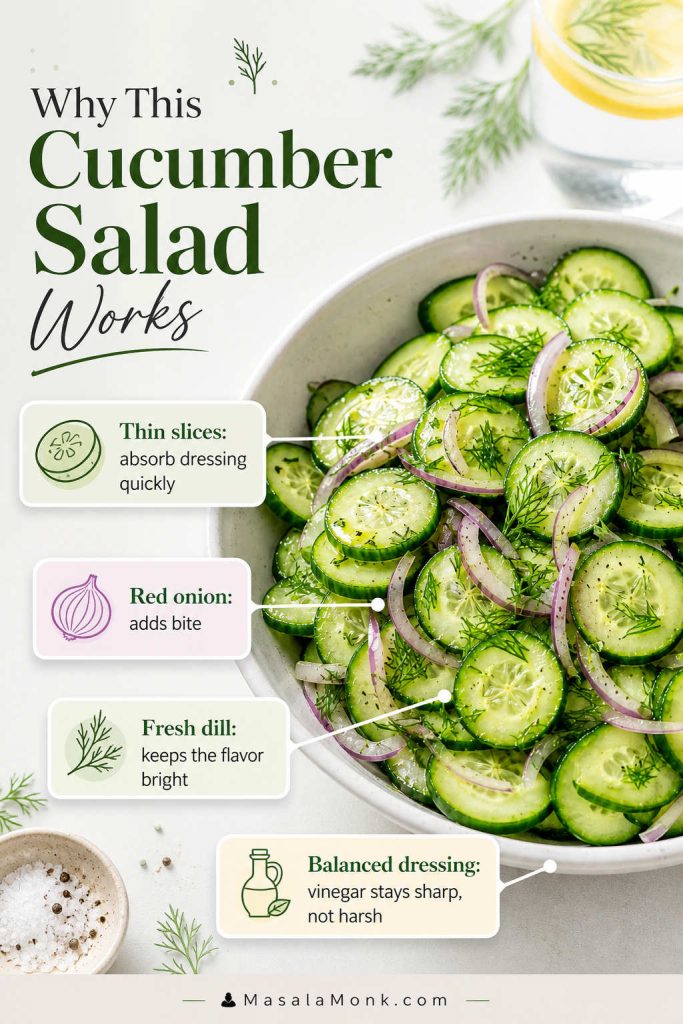
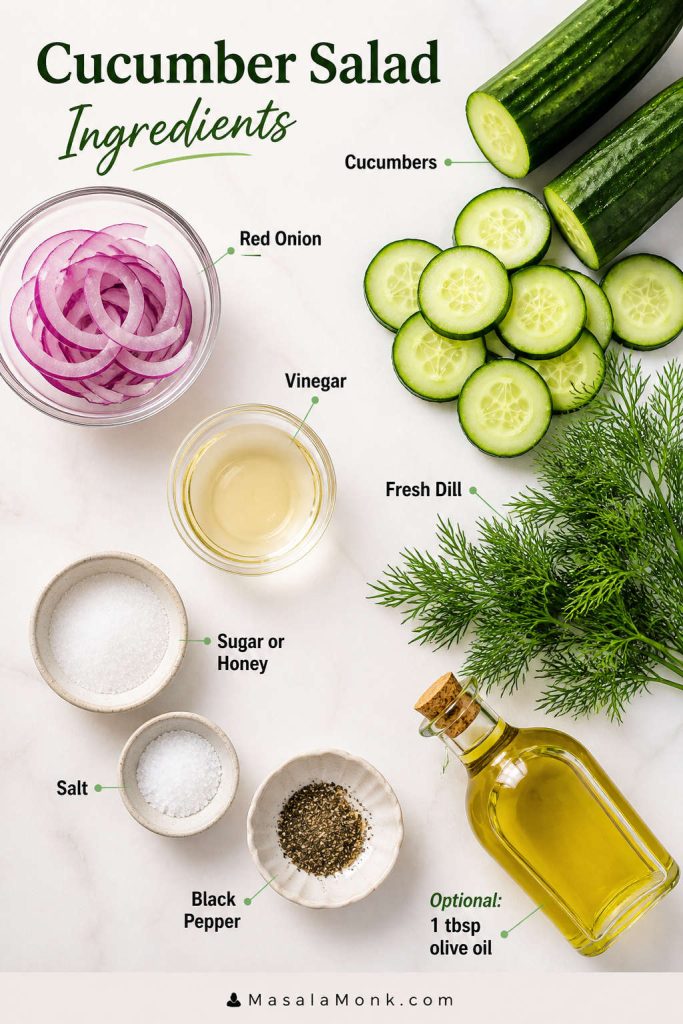
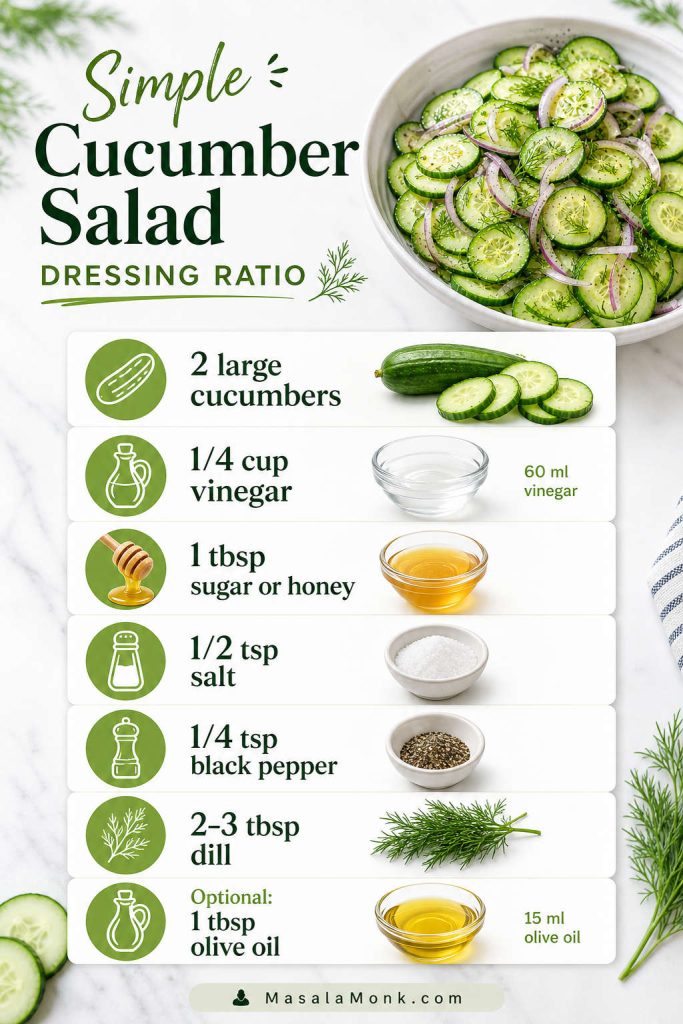
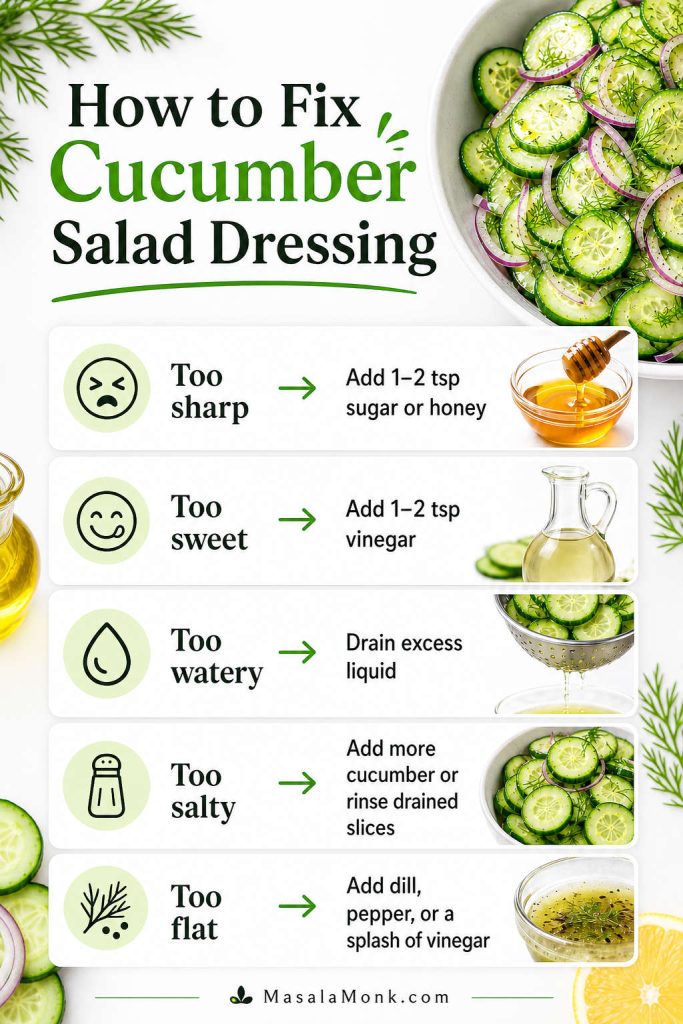
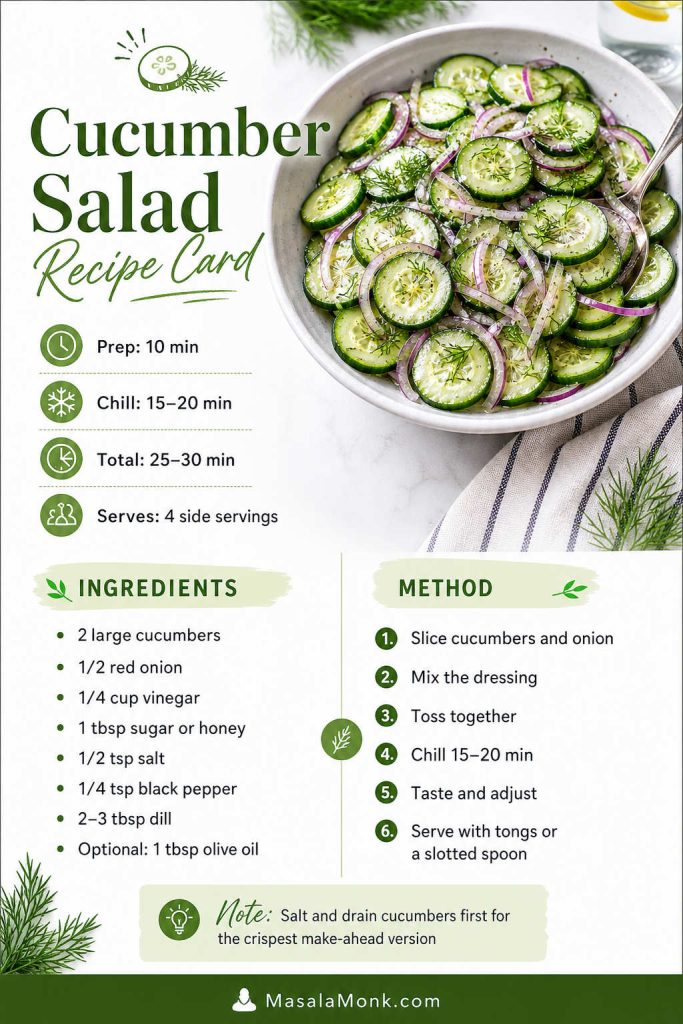
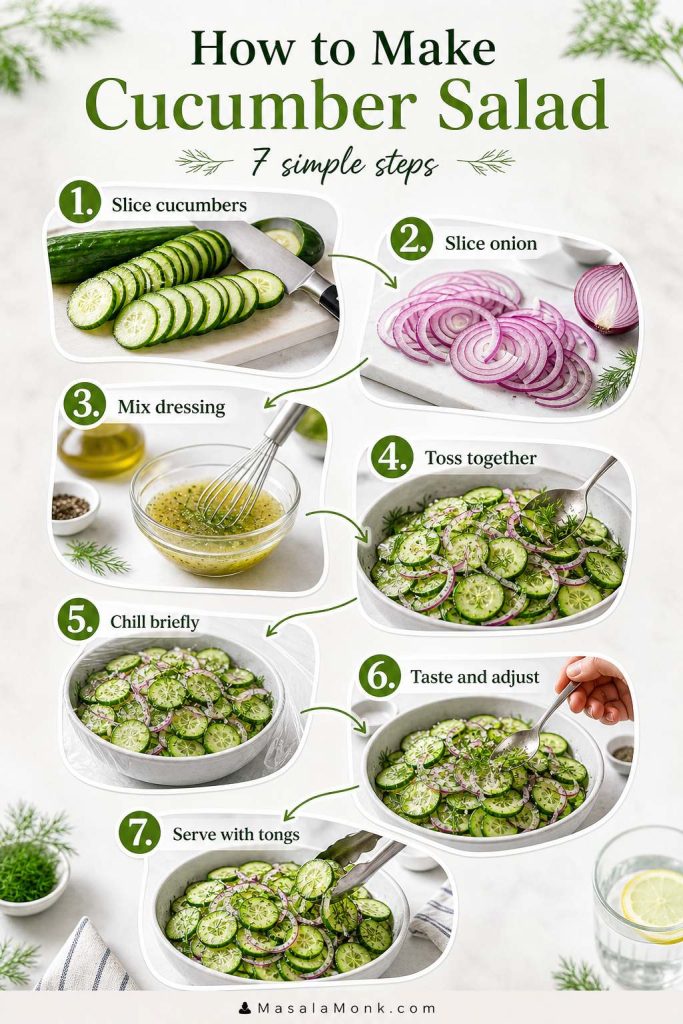
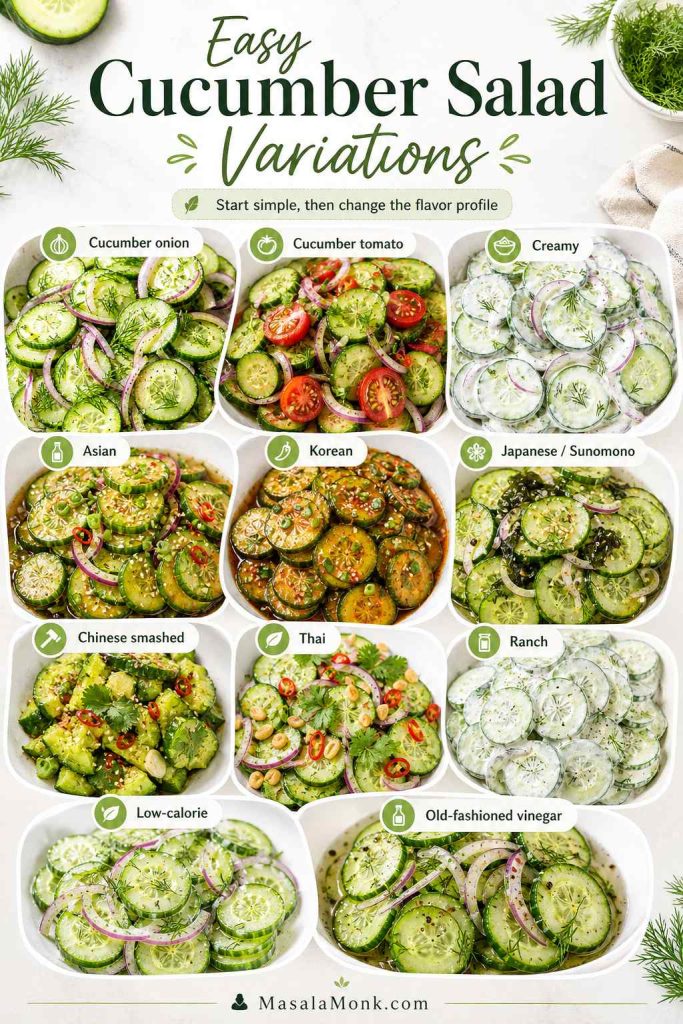
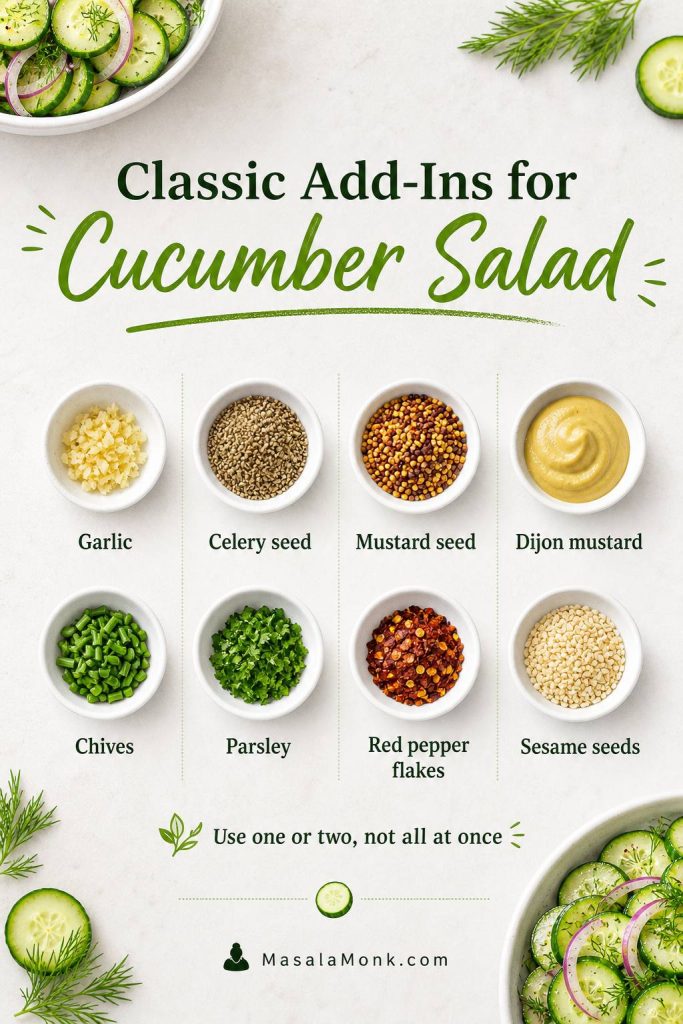
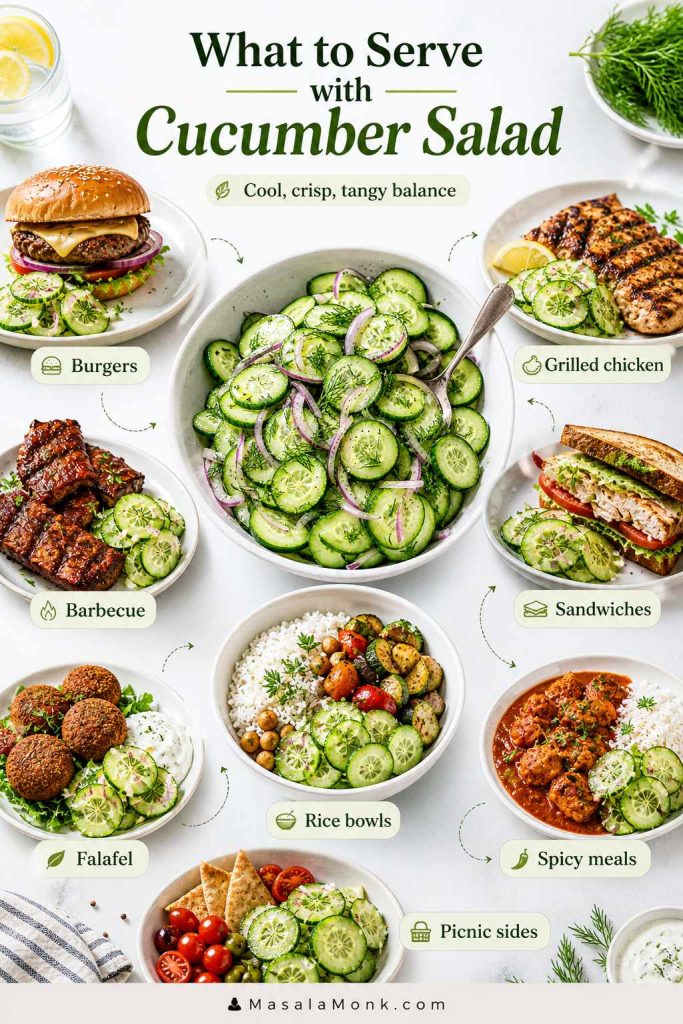
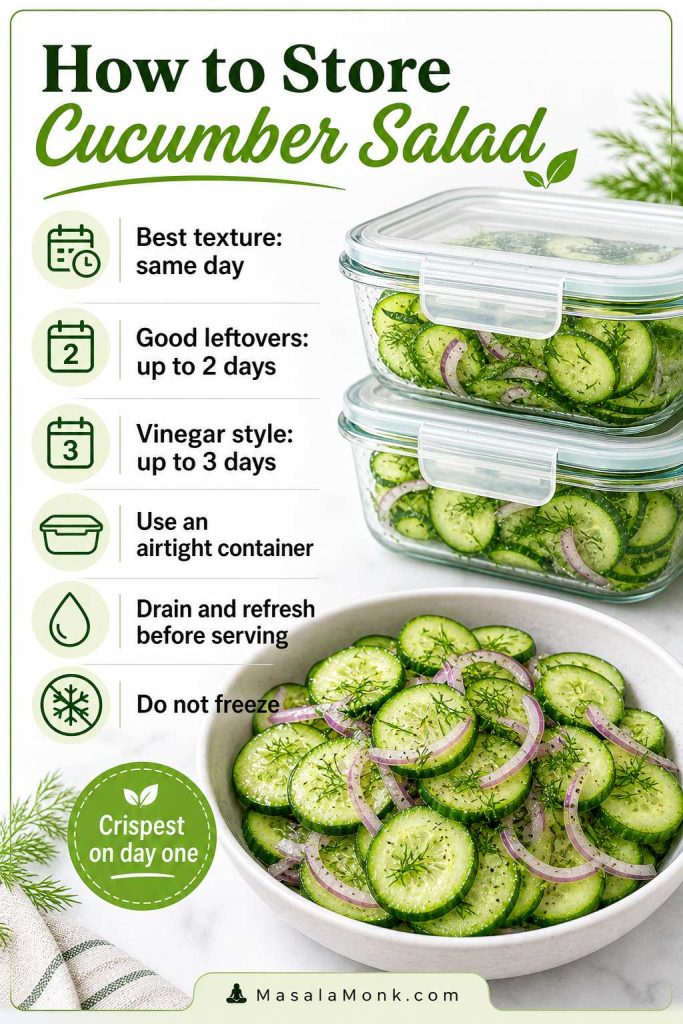
If you like fresh no-cook sides, this pairs well with MasalaMonk’s cucumber salad recipe. That one leans lighter and tangier, while this chickpea version is more filling.
Herbs That Make Chickpea Salad Taste Fresher
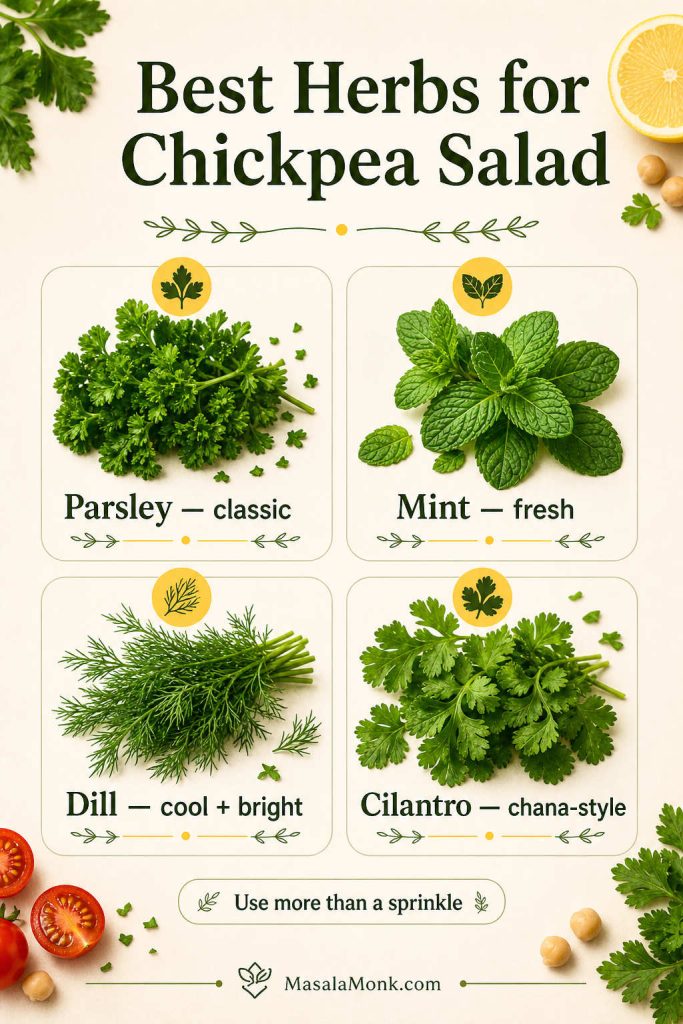
Parsley is the most classic choice, but mint, dill, and cilantro all work. For a Mediterranean-style salad, pair parsley with mint. For a cooler, brighter bowl, add dill. If you want the recipe to lean closer to Indian chana salad, go with cilantro, cumin, and chili.
Be generous with the herbs. Chickpeas are dense, so a small sprinkle can disappear in the bowl.
Herbs can shift the whole direction of a chickpea salad, so parsley keeps it classic, mint makes it brighter, dill makes it cooler, and cilantro pushes it toward a chana-style version.
Optional Add-Ins for This Recipe
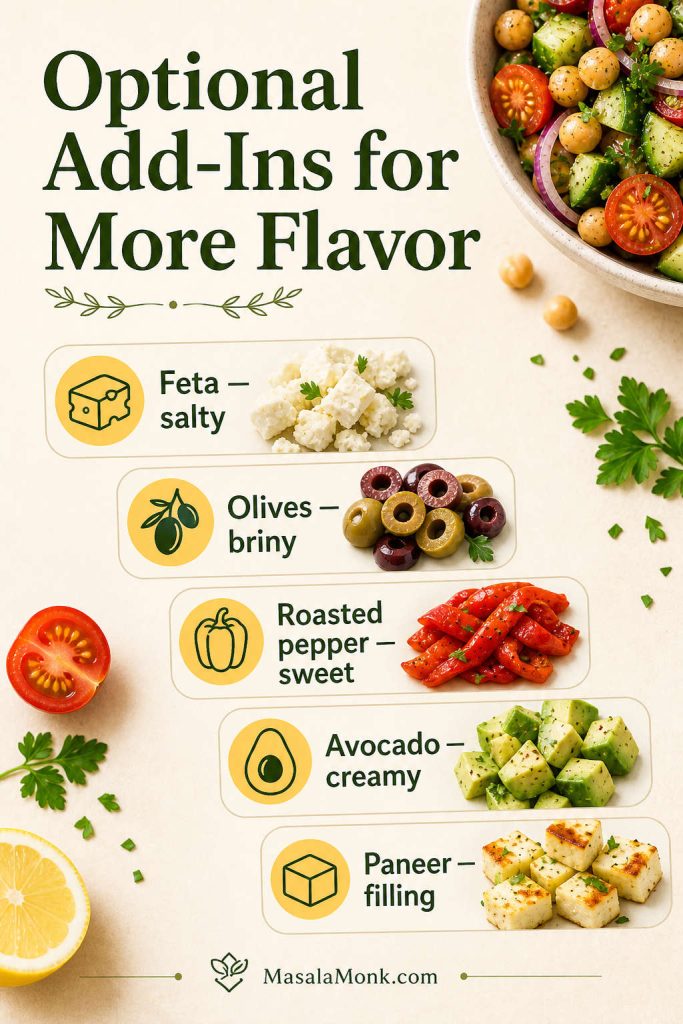
Olives, feta, roasted red pepper, avocado, and paneer all work, but they change the salad in different ways. Olives and feta make it more Mediterranean. Avocado makes it creamy. Paneer adds a firmer vegetarian protein option. Roasted red pepper brings sweetness and color.
If you are making this recipe ahead, add avocado just before serving. It tastes great with chickpeas, but it browns and softens quickly once mixed into the salad.
Once the base tastes balanced, add-ins can change the whole mood: feta and olives make it more Mediterranean, avocado makes it creamier, and paneer makes it more filling.
Easy Substitutions
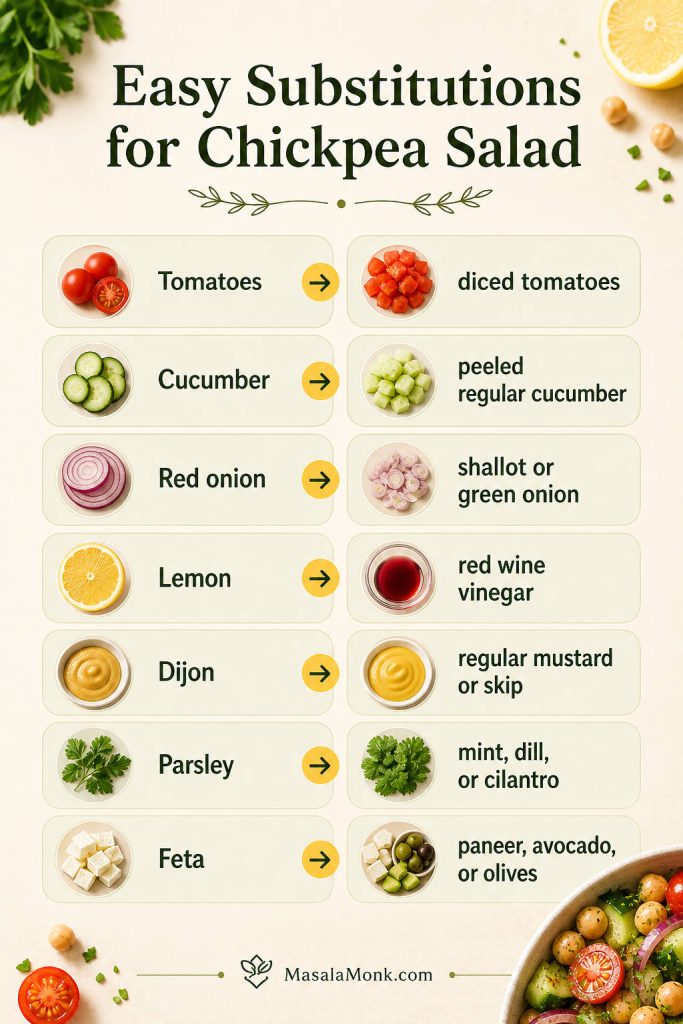
This salad is flexible, so you do not need every optional ingredient. As long as you keep the chickpeas, something crisp, something juicy, enough herbs, and a bright dressing, the recipe still works. Then you can adjust with what you have.
If you do not have…
Use this instead
Cherry tomatoes
Diced regular tomatoes, drained if they are very juicy
English or Persian cucumber
Regular cucumber, peeled if the skin is tough and seeded if watery
Red onion
Shallots, green onion, or white onion soaked in cold water for 10 minutes
Fresh lemon
Red wine vinegar or apple cider vinegar, added to taste
Dijon mustard
A small spoon of regular mustard, or skip it and whisk the dressing well
Parsley
Mint, dill, cilantro, or a mix of fresh herbs
Feta
Paneer, avocado, olives, toasted seeds, or simply leave it out
Missing one ingredient should not stop the recipe, because a good chickpea salad still works when you keep the same balance of chickpeas, crunch, herbs, acidity, and seasoning.
The Lemon Dressing That Makes the Salad Work
The dressing should taste bright, salty, and slightly sharp before it touches the chickpeas. Once everything is tossed together, the chickpeas, cucumber, and tomatoes soften that intensity, so the dressing needs enough lemon, garlic, mustard, and salt to season the whole salad.
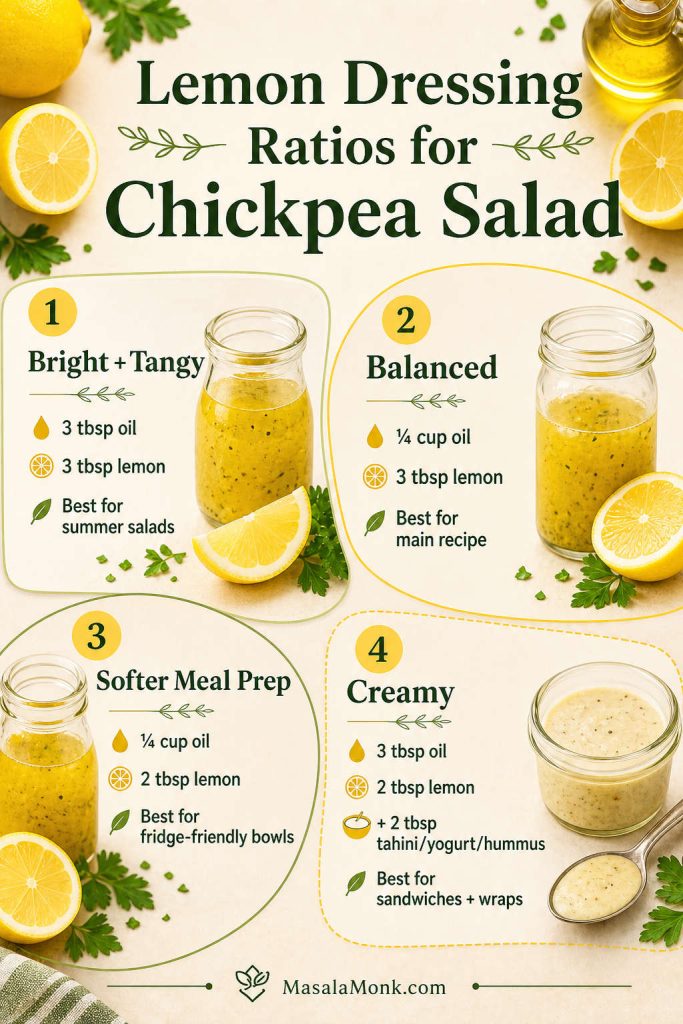
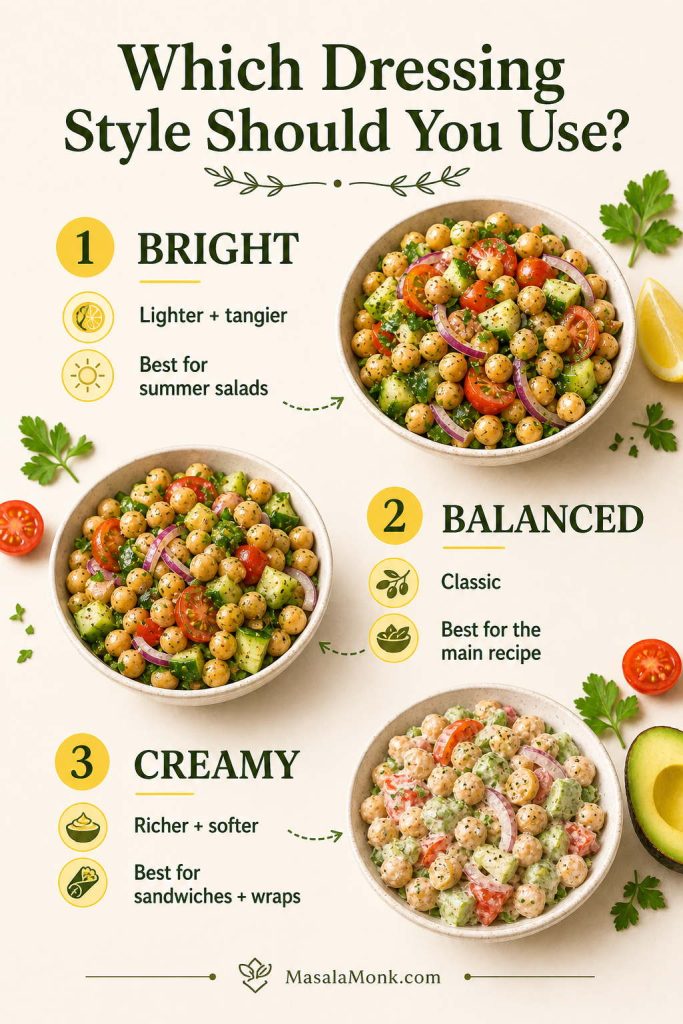
A small change in oil, lemon, or creamy binder can shift the whole bowl, so this dressing guide helps you choose the best chickpea salad texture for bowls, meal prep, wraps, or sandwiches.
Balanced Lemon Dressing
For the main recipe, use ¼ cup / 60 ml olive oil and 3 tablespoons / 45 ml fresh lemon juice. Add Dijon mustard, garlic, salt, black pepper, and either cumin or oregano. This gives the salad a balanced flavor without making it oily or sour.
A Brighter Lemon Dressing
If your chickpeas taste a little flat or your vegetables are very juicy, use equal parts olive oil and lemon juice. This sharper version works well for summer salads, cucumber-heavy bowls, and versions served with pita or grilled foods.
Creamy Dressing for Chickpeas and Sandwiches
When the recipe is going toward wraps or sandwiches, add 2 tablespoons of tahini, Greek yogurt, hummus, vegan mayo, or mashed avocado. A creamy dressing helps the chickpeas hold together instead of rolling out of the bread.
Indian-Style Lemon Dressing
For a chana salad variation, use lemon juice, olive oil, roasted cumin powder, black pepper, chopped cilantro, chili flakes or green chili, and salt. A tiny pinch of chaat masala can work if you want a sharper snack-style flavor, but keep it light so it does not overpower the chickpeas.
Bright, Balanced, and Creamy Dressing Guide
Dressing style
Olive oil
Lemon or vinegar
Best for
Bright and tangy
3 tbsp / 45 ml
3 tbsp / 45 ml
Summer salad, cucumber-heavy versions
Balanced
¼ cup / 60 ml
3 tbsp / 45 ml
Main recipe
Softer meal-prep
¼ cup / 60 ml
2 tbsp / 30 ml
Fridge-friendly version
Creamy
3 tbsp / 45 ml
2 tbsp / 30 ml plus 2 tbsp tahini, yogurt, hummus, or vegan mayo
Sandwiches, wraps, and bowls
Choose a brighter dressing when you want a sharper summer salad, a balanced dressing for the classic version, and a creamy dressing when the chickpea salad is headed for wraps or sandwiches.
Equipment You Need
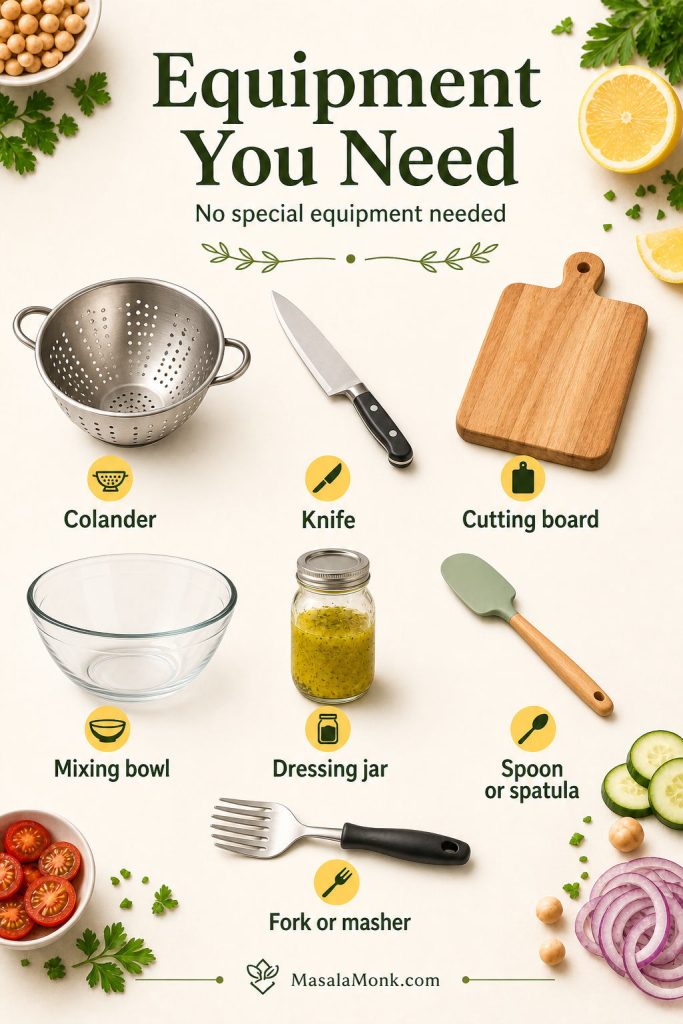
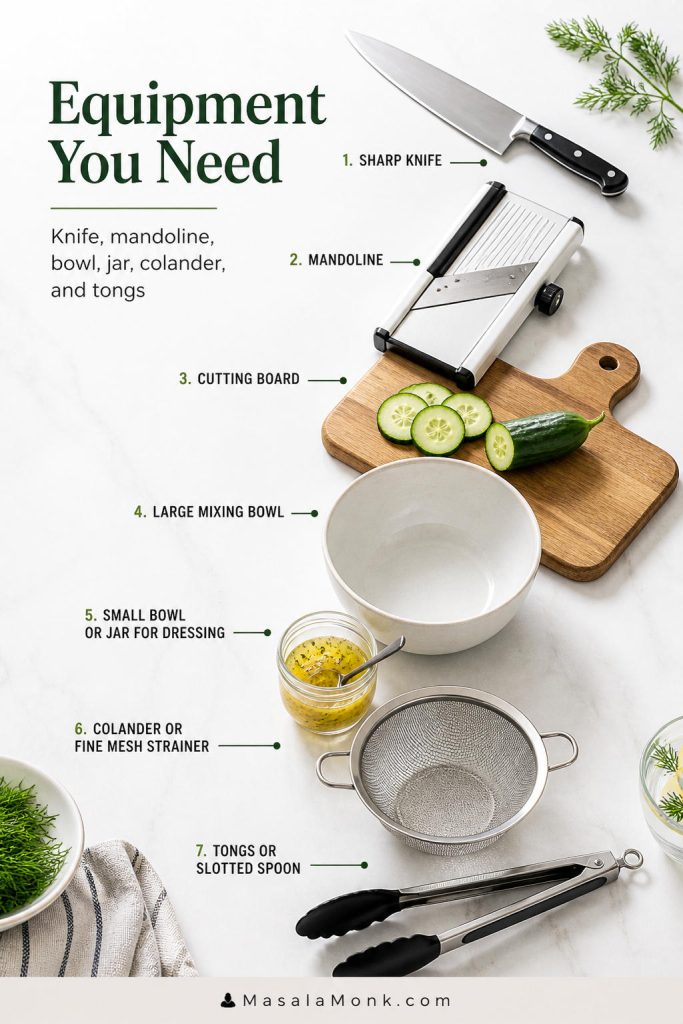
You do not need special equipment for this salad. A colander, cutting board, sharp knife, large mixing bowl, small bowl or jar for the dressing, and a spoon or spatula are enough. For the sandwich version, keep a fork or potato masher nearby so you can lightly smash the chickpeas.
This chickpea salad recipe stays practical because it only needs a few everyday tools, so you can make it easily without special equipment or unnecessary cleanup.
How to Make Chickpea Salad
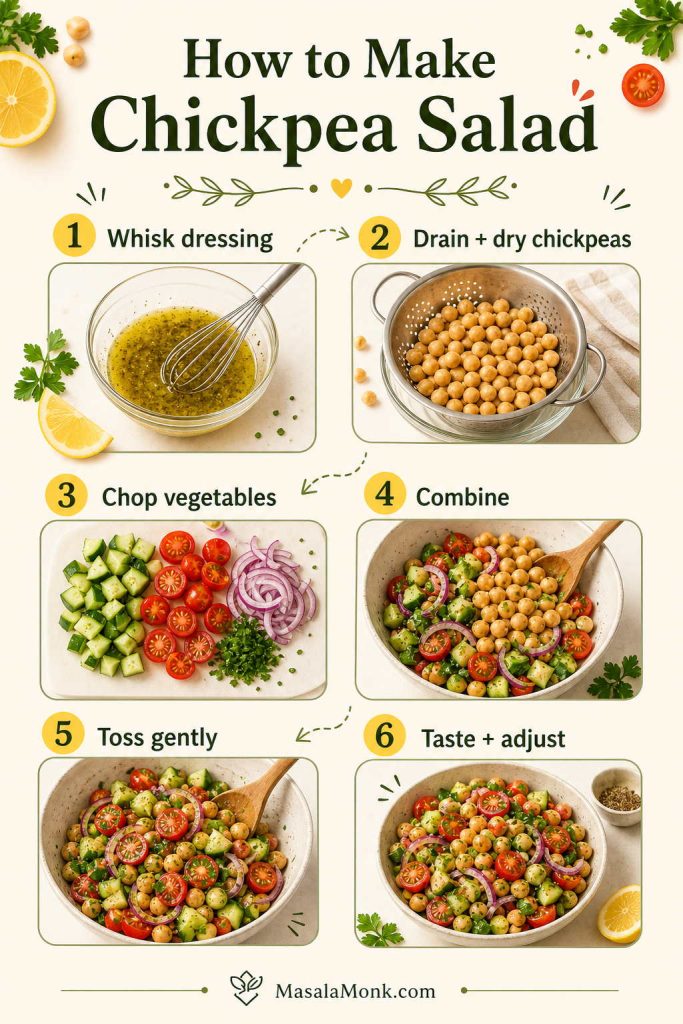
Because this is a no-cook recipe, making the salad is mostly about dressing the chickpeas well, chopping the vegetables, tossing gently, and tasting at the end.
Make the dressing first. Whisk olive oil, lemon juice, Dijon, garlic, salt, pepper, and cumin or oregano in a large bowl. You can also shake it in a jar.
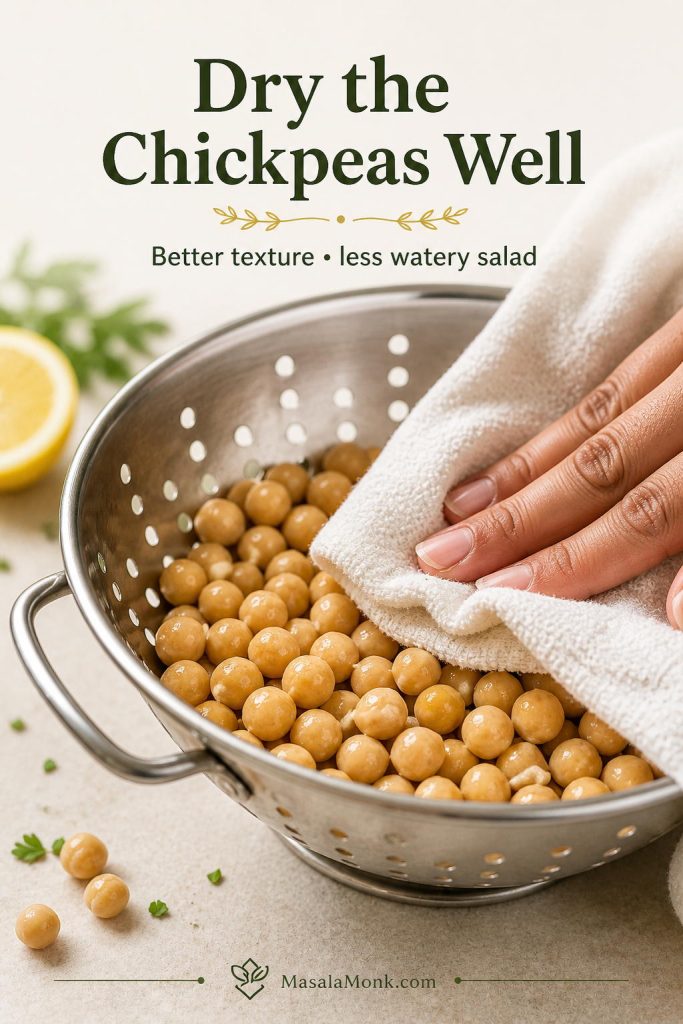
Drain, rinse, and dry the chickpeas. Let them sit in a colander for a minute, then pat them lightly with a clean towel if they still look wet. Drier chickpeas hold the lemon dressing better and keep the salad from turning watery.
Chop the vegetables. Dice the cucumber, halve the tomatoes, and finely chop the onion or shallot.
Add everything to the bowl. Add chickpeas, vegetables, herbs, and sturdy add-ins to the dressing.
Toss gently. Coat everything without crushing the chickpeas.
Rest briefly. Let the salad sit for 10 minutes if you have time.
Check the bowl. The chickpeas should look lightly glossy, not oily, and the salad should taste bright before it tastes salty.
Taste and adjust. Add more lemon, salt, pepper, herbs, or olive oil as needed.
The method matters more than it first seems: whisk the dressing first, dry the chickpeas well, toss gently, and then taste again so the salad stays bright instead of bland or watery.
Avoid bland chickpeas: rinse them well, season the dressing boldly, and let the salad rest for 10 minutes before judging the flavor.
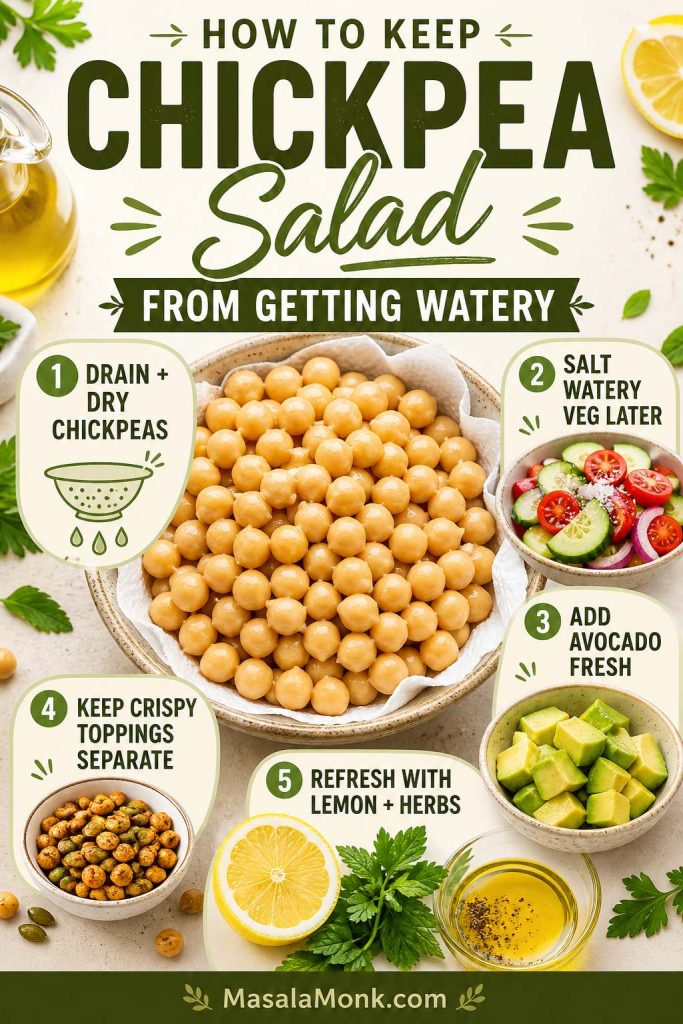
Avoid a watery salad: drain the chickpeas well, dry them if needed, do not over-salt cucumber and tomatoes too early, and add avocado only when you are close to serving.
Dry the Chickpeas Before Making Salad
Drying the chickpeas is one of the easiest upgrades because it helps the dressing cling better and, in turn, keeps the chickpea salad from turning loose or watered down.
Recipe Card
Chickpea Salad Recipe
A 15-minute no-cook salad made with chickpeas, cucumber, tomatoes, herbs, and lemon dressing. Serve it whole as a fresh salad bowl, lightly mashed in wraps or pita, or smashed into a creamy chickpea salad sandwich filling.
Prep Time15 minutes
Cook Time0 minutes
Total Time15 minutes
Servings4 main or 6 side servings
Optional rest time: 10 minutes Course: Salad, Lunch, Side Dish Cuisine: Mediterranean-inspired Diet: Vegetarian; vegan if feta or paneer is omitted
Ingredients
Salad
2 cans chickpeas, 15 oz / 425 g each, or two 400 g cans, drained and rinsed
Or use about 3 cups / 480–500 g cooked chickpeas
1 large English cucumber or 3 Persian cucumbers, diced
2 cups cherry or grape tomatoes, halved
1 small red onion or 2 shallots, finely chopped
½ cup olives, sliced, optional
½ cup roasted red pepper, chopped, optional
¾–1 cup chopped fresh herbs: parsley, mint, dill, cilantro, or a mix
½ cup feta or paneer cubes, optional
1 avocado, diced, optional and best added just before serving
Lemon Dressing
¼ cup / 60 ml extra-virgin olive oil
3 tbsp / 45 ml fresh lemon juice
1 tsp Dijon mustard
1 garlic clove, grated or minced
½ tsp fine salt, plus more to taste
½ tsp black pepper
½ tsp ground cumin or dried oregano
½–1 tsp sumac or lemon zest, optional
Pinch chili flakes or Aleppo pepper, optional
Instructions
Whisk olive oil, lemon juice, Dijon mustard, garlic, salt, pepper, cumin or oregano, and sumac or lemon zest if using in a large bowl.
Drain and rinse the chickpeas well. Let them sit in a colander for a minute, then pat dry if needed so the salad does not turn watery.
Add chickpeas, cucumber, tomatoes, onion, olives, roasted red pepper, and herbs to the dressing. Toss gently.
Add feta, paneer, or avocado only if serving soon.
Let the salad rest for 10 minutes if possible.
Taste and adjust with more lemon, salt, pepper, herbs, or olive oil.
Serve cold or at room temperature as a salad, side dish, wrap filling, pita filling, or sandwich base.
Notes
For the cleanest flavor, rinse canned chickpeas well and let them drain before mixing.
If the chickpeas still look wet after draining, pat them lightly with a clean towel before mixing.
For a vegan version, skip feta and paneer. Use olives, avocado, roasted pepper, tahini, or extra herbs for richness.
For sandwiches, mash 60–70% of the chickpeas and add 2–4 tablespoons of a creamy binder.
For meal prep, add avocado, crispy chickpeas, and delicate herbs right before serving.
If using dried chickpeas, cook them until tender and use about 3 cups / 480–500 g cooked chickpeas.
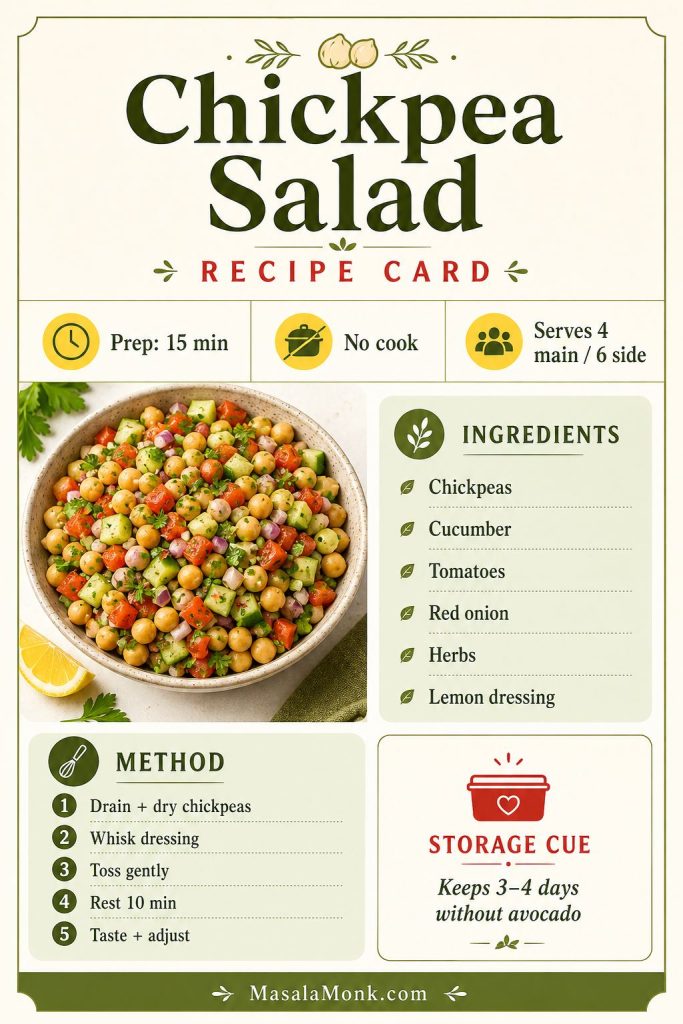
Keep this recipe card handy when you need the short version: drain and dry the chickpeas, whisk the lemon dressing, toss gently, rest briefly, and adjust before serving.
The salad works because chickpeas make it filling without any cooking, while cucumber, tomatoes, onion, herbs, and lemon keep it fresh. The dressing is bright enough to season the chickpeas properly, and the same base can stay whole for bowls, lightly mashed for wraps, or smashed for sandwiches.
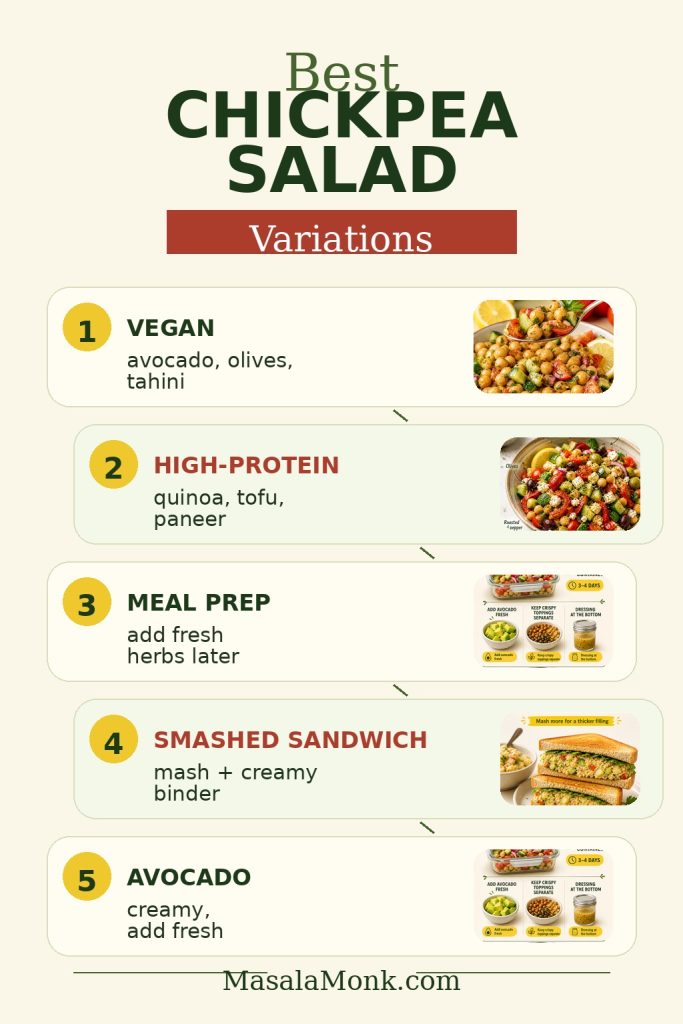
Whole, Lightly Mashed, or Smashed Chickpeas?
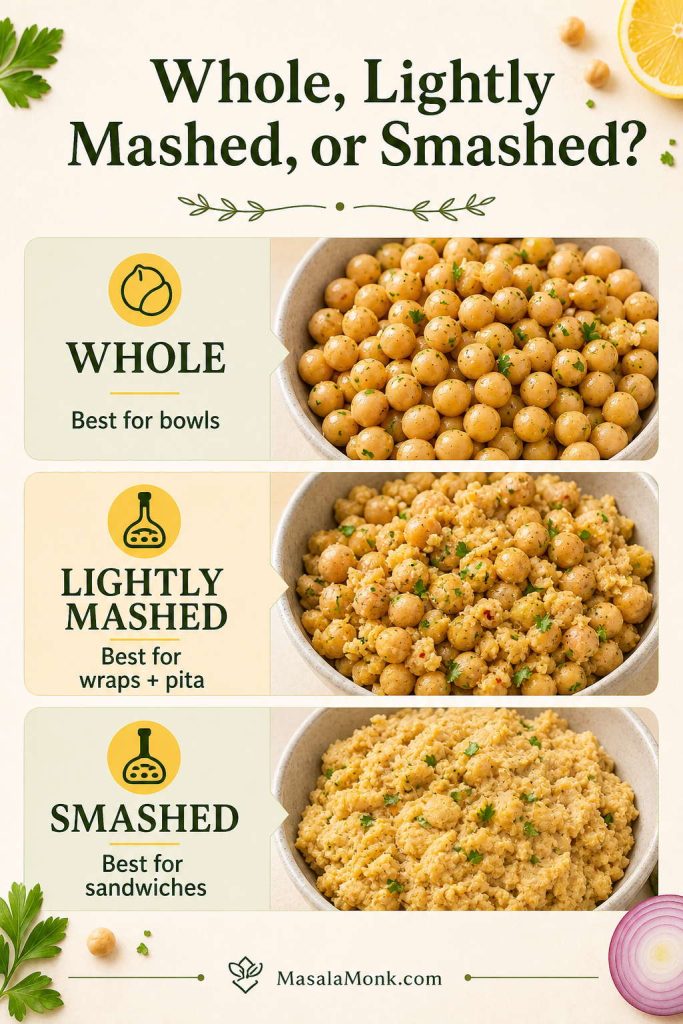
A small change in texture changes how you can use the salad. Whole chickpeas make the best fresh bowl. Lightly mashed chickpeas help the salad sit better in wraps or pita. Smashed chickpeas turn the same ingredients into a sandwich filling that holds together instead of rolling out of the bread.
Texture
What to do
Best use
Whole chickpeas
Toss gently and do not mash
Fresh salad bowls and side salads
Lightly mashed
Press ¼–⅓ of the chickpeas
Wraps, pita pockets, and lunch bowls
Smashed
Mash 60–70% of the chickpeas
Chickpea salad sandwiches
Creamy
Mash deeply and add mayo, yogurt, tahini, hummus, or avocado
Vegan tuna-style chickpea salad
Texture changes how the recipe works, so whole chickpeas suit salad bowls, lightly mashed chickpeas hold better in wraps, and smashed chickpeas make the most reliable sandwich filling.
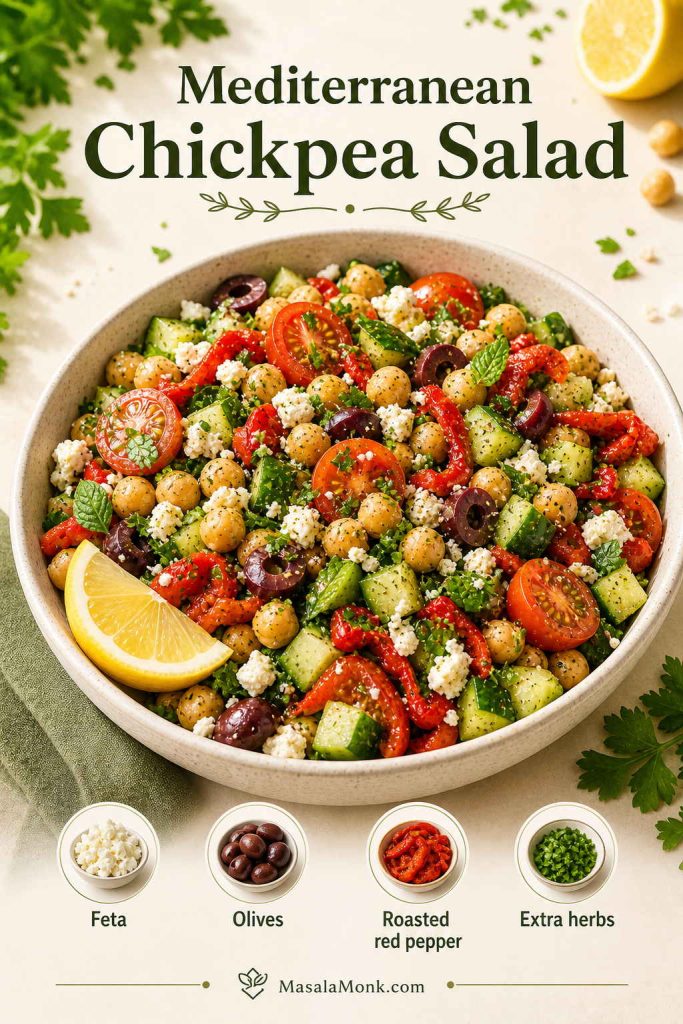
To make this recipe more Mediterranean, add olives, feta, roasted red pepper, parsley, mint, oregano, and extra lemon. Keep the cucumber, tomato, and red onion because they give the salad the fresh chopped texture that works so well with chickpeas.
This version is especially good with pita, hummus, grilled vegetables, rice bowls, roasted chicken, fish, or a simple soup. If you like herb-heavy Mediterranean salads, it also sits well next to MasalaMonk’s tabbouleh recipe, especially when serving pita, hummus, grilled vegetables, or mezze-style plates.
For a Mediterranean chickpea salad, feta, olives, roasted red pepper, and extra herbs deepen the flavor while still keeping the recipe fresh, colorful, and easy to serve.
Turn This Recipe Into a Chickpea Salad Sandwich
For a sandwich, mash most of the chickpeas and add a creamy binder. Greek yogurt, vegan mayo, tahini, hummus, mashed avocado, or a mix of mayo and yogurt all work. Then add something crunchy, such as celery, cucumber, onion, radish, or pickles.
Toasted bread, pita, wraps, and lettuce cups all work. If you are packing lunch, store the filling separately and assemble the sandwich later so the bread stays firm. This is also a useful plant-based alternative when you want a creamy, tangy sandwich filling. For a non-vegetarian comparison, see MasalaMonk’s chicken salad sandwich recipe.
Sandwich formula: 2 cups chickpea salad + 2–4 tbsp creamy binder + ¼ cup crunchy vegetables + lemon, mustard, herbs, salt, and pepper to taste.
If you want a cooler, yogurt-based sauce for wraps or pita, MasalaMonk’s Greek tzatziki sauce recipe is a natural fit with cucumber, herbs, chickpeas, and toasted bread.
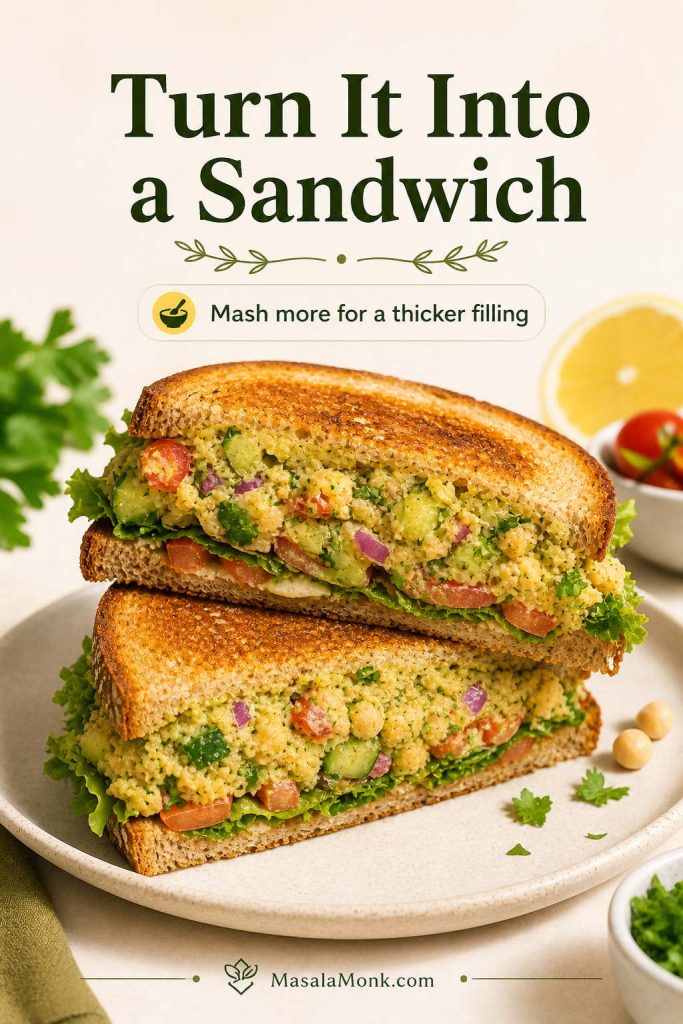
Turning chickpea salad into a sandwich works best when you mash more of the chickpeas, because the filling becomes thicker, creamier, and much easier to hold together.
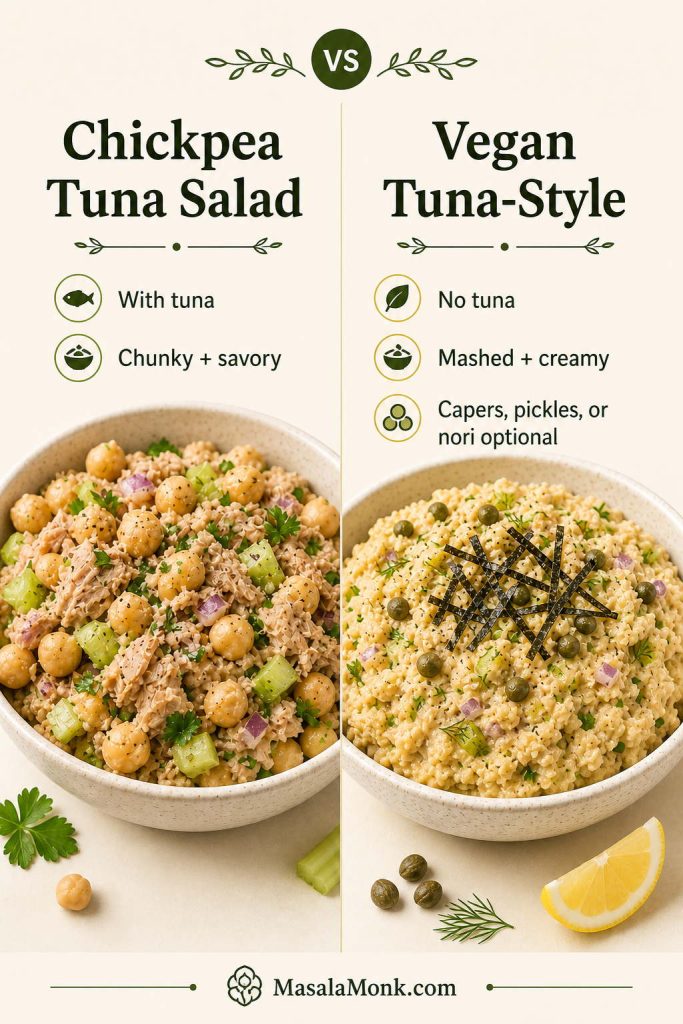
This base can move in two directions. To make a real chickpea tuna salad, add drained tuna, celery, lemon, herbs, and a little Greek yogurt or mayo. If you want a vegan tuna-style version, skip the tuna, mash the chickpeas more deeply, and add celery, lemon, pickles or capers, herbs, and a creamy binder such as vegan mayo, tahini, hummus, or avocado.
A more sea-like vegan flavor can come from finely crushed nori or a tiny pinch of kelp flakes. Keep it optional; the mashed chickpea version still works as a creamy salad filling without any sea flavor.
For a chickpea tuna salad, add real tuna for a chunkier, savory version; for a vegan tuna-style salad, mash the chickpeas more and use capers, pickles, or nori for extra depth.
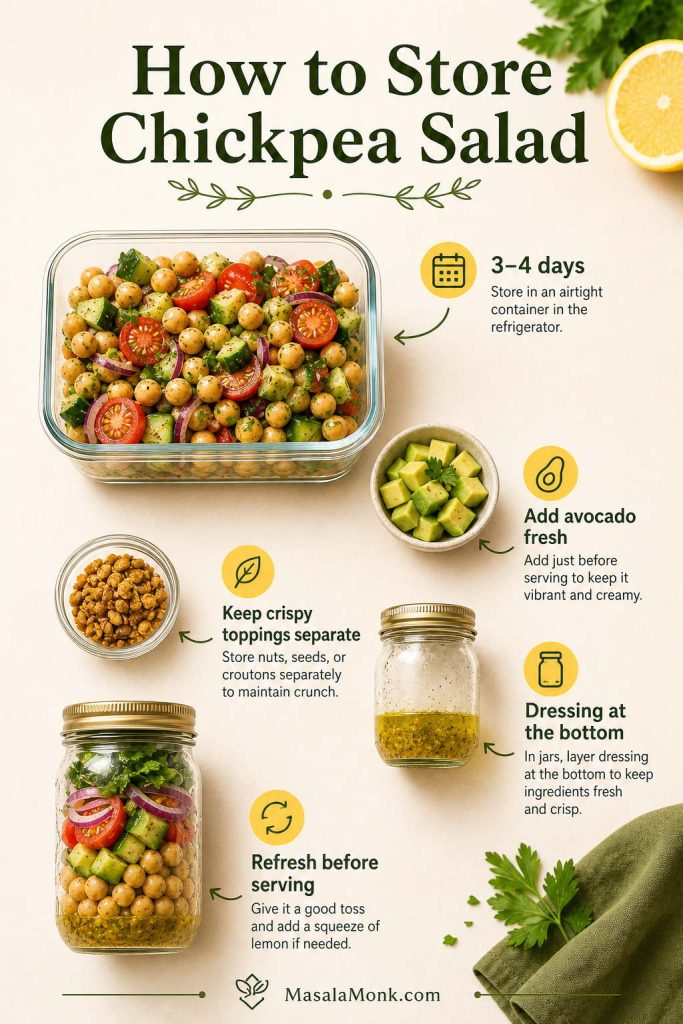
Chickpea salad is good for meal prep because chickpeas hold their shape better than leafy greens, so the salad stays useful for lunches over several days. However, a few ingredients are better added fresh. For example, avocado browns, crispy chickpeas soften, and delicate herbs taste brighter when added closer to serving.
Chickpea salad is meal-prep friendly; however, it stores best when avocado, crispy toppings, and delicate herbs are added later instead of being mixed in too early.
For the best make-ahead version, store the base salad without avocado and add delicate toppings just before serving. If you are making lunch jars, put the dressing at the bottom, then chickpeas and firmer vegetables, then herbs or greens near the top.
If you are making the salad more than a few hours ahead, keep some of the herbs fresh for serving and go lighter on the salt at first. Salt draws water from cucumber and tomatoes, so a final pinch right before serving keeps the salad fresher.
How to Store This Recipe Without Making the Salad Watery
Drain and dry the chickpeas well, avoid over-salting watery vegetables too early, and keep avocado or crispy toppings separate. If the salad sits overnight, refresh it with a little lemon juice, olive oil, and fresh herbs before serving.
If your chickpea salad turns watery, the fix usually starts earlier: dry the chickpeas well, salt juicy vegetables later, and add avocado or crunchy toppings closer to serving time.
Version
Fridge life
Best method
Plain chickpea salad, no avocado
3–4 days
Store in an airtight container
With avocado
Same day best
Add avocado fresh just before serving
With feta or paneer
2–3 days best
Add fresh if you want the cleanest texture
Dressing mixed in
2–3 days best texture
Stir before serving and refresh with lemon or herbs
Dressing only
7–10 days
Keep in a sealed jar in the fridge
Sandwich filling
3–4 days
Store filling separately from bread
Crispy chickpeas
Same day best
Keep separate and add just before eating
Meal-prep jars
4–5 days
Dressing bottom, chickpeas and vegetables middle, herbs top
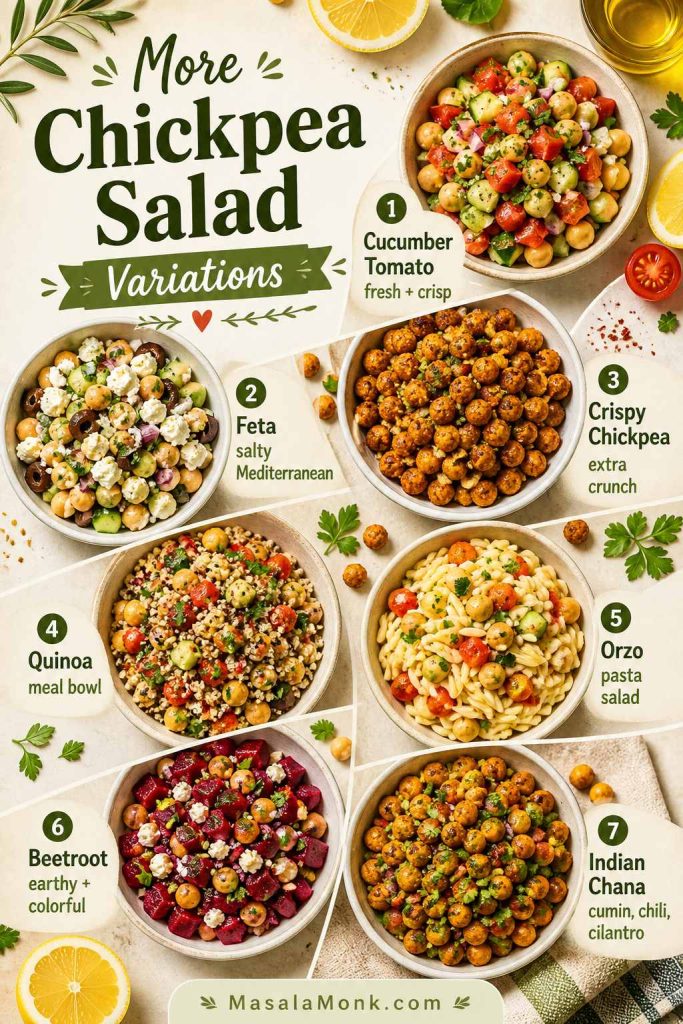
Once the base recipe is balanced, the same chickpeas can move in several salad directions. Keep lemon, salt, and herbs as the anchor, then change the add-ins based on how you want to serve it.
Lunch, Meal Prep, and Sandwich Versions
If you want…
Make this version
What to add
A dairy-free lunch
Vegan chickpea salad
Avocado, olives, roasted red pepper, extra herbs, toasted seeds, or tahini dressing
A more filling meal
High-protein salad with chickpeas
Quinoa, tofu, paneer, boiled eggs, Greek yogurt dressing, feta, grilled chicken, or extra chickpeas
A lunchbox or picnic salad
Meal-prep chickpea salad
Keep avocado and crispy toppings separate, use a slightly softer dressing, and add fresh herbs before serving
A sandwich filling
Smashed chickpea salad
Mash most of the chickpeas and add yogurt, tahini, hummus, vegan mayo, or avocado
A creamier bowl or wrap
Avocado chickpea salad
Diced avocado added just before serving, or a little mashed avocado in the dressing
The same base recipe can become a vegan lunch, higher-protein bowl, meal-prep container, smashed sandwich filling, or avocado chickpea salad with only a few targeted changes.
Extra cucumber, tomatoes, red onion, parsley, lemon, olive oil, salt, and pepper
A saltier Mediterranean side
Feta chickpea salad
Feta, olives, oregano, and lemon zest; taste before adding extra salt
A crunchy topping
Crispy chickpea salad
Add roasted or air-fried chickpeas right before serving so they stay crisp
A meal-prep grain bowl
Quinoa chickpea salad
Cooked and cooled quinoa plus extra dressing because grains absorb liquid
A pasta salad direction
Orzo chickpea salad
Cooked and cooled orzo, cucumber, tomato, herbs, feta, and extra lemon dressing
An earthy, colorful bowl
Beetroot chickpea salad
Cooked and cooled beetroot, feta or paneer, cumin, herbs, lemon, and red onion
An Indian-style side
Indian chana salad
Use kabuli chana for the closest chickpea salad texture, or kala chana for a firmer, earthier Indian-style version with cilantro, lemon, cumin, chili, onion, cucumber, and tomato
For more variety, the chickpea salad can turn crisp with cucumber and tomato, salty with feta, hearty with quinoa or orzo, earthy with beetroot, or spicier as Indian chana salad.
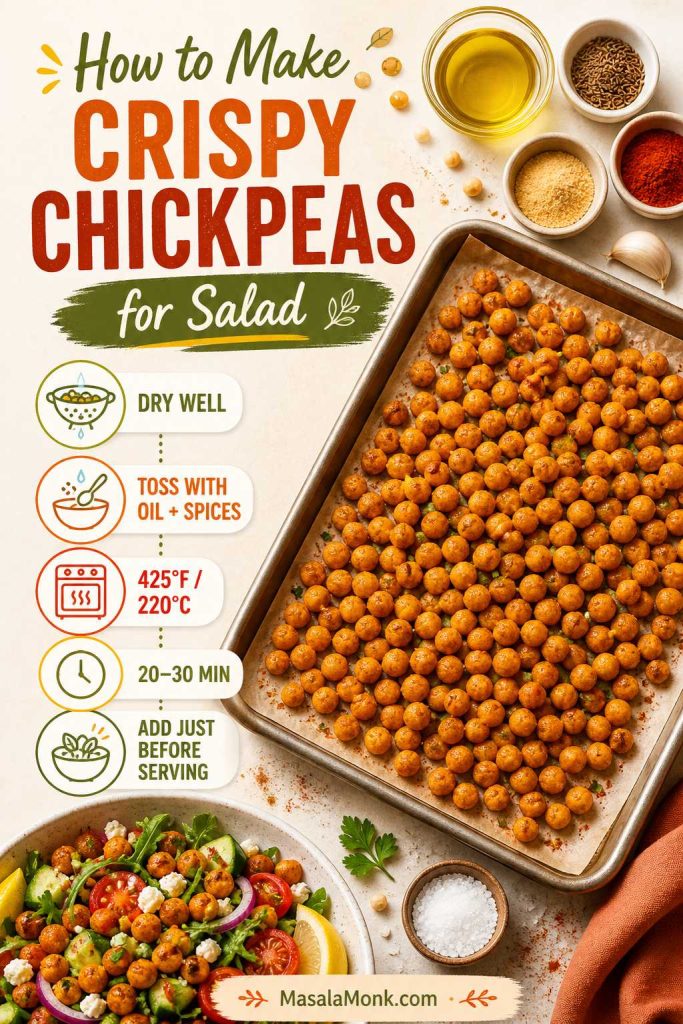
For crispy chickpeas, dry the drained chickpeas very well, toss them with a little oil, salt, cumin, paprika, or garlic powder, and roast at 425°F / 220°C for about 20–30 minutes, shaking the pan once or twice. Add them to the salad right before serving so they stay crisp.
Crispy chickpeas add the most texture when they are roasted until dry and added right before serving, so they stay crunchy instead of softening in the salad.
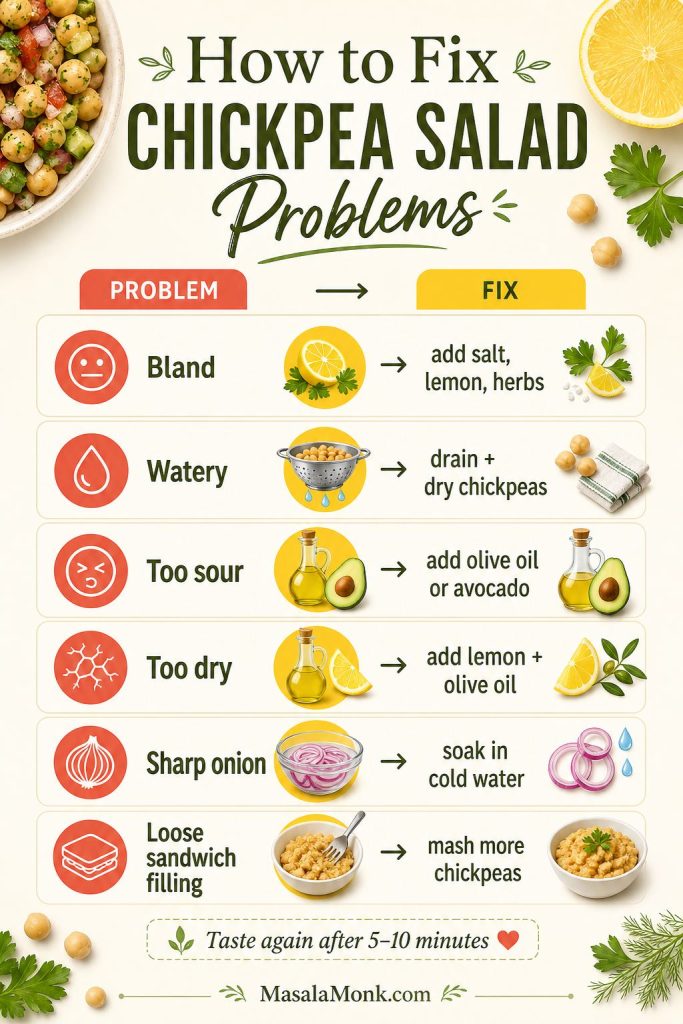
Because this recipe is not cooked, most chickpea salad problems can be fixed before serving. If the chickpeas taste bland, watery, sour, or dry, adjust the dressing first. Then give the salad a few minutes to settle before judging it again.
Problem
Likely cause
Fix
Salad tastes bland
Not enough salt, acid, or herbs
Add salt first, then lemon, then more herbs
Salad is watery
Chickpeas or vegetables were too wet
Drain and dry chickpeas well, and add tomatoes closer to serving
Chickpeas taste canned
They were not rinsed well or not seasoned enough
Rinse thoroughly and let them sit in dressing for 10 minutes
Onion is too sharp
Raw onion is too strong
Soak chopped onion in cold water for 10 minutes, then drain
Salad is too sour
Too much lemon or vinegar
Add olive oil, chickpeas, avocado, or feta to soften it
Salad is too dry
Chickpeas absorbed the dressing
Add a splash of olive oil and lemon juice before serving
Avocado browned
It was added too early
Add avocado fresh, or toss it with lemon before mixing
Sandwich filling is too loose
Too much dressing or not enough mashing
Mash more chickpeas and add a thicker binder
Crispy chickpeas went soft
They sat in the wet salad
Keep them separate and add just before eating
Before starting over, fix the bowl: bland salad usually needs salt, lemon, and herbs; watery salad needs better draining; and loose sandwich filling needs more mashed chickpeas.
What to Serve with Chickpea Salad
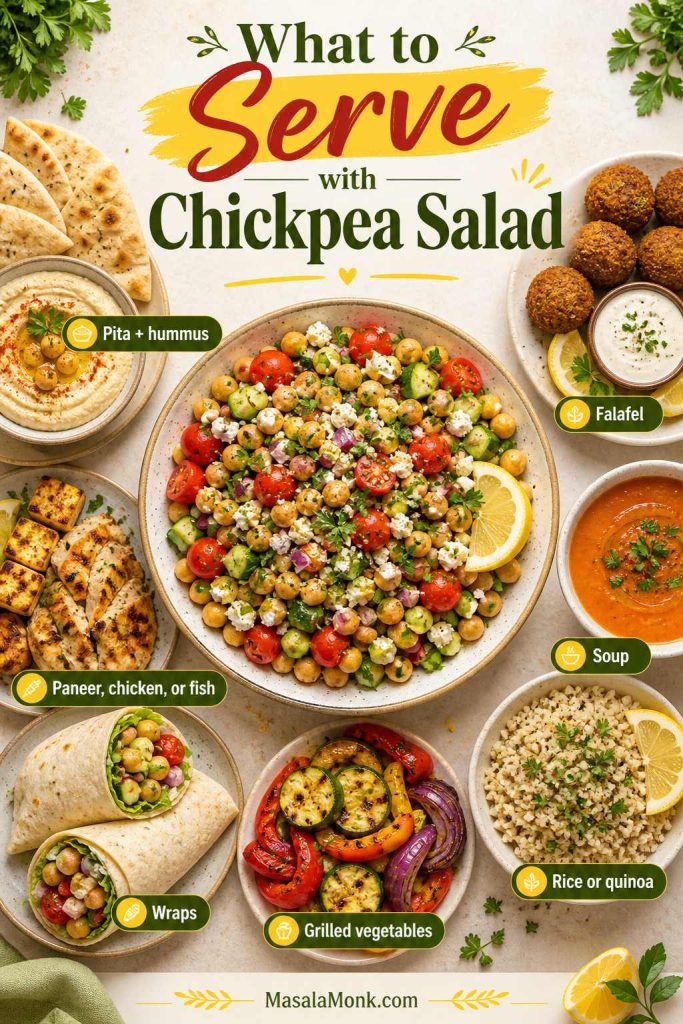
Serve chickpea salad with pita, hummus, grilled vegetables, rice, quinoa, soup, roasted potatoes, grilled chicken, fish, or paneer. It also works inside wraps, lettuce cups, toasted sandwiches, or meal-prep bowls. To make a fuller chickpea-based mezze plate, add MasalaMonk’s falafel recipe on the side.
A lighter plate can be as simple as cucumber salad, tomato soup, or a green salad. For a sharper Middle Eastern-style plate, serve it with pita and a spoon of MasalaMonk’s amba sauce recipe for a tangy mango-chili contrast.
Chickpea salad becomes a fuller meal more easily when you pair it with pita, hummus, soup, falafel, grains, or grilled vegetables, rather than serving it as a plain side alone.
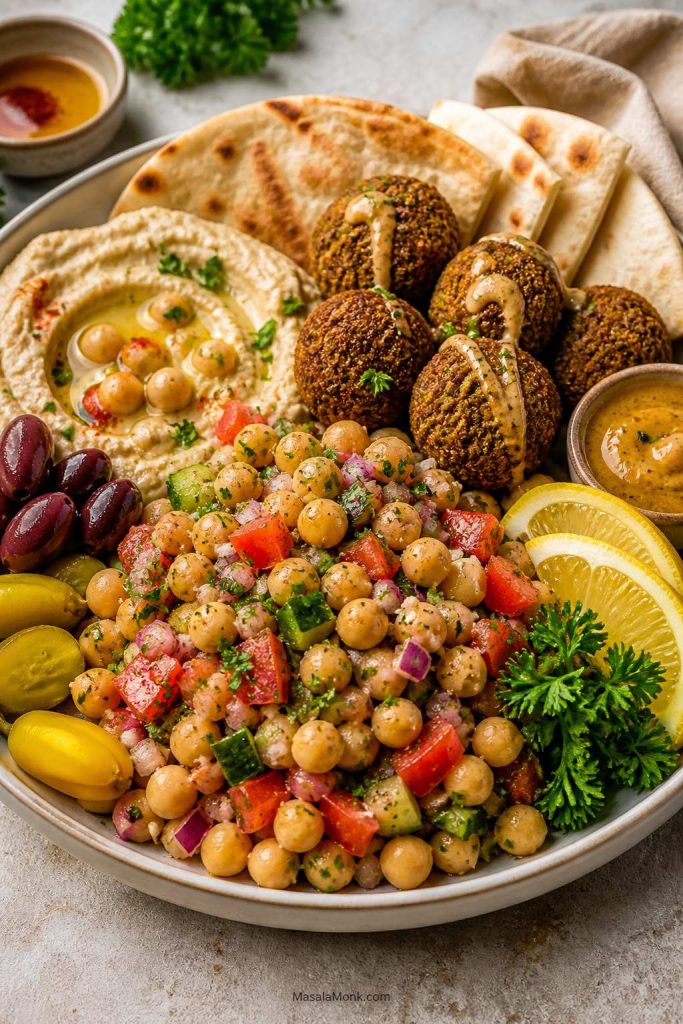
Chickpea Salad Mezze Plate
Serving chickpea salad as part of a mezze plate adds variety and makes the recipe more useful for lunch or dinner, especially when paired with hummus, pita, and falafel.
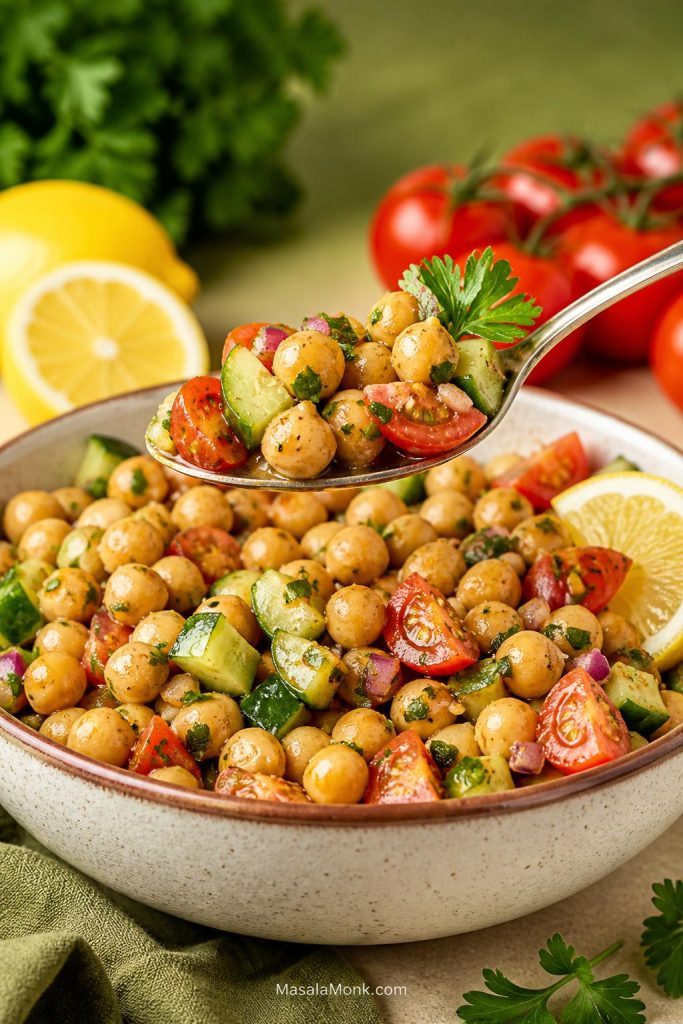
Final Serving Texture
A final serving image highlights the texture that makes this recipe work so well: chickpeas stay distinct, vegetables stay crisp, and the dressing coats the salad without drowning it.
Chickpeas and garbanzo beans are the same ingredient. “Chickpea” is more common in many recipe titles, while “garbanzo bean” often appears on cans and packaging. Use either one for this salad.
What kind of chickpeas work best for this salad?
Canned chickpeas are the easiest choice because they are already cooked and ready to use. Drain and rinse them well, then let them sit in a colander for a minute so extra water does not dilute the dressing.
Do canned chickpeas need to be cooked first?
No cooking is needed. Canned chickpeas are already cooked, so this recipe only needs draining, rinsing, chopping, dressing, and tossing.
How long does this chickpea salad recipe last in the fridge?
This chickpea salad recipe keeps well for about 3–4 days without avocado. Store it in an airtight container, then add avocado, crispy chickpeas, or delicate herbs closer to serving for the best texture.
How do you keep chickpea salad from getting watery?
Drain and dry the chickpeas well, use tomatoes that are not overly watery, and go lighter on salt if you are making the salad ahead. Salt pulls moisture from cucumber and tomatoes, so a final pinch before serving keeps the salad fresher.
Is this chickpea salad vegan?
The base salad is vegan when you skip feta, paneer, yogurt, and any dairy-based creamy add-ins. For richness, use olives, avocado, tahini, hummus, vegan mayo, roasted red pepper, toasted seeds, or extra herbs.
Is chickpea salad healthy?
Chickpea salad can be a nourishing meal or side because chickpeas provide plant-based protein and fiber, while the vegetables and herbs add freshness. Keep the dressing balanced and use richer add-ins like feta, paneer, avocado, or creamy binders according to how filling you want the salad to be. For more general chickpea nutrition background, see the Harvard Nutrition Source guide to chickpeas.
What can I use instead of lemon juice?
Red wine vinegar or apple cider vinegar can replace lemon juice. However, start with a little less than the recipe calls for, then taste and add more only if the salad needs extra brightness.
How do I make chickpea salad without mayo?
The base salad uses lemon and olive oil dressing, so it does not need mayo. For a creamy no-mayo version, use tahini, hummus, Greek yogurt, or mashed avocado.
How do I turn this into chickpea salad sandwiches?
Mash 60–70% of the chickpeas, add 2–4 tablespoons of a creamy binder, and keep the filling thick. Toasted bread, pita, wraps, and lettuce cups all work, but the filling should be stored separately from bread until serving.
What goes well with chickpea salad?
Pita, hummus, grilled vegetables, soup, rice, quinoa, roasted potatoes, paneer, grilled chicken, fish, and simple green salads all pair well with chickpea salad. It also works inside wraps, lettuce cups, and meal-prep bowls.
How can I make the salad higher in protein?
Add quinoa, paneer, tofu, boiled eggs, Greek yogurt dressing, feta, grilled chicken, or extra chickpeas. For a vegan version, use tofu, quinoa, hummus, tahini, seeds, or another legume.
Should you freeze chickpea salad?
Freezing is not worth it for this recipe. Cucumber, tomatoes, herbs, and dressing lose their fresh texture after thawing. If you want to prep ahead, freeze cooked chickpeas separately and make the salad fresh.
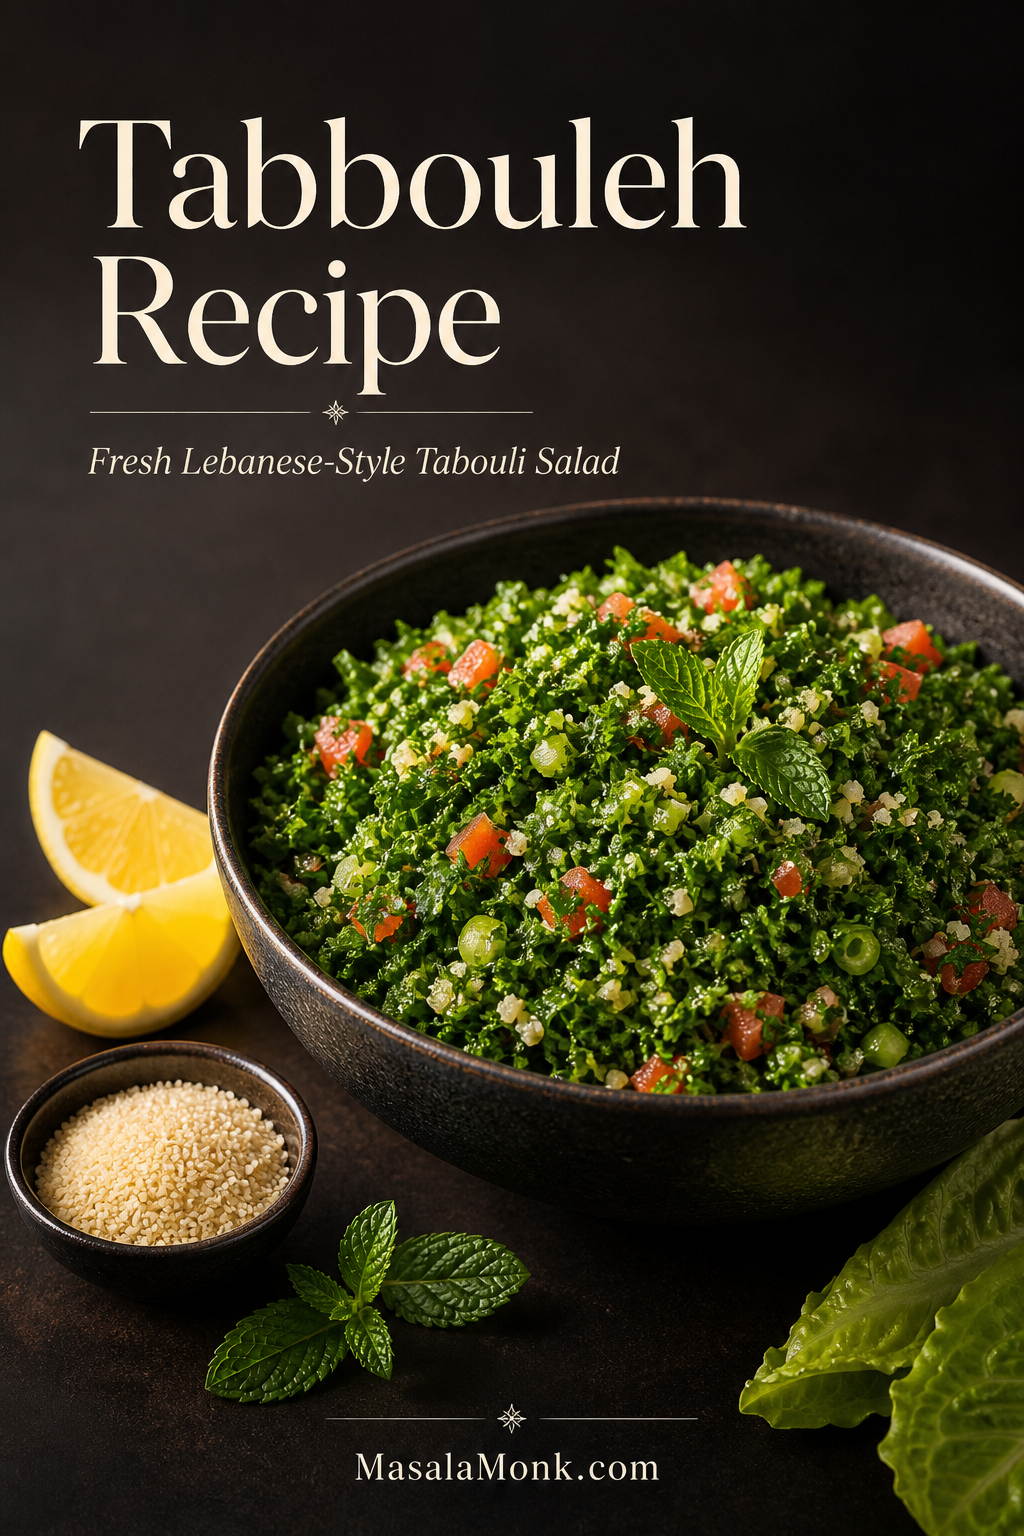
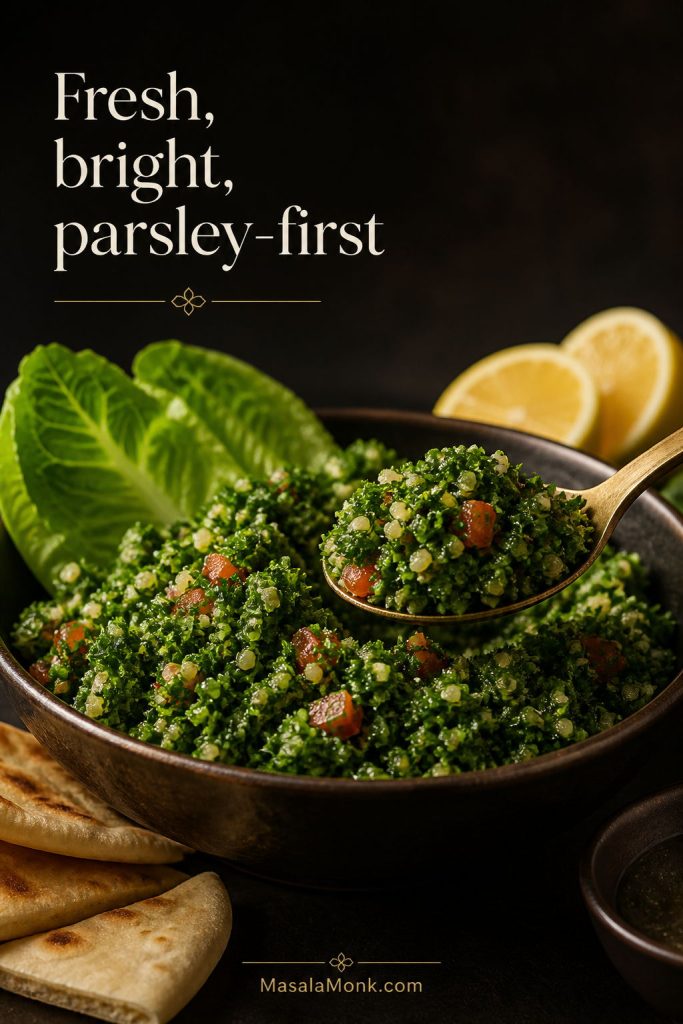
This tabbouleh recipe is fresh, lemony, parsley-heavy, and built around the detail that matters most: tabbouleh should taste like a chopped herb salad, not a bowl of bulgur with a few herbs mixed in.
Also spelled tabouli, this Lebanese-style salad is made with finely chopped parsley, tomato, mint, green onion, fine bulgur, lemon juice, olive oil, salt, and pepper. Although the bulgur adds texture, parsley is the star.
To keep the recipe no-cook, the method below soaks fine bulgur directly in the lemon-olive oil dressing while you chop the herbs. As a result, the bulgur gets more flavor, the salad stays bright, and you avoid the watery, grain-heavy tabbouleh that often happens at home.
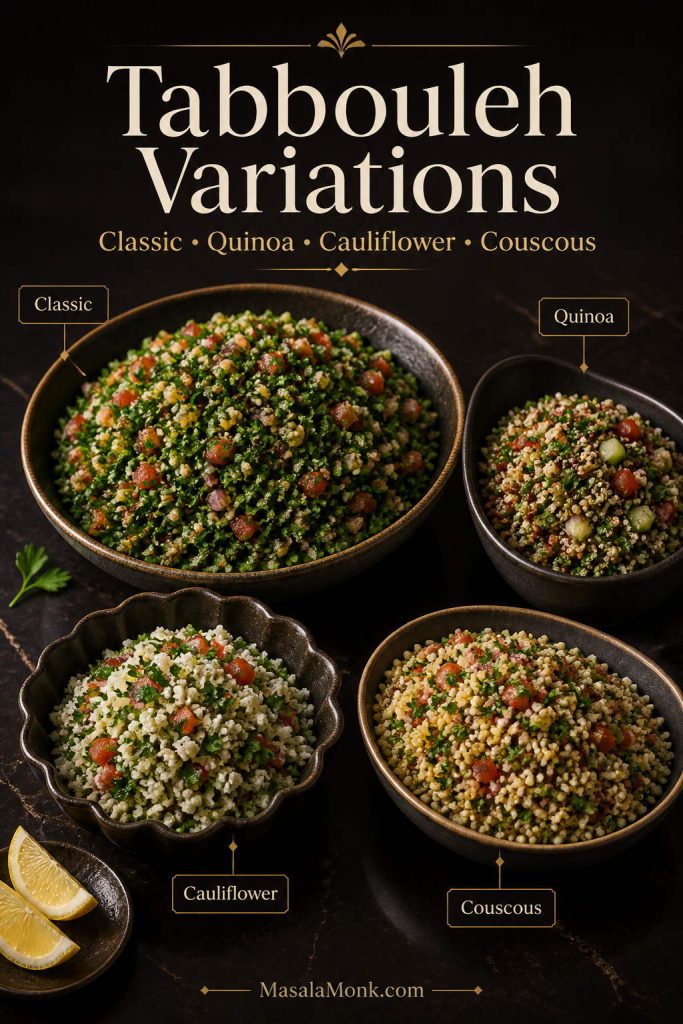
Use this guide to make fresh tabbouleh, choose the right bulgur, keep it from turning watery, and adapt it for quinoa, cauliflower, or couscous versions.
Tabbouleh is a fresh Middle Eastern parsley salad made with finely chopped parsley, tomato, mint, green onion, fine bulgur wheat, lemon juice, olive oil, salt, and pepper. In a good tabbouleh recipe, the herbs should lead and the bulgur should support.
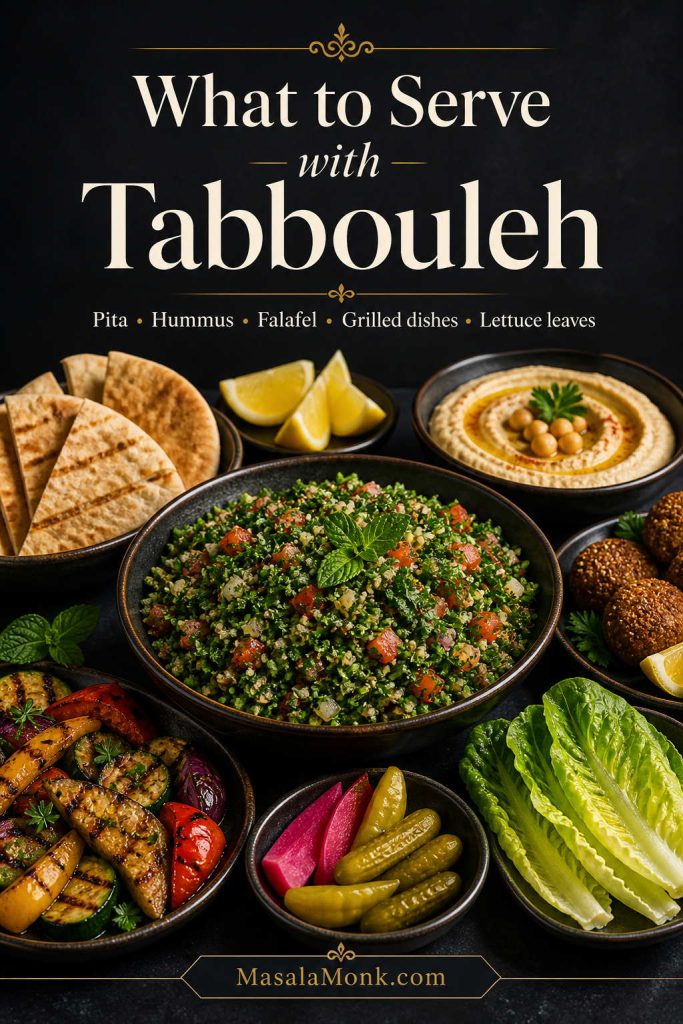
Classic tabbouleh is usually served as part of a mezze spread with pita, hummus, falafel, grilled meats, or lettuce leaves. It is naturally vegan and dairy-free, though it is not gluten-free because bulgur is made from wheat.
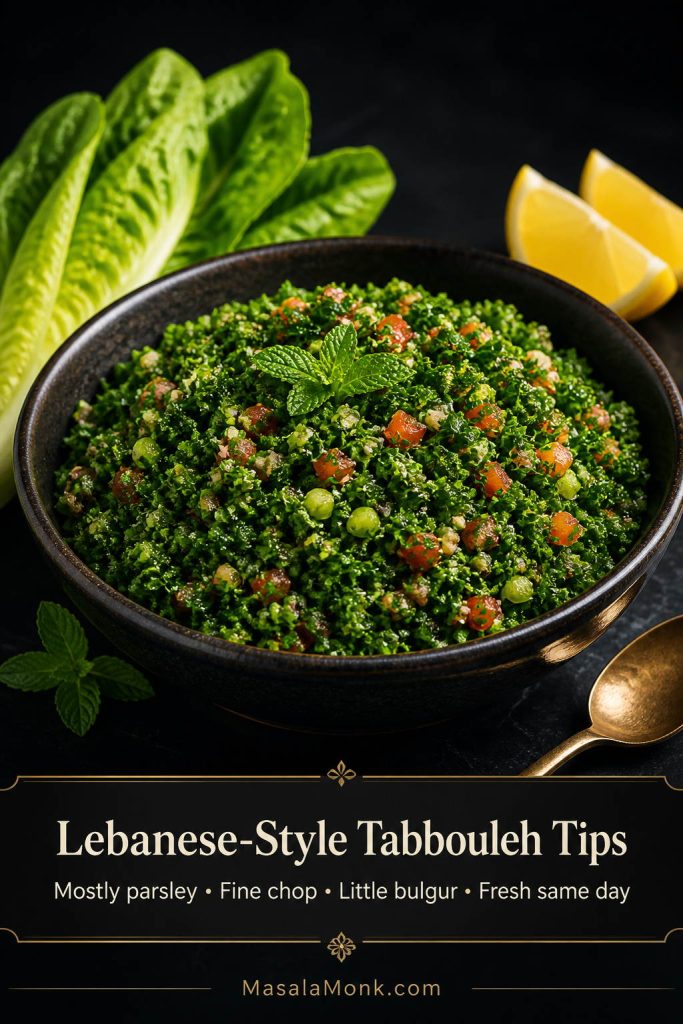
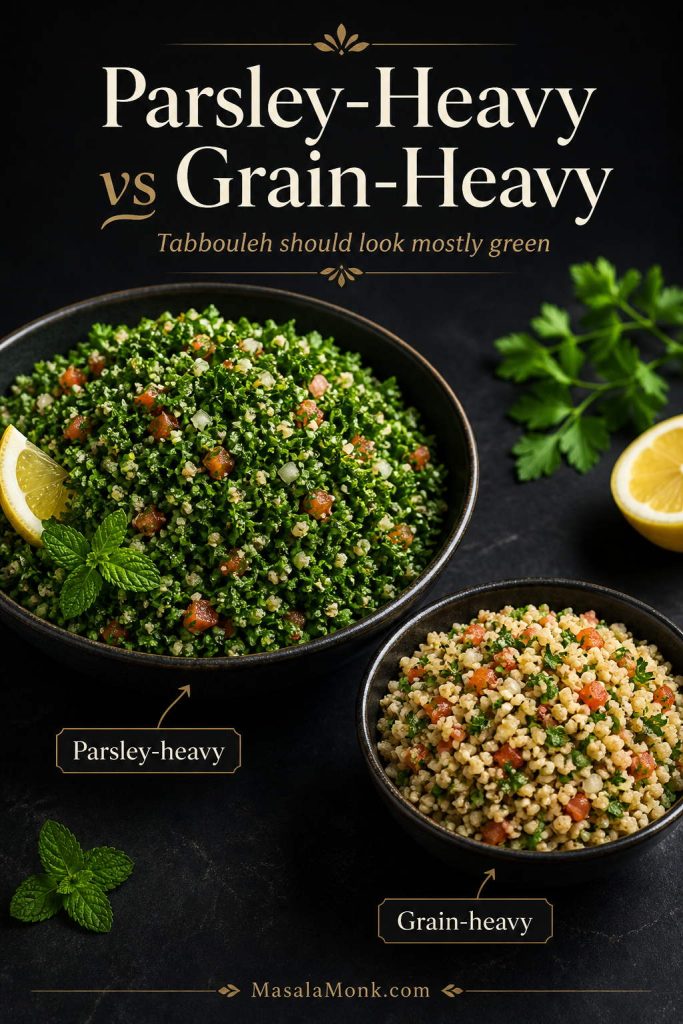
Quick ratio: For a parsley-first tabbouleh, use about 3 packed cups finely chopped parsley with only 1/3 cup fine bulgur. That keeps the salad fresh and herb-heavy instead of turning it into a grain salad.
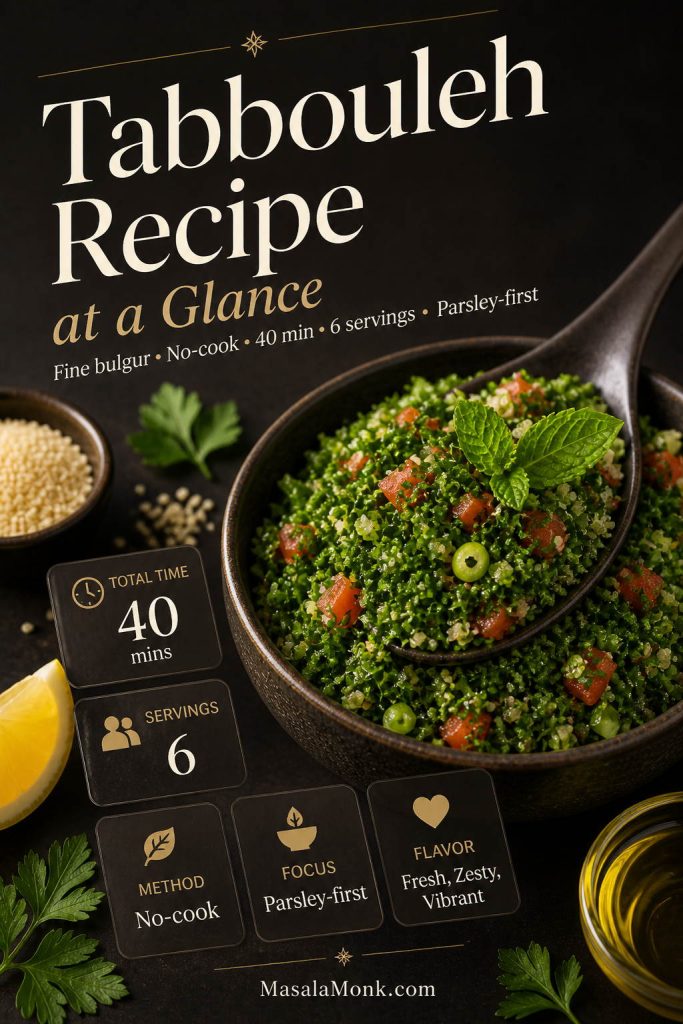
Tabbouleh Recipe at a Glance
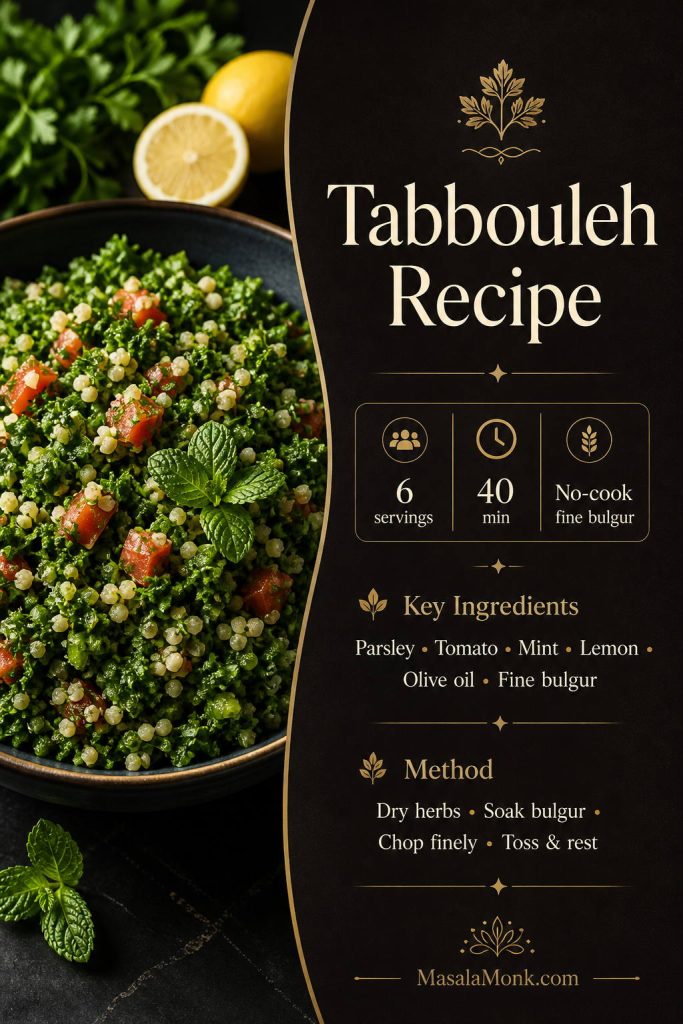
This tabbouleh recipe is built for a fresh, parsley-heavy texture with fine bulgur, bright lemon dressing, and no cooking required when you use the right grain.
Best bulgur
Fine #1 bulgur wheat
Cook time
0 minutes for fine bulgur
Total time
About 40 minutes
Yield
6 servings, about 5–6 cups
Flavor
Fresh, lemony, herb-heavy, lightly juicy
Best texture
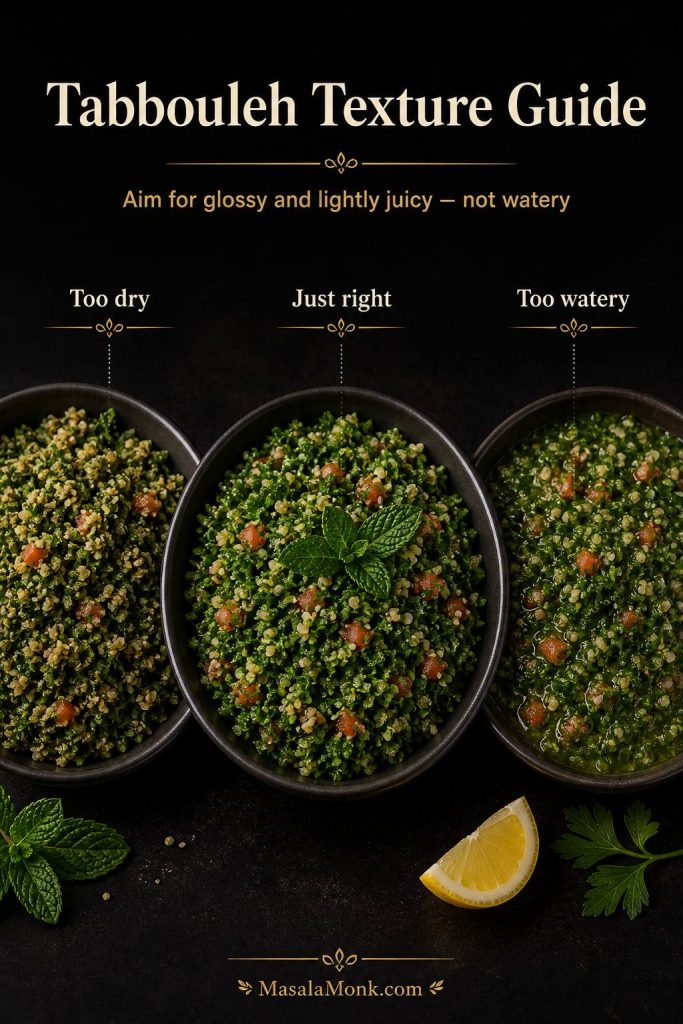
Finely chopped herbs, tender bulgur, no puddle of dressing
Make-ahead
Best same day; leftovers keep 2–3 days
This tabbouleh recipe uses fine bulgur, needs no cooking, and takes about 40 minutes. The main texture goal is simple: plenty of parsley with just enough bulgur to support it.
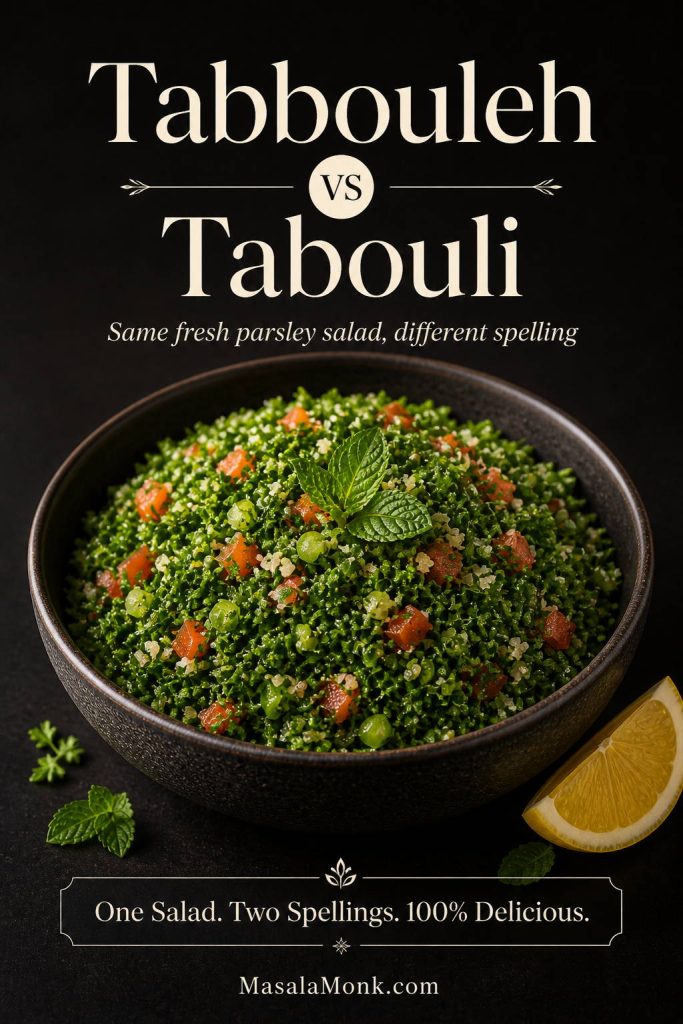
Tabbouleh vs Tabouli: Same Salad, Different Spelling
Tabbouleh and tabouli usually refer to the same salad. The spelling changes because the Arabic word is transliterated into English in different ways.
You may see it written as tabbouleh, tabouli, tabouleh, tabouli salad, or tabbouleh salad. The spellings vary by region, family tradition, and how the Arabic word is transliterated into English.
Here, the salad follows a Lebanese-style direction: finely chopped parsley, tomato, mint, green onion, fine bulgur, lemon juice, and olive oil.
Tabbouleh and tabouli usually mean the same salad. The spelling changes, but the base stays familiar: parsley, tomato, mint, fine bulgur, lemon juice, and olive oil.
Why This Tabbouleh Recipe Works
Homemade tabbouleh usually goes wrong in a few predictable ways: too much bulgur, wet herbs, bland dressing, hard grains, or a watery bowl after 20 minutes. To avoid those problems, this version uses a parsley-first ratio, fine bulgur, careful draining, and a simple dressing that seasons the grain as it softens.
It is parsley-first. The salad tastes fresh and green, not heavy or grainy.
Fine bulgur keeps it no-cook. Fine #1 bulgur softens in lemon juice and olive oil while you chop the herbs.
The tomatoes are drained if needed. That keeps the salad juicy without turning soupy.
The dressing is simple. Lemon juice, olive oil, salt, and pepper are enough when the herbs are fresh.
The amounts are precise. Cups, grams, and milliliters are included so the parsley-to-bulgur balance stays right.
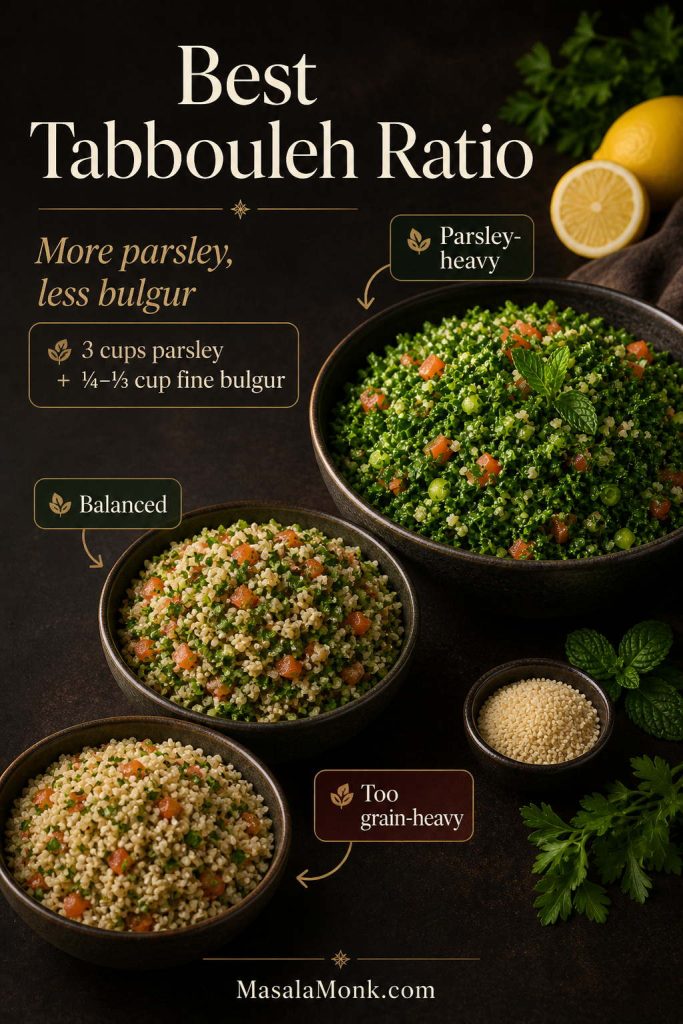
Best Parsley-to-Bulgur Ratio for Tabbouleh
The easiest way to keep tabbouleh fresh is to use a lot of parsley and only a small amount of bulgur. The bulgur should soften the bite and absorb flavor, but it should not make the salad heavy.
Style
Parsley
Bulgur
Result
Parsley-heavy Lebanese-style
3 packed cups
1/4 to 1/3 cup fine bulgur
Fresh, green, herb-led tabbouleh
Balanced everyday style
3 packed cups
1/2 cup fine bulgur
Still fresh, but slightly more filling
Grain-heavy style
2–3 cups
3/4 cup or more
More like bulgur salad than classic tabbouleh
For a Lebanese-style tabbouleh ratio, start with about 3 packed cups of chopped parsley and only ¼ to ⅓ cup fine bulgur. More bulgur makes the salad heavier and less herb-led.
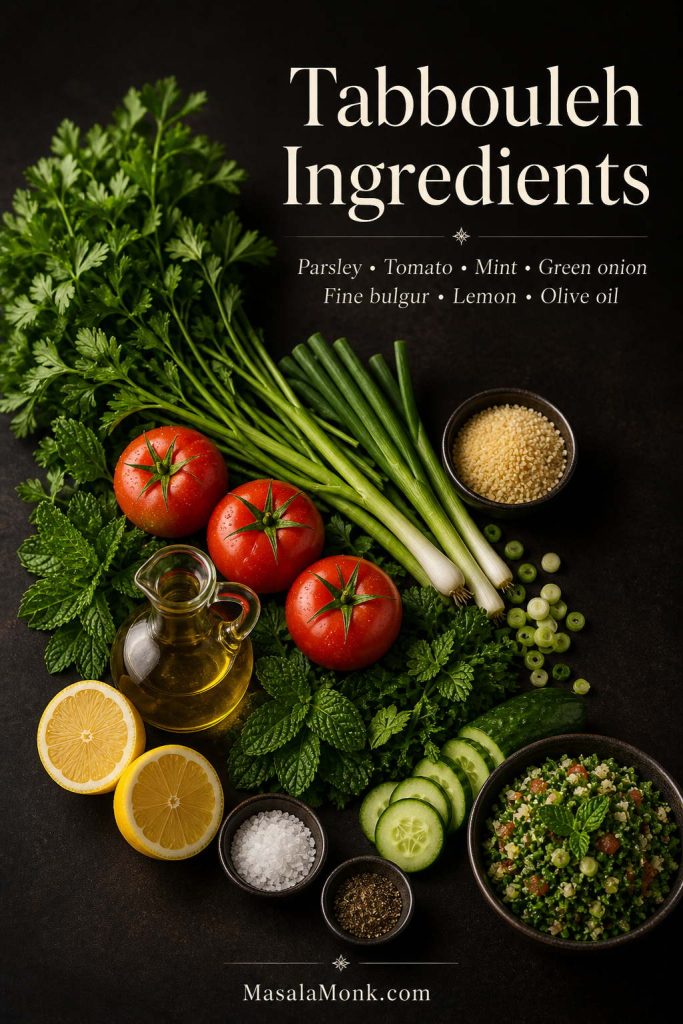
Tabbouleh Ingredients
For tabbouleh, this recipe keeps the ingredient list simple but pays close attention to texture: dry herbs, firm tomatoes, fine bulgur, fresh lemon, and enough olive oil to round everything out.
The best tabbouleh ingredients are simple, but prep matters. Dry the herbs, use firm tomatoes, choose fine bulgur, and rely on fresh lemon juice rather than bottled citrus.
Parsley
Because parsley is the main ingredient, its texture matters. You can use curly parsley or flat-leaf parsley, but the leaves need to be very dry before chopping. Wet parsley is one of the main reasons tabbouleh becomes watery.
Chop the parsley finely with a sharp knife. A food processor can bruise the herbs and turn them wet or pasty if you overdo it.
Tomatoes
Use firm Roma tomatoes or another firm, meaty tomato. Chop them small, then drain off extra liquid if they are very juicy. You want tomato freshness, not a pool of tomato water at the bottom of the bowl.
Mint
Fresh mint gives tabbouleh its cooling lift. Do not use dried mint as a full replacement here; it will not give the same fresh, bright finish.
Green Onions or Scallions
Green onions add mild onion flavor without overpowering the herbs. Slice them finely so they disappear into the salad rather than standing out in large pieces.
Fine Bulgur
Fine #1 bulgur is best for Lebanese-style tabbouleh. It softens quickly and blends into the herbs without making the salad feel heavy.
Lemon Juice and Olive Oil
Fresh lemon juice gives tabbouleh its sharp, clean brightness. Extra-virgin olive oil rounds out the dressing and helps soften the bulgur. Bottled lemon juice is not ideal because the salad depends on a fresh citrus flavor.
Cucumber, Optional
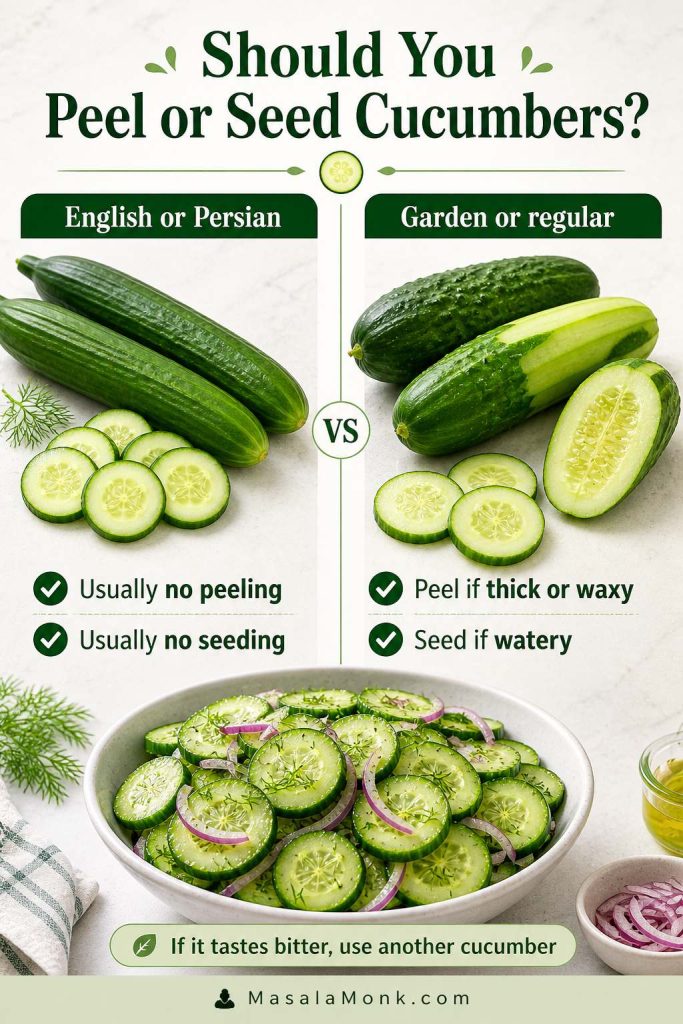
Cucumber is optional. It adds crunch and freshness, especially in modern tabouli salad versions, but the salad still works beautifully without it. If you use cucumber, dice it small and drain it if it is watery.
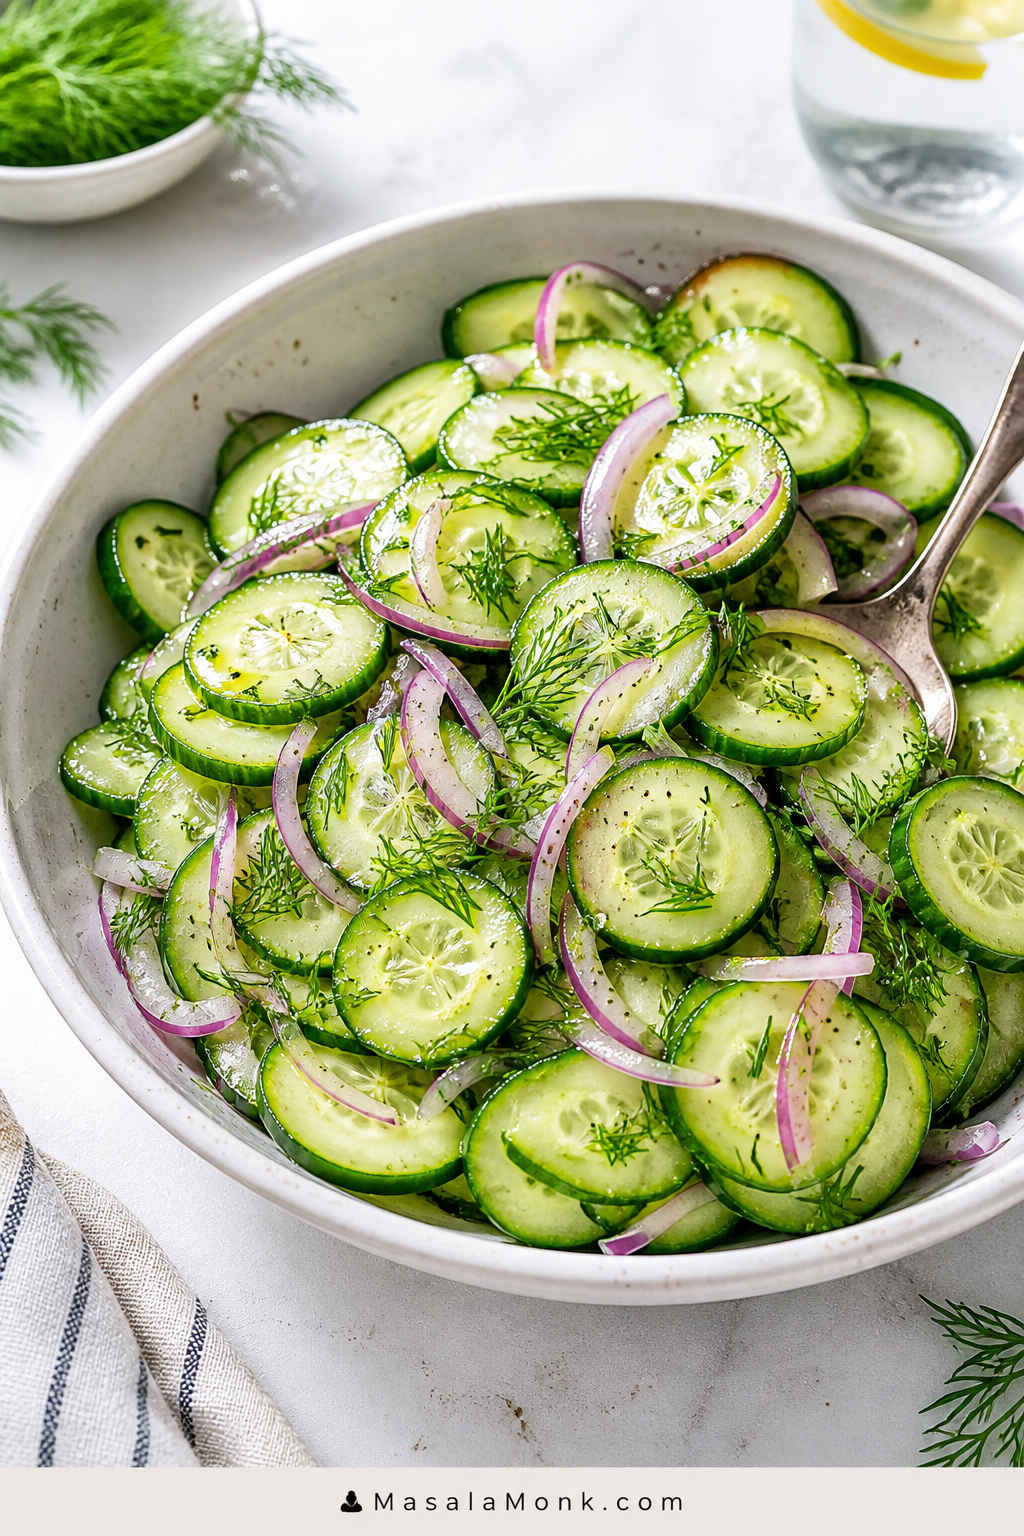
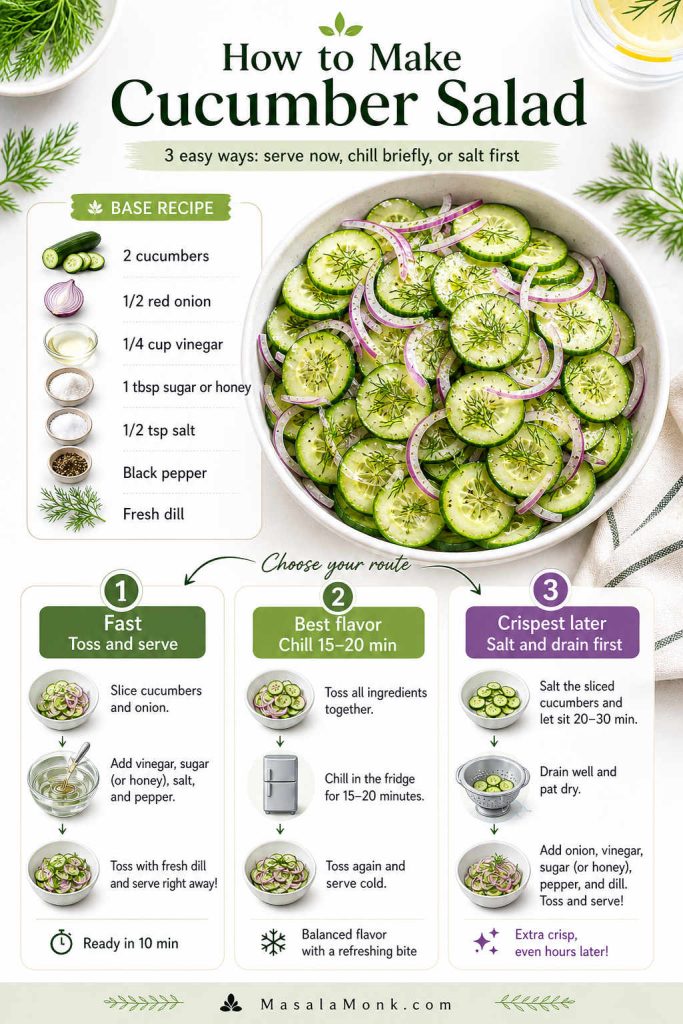
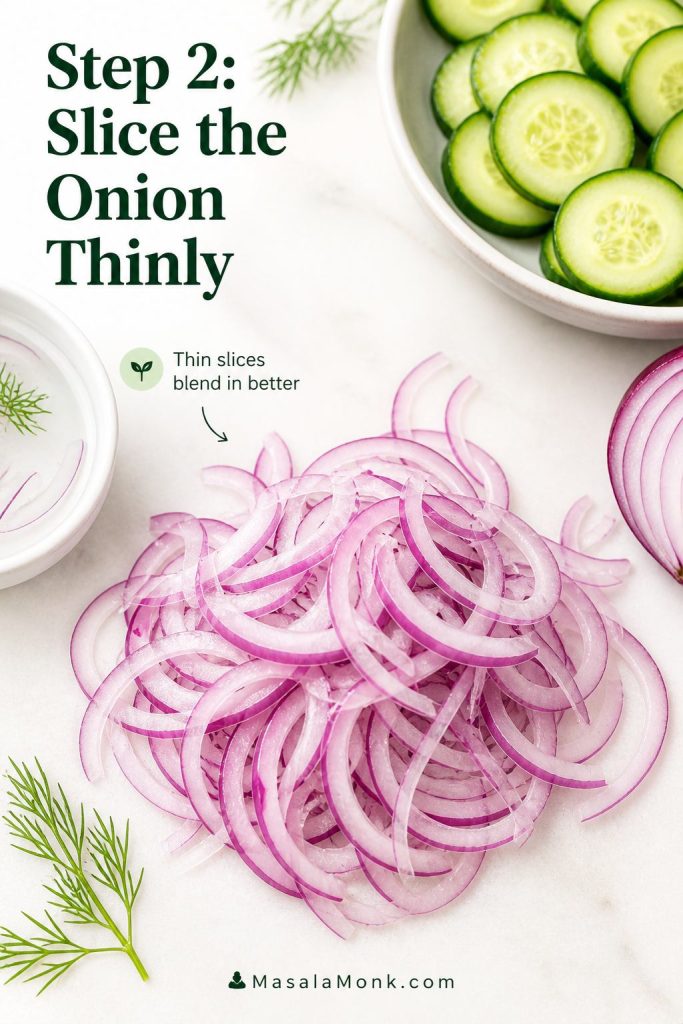
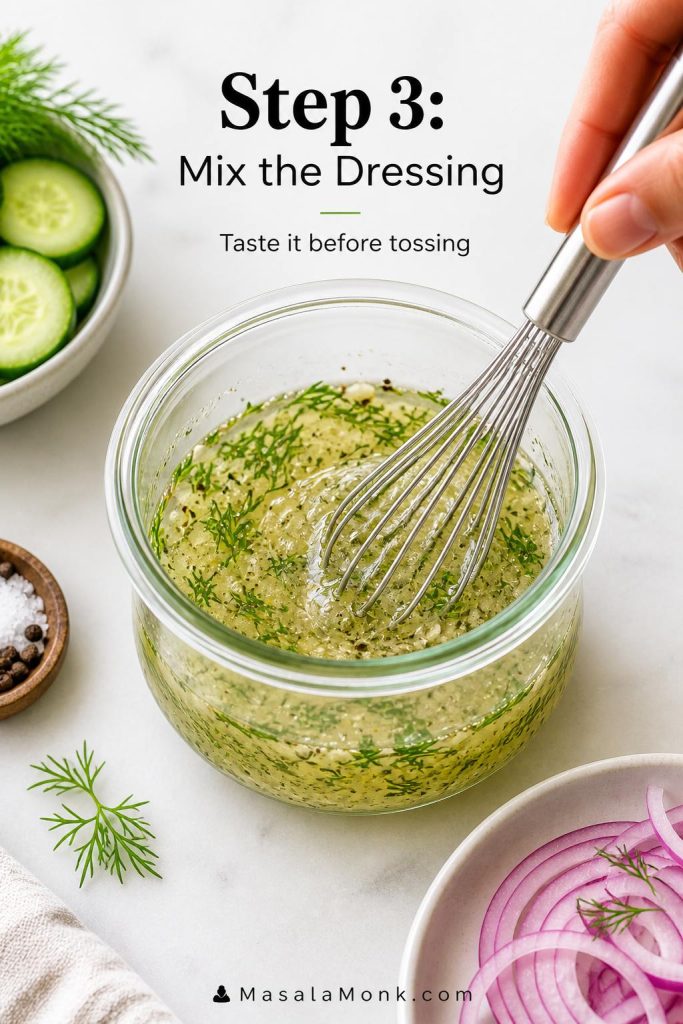
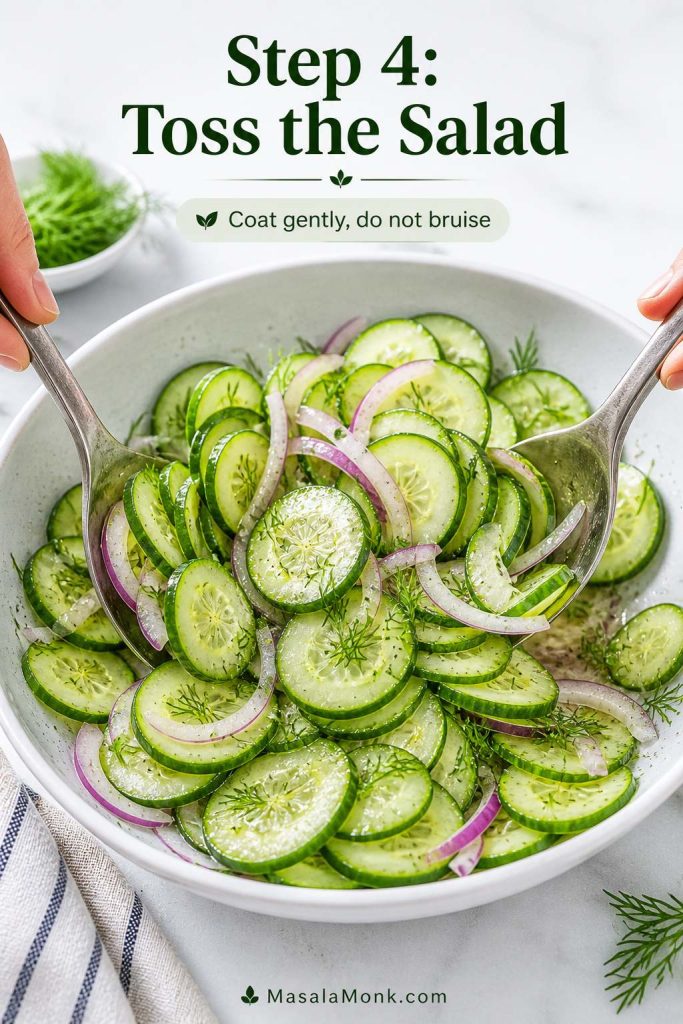
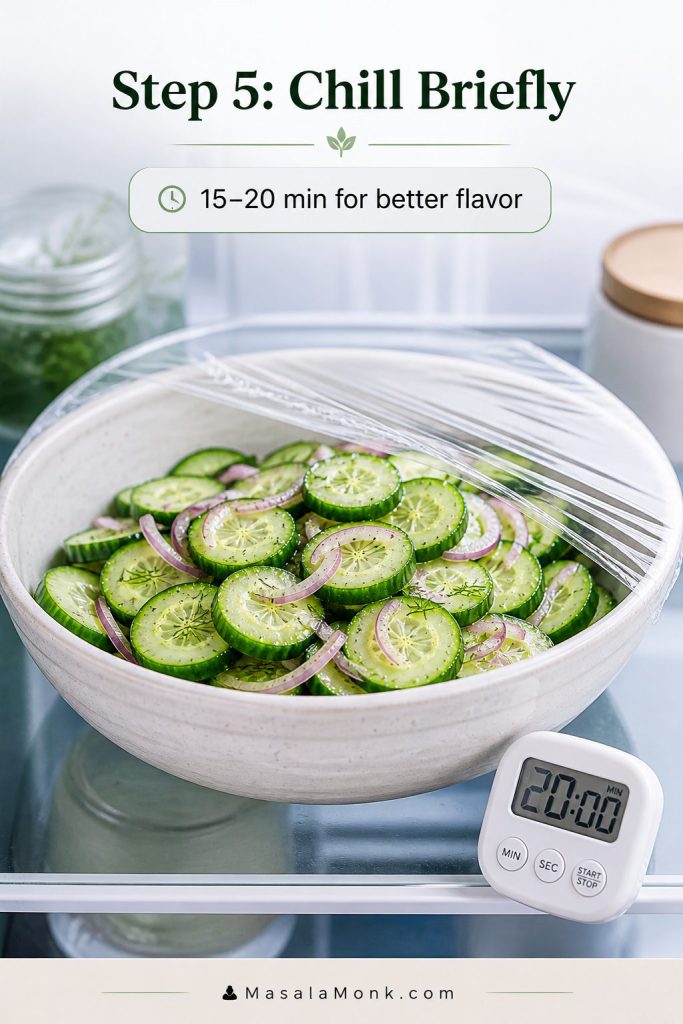
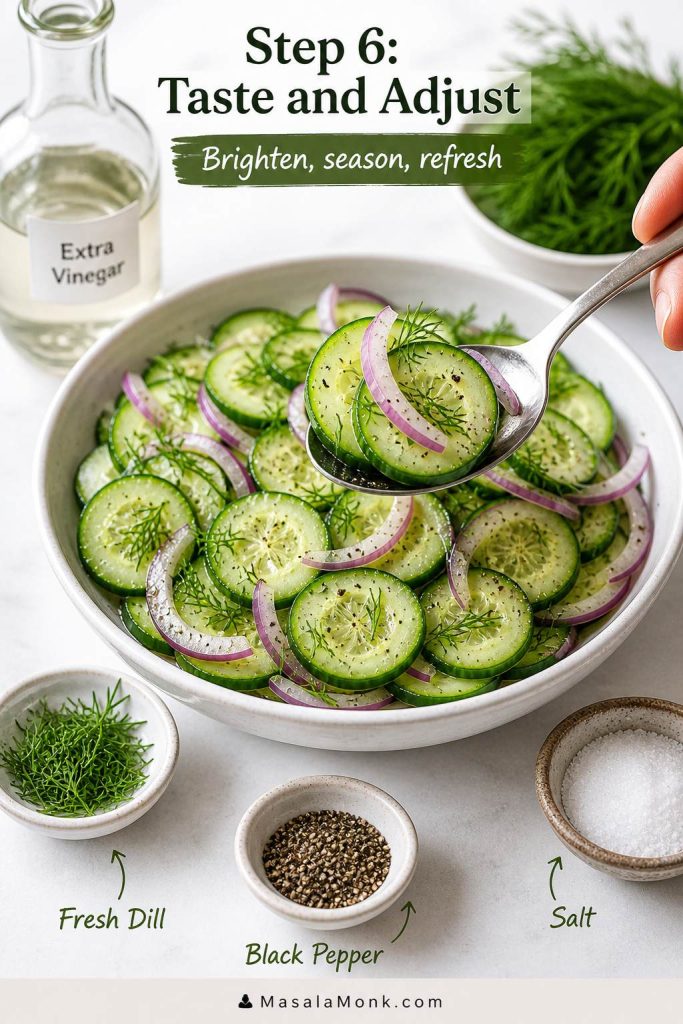
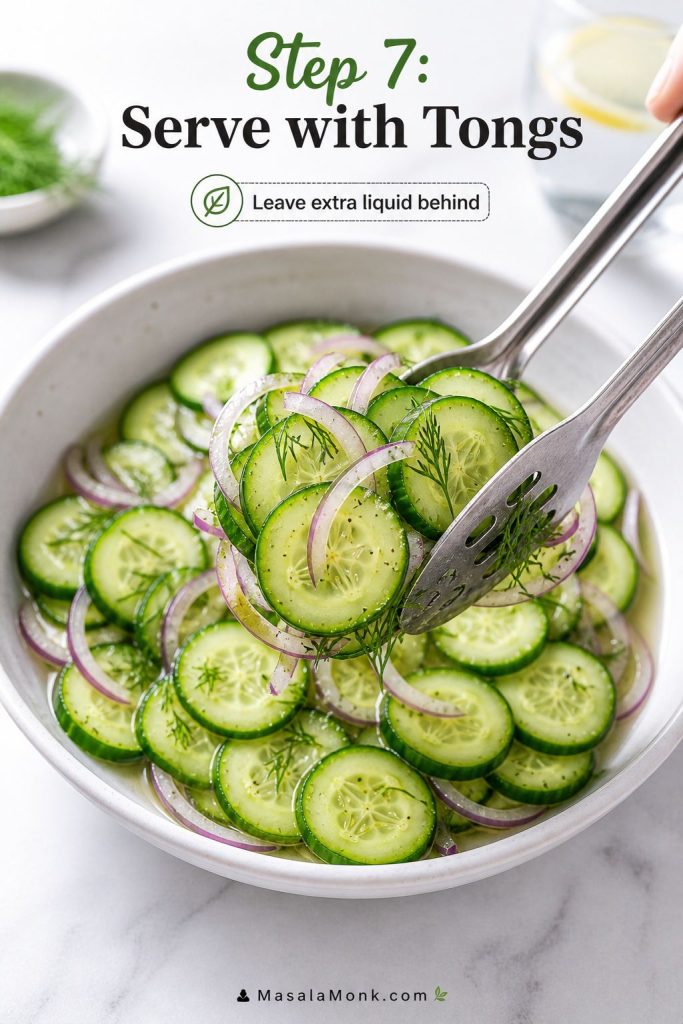
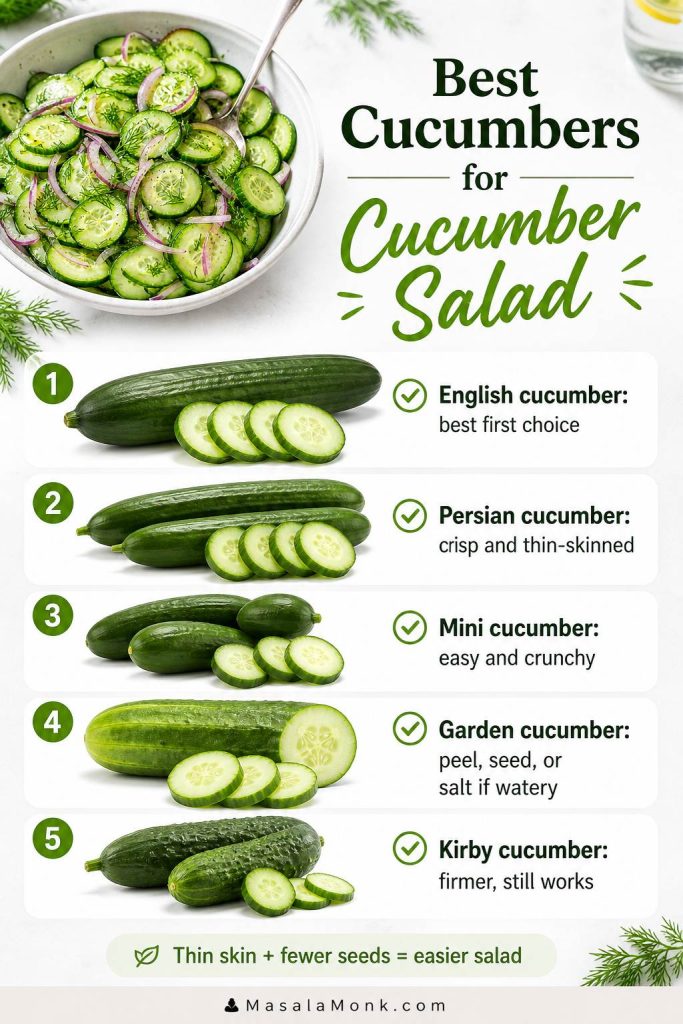
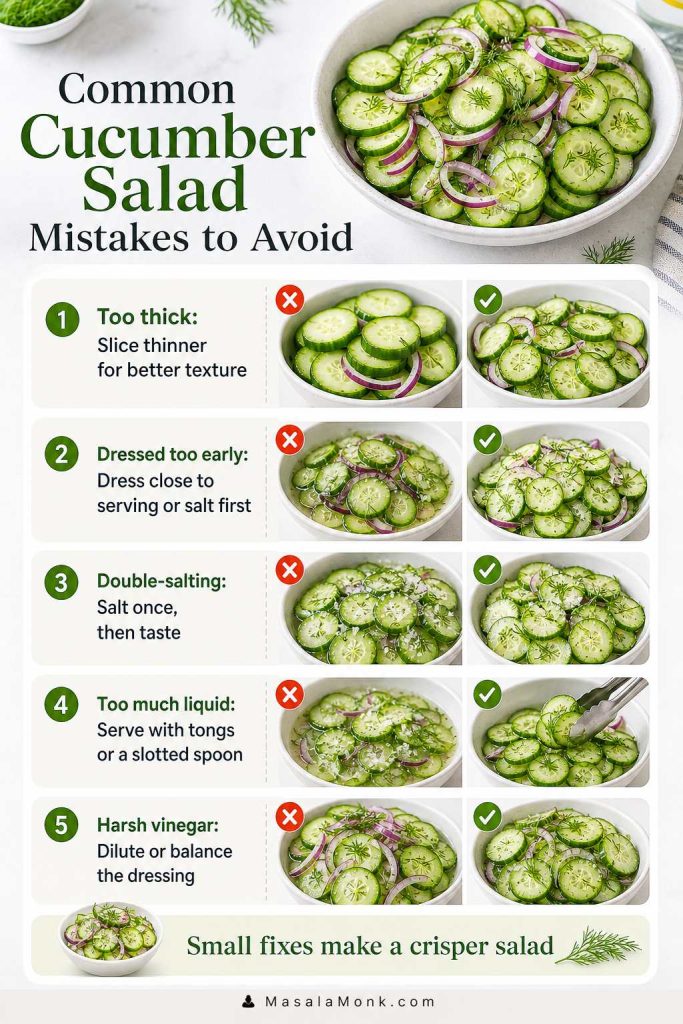
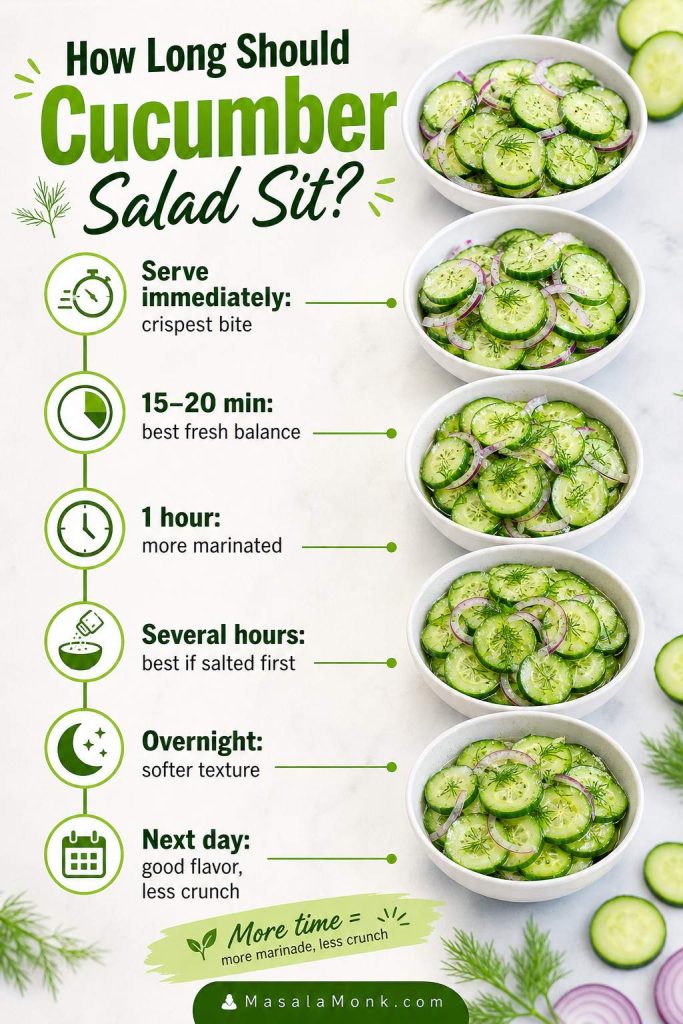
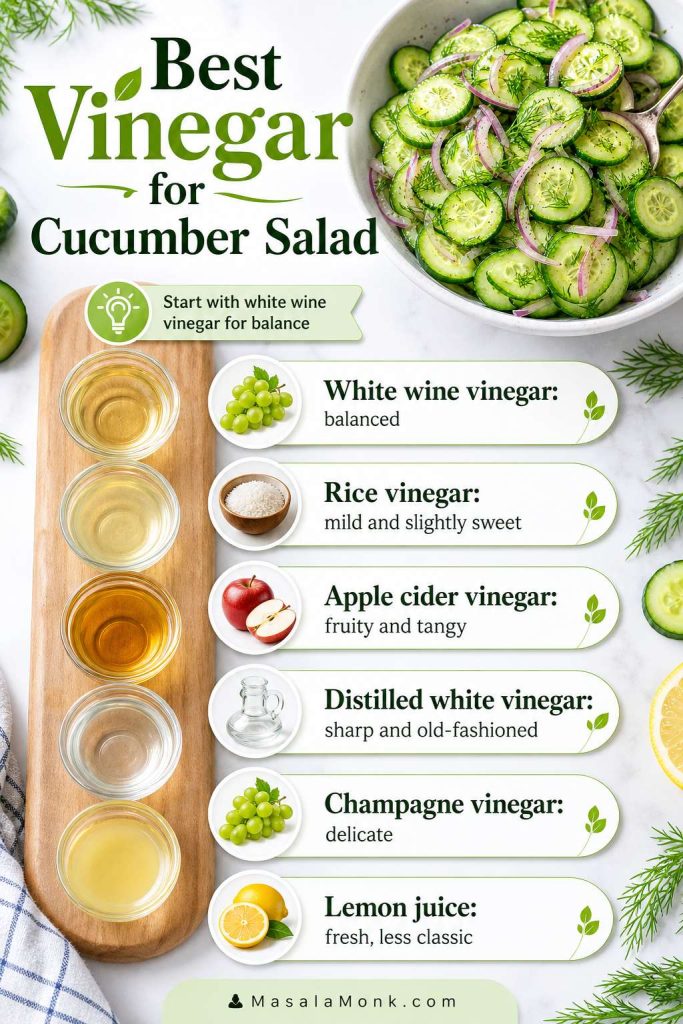
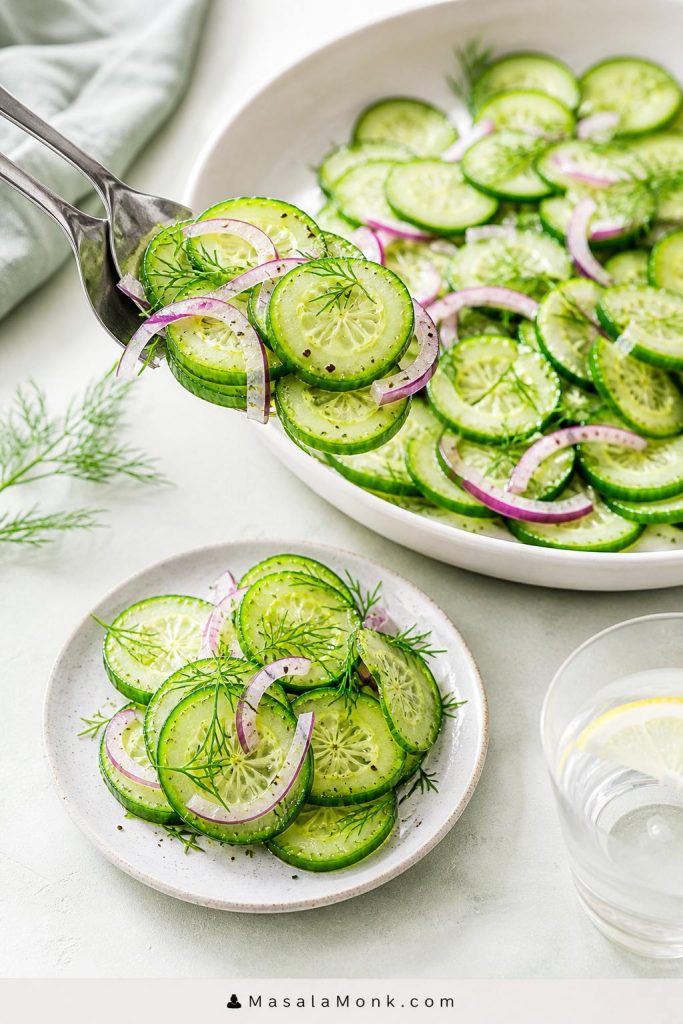
If cucumber is the part you love most, you may also like this crisp cucumber salad recipe with vinegar, dill, and onion.
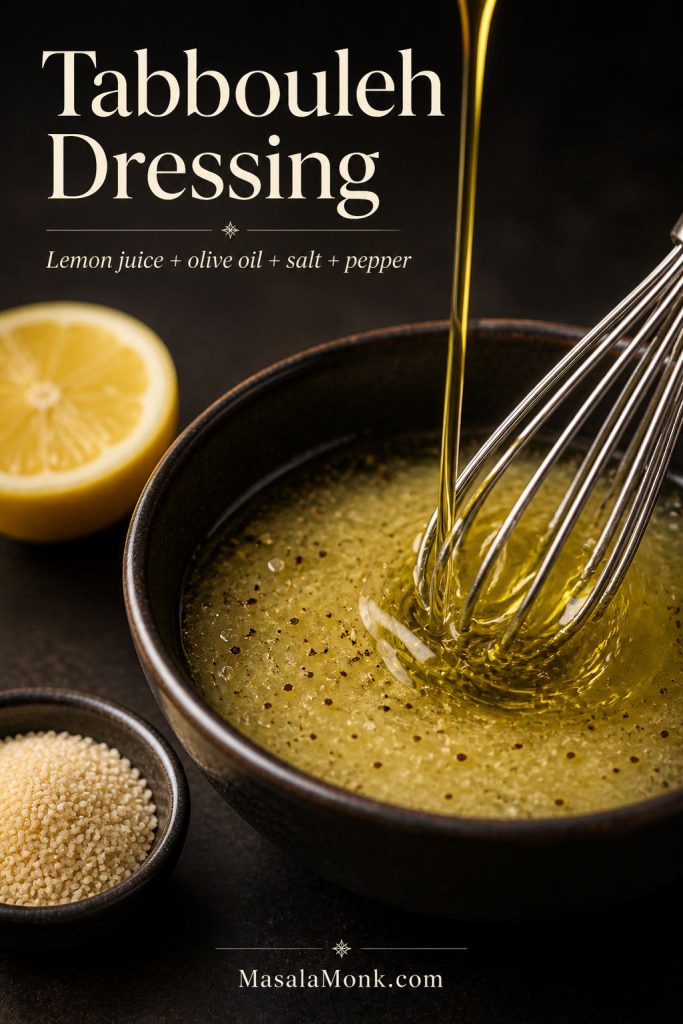
Tabbouleh Dressing
In this tabbouleh recipe, the dressing is simple: fresh lemon juice, extra-virgin olive oil, salt, and black pepper. It should lightly coat the herbs, season the tomatoes, and soften the fine bulgur without drowning the salad.
Tabbouleh dressing is not a thick vinaigrette. Lemon juice, olive oil, salt, and pepper should lightly coat the herbs and help fine bulgur soften without drowning the salad.
Here, the fine bulgur sits in the lemon-olive oil dressing while you chop the parsley, mint, tomatoes, and green onions. That gives the bulgur better flavor than soaking it in plain water.
Once the salad rests, taste before adding anything else. A pinch of salt usually fixes flat flavor, extra lemon brings brightness, and a small drizzle of olive oil softens a sharp edge.
Best Bulgur for Tabbouleh
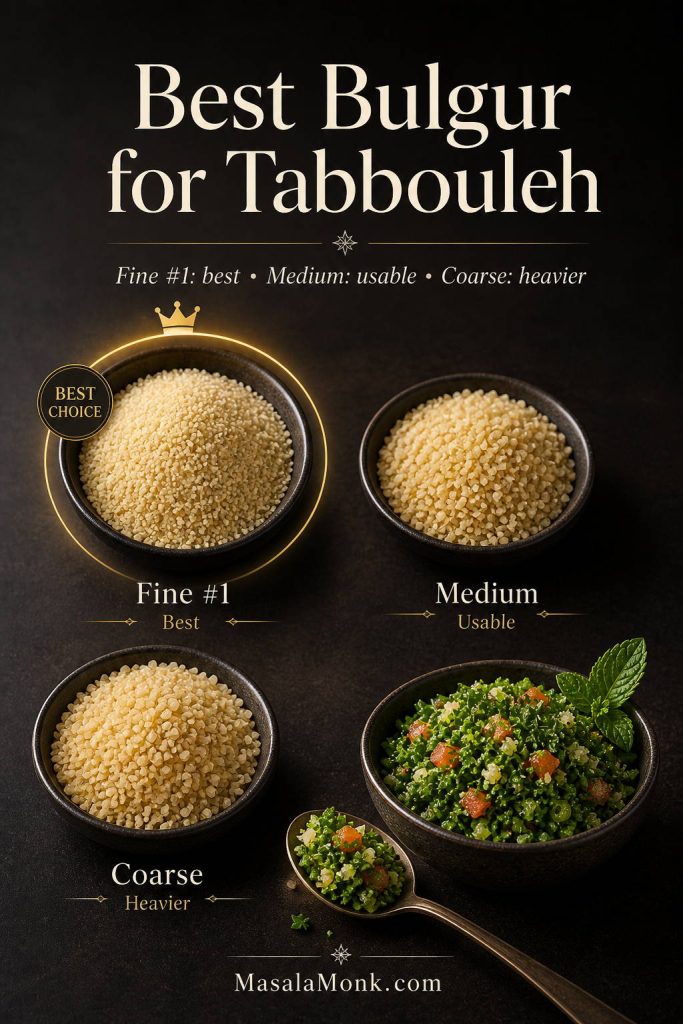
The best bulgur for tabbouleh is fine #1 bulgur. It is small enough to soften without boiling and delicate enough to stay in the background. That matters because tabbouleh should taste like a fresh herb salad, not a bulgur bowl.
Bulgur is wheat that has already been parboiled, dried, cracked, and sorted by size. That is why fine bulgur can soften quickly in dressing instead of needing a full boil. For more background, see the Whole Grains Council guide to bulgur and freekeh.
If your bulgur is medium or coarse, you can still use it, but the texture will be different and it usually needs hot water before mixing.
Bulgur or Swap
Best For
How to Prepare It
Extra-fine / #1 bulgur
Best choice for Lebanese-style tabbouleh
Soak in the lemon-olive oil dressing for 20–30 minutes. No cooking needed.
Fine bulgur
Good everyday choice
Soak until tender. Drain if you use water.
Medium bulgur
Usable, but less delicate
Soak in hot water, drain well, and cool before mixing.
Coarse bulgur
More of a grain-salad texture
Cook or hot-soak until tender, then cool completely. Use less than you would in a grain salad.
Cracked wheat
Depends on grind and processing
Usually needs longer soaking or cooking. Check texture before adding.
Quinoa
Gluten-free tabbouleh variation
Cook, cool completely, then mix with the herbs and dressing.
Cauliflower rice
Grain-free variation
Use raw or lightly salted and drained. Keep the pieces small and dry.
Couscous
Quick variation, not classic tabbouleh
Steam or soak, fluff, cool completely, then mix.
Fine #1 bulgur is best for tabbouleh because it softens quickly and stays delicate. Medium or coarse bulgur can work, but it usually needs hot soaking and gives a heavier texture.
Do not overuse bulgur. If you add too much, the salad shifts from tabbouleh into a bulgur salad. For this recipe, 1/3 cup fine bulgur is enough for 6 servings.
What If You Only Have Medium or Coarse Bulgur?
If you only have medium or coarse bulgur, you can still make tabbouleh, but the texture will be less delicate. Put the medium or coarse bulgur in a bowl, cover it with hot water, and let it sit until tender. Drain it very well, press out excess moisture, and cool it completely before adding it to the herbs.
Use a smaller amount than you would in a grain salad. The goal is still a parsley-forward tabbouleh, not a heavy bulgur salad.
How to Buy Bulgur for Tabbouleh
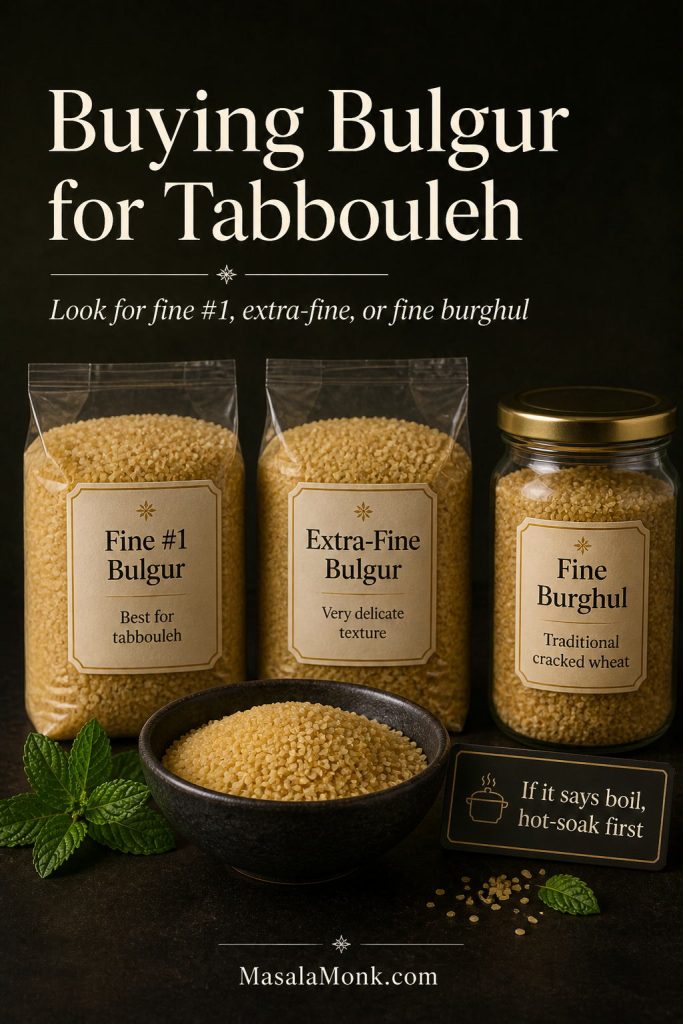
When shopping, look for fine #1 bulgur, extra-fine bulgur, or fine burghul. It is often easier to find in Middle Eastern grocery stores, international aisles, or natural-food stores than in the regular grain aisle. If the package says it must be boiled, treat it like medium or coarse bulgur and cool it before mixing.
When buying bulgur for tabbouleh, look for fine #1, extra-fine bulgur, or fine burghul. If the package says it must be boiled, treat it like a coarser grain.
Equipment You’ll Need
You do not need special equipment, but a few basic tools make a big difference in the final texture.
Sharp chef’s knife: for finely chopping parsley without bruising it.
Large cutting board: tabbouleh uses a lot of herbs, so space helps.
Salad spinner or clean towels: for drying parsley and mint thoroughly.
Large mixing bowl: gives you room to toss without crushing the herbs.
Small bowl or measuring jug: for the lemon-olive oil dressing.
Fine-mesh strainer or colander: useful for draining tomatoes, cucumber, or soaked bulgur.
How to Make Tabbouleh
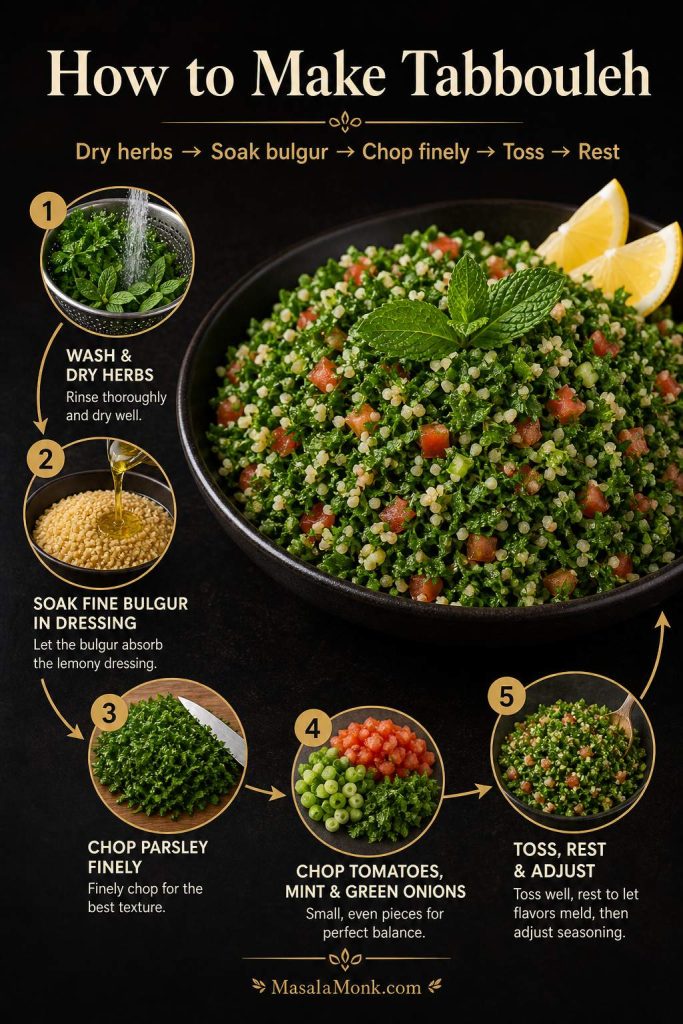
Good tabbouleh is mostly about prep. Although the ingredients are simple, the herbs need to be dry, the chopping needs to be fine, and the bulgur needs enough time to soften.
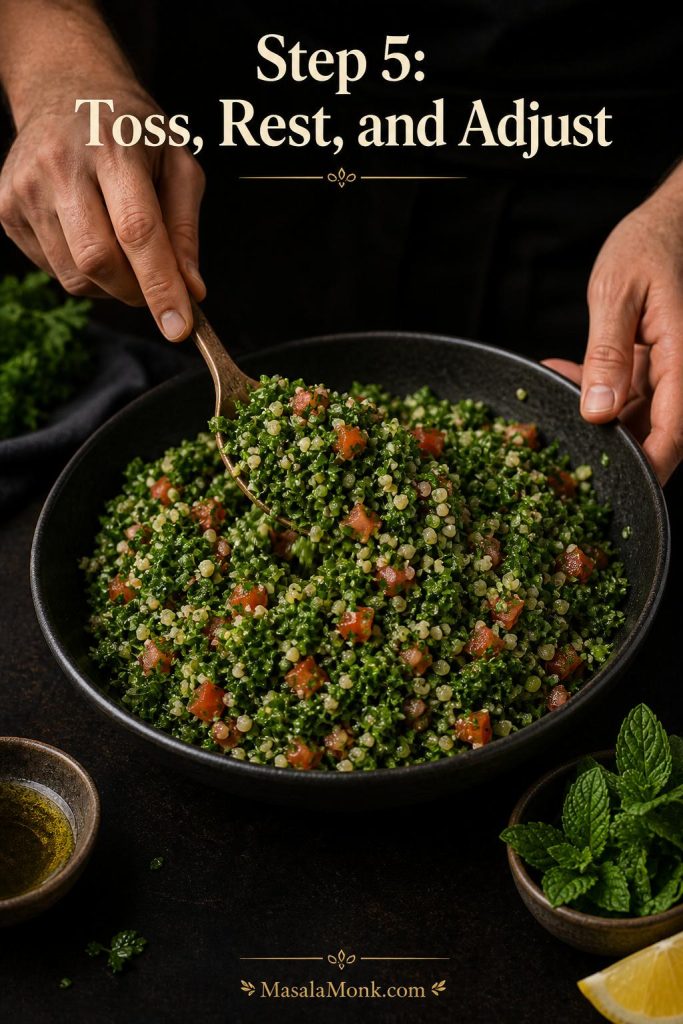
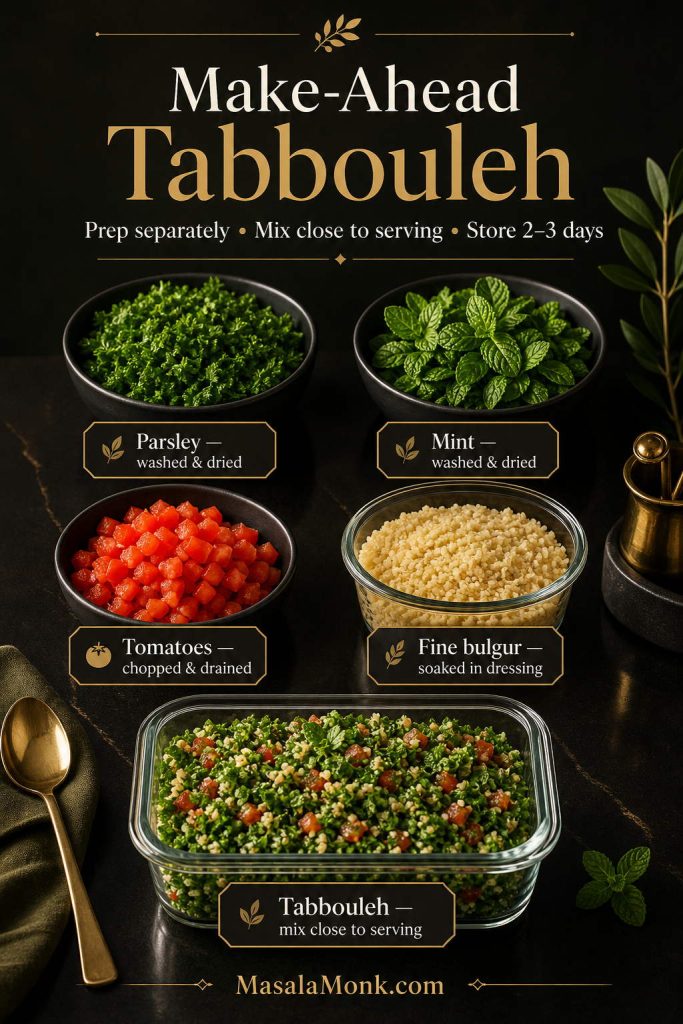
The tabbouleh method is mostly about order: dry the herbs first, soak fine bulgur in dressing, chop everything small, toss gently, then rest before the final seasoning check.
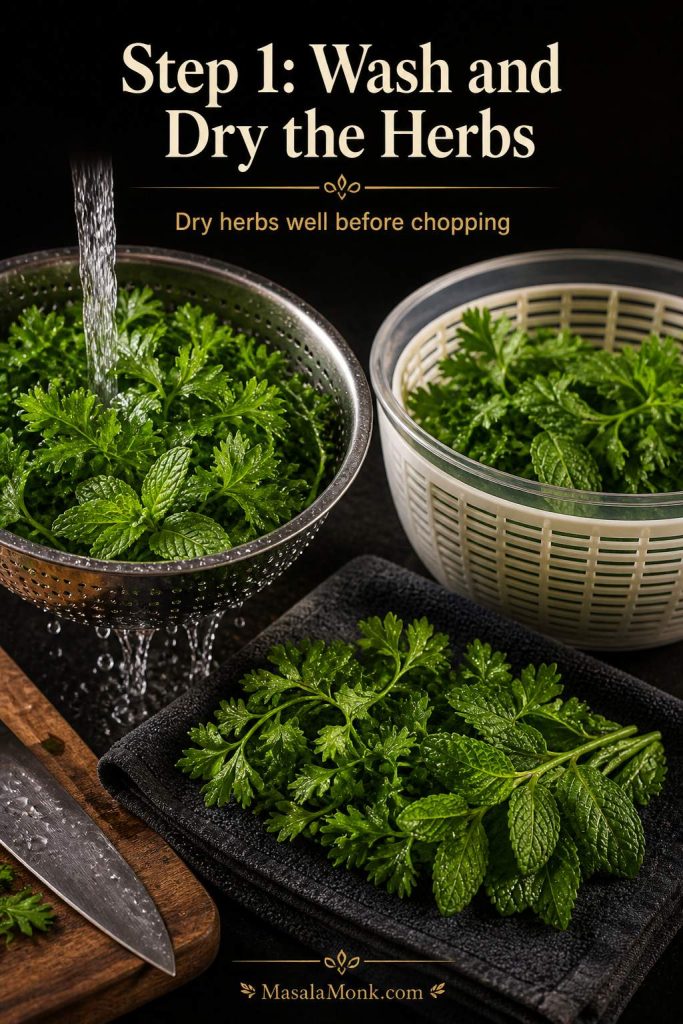
Step 1: Wash and Dry the Herbs
Wash the parsley and mint, then dry them very well. A salad spinner is helpful, but you can also spread the herbs on clean towels and pat them dry.
This step matters because wet herbs dilute the dressing and make the salad watery faster.
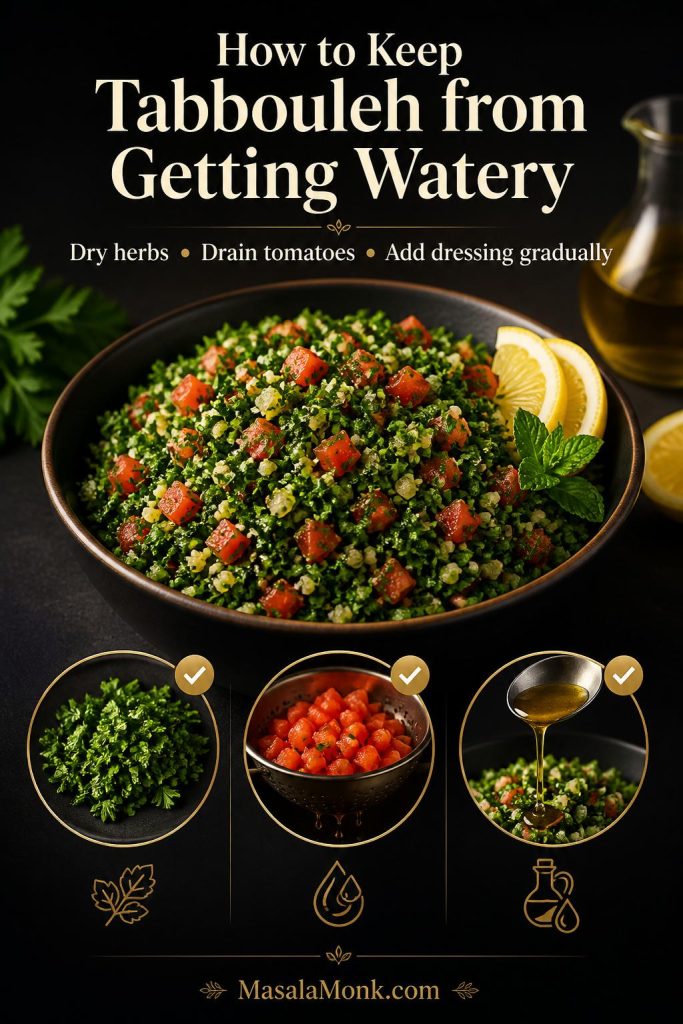
Dry parsley and mint thoroughly before chopping. Even a little extra water on the herbs can dilute the lemon-olive oil dressing and make tabbouleh turn watery.
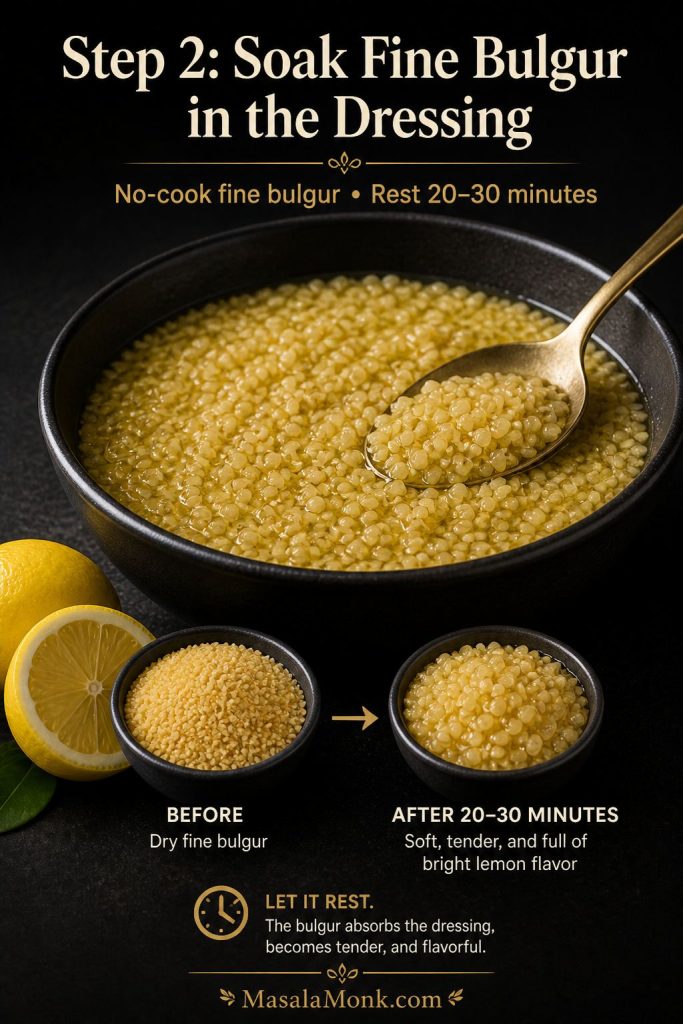
Step 2: Soak the Fine Bulgur in the Dressing
In a large mixing bowl, whisk together the lemon juice, 1/4 cup olive oil, salt, and pepper. Stir in the fine bulgur and let it sit for 20–30 minutes while you chop the herbs and vegetables.
The bulgur should soften but not become mushy. If it still tastes hard after resting, add 1 tablespoon of warm water or lemon juice, stir, and wait another 10 minutes.
Fine bulgur does not need boiling for this tabbouleh recipe. Let it sit in the lemon-olive oil dressing for 20–30 minutes so it becomes tender and better seasoned.
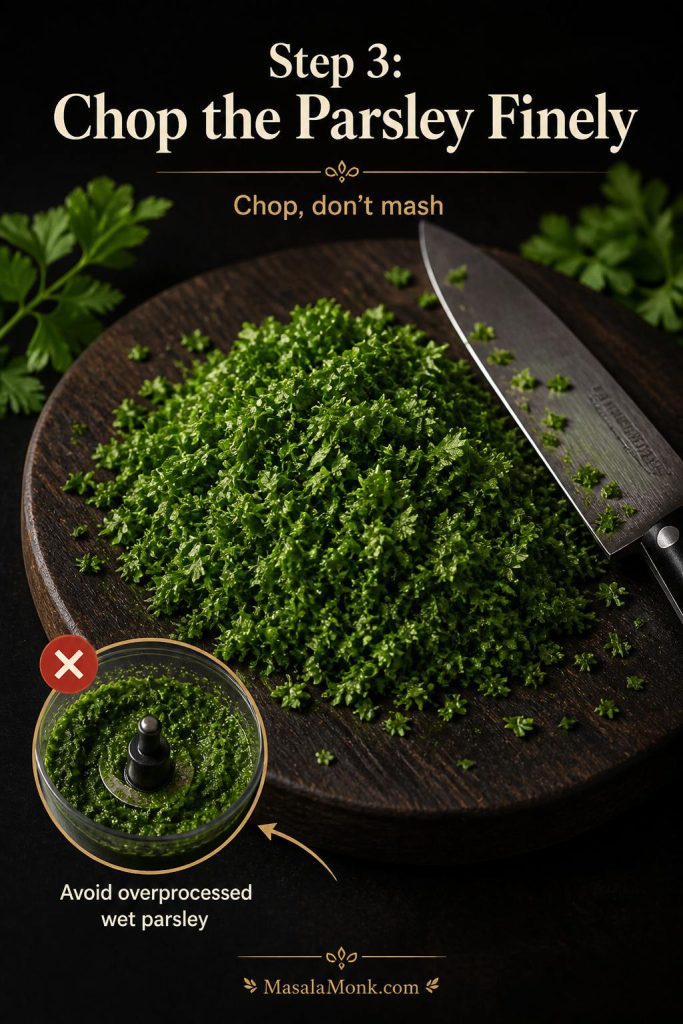
Step 3: Chop the Parsley Finely
Gather the dry parsley into small bunches and chop it finely with a sharp knife. You want small, even pieces, not large leaves and not a wet green paste.
Tender stems are fine if they are chopped very small. Thick stems should be removed.
Hand-chopped parsley gives tabbouleh a lighter texture. A food processor can work only if pulsed carefully, but overprocessing turns the herbs wet, dark, and pasty.
Step 4: Chop the Tomatoes, Mint, and Green Onions
Finely chop the tomatoes, mint, and green onions. If the tomatoes release a lot of juice, drain them briefly before adding them to the bowl. If using cucumber, dice it small and drain it too.
Chop tomatoes, mint, and green onions small enough to blend into every bite. If the tomatoes are juicy, drain them before mixing so the salad stays fresh instead of soupy.
Step 5: Toss, Rest, and Adjust
Add the parsley, mint, tomatoes, green onions, and optional cucumber to the soaked bulgur. Toss gently until everything is evenly coated, but do not crush the herbs.
Let the tabbouleh rest for 10 minutes, then taste and adjust. Start with salt if the flavor feels flat, brighten it with lemon if needed, or round it out with a little olive oil if the salad tastes too sharp. Add the remaining olive oil only if the salad needs a softer finish.
Once the herbs, tomatoes, and softened bulgur are combined, toss gently and let the salad rest for about 10 minutes. After that, adjust salt, lemon, or olive oil.
How to Keep Tabbouleh from Getting Watery
Watery tabbouleh usually comes from wet herbs, juicy tomatoes, too much dressing, or bulgur that has not been drained properly. The best fix is to control moisture before everything goes into the bowl.
Drain Juicy Tomatoes and Cucumber First
If your tomatoes or cucumber are very juicy, sprinkle them with a small pinch of salt and let them sit in a strainer for 10 minutes while you chop the herbs. After 10 minutes, drain the liquid before mixing. This keeps the salad fresh and juicy without creating a puddle at the bottom of the bowl.
Watery tabbouleh usually comes from wet herbs, juicy tomatoes, or too much dressing. Fix it before mixing by drying the herbs, draining the tomatoes, and adding dressing gradually.
Quick Fixes for Watery Tabbouleh
Problem
Likely Cause
Best Fix
Tabbouleh is watery
Wet parsley, juicy tomatoes, or too much dressing
Dry herbs thoroughly, drain tomatoes, and add dressing gradually.
Bulgur is hard
Bulgur is too coarse or under-soaked
Add 1–2 tablespoons warm water or lemon juice and rest 10–15 minutes.
Bulgur is soggy
Too much soaking liquid
Drain or blot if possible, then add more parsley, mint, or tomato.
Salad tastes flat
Not enough salt or lemon
Add salt first, then lemon juice in small amounts.
Salad tastes too sharp
Too much lemon juice
Add a little olive oil and extra tomato to round it out.
Parsley tastes harsh
Pieces are too large or salad has not rested
Chop finer next time and let the salad rest 10–20 minutes before serving.
Herbs look mushy
Food processor overuse or wet herbs
Chop by hand and dry herbs well before cutting.
What the Finished Tabbouleh Should Look Like
For the best texture, serve tabbouleh the same day it is made. Although it keeps well for a couple of days, the herbs soften as they sit.
Best texture target: The finished tabbouleh should be finely chopped, glossy, lemony, and lightly juicy, but there should not be a puddle of dressing at the bottom of the bowl.
Do not worry if the herbs darken slightly after dressing. Proper tabbouleh should look moist and glossy, not dry and fluffy. The warning sign is excess liquid pooling underneath, not a lightly dressed herb texture.
Finished tabbouleh should be glossy and lightly juicy, not dry and not puddled. If liquid collects at the bottom, lift the salad out with a slotted spoon and drain juicier vegetables next time.
Authentic Lebanese-Style Tabbouleh Tips
Lebanese-style tabbouleh is usually much more herb-heavy than many restaurant or grocery-store versions. Parsley should be the main ingredient, while the bulgur should add texture in the background rather than making the salad feel like a grain bowl.
Lebanese-style tabbouleh is usually much more herb-led than many store-bought versions. Use fine bulgur sparingly so the salad stays light, fresh, and finely chopped.
Use more parsley than bulgur. A small amount of fine bulgur is enough to give texture without taking over.
Chop everything finely. The parsley, tomatoes, mint, and green onions should feel evenly mixed in every bite.
Use fine bulgur if possible. Fine #1 bulgur gives the most delicate texture and does not need boiling.
Keep cucumber optional. Cucumber is common in many modern tabouli salad versions, but the salad still works beautifully without it.
Serve it fresh. Tabbouleh can be stored, but the brightest flavor and best herb texture are usually the same day.
Texture cue: If the bowl looks mostly green with small flecks of tomato, mint, onion, and bulgur, you are close to a Lebanese-style tabbouleh texture. If it looks mostly grain-based, there is probably too much bulgur.
A parsley-heavy tabbouleh bowl looks green, fresh, and finely chopped. When the bowl looks beige or grain-led, the recipe has moved closer to bulgur salad.
Tabbouleh Recipe Card
Tabbouleh Recipe: Fresh Lebanese Tabouli Salad with Bulgur
This fresh tabbouleh recipe is parsley-first, lemony, and no-cook. Fine bulgur softens in the lemon-olive oil dressing while you chop the herbs, keeping the salad bright instead of watery.
Prep Time40 minutes
Cook Time0 minutes
Total Time40 minutes
Yield6 servings, about 5–6 cups
Ingredients
1/3 cup fine #1 bulgur wheat, about 50g
1/4 cup fresh lemon juice, 60ml
1/4 to 1/3 cup extra-virgin olive oil, 60–80ml
3/4 teaspoon fine salt, plus more to taste
1/4 teaspoon black pepper
3 packed cups finely chopped parsley, about 90–120g chopped leaves and tender stems
2–3 firm Roma tomatoes, finely chopped and drained, about 250–300g
3–4 green onions or scallions, finely chopped, about 45–60g
1/4 to 1/3 cup finely chopped fresh mint, about 10–15g
1 cup finely diced English cucumber, about 120–150g, optional
Romaine lettuce leaves, optional, for serving
Instructions
Wash and dry the herbs. Wash the parsley and mint, then dry very well in a salad spinner or with clean kitchen towels.
Soak the bulgur. In a large bowl, whisk lemon juice, 1/4 cup olive oil, salt, and pepper. Stir in the fine bulgur and let it sit for 20–30 minutes while you chop the herbs and vegetables.
Chop the parsley. Finely chop the parsley by hand. Remove thick stems, but tender stems are fine if chopped small.
Prepare the vegetables. Finely chop the tomatoes, green onions, mint, and optional cucumber. Drain tomatoes and cucumber if they release a lot of liquid.
Mix the tabbouleh. Add the parsley, tomatoes, green onions, mint, and cucumber to the soaked bulgur. Toss gently until evenly combined.
Rest and adjust. Let the salad rest for 10 minutes. Taste and adjust with more salt, lemon juice, or olive oil as needed. Use the remaining olive oil only if the salad needs a softer finish.
Serve. Serve chilled or at room temperature, with romaine leaves, pita, hummus, falafel, or grilled dishes.
Notes
Fine #1 bulgur gives the best no-cook texture for tabbouleh.
If using medium or coarse bulgur, soak it separately in hot water, drain very well, and cool completely before mixing.
Dry the parsley thoroughly before chopping. Wet herbs make watery tabbouleh.
Drain juicy tomatoes and cucumber before adding them to the bowl.
For a stricter parsley-heavy version, skip the cucumber.
For gluten-free tabbouleh, use cooked and cooled quinoa or finely riced cauliflower instead of bulgur.
Best texture is the same day, but leftovers keep 2–3 days in the fridge.
This tabbouleh recipe card keeps the essentials together: 6 servings, about 40 minutes, no-cook fine bulgur, fresh herbs, lemon dressing, and a short rest before serving.
Make-Ahead and Storage
Although tabbouleh can be made ahead, it is best when the herbs still taste fresh and lively. If you want to prepare it early, wash and dry the herbs first, then chop and mix closer to serving.
For the freshest texture, keep the chopped herbs, drained tomatoes, and soaked bulgur separate until close to serving, then toss and adjust the seasoning. This is especially helpful if you are making tabbouleh for guests.
Best same day: Tabbouleh has the brightest texture and flavor within a few hours of mixing.
Best for guests: Mix the salad within 30–60 minutes of serving for the freshest herb texture.
Best for leftovers: Store dressed tabbouleh in an airtight container for 2–3 days, knowing the herbs will soften over time.
Make-ahead tip: Wash and dry parsley up to 1 day ahead. Keep it wrapped in towels in the fridge.
Do not freeze: The tomatoes and herbs turn limp and watery after thawing.
For make-ahead tabbouleh, prep the herbs, tomatoes, and fine bulgur separately. Then mix close to serving and store leftovers in the fridge for 2–3 days.
If the salad tastes dull after sitting, refresh it with a small squeeze of lemon juice, a pinch of salt, and a drizzle of olive oil before serving. This brings back brightness without needing a full new batch of dressing.
What to Serve with Tabbouleh
Tabbouleh works as a salad, side dish, or part of a mezze spread. Its bright lemon and herb flavor makes it especially good beside richer dishes.
Hummus and warm pita
Falafel
Grilled chicken, kebabs, or kofta
Lentil soup
Stuffed pita wraps
Roasted eggplant or grilled vegetables
Romaine lettuce leaves for scooping
Rice bowls or grain bowls
Tabbouleh works well with mezze because its lemony herbs cut through richer foods. Serve it with pita, hummus, falafel, grilled dishes, pickles, or crisp lettuce leaves.
For a full mezze-style meal, serve tabbouleh with warm pita, hummus, pickles, and homemade falafel. If you are building a falafel, shawarma, or pita spread, a spoon of amba sauce adds a sharp, tangy contrast beside the fresh herbs.
For grilled chicken, wraps, or pita plates, tabbouleh also works well with a cooling tzatziki sauce. You can also spoon it into pita pockets with hummus, cucumber, and crisp vegetables, similar to this hummus veggie sandwich.
For a lighter plate, serve tabbouleh with hummus, raw vegetables, olives, and pita. For a fuller dinner, pair it with grilled chicken or lamb and a creamy yogurt sauce.
Tabbouleh Variations
Once you understand the base recipe for tabbouleh, the variations are easy. For example, you can swap bulgur for quinoa, cauliflower rice, or couscous while keeping the herbs generous, the pieces small, and the lemon-olive oil balance bright.
Once the parsley-heavy base is clear, tabbouleh variations are easy. Use quinoa for gluten-free tabbouleh, cauliflower rice for grain-free tabbouleh, or couscous for a quick variation.
Quinoa Tabbouleh
Use cooked and fully cooled quinoa instead of bulgur. Quinoa tabbouleh is the best gluten-free version because quinoa has a small grain size and absorbs lemon dressing well. Keep the parsley generous so it still tastes like tabbouleh, not just quinoa salad.
If you are using quinoa for meal prep, this quinoa and chickpea salad idea shows how well quinoa works with cucumber, tomatoes, red onion, and lemon-tahini dressing.
Cauliflower Tabbouleh
Use finely riced cauliflower instead of bulgur for a grain-free version. Raw cauliflower rice works well if it is chopped small and not watery. For a softer texture, salt it lightly, let it sit for a few minutes, then squeeze out extra moisture before mixing.
Couscous Tabbouleh
Couscous tabbouleh is a quick variation, but it is not the traditional version. Cook or soak the couscous, fluff it, cool it completely, then mix with the herbs, tomato, lemon, and olive oil.
No-Bulgur Tabbouleh
You can skip the bulgur for a lighter herb salad. The texture will be less traditional, but it works if you want a very fresh salad with parsley, tomato, mint, lemon, and olive oil.
Extra-Lemony Tabbouleh
If you like a sharper salad, add another tablespoon of lemon juice after the salad rests. Add it gradually because too much lemon can overpower the herbs.
Tabbouleh FAQs
Is tabbouleh the same as tabouli?
Yes. Tabbouleh and tabouli usually mean the same parsley, tomato, mint, bulgur, lemon, and olive oil salad. The difference is mostly spelling.
What is tabbouleh made of?
Tabbouleh is made with parsley, tomatoes, mint, green onions, fine bulgur, lemon juice, olive oil, salt, and pepper. Some versions also include cucumber.
What kind of bulgur is best for tabbouleh?
Fine #1 bulgur is best for tabbouleh because it softens quickly and does not overpower the parsley. Medium or coarse bulgur can work, but it usually needs hot water and gives the salad a heavier texture.
Do you cook bulgur for tabbouleh?
You do not need to cook fine bulgur for tabbouleh. In this recipe, it softens in the lemon-olive oil dressing while you chop the herbs and vegetables. Medium or coarse bulgur should be hot-soaked or cooked, then cooled before mixing.
Can I make tabbouleh without bulgur?
Yes. You can leave out the bulgur for a lighter parsley salad, but the texture will be less traditional. If you want a gluten-free version with a similar small-grain feel, cooked and cooled quinoa is the best swap.
Is tabbouleh gluten-free?
Classic tabbouleh is not gluten-free because bulgur is made from wheat. For a gluten-free version, use cooked quinoa or cauliflower rice instead of bulgur.
Is tabbouleh vegan?
Yes. Traditional tabbouleh ingredients are plant-based, so the salad is naturally vegan and dairy-free.
Is tabbouleh healthy?
Tabbouleh is a fresh, herb- and vegetable-heavy salad made with parsley, tomatoes, mint, lemon juice, olive oil, and a small amount of bulgur. It can fit well into a balanced Mediterranean-style meal with vegetables, legumes, whole grains, and olive oil. For broader context, Harvard’s Nutrition Source has a useful overview of the Mediterranean diet pattern.
Why is my tabbouleh watery?
Tabbouleh becomes watery when the parsley is wet, the tomatoes are too juicy, the cucumber is not drained, or too much dressing is added. Dry the herbs well, drain juicy vegetables, and let the salad rest before adjusting the final seasoning.
Should tabbouleh be served cold?
Tabbouleh can be served chilled or at room temperature. It tastes best after a short rest, but it should not sit out for too long because the herbs soften and the tomatoes release more liquid.
How long should tabbouleh rest before serving?
Let tabbouleh rest for about 10–30 minutes after mixing. That gives the bulgur time to finish softening and lets the lemon, olive oil, herbs, and tomatoes settle into a brighter flavor.
Can I make tabbouleh ahead of time?
Yes, but it tastes freshest the same day. You can wash and dry the herbs ahead of time, then chop and mix the salad closer to serving. Leftovers keep 2–3 days in the fridge.
Can I freeze tabbouleh?
No. Tabbouleh does not freeze well because the herbs and tomatoes become limp and watery after thawing.
Can I use quinoa instead of bulgur?
Yes. Use cooked and cooled quinoa instead of bulgur for a gluten-free quinoa tabbouleh. Keep the herbs generous so the salad still tastes fresh and parsley-forward.
Can I use couscous instead of bulgur?
Yes, but couscous tabbouleh is a quick variation rather than the classic version. Cook or soak the couscous, cool it completely, then mix with the herbs, tomatoes, lemon, and olive oil.
Can I use cauliflower rice instead of bulgur?
Yes. Finely riced cauliflower makes a grain-free tabbouleh variation. Use it raw for crunch or salt and drain it lightly for a softer texture.
Should I use curly parsley or flat-leaf parsley?
Both can work. Curly parsley gives a fluffy, traditional-looking texture, while flat-leaf parsley has a stronger flavor and is easier to chop. Whichever you use, dry it very well before chopping.
Can I chop parsley in a food processor?
You can, but hand-chopping gives better texture. If using a food processor, pulse carefully and stop before the parsley becomes wet or pasty.
Before serving, taste the rested tabbouleh one last time. Salt fixes flat flavor, lemon adds brightness, and a small drizzle of olive oil softens sharp edges.
Tabbouleh Recipe Tips to Remember
For the best tabbouleh, keep the salad parsley-first, use fine bulgur, dry the herbs thoroughly, drain juicy tomatoes, and taste after the salad rests. Those small details make the difference between a fresh, bright herb salad and a watery, grain-heavy bowl.
This cucumber salad recipe is cold, crisp, tangy, and exactly the kind of no-cook side dish you want when a meal needs something fresh. Thin cucumber slices, red onion, fresh dill, and a bright vinegar dressing come together quickly, without mayo, heavy cream, or cooking.
Ideally, the finished salad should taste cool and snappy, with enough vinegar to wake up the cucumbers but not so much that every bite feels sharp.
Because the method is flexible, you can make it in 10 minutes when dinner is already on the table, chill it for 15–20 minutes when the dressing needs time to settle into the cucumbers, or salt and drain the slices first for a crisper make-ahead version.
Although the simple version is refreshing on its own, the recipe gets better when you understand the small details: which cucumbers to choose, how thin to slice them, when to peel or seed them, what vinegar tastes best, and how to keep the salad from turning watery in the fridge.
Use the quick sections to make the salad now, then use the deeper notes to adjust the dressing, keep the cucumbers crisp, and make it ahead without losing texture.
At a glance: Start with 2 large cucumbers, ½ red onion, ¼ cup vinegar, 1 tablespoon sugar or honey, ½ teaspoon salt, black pepper, and fresh dill. Toss and serve right away for speed, chill 15–20 minutes for better flavor, or salt and drain the cucumbers first for the crispest make-ahead version.
To make an easy cucumber salad recipe, thinly slice 2 large English cucumbers and ½ red onion. Toss them with ¼ cup vinegar, 1 tablespoon sugar or honey, ½ teaspoon salt, black pepper, and 2–3 tablespoons fresh dill. Serve the salad right away for maximum crunch, or chill it for 15–20 minutes for better flavor.
If you need speed, toss and serve right away; for better flavor, chill briefly, and for the crispest make-ahead cucumber salad, salt and drain the slices first.
For the crispest version, especially when making the salad ahead, salt the cucumber slices first. Let them drain for 20–30 minutes, pat them dry, and then add the dressing. This removes excess water before it can thin out the vinegar dressing.
Version
Best for
Total time
Fast cucumber salad
Last-minute side dish
10 minutes
Best-flavor cucumber salad
Fresh salad with better dressing absorption
25–30 minutes
Crispest make-ahead cucumber salad
Parties, picnics, meal prep, less watery texture
40–50 minutes
Why This Cucumber Salad Works
This recipe works because the flavor stays clean and balanced. Thin cucumber slices soak up the dressing quickly, while red onion adds bite, dill brings freshness, and a little sweetness softens the vinegar without making the salad taste sugary.
Thin slices absorb the dressing quickly, while onion, dill, and a little sweetness keep the vinegar bright without making the salad harsh.
The recipe also gives you control over texture. For the fastest version, toss and serve. For better flavor, chill the salad briefly. When you need a snappier make-ahead texture, salt and drain the cucumber slices before dressing them.
That flexibility matters because cucumbers naturally release water after slicing. Instead of letting the dressing turn diluted, you can choose the method that fits your timing.
Cucumber Salad Ingredients
Cucumbers, onion, vinegar, dill, salt, pepper, and a small amount of sweetener do most of the work here. Still, each ingredient affects the final bite, so it helps to choose carefully.
Since the ingredient list is short, each choice matters: the cucumber brings crunch, the vinegar brings tang, and the dill keeps everything fresh.
Cucumbers
English cucumbers and Persian cucumbers are the easiest choices because they have thin skins, fewer seeds, and a clean crunch. Regular garden cucumbers also work, but they may need peeling, seeding, and salting when the skin is thick or the center is watery.
For the coldest, crunchiest salad, use chilled cucumbers straight from the fridge. Room-temperature cucumbers still work, though the finished salad will taste fresher after a short chill.
Onion
Red onion gives cucumber salad color and bite. Sweet onion or Vidalia onion tastes softer and more old-fashioned. White onion works especially well in cucumbers and onions in vinegar, while scallions are useful when you want a milder onion flavor.
If raw onion tastes too strong, soak the slices in cold water for 10 minutes, then drain them well. Alternatively, let the onion sit in the vinegar dressing for a few minutes before adding the cucumbers.
Vinegar
White wine vinegar is the best balanced first choice. Rice vinegar is milder and lightly sweet, while apple cider vinegar tastes fruitier and distilled white vinegar gives a sharper old-fashioned flavor. If you use distilled white vinegar, dilute it with a little water so the dressing does not overpower the cucumbers.
Sweetener
A small amount of sugar or honey balances the vinegar. In most batches, one tablespoon is enough. For no-sugar cucumber salad, skip the sweetener or use rice vinegar, which tastes gentler on its own.
Dill and Herbs
Fresh dill is the classic herb for cucumber dill salad. It tastes cool, grassy, and bright. Chives, parsley, or a little basil can also work, but dill gives this version its most familiar flavor.
If you only have dried dill, start with 1 teaspoon. Although fresh dill tastes brighter, dried dill is useful when you need a pantry-friendly version.
Salt and Pepper
Salt seasons the salad and helps manage water. For the fast version, use ½ teaspoon salt in the dressing. For the crispest version, salt the cucumbers separately, drain them, and season lightly at the end.
Optional Olive Oil
This cucumber vinegar salad is best without oil when you want the lightest, sharpest, most refreshing version. However, 1 tablespoon olive oil gives the dressing a rounder vinaigrette feel for a softer bite.
Cucumber Salad Dressing
The dressing should coat the cucumber slices lightly, so the salad tastes tangy, lightly sweet, and fresh rather than wet or heavy.
If you are not sure which vinegar to choose, start with white wine vinegar for balance, rice vinegar for a milder salad, or apple cider vinegar for a fruitier bite. The full vinegar comparison below gives you more options.
Simple Cucumber Salad Dressing Ratio
For every 2 large English cucumbers or 5–6 Persian cucumbers, use this simple dressing ratio:
Start with this cucumber salad dressing ratio, then fine-tune it after tossing because the cucumbers naturally soften the vinegar and loosen the seasoning balance.
Ingredient
Amount
Metric
Vinegar
¼ cup
60 ml
Sugar or honey
1 tablespoon
12–13 g sugar or about 21 g honey
Fine sea salt
½ teaspoon if not pre-salting
about 3 g
Black pepper
¼ teaspoon, or to taste
about 0.5 g
Fresh dill
2–3 tablespoons
about 3–6 g, loosely packed
Optional olive oil
1 tablespoon
15 ml
How to Adjust the Dressing
Problem
Fix
Sharp dressing
Balance it with 1–2 teaspoons sugar or honey.
Sweet dressing
Brighten it with 1–2 teaspoons vinegar.
Watery salad
First, drain excess liquid; then serve with tongs or a slotted spoon.
Salty salad
Add more sliced cucumber. If needed, briefly rinse drained cucumbers and pat them dry.
Flat flavor
Finish with more dill, black pepper, a splash of vinegar, or a squeeze of lemon.
Instead of starting over, fix the dressing in small steps: add sweetness for sharpness, vinegar for sweetness, or fresh dill and pepper when the salad tastes flat.
Equipment You Need
You do not need special equipment for this cucumber salad recipe, but the right tools make the texture easier to control, especially when you want very even slices or plan to salt and drain the cucumbers first.
You do not need special equipment, although a mandoline, colander, and tongs make even slicing, draining, and serving much easier.
Sharp knife or mandoline
Cutting board
Large mixing bowl
Small bowl or jar for the dressing
Colander or fine mesh strainer if salting the cucumbers
Tongs or a slotted spoon for serving
Use this base recipe when you want cucumber salad for a quick dinner, a picnic table, or a make-ahead meal. Keep the formula as your starting point, then adjust the vinegar, herbs, onion, and salting method as needed.
Use this recipe card when you want the full cucumber salad recipe in one glance, especially if you need the ingredient amounts, short method, and make-ahead note together.
Cucumber Salad Recipe Card
A crisp, no-cook cucumber salad with thin cucumbers, red onion, fresh dill, and a tangy vinegar dressing. Serve it right away, chill it briefly for better flavor, or salt the cucumbers first for the crispest make-ahead version.
Prep Time
10 minutes
Cook Time
0 minutes
Chill Time
15–20 minutes
Total Time
25–30 minutes
Servings
4 side servings or 6 small servings
Ingredients
2 large English cucumbers, about 600–680 g / 21–24 oz, thinly sliced, or 5–6 Persian cucumbers, about 600 g / 21 oz
½ small to medium red onion, about 50–75 g / 1.8–2.6 oz, very thinly sliced
¼ cup / 60 ml white wine vinegar, rice vinegar, or apple cider vinegar
Optional: 1 tablespoon / 15 ml olive oil for a softer vinaigrette
Optional: 1–2 tablespoons chopped chives or parsley
Salt note: Use ½ teaspoon salt for the regular version. If you salt and drain the cucumbers first, use 1 teaspoon salt for draining, then add extra salt to the dressing only after tasting.
Instructions: Best-Flavor Version
Slice the cucumbers about ⅛ inch / 3 mm thick. Slice the red onion very thinly.
In a small bowl or jar, mix the vinegar, sugar or honey, salt, black pepper, and dill. Add olive oil only if using.
Add the cucumbers and onion to a large bowl. Pour the dressing over the top.
Toss gently until the cucumber slices are evenly coated.
Chill for 15–20 minutes so the cucumbers absorb the dressing.
Toss once more, then taste and adjust with more vinegar, salt, pepper, or dill if needed.
Serve with tongs or a slotted spoon, leaving excess liquid behind in the bowl.
Fast 10-Minute Version
Slice the cucumbers and onion, mix the dressing, toss everything together, and serve immediately. The salad will taste lighter and crunchier, but less marinated.
Crispest Make-Ahead Version
Toss the sliced cucumbers with 1 teaspoon fine sea salt.
Place them in a colander or fine mesh strainer for 20–30 minutes.
Pat them dry with a clean towel or paper towels.
Mix the dressing without adding the extra ½ teaspoon salt at first.
Toss the drained cucumbers with onion, dressing, dill, and pepper.
Taste and add salt only if needed.
Do not add the full dressing salt automatically after pre-salting; the cucumbers will already carry some salt.
Notes
This amount makes about 4 generous side servings or 6 smaller picnic-style servings.
Use English or Persian cucumbers for the easiest texture.
Use chilled cucumbers for the coldest, crunchiest salad.
Use white wine vinegar for the cleanest balanced flavor.
Use rice vinegar for a milder, slightly sweeter salad.
Use distilled white vinegar only if you like a sharper old-fashioned style; dilute it with water if needed.
For no-sugar cucumber salad, skip the sweetener or use rice vinegar.
For low-calorie cucumber salad, skip the optional oil.
Best eaten the same day, but leftovers keep 2–3 days in the fridge.
How to Make Cucumber Salad Step by Step
This recipe gives cucumber salad the best balance of speed, flavor, and texture because a short rest seasons the slices without turning them limp. You get a brighter salad without needing a long marinade.
This step overview helps you see the whole cucumber salad recipe at once, so the timing, chilling, and final serving steps make sense before you begin.
Step 1: Slice the Cucumbers
Wash and dry the cucumbers, then slice them about ⅛ inch / 3 mm thick. A mandoline gives the most even slices, although a sharp knife works well too. If you are using large garden cucumbers, peel them first if the skin is thick, then cut them lengthwise and scrape out the seeds if the center looks watery.
Even cucumber slices season more consistently; as a result, every bite has the same crunch, tang, and freshness.
Even slices matter because they help the salad marinate evenly. Very thin slices absorb flavor faster, while slightly thicker slices stay firmer.
Step 2: Slice the Onion Thinly
Thinly slice the red onion so it blends into the salad rather than overpowering it. If raw onion tastes too strong to you, soak the slices in cold water for 10 minutes, then drain and pat dry before adding them.
Thin onion slices blend into the salad better, whereas thick pieces can taste sharp and dominate the cucumbers.
That way, the onion keeps its crunch while losing some of its harsh bite.
Step 3: Mix the Dressing
In a small bowl or jar, combine the vinegar, sugar or honey, salt, black pepper, and fresh dill. Stir or shake until the sweetener is dissolved. If you prefer a rounder dressing, add the optional olive oil here.
Taste the dressing before tossing because it should seem slightly sharper at first; the cucumbers will soften it as they sit.
Taste the dressing before adding it to the vegetables. Ideally, it should taste slightly sharper and saltier than you want the finished salad to taste, because the cucumbers will dilute it a little as they rest.
Step 4: Toss the Cucumbers and Onion with the Dressing
Add the sliced cucumbers and onion to a large bowl, pour the dressing over the top, and toss gently until everything is evenly coated. Use your hands, salad tongs, or two large spoons so the slices stay intact.
Toss gently so the dressing coats the slices without bruising them or turning the salad watery too quickly.
At this point, the salad is already good enough to serve when you need a very fast version.
Step 5: Chill Briefly for Better Flavor
For the best everyday version, chill the salad for 15–20 minutes. That short rest helps the cucumber slices absorb the dressing and lets the onion mellow slightly.
A short 15–20 minute chill lets the vinegar dressing settle in, yet the cucumber salad still keeps its fresh crunch.
If you are in a rush, you can skip this and serve the salad right away. The texture will be a little crisper, while the flavor will be a little lighter.
Step 6: Taste and Adjust Before Serving
After the salad has rested, toss it once more and taste it again. Add a splash more vinegar if it needs brightness, a small pinch of salt if it tastes flat, or more dill if you want a fresher herbal note.
Once the salad rests, taste it again because the cucumbers release water and the balance may need a small final adjustment.
This second taste matters because the cucumber slices release water as they sit, which can change the balance of the dressing before serving.
Step 7: Serve with a Slotted Spoon or Tongs
Lift the salad out of the bowl with tongs or a slotted spoon instead of pouring everything out at once. That way, you leave behind excess liquid and the finished serving looks cleaner and tastes brighter.
Use tongs or a slotted spoon when serving so the salad tastes fresh on the plate instead of sitting in extra liquid.
Serve cold, ideally on the same day, for the best crunch.
Quick tip: If you are making this salad for dinner right now, the short-chill method is enough. If you are making it for a party or later in the day, salt and drain the cucumbers first.
Best Cucumbers for Cucumber Salad
The best cucumbers for cucumber salad are English cucumbers and Persian cucumbers. They are crisp, thin-skinned, and less seedy, so they can usually be sliced without peeling or seeding.
Garden cucumbers and regular slicing cucumbers can still make a good salad. However, because they are often thicker-skinned and more watery, they may need a little extra prep before they go into the bowl.
English and Persian cucumbers are the easiest for cucumber salad, although garden cucumbers still work when you peel, seed, or salt them to control excess water.
Cucumber type
Use it?
Peel?
Seed?
Salt/drain?
English cucumber
Best first choice
Usually no
No
Optional
Persian cucumber
Best crisp choice
No
No
Optional
Mini cucumber
Good choice
Usually no
No
Optional
Garden cucumber
Good if handled well
If thick or waxy
If seedy or watery
Yes, for best texture
Regular slicing cucumber
Works
Often yes
Often yes
Yes, especially for make-ahead
Kirby or pickling cucumber
Works, but firmer
Usually no
No
Optional
Should You Peel or Seed Cucumbers?
You do not need to peel English or Persian cucumbers unless the skin tastes bitter. Their skins are usually tender enough for salad.
Regular garden cucumbers are different. First, remove the peel if it feels thick, waxy, or tough. Next, if the center looks watery or full of large seeds, cut the cucumber lengthwise and scrape out the seeds with a small spoon. Then, slice the cucumber into half-moons.
Usually, thin-skinned cucumbers need little prep; however, thick-skinned or watery garden cucumbers may need peeling or seeding.
If a cucumber tastes very bitter, peeling can help slightly, but it may be better to use another cucumber. A harsh cucumber can overpower the clean vinegar dressing.
How Thin Should You Slice Cucumbers?
Slice thickness changes the whole salad. Very thin slices taste more marinated. Slightly thicker slices stay crunchier. For the best all-purpose cucumber salad, aim for about ⅛ inch / 3 mm.
Slice thickness changes the whole cucumber salad: thinner slices taste more marinated, while thicker slices stay crunchier.
Slice style
Approximate thickness
Best for
Paper-thin
1–2 mm
Quick marinated cucumber salad
Thin slices
⅛ inch / 3 mm
Best all-purpose cucumber salad
Crunchy slices
¼ inch / 6 mm
Immediate serving and extra crunch
Half-moons
⅛–¼ inch / 3–6 mm
Large garden cucumbers
Cubes
Small dice
Lunch bowls and less traditional versions
Mandoline note: A mandoline gives even slices, but always use the guard. Cucumbers become slippery once they start releasing moisture.
Should You Salt Cucumbers First?
You do not always need to salt cucumbers before making cucumber salad. For example, if you are serving the salad right away or chilling it for only 15–20 minutes, you can usually skip this step, especially with English or Persian cucumbers.
However, salting is worth it when you are making cucumber salad ahead, using watery garden cucumbers, or trying to keep the dressing from becoming diluted. Salt pulls excess water from the cucumber slices before they go into the salad, so the finished bowl tastes brighter instead of watered down. For a deeper look at the technique, see this guide on how to drain cucumbers.
Salting first matters most for make-ahead cucumber salad or watery cucumbers, whereas a quick same-day version often does fine without it.
How to Salt Cucumbers for Salad
Slice the cucumbers.
Toss them with 1 teaspoon fine sea salt.
Place them in a colander or fine mesh strainer.
Let them drain for 20–30 minutes.
Pat them dry with a clean towel or paper towels.
Toss with dressing, then taste before adding more salt.
For a crisper make-ahead cucumber salad, salt the slices, drain them for 20–30 minutes, and pat them dry before dressing so the bowl stays bright instead of diluted.
After salting, do not squeeze the cucumber slices aggressively. Pat them dry instead, since pressing too hard can bruise the slices and make the texture less pleasant.
Situation
Salt first?
Serving immediately
Optional
Chilling 15–20 minutes
Optional
Making ahead
Yes
Using garden cucumbers
Yes
Using English or Persian cucumbers
Optional
Wanting the crispest texture
Yes
How to Keep Cucumber Salad from Getting Watery or Soggy
Cucumber salad gets soggy when the cucumber slices release too much water into the dressing. Fortunately, the fix is simple: manage the water before serving, especially if the salad needs to sit.
Watery cucumber salad is usually a timing or cucumber-choice issue, so draining well, serving with tongs, and keeping the dressing separate can all help preserve texture.
Problem
Best fix
Watery cucumbers
Salt and drain the sliced cucumbers before dressing.
Too much liquid in the bowl
Serve with tongs or a slotted spoon, leaving liquid behind.
Making cucumber salad ahead
Keep the dressing separate or salt/drain the cucumbers first.
Using garden cucumbers
Peel if thick-skinned, seed if watery, and salt before dressing.
Leftovers softened overnight
Drain excess liquid and refresh with dill, pepper, or a splash of vinegar.
Salad became too salty
Add more cucumber, or briefly rinse drained cucumbers and pat them dry.
Common Cucumber Salad Mistakes to Avoid
Slicing too thick for a quick salad: thick slices need more time to absorb dressing.
Dressing too early for make-ahead: cucumbers release water as they sit, so keep dressing separate if making the salad the day before.
Adding all the salt twice: if you pre-salt the cucumbers, taste before salting the dressing.
Pouring all the bowl liquid onto the plate: serve with tongs or a slotted spoon for a cleaner salad.
Using harsh vinegar without balancing it: dilute strong white vinegar or add a little sweetener.
Small technique changes make a big difference: slice thinner, salt only once, and serve without pouring all the liquid onto the plate.
How Long Should Cucumber Salad Sit Before Serving?
Cucumber salad can be eaten right away, but a short rest improves the flavor. As it sits longer, it becomes more marinated and less crunchy.
The longer cucumber salad sits, the more marinated it becomes, so serve it sooner for crunch or later for a softer, more vinegary bite.
Timing
Result
Serve immediately
Crispest bite, lighter flavor
15–20 minutes
Best fresh-salad balance
1 hour
More marinated, stronger vinegar flavor
Several hours
Good if cucumbers were salted and drained first
Overnight
Softer texture, still usable for vinegar-style salad
Next day
Good flavor, less crunch
Best Vinegar for Cucumber Salad
The best vinegar for cucumber salad depends on whether you want the dressing balanced, mild, fruity, or old-fashioned. White wine vinegar is the safest first choice because it tastes bright without becoming too sharp.
White wine vinegar gives the most balanced classic flavor, while rice vinegar is softer and distilled white vinegar tastes sharper and more old-fashioned.
Vinegar
Flavor
Best use
White wine vinegar
Clean, bright, balanced
Best first choice for classic cucumber salad
Rice vinegar
Mild, lightly sweet
Gentler salad and no-sugar versions
Apple cider vinegar
Fruity, sharper
Rustic tangy cucumber salad
Distilled white vinegar
Strong, sharp, old-fashioned
Cucumbers and onions in vinegar; best diluted with water
Champagne vinegar
Delicate, elegant
Lighter premium variation
Lemon juice
Fresh and citrusy
Works, but tastes less like classic vinegar cucumber salad
Old-Fashioned Cucumbers and Onions in Vinegar
Old-fashioned cucumbers and onions in vinegar are slightly different from the fresh cucumber salad recipe above. Instead of a light toss, the cucumbers and onions sit in a vinegar-water-sugar brine until they taste more marinated.
Think of this as a brinier, more marinated cucumber onion salad, not a shelf-stable pickle. It still belongs in the fridge and is best eaten within a few days.
This old-fashioned cucumber onion salad is brinier than the fresh version, but it still belongs in the fridge and is not a shelf-stable pickle.
This version is especially good with barbecue, pulled pork, burgers, sandwiches, grilled chicken, and summer cookout meals. It is also useful when you want a sharper, pickle-like cucumber side.
Old-Fashioned Vinegar Cucumber Salad Formula
½ cup distilled white vinegar
½ cup water
1–2 tablespoons sugar
1 teaspoon salt
2 large cucumbers or 5–6 small cucumbers, sliced
½ sweet onion or white onion, thinly sliced
Optional: garlic, dill, celery seed, or mustard seed
Mix the vinegar, water, sugar, and salt until dissolved. Add the cucumbers and onion, then refrigerate for at least 1 hour. Serve with a slotted spoon because this style is intentionally brinier than the fresh cucumber salad recipe.
For the best texture, eat this old-fashioned version within 2–3 days. The flavor gets stronger as it sits, but the cucumber slices soften over time.
Easy Cucumber Salad Variations
Once you know the basic cucumber salad formula, you can adjust it in several directions without losing the fresh, cooling character of the dish. Use the table as a quick map, then read the notes below for the variations that need extra handling.
Once the base cucumber salad works for you, it becomes easy to branch into creamy, tomato, sesame, spicy, ranch, or old-fashioned vinegar versions.
Variation
How to adjust it
Cucumber onion salad
Use extra red onion, sweet onion, or white onion.
Cucumber dill salad
Increase fresh dill to 3–4 tablespoons.
Cucumber vinegar salad
Skip the oil and keep the dressing vinegar-forward.
No-sugar cucumber salad
Skip sweetener or use mild rice vinegar.
Low-calorie cucumber salad
Use no oil and reduce or skip the sugar.
Creamy cucumber salad
Use sour cream, yogurt, or mayo.
Cucumber tomato salad
Add tomatoes shortly before serving because they release juice.
Asian cucumber salad
Use rice vinegar, sesame, soy sauce, ginger, and scallions.
Spicy cucumber salad
Add chili flakes, fresh chili, chili crisp, or chili oil.
German cucumber salad / Gurkensalat
Use dill and either a vinegar dressing or a creamy sour cream-style dressing.
Cucumber Onion Salad
For a stronger cucumber onion salad, increase the onion to ¾ cup and use red onion for bite, sweet onion for a softer flavor, or white onion for an old-fashioned vinegar version. Slice the onion very thinly so it blends into the cucumbers instead of taking over the bowl.
If the onion tastes too sharp, soak the slices in cold water for 10 minutes or let them sit in the vinegar dressing for a few minutes before adding the cucumbers.
Cucumber Tomato Salad
For cucumber tomato salad, add 1½–2 cups halved cherry tomatoes or chopped ripe tomatoes to the base salad. Add them shortly before serving because tomatoes release juice quickly and can soften the dressing.
This version works best with red onion, dill, parsley, or basil. If the tomatoes are very juicy, serve with a slotted spoon and refresh the bowl with a little extra vinegar, salt, and pepper.
Creamy Cucumber Salad
For creamy cucumber salad, replace the vinegar dressing with ½ cup sour cream, Greek yogurt, or a yogurt-mayo mix. Then add 1 tablespoon vinegar or lemon juice, 1 small grated garlic clove, 2–3 tablespoons dill, salt, and black pepper.
Because creamy dressings loosen as cucumbers release water, salt and drain the slices first for the best texture. For a yogurt-cucumber direction, see this Greek tzatziki sauce recipe.
Asian Cucumber Salad
For Asian cucumber salad, use rice vinegar instead of white wine vinegar, then add 1 tablespoon soy sauce, 1 tablespoon toasted sesame oil, 1 teaspoon grated ginger, 1 small garlic clove, scallions, and sesame seeds.
This variation works best with Persian or English cucumbers and a short chill. If you want a spicy cucumber salad, add chili oil, chili crisp, or red pepper flakes after tossing.
Spicy Cucumber Salad
For spicy cucumber salad, keep the base vinegar dressing and add red pepper flakes, sliced fresh chili, chili oil, or chili crisp. Start small, then taste again after 10 minutes because the heat spreads as the cucumbers sit.
For a more savory version, use rice vinegar, soy sauce, sesame oil, garlic, scallions, and sesame seeds instead of the classic dill dressing.
Korean Cucumber Salad
For Korean cucumber salad, use rice vinegar, sesame oil, soy sauce, garlic, scallions, sesame seeds, and gochugaru. Because the dressing is bold, keep the cucumber slices slightly thicker so the salad stays crunchy after tossing.
This version works especially well with rice bowls, grilled meats, tofu, noodles, and spicy meals because the cucumber keeps the salad cool while the dressing brings heat.
Japanese Cucumber Salad / Sunomono
For Japanese cucumber salad, keep the dressing lighter: rice vinegar, a small amount of sugar, a pinch of salt, and optional sesame seeds. Then slice the cucumbers very thinly and let them rest briefly so they soften just enough to absorb the dressing.
This version is cleaner and more delicate than spicy Asian or Korean cucumber salad. For that reason, avoid heavy garlic, chili oil, or strong herbs here.
Chinese Smashed Cucumber Salad
For Chinese smashed cucumber salad, lightly smash the cucumbers before cutting them into bite-size pieces. The cracked edges catch more dressing than smooth slices, which makes the salad taste bolder.
Use rice vinegar, soy sauce, sesame oil, garlic, a little sugar, chili oil, and sesame seeds. Serve this version soon after tossing so the cucumber pieces stay crisp.
Thai Cucumber Salad
For Thai cucumber salad, use rice vinegar, lime juice, a little sugar, sliced shallot or red onion, fresh chili, cilantro, and crushed roasted peanuts. If you are not keeping the salad vegetarian, a small splash of fish sauce can add depth.
This version works especially well with grilled foods, satay-style meals, fried snacks, rice bowls, and spicy mains because the salad tastes sweet, sharp, crunchy, and fresh at the same time.
Ranch Cucumber Salad
For ranch cucumber salad, toss sliced cucumbers with a creamy ranch-style dressing, extra dill, black pepper, and red onion or scallions. Serve it soon after mixing because creamy dressings loosen as cucumbers release water.
For a lighter ranch-style recipe, use Greek yogurt, lemon juice, garlic powder, onion powder, dill, parsley, salt, and pepper instead of bottled dressing.
German Cucumber Salad / Gurkensalat
For German cucumber salad, keep the dill but choose either a light vinegar dressing or a creamy sour cream-style dressing. Slice the cucumbers thinly, salt and drain them first if possible, then toss with dill, onion, vinegar or sour cream, salt, pepper, and a small amount of sugar if needed.
This version tastes softer and more old-fashioned than the Asian or spicy variations, so keep the seasoning simple and let the cucumber, dill, and tangy dressing lead.
Low-Calorie Cucumber Salad
For low-calorie cucumber salad, skip the olive oil and reduce or omit the sugar. Because rice vinegar tastes naturally milder, the dressing does not need as much sweetener to feel balanced.
Instead, add more dill, black pepper, lemon juice, scallions, or chili flakes when you want bigger flavor without making the dressing heavier.
If you want a more snack-style Indian salad with cucumber, onion, tomato, roasted peanuts, lemon, cumin, and chaat masala, try this crunchy tangy spicy salad.
Classic Add-Ins for Cucumber Salad
These add-ins keep the salad close to the classic cucumber salad lane. Use one or two at a time instead of crowding the bowl.
Add-ins work best in small amounts because garlic, chives, sesame, or mustard can deepen the flavor without covering up the cucumber itself.
Garlic: for a sharper dressing.
Celery seed: for old-fashioned deli-style flavor.
Mustard seed: for a pickle-like note.
Dijon mustard: for a more vinaigrette-style dressing.
Chives: for mild onion flavor.
Parsley: for a cleaner herbal flavor.
Red pepper flakes: for gentle heat.
Sesame seeds: for light crunch, though the flavor starts leaning Asian.
What to Serve with Cucumber Salad
Cucumber salad works especially well next to rich, spicy, smoky, grilled, or fried foods because it brings coolness and acidity. It can also act like a quick pickle-style topping when you want crunch without making actual pickles.
Because cucumber salad is cool, crisp, and tangy, it balances richer foods like burgers, barbecue, grilled chicken, falafel, and spicy meals.
For example, it works especially well beside air fryer burgers, where the cool vinegar crunch balances the richness of the patty and cheese. It also makes sense with sandwiches, including a chicken salad sandwich, because the tangy cucumbers cut through creamy fillings.
For a fuller cookout or picnic table, pair this crisp cucumber salad with a heartier side from MasalaMonk’s potato salad recipe guide. The fresh vinegar crunch also works well beside other cold picnic sides.
It also works well with pita meals, wraps, and homemade falafel.
Grilled chicken
Salmon or other fish
Barbecue and pulled pork
Rice bowls
Spicy curries
Dal and rice
Roti or paratha meals
As a pickle-like topping for sandwiches
How to Store Cucumber Salad
This recipe tastes best the day the cucumber salad is made because the slices soften as they sit in the dressing. For whole cucumbers before you slice them, Purdue Extension has practical cucumber storage guidance; once the salad is sliced and dressed, however, it is best eaten sooner for texture.
Cucumber salad is best on day one, although airtight storage and a quick drain before serving can still keep leftovers worth eating for another day or two.
Storage need
Best guidance
Best texture
Eat the same day.
Good leftovers
Store up to 2 days in the fridge.
Still usable
Up to 3 days for vinegar cucumber salad, though softer.
Container
Use an airtight container.
Before serving leftovers
Drain excess liquid and refresh with dill, pepper, or vinegar.
Freezing
Do not freeze; cucumbers turn mushy.
Can You Make Cucumber Salad Ahead?
Yes, you can make cucumber salad ahead, but the best method depends on how far ahead you are preparing it. For the crispest texture, keep the cucumbers and dressing separate until shortly before serving. It can also work as a fresh side for high-protein Indian vegetarian meal prep, especially when you want something cool and sharp beside richer components.
For the best make-ahead cucumber salad, prep the cucumbers and dressing separately, then toss them closer to serving so the slices stay crisp longer.
Make-ahead need
Best method
1–2 hours ahead
Salt and drain cucumbers if possible, then dress.
Same day
Dress and chill, then serve with tongs or a slotted spoon.
Next day
Keep sliced cucumbers/onion and dressing separate.
Meal prep
Slice cucumbers and onion, store dressing separately, and toss before eating.
Dressing ahead
Mix vinegar, sweetener, salt, pepper, and optional oil in a jar 4–5 days ahead. Add dill closer to serving.
Diet Notes: Low-Calorie, Keto, Vegan, Gluten-Free, and No Sugar
This vinegar cucumber salad is naturally light because it is built around cucumbers, herbs, and a simple dressing instead of mayo or cream. A few small swaps can also make it fit different preferences without changing the basic recipe.
This cucumber salad stays flexible because you can skip oil, adjust the sweetener, or keep it mayo-free while still holding onto the same fresh, crisp texture.
Low-calorie cucumber salad: skip the optional olive oil and reduce or skip the sugar.
No-sugar cucumber salad: use rice vinegar and leave out the sweetener, or add only a tiny pinch.
Vegan cucumber salad: use sugar, maple syrup, or agave instead of honey.
Gluten-free cucumber salad: the recipe is naturally gluten-free if you use plain vinegar and check packaged ingredients.
Keto or low-carb cucumber salad: use a keto-friendly sweetener such as monk fruit or erythritol, or skip the sweetener.
No-mayo cucumber salad: this recipe is already mayo-free.
This is the texture to aim for: glossy cucumber slices, fresh dill, thin onion, and just enough dressing to coat the salad without pooling at the bottom.
Do you peel cucumbers for cucumber salad?
You do not need to peel English or Persian cucumbers because their skins are thin. Peel regular garden cucumbers if the skin is thick, waxy, tough, or bitter.
What cucumber is best for cucumber salad?
English cucumbers are the best all-purpose choice. Persian cucumbers are also excellent because they are small, crisp, and thin-skinned. Garden cucumbers work well if you peel, seed, and salt them when needed.
Should you seed cucumbers for cucumber salad?
Seed cucumbers if the center is watery or full of large seeds. English and Persian cucumbers usually do not need seeding, but regular garden cucumbers often benefit from it.
How thin should cucumbers be sliced?
For the best all-purpose cucumber salad, slice cucumbers about ⅛ inch / 3 mm thick. Slice them thinner for a more marinated salad, or thicker if you want more crunch.
Should you salt cucumbers before making cucumber salad?
Salt cucumbers first if you are making the salad ahead, using watery garden cucumbers, or trying to prevent a diluted dressing. If you are serving it right away, salting is optional.
How do you keep cucumber salad from getting watery?
Salt and drain the cucumber slices for 20–30 minutes, then pat them dry before adding dressing. Also, serve the salad with tongs or a slotted spoon so extra liquid stays behind in the bowl.
What vinegar is best for cucumber salad?
White wine vinegar is the best balanced choice. Rice vinegar is milder, apple cider vinegar is fruitier, and distilled white vinegar gives a sharper old-fashioned flavor when diluted with water.
Can I make cucumber salad without sugar?
Yes. Skip the sugar completely or use rice vinegar for a milder dressing. You can also use a small amount of monk fruit, erythritol, maple syrup, or agave depending on your preference.
Can I use dried dill instead of fresh dill?
Yes, but use less. Start with 1 teaspoon dried dill for this recipe, then add more only if needed. Fresh dill tastes brighter and is better when available.
How long does cucumber salad last in the fridge?
This salad is best the day it is made. However, the cucumbers can still hold up for about 2 days, and leftovers may be usable up to 3 days, although the texture softens over time.
Can cucumber salad be made ahead?
Yes. For the best make-ahead cucumber salad, keep the dressing separate or salt and drain the cucumbers before dressing them. Toss everything 15–20 minutes before serving when possible.
Can you freeze cucumber salad?
No. Cucumber salad does not freeze well because cucumbers become soft and watery after thawing.
What onion is best for cucumber salad?
Red onion is best for color and bite. Sweet onion is best for a milder old-fashioned cucumber salad. White onion works well in cucumbers and onions in vinegar.
Is cucumber salad healthy?
Vinegar cucumber salad is a light, hydrating side dish, especially when made without oil or mayo. To keep it lighter, reduce the sugar and skip the optional olive oil.
Is cucumber salad the same as pickled cucumbers?
No. Cucumber salad is usually a fresh side dish tossed with vinegar dressing and eaten soon. Pickled cucumbers sit in a stronger brine and are meant to taste more preserved or pickle-like.
There are some foods that feel bigger than the sum of their ingredients. Falafel is one of them. At a glance, a falafel recipe seems humble enough: chickpeas, herbs, onion, garlic, spices, and a little patience. Yet when everything comes together properly, the result is far more memorable than that short ingredient list suggests. A really good falafel has a crisp, deeply golden shell, a tender green center, and the kind of savoury, herb-packed character that makes one bite lead to another before you have even reached for the sauce.
That contrast is exactly why a proper falafel recipe deserves more than a quick set of instructions. It helps to understand what falafel is, why some versions turn light while others become heavy, why soaked dried chickpeas behave differently from canned chickpeas, and how the cooking method changes the final texture. Once those pieces fall into place, making falafel at home becomes less mysterious and much more rewarding.
Why a homemade falafel recipe can feel intimidating at first
For many home cooks, falafel falls into that frustrating category of dishes they happily order but hesitate to make themselves. One person worries about dealing with hot oil, while another is put off by the fear of a dense or crumbly result. Quite often, the concern is that the mixture will turn bland, fall apart in the pan, or end up pasty rather than light. There is also the lingering question of method: does an authentic falafel recipe really need deep frying, or can air fryer falafel and baked falafel still be crisp, satisfying, and fully worth making?
Then again, the hesitation does not only come from technique. Plenty of people also wonder whether a chickpea falafel recipe made with canned chickpeas can ever be as good as one made with soaked dried chickpeas. Others are unsure about the herbs, the spices, or the right sauce to serve alongside the final plate. Once all those questions pile up, a dish that sounds simple in theory can start feeling strangely complicated in practice.
A great falafel recipe is easier to understand once the biggest choices are clear from the start. This opening guide highlights the best base for strong texture, the coarse mixture that keeps falafel light instead of dense, the three main cooking routes, and the simple plate elements that make the final meal feel complete. It works as a quick visual roadmap for the rest of the post while still showing the crisp shell, green center, and contrast that make homemade falafel worth getting right.
What this falafel recipe guide covers
This guide brings all of that together in one place. It begins with the classic foundations, moves through the ingredient choices that matter most, explains how to make falafel from scratch, and then walks through fried, air fryer, and baked options with the kind of detail that helps in a real kitchen. Along the way, it also makes room for serving ideas, falafel sauces, pita and wrap combinations, bowl variations, canned chickpea options, make-ahead advice, and the troubleshooting that turns a frustrating first attempt into a dependable homemade meal.
Falafel is widely understood as a Middle Eastern dish made from chickpeas, fava beans, or both, shaped and cooked until crisp, and often served with pita, salad, and tahini. It is also often linked to Egypt in origin discussions, although it now belongs to a much broader and richly shared regional story. If you enjoy food history, both Britannica’s overview of falafel and its notes on daily life and cuisine in Egypt give helpful background without getting in the way of dinner.
Why falafel becomes a repeat recipe
Still, what matters most here is what happens on the plate. Whether you want an easy falafel recipe for a weekday lunch, a more traditional homemade falafel for a weekend spread, a healthy falafel option for meal prep, or a crisp falafel wrap with sauce and salad, the fundamentals remain the same. Start with the right base. Build in enough herbs and seasoning. Respect the texture. Choose the cooking method that suits the meal in front of you.
Once you do that, falafel stops feeling like a specialty and starts feeling like one of the smartest things you can cook with chickpeas.
What Is Falafel and What Makes a Good Falafel Recipe
Falafel is often described in a sentence or two, but it becomes much easier to appreciate once you think of it not as a single rigid recipe but as a family of preparations built around legumes, herbs, aromatics, and spice. The basic idea is straightforward: chickpeas or fava beans are combined with onion, garlic, parsley, cilantro, cumin, coriander, salt, and sometimes other seasonings, then shaped into balls or patties and cooked until crisp outside and tender inside.
Great falafel is built on contrast. The shell should be crisp and deeply golden rather than oily, the center should stay tender and green instead of turning dense, and the seasoning should feel lively enough that the chickpeas, herbs, and spices all register clearly in each bite. A guide like this helps readers understand what they are aiming for before they move deeper into the ingredient, texture, and cooking-method sections of the post.
What makes a good falafel recipe so satisfying
Still, that basic definition does not fully explain why falafel has such lasting appeal. At its best, it is earthy without feeling heavy, fragrant without becoming overpowering, and substantial without tipping into stodgy territory. Just as importantly, it slips easily into different kinds of meals. One day it becomes lunch tucked into pita, while on another it lands in a grain bowl, joins a mezze-style spread, or turns into a quick snack with tahini sauce on the side. Depending on how you serve it, falafel can feel firmly traditional or pleasantly flexible.
A good falafel recipe is also built around contrast. The shell should be crisp rather than oily. The center should be tender and herb-flecked rather than pasty. The chickpeas should still feel like chickpeas, yet the mixture should be processed enough to hold together with confidence. In other words, the pleasure of falafel comes not from one single element but from the way texture, aroma, seasoning, and serving all work together.
Chickpeas, fava beans, and authentic falafel variation
Because falafel has spread so widely across kitchens, restaurants, and home tables, there is more than one accepted version. Some cooks build an authentic falafel recipe around chickpeas. Others lean toward fava beans. Some make small balls. Others prefer patties. Some stay very close to a classic seasoning profile, while others add chillies, sesame seeds, or regional twists. What ties these approaches together is the pursuit of that unmistakable texture: crisp shell, soft center, lively flavour.
That broader view matters because people often search for falafel as though there is only one correct version. In reality, there is a core identity, but there is also room for regional nuance. A chickpea falafel recipe may be the most familiar style in many kitchens, whereas a broad bean falafel recipe may feel more connected to Egyptian tradition. Both belong to the wider falafel story.
Why homemade falafel can surprise you
That is also why homemade falafel can be such a surprise if your main reference point is dry takeaway falafel. When it is fresh and properly seasoned, it tastes greener, brighter, warmer, and more alive. The herbs are more pronounced. The crust is more delicate. The interior has more nuance. In other words, a good homemade falafel recipe does not simply recreate something familiar. It can completely change how you think about the dish.
Falafel Recipe Ingredients: What Falafel Is Made Of
At its heart, falafel relies on a handful of ingredients that each play a distinct role. The list is not long, yet the balance is everything.
This falafel ingredient guide shows how a great falafel recipe is built: dried chickpeas for structure, parsley and cilantro for the fresh green center, onion and garlic for savoury depth, and cumin, coriander, and black pepper for warm spice. It also highlights chickpea flour as an optional helper when the mixture needs a little extra support. Use this card to quickly understand what gives homemade falafel its crisp exterior, flavorful interior, and distinctive texture before moving into the step-by-step method.
The best chickpeas for a falafel recipe
Chickpeas are the base most people have in mind when they picture falafel. They bring body, earthy flavour, and enough structure to create the right interior once processed properly. For a traditional falafel recipe, dried chickpeas are soaked and used raw rather than boiled first. That step matters more than it may seem, because their firmness affects both texture and how the mixture holds together.
A chickpea falafel recipe made this way usually has the most satisfying interior. The chickpeas stay structured, the mixture remains textured, and the final falafel cooks into something crisp outside and tender inside. By contrast, softer cooked chickpeas move much more quickly toward a paste.
The aromatics
Onion and garlic build the savoury backbone. Without them, the mixture can taste flat and timid. They also contribute a little moisture, which is helpful in moderation and troublesome in excess. That is one reason why the exact balance of onion, garlic, and herbs matters so much.
Too much onion can loosen the mixture more than you expect, especially if the onion is watery. Too little garlic, meanwhile, can leave the final falafel feeling mild rather than warmly savoury. The aim is not sharpness for its own sake, but depth.
The herbs that lift a homemade falafel recipe
Parsley and cilantro are not decorative extras. They are central to the flavour and appearance of falafel. They create that fresh, green interior that sets a truly good falafel apart from a beige, dense one. If you have ever bitten into a falafel that felt oddly dull, the herb ratio was often part of the problem.
Parsley brings clean freshness, while cilantro adds brightness and a slightly sharper herbal note. If you prefer less cilantro, it is usually better to replace it with more parsley than to reduce the herbs overall. Otherwise, the mixture can lose the lively quality that makes falafel feel fresh rather than heavy.
The spices behind an authentic falafel recipe
Cumin and coriander are the classic pair. Cumin adds warmth and depth, while coriander lifts the flavour and keeps the mixture from leaning too heavily into earthiness alone. Black pepper appears often. So does a little chilli in some kitchens. Beyond that, there is room for modest variation, though it is usually wiser to perfect the fundamentals before adding too many extra notes.
The salt
Salt is not a background player here. Since falafel contains chickpeas, herbs, onion, and garlic, it needs enough seasoning to prevent all that wholesome goodness from becoming merely worthy. One of the most common issues with a homemade falafel recipe is not texture but blandness, and that often begins with under-seasoning the raw mixture.
The optional helpers
Some recipes include chickpea flour, a little plain flour, or baking powder. These are not always necessary, especially when the mixture is well balanced and the chickpeas have been handled correctly. Still, they can be useful in specific contexts, particularly for baked falafel, air fryer falafel, or mixtures that feel slightly too loose after processing.
For a gluten free falafel recipe, chickpea flour is especially useful because it helps bind without changing the character of the mixture too much. Baking powder, on the other hand, is best seen as a small supporting detail rather than the secret to success.
What Makes This Homemade Falafel Recipe So Good for Texture and Flavor
The difference between average falafel and memorable falafel is rarely about extravagance. More often, it comes down to texture, balance, and timing.
A strong falafel recipe should deliver contrast at every stage. The first bite should meet a crisp exterior rather than a soft, oily shell. The interior should feel tender and almost fluffy, yet still have enough texture to remind you it came from soaked chickpeas and herbs, not from a smooth purée. The seasoning should taste warm and rounded rather than harsh or flat. The herbs should be present enough to brighten each bite without turning the whole mixture grassy.
The difference between average falafel and memorable falafel usually comes down to a few details that are easy to overlook. A softer shell, denser center, and flatter flavor often come from rushed processing, weak herb balance, or timing that is just slightly off, while great falafel keeps its contrast: crisp outside, tender green center, and seasoning that feels lively instead of dull. Seeing those differences side by side makes it much easier to understand what you are actually aiming for before you cook the next batch.
This is exactly where rushed methods tend to disappoint. Over-process the chickpeas and the mixture quickly turns pasty instead of textured. Treat canned chickpeas the same way as soaked dried chickpeas and the finished falafel often comes out denser than you hoped. Skimp on the herbs and the center loses the freshness that makes falafel so distinctive. Meanwhile, if the oil temperature is off, the exterior may brown too fast or soak up more oil than it should.
Writers who focus closely on texture, such as Serious Eats, and cooks who emphasize practical home technique, such as The Mediterranean Dish, return to these same points again and again for good reason. They are not small details. They are the difference between falafel you politely finish and falafel you start planning to make again before the meal is over.
Here is a balanced ingredient list for a classic chickpea falafel that works beautifully as a base recipe.
Ingredients
1 1/2 cups dried chickpeas
1 small onion, roughly chopped
4 to 6 garlic cloves
1 packed cup parsley leaves and tender stems
1/2 to 1 cup cilantro leaves and tender stems
2 teaspoons ground cumin
1 teaspoon ground coriander
1/2 to 1 teaspoon black pepper
1 1/2 to 2 teaspoons salt
1 to 2 tablespoons chickpea flour, only if needed
1 teaspoon baking powder, optional
neutral oil for frying, or a little oil for brushing in air fryer and baked methods
A clear ingredient card makes homemade falafel easier to save, shop for, and cook without scrolling back and forth through the whole post. This classic base starts with dried chickpeas, onion, garlic, parsley, cilantro, cumin, coriander, black pepper, and salt, while chickpea flour and baking powder stay in the optional-helper category for batches that need a little support. Seeing the full list in one place is especially useful before soaking chickpeas or setting up your prep station.
A few ingredient notes
For a greener and fresher falafel, add a little more parsley to the mixture. Anyone who does not love cilantro can scale it back and replace that volume with extra parsley rather than leaving the herbs unbalanced. A touch of chilli can also be introduced for heat, although the classic flavour profile leans far more on cumin and coriander than on spice alone.
For a gluten free falafel recipe, chickpea flour is the simplest binder when needed. Since chickpeas themselves are naturally gluten free, the key is simply to avoid unnecessary additions that introduce gluten.
This is also naturally very close to a vegan falafel recipe. The mixture itself relies on chickpeas, herbs, aromatics, and spices, so the falafel can easily remain vegan as long as the sauces and sides you choose do the same.
Dried Chickpeas vs Canned Chickpeas for a Falafel Recipe
This question sits at the center of nearly every serious falafel conversation, and rightly so. The choice between dried chickpeas and canned chickpeas changes the texture, the handling, and often the final method.
This falafel comparison card shows why dried chickpeas usually make the best falafel recipe, while canned chickpeas work as a faster shortcut. Soaked dried chickpeas give homemade falafel a firmer mixture, a lighter interior, and a more classic crisp result. Canned chickpeas, by contrast, are softer and wetter, so they tend to produce a denser falafel unless the mixture is handled carefully. Use this guide to choose the right base before moving into the method, especially if you are deciding between authentic falafel texture and weeknight convenience.
Why dried chickpeas make the best falafel recipe
For a traditional or authentic falafel recipe, dried chickpeas are soaked in water until they swell, then drained and processed raw. They have enough firmness to create a mixture that stays textured rather than turning creamy. They also behave better in hot oil because they are not already fully cooked and softened.
That is why many respected falafel recipes insist on dried chickpeas and warn against canned chickpeas for the classic version. Both The Mediterranean Dish and Serious Eats make this point clearly, and once you have seen the difference in the food processor, it becomes obvious.
Can canned chickpeas work in a falafel recipe?
Yes, canned chickpea falafel can work. It simply behaves differently. Canned chickpeas are already cooked and much softer, so they are more likely to become mushy when processed. That can make it harder to form balls that stay light inside. The resulting falafel may still taste good, but it usually has a denser, less open texture.
When to use canned chickpeas anyway
There are moments when convenience matters more than orthodoxy. If you need an easy falafel recipe on a weekday and did not soak dried chickpeas ahead of time, canned chickpeas can still get dinner on the table. In that case, it helps to pulse very carefully, dry the chickpeas thoroughly, use a modest amount of binder if needed, and lean toward flatter patties for baking or air frying.
The honest difference
If you are chasing the best falafel recipe you can make at home, dried chickpeas are worth it. If you are chasing speed and flexibility, canned chickpeas remain an option. The key is knowing that these are not interchangeable choices with identical results. They are two related but different paths.
How to Soak Dried Chickpeas for the Best Falafel Recipe
Soaking chickpeas is easy, though it does require a little foresight.
Place the dried chickpeas in a large bowl and cover them generously with cold water. They need far more room than you might expect because they expand as they absorb liquid. Leave them overnight, or for roughly 18 to 24 hours if your kitchen is cool and your timing allows. Then drain them well.
This soaked chickpea guide shows the texture you want before making falafel from scratch. Properly soaked chickpeas for a falafel recipe should look plump, hydrated, and larger than before, yet still feel firm rather than soft like cooked chickpeas. That difference matters because the right chickpea texture helps the falafel mixture stay structured, shape well, and cook into a crisp outside with a tender green center instead of turning mushy.
What you are looking for is this: the chickpeas should be larger and hydrated, but still firm. They should not resemble boiled chickpeas, and they definitely should not be soft enough to mash between your fingers with almost no effort. That firmer state is what helps create the right falafel texture later.
Once drained, it helps to let them sit in a colander for a few minutes so extra moisture can run off. Too much lingering water can loosen the mixture more than necessary.
Although chickpea falafel is the version many readers will be searching for, it is worth noting that falafel is not limited to chickpeas alone. In some traditions, especially those tied more closely to Egypt, falafel may be made with fava beans or broad beans instead. That version can taste slightly different and may have a softer, more delicate character depending on the recipe.
Falafel is not limited to one exact formula, which is why chickpea falafel and broad bean falafel are both worth understanding. Chickpea falafel is the version many home cooks recognize most easily, while broad bean falafel is often more closely tied to Egyptian tradition and can have a slightly softer, more delicate character. Seeing the legumes and the finished falafel side by side makes the distinction clearer and helps explain why falafel can feel familiar in one kitchen and slightly different in another.
For that reason, when people search for an Egyptian falafel recipe or a broad bean falafel recipe, they are often looking for a related but not identical dish. Chickpea falafel tends to be the most familiar version in many home kitchens, and it is also the easiest one to build a broad guide around. Even so, knowing that fava bean falafel exists adds useful context. It reminds us that falafel has regional breadth and a longer story than one single formula can capture.
How to Make Falafel from Scratch: Step-by-Step Falafel Recipe
Making falafel at home becomes much less intimidating once you see that the steps are logical and manageable.
This step-by-step falafel guide shows the full flow of a homemade falafel recipe, from soaked chickpeas and the freshly pulsed herb mixture to shaped falafel and the final crisp, golden result. Use it as a quick visual roadmap before diving into the full method, especially if you are making falafel from scratch for the first time and want to understand how the texture should look at each stage.
Step 1: Prepare the ingredients
Drain the soaked chickpeas. Roughly chop the onion if it is large. Peel the garlic. Wash and dry the herbs. Gather the spices and salt. This is not a fussy recipe, but having everything ready makes it easier to stop processing at the right moment rather than scrambling for ingredients while the food processor is running.
Getting everything ready before the food processor starts makes the rest of the falafel recipe much smoother. Drained chickpeas, chopped onion, peeled garlic, washed herbs, and measured spices let you stop at the right texture instead of scrambling for ingredients halfway through. It is a simple prep step, but it makes the mixture easier to control and the method far less messy.
Step 2: Process the mixture
Add the chickpeas, onion, garlic, parsley, cilantro, cumin, coriander, salt, and pepper to a food processor. Pulse in short bursts. Scrape down the bowl as needed. The goal is a coarse, even mixture that holds together when pressed but still shows texture.
The texture of the falafel mixture matters more than most people expect. After pulsing, it should look evenly mixed and hold together when pressed, but still keep a nubbly chickpea-and-herb texture. Stay too coarse and the falafel can fall apart. Go too smooth and it starts turning dense and pasty instead of giving you the light, textured center that makes homemade falafel so satisfying.
Step 3: Check the texture
Take a small amount of the mixture in your palm and press it gently. A mixture that holds together under light pressure is usually in good shape. On the other hand, if it crumbles straight away, it needs a little more pulsing. Should it feel wetter than expected, add a small spoonful of chickpea flour and pulse again briefly until the texture looks more cooperative.
Before shaping the falafel, press a small amount of the mixture in your hand. It should hold together without feeling wet or turning into paste. If it crumbles too easily, the mixture may need a little more pulsing or a small amount of chickpea flour to help it bind. This quick hand test makes the next steps far easier and helps prevent falafel that falls apart during cooking.
Step 4: Rest the mixture
Cover and chill the processed mixture for at least 30 minutes. This resting time helps in two ways. First, it firms the mixture and makes shaping easier. Second, it gives the flavors a moment to settle together.
A short rest in the fridge gives the falafel mixture time to firm up before shaping. That small pause makes the mixture easier to handle, helps it feel more cohesive in the hand, and reduces the chances of frustration in the next step. It is one of those quiet details that makes homemade falafel feel much more manageable.
Step 5: Shape the falafel
Use your hands, a spoon, or a falafel scoop if you have one. Small balls are traditional and beautiful when fried. Slightly flattened patties are particularly useful for baked falafel and air fryer falafel, since they brown more evenly and are easier to turn.
Shape affects how falafel cooks. Balls are the more classic choice and work especially well for frying, while flatter patties brown more evenly in the oven or air fryer and are easier to turn without breaking. Picking the shape that matches your cooking method makes the recipe more predictable and helps you get better texture with less guesswork.
Step 6: Cook by your chosen method
From here, you can fry, air fry, or bake. Each route has its own appeal, and none of them are difficult once the mixture is right.
Cooking method changes the final character of falafel more than most people expect. Frying gives the deepest crust and the most classic result, air frying offers a lighter route with good browning, and baking is especially practical for batch cooking and meal prep. Choosing the method that matches the meal you want makes the whole recipe feel more intentional and helps set the right expectations before you move into the detailed method sections below.
For many cooks, fried falafel remains the benchmark. There is a reason for that. Hot oil creates a crust that is difficult for any other method to match. The shell becomes deeply crisp, the center stays tender, and the whole thing tastes unmistakably falafel in the way many people first fell in love with it.
How to fry falafel
Fill a deep pan or pot with enough neutral oil to allow the falafel to cook without touching the bottom too aggressively. Heat the oil until it is hot but not smoking. If the oil is too cool, the falafel may absorb excess oil and feel greasy. If it is too hot, the exterior will brown too quickly.
Lower a few pieces in at a time. Avoid crowding the pan, since that can drop the temperature and make the batch less crisp. Let them cook until evenly golden brown, then remove and drain on paper towels or a wire rack.
Fried falafel stays the benchmark because hot oil creates the strongest contrast between a crisp shell and a tender center. The most important cues are simple but easy to miss: heat the oil properly without letting it smoke, fry only a few pieces at a time so the temperature does not drop, and cook until the crust turns deeply golden rather than pale. A method card like this is useful because it shows both the process and the finish readers should be looking for when they want truly classic falafel.
What fried falafel should look like
The outside should be dark golden and crisp, not pale. The inside should be cooked through but still moist and green-flecked. If you split one open and it looks smooth or pasty, the mixture was likely processed too far or the chickpeas were not ideal for the method.
Why people keep coming back to fried falafel
Because it is hard to beat. Fried falafel offers the strongest crust and the clearest contrast between crisp exterior and tender middle. For a weekend lunch, a dinner spread, or any time you want the most classic version, it remains the method that most fully expresses what falafel can be.
Air fryer falafel occupies a very useful place in a modern kitchen. It gives you a lighter option, avoids a pot of oil, and still creates browning and texture when done well. It is not identical to fried falafel, but it can be genuinely satisfying rather than a compromise made with resignation.
Why air fryer falafel works
The circulating heat of the air fryer encourages the exterior to dry and color while keeping the inside relatively tender. A light brushing or spraying of oil helps enormously here. Without a little exterior fat, the surface can dry before it crisps.
Air fryer falafel works best when the shape and cooking style match the method. Slightly flatter patties brown more evenly than thick balls, a light coating of oil helps the surface crisp instead of drying out, and enough space in the basket keeps the hot air moving properly around each piece. A guide like this is useful because it shows the difference between merely cooked falafel and air fryer falafel that is browned outside, tender inside, and worth making again.
How to shape air fryer falafel
Slightly flattened patties often work best because they expose more surface area and cook more evenly. Small balls can also work, although they may need turning and a little more attention.
How to cook falafel in an air fryer without drying it out
Preheat the air fryer if your model allows it. Arrange the falafel in a single layer with space between each piece. Cook until the surface is browned and the falafel feels set, turning once if needed. Since every air fryer behaves a little differently, it helps to watch the first batch closely rather than trusting one exact minute count.
How to keep air fryer falafel from drying out
There are several ways. Use enough herbs so the interior stays lively. Do not over-process the mixture. Do not make the patties too small. Lightly oil the exterior. Most importantly, stop cooking as soon as they are crisp rather than pushing for a darker shade at the expense of tenderness.
Baked falafel is sometimes dismissed too quickly, usually because people expect it to behave exactly like fried falafel. It does not. Still, when approached on its own terms, it can be delicious, practical, and surprisingly satisfying.
What a baked falafel recipe does well
Baked falafel has several practical advantages. Larger batches are much easier to manage in the oven, and the process is notably less messy than frying. It also suits make-ahead cooking particularly well. Better still, baked falafel reheats nicely, which makes it a strong option for lunchboxes, grain bowls, and easy weeknight wraps.
Baked falafel works best when the shape, tray setup, and expectations all match the method. Flatter patties brown more evenly than thick balls, a lightly oiled tray and brushed tops help build better color, and turning partway through makes the finished falafel feel more balanced on both sides. A card like this is worth saving because it shows how baked falafel can stay practical, flavorful, and meal-prep-friendly without pretending to be the same as deep-fried falafel.
How to bake falafel so it stays crisp and tender
Use a hot oven. Place the falafel on a lightly oiled tray or parchment. Brush or spray the tops with a little oil. Patties rather than thick balls usually bake more evenly. Turn them partway through so both sides color well.
What baked falafel tastes like
The crust is gentler, and the overall result is slightly drier than deep-fried falafel, though not unpleasantly so when the mixture itself is well balanced. In fact, baked falafel often shines most when served with generous sauces, crunchy vegetables, and warm bread or grains.
When a baked falafel recipe is the smart choice
When you want a healthy falafel recipe, when you are feeding more people at once, or when you want leftovers that hold up well the next day. It may not be the purest expression of the dish, yet it is one of the most practical.
Since many cooks still want a canned chickpea falafel option, it is worth setting out a practical approach.
Use 2 cans of chickpeas, drained and dried very thoroughly. Reduce the onion slightly if you know yours is especially watery. Pulse carefully, because canned chickpeas go from chunky to mushy fast. Use chickpea flour a little more readily than you would in the dried-chickpea version. Prefer patties rather than balls. Then cook in the oven or air fryer rather than expecting the mixture to behave exactly like traditional fried falafel.
Canned chickpeas can still make a workable falafel, but they need gentler handling than soaked dried chickpeas. Drying them thoroughly, keeping watery onion in check, pulsing carefully, and using chickpea flour sooner all help prevent the mixture from turning soft and pasty. Leaning toward patties and choosing the oven or air fryer usually gives the most reliable shortcut version when you want falafel without the overnight soak.
Tips for canned chickpea falafel
Dry the chickpeas as thoroughly as you can. Pat them dry with a clean towel if needed. Do not over-process. Chill the mixture before shaping. Use a binder sooner rather than later if the mix seems soft. Keep expectations honest and shape for the method rather than for tradition.
Why canned chickpea falafel turns mushy
Because the chickpeas are already cooked. They are softer, more hydrated, and easier to turn into paste. Once that happens, the interior loses the airy, crumbly quality that makes falafel feel so good. The goal, therefore, is not to make canned chickpeas behave like dried ones. The goal is to get the best possible shortcut version from the ingredient you have.
Will it be identical to an authentic falafel recipe made with soaked dried chickpeas? No. Can it still be tasty, crisp in places, and absolutely worth eating in a pita with salad and sauce? Certainly.
This is one of the classic falafel frustrations, and it nearly always comes down to structure and moisture.
When falafel falls apart, the problem is usually not random. Most batches fail because the mixture is too wet, too coarse to bind, not rested long enough, made with chickpeas that are too soft, or fried before the oil is properly hot. Catching the real cause early makes the fix much easier, whether that means draining better, pulsing a little more, chilling the mixture, switching to soaked dried chickpeas, or waiting for the oil to come up to temperature.
The mixture may be too wet
Extra water from poorly drained chickpeas, very watery onion, or excessive herbs can all loosen the mixture. If the mix feels sticky and sloppy rather than cohesive, it needs help. A spoonful of chickpea flour can make a real difference.
The mixture may be too coarse
If the ingredients have not been pulsed enough, they may not bind. Falafel should not be puréed, but it does need enough processing for the particles to catch and hold together when pressed.
The mixture may need rest
Resting the mixture in the fridge gives it time to firm up. If shaping feels difficult, a half-hour of chilling often improves things.
The chickpeas may be the issue
Canned chickpeas are more prone to creating a softer mix that struggles in hot oil. That is one reason why so many cooks prefer dried chickpeas for a true homemade falafel recipe.
The oil may be part of the problem
If you are frying, oil that is not hot enough can weaken the structure before the exterior sets. Consequently, the falafel may seem as though it lacks binding when the real issue is that the crust never had a chance to form quickly enough.
Mushy falafel is usually a sign that the mixture lost too much structure before it ever reached the pan or oven.
One common culprit is over-processing. Once chickpeas become a smooth paste, the interior tends to lose that delicate, crumbly quality. Another frequent cause is over-reliance on canned chickpeas. Since they are already cooked, they are easier to reduce to something dense and creamy.
Mushy falafel usually starts before the mixture ever reaches the pan, oven, or air fryer. The most common causes are processing the mixture too far, using chickpeas that are too soft, letting too much moisture from onion or herbs loosen the mix, or skipping the resting time that helps it firm up. Fixing those early texture problems is what gives falafel its crisp exterior and tender, structured center instead of a soft, dense interior.
Too much onion can also play a role, as can insufficient resting time. In some cases, falafel that looks mushy after cooking was not actually undercooked; it was simply too wet and too smooth going in.
The simplest prevention is this: start with soaked dried chickpeas, pulse rather than blend, drain everything well, and chill the mixture before shaping.
How to Build More Flavor into a Homemade Falafel Recipe
Even when the texture is right, falafel can disappoint if it tastes muted. Fortunately, that is one of the easiest problems to fix.
Falafel can be technically correct and still taste flat, which is why flavor-building matters as much as texture. More herbs give the center a fresher, livelier character, confident seasoning keeps chickpeas from tasting dull, and the raw mixture should already smell aromatic before it ever gets cooked. Once the falafel reaches the plate, sauce, salad, pickles, and bread are not extras so much as the final layer that makes the whole meal feel balanced, bright, and complete.
Use enough herbs
A pale falafel interior often points to not enough parsley and cilantro. The herbs do not merely add freshness. They shape the identity of the dish.
Season assertively
Chickpeas are mild. Onion and herbs mellow as they cook. Salt, cumin, coriander, and garlic all need to be generous enough to remain clear in the finished falafel.
Smell the raw mixture carefully
You cannot eat it in the same carefree way you might taste a dressing, but you can smell it and assess the seasoning in that sense. Does it smell aromatic and warm? Or does it smell mostly like wet chickpeas? Your nose gives a useful clue.
Think about the whole plate
Falafel often sits alongside tahini, yogurt sauce, salad, pickles, hummus, and bread. The main falafel mixture should therefore be flavourful in its own right, but it does not need to carry the entire meal alone. Balance across the plate matters.
Best Falafel Sauce Ideas for Wraps, Bowls, and Pita
Falafel without sauce can still be good. And then falafel with the right sauce becomes a complete meal.
The right sauce changes falafel from good to complete. Tahini brings the classic nutty, lemony richness that most people expect, yogurt sauce adds cool creaminess, cucumber yogurt sauce feels especially fresh in wraps and summer plates, and a spicy sauce gives the whole meal more edge. Choosing the sauce that matches the kind of falafel plate you want is one of the easiest ways to make the recipe feel more personal and more satisfying.
Tahini sauce for falafel
This is the classic partner for falafel. Tahini mixed with lemon juice, garlic, water, and salt creates a sauce that is creamy yet bright. Its slight bitterness and richness work beautifully against the crisp shell and herb-forward center.
Yogurt sauce for falafel
A cool yogurt sauce offers a different kind of balance. It softens the warmth of cumin and coriander and pairs especially well with pita, salad, and crunchy vegetables. A cucumber-based version is even better on warm days. That is one reason why this Greek tzatziki sauce guide fits so naturally alongside falafel.
Cucumber yogurt sauce for falafel
If you want something especially fresh, a cucumber yogurt sauce is hard to beat. It brings coolness, moisture, and tang, all of which make it excellent for wraps and summer platters.
Creamy dairy-free options
If you want something richer without dairy, a tahini-forward mayo or a vegan herb sauce can be excellent. For readers who enjoy that style, the ideas in these vegan mayo variations can be adapted into very good sandwich and wrap sauces.
Spicy sauces
Falafel also welcomes heat. Harissa, chilli sauce, or a spicy yogurt dressing can shift the whole plate in a livelier direction. The warmth of the falafel base gives these sauces something solid to lean against.
How to Serve Falafel in Pita, Wraps, Bowls, and Platters
One of falafel’s greatest strengths is how easily it slides into different meals. A batch made in the afternoon can become lunch, dinner, and leftovers the next day without feeling repetitive.
Falafel becomes far more versatile once you stop thinking of it as only a pita filling. It works just as well tucked into a wrap, layered over grains or greens in a bowl, or spread across a platter with hummus, salad, bread, and dips for a more generous meal. Seeing the four main serving directions side by side makes it easier to choose the version that fits your mood, your meal, and how much time you want to spend assembling the plate.
Falafel in pita bread
This is the classic arrangement for good reason. Warm pita, falafel, chopped tomato, cucumber, onion, herbs, tahini sauce, and perhaps a few pickles create a balance of crisp, creamy, bright, and warm. It feels complete in a way that many simple sandwiches do not.
Falafel wrap ideas
Wraps offer a slightly more flexible version of the same idea. Flatbread, lavash, or even tortillas can work if you are using what you have. Layer in lettuce, crunchy vegetables, sauce, and perhaps a spoonful of hummus. If you enjoy this lunch-friendly direction, plant-based sandwich inspiration and chickpea meal prep ideas make useful companions.
Falafel bowls for lunch or meal prep
For a lighter or more meal-prep-friendly route, serve falafel over rice, bulgur, couscous, quinoa, or greens. Add chopped vegetables, pickles, hummus, and sauce. A bowl can feel hearty or fresh depending on what you add, and it is an excellent home for air fryer falafel or baked falafel. If you like this format, this vegan bowl idea shows how satisfying sauce-and-grain bowls can be even outside a Mediterranean flavour profile.
Falafel platter
There is also something especially inviting about serving falafel as part of a broader spread. Place it alongside hummus, chopped salad, pickled onions, olives, warm bread, yogurt sauce, and a few herbs. Suddenly a simple chickpea preparation becomes the center of a table. That broader serving style connects naturally with your own guide to what to eat with hummus, which includes pairings that can sit comfortably beside falafel as well.
Falafel with playful twists
Once the classic version is secure, it can also be fun to explore other directions. Your post on falafel with Indian twists opens up a more inventive path without losing the core appeal of the dish.
This pairing deserves special mention because it is one of the most satisfying ways to serve falafel. Falafel brings crispness, warmth, and structure. Hummus brings creaminess, earthiness, and a soft counterpoint. Add pickles, lemon, chopped salad, and bread, and suddenly the plate has everything it needs.
Falafel and hummus work so well together because each one brings what the other lacks. Falafel adds crispness, warmth, and structure, while hummus adds creaminess, richness, and a softer counterpoint that makes the whole plate feel more complete. Add bread, salad, olives, or something tangy on the side, and the pairing turns into one of the easiest ways to build a generous, deeply satisfying falafel meal.
What makes falafel and hummus work so well is contrast. One is crisp, the other smooth. One is herb-forward, the other mellow. And then one is hot, the other can be room temperature or cool. Together, they make each other better.
That is also why this pairing works across formats. It can be part of a platter, spread inside a wrap, spooned into a bowl, or layered into pita bread. It feels generous, complete, and deeply comforting without being complicated.
Falafel is rich enough to appreciate something fresh and cooling on the side. Since the plate often includes tahini, hummus, bread, salad, and spice, a drink with brightness and lift feels especially welcome.
Falafel feels best with drinks that refresh the plate instead of weighing it down. Jal jeera brings tang, mint, and spice that echo the meal beautifully, a mint lemon cooler adds brightness and lift, and a cucumber-herb drink keeps everything feeling crisp and cooling. Pairings like these work especially well with tahini, hummus, salad, and warm bread because they cut through richness without fighting the flavors on the plate.
A minty, tangy option like jal jeera works surprisingly well, particularly in hot weather. Its cumin, mint, and citrus notes echo some of the aromatic qualities in the meal without competing with them. For a more playful summer table, a chilled mint-forward mocktail can also fit, though falafel rarely needs anything too sweet beside it.
In general, the most natural drink pairings are refreshing rather than rich. Think lemon, herbs, mint, cucumber, and cooling acidity rather than cream-heavy beverages.
Is Falafel Healthy? Fried vs Air Fryer vs Baked Falafel
Falafel occupies an interesting space in the kitchen because it can feel both hearty and wholesome at the same time. Much of that comes from its base. Chickpeas are a legume, and legumes are valued for protein, fiber, folate, iron, and other useful nutrients. If you enjoy reading more about the nutritional side of ingredients, both USDA FoodData Central and the NIH Office of Dietary Supplements glossary offer broad, reliable context around foods like chickpeas and legumes.
Falafel can fit into very different kinds of meals depending on how it is cooked and what it is served with. Fried falafel gives the deepest crust and the most classic result, air fryer falafel feels lighter while still browning well, and baked falafel is especially practical for batch cooking and meal prep. The method changes the feel of the plate, but balance still depends on the sauces, vegetables, and sides that come with it.
That said, whether falafel feels especially light or more indulgent depends on the method and the company it keeps.
Fried falafel is richer. Air fryer falafel and baked falafel are lighter. A pita packed with sauce can feel very different from a bowl of greens, chopped vegetables, and tahini. A platter with hummus, pickles, salad, and warm bread can be both nourishing and abundant.
The better way to think about healthy falafel is not by trying to strip it of pleasure. Instead, think in terms of balance. Use plenty of herbs. Do not under-season the mixture. Choose the method that fits your needs. Pair it with vegetables and sauces that add freshness rather than heaviness alone.
Why this is naturally a vegan falafel recipe
The falafel itself is usually vegan, because it is built from chickpeas, herbs, spices, onion, and garlic. The main thing to watch is what you serve with it. Tahini sauce keeps the whole meal vegan. Yogurt sauce, naturally, does not. Accordingly, vegan falafel is often less about changing the falafel itself and more about choosing the right accompaniments.
Why falafel is often gluten free
Falafel can also be gluten free, provided the binder and accompaniments cooperate. Chickpeas, herbs, and spices are naturally gluten free. If a recipe needs help holding together, chickpea flour is usually the easiest gluten free option. The falafel itself may be gluten free even when the pita is not.
Falafel Recipe Variations: Green, Spicy, Mini, and Breakfast Falafel
Once the base technique feels familiar, falafel becomes an invitation to explore.
Once the base falafel recipe feels familiar, small changes can take it in very different directions. More parsley and cilantro create a greener, fresher version, chilli or harissa adds heat, smaller balls make falafel more platter-friendly, and serving it with eggs and yogurt turns it into a savory brunch plate. Seeing the variation, the tweak, and the payoff together makes it much easier to decide which version fits the mood of the meal.
Green falafel
Increase the herb ratio for a brighter, more vivid interior. This version feels particularly fresh in wraps and bowls.
Spicy falafel
Add green chilli, red chilli flakes, or a little harissa to the mixture or the accompanying sauce. The chickpeas soften the heat nicely.
Mini falafel
Shape smaller balls for platters, snack boards, or party spreads. These are especially useful if you want falafel as part of a larger mezze table.
Falafel pockets
Stuff pita pockets with chopped salad, tahini, and smaller falafel pieces. This works well for packed lunches because the filling stays more contained.
Breakfast falafel
While not a traditional breakfast dish everywhere, falafel can be excellent in the morning with eggs, chopped tomatoes, yogurt sauce, herbs, and warm bread. The savory, spiced character suits a relaxed brunch surprisingly well.
Falafel and hummus
This pairing deserves mention again because it is so satisfying. Falafel with hummus, pickles, vegetables, and bread offers creamy, crisp, tangy, and earthy elements all in one plate. If you want more ideas in that direction, the pairings in what to eat with hummus make an easy extension.
Falafel is one of the smartest foods to batch once you know the fundamentals.
Falafel becomes much more useful once you treat it as a meal prep base instead of a one-time recipe. The mixture can be made ahead and chilled, shaped falafel can be frozen for later, cooked falafel stores well in the fridge, and the oven or air fryer is the best way to bring back texture when it is time to eat. That flexibility is part of what makes homemade falafel such a smart repeat recipe for wraps, bowls, and quick lunches through the week.
Prepare the mixture ahead
The raw mixture can be made and chilled in advance, which makes shaping and cooking much easier the next day. This is especially helpful if you are using dried chickpeas and want to spread the work out.
Shape and freeze
You can shape falafel and freeze it on a tray before transferring it to a container. Later, you can fry, bake, or air fry smaller portions without starting from scratch.
Cook and store
Cooked falafel keeps well in the fridge for a few days. It is excellent for quick lunches when tucked into wraps or bowls with fresh vegetables and a sauce.
Reheat the right way
The oven or air fryer is the best route for reviving texture. The microwave softens the crust, which is not ideal unless speed matters more than crispness.
Build flexible meals around it
This is where falafel becomes especially useful. One batch can become pita sandwiches one day, bowls the next, and a snack plate later in the week. Because the base is so adaptable, meal prep rarely feels repetitive.
neutral oil for frying, or a little oil for brushing
This homemade falafel recipe card brings the core recipe into one saveable reference: yield, prep notes, ingredient list, and a compact method, all paired with the crisp shell and tender green center the post is aiming for. It is especially useful once you are ready to cook, because it turns a long guide into a quicker working version you can pin, screenshot, or revisit without hunting through every section again.
Step-by-Step Method for this Falafel Recipe
Soak the dried chickpeas in plenty of water overnight or up to 24 hours. Drain well.
Add the chickpeas, onion, garlic, parsley, cilantro, cumin, coriander, salt, and pepper to a food processor.
Pulse until the mixture is finely chopped and holds together when pressed, but do not purée it.
If needed, add chickpea flour to help bind. Pulse briefly again.
Chill the mixture for at least 30 minutes.
Shape into balls or patties.
Fry in hot oil until deeply golden, or cook in an air fryer or hot oven until crisp and cooked through.
Serve hot with tahini sauce, yogurt sauce, pita, salad, and pickles.
A Few Serving Menus Built Around the Falafel Recipe
Sometimes the easiest way to picture a recipe is to see how it can shape a full meal.
One of the best things about falafel is how easily one batch can turn into very different meals. It can stay simple for a quick weekday lunch, become a packed office bowl or box, expand into a generous dinner platter, or shift into a lighter summer spread with wraps and cooling sides. Seeing those menu directions together makes the recipe feel more flexible, more practical, and easier to use in real life.
A simple weekday lunch
Air fryer falafel, chopped cucumber and tomato, tahini sauce, and warm pita.
The Small Decisions That Improve a Falafel Recipe the Most
Once you have made falafel a few times, you begin to notice that the biggest improvements often come from surprisingly small adjustments.
The biggest improvements in falafel usually come from details that seem minor at first. Drying the chickpeas properly, using enough herbs, stopping the food processor at the right moment, chilling before shaping, and matching the shape to the cooking method all make a noticeable difference to texture and flavor. A guide like this is useful because it turns scattered tips into a short set of choices that can quietly improve every future batch.
Drying the chickpeas well matters. Using enough herbs matters. Stopping the food processor a little earlier matters. Chilling the mixture matters. Choosing patties for the oven and balls for frying matters. Serving the falafel while still warm matters. Adding enough sauce and crunch on the plate matters.
These are not glamorous insights, yet they are what turn a decent falafel recipe into one that becomes part of your regular cooking rhythm.
It is also worth saying that confidence changes the result. The first time, you may second-guess the texture, the seasoning, or the shape. The second time, you will already know more. The third time, you will make small decisions more naturally. Falafel rewards repetition in a very tangible way.
Some recipes are enjoyable once and then forgotten. Falafel rarely belongs to that category. It tends to become more useful the more often you make it. The first time, you are learning the texture. The second time, you are refining the seasoning. The third time, you are already deciding whether the batch should become pita sandwiches, bowls, or a platter for friends.
That repeatability is part of what makes falafel so lovable. It adapts easily without losing the qualities that make it recognisable in the first place. A batch can become a quick lunch, a casual dinner, or the centerpiece of a table meant for sharing. On some days it leans more traditional; on others it takes on a slightly more flexible role. You can fry it for maximum crispness, air fry it for convenience, or bake it for meal prep, yet the heart of the dish remains the same: chickpeas, herbs, aromatics, spice, and that irresistible contrast between crust and center.
A good falafel recipe, then, is not only about one successful meal. It is about opening the door to many meals that follow naturally from the same set of ingredients.
Falafel rewards care, though it does not demand fussiness. If you soak dried chickpeas, pulse the mixture to the right texture, season with confidence, and choose a cooking method that suits the meal you want, you are already most of the way there.
A good falafel recipe gets much easier once the biggest decisions are clear. Start with soaked dried chickpeas, aim for a coarse mixture instead of a paste, adjust quickly if the mix is crumbly or too wet, and match the shape to the cooking method for better results. Once the texture is right, the final meal becomes easy to build with the right sauce and serving format, which is why a guide like this works well as a quick reference before making falafel again.
From there, the process stops feeling like effort and starts feeling like pleasure. One meal might see the falafel tucked into pita with salad and tahini, while the next turns it into a bowl with grains and pickles. It can sit beside tzatziki, pair beautifully with hummus, or anchor a fuller spread of sauces, vegetables, and bread. Some batches are worth keeping classic, whereas others invite a spicier, greener, or more playful variation the next time around.
What matters most is that the falafel feels alive. Crisp outside. Tender inside. Fragrant with herbs. Warm with spice. Worth making again.
And once you have that, you do not simply have a homemade falafel recipe. You have one of the most versatile, satisfying, and generous chickpea dishes a home kitchen can offer.
Falafel is usually made from chickpeas or fava beans, along with onion, garlic, parsley, cilantro, cumin, coriander, salt, and pepper. In many homemade versions, chickpeas are the main base, especially in a classic chickpea falafel recipe. Some variations also use a little chickpea flour or baking powder to improve texture. Although the ingredient list is fairly simple, the balance of herbs, aromatics, and seasoning is what gives falafel its distinct flavor.
2. What is falafel, exactly?
Falafel is a savory Middle Eastern dish made by grinding soaked legumes with herbs, aromatics, and spices, then shaping the mixture into balls or patties and cooking it until crisp outside and tender inside. It is often served in pita, wraps, bowls, or on a platter with salad and sauce. As a result, falafel can work as a snack, lunch, or full meal depending on how it is served.
3. How do you make falafel from scratch?
To make falafel from scratch, start by soaking dried chickpeas until they are plump but still firm. After that, pulse them with onion, garlic, herbs, and spices until the mixture is finely chopped and holds together when pressed. Then chill the mixture, shape it, and fry, bake, or air fry it. The key is to pulse rather than puree, because that keeps the texture light instead of pasty.
4. Do you need dried chickpeas for an authentic falafel recipe?
Traditionally, yes. An authentic falafel recipe is usually made with dried chickpeas that have been soaked but not boiled. That method creates a mixture with better texture and structure, which helps the falafel stay crisp outside and tender inside. By contrast, canned chickpeas are much softer, so they tend to produce a denser result.
5. Can you make falafel with canned chickpeas?
Yes, you can make falafel with canned chickpeas, though the texture will be different. Since canned chickpeas are already cooked, they are softer and wetter than soaked dried chickpeas. Because of that, canned chickpea falafel can turn mushy or dense if the mixture is over-processed. Even so, it can still work well for a quicker homemade falafel, especially in baked or air fryer versions.
6. Why does falafel fall apart?
Falafel usually falls apart when the mixture is too wet, too coarse, or not rested long enough before cooking. Occasionally, canned chickpeas are the reason, since they create a softer mixture that may struggle to hold shape. In other cases, the issue is simply that the ingredients were not pulsed enough. Chilling the mixture and adding a small amount of chickpea flour, if needed, often helps.
7. Why is my falafel mushy instead of crisp?
Mushy falafel usually happens when the chickpeas are too soft, the mixture is too wet, or the food processor turns everything into a paste. Canned chickpeas can cause this more easily than soaked dried chickpeas. Likewise, overcrowding an air fryer or baking tray can prevent the exterior from crisping properly. For better results, keep the mixture textured, drain ingredients well, and give each piece enough space while cooking.
8. How do you make falafel crispy?
For crisp falafel, start with the right texture in the mixture. It should be finely chopped and cohesive, not smooth. Then chill it before shaping. Fried falafel usually gives the crispiest shell, although air fryer falafel can also turn out very well if lightly oiled and spaced properly. In the oven, shaping flatter patties instead of thick balls helps create more surface area for browning.
9. Is air fryer falafel good?
Yes, air fryer falafel can be very good when made carefully. While it does not have exactly the same crust as deep-fried falafel, it still develops a nicely browned exterior and keeps the inside tender. For many home cooks, air fryer falafel is the best balance between convenience, lighter cooking, and satisfying texture. It is especially useful for weeknight dinners and meal prep.
10. How do you cook falafel in an air fryer?
To cook falafel in an air fryer, shape the mixture into small patties or compact balls, lightly oil the outside, and arrange them in a single layer with space between each piece. Then cook until browned and crisp, turning if your air fryer needs it. Since machines vary, it is best to check the first batch closely. Generally, air fryer falafel works best when the basket is not crowded and the falafel is not too thick.
11. Is baked falafel worth making?
Absolutely. Baked falafel does not taste exactly like fried falafel, yet it can still be delicious. It is particularly useful for larger batches, meal prep, and lighter meals. Moreover, baked falafel reheats well and works beautifully in bowls, wraps, and lunchboxes. A hot oven, a lightly oiled surface, and flatter patties all help improve the final texture.
12. Is falafel healthy?
Falafel can be part of a healthy meal, especially when made with plenty of herbs and served with vegetables, hummus, yogurt sauce, or tahini. Chickpeas bring fiber and plant-based protein, which makes falafel filling and satisfying. Naturally, fried falafel is richer than baked or air fried falafel, so the cooking method changes the overall feel of the meal. Even then, falafel can still fit easily into balanced vegetarian eating.
13. Is falafel vegan?
Most classic falafel recipes are vegan because they are made from chickpeas or fava beans, herbs, spices, and aromatics. That said, it is always worth checking the binder or sauce being served alongside it. The falafel itself is often vegan, whereas yogurt sauce or certain accompaniments may not be.
14. Is falafel gluten free?
Falafel can be gluten free, though it depends on the recipe. Chickpeas, herbs, and spices are naturally gluten free, but some recipes use flour as a binder. If you want gluten free falafel, chickpea flour is one of the easiest alternatives. Accordingly, it is always a good idea to check the ingredients if you are cooking for someone who avoids gluten.
15. What sauce goes best with falafel?
Tahini sauce is the classic choice for falafel. Its creamy, nutty, lemony flavor pairs beautifully with the crisp shell and herb-filled center. Still, falafel also works very well with yogurt sauce, tzatziki, spicy sauces, or even a creamy garlic dressing. The best option depends on whether you want the meal to feel more classic, cooling, or bold.
16. What do you serve with falafel?
Falafel goes well with pita, wraps, chopped salad, hummus, tahini sauce, pickles, yogurt sauce, slaw, and grain bowls. It can be the centerpiece of a simple lunch or part of a larger mezze-style spread. Depending on the occasion, you can serve it in pita bread, over rice or couscous, or alongside fresh vegetables and dips.
17. Can falafel be made ahead of time?
Yes, falafel is excellent for make-ahead cooking. You can prepare the mixture in advance and chill it until you are ready to shape and cook it. Alternatively, you can shape the falafel and freeze it for later. Cooked falafel also stores well, which makes it useful for quick lunches and easy dinners throughout the week.
18. Can you freeze falafel?
Yes, falafel freezes very well. In fact, one of the best ways to do it is to freeze the shaped, uncooked falafel first on a tray, then transfer it to a container once firm. That way, you can cook only as much as you need later. Cooked falafel can also be frozen, though freshly cooked falafel usually gives the best texture.
19. How do you reheat falafel so it stays crisp?
The best way to reheat falafel is in the oven or air fryer. That helps the outside crisp up again instead of turning soft. A microwave will warm it quickly, but it usually softens the crust. Therefore, if texture matters, the oven or air fryer is the better choice.
20. What is the difference between falafel balls and falafel patties?
Falafel balls are more traditional and are especially popular for frying. Falafel patties, on the other hand, are often easier for baking and air frying because they cook more evenly and expose more surface area to heat. The flavor is essentially the same, but the shape can affect the texture and the method that works best.
21. Can you make easy falafel at home without deep frying?
Yes, easy falafel can absolutely be made at home without deep frying. Air fryer falafel and baked falafel are both practical options, especially for home cooks who want less mess and lighter cooking. The most important thing is getting the mixture right first. Once that is in place, the cooking method becomes much easier to adapt.
22. What makes the best falafel recipe?
The best falafel recipe starts with the right chickpeas, plenty of fresh herbs, enough seasoning, and the right texture in the mixture. It should hold together well, cook up crisp outside, and stay tender inside. Beyond that, the best falafel recipe is the one that suits how you want to eat it, whether that means a traditional fried version, a homemade baked falafel, or a lighter air fryer falafel for everyday meals.
23. What is the difference between falafel and hummus?
Falafel and hummus both often begin with chickpeas, yet they become very different foods. Hummus is a smooth dip or spread, whereas falafel is a shaped mixture that is cooked until crisp. They are often served together because their textures contrast so well.
24. Can I use falafel in a wrap instead of pita?
Absolutely. Falafel works beautifully in wraps. In fact, wraps can be easier to eat than stuffed pita pockets because the filling stays more contained. Add lettuce, chopped vegetables, sauce, and hummus if you like, then roll everything tightly.
25. What herbs are best in a falafel recipe?
Parsley and cilantro are the classic herb combination. Parsley keeps the mixture fresh and green, while cilantro adds brightness and a slightly sharper edge. If you dislike cilantro, extra parsley is usually the best substitute rather than skipping herbs altogether.
26. Why is my falafel bland?
Falafel usually tastes bland when the mixture is under-seasoned or under-herbed. Chickpeas are mild, so they need enough salt, garlic, cumin, coriander, and fresh herbs to feel alive once cooked. Bland falafel is often not a structural problem at all. It is simply a seasoning problem.
27. Can I make mini falafel for a party?
Yes, mini falafel is excellent for platters and party food. Smaller pieces work especially well on mezze boards with hummus, tahini, pickles, olives, chopped salad, and warm bread. They also make it easier for guests to sample more than one sauce.
28. What is the best oil for frying falafel?
A neutral oil with a suitable frying profile works best. You want an oil that lets the herbs, spices, and chickpeas speak for themselves rather than adding a strong flavor of its own.
29. Can falafel be part of a vegetarian meal prep plan?
Very easily. Falafel is one of the best vegetarian meal prep options because it holds well, reheats nicely in the oven or air fryer, and works in wraps, bowls, and platter-style lunches. It is filling, flexible, and easy to pair with vegetables, sauces, and grains.
30. Why does homemade falafel become a repeat recipe?
Because once you understand the texture and the method, it pays you back in many forms. One batch can become a quick lunch, a casual dinner, a platter for guests, or several meal-prep boxes across the week. It is deeply versatile, satisfying, and far more generous than its ingredient list first suggests.