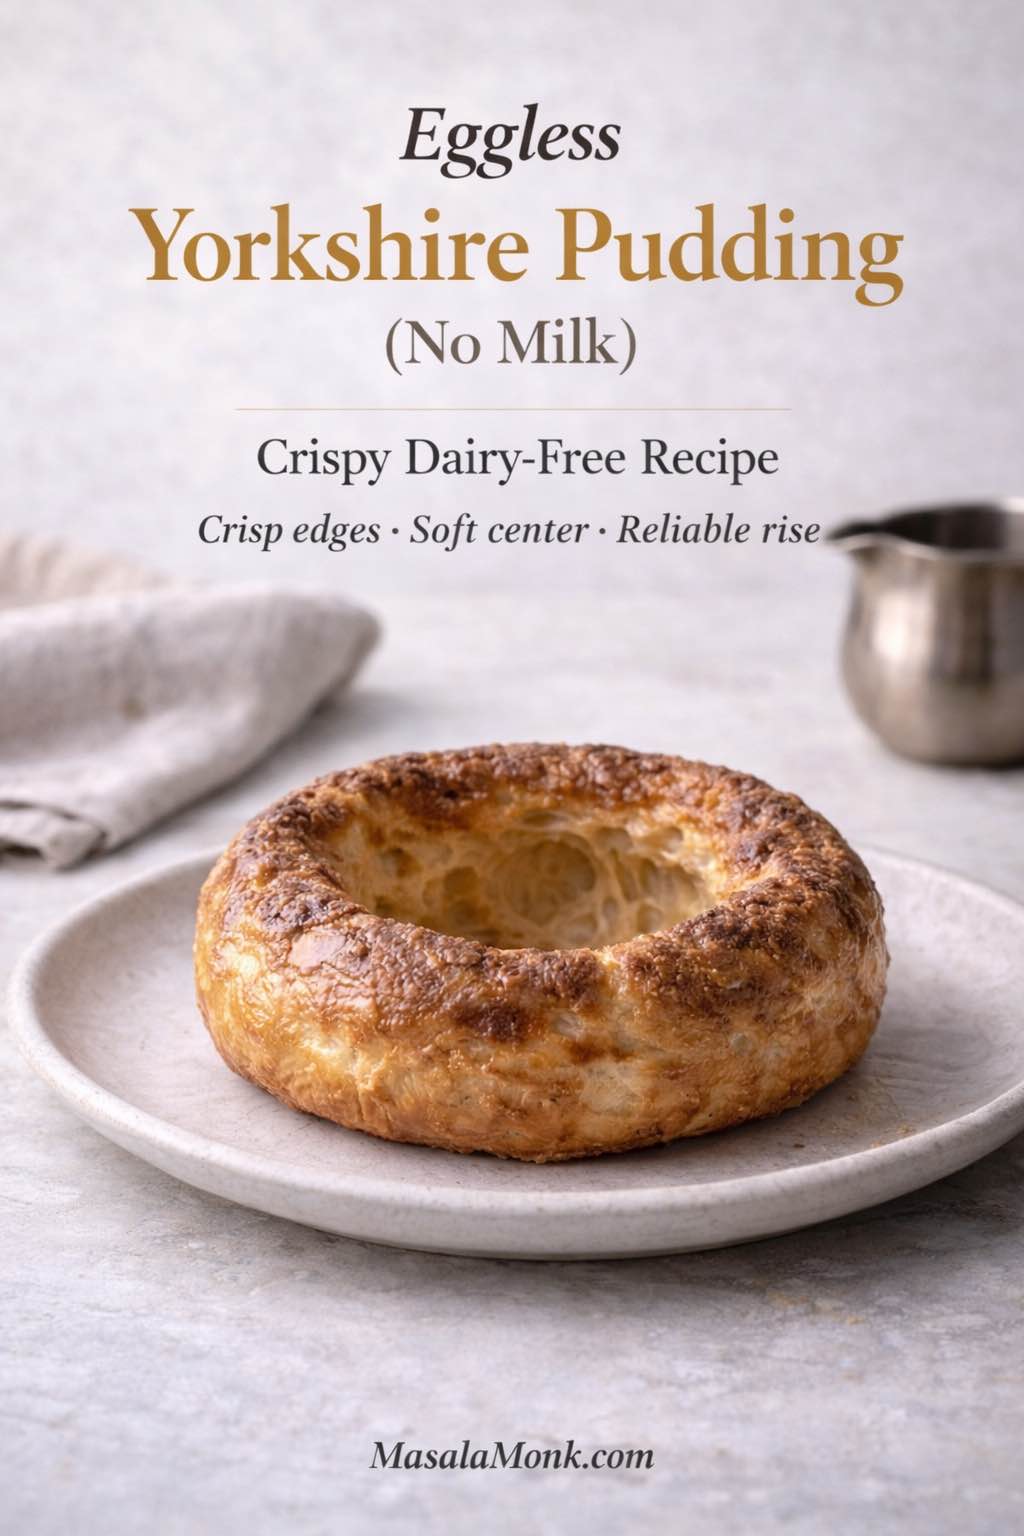
Eggless Yorkshire pudding (no milk) can feel like a contradiction at first—after all, the traditional version depends on eggs for structure and milk for richness. Still, with the right batter consistency and a properly heated tin, you can bake dairy-free Yorkshire puddings that rise tall, turn crisp around the edges, and stay tender in the middle.
If you’re looking for a Yorkshire pudding recipe without eggs, a dairy free Yorkshire pudding recipe, or simply a reliable way to make Yorkshire pudding without milk for a roast dinner or party food, this method is built to be repeatable. It focuses on the same core principles used in the most successful egg-free approaches: a thin, rested batter poured into smoking-hot fat, then baked hot and undisturbed until deeply golden.
Along the way, you’ll see how to tweak the batter for no egg Yorkshire pudding variations, how to choose the best pan for Yorkshire pudding so the rise is consistent, and how to adapt the same base into mini Yorkshire puddings, giant Yorkshires, and stuffed Yorkshire pudding dinners that hold gravy, curry, or stew without collapsing.
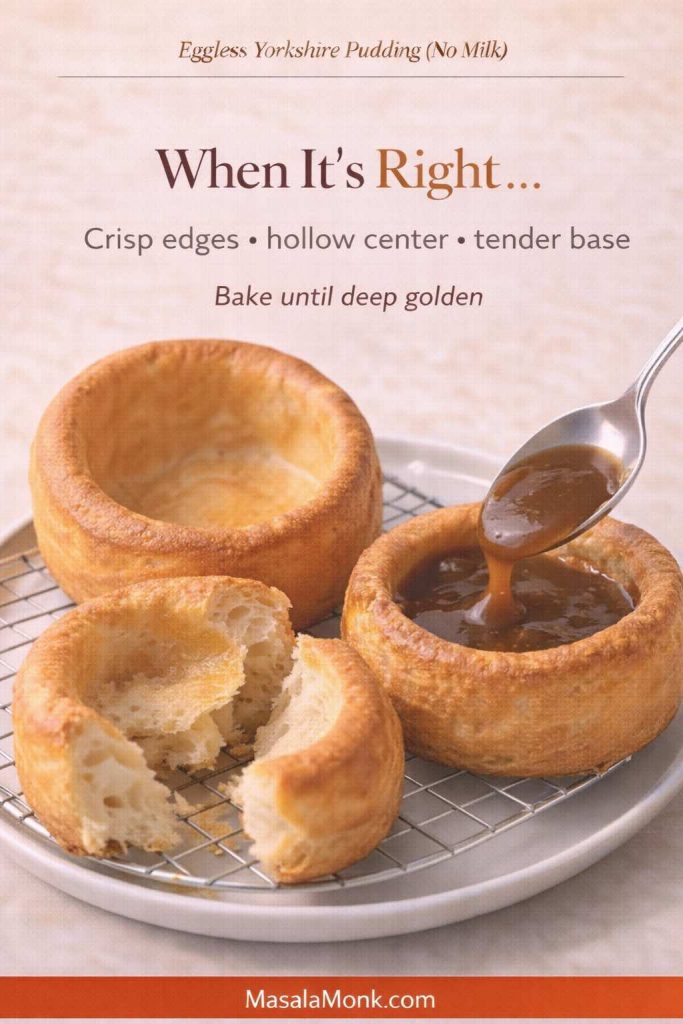
Eggless Yorkshire pudding (no milk): what it’s like when it’s right
When this works, you’ll get a Yorkshire pudding that looks like a popover: browned walls, a hollow center, and edges that shatter a little when you tear one open. The base will be slightly softer than an egg-based version, but still sturdy enough to hold a ladle of gravy or a spoonful of curry.
Also, the flavor is clean and savory rather than “eggy.” If you want a hint of that classic aroma, you can add a tiny pinch of kala namak (black salt)—the same trick used in a lot of egg-free cooking, like in these plant-based breakfast ideas that use tofu as an egg stand-in. Here’s a helpful guide on that approach: plant-based breakfast ideas that use tofu instead of eggs.
Meanwhile, if you’re here because you specifically need a dairy free Yorkshire pudding recipe, the good news is that milk is the easier part to replace. The bigger challenge is structure, which is why you’ll see so much emphasis on heat, resting, and pan choice.
Also Read: Crock Pot Chicken Breast Recipes: 10 Easy Slow Cooker Dinners (Juicy Every Time)
Yorkshire pudding recipe without eggs: the foundation you can trust
This batter is built for two common needs: skipping eggs and skipping milk. If you landed here seeking a Yorkshire pudding recipe without eggs, a dairy-free Yorkshire pudding recipe, or simply Yorkshire pudding without milk that still rises, this is the base to start with. It’s also flexible enough that you can turn it into giant yorkshire pudding, miniature yorkshire puddings, or even a tray-baked yorkshire pudding in a roasting tin.
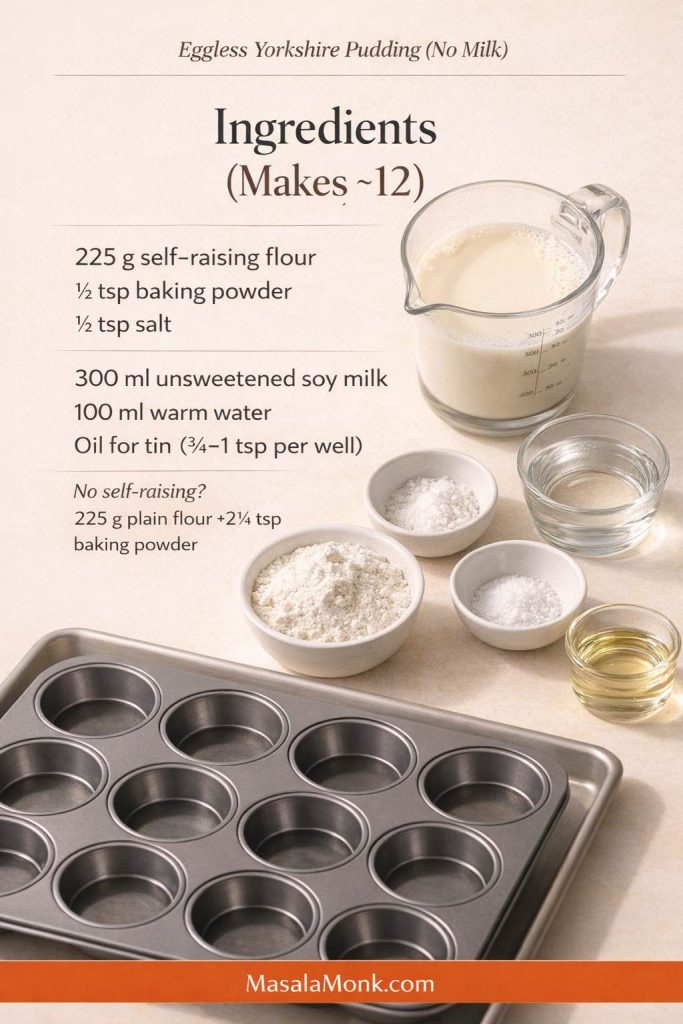
Ingredients (makes about 12 standard puddings)
- 225 g self-raising flour
- ½ tsp baking powder
- ½ tsp fine salt
- 300 ml unsweetened soy milk
- 100 ml warm water
- Neutral oil for the tin (about ¾–1 tsp per hole)
No self-raising flour? Use 225 g plain flour + 2¼ tsp baking powder (instead of ½ tsp) + the same salt.
If you only have plain flour, you can still make this work. Use all-purpose flour and increase baking powder to compensate, similar to the “no self-raising flour” workaround used in a popular vegan yorkshire method here: self-raising flour substitute notes for vegan Yorkshire puddings.
Soy milk is the most reliable milk swap for lift and browning. That said, if you’re avoiding soy or simply prefer homemade, these options are useful:
- For a light, neutral option: how to make almond milk at home
- For a creamy option that behaves better in cooking when strained well: easy homemade oat milk that isn’t slimy
- If you want a broader overview of plant milk choices for everyday cooking: a guide to plant-based milk options
Yorkshire pudding without milk: why the batter has warm water
It’s tempting to pour in plant milk and call it a day, yet warm water has a quiet role here. First, it keeps the batter thin enough to climb. Second, it boosts early steam. Third, it helps the batter hit hot fat without cooling it too much.

That combination matters because Yorkshire puddings rise like popovers. Heat sets the outside quickly while steam expands inside, pushing the batter upward. Without eggs, the rise depends on two things: steam expansion and fast-setting walls. Self-raising flour plus a touch of baking powder helps the batter set before it can slump, while a thin, rested batter makes it easier for steam to push upward. If you enjoy the deep explanation, this is a great technical read on what makes a popover-style rise happen: why hot fat and high heat matter for Yorkshire puddings and popovers.
How to make Yorkshire pudding without eggs or milk
This is where things get satisfying. Once you bake a batch that rises, you’ll start trusting the process, because the rules are simple and repeatable.
1) Preheat the oven properly
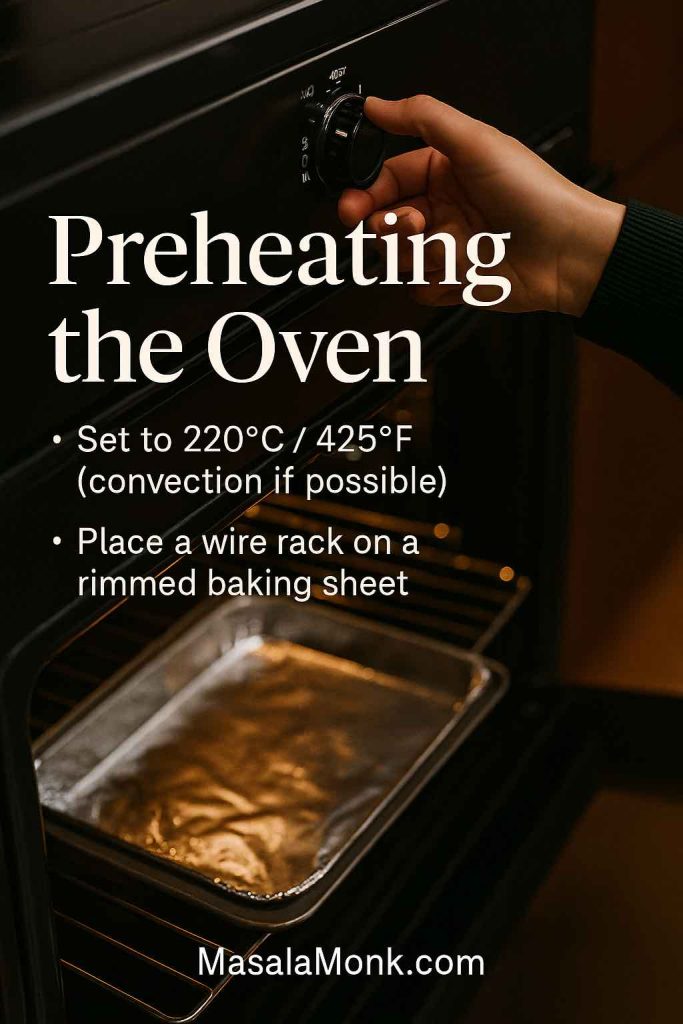
Set your oven to 220°C (or 200°C fan). Don’t rush this. A hot oven is not a suggestion here; it’s the engine.

2) Make the batter, then rest it
Whisk self-raising flour, baking powder, and salt in a bowl. Next, pour in soy milk and warm water, then whisk until smooth.
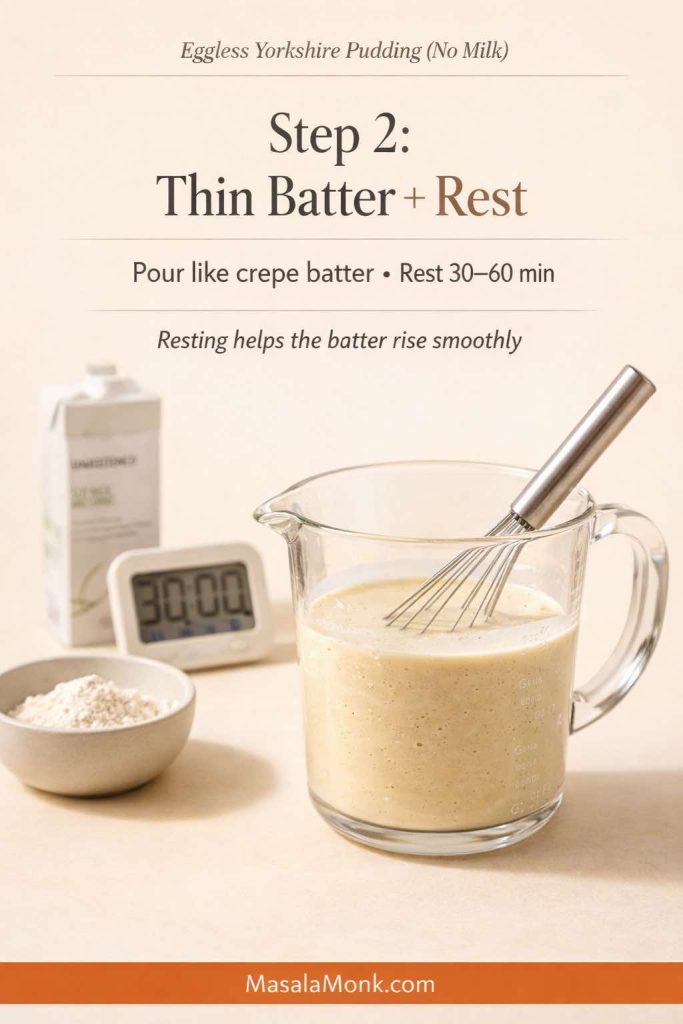
You’re aiming for a pourable batter that looks closer to crepe batter than pancake batter. If it feels thick, add a tablespoon of warm water and whisk again. If it looks thin but smooth, you’re in the right zone.
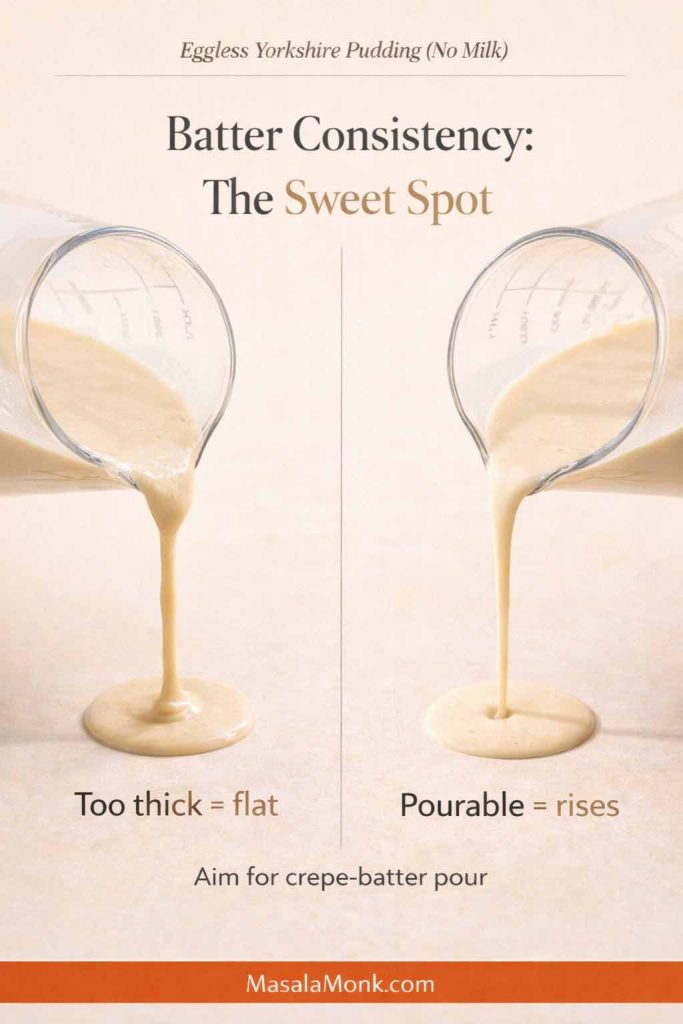
Now let it rest. Ten minutes is the minimum. Thirty minutes is better. An hour is often excellent, particularly if your kitchen is cool. Resting gives the flour time to hydrate, which improves how the batter behaves when it hits hot fat. If you’ve ever noticed how resting changes the texture of other batters, it’s a similar idea—this batter guide for fluffy idlis and crisp dosas captures the concept beautifully: why batter consistency and resting time change the final texture.
3) Heat the tin and oil until it’s fiercely hot
Use a metal muffin tin, ideally a standard 12-hole tin. Add about ¾–1 tsp neutral oil to each hole.
Slide the tin into the oven for 8–10 minutes, until the oil is shimmering and looks almost smoking.

This is the moment that separates flat “muffin-like” results from true Yorkshire rise. In fact, the most consistent egg-free methods emphasize the same thing: deep metal wells and very hot fat. If you want a technique-focused walkthrough from a dedicated vegan approach, this guide breaks down the common failure points clearly: why vegan Yorkshire puddings fail and how to fix them.
4) Pour quickly, then bake without opening the door
Pull the hot tin out carefully. Working quickly, pour batter into each hole—about one-third to one-half full.
Then return the tin to the oven immediately. Bake 18–22 minutes, until puffed and deeply golden.
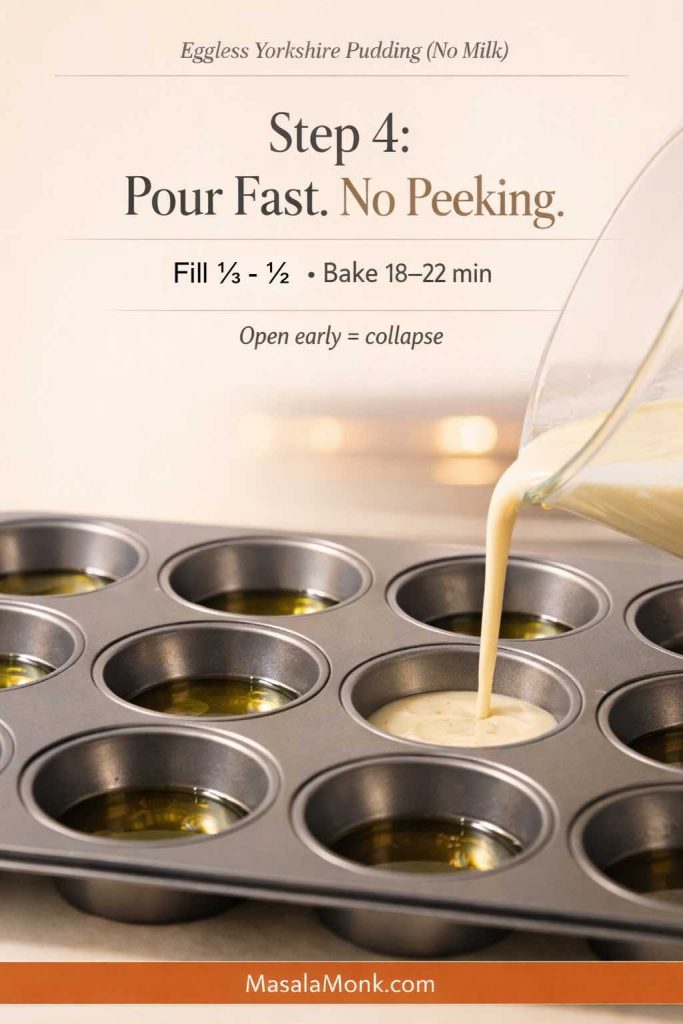
Resist the urge to check early. Opening the door drops heat, and that can collapse an egg-free rise. Instead, trust the timer for the first 18 minutes. After that, check once, quickly, and let them finish browning.
5) Let them set for crispness
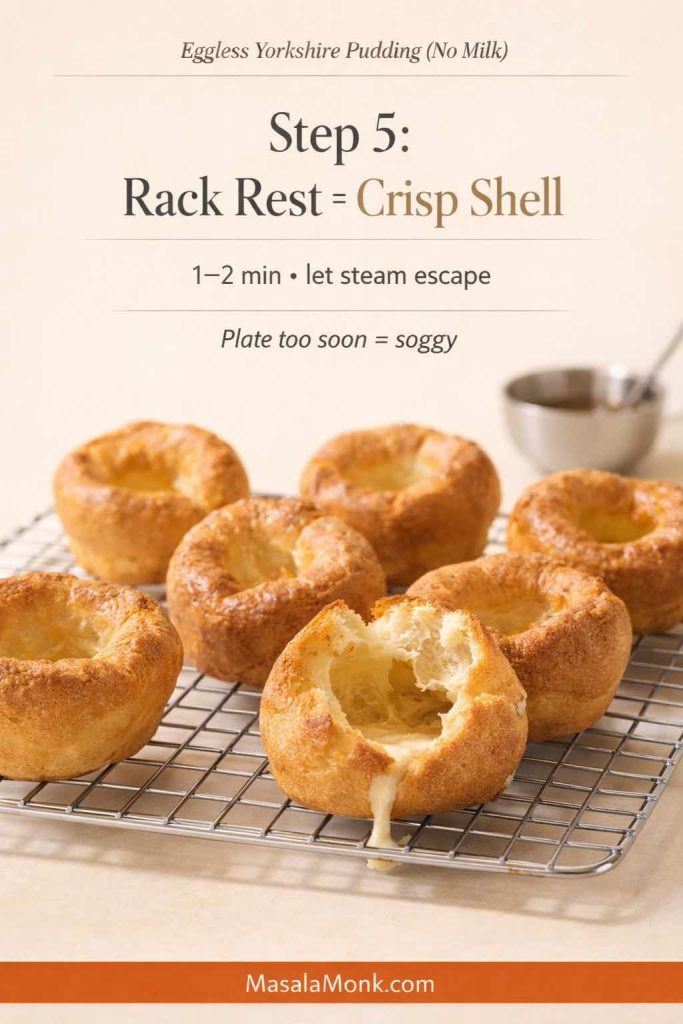
Transfer the puddings to a rack for a minute or two. That tiny pause helps the shell stay crisp rather than steaming itself soft on a plate.
Also Read: Sourdough Starter Recipe: Make, Feed, Store & Fix Your Starter (Beginner Guide)
Egg free Yorkshire pudding recipe: the choice of fat
There’s a reason “beef dripping Yorkshire pudding” is a classic phrase: fat contributes flavor and crispness. However, if you’re making a dairy free yorkshire pudding or plant based yorkshire pudding, neutral oil is the easiest and most consistent.
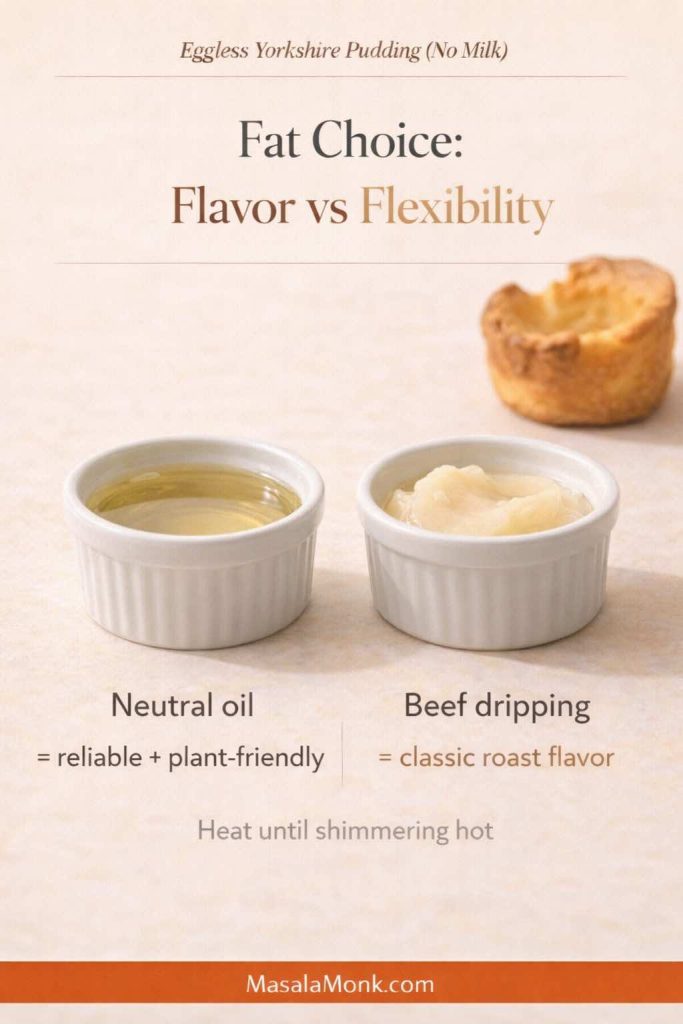
If you do eat beef, you can absolutely bake Yorkshire pudding in beef dripping using this same method. Still, for most kitchens, oil is simply more practical and keeps the recipe accessible.
If you’re curious about oils and smoke points, focus less on perfection and more on the simple rule: pick a neutral fat that can handle high heat.
Also Read: How to make No-Bake Banana Pudding: No Oven Required Recipe
Plant milk swaps for milk free Yorkshire pudding
Plant milks vary wildly. Some are thin, some are thick, some contain gums, and some brown more easily than others. Because of that, swapping milk can change the rise.
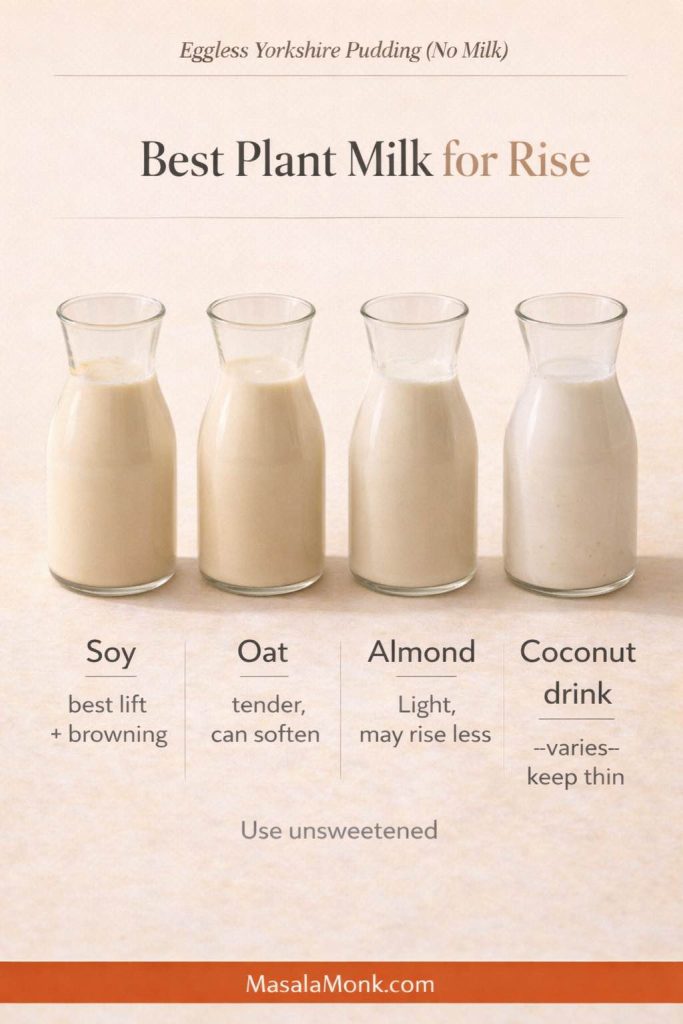
Soy milk (best for consistency)
Unsweetened soy milk usually gives the most dependable lift and browning. It behaves closer to dairy milk in structure than many other plant milks.
Oat milk (tender, sometimes softer)
Oat milk can produce a gentler shell, especially if it’s thickened. If you’re using homemade, strain it well and keep it smooth. This version is designed specifically to avoid the gummy texture that can mess with batters: easy homemade oat milk that isn’t slimy.
Almond milk (lighter taste, sometimes less dramatic rise)
Almond milk works, particularly if you don’t mind a slightly softer set. If you make it at home, keep it simple and unsweetened: how to make almond milk at home.
Coconut milk (use thoughtfully)
This is where many dairy-free cooks get tripped up. Canned coconut milk is rich and heavy; it can make the batter thicker and reduce lift. Coconut milk beverage is lighter and behaves closer to other plant milks. If you’re unsure which you have, this explainer helps: coconut milk basics and how it differs by type.
Best pan for Yorkshire pudding: what matters more than brand
You’ll see endless discussion about the “best yorkshire pudding tin,” and brands do exist for everything from stainless steel yorkshire pudding tins to non stick yorkshire pudding trays. Still, before you get pulled into product debates, focus on the features that genuinely affect your bake.
Metal beats silicone for lift
A metal tray heats quickly and transfers heat into the oil and batter fast. Silicone, on the other hand, is convenient but slower to heat, which often leads to pale, soft puddings. Silicone can still work, particularly for casual batches or smaller ovens, but it’s not ideal when you want tall crowns.
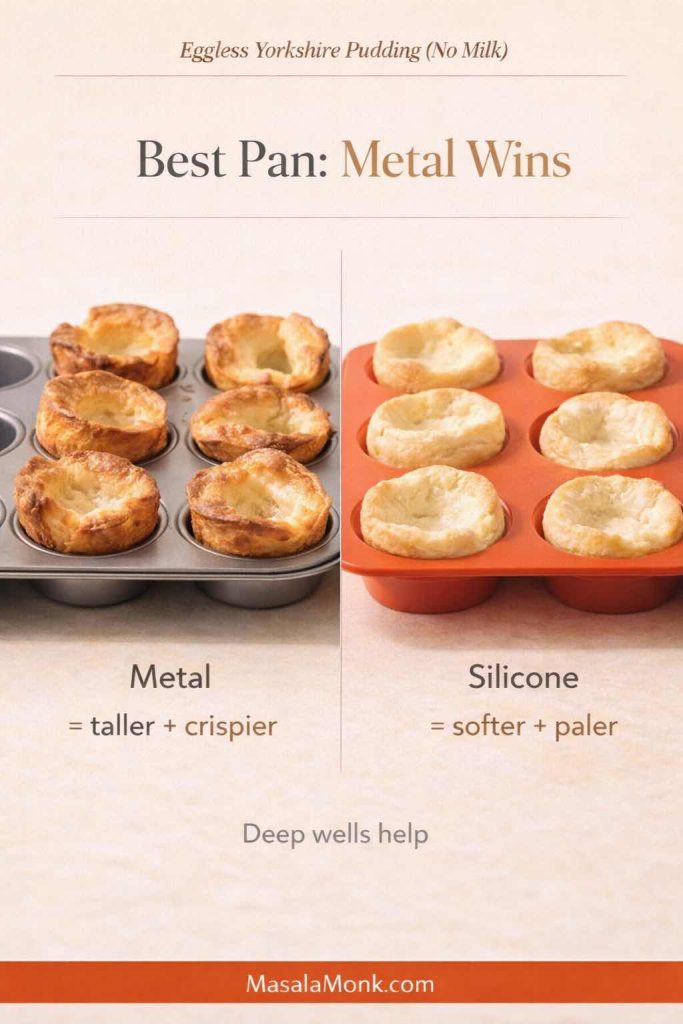
Deep wells matter
A deep muffin pan or popover pan gives batter a vertical runway. That’s why popover pans and deeper yorkshire pudding trays often produce better rise than shallow tins.
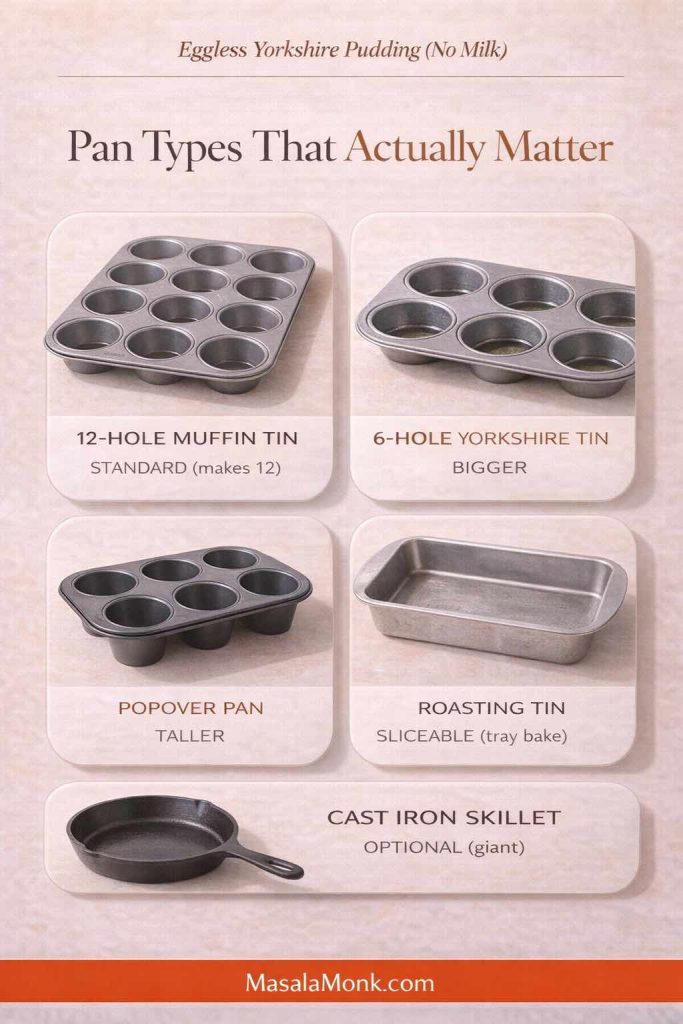
Common tin types you’ll see (and what they’re good for)
- A standard muffin tin (often 12 holes) is a great everyday choice.
- A 6 hole Yorkshire pudding tin gives larger puddings with more dramatic size.
- A 4 hole yorkshire pudding tin is perfect if you want oversized puddings without committing to a whole tray.
- A popover pan is a strong option when you want extra height.
- A roasting tin works for a large tray yorkshire pudding, especially if you like slicing and sharing.
As for materials, stainless steel yorkshire pudding trays and heavy-gauge non-stick tins both work well. Cast iron is also excellent, although it behaves differently: it holds heat for a long time, so you get strong crispness but less flexibility once it’s preheated.
If you own premium cookware like Le Creuset, you can use it; however, you don’t need it. A sturdy pan that heats evenly is enough.
Also Read: Chicken Adobo — Step-by-Step Recipe — Classic Filipino Adobong Manok
Cast iron Yorkshire pudding and giant Yorkshires
A cast iron Yorkshire pudding is the easiest way to make one big, dramatic Yorkshire that you can slice like bread. It bakes up with a bold rise, deeply browned edges, and a center that stays soft enough to soak up gravy.

Start by heating your oven to 220°C (200°C fan). Put a cast iron skillet inside to preheat. Once the oven is hot, carefully remove the skillet, add 1–2 tablespoons of neutral oil, then return it to the oven for 8–10 minutes until the oil is shimmering hot. Pour in your rested batter and immediately put the skillet back into the oven. Bake until the Yorkshire is well-risen and a deep golden brown.
Giant Yorkshires work brilliantly as a centerpiece for roast dinners and for extra-large Yorkshire pudding meals. Slice into wedges and serve alongside gravy, or keep it whole and fill it like a savory bowl with saucy vegetables, beans, or stew.
Also Read: Sweetened Condensed Milk Fudge: 10 Easy Recipes
Mini Yorkshire puddings, miniature Yorkshires, and party food bites
Miniature yorkshire puddings are perfect for parties because they’re easy to fill and serve. Moreover, they feel special without requiring extra effort.
To make mini yorkshires, use the same batter, yet fill each well slightly less. Because the batter layer is thinner, they cook faster. Start checking at around 15–18 minutes.
From there, you can turn them into yorkshire pudding party food in dozens of ways:
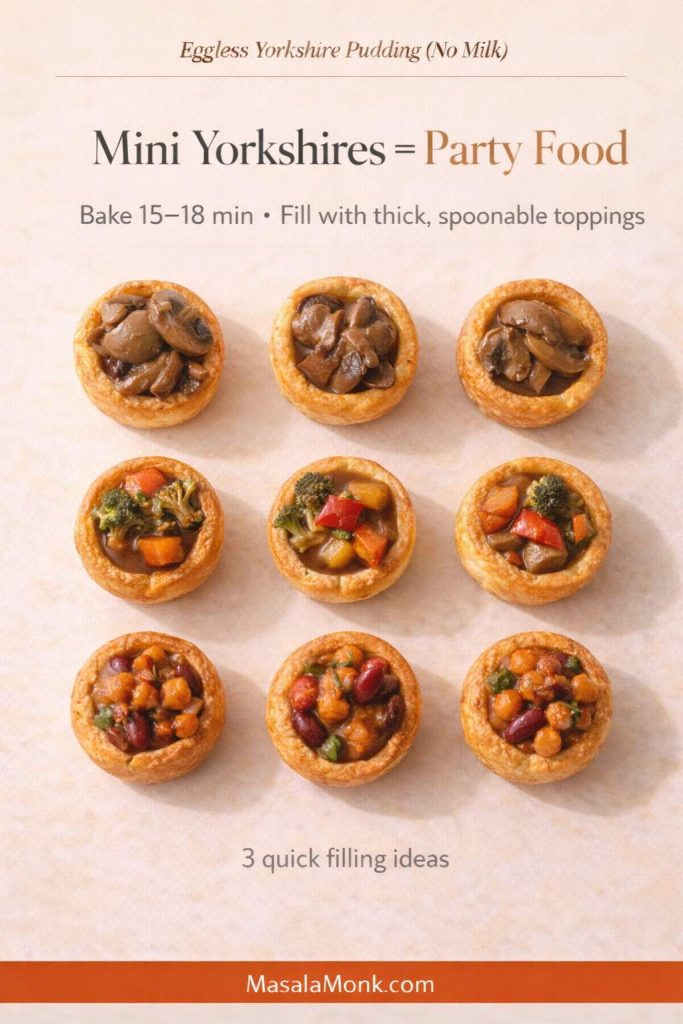
- Fill with thick gravy and roasted vegetables
- Add a spoon of saucy beans
- Top with spiced mushrooms
- Use them as a base for small bites at a holiday table
If you’re serving meat, mini roast beef and yorkshire puddings are a classic combination. If you’re vegetarian, you can do the same structure with roasted vegetables and onion gravy.
Also Read: Sourdough Recipe: 10 Easy Bread Bakes (Loaves, Rolls & Bagels)
Yorkshire pudding pies, stuffed Yorkshires, and “Yorkshire pudding pies” dinners
The phrase yorkshire pies can mean different things depending on who’s talking: sometimes it’s a roast dinner baked into a giant pudding, and sometimes it’s mini puddings stuffed like a canapé. Either way, the idea is the same: the Yorkshire becomes the crust.

For a stuffed yorkshire pudding dinner, bake large puddings in a 6-hole tin, then fill them with:
- roasted vegetables and gravy
- mushrooms and onions
- thick stews or bean-based sauces
For an easy, deeply satisfying option that pairs beautifully with the crisp edges of eggless yorkshires, try a spoonable curry. Rajma works especially well: Punjabi-style rajma curry. Likewise, a coconut-based stew creates a lighter but still comforting pairing: Kerala-style coconut vegetable stew.
You can also go the “Yorkshire pudding pies” route by baking a giant yorkshire pudding in a roasting tin, then piling on your filling and slicing it like a savory pie.
Also Read: Peanut Butter Fudge: Recipes & Guide (8 Methods + Easy Variations)
Vegetarian Yorkshire pudding and plant based Yorkshire pudding dinners
An eggless batter is already friendly for many vegetarian tables. Still, if you want a fully plant based Yorkshire pudding dinner, your fillings matter.
Instead of thinking “roast beef or nothing,” lean into what makes yorkshires great: they love sauce. They love savoriness. They love contrast.
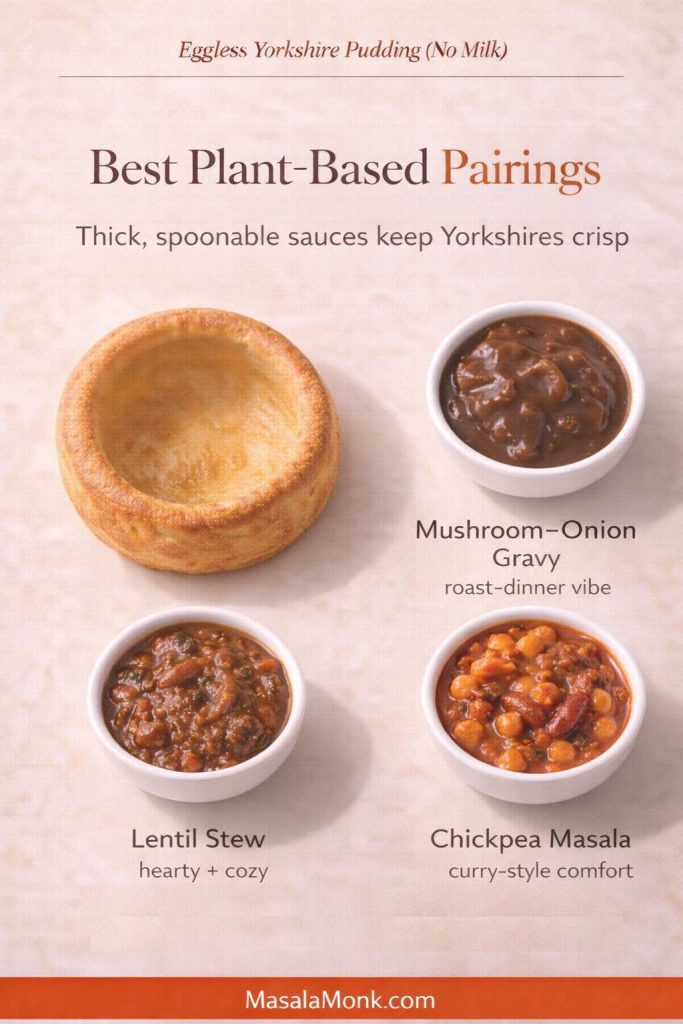
A few plant-forward ideas:
- Mushroom-onion gravy plus roasted carrots and potatoes
- Lentil stew ladled into large yorkshires
- Chickpea masala spooned into mini puddings for a snacky dinner
If you want inspiration for hearty, bowl-friendly soups, these collections can help you build a whole meal around your puddings: vegan lentil soup recipes and yellow moong dal vegan soups.
Eggless Yorkshire pudding with milk: a quick adaptation
Sometimes the need is narrower: eggs are the issue, but milk is fine. In that case, eggless Yorkshire pudding with milk is an easy variation.
Simply replace soy milk with dairy milk. Keep warm water because it helps maintain the thin batter and steam. The rest of the method stays the same: hot oil, hot oven, quick pour, no peeking.
This adaptation is particularly useful when you’re baking for someone with an egg allergy but not dairy intolerance.
Also Read: 10 Vegan Chocolate Cake Recipes (Easy, Moist, & Dairy-Free)
Lactose free Yorkshire pudding and dairy free Yorkshires: what changes, what doesn’t
Lactose free and dairy free sound similar, but they aren’t identical. Lactose-free dairy milk still behaves like dairy milk in baking, so it’s usually an easy swap. Dairy-free, by contrast, shifts you into plant milk territory, which is where thickness and additives can change the rise.
If you’re deciding which dairy alternatives to keep on hand, this overview can help you weigh options: dairy-free milk alternatives and how they differ.
Yorkshire pudding in an air fryer: possible, but choose your setup carefully
Air fryer yorkshire pudding is doable, but it’s fussier than oven-baked. The main challenge is heat stability: you need the oil hot and the cooking environment consistent, which can be harder in smaller baskets.
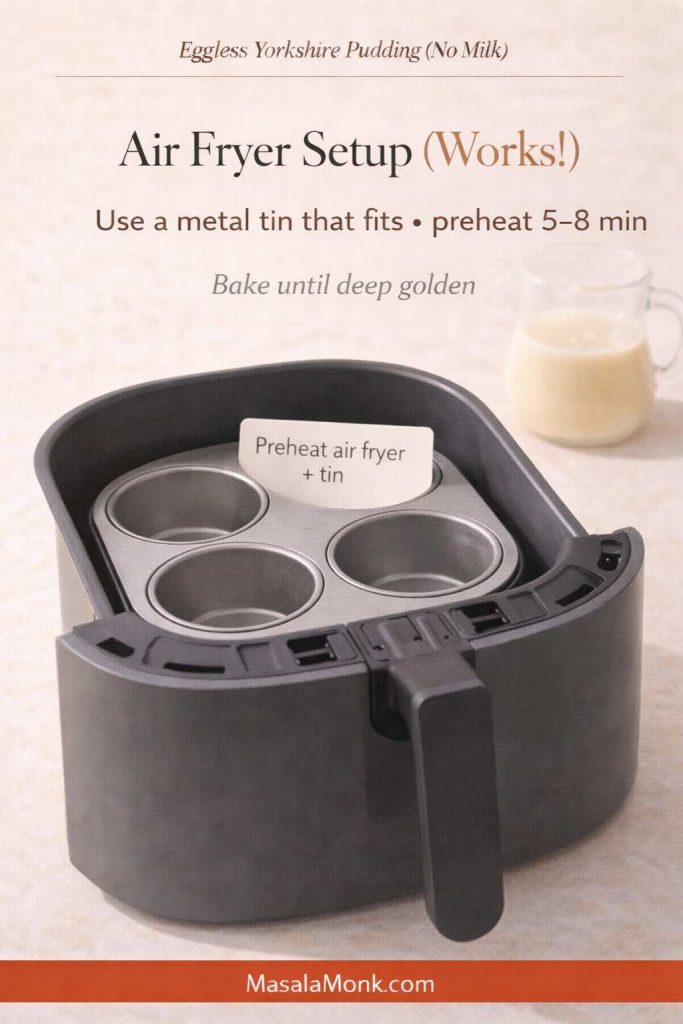
If you want to try it, use a metal tin that fits your air fryer basket and preheat both the machine and the tin. Keep the batter thin. Then cook until deeply browned, not just “set.” Pale egg-free yorkshires tend to turn soft quickly.
Appliances like Ninja are powerful, but even the best air fryer still behaves differently than a full oven. In other words, treat it as a variation, not the gold standard.
Also Read: Baked Ziti Recipe Collection: 15 Easy Variations
Yorkshire pudding tray talk: silicone, non-stick, stainless steel, and everything in between
If you’ve ever gone down the rabbit hole of yorkshire pudding trays, you’ve seen it all: 6 cup yorkshire pudding trays, 12 hole yorkshire pudding tins, ceramic yorkshire pudding trays, shallow yorkshire pudding tins, extra deep yorkshire pudding trays, disposable yorkshire pudding trays, even niche options marketed as air fryer yorkshire pudding trays.
Here’s the practical truth: a heavy, deep metal tin wins most of the time.
Non-stick can be helpful, particularly for easy release, but it isn’t essential if you use enough hot fat. Stainless steel tins heat well, too. Ceramic is slower to heat and tends to soften the crispness. Silicone is the most convenient but least punchy.
Brands exist everywhere—Tefal, MasterClass, and store lines from Argos, among others—yet your method matters more than a logo.
Also Read: Vegan Mayo Recipe Guide: 5 Plant-Based Mayonnaise
Golden, crisp, and not flat: troubleshooting eggless Yorkshire pudding
When egg-free yorkshires fail, they usually fail in predictable ways. Thankfully, the fixes are equally predictable.
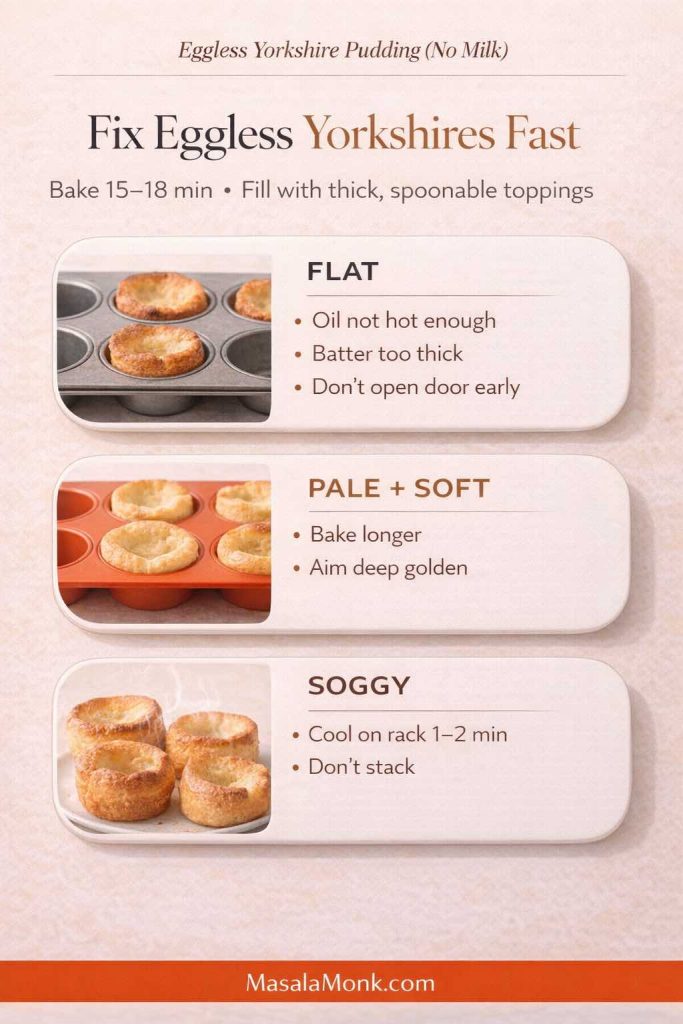
When the puddings don’t rise
This is almost always one of the following:
The oil wasn’t hot enough.
It needs to be shimmering-hot before batter touches it.
The batter was too thick.
Thin it slightly with warm water. A thick batter sets too fast and can’t climb.
The pan didn’t heat properly.
Metal pans help. Deep wells help. Preheating helps.
The oven temperature was too low or unstable.
Give your oven time to fully preheat. Don’t open the door early.
If you want a detailed breakdown of common failure points from a technique-driven vegan approach, this guide is worth reading once: a detailed vegan Yorkshire pudding method with common fixes.
When they’re pale and soft
Browning is not just about looks. It’s about texture.
Bake longer. Aim for deeper color. Also, cool on a rack so steam escapes.
When they taste bland
Increase salt slightly. Also, consider a pinch of mustard powder, black pepper, or kala namak if you like that subtle savory “eggy” note.
Also Read: Potato Salad Recipe: Classic, Russian, German, Vegan & More
Vegan gluten free Yorkshire pudding recipe notes (if you need it)
Sometimes the ask is bigger: vegan and gluten free yorkshire pudding, gluten free vegan yorkshire puddings, or dairy and gluten free yorkshire pudding. The truth is that gluten-free versions can be done, but they’re more sensitive because structure shifts again.
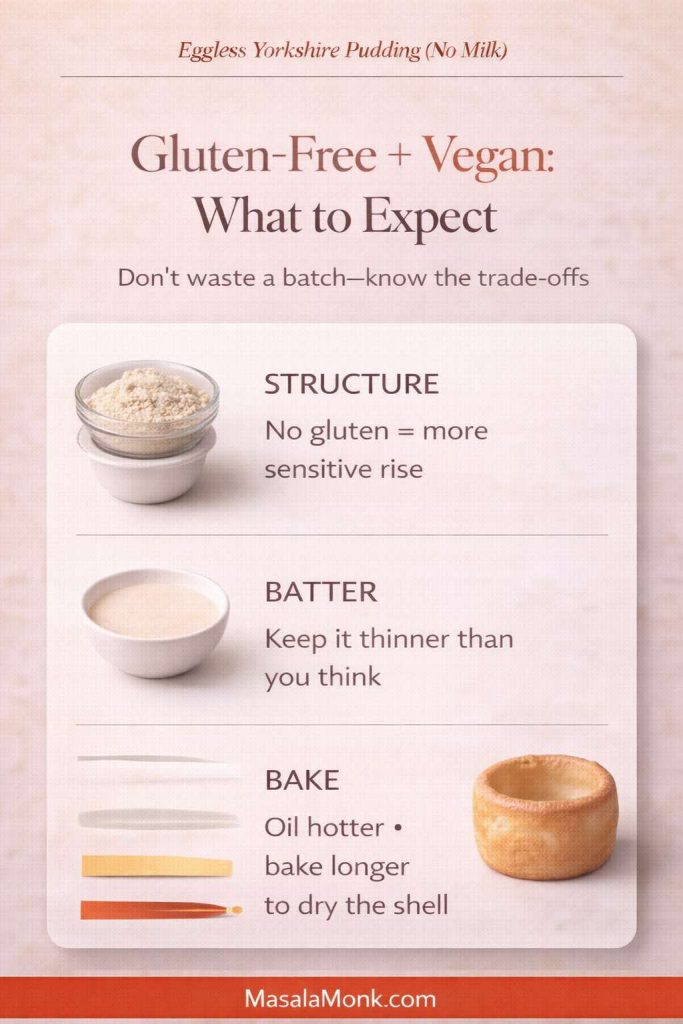
If you want to keep this post focused, you can treat gluten-free as a separate recipe later. Still, if you need a quick direction right now, most successful approaches use a blend of gluten-free flour plus starch, while keeping the batter thin and the oil extremely hot.
A useful example of the gluten-free plus vegan approach is here: a gluten-free vegan Yorkshire pudding method. Treat it as a reference, then adjust based on how your batter behaves.
Also Read: High Protein Overnight Oats | 5 Recipes (Low Calorie, Vegan, Bulking & More)
Keto Yorkshire pudding and “free from” variations
Keto yorkshire pudding is usually built around low-carb flours and often relies on eggs for structure, which doesn’t align with an eggless goal. If you want egg-free and keto together, you’ll likely be experimenting more, and results can vary.
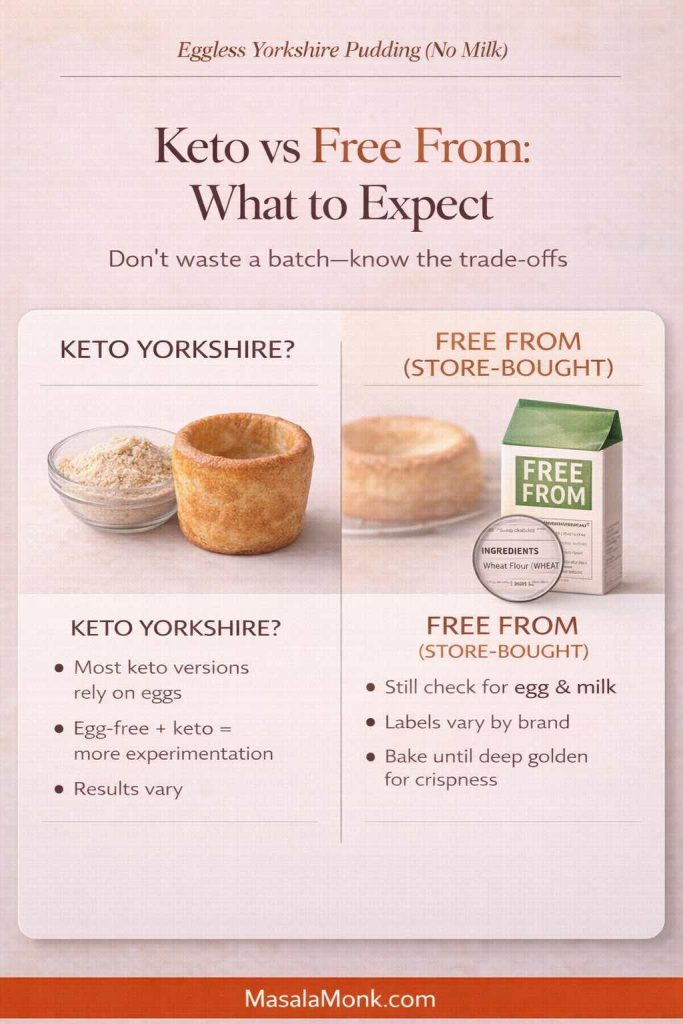
On the other hand, “free from Yorkshire puddings” often refers to store-bought options that avoid specific allergens. If you’re baking from scratch, you get more control and usually better texture.
Also Read: Keto pancakes that actually taste like pancakes
Make-ahead eggless Yorkshire puddings: batter, storage, and re-crisping
If you’re cooking for a holiday, a roast, or a crowd, make-ahead matters.
Can you rest batter longer?
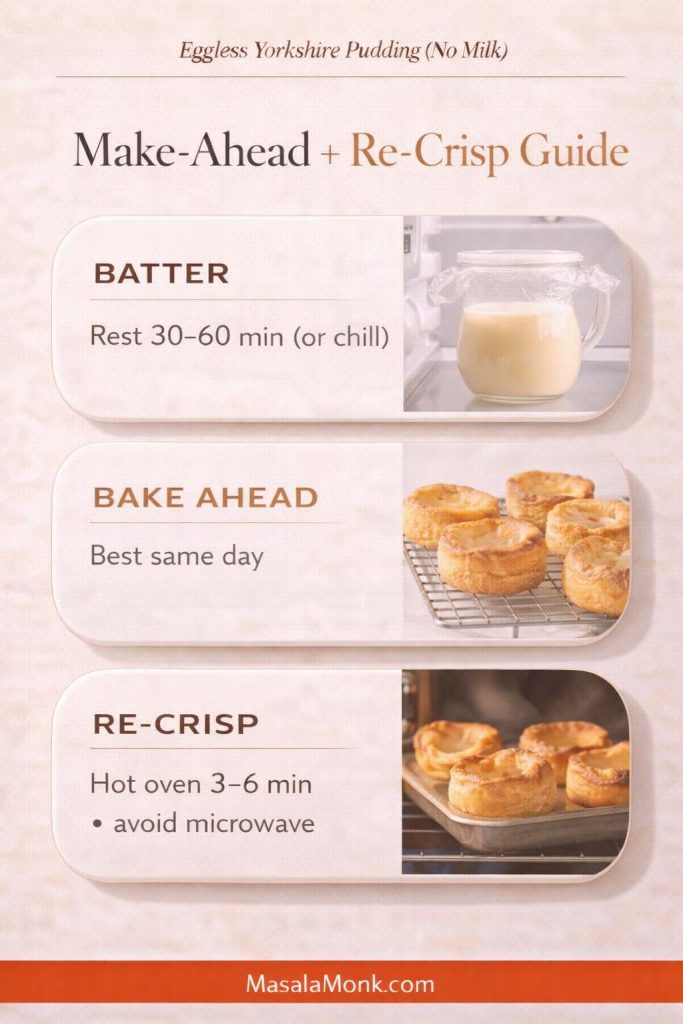
Yes. In fact, resting longer often improves consistency. Refrigerating batter for several hours can work too, although you’ll want to bring it closer to room temperature before pouring so it doesn’t chill the oil on contact.
Can you bake ahead?
You can, but they’re best fresh. Still, you can bake them earlier in the day and reheat in a hot oven to revive crispness. Keep them spread out rather than stacked so steam doesn’t soften them.
How to reheat
A hot oven for a few minutes usually brings back the shell. Avoid microwaving if you can; it tends to soften the structure.
Also Read: Béchamel Sauce for Lasagna: Classic, Vegan & Ricotta Sauce Recipe
Ready made Yorkshire pudding, frozen Yorkshires, and premade options
Sometimes you don’t want a project. Maybe you’re building a meal fast, or maybe you want a backup plan.
Ready made yorkshire pudding and frozen yorkshire pudding options exist in many places. In the UK, brands like Aunt Bessie’s are widely recognized, and supermarkets like Marks and Spencer, Sainsbury’s, Asda, and Ocado often carry variations—sometimes including giant yorkshire pudding trays or mini yorkshire puddings frozen. In the US, stores such as Whole Foods Market or Publix may stock British-style items seasonally or through specialty ranges, depending on location and time of year.
Those premade options can be handy, especially for a holiday table. Even so, if you’re after a true eggless yorkshire pudding, label-reading matters because many premade products still contain egg and milk.
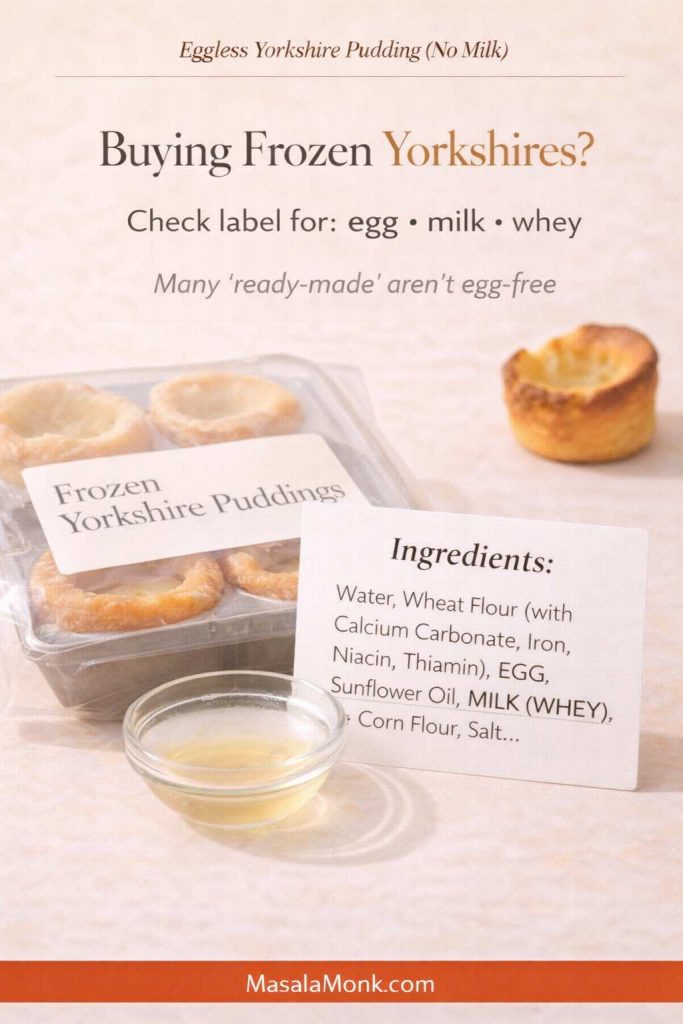
If you do buy frozen puddings, crisp them well in a hot oven. Most of the disappointment people feel with store-bought yorkshires comes from under-baking and pale reheating.
Also Read: Vegan French Toast: 6 Easy Recipes (Pan, Air Fryer, GF & High-Protein)
Serving ideas that make these feel like a full meal
Yorkshire puddings love saucy foods. That’s true whether you’re doing a classic roast, a vegetarian dinner, or a plant-based spread.
Two of my favorite pairings for a dairy free yorkshire pudding dinner are:
- Punjabi-style rajma curry for thick, spoonable comfort
- Kerala-style coconut vegetable stew for a lighter but deeply satisfying pour-over
If you want an external gravy reference that fits a traditional roast dinner mood, these are reliable:
Drinks that go beautifully with eggless Yorkshire puddings
Yorkshires are often served at dinner, yet they also work at brunch, as a snack board, or as part of a cozy winter spread. Drinks can set the mood in a way that feels effortless.
For a warm pairing, try:
- masala chai recipes for something fragrant and comforting
- a cappuccino recipe for a café-style brunch vibe
- coffee and hot chocolate ideas when you want something dessert-like without being heavy
If you’re hosting adults and want a “holiday table” drink, you can also lean into cocktails:
- cold brew espresso martini
- spiced espresso martini ideas
- easy Kahlúa drink ideas
- creative gin cocktails
A slightly more advanced variation: extra lift with aquafaba
If you’ve baked the base version and want taller crowns, aquafaba can help. It’s the liquid from canned chickpeas, and it behaves surprisingly well in egg-free baking when paired with heat and a thin batter.
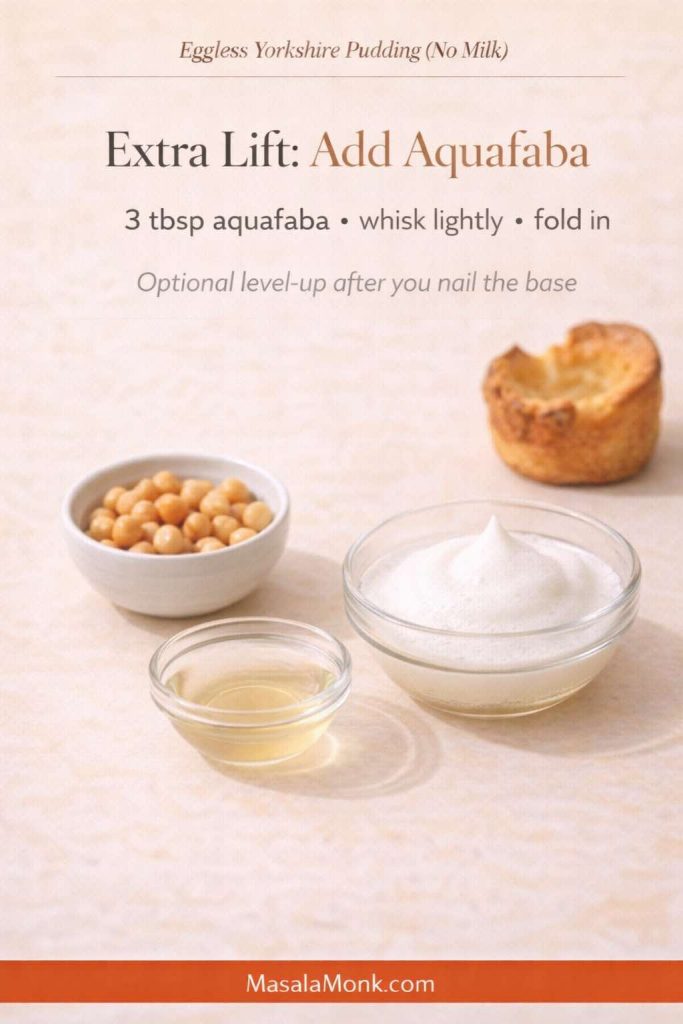
A detailed approach that many cooks follow is here: an aquafaba-based vegan Yorkshire pudding method for extra lift.
You don’t need aquafaba to succeed, though. Think of it as the “level up” variation once you’ve nailed the foundation.
Also Read: How to Cook Tortellini (Fresh, Frozen, Dried) + Easy Dinner Ideas
A gentle closing note (because this recipe is worth repeating)
Eggless yorkshire pudding can feel like a contradiction the first time you hear it. Nonetheless, once you understand what really drives the rise—hot fat, a thin rested batter, and steady oven heat—it stops feeling mysterious and starts feeling almost inevitable.
Bake a batch on a regular day first, when you’re not under pressure. Then, once you’ve seen them lift, you can confidently scale up for holidays, turn them into miniature yorkshire puddings for party food, bake a giant yorkshire pudding tray for a centerpiece dinner, or keep the batter ready for a quick comfort meal that doesn’t rely on eggs or dairy at all.
And if you’re experimenting, keep the method steady while you change one variable at a time. That way, every batch teaches you something useful—plus, you still get Yorkshire puddings at the end, which is rarely a bad outcome.
Also Read: 19 Essential Kitchen Tools That Make Cooking Easier
FAQs about No-Milk Eggless Yorkshire pudding
1) Can I make eggless Yorkshire pudding with no milk and still get a good rise?
Yes. Eggless Yorkshire pudding (no milk) rises when three things line up: a thin batter, very hot fat in the tin, and a fully preheated oven. When those are right, the batter lifts up the sides and sets into a crisp shell with a tender center.
2) What’s the difference between “dairy free Yorkshire pudding” and “lactose free Yorkshire pudding”?
Dairy-free means no dairy ingredients at all (no milk, no butter, no whey). Lactose-free can still use dairy milk that has had lactose removed. In practice, lactose-free behaves like regular milk in baking, whereas dairy-free relies on plant milk and can change browning and texture.
3) Which plant milk works best for Yorkshire pudding without milk?
Unsweetened soy milk is the most reliable for structure and browning. Oat milk can be softer depending on thickness, while almond milk usually tastes lighter but may rise a bit less. Whichever you choose, use unsweetened milk and keep the batter pourable.
4) Can I make eggless Yorkshire pudding with milk if I’m only avoiding eggs?
Absolutely. Use the same method, keep the batter thin, and swap the plant milk for regular milk. The heat and timing stay the same, so you still get crisp edges and a hollow center.
5) Why did my Yorkshire pudding without egg turn out flat?
Most flat egg-free Yorkshires come from one issue: the fat wasn’t hot enough when the batter went in. Another common cause is batter that’s too thick to climb. Finally, opening the oven too early can collapse the rise before the shell sets.
6) Why are my milk free Yorkshire puddings soggy?
Sogginess usually means they didn’t bake long enough to set a firm shell, or they steamed on a plate instead of cooling briefly on a rack. Also, overfilling the wells traps moisture and prevents crisp edges.
7) How long should I rest the batter for no egg Yorkshire pudding?
Rest at least 10 minutes. For steadier results, rest 30–60 minutes. Resting hydrates the flour and helps the batter expand more smoothly when it hits hot oil.
8) What pan is best for eggless Yorkshire puddings: muffin tin, popover pan, or Yorkshire pudding tin?
A metal muffin tin or popover pan gives the most consistent rise because it heats fast and creates strong oven spring. A 6 hole Yorkshire pudding tin makes larger puddings, though it may need extra baking time. Silicone trays are convenient, yet they often brown less and rise less because they don’t transfer heat as aggressively.
9) Can I use a cast iron Yorkshire pudding pan for a giant Yorkshire?
Yes. Cast iron holds heat extremely well, so it’s ideal for a giant Yorkshire pudding or an extra large Yorkshire pudding that you slice into wedges. Preheat the skillet with oil until shimmering hot, then pour the batter and bake until deeply golden.
10) What’s the best oil for Yorkshire puddings if I’m not using beef drippings?
Use a neutral high-heat oil such as sunflower, rapeseed/canola, or vegetable oil. The key is getting it hot enough before adding batter. For traditional flavor, beef dripping works, yet it won’t be suitable for vegan or plant based Yorkshire pudding.
11) Can I make Yorkshire pudding in beef dripping with an eggless batter?
Yes, the cooking method stays the same. The batter can be egg-free while the fat is beef dripping. Just remember it won’t be vegan or vegetarian.
12) Can I cook Yorkshire pudding in an air fryer?
You can, provided you use a metal tin that fits and you preheat both the air fryer and the tin well. Because air fryers vary, timing will differ; therefore, focus on deep browning for crispness rather than stopping as soon as they look set.
13) Is there a reliable gluten free vegan Yorkshire pudding option?
There are workable versions, but they’re more sensitive because gluten-free flour blends behave differently. A thinner batter, very hot oil, and a longer bake to dry the shell are especially important for gluten free vegan Yorkshire puddings.
14) How do I make mini Yorkshire puddings for party food?
Use the same batter, then fill each well slightly less than usual so they bake faster and stay crisp. Miniature Yorkshire puddings are perfect for fillings like gravy, mushrooms, or saucy vegetables.
15) What are “Yorkshire pudding pies” and “stuffed Yorkshire pudding” meals?
Yorkshire pudding pies usually mean a large Yorkshire baked in a tray or skillet and served with a generous filling, almost like a crust. Stuffed Yorkshire pudding is the same idea in individual form: bake larger puddings, then fill them with roast-style sides or thick, spoonable sauces.
16) Can I buy vegan Yorkshire pudding or pre made Yorkshire puddings instead?
In some places you’ll find ready made Yorkshire pudding, frozen Yorkshires, or pre made Yorkshire puddings. However, many contain egg or milk, so check ingredients carefully if you need egg free or dairy free.
17) How do I reheat eggless Yorkshire puddings so they stay crisp?
Reheat in a hot oven until the edges feel dry and crisp again. Avoid microwaving because it softens the shell. For best texture, reheat them spaced out so steam can escape.
18) How many Yorkshire puddings does this recipe make, and can I scale it?
A standard batch typically makes about 12 in a muffin tin of eggless yorkshire pudding, depending on how full you pour. You can scale up easily; nonetheless, bake in batches so the tin and oil stay properly hot for each round.
19) What’s the simplest “perfect eggless Yorkshire pudding mix” approach for beginners?
Keep it basic: self-raising flour, baking powder, salt, plant milk, warm water. Then focus on the method—rest the batter, heat the oil until shimmering, pour quickly, and bake without opening the oven early.
20) Can I make Yorkshire pudding for two people without wasting batter?
Yes. Make a smaller batch by halving the ingredients, or bake a full batch and reheat extras later. Even when scaled down, the method remains identical: thin batter, hot fat, and steady oven heat.

