Posted on — Leave a comment

Turkey Pot Pie Recipe: Easy, Creamy & Perfect for Leftover Turkey

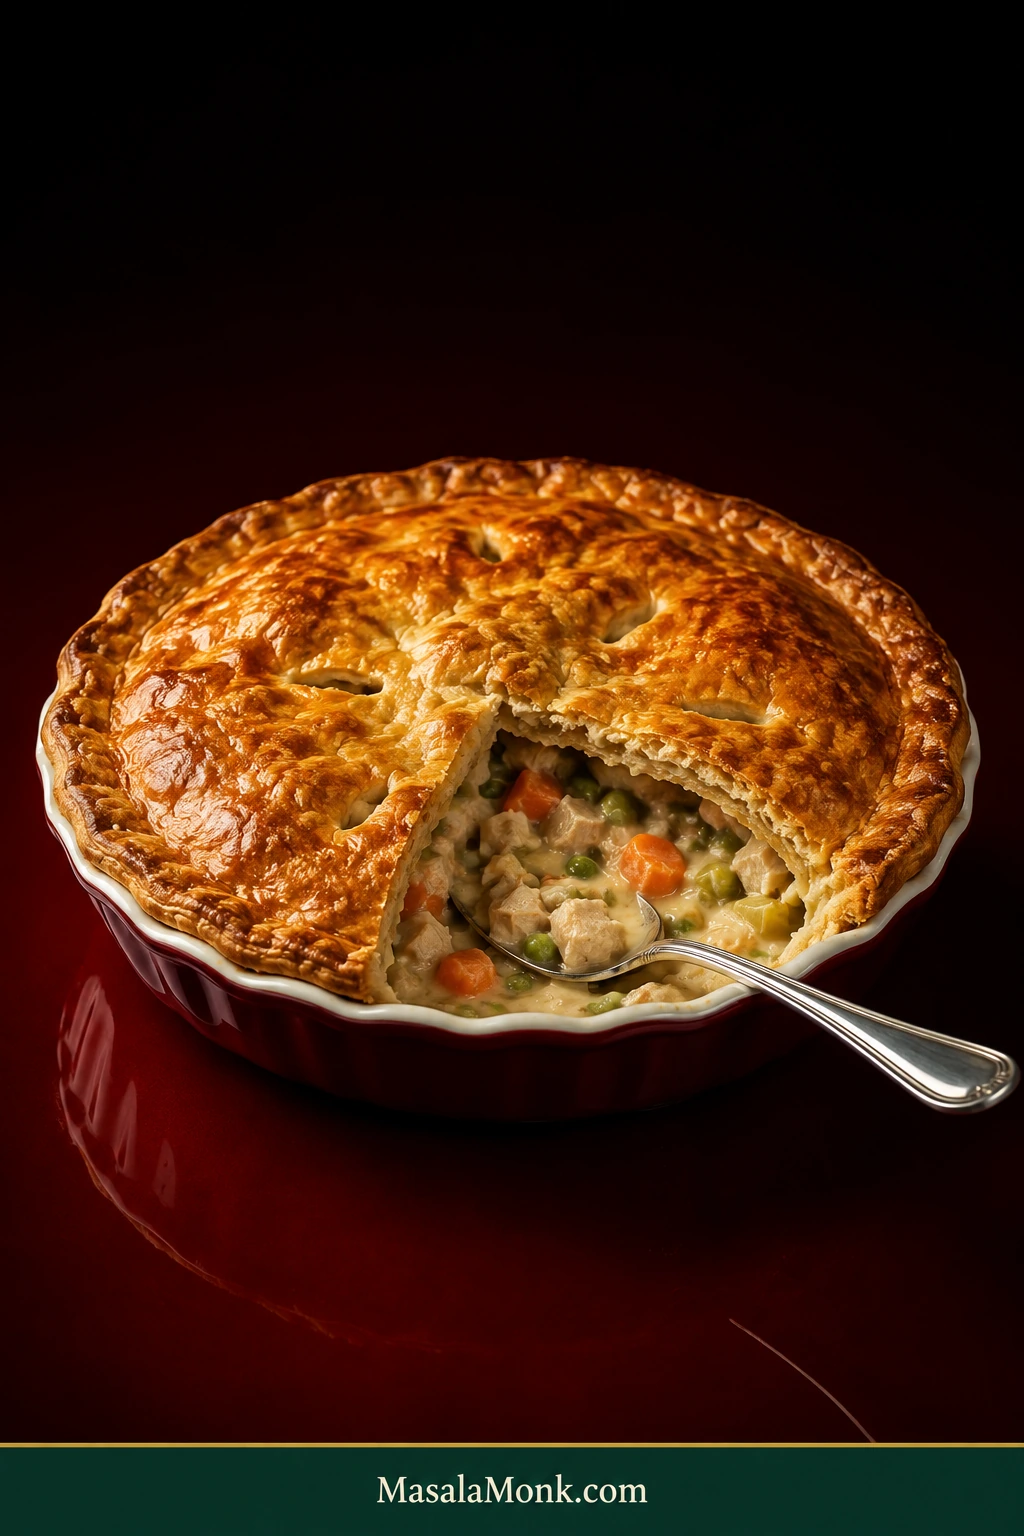
Deep burgundy pie dish holding a golden turkey pot pie with one serving removed, revealing creamy turkey, carrots, peas and celery beneath the top crust.

Leftover turkey is already halfway to becoming an excellent pot pie.

Maybe there is a container of roast turkey in the fridge, a little gravy, a few vegetables from Thanksgiving dinner—and very little enthusiasm for eating the same plate again. Maybe the breast meat is not as juicy as it was the first night. That is fine. Pot pie gives all of it a different job.

This version keeps the second round of cooking practical: one top crust, refrigerated pie dough if you want it, frozen vegetables if they make dinner easier, and a sauce that adjusts to however much leftover gravy you actually have. You already cooked Thanksgiving dinner; this doesn’t need to become another project. Get the vegetables nearly tender and the filling creamy before the crust goes on, and the payoff is a deeply golden top that cracks under the spoon with tender turkey and savory sauce underneath.

Quick Answer

For one easy 9-inch / 23-cm turkey pot pie, use 3 cups / 12–13 oz / 340–370 g cooked turkey. Cook the vegetables until nearly tender, make a creamy butter-and-flour sauce with broth and milk, then add the turkey after the sauce has thickened.

The creamy filling is made with a simple butter-and-flour roux, broth and milk, so no canned cream soup is needed. Leftover turkey gravy can replace part—or most—of that fresh sauce when you have it.

Transfer the filling to a deep pie dish, leaving 1/2 inch / 1.25 cm of headroom. Let it stand until it is still warm but no longer giving off strong clouds of steam, then cover with a cold top crust.

Bake at 400°F / 205°C for 30–35 minutes, until the pastry is deeply golden and you can see filling bubbling through the vents or around the edges. Rest the pie for 15 minutes before serving. Hands-on work is roughly 35–40 minutes; much of the remaining time is baking, cooling and resting.

Table of Contents


Turkey Pot Pie Recipe

Easy Creamy Leftover Turkey Pot Pie

Servings: 6 generous portions
Dish: Deep 9-inch / 23-cm pie dish
Oven: 400°F / 205°C
Hands-on time: 35–40 minutes
Bake time: 30–35 minutes
Rest time: 15 minutes
Total time: 1 hour 30 minutes to 1 hour 45 minutes

Using leftover gravy? Do not add it to the full standard sauce below. Use the leftover gravy adjustments instead. Omit the 1/4 teaspoon starting salt when using gravy and season only after the gravy and turkey are both in the filling.

Fastest vegetable shortcut: Keep the onion and garlic, but replace the carrot, celery and peas with 2 cups frozen mixed vegetables. Soften the onion first, add the frozen vegetables and cook until hot and any obvious excess water has evaporated, then add the garlic and continue with the flour.

Ingredients

Creamy Turkey Filling

  • 3 tablespoons / 42–43 g unsalted butter, divided
  • 3/4 cup / 115 g finely diced yellow onion
  • 3/4 cup / 95 g carrot, cut into 1/4- to 1/3-inch / 6- to 8-mm pieces
  • 1/2 cup / 60 g celery, finely diced
  • 2 garlic cloves, minced
  • 1/3 cup / 40 g all-purpose flour
  • 2 cups / 480 ml low-sodium turkey or chicken broth
  • 1/2 cup / 120 ml whole milk
  • 1 teaspoon dried thyme
  • 1/4 teaspoon celery seed
  • 1/2 teaspoon freshly ground black pepper
  • 1/4 teaspoon fine salt to start, plus more if needed (omit if using leftover gravy)
  • 3 cups / 12–13 oz / 340–370 g cooked turkey, chopped or loosely shredded into bite-size pieces
  • 3/4 cup / 100 g peas, frozen is fine
  • Up to 1 teaspoon Worcestershire sauce, optional

Crust

  • 1 refrigerated rolled pie-crust round, or 1 chilled homemade pie-dough disc rolled to 11–12 inches / 28–30 cm across
  • 1 large egg + 1 tablespoon milk or water for egg wash, optional but recommended for a deeper golden, glossy crust

Equipment

  • Large skillet or wide saucepan
  • Whisk
  • Silicone spatula or wooden spoon
  • Deep 9-inch / 23-cm pie dish
  • Rimmed baking sheet
  • Small sharp knife

Pie dishes vary in depth. Do not force every spoonful into a shallow dish. Stop when the filling sits about 1/2 inch / 1.25 cm below the rim and bake any extra separately in a small ramekin.

Method

Cook the Filling

  1. Heat the oven. Preheat to 400°F / 205°C and keep a rimmed baking sheet ready.
  2. Cook the vegetables. Melt 2 tablespoons butter in a large skillet over medium heat. Add the onion, carrot and celery and cook for 7–10 minutes, until the onion is soft and a piece of carrot can be pierced with only slight resistance. Add the garlic and cook for 30 seconds, just until fragrant.
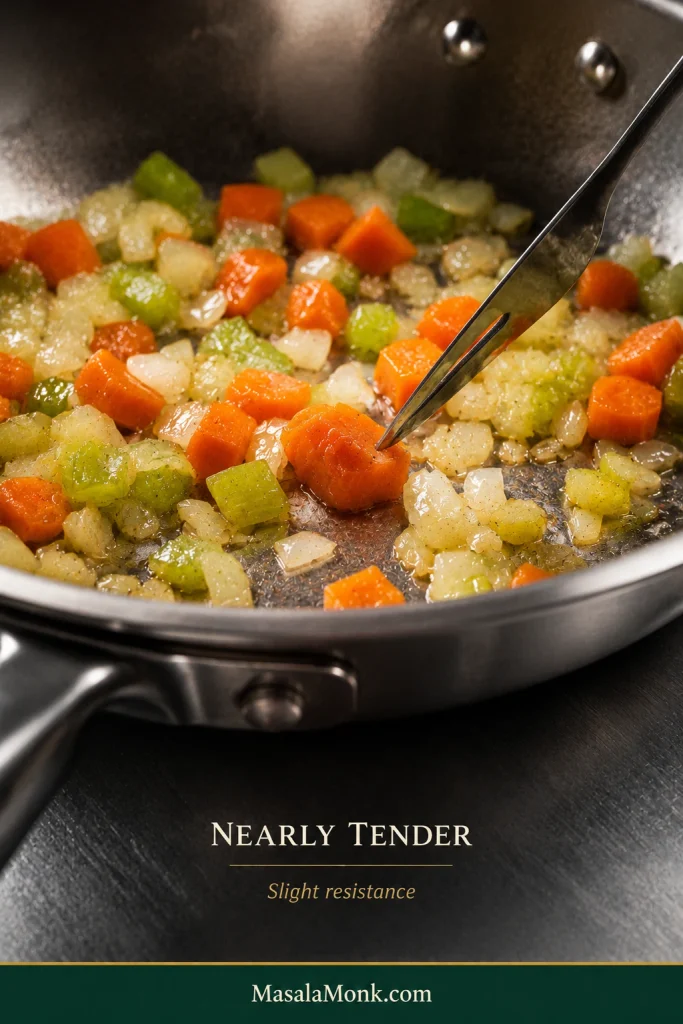
Fork testing a small carrot piece in a stainless skillet with softened diced onion and celery. Text reads “Nearly tender — Slight resistance.”
Test a carrot rather than trusting the clock. Slight resistance means it can finish in the oven without a hard center.
  1. Make the roux. Add the remaining tablespoon butter. When it melts, stir in the flour, thyme, celery seed, black pepper and 1/4 teaspoon starting salt. Cook for 1 minute, stirring, until no dry flour remains. Skip the starting salt when using leftover gravy.
  2. Build the sauce gradually. Whisk in only 1/2 cup broth first. Get that small amount completely smooth before gradually whisking in the remaining broth, followed by the milk. This two-stage addition makes lumps much less likely.
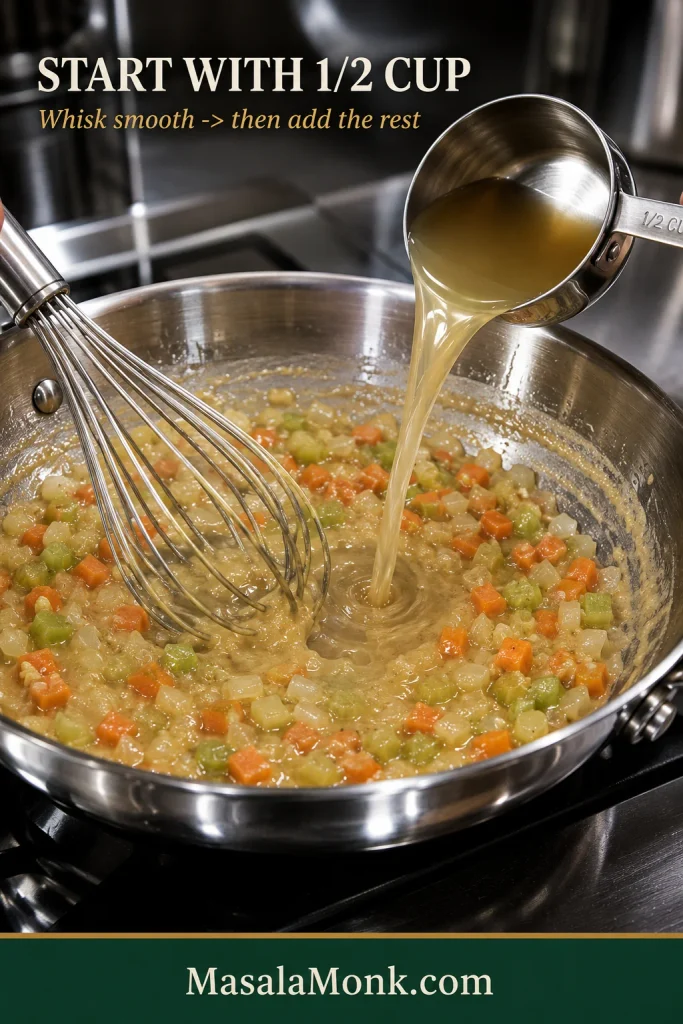
Broth being poured from a half-cup metal measure into cooked carrot, onion and celery while a whisk mixes the thick roux in a stainless skillet.
The first small pour loosens the cooked roux into a smooth base before the rest of the broth goes in.
  1. Thicken the filling. Bring the sauce to a gentle simmer and cook for 4–7 minutes. Drag a spatula across the bottom of the skillet: the trail should remain open for a moment, then slowly close.
  2. Add the turkey and peas. Fold them in and heat only until warmed through. If you used the frozen-mixed-vegetable shortcut, add just the turkey here. Taste before adding more salt. When the salt is right but the flavor still seems muted, add 1/2 teaspoon Worcestershire sauce, taste, and add a little more only if it helps.

Assemble, Bake and Rest

  1. Fill the dish. Transfer the filling to the pie dish, stopping about 1/2 inch / 1.25 cm below the rim.
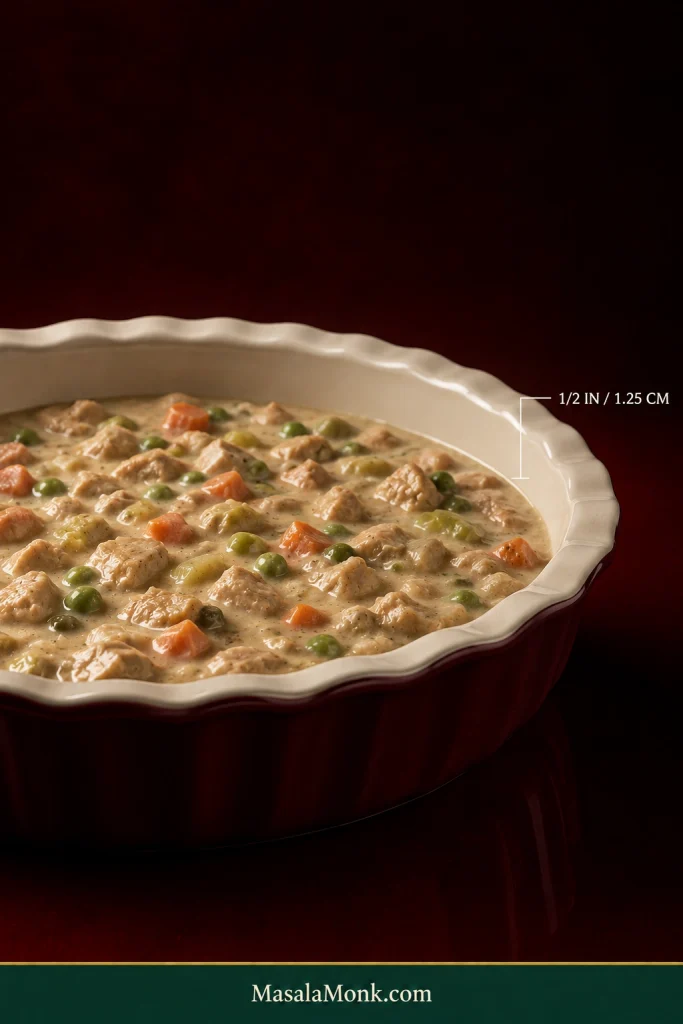
Burgundy pie dish filled with creamy turkey and vegetables to about half an inch below the rim, marked with a 1/2 inch or 1.25 cm bracket.
Leave the marked headroom so bubbling filling stays inside the dish instead of running over the rim.
  1. Let the filling stand. Give it 10–15 minutes, until it is still warm but no longer sending up strong clouds of steam.
  2. Add the crust. Lay the cold pastry over the filling without stretching it. Trim or tuck the edge, cut 3–5 steam vents and brush lightly with egg wash if using.
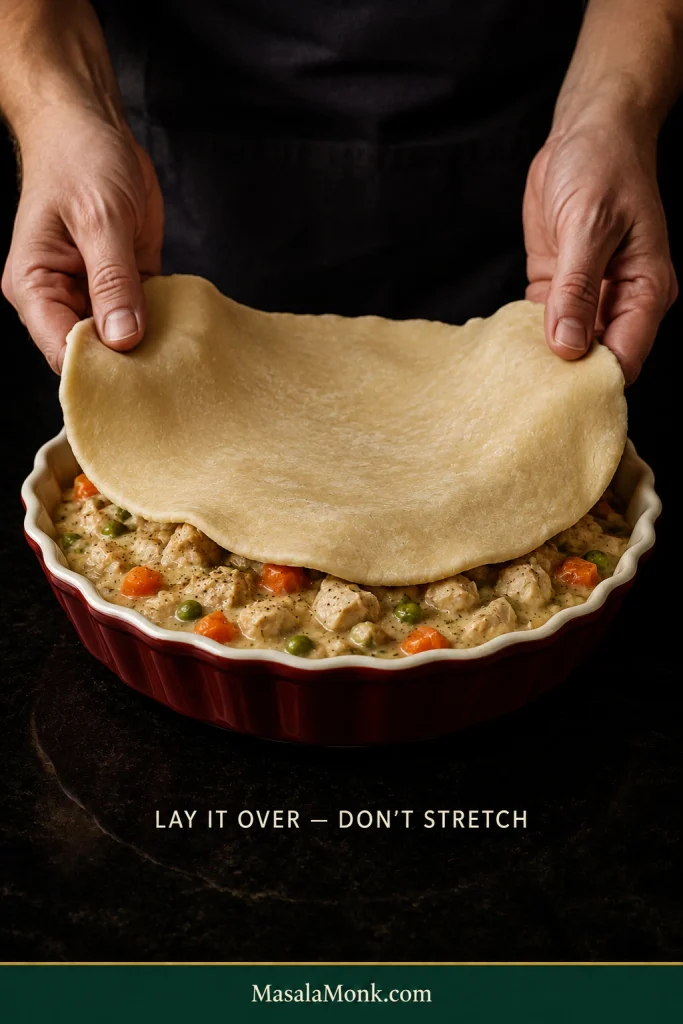
Two hands gently lowering a round of pie dough over creamy turkey pot pie filling in a deep burgundy pie dish.
Cold pastry should look relaxed over the filling rather than drum-tight. A little natural slack lets the dough settle around the rim as it bakes.
  1. Bake. Set the dish on the rimmed baking sheet and bake for 30–35 minutes, until the pastry is deeply golden and you can see filling bubbling through the vents or around the edges.
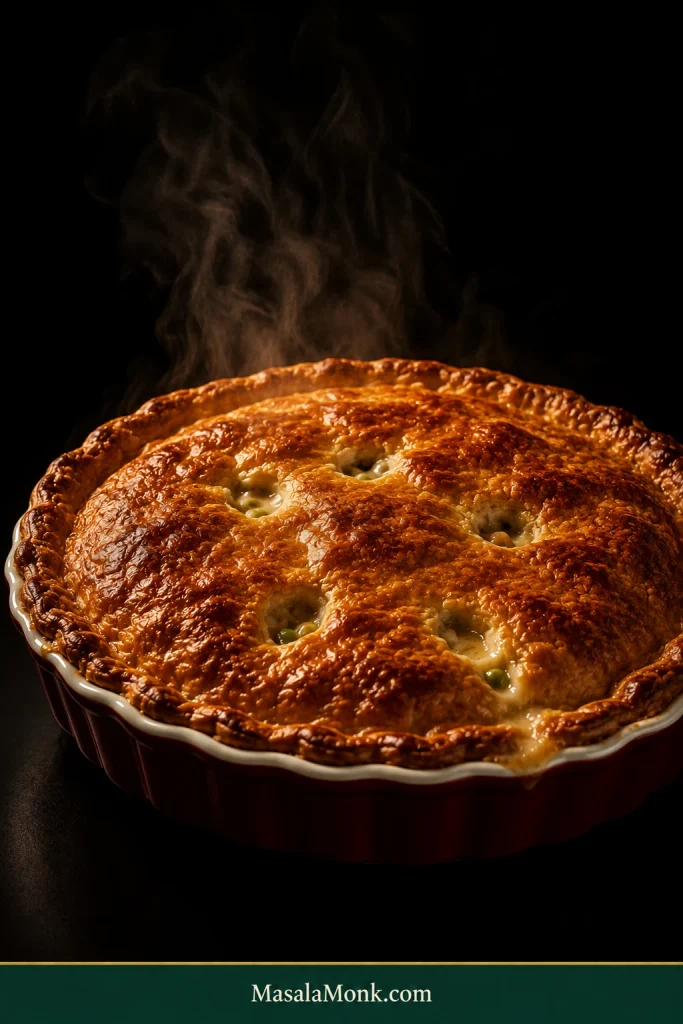
Freshly baked turkey pot pie with a glossy dark-golden crust, steam rising and creamy filling bubbling through several vents.
Think of the vents as windows into the filling. Steady bubbling there confirms that heat has reached beneath the browned pastry.
  1. Rest. Leave the pie for 15 minutes. That pause lets the creamy filling settle enough to spoon cleanly while the crust keeps its crisp edge.

Choose Your Leftover Route

Leftover cooking rarely starts with identical containers. For the sauce, pick the route closest to what is actually in your fridge.

What You HaveBest Route
Turkey, no gravyUse the standard broth-and-milk sauce in the recipe
Turkey + about 1/2 cup gravyReplace some broth and use a smaller fresh roux
Turkey + about 1 cup gravyLet the gravy provide more of the sauce and thickening
Turkey + 1 1/2–2 cups gravyLet the gravy become the sauce and loosen only as needed
Other saucy leftoversCount their liquid as part of the filling rather than adding it on top of the full sauce

Your leftovers do not need to match the recipe perfectly. You only need to know what moisture they are bringing with them.

Using gravy? Jump to the leftover turkey gravy guide →

Get the Filling Right

The Leftover Moisture Rule

A cup of leftover vegetables is not always just a cup of vegetables. When a leftover already contains gravy, cream sauce or noticeable cooking juices, reduce the pot-pie liquid to account for it.

Plain green beans and green bean casserole may take up similar room in a measuring cup, but the casserole also brings sauce. Mushrooms release water. Frozen vegetables can carry ice. Roasted vegetables may come with a spoonful of pan juices.
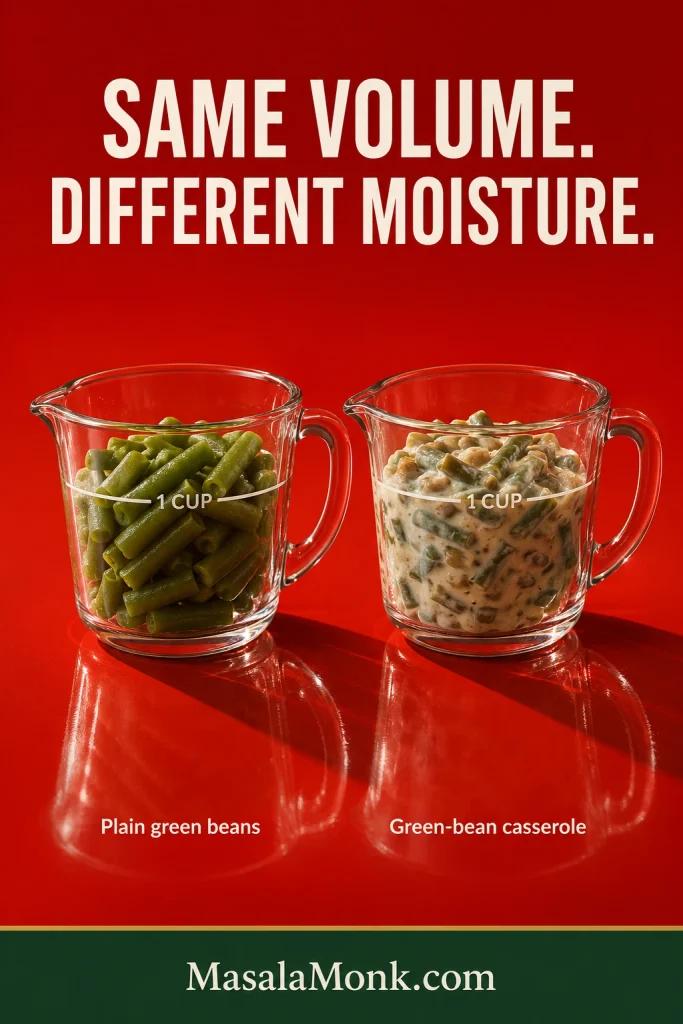
Two identical one-cup glass measures on a red background, one holding plain green beans and the other holding creamy green-bean casserole.
Same volume does not mean the same liquid contribution: saucy leftovers bring part of the pot pie sauce with them.
  • Mostly dry: chopped turkey, peas, drained corn, plain cooked carrots and drained green beans.
  • Moist: mushrooms, icy frozen vegetables, wet steamed vegetables and roasted vegetables stored with juices.
  • Saucy: gravy, turkey stored in gravy, green-bean casserole, creamed vegetables and similar leftovers carrying their own sauce.

The rule is simple: when something brings meaningful liquid, let it replace some of the recipe liquid instead of adding both.

How Thick Should Turkey Pot Pie Filling Be?

Turkey pot pie filling should coat the turkey and vegetables while still moving easily. Drag a spatula across the bottom of the skillet. The trail should stay open for a moment, then slowly close.
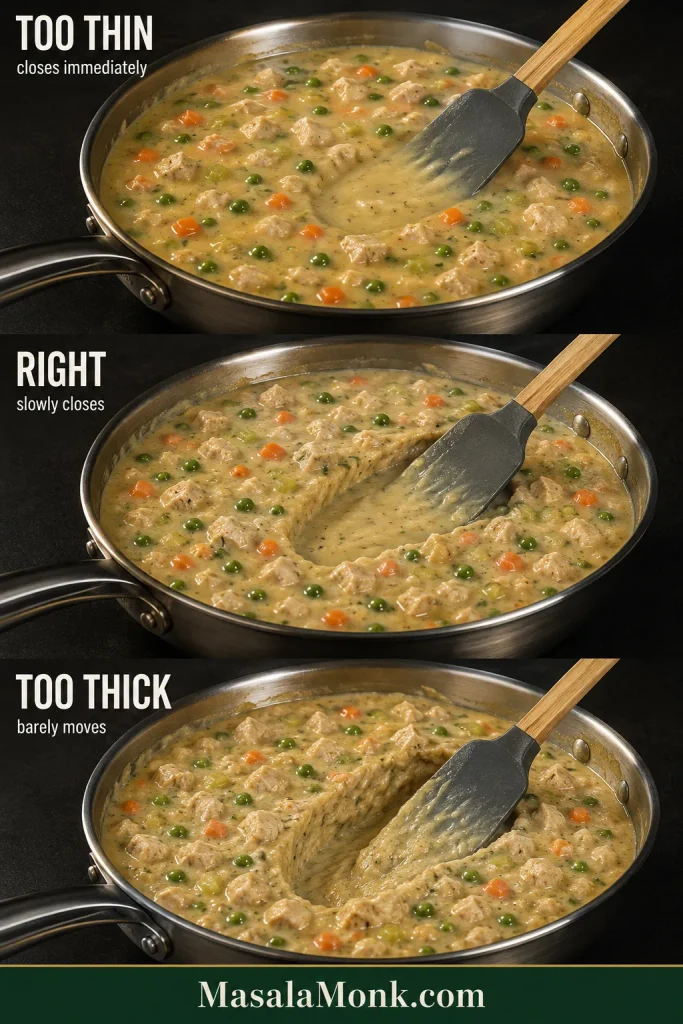
Three views of turkey pot pie filling in the same skillet showing too-thin filling that closes quickly, correct filling that slowly closes, and too-thick filling that barely moves.
Aim for the center state before the turkey goes in: the trail pauses, then slowly closes.
What You SeeWhat It MeansWhat to Do
The trail disappears immediately and the vegetables seem to swimToo thinKeep simmering gently
The trail stays open briefly, then slowly closesJust rightAdd the turkey and continue
The filling sits stiffly and barely flowsToo thickAdd broth 1–2 tablespoons at a time

Close enough is fine. Before the crust goes on, look for a filling that still moves but no longer leaves loose liquid pooling around the turkey and vegetables. A few extra minutes of simmering fixes most loose fillings; a splash of broth fixes one that has tightened too far.
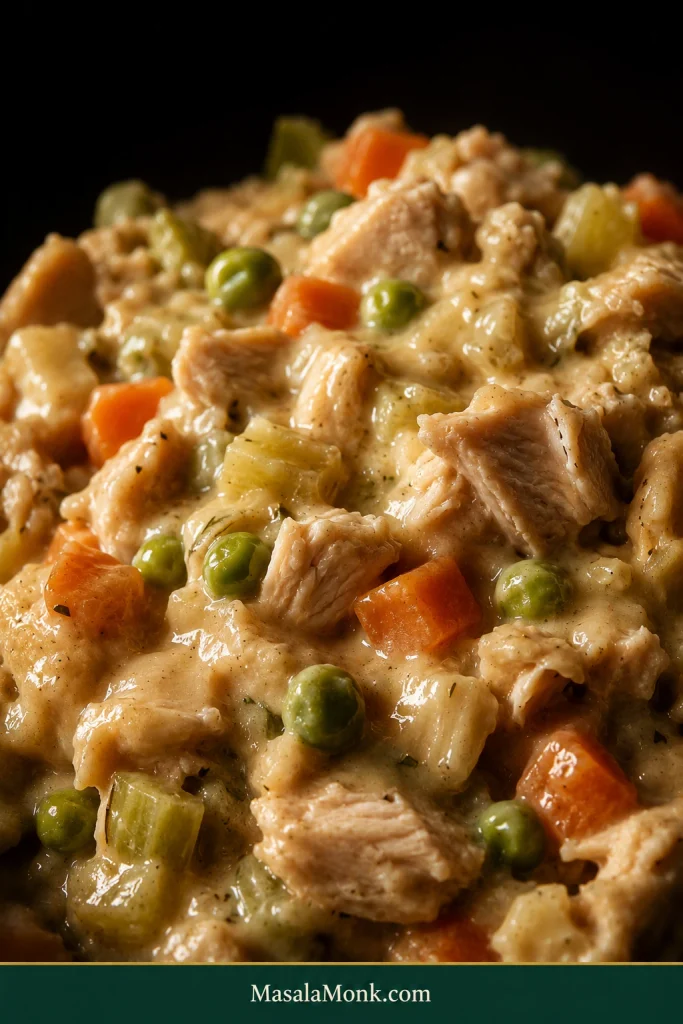
Close-up of creamy turkey pot pie filling with irregular pieces of turkey, carrots, peas and celery coated in a glossy pale-golden sauce.
The target is creamy and cohesive—no watery moat around the vegetables and no stiff paste between them.

How to Use Leftover Turkey Gravy

Match the Sauce to the Gravy You Have

If you have about 1/2 cup gravy, replace part of the broth and make a smaller roux. Around 1 cup needs even less fresh flour. Once you have roughly 1 1/2–2 cups of medium-thick gravy, let the gravy become the sauce and add broth only as needed.

Think of gravy as part of the sauce, not an extra ingredient piled on top of it. Gravy replaces broth, while the amount of fresh flour drops as the gravy contributes more thickening of its own.

Gravy itself varies. One batch pours easily once warm; another stands almost like pudding before the heat loosens it. The guide below assumes a medium-thick gravy that coats a spoon once warm.
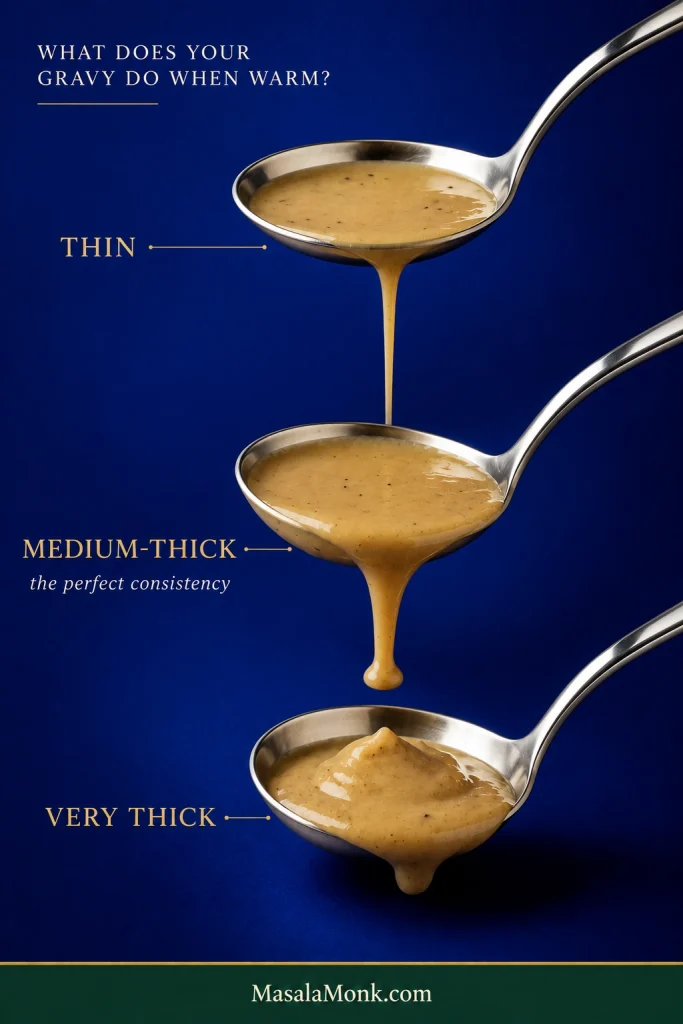
Three metal spoons against a blue background demonstrating thin flowing turkey gravy, medium-thick gravy that coats the spoon, and very thick gravy that holds a mound.
Warm gravy before judging it; thickness matters just as much as how much you have.
Gravy You HaveStart WithThen Check
About 1/2 cup / 120 ml1 1/2 cups broth + 1/2 cup milk + 2 Tbsp butter + 3 1/2–4 Tbsp / 25–30 g flourSimmer until it passes the spatula-trail test
About 1 cup / 240 ml1 cup broth + 1/2 cup milk + 2 Tbsp butter + 2–2 1/2 Tbsp / 15–20 g flourAdd more thickener only if the warm gravy is unusually thin
About 1 1/2–2 cups / 360–480 ml2 Tbsp butter for the vegetables; gravy plus broth only as needed to loosen; milk optionalStart without fresh flour and adjust after everything is hot

Build the Filling With Leftover Gravy

With 1/2–1 cup gravy: Cook the vegetables in the 2 tablespoons butter listed in the table. Add the garlic and cook for about 30 seconds. Stir in the reduced amount of flour with the thyme, celery seed and black pepper and cook for 1 minute. Whisk in the listed broth and milk, stir in the warm gravy, then simmer until the filling passes the spatula test. Add the turkey and peas and season to taste.

With 1 1/2–2 cups gravy: Cook the vegetables in 2 tablespoons butter. Add the garlic and cook for about 30 seconds, then stir in the thyme, celery seed and black pepper. Add the gravy and warm it through without adding fresh flour. Loosen with broth as needed; add a splash of milk only if you want a creamier filling. Add the turkey and peas, then judge the warm filling before making any further adjustment.

These are starting points, not laws. Very thick gravy may loosen enough on its own once heated, while thin gravy may simply need more simmering. Rich gravy can reduce the need for butter, and salty gravy calls for low-sodium or unsalted broth. Make the final decision from the filling in front of you.

Back to the recipe ↑  ·  Back to top ↑

Use What You Have

Turkey, Broth and Milk

Turkey. Breast meat, dark meat or a mixture all work. Slightly dry turkey is especially welcome here: once coated in creamy sauce and tucked beneath crisp pastry, the breast meat that felt disappointing on the first night stops feeling like the leftover everyone was avoiding. Cooked chicken or rotisserie chicken can replace the turkey in the same amount; taste before adding much salt because rotisserie meat may already be heavily seasoned.
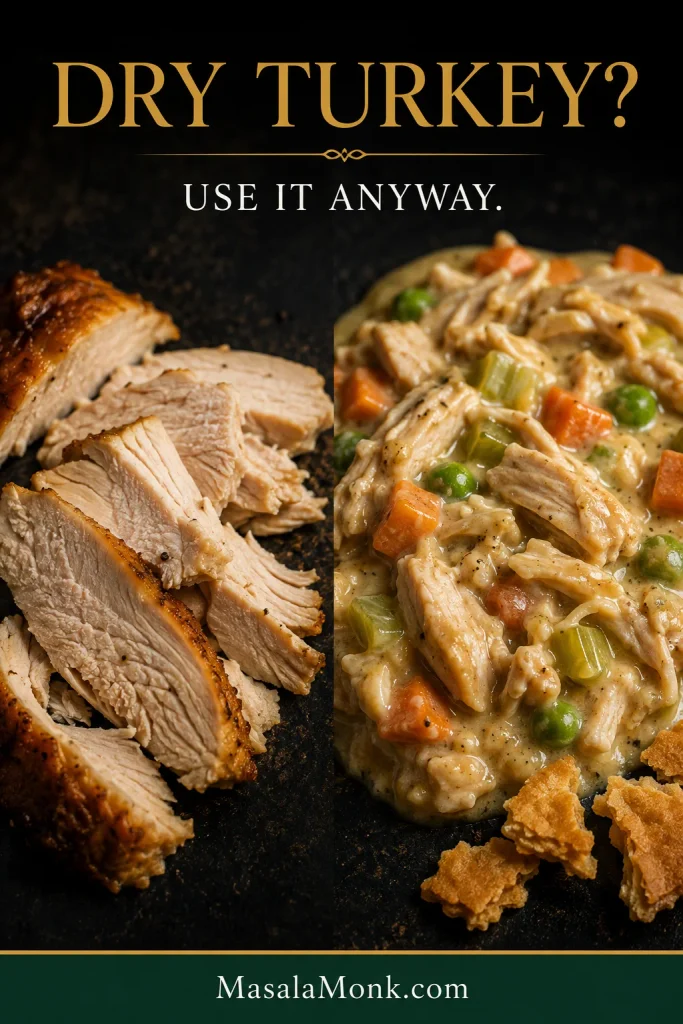
Split food photograph showing slices of slightly dry roast turkey on one side and the same type of turkey coated in creamy pot pie filling with carrots, peas and celery on the other.
The goal is coating, not recooking. Irregular bite-size pieces give the creamy sauce plenty of surface to cling to without asking cooked turkey to become tender again.

Broth and milk. Use turkey broth if you have it; low-sodium chicken broth works very well too and gives you more control when gravy or seasoned leftovers are involved. For a milk-free pie, replace the milk with more broth or use an unsweetened neutral non-dairy milk. The filling will be a little less creamy but still savory.

Vegetables and Thanksgiving Leftovers

For vegetables and Thanksgiving extras, the main question is whether they need cooking, warming or moisture adjustment.
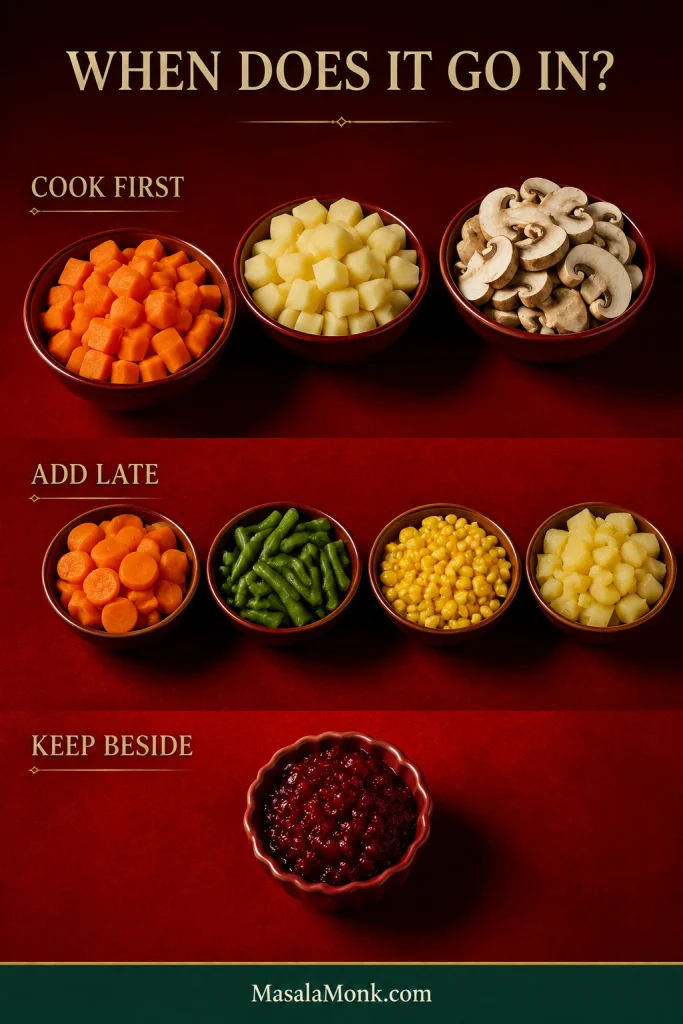
Red-background guide grouping raw carrots, potatoes and mushrooms under “Cook First,” cooked carrots, green beans, corn and potatoes under “Add Late,” and cranberry sauce under “Keep Beside.”
Instead of asking whether a vegetable belongs in pot pie, ask what cooking it still needs. Firm ingredients start early, cooked leftovers arrive late, and cranberry sauce stays beside the pie.
What You HaveBest Way to Use It
Frozen mixed vegetablesUse the 2-cup shortcut in the recipe card and cook off obvious excess water
Already-cooked carrots, green beans or cornFold in near the end; they only need warming
MushroomsCook until most released moisture evaporates
Raw potatoCut into 1/2-inch / 1.25-cm cubes and simmer until just fork-tender before adding
Cooked or canned diced potatoDrain well and fold in late
Green-bean casseroleUse modestly and count its creamy sauce toward the filling liquid
Mashed potatoesUse only a small amount inside; otherwise serve your creamy mashed potatoes alongside
StuffingBetter used as a topping for a different stuffing-topped pot pie than stirred into this creamy filling
Cranberry sauceKeep it for the plate; the tart sweetness works better beside the savory pie

Swap rather than endlessly add. Another cup of this and another cup of that eventually gives you more solids than sauce—or more filling than the dish can comfortably hold.

Back to the recipe method ↑

Keep the Crust Crisp

A single top crust is the easiest route here. You still get flaky pastry in every serving without asking a bottom crust to sit underneath a creamy filling.
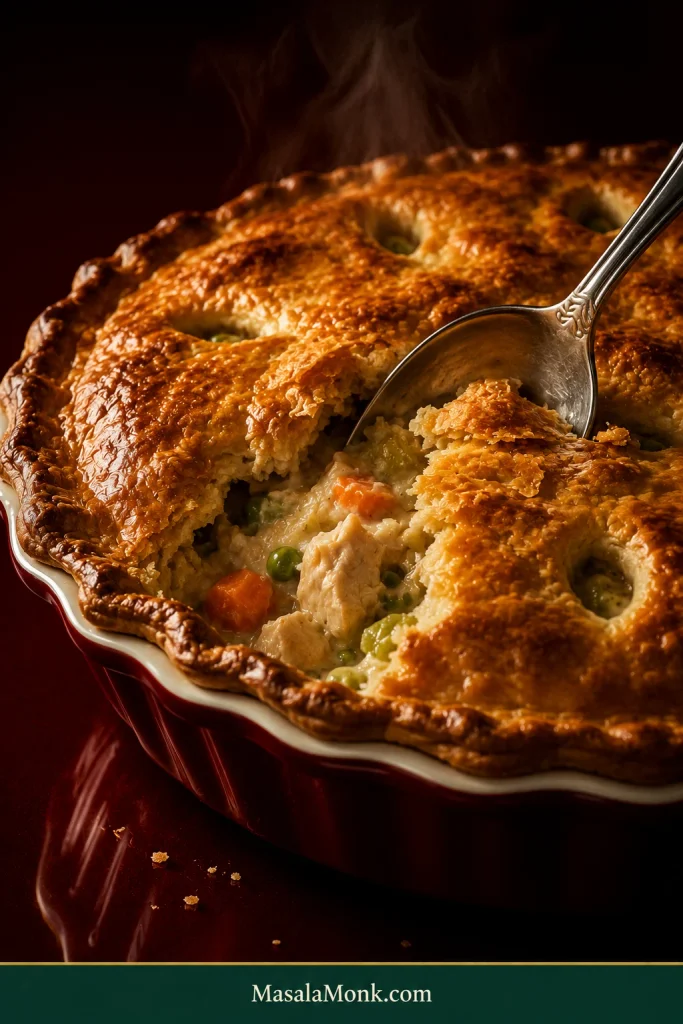
Silver serving spoon breaking through the deeply browned top crust of a turkey pot pie, exposing creamy turkey and vegetable filling underneath.
That crisp first fracture is the payoff for getting the moisture right. Flaky top crust gives way to creamy turkey filling below without either texture compromising the other.

For a double-crust version, cool the filling more thoroughly, keep the bottom dough cold and make sure the sauce has already reached the correct thickness before assembly. Our flaky homemade pie crust guide covers the pastry itself.

Whatever crust you use, keep it cold and do not stretch it over the dish. Warm pastry softens before it has a chance to set, while stretched dough tends to pull back as it bakes.

If the rim becomes deeply browned before the center is ready, shield only the edge loosely with foil. By the time the filling is bubbling through the vents and the crust smells toasted and buttery, those refrigerator containers finally feel like dinner again.
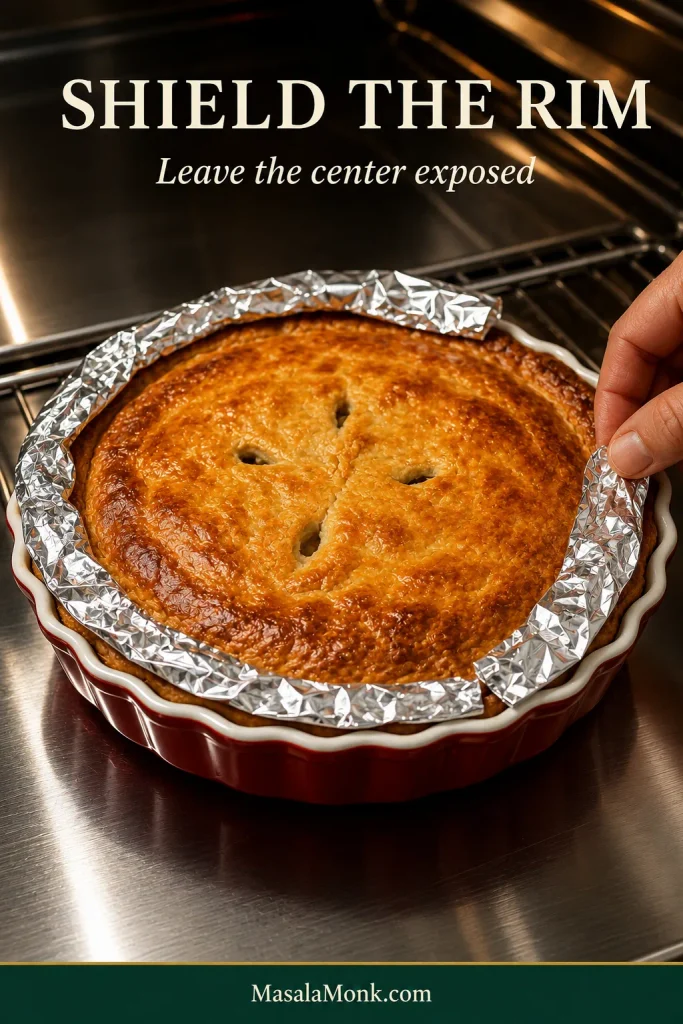
Whole golden turkey pot pie in a burgundy dish with strips of aluminum foil wrapped around the outer crust rim while the center remains uncovered.
A narrow foil collar is enough. Covering the whole pie would also trap steam over the center you are still trying to brown and crisp.

Turkey Pot Pie Troubleshooting

Most pot-pie problems come down to moisture, heat or timing, and many are easy to correct before the crust ever goes on.
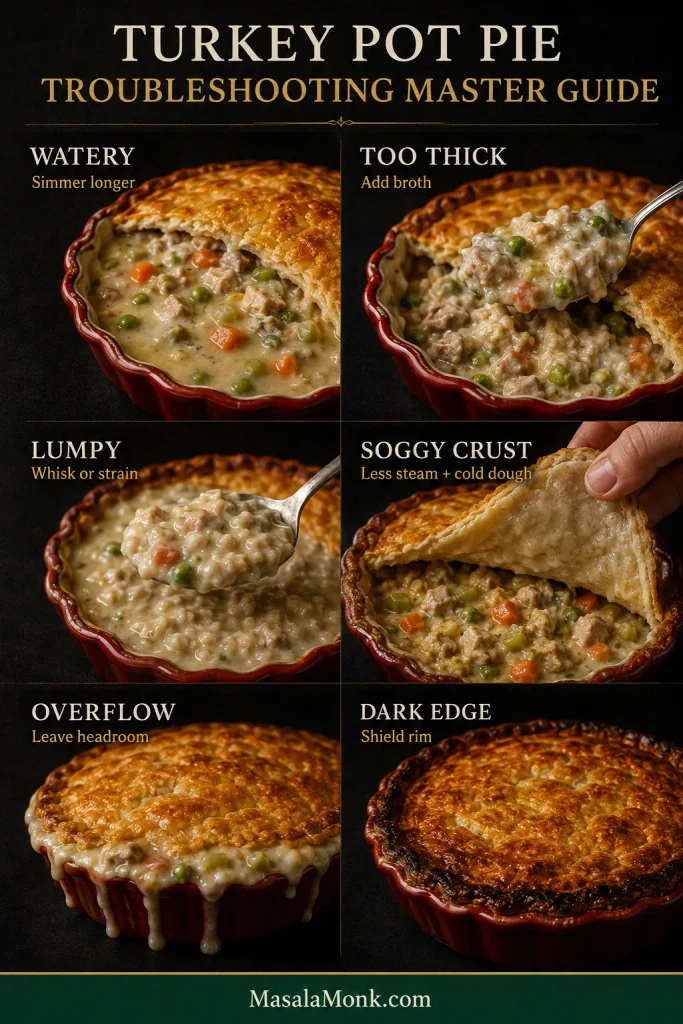
Six-part turkey pot pie troubleshooting guide showing watery filling, overly thick filling, lumpy sauce, soggy pastry, filling overflowing a pie dish and a darkened crust edge.
Troubleshooting starts with identifying the symptom correctly. Similar-looking pot pies can need opposite fixes, so diagnose what you see before reaching for more broth, flour or bake time.

My filling is watery

Keep it uncovered over a gentle simmer until it passes the spatula-trail test above. Frozen vegetables, mushrooms, roasting juices and gravy can all contribute more water than expected, so let that excess cook away before the pastry goes on.

My sauce looks oily or separated

Very rich gravy can supply more fat than the standard sauce expects, while a hard boil after the milk goes in can make a dairy-based sauce look grainy or separated. Keep the heat gentle and reduce the butter when your gravy already brings plenty of fat.

My leftover turkey is dry

Use it anyway. This is one of the better destinations for dry turkey: the sauce brings moisture to every bite, and adding the cooked meat only after the filling thickens keeps it from spending unnecessary time over the heat.

My filling tastes flat

Check the salt first. A properly salted filling can still taste washed out when the broth itself is weak, in which case a small amount of concentrated turkey or chicken base can deepen it quickly. Add cautiously because those products can be salty.

When the broth already tastes good, try a little more black pepper, a pinch of thyme or 1/2 teaspoon Worcestershire sauce, then taste again.

ProblemLikely CauseBest Fix
Filling too thickToo much reduction or very thick gravyAdd broth 1–2 tablespoons at a time
Lumpy sauceLiquid added to the roux too quicklyWhisk firmly and press small lumps against the pan; if lumping is severe, strain the sauce before adding the turkey
Hard carrots or potatoesPieces too large or not pre-cooked enoughCook firm vegetables until nearly tender before assembly
Soggy underside of top crustVery wet or strongly steaming filling, warm pastry or oven not fully preheatedThicken the filling first, let strong steam subside and use cold dough
Pie overflowedDish overfilledLeave headroom and always bake on a rimmed sheet
Crust edge too darkRim browned before center finishedShield only the edge loosely with foil
Filling runs when servedLoose filling or pie cut too soonUse the spatula test before baking and rest 15 minutes before serving

Back to the recipe method ↑  ·  Make ahead, freeze or reheat →  ·  Back to top ↑

Make Ahead, Freeze and Reheat

For the easiest make-ahead route, prepare the filling and keep the pastry separate. Freezing the filling by itself also gives you the most flexibility.
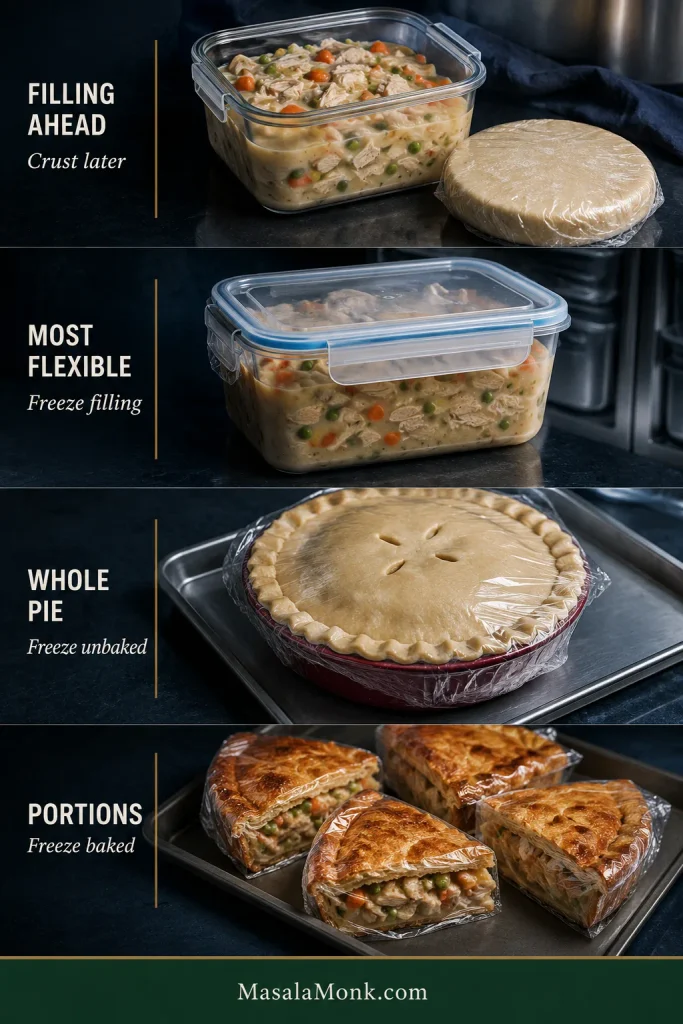
Four-part storage guide showing turkey pot pie filling with separate pastry, filling in a freezer container, a wrapped unbaked whole pie, and wrapped portions cut from a baked pie.
If crust quality matters most, stop the prep before assembly. If convenience matters more, freeze farther along the process.

Already cooked? Jump straight to reheating →

Make the filling ahead

Cook the filling, cool it promptly and refrigerate it covered. Keep the pastry separate and assemble the pie when you are ready to bake. That prevents raw dough from sitting against moist filling for hours.

Freeze the filling

Cool the filling promptly, chill it completely in the refrigerator, then freeze one pie’s worth in a freezer-safe container. Thaw overnight in the refrigerator, warm it enough to judge the texture again, then assemble with fresh cold pastry. A very thick thawed filling usually needs only a small splash of broth.

Freeze an assembled unbaked pie

Freeze the assembled pie in cookware suitable for both freezing and baking, following the manufacturer’s guidance for temperature changes. Wrap it well once firm. For the most predictable result, thaw it overnight in the refrigerator before baking.

A refrigerator-cold pie may need roughly 5–15 minutes beyond the usual 30–35 minute bake. Start checking at the normal time and continue until the crust is deeply golden and the filling is visibly bubbling through the vents and around the edges. Shield the crust if it browns before the filling is fully hot.

Baking from frozen: Thawing overnight is the more predictable route for this recipe. Direct-from-frozen timing can vary substantially with filling depth and cookware, so use a freezer-to-oven approach only when your baking dish is designed for it and follow the manufacturer’s temperature guidance.

Freeze baked portions

Baked pot pie can also be frozen in portions. It is convenient, although the pastry will normally be softer after thawing and reheating than it was on the first night.

Previously frozen cooked turkey

Previously frozen cooked turkey can still be used when it was thawed safely in the refrigerator. USDA guidance on freezing and refreezing says food thawed in the refrigerator can generally be refrozen, although repeated freezing and thawing may reduce quality.

Refrigerator storage

Older turkey does not become a fresh batch of leftovers simply because it has gone into a pie. When the turkey is already several days old, eat or freeze the finished pot pie promptly rather than treating it as a brand-new storage window.

FoodSafety.gov’s leftover guidance recommends using or freezing refrigerated leftovers within four days and reheating leftovers to 165°F / 74°C.

How to Reheat Turkey Pot Pie

Three-part reheating guide showing an oven-reheated portion, a larger amount of turkey pot pie and a microwave-reheated portion, with a center-temperature reminder of 165°F or 74°C.
Choose the reheating method by what matters most: the oven preserves a crisper top crust, while the microwave saves time. Either way, the center—not just the pastry—should reach 165°F / 74°C.

For the crispiest crust, use the oven. Reheat individual portions at 350°F / 175°C for roughly 15–20 minutes. A larger portion or much of the remaining pie may take 20–30 minutes. Loosely cover pastry that is already dark, then uncover for the final few minutes if it needs to crisp again. Heat the center to 165°F / 74°C.

For speed, use the microwave. Loosely cover an individual portion and heat until the center reaches 165°F / 74°C; around 2–3 minutes at reduced power is a useful starting point for many microwaves. The filling reheats well, but the pastry will be softer.

When exposed filling has become very thick in the refrigerator, stir a small splash of broth into the filling where you can reach it. Pouring liquid over the pastry only makes the crust soggy.

What to Serve With Turkey Pot Pie

Turkey pot pie already brings meat, vegetables, creamy sauce and pastry, so lighter, sharper sides usually balance it best.

A crisp cucumber salad with vinegar, dill and onion gives the rich filling a cool, acidic contrast. A simple green salad, steamed greens or roasted Brussels sprouts work for the same reason.

If cranberry sauce is still in the fridge, a spoonful of cranberry sauce with orange juice beside the pie gives each bite a bright sweet-tart edge.
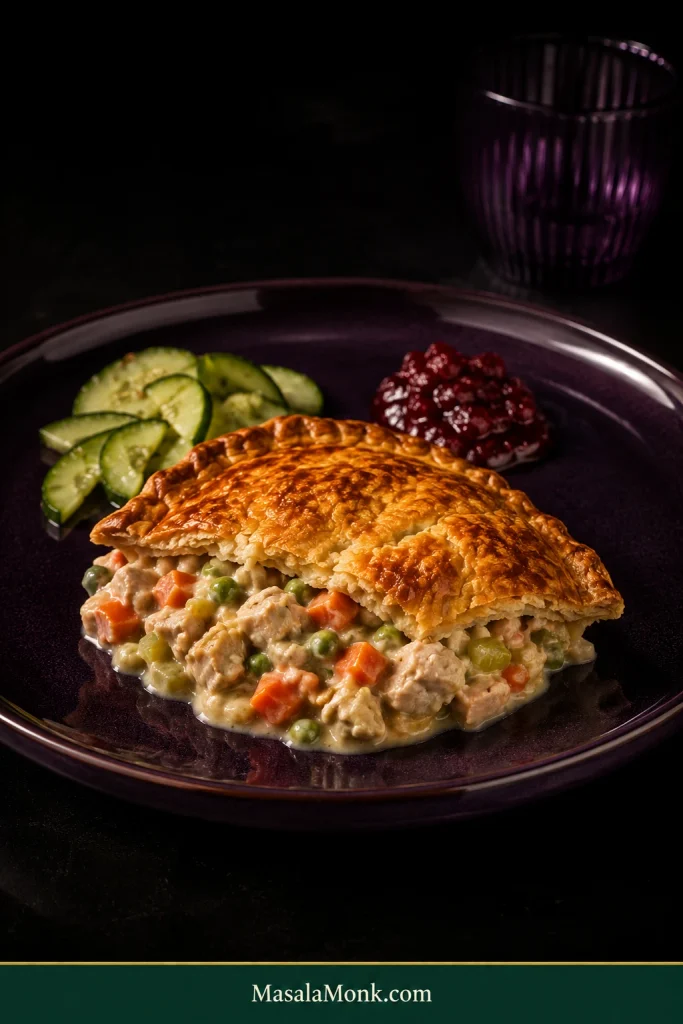
Serving of creamy turkey pot pie topped with a large piece of golden crust on a dark plum plate, accompanied by sliced cucumber salad and cranberry sauce.
The plate gives one last consistency check. After resting, the filling should support a piece of top crust rather than spread underneath it.

Leftover Turkey, Completely Different Dinner

A container of leftover turkey, half a bowl of gravy and a few odds and ends from the holiday table do not look especially exciting in the refrigerator.

Put them under a crisp golden crust with enough creamy sauce, though, and they stop feeling like a repeat of yesterday’s meal.
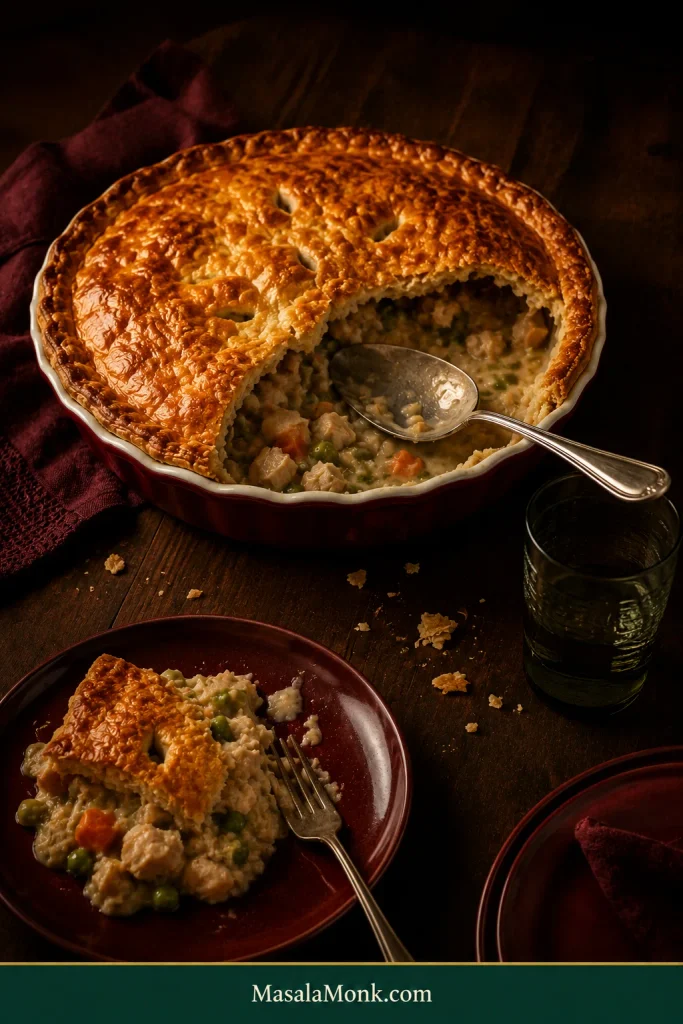
Half-served turkey pot pie in a burgundy dish on a dark wooden table with a serving spoon, pastry crumbs, a partly eaten portion on a plate and a dark drinking glass.
By this point, the recipe has done more than clear a few containers from the refrigerator. Yesterday’s turkey and gravy have become a dinner people actually came back for.

If you make yours with leftover gravy or an unexpected Thanksgiving leftover, tell us what found its way into the pie.
Back to top ↑

Posted on — 6 Comments

Cranberry Sauce with Orange Juice (7 Easy Recipes & Variations)

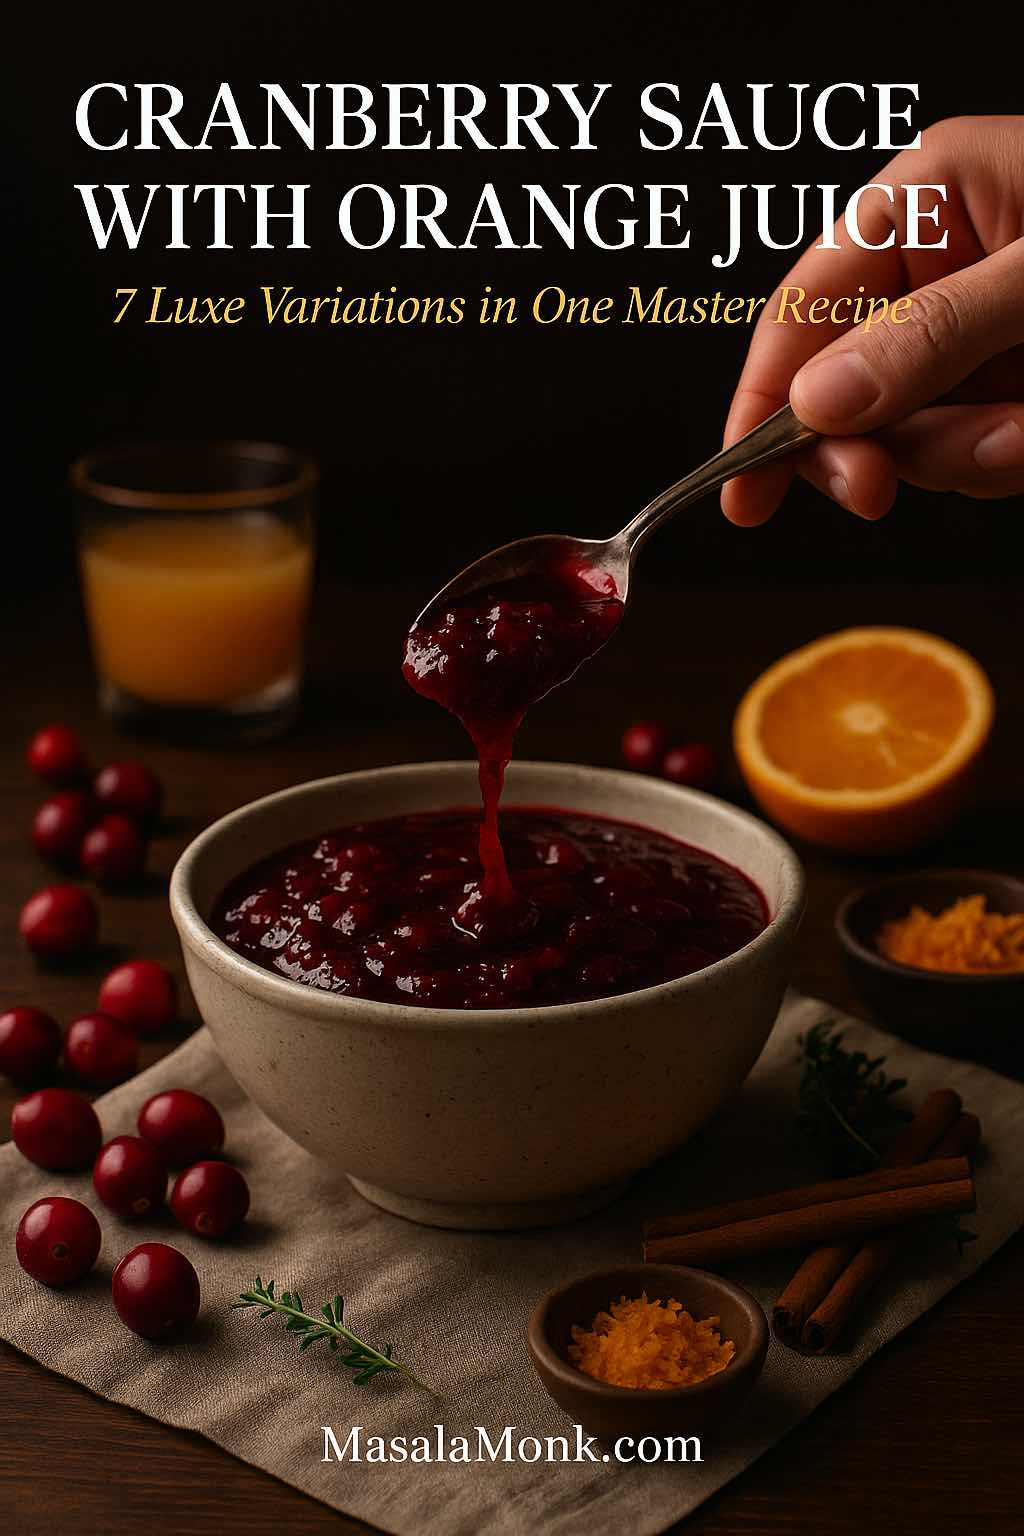
Luxe magazine-style portrait image of a hand spooning homemade cranberry sauce with orange juice into a ceramic bowl, surrounded by fresh cranberries, orange halves, orange zest and cinnamon sticks on a dark wooden table, MasalaMonk food photography.

Cranberry sauce is one of those dishes that looks fancy, but once you strip it down, it’s just cranberries, sugar, and liquid. Swap in orange juice for plain water and you suddenly have a bright, zesty homemade cranberry sauce with orange juice that tastes like pure holiday cheer.

This post is built around that idea: one reliable recipe for cranberry sauce with orange juice, plus a whole family of twists you can spin from the same pot. You’ll find:

  • A classic, easy cranberry sauce with orange juice that feels familiar and comforting
  • A brown-butter and vanilla twist that turns into a cosy gourmet cranberry sauce recipe
  • Naturally sweetened maple or honey versions
  • Low sugar, sugar-free and keto-style options
  • A boozy orange liqueur or whiskey version
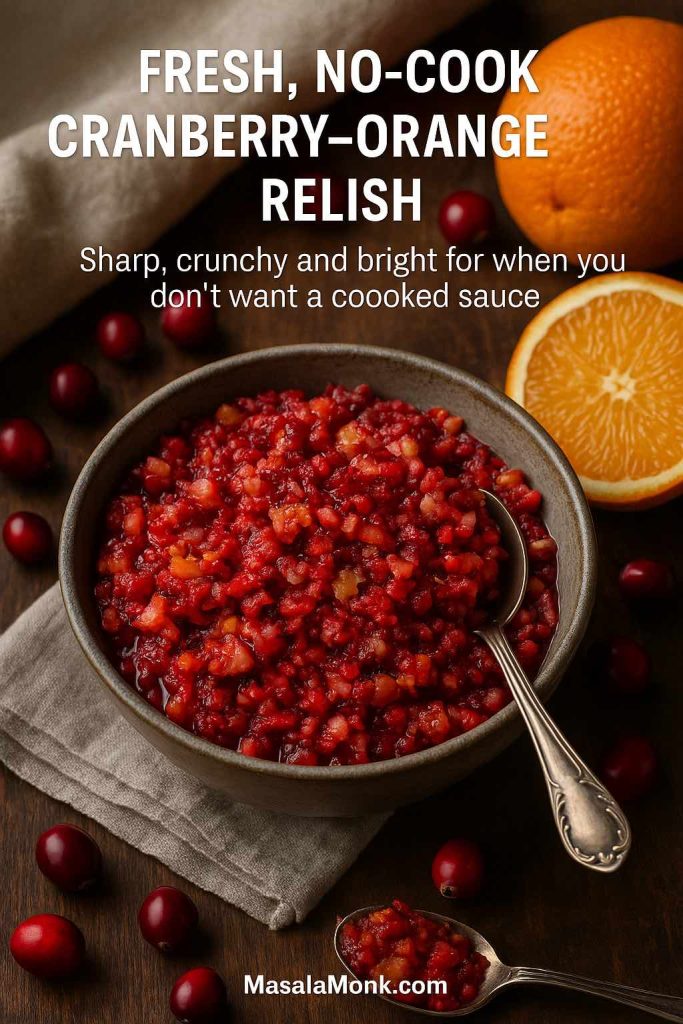
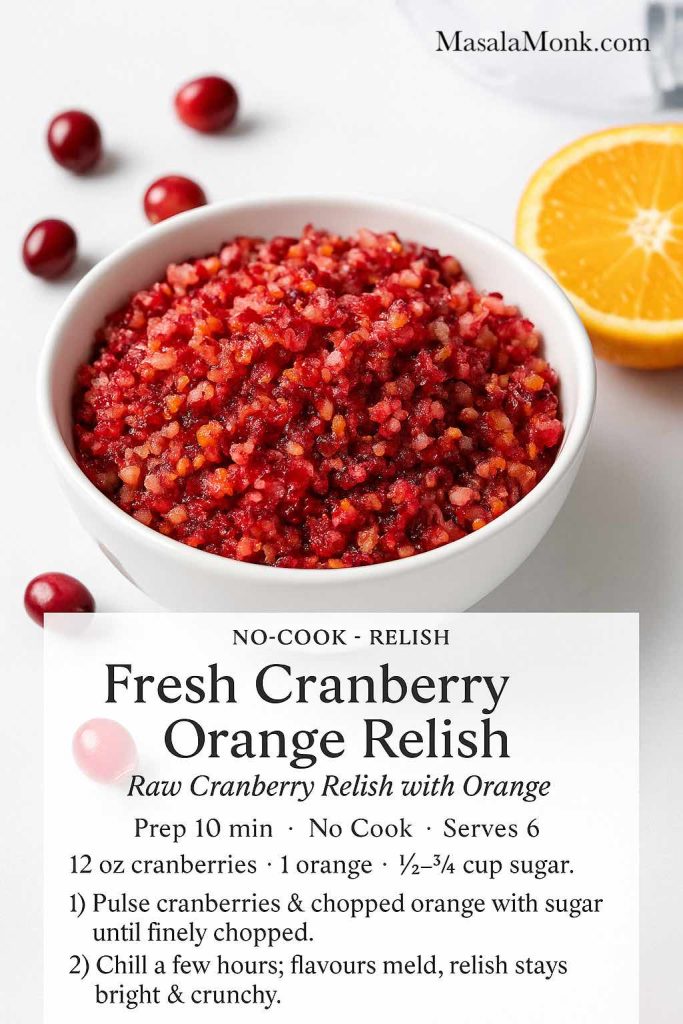
  • A fresh, no-cook cranberry orange relish
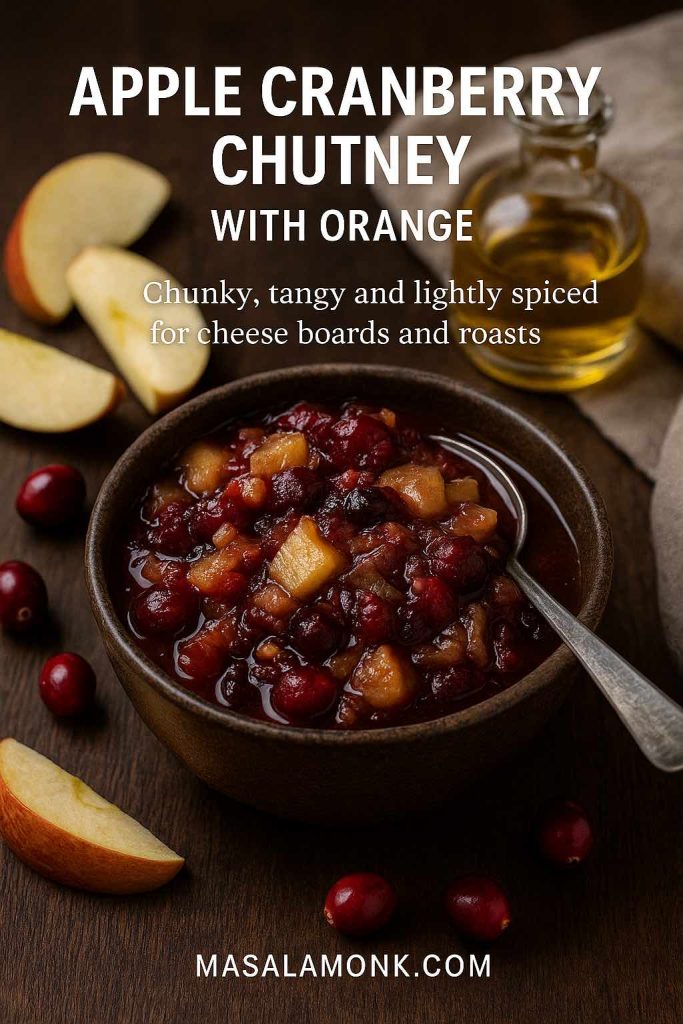
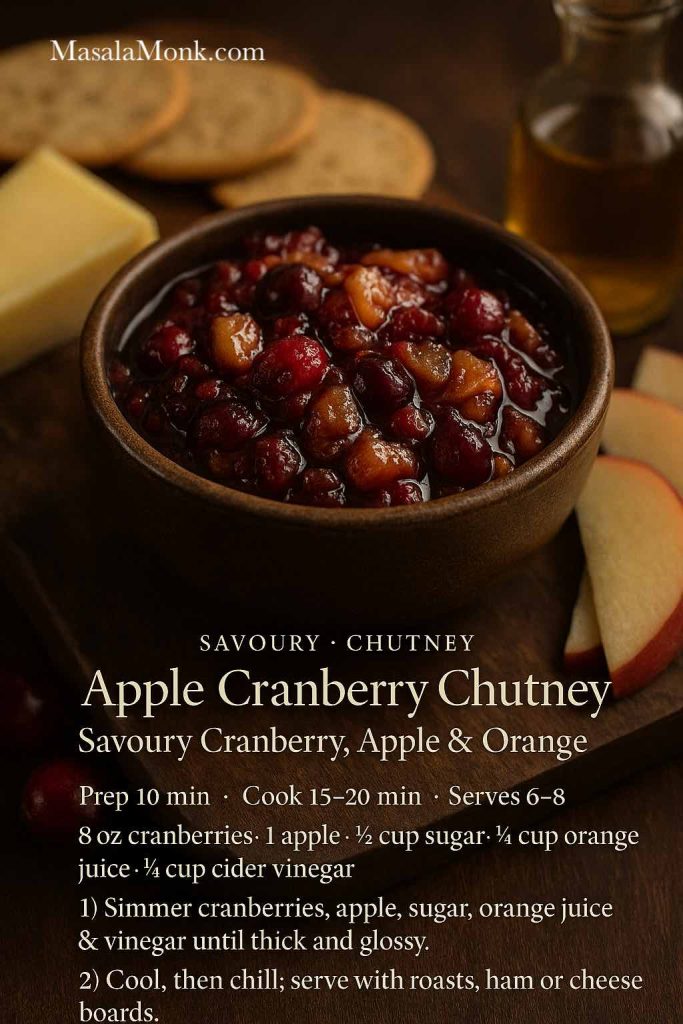
  • A tangy apple cranberry chutney that leans savoury

Along the way, we’ll talk about texture and cooking science, how to make your cranberry and orange juice sauce in the slow cooker, how far ahead you can prep for cranberry sauce Thanksgiving dinners, and plenty of ideas for using leftovers so nothing quietly dies in the back of the fridge.

If you’d like to get deeper into what cranberries do for your body—antioxidants, vitamin C, and more—you can follow up later with this cranberry nutrition and benefits breakdown.


Easy Homemade Cranberry Sauce with Orange Juice

Let’s start with the base. This is a simple cranberry sauce recipe with orange juice that you can make on autopilot once you’ve done it once or twice. It works whether you’re cooking for a small dinner or a full Thanksgiving crowd.

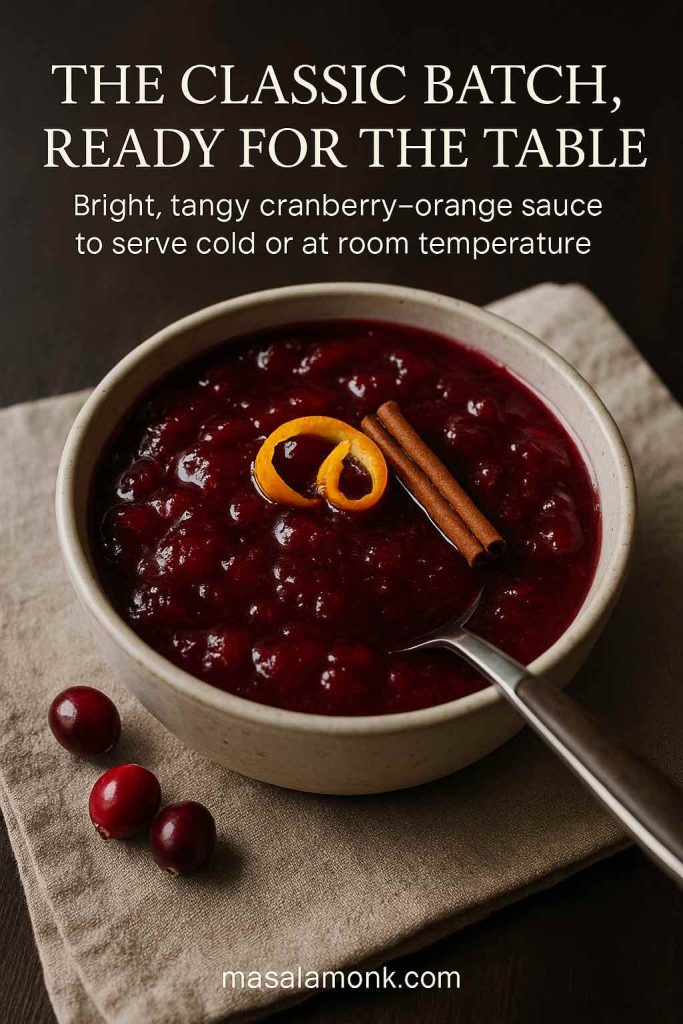
Classic homemade cranberry orange sauce in a ceramic bowl, garnished with a curl of orange zest and a cinnamon stick, ready to serve as a side dish.
The classic batch of cranberry–orange sauce: glossy, tangy and just sweet enough to serve straight from the bowl beside turkey, chicken or a nut roast.

Ingredients for the Classic Version

  • 12 oz (340 g) fresh or frozen cranberries, rinsed and picked over
  • 1 cup (200 g) granulated sugar
  • 1 cup (240 ml) orange juice (freshly squeezed if possible)
  • 1–2 teaspoons finely grated orange zest
  • Pinch of fine salt
  • 2–3 tablespoons water, if needed
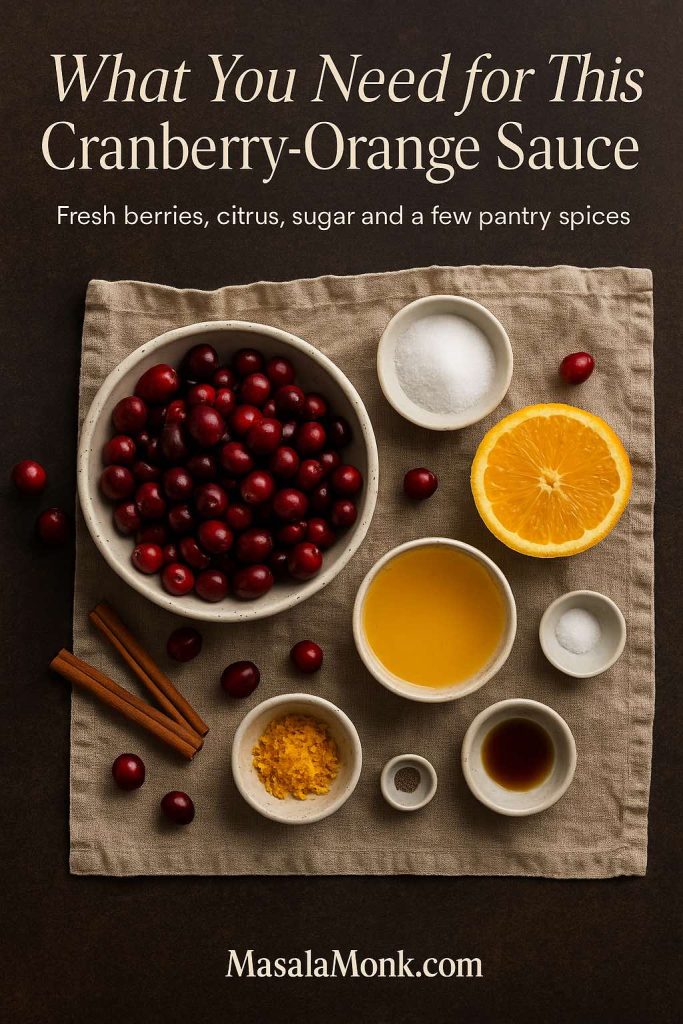
Overhead photo of ingredients for cranberry orange sauce on a linen cloth, with fresh cranberries, orange juice, sugar, orange zest, cinnamon sticks, vanilla, salt and pepper arranged in small bowls.
What you need for this cranberry–orange sauce at a glance: fresh cranberries, citrus, sugar and a few warm pantry spices, measured and ready to cook.

Optional flavour boosters:

  • 1 teaspoon vanilla extract
  • 1 small cinnamon stick or ¼ teaspoon ground cinnamon

This is a fairly classic recipe cranberry sauce formula; the twist is that orange juice replaces water, bringing sweetness and citrusy perfume. It’s in the same family as well-loved minimalist recipes such as Bon Appétit’s easiest cranberry sauce, but the orange plays a bigger role here.

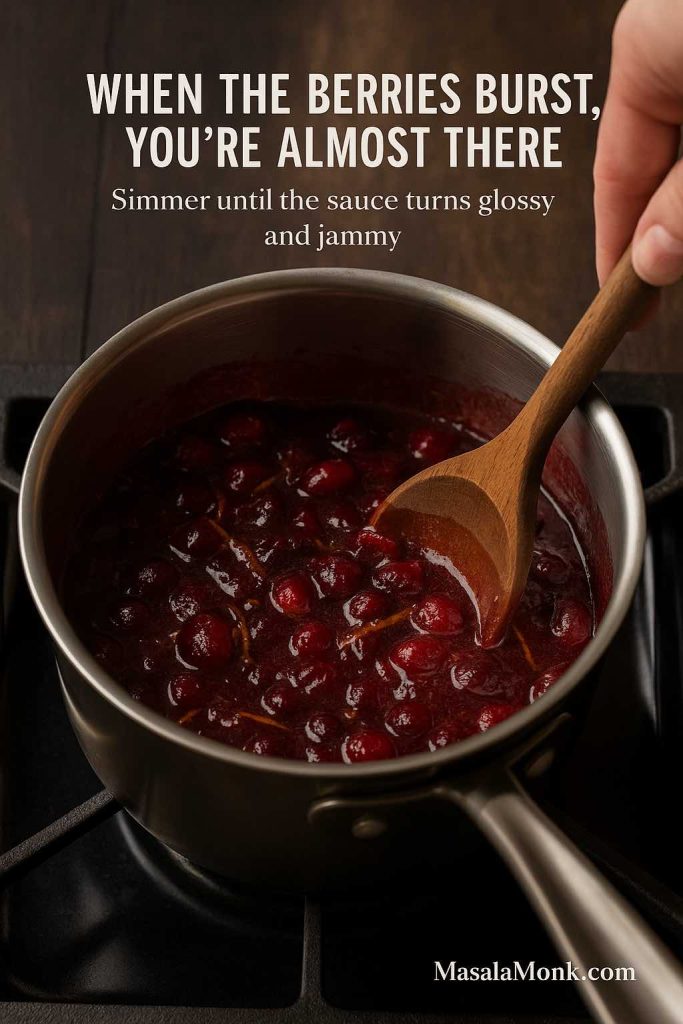
Cranberry orange sauce simmering in a saucepan, with cranberries bursting and a hand stirring the glossy, jammy mixture with a wooden spoon.
When the cranberries burst and the orange-spiked syrup turns glossy and jammy, your homemade cranberry sauce is just a minute away from perfect.

How to Cook Cranberry Sauce with Orange Juice (Step-by-Step)

  1. Set up the base.
    Tip the cranberries into a medium saucepan. Add sugar, orange juice, orange zest, salt, and the cinnamon stick if you’re using one. Give everything a stir so the cranberries are coated.
  2. Dissolve the sugar gently.
    Place the pan over medium heat. Stir every minute or so until the sugar dissolves and the liquid turns glossy. This usually takes 3–5 minutes. If things look very thick and the berries aren’t relaxing into the liquid, add a couple of tablespoons of water.
  3. Bring it to a gentle boil.
    Increase the heat slightly until the surface starts to bubble. You don’t want a wild, splattering boil—just a steady simmer that lets the cranberries soften.
  4. Simmer until the berries burst.
    Cook for 8–10 minutes, stirring occasionally. You’ll hear and see the cranberries pop. The sauce will start to thicken and look jammy. When you’re making cranberry sauce, the most important thing to remember is that it continues to thicken as it cools, so don’t wait for it to look like jelly in the pan.
  5. Finish with flavour.
    Take the pan off the heat. Pull out the cinnamon stick, if you added it. Stir in the vanilla extract. Taste carefully (it will be very hot) and decide whether you want more sugar for sweetness or a squeeze of extra orange juice for a sharper finish.
  6. Cool and chill.
    Let the homemade cranberry sauce cool to room temperature in the pan. It will look looser at this stage. Once it’s no longer steaming, transfer it to a glass or ceramic container and refrigerate for at least 2 hours, preferably overnight. Cold time is when the texture settles into that glossy, spoonable consistency everyone expects.

If you just want a basic cranberry sauce, you can skip the vanilla and cinnamon and stick to cranberries, sugar, and orange juice.

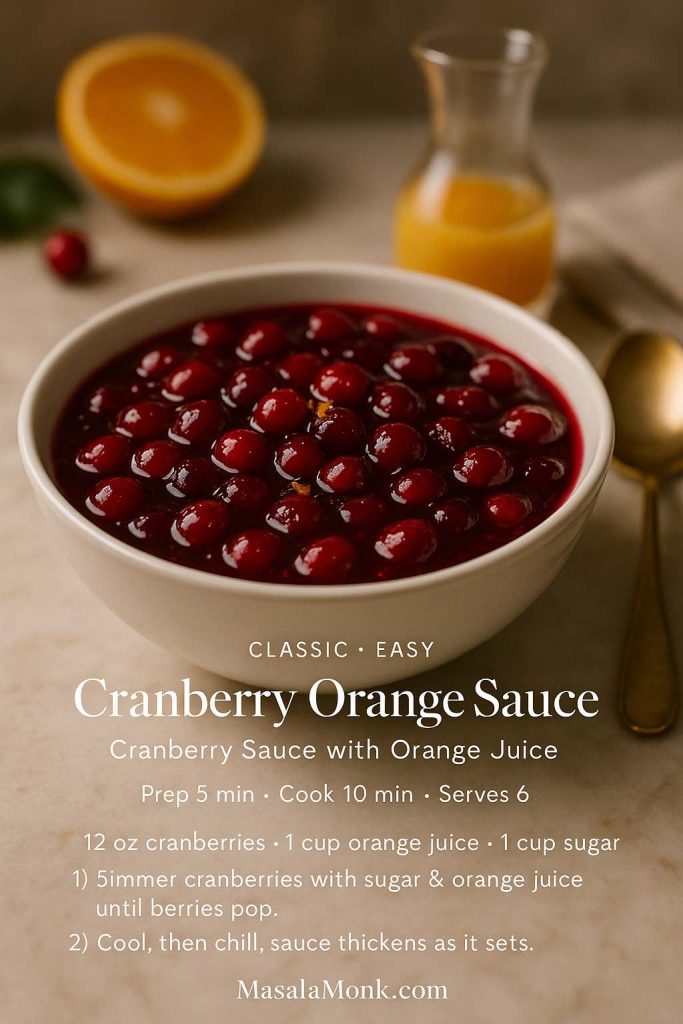
Glossy cranberry orange sauce in a white bowl, styled with orange juice and gold spoon on a marble surface, with an elegant text overlay mini recipe card for classic cranberry sauce with orange juice from MasalaMonk.com.
Save this mini recipe card for later: a classic cranberry orange sauce made with fresh cranberries, orange juice and sugar, ready in about 15 minutes and perfect to prepare ahead for Thanksgiving.

What This Classic Cranberry Sauce Tastes Like

This base cranberry sauce made with orange juice is bright and tangy, but not painfully sharp. The sugar balances the natural acidity of cranberries, while orange juice and zest add sweet citrus flavour and a gentle bitterness from the peel. Cinnamon and vanilla stay in the background; they shouldn’t make it taste like a full-on dessert, just a little warmer and more rounded.

Serve it straight from the fridge as a cranberry side dish next to turkey, chicken, duck, nut roasts, or even a rich main like macaroni and cheese. A spoonful on the plate does a lot of work cutting through fat and salt.


Understanding Cranberries: Fresh, Frozen & Dried

Before we layer on variations, it helps to know what’s happening in the pot.

Fresh vs Frozen Cranberries

For this cranberry sauce recipe fresh cranberries are ideal when they’re in season (usually October through December). They’re firm, shiny, and snap when you bite one. If you’re using frozen cranberries, there’s no need to thaw. Add them straight to the pan; you may need an extra minute or two of simmering.

Frozen berries are picked at peak ripeness and frozen quickly, so they behave very similarly to fresh. If anything, they sometimes release water more readily, which can help the sauce set nicely.

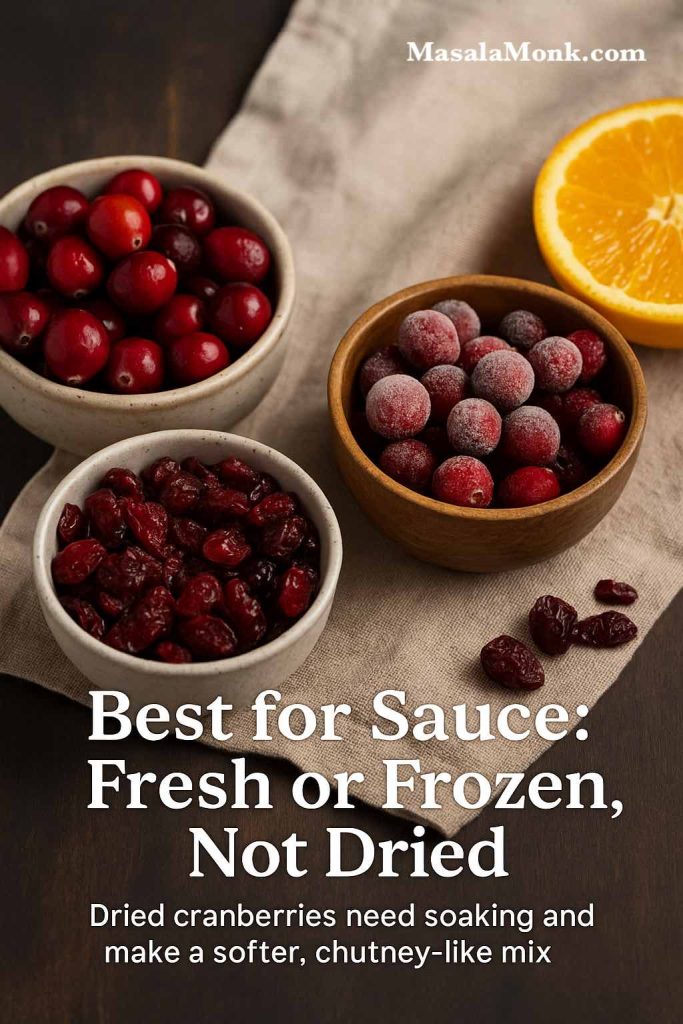
Three small bowls showing fresh cranberries, frozen cranberries and dried cranberries side by side on a linen cloth with a halved orange, illustrating which type works best for cranberry sauce.
For classic cranberry sauce, fresh or frozen berries give the best set and flavour; dried cranberries need soaking and are better for a softer, chutney-style mix.

What About Dried Cranberries?

Dried cranberries are great for salads and baking, but they’re not a straight swap in a standard cranberry sauce recipe using orange juice. They’ve already been sweetened and dehydrated, so they won’t burst and gel in the same way.

If you really want to use dried cranberries:

  • Soak them first in warm orange juice and water for at least 30 minutes
  • Use more liquid than the fresh recipe calls for
  • Expect a softer, chutney-like texture rather than a classic sauce

That kind of approach can work in a cranberry sauce recipe from dried cranberries, but for a traditional Thanksgiving-style sauce, fresh or frozen is the way to go.

Why Cranberry Sauce Thickens on Its Own

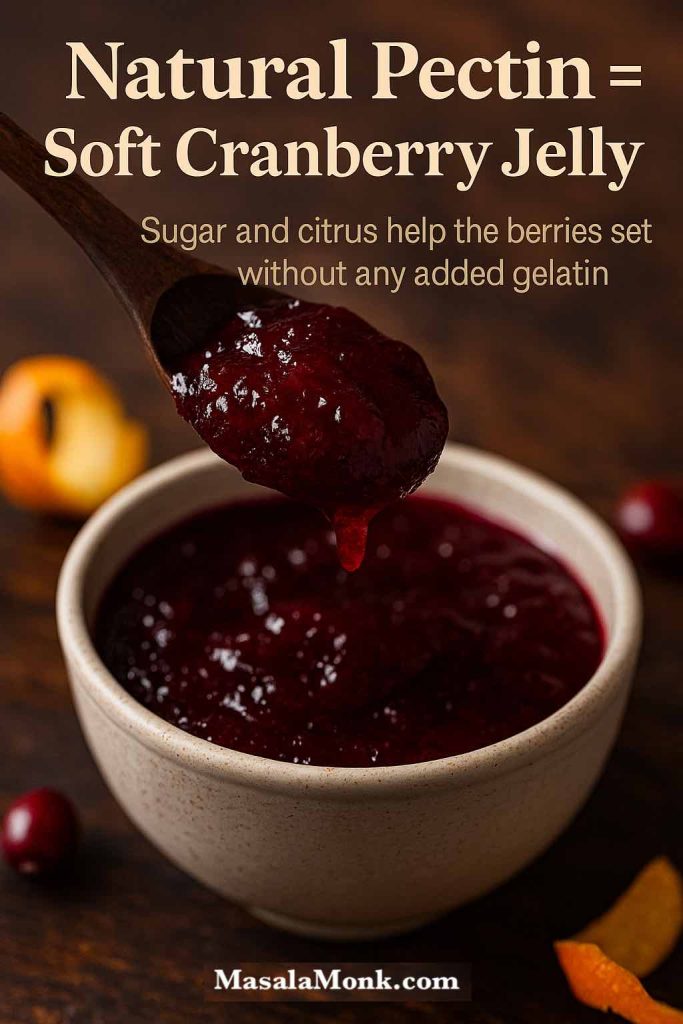
Cranberries are naturally high in pectin, a type of soluble fibre that gels when combined with acid and sugar. Orange juice adds acidity and sugar, so when you simmer everything together, you’re quietly making a soft, homemade jelly.

Close-up of a spoon lifting thick, gelled cranberry orange sauce from a bowl, with text reading “Natural Pectin = Soft Cranberry Jelly,” showing how the sauce sets without added gelatin.
Cranberries are naturally rich in pectin, so a simple cranberry sauce with orange juice thickens into a soft jelly as it cools—no gelatin or cornstarch needed.

This is why:

  • A basic cranberry sauce recipe doesn’t need gelatin or cornstarch
  • The sauce looks runnier in the pan than it does once chilled
  • High-sugar versions often set more firmly than low-sugar or sugar-free ones

Once you understand that, it’s easier to trust the process. When in doubt, err on the side of stopping the simmer a little early. You can always thicken slightly later, but rescuing an over-thick, sticky sauce is more tricky.

Also Read: Pesto Recipe: Classic Basil Pesto Sauce & 10 Variations


Texture, Taste, and Tweaks for the Classic Sauce

A simple easy cranberry sauce can feel completely different depending on how long you cook it and how much you mash it.

Choosing Your Texture

Think about your crowd:

  • For people who like whole berries and a bit of bite, aim for a chunky cranberry and orange juice sauce. Simmer just until most berries pop and stop there.
  • If you prefer a jammy, spreadable texture that sits neatly on turkey or bread, cook it a couple of minutes longer until the liquid coats the back of a spoon. This makes a rich cranberry orange juice sauce that doubles as a spread.
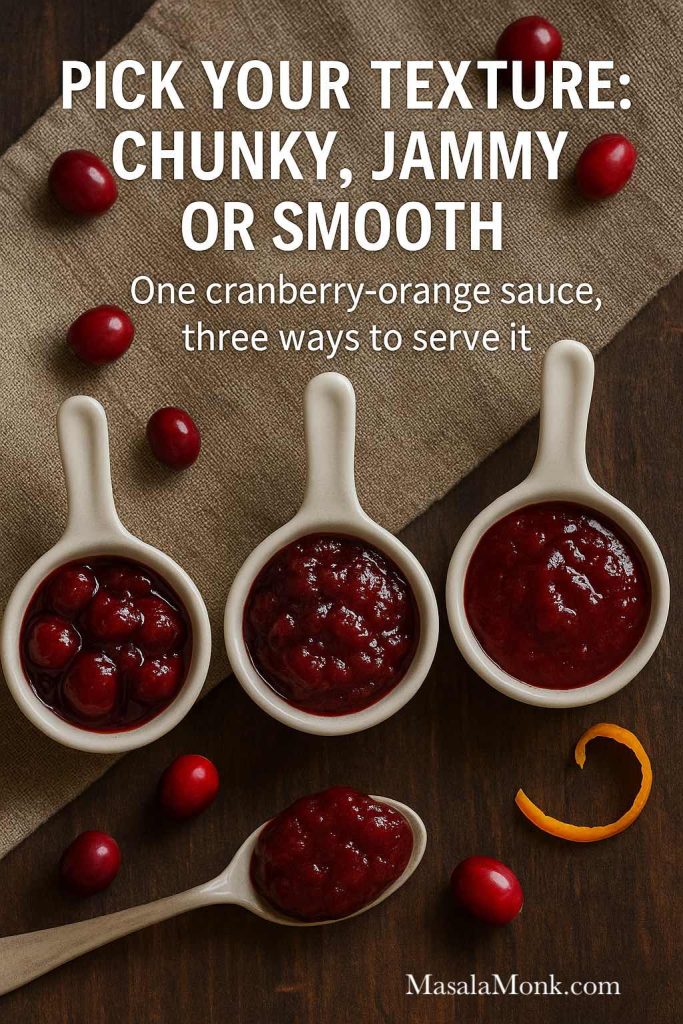
  • For kids or anyone who dislikes “bits”, use a potato masher to break everything down once it’s off the heat. For an extra-smooth finish, give it a brief whizz with an immersion blender.
Overhead photo of three ceramic spoons filled with chunky, jammy and smooth cranberry orange sauce on a wooden table with fresh cranberries and orange zest.
One master cranberry–orange sauce, three textures: leave the berries whole and chunky, cook it down until jammy, or blend it silky smooth depending on how you like it on the plate.

You can even split a batch: half left chunky, half blended, so your homemade cranberry sauce recipe covers both preferences without extra effort.

Adjusting Sweetness and Tartness of Cranberry Sauce with Orange Juice

Taste before chilling, but keep in mind flavours soften in the fridge. If you know your family likes sweeter sauces (maybe they’re used to canned), add a touch more sugar while it’s still warm. If you prefer a sharper profile, hold back on the sugar and add extra orange zest instead of more juice.

You can also:

  • Add a spoonful of brown sugar for a caramel note
  • Stir in a little maple syrup at the end for a healthy cranberry sauce feel with more nuanced sweet notes
  • Balance too much sweetness with a splash of extra orange juice or a squeeze of lemon

Balancing Spices in Cranberry Sauce with Orange Juice

Cranberries can handle quite a bit of spice, but for a classic cranberry sauce Thanksgiving vibe, it’s best not to go too wild in the base recipe. A cinnamon stick or pinch of ground cinnamon is usually enough. Save bolder flavours like cloves, star anise, or cardamom for one of the twists below, so your main pot stays broadly appealing.

Also Read: Katsu Curry Rice (Japanese Recipe, with Chicken Cutlet)


Flavor Variations on Cranberry Sauce with Orange Juice

Once your base is sorted, you can treat it like a master sauce and spin it several ways. Think of the following as mini recipes that sit on top of the same core idea: a cranberry sauce with orange juice that you understand and trust.

Brown Butter & Vanilla Cranberry Sauce (Gourmet Twist)

When you want something that feels restaurant-level without extra stress, this brown butter version is your best friend. It’s still recognisably cranberry sauce, just with deeper, nutty notes.

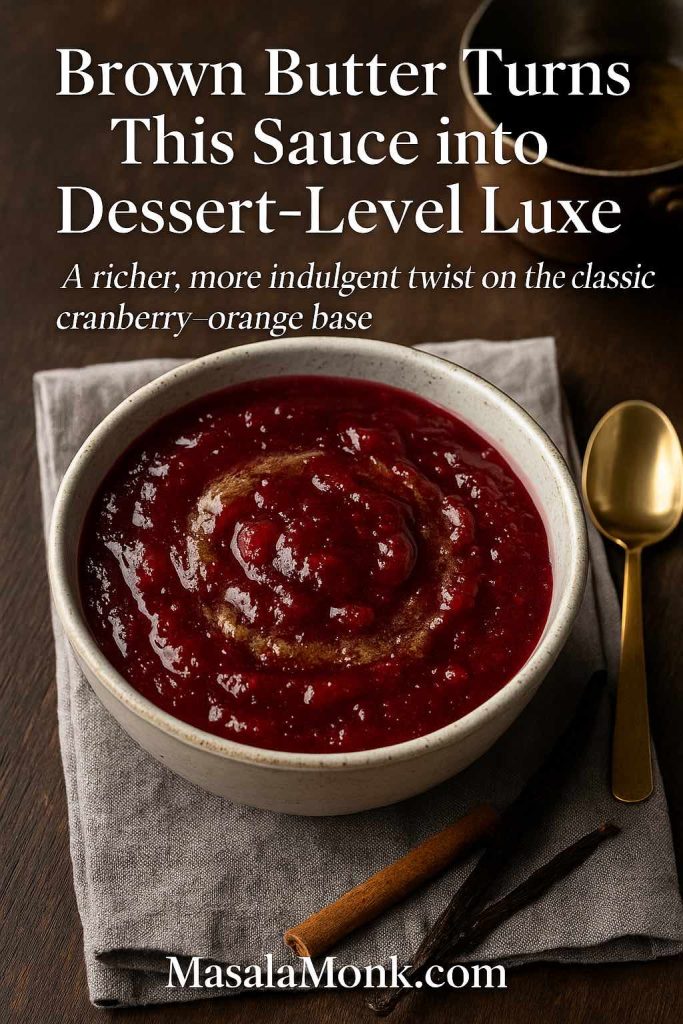
Bowl of brown butter and vanilla cranberry orange sauce on a linen cloth, with a gold spoon, cinnamon stick and vanilla bean, styled as a rich gourmet version of classic cranberry sauce.
Brown butter and vanilla swirl through this cranberry–orange sauce, turning the same simple base into a dessert-level, gourmet side dish for holiday dinners.

You’ll need:

  • Classic batch of cranberry sauce with orange juice
  • 2 tablespoons unsalted butter
  • Extra ½ teaspoon vanilla extract

How to make it:

  1. In a small light-coloured pan, melt the butter over medium heat.
  2. Continue cooking, swirling the pan, until the butter foams and the milk solids at the bottom turn golden and smell nutty. Take off the heat; this is brown butter.
  3. Prepare the base cranberry sauce recipe using orange juice as usual.
  4. Once the sauce is off the heat, fish out the cinnamon stick if you used one, then stir in the brown butter and extra vanilla.
  5. Taste and adjust; brown butter adds richness but not sweetness, so you may want a teaspoon of extra sugar or maple if you like a softer edge.
  6. Cool and chill.
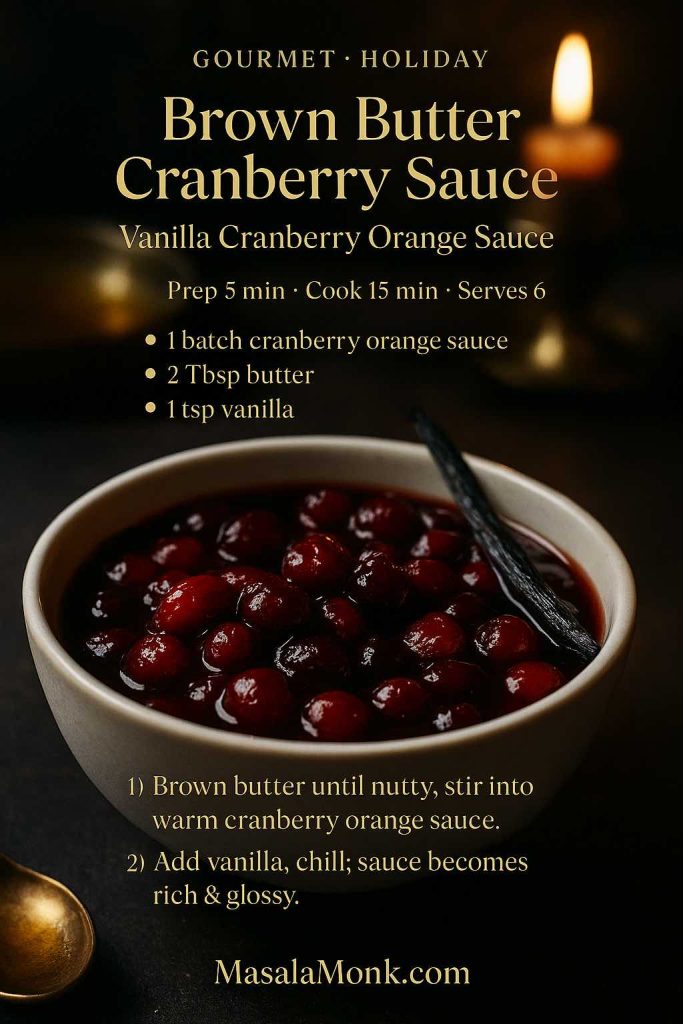
Brown butter cranberry sauce in a cream bowl with a split vanilla bean on top, styled on a dark table with candlelight, featuring an elegant text overlay recipe card for vanilla cranberry orange sauce from MasalaMonk.com.
Brown butter and real vanilla turn classic cranberry orange sauce into a rich, restaurant-style side. Save this gourmet cranberry sauce recipe card for holiday dinners when you want something a little extra.

The result is a cosy gourmet cranberry sauce recipe that works for Thanksgiving, Christmas dinners, or even alongside duck breast, pork fillet, or a rich vegetarian main. If you like building “one master sauce + many ways to use it”, this approach is very similar in spirit to how we handle yogurt sauces in our Greek tzatziki guide.


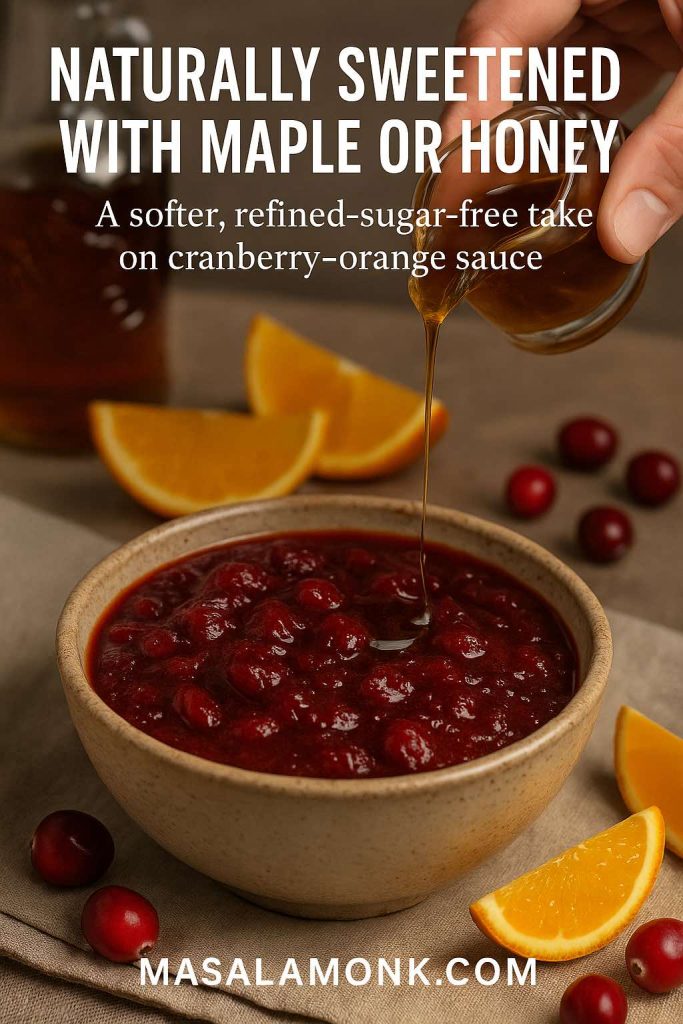
Naturally Sweetened Cranberry Sauce with Orange Juice (Maple or Honey)

For guests who like slightly “cleaner” flavours, a naturally sweetened version hits the spot. This variation keeps the orange but swaps white sugar for maple syrup or honey, so it fits neatly into the healthy cranberry sauce and low sugar cranberry sauce camp.

Close-up of a rustic bowl filled with cranberry orange sauce while a hand pours maple or honey syrup over the top, with orange wedges and fresh cranberries in the background.
Naturally sweetened cranberry–orange sauce, finished with maple or honey for a gentler, refined-sugar-free twist on the classic recipe.

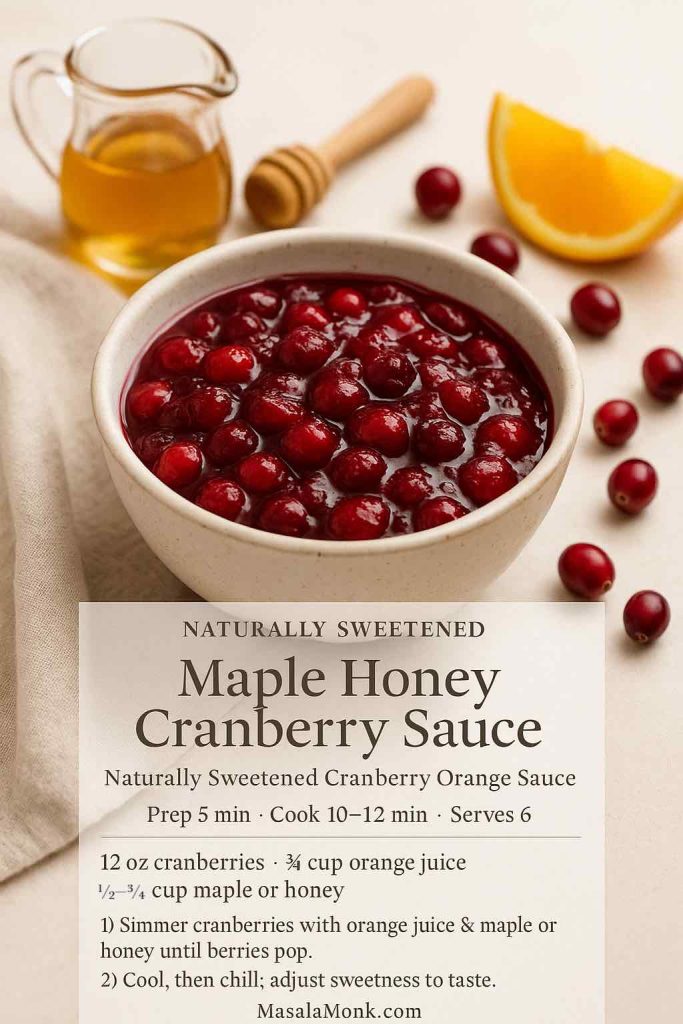
Ingredients (Maple Version):

  • 12 oz (340 g) cranberries
  • ½–¾ cup (120–180 ml) pure maple syrup
  • ¾ cup (180 ml) orange juice
  • ¼ cup (60 ml) water
  • 1–2 teaspoons orange zest
  • Pinch of salt
  • Optional: cinnamon stick, 1 teaspoon vanilla

Method:

  1. Combine cranberries, maple syrup, orange juice, water, zest, salt and optional cinnamon in a saucepan.
  2. Bring to a gentle boil over medium heat.
  3. Simmer 10–12 minutes until most berries burst and the sauce thickens.
  4. Remove from the heat, stir in vanilla if using, and taste. Add more maple syrup if you’d like a sweeter cranberry sauce less sugar style.
  5. Cool and chill.
Naturally sweetened maple honey cranberry sauce in a rustic ceramic bowl, surrounded by a honey dipper, maple syrup jug, orange slice and fresh cranberries, with a text overlay mini recipe card for naturally sweetened cranberry orange sauce from MasalaMonk.com.
This naturally sweetened cranberry orange sauce swaps refined sugar for maple syrup or honey. Save this recipe card if you’re after a brighter, “healthier” cranberry sauce that still feels cosy and festive.

Honey works similarly, though it tastes sweeter than sugar or maple. Start with ½ cup, taste towards the end of cooking, and add more gradually if needed.

For more inspiration, Ambitious Kitchen has a lovely naturally sweetened orange cranberry sauce using orange juice, maple or honey, and vanilla. Cookie and Kate’s naturally sweetened cranberry sauce is another strong example of a cranberry sauce recipe healthy that skips refined sugar.


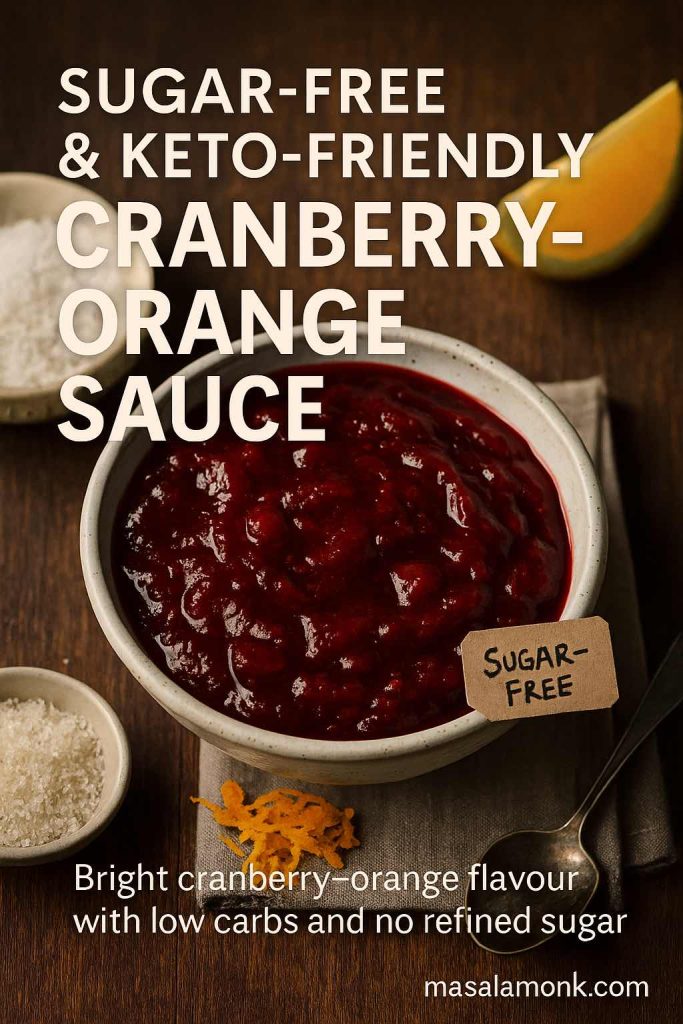
Low Sugar, Sugar-Free & Keto Cranberry Sauce with Orange Juice

Sometimes you need a sugar free cranberry sauce that still feels festive: maybe you’re cooking for someone watching their blood sugar, or for guests who prefer low-carb options. This variation stays tart and bright, with orange notes, but uses sugar-free sweetener instead of sugar.

Bowl of sugar-free, keto-friendly cranberry orange sauce on a wooden table with citrus zest, lemon wedge and a small dish of granular sweetener, styled with “Sugar-Free” label text on the image.
A sugar-free, keto-friendly cranberry–orange sauce made with low-carb sweetener instead of sugar, keeping the bright flavour while cutting the carbs for guests who prefer a lighter option.

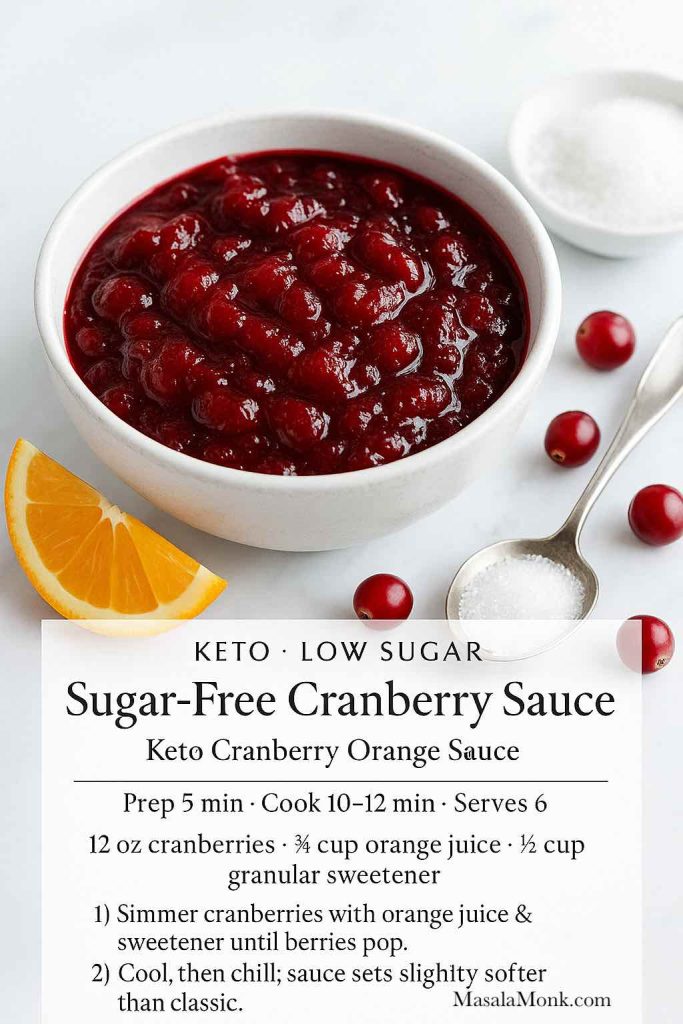
Ingredients:

  • 12 oz (340 g) cranberries
  • ¾ cup (180 ml) orange juice
  • ½ cup (120 ml) water
  • ½–⅔ cup granular sugar-free sweetener (such as a monkfruit–erythritol blend)
  • 1–2 teaspoons orange zest
  • Pinch of salt
  • Optional: cinnamon stick, vanilla extract

Steps:

  1. Combine cranberries, orange juice, water, sweetener, zest, and salt in a saucepan.
  2. Bring to a gentle boil over medium heat.
  3. Simmer for 10–12 minutes, stirring often, until the sauce thickens and most berries have popped.
  4. Remove from heat and stir in vanilla if you like.
  5. Taste while still warm. Sugar-free sweeteners can taste slightly less sweet once chilled, so make it just a touch sweeter than you think you want.
  6. Cool, then refrigerate to let it set.
Sugar-free cranberry sauce in a white bowl on a marble surface, styled with fresh cranberries, an orange wedge and a spoonful of granular sweetener, with a clean text overlay mini recipe card for keto cranberry orange sauce from MasalaMonk.com.
This keto-friendly cranberry orange sauce skips regular sugar and uses a granular low-carb sweetener instead. Save this sugar-free cranberry sauce recipe card if you need a lighter option that still looks and tastes festive.

This style fits well with requirements of keto cranberry sauce, no sugar added cranberry sauce, and low carb cranberry sauce. For a different take, Wholesome Yum’s low-carb cranberry sauce leans on allulose and orange zest for a very low net-carb result.

Quick note: if anyone at your table has diabetes or other health concerns, remind them to chat with their doctor before relying on “diabetic cranberry sauce” or juice drinks as part of treatment. For a broader look at how cranberry juice fits into weight management, there’s a helpful summary here on cranberry juice and weight loss.


Boozy Holiday Cranberry and Orange Juice Sauce

For adults-only dinners, adding a splash of alcohol turns your basic cranberry and orange juice sauce into something that tastes like it fell off a restaurant dessert menu.

Bowl of boozy cranberry orange sauce on a wooden table with a glass of whiskey in the background and fresh cranberries scattered around, styled as a grown-up holiday version of classic cranberry sauce.
Boozy cranberry–orange sauce finished with whiskey or orange liqueur for grown-up holiday plates, perfect with roast duck, glazed ham or rich beef roasts.

You’ll need:

  • One batch of classic cranberry sauce with orange juice
  • 2–4 tablespoons orange liqueur (like Cointreau or Grand Marnier) or whiskey/bourbon

How to build it:

  1. Make the base easy cranberry sauce recipe as usual, but reduce the orange juice by 2–4 tablespoons to make room for the alcohol.
  2. Once you’ve turned off the heat, stir in the liqueur or whiskey.
  3. Taste and adjust. Alcohol can slightly amplify bitterness, so an extra teaspoon of sugar or maple can round things out if desired.
  4. Cool and chill; the boozy edge softens overnight.
Boozy cranberry orange sauce in a dark bowl on a wooden table, garnished with an orange twist and fresh cranberries, with a glass of bourbon and a text overlay mini recipe card for cranberry sauce with orange liqueur or bourbon from MasalaMonk.com.
When you stir in a splash of bourbon or orange liqueur, classic cranberry orange sauce turns into this moody, grown-up side. Save this boozy cranberry sauce recipe card for dinner parties where you want the cranberry to feel a little bit cocktail-bar chic.

This twist is wonderful with roast duck, glazed ham, and beef roasts. Leftover boozy cranberry sauce can double as a quick pan sauce: deglaze a roasting pan with a splash of stock, whisk in a spoonful of cranberry sauce, and simmer briefly.

If you like playing with citrusy cocktails, a spoonful of this sauce blends beautifully into a whiskey sour or adds flavour and colour to the sugar rim on a lemon drop martini.


Fresh Cranberry Orange Relish (No Cook)

For some people, the ultimate cranberry orange relish isn’t cooked at all. Instead of simmering, you blitz everything raw in a food processor and let time in the fridge meld the flavours.

This no-cook cranberry relish recipe with orange juice is bright, crunchy, and a little sharp.

Bowl of fresh no-cook cranberry orange relish with a spoon, surrounded by whole cranberries and orange halves on a wooden table.
Fresh, no-cook cranberry–orange relish: finely chopped cranberries and whole orange peel for a crunchy, zippy alternative to classic cooked cranberry sauce.

Ingredients:

  • 12 oz (340 g) fresh cranberries
  • 1 thin-skinned orange, scrubbed (remove seeds, keep peel)
  • ½–¾ cup (100–150 g) sugar, or more to taste
  • Splash of orange juice if needed
  • Pinch of salt

Method:

  1. Roughly chop the orange, removing any seeds.
  2. Add the cranberries and orange pieces to a food processor.
  3. Pulse until everything is finely chopped but not pureed; scrape down the sides as needed.
  4. Sprinkle over ½ cup sugar and the salt. Pulse again to combine.
  5. Taste and add more sugar if you’d like a sweeter fresh cranberry orange relish. If the mixture seems very dry, add a spoonful of orange juice.
  6. Transfer to a container and chill for at least 2 hours, preferably overnight.
Fresh cranberry orange relish in a white bowl on a bright white surface, with chopped cranberries and orange peel visible, surrounded by fresh cranberries and half an orange, plus a text overlay mini recipe card for raw cranberry relish with orange from MasalaMonk.com.
This no-cook cranberry orange relish stays bright, crunchy and a little bit sharp. Save this recipe card if you like a raw cranberry relish for Thanksgiving, cheese boards and leftover turkey sandwiches.

The texture is closer to a chutney than to a smooth sauce, which makes it fantastic with cold turkey sandwiches, cheese boards, and rich mains. It’s also lovely spooned on top of savoury breakfast dishes like upma and other wholesome brunch bowls.

Because it’s raw, this variation particularly benefits from good-quality fruit. It’s a great way to use cranberries for Thanksgiving dinner when you want something sharper and fresher than cooked sauce.


Apple Cranberry Chutney with Orange

Finally, if you want something that bridges the gap between jammy sauce and savoury chutney, this apple-forward variation is a keeper. It leans into vinegar, onion and ginger, making it a brilliant cranberry side dish for roasted meats, charcuterie, and cheese.

Rustic bowl of chunky apple cranberry chutney with orange, showing visible pieces of apple and cranberries, styled with apple slices, cranberries and a small bottle of vinegar on a wooden table.
Apple cranberry chutney with orange: chunky, tangy and lightly spiced, perfect alongside roast meats, nut roasts or a holiday cheese and cracker board.

Ingredients:

  • 8 oz (225 g) cranberries
  • 1 medium apple, peeled and finely diced
  • ½ cup (100 g) sugar (or ¼ cup white, ¼ cup brown)
  • ½ cup (120 ml) orange juice
  • ¼ cup (60 ml) apple cider vinegar
  • ¼ cup (40 g) finely chopped onion
  • ¼ teaspoon ground ginger or 1 teaspoon freshly grated ginger
  • Pinch of salt
  • Pinch of ground cinnamon

How to make it:

  1. Add cranberries, apple, sugar, orange juice, vinegar, onion, ginger, salt, and cinnamon to a saucepan.
  2. Bring to a gentle simmer over medium heat.
  3. Cook 15–20 minutes, stirring from time to time, until the cranberries burst, the apples soften, and the chutney is thick and glossy.
  4. Taste and adjust balance: more sugar for sweetness, more vinegar for tang, or a little extra salt for savouriness.
  5. Cool and chill.
Rustic apple cranberry chutney with orange in a brown ceramic bowl on a wooden board, with cheese, crackers and apple slices around it, plus a text overlay mini recipe card for savoury cranberry, apple and orange chutney from MasalaMonk.com.
This apple cranberry chutney leans savoury thanks to onion, ginger and cider vinegar, so it works as well with cheese boards and ham as it does with roast turkey. Save this recipe card if you like something chunkier and more chutney-style than classic cranberry sauce.

This apple cranberry chutney sits nicely next to roast pork, ham, or a vegetarian roast, and it pairs beautifully with a platter of cheeses and crackers. It also doesn’t feel limited to November; you can happily serve it any time you’re craving something fruity and savoury.

Also Read: Peanut Butter Cookies (Classic Recipe & 3 Variations)


Slow Cooker, Make-Ahead & Freezer Tips

Cranberry sauce is one of the easiest dishes to prepare ahead for a big holiday meal. Whether you’re going traditional stove-top or want a cranberry sauce crock pot method, it’s extremely forgiving.

Slow Cooker Cranberry Sauce

The slow cooker version is ideal if all your burners are busy or if you want a cranberry sauce in slow cooker approach that gently simmers away in the background.

Basic method:

  1. Add all the ingredients for any of the cooked variations (classic, maple, sugar-free, or boozy) into a small slow cooker.
  2. Stir to combine.
  3. Cook on LOW for 3–4 hours or HIGH for about 2 hours, stirring once or twice if convenient.
  4. Once the cranberries have burst and the sauce looks thick around the edges, switch the slow cooker off.
  5. Let it cool slightly, then transfer to a container and refrigerate.

Because the slow cooker retains moisture, sauces from this method sometimes look a tiny bit looser. If needed, you can move the sauce to a saucepan and simmer for a couple of minutes to tighten it up.

How Far in Advance Can You Make Cranberry Sauce with Orange Juice?

For stress-free cranberry recipes for Thanksgiving, aim to make your sauce at least one day ahead; three days is even better. The flavours deepen, and it’s one less thing on your day-of list.

Rough guidelines:

  • Fridge life: about 7 days, tightly covered
  • Freezer life: up to 2 months in an airtight container, leaving a little headroom for expansion

To serve from frozen, thaw overnight in the fridge, stir well, and warm gently in a saucepan or let it come to room temperature.

A smooth, properly set cranberry sauce recipe homemade will thicken slightly in the cold. If it’s too stiff, stir in a splash of water or orange juice over low heat until you like the consistency.

Also Read: Tres Leches – Mexican 3 Milk Cake Recipe


Serving Suggestions & Menu Pairings

Once you have a reliable best cranberry sauce for Thanksgiving in your back pocket, it’s fun to think beyond the turkey.

Classic Holiday Plates

Your sauce is an obvious match for:

  • Roast turkey (whole or breast)
  • Roast chicken or Cornish hens
  • Baked ham
  • Nut roasts or lentil loaves

On the side, consider a mix of creamy, crunchy, and green elements. A spoonful of cranberry sauce with orange juice feels right at home with:

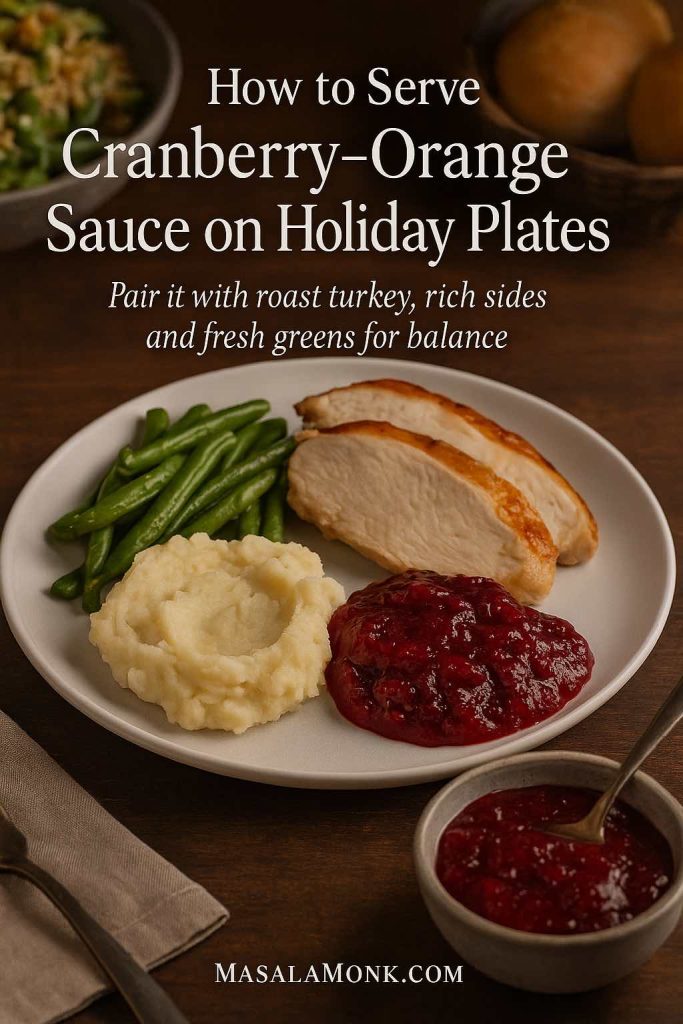
All together, they build the kind of plate people dream about when they search for the best cranberry sauce recipe for Thanksgiving.

Holiday dinner plate with roast turkey, mashed potatoes, green beans and a generous spoonful of cranberry orange sauce, with extra sauce in a small bowl on a wooden table.
Serve cranberry–orange sauce alongside roast turkey, creamy potatoes and green vegetables for a balanced holiday plate that feels rich yet bright.

Casual Comfort Dinners

Cranberry sauce isn’t limited to one Thursday in November. The same bright-tart spoonful can cut through:

You don’t have to serve it in a huge mound; even a small dish on the table lets everyone add that burst of colour and acidity where they like.

Brunch & Grazing Boards

On more relaxed days, your cranberry orange sauce also belongs on brunch spreads:

  • Dolloped next to cheeses, nuts, and crackers
  • Served with buttery scones or biscuits
  • Paired with savoury egg dishes and fresh fruit

It sits nicely next to a jug of mimosa variations or a tray of strawberry mojito mocktails that you can also adapt with cranberry and orange.


Using Leftover Cranberry Sauce with Orange Juice

One of the hidden strengths of a good cranberry sauce with orange juice is how flexible the leftovers are. A cup or two in the fridge can quietly upgrade meals all week. All of these recipes with cranberry sauce turn leftovers into easy meals and snacks.

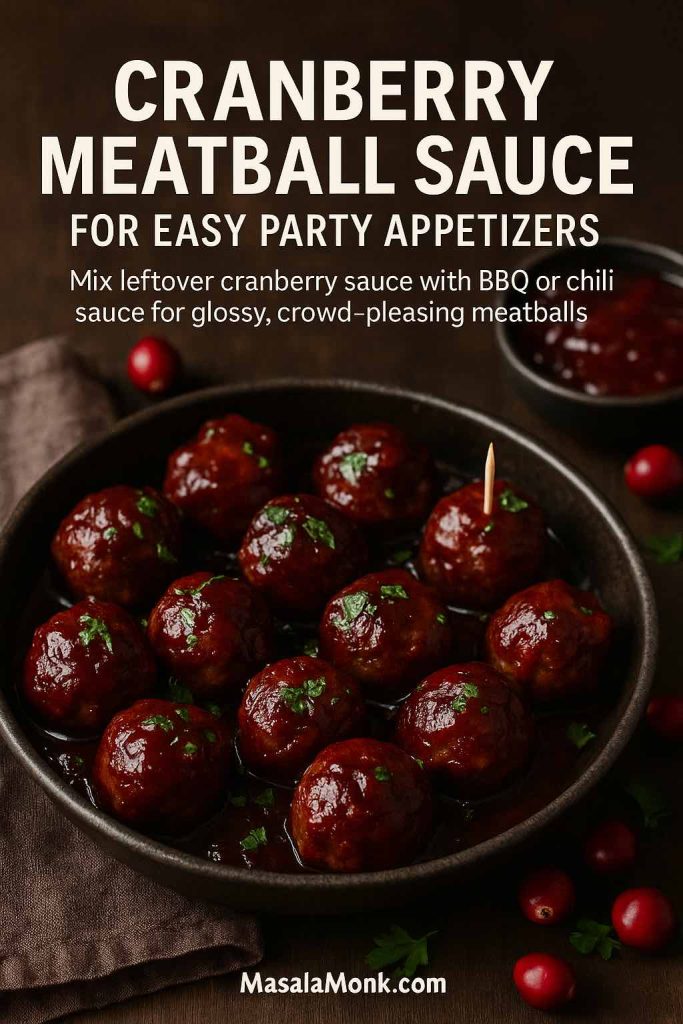
Cranberry Meatball Sauce

Turn your sauce into a sticky, tangy glaze for meatballs:

  1. Mix equal parts cranberry sauce and your favourite BBQ or chili sauce.
  2. Add a splash of soy sauce or Worcestershire for savouriness.
  3. Warm in a pan until smooth.
  4. Add cooked meatballs and simmer a few minutes so they’re coated and hot.

This simple trick gives you a cranberry meatball sauce that works as a party appetizer or a quick dinner over rice or mashed potatoes.

Skillet of meatballs glazed in glossy cranberry sauce, garnished with parsley and surrounded by fresh cranberries, with text reading “Cranberry Meatball Sauce for Easy Party Appetizers.”
Mix leftover cranberry sauce with BBQ or chili sauce to make this glossy cranberry meatball sauce—an easy, crowd-pleasing party appetizer or weeknight dinner.

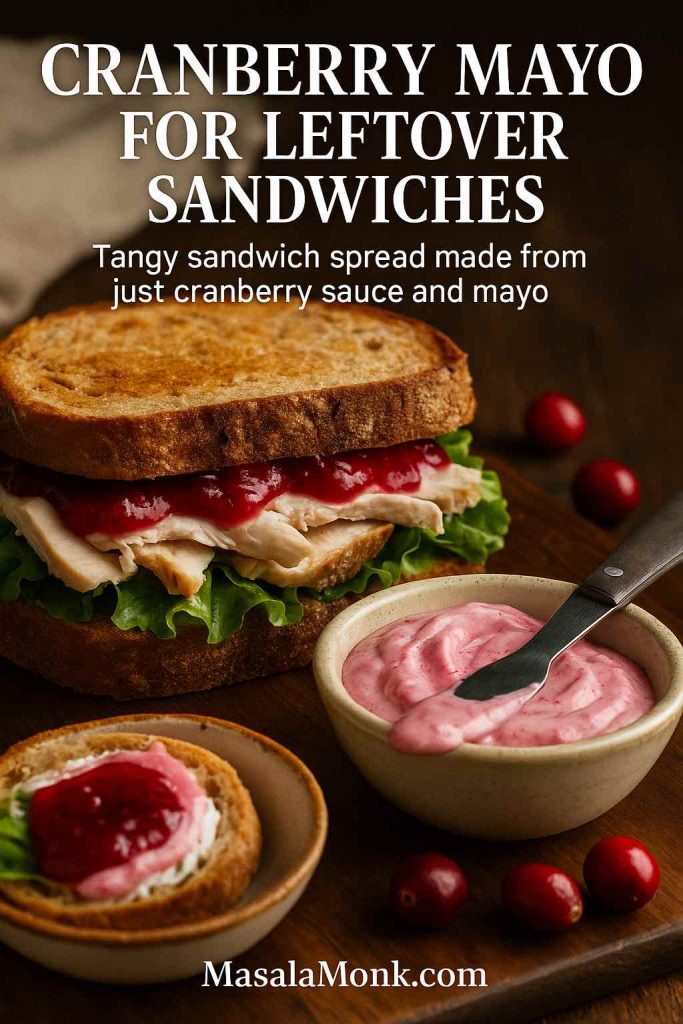
Cranberry Mayo for Sandwiches

A spoonful of cranberry sauce goes a long way in sandwich spreads:

  1. Stir 1 tablespoon cranberry sauce into 2 tablespoons mayonnaise.
  2. Taste and add more mayo if you want it milder.
  3. Spread on bread for turkey or chicken sandwiches.

The result is a tangy, creamy cranberry sauce for sandwiches that plays nicely with roasted poultry, cheese, and salad leaves. For more ideas, you can look at flavour combos from this collection of chicken sandwich recipes.

Turkey sandwich on rustic toasted bread with cranberry mayo and lettuce, served beside a small bowl of pink cranberry mayonnaise and fresh cranberries on a wooden board.
Leftover cranberry sauce whipped into mayo makes a tangy cranberry spread that instantly upgrades next-day turkey or chicken sandwiches.

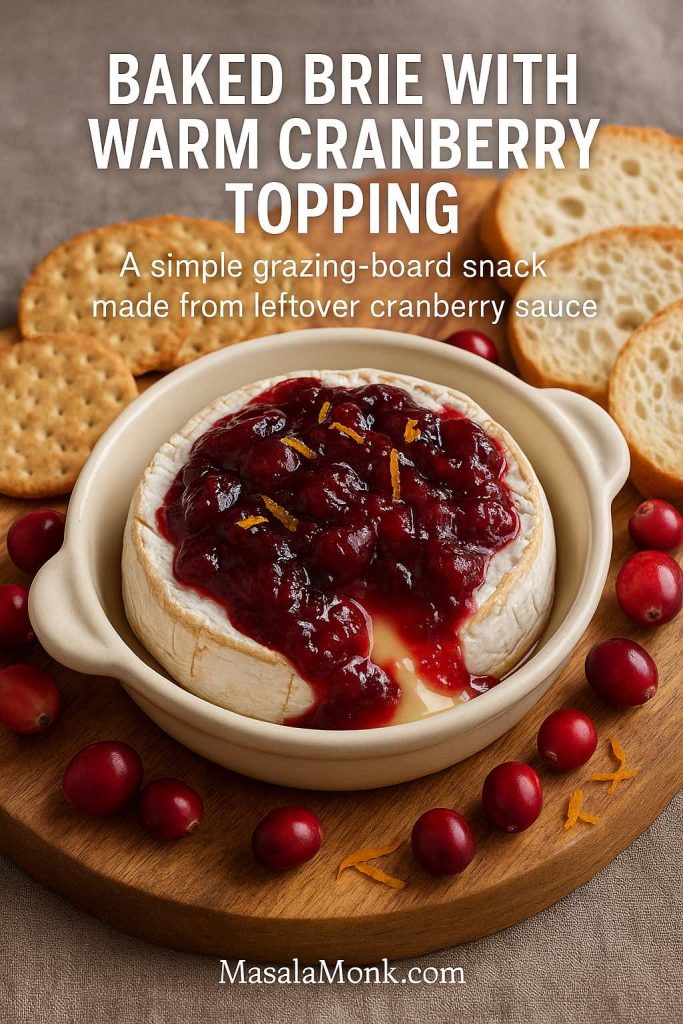
Baked Brie with Cranberry Topping

If you love grazing boards, baked brie topped with cranberry orange relish is a near-perfect snack:

  1. Place a small wheel of brie in an oven-safe dish.
  2. Spoon cranberry sauce on top—classic, brown butter, or even apple cranberry chutney all work.
  3. Bake at 180°C / 350°F for 10–15 minutes until the cheese is soft and oozing.
  4. Serve with crackers or sliced baguette.

If you’re pregnant or feeding pregnant guests, it’s worth checking which soft cheeses are safe before you plan the board; this guide to soft cheese and pregnancy is a handy starting point.

Baked Brie wheel topped with glossy cranberry orange sauce, oozing onto a ceramic dish and surrounded by crackers, baguette slices and fresh cranberries on a wooden board.
Warm baked Brie crowned with leftover cranberry–orange sauce makes an instant grazing-board centrepiece that looks fancy but takes only minutes in the oven.

Breakfast Bowls and Oats

Cranberry sauce can also brighten breakfast:

  • Swirl into Greek yogurt with granola
  • Spoon over overnight oats
  • Stir into warm porridge

A solid base like this protein oatmeal formula turns leftover sauce into a colourful topping that adds both flavour and a bit of natural sweetness, especially if you’ve made a low sugar cranberry sauce or naturally sweetened cranberry sauce.

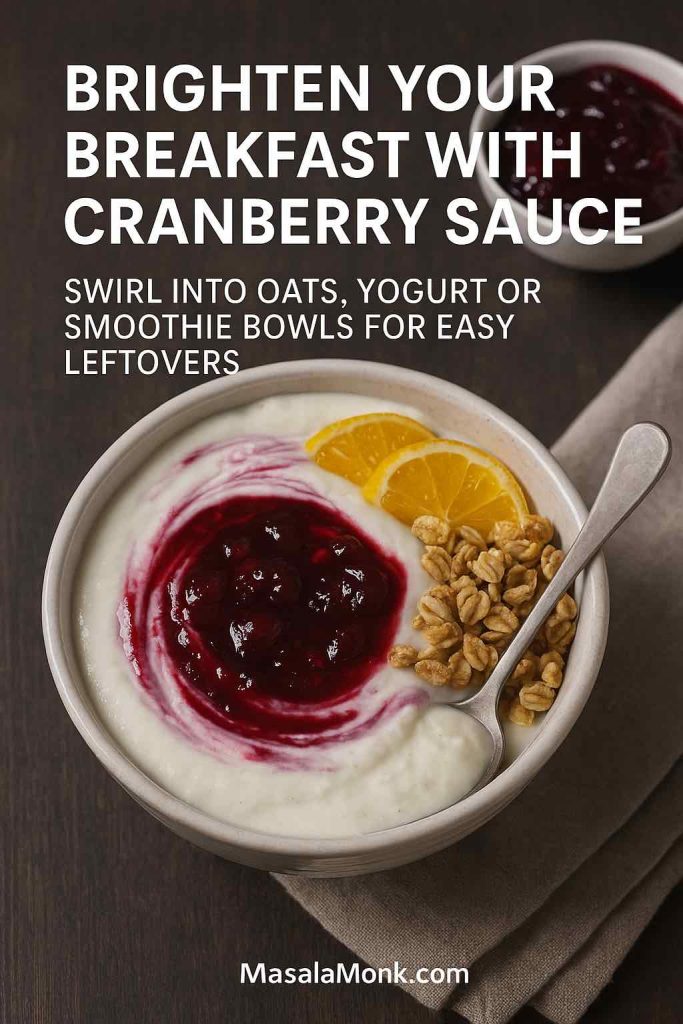
Breakfast bowl of creamy yogurt or oatmeal topped with a swirl of cranberry sauce, orange slices and granola, with a second bowl of cranberry sauce in the background.
Swirl leftover cranberry sauce into oats or yogurt for a colourful breakfast bowl that’s tangy, slightly sweet and far more exciting than plain porridge.

Dessert Ideas

Cranberry’s tartness pairs beautifully with chocolate and cream:

  • Warm lightly and drizzle over vanilla ice cream or cheesecake
  • Use as a filling for thumbprint cookies or sandwich cookies
  • Layer into parfaits with whipped cream and crushed biscuits

A plate of cranberry thumbprints goes especially well alongside something rich like these double chocolate chip cookies. For cosy nights in, stir a spoonful of cranberry orange sauce into a mug of homemade hot chocolate for a wintery twist.

Bowl of vanilla ice cream drizzled with cranberry sauce and a plate of thumbprint cookies filled with cranberry jam, styled together on a wooden table as easy desserts made from leftover cranberry sauce.
Leftover cranberry sauce turns into dessert in minutes—drizzle it over vanilla ice cream or spoon it into thumbprint cookies for an easy sweet finish after a holiday meal.

Drinks & Mocktails

Leftover sauce also loves a glass:

  • Shake a spoonful with lemon juice, simple syrup, and whiskey for a cranberry take on a sour
  • Stir into sparkling water with extra orange juice for a quick mocktail
  • Use as a flavour base in mocktails similar to those in our ACV & cranberry mocktail ideas
Two cranberry drinks on a wooden table, one a whiskey sour–style cocktail with foam and orange slice and one a sparkling mocktail with cranberries and citrus, with a small bowl of cranberry sauce in front and text about turning leftover cranberry sauce into drinks and mocktails.
A spoonful of leftover cranberry sauce can be shaken into a cranberry sour or stirred into sparkling water with citrus for easy cocktails and mocktails that use up every last bit.

All of these are small, low-effort ways to make sure your recipes using cranberry sauce don’t stop at the main meal.


A Little More on Cranberries & Health

Even though most versions of cranberry sauce with orange juice are treats rather than health foods, it’s still nice to know what’s inside those jewel-coloured berries.

Cranberries offer:

  • Vitamin C
  • Manganese
  • Dietary fibre
  • Various polyphenol antioxidants

Healthline’s overview of cranberry nutrition and health benefits explains how cranberries may help support urinary tract health, reduce oxidative stress, and influence some heart-health markers. The Cranberry Institute collects research summaries on cranberry bioactives, particularly around proanthocyanidins (PACs), the compounds thought to help prevent certain bacteria from sticking to urinary tract walls.

On the flip side, most holiday sauces also contain a decent amount of sugar, so they’re still in the “enjoy in moderation” category. If you’re looking for something lighter, lean on your naturally sweetened cranberry sauce or no sugar added cranberry sauce variation, and perhaps save the biggest spoonfuls for big meals rather than everyday snacks.

For those balancing rich holiday food with lighter days, homemade hydration and detox-style drinks featuring cranberry and apple cider vinegar can feel like a reset; you’ll find several precise formulas in this guide to cranberry-ACV detox drinks and these homemade electrolyte recipes for fasting.


Conclusion

With this one post, you’ve got:

  • A reliable, classic cranberry sauce with orange juice
  • A set of seven easy recipes and variations (from cranberry orange relish to apple cranberry chutney)
  • Options that cover classic, gourmet, low-sugar, sugar-free, and boozy moods
  • Plenty of ideas for recipes using cranberry sauce the next day and beyond

From here, you can keep things as simple as a single pot of sauce—or build a whole cranberry “universe” across your Thanksgiving, Christmas and everyday menus.

FAQs about Cranberry Sauce with Orange Juice

1. Can I make cranberry sauce with orange juice instead of water?

Yes, absolutely. A cranberry sauce with orange juice is simply a classic cranberry sauce recipe where orange juice replaces some or all of the water. This gives you a brighter flavour, gentle sweetness, and a more “holiday” feel. Any basic cranberry sauce recipe using orange juice can follow the same ratios as a water-based sauce; just watch the simmer time so it doesn’t reduce too much and turn too thick.


2. What’s the difference between cranberry sauce and cranberry orange relish?

Cranberry sauce is cooked: the berries burst over heat and the mixture thickens into a glossy, jammy side dish. A cranberry orange relish is usually raw, often made in a food processor with whole orange, sugar, and fresh cranberries. So, a cranberry relish recipe with orange juice or whole orange has more crunch, brighter acidity, and a slightly bitter edge from the peel. In short, sauce is smooth and spoonable; relish is chopped and zippy.


3. How do I fix cranberry sauce that’s too runny or too thick?

If your cranberry sauce made with orange juice is too runny after chilling, return it to the pan and simmer for a few minutes until it reduces and coats the back of a spoon. Conversely, if it ends up too thick, stir in extra orange juice or a little water, a tablespoon at a time, over low heat until it loosens. Always remember: a cranberry orange juice sauce thickens as it cools, so judge consistency after it’s chilled, not just while it’s hot.


4. Can I make cranberry sauce ahead of time or freeze it?

Yes, homemade cranberry sauce is perfect for making in advance. It keeps in the fridge for about a week, so you can prepare your cranberry sauce with orange juice several days before Thanksgiving or Christmas. It also freezes well for up to a couple of months; just thaw in the fridge and stir before serving. This make-ahead option frees up time and stove space on busy days.


5. Can I use frozen cranberries instead of fresh?

Frozen cranberries work just as well in a cranberry sauce recipe using orange juice. There’s no need to thaw them; simply add straight from the freezer and extend the simmer time by a minute or two. The texture and flavour will be very close to fresh, and your homemade cranberry sauce recipe will still set thanks to the natural pectin in the berries.


6. How can I make a low sugar or sugar free cranberry sauce?

To create a low sugar cranberry sauce, reduce the sugar and balance with more orange zest rather than extra juice, keeping the flavour bright without over-sweetening. For a sugar free cranberry sauce, swap sugar for a granular sweetener such as a monkfruit–erythritol blend and follow the same method. This style fits low-carb, keto and “diabetic-friendly” needs, although individual health conditions may still require personal adjustments. Expect the set to be slightly softer than a traditional full-sugar sauce.


7. Is cranberry sauce vegan and gluten free?

Most homemade cranberry sauce recipes are naturally vegan and gluten free, especially a simple cranberry sauce with orange juice made from fruit, sugar, and spices. Just avoid butter-based variations if you’re cooking for vegans, or use plant-based butter in gourmet versions like brown-butter-style twists. Likewise, check labels on alternative sweeteners if you’re making keto cranberry sauce or sugar-free versions.


8. Can I make cranberry sauce without orange juice?

Certainly. If you don’t want citrus, you can make a basic cranberry sauce recipe with water and sugar, then add a little lemon zest, apple juice, or even pomegranate juice for complexity. On the other hand, if you enjoy fruitier flavours but have no oranges, apple juice gives a softer, sweeter profile than a sharp cranberry sauce with orange juice. Just keep the overall liquid-to-cranberry ratio similar so the sauce still sets properly.


9. How much cranberry sauce do I need per person?

As a general guide, plan about ¼ to ⅓ cup of cranberry sauce per person. If you know your crowd loves it—especially if you’re also serving cranberry orange relish or chutney—lean towards the higher end. Leftovers are incredibly versatile, so making a bit extra rarely goes to waste. They can be used in recipes with cranberry sauce like meatball glaze, sandwich spread, or dessert toppings.


10. What can I do with leftover cranberry sauce?

Leftovers are gold. You can turn them into cranberry sauce for sandwiches, whisk them into a quick pan sauce for pork or chicken, or use them as a glaze for meatballs. Additionally, leftover cranberry and orange juice sauce works in baking—think thumbprint cookies, bars, or swirled cheesecakes—and even in breakfast bowls with yogurt and oats. In other words, recipes using cranberry sauce don’t have to stop at the holiday table.


11. How do I make my cranberry sauce more “gourmet”?

To transform a simple easy cranberry sauce into something special, add brown butter, vanilla, warm spices, or a splash of orange liqueur or bourbon at the end of cooking. These small tweaks create a richer, more complex gourmet cranberry sauce recipe without complicating the method. You can also fold in toasted nuts or dried fruit for extra texture, keeping the core cranberry sauce with orange juice base as your foundation.


12. What’s the best way to serve cranberry sauce for Thanksgiving?

For cranberry recipes for Thanksgiving, serve the sauce chilled or at cool room temperature so it holds its shape on the plate. Place it in a small bowl or shallow dish so the colour is visible, and pair it with classic sides like stuffing, mashed potatoes, green bean casserole, and roasted vegetables. A well-balanced cranberry sauce Thanksgiving spread often includes a smooth sauce plus a chunky relish or chutney, giving guests a choice of textures and flavours.