This post was last updated on:
A good butter chicken has contrast, and keto doesn’t change that.
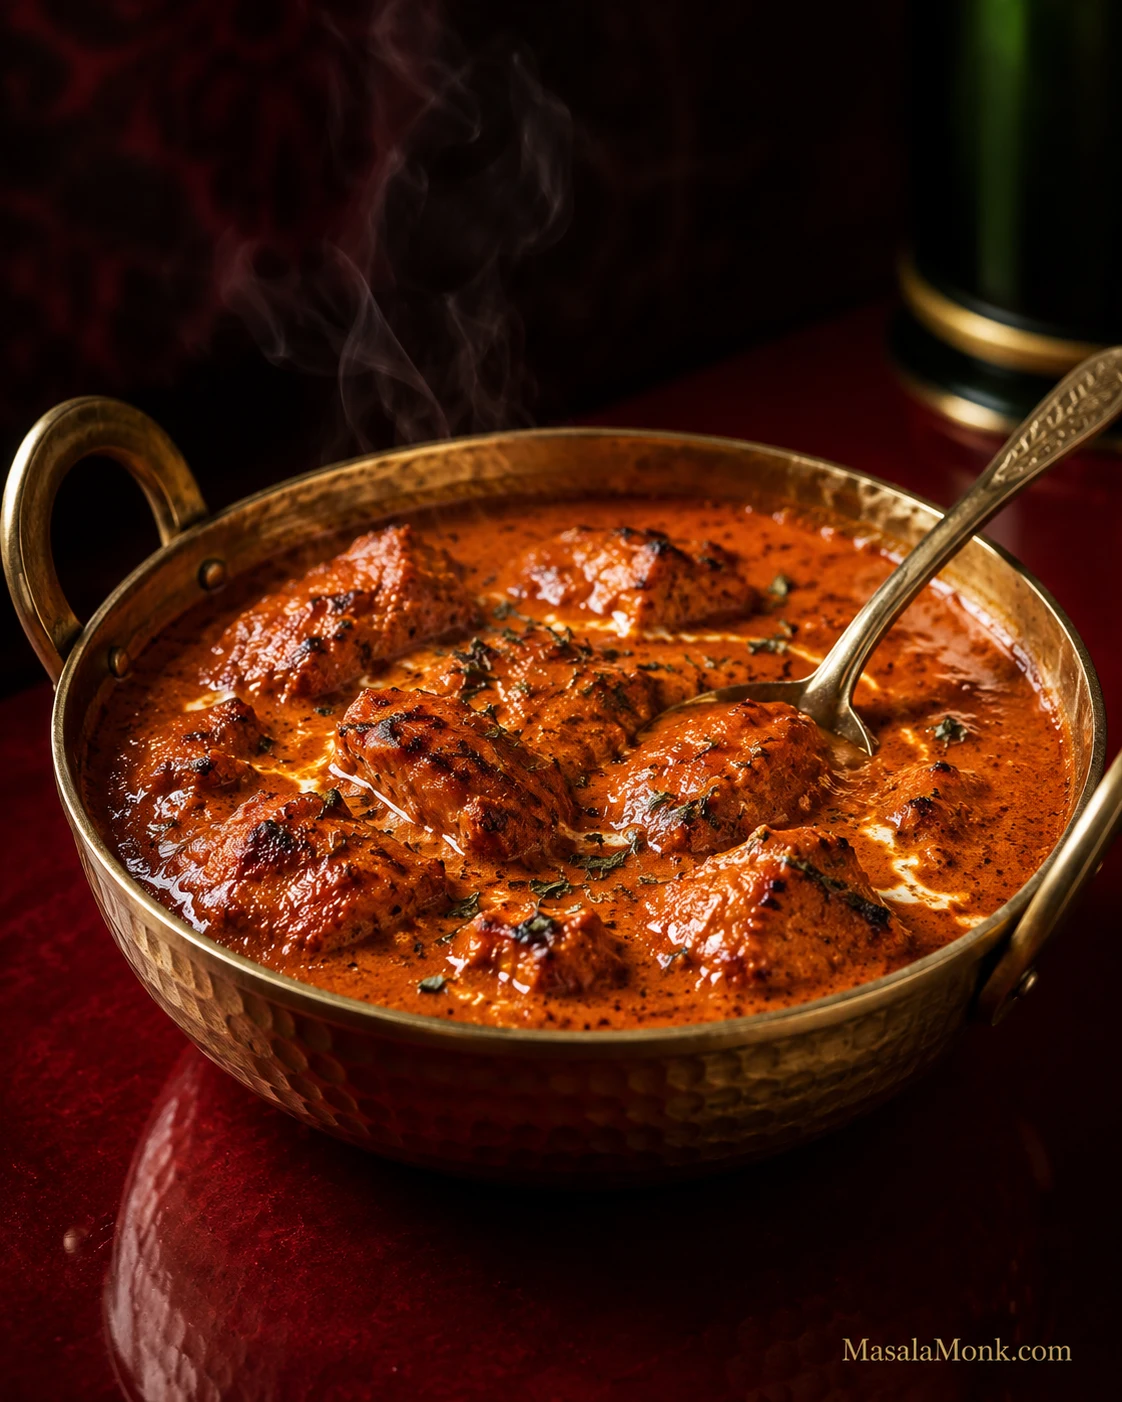
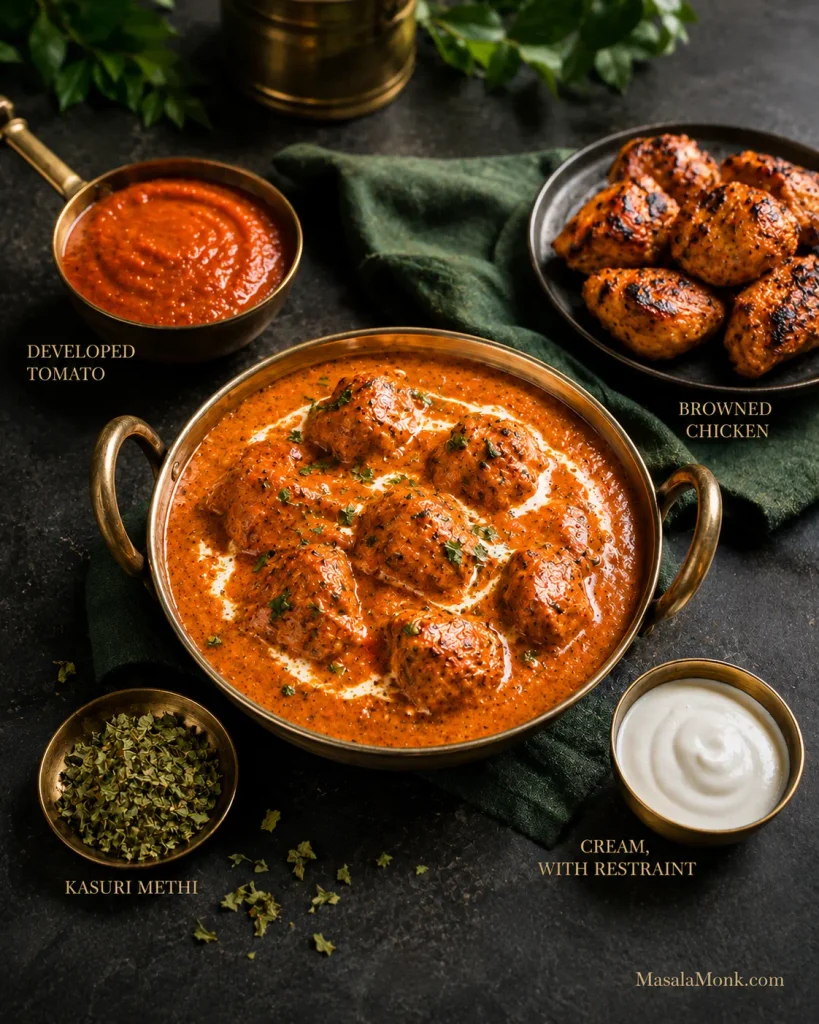
The chicken should have browned, sometimes lightly charred edges. The gravy should cling to those pieces and still move around them, with a soft butter sheen. Tomato gives the sauce its backbone, cream smooths the acidity, and crushed kasuri methi leaves the aroma that makes the finished curry recognizably butter chicken.
If butter chicken is one of the dinners you’ve been missing since cutting back on carbs, most of what makes it worth eating can stay. Or maybe you’ve already tried a low-carb version and ended up with perfectly decent creamy tomato chicken that somehow never quite became butter chicken. This recipe is meant to solve both problems.
This version is savory and tomato-deep, with browned chicken, a smooth orange-red gravy, moderate cream and kasuri methi still noticeable after the bite. A favourite takeaway may be much sweeter or richer. If yours is, this will taste different—and nothing has gone wrong.
Butter chicken—murgh makhani—already starts with plenty of ingredients that fit naturally into a lower-carb meal. Most of the carb difference comes from added sugar, how much tomato and onion go into the gravy, cashews or starches, prepared sauces and, very often, the rice and naan served with it.
Keep the butter chicken. Change the carbs that matter.
Jump to: Recipe · The 5 Changes · Troubleshooting · Low-Carb Sides · Nutrition · Restaurant Butter Chicken
Quick Answer: Is Butter Chicken Keto-Friendly?
Yes. Homemade butter chicken can be keto-friendly. This version comes to roughly 7g net carbs per serving, with no added sugar, cashews or flour-based thickener.
Chicken, butter, ghee, cream and spices contribute relatively little carbohydrate in the amounts used here. Tomato, onion and plain yogurt contribute some. Restaurant and packaged gravies may add sugar, ketchup, flour, cornstarch, cashews or simply a much larger amount of sauce.
Homemade is easier to calculate because you know what went into the pan. Whether roughly 7g net carbs fits your day depends on the carbohydrate target you’re following.
Ready to cook? Jump to the keto butter chicken recipe →
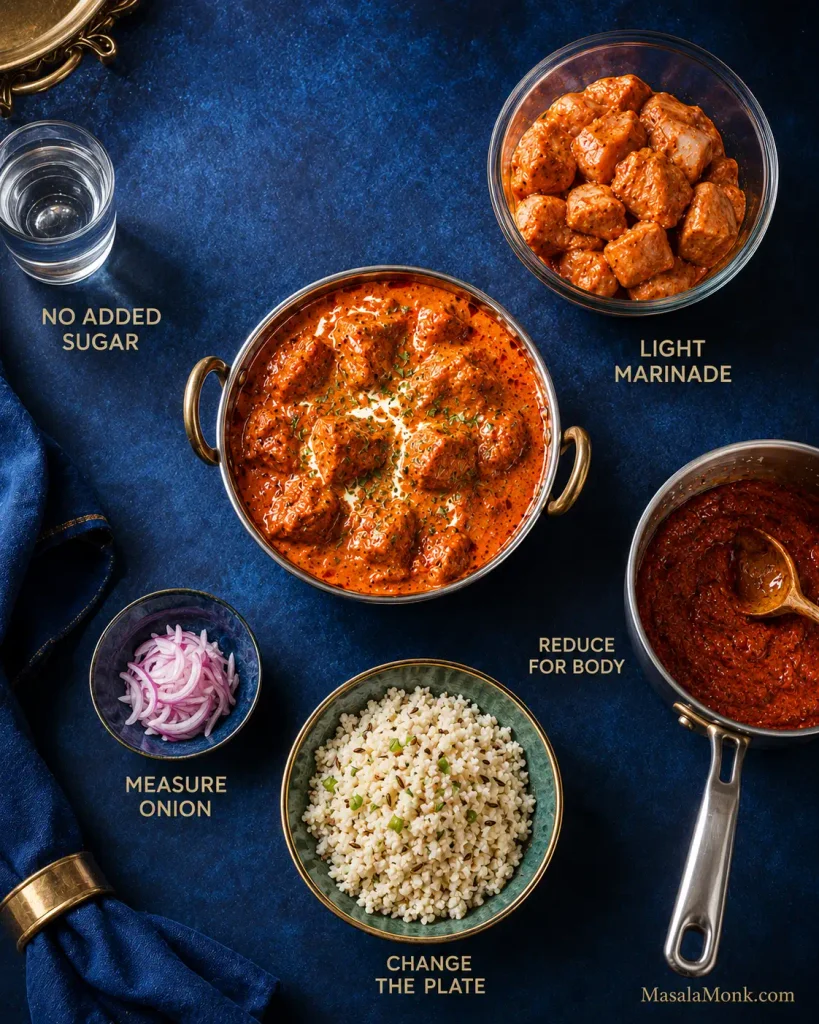
The 5 Changes That Matter
- Skip the added sugar. Give the tomato enough time to lose its raw, sharp edge before deciding the sauce needs sweetness.
- Keep the yogurt-and-lemon marinade. Leave only a light coating on the chicken before browning so the spices stay with the meat without flooding the pan.
- Let the gravy thicken through cooking. Tomato reduction and blending give this sauce plenty of body. Flour and specialty keto thickeners are unnecessary.
- Measure the onion; skip the cashews in this version. A modest amount of onion still gives the gravy body and sweetness, while the tomato, butter and cream supply enough richness.
- Look at the whole plate. Jeera cauliflower rice, greens and something crisp can save more carbohydrates than stripping character out of the curry itself.
That’s most of the keto work. From here, cook it like butter chicken.
Keto Butter Chicken Recipe
The ingredient list looks long, but the cooking itself is straightforward. Most of the work is measuring, browning the chicken and giving the tomato enough time.
If other people at the table aren’t eating low-carb, you do not need a second curry. Put rice or naan on their side of the table and cauliflower rice or vegetables on yours.
At a Glance
| Detail | What to expect |
|---|---|
| Serves | 4 generous main-course portions |
| Chicken | 700g / 1½ lb boneless skinless thighs |
| Prep | About 15 minutes |
| Marinating | 30 minutes minimum; 2–4 hours is better |
| Cook | About 30–40 minutes |
| Minimum elapsed time | About 1¼–1½ hours |
| Pan | 11–12in / 28–30cm wide, reasonably deep skillet or sauté pan |
| Heat level | Mild to medium |
| Estimated net carbs | About 7g per serving, before sides |
Equipment
- 11–12in / 28–30cm wide, reasonably deep skillet or sauté pan
- mixing bowl
- knife and cutting board
- instant-read thermometer
- immersion blender, recommended for a smoother gravy
- digital kitchen scale, useful but not essential
A countertop blender works too. If the gravy is too shallow for an immersion blender to stay submerged, transfer it to a tall heatproof jug. Let very hot gravy settle briefly and follow your blender manufacturer’s guidance for hot liquids. A fine-mesh strainer is optional.
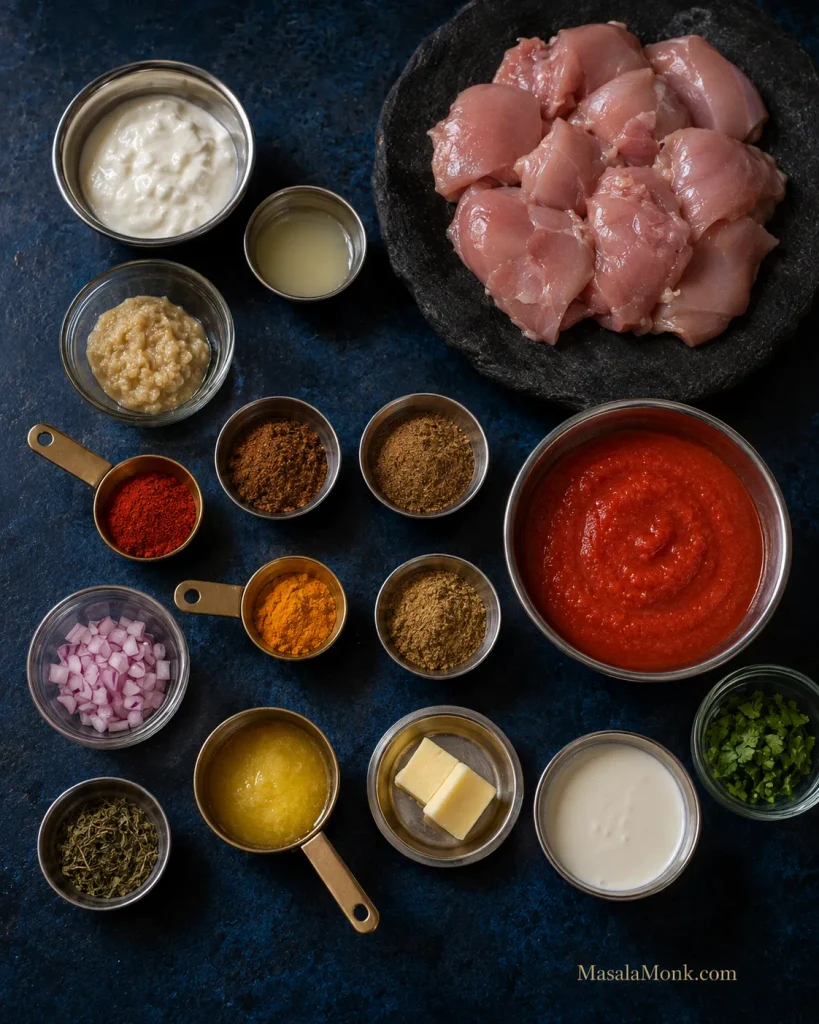
Chicken and Marinade
- 700g / 1½ lb boneless, skinless chicken thighs, cut into roughly 3cm / 1¼-inch pieces
- 80g / ⅓ cup thick plain full-fat yogurt or dahi; mild full-fat Greek yogurt also works
- 15ml / 1 tbsp lemon juice
- 15g / 1 tbsp ginger-garlic paste
- 1 tsp Kashmiri red chilli powder
- 1 tsp garam masala
- ½ tsp ground cumin
- 4g / about ¾ tsp fine sea salt
Makhani Gravy
- 14g / 1 tbsp ghee, for browning the chicken
- 14g / 1 tbsp ghee or butter, for the gravy
- 50g / roughly ½ small onion, finely chopped
- 15g / 1 tbsp ginger-garlic paste
- 1 tsp ground coriander
- ½ tsp ground cumin
- ½ tsp garam masala
- ¼ tsp ground turmeric
- ¼–½ tsp Kashmiri red chilli powder
- 225g / 8oz / scant 1 cup plain passata or strained tomatoes, with no added sugar
- 60ml / ¼ cup hot water or unsalted/lightly salted chicken stock, plus more if needed
- 3g / about ½ tsp fine sea salt
To Finish
- 120ml / ½ cup heavy or whipping cream
- 14g / 1 tbsp butter
- 1 tsp dried kasuri methi
- fresh coriander/cilantro, optional
A fresh cream around 25% milk fat works too. The gravy will be slightly lighter and looser and may need another minute of gentle reduction. The nutrition estimate later in the post assumes heavier cream in roughly the 30–36% range.
Kashmiri chilli is being used mainly for colour and gentle warmth. Add cayenne or a hotter Indian chilli powder separately when you want more heat. For a mixed table, keeping the main pan mild and sharpening individual portions at the end is usually easier.
1. Marinate the Chicken
Mix the yogurt, lemon juice, ginger-garlic paste, Kashmiri chilli, garam masala, cumin and salt. Add the chicken and turn until every piece carries a light coating.
Cover and refrigerate for at least 30 minutes. Two to four hours works particularly well, and overnight is fine when that suits your schedule.
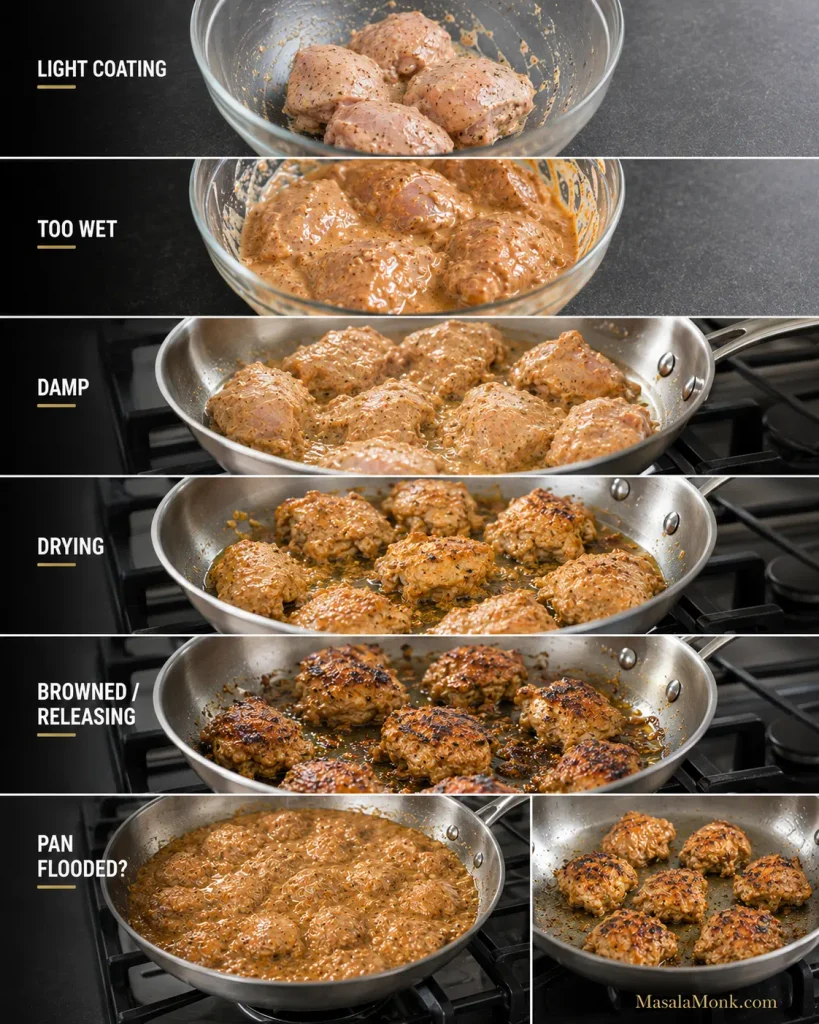
Before cooking, lift the chicken from the bowl and scrape or shake away the heavy excess marinade. Discard what remains after contact with the raw chicken. A little yogurt-spice coating should stay on the meat, but there should not be enough to form a puddle in the pan.
2. Brown the Chicken
Heat the pan over medium-high heat and add the ghee. If you’re cooking in two batches, divide that tablespoon between them. Arrange the chicken in a single layer with some room around the pieces.
At first you’ll hear a damp hiss as moisture leaves the surface. As the pan dries, the sound becomes sharper and the yogurt-spice coating begins catching and darkening around the edges. Give the first side roughly 2–3 minutes before checking it. Chicken that still grips the pan usually needs another few moments; once the surface has browned properly, it releases more easily.
Turn and colour the second side briefly, then transfer the chicken to a plate while the centre is still underdone. A few uneven dark patches are exactly what you want. The pieces do not need to look identical.
Pan filling with water? Stop adding chicken. Remove the pieces if necessary, let the excess liquid evaporate, add a touch of ghee once the pan is dry again and continue in smaller batches.
For stronger tandoori-style edges, the marinated chicken can go under a very hot broiler/grill until a few spots blister, then finish cooking in the gravy.
3. Build the Makhani Base
Lower the heat to medium and add the second tablespoon of ghee or butter. Add the onion and measured salt and cook for about 4–6 minutes, until the onion softens and loses its sharp raw smell. A little gold around the edges is welcome.
Add the ginger-garlic paste and cook for roughly 30 seconds, until its raw aroma mellows. Stir in the coriander, cumin, garam masala, turmeric and Kashmiri chilli for another 20–30 seconds. Lower the heat if the spices begin sticking or darkening quickly.
4. Give the Tomato Enough Time
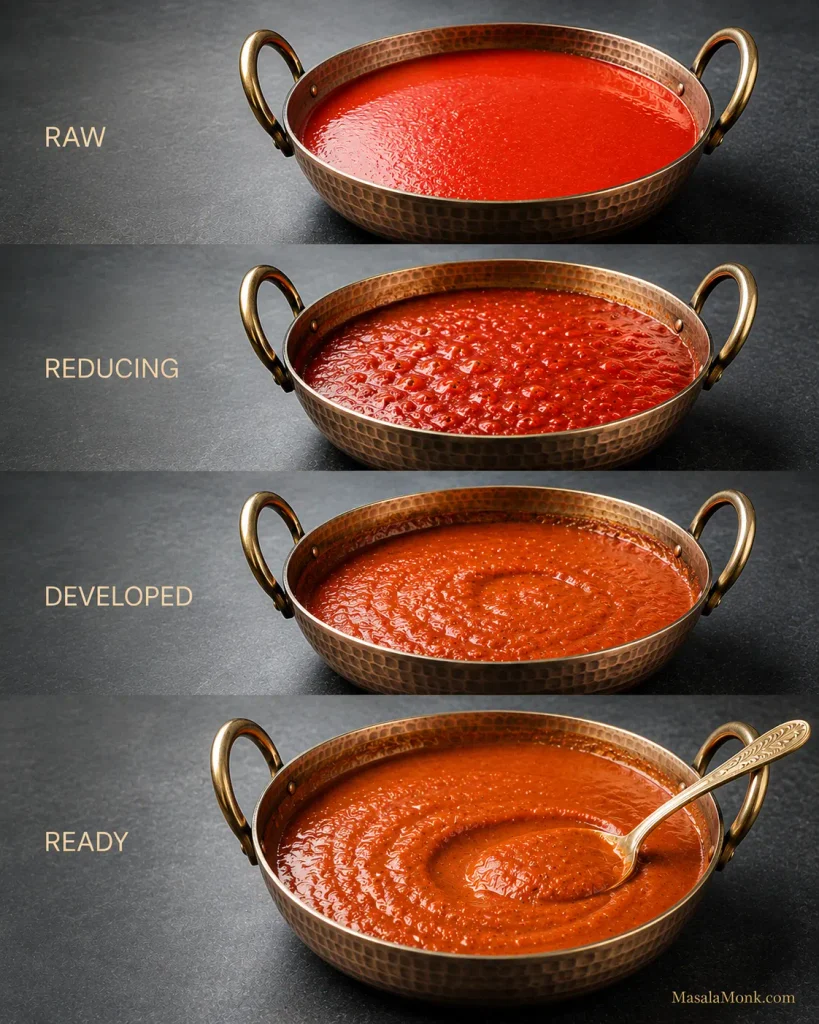
Pour in the passata and scrape the bottom of the pan to release the browned chicken and spice residue. Cook uncovered over medium to medium-low heat, stirring regularly.
Expect roughly 8–15 minutes, sometimes longer. Tomato products vary, and so do burners and pans. If yours needs 18 minutes, nothing has gone wrong.
The sauce starts bright and loose. As water cooks away, the colour deepens, the texture tightens and the obvious bottled-tomato smell fades. Draw a spoon through the pan: the trail should remain visible briefly before the sauce flows back. Small beads or streaks of fat may appear near the edges; you do not need a dramatic oil layer.
Taste a little. A sharp, raw tomato flavour means it needs more cooking. Extra tomato paste makes the colour stronger, but it can push the gravy towards a concentrated pasta-sauce flavour. Use it only when the tomato product itself is unusually pale or weak.
5. Blend the Gravy, Then Finish the Chicken
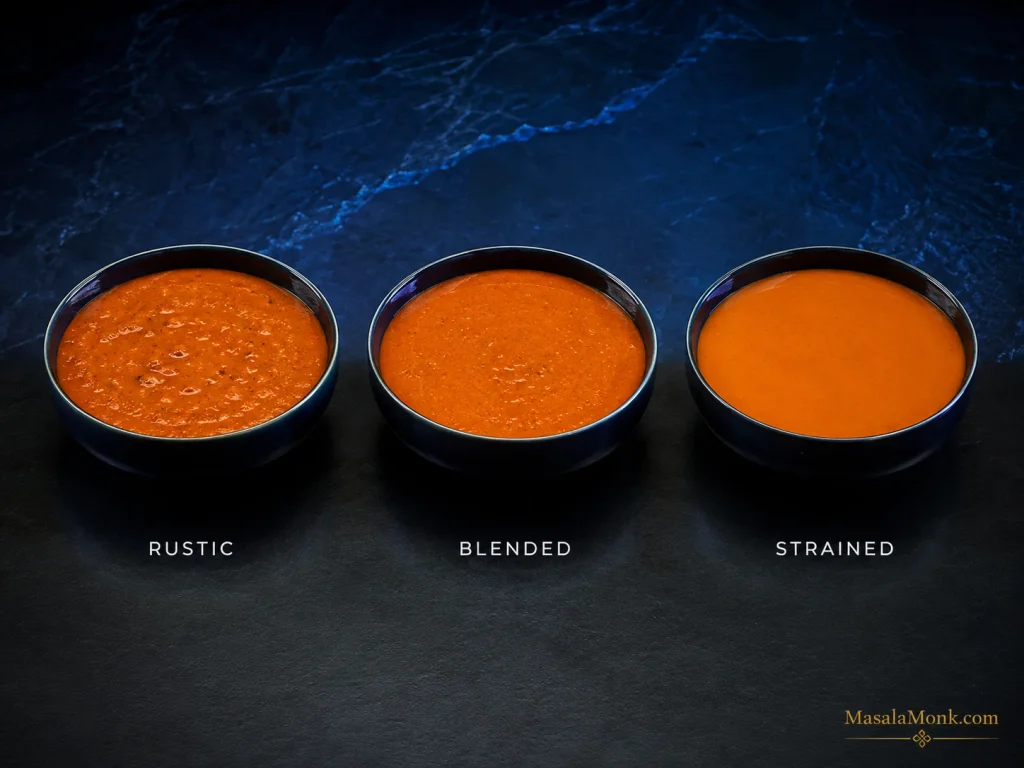
Pour in 60ml / ¼ cup hot water or stock and remove the pan briefly from the heat. Blend until smooth. For an especially silky gravy, strain it before returning it to the pan. Leaving it a little rustic is fine too.
Return the blended gravy to medium-low heat for 2–3 minutes, stirring as it comes back together and thickens slightly. Tiny beads of fat may appear around the edge.
Add the browned chicken and the juices collected on the plate. Simmer gently until the largest piece reaches 165°F / 74°C, generally another 4–7 minutes at this size. The USDA recommends 165°F as the safe minimum internal temperature for poultry.
If the gravy tightens before the chicken is ready, add hot water or stock 1 tbsp / 15ml at a time.
6. Finish With Cream, Butter and Kasuri Methi
Reduce the heat to low and let hard bubbling settle. Stir in the cream, then crush 1 teaspoon kasuri methi between your palms over the pan and add it with the finishing butter. Warm everything gently for another minute.
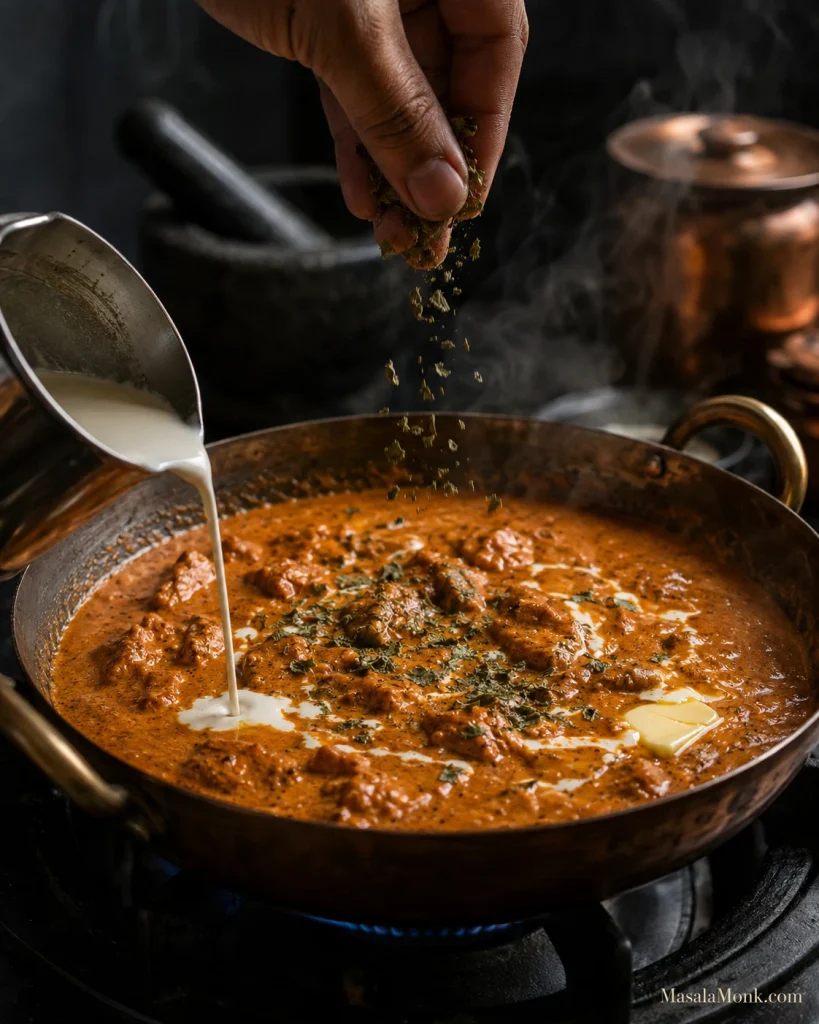
Taste and check the salt first. After that, make only the adjustment the gravy needs: another ¼ teaspoon methi, a touch more heat, a small finishing pinch of garam masala, a spoonful of water or perhaps one more spoonful of cream.
If the tomato is still sharply acidic after it has cooked fully and the salt, butter and cream are in place, a very small amount of your preferred low-carb sweetener can help. Add it only at the end and only if the sauce genuinely needs it.
Turn off the heat and let the curry rest for about 5 minutes.
The Finished Butter Chicken
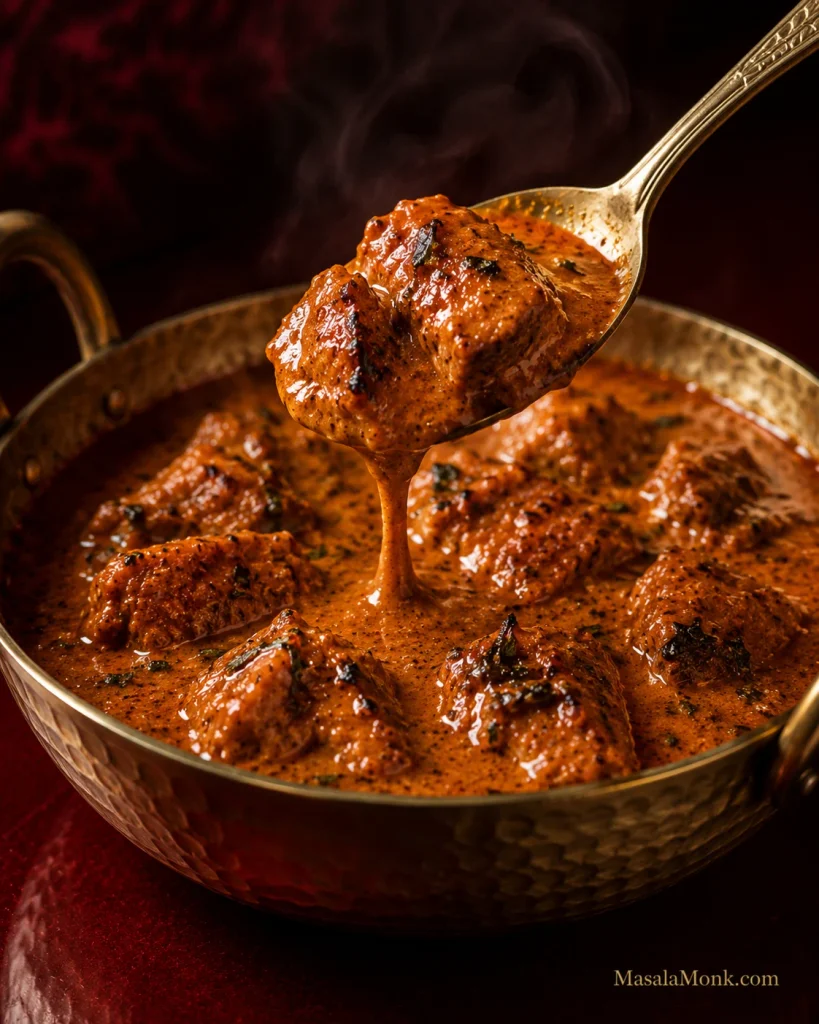
Some of the yogurt-spice coating should have darkened around the chicken while the centre stays juicy. The gravy should settle naturally around the pieces, with no watery pool underneath. The raw tomato edge should be gone, but you should still taste tomato, ginger, chilli and spice after the cream goes in.
Kasuri methi should be easy to notice when you lean over the pan. Drag a spoon through the gravy; the line should stay open for a moment and then slowly close. Lift the spoon and the sauce should cling before falling back in a slow ribbon.
Too thick? Stir in 1 tbsp / 15ml hot water. Too loose? Give it another minute or two uncovered.
Then stop adjusting.
Spoon it over hot jeera cauliflower rice and get some browned chicken and gravy in the first bite. At that point, nobody needs to be thinking about what was removed.
If dinner is already on the table, stop here and eat. Everything below is for the question that comes next: why another recipe claims fewer carbs, why a gravy tastes wrong, what changes at a restaurant or how to make the next batch easier.
Need something specific? Troubleshoot the gravy · Build the low-carb plate · Order butter chicken at a restaurant
What Makes Butter Chicken Taste Like Butter Chicken?
The hardest butter chicken to diagnose is the one that isn’t bad. The chicken is tender, the sauce is creamy and the seasoning seems reasonable, yet the first bite still tastes like generic tomato curry.
Usually there isn’t one secret ingredient missing. Tomato that has cooked far enough, properly browned chicken, enough salt and a sensible amount of cream all matter. Kasuri methi adds one of the most recognizable aromas in the finished gravy, and even a small amount can change the character of the sauce.
If the curry tastes seasoned but still smells anonymous, smell the kasuri methi before reaching for another spoonful of spice.
Where the Carbs in Butter Chicken Come From
Two bowls of butter chicken can look nearly identical and still produce very different nutrition numbers. Much of that variation comes from the gravy and from what somebody has decided counts as one serving.
| Variable | Lower-carb direction | Higher-carb direction |
|---|---|---|
| Tomato | Measured tomato base | Large tomato-heavy gravy |
| Onion | Small measured amount | Onion-heavy base |
| Added sweetness | None | Sugar, honey or ketchup |
| Cashews | None or a little | Cashew-rich gravy |
| Yogurt | Plain and measured | Sweetened or larger amounts |
| Thickening | Reduction | Flour or cornstarch |
| Prepared sauce | Plain/no-added-sugar | Sweetened commercial gravy |
| Serving size | Clearly defined | Tiny or vague |
| The plate | Vegetables or cauliflower rice | Rice plus naan |
For this recipe, one serving means one-quarter of the finished curry.
The 225g / 8oz tomato gives the gravy enough acidity and fruitiness without making tomato the whole story. Once properly cooked, it tastes much less dominant than it does straight from the bottle.
Some butter chicken is sweet and some isn’t. This version starts without added sugar because cooked tomato, salt, butter and cream usually provide enough balance.
The 50g onion contributes body and natural sweetness while keeping the quantity predictable. Cashew paste can make a lovely rich butter chicken gravy, but this sauce does not need it.
Ingredient Notes That Change the Result
Thick yogurt helps the seasoning cling to the chicken, and lemon adds brightness. Moisture is the part to watch during browning: a heavy yogurt coating cools the pan, releases water and can leave pale coagulated clumps. Plain unsweetened yogurt or dahi works well. A particularly tangy Greek yogurt can make the finished curry noticeably more sour.
Chicken thighs are more forgiving through browning and the final simmer. Breast works too; keep the pieces evenly sized and avoid cooking them through during the first sear. MasalaMonk’s baked chicken breast recipe goes deeper into thickness, temperature and keeping lean breast meat juicy.
For the tomato, smooth plain passata is the easiest choice. Finely crushed tomatoes can be used too and may need more cooking and blending. Sweet pasta sauce, ketchup and seasoned marinara change the flavour substantially. Tomato paste is far more concentrated, so save it for the rare batch where the tomato itself seems unusually pale or weak.
Spices, Kasuri Methi and Cream
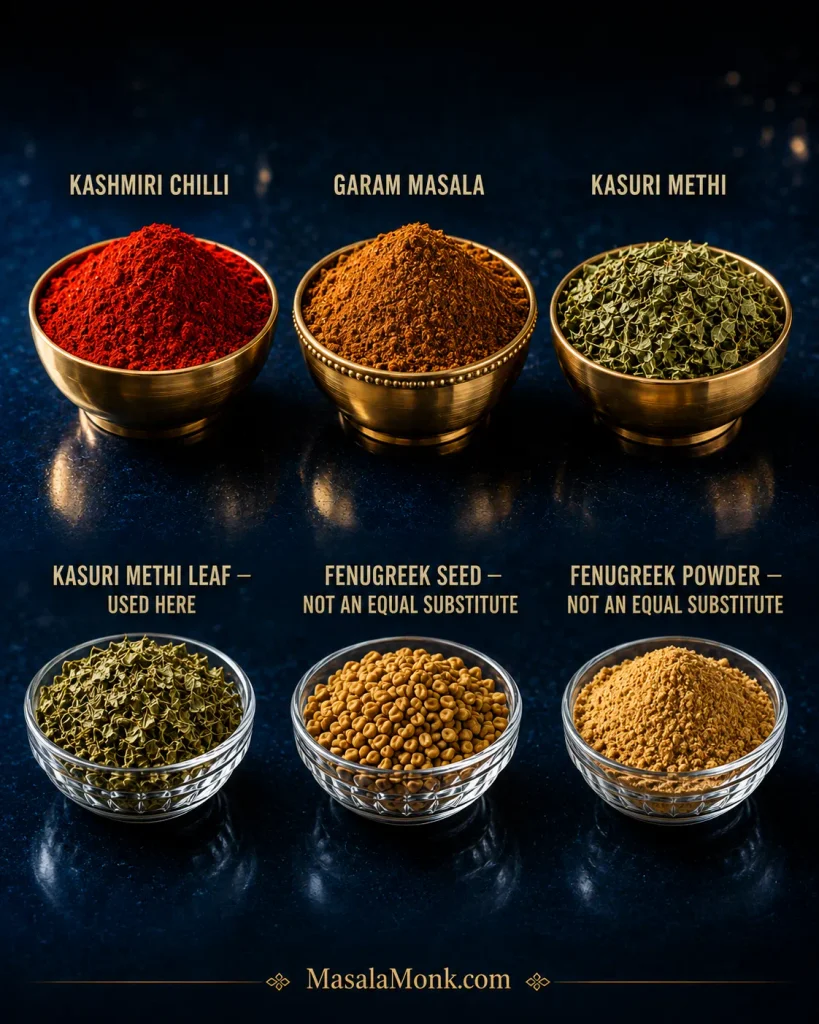
Kashmiri chilli gives deep colour with moderate heat. Paprika can provide much of that colour when Kashmiri chilli is unavailable, with stronger chilli added separately. Garam masala varies considerably from brand to brand, so a small finishing pinch can help when its aroma seems muted.
Kasuri methi is dried fenugreek leaf. Fenugreek seed and ground fenugreek are much stronger and should not replace it measure-for-measure. Start with 1 teaspoon of the leaves and increase in ¼-teaspoon steps only after tasting. If you cannot find kasuri methi, leaving it out is safer than substituting the same quantity of seed or powder.
The 120ml / ½ cup cream used here softens the tomato and carries the spices through the gravy. Add much more and the curry can turn pale while the ginger, chilli and methi recede into the background.
Want a Smoother, More Restaurant-Style Finish?
Restaurant butter chicken is not one fixed flavour. Some gravies are sweeter, some tangier and some substantially richer with cream or cashew. You can reproduce much of the char, silkiness and aroma at home, but a particular restaurant may still taste quite different.
A very hot broiler or grill gives the chicken darker blistered edges than most home pans can manage when they are full. A few charred spots are enough.
For the gravy, thorough blending makes the biggest difference. Straining takes the texture one step further when you specifically want the very smooth finish found in many restaurant versions.
Keep the butter and kasuri methi for the end so their aroma stays fresh. A brief dhungar smoke can add another layer when that is a technique you already use comfortably. Good chicken char gets you a long way without it.
Fix Your Butter Chicken
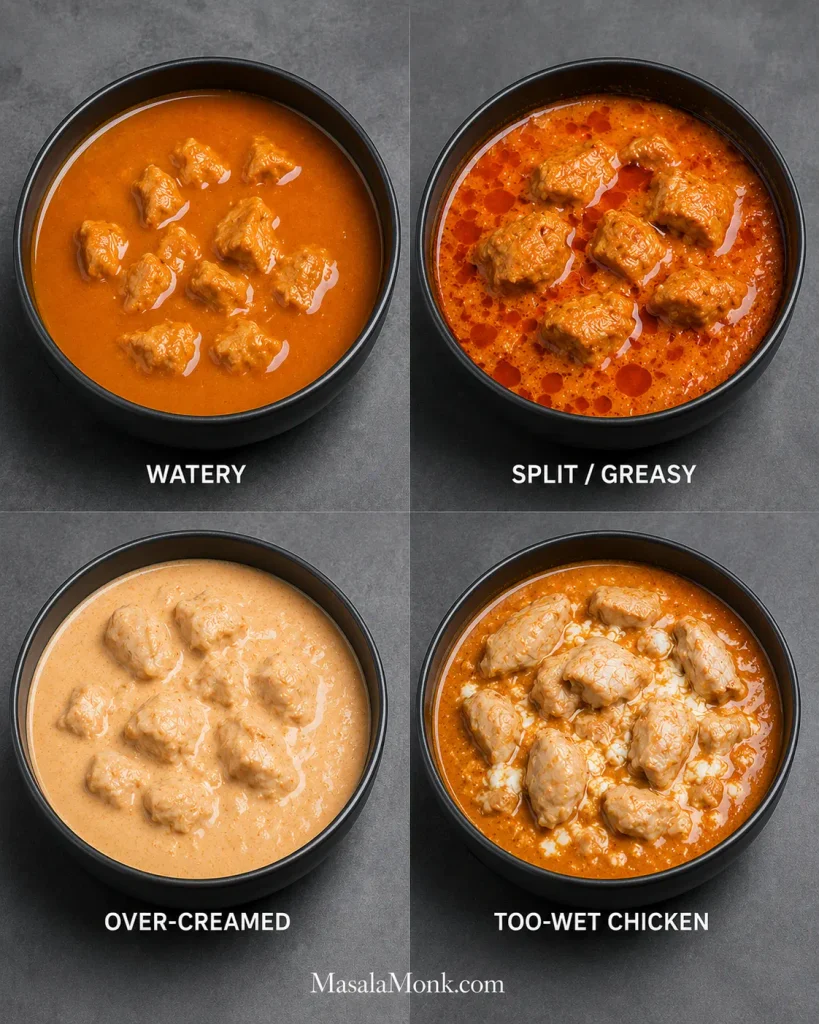
Butter chicken problems often sound alike. “Too tomatoey,” “bland” and “thin” can each describe more than one failure, and throwing more cream or spice at a confused gravy rarely helps. Work out what is actually wrong first.
| Problem | Likely cause | First move |
|---|---|---|
| Raw or harsh tomato | Tomato base undercooked | Keep reducing |
| Tastes like pasta sauce | Too much concentrate or underdeveloped gravy | Cook the base further |
| Bland | Salt, char or finishing aroma lacking | Check salt first |
| Too sour | Acidic or undercooked tomato | Cook, then balance |
| Too sweet | Too much sweetener | Restore salt and spice balance |
| Generic creamy curry | Weak char, little methi or rushed tomato | Correct those elements |
| Watery | Too much liquid | Remove chicken and reduce |
| Pasty | Over-reduced | Add hot water 15ml at a time |
| Too much gravy | Sauce volume drifted upward | Remove some sauce |
| Chicken released lots of water | Wet coating, cool pan, crowding or high-water chicken | Dry the pan and brown smaller batches |
| White yogurt clumps | Wet marinade or crowded/cool pan | Less coating, more heat, smaller batches |
| Greasy or split | Excess fat or hard boiling after dairy | Lower the heat |
| Dry chicken | Overcooked during both stages | Brown first; finish only to 165°F / 74°C |
| Bitter methi | Too much kasuri methi | Dilute if possible |
| Too spicy | Excess hot chilli | Add a little cream |
| Too pale | Too much cream | Use less next time |
Too Tomatoey or Too Sour
Bright, raw tomato needs more cooking. A heavy concentrated-tomato flavour is different and often comes from too much tomato paste. For sourness, make sure the tomato is fully cooked and then check the salt. Butter or a little more cream can soften what remains; sweetener comes last.
Bland—or Just Not Tasting Like Butter Chicken?
Flat flavour usually calls for salt first. A curry that is already seasoned but still tastes generic needs a different diagnosis: check the chicken browning, tomato development and kasuri methi. Smell the garam masala and methi straight from their containers too. Old spices can be present in the recipe and almost absent in the bowl.
Watery Sauce
Once the chicken reaches temperature, take it out. Reduce the gravy uncovered and return the chicken only long enough to coat and warm through.
Great Sauce, Wrong Ratio?
Sometimes the gravy is perfectly thick and there is simply too much of it. An oversized onion, extra tomato or accidentally scaled-up sauce can do that. Remove some and save it for another meal instead of continuing to cook the chicken.
White Yogurt Clumps
The pan was probably too cool, too crowded or carrying too much wet marinade. The curry is still edible. Next time, leave only a light coating on the chicken and give the pieces more space.
Bitter Kasuri Methi
Once too much methi is in the sauce, there is no clean way to remove it. Extra unsweetened gravy or a little cream can dilute the bitterness. Starting with the first teaspoon and increasing slowly is much easier than rescuing an over-methi’d pan.
← Back to the recipe · Build the low-carb dinner →
Build a Low-Carb Butter Chicken Dinner
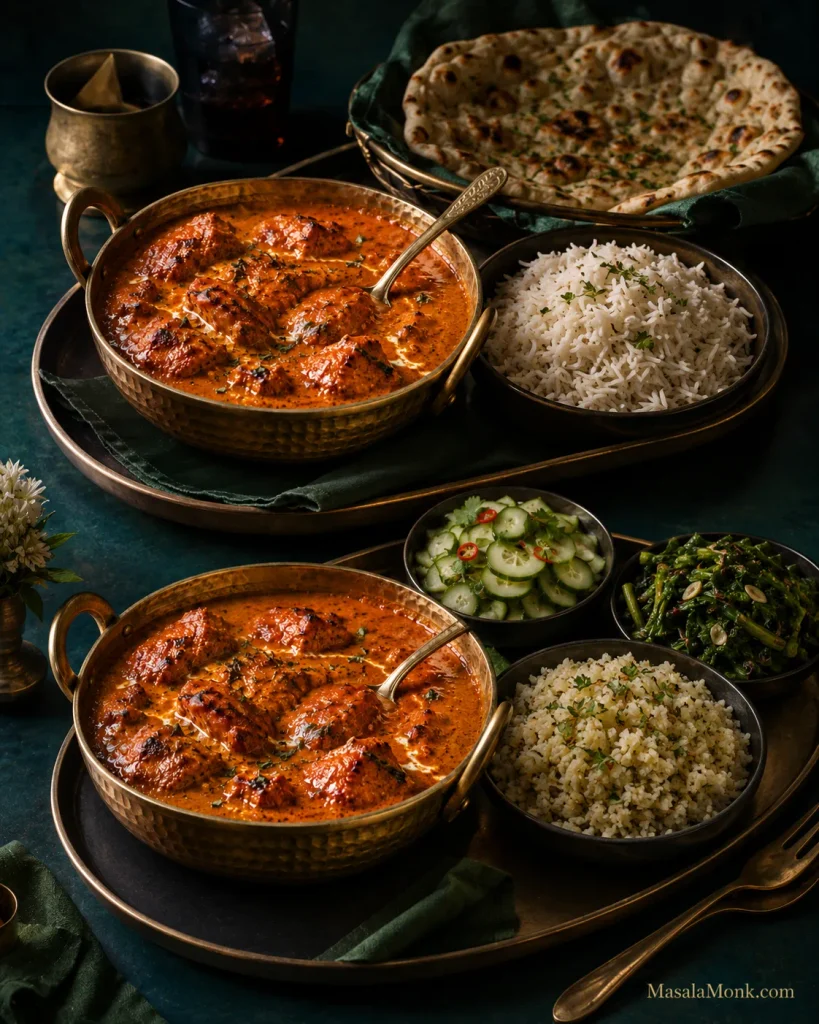
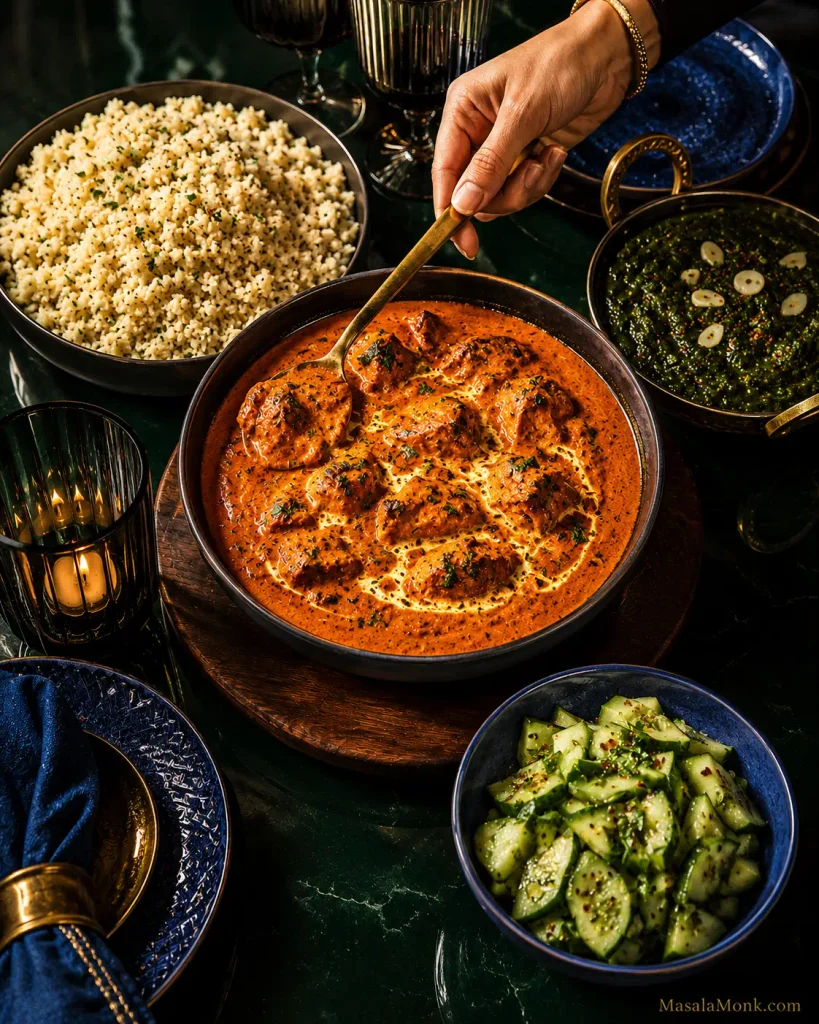
A lower-carb butter chicken dinner does not need to look like curry surrounded by substitutes you’re merely tolerating. Give the gravy something warm to sit on, something green to cut through the richness and something cold and crisp beside it.
Jeera Cauliflower Rice
Cumin makes cauliflower rice feel like part of dinner.
Serves 4
Ingredients: 600g / about 6 cups cauliflower rice, 1 tbsp ghee or butter, 1 tsp cumin seeds, ½–¾ tsp salt, plus coriander and a small squeeze of lemon if you like.
Heat a wide pan over medium heat and add the ghee. Let the cumin seeds sizzle for 20–30 seconds, until fragrant, then add the cauliflower rice and salt. Increase the heat to medium-high and cook uncovered for about 5–7 minutes.
There will be plenty of steam at first. As it eases, the cauliflower should become tender while the small grains remain separate. Stop before it turns soft and wet.
For more ways to use it, MasalaMonk’s guide to using cauliflower on keto goes beyond cauliflower rice.
Something Green
Garlic spinach is especially good here because its slight bitterness cuts through the buttery gravy. Roasted cauliflower, cabbage, broccoli and green beans are easy alternatives.
Something Cold and Crisp
Cucumber, coriander, mint and lemon bring crunch and acidity. MasalaMonk’s cucumber salad recipe gives you several ways to build that fresh side.
If You Miss Naan
A low-carb naan or roti can make the meal feel much closer to the dinner you were craving. With packaged low-carb breads, check the actual carbohydrate amount and serving size on the label.
Cauliflower rice, one green vegetable and something cold already make a generous plate.
Is Restaurant Butter Chicken Keto?
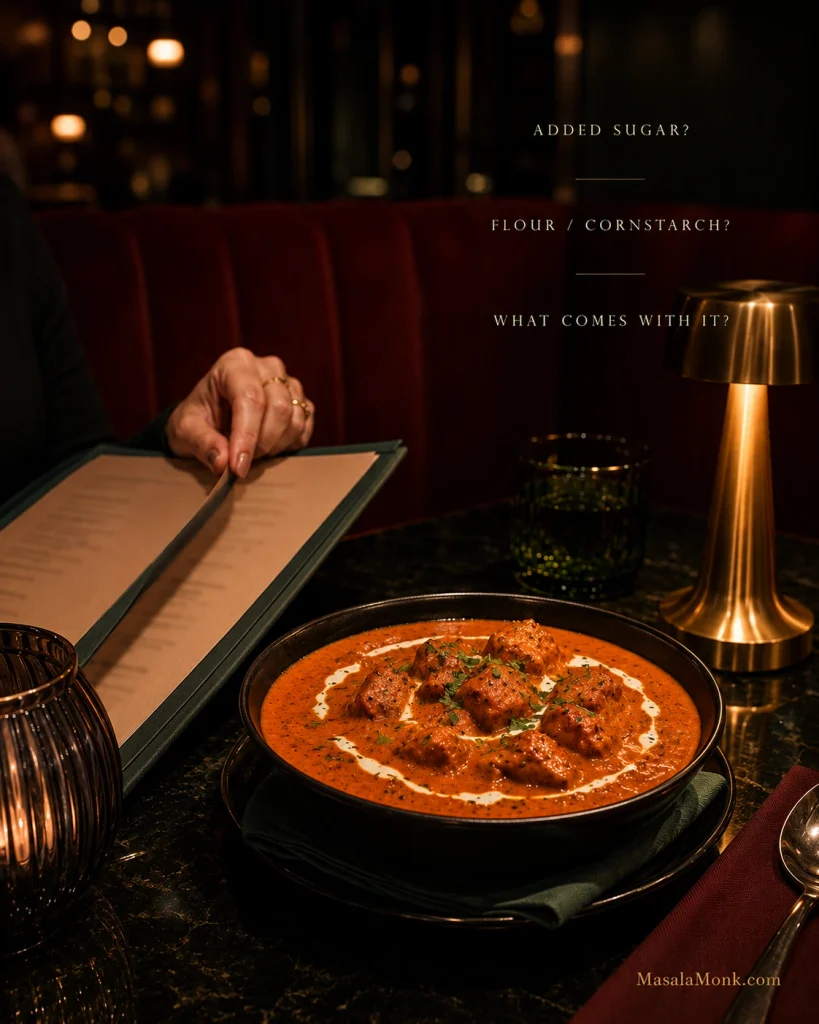
Restaurant butter chicken is harder to calculate because the gravy has usually made most of its decisions before you sit down.
It may contain sugar or honey, ketchup, more onion, cashew paste, flour or cornstarch, sweetened tomato products or a premade curry base. Because that gravy is often prepared in a large batch, asking for “no sugar” may not change what is already in the pot.
The most useful question is simple: Does the butter chicken gravy contain added sugar or flour/cornstarch?
Can’t get a clear answer? Simpler grilled dishes are easier to judge when you’re keeping carbohydrates particularly low: tandoori chicken, chicken tikka, kebabs, grilled fish and some dry-style meat preparations. MasalaMonk’s green chutney recipe is a natural partner for those dishes.
Then look at the rest of the order. Rice, naan and sweet chutneys can change the meal far more than a measured amount of tomato in the curry.
Your favourite takeaway may taste quite different from this recipe even when both are good butter chicken. Some house gravies are much sweeter, saltier or richer. If that is exactly the butter chicken you love, a different result at home does not mean the recipe failed; you’re simply aiming at another style.
← Back to the recipe · Make ahead and reheat →
Shortcuts and Appliance Notes
A jarred butter chicken sauce can make dinner much faster. Check the total carbohydrates, added sugars, flour or starch, stated serving size and how much sauce you will actually use. A sauce that fits your numbers but tastes flat can often be improved with a little butter, cream and crushed kasuri methi.
The full recipe takes roughly 45–55 minutes of active work plus at least a short marinade. For a quicker weeknight, marinate the chicken first and use those 20–30 minutes to chop and measure everything else. Smooth passata and skipping the optional straining save time without giving up the chicken browning or tomato reduction.
For nights when fifteen minutes really is the limit, MasalaMonk’s 15-minute sesame ground chicken works well over cauliflower rice, sautéed cabbage or lettuce.
Instant Pot
Pressure cooking traps moisture, so the finished gravy tends to be thinner. Use Sauté for the aromatics, deglaze the pot thoroughly and follow the minimum-liquid requirement for your cooker. Once the chicken is cooked, remove it and reduce a loose sauce with Sauté uncovered before adding the chicken back with the cream, butter and kasuri methi.
Slow Cooker
Slow cooking gives tenderness but very little browning, so sear the marinated chicken first when you can. For boneless pieces, 2–3 hours on High or 4–6 hours on Low is a reasonable starting range; the chicken still needs to reach 165°F / 74°C. Add the cream and finishing butter near the end, and reduce a thin gravy separately.
Make Ahead, Store and Reheat
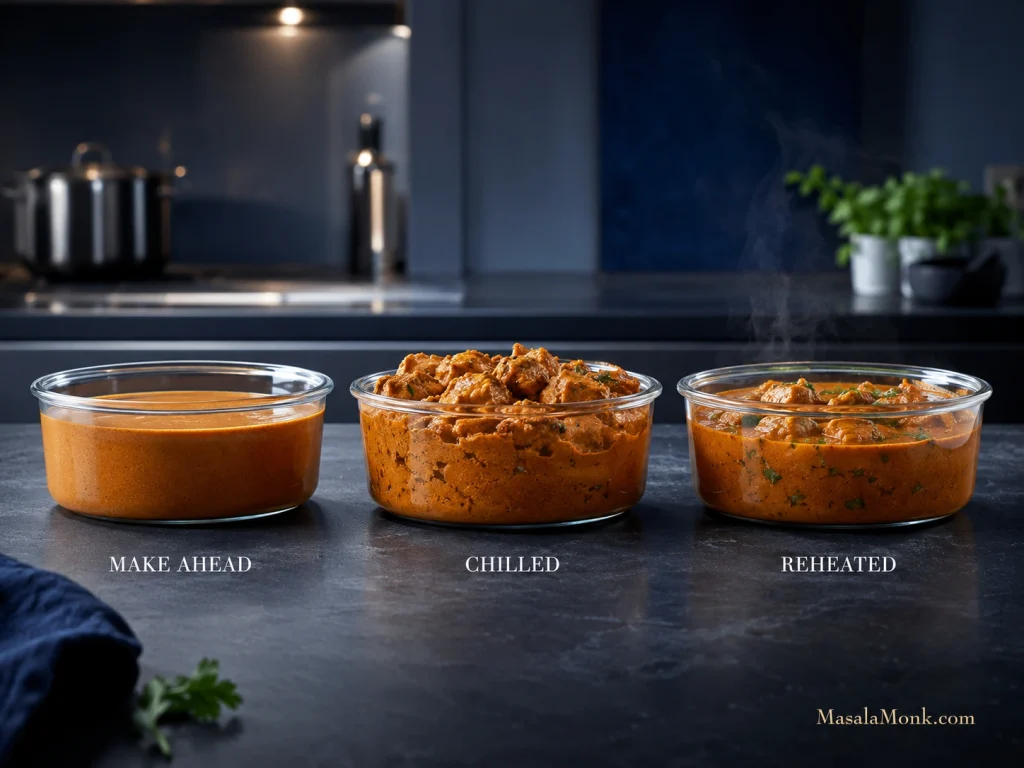
The chicken can be marinated the day before. The blended tomato gravy can also be cooked ahead. If dinner is for tomorrow, refrigerate the gravy before adding the final cream, butter and kasuri methi, then add those as you reheat it.
Cool leftovers promptly and refrigerate them in a covered container. Use them within 3–4 days, in line with USDA leftover-storage guidance.
Cold butter chicken will look much thicker after a night in the refrigerator. That is normal. Warm it gently and add a splash of water or stock as the gravy loosens. Bring reheated leftovers back to 165°F / 74°C.
Butter chicken freezes well too. Portion it before freezing and aim to use it within about 3 months for best quality.
Keto Butter Chicken Nutrition
Based on typical nutrition values for the ingredients listed, one-quarter of the finished curry is approximately:
| Per serving | Estimated amount |
|---|---|
| Calories | About 500 kcal |
| Protein | About 36g |
| Fat | About 36g |
| Total carbohydrates | About 9g |
| Fiber | About 2g |
| Estimated net carbohydrates | About 7g |
Here, net carbs means total carbohydrate minus fiber. The estimate assumes full-fat plain yogurt and heavy/whipping cream in roughly the 30–36% fat range; a lighter fresh cream will lower the fat and calorie numbers somewhat.
The calculation includes the chicken, yogurt, lemon, onion, tomato, ginger, garlic, ghee, butter, cream and measured spices. It does not include cauliflower rice, bread, optional sweetener, extra cream at serving or other sides.
1 serving = ¼ of the finished curry. If you track carbohydrates closely, the labels on the ingredients in your own kitchen are the most relevant numbers.
Frequently Asked Questions
Does Butter Chicken Usually Contain Sugar?
Sometimes. Some home and restaurant versions add sugar or honey to soften tomato acidity; many others don’t. It isn’t required here. Cook the tomato fully and balance the gravy before deciding it needs sweetness.
Do I Really Need Kasuri Methi?
You can make good creamy tomato chicken without it, but kasuri methi contributes an aroma closely associated with butter chicken. Use dried fenugreek leaves, not the same quantity of fenugreek seed or powder. If the leaves are unavailable, omission is safer than an equal substitution.
Can I Make This Dairy-Free?
Yes, although the flavour will shift. Use plain unsweetened dairy-free yogurt in the marinade and full-fat coconut cream in the gravy, along with a suitable non-dairy cooking fat. The finished sauce becomes more coconut-forward and moves away from classic murgh makhani.
If you’re avoiding dairy because of a milk allergy, don’t assume ghee is automatically suitable.
Is This Butter Chicken Gluten-Free?
The recipe itself doesn’t use wheat flour. Stocks, packaged spice blends and prepared sauces can vary, so check labels when avoiding gluten strictly.
Can I Make It Without a Blender?
Absolutely. Use smooth passata, chop the onion finely and leave the gravy a little more rustic. You lose some silkiness, not dinner.
Keep the Butter Chicken
Once the bowl reaches the table, “keto” shouldn’t be the first thing you notice.
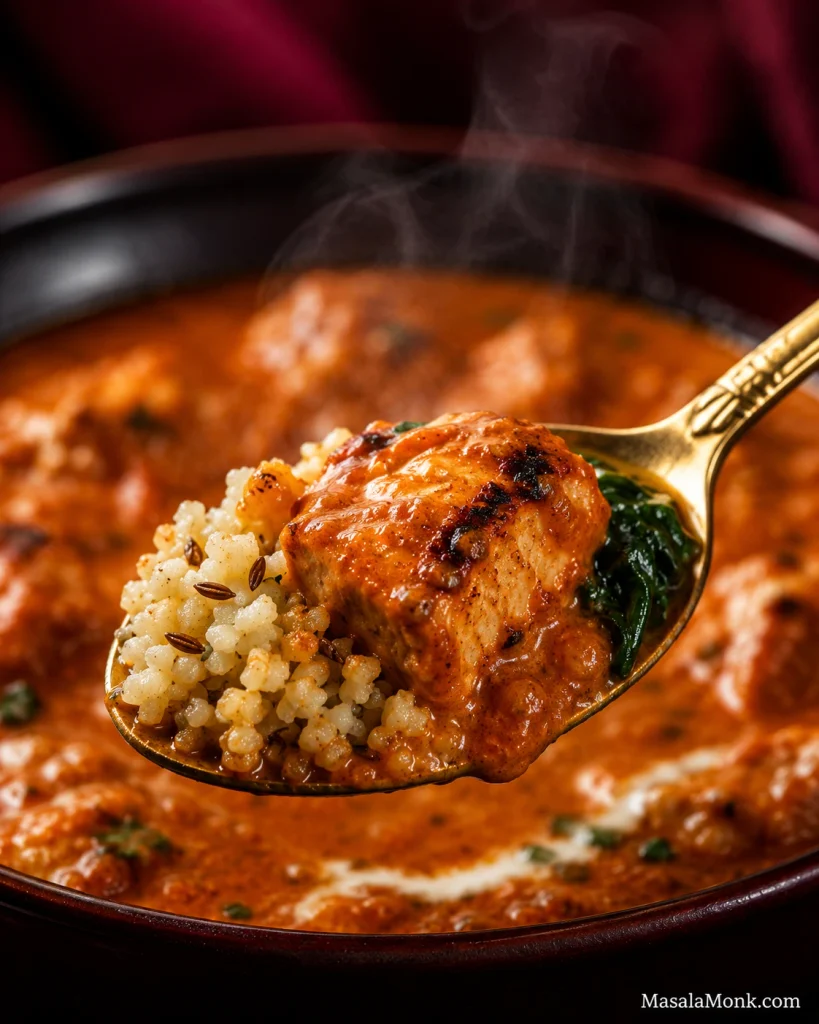
There should be a browned edge on the chicken and enough gravy to drag through whatever is underneath it. The tomato should taste deep and fully cooked, the cream should leave the spices easy to taste, and the butter should give the sauce a soft sheen.
The kasuri methi lingers after the bite.
Keep the butter chicken. Change the carbs that matter.