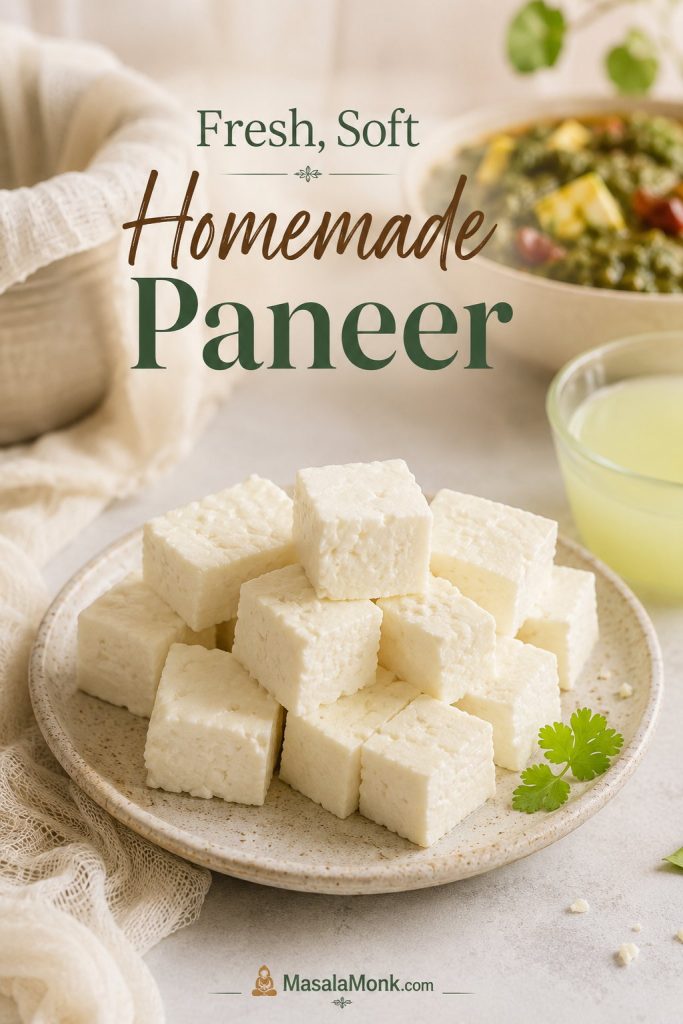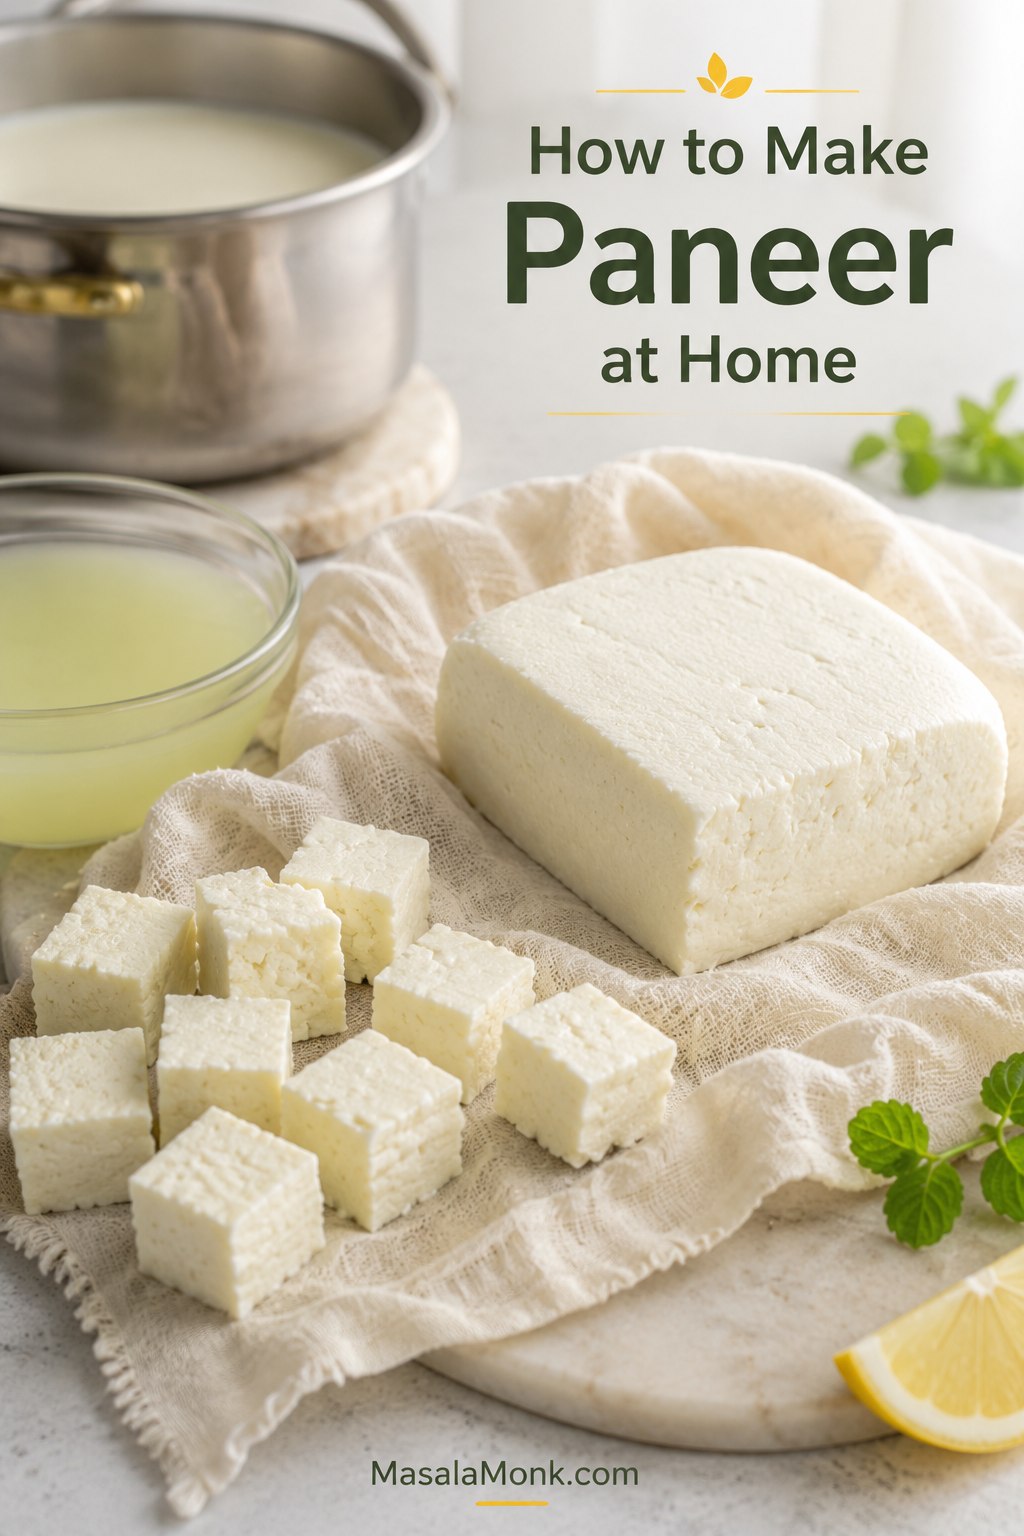
If you want to know how to make paneer at home, the process is simpler than it looks: heat milk, add just enough acid, strain the curds, and press only as much as your dish needs. Paneer may look like something you have to buy from an Indian grocery store, already pressed into a neat block for palak paneer, paneer tikka, or a creamy restaurant-style curry, but fresh homemade paneer is very doable in a regular kitchen.
The goal is not just paneer that sets. The goal is paneer that curdles cleanly, cuts neatly when you need cubes, and still stays tender when it goes into sauce.
That texture comes from stopping at the right moments: before the milk boils too hard, before too much acid makes the curds tight, and before pressing turns soft curds into a dry block.
You do not need to understand cheesemaking to make paneer. You only need to know when the milk is hot enough, when the curds have separated, and when to stop pressing.
This guide helps most when you do not live near an Indian grocery store, feel unsure about supermarket milk labels, or have only found dense packaged paneer. If packaged paneer near you is firm, squeaky, or rubbery, homemade paneer can feel like a different ingredient.
If you have tried making paneer before and ended up with sour crumbs, weak curds, rubbery cubes, or milk that refused to curdle, you probably did not fail. Milk behaves differently from brand to brand: one batch may need gentler heat, another may need less acid, and another may need a shorter press. If you are nervous about wasting a large pot of milk, start with the 1-litre batch in the scaling table below.
If you are here because a batch already went wrong, jump to Troubleshooting Homemade Paneer first, then come back to the recipe with the problem in mind.
Once you have a good block, you can use it anywhere paneer texture matters: a rich curry like Balti Paneer Gravy, a quick filling, a salad bowl, a pan-seared snack, or a simple vegetarian dinner.
What You’ll Find in This Guide
Paneer Basics
Milk, Acid & Pressing
Cooking, Storage & Fixes
Quick Answer: How to Make Paneer at Home
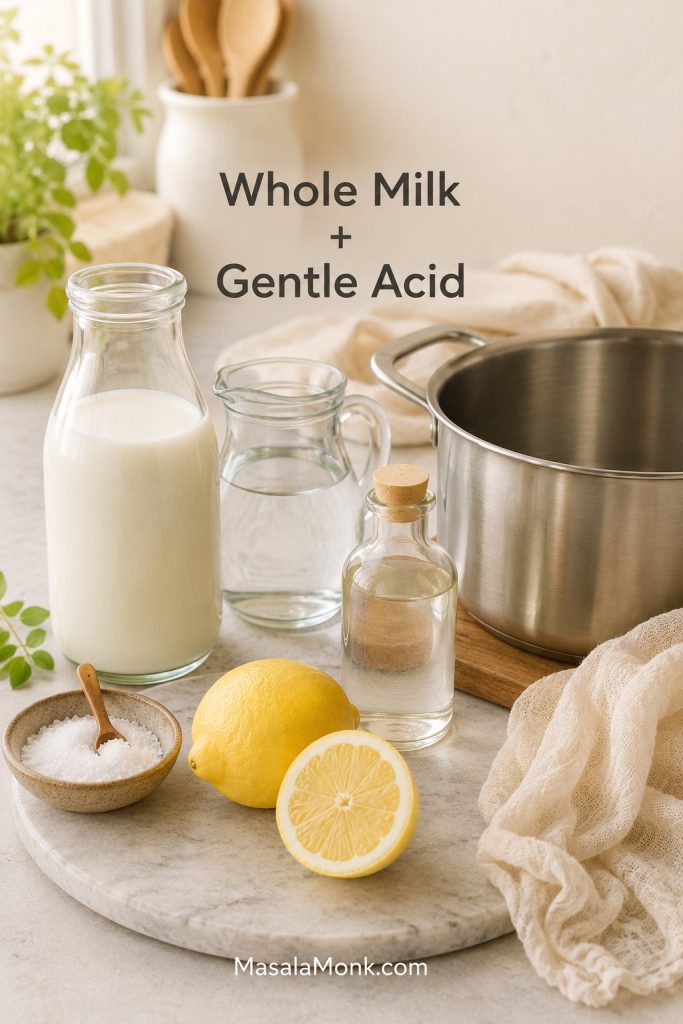
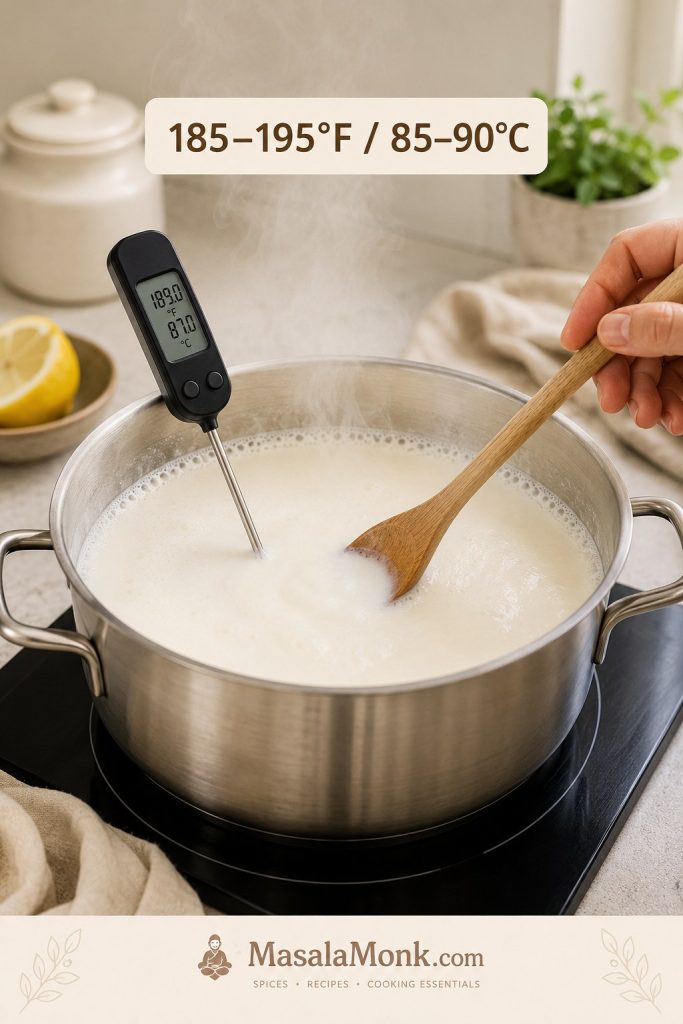
The easiest way to make paneer at home is to heat whole milk to 185–195°F / 85–90°C, or until it is steaming, foamy, and just about to rise. Add diluted lemon juice or plain white vinegar gradually until soft white curds separate from pale yellow-green, slightly translucent whey. Strain the curds through cloth, rinse briefly if needed, then press for 10 minutes for soft crumbles, 30–40 minutes for curry cubes, or up to 50 minutes for firmer tikka-style paneer.
The active work is about 20–25 minutes. The rest is mostly resting, draining, pressing, or chilling, depending on how firm you want the final paneer.
| Best milk | Whole milk / full-fat milk |
| Avoid if possible | Skim milk, fat-free milk, UHT milk, and ultra-pasteurized milk |
| Best beginner acid | Lemon juice or plain white vinegar, diluted with water |
| Temperature cue | 185–195°F / 85–90°C, or steaming and just about to rise |
| Yield from 2 litres / 8½ cups milk | About 300–400 g / 10.5–14 oz paneer, depending on milk and pressing |
| Fridge storage | 2–3 days, covered or submerged in fresh cold water |
Still choosing ingredients? Start with Best Milk for Paneer. Already curdled the milk? Use the Pressing Times section to choose soft crumbles, curry cubes, or firmer tikka paneer.
Before You Start: 3 Things That Decide Paneer Texture
Most paneer problems come down to three simple choices: the milk, the acid, and how long you press. Get those right and the recipe becomes much more reliable.
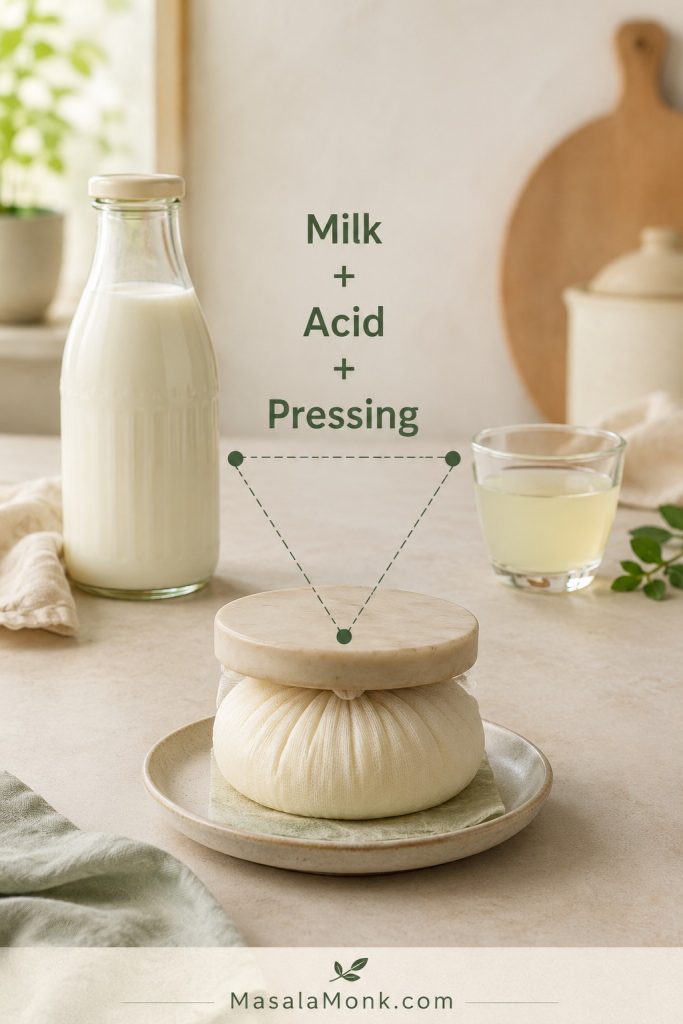
Three things decide paneer texture: use whole milk for better curds, add diluted acid gradually, and press for the dish you are making. Bhurji needs almost no pressing, curry cubes need moderate pressing, and tikka needs a firmer block. Acid is the trigger, not the target.
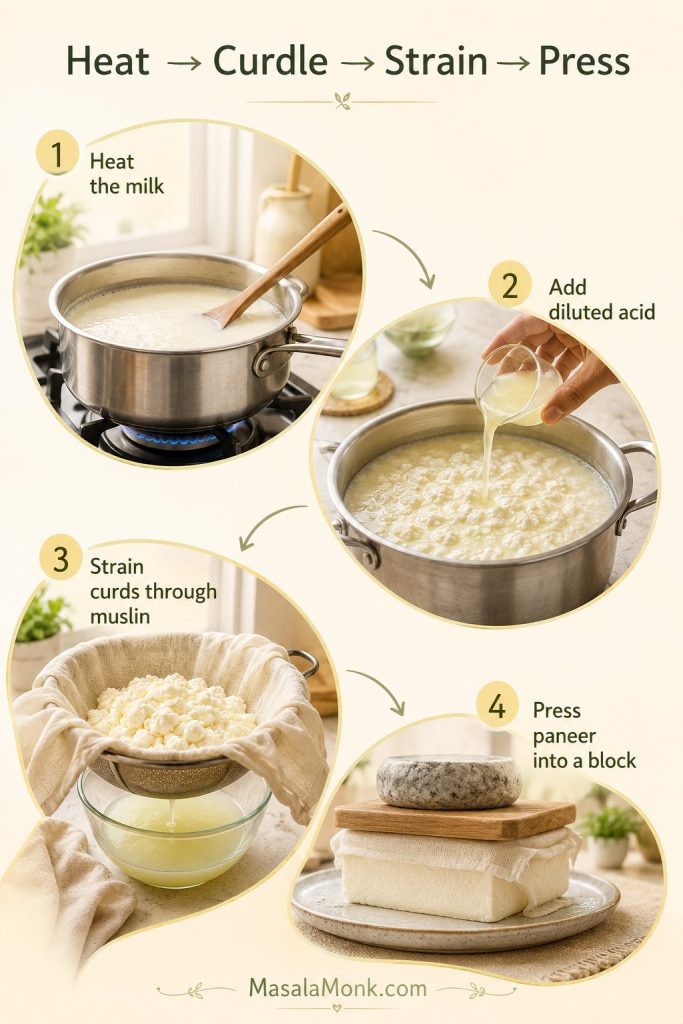
At its simplest, paneer is just hot milk plus a little acid. The details below help you keep it soft, but the basic process is only heat, curdle, strain, and press.
Once you have seen milk split cleanly into curds and clearer yellow-green whey, the whole process feels much less mysterious.
Homemade Paneer Recipe
This is the base recipe if you want to make paneer at home with whole milk and lemon juice or vinegar. Use the pressing chart later in the guide to adjust the texture for bhurji, curries, tikka, wraps, bowls, or grilling.
Equipment
- Large heavy-bottomed pot, with room for the milk to rise
- Wooden spoon or silicone spatula
- Thermometer, optional but helpful for first-timers
- Colander or large sieve
- Cheesecloth, muslin, thin cotton towel, clean handkerchief, or nut milk bag
- Large bowl to catch the whey
- Plate or tray for pressing
- Moderate weight, such as canned beans, a small pot, or a heavy skillet
Ingredients
- 2 litres / 8½ cups / about 2.1 quarts whole milk
- 3 tablespoons / 45 ml lemon juice or plain white vinegar, plus 1 tablespoon / 15 ml more if needed, diluted before adding
- 3–4 tablespoons / 45–60 ml water, plus a little more if using the extra acid
- ¼–½ teaspoon / about 1.5–3 g fine salt, optional
Step-by-Step Method
Heat, curdle, and strain the milk
- Prepare the strainer. Line a colander with cheesecloth, muslin, a thin cotton towel, or a nut milk bag. Place it over a large bowl to catch the whey.
- Heat the milk. Pour the milk into a heavy-bottomed pot. Heat over medium-low to medium heat, stirring often so the bottom does not scorch.
- Watch the temperature. Heat the milk to 185–195°F / 85–90°C. Without a thermometer, look for milk that is steaming, foamy at the edges, and just about to rise. Avoid a violent rolling boil.
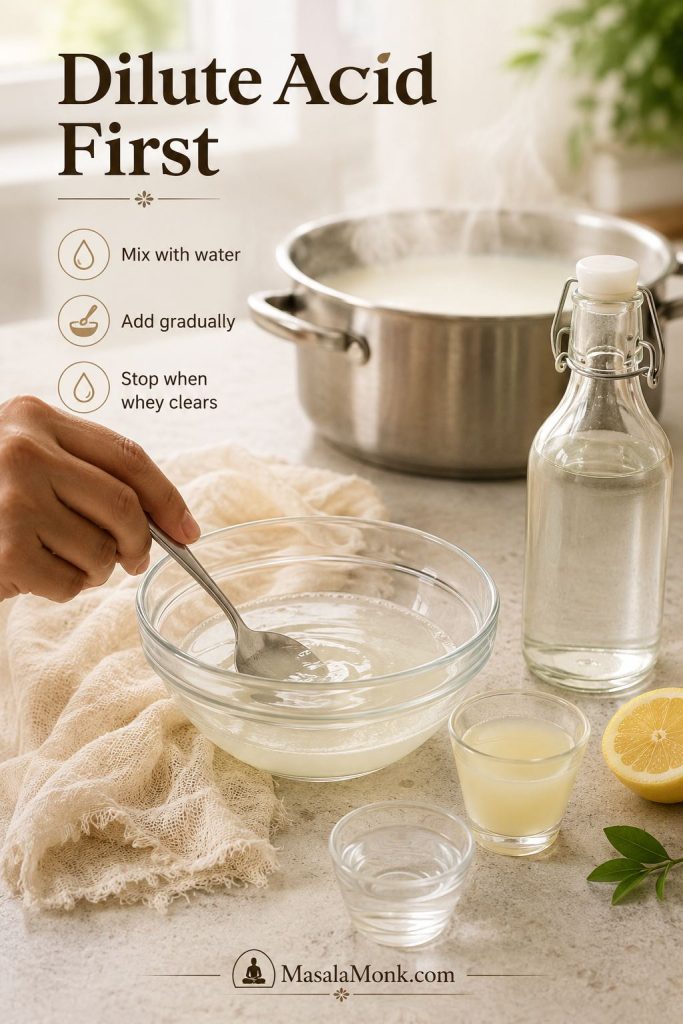
- Dilute and add the acid. Mix the lemon juice or vinegar with the water. Turn the heat to low or switch it off, then add the diluted acid about 1 tablespoon at a time, stirring gently for a few seconds after each addition.
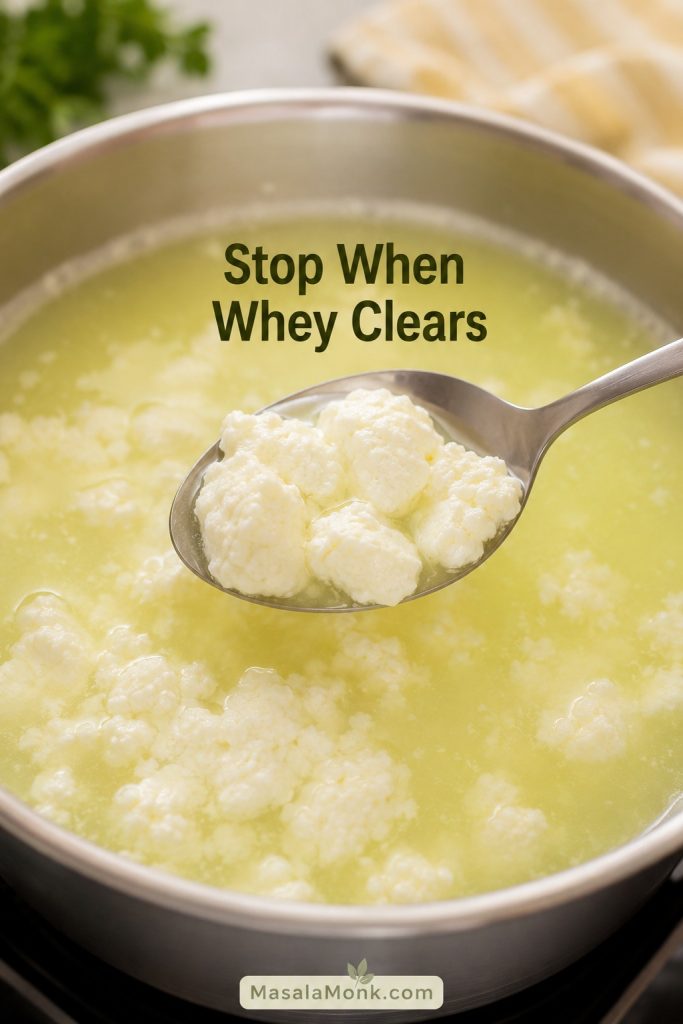
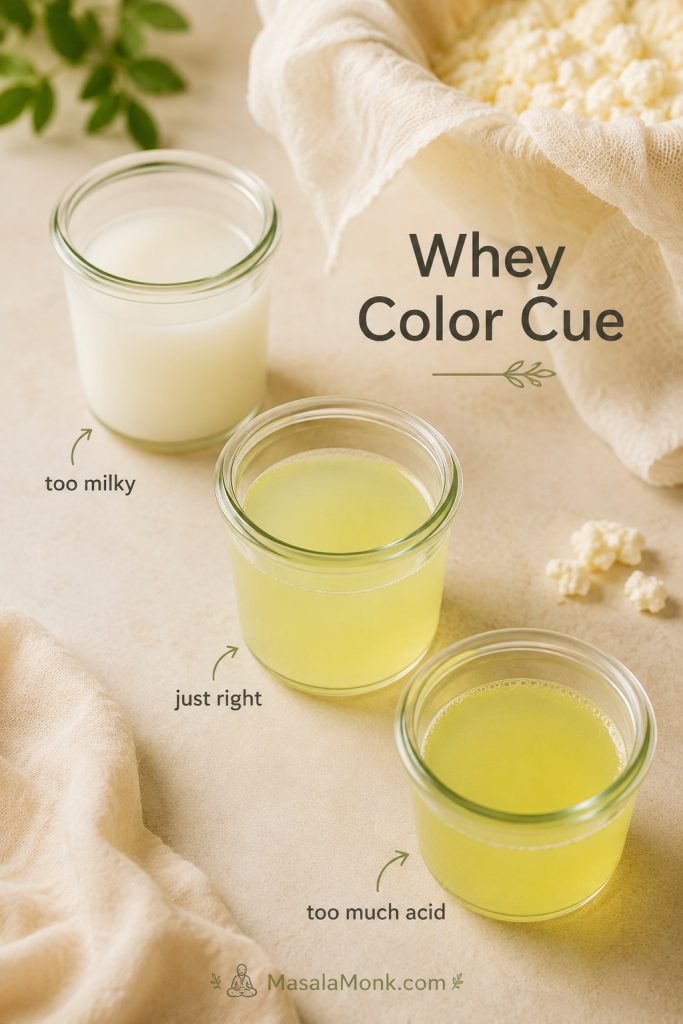
- Stop when the milk separates. Stop once you see soft white curds and pale yellow-green, slightly translucent whey. If the liquid still looks milky after 1–2 minutes, dilute the extra acid and add it 1 teaspoon at a time, waiting briefly between additions.
- Let the curds settle. Once curds form, stir as little as possible. Too much stirring can break soft curds into small grains. Let the curds sit in the hot whey for 5–10 minutes so they settle and gather.
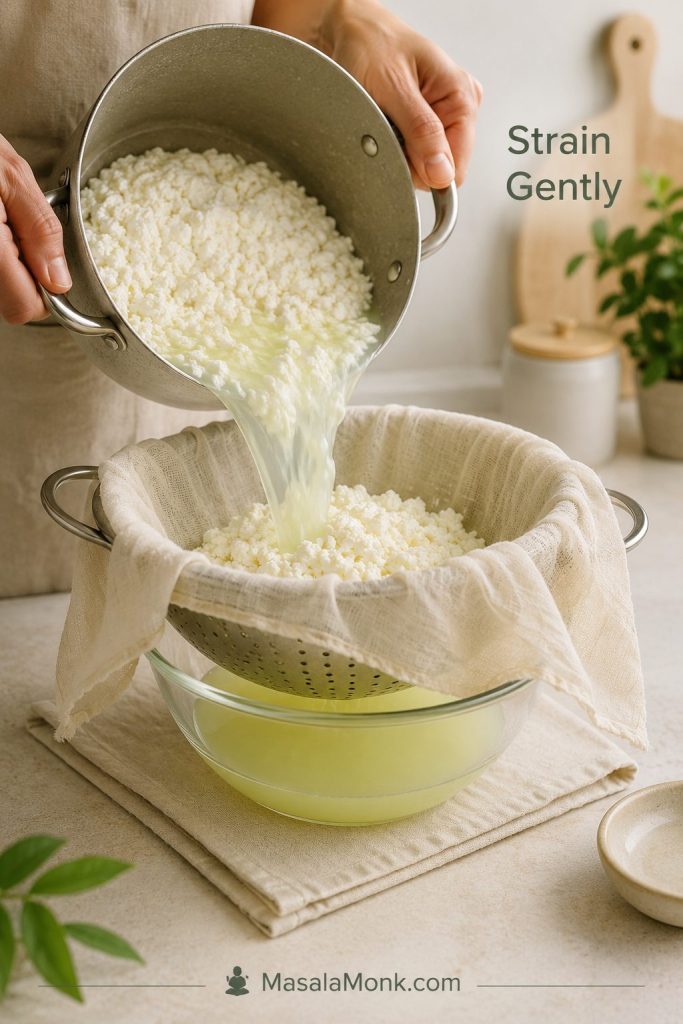
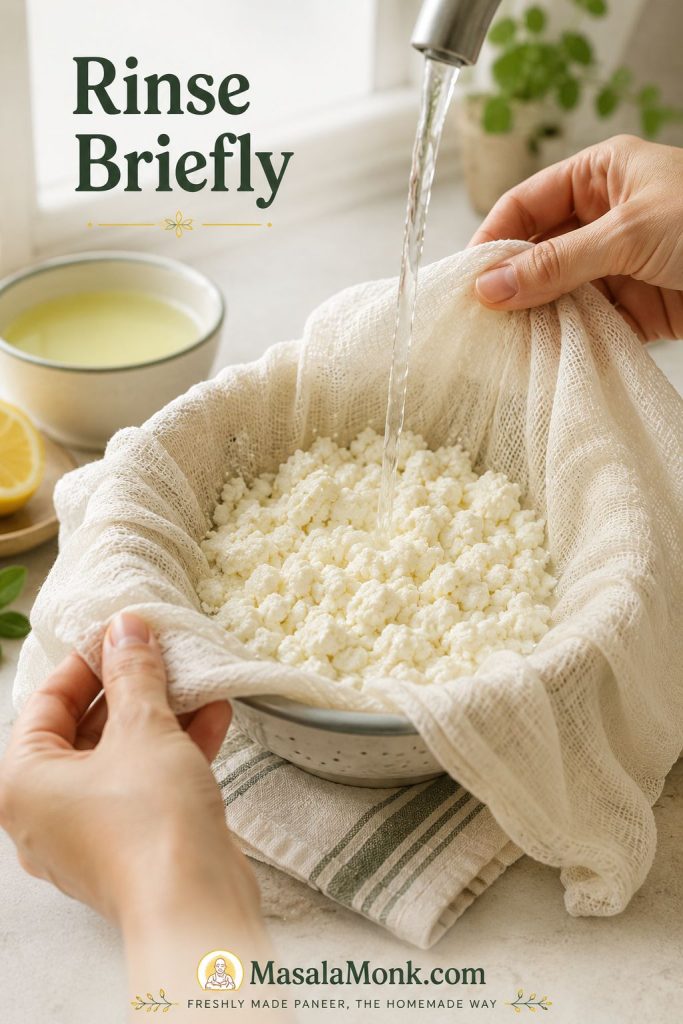
- Strain and rinse. Pour the curds and whey into the lined colander. Gather the cloth gently and let gravity drain first. If you used lemon juice or vinegar, rinse the curds briefly under cool water to remove excess sourness and stop the cooking.
Salt, press, and cut the paneer
- Salt only if needed. For unsalted paneer, skip the salt. For lightly salted paneer, sprinkle the salt over the drained curds before shaping and pressing. If the paneer is going into a curry, you can skip the salt and season the sauce instead.
- Shape and press for your dish. Shape the curds into a flat square or disc inside the cloth. Press according to your final use: 0–10 minutes for soft crumbles, 15–20 minutes for a tender block, 30–40 minutes for curry cubes, or 45–50 minutes for firmer tikka cubes.
- Cut if needed. You can use soft paneer right away. For neat cubes, chill the pressed block for 20–30 minutes before cutting. For firmer tikka-style cubes, you can instead dip the pressed block in cold water for 5–10 minutes, then pat dry before cutting. Skip this for soft crumbled paneer.
Important cue: Once the curds have formed and the whey is no longer milky, pause. More acid will not make better paneer. It will only make sharper, firmer, more sour paneer.
Unsure which acid to use? The lemon, vinegar, yogurt, and citric acid comparison explains which option gives the cleanest flavor and which one makes softer curds.
Milk Temperature Cue
Use the thermometer reading or the visual cues together: the milk should be hot, steaming, foamy at the edges, and close to rising before you add acid.
Curds and Whey Cue
After adding diluted acid, watch the liquid around the curds. Soft curds and pale yellow-green whey mean the milk has separated cleanly.
Straining Paneer Curds
Once the curds have settled, pour them into the lined colander and let the whey drain first before you gather the cloth.
How to Make Paneer with 1 Litre, 2 Litres, or 1 Gallon Milk
The recipe above uses 2 litres / about 8½ cups milk because it gives a useful home batch. You can scale homemade paneer up or down, but keep the acid flexible. Lemons vary, vinegar brands can differ slightly, and milk behaves differently by country, season, and processing method.
If this is your first time making paneer or you are testing a new milk brand, start with 1 litre. It is a smaller commitment, and it teaches you how that milk behaves before you make a larger batch.
| Milk amount | Acid to start with | Use more only if… | Expected paneer |
|---|---|---|---|
| 1 litre / about 4¼ cups | 1–1½ tablespoons / 15–22 ml lemon juice or vinegar, diluted | The whey still looks milky | About 150–200 g / 5–7 oz |
| 2 litres / about 8½ cups | 3 tablespoons / 45 ml lemon juice or vinegar, diluted | Use up to 4 tablespoons / 60 ml if needed | About 300–400 g / 10.5–14 oz |
| 1 gallon / about 3.8 litres | 6 tablespoons / 90 ml lemon juice or vinegar, diluted | Use up to 8 tablespoons / 120 ml if needed | About 600–750 g / 21–26 oz |
Use these as practical ranges, not fixed guarantees. Richer milk gives more paneer. Leaner milk gives less. Longer pressing removes more moisture, so the final block weighs less. A 300–400 g block usually works for a family-style curry serving 3–4 people, depending on how paneer-heavy you like the dish.
What Soft Homemade Paneer Looks and Feels Like
The first batch is less stressful when you know what “right” looks like. These are the cues to trust as the milk changes from liquid to curds.
| Stage | Good sign | Warning sign |
|---|---|---|
| Milk before acid | Steaming, foamy at the edges, almost rising | Violently boiling for several minutes |
| Curds forming | Soft white clumps pulling away from the liquid | Tiny, tight, dry-looking grains |
| Whey | Pale yellow-green and slightly translucent | Cloudy, white, and still milky |
| Pressed block | Set but still slightly tender when touched | Hard, dry, dense, or squeaky |
| Taste and smell | Clean, milky, faintly sweet | Sharply vinegary, harshly lemony, or stale-smelling |
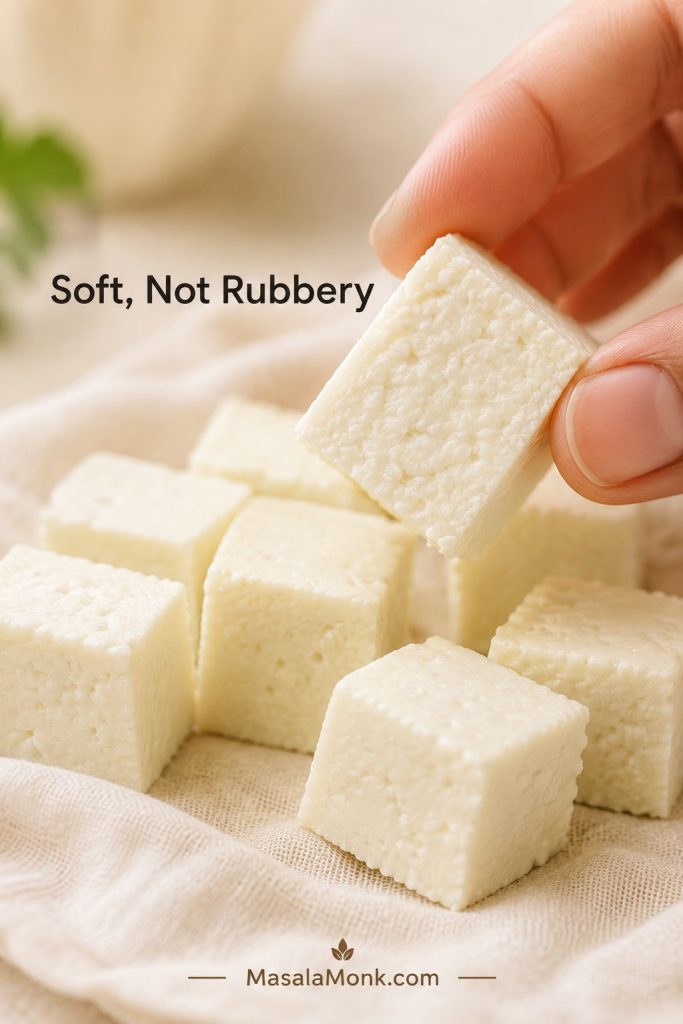
The curds should look soft and pillowy, not dry and pebbly. The pressed block should hold together, but it should not feel like a brick. If the paneer smells sharply acidic, rinse briefly and use less acid next time.
If your curds look tight, the whey is still milky, or the block feels squeaky, compare it with Troubleshooting Homemade Paneer before you throw the batch away.
What Is Paneer?
Paneer is a fresh Indian cheese made by curdling hot milk with an acid such as lemon juice, vinegar, yogurt, buttermilk, or citric acid. It is not aged, it does not need rennet, and it does not melt into strings like mozzarella or cheddar. Instead, paneer holds its shape when cooked, which is why it works so well in curries, skewers, stir-fries, wraps, sandwiches, and rice bowls.
Paneer is often called Indian cottage cheese, but that phrase can be confusing outside India. Western cottage cheese is loose, wet, and spoonable. Paneer is usually drained and pressed into a sliceable block. Depending on how long you press it, it can be soft and crumbly, tender and cubeable, or firm enough for tikka.
The flavor is mild, milky, and slightly sweet by design. That gentleness is exactly why paneer works so well with bold gravies, smoky marinades, peppery sauces, and spicy vegetables.
Best Milk for Homemade Paneer Outside India
Your carton matters more than the brand name here. The best milk for homemade paneer is whole milk, also called full-fat milk in many countries. It gives better curds, better yield, and a softer finished texture. Different countries sell milk under different labels, so do not worry if your carton does not say “full cream.” Look for regular pasteurized dairy milk with enough fat.
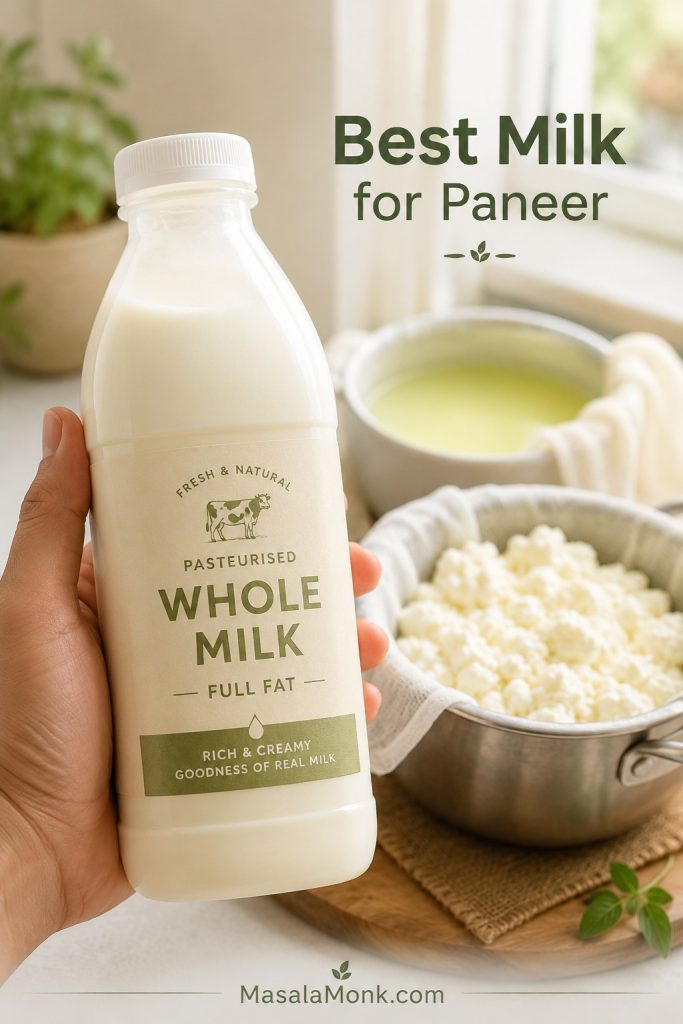
Regular pasteurized whole cow’s milk is the best supermarket default. Buffalo milk is excellent if you can find it because it is richer and usually gives a softer, higher-yield paneer. Goat milk can work too, though the flavor is tangier and the curds may be more delicate.
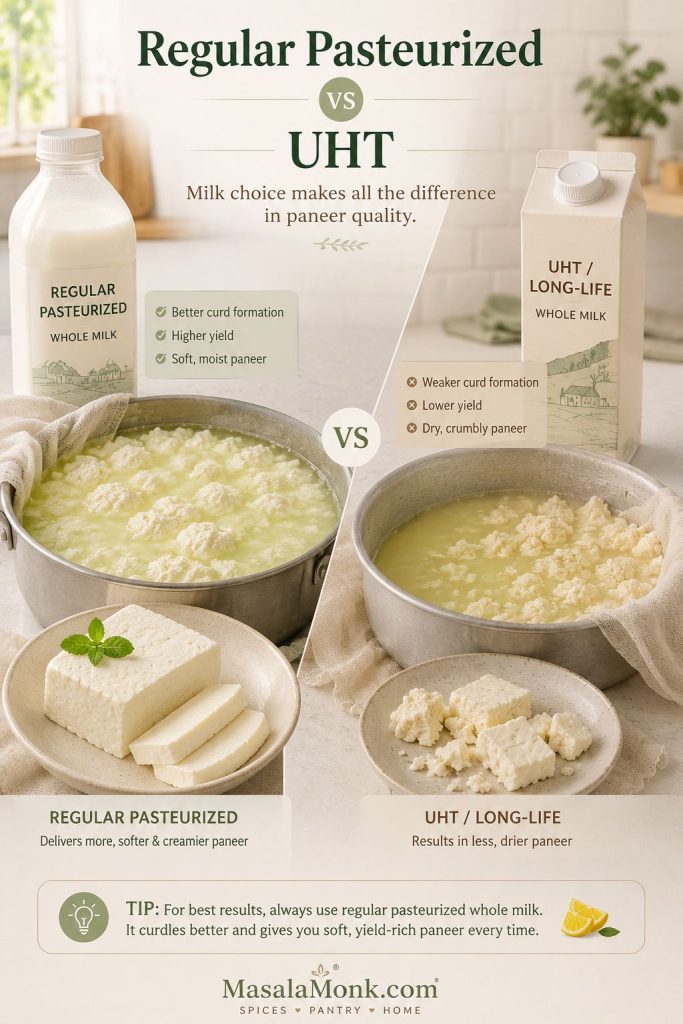
The milk to be careful with is UHT, long-life, or ultra-pasteurized milk. These milks are treated at higher temperatures for longer shelf life, and that extra processing can make curd formation less reliable. If you are unsure what UHT or ultra-pasteurized means on a carton, this pasteurization guide explains the terms clearly.
Do not confuse regular pasteurized milk with ultra-pasteurized milk. Regular refrigerated pasteurized whole milk usually works well for paneer. The bigger issue is long-life, shelf-stable, UHT, or ultra-pasteurized milk, which can form weaker curds.
Milk Labels That Work Best for Homemade Paneer
| Milk label | Use for paneer? | What to expect |
|---|---|---|
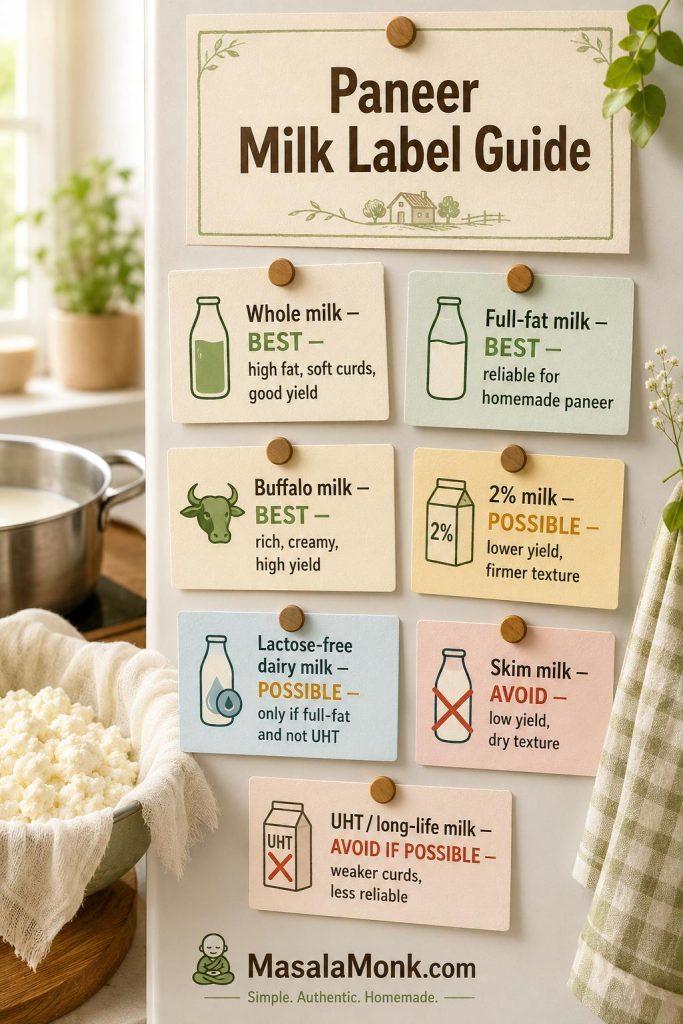
| Whole milk / full-fat milk | Best choice | Soft, reliable curds and good yield. |
| Regular pasteurized cow’s milk | Yes | The best supermarket default for most readers. |
| Buffalo milk | Excellent | Richer, higher-yield, and traditionally prized for soft paneer. |
| Lactose-free dairy milk | Sometimes | Can work if it is full-fat and not UHT or ultra-pasteurized. |
| 2% milk | Possible, not ideal | Lower yield and a firmer, less creamy texture. |
| Skim or fat-free milk | Avoid | Dry, weak, low-yield paneer that can crumble easily. |
| Organic milk | Check label | Works if regular pasteurized, but some brands are ultra-pasteurized. |
| UHT / ultra-pasteurized / long-life milk | Avoid if possible | May curdle poorly or form weak curds. |
| Goat milk | Possible | Softer curds and a tangier flavor. |
| Plant milk | Not true paneer | You can make a vegan curd or tofu-style alternative, but it is not dairy paneer. |
Important: Milk varies by country, brand, season, fat level, and processing. If one carton gives weak curds, do not blame yourself or the whole recipe. Try a different full-fat, non-UHT brand before changing the method.
If your milk is already hot but still not separating, go to Troubleshooting Homemade Paneer before adding too much acid.
Best Acid for Homemade Paneer: Lemon, Vinegar, Yogurt, or Citric Acid
Once the milk question is sorted, the next decision is acid. Paneer needs an acid to separate the milk into curds and whey. Lemon juice and plain white vinegar are the easiest choices for beginners because they are available almost everywhere. Yogurt, buttermilk, and citric acid also work, but they behave differently.
Watch the liquid around the curds; it tells you when to stop. The most important rule is not which acid you choose. It is how you add it. Dilute the acid with water, add it gradually, and stop as soon as the milk separates clearly. Too much acid can make paneer sour, grainy, firm, or rubbery.
Paneer Acid Options
Choose the acid by flavor and texture, but keep the method the same: dilute it, add it gradually, and stop when the milk separates clearly.
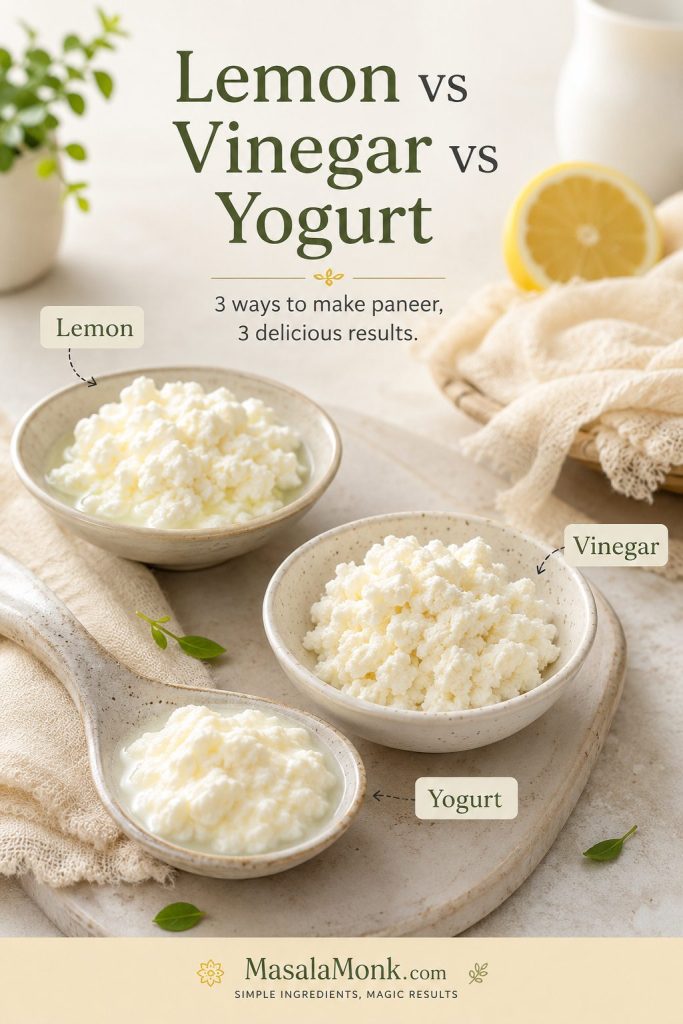
| Acid | Best for | Flavor | Texture |
|---|---|---|---|
| Lemon juice | Beginner homemade paneer | Light citrus note if not rinsed | Soft to medium |
| Plain white vinegar | Reliable curdling and clean cubes | Neutral if diluted and rinsed | Clean, firm curds |
| Yogurt / curd | Softer paneer | Mild dairy tang | Softer and moister |
| Buttermilk | Gentle curdling | Mild tang | Soft and delicate |
| Citric acid | Precise curdling | Neutral if measured carefully | Can turn firm if overused |
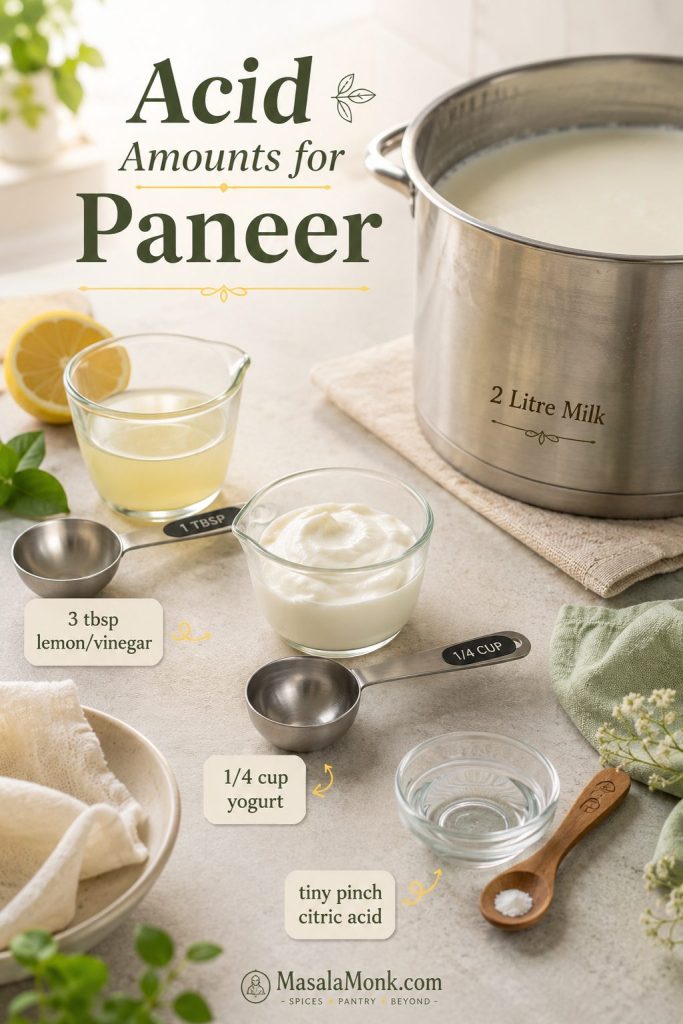
How Much Acid to Use for Paneer
Practical starting point: for 2 litres / 8½ cups milk, start with 3 tablespoons / 45 ml diluted lemon juice or white vinegar. If using yogurt, start with ¼ cup / 60 g whisked plain yogurt and add more only if the whey still looks milky. If using citric acid, dissolve a very small amount in water first and add gradually; it is easy to overdo and can make paneer firm or sharp.
Fresh lemon juice tastes clean, but lemons vary, so you may need a little more or less. Bottled lemon juice can work because it is consistent, though the flavor may be flatter than fresh lemon. Plain white vinegar is usually more predictable than fresh lemon juice and usually tastes neutral after dilution and rinsing.
Avoid strongly flavored vinegars unless you want that flavor in the paneer. Apple cider vinegar can work in a pinch, but plain white vinegar is cleaner. Whatever acid you use, add it slowly and watch the whey. The goal is not to empty the cup; the goal is to use only enough.
Step-by-Step Paneer Cues That Matter Most
The recipe card gives you the full method. These four cues keep homemade paneer soft instead of tight, sour, or rubbery.

- Milk: use full-fat, non-UHT milk that separates cleanly.
- Heat: stop at steaming and foamy, not a violent boil.
- Acid: add it slowly and stop when the whey turns pale yellow-green and slightly translucent.
- Draining: let gravity work before pressing; hard squeezing steals softness.
Rinsing Paneer Curds
Rinsing is useful when you used lemon juice or vinegar and want to remove sharpness. Keep it brief so the curds stay rich and delicate.
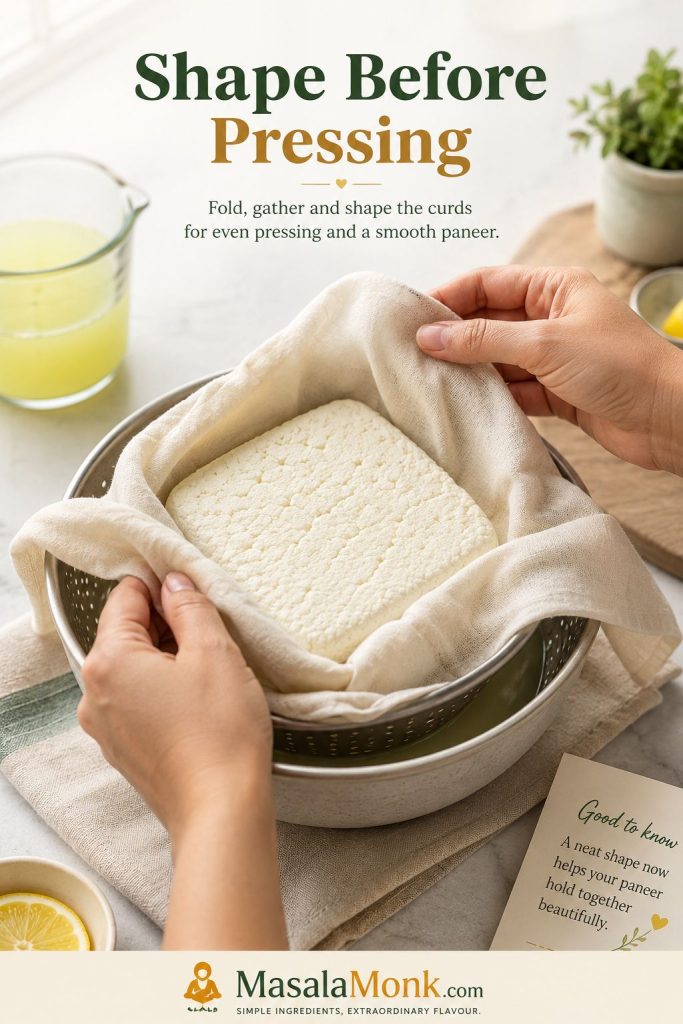
Shape Before Pressing
Before you add weight, gather the drained curds neatly in the cloth. A tidy shape helps the paneer press evenly and cut more cleanly later.
How Long to Press Homemade Paneer
This is where you choose the paneer you actually want to eat: loose and soft for bhurji, tender for curry, or firm enough for skewers. Less pressing gives softer paneer. Longer pressing gives cleaner, firmer cubes.
If your paneer often turns hard, this is the section to slow down on. Pressing is not just a shaping step; it decides whether the paneer stays moist or becomes dense.

| Final use | Pressing time | Suggested weight | Result |
|---|---|---|---|
| Paneer bhurji, fillings, toast, sandwiches | 0–10 minutes | No weight or a very light plate | Loose, soft curds |
| Bowls, salads, gentle pan-frying | 15–20 minutes | 400–600 g / 14–21 oz | Tender block |
| Curries like palak paneer, matar paneer, or balti paneer | 30–40 minutes | 600–900 g / 1.3–2 lb | Sliceable cubes that still stay moist |
| Paneer tikka, skewers, grilling | 45–50 minutes, then chill | 900 g–1.2 kg / 2–2.6 lb | Firmer cubes that handle marinating and skewering |
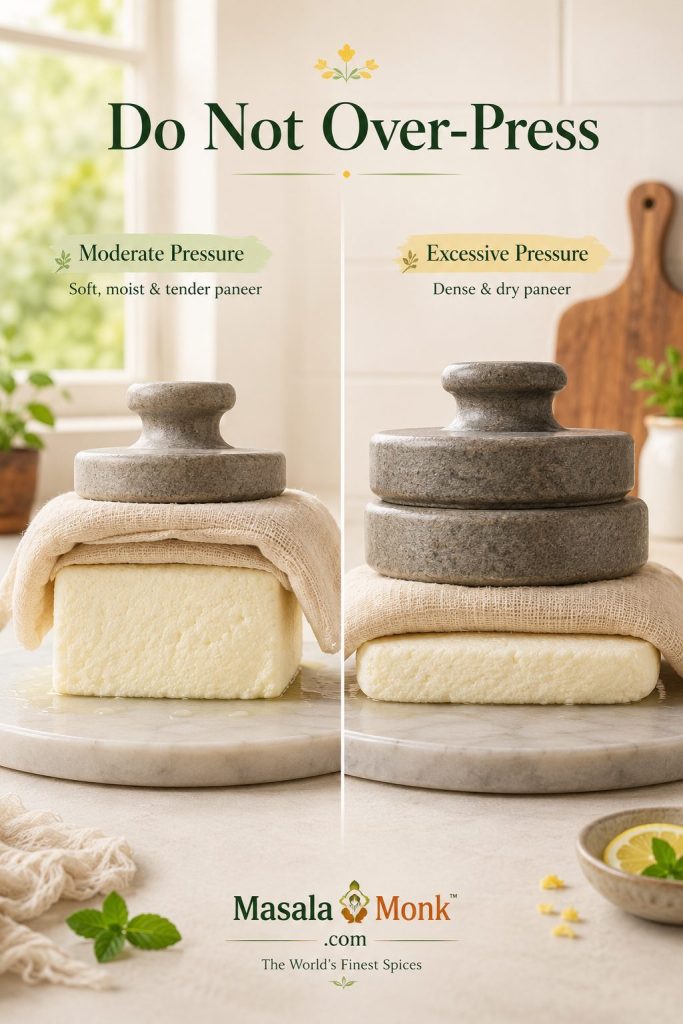
| Very heavy pressing for several hours | Avoid for soft paneer | Avoid heavy crushing weight | Can become dense, dry, or rubbery |
Use moderate weight, not crushing pressure. Two cans, a small pot, or a heavy skillet is enough for most home batches. If the paneer is for curry, a 30–40 minute press is usually plenty. If you want tidy cubes, chill the pressed block briefly before cutting.
Light vs Heavy Pressing
Use enough weight to form the block, not so much that the paneer loses all its moisture. This is especially important for curry cubes.
Once the paneer is pressed, the next texture risk happens in the pan. See How to Keep Paneer Soft When Cooking before adding the cubes to curry.
Soft Paneer vs Firm Paneer: Both Can Be Right
The best paneer is not always the firmest paneer. The right texture depends on what you are cooking next.
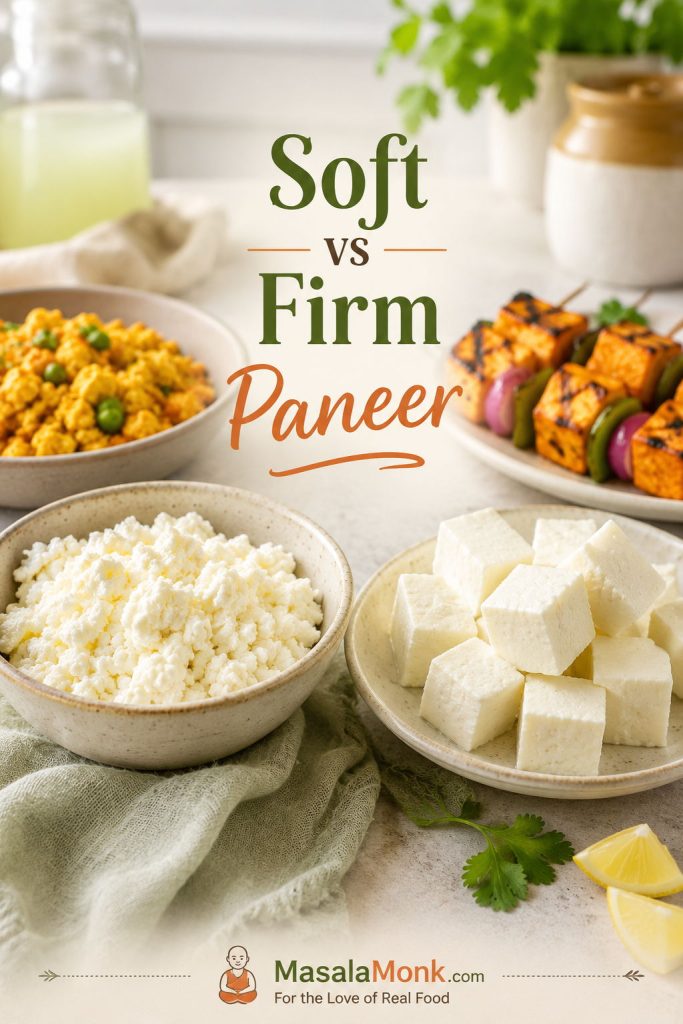
Soft paneer is delicate, moist, and slightly crumbly, so it works beautifully for bhurji, fillings, wraps, cutlets, quick bowls, and gentle curries where perfect cubes do not matter.
Firm paneer is better for tikka, skewers, grilling, pan-searing, or restaurant-style cubes in thick gravy. However, firm should not mean rubbery. Good firm paneer still has moisture inside.
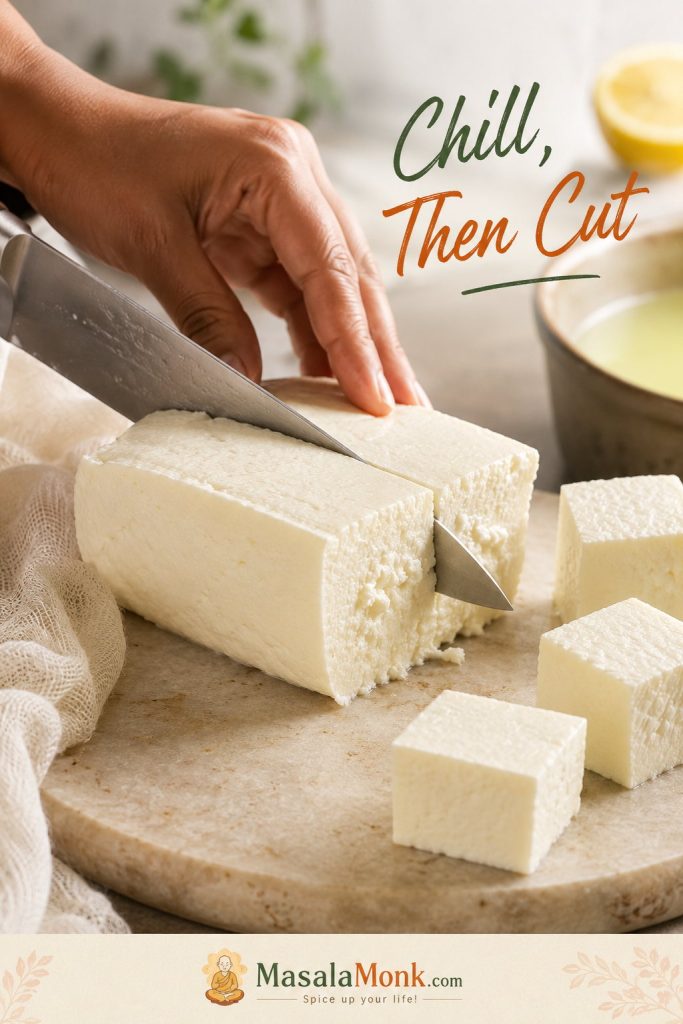
How to Cut Paneer Cubes Cleanly
If you want tidy cubes, chill the pressed paneer briefly and cut with a sharp knife. Slightly larger cubes are easier to handle in curry.
How to Keep Paneer Soft When Cooking
Paneer can be perfect after pressing and still turn dry if it is cooked too aggressively. Most paneer dishes do not need the paneer to simmer for a long time. Add it when the sauce is already cooked, let it warm through gently, and avoid hard boiling. This matters in creamy gravies such as Kali Mirch Paneer, where paneer should stay tender rather than chewy.
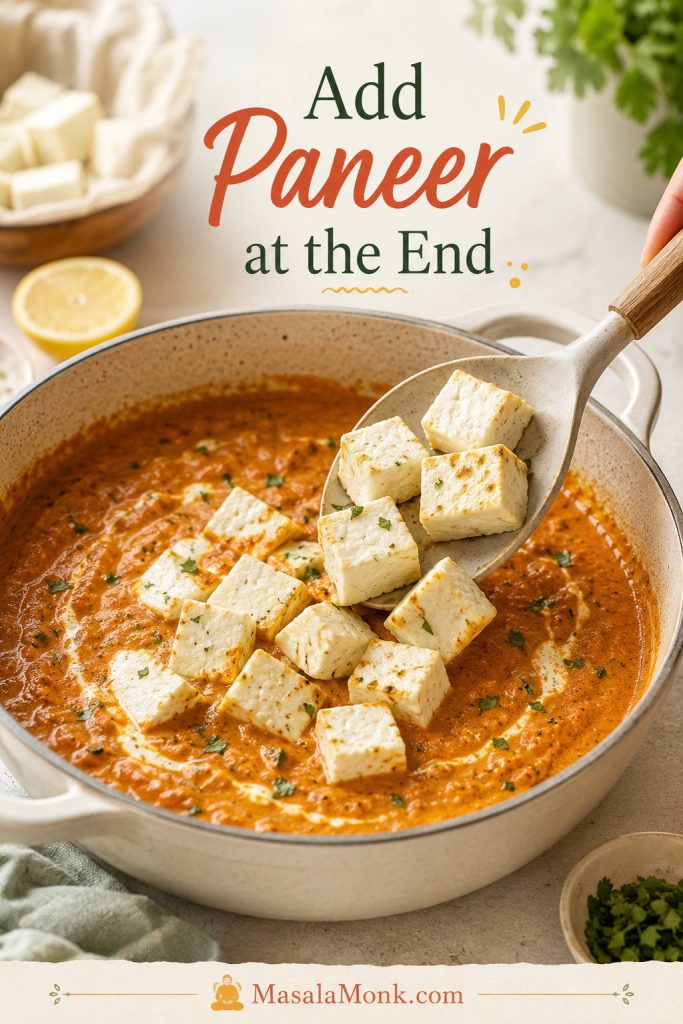
- Curries: add paneer near the end and simmer gently for only a few minutes.
- Pan-frying: sear quickly, then remove or add sauce. Long frying can toughen paneer.
- Store-bought paneer: soak cubes in warm water for 10–15 minutes before cooking, especially if the block feels cold and stiff.
- Homemade paneer: avoid over-pressing if it is going into a soft curry.
- Paneer tikka: press firmer, chill before cutting, and handle gently while marinating.
Homemade paneer is often softer than store-bought paneer, so treat it gently. Use a sharp knife, cut slightly larger cubes if the paneer feels delicate, and avoid aggressive stirring after adding it to curry. If you are making a rich paneer gravy, the sauce should be ready before the paneer goes in. Paneer should finish the dish, not endure the whole cooking process.
Homemade Paneer vs Store-Bought Paneer
Store-bought paneer is convenient, and there is nothing wrong with using it. It is helpful when you are short on time or cooking a quick dinner. But homemade paneer gives you freshness and texture control that packaged paneer often cannot match.
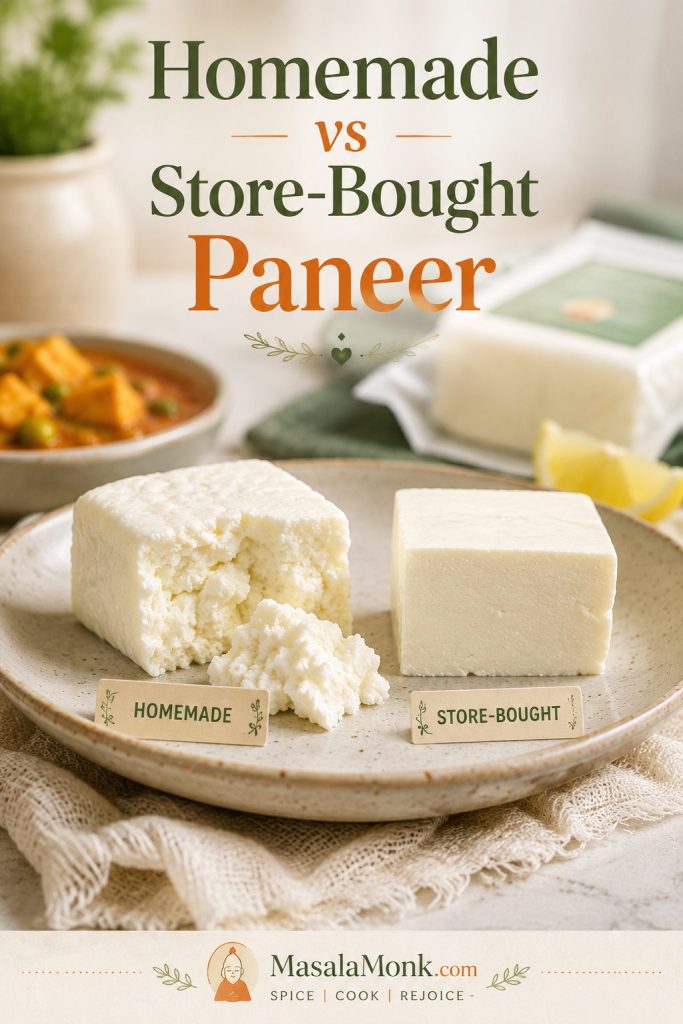
Many store-bought paneer blocks are firmer because they are pressed, packaged, transported, refrigerated, and stored before you cook with them. Some are excellent, but many are denser than the paneer you would make fresh at home.
If your only experience with paneer has been hard cubes that sit separately from the sauce, homemade paneer can change how you think about the dish. Good paneer should be gentle, milky, and tender enough to belong inside the gravy, not feel like a separate chewy block.
You can also fold homemade paneer into vegetable dishes near the end, as in an Aloo Gobi with Paneer variation, where the cubes add protein without needing a long cooking time.
Already Bought Paneer? Here’s How to Soften It
Warm-water soaking can relax cold store-bought paneer and make it feel less stiff, but it may not fully rescue a very dense block. Choose the method based on the dish.
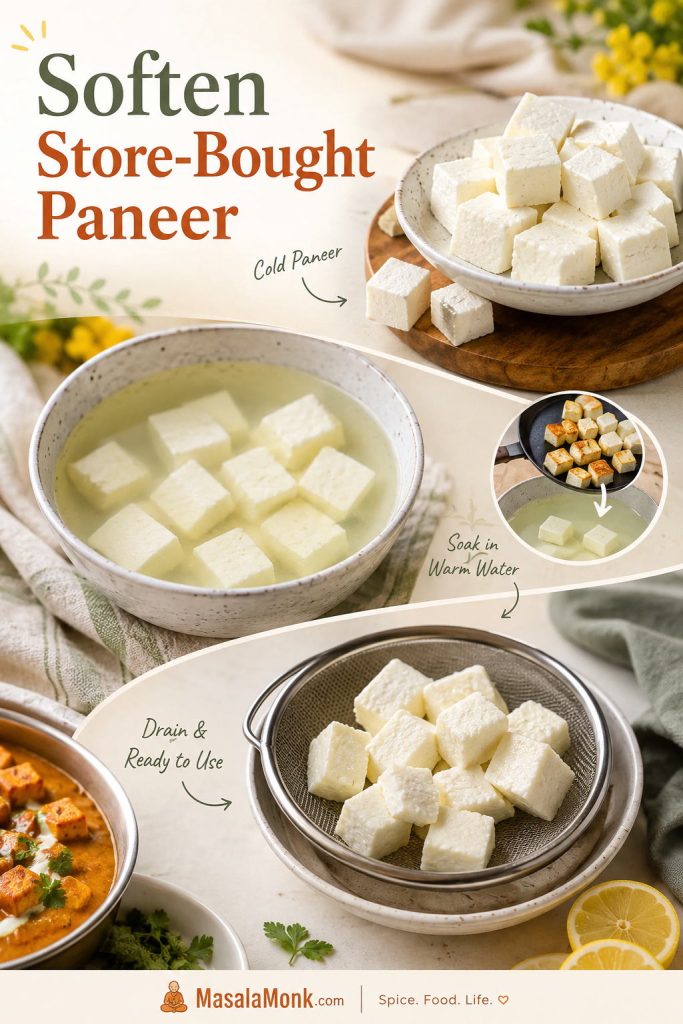
- Quick curries: cut the paneer into cubes and soak in warm water for 10–15 minutes, then drain gently.
- Browned paneer in saucy dishes: shallow-fry the cubes briefly, then soak them in warm water before adding them to the gravy.
- Delicate creamy gravies: skip hard frying and add paneer near the end so it only warms through.
- Very rubbery paneer: soaking helps, but it may not completely fix an over-pressed or low-moisture block.
If packaged paneer keeps turning dense for you, the pressing guide shows how homemade paneer can be adjusted for softer curry cubes or firmer tikka pieces.
Paneer vs Tofu, Halloumi, Ricotta, Queso Fresco, and Cottage Cheese
If you are new to paneer, think of it as a mild, dairy-based cheese that holds its shape. Firm tofu is the closest non-dairy shape-holder, halloumi is saltier and springier, and queso fresco or queso blanco can be crumbly or tangier. Ricotta works better for soft fillings than cubes, while Western cottage cheese is wet and curdy rather than pressed.
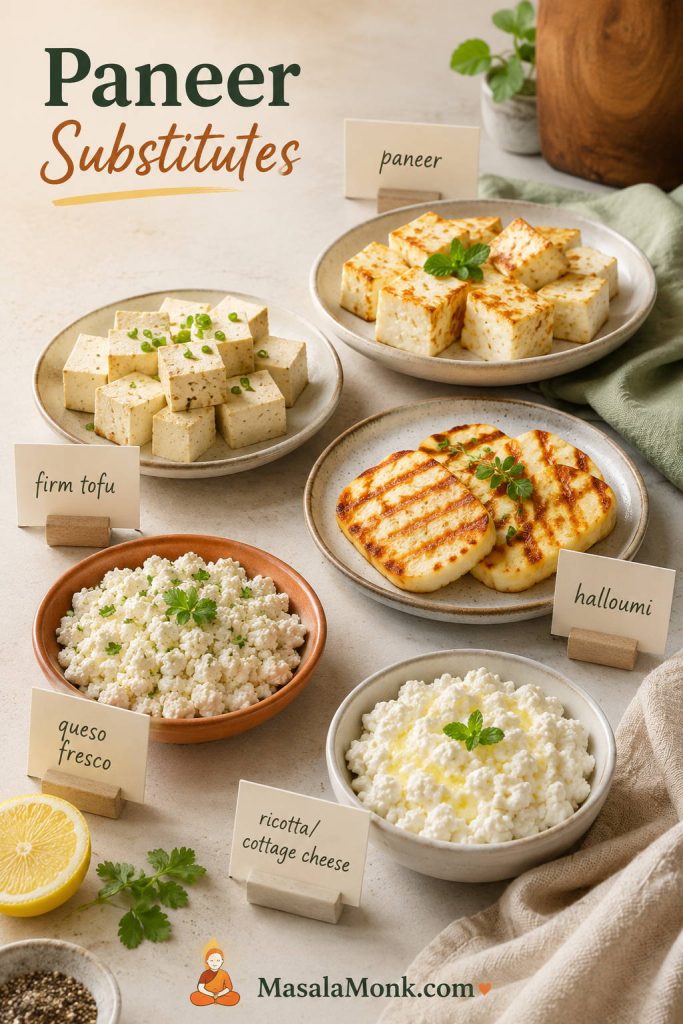
If paneer is not sold where you live, homemade is often easier than hunting for the perfect substitute.
Richer Malai-Style Paneer Variation
If you are using regular cow’s milk and want richer, softer paneer, you can make a malai-style variation by adding cream. This is especially useful if your local milk produces firmer paneer than you like.
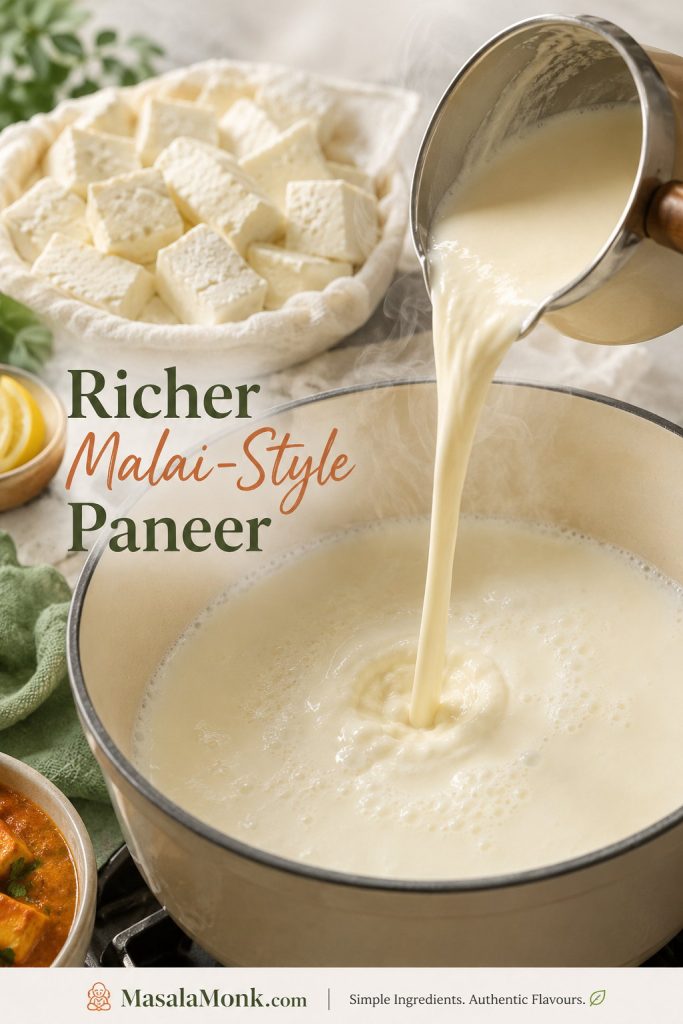
For 2 litres / 8½ cups whole milk, add ¼–½ cup / 60–120 ml heavy cream or replace ½ cup / 120 ml of the milk with cream. Use plain dairy cream without strong stabilizers if possible. Heat, curdle, strain, and press as usual. Because the extra fat makes the curds richer and softer, press gently unless you specifically need firm tikka cubes.
Can You Make Paneer with 2% or Low-Fat Milk?
You can make paneer with 2% milk, but it will not behave like whole-milk paneer. Expect less yield, leaner curds, and a block that may taste firmer or more crumbly. It can still work for bhurji, fillings, or macro-focused cooking, but whole milk is better for soft curry cubes.
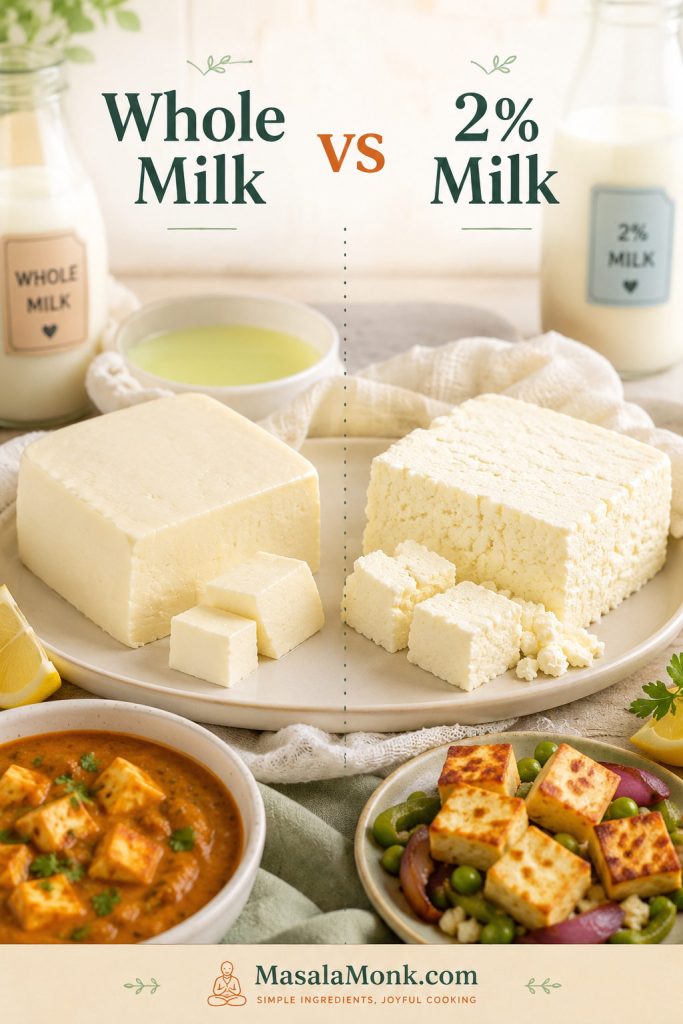
Skim milk or fat-free milk is not recommended for this recipe. If you must use lower-fat milk, keep the method gentle: avoid harsh boiling, add acid gradually, rinse briefly, press lightly, and store the paneer in water. Expect a different result from full-fat paneer.
Instant Pot Note
You can make paneer in an Instant Pot, especially with the yogurt-boil function. Use it only to heat the milk; do not pressure cook the paneer. Once the milk is hot and foamy, add diluted lemon juice or vinegar gradually, then follow the same resting, straining, and pressing method. For your first batch, the stovetop is still easier because you can see exactly when the milk is hot enough and when the curds separate.
How to Use Homemade Paneer
Homemade paneer is best when you match the texture to the dish: soft curds for fillings, tender cubes for curries, and firmer cubes for grilling or skewers.

Use soft crumbled paneer for fillings and quick meals
Soft paneer curds are excellent for paneer bhurji, toast, wraps, paratha fillings, sandwiches, cutlets, and snack-style recipes. They also work well in comfort-food ideas like Indian Cottage Cheese Jaffles, where a soft filling matters more than tidy cubes.
Use soft cubes for curries and vegetable dishes
For curries, you want paneer that holds shape but still feels moist. Press for 30–40 minutes, chill if needed, then add the cubes near the end of cooking. The sauce should be ready first; paneer only needs a few gentle minutes to warm through. This works for palak paneer, matar paneer, paneer butter masala, kadai paneer, and similar gravies.
Use firmer cubes for tikka, skewers, and grilling
For paneer tikka or skewers, press a little longer and chill before cutting. Firmer paneer is easier to marinate and thread onto skewers. Handle it gently, especially if your homemade paneer is softer than packaged paneer.
Use paneer for vegetarian protein
Paneer is also useful in vegetarian meal prep because it adds protein and richness without needing a long cooking time. Use it in salads, rice bowls, wraps, cutlets, and Indian-style meal prep plates. For more protein-focused Indian meal ideas, see MasalaMonk’s High-Protein Indian Meal Prep.
Do Not Throw Away the Whey
After you strain paneer, you will be left with whey: the pale yellow liquid that separated from the curds. It may look like something to discard, but it is useful in the kitchen.
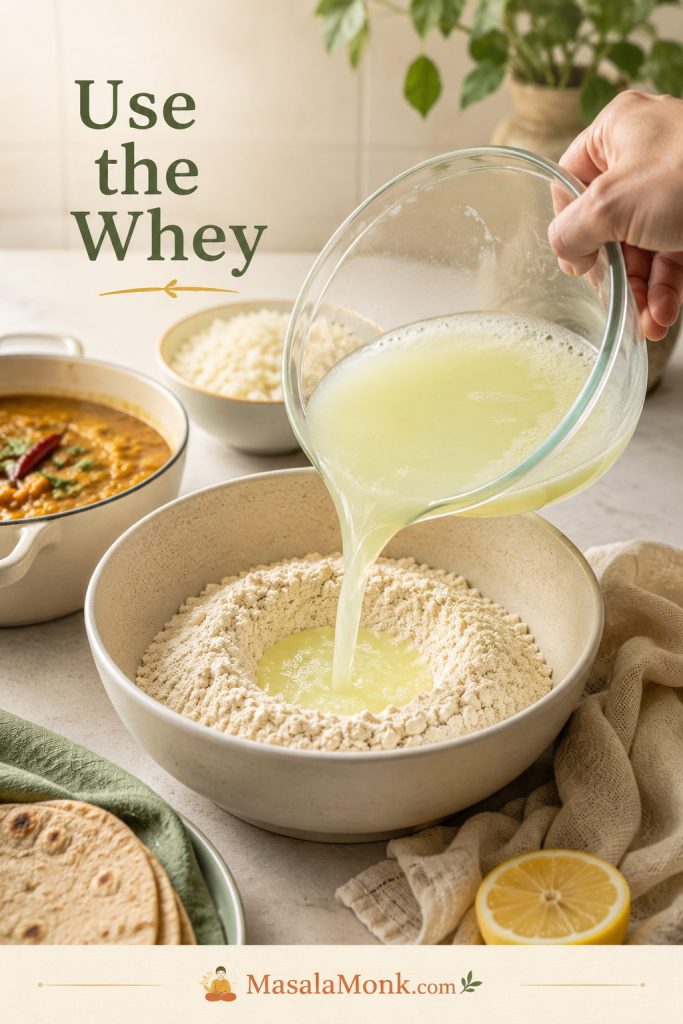
- Use whey to knead flatbread, roti, naan, paratha, or bread dough.
- Add it to lentils, dals, soups, stews, and curries.
- Use it as part of the liquid for rice, quinoa, oats, or other grains.
- Add a small amount to smoothies if it is not too sour.
- Freeze it in small portions for later cooking.
- Use very sour whey carefully, because it can change the flavor of delicate dishes.
Mild whey is useful in dough, rice, dals, and soups. Very sour whey is better in robust curries, breads, or flatbreads where a little tang makes sense. Avoid using sour whey in delicate desserts or plain rice unless you specifically want that flavor.
Refrigerate whey promptly and use it within 2–3 days, or freeze it in small portions. If you make paneer often, you can also use leftover whey from one batch to help curdle a future batch, although lemon juice or vinegar is easier for beginners.
Storing the paneer too? Use the storage and freezing guide so the cubes stay fresh while the whey gets used in dough, dal, rice, or soup.
How to Store and Freeze Homemade Paneer
Homemade paneer is a fresh, high-moisture cheese, so treat it gently and use it soon. Fresh paneer is softest the day it is made, but it can be refrigerated for a short time. Do not leave it sitting at room temperature for long. Cool it, cover it, and refrigerate it promptly.
| Storage method | Best time | Notes |
|---|---|---|
| Same day | Best texture | Use fresh paneer the day you make it for the softest result. |
| Refrigerator | 2–3 days | Store covered or submerged in fresh cold water. Change water daily. |
| Freezer | Up to 1 month for best texture | Freeze in portions. Thaw in the fridge and soak briefly in warm water before using if needed. |
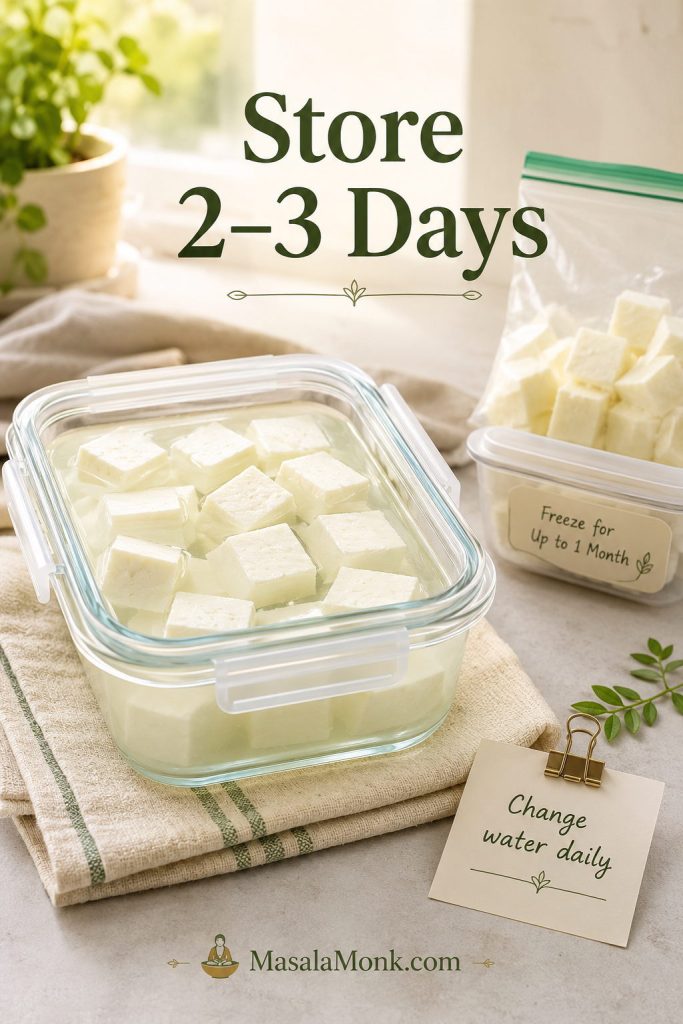
To refrigerate paneer, cool it first, then store it in an airtight container. For softer paneer, cover it with fresh drinking water, keep the container covered, and change the water daily. Avoid storing paneer in very sour whey unless you want the flavor to become tangier. For broader cold-storage guidance, FoodSafety.gov has a useful reference, but for homemade paneer, the simple rule is: refrigerate promptly and use it within 2–3 days.
Unsalted homemade paneer tastes freshest sooner; if you lightly salt the curds, it may taste seasoned for snacks but should still be treated as a fresh cheese and used quickly.
If paneer smells sour in a bad way, feels slimy, looks moldy, becomes fizzy, or feels unusually sticky, discard it.
Troubleshooting Homemade Paneer
When you make paneer at home, an imperfect batch does not always mean failure. Paneer that will not cube neatly can still become bhurji, a sandwich filling, paratha stuffing, cutlets, toast, or a quick scramble. Most paneer problems are texture problems, not total failures.
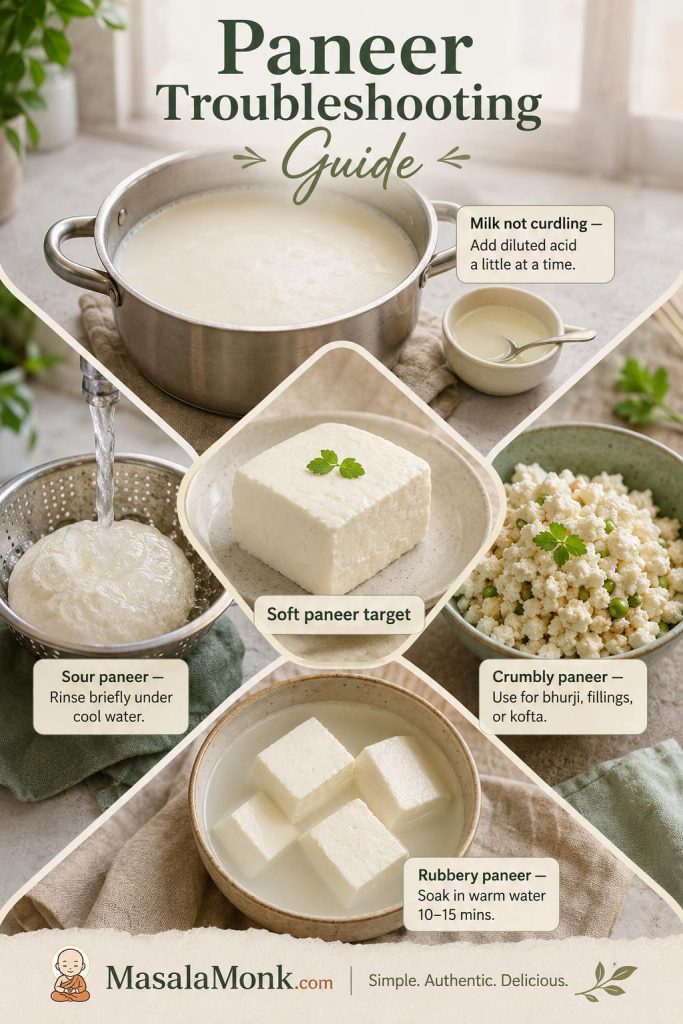
Use the table below to decide what to do now and what to change next time.
| Problem | Likely cause | Fix now | Fix next time |
|---|---|---|---|
| Milk did not curdle | Milk was not hot enough, not enough acid, or UHT/ultra-pasteurized milk | Reheat gently and add diluted acid 1 teaspoon at a time | Use full-fat, non-UHT milk |
| Whey still looks milky | Incomplete separation | Rest longer or add a little more diluted acid | Wait for pale yellow-green, slightly translucent whey before straining |
| Paneer tastes sour | Too much acid or not rinsed | Rinse briefly under cool water | Dilute acid and stop adding it earlier |
| Paneer is rubbery | Overheating, too much acid, over-pressing, or harsh cooking | Soak cubes in warm water for 10–15 minutes | Use gentler heat, gradual acid, and shorter pressing |
| Paneer is crumbly | Weak curds, low-fat milk, over-acidified curds, or not enough pressing | Use it as bhurji or filling | Use richer milk and press slightly longer |
| Paneer breaks in curry | Too soft, cut too soon, or stirred too roughly | Add gently when the sauce is ready | Press 30–40 minutes and chill before cutting |
| Paneer is dry after cooking | Fried or simmered too long | Soak briefly in warm water | Cook the sauce first, then warm paneer through gently |
Why did my milk not curdle?
Usually, the milk was not hot enough, the acid was too weak, or the milk was UHT / ultra-pasteurized. Bring the milk back to 185–195°F / 85–90°C, add 1 teaspoon diluted lemon juice or vinegar, stir gently, and wait 30–60 seconds. Repeat only until the whey clears and the curds separate.
If the milk still refuses to separate, the milk itself may be the issue. Try another full-fat, non-UHT brand next time.
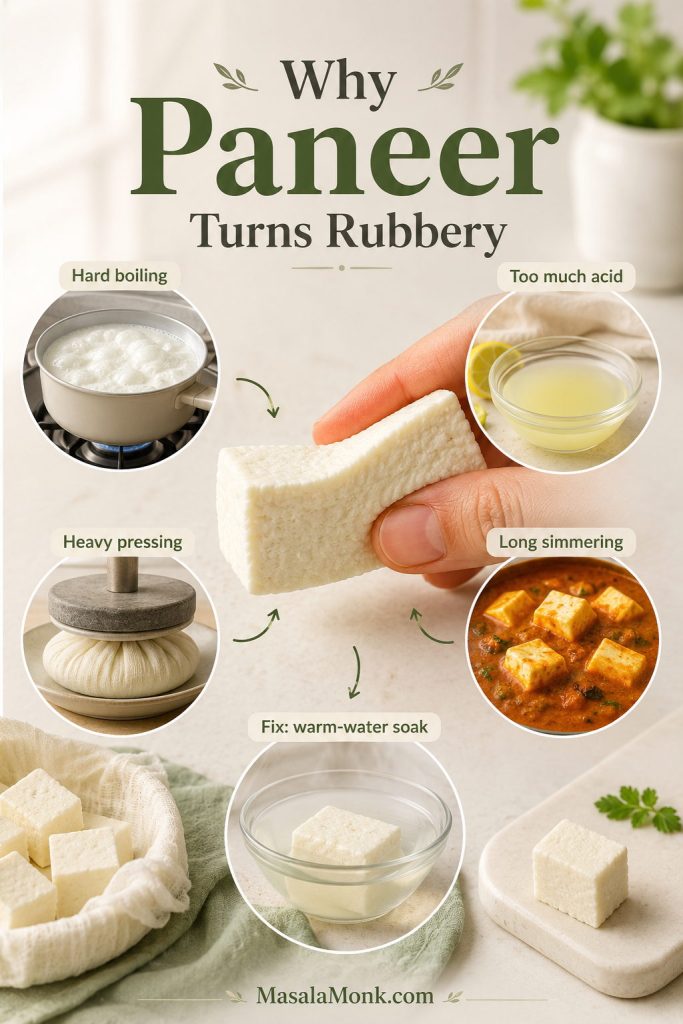
Why is my paneer rubbery?
Rubbery paneer usually comes from hard boiling, too much acid, heavy pressing, or long cooking in sauce. To rescue a batch, soak the cubes in warm water for 10–15 minutes. This will not fully reverse overcooking, but it can make the texture noticeably softer.
Why does my paneer taste sour?
Sour paneer usually means too much lemon juice or vinegar remained in the curds. Rinse the curds briefly under cool water after straining. Next time, dilute the acid and add it gradually. Stop once the whey is clear enough and no longer looks milky.
Why is my paneer crumbly?
Crumbly paneer is not always bad. If it is moist and soft, use it for paneer bhurji, sandwich fillings, paratha fillings, cutlets, or toast. For a snackier route, lightly pressed or crumbled paneer also works in vegetarian patties such as Protein Packed Millet Cutlets.
For cleaner cubes next time, use full-fat, non-UHT milk, add acid slowly, rest the curds before straining, press for 30–40 minutes, and chill before cutting.
Why did my paneer break in curry?
The paneer may have been too soft for cubes, cut before it fully set, or stirred too roughly in the sauce. For curries, press the paneer for 30–40 minutes, chill it briefly, cut with a sharp knife, and add it only when the sauce is ready. Stir gently after adding paneer.
How do I make softer paneer next time?
Use richer milk, gentler heat, gradual acid, and shorter pressing. For especially soft paneer, add a little cream to the milk or use yogurt as the acid once you are comfortable with the basic method.
After you identify the problem, return to the homemade paneer recipe and watch the step-by-step paneer cues more closely on your next batch.
FAQs About Homemade Paneer
What is the best milk for making paneer at home?
Whole milk or full-fat milk is best because it gives better curds, better yield, and a softer texture. Regular pasteurized whole cow’s milk is the safest supermarket default.
Why did my milk not curdle?
Usually the milk was not hot enough, the acid was too weak, or the milk was UHT / ultra-pasteurized. Reheat gently, add diluted acid 1 teaspoon at a time, and stop once the whey clears.
Lemon juice or vinegar: which is better for paneer?
Both work. Lemon juice tastes fresher but varies in acidity. Plain white vinegar is more predictable and usually tastes neutral after dilution and rinsing.
How much paneer do you get from 1 litre, 2 litres, or 1 gallon of milk?
Yield varies by milk, fat level, draining, and pressing. Expect about 150–200 g from 1 litre, 300–400 g from 2 litres, and 600–750 g from 1 gallon / 3.8 litres.
How do you make paneer soft instead of rubbery?
Rubbery paneer usually comes from hard boiling, too much acid, heavy pressing, or long cooking in sauce. Use gentler heat, add acid gradually, press for less time, and add paneer near the end of cooking.
Is paneer the same as cottage cheese?
Not exactly. Paneer is sometimes called Indian cottage cheese, but Western cottage cheese is loose and wet, while paneer is drained and pressed.
Can ultra-pasteurized or UHT milk be used for paneer?
It may work sometimes, but it is not the best choice. Ultra-pasteurized and UHT milk can form weak, grainy, or unreliable curds. For your first batch, use full-fat, non-UHT milk if you can.
Can lactose-free milk be used for paneer?
Lactose-free dairy milk can work if it is full-fat and not UHT or ultra-pasteurized. Check the carton carefully, because some lactose-free milks are processed for long shelf life and may curdle less reliably.
What should I do with leftover whey?
Use whey in doughs, dals, soups, curries, rice, oats, or grains. You can also freeze it in small portions. If the whey is very sour, use it in recipes where a slight tang makes sense.
How long does homemade paneer last?
Homemade paneer tastes best the day it is made. Refrigerate it for 2–3 days, covered or submerged in fresh cold water. Change the water daily if storing submerged. Freeze for up to 1 month for best texture.
When should paneer be added to curry?
Add paneer near the end of cooking. The sauce should already be cooked and seasoned. Once the paneer goes in, simmer gently for a few minutes so it warms through without becoming tough.
Final Thought
Once you learn how to make paneer at home, the process becomes less about doing something complicated and more about reading what the milk is telling you. Use milk that curdles cleanly, heat it gently, add only enough acid, and press the curds for the dish in front of you.
After one good block, paneer stops feeling like a specialty-store ingredient. It becomes something you can make when a curry needs soft cubes, a wrap needs a filling, or a quick vegetarian meal needs something fresh, milky, and satisfying.