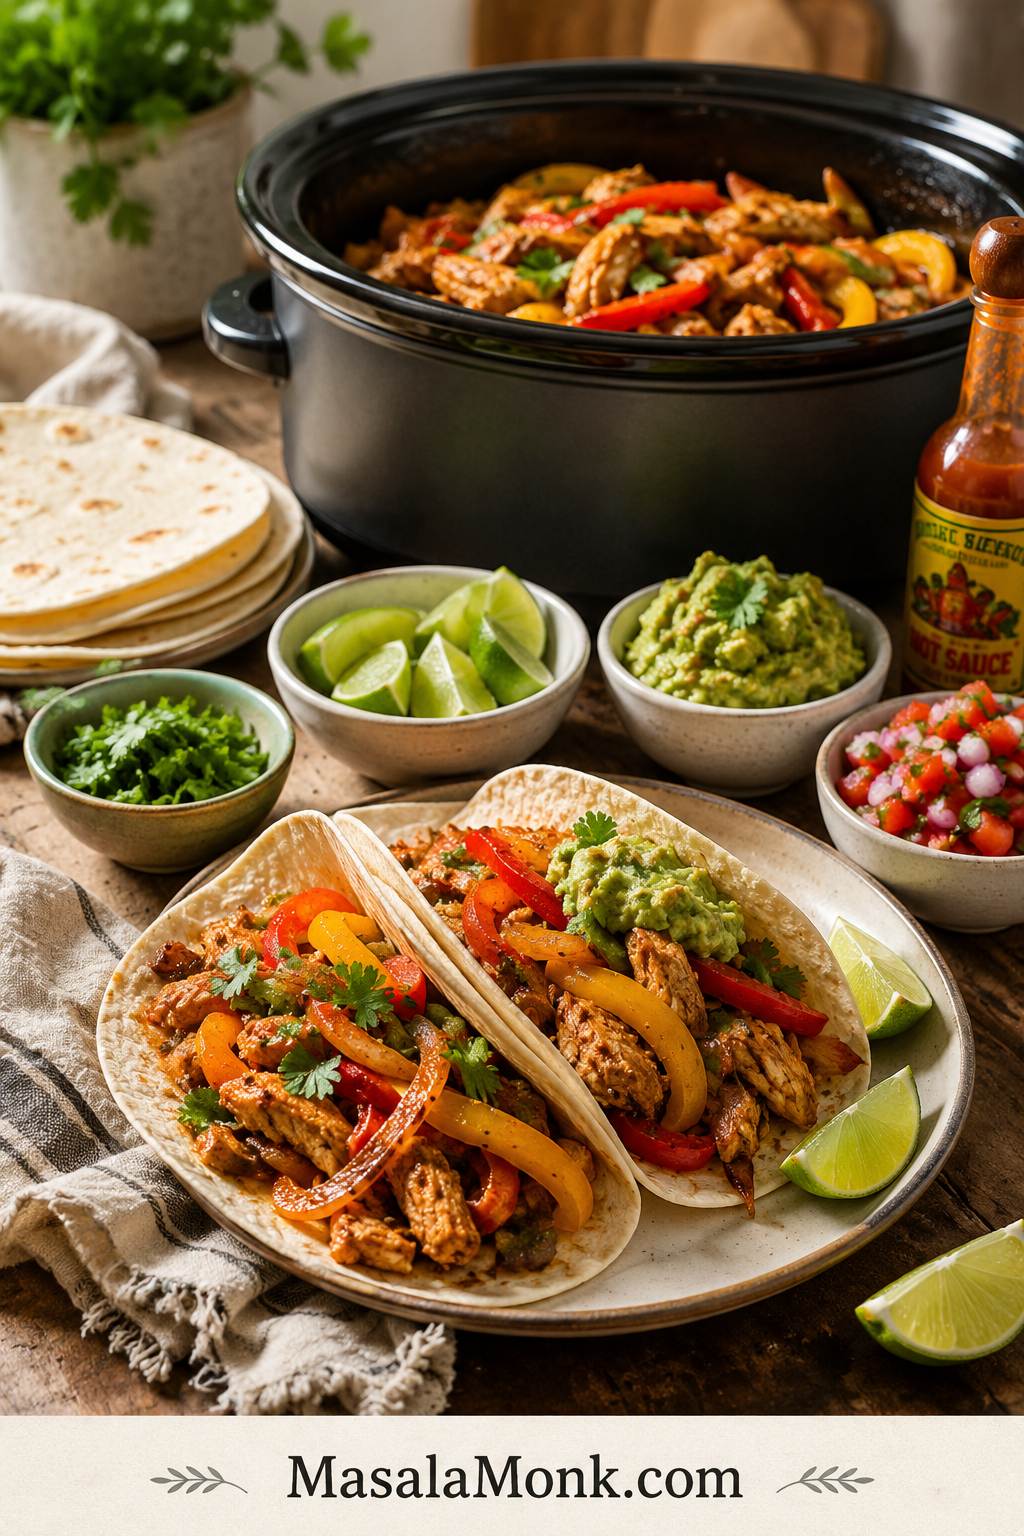
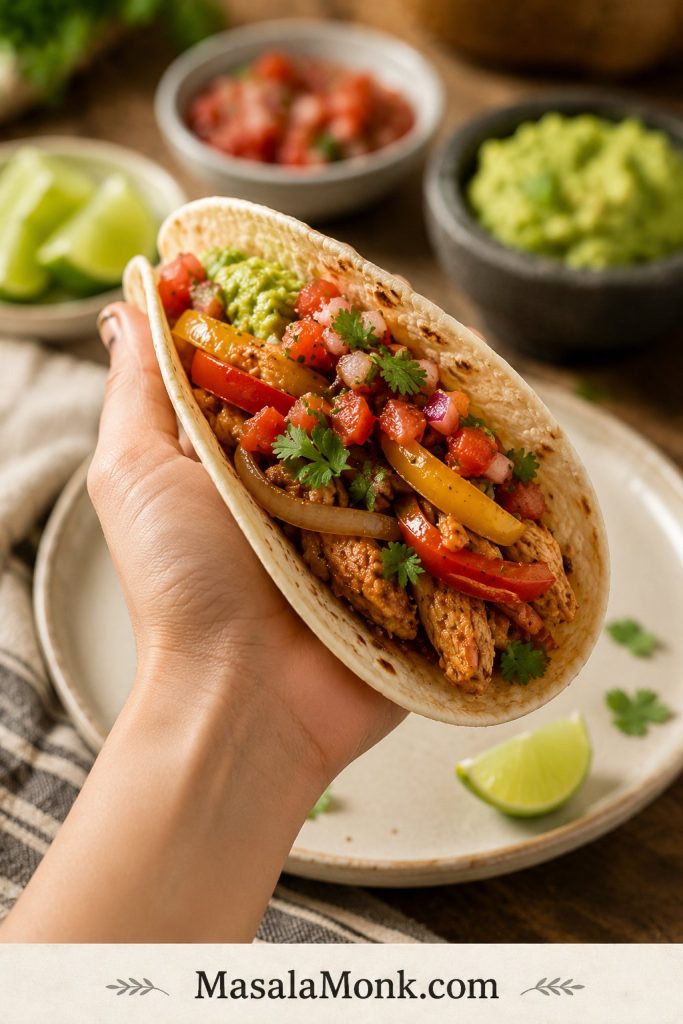
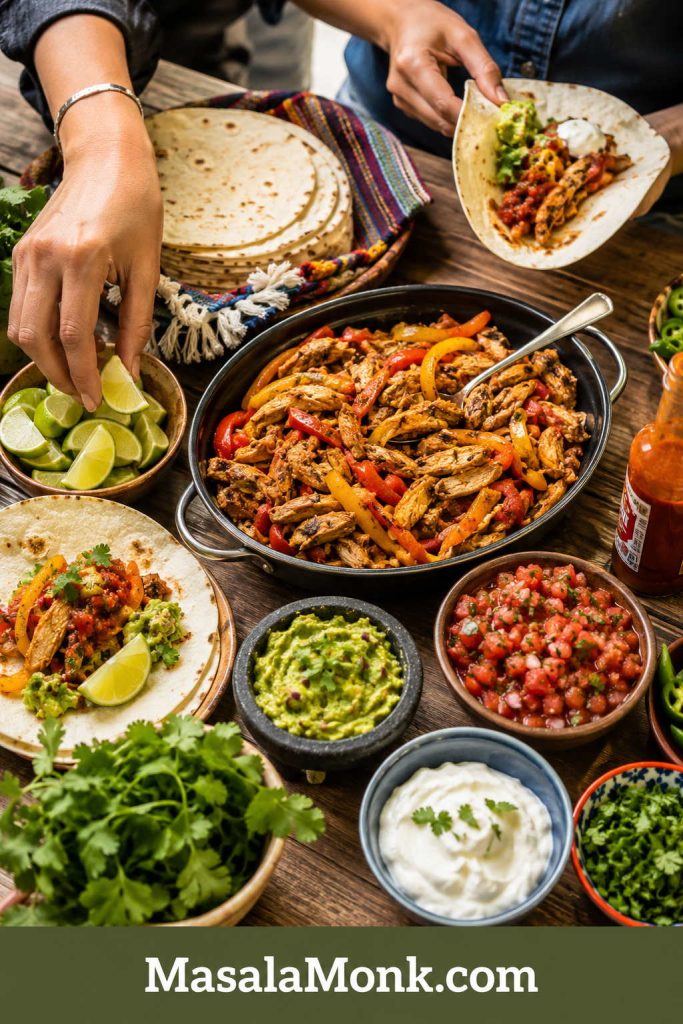
These slow cooker chicken fajitas are for the nights when you want the Crock Pot to handle dinner, but you still want the meal to feel fresh when everyone sits down. You get smoky, lime-bright chicken with sweet peppers and soft onions, ready to tuck into warm tortillas or spoon over rice.
The only tricky part is knowing what the slow cooker will do once the lid goes on. It traps moisture, so fajitas can become too wet, too soft, or a little flat if everything cooks together with too much liquid. This version keeps the method easy but gives you one simple rule to remember: less liquid, later peppers, lime at the end.
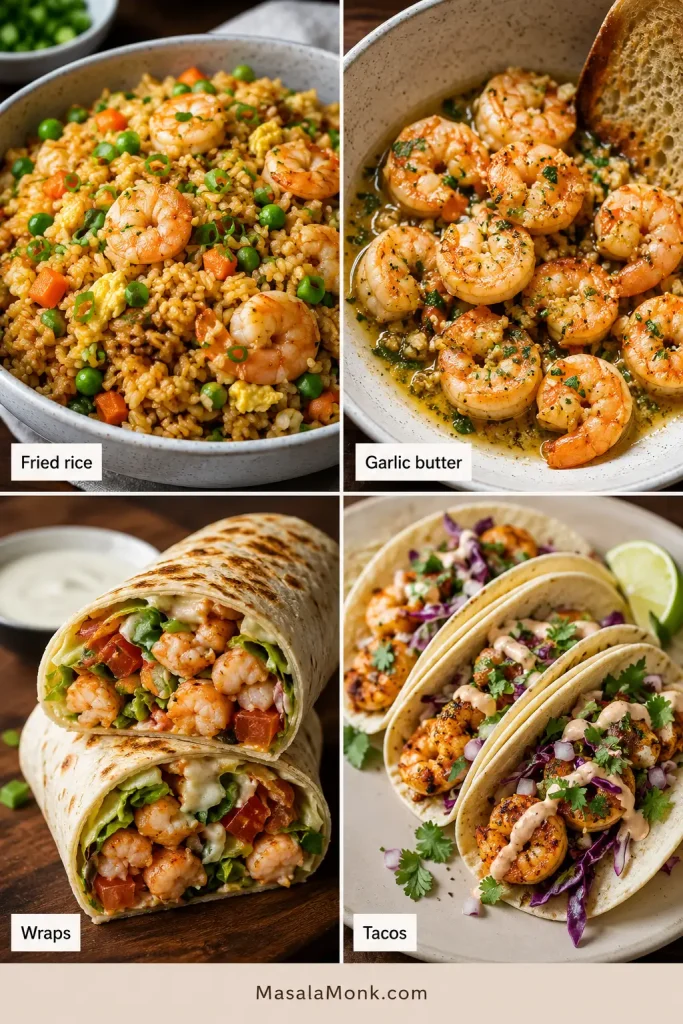
By the time you warm the tortillas and cut the lime, the chicken is tender, the peppers are sweet, the onions are soft, and dinner feels like more than something you simply left in the slow cooker. Use the cooked chicken and peppers for classic fajitas, tacos, bowls, quesadillas, nachos, or easy leftovers.
It will not have the same char as skillet or sheet pan fajitas, but it gives you an easy, reliable Crock Pot dinner with very little hands-on work.
What This Recipe Helps You With
Make the Fajitas
Quick Answer: How to Make Slow Cooker Chicken Fajitas
To make slow cooker chicken fajitas, add boneless chicken breasts or thighs to a 5.5 to 6 quart slow cooker with sliced bell peppers, onion, garlic, fajita seasoning, and ¾ to 1 cup salsa, Rotel, or diced tomatoes. Cook on low for 4 to 6 hours or high for 2½ to 3½ hours, until the chicken reaches 165°F / 74°C. Slice or shred the chicken, return it with only enough juices to coat, finish with lime, and serve in tortillas, bowls, tacos, salads, or quesadillas.
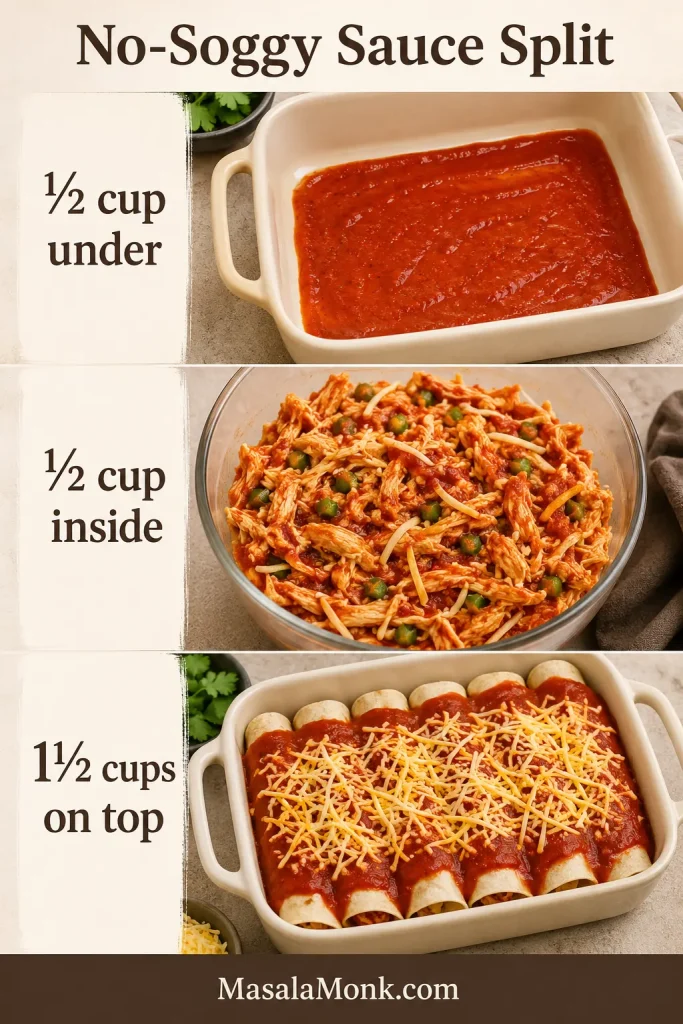
The three keys are less liquid, later peppers, and lime at the end. For better texture, add only half the peppers and onions at the beginning. Add the rest during the last 30 to 60 minutes so they stay brighter, firmer, and less watery.
For the easiest version, add everything at the beginning and drain before serving. If you want better texture, save some peppers for the end, keep the filling glossy, and finish with lime. The rest of the guide helps you make it tighter for tortillas, saucier for bowls, or softer for shredded leftovers.
Start with Less Liquid
This is the first texture decision in slow cooker chicken fajitas: add enough salsa or Rotel to season the chicken, but not so much that the pot turns soupy.
Slow Cooker Chicken Fajitas at a Glance
| Slow cooker size | 5.5 to 6 quart / 5.2 to 5.7 L |
| Fill level | Aim for about half to two-thirds full for even cooking |
| Chicken amount | 2 lb / 900 g |
| Chicken to use | Breasts for slicing, thighs for juicier shredded fajitas |
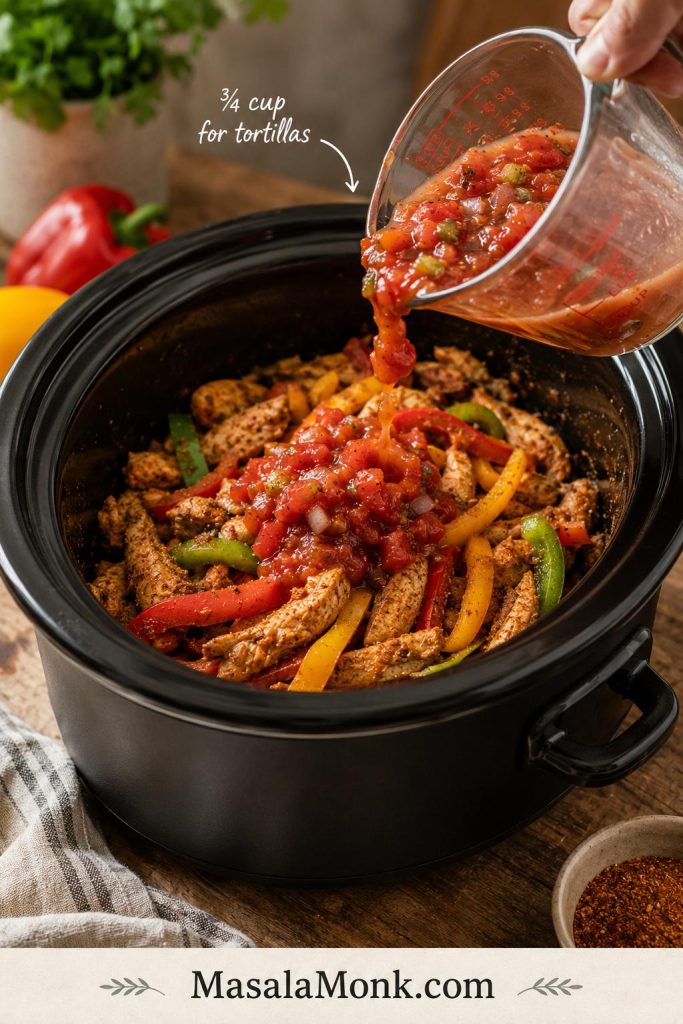
| Liquid amount | ¾ cup for tortillas, up to 1 cup for bowls |
| Low cook time | 4 to 6 hours |
| High cook time | 2½ to 3½ hours |
| Pepper method | Half early, half late |
| Safe chicken temperature | 165°F / 74°C |
| Finish with | Fresh lime juice after cooking |
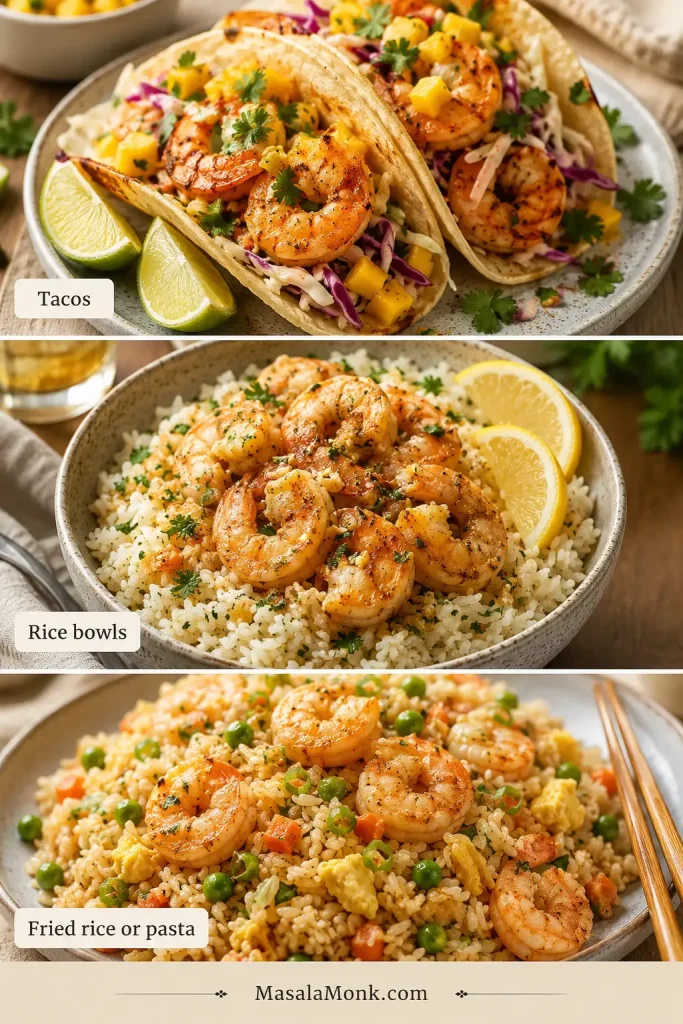
| Serve as | Fajitas, tacos, bowls, quesadillas, salads, nachos, meal prep |
Slow Cooker Chicken Fajitas Recipe
Description: Easy Crock Pot chicken fajitas with juicy chicken, sweet peppers, soft onions, smoky fajita seasoning, lime, and just enough salsa or Rotel to keep everything flavorful without turning watery.
Prep time: 10 to 15 minutes
Cook time: 2½ to 3½ hours on high, or 4 to 6 hours on low
Total time: About 2 hours 45 minutes to 6 hours 15 minutes
Servings: 6
Yield: Enough chicken and peppers for 8 to 12 fajitas, depending on tortilla size
Equipment: 5.5 to 6 quart / 5.2 to 5.7 L slow cooker, knife, cutting board, tongs, slotted spoon, instant-read thermometer
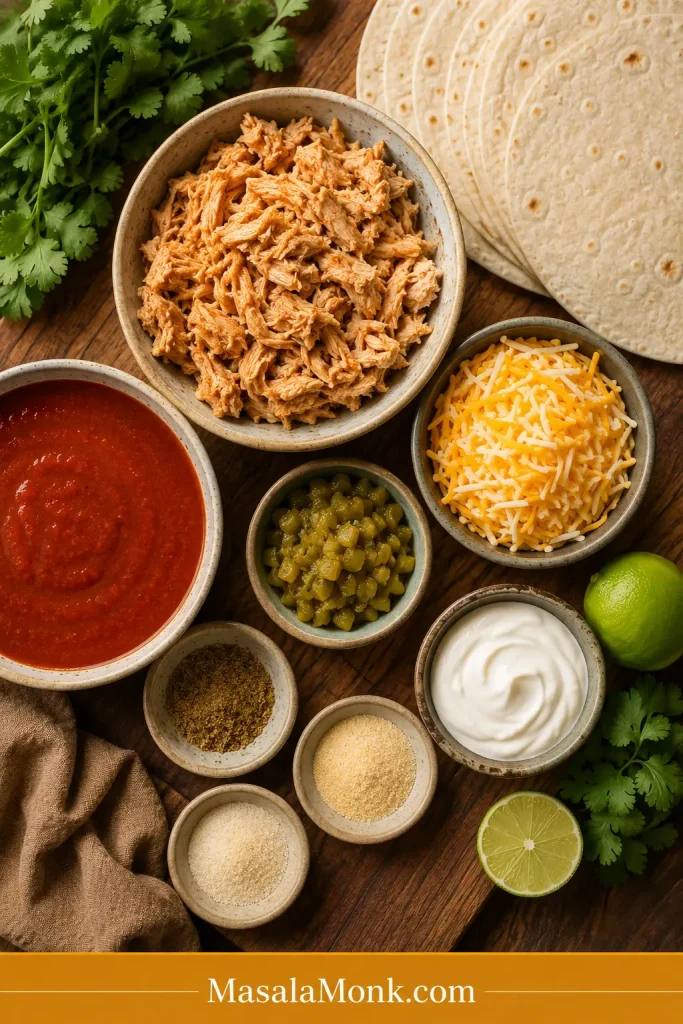
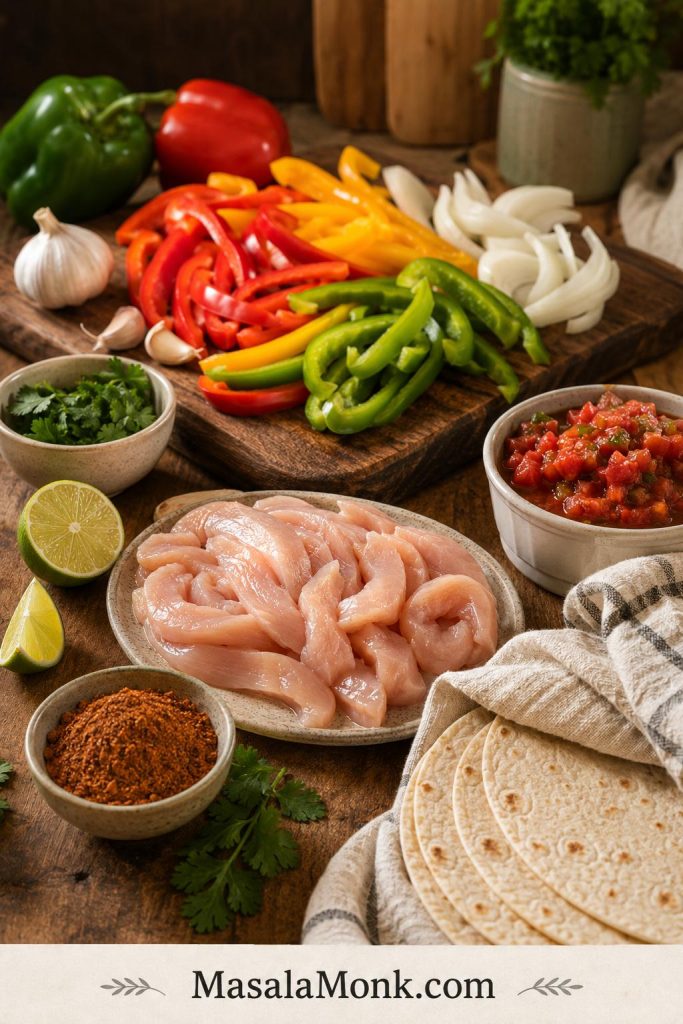
Ingredients
- 2 lb / 900 g boneless skinless chicken breasts or thighs
- 3 large bell peppers / 420 to 500 g, sliced, preferably mixed colors
- 1 large onion / 180 to 220 g, sliced
- ¾ to 1 cup / 180 to 240 ml salsa, Rotel, or diced tomatoes
- 3 to 4 garlic cloves / 12 to 16 g, minced
- 2½ to 3 tablespoons / 22 to 28 g fajita seasoning, homemade or store-bought
- 2 tablespoons / 30 ml fresh lime juice, plus extra lime wedges for serving
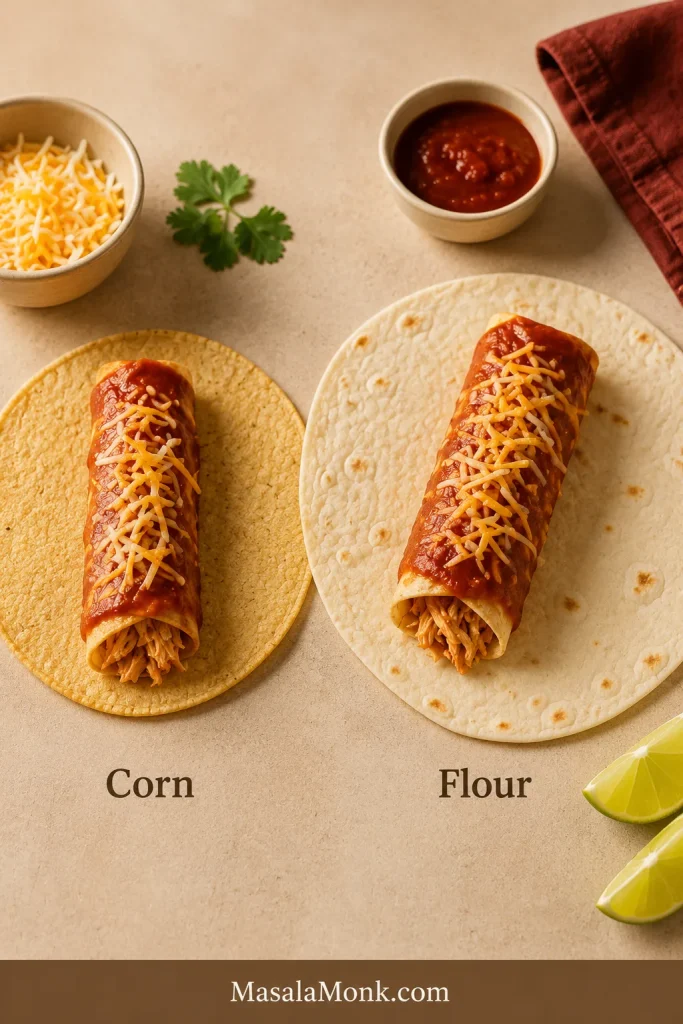
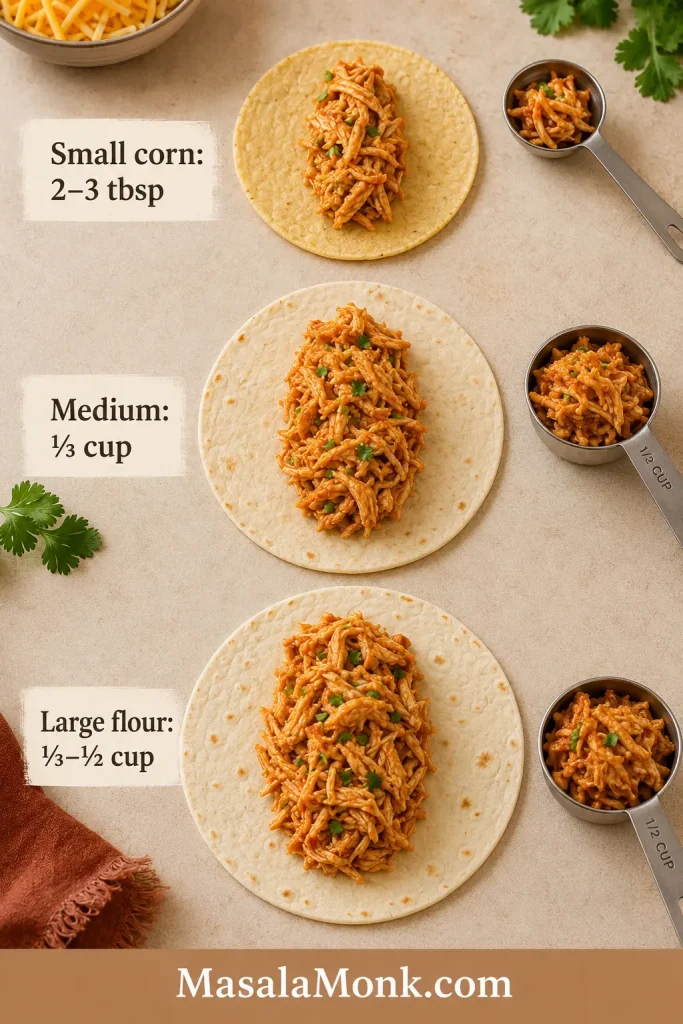
- 8 to 12 tortillas, flour or corn
- Optional toppings: sour cream, avocado, guacamole, cilantro, shredded cheese, salsa, jalapeños, lettuce, or hot sauce
Use ¾ cup / 180 ml salsa or Rotel for thicker tortilla-friendly fajitas. For juicier bowls or meal prep, use closer to 1 cup / 240 ml.
Instructions
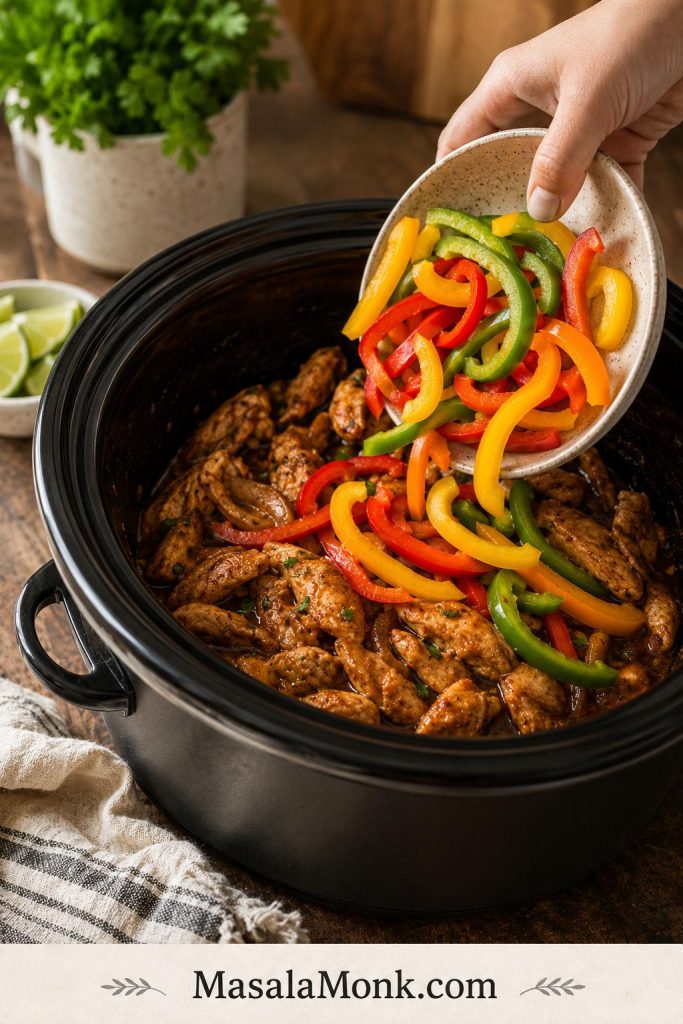
- Slice the vegetables. Cut the bell peppers and onion into strips. Set aside about half of them to add near the end of cooking.
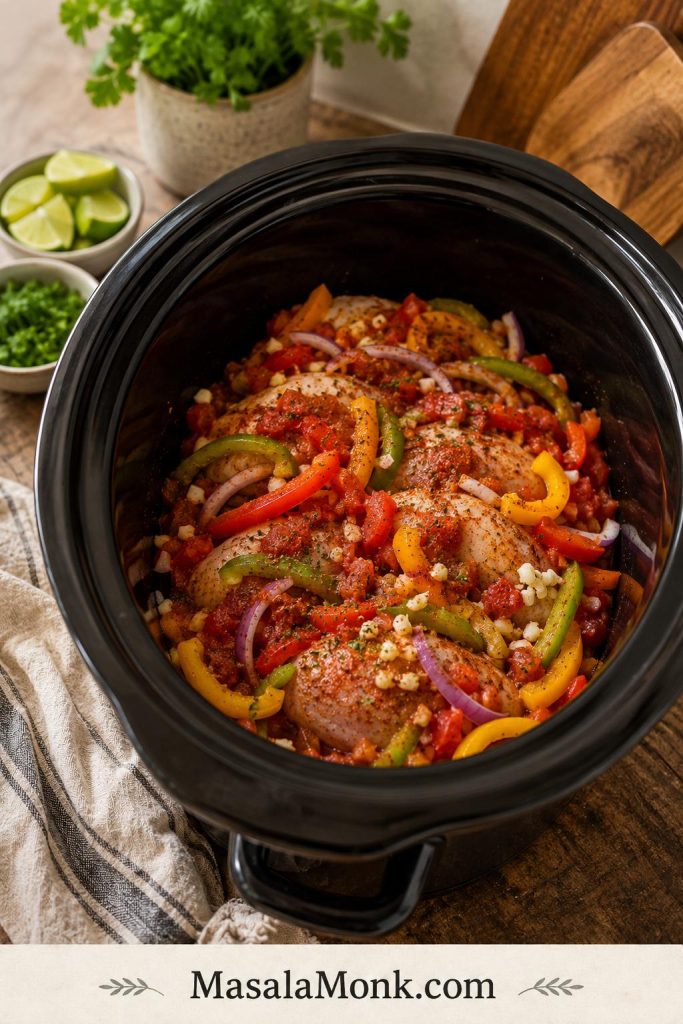
- Layer the slow cooker. Add the first half of the peppers and onions to the bottom of the slow cooker. Place the chicken on top.
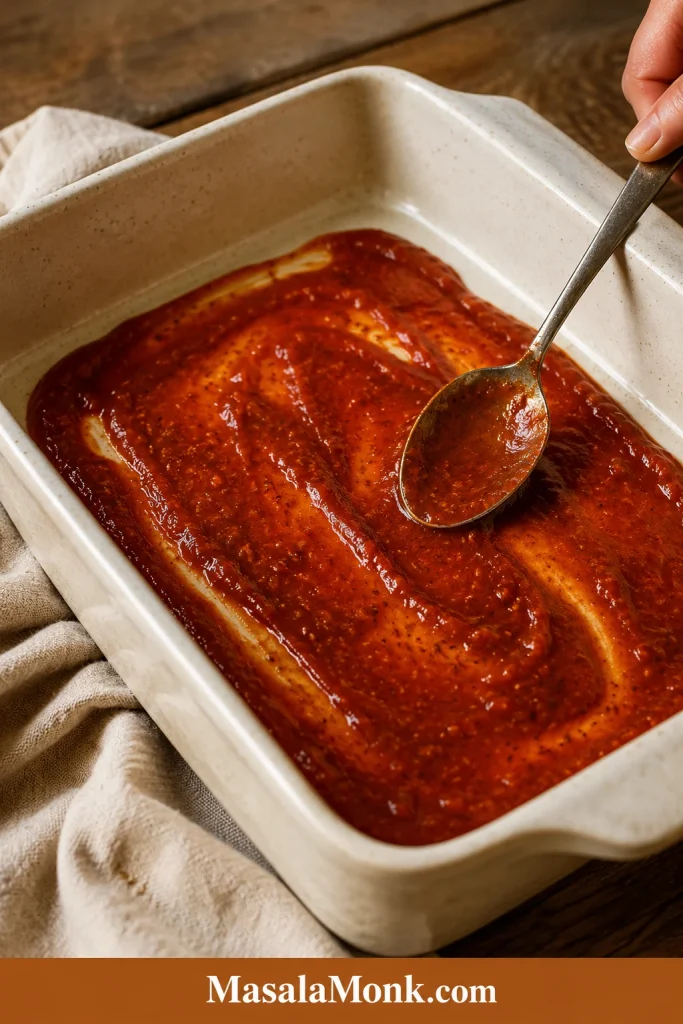
- Add flavor. Sprinkle the chicken with fajita seasoning and garlic. Pour the salsa, Rotel, or diced tomatoes over the top. Do not add extra water.
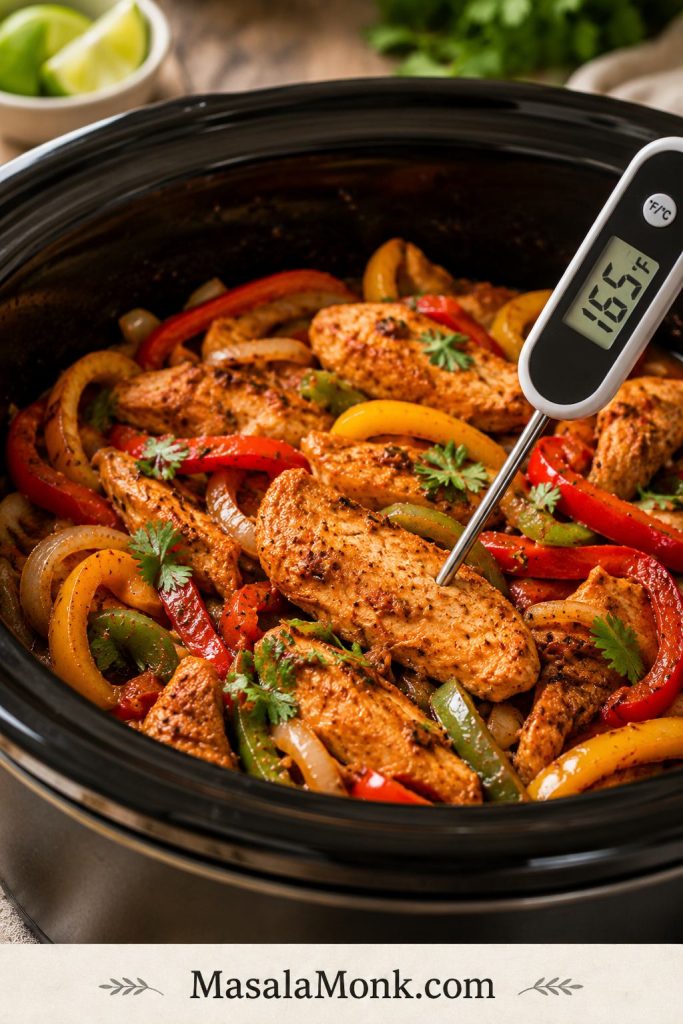
- Cook. Cover and cook on high for 2½ to 3½ hours or low for 4 to 6 hours, until the chicken reaches 165°F / 74°C. Very thick chicken breasts may need the longer end of the range.
- Add the remaining peppers. Stir in the reserved peppers and onions during the last 30 to 60 minutes. Use 30 minutes for firmer peppers and 60 minutes for softer peppers.
- Slice or shred. Remove the chicken. Rest it for 5 minutes if slicing, or shred it with two forks. Shredded fajitas should pull apart easily. Sliced fajitas should cut cleanly after resting.
- Adjust the juices. If there is a lot of liquid in the slow cooker, ladle some out. Return the chicken with only enough juices to coat the meat and vegetables.
- Finish with lime. Stir in the lime juice. Taste and adjust salt, seasoning, or lime.
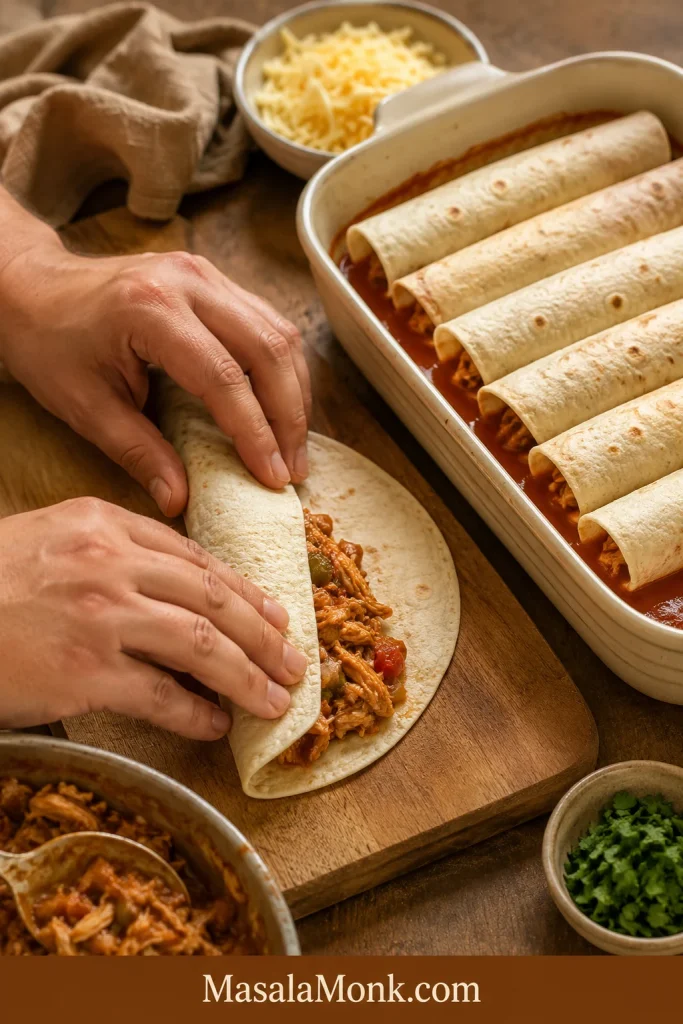
- Serve. Fill warm tortillas with the chicken and peppers, or spoon them into bowls, quesadillas, or leftover meals.
Recipe Notes
- Use ¾ cup / 180 ml salsa or Rotel for tortillas, or up to 1 cup / 240 ml for bowls.
- Do not add extra water. The chicken, peppers, onions, and tomatoes release liquid as they cook.
- Add half the peppers and onions late if you want better texture.
- Thaw frozen chicken before using it in a slow cooker.
- Finish with lime juice after cooking so the flavor stays fresh.
- For tortillas, think glossy, not soupy. Drain or lift with tongs before filling tortillas.
Want better texture? See when to add peppers. Need to fix extra liquid? Read the watery fajitas section. Planning leftovers? Jump to storage and meal prep.
Why You’ll Make This Again
This is the kind of recipe that earns its place on a weeknight because it does more than make one dinner. It helps when the day is long, the chicken is already in the fridge, and you need something that can turn into warm tortillas tonight and easy leftovers tomorrow.
- Mostly hands-off. Once the slow cooker is loaded, dinner is already moving.
- It works with shortcuts. Use homemade fajita seasoning, a packet, salsa, Rotel, or diced tomatoes.
- It solves the usual slow-cooker problems. The filling stays glossy instead of watery.
- It can be tight or saucy. Keep it neat for tortillas or leave it juicier for bowls.
- It turns into more than fajitas. Use the same batch for tacos, bowls, quesadillas, and leftovers.
Once the basic method is set, you can decide whether you want a tighter tortilla filling, a saucier bowl, or soft shredded chicken for leftovers.
Why This Crock Pot Chicken Fajita Recipe Works
A slow cooker does not brown food, so the flavor has to come from seasoning, acidity, vegetables, and the way you manage the juices. That is why this recipe uses a controlled amount of salsa or Rotel, adds some peppers late, and finishes with lime instead of relying on char.
A lot of Crock Pot chicken fajita recipes are easy, but they make the same mistake: too much liquid, all the peppers added too early, and no clear plan for what to do with the juices at the end. The result can still taste good, but it often behaves more like wet shredded chicken than fajita filling.
Here, you still get the easy Crock Pot dinner, but the chicken stays juicy and the peppers do not all collapse into the sauce. A smaller amount of salsa or Rotel gives the meat enough moisture without drowning it. Some peppers and onions go in early to flavor the chicken, while the rest go in near the end so the finished chicken and peppers still have color and bite. Lime juice goes in after cooking, when it can wake up the smoky seasoning and sweet peppers instead of disappearing into the pot.
- Controlled liquid keeps the chicken useful for tortillas.
- Two-stage peppers give you flavor and better texture.
- Chicken breasts or thighs both work depending on your goal.
- Sliced or shredded chicken lets you choose classic fajita-style strips or easier pulled chicken.
- Fresh lime at the end keeps the flavor lively.
Do Slow Cooker Fajitas Taste Like Skillet Fajitas?
Not exactly, and that is worth saying clearly. This is not the sizzling-pan version. It is the weeknight version: softer, juicier, easier, and still bright enough to feel fresh when the tortillas hit the table.
Expect soft, juicy fajita chicken with sweet peppers, smoky seasoning, and a fresh lime finish. It is not charred or sizzling, but it should taste bright, savory, and easy to fold into warm tortillas.
To make the slow-cooked version taste more fajita-like, add some peppers near the end, finish with fresh lime, avoid too much liquid, and use smoked paprika in the seasoning. For more roasted edges and oven-style flavor, try these sheet pan chicken fajitas. They give you the same chicken, peppers, and onion idea with more browning and less slow-cooker softness.
Ingredients You Need
The ingredient list is simple, but each part matters. Good slow cooker fajitas need enough seasoning to stand up to the long cook, enough moisture to keep the chicken juicy, and not so much liquid that the finished chicken and peppers become soupy.
Ingredient checkpoint: the chicken, peppers, onion, seasoning, salsa or Rotel, lime, tortillas, and toppings all support a different part of the final fajita texture.
| Ingredient | What it does | Use |
|---|---|---|
| Chicken | Main protein | Breasts for leaner sliced fajitas; thighs for juicier shredded fajitas |
| Bell peppers | Sweetness, color, fajita flavor | Use mixed colors for better flavor and appearance |
| Onion | Savory sweetness | Yellow, white, or red onion all work |
| Fajita seasoning | Main flavor base | Homemade, packet fajita seasoning, or taco seasoning in a pinch |
| Salsa, Rotel, or tomatoes | Moisture and flavor | Use less for tortillas and more for bowls |
| Garlic | Depth and aroma | Fresh garlic is ideal; garlic powder works if needed |
| Lime juice | Freshness and balance | Add after cooking for the liveliest flavor |
| Tortillas and toppings | Turn the chicken and peppers into dinner | Use tortillas, rice, lettuce cups, or bowls |
Chicken Breast vs Chicken Thighs
Choose chicken breasts if you want leaner pieces that can be sliced into strips. They cook well here, but they can dry out if they sit too long, so start checking closer to the shorter end of the timing range.
If chicken breast is your default cut and dry slow-cooker chicken is a recurring problem, this guide to crock pot chicken breast recipes goes deeper into timing, sauce, and keeping lean chicken useful for bowls, wraps, and leftovers.
Choose chicken thighs if you want the most forgiving version. They stay juicier, shred easily, and are especially good for tacos, bowls, and meal prep. If your slow cooker runs hot or dinner timing is unpredictable, thighs are usually easier to work with.
Both breasts and thighs should reach 165°F / 74°C before serving.
Homemade Fajita Seasoning, Packet Seasoning, or Taco Seasoning?
Use what fits the night. A packet of fajita seasoning is fast, easy, and completely acceptable for a weeknight slow cooker dinner. Homemade fajita seasoning gives you more control over salt, heat, smoke, and sweetness.
Taco seasoning also works in a pinch. It may taste a little more like taco chicken than fajitas, but the peppers, onions, lime, and smoked paprika help pull it back toward fajita flavor. If you use a packet, wait until the end before adding extra salt because many store-bought blends are already salty.
Simple Homemade Fajita Seasoning
| Spice | Amount |
|---|---|
| Chili powder | 1 tablespoon |
| Ground cumin | 2 teaspoons |
| Smoked paprika | 1 teaspoon |
| Garlic powder | 1 teaspoon |
| Onion powder | 1 teaspoon |
| Dried oregano | ½ teaspoon |
| Ground coriander | ½ teaspoon |
| Black pepper | ½ teaspoon |
| Salt | 1 to 1½ teaspoons |
| Cayenne pepper | ⅛ to ¼ teaspoon, optional |
This amount seasons about 2 lb / 900 g chicken. If your chili powder or store-bought seasoning already contains salt, reduce the added salt and adjust after cooking.
How to Make Slow Cooker Chicken Fajitas
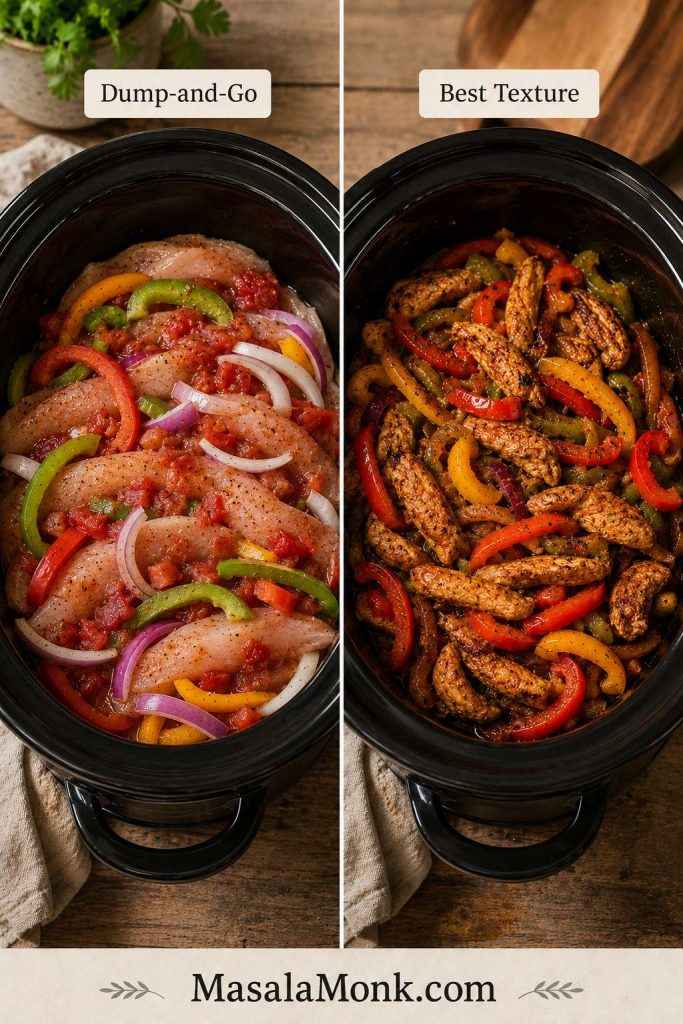
The easiest method is to add everything at once and cook. That works, especially for shredded tacos and bowls. The better method is almost as easy: add some vegetables at the beginning and some near the end. That small move makes the dish feel more like fajitas and less like slow-cooker chicken stew.
Step 1: Slice the Peppers and Onion
Slice the bell peppers and onion into strips. Keep them similar in size so they cook evenly. Set aside about half of the peppers and onions if you want better texture in the finished fajitas.
Step 2: Build the First Layer
Add half the peppers and onions to the bottom of the slow cooker. This gives the chicken a flavorful base and helps season the cooking juices.
Step 3: Add Chicken, Garlic, Seasoning, and Salsa
Place the chicken on top of the vegetables. Sprinkle the fajita seasoning and garlic over the chicken, then add the salsa, Rotel, or diced tomatoes. Do not add extra water. In most slow cookers, the chicken, peppers, onions, and tomatoes release more liquid than you expect.
Before the lid goes on: the pot should look seasoned and lightly sauced, not flooded. That setup helps the chicken cook juicy without creating a watery tortilla filling later.
Step 4: Cook Until the Chicken Is Done
Cook on high for 2½ to 3½ hours or low for 4 to 6 hours. Chicken breasts are usually best closer to the shorter end if you want slices that hold together. Thighs can handle a longer cook and are better for shredding.
Step 5: Add the Remaining Peppers and Onions
Add the reserved peppers and onions during the last 30 to 60 minutes. Use 30 minutes for more bite, or go closer to 60 minutes if you want them softer but still fresher than the vegetables that cooked from the beginning.
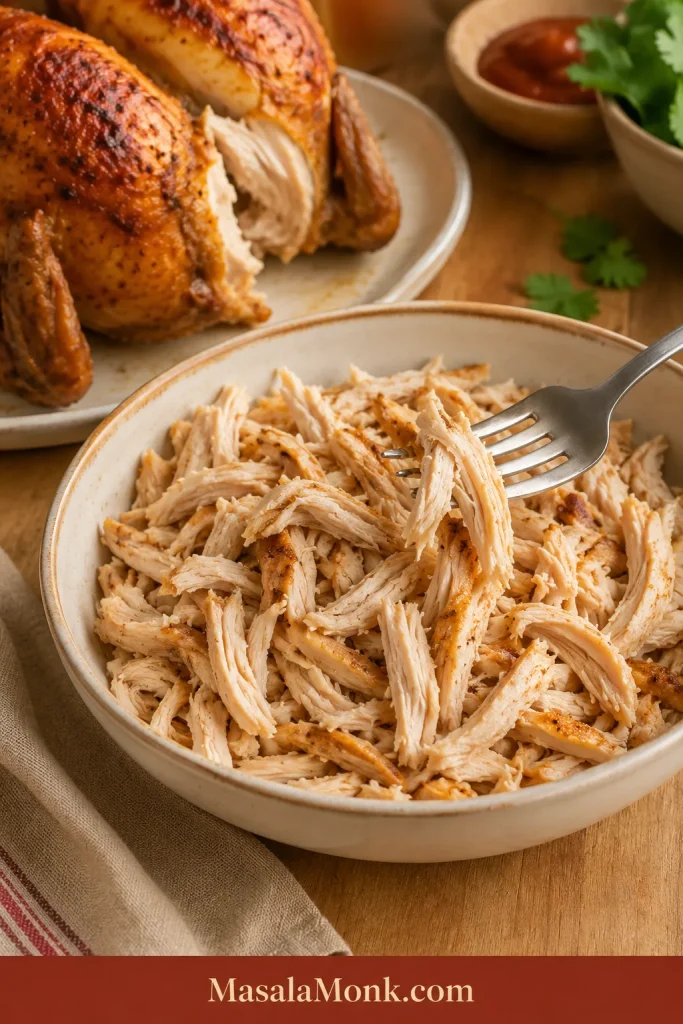
Step 6: Slice or Shred the Chicken
Once the chicken reaches 165°F / 74°C, remove it from the slow cooker. Rest it for a few minutes before slicing, or shred it with two forks if you want pulled chicken for tacos, bowls, or leftovers.
Step 7: Manage the Cooking Juices
If the slow cooker has a lot of liquid, ladle some out before returning the chicken. The finished chicken should look shiny and coated, with a little sauce clinging to the peppers, not a pool of liquid under every tortilla. You are not trying to make dry chicken. Instead, keep the chicken and peppers juicy enough to taste good but firm enough to pick up in a tortilla.
Step 8: Finish with Lime and Serve
Stir in fresh lime juice at the end. When the lime goes in, the whole pot should smell brighter. Taste and adjust salt, seasoning, or lime. Serve with warm tortillas, bowls, or whatever leftovers need rescuing tomorrow.
Slow Cooker Timing: Low vs High
Once the pot is set up, timing is the main thing to watch. The goal is not just cooked chicken. It is chicken that is done before it turns stringy.
Slow cookers are not all the same, and chicken breast can go from juicy to dry faster than people expect. Use the times below as a guide, then let temperature and texture decide when the chicken is done. Chicken should reach 165°F / 74°C. You can confirm poultry temperature guidance from FoodSafety.gov.
Temperature checkpoint: once the chicken reaches 165°F / 74°C, you can safely slice or shred it and then decide how much cooking juice to keep.
| Goal | Setting | Time | What to know |
|---|---|---|---|
| Sliced chicken fajitas | Low | 4 to 5 hours | Helpful when you want the chicken to hold its shape |
| Shredded chicken fajitas | Low | 5 to 6 hours | Works well for tacos, bowls, quesadillas, and meal prep |
| Faster dinner | High | 2½ to 3½ hours | Useful, but check early to avoid dry chicken breast |
| Chicken thighs | Low | 5 to 6 hours | Juicier and more forgiving than breasts |
| Holding after cooking | Warm | As short as possible | Long holding can make chicken breast dry or stringy |
Very thick chicken breasts may need the longer end of the range. If the chicken is done before dinner, remove it from the slow cooker and keep it covered. Return it to the warm chicken and peppers closer to serving time so lean breast meat does not keep cooking while the vegetables sit in the hot pot.
How to Keep Slow Cooker Chicken Fajitas from Getting Watery
If there is one place slow cooker fajitas usually go wrong, it is the liquid. The chicken may taste good, but if it drips through the tortilla, dinner becomes messy fast.
Do not panic if the slow cooker looks juicy when you open the lid. That is normal. The trick is deciding how much of that liquid belongs in the final tortilla filling.
Look for Glossy, Not Soupy
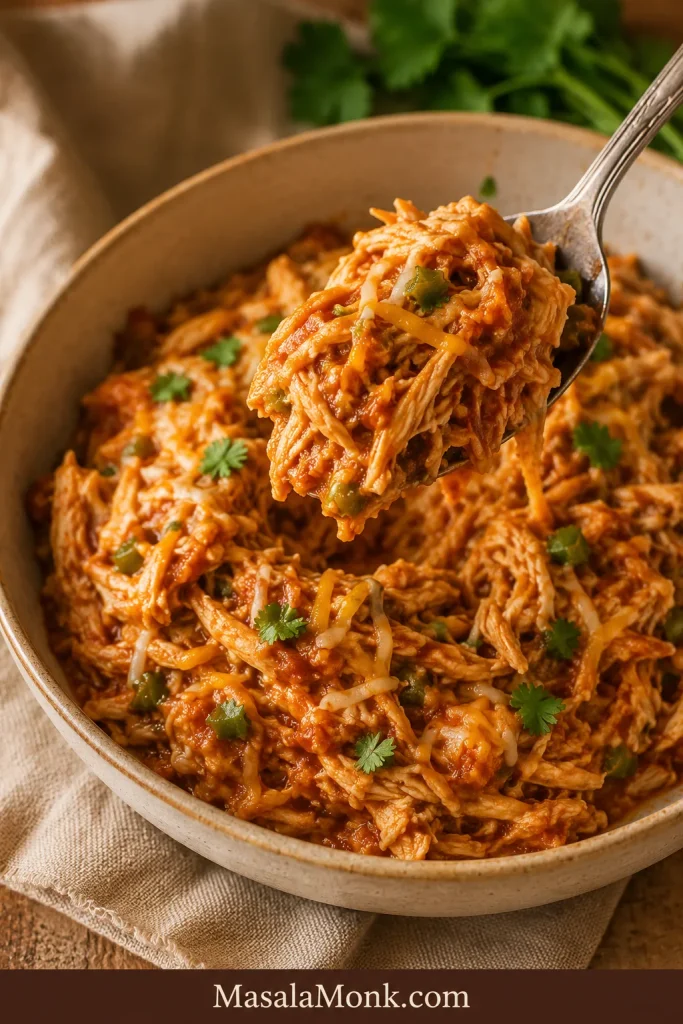
This is the visual cue for tortilla fajitas. The chicken and peppers should be coated with seasoned juices, but the filling should not be loose enough to run through a warm tortilla.
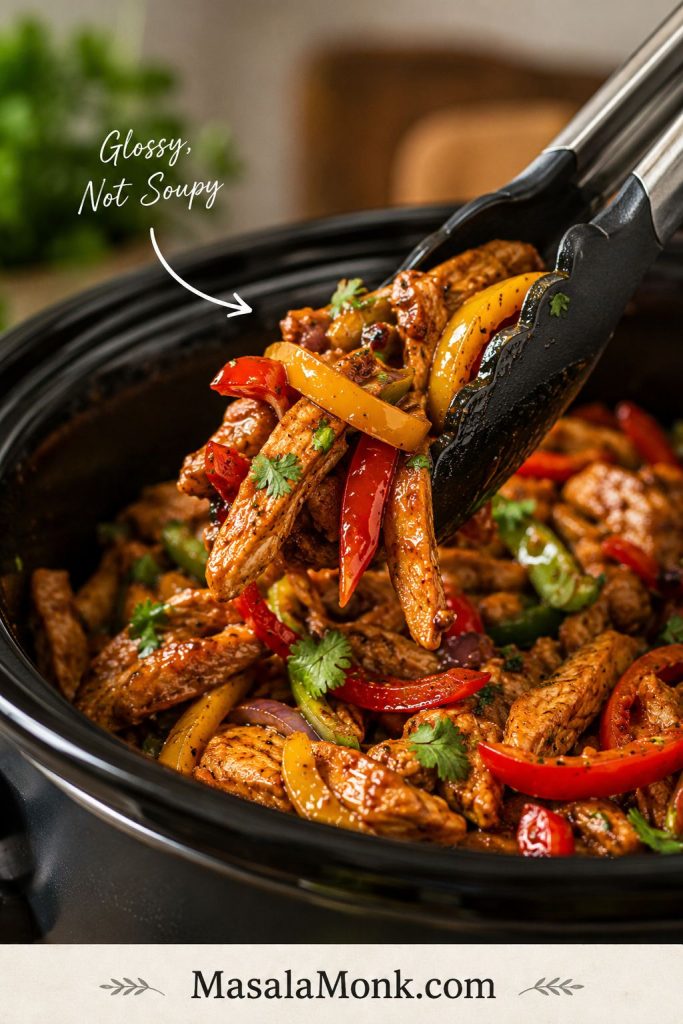
If past slow-cooker chicken has turned out watery or bland, this is the part that changes it: start with less liquid, add some peppers later, and brighten the pot at the end. A few small choices make the difference between juicy and soggy. For tortillas, think glossy, not soupy. Bowls can stay a little juicier because rice, quinoa, or cauliflower rice can soak up the seasoned liquid.
| Problem | Fix |
|---|---|
| Too much salsa, Rotel, or tomato | Use ¾ cup / 180 ml for 2 lb / 900 g chicken if serving in tortillas |
| Peppers release too much water | Add half the peppers near the end instead of all at the beginning |
| Chicken releases a lot of juice | Remove extra liquid before returning sliced or shredded chicken |
| Tortillas get soggy | Serve with tongs or a slotted spoon |
| The pot looks soupy | After the chicken reaches 165°F / 74°C, remove the lid or set it slightly ajar on high for 20 to 30 minutes to reduce excess liquid |
| You want bowl-style fajitas | Leave it a little juicier for rice, quinoa, or cauliflower rice |
How to Fix Watery Fajitas
If the pot gave you more liquid than expected, treat it as a final adjustment instead of a failure. Drain, reduce, or lift the filling with tongs so the flavor stays concentrated.
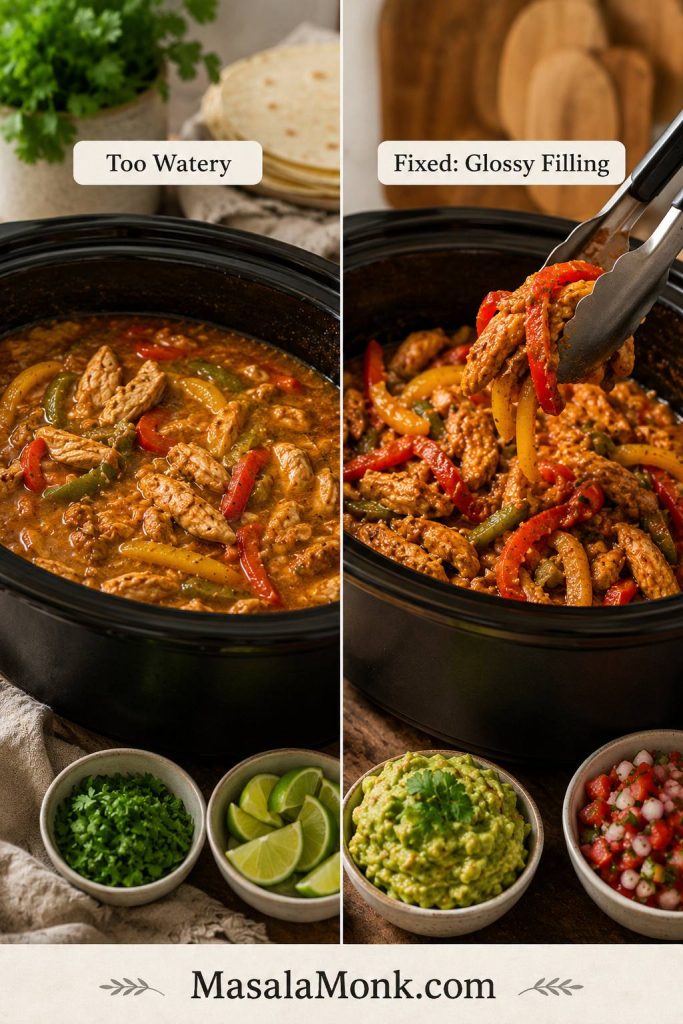
Before serving, look at the bottom of the slow cooker. A little seasoned juice is fine. However, a pool of liquid means the chicken and peppers should be lifted with tongs, drained with a slotted spoon, or reduced briefly before they go into tortillas.
After the extra liquid is out of the way, the filling tastes more concentrated: smoky, bright, and juicy enough to fold into a tortilla without losing half of it on the plate.
Do not add water at the beginning unless your slow cooker is unusually dry. For most slow cookers, the chicken, vegetables, and salsa or tomatoes create enough moisture on their own.
Use the Tortilla Test Before Serving
Before the filling goes to the table, try one tortilla. If it folds neatly and tastes juicy without dripping, the texture is right for fajitas.
Back to recipe card · Choose your serving style · Back to top
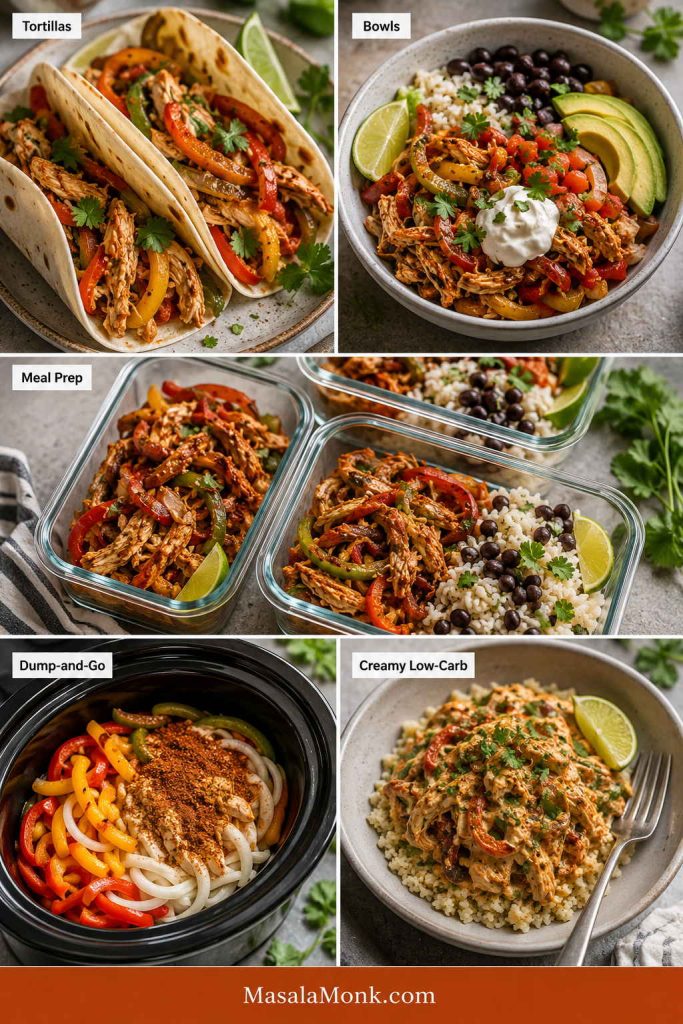
Choose Your Version: Tortillas, Bowls, Meal Prep, or Dump-and-Go
One pot can give you a few different dinners, depending on how much juice you leave behind. Choose the tighter version for tortillas, the juicier version for bowls, the shredded version for meal prep, and the late-pepper version when you want the freshest texture.
Use the visual guide: one batch can become tighter tortilla fajitas, juicier bowls, shredded meal prep, dump-and-go dinner, or creamy low-carb fajita chicken.
| What you want | Liquid | Chicken | Peppers | Finish |
|---|---|---|---|---|
| Tortilla fajitas | ¾ cup / 180 ml | Sliced or chunky | Half early, half late | Drain well, then add lime |
| Rice bowls | 1 cup / 240 ml | Shredded or chunky | Early or half-late | Keep some juices |
| Meal prep | ¾ to 1 cup / 180 to 240 ml | Shredded | Softer is fine | Pack toppings separately |
| Best texture | ¾ cup / 180 ml | Sliced | Add some peppers late | Use lime and tongs |
| Dump-and-go | ¾ to 1 cup / 180 to 240 ml | Shredded | All at the beginning | Drain before serving |
| Creamy low-carb | ¾ cup / 180 ml | Shredded | Half-late | Add cream cheese at the end |
After the juices are right and the lime goes in, the same batch can become warm tortillas tonight, rice bowls tomorrow, or easy leftovers for lunch.
Dump-and-Go vs Best Texture
Both paths work. The fastest path is dump-and-go, while the best-texture version keeps some peppers back so the finished fajitas look brighter and eat less soft.
When to Add Peppers and Onions
Once you know whether you are making tortillas, bowls, or meal prep, the next choice is how fresh you want the peppers to feel.
Peppers are where slow cooker fajitas can either feel fresh or fall flat. If they cook for the full time, they become soft and saucy. That is fine for shredded chicken bowls or tacos, but it does not feel as much like classic fajitas.
For the best balance, use the half early, half late method. Early vegetables flavor the chicken. The late peppers should still look colorful and taste sweet, not faded into the sauce.
Add Some Peppers Late
Late peppers are the simplest way to make slow cooker fajitas feel more like fajitas. They add color, sweetness, and bite without requiring a separate skillet.
If using frozen sliced peppers, add them late and expect a softer, juicier result. Fresh peppers give the best color and bite, but frozen peppers are still useful for quick bowls, tacos, and weeknight dinners.
| When you add them | Result | Use when |
|---|---|---|
| At the beginning | Very soft peppers and onions | You want the easiest dump-and-go dinner |
| Halfway through | Balanced texture | You want a simple family dinner |
| Last 30 to 60 minutes | Brighter, firmer peppers | You want more fajita-like texture |
| Sauté separately | Most bite and closest skillet feel | You do not mind one extra pan |
| Half early, half late | Flavor plus texture | You want the most practical slow cooker method |
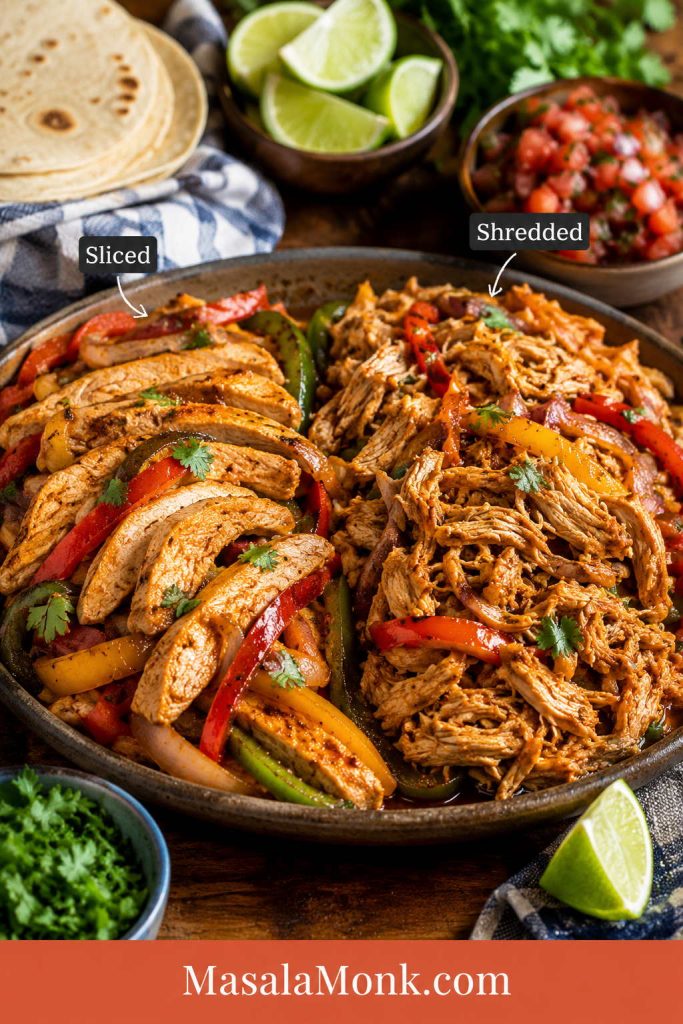
Shredded vs Sliced Slow Cooker Chicken Fajitas
Once the liquid is under control, the next choice is how you want to eat the chicken. Traditional fajitas usually use sliced meat, but Crock Pot chicken naturally becomes tender enough to shred. Neither option is wrong.
Shredded vs Sliced Chicken
Sliced chicken feels more classic in tortillas. Shredded chicken is easier for tacos, bowls, quesadillas, and leftovers, especially when the juices are controlled.
| Style | Use for | How to do it |
|---|---|---|
| Sliced chicken fajitas | Classic tortillas | Cook just until done, rest 5 minutes, then slice across the grain |
| Shredded chicken fajitas | Tacos, bowls, quesadillas, leftovers | Cook until fork-tender, shred with two forks, toss with controlled juices |
| Chunky chicken fajitas | Rice bowls and salads | Cut cooked chicken into thick pieces and fold back into the peppers and onions |
For the most classic fajita feel, slice the chicken and add some peppers late. The easiest meal prep option is shredded chicken with just enough juice to coat.
Troubleshooting Slow Cooker Chicken Fajitas
If the pot looks a little messy at the end, that is normal. Slow cooker fajitas usually need one final adjustment before they become dinner.
If the pot does not look the way you hoped, it is usually one of four easy fixes: too much liquid, peppers that cooked too long, chicken breast that stayed on heat too long, or a finish that needs lime and salt.
Quick Fixes for Common Slow Cooker Fajita Problems
| Problem | Likely cause | Fix |
|---|---|---|
| The pot is watery | Too much salsa, Rotel, tomato, or trapped steam | Drain extra liquid, reduce it after the chicken is fully cooked, or use ¾ cup liquid next time |
| Peppers are mushy | All the peppers cooked from the beginning | Add half the peppers in the last 30 to 60 minutes |
| Chicken breast is dry | Cooked too long or held on warm too long | Check early, use thighs next time, and return chicken with some juices |
| Flavor tastes flat | Slow cooking muted the seasoning | Add lime juice, salt, smoked paprika, hot sauce, or fresh cilantro |
| Tortillas get soggy | The chicken and peppers are too wet when assembled | Use tongs or a slotted spoon and let liquid drip back into the cooker |
| Fajitas do not taste fajita-like | No char, soft peppers, or too much sauce | Add peppers late, sauté peppers separately, or use the sheet pan method next time |
| Chicken is too dry after chilling | It absorbed liquid in the fridge | Reheat with a spoonful of salsa, water, or reserved cooking liquid |
| Too loose for quesadillas | Too much cooking juice left in the meat | Drain well and reheat uncovered before adding to tortillas with cheese |
From there, the fix is simple: drain a little, brighten with lime, or save the extra juice for bowls. Tortillas need a tighter filling. Quesadillas need the chicken drained well so the cheese and tortilla can crisp instead of steam.
Variations: Dump-and-Go, Rotel, No Tomato, and Creamy Low-Carb
Once the texture is handled, the flavor base can flex around what you have: Rotel, salsa, taco seasoning, no tomatoes, or a creamy finish.
You do not need the exact same jar, can, or seasoning blend every time. Use this section when you want the fastest version, a Rotel version, a no-tomato version, or a creamy low-carb fajita chicken.
Rotel, Salsa, or No Tomato
This choice changes both flavor and moisture. Tomato-based options add a red base, while the no-tomato version stays lighter and depends more on peppers, seasoning, garlic, and lime.

| Variation | What changes | Best for |
|---|---|---|
| 4-ingredient | Use chicken, peppers and onions, seasoning, and salsa or Rotel | Busiest nights |
| Rotel | Use one 10 oz / 285 g can; drain lightly if very juicy | Tomato-chile flavor |
| No tomato | Use seasoning, garlic, lime, peppers, onions, and a small splash of broth only if needed | Less watery fajitas |
| Cream cheese | Add 3 to 4 oz / 85 to 115 g cream cheese during the last 20 to 30 minutes | Bowls, lettuce cups, low-carb plates |
| Taco seasoning | Use a packet and adjust salt after cooking | Shortcut version |
| Salsa verde topping | Add after cooking or at the table | Brighter green flavor |
Rotel is canned diced tomatoes with green chiles. If you do not have it, use diced tomatoes plus a little chopped green chile, mild salsa, or another tomato-chile blend you like.
No-tomato fajitas need a little extra lime, smoked paprika, garlic, and seasoning so the chicken does not taste flat. For creamy fajita chicken, use the lower amount of salsa or Rotel so the sauce does not become loose.
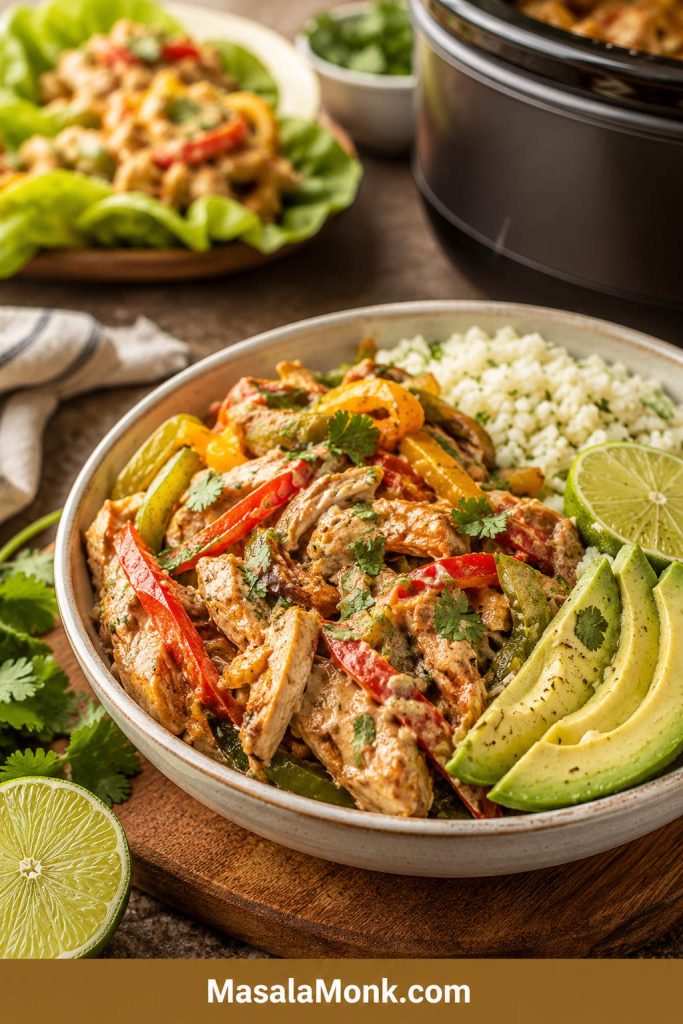
Creamy Low-Carb Fajita Chicken
Add cream cheese near the end so the sauce stays smooth and the peppers do not disappear into a heavy base. This version works especially well with cauliflower rice or lettuce cups.
A fast dump-and-go Crock Pot chicken fajitas version can be made with chicken, fajita seasoning, one can Rotel, peppers, onions, and lime. It will still work; just drain before serving if the pot looks juicy.
For a brighter green topping instead of more red salsa, a spoon of salsa verde works especially well with the chicken, peppers, lime, and tortillas.
Back to recipe card · Choose your version · Back to top
Can You Add Rice to the Slow Cooker?
Cook the rice separately. It is the safer, fluffier option because uncooked rice changes the liquid balance in this recipe and can turn mushy in the slow cooker. For reliable bowls, spoon the chicken, peppers, onions, and some of the juices over cooked rice instead.
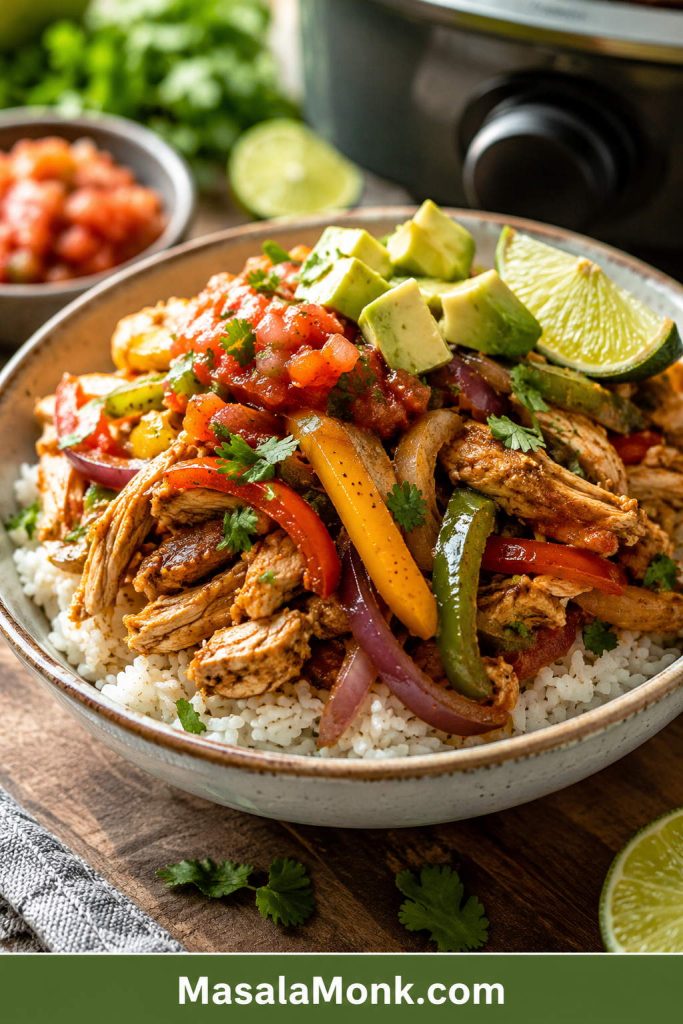
Serve It Over Rice
Rice bowls are the place to keep a little more seasoned juice. The rice catches the sauce, while avocado, salsa, cilantro, and lime keep the bowl balanced.
If rice texture is where dinner usually goes wrong, this guide on how to cook rice covers stovetop, rice cooker, and Instant Pot timing so your bowl base stays fluffy instead of wet or gummy.
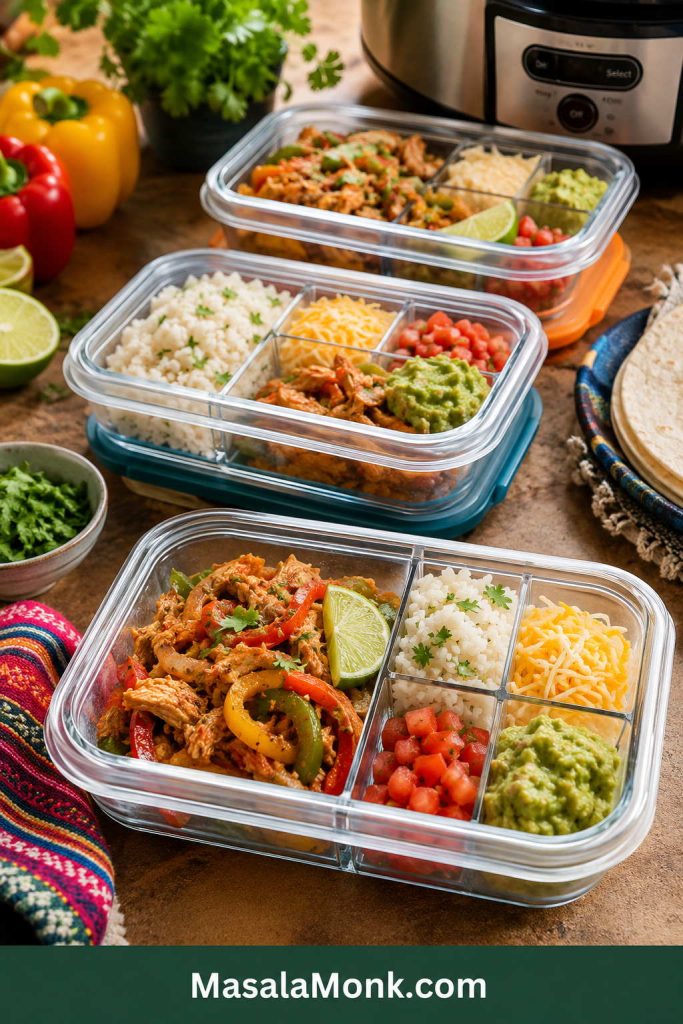
For meal prep, pack the rice and fajita chicken together only after both have cooled. Keep fresh toppings like lettuce, sour cream, avocado, and cilantro separate until serving.
Can You Use Frozen Chicken for Slow Cooker Fajitas?
No. Thaw the chicken first before using it in this recipe. Slow cookers heat gradually, and frozen chicken can take too long to move through unsafe temperatures. FoodSafety.gov’s slow-cooker guidance says frozen meat, poultry, or seafood should be thawed safely before adding it to the slow cooker.
Forgot to thaw? Use a pressure cooker method or cook the chicken separately from frozen with a faster method, then combine it with the peppers, seasoning, salsa, and lime after it is fully cooked. Check that the chicken reaches 165°F / 74°C before serving.
What to Serve with Slow Cooker Chicken Fajitas
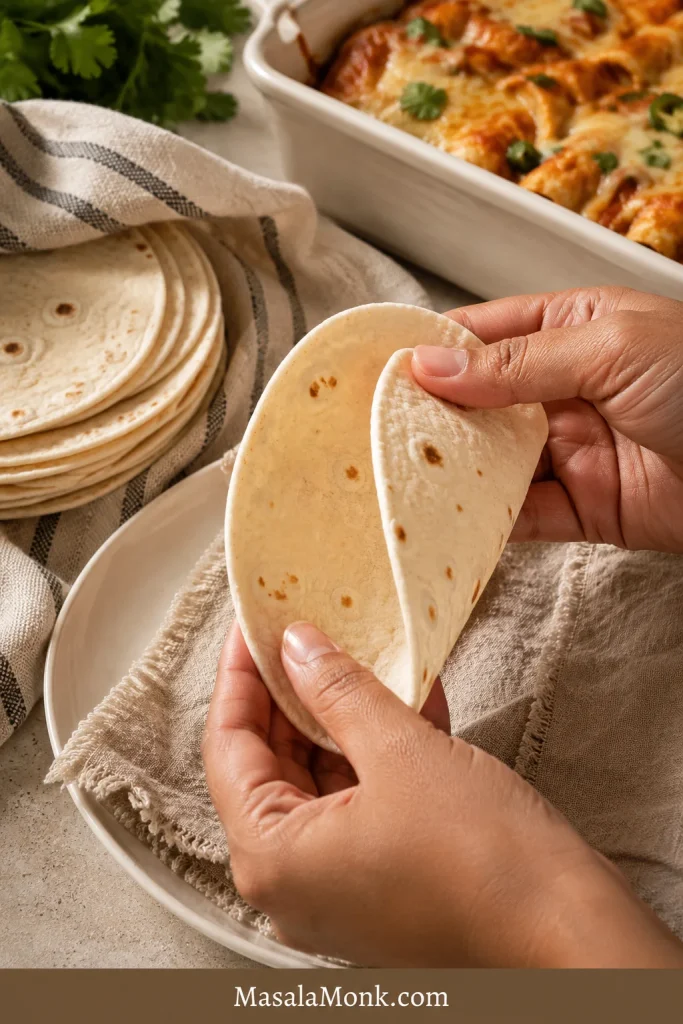
Warm tortillas are the classic choice, but this chicken is flexible. One batch can become dinner tonight and a different lunch tomorrow.
Warm tortillas in a dry skillet for 20 to 30 seconds per side, or wrap a stack in foil and place it in a 250°F / 120°C oven until soft. Soft, warm tortillas fold better, hold the chicken more neatly, and make even a simple Crock Pot dinner feel fresher.
Put the tortillas, lime wedges, avocado, salsa, and hot sauce on the table and let everyone build their own. That is where this slow cooker dinner starts to feel fresh.
Table setup: set the chicken and peppers beside warm tortillas and fresh toppings so everyone can build the fajita they want.
| Serving idea | Why it fits |
|---|---|
| Flour or corn tortillas | Classic fajita dinner |
| Rice bowls | Easy meal prep and filling lunches |
| Cauliflower rice | Lower-carb bowl option |
| Lettuce cups | Lighter fajita wraps |
| Tacos | Family-friendly and easy to assemble |
| Quesadillas | One of the best uses for leftovers |
| Salad | High-protein lunch with avocado, lime, and crisp vegetables |
| Nachos | Casual snack or game-day style dinner |
| Pasta or pasta bake | Comfort-food variation |
| Casserole | Good for stretching leftovers into another family dinner |
Best Toppings for Chicken Fajitas
Because the chicken is warm and saucy, the best toppings are the ones that wake it up: lime, cilantro, avocado, salsa, crunch, or heat.
- Sour cream or Greek yogurt
- Avocado or guacamole
- Fresh cilantro
- Lime wedges
- Shredded lettuce
- Cheese, shredded or crumbled
- Salsa or pico de gallo
- Pickled jalapeños
- Hot sauce
- Crushed tortilla chips for bowls or salads
For the creamy avocado route, this guacamole recipe is the easiest topping to put beside warm tortillas, salsa, lime, and fajita chicken.
If you like heat at the table, a thin vinegar-style hot sauce, jalapeño sauce, or smoky chile sauce can wake up the whole plate. This pepper sauce guide gives you several directions, from bright and sharp to smoky and fruity.
Storage, Freezing, and Reheating
Slow cooker chicken fajita filling stores well. Keep tortillas, rice, lettuce, and fresh toppings separate so they do not become soggy.
Pack It for Meal Prep
Cool the rice and chicken before packing, then keep wet or fresh toppings separate. That one step keeps fajita bowls from turning soggy in the fridge.
| Storage method | How to do it |
|---|---|
| Fridge | Store cooked chicken and peppers in an airtight container for 3 to 4 days |
| Freezer | Freeze cooked chicken and vegetables for 2 to 3 months |
| Freezer tip | Freeze without tortillas or fresh toppings |
| Reheating | Reheat in a skillet or microwave until hot |
| Meal prep tip | Pack rice or tortillas separately and add toppings after reheating |
| To avoid sogginess | Drain extra liquid before packing tortillas, tacos, or wraps |
If the chicken looks dry after refrigeration, reheat it with a spoonful of salsa, water, or reserved cooking liquid. When it looks too wet, reheat it uncovered in a skillet for a few minutes so some moisture evaporates.
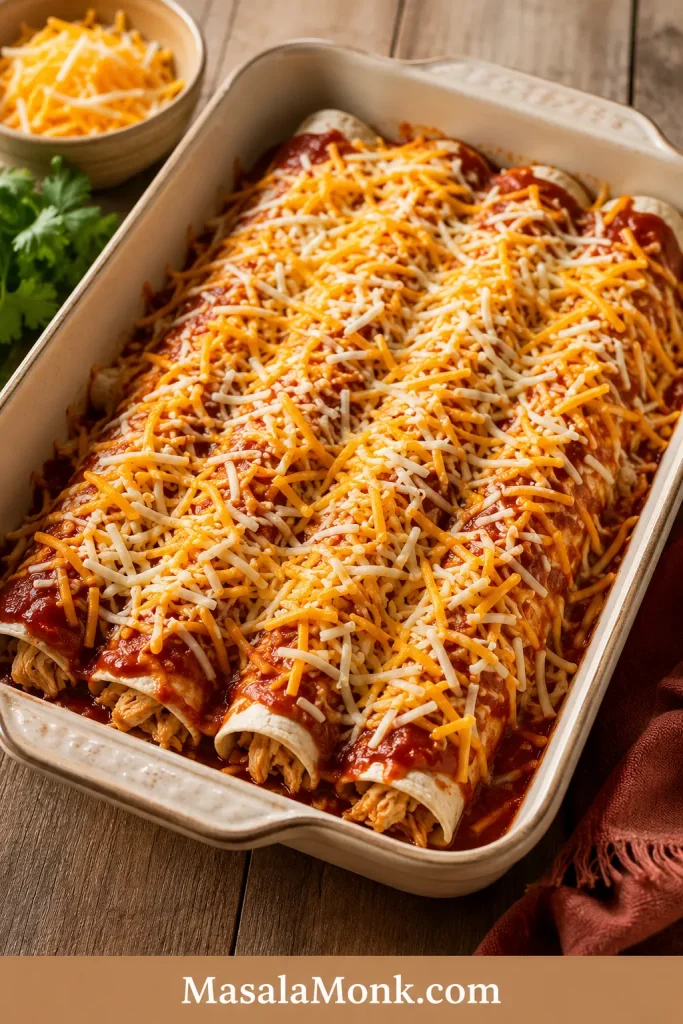
Leftover fajita chicken can also become a baked dinner using the same shredded chicken-and-tortilla logic in this chicken enchilada casserole.
Slow Cooker Chicken Fajitas FAQ
How long do chicken fajitas take in the slow cooker?
Most chicken fajitas take 4 to 6 hours on low or 2½ to 3½ hours on high. Chicken breasts are usually better closer to the shorter end if you want slices. For shredded chicken, cook until the meat is fork-tender and reaches 165°F / 74°C.
Is low or high better for Crock Pot chicken fajitas?
Low is usually better for juicier chicken and more even cooking. High works when you need dinner faster, but chicken breast can dry out if it cooks too long. Start checking around 2½ hours on high, especially if the chicken pieces are not very thick.
Why are my slow cooker fajitas watery?
They are usually watery because a covered slow cooker traps steam while chicken, peppers, onions, salsa, and tomatoes release liquid. Use less salsa, add some peppers late, and drain before filling tortillas.
When should I add peppers and onions?
Add all the peppers and onions at the beginning for the easiest dump-and-go version. For better texture, add half at the beginning and half during the last 30 to 60 minutes so every pepper strip does not turn soft.
Should the chicken be shredded or sliced?
Either works. Sliced chicken feels more like classic fajitas. Shredded chicken is easier in the slow cooker and works well for tacos, rice bowls, quesadillas, nachos, and meal prep.
Can I use taco seasoning instead of fajita seasoning?
Yes. Taco seasoning works in a pinch. It may taste slightly more like taco chicken, but peppers, onions, smoked paprika, and lime help pull the flavor back toward fajitas.
Is Rotel good in Crock Pot fajitas?
Yes. Rotel adds tomatoes, green chiles, and flavor in one can. For 2 lb / 900 g chicken, one 10 oz / 285 g can works well. If the can is very juicy, drain a little first or remove excess liquid after cooking.
Can I make chicken fajitas without tomatoes?
Yes. Skip the salsa, Rotel, or diced tomatoes. Use chicken, peppers, onions, garlic, fajita seasoning, lime, and only a small splash of broth if your slow cooker needs moisture. Add extra lime, smoked paprika, garlic, or seasoning if the flavor tastes flat.
Can I use frozen chicken in the slow cooker?
For this recipe, thaw it first. Slow cookers heat gradually, and frozen chicken can take too long to cook safely. Use a pressure cooker or another faster method if you need to cook chicken from frozen, then check that it reaches 165°F / 74°C.
Can I add rice to the same slow cooker?
Cook rice separately and serve the fajita chicken over it. Uncooked rice changes the liquid ratio and can become mushy in this recipe. For meal prep, cool the rice and chicken before packing them together.
What can I make with leftover chicken fajitas?
Use leftovers in quesadillas, tacos, rice bowls, salads, nachos, or casseroles. Drain juicy chicken before adding it to tortillas or quesadillas. Reheat dry leftovers with a spoonful of salsa or cooking liquid.
Final Note
This slow cooker dinner works because it solves the hard part before dinner starts. Keep the filling glossy, add a handful of peppers late, squeeze in lime at the end, and the pot tastes brighter than a slow cooker dinner usually does.
That is the kind of dinner that feels easy before you eat it and useful again the next day.
If you make it, leave a comment with the version you chose: tighter tortilla fajitas, saucier bowls, dump-and-go, or creamy low-carb. That choice helps other readers decide which path to take.