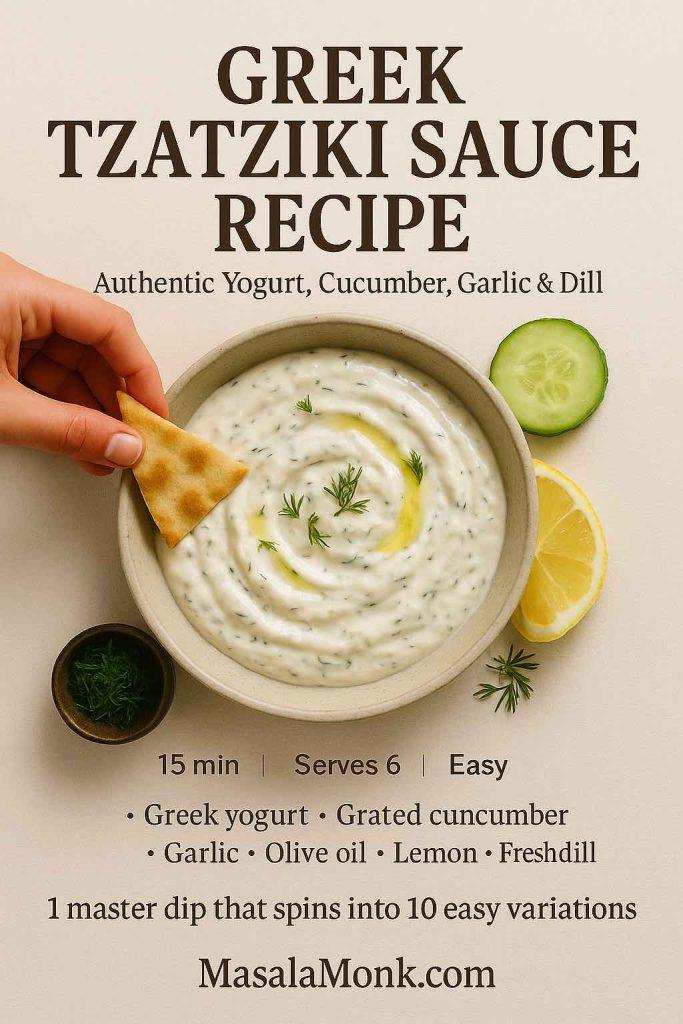
Mozzarella sticks are comfort food with a little drama built in. You bite through a crisp shell, the cheese stretches, steam escapes, and suddenly the plate needs “just one more.” Even better, once you learn a reliable base recipe, you can pivot in any direction—classic fried mozzarella sticks, air fryer mozzarella sticks, oven baked cheese sticks, beer battered mozzarella sticks, keto cheese sticks, prosciutto wrapped mozzarella sticks, puff pastry mozzarella sticks, and even mozzarella sticks with shredded cheese when that’s what your fridge gives you.
This is that base method—plus multiple detailed recipes—so you can make the version that fits your night, your pantry, and your patience level.
If you want to turn it into a full snack spread instead of a single plate, it’s easy to build a “pizza night” board around them: pick a dip from MasalaMonk’s pizza sauce recipes, add something warm and bready like a homemade garlic bread loaf, and suddenly mozzarella sticks feel like a party, even on an ordinary evening.
Mozzarella sticks recipe: the master method that prevents leaks
Mozzarella sticks are simple, but they’re not forgiving. Cheese melts quickly; breading sets on its own schedule. The gap between those two timelines is where most “burst open” disasters happen.
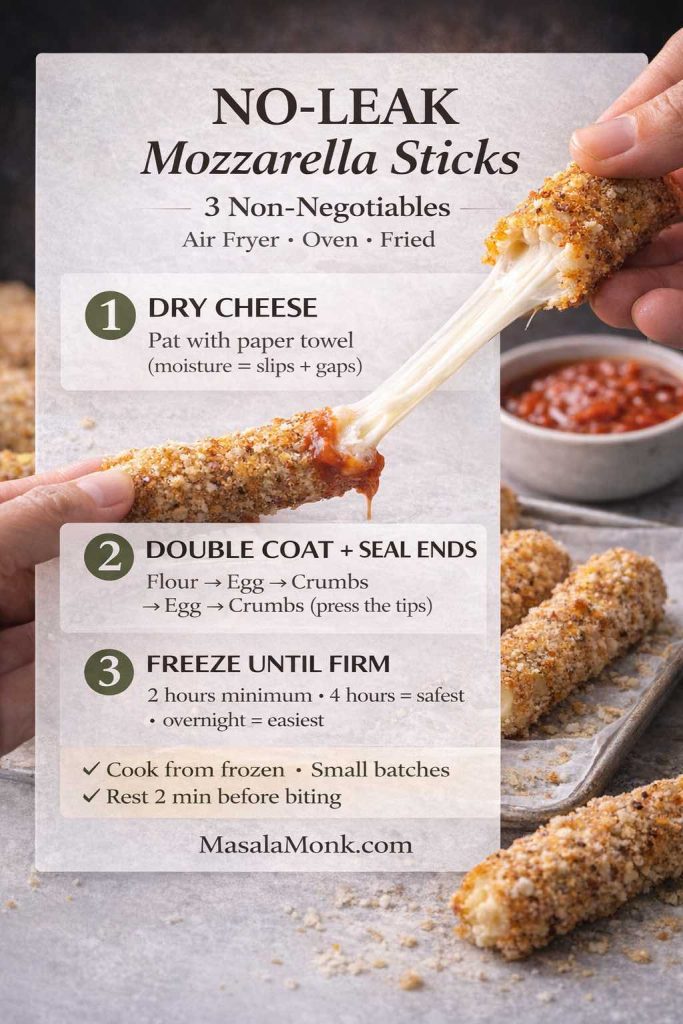
So rather than chasing perfection with complicated ingredients, focus on three non-negotiables:
- A dry cheese surface
- A coating that’s thick enough to seal
- A frozen center so the crust can set first
Serious Eats emphasizes the value of a thicker coating for fried cheese and specifically notes coating the ends to prevent leaking in their mozzarella sticks method (Gluten-Free Tuesday: Mozzarella Sticks). It’s not about being fussy; it’s about giving melted cheese fewer escape routes.
Ingredients for mozzarella cheese sticks (base setup)
This makes about 12 sticks (more if you cut them shorter).
Cheese (choose one)
- 12 mozzarella string cheese sticks (the most reliable starting point)
- or 450–500 g low-moisture mozzarella block, cut into sticks (about 10–12 cm long, 2 cm thick)
- or shredded mozzarella (there’s a dedicated method below, because it needs structure)
Breading station
- 70 g all-purpose flour
- 2 large eggs
- 1 tbsp water or milk (loosens eggs so they coat evenly)
- 120 g panko breadcrumbs (for crunch)
- 40 g fine breadcrumbs (optional, but it helps seal gaps)
- 1 tsp garlic powder
- 1 tsp onion powder
- 1 tsp dried oregano or Italian seasoning
- ½ tsp paprika (or chili flakes if you want heat)
- ¾ tsp salt
- black pepper
For cooking
- Air fryer or oven: neutral oil spray
- Frying: neutral oil (enough for 5–7 cm depth in your pot)
How to bread mozzarella sticks (the order matters)
Set up three shallow bowls: flour, egg wash, breadcrumb mix.
- Dry the cheese. Pat each stick with paper towel. Moisture is the enemy of adhesion.
- Flour first. Coat in flour; tap off excess. Flour is the “primer coat.”
- Egg wash. Dip fully and let extra drip off.
- Breadcrumb coat. Roll and press gently so crumbs cling, especially at the ends.
- Second dip, second coat. Back into egg, then crumbs again. This double coating is what turns “okay” into “crispy and sealed.”

Now the most important step:
- Freeze until firm. Arrange on a tray and freeze at least 2 hours. For stress-free results, freeze 4 hours or overnight.
Why freezing works: the crust sets before the cheese reaches full melt, so the cheese stays inside long enough to warm and stretch instead of instantly escaping.
Quick reality check: if you want truly no-stress mozzarella sticks
Use string cheese, double coat, freeze longer than you think you need, and cook in small batches. It sounds boring, yet it’s the route to “they all stayed sealed.”
Also Read: Sourdough Starter Recipe: Make, Feed, Store & Fix Your Starter (Beginner Guide)
Best cheese for mozzarella sticks: string cheese vs block vs shredded
Mozzarella sticks are not picky about flavor; they’re picky about water content and structure.
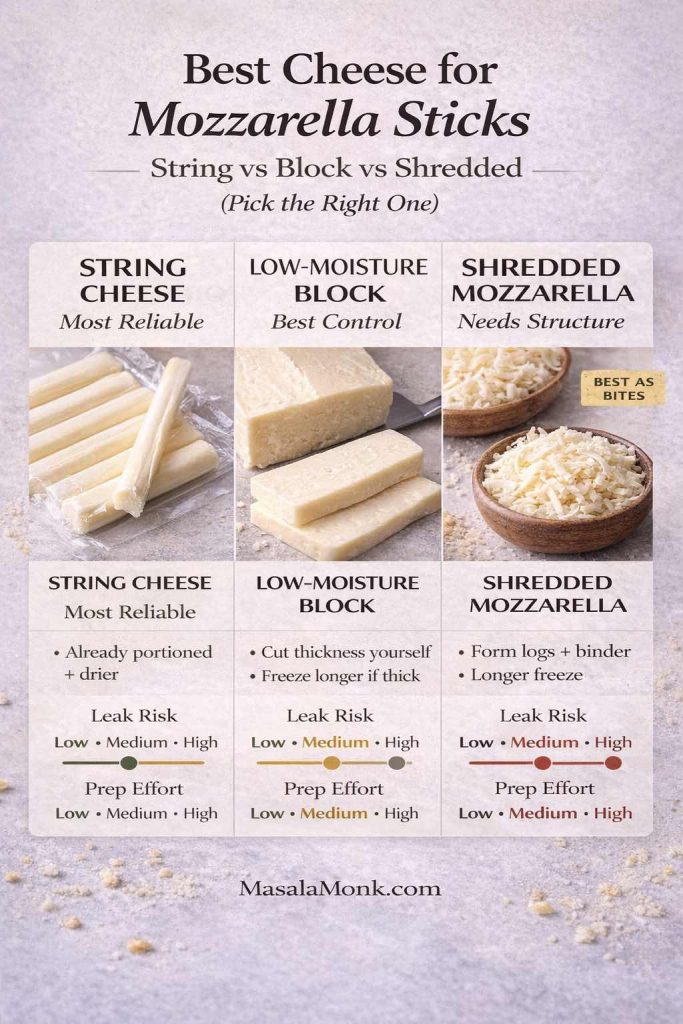
String cheese mozzarella sticks (easiest and most consistent)
String cheese is already portioned, relatively dry, and firm enough to handle breading. It’s also the best option if you’re making mozzarella sticks in an air fryer, because air fryers cook aggressively from the outside in.
Mozzarella sticks with shredded cheese (it can work, but shape is everything)
Shredded cheese is loose. It melts quickly. It needs help. The solution is to turn shredded mozzarella into a cohesive “log” before breading.
Below, you’ll get a method that uses a binder and a longer freeze so the exterior can set without the center instantly collapsing.
Smoked mozzarella sticks (big flavor, different behavior)
Smoked mozzarella brings a deeper flavor, but it often softens faster once heated. That means the same rule applies—freeze longer, and don’t cook too long “just to be safe,” because extra time usually causes leakage.
Also Read: How to make No-Bake Banana Pudding: No Oven Required Recipe
Mozzarella sticks with shredded mozzarella (formed logs recipe)
If you’re here because you want mozzarella sticks shredded cheese style, this is the most dependable approach.
Shredded mozzarella “sticks” recipe (best as short logs or bites)
Ingredients
- 200 g shredded low-moisture mozzarella
- 20 g cornstarch (about 2 tbsp)
- 30 g cream cheese (about 2 tbsp), softened
- 1 egg white (optional, use it if the mix feels loose)
- breading station from the master method
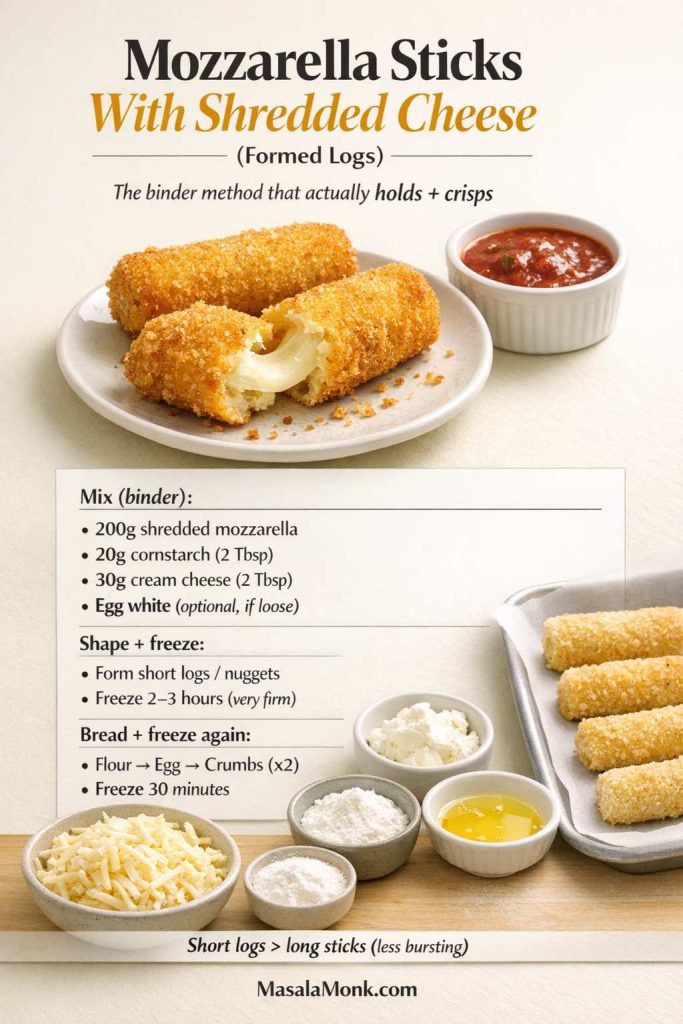
Method
- Mix shredded mozzarella and cornstarch until the shreds look lightly dusted.
- Add cream cheese and mix until the mixture clumps and holds together.
- If it still feels crumbly, add the egg white and mix again.
- Shape into short logs (about finger length) or nuggets.
- Freeze 2–3 hours until very firm.
- Bread using the master method (double coat), then freeze 30 minutes again.
- Cook using any method below; start checking early because formed logs can go from perfect to bursting quickly.
These are closer to mozzarella cheese bites than classic long sticks, although the flavor and crunch payoff is exactly what you want.
Also Read: Chicken Adobo — Step-by-Step Recipe — Classic Filipino Adobong Manok
Mozzarella sticks sauce: build dips that make the plate disappear
Mozzarella sticks and marinara are classic for a reason. Still, a second sauce makes the whole thing feel intentional rather than routine.
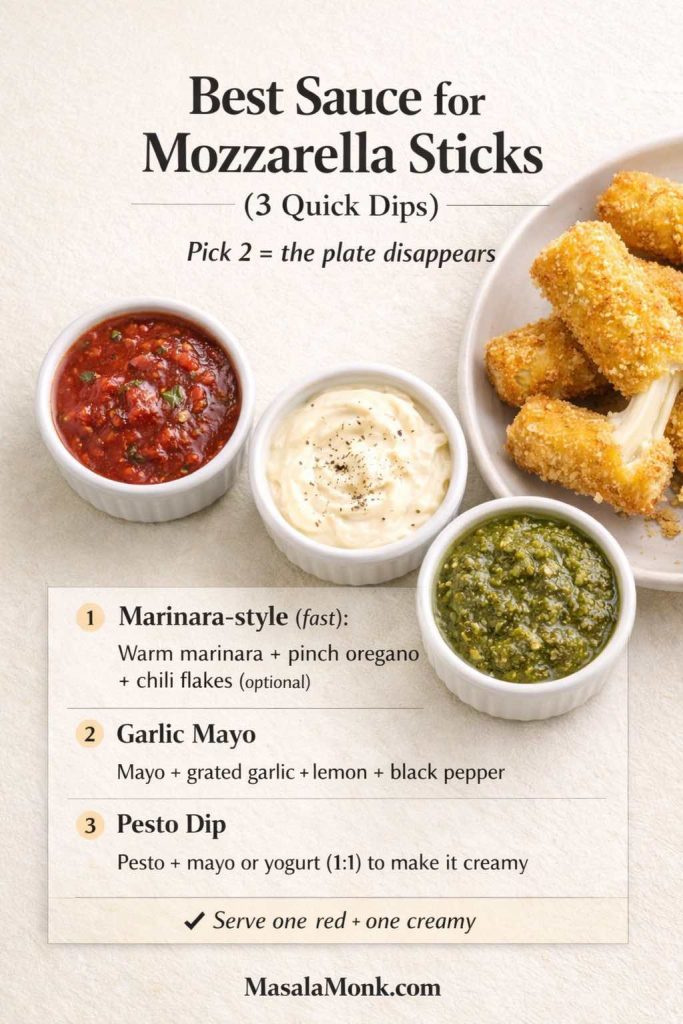
Marinara-style dip
Instead of locking yourself into one red sauce, keep it flexible. MasalaMonk’s pizza sauce recipes gives you multiple sauce directions that still work as “cheese sticks sauce”—classic marinara-style, vodka-style, ranch-style, and more—so you can switch it up without changing the snack.
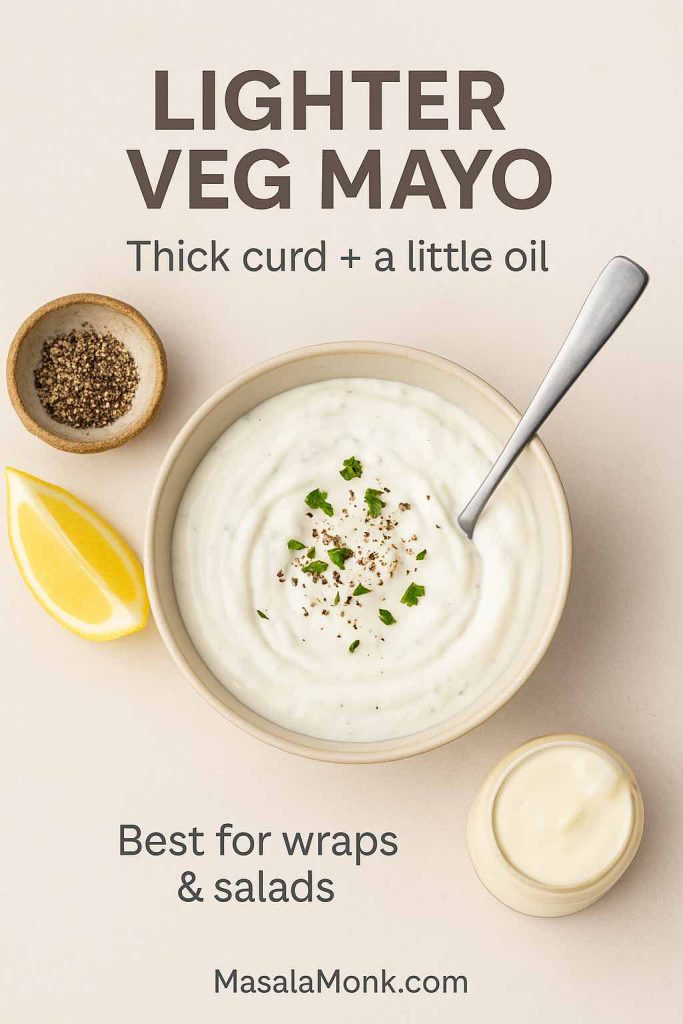
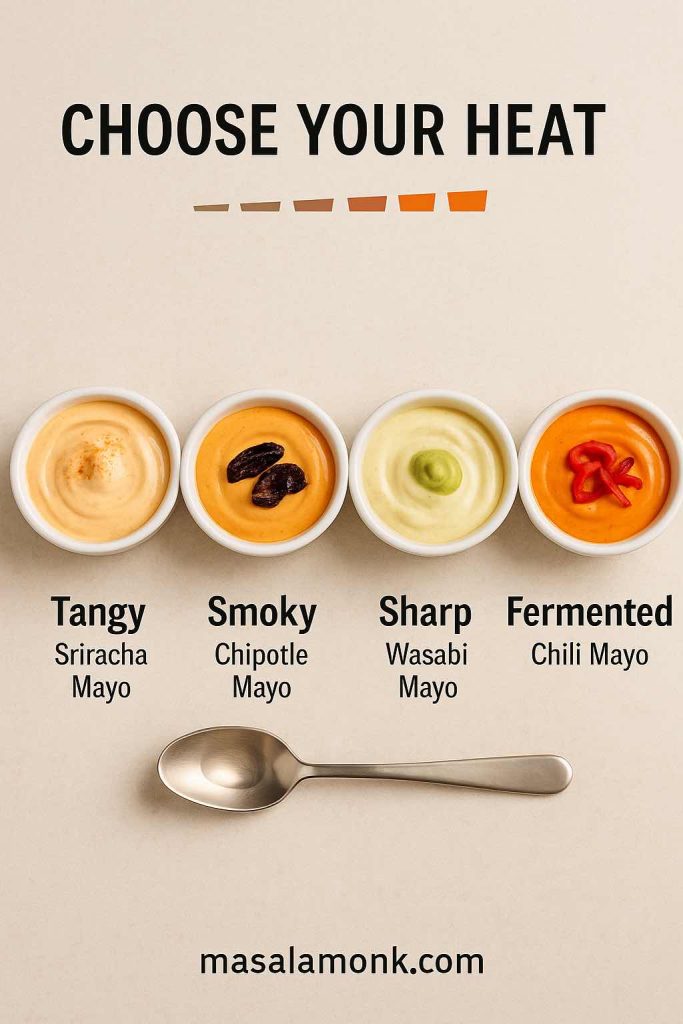
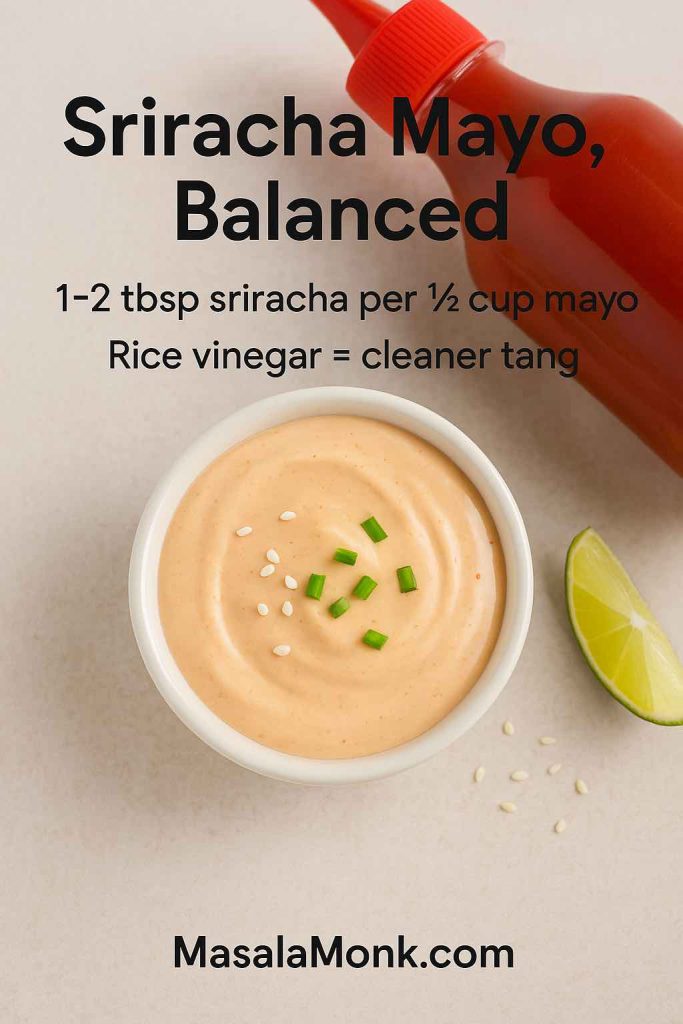
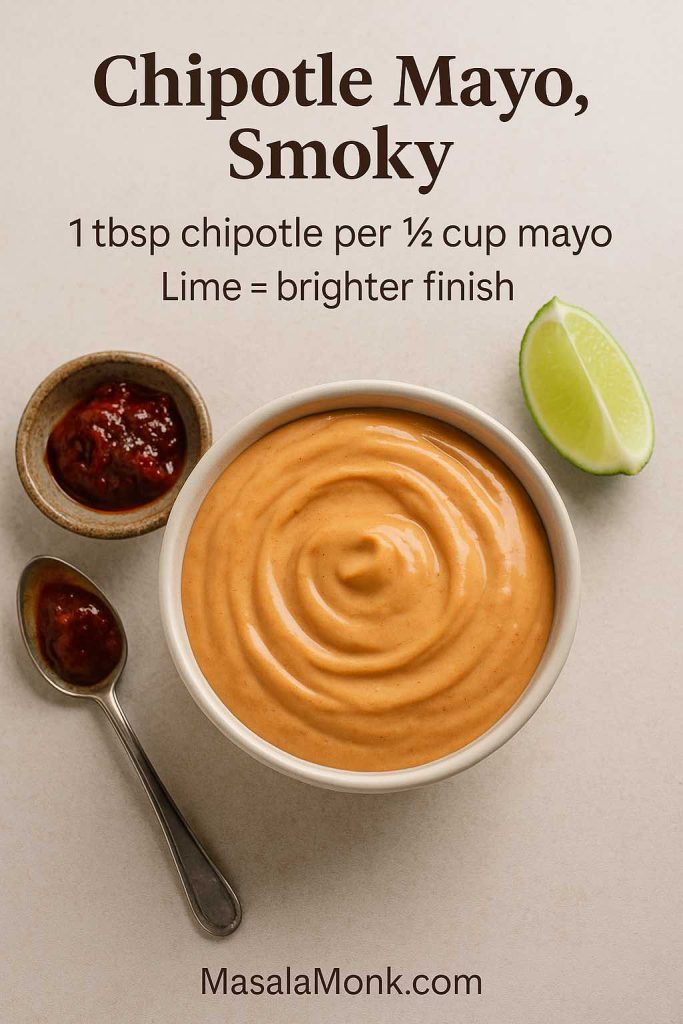
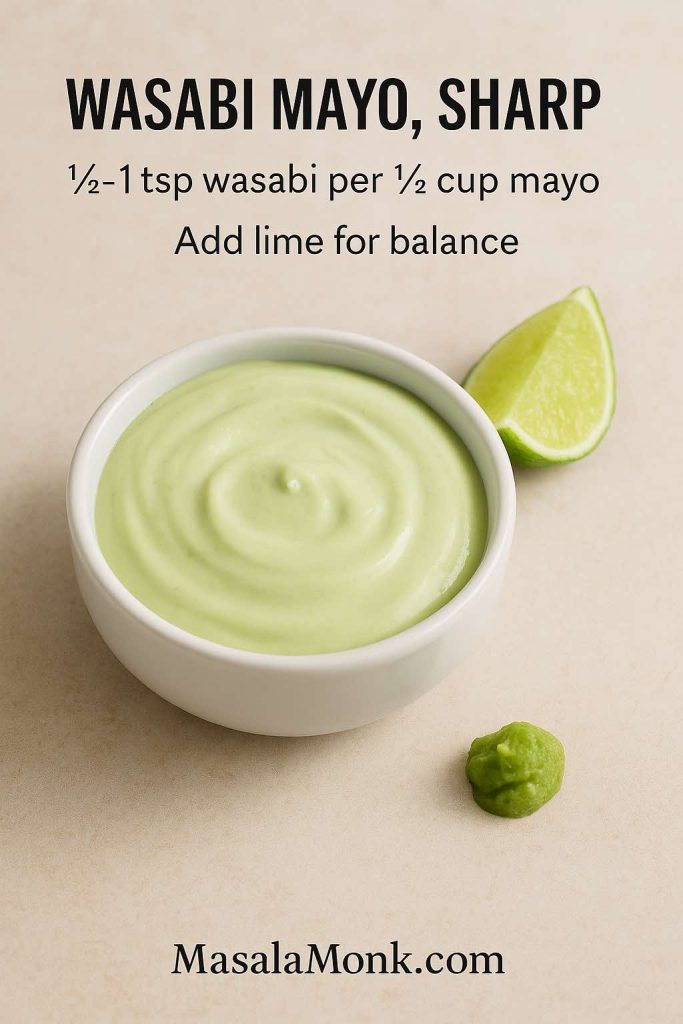
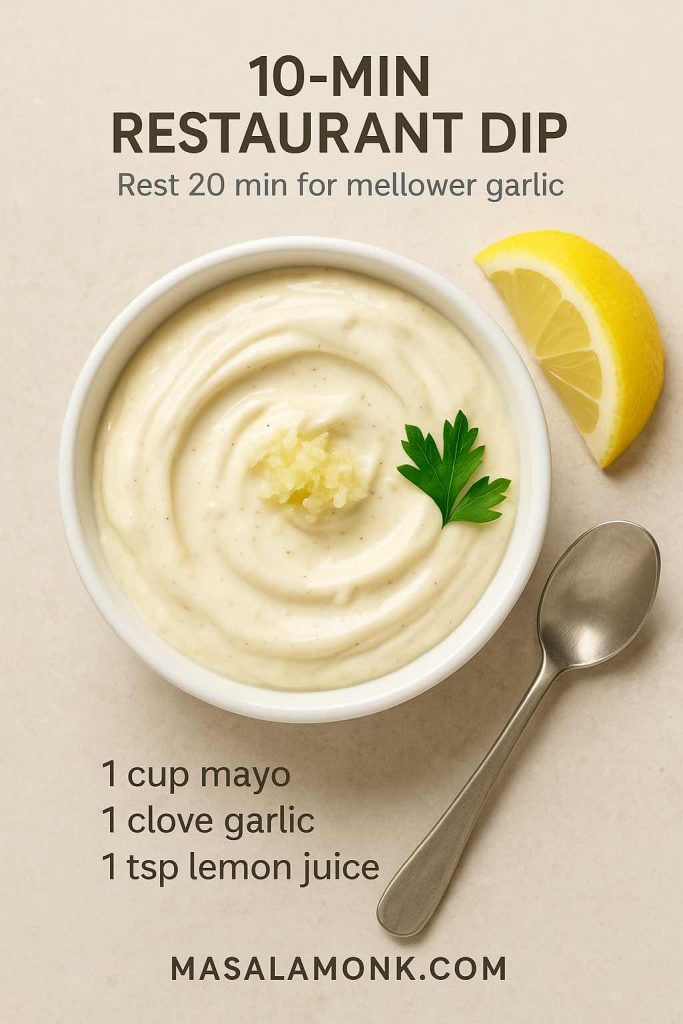
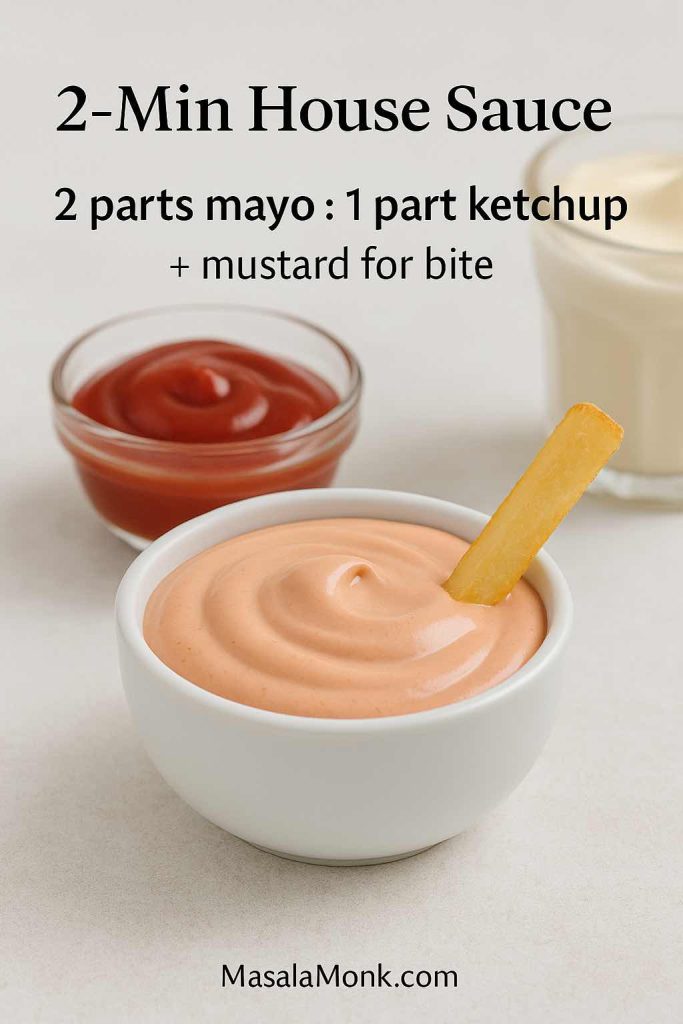
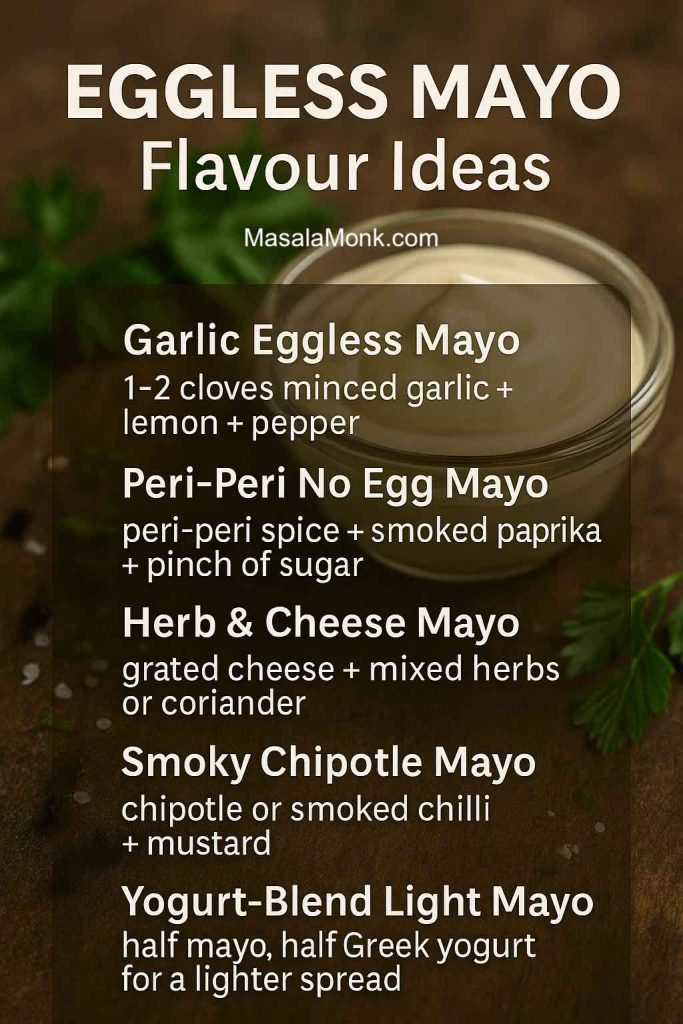
Creamy dip base (spicy mayo, garlic mayo, herby mayo)
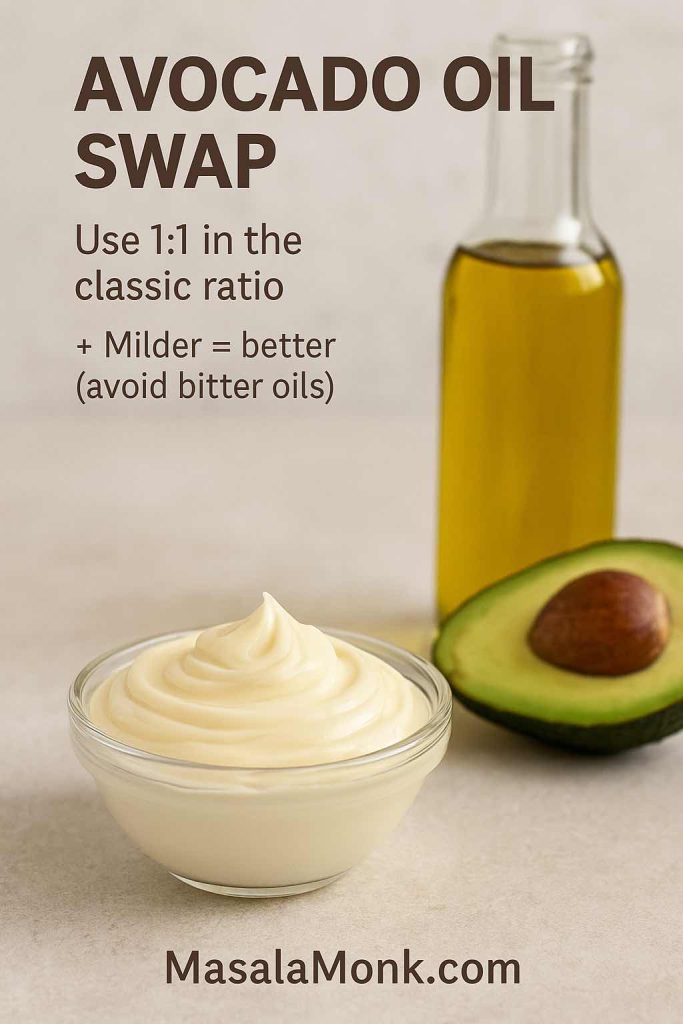
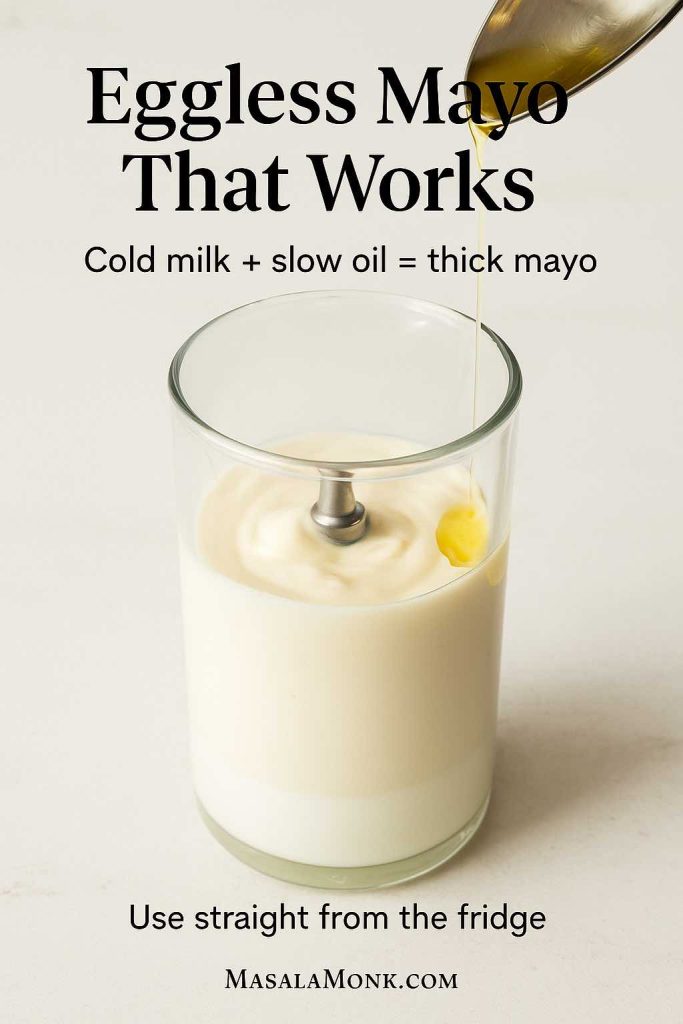
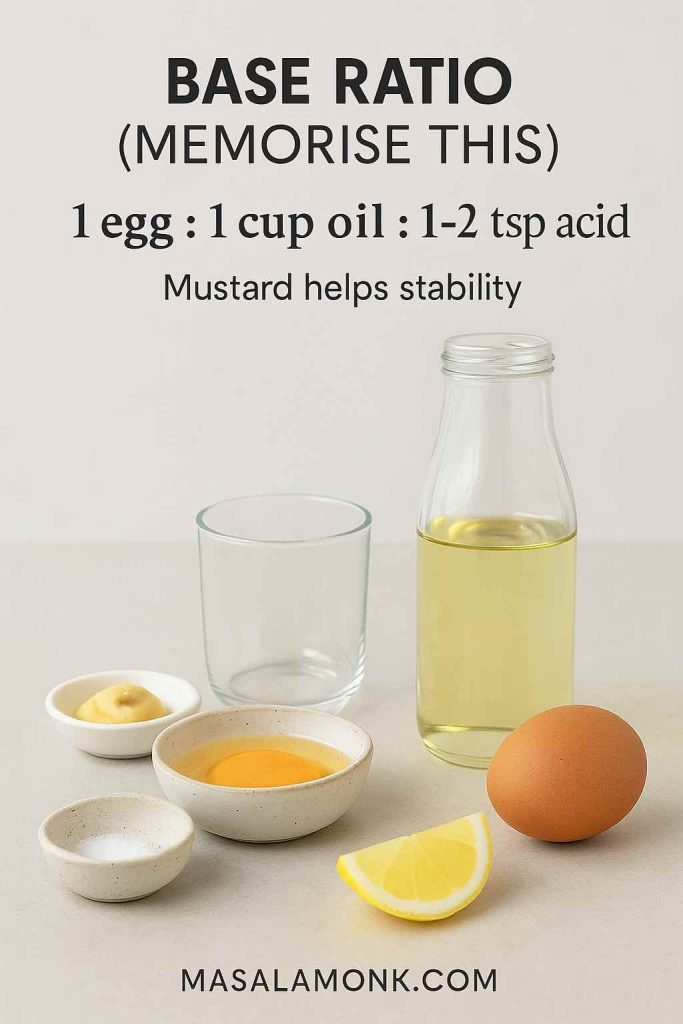
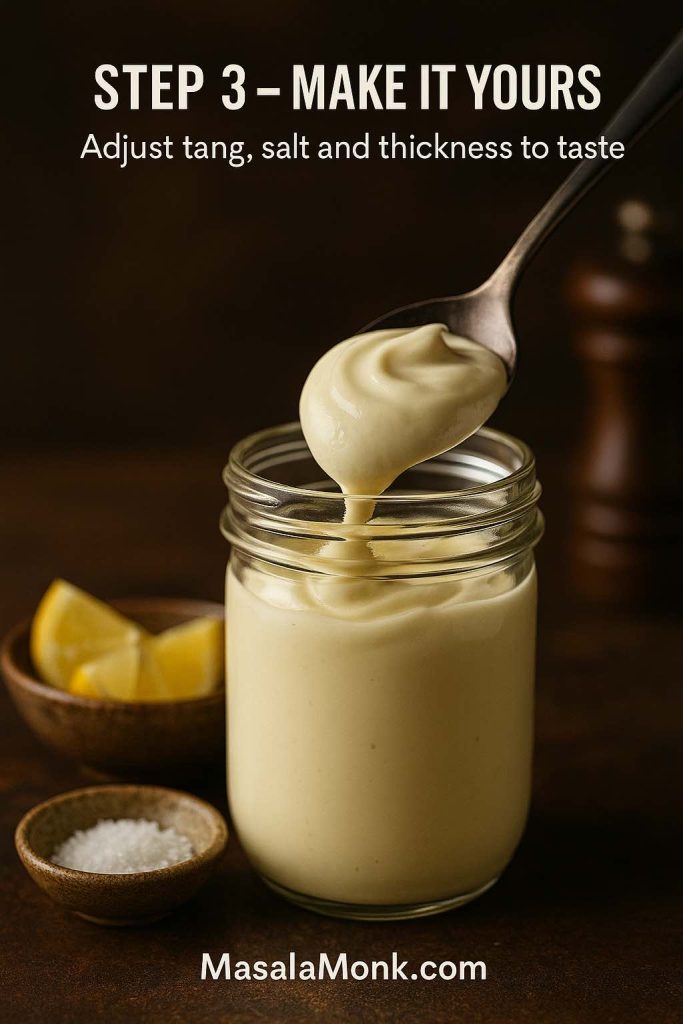
If you want a dip that clings, mayo is the base. The easiest way to make it feel restaurant-level is to start with a strong foundation like MasalaMonk’s homemade mayonnaise guide, then flavor it:
- spicy mayo: chili sauce + lime + pinch of sugar
- garlic mayo: grated garlic + lemon + black pepper
- herby mayo: dried oregano + parsley + a splash of pickle brine
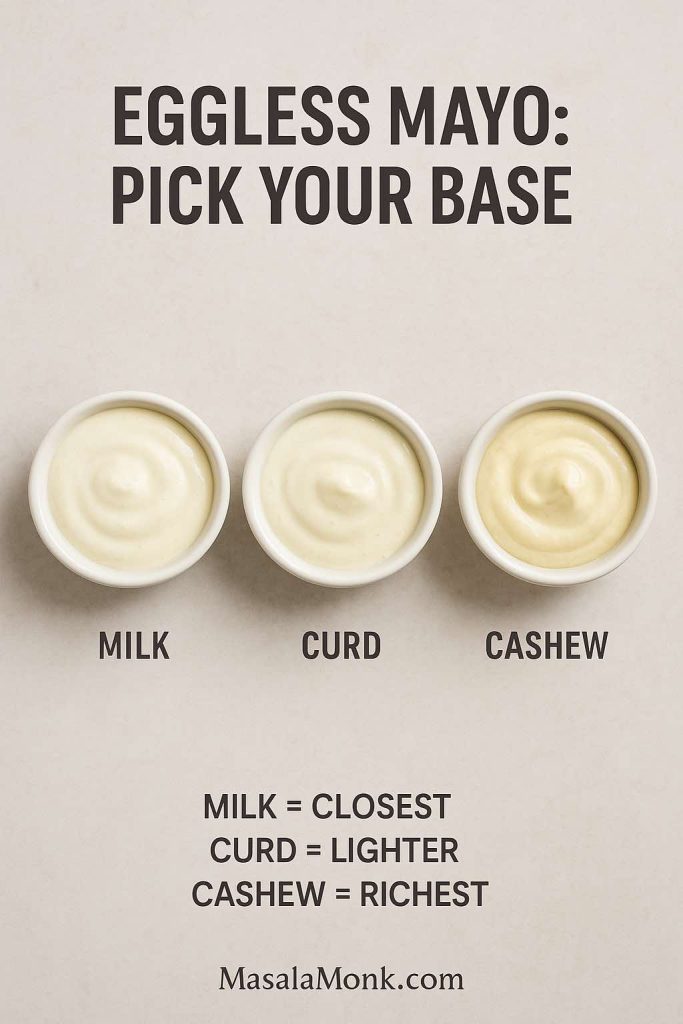
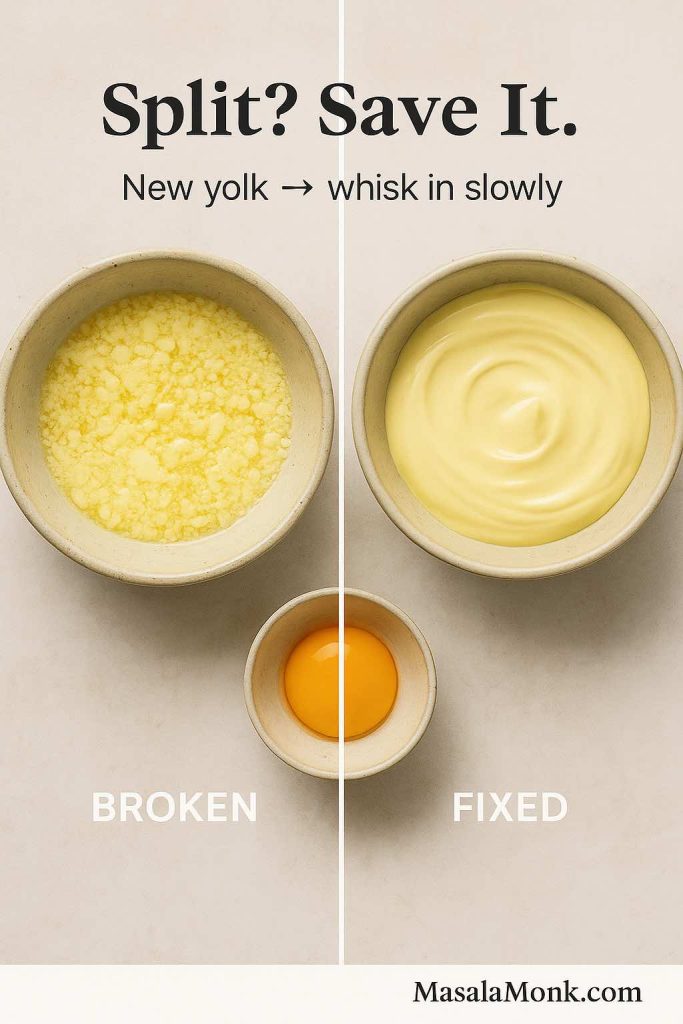
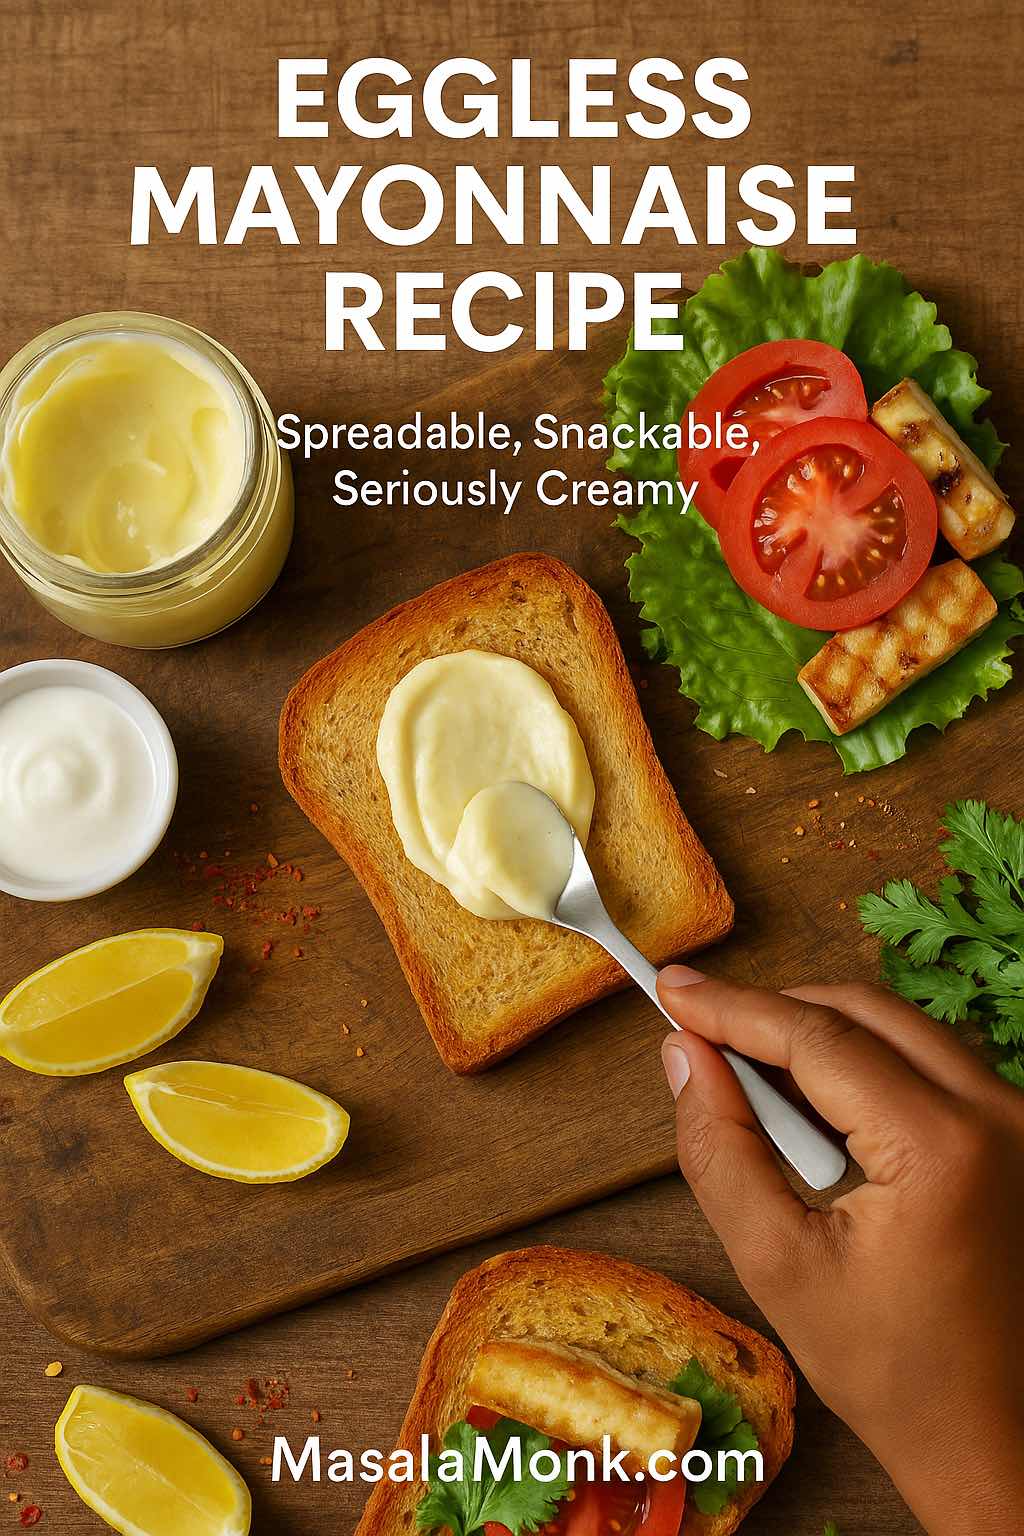
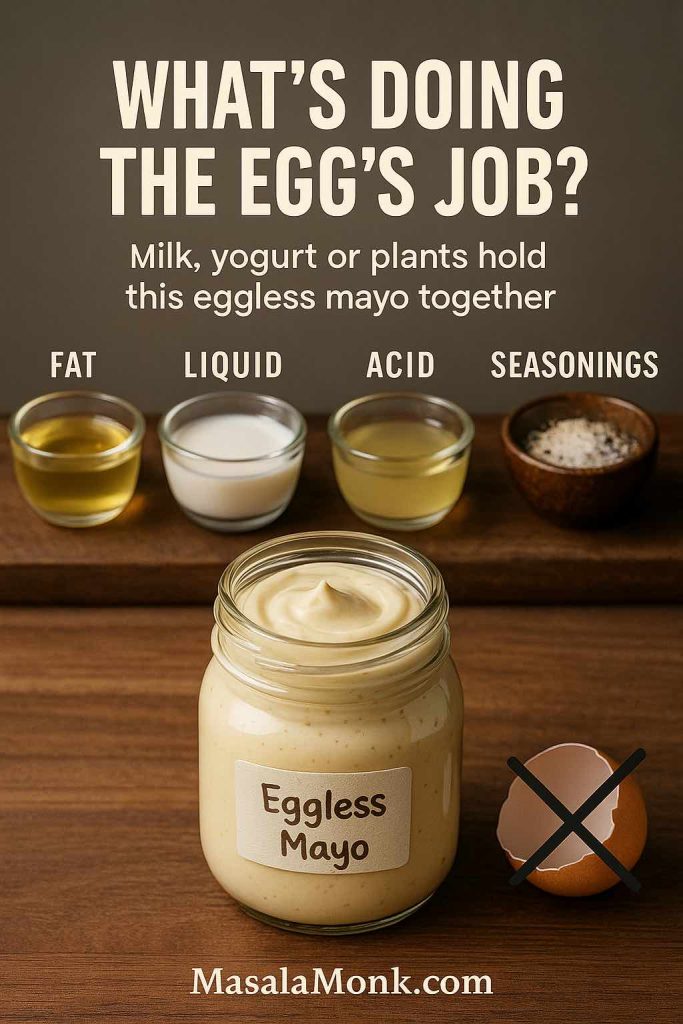
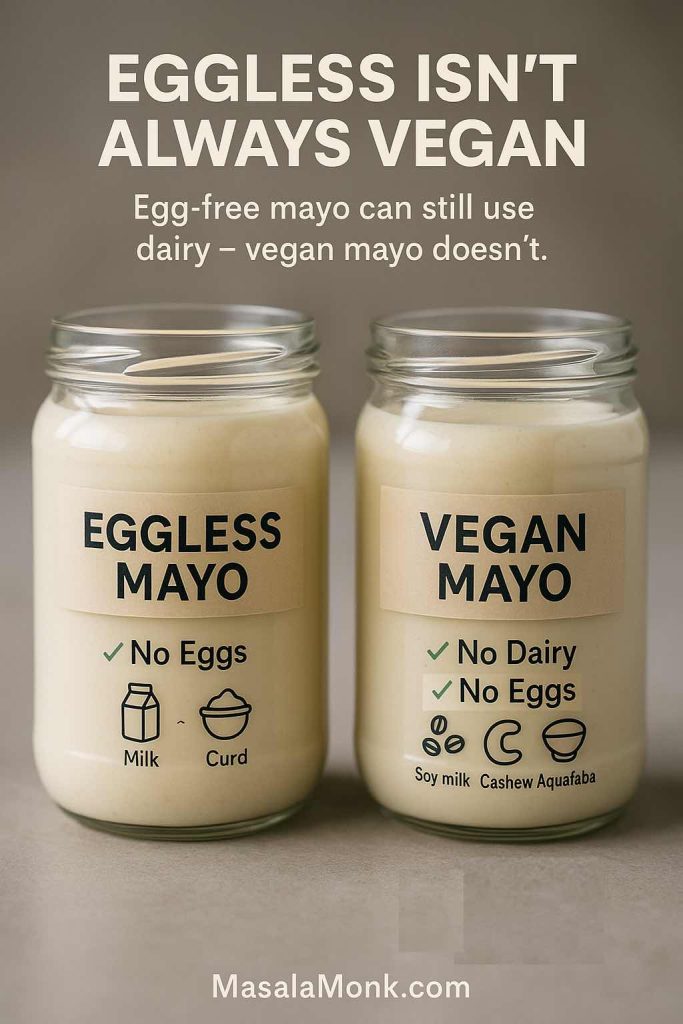
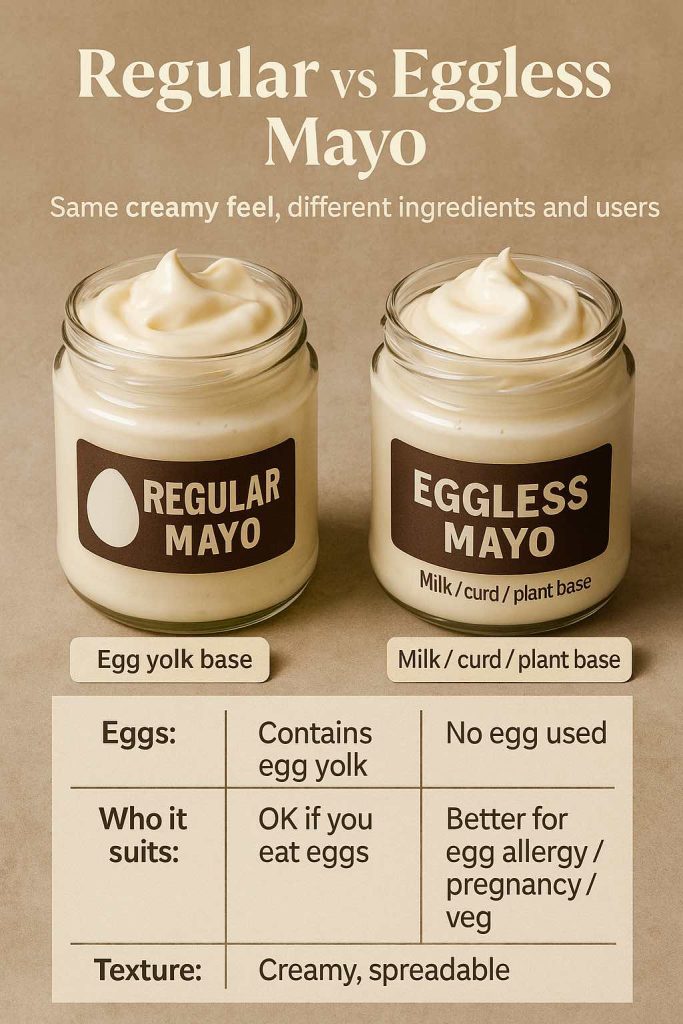
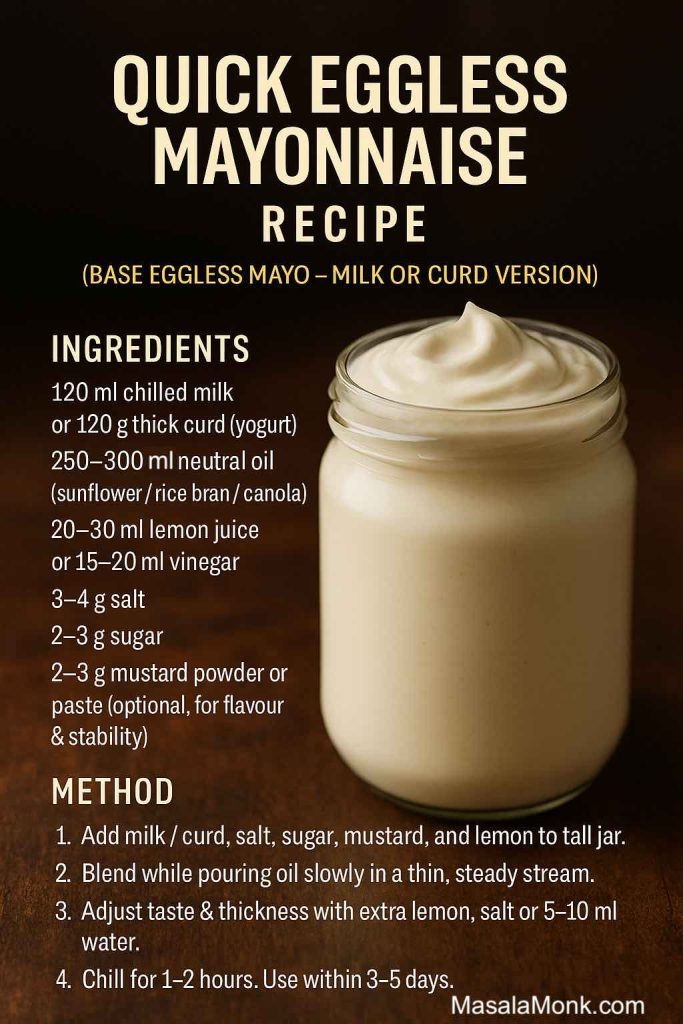
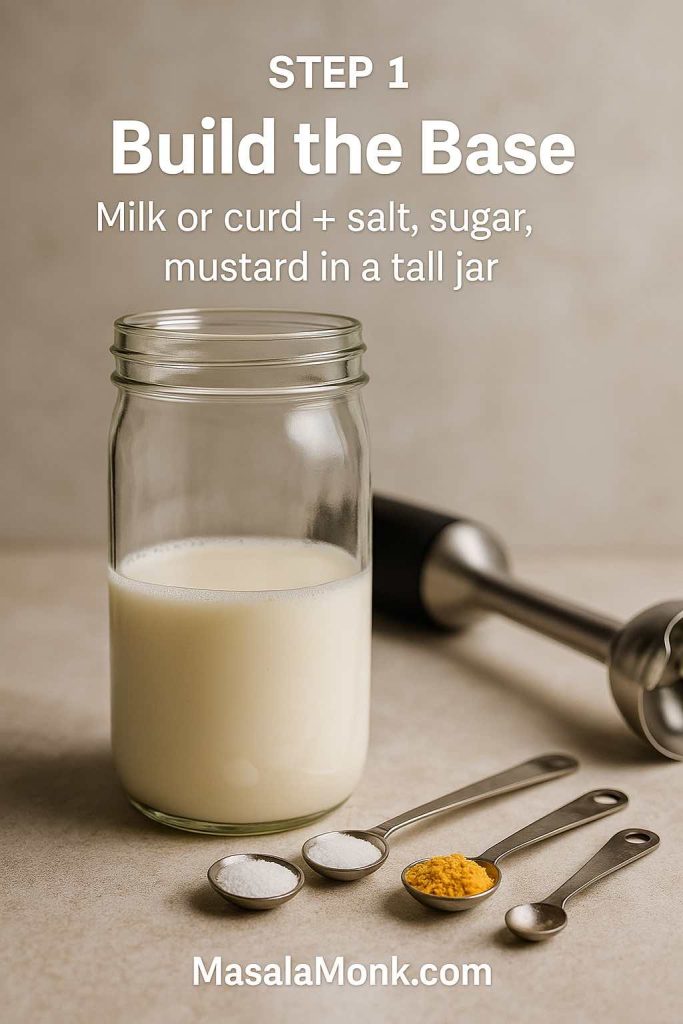
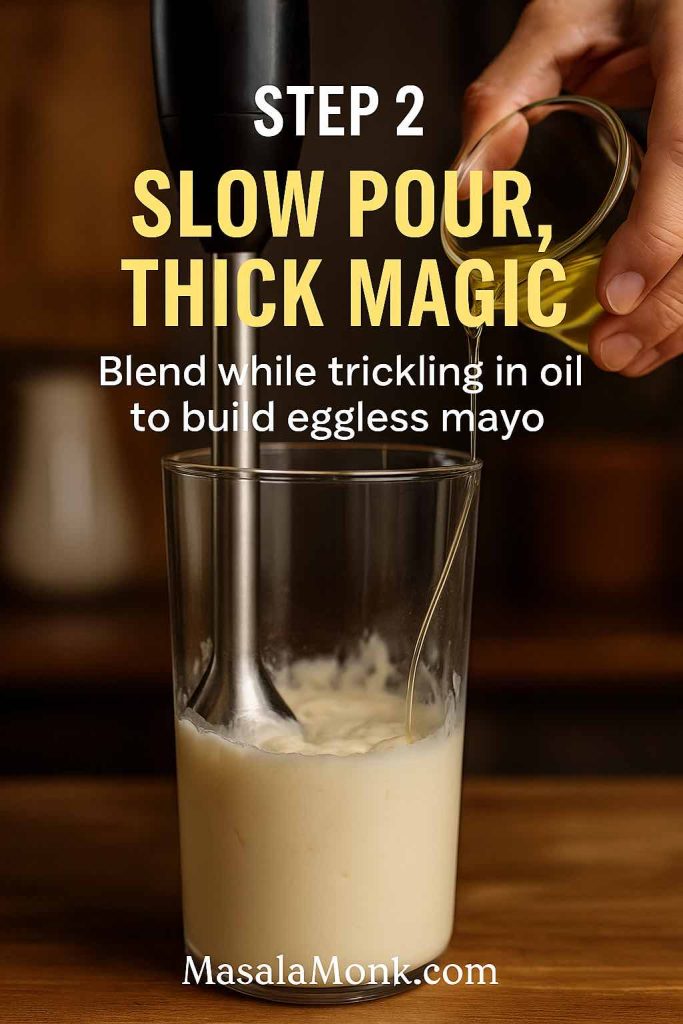
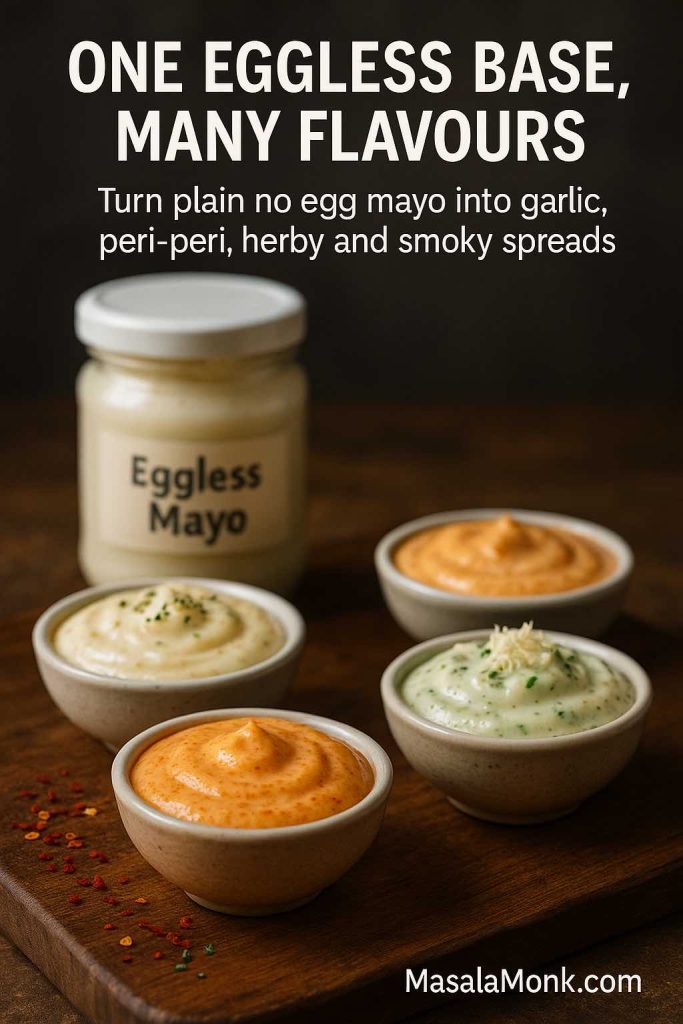
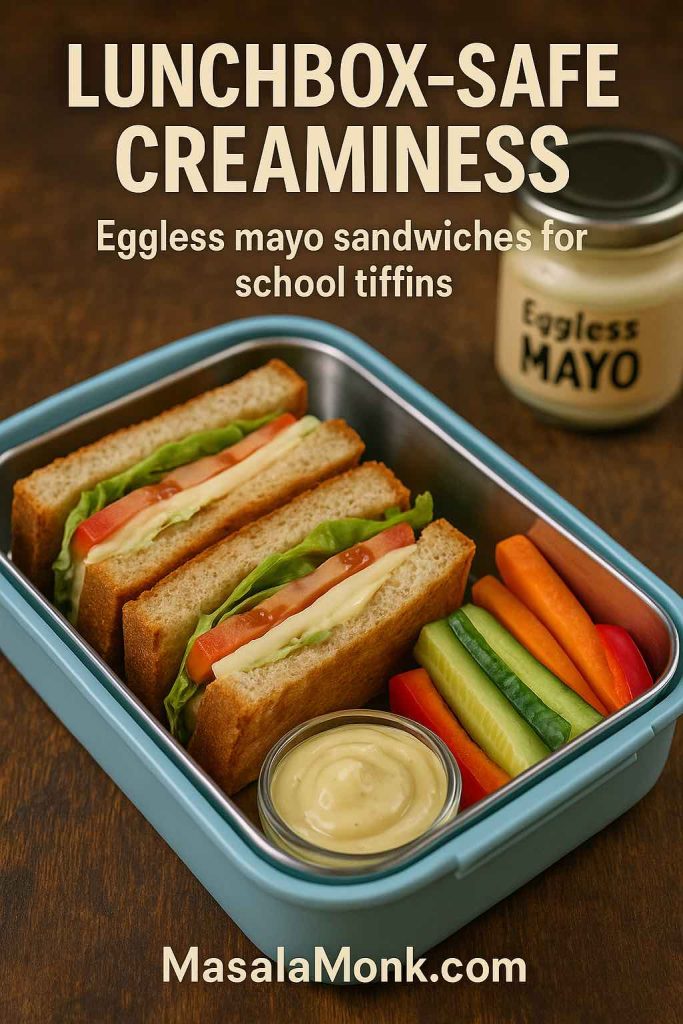
If you want an egg-free base, use MasalaMonk’s eggless mayonnaise recipe and build the same variations.
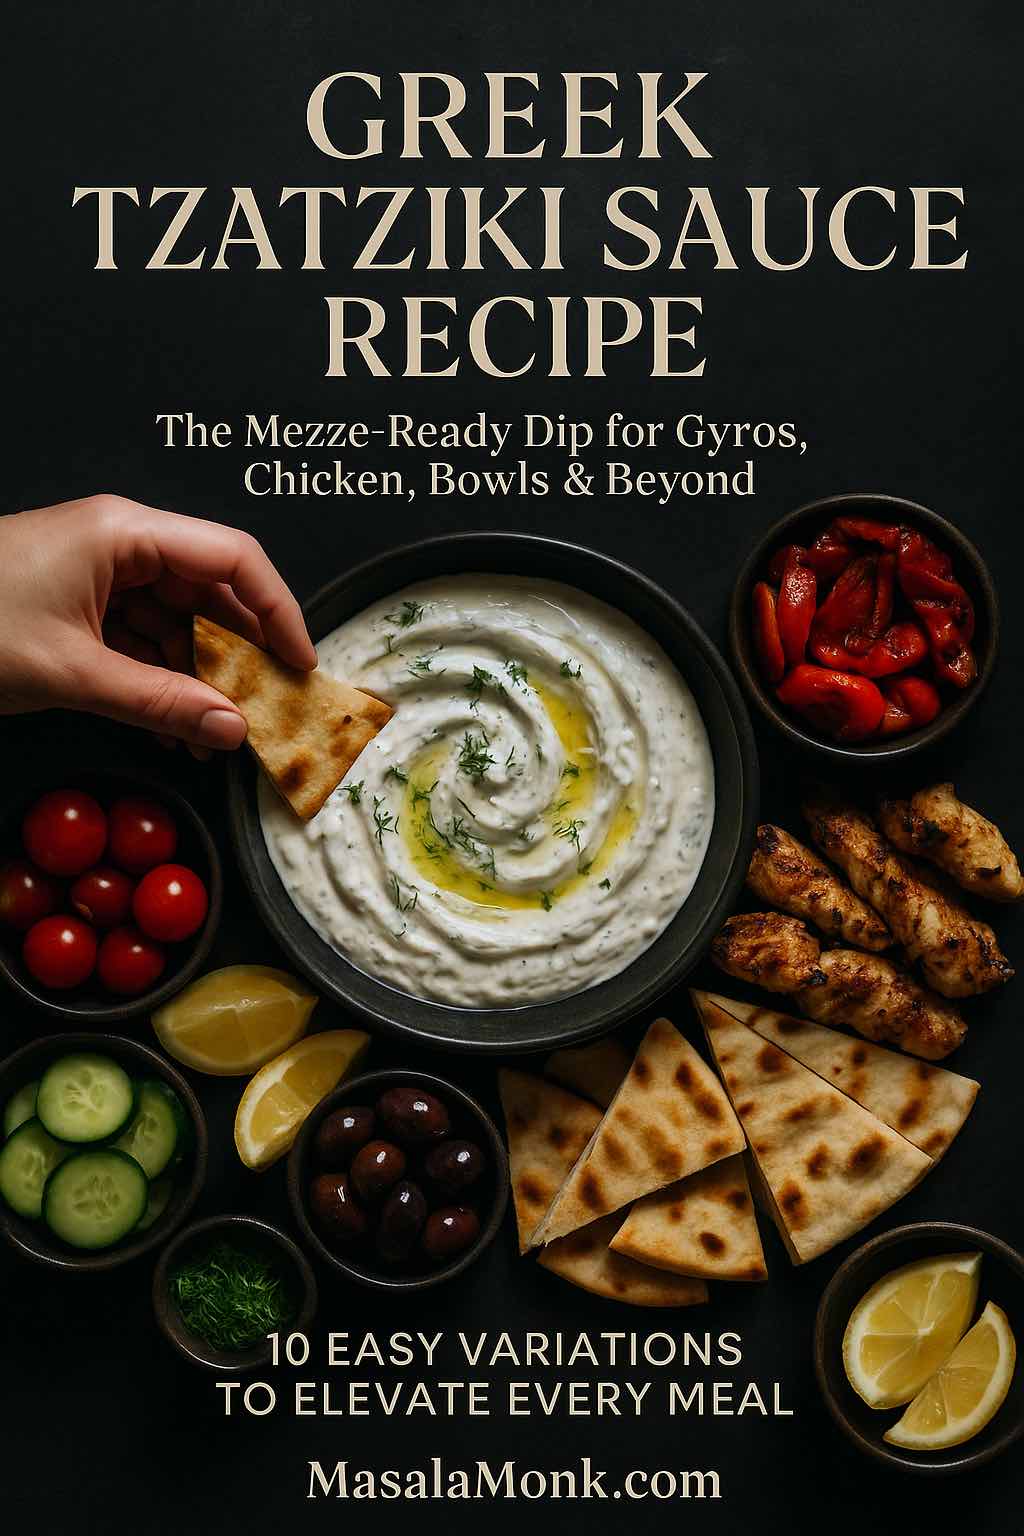
Pesto dip (fresh, bright, unexpectedly perfect)
Pesto is underrated with fried cheese. A spoonful beside hot mozzarella sticks feels “fancier” instantly. Start with MasalaMonk’s pesto recipe guide if you want a classic or a creative variation.
Also Read: Sourdough Recipe: 10 Easy Bread Bakes (Loaves, Rolls & Bagels)
Air fryer mozzarella sticks recipe (crispy, fast, minimal oil)
Air fryer mozzarella sticks are the weeknight hero version. They also demand discipline: the air fryer’s heat is intense, and overcrowding makes breading soften instead of crisp.
Food Network’s air fryer mozzarella sticks method preheats to 400°F and cooks around 6 minutes, turning halfway (Air Fryer Mozzarella Sticks). Use that as a baseline, then adjust for your model.
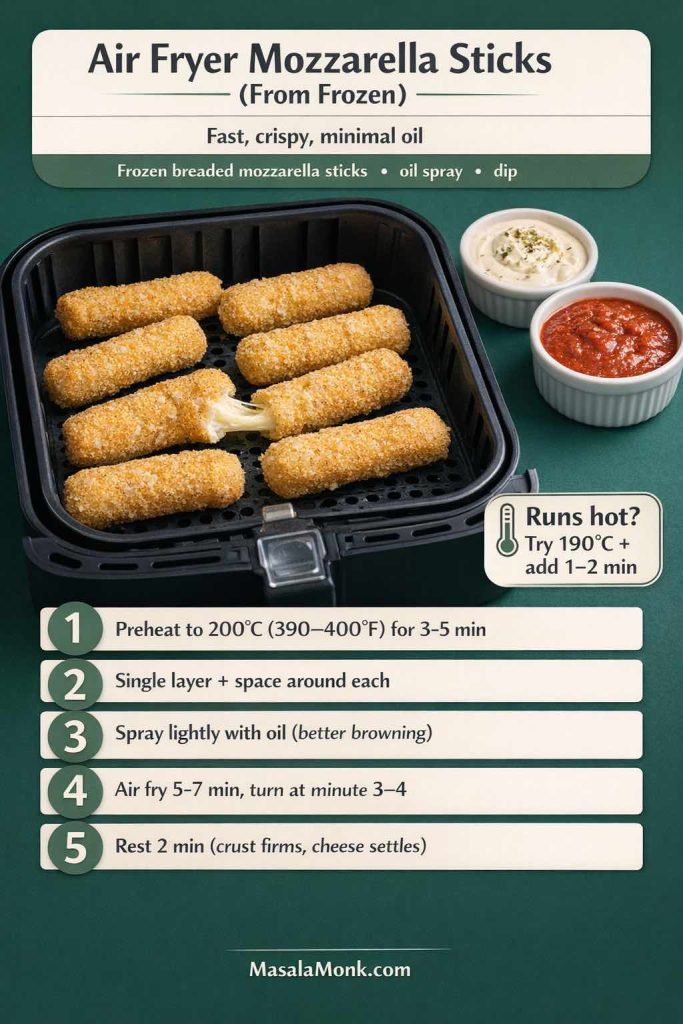
Air fryer mozzarella sticks (from frozen, breaded)
Ingredients
- frozen breaded mozzarella sticks (string cheese or block)
- oil spray
- marinara-style sauce or creamy dip
Steps
- Preheat air fryer to 200°C (390–400°F) for 3–5 minutes.
- Arrange sticks in a single layer with space around each. If they touch, crisping suffers.
- Spray lightly with oil to help browning.
- Air fry 5–7 minutes, turning at minute 3–4.
- Rest 2 minutes before biting; the cheese settles and the crust firms.
If your air fryer runs hot, drop to 190°C and add 1–2 minutes instead. That small change often prevents blowouts.
When you’re already in air fryer mode, it’s easy to keep the basket moving with something like MasalaMonk’s air fryer chicken wings as a companion platter—crispy, shareable, and in the same “dunkable snack” lane.
Also Read: Sweetened Condensed Milk Fudge: 10 Easy Recipes
Oven baked mozzarella sticks recipe (big batch, hands-off)
When you’re feeding more people, or when you want everything done at once instead of in air fryer batches – oven baked cheese sticks are the move you make.
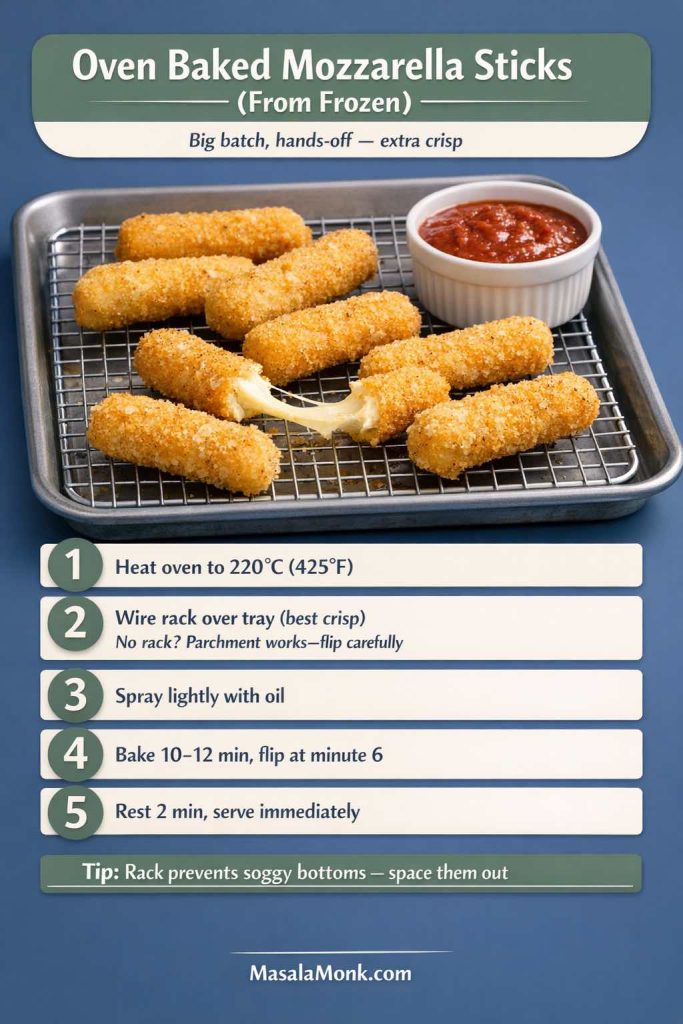
Oven baked mozzarella sticks (from frozen, breaded)
Steps
- Heat oven to 220°C (425°F).
- Place sticks on a wire rack over a tray if you have one. If not, parchment works—just flip carefully.
- Spray lightly with oil.
- Bake 10–12 minutes, flipping at minute 6.
- Rest 2 minutes, then serve immediately.
If you’re building a tray of snacks, oven timing pairs beautifully with MasalaMonk’s baked jalapeño poppers—cheese plus heat, crisp edges, and the same “dip and repeat” rhythm.
Fried mozzarella sticks recipe (restaurant-style crunch)
Deep fried mozzarella sticks are the most dramatic and the most satisfying. They’re also the most sensitive to oil temperature. Too cool, and the cheese melts before the crust sets. Too hot, and the breading browns before the cheese warms.
USDA’s food safety guidance for deep frying is worth a quick read before you start (Deep Fat Frying and Food Safety), especially if you’re new to frying. Meanwhile, if you want a temperature target you can trust, USDA notes deep frying oil is usually maintained around 350°F to 375°F with a deep fry thermometer.
Deep fried mozzarella sticks (from frozen, breaded)
Ingredients
- frozen breaded mozzarella sticks
- neutral oil (canola/vegetable/sunflower)
- sauce for dipping
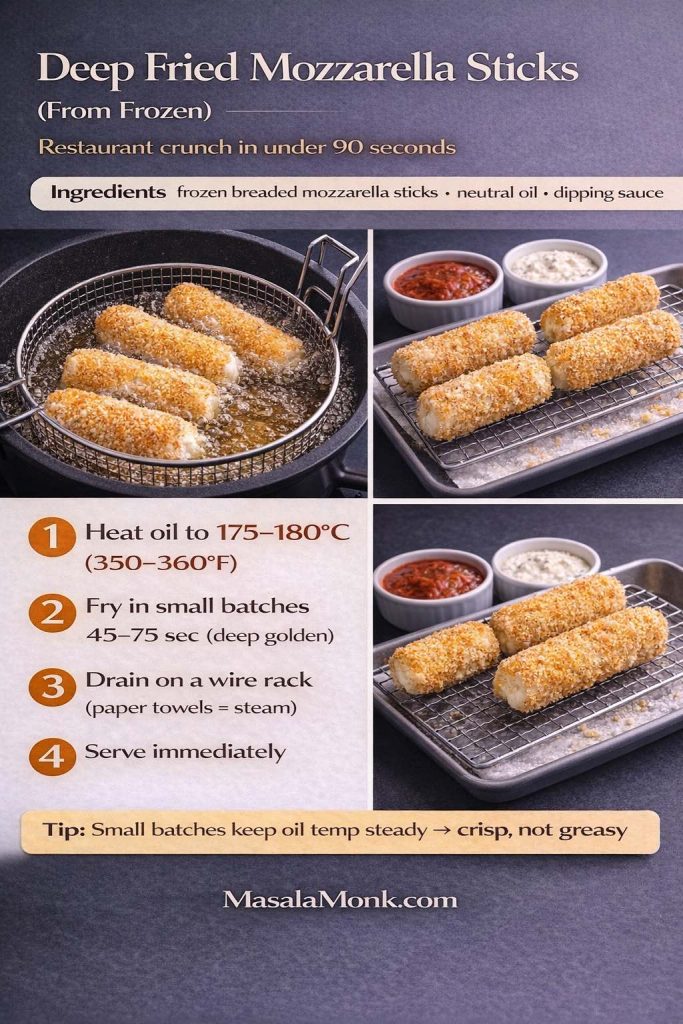
Steps
- Heat oil to 175–180°C (350–360°F).
- Fry in small batches for 45–75 seconds until deep golden.
- Drain on a wire rack. Paper towels can trap steam and soften crust.
- Serve immediately.
If you want the crunch to stay loud: don’t stack them. Put them on a rack, spread out, and dip one at a time.
Bon Appétit’s homemade mozzarella sticks recipe leans into that ideal balance—crispy coating, gooey center, not greasy—while emphasizing a proper crust and good oil temperature control (Homemade Mozzarella Sticks).
Also Read: 10 Vegan Chocolate Cake Recipes (Easy, Moist, & Dairy-Free)
Pan fried mozzarella sticks (when you don’t want deep frying)
Pan frying is a compromise: less oil, less mess, still crisp. However, it only works well if you keep the oil hot enough and you don’t flip endlessly.
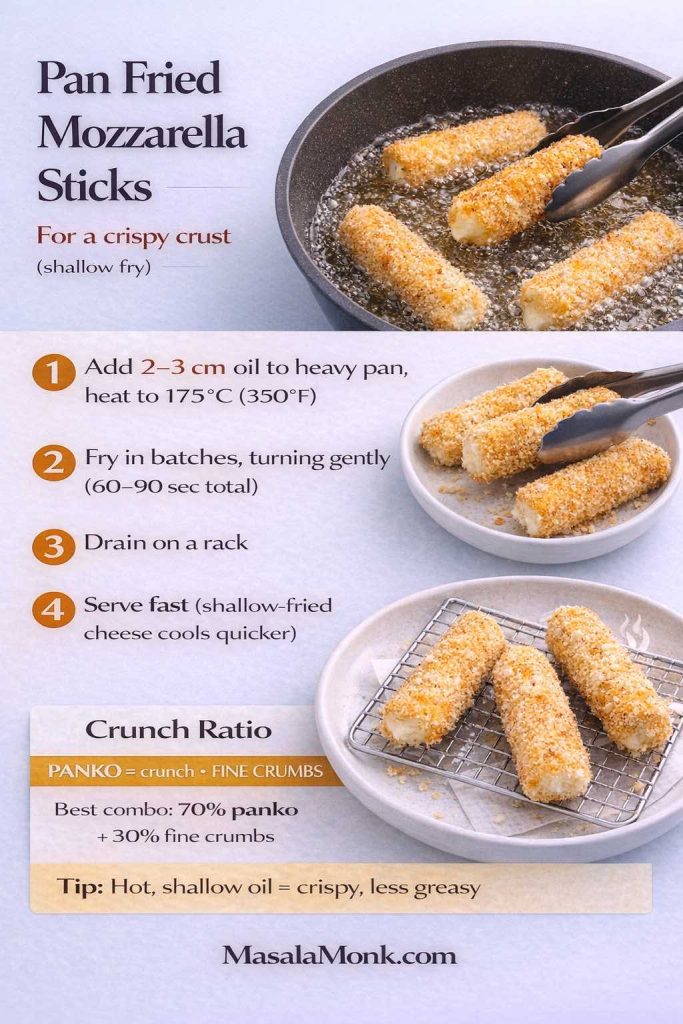
Pan fried mozzarella sticks (shallow fry)
Steps
- Add 2–3 cm of oil to a heavy pan and heat to 175°C (350°F).
- Fry in batches, turning gently, about 60–90 seconds total.
- Drain on a rack.
- Serve fast—shallow-fried cheese cools quicker than deep fried.
This method is best for shorter sticks (cut string cheese in half) because they heat through before the cheese has time to escape.
Also Read: Kahlua Drinks: 10 Easy Cocktail Recipes (Milk, Vodka, Coffee)
Beer battered mozzarella sticks (pub-style, craggy and bold)
Breadcrumbs give a clean crunch. Beer batter gives a thicker, more rugged coating—almost like a tempura cousin with pub energy.
Beer battered mozzarella sticks recipe
Ingredients
- 12 cheese sticks (preferably block-cut or firm string cheese)
- 125 g flour
- 1 tbsp cornstarch
- 1 tsp baking powder
- ½ tsp salt + pepper
- 180–240 ml cold beer (add gradually)
- oil for frying
Steps
- Freeze cheese sticks 2–4 hours.
- Whisk dry ingredients, then add cold beer until the batter is thick yet pourable.
- Dust cheese lightly in flour first (batter sticks better).
- Dip in batter and fry at 180°C for 60–90 seconds.
- Drain and serve.
Beer battered mozzarella sticks are one of those snacks that feel like they came from a menu, even though they’re made in your kitchen.
Also Read: Hot Chocolate Coffee: 3 Easy Recipes (Cocoa, Mix, or Espresso)
Breaded mozzarella sticks recipe (classic breadcrumb version)
This is the “default” mozzarella sticks recipe most people want: breaded, crispy, stretchy, and made with string cheese or block cheese.
Use the master breading method above, then choose your cooking path:
- Air fryer: 200°C for 5–7 minutes, flip halfway
- Oven: 220°C for 10–12 minutes, flip halfway
- Frying: 175–180°C for 45–75 seconds
It’s the same breaded base, three different personalities.
Also Read: Cappuccino Recipe: How to Make a Perfect Cappuccino at Home
3 ingredient mozzarella sticks (simple recipe, fast prep)
When you want a quick easy mozzarella sticks recipe without extra seasoning bowls, keep it minimal.
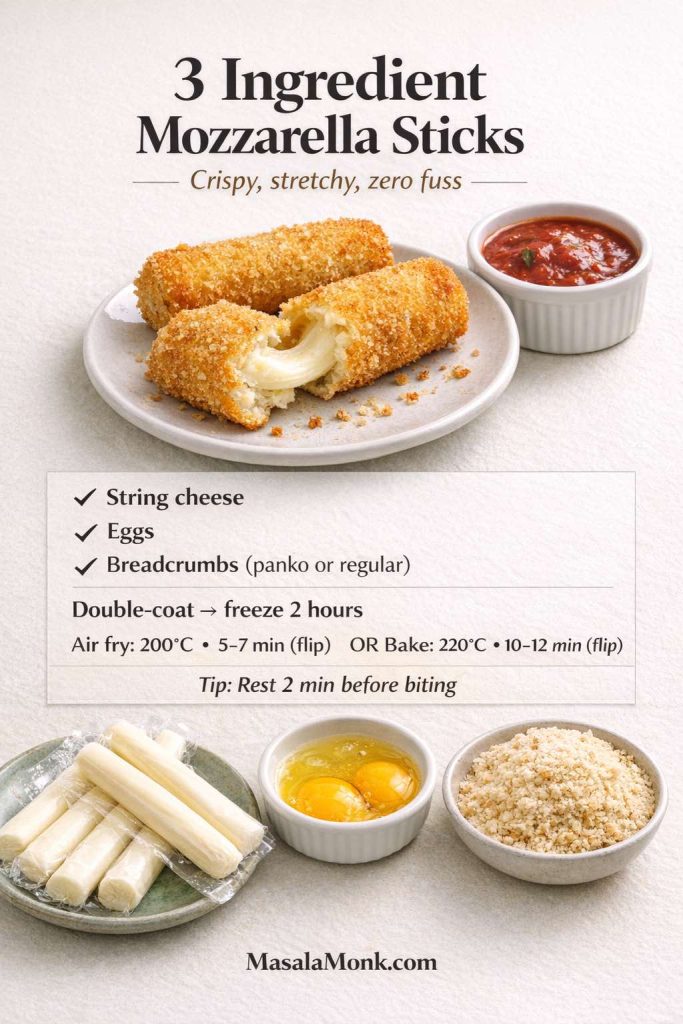
How to make three-ingredient mozzarella sticks
- string cheese
- eggs
- breadcrumbs (panko or regular)
Bread the sticks (egg → crumbs), repeat once more for a double coat, freeze 2 hours, then air fry or bake using the timings above.
Even without extra spices, these still work because the dip carries flavor.
Also Read: Cold Brew Espresso Martini: How to Make It (Step-by-Step Recipe)
Puff pastry mozzarella sticks (flaky, golden, party-perfect recipe)
Puff pastry mozzarella sticks are the “wrapped cheese sticks” upgrade. They don’t need breading; they need good sealing and enough bake time to crisp.
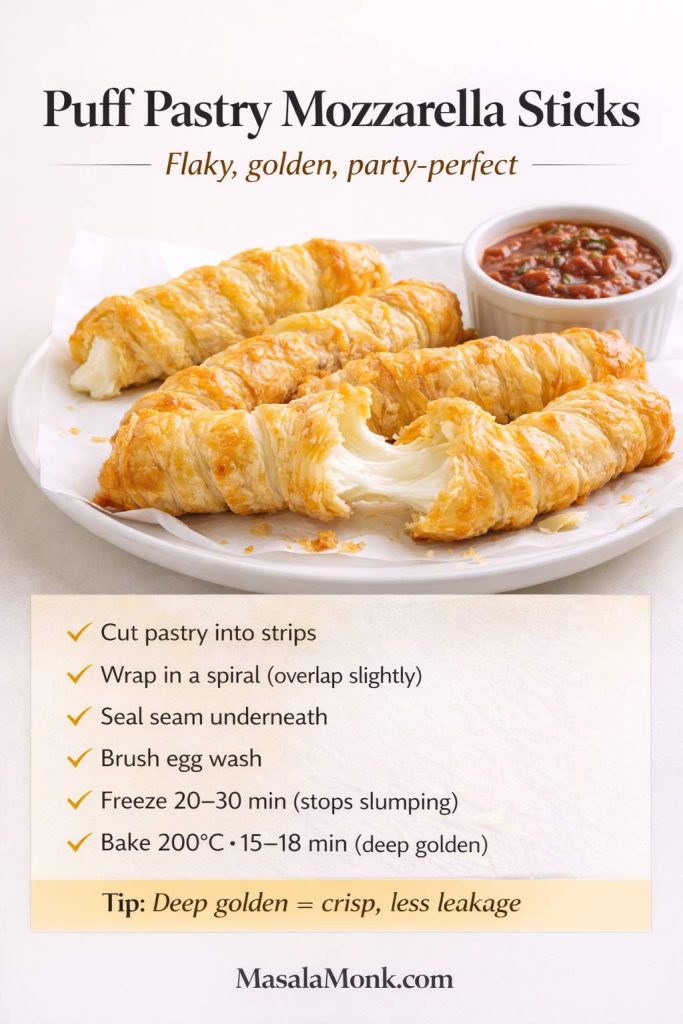
Puff pastry mozzarella sticks recipe
Ingredients
- puff pastry sheet, thawed
- mozzarella sticks (or cut block sticks)
- egg wash (1 egg + splash water)
- optional: chili flakes, oregano, sesame seeds
Steps
- Cut pastry into strips.
- Wrap each cheese stick in a spiral, overlapping slightly.
- Seal the seam underneath.
- Brush with egg wash.
- Freeze 20–30 minutes so the pastry sets and doesn’t slump.
- Bake at 200°C (400°F) for 15–18 minutes until deeply golden.
These are especially good with pesto, because flaky pastry plus herb sauce feels like a snack you’d order twice.
Also Read: Sandwich for Breakfast: Breakfast Sandwich Recipe + 10 Variations
Crescent roll mozzarella sticks (easy wrapped cheese sticks)
This dough is forgiving and fast, which makes it perfect for quick cheese sticks at home.
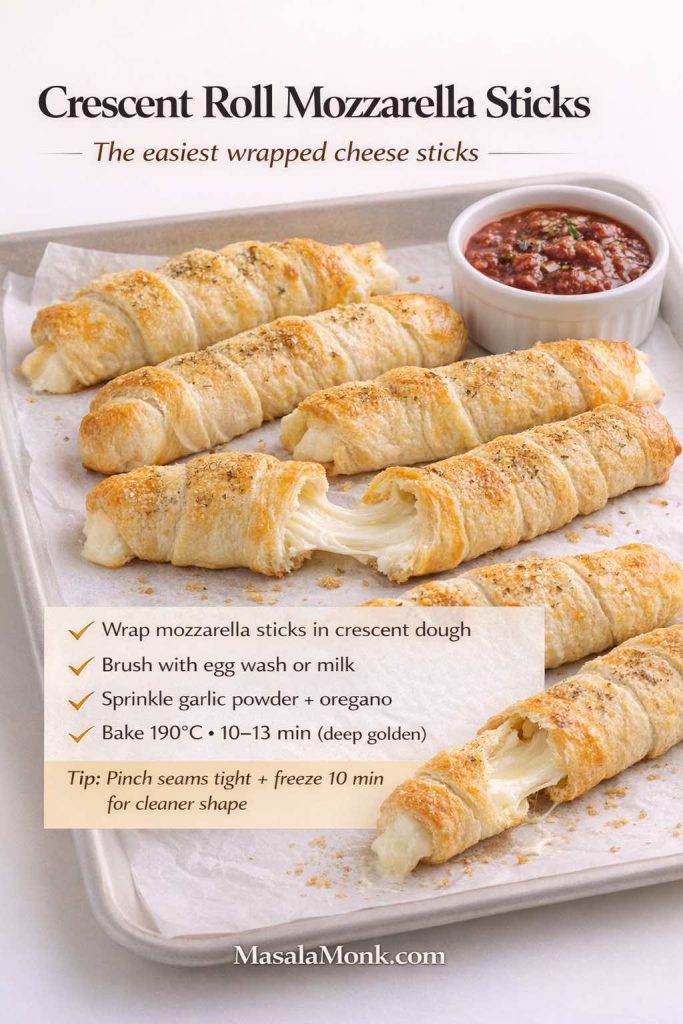
Crescent roll mozzarella sticks
Steps
- Wrap mozzarella sticks in crescent dough.
- Brush with egg wash or milk.
- Sprinkle garlic powder and oregano.
- Bake at 190°C (375°F) for 10–13 minutes until browned.
They’re softer than breaded sticks, yet they deliver a satisfying “pull” and hold up well with marinara.
Also Read: Iced Coffee: 15 Drink Recipes—Latte, Cold Brew, Frappe & More
Prosciutto wrapped mozzarella sticks (and pepperoni wrapped mozzarella sticks)
Wrapped mozzarella sticks are a different kind of crunchy: the crisp comes from rendered cured meat rather than breadcrumbs. They’re also naturally lower carb, although they’re not exactly “low calorie mozzarella sticks.”
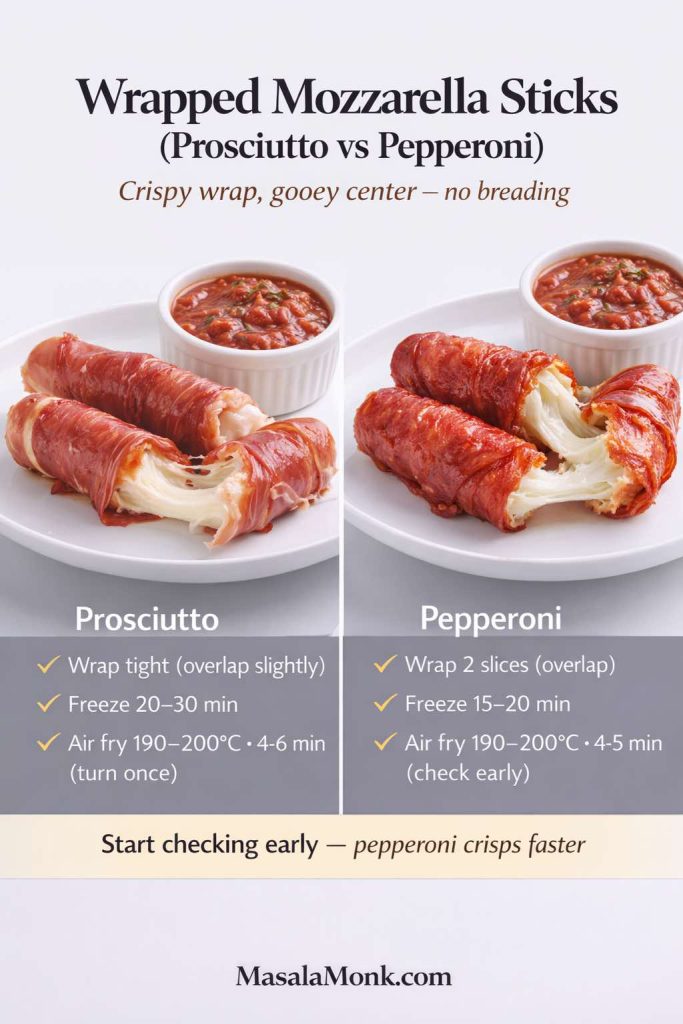
Prosciutto wrapped mozzarella sticks recipe
Steps
- Wrap each mozzarella stick with a thin slice of prosciutto, overlapping slightly.
- Freeze 20–30 minutes so the wrap firms.
- Air fry at 190–200°C for 4–6 minutes, turning once.
- Serve immediately.
Pepperoni wrapped mozzarella sticks
Follow the same method, although pepperoni crisps even faster, so start checking at 4 minutes.
If you want to build a full tray of savory bites alongside these, it’s easy to add something like MasalaMonk’s how to cook bacon in the oven method for crisp bacon strips that can top dips, salads, or even a snack board.
Also Read: Cranberry Moscow Mule Recipe: A Festive Holiday Cocktail With Easy Variations
Keto mozzarella sticks (low carb cheese sticks recipe that still crunch)
To make these cheese sticks keto, is all about swapping breadcrumbs for a coating that browns and crisps without flour.
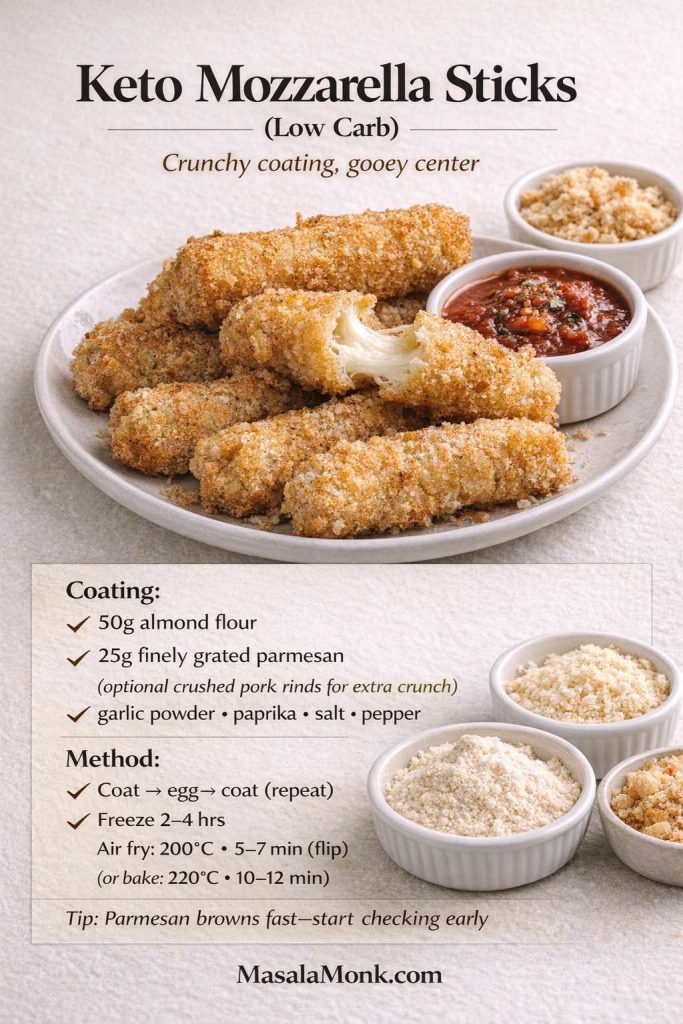
Keto mozzarella sticks recipe
Coating
- 50 g almond flour
- 25 g parmesan, finely grated
- optional: ½ cup crushed pork rinds for extra crunch
- garlic powder, paprika, pepper, salt
Steps
- Bread as usual: almond flour mix → egg → almond flour mix again.
- Freeze 2–4 hours.
- Air fry 200°C for 5–7 minutes or bake 220°C for 10–12 minutes.
If you want a deeper mozzarella-and-low-carb angle for readers who like that lane, MasalaMonk’s mozzarella keto-friendly guide fits naturally as a supporting read.
Also Read: Baked Ziti Recipe Collection: 15 Easy Variations
Cheddar cheese stick recipe (a sharper, richer twist)
Cheddar sticks are delicious, but cheddar behaves differently from mozzarella. It melts more aggressively and can separate if pushed too far. That means the safest way is thicker sticks, longer freezing, and quick cooking.
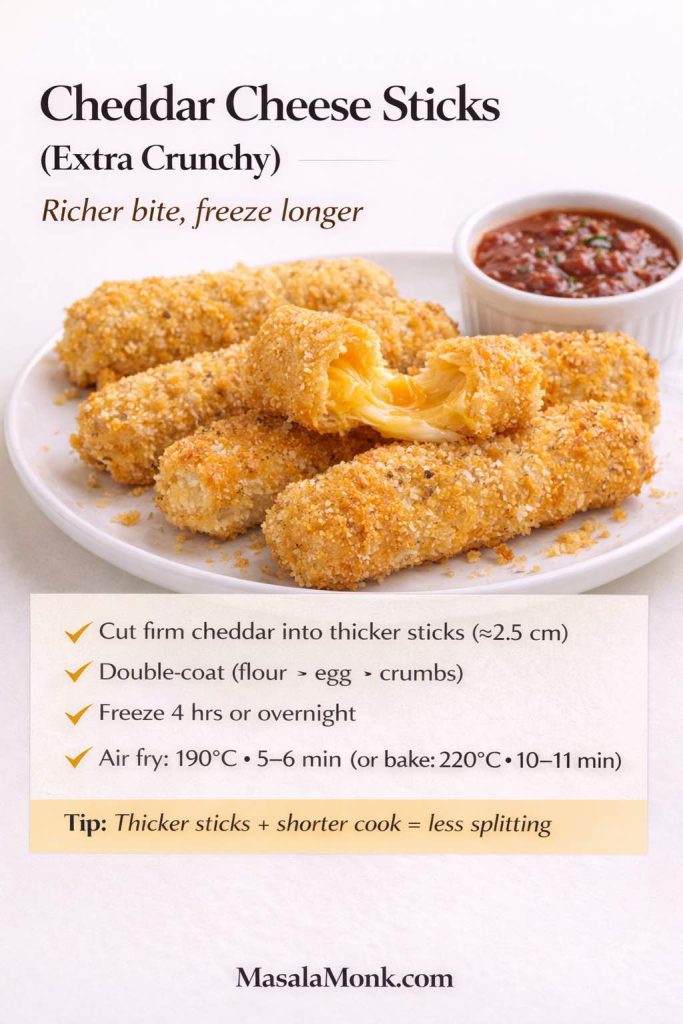
Cheddar cheese sticks (breaded)
Steps
- Cut firm cheddar into thicker sticks than mozzarella (about 2.5 cm thick).
- Double coat using the master breading method.
- Freeze 4 hours or overnight.
- Air fry 190°C for 5–6 minutes or bake 220°C for 10–11 minutes.
- Serve fast; cheddar cools and firms quickly.
These don’t stretch like mozzarella, yet they deliver a richer bite that’s excellent with a tangy sauce.
Also Read: Green Chutney Recipe (Coriander–Mint / Cilantro Chutney)
Smoked mozzarella sticks (bolder flavor, same recipe)
Mozzarella sticks with smoked cheese are pure snack joy—especially with marinara or spicy mayo.
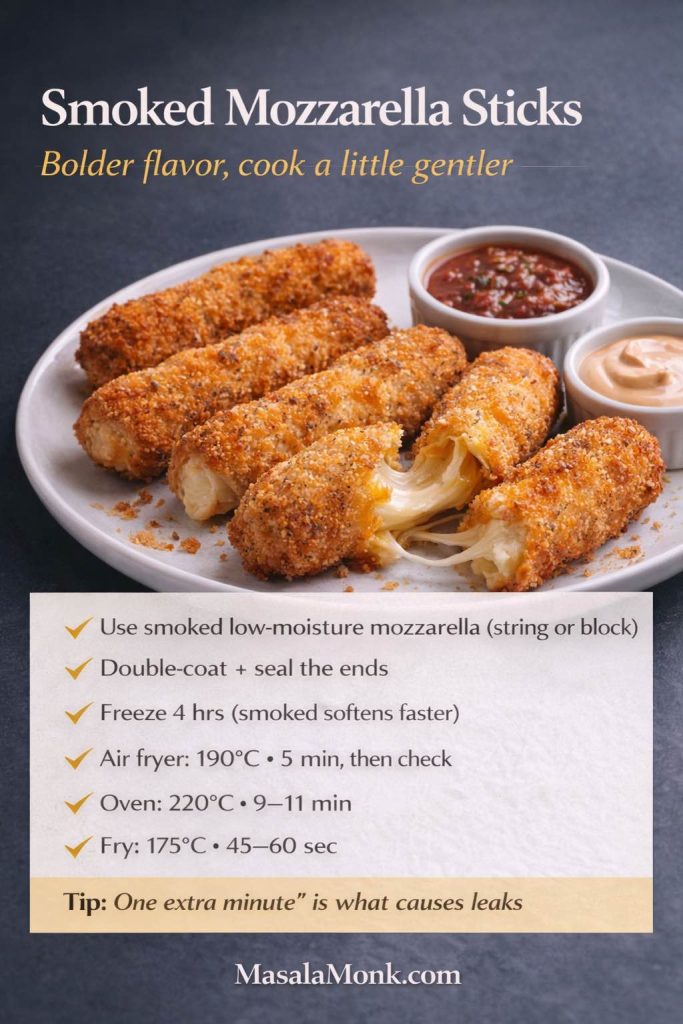
Use the same breading and freezing method, then cook slightly more cautiously:
- Air fryer: start at 190°C for 5 minutes, then check
- Oven: 220°C for 9–11 minutes
- Frying: 175°C for 45–60 seconds
Because smoked mozzarella can soften fast, “just one extra minute” is often what causes leaks.
Also Read: Manhattan Cocktail Recipe (Classic + 6 Variations)
Mozzarella rounds and mozzarella cheese bites (bite-size versions)
Sometimes sticks feel too long, especially for a party tray. In that case, cut string cheese into thirds or use a low-moisture block and cut small rectangles. Bread them the same way, freeze thoroughly, then cook a little faster:
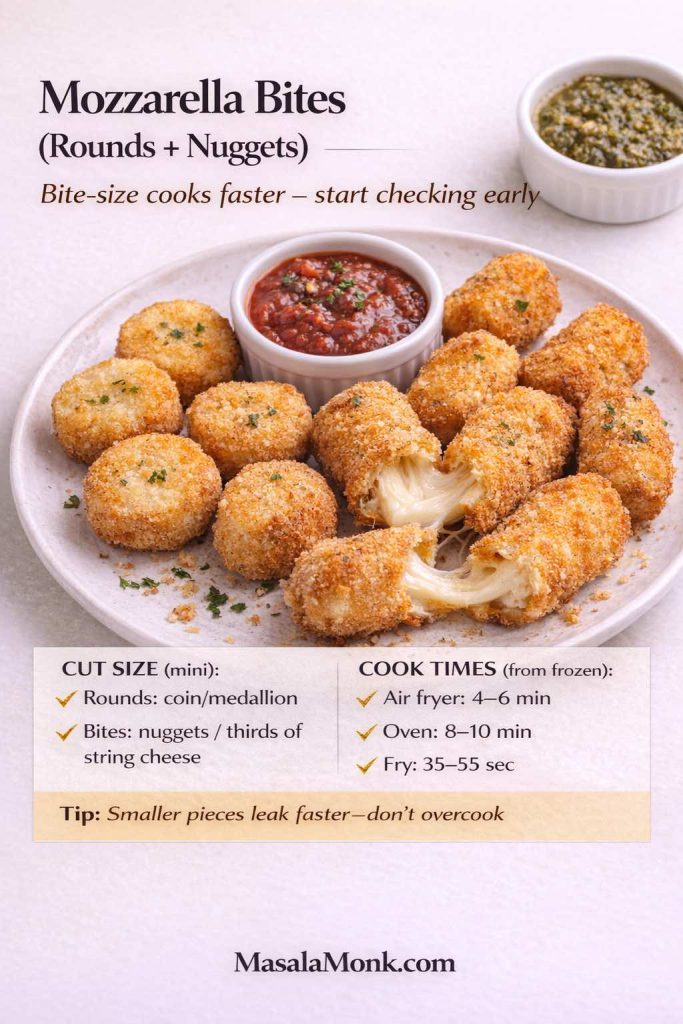
- Air fryer: 4–6 minutes
- Oven: 8–10 minutes
- Frying: 35–55 seconds
Bite-size pieces are also the easiest way to use shredded cheese logs because they hold shape better.
Also Read: Paper Plane Cocktail Recipe + Best Amaro Substitutes & Tips
Hot mozzarella sticks and “hot cheetos” style crust (spicy snack energy)
If you want a bright, spicy crust that feels like a guilty pleasure, crushed spicy corn snacks can replace breadcrumbs. It’s messy, but it’s fun.
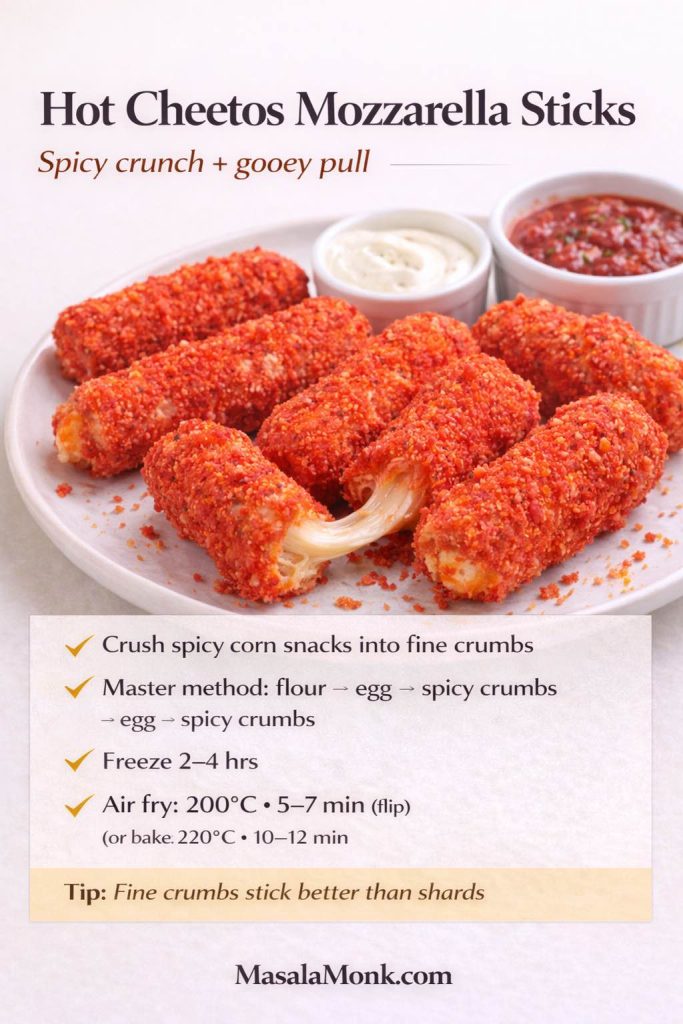
Hot “cheetos” mozzarella sticks
Steps
- Crush spicy corn snacks finely (you want a crumb, not shards).
- Use the master method: flour → egg → spicy crumbs → egg → spicy crumbs.
- Freeze 2–4 hours.
- Air fry 200°C for 5–7 minutes or bake 220°C for 10–12 minutes.
These are best served with a cool dip—eggless mayo or ranch-style sauce works beautifully.
Also Read: Rob Roy Drink Recipe: Classic Scotch Cocktail (Perfect + Dry + Sweet Variations)
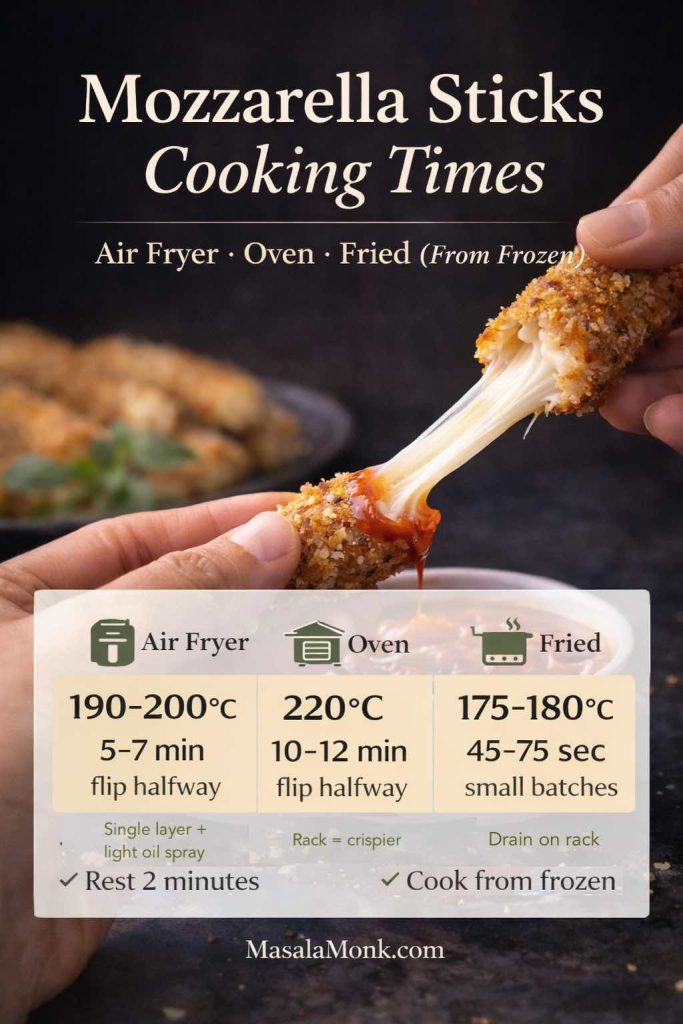
How to cook frozen mozzarella sticks (air fryer and oven)
Frozen mozzarella sticks are built for convenience, but they still benefit from good spacing and correct heat. The biggest mistake is crowding the basket or stacking on a tray, because trapped steam softens the coating.
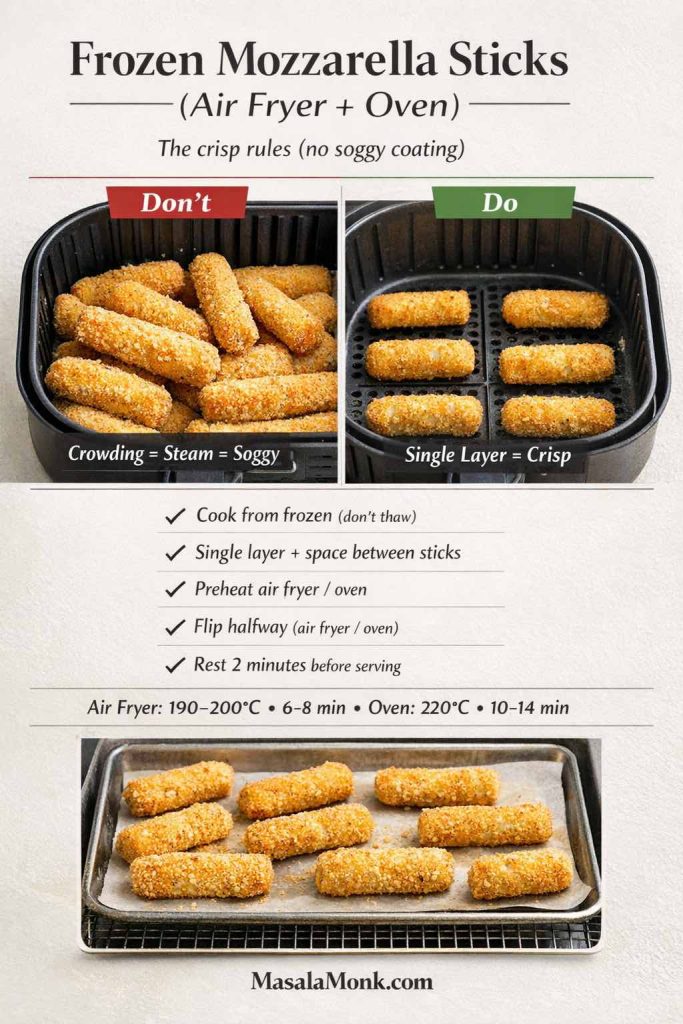
Instant Pot’s from-frozen mozzarella sticks method stresses single-layer spacing, with room around each piece, so hot air can circulate (From-Frozen Mozzarella Sticks).
Frozen mozzarella sticks in air fryer
- Preheat to 190–200°C (375–400°F).
- Arrange in one layer with space around each.
- Air fry 6–8 minutes, turning once if your model benefits from it.
Frozen mozzarella sticks in oven
- Heat oven to 220°C (425°F).
- Place sticks on a rack or spaced out on parchment.
- Bake 10–14 minutes, flipping halfway.
If you want the “best mozzarella sticks frozen” experience at home, the trick is simply cooking them hot and fast without crowding.
Also Read: Blueberry Pancakes (6 Recipes) + Homemade Pancake Mix
Mozzarella stick breading: how to make it taste like more than crumbs
Breading can taste bland if it’s treated like an afterthought. Luckily, the fix is simple: give it fragrance and contrast.
Try one of these breadcrumb blends:
- Italian-style: oregano + garlic + parmesan
- smoky: smoked paprika + black pepper + pinch of sugar
- spicy: chili flakes + paprika + garlic
- herby: dried parsley + oregano + lemon zest (tiny amount)
Also, panko gives a louder crunch, while fine breadcrumbs help seal. Combining both is the easiest way to get “crispy cheese stick” texture without extra steps.
Also Read: Negroni Recipe: Classic Cocktail & Its Variation Drinks
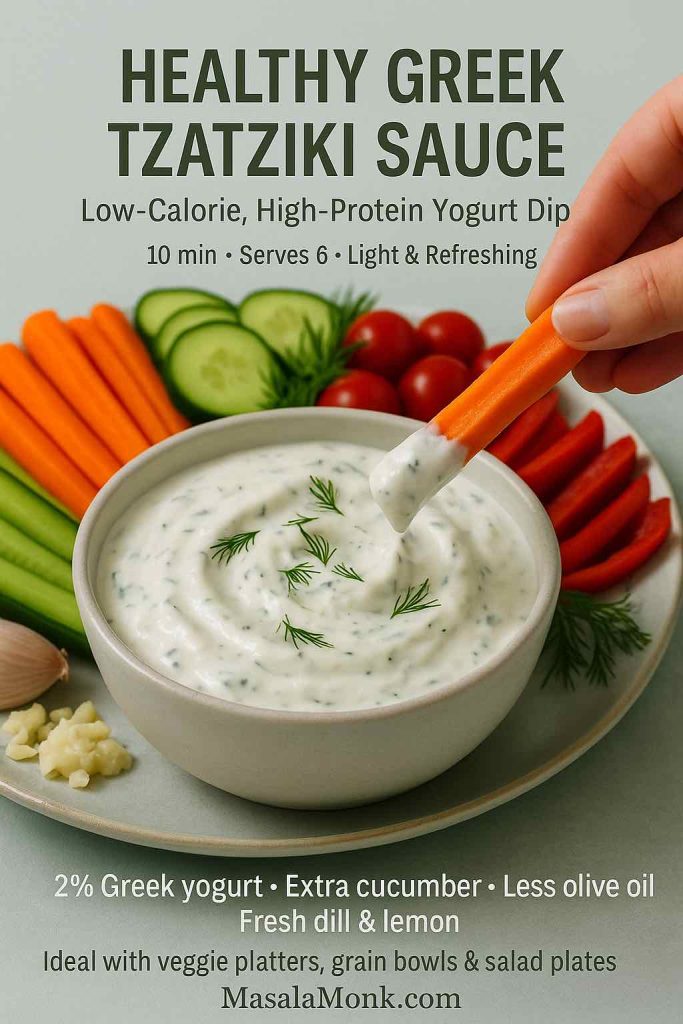
Low calorie mozzarella sticks (the realistic approach)
Mozzarella sticks are not diet food; still, you can make them lighter without turning them sad.
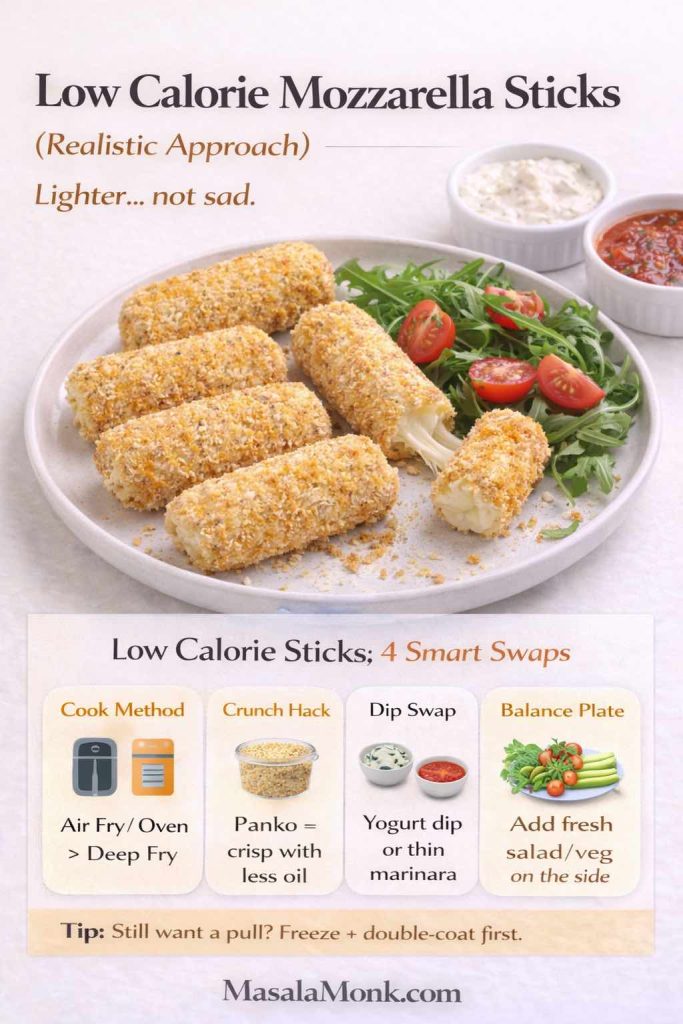
Here’s what helps:
- Choose air fryer or oven instead of deep frying.
- Use panko for crunch so you don’t need as much oil.
- Serve with a lighter dip (yogurt-based or a thinner marinara-style sauce).
- Pair with something fresh so the plate feels balanced.
If you want another crisp side that’s baked rather than fried, MasalaMonk’s garlic cheese potatoes (no frying) fits the same comfort lane while staying oven-friendly.
Also Read: Keto Chia Pudding Recipe with Almond Milk
A snack board built around mozzarella sticks (so the night feels like a plan)
Mozzarella sticks shine brightest when they’re part of a spread. That doesn’t mean you need ten dishes; it means you need contrast.
Here’s a simple board idea:
- Mozzarella sticks (pick one method)
- One red sauce from pizza sauce recipes
- One creamy dip using homemade mayonnaise or eggless mayonnaise
- A crunchy side like MasalaMonk’s air fried chilli garlic potato bites
- Something bold and cheesy like MasalaMonk’s cheese balls (5 variations)
If you want one “effort snack” that’s still in the same family, MasalaMonk’s arancini balls guide is basically mozzarella sticks’ cousin—crispy outside, gooey and cheesy inside, and impossible to ignore.
Also Read: Almond Flour Pancakes (Easy Recipes) Fluffy, High-Protein, Keto & More
How to make mozzarella sticks at home without stress (common issues and fixes)
Even with a good recipe, mozzarella sticks can misbehave. When that happens, the fix is usually one of these, not a full restart.
“They burst open in the air fryer.”
- Freeze longer. Two hours is the minimum; four is calmer.
- Lower the temperature slightly and extend the time.
- Make sure the ends are sealed with crumbs.
“Breading falls off.”
- Don’t skip flour. Flour gives the egg something to grip.
- Pat the cheese dry first.
- Press crumbs gently; don’t just roll and hope.
“They’re golden but the cheese isn’t melty.”
- Your cheese pieces are too thick for your cook time.
- Cut sticks slightly slimmer next time, or cook 30–60 seconds longer—carefully.
“They’re greasy.”
- Oil was too cool (frying), or you drained on paper towels and steam softened the crust.
- If frying, keep oil temperature steady. USDA’s deep frying guidance is useful here (Deep Fat Frying and Food Safety).
Also Read: Authentic Chimichurri Recipe (Argentine Steak Sauce)
Make-ahead mozzarella sticks (and why they’re perfect for it)
Mozzarella sticks are at their best right after cooking, yet the prep can be done long before anyone shows up.
Make ahead
Bread the sticks, freeze until solid, then transfer to a freezer bag.
How long they keep
They keep well frozen for several weeks. The key is keeping them sealed so they don’t pick up freezer odors.
Reheating leftovers
Microwaves soften breading. Instead, reheat in:
- air fryer at 190°C for 3–4 minutes
- oven at 220°C for 6–8 minutes
Bon Appétit highlights the advantage of prepping ahead with homemade mozzarella sticks since cooking is quick once you’re ready (Homemade Mozzarella Sticks).
Also Read: How to Make Churros (Authentic + Easy Recipe)
Turn mozzarella sticks into dinner (not just snacks)
Mozzarella sticks can be the opening act. If you want a full meal, keep the rest simple and comforting.
- Start with mozzarella sticks + marinara-style dip
- Add a big dish like MasalaMonk’s baked ziti recipe collection
- Finish with garlic bread from the homemade garlic bread loaf recipe
It’s warm, shareable, and it makes the night feel like it had a plan—without turning cooking into a project.
Also Read: 19 Essential Kitchen Tools That Make Cooking Easier
One last note before you cook
Mozzarella sticks are a snack, but they’re also a small technique: seal, freeze, cook hot and fast, and serve immediately. Once you nail that rhythm, you can make them any way you want—string cheese mozzarella sticks, mozzarella sticks with shredded cheese, beer battered cheese sticks, baked cheese sticks, keto cheesesticks, or frozen mozzarella sticks in the air fryer when time is tight.
Also Read: How to Cook Tortellini (Fresh, Frozen, Dried) + Easy Dinner Ideas
FAQs
1) What’s the best cheese for mozzarella sticks?
For the most reliable mozzarella sticks recipe, low-moisture mozzarella is the sweet spot because it melts smoothly without releasing as much water. String cheese is the easiest option since it’s already shaped and fairly firm. Meanwhile, block mozzarella (cut into sticks) gives you control over thickness and texture. If you’re using fresh mozzarella, expect more leaking unless you dry it very well and freeze longer.
2) Can I make mozzarella sticks using string cheese?
Yes—mozzarella sticks made with string cheese are often the simplest way to get consistent results. Since the pieces are uniform, they cook evenly whether you choose air fryer mozzarella sticks, oven baked mozzarella sticks, or fried mozzarella sticks. Just make sure they’re double-breaded and thoroughly frozen first.
3) How do I make mozzarella sticks with shredded cheese without them falling apart?
Mozzarella sticks with shredded cheese work best when you treat them like shaped logs or bites rather than long sticks. First, mix shredded mozzarella with a small amount of starch (cornstarch works well) and a soft binder like cream cheese so it holds together. After that, freeze the shaped pieces until very firm, then double-coat and freeze again. As a result, the coating has time to set before the cheese collapses.
4) Why do my cheese sticks burst open while cooking?
Usually, the center isn’t frozen enough or the breading has thin spots—especially at the ends. Sometimes, cooking temperature also plays a role: if the oil is too cool, the cheese melts before the crust sets; if the air fryer runs very hot, the outside browns quickly while the middle erupts. Therefore, longer freezing, better sealing, and steady heat fix most blowouts.
5) How long should I freeze mozzarella sticks before cooking?
Freeze breaded mozzarella sticks for at least 2 hours; however, 4 hours (or overnight) makes the process calmer and more forgiving. If you’re making mozzarella sticks from shredded mozzarella, freeze even longer because the shaped mixture warms and softens faster.
6) What’s the best breading for mozzarella sticks?
A mix of panko and fine breadcrumbs creates the best balance: panko gives louder crunch, while finer crumbs help seal gaps. Additionally, seasoning the breading—garlic powder, oregano, onion powder, paprika—makes the crust taste like more than “just crumbs.”
7) How do I bread mozzarella sticks so the coating stays on?
Start with flour, then egg, then breadcrumbs—because flour helps the egg grip and prevents slipping. After that, repeat egg and breadcrumbs for a second coat. Finally, press the crumbs gently, especially around the ends, since that’s where leaking usually starts.
8) How to cook mozzarella sticks in an air fryer?
For mozzarella sticks in air fryer, preheat to around 190–200°C, arrange in a single layer, lightly spray with oil, and cook for about 5–7 minutes, flipping halfway. Then let them rest for a minute or two so the cheese settles rather than spilling immediately.
9) How long to cook cheese sticks in air fryer (time guide)?
Most air fryer cheese sticks take 6–8 minutes, depending on thickness and the air fryer’s intensity. If they’re small or your air fryer runs hot, start checking at 5 minutes. Conversely, thicker sticks might need closer to 8 minutes.
10) How to cook frozen mozzarella sticks in air fryer?
Air fry frozen mozzarella sticks straight from the freezer at 190–200°C for about 6–8 minutes, turning once if needed. Importantly, don’t thaw first, because thawing increases leakage and can make the coating soggy.
11) How to cook frozen cheese sticks in the oven?
Bake frozen mozzarella sticks in oven at about 220°C for 10–14 minutes, flipping halfway. For extra crispness, bake on a rack so hot air circulates underneath instead of steaming the bottom.
12) Can I bake mozzarella sticks instead of frying?
Absolutely—baked mozzarella sticks can get very crisp, particularly with panko breading and a light oil spray. Use a hot oven and avoid crowding. Even so, freezing first still matters, because the cheese needs time to warm without escaping.
13) What’s the best way to make mozzarella sticks extra crispy?
Double breading is step one. After that, freeze thoroughly, then cook hot and fast. Additionally, panko breadcrumbs and a light oil spray help browning, while cooking on a rack (in the oven) prevents soggy bottoms.
14) Can I pan fry mozzarella sticks?
Yes, pan fried mozzarella sticks can work with a shallow layer of hot oil. Still, you’ll want to fry in small batches and avoid constant flipping. In other words, treat it like quick shallow frying: set the crust, turn once, and remove promptly.
15) How long to fry mozzarella sticks?
Most deep fried mozzarella sticks cook quickly—often under 90 seconds—because the goal is to brown the crust while warming the center. If you fry too long, the cheese melts completely and pushes out. So, once they’re golden, pull them.
16) What oil is best for fried cheese sticks?
Choose a neutral, high-heat oil such as sunflower, canola, or vegetable oil. In addition, keep the temperature steady so the breading crisps quickly without absorbing excess oil.
17) What are beer battered mozzarella sticks, and how are they different?
Beer battered mozzarella sticks use a thick batter instead of breadcrumbs, creating a craggy, pub-style shell. Because batter needs time to set, freezing the cheese extra well is even more important. Also, a quick flour dust before dipping helps the batter cling.
18) Can I make low carb mozzarella sticks or keto cheese sticks?
Yes—keto mozzarella sticks skip breadcrumbs and use coatings like almond flour, parmesan, and sometimes crushed pork rinds for crunch. Even so, the same rules apply: double coat, freeze thoroughly, then cook quickly to prevent blowouts.
19) Are “low calorie mozzarella sticks” actually possible?
They can be lighter, although they won’t be “diet food.” Air fryer mozzarella sticks or oven baked cheese sticks reduce oil compared to deep frying. Moreover, pairing them with a tomato-based dip instead of a heavy creamy sauce can keep the plate feeling balanced.
20) What sauce goes with mozzarella sticks besides marinara?
Marinara sauce for mozzarella sticks is classic, yet plenty of other options work: garlic mayo, spicy mayo, ranch-style dip, pesto, honey-mustard, or even a simple chili sauce. As a result, the same cheese sticks can feel totally different from one night to the next.
21) Can I reheat mozzarella sticks and keep them crispy?
Yes—reheat in an air fryer or hot oven so the crust re-crispens. Meanwhile, microwaving tends to soften the coating. For best texture, reheat briefly, then rest for a minute before serving.
22) Can I make mozzarella sticks ahead of time?
Definitely. Bread the sticks, freeze until solid, and store in a freezer bag. Then cook straight from frozen whenever you want. Consequently, mozzarella sticks become a quick snack instead of a last-minute project.
23) Why are my mozzarella sticks soggy?
Crowding is the usual culprit, especially in the air fryer. Also, baking on a flat tray can trap steam underneath. Therefore, space them out, flip midway, and consider using a rack in the oven.
24) Can I use cheddar for cheese sticks?
Yes—cheddar cheese stick recipe versions exist, but cheddar melts differently and can separate. For that reason, cut thicker pieces, freeze longer, and cook slightly faster. Alternatively, blend cheddar with mozzarella for a sharper flavor with better melt behavior.
25) What are mozzarella rounds, and can I cook them like cheese sticks?
Mozzarella rounds are simply thicker coin-shaped pieces (or small medallions). You can bread and cook them like mozzarella cheese bites, although they often need slightly shorter cooking times. In addition, they’re great for snack platters because they’re bite-sized and easy to dip.