Posted on Leave a comment

Instant Masala Bread Idli- Easy Breakfast Recipe

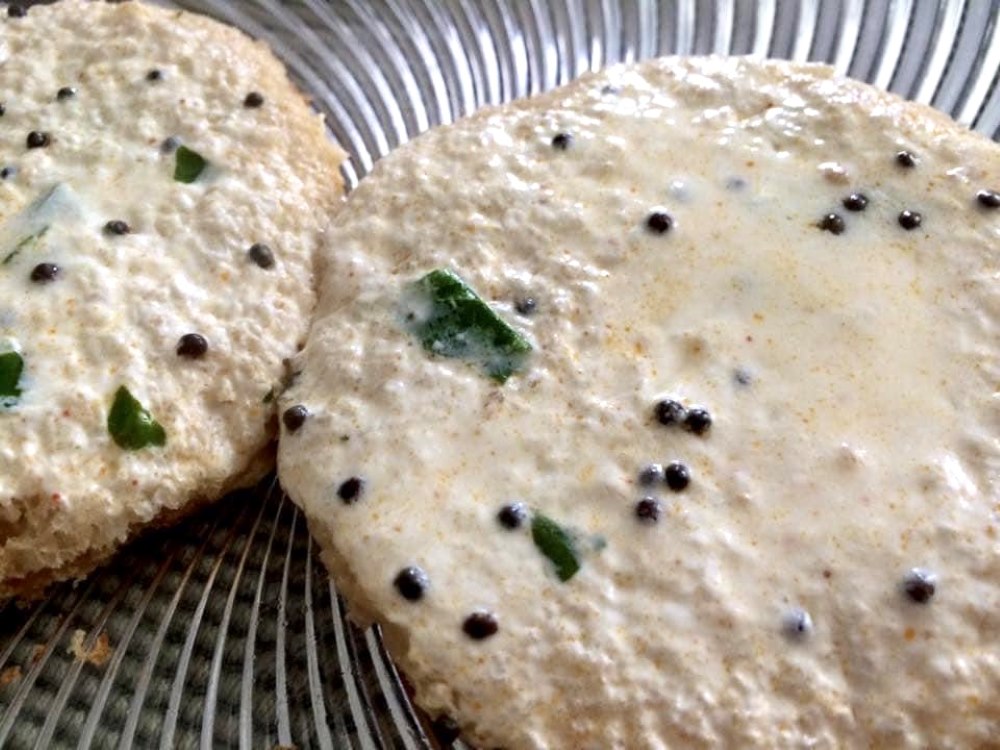
Instant Masala Bread idli is delicious protein rich breakfast. They are air light, super easy to make and above all healthy. I can bet you can’t stop at one. This is one of my favourite breakfast recipes. Easy, simple with no fancy ingredients required!

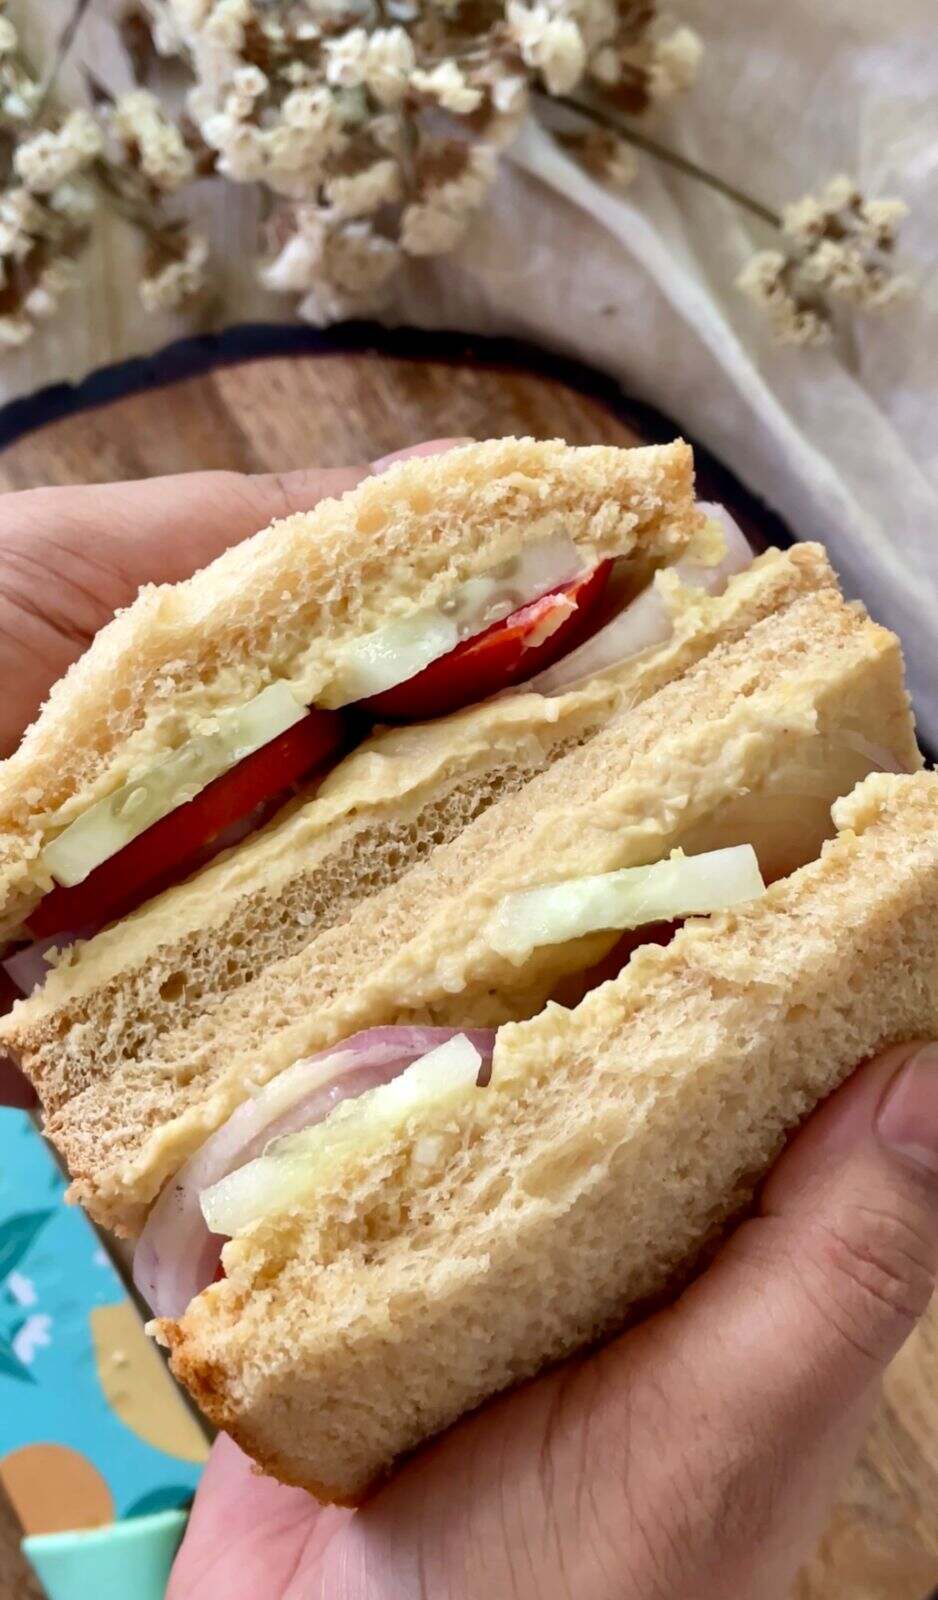
It is like a slice of bread with a filling of your choice on one side and steamed tempered yogurt on the other side, adding different textures to this simple yet delicious dish. It’s creamy, soft and crispy- all of that in one slice of bread. 

I had these bread idlis for the first time some 17-18 years back at my Aunt’s house and instantly fell in love with it. Years later when I got married, I remembered those instant bread idlis and wanted to make it for my husband and child. Just like me, my family too totally loved it.

You need very basic ingredients for this recipe- bread slices, either brown or white bread, thick yogurt or homemade curd and Indian cottage cheese (Paneer) or potatoes.

I shared this recipe in one of the food community groups on facebook, Eatlo and it was such a huge hit. I was amazed to see that hundreds of people tried this recipe and the feedback was just fantastic. If you talk about food just as much as you eat, you should definitely join this community. It’s a safe space where you can share your cooking adventures, know more about different cultural and regional foods, ask for recipes, get health tips and interact with food enthusiasts all over the world.

Now without further delay let’s see how you can make this delicious recipe

Recipe: serves 3

Ingredients: 

  • Bread slices: 8
  • Oil/Ghee for Cooking

For Tempered Yogurt/Curd

  • Thick Yogurt/Curd: 1.5 cup
  • Mustard seeds: 1/2 tsp
  • Curry leaves: 1 sprig
  • Asafoetida/hing: a pinch
  • Oil: 1 tbsp
  • Red chilli powder: 1/4th tsp
  • Salt to taste

For Paneer Filling

  • Paneer: 150 grams
  • Coriander Leaves: handful 
  • Capsicum: 1/4th cup; finely chopped
  • Salt to taste
  • Minced Garlic: 1/4th tsp
  • Red Chilli Powder: 1/4th tsp or to taste
  • Garam masala: 1/4th tsp
  • Roasted Cumin Powder: 1/2 tsp
  • Raw Mango Powder: 1/4th tsp
  • Green Chilies: 1; finely chopped (optional)

Method:

  • Whisk thick yogurt/curd to get a smooth consistency. 
  • Now heat oil in a small pan. Add mustard seeds and hing. Let it splutter. Switch off the flame and add curry leaves, salt and red chilli powder. Let it sit in hot oil for 15 seconds and then add this tempering to yogurt and mix well. Keep aside.
  • Cut bread slices in roundels using a bowl or a round cutter and keep aside.
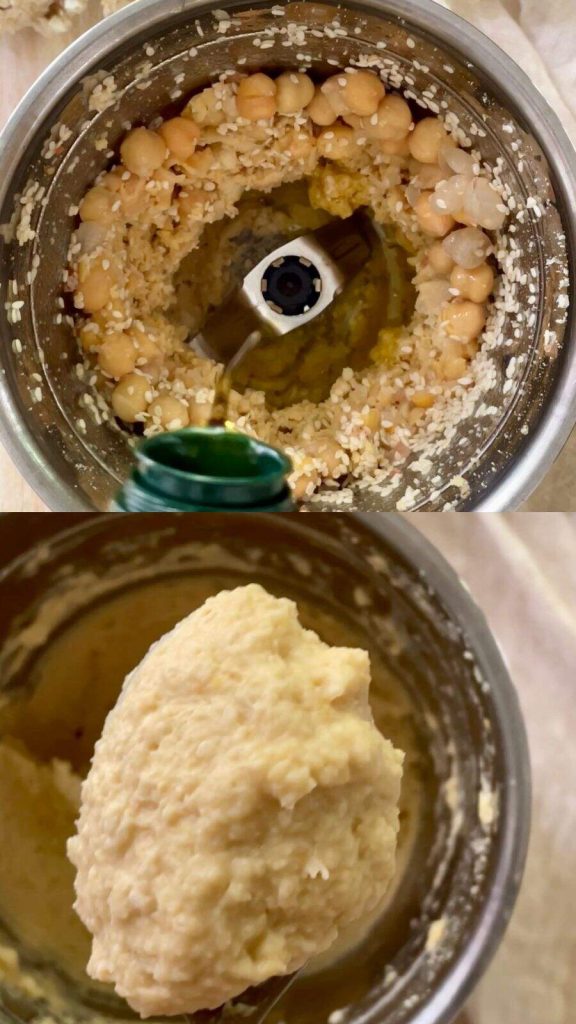
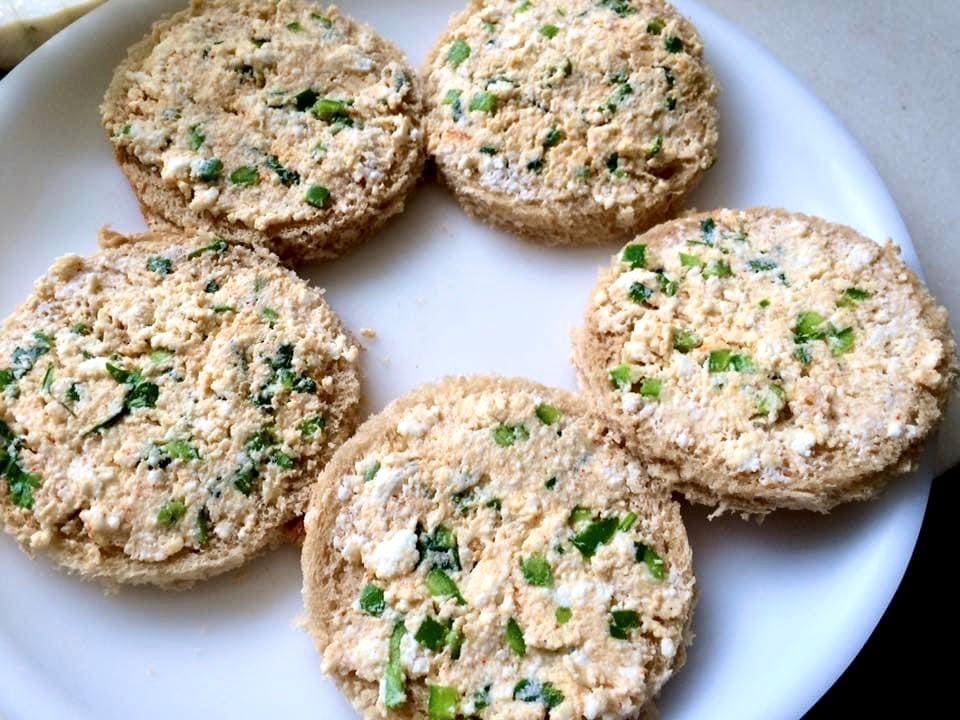
  • Crumble paneer in a plate. Add finely chopped capsicum, coriander leaves, minced garlic, salt, red chilli powder, garam masala, cumin powder and raw mango powder. Mix well. Check for seasoning and your filling is ready.
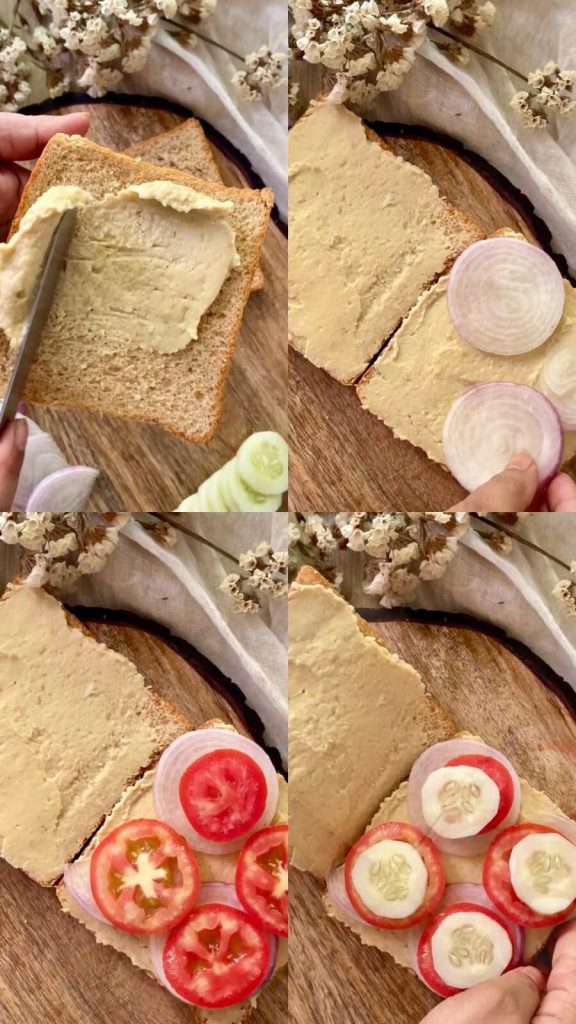
  • Now take the bread slice and spread the prepared filling on one side. Do not make a very thick layer. 
  • Heat a non stick pan to a medium heat. Brush it with some oil or ghee. 
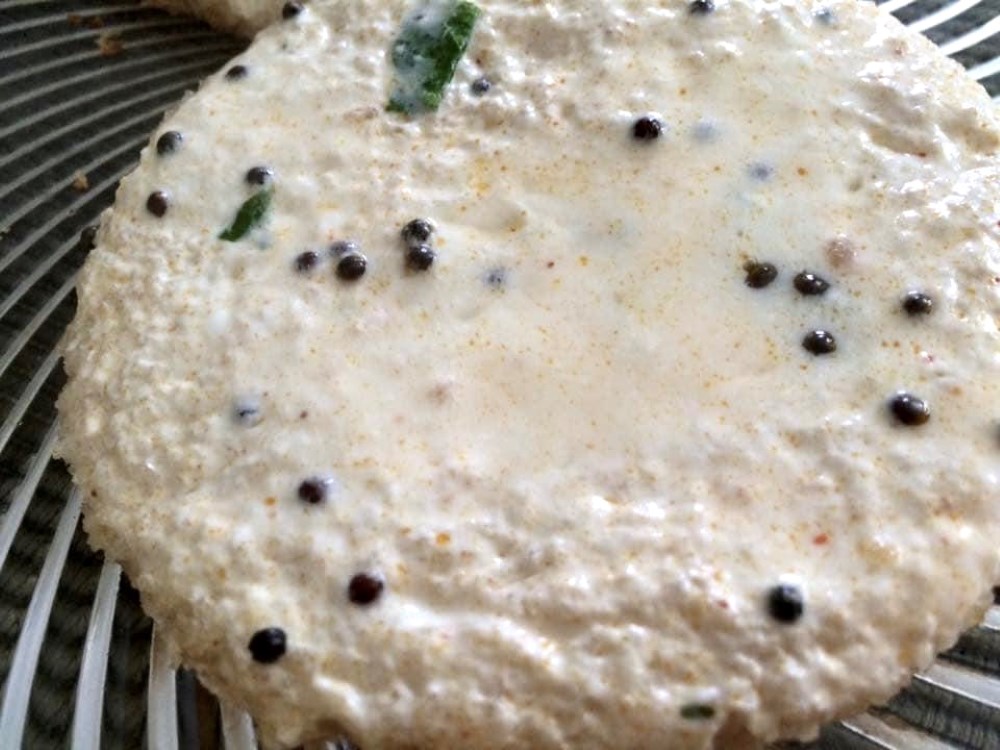
  • Now put the filling side down. Reduce the flame to the lowest. On the top, apply the prepared tempered yogurt. Do not overload it with curd but put a generous amount so that the bread is coated well. 
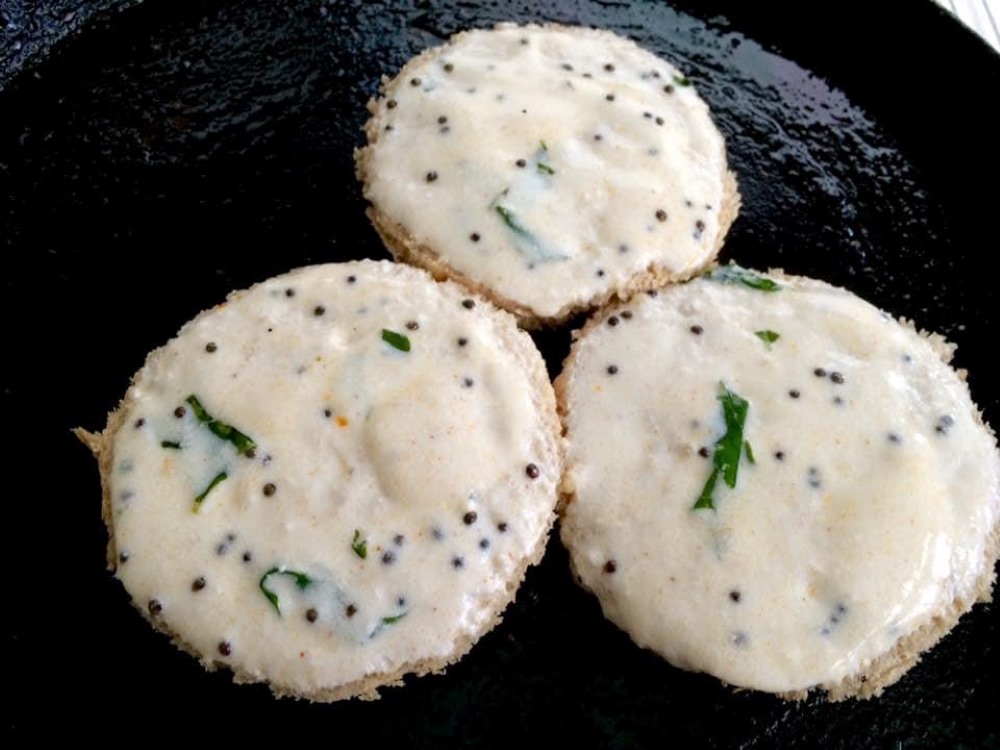
  • Cover the slice with a large bowl. The idea is to steam the yogurt side and make the filling side crisp. This should take about 3-4 minutes to cook. Keep the flame low.
  • Cook till bottom side becomes golden brown. 
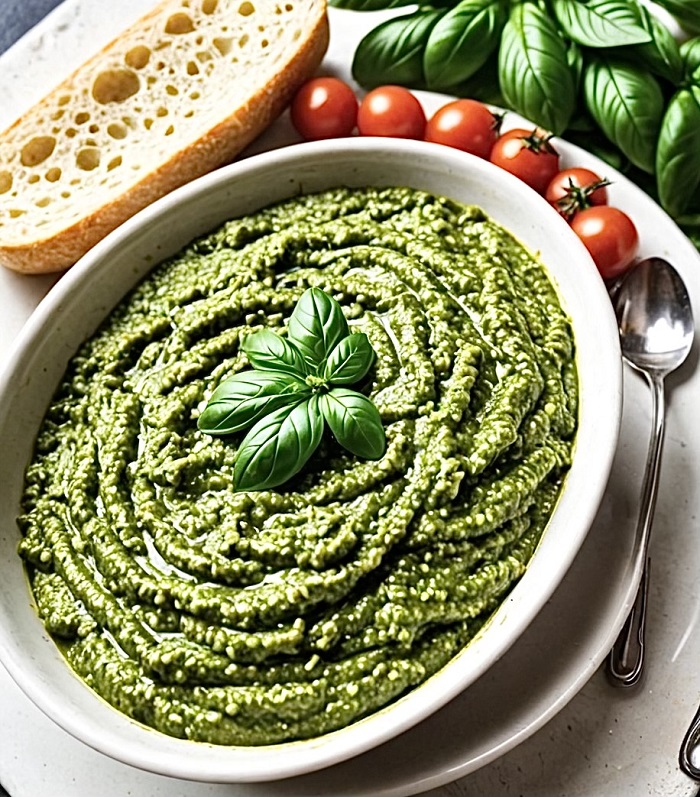
  • Serve hot with chutney of your choice.

Notes: 

  1. You can choose the filling of your choice. I also make this with potatoes. Just replace paneer with potatoes. 
  2. Always cook bread idli on low flame. Otherwise the bottom side will be cooked and yogurt side will not get time to get set. 
  3. Serve it immediately or the bread will become soggy.
  4. For leftover bread sides, you can toast them in the oven and turn into bread crumbs.
  5. If the yogurt or curd you have is watery, simply line a colander with muslin cloth. Add yogurt/curd and keep it refrigerated for an hour. This will drain the excess whey.

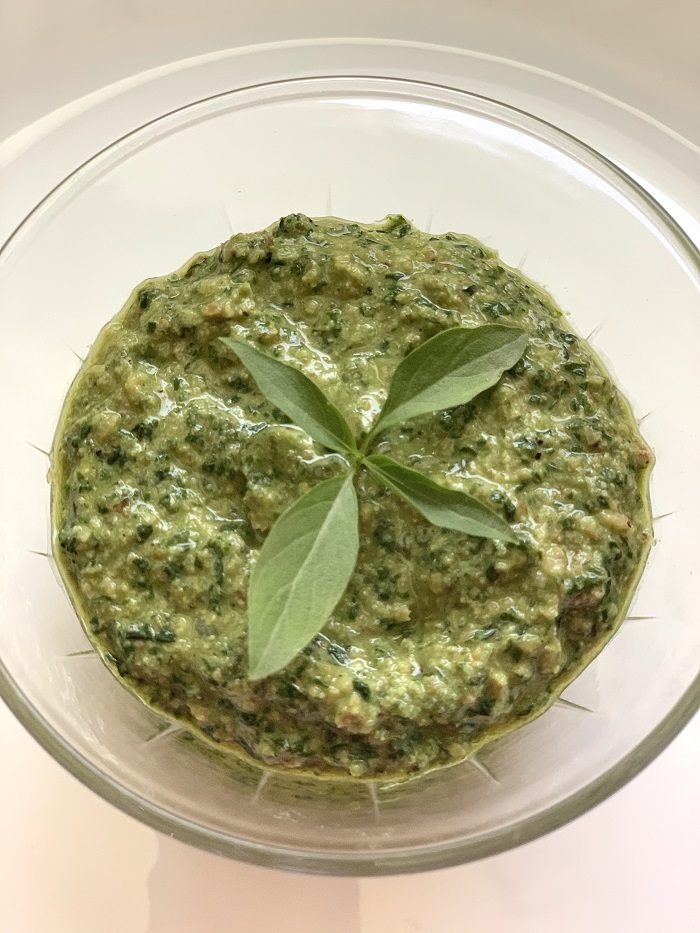
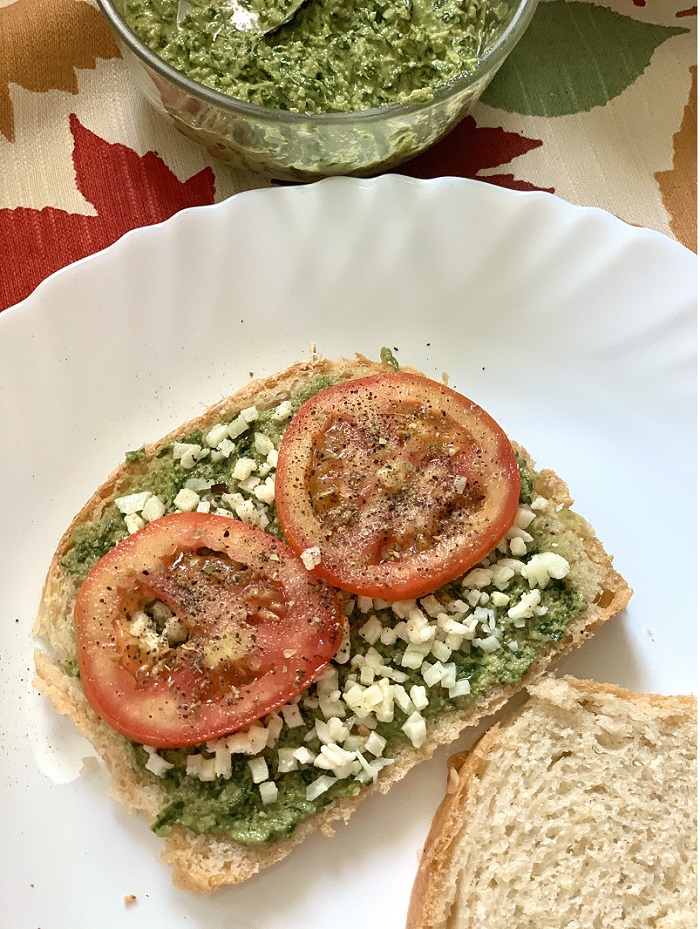
For more quick yogurt recipes you can try out my quick and absolutely delicious Hung Curd Spinach Cheese Sandwiches

Do try out this recipe. I promise you will not be disappointed. Let me know in the comments if you do try. Would love to have your feedback. Happy Cooking! 😊

Posted on Leave a comment

Avocado, Basil, and Grilled Tomato Sandwich: A Perfect Breakfast Option

Looking for a healthy and delicious breakfast option? This Avocado, Basil, and Grilled Tomato Sandwich is the perfect way to kickstart your day. Packed with fresh ingredients and bursting with flavors, this sandwich not only tastes amazing but also provides essential nutrients to keep you energized throughout the morning. The creamy avocado, aromatic basil, and juicy grilled tomatoes come together in a delightful combination that will make your taste buds sing.

Ingredients:


Sliced avocado
Basil leaves
Grilled tomato slices
Salt and pepper
Butter

Method:

Wash and clean the basil leaves. Cut the avocado into slices.


Heat a pan and add butter. Grill the tomato slices in the butter until they are slightly charred. Sprinkle with salt and pepper.

Toast your bread slices until they are golden and crispy.


Start by placing the grilled tomato slices on one piece of toast.


Layer the avocado slices on top of the tomatoes.


Add the fresh basil leaves. Sprinkle a little more salt and pepper for extra flavor.


Serve: Cut the sandwich into two pieces and serve with your favorite sauce or chutney.

Why This Sandwich is Great for Breakfast
This sandwich is not only quick and easy to make but also incredibly nutritious. Avocados are rich in healthy fats and fiber, which help keep you full longer. Basil adds a refreshing flavor and is packed with antioxidants. Grilled tomatoes bring a slight sweetness and are a good source of vitamins A and C. Together, these ingredients create a balanced meal that is perfect for a satisfying breakfast.

Give this Avocado, Basil, and Grilled Tomato Sandwich a try and start your day on a delicious note. It’s a simple yet flavorful recipe that you can enjoy any day of the week. Don’t forget to share your feedback or any variations you try! Enjoy your breakfast!

Explore More Delicious Sandwich Recipes
If you enjoyed this sandwich, be sure to check out our other sandwich recipes for more tasty ideas. Here’s is some of our favorites: Hummus sandwich , Mushroom Cheese Sandwich, Hung Curd Spinach Cheese Sandwich.

Happy cooking!

Posted on Leave a comment

Hummus Veggie Sandwich: A Nutritious and Delicious Delight

There’s something incredibly satisfying about biting into a sandwich that’s not only packed with flavor but also brimming with nutrients. Enter the Hummus Veggie Sandwich, a perfect blend of creamy, flavorful hummus and a colorful medley of fresh vegetables. This sandwich is a fantastic option for a quick breakfast, a healthy snack, or even a light dinner.

Hummus, made from blended chickpeas, tahini, lemon juice, and garlic, is a staple in many kitchens for good reason. It’s rich in protein, fiber, and healthy fats, making it a nourishing choice for any meal. Its creamy texture and savory taste complement a variety of veggies, enhancing the overall flavor of the sandwich.

Ingredients: For Hummus:

  • 1 cup boiled Chickpeas
  • 2-3 cloves of Garlic
  • 2 tablespoons Olive oil
  • 1 tablespoon Sesame Seeds (Tahini)
  • 1/2 teaspoon Salt

For the Sandwich:

  • Hummus (prepared from the above ingredients)
  • 4 slices of Bread
  • 1/2 Cucumber, thinly sliced
  • 1/2 Onion, thinly sliced
  • 1 Tomato, thinly sliced

Instructions:

In a food processor or blender, add the boiled Chickpeas, garlic, olive oil, sesame seeds, and salt.

Blend the ingredients until you get a smooth and creamy consistency. If the mixture is too thick, you can add a little water or more olive oil to achieve the desired texture. Taste the Hummus and adjust the salt or other seasonings to your preference.

Take two slices of bread and spread a generous amount of Hummus on each slice. Place the thinly sliced cucumber, onion, and tomato on one slice of bread, creating a layer of fresh veggies.

If you prefer a warm and toasty sandwich, you can grill it in a pan or sandwich press. Heat a non-stick pan or sandwich press over medium heat. Place the assembled sandwich on the hot pan or press and cook for a few minutes on each side until the bread turns golden brown and crispy.

Once the sandwich is ready, remove it from the pan or press (if you grilled it). Cut the sandwich in half or quarters, if desired, and serve immediately. You can enjoy the Hummus sandwich as it is, or pair it with a side salad or your favorite dipping sauce.

This Hummus sandwich is not only delicious but also packed with nutrients, making it a healthy and satisfying meal option for any time of the day. Enjoy your tasty and nutritious creation!

Whether you’re packing it for lunch, serving it at a picnic, or enjoying it as a quick dinner at home, this sandwich is sure to satisfy. It’s easy to make, highly customizable, and perfect for meal prep. Plus, it’s a fantastic way to enjoy a variety of fresh, nutrient-dense vegetables in one tasty package.

Give this Hummus Veggie Sandwich a try, and discover a new favorite that’s as healthy as it is delicious. Your taste buds and your body will thank you!

Posted on Leave a comment

Fresh Basil Pesto- Vegan Recipe

One of my favorite things about summer is the bounty of fresh herbs that are in my kitchen garden. There’s something so satisfying about plucking fresh herbs that you grew with so much love.

Pesto is not only delicious but super healthy too. It is a great source of Vitamin K, Vitamin E & Vitamin C. It is highly rich in antioxidants that helps fight free radicals. In fact, it helps to reduce your blood sugar, cholesterol, blood pressure, and cancer risk. Also, high in unsaturated fat, it is great for your heart health and for your kids healthy weight gain.

What is a pesto and how you can use it?

Traditional pesto is a blend of fresh sweet basil, garlic, pine nuts, extra-virgin olive oil and Parmesan cheese. While pesto may seem fancy and gourmet, but homemade pesto is very easy to make. It will literally take you 5 minutes. Just a few blitz in the food processor and it’s done. The flavor of sweet basil is between sweet and savory, with hints of mint, star anise, and pepper.

Pesto can be used to make grilled sandwiches, as a pizza sauce, spaghetti, salad dressing, eggs, grilled vegetables. Now you get the idea, so you can get creative and use it to create different things.

Once you’ve made the classic basil pesto recipe, try changing it up! In this recipe, I swapped the pine nuts with cashews and pumpkin seeds. 

Recipe: makes 1 cup of Pesto 

Ingredients:

  • 2 cups tightly packed Sweet Basil
  • 1/4th cup Cashews
  • 1/4th cup Pumpkin seeds
  • 1/4th cup Olive Oil
  • 2 cloves garlic 
  • Salt & Pepper to taste
  • 1 tsp Lemon juice (taste and adjust)

Method:

  1. In a food processor combine, cashews, pumpkin seeds, salt & pepper. 
  2. Add lemon juice, basil leaves & garlic. Give it a nice blitz. 
  3. Now with the food processor running, keep adding olive oil little by little till everything comes together. Do not add water. Pesto is suppose to be a coarse paste and not a smooth one. 

Pesto recipe variations

  1. If you want to make it nut free, you can add hemp seeds or sunflower seeds or a combination of both. It gives a nice nutty flavour without the use of nuts. 
  2. Add Parmesan cheese if you want to make it rich & cheesy. Be mindful of salt if adding parmesan.
  3. You can use different herbs. You can try pesto with mint leaves, coriander leaves or fresh carrot leaves. You can also try combination of basil with mint leaves or basil with coriander leaves.
  4. You can also add roasted red bell pepper and sun-dried tomatoes for that extra punch. 
Posted on Leave a comment

Easy English Scone Recipe

food man people woman

The humble scone: a basic yet versatile bakery delight that’s been a cherished part of British culinary tradition since its Scottish birth. Now a centerpiece in the beloved English afternoon tea, this simple pastry has won hearts globally with its tender, crumbly texture and perfect balance of flavors.

What Makes English Scones Special?

Distinct from the sweet, varied-flavor scones of America, the traditional English scone is typically plain or dotted with currants. The scone’s charm lies in its modesty – a circular, slightly sweet delight baked to golden perfection. Its tender, crumbly texture makes it an ideal companion for clotted cream and strawberry jam, in a combo popularly known as a “cream tea”. English scones serve as a neutral, yet satisfying canvas allowing the harmonious marriage of cream and jam to take center stage.

The Tradition of English Scones

The custom of baking and relishing scones is entwined with the English tradition of afternoon tea, dating back to the 1840s. The habit, initiated by Anna, the Duchess of Bedford, intended to bridge the hunger gap between lunch and a late dinner. Now, it’s an integral part of British culture, replete with finger sandwiches, a variety of cakes, pastries, and, of course, scones served with clotted cream and jam.

Let’s dive into the recipe of a traditional English scone and explore its delectable variations, accommodating varied dietary needs and preferences.

1. Traditional English Scone Recipe

Whip up a classic English scone with these simple ingredients and steps:

Ingredients:

  • 3 cups all-purpose flour
  • 1/2 cup sugar
  • 5 teaspoons baking powder
  • 1/2 teaspoon salt
  • 3/4 cup (1 1/2 sticks) unsalted butter, chilled and cut into small cubes
  • 1 cup whole milk
  • 1 egg
  • 1 teaspoon pure vanilla extract

For the egg wash:

  • 1 egg beaten with a splash of milk

Instructions:

  1. Preheat your oven to 200°C (approximately 392°F) and line a baking tray with parchment paper.
  2. In a large bowl, combine the flour, sugar, baking powder, and salt.
  3. Add the cold, cubed butter to the flour mixture. Use your fingers, a pastry cutter or a food processor to work the butter into the flour until the mixture resembles coarse crumbs.
  4. In a separate bowl, whisk together the milk, egg, and vanilla extract. Gradually add this to the flour mixture, stirring until just combined. Remember, overmixing can lead to tough scones.
  5. Turn the dough out onto a lightly floured surface and knead it gently a few times to bring it together.
  6. Pat the dough into a rectangle about 1 inch thick. Using a round biscuit cutter (or a glass), cut out scones from the dough and place them on the prepared baking tray. You can re-roll the scraps to cut out more scones.
  7. Brush the tops of the scones with the egg wash.
  8. Bake in the preheated oven for 15-20 minutes or until the scones are golden brown.
  9. Allow the scones to cool on the tray for a few minutes, then transfer them to a wire rack to cool further.
  10. Serve warm with clotted cream and strawberry jam, or simply butter.

Enjoy your homemade traditional English scones with this Easy Recipe!

Variations

2. Vegan Scones – In a compassionate twist on the classic, replace butter with coconut oil and use plant-based milk. You can even replace the traditional egg wash with a simple brush of almond milk for a golden finish.

3. Gluten-Free Scones – Perfect for those with dietary restrictions. Replace regular flour with a mix of almond and coconut flour. A hint of xanthan gum will keep your gluten-free scones springy and delicious.

4. Cheese and Chive Scones – Transform the humble scone into a savory delight. Add grated sharp cheddar and finely chopped chives to your basic scone mixture. Serve warm with butter for a satisfying snack or as a side to a hearty soup.

5. Blueberry Scones – Introduce a fruity twist to the classic scone. Fold in fresh blueberries to your scone dough for a burst of sweet and tart flavors with every bite.

6. Lemonade Scones – Intriguing and surprisingly delightful, lemonade scones are exceptionally light and fluffy. The lemonade offers a subtle sweetness and hint of citrus to these novel scones.

Frequently Asked Questions

  1. What are English Scones?
    • English scones are a type of baked goods that originated in the United Kingdom. They are often lightly sweetened and typically served with clotted cream and jam.
  2. How are English Scones different from other types of scones?
    • English scones are generally less sweet and more dense than American scones. They are usually plain or have currants or raisins added in, while American scones often come in a variety of flavors and can be packed with mix-ins like berries or chocolate chips.
  3. When are English Scones traditionally made and served?
    • English scones are traditionally made and served for afternoon tea, a British custom that usually takes place around 4pm. However, they can also be enjoyed for breakfast or brunch.
  4. Can I make English Scones vegan?
    • Yes, it’s possible to make vegan English Scones by replacing the dairy milk with a plant-based milk and using a vegan butter substitute or coconut oil instead of traditional butter.
  5. Can I add fruits to my English Scones?
    • Absolutely! You can customize your English Scones with a variety of fruits such as blueberries, strawberries, or apples. You can also add dried fruits like raisins or currants.
  6. What is the best way to serve English Scones?
    • English Scones are best served warm with clotted cream and strawberry jam. You can also serve them with butter or whipped cream.
  7. Can I make these scones gluten-free?
    • Yes, you can make gluten-free scones by using a gluten-free flour blend. Just make sure to blend is meant for baking and that it contains xanthan gum, which helps with texture and rise.
  8. How long do homemade English Scones last?
    • Homemade English Scones can last for up to two days when stored in an airtight container at room temperature. For longer storage, you can freeze them for up to three months.
  9. Can I reheat my English Scones?
    • Yes, to reheat English Scones, warm them in a preheated 350°F oven for about 10 minutes.
  10. I’m following a keto diet. Can I still make English Scones?
    • Yes, to make keto-friendly English Scones, you can substitute regular flour with almond flour or coconut flour and replace the sugar with a low-carb sweetener.

From vegan to gluten-free, fruity to savory, scones offer endless possibilities. Their versatility ensures there’s a variant to satisfy every palate and dietary preference. Whether it’s a soft, fluffy scone to accompany your afternoon tea, a healthy oatmeal scone for a quick breakfast, or a savory cheese scone to serve with a winter soup, mastering the art of scone-making offers a world of culinary delights.

Embrace the tradition, master the basic recipe, and let your imagination guide your scone variations. Happy baking!