Nuts are one of nature’s most powerful—and underutilized—ingredients. Packed with nutrients, flavor, and texture, they are a culinary multitool that can add health and depth to nearly any dish. From your morning smoothie to your evening dinner plate, and every snack in between, nuts can bring variety, satisfaction, and nourishment. Here’s a practical, creative, and engaging guide on how to make nuts a staple in your daily eating routine.
Why Nuts Matter: A Nutritional Powerhouse
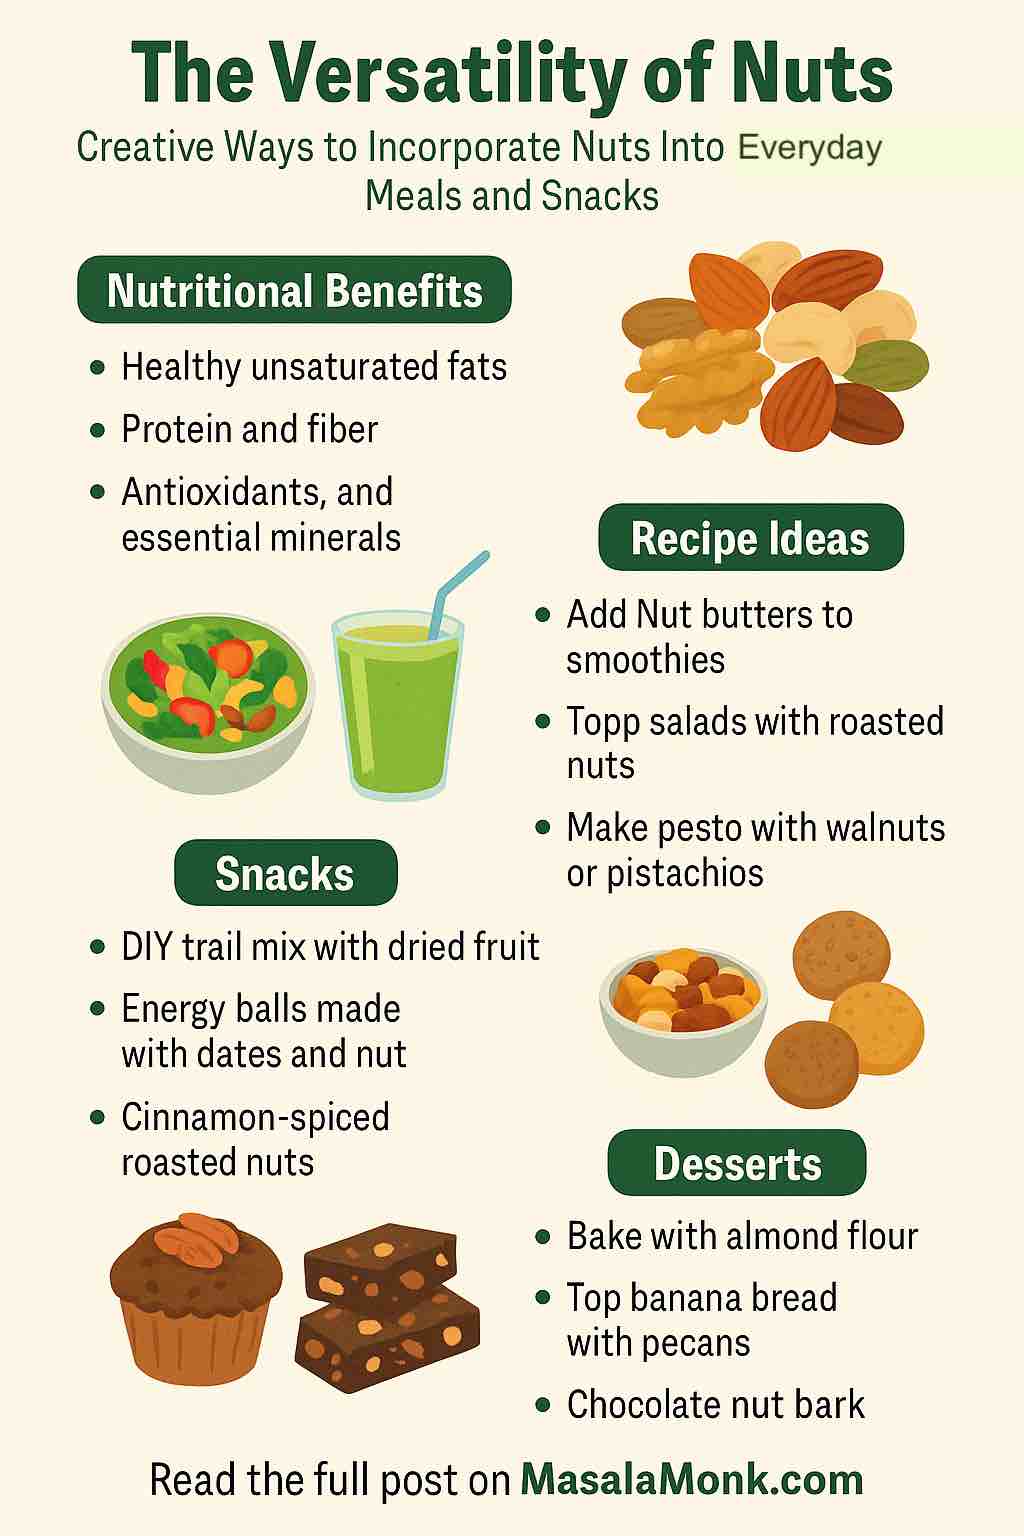
Nuts like almonds, walnuts, pistachios, and cashews are rich in healthy fats, plant protein, fiber, and essential micronutrients including magnesium, vitamin E, selenium, and calcium. A single ounce (30g) of almonds, for example, contains about 6g of protein and 80mg of calcium. Regular consumption is linked to improved heart health, better weight management, and reduced inflammation. Despite their small size, they can make a big impact on your diet and overall well-being.
Morning Boosters: Start Your Day Right
1. Nut-Infused Smoothies
Blend nut butters like almond, peanut, or cashew into smoothies for added creaminess, protein, and richness. Combine with banana, spinach, dates, and a milk of your choice for a nutritious start.
2. Yogurt & Smoothie Bowls
Top bowls with chopped nuts, chia seeds, and a drizzle of nut butter. Try pistachios with strawberries or walnuts with apple slices and cinnamon.
3. Homemade Nut Granola
Bake a mix of rolled oats, honey, olive oil, and your favorite nuts for a crunchy, customizable granola.
4. Savory Nut Toasts
Spread cashew cream cheese or almond ricotta on whole grain toast. Add avocado, smoked paprika, or sliced tomatoes for a gourmet touch.
Midday & Main Meal Marvels
1. Nutty Salads with Texture
Toss roasted pecans, pine nuts, or almonds into salads. Combine with arugula, goat cheese, and citrus segments for a flavorful twist.
2. Stir-fries and Curries
Add cashews to Thai or Indian curries, or ground peanuts in Indonesian sauces. They soak up spices beautifully and offer hearty texture.
3. Nut-Crusted Proteins
Coat chicken, tofu, or salmon in crushed pistachios, almonds, or hazelnuts for a crunchy finish.
4. Innovative Pesto & Sauces
Swap traditional pine nuts for walnuts or pistachios in your pesto. Create creamy peanut or cashew sauces for noodles, wraps, or dipping.
5. Rice & Grain Upgrades
Sprinkle toasted slivered almonds or pine nuts over couscous, quinoa, or brown rice to add layers of flavor and crunch.
Snacks That Travel Well
1. DIY Trail Mix
Build your own mix with roasted nuts, dried fruits, dark chocolate chips, and seeds like pumpkin or sunflower.
2. Energy Balls and Bars
Blend dates, oats, and nut butters with extras like cocoa nibs, coconut, or protein powder. Roll into balls or press into bars for a grab-and-go option.
3. Spiced & Roasted Nuts
Roast nuts with bold flavors—sweet (cinnamon-honey), savory (rosemary-garlic), or spicy (chili-lime). Perfect for snacks, salads, or cocktails.
4. Portable Nut Dips
Make muhammara (roasted red pepper and walnut dip) or use almond butter as a dip for sliced apples, carrots, or celery.
Sweet but Smart: Nut-Based Desserts
1. Nut Flours for Baking
Use almond flour or hazelnut meal in gluten-free baking recipes for cookies, muffins, and cakes.
2. Nut Toppings
Sprinkle crushed nuts on banana bread, oatmeal cookies, or fruit crisps to elevate texture and flavor.
3. Chocolate Nut Barks & Clusters
Melt dark chocolate and mix with nuts and seeds. Spread into thin bark or form clusters for a simple, satisfying dessert.
4. Stuffed Dates
Fill Medjool dates with nut butter and dip in dark chocolate. Finish with a pinch of sea salt for a luxurious treat.
Global Inspirations for Everyday Variety
- Middle Eastern: Add pine nuts to hummus, or make classic baklava with layers of phyllo and crushed walnuts or pistachios.
- Asian: Use peanuts in satay sauce or sprinkle chopped cashews over Thai noodle bowls.
- Mediterranean: Blend walnut pesto for pasta or spread almond dips on flatbread.
- Western Vegetarian: Make a hearty nut roast for a meatless dinner centerpiece.
Tips for Storage, Substitutes & Safety
- Storage: Keep nuts in airtight containers; refrigerate or freeze to prevent rancidity.
- Portion Control: Stick to about 30g/day to balance calorie intake and health benefits.
- Low-Sodium Option: Choose raw or unsalted nuts for heart-friendly snacking.
- Allergy Alternatives: Try sunflower seed butter, pepitas, or coconut flakes as substitutes.
Final Thoughts: Small Changes, Big Impact
Whether you’re upgrading your breakfast, adding crunch to your salad, or experimenting with global flavors, nuts can play a delicious and meaningful role in your meals. They’re not just a snack—they’re an ingredient that bridges convenience, flavor, and wellness. Start small, mix and match, and you’ll soon discover that a handful of nuts can go a long way.
Ready to get nutty in the kitchen? Start today with a new recipe or a fresh twist on an old favorite.
✅ Summary Table
| Use Case | Nut Application | Benefit |
|---|---|---|
| Smoothies/Bowls | Nut powders, butters, chopped nuts | Creaminess, protein, crunch |
| Cooking | Nut‑based sauces, pestos, crusts, meat sub | Flavor, texture, plant protein |
| Snacks & Bars | Trail mix, energy balls, spiced nuts | On‑the‑go nutrition |
| Baking/Desserts | Nut flours, toppings, barks | Healthier indulgence |
| Gastro-culture | Muhammara, karedok, nut roast, satays | Global authenticity |
| Gifting/Party | Jar mixes, charcuterie nuts | Presentation, convenience |