Posted on Leave a comment

Kiwi Smoothie Recipe

Creamy pale-green kiwi smoothie in a glass with sliced kiwi and banana on a breakfast counter.

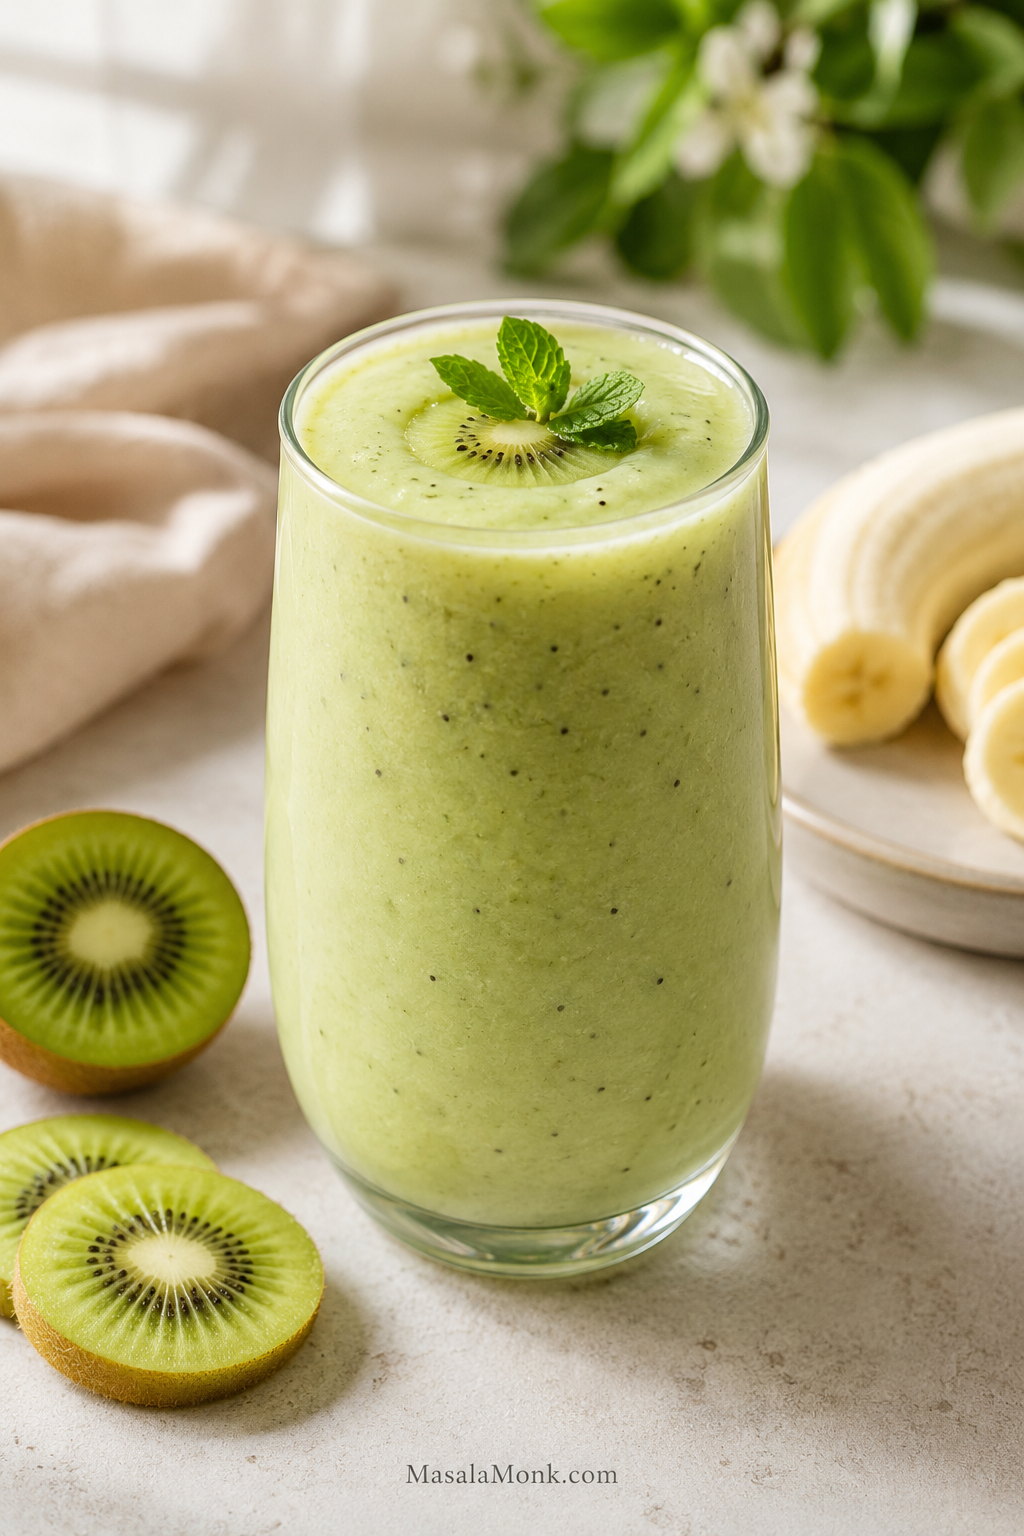
This kiwi smoothie recipe is creamy, fresh, tangy-sweet, and easy to adjust with banana, yogurt, milk, strawberry, mango, or dairy-free swaps. It takes about 5 minutes, but it still gives you enough control to avoid the usual problems: a smoothie that tastes too sour, too thin, too watery, too seedy, or too bland.

Done right, it tastes bright and creamy at the same time — fresh enough for a warm morning, but filling enough to feel like breakfast.

The base is simple: ripe kiwi for brightness, frozen banana for creaminess, yogurt for body, and just enough liquid to help the blender move. From there, you can make it lighter with coconut water, fruitier with orange juice, thicker as a smoothie bowl, greener with spinach, or sweeter with mango and strawberries.

Start with the classic kiwi banana smoothie, then adjust it to fit what you have. If your kiwis are sharp, jump to the fixes section. If you want a no-yogurt smoothie, a no-banana version, or a kiwi shake-style drink, those options are built into the guide too.

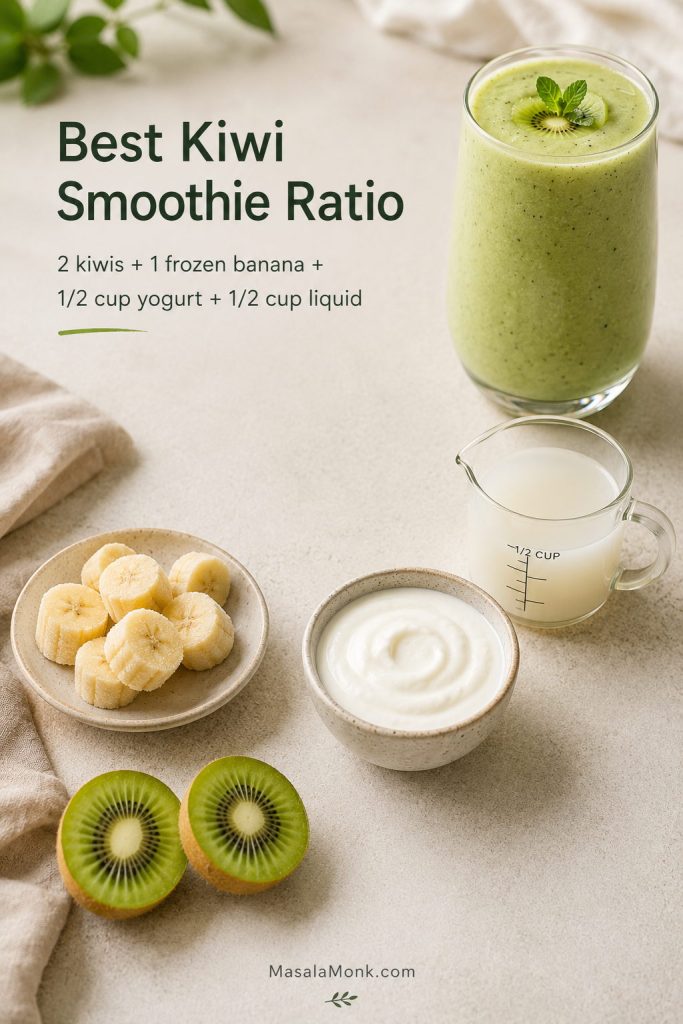
Quick Answer: Best Kiwi Smoothie Recipe Ratio

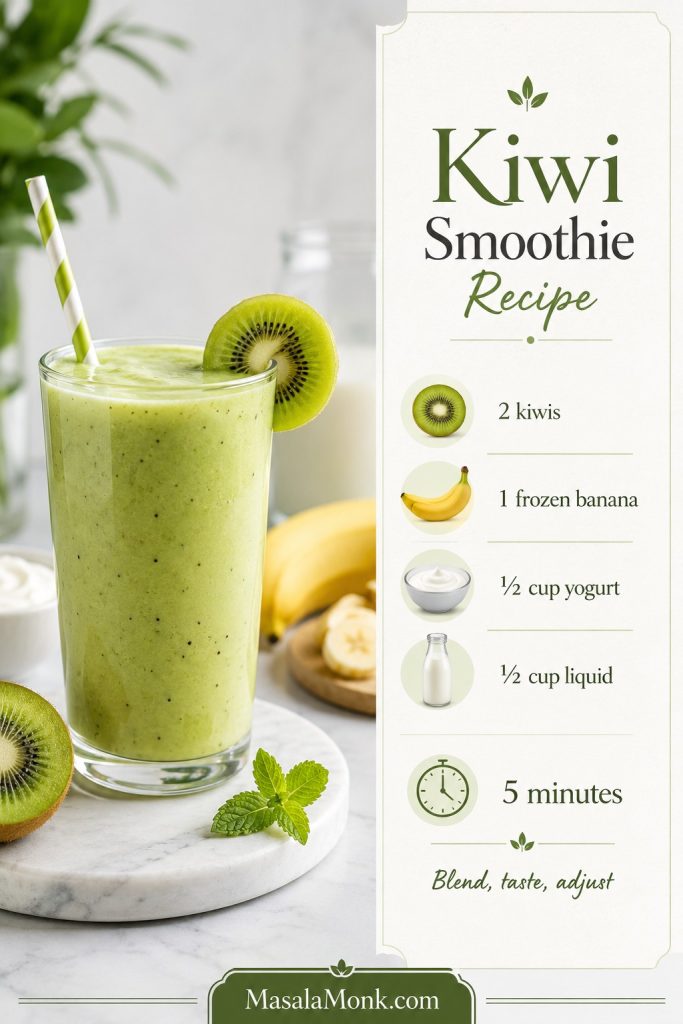
The best kiwi smoothie ratio is 2 ripe kiwis + 1 frozen banana + ½ cup yogurt + ½ cup liquid. Choose milk for a creamier smoothie, coconut water for a lighter smoothie, or orange juice for a brighter fruitier version. Add honey only if your kiwis taste sharp.

Kiwi smoothie ratio guide with kiwis, frozen banana, yogurt, liquid, and a finished smoothie
Start with this base kiwi smoothie ratio first; then taste before adding more fruit, liquid, or sweetener.

Best First Version to Try

Use 2 ripe kiwis, 1 frozen banana, ½ cup plain Greek yogurt, and ½ cup milk or coconut water. This gives you the cleanest creamy-tangy balance before you start changing the fruit, liquid, or sweetness.
Finished kiwi smoothie with ripe kiwis, frozen banana, Greek yogurt, and milk or coconut water
This first blend is the safest place to start because it gives you a creamy-tangy balance before you try strawberry, mango, no-yogurt, or no-banana versions.

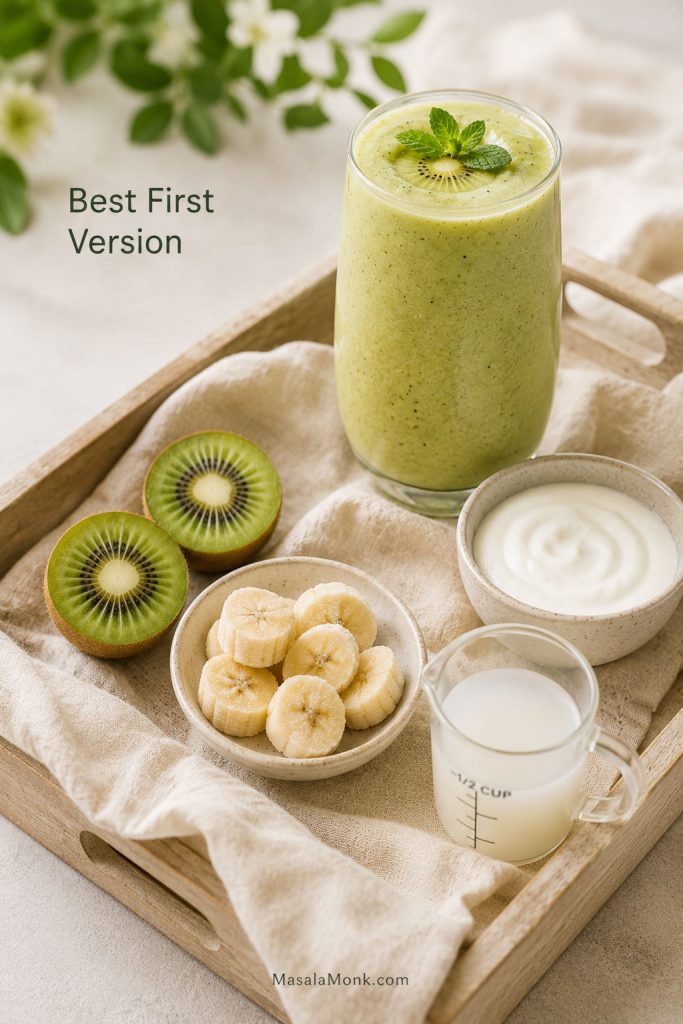
For one large smoothie, the base recipe usually means 2 peeled kiwis, 1 medium frozen banana, ½ cup Greek yogurt or plain yogurt, and ½ cup milk, water, coconut water, or orange juice. Blend until smooth, taste, then adjust before pouring.

The formula works because each ingredient has a job. Kiwi brings the bright fruit flavor, banana softens the tartness, yogurt gives body, and the liquid helps everything blend. Once that balance is right, the smoothie tastes fresh instead of sharp or watery.

If you already know what went wrong with your last smoothie, the troubleshooting table will help you adjust sourness, thickness, sweetness, and texture quickly.

How to Adjust the Ratio

Want your kiwi smoothie… Add or adjust this
Creamier Frozen banana, Greek yogurt, avocado, or a splash of milk.
Sweeter Ripe banana, mango, strawberries, or 1–2 teaspoons honey.
Brighter Orange juice as the liquid or a tiny squeeze of lime.
Lighter Coconut water, water, cucumber, or spinach.
Thicker Frozen banana, frozen mango, chia seeds, or less liquid.
Dairy-free Almond milk, oat milk, coconut water, plant yogurt, mango, or avocado.
Four kiwi smoothie glasses showing creamier, sweeter, brighter, and lighter adjustment options
Small adjustments change the whole drink, so correct one thing at a time: body, sweetness, brightness, or overall lightness.

From there, the rest of the recipe is mostly about control. If your kiwi is very sweet, you may not need honey. If it tastes sharp, banana, mango, or yogurt will smooth it out quickly without changing the whole recipe.

Ingredients for a Creamy Kiwi Smoothie

Kiwi smoothie ingredient guide with kiwi, banana, yogurt, liquid, mango, spinach, chia, oats, and avocado grouped by purpose
Each ingredient has a clear job: kiwi brings brightness, banana and yogurt add body, while the liquid decides whether the smoothie feels creamy, light, or bright.

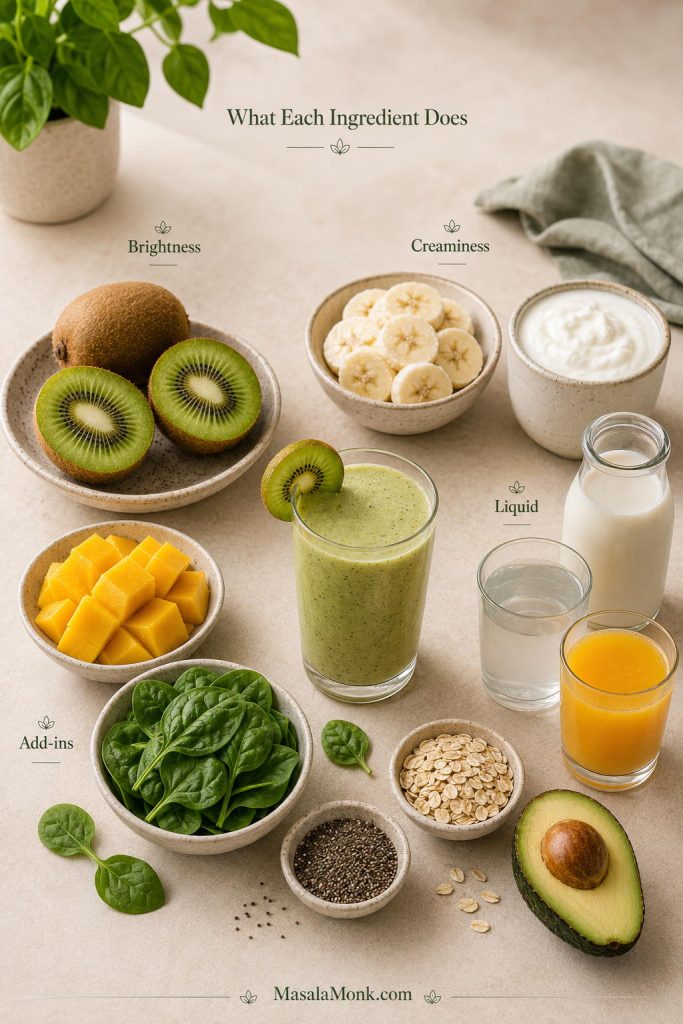
A good smoothie recipe using kiwis needs balance. Kiwi gives the drink its bright, tangy flavor, but it needs something creamy or sweet beside it so the smoothie does not taste thin or harsh. The best version is not just about adding kiwi; it is about giving kiwi the right support.

Kiwi

Kiwi ripeness guide showing firm kiwi, ripe kiwi, and very soft kiwi for smoothies
Ripe kiwis usually make a smoother, sweeter smoothie; however, firm kiwis can taste grassy or harsh once blended.

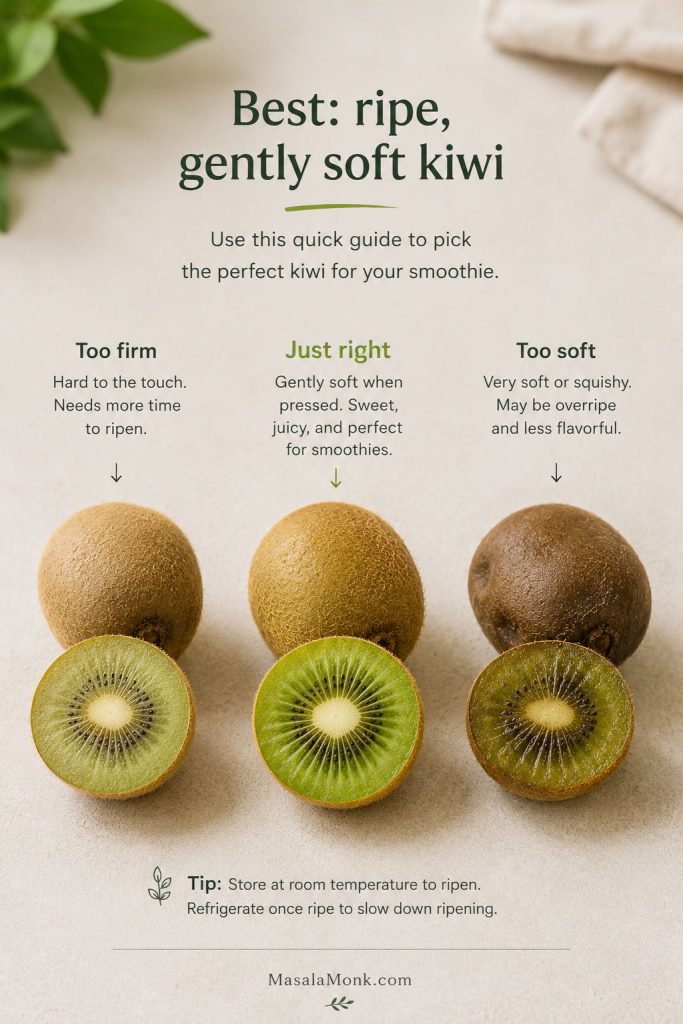
Ripe kiwis make the best smoothie. They should give slightly when pressed and smell fresh, not fermented. Hard kiwis can taste grassy, sour, or harsh once blended, while overripe kiwis can make the smoothie taste dull.

For the smoothest texture, peel the kiwi before blending. Kiwi skin is edible, but it can make a smoothie feel fibrous or slightly fuzzy, especially if your blender is not very powerful.

Fresh or frozen kiwi? Fresh kiwi gives the brightest flavor. Frozen kiwi makes the smoothie colder and thicker, but it works best with banana, mango, yogurt, or another creamy ingredient so the drink does not turn icy.
Fresh kiwi slices compared with frozen kiwi chunks for smoothie making
Fresh kiwi gives the brightest flavor, while frozen kiwi helps chill and thicken the smoothie when it is paired with banana, mango, yogurt, or another creamy ingredient.

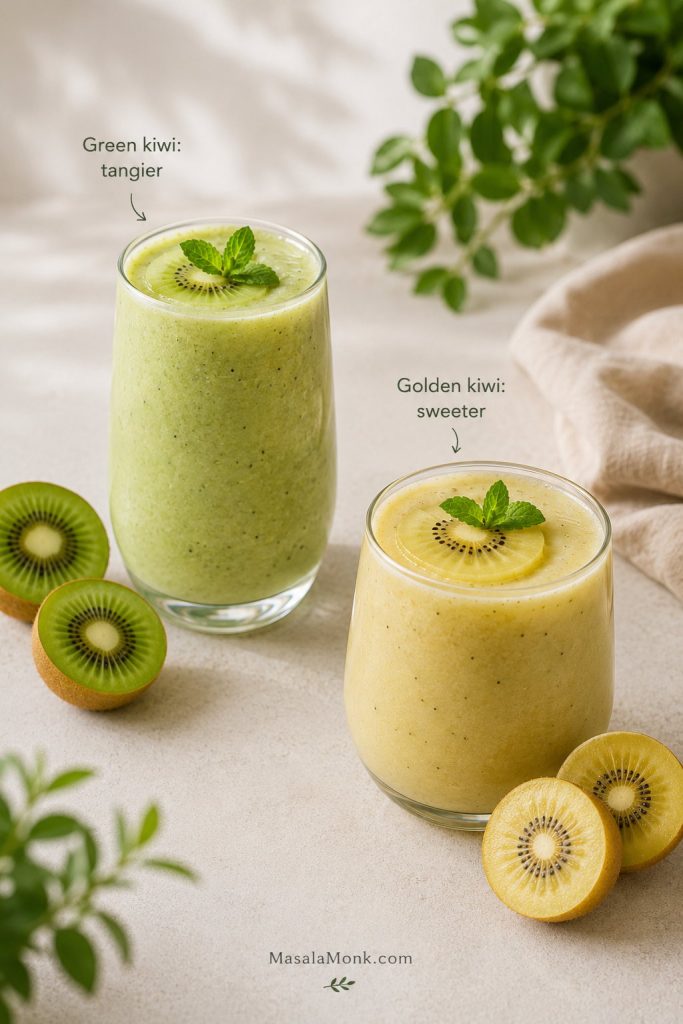
Green kiwi gives the classic tangy flavor. Golden kiwi is usually sweeter and softer, so it can work well if you want a milder smoothie with less added sweetener.

Green kiwi smoothie and golden kiwi smoothie shown side by side with matching fruit
Green kiwi gives the classic tangy smoothie flavor, whereas golden kiwi makes the drink softer, sweeter, and a little milder.

Banana

Banana is the easiest way to make the drink creamy, especially in a recipe where kiwis bring most of the tartness. A frozen banana works best because it chills and thickens the drink without needing lots of ice. For a less sweet smoothie, use half a banana and add more yogurt, mango, or avocado for body.

Yogurt

Plain Greek yogurt makes the smoothie thicker and more satisfying. Regular plain yogurt gives a softer, drinkable texture. For a dairy-free version, plant yogurt, almond milk, coconut water, avocado, chia, oats, and frozen mango can all help replace some of that body. The no-yogurt variation gives the easiest swaps.

Liquid

The liquid decides whether the smoothie tastes creamy, light, or bright. Milk makes it mellow, coconut water keeps it fresh, orange juice makes it fruitier, and water keeps it simple but thinner. Start with ½ cup and add more only if the blender needs help.

Optional Add-Ins

Spinach, mango, pineapple, chia seeds, oats, protein powder, avocado, mint, and lime can all work with kiwi. Add them with a purpose: mango for sweetness, avocado for creaminess, spinach for a green smoothie, chia or oats for thickness, and lime only when the smoothie needs a sharper finish.

How to Make a Kiwi Smoothie

Liquid being poured into a blender with kiwi, banana, yogurt, and a finished smoothie nearby
Add the liquid first, because it helps the blender catch the fruit more easily and keeps the smoothie from getting watered down later.

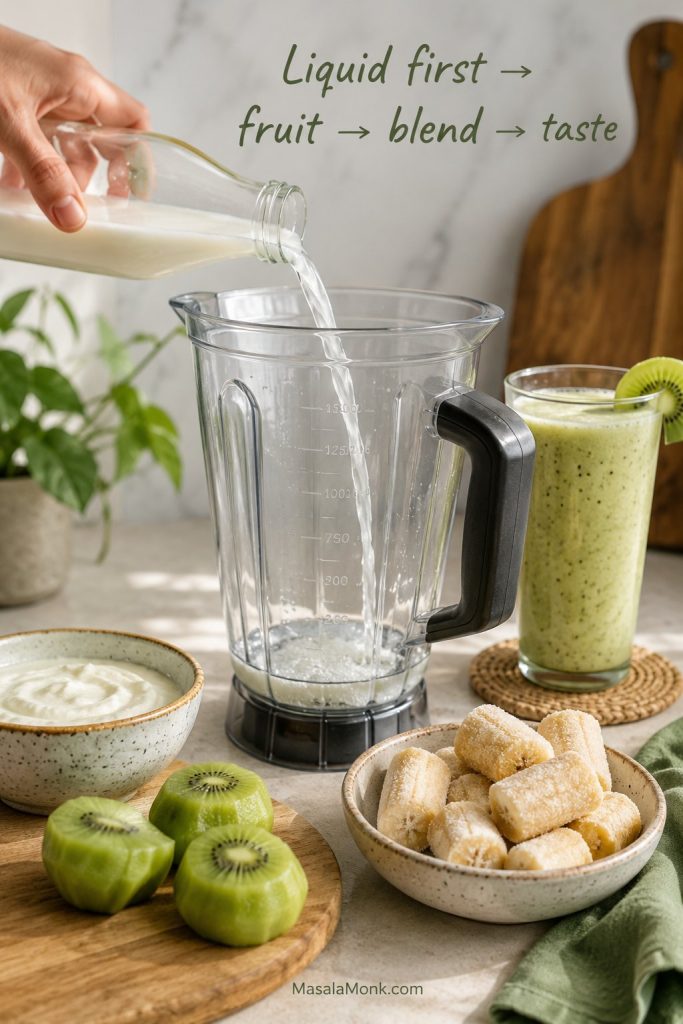
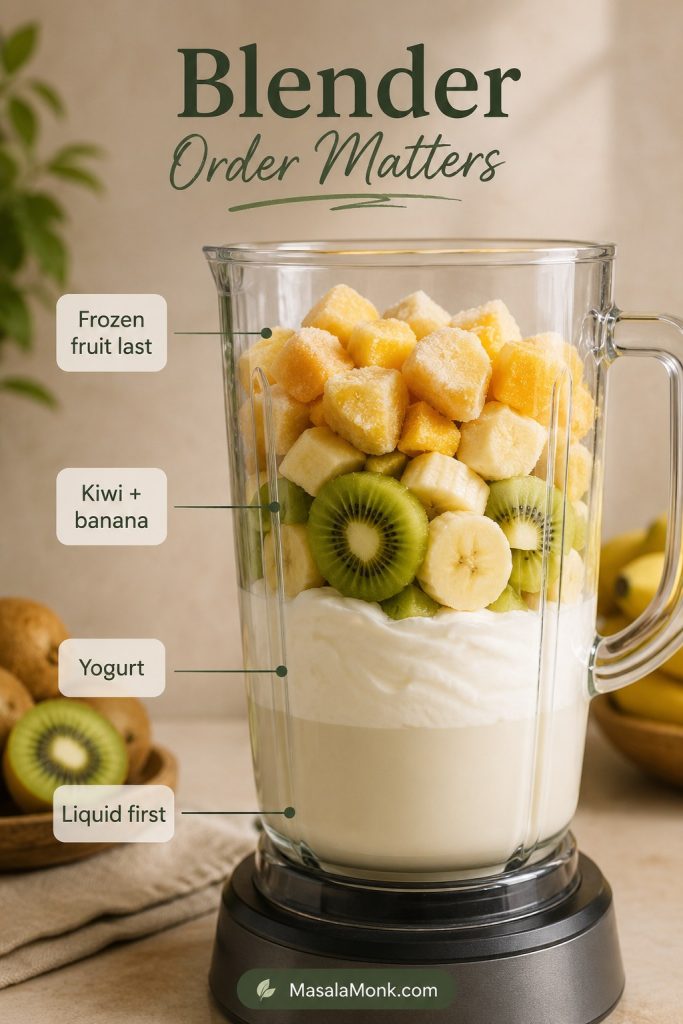
The method is simple, but the order matters when you are blending kiwis with frozen banana, yogurt, and liquid. Add the liquid first so the blender can catch the ingredients more easily, especially if you are using frozen mango, frozen strawberries, oats, or greens.

  1. Peel and chop the kiwis. Cut away the fuzzy skin for the smoothest drink.
  2. Add the liquid first. Pour milk, coconut water, orange juice, or water into the blender.
  3. Add yogurt and soft ingredients. This helps the blender move before the frozen fruit goes in.
  4. Add kiwi and banana. Break the frozen banana into chunks if needed.
  5. Add frozen fruit or ice last. Use ice only if your fruit is fresh and the smoothie needs chilling.
  6. Blend until smooth. Most versions take 30–60 seconds. Green or frozen-heavy smoothies may need 60–120 seconds.
  7. Taste before pouring. Adjust sweetness, thickness, or brightness while the smoothie is still in the blender. The fixes table below shows the quickest adjustments.
Blender tip: If the blender stalls, do not dump in a lot of liquid at once. Add 1 tablespoon at a time, blend again, and stop as soon as the smoothie moves smoothly.
Blender jar layered with liquid, yogurt, kiwi, banana, and frozen fruit for a smoothie
The right blender order matters: liquid first, creamy ingredients next, and frozen fruit last so the blades can move smoothly.

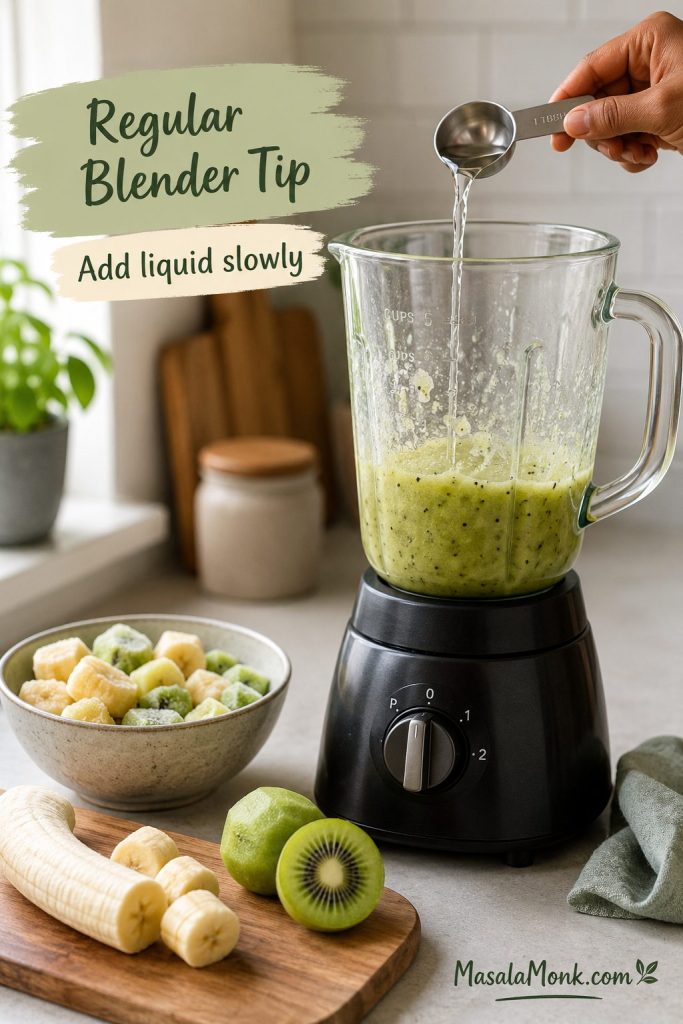
If you are using a regular blender, chop the frozen banana smaller and let very hard frozen fruit sit at room temperature for 3–5 minutes before blending. Also, add liquid first, then increase the liquid by tablespoons only if the blades stop moving.

Regular blender with kiwi smoothie ingredients and liquid being added slowly
Even a regular blender can make a creamy kiwi smoothie when the frozen fruit is chopped smaller and the liquid is added gradually.

Kiwi Smoothie Recipe Card

Kiwi smoothie recipe card with a finished smoothie and the base ingredient ratio
Save this base recipe first; once the ratio is familiar, it becomes much easier to troubleshoot texture and build variations confidently.

Kiwi Smoothie Recipe

This creamy kiwi smoothie recipe is made with ripe kiwi, frozen banana, yogurt, and your choice of milk, coconut water, orange juice, or water. It is bright, fresh, tangy-sweet, and easy to adjust.

Prep Time5 minutes
Cook Time0 minutes
Total Time5 minutes
YieldAbout 1 large 16–20 oz smoothie or 2 small 8–10 oz smoothies

Equipment

  • Blender or high-speed blender
  • Knife and cutting board
  • Measuring cups and spoons
  • Glass or jar for serving

Ingredients

  • 2 medium ripe kiwis, peeled and chopped, about 140–160 g flesh
  • 1 medium frozen banana, about 100–120 g
  • ½ cup plain Greek yogurt or regular plain yogurt, about 120 g
  • ½ cup milk, coconut water, orange juice, or water, 4 fl oz / 120 ml
  • 1–2 teaspoons honey or maple syrup, optional, 7–14 g
  • ½ cup frozen mango, strawberries, or pineapple, optional, about 70–90 g
  • ¼–½ cup ice, optional, only if your fruit is fresh and the smoothie needs chilling
  • 1 teaspoon lime or lemon juice, optional, 5 ml

Method

  1. Add the liquid to the blender first.
  2. Add the yogurt, peeled kiwi, frozen banana, and any optional frozen fruit.
  3. Blend for 30–60 seconds, or until smooth. If using greens, oats, chia, protein powder, or a lot of frozen fruit, blend for 60–120 seconds.
  4. Taste the smoothie. Add honey if it is too tart, more liquid if it is too thick, or more frozen banana/mango if it is too thin.
  5. Pour into one large glass or two small glasses and drink right away.

Notes

  • For the creamiest smoothie, use frozen banana instead of fresh banana.
  • For a dairy-free smoothie, use plant yogurt, almond milk, coconut water, mango, or avocado.
  • For a smoothie bowl, reduce the liquid to ¼ cup / 60 ml and use frozen banana or frozen mango.
  • Kiwi smoothies with milk or yogurt are best enjoyed fresh because kiwi can change the texture as it sits. See the milk, yogurt, and juice guide for more detail.
  • The final yield depends on how much frozen fruit or ice you add.

Kiwi Smoothie Variations

Five kiwi smoothie variations in different glasses with banana, strawberry, mango, spinach, and cucumber styles
A good base smoothie can move in several directions; however, changing one main ingredient at a time keeps the flavor balanced.

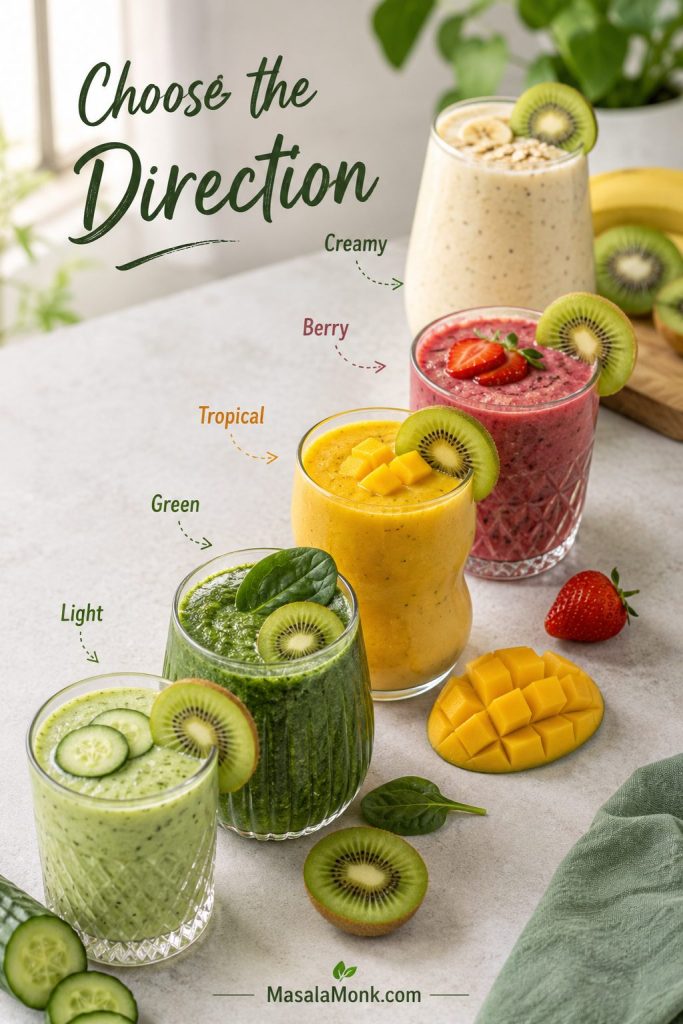
Once the base ratio tastes right, the fun part is choosing the direction. You can make it creamy and breakfast-like with banana, tropical with mango or pineapple, sharper with strawberries, greener with spinach, or lighter with cucumber and coconut water. Since kiwis bring most of the bright, tangy flavor, change one thing at a time so the blend stays balanced.

Banana Kiwi Smoothie

Creamy banana kiwi smoothie with banana slices and fresh kiwi garnish
Banana softens kiwi’s tartness and gives the smoothie a thicker breakfast-style texture without relying on extra ice.

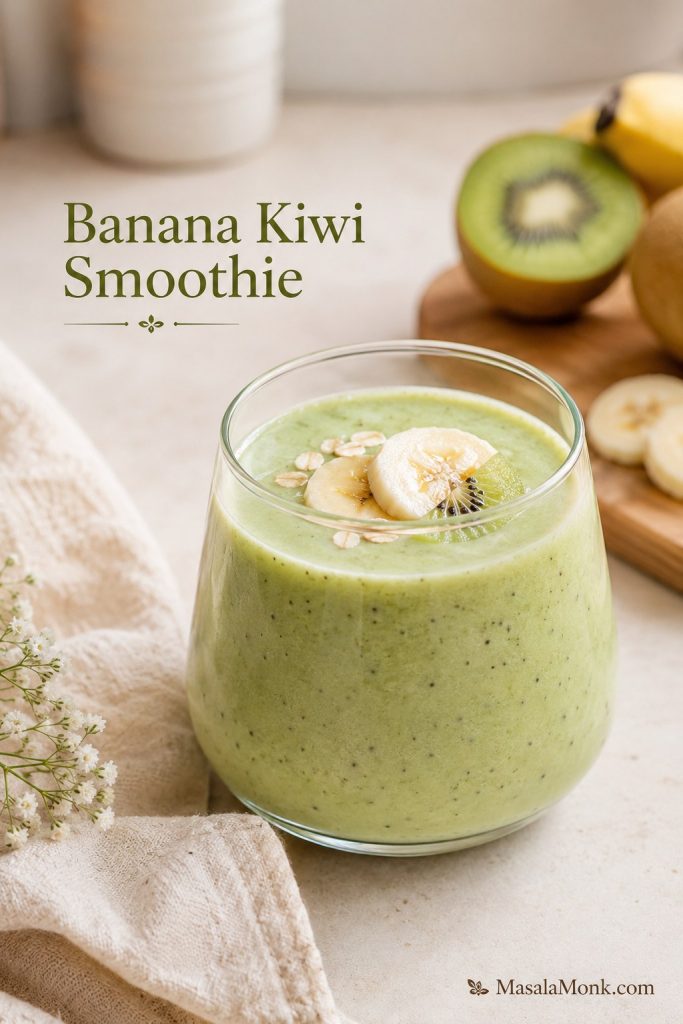
This is the easiest and creamiest version. Make the base recipe with 2 ripe kiwis, 1 frozen banana, yogurt, and milk or coconut water. The banana softens kiwi’s tartness and gives the smoothie a smooth breakfast-style texture.

Strawberry Kiwi Smoothie

Strawberry kiwi smoothie with pink and green blended layers, kiwi, and strawberries
Strawberries make the drink brighter and more familiar, while kiwi keeps the smoothie fresh, tangy, and fruit-forward.

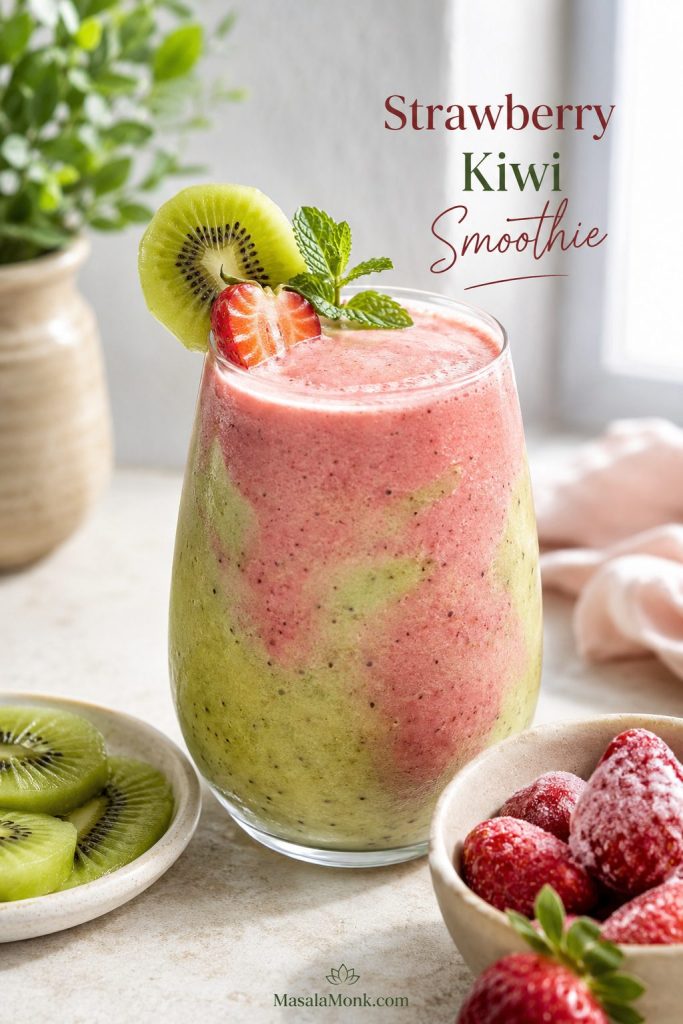
Strawberries make the smoothie taste brighter and more familiar, especially if you like a sweet-tart berry flavor. Add ½–1 cup frozen strawberries to the base recipe. Keep the banana if you want creaminess, or reduce it slightly if you want the strawberry and kiwi to taste sharper and fresher.

If you want to go deeper on the berry side, MasalaMonk also has a full strawberry smoothie guide with yogurt, no-yogurt, protein, and fruit variation ideas.

Kiwi Mango Smoothie

Golden-green kiwi mango smoothie with mango cubes and sliced kiwi
Mango is one of the best ways to soften sharp kiwi because it adds natural sweetness and body at the same time.

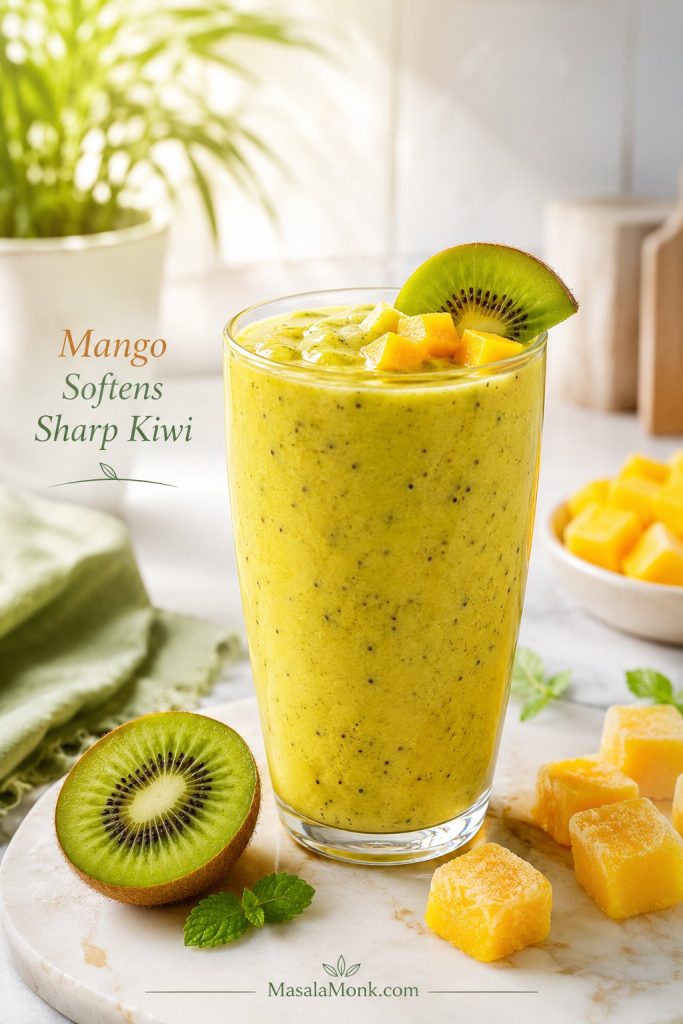
Mango is one of the easiest ways to tame sharp kiwi. It adds sweetness, body, and a tropical flavor without needing much extra sweetener. Blend ½–1 cup frozen mango with 2 kiwis, then use coconut water for a lighter drink or orange juice for a brighter one.

If mango is the fruit you use most often in smoothies, this mango smoothie recipe is a useful companion because it covers fresh mango, frozen mango, yogurt, milk, banana, no-banana, dairy-free, protein, and smoothie bowl versions.

Kiwi Pineapple Smoothie

Kiwi pineapple smoothie in a tall glass with pineapple and kiwi garnish
Pineapple pushes the smoothie in a brighter tropical direction; because it can also taste tart, banana, mango, or yogurt helps keep it balanced.

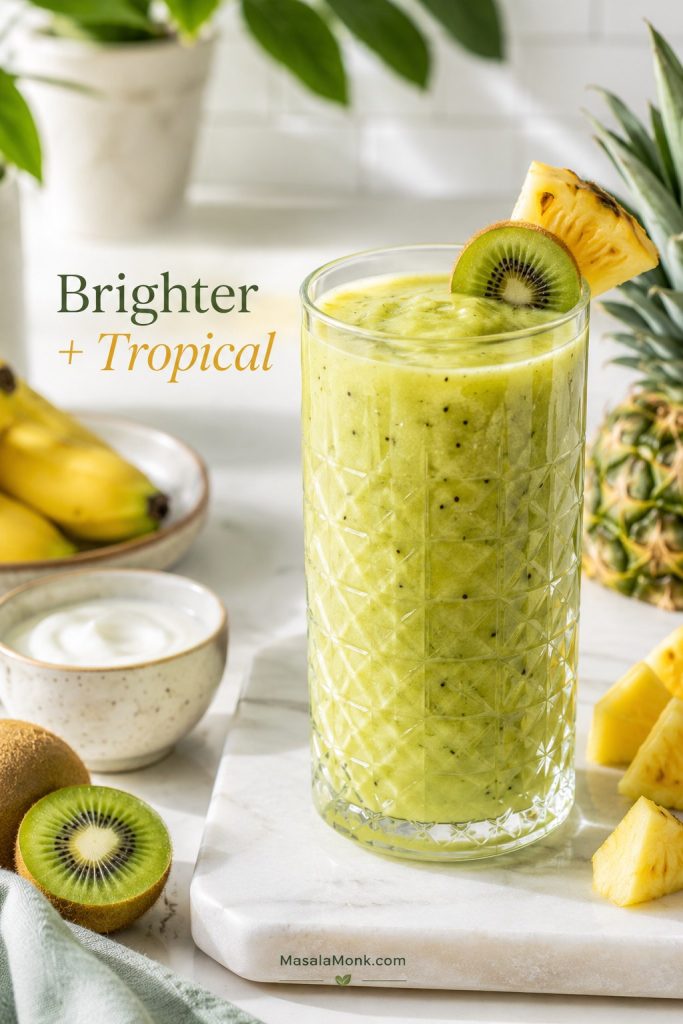
Pineapple pushes the smoothie in a sharper, juicier, more tropical direction. Frozen pineapple is especially good when you want a colder, thicker drink. Because both kiwi and pineapple can taste tart, balance this version with banana, yogurt, mango, or a small amount of honey.

Green Kiwi Smoothie With Spinach

Green kiwi smoothie with spinach, banana, mango, and kiwi garnish
Fresh spinach blends into a kiwi smoothie more gently than frozen spinach, especially when banana or mango stays in the mix for sweetness.

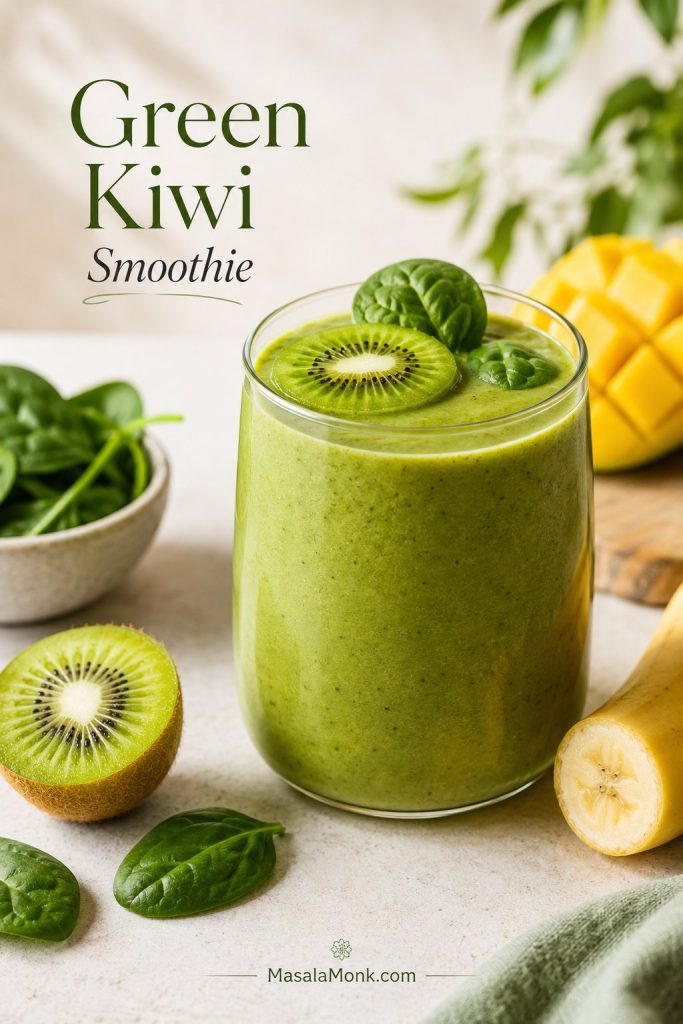
Fresh baby spinach blends into kiwi smoothies more gently than frozen spinach. Add 1 cup to the base recipe, then keep banana or mango in the mix so the smoothie still tastes sweet enough. The color becomes greener, but the flavor stays mild when the spinach is fresh and not packed too heavily.

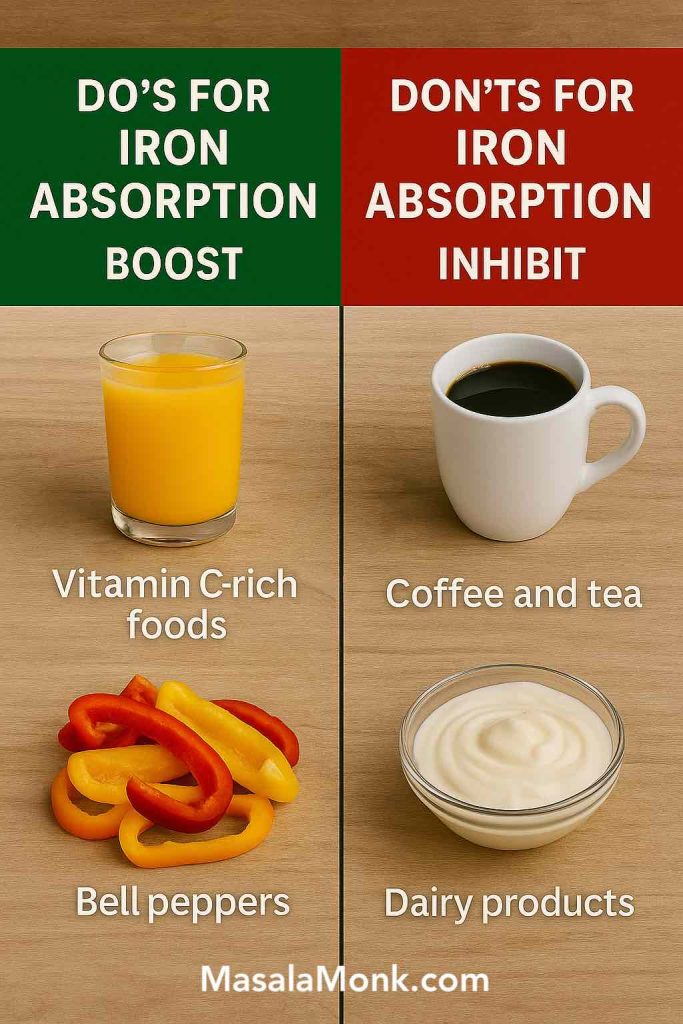
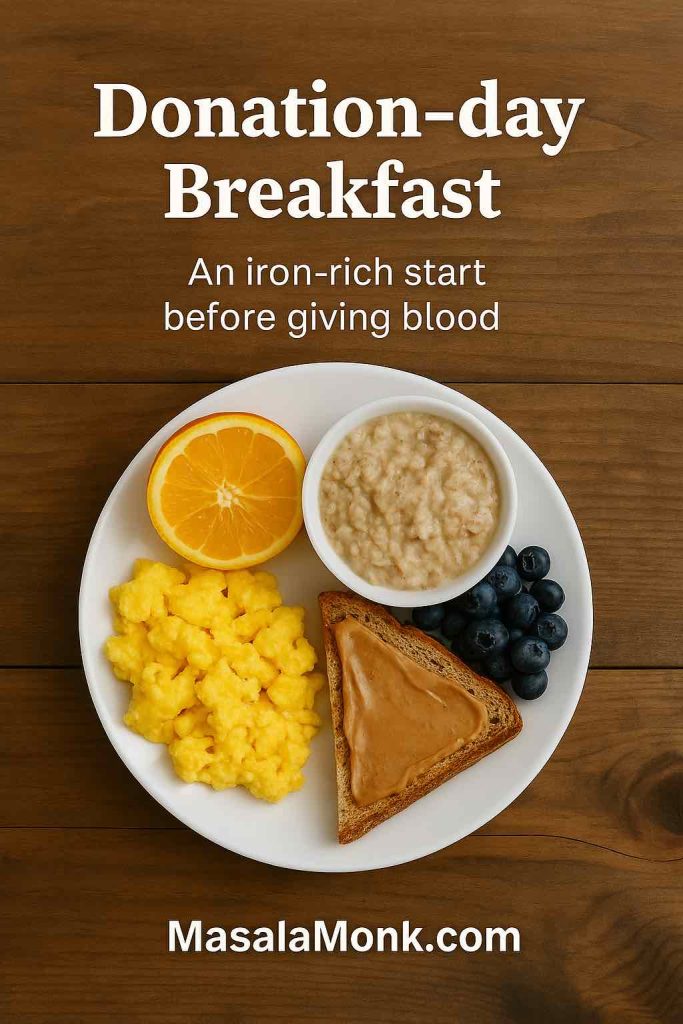
For more smoothie ideas built around fruit, greens, and vitamin C pairings, see MasalaMonk’s high-iron smoothies and shakes guide.

Kiwi Cucumber Smoothie

Light kiwi cucumber smoothie with cucumber slices, mint, lime, and kiwi
For a lighter version, cucumber, mint, lime, and coconut water make the smoothie feel crisp without turning it into a heavy breakfast blend.

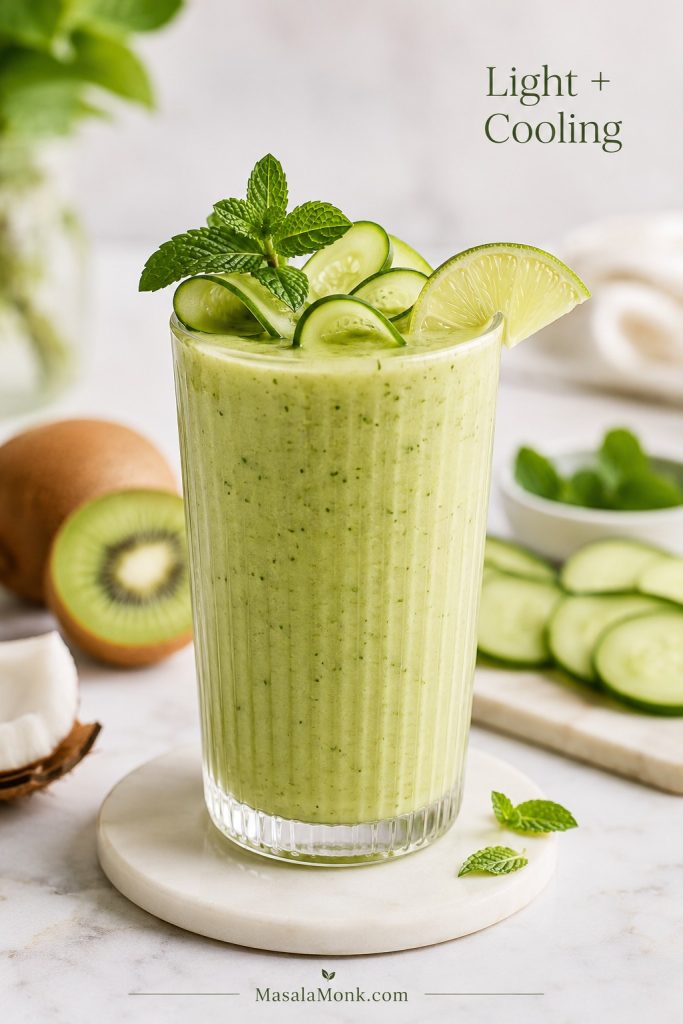
This cucumber version is lighter and fresher than the banana-yogurt blend. Blend kiwi with cucumber, mint, lime, and coconut water for a crisp, cooling drink. Add a little banana, mango, or Greek yogurt if you want it to feel more filling.

Kiwi Protein Smoothie

Greek yogurt is the simplest protein boost because it also improves texture. You can add one scoop of plain or vanilla protein powder, but keep banana, mango, or yogurt in the mix so the smoothie does not taste chalky.

For another simple way to add texture to smoothies, see this guide on using hemp seeds in smoothies.

Kiwi Smoothie Without Yogurt

Kiwi smoothie without yogurt shown with mango, avocado, oats, chia seeds, and plant milk
Without yogurt, the smoothie needs another source of body, so mango, avocado, oats, chia, or plant milk become more important.

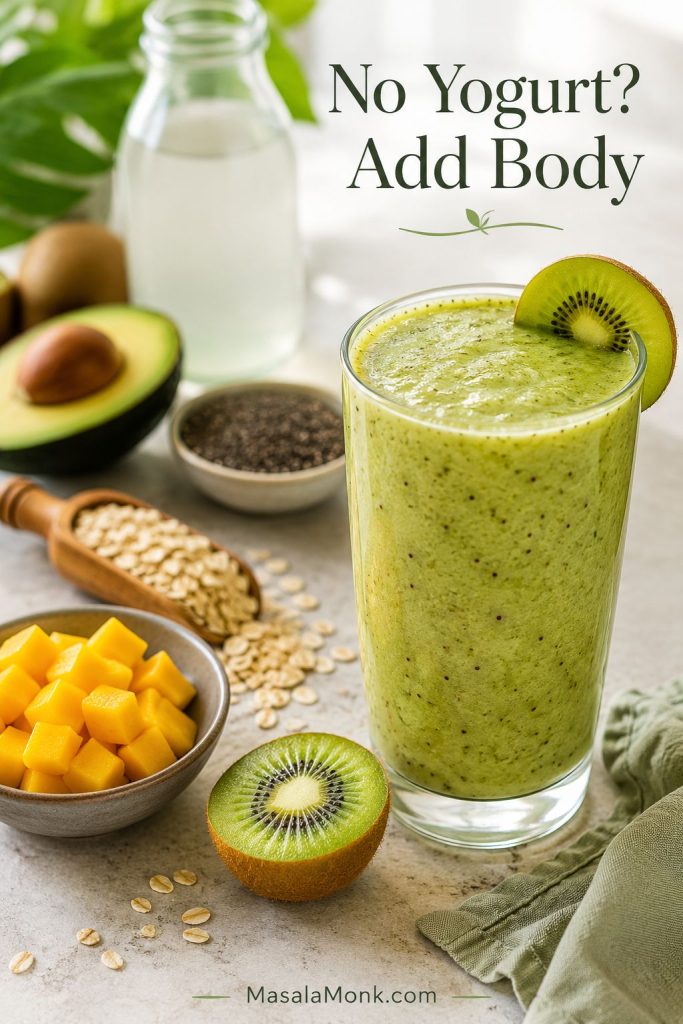
A no-yogurt version still needs body because kiwis alone can make the recipe taste sharp and thin. Keep the frozen banana and use almond milk, oat milk, coconut water, or orange juice as the liquid. For a thicker texture, add frozen mango, avocado, chia seeds, oats, or plant-based yogurt.

Kiwi Smoothie Without Banana

Kiwi smoothie without banana shown with mango, avocado, pear, yogurt, and kiwi
Banana is easy, but not essential; instead, use mango for sweetness or avocado and pear when you want creaminess with a different flavor profile.

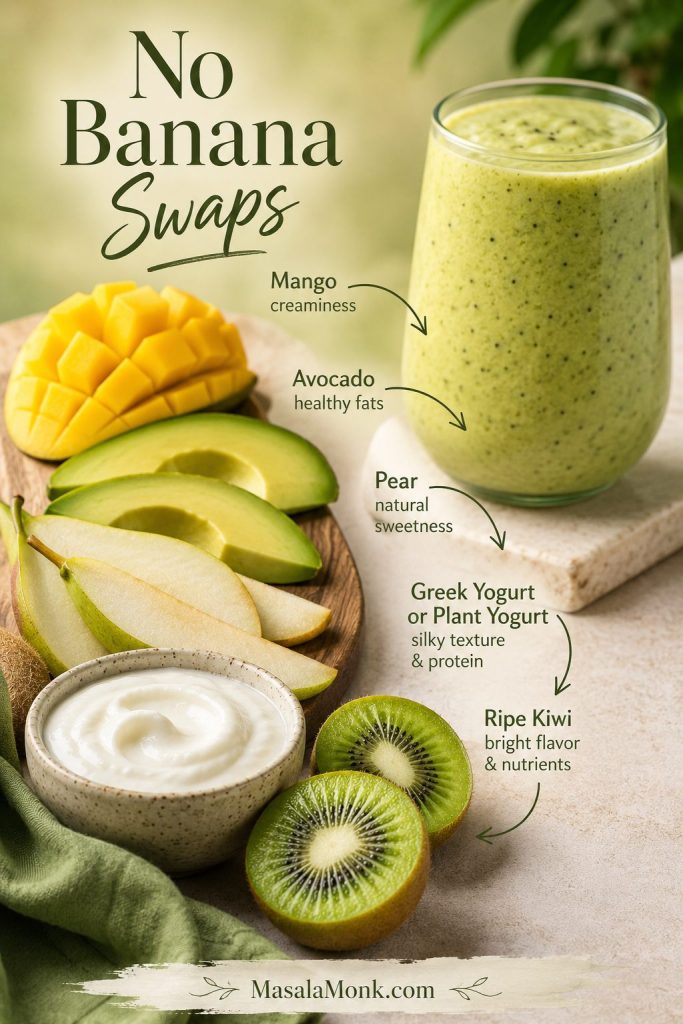
Banana is helpful, but it is not mandatory. Frozen mango is the best swap when you still want sweetness and thickness. Avocado gives creaminess without sweetness, Greek yogurt adds body, and pear gives a softer fruit flavor. Without one of these replacements, kiwi can taste sharper and the smoothie may feel thinner.

Kiwi Smoothie Bowl

Thick kiwi smoothie bowl with sliced kiwi, berries, granola, coconut, chia, and a spooned texture
A kiwi smoothie bowl needs less liquid than a drinkable smoothie; otherwise, the toppings sink and the base becomes too loose.

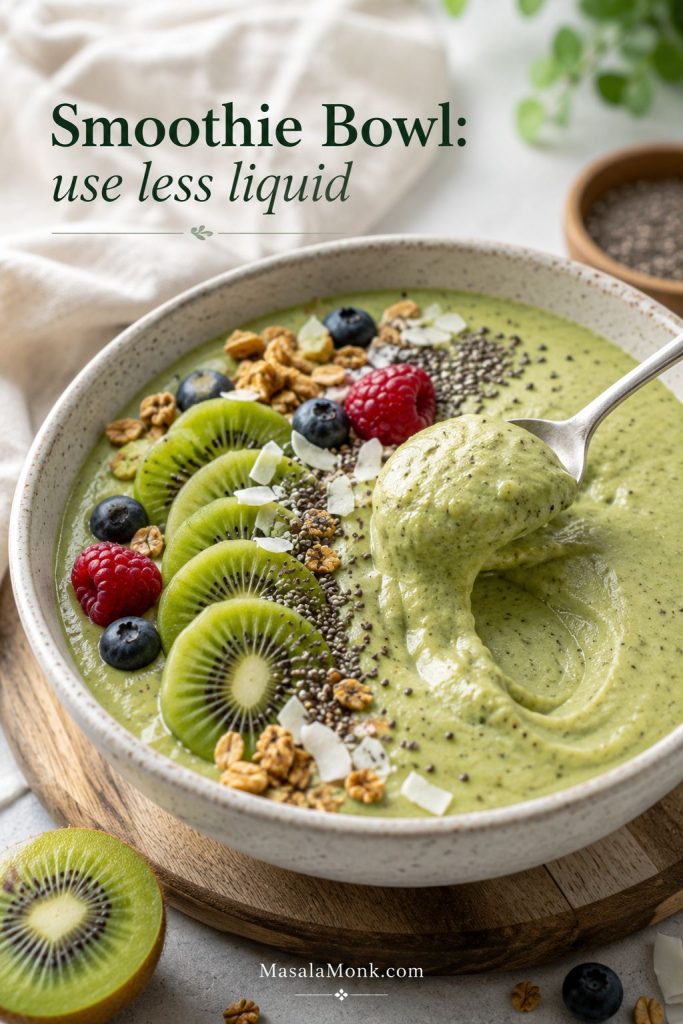
A smoothie bowl needs much less liquid than a drinkable smoothie. Reduce the liquid to ¼ cup / 60 ml and use frozen banana, frozen mango, or frozen pineapple. Blend thick, then top with sliced kiwi, granola, coconut, chia seeds, berries, or pumpkin seeds.

Kiwi Milkshake or Kiwi Shake

Kiwi smoothie and kiwi milkshake compared in two different glasses
A kiwi smoothie is usually lighter and fruit-based, while a kiwi shake becomes richer and sweeter with milk, banana, and ice cream.

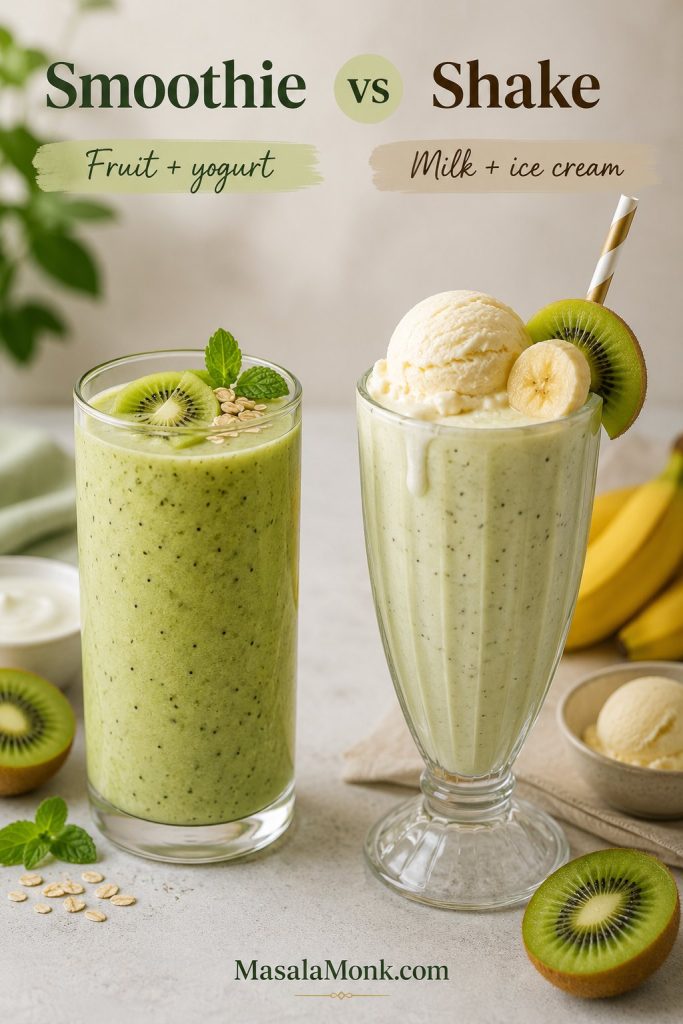
A kiwi shake is the dessert-style cousin of this smoothie. Blend 2–3 peeled kiwis with milk, banana, and a scoop of vanilla ice cream for a colder, sweeter drink. It is richer than the main recipe, so serve it right away and treat it more like a milkshake than a breakfast smoothie.

Best Fruits to Pair With Kiwi in Smoothies

Fruit pairing guide for kiwi smoothies with banana, avocado, pear, berries, orange, mango, pineapple, cucumber, spinach, and apple
Kiwi pairs best with fruits that either soften its tangy edge or echo its bright flavor, so choose the pairing based on the smoothie you want.

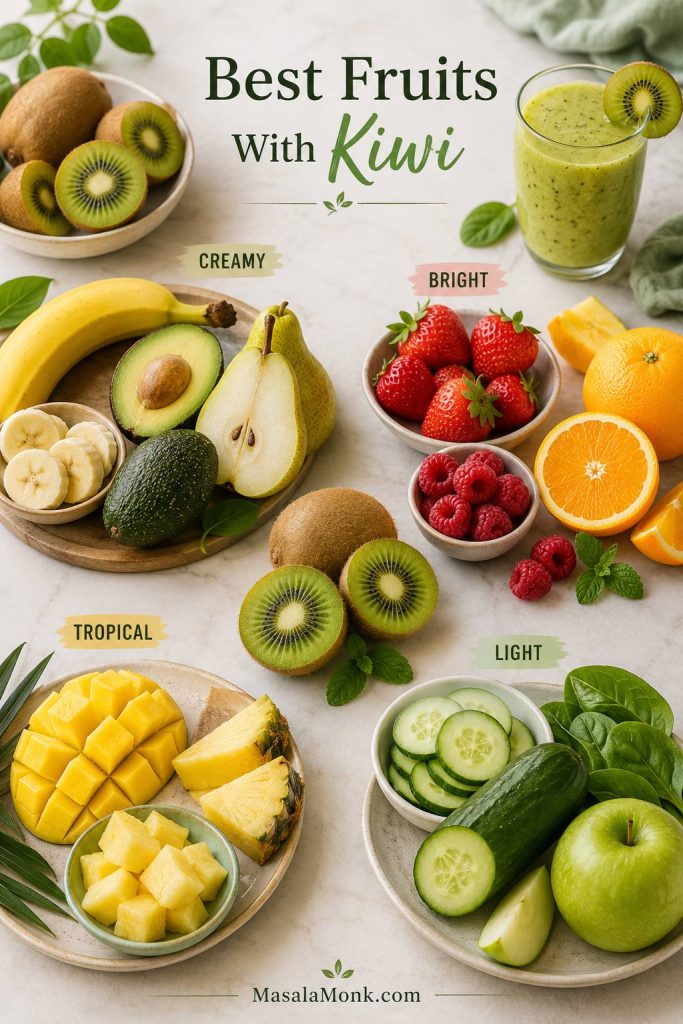
Because kiwi has a naturally bright edge, it works best with fruits that either soften its tartness or echo that fresh flavor. Banana and mango make it creamier. Strawberry and raspberry keep it tangy. Pineapple and orange make it tropical. Apple, pear, cucumber, and spinach keep it lighter.

Fruit or add-in Why it works with kiwi Best smoothie style
Banana Softens tartness and thickens the drink. Creamy breakfast smoothie
Strawberry Gives a familiar sweet-tart berry flavor. Berry kiwi smoothie
Mango Adds tropical sweetness and body. No-yogurt or tropical smoothie
Pineapple Makes the smoothie bright and juicy. Refreshing summer smoothie
Orange Adds citrus sweetness and makes the drink fruitier. Juice-based smoothie
Apple Keeps the flavor mild and fresh. Light breakfast smoothie
Blueberry Adds deeper berry flavor and color. Purple fruit smoothie
Raspberry Keeps the smoothie sharp and tangy. Tart berry smoothie
Pear Adds gentle sweetness without dominating. No-banana smoothie
Avocado Makes the smoothie creamy without banana. No-banana creamy smoothie
Spinach Adds green color with mild flavor. Green kiwi smoothie
Cucumber Makes the smoothie lighter and fresher. Cooling smoothie

Kiwi Smoothie With Milk, Yogurt, or Juice

Liquid guide for kiwi smoothies showing milk, coconut water, orange juice, water, and plant milk
Liquid choice shapes the whole smoothie, so pick milk for creaminess, coconut water for lightness, orange juice for brightness, or water when the fruit already tastes sweet.

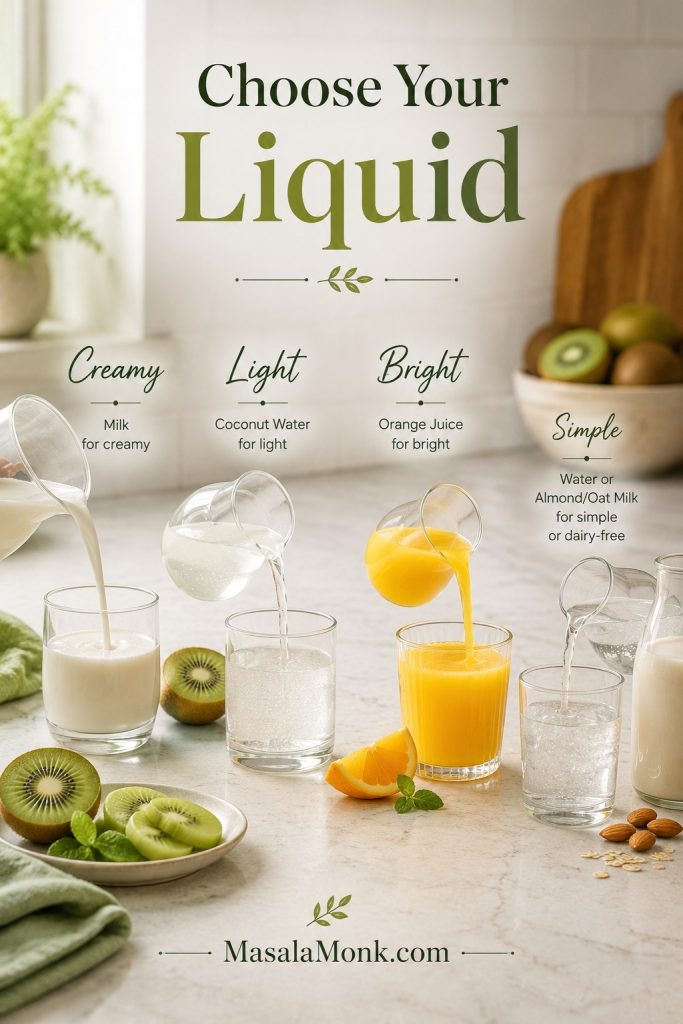
The liquid you choose changes the whole smoothie. There is no single correct option; the best one depends on whether you want the drink creamy, light, bright, dairy-free, or more filling.

Because the liquid changes the final texture so much, choose based on the smoothie you actually want instead of forcing one option.

Liquid Best use Watch-out
Milk Creamy, mellow smoothie. Best with banana or yogurt for balance.
Greek yogurt + water Thick texture without too much liquid. Can taste tangy if the kiwi is tart.
Almond milk or oat milk Dairy-free creaminess. Use unsweetened if you want more control.
Coconut water Light, refreshing, tropical-style smoothie. Thinner than milk or yogurt.
Orange juice Bright, fruity, tropical flavor. Can make a tart kiwi taste even sharper.
Water Cleanest and simplest option. Can taste thin unless you use banana or mango.
Canned coconut milk Rich tropical smoothie. Can get heavy fast; use a small amount.

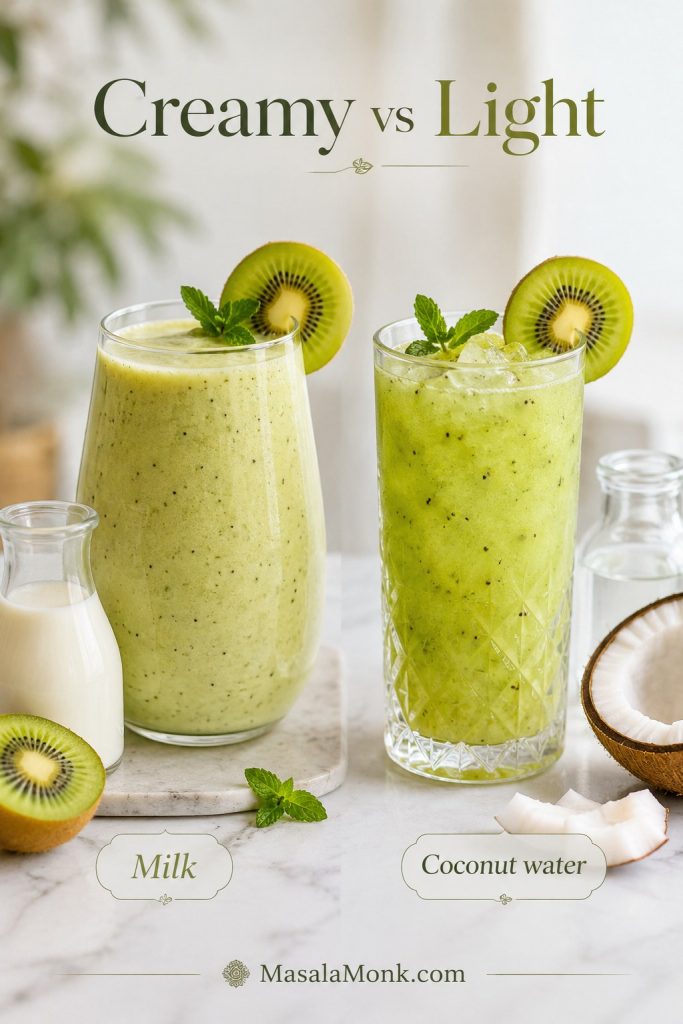
Milk vs Coconut Water

Milk-based kiwi smoothie and coconut-water kiwi smoothie shown side by side
Choose milk when you want a softer, creamier breakfast smoothie; meanwhile, coconut water works better for a lighter, fresher finish.

If you like the lighter tropical finish of coconut water, MasalaMonk’s coconut water smoothie ideas can give you more combinations beyond kiwi.

Kiwi works with milk and yogurt, but dairy-based versions are best enjoyed soon after blending. Green kiwifruit contains actinidin, a natural protein-digesting enzyme, so a milk- or yogurt-heavy smoothie can thin or separate more noticeably as it sits.

Is a Kiwi Smoothie Good for Weight Loss?

A smoothie recipe with kiwis can fit into a lighter breakfast or snack, but it is not magic on its own. The overall blend matters more than the word “kiwi.” Use whole fruit, keep juice and sweeteners modest, and add protein or fiber if you want the smoothie to feel more satisfying. The protein smoothie variation is a good place to start if you want a more filling version.

For example, a more balanced version could use 2 kiwis, ½ frozen banana, Greek yogurt or unsweetened plant milk, spinach or cucumber, and chia seeds. On the other hand, too much honey, sweetened yogurt, fruit juice, or ice cream can quickly turn it into a dessert drink.

Harvard Health notes that smoothies can become calorie-heavy when they include added sugar, syrup, honey, sweetened yogurt, frozen yogurt, or large amounts of juice. That is why this recipe keeps sweetener optional and uses whole fruit as the main base.

How to Fix a Kiwi Smoothie

Kiwi smoothie troubleshooting scene with small glasses labeled sour, thin, thick, flat, and watery
A kiwi smoothie that tastes off rarely needs a full remake; instead, one small fix for flavor or texture usually brings it back quickly.

Most problems in a smoothie recipe with kiwis are easy to fix while the drink is still in the blender. Taste before pouring, then adjust one thing at a time. Small changes work better than adding a lot of liquid, sugar, or ice all at once.

Do not throw out a smoothie just because the first sip is not perfect. Kiwi can taste different from fruit to fruit, and one small adjustment in the blender can turn a sharp, flat, or watery smoothie into something balanced.

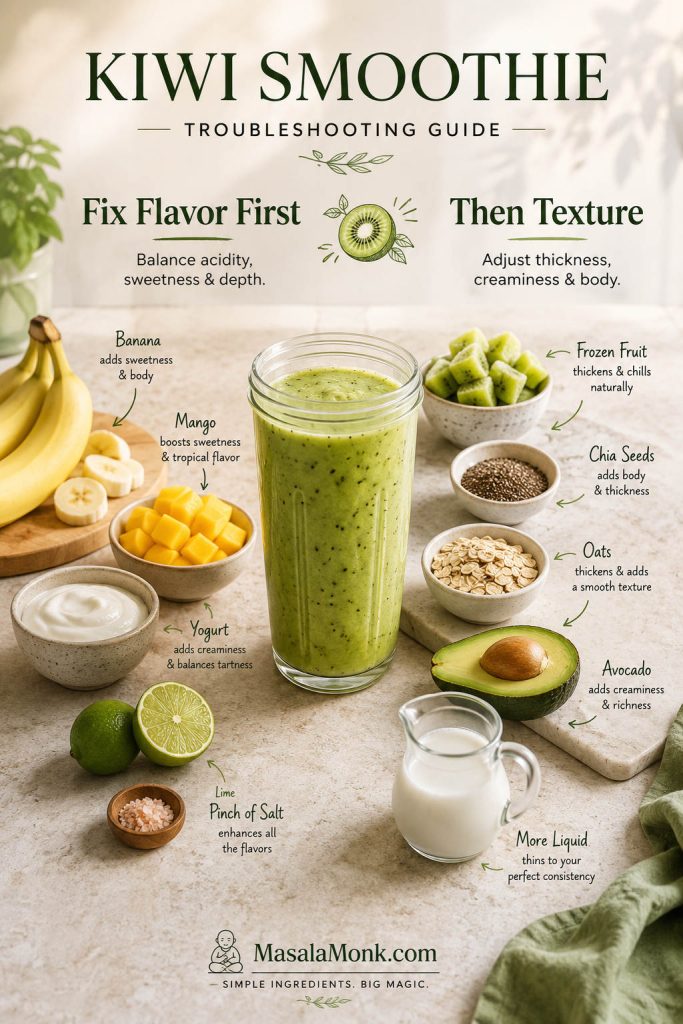
Fix the Flavor First

If the smoothie tastes sour, flat, bitter, or too sweet, fix the flavor before you change the texture. Usually, one small addition is enough: banana or mango for softness, yogurt for roundness, lime for brightness, or a tiny pinch of salt for a flat-tasting blend.

Kiwi smoothie fix guide with flavor ingredients on one side and texture ingredients on the other
Fix flavor before texture, because a smoothie that is sour or bland needs a different adjustment than one that is too thick or too thin.

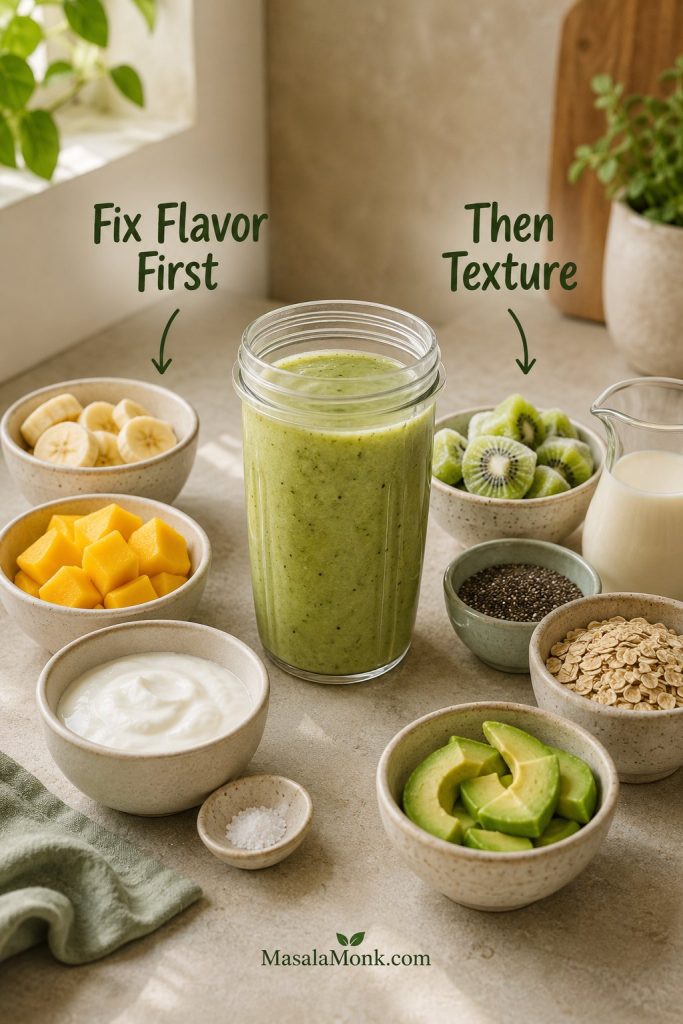
Then Fix the Texture

Once the flavor tastes right, adjust the texture. Frozen fruit, banana, chia, oats, and avocado add body, while milk, coconut water, orange juice, or water loosen a thick smoothie. Add liquid slowly so the drink does not become watery.

Problem Best fix
Sour or sharp Blend in banana, mango, honey, maple syrup, or yogurt to soften the edge.
Thin texture Use frozen banana, frozen mango, chia seeds, oats, or avocado to bring back body. Next time, start with less liquid.
Overly thick Add milk, coconut water, orange juice, or water 1 tablespoon at a time until the blender moves smoothly.
Flat flavor A little more kiwi, a tiny squeeze of lime, orange juice, or even a small pinch of salt can wake it up.
Overly sweet Plain yogurt, cucumber, spinach, extra kiwi, or a little lemon/lime can pull the sweetness back into balance.
Seed-heavy texture Blend longer or use a high-speed blender. Kiwi seeds are edible, but a little texture is normal.
Watery smoothie Use frozen fruit instead of lots of ice, and keep the liquid lower at the start.
Bitter or harsh Use ripe, peeled kiwi. Hard kiwis and too much skin can make the drink taste rough.
Separation after sitting Shake or stir before drinking. For the next batch, use banana, yogurt, chia, or a less watery liquid.
Blender struggling Pour liquid in first, chop frozen fruit smaller, and add extra liquid by tablespoons instead of splashing in too much at once.

Kiwi Smoothie Thickness Guide

Kiwi smoothie texture guide showing too thin, just right, and too thick spoon textures
The sweet spot is thick enough to feel creamy, yet still loose enough to pour and sip comfortably without feeling heavy.

Make-Ahead, Freezing, and Storage Tips

Kiwi smoothie storage image with a fridge jar and freezer packs for kiwi banana, kiwi mango, kiwi strawberry, and kiwi spinach
Blended smoothies taste best fresh, but freezer packs make it easier to prep kiwi, banana, mango, berries, or spinach ahead of time.

This smoothie tastes best right after blending. The flavor is brighter, the texture is smoother, and dairy-based versions are less likely to thin out. If you need to make it ahead, keep it short and practical.

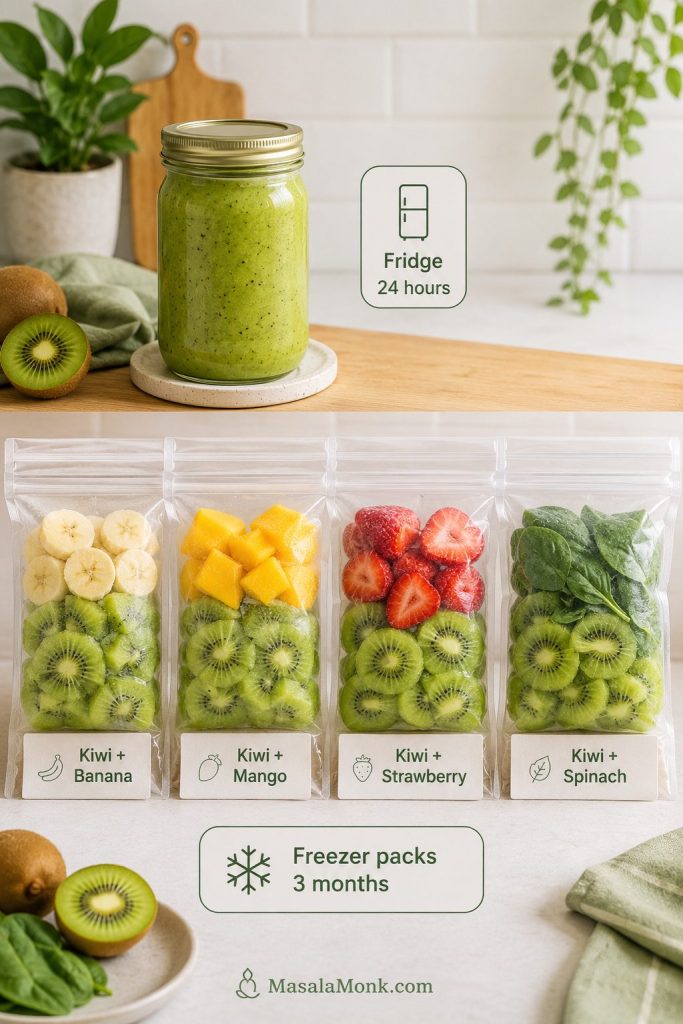
Storing a Kiwi Smoothie in the Fridge

For the best texture, drink it within 24 hours. Store it in a sealed jar or bottle, refrigerate it, and shake or stir before drinking. The smoothie may separate slightly, especially if it has water, coconut water, or juice instead of yogurt.

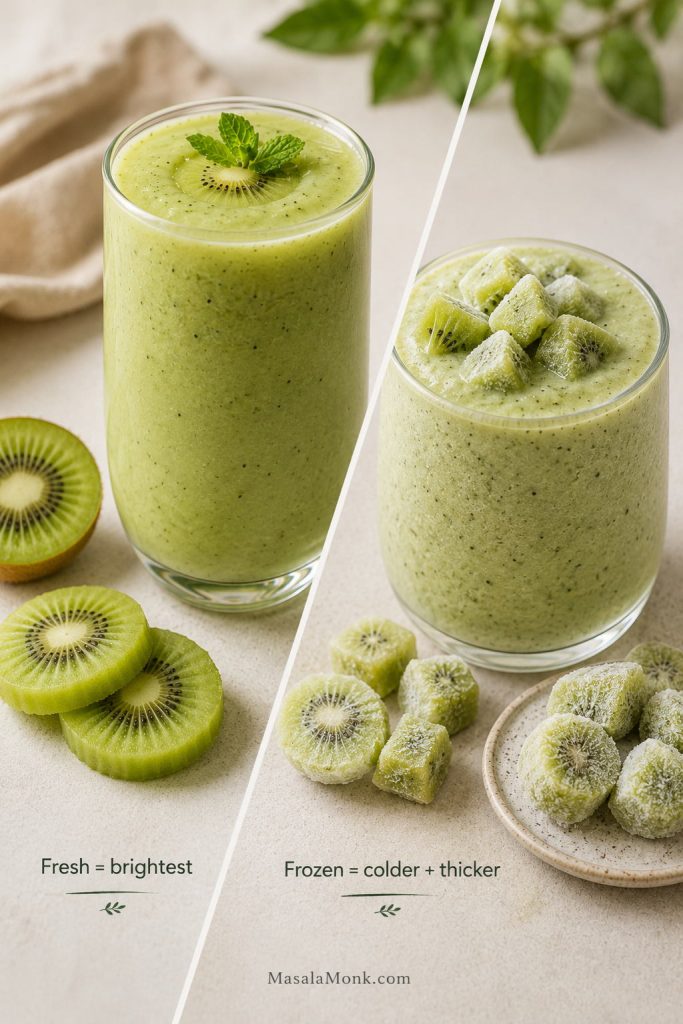
Freezing Kiwi for Smoothies

Frozen kiwi works well in smoothies. Peel and chop ripe kiwi, freeze the pieces on a tray, then transfer them to a freezer bag or container. However, frozen kiwi works best with banana, mango, strawberry, or yogurt because kiwi alone can become icy.

Making Kiwi Smoothie Packs

Smoothie packs are the easiest make-ahead option. Add peeled kiwi, banana, mango, strawberries, spinach, or pineapple to freezer bags. Freeze for up to 3 months. When ready to blend, add the frozen pack to the blender with yogurt and liquid.

Kiwi Nutrition Notes for Smoothies

Kiwi is often used in smoothies because it brings bright flavor, gentle natural sweetness, fiber from the whole fruit, and vitamin C. It pairs especially well with banana, mango, strawberry, spinach, and yogurt because those ingredients balance the tartness.

The USDA vitamin C table lists raw green kiwifruit as a high-vitamin-C fruit per cup, which makes kiwi a useful ingredient in fruit smoothies. You can also explore MasalaMonk’s broader guide to vitamin C rich foods for more everyday fruit and vegetable ideas.

For a deeper look at kiwi beyond smoothies, MasalaMonk has a guide to kiwi nutrition, benefits, and practical uses. For this recipe, though, the most important thing is simple: ripe fruit, the right liquid, and enough body to keep the smoothie enjoyable.

FAQs About Kiwi Smoothies

These quick answers cover the most common questions readers have before changing the base recipe: milk or no milk, yogurt or no yogurt, banana or no banana, fresh kiwi or frozen kiwi.

Can you put kiwi in a smoothie?

Kiwi works very well in smoothies because it adds bright, tangy fruit flavor. It tastes best with creamy or sweet ingredients like banana, yogurt, mango, strawberry, milk, or coconut water.

Do you peel kiwi before putting it in a smoothie?

For the smoothest kiwi smoothie, peel it first. Kiwi skin is edible, but it can add a fuzzy, fibrous texture. If you want to blend kiwi with the skin on, wash it very well and use a strong blender.

What fruit goes well with kiwi in smoothies?

Banana, strawberry, mango, pineapple, orange, apple, blueberry, raspberry, pear, and avocado all pair well with kiwi. Banana and mango are best for sweetness and creaminess, while strawberry and pineapple keep the flavor brighter.

Can I make a kiwi smoothie with milk?

Milk makes the drink creamy and mild, especially when paired with banana or yogurt. For the best texture, drink milk-based versions soon after blending.

Can I make a kiwi smoothie without yogurt?

For a no-yogurt version, replace yogurt with frozen banana, mango, avocado, plant milk, coconut water, chia seeds, oats, or plant-based yogurt. Without yogurt, the smoothie usually needs frozen fruit or banana to stay thick.

Can I make a kiwi smoothie without banana?

Mango, avocado, pear, Greek yogurt, frozen pineapple, or chia seeds can all replace banana. Mango is the best swap when you want sweetness and thickness without changing the flavor too much.

How do you make a kiwi smoothie less sour?

Start with ripe kiwis, then add banana or mango if the smoothie still tastes sharp. Milk or yogurt can also soften the flavor better than water. If needed, add 1–2 teaspoons honey or maple syrup, but avoid too much lime, lemon, pineapple, or orange juice when the kiwi is already tart.

Why did my kiwi smoothie turn watery?

It may have too much liquid, too much ice, or not enough creamy fruit. Frozen banana, frozen mango, yogurt, avocado, chia seeds, or oats will help thicken it. Also, the texture can thin slightly as it sits, so it is best fresh.

Can I use frozen kiwi in a smoothie?

Frozen kiwi works well, especially with banana, mango, strawberry, yogurt, or another creamy ingredient. On its own, frozen kiwi can make a smoothie taste icy or sharp.

What is the difference between a kiwi smoothie and a kiwi milkshake?

The smoothie version is usually fruit-based and often made with yogurt, milk, coconut water, or juice. A kiwi milkshake is dessert-style and usually includes milk, ice cream, or extra sweetener.

Final Tips for the Best Kiwi Smoothie

The first time you make it, start with 2 ripe kiwis, 1 frozen banana, ½ cup yogurt, and ½ cup liquid. Then, taste it before pouring. That one small pause is what helps you catch a sharp kiwi, a thin texture, or a smoothie that needs one more spoonful of yogurt.

After that, the recipe becomes easy to adapt. Banana makes it creamy, mango makes it tropical, strawberry makes it brighter, cucumber makes it lighter, and ice cream turns it into a kiwi shake. Once you make it once, note which direction you liked best: creamy banana, tropical mango, lighter coconut water, or sharper strawberry kiwi.

The best version is not always the sweetest one. It is the one where the kiwi still tastes fresh, the texture feels creamy, and nothing sharp, watery, or heavy takes over.

Finished creamy kiwi smoothie served in a glass with sliced kiwi in a warm breakfast setting
At its best, this smoothie stays bright, creamy, and fresh-tasting, so the kiwi still leads without turning the drink watery or harsh.
Posted on Leave a comment

Low Histamine Diet: Food List, Easy Meals & 7-Day Plan

low-histamine-diet-cover-food-list-7-day-meal-plan-portrait-masalamonk

If you’re exploring a low histamine diet, you’re likely looking for calm, clear direction—not another rabbit hole of contradicting charts. To make this practical, let’s anchor the essentials in simple cooking habits, walk through a flexible meal pattern, and, importantly, call out where evidence sits today. For balance and credibility, you can skim neutral overviews from the American Academy of Allergy, Asthma & Immunology, check the clinician handout from Johns Hopkins Medicine, and review patient-friendly pages from Allergy UK and the British Dietetic Association as you go. Meanwhile, when you want a concise consumer explainer, the Cleveland Clinic overview is a solid quick read.


Low Histamine Diet Basics: What It Is—and What It Isn’t

To begin with, a low histamine diet is a short-term elimination and re-challenge strategy that reduces foods high in histamine (and some that may liberate histamine) while you observe your own symptoms. Crucially, this approach is not the same as a classic IgE-mediated food allergy. Instead, you’re aiming to lower dietary histamine intake, tighten up food handling, and separate triggers from safe choices by testing them one at a time. In short, you create a peaceful baseline for two to four weeks and then, step by step, you bring foods back.

Furthermore, because histamine levels fluctuate with time and storage, freshness matters as much as the ingredient list. Consequently, simple habits—buying smaller amounts more often, cooking promptly, rapid-chilling leftovers, and rotating meals—do much of the heavy lifting. On balance, you may find the diet less about restriction and more about logistics.

Download the Low Histamine Diet Interactive Tracker (free PDF)—7-day meal plan, fillable shopping list, daily log, and re-intro worksheet—right here.


What to Eat on a Low Histamine Diet (Core “Yes” List)

Proteins (fresh is everything). Choose fresh chicken, turkey, lamb, and eggs; likewise, opt for very fresh white fish cooked the day you buy it. Even so, individual tolerance varies, so you’ll still reintroduce cautiously later.

Carbs & grains (gentle, steady energy). Reach for rice, quinoa, buckwheat, oats, rice noodles, and rice cakes. If you want context about buckwheat’s versatility, scan this short primer on buckwheat benefits—it’s naturally gluten-free and easy to slot into bowls or breakfast porridge.

Vegetables (crisp, quick-cooking choices). Lean on zucchini, carrots, green beans, cucumbers, bok choy, lettuce, and other mild greens (many people sidestep spinach during the elimination phase). Because quick heat helps you avoid long simmer times, sautéing or steaming works beautifully.

Fruit (light and predictable). Apples, pears, and blueberries usually fit early; nevertheless, trial citrus later since it can act as a liberator for some.

Fats (simple and stable). Olive oil is your everyday staple; avocado oil is fine for many, although some people prefer to test avocado itself later.

Drinks (keep it calm). Plain water and gentle herbal teas—ginger, rooibos, peppermint if tolerated—keep hydration easy without complicating the elimination phase.

For a concise, public-facing cross-check, compare your cart with the Histamine Intolerance Food List; and for a helpful “what to expect” overview, see Cleveland Clinic’s guide as well. Meanwhile, if you want a mainstream media digest that echoes many of these items, BBC Good Food’s low-histamine picks are straightforward.


What to Limit First (and Why)

Fermented or aged foods. Soy sauce, vinegar, kombucha, sauerkraut/kimchi, aged cheeses, and cured meats rise to the top of the “hold for later” list.

Alcohol. Wine and beer are frequent irritants during the elimination window.

Seafood that’s canned, smoked, or not cooked promptly. Since histamine can accumulate post-harvest, storage becomes a major factor; fish kept too long, even when cooked later, is a common issue.

Produce commonly flagged as potential liberators. Tomatoes, spinach, eggplant, avocado, and citrus often move into mid-to-late reintroduction instead of day one.

Long-simmered dishes and bone broth. Because amines build with time and temperature, short, bright cooking methods generally suit the elimination phase better than all-day simmering.

All told, the idea is not to demonize foods forever; rather, you’re reducing confounders temporarily. Afterwards, you’ll add items back with intention.


Low Histamine Diet Breakfasts: Fast, Cozy, and Repeatable

To set the tone, start mornings with warm, simple textures and minimal ingredients. In particular:

  • Oats with pear and chia. Cook rolled oats in water or a mild non-dairy base; top with diced pear and a spoon of chia. When you want more control over ingredients, consider making your own non-dairy options—this quick explainer on coconut milk nutrition and glycemic impact gives you a sense of how it fits.
  • Eggs with sautéed zucchini on toast. Keep the pan hot, cook fast, and season with herbs.
  • Chia pudding with apple. For an adaptable method, peek at this chia pudding how-to and simply swap the fruit for something you tolerate early on (e.g., apple or pear).
  • Puffed rice “cereal.” Use coconut milk and a sprinkle of pumpkin seeds for crunch without leaning on additives.

Moreover, you’ll notice how often breakfast success comes from short cooking times and rapid cooling. That’s not accidental; those mechanics help you keep amine accumulation low while still eating familiar food.


Snacks, Sweets & “Fun Food” on a Low Histamine Diet

Because snacks can derail plans quickly, it helps to pre-commit to two or three options you actually enjoy:

  • Rice cakes with pumpkin-seed butter. Smooth and salty works; add sliced pear if you want contrast.
  • DIY oat bars you fully control. This template for healthy oat protein bars is easy to adapt, and when you’re in a rush, these oat bars in 5 minutes keep ingredients tight.
  • Light granola. Combine rolled oats, coconut flakes, and pumpkin seeds; toast lightly; store briefly.
  • Simple desserts. Baked apples, pears with a hint of olive oil and cinnamon, or a coconut-rice pudding when you want comfort without complexity.

Incidentally, chocolate tends to split audiences during reintroduction, so if you trial it later, do so in tiny amounts and document how you feel.


Low Histamine Diet Cooking & Storage: Tiny Tweaks, Big Wins

Now for the logistics that quietly make the diet work:

Buy smaller amounts more often. Instead of massive shops, pick up just enough meat or fish for a day or two. That way, you’ll naturally cook promptly rather than parking proteins for days.

Cook promptly and cool rapidly. Transfer cooked food into shallow containers and move it into the refrigerator as soon as steam subsides; then, ideally, eat within 24 hours or freeze.

Favor quick methods. Searing, steaming, sautéing, roasting en papillote, and short simmering keep both time and ingredient lists short.

Label and rotate. Even when you’re meticulous, unlabeled containers sabotage the plan. A marker and a roll of tape keep you honest.

Why so fussy? Because histamine is a small, heat-stable molecule—cooking doesn’t reliably destroy it—so your best lever is handling. For a plain-language reminder about storage and histamine formation (especially relevant to fish), skim histamine toxicity basics and you’ll see why these habits matter.


Low Histamine Diet: 7-Day Meal Plan (Mix & Match)

Although individual tolerance differs, this pattern keeps flavors bright and prep times short. Feel free to swap proteins and vegetables across days, and, of course, keep portions aligned to your energy needs.

Day 1
Breakfast: Oats with pear and chia.
Lunch: Poached chicken, quinoa, zucchini and carrot bowl.
Dinner: Pan-seared fresh cod, sweet potato mash, green beans.
Snack ideas: Rice cakes with pumpkin-seed butter; apple slices.

Day 2
Breakfast: Buckwheat porridge with blueberries.
Lunch: Turkey lettuce wraps with cucumber and herbs.
Dinner: Baked lamb meatballs with rice and roasted carrots.
Snack ideas: Coconut yogurt alternative; oat bar square.

Day 3
Breakfast: Scrambled eggs with sautéed courgette; slice of toast (gluten-free if needed).
Lunch: Rice-noodle chicken soup (short simmer; add bok choy at the end).
Dinner: Stir-fried chicken or very fresh prawns with rice and pak choi.
Snack ideas: Pear; rice crackers.

Day 4
Breakfast: Chia pudding (coconut milk) with diced apple.
Lunch: Chicken and rice salad with zucchini ribbons and fresh herbs.
Dinner: Herb-rubbed chicken thighs, quinoa, steamed greens (avoid spinach for now).
Snack ideas: Blueberries; pumpkin seeds.

Day 5
Breakfast: Puffed rice with coconut milk and pumpkin seeds.
Lunch: Lamb and sweet potato bowl with green beans.
Dinner: White fish en papillote with rice and carrot coins.
Snack ideas: Rice cakes; cucumber slices with olive oil and salt.

Day 6
Breakfast: Oat pancakes (trial banana later if you suspect it’s a trigger).
Lunch: Egg fried rice with finely diced zucchini (use day-old rice that was chilled promptly).
Dinner: Roast turkey breast, buckwheat, and a leafy salad (choose non-spinach greens).
Snack ideas: Baked apple; small oat bar.

Day 7
Breakfast: Eggs, rice cakes, and cucumber.
Lunch: Quinoa “tabbouleh-style” (skip tomato for now), plus sliced chicken.
Dinner: Quick chicken stew (short simmer), sweet potato, tender carrots.
Snack ideas: Pear; a few pumpkin seeds.

Naturally, you’ll adjust seasoning to taste—think fresh parsley, chives, dill, or a squeeze of non-citrus brightness (e.g., a splash of mild vinegar only during reintroduction if tolerated). Until then, rely on herbs, garlic-infused oil if whole garlic bothers you, and a confident hand with salt.

Grab the Low Histamine Diet Interactive Tracker (free PDF) with a 7-day meal plan, fillable shopping list, and re-introduction log – Download Here.


Low Histamine Diet × Anti-Inflammatory Eating: How to Blend Without Stress

Because many readers are also trying to reduce background inflammation, it helps to build plates around lean protein + colorful vegetables + gentle carbs + olive oil. Beyond that, consider polyphenol-rich fruit such as blueberries if you tolerate them. Notably, while fermentation can improve nutrient availability in some contexts, the early days of a low histamine diet emphasize unfermented choices first. Later—once you’ve stabilized—you’ll reintroduce candidates gradually and keep what loves you back.

For newcomers who want a conventional medical voice alongside this plan, the Cleveland Clinic introduction is a handy companion; and for a concise checklist you can cross-verify, the Histamine Intolerance UK food list is easy to scan. Meanwhile, keep your own notes—what you ate, when you stored it, how you felt—since your tolerance is the final referee.


Low Histamine Diet Breakfast Variations (So You Never Get Bored)

Even with a tight ingredient set, breakfast can feel fresh day after day. Consider these rotations:

  • Oats three ways. Classic porridge; oven-baked oat squares; or overnight oats in a non-dairy base. For a controlled approach to snacks that double as breakfast, tweak healthy oat protein bars to your tolerance.
  • Eggs beyond scrambled. Poached on quick-sautéed greens; omelettes with fine-diced zucchini; or frittata cups baked for 12–15 minutes for fast weekday reheats.
  • Buckwheat porridge and pancakes. Soft, nutty, and easy to digest, buckwheat performs well in both sweet and savory directions; for background, skim this buckwheat overview and adapt freely.
  • Chia pudding two ingredients at a time. A spoon of chia plus a mild base and a small fruit portion—this chia method is a template you can strip down and rebuild without fuss.

Meanwhile, remember that repetition in structure doesn’t mean monotony in taste; herbs, textures, and plating can carry variety even before you reintroduce more adventurous items.


Low Histamine Diet: Smart Flavor Without Ferments

At first glance, removing ferments looks like removing flavor. Nevertheless, you can still cook boldly:

  • Fresh herb pastes. Blend parsley, dill, or cilantro with olive oil and a pinch of salt; freeze in small portions for instant brightness.
  • Allium strategy. If whole garlic or onion bothers you, use garlic-infused oil for aroma without the same compounds that trouble some people.
  • Crunch and contrast. Pair soft grains with crisp vegetables; add pumpkin seeds or cucumber ribbons to keep each bite interesting.
  • Heat control. Sear meats quickly for browning, then finish gently to avoid extended cook times.

In practice, these techniques make “simple” food taste restaurant-level, which makes adherence easier while you figure out your unique tolerance.


Low Histamine Diet: How to Re-Introduce Foods Confidently

Once you’ve had a quiet baseline for two to four weeks, reintroduce foods one by one. To that end:

  1. Pick one candidate (e.g., tomato). Eat a small portion at one meal.
  2. Wait 48–72 hours, noting symptoms as well as sleep, stress, and storage variables.
  3. Increase portion if day one went well.
  4. Decide: keep, limit, or postpone.

To stay grounded in cautious, evidence-aware advice while you test, a neutral synthesis from the British Dietetic Association helps temper expectations, and the Allergy UK explainer offers practical reminders. Notably, divergent opinions in the literature are normal; your day-to-day response trumps theory.


DAO, Supplements & “Foods That Help”: A Balanced View

Your small intestinal enzyme diamine oxidase (DAO) degrades dietary histamine; thus, you’ll see supplements marketed as a quick fix. However, while some people report benefits, formal evidence and testing standards are still evolving. Accordingly, treat supplements as adjuncts, not anchors. If you want to read an allergy specialist’s cautionary note in plain language, try this DAO Q&A from AAAAI; then, if you experiment, change only one variable at a time so you can tell what helped.

As for “antihistamine foods,” nutrients like vitamin C and polyphenols are interesting, and yet, the basics still win: fresh food, tidy storage, short cooking times, and consistent meal patterns. Consequently, the plan above does more good than hunting for a magic ingredient.


Low Histamine Diet Troubleshooting: When Something Feels Off

Despite best efforts, you may hit snags. If symptoms persist, widen the lens:

  • Check storage and timing. Even a “safe” food can feel unsafe if it lingered too long.
  • Evaluate stress and sleep. Mast-cell behavior isn’t isolated from the rest of your life.
  • Consider overlap with other GI patterns. Some people run a low histamine diet alongside low-FODMAP for a short, supervised window; if that’s you, a cautious, clinician-guided approach is wise.
  • Rule out mimickers. True food allergy, celiac disease, and inflammatory bowel disease deserve medical evaluation when symptoms are significant.

Parallel to this, precise, trustworthy resources keep you grounded. Keep Cleveland Clinic’s overview and the BDA guidance bookmarked for readers who want a conventional lens.


Closing Thoughts: Calm Food, Clear Decisions

Ultimately, a low histamine diet is less about memorizing an encyclopedic list and more about running a clean, fair experiment. First, simplify meals and tighten storage. Next, listen to your body for two to four quiet weeks. Finally, bring foods back systematically and keep the ones that love you back. Meanwhile—and this is the part many people skip—stay flexible. Your goal isn’t a permanent cage; it’s a personal map.

If you keep that spirit, you’ll find this way of eating not only tolerable but surprisingly freeing: fewer variables, fewer surprises, and more breakfasts, lunches, and dinners that feel like you—steady, satisfying, and refreshingly uncomplicated.

Ready to use? Download the Low Histamine Diet Interactive Tracker (free PDF)—7-day meal plan, fillable shopping list, daily log, and re-intro worksheet—right here.

FAQs

1) What is a low histamine diet?

A low histamine diet is a short-term elimination and re-challenge approach that reduces high-histamine foods and potential “liberators,” then gradually reintroduces them to identify personal tolerance.

2) How long should I follow a low histamine diet before reintroducing foods?

Typically 2–4 weeks of a calm baseline works well; subsequently reintroduce one item every 2–3 days while tracking symptoms, sleep, stress, and storage habits.

3) Which foods are best to eat on a low histamine diet?

Emphasize fresh chicken or turkey, eggs, very fresh white fish, rice, quinoa, buckwheat, oats, zucchini, carrots, green beans, lettuce, apples, pears, blueberries, and olive oil.

4) Which foods should I avoid at first on a low histamine diet?

Initially sidestep fermented and aged items (soy sauce, vinegar, sauerkraut, aged cheese, cured meats), alcohol, canned or smoked fish, long-simmered stews, and common liberators like tomato, spinach, eggplant, avocado, and citrus.

5) What are histamine liberating foods?

They’re foods that may prompt your body to release histamine even if the food itself isn’t high in histamine; examples often include citrus, tomato, spinach, eggplant, and avocado.

6) What does a simple low histamine diet meal plan look like?

Build each plate with fresh protein, a gentle carb (rice, quinoa, buckwheat, oats), half a plate of mild vegetables, and olive oil; rotate options through seven days to keep variety.

7) What are easy low histamine breakfast ideas?

Think warm oats with pear, eggs with sautéed zucchini, chia pudding with apple, and puffed rice with a non-dairy base and pumpkin seeds.

8) Are bone broth and long-simmered soups okay on a low histamine diet?

Generally not during elimination; as cooking time lengthens, biogenic amines tend to rise. Prefer quick soups or short simmers, then test longer cooks later.

9) Can I have yogurt, cereal, crackers, granola, or protein bars?

Fermented dairy yogurts are usually high; consider non-dairy alternatives first. Choose plain oats or puffed rice for cereal, simple rice/oat crackers, light DIY granola, and homemade bars with minimal additives.

10) How should I handle leftovers to keep histamine lower?

Cook promptly, cool rapidly in shallow containers, refrigerate early, and eat within 24 hours or freeze. Moreover, label dates so rotation stays tight.

11) Can a low histamine diet be combined with low FODMAP?

Yes, for a short, guided window. Select overlapping “safe” foods from both patterns, keep recipes simple, and stage reintroductions to avoid confounding results.

12) Do DAO supplements or “DAO foods” help on a low histamine diet?

They might assist some people, though evidence is mixed. Treat them as optional adjuncts; first optimize freshness, storage, and structured reintroductions.

13) Are there “antihistamine foods” that reduce symptoms?

Nutrients like vitamin C and polyphenols are discussed, yet no single food is a cure. Consistently low-histamine patterns plus careful prep tend to matter more.

14) What about chocolate, coffee, and tea?

Chocolate often triggers people and is best tested later in tiny amounts. Coffee and tea vary by individual; trial cautiously and note dose, timing, and any symptoms.

15) How do I reintroduce foods on a low histamine diet without confusion?

Select one food, try a small portion once, wait 48–72 hours, then increase if tolerated. Keep notes, avoid adding two new items together, and decide to keep, limit, or pause.

16) What are good low histamine snacks and sweets?

Rice cakes with pumpkin-seed spread, fruit like apples or pears, light oat bars you control, simple granola, baked apples, and coconut-rice pudding are reliable starters.

17) Is fish allowed, and if so, which types?

Yes—choose very fresh white fish and cook the same day. Conversely, avoid canned, smoked, or long-stored fish during elimination.

18) Can I follow a vegetarian or vegan low histamine diet?

Absolutely, though protein variety requires planning. Center plates on eggs (if included), quinoa, buckwheat, oats, rice, and tolerated seeds; then stage legumes later if needed.

19) Will a low histamine diet help mast-cell–related symptoms?

It may help some people by reducing dietary triggers; nevertheless, consider it supportive, not curative, and coordinate with your clinician for comprehensive care.

20) What’s the single most important success tip for a low histamine diet?

Prioritize freshness over perfection: buy smaller quantities, cook quickly, cool fast, and reintroduce foods with intention so your long-term pattern fits your life.

Posted on 2 Comments

Benefits of Drinking Warm Lemon Water Every Morning

Infographic on warm lemon water in the morning—benefits, safe recipe, enamel tips, myth vs facts—MasalaMonk.com footer.

Before messages and meetings, before the day picks up speed, there’s a small decision that can soften the edges: a warm mug, a squeeze of lemon, and a quiet minute that belongs only to you. Warm lemon water in the morning won’t transform life in a single sip—and thankfully it doesn’t pretend to. What it offers is gentler: an easy way to hydrate first, a clean citrus lift, and a calmer shape to your morning. That little bit of steadiness is often what sets the tone for better choices through the next twelve hours.

This isn’t a sales pitch for miracles. It’s a simple ritual explained plainly: what helps, what doesn’t, how to protect your teeth, when to adjust for your body, and how to make it a habit that lasts.

Why warm lemon water in the morning helps

You actually drink it

Most people wake slightly dehydrated. A warm, lightly flavored drink is simply easier to finish than a tall glass of cold water; that first 200–250 ml goes down without much effort, and as a result the morning feels less jagged. If this mug nudges you to skip a sweetened beverage, that’s a quiet win for energy and long-term health. If you like receipts, the public-health team at Harvard has a clear, readable overview of sugary drinks and risk that explains why replacing sugar-sweetened drinks is one of the most useful everyday changes.

Of course, routines shift with seasons. On hot afternoons, a cooler glass may feel more inviting. When the weather turns that way, it’s easy to slide toward your own take on cold citrus hydration—our deep dive on benefits of cold lemon water compares the experiences without the hype.

A modest vitamin C nudge

Half a lemon won’t replace a bowl of fruit, yet it still adds a small but useful vitamin C top-up—especially on coffee-and-toast mornings. If you’re the kind of reader who enjoys the details, you can check citrus values in USDA FoodData Central and skim the NIH vitamin C fact sheet for sensible ranges. If you’d rather stay in our kitchen, stroll through lemon varieties around the world and their health benefits to see how flavor and nutrition dance across different cultivars.

For some, a citrate assist

If you’ve dealt with certain calcium kidney stones, citrus citrate can help—when overall hydration is on point. It’s not a cure; it’s an assist. The National Kidney Foundation notes that lemon juice diluted in water can raise urinary citrate (be mindful of sugar if you’re turning it into lemonade). Prefer to compare citrus side by side? Our guide to lemon vs. lime water offers a simple, practical look.

What the ritual doesn’t do (and what does)

Let’s be honest. Lemon water doesn’t detox your liver, alkalize your blood, or burn belly fat. Your body handles detox, your blood’s pH isn’t pushed around by a wedge of fruit, and fat loss comes from overall balance—not a single ingredient. Still, warm lemon water in the morning can influence the day in a way that matters: hydrate early, and breakfast tends to calm down; skip one sugary drink, and the afternoon is steadier. If you’re exploring weight topics with nuance, lemon and black pepper for weight loss frames lemon as a helpful nudge rather than a magic trick.

Warm vs. hot vs. cold Lemon Water in the Morning

Warm usually wins at sunrise: soothing, easy on an empty stomach, and inviting enough that you finish the mug. Very hot water doesn’t add benefits and can irritate. Cold is lovely later in the day—especially after a walk or when the weather leans tropical. None of this needs to become a doctrine. The best temperature is the one you’ll actually drink, consistently.

When to drink it

Morning works because it stacks neatly with things you already do—open the curtains, put on the kettle, squeeze lemon, sip. If evenings are gentler in your world, shift the ritual there and keep everything else the same. The effect comes from showing up for the habit, not from the clock.

Protecting your teeth while you sip

Lemon is acidic. You don’t have to avoid it; you just have to be kind to enamel.

  • Use warm, not boiling water—comfortable to sip.
  • Sip rather than swish; if you like to linger over your mug, a straw helps limit contact.
  • Rinse with plain water right after.
  • Wait 30–60 minutes before brushing so saliva can rebalance and the enamel surface can re-harden. Mayo Clinic explains the timing clearly; for a friendly recap, Verywell Health’s explainer says the same in gentler language.

Prefer the reminder in our own voice? The pros-and-cons note in lemon water in morning: 5 benefits and drawbacks keeps the guidance practical without the scare tactics.

The recipe (and variations that respect the ritual)

The simple version (two minutes)

  1. Warm 200–250 ml water until it’s comfortable to sip.
  2. Squeeze ½ fresh lemon (or 1–2 tablespoons bottled juice).
  3. Stir, sip, and rinse with plain water afterward.

That’s enough. The ritual works because it’s simple and repeatable. But on days when you want a little more character, small additions help without turning your kitchen into a lab.

Small upgrades, still simple

  • Ginger: a thin slice brings subtle heat and clears the morning cobwebs.
  • Cinnamon: a pinch softens the edges and suits cooler weather.
  • Mint: a few leaves brighten the cup without adding acidity.
  • Cucumber: when afternoons run hot, keep the hydration theme rolling with cucumber, lemon, and ginger water or dip into cooling cucumber electrolyte quenchers to make “drink more water” feel like pleasure instead of duty.

Honey, used thoughtfully

If a touch of sweetness keeps the habit alive, add ½–1 teaspoon honey. It softens the citrus, which, in turn, makes the ritual easier to keep. It does add calories and the drink is still acidic, so keep the enamel tips. Curious about choosing better honey—raw or filtered, floral varietals and all the rest? Wander through Raw Honey: The Sweet Superfood, or pair the conversation with a measured look at ginger and honey for weight.

Making the habit of Warm Lemon Water in the Morning stick

Habits don’t survive on motivation; they survive on logistics. Reduce friction until the ritual is almost automatic.

  • Pair it with something you already do: kettle on → squeeze lemon → two easy stretches → coffee.
  • Keep a small “lemon station”—knife, board, mug—in one dependable spot.
  • If mornings are chaotic, pre-cut wedges at night.
  • Use the kettle’s timer if it has one and let the machine do the reminding.
  • Track a short two-week streak; once it feels natural, drop the tracker and trust the routine.

The next steps matter too. After warm lemon water in the morning, breakfast tends to tilt toward balance: yogurt and fruit instead of a hurried pastry; an omelet instead of a sugar crash. For practical ideas you can use tomorrow, our quick hydration-forward breakfasts live neatly alongside health benefits of cucumber and lemon water and refreshing lemon cucumber water—ignore the word “detox”; keep the parts that make drinking water easier.

When to soften, switch, or skip

Sensitive stomachs and reflux

Citrus can aggravate symptoms for some people with GERD. That doesn’t automatically rule out the ritual. Try less lemon in more water, sip after a small bite of food, or keep the habit with warm plain water in the morning and enjoy citrus later in the day. The Cleveland Clinic’s GERD diet guide is a straightforward, no-drama reference if you need it.

Also Read: 21 Remedies for Acid Reflux, Heartburn, and GERD: Natural and Ayurvedic Solutions.

Enamel concerns

If enamel is already compromised, keep the practical steps—warm water, brief contact, a rinse after, and a pause before brushing—and keep regular dental check-ins. The short Mayo Clinic piece above is the cleanest summary if anyone in your house likes to know “why” before they change a routine.

Travel days

Rituals wobble when you’re away from your kitchen. A tiny bottle of lemon juice in your bag is a quick fix; if that’s not your style, switch to warm plain water while traveling and return to lemon at home. No guilt necessary; the habit’s shape matters more than its exact ingredients for a week or two.

Small science, plain English

  • Hydration is the clearest benefit. Flavors you enjoy increase intake; better intake supports digestion, cognition, and energy. For context on why swapping out sugary beverages matters, the Harvard sugary-drinks pages make a crisp case without sensationalism.
  • Vitamin C: lemons help, modestly; bigger wins come from the overall pattern—daily fruit and vegetables, not a single mug. Exact values and reasonable limits live in USDA FoodData Central and the NIH fact sheet.
  • Citrate & stones: relevant for a subset of people; hydration is the main lever and lemon can assist. The National Kidney Foundation lays out practical steps without hype.
  • Weight: there’s no fat-burning shortcut in a cup. The value is in replacing a sugary drink and building a low-friction morning that keeps you steady. When you want a grounded follow-up, lemon and black pepper for weight loss keeps expectations realistic.

Putting it together

Begin with warm lemon water in the morning because it’s easy and kind. Protect your teeth with simple steps. Adjust the lemon or the timing if your body asks for it. Keep the ritual because it helps you drink water—and because it says something about how you want the day to feel: less noise, more intention. The benefits aren’t flashy; they accrue in the background while you get on with living.

FAQs about Warm Lemon Water in the Morning

1) What are the benefits of warm lemon water in the morning?

It’s a gentle way to hydrate first thing, which often steadies energy and digestion. Plus, you’ll get a small vitamin C nudge from the lemon. While it won’t “detox” or melt fat, it can help you replace sugary morning drinks—and that shift matters over time.

2) Is warm lemon water better than hot lemon water in the morning?

Yes—generally. Warm is kinder on the throat and teeth, and, importantly, you’re more likely to sip it comfortably and consistently. Meanwhile, very hot water doesn’t increase benefits and can feel harsh.

3) What’s the difference between warm lemon water and hot lemon water benefits?

Practically speaking, the benefits are similar—hydration plus a little vitamin C. However, warm wins for comfort and tooth-friendliness, so it’s usually the better everyday choice.

4) Does adding honey change the benefits of warm lemon water?

Not much nutritionally—honey adds flavor (and a few calories). However, if a touch of honey helps you stick to the habit, that consistency is the real win. Just keep the same enamel-care tips in mind.

5) Can warm lemon water help with weight loss?

Indirectly, yes. Although it doesn’t burn fat, it can replace higher-calorie beverages and set a steadier tone for breakfast choices. Over weeks, that routine can support a healthier overall pattern.

6) Is it good to drink warm lemon water on an empty stomach in the morning?

Usually, yes. Starting the day with a warm, mild drink is comfortable for many people. That said, if you have a sensitive stomach, try less lemon in more water—or sip after a small bite of food.

7) How much lemon should I use for morning warm water with lemon?

A simple, sustainable ratio is ½ fresh lemon (or 1–2 tablespoons juice) in 200–250 ml of warm water. It’s enough for flavor without overwhelming acidity.

8) How hot should the water be—warm, hot, or lukewarm?

Aim for pleasantly warm—comfortable to sip, not steaming. In other words, think “cozy tea” rather than “fresh-off-the-boil.”

9) Are there benefits of drinking warm water and lemon in the morning with honey?

Mainly taste and habit-keeping. Honey can make the flavor softer, which, in turn, makes the routine easier to repeat. nutritionally, the core benefits still come from hydration and the lemon’s citrus notes.

10) What are the early morning lemon water benefits vs. drinking it later?

The main benefits don’t depend on the clock; consistency does. Even so, many people find morning easiest because it stacks neatly with existing routines—and that makes the habit stick.

11) Is warm lemon water safe to drink every day?

For most people, yes. Just be enamel-smart: sip (don’t swish), rinse with plain water afterward, and wait a bit before brushing. If citrus bothers your stomach, dilute it more—or drink it later in the day.

12) Can warm lemon water affect teeth or enamel?

Lemon is acidic, so a little care helps. Therefore, use warm (not hot) water, minimize mouth contact (a straw can help), rinse after, and wait 30–60 minutes before brushing. With those steps, most people do fine.

13) Is there a difference between benefits of warm water with lemon in morning and at night?

Not really; timing is personal. Morning encourages routine and replaces sugary a.m. drinks, while night can be calming. Choose the moment that helps you keep the habit comfortably.

14) Does warm lemon water help with digestion or bloating?

It can, gently. Warm fluids tend to feel soothing, and beginning hydrated often makes the rest of breakfast sit better. However, if you have persistent digestive issues, it’s wise to notice patterns and adjust.

15) What about GERD or acid reflux—should I avoid lemon water in the morning?

Because citrus can trigger symptoms for some, start mild: less juice, more water, and slow sips. Alternatively, keep the ritual with warm plain water and save lemon for later if mornings are sensitive.

16) Are there benefits of hot lemon water in the morning specifically?

Beyond comfort, not especially—“hot” isn’t more effective. In fact, very hot water can feel irritating. Warm remains the sweet spot.

17) Does lukewarm water with lemon in morning work as well?

Absolutely. Lukewarm sits in the same comfort zone as warm—easy to drink, easy to keep. And consistency, again, is the real advantage.

18) Should I drink warm lemon water before or after breakfast?

Either is fine. Before breakfast is popular because it creates a clean, calm start and helps you hydrate early. Still, if after-breakfast feels better for you, stick with that.

19) Can I add ginger, cinnamon, or mint to morning lemon water?

Yes—small add-ins can make the ritual more enjoyable without complicating it. A thin slice of ginger, a pinch of cinnamon, or a few mint leaves keeps the flavor interesting while you keep the habit.

20) How many times should I drink warm lemon water in a day?

Once daily is a simple, sustainable baseline. If you enjoy a second cup later—perhaps without lemon or with a milder squeeze—that’s fine too. As always, let comfort and enamel care guide you.

21) Is there any benefit to warm lemon water with honey at night instead of morning?

It’s mostly about preference. Night can feel soothing and can help you wind down; morning anchors your day. Choose the moment that you’ll actually keep—because the habit you enjoy is the one that lasts.

22) Can warm lemon water help with skin or immunity?

Indirectly. Better hydration and a modest vitamin C bump support overall wellness, which can reflect in skin and seasonal resilience. But, to be clear, the mug is a helper—not a cure-all.

23) Are there benefits of drinking warm lemon water with honey for weight loss?

Only indirectly through habit change and beverage swaps. Honey adds calories, so keep it light; the goal is a routine that nudges you toward steadier choices throughout the day.

24) Any quick tips to make the morning habit stick?

Yes—pair it with something you already do (kettle on, lemon squeezed, two easy stretches, then coffee), keep a small “lemon station” ready, and prep wedges if mornings are rushed. Small frictions removed; habit secured.

Posted on 2 Comments

Lemon, Cayenne Pepper, and Honey for Detox

Photorealistic portrait of a warm lemon, cayenne, and honey drink in a clear mug with lemon halves, cayenne powder, and a honey jar on a dark background; headline reads “Lemon + Cayenne + Honey — Recipe • Variations • Safety”; MasalaMonk.com footer.

Some mornings ask for something simple, warm, and a little zippy. That’s where lemon, cayenne, and honey shine. This drink isn’t a miracle cure—your liver and kidneys already handle detoxing—but it can absolutely be a comforting ritual that supports hydration, brings a citrusy lift of vitamin C, and adds a gentle, invigorating heat from cayenne. Because people often arrive with very specific questions, we’ll walk through the benefits of lemon and cayenne pepper, share a two-minute recipe, explore smart variations (ginger, apple cider vinegar, and the maple-syrup version), and finish with realistic safety tips so the habit stays friendly.


Quick Take: The Real Benefits of Lemon and Cayenne Pepper

First, let’s set expectations in plain language. Most of the feel-good effect comes from hydration; starting your day with fluid is an underrated win. Meanwhile, lemon contributes vitamin C—a water-soluble nutrient you need regularly (see Harvard’s Nutrition Source on vitamin C and Harvard Health’s explainer).

Next, cayenne’s warmth comes from capsaicin. Research suggests small, short-term bumps in thermogenesis and energy expenditure; think of it as a gentle assist rather than a dramatic change (skim this broad umbrella review on spicy foods and a focused paper on capsaicin and body weight).

Finally, honey smooths acidity and spice, making the habit easier to enjoy consistently. It does add antioxidants, yet it’s still added sugar, so a measured teaspoon is plenty. And importantly, never give honey to infants under 12 months—the CDC’s guidance on infant botulism is crystal clear.

Because this drink is often lumped into “detox” talk, it helps to keep perspective. If you’d like a balanced view on cleanse claims, start with Harvard Health on detox cleanses and this general look at detox diets. Afterwards, if you want to compare rituals, you can also read our plain-spoken, in-house overview of the Master Cleanse for Detox and how it differs from an everyday beverage.


Evidence-Aware Benefits of Lemon and Cayenne Pepper (and Honey)

Lemon Water with Cayenne Benefits: Hydration First, Vitamin C Next

To begin with, the biggest, most reliable win is drinking more water. That alone can help you feel sharper and more energized. On top of that, lemon adds vitamin C, which supports normal immune function and helps with iron absorption. Because it’s water-soluble, a little each day works well—and a citrusy drink simply makes “a little each day” easier to do.

If you’re torn between warm or cold, choose the version you’ll actually drink. For gentle routines, many people like a mug of warm lemon water in the morning; for hot afternoons, others prefer the crisp feel of cold lemon water. Either way, you’re hydrating, and that’s the main win.

Cayenne Pepper, Lemon and Honey Benefits: A Gentle Thermogenic Nudge

Meanwhile, the spice note from cayenne can feel naturally stimulating. Mechanistically, capsaicin seems to nudge energy expenditure and fat oxidation modestly. However, it’s not a magic switch; your best results still come from an overall routine—protein, fiber, movement, and sleep—while this drink adds a small assist and a pleasant ritual. In other words, let the warmth help you start the day well, then let food and movement do the deeper work.

Honey’s Role: Flavor, Mouthfeel, and Consistency

Next up, honey. A teaspoon rounds off the edges so the drink feels balanced rather than sharp. That matters because a habit you enjoy is a habit you keep. Still, because honey is added sugar, consider it a flavor accent, not a requirement. If you’re sharing sips with family, remember: no honey for infants under one.


How To Make Lemon–Honey–Cayenne Water (2 Minutes)

Ingredients (1 serving)

  • 250–300 ml warm water
  • Juice of ½–1 lemon (to taste)
  • ⅛ teaspoon cayenne pepper (start low; increase slowly)
  • 1 teaspoon honey (optional)
Close-up of a warm lemon, cayenne, and honey drink in a clear mug with a lemon half and cayenne powder on a dark surface; headline reads “Lemon + Cayenne + Honey” with bullets “Supports Hydration • Boosts Metabolism • Gentle Detox”; MasalaMonk.com footer.
Hydration is the main benefit here, with a small thermogenic nudge from cayenne and optional honey for balance. Try ½ lemon, a pinch to ⅛ tsp cayenne, and 1 tsp honey. Note: this doesn’t “detox” the body—sip, then rinse with water to protect enamel; no honey for infants under 12 months.

Method

  1. Stir lemon juice into warm water.
  2. Whisk in cayenne until dispersed.
  3. Add honey, stir, and sip while warm—or shake with ice if you prefer it cold.

Make-it-yours tips

  • If you’re spice-sensitive, begin with a pinch of cayenne and build up over a week.
  • If you love a brighter, crisper profile, make it iced by shaking with ice and straining.
  • If you care about tooth enamel, remember that acidic drinks can contribute to erosion when sipped for long periods. Therefore, sip (don’t swish), rinse with plain water afterward, and give it a bit of time before brushing. Practical overview: American Dental Association on erosive tooth wear.

Variations Readers Actually Use (Flavor First, Hype Last)

Because everyone tweaks this drink, here are three popular riffs. Each keeps the core intact while changing the flavor or mouthfeel, and each still aligns with the overall benefits of lemon and cayenne pepper story.

Variation 1 — Lemon Cayenne Honey Drink with Ginger

If you want a cosier, aromatic kick, grate ½–1 tsp fresh ginger into the mug (or steep a thin slice for 3–5 minutes and remove). Ginger is well-known for easing certain kinds of nausea (including pregnancy-related), and it pairs beautifully with citrus and gentle heat. For a level-headed overview of usefulness and safety, see NCCIH on ginger.
If you’d like more ways to use it at home, our round-up of ginger drinks has easy combinations you can try this week.

Photorealistic mug of warm ginger, lemon, and cayenne tea on a light marble surface with fresh ginger, a lemon half, and a small bowl of cayenne; headline reads “Ginger + Lemon + Cayenne” with bullets “Aids Digestion • Supports Immunity • Boosts Metabolism”; MasalaMonk.com footer.
Ginger adds cozy spice and may help settle stomachs; lemon brings a vitamin-C lift; cayenne adds gentle heat. Grate ½–1 tsp fresh ginger to steep 3–5 min, then add ½ lemon juice and a pinch of cayenne; sweeten lightly if desired. If acid-sensitive, dilute more and sip with food; rinse with water afterward.

Flavor note: If you want ginger to lead, steep it first, then add lemon and cayenne at the end so the citrus stays bright and the spice stays crisp.

Variation 2 — Lemon and Cayenne Pepper Water with Apple Cider Vinegar (ACV)

For a sharper, tangier sip, add 1–2 teaspoons ACV to the base recipe and dilute well. The lemon keeps the drink bright, while cayenne adds warmth behind the vinegar’s tang. Because ACV is acidic, it can aggravate reflux and, over time, contribute to enamel erosion; rinsing with water afterward is a good habit. For what the evidence really says (and realistic amounts people use), see Harvard Health on ACV.
Prefer to eat your vinegar? Try one of our simple ACV salad dressing recipes and let flavor do the heavy lifting at mealtime.

Photorealistic portrait of a lemon, cayenne, and apple cider vinegar drink in a clear glass with a lemon slice on the rim; ACV bottle and small bowl of cayenne on a light marble surface; headline reads “LEMON + CAYENNE + ACV” with bullets “Tangy & refreshing • Easy daily ritual • Rinse after acidic drinks”; MasalaMonk.com footer.
Lemon + cayenne + ACV makes a bright, tangy sip: mix 250–300 ml warm water, juice of ½ lemon, a pinch to ⅛ tsp cayenne, and 1–2 tsp ACV (diluted well). Optional: 1 tsp honey. Hydration is the main benefit; ACV is acidic, so if you’re reflux-prone dilute more, sip (don’t swish), and rinse with plain water afterward to protect enamel. Not a “detox,” just a simple daily ritual you can enjoy.

Pro tip: If lemon + ACV feels too intense, halve the lemon and go lighter on cayenne. Balance is everything.

Variation 3 — Lemon Cayenne “Cleanse” (the Maple Syrup Version)

This is the famous water-lemon-maple-cayenne combination, often used as a short fast. As a multi-day plan, it’s not nutritionally balanced and generally not recommended. If you’re simply curious about the taste, add 1–2 teaspoons maple syrup to the everyday recipe and stop there. For a straightforward overview, see WebMD’s Master Cleanse explainer.

Photorealistic portrait of a lemon, cayenne, and maple syrup drink in a clear mug on light marble with lemon slices, a maple syrup bottle, and a small bowl of cayenne; headline reads “LEMON + CAYENNE + MAPLE” with subhead “Flavor variation – not a multi-day cleanse”; MasalaMonk.com footer.
Maple adds round sweetness to lemon–cayenne water—enjoy it as a flavor variation, not a cleanse. Mix 250–300 ml warm water, juice of ½ lemon, a pinch to ⅛ tsp cayenne, and 1–2 tsp maple syrup. Optional: a little honey. Hydration is the main benefit; it’s still sugary and acidic—sip (don’t swish) and rinse with water afterward.


If you still want to understand how the cleanse compares to a daily beverage, our in-house overview—Master Cleanse for Detox—lays out the differences without the hype.


When To Drink It, How Often, and Small Tweaks That Matter

Now, let’s make this habit sustainable.

  • Timing: Many people like it first thing in the morning because it’s soothing and hydrating. However, if you’re acid-sensitive, try it with breakfast instead.
  • How much: One mug a day is plenty. More isn’t better; it’s still acidic, and honey or maple are still sugars.
  • Sweetness dial: Keep honey to ~1 teaspoon or skip it. If you switch to maple syrup, start with less—it tastes slightly sweeter per teaspoon.
  • Spice dial: You can move from a pinch to ⅛ teaspoon, and eventually to ¼ teaspoon if you love heat. Increase gradually and listen to your gut.
  • Temperature choice: Warm feels cosy and morning-friendly; iced feels bright and afternoon-friendly. Pick what keeps you consistent.

And if you enjoy the citrus theme, you may also like exploring how lemon and lime water compare in everyday life—our round-up on lemon vs lime water is a quick, practical read.


Safety Snapshot (So This Stays Friendly)

  • Infants: Absolutely no honey under 12 months (risk of infant botulism). See the CDC’s prevention page.
  • Stomach/GERD/ulcers: Lemon’s acid plus capsaicin’s heat can irritate sensitive stomachs. Therefore, dilute more, go gentler on cayenne, and consider having it with food.
  • Teeth: Acidic beverages can erode enamel with prolonged sipping. So, sip, rinse, and wait before brushing. Read more at the American Dental Association.
  • Weight expectations: The benefits of lemon and cayenne pepper are supportive, not transformative. Capsaicin’s effect is modest; lasting change comes from overall diet quality, protein, fiber, movement, and sleep. If you’re curious about the research, see capsaicin & body weight and the spicy-foods umbrella review.
  • Allergies & meds: If you have citrus sensitivities, mouth ulcers, or you’re on GI-sensitive medications, start mild and check with a clinician if unsure.

A Few Helpful Next Reads


Final thought

In the end, the biggest benefits of lemon and cayenne pepper come from a very human place: small habits that feel good are the ones we actually keep. A warm (or iced) citrus-and-spice mug can mark the start of your day, nudge you to hydrate, and invite you to take the next right step—whether that’s a balanced breakfast, a short walk, or a calmer pace. Keep it simple, keep it kind, and let the ritual do its quiet work.

FAQs

1) What are the real benefits of lemon and cayenne pepper (with honey)?

In short, the benefits of lemon and cayenne pepper are mostly practical: hydration from the water, a gentle boost from vitamin C in lemon, and a mild thermogenic nudge from cayenne’s capsaicin. Honey can make the drink smoother and easier to stick with as a daily ritual. However, it’s supportive rather than miraculous—use it alongside balanced meals, sleep, and movement.

2) Does lemon water with cayenne pepper actually “detox” the body?

Not exactly. Your liver and kidneys already handle detox 24/7. So, while lemon water with cayenne benefits include hydration, flavor, and a cozy warm-up, the drink itself doesn’t remove toxins. Instead, think of it as a pleasant habit that nudges you toward better daily choices.

3) How do I make a quick lemon–honey–cayenne detox drink?

Start simple: warm water, juice of ½–1 lemon, ⅛ teaspoon cayenne (or just a pinch at first), and 1 teaspoon honey if you like. Stir and sip. For an iced version, shake with ice and strain. This covers “how to make lemon honey–cayenne pepper detox drink” while keeping it realistic and gentle.

4) What’s the best time to drink it—morning or evening?

Because it’s warming and hydrating, many people enjoy it first thing in the morning. That said, if acidity bothers you on an empty stomach, consider sipping it with breakfast. In the evening, keep the cayenne light so it feels soothing rather than too stimulating.

5) How much cayenne should I use if I’m new to it?

Begin with a tiny pinch—less than ⅛ teaspoon—and notice how you feel. Then, over a few days, ease up to ⅛ teaspoon. If you genuinely love heat, you can work toward ¼ teaspoon, but there’s no prize for going hotter. Consistency matters more than intensity.

6) Are there benefits of lemon and cayenne pepper without honey?

Absolutely. The core benefits of lemon and cayenne pepper—hydration, vitamin C, and gentle warmth—don’t require honey. Honey is mainly for taste and mouthfeel, so if you’re managing sugars, simply skip it or reduce the amount.

7) What about cayenne pepper, lemon, and honey benefits for weight loss?

Here’s the balanced view: cayenne’s thermogenic effect is modest. Therefore, the trio can support a healthy routine by making hydration enjoyable and signaling a “fresh start” to the day. Still, lasting weight change comes from overall habits—protein, fiber, steps, strength, and sleep.

8) Is the lemon cayenne cleanse (with maple syrup) a good idea?

As a long cleanse, it’s not ideal—too low in protein and fiber. However, as a flavor variation of your usual drink, a small splash of maple syrup is fine now and then. In other words, enjoy the taste, but avoid turning it into a multi-day fast.

9) Can I add ginger—and if so, why would I?

Yes, and it’s delicious. Grate ½–1 teaspoon of fresh ginger or steep a thin slice, then finish with lemon and cayenne. As a result, you get a deeper, spicier profile. Many people find ginger comforting, especially on cooler mornings.

10) What about apple cider vinegar with lemon and cayenne?

You can add 1–2 teaspoons for a tangier sip. Nevertheless, go slowly: the added acidity can feel strong. If reflux or enamel sensitivity is a concern, dilute more, sip rather than swish, and rinse your mouth with plain water afterward.

11) Warm or cold—does temperature change the benefits?

Not really. The primary lemon cayenne benefits come from hydration, vitamin C, and gentle spice—all of which you’ll get whether it’s warm or iced. So, choose the version you’ll happily drink today and tomorrow.

12) Who should be cautious with lemon and cayenne pepper water?

If you have reflux, active mouth ulcers, or a very sensitive stomach, start gently or have the drink with food. And importantly, never serve honey to infants under 12 months. When in doubt, go lighter, dilute more, and listen to your body.

13) Will this help my skin or immunity?

Indirectly, yes—by encouraging hydration and adding a small bump of vitamin C. But to be clear, glowing skin and resilient immunity depend on many factors: sleep, protein, colorful produce, and stress management. This drink can fit into that bigger picture.

14) How often should I drink it for best results?

Once a day is plenty for most people. More doesn’t necessarily mean better—especially since it’s acidic and, if sweetened, contains added sugar. Remember, the biggest benefits of lemon and cayenne pepper show up when the habit is consistent and comfortable.

15) Can I prep a batch in advance?

You can prep components. For the freshest flavor, squeeze lemon close to drinking time, or refrigerate lemon water for a few hours max. As for cayenne, it disperses better when freshly stirred. If you’re rushing, premix the dry cayenne with a spoon of honey so it blends faster later.

16) Does using bottled lemon juice change the benefits?

Fresh lemon tends to taste brighter, yet bottled is convenient. If you use bottled, choose one with lemon juice as the only ingredient and adjust to taste. Ultimately, the habit you’ll keep—fresh or bottled—is the one that brings you the most day-to-day benefit.

17) Can I swap honey for maple syrup or skip sweetness entirely?

Yes on both counts. Maple syrup brings a rounder sweetness, but it’s still sugar; use sparingly. Or, for an unsweetened version, lean on the citrus and spice alone. Many people find that, over time, their palate naturally adjusts to less sweetness.

18) Will lemon and cayenne water hurt my teeth?

Acidic drinks can wear enamel if you sip for long periods. Therefore, enjoy your mug, avoid swishing, and then rinse your mouth with water. Waiting a bit before brushing helps, too. Small, simple habits like these keep the ritual teeth-friendly.

19) Can I drink it before a workout?

You can. The warm spice and light hydration can feel motivating. Still, if you’re training hard, you may want a bit of protein or carbs as well. Try the drink 20–30 minutes before and see how your stomach feels, then adjust the cayenne up or down.

20) What’s the biggest mistake people make with this drink?

Going too strong, too soon. Instead, start with a pinch of cayenne, a moderate squeeze of lemon, and a teaspoon of honey (or none). Then, gradually adjust. When the routine feels kind and sustainable, the benefits of lemon and cayenne pepper naturally add up over time.

Posted on 1 Comment

Iron-Rich Foods for Blood Donation: What to Eat Before & After

Iron-rich foods for blood donation: heme vs non-heme plates with chicken, tuna, beef, lemon, lentils, spinach, pumpkin seeds, fortified cereal on wooden table

You want to donate—and you want that calm “you’re good to go” at screening. Food can’t rewrite biology overnight, but if you choose well and time things right, it can give you a steady tailwind. This guide breaks down iron rich foods for blood donation in the only way that matters on a busy week: plain servings with actual iron numbers, quick pairings that improve absorption, and a realistic answer to the question everyone asks—is food alone enough, or do I need a supplement?

When you’re ready to double-check day-of rules (hemoglobin cut-offs, plasma protein checks, cadence), hop to our plain-English explainer—Can You Donate Plasma if You’re Anemic or Have Low Iron?—then come back here to plan the meals that make that “yes” more likely.

⚠️ Educational Information Only
This article is for general education about iron, blood donation, and plasma eligibility. It is not medical advice and does not replace consultation with a qualified health professional. Donation rules, hemoglobin thresholds, and iron requirements differ by country and by program. Always check your local blood service’s guidelines and talk to your clinician before changing diet, taking supplements, or booking a donation.


Why Iron Matters Before You Give Blood (and What Clinics Actually Check)

As a quick refresher, iron is a core part of hemoglobin, the protein in red blood cells that carries oxygen. On donation day, most services measure hemoglobin; some plasma programs also check total protein before apheresis (typically acceptable 6.0–9.0 g/dL in the U.S.). That means you’re optimizing your day-of hemoglobin with the foods and habits below. Your deeper iron stores (often tracked as ferritin) change more slowly, which is why consistency over a few weeks beats one heroic salad.

If you’d like to see the difference between iron types, common inhibitors, and safety notes in one place, bookmark these readable, authoritative primers: the NIH’s Iron Fact Sheet for Consumers, American Red Cross blood donor iron guidance, and the WHO overview on iron deficiency.

(For a friendly overview on our website, see Iron-rich vegetables that boost hemoglobin.)


The Two Kinds of Iron—And the One Habit That Changes Everything

Dietary iron arrives in two forms:

  • Heme iron (animal sources): beef, chicken, turkey, tuna/salmon, liver. It’s absorbed more easily.
  • Non-heme iron (plant & fortified foods): lentils, beans, chickpeas, tofu/tempeh, spinach, iron-fortified cereals and oats. It needs a little help.

That help is vitamin C. Pair plant iron with peppers, tomatoes, citrus, kiwi, berries, or amla in the same meal. Just as important, keep tea/coffee and big calcium servings away from the iron-focused plate; both can blunt absorption if they show up at the same time. If you want more depth on the why, the NIH sheet above is clear and practical.

Explore: Fight Anemia and Boost Hemoglobin: 10 High Iron Shakes & Smoothie Ideas


How Much Iron Is in Real Food? (Serving-by-Serving Numbers)

Let’s talk grams and cups, not vibes. Use these as building blocks while you assemble iron rich foods for blood donation across your week.

Top movers (one of these can anchor a day):

  • Fortified breakfast cereal (100% Daily Value): ~18 mg per labeled serving. Check the back of the box; many mainstream cereals still hit 18 mg.
  • White beans, canned, 1 cup: ~8 mg.
  • Oysters, cooked, 3 oz: ~8 mg.
  • Beef liver, cooked, 3 oz: ~5 mg.

Everyday staples (stack two or three):

  • Lentils, cooked, 1 cup: ~6.6 mg.
  • Spinach, cooked, 1 cup: ~6 mg (pair with vitamin C for better uptake).
  • Tofu, firm, 1 cup: ~6 mg.
  • Kidney/black beans, 1 cup: ~4 mg.
  • Canned tuna, 3 oz: ~1–1.4 mg.
  • Pumpkin seeds, 1 oz (28 g): ~2–2.5 mg.

Quiet helpers:

  • Cast-iron cookware: tomato-rich dishes (chili, dal, sauces) can pick up extra iron during cooking. It’s not a miracle, but over months it nudges the needle.
  • Citrus/peppers/tomatoes/berries: these are your vitamin-C “keys” that unlock non-heme iron absorption. Pair plant iron with ~75–100 mg vitamin C in the same meal (½ bell pepper, a kiwi, or a small orange does it); keep tea/coffee and big calcium servings 90+ minutes away.
Split infographic showing vitamin C foods and peppers on the left and coffee plus dairy on the right to illustrate iron absorption tips
Timing changes everything: Do pair plant iron with vitamin-C foods (peppers, tomatoes, citrus). Don’t take tea/coffee or large dairy servings with the iron meal—enjoy them between meals so non-heme iron actually absorbs.

For quick label lookups and recipe planning, USDA FoodData Central is gold; it’s searchable, detailed, and free.

Sources: NIH Table 2 + USDA FoodData Central.


Two Honest Paths to “Ready to Donate”

Because readers ask this bluntly, let’s answer it the same way.

Path A — You were close to the threshold

  • Goal: Build days that deliver ~18–25 mg iron on paper, protect absorption, and keep caffeine/calcium away from the iron meal.
  • Timeline: Over 2–4 weeks, many borderline donors see hemoglobin drift up modestly—enough to clear day-of checks, especially if starting with plasma.
  • Why it works: Repetition. You eat two default meals daily that are iron-forward, vitamin-C paired, and timing-smart. You’re stacking small wins.

Path B — You were clearly below the line

  • Goal: Discuss a short course of low-dose elemental iron with your clinician (frequent-donor guidance often falls around 18–38 mg/day for a defined window), plus the same food pattern as Path A.
  • Timeline: With oral iron therapy, a ~1 g/dL hemoglobin rise in ~4 weeks is a common response; ~2 g/dL in 3–4 weeks is an optimal textbook rise.
  • Why it works: The supplement does the heavy lifting; food makes the result stick so you don’t slide back between donations.

If you’re weighing plasma vs whole blood for your return, remember: plasma returns your red cells (smaller iron hit), though some programs also check total protein and enforce spacing. For U.S. readers, you can confirm spacing and protein ranges on the eCFR for Source Plasma and donor protein requirement pages.

Whenever eligibility—rather than food—is your main question, use the canonical in-house reference: Can You Donate Plasma if You’re Anemic or Have Low Iron?


Iron-Rich Foods for Giving Blood (Omnivore Day Plan That Actually Fits in a Workweek)

Think practical, not perfect. Here’s a single day you can repeat (and rotate ingredients) to keep momentum. It’s deliberately simple and designed around iron rich foods for blood donation.

Breakfast

  • Fortified cereal (100% DV): ~18 mg + berries or orange segments for vitamin C.
  • Coffee/tea: hold for 90 minutes; enjoy it mid-morning.

Lunch

  • Lentil bowl, 1 cup: ~6.6 mg, with tomatoes and peppers, olive oil, herbs, and a lemon squeeze.
  • Side of citrus or kiwi.

Dinner

  • Chicken thighs or tuna (3–4 oz: ~1–1.4 mg) over greens; add sautéed spinach (1 cup cooked: ~6 mg).
  • Bright finish: lemon, salsa, or peppers.

Evening snack (optional)

  • Pumpkin seeds, 1 oz: ~2–2.5 mg or hummus with chopped peppers.

On paper: ~29–33 mg. With mixed-diet absorption, that might net 4–6 mg—steady enough for maintenance and a slow rise.

⚠️ Educational Information Only
This article is for general education about iron, blood donation, and plasma eligibility. It is not medical advice and does not replace consultation with a qualified health professional. Donation rules, hemoglobin thresholds, and iron requirements differ by country and by program. Always check your local blood service’s guidelines and talk to your clinician before changing diet, taking supplements, or booking a donation.


Iron-Rich Foods for Blood Donation (Plant-Forward Day That Still Hits the Numbers)

You don’t need meat to donate comfortably. You need plant iron + vitamin C + timing.

Breakfast

  • Fortified oats/cereal (check label; many provide 8–18 mg).
  • Add strawberries/kiwi for vitamin C.

Lunch

  • Chana masala (1 cup: ~4–5 mg) + peppers and tomatoes; finish with lemon.
  • Roasted chickpeas on the side.

Dinner

  • Tofu, 1 cup: ~6 mg, and spinach, 1 cup cooked: ~6 mg, in a tomato-rich curry.
  • Rice, quinoa, or millet for comfort.

Snack

  • Pumpkin seeds, 1 oz: ~2–2.5 mg.

Caffeine & calcium

  • Keep both away from iron plates; enjoy coffee/tea between meals, and schedule calcium tablets for another part of the day.

On paper: 22–28 mg; with diligent vitamin-C pairings and clean timing, you raise the odds of absorbing enough to climb—slowly but surely.

Read More: Iron Deficiency Symptoms & Top 10 Vegan Iron Rich Foods That Can Help


A Week-Out Planner (So the Night Before Isn’t a Scramble)

Because the calendar matters, here’s a Saturday-morning donor template. Shift days as needed.

Light breakfast plate with fortified oats, strawberries or orange, peanut butter toast and water for donation day
The morning of donation: Keep it light but iron-aware—fortified oats with fruit, a little protein/fat (e.g., peanut butter toast), and water. Save coffee for later so you don’t blunt iron uptake.

Mon–Wed (foundation)

  • Breakfast: fortified cereal + berries; pumpkin seed sprinkle.
  • Lunch: lentil or bean bowls with peppers/tomatoes; lemon-tahini.
  • Dinner: rotate dal with spinach, tofu-pepper stir-fry, and tuna + tomato salsa.
  • Snacks: hummus + veg; citrus; roasted chickpeas.
  • Habit: coffee mid-morning; put yogurt/cheese away from iron meals.

Thu–Fri (tighten up)

  • Keep the pattern; if you eat meat/fish, add one heme dinner (chicken thighs or salmon).
  • If plant-based, double down on spinach + legumes + citrus.
  • Hydrate; don’t oversalt dinner the night before.

Sat (donation day)

  • Light breakfast you trust: fortified cereal + berries, or chickpea-pepper salad, or eggs/tofu + tomatoes.
  • Coffee after, not with.
  • Pack a steady snack for later (banana, trail mix with pumpkin seeds).

Sat night–Sun (recovery)

  • Keep meals iron-positive: soups, beans, greens, fish/chicken or tofu/tempeh, with citrus and peppers.
  • Sleep well; note how your body responds.

Explore More: Iron Deficiency Anemia Symptoms: 15 Signs You Are Iron Deficient


Can Food Alone Raise Hemoglobin Enough to Pass Screening?

If you were borderline, yes—very often—if you give it 2–4 weeks and protect absorption. That means getting ~18–25 mg daily on paper, pairing plant iron with vitamin C, and kicking caffeine and big calcium servings to another time. Many donors clear the line this way, especially if they start back with plasma.

If you were clearly low, food alone is usually too slow. In that case, combining short, low-dose elemental iron (per clinician guidance) with the same food pattern is the predictable path back. The supplement corrects; your meals keep you there. For a simple, country-by-country sense check before you book your return, open our eligibility guide.


Iron Level to Donate Blood vs Iron Level to Donate Plasma (Plain English Only)

People often seek “iron level to donate blood” or “iron level to donate plasma,” but the decision on the day is almost always about hemoglobin—your oxygen-carrying capacity right now. For whole blood, many services also have sex-specific cut-offs. For plasma, red cells are returned, though some programs check total protein and enforce spacing between sessions. If you like to verify details straight from the source, these pages are tidy and current:

  • American Red Cross: hemoglobin minimums and frequent-donor iron guidance (start at their donor iron page and eligibility sections).
  • Canadian Blood Services: practical explainers on hemoglobin & iron for donors.
  • NHS Blood and Transplant (UK): clear thresholds and haemoglobin and iron guidance.
  • Australian Red Cross Lifeblood: accessible pieces on plasma and iron-aware donation.
  • U.S. plasma spacing/protein: eCFR rules for spacing and donor protein checks.

When you just want the bottom line without clicking around, lean on our in-house explainer—Can You Donate Plasma if You’re Anemic or Have Low Iron?—and then return to this page to keep your meals humming.

⚠️ Educational Information Only
This article is for general education about iron, blood donation, and plasma eligibility. It is not medical advice and does not replace consultation with a qualified health professional. Donation rules, hemoglobin thresholds, and iron requirements differ by country and by program. Always check your local blood service’s guidelines and talk to your clinician before changing diet, taking supplements, or booking a donation.


Iron-Rich Foods for Blood Donation: Cultural Plates You Already Love

Because food sticks when it tastes like home, here are familiar patterns that quietly deliver iron rich foods for blood donation:

  • Indian: chana masala with tomatoes; rajma; palak dal; lemon on grilled fish; poha with peas and a squeeze of lime; amla on the side.
  • Mediterranean: chickpea-pepper salads; lentil-tomato soups; sardines or tuna on toast with lemon; tomato-pepper shakshuka.
  • East/Southeast Asian-leaning: tofu/bok choy stir-fries; tempeh with sambal and lime; salmon with ginger, scallion, and citrus.
  • Latin-inspired: black beans with peppers and pico de gallo; beef-and-bean picadillo with tomato; lime-forward salsas over everything.

Different cuisines, same pattern: iron + vitamin C + timing.

Do Read: Revitalizing Recipes for Iron Deficiency: Nourish Your Body Naturally


Cooking Moves That Help Without Thinking About Them

  • Cook tomato-forward dishes in cast iron. You’ll likely get a small iron lift meal after meal—no extra effort.
  • Finish with acidity. Lemon, lime, salsa, or a tomato-pepper relish at the table are easy vitamin-C boosts.
  • Batch and freeze. Chili, dal, and bean soups mean your plan survives the Wednesday evening you’d otherwise phone in.

“How Much Should I Eat to Reach the Target?”

Here’s an easy equivalence for a typical 18–25 mg day (on paper). You can pick one from the top row and two from the middle row, then add whatever protein and vitamin-C sides you like.

Pick one (anchor):

  • Fortified cereal (100% DV) → 18 mg
  • White beans 1 cup → 8 mg
  • Oysters 3 oz → 8 mg

Pick two (supporting):

  • Lentils 1 cup → 6.6 mg
  • Spinach 1 cup cooked → ~6 mg
  • Tofu 1 cup → ~6 mg
  • Kidney/black beans 1 cup → ~4 mg

Add protein/boosters:

  • Chicken/turkey 3–4 oz → ~1 mg (plus a modest “meat factor” that improves plant-iron uptake)
  • Tuna 3 oz → ~1–1.4 mg
  • Pumpkin seeds 1 oz → ~2–2.5 mg
  • Vitamin-C side (peppers, tomatoes, citrus, berries) → better absorption

Now, because we’re aiming for iron rich foods for blood donation and absorption, remember the automatics: move coffee/tea between meals, and park big dairy servings and calcium tablets elsewhere in the day.

For a smart crunch, see our post on pumpkin seed benefits.


If You Were Deferred: A Calm, Doable Reset

First, find out what was low—hemoglobin, protein (for some plasma programs), or something else. Then pick Path A or Path B from above. Finally, hard-wire two dinners and one breakfast you can repeat with your eyes closed. Put a lemon next to your salt; it’ll remind you to finish plates with a squeeze. If you’re often on the go, keep a jar of roasted peppers or a quick tomato relish in the fridge; it turns any bean, lentil, tofu, or tuna dish into a vitamin-C-paired meal in seconds.

If you’re unsure whether to try plasma or whole blood first on your return, use our step-by-step eligibility guide and start with the gentler option your clinic confirms you qualify for today.


Iron-Rich Foods for Blood Donation: Your Takeaway

At this point you’ve got everything you need: actual serving amounts, the pairings that make iron count, the timing that stops good meals from going to waste, and a clear sense of what’s possible on food alone. More importantly, you’ve seen how to turn iron rich foods for blood donation into a pattern you hardly have to think about: two defaults a day, a couple of bright finishes, caffeine between meals, and—if needed—a short, clinician-guided supplement to get over the hump.

So choose your anchors, set your week, and book your screening when you feel steady. And when you want the exact cut-offs and donation rhythm for your country, keep this at hand: Can You Donate Plasma if You’re Anemic or Have Low Iron?.

That way, you focus on cooking and consistency—because that’s what gets you to “yes.”


Notes & disclaimers (reader-first)

This article is for general education. It doesn’t replace medical advice, diagnosis, or your local service’s rules. If you donate frequently or were deferred by a wide margin, talk to your clinician about a short, low-dose elemental iron plan and re-check rather than taking iron indefinitely.


FAQs on Iron Rich Foods for Blood Donation

1) What are the best iron rich foods for blood donation?

Lean heme sources like beef, chicken thighs, turkey, tuna, or salmon absorb easily; meanwhile, plant favorites—lentils, chickpeas, beans, tofu, tempeh, spinach, pumpkin seeds, and iron-fortified cereals—deliver steady non-heme iron. Pair them, moreover, with vitamin C foods (peppers, tomatoes, citrus, berries) so the iron actually absorbs.

2) How to increase iron levels for blood donation quickly yet safely?

First, repeat two iron-forward meals every day for 2–4 weeks; then, add vitamin C in the same plate; finally, keep tea/coffee and large calcium servings away from those meals. This simple rhythm usually nudges hemoglobin upward without drama.

3) What does your hemoglobin have to be to donate blood?

Because thresholds vary by service, use this rule of thumb: you must meet your local minimum hemoglobin for blood donation on the day. Practically, aim to sit a little above the cut-off so you’re not living on the edge at every visit.

4) What does your hemoglobin have to be to donate plasma?

Although plasma returns red cells, you still need to meet your center’s iron level to donate plasma, which is usually checked as same-day hemoglobin. Therefore, target a comfortable margin, not just the bare minimum.

5) Can you donate plasma with low iron?

Generally, not today. If your hemoglobin tests below the cut-off, you’ll be deferred; however, once it’s back in range—and you feel well—you can usually donate plasma again.

6) Can you donate plasma if you’re anemic?

If you’re actively anemic or trending low, most centers will say “not today.” Nevertheless, after a period of recovery—think iron-forward meals, rest, and, if recommended, a short, low-dose supplement—you can reassess eligibility.

7) What happens if you donate blood with low iron?

You risk feeling faint, recovering slowly, and sliding deeper into deficiency. Consequently, clinics defer donors with low hemoglobin to protect health first, donation second.

8) How much does hemoglobin drop after blood donation?

Typically, you’ll see a modest dip for a short period; then, with sensible spacing, iron rich foods for blood donation, and adequate sleep and hydration, most people return to baseline.

9) Iron rich foods for giving blood: what should I eat the day before?

Go for an iron-dense dinner—say, chicken thighs with peppers and tomatoes or lentil dal with spinach and lemon. Additionally, finish with a vitamin-C squeeze to boost non-heme absorption.

10) Same-day meals: what should I eat before giving blood?

Choose something light but iron-aware: fortified cereal with berries, chickpea-pepper salad with lemon, or tuna on wholegrain with tomatoes. Then, enjoy coffee or tea between meals, not alongside them.

11) Do tea and coffee really block iron?

Yes—especially for plant iron. Therefore, sip your tea or coffee at least an hour or so after your iron-focused meal; that way, you keep the benefits while avoiding the absorption hit.

12) Does calcium affect iron absorption?

Large calcium doses can blunt iron uptake when taken with the meal. So, place big dairy servings or calcium tablets away from iron plates to keep absorption on track.

13) Iron supplements for blood donors: when do they make sense?

If you donate often or were clearly below the threshold, a short, clinician-guided low-dose elemental iron course can help. Meanwhile, keep the food pattern going; diet maintains the gains once you’re back in range.

14) Is it possible to pass screening with food alone?

Sometimes—particularly if you were borderline. With two to four weeks of consistent meals, vitamin-C pairings, and smart timing, many donors clear same-day checks. However, if you were well below the cut-off, diet alone is usually too slow; supplementation may be needed.

15) Iron levels for plasma donation vs whole blood: what’s the difference?

Whole blood removes red cells, so the iron hit is larger; plasma returns red cells, so the iron hit is smaller. Even so, both look at same-day hemoglobin; some plasma programs also check total protein and enforce spacing.

16) Minimum hemoglobin for blood donation: should I aim for the exact number?

Technically you can, but practically, it’s kinder to aim above the line. Thus, you stop playing roulette at the clinic and donation day feels routine rather than risky.

17) How to increase iron levels to give blood if I’m vegetarian or vegan?

Stack plant iron (lentils, beans, chickpeas, tofu/tempeh, spinach, iron-fortified cereals) and, crucially, add vitamin C in the same bowl—peppers, tomatoes, citrus, berries. Then, separate tea/coffee and large calcium servings from those meals. Consistency, not novelty, does the work.

18) What about cast-iron cookware—does it help at all?

Yes, sometimes. Tomato-forward dishes, stews, and chilis cooked in cast iron can pick up extra iron. It’s not a miracle; yet, across months, the small boost adds up alongside your regular iron rich foods for blood donation plan.

19) Can donating blood cause anemia?

Not by itself—provided you space donations sensibly and replenish iron. However, frequent donations without recovery time can nudge stores downward. Hence the emphasis on meal patterns and, when appropriate, a short supplement.

20) Giving blood to reduce iron levels: is that a thing?

Therapeutic phlebotomy exists for iron overload conditions, but it’s medically directed and not the same as routine community donation. If you suspect high iron, you’ll need clinical evaluation rather than self-treatment.

21) How long should I follow an iron-forward plan before re-screening?

As a reasonable benchmark, give it 2–4 weeks. During that time, repeat two iron-forward meals daily, pair with vitamin C, and move caffeine and big calcium servings away from those plates. Afterward, re-check and adjust.

22) Iron level to give blood vs ferritin: which one matters for screening?

For the day-of decision, hemoglobin is the usual gatekeeper. Ferritin (your iron stores) changes more slowly; nevertheless, a steady food pattern helps both over time.

23) Can I donate blood with high ferritin or hemochromatosis?

Policies differ and usually involve medical oversight. As a donor-health rule of thumb, follow clinical guidance first; then, once cleared, consider how your situation fits the local donation framework.

24) If I was deferred, should I try plasma first next time?

Often, yes. Because plasma returns red cells, it’s a gentler step back once your same-day hemoglobin is in range. Still, pace yourself, maintain the meals, and keep an eye on how you feel after each session.

25) Bottom line—how do I get to “yes” and donate confidently?

First, identify what was low; next, run a two-to-four-week plan centered on iron rich foods for blood donation with vitamin-C pairings and smart timing; then, if needed, layer in a short, clinician-guided supplement. Finally, re-screen when you feel steady and aim to sit slightly above the minimum.


⚠️ Educational Information Only
This article is for general education about iron, blood donation, and plasma eligibility. It is not medical advice and does not replace consultation with a qualified health professional. Donation rules, hemoglobin thresholds, and iron requirements differ by country and by program. Always check your local blood service’s guidelines and talk to your clinician before changing diet, taking supplements, or booking a donation.