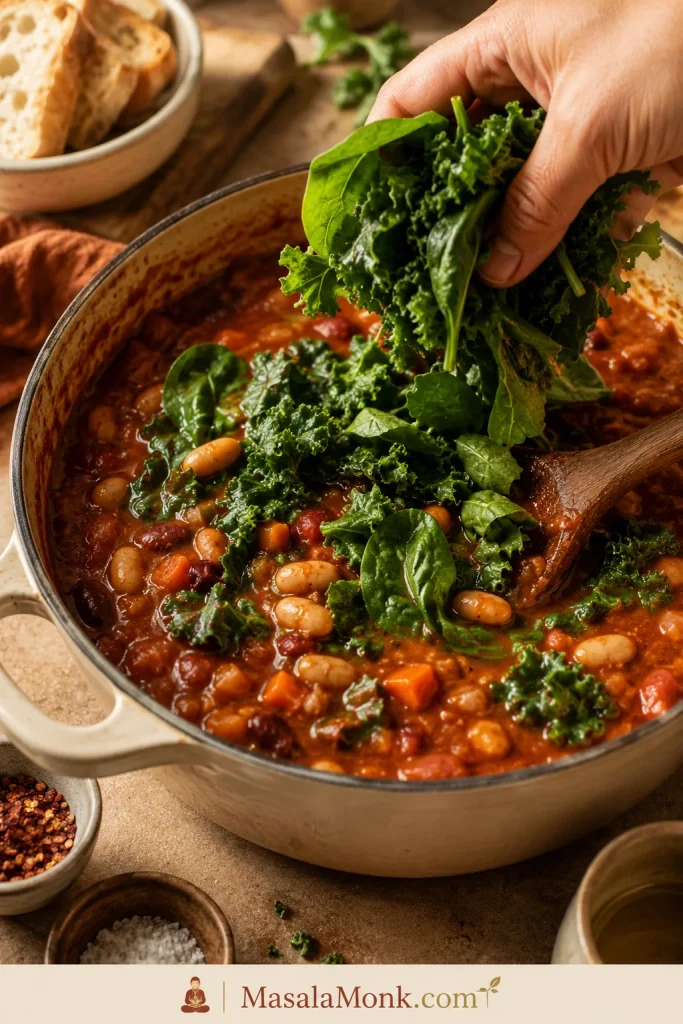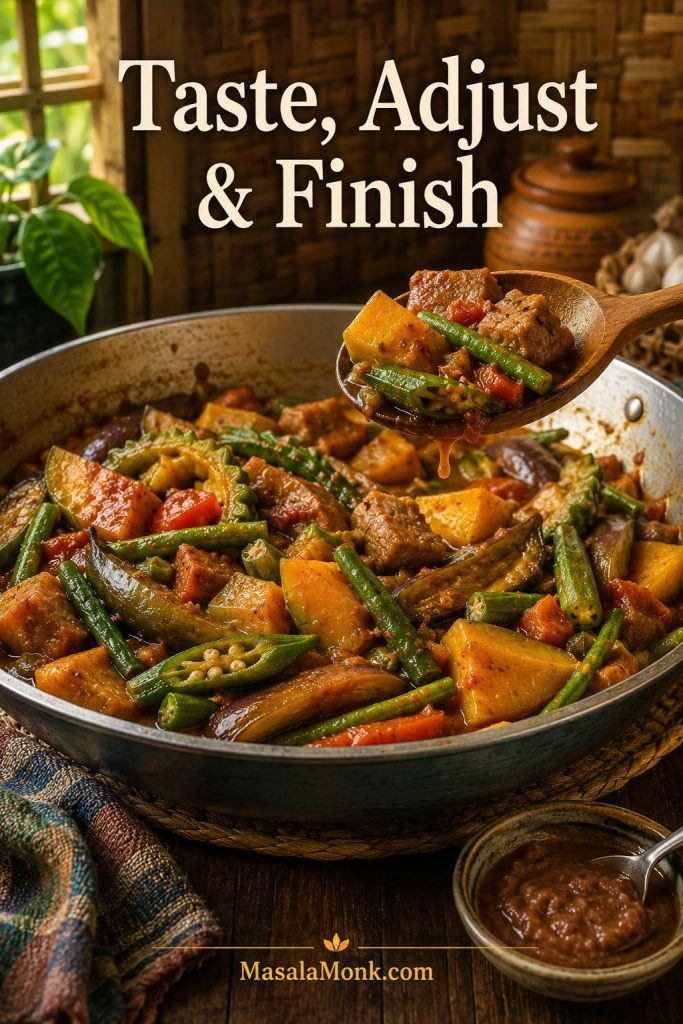
A stir-fry can look perfect in the pan and still taste disappointing if the sauce is off. Use too little, and dinner feels dry. Pour too much, and the vegetables turn watery. Go too salty, and you lose the freshness. Let it get too sweet, and everything starts tasting bottled.
The short version: mix one jar, add it near the end, and use about 1 cup for a family-size stir-fry so dinner turns glossy, not watery.
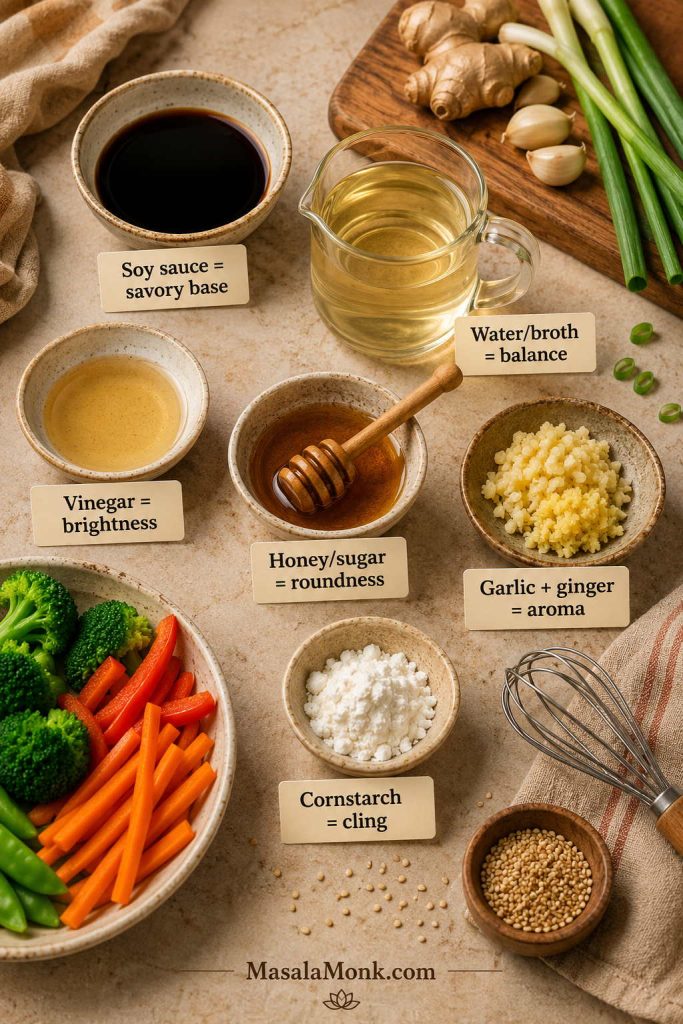
This homemade stir fry sauce is built around a simple MasalaMonk rule: salt, loosen, brighten, round, aroma, cling. Soy sauce gives the savory base, water or broth keeps it balanced, vinegar brightens it, honey or brown sugar rounds it, garlic-ginger-sesame bring aroma, and cornstarch helps it cling to the food instead of pooling at the bottom of the pan.
It takes about five minutes to mix and works with chicken, beef, tofu, shrimp, vegetables, noodles, rice bowls, and those tired weeknight dinners where the fridge has a few vegetables, a protein, and no clear plan.
This is the sauce to keep in your back pocket: flexible enough for whatever is in the pan, reliable enough to make a random skillet taste like a real dinner, and easy enough to adjust lighter, deeper, sweeter, spicier, lower-sodium, vegan, keto-friendly, gluten-free, or soy-free.
Quick Answer: What Is Stir Fry Sauce Made Of?
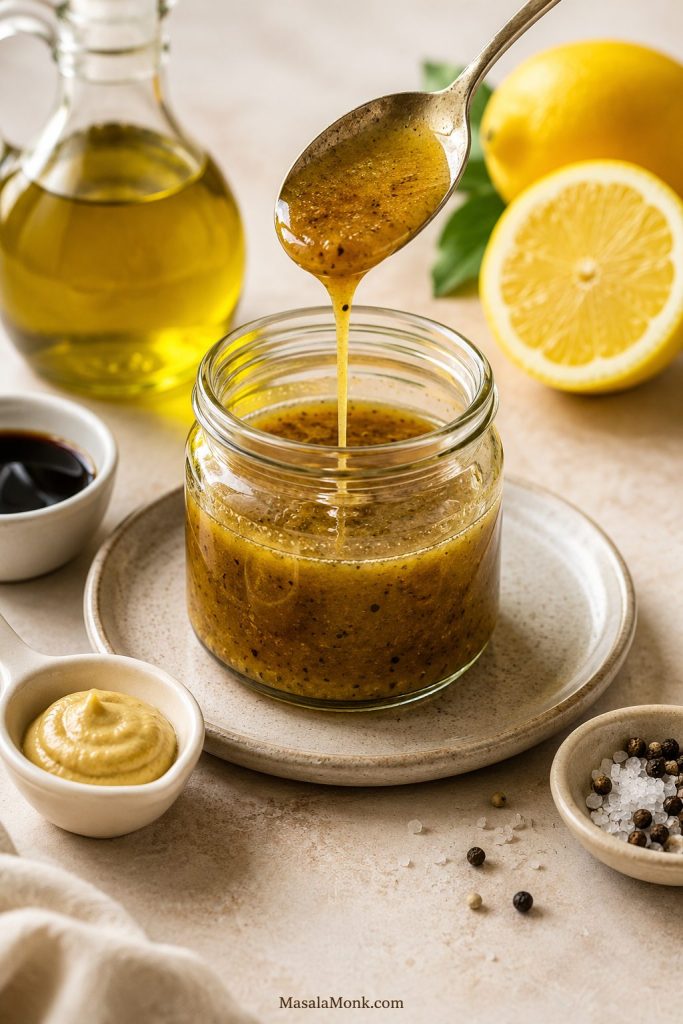
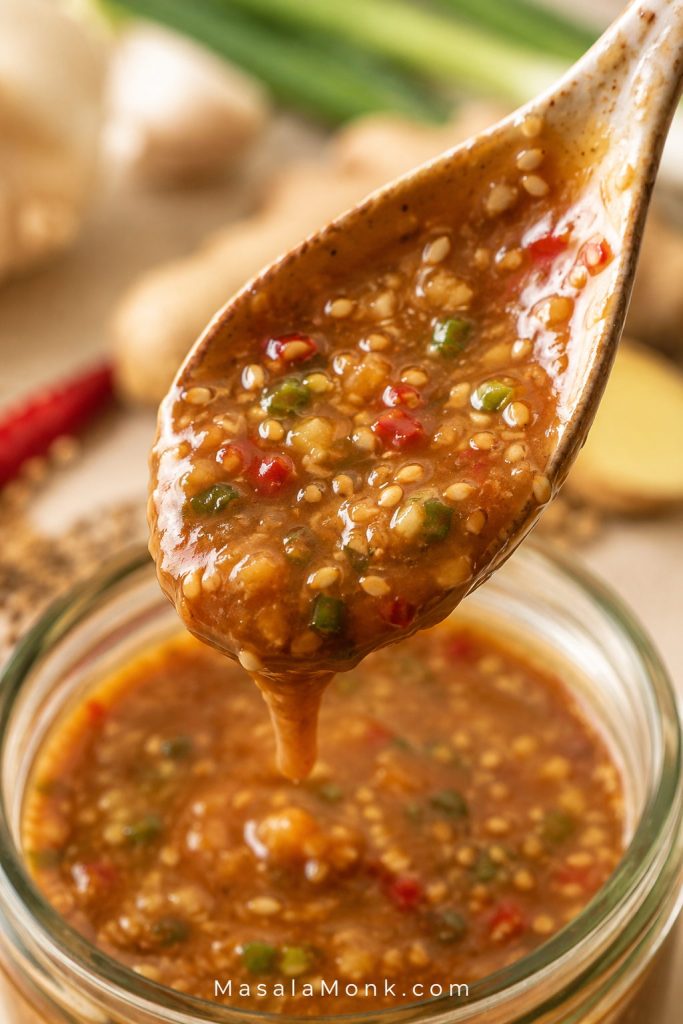
A basic stir fry sauce is made with soy sauce, water or broth, rice vinegar, honey or brown sugar, toasted sesame oil, garlic, ginger, and cornstarch. Whisk everything together, add it near the end of cooking, and let it bubble for 30 to 60 seconds until it turns glossy and coats the food.
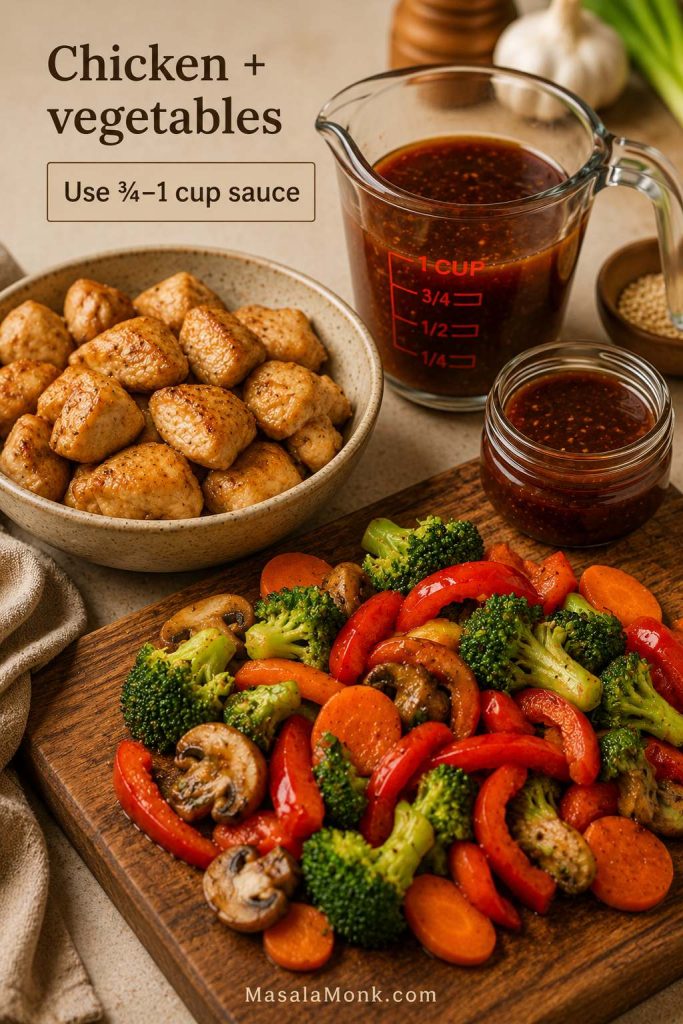
For most stir-fries, use about ¾ to 1 cup sauce for 1 lb / 450 g protein plus vegetables. Use less for fried rice, more for noodles, and slightly less if your vegetables release a lot of water.
If you have ever poured sauce into a stir-fry and watched it turn thin, salty, or soupy, the problem was probably not you. It was usually timing, pan moisture, or too much sauce for the amount of food in the pan.
Need a specific fix? Jump to how much sauce to use, when to add it, or how to fix watery stir-fry sauce.
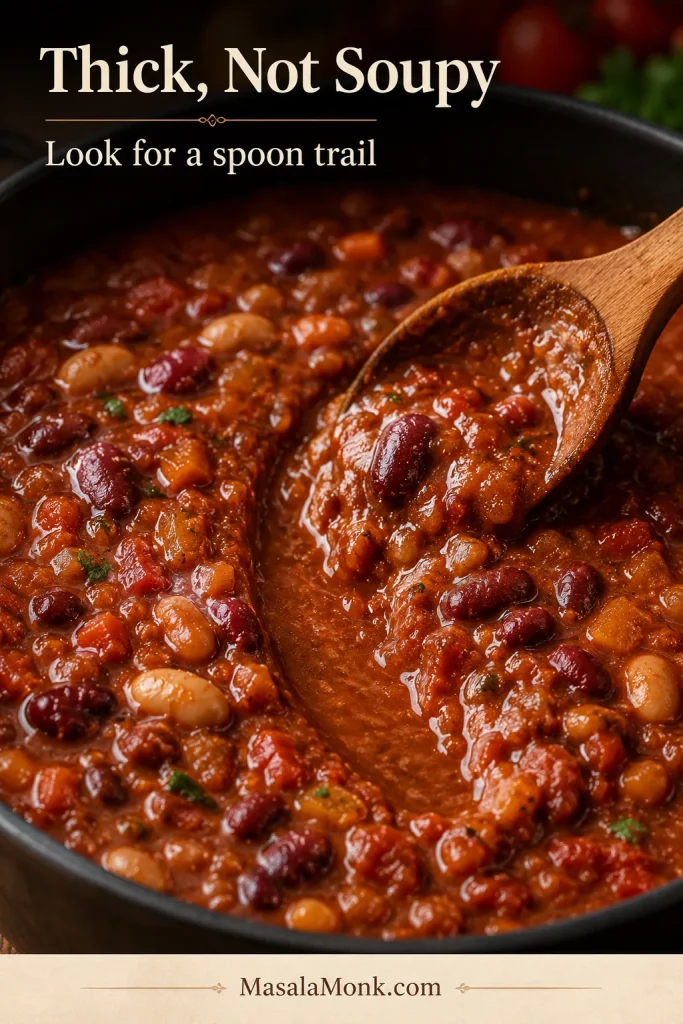
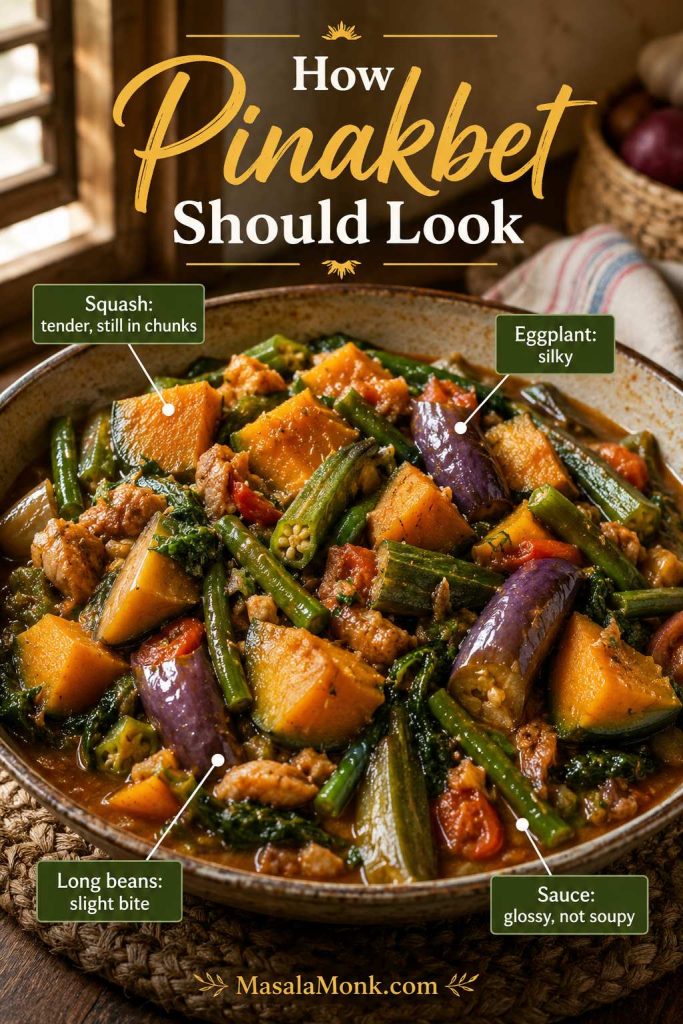
What the sauce texture should look like
Before the sauce ever hits the pan, check the texture. It should be thin enough to pour, but balanced enough to turn shiny and cling once heated.
Recipe at a Glance
5 minutes
No cooking until added to the pan
About 1 cup / 250 ml
1 family-size stir-fry / about 4 portions
Chicken, beef, tofu, vegetables, noodles, rice bowls
Savory, lightly sweet, garlicky, gingery
5–7 days in the fridge
Add near the end; stop when shiny and coating
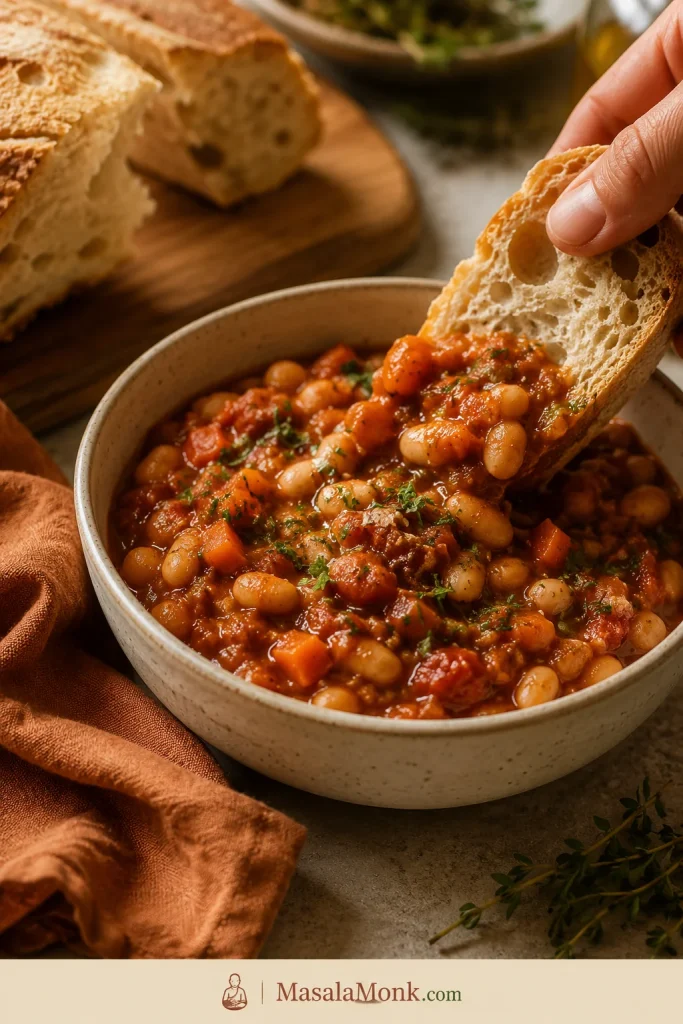
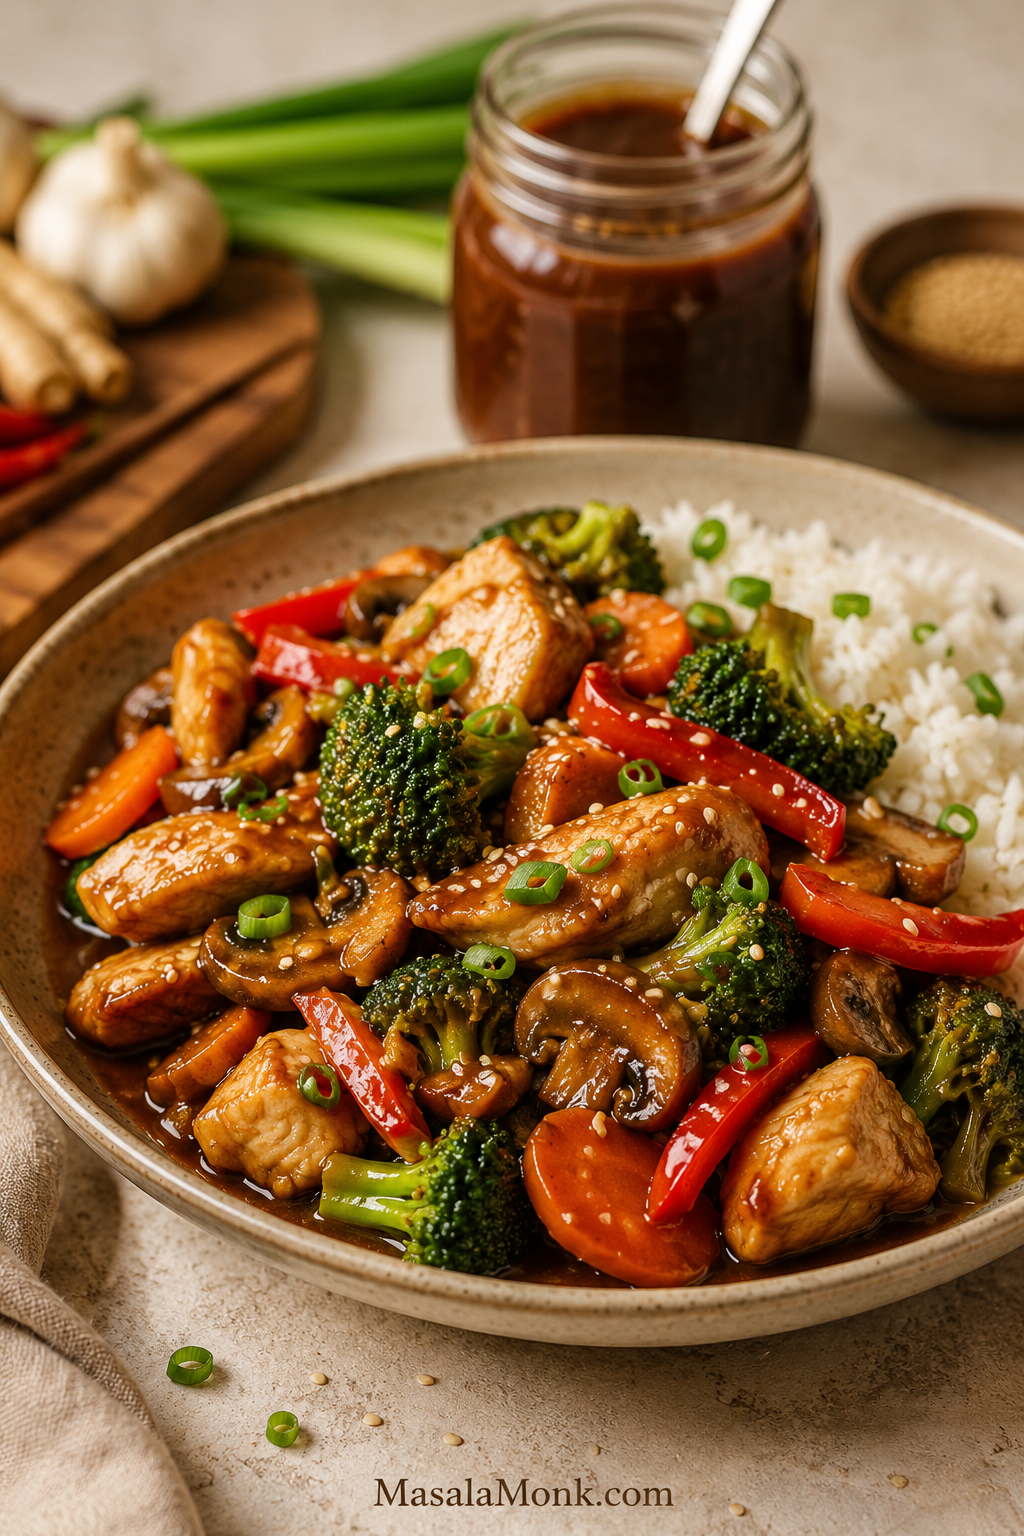
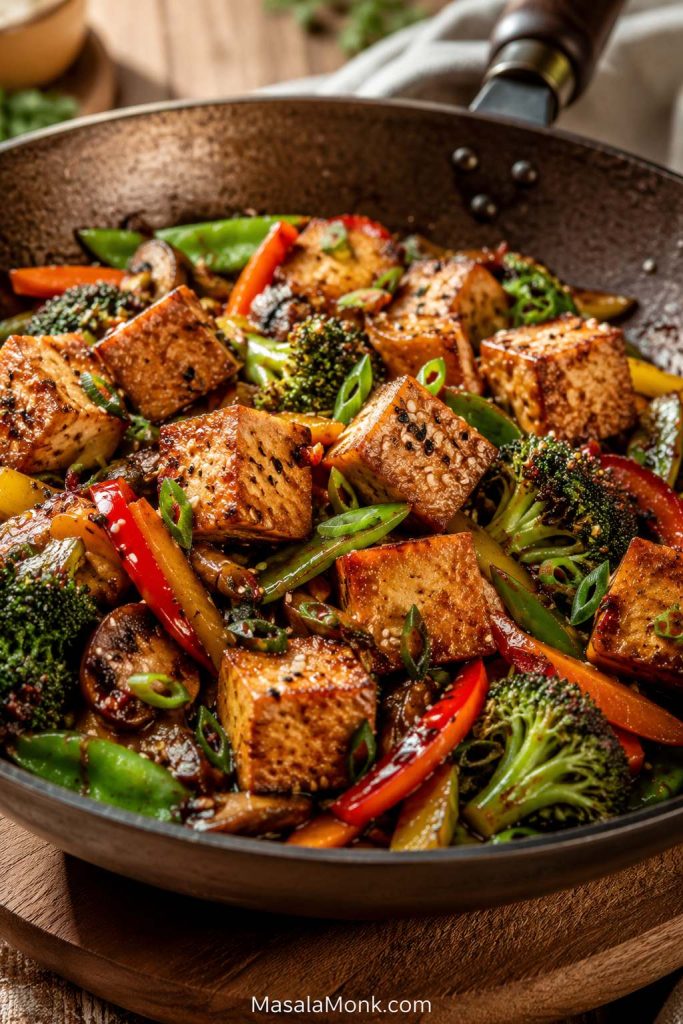
Easy Homemade Stir-Fry Sauce
This is the all-purpose version to start with. It is balanced enough for chicken, beef, tofu, vegetables, noodles, and rice bowls, but simple enough to mix before the pan is even hot.
All-Purpose Stir Fry Sauce
Equipment
No special equipment is needed. A small bowl or jar, a whisk or fork, measuring spoons, and a hot wok or large skillet are enough.
Best For
Chicken, beef, tofu, shrimp, vegetables, noodles, rice bowls, and quick weeknight stir-fries.
Not Best For
It is not meant for deep-frying or as a thick dip straight from the jar. This sauce shines when it hits hot food in the pan and has a minute to thicken.
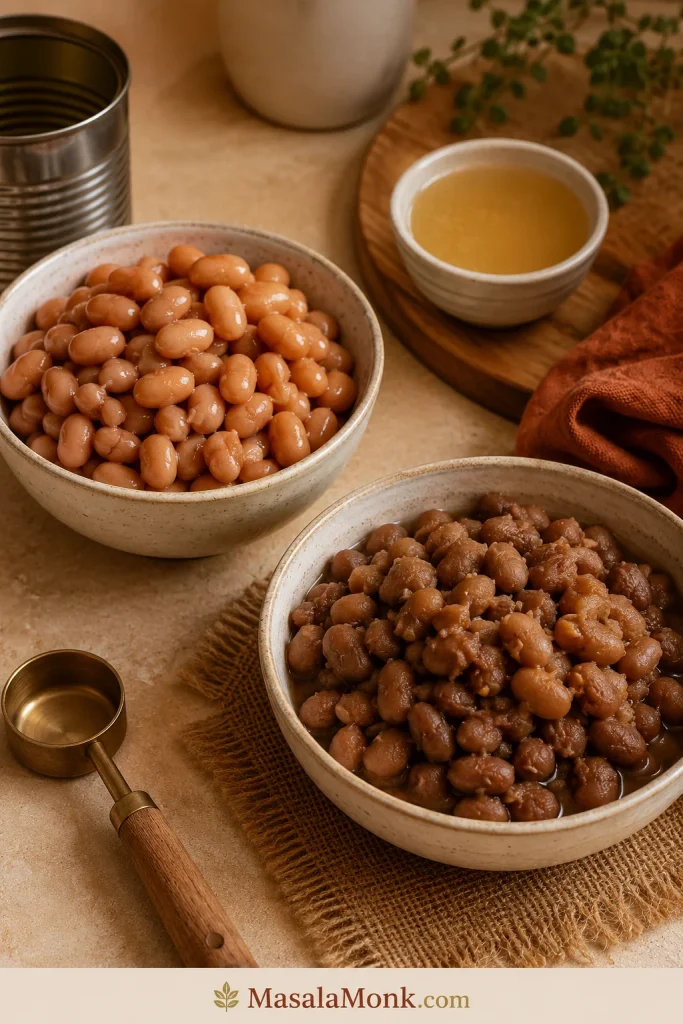
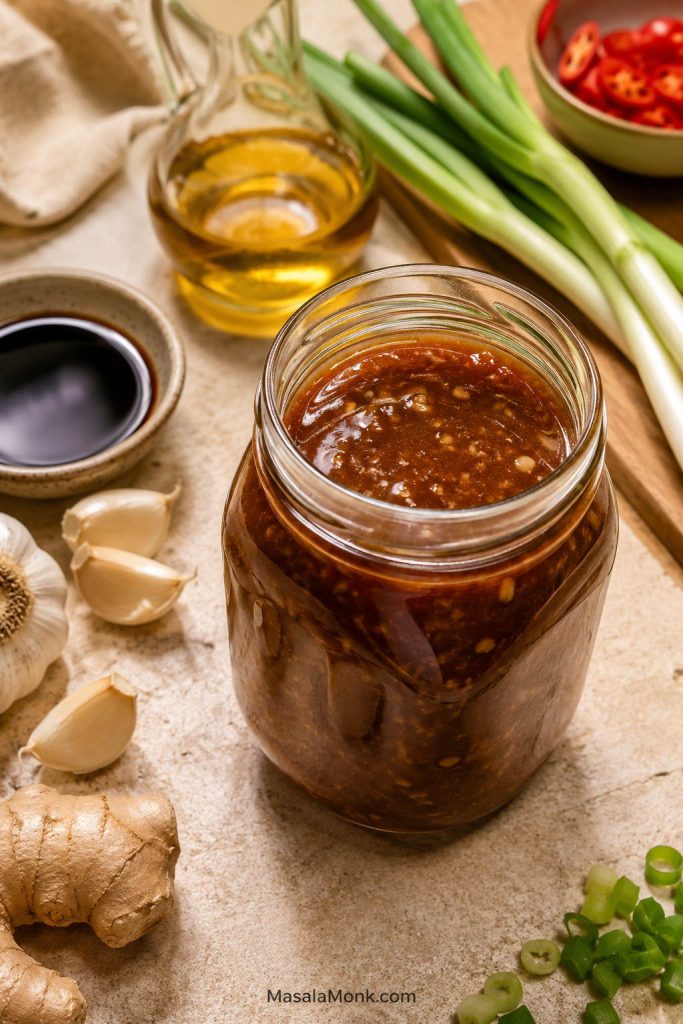
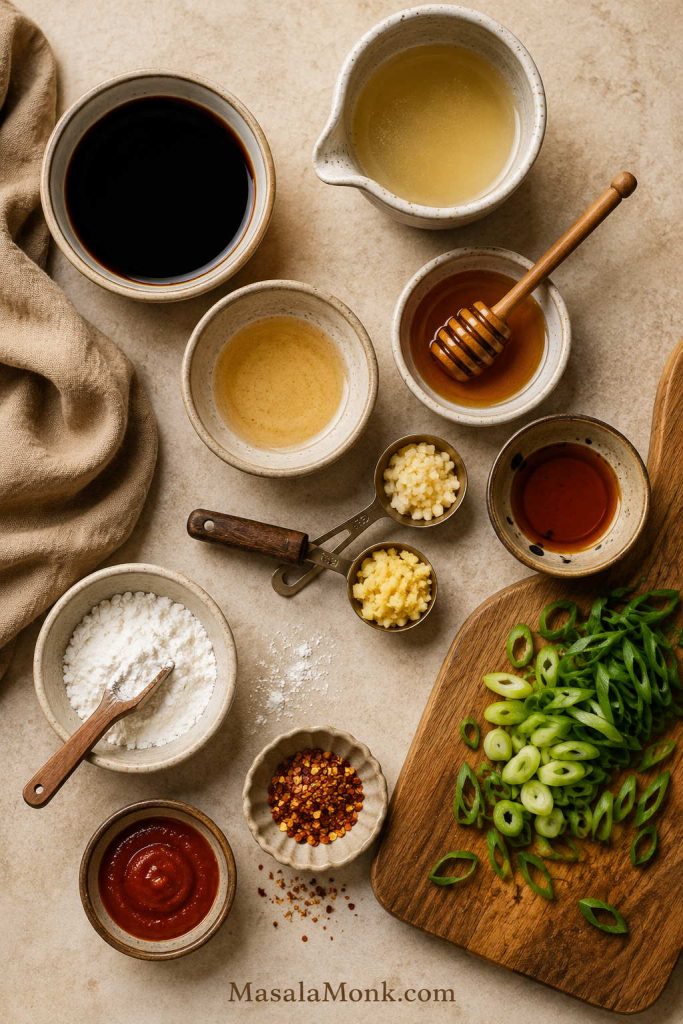
Ingredients
- ½ cup / 120 ml water or low-sodium broth
- ⅓ cup / 80 ml low-sodium soy sauce
- 1 tablespoon / 15 ml rice vinegar
- 1 tablespoon honey or brown sugar, about 20 g honey or 12–13 g sugar
- 2 teaspoons / 10 ml toasted sesame oil
- 2 garlic cloves, grated or very finely minced
- 2 teaspoons fresh ginger, grated
- 1 tablespoon cornstarch / cornflour (the white thickening starch), about 8 g
- ¼ to ½ teaspoon red pepper flakes, chili garlic sauce, or sriracha, optional
Instructions
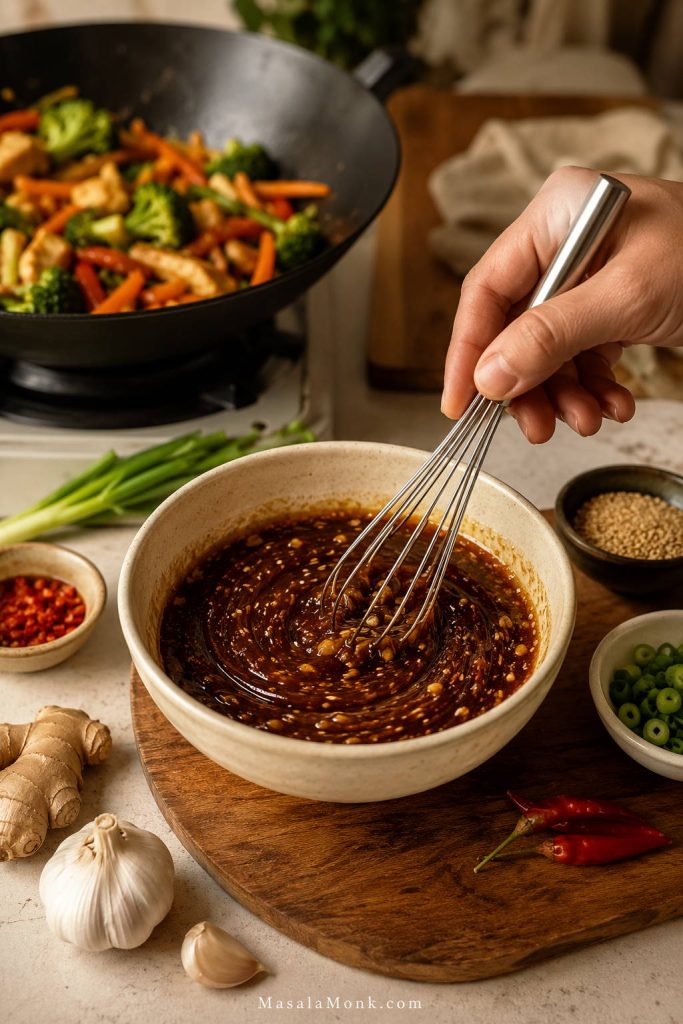
- Add the water or broth, soy sauce, rice vinegar, honey or brown sugar, sesame oil, garlic, ginger, cornstarch, and chili if using to a bowl or jar.
- Whisk well, or close the jar and shake until the cornstarch is fully dissolved.
- Use immediately, or refrigerate in an airtight jar.
- Shake or whisk again before using because the cornstarch settles as the sauce sits.
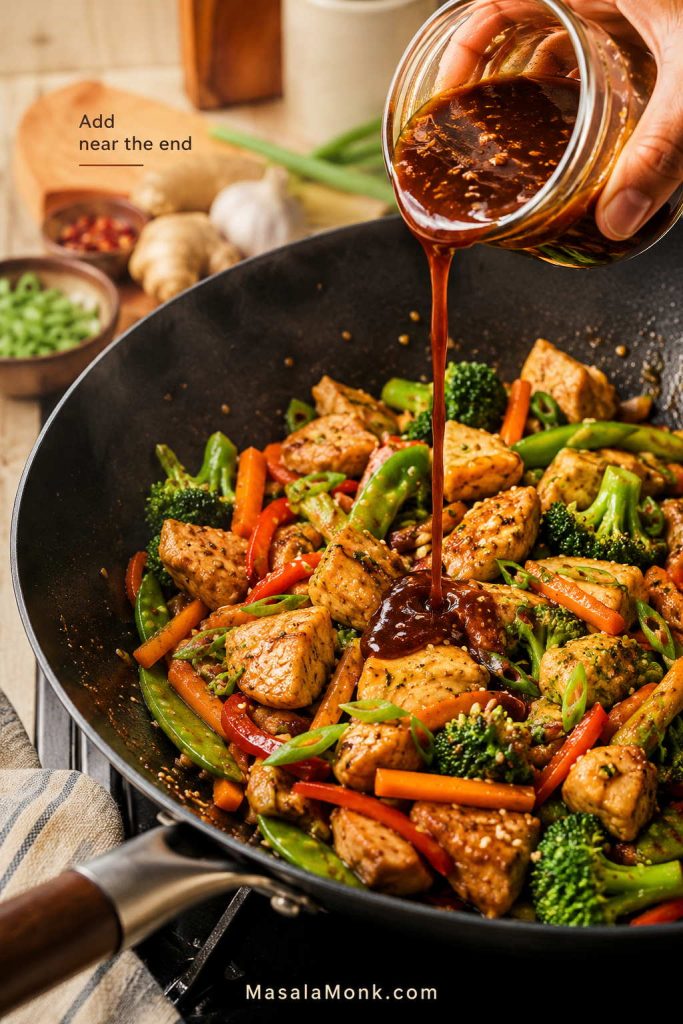
- Add near the end of stir-frying, after the protein and vegetables are mostly cooked.
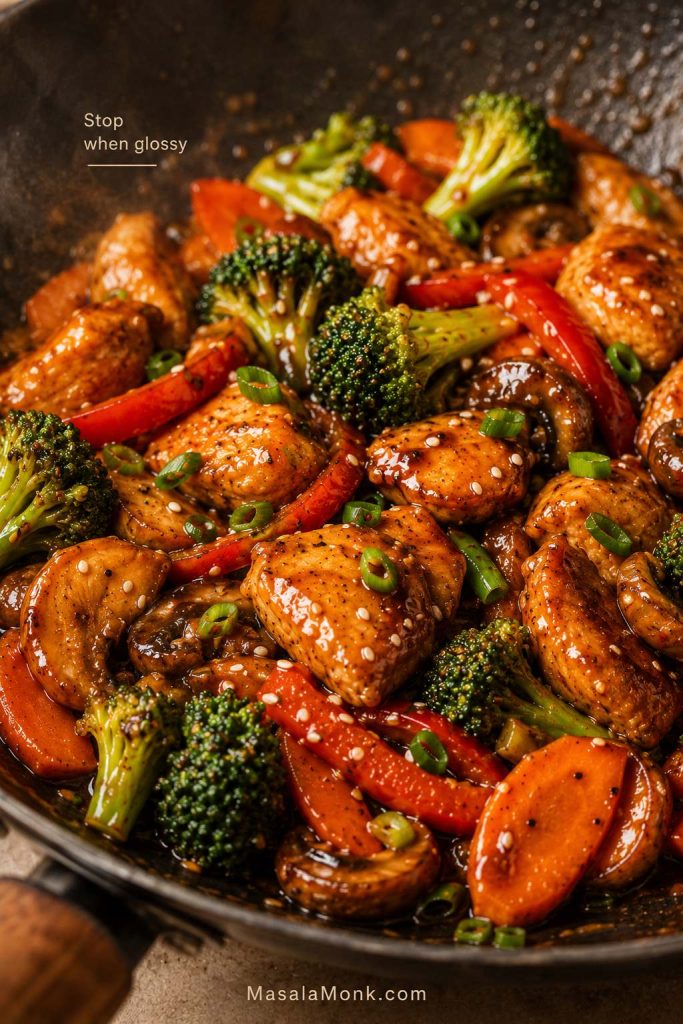
- Let it bubble for 30 to 60 seconds, tossing until it turns shiny and coats the food.
Recipe Notes
- Use low-sodium soy sauce for the best balance. Regular soy sauce can become too salty once reduced.
- Use broth instead of water when you want a deeper sauce for chicken or beef.
- For a brighter sauce, add 1 extra teaspoon rice vinegar at the end.
- For a saucier rice bowl, add 2 to 4 tablespoons extra water or broth when the sauce hits the pan.
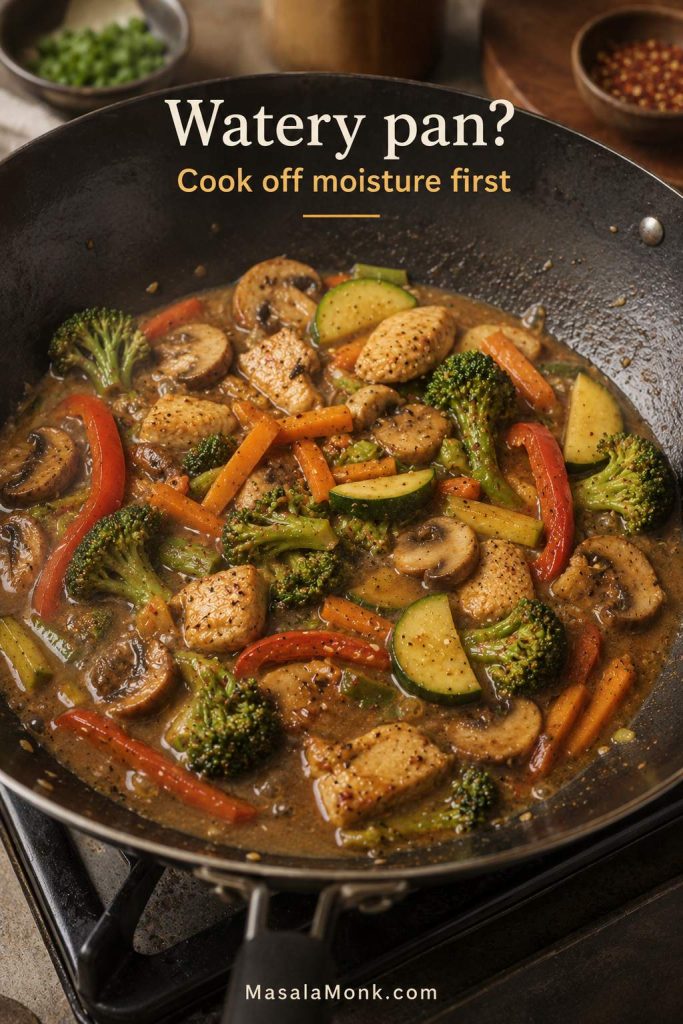
- Do not pour it into a pan full of watery vegetables. Cook off extra moisture first.
- If using this as a marinade, leave out the cornstarch. Cornstarch is for thickening in the hot pan; in a marinade, it can settle, clump, or make the surface pasty.
- Yes, you can double the recipe. Double all ingredients, store in a larger jar, and shake well before each use.
- It is also a good meal-prep sauce. Keep a jar in the fridge, and you are halfway to a stir-fry before the pan is even hot.
Why a jar of sauce makes stir-fry easier
A mixed sauce jar turns stir-fry into assembly cooking. With the flavor base ready, you can focus on heat, sequence, and not overcrowding the pan.
Stir fry sauce ingredients before you mix
Keep the ingredients measured before cooking starts. Stir-fries move quickly, so the sauce should be ready before the wok or skillet gets hot.
Mix the sauce before the pan gets hot
Whisk or shake until the cornstarch disappears into the liquid. That prevents last-minute measuring and gives the thickener time to disperse evenly.
Before you pour it into the pan: check how much sauce to use and when to add it so the stir-fry turns glossy instead of soupy.
The first time this sauce really clicks is when you stop treating it like a separate recipe and start treating it like a dinner shortcut. A jar in the fridge means chicken, tofu, broccoli, mushrooms, noodles, or leftover rice can turn into something that feels planned — as long as you use the right amount.
Timing cue: Mix the sauce before the pan gets hot. The protein should be cooked, the vegetables should be crisp-tender, and the pan should be hot but not swimming in liquid before the sauce goes in.
The MasalaMonk Stir-Fry Sauce Rule
A good stir-fry sauce is not just soy sauce plus thickener. It needs balance. Once you understand what each part is doing, you can adjust the sauce without guessing.
The six-part sauce rule
Use this as the control panel for the recipe. If dinner tastes off, fix the missing role instead of adding random ingredients.
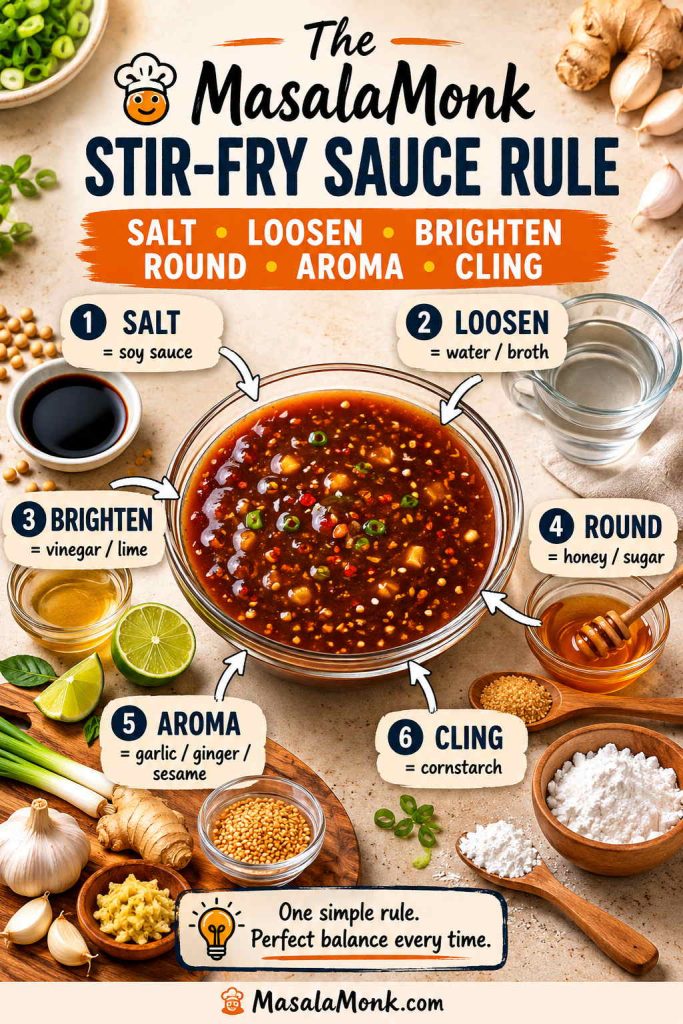
| Balance Part | Ingredient | Job in the Sauce |
|---|---|---|
| Salt | Soy sauce, tamari, coconut aminos | Creates the savory base. |
| Loosen | Water or broth | Keeps the sauce from becoming too salty or heavy. |
| Brighten | Rice vinegar, lime juice | Cuts through richness and keeps the flavor awake. |
| Round | Honey, brown sugar, maple syrup | Softens salt, acid, and heat. |
| Aroma | Garlic, ginger, toasted sesame oil | Makes the sauce smell fresh instead of flat. |
| Cling | Cornstarch, arrowroot, xanthan gum | Helps the sauce coat the food instead of pooling. |
That is the real trick. The recipe gives you the base, but this rule tells you how to fix it. Too salty? Loosen. Too flat? Brighten. Too sharp? Round. Too thin? Help it cling. Too bottled? Add aroma.
Using the rule to fix dinner? If the sauce tastes too salty, too flat, too thin, or too sweet, jump to the troubleshooting table.
How Much Stir Fry Sauce to Use
This is the part most recipes skip, and it is also the part that saves dinner. The same sauce can taste perfect or overwhelming depending on how much food is in the pan.
If your stir-fries usually taste either dry or soupy, use the table first, then check the image cue that matches what you are cooking.
| What You Are Cooking | How Much Sauce to Use | What to Watch |
|---|---|---|
| 1 lb / 450 g chicken + vegetables | ¾ to 1 cup | Use the full cup if serving over rice and you want extra sauce. |
| 1 lb / 450 g beef + vegetables | ⅔ to 1 cup | Beef can handle a deeper, slightly stronger sauce. |
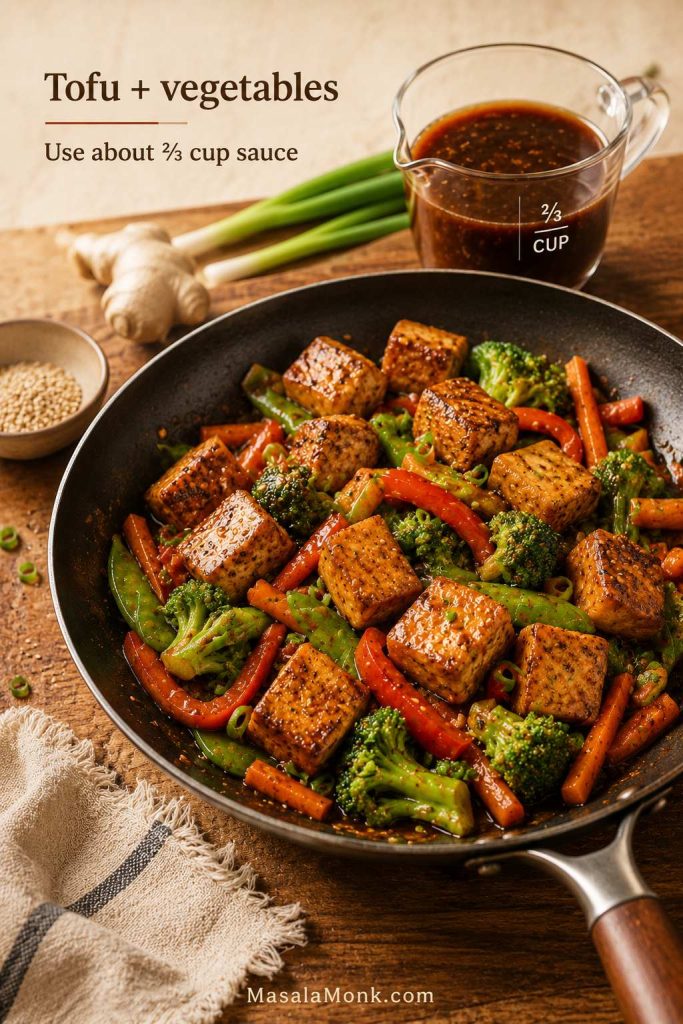
| 14 oz / 400 g tofu + vegetables | About ⅔ cup | Use a slightly thicker sauce so it clings to crisp tofu. |
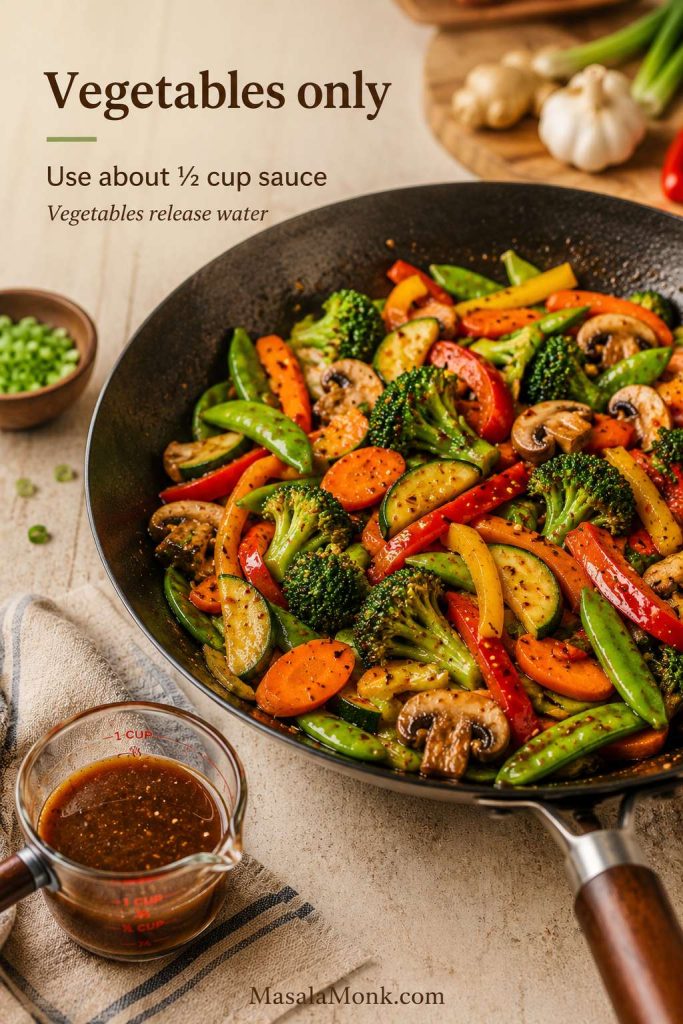
| 4 cups vegetables only | About ½ cup | Use less if the vegetables release water. |
| 6 cups vegetables + 1 lb protein | About 1 cup | This is the classic family-size stir-fry amount. |
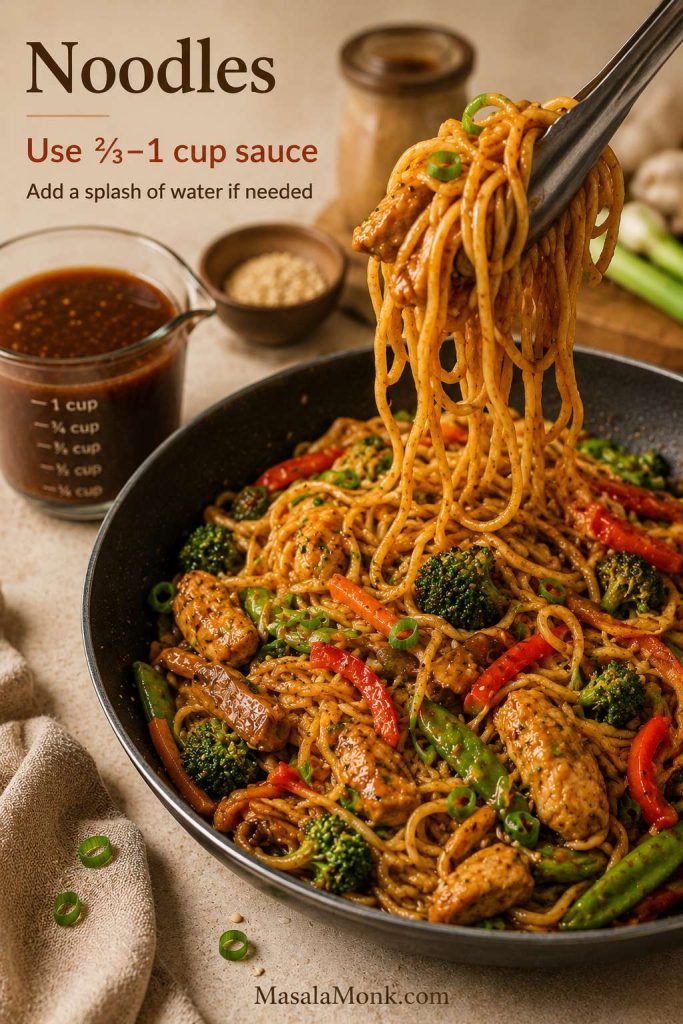
| 200 g fresh noodles or 100 g dried noodles + add-ins | ⅔ to 1 cup | Noodles absorb sauce quickly; add water or broth if needed. |
| Fried rice-style stir fry | 3 to 5 tablespoons | Too much sauce makes rice wet and soft. |
| Very saucy takeout-style stir fry | 1 cup plus 2 to 4 tablespoons water or broth | Best when serving over plain rice. |
How much sauce to use for chicken stir-fry
For chicken and vegetables, start with ¾ cup if the pan is modest and go up to 1 cup when you want extra sauce for plain rice.
How much sauce to use for tofu stir-fry
Tofu works better with restraint. Too much sauce softens the crisp edges before they can hold flavor.
How much sauce to use for vegetables
Vegetables release moisture as they cook, so a smaller amount of sauce often looks light at first but finishes better after bubbling.
How much sauce to use for noodles
Noodles absorb sauce quickly. Keep water or broth nearby so you can loosen the pan without adding more salt or sweetness.
How much sauce to use for fried rice
Fried rice needs seasoning, not a full stir-fry sauce pour. Start with a few tablespoons, toss, taste, and stop before the grains clump.

Amount rule: Start lower if your pan is crowded, your vegetables are watery, or your noodles are already soft. You can always add more sauce after it thickens; you cannot easily remove extra once the pan turns soupy.
When to Add the Sauce
Add it near the end of cooking, not at the beginning. The sauce is there to coat and finish the food, not to boil the vegetables or stew the protein.
The stir-fry order before sauce goes in
The pan should be hot, the protein mostly cooked, and excess vegetable moisture reduced before the sauce goes in.
- Heat the wok or large skillet first. A hot pan helps food sear instead of steam.
- Cook the protein. Chicken, beef, shrimp, pork, or tofu need direct heat before sauce.
- Remove the protein if needed. This prevents overcooking while vegetables finish.
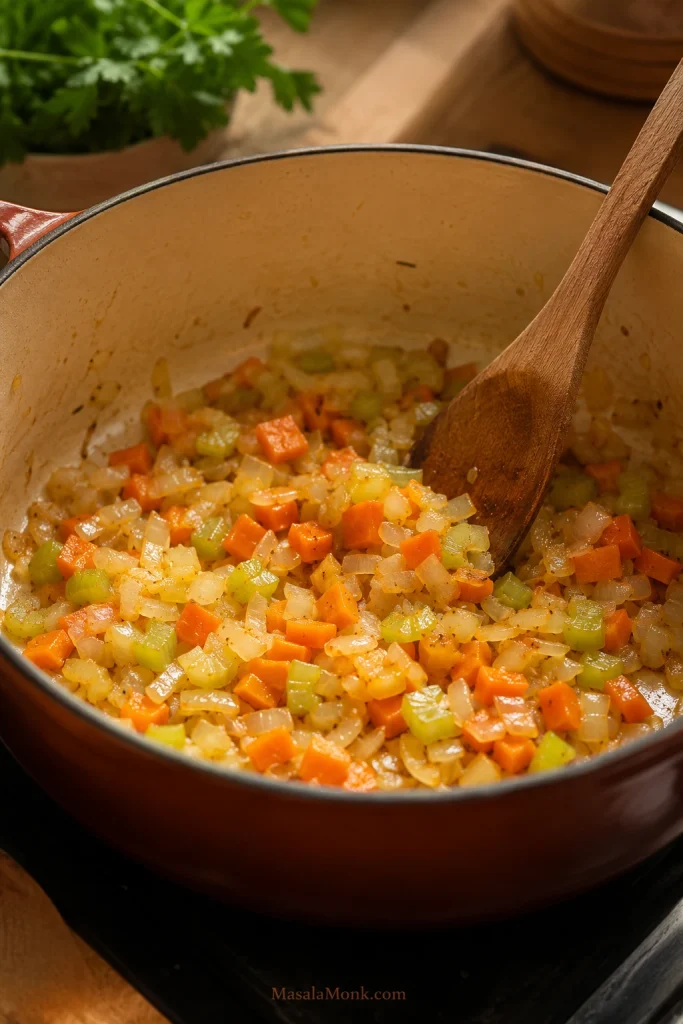
- Cook firm vegetables first. Broccoli and carrots need more time than bok choy leaves or peppers.
- Cook off extra moisture. A watery pan dilutes the sauce.
- Return the protein and shake the sauce. Cornstarch settles, so mix it again.
- Add the sauce and toss for 30 to 60 seconds. Stop when it thickens and finishes the pan.
Cloudy to glossy: what the sauce should do in the pan
In the pan, the sauce often starts cloudy because the cornstarch is just beginning to hydrate. Once it bubbles around the edges, it should turn clearer, darker, and shinier.
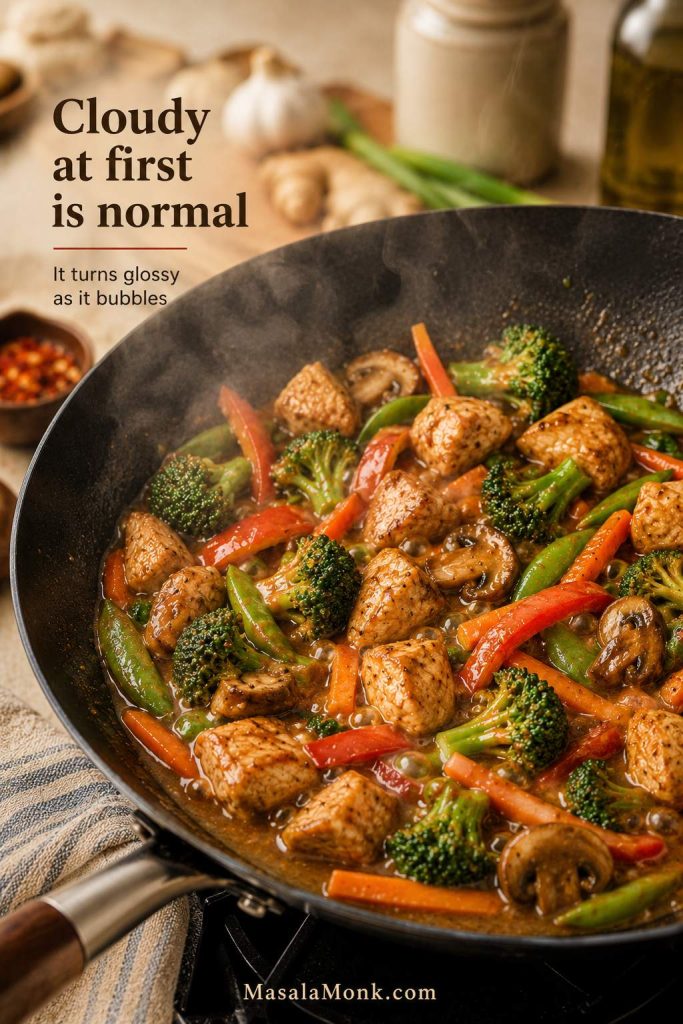
Stop when the sauce turns glossy
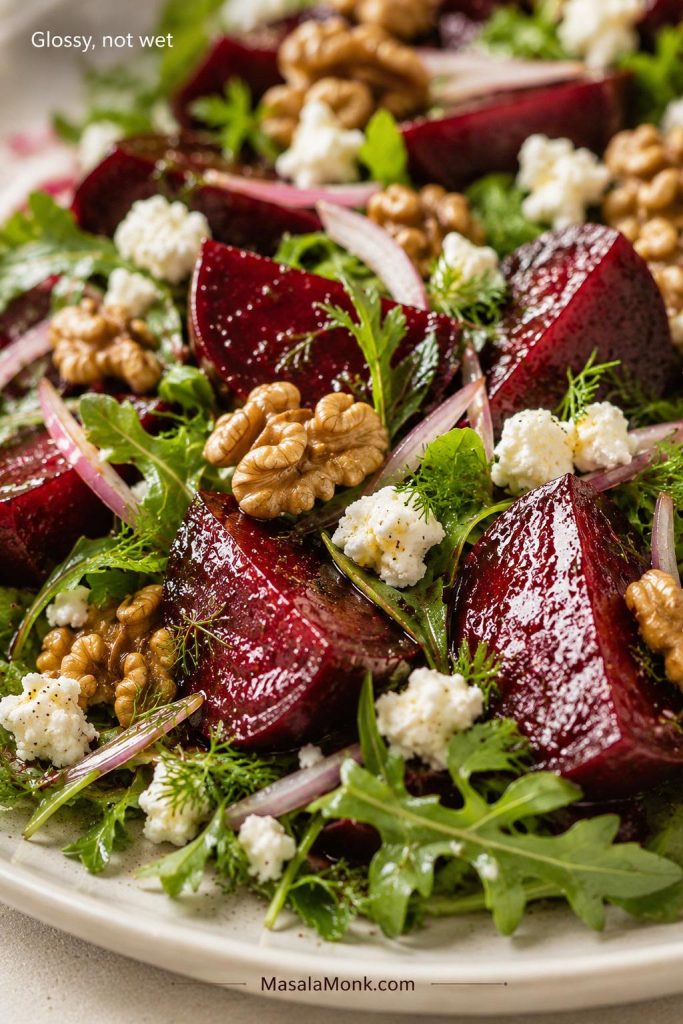
The stop point is short and visual: the sauce tightens, the food looks coated, and the vegetables still look bright. Keep cooking after that and the flavor can turn too salty.
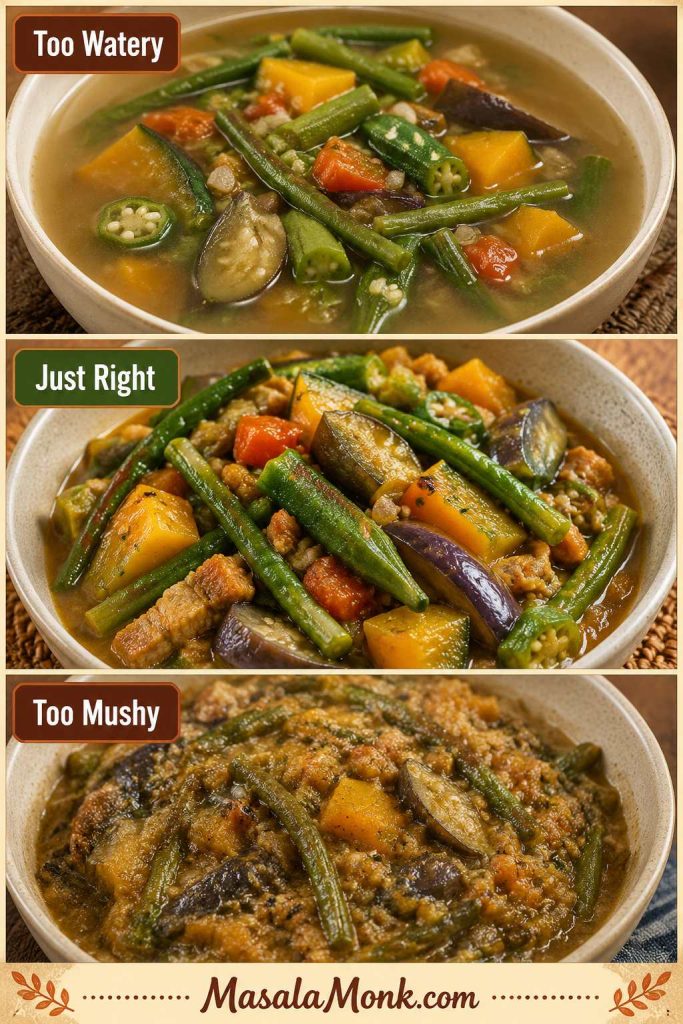
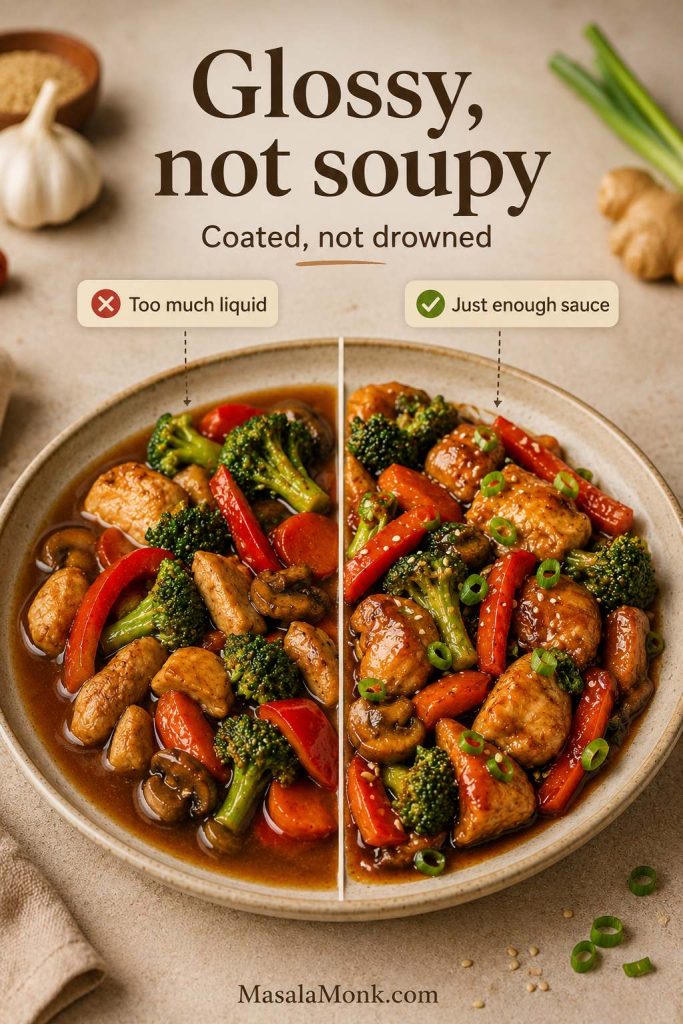
Glossy, not soupy: the final texture cue
The goal is glossy, not soupy — coated, not drowned. If sauce sits under the food instead of clinging to it, the pan probably has too much liquid.
Good stir-frying is mostly prep, heat, and sequence. Serious Eats explains those stir-frying basics in depth, but for this sauce the main thing is simple: mix it first and add it near the end.
If you need rice underneath your stir-fry, MasalaMonk’s how to cook rice guide is useful when you want fluffy rice that can hold sauce without turning mushy.
Why This Recipe Works
Why each ingredient has a job
This recipe works because each ingredient solves a specific sauce problem. Use the roles below when you need to adjust taste, thickness, or balance.
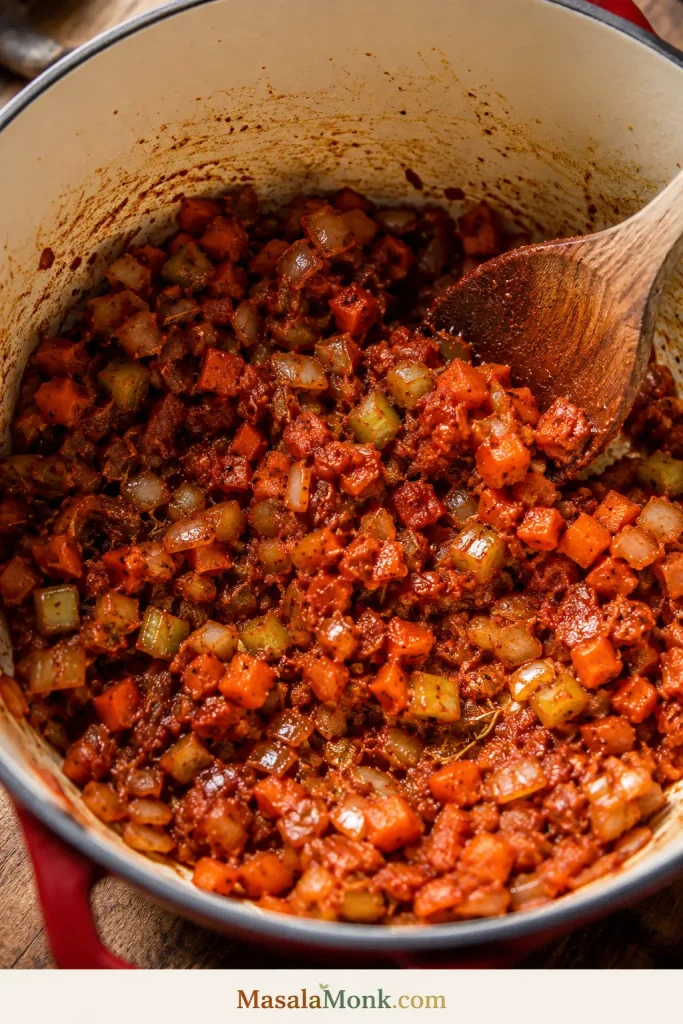
This sauce is simple, but it is not random. Soy sauce brings salt and savory depth, while water or broth keeps it from becoming too intense. Rice vinegar adds brightness, and honey or brown sugar rounds the sharp edges so the sauce tastes balanced instead of harsh.
Garlic and ginger give the sauce its classic stir-fry aroma. Toasted sesame oil adds a warm nutty finish. Cornstarch is what changes the sauce from thin liquid into a shiny coating in the hot pan.
The goal is not a heavy glaze. The goal is a thin mixture that thickens in the hot pan, grabs onto the food, and leaves everything tasting seasoned but still fresh.
When it is right, you should smell the garlic and ginger first, see the sauce turn from cloudy to shiny, and still taste the freshness of the vegetables underneath. The sauce should make the food feel finished, not hidden.
Ingredients and Substitutions
Think of this section as permission to adjust. The sauce does not fall apart if you swap broth for water, honey for maple syrup, or tamari for soy sauce. You just need to keep the balance: salt, loosen, brighten, round, aroma, and cling.
Cooking for a specific need? Jump to gluten-free, soy-free, vegan, lower-sodium, and keto variations.
Soy Sauce
Low-sodium soy sauce is the best default. Regular soy sauce can work, but it becomes stronger as it reduces. If you only have regular soy sauce, use ¼ cup instead of ⅓ cup, then add 1 to 2 extra tablespoons water or broth.
For gluten-free sauce, use certified gluten-free tamari, certified gluten-free soy sauce, or coconut aminos. For a soy-free style version, coconut aminos are usually the easiest starting point, but they are sweeter and less salty than soy sauce, so reduce the sweetener and taste at the end.
Water or Broth
Water keeps the flavor clean and light. Broth gives more depth. Chicken broth works well with chicken, beef broth gives beef stir-fries a deeper base, and vegetable broth keeps tofu or vegetable stir-fries flexible. Low-sodium broth is best because the soy sauce already brings salt.
Honey or Brown Sugar
A little sweetness balances the saltiness of soy sauce and the sharpness of vinegar. Honey gives a smooth feel. Brown sugar gives deeper flavor. Maple syrup works well for a vegan version.
For the base sauce, keep the sweetener modest. This is a balanced weeknight sauce, not a sticky glaze. If you want something sweeter, use the honey soy variation below.
Rice Vinegar
Rice vinegar keeps the sauce bright. Apple cider vinegar can work in a pinch. Lime juice also works, especially for a Thai-inspired version, but it changes the flavor and makes the sauce sharper.
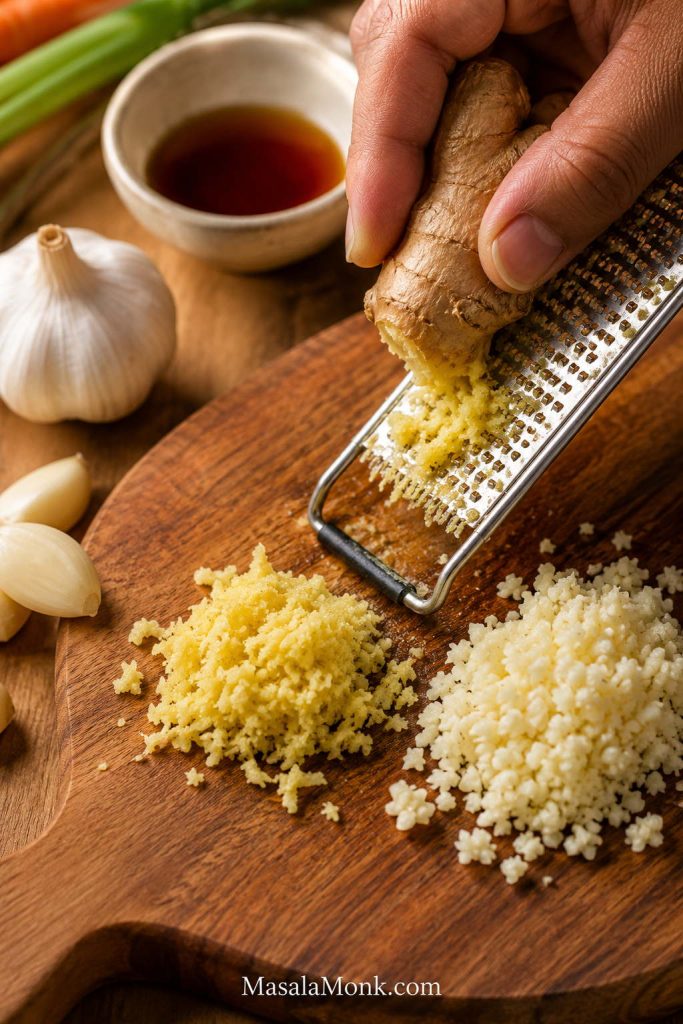
Garlic and Ginger
Fresh garlic and ginger make the sauce taste more alive. Grating them helps them disappear into the mixture and spread evenly through the pan.
If you need to use powders, replace 2 garlic cloves with about ½ teaspoon garlic powder, and replace 2 teaspoons fresh ginger with about ½ to ¾ teaspoon ground ginger. The sauce will still work, but fresh gives better aroma.
Toasted Sesame Oil
Use toasted sesame oil for flavor, not as the main cooking oil. Two teaspoons are enough to make the sauce taste warm and nutty without overpowering the garlic and ginger.
Cornstarch / Cornflour
Cornstarch thickens the sauce and gives it that takeout-style finish. It must be mixed into cold or room-temperature liquid before heating. If dry cornstarch hits hot liquid directly, it can clump.
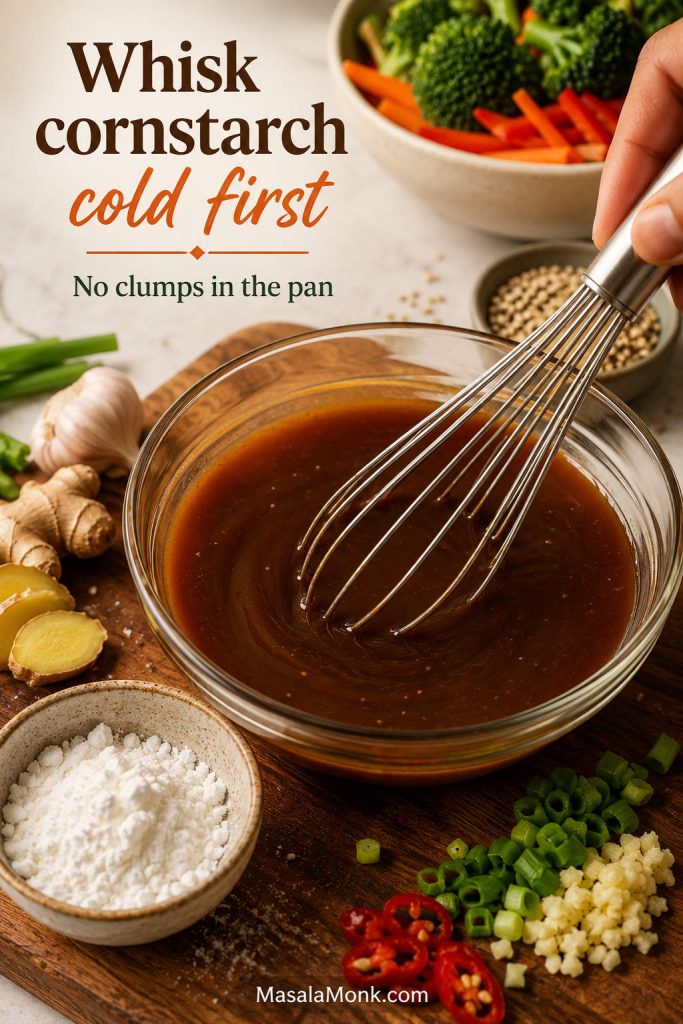
It also settles when the sauce sits, so always shake or whisk before adding it to the pan.
Can you make it without cornstarch? Yes, but it will be thinner. You can simmer it slightly longer, use arrowroot for some gluten-free or grain-free versions, or use a tiny amount of xanthan gum for keto sauce. Cornstarch is still the easiest everyday thickener.
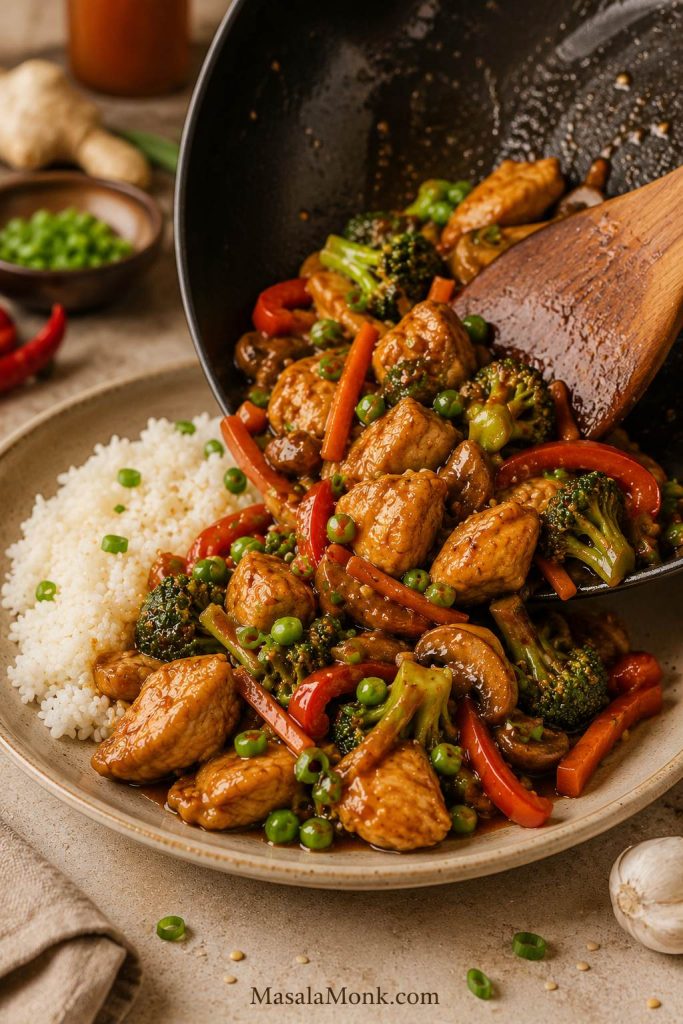
How to Use This Sauce for Different Stir-Fries
Once the base is mixed, the rest is about matching the sauce to the food. Chicken wants balance. Beef can take depth. Tofu needs cling. Vegetables need restraint. Noodles need room to move.
For Chicken
Chicken is mild, so the sauce should stay balanced rather than too salty or too sweet. The base recipe works as written, especially if you use broth instead of water.
For 1 lb / 450 g chicken plus vegetables, ¾ to 1 cup is usually right. Go closer to the full cup if you are serving it over rice and want a little extra sauce to catch underneath.
The main danger with chicken is not the sauce; it is overcooking the chicken while waiting for the sauce to thicken. Keep the final simmer short.
Good vegetables for chicken include broccoli, bell peppers, carrots, snap peas, green beans, mushrooms, cabbage, bok choy, zucchini, and onions.
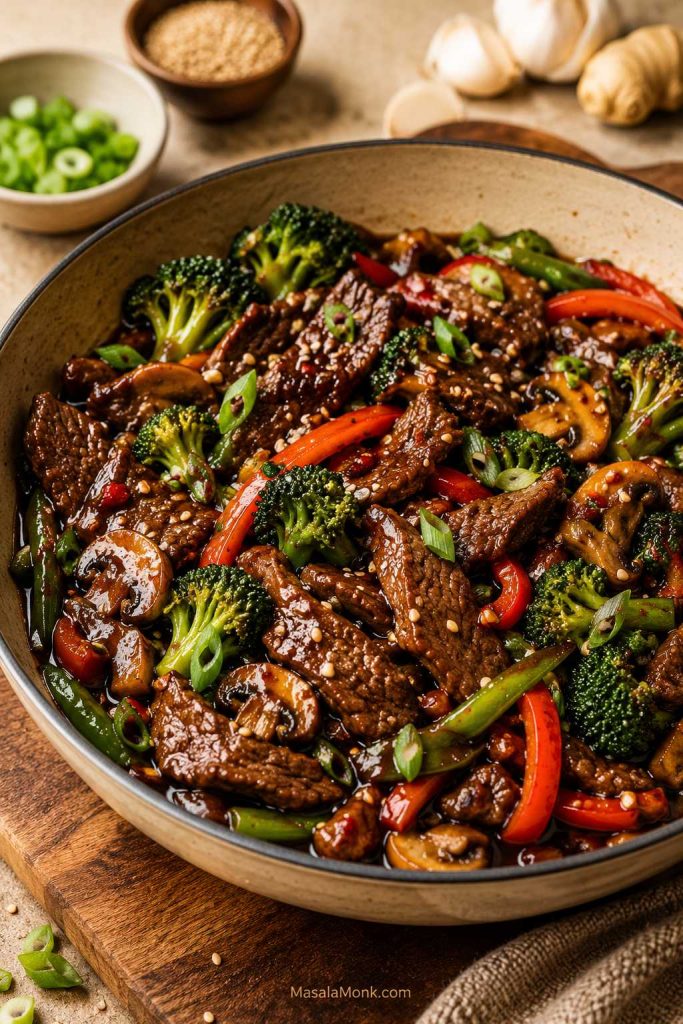
For Beef
Beef likes a darker, more savory sauce. Start by swapping water for broth. Oyster sauce gives the quickest savory boost, Shaoxing wine or dry sherry adds restaurant-style depth, white pepper brings quiet warmth, and a small splash of dark soy sauce gives color if you have it.
You do not need every add-in at once. Even one or two — broth, oyster sauce, or white pepper — can make the sauce taste deeper.
For 1 lb / 450 g beef plus vegetables, ⅔ to 1 cup works well. Beef can carry a stronger sauce, especially with broccoli, mushrooms, green beans, or rice underneath.
Slice beef thinly across the grain and cook it quickly over high heat. Add the sauce only after the beef and vegetables are mostly cooked, then toss just long enough for everything to thicken and coat.
For Tofu
Tofu needs the sauce to cling, not slide off. If the tofu is not browned first, it can taste bland even when the sauce itself tastes good.
A 14 oz / 400 g block of tofu plus vegetables usually needs about ⅔ cup. More than that can flood the pan before the tofu has a chance to hold the flavor.
Press firm or extra-firm tofu, cut it into cubes or slabs, and pat it dry before it hits the pan. A dry surface browns better, and browned tofu holds sauce better.
For a lower-carb tofu dinner idea, MasalaMonk’s tofu and broccoli stir-fry with cauliflower rice is a natural fit, especially when you want a high-protein meal without noodles or regular rice.
For a vegan tofu stir-fry, use vegetable broth and maple syrup or sugar instead of honey. If you want deeper savory flavor, add mushroom powder or a little dried-shiitake soaking liquid.
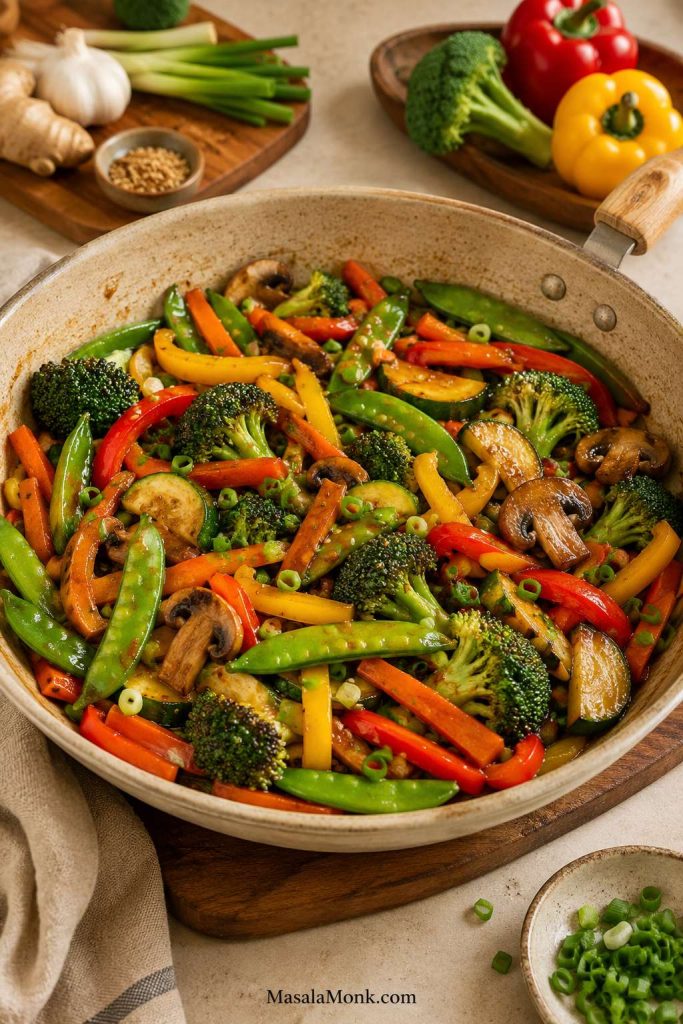
For Vegetables
Vegetables are sneaky. They look dry when they first hit the pan, then suddenly release enough water to thin the whole sauce. That is why vegetable stir-fries need less sauce and a hotter pan.
Four cups of vegetables usually need only about ½ cup sauce. That may look modest, but vegetables release their own moisture as they cook.
Mushrooms and zucchini are the biggest water releasers here. Give them space, use higher heat, and wait until their moisture cooks off before adding the sauce.
Cook firm vegetables first: broccoli, carrots, cauliflower, green beans, cabbage stems. Add softer vegetables later: bell peppers, mushrooms, zucchini, bok choy leaves, snap peas, and scallions.
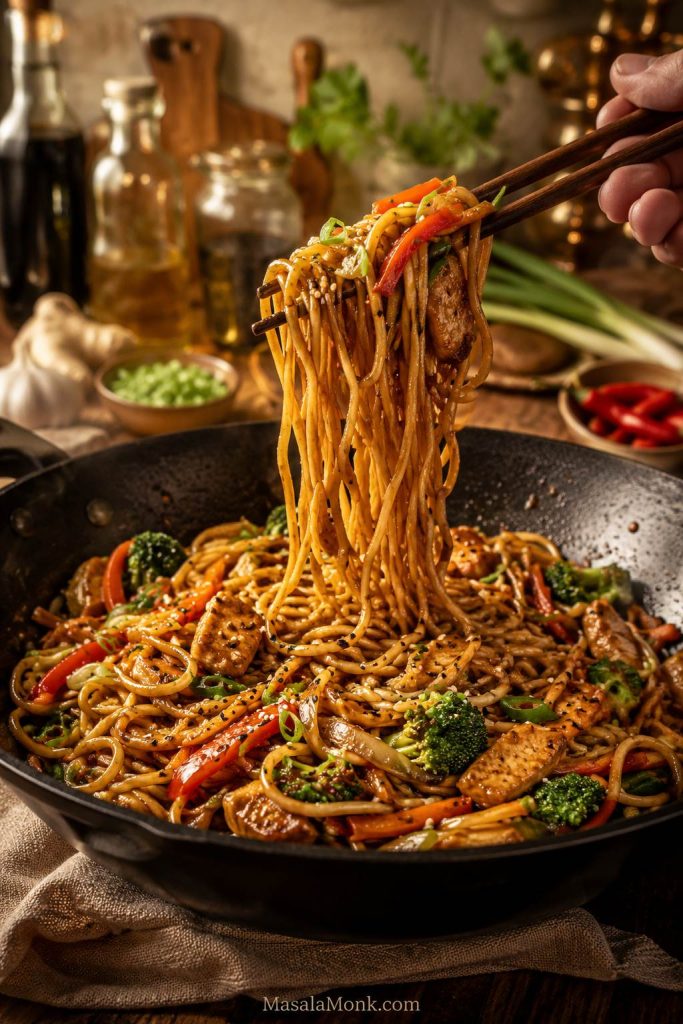
For Noodles and Rice
Noodles drink sauce quickly, so they need a looser finish. For noodles, use ⅔ to 1 cup sauce for about 200 g fresh noodles or 100 g dried noodles, plus your protein and vegetables. Start lower if the noodles are already soft or oily; add a splash of water or broth if they drink up the sauce too quickly.
If cooked noodles are clumped before they go into the pan, loosen them first with a splash of water or oil. Sauce cannot coat noodles evenly if they enter the pan as one sticky block.
For fried rice-style cooking, use much less. Start with 3 to 5 tablespoons. Too much liquid makes rice wet and heavy. Cold cooked rice works better than freshly cooked hot rice because it is drier and separates more easily in the pan.
If you like saucy rice-bowl dinners, use the full cup in the stir-fry and serve it over plain rice. For fried rice, season gradually.
For a takeout-style egg dish with a glossy sauce, MasalaMonk’s egg foo young recipe is a useful companion because it also leans on a savory sauce that thickens and coats.
Easy Sauce Variations
You do not need every variation today. Make the base sauce first. Come back to this section when you want it sweeter, spicier, darker, lower-sodium, vegan, gluten-free, keto-friendly, or soy-free.
Choose the sauce direction that fits dinner
Use the base recipe as your starting point, then nudge it sweeter, hotter, darker, or looser depending on what is in the pan.

| If You Want | Change This | Best For |
|---|---|---|
| Balanced everyday sauce | Use the base recipe as written. | Chicken, tofu, vegetables, rice bowls |
| Sweeter honey soy | Increase honey to 2 tablespoons. | Chicken, shrimp, tofu, noodles |
| Darker takeout-style sauce | Use broth, oyster sauce, Shaoxing wine, and white pepper. | Beef, broccoli, mushrooms, cabbage |
| Spicy sauce | Add chili garlic sauce, sriracha, chili crisp, or fresh chilies. | Chicken, shrimp, tofu, noodles |
| Noodle-friendly sauce | Keep it looser with extra water or broth. | Fresh noodles, dried noodles, rice noodles |
| Soy-free style | Use coconut aminos and reduce the sweetener. | Tofu, vegetables, chicken, rice bowls |
Pick the version closest to tonight’s dinner, then adjust from there. Chicken and noodles may want sweeter or looser; beef may want darker; vegetables usually want restraint.
If you find a version that works especially well — extra ginger, chili crisp, coconut aminos, mushroom broth, less sweetener, or something completely your own — leave it in the comments so another reader can borrow the idea.
3 Ingredient Stir Fry Sauce
A 3 ingredient version is useful when you need something fast and do not have the full list of ingredients. Mix soy sauce, honey or brown sugar, and a cornstarch slurry. It works in a pinch, but the full sauce tastes more balanced because it includes acid, aromatics, sesame oil, and a proper loosened base.
Chinese Takeout-Style Brown Sauce Variation
For a deeper, darker, more takeout-style sauce, start by swapping water for broth. Oyster sauce brings the quickest savory boost, Shaoxing wine or dry sherry adds restaurant-style depth, white pepper brings quiet warmth, and a small splash of dark soy sauce gives color if you have it. Reduce the honey or brown sugar slightly so the sauce stays savory.
Vegetarian cooks can use mushroom sauce instead of oyster sauce. For a vegan version, skip oyster sauce and use mushroom powder, shiitake soaking liquid, or a vegan mushroom stir-fry sauce.
Honey Soy Stir Fry Sauce
The honey soy version is sweeter and shinier: increase the honey to 2 tablespoons. It works especially well with chicken, shrimp, salmon, tofu, broccoli, carrots, bell peppers, and noodles. If it tastes too sweet, balance it with rice vinegar, lime juice, chili flakes, or a little more soy sauce.
Spicy Stir Fry Sauce
To make it spicy, add red pepper flakes, chili garlic sauce, sriracha, gochujang, chili crisp, or fresh chopped chilies to the base recipe. Start small. Spicy sauce tastes better when it still has balance: salt, sweetness, acid, garlic, ginger, and heat.
Thai-Inspired Quick Stir-Fry Sauce
This is not a replacement for a specific Thai dish sauce. It is a quick direction for weeknight stir-fries when you want the flavor to lean brighter, sharper, and more chili-forward. Replace some rice vinegar with lime juice, add a little fish sauce if you are not vegetarian, reduce the soy sauce slightly, and keep the garlic and chili strong.
If you want a full Thai basil stir-fry, MasalaMonk’s Pad Kra Pao recipe goes deeper into that sharper, basil-heavy sauce style.
Teriyaki-Style Stir Fry Sauce
For a teriyaki-style version, make the sauce sweeter and shinier. Increase the sweetener, use a little more ginger, and let it reduce until it looks lightly glazed. Use this when you want a sweeter rice-bowl style dinner rather than a lighter vegetable stir-fry. For a dedicated sweeter glaze, see MasalaMonk’s teriyaki sauce recipe.
Diet and Substitution Variations
These versions are not here to make the sauce feel restricted. They are here so the same jar can still work when someone at the table needs less sodium, no gluten, no soy, no animal products, or no sugar.
Use this section like a shortcut: lower-sodium if salt is the problem, gluten-free if wheat is the problem, soy-free if soy itself is the problem, and keto if sugar or starch is the problem.
Easy stir fry sauce swaps that are not interchangeable
The labels matter here. Gluten-free, soy-free, vegan, and lower-sodium changes solve different problems, so choose the swap that matches the actual need.
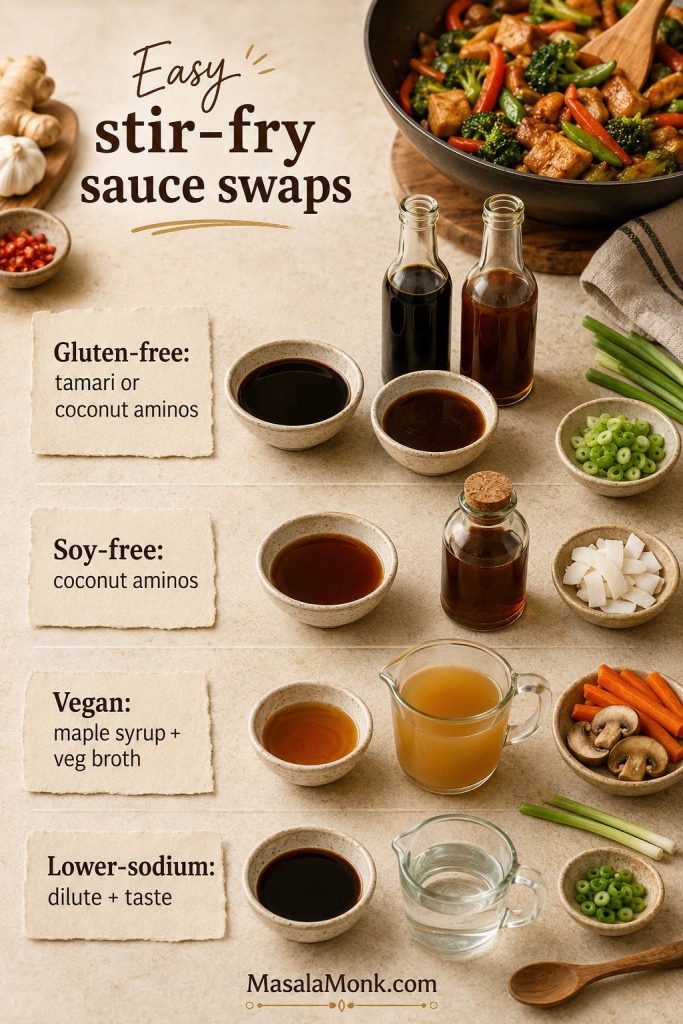
Lower-Sodium Version
A lower-sodium version needs more than just low-sodium soy sauce. Low-sodium soy sauce still contains sodium, and the sauce can become saltier as it reduces. Reduce the soy sauce first, increase water or unsalted broth, and build flavor with garlic, ginger, vinegar, chili, scallions, mushrooms, and sesame aroma.
Do not add salt until the stir-fry is finished and tasted. If you are cooking for a strict sodium limit, use label numbers rather than taste alone.
Keto / Sugar-Free Version
For a keto or sugar-free version, skip the honey or brown sugar and use a keto-friendly sweetener only if needed. Cornstarch is not ideal for strict keto. Use up to ⅛ teaspoon xanthan gum for 1 cup sauce, starting with a smaller pinch if your brand thickens aggressively.
Xanthan gum does not behave like cornstarch: cornstarch thickens as it cooks, while xanthan gum thickens as it hydrates. Whisk well, wait a minute, and add more only if you really need it. A sauce can go from glossy to gummy quickly.
Vegan Version
To make it vegan, use vegetable broth and maple syrup or sugar instead of honey. Avoid oyster sauce, fish sauce, chicken broth, chicken bouillon, and non-vegan bottled sauces. For deeper savory flavor, add mushroom powder, finely minced mushrooms, or a little dried-shiitake soaking liquid.
If you are building more plant-forward meals around tofu, tempeh, edamame, lentils, or beans, MasalaMonk’s plant-based protein sources guide can help you choose what to pair with the sauce.
Gluten-Free Version
Regular soy sauce often contains wheat, so it is not always gluten-free. Use certified gluten-free tamari, certified gluten-free soy sauce, or coconut aminos. Also check the labels on broth, oyster sauce, hoisin sauce, chili garlic sauce, and bottled sauces because gluten can appear in places you may not expect.
No Soy Sauce vs Soy-Free vs Gluten-Free
These terms sound similar, but they are not interchangeable. That matters when you are cooking for allergies, gluten-free needs, or someone who is avoiding soy completely. For a broader look at tamari, coconut aminos, and liquid aminos, EatingWell’s guide to soy sauce substitutes is a helpful reference.
| Phrase | What It Actually Means | What to Watch |
|---|---|---|
| Without soy sauce | The recipe does not use soy sauce. | It may still contain soy from hoisin, oyster-style sauces, or other condiments. |
| Soy-free | No soy ingredients at all. | Check every label carefully. |
| Gluten-free | No wheat/gluten ingredients. | Tamari may be gluten-free but still contains soy. |
| Coconut aminos | A common soy-free and gluten-free substitute for soy sauce. | Usually sweeter and less salty, so reduce sweetener. |
| Liquid aminos | A savory soy-sauce-like seasoning. | Many versions are soy-based and can still be high in sodium; check the label. |
Without Soy Sauce
A sauce without soy sauce is not always the same as a soy-free sauce. Some recipes skip soy sauce but use hoisin sauce, oyster sauce, or other bottled condiments that may still contain soy. That may be fine if you only want to avoid soy sauce specifically, but it is not appropriate for someone who needs a truly soy-free version.
Coconut aminos are the easiest starting point for a soy-sauce-style substitute. From there, garlic, ginger, vinegar, chili, and a little mushroom depth help bring back the savory edge that soy sauce usually provides.
Truly Soy-Free Version
For a truly soy-free version, check every ingredient label carefully. Do not use soy sauce, tamari, hoisin sauce, or oyster-style sauces unless they are clearly labeled soy-free. Use coconut aminos as the main savory base, then add garlic, ginger, rice vinegar, sesame oil if tolerated, chili, and mushroom flavor for depth.
Homemade vs Store-Bought Stir Fry Sauce
Store-bought sauce is convenient, but it often leans too sweet, too salty, or too thick. Homemade sauce lets you adjust the balance in the moment: more vinegar for brightness, more broth for looseness, more garlic or ginger for freshness, and a little sweetener only when the sauce tastes harsh.
If you are using bottled sauce, start with ⅓ to ½ cup for a small two-serving stir-fry, or ½ to ¾ cup for a larger pan. Bottled sauces are often saltier and sweeter than homemade, so add less first and stretch with water or broth if needed.
- Too salty? Dilute with water or broth and add more vegetables.
- Too sweet? Add rice vinegar, lime juice, chili, or a little soy sauce.
- Too thick? Loosen with water or broth.
- Too flat? Add fresh garlic, ginger, scallions, chili, or toasted sesame oil.
- Tastes bottled? Add fresh aromatics and a splash of acid.
Use bottled sauce near the end of cooking, just like homemade. If it is already thick and sweet, do not simmer it for too long or it can become sticky and overpowering.
How to Fix Sauce Problems
A stir-fry can go sideways fast, but most sauce problems are fixable while the pan is still hot. Usually the pan needs one small correction, not a restart.
Most sauce problems start earlier: check the amount guide and the timing cue if your stir-fries often turn watery, salty, or too thick.
Quick fixes for common stir-fry sauce problems
| Problem | Why It Happened | Fix |
|---|---|---|
| Sauce is too salty | Too much regular soy sauce, salty broth, or bottled sauce. | Add water or broth, vinegar or lime, more vegetables, or a little sweetener. |
| Sauce is too thin | Not enough cornstarch, not simmered long enough, or pan is watery. | Simmer 30–60 seconds more or add a small slurry. |
| Sauce is too thick | Too much cornstarch or sauce reduced too much. | Add water or broth 1 tablespoon at a time. |
| Sauce tastes flat | Not enough acid, garlic, ginger, or heat. | Add vinegar, lime, garlic, ginger, chili, or sesame oil. |
| Sauce is too sweet | Too much honey, sugar, or bottled sauce. | Add vinegar, chili, soy sauce, or broth. |
| Sauce clumps | Cornstarch was added directly to hot liquid. | Mix cornstarch with cold liquid first. |
| Stir-fry turns watery | Vegetables released moisture into the pan. | Cook off liquid before adding sauce. |
| Sauce burns | Sugary sauce cooked too long over high heat. | Add sauce at the end, lower the heat slightly if needed, and stop once glossy. |
| Noodles absorb everything | Noodles are thirsty or sauce is too thick. | Add water or broth and toss briefly. |
| Tofu tastes bland | Tofu was not crisped or sauce was too thin. | Crisp tofu first and use a slightly thicker sauce. |
| Sauce tastes bottled | It is sweet, salty, and thick but missing freshness. | Add fresh garlic, ginger, vinegar or lime, scallions, chili, or sesame oil. |
Why your stir-fry turns watery
The most common mistake is adding sauce to a crowded, watery pan. Cook the vegetables until extra moisture reduces, then add the sauce and let it bubble briefly.
Small fixes before you restart dinner
Small save: If the pan tastes almost right but not quite, add a splash of water if it is too strong, a little vinegar if it feels flat, or a pinch of sugar if it tastes harsh. Tiny changes fix most stir-fry sauce problems.
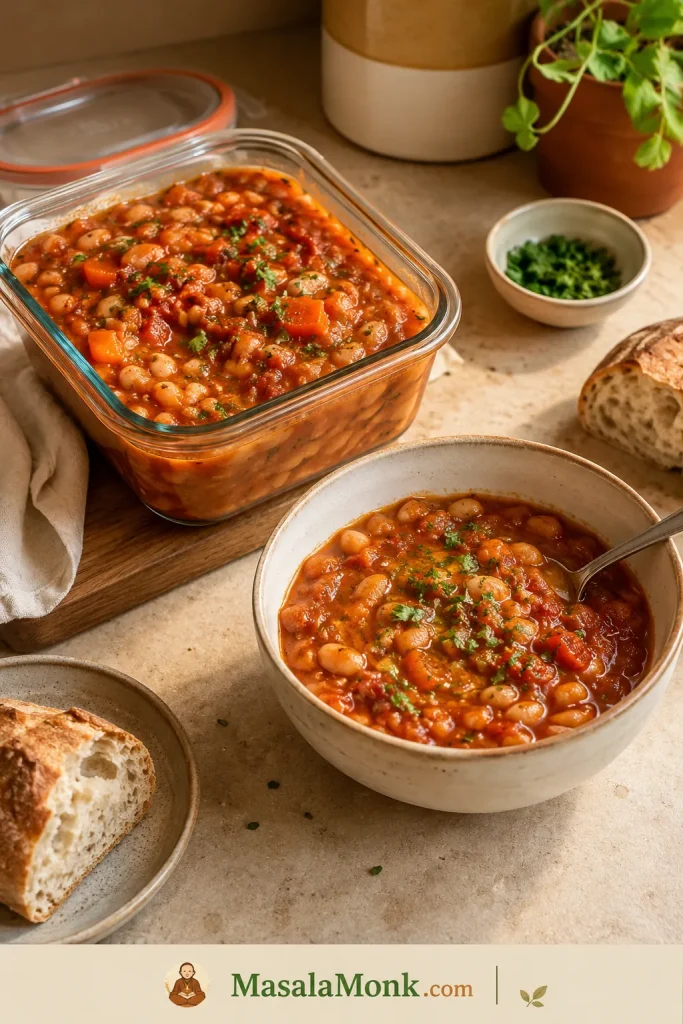
How to Store It
Store the sauce in an airtight jar in the refrigerator for 5 to 7 days. Shake or whisk before using because the cornstarch settles at the bottom.
You can also freeze it for up to 3 months. Thaw in the refrigerator, then whisk or shake well before adding it to the pan. If freezing, use a freezer-safe container and leave a little room for expansion.
Do not worry if it looks cloudy or separated when cold. Cornstarch can settle and make the sauce look uneven. Once heated and stirred, it should smooth out again.
If the sauce has already been cooked into a stir-fry, store leftovers in an airtight container. For best texture, store noodles or rice separately from saucy stir-fry when possible.
What to Serve With It
It fits easy dinners like chicken and broccoli, beef and green beans, tofu and bok choy, shrimp and vegetables, cabbage and mushrooms, or zucchini and peppers.
Serve those over steamed jasmine rice, brown rice, cauliflower rice, stir-fried noodles, lettuce wraps, or fried rice. For choosing between rice, quinoa, cauliflower rice, or lighter base options, MasalaMonk’s quinoa vs rice guide is helpful, especially if you are balancing fullness, carbs, and texture.
If you want a cool, crisp side beside a salty-sweet stir-fry, MasalaMonk’s cucumber salad is a simple contrast: fresh, tangy, and fast enough to make while the sauce is resting in the jar.
If you want a rice-based takeout-style meal with a different flavor direction, MasalaMonk’s Spam fried rice recipe shows how little sauce fried rice actually needs compared with a saucy stir-fry.
At its best, the sauce leaves you with crisp vegetables, tender protein, and just enough savory-sweet shine for the rice or noodles to catch.
Frequently Asked Questions
What is stir fry sauce made of?
It is usually made with soy sauce, water or broth, rice vinegar, a little sweetener, garlic, ginger, sesame oil, and cornstarch. Together, they make a sauce that is savory, lightly sweet, aromatic, and able to thicken in the pan.
How much sauce should I use for a stir-fry?
Use about ¾ to 1 cup for 1 lb / 450 g protein plus vegetables. Use about ½ cup for vegetables only, ⅔ to 1 cup for noodles, and only 3 to 5 tablespoons for fried rice.
When should I add sauce to a stir-fry?
Add it near the end of cooking, after the protein and vegetables are mostly cooked. Let it bubble for 30 to 60 seconds until it turns glossy and coats the food.
Can I make this without soy sauce?
Yes. Coconut aminos are the easiest soy-sauce-style substitute. They are usually sweeter and less salty than soy sauce, so reduce the sweetener and adjust the flavor at the end. Be careful with hoisin, oyster sauce, and bottled sauces because they may still contain soy even if they are not soy sauce.
Is this sauce gluten-free?
Only if you use the right soy sauce substitute. Regular soy sauce often contains wheat, so choose certified gluten-free tamari, certified gluten-free soy sauce, or coconut aminos, and check all bottled add-ins.
How do I make a lower-sodium version?
Use low-sodium soy sauce or a lower-sodium alternative, water or unsalted broth, and extra garlic, ginger, vinegar, chili, scallions, or mushroom flavor. Avoid high-sodium bottled sauces unless the label works for your needs.
How do I make a keto version?
Skip honey or sugar and use a keto sweetener only if needed. Replace cornstarch with up to ⅛ teaspoon xanthan gum for 1 cup sauce, starting with a small pinch. Soy sauce, tamari, or coconut aminos can all work depending on your carb and sodium needs.
Can I use this for noodles?
Yes. Use ⅔ to 1 cup for a noodle stir-fry, and keep a little water or broth nearby. Noodles absorb sauce quickly, so you may need a splash to loosen everything in the pan.
Can I use this as a marinade?
Yes, but leave out the cornstarch if using it as a marinade. Cornstarch is for thickening in the pan, not for soaking raw protein. Add the cornstarch later when you are ready to cook.
Why is my sauce too salty?
The most common reason is regular soy sauce, salty broth, or too much bottled sauce. Dilute with water or broth, add more vegetables, brighten with vinegar or lime, or balance with a small amount of sweetener.
Why did it not thicken?
It may not have simmered long enough, the pan may have too much vegetable liquid, or there may not be enough cornstarch. Let it bubble briefly, or add a small slurry made from cornstarch and cold water.
How long does homemade stir fry sauce last?
It lasts 5 to 7 days in an airtight jar in the refrigerator. Shake or whisk before using because the cornstarch settles.
Final Notes
Do not let the length of the guide make the sauce feel complicated. The base recipe is simple; the extra notes are just here to help you adjust it without guessing.
Once you know the rule — salt, loosen, brighten, round, aroma, cling — stir-fry sauce stops feeling like a fixed recipe and starts feeling like something you can control.
Keep a jar ready, and a random mix of protein, vegetables, and rice or noodles starts to feel like dinner instead of leftovers. If you make it your own — sweeter, spicier, soy-free, or extra garlicky — share what worked so others can borrow the idea too.