Posted on Leave a comment

Eggless Yorkshire Pudding (No Milk) Recipe

Eggless Yorkshire pudding made without milk on a plate, showing a golden, crisp rim and hollow center—dairy-free Yorkshire pudding recipe cover image.

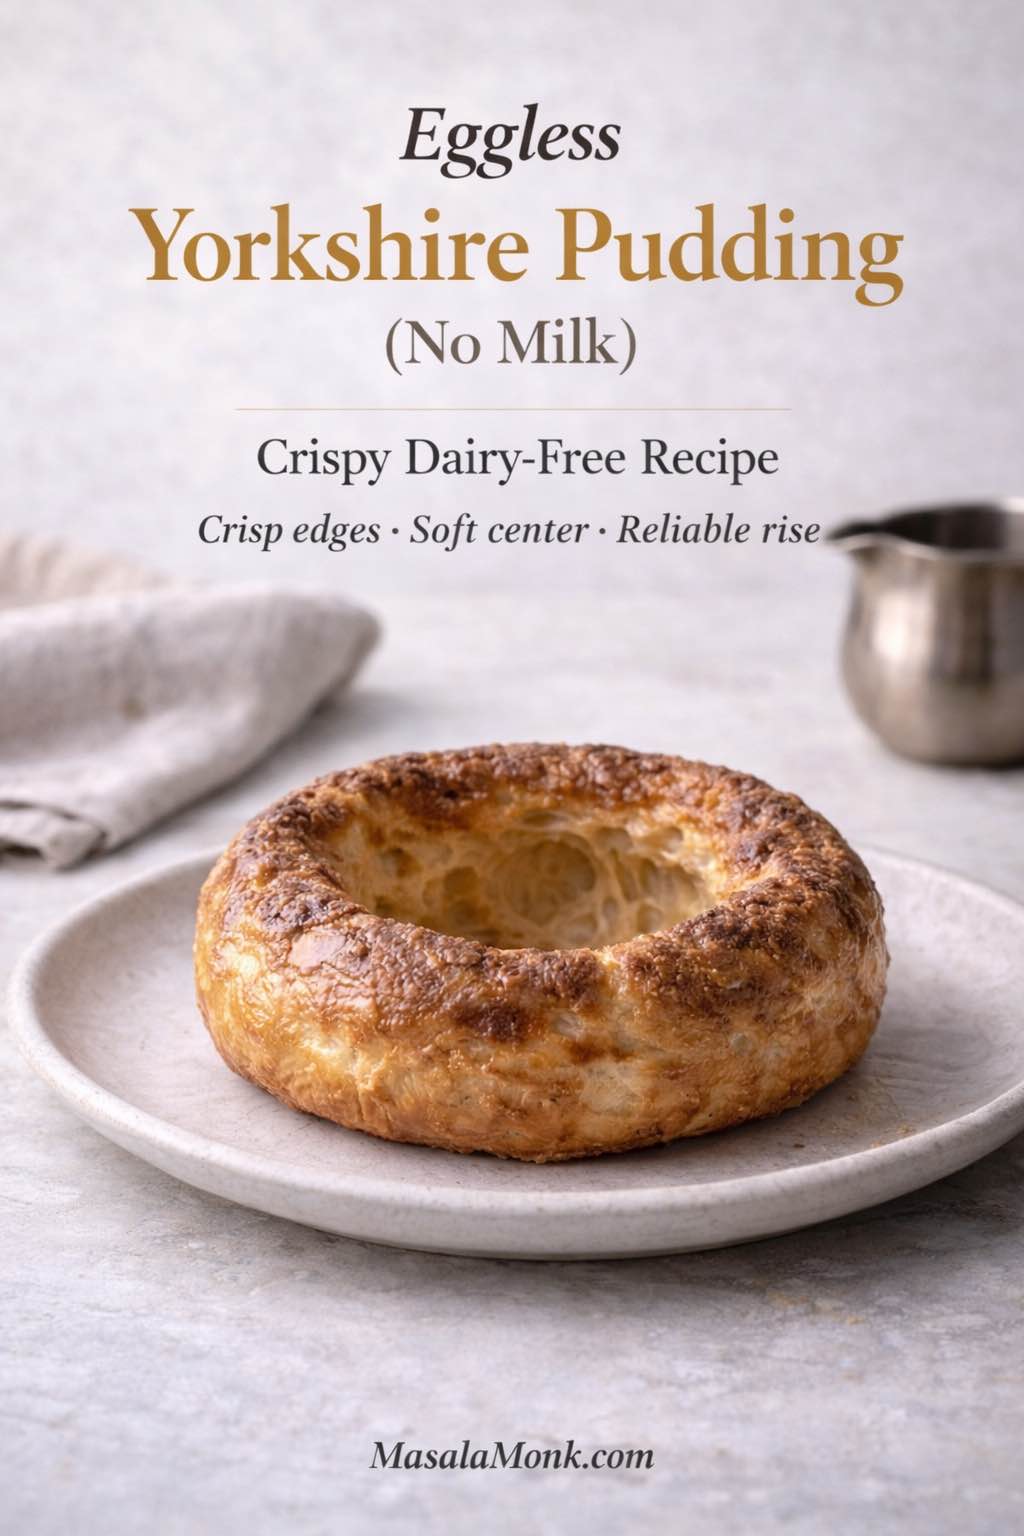
Eggless Yorkshire pudding (no milk) can feel like a contradiction at first—after all, the traditional version depends on eggs for structure and milk for richness. Still, with the right batter consistency and a properly heated tin, you can bake dairy-free Yorkshire puddings that rise tall, turn crisp around the edges, and stay tender in the middle.

If you’re looking for a Yorkshire pudding recipe without eggs, a dairy free Yorkshire pudding recipe, or simply a reliable way to make Yorkshire pudding without milk for a roast dinner or party food, this method is built to be repeatable. It focuses on the same core principles used in the most successful egg-free approaches: a thin, rested batter poured into smoking-hot fat, then baked hot and undisturbed until deeply golden.

Along the way, you’ll see how to tweak the batter for no egg Yorkshire pudding variations, how to choose the best pan for Yorkshire pudding so the rise is consistent, and how to adapt the same base into mini Yorkshire puddings, giant Yorkshires, and stuffed Yorkshire pudding dinners that hold gravy, curry, or stew without collapsing.


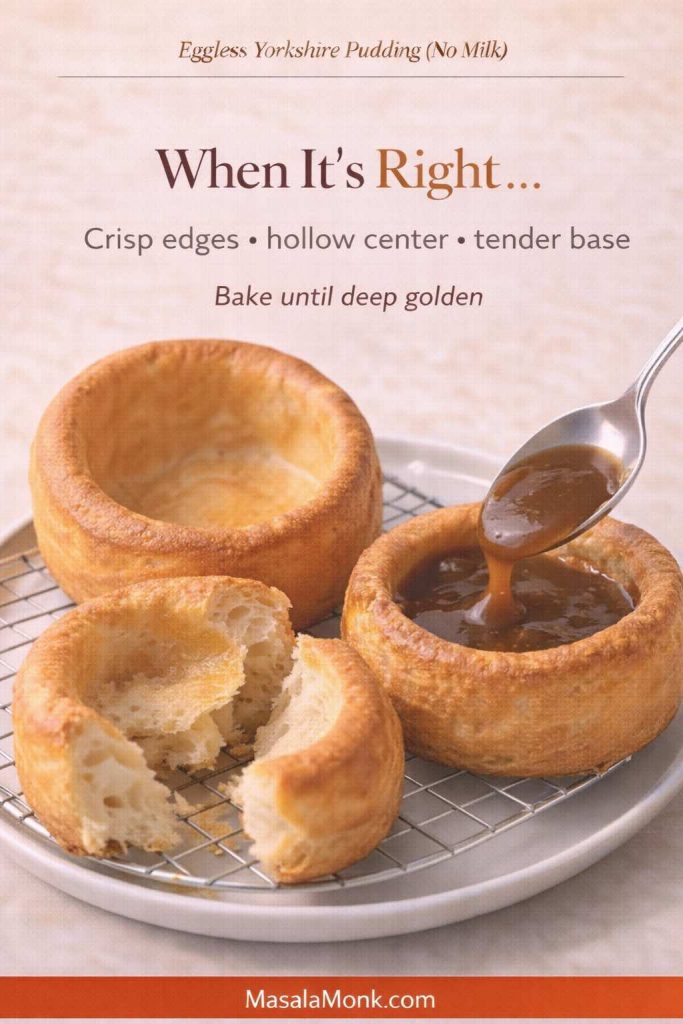
Eggless Yorkshire pudding (no milk): what it’s like when it’s right

When this works, you’ll get a Yorkshire pudding that looks like a popover: browned walls, a hollow center, and edges that shatter a little when you tear one open. The base will be slightly softer than an egg-based version, but still sturdy enough to hold a ladle of gravy or a spoonful of curry.

Three eggless Yorkshire puddings made without milk on a cooling rack: one whole with tall crisp walls, one torn open to show a hollow center, and one being filled with gravy; text overlay reads “When It’s Right… Crisp edges • hollow center • tender base” and “Bake until deep golden,” with MasalaMonk.com in the footer.
This is the goal. When eggless Yorkshire pudding (no milk) turns out right, you’ll see tall browned walls, a hollow center, and crisp edges that hold gravy without collapsing. Bake until deep golden—that extra color is what keeps dairy-free, egg-free Yorkshires crisp instead of soft.

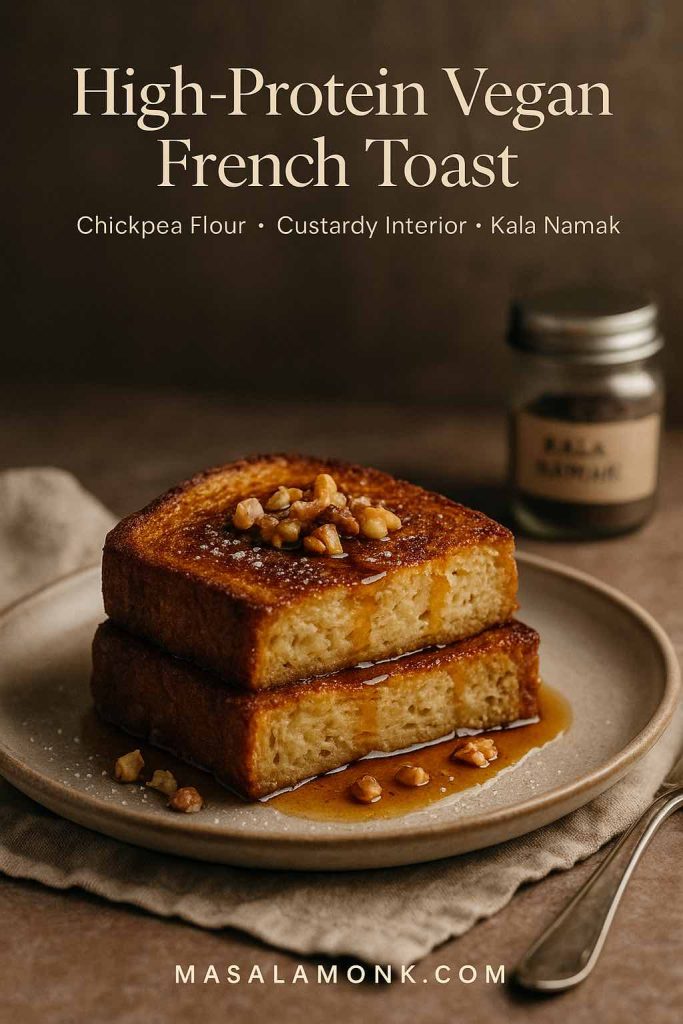
Also, the flavor is clean and savory rather than “eggy.” If you want a hint of that classic aroma, you can add a tiny pinch of kala namak (black salt)—the same trick used in a lot of egg-free cooking, like in these plant-based breakfast ideas that use tofu as an egg stand-in. Here’s a helpful guide on that approach: plant-based breakfast ideas that use tofu instead of eggs.

Meanwhile, if you’re here because you specifically need a dairy free Yorkshire pudding recipe, the good news is that milk is the easier part to replace. The bigger challenge is structure, which is why you’ll see so much emphasis on heat, resting, and pan choice.

Also Read: Crock Pot Chicken Breast Recipes: 10 Easy Slow Cooker Dinners (Juicy Every Time)


Yorkshire pudding recipe without eggs: the foundation you can trust

This batter is built for two common needs: skipping eggs and skipping milk. If you landed here seeking a Yorkshire pudding recipe without eggs, a dairy-free Yorkshire pudding recipe, or simply Yorkshire pudding without milk that still rises, this is the base to start with. It’s also flexible enough that you can turn it into giant yorkshire pudding, miniature yorkshire puddings, or even a tray-baked yorkshire pudding in a roasting tin.

Ingredients (makes about 12 standard puddings)

  • 225 g self-raising flour
  • ½ tsp baking powder
  • ½ tsp fine salt
  • 300 ml unsweetened soy milk
  • 100 ml warm water
  • Neutral oil for the tin (about ¾–1 tsp per hole)

No self-raising flour? Use 225 g plain flour + 2¼ tsp baking powder (instead of ½ tsp) + the same salt.

Flat lay of ingredients for eggless Yorkshire pudding with no milk, including self-raising flour, baking powder, salt, unsweetened soy milk, warm water, and oil with a muffin tin, plus a note for substituting plain flour; MasalaMonk.com footer.
Quick ingredient check before you start: this eggless Yorkshire pudding (no milk) batter uses self-raising flour plus a little baking powder for lift, soy milk for reliable browning, warm water for steam, and hot oil in the tin for crisp edges. If you don’t have self-raising flour, the plain flour + baking powder swap keeps the recipe doable without changing the method.

If you only have plain flour, you can still make this work. Use all-purpose flour and increase baking powder to compensate, similar to the “no self-raising flour” workaround used in a popular vegan yorkshire method here: self-raising flour substitute notes for vegan Yorkshire puddings.

Soy milk is the most reliable milk swap for lift and browning. That said, if you’re avoiding soy or simply prefer homemade, these options are useful:


Yorkshire pudding without milk: why the batter has warm water

It’s tempting to pour in plant milk and call it a day, yet warm water has a quiet role here. First, it keeps the batter thin enough to climb. Second, it boosts early steam. Third, it helps the batter hit hot fat without cooling it too much.

Split-screen graphic for eggless Yorkshire pudding (no milk) comparing “plant milk only” batter versus “plant milk + warm water,” explaining that warm water makes a thinner batter, creates more early steam, improves lift, and keeps oil hotter on contact; MasalaMonk.com footer.
Warm water is the quiet advantage in Yorkshire pudding without milk. It keeps the batter thin enough to climb, creates more early steam for lift, and helps the batter hit the hot oil without cooling it down too much. The result is a better rise and crispier edges in eggless, dairy-free Yorkshires.

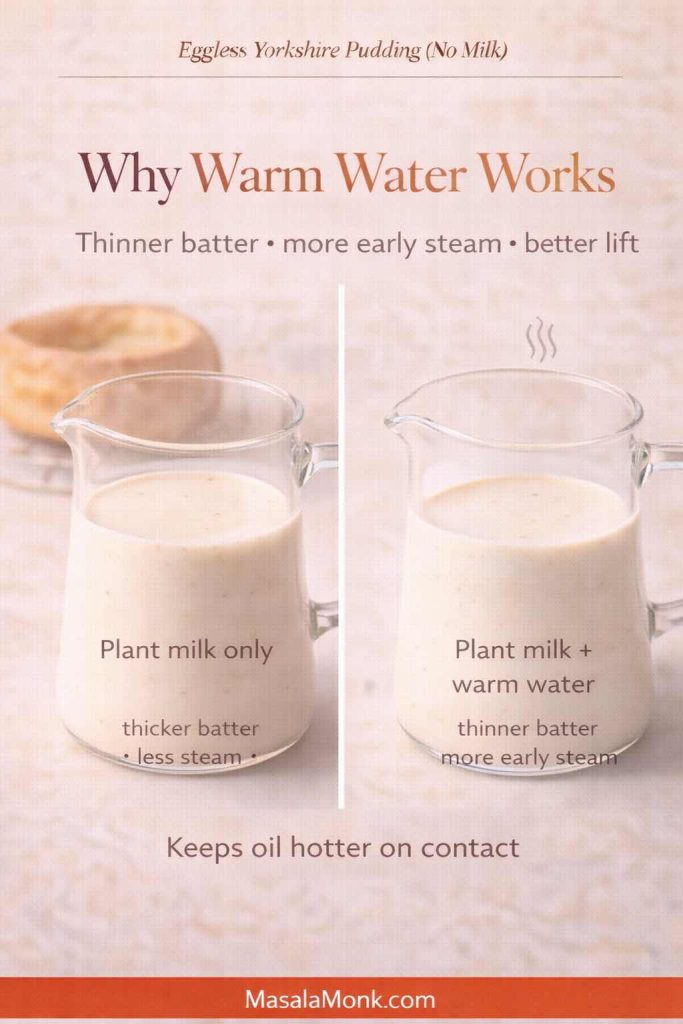
That combination matters because Yorkshire puddings rise like popovers. Heat sets the outside quickly while steam expands inside, pushing the batter upward. Without eggs, the rise depends on two things: steam expansion and fast-setting walls. Self-raising flour plus a touch of baking powder helps the batter set before it can slump, while a thin, rested batter makes it easier for steam to push upward. If you enjoy the deep explanation, this is a great technical read on what makes a popover-style rise happen: why hot fat and high heat matter for Yorkshire puddings and popovers.

Also Read: Mozzarella Sticks Recipe (Air Fryer, Oven, or Fried): String Cheese, Shredded Cheese, and Every Crunchy Variation


How to make Yorkshire pudding without eggs or milk

This is where things get satisfying. Once you bake a batch that rises, you’ll start trusting the process, because the rules are simple and repeatable.

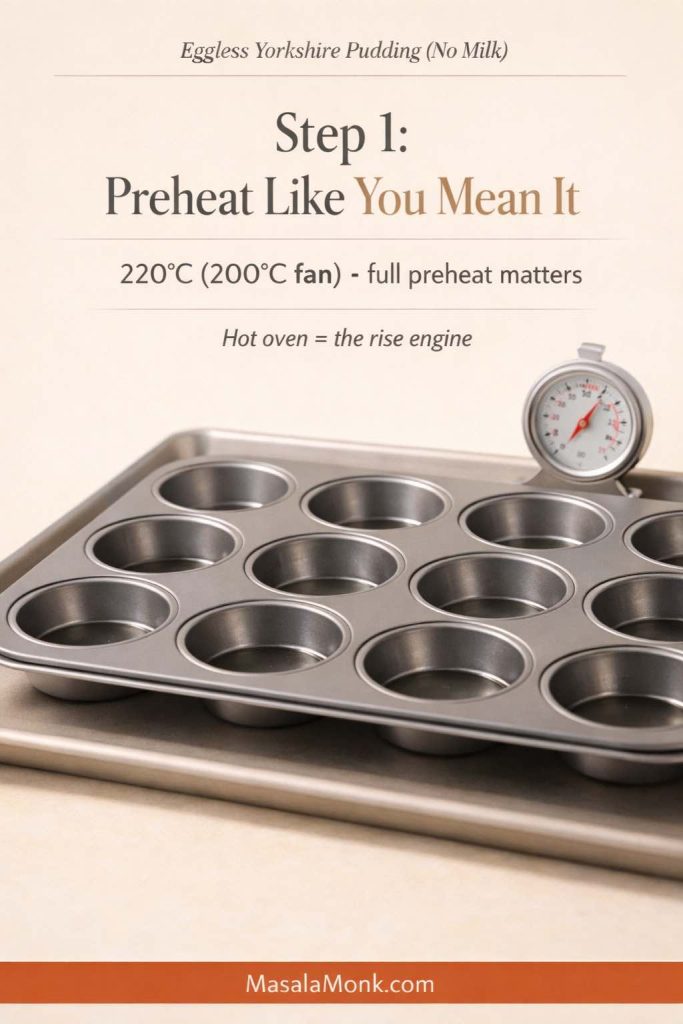
1) Preheat the oven properly

Set your oven to 220°C (or 200°C fan). Don’t rush this. A hot oven is not a suggestion here; it’s the engine.

Empty metal muffin tin on a baking tray beside an oven thermometer reading 220°C, labeled Step 1 for eggless Yorkshire pudding (no milk): fully preheat the oven because high heat drives the rise, with MasalaMonk.com in the footer.
Step 1 makes everything else work. For eggless Yorkshire pudding without milk, a fully preheated oven (220°C / 200°C fan) is the “rise engine.” If the oven isn’t truly hot before the batter hits the tin, the puddings set too slowly and turn out flatter and softer.

2) Make the batter, then rest it

Whisk self-raising flour, baking powder, and salt in a bowl. Next, pour in soy milk and warm water, then whisk until smooth.

Glass measuring jug of thin Yorkshire pudding batter with a whisk and a timer, showing Step 2 for eggless Yorkshire pudding (no milk): pour like crepe batter and rest 30–60 minutes for a better rise, with MasalaMonk.com in the footer.
Step 2 sets the texture and the lift. Keep the eggless Yorkshire pudding batter thin (closer to crepe batter than pancake batter), then rest it for 30–60 minutes so the flour hydrates and the puddings rise more smoothly once the batter hits hot oil.

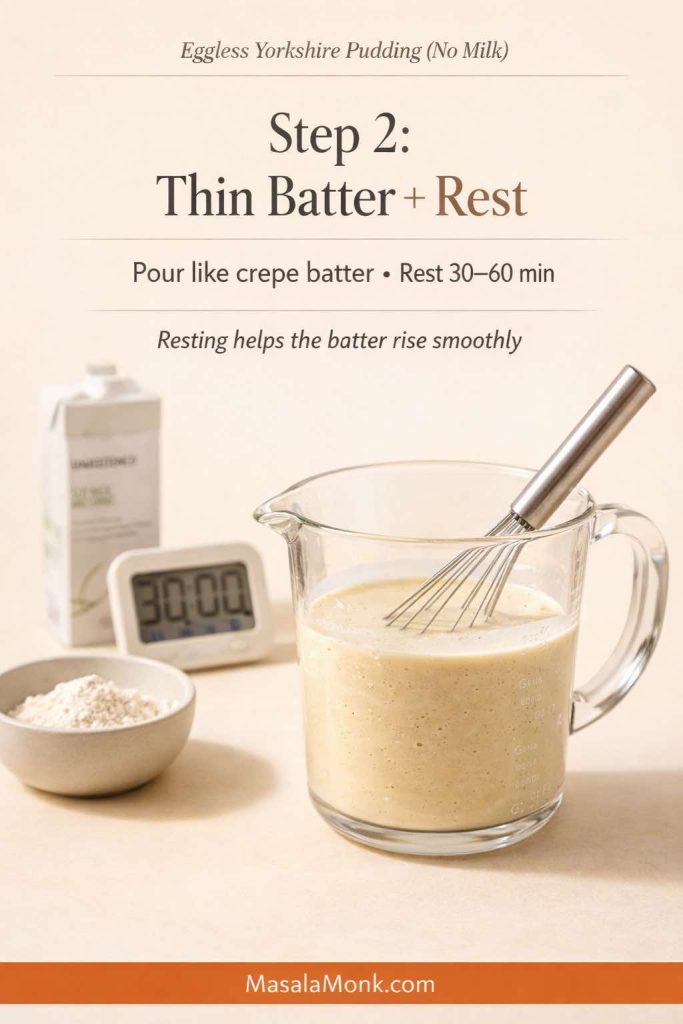
You’re aiming for a pourable batter that looks closer to crepe batter than pancake batter. If it feels thick, add a tablespoon of warm water and whisk again. If it looks thin but smooth, you’re in the right zone.

Split comparison of Yorkshire pudding batter consistency for an eggless no-milk recipe: left shows batter pouring thick with the note “too thick = flat,” right shows a thinner pourable batter with “pourable = rises,” plus “aim for crepe-batter pour” and a MasalaMonk.com footer.
Batter thickness is the silent deal-breaker. For eggless Yorkshire pudding without milk, you want a smooth, pourable batter that flows like crepe batter. If it pours thick like pancake batter, it sets too fast and can’t climb—thin it with a tablespoon of warm water and whisk again.

Now let it rest. Ten minutes is the minimum. Thirty minutes is better. An hour is often excellent, particularly if your kitchen is cool. Resting gives the flour time to hydrate, which improves how the batter behaves when it hits hot fat. If you’ve ever noticed how resting changes the texture of other batters, it’s a similar idea—this batter guide for fluffy idlis and crisp dosas captures the concept beautifully: why batter consistency and resting time change the final texture.

3) Heat the tin and oil until it’s fiercely hot

Use a metal muffin tin, ideally a standard 12-hole tin. Add about ¾–1 tsp neutral oil to each hole.

Slide the tin into the oven for 8–10 minutes, until the oil is shimmering and looks almost smoking.

Metal muffin tin filled with small pools of shimmering hot oil, shown as Step 3 for eggless Yorkshire pudding (no milk) with text overlay about preheating 8–10 minutes and a footer that reads MasalaMonk.com.
Step 3 is the whole game: preheat the muffin tin with oil until it shimmers (8–10 minutes). That heat is what creates tall, crisp eggless Yorkshire puddings—pour the batter quickly and avoid opening the oven early so the rise doesn’t collapse.

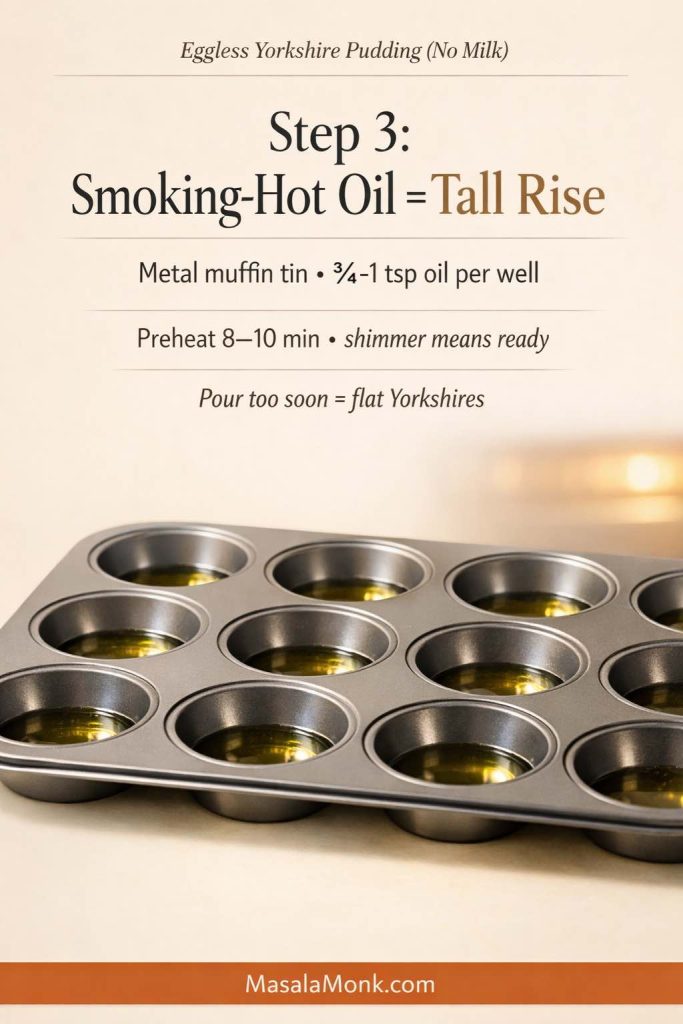
This is the moment that separates flat “muffin-like” results from true Yorkshire rise. In fact, the most consistent egg-free methods emphasize the same thing: deep metal wells and very hot fat. If you want a technique-focused walkthrough from a dedicated vegan approach, this guide breaks down the common failure points clearly: why vegan Yorkshire puddings fail and how to fix them.

4) Pour quickly, then bake without opening the door

Pull the hot tin out carefully. Working quickly, pour batter into each hole—about one-third to one-half full.

Then return the tin to the oven immediately. Bake 18–22 minutes, until puffed and deeply golden.

Batter being poured from a jug into a hot oiled metal muffin tin for eggless Yorkshire pudding (no milk), labeled Step 4: pour fast, fill each well ⅓–½, and bake 18–22 minutes without opening the oven; MasalaMonk.com footer.
Step 4 is where eggless Yorkshires either rise or collapse. Pour the thin batter into the smoking-hot oil fast, fill each well only about one-third to one-half, then bake 18–22 minutes without opening the oven door. That steady heat is what sets crisp edges and a hollow center.

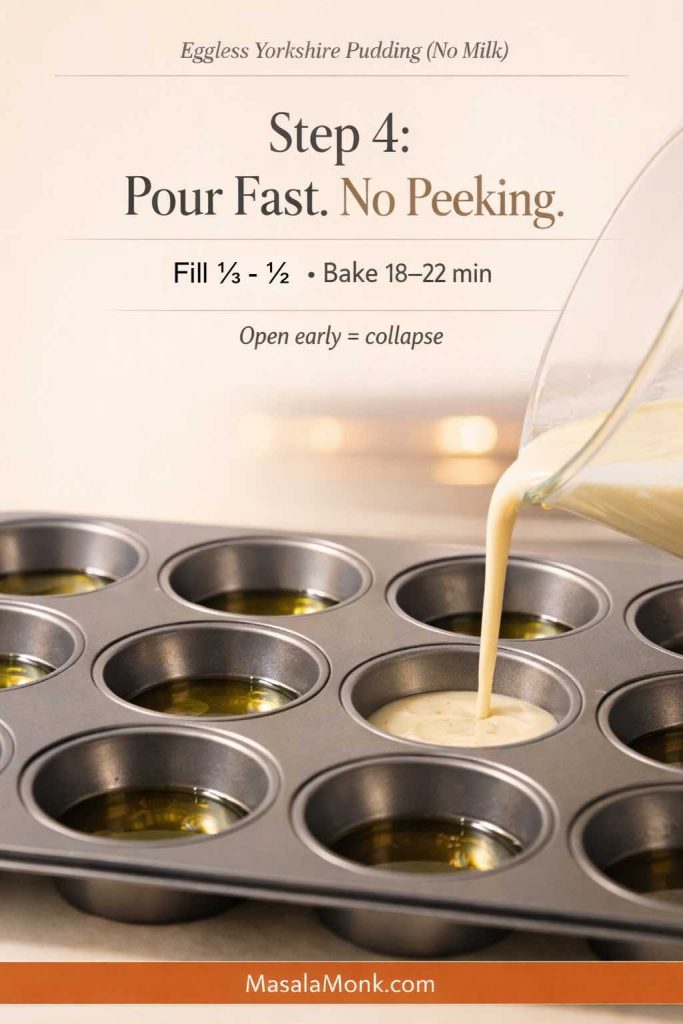
Resist the urge to check early. Opening the door drops heat, and that can collapse an egg-free rise. Instead, trust the timer for the first 18 minutes. After that, check once, quickly, and let them finish browning.

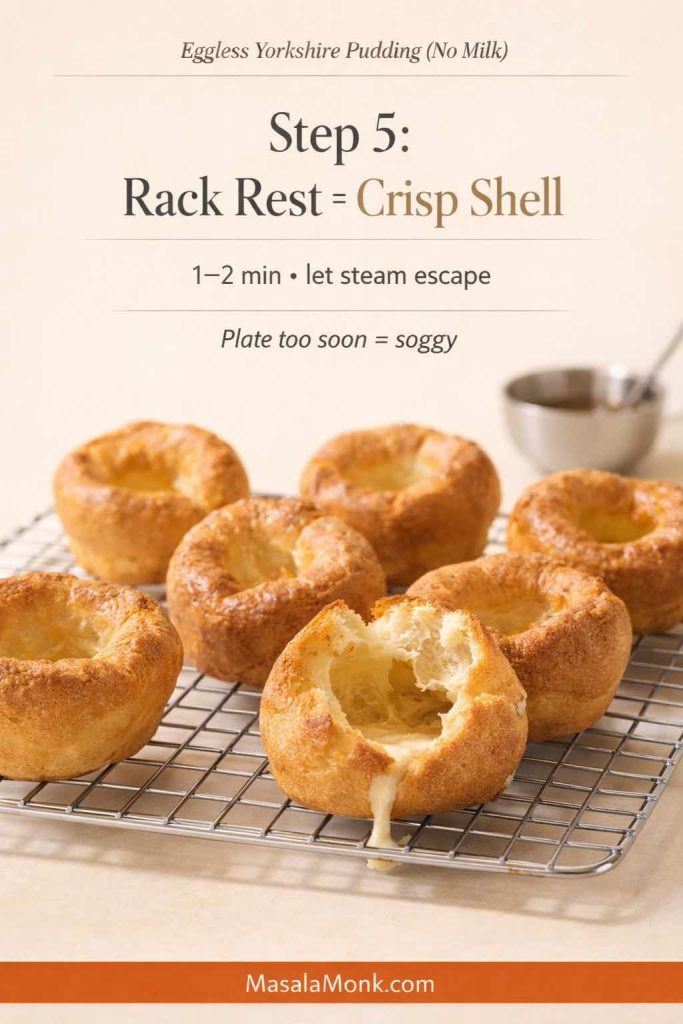
5) Let them set for crispness

Transfer the puddings to a rack for a minute or two. That tiny pause helps the shell stay crisp rather than steaming itself soft on a plate.

Eggless Yorkshire puddings cooling on a wire rack, with one torn open to show a hollow center; text overlay explains Step 5 for Yorkshire pudding without milk: rest 1–2 minutes so steam escapes and the shell stays crisp, with MasalaMonk.com in the footer.
Don’t skip the rack rest. Even perfect eggless Yorkshire puddings can turn soft if they steam on a plate. Let them sit on a wire rack for 1–2 minutes so moisture escapes—this keeps the edges crisp while the center stays tender and hollow.

Also Read: Sourdough Starter Recipe: Make, Feed, Store & Fix Your Starter (Beginner Guide)


Egg free Yorkshire pudding recipe: the choice of fat

There’s a reason “beef dripping Yorkshire pudding” is a classic phrase: fat contributes flavor and crispness. However, if you’re making a dairy free yorkshire pudding or plant based yorkshire pudding, neutral oil is the easiest and most consistent.

Two ramekins labeled neutral oil and beef dripping shown as “Fat Choice: Flavor vs Flexibility” for eggless Yorkshire pudding (no milk), noting neutral oil is reliable and plant-friendly while beef dripping gives classic roast flavor, with a Yorkshire pudding blurred in the background and MasalaMonk.com in the footer.
Fat choice changes the flavor, not the method. Neutral oil is the most reliable option for eggless Yorkshire pudding without milk—easy, consistent, and plant-friendly. Beef dripping gives that classic roast-dinner taste; just heat it until shimmering hot before you pour in the batter for crisp edges and a better rise.

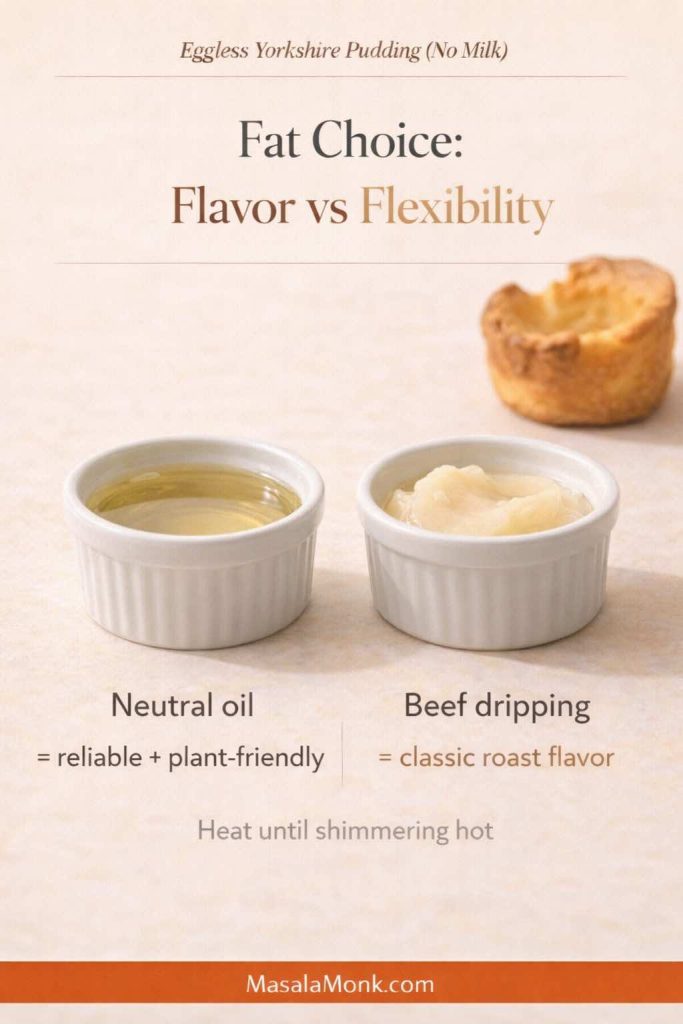
If you do eat beef, you can absolutely bake Yorkshire pudding in beef dripping using this same method. Still, for most kitchens, oil is simply more practical and keeps the recipe accessible.

If you’re curious about oils and smoke points, focus less on perfection and more on the simple rule: pick a neutral fat that can handle high heat.

Also Read: How to make No-Bake Banana Pudding: No Oven Required Recipe


Plant milk swaps for milk free Yorkshire pudding

Plant milks vary wildly. Some are thin, some are thick, some contain gums, and some brown more easily than others. Because of that, swapping milk can change the rise.

Comparison graphic titled “Best Plant Milk for Rise” for eggless Yorkshire pudding (no milk), showing four glass carafes labeled soy, oat, almond, and coconut drink with notes on lift and texture, plus “use unsweetened” and a MasalaMonk.com footer.
Not all plant milks bake the same. For Yorkshire pudding without milk, unsweetened soy milk tends to give the best rise and browning. Oat milk can be softer, almond milk is lighter (sometimes less dramatic lift), and coconut drink varies—so keep the batter thin and pourable.

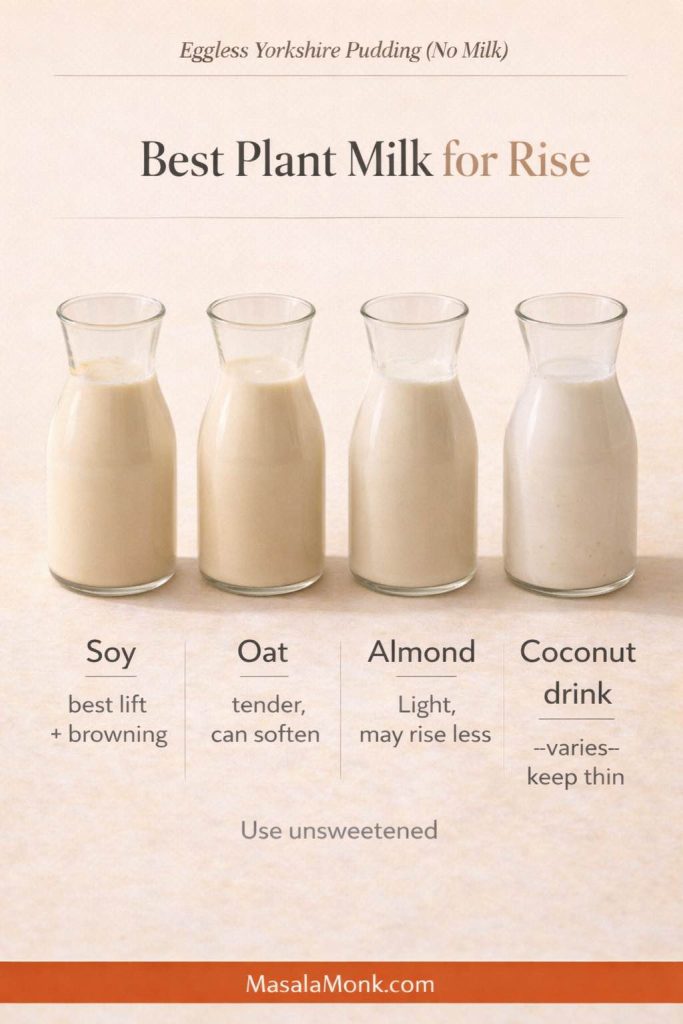
Soy milk (best for consistency)

Unsweetened soy milk usually gives the most dependable lift and browning. It behaves closer to dairy milk in structure than many other plant milks.

Oat milk (tender, sometimes softer)

Oat milk can produce a gentler shell, especially if it’s thickened. If you’re using homemade, strain it well and keep it smooth. This version is designed specifically to avoid the gummy texture that can mess with batters: easy homemade oat milk that isn’t slimy.

Almond milk (lighter taste, sometimes less dramatic rise)

Almond milk works, particularly if you don’t mind a slightly softer set. If you make it at home, keep it simple and unsweetened: how to make almond milk at home.

Coconut milk (use thoughtfully)

This is where many dairy-free cooks get tripped up. Canned coconut milk is rich and heavy; it can make the batter thicker and reduce lift. Coconut milk beverage is lighter and behaves closer to other plant milks. If you’re unsure which you have, this explainer helps: coconut milk basics and how it differs by type.


Best pan for Yorkshire pudding: what matters more than brand

You’ll see endless discussion about the “best yorkshire pudding tin,” and brands do exist for everything from stainless steel yorkshire pudding tins to non stick yorkshire pudding trays. Still, before you get pulled into product debates, focus on the features that genuinely affect your bake.

Metal beats silicone for lift

A metal tray heats quickly and transfers heat into the oil and batter fast. Silicone, on the other hand, is convenient but slower to heat, which often leads to pale, soft puddings. Silicone can still work, particularly for casual batches or smaller ovens, but it’s not ideal when you want tall crowns.
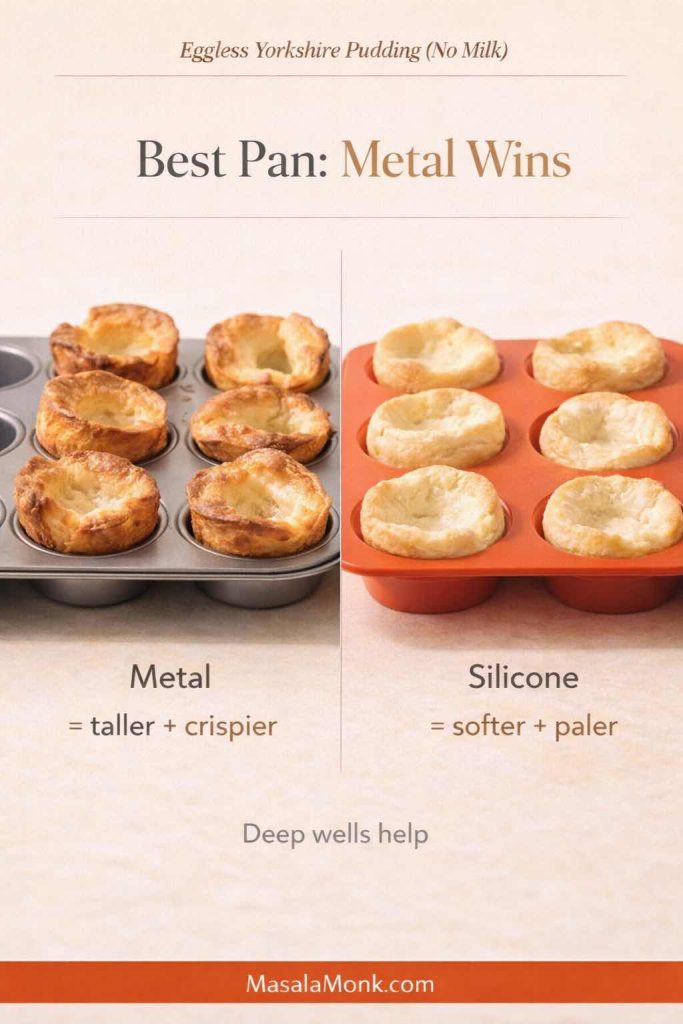
Side-by-side comparison of eggless Yorkshire puddings baked in a metal muffin tin versus a silicone tray: the metal pan batch is taller and crispier, while the silicone batch is paler and softer; text overlay says “Best Pan: Metal Wins” with MasalaMonk.com in the footer.
Pan choice changes the rise. For eggless Yorkshire pudding (no milk), a heavy metal tin heats faster and helps the batter climb into taller, crispier walls. Silicone trays can work, but they usually bake up paler and softer because they don’t transfer heat as aggressively.

Deep wells matter

A deep muffin pan or popover pan gives batter a vertical runway. That’s why popover pans and deeper yorkshire pudding trays often produce better rise than shallow tins.

Infographic titled “Pan Types That Actually Matter” for eggless Yorkshire pudding (no milk), showing a 12-hole muffin tin, 6-hole Yorkshire tin, popover pan, roasting tin for tray-baked slices, and a cast iron skillet for a giant Yorkshire, with MasalaMonk.com in the footer.
Your pan choice changes the shape of your Yorkshire more than any brand name. A 12-hole muffin tin is the reliable everyday option, a 6-hole Yorkshire tin makes bigger puddings, a popover pan pushes extra height, a roasting tin gives a sliceable tray-bake, and a cast iron skillet is perfect for a giant Yorkshire you can cut into wedges.

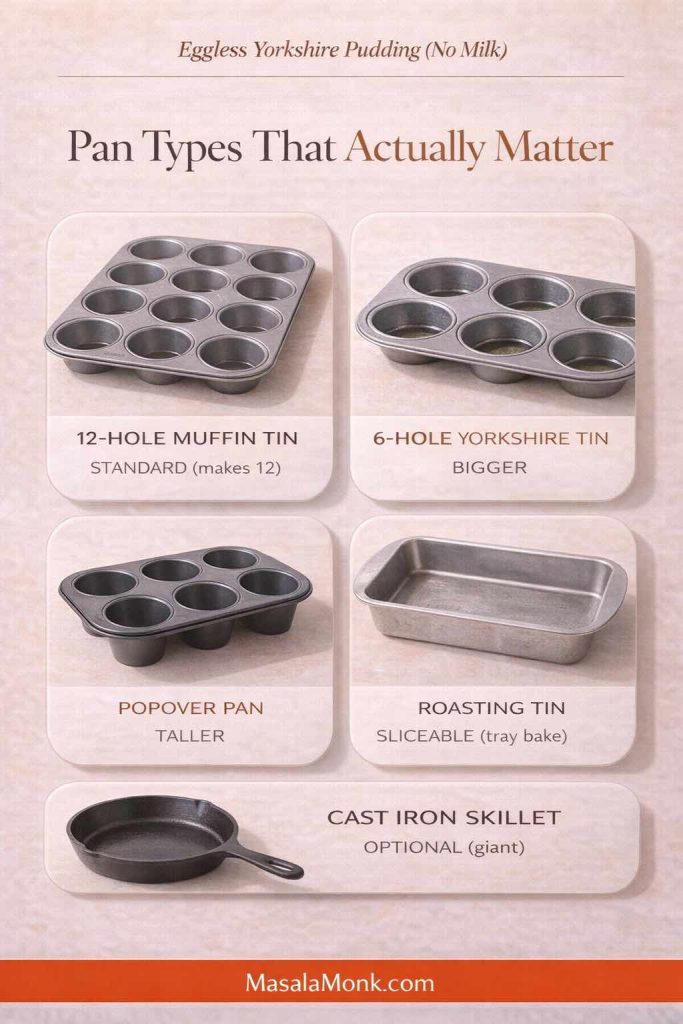
Common tin types you’ll see (and what they’re good for)

  • A standard muffin tin (often 12 holes) is a great everyday choice.
  • A 6 hole Yorkshire pudding tin gives larger puddings with more dramatic size.
  • A 4 hole yorkshire pudding tin is perfect if you want oversized puddings without committing to a whole tray.
  • A popover pan is a strong option when you want extra height.
  • A roasting tin works for a large tray yorkshire pudding, especially if you like slicing and sharing.

As for materials, stainless steel yorkshire pudding trays and heavy-gauge non-stick tins both work well. Cast iron is also excellent, although it behaves differently: it holds heat for a long time, so you get strong crispness but less flexibility once it’s preheated.

If you own premium cookware like Le Creuset, you can use it; however, you don’t need it. A sturdy pan that heats evenly is enough.

Also Read: Chicken Adobo — Step-by-Step Recipe — Classic Filipino Adobong Manok


Cast iron Yorkshire pudding and giant Yorkshires

A cast iron Yorkshire pudding is the easiest way to make one big, dramatic Yorkshire that you can slice like bread. It bakes up with a bold rise, deeply browned edges, and a center that stays soft enough to soak up gravy.

Giant eggless Yorkshire pudding baked in a cast iron skillet with a slice removed to show the hollow center and crisp edges; text overlay reads “Giant Yorkshire in Cast Iron” with tips to preheat skillet and oil, pour batter, and bake deep golden; MasalaMonk.com footer.
Want one dramatic centerpiece instead of individual cups? A cast iron skillet makes a giant eggless Yorkshire pudding with deeply browned, crisp edges and a hollow center you can slice and fill like a savory bowl. Preheat the skillet and oil until shimmering hot, pour in the rested batter, then bake until deep golden for the best rise.

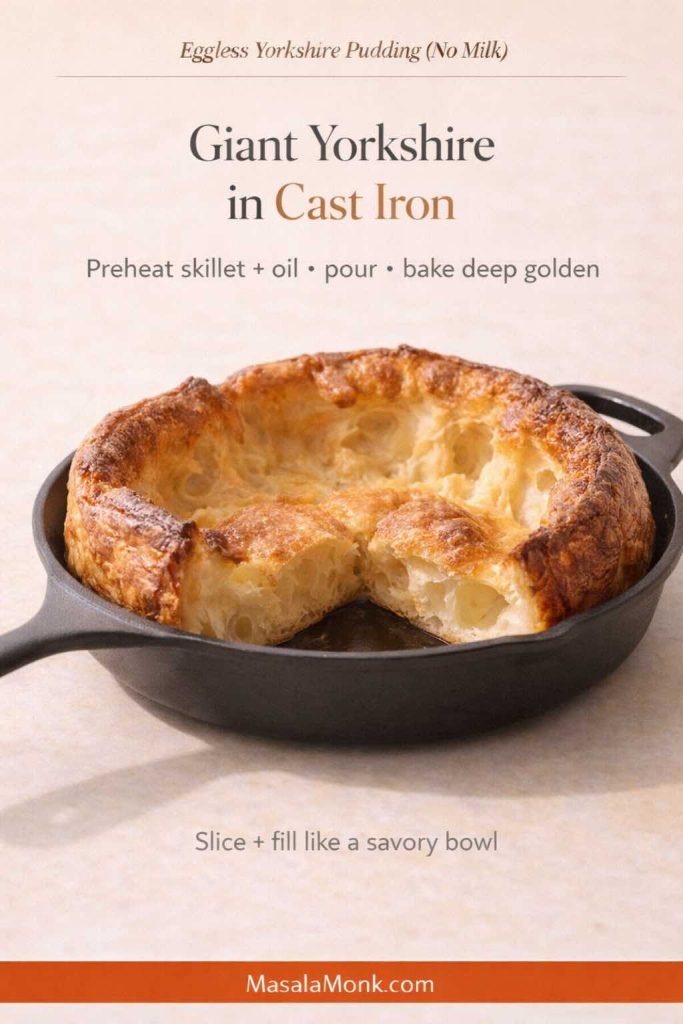
Start by heating your oven to 220°C (200°C fan). Put a cast iron skillet inside to preheat. Once the oven is hot, carefully remove the skillet, add 1–2 tablespoons of neutral oil, then return it to the oven for 8–10 minutes until the oil is shimmering hot. Pour in your rested batter and immediately put the skillet back into the oven. Bake until the Yorkshire is well-risen and a deep golden brown.

Giant Yorkshires work brilliantly as a centerpiece for roast dinners and for extra-large Yorkshire pudding meals. Slice into wedges and serve alongside gravy, or keep it whole and fill it like a savory bowl with saucy vegetables, beans, or stew.

Also Read: Sweetened Condensed Milk Fudge: 10 Easy Recipes


Mini Yorkshire puddings, miniature Yorkshires, and party food bites

Miniature yorkshire puddings are perfect for parties because they’re easy to fill and serve. Moreover, they feel special without requiring extra effort.

To make mini yorkshires, use the same batter, yet fill each well slightly less. Because the batter layer is thinner, they cook faster. Start checking at around 15–18 minutes.

From there, you can turn them into yorkshire pudding party food in dozens of ways:

Nine mini eggless Yorkshire puddings (no milk) arranged in a grid and filled with three toppings—mushroom-onion gravy, roasted vegetables in gravy, and a thick chickpea/bean curry—with text overlay “Mini Yorkshires = Party Food,” bake time 15–18 minutes, and MasalaMonk.com in the footer.
Mini Yorkshires are the easiest party upgrade. Bake mini eggless Yorkshire puddings (no milk) until deeply golden (about 15–18 minutes), then fill them with thick, spoonable toppings so they stay crisp—mushroom-onion gravy, roasted veg + gravy, or a thick chickpea/bean curry all work beautifully.
  • Fill with thick gravy and roasted vegetables
  • Add a spoon of saucy beans
  • Top with spiced mushrooms
  • Use them as a base for small bites at a holiday table

If you’re serving meat, mini roast beef and yorkshire puddings are a classic combination. If you’re vegetarian, you can do the same structure with roasted vegetables and onion gravy.

Also Read: Sourdough Recipe: 10 Easy Bread Bakes (Loaves, Rolls & Bagels)


Yorkshire pudding pies, stuffed Yorkshires, and “Yorkshire pudding pies” dinners

The phrase yorkshire pies can mean different things depending on who’s talking: sometimes it’s a roast dinner baked into a giant pudding, and sometimes it’s mini puddings stuffed like a canapé. Either way, the idea is the same: the Yorkshire becomes the crust.

Split image of two large stuffed eggless Yorkshire puddings (no milk): one filled with mushroom-onion gravy and roasted vegetables, the other filled with thick rajma/chickpea masala; text overlay says “Stuffed Yorkshires = Dinner” and “The Yorkshire becomes the crust,” with MasalaMonk.com in the footer.
Stuffed Yorkshires turn this recipe into a full meal. Bake larger eggless Yorkshire puddings (no milk), then fill with thick, spoonable fillings so they stay crisp—mushroom-onion gravy + roasted veg for roast-dinner vibes, or rajma/chickpea masala for a cozy curry-style dinner. Think of it like an edible bowl: the Yorkshire becomes the crust.

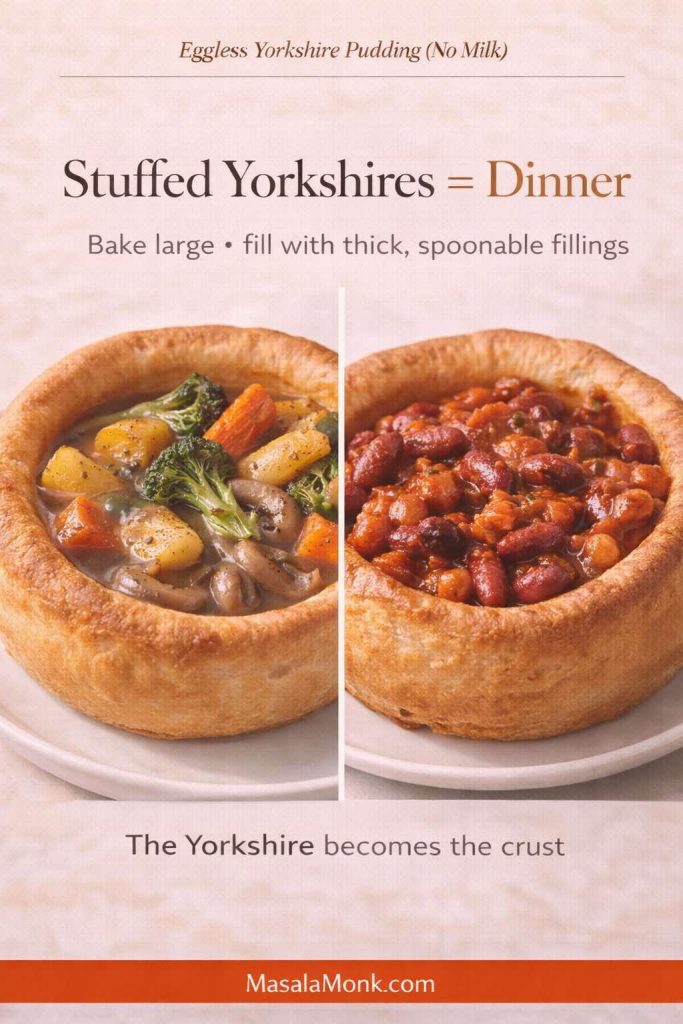
For a stuffed yorkshire pudding dinner, bake large puddings in a 6-hole tin, then fill them with:

  • roasted vegetables and gravy
  • mushrooms and onions
  • thick stews or bean-based sauces

For an easy, deeply satisfying option that pairs beautifully with the crisp edges of eggless yorkshires, try a spoonable curry. Rajma works especially well: Punjabi-style rajma curry. Likewise, a coconut-based stew creates a lighter but still comforting pairing: Kerala-style coconut vegetable stew.

You can also go the “Yorkshire pudding pies” route by baking a giant yorkshire pudding in a roasting tin, then piling on your filling and slicing it like a savory pie.

Also Read: Peanut Butter Fudge: Recipes & Guide (8 Methods + Easy Variations)


Vegetarian Yorkshire pudding and plant based Yorkshire pudding dinners

An eggless batter is already friendly for many vegetarian tables. Still, if you want a fully plant based Yorkshire pudding dinner, your fillings matter.

Instead of thinking “roast beef or nothing,” lean into what makes yorkshires great: they love sauce. They love savoriness. They love contrast.

Infographic titled “Best Plant-Based Pairings” for eggless Yorkshire pudding (no milk), showing one plain Yorkshire pudding beside three bowls labeled mushroom–onion gravy, lentil stew, and chickpea masala, with the note “Thick, spoonable sauces keep Yorkshires crisp” and MasalaMonk.com in the footer.
Yorkshires love sauce—just keep it thick. For a plant-based dinner with eggless Yorkshire pudding (no milk), choose spoonable pairings that won’t steam the shell soft: mushroom–onion gravy for roast-dinner vibes, lentil stew for hearty comfort, or chickpea masala for a cozy curry-style meal.

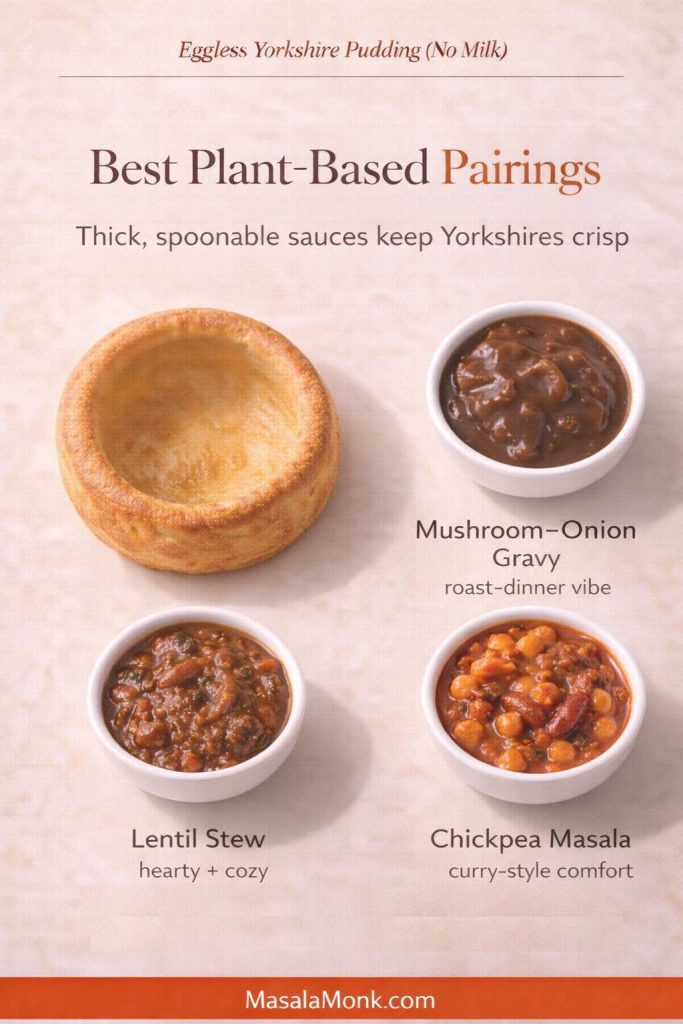
A few plant-forward ideas:

  • Mushroom-onion gravy plus roasted carrots and potatoes
  • Lentil stew ladled into large yorkshires
  • Chickpea masala spooned into mini puddings for a snacky dinner

If you want inspiration for hearty, bowl-friendly soups, these collections can help you build a whole meal around your puddings: vegan lentil soup recipes and yellow moong dal vegan soups.


Eggless Yorkshire pudding with milk: a quick adaptation

Sometimes the need is narrower: eggs are the issue, but milk is fine. In that case, eggless Yorkshire pudding with milk is an easy variation.

Simply replace soy milk with dairy milk. Keep warm water because it helps maintain the thin batter and steam. The rest of the method stays the same: hot oil, hot oven, quick pour, no peeking.

This adaptation is particularly useful when you’re baking for someone with an egg allergy but not dairy intolerance.

Also Read: 10 Vegan Chocolate Cake Recipes (Easy, Moist, & Dairy-Free)


Lactose free Yorkshire pudding and dairy free Yorkshires: what changes, what doesn’t

Lactose free and dairy free sound similar, but they aren’t identical. Lactose-free dairy milk still behaves like dairy milk in baking, so it’s usually an easy swap. Dairy-free, by contrast, shifts you into plant milk territory, which is where thickness and additives can change the rise.

If you’re deciding which dairy alternatives to keep on hand, this overview can help you weigh options: dairy-free milk alternatives and how they differ.


Yorkshire pudding in an air fryer: possible, but choose your setup carefully

Air fryer yorkshire pudding is doable, but it’s fussier than oven-baked. The main challenge is heat stability: you need the oil hot and the cooking environment consistent, which can be harder in smaller baskets.

Air fryer setup for eggless Yorkshire pudding (no milk) showing a small metal muffin tin inside an air fryer basket with text overlay: “Use a metal tin that fits • preheat 5–8 min • bake until deep golden,” and MasalaMonk.com in the footer.
Air fryer Yorkshires can work—setup is everything. Use a metal tin that fits your basket and preheat both the air fryer and the tin before adding oil and batter. Then bake until deep golden (not just set), because eggless Yorkshire pudding without milk needs extra browning to stay crisp.

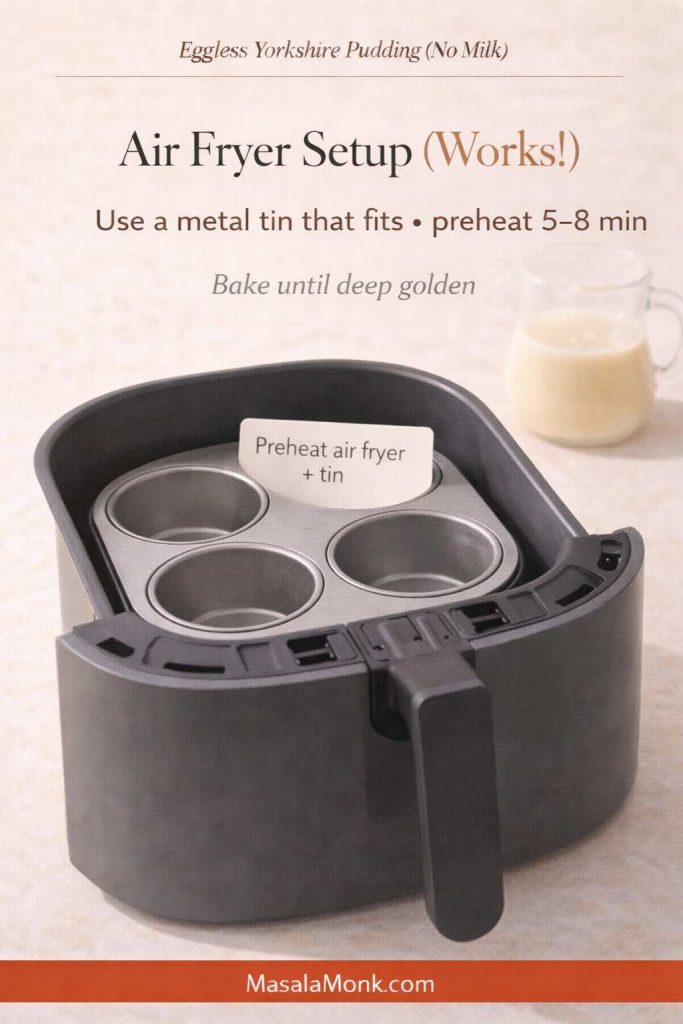
If you want to try it, use a metal tin that fits your air fryer basket and preheat both the machine and the tin. Keep the batter thin. Then cook until deeply browned, not just “set.” Pale egg-free yorkshires tend to turn soft quickly.

Appliances like Ninja are powerful, but even the best air fryer still behaves differently than a full oven. In other words, treat it as a variation, not the gold standard.

Also Read: Baked Ziti Recipe Collection: 15 Easy Variations


Yorkshire pudding tray talk: silicone, non-stick, stainless steel, and everything in between

If you’ve ever gone down the rabbit hole of yorkshire pudding trays, you’ve seen it all: 6 cup yorkshire pudding trays, 12 hole yorkshire pudding tins, ceramic yorkshire pudding trays, shallow yorkshire pudding tins, extra deep yorkshire pudding trays, disposable yorkshire pudding trays, even niche options marketed as air fryer yorkshire pudding trays.

Here’s the practical truth: a heavy, deep metal tin wins most of the time.

Non-stick can be helpful, particularly for easy release, but it isn’t essential if you use enough hot fat. Stainless steel tins heat well, too. Ceramic is slower to heat and tends to soften the crispness. Silicone is the most convenient but least punchy.

Brands exist everywhere—Tefal, MasterClass, and store lines from Argos, among others—yet your method matters more than a logo.

Also Read: Vegan Mayo Recipe Guide: 5 Plant-Based Mayonnaise


Golden, crisp, and not flat: troubleshooting eggless Yorkshire pudding

When egg-free yorkshires fail, they usually fail in predictable ways. Thankfully, the fixes are equally predictable.

Troubleshooting infographic for eggless Yorkshire pudding (no milk) showing three problems—flat, pale + soft, and soggy—with fixes: heat oil more, keep batter thin, don’t open the oven early, bake longer to deep golden, and cool on a rack 1–2 minutes; MasalaMonk.com footer.
If your eggless Yorkshires didn’t behave, this is the fastest reset. Flat usually means the oil wasn’t hot enough, the batter was too thick, or the oven door was opened early. Pale + soft needs more bake time (deep golden = crisp). Soggy is almost always trapped steam—cool on a rack for 1–2 minutes and don’t stack.

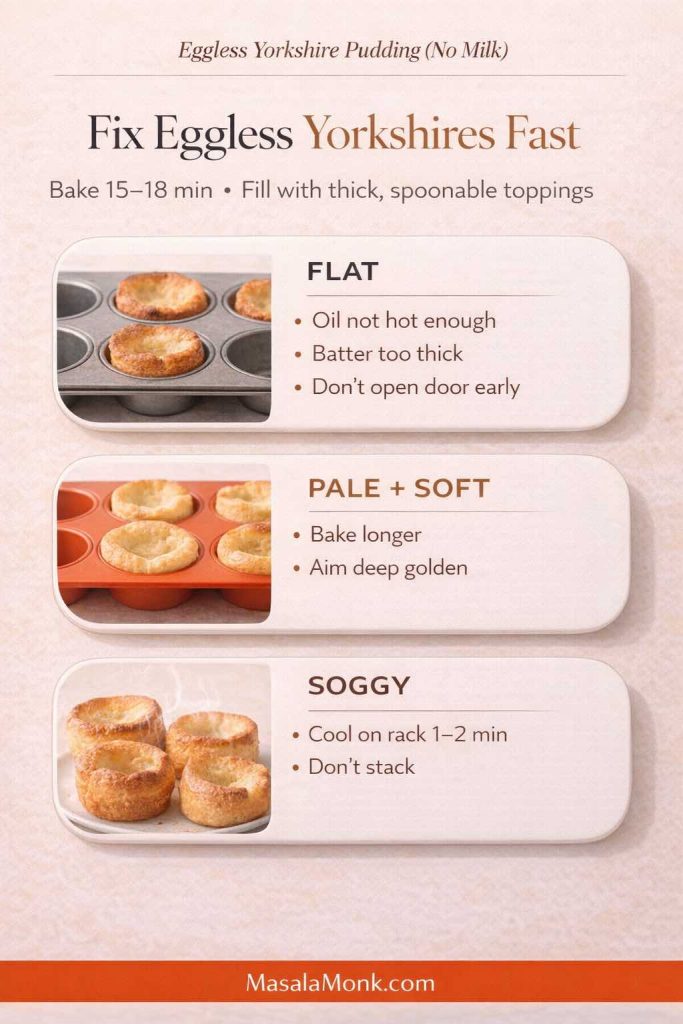
When the puddings don’t rise

This is almost always one of the following:

The oil wasn’t hot enough.
It needs to be shimmering-hot before batter touches it.

The batter was too thick.
Thin it slightly with warm water. A thick batter sets too fast and can’t climb.

The pan didn’t heat properly.
Metal pans help. Deep wells help. Preheating helps.

The oven temperature was too low or unstable.
Give your oven time to fully preheat. Don’t open the door early.

If you want a detailed breakdown of common failure points from a technique-driven vegan approach, this guide is worth reading once: a detailed vegan Yorkshire pudding method with common fixes.

When they’re pale and soft

Browning is not just about looks. It’s about texture.

Bake longer. Aim for deeper color. Also, cool on a rack so steam escapes.

When they taste bland

Increase salt slightly. Also, consider a pinch of mustard powder, black pepper, or kala namak if you like that subtle savory “eggy” note.

Also Read: Potato Salad Recipe: Classic, Russian, German, Vegan & More


Vegan gluten free Yorkshire pudding recipe notes (if you need it)

Sometimes the ask is bigger: vegan and gluten free yorkshire pudding, gluten free vegan yorkshire puddings, or dairy and gluten free yorkshire pudding. The truth is that gluten-free versions can be done, but they’re more sensitive because structure shifts again.

Infographic titled “Gluten-Free + Vegan: What to Expect” for eggless Yorkshire pudding (no milk), with three cards: Structure (no gluten = more sensitive rise), Batter (keep it thinner than you think), and Bake (oil hotter, bake longer to dry the shell), plus MasalaMonk.com in the footer.
If you need gluten free vegan Yorkshire puddings, expect a more sensitive rise. Keep the batter thinner than you think, get the oil extra hot, and bake longer so the shell dries and stays crisp. This quick guide helps you adapt the eggless, no-milk method without guessing your way through a batch.

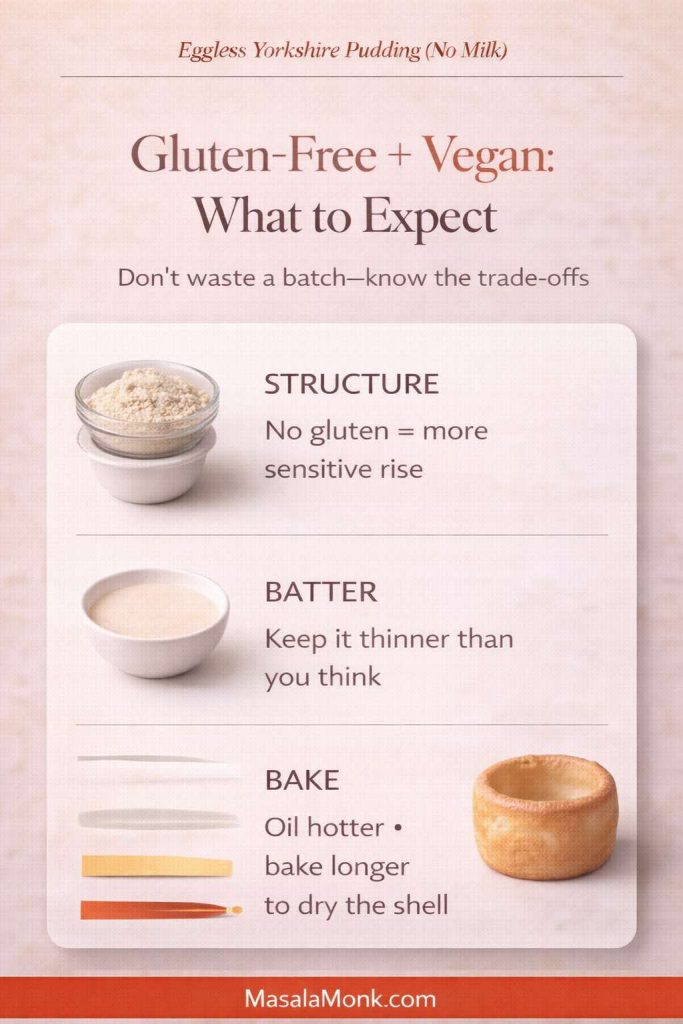
If you want to keep this post focused, you can treat gluten-free as a separate recipe later. Still, if you need a quick direction right now, most successful approaches use a blend of gluten-free flour plus starch, while keeping the batter thin and the oil extremely hot.

A useful example of the gluten-free plus vegan approach is here: a gluten-free vegan Yorkshire pudding method. Treat it as a reference, then adjust based on how your batter behaves.

Also Read: High Protein Overnight Oats | 5 Recipes (Low Calorie, Vegan, Bulking & More)


Keto Yorkshire pudding and “free from” variations

Keto yorkshire pudding is usually built around low-carb flours and often relies on eggs for structure, which doesn’t align with an eggless goal. If you want egg-free and keto together, you’ll likely be experimenting more, and results can vary.

Infographic titled “Keto vs Free From: What to Expect” for eggless Yorkshire pudding (no milk), comparing keto Yorkshire options (often egg-based and more experimental if egg-free) versus store-bought “free from” products (still check labels for egg and milk; bake until deep golden for crispness), with MasalaMonk.com in the footer.
Quick reality check before you bake: most keto Yorkshire pudding recipes rely on eggs for structure, so an egg-free keto version usually takes more experimenting and results can vary. Meanwhile, “free from” store-bought Yorkshires still need label-reading—egg and milk can show up in surprising places. If you want the most reliable crisp, dairy-free, eggless Yorkshire pudding, baking from scratch keeps everything in your control.

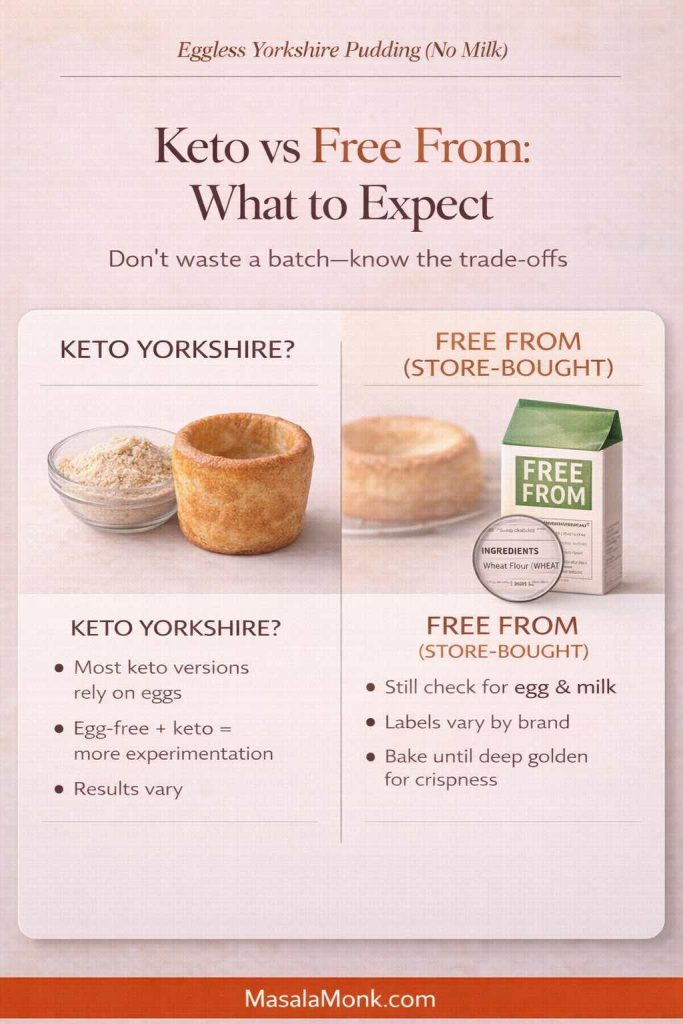
On the other hand, “free from Yorkshire puddings” often refers to store-bought options that avoid specific allergens. If you’re baking from scratch, you get more control and usually better texture.

Also Read: Keto pancakes that actually taste like pancakes


Make-ahead eggless Yorkshire puddings: batter, storage, and re-crisping

If you’re cooking for a holiday, a roast, or a crowd, make-ahead matters.

Make-ahead and re-crisp infographic for eggless Yorkshire pudding (no milk) with three steps: rest batter 30–60 minutes (or chill), bake ahead best same day, and re-crisp in a hot oven for 3–6 minutes while avoiding the microwave; MasalaMonk.com footer.
Holiday-friendly plan: Rest the eggless no-milk batter (30–60 minutes, or chill it), bake the Yorkshires earlier in the day, then re-crisp in a hot oven for 3–6 minutes right before serving. Skipping the microwave keeps the shell crisp instead of turning it soft.

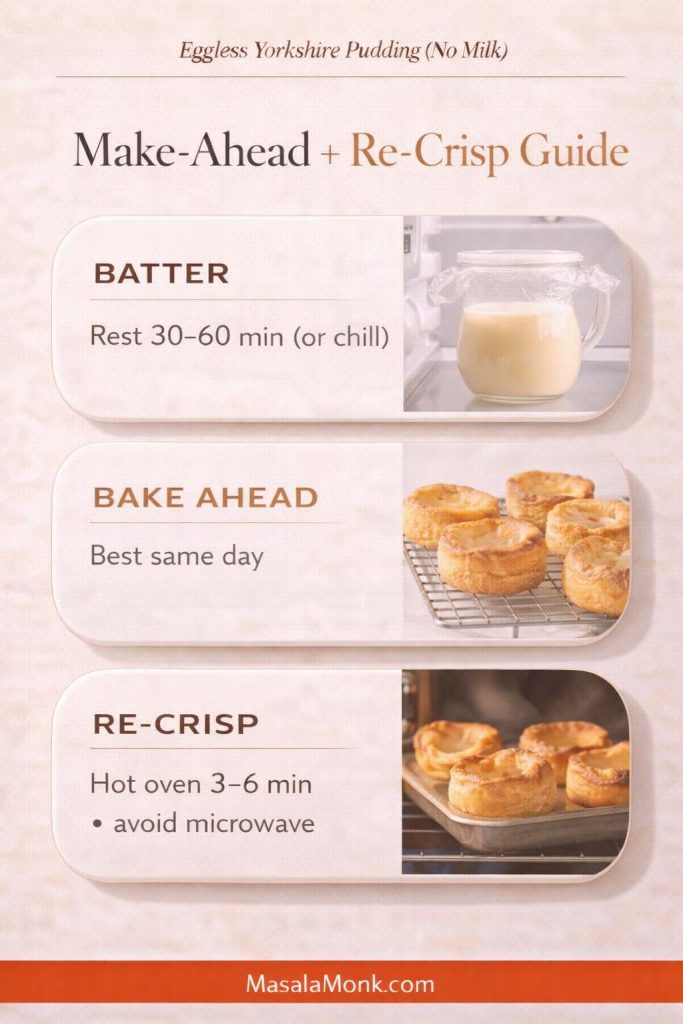
Can you rest batter longer?

Yes. In fact, resting longer often improves consistency. Refrigerating batter for several hours can work too, although you’ll want to bring it closer to room temperature before pouring so it doesn’t chill the oil on contact.

Can you bake ahead?

You can, but they’re best fresh. Still, you can bake them earlier in the day and reheat in a hot oven to revive crispness. Keep them spread out rather than stacked so steam doesn’t soften them.

How to reheat

A hot oven for a few minutes usually brings back the shell. Avoid microwaving if you can; it tends to soften the structure.

Also Read: Béchamel Sauce for Lasagna: Classic, Vegan & Ricotta Sauce Recipe


Ready made Yorkshire pudding, frozen Yorkshires, and premade options

Sometimes you don’t want a project. Maybe you’re building a meal fast, or maybe you want a backup plan.

Ready made yorkshire pudding and frozen yorkshire pudding options exist in many places. In the UK, brands like Aunt Bessie’s are widely recognized, and supermarkets like Marks and Spencer, Sainsbury’s, Asda, and Ocado often carry variations—sometimes including giant yorkshire pudding trays or mini yorkshire puddings frozen. In the US, stores such as Whole Foods Market or Publix may stock British-style items seasonally or through specialty ranges, depending on location and time of year.

Those premade options can be handy, especially for a holiday table. Even so, if you’re after a true eggless yorkshire pudding, label-reading matters because many premade products still contain egg and milk.

Pinterest-style graphic for eggless Yorkshire pudding (no milk) showing a frozen Yorkshire puddings pack and an ingredient label card highlighting “EGG” and “MILK (WHEY),” with text advising to check labels for egg, milk, and whey; MasalaMonk.com in the footer.
Buying frozen Yorkshires as a shortcut? Check the label first. Many ready-made Yorkshire puddings still contain egg, milk, or whey—even when they look “simple.” If you need truly egg-free or dairy-free, scan the ingredients before you buy, or bake this no-milk eggless version so you control what’s inside.

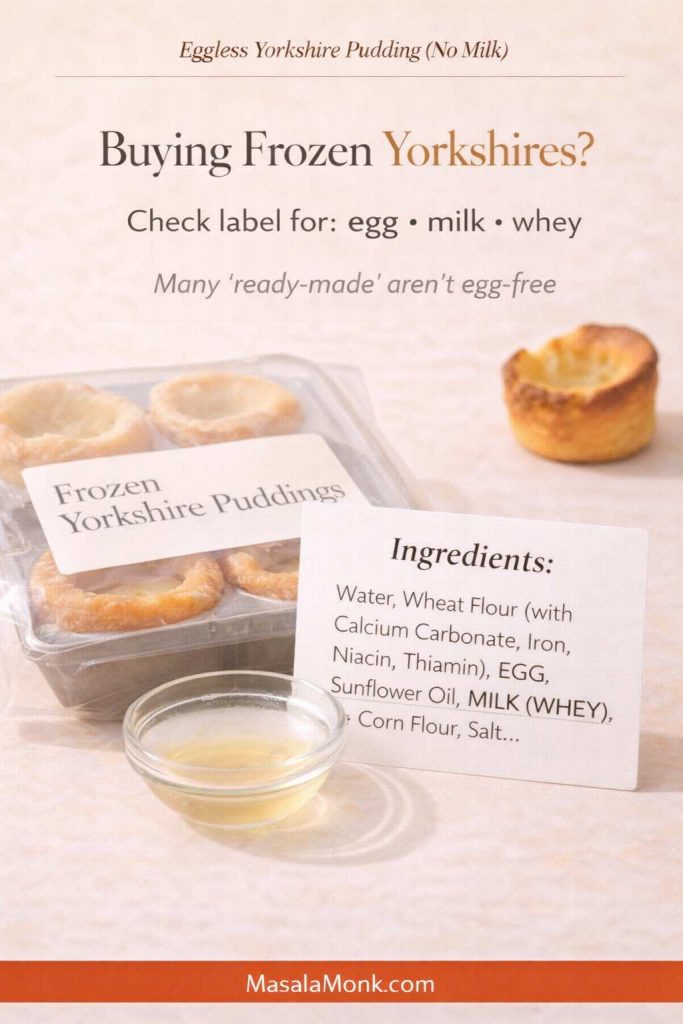
If you do buy frozen puddings, crisp them well in a hot oven. Most of the disappointment people feel with store-bought yorkshires comes from under-baking and pale reheating.

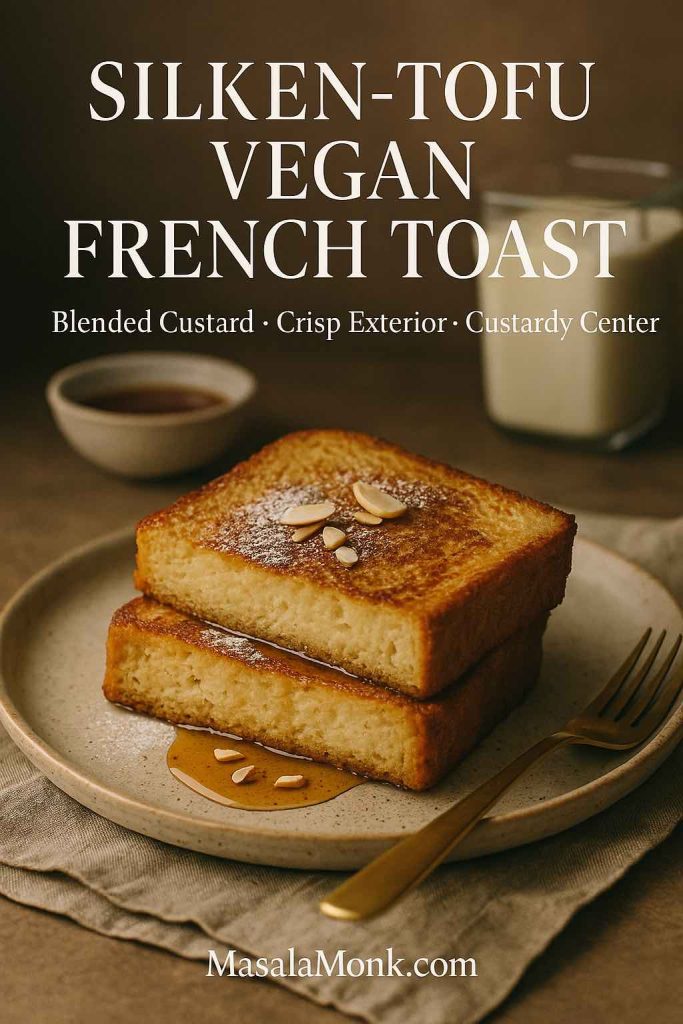
Also Read: Vegan French Toast: 6 Easy Recipes (Pan, Air Fryer, GF & High-Protein)


Serving ideas that make these feel like a full meal

Yorkshire puddings love saucy foods. That’s true whether you’re doing a classic roast, a vegetarian dinner, or a plant-based spread.

Two of my favorite pairings for a dairy free yorkshire pudding dinner are:

If you want an external gravy reference that fits a traditional roast dinner mood, these are reliable:

Drinks that go beautifully with eggless Yorkshire puddings

Yorkshires are often served at dinner, yet they also work at brunch, as a snack board, or as part of a cozy winter spread. Drinks can set the mood in a way that feels effortless.

For a warm pairing, try:

If you’re hosting adults and want a “holiday table” drink, you can also lean into cocktails:


A slightly more advanced variation: extra lift with aquafaba

If you’ve baked the base version and want taller crowns, aquafaba can help. It’s the liquid from canned chickpeas, and it behaves surprisingly well in egg-free baking when paired with heat and a thin batter.

Infographic for eggless Yorkshire pudding (no milk) titled “Extra Lift: Add Aquafaba,” showing bowls of chickpeas, aquafaba liquid, and lightly whipped aquafaba with instructions “3 tbsp aquafaba • whisk lightly • fold in,” plus MasalaMonk.com in the footer.
Optional level-up for taller crowns: aquafaba (the liquid from canned chickpeas) can add extra lift to eggless Yorkshire pudding without milk. Whisk a small amount until lightly foamy, fold it into the rested batter, then bake exactly the same way—hot oil, quick pour, and no opening the oven early.

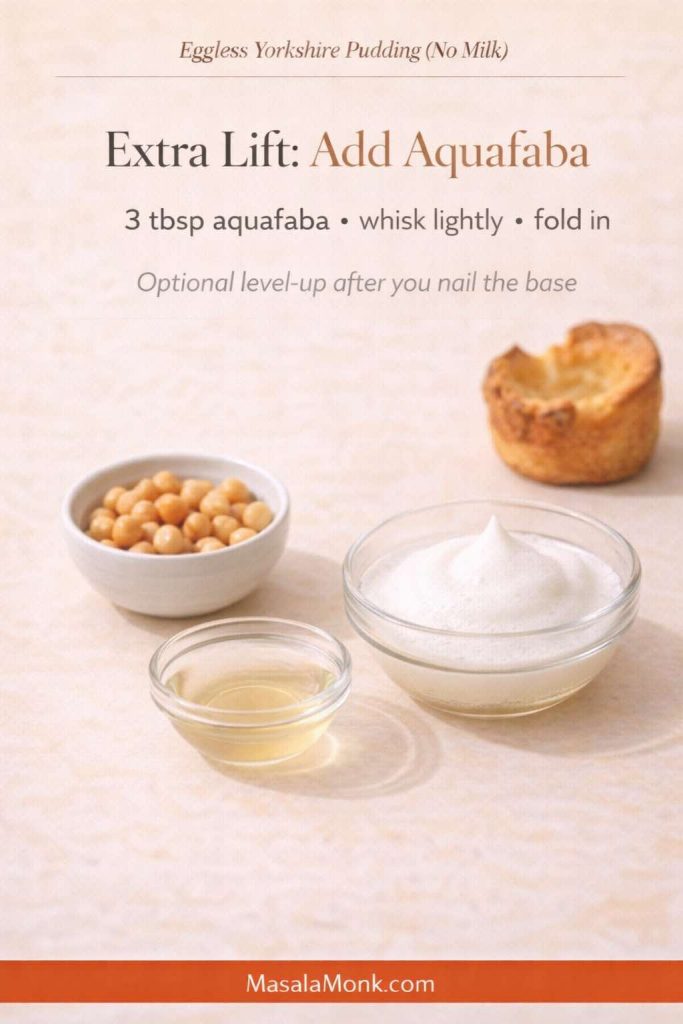
A detailed approach that many cooks follow is here: an aquafaba-based vegan Yorkshire pudding method for extra lift.

You don’t need aquafaba to succeed, though. Think of it as the “level up” variation once you’ve nailed the foundation.

Also Read: How to Cook Tortellini (Fresh, Frozen, Dried) + Easy Dinner Ideas


A gentle closing note (because this recipe is worth repeating)

Eggless yorkshire pudding can feel like a contradiction the first time you hear it. Nonetheless, once you understand what really drives the rise—hot fat, a thin rested batter, and steady oven heat—it stops feeling mysterious and starts feeling almost inevitable.

Bake a batch on a regular day first, when you’re not under pressure. Then, once you’ve seen them lift, you can confidently scale up for holidays, turn them into miniature yorkshire puddings for party food, bake a giant yorkshire pudding tray for a centerpiece dinner, or keep the batter ready for a quick comfort meal that doesn’t rely on eggs or dairy at all.

And if you’re experimenting, keep the method steady while you change one variable at a time. That way, every batch teaches you something useful—plus, you still get Yorkshire puddings at the end, which is rarely a bad outcome.

Also Read: 19 Essential Kitchen Tools That Make Cooking Easier

FAQs about No-Milk Eggless Yorkshire pudding

1) Can I make eggless Yorkshire pudding with no milk and still get a good rise?

Yes. Eggless Yorkshire pudding (no milk) rises when three things line up: a thin batter, very hot fat in the tin, and a fully preheated oven. When those are right, the batter lifts up the sides and sets into a crisp shell with a tender center.

2) What’s the difference between “dairy free Yorkshire pudding” and “lactose free Yorkshire pudding”?

Dairy-free means no dairy ingredients at all (no milk, no butter, no whey). Lactose-free can still use dairy milk that has had lactose removed. In practice, lactose-free behaves like regular milk in baking, whereas dairy-free relies on plant milk and can change browning and texture.

3) Which plant milk works best for Yorkshire pudding without milk?

Unsweetened soy milk is the most reliable for structure and browning. Oat milk can be softer depending on thickness, while almond milk usually tastes lighter but may rise a bit less. Whichever you choose, use unsweetened milk and keep the batter pourable.

4) Can I make eggless Yorkshire pudding with milk if I’m only avoiding eggs?

Absolutely. Use the same method, keep the batter thin, and swap the plant milk for regular milk. The heat and timing stay the same, so you still get crisp edges and a hollow center.

5) Why did my Yorkshire pudding without egg turn out flat?

Most flat egg-free Yorkshires come from one issue: the fat wasn’t hot enough when the batter went in. Another common cause is batter that’s too thick to climb. Finally, opening the oven too early can collapse the rise before the shell sets.

6) Why are my milk free Yorkshire puddings soggy?

Sogginess usually means they didn’t bake long enough to set a firm shell, or they steamed on a plate instead of cooling briefly on a rack. Also, overfilling the wells traps moisture and prevents crisp edges.

7) How long should I rest the batter for no egg Yorkshire pudding?

Rest at least 10 minutes. For steadier results, rest 30–60 minutes. Resting hydrates the flour and helps the batter expand more smoothly when it hits hot oil.

8) What pan is best for eggless Yorkshire puddings: muffin tin, popover pan, or Yorkshire pudding tin?

A metal muffin tin or popover pan gives the most consistent rise because it heats fast and creates strong oven spring. A 6 hole Yorkshire pudding tin makes larger puddings, though it may need extra baking time. Silicone trays are convenient, yet they often brown less and rise less because they don’t transfer heat as aggressively.

9) Can I use a cast iron Yorkshire pudding pan for a giant Yorkshire?

Yes. Cast iron holds heat extremely well, so it’s ideal for a giant Yorkshire pudding or an extra large Yorkshire pudding that you slice into wedges. Preheat the skillet with oil until shimmering hot, then pour the batter and bake until deeply golden.

10) What’s the best oil for Yorkshire puddings if I’m not using beef drippings?

Use a neutral high-heat oil such as sunflower, rapeseed/canola, or vegetable oil. The key is getting it hot enough before adding batter. For traditional flavor, beef dripping works, yet it won’t be suitable for vegan or plant based Yorkshire pudding.

11) Can I make Yorkshire pudding in beef dripping with an eggless batter?

Yes, the cooking method stays the same. The batter can be egg-free while the fat is beef dripping. Just remember it won’t be vegan or vegetarian.

12) Can I cook Yorkshire pudding in an air fryer?

You can, provided you use a metal tin that fits and you preheat both the air fryer and the tin well. Because air fryers vary, timing will differ; therefore, focus on deep browning for crispness rather than stopping as soon as they look set.

13) Is there a reliable gluten free vegan Yorkshire pudding option?

There are workable versions, but they’re more sensitive because gluten-free flour blends behave differently. A thinner batter, very hot oil, and a longer bake to dry the shell are especially important for gluten free vegan Yorkshire puddings.

14) How do I make mini Yorkshire puddings for party food?

Use the same batter, then fill each well slightly less than usual so they bake faster and stay crisp. Miniature Yorkshire puddings are perfect for fillings like gravy, mushrooms, or saucy vegetables.

15) What are “Yorkshire pudding pies” and “stuffed Yorkshire pudding” meals?

Yorkshire pudding pies usually mean a large Yorkshire baked in a tray or skillet and served with a generous filling, almost like a crust. Stuffed Yorkshire pudding is the same idea in individual form: bake larger puddings, then fill them with roast-style sides or thick, spoonable sauces.

16) Can I buy vegan Yorkshire pudding or pre made Yorkshire puddings instead?

In some places you’ll find ready made Yorkshire pudding, frozen Yorkshires, or pre made Yorkshire puddings. However, many contain egg or milk, so check ingredients carefully if you need egg free or dairy free.

17) How do I reheat eggless Yorkshire puddings so they stay crisp?

Reheat in a hot oven until the edges feel dry and crisp again. Avoid microwaving because it softens the shell. For best texture, reheat them spaced out so steam can escape.

18) How many Yorkshire puddings does this recipe make, and can I scale it?

A standard batch typically makes about 12 in a muffin tin of eggless yorkshire pudding, depending on how full you pour. You can scale up easily; nonetheless, bake in batches so the tin and oil stay properly hot for each round.

19) What’s the simplest “perfect eggless Yorkshire pudding mix” approach for beginners?

Keep it basic: self-raising flour, baking powder, salt, plant milk, warm water. Then focus on the method—rest the batter, heat the oil until shimmering, pour quickly, and bake without opening the oven early.

20) Can I make Yorkshire pudding for two people without wasting batter?

Yes. Make a smaller batch by halving the ingredients, or bake a full batch and reheat extras later. Even when scaled down, the method remains identical: thin batter, hot fat, and steady oven heat.

Posted on 13 Comments

Vegan French Toast: 6 Easy Recipes (Pan, Air Fryer, GF & High-Protein)

Hand dusting powdered sugar over golden vegan French toast on a cooling rack; cover for 6 recipe variations including air fryer, gluten-free, and high-protein. How to make Vegan French Toast Recipes Post.

If you’ve been craving vegan french toast (Dairy and Egg Free) that delivers diner-level crisp edges and a plush, custardy center—without eggs or dairy—you’re exactly where you need to be. This guide starts with a reliable base batter and then branches into five more variations that cover air fryer convenience, freezer-friendly sticks, gluten-free tweaks, chickpea-powered protein, and a beautifully silky tofu custard. Along the way, you’ll pick up small adjustments that transform “pretty good” slices into the ones everybody fights over. Moreover, you’ll find helpful links to deepen your understanding—whether you want to make your own almond milk, understand browning, or choose better gluten-free bread.

Before we cook, a quick mindset: french toast isn’t only a recipe; it’s a tiny set of decisions—bread, batter thickness, soak time, and heat. Tweak those four, and breakfast turns into brunch. Consequently, this page is organized to help you see exactly which lever to pull for your situation, so you can enjoy a stack that’s crisp outside, custardy inside, and absolutely worth repeating.


Core Vegan French Toast Recipe (Pan Method)

A classic slice needs a custard that clings. Here, eggs are replaced with a plant-milk base and a spoon of starch, which acts as a gentle thickener. Once the dipped bread hits the pan, that thin coating sets into a delicate shell while the interior remains soft. As a result, you get structure and tenderness without scrambling a single egg.

Ingredients (serves 2)

  • 1 cup unsweetened oat or almond milk
  • 1 Tbsp cornstarch (or 1½ Tbsp arrowroot)
  • 1½ Tbsp sugar or maple syrup
  • 1 tsp vanilla extract
  • ½ tsp ground cinnamon
  • Pinch of fine salt
  • 4 slices day-old thick bread (vegan)
  • 1 tsp neutral oil + 1 tsp vegan butter
Crisp vegan french toast in a pan with berries, brushed steel knife and linen napkin in a classy, moody kitchen setting.
Pan-seared vegan french toast with maple and berries. A quick custard, a steady medium heat, and a minute on a rack—that’s the formula.

Method for Dairy and Egg Free French Toast

First, whisk the cornstarch with a splash of plant milk until lump-free. Then add the remaining milk, sugar, vanilla, cinnamon, and salt; whisk again until the mixture looks smooth and lightly thickened. Meanwhile, set a nonstick pan or griddle over medium and add the oil plus vegan butter; let the fats mingle and shimmer. Next, dip each slice for 10–20 seconds per side (or 30–60 seconds if you’re using thick-cut bread), let the excess drip, and lay it into the hot pan. Cook 2–3 minutes per side for regular slices or 3–4 minutes for thick ones, turning once, until each face turns deep golden and the edges feel crisp. Finally, transfer the slices to a wire rack for a minute so steam escapes and the underside doesn’t soften.

Why this works

Put simply, starch helps keep the recipe egg free and delivers the grip that eggs usually provide. It gelatinizes as it heats, which helps the custard hug the bread instead of sliding off. At the same time, a little sugar encourages browning, while vanilla and cinnamon do the aromatic heavy lifting. Importantly, the rack rest is not negotiable; by elevating the slice even briefly, you preserve that fragile crispness you just created.

Browning, briefly

Oat or soy milk often brown more readily than very lean almond milk because they typically carry more natural sugars and a touch more protein—two participants in the Maillard reaction (the chemistry that gives you that rich, toasty flavor). However, if almond milk is your favorite, you can absolutely get great color: keep the batter’s small dose of sugar, preheat thoroughly, and avoid crowding the pan. Prefer to control ingredients from the start? Try making your own with this straightforward tutorial for homemade almond milk (clean flavor, short ingredient list, and pleasantly affordable).


Vegan French Toast — Ingredients & Ratios

For consistent results, keep this pocket rule close: per 4 standard slices, use 1 cup plant milk + 1 Tbsp starch. If you’re cooking for a crowd, double everything; if your bread is especially thick, extend the soak rather than thinning the batter. Conversely, if your loaf is very fresh and soft, lightly pre-toast the slices for a sturdier crumb that holds its shape. Moreover, remember that sweetness in the bread itself counts; cinnamon-raisin and similar loaves brown faster and need a touch lower heat.

Also Read: Easy Homemade Oats Milk with just One Ingredient- Non Slimy, at last


Vegan French Toast — Step-by-Step & Browning Tips

To avoid sogginess, let the custard cling and then drip cleanly; don’t send it into the pan dripping rivers of batter. Next, keep the heat at medium—hot enough to brown, gentle enough to set the interior. In addition, rotate slices if your pan has hot spots, and, if needed, nudge the heat down for sugar-rich breads so the exterior doesn’t darken before the center firms. Curious about the science behind that gorgeous color? A friendly primer on the Maillard reaction shows why proteins plus sugars under heat equal deep flavor and golden edges.

As a tiny flourish, dust one face of the dipped slice with a whisper-thin veil of cornstarch just before it hits the pan, then cook that side first. Consequently, you’ll get a glassier, extra-crisp crust without altering the interior at all.


How to make Vegan French Toast in Air Fryer

Some mornings, hands-off wins. The air fryer delivers consistent browning, less stovetop babysitting, and easy batching.

Two slices of vegan french toast from the air fryer on a wire rack over a tray, maple drizzle and linen.
The air fryer takes over while you pour coffee—375°F, a mid-cook flip, and a brief rack rest for that diner-style crunch.

Whole slices

Preheat to 190°C / 375°F and lightly coat the basket. Meanwhile, dip and drain the slices, then lay them in a single layer—no touching corners. Cook 6–8 minutes total, flipping at 4 minutes. Because space equals crispness, work in batches and resist stacking. To keep the first batch snappy, set finished slices on a rack instead of a plate. For a helpful benchmark that lives in the same temperature neighborhood (even though it uses sticks), this air-fryer range for french toast sticks is a useful reference you can adapt to whole slices.

If your air fryer runs hot, reduce the temperature by 10–15 degrees and add a minute to the total time; if it runs cool, go the other way. Furthermore, if the underside looks pale after flipping, mist lightly with oil and continue—little adjustments like that make a visible difference to this Egg and Dairy Free French Toast Recipe.

Also Read: 5 Delicious High-Protein Vegan Meal Prep Ideas Using an Air Fryer


Vegan French Toast Sticks (Air Fryer)

These are a guaranteed hit: easy to hold, perfect for dunking, and surprisingly freezer-friendly.

How to

After dipping, slice each piece into 3–4 sticks. Next, for a snack-shop crunch, roll the wet sides in fine panko or lightly crushed cornflakes. Subsequently, arrange in a single layer and air-fry 7–9 minutes, shaking or flipping at 4 minutes. Finally, rest the sticks for 1 minute; the coating sets as it cools, so patience pays off.

Air-fried vegan french toast sticks with light cornflake crunch cooling on a tray, tongs and linen beside a maple ramekin.
Cut, coat, air-fry. A quick dunk, a light crumb, and a brief rack rest turn simple sticks into a snack-shop classic.

Make-ahead, the simple way

Bake or air-fry a full tray, cool completely, and freeze the sticks in a single layer on a sheet pan. Then bag them. Later, reheat straight from frozen—no thawing—in a hot air fryer or toaster oven until the edges sing. If you prefer a clear workflow, this tutorial on freezing and speedy reheats lays out the steps in a way that’s easy to adapt to vegan batter.

For packed-lunch convenience, include a small lidded container of maple or a quick cinnamon-sugar dip. Notably, sticks travel better than whole slices; they keep their texture longer and fit neatly into bento-style boxes.


Gluten-Free Vegan French Toast

Gluten-free french toast can be crisp and custardy—no compromises—if you start with the right bread and thicken the custard slightly.

Choose sturdier breads

Seek out GF loaves that use psyllium husk (often with xanthan). In practice, psyllium forms a gel that mimics gluten’s elasticity, which helps slices survive a quick soak and a decisive flip. If you enjoy the “why,” this clear baking overview of psyllium’s role in structure explains how it strengthens doughs, while this sandwich loaf example shows the concept in a trustworthy recipe. Additionally, Bon Appétit’s take on psyllium for gluten-free baking is a handy companion read if you love nerdy kitchen notes.

Crisp gluten-free vegan french toast with powdered sugar on a stone counter; gluten-free loaf blurred in the background.
Structure first: choose a psyllium-supported GF loaf, dip briefly, then let the surface set before you flip for that deep golden finish.

Small tweaks, big payoff

  • Shorten the soak to 8–12 seconds per side; gluten-free crumb hydrates quickly.
  • Add ½ Tbsp extra cornstarch per cup of plant milk to the batter for a firmer set.
  • Prefer oat or soy milk when you want deeper browning on GF loaves.
  • If slices feel a touch dry after cooking, brush the edges with melted vegan butter just before serving.

Because readers often ask “who needs gluten-free, anyway?”, a concise explainer helps. This friendly overview—what is gluten—frames the basics without getting preachy. Consequently, you can give context without derailing the recipe.


High-Protein Vegan French Toast Recipe with Chickpea Flour

On days you want more protein and a gentle “eggy” vibe, chickpea flour (besan) shines.

Dairy and Egg Free Custard swap (serves 2)

  • 1 cup plant milk
  • 2 Tbsp chickpea flour
  • 1–2 Tbsp sugar or maple
  • 1 tsp vanilla, ½ tsp cinnamon, pinch salt
  • Optional ⅛ tsp baking powder for a soft lift
High-protein vegan french toast made with chickpea flour, crisp exterior and custardy interior on a ceramic plate.
Whisk plant milk with besan, cook gently, then rest on a rack: the result is crisp edges and a protein-rich, custardy bite.

Whisk until perfectly smooth and proceed exactly like the base recipe. Because chickpea flour binds so well, thick slices flip confidently and come off the pan with crisp, tidy edges. Moreover, the gram-flour aroma leans subtly savory in a way that many people associate with classic diner toast—especially if you stir in a pinch of kala namak (black salt) for that faint eggy aroma.

If you enjoy seeing how gram-flour batters behave in other cuisines, Meera Sodha’s beloved Pondicherry toast is a delightful read; although it’s a savory cousin, it demonstrates how crisp and golden a chickpea batter can be.

Also Read: 5 Facts about Besan (Chickpea Flour) and Its Place in the Keto Diet


Silken-Tofu Vegan French Toast Recipe (Blended Custard)

Prefer a silkier, richer bite? Silken tofu emulsifies into a creamy custard that sets like a dream.

Blend this (serves 2)

  • 150 g silken tofu
  • ½ cup plant milk
  • 1–2 Tbsp sugar or maple
  • 1 tsp vanilla, ½ tsp cinnamon, pinch salt
Hand dusting powdered sugar over golden vegan French toast on a cooling rack; cover for 6 variations including air fryer, gluten-free, and high-protein.
Blend silken tofu into the custard, cook low and steady, then rest briefly on a rack for a crisp edge and a velvet-soft middle.

Blend until completely smooth and glossy. Then dip briefly—this mixture clings—and cook over medium to medium-low so the surface doesn’t over-brown before the center sets. In addition, rest the slices on a rack for one minute to maintain that tender perimeter crunch.

If you’re currently avoiding soy, swing back to the starch-based master batter; it delivers excellent crispness with pantry staples and zero legumes. On the other hand, if you adore creamier centers, tofu delivers that “custard pull” when you cut the slice.

Also Read: ‘Tofu’ Instead of ‘Eggs’: 5 High Protein Plant-Based Breakfast Ideas


Flavor Add-Ins & Vegan Toppings

Once the base is set, it’s time to play. Because the batter is intentionally balanced, it welcomes many directions without seizing or splitting.

  • Vanilla-cinnamon classic: keep the base ratios as written.
  • Brown sugar + nutmeg: add 1 Tbsp brown sugar and a scant ⅛ tsp nutmeg to the custard.
  • Banana custard: mash ½ ripe banana into the mix and reduce plant milk by ¼ cup; consequently, you’ll get banana-bread vibes without going overly sweet.
  • Chocolate-hazelnut swirl: dot a dairy-free spread over hot slices so it melts into rivulets.
  • Bananas Foster topping: caramelize banana with a little vegan butter and brown sugar; optionally, finish with a splash of rum.
  • Ice-cream sundae breakfast: crown warm slices with a scoop of vegan vanilla and a ribbon of maple.

Meanwhile, if you like to prep a second dish the night before, a jar of creative chia puddings offers an effortless, dairy-free counterpoint—cool and creamy against hot and crisp. Alternatively, when you want a heartier plate, this roundup of quinoa breakfast and prep ideas delivers extra protein without crowding the skillet.


Bread Choices, Soak Times, and Crispness

Bread thickness, dryness, and sugar content steer results more than almost anything else, regardless of the custard you choose.

  • Thick, enriched loaves (vegan brioche or Texas-style sandwich bread) love a 30–60 second soak and 3–4 minutes per side. As a result, you’ll get that spoon-tender center people rave about.
  • Standard sandwich slices prefer a 10–20 second dip and 2–3 minutes per side cook—fast, tidy, weeknight-friendly.
  • Very fresh bread tends to go soft; therefore, pre-toast briefly to add backbone.
  • Cinnamon-raisin or sweeter breads brown faster; thus, reduce the heat slightly and lengthen the cook by 30–60 seconds.
  • Gluten-free loaves need shorter soaks and slightly thicker batter (see the GF section above).

Crucially, let slices rest on a wire rack rather than stacking them on a plate; otherwise, trapped steam softens the crust you carefully built. Additionally, if you want a glassier finish, dust one face of a dipped slice with cornstarch right before searing and cook that side first. Conversely, if you prefer a softer exterior, skip the dusting and cover the pan for the final minute to create a gentle steam.

Read More: Why is modern sandwich bread different from ‘real’ bread?


Plant Milks for Vegan French Toast (Oat vs Almond)

To keep Recipe of French Toast Vegan and free from dairy, choosing the milk is really important, as it shapes both flavor and color. By contrast with very lean almond milk, oat milk typically brings more carbohydrates—and sometimes a smidge more protein—which can deepen browning and enhance aroma. Nevertheless, almond milk has a wonderfully clean taste and keeps sweetness in check. Therefore, if you use almond milk, keep that small measure of sugar in the batter and preheat the pan until a drop of custard sizzles on contact. Furthermore, barista-style oat milks may be sweeter than you expect; if yours tastes notably sweet, reduce the added sugar by a teaspoon to maintain balance.

Prefer to skip additives and minimize packaging? Here’s a practical, step-by-step on almond milk from scratch you can keep on hand. Beyond that, consider experimenting with soy milk when you want extra browning; its protein content often nudges the Maillard reaction along.

Also Read: Coconut Milk Nutrition Facts & Glycemic Index Impact


Make-Ahead, Freezer-Friendly, and Crowd Service

If you’re cooking for more than two, organization beats speed. First, heat the oven to 95–120°C / 200–250°F and place a wire rack over a sheet pan. As each slice finishes, transfer it to the rack so it stays crisp while you finish the batch. Secondly, for brunch service, keep the pan at medium and rotate slices through in an even rhythm; it’s calmer than cranking the heat and hoping.

For weekly planning, the stick format is your friend. Prepare a double batch on Sunday, freeze them flat, and reheat on weekday mornings. Not only do they keep beautifully, but they also return to crisp with minimal fuss—especially in an air fryer. Meanwhile, if your family prefers whole slices, you can cool them on a rack, freeze between sheets of parchment, and reheat directly from frozen in a toaster oven.


Serving Ideas & Natural Pairings

Because the pan is already hot, you can build a small spread without extra stress. For instance, a bowl of berries and a spoonful of coconut yogurt turn a couple of slices into a complete breakfast. Alternatively, a wedge of citrus brightens heavier toppings like banana and brown sugar. Moreover, a sprinkle of toasted nuts or seeds adds welcome contrast—walnuts with maple, pistachios with rose syrup, almonds with cinnamon.

If you enjoy putting something make-ahead on the table, assemble a jar of chia pudding ideas the night before. For a higher-protein side, a warm quinoa breakfast bowl with fruit and nuts sits comfortably beside cinnamon-forward toast. And if you’re celebrating, vegan ice cream on hot slices never fails; it melts into the ridges like a sauce you didn’t have to make.


Troubleshooting on the Fly

  • Center still wet? Shorten the soak next time and add ½ Tbsp more starch per cup of plant milk. Also, give the slices another minute in a low oven on a rack; that gentle finish works wonders.
  • Edges burn before the interior sets? Lower the heat a notch and extend the cook by 30–60 seconds per side. Additionally, consider whether the bread is very sugary; if so, dial back batter sugar by a teaspoon.
  • Pale color? Preheat properly, avoid crowding (steam is the enemy of browning), and use oat or soy milk when you want deeper color. A dab more sugar in the custard can also help.
  • Slices fall apart when flipping? Reduce the soak, choose sturdier bread, and, for gluten-free, pick loaves with psyllium; the structure matters more than you think.
  • Texture too dry? Brush the edges lightly with melted vegan butter right before serving, or shorten the rack rest to 30 seconds instead of a minute.

Also Read: Vegan Keto Smoothie Kick-Start: 5 Macadamia Nut Recipes for Nutrient-Packed Mornings


The Six Vegan French Toast Recipes, At a Glance

For quick reference, here are compact summaries. Each follows the bread guidance above; timings assume medium heat on the stove or a preheated 190°C / 375°F air fryer.

1) Vegan French Toast — Pan (Base)

  • Batter: 1 cup plant milk + 1 Tbsp cornstarch + 1½ Tbsp sugar + 1 tsp vanilla + ½ tsp cinnamon + pinch salt.
  • Dip: 10–20 sec/side (30–60 sec for thick slices).
  • Cook: 2–3 min/side (3–4 for thick), then rest on a rack.

2) Vegan French Toast — Air Fryer (Whole Slices)

  • Batter: same as base.
  • Cook: 6–8 min total at 190°C / 375°F; flip at 4 min.
  • Note: leave space between slices for crispness; mist lightly with oil if needed.

3) Vegan French Toast Sticks — Air Fryer

  • Batter: base batter.
  • Form: cut each dipped slice into 3–4 sticks; optionally coat in fine panko or crushed cornflakes.
  • Cook: 7–9 min at 190°C / 375°F; shake/flip at 4 min.
  • Freeze & reheat: cool completely, freeze flat, then bag; reheat directly from frozen.

4) Gluten-Free Vegan French Toast

  • Batter: base batter + ½ Tbsp extra cornstarch per cup.
  • Bread: sturdier GF loaf with psyllium.
  • Dip: 8–12 sec/side.
  • Cook: 2–3 min/side; rest on a rack.

5) High-Protein Vegan French Toast — Chickpea Flour

  • Batter: 1 cup plant milk + 2 Tbsp chickpea flour + sugar + vanilla + cinnamon + salt (optional ⅛ tsp baking powder).
  • Dip/Cook: as base; go slightly lower/slower for thick bread.
  • Aroma tweak: a pinch of kala namak adds that classic breakfast note.

6) Silken-Tofu Vegan French Toast — Blended Custard

  • Batter: blend 150 g silken tofu + ½ cup plant milk + sugar + vanilla + cinnamon + salt until silky.
  • Dip: brief; this custard clings well.
  • Cook: medium to medium-low so it sets before over-browning.

Parting thought

Above all, remember that vegan french toast is more technique than trick. With a clingy batter, a measured soak, steady heat, and a short rest on a rack, you’ll serve stacks that taste as indulgent as anything from your favorite brunch spot—only friendlier to your pantry and your routine. Now pass the maple, pour the coffee, and enjoy the kind of breakfast that makes the whole day feel easier.

Also Read: Eggless French Toast Recipe – Crispy, Fluffy & Totally Irresistible!

FAQs

1) What is the best plant milk for vegan French toast?

Oat milk usually browns faster and tastes fuller; almond milk stays cleaner and less sweet; soy milk boosts Maillard browning thanks to protein. Choose based on flavor and color goals.

2) How do I get crisp edges and a custardy center without eggs?

Use a clingy batter (about 1 cup plant milk + 1 Tbsp starch for 4 slices), dip just long enough for the crumb to hydrate, cook over steady medium heat, then rest slices on a wire rack for one minute.

3) Why is my vegan French toast soggy?

Excess batter and overcrowding trap steam. Let slices drip cleanly, keep space in the pan, and avoid ultra-fresh bread unless lightly pre-toasted.

4) How long should I soak the bread?

Standard sandwich slices: 10–20 seconds per side. Thick vegan brioche or Texas toast: 30–60 seconds. Gluten-free slices: 8–12 seconds since the crumb hydrates quickly.

5) Which bread works best?

Day-old, sturdy loaves hold shape and deliver structure. Enriched vegan brioche gives a plush interior; plain sandwich bread is weeknight-friendly; psyllium-based gluten-free loaves flip reliably.

6) Can I make gluten-free vegan French toast?

Absolutely. Slightly thicken the batter (+½ Tbsp starch per cup of milk), shorten the soak, and choose a GF loaf with psyllium for elasticity and resilience.

7) What’s the ideal pan temperature?

Medium. Too hot scorches edges before the center sets; too low dries the slice without browning. A faint sizzle on contact signals you’re in the sweet spot.

8) How do I keep the exterior from burning on sweeter breads?

Dial the heat down a notch and extend cooking by 30–60 seconds per side. Cinnamon-raisin and similar loaves caramelize quickly, so patience pays off.

9) Can I use an air fryer for vegan French toast?

Yes. Preheat to 190°C / 375°F, arrange slices in a single layer, flip at the halfway point, and rest on a rack. For sticks, cut each slice into 3–4 pieces and cook a touch longer.

10) How can I add more protein?

Swap the starch for 2 Tbsp chickpea flour (besan) per cup of milk, or blend silken tofu into the custard. Optionally add a pinch of kala namak for a classic breakfast aroma.

11) What if my slices tear when flipping?

Reduce soak time, pick sturdier bread, and slide a thin spatula under the crust side first. For gluten-free, the psyllium crumb matters more than thickness alone.

12) How do I boost browning without over-sweetening?

Maintain a small amount of sugar in the batter, preheat thoroughly, and prefer oat or soy milk. Alternatively, dust one dipped face very lightly with cornstarch and cook that side first.

13) Can I meal-prep or freeze vegan French toast?

Definitely. Air-fry or bake sticks, cool completely, freeze flat, then bag. Reheat from frozen in an air fryer or toaster oven until crisp at the edges.

14) What toppings match vegan French toast?

Fresh berries, citrus wedges, toasted nuts, coconut yogurt, or a drizzle of maple keep balance; dairy-free chocolate-hazelnut spread or quick caramelized banana leans indulgent.

15) How do I adjust sweetness across milks and breads?

Taste your milk first—barista-style oat can be sweeter—then trim added sugar by 1 teaspoon if needed. Conversely, lean almond milk benefits from keeping the full measure for flavor and color.

16) What’s the quick ratio I should memorize?

Per 4 slices: 1 cup plant milk + 1 Tbsp starch + 1½ Tbsp sweetener + 1 tsp vanilla + ½ tsp cinnamon + pinch salt. Dip, sear over medium, then rack-rest to finish.

Posted on 1 Comment

Milk Allergy Symptoms: Babies (CMPA), Adults & Tests

Milk allergy symptoms explained for babies (CMPA) and adults, with clear headline, simple icons, and MasalaMonk.com in the footer.

Milk allergy—often called cow’s milk protein allergy (CMPA)—happens when the immune system reacts to milk proteins (mainly casein and whey). That reaction or Milk Allergy Symptoms can show up on the skin, in the gut, in the airways, or—when severe—across the whole body. By contrast, lactose intolerance is trouble digesting the milk sugar (lactose) and is uncomfortable but not dangerous. If you want clinician-grade context as you read, the EAACI guideline on IgE-mediated food allergy covers allergy mechanisms and care, and NIDDK’s lactose intolerance pages explain why intolerance feels so different.

Quick note: This guide is educational and not a substitute for medical advice. If you suspect a milk allergy—especially in an infant—please speak to your clinician.


What “Milk Allergy Symptoms” Can Look Like

Because milk allergy is an immune reaction, symptoms don’t look the same for everyone. Timing helps: some symptoms appear quickly (often within minutes to two hours) and are typically IgE-mediated; others are delayed (hours to a couple of days) and tend to be gut-focused or eczema-like. Recognizing both patterns explains why one child may get hives right away while another develops slow-burn tummy issues later.

Faster (often IgE-type) symptoms

  • Itchy hives (wheals), flushing, or rapidly spreading rash
  • Swelling of lips, eyelids, face, or tongue
  • Vomiting shortly after milk exposure
  • Cough, wheeze, chest tightness, voice change
  • Dizziness or fainting from a drop in blood pressure (anaphylaxis)

Slower (often non-IgE) symptoms

  • Eczema flares that are stubborn despite good skin care
  • Ongoing gastrointestinal issues: abdominal pain, diarrhea, excessive gas
  • In infants: mucus or blood in stools, distress with feeds, reflux-like irritability
  • Feeding difficulties or poor weight gain in persistent cases

Emergency signs—act now: trouble breathing, throat tightness, repeated vomiting, sudden drowsiness/fainting, or widespread hives with breathing symptoms. Use epinephrine if prescribed and get urgent care. The latest Anaphylaxis Practice Parameter is crystal clear: epinephrine is first-line and should not be delayed.


CMPA Symptoms in Newborns & Infants (What Parents Actually Notice)

Milk allergy commonly presents in the first year of life. Not every fussy baby has CMPA, of course, but clinicians look for patterns across skin, gut, and feeding.

Skin

  • Facial rash on the cheeks or scattered body rashes that worsen around feeds
  • Eczema that’s difficult to control despite moisturizers and steroid creams

Gut

  • Frequent regurgitation or vomiting; back-arching or discomfort during feeds
  • Stools with mucus or streaks of blood in some non-IgE presentations
  • Diarrhea, cramping, significant gas; occasionally constipation

Feeding and Growth

  • Irritability during or after feeds; pushing the bottle/breast away
  • Poor weight gain when symptoms persist over time
  • Symptoms from tiny exposures via cross-contact in more sensitive infants

If you’re navigating formula or breastfeeding decisions, the World Allergy Organization’s DRACMA updates are the most practical, current references on nutrition: WAO DRACMA—Nutritional management of CMA. In short: extensively hydrolyzed formula (eHF) is typically first-line; amino-acid formula (AAF) is considered if symptoms persist or are severe; in some settings, hydrolyzed rice formulas can be options. Breastfeeding can continue, but in select cases your clinician may suggest a short, guided trial of maternal dairy elimination.

Important reminder before changes: Infant feeding is personal and should be supervised. Please talk to your pediatrician/allergist before switching formula or altering a breastfeeding diet.

For parents also dealing with skin flares, you might find our gentle, practical read on Milk and Eczema helpful—it explains how allergy (protein) and intolerance (lactose) affect skin differently and what actually helps.


Milk Allergy Symptoms in Adults

Adults can absolutely have milk allergy (even though many adult “dairy issues” turn out to be lactose intolerance). Adult allergy symptoms often mirror pediatric ones:

  • Skin: hives, flushing, swelling
  • Gut: cramping, nausea, vomiting, diarrhea
  • Respiratory: coughing, wheeze, throat tightness
  • Systemic: dizziness or fainting in severe reactions (anaphylaxis)

Because the overlap with intolerance confuses things, it helps to separate the two. If your symptoms are mainly gas, bloating, and diarrhea—especially 30 to 120 minutes after dairy—and you don’t get hives or breathing issues, lactose intolerance is more likely. For a clear, patient-friendly explainer, see NIDDK: symptoms & causes and NIDDK: diagnosis & tests.

If you’re testing the waters with dairy alternatives, our practical round-ups are handy: Easy Homemade Oat Milk, Dairy-Free Chocolate Syrup, and Chia Puddings (Dairy-Free).


Milk Allergy vs Lactose Intolerance (Plain-English, Side-by-Side)

Allergy = immune reaction to proteins.
Intolerance = enzyme problem with lactose sugar.
One can be dangerous; the other is uncomfortable.

FeatureMilk Allergy (CMA/CMPA)Lactose Intolerance
What’s reacting?Immune system to proteins (casein/whey)Low lactase enzyme → can’t digest lactose
TimingMinutes–2 hours (IgE) or delayed (non-IgE)30 minutes–several hours after lactose
Typical symptomsHives, swelling, vomiting, cough/wheeze; anaphylaxis possible; delayed eczema/GIGas, bloating, cramps, diarrhea
ConfirmationHistory + tests; sometimes oral food challengeBreath tests (hydrogen/methane), diet trial
Is lactose-free milk safe?No (proteins still present)Often yes

For clinical background while you compare, the EAACI food-allergy guideline and NIDDK’s lactose pages are reliable.

If you prefer a lifestyle-focused read on cutting dairy, we have a practical overview: The Health Benefits of Going Dairy-Free.


How Doctors Actually Diagnose a Milk Allergy

Heads up before we dig into tests: Only a healthcare professional can diagnose a milk allergy. Tests help, but context is everything. The safest way to confirm—when needed—is a supervised oral food challenge.

Step 1: History + examination
A clinician maps symptoms to timing, amount eaten, and previous reactions. Recognizing immediate versus delayed patterns helps decide which tests to run and how to interpret them. The EAACI guideline walks through this approach.

Step 2: Allergy tests (supportive—not yes/no by themselves)

  • Skin-prick testing (SPT) to milk and/or milk protein components
  • Blood tests for specific IgE, e.g., to whole milk, casein, or whey proteins

These results must be interpreted alongside the story. High numbers don’t automatically mean “more allergic,” and low numbers don’t always mean “safe.”

Step 3: Oral Food Challenge (OFC) when needed
A carefully planned OFC in a clinic confirms allergy or tolerance; it’s also used to check whether a child can handle baked milk. This is the gold standardnever try challenges at home. For protocols and safety notes, see AAAAI: Conducting an Oral Food Challenge (2020 update).

What about “at-home allergy tests”?
Kits (like IgG panels or hair analysis) are not validated to diagnose food allergy and can mislead decisions. If you’re unsure, it’s safer to speak with an allergist and rely on validated methods.

Meanwhile, for lactose intolerance
If the story points to intolerance, clinicians may use hydrogen/methane breath tests or structured diet trials. These diagnose intolerance, not allergy. Here’s what to expect: NIDDK: Diagnosis of Lactose Intolerance.


The “Baked Milk” Pathway (Why It Matters—and Why You Shouldn’t DIY)

Some children with IgE-mediated milk allergy can tolerate extensively heated (baked) milk in foods like muffins or biscuits. Research suggests that children who safely add baked milk—as part of an allergist-guided plan—often outgrow their milk allergy sooner than those who strictly avoid all dairy. Conversely, reacting to baked milk tends to predict a more persistent allergy. A widely cited study summarizing this approach: Dietary baked milk accelerates resolution of cow’s milk allergy in children (JACI).

Plain English: There may be a bridge to tolerance for some kids, but it needs a plan and monitoring. Don’t trial baked milk without medical guidance.


Treatment & What To Do During Reactions

Safety reminder first: If breathing is difficult, the voice sounds tight, or there’s repeated vomiting or fainting—that’s an emergency. Use epinephrine (if prescribed) and seek urgent care. Antihistamines can reduce itch and hives but don’t treat airway or blood-pressure problems. The evidence-based steps are summarized in the Anaphylaxis Practice Parameter (2023).

Day-to-day management (everyone)

  • Avoid milk proteins (casein, caseinate, whey). Read labels carefully; lactose-free milk still contains milk proteins and is not safe for allergy.
  • If you or your child has had systemic reactions, carry epinephrine autoinjectors and keep a written action plan at home, school, and day-care. Practice with your device so you’re confident under stress.
  • Antihistamines can help hives/itch; they are not a substitute for epinephrine during anaphylaxis.

Infant feeding (doctor-directed)

  • For diagnosed CMPA, extensively hydrolyzed formula (eHF) is usually first-line.
  • If symptoms persist or are severe, amino-acid formula (AAF) may be needed.
  • In some regions, hydrolyzed rice formulas are considered.
  • Breastfeeding can continue; in selected cases your clinician may suggest a short, guided trial of maternal dairy elimination.
    For practical, up-to-date guidance, see WAO DRACMA—Nutritional management of CMA.

A quick note on ghee and “hidden dairy”
Highly clarified ghee contains minimal milk solids, but trace proteins may remain and can trigger symptoms in some people with true milk allergy. Discuss with your allergist before using it. For a lifestyle view on differences and tolerability, see our balanced explainer Ghee vs. Butter.


Foods To Avoid (And How To Scan a Label Fast)

Milk proteins hide in plain sight. Beyond obvious foods like milk, curd/yogurt, paneer, cheese, butter, cream, and milk-based sweets, learn to spot these ingredient words:

  • Casein, caseinate, caseinates
  • Whey, whey protein, whey solids
  • Milk solids, milk powder, nonfat dry milk
  • Lactalbumin, lactoglobulin, milk fat (fat alone isn’t the allergen, but can be a marker of dairy processing)

When eating out, ask about ingredients and preparation areas to reduce cross-contact (shared cutting boards, fryers, spatulas). If you’re re-stocking the pantry, we have several dairy-free recipes and ideas you can lean on: Vegan Stuffed Portobellos, Creamy Cauliflower Soup (vegan option), and Homemade Oat Milk.


Best Milk Alternatives (Simple and Practical)

For milk allergy, you’ll want non-dairy choices that still provide calcium and vitamin D. Popular options include oat, almond, pea, soy*, and coconut beverages. Always check labels: some brands add milk-like proteins or are processed alongside dairy.
*If soy allergy is a concern, pick non-soy options. A registered dietitian can help balance nutrients during elimination.

Looking for practical ideas? Try our Baby-friendly Apple Pancakes (no milk), or a high-protein plant-based breakfast with dairy-free swaps.


When It Might Not Be Milk Allergy

Plenty of GI-only complaints after dairy—gas, bloating, cramps, diarrhea—are more likely lactose intolerance than allergy, especially in older kids, teens, and adults. Symptoms usually start 30 minutes to a few hours after lactose and don’t include hives, swelling, or breathing issues. Management is different (lactose-reduced diets, lactase tablets, or lactose-free dairy). For a clear, trusted explainer, see NIDDK: Lactose Intolerance.

If your doctor suspects a protein-driven condition affecting the esophagus rather than classic allergy, you might hear about Eosinophilic Esophagitis (EoE). It’s a different condition, but milk is a common trigger; our pragmatic primer EoE: Diet & Treatment Strategies explains the elimination-diet approach in plain English.


A Quick Word on Evidence (For Readers Who Like Receipts)


The Bottom Line

  • Milk allergy symptoms can involve skin (hives, swelling, eczema flares), gut (vomiting, diarrhea, mucus/blood in stools in infants), breathing (cough, wheeze, throat tightness), or the whole body (anaphylaxis). Infants and newborns (CMPA) often show rashes, feed-related distress, and specific stool changes; adults can be affected too.
  • Tests help, but a supervised Oral Food Challenge is what confirms allergy or tolerance (including baked milk).
  • For emergencies, epinephrine is first-line—don’t delay.
  • Diet changes for babies and any baked-milk trials should always be clinician-guided.

Final reminder: This article is informational. Please work with your pediatrician/allergist for diagnosis and a safe, personalized plan.

FAQs

1) What are the most common milk allergy symptoms?

Usually, they start with skin and gut signs—think itchy hives, facial swelling, vomiting soon after dairy, tummy cramps, or diarrhea. However, because it’s an immune reaction, breathing symptoms (cough, wheeze, throat tightness) can also appear—and in rare cases, anaphylaxis. In short, symptoms can be fast (minutes to two hours) or slower (hours to days), so timing matters.

2) How do CMPA symptoms show up in newborns and infants?

First, parents often notice feeding fussiness or reflux-like irritability. Next, stools may have mucus or small streaks of blood, and rashes can flare—especially on the cheeks. Finally, if symptoms persist, poor weight gain can follow. It’s the overall pattern—skin + gut + feed issues—that raises suspicion for cow’s milk protein allergy (CMPA).

3) What does a CMPA rash on the face look like?

Typically, you’ll see red, rough, or itchy patches on the cheeks or around the mouth, sometimes spreading to the neck. Because exposure can be frequent with feeds, it may wax and wane. And importantly, if other milk allergy symptoms (like vomiting or wheeze) cluster around feeds, the rash deserves a closer look.

4) Are milk allergy symptoms in adults different from children?

Mostly, no—the same buckets apply: skin (hives/swelling), gut (nausea, cramps, diarrhea), and breathing (cough/wheeze). However, adults more often confuse allergy with lactose intolerance. A quick mental check helps: if it’s mainly gas and bloating without hives or breathing issues, intolerance is more likely than allergy.

5) Milk allergy vs lactose intolerance—how do I tell?

Start with the trigger: allergy reacts to milk proteins (casein/whey), while intolerance struggles with lactose sugar. Then, consider severity and timing: allergy can be rapid and occasionally severe; intolerance is slower and uncomfortable. Finally, remember this rule of thumb—lactose-free milk isn’t safe for milk allergy because it still contains proteins.

6) Which milk allergy test is most reliable?

First comes history (what, how much, how fast). Then, skin-prick or blood tests for specific IgE can support the picture. But when it’s unclear—or to check tolerance (including baked milk)—a supervised oral food challenge is the gold standard. In other words, tests guide; a challenge confirms.

7) Do at-home dairy allergy tests work?

In short, not for diagnosis. Hair analyses and IgG kits can muddy the waters. While they may sound convenient, they can’t replace a proper assessment. A clinical history, targeted tests, and—if needed—an oral food challenge remain the evidence-based path.

8) What are baked milk trials, and who should try them?

Some children with IgE-mediated milk allergy can tolerate milk that’s been baked at high heat (for example, in muffins). Over time, carefully introducing baked milk—if appropriate—may speed tolerance. However, because reactions can still happen, this is a specialist-guided step, not a DIY experiment.

9) What are clear emergency signs to watch for?

If there’s trouble breathing, noisy wheeze, throat tightness, repeated vomiting, fainting, or sudden sleepiness—move fast. Use epinephrine if prescribed and seek urgent care. Antihistamines can calm hives, but they do not treat airway or blood-pressure problems.

10) Which foods to avoid with cow’s milk protein allergy?

Besides obvious dairy (milk, curd/yogurt, paneer, cheese, butter, cream), scan labels for casein/caseinate, whey, milk powder, milk solids, lactalbumin, and lactoglobulin. Then, think about cross-contact: shared fryers, grills, or scoops can transfer tiny amounts of milk protein.

11) Is ghee safe if I have a milk allergy?

Sometimes it’s tolerated, but not always. Although ghee is highly clarified, trace milk proteins may remain. Therefore, if your reactions have been significant—or if you’re unsure—it’s safer to discuss ghee use with your allergist first.

12) What about A1 vs A2 milk for allergy or intolerance?

For allergy, switching protein variants (A1/A2) does not remove milk proteins; reactions can still occur. For intolerance, some people report differences in comfort, but that’s not an allergy fix. In other words, A2 is not a treatment for milk allergy symptoms.

13) Which hypoallergenic formula is used for infants with CMPA?

Generally, the journey starts with extensively hydrolyzed formula (eHF). If symptoms persist or are severe, amino-acid formula (AAF) comes next. Meanwhile, breastfeeding can continue; in selected cases, a short, guided maternal dairy elimination may be considered. The key word is guided.

14) Can lactose-free milk help with milk allergy?

No. It helps lactose intolerance, not allergy. Lactose-free milk keeps the proteins that trigger milk allergy symptoms. For allergy, you need non-dairy alternatives and careful label reading.

15) What are practical milk allergy alternatives?

Start with fortified plant beverages such as oat, almond, pea, soy*, or coconut. Then, check for calcium and vitamin D, and watch for “may contain milk” advisories. *If soy is a concern, pick non-soy options and, when in doubt, ask a dietitian to help balance nutrients.

16) Why do CMPA stools sometimes show mucus or a little blood?

Because some non-IgE presentations inflame the lower gut, tiny streaks of blood or mucus can appear. However, context is everything: clinicians look at growth, feeding comfort, rashes, and response to elimination before calling it CMPA.

17) Are milk allergy symptoms always immediate?

Not necessarily. While many reactions are quick, others take hours or longer—especially gut-focused or eczema-type responses. That’s why keeping a brief food-and-symptom log can be helpful before your appointment.

18) When should I consider a specialist referral?

Consider it when symptoms escalate, when you’ve had breathing issues or systemic reactions, when an elimination diet hasn’t clarified things, or when you’re considering a baked-milk plan. In short, if the picture is complicated—or feels scary—bring in an allergist.

19) Can adults outgrow milk allergy?

It’s less common than in children, but it happens. Meanwhile, tolerance can also shift with time or with guided therapies. Regular re-evaluation with your clinician keeps the plan current and safe.

20) What’s the simple action plan for families?

First, learn your specific triggers and read labels like a pro. Next, keep any prescribed epinephrine close—and practice. Then, share a one-page plan with caregivers and schools. Finally, review progress every few months; kids (and their milk allergy symptoms) can change as they grow.

Posted on Leave a comment

5 Plant-Based Milk for BreastFeeding Vegan Mothers

Introduction

The Journey of Motherhood and Nutrition: Embracing Plant-Based Alternatives

As a new mother, the journey you embark upon is not only beautiful but also one laden with responsibilities, particularly in terms of nutrition. Breastfeeding, a vital phase of early motherhood, demands special attention to your diet, as it directly impacts your baby’s health and development. In today’s health-conscious world, many mothers are turning towards vegan diets, either due to ethical beliefs, health reasons, or environmental concerns. This shift has brought plant-based milks into the spotlight, especially for breastfeeding mothers who are keen on ensuring their diet is both vegan-friendly and nutritionally rich.

The intention of this guide is to delve deep into the world of plant-based milks – exploring, comparing, and understanding their nutritional profiles and how they align with the needs of breastfeeding mothers. Whether you’re a long-term vegan or newly embracing this lifestyle, this guide aims to be your companion in making informed decisions about plant-based nutrition during one of life’s most precious stages.


Why Plant-Based Milks?

Plant-based milks are not just a trend; they’re a reflection of a growing awareness about dietary choices and their impact on health and the environment. For vegan mothers, these milks offer a way to adhere to their vegan principles while still obtaining the essential nutrients needed for both themselves and their breastfeeding babies. From soy to almond, and oat to coconut, each type of plant-based milk comes with its unique nutritional profile. Understanding these differences is key to choosing the milk that best supports your and your baby’s health.


Nutritional Needs During Breastfeeding

Breastfeeding mothers have increased nutritional needs to ensure the health and development of their babies. Key nutrients of focus include:

  • Protein: Essential for the growth and repair of tissues.
  • Calcium: Vital for bone development.
  • Vitamins B12 and D: Crucial for the nervous system and bone health.
  • Iron, Zinc, and Omega-3 Fatty Acids: Important for cognitive development and overall health.

Embracing the Vegan Lifestyle: Challenges and Considerations

While a vegan diet can be rich and varied, certain nutrients commonly found in animal products might be less available in plant-based sources. This is where fortified plant-based milks come into play, potentially filling nutritional gaps. However, it’s not just about replacing cow’s milk with a plant-based alternative; it’s about understanding the unique nutritional needs of breastfeeding mothers and how different plant-based milk can meet these needs.


Navigating the World of Plant-Based Milks

In the realm of vegan breastfeeding, understanding the nuances of different plant-based milks is crucial. Let’s embark on a journey through the most popular options, dissecting their nutritional profiles and suitability for nursing mothers.

Soy Milk: The Protein Powerhouse

Nutritional Highlights:

  • Rich in protein, closely mirroring the protein content of cow’s milk.
  • Often fortified with calcium, vitamins D and B12.
  • Contains essential amino acids and phytoestrogens, which have been debated but generally considered safe.

Why It’s Great for Breastfeeding:

  • The high protein content supports tissue repair and growth, vital for both mother and baby.
  • Fortification covers key nutrients that might be lacking in a vegan diet.

Points to Consider:

  • Ensure non-GMO and organic choices to avoid potential contaminants.
  • Some may have concerns about phytoestrogens, although current research suggests they are safe.

Almond Milk: The Low-Calorie Choice

Nutritional Highlights:

  • Lower in calories and fat.
  • High in vitamin E and often fortified with calcium and vitamin D.

Best For:

  • Those looking to manage calorie intake without compromising on nutritional value.
  • Excellent source of vitamin E, beneficial for skin health.

Points to Consider:

  • Lower in protein; should be complemented with other protein sources in the diet.
  • Not suitable for those with nut allergies.

Oat Milk: The Fiber-Friendly Option

Nutritional Highlights:

  • Good source of dietary fiber and beta-glucans for heart health.
  • Often fortified with vitamins and minerals.

Best For:

  • Breastfeeding mothers needing additional fiber.
  • A creamy texture that makes it a popular choice for beverages.

Points to Consider:

  • Can be higher in carbohydrates and calories.
  • Ensure it’s gluten-free if you have gluten sensitivities.

Rice Milk: The Hypoallergenic Alternative

Nutritional Highlights:

  • Low in fat and often enriched with vitamins and minerals.
  • The most hypoallergenic of all plant-based milks.

Best For:

  • Mothers with allergies to soy, nuts, and gluten.
  • Those who prefer a lighter, naturally sweet taste.

Points to Consider:

  • Low in protein and higher in carbohydrates.
  • Some concerns over arsenic levels, especially in brown rice varieties.

Coconut Milk: The Tropical Choice

Nutritional Highlights:

  • Contains medium-chain triglycerides (MCTs) for quick energy.
  • Low in protein but can be fortified with vitamins and minerals.

Best For:

  • Those looking for a milk with a distinct flavor profile.
  • Mothers needing an energy boost due to MCTs.

Points to Consider:

  • Lower in protein and can be high in saturated fats.
  • Check for added sugars and preservatives in commercial varieties.

Making the Right Choice for You and Your Baby

When selecting the ideal plant-based milk for breastfeeding, it’s important to consider your individual dietary needs and preferences. Here are some tips to guide your choice:

  1. Understand Your Nutritional Needs: Consider what nutrients you and your baby need most. If protein is a priority, soy milk might be your best bet. For lower calories and higher vitamin E, almond milk could be the way to go.
  2. Read Labels Carefully: Look for milks that are fortified with essential nutrients like calcium, vitamin D, and B12. Be mindful of added sugars and preservatives.
  3. Consult with Healthcare Professionals: Speak with a dietitian or healthcare provider to ensure your dietary choices align with your and your baby’s nutritional needs.
  4. Listen to Your Body: Pay attention to how different milks make you feel. Gut health and personal tolerance are key to a sustainable diet.
  5. Diversify Your Intake: Don’t rely solely on one type of milk. Variety ensures a broader range of nutrients and reduces the risk of potential allergens or intolerances.

In the next section, we’ll delve into how to incorporate these milks into your daily diet and explore the role of supplementation to ensure a balanced and nutritious breastfeeding journey. Stay tuned for practical, tasty tips and recipe ideas to enhance your vegan breastfeeding experience.

Integrating Plant-Based Milks into Your Breastfeeding Diet

With a clearer understanding of the nutritional profiles and benefits of various plant-based milks, the next step is to effectively integrate these into your daily diet. This section offers practical advice on how to do just that, ensuring both taste and nutrition are optimized.

Creative and Nutritious Uses of Plant-Based Milks

Incorporating Variety: Each plant-based milk brings its unique flavor and nutritional profile. Use this to your advantage by rotating them in your diet. Here’s how:

  1. Soy Milk: Ideal for protein-rich smoothies, soy milk can also be a great base for homemade protein shakes. Add fruits, a handful of nuts, and a scoop of vegan protein powder for a nutritious postpartum snack.
  2. Almond Milk: Its light and nutty flavor makes it perfect for cereal, oatmeal, or your morning coffee. It’s also great in baking, adding a subtle nutty undertone to vegan muffins and pancakes. Homemade Almond Milk tastes absolutely delicious. It is much more nuttier and creamier than commercial milk and it will take you only 5 minutes to make it.
  3. Oat Milk: With its creamy texture, oat milk is excellent for making vegan yogurt or creamy soups. It also works well in savory sauces or as a milk substitute in mashed potatoes. You can easily make Non- Slimy Oats Milk at home with just oats and water.
  4. Rice Milk: Due to its naturally sweet taste, rice milk is a good choice for desserts or sweetened beverages. It can also be used in light, summery smoothies.
  5. Coconut Milk: Use it in curries or vegan creamy pasta dishes for a rich, tropical flavor. It’s also perfect for creating dairy-free whipped cream or ice cream. Check out the recipe of Homemade Coconut Milk here. It will take you just 5 minutes to make it at home

Balancing Your Diet with Whole Foods

While plant-based milks can be a key part of your diet, it’s essential to balance them with whole foods. Focus on a variety of fruits, vegetables, whole grains, legumes, nuts, and seeds. These foods provide a wide range of nutrients that are crucial for both you and your baby.

Importance of Supplementation

Given the potential gaps in a vegan diet, especially during breastfeeding, supplementation can be important:

  1. Vitamin B12: Since it’s primarily found in animal products, a B12 supplement is often necessary for vegan mothers.
  2. Vitamin D: If your exposure to sunlight is limited, consider a vitamin D supplement, especially in the winter months.
  3. DHA: An omega-3 fatty acid crucial for your baby’s brain development, often supplemented through algae-based products.
  4. Iron and Calcium: If your diet lacks these, a supplement might be needed, though many plant-based milks are fortified with them.

Always consult with a healthcare professional before starting any supplement regimen.

Hydration and Breastfeeding

Staying hydrated is vital for milk production. Along with plant-based milks, ensure you’re drinking plenty of water throughout the day. Herbal teas and infused water can also be good choices for keeping hydration levels up.

Recipe Ideas and Meal Planning

Incorporate plant-based milks into your meals and snacks with these ideas:

  • Breakfast: Oatmeal cooked with almond milk, topped with berries and chia seeds.
  • Lunch: Creamy tomato soup made with coconut milk, served with a side of whole grain bread.
  • Snack: A smoothie with soy milk, banana, spinach, and a scoop of peanut butter.
  • Dinner: Rice milk-based risotto with mushrooms and peas.

Meal planning can help ensure you’re getting a varied and balanced diet. Prepare in advance to make mealtimes less stressful.


Navigating Challenges and Listening to Your Body

Breastfeeding is a journey with its unique challenges and joys. As you navigate this path, listen to your body’s cues and adjust your diet accordingly. If you notice any adverse reactions to specific plant-based milks (like allergies or sensitivities), it’s important to adjust your choices and consult with a healthcare professional.

Remember, the goal is to nourish both yourself and your baby with a diet that’s balanced, diverse, and aligned with your ethical choices. In the next section, we will explore the long-term benefits of plant-based diets for both mother and child, backed by scientific research and real-life testimonies.

Stay with us as we continue to unravel the world of vegan breastfeeding, ensuring that your journey is as healthy and joyful as it can be.

Long-Term Benefits and Considerations for Vegan Breastfeeding

In this section, we delve into the long-term benefits and considerations of a vegan breastfeeding journey, exploring both the mother’s and the baby’s health, backed by scientific research and real-life experiences.

Health Benefits for Mother and Baby

  1. Nutritional Adequacy: Studies have shown that well-planned vegan diets can meet nutritional needs during breastfeeding. Plant-based diets rich in fruits, vegetables, whole grains, nuts, and seeds provide ample nutrients and antioxidants beneficial for both mother and child.
  2. Chronic Disease Prevention: Vegan diets are associated with lower risks of heart disease, hypertension, type 2 diabetes, and certain cancers. Breastfeeding mothers on a vegan diet potentially impart these health benefits to their children.
  3. Digestive Health: Plant-based diets are high in fiber, which promotes healthy digestion. This can be particularly beneficial for breastfeeding mothers, helping to regulate postpartum digestion.
  4. Weight Management: Postpartum weight loss can be effectively managed with a balanced vegan diet, as it is often lower in calories and saturated fats compared to diets with animal products.

Considerations for Sustainable Vegan Breastfeeding

  1. Diverse Diet: Ensure a variety of foods to cover all essential nutrients. Rotate through different plant-based milks and include a wide range of fruits, vegetables, whole grains, and protein sources.
  2. Monitoring Baby’s Development: Regular check-ups with a pediatrician are vital to ensure the baby is growing healthily and not showing any signs of nutritional deficiencies.
  3. Allergies and Intolerances: Monitor both the mother’s and baby’s reactions to different foods, especially when introducing new items into the diet.
  4. Emotional and Mental Health: Breastfeeding, especially on a restricted diet, can be challenging. Support from family, friends, and online communities can be invaluable.

Scientific Backing and Real-Life Stories

Research and anecdotes from vegan mothers can provide reassurance and guidance. Many mothers report successful breastfeeding experiences on a vegan diet, while scientific research often backs up the safety and efficacy of these diets for both mother and child.

  1. Case Studies: Sharing real-life stories of vegan breastfeeding mothers can be inspiring and educational. It shows practical examples of how a vegan diet can be successfully implemented during this critical phase.
  2. Latest Research: Keeping abreast of the latest scientific studies helps in staying informed about the best practices for vegan breastfeeding. This includes understanding the impact of specific nutrients and the role of supplements.

Preparing for the Transition to Solid Foods

As the baby grows, the transition to solid foods becomes the next important phase. For vegan mothers, this includes planning a balanced, plant-based diet for their child.

  1. Introducing Solids: Around six months, start introducing solid foods while continuing breastfeeding. Offer a variety of mashed or pureed fruits, vegetables, and iron-fortified cereals.
  2. Balanced Meals: Ensure the baby’s meals are nutritionally balanced, providing all the necessary vitamins and minerals for healthy growth and development.
  3. Continued Supplementation: Depending on dietary choices, certain supplements like vitamin B12 might still be necessary.

Conclusion: Embracing Vegan Breastfeeding with Confidence

Breastfeeding is an extraordinary journey that nurtures and bonds the mother and baby. For vegan mothers, it presents an opportunity to impart healthy eating habits from the earliest stages of life. By understanding the nutritional profiles of various plant-based milks, complementing them with a diverse diet, and staying informed through scientific research and real-life experiences, vegan mothers can confidently navigate this journey.

In this guide, we aimed to equip you with the knowledge and tools to make informed choices about your diet during breastfeeding. Remember, every mother’s journey is unique – listen to your body, consult with healthcare professionals, and embrace the support of the vegan community. With careful planning and consideration, vegan breastfeeding can be a fulfilling and healthful experience for both you and your baby.

Stay tuned for more insights and tips on vegan parenting, as we continue to explore and celebrate the journey of motherhood in harmony with nature and health.

10 FAQs for Plant-Based Milks and Breastfeeding

  1. Is soy milk safe for breastfeeding mothers?
  • Yes, soy milk is generally safe and beneficial for breastfeeding mothers, being high in protein and often fortified with essential nutrients. However, choose non-GMO and organic varieties to avoid potential contaminants.
  1. Can plant-based milks fully replace cow’s milk in my diet?
  • Plant-based milks can be a good substitute for cow’s milk, especially if they are fortified. However, it’s important to ensure a varied diet to cover all nutritional needs.
  1. Do I need to supplement my diet if I’m relying on plant-based milks?
  • While plant-based milks can provide many nutrients, supplements like Vitamin B12, Vitamin D, and DHA are often recommended for breastfeeding mothers on a vegan diet.
  1. Which plant-based milk is highest in calcium?
  • Fortified plant-based milks, like almond and soy milk, can be high in calcium. Check the nutrition labels for calcium content as it can vary between brands.
  1. Is almond milk good for breastfeeding mothers?
  • Almond milk can be a good option due to its low calorie content and being high in vitamin E. However, it’s low in protein, so you should get protein from other sources.
  1. How does oat milk compare nutritionally for breastfeeding?
  • Oat milk is a good source of dietary fiber and is often enriched with vitamins and minerals. It’s beneficial for those needing additional fiber in their diet.
  1. Can rice milk support my nutritional needs during breastfeeding?
  • Rice milk is low in protein and high in carbohydrates. It’s the least allergenic but should be complemented with other nutrient-rich foods.
  1. Is coconut milk beneficial for breastfeeding mothers?
  • Coconut milk is rich in medium-chain triglycerides (MCTs) but low in protein. It’s more suitable for adding variety and flavor to your diet rather than as a primary milk source.
  1. What are the best ways to incorporate plant-based milks into my diet?
  • You can use them in smoothies, cereals, baking, soups, and sauces. Rotating different types of plant-based milks can help cover a range of nutrients.
  1. Are there any plant-based milks to avoid during breastfeeding?
    • It’s generally recommended to avoid plant-based milks high in added sugars or those that are not fortified with essential nutrients like calcium, vitamin D, and B12.

Blog Tags for the Post

vegan breastfeeding, plant-based milks, soy milk, almond milk, oat milk, rice milk, coconut milk, vegan motherhood, breastfeeding nutrition, dairy-free alternatives, lactation diet, vegan supplements, breastfeeding health, infant nutrition, vegan lifestyle, postpartum diet, health and wellness, plant-based parenting, nutritional guidance, vegan recipes

Posted on Leave a comment

Unpacking the Health Perks of Drinking Soy Milk

Soy milk, derived from soybeans, has gained popularity as a plant-based alternative to cow’s milk. Packed with nutrients and unique health benefits, soy milk has become a staple in many households. In this post, we’ll dive into the health perks of drinking soy milk, exploring its nutritional profile, potential health benefits, and ways to incorporate it into your daily routine. Get ready to discover why soy milk is not just a delicious dairy alternative but also a nutritious addition to your diet! 🥛🌱💪✨

🌱 A Nutritional Powerhouse: Soy milk is known for its impressive nutritional profile. Here are some key nutrients found in soy milk:

1️⃣ Protein: Soy milk is a rich source of plant-based protein, making it an excellent option for vegans, vegetarians, and those looking to reduce their reliance on animal products. Protein is essential for various bodily functions, including muscle growth and repair. Soy milk contains all nine essential amino acids, making it a complete protein source.

2️⃣ Healthy Fats: Soy milk contains unsaturated fats, including omega-3 and omega-6 fatty acids. These fats are beneficial for heart health, reducing inflammation, and supporting brain function. The presence of these healthy fats also aids in the absorption of fat-soluble vitamins.

3️⃣ Calcium: Many brands fortify soy milk with calcium, making it a suitable alternative for individuals who are lactose intolerant or avoiding dairy. Calcium is crucial for maintaining strong bones and teeth, supporting nerve function, and promoting proper muscle contraction. Be sure to choose a calcium-fortified variety to ensure adequate intake.

4️⃣ Vitamins and Minerals: Soy milk is a good source of essential vitamins and minerals, including vitamin D, vitamin B12, phosphorus, potassium, and magnesium. These nutrients play vital roles in overall health, immune function, energy production, and maintaining healthy cellular processes.

💪 Potential Health Benefits: Drinking soy milk has been associated with several health benefits. Here are a few worth noting:

1️⃣ Heart Health: Soy milk is low in saturated fat and cholesterol-free, making it a heart-healthy choice. Consuming soy milk as part of a balanced diet has been linked to lower cholesterol levels and a reduced risk of heart disease. The presence of omega-3 fatty acids in soy milk also supports cardiovascular health.

2️⃣ Bone Health: Calcium-fortified soy milk can contribute to optimal bone health, especially in individuals who are lactose intolerant or follow a vegan or vegetarian diet. Adequate calcium intake is essential for preventing osteoporosis and maintaining bone density. The presence of vitamin D in soy milk aids in calcium absorption.

3️⃣ Hormone Balance: Soy milk contains compounds called phytoestrogens, which are plant-based estrogens. These compounds have been studied for their potential positive effects on hormone balance, particularly in women experiencing menopause symptoms. Phytoestrogens can help alleviate hot flashes and support overall hormonal health.

4️⃣ Weight Management: Soy milk is relatively low in calories compared to cow’s milk and may be beneficial for weight management. Its high protein content helps promote feelings of fullness and can assist in controlling calorie intake. Additionally, soy milk contains fiber, which aids in digestion and promotes satiety.

Incorporating Soy Milk into Your Diet: There are various ways to enjoy the health benefits of soy milk. Here are a few ideas:

1️⃣ Enjoy It on Its Own: Sip a glass of chilled soy milk as a refreshing and nutritious beverage. Opt for unsweetened or lightly sweetened varieties to keep added sugars in check. You can also experiment with different flavors like vanilla or chocolate for a delightful treat.

2️⃣ Use It in Smoothies: Blend soy milk with fruits, vegetables, and your favorite smoothie ingredients for a creamy and plant-based treat. The smooth texture of soy milk makes it an ideal base for a wide range of smoothie combinations.

3️⃣ Cereal and Oatmeal: Pour soy milk over your favorite cereal or use it to make a creamy bowl of oatmeal for a nourishing and filling breakfast. The creamy consistency of soy milk enhances the taste and texture of your morning meal.

4️⃣ Coffee and Tea: Use soy milk as a dairy alternative in your morning coffee or tea for a creamy and flavorful twist. It blends well with the rich flavors of coffee and complements the delicate notes of tea.

5️⃣ Cooking and Baking: Replace cow’s milk with soy milk in your favorite recipes. Whether you’re making pancakes, muffins, or sauces, soy milk can be a suitable substitute, providing a creamy texture and adding a subtle nutty flavor.

6️⃣ Dairy-Free Treats: Explore the world of dairy-free desserts and treats using soy milk as a key ingredient. From creamy puddings to luscious ice creams, soy milk can be the foundation of delicious and satisfying dairy alternatives.

🥛🌱💪✨ Discover the Benefits of Soy Milk: Soy milk is not just a substitute for cow’s milk—it’s a nutritional powerhouse in its own right. With its protein content, healthy fats, vitamins, and minerals, soy milk offers numerous health perks. Incorporating soy milk into your diet can support heart health, bone health, hormone balance, weight management, and overall well-being. So why not give it a try and embrace the benefits of this plant-based delight? 🥛🌱💪✨