Posted on Leave a comment

Almond Flour Cookies Recipe

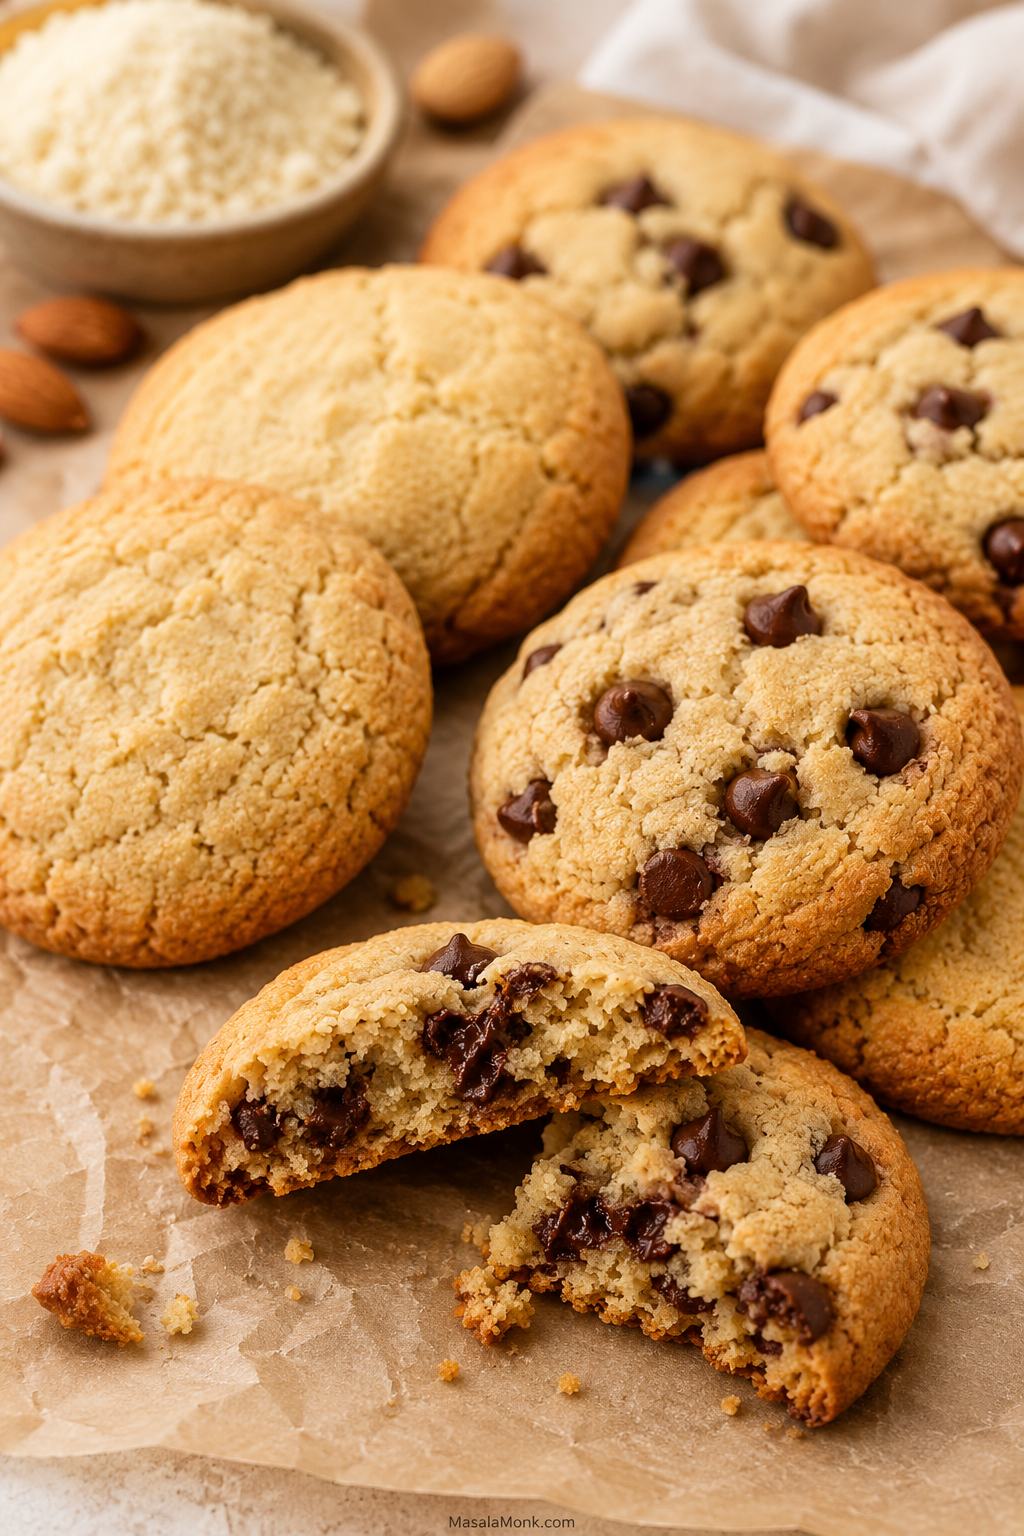
Almond flour cookies with golden edges, chocolate chips, and a soft broken center on parchment.

Good almond flour cookies should not taste like a gluten-free compromise. They should be soft in the middle, lightly golden at the edges, rich with vanilla and butter, and sturdy enough to pick up once cooled. This one-bowl almond flour cookies recipe gives you that texture without a long chill.
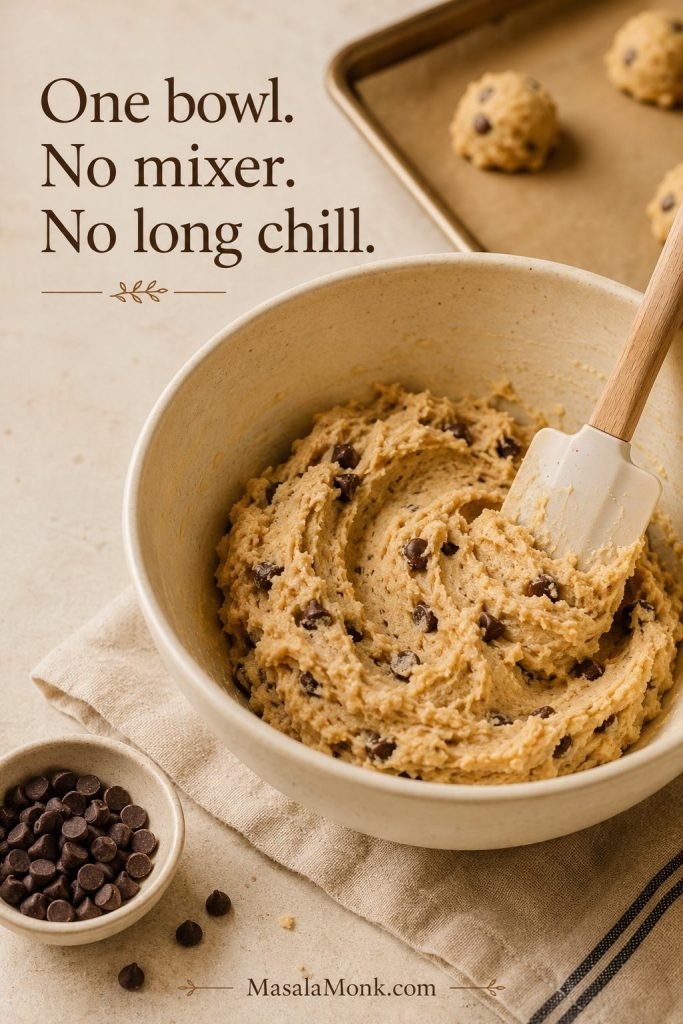
Almond flour cookie dough being mixed in one bowl with a spatula and chocolate chips nearby.
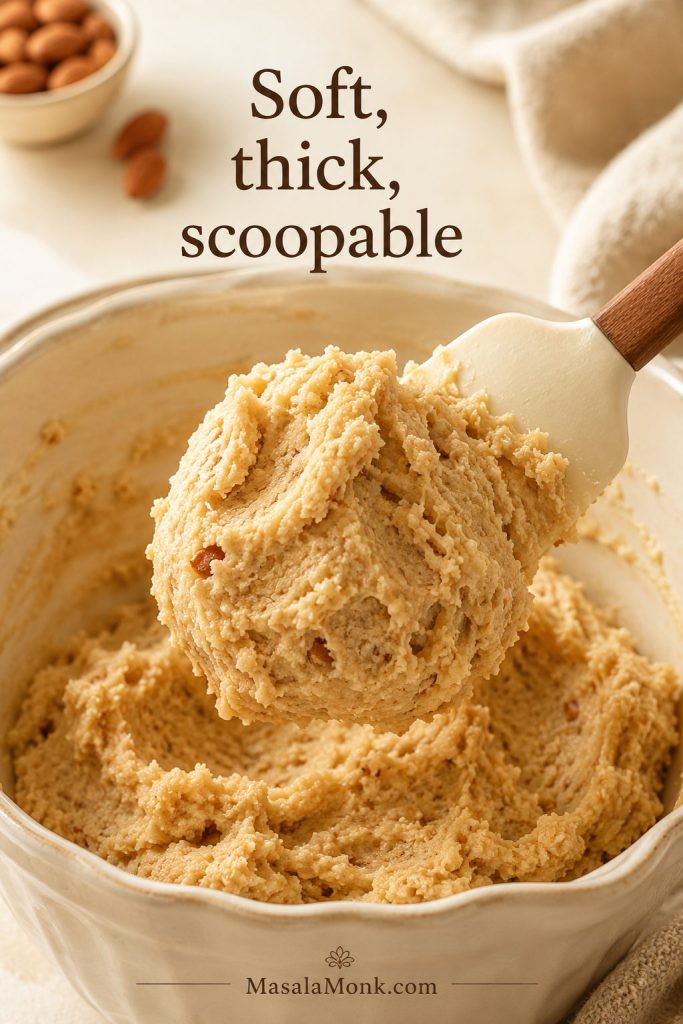
This one-bowl dough should look thick and scoopable, never runny, before you shape it.

Make them plain when you want the warm almond-vanilla flavor to shine, or fold in chocolate chips for the familiar bakery-style version most people picture first. Either way, the dough is simple, scoopable, and built around the small details that make almond flour baking work.
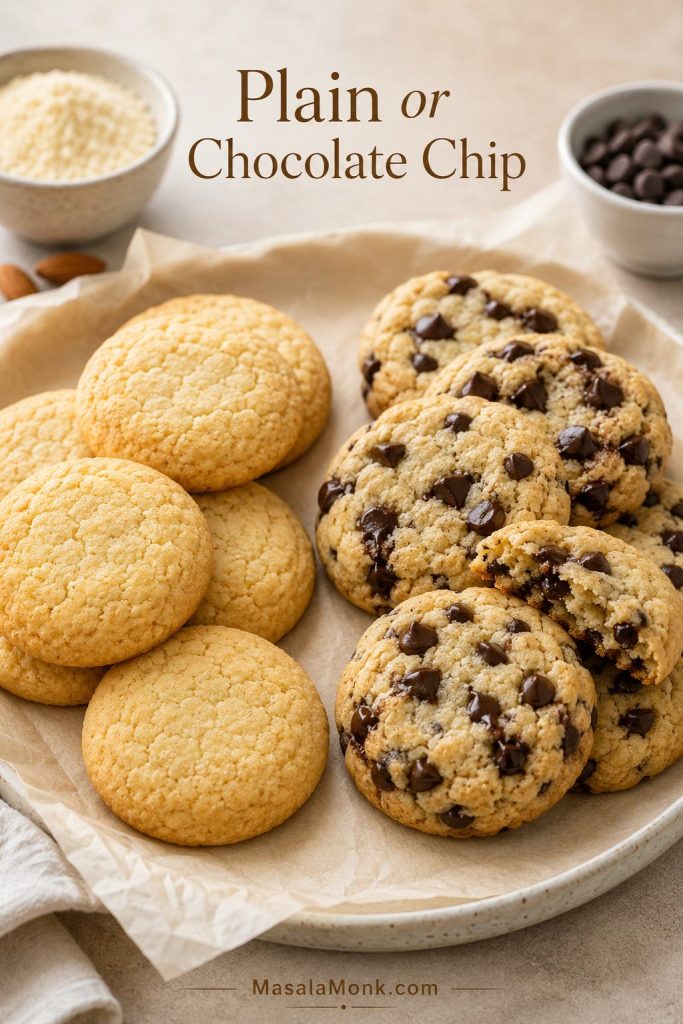
Plain almond flour cookies beside chocolate chip almond flour cookies from the same base dough.
Use the same almond flour cookie dough plain for a warmer almond-vanilla bite, or add chocolate chips for a familiar bakery-style version.

The payoff is a batch of cookies that smell warm and buttery, break softly once cooled, and feel just as welcome with coffee in the afternoon as they do with a few extra chocolate chips after dinner.

The main recipe is the one to start with when you want cookies that hold together, taste smooth instead of gritty, and still feel soft in the center. It is built for the almond-flour problems readers run into most often: oily dough, low spread, fragile cookies, and centers that need time to set.

Use the main recipe first if you want the most reliable batch. Then use the variation notes for 3-ingredient, vegan, keto-style, chocolate chip, and crispier cookies once you know how the dough should feel.

Almond Flour Cookies at a Glance

  • Active time: about 12 minutes
  • Bake time: 10–12 minutes for soft cookies, 13–14 minutes for firmer edges
  • Dough rest: 10 minutes while the oven heats
  • Tray set time: 10–15 minutes before moving
  • No long chill: chill only if the dough feels greasy, sticky, or too soft
  • Yield: about 16 cookies, plain or with chocolate chips
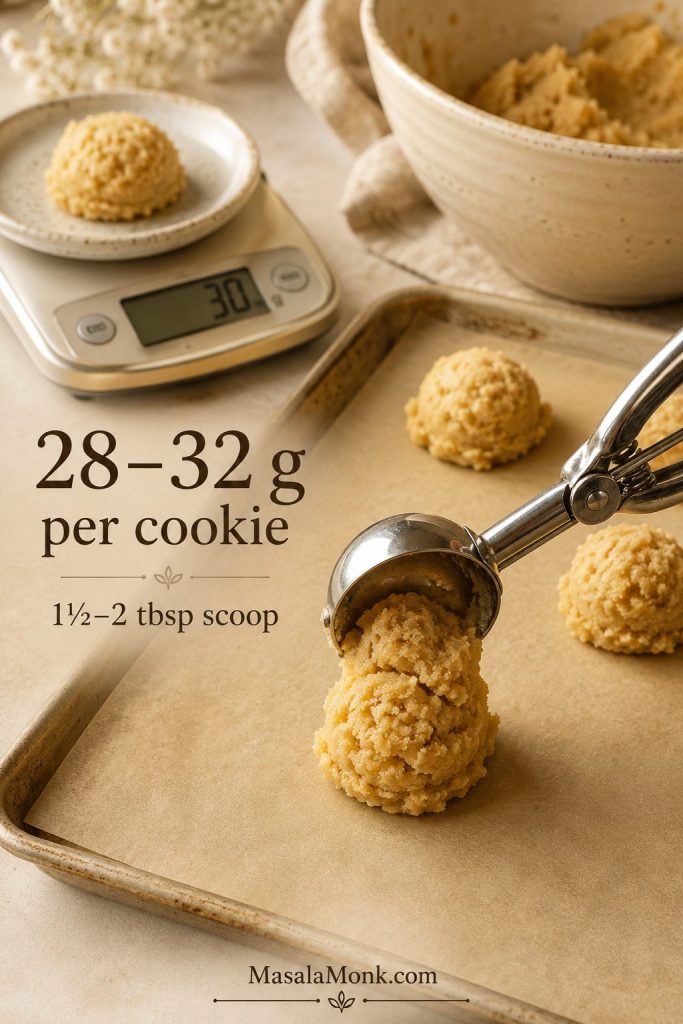
  • Scoop size: 1 1/2 to 2 tablespoons, about 28–32 g dough per cookie
  • Best flour: fine blanched almond flour, not coarse almond meal
  • Most important step: shape before baking, then let the cookies set on the warm tray before lifting

Quick Answer: How to Make Almond Flour Cookies

To make almond flour cookies, mix fine blanched almond flour with brown sugar, melted butter, egg, vanilla, baking soda, salt, and a little cornstarch or arrowroot if you want a softer, thicker cookie. Fold in chocolate chips for the most familiar bakery-style version, or leave the dough plain for a warmer almond-vanilla cookie. Scoop, press each mound into a thick disc, and bake at 350°F / 175°C for 10–12 minutes, until the edges look lightly golden and the centers still look tender.

The two steps that matter most are simple: shape the cookies before baking and let them set on the baking sheet before moving them. This dough does not spread as much as regular cookie dough, and the baked cookies are delicate while hot. Once they cool, they firm up into soft, tender cookies that lift cleanly from the tray.

If this style of cookie has disappointed you before, this recipe is designed to take the guesswork out of the tray. The dough is supposed to feel softer than regular cookie dough, the centers are supposed to look slightly tender when they come out of the oven, and the cookies are supposed to finish setting as they cool. Once you know those cues, the recipe becomes much easier.

If you need quick fixes while baking, jump to the troubleshooting section; if you are ready to mix, go straight to the recipe card.

Why almond flour cookies fail

Most failed batches come down to four things: coarse almond meal, dough left too round before baking, cookies moved while hot, or centers judged before they had time to set. This recipe builds those fixes into the method, so the cookies lift cleanly and taste tender instead of gritty or crumbly.

For step-by-step help, use the method cues first, then check the troubleshooting table if the dough or baked cookies still seem off.
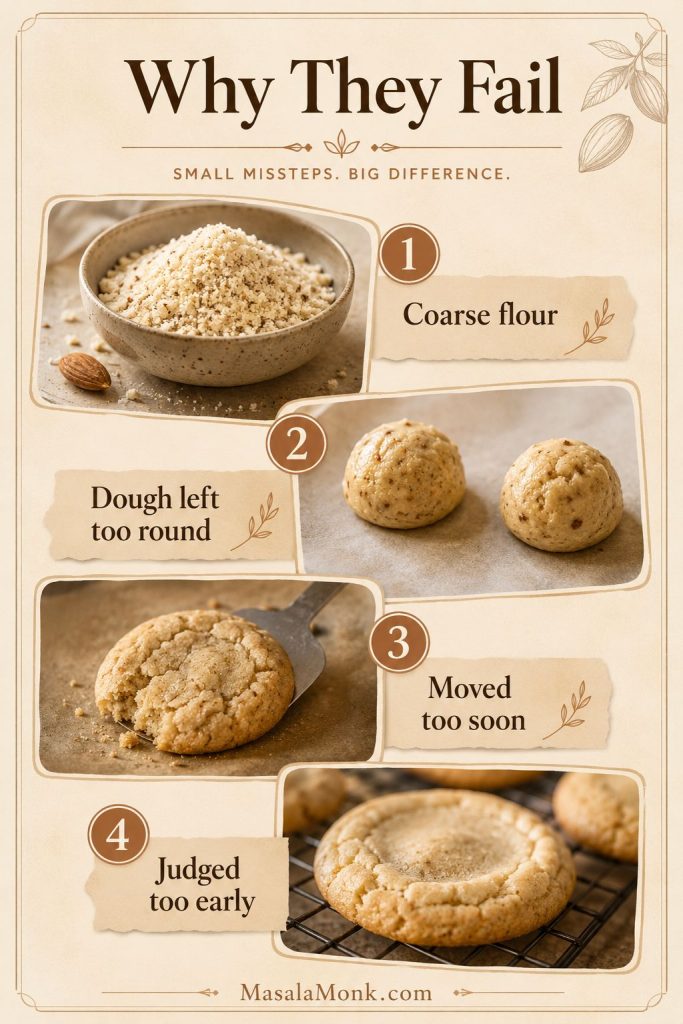
Common almond flour cookie problems including coarse almond meal, unpressed dough, fragile cookies, and soft centers.
If almond flour cookies have failed before, start by checking the flour texture, dough shape, bake cues, and cooling time.

Why You’ll Like This Batch

  • It feels like a real cookie: soft middle, golden edge, and rich almond-vanilla flavor.
  • It is easy enough for a weeknight: one bowl, no mixer, and no long chill.
  • It is flexible: bake them plain, add chocolate chips, or try the 3-ingredient version later.
  • It is built for almond flour: the recipe tells you when to shape, when to pull the tray, and when the cookies are sturdy enough to move.

Why This Almond Flour Cookies Recipe Works

Most problems with this dough do not come from flavor. Almond flour already tastes rich, nutty, and buttery. The challenge is helping the cookies hold together, bake evenly, and set without becoming gritty, oily, or too soft.

The fix starts with fine blanched almond flour, then a few small choices that help the cookies bake up tender instead of sandy or fragile: one egg for lift, brown sugar for a gentle chew, a short dough rest for better hydration, and optional cornstarch or arrowroot for a softer, thicker bite.

The biggest difference is not a complicated technique. The best batches come from dough that is pressed before baking, pulled while the centers still look slightly soft, and left alone long enough for the bottoms to firm on the tray.

  • Fine blanched almond flour keeps the bite smoother and less gritty.
  • Brown sugar gives more familiar chew than dry sweeteners alone.
  • One egg helps the cookies lift cleanly from the tray once cooled.
  • A short rest makes the dough easier to scoop and shape.
  • Gentle handling keeps the cookies intact while they finish setting.

Best first-batch version

For the most reliable first tray, use fine blanched almond flour, brown sugar, butter, the egg, and the cornstarch or arrowroot. This version gives the best balance of tenderness, browning, and cookies that lift cleanly after cooling. Try the 3-ingredient, keto, or vegan variations after you know how the base dough should feel.

The one habit that changes the batch

Treat almond flour cookies gently while they are hot. Give them a few quiet minutes on the tray, and they go from fragile to tender, sturdy, and easy to lift.

Before You Start: 5 Almond Flour Cookie Rules

This dough is easy, but it does not behave like regular cookie dough. Keep these rules in mind before you mix the bowl, especially if this is your first batch.

  • Use fine almond flour. Coarse almond meal can make the cookies gritty and fragile.
  • Press the dough before baking. The shape you make is close to the shape you get.
  • Mix gently. Almond flour has natural fat, so overmixing can make the dough oily.
  • Move them only after they set. Hot cookies are delicate; cooled cookies lift cleanly.
  • Judge texture after cooling. Warm centers can seem too soft even when baked correctly.

What These Almond Flour Cookies Taste Like

These almond flour cookies have a warm vanilla-almond flavor, buttery edges, and a soft, tender bite. They are not meant to be stretchy like wheat-flour chocolate chip cookies. Instead, they break softly, taste rich from the almond flour, and become sturdy enough to lift once fully cooled.

Chocolate chips make them feel more classic and dessert-like, while the plain version lets the almond flavor come through more clearly. Either way, the goal is a cookie that feels homemade and satisfying, not dry, sandy, or like a gluten-free compromise.

For crispier edges, press the dough a little flatter and bake the cookies until the edges are deeper golden. For softer centers, keep the dough slightly thicker and avoid overbaking.

Ingredients You Need

This recipe keeps the ingredient list simple, but every ingredient has a job. You want a tender cookie that tastes warm and satisfying, not like a dry gluten-free compromise. If you plan to change sweeteners, fat, eggs, or flour, check the substitution guide before mixing.
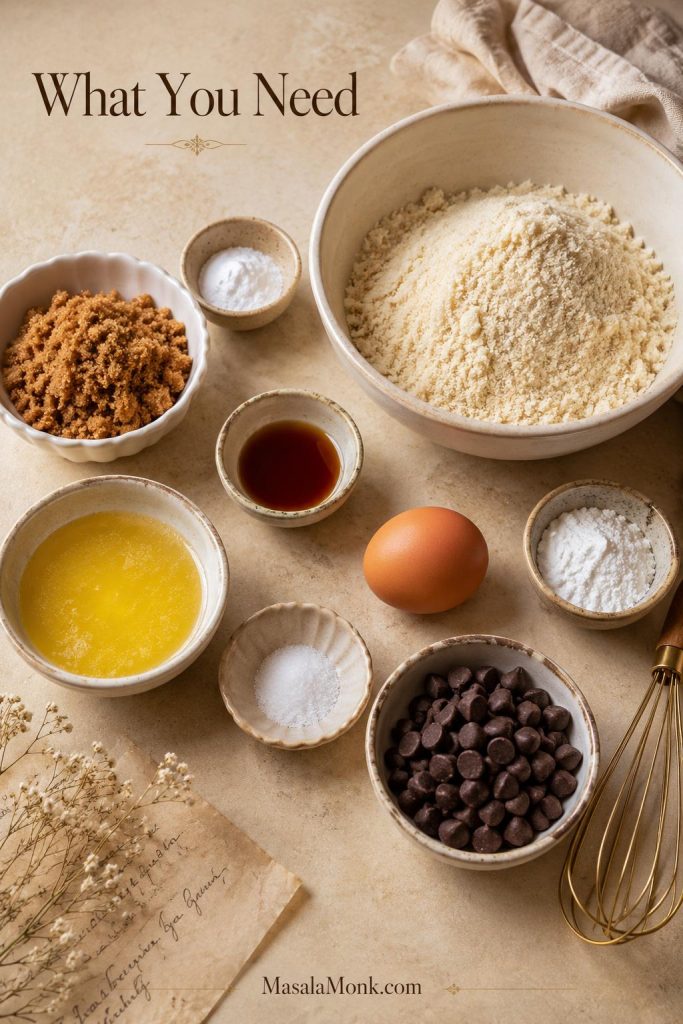
Ingredients for almond flour cookies including almond flour, brown sugar, butter, egg, vanilla, starch, and chocolate chips.
Each ingredient has a clear job: almond flour brings richness, brown sugar helps chew, and optional starch makes the cookies a little softer.

Fine blanched almond flour

Use fine blanched almond flour for the softest texture. It gives the cookies a pale golden color, tender crumb, and smoother bite. Coarse almond meal can work in a pinch, but the batch may taste grainier, darker, and more fragile.

Brown sugar or coconut sugar

Brown sugar gives these cookies a softer, chewier feel and a warmer flavor. Coconut sugar also works, but it weighs a little differently and gives a deeper, more caramel-like taste. For keto-style cookies, use the notes in the variation section because low-carb sweeteners change browning, spread, and chew.

Butter

Melted butter gives the cookies classic flavor and helps the dough come together easily. Let it cool slightly before mixing so it does not scramble the egg or make the dough oily. For a dairy-free version, coconut oil can work, but the cookies will taste a little different and may be slightly softer.

Egg

One egg helps the cookies lift cleanly from the tray after cooling. Egg-free versions are possible, but they need a different formula because almond flour has no gluten to help the dough hold together.

Vanilla, baking soda, and salt

Vanilla is not just background here. It rounds the almond flavor and makes the cookies taste warmer. Baking soda gives a little lift and helps the edges brown, while salt keeps the sweetness from tasting flat.

Recommended starch for softer cookies

A tablespoon of cornstarch or arrowroot helps the cookies bake softer, thicker, and a little less fragile. Use cornstarch for the most familiar cookie texture, arrowroot if you prefer a grain-free option, or skip it for keto-style cookies. Without it, the cookies still work, but they will be slightly more delicate.
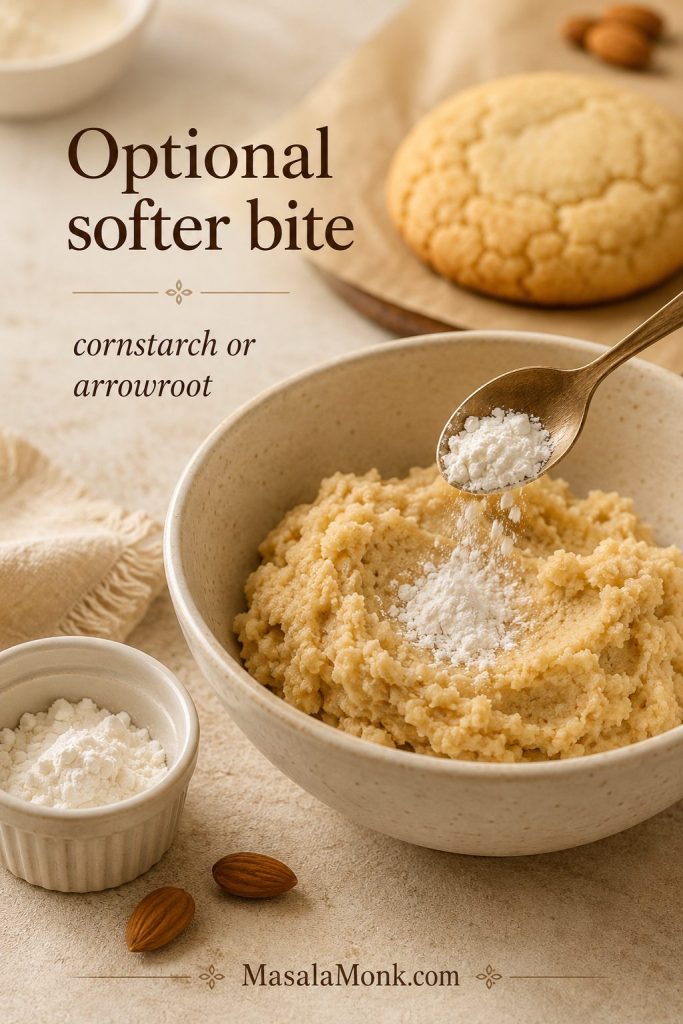
Cornstarch or arrowroot being added to almond flour cookie dough for a softer texture.
A small amount of cornstarch or arrowroot is optional, but it helps the cookies bake thicker, softer, and less delicate.

Chocolate chips

Chocolate chips are optional, but they turn this base dough into an easy chocolate chip version. Mini chocolate chips distribute especially well through the dough, while regular chips give bigger pockets of chocolate.

A note on strict gluten-free baking

Almond flour is naturally gluten-free, but if you are baking for someone who needs strict gluten-free food, use almond flour, chocolate chips, and starch that are labeled gluten-free. The FDA’s gluten-free labeling rule sets a clear standard for foods that carry a gluten-free claim.

Almond Flour vs Almond Meal for Cookies

For the best texture, use fine blanched almond flour. It is usually made from almonds without their skins, so the texture is finer and the color is lighter. This helps the cookies bake up soft, even, and tender.

Almond meal is usually coarser and may include almond skins. It can make cookies darker, grainier, and more rustic. That is not always bad, but it is not ideal when you want a soft, smooth cookie that holds together neatly.
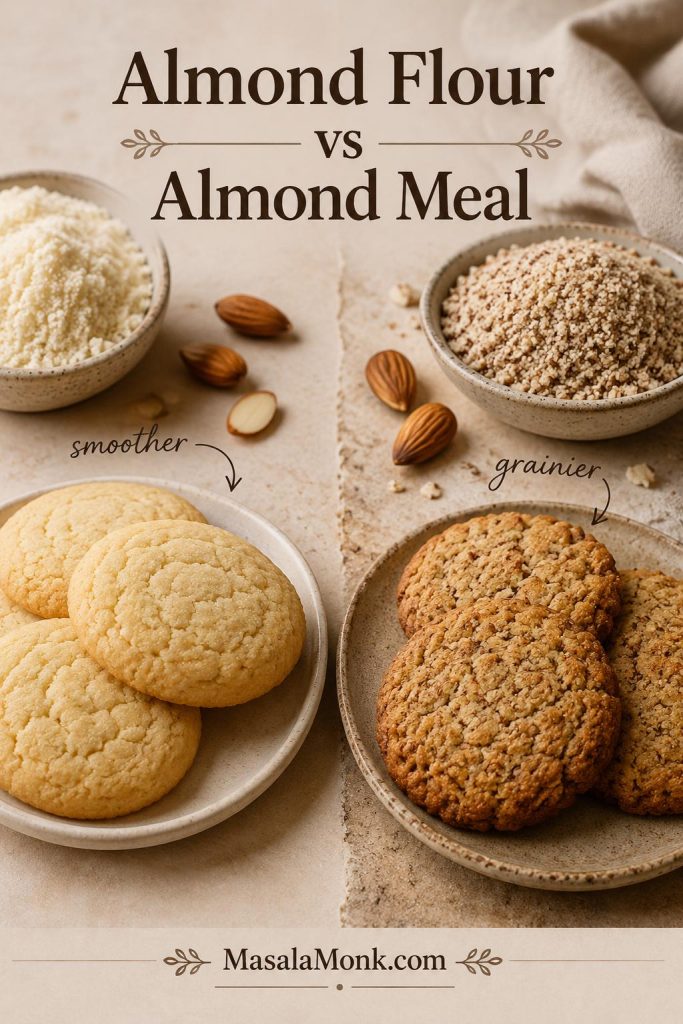
Fine almond flour and almond meal compared with smoother and grainier cookies.
Fine blanched almond flour gives a smoother cookie, while almond meal can make the texture darker, grainier, and more fragile.
Ingredient Best for Cookies? What to Expect
Fine blanched almond flour Best choice Soft, even texture with less grittiness and a cleaner bite.
Almond meal Works, with tradeoffs Darker, grainier cookies that may feel more delicate.
Coarse homemade almond flour Risky Can make the dough uneven, oily, or gritty if the grind is too coarse.

For a deeper baking-focused explanation of almond flour texture and grind, King Arthur Baking has a helpful almond flour guide that explains how finely ground almond flour behaves in baked goods.

If you want to see almond flour behaving in a batter instead of a dough, our almond flour pancakes guide shows why almond-based recipes brown quickly and feel more delicate than wheat-flour versions.

Once you have the right flour, the next important cue is what the dough should look like before baking.

Ingredient Substitutions and What Changes

Substitutions can work, but they are not all equal. Because almond flour has no gluten and contains natural fat, small changes can affect how the cookies spread, brown, and set.
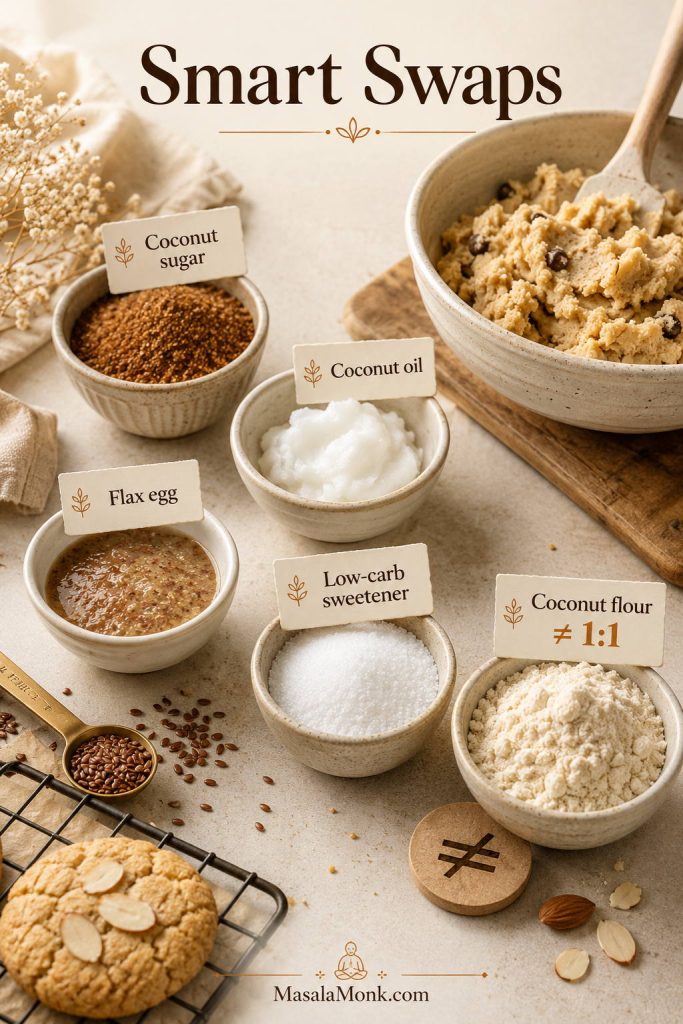
Substitution guide for almond flour cookies with coconut sugar, coconut oil, flax egg, low-carb sweetener, and coconut flour warning.
Some swaps are easy, but coconut flour is not one of them because it absorbs far more liquid than almond flour.
Swap Will It Work? What Changes
Almond meal instead of almond flour Yes, with tradeoffs Cookies may be darker, grainier, and more fragile.
Coconut oil instead of butter Yes Good for dairy-free cookies, but the flavor is less classic and the texture can be softer.
Coconut sugar instead of brown sugar Yes Use 1/2 cup, about 95 g. It gives a deeper flavor and slightly less classic chew.
Maple syrup instead of sugar Not as a direct swap It adds liquid and changes the dough. Use the 3-ingredient variation instead.
Low-carb sweetener instead of sugar Yes, with texture changes Use a 1:1 granular baking sweetener. The cookies may brown less, spread less, and feel less chewy.
Flax egg instead of egg Sometimes The cookies become softer and more delicate. The vegan variation is the safer starting point.
Coconut flour instead of almond flour No Coconut flour absorbs much more liquid and cannot be swapped 1:1.
All-purpose flour instead of almond flour No This recipe is balanced for almond flour’s fat and moisture behavior.
Gluten-free flour blend instead of almond flour No, not directly Most blends behave more like wheat flour and need a different cookie formula.

For the first batch, stay close to the main recipe. Once you know how the dough should feel, it is much easier to adjust sweeteners, fats, or add-ins without losing the soft, tender texture. Then compare the almond flour cookie variations to choose the best next batch.

This recipe is built for almond flour

Other flours need their own formulas. Coconut flour, oat flour, all-purpose flour, and gluten-free flour blends absorb liquid and fat differently, so they cannot replace almond flour directly in this recipe.

Equipment You Need

You do not need a mixer or special equipment. A bowl, spatula, baking sheet, parchment paper, and a cookie scoop are enough for this one-bowl dough.

  • Baking sheet: one large sheet pan or two smaller trays.
  • Parchment paper: best for clean release and even browning.
  • Mixing bowl and spatula: enough for this no-mixer, one-bowl dough.
  • Cookie scoop: a 1 1/2 to 2 tablespoon scoop keeps the cookies even.
  • Wire rack: useful after the cookies set on the tray.
  • Kitchen scale, optional: best for measuring almond flour accurately.
Almond flour cookie dough portioned with a cookie scoop at 28 to 32 grams per cookie.
Even scoops help the cookies bake at the same pace, so the centers stay tender while the edges turn lightly golden.

Parchment paper gives the cleanest release and slightly better browning. A silicone baking mat also works, but the bottoms may brown a little less.

How to Make Almond Flour Cookies

This is a one-bowl style cookie dough. The method is simple, but a few small cues make the difference between cookies that lift cleanly and cookies that crumble when you pick them up. If you already know the dough basics, you can skip ahead to doneness or the texture guide.

1. Mix the wet ingredients

In a large bowl, whisk the melted butter, brown sugar, egg, and vanilla until smooth and glossy. The butter should be melted but not hot. If it feels hot to the touch, let it cool for a few minutes before adding the egg.
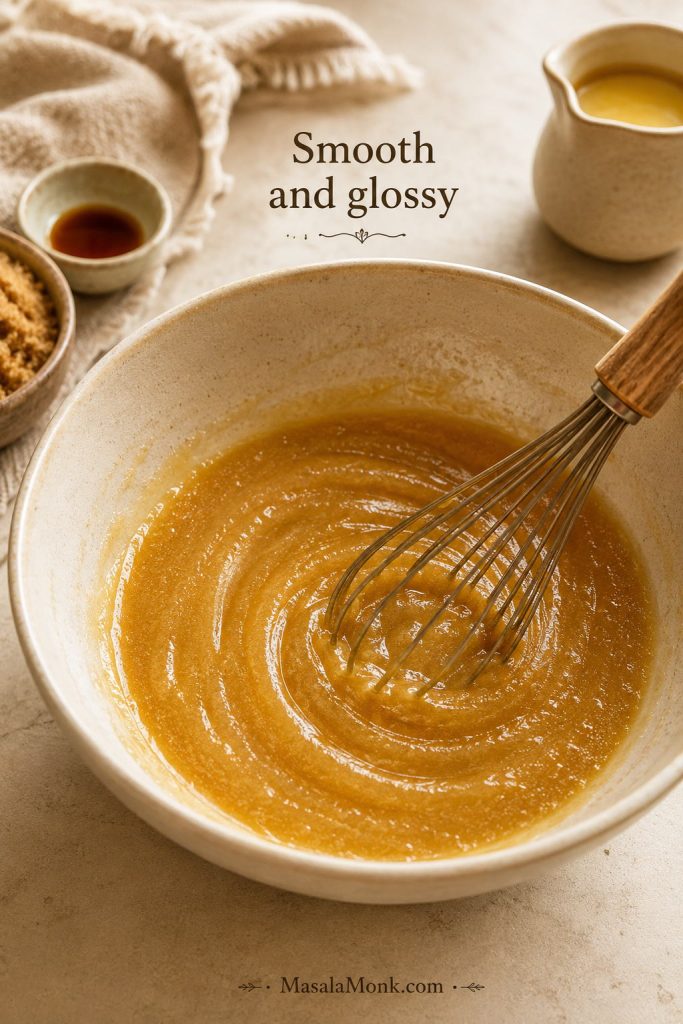
Melted butter, brown sugar, egg, and vanilla being whisked smooth in a ceramic bowl.
Let the melted butter cool slightly before adding the egg; otherwise, the wet mixture can turn greasy or uneven.

2. Add the dry ingredients

Soft thick almond flour cookie dough lifted with a spatula from a mixing bowl.
The dough should look moist and scoopable, not runny like batter or dry like crumbs, before you shape the cookies.
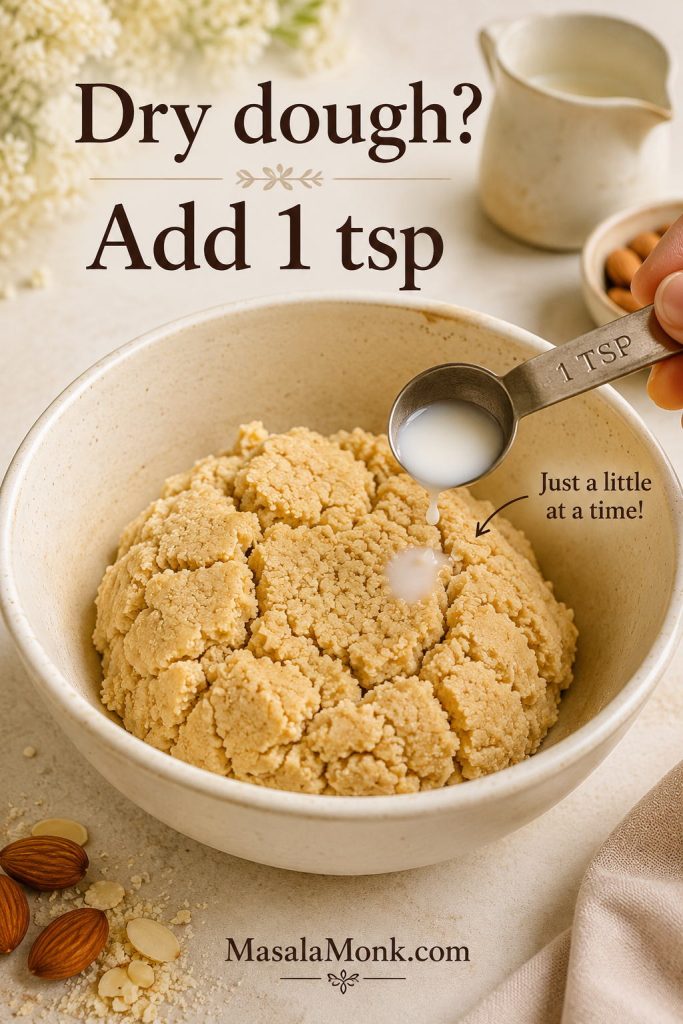
A teaspoon adding water or milk to slightly dry cracked almond flour cookie dough.
If the dough cracks badly when pressed, add water or milk one teaspoon at a time instead of overcorrecting.

For a chocolate chip version, fold in the chocolate chips now. For a prettier finish, save a few chips and press them onto the tops of the dough before baking.
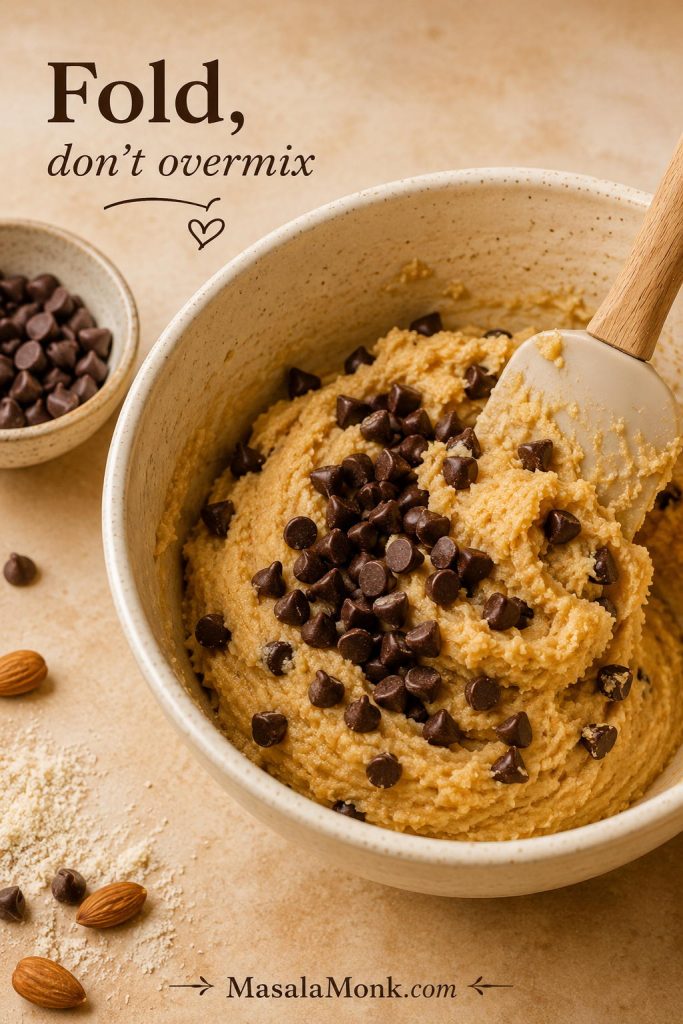
Chocolate chips being folded into almond flour cookie dough with a spatula.
Fold the chocolate chips in gently, because too much mixing can make almond flour dough oily instead of tender.

Let the dough sit for about 10 minutes while the oven heats. This short rest helps the almond flour absorb moisture and makes the dough easier to scoop. If your kitchen is warm and the bowl feels very soft, chill it for 15–20 minutes.
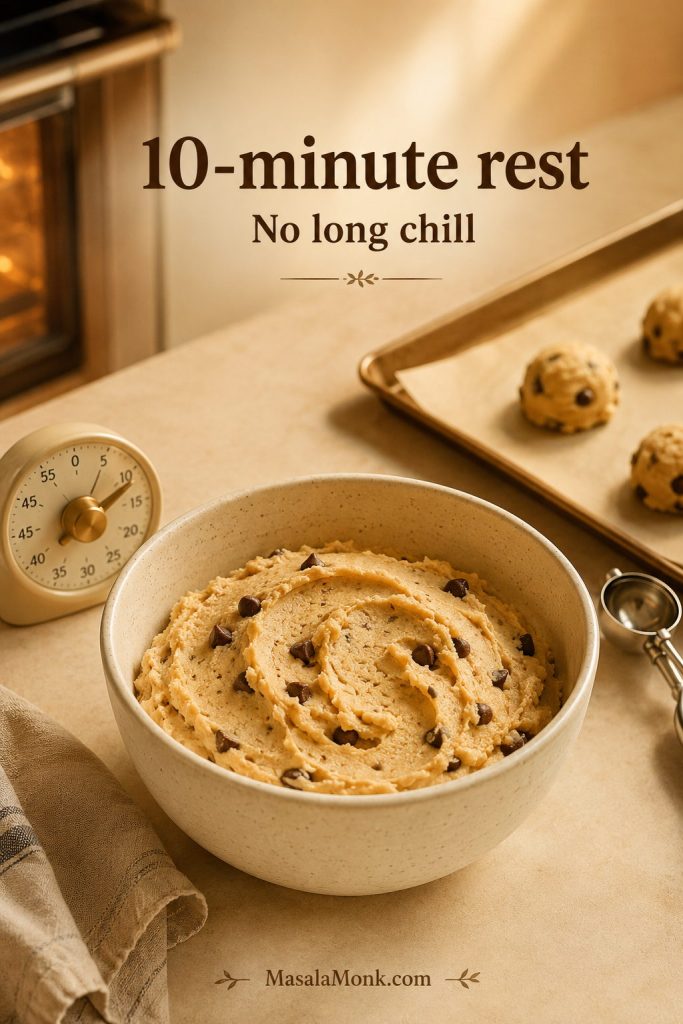
Almond flour cookie dough resting in a bowl near a timer and parchment-lined tray.
After a short rest, the dough feels easier to scoop because the almond flour has had time to absorb moisture.

5. Scoop and shape

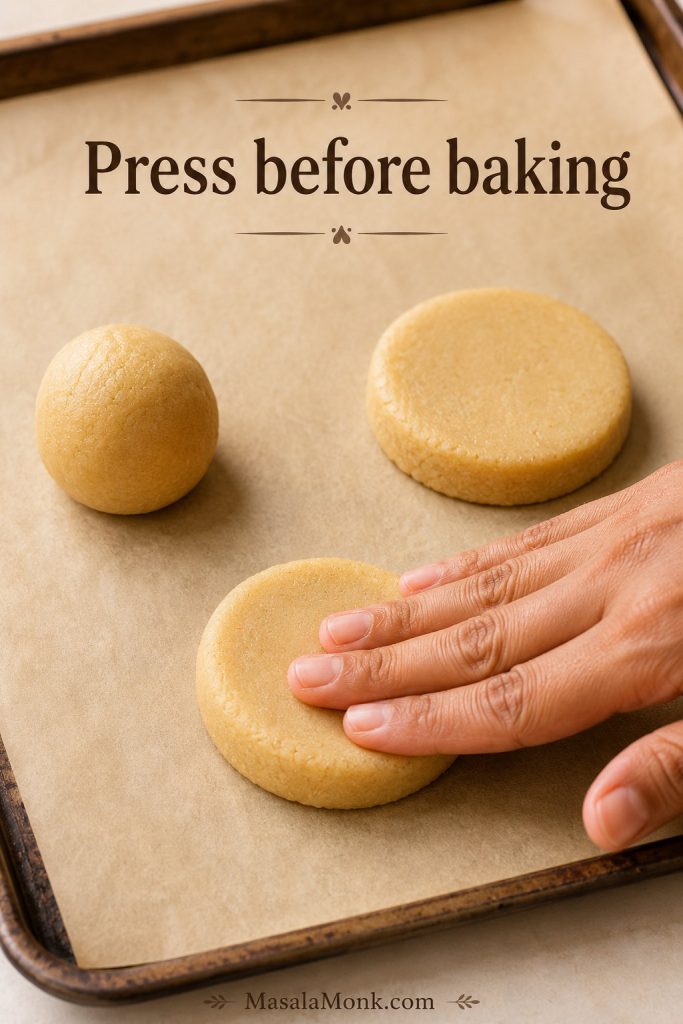
Almond flour cookie dough mound being pressed into a thick disc on a parchment-lined baking tray.
Press each mound into a thick disc before baking; otherwise, almond flour dough can stay too tall in the oven.
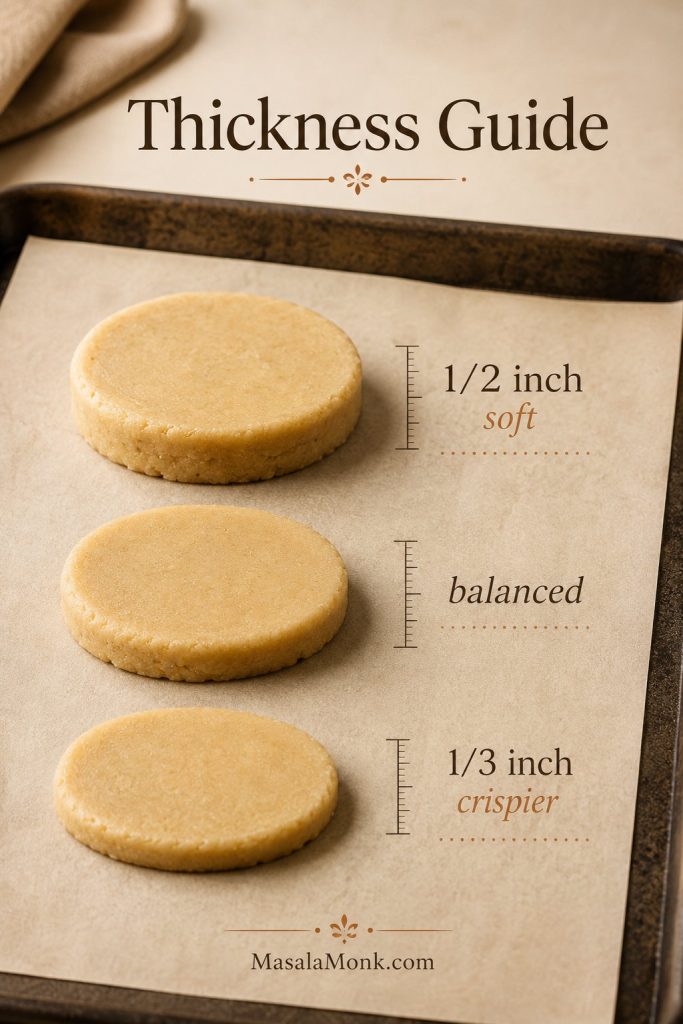
Three almond flour cookie dough discs showing different thicknesses for soft, balanced, and crispier cookies.
Thickness changes the final bite: keep the dough thicker for soft centers, or press it flatter for more golden edge.

Use one large baking sheet or divide the dough between two sheets. For the most even baking, bake one tray at a time in the center of the oven.

6. Bake until the edges are lightly golden

Bake at 350°F / 175°C, or about 160°C fan, for 10–12 minutes. The edges should look lightly golden, but the centers should still look soft. If your oven runs hot, check at 9 minutes because almond flour can brown quickly at the edges.
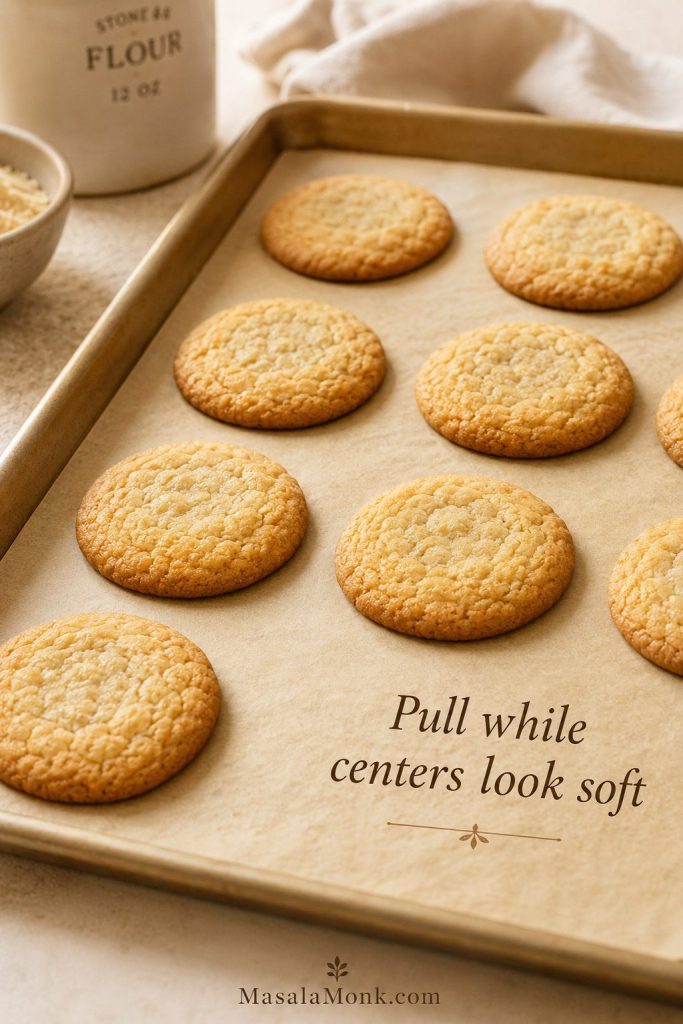
Freshly baked almond flour cookies with golden edges and soft centers on a parchment-lined tray.
Look for set, lightly golden edges rather than firm centers; the middle should still look a little tender.

7. Let the cookies set on the tray

Let the cookies cool on the baking sheet for at least 10 minutes before moving them. They are delicate when hot, but they firm as they cool. After that, transfer them to a wire rack and let them cool completely.
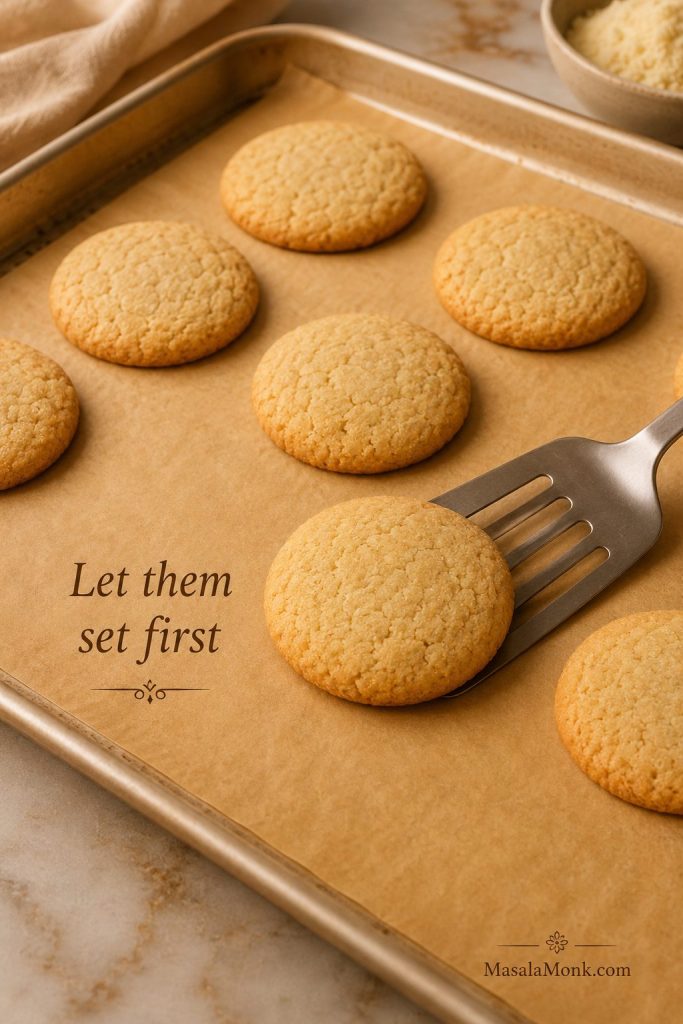
Almond flour cookies cooling on a baking sheet with a spatula lifting one cookie.
A clean spatula lift is the sign to wait for; if the cookie bends or breaks, give the tray a few more minutes.

The cookies may look a little softer than you expect when they first come out. That is normal. The edges should be set, but the centers finish firming as the tray cools.

Do You Need to Chill Almond Flour Cookie Dough?

You do not need a long chill for this dough. A 10-minute rest is enough for most batches because it gives the almond flour time to absorb moisture and makes the dough easier to scoop.

Chill the dough for 15–20 minutes only if it feels sticky, greasy, or too soft to shape. This usually happens when the butter is too warm, the kitchen is hot, or the almond flour is very fine and fresh. Even after chilling, press the dough into discs before baking so the cookies do not stay too thick.

How to Know When Almond Flour Cookies Are Done

The cookies are done when the edges look lightly golden and set, but the centers still look a little soft. Do not wait for the centers to look firm in the oven, or the cookies may turn dry after cooling.

When in doubt, pull the tray when the edges are set and the centers still look slightly soft. Overbaked almond flour cookies can taste dry once cooled.

The cookies should look lightly golden at the edges, soft in the center, and slightly fragile when they first come out. After 10–15 minutes on the tray, they should lift cleanly with a spatula and break softly when you bite into them.
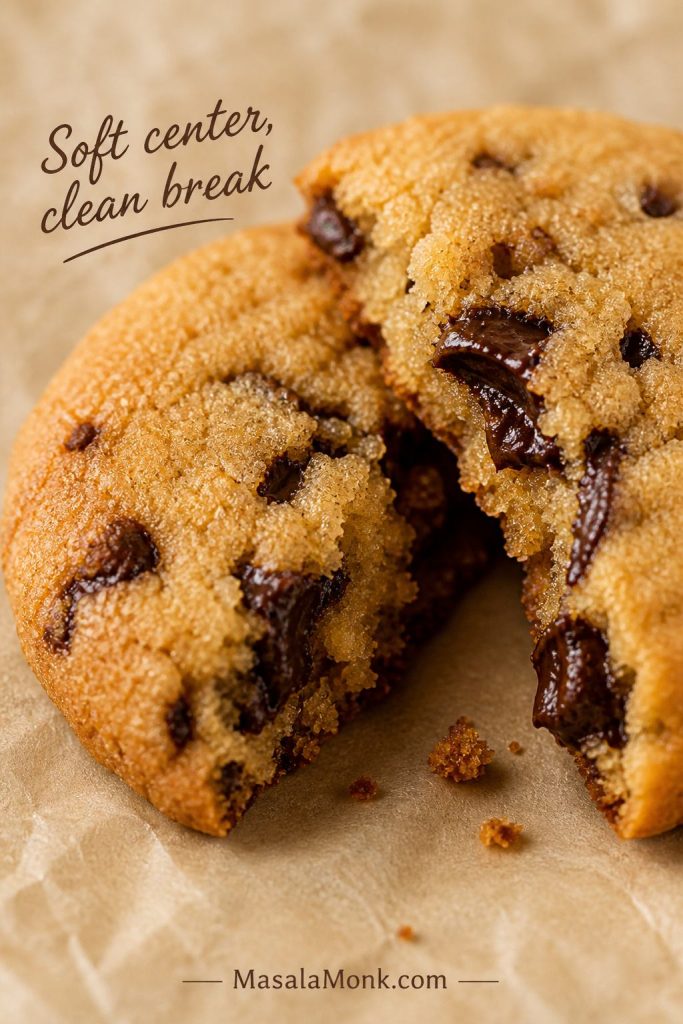
Broken chocolate chip almond flour cookie showing a soft center and melted chocolate pockets.
The finished cookie should break softly, not crumble into sand, which tells you the dough and bake time worked together.

Soft, Chewy, or Crispy Almond Flour Cookies

Before you bake, decide what kind of cookie you want. A thicker cookie gives you the softest center. A slightly flatter cookie gives you more golden edge. The recipe is flexible, but the shape you choose before baking matters.

Texture Goal How to Shape Bake Time Best Cue
Soft almond flour cookies Keep thicker, about 1/2 inch 10–11 minutes Edges barely golden, centers soft
Chewy almond flour cookies Flatten slightly, but not thin 11–12 minutes Light golden edges, tender centers
Crispier almond flour cookies Flatten more, about 1/3 inch 13–14 minutes Deeper golden edges, fully cooled before serving
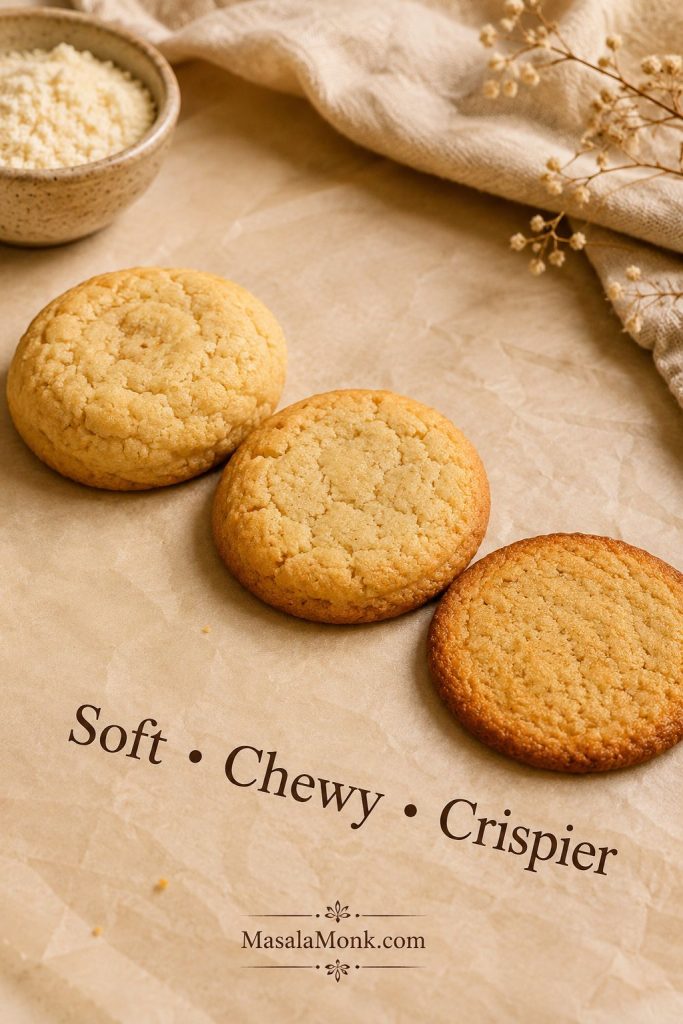
Soft, chewy, and crispier almond flour cookies shown side by side on parchment.
The same dough can bake soft, chewy, or crispier depending on how thickly you shape it and how long it stays in the oven.

For the chewiest result, use brown sugar, keep the egg, and avoid overbaking. For crispier cookies, press the dough flatter and give the tray an extra minute or two in the oven. Either way, wait until the cookies cool before judging the final texture. If your cookies came out dry, crumbly, oily, or too thick, the troubleshooting section will help you adjust the next tray.
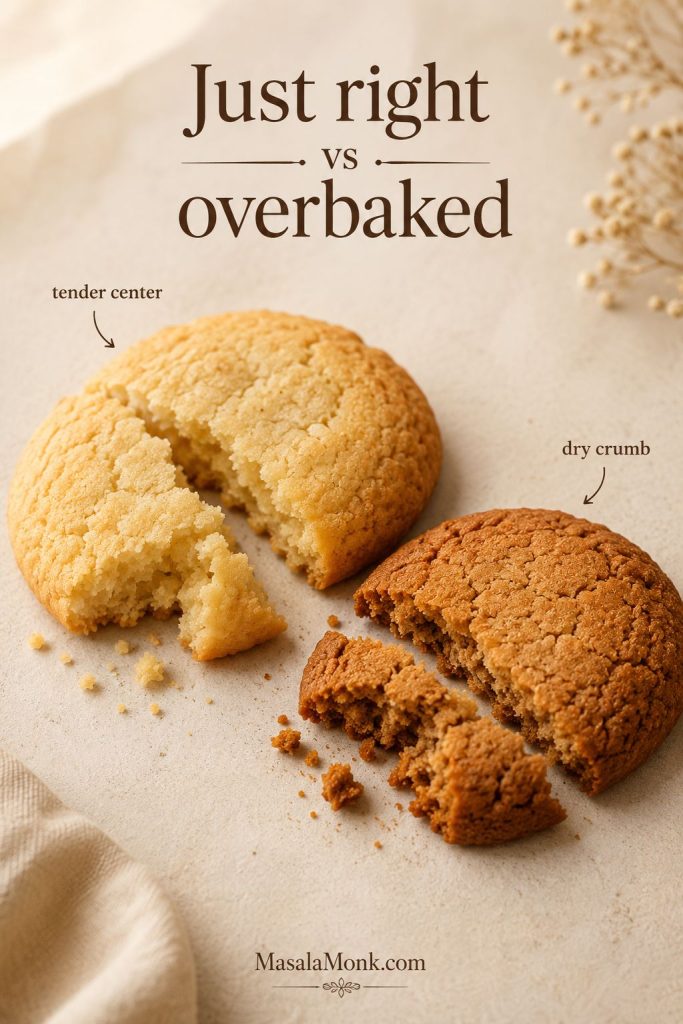
Just-right almond flour cookie with tender center compared with a darker overbaked cookie with dry crumb.
Instead of waiting for firm centers, look for golden edges; overbaked almond flour cookies can taste dry after cooling.

Almond Flour Cookie Variations

Think of the base recipe as the dependable version. Once you know how the dough behaves, the variations below let you move toward simpler, richer, lower-carb, dairy-free, or more chocolate-forward cookies without starting from scratch. Need the base formula first? Use the recipe card, then come back here to choose a version.

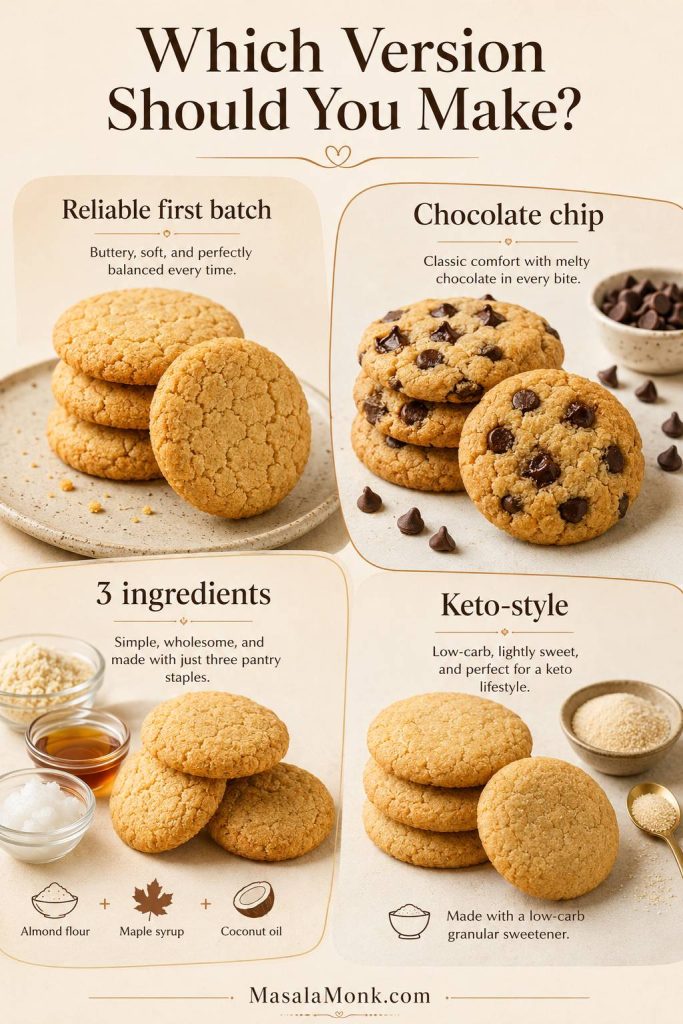
If You Want… Make This Version Why
The most reliable first batch Main recipe with egg and starch Best balance of softness, browning, and cookies that lift cleanly.
The most familiar cookie Chocolate chip version Classic flavor, melty pockets, and broadest appeal.
The simplest egg-free cookie 3-ingredient version Quick, small-batch, and dairy-free if you use coconut oil.
Lower sugar Keto-style version Works with a 1:1 granular low-carb baking sweetener, but browns less.
Almond flour cookie version chooser showing reliable first batch, chocolate chip, 3 ingredient, and keto-style cookies.
Start with the reliable first batch when texture matters most, then choose chocolate chip, 3-ingredient, or keto-style based on your needs.

If you are baking for people who do not usually choose gluten-free cookies, start with the chocolate chip version. It feels familiar first, then quietly happens to be almond-flour based.

If you want something simpler with coffee or tea, keep them plain. If you need egg-free or dairy-free cookies, use the 3-ingredient version as its own small-batch formula rather than forcing swaps into the main dough.

3 Ingredient Almond Flour Cookies

Choose the 3-ingredient version when you want a quick, simple, egg-free cookie with very little prep. It will be softer and more delicate than the main recipe, but it works well for a snack-style cookie when you keep the cookies small, shape them before baking, and let them cool fully on the tray.
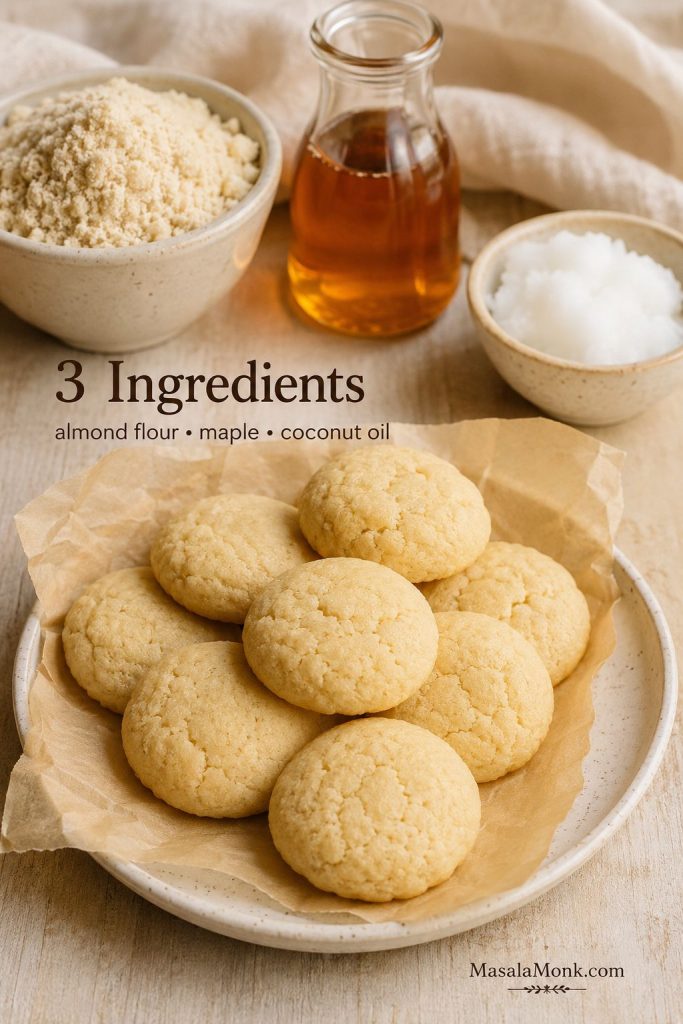
Three ingredient almond flour cookies with almond flour, maple syrup, and coconut oil nearby.
The 3-ingredient version is quick and egg-free, but it bakes softer and more delicate than the main recipe.

For a small batch of about 8 small cookies, mix 1 cup fine almond flour, 3 tablespoons maple syrup, and 2 tablespoons melted coconut oil or butter. Add a pinch of salt if possible. Scoop into small 1-tablespoon portions, press into discs, and bake at 350°F / 175°C for 8–10 minutes, or closer to 10–12 minutes if you make them larger. Let them set fully on the tray before moving.

If the 3-ingredient dough feels dry or cracks heavily, add water or milk 1 teaspoon at a time. If it feels sticky, let it rest for 5–10 minutes before shaping.

Choose the 3-ingredient version for speed and simplicity. Choose the main recipe when you want more classic browning, chew, and lift.

Chocolate Chip Almond Flour Cookies

For a chocolate chip version, add 1/2 cup / 85 g chocolate chips to the main dough. Mini chocolate chips spread through the dough evenly, while regular chips give bigger pockets of chocolate. Press a few extra chips on top before baking for a bakery-style finish.
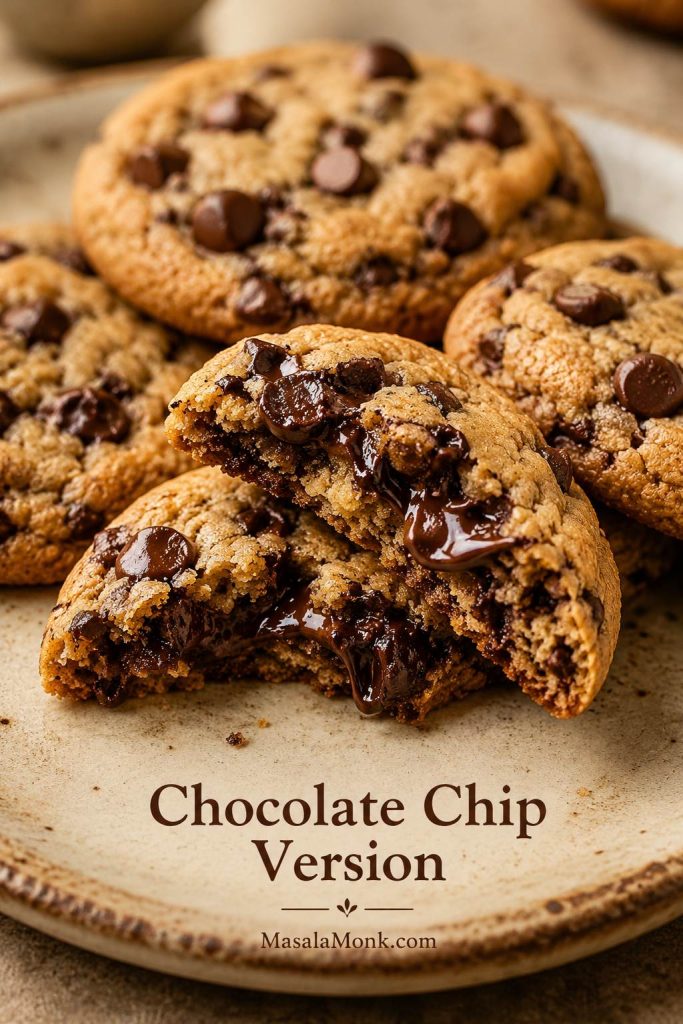
Chocolate chip almond flour cookies with a broken cookie showing melted chocolate and a soft center.
Chocolate chip almond flour cookies feel familiar first, which helps when you are baking for both gluten-free and regular-cookie eaters.

If you like deep chocolate cookies, you can also visit our double chocolate chip cookies for a richer chocolate-cookie direction.

More Wholesome Almond Flour Cookies

For a more wholesome version, use coconut sugar, dark chocolate chips, and keep the cookies slightly thicker so they stay tender. They are still cookies, but this version leans less sweet and lets the almond flavor come through more clearly.

Vegan Almond Flour Cookies

For vegan almond flour cookies, start with the 3-ingredient version: almond flour, maple syrup, and coconut oil. It gives you a softer, simpler cookie without needing an egg replacer. A flax egg can work in some almond flour doughs, but it often makes the cookies more delicate, so cool the cookies completely before moving them.
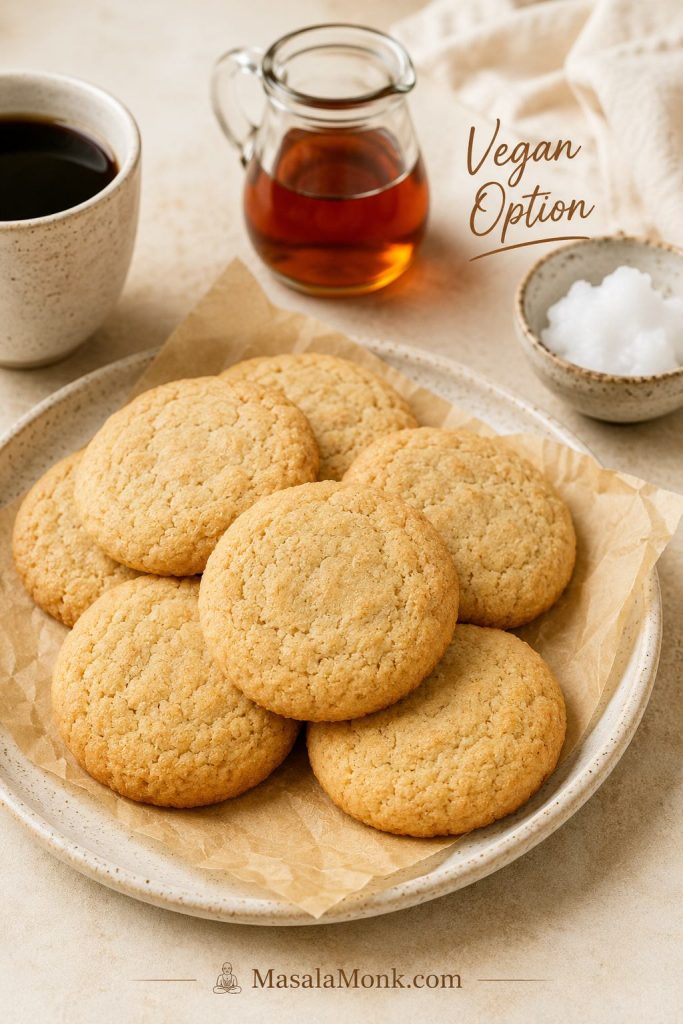
Vegan almond flour cookies served with maple syrup, coconut oil, and black coffee.
For vegan almond flour cookies, use maple syrup and coconut oil as the base rather than forcing a direct egg swap.

Keto Almond Flour Cookies

Choose the keto-style version when lower sugar matters more than classic brown-sugar chew. Use a 1:1 granular low-carb baking sweetener, not pure stevia or a liquid sweetener. Skip the cornstarch, shape the dough before baking, and expect cookies that brown less and spread less than the brown-sugar version.
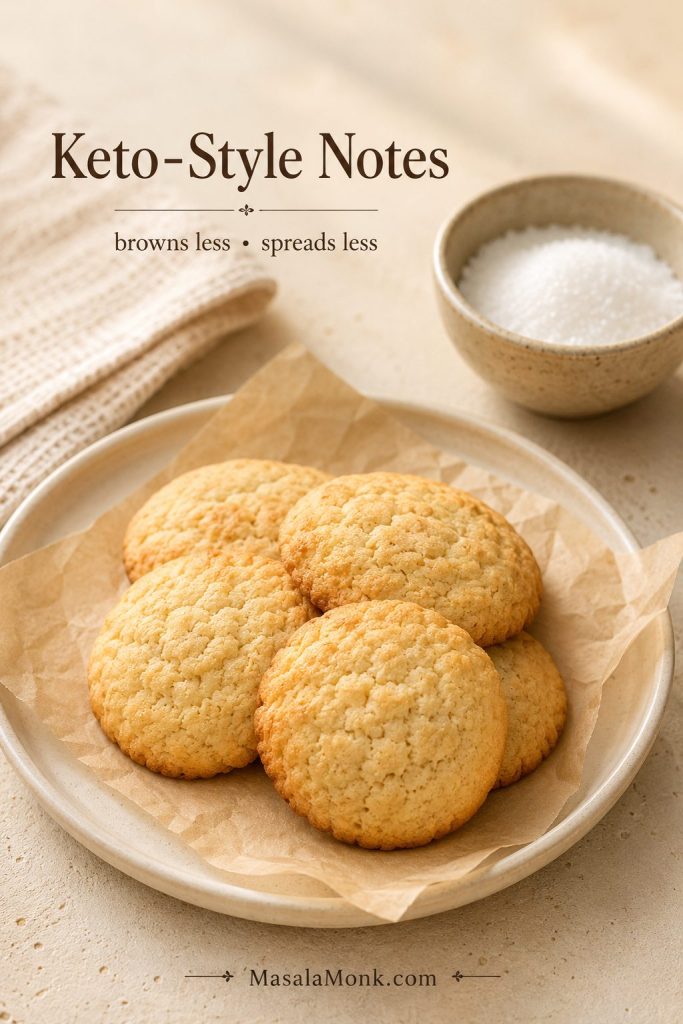
Keto-style almond flour cookies on parchment with a bowl of granular low-carb sweetener nearby.
Keto-style almond flour cookies usually brown less and spread less, so judge them by texture and edge set rather than deep color.

If you are doing more low-carb baking, our keto-friendly flours guide explains how almond flour behaves compared with other low-carb flours.

Peanut Butter Almond Flour Cookies

For a light peanut butter direction, replace 2 tablespoons of the butter with creamy peanut butter and add a pinch more salt. This gives the base cookie a nutty peanut-butter note, but a true almond flour peanut butter cookie works best as its own formula because peanut butter changes the dough’s fat and moisture balance.

A full peanut-butter-first cookie is better handled as its own recipe. See our peanut butter cookies recipe, which includes classic, 3-ingredient, chocolate chip, and oatmeal versions.

Almond Flour Shortbread Cookies

For a shortbread-style cookie, skip the egg and use almond flour, softened butter, powdered sugar, vanilla, and salt. Shape the cookies flatter and bake until the edges are deeper golden. This style is more delicate, so tray cooling matters even more.

Almond Flour Oatmeal or Sugar Cookies

Oatmeal and sugar-cookie versions are better as their own formulas because oats, extra sugar, and decorating needs all change the dough. From this base, you can experiment with a small handful of oats, but keep sugar-cookie versions as drop cookies rather than cut-out cookies unless you are using a recipe built for rolling.

Why Did My Almond Flour Cookies Crumble?

If a batch does not come out perfectly, do not throw the recipe away. This dough is sensitive to flour texture, measuring, shaping, and cooling time, so one small change can make a big difference in the next tray. Most problems are easy to fix once you know what caused them.
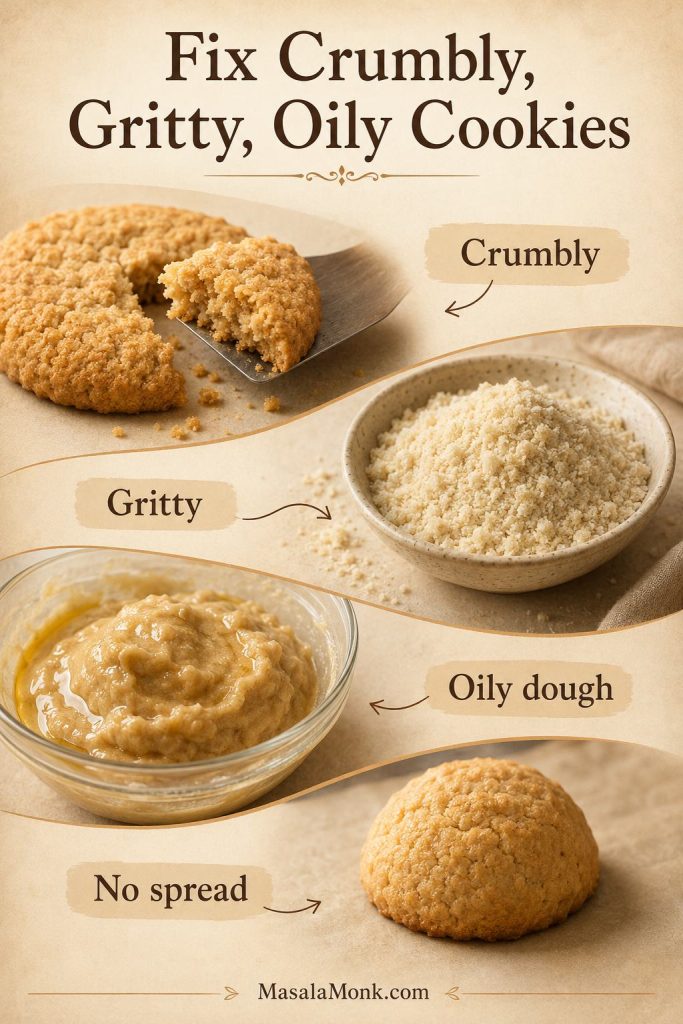
Troubleshooting guide for almond flour cookies showing crumbly cookies, gritty flour, oily dough, and no-spread dough.
Troubleshooting is easier when you match the problem to the cause: flour texture, fat temperature, dough shape, or cooling time.
Problem Likely Cause Fix
Crumbling when lifted The cookies had not set yet Let them cool on the baking sheet for 10–15 minutes before moving.
Gritty texture Almond meal or coarse almond flour Use fine blanched almond flour for the smoothest texture.
Oily-feeling cookies Too much fat, hot butter, or heavy mixing Cool melted butter slightly and mix only until the dough comes together.
No spreading in the oven This dough spreads less than wheat-flour dough Press the dough into discs before baking.
Centers too soft The centers need more time to set Bake 1–2 minutes longer next time and cool fully before serving.
Dry or sandy cookies Flour may have been packed, or the cookies baked too long Weigh the almond flour or spoon and level it; reduce bake time slightly.
Sticky dough Warm kitchen or warm butter Rest the dough for 10 minutes or chill for 15–20 minutes.
Dough cracks badly when pressed The almond flour is dry or the dough needs a little moisture Add 1 teaspoon water or milk and mix gently.
Cakey texture Too much egg, too much leavening, or cookies shaped too thick Flatten slightly more next time and bake until the edges are more golden.
Pale cookies Low-carb sweetener or underbaking Bake 1–2 minutes longer and rely on edge color, not center firmness.

Fix crumbly almond flour cookies

If the cookies break when you lift them, let the tray sit longer before moving the next batch. A clean spatula lift usually means the bottoms have set enough.
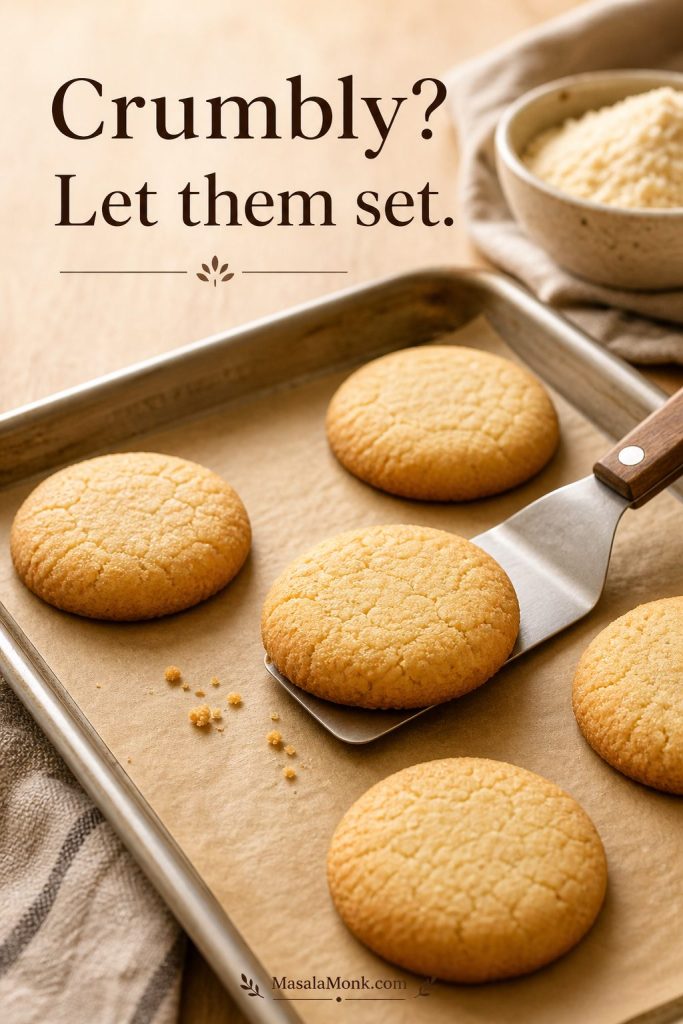
Almond flour cookie lifting cleanly with a spatula after setting on the baking sheet.
If almond flour cookies crumble when lifted, they often needed more tray time, not more baking time.

If the dough looks shiny or greasy, pause before scooping. Slightly cooled butter and gentle mixing usually give you a thicker, more scoopable dough.
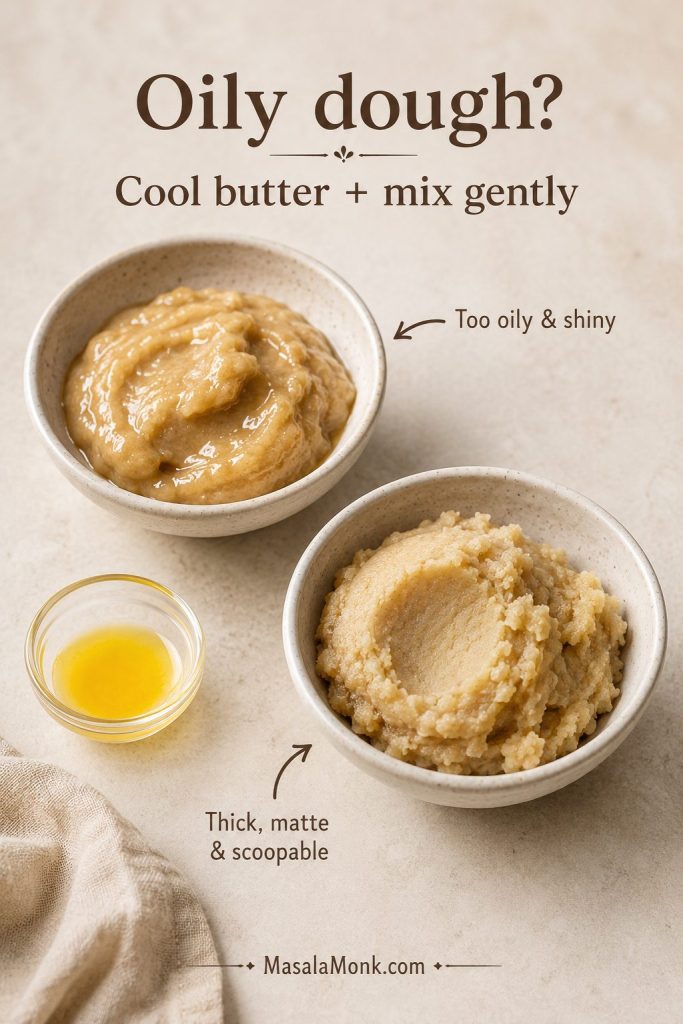
Oily almond flour cookie dough compared with properly mixed thick scoopable dough.
Shiny dough usually means the butter was too warm or the mixture was worked too much, so cool the butter and mix gently.

Fix almond flour cookies that do not spread

If the dough stays in tall mounds, press each portion into a thick disc before baking. That one shaping step gives the cookies a better final form.
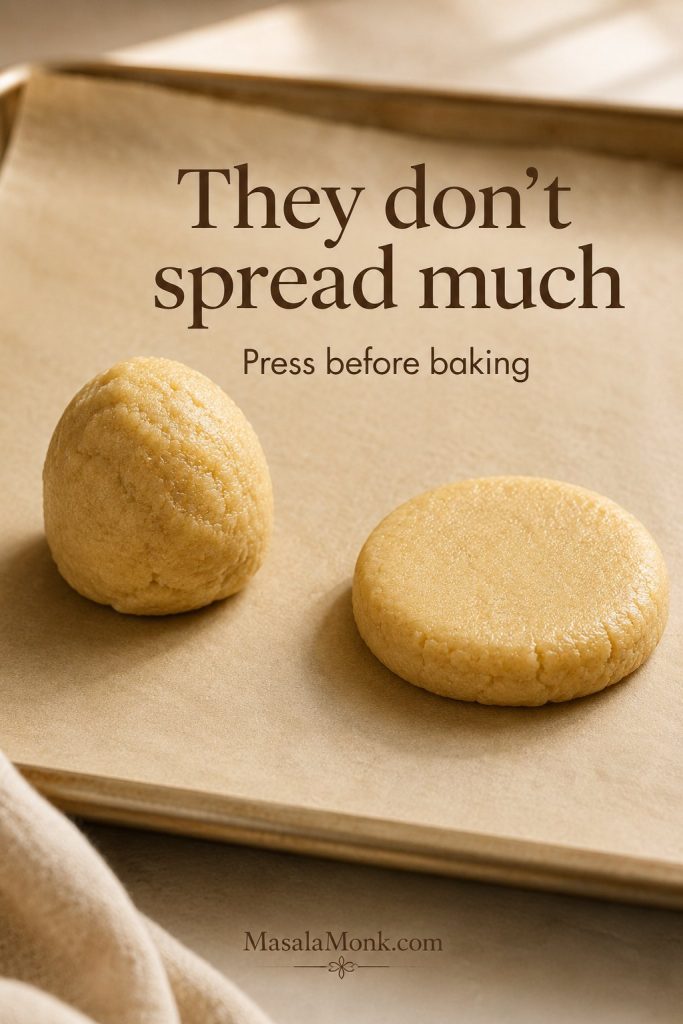
Tall unpressed almond flour cookie dough mound beside a pressed thick disc on parchment.
If the dough goes in as a tall mound, it may come out too thick; press it first for a better cookie shape.

How to Store and Freeze Almond Flour Cookies

These cookies keep well once they are fully cooled. Because they are tender, stack them gently and use parchment between layers if you are storing a large batch.
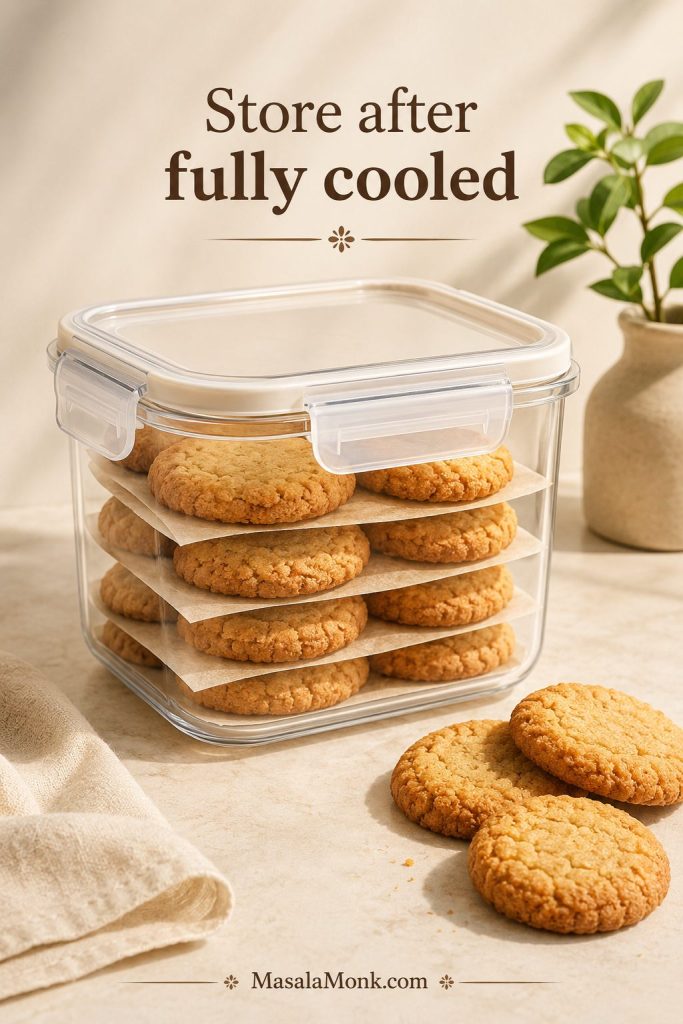
Almond flour cookies stored in an airtight container with parchment between the layers.
Store almond flour cookies only after they are fully cool, and use parchment between layers to protect their soft texture.
Storage Method How Long Best Tip
Room temperature 3–4 days Store airtight after cookies are completely cool.
Refrigerator Up to 1 week Let cookies come closer to room temperature before serving.
Freezer, baked cookies 2–3 months Freeze in a single layer first, then transfer to a freezer bag.
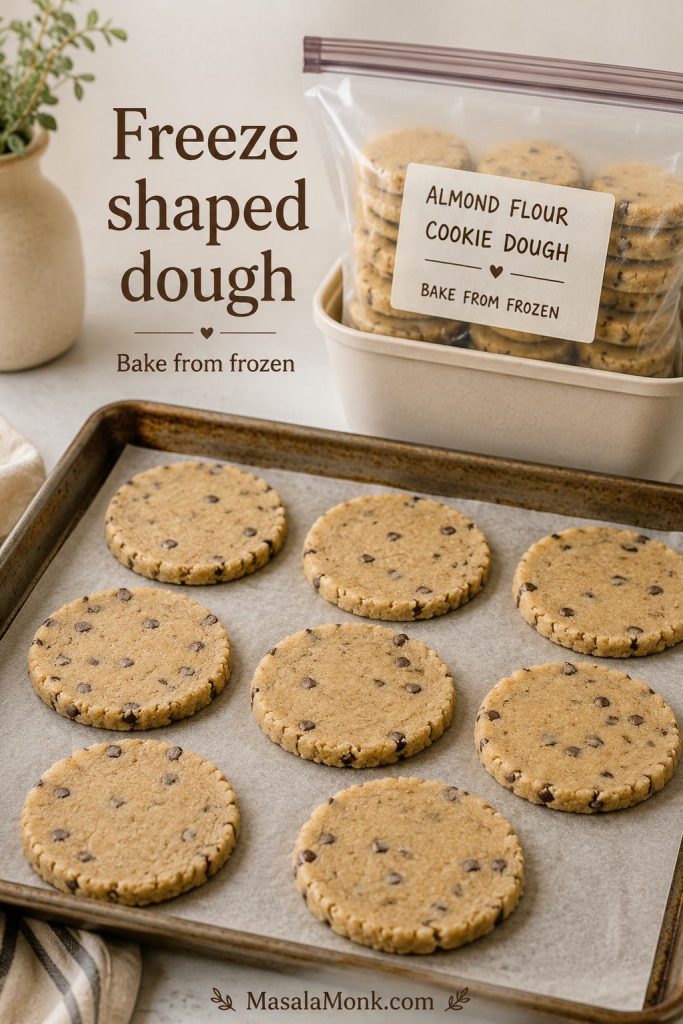
Freezer, dough portions 2–3 months Shape and flatten before freezing; bake from frozen with 1–2 extra minutes.
Flattened almond flour cookie dough portions on a tray with a labeled freezer bag behind them.
Freeze the dough after shaping and flattening, so the portions bake more evenly later without needing to thaw first.

Once cooled, the cookies should lift cleanly, bend slightly before they break, and taste rich enough that no one has to think about them as a gluten-free substitute. That is the batch you are aiming for.

Almond Flour Cookies Recipe Card

Almond Flour Cookies Recipe

Soft, tender almond flour cookies with lightly golden edges, a gentle chew, and a warm vanilla-almond flavor. Keep them plain, add chocolate chips, or bake them a little longer for crispier edges.

Prep Time 12 minutes
Rest Time 10 minutes
Bake Time 10–12 minutes
Set Time 10–15 minutes

Active Time: about 12 minutes

Bake + Rest Time: about 20–22 minutes before tray cooling

Ready to Move: about 35–40 minutes, including dough rest and tray set time

Yield: about 16 cookies, plain or with chocolate chips

Ingredients

  • 2 cups fine blanched almond flour, 200 g / about 7 oz
  • 1/2 cup packed light brown sugar, 110 g / about 3.9 oz, or 1/2 cup coconut sugar, about 95 g
  • 1/4 cup unsalted butter, melted and slightly cooled, 56 g / 2 oz
  • 1 large egg
  • 1 teaspoon vanilla extract, 5 ml
  • 1/2 teaspoon baking soda
  • 1/4 teaspoon fine salt
  • 1 tablespoon cornstarch or arrowroot starch, about 8 g, recommended for softer, thicker cookies; optional, and skip for keto-style cookies
  • 1/2 cup chocolate chips, 85 g / 3 oz, optional

Instructions

  1. Preheat the oven to 350°F / 175°C, or about 160°C fan. Line a baking sheet with parchment paper.
  2. In a large bowl, whisk together the melted butter, brown sugar, egg, and vanilla until smooth.
  3. Add the almond flour, baking soda, salt, and cornstarch or arrowroot, if using. Stir until a soft, scoopable cookie dough forms.
  4. The dough should look moist and thick, not runny. If it cracks badly when pressed, add 1 teaspoon water or milk and mix gently.
  5. Fold in the chocolate chips, if using.
  6. Let the dough rest for 10 minutes while the oven heats. If it feels very sticky, greasy, or too soft to scoop after resting, chill it for 15–20 minutes.
  7. Scoop into 1 1/2 to 2 tablespoon portions, about 28–32 g each, and place on the prepared baking sheet, leaving about 2 inches between cookies.
  8. Press each mound gently into a thick disc. This dough does not spread much, so shape it before baking.
  9. Bake for 10–12 minutes, until the edges are lightly golden and the centers still look soft. For firmer edges, bake 1–2 minutes longer.
  10. Cool on the baking sheet for 10–15 minutes before moving. Transfer to a wire rack and cool completely.

Notes

  • Use fine blanched almond flour, not coarse almond meal, for the smoothest texture.
  • If measuring by cups, spoon the almond flour into the cup and level it off. Do not pack it tightly.
  • The dough should be soft but scoopable. If it looks shiny or greasy, chill it briefly before baking.
  • Flatten cookies to about 1/2 inch for soft cookies or closer to 1/3 inch for crispier edges.
  • The centers should look slightly soft when the cookies come out of the oven. They finish setting as they cool.
  • Let the cookies rest on the tray before transferring; they are fragile while hot.
  • You can skip the starch, but the cookies will be slightly more delicate.
  • For a dairy-free version, use melted coconut oil instead of butter.
  • For chocolate chip almond flour cookies, use 1/2 cup / 85 g chocolate chips.

What to Bake Next with Almond Flour

Once you are comfortable with this dough, almond flour becomes much easier to bake with. The next best cookie recipes to build are the ones with stronger identities — peanut butter, oatmeal, shortbread, sugar cookies, and chocolate chip — because each one needs its own balance of fat, sweetness, moisture, and structure.

  • Richer direction: build a dedicated peanut butter almond flour cookie.
  • Heartier option: try an almond flour oatmeal cookie with the right oat-to-flour balance.
  • Best for gifting: shortbread-style almond flour cookies are the better direction.
  • Decorating route: almond flour sugar cookies need a dough made for shaping, chilling, or dropping.

For no-bake cookie-style desserts, you can also see our edible cookie dough and protein cookie dough recipes.

FAQs About Almond Flour Cookies

Can I use almond meal instead of almond flour?

Almond meal works in a pinch, but it changes the cookie. Because it is usually coarser and may include almond skins, the cookies can bake darker, taste grainier, and feel more fragile than cookies made with fine blanched almond flour.

Do almond flour cookies spread?

They spread less than wheat-flour cookies, so press the dough into the shape you want before baking. Thicker discs stay softer; flatter discs bake with more golden edge.

Why did my almond flour cookies fall apart?

They were probably moved too soon. Almond flour cookies are delicate when hot and firm as they cool, so wait at least 10 minutes before lifting them from the baking sheet.

Why are my almond flour cookies greasy?

Greasy cookies usually come from too much added fat, butter that was too hot, or dough that was mixed too heavily. Use slightly cooled melted butter and stop mixing once the dough comes together.

Should I chill almond flour cookie dough?

A long chill is not needed for this recipe. A 10-minute rest is usually enough. Chill the dough for 15–20 minutes only if it feels very soft, sticky, or greasy.

Can I make almond flour cookies without eggs?

Egg-free versions work best when the formula is designed for them. The 3-ingredient variation with almond flour, maple syrup, and coconut oil is a good starting point. It makes a softer, more delicate cookie than the main recipe.

Can I make almond flour cookies with maple syrup?

Maple syrup works best in a recipe designed around it, such as the 3-ingredient variation. In the main recipe, swapping it directly for brown sugar adds extra liquid and can make the centers too soft.

How do I make almond flour cookies crispy?

Press the dough flatter and bake for 13–14 minutes, until the edges are deeper golden. Cool fully before serving, because the cookies firm more as they sit.

Can I make almond flour cookies keto?

Keto-style cookies need a 1:1 granular low-carb sweetener made for baking. Skip the cornstarch, avoid liquid sweeteners, and expect cookies that brown less and feel less chewy than brown-sugar cookies.

Is almond flour a 1:1 replacement for all-purpose flour in cookies?

A direct 1:1 swap usually does not work well. Almond flour has no gluten and more natural fat than wheat flour, so it needs a recipe built around its own texture and moisture behavior.

Will coconut flour work in this recipe?

Coconut flour absorbs far more liquid than almond flour, so it cannot replace almond flour in this recipe. Use a cookie recipe written specifically for coconut flour instead.

Are almond flour cookies gluten-free?

Almond flour is naturally gluten-free, but check labels if you are baking for someone who needs strict gluten-free food. Some almond flour, chocolate chips, or starches may be processed in facilities that also handle wheat.

Can I freeze almond flour cookie dough?

Yes. Scoop and shape the dough first, then freeze the portions on a tray. Once firm, transfer them to a freezer bag. Bake from frozen at 350°F / 175°C, adding 1–2 extra minutes as needed.
Back to top ↑

Posted on 2 Comments

Salmon Croquettes Recipe with Canned Salmon

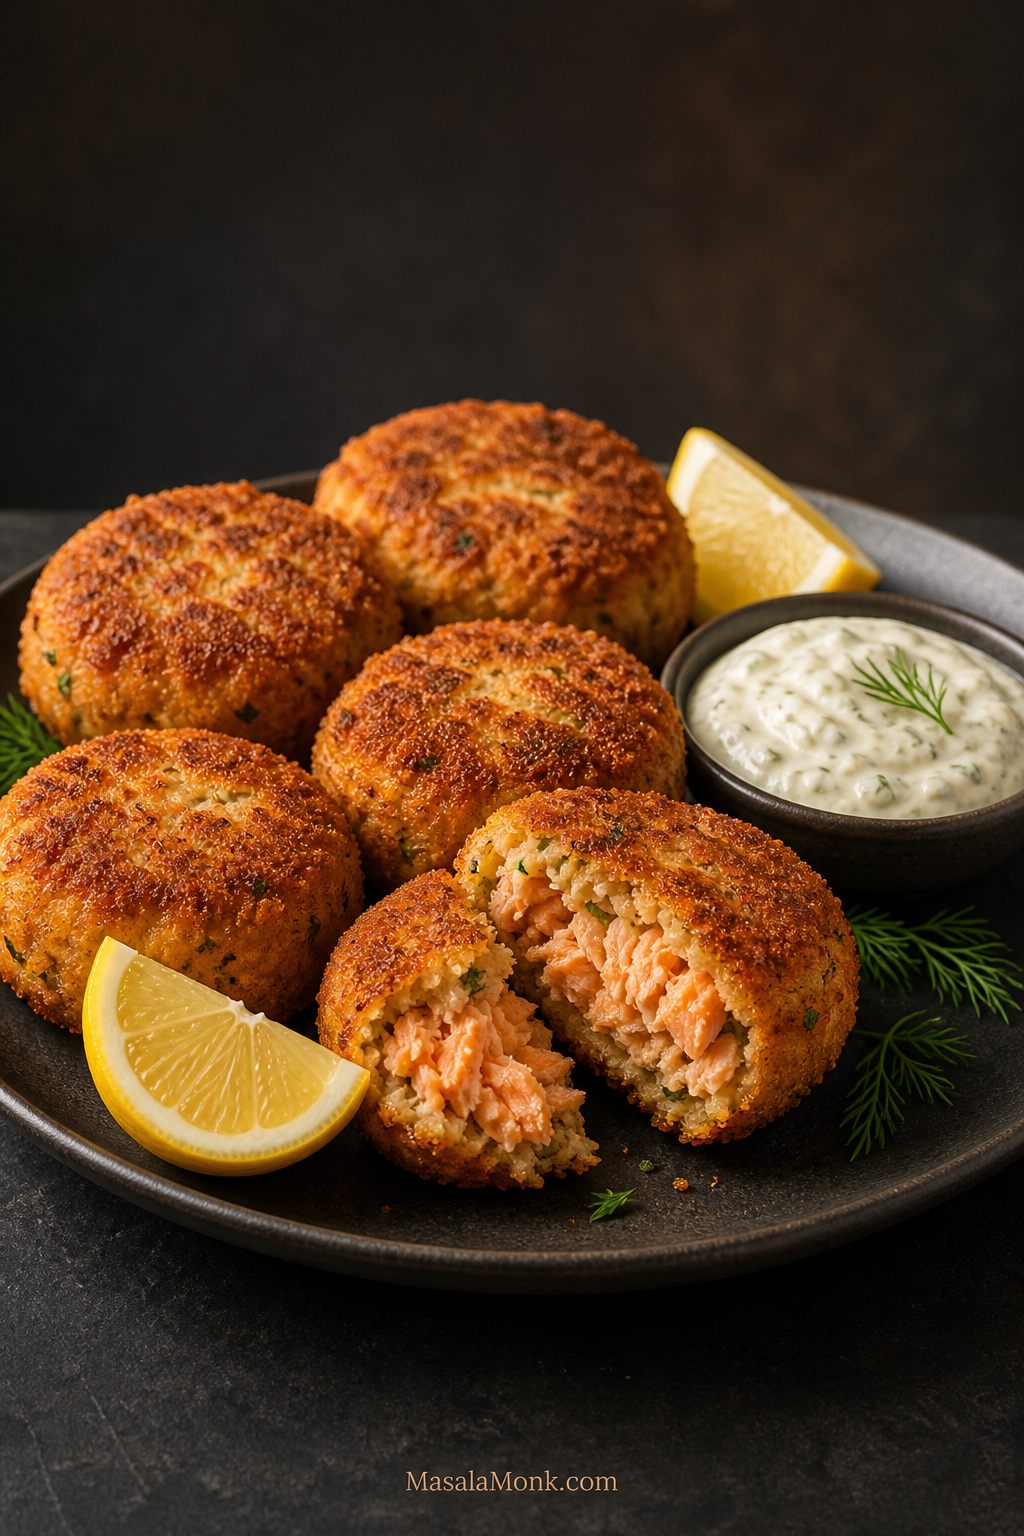
Crispy salmon croquettes on a dark plate with lemon wedges, dipping sauce, herbs, and one croquette broken open

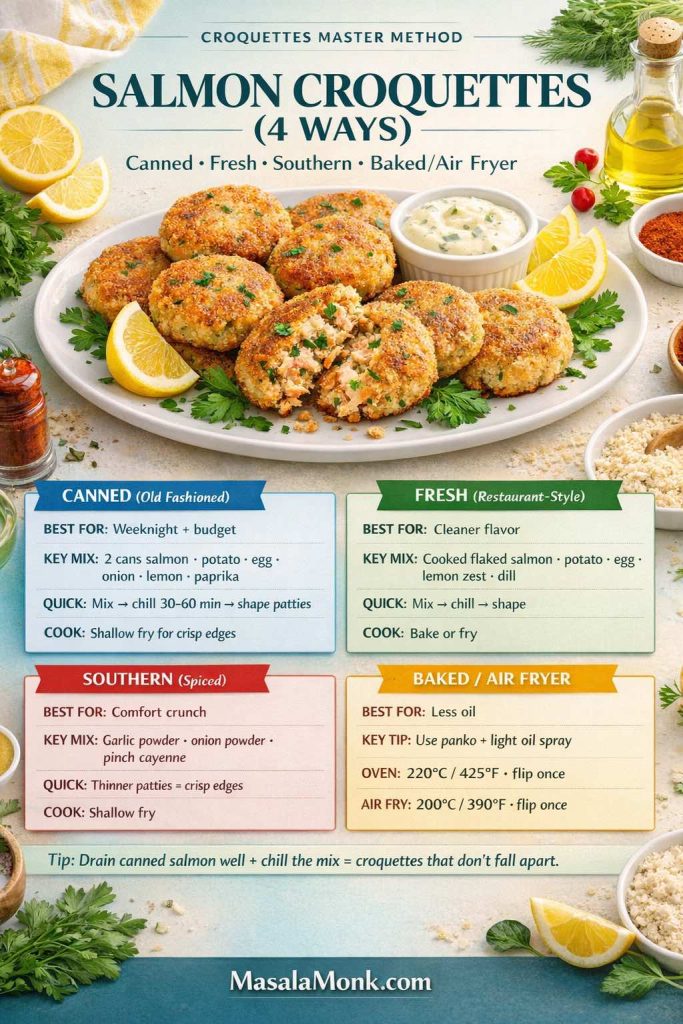
This salmon croquettes recipe gives you crisp, golden patties with a tender, flaky center using canned salmon, egg, cornmeal, flour, onion, bell pepper, lemon, and simple pantry seasoning. The main version is pan-fried and Southern-style, with baked salmon croquettes, air fryer salmon croquettes, and a fresh salmon option included below.

Most importantly, this recipe is built to work on the first try, even if salmon croquettes or salmon patties have fallen apart on you before. You will learn how to drain and bind the salmon, how thick to shape the patties, when to use cornmeal versus panko or crackers, what sauce to serve with them, and how to fix common problems like patties falling apart, turning mushy, or tasting dry.

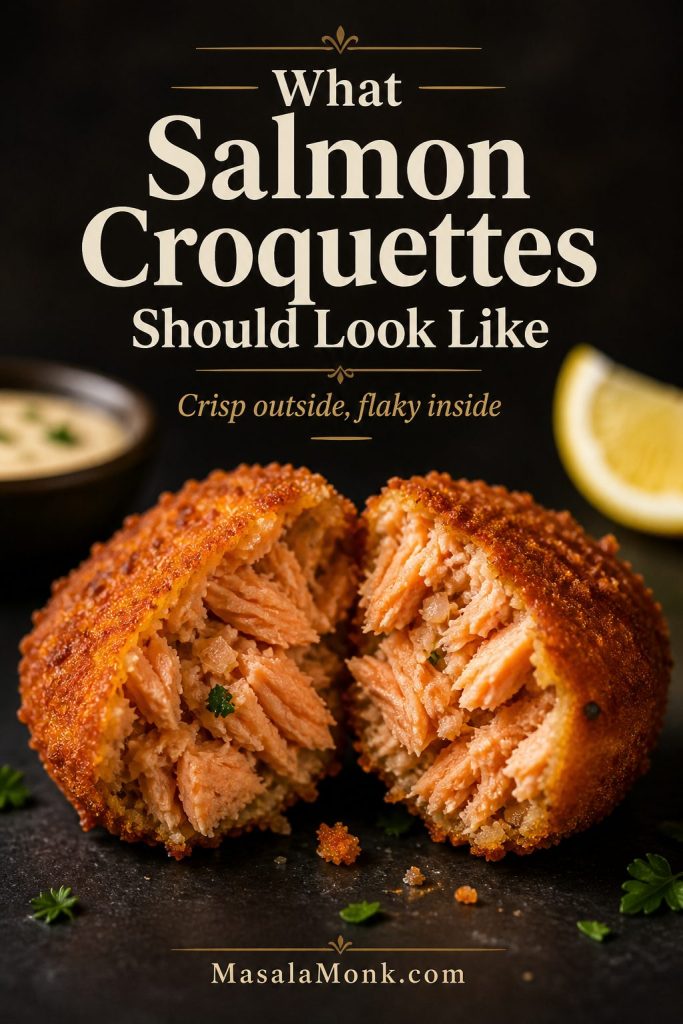
What Salmon Croquettes Should Look Like

Close-up of a salmon croquette split open to show a crisp crust and flaky salmon filling
A good croquette should not be pasty inside. Instead, the crust should crack slightly while the center stays moist, flaky, and easy to break with a fork.

Quick Answer: How to Make Salmon Croquettes

This salmon croquettes recipe starts with well-drained canned salmon, egg, mayonnaise, cornmeal, flour, onion, bell pepper, Worcestershire sauce, lemon juice, and seasonings. Shape the mixture into ¼-cup patties, then pan-fry them in hot oil for 3–4 minutes per side until crisp and golden.

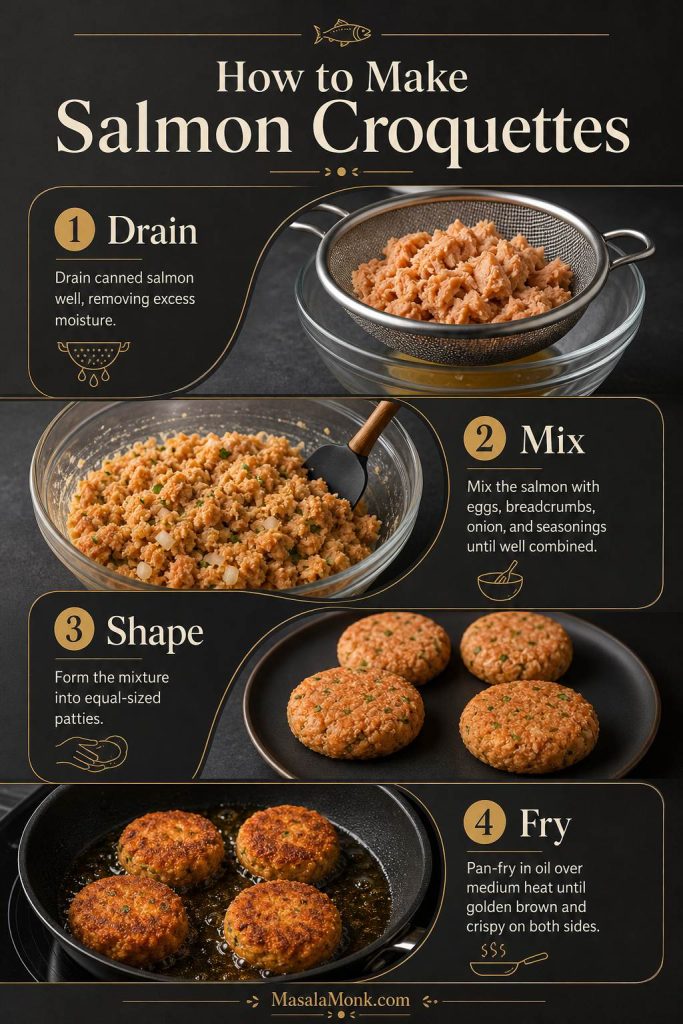
Quick Visual Guide to Salmon Croquettes

Four-step visual guide showing salmon being drained, binder being mixed, patties being shaped, and croquettes being fried
The fastest way to understand this salmon croquettes recipe is to follow the sequence: drain the salmon, mix the binder, shape evenly, and fry only once the pan is hot enough.

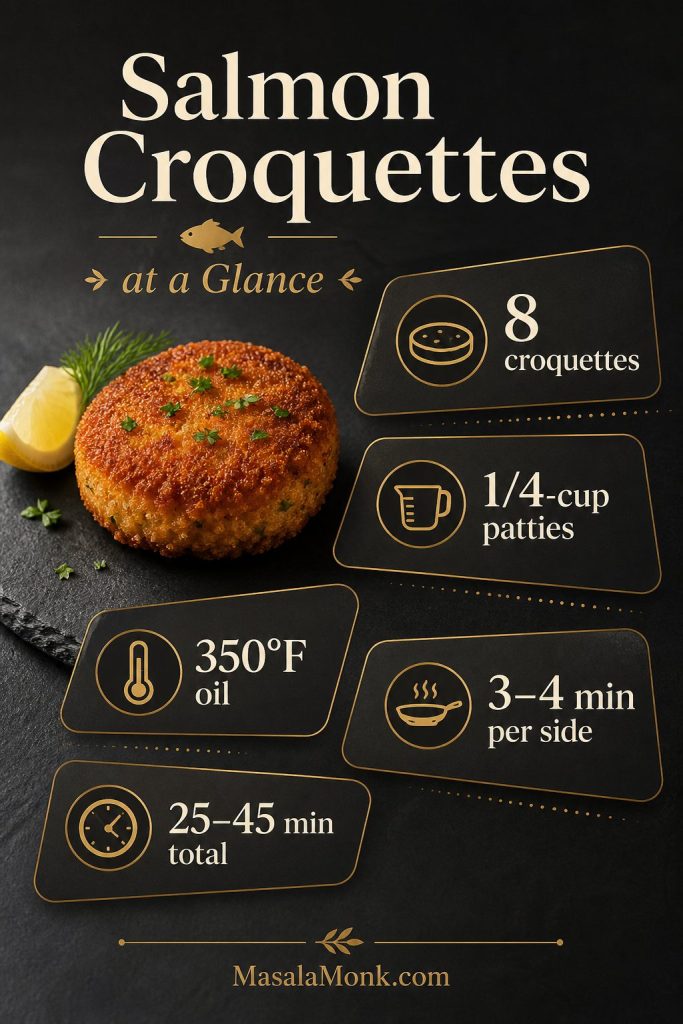
At a Glance

Detail Best answer
Yield 8 medium croquettes
Main salmon Canned pink salmon for the classic version
Best binder Egg, mayo, cornmeal, and flour
Best method Pan-fried in a cast iron skillet or heavy skillet
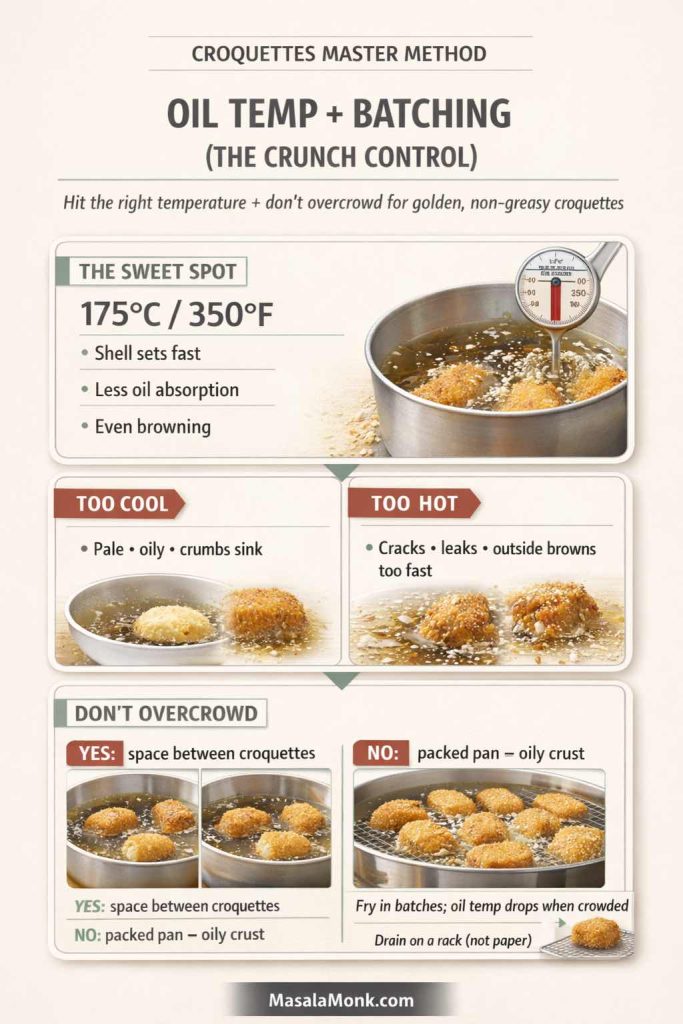
Oil temperature About 350°F / 175°C
Cook time 3–4 minutes per side
Total time 25–45 minutes, depending on whether you chill the patties
Patty size ¼ cup mixture each, about ½–⅔ inch thick
Best sauces Tartar sauce, lemon dill mayo, remoulade, green chutney mayo, tzatziki, or mango mustard
Make-ahead tip Chill shaped patties 10–20 minutes if the mixture feels soft

Salmon Croquettes at a Glance

At-a-glance guide for salmon croquettes showing yield, patty size, oil temperature, cook time, and total time
These quick numbers make the salmon croquettes recipe easier to repeat successfully. Once the patties stay near ¼ cup and the oil stays around 350°F, the crust browns evenly while the center stays moist.

Ready to cook? Jump to the recipe card or see the step-by-step method.

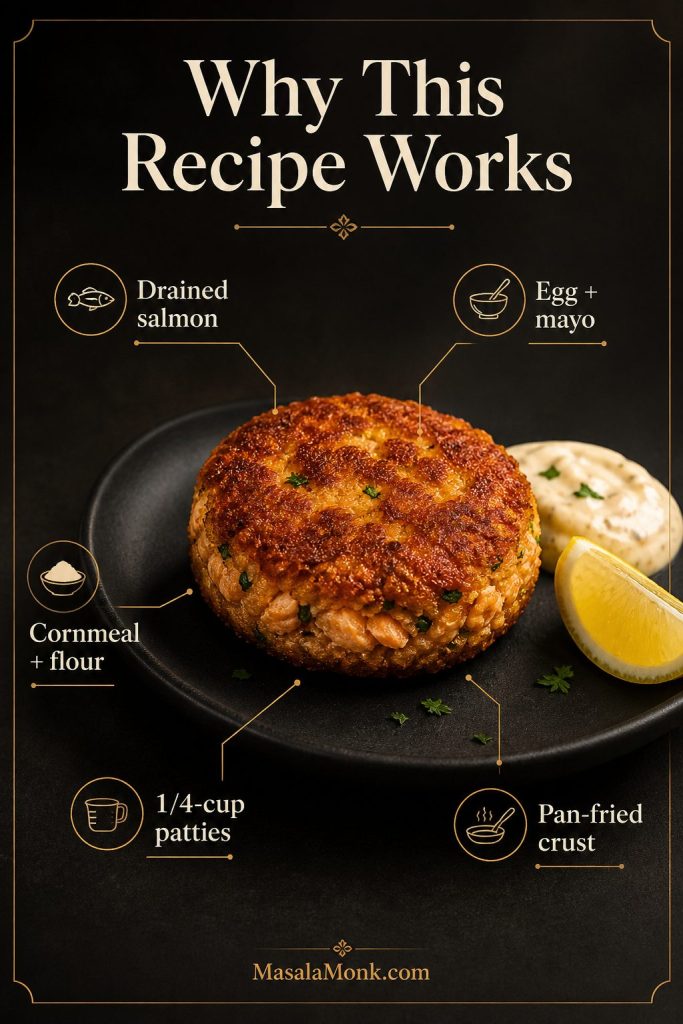
Why This Salmon Croquettes Recipe Works

  • Draining the salmon first prevents mushy patties. Too much liquid is one of the biggest reasons croquettes fall apart.
  • Egg, mayo, cornmeal, and flour give balanced structure. The egg binds, the mayo keeps the center tender, the cornmeal adds crispness, and the flour helps the mixture hold together.
  • ¼-cup patties cook evenly. This size gives you crisp edges without drying out the center.
  • Pan-frying gives the best crust. Baked and air fryer versions work, but the skillet method gives the most classic Southern-style texture.
  • The troubleshooting guide fixes common failures. If the mixture is wet, bland, dry, greasy, or falling apart, there is a direct fix below.

Why This Recipe Works Visually

Visual guide showing drained salmon, egg, mayonnaise, cornmeal, flour, patty size, and pan-fried crust for salmon croquettes
These salmon croquettes hold together because the moisture is controlled first, and then the binder is balanced. As a result, the patties stay crisp outside while still breaking apart in tender flakes.

What Are Salmon Croquettes?

Salmon croquettes are crisp, shaped patties made from flaked salmon, egg, dry binder, aromatics, and seasoning. In many Southern-style versions, they are made with canned salmon, cornmeal or flour, onion, bell pepper, egg, and a hot skillet. They are inexpensive, fast, and deeply satisfying when the outside is crisp and the inside stays tender.

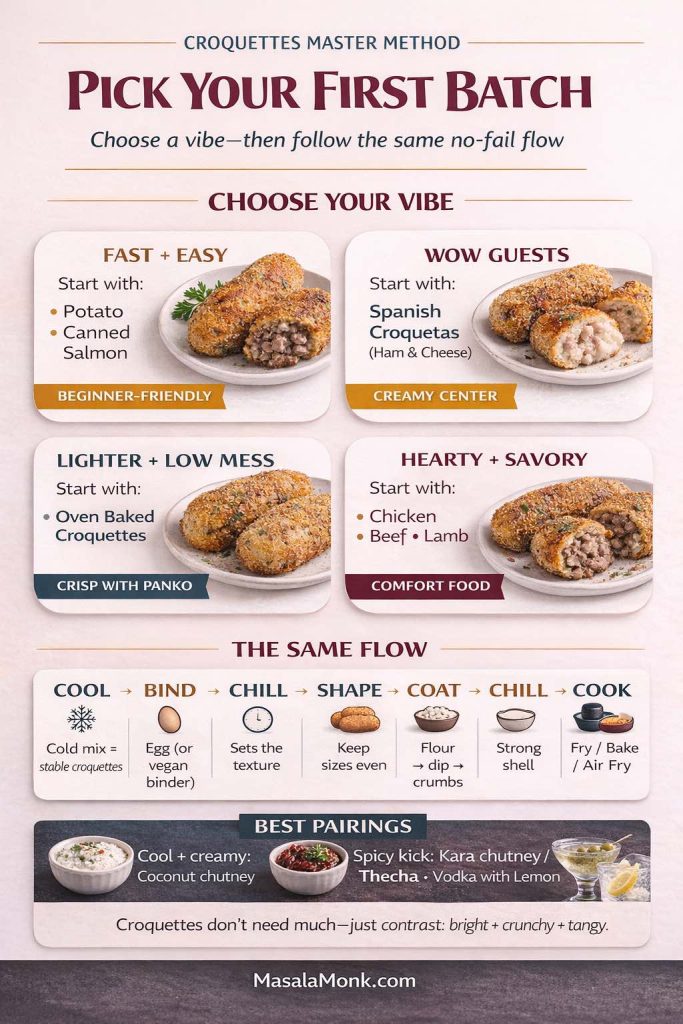
The basic logic is the same as a good croquettes master method: control moisture, bind the filling, shape it evenly, and cook until the outside sets before you flip.

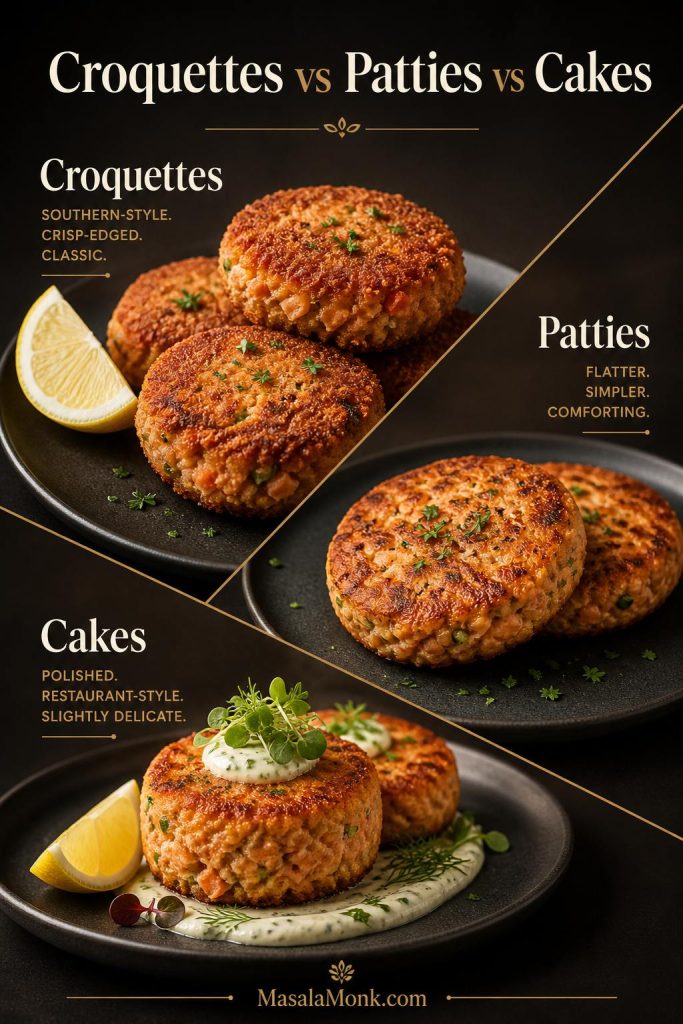
Salmon Croquettes vs Salmon Patties vs Salmon Cakes

These names overlap, and many people use them interchangeably. Still, there are a few useful differences.

Term Usually means How to think about it
Salmon croquettes Often Southern-style, made with canned salmon, binder, and a crisp fried crust. This is the main recipe here.
Salmon patties A broader term for flatter salmon cakes or patties, usually made with canned or leftover cooked salmon. Same family, slightly less specific.
Salmon cakes Often a little more restaurant-style, sometimes made with fresh salmon, panko, herbs, Dijon, or mayo. Use the fresh salmon variation below if you want this style.
Comparison of salmon croquettes, salmon patties, and salmon cakes arranged as three different plated examples
The names overlap, but the texture is the real clue. Croquettes usually lean crisp-edged and Southern-style, patties are often flatter and simpler, while salmon cakes tend to feel more polished.

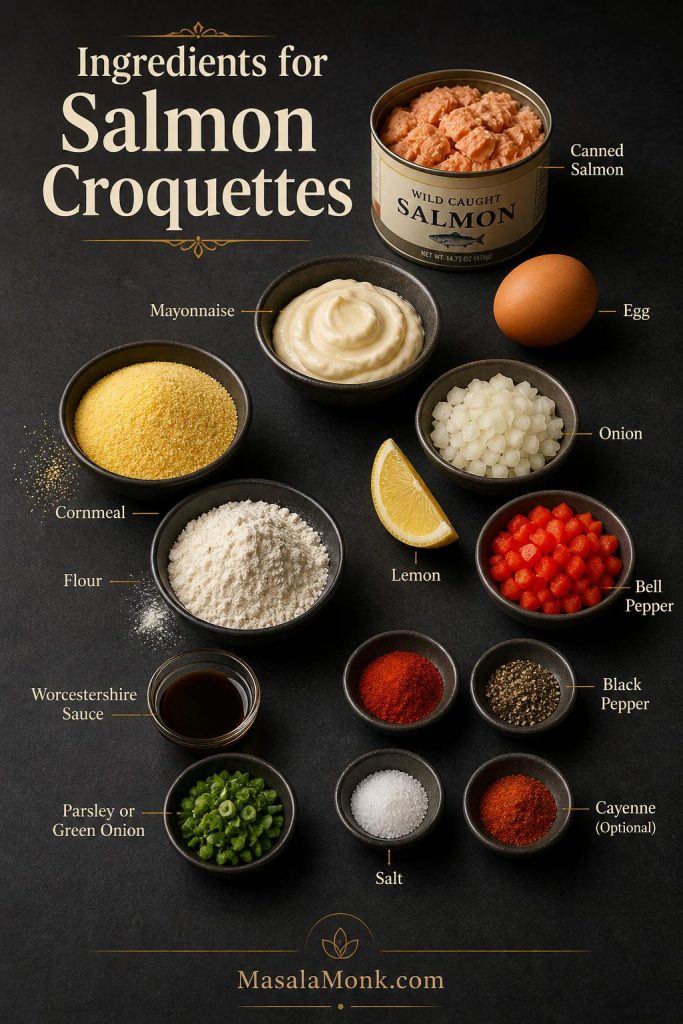
Ingredients for Salmon Croquettes

A good salmon croquettes recipe is simple, but balance still matters. Too much wet binder makes the mixture mushy; meanwhile, too much flour or cornmeal can make the patties dry. This version uses canned salmon, egg, mayo, cornmeal, and flour so the croquettes hold together while the center stays flaky.

Visual Guide to Salmon Croquettes Ingredients

Ingredients for salmon croquettes including canned salmon, egg, mayonnaise, cornmeal, flour, onion, bell pepper, lemon, Worcestershire sauce, herbs, and spices
The ingredient list is simple, but balance matters. Canned salmon gives the base, while egg, mayo, cornmeal, and flour help the croquettes stay moist without falling apart.

Salmon

For classic salmon croquettes, use one standard can of pink salmon, usually 14.75–15 ounces / 418–425 grams. Drain off excess liquid, but do not squeeze the salmon completely dry. It should be moist enough to flake, not watery. You can remove the larger bones and skin if you prefer, although many canned salmon recipes leave the small soft bones in because they mash easily and add calcium.

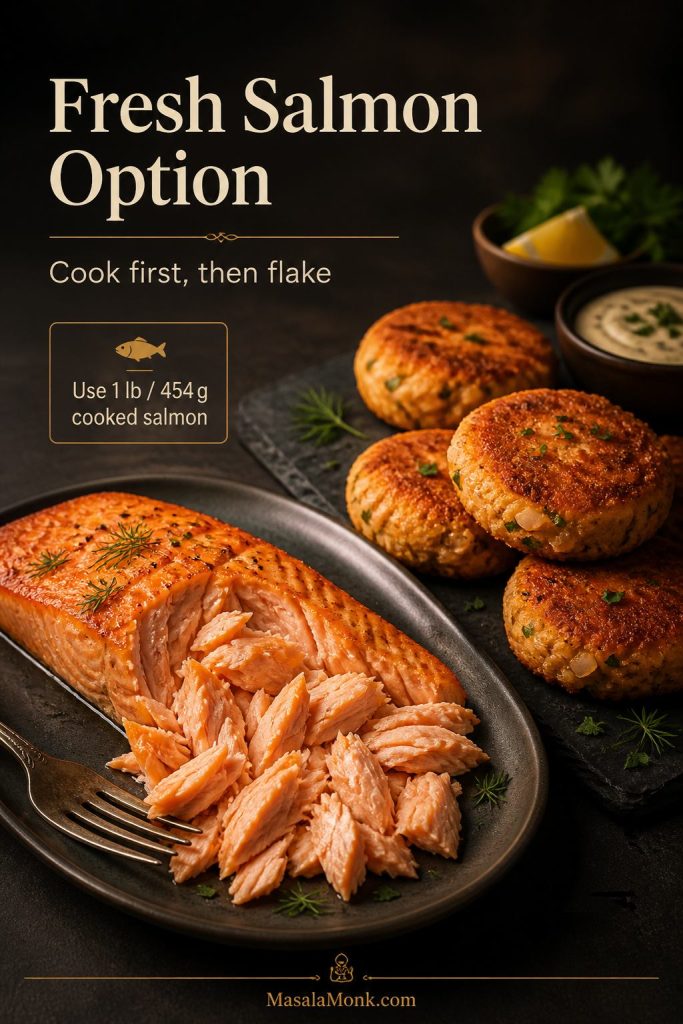
Fresh cooked salmon also works. Use about 1 pound / 454 grams raw salmon, cook it first, cool it slightly, then flake it into the mixture. Leftover cooked salmon is even easier because it is already cooked and ready to flake.

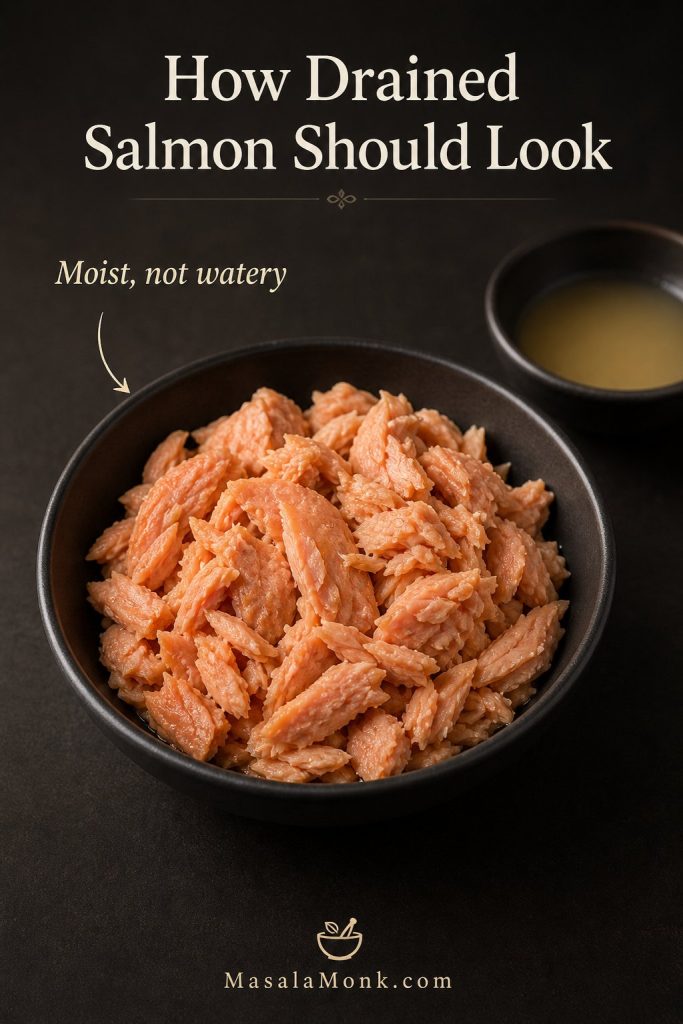
How Drained Salmon Should Look

Drained canned salmon flakes in a bowl with excess liquid shown separately
The salmon should be moist, not watery. Draining off excess liquid prevents mushy croquettes; however, keeping a little moisture helps the center stay tender.

Egg, Mayo, Cornmeal, and Flour

The egg gives structure. Mayo adds moisture and helps keep the center from drying out. Cornmeal adds a crisp, old-fashioned Southern texture. Flour helps the mixture bind without making the croquettes too crumbly.

Mayo also gives you an easy sauce base. If you like homemade condiments, use homemade mayo to make lemon dill mayo, garlic mayo, spicy mayo, tartar sauce, or a quick remoulade-style dip for serving.

Onion, Bell Pepper, Herbs, and Seasoning

Finely diced onion and bell pepper give the croquettes sweetness and texture. Green onion or parsley adds freshness. Worcestershire sauce gives a savory backbone, lemon juice brightens the salmon, and paprika, garlic powder, black pepper, and a little cayenne or hot sauce round out the flavor.

For a seafood-style flavor, add ½ teaspoon Old Bay-style seafood seasoning, Cajun seasoning, or Creole seasoning and reduce the added salt if the blend is already salty.

Texture tip: Dice the onion and bell pepper small. Large pieces can make the patties crack or break apart when you flip them.

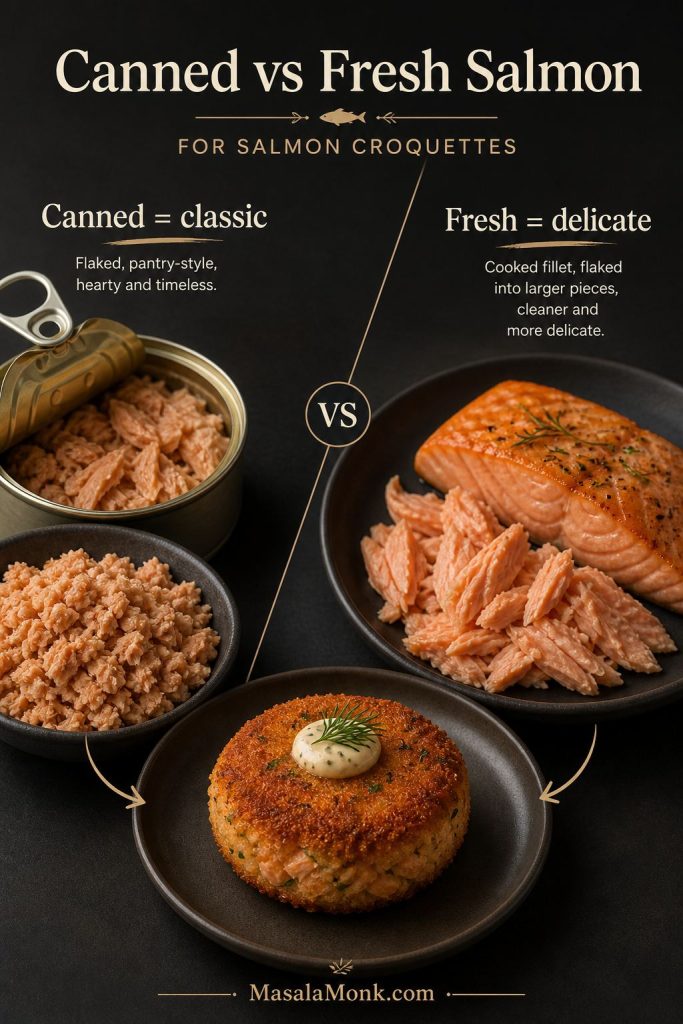
Canned Salmon vs Fresh Salmon for Croquettes

Canned salmon is the best first choice for classic salmon croquettes because it is already cooked, affordable, easy to flake, and traditional in many old-fashioned and Southern-style recipes. Fresh salmon, meanwhile, gives a cleaner flavor and a softer, more delicate texture, but it needs to be cooked before you mix the croquettes.

Canned vs Fresh Salmon at a Glance

Canned salmon and cooked fresh salmon shown side by side for making salmon croquettes
For a classic pantry-style batch, use canned salmon; meanwhile, cooked fresh salmon gives you a cleaner, more delicate croquette when you want a softer salmon cake texture.

Canned Salmon Croquettes

For classic croquettes, canned salmon is the easiest and most traditional choice. Drain it very well, flake it gently, and use one 14.75–15 ounce / 418–425 gram can for about 8 croquettes. In this recipe, canned pink salmon gives a milder, budget-friendly patty, while canned red salmon tastes richer. Remove large pieces of skin or bone if you prefer a smoother texture.

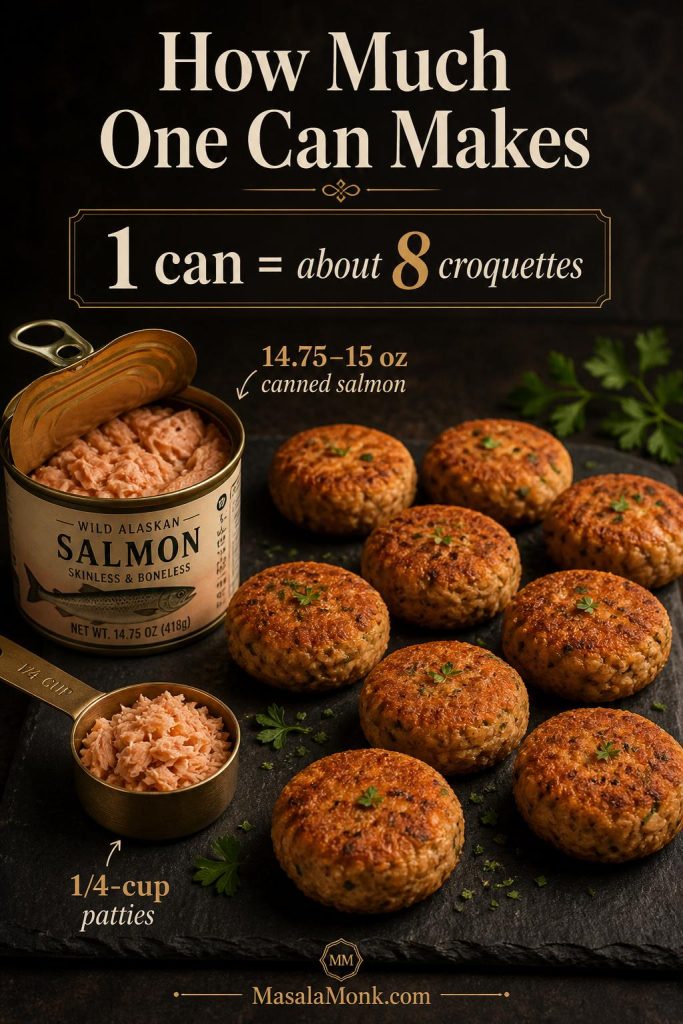
How Much One Can of Salmon Makes

Open can of salmon with a quarter-cup scoop and about eight salmon croquettes on a dark surface
One standard can of salmon makes about eight medium croquettes, so the recipe is easy to scale for dinner or meal prep. If you keep the patties the same size, they also cook more evenly in the skillet.

Once your salmon is drained and flaked, jump to the step-by-step method.

Salmon type Best for How to use it
Canned pink salmon Classic salmon croquettes, Southern salmon croquettes, quick dinners Drain off excess liquid, flake with a fork, and remove large bones or skin if desired. The salmon should be moist, not watery.
Canned red salmon A richer canned salmon version Use the same amount as pink salmon, but reduce added salt if the can tastes salty.
Fresh salmon Fresh salmon croquettes or salmon cakes Cook first, cool slightly, then flake into the binder.
Leftover cooked salmon Fastest fresh-style version Flake gently and reduce salt if the salmon was already seasoned.

If you have extra cooked salmon after dinner, use some for croquettes and turn the rest into a salmon bowl with rice, cucumber, sauce, avocado, herbs, and crunchy toppings.

How to Make Fresh Salmon Croquettes

To use fresh salmon, start with about 1 pound / 454 grams of salmon fillet. Cook it until just done, cool it slightly, then flake it into large pieces before mixing. For food safety, fresh fish should reach 145°F / 63°C, or the flesh should be opaque and separate easily with a fork, according to FoodSafety.gov.

When buying fresh salmon, the FDA’s seafood safety guidance recommends choosing fish that smells fresh and mild, not fishy, sour, or ammonia-like. Fresh fillets should look firm, not dried or discolored around the edges.

How to Use Fresh Salmon Instead

Cooked fresh salmon fillet flaked into pieces with salmon croquettes nearby
Fresh salmon can make excellent salmon croquettes, although the texture is usually cleaner and more delicate than the canned version. For that reason, cook it first, cool it slightly, and then flake it gently before mixing.
Fresh salmon adjustment: Because fresh salmon is usually less salty than canned salmon, taste the mixture before shaping and add a little extra salt, lemon, or Worcestershire if needed.
How to Make Salmon Croquettes Step by Step

This method keeps the salmon flaky and the croquettes sturdy, which is the main thing a good recipe needs to get right. Drain well, mix the wet binder first, fold gently, shape evenly, and avoid flipping until the first side has formed a crust.

Step 1: Drain and Flake the Salmon

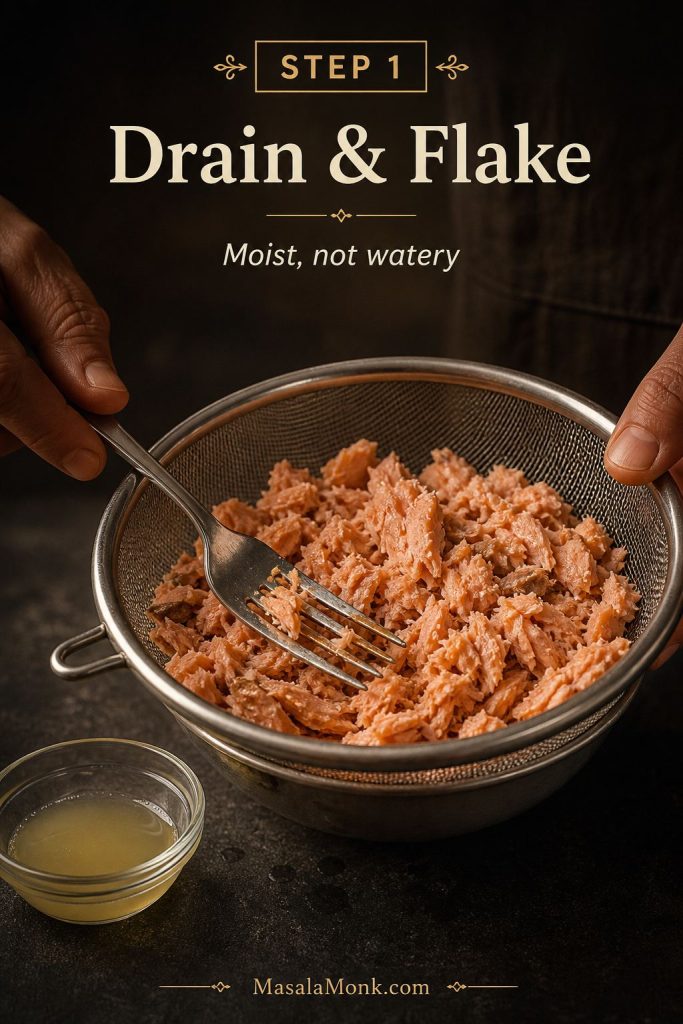
Drain the canned salmon thoroughly. Press out extra liquid if needed, then flake it with a fork. Do not mash it into a paste. A little texture gives the croquettes a better center.

Canned salmon being flaked with a fork in a strainer after draining
Start by draining and flaking the salmon gently. This step removes extra liquid, but it also keeps enough texture so the croquettes do not turn into a paste.

Step 2: Mix the Wet Binder First

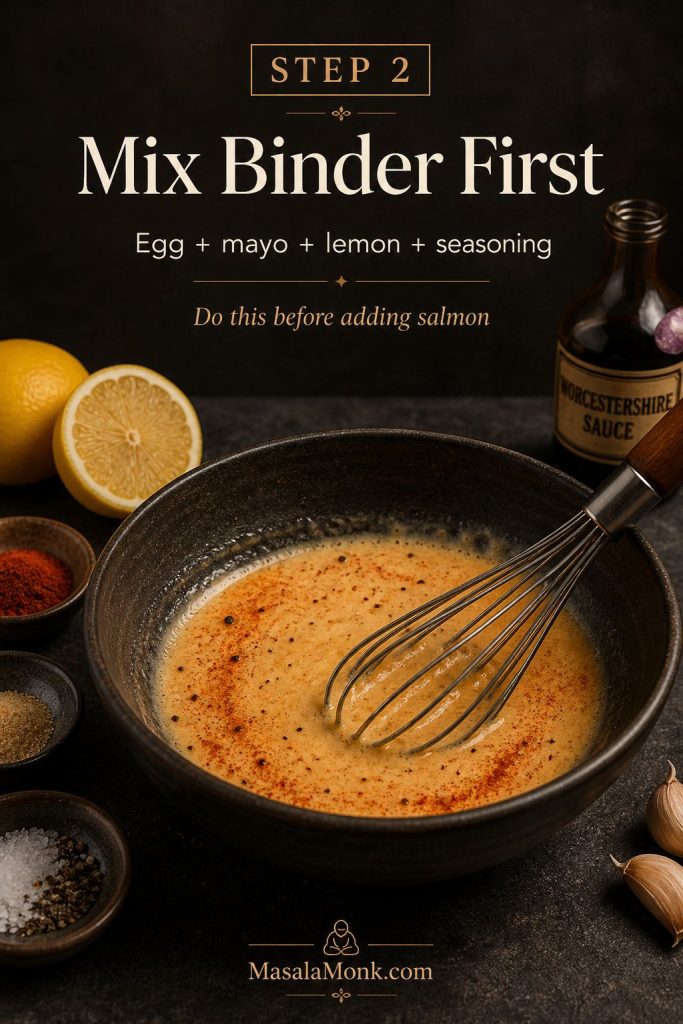
In a large bowl, whisk the egg, mayonnaise, Worcestershire sauce, lemon juice, garlic powder, paprika, black pepper, salt, and cayenne or hot sauce if using. Mixing the wet ingredients first helps the seasoning spread evenly.

Egg, mayonnaise, lemon juice, Worcestershire sauce, and seasonings being whisked together in a bowl
Mixing the wet binder first spreads the seasoning evenly. As a result, you can fold in the salmon gently later instead of overworking the mixture.

Step 3: Fold in Salmon, Vegetables, Cornmeal, and Flour

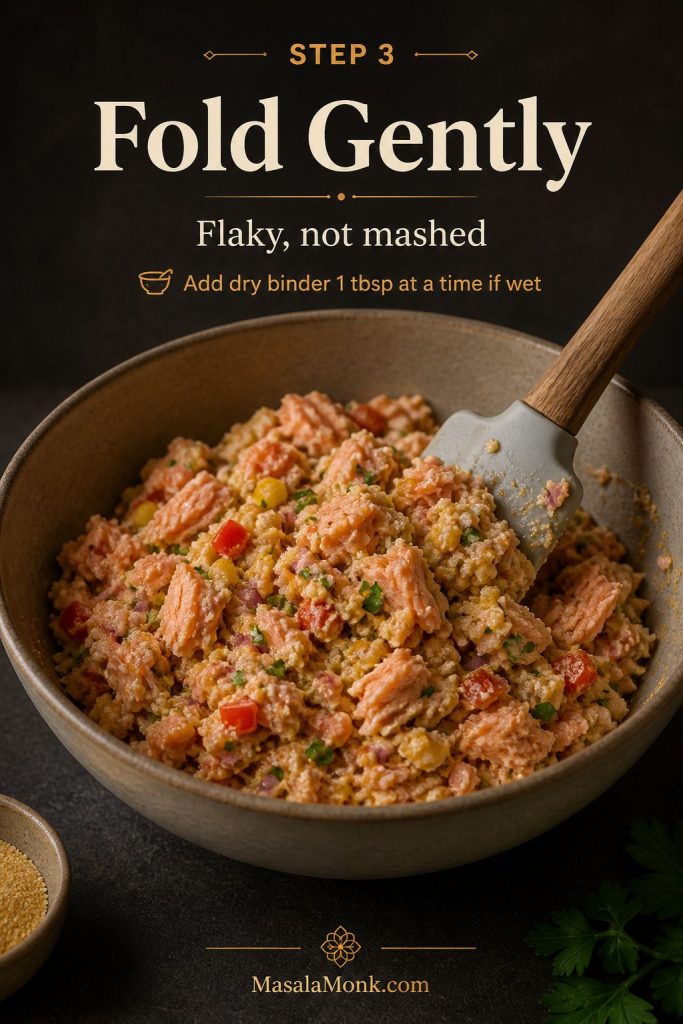
Add the flaked salmon, onion, bell pepper, green onion or parsley, cornmeal, and flour. Fold gently until the mixture holds together when pressed. If it feels very wet, add another tablespoon of cornmeal, flour, panko, or crushed crackers.

Salmon croquette mixture with salmon flakes, onion, bell pepper, cornmeal, flour, and herbs being folded with a spatula
Fold the mixture just until it holds together. You should still see salmon flakes, small vegetables, and binder throughout rather than a smooth mashed filling.

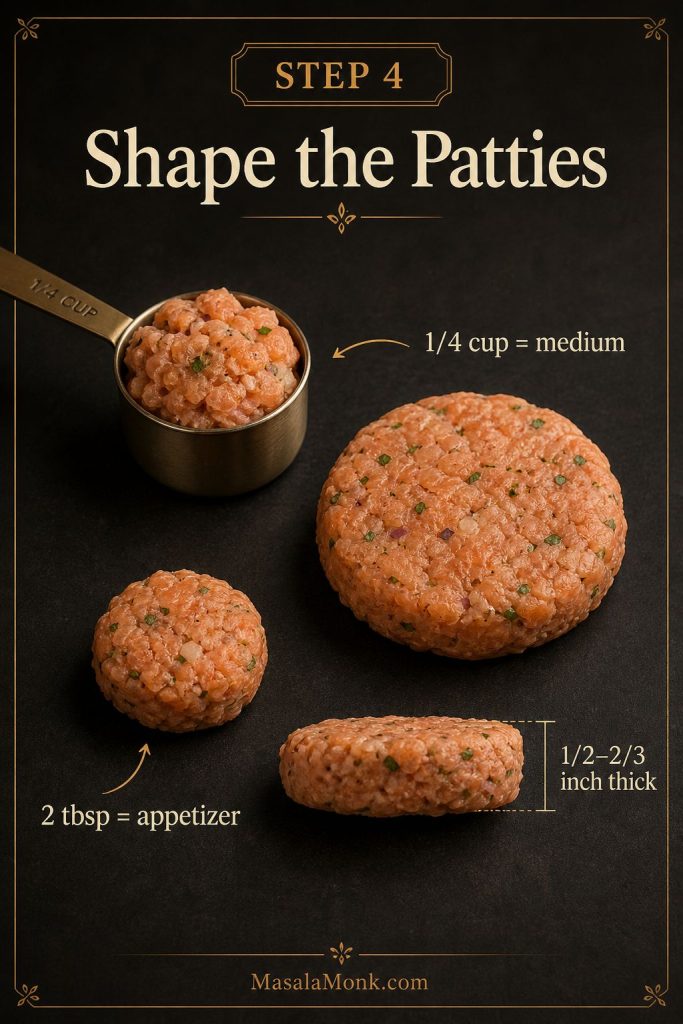
Step 4: Shape Into ¼-Cup Patties

Scoop about ¼ cup of mixture for each croquette. Shape into patties about ½–⅔ inch thick. Do not pack them too tightly; press just enough so they hold together.

Appetizer size: For smaller salmon croquettes, use 2 tablespoons of mixture per patty and cook slightly less, about 2–3 minutes per side.
Quarter-cup scoop, medium salmon croquette patty, smaller appetizer patty, and thickness guide
Even sizing helps the croquettes cook at the same speed. Use ¼ cup for dinner-size patties or 2 tablespoons for smaller appetizer croquettes.

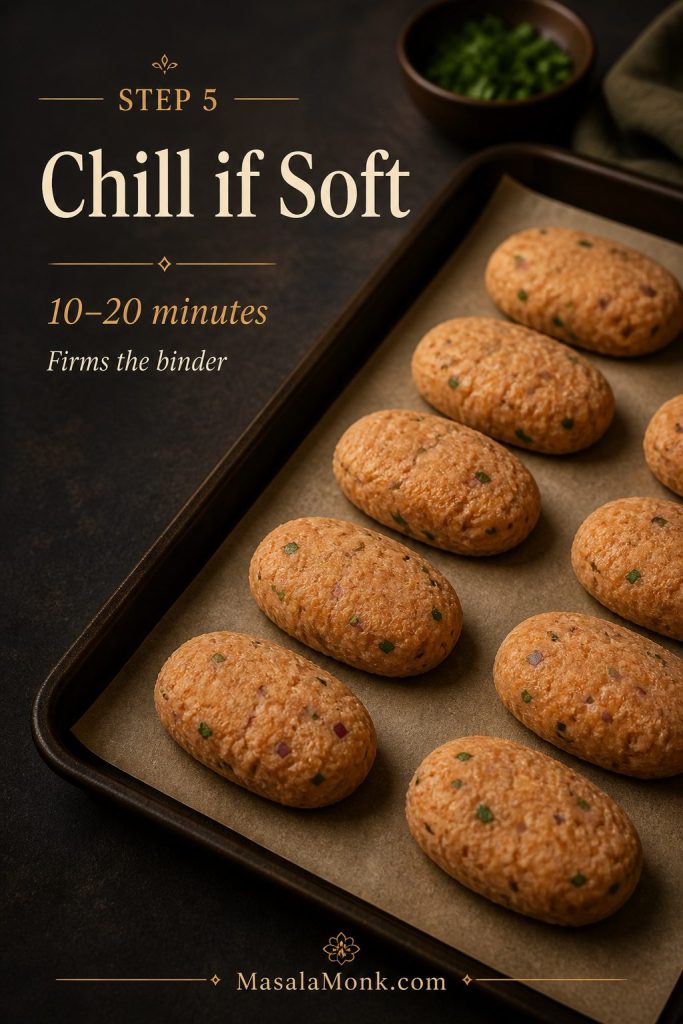
Step 5: Chill if the Mixture Feels Soft

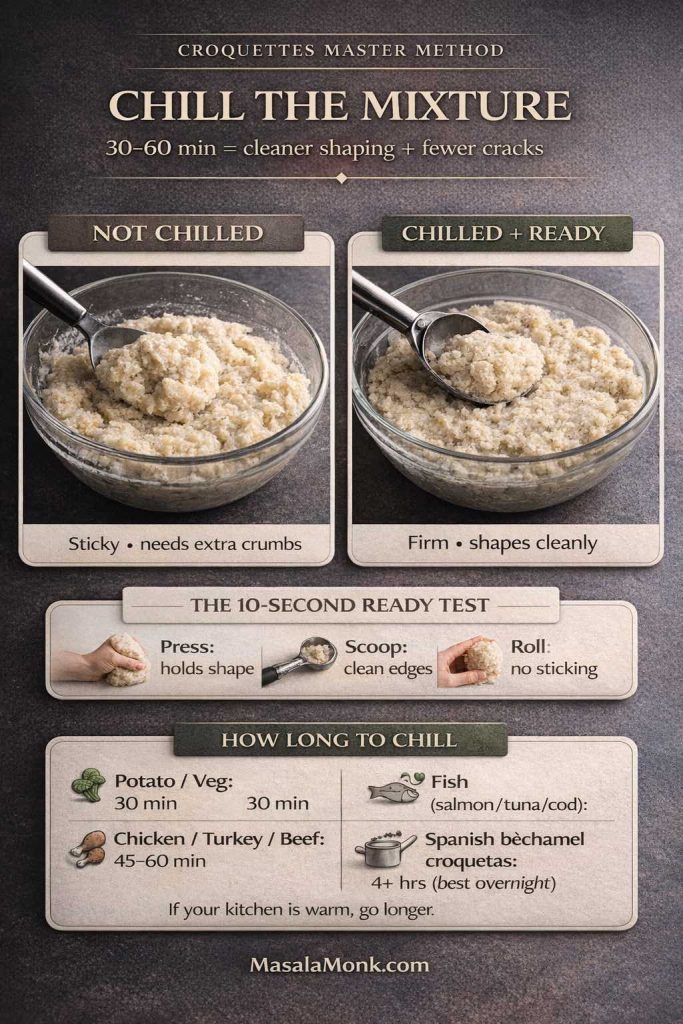
If the croquettes feel delicate, chill them for 10–20 minutes. Chilling firms the binder and makes them easier to flip. This is especially useful if your salmon was very moist or if you used fresh salmon.

Shaped uncooked salmon croquettes resting on a parchment-lined tray before frying
If the patties feel soft, chill them before cooking. This short rest firms the binder and makes the salmon croquettes easier to move without cracking.

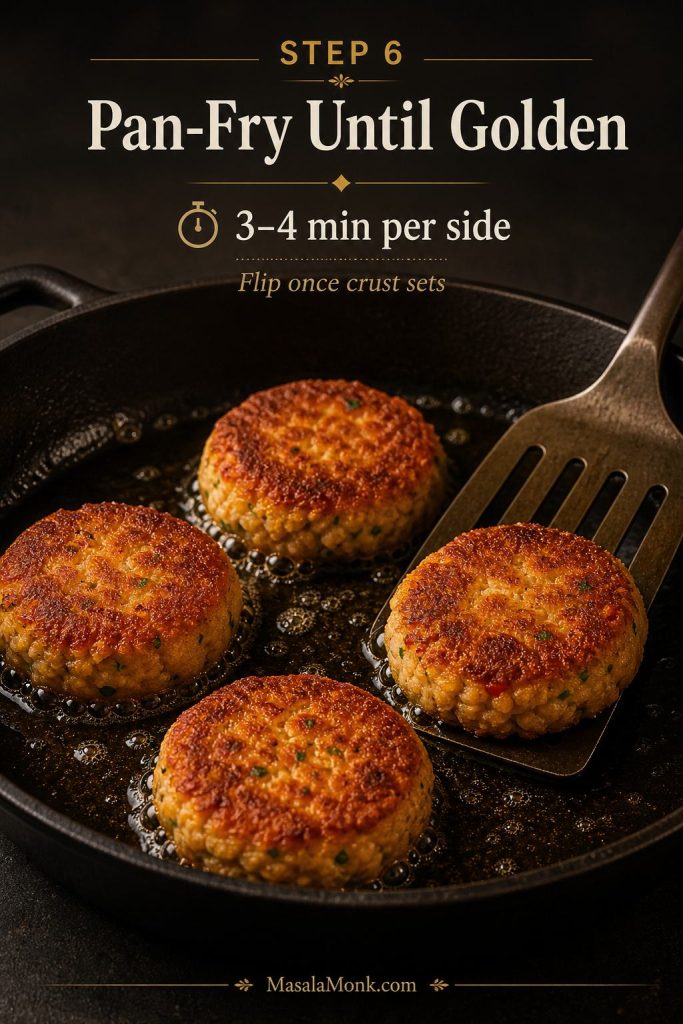
Step 6: Pan-Fry Until Crisp

Heat neutral oil in a cast iron skillet or heavy-bottom skillet until it reaches about 350°F / 175°C, or until a small crumb sizzles steadily when dropped in. Fry the croquettes for 3–4 minutes per side, flipping once, until deeply golden and crisp. Drain on a wire rack or paper-towel-lined plate.

Salmon croquettes frying in shallow oil in a skillet until golden brown
Pan-fry the croquettes until the first side is golden and set. Once that crust forms, the patties are much easier to flip cleanly.

Pan-Fried Salmon Croquettes

Pan-frying is the best default method because it gives salmon croquettes the crispest crust and the most classic texture. Use a 10-inch cast iron skillet or heavy-bottom skillet, and fry in batches so the oil temperature does not drop too much.

Because the salmon is already cooked when you use canned salmon, the real goal is to set the croquettes, crisp the crust, and heat the center without drying them out.

You do not need to deep-fry them. A shallow layer of oil is enough. For 8 croquettes, start with about ¼ cup / 60 ml oil and add a little more if the pan looks dry. For a more old-fashioned Southern fry, use closer to ½ cup / 120 ml.

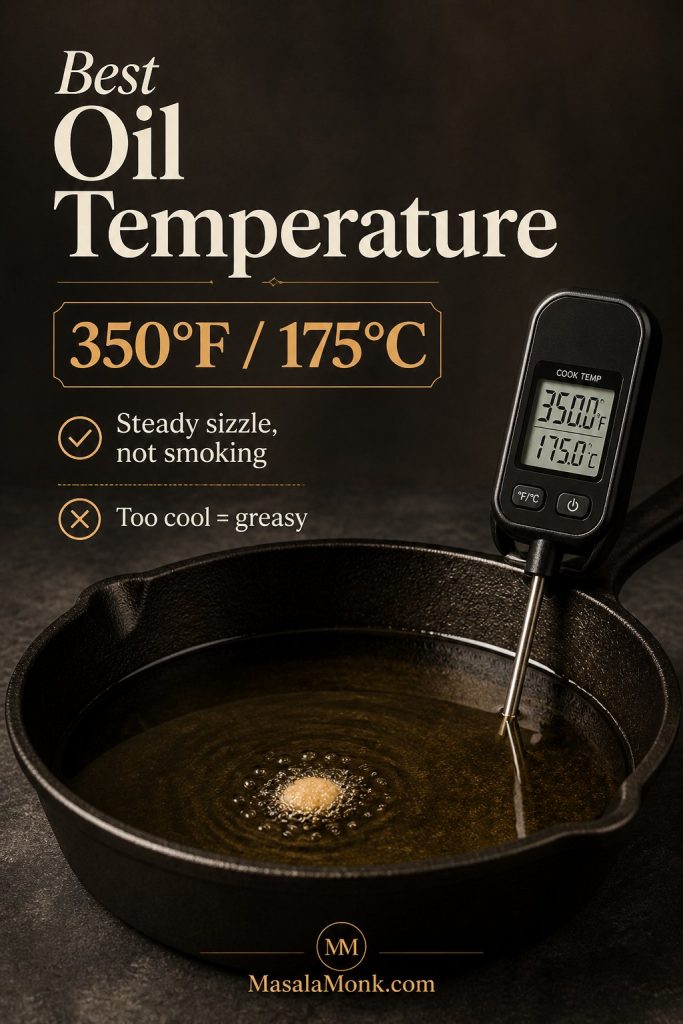
Use a neutral frying oil such as canola, vegetable, avocado, or peanut oil. The oil should shimmer, and a small crumb should sizzle steadily when dropped in. Croquettes that brown too fast need slightly lower heat. Croquettes that absorb oil and taste greasy usually need hotter oil or fewer patties in the pan.

Best Oil Temperature for Salmon Croquettes

Frying thermometer in shallow oil at 350 degrees Fahrenheit with a small crumb sizzling in a cast iron skillet
Oil temperature matters because cool oil makes croquettes greasy, while overheated oil browns the crust too fast. Aim for a steady sizzle around 350°F.

The croquettes are done when the outside is deeply golden, the center feels hot, and the patties feel set when lifted with a spatula.

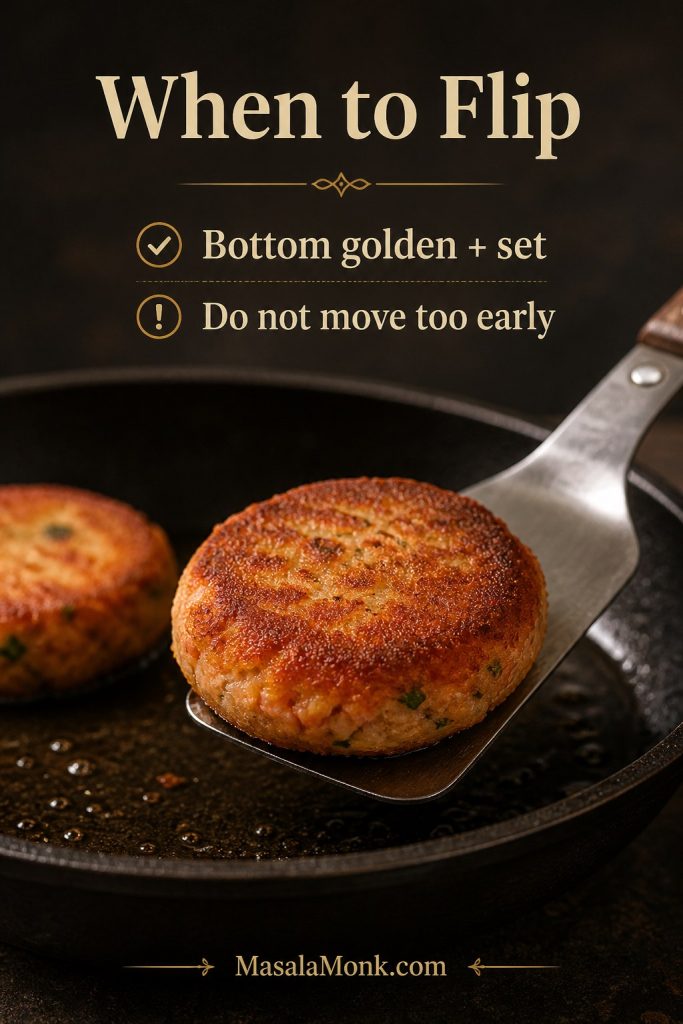
Do not flip too early. If the first side has not formed a crust, the croquette may tear. Let it cook until the edges look set and the bottom is golden.

When to Flip Salmon Croquettes

Salmon croquette lifted on a spatula to show a golden, set underside in a skillet
Flip only when the underside is golden and firm. Otherwise, the crust may tear before it has enough structure to hold the patty together.

Southern Salmon Croquettes

Southern salmon croquettes usually start with canned pink salmon, onion, bell pepper, egg, cornmeal, flour, and a hot skillet. The texture is crisp-edged and old-fashioned, with a savory salmon center and a little sweetness from the vegetables.

For a stronger Southern-style version, keep the cornmeal and flour combination in the recipe card, add a pinch of cayenne or a few dashes of hot sauce, and serve the croquettes with remoulade, lemon dill mayo, green chutney mayo, or hot sauce.

Extra cornmeal on the outside creates a rougher, crunchier crust. For a softer patty, skip the extra coating and let the flour do more of the binding.

Southern Salmon Croquettes Texture Cue

Southern-style salmon croquettes with a cornmeal crust served with sauce, lemon, herbs, and one croquette broken open
Southern salmon croquettes lean into canned salmon, cornmeal, and skillet frying. That combination gives them a crisp old-fashioned crust and a tender, savory center.

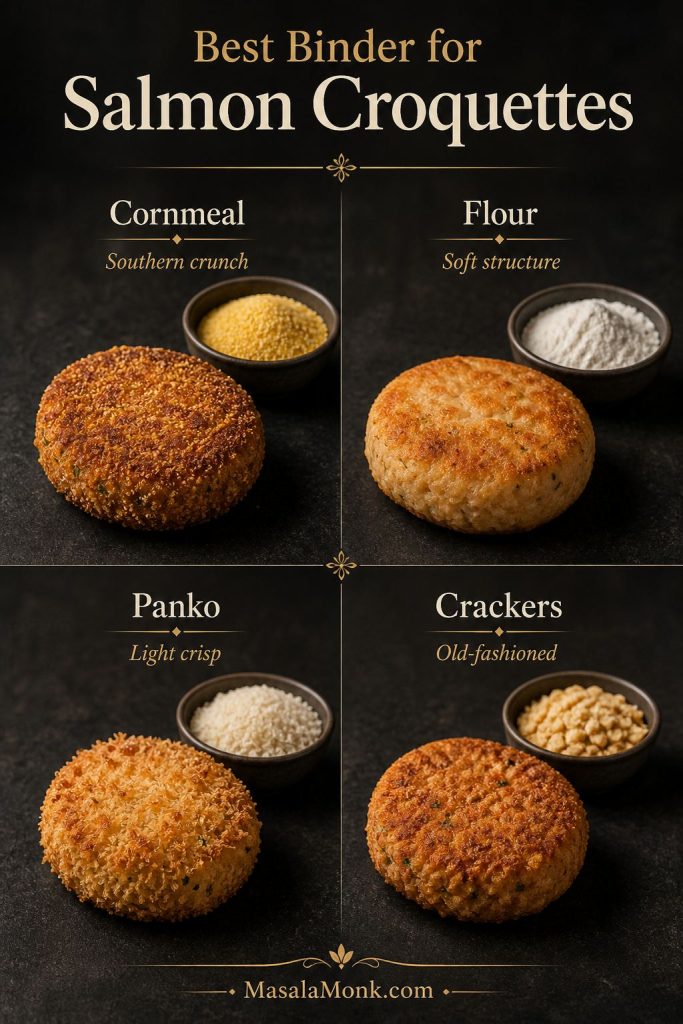
Cornmeal vs Flour vs Crackers vs Panko

The binder changes the texture of salmon croquettes more than most people realize. Cornmeal gives a classic Southern texture. Flour makes the mixture more cohesive. Panko makes the croquettes lighter and crispier. Crushed crackers give an old-fashioned pantry flavor.

Binder or coating Best for Texture
Cornmeal Southern salmon croquettes Crisp, grainy, old-fashioned crust
Flour Softer salmon patties Tender, cohesive, less crunchy
Panko Modern crispy salmon cakes Light, airy crunch
Crushed saltines Pantry-style salmon patties Savory, tender-crisp, nostalgic
Regular breadcrumbs Classic salmon cakes Even structure and mild crust
Almond flour Low-carb or gluten-free variation Softer and less crisp, but useful for dietary swaps

Best Binder for Salmon Croquettes

Four salmon croquettes compared with cornmeal, flour, panko, and crushed crackers as binders
The binder changes the final bite. Cornmeal adds crunch, flour gives structure, panko makes the crust lighter, and crackers create a more old-fashioned pantry-style patty.

For the best first batch, use cornmeal plus flour. If you want a lighter, crispier version, replace some or all of the cornmeal with panko. For old-fashioned salmon patties, crushed saltines work beautifully instead of panko or breadcrumbs.

If your mixture feels too wet or too loose, jump to the troubleshooting guide.

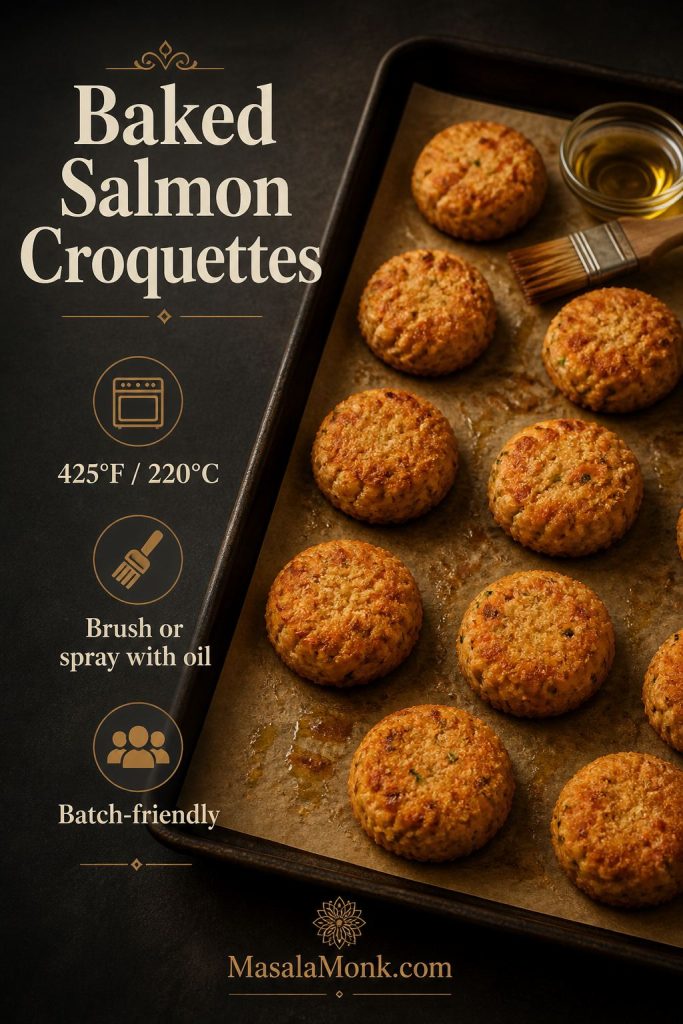
Baked Salmon Croquettes

Baked salmon croquettes are useful when you want less oil or need to cook a whole batch at once. Although they will not be quite as deeply crisp as pan-fried croquettes, a hot, well-oiled sheet pan helps them brown.

To bake them, heat the oven to 425°F / 220°C. Place the shaped croquettes on a well-oiled sheet pan, brush or spray the tops lightly with oil, and bake for 15 minutes. Flip carefully, then bake for another 5–7 minutes, until golden and firm.

Baked Salmon Croquettes Texture Cue

Baked salmon croquettes on a parchment-lined sheet pan with oil brush and small bowl of oil
Baked salmon croquettes are useful when you want a lighter batch or need to cook several at once. However, brushing or spraying them with oil helps the surface brown better and keeps the crust from tasting dry.
Baked texture tip: Keep baked croquettes slightly thinner, around ½ inch, so they heat through and brown before drying out.

Want a crisp, lower-oil option without using the oven? See the air fryer method.

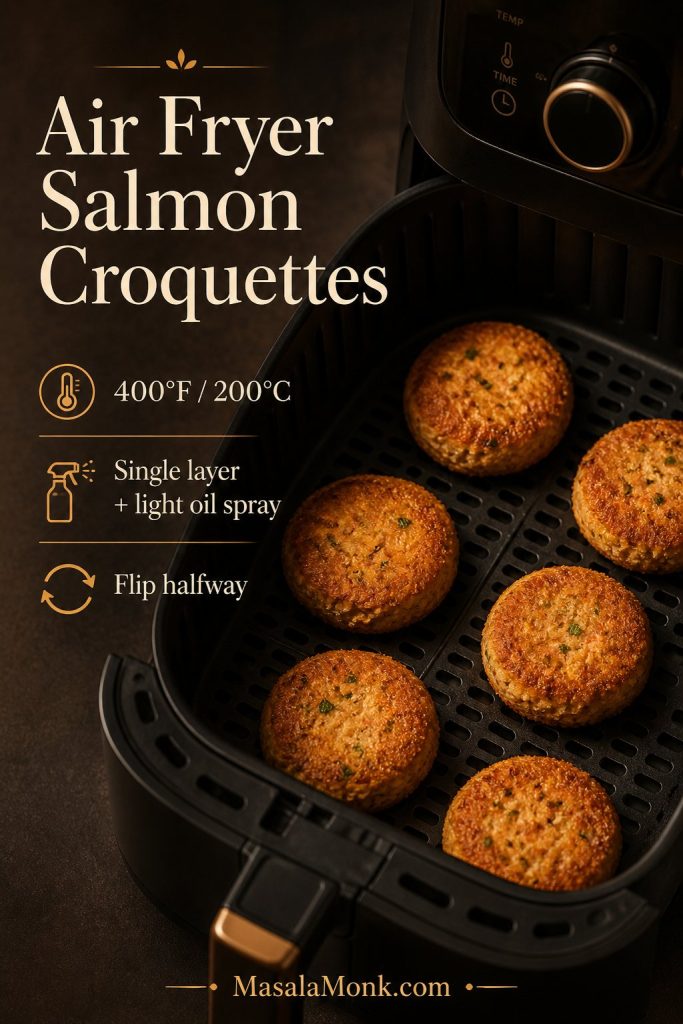
Air Fryer Salmon Croquettes

Air fryer salmon croquettes are a good middle ground between pan-fried and baked. They use less oil than skillet frying; however, they can still develop a crisp surface if you spray them lightly and avoid overcrowding the basket.

Preheat the air fryer to 400°F / 200°C. Spray the basket or use perforated parchment. Add the croquettes in a single layer, spray the tops lightly with oil, and air fry for 8–10 minutes. Flip, spray again if needed, and cook for another 3–5 minutes, depending on thickness.

Air Fryer Salmon Croquettes Texture Cue

Salmon croquettes arranged in a single layer inside an air fryer basket
Air fryer salmon croquettes can crisp surprisingly well, provided the patties are spaced apart and lightly oiled. Meanwhile, overcrowding the basket traps steam and makes the crust softer.

If you are building a full air fryer meal, serve the croquettes with something crisp and simple like air fryer hash browns or a cold salad on the side.

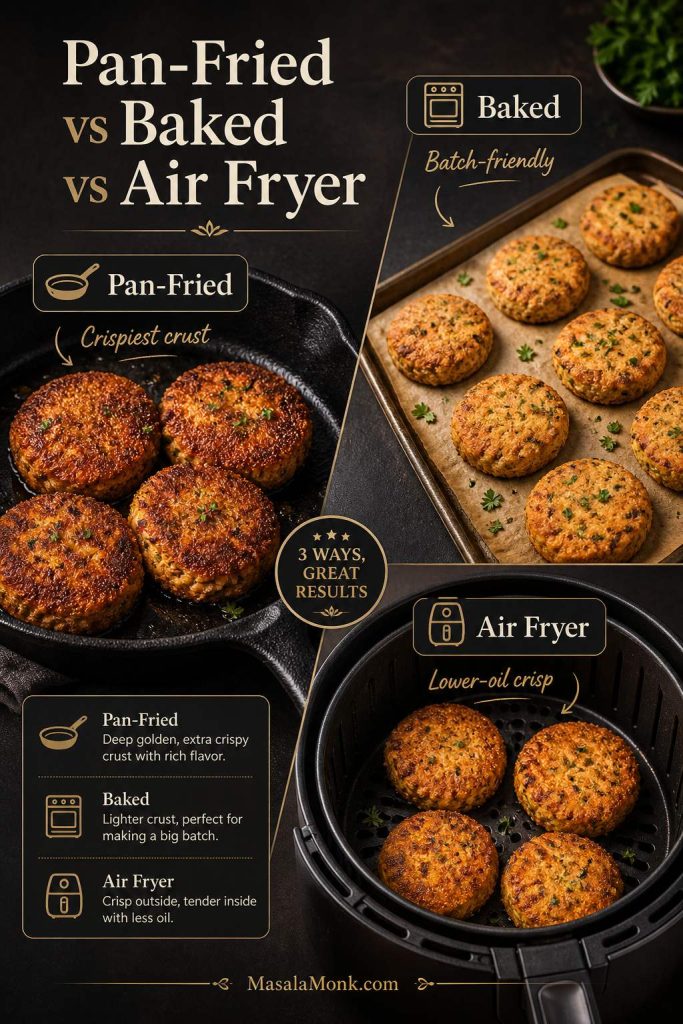
Pan-Fried vs Baked vs Air Fryer Salmon Croquettes

Comparison board showing pan-fried, baked, and air fryer salmon croquettes with different cooking equipment
Each cooking method changes the result a little. Pan-fried salmon croquettes give the boldest crust, baked croquettes are easiest for a larger batch, and the air fryer offers a crisp finish with less oil.

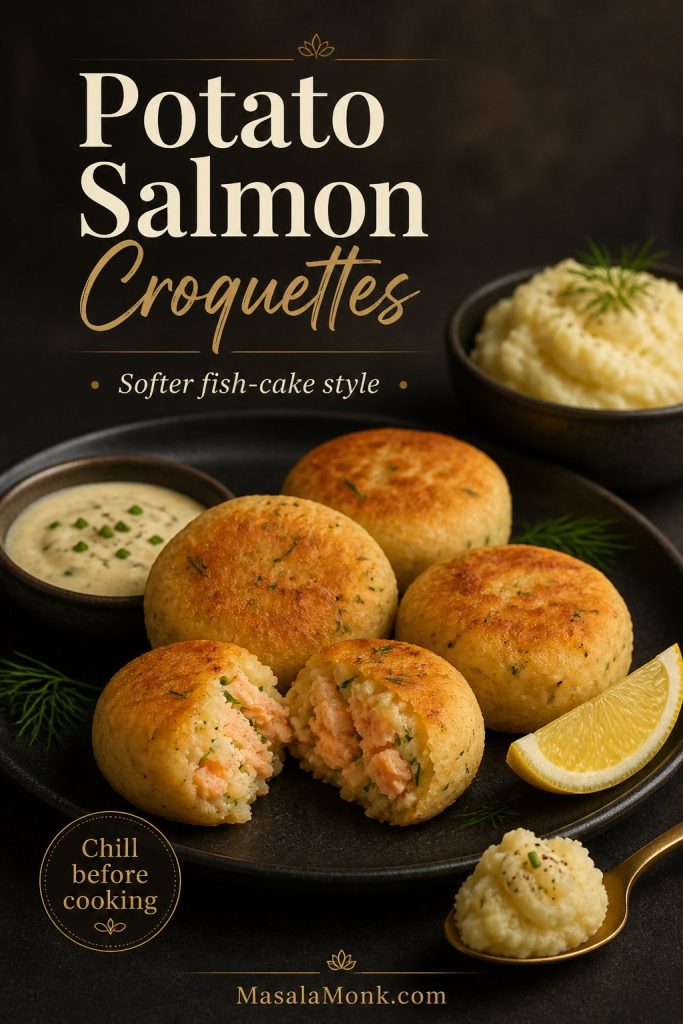
Potato Salmon Croquettes

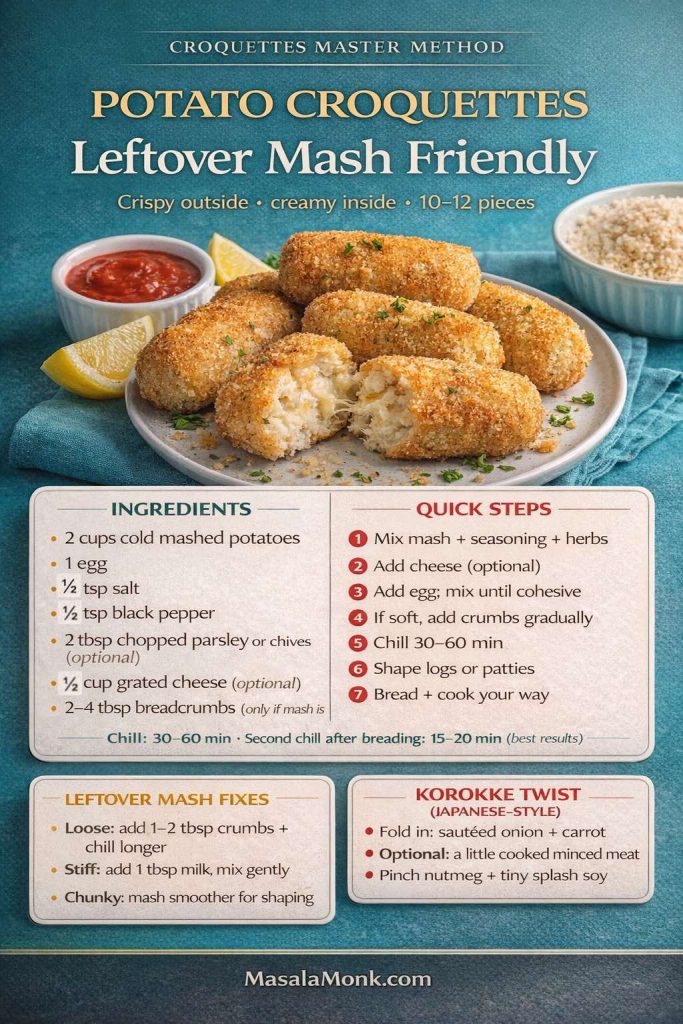
Potato salmon croquettes are softer and more like fish cakes. To make them, mix the drained salmon with about 1 cup mashed potatoes, one egg, onion, herbs, lemon, and seasoning. Reduce the cornmeal and flour because the potatoes already add body.

Chill potato salmon croquettes before cooking. They are more delicate than the canned salmon version, so a short rest in the fridge helps them hold their shape.

Potato Salmon Croquettes Texture Cue

Potato salmon croquettes served with mashed potato, lemon, sauce, and one croquette broken open
Potato salmon croquettes are softer than the cornmeal version. Because the mixture is more delicate, chilling before cooking helps them hold their shape.

Best Sauce for Salmon Croquettes

Salmon croquettes need a sauce with acid, creaminess, herbs, or heat. Tartar sauce is the familiar classic, lemon dill mayo is the easiest homemade option, remoulade gives a more Southern seafood-style finish, and brighter sauces like green chutney mayo, tzatziki, mango mustard, or mango habanero can change the whole plate.

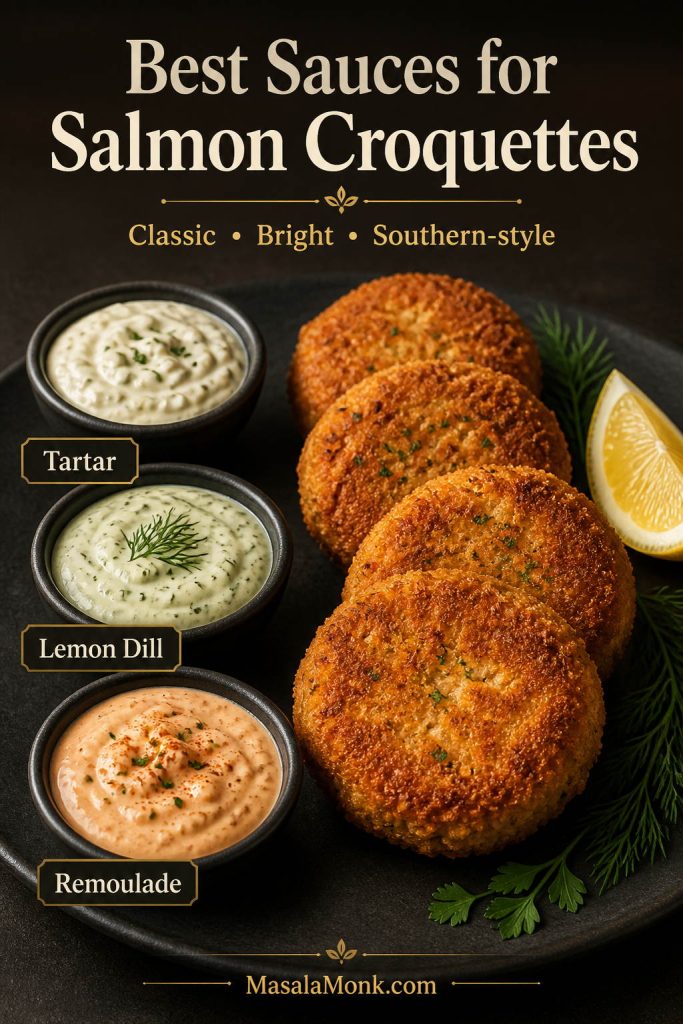
Best Sauces for Salmon Croquettes

Salmon croquettes served with three sauces labeled tartar, lemon dill, and remoulade
The best sauce depends on the mood of the plate. Tartar keeps things classic, lemon dill adds brightness, and remoulade gives the croquettes a Southern seafood-style finish.

Quick Tartar Sauce Shortcut

  • ½ cup mayonnaise
  • 1–2 tablespoons chopped pickles or relish
  • 1 teaspoon lemon juice
  • 1 teaspoon Dijon mustard, optional
  • Black pepper, to taste

Stir everything together and chill until serving. This is the easiest classic dip for salmon patties, salmon cakes, and crisp croquettes.

Quick Lemon Dill Sauce

  • ½ cup mayonnaise or Greek yogurt
  • 1 tablespoon lemon juice
  • 1 teaspoon Dijon mustard
  • 1 tablespoon chopped dill or parsley
  • 1 small grated garlic clove
  • Salt and black pepper, to taste

Mix everything together and chill until ready to serve. If the sauce tastes flat, add more lemon. If it tastes too sharp, add a spoonful more mayo or yogurt.

Quick Remoulade-Style Sauce

  • ½ cup mayonnaise
  • 1 teaspoon Dijon mustard
  • 1 tablespoon lemon juice or pickle juice
  • 1 teaspoon hot sauce
  • ½ teaspoon paprika
  • 1 tablespoon chopped pickles, relish, or capers, optional
  • Black pepper, to taste

Mix everything together and chill for 10–15 minutes if you have time. This sauce is especially good with Southern salmon croquettes, cornmeal-crusted croquettes, and fried salmon patties.

For an Indian-style twist, stir green chutney into mayo or yogurt. The coriander, mint, chilli, ginger, cumin, and citrus make a sharp, fresh dip that cuts through the fried crust.

For baked or air fryer croquettes, a cool tzatziki sauce works beautifully. The cucumber and yogurt keep the plate lighter, especially if the croquettes are spicy or served as lunch.

For a sweet, tangy, fish-friendly sauce, try mango mustard sauce instead of plain mustard. For more heat, finish the plate with mango habanero sauce, especially with slaw, rice, or a bowl-style meal.

Building a full plate? See what to serve with salmon croquettes.

What to Serve with Salmon Croquettes

A cold, crisp cucumber salad is one of the easiest sides for salmon croquettes. The vinegar, dill, onion, and crunch balance the fried crust without making the meal heavy.

Tabbouleh is a brighter herb-heavy side because parsley, mint, lemon, tomato, and bulgur bring freshness to the plate.

For a more filling lunch, add chickpea salad on the side or tuck the croquettes into bowls with greens, cucumber, herbs, and sauce.

A classic comfort-food plate works well with potato salad, fries, roasted potatoes, green beans, coleslaw, or a simple green salad.

During warmer months, serve the croquettes with mango salsa, lime, and shredded cabbage for a fresher, taco-inspired plate.

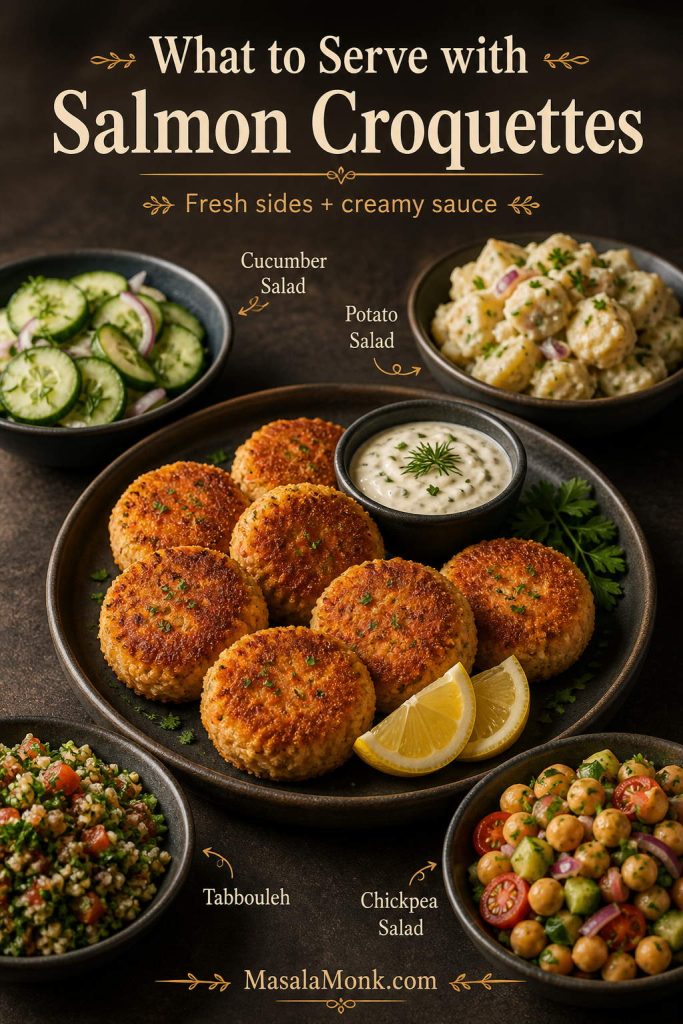
Visual Side Dish Guide

Salmon croquettes served with cucumber salad, potato salad, tabbouleh, chickpea salad, lemon wedges, and creamy sauce
For a balanced meal, pair crisp salmon croquettes with something fresh and something creamy. Cucumber salad, tabbouleh, chickpea salad, and potato salad all work well because they cut through the richness.

Healthy, Gluten-Free, Low-Carb, and Egg-Free Variations

For a lighter or dietary-specific version, keep the same basic method and adjust the binder, cooking method, or sauce.

Variation How to adjust it
Lighter salmon croquettes Bake or air fry instead of pan-frying, and serve with a yogurt-based sauce like tzatziki.
Gluten-free salmon croquettes Use certified gluten-free cornmeal plus gluten-free flour, gluten-free crackers, gluten-free breadcrumbs, or almond flour. Expect almond flour to make a softer croquette.
Low-carb salmon croquettes Use almond flour in place of flour and skip crackers or breadcrumbs. Expect a softer texture than the cornmeal version.
Egg-free salmon croquettes Use 2–3 tablespoons mashed potato or a flax egg as the binder, then chill the patties well before cooking.
Dairy-free salmon croquettes The base recipe is already dairy-free if your mayo is dairy-free.

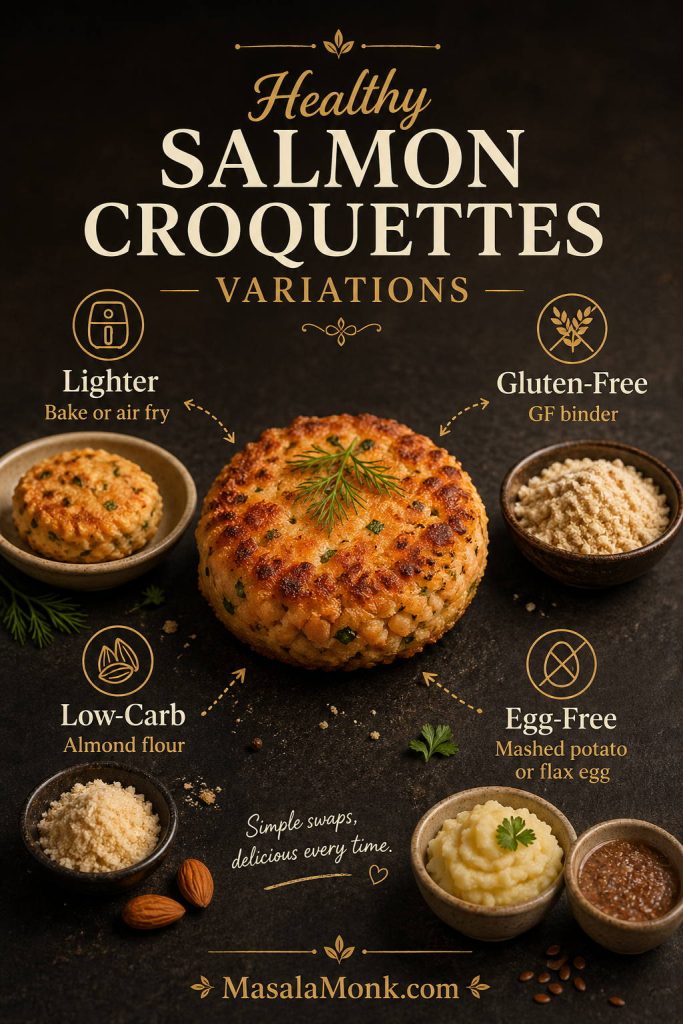
Healthy Salmon Croquettes Variations

Healthy salmon croquette variation board showing lighter, gluten-free, low-carb, and egg-free options
You can adapt this salmon croquettes recipe in several directions without starting over. For example, bake or air fry for a lighter version, use a gluten-free binder if needed, or swap the binder to fit low-carb or egg-free needs.

In these gluten-free, low-carb, or egg-free versions, treat the croquette mixture more gently and chill it before cooking. These swaps usually need a short rest because they are softer than the classic canned salmon and cornmeal version.

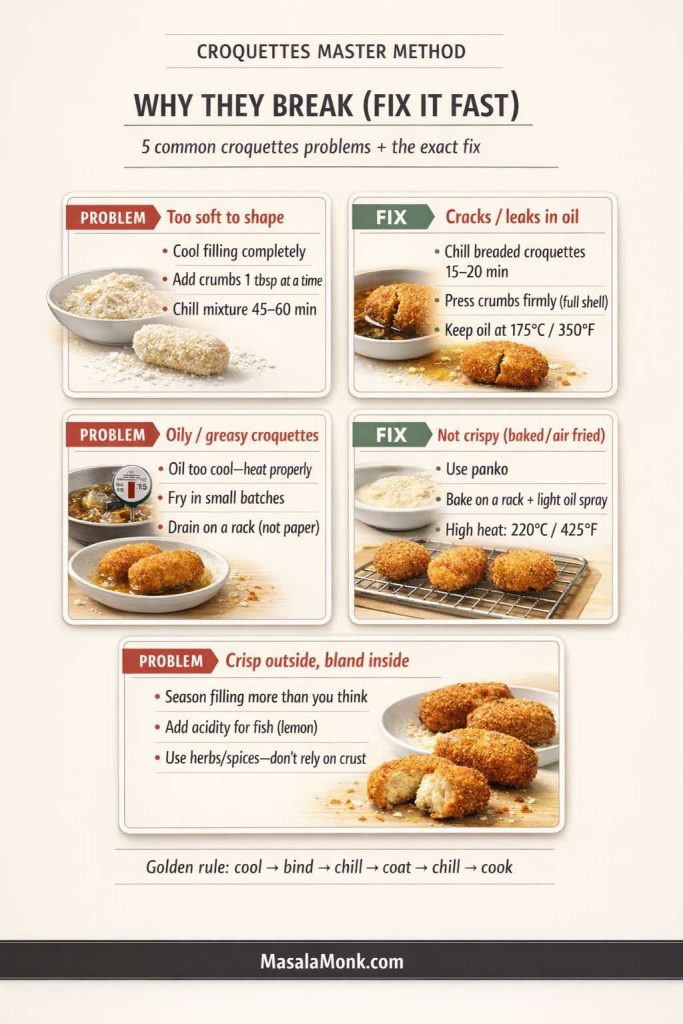
Why Do Salmon Croquettes Fall Apart?

Croquettes usually fall apart when the salmon mixture is too wet, the binder is too weak, the patties were not chilled, or they were flipped before the crust had time to set. Fortunately, the fix is simple: drain the salmon better, add dry binder one tablespoon at a time, chill the shaped patties, and flip only after the bottom is golden.

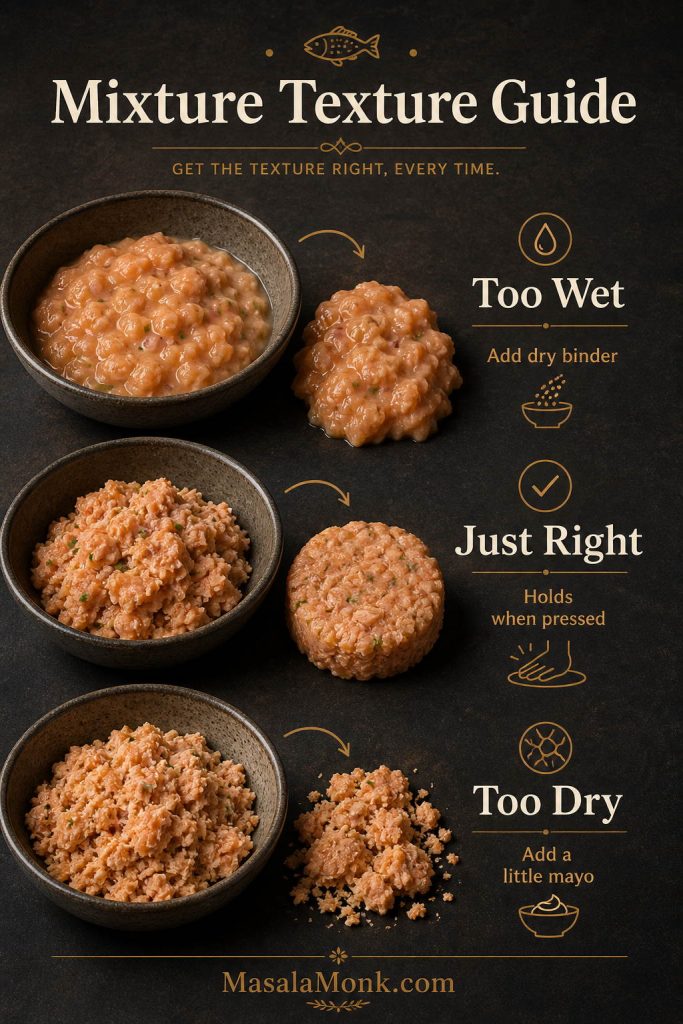
Salmon Croquettes Mixture Texture Guide

Three salmon croquette mixtures labeled too wet, just right, and too dry
The mixture should hold together when pressed, but still look flaky. If it is wet, add dry binder; if it crumbles, add a little mayo.
Problem Why it happens Fix
Croquettes fall apart Too wet, weak binder, or flipped too early. Add 1–2 tablespoons dry binder, chill 10–20 minutes, and flip only after a crust forms.
Mixture is too wet Salmon was not drained well or there is too much mayo. Add cornmeal, flour, panko, or crushed crackers 1 tablespoon at a time.
Croquettes are dry Too much flour or cornmeal, or they cooked too long. Add a little mayo to the mixture next time and serve with sauce.
Croquettes are mushy Too much wet binder or salmon mashed too finely. Drain salmon well, leave some flakes, and reduce mayo slightly.
They stick to the pan Oil was not hot enough or they were moved too soon. Heat oil until shimmering and let the bottom set before flipping.
They taste greasy Oil was too cool or the pan was crowded. Fry hotter, cook in batches, and drain on a wire rack.
They taste bland Not enough salt, acid, or savory seasoning. Add lemon, Worcestershire, herbs, black pepper, cayenne, hot sauce, or a small amount of Old Bay-style seasoning.

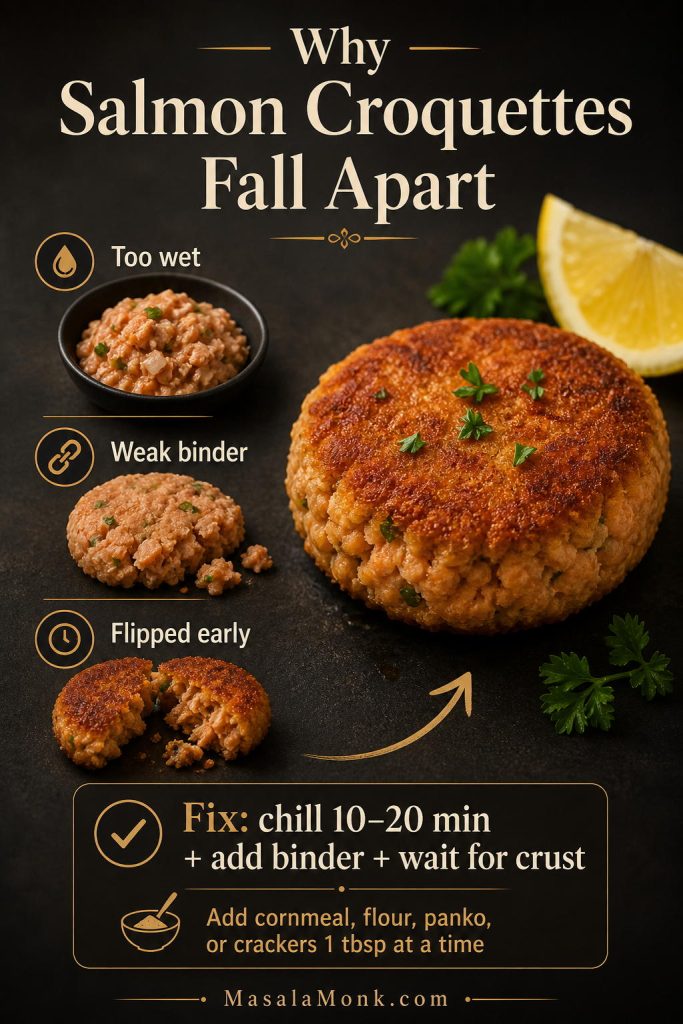
Why Salmon Croquettes Fall Apart

Troubleshooting guide showing wet mixture, weak binder, early flipping, and a corrected salmon croquette
Salmon croquettes usually fall apart for one of three reasons: too much moisture, weak binder, or flipping too early. Therefore, chill the patties, adjust the binder, and wait for the crust to set.

Ready to try again? Return to the recipe card.

Storage, Freezing, and Reheating

Salmon croquettes are best right after frying, but leftovers reheat well if you use a skillet, oven, or air fryer. Avoid microwaving if you want to keep the crust crisp.

Storage method Time Best reheating method
Fridge 2–3 days Skillet, oven, or air fryer
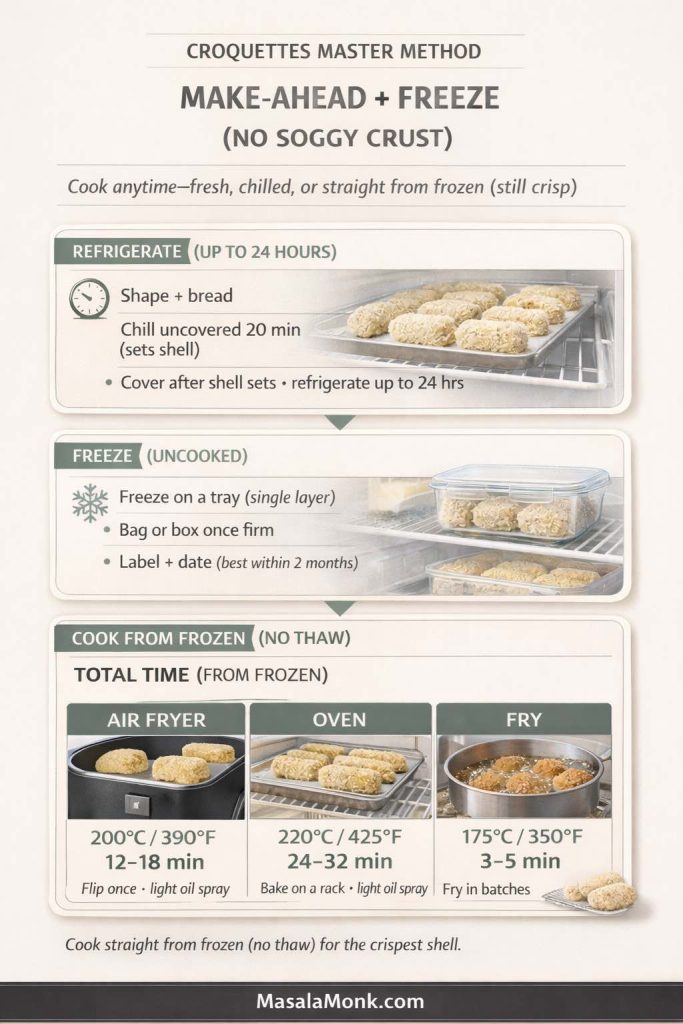
Make ahead Up to 1 day Shape the croquettes, cover, and refrigerate. Fry straight from the fridge, adding an extra minute if needed.
Freeze uncooked Up to 2–3 months Freeze on a tray first, then transfer to a bag. Thaw before cooking.
Freeze cooked Up to 2–3 months Cool fully, freeze in a single layer, then reheat from thawed.
Skillet reheat 2–3 minutes per side Best for restoring the crust
Air fryer reheat 375°F / 190°C for 4–7 minutes Fast and crisp
Oven reheat 350°F / 175°C for 10–15 minutes Best for larger batches

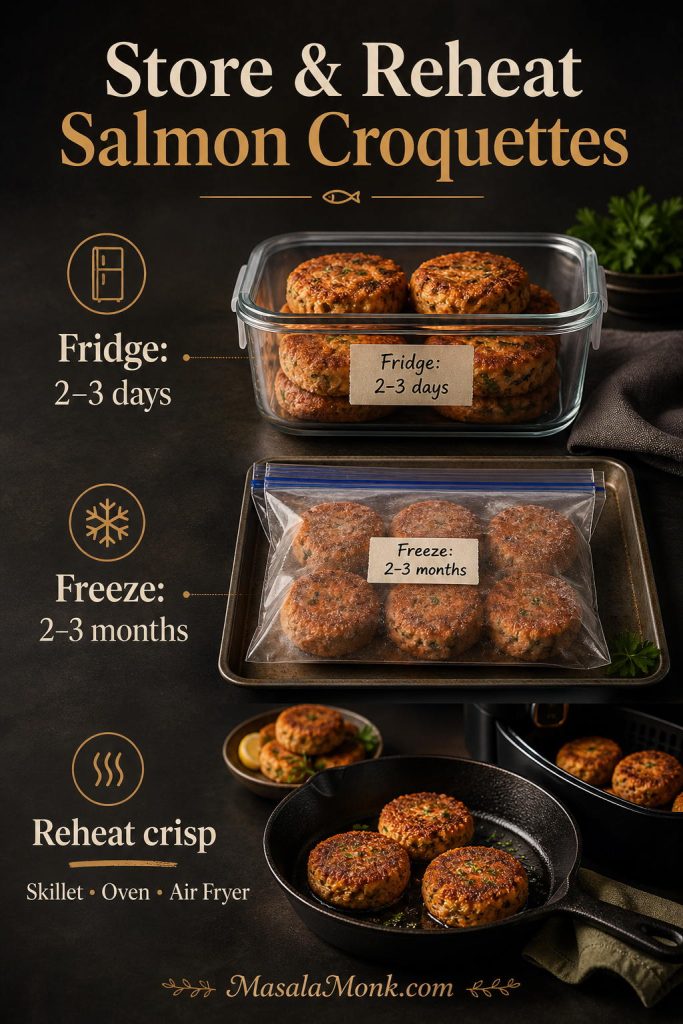
How to Store and Reheat Salmon Croquettes

Salmon croquettes stored in a fridge container, frozen in a freezer bag, and reheated in a skillet or air fryer
Leftover croquettes keep best when stored properly and reheated with dry heat. Use the fridge for short storage, the freezer for longer storage, and a skillet, oven, or air fryer to bring back the crust.

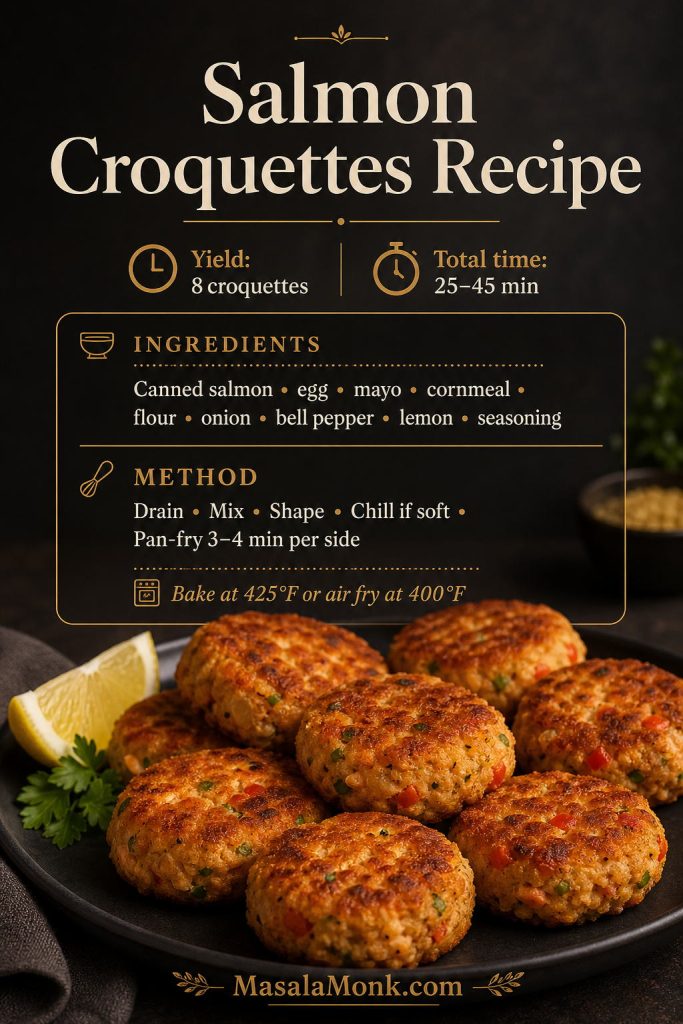
Saveable Salmon Croquettes Recipe Card

Saveable salmon croquettes recipe card with yield, total time, ingredients, method, and cooked croquettes
This saveable salmon croquettes recipe card keeps the core method simple: drain well, bind carefully, shape evenly, and fry until the crust sets. Therefore, it works as a quick refresher when you do not want to reread the full post.

Crispy Salmon Croquettes Recipe

These salmon croquettes are crisp outside, tender inside, and made with canned salmon, egg, mayo, cornmeal, flour, onion, bell pepper, lemon, Worcestershire, and pantry seasoning. Pan-fry them for the classic version, or use the baked and air fryer notes below.

Prep Time15 minutes
Cook Time8–10 minutes
Optional Chill10–20 minutes
Total Time25–45 minutes
Yield8 croquettes

Equipment

  • Large mixing bowl
  • Fork for flaking salmon
  • ¼-cup measuring cup or scoop
  • 10-inch cast iron skillet or heavy-bottom skillet
  • Thin spatula or fish spatula
  • Wire rack or paper-towel-lined plate
  • Optional instant-read thermometer for oil

Ingredients

  • 1 can canned pink salmon, 14.75–15 oz / 418–425 g, drained well
  • 1 large egg
  • ¼ cup / 60 g mayonnaise
  • ½ cup / about 75 g fine yellow cornmeal
  • ¼ cup / about 30 g all-purpose flour
  • ¼ cup / about 40 g finely diced onion
  • ¼ cup / about 35 g finely diced bell pepper
  • 2 tablespoons chopped green onion or parsley
  • 1 tablespoon / 15 ml Worcestershire sauce
  • 1 tablespoon / 15 ml fresh lemon juice
  • ½ teaspoon garlic powder
  • ½ teaspoon paprika or smoked paprika
  • ¼ teaspoon black pepper
  • ¼–½ teaspoon salt, to taste
  • Pinch of cayenne or a few dashes hot sauce, optional
  • Optional: ½ teaspoon Old Bay-style seafood seasoning, Cajun seasoning, or Creole seasoning; reduce salt if using a salty blend
  • ¼–½ cup / 60–120 ml neutral oil, such as canola, vegetable, avocado, or peanut oil, for frying

Instructions

  1. Drain and flake the salmon. Drain the canned salmon well, but do not squeeze it completely dry. Flake it with a fork, leaving some texture.
  2. Mix the wet binder. In a large bowl, whisk the egg, mayonnaise, Worcestershire sauce, lemon juice, garlic powder, paprika, black pepper, salt, and cayenne or hot sauce.
  3. Add the salmon and dry binder. Fold in the salmon, onion, bell pepper, green onion or parsley, cornmeal, and flour. Mix gently until the mixture holds together when pressed.
  4. Adjust texture if needed. If the mixture feels too wet, add cornmeal, flour, panko, or crushed crackers 1 tablespoon at a time.
  5. Shape. Scoop about ¼ cup mixture per croquette and shape into patties about ½–⅔ inch thick. You should get about 8 croquettes.
  6. Chill if needed. If the patties feel soft, chill them for 10–20 minutes.
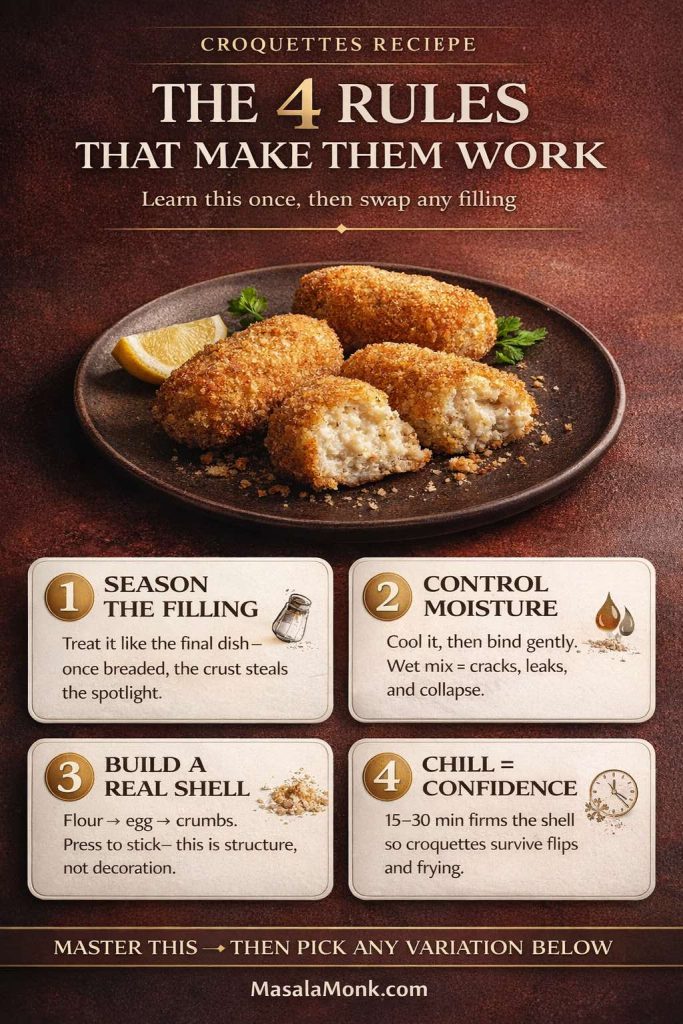
  7. Heat the oil. Add oil to a cast iron skillet or heavy-bottom skillet and heat to about 350°F / 175°C.
  8. Fry. Cook the croquettes for 3–4 minutes per side, flipping once, until golden, crisp, hot in the center, and set enough to lift with a spatula.
  9. Drain and serve. Transfer to a wire rack or paper-towel-lined plate. Serve hot with lemon wedges, tartar sauce, lemon dill sauce, remoulade, green chutney mayo, tzatziki, mango mustard, or hot sauce.

Baked Version

Heat oven to 425°F / 220°C. Place croquettes on a well-oiled sheet pan, brush or spray the tops with oil, and bake for 15 minutes. Flip and bake 5–7 minutes more.

Air Fryer Version

Air fry at 400°F / 200°C for 8–10 minutes. Flip, spray lightly with oil, and cook 3–5 minutes more, until crisp and heated through.

Fresh Salmon Version

Use 1 lb / 454 g cooked fresh salmon. Cool slightly, flake, and use in place of canned salmon. Taste before shaping because fresh salmon may need a little extra salt or seasoning.

Notes

  • For a lighter crispy version, replace some or all of the cornmeal with panko.
  • For old-fashioned salmon patties, use crushed saltines instead of panko or breadcrumbs.
  • For gluten-free salmon croquettes, use certified gluten-free cornmeal plus gluten-free flour, gluten-free crackers, gluten-free breadcrumbs, or almond flour.
  • For spicier croquettes, add cayenne, hot sauce, Cajun-style seasoning, or extra black pepper.
  • You can shape the croquettes up to 1 day ahead, cover, and refrigerate. Fry them straight from the fridge, adding an extra minute if needed.
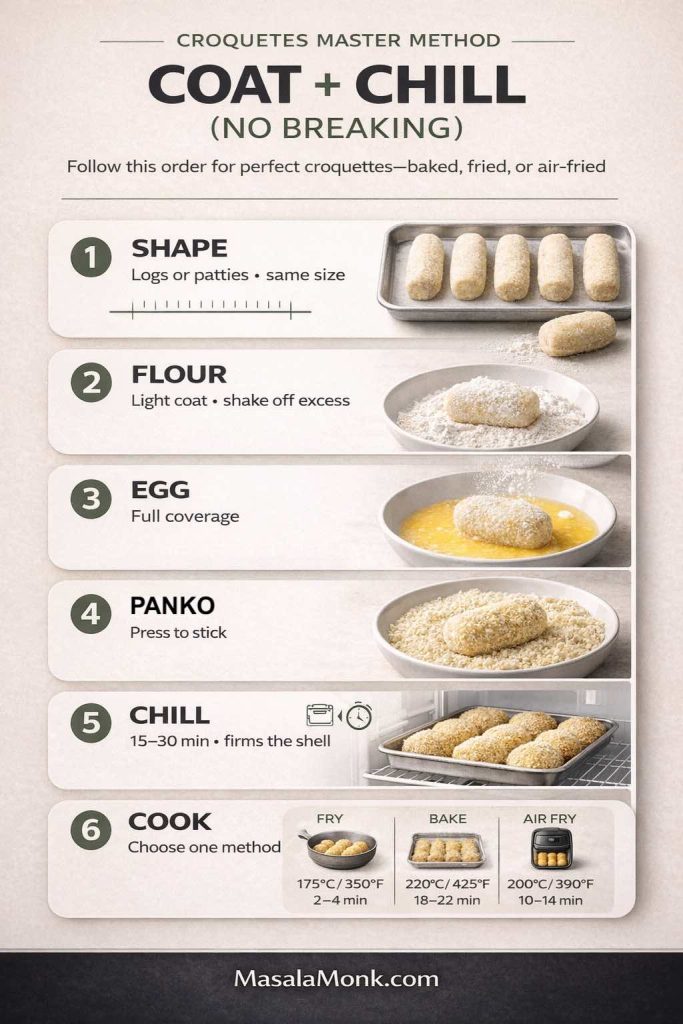
  • Serve with lemon wedges and one creamy sauce, such as tartar sauce, lemon dill mayo, or remoulade.

If this salmon croquettes recipe helped you get crisp patties that actually hold together, save it for the next time you have canned salmon in the pantry. You can also come back to the binder guide, sauce ideas, and troubleshooting table whenever you want to adjust the recipe with panko, crackers, fresh salmon, or the air fryer.

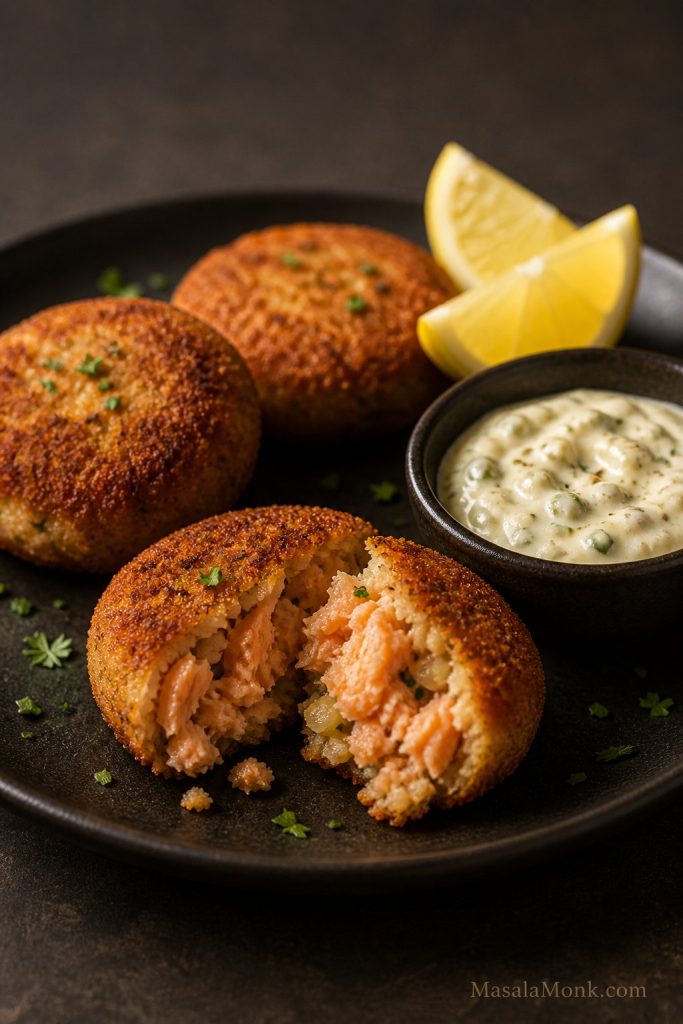
Serving Salmon Croquettes

Finished salmon croquettes served with lemon wedges and creamy dipping sauce, with one croquette broken open
Serve salmon croquettes as soon as they come out of the pan if you want the contrast at its best. The crust stays crispest early on, while lemon and a creamy sauce brighten the rich, savory center.

FAQs About Salmon Croquettes

Are salmon croquettes the same as salmon patties?

They are very similar, and many people use the names interchangeably. Salmon croquettes are often associated with a crisp, Southern-style version made with canned salmon, cornmeal or flour, egg, onion, and skillet frying. Salmon patties is a broader term and can refer to thinner or simpler salmon cakes.

Are salmon croquettes the same as salmon cakes?

They are in the same family, but salmon cakes often sound a little more restaurant-style and may use fresh salmon, panko, herbs, Dijon, or mayo. Croquettes usually feel more old-fashioned, pantry-friendly, and crisp-edged.
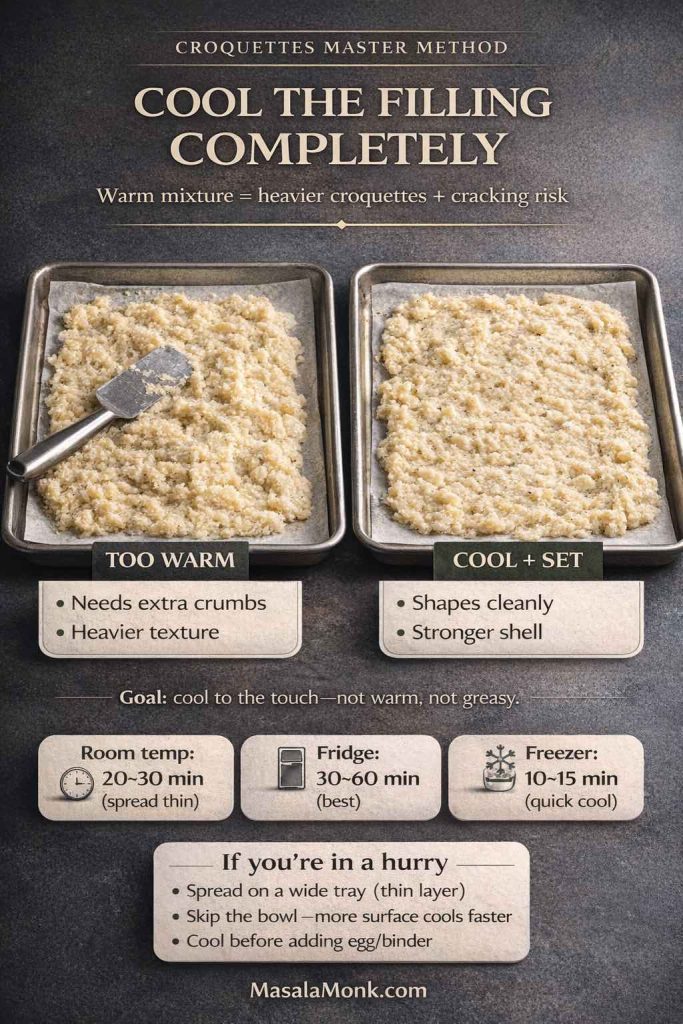
Can I use canned salmon?

Yes. Canned salmon is the easiest and most traditional choice for classic salmon croquettes. Drain it well and flake it before mixing.

Do I remove the bones and skin from canned salmon?

You can remove the larger bones and skin if you prefer a smoother texture. The small soft bones are edible and mash easily, but it is fine to take them out if you do not like them.

Is this recipe better with canned salmon or fresh salmon?

For classic croquettes, canned salmon is easier because it is already cooked, budget-friendly, and easy to bind. Fresh salmon also works, but you need to cook it first, cool it slightly, and flake it before mixing the patties.
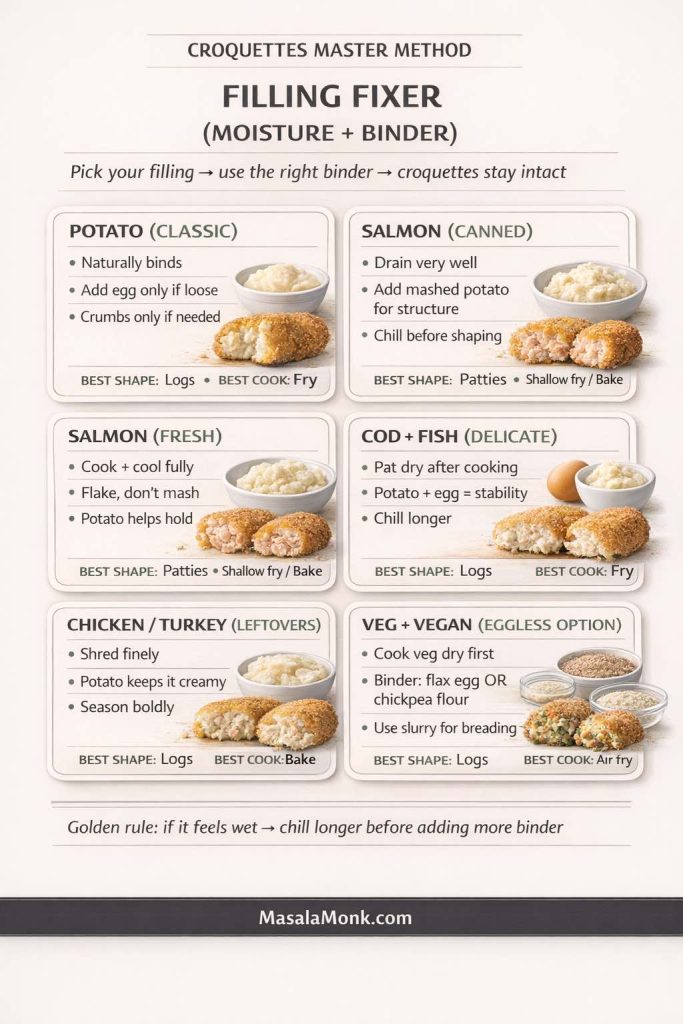
Can I use fresh salmon?

Yes. Cook fresh salmon first, cool it slightly, then flake it and use it in place of canned salmon. Fresh salmon croquettes usually taste cleaner and more delicate than canned salmon croquettes.

What keeps salmon croquettes from falling apart?

Good drainage, enough binder, even shaping, and patient frying. Use egg plus a dry binder, chill the patties if they feel soft, and do not flip until the first side has formed a crust.

Do you use cornmeal or flour for salmon croquettes?

Use both for the best classic texture. Cornmeal gives crispness and an old-fashioned Southern feel, while flour helps bind the mixture. You can also use panko, breadcrumbs, or crushed crackers.

Can I use crackers instead of breadcrumbs?

Yes. Crushed saltines are a classic pantry binder for salmon patties and croquettes. They give a savory, tender-crisp texture.

Can salmon croquettes be baked?

Yes. Bake them at 425°F / 220°C on a well-oiled sheet pan for 15 minutes, flip, then bake 5–7 minutes more. Brush or spray the tops with oil for better browning.

Can salmon croquettes be cooked in the air fryer?

Yes. Air fry at 400°F / 200°C for 8–10 minutes, flip, then cook 3–5 minutes more. Spray lightly with oil for a crisp surface.

How long do you cook salmon croquettes?

Pan-fried salmon croquettes usually take 3–4 minutes per side. Baked salmon croquettes take about 20–22 minutes total at 425°F / 220°C. Air fryer salmon croquettes usually take 11–15 minutes total at 400°F / 200°C, depending on thickness.

What sauce goes with salmon croquettes?

Tartar sauce, lemon dill mayo, remoulade, green chutney mayo, tzatziki, mango mustard, mango habanero sauce, hot sauce, or a simple garlic mayo all work well.

What sides go with salmon croquettes?

Cucumber salad, tabbouleh, chickpea salad, potato salad, coleslaw, roasted potatoes, rice, green beans, and mango salsa all pair well with salmon croquettes.

Can you freeze salmon croquettes?

Yes. Freeze shaped uncooked croquettes on a tray, then transfer to a freezer bag. You can also freeze cooked croquettes after they cool fully. For best texture, thaw before reheating or frying.

How do you reheat salmon croquettes?

Reheat them in a skillet for 2–3 minutes per side, in an air fryer at 375°F / 190°C for 4–7 minutes, or in the oven at 350°F / 175°C for 10–15 minutes. The microwave works, but it softens the crust.

Are salmon croquettes healthy?

They can be part of a balanced meal, especially if you serve them with salad, vegetables, or a yogurt-based sauce. Pan-fried croquettes use more oil, while baked or air fryer salmon croquettes are lighter.

Posted on 8 Comments

Croquettes Recipe: One Master Method + 10 Popular Variations

Magazine-style cover graphic titled “The Ultimate Guide to Croquettes” showing four colored lanes—Potato & Ham, Salmon, Vegetarian, and Cheese—with croquettes cut open to reveal fillings, plus “Master Method + 10 Variations (Baked or Fried)” and MasalaMonk.com at the bottom.

Croquettes have a way of making an ordinary day feel a little more celebratory. The outside turns crisp and golden, the inside stays soft and savory, and suddenly a handful of simple ingredients becomes something you’d happily serve to guests. Even so, a lot of people hesitate to try a croquettes recipe because they’ve had the frustrating version: croquettes that crack in the oil, croquettes that taste bland inside, croquettes that go oily, or croquettes that collapse the moment you flip them.

Fortunately, once you learn one reliable croquettes recipe method, everything clicks. After that, you can make easy croquettes on a weeknight, bake them when you want healthy croquettes, or go all-in with Spanish croquetas that are creamy enough to feel like a tapas bar at home. You can also work through the classics—potato croquettes, ham croquettes, chicken croquettes, tuna croquettes, salmon croquettes (canned or fresh salmon croquette), cod croquettes, vegetarian croquettes, vegan croquettes—without learning a new technique every time.

This post is exactly that: a single, detailed, step-by-step guide that covers croquette fish styles, croquette veggie options, and the “perfect croquettes” approach—plus the oven baked croquettes route when you want crunch with less fuss.

And because croquettes are at their best when they’re part of a spread, you’ll also get natural pairings: cooling chutneys, fiery chutneys, and a few drink and dessert ideas to finish the meal without feeling heavy.


Croquettes Recipe: The Four Rules That Make Them Work Every Time

Before you pick a variant, it helps to understand what croquettes really are. Whether you call it a croquette, a croqueta recipe, a kroket (you’ll see “chicken kroket” and “dutch croquettes” used in different places), or even a Japanese potato croquette style, the structure is the same:

  1. A flavorful filling
  2. A binder that holds it together
  3. A coating that creates crunch
  4. A chill step that turns “hope” into “confidence”

If you keep those four rules steady, you can change almost everything else.

Infographic showing the four rules for a croquettes recipe: season the filling, control moisture, build a strong flour–egg–crumb shell, and chill 15–30 minutes for croquettes that don’t crack, leak, or fall apart. Includes a croquette hero photo and MasalaMonk.com footer.
Croquettes falling apart? This is the “save it forever” checklist. Season the filling like it’s the final dish, cool and control moisture, build a real shell (flour → egg → crumbs), then chill so the coating firms up before you cook. Once these four rules click, you can swap in potato, salmon (canned or fresh), ham & cheese, chicken, tuna, cod, vegetarian, or vegan fillings without changing the method. Bookmark this guide, pin it for later, and use it as your quick reset before frying, baking, or air frying.

Rule 1: Season the filling like it’s the final dish.
Once croquettes are breaded, the outside becomes the star. That means the inside must be seasoned enough to hold its own.

Rule 2: Control moisture, don’t fight it.
Wet fillings are the number one reason croquettes fall apart. Instead of adding more egg (which can make them softer), you remove or offset moisture: cool the mixture, add just enough dry binder, and chill properly.

Rule 3: The coating is a shell, not decoration.
Flour → egg → crumbs isn’t tradition for tradition’s sake. It builds a sturdy exterior so the inside can stay creamy.

Rule 4: Chilling is non-negotiable for perfect croquettes.
Chilling firms fat and starches, reduces steam pressure, and makes shaping easier. It’s the difference between croquettes that survive the pan and croquettes that become snack-flavored chaos.

Keep these rules in mind, and suddenly “how do you make croquettes” becomes a calm question rather than a stressful one.

Also Read: Ravioli Recipe Reinvented: 5 Indian-Inspired Twists on the Italian Classic


How to Make Croquettes: The Master Step-by-Step (Works for Every Variant)

This is the core croquettes recipe method you’ll use for everything in the post—potato, fish, chicken, turkey, vegetarian, vegan, Spanish croquetas, and more.

Step-by-step croquettes master method infographic showing how to shape croquettes, coat in flour, dip in egg, press into panko, chill 15–30 minutes, then cook by frying (175°C/350°F 2–4 min), baking (220°C/425°F 18–22 min), or air frying (200°C/390°F 10–14 min), with MasalaMonk.com at the bottom.
If your croquettes crack, leak, or fall apart, this is the fix: shape → flour → egg → panko → chill. That 15–30 minute chill firms the coating so you can fry for max crunch or bake/air-fry for a lighter batch—then plug in any filling from the post (potato, salmon, ham & cheese, tuna, chicken, cod, or vegan) without changing the method.

What you’ll need

  • 3 shallow bowls (for breading)
  • A tray (for chilling shaped croquettes)
  • A rack (for draining fried croquettes or baking with airflow)
  • Optional but helpful: a food thermometer for meat and fish variants

Base quantities (Recipe makes 10–12 croquettes)

Think of these as the “croquettes template.” Your filling changes, the structure stays.

For the croquette mixture

  • 2 packed cups prepared filling (pick a variant below)
  • 1 large egg (binder)
    Vegan binder method is included later
  • 2–6 tablespoons breadcrumbs or flour, only as needed (moisture control)
  • Salt and pepper (plus any spices/herbs your filling wants)

For the coating

  • ½ cup flour
  • 2 eggs, beaten with a pinch of salt
  • 1½ cups breadcrumbs or panko (panko gives the crispest bite)

Step 1: Prepare the filling, then cool it completely

Make your filling according to the variant recipe you’re using. When it’s done, spread it out on a plate or tray and let it cool. If you rush and mix while it’s warm, you’ll need more breadcrumbs, the texture will be heavier, and shaping will feel like wrestling mashed clouds.

Croquettes filling spread on two trays showing why the mixture must cool completely before shaping and breading croquettes. Left tray is too warm and needs extra crumbs; right tray is cool and sets firm for a stronger shell. Includes cooling options: room temp, fridge, quick-freeze, with MasalaMonk.com.
Warm croquette mixture is the fastest way to end up with heavy croquettes that crack or soak up oil. Spread your filling thin, cool it fully, then bind and bread—your croquettes shape cleanly, hold their coating, and cook with less drama whether you fry, bake, or air fry. Save this card for every potato, salmon, chicken, veg, or vegan batch.

Step 2: Bind the mixture

Add your egg and mix thoroughly. Then test the texture:

  • If it holds together when you press a small handful, you’re good.
  • If it feels loose or wet, add breadcrumbs 1 tablespoon at a time until it firms up.

This step is where people often over-correct. Slow down. You’re aiming for a mixture that is cohesive, not dry.

Croquettes master method ‘Filling Fixer’ infographic showing how to keep croquettes from falling apart by matching moisture level to the right binder for six fillings: potato, canned salmon, fresh salmon, cod/fish, chicken/turkey, and veg/vegan, with best shape and best cooking method tips plus a note to chill longer if the mixture feels wet.
Use this quick ‘filling fixer’ before you shape anything: it shows the one adjustment that saves a batch—drain/pat dry where needed, then choose the right binder so croquettes stay intact. It’s especially handy for fish croquettes (salmon/cod) and vegan croquettes, where moisture control makes or breaks the crust.

Step 3: Chill the mixture (30–60 minutes)

This single step makes shaping easier and prevents cracking. In addition, it helps the mixture set so it survives turning.

Infographic showing why to chill croquettes mixture 30–60 minutes before shaping: not chilled mixture is sticky, chilled mixture shapes cleanly. Includes a 10-second readiness test (press, scoop, roll) and a “how long to chill” guide for potato/veg, fish (salmon/tuna/cod), chicken/turkey/beef, and Spanish béchamel croquetas, with MasalaMonk.com footer.
Chilling the croquettes mixture is the quiet step that prevents most disasters. A cold mix holds its shape, needs fewer extra crumbs, and is far less likely to crack once it hits hot oil. Use the quick ready test here (press → scoop → roll), then match the chill time to your filling—potato/veg sets fast, fish benefits from a steady firm-up, and béchamel-based Spanish croquetas really shine with a longer rest. Keep this guide nearby before shaping so every batch stays tidy, crisp, and confident.

Step 4: Shape your croquettes

You can shape croquettes as:

  • Logs (classic croquette shape)
  • Thick patties (great for salmon croquettes, tuna croquettes, and easy croquettes you want to flip quickly)
  • Small cylinders (perfect for Spanish croquetas, which are often bite-sized)

As you shape, keep the sizes consistent so cook times match.

Infographic titled “Croquettes Master Method: Shape Guide” showing three croquette shapes—logs (classic), patties (fast flip), and bite-size (tapas). Each card lists what the shape is best for (potato/chicken/veg; salmon/tuna; Spanish croquetas béchamel) and the best cooking method (fry or bake on a rack; shallow fry 2–3 minutes per side or bake; deep fry fast set). Footer reads MasalaMonk.com.
Not sure which croquettes shape to make? Use this quick shape guide: logs cook evenly (great for potato, chicken, veg), patties are perfect for salmon croquettes and tuna croquettes when you want a quick shallow-fry, and bite-size croquetas are the tapas-style choice for creamy béchamel centers. Keep sizes consistent so every batch cooks evenly—then bake, air fry, shallow fry, or deep fry with confidence.

Step 5: Bread the croquettes (flour → egg → crumbs)

Set up a breading station:

  1. Flour bowl
  2. Egg bowl
  3. Breadcrumb bowl

Coat each croquette in flour first, shaking off excess. Then dip in egg. Finally, press into breadcrumbs so the crumbs actually stick rather than merely dust the surface.

Infographic showing a croquettes breading station with two methods: classic (egg) and vegan (eggless). Both use flour then panko; the classic method dips in egg, while the vegan method uses a slurry (3 tbsp flour + 6 tbsp water). Note says to chill breaded croquettes 15–20 minutes for a stronger shell. MasalaMonk.com in the footer.
Want croquettes that stay sealed and crisp? Use this breading station every time: flour → egg (or eggless slurry) → panko, then chill 15–20 minutes so the coating sets like a shell before you fry, bake, or air fry. The right side is perfect for vegan croquettes or when you’re out of eggs—same crunch, less stress.

Step 6: Chill again (15–20 minutes)

This second chill is optional for potato croquettes, yet extremely helpful for béchamel-based Spanish croquetas and any very soft filling. It firms the exterior and helps the coating adhere.

Recipe card infographic showing breaded croquettes on a tray chilling in the fridge for 15–20 minutes to lock in crumbs and reduce cracks. Includes quick notes on why the second chill helps coating adhesion and when it’s most useful (soft fillings like béchamel-based Spanish croquetas), with MasalaMonk.com in the footer.
That “second chill” is the quiet upgrade that stops croquettes from cracking or shedding crumbs. After flour → egg/slurry → panko, refrigerate the breaded croquettes for 15–20 minutes so the coating hydrates, firms up, and grips the surface—especially for very soft fillings like béchamel-style Spanish croquetas, fish, or cheese-heavy centers. Then cook with confidence: the shell sets faster, edges stay cleaner, and frying feels far less stressful. Keep this card saved as your quick reminder whenever your coating feels fragile.

Step 7: Cook using your method of choice (fry, shallow fry, bake, or air fry)

You’ve got options. None of them are “wrong,” so choose based on your time and your mood.

Split infographic comparing croquettes baked vs fried: left shows fried croquettes with 175°C/350°F cook time 2–4 minutes and “Max Crunch,” right shows baked/air fryer croquettes with 220°C/425°F 18–22 minutes plus air fryer 200°C/390°F 10–14 minutes and “Less Oil,” with MasalaMonk.com in the footer.
Baked vs fried croquettes at a glance: fry at 175°C/350°F for 2–4 minutes for maximum crunch, or bake at 220°C/425°F for 18–22 minutes (air fryer 200°C/390°F for 10–14 minutes) for a lighter option. Use this as your quick timing guide before you jump into the master croquettes recipe and pick a variation.

Also Read: Fish and Chips Reimagined: 5 Indian Twists (Recipe + Method)


Croquettes Cooking Methods (Fried, Shallow-Fried, Oven Baked, Air Fryer)

Deep-fried croquettes recipe (crispiest and fastest)

  • Heat oil to 175°C / 350°F
  • Fry in batches, 2–4 minutes, until deep golden
  • Drain on a rack so they stay crisp
A croquettes master method infographic about oil temperature and batching for crisp, non-greasy croquettes. It highlights the sweet spot of 175°C/350°F, shows what happens when oil is too cool (pale, oily, crumbs sink) or too hot (cracks, leaks, outside browns too fast), and compares spaced frying vs overcrowding. It also notes frying in batches and draining on a rack, with MasalaMonk.com in the footer.
If your croquettes ever turn greasy or crack in the oil, this is the reset: aim for 175°C / 350°F and fry in small batches so the shell sets fast and browns evenly. Use the “too cool vs too hot” cues here to troubleshoot in seconds, then drain on a rack (not paper) to keep the crust crunchy—whether you’re making potato croquettes, salmon croquettes, chicken croquettes, or Spanish croquetas.

Because the shell sets quickly, deep frying is surprisingly forgiving—provided the oil is hot enough and you don’t overcrowd the pot.

Shallow-fried croquettes (easier, still crisp)

  • Add about 1 cm of oil to a skillet
  • Medium heat
  • Fry 2–3 minutes per side

Shallow frying is excellent for salmon croquette patties and old fashioned tuna croquettes where you want more surface browning.

Croquettes oven baked (the best “healthy croquettes” recipe)

If you want croquettes oven baked without losing that crunch, do this:

  • Preheat oven to 220°C / 425°F
  • Place croquettes on a rack over a tray
  • Lightly spray or brush with oil
  • Bake 18–22 minutes, flipping once

Baked croquettes won’t taste “fried,” but they can be crisp and satisfying when you use panko and high heat.

Air fryer croquettes (fast, crisp, low mess recipe)

  • Preheat if your air fryer benefits from it
  • Cook at 200°C / 390°F
  • Spray lightly with oil
  • Air fry 10–14 minutes, flipping once

Air frying is fantastic for frozen croquettes you’ve made ahead, because it re-crisps without drying out the center too harshly.

Also Read: Dirty Martini Recipe (Classic, Extra Dirty, No Vermouth, Spicy, Blue Cheese, Tequila + Batched)


Croquettes and Sauces: The Secret to Keeping Every Batch Exciting

Croquettes are rich by design. Therefore, they love sauces that bring contrast: bright, spicy, tangy, or herbaceous.

For an Indian-inspired spread, you can rotate between:

Meanwhile, if you’re turning croquettes into cocktail snacks, the pairing is almost too natural: salty croquettes with a briny drink, or crispy croquettes with a citrusy drink. A crisp Dirty Martini fits especially well with Spanish croquetas and ham and cheese croquettes, while a bright Lemon Drop Martini works beautifully when you want freshness to cut richness. If you prefer something lighter and longer, Vodka with Lemon is an easy match.

Now that the method is clear, let’s cook through the variants properly.

Also Read: Keto Hot Chocolate Recipe (Sugar-Free Hot Cocoa) + Best Homemade Mix


Potato Croquettes (Classic, Leftover Mash Friendly, and Japanese Potato Croquette Recipe)

Potato croquettes are the easiest place to start because potatoes naturally bind. That’s why “mashed potato croquette” and “how to make potato croquettes with leftover mashed potatoes” are such popular queries—this version welcomes leftovers.

Potato croquettes are the easiest starting point because mashed potatoes bind naturally. This quick card gives you the exact ingredient ratios, the chill window (30–60 minutes), and the 3 “leftover mash” fixes (loose/stiff/chunky), plus a Japanese korokke-style twist—so you can get crisp, golden croquettes without guessing.

Easy potato croquettes recipe (makes 10–12)

Ingredients

  • 2 cups cold mashed potatoes
  • 1 egg
  • ½ teaspoon salt
  • ½ teaspoon black pepper
  • 2 tablespoons chopped parsley or chives (optional)
  • ½ cup grated cheese (optional, great for cheese croquettes vibes)
  • 2–4 tablespoons breadcrumbs if needed (only if your mash is loose)

Step-by-step

  1. Mix the mashed potatoes with salt, pepper, and herbs.
  2. Stir in cheese if you want a richer center.
  3. Add the egg and mix until cohesive.
  4. If it feels too soft to shape, add breadcrumbs gradually.
  5. Chill 30–60 minutes.
  6. Shape into logs or patties.
  7. Bread and cook using your preferred method.

If you like checking a classic baseline, BBC Good Food’s potato croquettes are a handy reference for the traditional approach.

Recipe for leftover mashed potato croquettes: making them sturdier

Leftover mash varies a lot. Some is buttery, some is stiff, some has milk or cream. Consequently, the fix also varies:

  • If your mash is loose: add 1–2 tablespoons breadcrumbs and chill longer
  • If your mash is stiff: add 1 tablespoon milk, mix gently, then chill
  • If your mash is chunky: mash a bit more so shaping is smoother

Japanese potato croquette direction (korokke vibe recipe)

If you want Japanese potato croquette style, keep the potato base, then fold in one of these:

  • sautéed onions and carrots
  • a little cooked minced meat (beef croquettes style)
  • a pinch of nutmeg plus a tiny splash of soy for depth

Shape into patties, bread with panko, then shallow fry or bake hot for a crisp shell.

Also Read: 10 Low Carb Chia Pudding Recipes for Weight Loss (Keto, High-Protein, Dairy-Free)


Spanish Croquetas (Ham, Jamón, and Ham and Cheese Croquettes recipe)

Spanish croquetas are the ones people describe as “perfect croquetas” because the interior is creamy in a way potato croquettes simply aren’t. Instead of mash, you build a very thick béchamel that sets in the fridge, then you bread and fry.

This is the point where “how do you make ham croquettes” becomes a real cooking question, because béchamel croquetas reward patience. Luckily, the steps are straightforward.

Jamón croquetas recipe (classic Spanish croquetas)

Makes: about 15–20 small croquetas

Ingredients

  • 3 tablespoons butter
  • ⅓ cup flour
  • 2 cups milk, warmed
  • 1 cup finely chopped ham or jamón (tiny dice)
  • ¼ teaspoon nutmeg
  • black pepper (generous)
  • salt only if needed

Step-by-step

  1. Melt butter in a pan over medium heat.
  2. Whisk in flour and cook 1–2 minutes so it loses its raw taste.
  3. Slowly pour in warm milk while whisking constantly.
  4. Keep stirring until it thickens dramatically; you want it thick enough that it pulls away from the pan.
  5. Stir in ham, nutmeg, and pepper. Taste before adding salt.
  6. Spread the mixture into a shallow tray so it cools quickly.
  7. Cool at room temp, then refrigerate at least 4 hours (overnight is better).
  8. Scoop and shape quickly, then bread carefully.
  9. Chill the breaded croquetas 15–20 minutes, then fry at 175°C / 350°F until golden.

For external references that echo this traditional Spanish food croquettes method, you can use:

Ham and cheese croquettes (extra creamy recipe)

If you want ham and cheese croquettes (also written as ham and cheese croquetas), do the same base, then stir in:

  • ¾ cup shredded cheese (manchego is classic; cheddar is excellent)

Chill overnight, bread, then fry. Because cheese browns quickly, keep the oil steady and don’t overcook.

Also Read: Garlic & Paprika Cabbage Rolls (Keto-Friendly Recipes) – 5 Bold Savory Twists


Salmon Croquettes (Canned, Fresh, Southern Style, and Baked Salmon Croquette Recipe)

Salmon croquettes are popular because they hit the sweet spot: inexpensive enough for regular meals, yet special enough for guests. They also adapt well to baking, so “baked salmon croquette recipe” and “easy salmon croquette” versions fit nicely alongside fried.

Salmon croquettes recipe card showing four options—canned (old fashioned), fresh (restaurant-style), southern (spiced), and baked/air fryer—with a platter of crispy salmon croquette patties, lemon wedges, creamy dip, and quick notes for key mix, chill time, and cooking temperatures, plus MasalaMonk.com footer.
Use this as your salmon croquettes shortcut: canned for weeknight budget patties, fresh for a cleaner “restaurant” bite, southern for crisp, spiced edges, or baked/air fryer when you want less oil. The big wins are the same across all four—drain well, chill the mix, and keep patties consistent—so they hold together whether you shallow fry, bake hot, or air fry.

Canned salmon croquettes recipe (old fashioned, reliable)

Makes: 10–12 patties

Ingredients

  • 2 cans salmon, drained well
  • 1½ cups mashed potatoes (best structure)
  • 1 egg
  • ¼ cup finely minced onion (or scallions)
  • 1 tablespoon lemon juice
  • 1 teaspoon paprika (or Old Bay)
  • black pepper
  • salt to taste
  • 2 tablespoons parsley

Step-by-step

  1. Flake salmon into a bowl.
  2. Add mashed potatoes, onion, lemon juice, and seasoning.
  3. Stir in the egg until cohesive.
  4. Chill 30–60 minutes.
  5. Shape into patties.
  6. Bread, then shallow fry, deep fry, bake, or air fry.

If you want the crispest shell with minimal mess, shallow frying is a wonderful middle ground.

Fresh salmon croquette (more “restaurant” recipe)

Ingredients

  • 2 cups cooked flaked salmon, cooled
  • 1½ cups mashed potatoes
  • 1 egg
  • zest of ½ lemon + 1 tablespoon lemon juice
  • 2 tablespoons dill or parsley
  • salt and pepper

Step-by-step

  1. Mix salmon, potato, herbs, lemon.
  2. Add egg; chill.
  3. Shape, bread, then cook.

Southern salmon croquettes (southern fried salmon croquettes recipe feel)

For southern-style salmon croquettes, keep the canned salmon base, then add:

  • ½ teaspoon garlic powder
  • ½ teaspoon onion powder
  • pinch of cayenne

Shape thinner patties and shallow fry for crisp edges. This style leans into that “recipe salmon croquettes soul food” comfort.

Salmon croquettes oven baked

To do salmon croquettes oven baked:

  • Use panko for the coating
  • Spray lightly with oil
  • Bake hot at 220°C / 425°F
  • Flip once for even browning

This is a great route when you want healthy croquettes that still feel satisfying.

Also Read: Eggless Yorkshire Pudding (No Milk) Recipe


Tuna Croquettes (Easy, Budget-Friendly, and Sturdy)

Tuna croquettes are simple, but they demand one thing: dry tuna. If you drain it aggressively, the rest is easy.

Tuna croquettes recipe card showing crispy tuna croquette patties with lemon wedges and creamy dip, plus a no-fail guide: ingredients for 10–12 patties, fast steps (mix, chill 30–60 minutes, shape, coat, cook), and fixes if the mixture is soft (add breadcrumbs, drain tuna again, press crumbs firmly), with MasalaMonk.com footer.
Tuna croquettes only ask for one thing: drain the tuna hard, then chill the mix so patties stay intact. Use this card as your quick reference—basic tuna + mashed potato + egg, plus the simple “fix-it” moves (breadcrumbs, extra draining, firm crumb press) that stop croquettes from turning mushy or breaking when you fry, bake, or air-fry.

Easy tuna croquette recipe (makes 10–12)

Ingredients

  • 2 cans tuna, drained very well
  • 1½ cups mashed potatoes
  • 1 egg
  • 2 tablespoons yogurt or mayo (optional)
  • 1 tablespoon lemon juice
  • ¼ cup finely diced onion or celery (optional)
  • salt and pepper
  • pinch paprika

Step-by-step

  1. Mix tuna with mashed potatoes and seasoning.
  2. Add egg and mix until cohesive.
  3. Chill, shape, bread, cook.

If you’re asking “how do you make tuna croquettes” without them falling apart, the answer is nearly always the same: drain more, chill more, and don’t rush the breading.

Also Read: Crock Pot Chicken Breast Recipes: 10 Easy Slow Cooker Dinners (Juicy Every Time)


Chicken Croquettes and Turkey Croquettes (Best Use of Leftovers)

Chicken croquettes are a brilliant leftover solution because shredded chicken gives texture and protein while the binder creates creaminess. Turkey croquettes follow the same pattern, and they’re especially useful after a roast dinner.

Chicken croquettes recipe (makes 10–12)

Ingredients

  • 2 cups cooked shredded chicken
  • 1 to 1½ cups mashed potatoes (start with 1 cup)
  • 1 egg
  • ¼ cup sautéed onion (or finely minced onion)
  • salt and pepper
  • optional: thyme or mixed herbs
Chicken croquettes are the best leftover upgrade: mix shredded chicken with mashed potatoes and egg, chill so they hold shape, then choose your cook method—shallow fry for crisp edges, deep fry for fastest crunch, or bake/air fry for a lighter batch. Use this card as your quick reference when you reach the chicken/turkey croquettes section, especially if your mixture feels dry or you want that creamy center every time.

Step-by-step

  1. Mix chicken with potatoes, onion, and seasonings.
  2. Add egg and mix well.
  3. If it feels loose, add breadcrumbs 1 tablespoon at a time.
  4. Chill, shape, bread, then fry or bake.

For a restaurant-style croquetas de pollo approach, Food & Wine’s chicken croquettes is a solid external reference.

Turkey croquettes (leftover-friendly recipe)

Use the chicken method, then lean into turkey flavors:

  • add chopped sage
  • add black pepper generously
  • optionally tuck a tiny cranberry center inside each croquette for a sweet-savory surprise

Because turkey can be drier than chicken, the potato ratio often helps: aim for the higher end (closer to 1½ cups potato).

Turkey croquettes recipe card infographic showing golden, crispy turkey croquettes on a plate with lemon wedges, herbs, and cranberry sauce, plus ingredient list (shredded turkey, mashed potatoes, egg, onion, seasonings), fast mixing and chilling steps, tips to keep turkey croquettes moist, and cooking options for shallow fry, deep fry, bake, or air fry.
These turkey croquettes are the easiest way to turn leftover roast turkey into a crisp, restaurant-style snack: bind shredded turkey with mashed potatoes, chill so the mixture firms up, then coat well for a sealed shell that stays moist inside. Use the “keep it moist” fixes if your mix feels dry, and pick your cook style—shallow fry for crisp edges, deep fry for fastest crunch, or bake/air fry when you want a lighter batch with less mess. Save this card as your quick reference when you’re making turkey (or chicken) croquettes again.

Also Read: Mozzarella Sticks Recipe (Air Fryer, Oven, or Fried): String Cheese, Shredded Cheese, and Every Crunchy Variation


Cod Croquettes Recipe and Croquette Fish Variants (Moisture Control Wins)

Cod croquettes are delicate, light, and surprisingly elegant. However, cod holds water, which is why “croquettes cod” attempts sometimes go wrong.

Cod fish croquettes (Recipe for 10–12 pieces)

Ingredients

  • 2 cups cooked flaked cod, cooled and patted dry
  • 1½ cups mashed potatoes
  • 1 egg
  • 1 tablespoon lemon juice
  • 2 tablespoons parsley
  • salt and pepper
Cod croquettes recipe card showing crispy cod patties with lemon wedges and dipping sauce, plus ingredients, fast steps, and moisture-control tips to pat cod dry, chill the mix, and keep croquettes from falling apart.
Cod croquettes are delicate because cod holds water—so the “secret” isn’t more binder, it’s drying the fish properly. Pat the cooled cod dry, mix with mashed potatoes + lemon + herbs, then chill before shaping so the patties stay firm. Use this card as your quick guide whenever you want light, lemony fish croquettes that don’t crack, leak, or turn mushy.

Step-by-step

  1. Pat cod dry after it cools.
  2. Mix cod with potatoes, lemon, herbs, seasoning.
  3. Add egg; chill.
  4. Shape, bread, then cook.

If you’re cooking fresh and frozen seafood, the FDA’s guidance is a helpful safety reference, especially for handling and storage: Selecting and Serving Fresh and Frozen Seafood Safely.

Also Read: Sourdough Starter Recipe: Make, Feed, Store & Fix Your Starter (Beginner Guide)


Vegetarian Croquettes (Croquette Veggie, Veg Croquettes Recipe)

Vegetarian croquettes work best when vegetables are flavorful and dry. In other words, cook out moisture before you ever add potato.

Veg croquettes recipe (makes 10–12)

Ingredients

  • 2 cups mixed vegetables (peas, corn, carrots), sautéed until moisture evaporates
  • 1½ cups mashed potatoes
  • 1 egg
  • ½ teaspoon cumin or paprika
  • salt and pepper
Vegetarian croquettes recipe card showing golden mixed-vegetable croquettes with visible peas, corn, and carrots, plus ingredients, quick steps, and the key tip to sauté vegetables until moisture evaporates before mixing with mashed potatoes.
Vegetarian croquettes succeed or fail on one detail: dry vegetables. Sauté peas, corn, and carrots until the pan looks dry (no steam, no watery shine), then mix with mashed potatoes, season well, and chill before shaping. This card is your quick guide for crisp, sturdy veg croquettes that don’t crumble—perfect for weeknight snacks, lunchboxes, or party platters.

Step-by-step

  1. Sauté vegetables until they’re tender and relatively dry.
  2. Cool, then mix with potatoes and spices.
  3. Add egg; chill.
  4. Shape, bread, cook.

These are especially good with South Indian Coconut Chutney because the creamy chutney doubles down on comfort without overpowering the filling.

Also Read: How to make No-Bake Banana Pudding: No Oven Required Recipe


Vegan Croquettes (Croquettes Vegan, Eggless Binding and Coating)

These croquettes can be just as crisp, yet the vegan version needs a binder that sets and a coating that sticks without eggs.

Vegan croquettes recipe infographic showing eggless binding options (flax egg or chickpea flour), eggless breading station (flour, slurry, panko), and cooking options for air fryer, oven, or frying, with MasalaMonk.com in the footer.
Vegan croquettes don’t fail because they’re vegan—they fail because the coating doesn’t set. Use one strong binder (flax egg or chickpea flour), then bread the smart way (flour → slurry → panko) and chill the breaded croquettes 15–20 minutes so the shell holds. This card gives you the full eggless workflow plus the best cook options (air fryer, oven, or quick fry) for a crisp crust and a center that stays together.

Vegan binder options

  • Flax “egg”: 1 tablespoon ground flax + 3 tablespoons water (rest 5 minutes)
  • Chickpea flour: 2–3 tablespoons stirred into the mixture for structure

Eggless breading method

  • Bowl 1: flour
  • Bowl 2: slurry (3 tablespoons flour + 6 tablespoons water)
  • Bowl 3: breadcrumbs or panko

Vegan croquettes recipe (makes 10–12)

Ingredients

  • 2 cups mashed potatoes (or half mashed chickpeas + half potato)
  • flax egg or chickpea flour binder
  • salt, pepper, paprika/garlic powder
  • breadcrumbs as needed

Step-by-step

  1. Mix the base, add binder, then adjust with breadcrumbs if the mixture is soft.
  2. Chill longer than usual—45–60 minutes helps.
  3. Shape, bread with slurry method, then bake or air fry for the best texture.

For dipping, vegan croquettes pair beautifully with Spicy Peanut Chutney (no onion, no garlic) because it brings richness without dairy.

Also Read: Chicken Adobo — Step-by-Step Recipe — Classic Filipino Adobong Manok


Beef Croquettes and Lamb Croquettes (When You Want Something Heartier)

Even though potato and fish croquettes get most of the attention, beef croquettes and lamb croquette versions are excellent when you want deeper savoriness.

Beef vs lamb croquettes comparison card showing two plates of crispy croquettes and two recipe panels: beef croquettes with minced beef, sautéed onion, spices and mashed potato binder, and lamb croquettes with minced lamb, cumin and a pinch of cinnamon, plus serving suggestions with plum chutney and vodka with lemon.
Craving something heartier than potato croquettes? This quick beef vs lamb croquettes guide helps you pick the vibe: beef croquettes for fast, savory comfort and lamb croquettes for a cozier, bolder batch (cumin + a pinch of cinnamon). Either way, the method stays the same—cool the filling, bind, chill, coat, then cook hot—so you get a crisp shell without the “fall apart” drama. Serve these with a sweet-tangy chutney (plum is perfect) and something bright like vodka with lemon to keep the plate feeling balanced.

Beef croquettes (quick recipe)

  • Use cooked minced beef, cooled
  • Add sautéed onions and a pinch of spice (paprika, cumin, or black pepper)
  • Bind with mashed potato and egg
  • Chill, bread, cook

Lamb croquette (cozy, bold recipe)

  • Use cooked minced lamb or finely chopped leftover roast lamb
  • Season with black pepper, cumin, and a small pinch of cinnamon
  • Bind with potato (or a thicker béchamel if you want a tapas vibe)
  • Serve with a sweet-tangy chutney like Indian Spiced Plum Chutney for contrast

These richer croquettes also pair nicely with a bright drink. Even a simple citrus-forward Vodka with Lemon can lighten the overall feel.

Also Read: Sourdough Recipe: 10 Easy Bread Bakes (Loaves, Rolls & Bagels)


Making Croquettes That Don’t Fall Apart (Without Overcomplicating It)

It’s tempting to treat croquettes like a mysterious technique. In reality, croquettes fail for a few predictable reasons. Once you can spot them, you can fix them quickly.

Troubleshooting infographic for croquettes showing five common problems and fixes: too soft to shape (cool filling, add crumbs, chill), cracks/leaks in oil (chill breaded croquettes, press crumbs, keep oil 175°C/350°F), oily croquettes (oil too cool, fry small batches, drain on rack), not crispy baked/air fried (use panko, rack + light oil spray, 220°C/425°F), and crisp outside but bland inside (season filling, add lemon for fish, use herbs/spices). MasalaMonk.com footer.
Croquettes cracking, going oily, or turning soft? Save this “fix it fast” guide. It covers the 5 issues that ruin a croquettes recipe—too-wet filling, weak coating, wrong oil temp, baked croquettes not crisp, and bland centers—plus the exact quick fixes (including the key chill steps). Use it right before you cook potato croquettes, salmon croquettes (canned or fresh), ham and cheese croquetas, chicken croquettes, cod croquettes, or vegan croquettes so every batch comes out golden and sturdy.

If your croquettes are too soft to shape

  • Cool the mixture fully
  • Add 1–2 tablespoons breadcrumbs
  • Chill 45–60 minutes
  • Shape smaller pieces (large croquettes are harder to stabilize)

Croquettes crack or leak while frying

  • Your oil may be too hot
  • Your croquettes may not be chilled enough
  • The mixture might be too wet
  • The coating may be too thin (press crumbs in firmly)

And if croquettes are crisp outside but bland inside

Season more than you think. Croquettes are not a stew. The crust dilutes the perceived seasoning, so the filling needs confidence: salt, pepper, acidity (lemon in fish croquettes), and aromatics.

If croquettes oven baked are not crisp

  • Use panko
  • Bake at high heat
  • Oil-spray the crumbs
  • Place on a rack so air circulates
  • Leave space between croquettes

Baked croquettes can be genuinely crunchy. They just need structure and heat rather than hope.

Also Read: Peanut Butter Fudge: Recipes & Guide (8 Methods + Easy Variations)


Food Safety for Croquettes (Simple, Practical, Calm)

Croquettes often start with cooked ingredients—leftover chicken, canned salmon, cooked mashed potatoes—then get chilled and cooked again. That’s normal. Still, it’s worth cooking to safe internal temperatures and reheating leftovers properly.

For authoritative temperature guidance, you can reference:

If you’re dealing with fish croquettes and you want handling guidance for fresh and frozen seafood, the FDA resource is helpful: Selecting and Serving Fresh and Frozen Seafood Safely.

Also Read: Cold Brew Espresso Martini: How to Make It (Step-by-Step Recipe)


Make-Ahead, Freezing, and “Frozen Croquettes” Without Store-Bought Anything

Even though “frozen croquettes” and “croquetas frozen” often show up as shopping intent, freezing homemade croquettes is one of the smartest ways to keep this recipe in your regular rotation. In fact, croquettes are almost designed for batch cooking.

Infographic titled “Croquettes Master Method: Make-Ahead + Freeze (No Soggy Crust)” showing how to refrigerate breaded croquettes up to 24 hours, freeze uncooked croquettes on a tray, and cook croquettes from frozen without thawing. It lists frozen cook times: air fryer 200°C/390°F 12–18 min, oven 220°C/425°F 24–32 min, and fry 175°C/350°F 3–5 min, plus tips like flip once and light oil spray.
Croquettes are made for batch cooking. Shape and bread a double batch, freeze them uncooked, then cook straight from frozen whenever you want easy croquettes—no soggy crust, no defrosting drama. Use this quick guide for frozen croquettes: air fryer 200°C/390°F (12–18 min), oven baked croquettes 220°C/425°F (24–32 min), or fry at 175°C/350°F (3–5 min). Flip once and add a light oil spray for the crispiest shell—then pair with your favorite chutney, dip, or sauce from the post.

Make-ahead (best texture)

  1. Prepare filling
  2. Shape croquettes
  3. Bread them
  4. Refrigerate up to 24 hours before cooking

This keeps the coating intact and gives you that “ready whenever” flexibility.

Freeze croquettes (uncooked, breaded)

  1. Place breaded croquettes on a tray in a single layer
  2. Freeze until firm
  3. Transfer to a freezer bag or container

Cook from frozen

  • Air fryer: add 2–4 minutes
  • Oven: add 6–10 minutes
  • Frying: lower into oil carefully, fry slightly longer at steady temperature

Frozen homemade croquettes are also a lifesaver when you want easy croquettes for guests without spending the whole evening at the stove.

Also Read: 19 Essential Kitchen Tools That Make Cooking Easier


Serving Croquettes Like a Complete Meal (Not Just a Snack)

Croquettes can be appetizers, lunch, or dinner. The difference is what you serve around them.

Infographic titled ‘Serve Croquettes Like a Meal’ showing three serving ideas: a snack platter with cooling chutney, spicy chutney, lemon wedges, and crunchy sides like cucumbers/pickles/salad; a cocktail night pairing croquettes with a dirty martini, lemon drop martini, or vodka with lemon; and a simple dinner with croquettes plus salad or sautéed greens, including a fish croquettes option with cucumber-onion salad and lemon.
Croquettes are rich and crispy—so the easiest way to make them feel like a complete meal is to add contrast. Use this serving guide for three go-to setups: a snack platter with a cooling chutney + spicy chutney, lemon wedges (especially for fish croquettes), and something crunchy like cucumbers, pickles, or salad; a cocktail-night spread with salty-sip pairings (Dirty Martini, Lemon Drop Martini, or Vodka with Lemon); or a simple dinner with croquettes alongside salad or sautéed greens. Keep the rule simple: bright + crunchy + tangy makes every croquettes recipe taste sharper and more satisfying.

For a snack platter

  • A cooling chutney + a spicy chutney
  • Lemon wedges for fish croquettes
  • Something crunchy on the side (salad, pickles, sliced cucumbers)

Try a duo like South Indian Coconut Chutney and Thecha—one soothing, one loud. Alternatively, Kara Chutney adds a sharp, spicy note that makes potato croquettes feel brighter.

For a cocktail night

Croquettes were practically made for a salty sip. A briny Dirty Martini pairs especially well with ham croquettes, jamon croquettes, and ham and cheese croquettes because the flavors reinforce each other instead of competing. On the other hand, if you want the opposite effect—freshness that cuts richness—a citrusy Lemon Drop Martini is a fun counterpoint. And when you want something lighter, Vodka with Lemon keeps the whole spread breezy.

For a simple dinner

  • Croquettes + salad
  • Croquettes + sautéed greens
  • Fish croquettes + a quick cucumber-onion salad with lemon

Croquettes don’t need much. They just need contrast.

Also Read: 10 Vegan Chocolate Cake Recipes (Easy, Moist, & Dairy-Free)


A Sweet Finish That Doesn’t Feel Heavy

After croquettes, most people want dessert that’s clean and easy rather than overly rich. That’s why a fruit-forward finish works so well.

If you’re keeping it simple, Quick Mango Pudding (10 minutes) is an easy win. If you’re building a full menu, you can also browse these mango dessert recipes and pick something that matches your mood.


Putting It All Together: Choose Your Croquettes Recipe, Then Follow the Same Flow

At this point, you’ve got everything you need:

  • a single croquettes recipe method
  • detailed recipes for the most common variants
  • a baked option for healthy croquettes
  • make-ahead and freezing guidance
  • sauces, drinks, and dessert pairings that turn croquettes into a full experience

So the only question left is what you’re making first.

Croquettes master method infographic titled ‘Pick Your First Batch’ with four starter options—fast and easy (potato or canned salmon), wow guests (Spanish croquetas ham and cheese), lighter low mess (oven baked croquettes), and hearty savory (chicken, beef, lamb)—plus a simple flow: cool, bind, chill, shape, coat, chill, cook, and a best pairings bar with coconut chutney, kara chutney/thecha, and vodka with lemon.
Not sure which croquettes recipe to start with? Use this “pick your first batch” guide to match your mood—potato croquettes or canned salmon croquettes for fast weeknights, Spanish croquetas (ham & cheese) to wow guests, oven baked croquettes for a lighter, low-mess option, or chicken/beef/lamb croquettes when you want hearty comfort. Whichever you choose, the success formula is the same: cool → bind → chill → shape → coat → chill → cook—then finish with contrast (coconut chutney for cool creaminess, kara chutney/thecha for heat, and a bright drink like vodka with lemon).

For a fast, no-drama batch, potato croquettes or canned salmon croquettes are the easiest place to begin. Planning to wow guests? Spanish croquetas—especially ham and cheese croquettes—feel instantly special alongside coconut chutney and a dirty martini. On busy nights when you’d rather skip splatter and cleanup, croquettes oven baked with a punchy kara chutney keep things crisp, flavorful, and wonderfully low-effort.

Whichever path you pick, the method stays the same—and that’s the real upgrade.

Also Read: Hot Chocolate Coffee: 3 Easy Recipes (Cocoa, Mix, or Espresso)


FAQs about Croquettes Recipe

1) What are croquettes, exactly?

Croquettes are crispy, breaded bites with a soft, savory center—usually made from mashed potato, béchamel, flaked fish, or shredded meat. In other words, a croquette is less about one “fixed” ingredient and more about the method: a seasoned filling, a binder, and a crunchy coating.

2) How do you make croquettes so they don’t fall apart?

Start by cooling the filling completely, then add just enough binder to make it hold its shape. After that, chill the shaped croquettes before cooking. Finally, keep the oil at a steady temperature (or bake hot on a rack) so the shell sets quickly instead of soaking.

3) How to make a croquette with the classic flour–egg–breadcrumbs coating?

First, roll each croquette in flour and shake off the excess. Next, dip in beaten egg. Then press firmly into breadcrumbs (panko if you want extra crunch). Afterward, chill briefly so the coating adheres, and cook.

4) What’s the easiest croquettes recipe for beginners?

Potato croquettes are the simplest starting point because mashed potatoes naturally bind and shape easily. Alternatively, canned salmon croquettes are very forgiving when you combine drained salmon with mashed potatoes and a single egg.

5) Can I make croquettes oven baked instead of fried?

Yes—croquettes oven baked can be crisp when you use panko, bake at a high temperature, and lightly oil the surface. Even so, spacing matters; if croquettes touch, steam builds and the coating softens.

6) Are baked croquettes actually “healthy croquettes”?

Compared with deep-frying, baking uses less oil, so it’s often a lighter option. However, “healthy” still depends on the filling and portion size—especially for ham and cheese croquettes or béchamel-based Spanish croquetas.

7) How do I make potato croquettes with leftover mashed potatoes?

Use cold mashed potatoes, mix in an egg, then adjust with a little breadcrumb only if needed. After that, chill the mixture, shape, bread, and cook. If your mash is very buttery or loose, chilling longer makes a big difference.

8) What’s the difference between potato croquettes and mashed potato croquette patties?

Potato croquettes are often shaped as logs, while mashed potato croquette patties are flattened and typically pan-fried. Because patties have more surface area, they brown quickly and feel extra crisp around the edges.

9) What are Spanish croquetas and how are they different from regular croquettes?

Spanish croquetas usually use a thick béchamel base instead of mashed potato. As a result, the center is creamier and softer. That said, they need more chilling time so they’re firm enough to bread and fry cleanly.

10) How do you make ham croquettes the Spanish way?

Make a very thick béchamel, stir in finely chopped ham or jamón, then chill until solid. Next, shape quickly, bread thoroughly, and fry at a steady temperature until golden. In practice, patience during chilling is what separates perfect croquetas from messy ones.

11) How to make ham and cheese croquettes without the filling leaking out?

Let the béchamel cool completely, then chill overnight if possible. Also, dice ham finely and use grated cheese that melts smoothly. Finally, keep the croquettes small and the coating firm so the shell seals before the cheese gets too runny.

12) Can I make cheese croquettes without ham?

Absolutely. Swap ham for grated cheese, sautéed mushrooms, spinach, or finely chopped herbs. Even so, avoid watery fillings; otherwise, the mixture turns loose and needs more binder.

13) What’s the best salmon croquette recipe: canned salmon or fresh salmon croquette?

Canned salmon croquettes are quicker and more consistent, especially for weeknights. Meanwhile, a fresh salmon croquette tastes cleaner and more “restaurant-like,” particularly when you add lemon zest and herbs.

14) How do I make old fashioned salmon croquettes?

Use drained canned salmon, mashed potatoes (or a small amount of breadcrumbs), egg, onion, and seasoning. Then shape into patties and shallow-fry until deeply golden. Traditionally, this style is simple, crisp, and comfort-forward.

15) How to make southern salmon croquettes (southern fried salmon croquettes recipe style)?

Season more boldly—think garlic powder, onion powder, and a pinch of cayenne—then shape thinner patties for extra crunch. After that, shallow-fry until the edges brown well. As a result, you get that classic southern-style crispness without a deep fryer.

16) Can I use fresh salmon for salmon croquettes southern style?

Yes—cook and flake the salmon first, then cool it completely before mixing. Still, add mashed potatoes for stability; fresh salmon can be softer than canned once it’s flaked.

17) How do you make tuna croquettes that aren’t mushy?

Drain tuna extremely well, then bind it with mashed potatoes and egg. Additionally, chill the mixture before shaping. If needed, add a small amount of breadcrumbs, but don’t overdo it or the croquettes turn dry.

18) How do you make chicken croquettes so they stay creamy inside?

Use shredded chicken plus a creamy binder like mashed potato (or a thick béchamel-style base). Then chill before shaping so the mixture firms up. Finally, cook until the crust is deeply golden, which helps seal in moisture.

19) How do you make turkey croquettes from leftovers?

Combine shredded turkey with mashed potatoes, seasoning, and an egg. Next, chill, shape, bread, and cook. For extra flavor, add herbs like sage or a little minced onion, and keep the croquettes slightly smaller so they heat through evenly.

20) What’s the best method for cod croquettes or cod fish croquette?

Pat the cooked cod dry after it cools, then mix with mashed potatoes, egg, lemon, and herbs. Afterward, chill thoroughly. Because cod holds moisture, that drying step is the quiet key to croquettes cod that hold together.

21) Can I make croquettes vegetarian without them crumbling?

Yes—use a sturdy base like mashed potatoes and cook vegetables until most moisture evaporates. Then add egg and chill before shaping. Consequently, vegetarian croquettes stay cohesive and fry or bake neatly.

22) How do I make croquettes vegan without eggs?

Use a binder such as a flax “egg” (ground flax + water) or chickpea flour. For breading, replace the egg dip with a simple flour-and-water slurry. Then chill longer before cooking to help everything set.

23) Why are my croquettes not crispy?

Usually, the oil wasn’t hot enough, the pan was overcrowded, or the coating was too thin. For oven baked croquettes, the most common issue is low heat or skipping oil on the crumbs. In contrast, using panko and baking on a rack improves crispness dramatically.

24) Why do croquettes crack while frying?

Cracking often happens when the mixture is too wet or not chilled, or when oil is too hot and the outside sets before the inside stabilizes. Therefore, chilling and steady oil temperature solve most cracking problems.

25) Can I freeze croquettes?

Yes—freeze breaded croquettes on a tray, then transfer to a container once firm. Later, bake, air-fry, or fry from frozen with a slightly longer cook time. This is especially handy for easy croquettes on busy days.

26) How do I reheat croquettes so they stay crisp?

Reheat in an oven or air fryer rather than the microwave. That way, the exterior re-crisps while the center warms through. If you must microwave, finish in a hot pan or oven for a quick crisping boost.

27) What can I serve with croquettes?

Pair croquettes with bright, tangy sides or sauces—something that cuts richness. Also, salads, pickles, citrus wedges, and herby dips all work well. Meanwhile, for party food, croquettes fit beautifully on snack platters alongside other small bites.

28) What’s the single biggest tip for perfect croquettes?

Chill twice: chill the mixture before shaping, and chill the breaded croquettes before cooking. Ultimately, that one habit makes croquettes easier to handle, cleaner to cook, and far more consistent.

Posted on 12 Comments

How to Eat 100 Grams of Protein a Day

HOW TO EAT 100 GRAMS OF PROTEIN A DAY

If you’ve ever set out to “eat more protein,” you know it sounds simple—until you actually try to get 100 grams by dinner without living on chicken breast, shakes, or mystery powders. But here’s the truth: hitting 100 grams isn’t just doable, it can actually be delicious, rewarding, and even fun if you approach it like a real person—not a spreadsheet.

Let’s break it down, bust some myths, and make this a high-protein journey you’ll actually enjoy (and stick to).


Why Are So Many People Chasing 100 Grams of Protein?

There’s a reason you keep hearing about “100 grams of protein a day” on fitness podcasts, Instagram reels, and even at your office lunch table. For most active adults, that’s a sweet spot: enough to build and repair muscle, keep hunger in check, boost metabolism, and maintain your energy—even if you’re just trying to feel a bit stronger and not run a marathon.

It’s not just for bodybuilders—100g is about taking charge of your nutrition, one satisfying meal at a time.

Want to geek out on the science? What Is Protein? covers all the reasons protein is the true MVP of your diet.


How to Actually Hit 100 Grams a Day—No Math Degree Required

The secret isn’t protein powders, it’s habits. Here’s how real people do it:

1. Build Every Meal Around Protein

Breakfast
Start your day strong! Instead of toast-and-go, try a bowl of Greek yogurt (10g+ per cup), eggs (6g each), or an oat bowl made with ultra-filtered milk. Top with nuts or chia seeds for extra points.

Example day-starter: 2 eggs + 1 cup Greek yogurt = 22g protein before 10am.

Feeling adventurous? Explore ways to boost your breakfast game in Benefits of Nuts and Seeds – Protein‑Packed Superfoods.


Lunch
Don’t let lunch be an afterthought! Go for a power salad with grilled chicken, tofu, or tempeh (100g of either gets you 19–27g), or pile chickpeas onto a hearty grain bowl. Even a quick dal and rice or a paneer wrap can pack serious protein.

Want more plant-based inspiration? Check out The Power of Tempeh: 10 High‑Protein Plant‑Based Meal Prep Ideas.


Dinner
Finish strong. Grill or bake fish (salmon = 22g/100g), toss cubes of paneer into curry, or scramble three eggs with veggies and a sprinkle of cheese for 25g+ in a single pan.

Stuck for dinner ideas? Protein in 3 Scrambled Eggs: Nutritional Insights and Benefits can help you level up your evening meal.


Snacks That Pull Their Weight
Snack time is a secret weapon. Grab cottage cheese (12g per half cup), roasted chickpeas, edamame, or a mini protein smoothie (blend Greek yogurt, milk, spinach, nut butter for 15g+). Suddenly, 100 grams looks… totally doable.


2. Distribute Your Protein Like a Pro

Why space it out? Because your body uses protein best when you give it steady doses (20–30g per meal), instead of flooding it all at once. This means better muscle recovery, less snacky hunger, and stable energy. It’s like charging your phone little by little instead of one frantic sprint at the end of the day.


3. Prioritize Whole Foods (and Flavor!)

You don’t need a cupboard full of supplements to get to 100g. In fact, real foods are your secret weapon: they keep you fuller, taste better, and pack bonus vitamins, minerals, and fiber.

Top picks:
Eggs, chicken, fish, paneer, Greek yogurt, cottage cheese, tofu, tempeh, lentils, beans, seeds, nuts, quinoa, and high-protein grains.

Want the numbers for eggs? How Much Protein in Two Boiled Eggs? breaks it down.

And if you want your grains to pull their weight, get creative with 10 Plant‑Based Meal Prep Ideas: Using Quinoa as a Protein Source.


4. Mix, Match, and Make It Yours

One size doesn’t fit all.

  • Vegetarian or vegan? Mix beans, lentils, tofu, tempeh, nuts, and seeds—combine them for complete protein.
  • Omnivore or pescatarian? Pair plant and animal sources for variety and maximum nutrition.

No matter your eating style, with a little mix-and-match, 100g is yours for the taking.


Real-Life Protein Hacks (That Don’t Suck)

  • Prep in Bulk: Cook a batch of chicken, lentils, or eggs so you’re always a step ahead.
  • Snack Smart: Keep cheese sticks, boiled eggs, protein bars, or roasted seeds in your bag or desk.
  • Upgrade Your Carbs: Use high-protein wraps, breads, or pasta to sneak in extra grams—effortlessly.
  • Smoothies Save Lives: A handful of spinach, scoop of yogurt, nut butter, and milk can turn a basic smoothie into a protein-packed meal in a cup.
  • Eat What You Like: Don’t force foods you hate. There’s always another protein source that fits your vibe.

Why the Fuss? The Benefits You’ll Actually Feel

More protein isn’t just a trend—it’s a real game-changer. Expect…

  • Sustained energy throughout the day (no more afternoon crashes)
  • Fewer cravings and snack attacks
  • Stronger muscles and faster recovery (even if you’re just chasing kids, not barbells)
  • Better hair, skin, and nails (thank those amino acids!)
  • More satisfaction from every meal

The Takeaway: Eat, Enjoy, and Repeat

Hitting 100 grams of protein a day isn’t about punishment or perfection—it’s about small, tasty upgrades and habits that actually make your life better. Build every meal (and snack) around protein, go for variety, and listen to what feels good in your body. The numbers will add up, and so will the results.


Hungry for more high-protein inspiration, meal prep tips, and myth-busting nutrition stories?

Head to MasalaMonk.com and dive into the rest of the blog—you’ll find dozens of guides, meal ideas, and science-backed answers to make eating well the easiest part of your day.

10 FAQs About Eating 100 Grams of Protein a Day

1. Is 100 grams of protein per day safe for everyone?
For most healthy adults, yes. People with kidney issues or other medical conditions should consult their doctor before significantly increasing protein intake.

2. Can vegetarians or vegans hit 100g protein without supplements?
Absolutely! By combining lentils, beans, tofu, tempeh, quinoa, nuts, and seeds throughout the day, plant-based eaters can easily reach 100g without protein powders.

3. What are the best protein sources for breakfast?
Eggs, Greek yogurt, cottage cheese, tofu scramble, nut butter, protein-enriched oats, and ultra-filtered milk are all great choices.

4. How can I get enough protein if I have a small appetite?
Distribute protein through smaller, more frequent meals/snacks—Greek yogurt, cheese, nuts, eggs, smoothies, or edamame work well in smaller portions.

5. Are protein bars and powders necessary to reach 100g?
Not at all! Whole foods should be your foundation, though bars or powders can help on extra-busy days or when you need portable options.

6. How much protein should I eat at each meal?
Aim for 20–30g per meal and use snacks (10–20g) to fill the gaps for the most even, effective intake.

7. Can I eat all my protein at dinner?
You’ll absorb it, but research shows your body uses protein better if you spread it throughout the day for muscle maintenance and fullness.

8. How can I add more protein to plant-based meals?
Incorporate legumes, lentils, tofu, tempeh, nuts, seeds, quinoa, and high-protein whole grains into your regular rotation.

9. Will eating 100g of protein help with weight loss?
Higher protein can help you feel fuller, preserve muscle, and support healthy weight loss—especially when paired with balanced carbs and fats.

10. How do I know if I’m getting enough protein?
Track your intake for a few days using a food diary or app, and adjust meals to fill the gaps. Over time, it gets easier and more intuitive.

Posted on Leave a comment

The Versatility of Nuts: Creative Ways to Incorporate Nuts into Your Everyday Meals and Snacks

Nuts-Into-Everyday-Meals-and-Snacks

Nuts are one of nature’s most powerful—and underutilized—ingredients. Packed with nutrients, flavor, and texture, they are a culinary multitool that can add health and depth to nearly any dish. From your morning smoothie to your evening dinner plate, and every snack in between, nuts can bring variety, satisfaction, and nourishment. Here’s a practical, creative, and engaging guide on how to make nuts a staple in your daily eating routine.


Why Nuts Matter: A Nutritional Powerhouse

Nuts like almonds, walnuts, pistachios, and cashews are rich in healthy fats, plant protein, fiber, and essential micronutrients including magnesium, vitamin E, selenium, and calcium. A single ounce (30g) of almonds, for example, contains about 6g of protein and 80mg of calcium. Regular consumption is linked to improved heart health, better weight management, and reduced inflammation. Despite their small size, they can make a big impact on your diet and overall well-being.


Morning Boosters: Start Your Day Right

1. Nut-Infused Smoothies
Blend nut butters like almond, peanut, or cashew into smoothies for added creaminess, protein, and richness. Combine with banana, spinach, dates, and a milk of your choice for a nutritious start.

2. Yogurt & Smoothie Bowls
Top bowls with chopped nuts, chia seeds, and a drizzle of nut butter. Try pistachios with strawberries or walnuts with apple slices and cinnamon.

3. Homemade Nut Granola
Bake a mix of rolled oats, honey, olive oil, and your favorite nuts for a crunchy, customizable granola.

4. Savory Nut Toasts
Spread cashew cream cheese or almond ricotta on whole grain toast. Add avocado, smoked paprika, or sliced tomatoes for a gourmet touch.


Midday & Main Meal Marvels

1. Nutty Salads with Texture
Toss roasted pecans, pine nuts, or almonds into salads. Combine with arugula, goat cheese, and citrus segments for a flavorful twist.

2. Stir-fries and Curries
Add cashews to Thai or Indian curries, or ground peanuts in Indonesian sauces. They soak up spices beautifully and offer hearty texture.

3. Nut-Crusted Proteins
Coat chicken, tofu, or salmon in crushed pistachios, almonds, or hazelnuts for a crunchy finish.

4. Innovative Pesto & Sauces
Swap traditional pine nuts for walnuts or pistachios in your pesto. Create creamy peanut or cashew sauces for noodles, wraps, or dipping.

5. Rice & Grain Upgrades
Sprinkle toasted slivered almonds or pine nuts over couscous, quinoa, or brown rice to add layers of flavor and crunch.


Snacks That Travel Well

1. DIY Trail Mix
Build your own mix with roasted nuts, dried fruits, dark chocolate chips, and seeds like pumpkin or sunflower.

2. Energy Balls and Bars
Blend dates, oats, and nut butters with extras like cocoa nibs, coconut, or protein powder. Roll into balls or press into bars for a grab-and-go option.

3. Spiced & Roasted Nuts
Roast nuts with bold flavors—sweet (cinnamon-honey), savory (rosemary-garlic), or spicy (chili-lime). Perfect for snacks, salads, or cocktails.

4. Portable Nut Dips
Make muhammara (roasted red pepper and walnut dip) or use almond butter as a dip for sliced apples, carrots, or celery.


Sweet but Smart: Nut-Based Desserts

1. Nut Flours for Baking
Use almond flour or hazelnut meal in gluten-free baking recipes for cookies, muffins, and cakes.

2. Nut Toppings
Sprinkle crushed nuts on banana bread, oatmeal cookies, or fruit crisps to elevate texture and flavor.

3. Chocolate Nut Barks & Clusters
Melt dark chocolate and mix with nuts and seeds. Spread into thin bark or form clusters for a simple, satisfying dessert.

4. Stuffed Dates
Fill Medjool dates with nut butter and dip in dark chocolate. Finish with a pinch of sea salt for a luxurious treat.


Global Inspirations for Everyday Variety

  • Middle Eastern: Add pine nuts to hummus, or make classic baklava with layers of phyllo and crushed walnuts or pistachios.
  • Asian: Use peanuts in satay sauce or sprinkle chopped cashews over Thai noodle bowls.
  • Mediterranean: Blend walnut pesto for pasta or spread almond dips on flatbread.
  • Western Vegetarian: Make a hearty nut roast for a meatless dinner centerpiece.

Tips for Storage, Substitutes & Safety

  • Storage: Keep nuts in airtight containers; refrigerate or freeze to prevent rancidity.
  • Portion Control: Stick to about 30g/day to balance calorie intake and health benefits.
  • Low-Sodium Option: Choose raw or unsalted nuts for heart-friendly snacking.
  • Allergy Alternatives: Try sunflower seed butter, pepitas, or coconut flakes as substitutes.

Final Thoughts: Small Changes, Big Impact

Whether you’re upgrading your breakfast, adding crunch to your salad, or experimenting with global flavors, nuts can play a delicious and meaningful role in your meals. They’re not just a snack—they’re an ingredient that bridges convenience, flavor, and wellness. Start small, mix and match, and you’ll soon discover that a handful of nuts can go a long way.

Ready to get nutty in the kitchen? Start today with a new recipe or a fresh twist on an old favorite.

✅ Summary Table

Use CaseNut ApplicationBenefit
Smoothies/BowlsNut powders, butters, chopped nutsCreaminess, protein, crunch
CookingNut‑based sauces, pestos, crusts, meat subFlavor, texture, plant protein
Snacks & BarsTrail mix, energy balls, spiced nutsOn‑the‑go nutrition
Baking/DessertsNut flours, toppings, barksHealthier indulgence
Gastro-cultureMuhammara, karedok, nut roast, sataysGlobal authenticity
Gifting/PartyJar mixes, charcuterie nutsPresentation, convenience