Posted on Leave a comment

Key Lime Pie Recipe

A pale yellow baked key lime pie in an ivory ceramic dish with whipped cream, lime garnish, and one slice removed from a graham cracker crust.

A good key lime pie should feel cold, creamy, tart, and clean from the first forkful. The crust should cut without collapsing into crumbs, the filling should hold a soft wedge without turning stiff, and the lime flavor should taste bright instead of sugary, bitter, or artificially green.

This version is built for the little worries that make key lime pie stressful: a loose filling, a soggy or brittle graham cracker crust, weak lime flavor, too much sweetness, and slices that slump because the pie was cut before it had fully chilled.

Unlike no-bake cheesecake-style pies, this is a baked bakery-style key lime pie with sweetened condensed milk, egg yolks, lime juice, zest, and a graham cracker crust. A short bake, a gently set center, and enough fridge time give you a taller pie that serves beautifully without becoming heavy.

The actual work is simple: press the crust, whisk the filling, bake briefly, and chill. It is especially good after food with heat or spice, when the first cold bite resets the table: sharp lime, soft cream, buttery crumbs, and no heavy frosting.

Make this pie first: use a 9-inch pie plate, pre-bake the graham cracker crust, bake the filling at 350°F / 177°C until the edges are set and the center moves gently, then chill for at least 4 hours. Overnight chilling gives the neatest wedges.

Quick Answer

Key lime pie is a chilled lime custard pie made with sweetened condensed milk, egg yolks, lime juice, and a graham cracker crust. This easy baked key lime pie bakes briefly at 350°F / 177°C, then rests in the refrigerator until the filling becomes creamy and sliceable.

Use fresh key limes for aroma, bottled key lime juice for ease, or regular limes with zest when that is what you have. The real win is a pie that bakes gently, chills fully, and cuts into a clean, creamy wedge.

The cold-wedge test: a good key lime pie should be cold all the way through, hold its shape when sliced, cut through a buttery crumb crust, and still taste creamy instead of stiff. For the bake, use visual cues: set edges, a softly moving center, no slosh, and no browning.

A tall slice of pale yellow key lime pie on a cream plate with smooth filling, graham cracker crust, whipped cream, and lime garnish.
After a long chill, a tall key lime pie slice should stand cleanly while still looking creamy, not stiff or dry.

Ready to bake now? Jump to the recipe card, or keep reading if you want the visual cues that make the pie easier to judge.

Key Lime Pie Recipe Card

Description

Make this easy baked key lime pie when you want a buttery graham cracker crust, tart condensed-milk filling, a softly set center, and a slice that holds without turning stiff.

Prep time25 minutes
Bake time26 to 30 minutes total
Cooling time30 to 45 minutes
Chill timeAt least 4 hours
Total timeAbout 5 hours 30 minutes, including cooling and chilling
YieldOne 9-inch pie, about 8 slices
Oven350°F / 177°C
Doneness cueSet edges, softly moving center

Why two cans? This taller 9-inch pie uses a deliberate ratio: 2 cans sweetened condensed milk, 1 cup lime juice, and 4 egg yolks. The extra volume gives you a higher bakery-style slice, but it also means a deeper pie plate and full chill time matter. If your pie plate looks close to full before all the filling is added, stop pouring and bake any extra filling separately in a small ramekin.

Equipment

  • 9-inch pie plate, preferably at least 1¼ inches deep
  • Mixing bowls
  • Whisk
  • Food processor, blender, or rolling pin for crushing crackers
  • Measuring cup or flat-bottomed glass for pressing the crust
  • Citrus zester
  • Citrus juicer
  • Wire rack

Ingredients

For the Graham Cracker Crust

  • 1½ cups graham cracker crumbs, about 150g
  • ¼ cup granulated sugar, 50g
  • 6 tablespoons unsalted butter, melted, 85g
  • Pinch of fine salt

For the Key Lime Filling

  • 2 cans sweetened condensed milk, 14 ounces each, 28 ounces total / about 793g
  • 4 large egg yolks
  • 1 cup key lime juice, 240ml
  • 1 tablespoon finely grated lime zest
  • Pinch of fine salt

For the Whipped Cream Topping

  • 1 cup cold heavy cream, 240ml
  • 1 to 2 tablespoons powdered sugar, 8 to 16g
  • ½ teaspoon vanilla extract
  • Extra lime zest or thin lime slices, optional

For a deeper guide to soft peaks, sweetness, and keeping the topping fluffy, use MasalaMonk’s whipped cream recipe before finishing the pie.

Instructions

Crust

1. Heat the oven. Preheat the oven to 350°F / 177°C. Place a rack in the center of the oven.

2. Make the crust mixture. Stir the graham cracker crumbs, sugar, melted butter, and salt together until the mixture looks like damp sand. When you squeeze a little in your hand, it should hold together.

3. Press the crust. Tip the crumbs into a 9-inch pie plate. Press the crumbs up the sides first, then press the remaining crumbs across the base. Use the bottom of a measuring cup or glass to even it out, but avoid packing it so hard that it becomes dense.

4. Pre-bake the crust. Bake for 8 to 10 minutes, until the crust smells toasted and looks slightly dry. Set it on a wire rack while you make the filling.

Filling, Bake, and Chill

5. Mix the filling. In a medium bowl, whisk the egg yolks and lime zest for about 1 minute, until slightly lighter and fragrant. Add the sweetened condensed milk, key lime juice, and salt. Whisk until smooth and slightly thickened. The filling should look glossy and pour slowly, not thin like milk.

6. Fill the crust. Pour the filling into the warm crust and smooth the top gently. Tap the pie plate once or twice on the counter to release large air bubbles. If your pie plate is shallow, hold back extra filling rather than overfilling.

7. Bake the pie. Bake for 18 to 20 minutes, until the edges look set and the middle moves gently when you nudge the pan. The filling should not slosh, the top should not brown, and the pie should smell like warm lime and toasted crumbs rather than browned custard.

8. Cool, then chill. Let the pie cool on a wire rack until it is no longer hot, about 30 to 45 minutes. Refrigerate for at least 4 hours, or overnight for the best texture.

9. Make the whipped cream. Before serving, beat the cold heavy cream, powdered sugar, and vanilla until soft or medium peaks form.

10. Finish and serve. Spread or pipe the whipped cream over the chilled pie. Add lime zest or thin lime slices if you like. Slice with a sharp knife, wiping the blade between cuts for tidy pieces.

Success Notes

  • Use sweetened condensed milk, not evaporated milk.
  • Use the full 1 cup / 240ml lime juice for a properly tart pie. If your bottled juice tastes extremely sharp, use ¾ cup / 180ml for a softer flavor.
  • A deeper 9-inch pie plate gives this bakery-style filling enough room. With a shallow plate, hold back extra filling.
  • A center that moves softly is not automatically underdone. That movement helps protect the filling from turning rubbery after chilling.
  • Add whipped cream after chilling for the freshest texture and neatest top.

That taller slice comes from the two-can filling ratio. The extra volume gives the pie height, while the full chill gives it the clean cut.

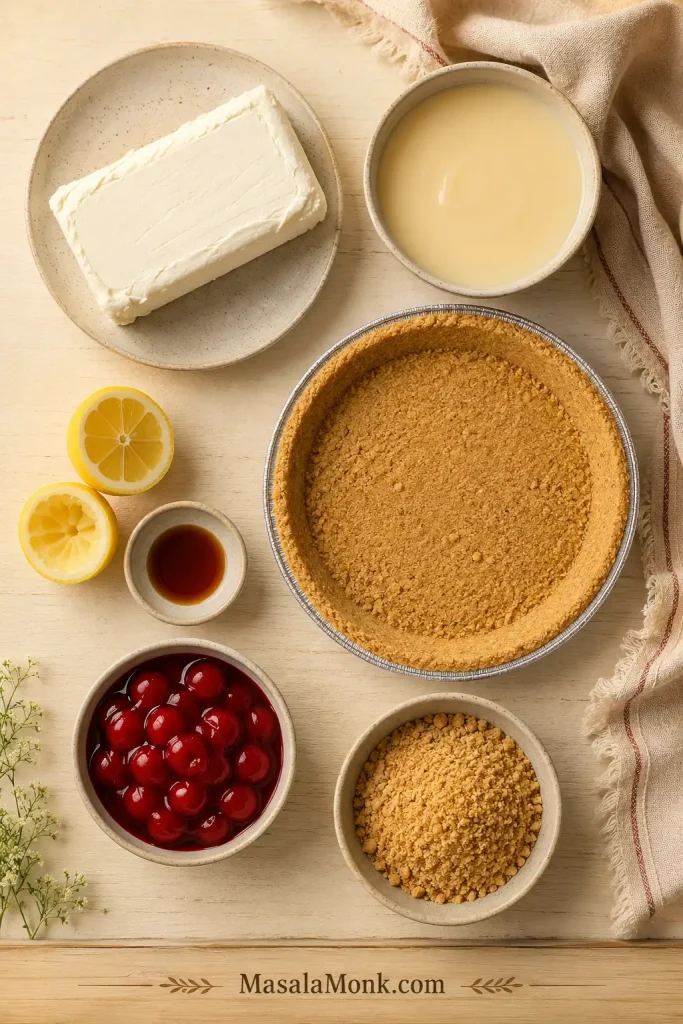
Two cans of sweetened condensed milk, one cup of lime juice, four egg yolks, and lime zest arranged for key lime pie filling.
Because this is a two-can condensed milk filling, the pie bakes taller than a classic version and needs both a deeper plate and patient chilling.

If this is your first key lime pie, do not judge it by how it looks hot from the oven. Judge it after it has cooled and chilled.

Key Lime Pie Cues at a Glance

Once the pie is in motion, these are the small signs that tell you everything is going right.

CueWhat to Look For
Crust mixtureDamp sand that holds when squeezed
Baked crustLightly dry, fragrant, and not dark
Filling before bakingSmooth, glossy, and slightly thickened
DonenessSet edges, softly moving center, no slosh
ColorPale yellow, not bright green
ChillCold all the way through before slicing
SliceHolds shape but still tastes creamy

Why This Recipe Works

The filling works because the ingredients do more than add flavor. Lime juice thickens the sweetened condensed milk mixture and cuts through its sweetness. Egg yolks add custard structure. Gentle oven heat finishes the set, and chilling gives the pie time to become cleanly sliceable.

The crust has a different job: it needs to stay crisp under a cold filling. Pre-baking dries and toasts the graham crumbs, while a little salt keeps the condensed milk filling from tasting flat.

That is why this pie does not need extra food coloring, complicated flavorings, or a long list of add-ins. The flavor comes from contrast: buttery crumbs, smooth lime custard, a little salt, and a cool cream finish.

That contrast is the whole charm: the pie tastes rich for a second, then the lime pulls it back into something clean and refreshing.

Ingredients for Key Lime Pie

The ingredient list is short, so every item matters. The filling should taste bright and balanced, not heavy, harsh, or candy-sweet.

Why no sour cream, Greek yogurt, or cream cheese? Those ingredients can make a delicious softer or tangier pie, but they move the texture toward cheesecake or cream pie. This version stays in the baked custard-style lane, using sweetened condensed milk, egg yolks, lime juice, and chill time for body.

Graham Cracker Crumbs

Fine graham cracker crumbs make the crust easier to press and slice. A few slightly larger crumbs are fine, but avoid a mix that is half powder and half chunks. The crust should feel sandy and buttery, not dry.

Outside the US, digestive biscuits or plain tea biscuits can work in the crust. Use the same crumb weight and adjust the butter only if the mixture does not hold when squeezed.

A store-bought 9-inch graham cracker crust works for a shortcut, but check the depth before filling. This is a generous bakery-style filling, so use a deep-dish crust if available, or hold back a little filling instead of overfilling.

Sweetened Condensed Milk

Sweetened condensed milk gives the filling its creamy body, sweetness, and smooth texture. Evaporated milk is not a good swap because it does not have the same thickness, sugar, or structure. It is what makes the filling feel lush instead of watery.

If you like condensed milk desserts, MasalaMonk’s banoffee pie recipe is another rich, chilled pie-style dessert to try.

Egg Yolks

Egg yolks help the filling cut like custard instead of spooning like pudding. They also give the pie its natural pale yellow color.

The same gentle-heat logic shows up in MasalaMonk’s crème brûlée recipe, where the custard should set softly instead of turning firm.

Key Lime Juice

Key lime juice gives the pie its sharp, bright flavor. Fresh key limes have a fragrant, floral tartness, but bottled key lime juice is useful and reliable when fresh key limes are hard to find. Regular limes can also work, especially when you use enough zest.

Lime Zest

Zest is what makes the pie smell like lime before the first bite even lands. Grate only the colored outer layer of the lime; the white pith underneath can taste bitter in a smooth custard filling.

Zest the limes before you juice them. Whole limes are easier to hold, and you are less likely to scrape into the bitter white pith.

Salt

A small pinch of salt keeps the filling from tasting flat. It should not make the pie taste salty; it simply sharpens the lime and balances the condensed milk.

Whipped Cream

Lightly sweetened whipped cream softens the tartness of the pie and gives each slice a cool finish. Heavy cream, a little powdered sugar, and vanilla are enough.

Once the basics are set, the lime choice is where most bakers hesitate. That is also where this recipe is more flexible than it may seem.

Fresh Key Limes, Bottled Juice, or Regular Limes?

Fresh key limes give the most aromatic version, but they are not the only way to make a good pie. Bottled key lime juice is useful when fresh key limes are hard to find, and regular Persian limes work well when you use enough fresh zest.

Fresh key limes, regular Persian limes, and bottled key lime juice arranged as options for making key lime pie.
For lime flavor, think in layers: fresh key limes bring aroma, bottled key lime juice brings consistency, and regular limes need zest for brightness.

For 1 cup / 240ml juice, expect about 20 to 30 small key limes, sometimes more if they are dry. Regular Persian limes are much larger, so 6 to 8 may be enough. Zest before juicing so the fruit is easier to hold.

Fresh key limes are lovely, but they are not a test you have to pass. The better test is the bite: clean, tart, aromatic, and balanced against the condensed milk.

No Key Limes? Use Regular Limes This Way

Regular limes work best when you treat zest as part of the flavor, not just a garnish. The juice brings tartness; the zest brings back the lime aroma.

A regular Persian lime being zested with a microplane, with fine green lime zest visible on a light surface.
When zesting regular limes, stop at the colored peel so the pie gets fragrance without the bitterness of the white pith.

Choose Your Lime Path

What You HaveWhat to DoBest Sign
Fresh key limesUse them for the most aromatic versionExpect a tart, floral filling
Bottled key lime juiceUse ¾ to 1 cup depending on sharpnessTaste first; it should be clean and tart
Regular limesUse the juice plus plenty of fresh zestZest gives back aroma
Very sharp bottled juiceStart closer to ¾ cup / 180mlUse zest for lime fragrance
Mild or weak limesUse the full juice amount and extra zestChill overnight for better flavor

With regular limes, fresh zest matters even more because it brings back the citrus aroma. With bottled key lime juice, taste it before mixing. It should be tart and clean, not stale or bitter.

A natural key lime pie is usually pale yellow because of the egg yolks and lime juice. Bright green pie may look playful, but it is not a sign of better lime flavor. Skip green food coloring unless you specifically want that look; it does not improve the pie.

A natural pale yellow key lime pie slice compared with an artificial neon green pie slice.
Instead of judging by green color, look for a soft pale yellow filling; that is the natural look of lime juice, yolks, and condensed milk.

Classic vs Bakery-Style Key Lime Pie

This is a taller bakery-style key lime pie, but the flavor stays classic: condensed milk, egg yolks, lime juice, zest, and a graham cracker crust. The difference is volume. A taller filling gives you a more generous slice, but it also needs a deeper 9-inch pie plate, careful doneness cues, and enough chill time to cut cleanly.

A classic-style key lime pie slice compared with a taller bakery-style key lime pie slice on cream plates.
A bakery-style key lime pie slice gets its height from extra filling volume, but the clean cut comes from proper baking and chilling.

Bakery-style does not mean greener, sweeter, or heavier. The pie should still taste tart, creamy, pale yellow, and balanced.

Key lime pie is also Florida’s official state pie, but that does not change the home-baking test: crisp crust, pale lime filling, and a chilled slice that holds. Florida Senate official state pie reference.

After the filling style, the crust is what makes the slice feel complete.

Graham Cracker Crust for Key Lime Pie

You are looking for a crust that is crisp, buttery, and strong enough to hold the chilled filling. It should not crumble into dust when sliced, but it should not be so tightly packed that it turns hard.

Crust Texture

The best cue is texture. Once the crumbs, sugar, butter, and salt are mixed, the crumbs should look like damp sand. Squeeze a small amount in your hand. If it holds together, the crust has enough butter. If it falls apart immediately, it may need a little more melted butter.

A hand squeezing graham cracker crumb mixture over a glass bowl to show the damp sand texture for key lime pie crust.
Before the crust goes into the dish, squeeze the crumbs once; they should clump lightly without leaving butter on your fingers.

Pressing and Pre-Baking

When pressing the crust into the pie plate, build the sides first. Then press the base flat. This gives you a more even edge and helps prevent the sides from collapsing. A measuring cup or flat-bottomed glass makes the job easier.

Hands pressing graham cracker crumbs up the sides of an ivory pie dish with a measuring cup to form the crust wall.
Next, press the sides before the base so the crust wall can support the taller lime filling instead of collapsing.

The crust is not just a container; it is the buttery, salty crunch that keeps the lime filling from tasting one-note. The best bite should give you a little sandy crunch before the lime custard melts.

A lightly pre-baked graham cracker crust in an ivory ceramic pie dish resting on a cooling rack.
Once pre-baked, the graham cracker crust should smell toasted and feel dry on top, which helps prevent a soggy chilled slice.

You see the same crust logic in MasalaMonk’s salted caramel cheesecake recipe, where the base has to stay crisp under a rich filling.

Crust ProblemLikely ReasonFix
Crust crumblesToo little butter or not pressed enoughAdd a little more butter next time and press firmly
Crust is too hardPressed too aggressivelyPress firmly, but do not crush it into a compact shell
Crust tastes flatNo saltAdd a small pinch of salt
Crust gets soggyNot pre-baked or filling added to a weak crustPre-bake until lightly dry and fragrant
Sides slump downLoose crumbs or thin sidesPress the sides first and make them even

Method Overview: How to Make Key Lime Pie

Think of the method in four stages: set the crust, thicken the filling, bake only until the center moves softly, then let the refrigerator finish the texture.

The crust gets a short pre-bake so it smells toasted and feels lightly dry. The filling should look smooth, glossy, and slightly thickened before it goes into the crust. After baking, the pie should cool at room temperature before it chills deeply in the refrigerator.

Pale yellow key lime pie filling in a bowl with a whisk trail, showing a smooth glossy texture with tiny lime zest flecks.
When the filling turns glossy and leaves soft whisk trails, the condensed milk, egg yolks, lime juice, and zest are blended enough to bake smooth.

Once the filling looks glossy and slow-pouring, add it to the warm crust gently so the surface stays smooth.

Pale yellow key lime pie filling being poured from a bowl into a pre-baked graham cracker crust in an ivory ceramic dish.
If the filling pours slowly rather than splashing thin, it has the body needed for a creamy baked key lime pie.

How to Know Key Lime Pie Is Done

Key lime pie is done when the edges look set and the center has a soft wobble. It should not slosh like liquid, but it should not look firm like a cheesecake either. Think of the center as gently jiggly, not loose.

A baked key lime pie in an ivory dish with labels pointing to set edges, a soft center, and no browning.
Pull the pie when the edges are set and the center still wobbles softly; the custard finishes as it cools and chills.

Keep the top pale; browning is a sign the pie has gone too far. A few tiny bubbles near the edges are fine, but a browned surface usually means the oven was too hot or the bake went too long.

A split image comparing a correct pale key lime pie top with an overbaked browned and cracked top.
Browning, puffing, or cracking are warning signs that the key lime custard has moved past creamy and into overbaked.

Done means: for this pie, your eyes are more helpful than a thermometer: set edges, a center that still moves softly, no slosh, no large bubbling, and a pale top with no browning.

After the bake, the next useful checks are chilling time and clean slicing.

How Long to Chill Key Lime Pie

Chill key lime pie for at least 4 hours before slicing. Overnight is better if you want the smoothest texture and the neatest wedges. The filling needs time to firm all the way through, not just cool on the surface.

Let the pie cool at room temperature first, then refrigerate it. If the pie is still warm, avoid sealing it tightly right away because condensation can drip onto the filling. Once cold, cover it loosely or place it in an airtight container.

When it is right, the fork should slide through cold lime custard, hit the buttery crumb crust, and bring up a bite that is tart first, creamy second, and sweet only at the end.

How to Get Clean Slices

For tidy wedges, use a sharp knife and cut straight down through the custard and crust. Wipe the blade between slices so each piece lifts cleanly.

A clean slice of key lime pie being lifted with a pie server while a hand wipes a sharp knife nearby.
For clean slices, chill first, cut with a sharp knife, and wipe between cuts so graham crumbs do not streak the filling.
  • For extra-clean cuts, dip the knife in hot water and dry it before slicing.
  • Add whipped cream after chilling, especially if you want a neat top.
  • Use a thin pie server instead of a spoon to lift each piece.

If the first piece comes out messy but the rest of the pie looks set, the pie is probably fine. Slices that slump across the whole pie usually needed more fridge time or a slightly longer bake.

When the pie still looks loose after slicing, check the troubleshooting table before changing the recipe.

How to Make It Less Sweet or More Tart

Key lime pie should be sweet, but it should not taste flat or sugary. The best balance comes from enough lime juice, fresh zest, a little salt, and a simple topping.

The best version should make your mouth water a little before the sweetness catches up. That is the difference between a pie that tastes bright and one that only tastes sweet.

A four-part board showing lime juice, lime zest, salt, whipped cream, and a key lime pie slice for flavor balance.
To make the pie taste brighter without breaking the filling, adjust zest, salt, and topping before changing the condensed milk ratio.
What You WantWhat to Adjust
Less sweetUse lightly sweetened whipped cream and avoid adding extra sugar to the filling
More tartUse the full 1 cup / 240ml lime juice
More lime aromaAdd a little extra zest, avoiding the white pith
Softer flavorUse ¾ cup / 180ml lime juice instead of 1 cup / 240ml
Better balanceAdd a pinch of salt and chill the pie overnight

Sweetened condensed milk is not only a sweetener; it also gives the filling its body. For a less sweet result, adjust the lime, zest, salt, and topping before changing the structure of the filling.

Whipped Cream, Meringue, or Plain?

Whipped cream is the easiest and most balanced topping for key lime pie. It softens the tartness of the filling and gives each slice a creamy finish without making the pie feel heavy.

Whipped cream should feel like a soft finish, not a second dessert on top of the pie. A little sweetness is enough because the filling already has condensed milk.

Soft whipped cream being piped onto a pale yellow key lime pie in an ivory dish with lime zest on top.
A light whipped cream finish softens the tart lime edge, while a little zest keeps the flavor fresh instead of heavy.

Meringue is more dramatic and can be beautiful, especially if lightly toasted. It also uses the egg whites left over from the filling. The tradeoff is that meringue needs more care, and it can weep if stored too long.

Serving the pie plain is also completely fine. If you want the lime flavor to feel sharper and cleaner, skip the topping or add only a small spoonful of whipped cream on each slice.

After topping, the other big choice is texture: classic baked custard or a softer no-bake pie.

Baked vs No-Bake Key Lime Pie

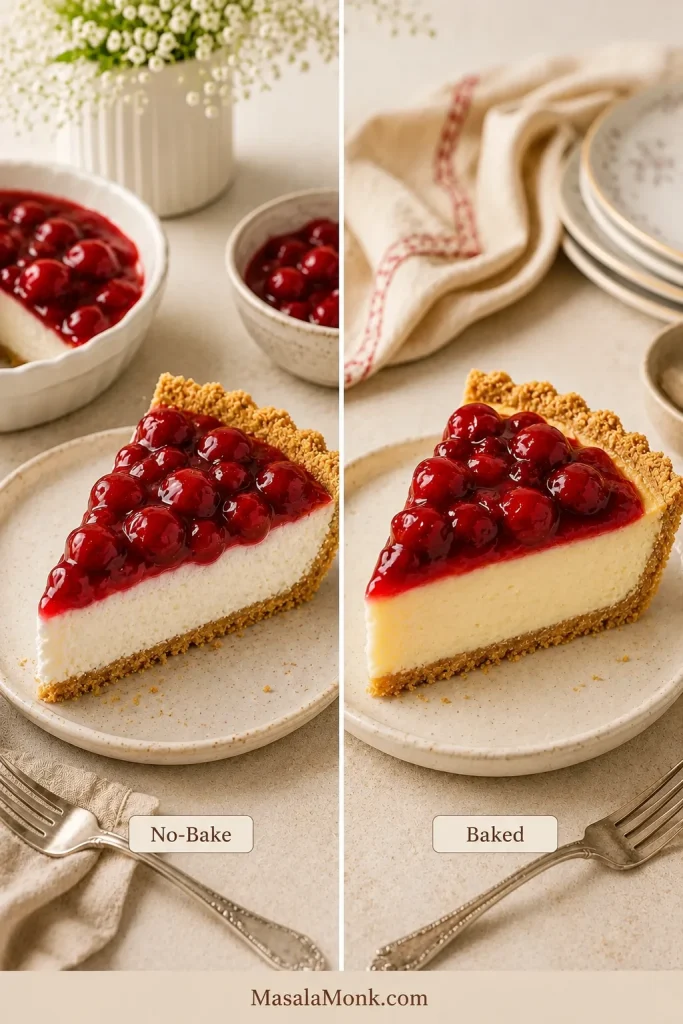
Baked and no-bake key lime pies both have their place. Choose baked when you want a classic chilled custard slice; choose no-bake when you want something softer, creamier, and closer to cheesecake or icebox pie.

A split comparison showing baked key lime pie as custardy and no-bake key lime pie as softer.
Choose baked key lime pie for a custardy slice; choose no-bake when you want a softer chilled dessert with a creamier set.
TypeTextureBest ForMain Caution
Baked key lime pieCustardy, creamy, sliceableClassic flavor and tidy wedgesDo not overbake
No-bake key lime pieCreamy, soft, cheesecake-likeHot weather and no-oven dessertsNeeds enough chill time
Frozen key lime pieFirm, cold, refreshingSummer serving and make-ahead dessertsNeeds thawing time before slicing

This recipe is baked because it gives the most reliable classic texture. The bake is short, and the oven does not need to stay on for long. Most of the total time is chilling time, not active cooking time.

If you want the same chilled-dessert comfort without turning on the oven, MasalaMonk’s no-bake mango cheesecake recipe is a natural next stop because it also focuses on clean setting, chill time, and a creamy fruit filling.

Key Lime Pie Variations

Make the baked pie once as written, then use these ideas when you want the same tart-creamy flavor in a different shape.

Mini key lime pies and square key lime pie bars arranged on light boards with pale yellow filling and graham crusts.
For parties or trays, mini pies and bars keep the same graham crust and lime filling but make serving cleaner and easier.

Mini Key Lime Pies

Mini key lime pies are great for parties and individual servings. Use a muffin tin or mini graham cracker crusts, press the crust firmly, and reduce the bake time because smaller pies set faster.

Key Lime Pie Bars

For bars, use a square pan lined with parchment so the slab lifts out cleanly. Bars need a slightly sturdier structure because they are cut into handheld pieces.

Gluten-Free Key Lime Pie

The filling is naturally gluten-free as long as your ingredient labels are safe. Use gluten-free graham crackers or gluten-free digestive-style biscuits for the crust, then follow the same butter, sugar, pressing, and pre-baking method.

Dairy-Free or Vegan Key Lime Pie

A dairy-free or vegan key lime pie needs a dedicated formula. Sweetened condensed milk and egg yolks are structural ingredients in this baked version, so simple one-for-one swaps can turn the filling loose or grainy.

For a coconut-based frozen dessert comparison, MasalaMonk’s coconut ice cream recipe is useful because it separates coconut milk, coconut cream, and texture control clearly.

Regular Lime Pie

Regular limes make a bright, delicious pie. The flavor is slightly different from fresh key limes, but fresh zest brings back more citrus aroma.

No-Bake Key Lime Pie

No-bake key lime pie usually uses cream cheese, whipped cream, whipped topping, or another chilled structure instead of egg yolks. It is useful when you want a cold summer dessert without turning on the oven, but it is not the same texture as this baked custard-style pie. For the no-oven setting logic, see MasalaMonk’s no-bake cheesecake recipe.

Master the baked version first; it is the one that rewards a night in the fridge.

Make-Ahead Key Lime Pie

Key lime pie is one of the easiest desserts to make ahead because it needs refrigerator time anyway. Make the pie the day before you plan to serve it, chill it overnight, and add the whipped cream close to serving time.

That is the quiet advantage of this pie: dessert is already finished before anyone sits down to eat. All that is left is cream, a clean knife, and cold slices on plates.

If you are making the pie ahead for guests, bake and chill the pie the day before, but whip and add the cream on the day you serve it.

For a summer dessert table, this pie also sits well beside something cold and fruit-forward like MasalaMonk’s homemade mango ice cream.

Best make-ahead plan: bake and chill the pie one day ahead, keep it covered in the refrigerator, then whip the cream and garnish the pie shortly before serving.

A chilled key lime pie in an ivory dish inside a refrigerator with limes, a covered slice, and whipped cream nearby.
For the best make-ahead result, chill the pie deeply first, then add whipped cream close to serving so the topping stays fresh.

Storage and Freezing

Because this is a dairy-and-egg dessert, it belongs in the refrigerator whenever it is not being served. Keep it cold, slice it cold, and return leftovers to the fridge once everyone has had a piece.

Storage MethodHow LongBest Practice
Refrigerator3 to 4 daysCover after fully chilled
Freezer, if you choose to freeze1 to 2 months for best textureFreeze fully chilled pie tightly wrapped; thaw in the refrigerator
Room temperatureUp to 2 hours while servingReturn leftovers to the refrigerator promptly

For refrigerator timing, FoodSafety.gov’s cold food storage chart lists custard and chiffon-style pies at 3 to 4 days refrigerated. Treat freezing as a texture-quality choice for this pie rather than a refrigerator-storage guideline. If you freeze it, wrap it tightly, thaw it in the refrigerator, and expect the crust or filling to be slightly softer after thawing.

A key lime pie storage guide showing fridge for 3 to 4 days, serving up to 2 hours, and freezer for 1 to 2 months with texture softening.
Refrigerate for the best texture, serve briefly at room temperature, and freeze only when planning ahead because thawing can soften the filling.

If possible, add whipped cream after thawing rather than before freezing. Fresh whipped cream has the best texture.

Troubleshooting Key Lime Pie

Most key lime pie problems come from three places: the wrong milk, too little bake time, or not enough chill time. Use the table below to fix the most common issues.

Loose or Runny Filling

If the pie is already baked but still looks loose, chill it longer before cutting. A slightly underbaked pie may firm up with extra refrigerator time. After overnight chilling, liquid filling usually points to the wrong milk type or a changed filling ratio.

Most key lime pie failures are not disasters; they are timing problems. More fridge time fixes more pies than people think, and a little patience can turn a nervous-looking pie into a slice you are happy to serve.

A troubleshooting board showing correct key lime pie texture beside runny, cracked, curdled, and crumbly crust examples.
Use the problem panels as diagnosis: runny needs more bake or chill, cracked needs gentler heat, and crumbly crust needs better binding.

Common Problems and Fixes

ProblemLikely ReasonFix Next Time
Pie did not setUnderbaked, sliced too soon, or wrong milk usedBake until edges set, chill fully, and use sweetened condensed milk
Filling is runnyPie was warm inside or filling ratio changedChill at least 4 hours and avoid reducing structural ingredients
Filling tastes harshBottled juice was bitter, stale, or too sharpUse a cleaner bottled key lime juice, reduce to ¾ cup / 180ml, or add more fresh zest
Filling looks curdled or grainyOverbaked, oven too hot, or acidic filling cooked too aggressivelyPull the pie while the center still moves softly and avoid browning or large bubbling
Pie tastes too sweetNot enough lime, zest, or saltUse the full lime juice amount, add zest, and include a pinch of salt
Pie tastes bitterToo much white pith in the zestZest only the colored outer layer
Crust crumblesToo little butter or not enough pressureUse enough melted butter and press the crust firmly
Crust is too hardCrust was overpackedPress evenly but not aggressively
Filling crackedPie was overbaked or cooled too aggressivelyRemove it while the center still moves softly; cover small cracks with whipped cream
Top brownedOven too hot or bake time too longBake just until set; the filling should stay pale
Slices are messyPie was not fully chilledChill overnight and wipe the knife between cuts

Need exact amounts again? Return to the recipe card, or continue to the FAQs for quick answers.

Key Lime Pie FAQs

What is key lime pie made of?

Key lime pie is made with a graham cracker crust, sweetened condensed milk, egg yolks, key lime juice, and lime zest. It is baked briefly, chilled until set, and often topped with whipped cream or meringue.

What temperature do you bake key lime pie?

Bake key lime pie at 350°F / 177°C. In this recipe, the crust bakes first for 8 to 10 minutes, then the filling bakes for 18 to 20 minutes.

How do you know when key lime pie is done?

Key lime pie is done when the edges are set and the center has a soft wobble. It should not slosh, brown, or look completely firm. Visual cues are more useful than temperature for this pie.

Why is my key lime pie runny?

Key lime pie can be runny if it is underbaked, sliced before it is fully chilled, or made with evaporated milk instead of sweetened condensed milk. Chill it for at least 4 hours before slicing.

How long should key lime pie chill before slicing?

Chill key lime pie for at least 4 hours. Overnight is better if you want the smoothest texture and neatest slices.

Fresh key limes or bottled key lime juice: which is better?

Fresh key limes are best for aroma, but bottled key lime juice works well in baked key lime pie. Choose a bottled juice that tastes clean and tart, not bitter or stale.

Do regular limes work in key lime pie?

Yes, regular Persian limes work in key lime pie. Use fresh zest along with the juice so the filling tastes bright and aromatic instead of flat.

What can I use instead of graham crackers?

Digestive biscuits or plain tea biscuits can work instead of graham crackers. Use the same crumb weight, then adjust the butter only if the crumb mixture does not hold when squeezed.

Can I use a store-bought graham cracker crust?

Yes. Use a deep-dish 9-inch graham cracker crust if possible. This recipe has a generous filling, so hold back a little filling if the packaged crust is shallow.

Can I make this with one can of sweetened condensed milk?

Not with the same measurements. This taller bakery-style pie is built around two cans of sweetened condensed milk. For a one-can pie, use a smaller filling formula.

Should key lime pie be green or yellow?

Key lime pie should usually be pale yellow, not bright green. The yellow color comes from egg yolks and lime juice; green color usually comes from food coloring.

Why did my key lime pie crack?

Key lime pie usually cracks when it is overbaked or cooled too aggressively. Pull it when the edges are set and the center still moves softly. A cracked pie is usually still edible; cover it with whipped cream and chill fully before slicing.

How far ahead can you make key lime pie?

You can make key lime pie one day ahead. Bake it, cool it, chill it overnight, and add whipped cream shortly before serving.

Does key lime pie need to be refrigerated?

Yes. Key lime pie needs to be refrigerated because it contains a dairy-and-egg-based filling. Keep it cold until serving and refrigerate leftovers promptly.

Can you freeze key lime pie?

You can freeze key lime pie for texture-quality convenience, but the crust and filling may soften slightly after thawing. Freeze it fully chilled and tightly wrapped, then thaw in the refrigerator. Add whipped cream after thawing.

How do you get clean slices?

Chill the pie thoroughly, preferably overnight. Cut straight down with a sharp knife, wipe the blade between slices, and add whipped cream after chilling for the neatest top.

Whipped cream or meringue: which is better?

Whipped cream is best for an easy key lime pie because it is soft, creamy, and reliable. Meringue is more dramatic, but it needs more care and can weep during storage.

What is the difference between baked and no-bake key lime pie?

Baked key lime pie is custardy and sliceable because it uses egg yolks and condensed milk. No-bake key lime pie is softer and more cheesecake-like, often using cream cheese or whipped cream.

Final Thought

The best key lime pie gives you contrast in one clean forkful: cold lime custard, buttery crumbs, a little salt, a little cream, and enough tartness to wake everything up.

Once you know the cues, it stops feeling risky and becomes the dessert you make ahead, chill deeply, and bring to the table already calm, cold, and ready to slice.

Posted on Leave a comment

Fudgy Brownie Recipe: Chewy Edges, Crackly Top & Soft Chocolate Center

Brownie square lifted from a parchment-lined metal pan, with a crackly top and dense chocolate middle visible.

These are the brownies for the person who does not want chocolate cake pretending to be a brownie. The knife should crack through a thin shiny top, the edges should have a little pull, and the center should stay dense, soft, and deeply chocolatey without tasting raw.

If you have ever pulled a pan from the oven and wondered whether the middle was still underbaked or already past fudgy, this recipe is for that exact moment. It is a no-guesswork brownie guide: one bowl, no mixer, clear batter cues, and a simple way to know when to stop baking.

The rule is this: pull the brownies before they look completely finished. A toothpick should show crumbs or a light chocolate smear — not wet batter, and not a completely dry stick. Cooling turns that soft center into a fudgy slice.

This homemade brownie recipe from scratch uses melted chocolate, cocoa powder, butter, sugar, eggs, and a small amount of flour to give you boxed-brownie comfort with deeper chocolate flavor, chewy edges, and fewer last-minute doubts at the oven.

Quick Answer: How to Make Fudgy Brownies

Fudgy brownies come from more fat and chocolate, less flour, no leavening, gentle mixing after flour, and a bake that stops before the center looks fully done. Use an 8-inch / 20 cm light metal pan, bake at 350°F / 175°C, and start checking early. The best cue is crumbs clinging to the toothpick, not a clean, dry one.

Best pan8-inch / 20 cm light metal square pan
Oven350°F / 175°C, or about 160°C fan-forced
Texture goalThin crackly top, chewy edges, dense chocolate center
Best cueCrumbs or a light smear on the toothpick, not wet batter

If this is your first time baking brownies from scratch, do not try to memorize every detail. Remember one thing: the right moment looks slightly early.

Use this close-up before you slice the pan. the middle should look compact and set, not loose like batter.

Broken brownie square on parchment, showing a moist dense chocolate interior and thin top crust.
A properly baked fudgy brownie looks moist and compact inside; if it looks loose, shiny, or batter-like, it needs more time.

Fudgy Brownie Recipe Card

Fudgy Brownies

A from-scratch batch of brownies with a thin shiny crust, chewy edges, and a dense chocolate center that firms as it cools. The key is simple: stop before the toothpick comes out clean, then let the brownies cool before slicing.

Prep Time15 minutes
Bake Time27–31 minutes
Cooling TimeAt least 1 hour
Active + Bake TimeAbout 45 minutes
Yield16 brownies
DifficultyEasy to moderate
Pan8-inch / 20 cm square metal pan
Oven350°F / 175°C conventional, or about 160°C fan-forced

Equipment

  • 8-inch / 20 cm square metal baking pan
  • Parchment paper
  • Heatproof mixing bowl or saucepan
  • Whisk
  • Rubber spatula
  • Fine mesh sieve
  • Digital kitchen scale, recommended
  • Sharp knife for slicing

No mixer is needed. The batter comes together in one main bowl: melt, whisk, fold, bake.

Ingredients

IngredientAmount
Unsalted butter170g / 6 oz / 12 tbsp
Semi-sweet or dark chocolate, chopped100–113g / 3.5–4 oz
Granulated or caster sugar250g / 1¼ cups
Large eggs2 whole eggs + 1 egg yolk
Vanilla extract2 tsp / 10ml
Unsweetened cocoa powder50g / about ½ cup, spooned and leveled
All-purpose flour / maida65g / ½ cup, spooned and leveled
Fine salt½–¾ tsp
Chocolate chips or chopped chocolate100–120g / 3.5–4.25 oz
Instant coffee or espresso powder, optional½–1 tsp

Instructions

  1. Prepare the pan. Preheat the oven to 350°F / 175°C. Line an 8-inch / 20 cm square metal pan with parchment paper, leaving overhang on two sides for lifting.
  2. Melt the butter and chocolate. Add the butter and chopped chocolate to a heatproof bowl. Melt gently in short microwave bursts, stirring between each, or use a bowl over barely simmering water. Stir until smooth and glossy, then let it stand until warm, not hot.
  3. Whisk in the sugar. Add the sugar while the chocolate-butter mixture is still warm. Whisk for 45–60 seconds. It may look slightly grainy at first, then heavier and shinier as you whisk.
  4. Add the eggs, yolk, and vanilla. Whisk in the 2 whole eggs, extra yolk, and vanilla until the batter looks smoother, thicker, and glossier. You want shine and structure, not cake-like air.
  5. Fold in the dry ingredients. Sift in the cocoa powder, flour, salt, and optional coffee powder. Fold gently just until the dry streaks disappear.
  6. Add more chocolate. Fold in the chocolate chips or chopped chocolate. The batter should be thick, slow-moving, and glossy when it falls from the spatula.
  7. Bake. Spread the batter evenly into the prepared pan. Bake for 27–31 minutes, checking from 24 minutes. Look for set edges, a dry-shiny top with fine cracks, and a middle that still looks a touch underfinished. Do not wait for a clean toothpick.
  8. Cool before slicing. Let the brownies cool for at least 1 hour. The soft middle turns sliceable as it rests. For the cleanest squares, cool completely, chill for 30–60 minutes, and cut with a sharp knife.

Recipe Notes

  • For best texture, use grams for the flour and cocoa powder. Brownies are sensitive to small changes in dry ingredients. The King Arthur Baking ingredient weight chart is useful if you often convert cups to grams.
  • Use maida as the all-purpose flour if baking in India.
  • A light metal pan gives the most reliable texture. Glass and dark pans can change the timing.
  • Use baking chocolate or a good dark/semi-sweet chocolate bar, not filled chocolate candy. Compound chocolate can behave differently because it uses different fats.
  • Do not reduce the sugar heavily on the first bake. Sugar helps moisture, chew, and the delicate top crust.
  • If your oven runs hot or your pan is dark, start checking around 22–23 minutes. For an OTG, preheat fully and bake on the middle rack.

First-bake non-negotiables: keep the flour low, use granulated or caster sugar, include the melted chocolate, skip leaveners, and pull the brownies before they look fully done. Once you know the texture, you can experiment more safely.

Quick bake targets: bake 27–31 minutes, start checking at 24 minutes, and cool at least 1 hour before judging the final texture. For hot ovens or dark pans, start checking at 22–23 minutes.

If you are baking right now, the recipe card has everything you need. The rest of this guide helps you read the cues in the bowl, in the pan, and on the toothpick, especially that strange little moment when the brownies look slightly underdone but are actually ready.

Why This Fudgy Brownie Recipe Works

A good brownie is a balancing act: enough structure to slice, enough fat to stay fudgy, and enough sugar to give that thin top crust. The flour stays low compared with the chocolate, cocoa, butter, and eggs, so the brownies set dense instead of fluffy.

A little extra flour, a wider pan, or two extra minutes in the oven can change the whole bite. That is why this recipe leans on visual cues instead of asking you to trust the timer alone.

The finished square should feel dense in your fingers, bend slightly before it breaks, and taste like soft chocolate rather than cake.

What Makes Brownies Fudgy?

Fudgy brownies come from more fat and chocolate, less flour, no leavening, gentle mixing after the flour, and a bake that stops while the center is still soft-set. The texture finishes as the brownies cool.

Low Flour Keeps the Center Dense

Flour gives structure, but extra flour quickly moves the texture toward cake. This recipe uses just enough to hold the squares together while keeping the crumb compact and tender.

Butter, Chocolate, and Cocoa Build the Flavor

Melted butter and chocolate create the rich base. Butter makes the chocolate taste full and rounded, while cocoa powder gives the flavor depth. Chocolate chips or chopped chocolate add soft pockets through the batch, especially when served slightly warm.

The Extra Egg Yolk Helps With Chew

The extra yolk adds richness without adding too much lift. It helps the center feel softer and gives the edges a little more pull.

Sugar Helps Moisture and Shine

Sugar is not only there for sweetness. It helps the batch stay moist and supports the thin shiny crust on top. These taste sweetest while warm; once the brownies cool and set, the salt, cocoa, and darker chocolate balance the sugar better.

No Baking Powder or Baking Soda

A brownie is not trying to rise like cake. That is the whole point. Skipping baking powder and baking soda keeps the texture dense, rich, and compact.

Fudgy vs Chewy vs Cakey Brownies

Brownie texture sits on a spectrum. Some batches are almost like chocolate fudge, some are chewy like a boxed mix, and some are light enough to feel like cake. This version sits between fudge and chew: dense through the center, with enough edge pull to make each square satisfying.

Brownie StyleTextureWhat Creates It
Fudgy browniesDense, moist, rich centerMore fat and chocolate, less flour, shorter bake
Chewy browniesSet edges with a little pullSugar, eggs, egg yolk, and enough structure
Cakey browniesLighter, taller, more open crumbMore flour, more air, leavening, longer bake

A brownie can be both fudgy and chewy. If you came here looking for a chewy brownie recipe, this version still gives you edge chew without giving up the dense chocolate middle.

Start by choosing the texture you actually want. because small changes in flour, fat, mixing, and bake time push brownies in different directions.

Three labeled brownie pieces comparing fudgy, chewy, and cakey textures.
Before changing the recipe, choose the texture you want: fudgy brownies bake dense, chewy brownies pull slightly, and cakey brownies rise lighter.

Ingredients That Shape the Texture

Once you understand the texture goal, the ingredient choices make more sense. Butter and chocolate bring richness, eggs help the brownies set, sugar helps shine and chew, and flour decides whether the brownie stays dense or drifts toward cake.

Before the ingredient notes get detailed. this visual shows why each item matters to the final brownie texture.

Brownie ingredients on a prep table, including butter, chocolate, cocoa, eggs, sugar, flour, and salt with small role labels.
Every ingredient has a job: fat adds richness, sugar helps the crust, eggs bind the batter, and flour decides how firm the brownie crumb becomes.

Butter

Butter is what makes the chocolate taste round instead of sharp. Melt it with the chopped chocolate so the batter starts smooth and glossy. Unsalted butter gives the most control, but salted butter can work if you reduce the added salt slightly.

Chocolate

Use semi-sweet or dark baking chocolate for the melted base. If you want brownies that taste nostalgic and sweet, choose semi-sweet chocolate. For a darker, more grown-up batch, choose chocolate closer to 70%. If cocoa, cacao, and dark chocolate labels ever feel confusing, MasalaMonk’s cacao vs chocolate vs dark chocolate guide is a useful companion.

Sugar

Granulated sugar or caster sugar both work. Caster sugar dissolves more easily, which can help the top bake up shinier. Brown sugar gives a softer, more caramel-like result, but it can make the crust less crackly. If the sweetness worries you, go darker with the chocolate before you start cutting sugar.

Eggs and Extra Yolk

The whole eggs help the brownies set, while the extra yolk adds richness and softness without making the batter too airy. Whisk until the mixture looks glossy before adding the dry ingredients.

Cocoa Powder

Unsweetened cocoa powder deepens the chocolate flavor. Natural cocoa gives a classic brownie taste; Dutch-process cocoa usually gives a darker color and smoother flavor. Sifting matters more here than fussing over the cocoa. Since the batter already contains melted chocolate and butter, the cocoa blends into a rich base; sifting simply prevents dry pockets.

All-Purpose Flour or Maida

Use all-purpose flour or maida. This is the ingredient to measure most carefully. A packed half cup can push the texture toward cake, so use grams when possible. If using cups, spoon the flour into the cup and level it instead of scooping straight from the bag. Do not use self-rising flour here.

Salt

Salt sharpens the chocolate flavor and keeps the sweetness from feeling flat. Use ½ teaspoon for a softer balance or ¾ teaspoon for a deeper bakery-style flavor.

Chocolate Chips or Chopped Chocolate

Chocolate chips give you little set pockets of chocolate. Chopped chocolate melts more lazily into the batter, which is lovely if you want soft streaks when the brownie is still slightly warm.

Coffee or Espresso Powder

A little instant coffee or espresso powder is optional. It does not make the brownies taste like coffee when used lightly; it simply makes the chocolate taste deeper.

Cocoa Powder vs Melted Chocolate in Brownies

Brownies can be cocoa-based, melted-chocolate based, or both. Cocoa powder brings strong chocolate flavor and keeps the recipe pantry-friendly; melted chocolate brings richness and a softer, more fudge-like center. This recipe uses both, and the visual below makes that split easier to understand before you compare the methods.

Look at the role of each chocolate ingredient first. cocoa brings intensity, while melted chocolate helps the brownie set softer.

Cocoa powder, melted chocolate, and brownie pieces arranged with labels comparing chocolate flavor and texture.
For a deeper chocolate brownie, use cocoa for intensity and melted chocolate for softness; together, they build flavor without making the crumb cakey.
Brownie MethodBest ForResult
Cocoa powder onlySimple pantry browniesDeep cocoa flavor, slightly lighter body
Melted chocolate onlyRich dessert-style browniesSofter, denser, more fudge-like
Cocoa + melted chocolateClassic fudgy browniesRich, balanced, chocolatey, reliable
Cocoa + chocolate chipsEasy chocolate pocketsExtra texture and melted chocolate bits

A cocoa-only brownie can still be excellent, but this recipe is designed for the deeper flavor and softer set that come from cocoa powder and melted chocolate together. For this version, keep the melted chocolate. If you want a cocoa-only brownie, it is better to use a recipe built for that style.

How to Make Fudgy Brownies

Now that the texture pieces are clear, the method is mostly about keeping the batter glossy, folding gently, and stopping the bake at the right moment.

1. Prepare the Pan and Oven

Preheat the oven to 350°F / 175°C. Line an 8-inch / 20 cm square metal pan with parchment paper, leaving overhang on two sides. A light metal pan gives the most predictable edge-to-center contrast.

2. Melt the Butter and Chocolate

Melt the butter and chopped chocolate gently until smooth. The mixture should look glossy and fluid. Let it stand briefly before adding eggs; warm is good, hot is not.

This is the foundation stage: smooth, glossy chocolate and butter before sugar, eggs, cocoa, or flour change the batter.

Melted chocolate and butter in a bowl, with a spatula dragging through the glossy mixture.
Once the chocolate and butter look smooth and glossy, stop heating; overheating can dull the flavor and make the base separate.

3. Whisk in the Sugar

Add the sugar while the chocolate mixture is still warm and whisk for 45–60 seconds. It may still look a little grainy, but it should feel heavier and shinier. This helps the surface bake into a thin crust.

The shiny-top work starts here. while the chocolate mixture is still warm enough to help the sugar begin dissolving.

Sugar being whisked into a warm chocolate mixture in a mixing bowl.
While the chocolate mixture is still warm, whisk in the sugar so it starts dissolving and helps form that shiny crackly brownie top.

4. Add the Eggs, Yolk, and Vanilla

Whisk in the eggs, extra yolk, and vanilla until the batter looks smoother and slightly thicker. You are not trying to whip in cake-like air; you are trying to make the mixture glossy and well combined.

Before adding dry ingredients, look for a cohesive glossy base. that shine tells you the eggs and chocolate mixture are properly combined.

Eggs and an extra yolk being mixed into dark chocolate brownie batter with a whisk.
After the eggs go in, the batter should turn smoother and glossier; that change tells you the base is properly combined.

5. Fold in the Cocoa, Flour, and Salt

Sift in the cocoa powder, flour, salt, and optional coffee powder. Fold with a spatula until the last dry streaks disappear. Stop there. Overmixing at this stage can make the texture tougher and more cake-like.

Once flour enters the bowl. switch from whisking to gentle folding so the batter stays dense and tender.

Cocoa powder and flour falling through a sieve into glossy chocolate brownie batter.
Sift first, then fold gently; this keeps cocoa pockets out of the batter and protects the dense, tender brownie bite.

6. Add Chocolate Chips or Chopped Chocolate

Fold in the chocolate chips or chopped chocolate. When you lift the spatula, the batter should fall slowly, not pour like cake batter.

Lift the spatula before filling the pan. the way the batter falls tells you whether it is thick enough for fudgy brownies.

Thick glossy brownie batter falling slowly from a spatula back into a bowl.
When the batter falls in a slow heavy ribbon, it has the thickness you want for fudgy brownies, not a light cake-style pour.

7. Bake Until the Center Is Soft-Set

Spread the batter evenly into the prepared pan. Bake for 27–31 minutes, checking from 24 minutes. Look for set edges, a thin shiny top, and a center that still looks slightly underfinished. Wet batter means it needs more time. If the toothpick is dry, do not panic; the brownies will still be good, but next time you can pull them a few minutes earlier.

Level the batter from corner to corner so timing. pan material, and toothpick checks can do their job fairly.

Thick brownie batter spread in a parchment-lined light metal square pan with a spatula.
Spread the batter into the corners and level the surface; uneven batter thickness can make the edges dry before the middle sets.

The hardest part is that the right moment can look a little wrong. That softness becomes the dense chocolate middle later, once the brownies have cooled.

8. Cool Before Cutting

Let the brownies cool for at least 1 hour. Warm brownies lie; cooled brownies tell the truth. For clean bakery-style squares, cool completely, chill briefly, then slice with a sharp knife.

How to Get the Shiny Crackly Top

The shiny crackly top comes from sugar, eggs, fat, and heat working together. It is not just decoration; it is a sign that the batter was mixed well before the flour went in and baked hot enough for the surface to set into a thin crust.

  • Use enough sugar. Heavy sugar reduction can make the top dull and the texture drier.
  • Whisk sugar while the chocolate mixture is warm. Warm fat helps the sugar begin dissolving.
  • Whisk the eggs until the batter looks glossy. The mixture should look thicker before the dry ingredients go in.
  • Choose caster sugar if you have it. It dissolves more easily than coarse granulated sugar.
  • Fold gently after flour. Once flour is added, more mixing will not improve the top.
  • Preheat the oven fully. A properly hot oven helps the surface set at the right time.

Read the surface first: set edges and a dry-shiny top mean it is time to check the inside instead of baking by color alone.

Freshly baked brownie slab in a parchment-lined pan with a shiny crackly top and set edges.
First check the surface: a dry-shiny top and set edges mean it is time to test the inside, not keep baking by color alone.

Do not chase perfection here. A shiny crust is lovely, but it is not the only sign of a good brownie. Even a slightly duller top can still hide a beautiful fudgy middle.

How to Tell When Fudgy Brownies Are Done

Fudgy brownies are done when the edges are set, the top looks dry and lightly crackled, and a toothpick near the center comes out with crumbs or a light chocolate smear rather than wet batter.

This is the most important part of the recipe, especially if you usually second-guess brownies at the oven. You are pulling them while they still look a little soft, then trusting the cooling time to finish the texture. Test near the center, or halfway between the edge and center if the brownies look very soft. Do not test only at the edge, because the edge sets first.

Use this toothpick guide before adding more oven time. the sweet spot is a few crumbs with a light chocolate smear.

Four labeled toothpick test stages for brownies: wet batter, thick smear, crumbs with light smear, and dry toothpick.
For the brownie toothpick test, aim for crumbs with a light chocolate smear; wet batter is underdone, but a clean pick often means overbaked.
Toothpick ResultTexture ResultWhat to Do
Wet raw batterRaw middleBake 2–3 minutes more and check again
Thick chocolate smear, no raw batterSofter middleRemove if you like a softer middle, then cool fully
Crumbs with a light smearClassic fudgy brownieBest default point to remove from the oven
Mostly crumbs, little smearFirmer squareGood for cleaner packed brownies
Completely dry toothpickLikely overbakedStill edible; next time, check earlier

Do not cut the pan right away to check if it is done. Freshly baked brownies can look too soft while warm, then set into clean squares once cooled. If your first slice is messy, the batch probably needed more time to firm up, not a different recipe.

Gooey vs Fudgy vs Underbaked Brownies

This is where many brownie mistakes happen. A fudgy center can look soft when warm, but raw batter is different. Use the visual first, then the table when you are not sure whether to pull the brownies or give them a few more minutes.

When softness makes you second-guess the pan, compare structure first: set brownies hold shape, raw batter does not.

Three labeled cut brownies showing gooey but set, fudgy and sliceable, and underbaked with a wet center.
The easiest clue is structure: gooey and fudgy brownies still hold shape, while underbaked brownies collapse or smear like batter.
StateWhat It Looks LikeWhat To Do
GooeySoft, sticky, and rich, but not liquidCool fully or chill before slicing
FudgyDense, moist, sliceable, with a soft-set centerIdeal for this recipe
UnderbakedWet batter, unstable middle, or liquid streaksBake a few minutes longer
OverbakedDry interior, hard edges, clean toothpickServe warm with sauce or ice cream

If the center looks slightly underfinished but not wet, you are usually in the fudgy window. When it looks liquid, it needs more time. This is the moment when the edges chew, the top cracks, and the inside still eats like chocolate fudge.

Pan Size, Oven Temperature, and Bake Time Guide

Best Pan and Size

A light metal 8×8-inch pan is the safest choice for this recipe because it gives set edges without overcooking the middle.

Pan size changes texture quickly. A wider pan spreads the batter thinner and bakes faster. With a smaller pan, the squares are thicker and need more time.

If your timing feels inconsistent, check the pan material before blaming the recipe. heat transfer changes the edge-to-center balance.

Light metal, dark metal, and glass brownie pans compared with brownie pieces and labels.
If your brownies overbake at the edges, check the pan first; light metal is usually the best pan for even fudgy brownies.

Timing Changes by Pan and Oven

Pan or Oven SetupWhat HappensWhat to Do
8×8-inch / 20 cm light metal panBest default textureUse the recipe as written
9×9-inch metal panThinner brownies, faster bakeStart checking 3–5 minutes earlier
7×7-inch panThicker browniesBake slightly longer and check the center carefully
8×8-inch glass panSlower heat transfer, softer edgesExpect timing differences and watch the center
Dark metal panEdges can bake fasterCheck early and avoid overbaking
9×13-inch panDifferent thickness and timingUse a properly scaled version instead of guessing
Fan-forced ovenStronger heat movementUse about 160°C and check early
OTGHeat can vary by rack and rod settingPreheat fully and bake on the middle rack

In an OTG. rack position matters because the top and bottom rods can heat the pan unevenly if it sits too high or too low.

Brownie pan placed on the middle rack of an open OTG oven.
For OTG brownies, the middle rack gives steadier heat so the top does not overcook before the inside reaches the right set.

If a 9×9-inch pan is all you have, the recipe will still work, but the squares will be thinner and less plush. Start checking early.

For extra-thick bakery-style brownies, do not simply overfill the pan or guess the bake time. Use a smaller pan only if you are ready to bake longer and check carefully near the center.

Time is a range, not a command. Your pan, oven, chocolate, and batter thickness all affect the final bake. The best square should feel dense in your fingers, not springy like cake.

Homemade Brownies With Boxed-Brownie Comfort

Boxed brownies are not the enemy. They train us to expect chew, shine, sweetness, and a predictable center. The real frustration is spending more time on homemade brownies and ending up with dry chocolate cake.

This recipe keeps those comforts — set edges, soft center, and a crackly top — but builds deeper flavor with real chocolate and cocoa powder. The trick is not to imitate the box exactly; it is to keep the comfort while learning the one cue the box cannot teach you: when to stop baking.

You get the comfort of the box, but with a darker, fuller chocolate bite. For another easy cut-and-share dessert, MasalaMonk’s sweetened condensed milk fudge leans more candy-like while still giving you neat chocolatey squares.

Why Brownies Turn Cakey, Dry, or Too Gooey

When a batch goes wrong, it is usually not mysterious. It is almost always flour, mixing, pan size, chocolate temperature, or a few extra minutes in the oven.

Common Brownie Problems and Fixes

ProblemLikely ReasonFix Next Time
Brownies turned cakeyToo much flour, overmixing, leaveners, or overbakingMeasure flour carefully, fold gently, skip leaveners, and check earlier
Brownies are dryOverbaked, pan too large, or too much flourPull the brownies before the toothpick is completely dry
Brownies are too softUnderbaked or sliced while warmCool fully; bake a few minutes longer next time if the center was truly raw
No crackly topSugar was not whisked well or was reduced too muchWhisk sugar well into the warm mixture and avoid heavy sugar cuts
Brownies sank in the middleCenter was underbaked or the pan was moved too earlyBake until the edges are set and the center is soft-set
Hard edgesOverbaking, dark pan, or strong side heatUse a light metal pan and start checking earlier
Brownies look oilyChocolate mixture was too hot or batter did not emulsify smoothlyLet melted chocolate stand briefly and whisk eggs in well before adding flour
Top looks done but center is rawOven heat too high, dark pan, or pan too smallUse a light metal pan, test nearer the center, and lower the oven slightly next time if needed
Brownies crumble when cutCut too warm or flour/fat balance changedCool completely and chill briefly before slicing
Brownies taste too sweetChocolate was mild or salt/cocoa balance was lowUse darker chocolate, add salt, or add a little espresso powder instead of cutting sugar heavily

When in doubt, protect two things: the flour measurement and the bake time. Those details decide whether the finished squares stay dense and soft or drift into dry cake territory.

How to Save a Brownie Batch

Even a batch that did not bake exactly as planned can usually be served well. Brownies are forgiving once you know how to use the texture you have.

If the center is liquid batter rather than soft brownie, return the pan to the oven for a few minutes if it is still warm. Once the pan has cooled, serve it only if the texture is set, not raw.

Problem After BakingSave It Today
Too soft to sliceCool fully, then chill 1–2 hours before cutting
Slightly underbaked but setServe chilled in small squares or warm as dessert bowls
Dry edgesTrim the edges and serve the softer center pieces
Overbaked batchWarm slightly and serve with chocolate syrup, ice cream, or whipped cream
Messy cutsChill, wipe the knife between cuts, and cut smaller squares
Too sweetServe with unsweetened whipped cream, coffee, or a pinch of flaky salt

Before you write off the batch, match the fix to the problem you have. soft, dry, and overbaked brownies each need a different save.

Brownie rescue board with chilled soft brownies, trimmed dry edges, and a warm brownie served with sauce.
If the batch is not perfect, adjust the serving: chill soft brownies, trim dry edges, or warm an overbaked piece with sauce.

A slightly imperfect batch is still dessert. Sometimes the save is not a new recipe; it is more chilling time, a sharper knife, or a scoop of ice cream.

Easy Brownie Variations

Once the base recipe works for you, use simple mix-ins and toppings. Keep the batter formula the same so the texture stays reliable.

  • Walnut brownies: fold in ¾ cup chopped toasted walnuts with the chocolate chips.
  • Double chocolate brownies: use both chocolate chips and chopped dark chocolate for extra pockets of melted chocolate. For a cookie version of that same deep chocolate mood, try these double chocolate chip cookies.
  • Espresso brownies: add 1 teaspoon instant espresso powder to deepen the chocolate flavor.
  • Sea salt brownies: sprinkle flaky salt on top just before baking or right after the brownies come out.
  • Orange chocolate brownies: rub a little fresh orange zest into the sugar before whisking it into the chocolate mixture.
  • Peanut butter swirl brownies: swirl a few spoonfuls of softened peanut butter into the top before baking. If that salty-sweet flavor is what you are craving, MasalaMonk’s peanut butter fudge guide is another easy square-cut dessert to try.

Avoid heavy wet toppings on the first try. Extra moisture changes the bake time and makes the center harder to judge.

Need Eggless Brownies?

Do not simply remove the eggs from this recipe. Eggs affect structure, shine, and the way the center sets. Without them, the batter needs a different balance of moisture and binding, usually from yogurt, curd, milk, or another tested substitute.

A proper eggless brownie needs its own formula, not just one missing ingredient. For general egg-substitute ratios in baking, MasalaMonk’s flax egg guide is useful, but brownies need more care than a simple one-for-one swap because the texture is so dependent on how the center sets.

How to Serve These as Hot Fudge Brownies

These brownies are excellent at room temperature, but they also make a rich hot fudge brownie dessert. Warm one square gently, place it in a bowl, add vanilla ice cream, and spoon over hot fudge sauce or MasalaMonk’s 3-minute homemade chocolate syrup. A pinch of flaky salt or chopped toasted nuts makes the chocolate taste even deeper.

Use this serving idea when a square tastes better warm than perfectly neat. sauce and ice cream turn softness into an advantage.

Warm brownie served with vanilla ice cream while chocolate sauce is poured over it.
To make hot fudge brownies, warm the square gently first, then add ice cream and sauce so the dessert stays creamy, rich, and soft.

For chilled frosted brownies, let the pan cool completely, then spread a thin layer of chocolate cream cheese frosting over the top before slicing.

To serve it sizzling-style, warm the brownie and sauce separately, then bring them together in a heated skillet or dessert plate. The brownie should be warm and soft, not reheated so long that the edges dry out.

How to Store and Freeze Brownies

Room Temperature

Store brownies in an airtight container at room temperature for 3–4 days. Place parchment between layers if stacking them.

Refrigerator

Refrigerating makes the squares firmer and even fudgier. Chilled brownies become denser and almost truffle-like, which is why some people like them even better the next day. Bring them back to room temperature before serving if you want a softer bite.

Freezer

Freeze individual squares. Wrap each piece tightly, then place them in a freezer-safe container or bag. Thaw at room temperature, or warm gently for a softer dessert-style brownie.

Separate the squares before freezing so the brownies stay easy to pull apart. thaw, and serve later.

Brownie squares separated with parchment, with some pieces wrapped for freezer storage and one unwrapped piece visible.
Before you freeze brownies, separate the squares with parchment; this prevents sticking and lets you thaw one fudgy piece at a time.

Make-Ahead Tip

This is one dessert that rewards patience. Bake the pan earlier in the day, chill briefly for clean cuts, then bring the squares back to room temperature before serving. They also travel well once fully cooled, which makes them easy for lunch boxes, potlucks, or gifting.

Serving Temperature

  • Warm: soft, melty, and messier; best for dessert bowls, ice cream, and hot fudge.
  • Room temperature: balanced, fudgy, and sliceable; best for everyday serving.
  • Chilled: firmest, neatest, and extra dense; best for clean squares and packed desserts.

Clean Cutting Tip

For neat squares, cool completely, chill briefly, and slice with a sharp knife. Wipe the blade between cuts so the edges stay clean. Warm serving gives softer edges; chilled brownies give neater squares.

Fudgy Brownie FAQs

Why did my brownies turn cakey instead of fudgy?

A cakey batch usually comes from too much flour, overmixing, leavening, or overbaking. Measure flour carefully, fold only until combined, skip baking powder and baking soda, and check earlier next time.

What cocoa powder works best for brownies?

Use unsweetened cocoa powder. Natural cocoa gives a classic brownie flavor, while Dutch-process cocoa gives a darker color and smoother chocolate taste. Either works in this recipe.

How soft should brownies be when they come out?

The center should be soft but not raw. If the toothpick comes out covered in wet batter, bake a little longer. When only crumbs and a light smear cling to it, the brownies are ready to cool.

Do brownies continue baking as they cool?

Yes. The center continues to set from residual heat after the brownies leave the oven. That is why they can look slightly soft at first but slice cleanly after cooling.

What pan is best for fudgy brownies?

A light metal 8-inch / 20 cm square pan is the best default. It gives reliable heat, set edges, and a soft middle. Glass pans can work, but they heat differently and may change the timing.

How do you cut clean brownie squares?

Cool completely, then chill for 30–60 minutes if needed. Lift the brownies out with the parchment overhang and cut with a sharp knife, wiping the blade between cuts.

Is melted chocolate necessary for fudgy brownies?

No, but it matters in this recipe. Cocoa-only brownies can also be fudgy, but this formula uses melted chocolate for a richer, softer center and a more dessert-like flavor. For this version, keep it. If you want a cocoa-only brownie, use a recipe built for that style.

Brown sugar or oil: are those swaps okay?

Brown sugar can make brownies softer and more caramel-like, but it may reduce the shiny crackly top. Oil can add moisture, but butter gives this recipe its rounded flavor and structure. Try the recipe as written before experimenting.

What makes the top of brownies crackly?

The crackly top comes from sugar, eggs, fat, and proper whisking. Whisk the sugar into the warm butter-chocolate mixture, then whisk the eggs in until the batter looks glossy before adding the flour.

Final Brownie Success Checklist

  • Look for batter that is thick, glossy, and slower than cake batter.
  • Fold only until the flour disappears; do not beat the batter heavily.
  • Use a light metal pan if possible.
  • Check for crumbs or a light chocolate smear on the toothpick, not wet batter and not a dry stick.
  • Cool the brownies before the first serious cut.
  • Wipe the knife between slices for clean edges.

Use this final visual check to keep the recipe simple at the oven: batter, pan, toothpick, and cooling time.

Stack of brownies beside a checklist reading thick glossy batter, light metal pan, crumbs on toothpick, and cool before slicing.
Before slicing, remember the winning cues: thick batter, a light metal pan, crumbs or a light smear on the toothpick, and enough cooling time.

The best fudgy brownies are a small exercise in stopping at the right moment. Stop mixing when the flour disappears. Pull the pan while the middle still looks a little underfinished. Hold back from cutting too soon. Give the brownies that little bit of patience, and you get the square people actually hope for: a thin crackly top, a soft chocolate middle, and edges that make every piece feel like the corner.

Posted on Leave a comment

Peanut Butter Rice Crispy Treats

Thick peanut butter rice crispy treats cut into squares, with one piece pulled apart to show marshmallow strands and crisp cereal texture.

These peanut butter rice crispy treats are soft, chewy, salty-sweet no-bake bars with creamy peanut butter melted into the marshmallow mixture and a crisp cereal bite in every square. They taste nostalgic, but the peanut butter makes them richer and more satisfying than the plain version.
The best ones pull apart with soft marshmallow threads, hold their shape when you pick them up, and still have that little crackly bite from the cereal. They should feel homemade and tender, not hard, dry, greasy, or packed down like a brick.

Close-up of a hand pulling apart a soft peanut butter rice crispy treat with marshmallow threads and airy cereal pieces.
If the square bends and pulls instead of snapping, the marshmallows were melted gently and the pan was pressed with a light hand.

This is the kind of pan that disappears in uneven little cuts: one square for a lunchbox, one for the potluck tray, one warm corner piece while the bars are still setting, and then “just one more sliver” later in the afternoon.

You may know these as peanut butter Rice Krispie treats, but Rice Krispies cereal is not the only option. Any fresh crisp rice cereal works as long as the marshmallow mixture stays gentle, glossy, and well balanced.

This version is built around one goal: peanut butter rice crispy treats that stay soft instead of turning stiff. The details are small but important: low heat, fresh marshmallows, the right cereal range, and a light hand when pressing the mixture into the pan.

Quick Answer: How to Make Soft Peanut Butter Rice Crispy Treats

For soft peanut butter rice crispy treats, melt 5 tablespoons butter over low heat, add most of a 16-ounce bag of mini marshmallows, then stir in ½ cup creamy peanut butter, vanilla, and salt. Fold in 5½ to 6 cups crisp rice cereal, press the mixture lightly into a lined 9×9-inch pan, and cool before slicing.

Quick formula board for peanut butter rice crispy treats showing 5 tablespoons butter, 16 ounces marshmallows, 1/2 cup peanut butter, 5 1/2 to 6 cups cereal, vanilla, salt, and a lined 9x9 pan.
This quick formula keeps the base recipe easy to remember, while the cereal range lets you choose a softer or cleaner-cut pan.

For softer, gooier bars, use 5½ cups cereal and fold in reserved mini marshmallows at the end. For cleaner-cut squares, use the full 6 cups cereal and let the pan cool completely. Not sure which texture you want? Use the texture chooser before you start.

The key is gentle heat and light pressing. Stop when the marshmallow mixture is glossy, not bubbling hard, and nudge the cereal mixture into the pan instead of packing it down. That is what keeps the bars soft instead of brick-like.

The move that keeps them soft: Melt the marshmallows gently, stop before the mixture bubbles hard, and fold reserved mini marshmallows in at the end. That gives you soft pockets instead of one dense, uniform chew. If your last batch turned stiff, check the troubleshooting guide.
Glossy melted marshmallows in a saucepan being lifted with a spatula before the mixture bubbles hard.
Stop at the glossy stage; once the marshmallows bubble hard, the finished treats are more likely to turn stiff.

Choose Your Peanut Butter Rice Crispy Treats Texture

Before you start, decide what kind of treat you want from the pan. The same base recipe can turn soft and gooey for home, cleaner-cut for lunchboxes, chocolate-topped for dessert, party-ready in a 9×13 pan, or firmer and snack-bar-like without marshmallows.

What you want Best move Where to go
Softest, gooey bars Use 5½ cups cereal and fold in reserved mini marshmallows See the Ratio
Cleaner lunchbox squares Use 6 cups cereal and cool completely before cutting See the Ratio
Party tray Use the larger 9×13 pan scale instead of stretching the 9×9 batch Choose a Pan
Dessert-bar version Add the soft chocolate-peanut butter topping after the bars cool Add Chocolate
Firmer snack-bar style Use the peanut butter and honey or maple syrup version without marshmallows Skip Marshmallows
Chooser board with gooey, clean-cut, party pan, chocolate-topped, and no-marshmallow peanut butter rice crispy treat options.
Start by choosing the texture you want; then the cereal amount, pan size, and topping become much easier decisions.

Peanut Butter Rice Crispy Treats at a Glance

Prep time 10 minutes
Cook time 5 minutes
Cooling time 30–45 minutes
Main pan 9×9-inch pan for thick bars
Party pan 9×13-inch pan for thinner squares
Yield 16 thick 9×9 squares, or about 24 thinner 9×13 party pieces
Texture Soft, chewy, lightly gooey, crisp around the cereal
Flavor Sweet-salty, peanut-buttery, marshmallowy
Best for Lunchboxes, bake sales, potlucks, parties, after-school snacks
Best peanut butter Regular creamy peanut butter
At-a-glance guide for peanut butter rice crispy treats showing prep time, cook time, yield, pan size, texture, core formula, and key method tips.
Use this quick at-a-glance guide to check the basic formula, 9×9 pan size, texture goal, and the key method rules before you start making peanut butter rice crispy treats.

Why These Peanut Butter Rice Crispy Treats Work

Peanut butter changes more than the flavor. It adds richness, saltiness, and body, so the bars taste fuller than plain marshmallow cereal treats. The tradeoff is that peanut butter also adds fat, which means the ratio matters: too much can make the bars greasy or heavy, while too little lets the peanut flavor fade into the marshmallow.

The balance is simple: enough marshmallow for pull, enough peanut butter for flavor, and just enough cereal to hold the bars together without making them stiff. You want a square that lifts cleanly from the pan but still bends a little when you bite it.

The peanut butter also keeps the sweetness from tasting one-note. Instead of plain marshmallow sweetness, you get a salty-sweet bar with deeper roasted peanut flavor, soft marshmallow pockets, and a crisp cereal bite.

The method matters too. Melt gently, stir the peanut butter in off the heat, fold without crushing the cereal, and press the mixture just enough to settle it into the pan. Think nudge, not pack.

Ingredients for Peanut Butter Cereal Bars

The ingredient list is short, so freshness matters. Soft marshmallows melt smoother, regular creamy peanut butter blends more reliably, and crisp cereal gives the bars that little crackle against the chewy marshmallow base.

Ingredients for peanut butter rice crispy treats, including marshmallows, peanut butter, cereal, butter, vanilla, and salt.
Because there are so few ingredients, stale cereal or dry marshmallows show up quickly in the final texture.

Crisp rice cereal

Any fresh crisp rice cereal will work here. Rice Krispies cereal is the branded classic, and the official peanut butter treats formula also uses butter, marshmallows, peanut butter, and crisp rice cereal; however, this version is built for thicker 9×9 bars with more softness and troubleshooting. See the official Rice Krispies peanut butter treats baseline.

Freshness matters: if the cereal tastes stale from the box, the finished bars will taste flat too, no matter how good the peanut butter mixture is.

Cereal volume can vary by brand and by how you scoop it, so the recipe gives a small range. Stay at the lower end for a softer pan, or use the upper end when you want neater squares.

Mini marshmallows

Mini marshmallows melt faster and more evenly than large marshmallows. If they feel dry, firm, or stale in the bag, save them for something else. Fresh marshmallows melt smoother and give you softer, stretchier bars.

Fresh marshmallows compared with stale marshmallows for making rice crispy treats.
Fresh marshmallows should feel soft and springy in the bag; dry ones melt unevenly and can make the bars tighter.

For the softest texture, reserve 1½ to 2 cups of mini marshmallows from the bag and fold them into the warm cereal mixture at the end. They will stay partly intact and create little marshmallow pockets throughout the bars.

Large marshmallows

Large marshmallows work, but weight is more reliable than counting pieces. This recipe needs 16 ounces / 454 g marshmallows total. Large marshmallows melt more slowly than minis, so keep the heat low and stir patiently instead of increasing the heat.

Mini marshmallows melting faster than large marshmallows in a side-by-side saucepan comparison.
Mini marshmallows melt faster and more evenly; however, large marshmallows still work if you keep the heat low and stir patiently.

Creamy peanut butter

Regular creamy peanut butter is the safest choice because it blends smoothly into the melted marshmallows and gives the bars a consistent texture. Natural peanut butter can work, but it is more likely to separate, which can make the bars oily, loose, or crumbly.

Butter, vanilla, and salt

Butter helps the marshmallows melt smoothly and gives the bars a rounder flavor. Salted butter works well because peanut butter loves salt. If you use unsalted butter, add fine salt to the mixture.

Vanilla is optional in the strictest sense, but it makes the bars taste more finished. It softens the marshmallow sweetness and brings the peanut butter flavor forward.

Gluten-free and dairy-free notes

Making these gluten-free mostly comes down to the cereal label. Some crisp rice cereals contain malt flavoring, and malt is often made from barley, so use a certified gluten-free crisp rice cereal if gluten matters in your kitchen. The Celiac Disease Foundation explains why many crispy rice treats are not automatically gluten-free.

Crisp rice cereal label check showing malt flavoring as a warning and certified gluten-free cereal as the safer choice.
Check the cereal label first for gluten-free rice crispy treats because some crisp rice cereals include malt flavoring from barley.

Dairy-free bars need a dairy-free butter substitute and dairy-free chocolate if you are adding the topping. Vegan bars also need vegan marshmallows, or you can use the no-marshmallow peanut butter and maple syrup version below.

Best Peanut Butter to Use

Peanut butter is doing two jobs here: flavor and structure. A smooth, no-stir creamy peanut butter melts into the marshmallow base instead of fighting it, which is why it gives the most reliable bars.

Peanut butter chooser board showing creamy, natural, crunchy, powdered, and almond or cashew butter options.
Choose no-stir creamy peanut butter for the smoothest set; separated natural peanut butter needs extra mixing before it goes in.
Peanut butter type Does it work? What to expect
Regular creamy peanut butter Best choice Melts smoothly into the base and gives the cleanest, softest set
Natural peanut butter Possible, but riskier Can separate and make the bars greasy, loose, or crumbly
Crunchy peanut butter Yes Adds peanut crunch, but the finished bars will not feel as soft and uniform
Powdered peanut butter Not recommended Can make the mixture dry unless the recipe is heavily adjusted
Almond or cashew butter Yes, as a variation Works as a variation, but the flavor and set will be different

If you only have natural peanut butter, stir it extremely well before measuring. If oil is sitting on top of the jar, the bars are more likely to turn greasy. For extra structure, use the full 6 cups of cereal instead of 5½ cups. If your bars already turned oily or loose, jump to the fixes.

Separated natural peanut butter beside fully stirred peanut butter with a loose cereal bar texture cue.
Natural peanut butter can work, but it needs to be stirred completely smooth so the bars do not turn greasy or crumbly.

If peanut butter is the flavor you are here for, these peanut butter cookies are the baked, cookie-style route for the same salty-sweet craving.

For a denser old-school peanut butter candy texture, this peanut butter fudge guide is the better next stop.

Best Ratio for Soft, Chewy Bars

Most hard, dry cereal bars are not really a cereal-brand problem. They happen when the binder gets stretched too far, the marshmallows get too hot, or the warm mixture gets packed down too firmly.

The goal is not just a sweet square. It is a bar that bends slightly when you bite it, tastes deeply peanut-buttery, and still has enough cereal crackle to keep it from feeling heavy.

Comparison of a gooey peanut butter rice crispy treat beside a cleaner-cut square on parchment.
A lower cereal amount gives a softer, more marshmallowy bite, while the upper end holds better for lunchboxes and party trays.

This recipe uses a 9×9-inch pan as the main version because it gives thick, soft bars without making them too tall to bite. For thinner party bars, use the 9×13 scale below.

Main 9×9 ratio

Ratio guide showing marshmallows, peanut butter, cereal, butter, and a 9x9 pan for peanut butter rice crispy treats.
The 9×9 ratio balances marshmallow pull, peanut butter flavor, and enough cereal structure for squares that hold together.
Ingredient US amount Metric amount Why it matters
Salted butter 5 tbsp 70 g Helps marshmallows melt smoothly and adds richness
Mini marshmallows 16 oz bag 454 g Creates the soft, chewy binder
Creamy peanut butter ½ cup 125–130 g Adds peanut flavor without making the bars greasy
Crisp rice cereal 5½–6 cups 155–170 g Use less for gooey bars, more for cleaner cuts
Vanilla extract 1 tsp 5 ml Rounds out the flavor
Fine salt, if using unsalted butter ¼ tsp 1–1.5 g Balances the sweetness
Ratio rule: The cereal should be fully coated but still loose enough to fold. If the mixture looks dry before it reaches the pan, do not fix it by pressing harder; use less cereal next time or melt the marshmallows more gently.
Cereal mixture being folded into marshmallow peanut butter base until coated but still airy.
The cereal should look coated and flexible, not cemented together, before it goes into the pan.

If you only make one version first, make the 9×9 pan with the softer cereal amount. It gives you the most classic pull-apart texture while still cutting cleanly enough for sharing.

Softer, gooier bars

For softer, gooier bars, go with 5½ cups cereal and reserve 1½ to 2 cups of mini marshmallows to fold in at the end. The bars will be a little stickier, but the texture is plush and marshmallowy.

Cleaner-cut squares

For cleaner-cut squares, use the full 6 cups cereal and let the pan cool completely before slicing. This version still tastes chewy, but it holds up better for lunchboxes, parties, and bake sales.

9×13 Party-Pan Scale for Peanut Butter Rice Crispy Treats

For potlucks, bake sales, and larger gatherings, use this 9×13-inch pan scale. It makes about 24 thinner squares, or more if you cut small party pieces. The full printable-style amounts are also included in the recipe card.

Do not simply spread the 9×9 recipe into a 9×13 pan unless you intentionally want very thin bars. The larger pan needs a larger batch.

Ingredient US amount Metric amount
Salted butter ½ cup / 8 tbsp 113 g
Mini marshmallows 20 oz 567 g
Creamy peanut butter 1 cup 250–260 g
Crisp rice cereal 8–8½ cups 225–240 g
Vanilla extract 1½–2 tsp 7.5–10 ml
Fine salt, if using unsalted butter ½ tsp 2–3 g
9x13 pan of peanut butter rice crispy treats cut into thinner party-size squares.
For a crowd, scale the recipe instead of stretching a smaller batch too thin; as a result, the pieces stay balanced and easy to serve.

Equipment You Need

You only need a 9×9-inch pan, parchment paper, a heavy-bottomed pot, and a silicone spatula for the main recipe. A kitchen scale helps with marshmallows and cereal, especially if you are using large marshmallows or a different cereal brand.

For the larger batch, use a 9×13-inch pan. For cleaner cuts, lightly grease your knife before slicing, especially if you added the chocolate topping.

How to Make Peanut Butter Rice Crispy Treats

This is a quick recipe, but it rewards a gentle hand. A few calm minutes over low heat are what keep the bars soft, stretchy, and easy to bite instead of stiff.

Once your ingredients are measured, the process moves quickly. Have the pan ready before you melt the marshmallows so the warm mixture can go straight in while it is still easy to shape.

The mixture will look messy at first, then suddenly turn glossy, stretchy, and smooth. That glossy stage is the signal to stop cooking, stir in the peanut butter, and move quickly before the cereal mixture cools and stiffens.

Before you start: Do not boil the marshmallow mixture, do not add extra cereal just because the mixture looks sticky, and do not press the bars firmly into the pan. Those three habits are the most common reasons crispy rice treats turn hard.

Step 1: Line and grease the pan

Line a 9×9-inch pan with parchment paper, leaving a little overhang so you can lift the bars out later. Then lightly grease the parchment, your spatula, and your hands before the marshmallow mixture starts getting sticky.

Hands lining a 9x9 pan with parchment paper before making peanut butter rice crispy treats.
Line and grease the pan before melting anything so the warm cereal mixture can go straight in while it is still flexible.

Step 2: Reserve mini marshmallows for soft pockets

Set aside 1½ to 2 cups of mini marshmallows from the 16-ounce bag before the pot goes on the heat. Because they are folded in at the end, they soften without disappearing completely.

Mini marshmallows reserved in a bowl for folding into peanut butter rice crispy treats at the end.
Reserving some mini marshmallows creates soft pockets throughout the bars, which makes the texture feel more homemade.

Step 3: Melt the base until glossy

Melt the butter in a large heavy-bottomed pot over low to medium-low heat. Add the remaining marshmallows and stir until they are mostly melted, glossy, and stretchy. A few small lumps are fine, but stop before the mixture bubbles hard.

Remove the pot from the burner, then stir in the peanut butter, vanilla, and salt until the base looks creamy and smooth rather than oily or separated.

Glossy marshmallow peanut butter base stretching from a spatula before cereal is added.
When the base holds a glossy ribbon on the spatula, it is ready for cereal before it starts cooling and tightening.

Step 4: Add peanut butter off heat

This off-heat moment is important because peanut butter needs gentle residual warmth, not direct heat. Stir it into the marshmallow base after the pot comes off the burner so the mixture stays smooth.

Creamy peanut butter being stirred into melted marshmallows in a pot moved off the heat.
Add the peanut butter off heat so it melts into the marshmallow base instead of separating or turning oily.

Step 5: Fold the cereal gently

Add the crisp rice cereal and fold with a silicone spatula until the pieces are coated but still airy. Stop once you no longer see dry pockets of cereal, then fold in the reserved mini marshmallows while the mixture is still warm.

Crisp rice cereal being folded gently into a glossy marshmallow peanut butter base with a spatula.
Fold just until coated because overmixing can crush the cereal and make the bars feel heavy.

Step 6: Press the mixture lightly

Transfer the mixture to the prepared pan and nudge it into the corners with a greased spatula or lightly buttered hands. Shape it while it is still warm, but do not pack it down or flatten the top hard.

Peanut butter rice crispy treat mixture being pressed lightly into a parchment-lined pan with a spatula.
Use the spatula to guide the mixture into the corners while keeping the top airy instead of flattening it hard.

Step 7: Cool before cutting

Let the bars cool at room temperature for 30–45 minutes, or until the top no longer feels warm and the slab lifts cleanly from the pan. Cooling helps the squares hold their shape without losing tenderness.

Peanut butter rice crispy treats lifted from a pan with parchment and cut into clean squares.
Let the slab cool until set so the knife cuts clean edges without smearing the still-soft center.
What good looks like: The melted mixture should be glossy, creamy, and stretchy, not oily or bubbling hard. The cereal should be coated but not crushed. When you press the mixture into the pan, it should mound softly and spring back a little. If it feels stiff before it reaches the pan, the marshmallows were probably overheated. If it sticks to your hands or spatula, lightly grease them instead of pressing harder.
Step-by-step board showing how to line the pan, melt low, make the base, fold cereal, press lightly, and cut.
The method stays easy when you follow the cues in order: melt gently, coat the cereal, press lightly, and cool before slicing.

8×8 vs 9×9 vs 9×13 Pan

Pan size changes the whole eating experience. The same mixture can feel tall and gooey in one pan, thinner and firmer in another. Choose the pan based on whether you want thick home-style squares or neat party pieces.

Pan size Best for Result
8×8 inch Very thick dessert bars Tall, gooey, slower to cool, best for small batches
9×9 inch Main recipe Thick but manageable, soft center, clean enough cuts
9×13 inch Parties, lunchboxes, bake sales Thinner bars, more squares, faster cooling
Pan size guide comparing 8x8, 9x9, and 9x13 pans for different rice crispy treat thicknesses.
Pan size changes the eating experience: 8×8 makes taller dessert bars, 9×9 stays balanced, and 9×13 gives thinner party pieces.

If you spread the 9×9 recipe into a 9×13 pan, the bars will be thin, firmer, and less gooey. Use the larger scale if you want a true party pan.

Microwave Method

The microwave is faster, but it needs short bursts and frequent stirring. Marshmallows can go from glossy to stiff quickly, so stop as soon as they are mostly melted.

  1. Use a large microwave-safe bowl with plenty of room for the marshmallows to puff.
  2. Add butter and most of the marshmallows.
  3. Microwave in 30–40 second bursts, stirring after each burst.
  4. Stop when the marshmallows are mostly melted and stir until smooth.
  5. Stir in peanut butter, vanilla, and salt.
  6. Fold in cereal and reserved marshmallows.
  7. Press lightly into a lined pan and cool before slicing.
Microwave-safe bowl of marshmallows and butter being stirred for peanut butter rice crispy treats.
For the microwave method, use short bursts and stir often so the marshmallows melt evenly instead of overheating.

If the marshmallow mixture looks dry, stringy, or stiff after microwaving, it was likely overheated. Start again if you can; adding more peanut butter will not fully fix overheated marshmallows.

The stovetop gives you more control. If you are making these bars for the first time, it is the safer choice.

Chocolate Topping

Add the chocolate topping when you want these to feel less like lunchbox squares and more like a peanut butter cup in bar form. The topping sets into a soft chocolate-peanut butter layer while the cereal base stays chewy, crisp, and marshmallowy underneath.

Chocolate peanut butter topping being poured over a pan of peanut butter rice crispy treats.
Add the chocolate topping when you want the bars to move from lunchbox-simple to richer dessert-bar territory.

A drizzle is enough for a lighter snack. However, a full layer turns the pan into something closer to a no-bake chocolate peanut butter bar.

Cross-section of a chocolate-topped peanut butter rice crispy treat with a soft chocolate layer and cereal base.
The chocolate layer should set softly, so every bite feels more like a peanut butter cup than a hard candy shell.

For another rich no-bake chocolate dessert, this avocado chocolate mousse keeps the chocolate flavor deep while staying creamy and spoonable.

Let the bars cool before adding chocolate. If the base is still warm, the topping can sink into the cereal instead of sitting neatly on top. That gives the topping a cleaner surface and helps it set evenly.

Balanced chocolate topping

Ingredient US amount Metric amount
Semi-sweet chocolate chips 1½ cups 255 g
Creamy peanut butter 2 tbsp 30–35 g
Flaky salt Optional Optional

Melt the chocolate chips with the peanut butter until smooth, then spread over the cooled bars. Add flaky salt if you like a sweet-salty finish. Let the chocolate set before slicing.

For a lighter version, use half the chocolate mixture and drizzle it over the top instead of spreading a full layer. For a thicker candy-bar finish, increase the chocolate chips to 2 cups.

Cutting tip: If the chocolate layer is very cold, it may crack when sliced. Let the pan sit at room temperature for a few minutes, then cut with a sharp knife.
Knife slicing chocolate-topped peanut butter rice crispy treats with a clean cut through the topping.
If the chocolate layer feels too firm, let it sit briefly at room temperature before slicing to prevent cracks.

If you are building a no-bake dessert table, these bars sit naturally beside something creamy and chilled, like this no bake cheesecake recipe.

No-Marshmallow Version

No marshmallows means a different kind of bar. Instead of stretchy, gooey peanut butter rice crispy treats, you get a firmer peanut butter snack bar held together with honey or maple syrup.

No-marshmallow peanut butter rice crispy bars made with peanut butter and honey or maple syrup.
Without marshmallows, these bars set from a peanut butter-syrup binder and taste more like a firmer snack bar.

Choose the marshmallow version when you want classic pull-apart cereal treats. Choose this version when you want something firmer, less candy-like, easier to chill, and more lunchbox-snack than dessert-bar.

Marshmallow peanut butter rice crispy treat with stretchy pull beside a firmer no-marshmallow snack bar.
The marshmallow version stretches like a classic cereal treat, while the no-marshmallow version sets firmer from peanut butter and syrup.

If that firmer snack-bar direction is what you want, this homemade granola bars recipe goes deeper into no-bake bar binders, texture, and lunchbox-style snacks.

Ingredient US amount Metric amount
Creamy peanut butter ¾ cup 190 g
Honey or maple syrup 6 tbsp 90 ml
Crisp rice cereal 3 cups 80–85 g
Fine salt Pinch Pinch

Warm the peanut butter and honey or maple syrup together just until smooth, then stir in the salt and cereal. Press the mixture firmly into a lined 8×8-inch pan and chill until set. This version needs firmer pressing and colder setting than the main recipe.

Can I Use Marshmallow Fluff?

Marshmallow fluff or marshmallow creme can work, but it behaves differently from regular marshmallows. It makes the bars softer, stickier, and harder to cut cleanly, so do not replace all 16 ounces of marshmallows with fluff unless you are using a fluff-specific recipe.

The safer move is to use fluff as a swirl. Fold ⅓ to ½ cup through the warm cereal mixture before pressing it into the pan, or swirl it over the top with a little melted peanut butter.

Marshmallow fluff swirled into peanut butter rice crispy treat mixture with a bowl of fluff nearby.
Marshmallow fluff behaves differently from regular marshmallows, so it works best as a swirl rather than a full swap.

If you are adapting a thinner 9×13 cereal-treat formula, a 7-ounce jar of marshmallow creme is often used as a substitute for a 10-ounce bag of marshmallows. Even then, the finished bars will be softer and stickier than bars made with regular marshmallows.

Peanut Butter Rice Crispy Treats vs Scotcheroos

These two bars are related, but the binder is different.

Peanut butter rice crispy treats usually rely on marshmallows, so they are softer, stretchier, and more classic cereal-treat-like. By contrast, Scotcheroos usually use peanut butter with corn syrup and sugar, then get a chocolate-butterscotch topping, so they are denser, sweeter, and more candy-like.

A quick clue: if the bar you remember had a glossy chocolate-butterscotch top and a firmer candy-like bite, you are probably thinking of Scotcheroos. If it was soft, marshmallowy, and stretchy when pulled apart, this is the recipe you want.

Peanut butter rice crispy treat compared with a chocolate-topped Scotcheroo on parchment.
Peanut butter rice crispy treats are usually softer and marshmallow-based, whereas Scotcheroos are denser and more candy-like.

Troubleshooting

Even with a simple recipe, small changes can affect the final texture. If a batch turns hard, dry, greasy, or too sticky, the fix is usually one of four things: heat, ratio, peanut butter type, or how firmly the mixture was pressed into the pan. If your bars turned out well and you just need to keep them fresh, jump to storage.

Soft peanut butter rice crispy treat pulling apart beside a compact hard bar with no stretch.
Hard bars usually come from overheated marshmallows, too much pressure, or a ratio that stretches the binder too far.
Problem Likely cause Quick fix next time
Hard bars Overheated marshmallows or packed-down mixture Use low heat, stop at glossy, and press lightly
Dry bars Too much cereal Use less cereal and fold more gently
Greasy bars Separated natural peanut butter Use regular creamy peanut butter
Bars falling apart Not enough binder or cut too early Cool fully before slicing
Sticky bars Too many marshmallows or not cooled Let them set longer
Cracked chocolate Chocolate layer too cold or too thick Let it soften slightly before slicing
Troubleshooting board for peanut butter rice crispy treats with fixes for hard, dry, greasy, sticky, falling apart, and cracked chocolate bars.
Most peanut butter rice crispy treat problems are fixable once you trace them back to heat, cereal amount, peanut butter type, or cooling time.

Why did my bars get hard?

The marshmallow mixture was probably overheated, the marshmallows were stale, too much cereal was added, or the mixture was pressed too firmly into the pan. Next time, use low heat, fresh marshmallows, and a gentler hand. Instead of packing the mixture down, nudge it into the pan just until it reaches the corners.

Why are they dry?

Dry bars usually mean there is too much cereal for the amount of marshmallow mixture. Next time, stay closer to the lower end of the cereal range, or add an extra handful of marshmallows to the melted mixture.

Why are they greasy?

Greasy bars often happen with natural peanut butter that has not been stirred well, or when too much peanut butter or butter is added. Regular creamy peanut butter gives the most reliable result.

Why are they falling apart?

The mixture may not have enough binder, the cereal amount may be too high, or the bars may have been cut before cooling. For the no-marshmallow version, the bars also need chilling time to firm up.

Why are they too sticky?

Sticky bars usually need more cooling time or slightly more cereal. If you folded in extra marshmallows, the bars may also be intentionally gooier. Let them sit longer before slicing.

Why did the chocolate topping crack?

The chocolate may have been too cold or too thick when sliced. Let the bars sit at room temperature for a few minutes before cutting, and use a sharp knife. Adding a little peanut butter to the melted chocolate also keeps the topping softer.

How to Store Them

These bars stay best when they are covered at room temperature: soft enough to bite, but still crisp around the cereal. Open air dries them out faster than time does.

They taste best the day they are made, when the cereal still has its crackle and the marshmallow base is soft. They stay good for about 2 days in an airtight container at room temperature. A third day is usually fine, but the bars will taste less fresh.

If stacking them, place parchment or wax paper between layers so the tops do not stick together. Otherwise, the soft marshmallow surface can cling to the layer above it.

Peanut butter rice crispy treats stored in an airtight container with parchment between the layers.
Store the squares covered at room temperature, with parchment between layers, so they stay easy to lift without drying out.

Avoid refrigerating plain bars because cold air can make them firm and dry. If you add a chocolate topping, you can chill the pan briefly just to set the chocolate, then move the sliced bars back to room temperature storage.

To freeze, place the bars in layers separated by parchment or wax paper inside an airtight freezer-safe container. Freeze for up to 6 weeks. Let them stand at room temperature before serving so the texture softens again. For the full batch formula, return to the recipe card.

Variations

Once the base is soft and reliable, the fun part is choosing what kind of pan you want: lunchbox-simple, candy-bar rich, salty-sweet, extra gooey, or full peanut butter cup.

Keep the base ratio steady, then change the personality of the pan with chocolate, crunch, salt, jam, or a thicker dessert-bar finish.

Five peanut butter rice crispy treat variations with peanut butter cups, chocolate chips, pretzels, jam, and flaky salt.
Once the base recipe is reliable, small add-ins like pretzels, jam, chocolate chips, or flaky salt can change the whole pan.

Chocolate and candy variations

  • Peanut butter cup bars: Fold in chopped peanut butter cups after the cereal is coated, or press them on top before the bars cool.
  • Chocolate chip bars: Sprinkle mini chocolate chips over the warm bars and press gently so they stick.
  • Cookie dough-style bars: Add mini chocolate chips and a little extra vanilla for a cookie-dough feel. If you want the actual spoonable version, make this edible cookie dough recipe instead.
  • Salted chocolate bars: Add the chocolate topping and finish with flaky salt.

Crunchy and salty variations

  • Pretzel bars: Replace ½ cup cereal with lightly crushed pretzels for a salty crunch.
  • Roasted peanut bars: Add ½ cup chopped roasted peanuts for extra texture.
  • Flaky salt finish: Sprinkle a little flaky salt over the top before the bars fully set.

Softer or richer variations

  • Brown butter bars: Brown the butter before adding marshmallows for a deeper, toasted flavor.
  • Extra marshmallow pocket bars: Fold in 2 cups reserved mini marshmallows at the end for a gooier bite.
  • Thicker dessert bars: Use an 8×8 pan and let the bars cool fully before slicing.

Lunchbox and snack-bar variations

  • Lunchbox squares: Use the full 6 cups cereal and cut smaller squares after the bars cool completely.
  • PB&J bars: Swirl a few teaspoons of jam over the top before the bars set, or sandwich a thin jam layer between two thinner layers of the peanut butter cereal mixture. Grape or strawberry keeps the classic lunchbox feel.
  • Protein-style bars: Use the no-marshmallow version as the base and add a small amount of protein powder only if the mixture still feels moist enough. For a no-bake protein dessert that is already built around protein powder, this protein cookie dough recipe is a safer next recipe.
  • Vegan-style bars: Use the no-marshmallow peanut butter and maple syrup version with a vegan crisp rice cereal.

Peanut Butter Rice Crispy Treats Recipe

Peanut Butter Rice Crispy Treats

Soft, chewy peanut butter cereal bars with a glossy marshmallow-peanut butter base, crisp rice cereal, and optional soft marshmallow pockets. Use 5½ cups cereal for gooier bars or 6 cups for cleaner-cut squares.

Prep Time 10 minutes
Cook Time 5 minutes
Cooling Time 30–45 minutes
Yield 16 thick 9×9 bars

Ingredients

  • 5 tbsp (70 g) salted butter, plus more for greasing
  • 16 oz (454 g) mini marshmallows, divided
  • ½ cup (125–130 g) regular creamy peanut butter
  • 1 tsp (5 ml) vanilla extract
  • ¼ tsp fine salt, only if using unsalted butter
  • 5½–6 cups (155–170 g) crisp rice cereal

Optional chocolate topping

  • 1½ cups (255 g) semi-sweet chocolate chips
  • 2 tbsp (30–35 g) creamy peanut butter
  • Flaky salt, optional

Instructions

  1. Line a 9×9-inch pan with parchment paper and lightly grease the parchment.
  2. Reserve 1½ to 2 cups of the mini marshmallows from the 16-ounce bag for folding in at the end.
  3. Melt the butter in a large heavy-bottomed pot over low to medium-low heat.
  4. Add the remaining marshmallows and stir until mostly melted, glossy, and stretchy. Stop before the mixture bubbles hard.
  5. Remove the pot from the heat. Stir in the peanut butter, vanilla, and salt until smooth.
  6. Add the crisp rice cereal and fold gently until evenly coated.
  7. Fold in the reserved mini marshmallows while the mixture is still warm.
  8. Transfer to the prepared pan and press lightly into an even layer. Do not compact firmly.
  9. Cool at room temperature for 30–45 minutes, then lift from the pan and cut into bars.
  10. For chocolate topping, melt chocolate chips with peanut butter, spread over cooled bars, sprinkle with flaky salt if using, and let set before slicing.

9×13 party-pan scale

  • Salted butter: ½ cup / 8 tbsp (113 g)
  • Mini marshmallows: 20 oz (567 g)
  • Creamy peanut butter: 1 cup (250–260 g)
  • Crisp rice cereal: 8–8½ cups (225–240 g)
  • Vanilla extract: 1½–2 tsp (7.5–10 ml)
  • Fine salt, if using unsalted butter: ½ tsp

Notes

  • For the softest bars, stay closer to 5½ cups cereal and press very lightly.
  • For cleaner-cut lunchbox or party squares, use 6 cups cereal and cool fully before slicing.
  • Regular creamy peanut butter gives the most reliable texture.
  • Natural peanut butter must be stirred completely smooth before measuring.
  • Measure marshmallows by weight if using large marshmallows or a different brand.
  • Store covered at room temperature so the bars stay soft and the cereal keeps some crackle.
Recipe card for peanut butter rice crispy treats with time, yield, pan size, core formula, and method rules.
Keep this card nearby for the two texture rules that matter most: glossy heat control and a light hand in the pan.

Once you have the low heat, fresh marshmallows, and light pressing down, this becomes the kind of no-bake recipe you can adjust from memory. Make it gooey for home, cleaner-cut for a party tray, or chocolate-topped when you want the pan to disappear faster.

FAQs

Are these the same as peanut butter Rice Krispie treats?

Yes. Rice Krispies is the branded cereal many people associate with classic crispy cereal bars, while crisp rice cereal is the generic ingredient. This recipe works with Rice Krispies cereal or another fresh crisp rice cereal.

What peanut butter works best?

Regular creamy peanut butter works best because it melts smoothly into the marshmallow base and stays stable. Natural peanut butter can work, but it must be stirred very well and may still make the bars softer or greasier.

Why did my treats get hard?

Hard treats usually come from overheated marshmallows, stale marshmallows, too much cereal, or pressing the mixture too firmly into the pan. Keep the heat low and nudge the mixture into the pan instead of packing it down.

How do I make them extra gooey?

Use 5½ cups cereal, keep the heat low, fold in 1½ to 2 cups reserved mini marshmallows at the end, and press the mixture lightly into the pan.

Can I use large marshmallows?

Yes. Use 16 ounces / 454 g marshmallows total, and give them more time to melt. Large marshmallows melt more slowly than minis, so keep the heat low instead of turning up the burner.

What if I do not have marshmallows?

Use the no-marshmallow version with peanut butter and honey or maple syrup. The texture will be firmer and more snack-bar-like, not stretchy and gooey.

Should I use an 8×8, 9×9, or 9×13 pan?

Use an 8×8 pan for very thick bars, a 9×9 pan for the best balance of thickness and easy cutting, or a 9×13 pan for thinner party squares. The main recipe is written for a 9×9 pan.

Do these need to be refrigerated?

No. They stay softer at room temperature in an airtight container. Refrigeration can make the cereal treats firm, so only chill briefly if you need to set a chocolate topping.

How far ahead can I make them?

They taste best the day they are made, but they keep well for about 2 days in an airtight container. For parties, making them the night before is a good compromise between freshness and convenience.

Can I add chocolate on top?

Yes. Spread melted semi-sweet chocolate chips with a little peanut butter over the cooled bars. Finish with flaky salt if you want a stronger sweet-salty balance.

Are these gluten-free?

They can be, but only if every ingredient is gluten-free. The cereal is the main thing to check because some crisp rice cereals contain malt flavoring. If gluten matters, use certified gluten-free crisp rice cereal.

What is the difference between these and Scotcheroos?

These bars usually use marshmallows as the binder, so they are softer and stretchier. Scotcheroos usually use peanut butter with corn syrup and sugar, then get topped with chocolate and butterscotch, so they are denser and more candy-like.

Back to top

Posted on Leave a comment

Edible Cookie Dough Recipe

A spoon lifts soft chocolate chip edible cookie dough from a bowl, showing a creamy texture with mini chocolate chips throughout.

This edible cookie dough recipe is for the spoonful you wanted before the cookies ever reached the oven: soft brown-sugar dough, creamy butter, vanilla, a little salt, and tiny chocolate chips in every bite. It tastes like classic chocolate chip cookie dough, but it is made for eating straight from the bowl — no baking tray, no waiting, no pretending you only wanted “one taste.”

The important difference is safety. This version skips raw eggs and treats flour as something that needs attention, not an ingredient to casually stir in raw. For the most cautious batch, use commercially heat-treated flour labeled ready-to-eat; if you use a home flour-heating method, the notes below explain the limits clearly.

Before You Start: Texture and Safety

The good news is that edible cookie dough does not need to be complicated. Once you understand the flour piece, the rest is simple: cream butter and sugar, add vanilla and salt, mix in the flour, then adjust the texture until it tastes like the middle of a chocolate chip cookie.

Once the base is right, you can keep it classic with mini chocolate chips, make a single-serving bowl, turn it into sugar cookie dough, add peanut butter, roll it into bites, or chill little pieces for ice cream. Start with the chocolate chip version first; it teaches you what the texture should feel like.

Before you start mixing, use the texture cue below as your visual target: the dough should look thick, creamy, and spoonable, not dry, runny, or frosting-soft.

Close-up spoonful of edible cookie dough held above a bowl, showing a thick, creamy texture with mini chocolate chips.
For the smoothest result, the dough should look dense but not dry; in other words, it should stay on the spoon without turning crumbly, stiff, or frosting-soft.

If the craving is really for warm cookies from the oven, use a proper cookie recipe like MasalaMonk’s double chocolate chip cookies instead. This one is built for one job: cookie dough you can enjoy by the spoonful.

What You’ll Find in This Edible Cookie Dough Guide

Use the quick answer if you already know the basics, or go straight to the safety notes if you want to understand the flour and egg issue before mixing.

Quick Answer: How to Make This Edible Cookie Dough Recipe

To make this edible cookie dough recipe, start with ready-to-eat flour or handle the flour using the safety notes below. Let the flour cool completely, then sift it so the dough does not taste lumpy or floury. Cream softened butter with brown sugar and a little granulated sugar, mix in vanilla and salt, add the flour, loosen the dough with milk or cream, and fold in mini chocolate chips.

The texture should be soft and scoopable, like the center of chocolate chip cookie dough before baking. It should not be runny, greasy, sandy, or crumbly. If it feels too thick, add milk one teaspoon at a time. If it feels too soft, chill it for 15 to 20 minutes before serving.

Quick texture cue: the dough should hold on a spoon, but still press easily when you scoop it. If it cracks apart, it needs a little more milk. If it slumps like frosting, it needs chilling or a spoonful of sifted flour.
  • Best flour option: commercially heat-treated flour labeled ready-to-eat
  • Eggs: none
  • Texture: creamy, spoonable, and thick enough to hold on a spoon
  • Best chips: mini semisweet chocolate chips
  • Chill time: optional, 10–20 minutes if the dough feels soft
  • Storage: 4–5 days refrigerated, 1–2 months frozen
At-a-glance edible cookie dough guide showing no eggs, ready-to-eat flour preferred, mini chocolate chips, and fridge and freezer storage times.
If you only remember the essentials, keep these in mind first: no eggs, ready-to-eat flour preferred, mini chips for a better bite, and short cold storage for the best texture.

Why This Edible Cookie Dough Works

A good edible cookie dough recipe should not taste like sweet flour paste. It should taste like the spoonful you wanted from a real chocolate chip cookie batch: buttery, brown-sugary, vanilla-scented, lightly salty, and soft enough to scoop.

  • No eggs: the dough is made for eating, not baking, so eggs are left out completely.
  • Better flour handling: ready-to-eat flour is the cleanest choice, and the home flour-heating note is explained honestly.
  • Brown sugar leads: it gives the deeper chocolate chip cookie flavor that plain white sugar cannot.
  • Softened butter, not melted: softened butter keeps the texture creamy instead of greasy or loose.
  • Mini chips: smaller chips spread through the dough better, so every spoonful tastes balanced.
  • Adjustable milk: flour behaves differently after heating, so milk is added slowly instead of dumped in all at once.

The safety piece gets much less confusing once you remember one thing: regular cookie dough is meant to be baked, and this dough is not. A safer edible cookie dough recipe starts with no raw eggs and a better flour choice from the beginning.

According to the CDC, raw dough and batter should not be eaten because uncooked flour and raw eggs can contain germs that may cause food poisoning. Commercial edible dough products, the CDC notes, are made with heat-treated flour and pasteurized eggs or no eggs.

So, is this kind of dough safer than sneaking a spoonful from a regular cookie batch? Yes, when it is made without raw eggs and with ready-to-eat flour. The safest route is commercially heat-treated flour labeled ready-to-eat. Home flour-heating methods are common in recipes, but they are not the same as validated commercial heat-treatment.

Why This Recipe Has No Eggs

Eggs stay out because the bowl is not going into the oven. They help baked cookies with structure, richness, and spread, but raw or lightly cooked eggs can carry food-safety risks. Since this is a spoonable dessert, the simplest direction is to leave eggs out completely.

That also means the dough will not bake like regular cookie dough. It has no eggs for structure and no leavening for lift, so treat it as a no-bake dessert rather than a shortcut cookie recipe.

What to Know About Raw Flour

Flour is easy to overlook because it does not look like a risky ingredient. However, the FDA explains that most flour is a raw food and has not been treated to kill bacteria. Baking or cooking is what normally makes flour-containing doughs safe to eat.

That is why the flour choice matters here. If you can get commercially heat-treated flour labeled ready-to-eat, use it. It gives you the cleanest safety story and keeps the method simple.

The Most Cautious Flour Option

For the most cautious batch, use flour labeled commercially heat-treated or ready-to-eat. SDSU Extension explains that commercial heat-treatment uses validated controls, while home flour heating is harder to control perfectly.

That does not mean homemade edible cookie dough is off the table; it just means the flour step deserves a little honesty. Ready-to-eat flour is the strongest option. If you choose to heat flour yourself, treat that step as risk reduction rather than the same thing as commercially processed flour.

Ready-to-eat flour displayed beside edible cookie dough ingredients as the preferred flour choice for no-bake cookie dough.
Commercially heat-treated ready-to-eat flour keeps the no-bake dough approach cleaner, especially because regular flour is normally made safer through baking or cooking.

About Heating Flour at Home

Many edible cookie dough recipes include a home flour-heating step, but this should be framed carefully. The most cautious choice is still commercially heat-treated flour labeled ready-to-eat. The FDA notes that home flour treatments may not reliably kill all bacteria or make raw flour safe to eat, so treat any home method as a recipe-blog risk-reduction step rather than a validated food-safety process.

For readers who still choose to follow a home flour-heating method, use an instant-read thermometer, spread the flour thinly, stir it during heating, check more than one spot, cool it completely, and sift before mixing.

Flour spread on a parchment-lined baking tray with an instant-read thermometer inserted, illustrating a home flour-heating method.
If you heat flour at home, use the thermometer cue as a careful kitchen step, not a promise; the safest route is still flour processed for ready-to-eat use.

Oven Method Used by Many Recipe Blogs

Preheat the oven to 350°F / 175°C. Spread a little more flour than you need in a thin layer on a parchment-lined rimmed baking sheet. Bake for 7 to 10 minutes, stirring once or twice, until the flour reaches 165°F / 74°C when checked in multiple spots with an instant-read thermometer. Cool completely, sift, then measure or weigh the amount needed for the dough.

Microwave Method Used by Many Recipe Blogs

Place flour in a wide microwave-safe bowl. Microwave for 30 seconds, stir well, then continue in 15-second bursts, stirring and checking the temperature in more than one spot. Let it cool completely and sift before using.

Simple takeaway: use ready-to-eat flour if you can find it. If not, read the home-heating note carefully and understand that it is a common recipe-blog risk-reduction step, not the same as commercial heat treatment.

Ingredients for Edible Cookie Dough

The ingredient list stays close to classic chocolate chip cookie dough, but each item has a job. Since the dough is not baked, little details matter more than usual: softened butter works better than melted butter, mini chips are easier to eat than large chips, and milk should be added slowly.

Ingredients for edible cookie dough arranged on a counter, including flour, softened butter, brown sugar, granulated sugar, vanilla, salt, milk, and mini chocolate chips.
Because this no-bake dough is eaten as-is, the ingredient balance matters more than usual: softened butter keeps it creamy, brown sugar adds depth, and milk helps fine-tune the consistency.

Ready-to-Eat or Properly Handled Flour

Flour gives the dough its familiar body. Use 1¼ cups / 150g commercially heat-treated all-purpose flour if you can find it. If you use a home flour-heating method, cool the flour completely, sift it, and then measure the final amount into the bowl.

Softened Butter

Use ½ cup / 113g / 4 oz unsalted butter, softened but not melted. Softened butter creams into the sugar and gives the dough a classic texture. Melted butter can make it greasy, loose, or frosting-like.

Brown Sugar and Granulated Sugar

Brown sugar gives the dough that deep chocolate chip cookie flavor. Granulated sugar adds familiar sweetness, but too much can make the texture gritty. This recipe uses mostly brown sugar with just a small amount of granulated sugar for balance.

Vanilla and Salt

Vanilla makes the dough taste like dessert instead of sweet butter and flour. Salt is just as important because it keeps the sweetness from feeling flat. Do not skip it, especially if you are using unsalted butter.

Milk or Cream

Milk or cream loosens the dough after the flour goes in. Start with 1 tablespoon and add more only if needed. Flour can absorb differently after heating, so the best amount is the one that gives you a scoopable texture.

Mini Chocolate Chips

Mini chocolate chips work better than large chips because this dough is eaten soft, not baked. They distribute evenly, so each spoonful has chocolate without turning the bowl into mostly hard chunks.

Optional Baking Soda for Flavor Only

A tiny pinch of baking soda can make the dough taste more like classic cookie dough, but it is optional. If you use it, add only ⅛ teaspoon. It is there for flavor, not because the dough should be baked.

Tools That Make the Texture Better

You can make this with a bowl and spatula, so do not let the tool list make the recipe feel fussy. A few extras simply make the result more reliable: an instant-read thermometer for the flour if you are using a home-heating method, a fine-mesh sieve for lumps, and a scale so the dough does not turn dry from too much flour.

  • Rimmed baking sheet
  • Parchment paper
  • Instant-read thermometer
  • Mixing bowl
  • Electric hand mixer or stand mixer
  • Rubber spatula
  • Fine-mesh sieve
  • Digital scale, strongly recommended
  • Small cookie scoop, optional
  • Airtight container for storage

A scale is especially useful because flour gets compacted easily. If you scoop too much into the bowl, the dough can turn dry, chalky, or too thick before you even start troubleshooting.

The method is easy, but the order makes a big difference. Handle the flour first, let it cool, then build the dough slowly. Warm flour and melted butter are two of the fastest ways to turn a good bowl of cookie dough into something greasy.

Step-by-step edible cookie dough process showing flour preparation, creaming butter and sugar, mixing ingredients, adjusting texture, and folding in mini chocolate chips.
The method works best in sequence: prepare the flour first, cream the butter and sugars well, then mix, adjust, and fold in the chips once the texture already feels close.

Step 1: Prepare the Flour

If you are using commercially heat-treated flour, measure or weigh it and move on. If you are using a home flour-heating method, follow the note above, cool the flour completely, and sift it before mixing. Do not add warm flour to the butter mixture.

Step 2: Cream the Butter and Sugars

Add softened butter, brown sugar, and granulated sugar to a bowl. Beat until the mixture looks creamy, lighter, and slightly fluffy. You should still see a thick butter-sugar mixture, not melted butter pooling around the edges. This step helps soften the sugar crystals and gives the dough a smoother bite.

Mix in the vanilla and salt, then add the cooled, sifted flour. Add the flour gradually if you are mixing by hand. At first, the mixture may look a little thick; that is normal.

Step 4: Adjust the Texture

Add milk or cream one teaspoon at a time. Stir, pause, and check the texture before adding more. The dough should hold its shape on a spoon but still press easily when you scoop it. Stop before it starts looking like frosting.

A small amount of milk is being added to thick edible cookie dough in a bowl while a spoon rests nearby.
Add milk slowly, then stir before deciding on more; the dough often softens after a few turns, so patience helps keep it thick and spoonable.

Step 5: Fold in Mini Chocolate Chips

Fold in the mini chocolate chips with a spatula. Taste and adjust with a tiny pinch of salt if it tastes too sweet, or a few extra drops of vanilla if it tastes flat.

Serving cue: this dough is best after a 10-minute rest. That short pause lets the sugar soften slightly and the flour hydrate, so each spoonful tastes smoother.

Spoon test: The dough should lift cleanly and still look creamy before you move to the recipe card.

A spoon presses into and lifts edible cookie dough, showing a soft texture that holds its shape.
The spoon test is one of the easiest checks in the whole recipe: if the dough lifts cleanly and still looks creamy, you are usually very close to the ideal finish.

Edible Cookie Dough Recipe Card

This edible cookie dough recipe is a classic chocolate chip version made without eggs and with a safer flour approach. It is designed for eating by the spoonful, rolling into bites, or folding into desserts.

YieldAbout 2½ cups
Servings12–16 small servings
Prep Time10 minutes
Total Time20–25 minutes

Ingredients

  • 1¼ cups / 150g commercially heat-treated all-purpose flour, preferred; or flour handled using the home-heating note above, cooled completely and sifted
  • ½ cup / 113g / 4 oz unsalted butter, softened
  • ½ cup / 100–110g packed light brown sugar
  • 2 tablespoons / 25g granulated sugar
  • 1½ teaspoons / 7ml vanilla extract
  • ½ teaspoon fine salt, or to taste
  • 1–2 tablespoons / 15–30ml milk or cream, added as needed
  • ¾ cup / 120–130g mini semisweet chocolate chips
  • Optional: ⅛ teaspoon baking soda, for classic cookie-dough flavor only

Method

  1. Prepare the flour. Use commercially heat-treated flour if available. If using a home flour-heating method, follow the safety note above, cool the flour completely, sift it, then measure 150g for the recipe.
  2. Cream the butter and sugars. In a mixing bowl, beat softened butter, brown sugar, and granulated sugar until creamy and slightly fluffy.
  3. Add flavor. Mix in vanilla, salt, and optional baking soda if using.
  4. Add flour. Add the cooled, sifted flour and mix until a thick dough forms.
  5. Adjust texture. Add milk or cream 1 teaspoon at a time until the dough is soft and scoopable.
  6. Add chocolate. Fold in mini chocolate chips. Let the dough rest for about 10 minutes before serving for the smoothest texture.

Notes

  • This dough is for eating as edible cookie dough, not for baking into cookies.
  • For the most cautious version, use commercially heat-treated flour labeled ready-to-eat.
  • Home flour-heating methods are common in recipe blogs, but FDA guidance says home treatments may not reliably make raw flour safe to eat. Use commercially heat-treated ready-to-eat flour for the most cautious version.
  • If you choose to heat flour at home, use an instant-read thermometer, stir well, check multiple spots, cool completely, and sift before mixing.
  • If the dough is too dry, add milk 1 teaspoon at a time. If it is too sticky, chill it for 15–20 minutes.
  • Store refrigerated in an airtight container for 4–5 days, or freeze portions for 1–2 months.
Recipe card image for edible cookie dough showing the main ingredients and a simple method beside a bowl of cookie dough.
Use the recipe card as your baseline, then adjust only the milk or chill time first; those two small changes usually fix the texture without changing the flavor.

Which Batch Size Should You Make?

Choose the batch based on the kind of cookie dough moment you want. The single-serve version is best for one quick craving, the for-two version is perfect for a small dessert, and the full edible cookie dough recipe works better when you want cookie dough bites, ice cream mix-ins, dessert cups, or a make-ahead treat in the fridge.

Three edible cookie dough portion sizes are shown, representing single serve, for two, and full batch amounts.
Batch size changes the experience as much as flavor does: a single serve suits one craving, a for-two version feels more dessert-like, while a full batch works better for bites or mix-ins.
Make This Best For Texture Tip
Single serve One craving, no leftovers Add milk slowly because small bowls loosen fast.
For two Movie night, date night, small dessert Rest 10 minutes before eating for a smoother bite.
Full batch Cookie dough bites, dessert cups, ice cream mix-ins Chill before rolling or portioning.

The single-serve version is the bowl to make when you want cookie dough now and do not want leftovers calling your name from the fridge. Because the batch is small, measure the flour and milk carefully; a tiny extra splash can change the texture quickly.

Single-serve edible cookie dough in a small bowl with mini chocolate chips and a spoon.
Choose the single-serve bowl when you want cookie dough for one and nothing left over, but add milk carefully because small batches loosen faster than larger ones.

Single-Serve Formula

  • 6 tablespoons / 48g ready-to-eat flour, preferred; or flour handled using the safety note above
  • 2 tablespoons / 28g / 1 oz softened butter
  • 2 tablespoons / 25–28g light brown sugar
  • 1 tablespoon / 12g granulated sugar
  • ¼–½ teaspoon vanilla extract
  • Small pinch of fine salt
  • ½–1 tablespoon / 7–15ml milk or cream
  • 2 tablespoons / 20–25g mini chocolate chips

Mix it the same way as the main batch: cream the softened butter and sugars, add vanilla and salt, stir in the flour, loosen with milk, and fold in the chips. If you want a firmer scoop, chill it for 10 minutes before eating.

This small-batch version makes enough for two dessert portions without leaving a full container in the fridge. That size works especially well for a movie night, date night, or quick no-bake dessert when you want something sweet without baking a tray of cookies.

Two small bowls of edible cookie dough with spoons, arranged as a dessert for two.
This small batch is a practical middle ground: enough for a shared dessert, yet still easy to mix without committing to a full container in the fridge.

For-Two Formula

  • ½ cup + 1 tablespoon / about 68g ready-to-eat flour, preferred; or flour handled using the safety note above
  • 4 tablespoons / 56g / 2 oz softened butter
  • ¼ cup / 50–55g light brown sugar
  • 1½–2 tablespoons / 18–25g granulated sugar
  • ½–1 teaspoon vanilla extract
  • ⅛–¼ teaspoon fine salt
  • 1–1½ tablespoons / 15–22ml milk or cream
  • ¼ cup / 40–45g mini chocolate chips

Start with the lower amount of milk, then add more only if the mixture feels too thick. Small batches can go from crumbly to loose quickly, so adjust slowly and give the bowl a minute before adding another splash.

Edible Cookie Dough Variations

Once the base is right, the dough is easy to customize. Keep the same safety logic: no raw eggs, avoid regular raw flour, and adjust the texture slowly because different add-ins change how soft or thick the mixture feels.

Not sure where to start? Make the classic chocolate chip version first, then decide what you want more of next time: extra vanilla, more chocolate, a salty peanut butter edge, a firmer bite for rolling, or a lighter dairy-free version.
Variation guide showing several edible cookie dough styles, including chocolate chip, peanut butter, vegan, protein, keto, and sprinkle-topped options.
Once the base recipe feels right, use the variations to choose your next direction, whether that means sweeter, nuttier, dairy-free, higher-protein, or lower-carb.
If You Want… Make This Variation Small Adjustment
Classic chocolate chip flavor Chocolate chip edible cookie dough Use mostly brown sugar and mini chips.
A sweeter bakery-style bowl Sugar cookie dough Use more granulated sugar and add sprinkles at the end.
A richer, saltier bite Peanut butter cookie dough Add creamy peanut butter and reduce the milk slightly.
A firmer bite for rolling Cookie dough bites Chill before scooping or dipping.
A lighter dairy-free option Vegan edible cookie dough Use vegan butter, dairy-free milk, and dairy-free chips.

Start here if you want the classic chocolate chip version. Brown sugar, vanilla, salt, softened butter, and mini chocolate chips give you the familiar cookie dough flavor without needing to bake anything.
Mini chocolate chips are being folded into edible cookie dough with a spatula.
Classic chocolate chip remains the best place to start, since brown sugar, vanilla, and mini chips come closest to the flavor most people expect from cookie dough.

For deeper chocolate flavor, add 1 to 2 tablespoons of cocoa powder and a splash more milk. For a chunkier bowl, use a mix of mini chips and finely chopped chocolate.

Choose this variation when you want the vanilla-sprinkle side of cookie dough instead of the brown-sugar chocolate chip side. It tastes lighter, sweeter, and more bakery-style.

Use more granulated sugar and less brown sugar. You can replace the brown sugar with granulated sugar for a cleaner vanilla flavor, then add a tiny splash of almond extract if you like bakery-style sugar cookies. Sprinkles, white chocolate chips, and a little extra vanilla work well here. Add sprinkles at the end so they do not bleed too much color into the dough.

This is the richer, saltier variation — the one that tastes like peanut butter cookie dough met chocolate chip cookie dough in the same bowl. Mix ¼ cup creamy peanut butter into the butter and sugar mixture, then reduce the milk slightly. Peanut butter adds richness and salt, so taste before adding extra salt.

Peanut butter is swirled into edible cookie dough with chocolate chips and chopped peanuts visible on top.
Meanwhile, the peanut butter version turns richer and slightly firmer, so it is a smart choice when you want a saltier edge and a more substantial bite.

Mini chocolate chips are great here, but chopped roasted peanuts also work if you want crunch. For a baked version of this flavor, MasalaMonk’s peanut butter cookies are the better route.

For a gluten-free version, use a gluten-free flour blend you already like in no-bake or raw-style applications. Different blends behave differently when they are not baked, so texture matters more than usual here.

If the dough tastes gummy, try a gum-free gluten-free blend next time. If it tastes grainy, let it rest for 10 to 15 minutes before serving. Almond flour can also work, but it gives a softer, nuttier dough rather than a classic all-purpose-flour texture.

To make the dough vegan or dairy-free, use vegan butter, dairy-free milk, and dairy-free chocolate chips. The same method works, but the mixture may soften faster depending on the vegan butter you use.

Vegan edible cookie dough in a bowl with dairy-free milk and chocolate chips shown nearby.
The dairy-free version should still feel like dessert first: creamy, scoopable, and close to the original texture, just made with vegan butter, dairy-free milk, and dairy-free chips.

If you want a dairy-free frozen dessert to pair with cookie dough bites, MasalaMonk’s coconut ice cream is a natural next recipe.

The protein version goes in a different direction from the classic butter-and-brown-sugar dough, but it is useful when you want the cookie dough idea in a higher-protein snack. For a quick version, blend cottage cheese until completely smooth, then stir it with almond flour or oat flour, vanilla protein powder, a little maple syrup or sweetener, vanilla, salt, and mini chocolate chips.

A bowl of protein-style edible cookie dough with mini chocolate chips, a scoop of protein powder, and a small bowl of creamy white protein base nearby.
Protein cookie dough goes in a different direction from the classic bowl; still, it can be useful when you want the same dessert idea in a more filling, snack-like version.
Chill it before eating so the texture firms up. If you like high-protein desserts, MasalaMonk’s protein ice cream goes deeper into protein powder, Greek yogurt, dairy-free, low-calorie, and sugar-free frozen dessert options.

Expect a nuttier, softer dough than the classic chocolate chip version. For a keto-style bowl, use almond flour instead of wheat flour, a low-carb sweetener instead of sugar, and sugar-free chocolate chips. Because almond flour has more fat and less starch than all-purpose flour, start with less added milk and adjust slowly.
Keto-style edible cookie dough in a bowl with almond flour, almonds, and dark chocolate pieces nearby.
Because almond flour behaves differently from all-purpose flour, keto edible cookie dough usually turns out softer and nuttier, with a flavor that feels less classic but still satisfying.

For another low-carb dessert direction, MasalaMonk’s keto hot chocolate is a good companion recipe.

How to Fix Edible Cookie Dough Texture

If your first spoonful is not perfect, do not panic. Edible cookie dough is one of the easiest desserts to adjust because nothing has been baked yet. Most texture problems come down to flour, butter temperature, or adding the milk too quickly.

The easiest way to fix the dough is to change only one thing at a time. Add milk slowly, chill before adding more flour, and taste again after a short rest.

Three bowls compare edible cookie dough textures labeled dry, just right, and too soft.
Look at the texture before changing the recipe: crumbly dough needs slow moisture, loose dough needs chilling, and the best bowl sits somewhere in between.
Problem Likely Cause Fix
Dry or crumbly texture Too much flour, packed flour, or not enough milk Add milk or cream 1 teaspoon at a time until scoopable.
Sticky dough Butter too warm or too much milk Chill 15–20 minutes, or add 1 tablespoon sifted flour.
Gritty bite Sugar has not softened into the butter enough Cream the butter and sugars longer, or let the dough rest 10 minutes.
Floury flavor Flour was overmeasured or not sifted after heating Use grams, sift after heating, and add a little vanilla or salt to balance.
Overly sweet dough Too much sugar or too many chips Add a pinch of salt and 1–2 tablespoons flour.
Greasy or soupy texture Butter was melted instead of softened Chill, then stir. Next time, use softened butter.
Very firm after chilling Butter hardened in the fridge Let the dough sit at room temperature for 10–15 minutes before serving.

Start with a teaspoon of milk or cream, then stir before adding more. Small corrections work better here because dry dough can move from crumbly to loose surprisingly quickly.

A teaspoon of milk is being added to dry, crumbly edible cookie dough to improve the texture.
If the dough turns dry or crumbly, fix it gradually rather than all at once; a teaspoon of milk or cream is usually enough to start bringing it back together.

Chill first so the butter firms up before you add more flour. After a short rest in the fridge, the same bowl often becomes scoopable without turning heavy or floury.

Soft edible cookie dough is shown with a fridge cue, illustrating chilling as a fix for sticky dough.
Chilling gives the butter time to firm up again; as a result, soft dough often becomes scoopable without needing extra flour.

No, this edible cookie dough is made for spooning, scooping, and rolling into bites — not for baking. It has no eggs and no leavening, so it will not behave like regular cookie dough in the oven. Instead of turning into chewy cookies, it may spread, turn greasy, stay dense, or bake up flat.

Edible cookie dough in a bowl is shown beside baked cookies on a tray to compare dough for eating with dough for baking.
Edible cookie dough is made for spooning and scooping, not for baking; therefore, use a proper cookie recipe whenever the goal is warm cookies from the oven.

Think of this as a no-bake dessert, not a shortcut cookie dough. If the craving is really for warm cookies from the oven, use a recipe designed for baking, like MasalaMonk’s double chocolate chip cookies. If you want a roll-and-cut dough, MasalaMonk’s gingerbread cookies are a better example of dough built for shaping and baking.

Eating it by the spoonful is the obvious answer, but this dough can do more. Because it is eggless and made with a safer flour approach, you can use it as a no-bake dessert component instead of treating it like leftover raw cookie dough.

Easy No-Bake Ways to Serve It

  • Eat it by the spoonful after a 10-minute rest for smoother texture.
  • Roll it into bites and chill until firm.
  • Dip the bites in melted chocolate and finish with flaky salt.
  • Fold chilled pieces into ice cream for homemade cookie dough ice cream.
  • Blend a spoonful into a milkshake for cookie dough flavor.
  • Use it as a brownie topping after brownies have cooled.
  • Layer it into dessert cups with whipped cream, chocolate sauce, or berries.
  • Press it into mini tart shells for a no-bake cookie dough dessert.
Several ways to use edible cookie dough are shown, including bites, ice cream mix-ins, milkshake, brownie topping, and dessert cups.
Beyond the spoonful, this dough can become bites, brownie topping, milkshake flavor, or ice cream mix-ins, so one batch can stretch into several no-bake dessert ideas.

Cookie Dough Ice Cream and Mix-In Safety

Ice cream note: only use dough made with ready-to-eat ingredients for ice cream mix-ins. Do not fold regular raw cookie dough into ice cream; the pieces should be made without raw eggs and with a safer flour approach.

Small chilled pieces are especially good folded into homemade ice cream. For a chocolate-chip frozen dessert direction, see MasalaMonk’s mint chocolate chip ice cream.

If you want another no-bake spoonable dessert, MasalaMonk’s avocado chocolate mousse gives you a chocolate-rich option with a completely different texture.

How to Store and Freeze Edible Cookie Dough

Because the dough contains butter and milk or cream, it should be stored cold. Do not leave it sitting out for long serving windows, especially in a warm kitchen.

  • Refrigerator: Store in an airtight container for 4–5 days.
  • Freezer: Freeze portioned balls or scoops for 1–2 months.
  • To serve from the fridge: Let it sit at room temperature for 10 minutes so the butter softens slightly.
  • To freeze neatly: Scoop into balls, freeze on a lined tray until firm, then transfer to a freezer-safe container.
Storage guide for edible cookie dough showing an airtight container for the fridge and portioned scoops for the freezer, with timing notes.
Cold storage firms the butter, so let refrigerated scoops rest briefly before serving; meanwhile, freezing in portions makes later dessert bowls much easier.

If you are making cookie dough bites for a party, keep them chilled until close to serving time. For the best texture, portion them small enough that people can eat them in one or two bites.

Protein versions made with cottage cheese or yogurt should be treated as more perishable. Keep them refrigerated, use clean utensils, and aim to eat them within 2–3 days rather than keeping them as long as the classic butter-based version.
FAQs

Is this edible cookie dough recipe safe to eat?

Edible cookie dough is safest when it is made without raw eggs and with commercially heat-treated flour labeled ready-to-eat. Regular raw cookie dough is not meant to be eaten because it usually contains raw flour and raw eggs. Home flour-heating methods are common in recipes, but they are not the same as commercially validated heat treatment.

What is the safest flour for edible cookie dough?

The safest flour choice is commercially heat-treated flour labeled ready-to-eat. Regular all-purpose flour is raw and is normally made safe through baking or cooking, not by being stirred directly into a no-bake dessert.

Why does edible cookie dough need safer flour handling?

Most flour is raw and has not been treated to kill bacteria. Regular cookie dough becomes safer when baked, but edible cookie dough is not baked. That is why this recipe uses ready-to-eat flour guidance instead of asking you to stir plain raw flour into dessert.

How do I make edible cookie dough without eggs?

This recipe is eggless by design. Eggs are useful in baked cookies, but they are not needed here because the dough is made for spooning, not for going into the oven.
How does almond flour change the texture?

Almond flour makes a softer, nuttier dough and works best in keto, gluten-free, or vegan-style edible cookie dough. It will not taste exactly like classic chocolate chip cookie dough made with all-purpose flour, so start with less milk and adjust slowly.

How do I make this edible cookie dough recipe gluten-free?

Use a gluten-free flour blend you already like in no-bake applications, or use almond flour for a softer variation. If your gluten-free dough feels gummy, try a gum-free blend next time. If it feels grainy, let it rest for 10 to 15 minutes before eating.

How do I make a vegan version?

For a vegan version, use vegan butter, dairy-free milk, and dairy-free chocolate chips. The dough may soften more quickly depending on the vegan butter, so chill it if it feels too loose.

How do I make edible cookie dough for one?

For one serving, use 6 tablespoons / 48g ready-to-eat flour, preferred; or flour handled using the safety note above, plus 2 tablespoons softened butter, 2 tablespoons brown sugar, 1 tablespoon granulated sugar, vanilla, salt, ½ to 1 tablespoon milk, and 2 tablespoons mini chocolate chips. Mix, adjust the texture, and chill briefly if needed.

Why should this dough not be baked?

This dough is made for eating, not baking. It has no eggs and no leavening, so it can bake up flat, greasy, dense, or crumbly. Use a real cookie recipe if you want baked cookies.

How long does edible cookie dough last in the fridge?

Store edible cookie dough in an airtight container in the refrigerator for 4–5 days. Let it sit at room temperature for about 10 minutes before eating if it becomes too firm.

How should you freeze edible cookie dough?

Freezing works best when the dough is portioned first. Scoop it into small balls, freeze them on a lined tray until firm, then move them to a freezer-safe container. Use within 1–2 months for the best texture.

Once you have the base texture right, this edible cookie dough recipe becomes the kind of dessert you can make your own: extra vanilla, darker chocolate, sprinkles, peanut butter, or chilled bite-size scoops tucked into ice cream. Start with the classic chocolate chip version first, then let the next batch follow your craving.

Make a quick note of what you changed — more salt, less milk, extra chips, longer chill time. The best edible cookie dough is the one you can repeat exactly when the craving hits again.

Back to the top

Posted on 8 Comments

Cookie Pie Recipe: 10 Best Flavors, Fillings and Variations

Premium cookie pie recipe cover image showing a thick chocolate chip cookie pie with a sliced opening, gooey melted chocolate center, cream background, gold dessert fork, and text overlay reading Cookie Pie Recipe with bakery-style results.

A truly great cookie pie recipe gives you something a regular cookie often cannot: crisp edges, a thick soft center, generous slices, and that unmistakable contrast between structure and richness. It has the comfort of cookie dough, the shape and drama of a pie, and the kind of richness that feels just right for birthdays, dinner parties, holidays, or simply a weekend when you want dessert to feel a little more special.

That balance is a large part of the dessert’s appeal. It feels more substantial than a tray of cookies, yet it is far less fussy than a layered cake or a plated dessert with multiple components. With the base recipe in hand, you can move from a classic chocolate chip cookie pie to a stuffed Biscoff cookie pie, a rich Nutella cookie pie, a dark brookie pie, a shareable giant cookie pie, or even mini cookie pies without relearning the whole category from scratch.

This guide is meant to help you bake well, not merely skim the idea. You will find the practical details that matter in a dessert like this: pan guidance, filling amounts, dough feel, chilling time, doneness cues, texture goals, variation strategy, storage, and the most common mistakes that throw the result off. If rich chocolate bakes are already part of your comfort zone, these double chocolate chip cookies are a natural next stop. Likewise, if alternative flour blends matter in your kitchen, this guide to keto flour for baking will be useful when you reach the gluten free section later on.

Quick Cookie Pie Recipe Snapshot

Before getting into the full method, here is the quick-glance view so you can see the shape of the bake at once.

Cookie pie recipe at a glance graphic showing pan size, yield, prep time, chill time, bake time, cooling time, texture goal, best first bake, and best stuffed version beside a sliced cookie pie.
Before you get into the full method, this cookie pie recipe snapshot gives you the key setup at a glance: pan size, yield, timing, texture goal, and the best starting variation for the easiest first bake.

Yield and Pan Size

This base makes one deep 8-inch cookie pie, which usually gives you 8 to 10 slices depending on how generously you cut it. If you adapt the dough to a muffin tin, you can also turn it into about 10 to 12 mini cookie pies, although the exact number depends on the cavity size and how heavily you fill them.

For the main version, an 8-inch deep round cake tin or an 8-inch springform pan works best. Both give you enough depth for a properly soft center while still allowing the edges to brown cleanly. A shallower pan can still work, but the dessert will move closer to cookie cake territory and lose some of the thick, bakery-style feel that makes cookie pie so satisfying.

Timing, Bake Window, and Texture Goal

Plan for about 20 minutes of prep, 30 to 45 minutes of chilling, 32 to 40 minutes of baking, and at least 1 hour of cooling. In practice, that means a little over 2 hours from start to finish if you include the rest that allows the center to settle properly before slicing.

The texture target is simple, although it matters enormously: golden edges, a top that looks set rather than wet, and a center that still appears slightly softer than the outer ring. Once cooled, each slice should feel thick, rich, and tender without collapsing.

Best First Version to Bake

If this is your first time making cookie pie, start with Chocolate Chip Cookie Pie. It is the clearest version, the easiest to read in the oven, and the most forgiving in terms of structure and bake cues.

If a gooier, stuffed center is the main attraction, move next to Biscoff Cookie Pie. If your priority is darker, deeper chocolate, Brookie Pie is where the payoff becomes especially dramatic.

Also Read: Peach Cobbler with Canned Peaches (Dessert Recipe)

Why This Cookie Pie Recipe Works So Well

A strong cookie pie only becomes truly good when it balances three things at once: structure, softness, and flavor. The dough has to be strong enough to hold a thick center or a filling, yet still soft enough to feel richer and more indulgent than a standard cookie. At the same time, the dough itself has to feel complete in flavor. Otherwise, the dessert becomes overly dependent on the filling to carry the experience.

For that reason, this version leans on softened butter, brown sugar, enough flour for body, and a baking window that protects the middle from drying out. Brown sugar keeps the middle softer and more flavorful. Butter brings richness and helps the edges brown attractively. Flour gives the dough the strength it needs, although too much will quickly make the texture dull, heavy, or bready.

Just as importantly, this base is flexible. A plain chocolate chip cookie pie can use it almost exactly as written, while a stuffed Nutella cookie pie or Biscoff cookie pie only asks for a few handling changes rather than an entirely different formula. Once the structure makes sense, the whole category becomes much easier to navigate.

What Is Cookie Pie?

Cookie pie is a thick, sliceable dessert made by baking cookie dough in pie form. Sometimes that means a thick, deep dessert with a bottom shell, a filling, and a top layer of dough. At other times, it means a large, soft, pie-shaped cookie baked in a round tin and sliced at the table. Both styles sit comfortably under the cookie pie umbrella, although the texture and visual impact vary a little.

Part of its appeal is that it sits in a very pleasing middle ground. It is more substantial than ordinary cookies, less elaborate than cake, and easier to adapt than many classic desserts. As a result, it can feel just as natural at a celebration as it does on an ordinary evening when you simply want something warm, rich, and satisfying.

Comparison graphic explaining what cookie pie is, showing cookie pie versus cookie cake versus pie cookies, plus the two main cookie pie styles: classic cookie pie and stuffed cookie pie.
Cookie pie sits in a useful middle ground: deeper and softer than cookie cake, very different from pie-inspired cookies, and flexible enough to be made as either a classic dough-forward bake or a more dramatic stuffed version.

Cookie Pie vs Cookie Cake

A cookie cake is usually flatter and more focused on the top. Very often, it is decorated with frosting, writing, borders, or celebration-style details. Cookie pie, by contrast, is more interested in depth and internal texture. Even when the surface looks simple, the interior is where the payoff sits.

That is especially true in a giant cookie pie. Even though the format is large and shareable, the goal is still a soft center and thick slice rather than a broad flat cookie with decorations.

Cookie Pie vs Pie Cookies

These terms sound close, but they refer to different ideas. Pie cookies usually means cookies inspired by pie flavors, such as apple pie cookies or pecan pie cookies. A true cookie pie, on the other hand, is built from cookie dough and baked as one sliceable dessert.

That distinction matters because it changes both the method and the expectation. This guide is about the real cookie pie format: dough-forward, thick, sliceable, and centered on the texture of a rich baked middle.

The Two Main Cookie Pie Styles

Before you begin, it helps to separate the two main styles.

The first is the classic style, where the dough itself is the main event. Think of a deep chocolate chip cookie pie with a rich center and no dramatic stuffed filling. The second is the stuffed style, where the dough forms a shell and a separate middle goes inside. This is the route for Biscoff cookie pie, Nutella cookie pie, and some brownie-based versions.

Both are excellent, but they reward slightly different approaches. The classic version is easier to read and easier to learn on. The stuffed version offers a more dramatic slice, although it asks for better chilling, a more controlled filling border, and a little more patience.

Also Read: Avocado Chocolate Mousse Recipe

How to Choose the Best Cookie Pie Version for Your Needs

One of the nicest things about this dessert is that it suits very different dessert moods without requiring a completely new skill set. Even so, choosing the right version at the beginning makes the process smoother and the final result more satisfying.

Not every cookie pie is aiming for the same result. This quick chooser helps you match the version to the kind of bake you want most, whether that means an easier first attempt, a gooier center, deeper chocolate flavor, or a format that is easier to share.

Best Cookie Pie for First-Time Bakers

For the easiest place to begin, bake Chocolate Chip Cookie Pie. It asks the least from the baker, needs no separate filling disc, and gives you the best feel for how the dough should behave. The doneness cues are also easier to read because you are not evaluating a stuffed center at the same time.

Best Cookie Pie for a Gooey Center

For a dramatic, visibly gooey middle, Biscoff Cookie Pie and Nutella Cookie Pie are the strongest options. “Both give you that dramatic cross-section where the center looks noticeably different from the shell.

Biscoff is slightly easier to control because it stays thicker when chilled. Nutella is softer and more molten, which can be wonderful, although it also means the structure needs a little more care.

Best Cookie Pie for Chocolate Lovers

For a deeper chocolate direction, you have two especially strong choices. Brookie Pie gives you the contrast of cookie and brownie in the same slice, which makes the texture more layered and the chocolate flavor more varied.

Brownie Cookie Pie, by comparison, pushes the whole dessert in one darker, denser direction. It feels more unified, more intense, and slightly more serious in flavor.

Best Cookie Pie for Sharing, Gifting, or Parties

When ease of serving matters most, go with Mini Cookie Pies or Giant Cookie Pie. Mini versions are ideal for dessert trays, edible gifts, and testing multiple fillings in one batch. Giant cookie pie, meanwhile, is excellent when you want a relaxed centerpiece dessert that still feels generous once it lands on the table.

Also Read: Falafel Recipe: Crispy Homemade, Air Fryer and Baked Falafel

Best Base Cookie Pie Recipe

This base holds the whole post together. Once this version works for you, the rest of the variations become much easier because you are adjusting a structure you already understand rather than improvising through a completely different dessert every time.

What makes this version dependable is that it aims for the texture most people actually want: lightly crisp edges, a tender-set middle, enough depth to feel generous when sliced, and enough strength to support fillings without turning dense or cakey.

Recipe card for the best base cookie pie recipe showing an 8-inch deep cookie pie with a soft center, key timing details, ingredient list, and short method steps.
This is the base cookie pie recipe the rest of the post builds from. From here, it becomes much easier to branch into stuffed, darker, mini, or party-style variations without losing the texture that makes cookie pie worth baking in the first place.

At a Glance

  • Yield: 1 deep 8-inch cookie pie, about 8 to 10 slices
  • Best pan: 8-inch deep round cake tin or 8-inch springform pan
  • Prep time: about 20 minutes
  • Chill time: 30 to 45 minutes
  • Bake time: 32 to 40 minutes
  • Cooling time: at least 1 hour
  • Texture goal: golden edges, set top, soft center
  • Best first version: Chocolate Chip Cookie Pie
  • Best stuffed version: Biscoff Cookie Pie

Yield, Pan, and Texture Expectations

This recipe makes one deep 8-inch cookie pie with 8 to 10 slices. The ideal result is a dessert that feels lightly crisp at the outer edge, tender within, and thick through the middle without ever tasting raw.

For the best result, use an 8-inch deep round tin or springform pan. A shallower pan can still work, but the pie will bake flatter and edge closer to cookie cake territory. A deeper pan gives the dough enough height to stay tender through the middle while still browning well around the edges.

Ingredients

You will need:

  • 225 g unsalted butter, softened
  • 180 g light brown sugar
  • 90 g caster sugar
  • 2 large eggs
  • 2 teaspoons vanilla extract
  • 360 g all-purpose flour
  • 1 teaspoon baking soda
  • 1 teaspoon fine salt
  • 250 g chocolate chips or chopped chocolate

Optional, depending on the version:

  • 180 to 220 g filling such as Biscoff or Nutella
  • extra chocolate chunks for the top
  • white chocolate chips
  • chopped hazelnuts
  • brownie filling
  • cream cheese-style filling

Equipment

Keep the setup straightforward:

  • large mixing bowl
  • medium bowl
  • hand mixer or stand mixer
  • spatula
  • digital scale
  • 8-inch deep round tin or springform pan
  • parchment paper
  • cooling rack

A digital scale helps more than many bakers expect here, because even a modest excess of flour can make the center heavier and drier than intended.

Also Read: Mango Margarita Recipe (Frozen or On the Rocks)

Ingredient Notes That Matter Most

A few ingredients shape this dessert more noticeably than they would in an ordinary batch of cookies. Because the dough is thicker, deeper, and sometimes asked to hold a filling, small ingredient choices show up clearly in the final texture.

Cookie pie ingredients guide showing softened butter, brown sugar and white sugar, eggs, flour, and chilled filling or chilling as key factors that affect structure, softness, and flavor.
A great cookie pie starts feeling right long before it goes into the oven. Softened butter, the right sugar balance, enough structure from the eggs and flour, and a well-chilled filling all work together to give you a softer center, better browning, and cleaner slices.

Butter

Use softened butter, not melted butter. Softened butter creams properly with the sugars and helps the dough keep its structure. Melted butter makes the mixture looser, greasier, and harder to control, especially in stuffed versions.

You want butter that yields when pressed but is not shiny or oily. If it is too cold, it will not cream well. If it is too warm, the dough will lose some of its shape before it ever reaches the oven.

Brown Sugar and White Sugar

Brown sugar is one of the main reasons the center stays soft and chewy. It brings moisture, depth, and that darker caramel-like cookie flavor that makes a thick slice feel rich rather than flat.

White sugar still matters. It sharpens the sweetness, supports browning, and helps the outer structure bake more cleanly. Using both gives you a much better balance than relying on only one.

Eggs

Eggs do more than bind the dough. They help the pie set through the center, support sliceability, and add richness. In a dessert like this, where the center needs to stay soft without collapsing, the eggs do a great deal of structural work.

That is why it is worth using large eggs as written. Smaller eggs can leave the dough a little tighter, while oversize eggs can soften it more than intended.

Flour

Flour provides the body that lets the pie stay thick without sinking. Even so, too much flour will quickly push the texture toward dry, dull, and overly bready.

For that reason, weighing the flour is one of the simplest ways to improve your result. If you want a reliable refresher, King Arthur’s guide on how to measure flour correctly is worth reading.

Baking Soda and Salt

Baking soda gives the dough lift and helps it bake with tenderness rather than staying heavy all the way through. Salt is just as important. In a rich dessert like this, it keeps the sweetness from tasting flat and gives the chocolate, brown sugar, and fillings more definition.

Chocolate

Chocolate is not just a mix-in here. It helps shape the eating experience of the whole slice. A mix of chopped chocolate and chips usually gives a better result than chips alone, because chopped chocolate melts into softer streaks while chips stay more distinct.

That contrast makes the finished pie feel more layered and more polished once sliced.

Fillings

Stuffed versions work best when the filling is thick and cold before assembly. Biscoff, Nutella, brownie filling, and cream cheese-style centers all behave better when chilled first. Warm or loose fillings are far more likely to spread into the shell and blur the middle.

Chilling

Chilling is not optional if clean structure is the goal. It firms the dough, helps the shell hold its shape, slows spreading, and makes stuffed versions noticeably easier to bake well.

In plain versions, chilling improves control. In stuffed versions, it often makes the difference between a distinct center and a muddy one.

Also Read: Sourdough Pizza Dough Recipe (Crispy Crust & Easy Pizza Base)

How to Make Cookie Pie Step by Step

The method is straightforward, but the feel of the dough matters just as much as the order of the steps does.

Step 1: Cream the Butter and Sugars

Beat the softened butter, brown sugar, and caster sugar together until the mixture looks creamy and slightly lighter. You do not need huge volume here. You are looking for smoothness, evenness, and a texture that no longer looks grainy or uneven.

Step 2: Add the Eggs and Vanilla

Add the eggs one at a time, mixing well after each addition. Then stir in the vanilla. At this stage, the mixture should still look thick and cohesive rather than loose or split.

Step 3: Mix the Dry Ingredients

In a separate bowl, whisk together the flour, baking soda, and salt. This may seem like a minor step, but it helps the leavening and seasoning distribute more evenly through the dough.

Step 4: Bring the Dough Together

Add the dry ingredients to the butter mixture and mix just until combined. Once the flour disappears, fold in the chocolate. The finished dough should feel thick and scoopable, not runny and not cake-like.

Step 5: Prepare the Pan

Line the base of the pan with parchment and lightly grease the sides. This small piece of preparation makes it much easier to release the finished pie without tearing the edges or losing the clean round shape.

Step-by-step cookie pie assembly guide showing how to prepare the pan, press the dough shell, add filling in the center, and top, seal, and chill the cookie pie before baking.
Assembling cookie pie becomes much easier once you can see the order clearly: line the pan, press the dough into a shell, keep the filling centered, then top and chill the pie before baking.

Step 6: Build the Shell

Divide the dough so that about 60 percent is used for the base and sides, while the remaining 40 percent becomes the top. Press the larger portion into the base and slightly up the sides of the pan, keeping the thickness as even as you can.

That evenness matters more than it may seem at first. If the shell is thick in some places and thin in others, the bake can turn uneven once the filling or top layer goes in.

Step 7: Add the Filling if Using

If you are making a stuffed version, place the filling in the center and leave a border of about 1.5 cm around the edge. This gap helps contain the middle and keeps the filling from leaking outward during baking.

As a guide, use around 180 to 200 g for Biscoff or Nutella, about 150 g for brownie filling, or around 180 g for a cream cheese-style center.

Step 8: Add the Top

Flatten the remaining dough in portions and place it over the center. Seal the edges gently. Do not mash the top down hard. You want it enclosed, but still loose enough to bake tenderly rather than compactly.

Cookie pie step-by-step guide showing how long to chill before baking, bake at 175C 350F for 32 to 40 minutes, and cool for 1 to 2 hours before slicing for cleaner structure.
Once the cookie pie is assembled, the last part is mostly about patience. Chill it first so the dough holds its shape, bake until the edges are golden and the top is set, then cool fully before slicing so the center can settle and the wedges hold more cleanly.

Step 9: Chill the Assembled Pie

Chill the pie for 30 to 45 minutes before baking. The dough should feel cooler, firmer, and less sticky at the surface. That is a better signal than the clock alone, because room temperature changes how quickly the pie firms up.

Step 10: Bake

Bake at 175°C / 350°F until the edges are golden and the top looks set. Most versions take 32 to 40 minutes in an 8-inch deep pan.

If the top browns too quickly while the center still needs time, loosely tent with foil and continue baking.

Step 11: Cool Properly

Let the pie cool in the pan for at least 1 hour before slicing. For the cleanest and most stable slices, cool it for closer to 2 hours. Warm slices will always be looser and messier, especially in filled versions, so do not judge the final texture too early.

Also Read: Balti Paneer Gravy (Restaurant-Style, Creamy + Bold Recipe)

How to Know When Cookie Pie Is Done

This is one of the most important parts of the entire bake, because the line between soft and underbaked can feel confusing at first. The aim is not a dry, fully firm middle straight from the oven. Instead, you want a pie that looks set around the edges and on top while the middle still looks a little more relaxed and finishes settling as it cools.

A good cookie pie should not look wet or liquid in the center. At the same time, it should not look hard and fully dry all the way across the surface. The best way to think about it is this: the pie should look baked rather than raw, while still staying tender through the middle.

Cookie pie doneness guide showing four stages: perfectly baked, slightly underbaked, underdone, and overbaked, with visual examples of golden edges, set top, soft center, wet middle, and dark edges.
Because the line between soft and underbaked can be easy to misread, this visual guide shows what cookie pie should look like at each stage so you can pull it from the oven with more confidence.

Visual Signs to Trust

  • the edges look set and lightly golden
  • the top no longer looks glossy-wet
  • the center still looks slightly softer than the outer ring
  • the pie gives a little when nudged, but does not ripple like batter
  • the whole surface looks settled rather than shiny and loose

Properly Baked

Look for edges that are clearly golden and set, a top that no longer looks wet, and a center that yields slightly when nudged but still holds its shape. The pie should continue setting as it cools.

Slightly Underbaked but Still Fine

If the middle feels looser than expected, yet the edges are done and the top is set, do not panic. Many cookie pies finish settling during cooling, especially when the filling or chocolate content is high.

Truly Underdone

If the center still looks glossy and loose, sinks dramatically, or spills like batter when sliced after proper cooling, it needed more baking time. Too much filling can also cause this.

Overbaked

If the top looks dry all over, the edges darken too far, and the middle loses its soft character after cooling, the pie has gone too far. It may still taste good, but it will lose the texture that makes cookie pie special.

Texture Guide

  • Gooey: best for stuffed versions, very soft center, more dramatic slices
  • Soft-set: ideal for classic chocolate chip cookie pie
  • Fully set: firmer slices, easier for transport, less molten character

Most people are happiest somewhere between gooey and just set.

Also Read: Mojito Recipe (Classic) + Ratios, Pitcher, Mocktail & Easy Variations

Chocolate Chip Cookie Pie

If you want the clearest and most reliable version of the whole format, chocolate chip cookie pie is it. This is the variation that most clearly shows what a great slice should feel like: thick, buttery, soft through the middle, and generous with chocolate without needing a separate stuffed filling to make its point.

Because it uses the base dough almost exactly as written, it is also the easiest place to build confidence. You are not judging an extra center, managing a filling border, or wondering whether the pie is done because of two different textures. You are simply learning how the dough bakes and what the pie should look like when it is ready to come out.

Recipe card for chocolate chip cookie pie showing a thick soft-centered slice, quick timing details, best chocolate mix, and simple step-by-step guidance.
Chocolate chip cookie pie is the easiest version to learn on because the dough itself does the work. This recipe card keeps the process simple, shows the chocolate balance that gives the best texture contrast, and helps you focus on the soft center without the extra variable of a stuffed filling.

Best Chocolate Balance

A particularly good mix is 150 g dark or semi-sweet chopped chocolate plus 100 g milk chocolate chips. That combination gives you contrast in both sweetness and texture. Chopped dark chocolate melts into softer streaks, while the milk chocolate chips stay more distinct.

If you prefer, you can also lean toward dark and white chocolate for stronger visual contrast. Either way, using more than one kind of chocolate makes the final slice feel more layered.

Easiest Way to Get It Right

Do not overcomplicate this first version. Skip the filling, keep the dough thickness even, chill properly, and trust the soft-center bake cue. That is enough to give you a dependable result.

If you want to push the chocolate flavor slightly further without changing the structure, a drizzle of homemade chocolate syrup over a warm slice can be lovely.

Also Read: Paloma Recipe: 12 Paloma Cocktail Drinks

More Cookie Pie Variations Worth Baking

After the base clicks into place, the fun part begins. This is where the format starts showing how flexible it really is.

Best cookie pie variations guide showing chocolate chip cookie pie, Biscoff cookie pie, Nutella cookie pie, brookie pie, brownie cookie pie, mini cookie pies, giant cookie pie, vegan cookie pie, and gluten free cookie pie.
With the base dough in place, you can take the same cookie pie recipe in several directions. Use this variation guide to compare classic, stuffed, mini, giant, vegan, and gluten free options before choosing the version that best matches the texture, flavor, and baking style you want.

Biscoff Cookie Pie

Biscoff cookie pie is one of the best stuffed versions because the filling is flavorful, thick, and comparatively stable. Freeze or chill the Biscoff spread in a disc before assembly if you want the cleanest center and the most obvious stuffed effect in the final slice.

Recipe card for Biscoff cookie pie showing a thick stuffed slice with a caramelized cookie butter center, quick timing details, filling tips, and simple step-by-step guidance.
If you want to try a stuffed cookie pie without starting with the trickiest version, Biscoff is usually the smartest place to begin. Its thicker filling is easier to control, so you get a cleaner center, a more defined shell, and a bakery-style slice without fighting a filling that runs too quickly.

The overall result is caramelised, spiced, warm, and deeply indulgent. For a first filled version, this is usually the smartest one to choose.

Nutella Cookie Pie

Nutella cookie pie is looser and more dramatic. The hazelnut-chocolate center melts more easily than Biscoff, so chilling matters even more here.

Recipe card for Nutella cookie pie showing a thick stuffed slice with a soft chocolate-hazelnut center, quick timing details, handling tips, and simple step-by-step guidance.
Nutella cookie pie is softer and more molten than Biscoff, so this version rewards a little more care. Chilling the center well and keeping it away from the edges helps you get the dramatic middle you want without letting the filling run too far as the pie bakes.

For a richer finish, add a few chopped hazelnuts to the dough or scatter them over the top. Just keep the filling away from the edges, because Nutella is quick to travel once warm.

Brookie Pie

Brookie pie gives you the appeal of both desserts at once. Part of the pie stays firmly in the cookie world, while the center or one layer leans brownie. That contrast is what makes each slice especially memorable.

Recipe card for brookie pie showing a thick slice with cookie edges and a darker brownie-style center, plus quick timing details, baking cues, and simple method steps.
Brookie pie works best when the contrast stays clear: cookie around the edges, brownie depth through the middle, and a center that looks soft-set rather than fully firm. This version is richest when you let the brownie layer stay dense and fudgy without overbaking the whole pie.

Because brownie filling is denser, this version benefits from careful baking. The edges can be done before the very middle looks fully ready, so trust the just-set cue rather than waiting for a completely firm middle.

Brownie Cookie Pie

Brownie cookie pie is darker and more unified than brookie pie. Instead of building contrast between two layers, it pushes the whole dessert in one deeper chocolate direction.

Recipe card for brownie cookie pie showing a dark, fudgy chocolate cookie pie slice with base-recipe adaptation notes, texture goals, timing details, and simple step-by-step guidance.
Brownie cookie pie works best when you treat it as a darker adaptation of the base recipe rather than a stuffed variation. The aim here is a deeper chocolate crumb, a fudgier middle, and enough structure at the edge to keep the slice rich without turning dry.

To adapt the base, reduce the flour slightly to about 330 g, add 30 g cocoa powder, increase the dark chocolate, and optionally include 1 teaspoon espresso powder. The finished pie should feel chewy at the edge and almost fudgy in the middle. Because cocoa-heavy dough dries out quickly once overbaked, start checking early.

Mini Cookie Pies

Mini cookie pies are one of the most practical adaptations in the entire format. Use a muffin tin, press dough into each cavity, add a spoonful of filling or extra chocolate, top with more dough, and chill briefly before baking.

Recipe card for mini cookie pies showing several small cookie pies baked in a muffin tin, with yield, timing, mini format tips, and step-by-step assembly guidance.
Mini cookie pies are one of the easiest ways to turn the same idea into something more flexible. They bake faster, portion more neatly, and make it much easier to serve a crowd, test different fillings, or build a dessert tray without committing to one large pie.

They usually bake in about 14 to 18 minutes, so start checking early. These are especially useful for parties, gifting, or trying several fillings from one batch. They also sit very nicely alongside softer desserts such as no-bake banana pudding if you are building a mixed dessert table.

Giant Cookie Pie

A giant cookie pie is ideal for a relaxed, shareable centrepiece dessert. Use a 9-inch or 10-inch round cake pan, but keep enough dough depth that the center still stays soft. If you spread the dough too thin, the dessert will drift toward cookie cake rather than a proper pie-style slice.

Recipe card for giant cookie pie showing a thick shareable cookie pie with pan size guidance, slicing notes, and texture tips.
A giant cookie pie works best when it still feels like cookie pie in the middle rather than drifting into cookie cake. Keeping enough dough depth is what gives you those thicker, softer wedges that feel generous when sliced and much more satisfying to share at the table.

Chocolate chip works especially well here, although a light Nutella swirl or mixed chocolate chunks can also be lovely.

Vegan Cookie Pie

A vegan cookie pie works best with a firm plant-based baking block, flax eggs, and dairy-free chocolate. If you need a reference for the egg swap, this guide on how to make a flax egg is helpful.

Recipe card for vegan cookie pie showing a dairy-free, egg-free cookie pie with a lifted slice, vegan adaptation tips, timing details, texture goal, and simple step-by-step guidance.
A good vegan cookie pie should still feel like real cookie pie when you slice into it. The key is choosing swaps that protect structure as well as richness, so the finished pie stays thick, soft in the center, and satisfying enough that it never feels like a compromise version.

Start with a plain chocolate chip version before moving into heavier fillings. That makes the adapted dough easier to judge on its own.

Gluten Free Cookie Pie

A gluten free cookie pie is easiest with a dependable cup-for-cup baking blend and a lighter first filling, or no filling at all. Extra chilling also helps if the dough feels softer than usual.

Recipe card for gluten free cookie pie showing a thick soft-centered slice with cup-for-cup flour blend guidance, timing details, texture goal, and simple step-by-step instructions.
Gluten free cookie pie becomes much easier once the structure feels predictable. A dependable cup-for-cup blend, a little extra chilling when the dough runs soft, and a lighter first version all make it easier to get a slice that holds cleanly without losing the soft center that makes cookie pie feel worth baking.

Once the structure feels dependable, stuffed versions become much easier to attempt with confidence.

Also Read: Air Fryer Donuts Recipe (2 Ways): Glazed Homemade Donuts + Biscuit Donuts

Best Cookie Pie Fillings and What Each One Does

Choose spread fillings when you want a gooey, bakery-style center, chunky mix-ins when you want easier structure, and brownie or cream cheese-style fillings only when you want a more dramatic texture shift.

That simple distinction makes the whole category easier to navigate. A strong dough can handle several fillings, but the best choice depends on how you want the slice to feel once cut.

Spread fillings such as Biscoff, Nutella, thick peanut butter, and chocolate hazelnut spread give you the most obvious stuffed-center effect. They are especially useful in deep cookie pies and mini versions, provided they are chilled first.

Chunkier mix-ins are easier to control. Dark chocolate chunks, milk chocolate chips, chopped hazelnuts, and a modest amount of biscuit crumbs work especially well in classic and giant versions because they add interest without changing the overall structure.

Best cookie pie fillings guide showing Biscoff, Nutella, brownie filling, cream cheese-style filling, and extra chocolate, with visual comparisons for texture, flavor, and structure.
Different fillings change cookie pie more than most bakers expect. This guide helps you compare which centers give you the gooey, rich, creamy, or more structured result you want before you commit to one version.

Then there are the more specific fillings, such as brownie mixture for brookie pie or a cream cheese-style center. These can be excellent, but they change the texture more dramatically, so they need a steadier hand and a little more restraint.

Biscoff

  • Flavor payoff: caramelized, spiced, warm
  • Texture behavior: thick and stable when chilled
  • Difficulty: easier
  • Best use: gooey center with reliable control

Nutella

  • Flavor payoff: rich hazelnut chocolate
  • Texture behavior: softer, melts faster
  • Difficulty: moderate
  • Best use: indulgent dessert-style center

Brownie Layer or Brownie Filling

  • Flavor payoff: deep chocolate
  • Texture behavior: dense and fudgy
  • Difficulty: moderate
  • Best use: brookie pie or brownie cookie pie

Cream Cheese-Style Filling

  • Flavor payoff: creamy, tangy, balanced
  • Texture behavior: softer and lighter
  • Difficulty: moderate
  • Best use: cheesecake-leaning variations

Extra Chocolate Only

  • Flavor payoff: classic and dependable
  • Texture behavior: no separate center, just richer dough throughout
  • Difficulty: easiest
  • Best use: beginner-friendly baking and cleaner slicing

A good rule is simple: if the filling feels loose at room temperature, it probably needs more chilling before it goes into the pie.

Also Read: Tapas Recipe With a Twist: 5 Indian-Inspired Small Plates

Tips Before You Bake Cookie Pie

A few habits make this dessert noticeably easier to get right. None of them are difficult, but together they improve the final result noticeably.

The Most Helpful Things to Remember

Keep these points in mind:

  • use softened butter, not melted
  • weigh the flour if possible
  • start checking before you think you need to
  • chill the assembled pie before baking
  • use a deeper pan for stuffed versions
  • keep the filling away from the edges
  • do not overmix after adding flour
  • do not overfill just because it looks tempting
  • cool for 1 hour minimum, 2 hours for cleaner slices
  • use a metal pan when you want better structure control

These are small decisions, yet together they make the difference between a pie that merely tastes good and one that slices, bakes, and cools the way it should.

Where Bakers Usually Go Wrong

Most problems come from excess rather than lack. Too much enthusiasm with the filling makes the center unstable. Too much baking dries the pie. And then too much flour makes the crumb heavy.

By contrast, a slightly softer center is often correct and will settle as the pie cools.

Also Read: Air Fryer Salmon Recipe (Time, Temp, and Tips for Perfect Fillets)

Common Cookie Pie Mistakes and How to Fix Them

Even a strong method can go off track if the handling slips. Fortunately, most problems are easy to read once you know what caused them.

Cookie pie troubleshooting guide showing common problems including a sunken pie, leaking filling, dry texture, and a middle that seems raw, with quick causes to check for each issue.
Even when the dough is right, cookie pie can still go off track at the baking stage. Use these quick checkpoints to work out whether the problem came from warmth, filling placement, baking time, or structure, so the next pie comes out closer to the texture you wanted.

Sinking, Leaking, and Dryness

If the pie sinks heavily, the usual reasons are too much filling, not enough chilling, uneven shell thickness, or underbaking. If the filling leaks, it was probably too close to the edge, too warm, or not sealed well enough under the top dough. In both cases, the fix is usually simple: chill more, leave a cleaner border, and keep the shell more even.

If the pie turns out dry, the cause is usually too much flour, too much baking time, or a pan that spreads the dough too thin. In that case, weigh the flour, start checking earlier, and use a deeper pan next time.

The pie sank

This usually means the dough or filling was too warm, or the center needed a little longer in the oven. Chill more thoroughly and check doneness more carefully next time.

The filling leaked

This almost always comes down to one of three things: the filling sat too close to the edges, the filling was too warm, or the top was not sealed properly. Keep the center contained and leave a visible dough border around it.

The pie turned dry

This usually means it baked too long, the pan was too wide, or the flour was slightly heavy. Check earlier and keep the bake deeper rather than flatter whenever possible.

Raw Middle, Overbaked Minis, and Crumbly Gluten Free Versions

A tender center is not automatically raw. If the middle is clearly shiny and wet, it needs more time. If it is simply soft but structured, it may just need cooling.

Mini cookie pies, meanwhile, often overbake because bakers leave them in on full-pie timing. Start checking them around 14 minutes and let carryover heat do the rest.

For gluten free cookie pie, crumbliness usually comes from the flour blend, not enough chilling, or trying an ambitious filling too early. Start with the plain chocolate chip format first, then build outward when the dough starts to feel reliable.

The middle seemed raw

A proper center should be soft, but not liquid. If it stayed truly loose after cooling, it either needed more time or had too much filling for the size of pan.

The top browned too fast

Tent loosely with foil and keep baking. This is especially common in stuffed versions.

The dough was too soft to shape

Chill it briefly. Ten to fifteen minutes can make a surprising difference.

Mini cookie pies overbaked

Check them early. The smaller format gives you much less margin for error than a full-size pie.

Gluten free cookie pie crumbled

Use a better all-purpose blend, chill thoroughly, and do not slice before it has fully cooled.

Also Read: Masterclass in Chai: How to Make the Perfect Masala Chai (Recipe)

How to Make Cookie Pie Ahead of Time

One of the most practical things about cookie pie is how easily you can spread the work out. The dough can be made a day ahead and chilled. In fact, a short rest often improves both flavor and handling.

You can also assemble the pie ahead and refrigerate it before baking. If you do that, remember that a colder pie may need a little extra time in the oven. Stuffed pies can be frozen before baking as well, which often helps them hold their shape more neatly once the heat hits the filling.

That flexibility makes this dessert especially useful for parties, birthdays, and weekends when you want the dessert mostly ready before guests arrive.

Also Read: Pork Tenderloin in Oven (Juicy, Easy, 350°F or 400°F) Recipe

How to Store, Freeze, and Reheat Cookie Pie

Cookie pie stores well, which is one of the reasons it deserves a place in a regular baking rotation. Plain versions such as chocolate chip cookie pie, brownie cookie pie, and giant cookie pie can usually stay tightly covered at room temperature for up to 2 days, provided the filling is stable.

Cookie pie storage guide showing how to keep plain cookie pie at room temperature, refrigerate stuffed cookie pie, freeze dough or slices, and reheat gently without drying the center.
Cookie pie keeps well, but the best storage method depends on the filling. Use this guide to decide when to keep it covered at room temperature, when to refrigerate or freeze it, and how to warm it gently without losing the soft center.

Stuffed versions such as Biscoff cookie pie, Nutella cookie pie, or anything with a cream cheese-style center are better kept in the fridge. Even then, they usually taste best once brought closer to room temperature or gently warmed before serving.

The dough can be frozen, the assembled unbaked pie can be frozen, and baked slices can be frozen too. When reheating, go gently. The aim is to warm the middle and bring back some of the chocolate melt, not rebake the dessert. For broader leftover guidance, Foodsafety.gov’s food safety guidance for leftovers is a practical reference.

Also Read: How to Make a Flax Egg (Recipe & Ratio for Vegan Baking)

What to Serve with Cookie Pie

Because cookie pie is rich, the best pairings are usually the ones that cool it down or bring in contrast. Vanilla ice cream is the obvious favorite for a reason, although softly whipped cream, cold milk, iced coffee, or even a latte can all work beautifully.

Serving guide for cookie pie showing three ideas: a warm cookie pie slice with ice cream, a plain slice with coffee or milk, and dessert table pairings with softer sweet treats.
Cookie pie is richest at the center, so the best pairings either cool it down or balance it with contrast. Use this guide when deciding whether to serve it warm with ice cream, simply with coffee or milk, or as part of a fuller dessert spread.

If you are building a fuller dessert table, it helps to pair it with something texturally different. No-bake banana pudding gives you a softer spoon dessert, while avocado chocolate mousse offers a colder, smoother chocolate contrast. For a more casual party setup, even a bright party punch with pineapple juice can balance the richness surprisingly well.

Which Cookie Pie Should You Bake First?

If you bake only one version first, make it Chocolate Chip Cookie Pie. It teaches you the structure most clearly, gives you the easiest bake cues to read, and makes every later variation easier to handle.

If you want the most obviously bakery-style stuffed result, bake Biscoff Cookie Pie. If deep chocolate is the whole point, choose Brookie Pie or Brownie Cookie Pie. For gifting and sharing, go with Mini Cookie Pies. For a centerpiece, bake a Giant Cookie Pie.

Meanwhile, if you are working around dietary needs, start with a simple Vegan Cookie Pie or Gluten Free Cookie Pie before moving into heavier filled versions. That way, you learn the behavior of the adapted dough first instead of managing too many variables at once.

Also Read: Croquettes Recipe: One Master Method + 10 Popular Variations

Final Thoughts on This Cookie Pie Recipe

The best part of learning one strong cookie pie method is that it gives you much more than a single dessert recipe. It gives you a format you can return to and reshape depending on the mood, the season, the occasion, or the ingredients already in your kitchen.

On one day, it can be a warm chocolate chip cookie pie served with melting vanilla ice cream. On another, it can become a thick Biscoff cookie pie, a softer Nutella cookie pie, a rich brookie pie, or a shareable giant cookie pie cut into generous wedges. When you know how the dough should feel, how the middle should look, and when the bake is done, the whole category opens up in a way that feels genuinely practical rather than overwhelming.

Also Read: Ravioli Recipe Reinvented: 5 Indian-Inspired Twists on the Italian Classic

FAQs

1. What is a cookie pie recipe?

A cookie pie recipe is a dessert made by baking cookie dough in pie form, usually in a deep round pan so the center stays thicker and softer than a standard cookie. Unlike a cookie cake, it is less focused on decoration and more focused on texture.

2. Is cookie pie the same as cookie cake?

Not exactly. A cookie pie is usually deeper, softer in the center, and more likely to include a filling or a thicker middle. A cookie cake, by comparison, is often flatter and more surface-focused.

3. What is the difference between cookie pie and pie cookies?

Pie cookies usually means cookies inspired by pie flavors, such as apple pie cookies or pecan pie cookies. Cookie pie, by contrast, is built from cookie dough and baked as one large dessert.

4. What is the best cookie pie version for beginners?

For most bakers, the easiest starting point is chocolate chip cookie pie. It gives you the clearest feel for how the dough should look, how the center should bake, and when the pie is ready to come out of the oven.

5. How do I know when cookie pie is done?

It is usually done when the edges are set, the top no longer looks wet, and the center still appears slightly soft. If the middle looks shiny, loose, or obviously raw, it needs more time.

6. Should cookie pie be gooey in the middle?

Yes, but only to a point. Ideally, the center should feel soft, rich, and slightly gooey after cooling. It should not be wet or underbaked.

7. What pan is best for cookie pie?

An 8-inch deep round cake tin or an 8-inch springform pan is usually the best choice. That depth helps the dessert keep its soft center without spreading too thin.

8. Can I make cookie pie in a pie dish?

Yes, you can. However, the result will usually be shallower than a deep-pan version, so the texture may feel closer to a thick cookie than a stuffed bakery-style slice.

9. Can I make mini cookie pies instead of one large pie?

Absolutely. Mini cookie pies are one of the easiest ways to turn the same base dough into something more party-friendly. A muffin tin usually works best.

10. How long do mini cookie pies take to bake?

Most mini cookie pies bake in about 14 to 18 minutes, depending on the tin, the dough depth, and whether they include filling.

11. What are the best cookie pie fillings?

If you want a bakery-style stuffed center, Biscoff and Nutella are excellent options. If you want a more classic result, mixed chocolate chunks, chips, or chopped nuts are often better choices. Brownie filling also works beautifully for brookie pie.

12. How much filling should I use?

Generally, around 180 to 200 grams of spread-style filling is enough for an 8-inch deep pie. That gives you a visible, rich center without overwhelming the structure.

13. Why did my cookie pie sink in the middle?

A little sinking is normal, especially in filled versions. A major collapse usually points to too much filling, not enough chilling, uneven dough thickness, or underbaking.

14. Why did my cookie pie turn out dry?

Usually, dryness comes from too much flour, too much baking time, or using a pan that spreads the dough too thin.

15. Why did the filling leak out?

Filling tends to leak when it is too close to the edge, too warm during assembly, or not properly sealed under the top layer of dough.

16. Can I freeze cookie pie dough?

Yes. You can freeze the dough before assembly, freeze shaped dough for mini cookie pies, or even freeze the fully assembled unbaked pie. Colder dough often gives you cleaner structure, especially in stuffed versions.