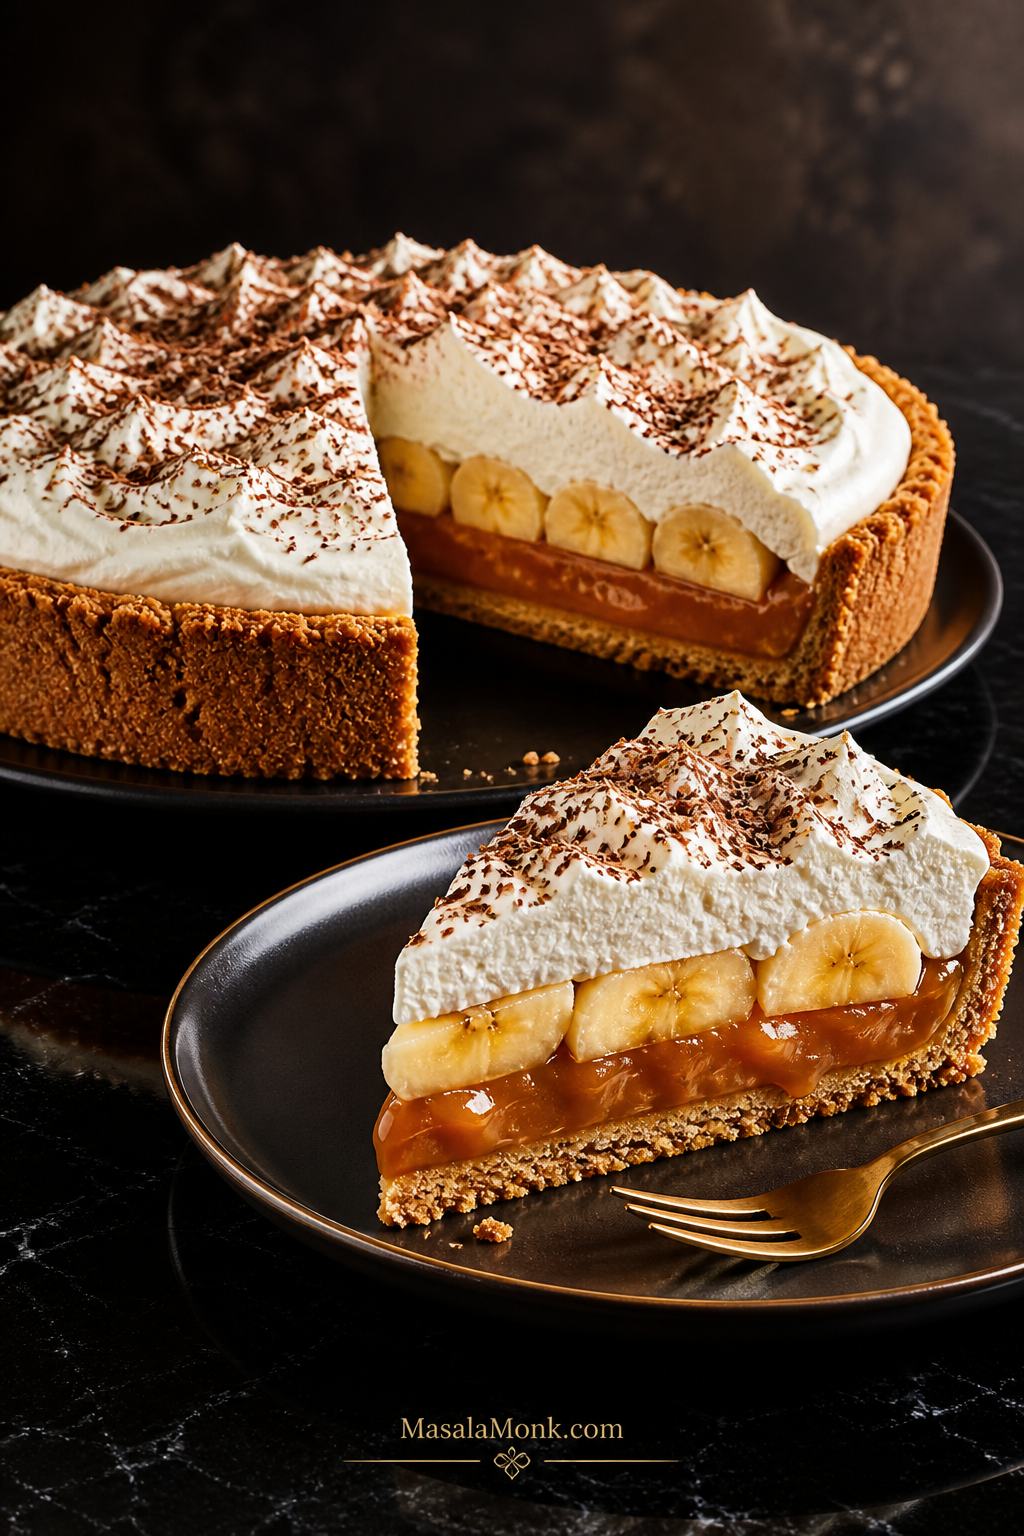
A good banoffee pie recipe should give you everything people love about this classic dessert: a buttery biscuit base, thick caramel, fresh bananas, cool whipped cream, and slices that actually hold together. This version keeps the method easy and mostly no-bake, while giving you the texture tips you need to avoid a runny, messy pie.
Even better, this is a no-bake Banoffee pie unless you choose to bake the crust for a firmer slice. So, if you love chilled banana desserts like no-bake banana pudding, this is the richer banana-toffee version: less spoonable pudding, more dramatic layered dessert.
This recipe for banoffee pie is especially useful if you want the classic flavor but do not want to guess your way through the caramel, crust, bananas, or cream. The trick is getting each layer to behave before the next one goes on: firm base, thick caramel, fresh bananas, and stable cream.
Done well, Banoffee Pie tastes like cold caramel cream, fresh banana, and buttery biscuit in one forkful. Done badly, it can slide apart before it reaches the plate. This version is built to give you the first result, not the second.
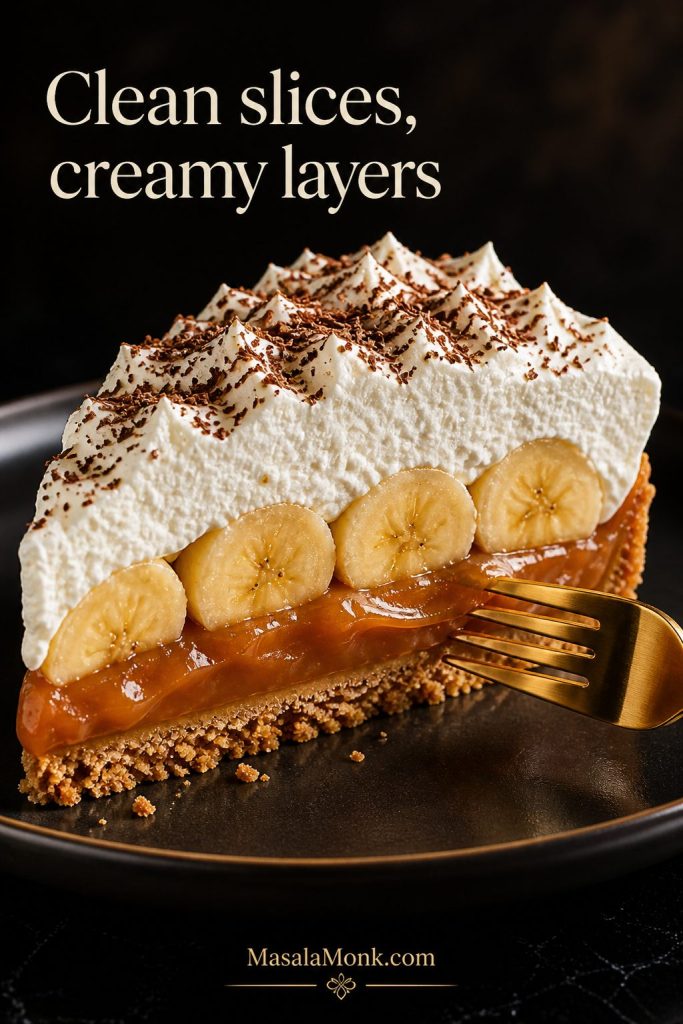
Although the layers look impressive, the actual work is simple: crush, press, spread, slice, whip, and chill.
It is the kind of dessert that looks like you worked harder than you did, which makes it especially useful for parties, family dinners, birthdays, and make-ahead dessert tables.
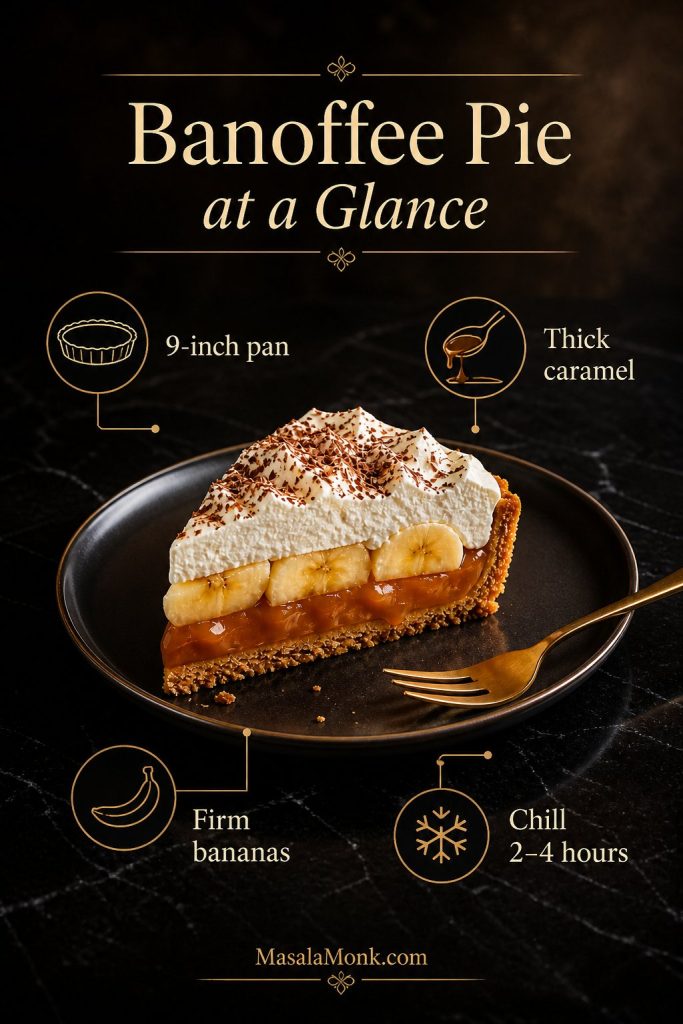
Banoffee Pie at a Glance
This recipe keeps banoffee pie simple: a biscuit base, thick caramel, firm bananas, and whipped cream. For the cleanest slices, use thick caramel, chill the base first, and add the bananas close to serving.
In This Guide
Quick Answer: What Is Banoffee Pie?
Banoffee Pie is a banana-and-toffee dessert made with a base, a thick caramel or toffee layer, sliced bananas, and whipped cream. Most modern versions use a biscuit base, although older versions may use pastry. The name comes from banana and toffee, which is why you may also see it written as Banoffi Pie.
The classic flavor is simple but powerful: buttery base, deep caramel, fresh banana, cool cream, and a little chocolate or cocoa on top. Since the dessert is chilled and layered, it feels impressive without needing a complicated baking method. Better still, each part can be prepared calmly, so the recipe is much easier than it looks.
If you enjoy the story behind classic desserts, the original Banoffi pie story is a lovely read because it comes from Ian Dowding, one of the people associated with the dessert’s creation.
Is Banoffee Pie the Same as Banoffee Pudding?
Banoffee Pie is the classic name, but you may also see people search for Banoffee pudding or Banoffee dessert because the dish is chilled, creamy, and layered. In British usage, “pudding” can also mean dessert in a general sense. For most home cooks, though, a Banoffee pudding recipe usually points to the same banana-toffee idea: a base, caramel, bananas, and cream.
Why This Banoffee Pie Works
This banoffee pie works because the recipe solves the problems that usually make the dessert disappointing: a crumbly base, loose caramel, browning bananas, soft cream, and messy slices. Each layer has a job, and the method keeps those layers distinct.
- The base is sturdy but not greasy. A balanced biscuit-to-butter ratio gives the pie enough structure without making the crust heavy.
- The caramel layer is thick. Dulce de leche, thick caramel, or homemade condensed milk toffee holds much better than thin caramel sauce.
- The bananas stay fresh. Firm ripe bananas slice cleanly and release less liquid than overripe bananas.
- The cream is whipped to the right stage. Medium or medium-firm peaks hold better than loose cream but still taste soft and fresh.
- The chilling plan is practical. First, you chill the base. After that, you chill the finished pie so it cuts neatly.
Most importantly, this recipe is less about difficult technique and more about timing. Once the base is cold, the caramel is thick, and the cream is properly whipped, you get a pie that tastes rich and homemade but still holds together when you cut it.
Banoffee Pie Ingredients
The ingredients are simple, but this recipe for banoffee pie depends on a few small choices: biscuit texture, caramel thickness, banana ripeness, and cold cream all matter.
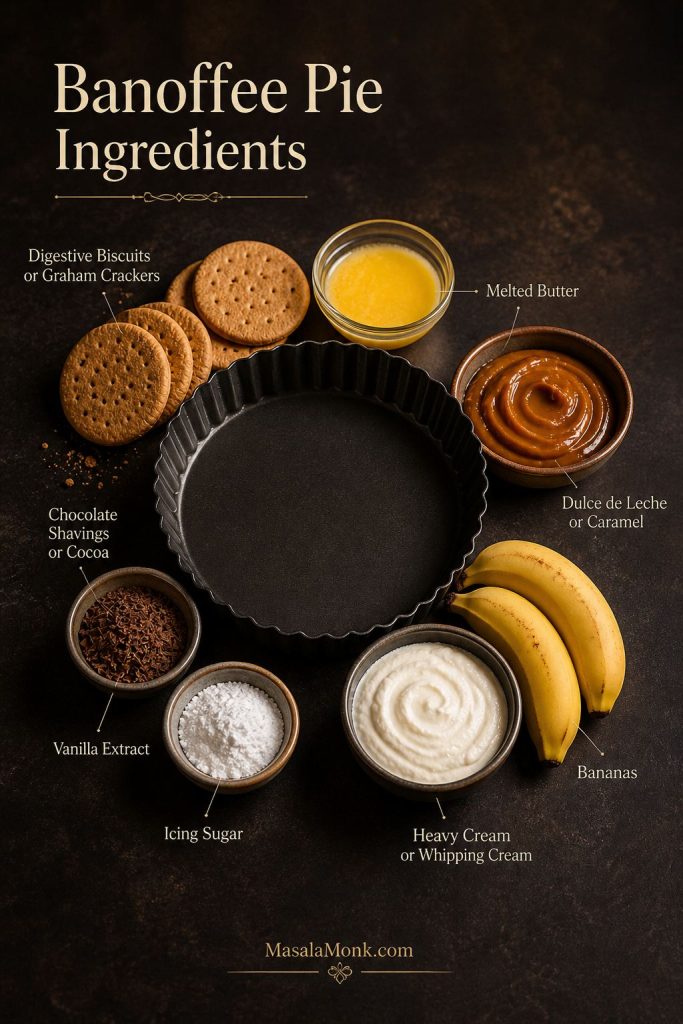
For example, a thin caramel sauce may taste good, but it will not hold like thick dulce de leche or cooked condensed milk toffee. Similarly, very soft bananas may be sweet, yet they can make the filling wet and unstable.
What to Use in the US, UK, and India
Banoffee Pie travels well across kitchens, but ingredient names change from country to country. Use this quick guide before you shop.
| Layer | US Option | UK Option | Common India Option |
|---|---|---|---|
| Base | Graham crackers | Digestive biscuits | Digestive biscuits or Marie biscuits |
| Caramel | Dulce de leche | Thick caramel or dulce de leche | Dulce de leche, milk caramel, or condensed milk toffee |
| Cream | Heavy cream | Double cream or whipping cream | Whipping cream; avoid low-fat table cream unless it whips reliably |
| Pan | 9-inch pie dish | 23cm loose-bottom tart tin | 8–9 inch tart tin or springform pan |
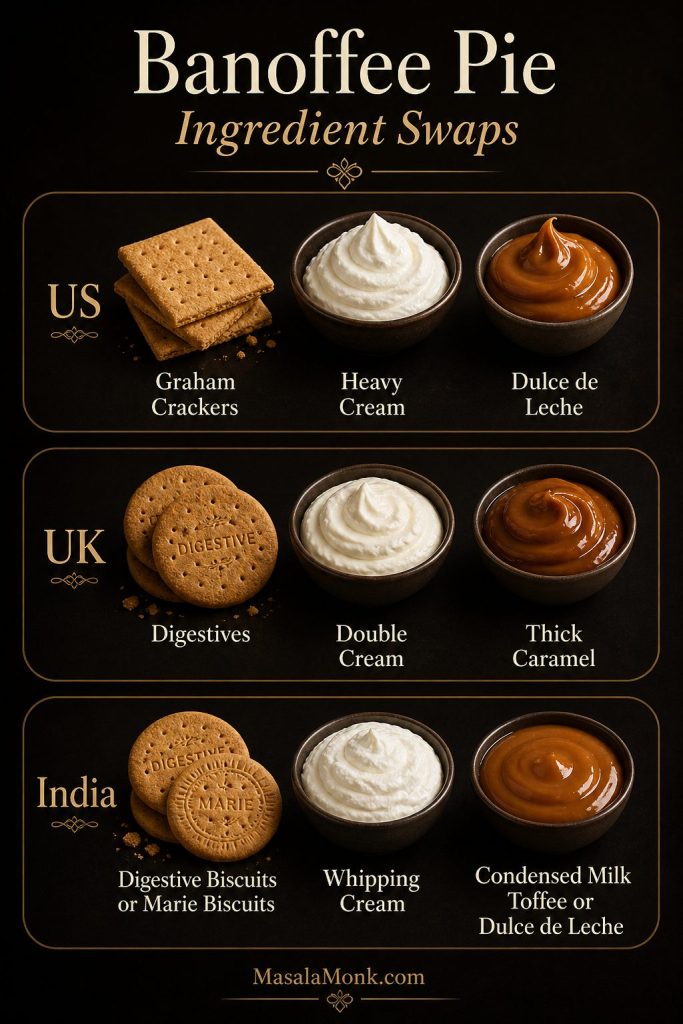
You may also see Brazilian-style Banoffee recipes call dulce de leche doce de leite, while a Maizena-style biscuit base may replace digestives or graham crackers. Either way, the idea is still the same: a crumb base, thick milk caramel, bananas, and cream.
Biscuits or Graham Crackers
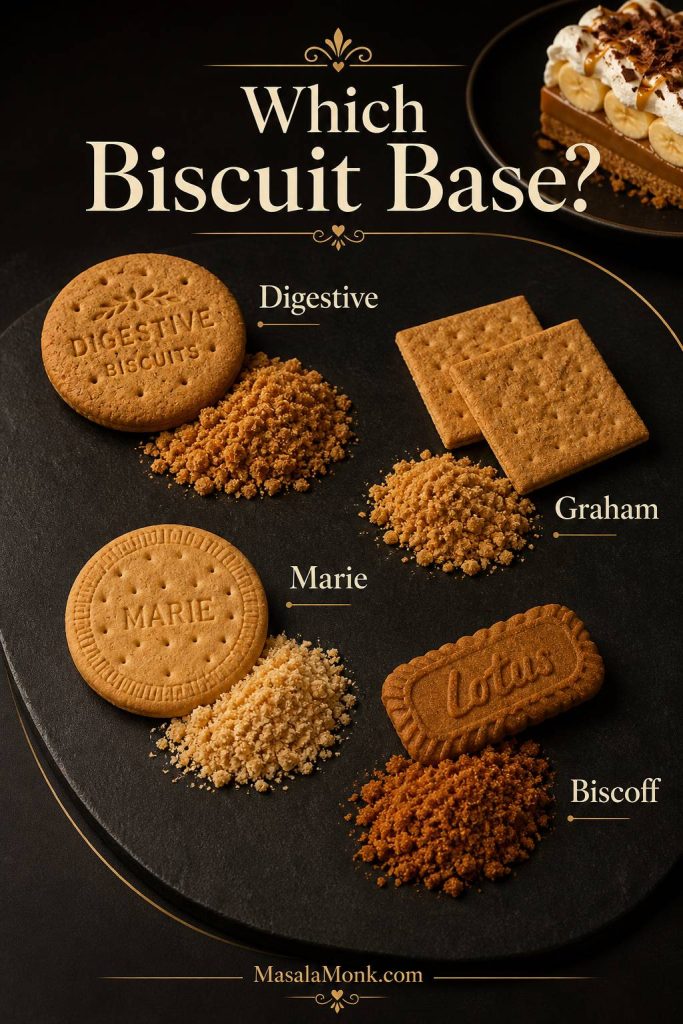
Digestive biscuits give Banoffee Pie the most classic biscuit-base flavor. Graham crackers work well for a US-style crust, while Marie biscuits are lighter and easy to find in many Indian kitchens. For a richer variation, Biscoff or Lotus biscuits add a spiced caramel flavor. However, they also make the dessert sweeter, so skip extra sugar in the base if you use them.
Butter and Salt
Melted butter binds the crumbs so the base holds together after chilling. A pinch of salt is just as important because Banoffee pie has several sweet layers. Without salt, the base can taste flat and the caramel can feel too heavy.
Caramel, Dulce de Leche, or Condensed Milk Toffee
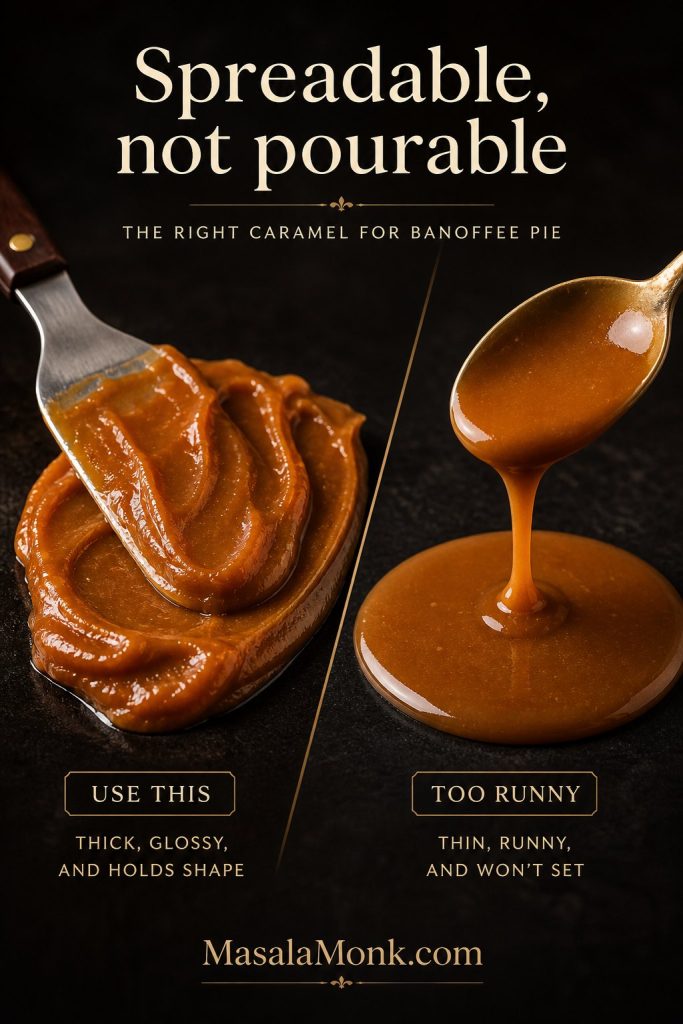
The caramel layer must be thick and spreadable. Dulce de leche is the easiest reliable option. Thick canned caramel can also work. However, thin caramel sauce should not be used as the main filling because it can make the pie runny.
If you keep condensed milk for quick pantry desserts, you may also like MasalaMonk’s guide to sweetened condensed milk fudge. For this pie, though, the condensed milk needs to become a thick toffee-style layer before it goes into the crust.
Bananas
Use firm ripe bananas. They should be yellow and sweet, but not mushy. Green bananas taste starchy, while overripe bananas can release too much moisture and make the pie harder to slice.
Cream
Use heavy cream, whipping cream, or double cream. Also, make sure the cream is cold before whipping. Canned spray cream is not ideal for the main recipe because it softens quickly and does not give the same clean finish.
Best Biscuit Base for Banoffee Pie
For this banoffee pie, the recipe works best with a biscuit base that is firm enough to hold caramel and bananas, but not so hard that it breaks when sliced. A good rule of thumb is 220g biscuits, 110g melted butter, and a pinch of salt.
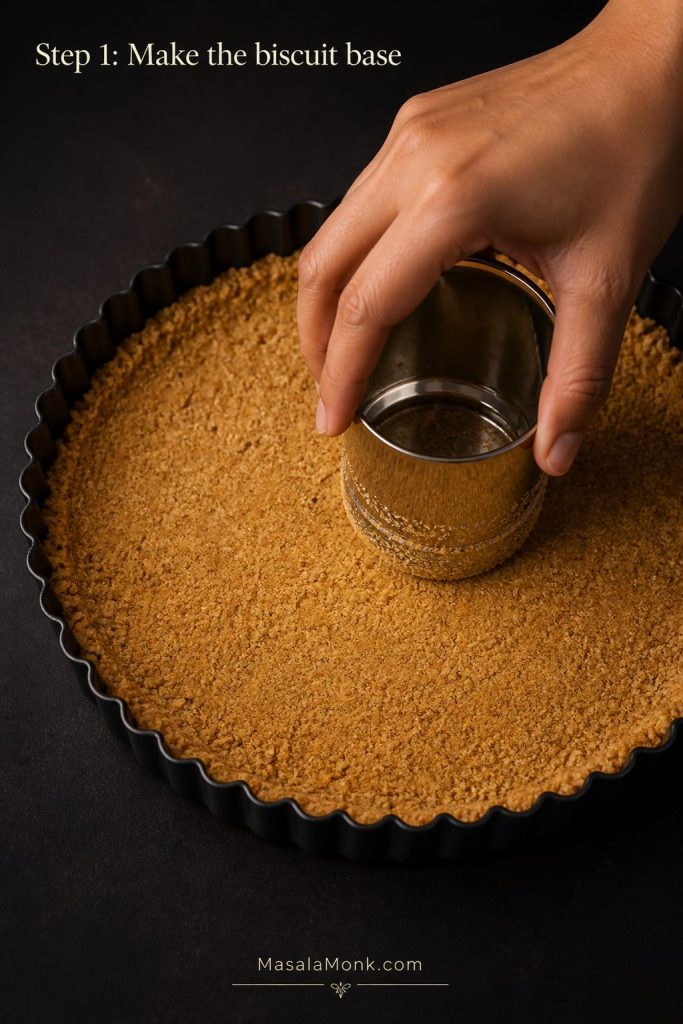
First, crush the biscuits finely. Then, mix them with melted butter until the crumbs look like damp sand. After that, press the mixture into the base and sides of the tin. A flat-bottomed measuring cup or glass helps you level the crumbs neatly.
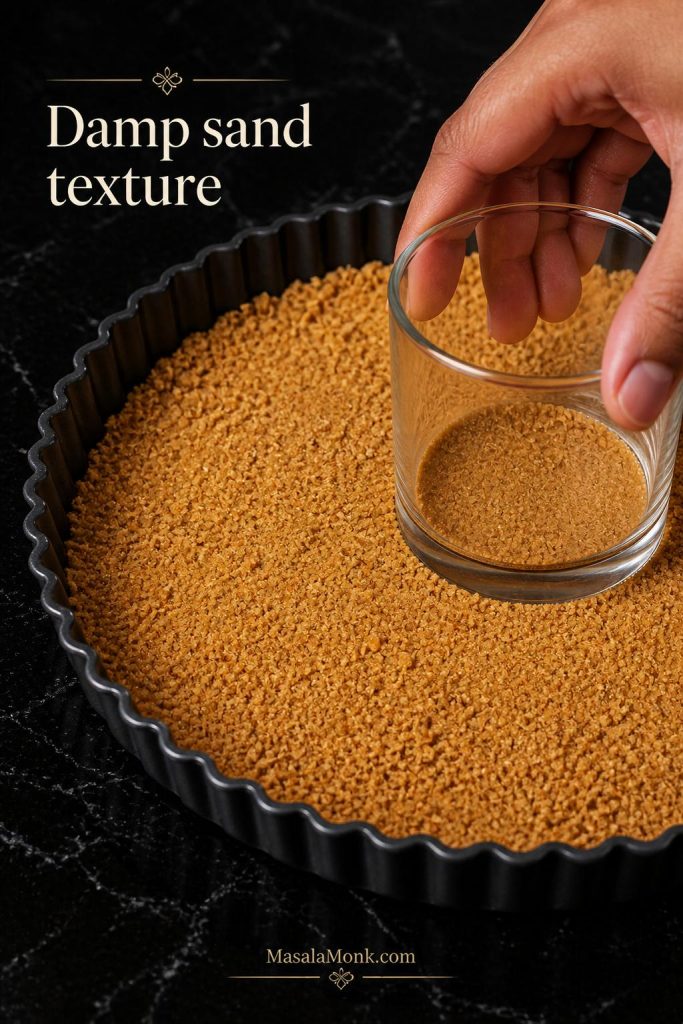
At this point, resist the urge to press too hard. Ideally, the base should be compact enough to hold, but still tender enough to cut with a fork.
Chill the base for at least 30 minutes before adding caramel. If you want a firmer slice, you can optionally bake the base for 8–10 minutes at 175°C / 350°F, then cool it completely before filling.
If you prefer a traditional pastry-style dessert instead of a crumb base, MasalaMonk’s apple pie crust recipe is the better starting point. Banoffee is usually easier as a biscuit-base pie, while apple pie dough needs cold butter, chilling, rolling, and baking.
Digestive Biscuits vs Graham Crackers vs Marie Biscuits vs Biscoff
| Base | Best For | Watch-Out |
|---|---|---|
| Digestive biscuits | Classic Banoffee base | Usually balanced and sturdy |
| Graham crackers | US-style pie crust | Sweeter, so added sugar is often unnecessary |
| Marie biscuits | Easy India option | Lighter, so press well and add salt |
| Biscoff or Lotus biscuits | Spiced caramel variation | Sweeter and stronger flavored |
Dulce de Leche vs Caramel vs Condensed Milk Toffee
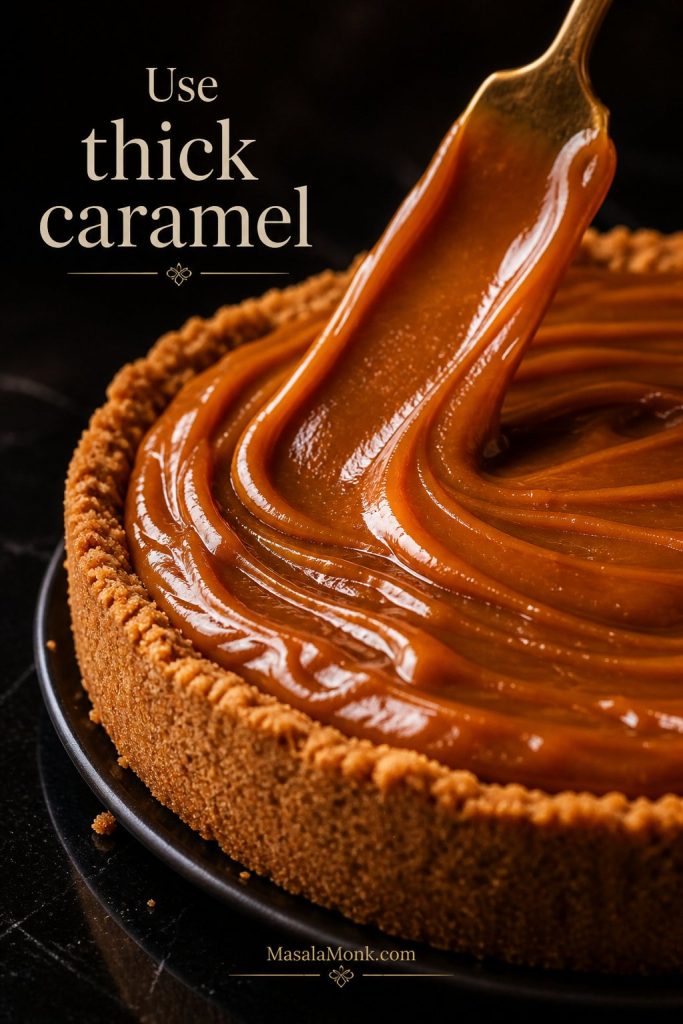
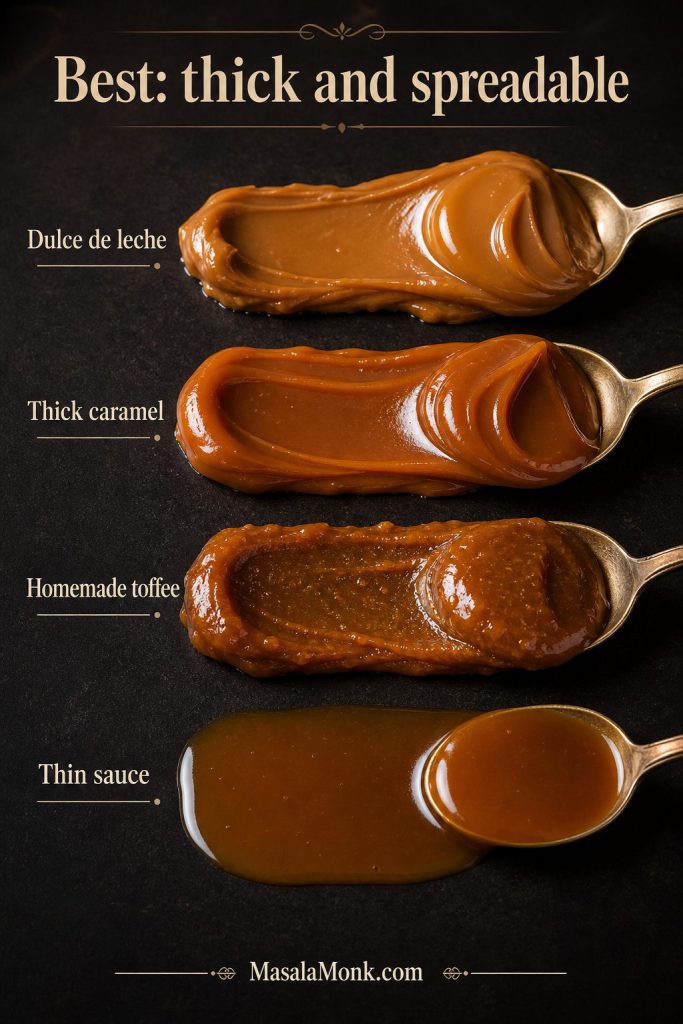
The caramel layer is where this banoffee pie recipe is worth slowing down. When the caramel is thick, the pie slices cleanly. When it is thin, the filling can slide, pool, and soak the crust.
Before you start layering, check the texture. For the cleanest slice, the caramel should spread like a thick filling, not pour like a dessert sauce.
| Option | Use It? | Best For | Watch-Out |
|---|---|---|---|
| Thick dulce de leche | Yes | Easiest reliable pie | Warm slightly if too stiff to spread |
| Thick canned caramel | Yes | Fast UK-style version | Must be spreadable, not runny |
| Homemade condensed milk toffee | Yes | Best homemade flavor | Stir constantly and cook gently |
| Thin caramel sauce | No, not as filling | Drizzle only | Makes the pie runny |
| Boiled condensed milk can | Avoid as main advice | Old-school shortcut | Use safer methods instead |
Easiest Option: Thick Dulce de Leche
Dulce de leche is the easiest option because it is already thick, creamy, and caramelized. Use about 397g / 14 oz for one 9-inch / 23cm pie. If it is too stiff to spread straight from the jar or can, warm it briefly until it loosens slightly.
Fast Option: Thick Ready Caramel
Thick ready caramel can work well, especially in a UK-style Banoffee Pie. The key word is thick. If the caramel pours like sauce, it is too loose for the main layer. Instead, save that kind of caramel for a final drizzle over the cream.
Homemade Option: Condensed Milk Toffee
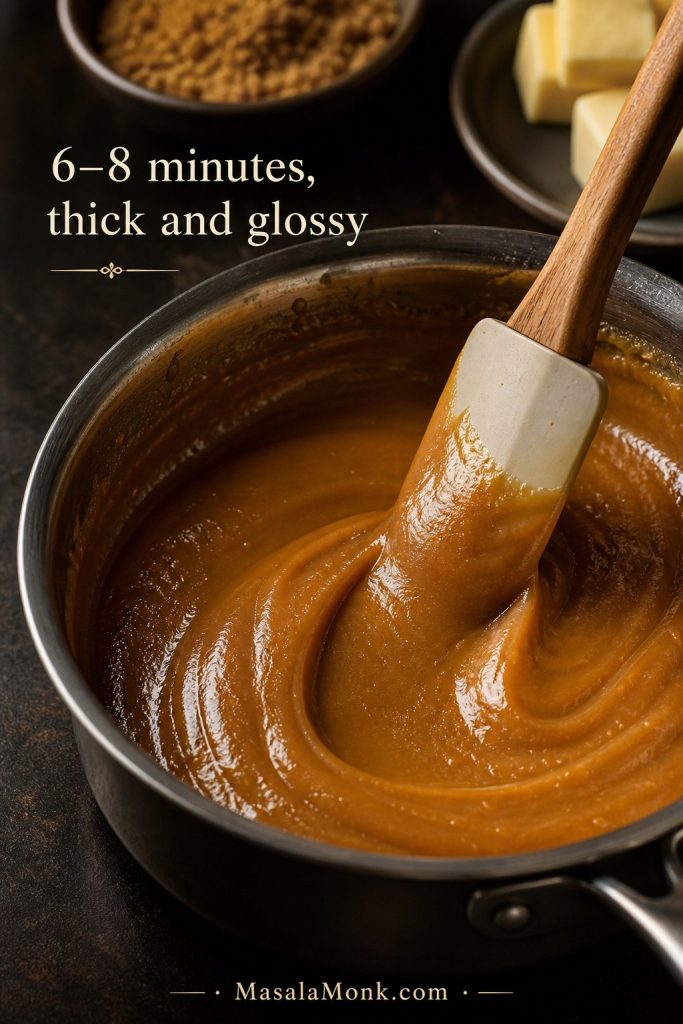
For a homemade toffee layer, combine 397g sweetened condensed milk, 80g butter, and 80g brown sugar in a saucepan. Cook over low to medium-low heat, stirring constantly, for about 6–8 minutes, or until the mixture becomes thick, glossy, and spreadable.
Do not rush this step. High heat can scorch the sugar or make the mixture catch on the bottom of the pan. Once the toffee thickens, spread it into the chilled base and let it cool before adding bananas and cream.
What Not to Use
Do not use thin caramel sauce as the main filling. It may look tempting at first, but it can run into the banana layer, soften the crust, and make the pie difficult to cut. If you have only a thin sauce, use it sparingly on top as a garnish.
Safety Note on Boiling Condensed Milk Cans
Some old Banoffee methods involve boiling unopened cans of condensed milk. For a home recipe, however, a safer approach is to use ready dulce de leche or make stovetop condensed milk toffee in a saucepan. Eagle Brand also says it does not recommend heating condensed milk in the can.
Best Bananas for Banoffee Pie
In this banoffee pie recipe, bananas should taste sweet but still behave like a clean layer. Choose fruit that is yellow with a few light speckles, not green and not soft enough for banana bread.
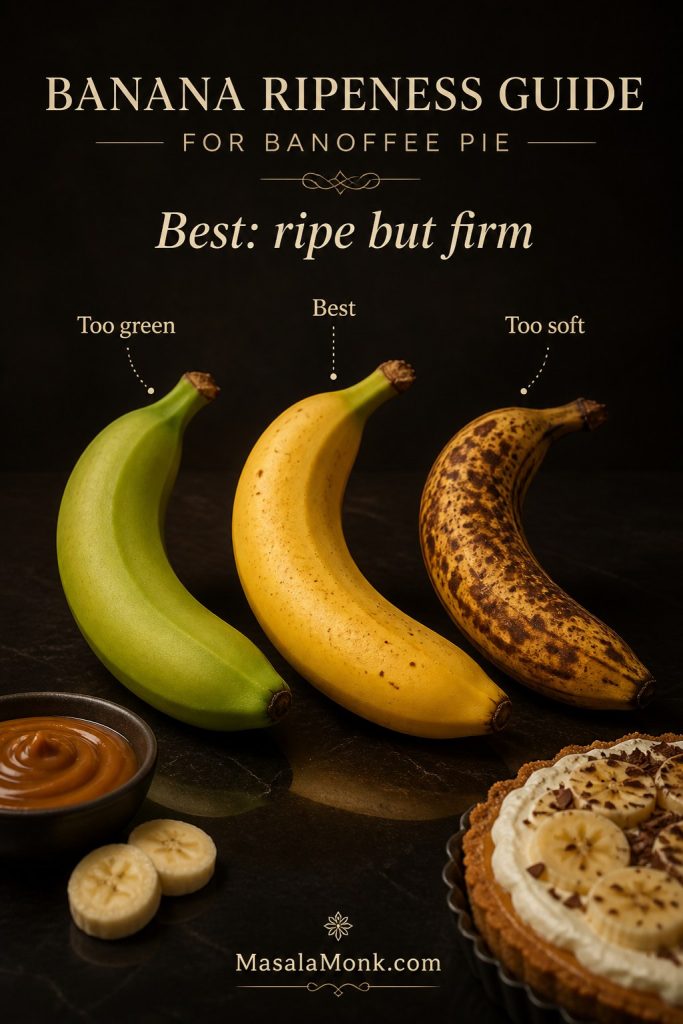
Avoid green bananas because they taste starchy and flat. On the other hand, very dark, soft bananas can turn mushy under the cream and release extra moisture into the pie.
Slice the bananas about ¼ inch / 6mm thick. That way, you get a clear banana layer without making the pie bulky. If you prefer a chunkier banana layer, you can go up to 1cm, but thinner slices usually give cleaner pieces.
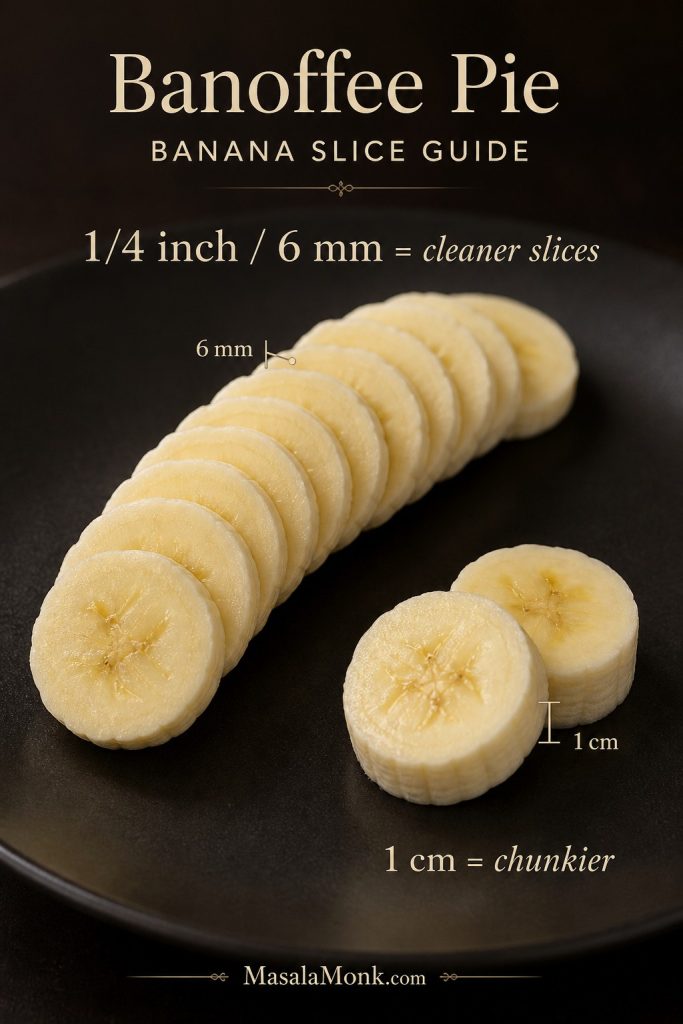
If you need to assemble slightly ahead, use only a few drops of lemon juice and cover the bananas fully with cream. Otherwise, too much lemon juice can make the filling taste sharp.
Best Cream for Banoffee Pie
For clean slices, the cream should look billowy, not stiff and grainy. You want it thick enough to sit proudly on the pie, but still soft enough to melt into the caramel and bananas when you take a bite.
For most home cooks, cold heavy cream, whipping cream, or double cream works best. If the cream is too loose, the topping can slide. If it is overwhipped, it can taste heavy and look rough.
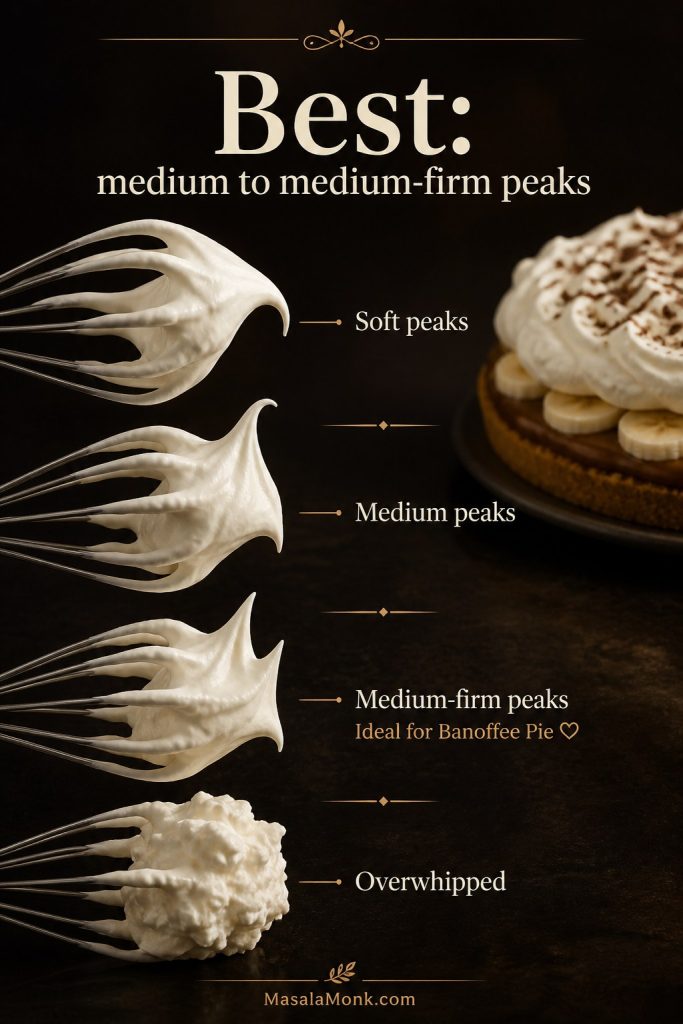
| Cream Stage | What It Looks Like | Best For |
|---|---|---|
| Soft peaks | Falls gently from the whisk | Spoonable desserts, not the cleanest slices |
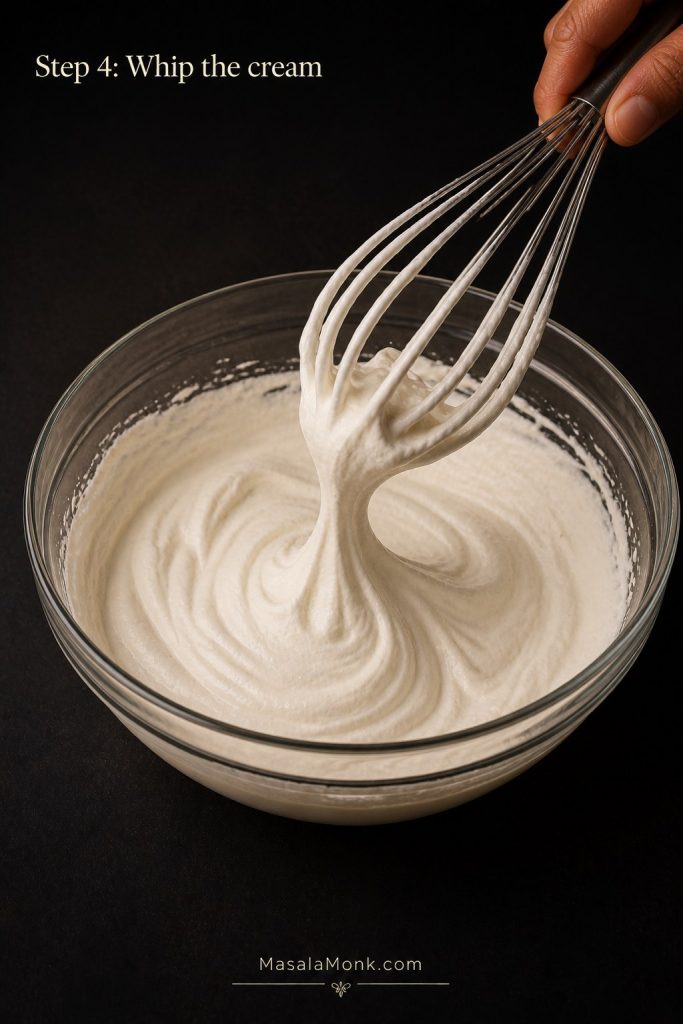
| Medium peaks | Holds shape but still looks smooth | Best everyday Banoffee Pie topping |
| Medium-firm peaks | Holds cleaner ridges without looking dry | Best if the pie needs to hold longer |
| Overwhipped | Grainy, stiff, or starting to split | Avoid; it tastes heavy and can look rough |
If you like desserts where whipped cream has to stay soft but still hold its shape, MasalaMonk’s strawberry shortcake recipe is another good guide. It uses fresh fruit and cream in a different way, but the same idea applies: the cream should feel light, not stiff or grainy.
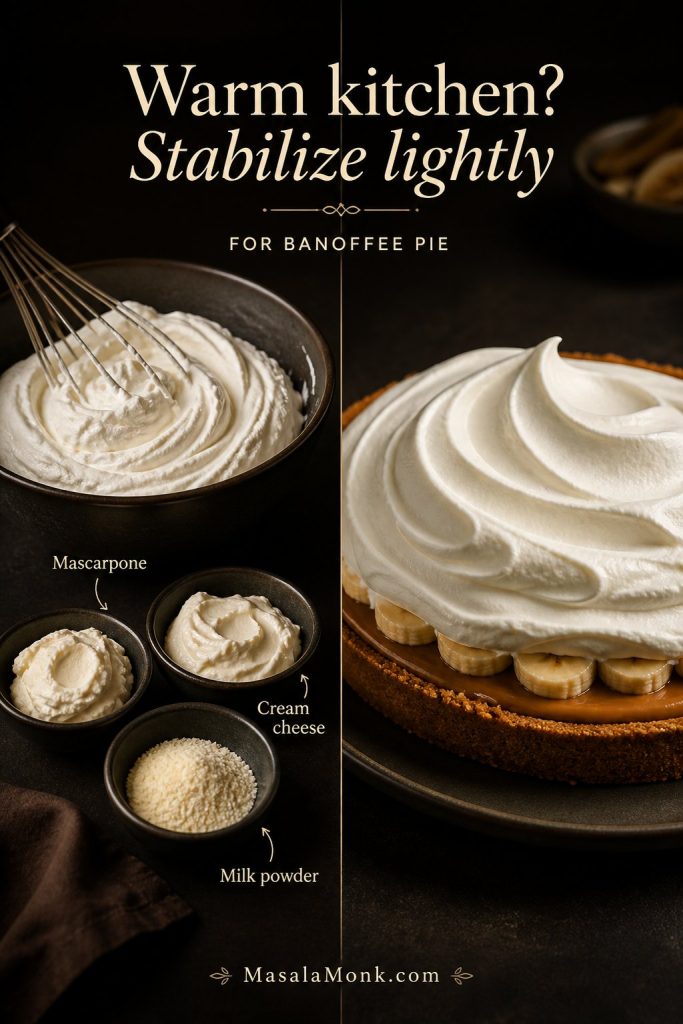
If your kitchen is warm or the pie needs to sit longer, you can stabilize the cream with 1–2 tablespoons mascarpone, cream cheese, or milk powder. Keep the cream cold, whip it only until medium-firm, and spread it over the bananas before the final chill.
Equipment You Need
You do not need pastry-school equipment for this dessert. A simple pan, a way to crush biscuits, and cold cream are enough.
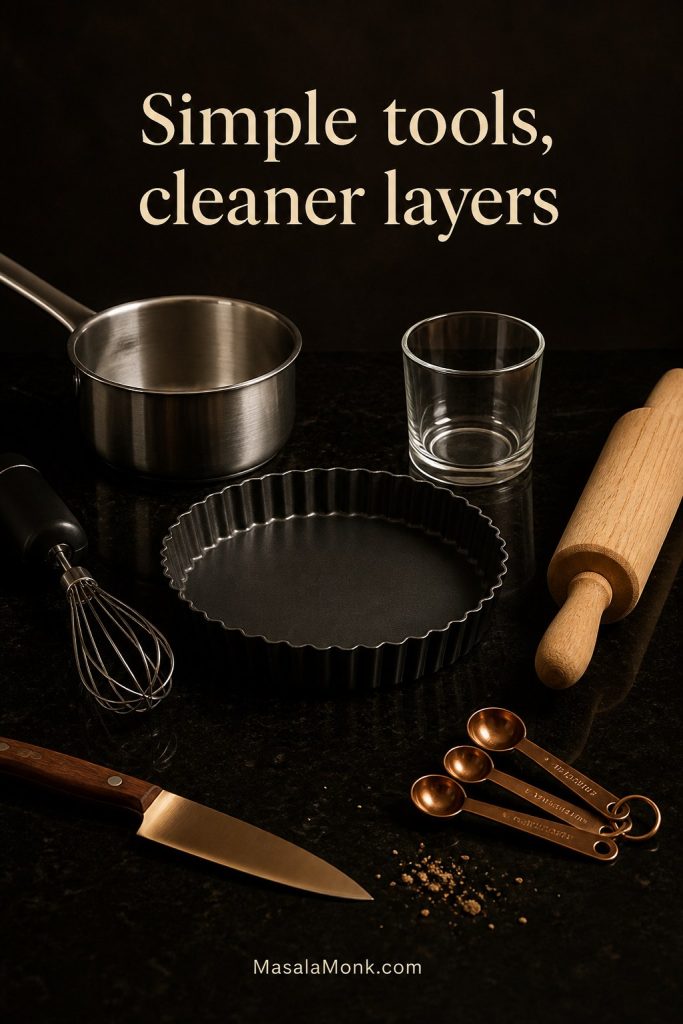
- 9-inch / 23cm pie dish, tart tin, or springform pan
- Food processor, or a zip-top bag and rolling pin for crushing biscuits
- Mixing bowl
- Flat-bottomed cup or measuring cup for pressing the base
- Saucepan, only if making homemade condensed milk toffee
- Hand mixer or whisk for the cream
- Warm sharp knife for clean slices
How to Make Banoffee Pie
Once the caramel is sorted, the rest is just layering and chilling: make the base, chill it, spread the caramel, add bananas, whip the cream, and chill before slicing.
Step 1: Make the Biscuit Base
Crush the biscuits into fine crumbs. From there, mix them with melted butter and salt until evenly moistened. Press into a 9-inch / 23cm pie dish, tart tin, or springform pan, then chill for at least 30 minutes.
Step 2: Add the Caramel or Dulce de Leche
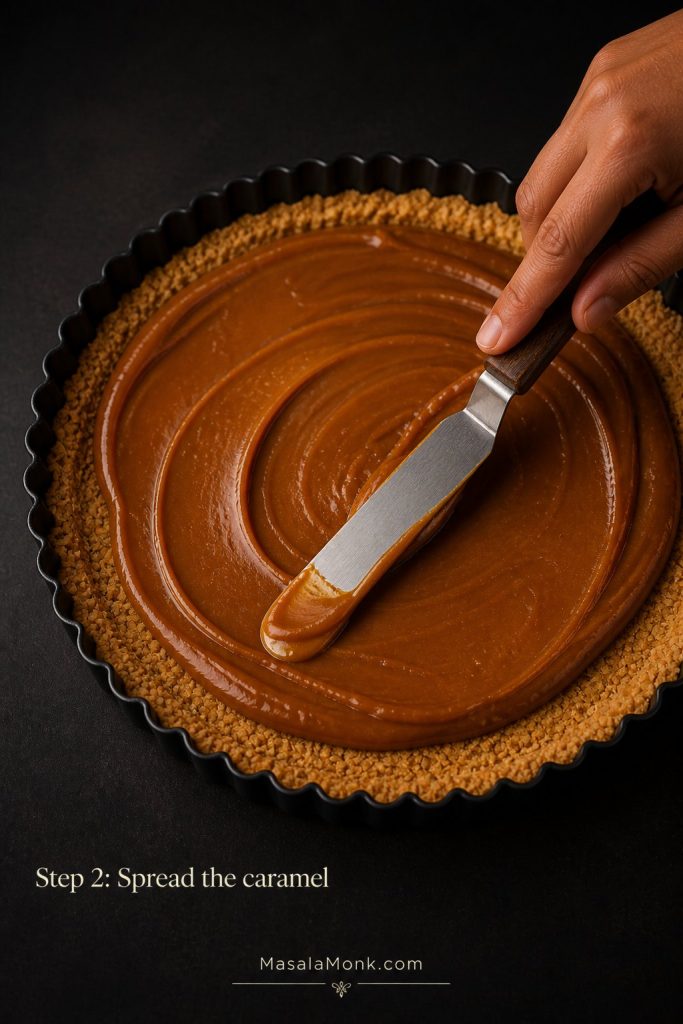
Spread thick dulce de leche, thick caramel, or homemade condensed milk toffee over the chilled base. Keep the layer even so every slice gets the same banana-toffee balance.
Step 3: Add the Bananas
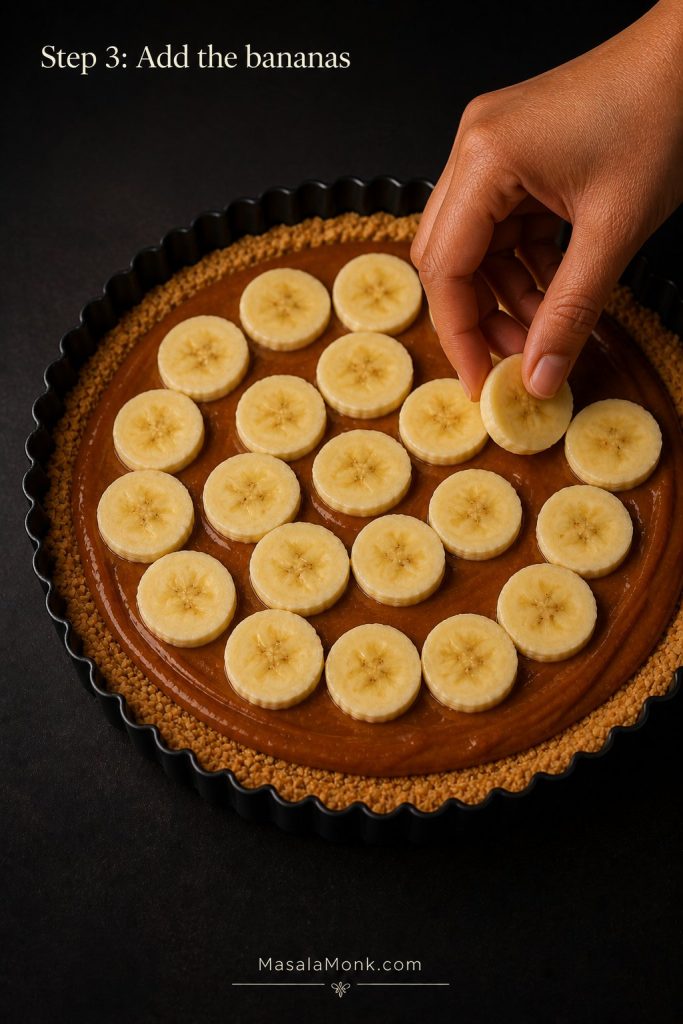
Arrange sliced bananas over the caramel in a single layer or a slightly overlapping layer. For the cleanest slice, do not pile on too many bananas; a heavy banana layer can make the pie unstable.
Step 4: Whip the Cream
Whip cold cream with icing sugar and vanilla until it reaches medium or medium-firm peaks. It should hold soft shape on the whisk, but it should not look dry, grainy, or overbeaten.
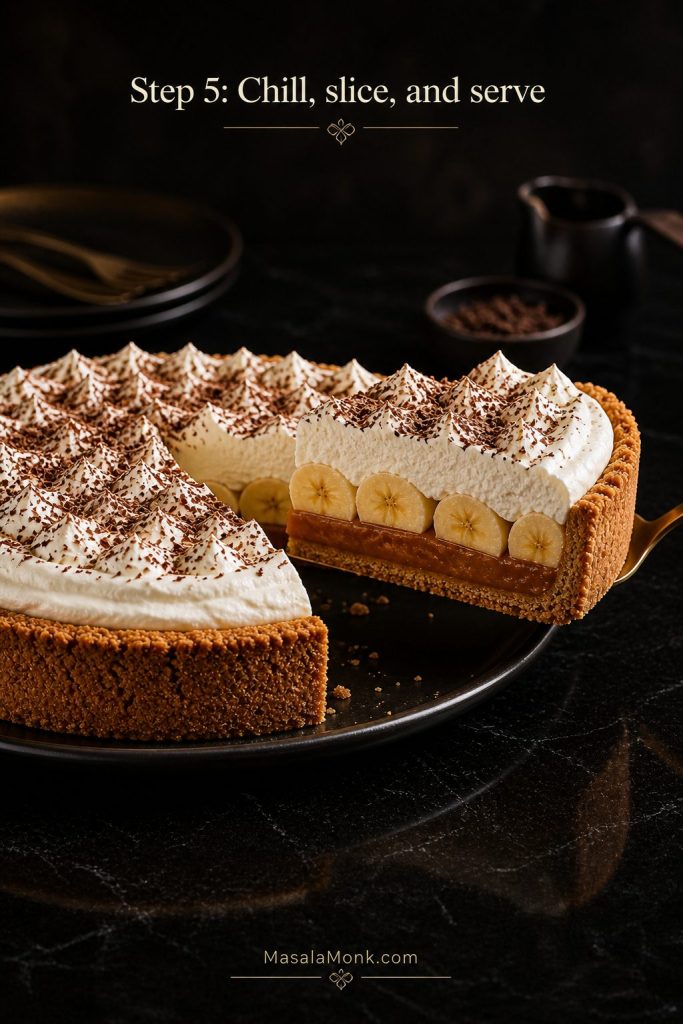
Step 5: Chill, Slice, and Serve
Spoon or spread the whipped cream over the bananas. Before slicing, chill the finished pie for at least 2 hours. For the cleanest slices, chill it closer to 4 hours, then finish with chocolate shavings, cocoa, or a very light caramel drizzle.
How Long to Chill Banoffee Pie
Chilling is not just a waiting step. It helps the base firm up, keeps the caramel layer stable, and makes the cream easier to slice through.
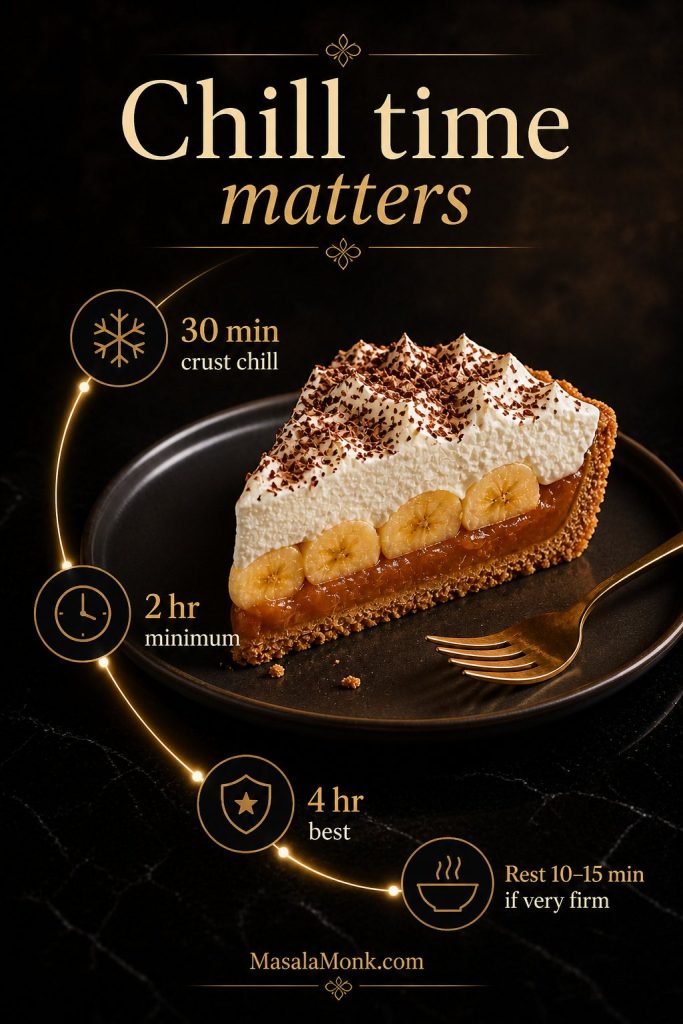
For a soft but sliceable banoffee pie, this recipe works best when you chill the base for at least 30 minutes, then chill the finished pie for at least 2 hours. For the cleanest slices, especially if your caramel is slightly soft, chill the finished pie for closer to 4 hours.
- Crust chill: at least 30 minutes before adding caramel.
- Finished pie chill: 2 hours minimum.
- Best clean-slice chill: closer to 4 hours.
- If caramel is very firm: rest the pie for 10–15 minutes before slicing.
If you want the firmest possible base, bake it for 8–10 minutes at 175°C / 350°F, then cool completely before filling. The pie will no longer be fully no-bake, but the slices will be cleaner.
Can You Make Banoffee Pie Ahead?
Yes, you can make Banoffee Pie ahead, but for the best texture, prepare the components rather than fully assembling the whole pie too early.
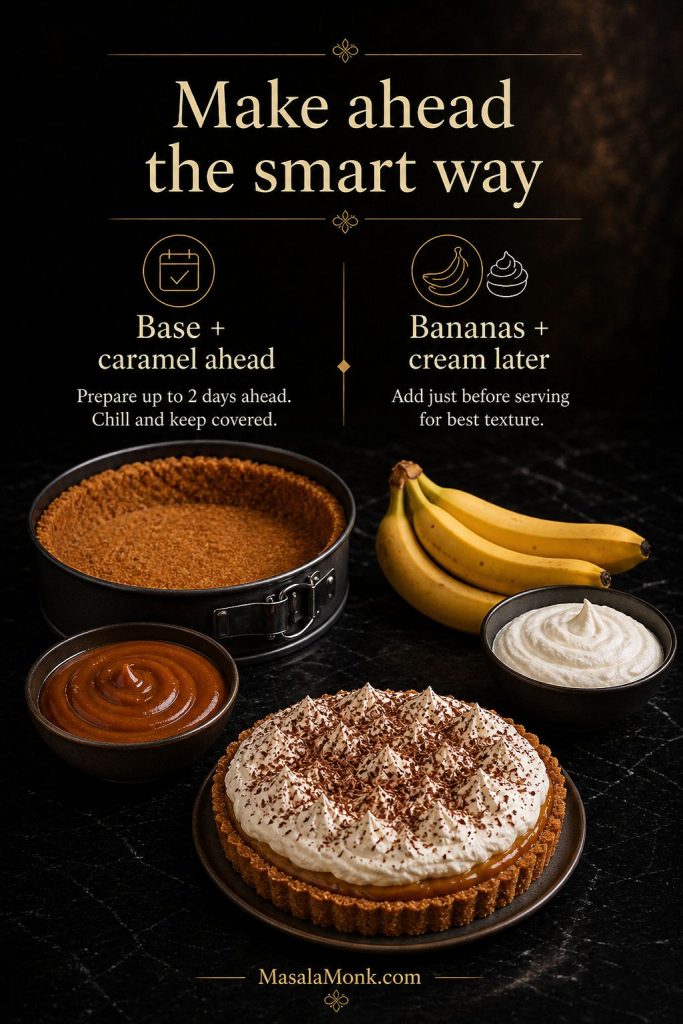
| Component | Can You Make It Ahead? | Best Timing |
|---|---|---|
| Biscuit base | Yes | 1–2 days ahead, covered in the fridge |
| Caramel layer | Yes | 1 day ahead, or spread into the chilled base before final assembly |
| Bananas | Not sliced early | Slice close to assembly for best color and texture |
| Whipped cream | Same day is best | Whip and add before the final chill |
| Fully assembled pie | Yes, but short window | Best within 4–8 hours; acceptable within 24 hours |
| Leftovers | Yes | Eat within 1–2 days, knowing the bananas and cream will soften |
Leftovers can still taste good later, although the bananas will darken, the cream will soften, and the base may absorb moisture. For guests, assemble it the day you plan to serve it.
How to Get Clean Slices
Clean slices mostly come down to patience and layer control. Because the pie has soft bananas, caramel, and cream, every layer needs to be slightly controlled.
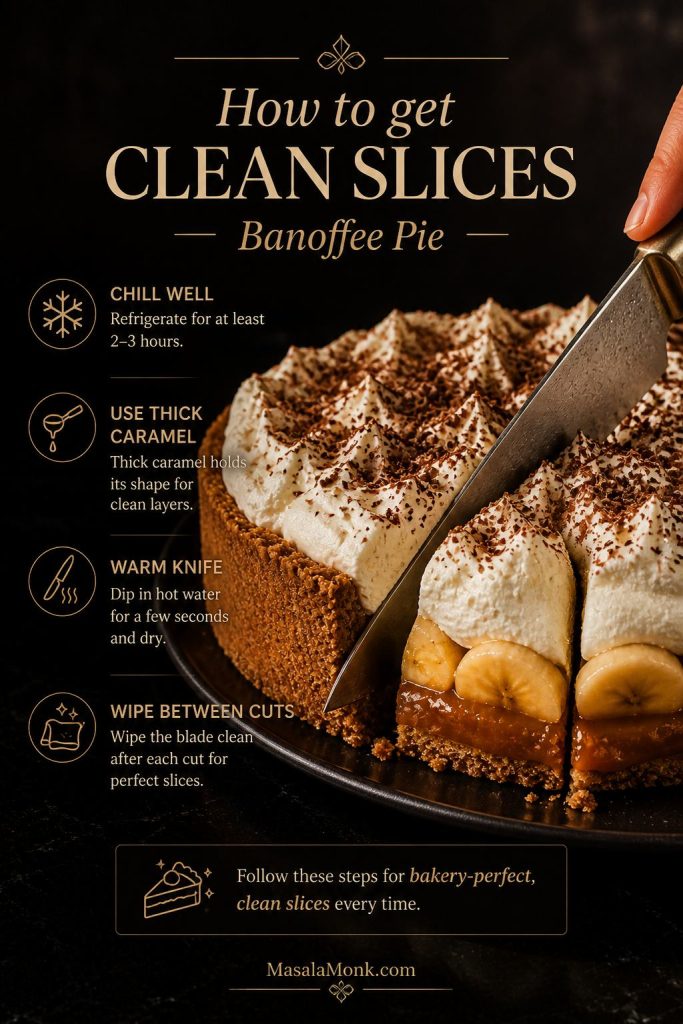
- Use thick caramel or dulce de leche, not thin sauce.
- Chill the base before filling.
- Slice bananas evenly and avoid overloading the pie.
- Whip cream to medium-firm peaks if the pie needs to hold longer.
- Use a removable-bottom tart tin or springform pan if possible.
- Cut with a warm sharp knife and wipe it between slices.
If your first slice is messy, let the pie chill longer before cutting the rest. Often, a little extra time in the fridge is all a soft caramel layer needs.
Banoffee Pie Variations
Once you know the classic method, Banoffee Pie is easy to adapt. The easiest way to keep it balanced is to change one thing at a time: the base, the topping, or the serving format.
Biscoff Banoffee Pie
Use Biscoff or Lotus biscuits instead of digestives or graham crackers. Because Biscoff is sweeter and more spiced, skip extra sugar in the base and keep the cream lightly sweetened. If you like the Biscoff idea, you may also enjoy this cookie pie recipe, especially when you want something baked, gooey, and sliceable.
Chocolate Banoffee Pie
A chocolate Banoffee Pie works best when chocolate supports the banana-toffee flavor instead of taking over. Use chocolate biscuits for the base or spread a thin cooled ganache over the caramel before adding the bananas.
Salted Caramel Banoffee Pie
To make it salted caramel-style, add a small pinch of fine salt to the caramel layer and finish the pie with a few flakes of sea salt. Use a light hand because the goal is balance, not a salty dessert.
Banoffee Cheesecake or Banoffee Tart
A Banoffee cheesecake moves the caramel and banana idea into a cream cheese filling, so it becomes a different dessert rather than a quick topping change. In a Banoffee tart, the same layers sit in a shallow tin for a neater, more elegant slice.
Mini Banoffee Pies or Banoffee Cups
Small jars or cups are easier to serve than slices at parties. Layer biscuit crumbs, caramel, banana slices, and whipped cream, then assemble them close to serving so the crumbs do not soften too much.
Vegan Banoffee Pie
A vegan version needs dairy-free biscuits, vegan butter, vegan caramel or condensed milk alternative, and a plant-based whipping cream. Because vegan caramel and plant-based cream behave differently, it is worth following a dedicated vegan method rather than swapping ingredients one-for-one.
Gluten-Free Banoffee Pie
Use certified gluten-free biscuits for the base and check that the caramel, chocolate, and toppings are gluten-free as well. The method stays similar, but the base may need a little extra chilling because gluten-free biscuits vary in texture.
Healthy Banoffee Pie
If you want a lighter version, plan it from the start instead of only reducing the sugar. Many healthier Banoffee-style desserts use oat, nut, or date-based crusts and a date-style caramel, so the base and filling usually need to change too.
What to Serve with Banoffee Pie
Banoffee Pie is rich, sweet, and creamy. That is why it pairs best with something bitter, cold, fruity, or lightly acidic.
- Black coffee or espresso
- Lightly sweet tea
- Fresh berries
- Vanilla ice cream
- Extra chocolate shavings
- A very small pinch of flaky salt on the caramel layer
For a summer meal or party spread, Banoffee Pie also pairs beautifully with homemade mango ice cream. The mango keeps things bright, while the Banoffee brings the caramel-and-cream richness.
For a bigger dessert table, a chilled cake like tres leches cake also makes sense beside Banoffee Pie. Both are creamy, cold desserts, but tres leches gives you a soft cake texture while Banoffee brings biscuit crunch and caramel.
Troubleshooting Banoffee Pie Recipe
Most Banoffee Pie problems come from texture. Fortunately, they are easy to understand once you know which layer caused the issue.
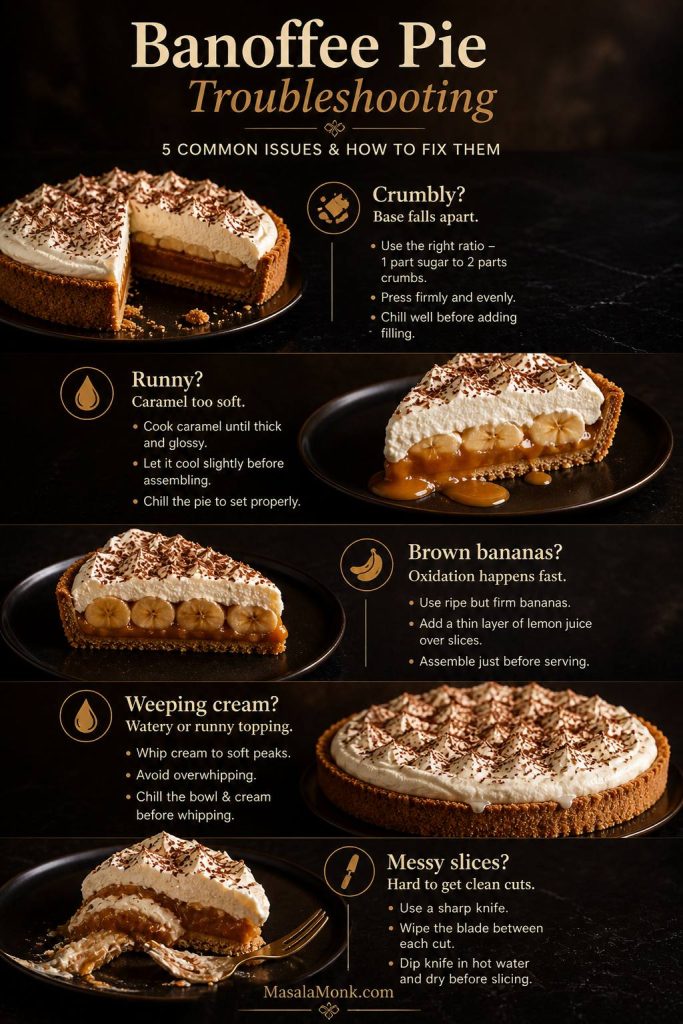
| Problem | Likely Cause | Fix |
|---|---|---|
| Base crumbles | Crumbs too coarse or not enough butter | Crush the biscuits finer, add a little more melted butter, and chill longer |
| Base feels greasy | Too much butter or very weak biscuits | Next time, use slightly less butter and chill the base well before filling |
| Caramel runs | Caramel too thin or not chilled | Switch to thick dulce de leche, or cook condensed milk toffee a little longer |
| Caramel too stiff | Dulce de leche too cold or thick | Warm it briefly before spreading |
| Bananas brown | Assembled too early | Slice the bananas closer to serving and cover them fully with cream |
| Cream weeps | Underwhipped or unstable cream | Start with cold cream and whip it to medium-firm peaks |
| Pie is too sweet | Sweet base, caramel, and cream together | Balance the layers with salt in the base and less sugar in the cream |
| Slices are messy | Not chilled, loose caramel, or soft bananas | Chill the pie longer and cut with a warm knife |
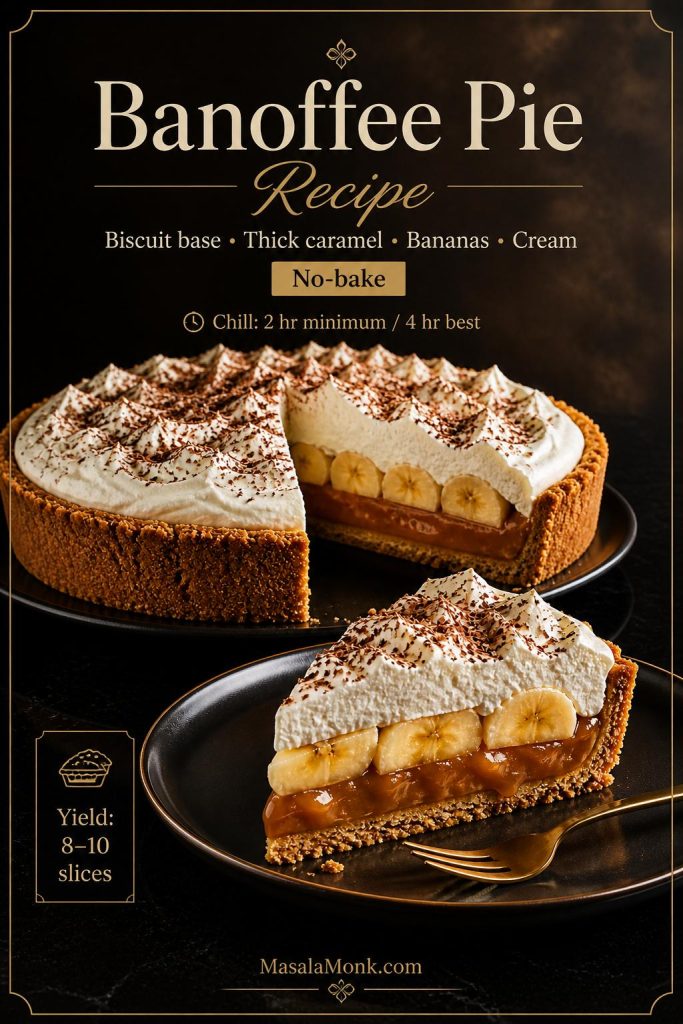
Banoffee Pie Recipe Card
This easy Banoffee Pie Recipe has a buttery biscuit base, thick caramel or dulce de leche, fresh bananas, whipped cream, and a simple chill-and-slice method.
Ingredients
Biscuit Base
- 220g digestive biscuits, Marie biscuits, or graham crackers, finely crushed, about 2 cups crumbs
- 110g unsalted butter, melted, about 1/2 cup
- Pinch of salt
- 1 tbsp sugar, optional, only if using very plain biscuits
Caramel Layer
- 397g / 14 oz thick dulce de leche or thick caramel
Homemade condensed milk toffee option: Use 397g / 14 oz sweetened condensed milk, 80g butter / about 5 1/2 tbsp, and 80g brown sugar / about 1/3 cup plus 1 tbsp packed. Cook gently, stirring constantly, for about 6–8 minutes, or until thick, glossy, and spreadable.
Let homemade toffee cool until warm, not hot, before adding bananas and cream.
Banana Layer
- 2–3 firm ripe bananas, sliced about 1/4 inch / 6mm thick
Cream Layer
- 300ml heavy cream, whipping cream, or double cream, cold, about 1 1/4 cups
- 1–2 tbsp icing sugar
- 1 tsp vanilla extract
Topping
- Chocolate shavings, cocoa powder, or a very light caramel drizzle
Method
- Start with the base. Mix crushed biscuits, melted butter, salt, and optional sugar until the crumbs look like damp sand.
- Shape and chill. Press the crumbs into a 9-inch / 23cm pie dish, tart tin, or springform pan, then chill for at least 30 minutes.
- Spread the caramel. Add thick dulce de leche, thick caramel, or homemade condensed milk toffee over the chilled base.
- Layer the bananas. Arrange banana slices over the caramel in a single or slightly overlapping layer.
- Whip the cream. Beat cold cream with icing sugar and vanilla until it reaches medium or medium-firm peaks.
- Cover the bananas. Spread or spoon the cream over the banana layer.
- Let it set. Chill the finished pie for at least 2 hours, or closer to 4 hours for cleaner slices.
- Finish and serve. Add chocolate shavings, cocoa, or a light caramel drizzle, then slice with a warm sharp knife.
Notes
- For a firmer base, bake the crust for 8–10 minutes at 175°C / 350°F, then cool completely before filling.
- If your caramel is thin, do not use it as the main layer because it can make the pie runny.
- For the freshest color, add the bananas closer to serving.
- Once fully assembled, Banoffee Pie is best within 4–8 hours and still acceptable within 24 hours.
- Depending on where you live, use digestives for a classic UK-style base, graham crackers for a US-style crust, or Marie biscuits for a lighter India-friendly option.
FAQs About This Banoffee Pie Recipe
1. What is Banoffee Pie made of?
A classic Banoffee Pie usually has a biscuit or pastry base, thick caramel or toffee, sliced bananas, whipped cream, and a chocolate or cocoa topping. In this version, the base is made with biscuits, the filling uses dulce de leche or thick caramel, and the cream is lightly sweetened so the pie does not become too heavy.
2. Is Banoffee Pie no-bake?
Yes, this version is no-bake if you chill the biscuit base instead of baking it. For a firmer crust and cleaner slices, however, you can bake the base for 8–10 minutes at 175°C / 350°F and cool it completely before filling.
3. Is Banoffee Pie the same as Banoffee pudding?
The classic name is Banoffee Pie, although some people call it Banoffee pudding because it is chilled, creamy, and layered. In everyday searches, Banoffee pudding and Banoffee dessert often point to the same banana, caramel, biscuit, and cream combination.
4. Is dulce de leche good for Banoffee Pie?
Absolutely. Thick dulce de leche is one of the easiest and most reliable fillings because it spreads well, holds its shape, and gives the dessert the deep caramel flavor it needs.
5. What kind of caramel sauce works?
Only use caramel sauce if it is very thick and spreadable. If it pours easily, keep it for a light drizzle on top because thin sauce can make the main filling runny.
6. How do you make Banoffee Pie with condensed milk?
You can use condensed milk, but it needs to be cooked into a thick toffee-style filling first. The easiest homemade method is to cook sweetened condensed milk with butter and brown sugar until the mixture looks thick, glossy, and spreadable.
7. Can I make Banoffee Pie without condensed milk?
Yes. You can use thick dulce de leche or thick ready caramel instead of making condensed milk toffee. Just avoid thin caramel sauce because it will not hold as well in the pie.
8. How do I stop Banoffee Pie from going runny?
Start with thick dulce de leche or thick caramel, chill the base before filling, choose firm ripe bananas, and chill the finished pie before slicing. Most importantly, avoid thin caramel sauce as the main layer.
9. How long does Banoffee Pie last?
Once assembled, Banoffee Pie is best the same day, especially within 4–8 hours. It is still acceptable within 24 hours, but the bananas may darken, the cream may soften, and the base may lose some texture.
10. Can I make Banoffee Pie ahead?
For the best result, make the base and caramel ahead, then add the bananas and whipped cream closer to serving. That way, the bananas stay fresher and the cream holds better.
11. Is Banoffee Pie eggless?
Yes. This banoffee pie recipe is naturally eggless because it uses a biscuit base, caramel or dulce de leche, bananas, and whipped cream, with no eggs in the filling or crust.
12. Can you freeze Banoffee Pie?
Freezing a fully assembled Banoffee Pie is not ideal because bananas can turn watery and the cream can lose its texture after thawing. If you want to work ahead, freeze only the biscuit base, then add caramel, bananas, and cream after thawing.