
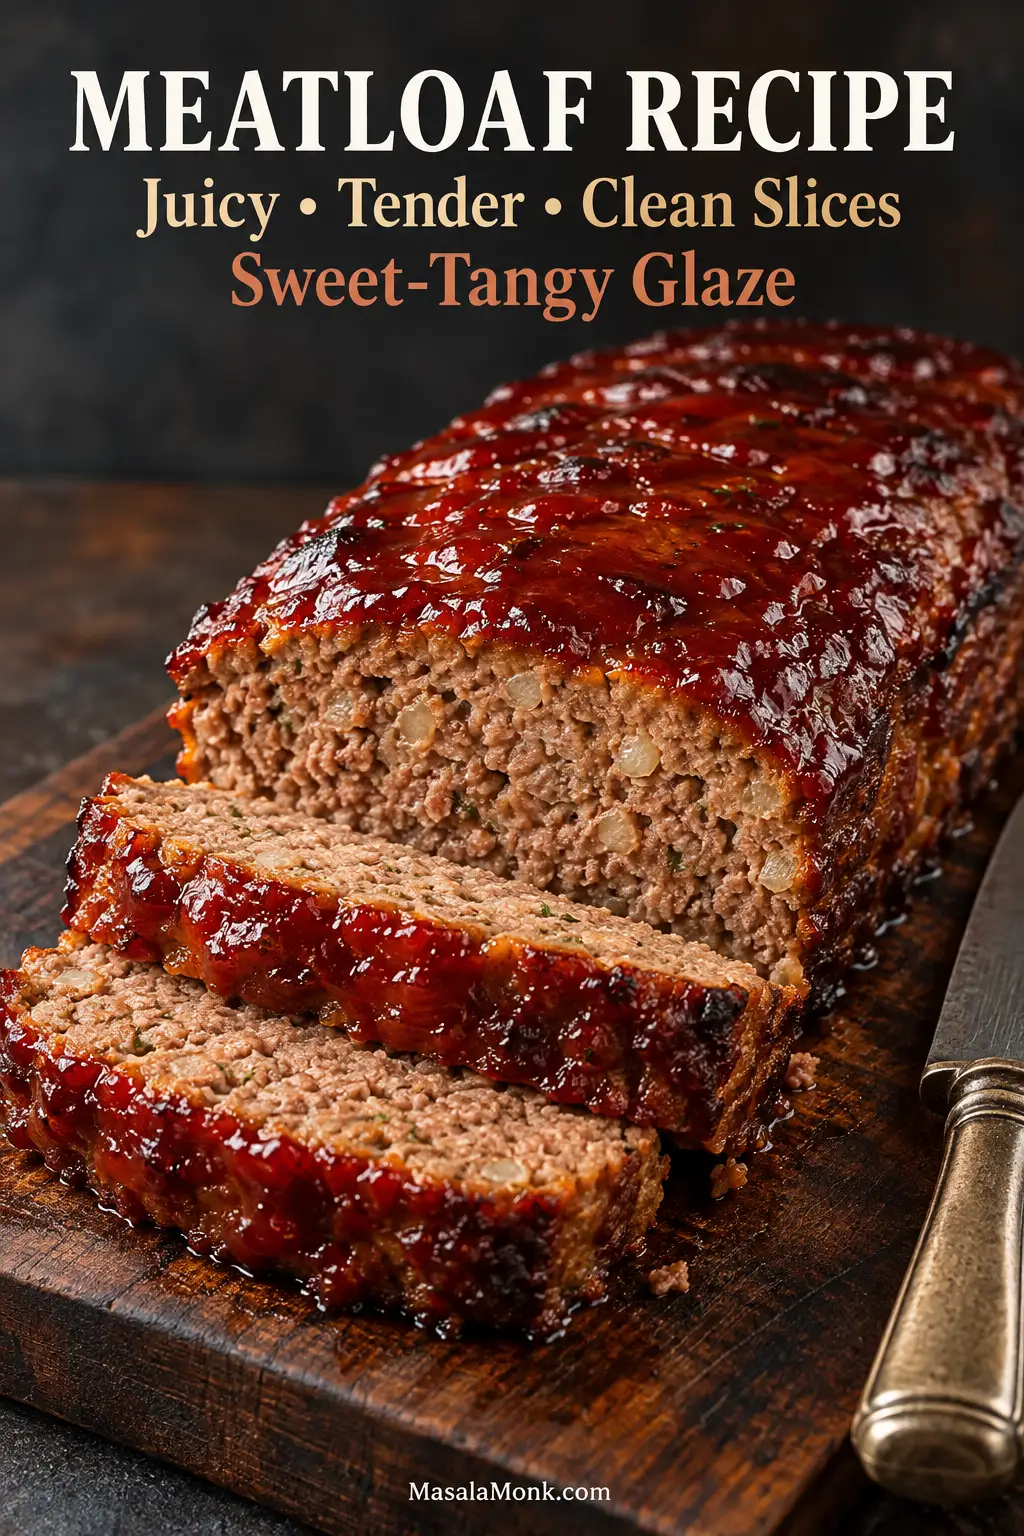
A good meatloaf should cut into thick slices without falling apart, stay juicy through the middle, and carry a glossy sweet-tangy glaze over browned edges.
If you’ve had meatloaf come out dry, loose, or still worryingly pink when the timer says it should be done, most of those problems come down to moisture, mixing, shape and final temperature. This meatloaf recipe uses 85/15 ground beef, panko soaked in milk, softened onion and an even free-form shape, with clear texture and temperature cues so you can judge the loaf as it cooks instead of relying on the timer alone.
Bake time tells you when to start checking. The meatloaf is done when the center reaches 160°F / 71°C.
Read the Meatloaf Before You Trust the Clock
- After mixing: The mixture feels moist and slightly tacky. A pressed portion stays together without dripping or crumbling apart.
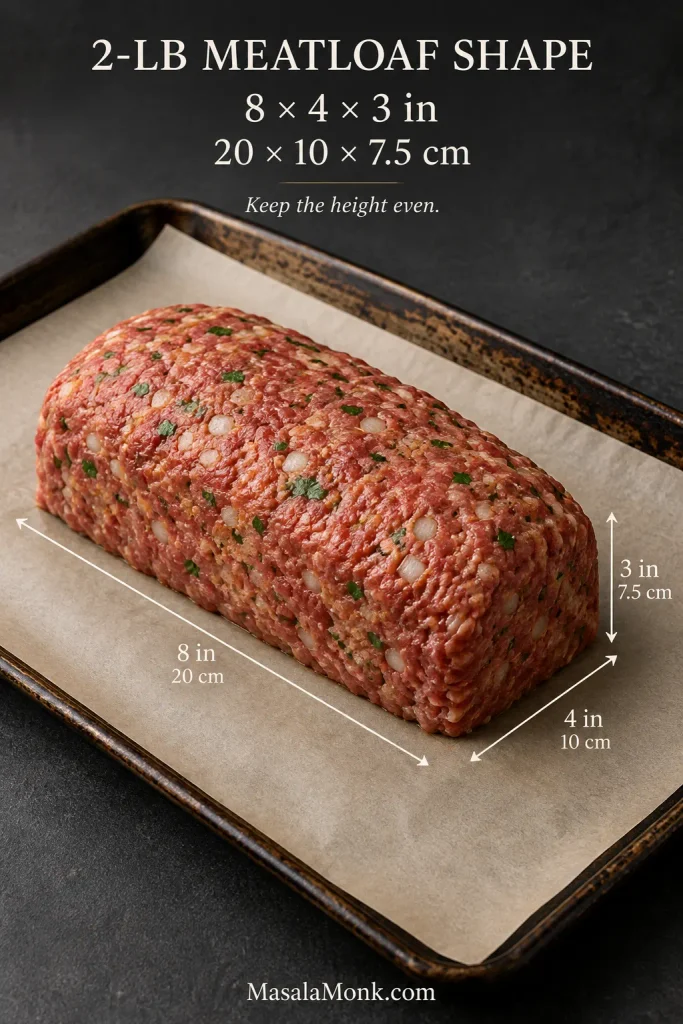
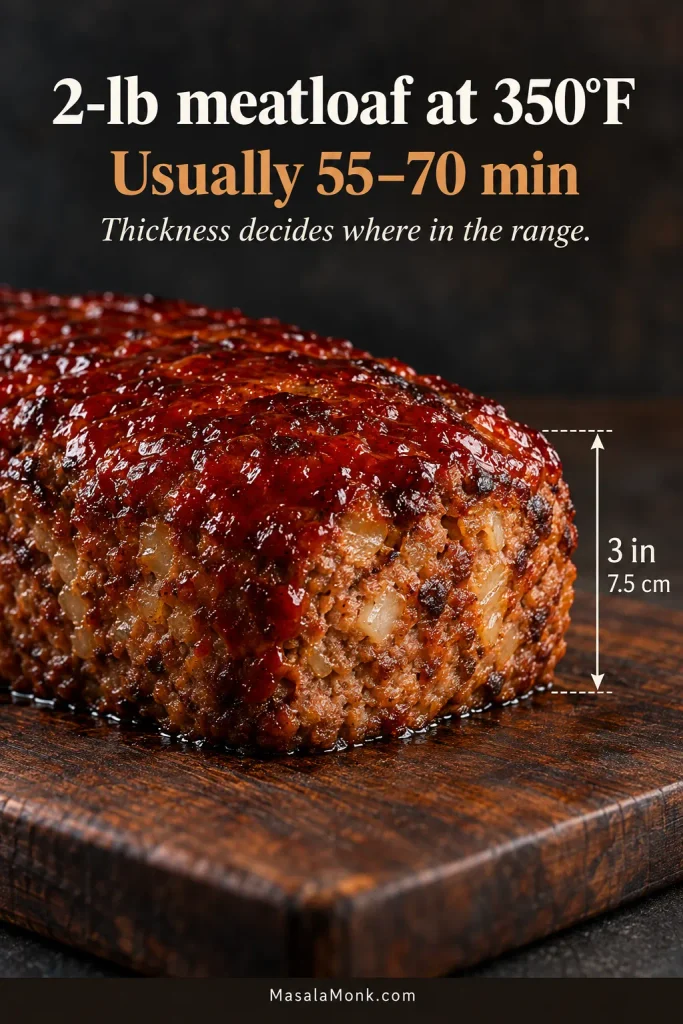
- After shaping: Keep the loaf about 3 inches / 7.5 cm tall, even from end to end, and sturdy enough to stand without being packed hard.
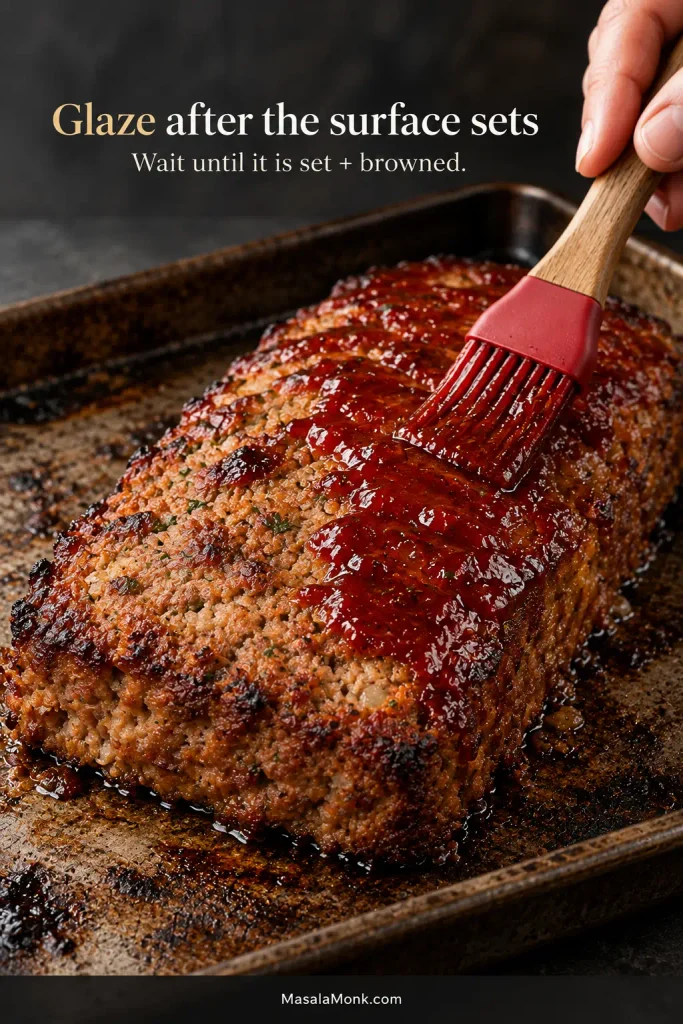
- Before glazing: The outside looks set and has begun to brown. Now the glaze has a firmer surface to grab onto.
- At the finish: Check the center with a thermometer rather than judging doneness by appearance alone.
Juicy Meatloaf with Sweet-Tangy Glaze
A classic all-beef meatloaf with softened onion and garlic, panko soaked in milk for tenderness, and a glossy ketchup glaze sharpened with mustard, Worcestershire and cider vinegar.
Equipment
- Rimmed baking sheet
- Parchment paper
- Medium skillet
- Large mixing bowl
- 2 small bowls for dividing the glaze
- Instant-read meat thermometer
For the Meatloaf
- 1 tablespoon (15 ml) olive oil
- 1 medium yellow onion, finely diced, about 150 g
- 3 large garlic cloves, minced, about 10 g
- ¾ cup panko breadcrumbs, approximately 45 g
- ½ cup (120 ml) whole milk
- 2 large eggs
- 2 tablespoons (30 ml) Worcestershire sauce
- 2 tablespoons (30 ml) ketchup
- 2 tablespoons finely chopped fresh parsley
- 1¼ teaspoons fine sea salt (7–8 g), plus up to ¼ teaspoon more to adjust
- 1 teaspoon freshly ground black pepper
- 2 lb / 907 g ground beef, preferably 85/15 (85% lean / 15% fat)
For the Sweet-Tangy Glaze
- ¾ cup (180 ml) ketchup
- 1 tablespoon packed brown sugar, about 12 g
- 2 teaspoons (10 ml) Dijon mustard
- 2 teaspoons (10 ml) Worcestershire sauce
- 1 tablespoon (15 ml) apple cider vinegar
Method
Prepare the Meatloaf Mixture
- Heat the oven. Preheat to 350°F / 175°C. Line a rimmed baking sheet with parchment paper.
- Soften the onion. Heat the olive oil in a skillet over medium heat. Add the onion and cook for about 5–7 minutes, until soft, translucent and no longer crunchy. Stir in the garlic and cook for about 30 seconds, just until fragrant. Transfer to a plate and let cool until no longer hot.
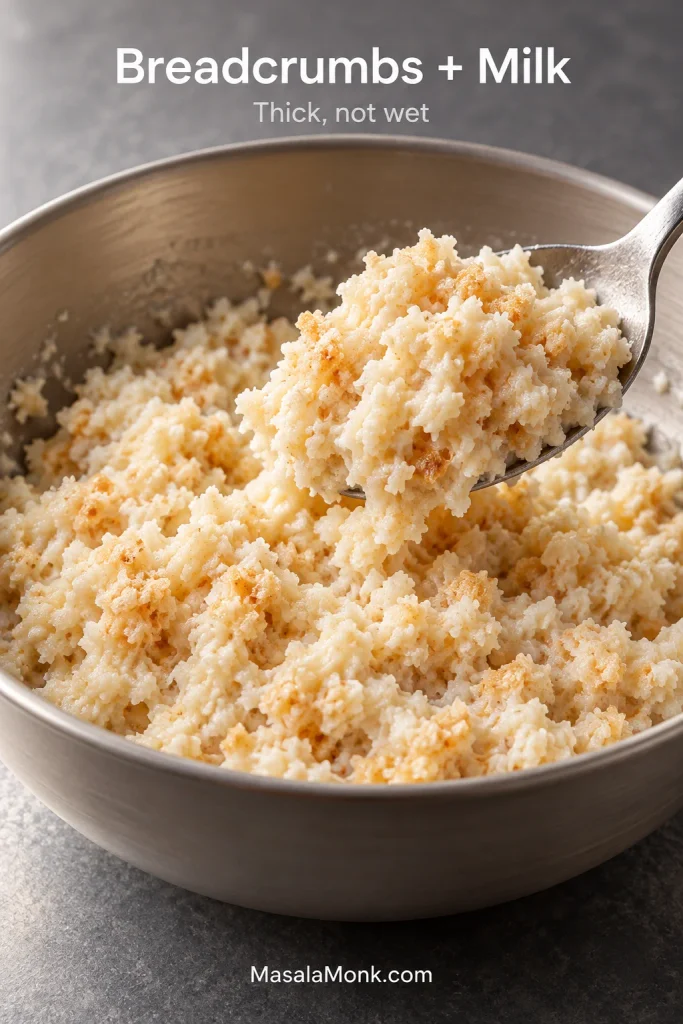
- Make the panade. While the onion cools, combine the panko and milk in a large bowl. Stir and leave for about 5 minutes. You want a thick, moist paste with no puddle of milk underneath.
- Make the glaze. Stir the ketchup, brown sugar, Dijon, Worcestershire and cider vinegar until smooth. Set roughly two-thirds aside for the first coat and keep the remaining third in a separate clean bowl for the finish.
- Mix the base. Stir the cooled onion and garlic into the panade. Add the eggs, Worcestershire, ketchup, parsley, the initial 1¼ teaspoons salt and the black pepper. Mix until evenly combined.
- Add the beef. Mix in the ground beef with clean hands. Stop once everything is evenly distributed and a squeezed portion holds together. The mixture should feel moist, not soupy; do not knead it into a smooth paste.
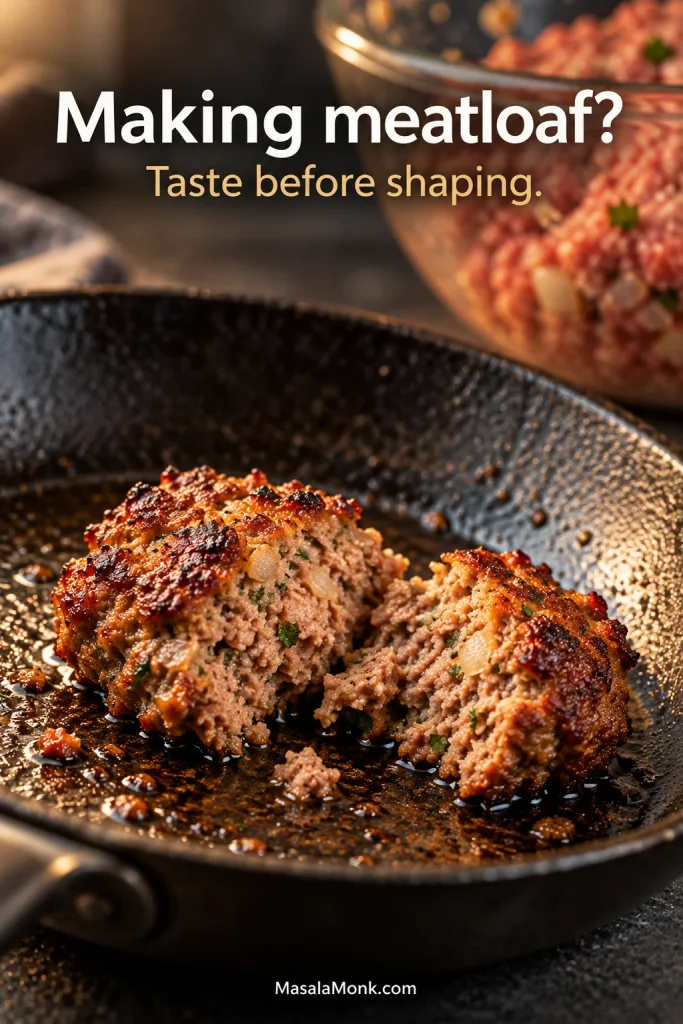
- Check the seasoning. Cook a small spoonful of the mixture in the skillet until fully cooked. Taste it. If the beef tastes flat, mix in some or all of the reserved ¼ teaspoon salt. Adjust the pepper or Worcestershire only if needed.
Shape, Bake and Finish
- Shape the loaf. Transfer the mixture to the prepared baking sheet and form an even loaf about 8 inches long × 4 inches wide × 3 inches tall / 20 × 10 × 7.5 cm. Keep the height similar from end to end and avoid packing the meat hard.
- Bake before glazing. Leave the loaf uncovered for about 35–40 minutes, until the exterior has set and begun to brown.
- Add the first glaze. Spread the larger portion over the top and sides in a thin, complete coat. It does not need to run down onto the baking sheet. Return the loaf to the oven.
- Finish the glaze and bake through. After about 10 minutes, spread on the reserved glaze in a thinner finishing coat. Continue baking until the center reaches 160°F / 71°C. Insert the probe into the middle of the loaf, not near the bottom. Total bake time is usually 55–70 minutes for this shape.
- Rest and slice. Let the meatloaf rest on the baking sheet for 10–15 minutes, then slice it crosswise into about 8 thick slices.
Useful Notes
- For a sweeter glaze: Increase the brown sugar to 2 tablespoons / about 24 g.
- If using 80/20 beef: Expect more rendered fat around the loaf.
- With 90/10 beef: Start checking early; leaner beef dries out more quickly if it cooks past the target temperature.
- Baking a refrigerator-cold loaf: Expect it to take longer than one mixed and baked immediately.
- If the raw mixture looks unusually wet: Let it sit for 2–3 minutes first. After that rest, if liquid still pools and a pressed portion falls apart, add 1 tablespoon of breadcrumbs and mix again. Stop as soon as the mixture can hold its shape; it should still feel moist.
- Still looks pink? Trust the thermometer. Ground beef can remain pink even after reaching a safe internal temperature.
What a Good Slice Should Look Like
The first clean slice is the payoff. It stands upright instead of breaking into loose chunks, with a tender center and a browned edge under the glaze. The center should taste well seasoned on its own; the glaze adds sweet-tangy contrast rather than carrying all the flavor.
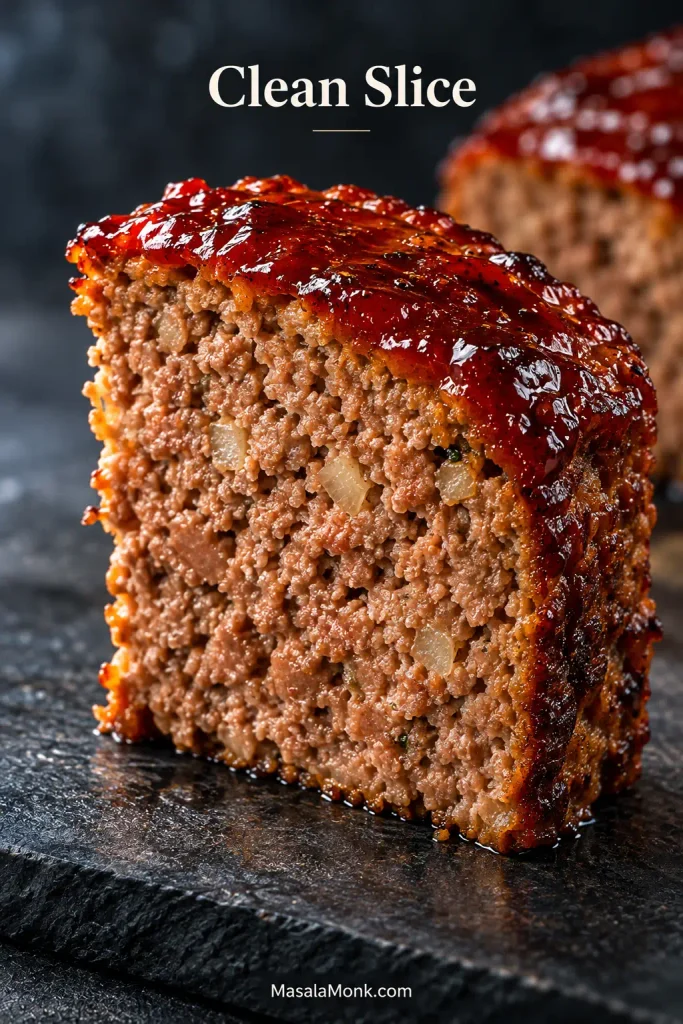
A little juice on the cutting board is normal. Watery liquid running freely from the loaf is different. The browned outside has a little chew while the center stays softer, and the glaze clings to the meat instead of sliding away in a wet sheet.
If the slice stays together on the fork without feeling dense, the texture is right.
When your meatloaf doesn’t turn out that way—or you want to understand why this version works—the sections below walk through the ingredients, mixing, shape, timing and the problems you can actually see.
More on Getting Meatloaf Right
Key Meatloaf Ingredients and What They Do
Most meatloaf ingredient lists look familiar. What matters is what those ingredients are doing for moisture, fat and structure.
What Ground Beef to Use for Meatloaf
For this recipe, use 85/15 ground beef. It has enough fat to stay juicy without leaving quite as much behind on the pan as 80/20.
80/20 is also fine and gives you a richer loaf, but expect more drippings. With 90/10, pay closer attention to the thermometer because there is less fat to protect the meat if it cooks too far.
Breadcrumbs and Milk Keep Meatloaf Moist
Soaking panko in milk before mixing it with the beef helps meatloaf stay moist and tender. The hydrated crumbs hold onto moisture and help keep the meat from tightening into a dense, springy texture as it cooks.
For this loaf, ¾ cup panko and ½ cup milk make that hydrated breadcrumb mixture, often called a panade. After about five minutes, it should look like a thick, moist paste instead of loose crumbs floating in milk. If liquid is still pooling underneath, stir again and give it another minute.
Why Sauté the Onion?
Sauté the onion first. Five to seven minutes softens the raw bite and brings out enough sweetness for the finely diced pieces to melt into the background instead of interrupting each tender slice.
Mix Until It Holds—Then Stop
Mix until the ingredients are evenly distributed and a pressed portion stays together. Stop before the meat becomes smooth, springy or paste-like.
“Do not overmix” should not mean “barely mix.” The egg, hydrated breadcrumbs, onion and seasonings still need to be distributed through the beef.
If you’re unsure, pinch off a little and press it between your fingers. It should hold its shape without squeezing out liquid.
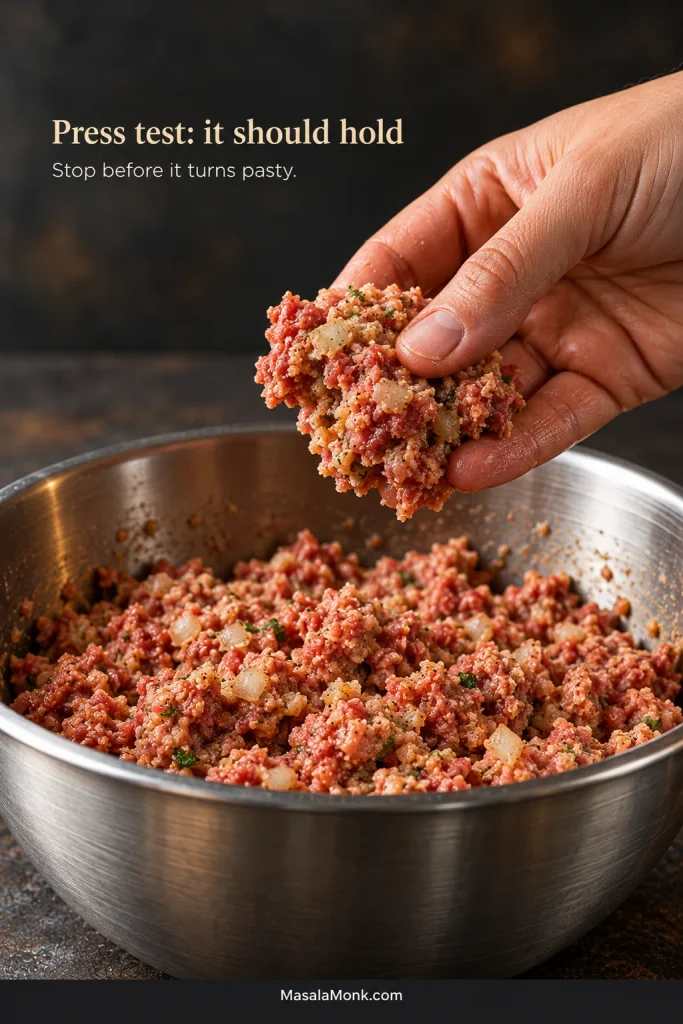
| Too loose | Right | Too far |
|---|---|---|
| Falls apart in your hand, obvious wet pockets, slumps badly | Moist, evenly mixed and easy to shape | Very smooth, springy, rubbery or heavily compacted |
Stop in the middle. You want a loaf that holds together, not meat kneaded into sausage filling.
Unlike a burger patty, meatloaf contains egg and panade, so it needs a little more mixing before it can be shaped cleanly.
Two pounds of beef is too much dinner to season blindly. Frying one spoonful takes a couple of minutes and gives you a chance to fix the salt and seasoning before the whole loaf goes into the oven.
Why Meatloaf Shape Changes the Cooking Time
Thickness matters more than weight alone. Two meatloaves can weigh exactly the same and finish at different times because heat takes longer to reach the center of a tall, compact loaf than one with a lower, even profile.
If your last meatloaf took much longer than the recipe promised, its shape may have been the reason. For this one, aim for roughly 8 × 4 × 3 inches / 20 × 10 × 7.5 cm and keep the height similar from end to end. Thin tapered ends cook faster than a thick middle.
Free-Form Meatloaf or Loaf Pan?
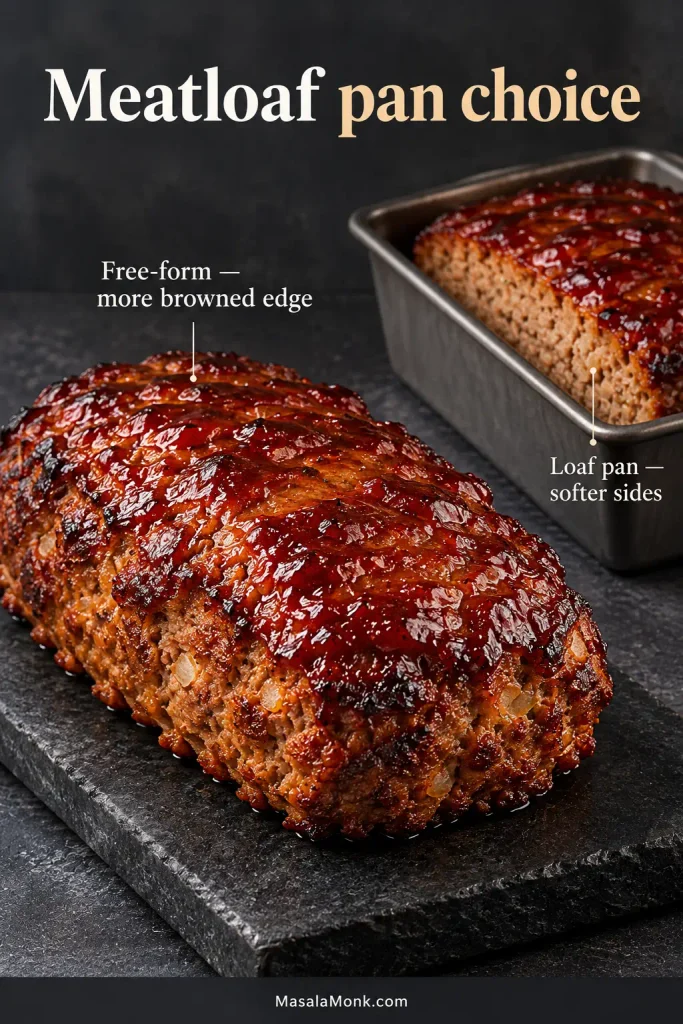
A free-form loaf on a rimmed baking sheet is the better fit for this version. You get more browned surface and more room for glaze, especially on the end pieces where the edges brown most deeply. A sheet pan also does not trap rendered fat tightly against the sides the way a loaf pan does, and any fat that collects around the meat is easy to spoon away.
By contrast, a 9×5-inch loaf pan is a workable alternative. The sides stay softer, and more fat and juices collect around the meat. Its shape can also change how long the center takes to reach temperature.
Use Color for the Glaze, Temperature for the Center
By the end, the glaze should look glossy across the top, with darker edges where it meets the browned beef. Ground beef can still look pink at a safe internal temperature, so use a thermometer for the center instead of waiting for every trace of pink to disappear.
Meatloaf Glaze and When to Add It
For this 2-pound loaf, add the first glaze after about 35–40 minutes, once the exterior has set and begun to brown. Add a thinner finishing coat about 10 minutes later.
Waiting gives the glaze a firmer surface to grip and reduces the chance of the sugar darkening too far.
Bottled ketchup is easiest, although homemade ketchup is equally good if you already have some.
A thin second coat near the end refreshes the glaze instead of letting the first layer bake dry.
The glaze is tangy rather than candy-sweet. Use the extra brown sugar in the recipe notes if you prefer the sweeter old-school style.
What Temperature Should Meatloaf Reach?
Cook an all-beef meatloaf until the center reaches 160°F / 71°C. Insert the probe into the center of the thickest part of the loaf, avoiding the crust and baking sheet.
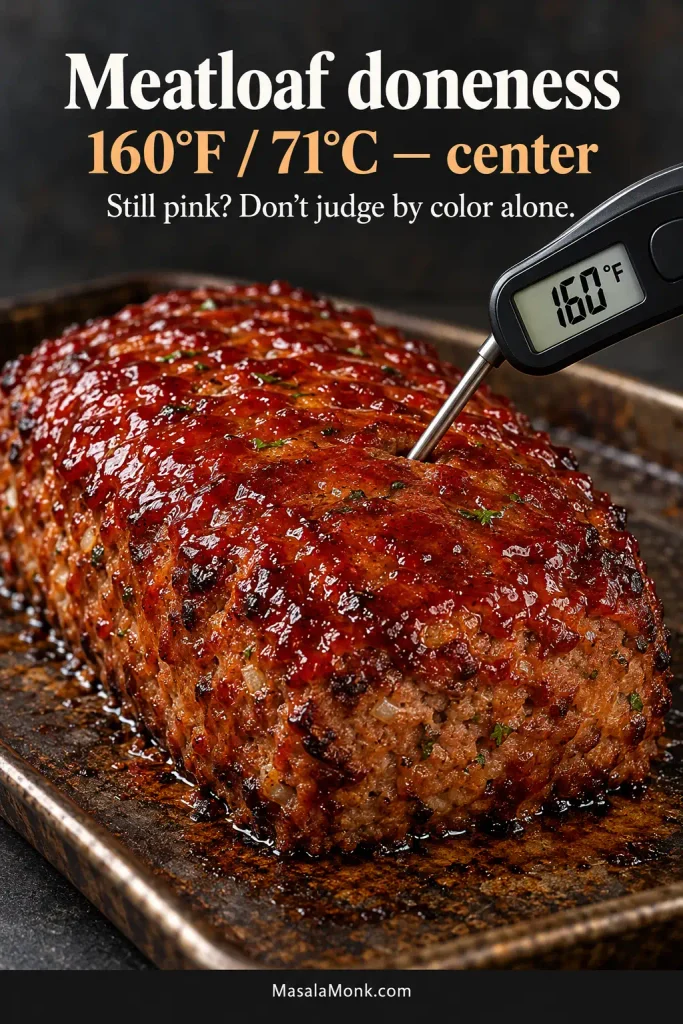
The USDA explains that safely cooked ground beef can remain pink and recommends an internal temperature of 160°F / 71.1°C. Color alone is not a reliable doneness test.
How Long Does Meatloaf Take at 350°F?
A 2-pound meatloaf shaped like this one usually takes about 55–70 minutes at 350°F / 175°C. Use the clock to decide when to start checking, not when to stop cooking.
That range assumes a free-form loaf about 3 inches / 7.5 cm tall, like the one in this recipe. Start checking around 50 minutes, then let the thermometer decide.
Making a bigger batch? Divide 3 or 4 pounds of mixture into two smaller loaves instead of one oversized loaf. If you make smaller loaves, start checking sooner, but do not calculate doneness from weight alone—thickness still matters.
Why Meatloaf Falls Apart, Turns Dry or Gets Mushy
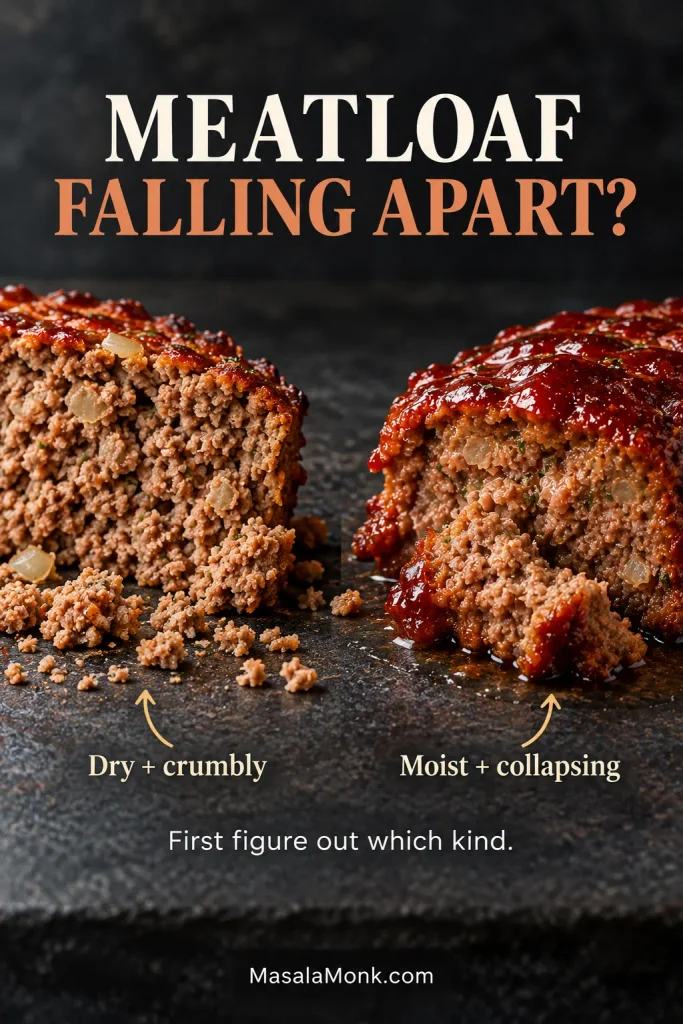
When dinner is already out of the oven and something looks wrong, start with the texture you actually have. “Falling apart” can mean two very different things, and throwing in more breadcrumbs next time is not always the answer.
| What happened | Likely cause | What to change next time |
|---|---|---|
| Dry or dry and crumbly | Lean beef, too little panade or overcooking | Use beef with some fat, hydrate the breadcrumbs fully and avoid cooking past the target temperature |
| Moist but falling apart | Raw mixture did not come together, too much loose liquid or slicing too soon | Mix until a pressed portion keeps its shape and give the baked loaf its full rest |
| Mushy or very soft | Too much liquid, watery vegetables or breadcrumbs that absorbed less than expected | Reduce loose liquid and check the panade and raw mixture before shaping |
| Dense or tough | Overworked, tightly packed or overcooked | Stop mixing once the mixture can be shaped cleanly and avoid compressing the loaf hard |
| Greasy | High-fat beef and drippings collecting around the loaf | Use a free-form loaf and spoon away excess rendered fat |
| Crunchy onion | Pieces too large or not softened first | Finely dice and sauté before mixing |
| Burned glaze | Sugary glaze added too early or too thickly | Let the meatloaf set first, then apply thin coats later in the bake |
Moist but Falling Apart
If the meat is juicy but the slices collapse, think back to the raw mixture. Could you press a small portion into one piece? If not, it may not have been mixed enough to slice cleanly after baking.
When it falls apart only while piping hot but slices well after cooling slightly, you probably cut it too soon rather than getting the recipe balance wrong.
Mushy or Too Soft
Too much unabsorbed liquid is the usual culprit. Excess milk, watery vegetables or a breadcrumb substitution that absorbs less than expected can leave the loaf soft even when fully cooked.
Do not chase a wet mixture with handful after handful of dry crumbs. At some point you stop fixing meatloaf and start building a bread-heavy loaf.
Grey or pale residue around the loaf? It can look unappealing, but it is normal—mostly rendered fat, meat juices and proteins that have cooked out of the loaf. Spoon or dab it away before serving.
If You’re Missing an Ingredient
- Panko: Plain dried breadcrumbs, finely crushed saltines or plain gluten-free breadcrumbs all work. Absorbency varies, so judge the panade by its texture instead of assuming every breadcrumb behaves the same way. If you use salted crackers, hold back some of the added salt until you’ve tasted the cooked test patty.
- Whole milk: 2% milk is fine. For a dairy-free loaf, use ½ cup / 120 ml low-sodium beef broth or an unsweetened neutral non-dairy milk. Broth makes the loaf a little less rich and adds salt, so taste the cooked test patty before using the reserved salt.
- Dijon mustard: Yellow mustard gives the glaze a slightly more old-fashioned bite.
- Apple cider vinegar: Red wine vinegar is an easy substitute.
- Worcestershire sauce: If you can’t use Worcestershire, leave it out rather than replacing it with a stronger sauce. The cooked test patty will tell you whether the meat needs more salt or seasoning.
Make Ahead, Store, Freeze and Reheat Meatloaf
Make Ahead or Freeze Before Baking
Mix and shape the loaf up to 24 hours ahead, as long as the raw beef stays within the USDA’s 1–2 day refrigerated window for ground meat. Cover well and refrigerate until baking.
A refrigerator-cold loaf may need a little longer in the oven. To freeze it raw, shape the loaf, wrap it tightly and freeze promptly. Thaw it completely in the refrigerator before baking, then cook the center to 160°F / 71°C.
Refrigerate or Freeze Cooked Meatloaf
The USDA recommends refrigerating leftovers within 2 hours of cooking and using them within 3–4 days.
For longer storage, wrap individual slices tightly and freeze them flat. They thaw faster and are easy to portion. For best quality, USDA guidance for cooked beef recommends about 2–3 months in the freezer.
Reheat Meatloaf to 165°F / 74°C
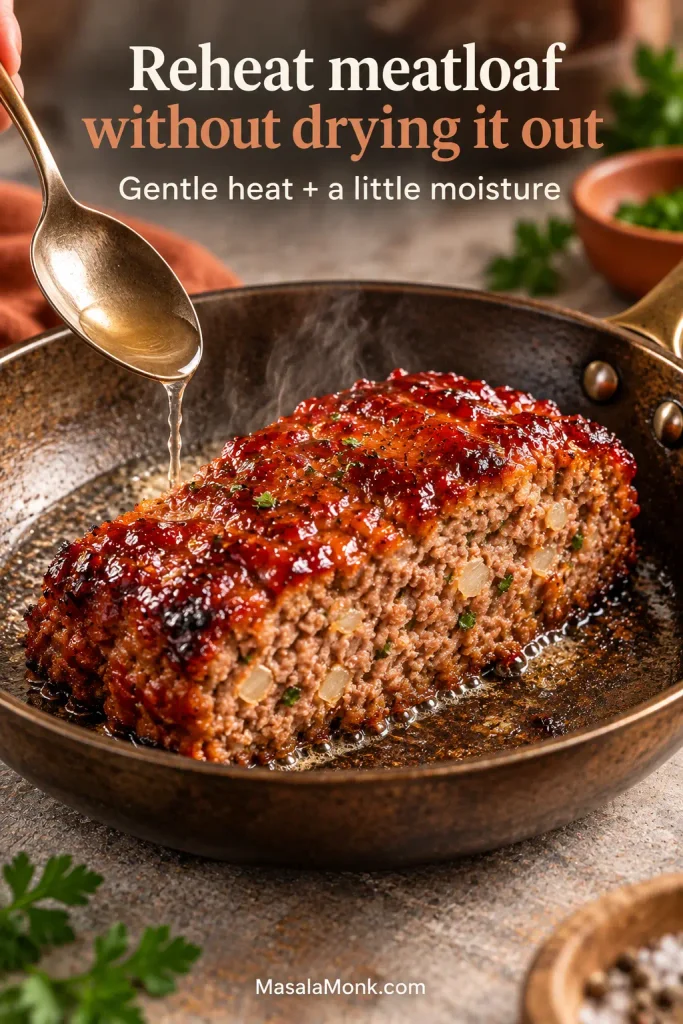
When reheating several slices, place them in a covered baking dish and use a 325°F / 165°C oven until the center reaches 165°F / 74°C. A spoonful of broth, water or extra glaze in the dish helps keep the cut surfaces moist.
For one slice, use short microwave intervals while loosely covered. A skillet is especially good when you want the cut sides browned; keep the heat moderate so the center gets hot before the edges overbrown.
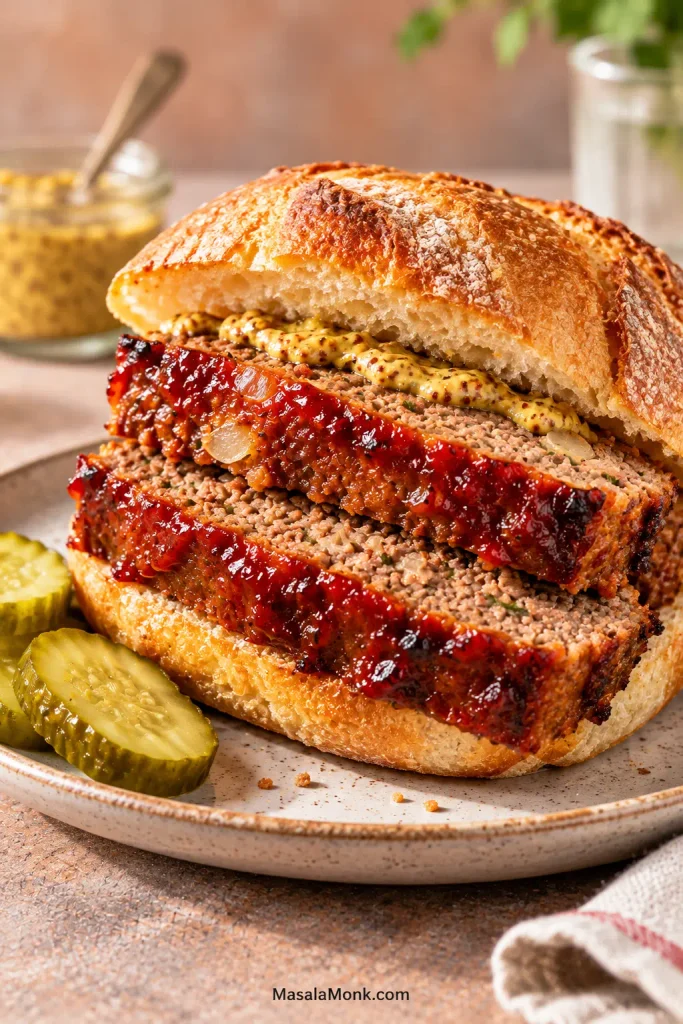
Cold meatloaf makes an excellent next-day sandwich. Thick slices work on regular sandwich bread; smaller pieces fit neatly into soft dinner rolls with mustard or a little leftover glaze.
What to Serve with Meatloaf
Creamy mashed potatoes are the classic partner because they catch the glaze and juices from each slice. If you want more contrast, green beans almondine bring lemon and toasted-almond crunch next to the tender meatloaf and creamy potatoes.
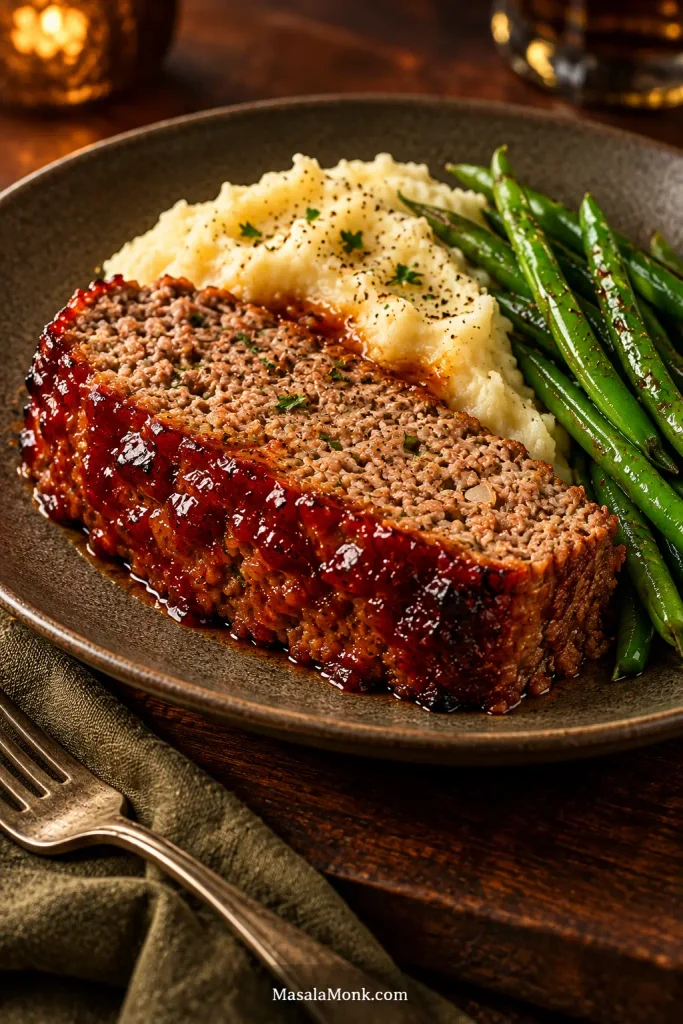
A crisp green salad or simply roasted vegetables keep the plate lighter. For the full comfort-food plate, add creamy macaroni and cheese and keep the other side simple.
When the loaf is right, the glaze is sticky at the edges, the outside is deeply browned, and the middle stays juicy while each slice holds together on the fork. That’s a much better finish line than whatever minute the timer happens to show.








