Black cod has a way of making you slow down before you cook it. The fillets look delicate, the fish feels expensive, and the miso glaze you are excited about can go from golden to burnt faster than you expect.
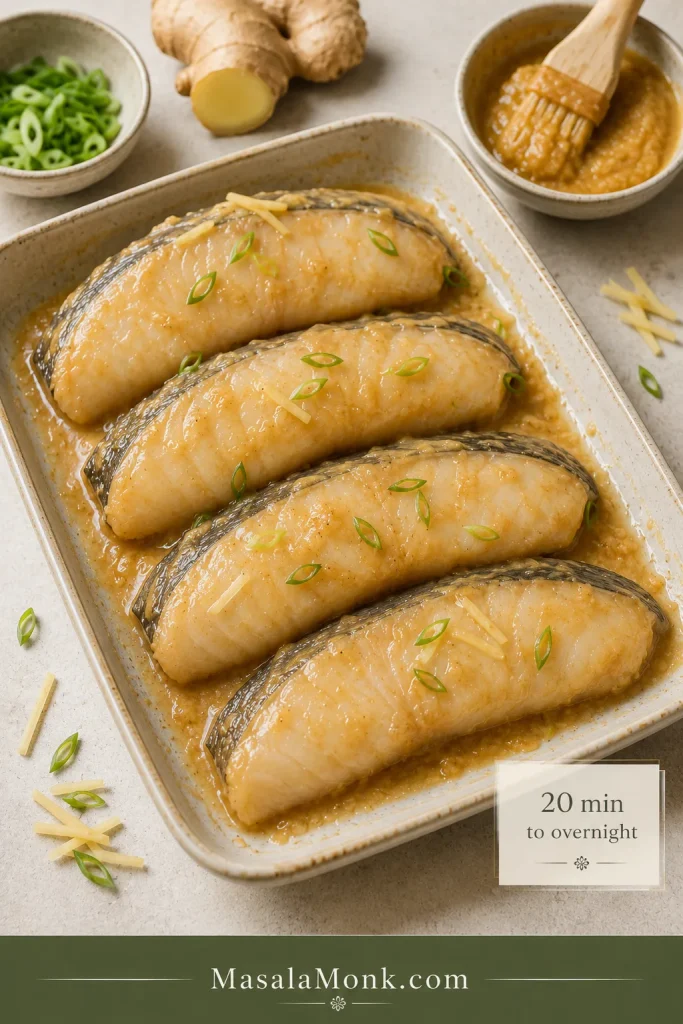
That is why this black cod recipe keeps the method clear without making dinner feel fussy. The fish gets a white miso marinade, just enough time to soak up flavor, and a hot but controlled finish so the top turns glossy and caramelized while the center stays soft enough to slide apart with a fork.
You can make this as a quick 20–30 minute miso black cod, or marinate the sablefish overnight for a deeper Nobu-style result. Start with the classic miso version, then use the method notes if your fillets are thick, frozen, skin-on, headed for the grill, or going into the air fryer.
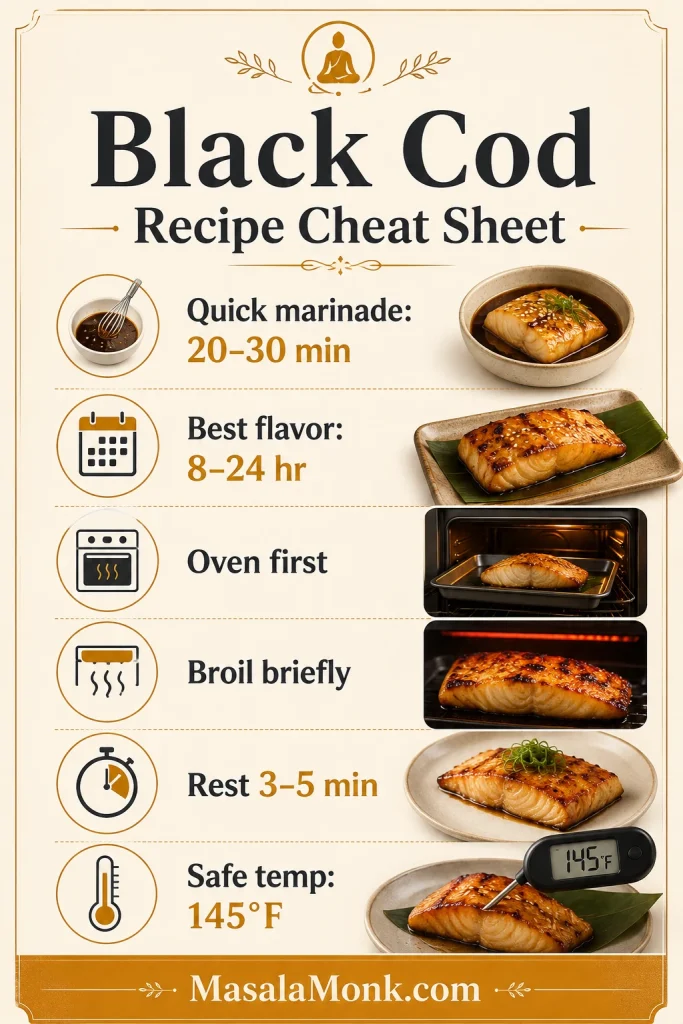
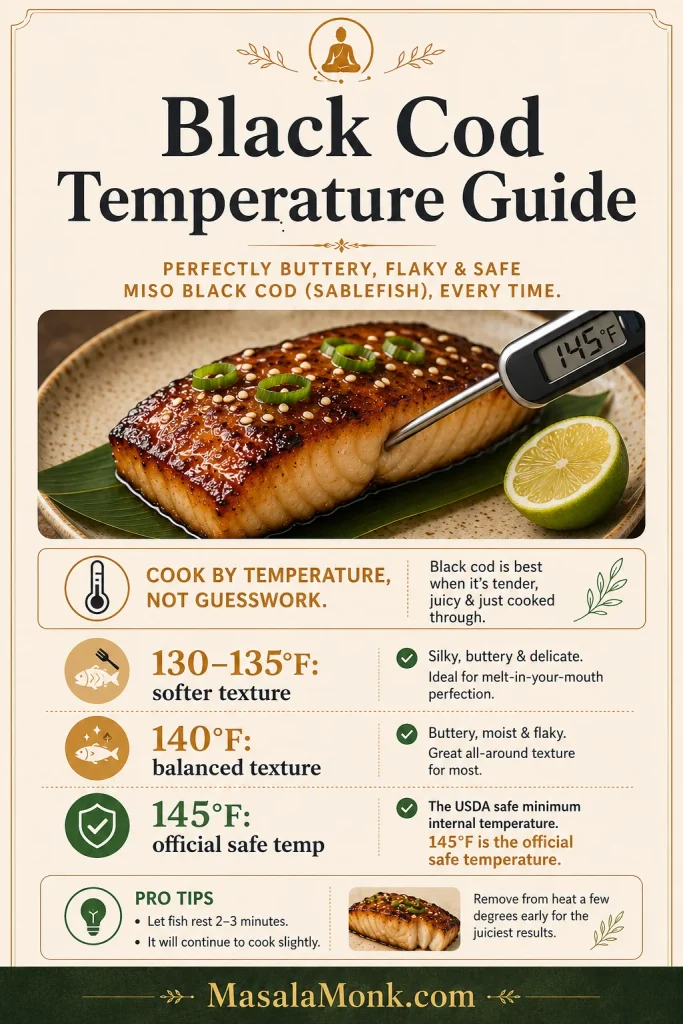
The whole recipe works around the Black Cod Safety Triangle: thin glaze, gentle center, fast caramelized finish. That means you wipe away heavy paste, cook the center gently, and only use strong direct heat long enough to brown the surface. Do that, and you get buttery miso sablefish with a sweet-salty glaze that makes plain rice feel necessary.
This visual gives the whole recipe its safety net: keep the miso layer light, cook the center gently, and save strong heat for the final color.

Quick Answer: The Best Way to Cook Black Cod
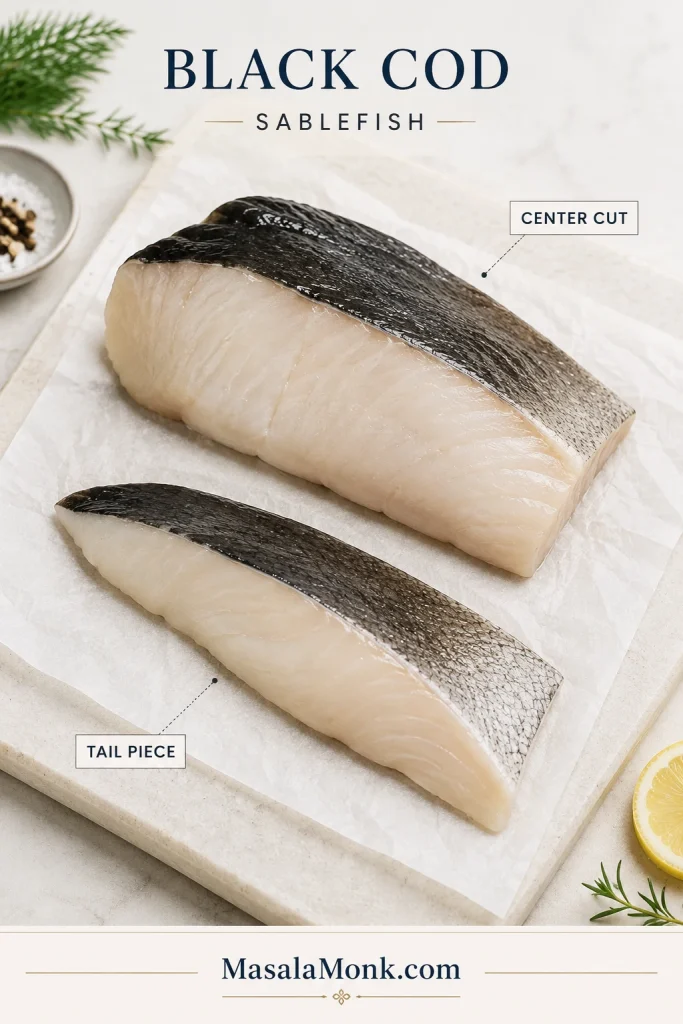
Black cod is also called sablefish. It is not the same as regular cod. Sablefish is richer, fattier, softer, and more buttery, which is why it works so well with a miso marinade and a fast caramelized finish.
The easiest method is white miso, mirin, sake, ginger, and a little sugar, followed by oven cooking and a short broiler finish. A 20–30 minute marinade works for dinner tonight. An 8–24 hour marinade gives deeper flavor and a more restaurant-style result.
You are not trying to bury the fish in paste. Lift the fillets out of the marinade, wipe away the heavy layer, and leave a thin shiny coating. Think glaze, not frosting. That delicate layer caramelizes; thick pockets of miso scorch before the center is done.
Best first version: Use the oven-first method with an 8–24 hour marinade. It gives you deeper flavor, gentler cooking, and a short broiler finish for that glossy browned top. For temperature, some cooks pull the fish around 130–135°F / 54–57°C for a softer restaurant-style texture, use 140°F / 60°C for a firmer middle path, or cook to 145°F / 63°C for the official safe internal temperature. Rest for 3–5 minutes before serving.
Once you understand that the broiler is only there for the finish, black cod stops feeling fragile and starts feeling manageable. The oven protects the center; the broiler makes the miso shine.
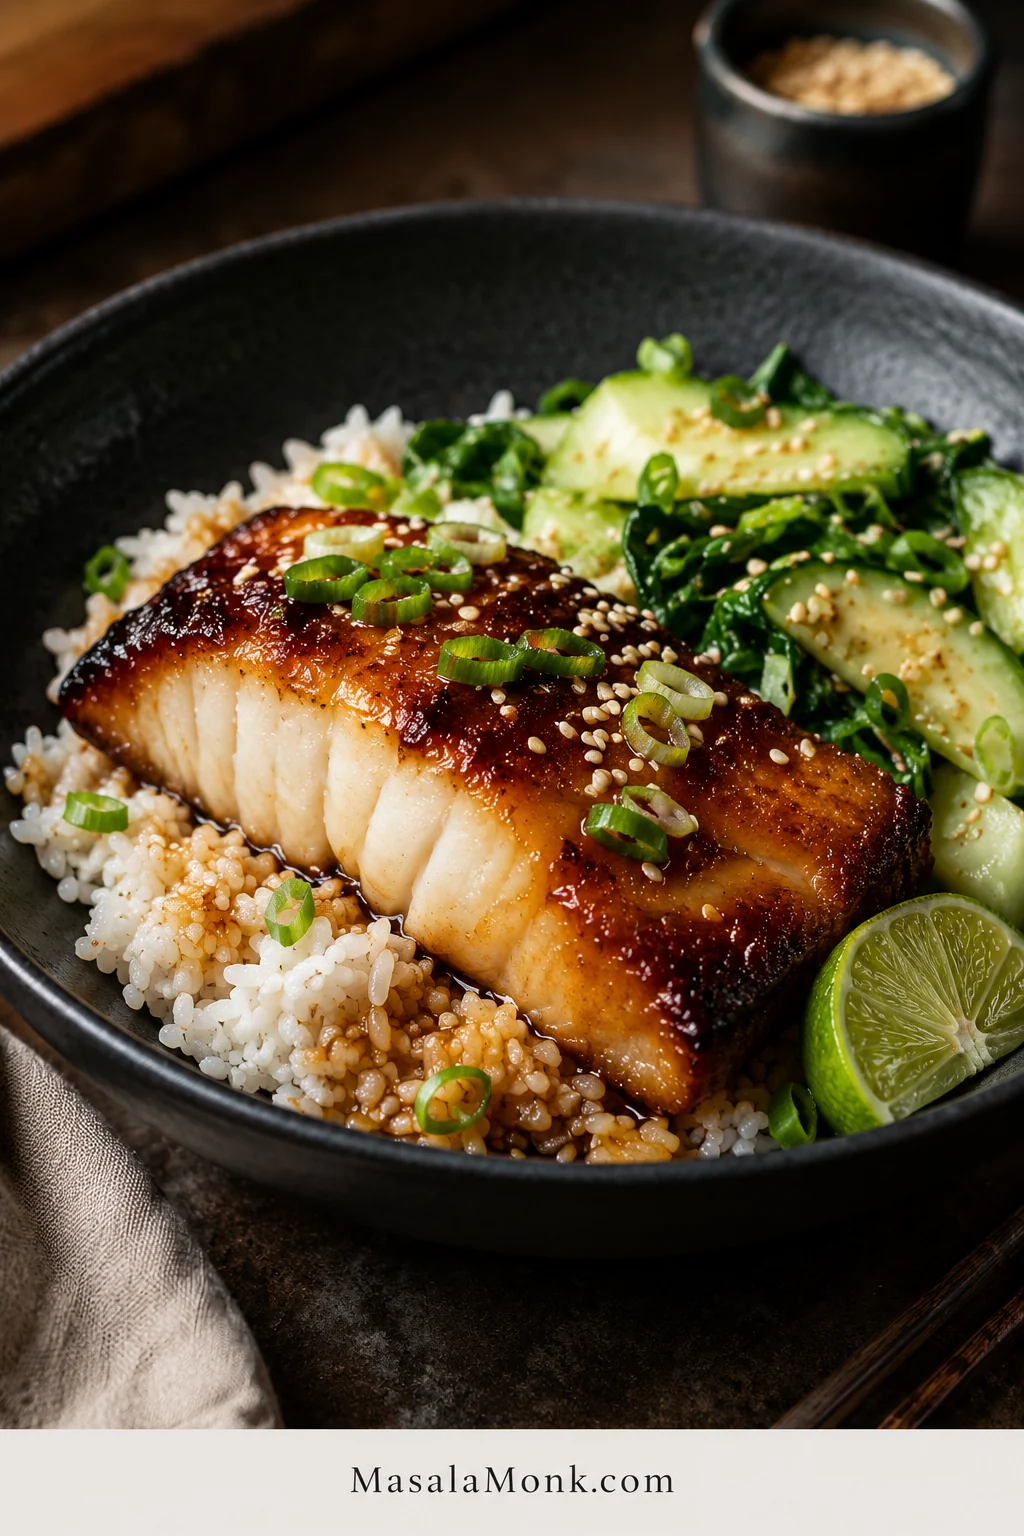
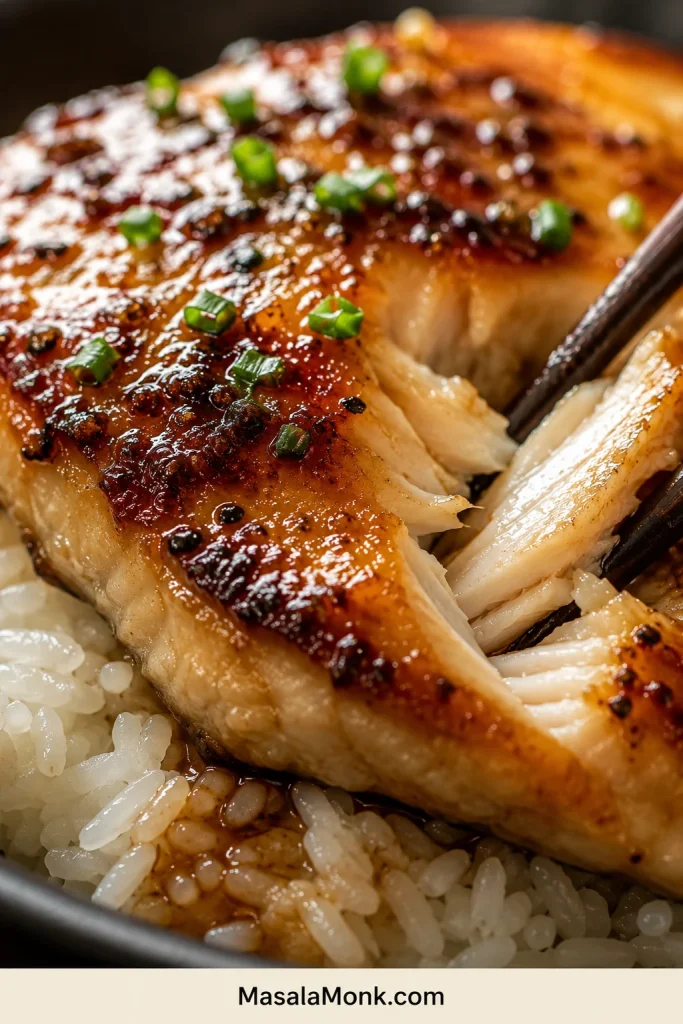
What Buttery Miso Sablefish Should Look Like
Look closely at the texture below: the miso surface should shine, while the sablefish flakes underneath stay soft and moist.
Make It Now: Miso Black Cod Recipe
The recipe below is the safe path: enough oven time to protect the center, just enough broiler time to make the miso glaze brown at the edges.
Here is the dependable version: black cod or sablefish marinated in miso, baked gently, then briefly broiled until the top is glossy and browned at the edges while the inside stays soft.
Recipe Details
- Serves: 4
- Prep time: 10 minutes
- Marinating time: 20 minutes to 24 hours
- Cook time: 8–12 minutes
- Total active time: about 20 minutes
- Make ahead: mix the glaze and marinate the fish up to 24 hours ahead; cook just before serving
- Best cue: browned glossy top, soft flakes, tender center
Equipment
- Small bowl or saucepan for the miso glaze
- Shallow dish or zip-top bag for marinating
- Sheet pan
- Foil for lining the sheet pan
- Fish spatula, especially for pan-searing or grilling
- Instant-read thermometer, helpful but not required
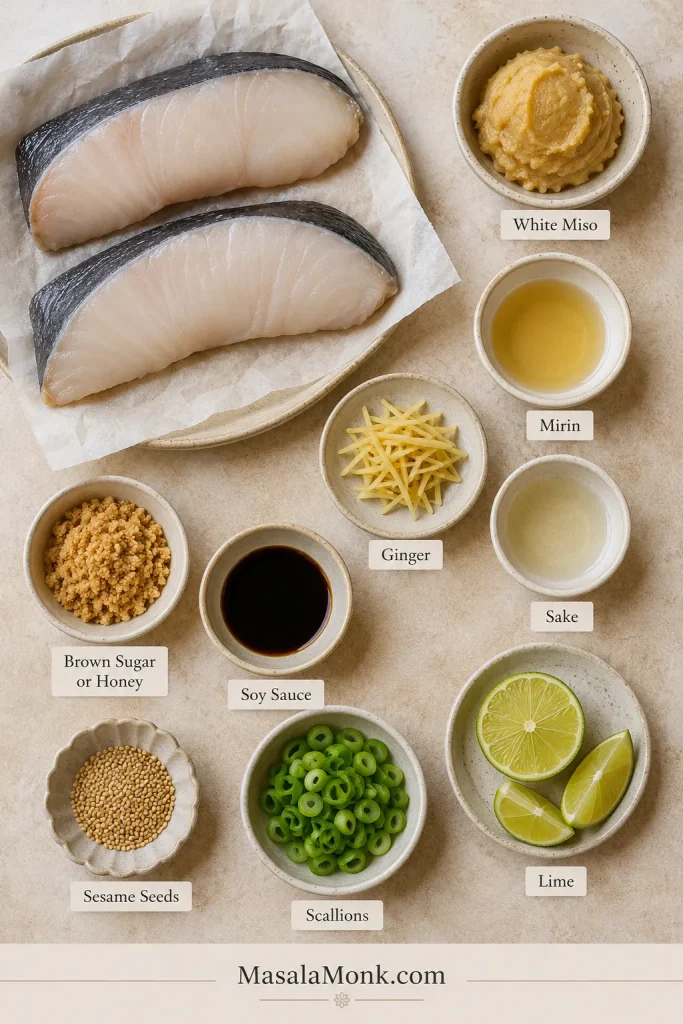
Ingredients
- 4 black cod or sablefish fillets, 5–6 oz / 140–170 g each, preferably skin-on
- ¼ cup white miso, about 70 g
- 3 tbsp mirin, 45 ml
- 2 tbsp sake, 30 ml
- 1–2 tbsp brown sugar or honey
- 1 tsp soy sauce, 5 ml
- 1 tsp grated fresh ginger
- 1 tsp neutral oil or toasted sesame oil, optional
- Sliced scallions, sesame seeds, lemon or lime wedges, for serving
No extra salt is usually needed. Miso and soy sauce bring plenty. Taste the glaze before adding anything salty.
Thickness note: These timings assume fillets around 1 inch thick. Thin tail pieces cook faster, while thick center-cut pieces may need a few extra minutes.
Using regular cod? Start looking before the timer ends. It is leaner than sablefish and dries out faster.
Instructions
Marinate and Prepare the Fish
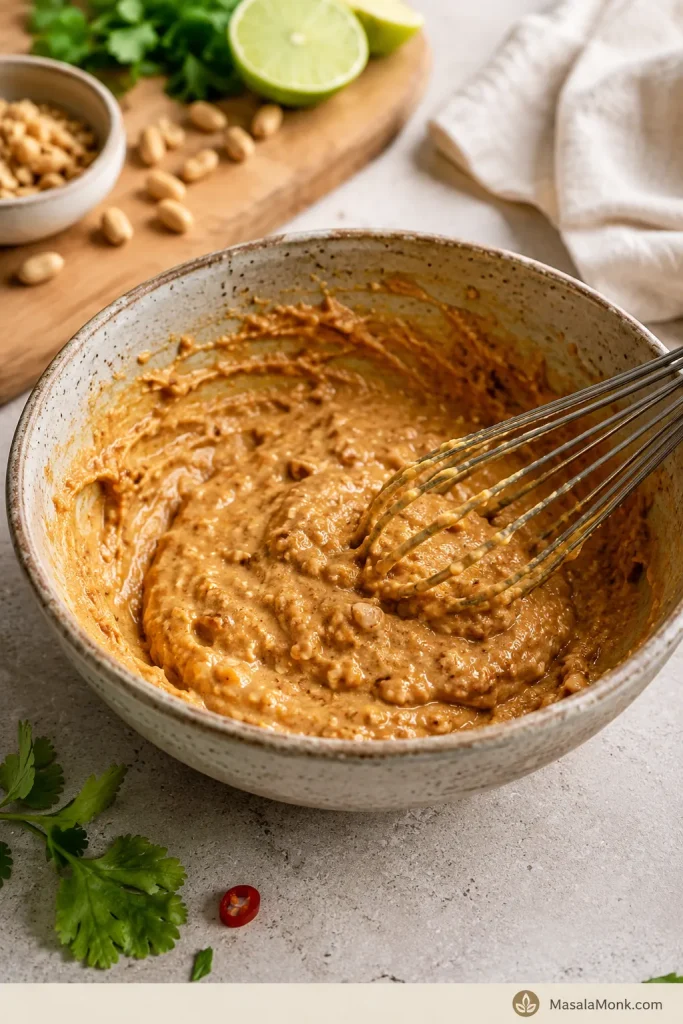
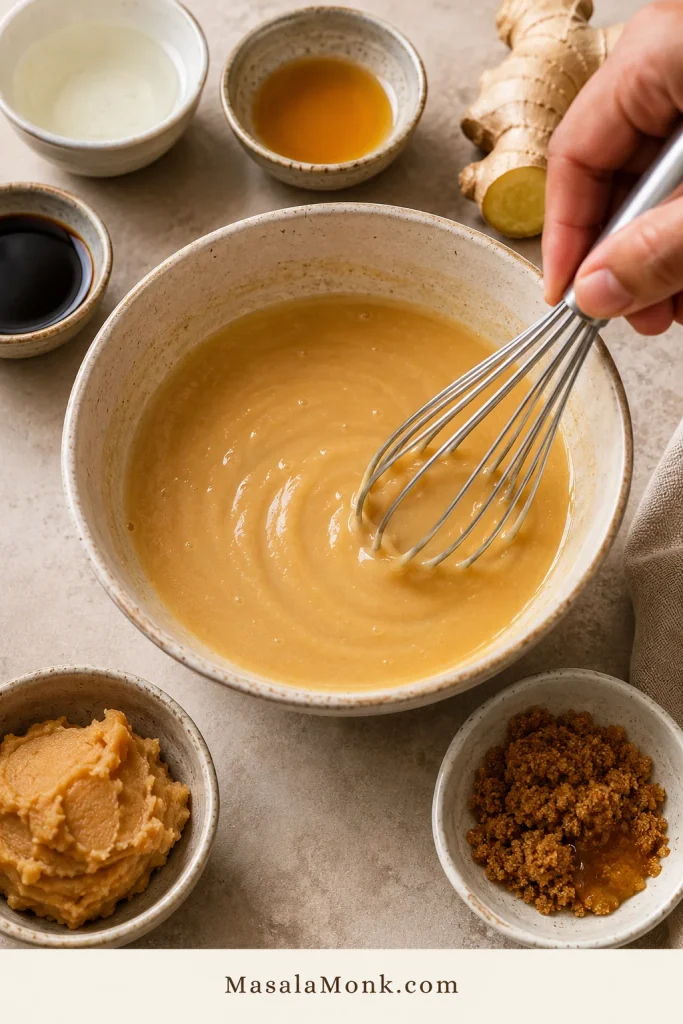
- Make the miso glaze. Whisk the white miso, mirin, sake, brown sugar or honey, soy sauce, ginger, and oil if using. If the miso is lumpy, gently warm the mirin and sake in a small saucepan, whisk everything together, then cool before adding the fish.
- Dry the fillets. Pat the fish dry with paper towels. A dry surface helps the marinade cling and gives the top a better chance to brown.
- Marinate. Place the fillets in a shallow dish or zip-top bag. Coat with the miso mixture. Marinate for 20–30 minutes for a quick version, or refrigerate for 8–24 hours for deeper flavor.
- Prepare the pan. Line a sheet pan with foil and lightly oil it, or set a lightly oiled wire rack over the sheet pan. Miso and sugar can drip and burn, so foil makes cleanup easier.
- Leave a thin coating. Lift the fish out of the marinade. Do not rinse it. Wipe or scrape away thick paste, leaving a shiny surface on the fish.
Bake, Broil, and Serve
- Bake first. Place the fillets skin-side down. Bake at 400°F / 200°C for 6–8 minutes, depending on thickness.
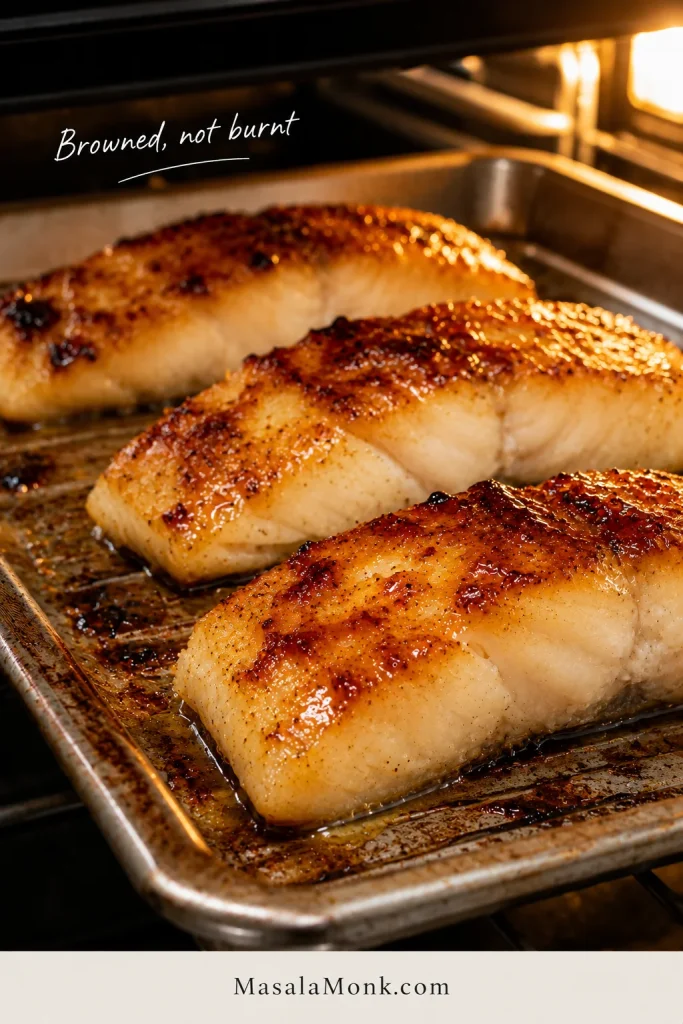
- Broil briefly. Switch to the broiler and broil about 6 inches from the heat for 1–3 minutes, just until the top is browned in spots.
- Check doneness. The fish should flake gently and still look moist. For a softer restaurant-style texture, some cooks pull it around 130–135°F / 54–57°C. To follow the official safe endpoint, cook fish to 145°F / 63°C.
- Serve after resting. Let the fish rest for 3–5 minutes, then serve with rice, greens, scallions, sesame seeds, and a squeeze of lemon or lime.
Important: If you want to brush on extra glaze after cooking, use fresh glaze or boil the leftover marinade first. Do not brush raw fish marinade onto cooked fish without cooking it.
After the recipe card: choose the best method · check doneness · fix problems · back to top
Black Cod Recipe at a Glance
Use this table as your counter-side cheat sheet before you start.
Before you start cooking, use the cheat sheet below to keep the marinade window, broiler finish, rest time, and safe temperature in one place.
| Fish | Black cod / sablefish |
| Amount | 4 fillets, 5–6 oz / 140–170 g each |
| Best cut | Skin-on, center-cut fillets if possible |
| Main method | Oven first, then broiler finish |
| Fast marinade | 20–30 minutes |
| Best marinade | 8–24 hours |
| Broiler distance | About 6 inches from heat |
| Cook time | 8–12 minutes, depending on thickness |
| Softer texture target | 130–135°F / 54–57°C |
| Fully cooked endpoint | 145°F / 63°C |
| Rest time | 3–5 minutes |
If this is your first time cooking sablefish, let this table be the reassuring part. The fish has enough natural fat to stay moist; the surface is what needs your attention.
Why This Recipe Works
This recipe works because it does not fight the fish. Sablefish is already full-bodied and soft-flaking, so the glaze only needs to season, shine, and caramelize. White miso brings gentle umami, mirin helps the surface catch at the edges, and the oven-first method keeps the center tender before the broiler does its quick finishing work.
- The fish stays moist. Sablefish has a naturally high-fat texture, so it is more forgiving than lean cod.
- White miso seasons without overpowering. It is milder and sweeter than red miso.
- The oven protects the center. Baking first gives thick fillets time to cook before the glaze faces direct heat.
- The broiler gives the finish. A short blast of heat creates the burnished top without turning the coating bitter.
If you enjoy glossy fish dinners but want something faster for another night, this honey garlic salmon has the same sweet-savory comfort with a simpler skillet-style glaze.
Before you choose a method, it helps to know why this fish behaves so differently from regular cod.
Is Black Cod the Same as Sablefish?
Yes. Black cod is commonly sold as sablefish. NOAA notes that sablefish are often referred to as black cod, even though they are not actually part of the cod family.
In some markets, sablefish may also be sold as butterfish, though that name can be used for other fish too. What you want for this recipe is black cod or sablefish: mild, oily, full-bodied, and naturally tender.
Regular cod is leaner, lighter, and flakier. You can use this miso glaze on regular cod, but reduce the cooking time and watch the edges first. The flavor will still be good, but the texture will be less buttery than true sablefish.
The cut matters before the method does: a thick center piece gives you more control, while a thin tail piece needs faster timing.
Is This Like Nobu’s Miso Black Cod?
This recipe follows the same broad idea that made Nobu-style miso black cod famous: rich black cod or sablefish, a miso-mirin-sake marinade, a little sweetness, and a caramelized finish.
The classic restaurant-style version often uses a longer marinade, sometimes several days. That gives a deeper, saltier, more cured flavor. This home version gives you two easier tracks: 20–30 minutes when dinner needs to happen tonight, or 8–24 hours when you want a deeper special-dinner result.
You do not need a three-day marinade to get a beautiful plate at home. For the closest restaurant-style result without making the fish too salty, marinate overnight, wipe away the heavy paste, use the oven-first method, and finish under the broiler just long enough for the top to catch and shine.
Want the restaurant-style path? go to marinade timing · use oven-first method · return to recipe card
Ingredient Notes and Substitutions
Once the fish is clear, the glaze is simple. Each ingredient has one job: salt, sweetness, shine, or freshness.
The ingredients below do different jobs: white miso brings umami, mirin and sweetness help browning, and ginger keeps the rich fish balanced.
| Ingredient | Why It Matters | Substitution |
|---|---|---|
| Black cod / sablefish | Buttery fish that stays moist | Regular cod can work, but cook it for less time |
| White miso | Mild, salty-sweet umami base | Yellow miso; use less if using red miso |
| Mirin | Sweetness, gloss, caramelization | A little rice vinegar plus honey or sugar; use less vinegar because it is sharper |
| Sake | Depth and balance | Dry white wine, or water with a little extra mirin |
| Brown sugar or honey | Helps the top caramelize | Use less for a more savory glaze |
| Soy sauce | Adds depth | Use low-sodium soy sauce, or skip if your miso is salty |
| Fresh ginger | Cuts through the richness | A small pinch of ground ginger in a pinch |
If you like seeing how soy, ginger, sweetness, and shine work in another sauce, this homemade teriyaki sauce follows a similar sweet-savory logic in a different direction.
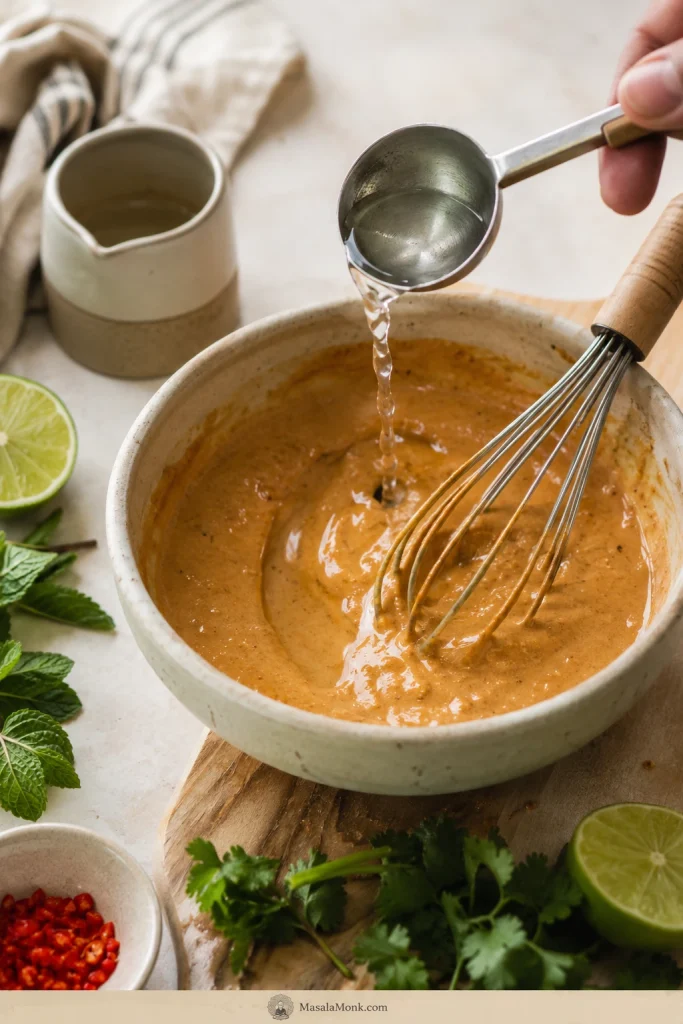
A smooth marinade is easier to control than a lumpy one because it coats the black cod evenly and leaves fewer salty spots to scorch.
Skin-on fillets are best for pan-searing and grilling because the skin acts like a handling layer. It helps the oily, delicate flesh stay together when you move it from pan, grill, or tray.
How Long Should You Marinate Black Cod?
The long-marinated version is famous, but dinner tonight is not a failure. Even a short marinade gives you a sweet-salty top and enough flavor to make rice feel like part of the plan. For most home kitchens, 8–24 hours is the best balance of flavor, salt, and texture.
Short marinating is enough for surface flavor, while overnight marinating moves the fish closer to a deeper Nobu-style black cod result.
| Marinating Time | Result | Best For |
|---|---|---|
| 20–30 minutes | Light flavor, browned top | Fast weeknight dinner |
| 2–4 hours | Better flavor without planning too far ahead | Same-day prep |
| 8–24 hours | Best balance of flavor, salt, and texture | Deeper miso flavor |
| 24–48 hours | Stronger and saltier | Only if you want a more intense marinade |
Some classic versions marinate for 2–3 days, but that is not necessary for this home version. If you go past 24 hours, use a mild white miso, keep the sweetener modest, and avoid leaving thick pockets of marinade on the fillets before cooking.
No Time to Marinate? Use a Quick Braise
If dinner needs to happen now, braise the fish instead of marinating it. This will not taste exactly like miso-marinated black cod, but it gives you a glossy, deeply savory result in about 10–12 minutes.
In a skillet, simmer ¼ cup soy sauce, ¼ cup mirin, ¼ cup sake or water, 1–2 tablespoons sugar or honey, and a few slices of ginger. Add the fillets, spoon the sauce over the top, cover partially, and cook gently until the fish flakes and the sauce lightly coats it.
Should You Wipe Off the Miso Marinade Before Cooking?
Yes, but do not rinse it. Lift the fillet from the marinade, wipe or scrape away heavy paste, and leave a barely-there shiny coating on the surface.
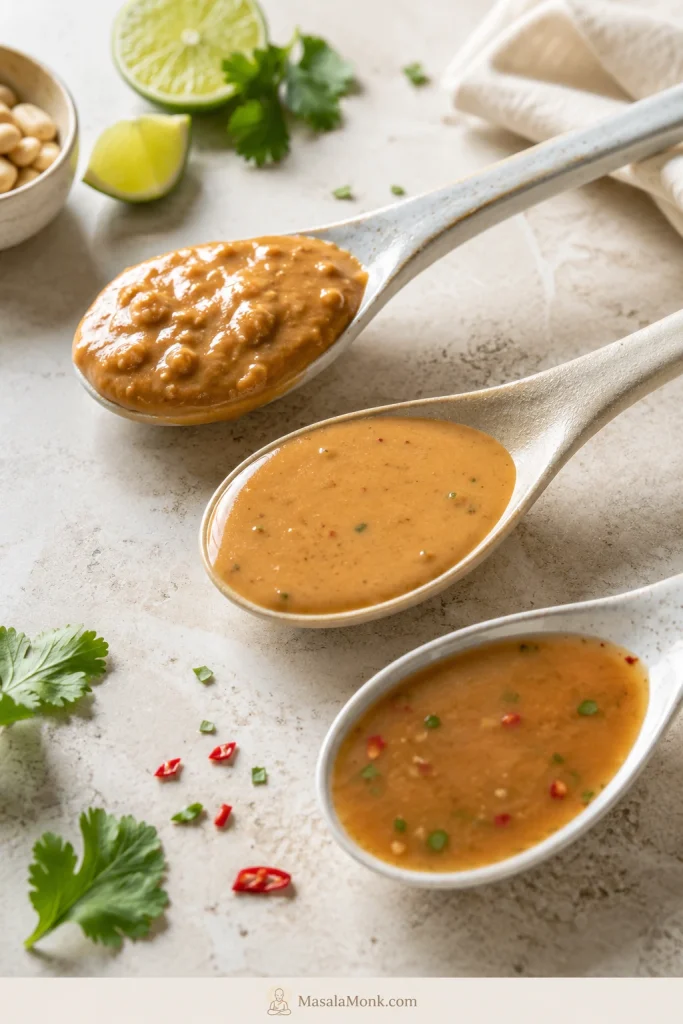
This is the pre-broiler move that prevents burning: remove heavy paste, but leave the thin shiny coating that browns best.
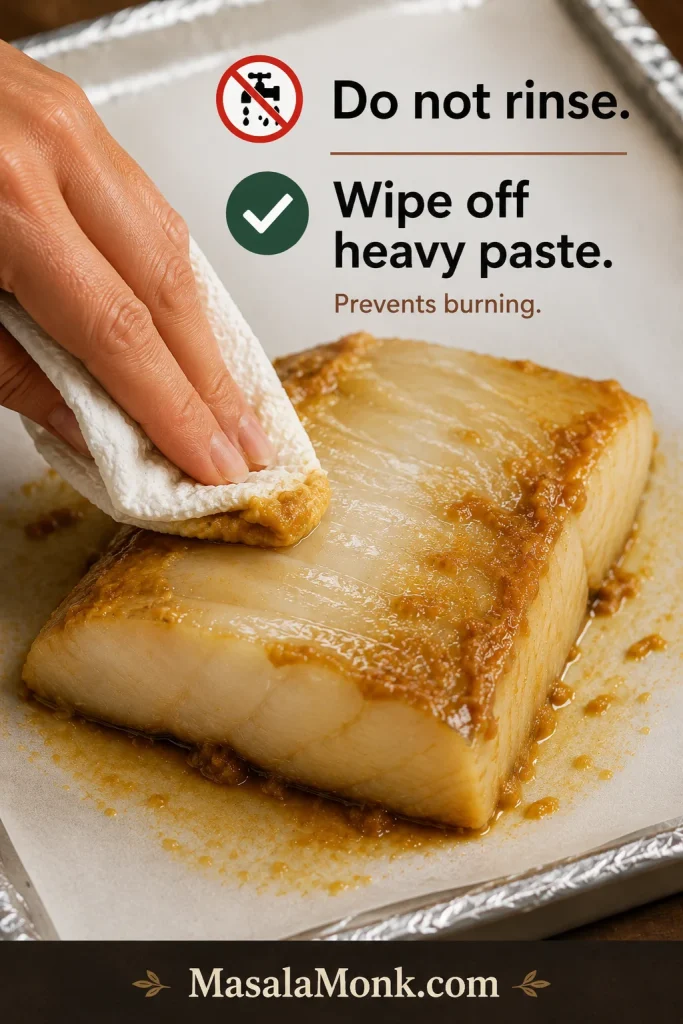
Miso and sugar brown quickly under direct heat. A thin coating caramelizes; a thick layer scorches before the center cooks. The goal is not a heavy crust. It is a glossy surface that catches at the edges while the fish underneath stays soft.
The comparison below shows the difference between a glaze that caramelizes and a thick paste layer that can burn before the center cooks.

Now choose the heat: compare methods · check safe temperature · skip to troubleshooting
Choose Your Cooking Method
Choose the method based on what you are actually dealing with: a thin tail piece, a thick center cut, a fierce broiler, skin-on fillets, or fish that came already packed in miso.
Not Sure Which Method to Use?
- Choose oven-first, then broil when you want the safest all-around result.
- Pick broiler-only for thinner fillets that will cook quickly.
- Try pan-sear, then oven when crisp skin and browned edges are the point.
- Use the air fryer for small or already-marinated pieces.
- Save the grill for skin-on fish and well-oiled grates.
The oven-first method gives the most breathing room, especially if the fish was expensive. Broiler-only is faster. Pan-searing gives you crisp skin and richer browned edges. Grilling adds subtle smoke. The air fryer gives you browning without standing under the broiler.
Once you know your fillet thickness and heat source, the rest is simple: protect the center first, then brown the surface only at the end.
| Method | Best For | Key Tip |
|---|---|---|
| Oven + broiler | Best all-around method | Bake first, caramelize last |
| Broiler-only | Thinner fillets and fast browning | Keep fish about 6 inches from heat |
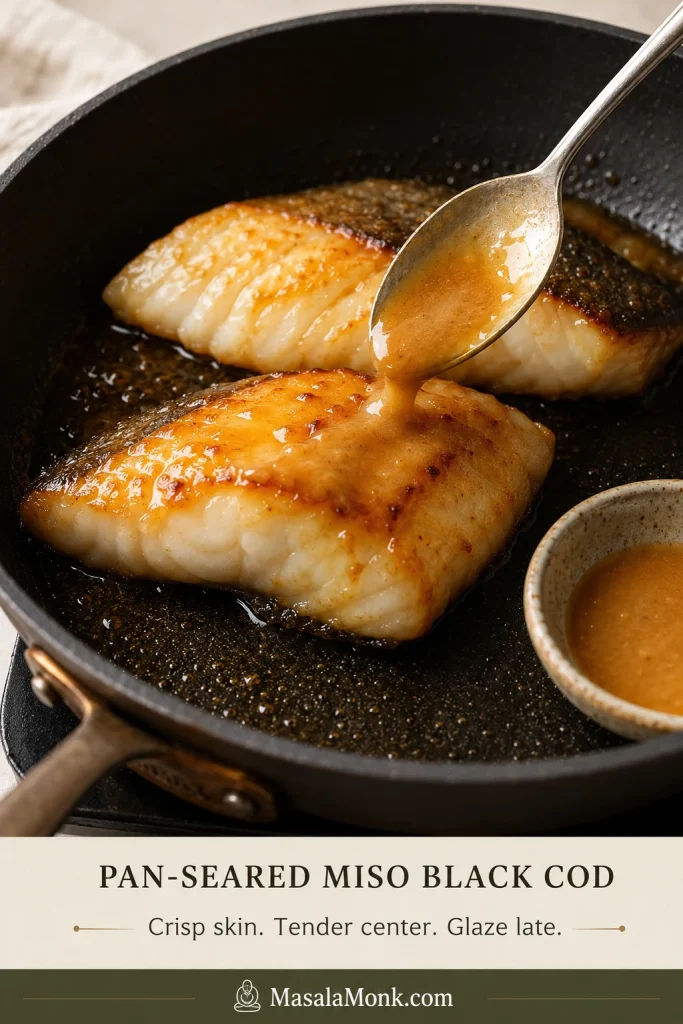
| Pan-seared | Crisper skin and quick dinner | Glaze late and avoid high heat from start to finish |
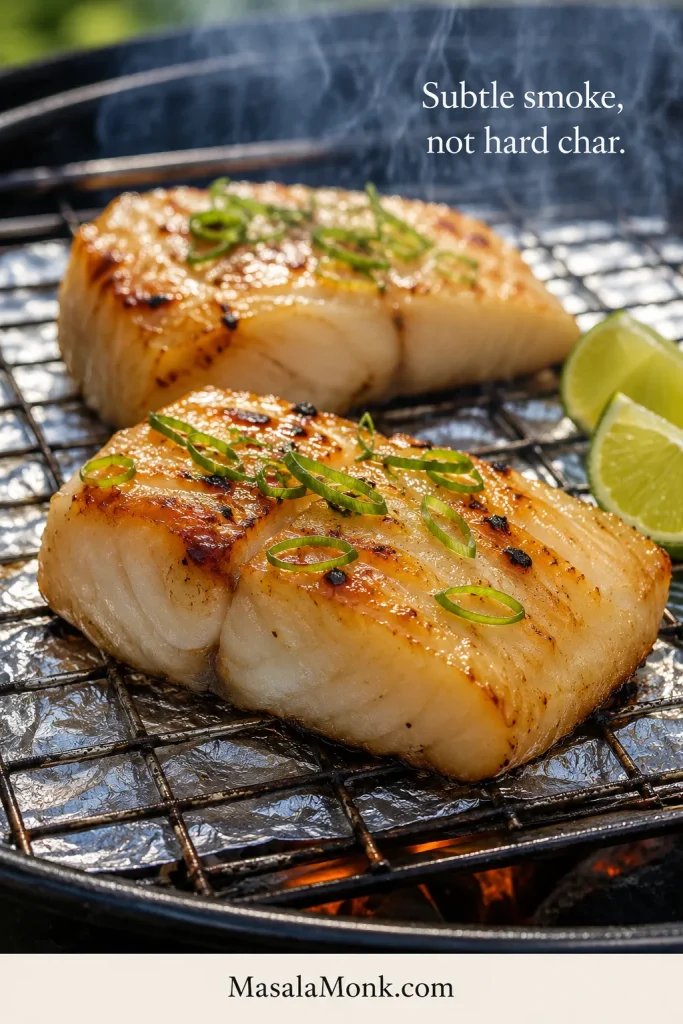
| Grilled | Smoky edges | Use skin-on fish and avoid early flipping |
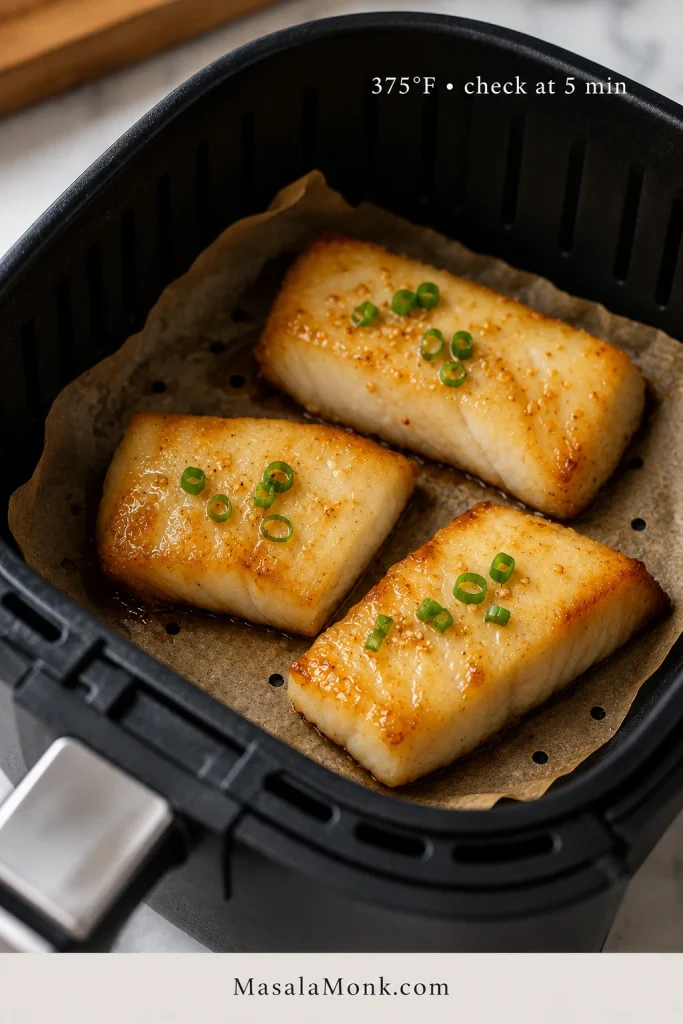
| Air fryer | Small fillets and pre-marinated fish | Check at 5 minutes and prevent glaze from pooling |
| Frozen or pre-marinated | Grocery-store or seafood-box fillets | Follow package instructions first, then use these cues |
Pick your method: oven or broiler · pan-seared · grilled · air fryer · frozen or pre-marinated
How to Cook Black Cod in the Oven or Broiler
Use the oven-first method when your broiler runs hot, your pieces are thick, or you simply want more control. Use the broiler-only method when the fillets are thinner and you can watch them closely.
These times assume pieces around 1 inch thick. Thin tail pieces cook quickly, so start looking before the timer ends; thick center-cut fillets may need a few minutes more.
Oven-First Method
For thick fillets, this method gives you the most control. The oven does the gentle work first, then the broiler adds color at the end.
For thick fillets, this is the calmest path: the oven cooks the center first, then the broiler adds color at the end.
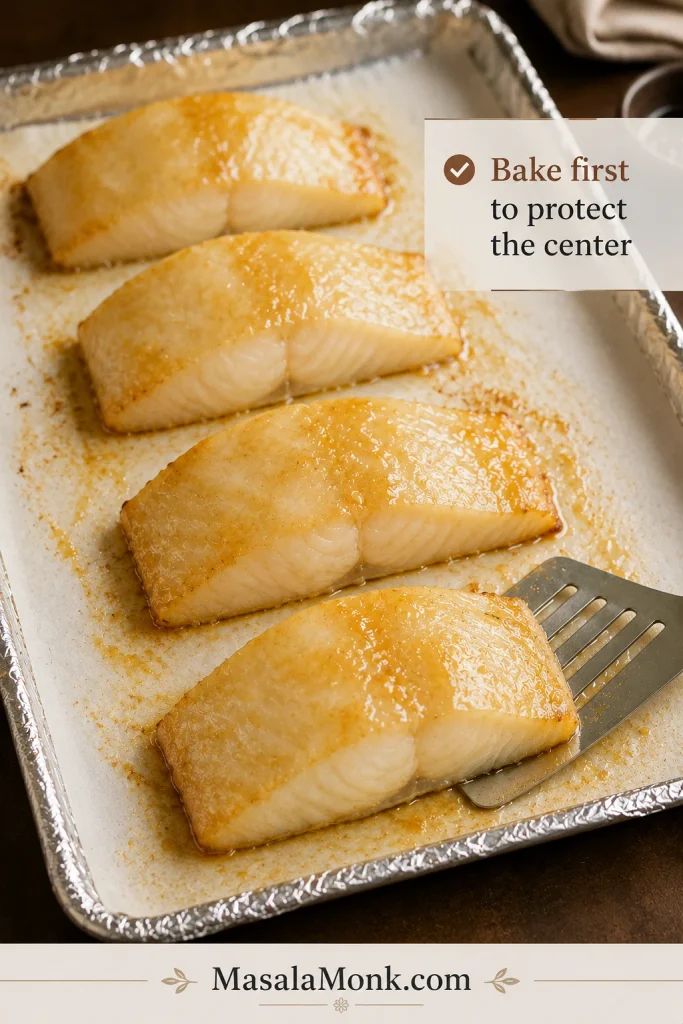
- Preheat the oven to 400°F / 200°C.
- Place the marinated fillets skin-side down on a lined sheet pan.
- Bake for 6–8 minutes.
- Switch to the broiler and broil for 1–3 minutes, just until the top browns.
- Rest before serving.
This is the method I would choose for a first attempt, especially if the fish was expensive. It gives you a little breathing room before the glaze faces direct heat.
Broiler-Only Method
Broiler-only gives you the fastest browning. It works best for thinner fillets, but it asks you to stay close and watch the surface.
- Heat the broiler and place a rack about 6 inches from the heat source.
- Line a sheet pan with foil and lightly oil it.
- Place the marinated fillets skin-side down.
- Leave only a thin coating of glaze on top.
- Broil for 8–10 minutes, depending on thickness.
- Rotate the pan once if the fish browns unevenly.
- Shield dark spots loosely with foil if they are browning too fast.
- Rest for 3–5 minutes before serving.
A few dark caramelized spots are good. Bitter black patches mean the fish was too close to the heat, the coating was too heavy, or it needed a shorter broiler finish.
When it is right, the top should look burnished and golden in spots, the flakes should separate softly, and the center should still look moist.
Use the broiler as a finishing tool, not the whole cooking method; the goal is quick browning after the fish is mostly cooked.
Black Cod Temperature and Doneness
This is where the thermometer earns its space on the counter. Sablefish is not as easy to judge by looks as lean white fish. It can still look juicy and soft when it is done, which is why temperature helps.
Use the temperature guide below to separate softer restaurant-style texture from the official safe endpoint for fish.
| Internal Temperature | Texture | Best For |
|---|---|---|
| 130–135°F / 54–57°C | Very soft, buttery, moist | Softer restaurant-style texture |
| 140°F / 60°C | Slightly firmer, still juicy | Balanced home-cook texture |
| 145°F / 63°C | Fully cooked, flakes easily | Official safe internal temperature for fish |
For the official safe internal temperature, FoodSafety.gov lists fish at 145°F / 63°C, or until the flesh is opaque and separates easily with a fork.
How to Tell Black Cod Is Done Without a Thermometer
A thermometer is helpful, but the fish also gives visual cues. Look for opaque edges, soft flakes that separate with gentle pressure, and a center that is moist rather than glassy-raw.
- Edges should turn opaque.
- Flakes should relax apart instead of breaking dry.
- The center should look moist, not translucent and raw.
- Overall, the fish should look relaxed and glossy, not tight.
- On top, the glaze should be browned in spots, not blackened.
- Thick center-cut pieces may need oven time before direct broiler heat.
When you do not have a thermometer, the flake test helps: the fish should separate gently and still look moist.

If the top is dark but the center still looks underdone, stop broiling and finish gently in the oven.
After checking doneness: return to recipe card · fix a problem · compare methods · back to top
Pan-Seared Black Cod Tips
A skillet gives you crisp skin, browned corners, and a richer finish, but it is also where miso can darken too quickly. Keep the surface lightly coated, let the skin release naturally, and add any extra glaze near the end.
In a skillet, build the texture first and add glaze late; sugar-heavy miso can darken quickly against direct pan heat.
- Pat the fillets dry before cooking.
- Use neutral oil first, not butter.
- Start skin-side down if the fillet has skin.
- Cook for 4–5 minutes without moving the fish.
- Flip carefully with a thin fish spatula.
- Cook for 2–4 minutes more, depending on thickness.
- For thick fillets, finish in a 400°F / 200°C oven for 5–8 minutes.
- Brush with fresh glaze during the last minute, or spoon warm glaze over the cooked fish.
If the surface darkens too fast, lower the heat immediately and finish the fillet in the oven. With sablefish, fewer flips are usually better.
Do not sear a thick, heavily coated fillet over high heat from start to finish. The outside can burn before the center is done.
Grilled Black Cod or Grilled Sablefish Tips
Grilling works beautifully, but sablefish rewards patience more than force. The reward is subtle smoke around the miso, not a hard char. A clean release matters more than dramatic grill marks.
On the grill, success looks more like gentle smoke and clean release than dramatic char marks on delicate sablefish.
- Use skin-on fillets if possible.
- Oil the grill grates very well.
- Use medium heat or a cooler indirect zone.
- Start the fish skin-side down.
- Keep the lid closed while it cooks.
- Do not flip early; wait until the fish releases more easily.
- Treat miso as a finishing glaze, not a thick barbecue sauce.
- Cook for about 8–12 minutes total, depending on thickness and grill heat.
- Rest for 3–5 minutes before serving.
If the fillet starts tearing or sticking, stop chasing grill marks. Use lightly oiled foil or a grill basket instead. You will lose a little direct char, but the fish will be much easier to handle.
Can You Air Fry Black Cod?
The air fryer is handy when you want browned edges without babysitting the broiler, especially for smaller fillets or pre-marinated pieces. Done right, it gives you quick color without turning the kitchen into a smoke alarm test.
Air fryer heat can brown miso quickly, so smaller fillets need an early check and no puddles of glaze underneath.
- Preheat the air fryer.
- Leave only a thin coating on the fish.
- Use air fryer parchment if sticking is a concern.
- Air fry at 375°F / 190°C for 7–10 minutes.
- For faster browning, air fry at 400°F / 200°C for 7–9 minutes.
- Check at 5 minutes because air fryers vary and miso can darken quickly.
- Rest briefly before serving.
If the air fryer starts smoking, pause, wipe any burnt glaze from the basket, lower the temperature, and continue. Very thick fillets are usually better in the oven or under a controlled broiler.
How to Cook Frozen or Pre-Marinated Miso Black Cod
This is also the section for the fillet that came home already wearing miso marinade. Those can be excellent, but they usually need drying and gentler heat more than they need more sauce.
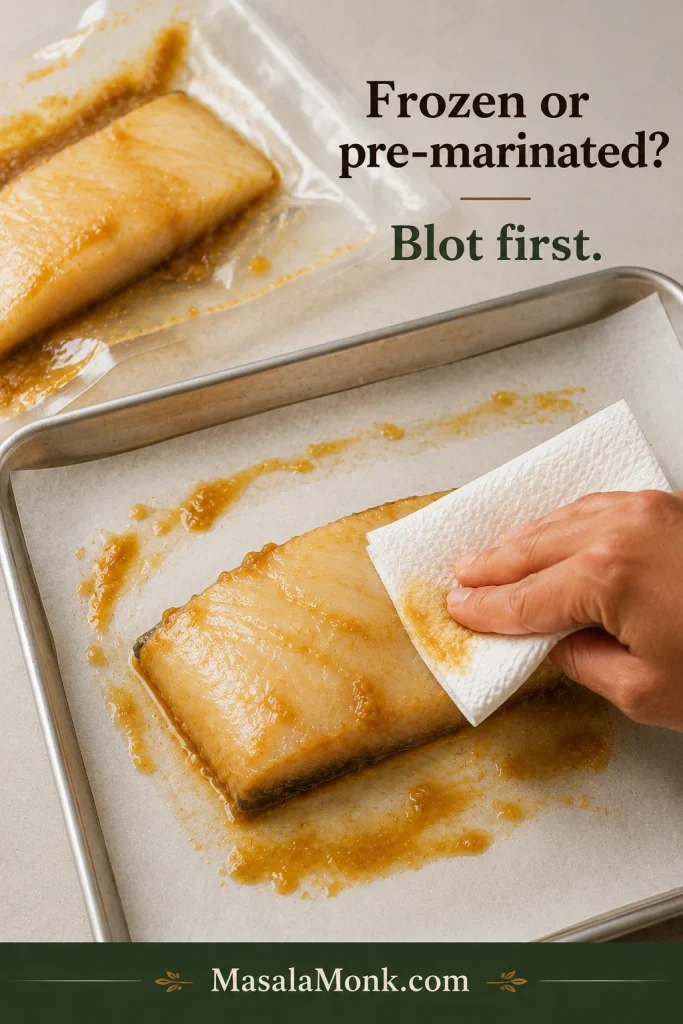
If you bought raw frozen sablefish, thaw it before marinating whenever possible. For pre-marinated miso black cod from a grocery store, seafood box, warehouse club, or freezer section, follow the package instructions first, then use these cues to prevent steaming or burning.
Frozen and Pre-Marinated Product Cues
Pre-marinated frozen fillets usually need less sauce, not more; blot away packaging liquid so the surface can brown.
| Product Type | Best Method | What to Watch |
|---|---|---|
| Frozen raw sablefish | Thaw, pat dry, then marinate | Wet surface prevents browning |
| Frozen pre-marinated miso black cod | Follow package first, then broil or air fry carefully | Sweet glaze burns fast |
| Vacuum-packed miso fillets | Remove excess liquid before cooking | Too much liquid causes steaming |
| Small air fryer fillets | Start at 375°F / 190°C | Check at 5 minutes |
How to Keep Frozen Black Cod from Steaming
For frozen miso black cod, the sequence matters: thaw if possible, blot well, avoid pooling, and brown only at the end.
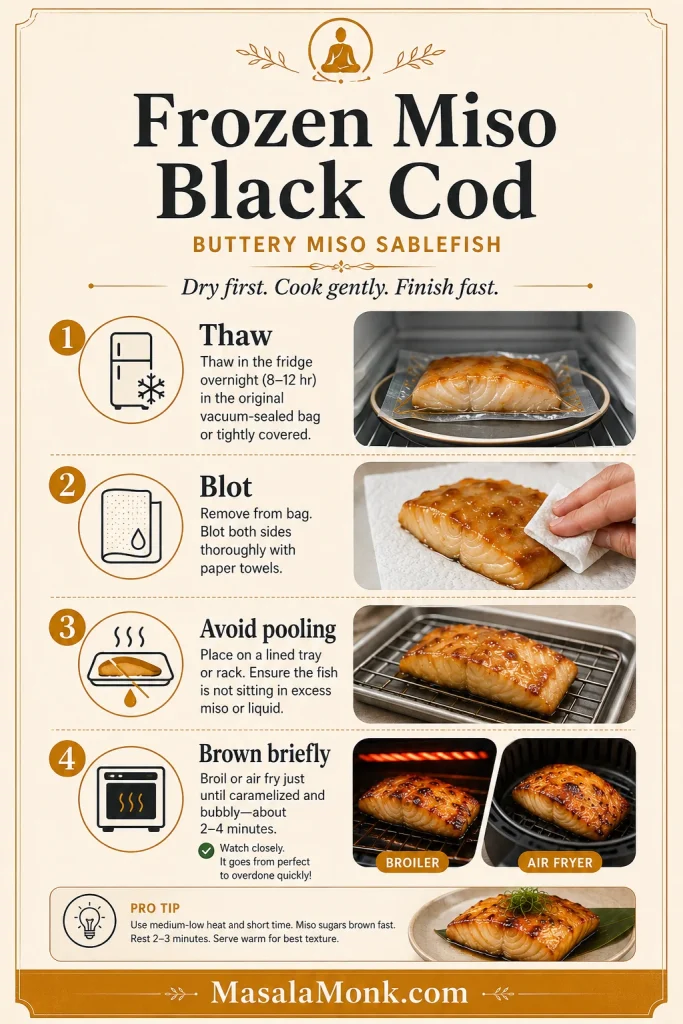
- Thaw frozen fillets overnight in the refrigerator when possible.
- Remove extra packaging liquid before cooking.
- Pat the fish gently if it looks wet.
- Avoid letting marinade pool under the fish.
- Choose the air fryer for quick browning on smaller fillets.
- Stay with the oven if you want a gentler method.
- Add a short broiler finish if the oven version looks pale.
- Be careful with pan cooking because sweet miso glaze can over-caramelize quickly.
Avoid cooking watery frozen fish straight from the package unless the package specifically tells you to do that. Water on the surface turns the first minutes of cooking into steaming, which weakens browning and dilutes the glaze.
Black Cod Without Miso
Miso is the famous move, but it is not the only one. If you want the fish to taste cleaner, brighter, or less sweet, these three directions work beautifully.
If you want a cleaner or less sweet dinner, black cod can move away from miso toward lemon garlic, soy ginger, or Mediterranean flavors.
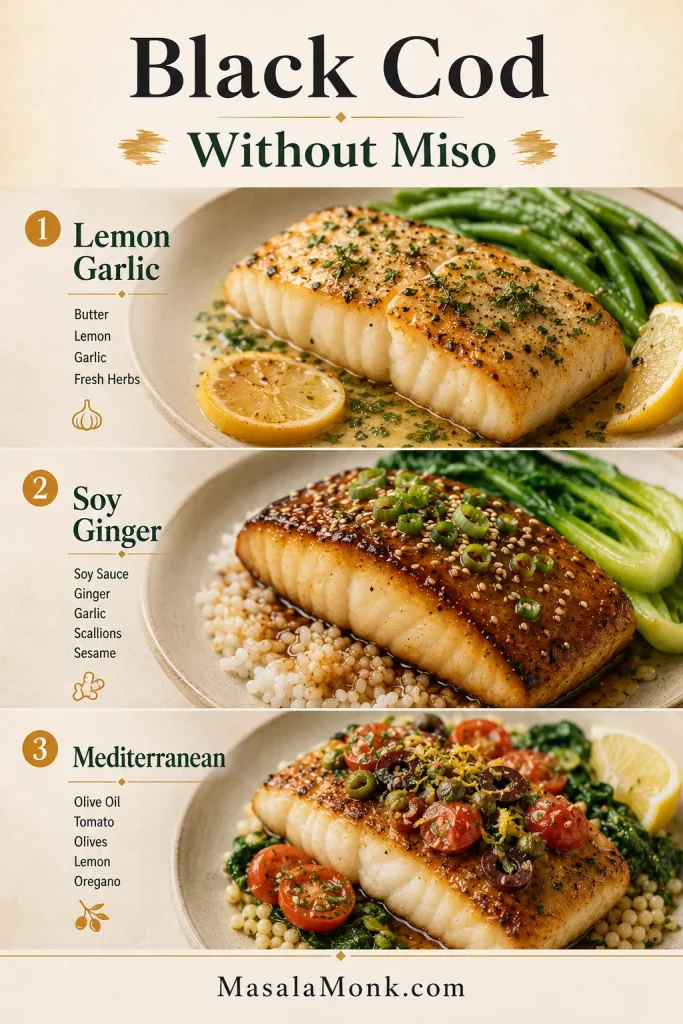
- Lemon garlic butter: best when you want the fish itself to stand out. Bake or pan-sear, then finish with garlic butter, lemon juice, and herbs.
- Soy ginger: best when you want sweet-savory flavor without miso. Use soy sauce, ginger, garlic, a little mirin or honey, and a small splash of sesame oil.
- Mediterranean: best when you want a lighter baked dinner. Use tomatoes, olives, lemon, garlic, olive oil, and herbs.
For a bolder seafood-style butter, borrow the idea from this garlic butter seafood sauce, but keep the seasoning lighter so the fish still shines.
What to Serve with Black Cod
Because the fish is so full-bodied, the best sides do the opposite: they stay simple, green, crisp, or bright. Rice is not just a side here; it catches the sweet-savory glaze.
The sides should balance the fish instead of competing with it: think rice, crisp vegetables, pickles, sesame, citrus, and greens.
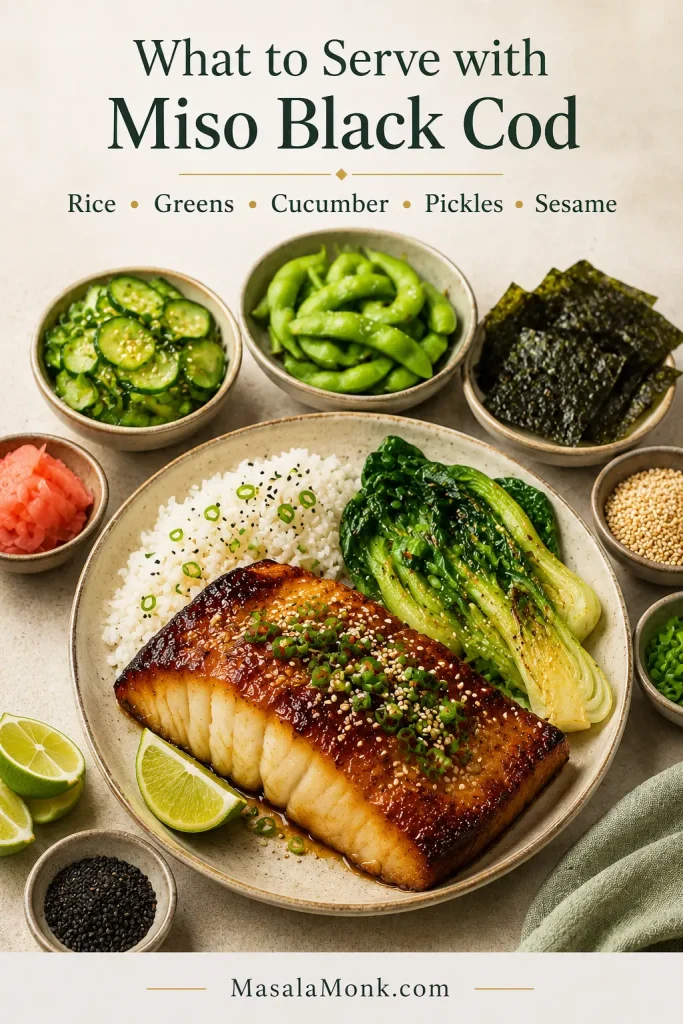
- Classic plate: steamed rice, bok choy, scallions, sesame seeds, and lime.
- Fresh plate: cucumber salad, pickled ginger, and citrusy greens.
- Comforting dinner: coconut rice, sautéed spinach, or roasted asparagus.
- Simple weeknight plate: jasmine rice, steamed broccoli, and lemon or lime wedges.
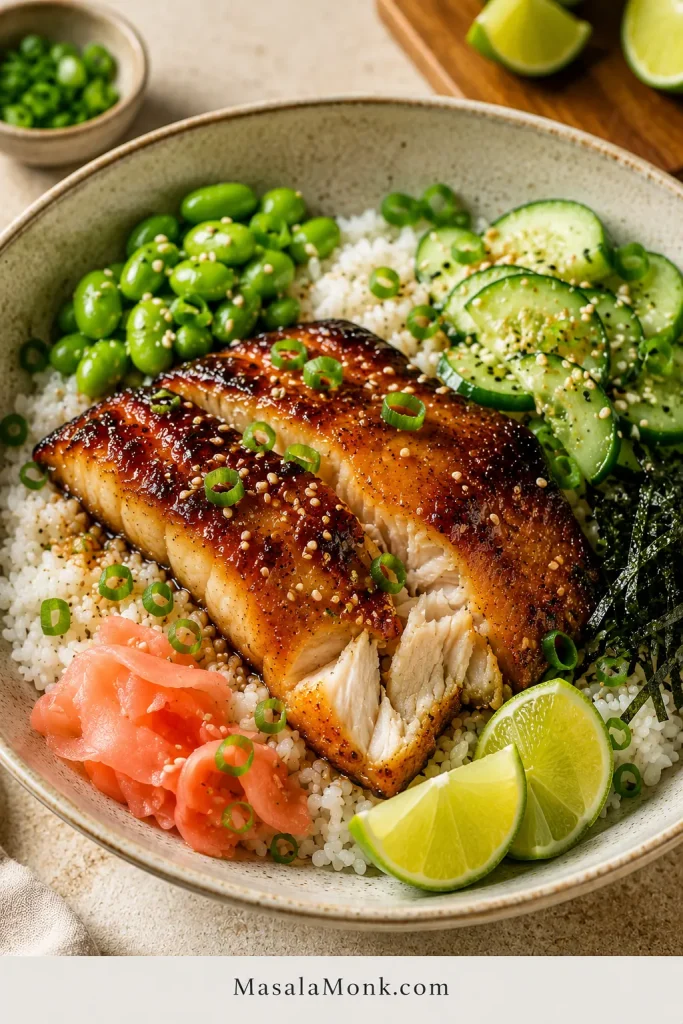
- Bowl-style dinner: sushi rice, edamame, nori, sesame, quick pickles, and scallions.
If you want to turn the fish into a rice bowl, use the same basic build as this salmon bowl recipe: rice underneath, something crisp, something green, something creamy or tangy, and a final sprinkle of sesame or scallions.
For a more casual meal, turn the fish into a rice bowl with something crisp, something green, something salty, and something tangy.
For the crisp side of the plate, a cold cucumber salad works beautifully because vinegar, herbs, and onion cut through the richness of the fish.
Skip very heavy cream sauces or overly sweet sides. Black cod already has plenty of richness, so the rest of the plate should bring balance.
Planning the plate? serving ideas · buying substitutes · storage and leftovers · recipe card
Buying, Thawing, Skin, and Pin Bones
Look for fish labeled black cod or sablefish. Choose fillets that look moist and firm, not dry around the edges. Center-cut pieces cook more evenly than thin tail pieces, especially if you are using the oven-first method.
| Label | Good for This Recipe? | Note |
|---|---|---|
| Black cod | Yes | Usually sablefish |
| Sablefish | Yes | Best choice |
| Butterfish | Maybe | Name can mean different fish in different markets |
| Regular cod | Acceptable | Leaner; check earlier |
| Chilean sea bass | Good but expensive | Similar richness |
| Salmon | Works with the glaze | Different flavor, easier to find |
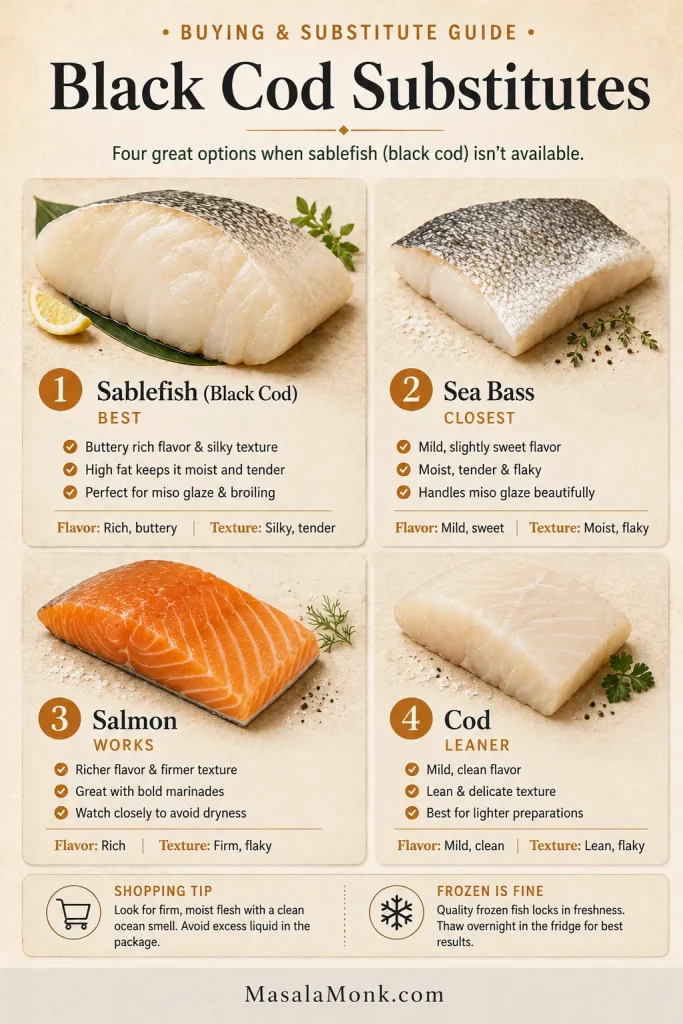
If black cod is unavailable, choose a substitute by texture and richness first, then adjust the cooking time for leaner fish.
Frozen sablefish is not a downgrade. This fish is often frozen close to harvest, and good frozen fillets can be excellent. Thaw them overnight in the refrigerator, remove any packaging liquid, and pat dry before marinating or cooking.
Skin-on fillets are helpful because they hold together better in a pan or on the grill. You can eat the skin if it is crisp, or lift the cooked fish away from the skin before serving.
The fillets may have pin bones. When you feel them before cooking, remove them with fish tweezers or clean pliers. If they are difficult to pull, cook the fish first; pin bones often come out more easily once the flesh has softened.
Storing and Reheating Black Cod
Leftovers are delicate, so reheat them like something you want to protect, not blast. Store cooked fish in an airtight container in the refrigerator for up to 2 days.
- Reheat gently in a low oven until just warmed through.
- Avoid aggressive microwaving, which can make the fish oily or broken.
- Do not re-broil miso-glazed leftovers hard; the coating can burn.
- Use leftovers in rice bowls, salads, noodles, or pasta.
It is often better gently warmed, or even used cold or room temperature in a bowl, than reheated hard. If you have a small amount of cooked fish left, fold it into noodles, rice, or pasta at the end rather than cooking it again.
Black Cod Troubleshooting
If something feels off, do not overthink it. When black cod goes wrong, it is usually one of three things: too much marinade on the surface, too much direct heat, or too much fiddling.
Start with the Main Cooking Cues
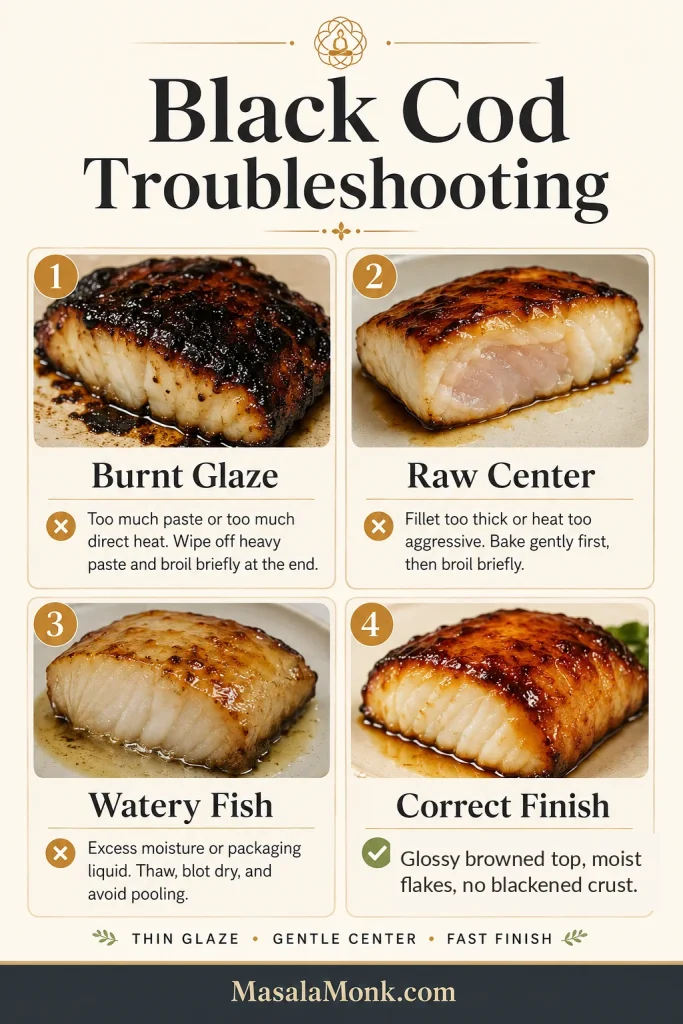
Most problems trace back to paste, heat, or moisture; the visual below shows what went wrong and how to correct it next time.
Glaze, Heat, and Moisture Problems
| Problem | Why It Happened | Fix |
|---|---|---|
| The miso glaze burned | Too much marinade, rack too close, or sugar burning under strong heat | Leave a lighter coating, move the rack lower, or broil only at the end |
| The top browned but the center was raw | The heat was too aggressive | Bake first, then broil briefly to finish |
| The fish tasted too salty | Long marinade, strong miso, or too much soy sauce | Use white miso, shorten the marinade, and wipe away excess before cooking |
| The fish tasted too sweet | Too much sugar or honey | Use 1 tablespoon sweetener next time instead of 2 |
| The fish was watery | Frozen fish was not fully thawed or dried | Thaw overnight and pat very dry before marinating |
Handling, Air Fryer, and Grill Problems
| Problem | Why It Happened | Fix |
|---|---|---|
| The fish fell apart | Sablefish is delicate and oily | Use skin-on fillets, a fish spatula, and fewer flips |
| Regular cod came out dry | Regular cod is much leaner than black cod | Cook it for less time and use gentler heat |
| The air fryer dried the edges | The fillet was small or the heat was too strong | Check at 5 minutes, lower the temperature, or use a thicker fillet |
| The fish tore on the grill | The grates were dry or the fish was flipped too early | Oil the grates well, start skin-side down, and use foil or a grill basket if needed |
When it is right, the first bite should be savory, gently sweet, and rich enough that rice and greens suddenly make perfect sense.
Still deciding? jump to recipe card · temperature guide · read the FAQ · back to top
FAQ
Is black cod the same as sablefish?
Yes. Black cod is sablefish. It is rich, oily, and naturally tender, which makes it especially good with miso marinades and high-heat cooking.
Is this Nobu-style black cod?
It uses the same broad miso-marinated black cod idea: sablefish, miso, mirin, sake, sugar, and a caramelized finish. This home version gives shorter and overnight marinade options instead of requiring a long multi-day marinade.
How long should black cod marinate?
For a quick dinner, 20–30 minutes is enough. To build deeper flavor, marinate for 8–24 hours. Longer marinades become stronger and saltier, so leave only a light coating before cooking.
Can I marinate black cod for 2 days?
Yes, but the flavor becomes stronger and saltier. For most home cooks, 8–24 hours is the best balance. If you marinate for 2 days, use mild white miso and wipe away heavy paste before cooking.
Should I wipe off miso marinade before cooking?
Yes. Do not rinse the fish, but remove heavy paste and leave only a shiny trace of marinade. Thick paste burns under the broiler; a shiny trace caramelizes.
What temperature should black cod be cooked to?
For a softer texture, some cooks pull it around 130–135°F / 54–57°C and let it rest. The official safe internal temperature for fish is 145°F / 63°C, or until it is opaque and flakes easily with a fork.
Why did my miso glaze burn?
Miso glaze burns because it contains sugar and fermented paste. Keep the fish slightly farther from the broiler, avoid thick pockets of marinade, and caramelize briefly at the end if your oven runs hot.
Do you cook black cod with the skin on?
Skin-on fillets are easier to handle, especially in a pan or on the grill. You can serve the fish with the skin or lift the cooked flesh away from it before eating.
What is the best substitute for black cod?
Chilean sea bass is closest in richness, but it is also expensive. Salmon works well with the miso glaze and is easier to find. Regular cod can work, but it is leaner, less buttery, and needs a shorter cook time.
Can I use Trader Joe’s, Costco, or other frozen miso black cod with these instructions?
Yes, but follow the package instructions first. Use the tips here to avoid common problems: remove excess liquid, do not let glaze pool, check early in the air fryer, and use a short broiler finish only if the fish needs more color.
Can I grill black cod?
Yes, and skin-on fillets make it much easier. Use medium or indirect heat, oil the grates well, and treat the miso as a finishing glaze so it does not burn before the fish is done.
Can I air fry black cod?
Yes. Use 375°F / 190°C for 7–10 minutes, or 400°F / 200°C for 7–9 minutes if you want faster browning. Check early; air fryers vary and miso can darken quickly.
Can I cook black cod from frozen?
Thawing overnight in the refrigerator gives the best texture and browning. Wet, icy fillets tend to steam instead of caramelize. If a package gives cook-from-frozen instructions, follow those first.
Why is black cod so expensive?
Black cod, or sablefish, is prized for its rich, high-fat texture and soft flakes. It also tends to be sold as a premium seafood item. Good frozen sablefish can still be excellent, so fresh is not the only good option.
Once you know how this fish behaves, it stops feeling intimidating. Use the Black Cod Safety Triangle: thin glaze, gentle center, fast caramelized finish. When the top is burnished, the center is still soft, and the rice catches that sweet-savory glaze, it feels like the kind of dinner you planned for days — even if you only started half an hour ago.