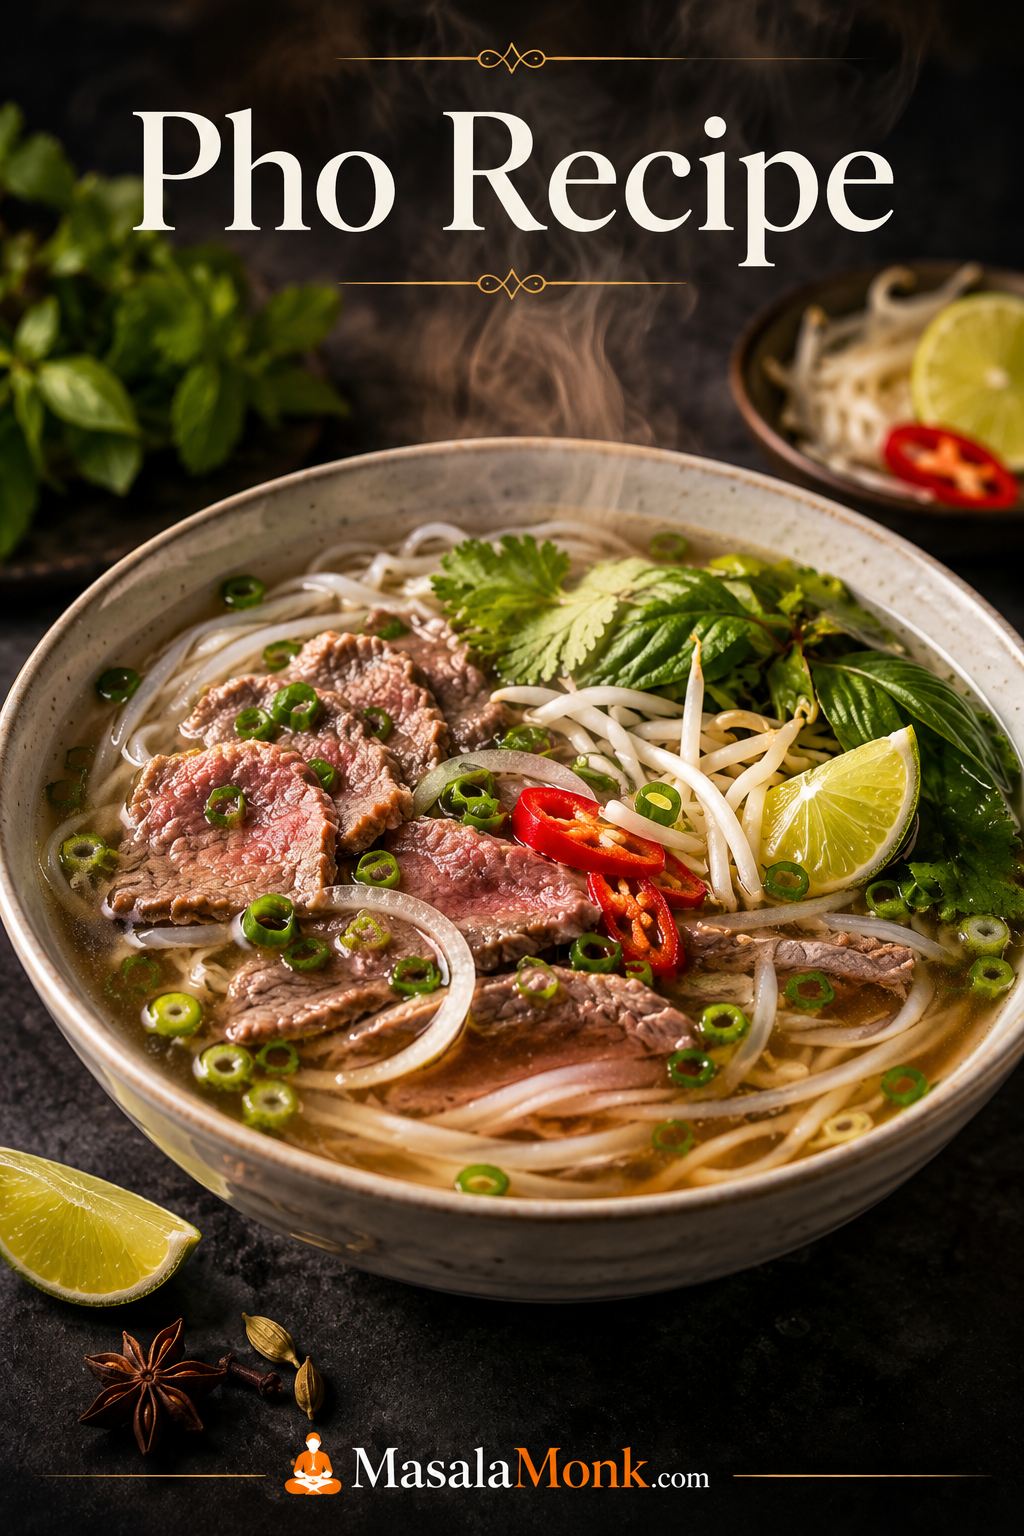
This pho recipe is for the day you want the comfort of a real Vietnamese noodle soup at home, but do not want to get lost in bones, spices, noodles, and conflicting broth advice. The process is easier once you stop treating pho as one giant task and start seeing it as four smaller jobs: build a clean aromatic broth, cook the noodles separately, prepare the beef and toppings, then assemble everything while the broth is steaming hot.
This is a home-style beef pho recipe built for a serious homemade pot, without pretending you need a restaurant setup. You get clear broth, real beef flavor, whole spices, proper rice noodles, and practical fixes for the mistakes that usually make pho taste flat.
Use the full beef version when you want broth depth, the quick pho section when you want a weeknight bowl, and the chicken or vegan notes when those fit your kitchen better. The method changes, but the goal stays the same: clean aroma, balanced broth, separate noodles, fresh toppings, and hot assembly.
Table of Contents
Start with the version that fits your day, then use the broth, noodle, topping, and troubleshooting sections to build a bowl that tastes clean, aromatic, and satisfying.
Quick Answer: How to Make Pho at Home
To make pho at home, start with a broth made from beef bones, a flavorful simmering cut such as brisket or chuck, browned onion, ginger, whole spices, fish sauce, salt, and a little rock sugar. Simmer it gently until the broth tastes deep and aromatic, then strain it and season it slightly stronger than a normal soup.
Next, cook the rice noodles separately, divide them into bowls, add sliced cooked beef and paper-thin raw beef if using, then ladle very hot broth over the top. Finish with herbs, bean sprouts, lime, chili, onion, scallions, and optional sauces on the side.
The two biggest mistakes are boiling the broth too hard and letting the noodles cook directly in the broth. Keep the broth at a gentle simmer while it cooks, then bring it back to a full boil only when you are ready to assemble the bowls.
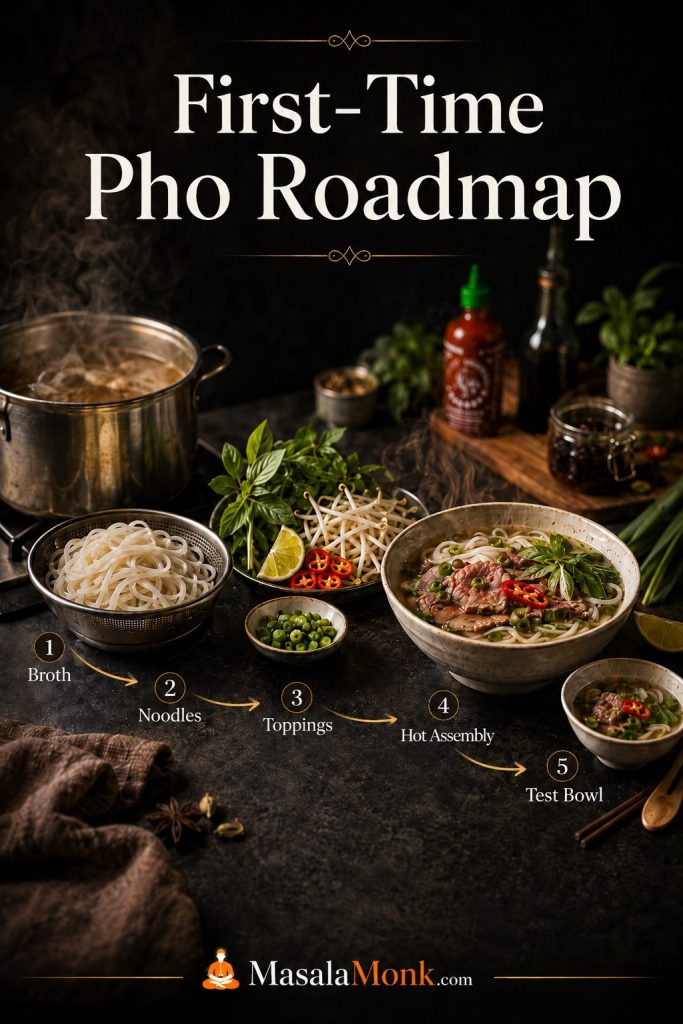
First-Time Pho Recipe Roadmap
If you are making the full beef version, give yourself a few unrushed hours. Homemade pho is not difficult, but it rewards calm timing. You do not want to be slicing beef, washing herbs, boiling noodles, and fixing broth seasoning all at the same time.
| Step | What to do | Why it helps |
|---|---|---|
| 1 | Make the broth on a day when you are not rushed. | The simmer is simple, but it needs time and attention. |
| 2 | Prepare noodles and toppings only when the broth is nearly ready. | Noodles stay better, herbs stay fresh, and the final bowl feels cleaner. |
| 3 | Taste the broth before assembly. | It should be a little bolder than sipping soup because noodles soften the flavor. |
| 4 | Bring the strained broth to a full boil only at serving. | The long simmer should be gentle, but the final pour should be hot. |
| 5 | Assemble one test bowl first. | If it tastes flat, you can fix the broth before serving the rest. |
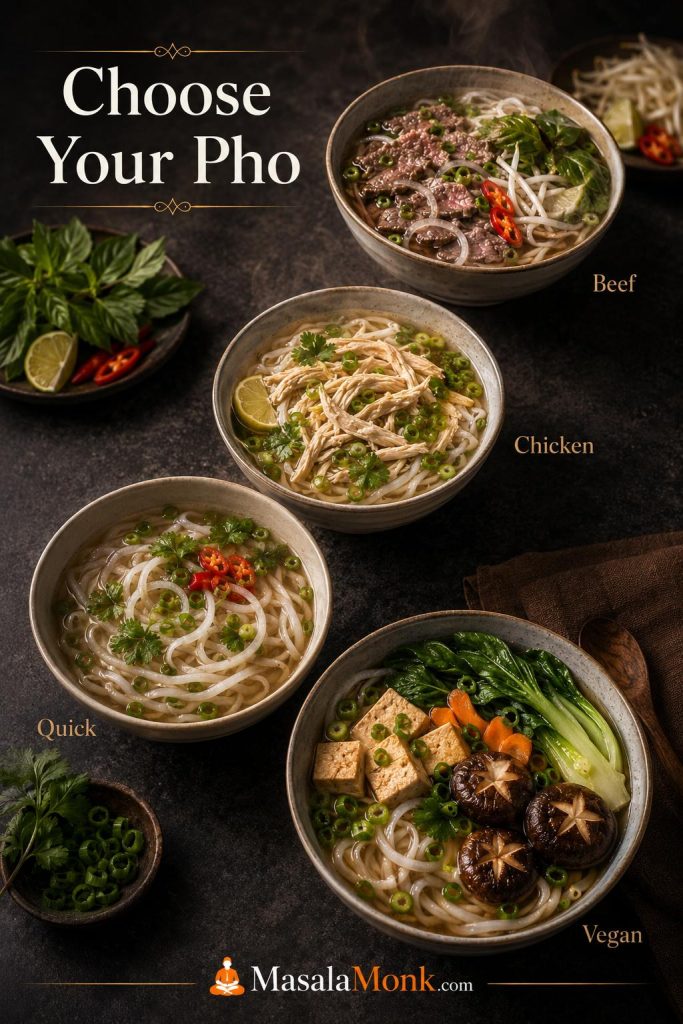
Choose Your Pho: Beef, Chicken, Quick, or Vegan
Pho does not have to mean the same thing every time. It can be a slow weekend broth, a lighter chicken soup, a practical shortcut, or a plant-based bowl with serious flavor. The trick is not to pretend every version is the same.
Which Pho Recipe Should You Make?
Choose the path that fits your time and ingredients, then build the bowl with the same basic logic: aromatic broth, rice noodles added at the end, fresh toppings, and hot broth to bring everything together.
| Version | Best for | What changes | Time expectation |
|---|---|---|---|
| Traditional beef pho | Deep broth, classic beef noodle soup flavor, weekend cooking | Uses beef bones, brisket or chuck, roasted aromatics, whole spices, and a long gentle simmer | About 4–5 hours |
| Chicken pho | An easier first pho, lighter broth, fewer hard-to-find ingredients | Uses chicken, chicken broth or a whole-chicken base, similar aromatics, and a shorter simmer | About 45–90 minutes |
| Quick pho | Weeknight cravings when you want a pho-style bowl without a full broth project | Uses good store-bought broth, roasted aromatics, warm spices, fish sauce, and fresh toppings | About 30–60 minutes |
| Vegetarian or vegan pho | Plant-based bowls that still need depth and aroma | Uses mushrooms, browned onion and ginger, whole spices, tamari or soy sauce, and tofu or vegetables | About 45–75 minutes |
| Instant Pot pho | Faster extraction from bones and meat | Uses pressure cooking, then careful straining, skimming, and final seasoning | About 2–3 hours with pressure release |
The Best First Pho Recipe to Try
If you have the time, beef pho is the best version for understanding how pho gets its depth. If you are rushed, start with chicken pho or quick pho instead. A calm, well-seasoned shortcut bowl is better than a stressed full beef version.
After you understand the broth, noodles, and bowl assembly, the other versions are not confusing anymore. They are simply different ways of building aroma, body, salt, sweetness, freshness, and heat.
What Is Pho?
Pho, or phở, is a Vietnamese noodle soup built around aromatic broth, flat rice noodles, meat or another protein, and fresh toppings. Beef pho is often called phở bò, while chicken pho is called phở gà. A good bowl tastes savory, fragrant, lightly sweet in the background, and fresh from herbs and lime.
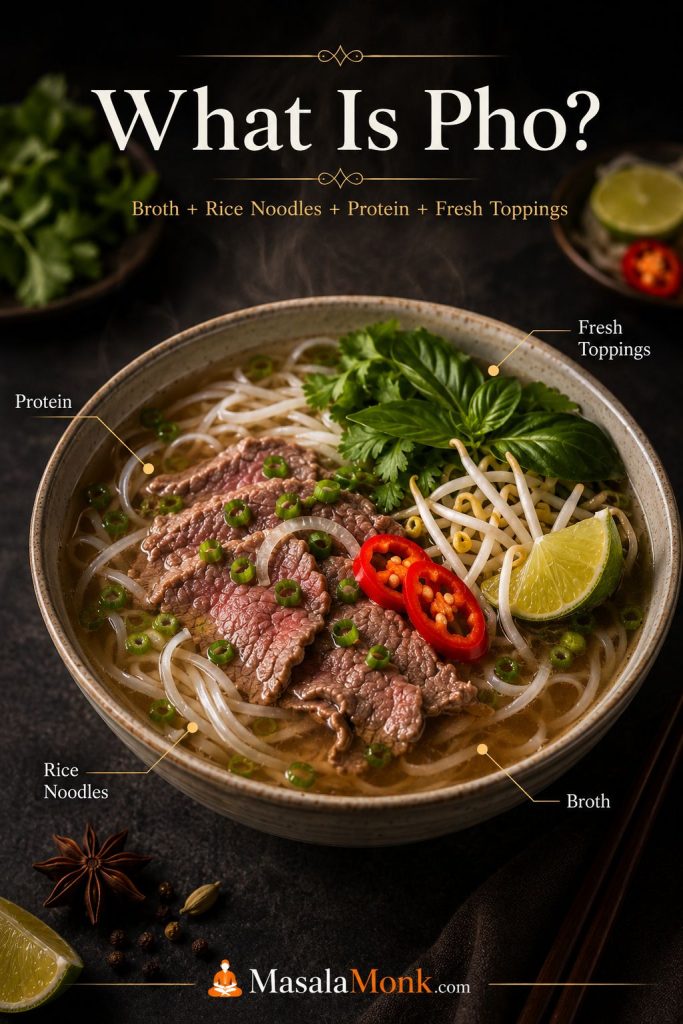
In every version, the broth does most of the work. Bones or chicken give body, onion and ginger bring warmth, whole spices create the unmistakable aroma, fish sauce and salt build savoriness, and fresh toppings brighten the finished bowl. If you want a light background read on pho’s place in Vietnamese food culture, Vietnam Travel has a useful overview of the story of Vietnamese pho.
Pho at a Glance
| Recipe type | Home-style beef pho / Vietnamese noodle soup |
|---|---|
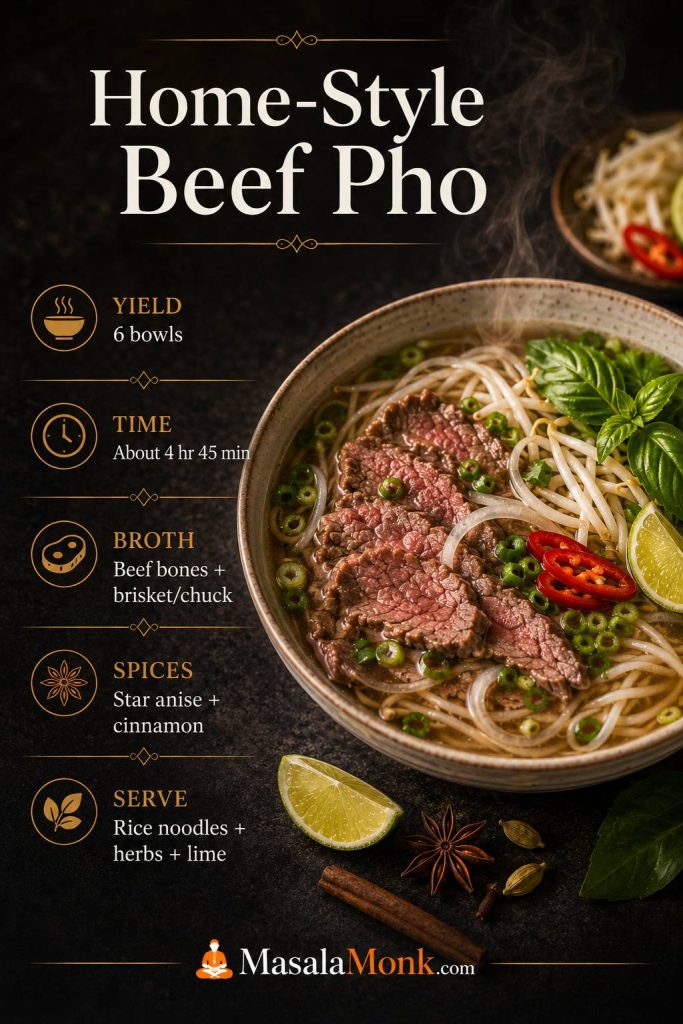
| Yield | 6 large bowls |
| Starting water | 4.5 L / 19 cups |
| Finished broth | About 3.5–4 L / 3.7–4.2 quarts, depending on evaporation |
| Prep time | 45 minutes |
| Cook time | About 4 hours |
| Total time | About 4 hours 45 minutes |
| Pot size | 9–10 L / 10-quart stockpot is ideal |
| Broth temperature while simmering | Gentle simmer, roughly 85–95°C / 185–203°F, not a rolling boil |
| Noodles per bowl | 50–80 g dried banh pho noodles, or about 120 g fresh noodles |
| Broth per bowl | 500–650 ml / 2–2¾ cups hot broth |
The starting water is higher than the final broth yield because some liquid evaporates during the long simmer. If the pot reduces too far, add hot water near the end and adjust the seasoning before serving.
Why This Recipe Works
This pho recipe uses both beef bones and a flavorful simmering cut because bones and meat do different jobs. Bones give body, richness, and depth. Brisket, chuck, or shank makes the broth taste more rounded and gives you tender cooked beef for the bowls.
Parboiling keeps the broth cleaner. Browned onion and ginger add roasted aroma, while the toasted spice bundle gives the broth its pho fragrance without leaving grit behind. A gentle simmer keeps the broth clearer instead of greasy and muddy.
The broth is seasoned slightly stronger than a regular soup because rice noodles, herbs, sprouts, beef, and lime will soften the flavor once the bowl is assembled. That one detail is why a broth that tastes bold in the pot can taste balanced at the table.
Pho Recipe Ingredients
Good pho does not need a huge list of fancy ingredients, but each ingredient has a job. The broth needs bones or chicken for body, meat for savoriness, onion and ginger for aroma, spices for warmth, fish sauce and salt for depth, sugar for balance, and noodles that stay silky after hot broth is poured over them.
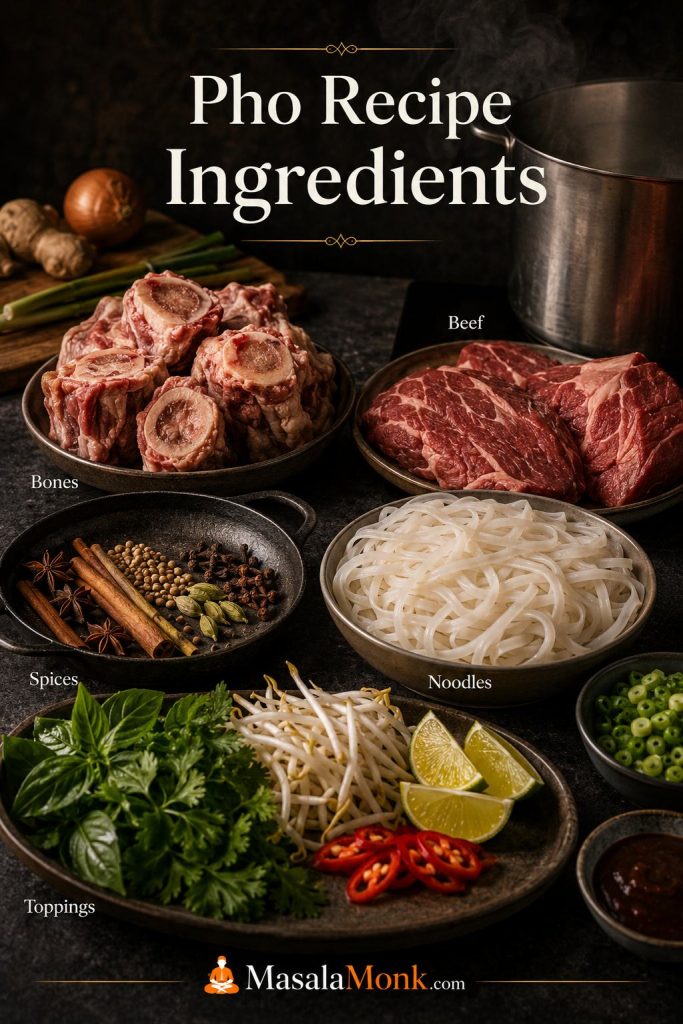
Broth Ingredients
- Beef bones: marrow, knuckle, leg, neck, oxtail, or meaty soup bones help build flavor and body.
- Brisket, chuck, or shank: this seasons the broth and becomes the cooked sliced beef for serving.
- Onion and ginger: browning them gives the broth a deeper, lightly smoky aroma.
- Water: start with 4.5 L / 19 cups so you end with enough broth for 6 bowls after simmering.
- Fish sauce: adds savory depth. Add it near the end so the final seasoning stays controlled.
- Salt: seasons the broth itself, not just the toppings.
- Rock sugar or regular sugar: rounds the broth without making it taste sugary.
Whole Spices
The classic pho aroma comes from whole spices, not powdered seasoning dumped into the pot. Star anise is the most recognizable note, while cinnamon, cloves, coriander, fennel, and black cardamom add warmth and depth.
- Star anise: the signature sweet-spiced aroma.
- Cinnamon: warm backbone. Use sticks, not ground cinnamon.
- Cloves: powerful and easy to overdo, so use a small amount.
- Coriander seeds: gentle citrusy lift.
- Fennel seeds: optional, with a sweet herbal edge.
- Black cardamom: optional, smoky, and strong. One pod is enough.
Pho Noodles
Use banh pho, the flat rice noodles made for pho. Dried noodles are easier to find and work very well when soaked or cooked separately. Fresh noodles need only a quick blanch. For a deeper noodle guide, Andrea Nguyen’s Viet World Kitchen has a helpful explanation of banh pho flat rice noodles.
If rice-based cooking often gives you texture trouble, MasalaMonk’s guide on how to cook rice perfectly is a useful companion for understanding rinsing, soaking, resting, and why starch control matters.
Beef, Chicken, or Plant-Based Protein
For beef pho, use two kinds of beef: one cut for simmering in the broth and one tender cut for the bowl. Brisket, chuck, or shank are good for simmering. Eye of round, sirloin, tenderloin, or flank can be sliced paper-thin and cooked by the hot broth in the bowl.
For chicken pho, use bone-in chicken, chicken thighs, or a whole-chicken base. For vegetarian or vegan pho, build body with mushrooms, roasted aromatics, whole spices, tamari or soy sauce, and tofu or vegetables.
Toppings, Herbs, and Condiments
Toppings should brighten the bowl, not cover up the broth. Bean sprouts add crunch, herbs add aroma, lime adds lift, chili adds heat, and sauces add sweetness or spice. Hoisin and sriracha are optional. To preserve the broth’s clean flavor, try sauces on the side for dipping meat instead of stirring a lot into the whole bowl.
- Bean sprouts
- Thai basil, mint, cilantro, or a mix
- Lime wedges
- Sliced chili or jalapeño
- Thinly sliced onion
- Scallions
- Hoisin sauce, optional
- Sriracha or chili sauce, optional
If you want something cool and crunchy on the side, this easy cucumber salad recipe has Asian-style and spicy cucumber variations that work well beside hot, aromatic noodle bowls.
What to Buy for Homemade Pho
If this is your first time making pho, do not worry about buying every possible beef cut, herb, or spice. Focus on the ingredients that change the broth most: bones, one flavorful simmering cut, onion, ginger, whole spices, fish sauce, and proper flat rice noodles.
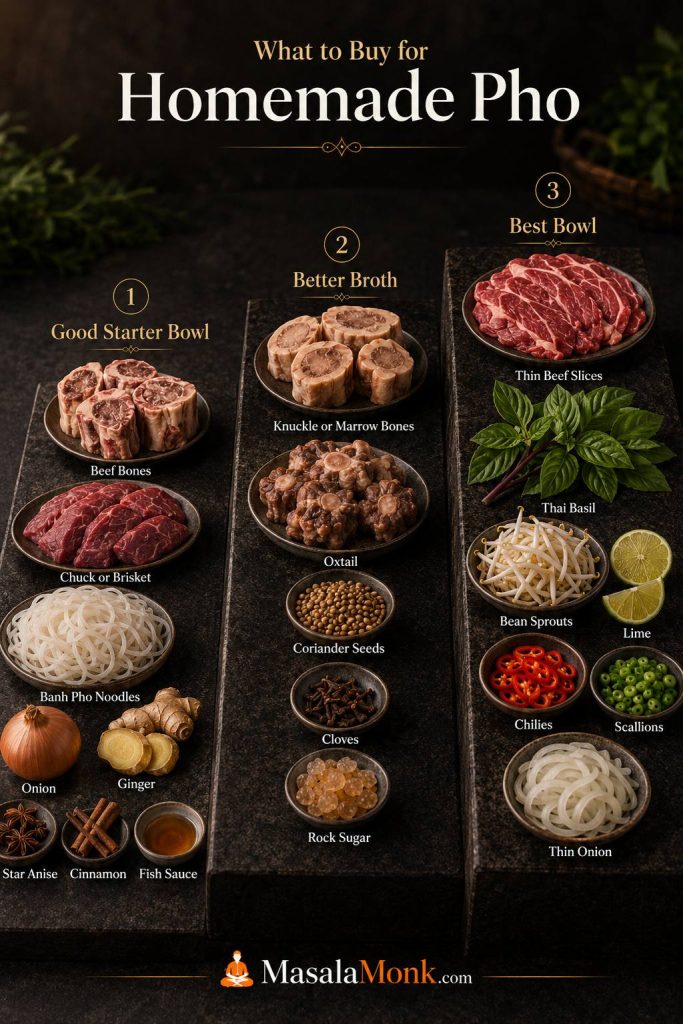
| Level | Buy this | What it gives you |
|---|---|---|
| Minimum good beef pho | Meaty beef bones, chuck or brisket, banh pho noodles, onion, ginger, star anise, cinnamon, fish sauce | A satisfying homemade bowl with real broth character |
| Better broth | Add knuckle bones, marrow bones, oxtail, coriander seed, cloves, and rock sugar | More body, deeper aroma, and better balance |
| Best topping setup | Add eye of round or sirloin, Thai basil, bean sprouts, lime, chilies, scallions, and thin onion | A fresher, more complete restaurant-style bowl |
| Shortcut version | Low-sodium broth, onion, ginger, whole spices, fish sauce, rice noodles, herbs, and lime | A good weeknight bowl, but not the same body as long-simmered beef pho |
Think of the shopping list for this pho recipe as a ladder. The first level can still make good pho. The higher levels add body, aroma, and freshness, but they are not worth stressing over if they keep you from cooking.
Best Bones and Beef Cuts for Pho
Great beef pho usually needs both bones and meat. Bones bring body and depth, but meat makes the broth taste more rounded and satisfying. A pot made only with bones can taste thin or hollow, while a pot with only meat can lack the gelatin-rich texture that makes pho broth feel complete.
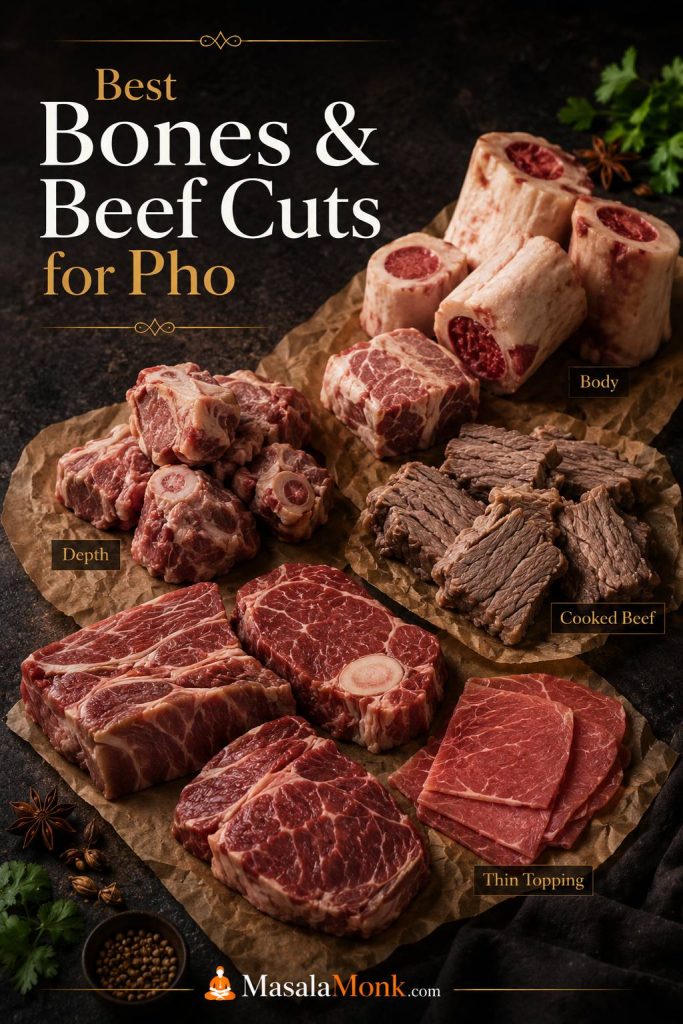
| Beef or bone | Best use | What it adds |
|---|---|---|
| Marrow bones | Broth base | Richness and beef flavor, though they can add fat that needs skimming |
| Knuckle or leg bones | Broth base | Gelatin and body |
| Neck bones or oxtail | Broth base | Meatiness and depth |
| Brisket | Simmered meat and topping | Classic cooked beef slices with rich flavor |
| Chuck | Simmered meat and topping | Beefy, affordable, and forgiving |
| Shank | Simmered meat and topping | Deep flavor and a slightly firmer texture |
| Eye of round, sirloin, tenderloin, or flank | Raw thin-sliced topping | Tender slices that cook in very hot broth |
For the easiest home version, use a mix of meaty bones, marrow or knuckle bones, and brisket or chuck. If your butcher has oxtail or neck bones, they are excellent, but you do not need every cut to make a strong homemade bowl.
How Thin to Slice Beef for Pho
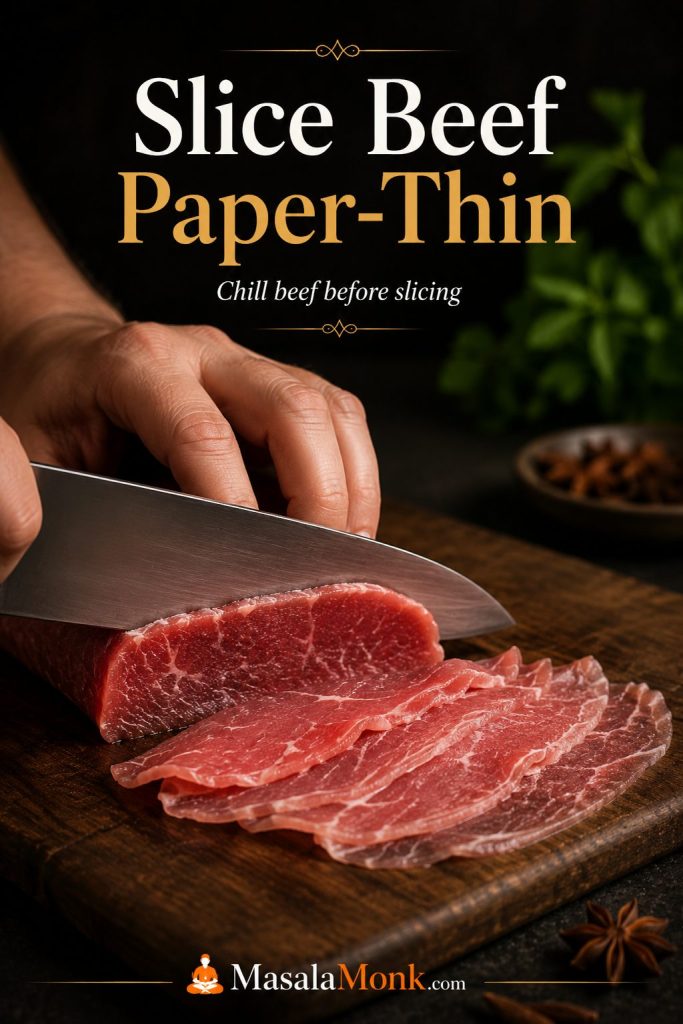
For raw beef topping, thickness matters more than the exact cut. The slices should be thin enough that hot broth can warm them quickly in the bowl. If the beef is cut too thick, it may stay cold or raw-looking even after the broth is poured.
Chill the beef briefly before slicing, then cut across the grain with a sharp knife. Aim for flexible, paper-thin slices rather than steak-like strips. For a fully cooked bowl, dip the slices into simmering broth first, then add them to the noodles.
Pho Spices and Spice Bag
Use whole spices and toast them briefly before they go into the broth. Toasting wakes up the aroma, while a spice bag keeps the broth cleaner and makes it easier to remove the spices before they become too strong.
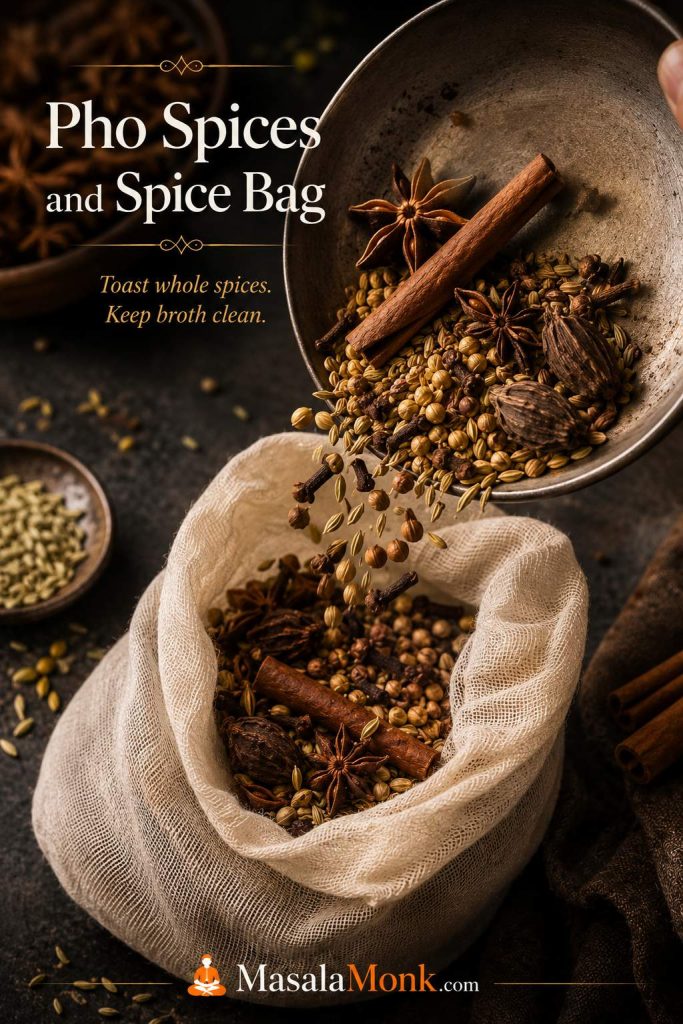
Ground spices are not ideal for the main broth because they can cloud the liquid and leave grit at the bottom of the bowl. If you only have ground spices, use them very sparingly in a shortcut broth, then strain carefully through a fine-mesh strainer lined with cheesecloth.
| Spice | Amount for this recipe | Role |
|---|---|---|
| Star anise | 6–8 pods | Signature pho aroma |
| Cinnamon sticks | 1–2 sticks | Warmth and sweetness |
| Cloves | 4–6 whole cloves | Deep spice; use carefully |
| Coriander seeds | 1 tablespoon | Citrusy lift |
| Fennel seeds | 1–2 teaspoons, optional | Sweet herbal note |
| Black cardamom | 1 pod, optional | Smoky depth |
Add the spice bag during the later part of simmering instead of leaving it in for the entire cook. If the broth starts smelling more like a spice cabinet than beef soup, remove the bag early. The spices should support the broth, not take over the bowl.
How to Make Clear Pho Broth
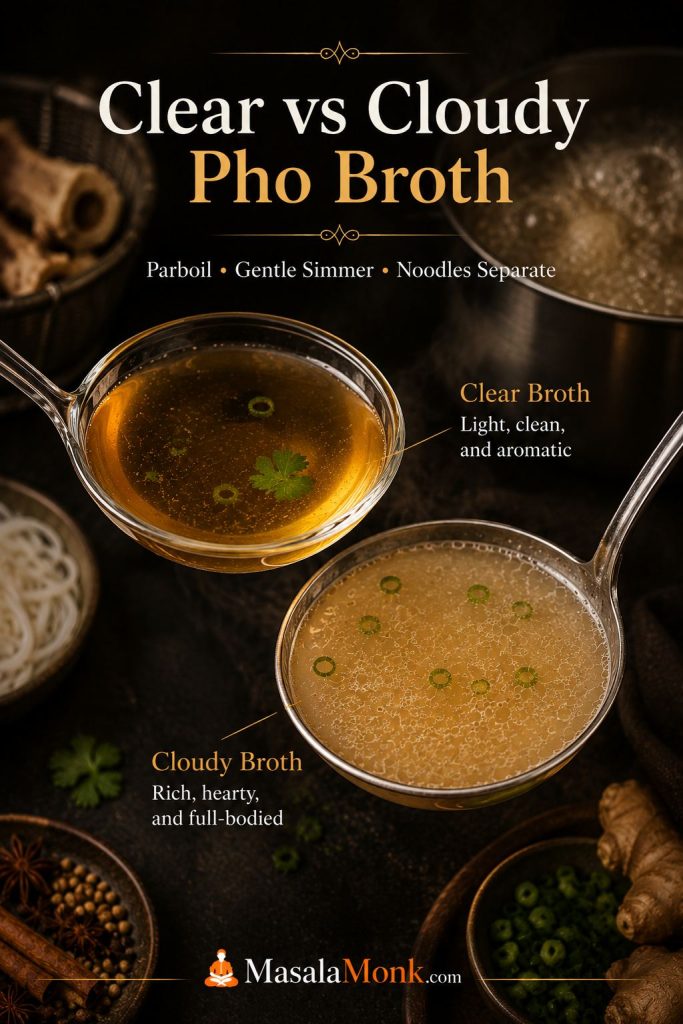
Clear broth comes from good preparation and gentle heat. The goal is not a weak broth; it is a broth that tastes deep but looks clean. Parboil the bones, rinse them well, brown the aromatics, simmer gently, skim when needed, and strain before serving.
The broth should smell warm from the spices, roasted from the onion and ginger, and savory before you ever add noodles. When it is right, it tastes bold on its own but not harsh, with enough salt and fish sauce to carry the plain rice noodles.
Why You Parboil the Bones First
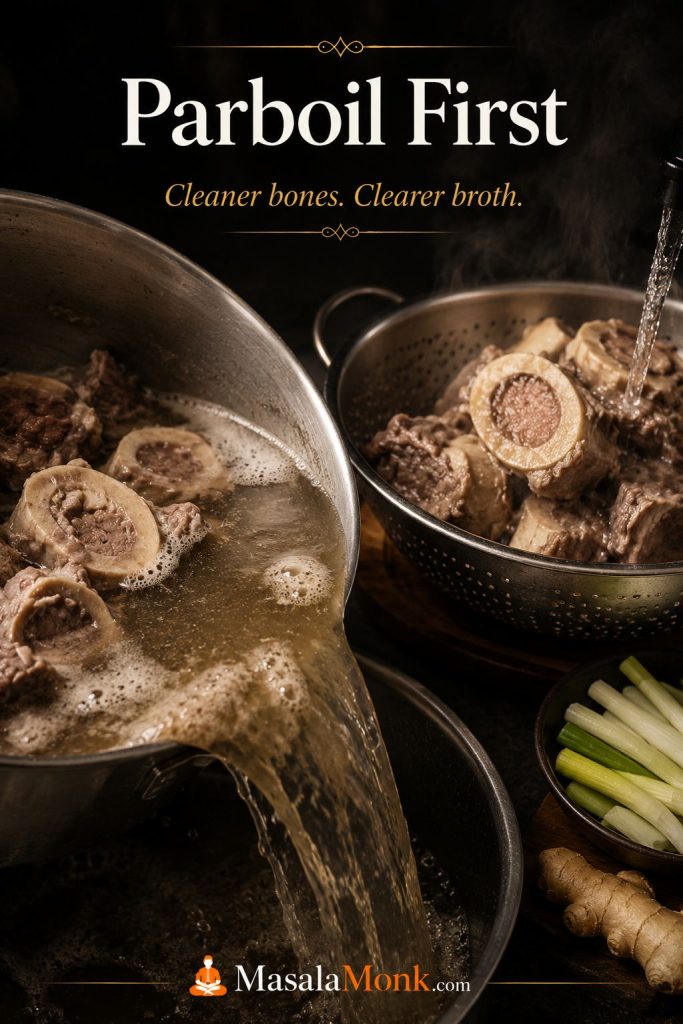
Parboiling removes surface impurities, blood, and loose proteins before the real broth begins. Add the bones and simmering beef to a pot, cover with water, bring to a hard boil for 5–10 minutes, then drain. Rinse the bones and meat under warm water and scrub the pot before starting the actual broth.
This step feels annoying, but it is one of the biggest differences between clear broth and a murky pot. You are not throwing away the good flavor. You are removing the material that would cloud the broth later.
Why You Char the Onion and Ginger
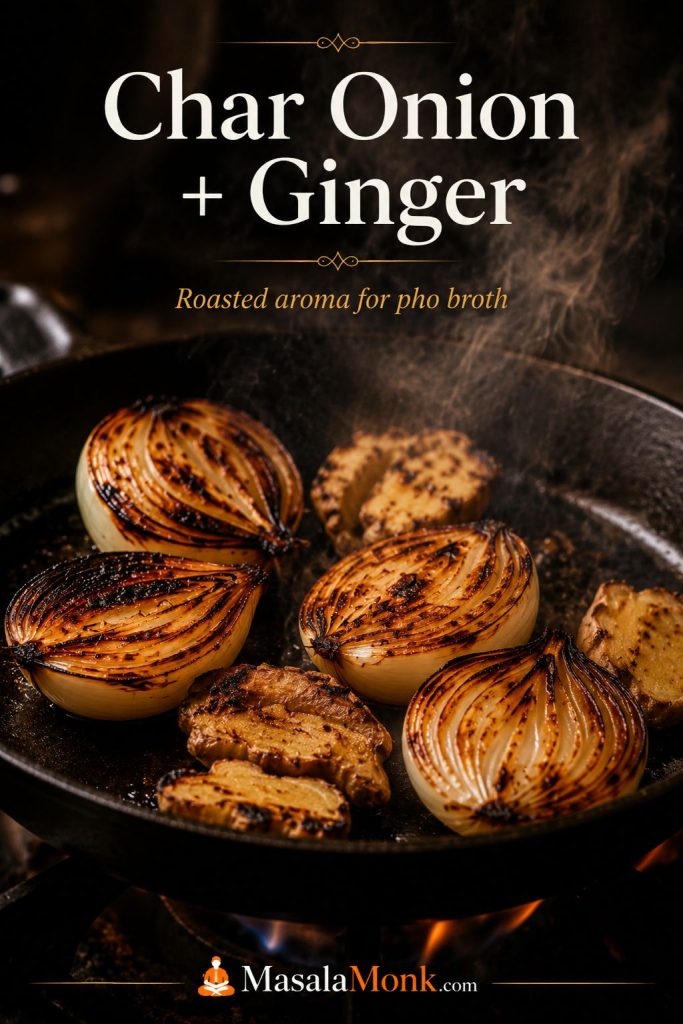
Charring onion and ginger gives pho broth a roasted, lightly smoky aroma. You can do this over a gas flame, in a dry skillet, under a broiler, or on a grill pan. The cut sides should be deeply browned in spots, not just lightly warmed.
Why You Toast the Spices
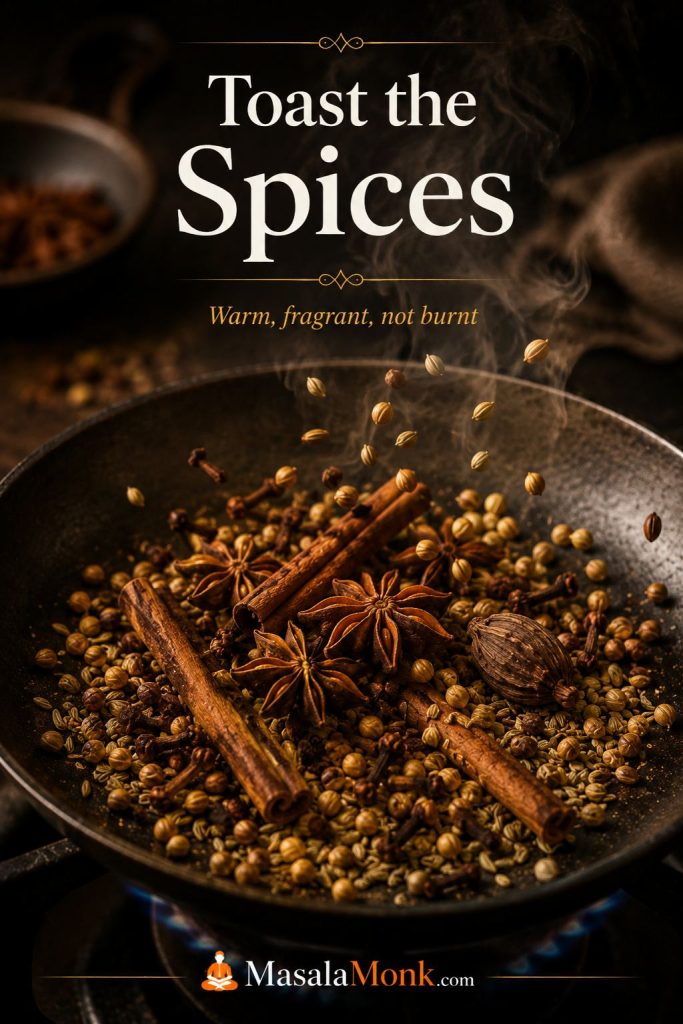
Toasting whole spices for 3–5 minutes makes them more fragrant. Use medium heat and keep them moving so they smell warm and aromatic, not burnt. After toasting, tie them in cheesecloth or place them in a spice bag.
How Long to Simmer Pho Broth
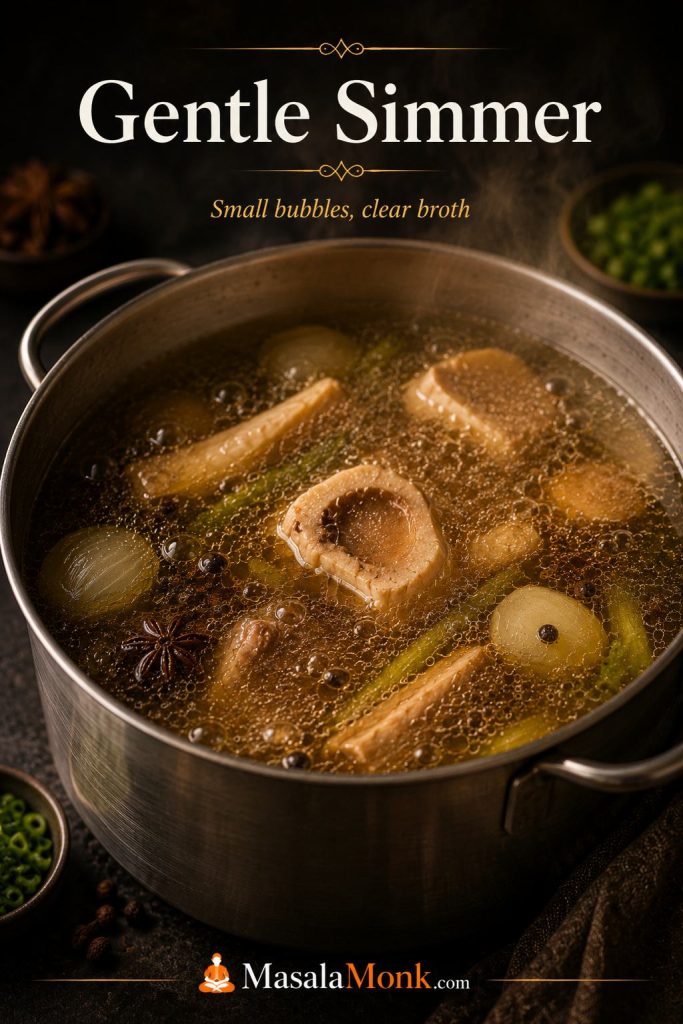
For this beef pho, plan on about 4 hours of gentle simmering after the parboil step. Keep the broth at a quiet simmer, roughly 85–95°C / 185–203°F. You should see small, steady bubbles and gentle movement, not a rolling boil that shakes the whole pot.
A rolling boil can pull fat and loose particles into the broth, which makes it cloudy and greasy. A calm simmer extracts flavor from the bones and meat while keeping the broth cleaner.
How to Season Pho Broth
Pho broth should taste slightly stronger than a normal sipping soup before it goes into the bowl. The noodles, meat, herbs, sprouts, and lime will soften the seasoning. If the broth tastes perfect in the pot, it may taste a little flat once the bowl is assembled.
Season near the end with fish sauce, salt, and a little rock sugar or sugar. Look for savory first, gentle sweetness in the background, warm spice in the aroma, and enough clarity that lime and herbs can brighten the bowl at the table.
When the broth is right, it should smell like roasted onion and warm spice first, then taste savory, clean, and slightly rounded. It should not taste like plain beef stock with noodles waiting nearby.
How Pho Broth Should Taste Before Serving
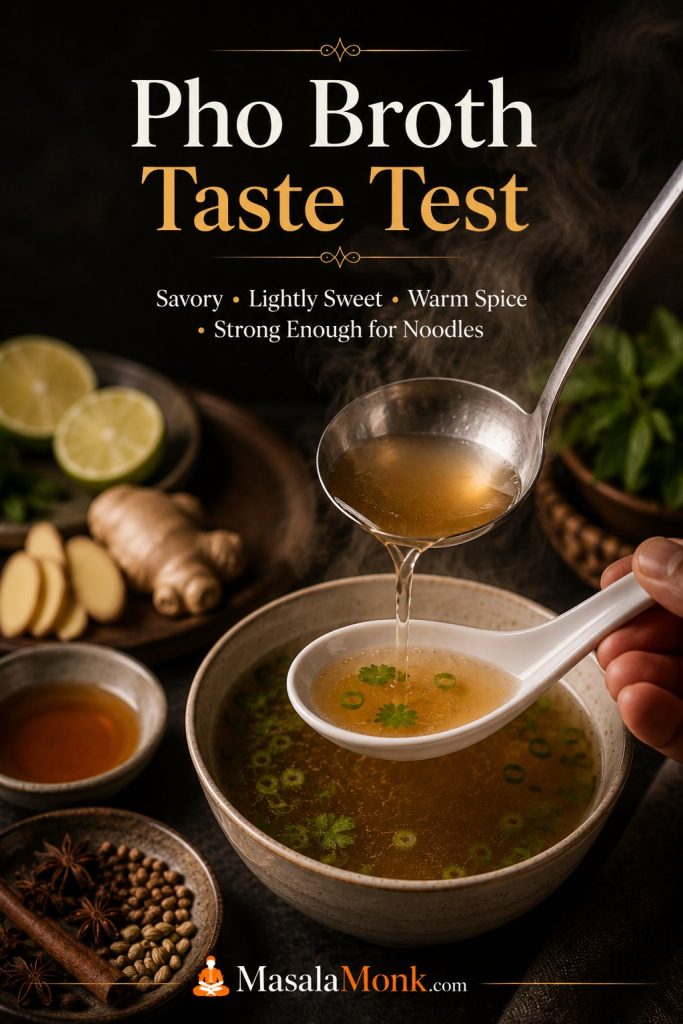
Before serving, taste the strained broth before it hits the bowl. It should feel a little too bold by itself: savory first, lightly sweet in the background, warm with spice, and strong enough to carry plain rice noodles. If it tastes perfect as a sipping soup, it may taste quiet once the noodles, beef, herbs, sprouts, and lime are added.
The broth for this pho recipe is on track when it smells roasted from onion and ginger, warm from star anise and cinnamon, and savory before any noodles are added. It should not smell muddy, greasy, burnt, or aggressively sweet.
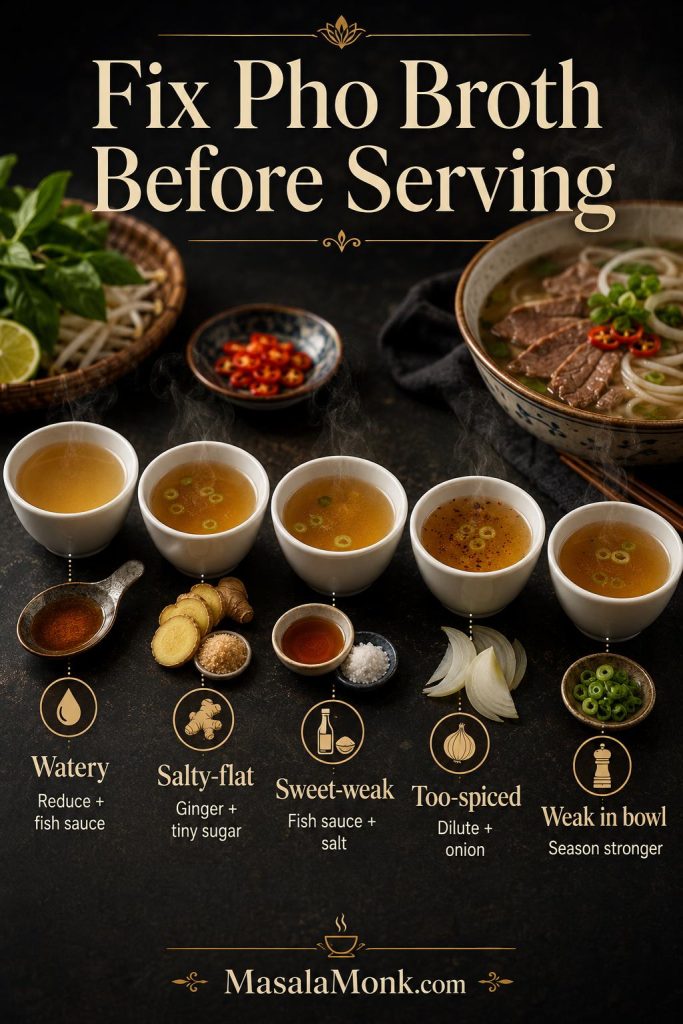
| What you taste | What it means | How to adjust |
|---|---|---|
| Thin or watery | The broth needs more concentration or seasoning | Simmer uncovered a little longer, or add fish sauce in small amounts |
| Salty but flat | It has salt, but not enough aroma or balance | Add a tiny pinch of sugar, more ginger aroma, or brighten later with lime |
| Sweet but weak | The sugar or onion is louder than the savory base | Add fish sauce or salt gradually |
| Too spiced | The spice bag stayed in too long | Remove the spices, dilute slightly, and simmer with onion or ginger |
| Good in the pot but weak in the bowl | The broth was seasoned like soup, not like pho broth | Season the next bowls slightly stronger before ladling |
How to Fix Pho Broth Before Serving
Do the final broth check before you assemble the bowls, not after everyone has started eating. At this point, the broth should taste slightly stronger than a normal soup because plain noodles, beef, herbs, sprouts, and lime will soften the flavor once they land in the bowl.
Thin broth should be reduced briefly before you add more seasoning. For sweet but weak broth, add fish sauce or salt in small amounts. When the broth smells too spiced, remove the spice bag and dilute it slightly. Fixing the pot now is much easier than trying to rescue six finished bowls later.
Best Noodles for Pho
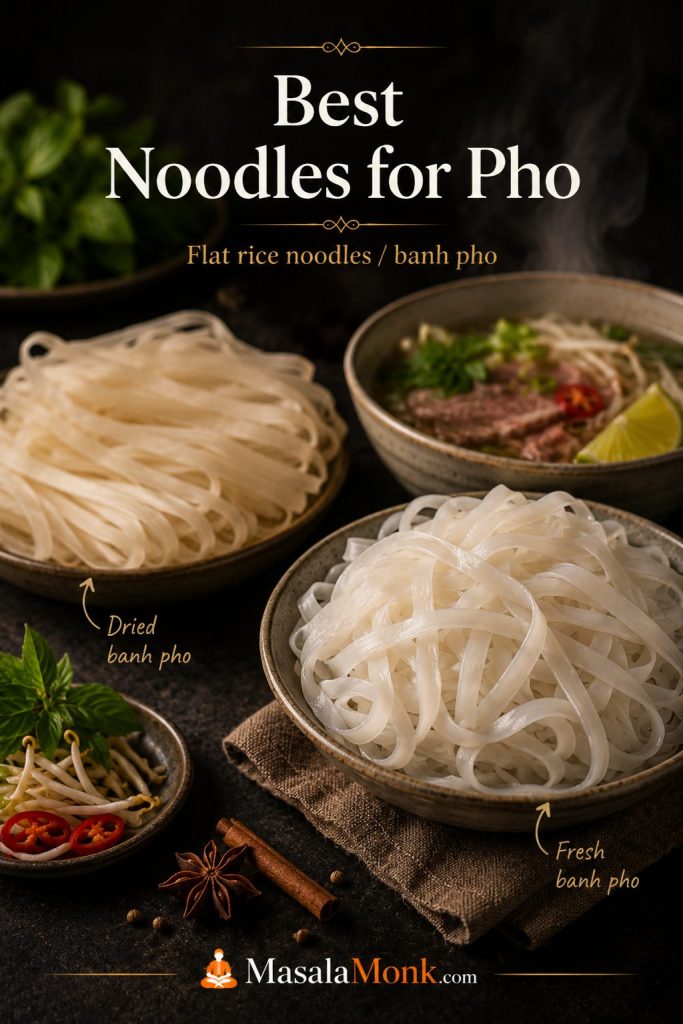
The best noodles for pho are banh pho, flat rice noodles. They may be sold dried or fresh. Dried noodles are usually easier to find, and they hold up well when soaked or cooked separately. Fresh noodles are softer and usually need only a quick blanch.
Dried vs Fresh Pho Noodles
| Noodle type | Best use | How to handle |
|---|---|---|
| Dried banh pho | Most home cooks; easy to store and find | Soak or cook according to the package, drain well, and add to bowls just before serving |
| Fresh banh pho | Best texture when available | Blanch briefly to loosen and warm; do not boil aggressively |
| Very wide rice noodles | Better for stir-fry than classic pho bowls | Use only if that is what you have, but expect a heavier bowl |
| Rice vermicelli | Not ideal for pho | Save it for other Vietnamese noodle bowls rather than using it as the first choice here |
What Width of Rice Noodles to Use
Small to medium flat rice noodles are best for pho soup. They should be wide enough to feel silky and satisfying, but not so wide that they dominate the bowl. Very wide noodles are more common in stir-fries and can make pho feel heavy.
How to Cook Pho Noodles Without Making Them Mushy
Cook pho noodles away from the broth. That one habit keeps the liquid clearer and gives the noodles a better texture in the finished bowl. The noodles should meet the broth only at the very end.
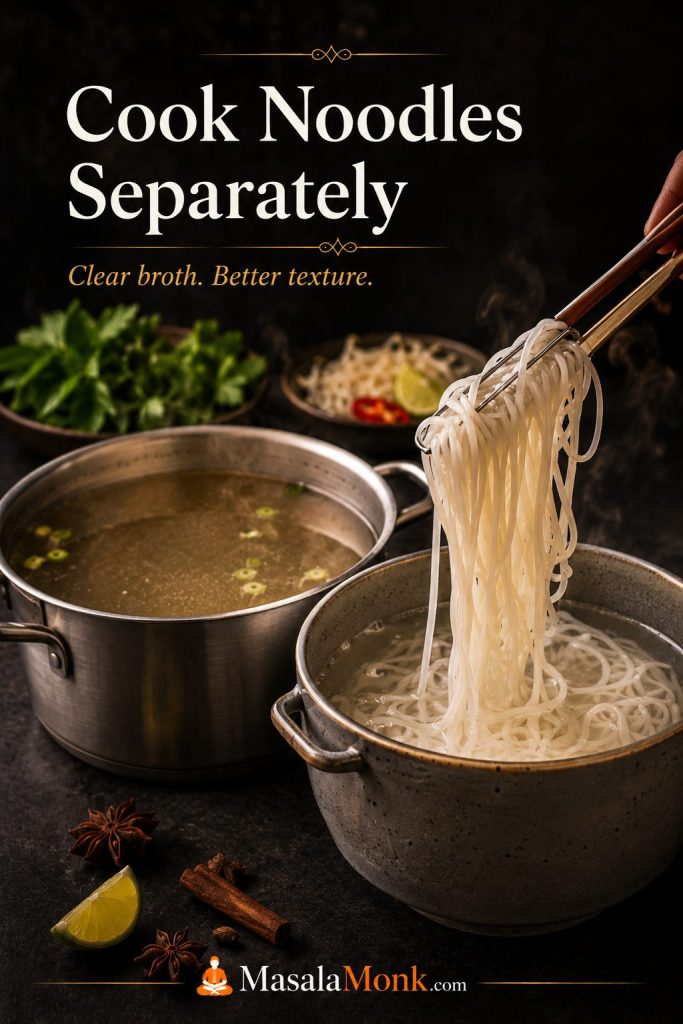
- Do not simmer noodles in the broth. They release starch and make the broth cloudy.
- Do not store noodles in broth. They keep absorbing liquid and turn mushy.
- Do not cook them too early. Prepare them close to serving time when possible.
- Use 50–80 g dried noodles per bowl. Use the lower end for lighter bowls and the higher end for noodle-heavy bowls.
- Refresh clumped noodles with hot water. Drain again before adding them to bowls.
Pho Noodle Texture Guide
Noodle texture can make a good broth feel better or worse. The goal is not a soft pile of rice noodles that breaks apart, and it is not a stiff noodle that fights the broth. Good pho noodles should bend easily, feel slippery, and still hold their shape when lifted with chopsticks.
If the noodles feel too firm, give them a little more time or refresh them with hot water. If they are already tearing, clumping, or collapsing before they reach the bowl, they have gone too far. Cook them close to serving time whenever possible.
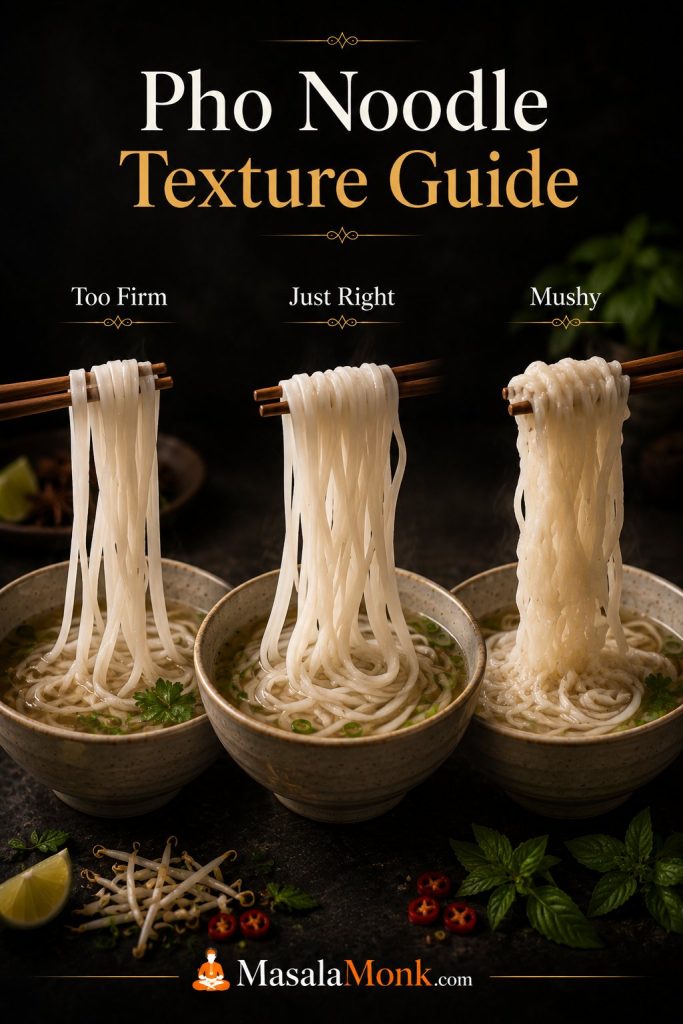
The noodles should be soft and slippery, but still have enough bite that they do not collapse in the hot broth.
How to Assemble Pho Bowls
Once the broth is strained and seasoned, the rest of the recipe moves quickly. Have the noodles cooked, herbs washed, beef sliced, broth hot, and bowls ready before you start assembling.
Bring the final broth to a full boil when it goes into the bowl, especially if you are using raw thin-sliced beef. Keep the simmering stage gentle, but make the serving stage hot and fast.
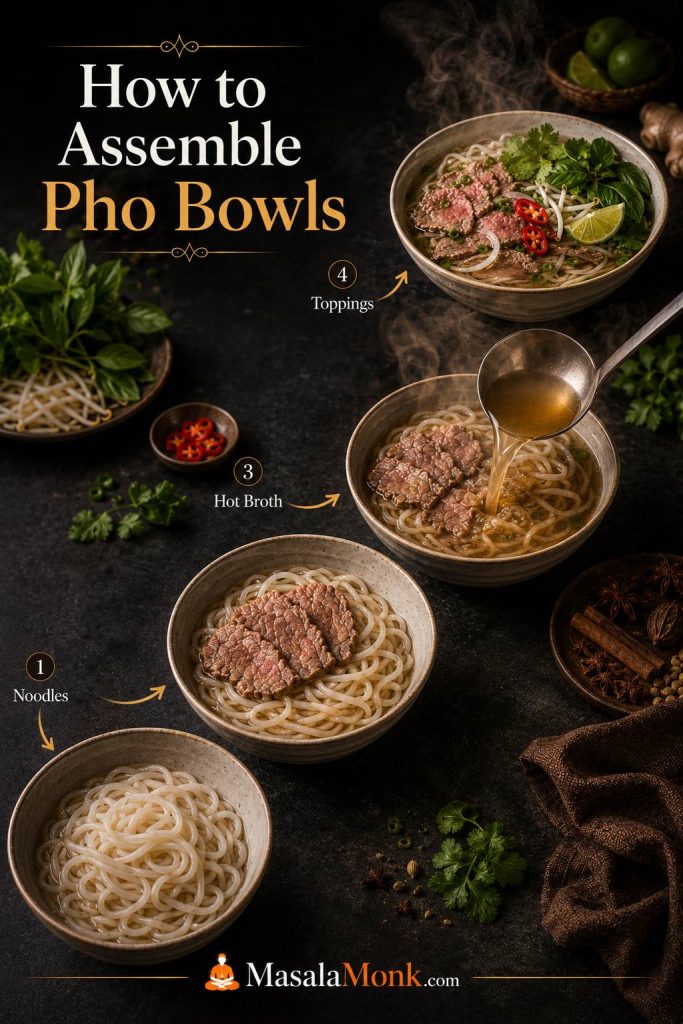
- Add cooked rice noodles to each bowl.
- Layer in slices of cooked brisket, chuck, or shank.
- Tuck in paper-thin raw beef slices if using.
- Ladle very hot broth directly over the beef and noodles.
- Top with onion, scallions, herbs, sprouts, chili, and lime.
- Serve immediately with optional hoisin and sriracha on the side.
Why the Final Broth Pour Must Be Hot
The long broth simmer should stay calm, but the final pour should be very hot. That last burst of heat warms the noodles, releases the aroma from the broth, and helps thin beef soften or cook in the bowl.
If the broth is only warm, the bowl can taste dull and the beef may not change texture properly. Bring the strained broth back to a full boil right before serving, then ladle it over the noodles and beef immediately.
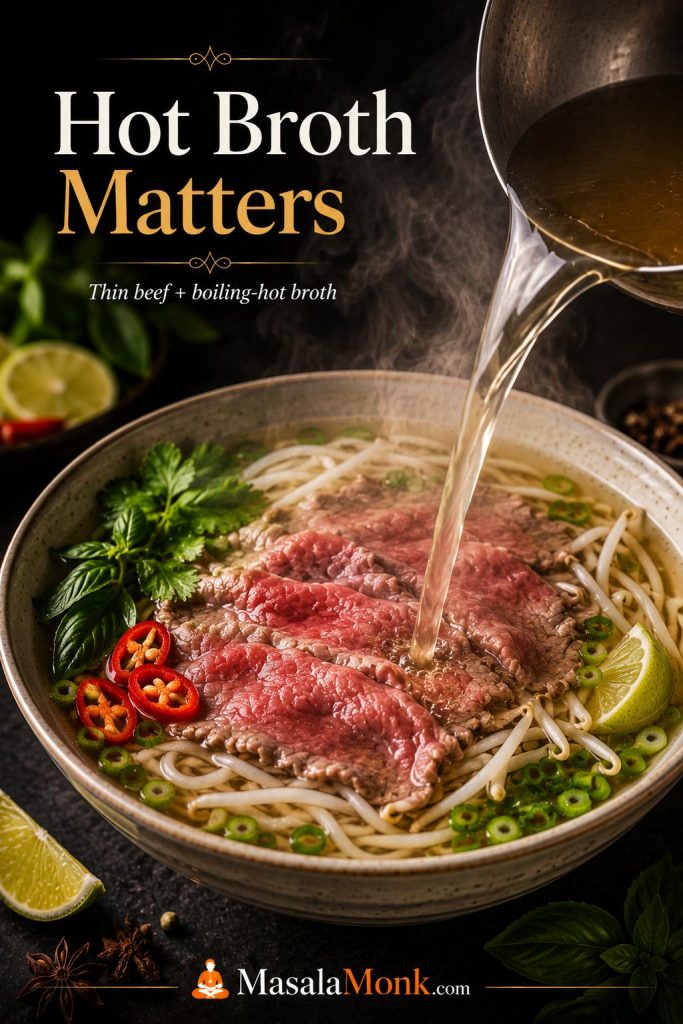
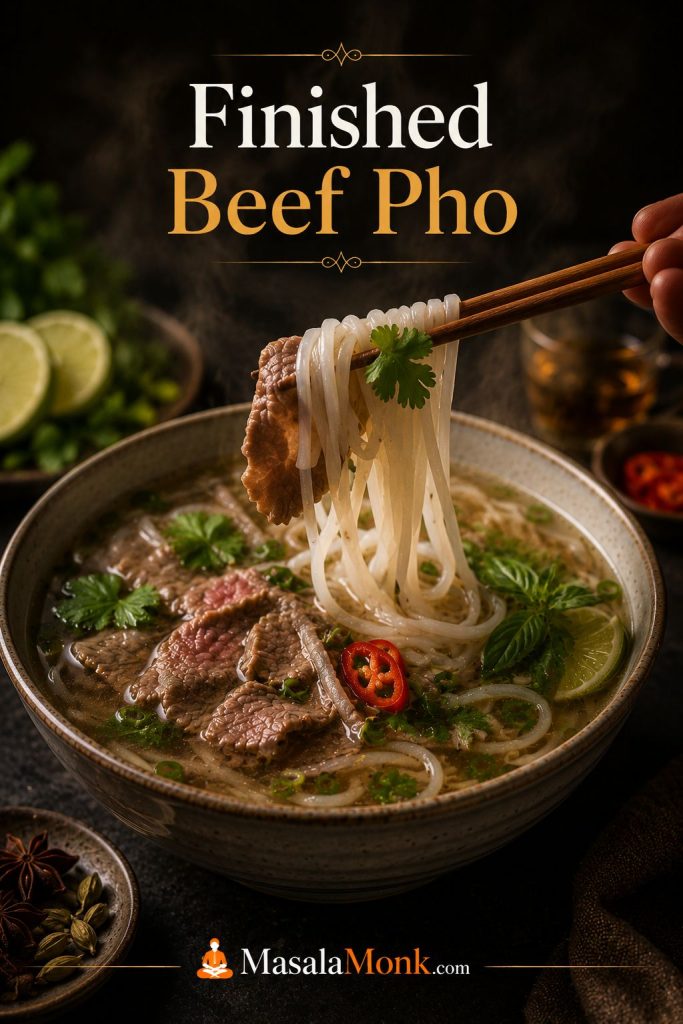
What a Finished Beef Pho Bowl Should Feel Like
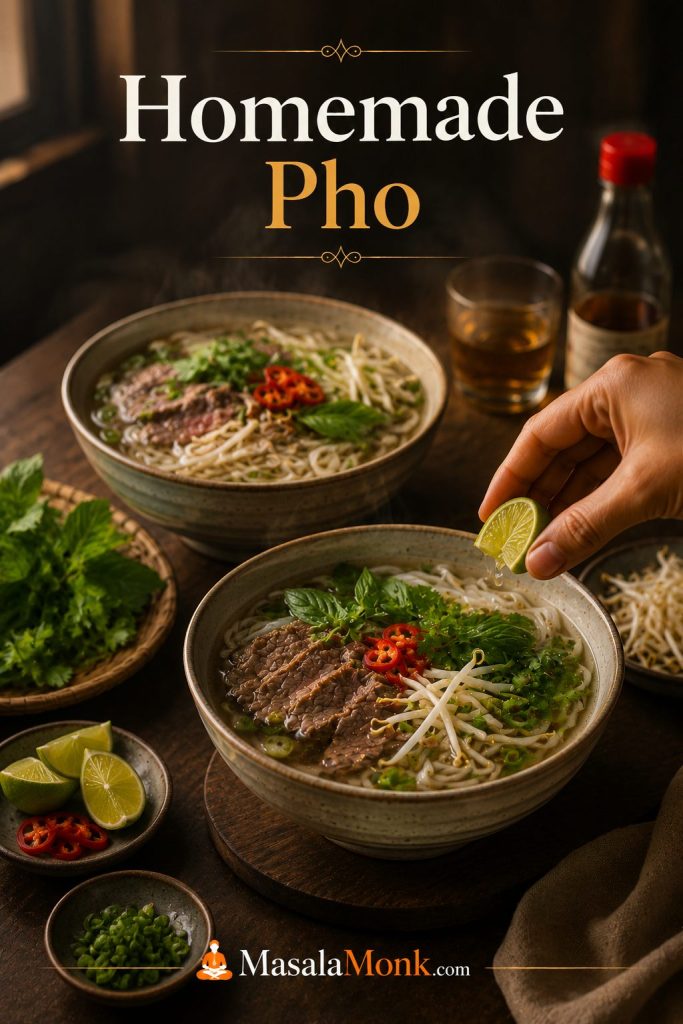
A finished beef pho bowl should not feel heavy, muddy, or overloaded. It should taste balanced: savory broth first, then soft noodles, tender beef, fresh herbs, sharp lime, and a little crunch from sprouts or onion.
If the first bowl tastes flat, do not keep assembling the rest. Add more seasoning to the broth, brighten the bowl with lime, or bring the broth back to a stronger boil before serving the next one. One test bowl can save the whole pot.
Suggested Pho Cooking Timeline
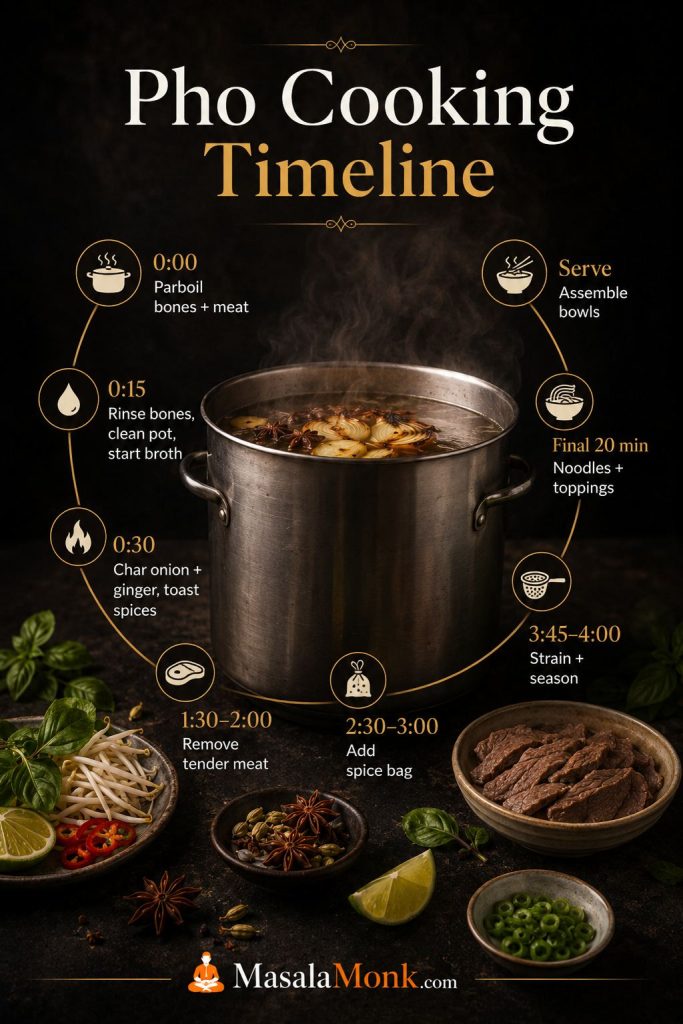
This timeline keeps the long recipe from feeling chaotic. The exact minutes do not have to be perfect; use it as a rhythm for the pot.
| Time | What to do |
|---|---|
| 0:00 | Parboil bones and meat. |
| 0:15 | Rinse bones and meat, clean the pot, and start the fresh broth. |
| 0:30 | Char onion and ginger, then toast the spices. |
| 1:30–2:00 | Remove brisket, chuck, or shank once tender enough to slice later. |
| 2:30–3:00 | Add the spice bag for the final stretch of simmering. |
| 3:45–4:00 | Strain, skim, and season the broth. |
| Final 20 minutes | Cook noodles, slice beef, wash herbs, cut lime, and prepare toppings. |
| Serving | Bring broth to a full boil and assemble bowls immediately. |
How to Make Pho Step by Step
1. Parboil the Bones and Meat
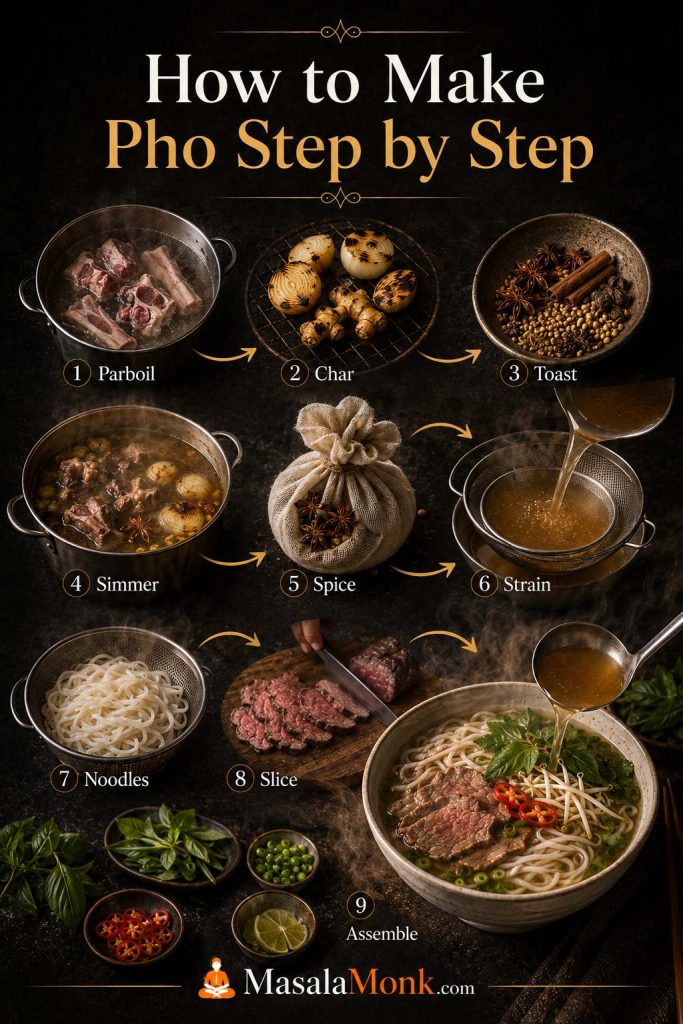
Place the beef bones and brisket, chuck, or shank in a large pot. Cover with water, bring to a hard boil, and boil for 5–10 minutes. Drain everything, rinse the bones and meat under warm water, and scrub the pot clean.
2. Char the Onion and Ginger
Halve the onions and split the ginger lengthwise. Char them over a gas flame, in a dry skillet, under a broiler, or on a grill pan until the surfaces are browned and fragrant. This usually takes 8–12 minutes depending on your heat source.
3. Toast the Spices
Add the star anise, cinnamon, cloves, coriander, fennel, and black cardamom if using to a dry skillet. Toast over medium heat for 3–5 minutes, shaking the pan often. Transfer to a spice bag or wrap in cheesecloth.
4. Start the Broth
Return the rinsed bones and simmering beef to the clean pot. Add 4.5 L / 19 cups fresh water, the charred onion, charred ginger, salt, and rock sugar. Bring to a boil, then immediately lower to a gentle simmer.
5. Simmer Gently
Simmer gently for about 1½–2 hours, skimming the surface when needed. When the brisket, chuck, or shank is tender, remove it from the broth, cool slightly, wrap, and refrigerate until slicing. Continue simmering the bones, keeping them mostly submerged; add hot water if the broth reduces too aggressively.
6. Add the Spice Bag
Add the toasted spice bag for the final 60–90 minutes of simmering. This gives the broth a clear pho aroma without letting the spices become bitter or too dominant. Remove the spice bag early if the broth smells strong enough before the time is up.
7. Strain and Season
Strain the broth through a fine-mesh strainer. Skim excess fat. Season with fish sauce, more salt, and a little sugar if needed. The broth should taste slightly stronger than a normal soup because the noodles and toppings will soften it.
8. Cook the Noodles
Cook or soak the banh pho noodles according to the package directions. Drain well. If they are ready before the broth, rinse lightly and keep them separate, then refresh briefly with hot water before serving.
9. Slice the Beef and Prepare Toppings
Slice the cooked brisket, chuck, or shank against the grain. Thinly slice the raw beef topping if using. Wash the herbs, cut the lime, slice the chilies, and prepare sprouts, scallions, and onion.
10. Assemble and Serve
Bring the strained broth back to a full boil. Divide noodles among bowls, add cooked beef and raw beef slices, then ladle hot broth over the top. Add toppings and serve immediately.
Quick Pho Recipe Shortcut
A quick pho shortcut can still make a good pho-style bowl if you build aroma properly. The key is to improve the broth instead of simply heating stock and adding noodles.
How to Upgrade Broth for Quick Pho
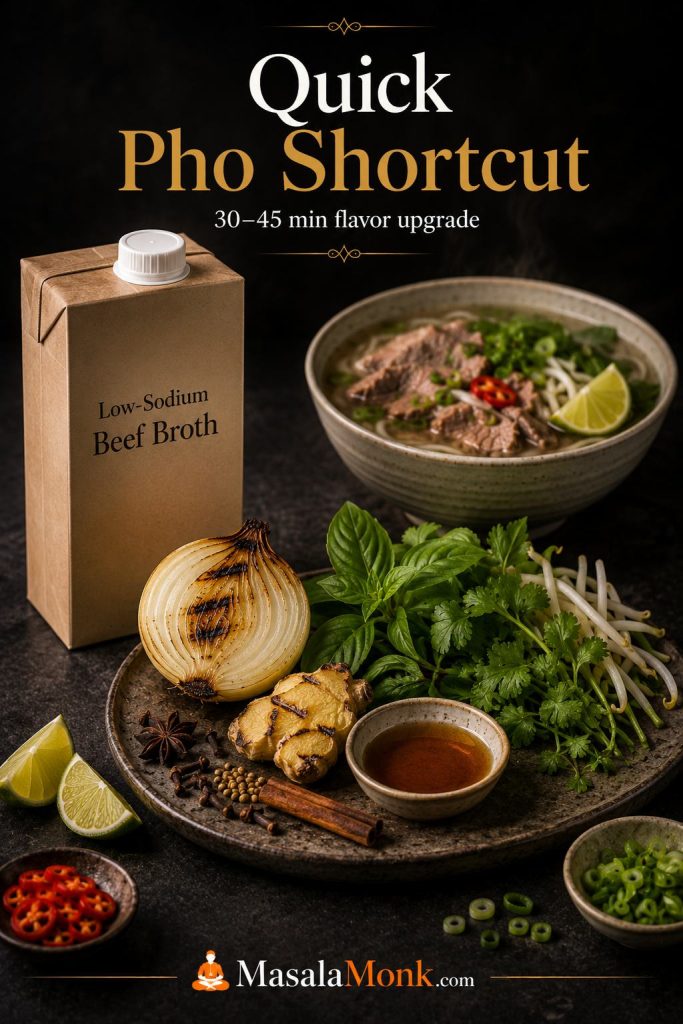
The shortcut version should still taste built, not rushed. Give the broth enough time with charred aromatics and whole spices before you season it, then use fresh herbs and lime at the end to make the bowl feel complete.
A fast pho recipe works best when you still give the broth 30–45 minutes with aromatics and spices. Simmer 1.5–2 L / 6–8 cups good low-sodium beef or chicken broth with 1 charred onion, a 2–3 inch piece of charred ginger, 2–3 star anise pods, 1 small cinnamon stick, 2 cloves, and 1 teaspoon coriander seeds. Strain, then season with fish sauce, salt, and a little sugar.
Shortcut pho should still smell like pho before it reaches the bowl. If it only tastes like boxed broth, give the onion, ginger, and spices more time.
- Use good low-sodium broth so you can control the final seasoning.
- Brown the onion and ginger instead of adding them raw.
- Toast the spices before simmering.
- Keep the simmer short but focused: 30–45 minutes is enough to perfume the broth.
- Keep the noodles out of the broth until serving and finish with fresh herbs, lime, sprouts, and chili.
For a better shortcut beef pho, simmer a piece of brisket, chuck, or shank in store-bought broth for 1½–2½ hours with the aromatics and spices. It is still much faster than a full bone broth, but it gives the bowl more body and real beef flavor.
Chicken Pho Recipe Option
Chicken pho is often the easiest first pho to make at home. It needs less time than beef pho and does not require the same hunt for beef bones. The bowl should taste lighter, cleaner, and brighter than beef pho, not like a forced beef-style broth.
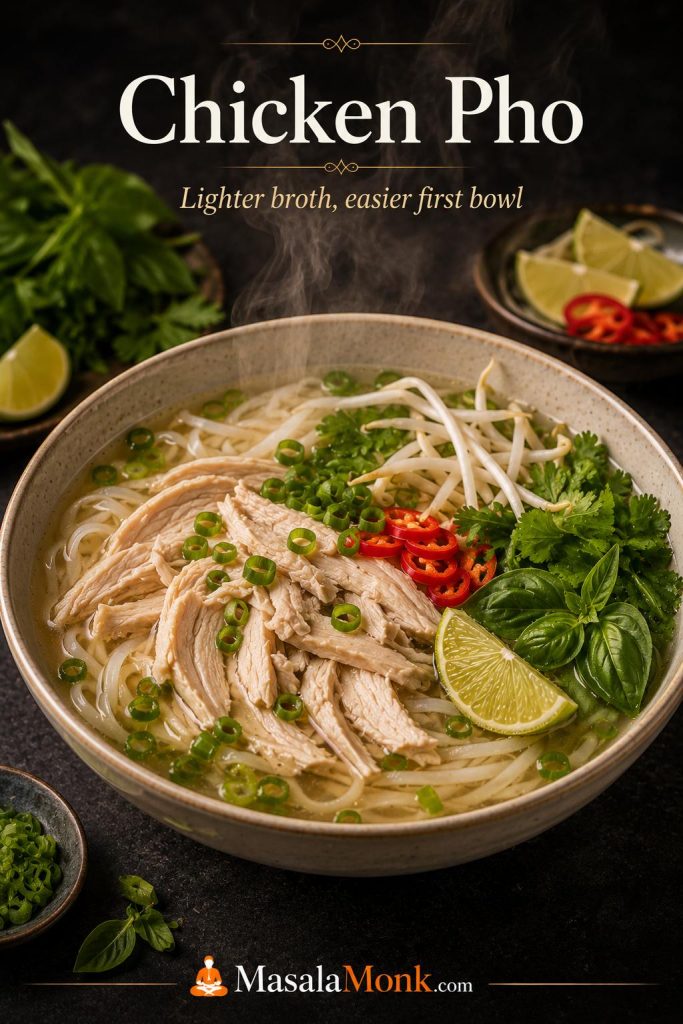
For a simple chicken pho, simmer 1.5–2 L / 6–8 cups chicken broth with 1 charred onion, a 2–3 inch piece of charred ginger, 2–3 star anise pods, 1 small cinnamon stick, 2 cloves, and 1 teaspoon coriander seeds. Add 450–700 g / 1–1½ lb chicken thighs, chicken breasts, or bone-in chicken pieces and simmer gently until cooked through. This amount makes about 3–4 bowls, depending on how much broth you like in each bowl.
Remove the chicken, shred or slice it, strain the broth, and season with fish sauce, salt, and a small amount of sugar. Serve with banh pho noodles, herbs, sprouts, lime, chili, onion, and scallions. If you want a richer chicken version, use bone-in chicken and simmer closer to 75–90 minutes.
Vegetarian and Vegan Pho Recipe Options
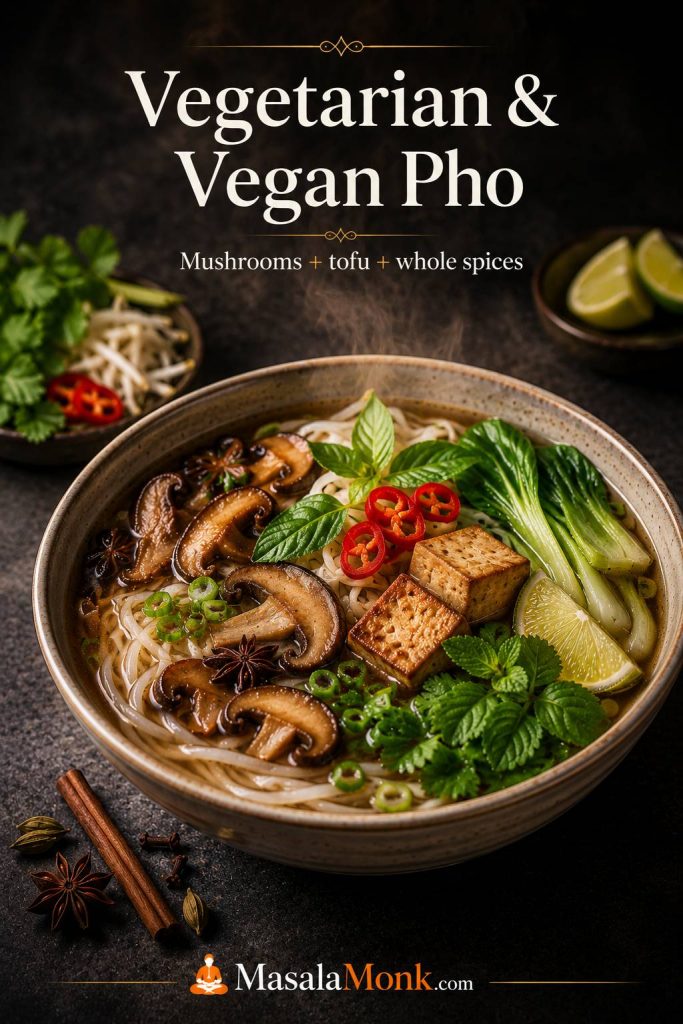
Vegetarian pho and vegan pho need more than plain vegetable broth. Without bones, meat, or fish sauce, you need to build umami from mushrooms, roasted aromatics, whole spices, and a salty-savory seasoning such as tamari or soy sauce.
Build a Vegan Pho Broth Base First
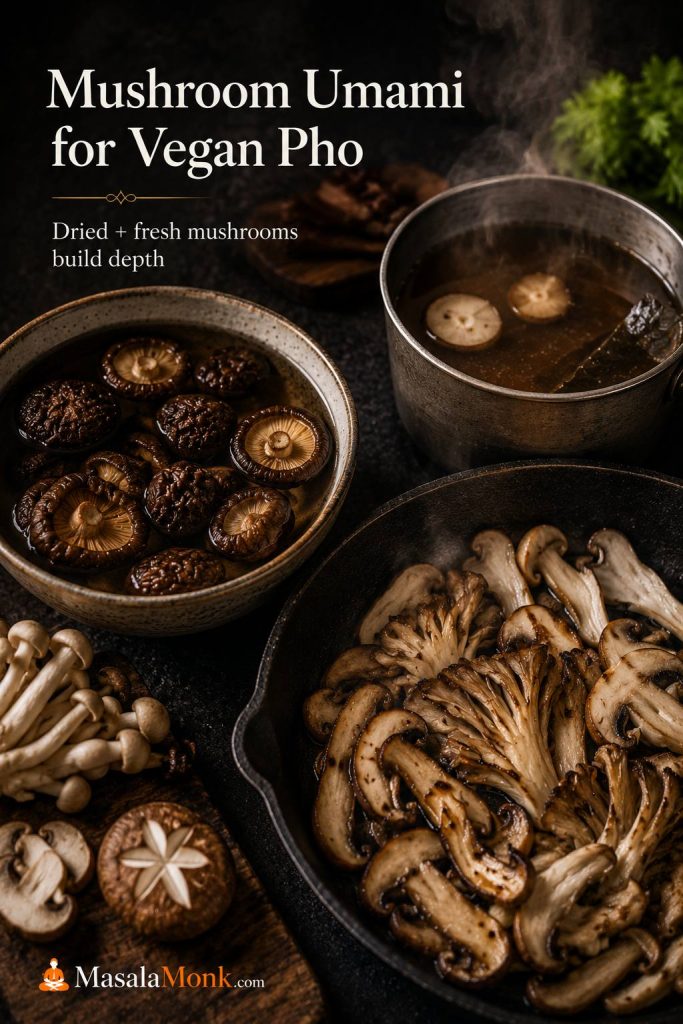
A plant-based broth needs extra umami, so start with 1.5–2 L / 6–8 cups vegetable broth or water, charred onion, charred ginger, toasted pho spices, 20–30 g dried shiitake or mixed dried mushrooms, and 225–300 g / 8–10 oz fresh mushrooms. Season with tamari or soy sauce, a little sugar, and salt to taste. Add tofu, bok choy, sautéed mushrooms, or other vegetables to the finished bowl.
For another simple way to make mushrooms feel satisfying rather than watery, MasalaMonk’s skillet mushroom and zucchini stir fry is a useful side or topping-style idea; just cook the vegetables drier if you want to add them to a noodle bowl.
Flavor Fixes for Vegetarian and Vegan Pho
- Use mushrooms: shiitake, cremini, oyster mushrooms, or dried mushrooms add depth.
- Keep the charred onion and ginger: they still matter in plant-based pho.
- Use whole spices: star anise, cinnamon, cloves, coriander, and fennel still create the pho aroma.
- Replace fish sauce: use tamari, soy sauce, or a vegan fish sauce alternative.
- Add protein: tofu, mushrooms, bok choy, or other vegetables work well.
- Do not overdo sweetness: plant-based broth can become sweet quickly if the vegetables dominate.
Dried mushrooms are especially helpful because they add a deeper savory base and keep the broth from tasting like plain vegetable soup. Strain out the dried mushrooms if they are tough, or slice them thinly and return them to the bowl if they are tender enough to eat.
If soy sauce or tamari starts making the broth taste too salty, dilute gently and rebuild flavor with ginger, herbs, chili, and lime instead of adding more salt. Lower-sodium soy sauce or tamari gives you more room to adjust.
If you use miso or kombu, keep them subtle so the bowl still tastes like pho rather than a different noodle soup.
Pho Troubleshooting: Broth, Noodles, and Beef
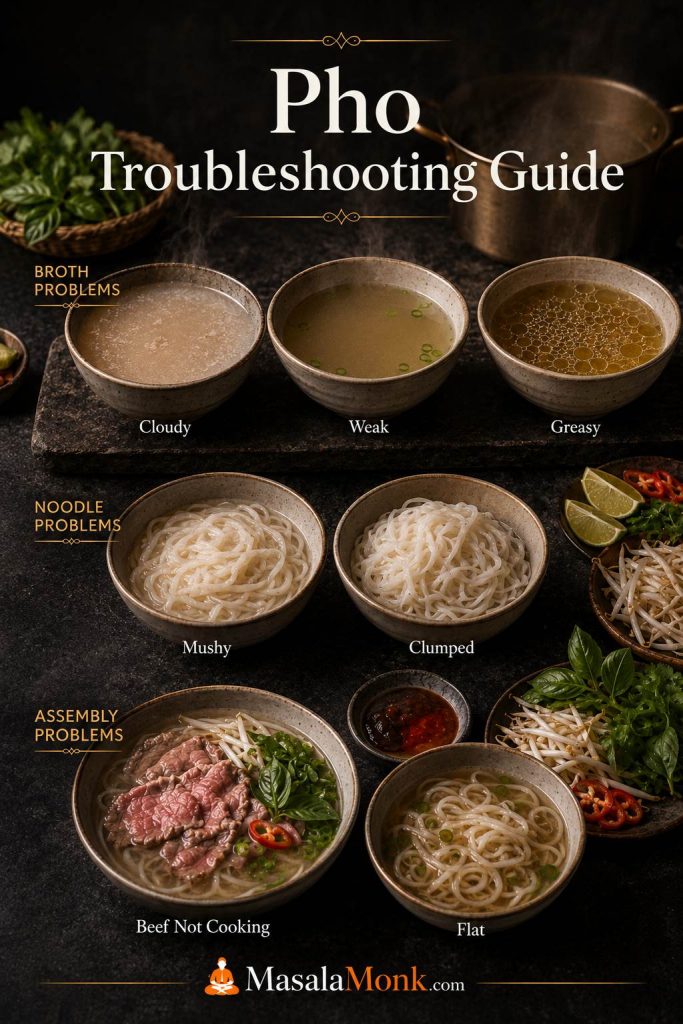
Most pho problems come from one of four places: the broth boiled too hard, the seasoning was not balanced, the noodles were handled like pasta in soup, or the final broth was not hot enough for assembly.
Broth Problems in This Pho Recipe
Use this table to fix broth issues before they affect every bowl.
| Problem | What probably happened | How to fix it |
|---|---|---|
| Cloudy broth | Bones were not parboiled, the pot boiled too hard, or noodles were cooked in the broth | Strain well, avoid stirring aggressively, and simmer gently next time. Cook noodles separately. |
| Weak broth | Too much water, not enough meat or bones, too short a simmer, or under-seasoning | Simmer longer, reduce slightly, and adjust with fish sauce, salt, and a little sugar. |
| Greasy broth | Fat from marrow or meat was not skimmed | Skim with a ladle, use a fat separator, or chill the broth and remove the solid fat. |
| Too salty | Too much fish sauce or salt, or broth reduced more than expected | Dilute with hot water or unsalted broth, then rebalance with aromatics and a tiny amount of sugar if needed. |
| Too sweet | Too much rock sugar or naturally sweet vegetables | Add fish sauce or salt in small amounts. Brighten the bowl with lime at serving. |
| Too spice-heavy | The spice bag stayed in too long or the spices were too strong | Remove the spice bag, dilute with broth or water, and simmer with extra onion or ginger if needed. |
Noodle and Bowl Problems in This Pho Recipe
Use this table when the broth is good, but the final bowl still feels off.
| Problem | What probably happened | How to fix it |
|---|---|---|
| Mushy noodles | Noodles were overcooked or sat in hot broth too long | Cook noodles separately and add them to bowls right before serving. |
| Noodles clumped | Cooked noodles sat too long after draining | Rinse or refresh briefly with hot water, loosen with chopsticks or tongs, then divide into bowls. |
| Raw beef did not cook in the bowl | Broth was not hot enough or beef slices were too thick | Bring broth to a full boil and slice beef paper-thin. Dip slices in simmering broth first if needed. |
| Broth tastes flat after assembling | The broth was seasoned perfectly in the pot but diluted by noodles and toppings | Season broth slightly stronger before serving. Add lime, herbs, fish sauce, or chili at the table. |
Test One Bowl Before Serving the Pot
If your first bowl tastes flat, fix the broth before assembling the rest. One test bowl can save the whole pot.
The easiest way to avoid most of these issues is to keep the broth and noodles separate until the last moment. Store them separately, reheat them separately, and assemble only as many bowls as you plan to eat right away.
Make-Ahead, Storage, Freezing, and Reheating
Pho is one of the best make-ahead soups if you store the components separately. The broth can be made ahead, chilled, skimmed, and reheated. The noodles and herbs should be prepared close to serving.
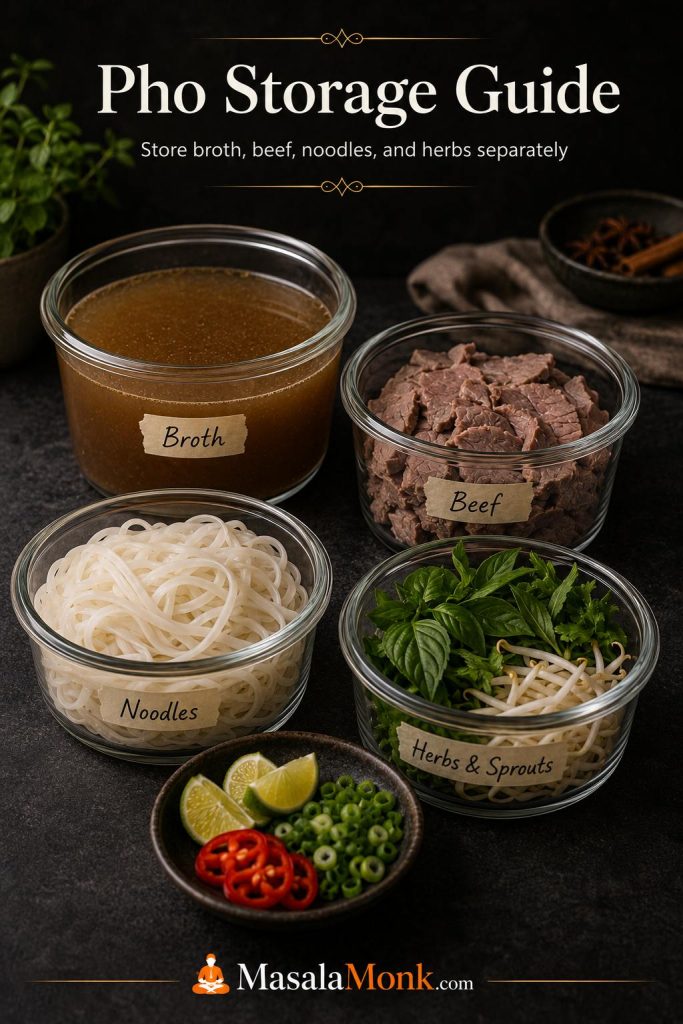
- Broth: refrigerate for 3–4 days, or freeze for about 3 months for best quality.
- Cooked beef: refrigerate separately and slice before serving.
- Noodles: best cooked fresh. If needed, store separately and refresh with hot water.
- Herbs and sprouts: wash and dry, but add only at serving.
- Reheating: bring broth back to a boil before assembling bowls.
If the broth tastes too concentrated after refrigeration or reheating, add a little hot water and adjust the seasoning. Reheat only the amount you plan to serve, bring it back to a full boil for assembly, and keep the noodles, herbs, sprouts, and beef stored separately until you build fresh bowls.
Before You Start the Recipe Card
Before starting, read the broth timing, noodle timing, and raw beef note once. The recipe is easiest when the broth is treated as the main project and the noodles, toppings, and bowl assembly happen at the end.
Home-Style Beef Pho Recipe Card
This beef pho recipe makes clear, aromatic Vietnamese-style noodle soup with beef bones, brisket or chuck, roasted onion and ginger, toasted whole spices, rice noodles, thin-sliced beef, herbs, and lime.
Equipment
- 9–10 L / 10-quart stockpot
- Large skillet, broiler, grill pan, or gas flame for charring
- Fine-mesh strainer
- Cheesecloth, muslin, or spice bag
- Ladle and tongs
- Large serving bowls
- Sharp knife
- Optional: fat separator
Broth Ingredients
- 1 kg / 2 lb meaty beef bones, such as neck bones, oxtail, or meaty soup bones
- 1 kg / 2 lb marrow, knuckle, leg, or other beef bones
- 1.25–1.5 kg / 2¾–3⅓ lb beef brisket, chuck, or shank
- 4.5 L / 19 cups fresh water, plus more if needed
- 2 large onions, halved
- 150 g / 5 oz fresh ginger, split lengthwise
- 1 tablespoon salt, plus more to taste
- 25–40 g yellow rock sugar, or 1–2 tablespoons regular sugar
- 45–60 ml / 3–4 tablespoons fish sauce, plus more to taste
Spice Bag
- 6–8 star anise pods
- 1–2 cinnamon sticks
- 4–6 whole cloves
- 1 tablespoon coriander seeds
- 1–2 teaspoons fennel seeds, optional
- 1 black cardamom pod, optional
For Each Bowl
- 50–80 g dried banh pho rice noodles, or about 120 g fresh pho noodles
- 30–45 g / 1–1½ oz raw eye of round, sirloin, tenderloin, or flank, sliced paper-thin
- A few slices cooked brisket, chuck, or shank
- 500–650 ml / 2–2¾ cups boiling-hot broth
- Bean sprouts
- Thai basil, mint, cilantro, or a mix
- Lime wedges
- Sliced chili or jalapeño
- Thinly sliced onion and scallions
- Hoisin and sriracha, optional
Instructions
Build the broth
- Parboil the bones and meat. Place the beef bones and brisket, chuck, or shank in a large pot. Cover with water, bring to a hard boil, and boil for 5–10 minutes. Drain, rinse the bones and meat, and clean the pot.
- Char the aromatics. Char the halved onions and split ginger over a gas flame, in a dry skillet, under a broiler, or on a grill pan until browned and fragrant.
- Toast the spices. Toast the star anise, cinnamon, cloves, coriander, fennel, and black cardamom if using for 3–5 minutes over medium heat. Transfer to a spice bag or cheesecloth bundle.
- Start the broth. Add the rinsed bones and meat back to the clean pot. Add 4.5 L / 19 cups fresh water, charred onion, charred ginger, salt, and rock sugar. Bring to a boil, then reduce to a gentle simmer.
- Simmer gently. Simmer for 1½–2 hours, skimming as needed. Remove the brisket, chuck, or shank once tender, cool slightly, then refrigerate until slicing. Continue simmering the bones, keeping them mostly submerged; add hot water if the broth reduces too aggressively.
- Add the spice bag. Add the toasted spice bag for the final 60–90 minutes of simmering. Remove it earlier if the broth smells strongly spiced.
- Strain and season. Strain the broth through a fine-mesh strainer. Skim excess fat. Season with fish sauce, more salt, and a little sugar if needed. The broth should taste slightly stronger than a normal soup.
Finish the bowls
- Cook the noodles separately. Cook or soak the banh pho noodles according to package directions. Drain well and keep separate from the broth.
- Prepare the beef and toppings. Slice the cooked beef. Slice the raw beef paper-thin. Wash herbs, prepare sprouts, cut lime wedges, and slice onion, scallions, and chili.
- Assemble the bowls. Bring the broth back to a full boil. Add noodles, cooked beef, and raw beef slices to bowls. Ladle boiling-hot broth over the top, then finish with herbs, sprouts, lime, chili, onion, scallions, and optional sauces.
Notes
- Keep the broth at a gentle simmer, not a rolling boil, for a clearer finish.
- Cook noodles separately. Do not simmer them in the broth.
- For raw beef topping, slice the beef very thin and use boiling-hot broth. For a fully cooked option, use cooked beef only or dip the slices directly into simmering broth before serving.
- Broth should taste slightly stronger in the pot because noodles and toppings dilute the seasoning.
- Store broth, noodles, meat, and herbs separately for best leftovers.
Final Adjustments Before Serving Pho
The final adjustment is where homemade pho starts to feel personal. Once the bowl is built, taste it the way you will actually eat it: with noodles, beef, herbs, lime, sprouts, and hot broth together.
A quiet bowl may need more fish sauce or salt in the broth. When the flavor feels heavy, lime and herbs can lift it. Thin-tasting pho usually needs more broth concentration or a stronger simmer before the next bowl. This last check is what turns a good pot of pho into a bowl that tastes right to you.
FAQs
What Pho Tastes Like
Pho tastes savory, aromatic, lightly sweet, and fresh at the same time. The broth should be beefy or chicken-forward, with warm spice from star anise and cinnamon, brightness from herbs and lime, and a clean finish from rice noodles and fresh toppings.
How to Pronounce Pho
Pho is usually pronounced closer to “fuh” than “foe.” The written Vietnamese word is phở.
The Best Noodles for Pho
Flat rice noodles called banh pho are best. Use small or medium-width noodles for soup. Dried banh pho is easy to store and works well; fresh banh pho only needs a quick blanch before serving.
How to Make Pho Without Beef Bones
Use good low-sodium beef broth, charred onion and ginger, toasted pho spices, fish sauce, and a flavorful cut like brisket or chuck if you still want beef depth. The broth will be lighter than bone broth, but it can still make a satisfying shortcut bowl.
When a Pho Spice Packet Works
A whole-spice pho packet can work well, especially for a first batch. Toast the spices briefly if they are loose enough to toast, then simmer them in the broth inside the packet or a spice bag. Powdered seasoning packets are better treated as shortcut helpers, not the whole flavor base.
Why Pho Broth Turns Cloudy
Cloudy pho broth usually comes from skipping the parboil step, boiling the pot too aggressively, stirring too much, or cooking noodles directly in the broth. Parboil and rinse the bones, keep the broth at a gentle simmer, and cook noodles separately.
How Long This Pho Recipe Should Simmer
This pho recipe should simmer for about 4 hours after the parboil step. Some traditional-style beef pho recipes go longer, especially with large bones, while chicken pho and shortcut pho need less time.
The Spices That Give Pho Its Aroma
The most common pho spices are star anise, cinnamon, cloves, coriander seeds, and sometimes fennel seeds or black cardamom. Use whole spices, toast them briefly, and keep them in a spice bag for a cleaner broth.
How to Handle Raw Beef Topping Safely
The beef used as a topping should be very fresh, kept cold, sliced paper-thin, and covered with boiling-hot broth right before serving. For a fully cooked option, use cooked beef only or dip the slices directly into simmering broth until they are no longer raw, then add them to the bowl.
Why Pho Tastes Flat
Flat pho usually needs better seasoning or more balance. Add fish sauce or salt in small amounts, check for a little sweetness, and brighten the finished bowl with lime and herbs. If the finished bowl tastes quiet, the broth was probably seasoned for sipping rather than for noodles.
Where Hoisin and Sriracha Belong
Hoisin and sriracha are optional. They can be delicious with pho, but adding too much directly to the broth can cover the clean flavor you worked to build. Try using them on the side as dipping sauces for the meat.
Beef Pho vs Chicken Pho
Beef pho is usually deeper, richer, and built around beef bones and beef cuts. Chicken pho is lighter, faster, and often easier for a first homemade version. Both use aromatic broth, rice noodles, herbs, and fresh toppings.
The Best Way to Make Pho Ahead
Make the broth ahead, then store the broth, cooked beef, noodles, herbs, and sprouts separately. Chilling the broth also makes it easier to remove excess fat. Reheat the broth until very hot and assemble fresh bowls when ready to eat.
How to Store Pho Leftovers
Store the broth, noodles, beef, and herbs separately. Refrigerate broth for 3–4 days, or freeze it for about 3 months for best quality. Reheat the broth until hot, then assemble fresh bowls with noodles and toppings.
How to Keep Pho Gluten-Free
Pho is often easy to make gluten-free because the noodles are rice-based, but the sauces and packaged ingredients still need a label check. Check fish sauce, hoisin sauce, soy sauce, broth cartons, seasoning packets, and any store-bought sauces before using them.