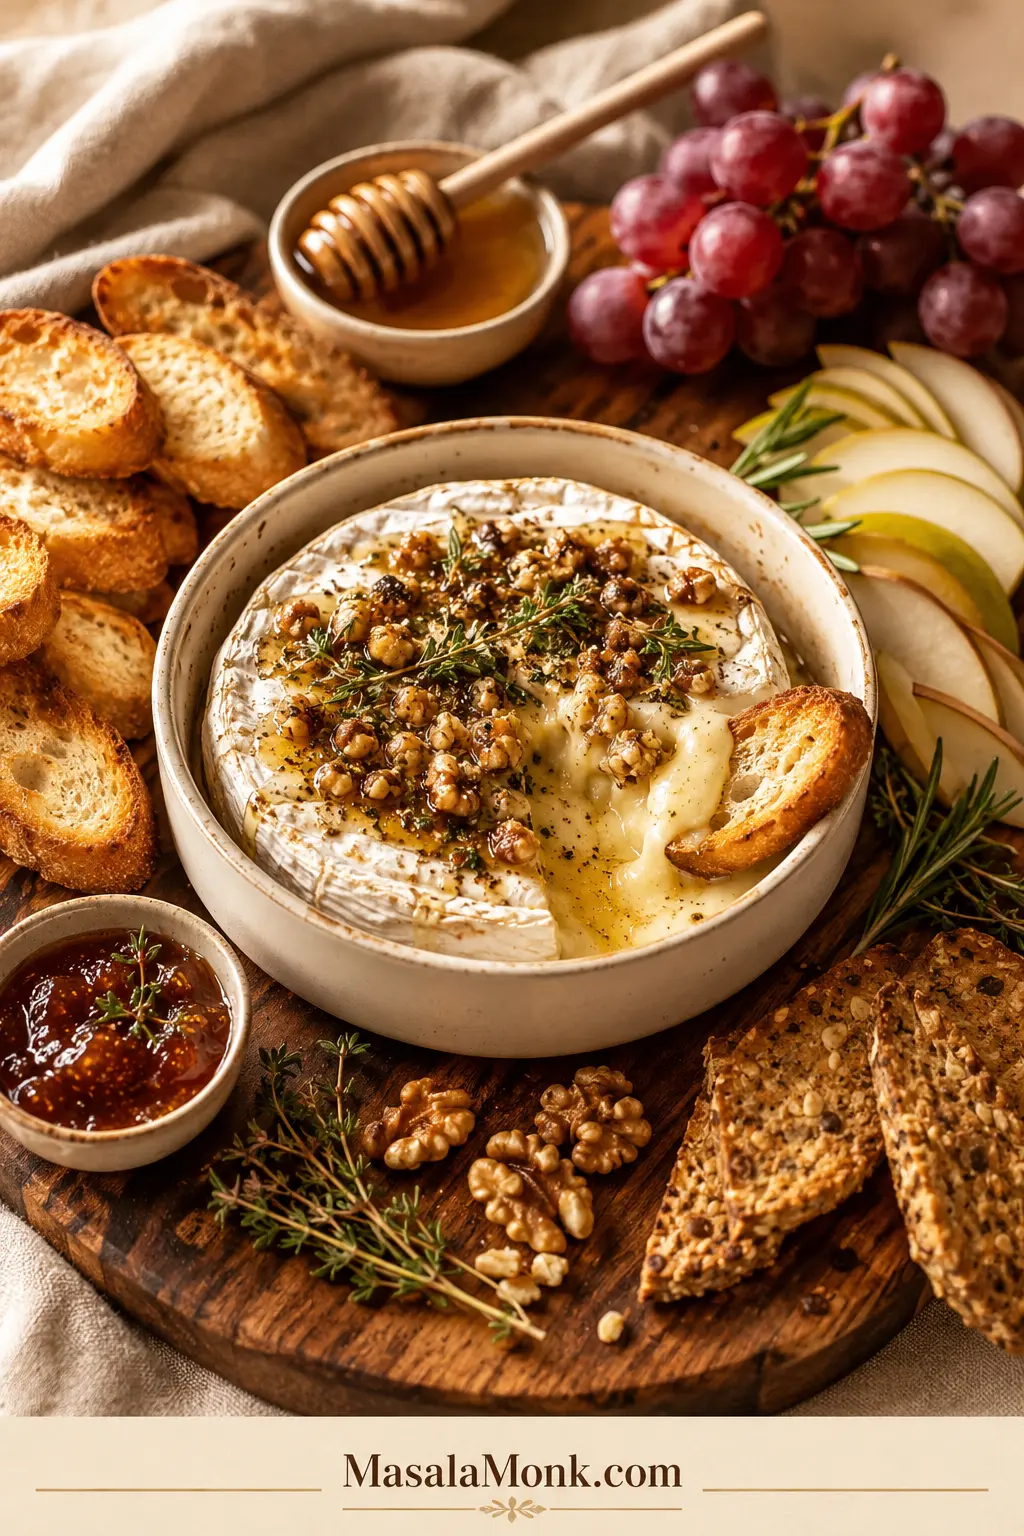
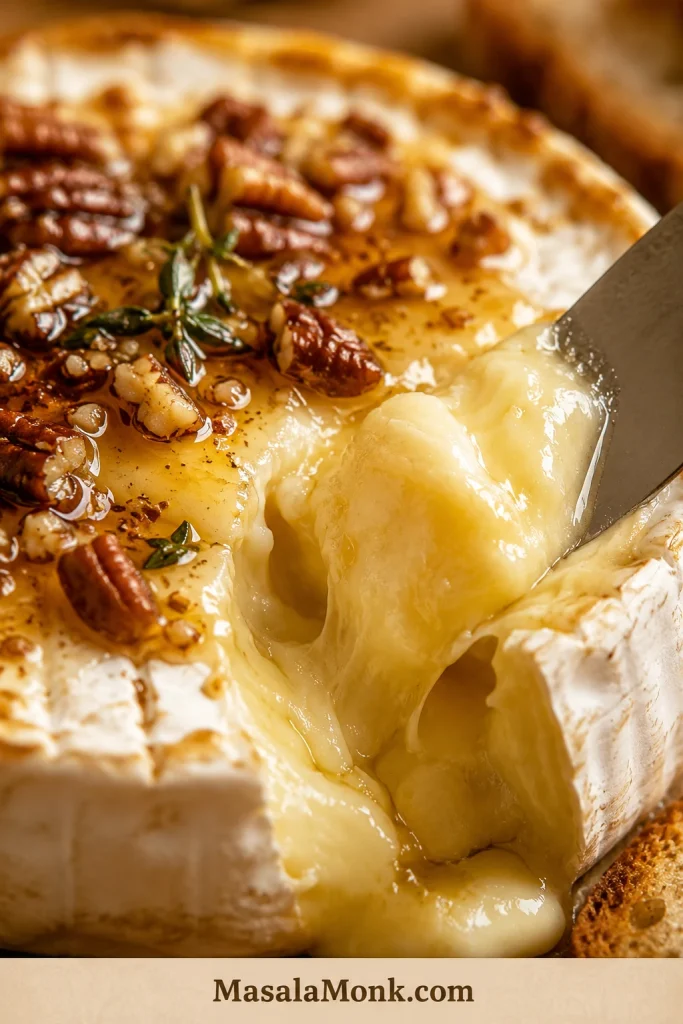
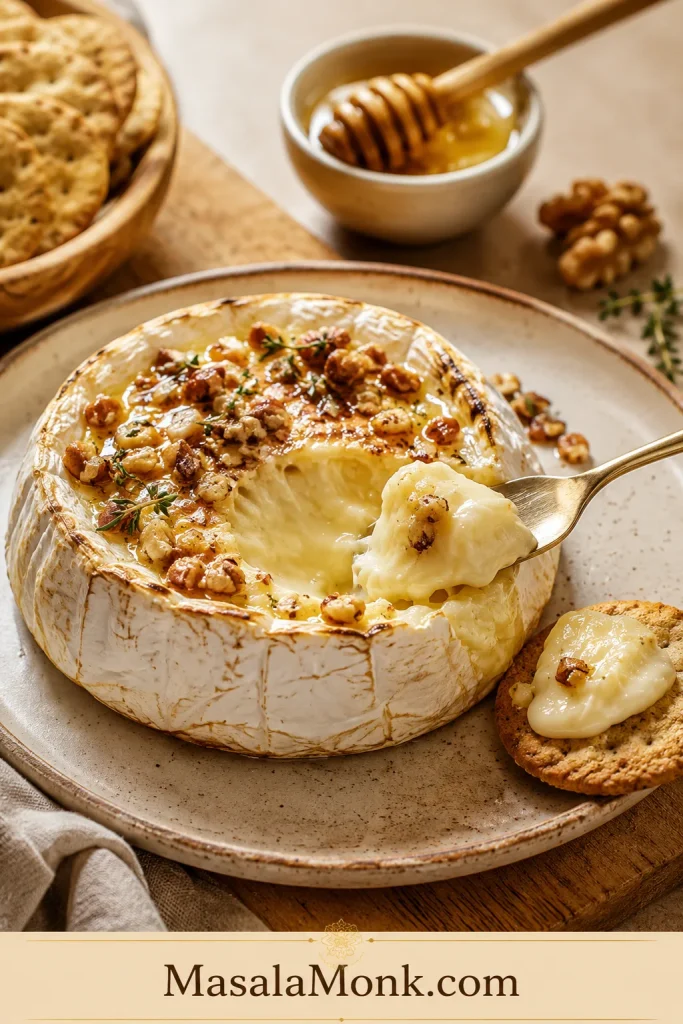
Baked brie is the appetizer that makes people drift toward the table before dinner is ready: a warm wheel of cheese, a soft center, something glossy on top, and crackers or bread waiting for the first scoop.
The trick is not making baked brie complicated. What matters most is knowing when to stop. Brie should be warm and soft in the middle, not collapsed into oil; easy to scoop, not so runny that it escapes before guests reach the board.
Start with the easy no-pastry version. It gets to the table in about 15 minutes, teaches you exactly how baked brie should feel, and lets toppings like honey, jam, cranberry sauce, fig jam, nuts, and herbs do the work.
That kind of appetizer looks generous before anyone realizes how little work it took; most of the magic is just heat, timing, and one good topping.
Quick Answer: How to Bake Brie
For easy baked brie without pastry, bake a cold 8 oz / 225 g wheel at 350°F / 175°C for 8–12 minutes, until the center feels soft when gently pressed. Leave the rind on so the cheese holds its shape.
Finish with honey, jam, cranberry sauce, fig jam, pepper jelly, nuts, herbs, or flaky salt. Keep crackers, crostini, baguette, apples, pears, or grapes ready so the brie can be served while warm. For baked brie in puff pastry, use 400°F / 200°C, bake until the pastry is golden, usually 35–40 minutes, and rest for 5–10 minutes before cutting.
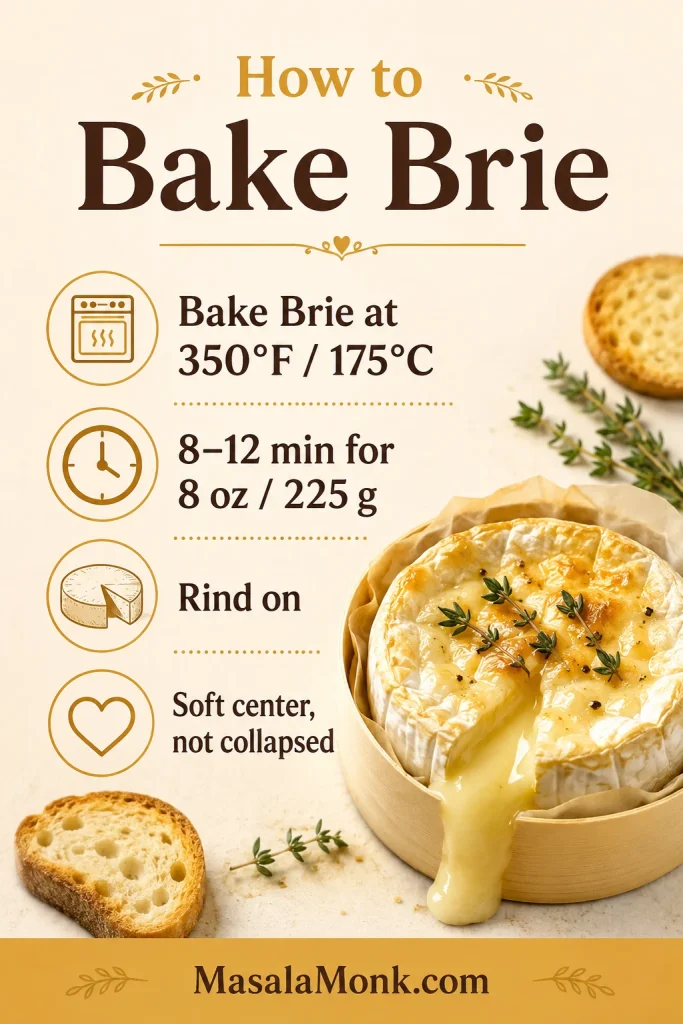
First-scoop check: the center should move easily while the rind still keeps the wheel mostly together.
Need the next step? Go to the easy baked brie recipe, check the bake time chart, or compare baked brie toppings.
Jump to What You Need
Make It
- Quick Answer
- Easy No-Pastry Baked Brie
- How Long to Bake Brie at 350°F
- How to Know When Baked Brie Is Done
- Should You Score Brie Before Baking?
Choose a Version
- Choose Your Baked Brie Version
- Best Baked Brie Toppings
- Baked Brie With Jam
- Baked Brie With Honey
- Cranberry Baked Brie
- Baked Brie With Fig Jam
- Baked Brie With or Without Puff Pastry
Serve and Fix
- What to Bake Brie In
- What to Serve With Baked Brie
- Make-Ahead, Storage, and Reheating
- Troubleshooting Baked Brie
- Baked Brie FAQ
Easy No-Pastry Baked Brie
No-pastry baked brie is the best first version because it teaches timing, shows off toppings, and reaches the table fast. There is no wrapping dough, no sealing pastry, no waiting for a crust to brown — just warm cheese, a good topping, and something sturdy to scoop it with.

Easy Baked Brie: Ingredients and Instructions
A fast no-pastry baked brie that lands on the table warm, soft-centered, and ready for crackers. This is the version to make when you want an easy appetizer that still feels generous.
- Prep time: 5 minutes
- Bake time: 8–12 minutes
- Total time: 15–20 minutes
- Servings: 4–6
- Brie size: 8 oz / 225 g wheel
- Oven: 350°F / 175°C
- Texture: soft-centered, scoopable, not collapsed
Baked Brie Ingredients
- 1 cold brie wheel, about 8 oz / 225 g
- 2–3 tablespoons / 30–45 ml honey, fig jam, cranberry sauce, raspberry jam, apricot preserves, or pepper jelly
- 2–4 tablespoons / about 15–30 g chopped pecans, walnuts, almonds, or pistachios
- 1–2 teaspoons / about 1–2 g fresh thyme or rosemary, optional
- Pinch of flaky salt, optional
- Crackers, crostini, sliced baguette, apple slices, pear slices, or grapes, for serving
Instructions
- Preheat the oven to 350°F / 175°C.
- Keep the brie cold until baking. Leave the rind on; it helps contain the soft center.
- Place the brie on parchment, in a shallow oven-safe dish, or in a small cast iron skillet.
- For thick jam or cranberry sauce warmed into the top, spoon it over the brie now. Honey, loose jam, fresh herbs, and flaky salt usually look better after baking.
- Bake for 8–12 minutes, until the center feels soft when gently pressed.
- Finish with honey, jam, cranberry sauce, fig jam, nuts, herbs, and a small pinch of flaky salt as needed.
- Rest for 2–3 minutes if the cheese looks very runny, then serve warm with crackers, bread, or fruit.
Recipe note: Start checking early. Soft and gently wobbly is better than burst and oily. This is the part to check, not the clock.
Before you bake: Check how long to bake brie, confirm doneness cues, or jump to what to serve with baked brie.
Fastest 3-Ingredient Baked Brie
Use brie + honey or jam + nuts. Bake the cold brie until soft, spoon honey or jam over the top, add chopped pecans or walnuts, and serve warm. That is enough to put something warm, golden, and generous on the table in about 15 minutes.
Bake the brie last, not first. The board can wait; the cheese cannot. Have the crackers, bread, fruit, topping, and spreader ready before the brie leaves the oven, and the whole appetizer feels calm instead of rushed.
What Makes This Baked Brie Work
Baked brie is a timing recipe more than an ingredient recipe. The cheese needs just enough heat to turn soft in the center, while the rind still holds everything together.
That is why the no-pastry version is the best place to start. It teaches you how baked brie should feel: warm, scoopable, gently wobbly, and still neat enough to bring to the table.
- Keep the rind on: it acts like a small edible bowl.
- Check early: soft and wobbly is better than burst and oily.
- Use contrast: honey, jam, cranberry, fig, nuts, herbs, or flaky salt keep the cheese from feeling too rich.
- Serve immediately: baked brie is at its best while the first scoop is still warm.
How Long to Bake Brie at 350°F
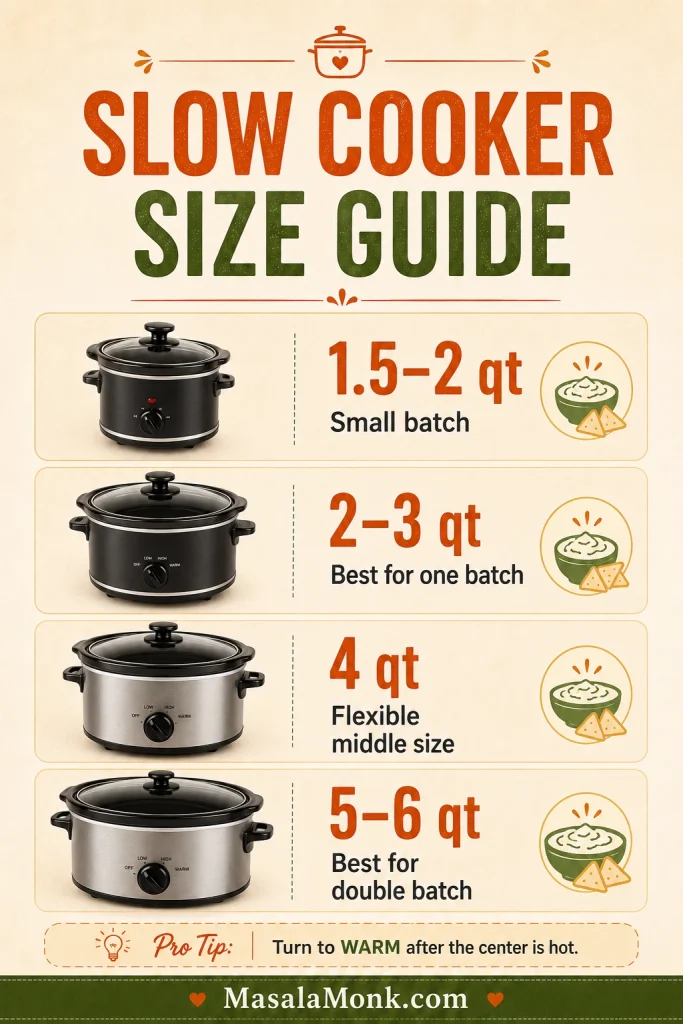
At 350°F / 175°C, a standard 8 oz / 225 g wheel of brie usually takes 8–12 minutes. Smaller wheels soften faster, while larger wheels need more time for the center to warm through.
| Brie Size | Metric | Oven Temp | Bake Time | Use For |
|---|---|---|---|---|
| Small wheel | 4–5 oz / 125 g | 350°F / 175°C | 6–8 min | 2–4 people |
| Standard wheel | 7–8 oz / 200–225 g | 350°F / 175°C | 8–12 min | 4–6 people |
| Medium wheel | 12–13 oz / 340–370 g | 350°F / 175°C | 12–18 min | 6–8 people |
| Large wheel | 16 oz / 450–500 g | 350°F / 175°C | 18–25 min | 8–10 people |
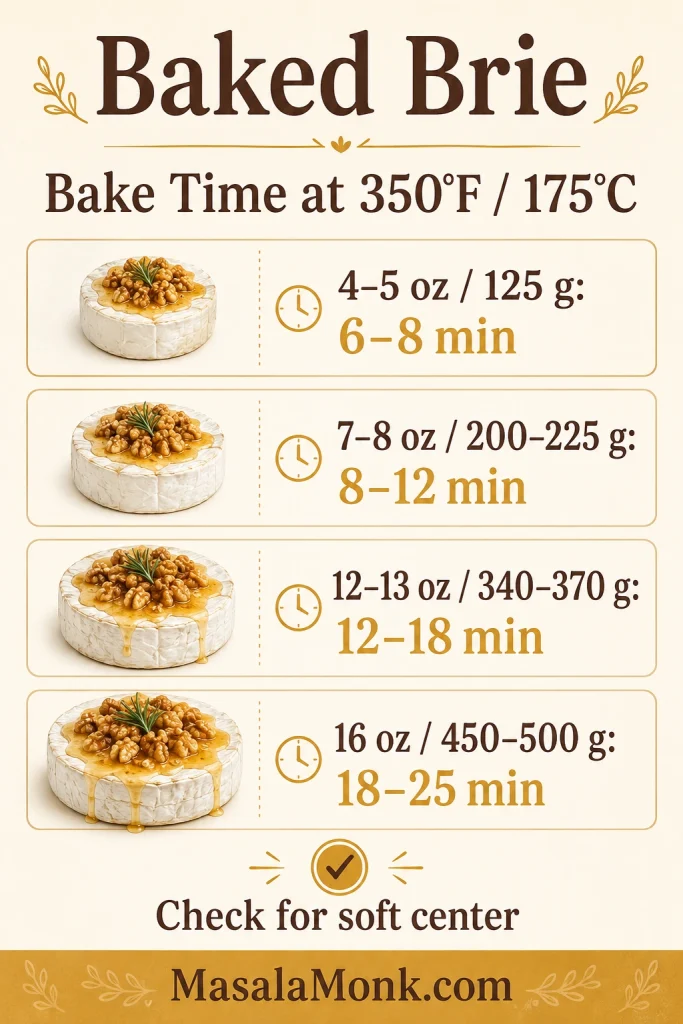
If your brie takes longer than the chart, nothing is wrong. Some wheels are thicker, colder, or packed more firmly. Use the chart as a starting point and the soft-center test as the final check.
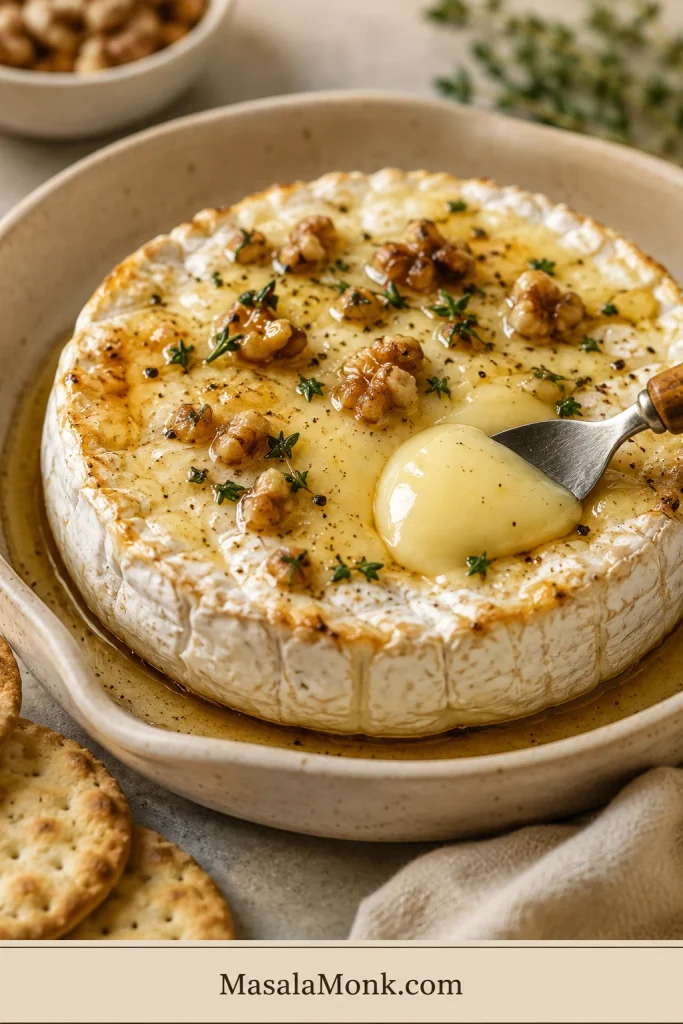
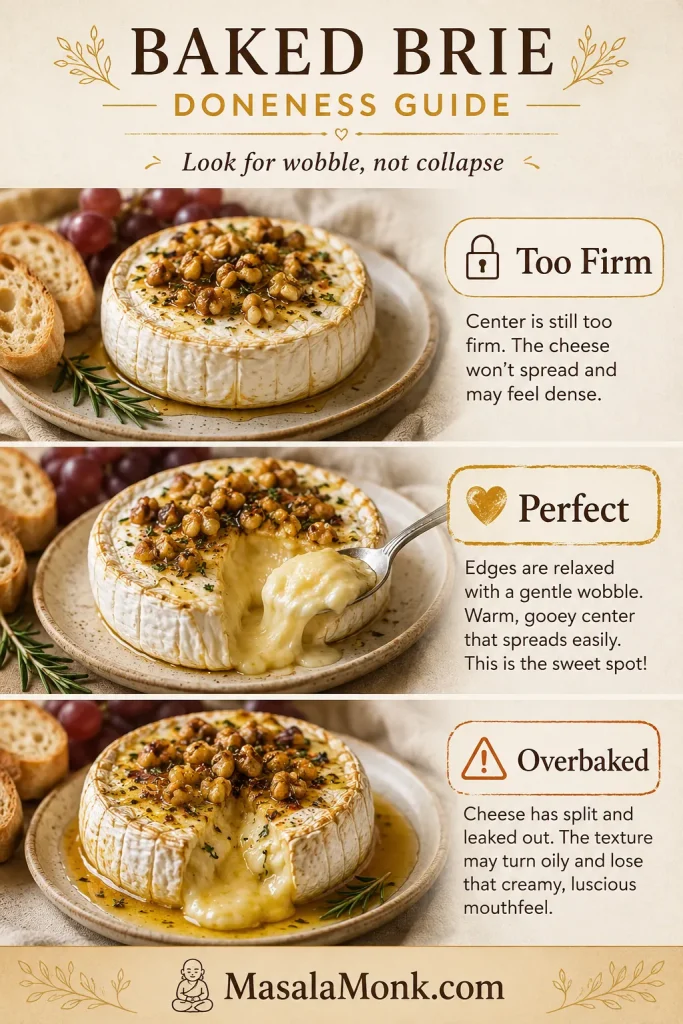
How to Know When Baked Brie Is Done
Baked brie is done when the center feels soft under the rind and the wheel relaxes slightly at the edges. Look for wobble, not collapse.
- Too firm: bake 2–3 minutes more and check again.
- Soft and gently wobbly: ready.
- Split, leaking, or oily: overbaked, but still fine to serve from the dish.
Too Firm, Perfect, or Overbaked
Use the visual cues together: a firm wheel needs a few minutes, a gentle wobble is ready, and a split rind means it is time to serve from the dish.
For an 8 oz wheel, 8–10 minutes gives you a neater brie. Around 10–12 minutes gives you a gooier center. After that, leaking becomes more likely.
A tiny bit of cheese escaping is not a disaster. The real problem is when the whole wheel splits and floods the dish, so check early and stop when the center feels soft.
Should You Score Brie Before Baking?
You can score the top rind before baking brie, but keep the cuts shallow. Scoring helps honey, jam, herbs, and nuts settle into the top of the cheese, but cutting too deeply gives the melted center a place to leak.

For no-pastry baked brie, make shallow lines only across the top. Do not cut down the sides. For puff pastry baked brie, keep the wheel mostly intact so the cheese stays contained inside the pastry.
The rind is edible and helps the brie hold its shape. If you dislike the flavor, lightly scrape or shallow-score the top, but do not remove the rind or cut into the sides before baking.
Worried about leaks? See the puff pastry baked brie tips or jump to troubleshooting baked brie.
Choose Your Baked Brie Version
Now choose the style that fits the kind of table you are building. If you are unsure, choose honey for easy, cranberry for festive, fig jam for elegant, and puff pastry for drama.

| Version | Use When | Approx. Time | Topping Idea |
|---|---|---|---|
| No-pastry baked brie | You want the fastest appetizer | 10–15 min | Honey, nuts, thyme |
| Baked brie with jam | You want easy sweet-savory flavor | 10–15 min | Fig, raspberry, apricot, pepper jelly |
| Cranberry baked brie | You are making a holiday board | 15–20 min | Cranberry sauce, pecans, orange zest |
| Baked brie with honey | You want something classic and simple | 10–15 min | Honey, walnuts, flaky salt |
| Baked brie with fig jam | You want a cheese-board feel | 10–15 min | Fig jam, walnuts, rosemary |
| Puff pastry baked brie | You want a dramatic centerpiece | 35–45 min | Fig jam, cranberry, honey |
| Crescent roll baked brie | You want a shortcut dough option | 25–35 min | Jam or cranberry sauce |
| Phyllo baked brie | You want a crisp, flaky wrapper | 25–35 min | Honey, fig jam, walnuts |
| Air fryer baked brie | You are making a small batch | 6–10 min | Honey or jam |
| Brie bites | You want party-tray finger food | 20–30 min | Cranberry, fig jam, pepper jelly |
Ingredients and Topping Basics
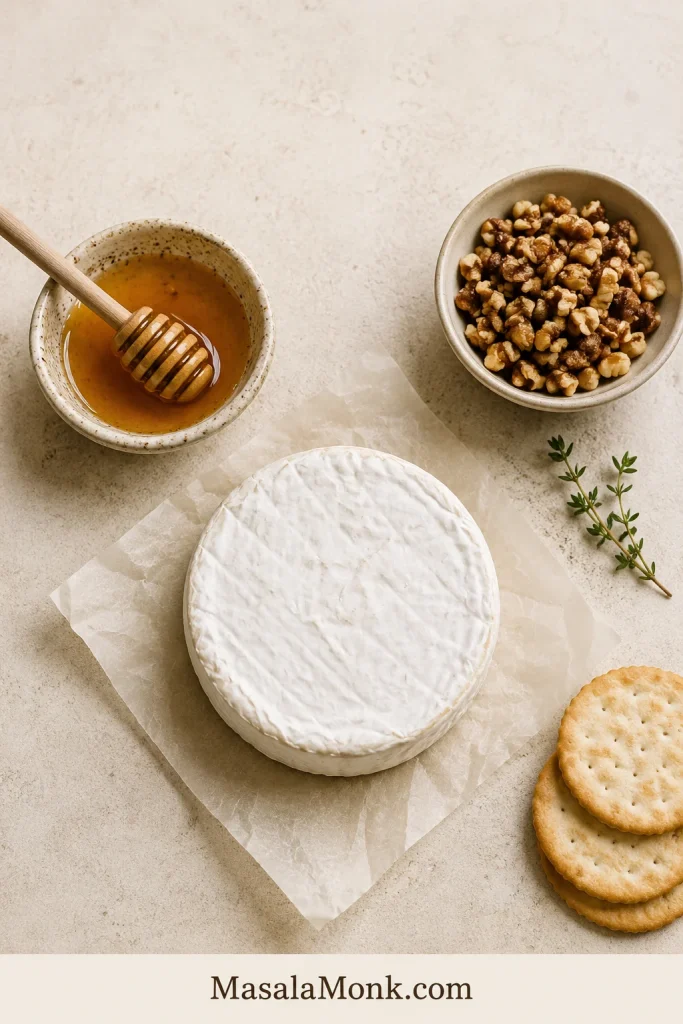
Brie
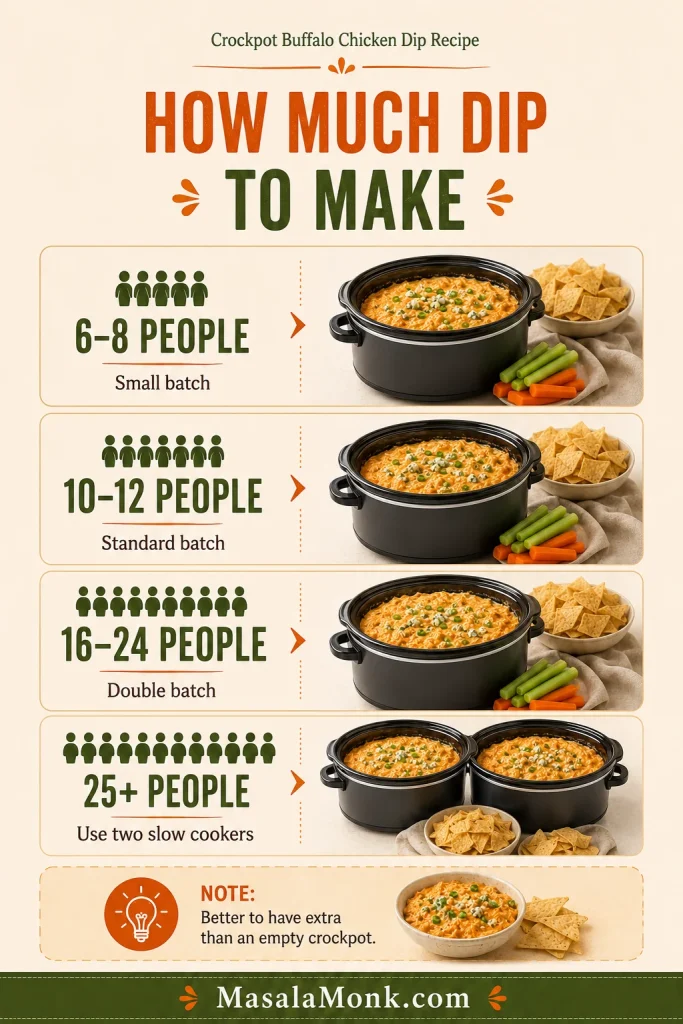
Use a round wheel of brie if possible. A standard wheel is usually 7–8 oz / 200–225 g and serves 4–6 people as an appetizer. For a party or holiday board, a larger 12–16 oz wheel works better. Wedges can be warmed, but a wheel holds its shape better and looks cleaner when guests start scooping.
You do not need the most expensive brie for baking. A good everyday wheel works well because the cheese is being warmed and topped; save very delicate or expensive brie for a room-temperature cheese board.
Honey, Jam, Cranberry Sauce, or Fig Jam
For an 8 oz / 225 g wheel, use 2–3 tablespoons / 30–45 ml honey, jam, cranberry sauce, fig jam, or pepper jelly, plus 2–4 tablespoons / about 15–30 g chopped nuts if using. That is enough to flavor the cheese without drowning it.
If you already have homemade jam, preserves, or leftover cranberry sauce, baked brie is one of the easiest ways to turn it into an appetizer.
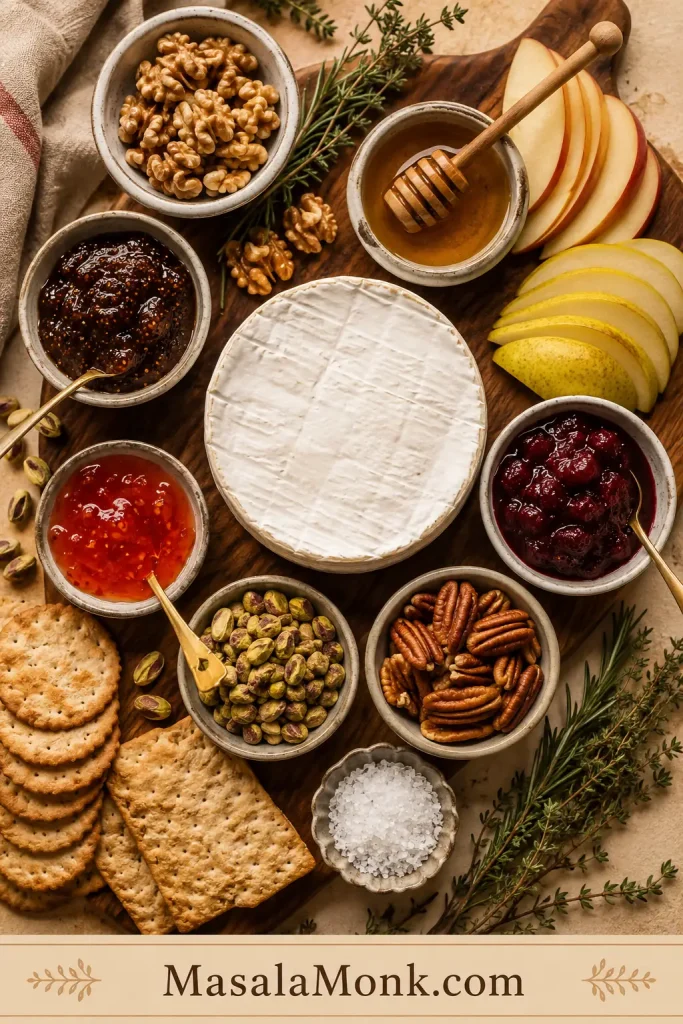
Nuts, Herbs, and Dippers
Pecans, walnuts, almonds, and pistachios add the crunch that keeps each bite interesting. Thyme and rosemary add aroma. Crackers, crostini, baguette, apples, pears, and grapes should be ready before the cheese goes into the oven. Warm brie should never be waiting on crackers.
Best Baked Brie Toppings
Use this chart like a shortcut to the mood you want: simple, festive, elegant, spicy, or savory.
The best bite has all three things: creamy cheese, glossy topping, and something crisp enough to carry it.
| Topping | Pair With | Flavor |
|---|---|---|
| Honey | Pecans, walnuts, thyme | Sweet, simple, glossy |
| Fig jam | Walnuts, pistachios, rosemary | Rich, elegant, cheese-board style |
| Cranberry sauce | Pecans, orange zest, rosemary | Tart, festive, holiday-ready |
| Raspberry jam | Almonds, pistachios | Bright and sweet-tart |
| Apricot preserves | Almonds, honey | Mild, fruity, crowd-friendly |
| Pepper jelly | Pecans, crackers, charcuterie boards | Sweet-spicy and bold |
| Hot honey | Walnuts, pecans, plain crackers | Sweet-spicy and bold |
| Apple or pear | Walnuts, honey, thyme | Fresh and fall-style |
| Garlic and herbs | Olive oil, rosemary, thyme | Savory and aromatic |
Nut-Free Baked Brie Toppings
For a nut-free baked brie, use honey with flaky salt, cranberry sauce with orange zest, fig jam with rosemary, pepper jelly with herbs, or apple slices and pomegranate seeds around the board.
Baked Brie With Jam
Jam turns warm brie into a sweet-savory appetizer with almost no extra work. When the jam warms slightly, it softens into the top of the brie and gives each cracker a little sweet-tart edge.
Baked Brie With Jam: Before or After Baking?
Add thick jam before baking if you want it warmed into the top of the cheese. For a brighter, glossier finish, spoon loose jam on after baking. Either way, keep the layer modest so the topping does not slide off or flood the dish.
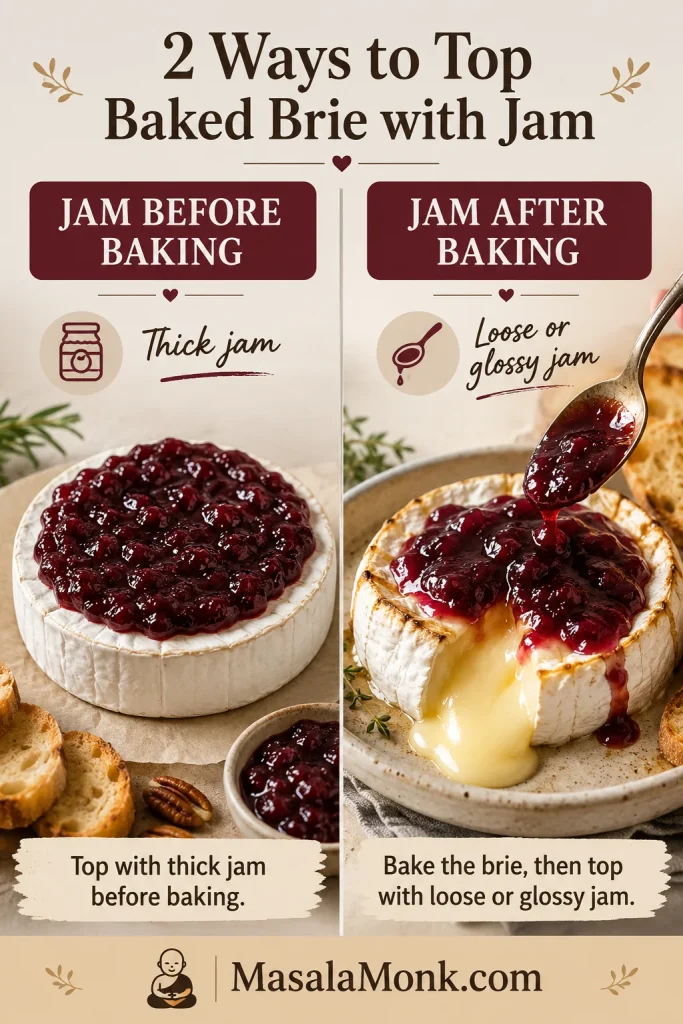
Fig jam, raspberry jam, apricot preserves, cherry jam, blackberry jam, cranberry sauce, and pepper jelly all work. For a sweeter, brighter twist, especially if you like sweet-fruity pairings, a small spoon of pineapple jam can also work with plain crackers or toasted baguette.
Use fig jam with walnuts and rosemary for a deeper cheese-board flavor. Raspberry jam with pistachios makes a brighter party appetizer, while apricot preserves with almonds are mild and crowd-friendly. Pepper jelly with sturdy crackers gives the brie a sweet-spicy edge.
Baked Brie With Honey
Honey is the easiest pretty choice: simple, golden, and good with almost any cracker or bread. Bake the brie first, then drizzle honey over the top and finish with nuts, herbs, and a small pinch of flaky salt.
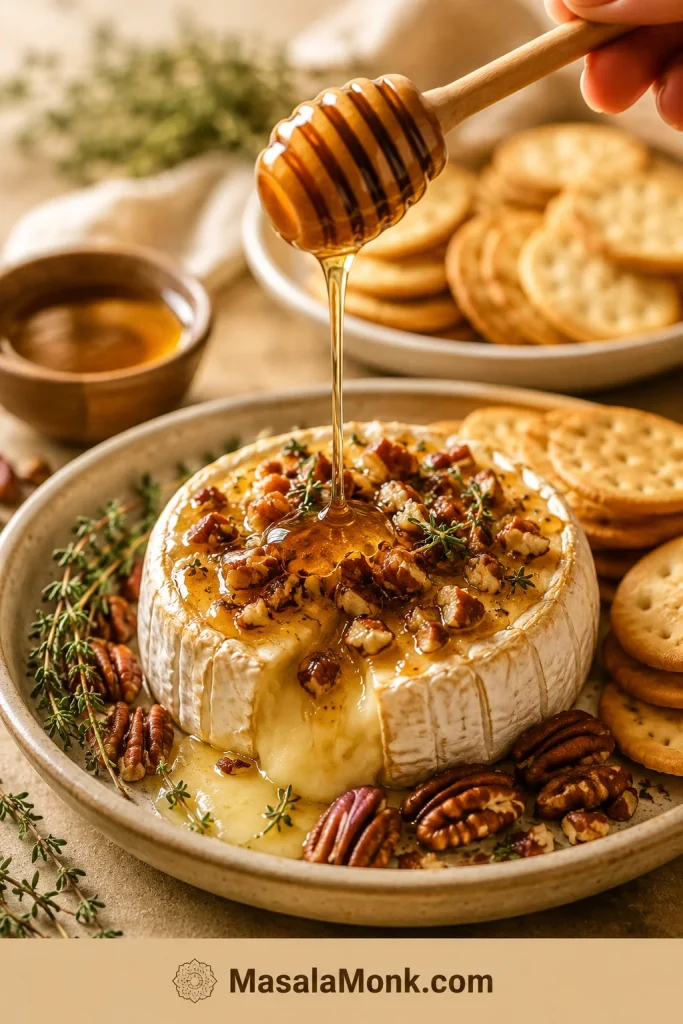
The honey should sit on top in a thin shiny layer, not drown the cheese. A little flaky salt and a few toasted nuts make each scoop taste fuller.
Maple syrup can stand in for honey when you want a deeper, cozier flavor. Pair it with pecans or walnuts, especially for fall or holiday appetizer boards.
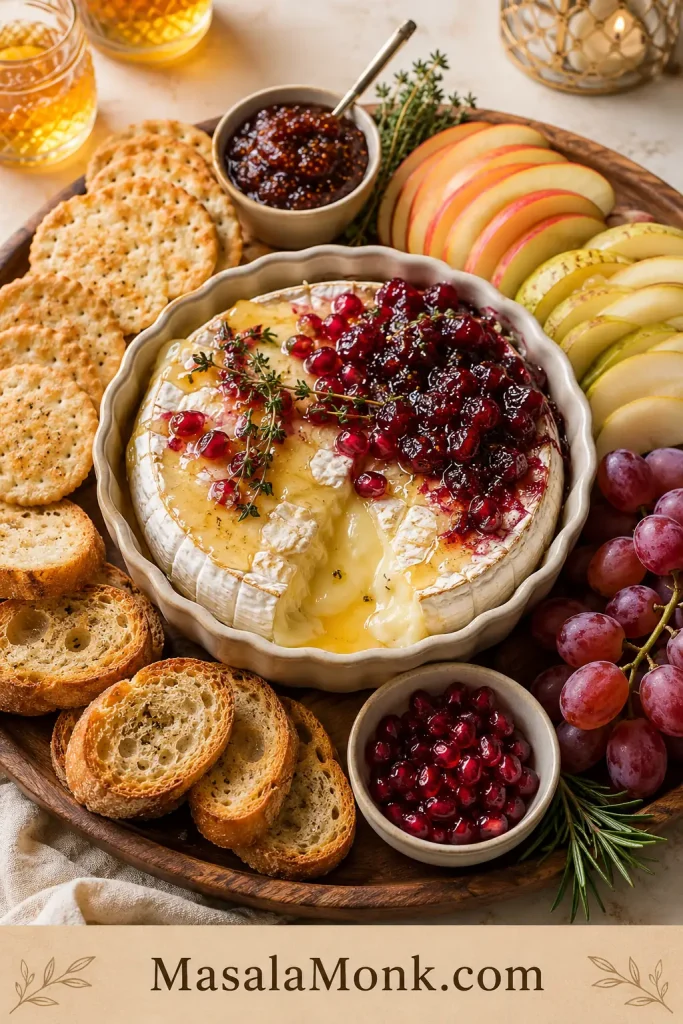
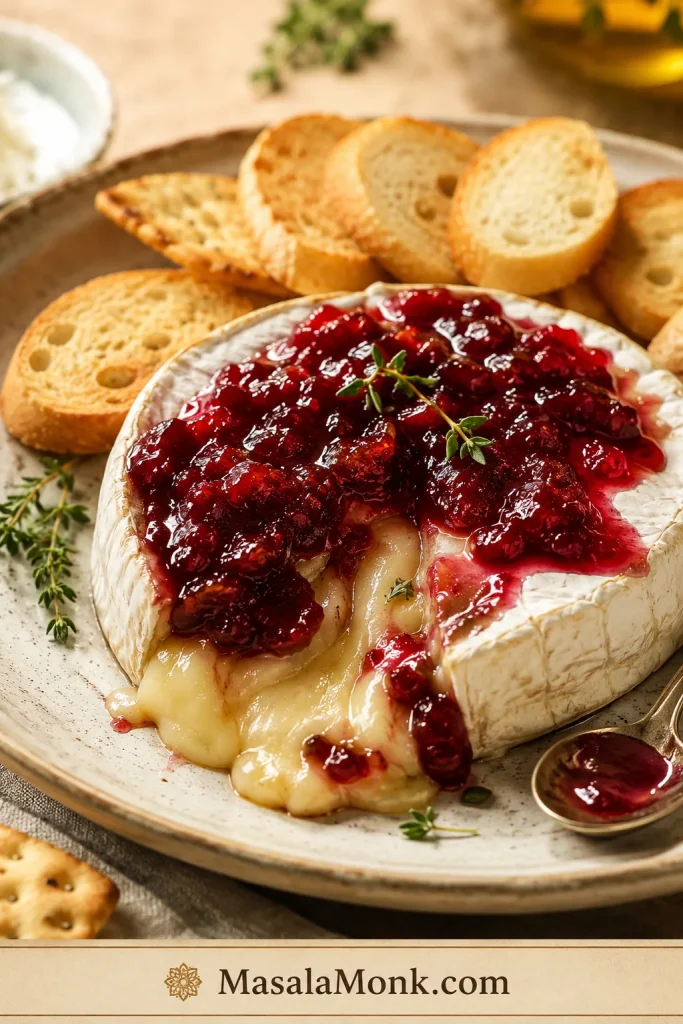
Cranberry Baked Brie
Cranberry baked brie is the holiday choice that brings color to the board. For Thanksgiving, Christmas, New Year’s Eve, or any winter table, cranberry sauce gives the cheese tartness and brightness.
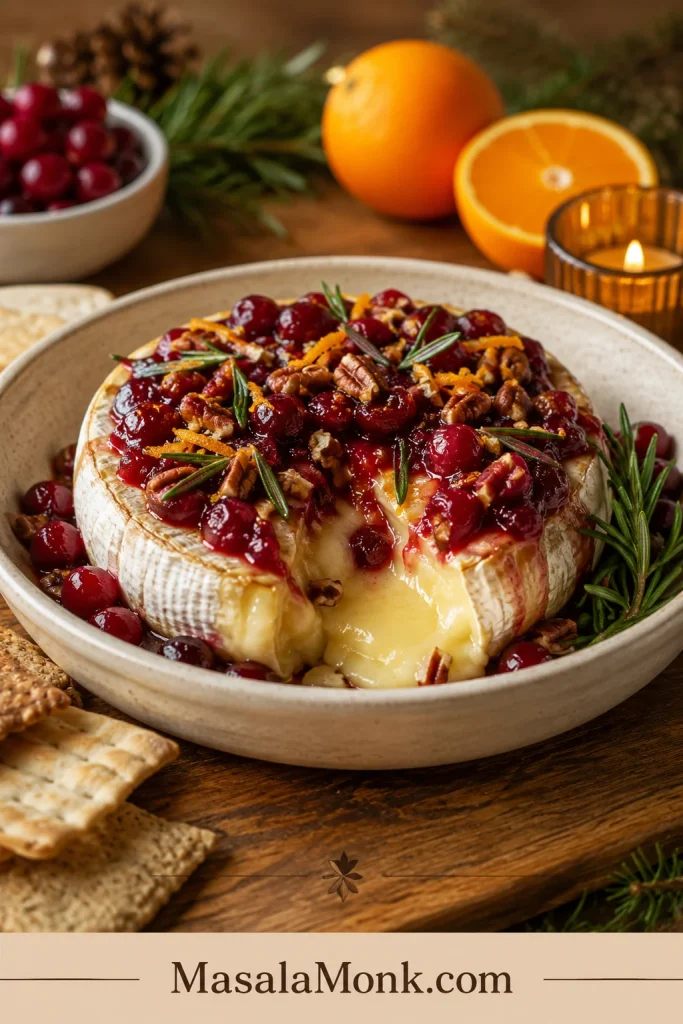
Add chopped pecans or walnuts, a little orange zest, and a few rosemary leaves for a more holiday-ready look and flavor. Leftover cranberry sauce works beautifully here, especially with orange or warm spices.
Homemade cranberry sauce with orange juice is especially good because the orange brightens the warm cheese and keeps the topping from feeling too heavy.
Baked Brie With Fig Jam
For the most cheese-board-style choice, reach for fig jam. It tastes rich and elegant with warm brie, especially when paired with walnuts, pistachios, rosemary, thyme, apples, grapes, or crostini.
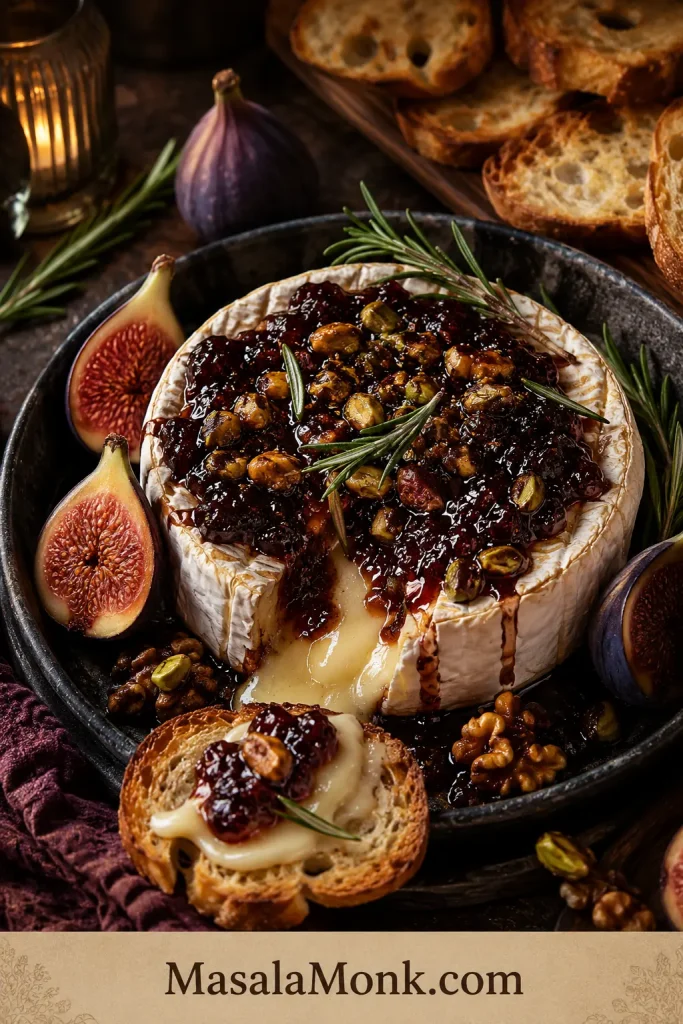
Bake the brie until soft, spoon the fig jam over the top, then finish with nuts and herbs. A tiny drizzle of honey can make it glossier, but you do not need much.
This is also a useful way to turn homemade fig jam into a party appetizer without making anything complicated.
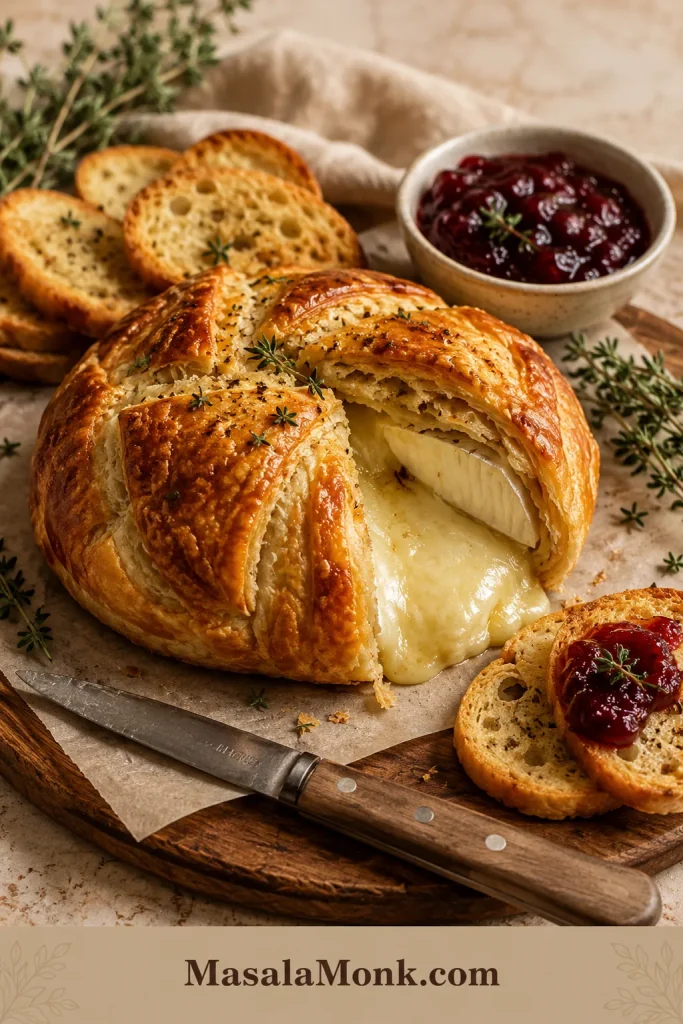
Baked Brie With or Without Puff Pastry
You can bake brie with or without puff pastry. No pastry is faster and lets the topping shine. Puff pastry turns baked brie from easy appetizer into a golden centerpiece, but it also asks for a little more patience.
| Version | Oven Temp | Time | Key Tip |
|---|---|---|---|
| No pastry | 350°F / 175°C | 8–12 min | Keep brie cold and check early |
| Puff pastry | 400°F / 200°C | 35–40 min | Seal pastry well and rest before cutting |
| Crescent rolls | 350°F / 175°C | 20–24 min | Seal every seam |
| Phyllo | 375°F / 190°C | 20–30 min | Brush layers with butter |
| Air fryer | 350°F / 175°C | 6–10 min | Use parchment or a small air-fryer-safe dish |
| Brie bites | 375°F / 190°C | 18–22 min | Use a mini muffin tin |
Puff Pastry Baked Brie
Use puff pastry when you want the dramatic version. You will need 1 thawed puff pastry sheet, an 8–12 oz brie wheel, egg wash, and optional jam, honey, cranberry sauce, or nuts.
How to Wrap Brie in Puff Pastry
Keep the pastry cold and the filling thin before sealing, because puff pastry bakes cleaner when it is not stretched or overloaded.
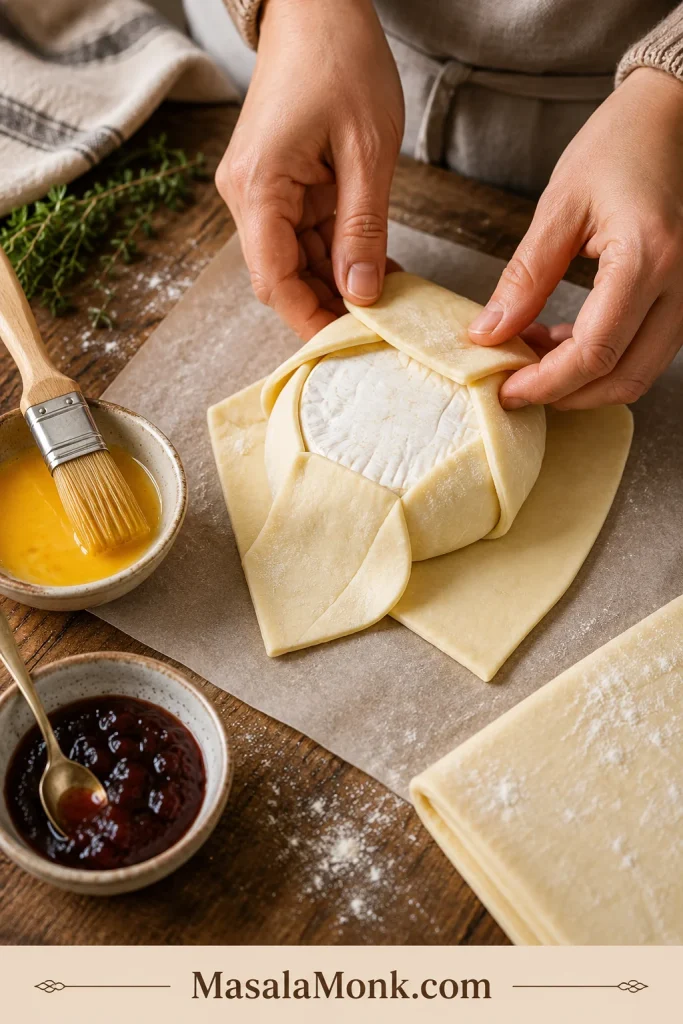
- Heat the oven to 400°F / 200°C.
- Roll the puff pastry into a square large enough to wrap the brie, usually about 10–11 inches wide.
- Place the brie in the center and add a thin layer of jam, honey, or cranberry sauce if using.
- Wrap the pastry around the brie and seal the seams well.
- Brush with beaten egg.
- Bake for 35–40 minutes, or until the pastry is golden.
- Rest for 5–10 minutes before cutting.
Here is where people usually go wrong: too much filling, warm pastry, or cutting too soon. Use less jam than you think, chill the wrapped brie if the pastry gets soft, and let the baked pastry rest before slicing so the cheese does not gush out before guests can scoop it.
Warm pastry stretches and tears more easily, which is why chilling the wrapped brie helps it bake up cleaner and leak less.
Rest Before Cutting Puff Pastry Baked Brie
Resting gives the pastry a cleaner cut and gives the melted brie a moment to settle before the first scoop.
If you are building a non-vegetarian puff pastry appetizer tray, these puff pastry sausage rolls make a heartier companion beside the brie.
Crescent Roll Baked Brie
Crescent dough is the casual shortcut. Wrap the brie completely, add jam or cranberry sauce if you like, brush with egg wash, and bake at 350°F / 175°C for 20–24 minutes. Let it rest for about 15 minutes before cutting.
Phyllo Baked Brie
Phyllo gives baked brie a crisp, flaky shell that feels lighter than puff pastry. Brush the phyllo sheets with melted butter, layer them around the brie, add a small amount of jam or honey, and bake until golden and crisp. Keep the filling modest so the layers stay crisp.
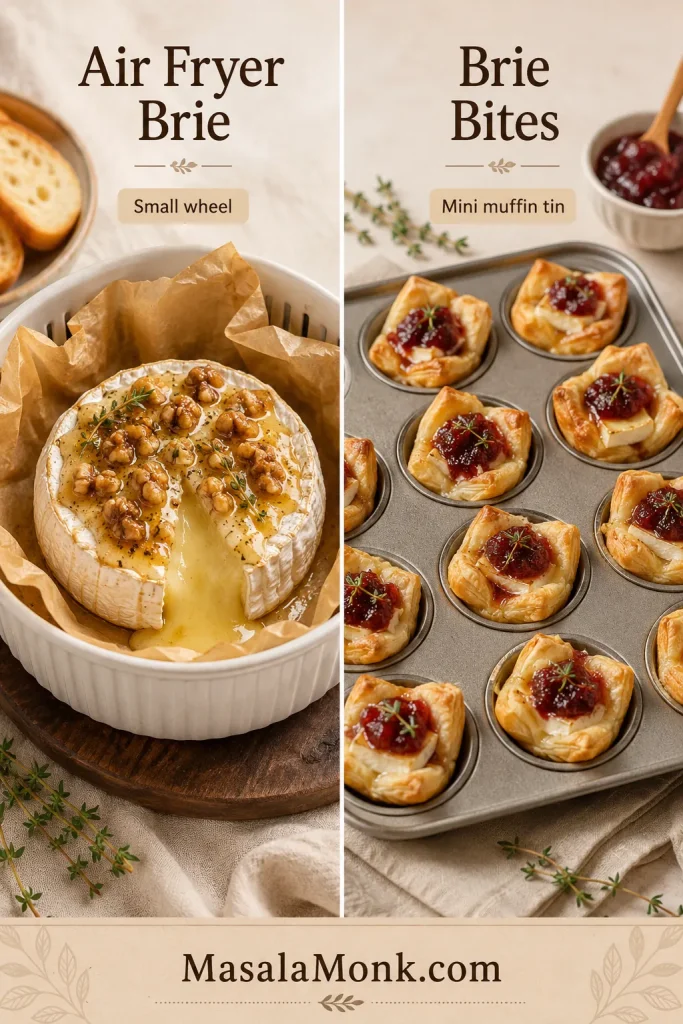
Air Fryer Baked Brie
For a quick few-people option, air fryer baked brie works well with a small wheel. Use parchment or a small air-fryer-safe dish, keep the rind on, and air fry at 350°F / 175°C for 6–10 minutes, depending on the size and thickness of the brie. Check early because air fryers heat quickly.
Baked Brie Bites
For a grazing table or party tray, brie bites are easier than asking everyone to gather around one wheel. Cut puff pastry into small squares, press them into a mini muffin tin, add small pieces of cold brie, and bake until the pastry is golden.
For a full party tray, cut the pastry and brie into 24 small pieces, keep the brie cold until assembly, and use only a small spoon of jam, cranberry sauce, fig jam, or pepper jelly in each cup so the bites stay neat.
Air Fryer Brie or Brie Bites?
Choose air fryer brie for a small wheel, or use brie bites when you want tidy portions for a party tray.
What to Bake Brie In
You do not need a special brie baker, but the right dish makes serving easier. Baked brie is hot, soft, and delicate when it comes out of the oven, so use something that helps you move or serve it without stress.
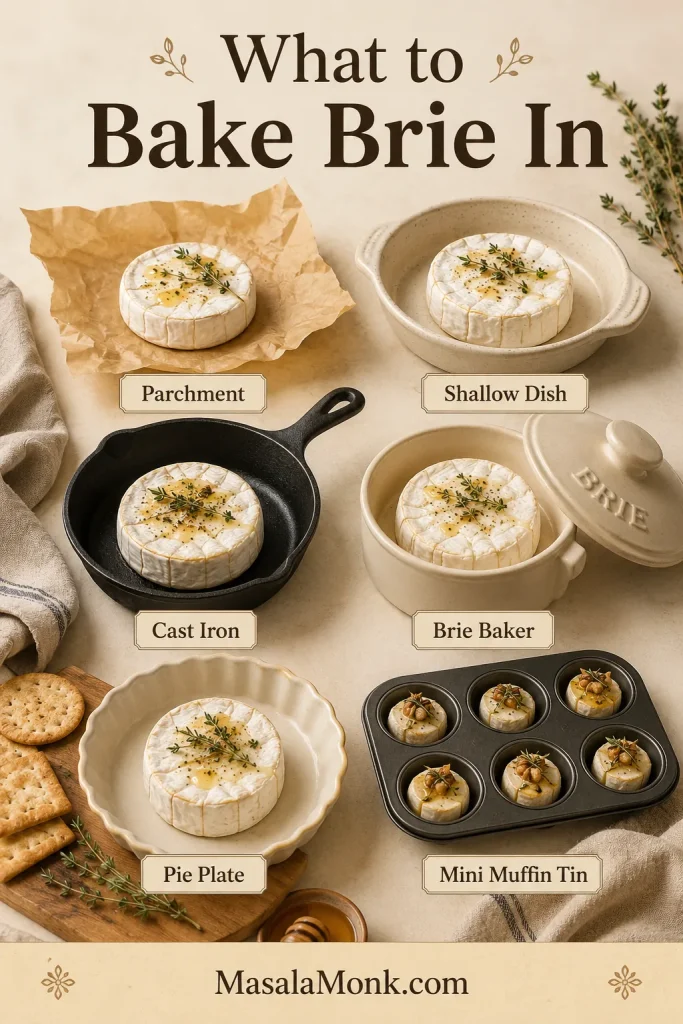
| Equipment | Use It For |
|---|---|
| Parchment-lined baking sheet | Easy cleanup and transfer |
| Shallow oven-safe dish | Serving directly from the oven |
| Small cast iron skillet | Rustic presentation and better heat retention |
| Ceramic brie baker | Holding toppings and melted cheese neatly |
| Pie plate | Puff pastry baked brie |
| Mini muffin tin | Baked brie bites |
If you are serving guests, a small dish or skillet is less stressful than trying to move a soft wheel from a flat pan. Serve the brie straight from the dish if you are nervous; it looks relaxed, catches any melted cheese, and keeps the appetizer warmer for a little longer.
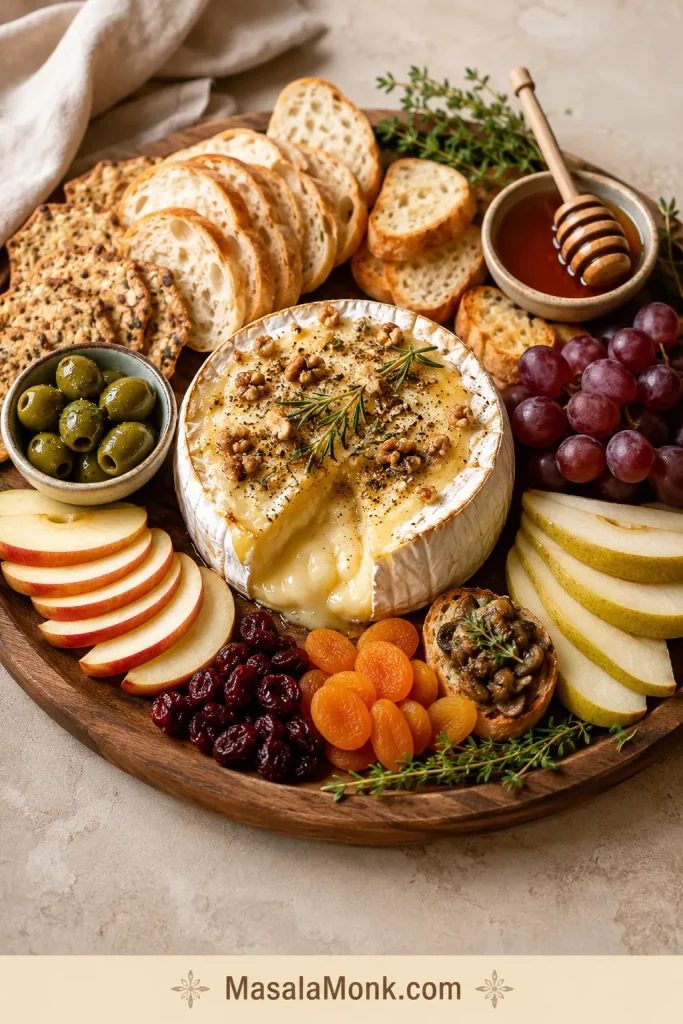
What to Serve With Baked Brie
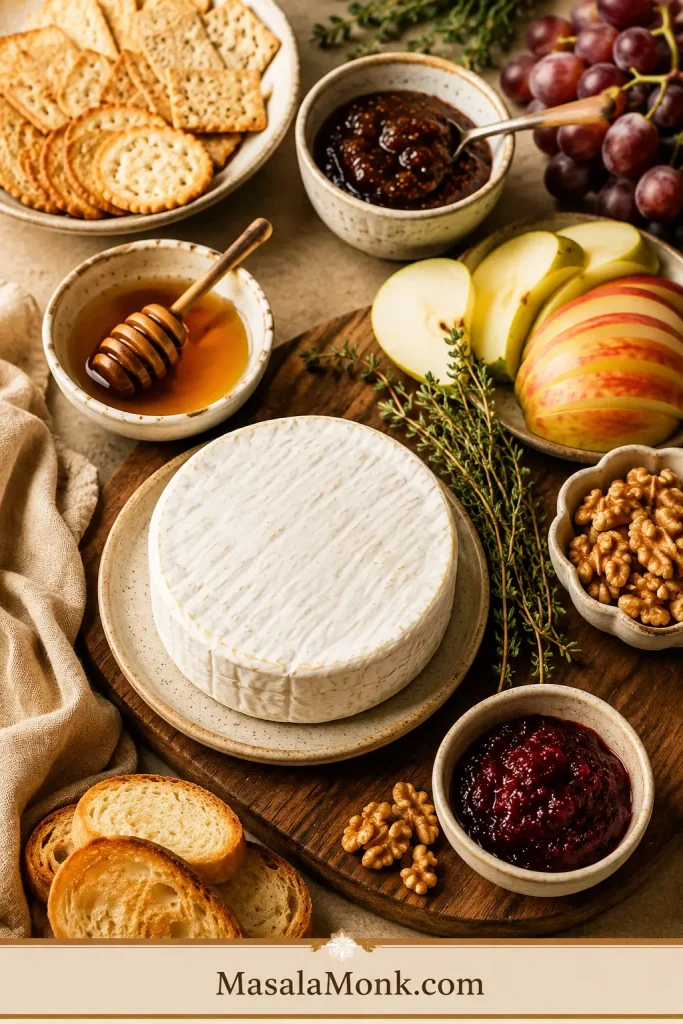
This is the kind of appetizer people naturally gather around, so make the scooping easy and the board relaxed.
Place the brie down first, then build around it. Tuck crackers and bread close enough for scooping, add fruit where the board needs color, nuts where it needs crunch, and one salty bite so the whole board does not feel too sweet.
Keep the dippers close. People should be able to scoop without chasing the cheese across the board.
Simple Baked Brie Board Formula
Use one warm brie + one crunchy cracker + one bread + one fresh fruit + one sweet topping + one salty or savory bite. That gives the board enough contrast without making it crowded.
For a fuller grazing board, the 3-3-3-3 charcuterie board rule is a useful way to balance cheeses, crackers or breads, fruit, nuts, pickles, and savory bites without overcrowding the board.
Good Dippers for Baked Brie
- Crunchy: water crackers, butter crackers, seeded crackers, crostini
- Bread: sliced baguette, toasted sourdough, crusty bread
- Fresh: apple slices, pear slices, grapes
- Sweet: dried apricots, dried cherries, fresh figs, pomegranate seeds
Apples and pears are especially useful because they cut through the richness of the cheese, while grapes and dried fruit make the board feel fuller with almost no prep.
Savory Board Additions
- Olives
- Roasted nuts
- Caramelized onions
- Roasted peppers
- Prosciutto or salami, if you are making a non-vegetarian board
If people are standing around the board instead of asking when dinner is ready, the brie did its job.
Back to quick answer · Jump to recipe
Make-Ahead, Storage, and Reheating
Can You Make Baked Brie Ahead?
You can do almost everything ahead except the actual melting. Get the topping, nuts, herbs, crackers, bread, and fruit ready first, then bake the cheese close to serving time.
For guests, set the board first, bake the brie 10–15 minutes before serving, and let the warm cheese be the last thing that lands on the table.
Do not fully bake no-pastry brie hours ahead for a party. It firms as it cools, and reheating works, but it never feels quite as fresh as baking it close to serving.
| Version | Make-Ahead Advice |
|---|---|
| No-pastry brie | Prep toppings ahead; bake close to serving |
| Puff pastry brie | Wrap up to 1 day ahead; brush with egg before baking |
| Crescent roll brie | Assemble and chill; bake fresh |
| Brie bites | Assemble ahead if needed; bake close to serving |
| Leftovers | Refrigerate and reheat gently |
For another appetizer that can be shaped and chilled ahead, a make-ahead cheese ball works well with many of the same crackers, nuts, herbs, and board items.
If you are building a warmer appetizer table, a creamy spinach artichoke dip gives guests another scoopable option while the brie is at its melty best.
How Long Does Baked Brie Stay Gooey?
Baked brie is at its gooey best for about 10–15 minutes after baking. It stays warm a little longer in a ceramic dish or cast iron skillet. As it cools, it becomes thicker and more spreadable rather than runny.
If the brie cools before everyone gets to it, do not worry. It becomes spreadable rather than ruined, and a few gentle minutes in the oven can soften it again.
How to Store Leftovers
Store leftover baked brie in an airtight container in the refrigerator for 2–3 days. This stays within the USDA’s general guidance for refrigerated leftovers. The texture will be firmer once chilled, but it can be warmed again.
For safety, do not leave baked brie sitting out for hours. Once the appetizer has cooled and the serving window is over, refrigerate leftovers rather than keeping the cheese on the table all evening.
How to Reheat Baked Brie
Reheat no-pastry baked brie gently in a low oven until soft again. A temperature between 300°F and 350°F / 150°C and 175°C works well. Low heat is better because brie can turn oily when it is warmed too aggressively a second time.
If the brie is wrapped in puff pastry, reheat it in the oven instead of the microwave so the pastry does not turn soft and soggy.
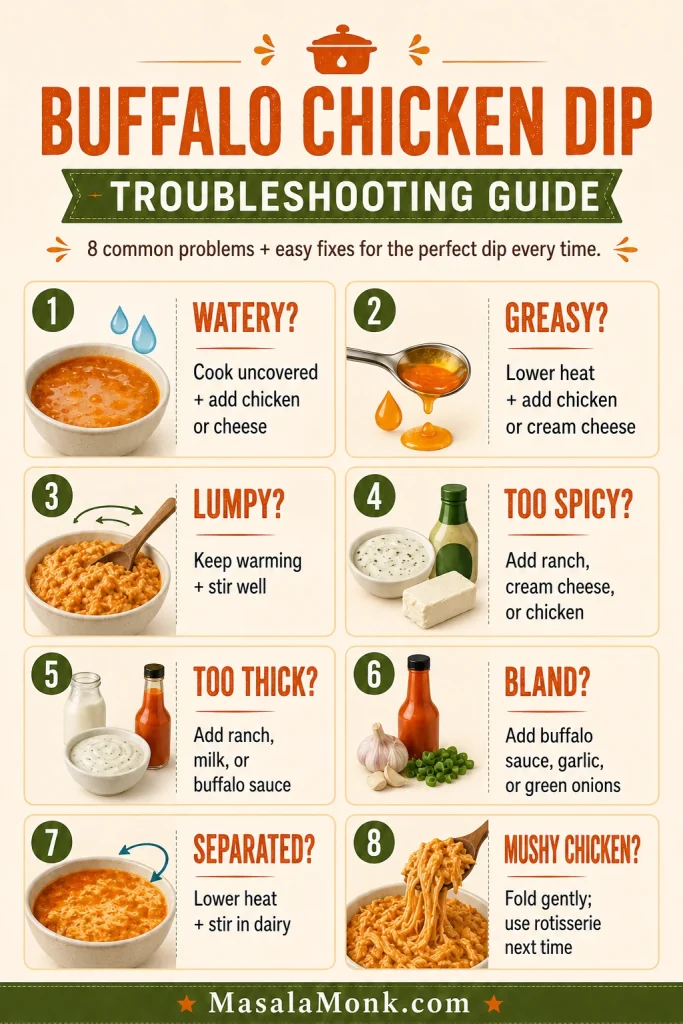
Troubleshooting Baked Brie
A messy baked brie is still baked brie. Most problems come from too much heat, cuts that are too deep, or a board that is not ready when the cheese is warm.
My Brie Did Not Melt
It probably needed more time. Larger wheels take longer, and some brie is thicker than others. Return it to the oven for 2–5 minutes and check again. The center should feel soft when gently pressed.
My Brie Leaked Everywhere
If the brie leaked everywhere, it was probably overbaked, cut too deeply, or given an escape route through an unsealed pastry seam. Next time, keep the rind intact, avoid cutting down the sides, and use a shallow dish to catch any melted cheese.
My Puff Pastry Is Soggy
The pastry may have been too warm, the filling may have been too wet, or the brie may have been cut too soon after baking. Use less jam inside, keep the pastry cold, bake until deeply golden, and let it rest before slicing.
My Brie Turned Oily or Rubbery
That usually means it was baked or reheated too long. Brie should be warmed until soft, not cooked until it fully collapses. Start checking early, especially with smaller wheels.
The Topping Slid Off
Use less topping or add some of it after baking. A small amount of jam or honey goes a long way. Chopped nuts can also help hold the topping in place.
The Brie Cooled Too Fast
Bake it close to serving time and serve it in the dish it was baked in. A small cast iron skillet or ceramic dish helps the cheese stay warm longer than a flat sheet pan.
The Flavor Is Too Sweet
Add balance. Use less honey or jam next time, finish with flaky salt, add fresh herbs, and serve with plain crackers, tart apple slices, or savory board items.
Trying again? Go back to the easy baked brie recipe, check the timing chart, or return to the quick answer.
Baked Brie FAQ
Do you remove the rind before baking brie?
No. The rind is edible and helps the brie hold its shape while the inside melts. US Dairy notes that bloomy rinds like brie are generally edible. You can lightly score or scrape the top if you prefer, but avoid cutting deeply into the sides.
How long do you bake brie?
A standard 8 oz / 225 g wheel usually takes 8–12 minutes at 350°F / 175°C. Larger wheels can take 18–25 minutes. If the center still feels firm, bake it a few minutes more and check again.
What temperature is best for baked brie?
Use 350°F / 175°C for no-pastry baked brie. Puff pastry baked brie needs 400°F / 200°C so the pastry can brown properly.
Do you bake brie covered or uncovered?
Bake no-pastry brie uncovered so you can see when the edges relax and the center softens. Puff pastry baked brie is also baked uncovered so the pastry can turn golden and crisp.
Can you bake brie without puff pastry?
Yes. No-pastry baked brie is often the easiest and most reliable version. It is usually ready in about 10–15 minutes and lets honey, jam, cranberry sauce, nuts, and herbs shine without needing dough.
What jam goes best with baked brie?
Fig jam is rich and elegant, cranberry sauce is tart and festive, raspberry jam is bright, apricot preserves are mild and crowd-friendly, and pepper jelly gives the brie a sweet-spicy edge.
Should toppings go on before or after baking?
Thick jam or cranberry sauce can go on before baking. Honey, loose sauces, fresh herbs, and flaky salt usually look better after baking. Nuts can go on before baking if you want them lightly toasted, or after baking if you want more crunch.
Can you make baked brie ahead of time?
For no-pastry brie, prep the toppings ahead but bake the cheese close to serving. Puff pastry brie can be wrapped ahead and refrigerated, then brushed with egg wash and baked fresh.
Can you bake Camembert instead of brie?
Yes. Camembert can be baked in a similar way, but it usually has a stronger, earthier flavor. Use the same soft-center test and check early, especially with small wheels.
Can you microwave brie?
You can microwave brie briefly, but the oven gives better control and presentation. If using the microwave, warm it in short bursts on a microwave-safe plate and stop as soon as the center softens.
What crackers go with baked brie?
Water crackers, butter crackers, seeded crackers, crostini, and toasted baguette all work well. Choose sturdy crackers that can scoop warm cheese without breaking.
How long does baked brie stay gooey?
Baked brie is usually gooey for about 10–15 minutes. It stays warm longer in a small cast iron skillet, ceramic dish, or brie baker.
Can you bake brie in an air fryer?
Yes. A small wheel of brie can usually be warmed in an air fryer at 350°F / 175°C for 6–10 minutes, depending on size. Use parchment or an air-fryer-safe dish to keep the cheese contained.
The Easiest Fancy Appetizer
Baked brie works because it gives you a lot of payoff for very little effort. Keep the cheese cold, bake it gently, choose one good topping, and have your crackers or bread ready before it comes out of the oven.
Bake it last, serve it warm, and let the first scoop do the work.