Posted on Leave a comment

Crab Cake Recipe: Easy Lump Crab Cakes With Little Filler

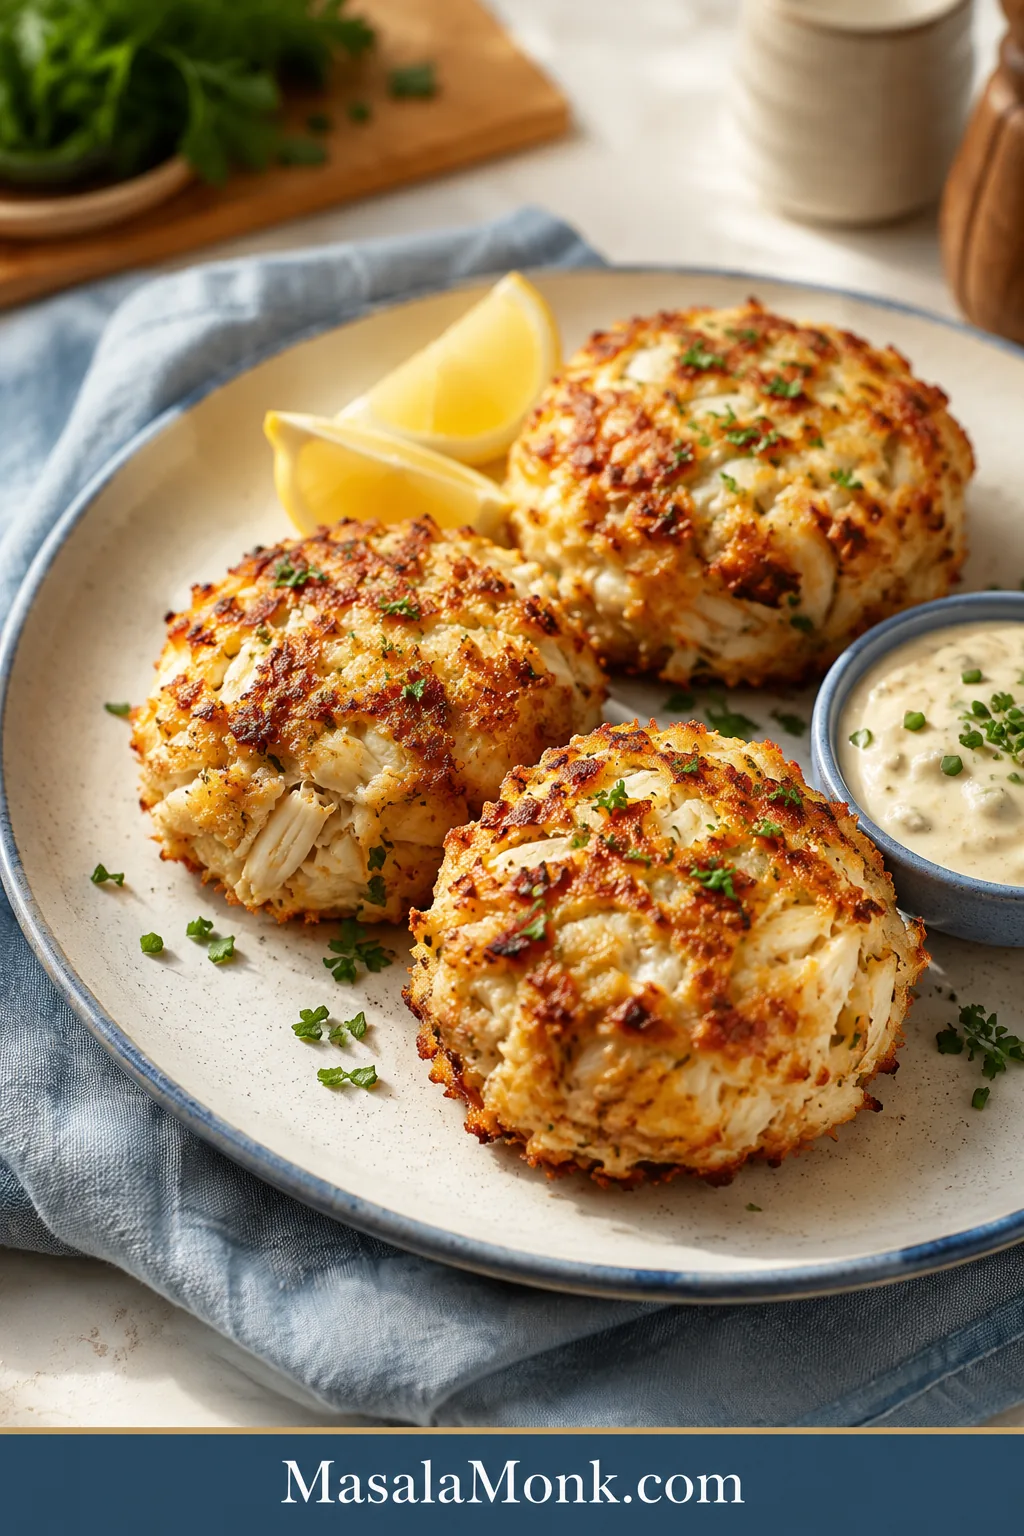
Golden lump crab cakes on a cream plate with lemon wedges, herb garnish, and creamy dipping sauce.

Crab cakes should feel generous, not stressful. When you buy good crab, the last thing you want is a bready patty, a dry center, or a cake that falls apart the second you flip it. This recipe protects what matters most: 1 lb / 454g lump crab, just enough mayo-egg binder, a small amount of panko or crushed saltines, and a proper chill so the cakes hold together without losing their sweet crab texture.

The goal is simple: big crab flavor, little filler, crisp edges, and no first-flip panic. The win is a cake that lifts cleanly from the pan, cracks lightly at the edge, and still tastes warm, tender, and unmistakably like crab in the center.

Pan-frying gives the deepest golden crust, but the same crab cake mixture can also be baked, air-fried, or seared and finished in the oven. Choose the method that fits the meal, then let the ratio, chill time, and visual cues do the work.

Quick Answer: How to Make Crab Cakes That Hold Together

For reliable crab cakes, use 1 lb / 454g lump crab meat, 1 egg, 1/4 cup / 60g mayonnaise, Dijon, Worcestershire, lemon juice, Old Bay, herbs, and a small amount of panko or crushed saltines. For every pound of crab, use 1/2 cup / 30–40g panko or 2/3 cup / 41g crushed saltines. That is enough filler to help the cakes hold together without turning them bready.

Fold gently, shape into 6 thick cakes, chill for 30–60 minutes, then pan-fry for 3–4 minutes per side until crisp and golden. To keep crab cakes from falling apart, drain the crab well, use just enough binder and crumbs, chill the shaped cakes, and wait until the first side is golden before flipping.

The method is simple on purpose: protect the crab, bind only as much as needed, chill before cooking, and let the crust form before you move the cakes. That is the difference between a crab cake that tastes like crab and one that needs too much filler just to survive the pan.
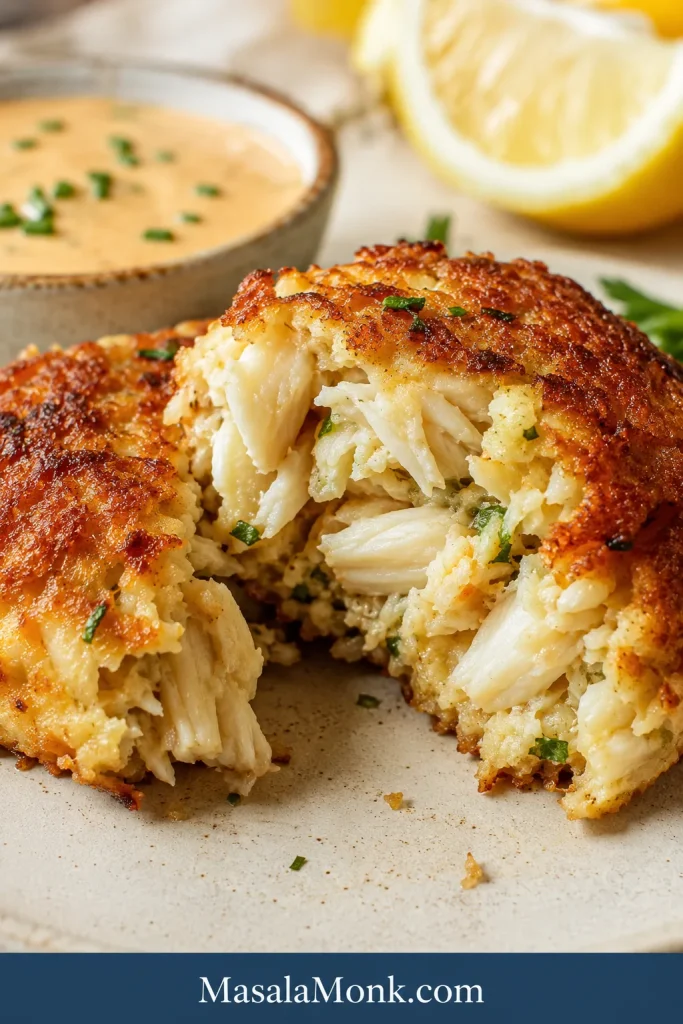
Split-open lump crab cake showing a crab-heavy interior with little filler and a crisp golden crust.
Breaking one open shows the real goal here: big crab pieces, a soft center, and just enough binder to hold the cake together.

The Few Details That Make Crab Cakes Work

If you remember only a few things, remember these: keep the crab cold and well-drained, use only enough filler to hold the cakes together, and let the first side brown before you move it.

Crab cake detailBest choiceWhy it matters
Crab meatLump crab; jumbo lump for a splurgeSweet, tender pieces without a bready bite
FillerPanko or crushed saltinesHelps the cakes stay intact without taking over
BinderEgg + mayoSets the cakes and keeps the center moist
Chill time30–60 minutesMakes the cakes easier to lift and flip
Main methodPan-friedGives the crispest golden edges
Easiest methodBakedNo flipping, less stress, better for batches
SauceTartar, remoulade, or lemon aioliAdds brightness without covering the crab

Recipe Card: Easy Crab Cakes With Lump Crab and Little Filler

These homemade crab cakes are crisp outside, tender inside, and packed with lump crab meat. They use little filler, just enough binder, Old Bay, lemon, Dijon, Worcestershire, and herbs for a recipe that still tastes like crab.

Yield6 large crab cakes
Prep time20 minutes
Chill time30–60 minutes
Cook time6–15 minutes, depending on method
Total timeAbout 1 hour to 1 hour 35 minutes
Main methodPan-fried
Other methodsBaked, air fryer, pan-seared with oven finish

Ingredients

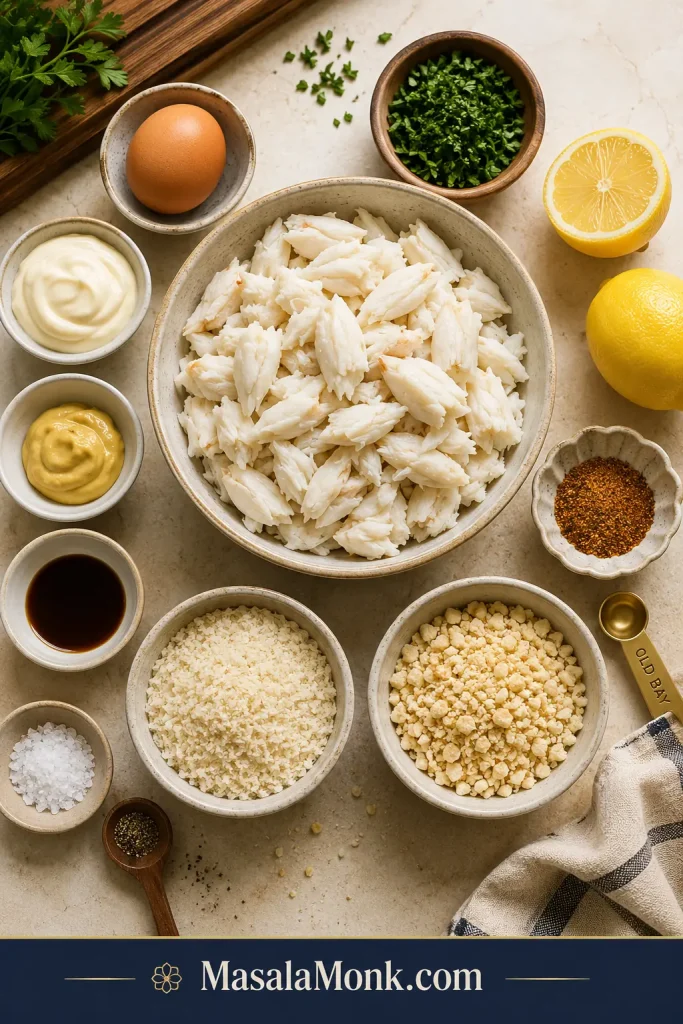
Overhead crab cake ingredient board with lump crab, egg, mayonnaise, lemon, Old Bay, panko, and saltines.
The ingredient list stays short on purpose, because the best crab cake flavor comes from crab, seasoning, and a light hand with crumbs.
  • 1 lb / 454g lump crab meat, picked over for shells
  • 1 large egg
  • 1/4 cup / 60g mayonnaise
  • 2 tsp Dijon mustard
  • 2 tsp / 10ml Worcestershire sauce
  • 1 tbsp / 15ml fresh lemon juice
  • 1 tsp Old Bay seasoning, plus more to taste
  • 1/8 tsp salt, optional
  • 1/4 tsp black pepper
  • 2 tbsp chopped parsley or chives
  • 1/2 cup / 30–40g panko breadcrumbs or 2/3 cup / 41g crushed saltines
  • Neutral oil, for pan-frying
  • Optional: 1 tbsp butter for richer browning or brushing baked crab cakes
  • Lemon wedges, for serving

Quick Remoulade-Style Crab Cake Sauce

This quick crab cake sauce is creamy, tangy, savory, and bright enough to lift the crab without covering it.

Make the sauce while the crab cakes chill, then keep it cold until the cakes are ready to serve.

  • 1/2 cup / 120g mayonnaise
  • 1 tbsp Dijon mustard
  • 1 tbsp / 15ml lemon juice
  • 1 tsp Worcestershire sauce
  • 1 tsp hot sauce
  • 1 tsp chopped capers or pickle relish
  • 1 small garlic clove, grated
  • Pinch of Old Bay or paprika
  • 1 tbsp chopped parsley or chives

Mix everything in a small bowl. The sauce should taste bright before it tastes heavy, because crab cakes are rich and sweet. Adjust with more lemon juice, hot sauce, or Old Bay, then chill until ready to serve.

Instructions

Mix and Shape the Crab Cakes

  1. Check the crab. Place the crab meat in a bowl and gently pick through it for small shell pieces. Try not to break up the larger lumps.
  2. Make the binder. In a large bowl, whisk together the egg, mayonnaise, Dijon mustard, Worcestershire sauce, lemon juice, Old Bay, salt, black pepper, and herbs.
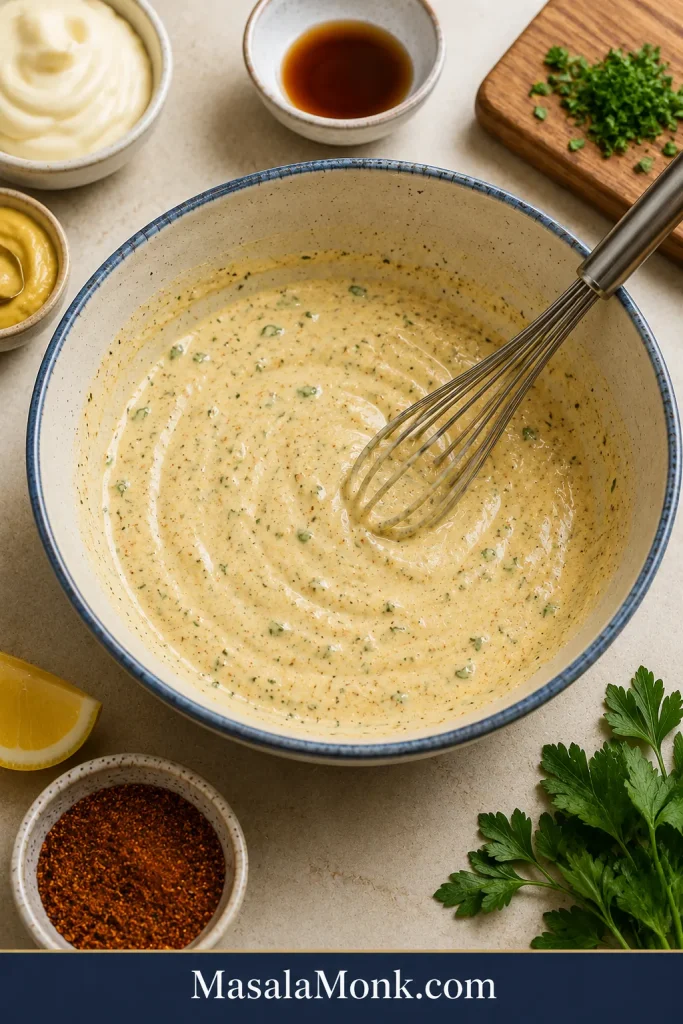
Mixing bowl with crab cake binder made from egg, mayonnaise, Dijon, Worcestershire, lemon, and seasoning.
Mixing the binder first keeps the seasoning even, so the crab stays in beautiful pieces when everything comes together.
  1. Fold in the crab and crumbs. Add the crab meat and panko or crushed saltines. Fold gently with a spatula until the mixture is evenly moistened. It should look loose but scoopable, not smooth or pasty.
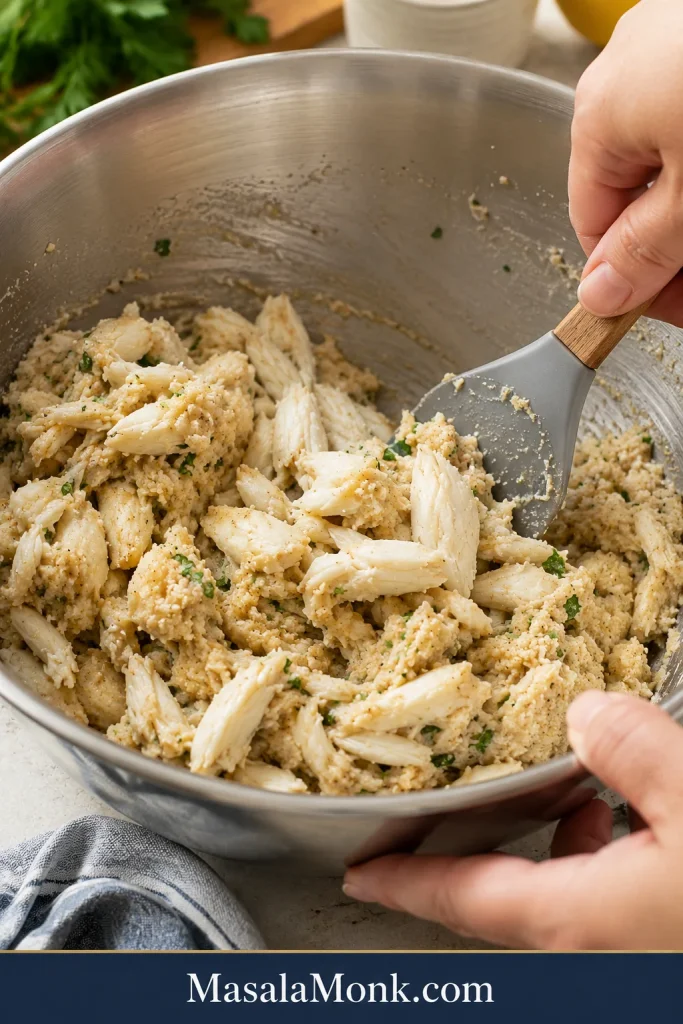
A spatula gently folding lump crab into crab cake mixture in a bowl.
Gentle folding protects the lump crab, which is why this step matters so much in a little-filler crab cake.
  1. Cook a tiny test cake if needed. If you are unsure about salt or seasoning, cook one small spoonful of the mixture first. Adjust gently before shaping the full batch.
  2. Shape the cakes. Divide the mixture into 6 large cakes, about 1/2 cup each. Shape gently but firmly. The cakes should hold their edges without feeling packed hard.
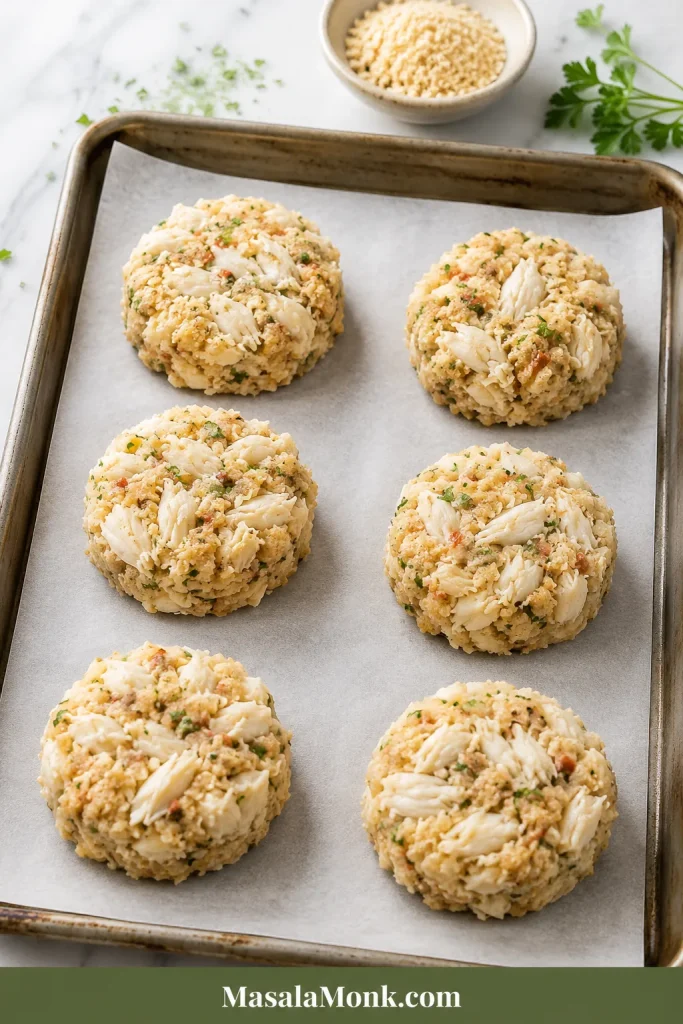
Six shaped lump crab cakes arranged on parchment before chilling.
Shaping the cakes before chilling helps them hold their shape later, especially when the batch is soft and crab-heavy.

Chill and Cook the Crab Cakes

  1. Chill. Place the crab cakes on a plate or parchment-lined tray. Refrigerate for 30–60 minutes so the binder and crumbs can settle.
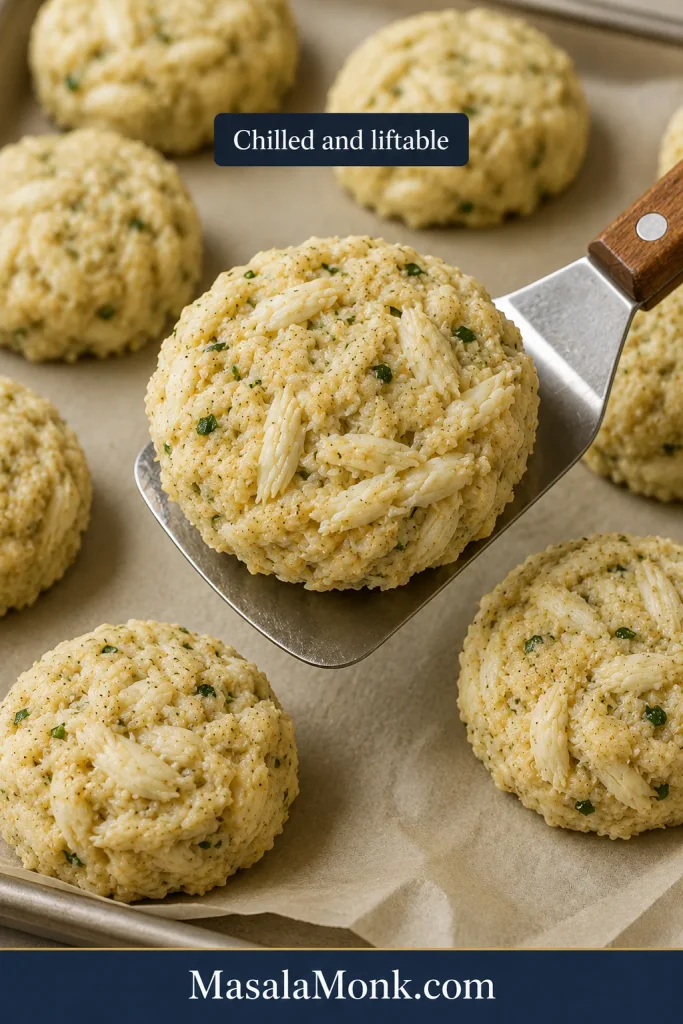
Chilled crab cakes lifting from parchment with a wide spatula before cooking.
Once the cakes are chilled, they should still feel delicate but lift cleanly enough to move without breaking apart.
  1. Pan-fry. Heat a thin layer of oil, about 1–2 tablespoons for a large skillet, over medium heat. Add the chilled cakes in a single layer without crowding. Cook for 3–4 minutes per side, until deeply golden and crisp at the edges. If a cake resists the spatula, give it another minute.
  2. Serve. Serve hot with the quick crab cake sauce, lemon wedges, and extra herbs.

Baked Crab Cake Option

  • Heat oven to 450°F / 230°C.
  • Place chilled crab cakes on a parchment-lined baking sheet.
  • Brush or dot the tops with a little melted butter.
  • Bake for 12–15 minutes, until heated through and golden on top.
  • For deeper color, broil for 1–2 minutes at the end, watching closely.

Baking is the easiest method because there is no flipping. Broil only at the end and only for color, or the tops can brown before the centers are properly heated.

Air Fryer Crab Cake Option

  • Preheat air fryer to 375°F / 190°C.
  • Spray the basket and crab cakes lightly with oil.
  • Air fry for 10–12 minutes, flipping halfway.
  • Check smaller crab cakes around the 8-minute mark so they do not dry out.

Once the recipe is in front of you, these choices help you adapt the batch without guessing or adding filler just to feel safe.

Best Choices for Your Crab Cake Batch

Use this as the fast decision guide for your crab cakes. It keeps the recipe flexible without making the mixture feel like a guessing game.
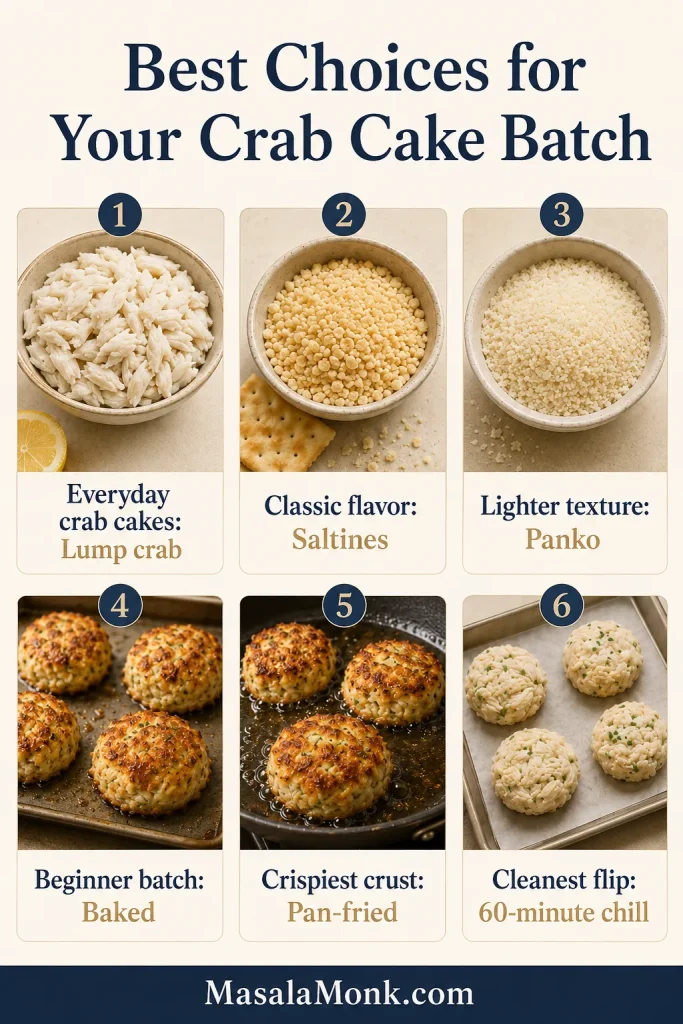
Crab cake decision guide showing best choices for crab, filler, cooking method, and chill time.
Use this guide to choose the right crab, filler, and cooking method before you shape the batch, so the result fits your plan.
Your situationGo with this
Everyday crab cakesRefrigerated lump crab
Classic flavorCrushed saltines
Lighter texturePanko
Beginner batchBake at 450°F / 230°C
Crispiest crustPan-fry over medium heat
Cleanest flipChill the full 60 minutes
Using canned crabDrain hard, reduce salt, shape smaller
Making sandwichesShape slightly flatter and sturdier

This ratio is built for little-filler crab cakes: enough egg, mayo, and crumbs to hold the shape, but not so much that the crab turns into a breadcrumb patty. The full 60-minute chill gives the cleanest flip, especially if your crab is wet or your cakes are large.

If this is your first batch, bake them or chill the full 60 minutes before pan-frying. If you want the most restaurant-style crust, pan-fry and wait for the golden edge before touching them.

Texture Target: What the Mixture Should Look and Feel Like

A loose mixture is not automatically a bad mixture. Little-filler crab cakes are supposed to feel delicate before they chill. The goal is not a stiff patty; the goal is a tender cake that uses only enough binder to stay together.
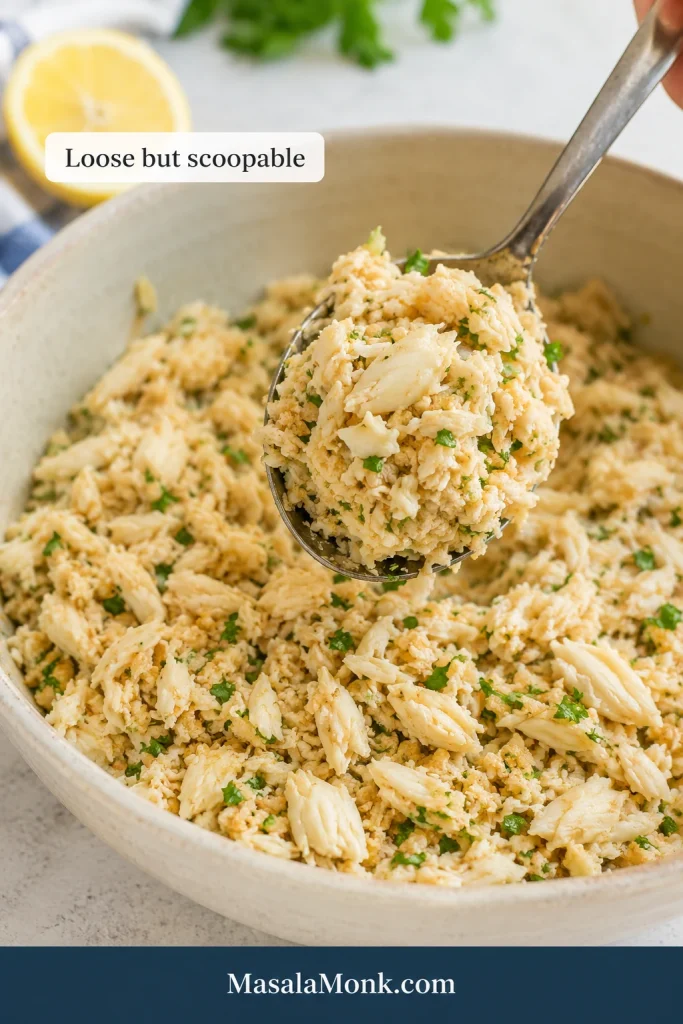
Crab cake mixture in a bowl being lifted with a spoon, showing a moist, scoopable texture with crab pieces.
A loose but scoopable mixture is exactly what you want before chilling, since crab cakes set best when they are handled gently.
  • Before chilling: moist, loose, and scoopable, with no liquid pooling at the bottom of the bowl.
  • After shaping: the cakes should hold their edges without feeling packed hard.
  • When the mixture is wet: drain better or add 1 tablespoon crumbs at a time.
  • For a dry mixture: add a small spoon of mayo or a few drops of lemon juice.
  • If the cakes stick: wait. The crust probably has not finished forming.

Use the visual guide below before adding more crumbs. Most soft crab cake mixtures need draining or chilling first, not heavy packing.
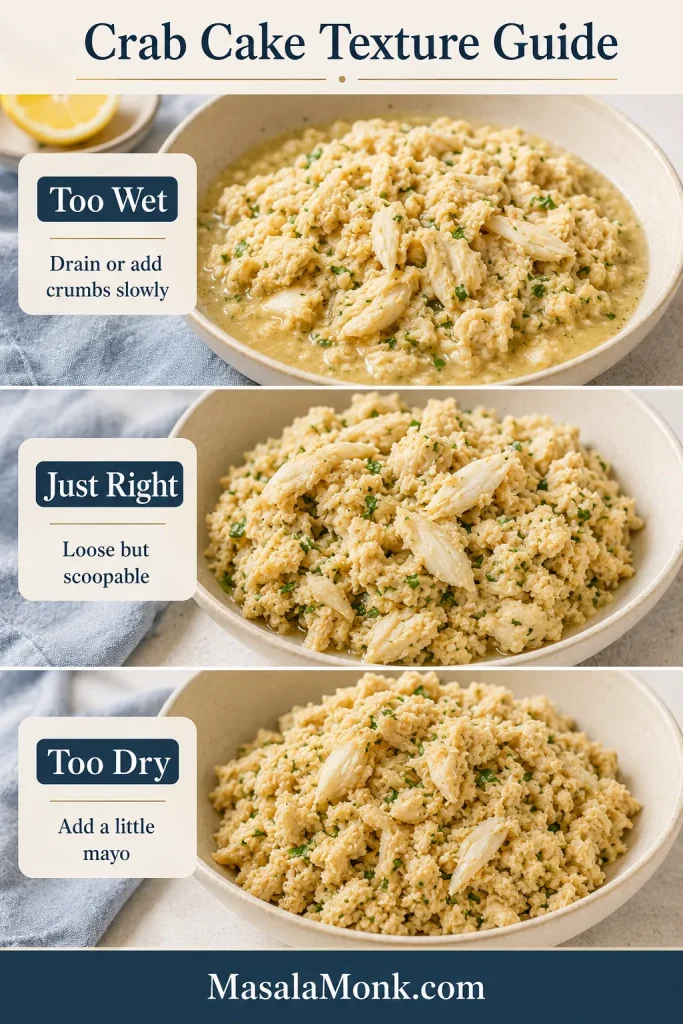
Three-panel crab cake texture guide showing too wet, just right, and too dry mixture stages.
If the mixture is too wet, drain it; if it feels dry, add a little mayo. This guide makes the fix easy to see at a glance.

Do not fix a loose crab cake mixture by smashing the cakes tighter. That makes the center dense. Chill first, then add crumbs only if the cakes still slump or fall apart.

Crab Cake Ratio Per 1 Pound of Crab

Once you know the ratio, crab cakes become much less intimidating. For every 1 lb / 454g crab meat, use one egg, about 1/4 cup mayo, a small amount of mustard and seasoning, and just enough crumbs to hold the cakes together.

For 1 lb / 454g crabUse
Egg1 large egg
Mayonnaise1/4 cup / 60g
Dijon mustard2 tsp
Worcestershire sauce2 tsp / 10ml
Lemon juice1 tbsp / 15ml
Old Bay1 tsp, plus more to taste
Panko1/2 cup / 30–40g
Crushed saltines2/3 cup / 41g
Yield6 large cakes or 8 medium cakes
Chill30–60 minutes

Use this ratio as the baseline before making small moisture adjustments for your crab meat.
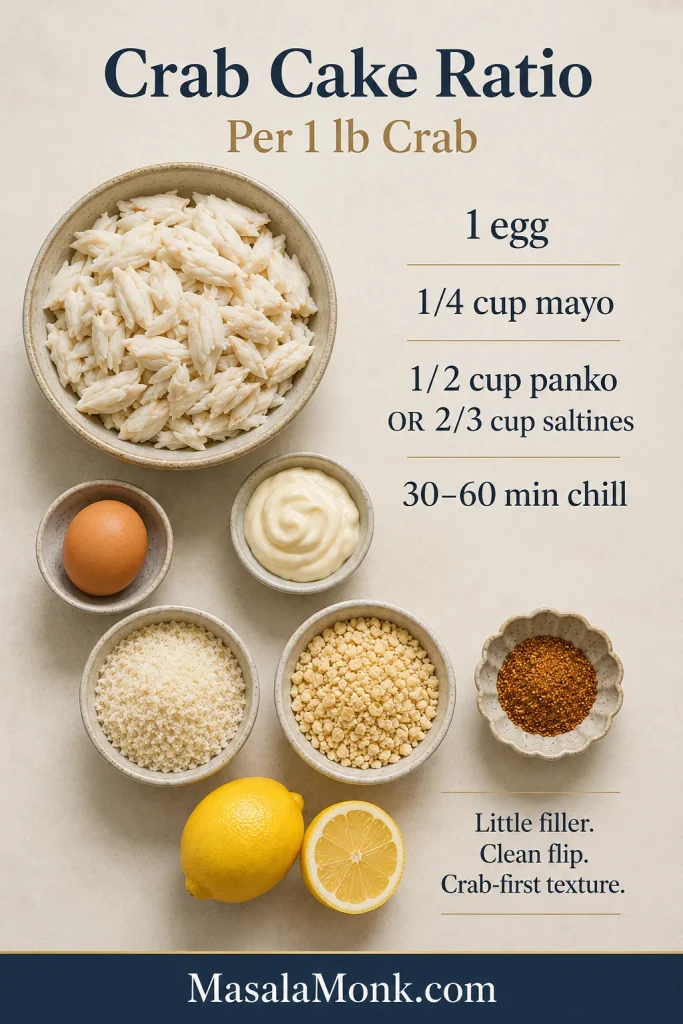
Crab cake ratio infographic showing the ingredient formula per pound of crab.
This ratio is the simple rule that keeps the cakes tender: one pound of crab, a light binder, a little filler, and a full chill.

This ratio keeps the cakes tender and crab-heavy without turning them bready. Very wet crab may need 1 extra tablespoon of crumbs and a longer chill. Dry crab may need a small spoon of mayo. Make either adjustment gently.

The Ingredients That Keep Crab First

Every ingredient has a job: protect the crab flavor, hold the cakes together, or help the edges brown.

Lump Crab Meat

Lump crab is the best everyday choice for homemade crab cakes. It has enough large pieces to feel special, but it is usually more affordable than jumbo lump. If using pasteurized refrigerated crab, drain it well and gently pat away extra moisture before mixing.
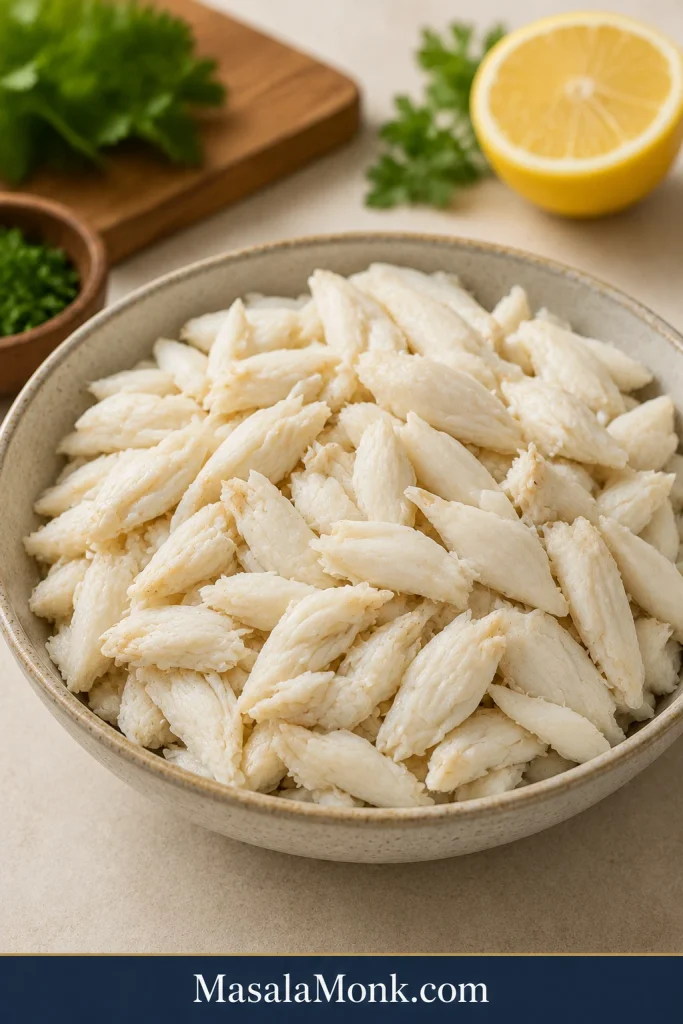
Bowl of lump crab meat on a light stone surface.
Lump crab is the best everyday choice because it gives sweet pieces, a clean bite, and the right balance of texture.

Egg and Mayonnaise

Egg helps the cakes set, while mayo keeps the center moist and helps the seasonings spread. Regular mayo gives the closest texture, while homemade mayonnaise can make the binder and sauce taste fresher.

Dijon, Worcestershire, Lemon, and Old Bay

Dijon adds sharpness, Worcestershire adds savory depth, lemon wakes up the sweetness of the crab, and Old Bay gives the cakes their familiar Maryland-style seasoning. Start gently with salt because crab meat, saltines, and seasoning blends can already be salty.

If you are nervous about seasoning, cook one tiny test cake before shaping the full batch. It is the easiest way to check salt, heat, and brightness without risking all the crab.

Panko, Saltines, or Ritz

Panko gives a light, clean texture and crisp edges. Crushed saltines taste more classic and slightly saltier. Ritz crackers make a softer, richer, buttery variation. Whatever you choose, the filler should support the crab, not become the main texture.
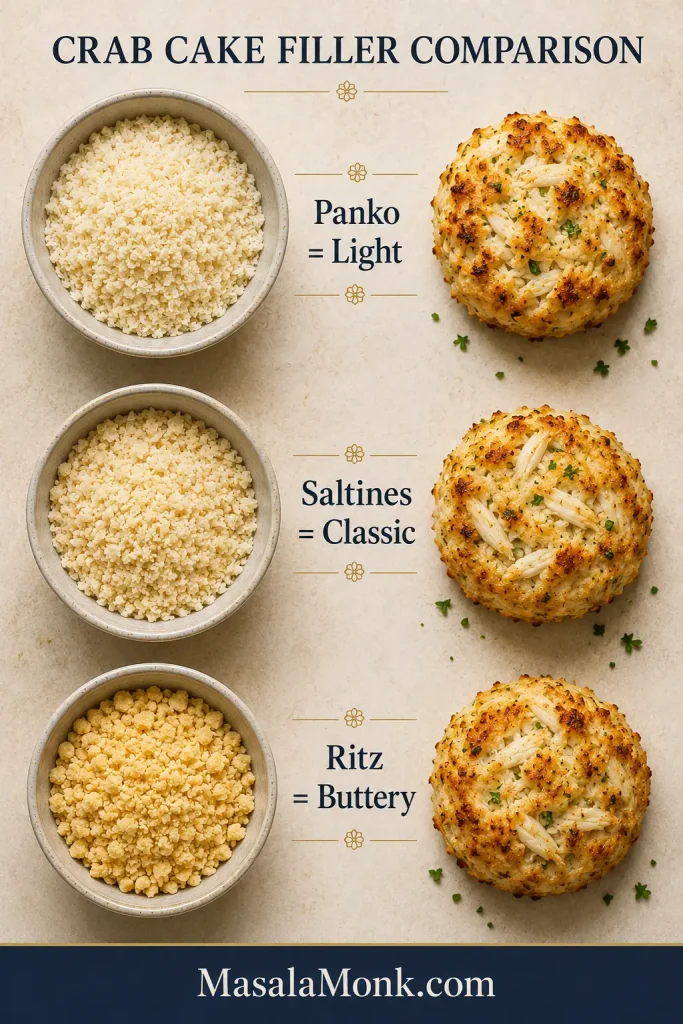
Comparison board showing panko, saltines, and Ritz crackers for crab cake filler.
The filler changes the texture more than most people expect, which is why panko, saltines, and Ritz each have a different job.

Parsley or Chives

Fresh herbs add color and lift. Parsley is classic and mild; chives are delicate and slightly oniony without taking over.

Smart Swaps Without Losing the Crab

Make small swaps, then chill before deciding the mixture needs more crumbs. Many crab cake mixtures feel soft at first and firm up after resting.

  • No panko: use crushed saltines for a classic flavor or Ritz for a richer, buttery version.
  • Out of saltines: use panko for a lighter texture or fine dry breadcrumbs in a pinch.
  • For a mayo swap: use Greek yogurt, sour cream, or eggless mayonnaise. Yogurt and sour cream will taste tangier.
  • No Old Bay: use seafood seasoning, Cajun seasoning, or paprika with celery salt. Add slowly and taste before adding extra salt.
  • Gluten-free: use gluten-free panko or crushed gluten-free crackers, and check the Worcestershire sauce and seasoning blend too.
  • No egg: use eggless mayo with 1–2 extra tablespoons crumbs, chill fully, shape smaller cakes, and flip carefully.

Which Crab Meat Should You Use?

The crab you choose changes the texture, price, and flavor of the finished cakes. For this recipe, lump crab is the best balance. Jumbo lump is beautiful for special occasions, while backfin or claw meat can work when you want something more affordable.
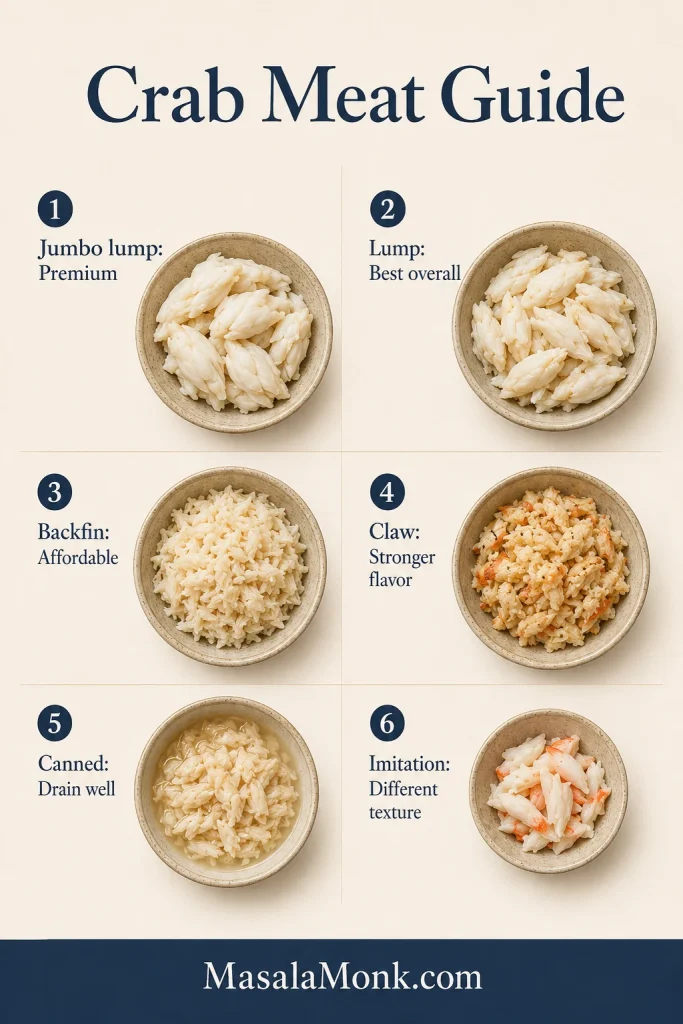
Crab meat guide showing jumbo lump, lump, backfin, claw, canned, and imitation crab.
Choosing the right crab meat is easier when you can see how each type changes texture, flavor, and moisture.
Crab meatShould you use it?Works well for
Jumbo lump crabYes, premiumSpecial occasion cakes with large visible pieces
Lump crabYes, best overallThe main recipe
Backfin crabYesAffordable crab cakes with good flavor
Claw meatYes, but strongerBudget cakes or mixing with lump crab
Canned crabYes, with adjustmentsPantry crab cakes when drained very well
Imitation crabNot ideal for this recipeBetter for a different budget crab-style patty
Dungeness crabYesSweet West Coast-style crab cakes
Blue crabYesClassic Maryland-style flavor

When buying crab specifically for this recipe, choose fresh or refrigerated pasteurized lump crab meat when possible. Avoid watery crab meat, and always drain it well before mixing. When buying fresh or refrigerated seafood, keep it cold, check that it smells clean rather than sour or ammonia-like, and refrigerate it promptly. The FDA seafood safety tips are helpful when choosing fresh or frozen seafood.

Pan-Fried, Baked, and Air Fryer Crab Cakes

Choose pan-fried for the deepest crust, baked for the least stress, and air fryer for a lighter, less-oil option. The mixture stays the same; only the cooking method changes.

MethodWorks well forTimeTexture
Pan-friedCrispiest golden edges3–4 minutes per sideCrisp outside, tender inside
BakedBeginners and batches12–15 minutes at 450°F / 230°CTender, less crust underneath
Air fryerLess oil10–12 minutes at 375°F / 190°CLightly crisp; check early
Pan + oven finishThicker cakes2–3 minutes per side, then 5–8 minutes at 400°F / 200°CCrisp crust with evenly heated center

Pan-Fried Crab Cakes

Pan-frying gives the best crust. Keep the heat at medium, use a thin layer of oil, and leave space between the cakes. Once the cakes hit the pan, the hardest part is leaving them alone.
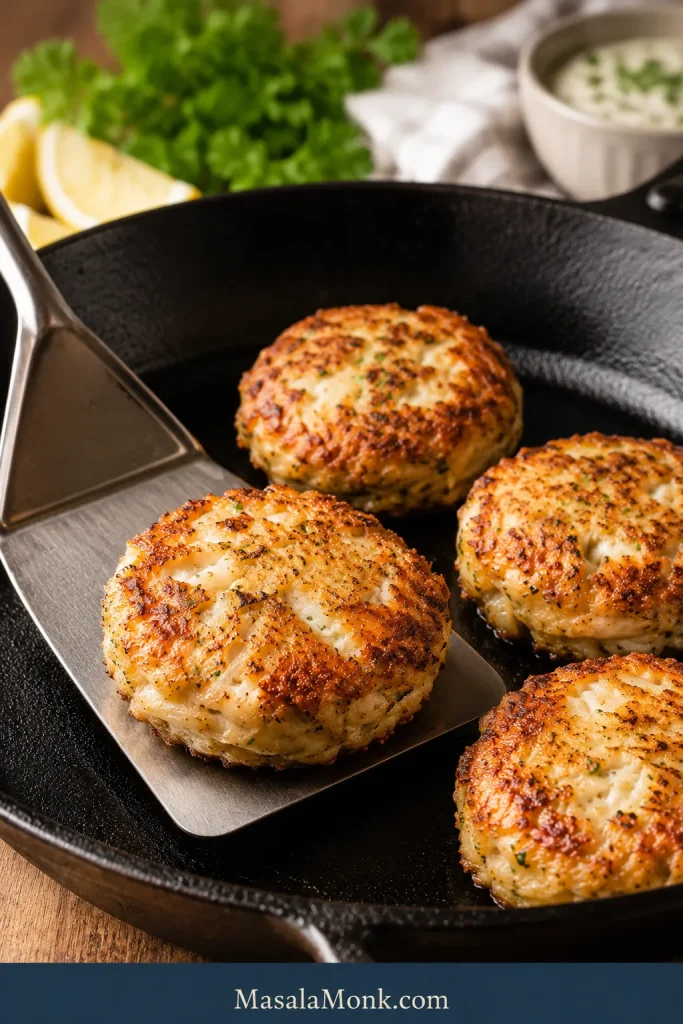
Golden pan-fried crab cakes in a skillet with crisp edges.
Pan-frying gives the richest crust, which is why the golden edges look so good when the cakes are done right.

Look for a golden ring around the bottom edge before you touch them. That little ring is your sign that the crust is forming and the cake is getting strong enough to lift. If the cake resists the spatula, that is not failure; it usually means the crust has not finished forming.
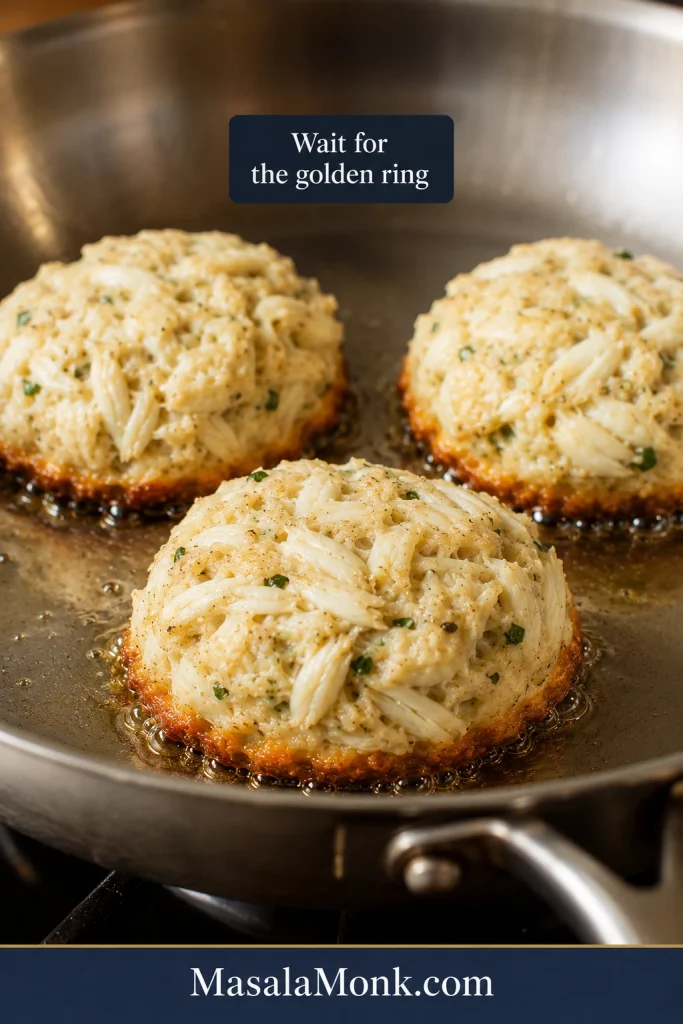
Crab cakes cooking in a skillet with a golden ring forming around the bottom edge before flipping.
That golden ring around the edge is your cue to wait a little longer, because the crust needs time before the flip.

When the first side is ready, the spatula should slide under with less resistance, and the bottom should look deeply golden instead of pale or patchy.
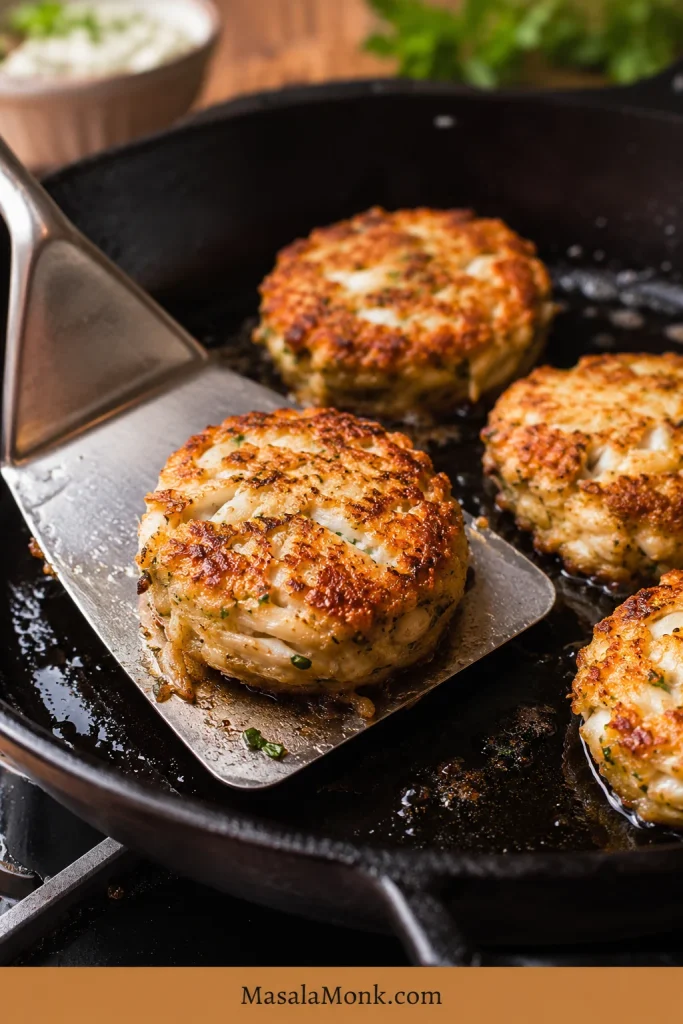
A crab cake being flipped cleanly with a wide metal spatula in a skillet.
A wide spatula gives the cleanest flip, which is one of the easiest ways to keep delicate crab cakes intact.

If cooking in batches, keep finished crab cakes on a rack in a 200°F / 95°C oven while the rest cook. Avoid stacking them, or the crust will soften.

Baked Crab Cakes

Baking is easier because there is no flipping. The cakes will be a little less crusty underneath, but they stay tender and golden on top. If you like gentle baked seafood, this baked haddock recipe uses the same idea: high enough heat for a tender finish, with lemon, butter, and a light panko or Ritz topping.
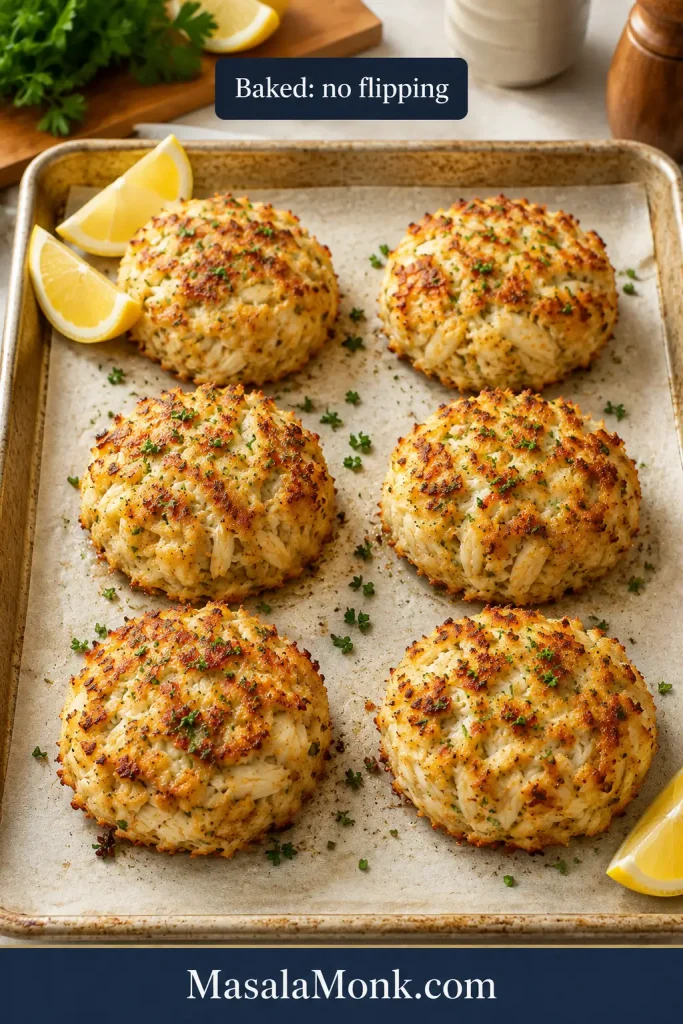
Baked crab cakes on a parchment-lined sheet pan with lightly browned tops.
Baking is the easiest option when you want less fuss, because the cakes can brown evenly without any flipping.

Air Fryer Crab Cakes

Air frying uses less oil than pan-frying, but the cakes still need a light spray and enough space for air to move around them.
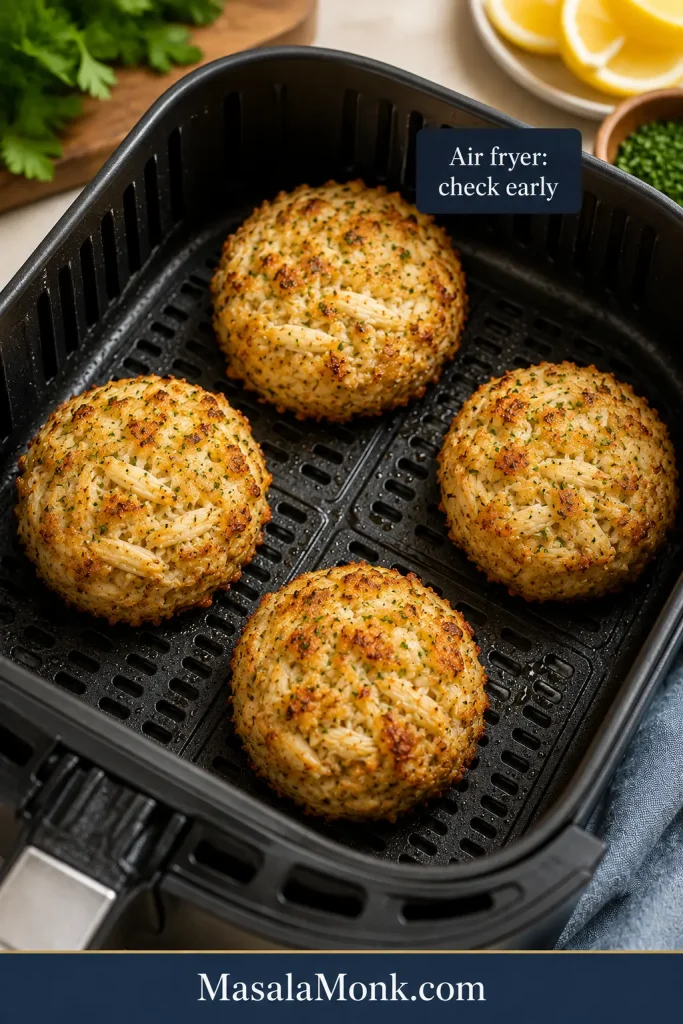
Crab cakes in an air fryer basket with lightly crisp golden edges.
Air fryer crab cakes are a useful middle ground when you want a crisp surface but still want a tender center.

Thick Crab Cakes

For extra-thick cakes, sear them first, then finish them in a 400°F / 200°C oven for 5–8 minutes. Because most lump crab meat is already cooked, the goal is to heat the cakes through and set the binder. For very thick cakes, 145°F / 63°C is a useful safety-minded check, but do not keep cooking thin cakes until they dry out. You can see the general seafood guidance on FoodSafety.gov.

How to Keep Crab Cakes From Falling Apart

Most crab cake problems are fixable and usually come from one of four places: too much moisture, too little chill time, too much or too little filler, or flipping before the crust forms.
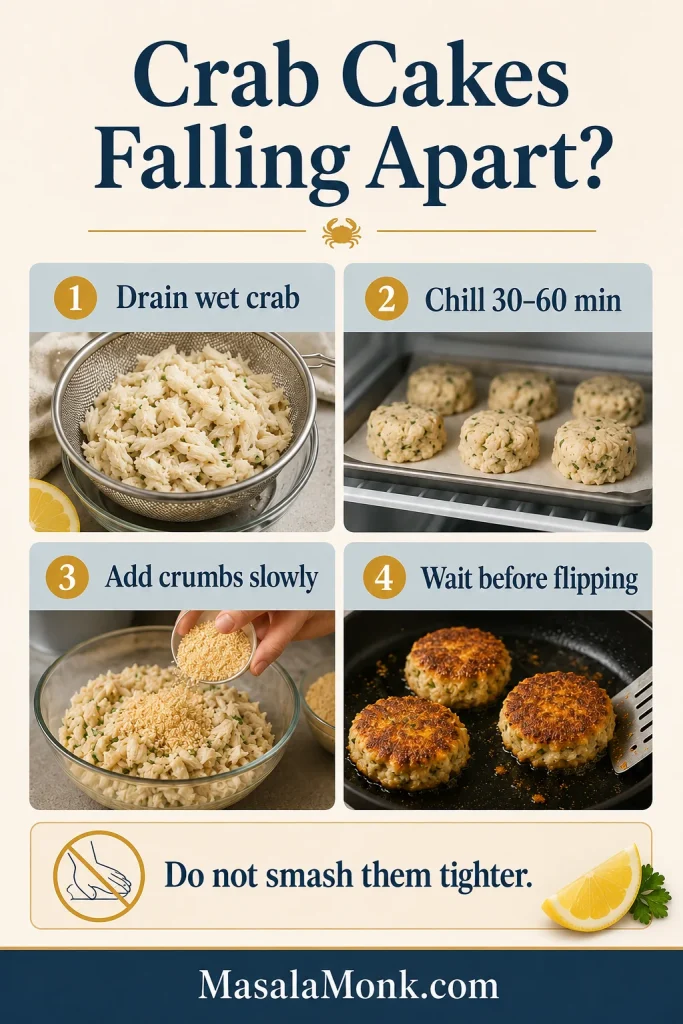
Crab cakes falling apart troubleshooting board with quick fixes for moisture, chilling, crumbs, and flipping.
Most crab cakes fall apart for the same few reasons, so this quick fix guide helps you solve the problem before the pan gets hot.
ProblemLikely causeFix
Cakes fall apartWet crab, short chill, or early flippingDrain well, chill longer, wait for the golden edge
Cakes taste breadyToo much filler or overmixingUse less crumbs next time and fold gently
Cakes feel dryToo much breadcrumb or overcookingAdd a small spoon of mayo; check air fryer cakes early
Cakes are soggyWet crab, low heat, or crowded panDrain better, use medium heat, leave space
Outside browns too fastHeat too high or cakes too thickSear, then finish in a 400°F / 200°C oven
Cakes stick to panMoved before crust formedWait another minute before lifting

If the mixture still feels loose after chilling, add 1 tablespoon panko or crushed saltines at a time. Stop as soon as the cakes hold together. Too much filler will make the crab disappear.

Canned Crab, Imitation Crab, and Maryland-Style Notes

Can You Use Canned Crab?

Yes, canned crab can work, but it needs care. Drain it very well, gently press out excess liquid, taste before adding salt, and add the lemon juice gradually instead of all at once. If the crab is very wet, add 1 extra tablespoon panko or crushed saltines, chill for the full 60 minutes, and shape slightly smaller cakes so they are easier to flip.
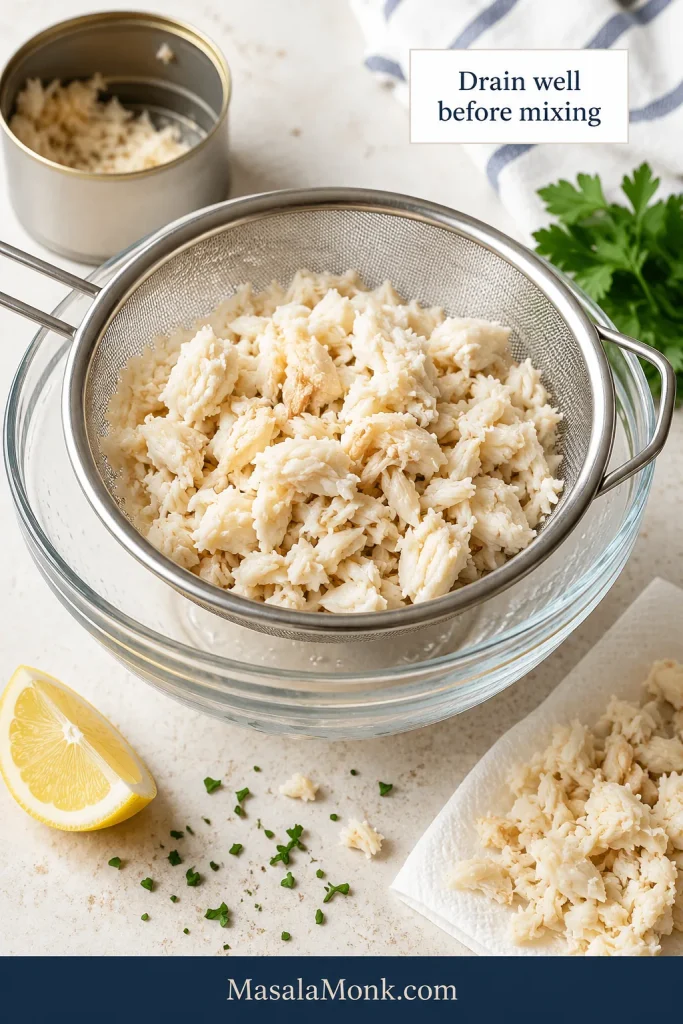
Canned crab drained in a fine-mesh sieve over a bowl before mixing.
Canned crab works better when you drain it well first, because excess moisture is what usually weakens the cakes.

The same moisture-control idea matters in salmon croquettes too: drain first, bind gently, shape evenly, and cook only once the pan is ready. For the cleanest crab flavor and best texture, though, lump crab is still the better choice when you can get it.

Can You Use Imitation Crab?

Imitation crab can be tasty in its own style, but it does not behave like lump crab. It is softer, sweeter, and more uniform, so this exact formula will not give the same flaky texture or sweet seafood flavor. If imitation crab is what you have, chop it small, reduce the mayo slightly, and make smaller cakes. The result will be more of an affordable crab-style patty than a lump crab cake.

Maryland-Style Crab Cake Notes: What This Recipe Keeps and Skips

This is a Maryland-style home version, not a claim that every Maryland cook makes crab cakes the same way. It keeps the important direction: sweet crab first, Old Bay, lemon, mustard, Worcestershire, and very little filler. It skips onions, peppers, and heavy seasoning so the crab stays clear.

Blue crab is classic, saltines are traditional in many versions, and panko is a lighter modern option when you want crisp edges without heaviness. The main rule is simple: let the crab lead. If the finished cake tastes mostly like bread, the balance has gone too far.

Crab Cake Sizes: Dinner Cakes, Mini Cakes, Crab Balls, and Sandwiches

Choose the size before you shape the mixture. Large cakes feel like dinner, medium cakes work for plates and appetizers, mini cakes are party-friendly, and slightly flatter cakes are best for sandwiches.
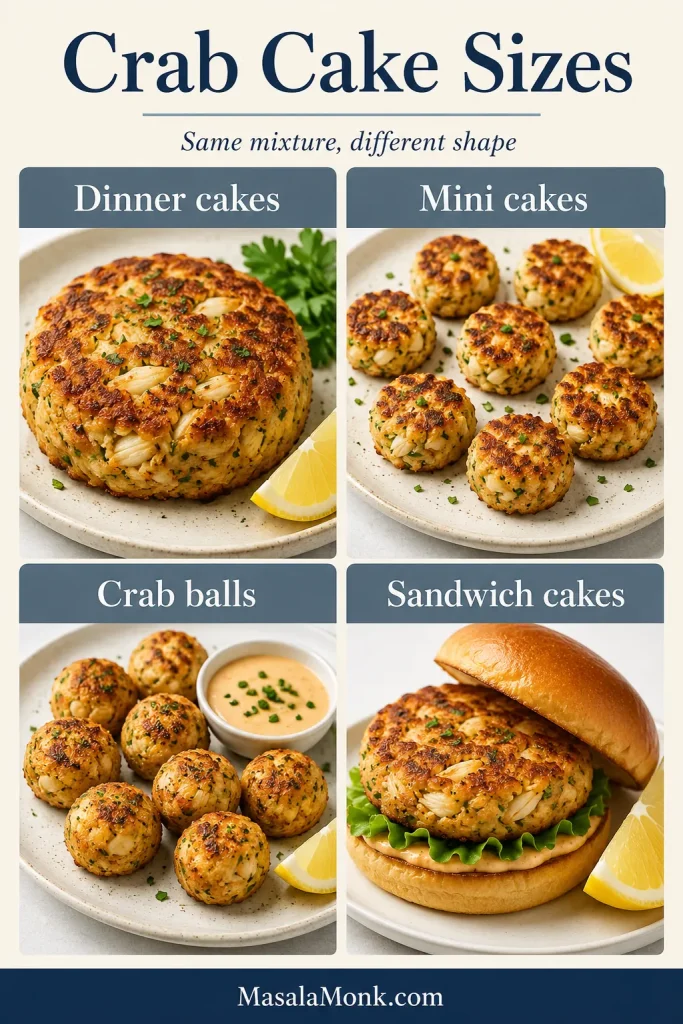
Crab cake size guide showing dinner cakes, mini cakes, crab balls, and sandwich cakes.
The same mixture can become dinner cakes, appetizer bites, crab balls, or sandwich cakes, depending on how you shape it.
SizeMixture per cakeYield from 1 lb crabWorks well for
Large crab cakesAbout 1/2 cup6 cakesDinner or main course
Medium crab cakesHeaping 1/3 cup8 cakesAppetizer or lighter meal
Mini crab cakes2 tbsp16–20 cakesParty bites
Crab balls1–2 tbsp24–36 ballsSnack boards and appetizers
Sandwich cakesAbout 1/3–1/2 cup6–8 cakesToasted buns with slaw and sauce

Smaller cakes cook faster, so check early. Mini crab cakes usually need only 2–3 minutes per side in a pan or about 8–10 minutes in a hot oven. The chill-and-shape logic also helps with other delicate patties and croquettes: control moisture, chill before cooking, and turn only when the first side is ready.

Sauces That Keep the Crab First

The best sauce for crab cakes is creamy, bright, and tangy: tartar sauce for classic flavor, remoulade for heat, and lemon or garlic aioli for a richer modern dip. The sauce should wake up the richness of the crab, not bury it.
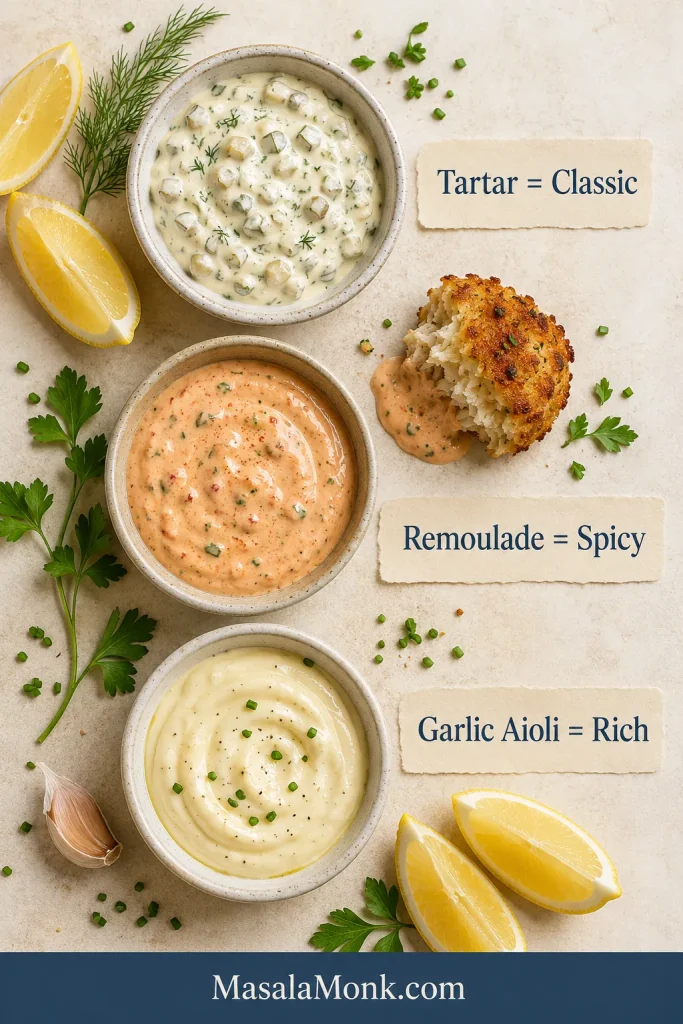
Sauce board showing tartar sauce, remoulade, and garlic aioli with lemon and herbs.
A classic tartar, a spicier remoulade, or a rich aioli can each change the plate without taking the crab out of focus.
  • Tartar sauce: classic, mild, and family-friendly.
  • Remoulade: spicier, tangier, and more restaurant-style.
  • Lemon aioli: rich, bright, and modern.
  • Garlic aioli: bold, creamy, and simple.
  • Mustard sauce: punchy and Maryland-style.

For a classic pairing, serve these crab cakes with homemade tartar sauce. Choose easy garlic aioli for a richer, garlicky dip. A small drizzle of honey mustard dressing works well with cabbage, greens, or a crab cake sandwich when you want a lighter slaw-style pairing.

Serve crab cakes while the edges are still crisp, with lemon on the side and just enough sauce to brighten each bite without hiding the crab.

What to Serve With Crab Cakes

Serve crab cakes as an appetizer, seafood dinner, sandwich filling, or brunch base. Keep the sides fresh and simple so the crab stays the star.
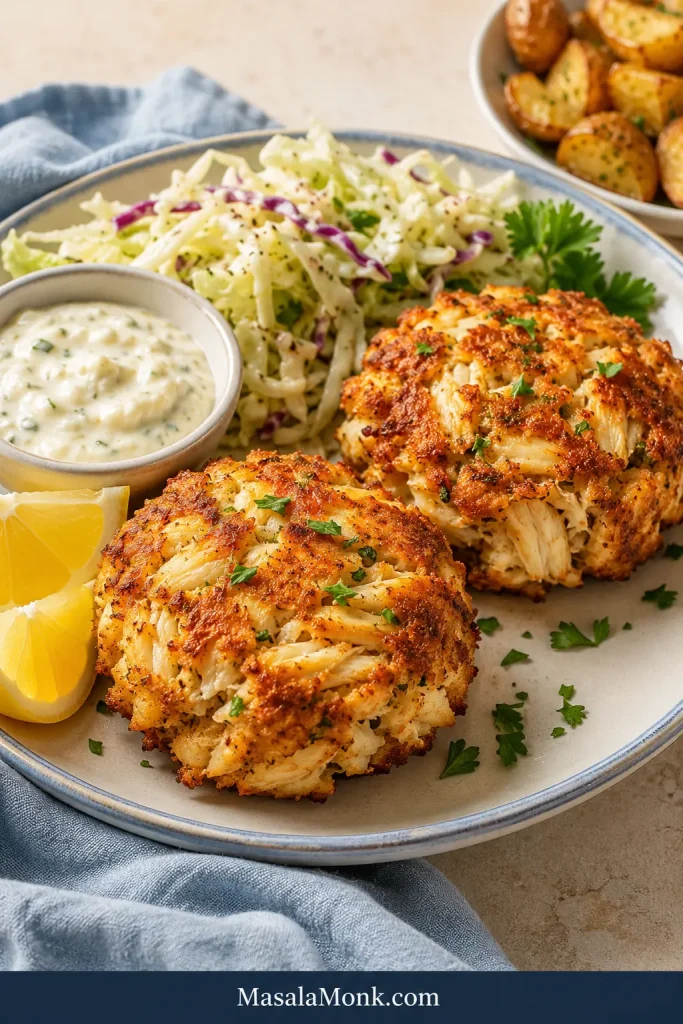
Crab cake dinner plate with two golden crab cakes, slaw, lemon wedges, sauce, and a blue linen napkin.
Serve the cakes while the crust is still crisp, then add lemon and slaw for a fresh finish that keeps each bite balanced.

For a picnic-style plate, add corn, pickles, and potato salad. For brunch, serve crab cakes with poached eggs and hollandaise sauce. For sandwiches, use toasted buns, lettuce, tomato, pickles, sauce, and a little slaw.

Make Ahead, Storage, Freezing, and Reheating

  • Make ahead: shape the crab cakes up to 24 hours ahead. Cover and refrigerate until ready to cook.
  • Refrigerate cooked crab cakes: store in an airtight container for up to 3 days. Let them cool before covering so steam does not soften the crust, but do not leave seafood sitting out for long.
  • Freeze uncooked crab cakes: freeze shaped cakes on a tray until firm, then transfer to a freezer-safe bag or container. Thaw overnight in the refrigerator before cooking.
  • Freeze cooked crab cakes: possible, but the texture is usually better when frozen before cooking.
  • Reheat: use a 350°F / 175°C oven for 8–12 minutes, an air fryer at 350°F / 175°C for 4–6 minutes, or a skillet over medium-low heat. The microwave works in a pinch but softens the crust.

FAQs

What is the best crab meat for crab cakes?

Lump crab meat is the best everyday choice because it gives tender pieces without the highest price of jumbo lump. Jumbo lump is beautiful for special occasions, while backfin or claw meat can work for more budget-friendly crab cakes.

Are crab cakes better baked or fried?

Pan-fried crab cakes have the crispest edges and deepest color. Baked crab cakes are easier for beginners and batches because there is no flipping, so they are less likely to break.

How much filler should crab cakes have?

For 1 lb / 454g crab meat, use about 1/2 cup / 30–40g panko or 2/3 cup / 41g crushed saltines. More than that can make the cakes taste bready.

What keeps crab cakes from falling apart best?

The biggest fixes are draining the crab well, chilling the shaped cakes, and waiting until the first side is golden before flipping. Add more crumbs only after chilling if the mixture still feels too loose.

Do crab cakes need egg?

Egg helps bind the crab cakes and makes them easier to cook without breaking. For an egg-free version, shape smaller cakes, add 1–2 extra tablespoons crumbs, chill for the full 60 minutes, and flip carefully.

What can replace mayonnaise in crab cakes?

Greek yogurt, sour cream, or eggless mayonnaise can replace regular mayo. Yogurt and sour cream taste tangier, while eggless mayo keeps the texture closer to the original.

Should I use panko or saltine crackers?

Use panko for a lighter, crisper texture and saltines for a more classic, slightly saltier Maryland-style crab cake. Ritz crackers are richer and more buttery.

How long should crab cakes chill before cooking?

Chill crab cakes for at least 30 minutes. A full 60 minutes is better when the mixture is soft, the crab is wet, or you are nervous about flipping.

Can crab cakes be made ahead?

Yes. Shape the crab cakes, place them on a tray, cover, and refrigerate for up to 24 hours before cooking. This makes them easier to handle and helps them stay intact.

Can you freeze crab cakes?

Yes. Freeze them uncooked after shaping for the best texture. Thaw overnight in the refrigerator before cooking.

How do I make gluten-free crab cakes?

Use gluten-free panko or crushed gluten-free crackers instead of regular panko or saltines. Check that your Worcestershire sauce and seasoning blend are gluten-free too.

The Crab Cake Promise

Crab cakes are easier when you remember the basic promise: 1 lb crab, 1 egg, 1/4 cup mayo, a small handful of crumbs, bright seasoning, and enough chill time. Start with good lump crab when you can, drain it well, fold gently, and let the first side brown before flipping.

When the edges are crisp, the center is warm and tender, and the crab still tastes sweet and clear, that is the whole win.

If you make them, leave a note with your crab type, cooking method, and whether you used panko, saltines, or Ritz. Your note can help the next person choose their version.
Posted on Leave a comment

Slow Cooker Pot Roast Recipe with Chuck Roast, Potatoes, Carrots & Gravy

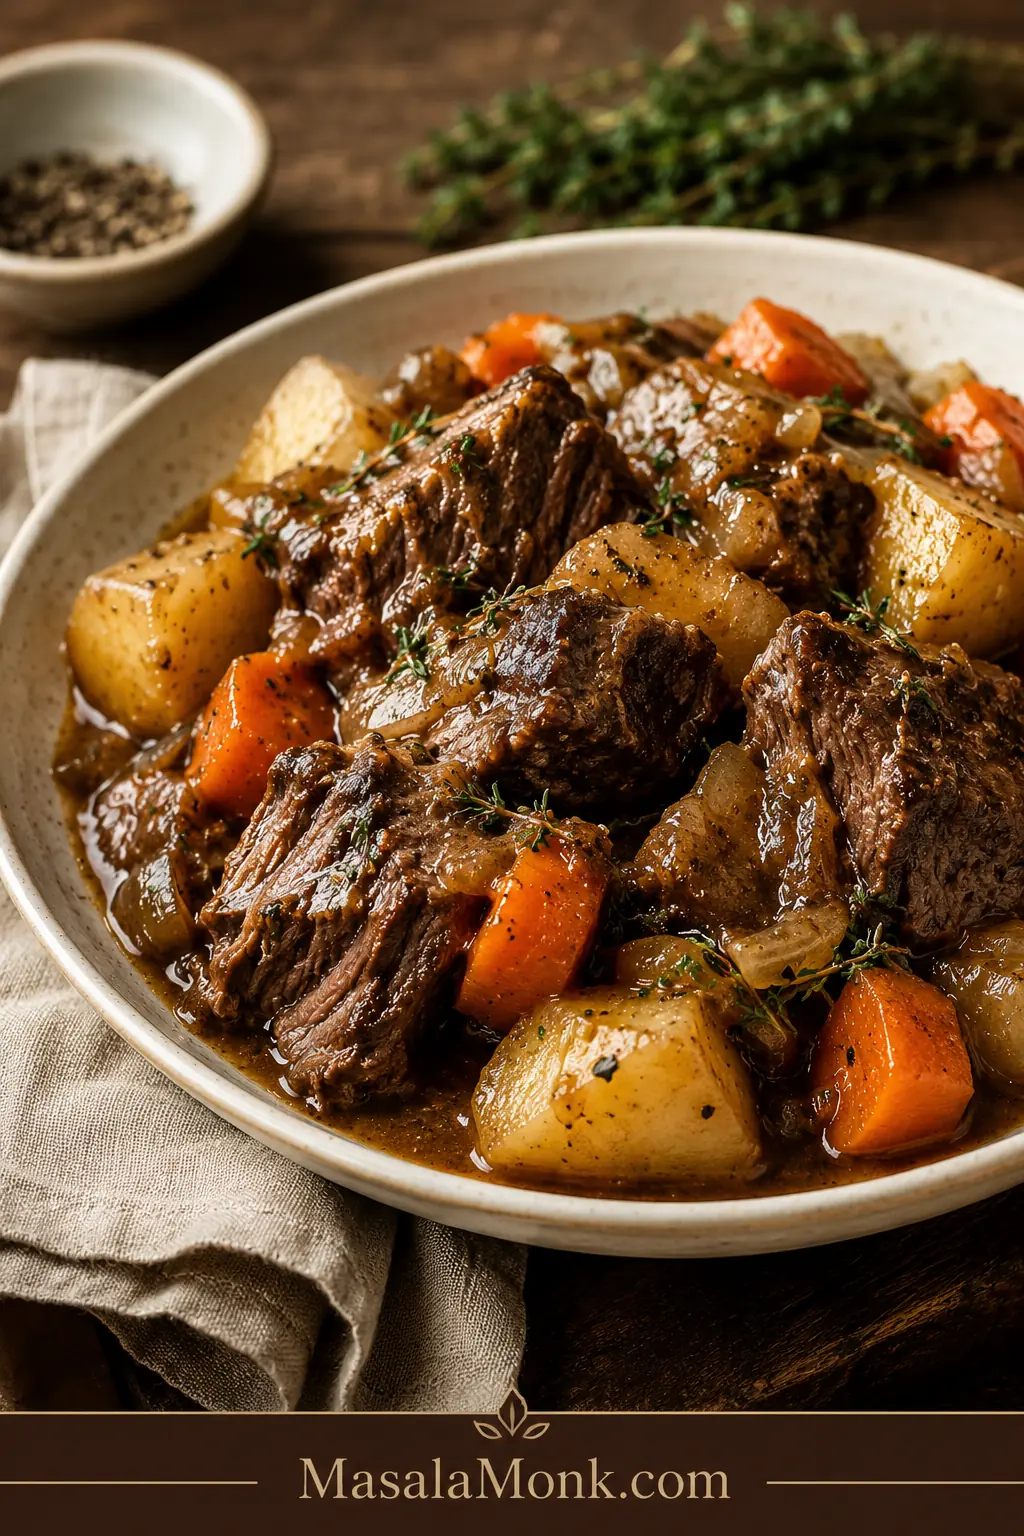
Plated slow cooker pot roast with tender chuck roast, carrots, potatoes, softened onions, and rich brown gravy on a cream plate.

Slow cooker pot roast sounds simple until you are standing in the kitchen with a big piece of beef, wondering if you bought the right cut, added too much liquid, or started too late for dinner. This version is built to remove that guesswork: tender chuck roast, soft potatoes and carrots, and cooking juices that become real gravy instead of thin broth.

The method keeps the liquid controlled, uses the fork test instead of blind timing, and finishes the juices properly so the whole meal tastes complete. You get the comfort of classic pot roast without the usual problems: a tough roast, watery sauce, mushy vegetables, or broth pretending to be gravy.

By the end, the onions should have melted into the sauce, the carrots should taste sweet and savory, the potatoes should catch the sauce, and the beef should feel like it finally relaxed. This is the kind of dinner where the gravy disappears first.

Use LOW when you can. Use HIGH when you need to. Sear the roast for deeper flavor, or skip the sear if the day is already busy. Pot roast is forgiving once you know what to look for; a firm roast usually needs more time, not more panic.

Quick Answer: Slow Cooker Pot Roast

For the best slow cooker pot roast, use a 3 to 4 lb / 1.4 to 1.8 kg beef chuck roast. Season it well, sear it if possible, then cook it with onions, carrots, potatoes, garlic, beef broth, Worcestershire sauce, tomato paste, thyme, rosemary, and bay leaves.

Cook on LOW for 8 to 10 hours or HIGH for 5 to 6 hours, until the roast is tender enough for a fork to slide in easily and the beef gives with gentle pressure. The fork test is the real timer.

Use 1½ cups / 360 ml beef broth for rich, concentrated cooking juices. Use up to 2 cups / 480 ml if you want extra sauce for the table. Keep the roast partly surrounded by liquid, not buried in it. The beef and vegetables release moisture as they cook.

When the beef is tender, remove the roast and vegetables, then thicken the juices with a cornstarch slurry or a quick flour gravy. That final step is what turns a slow cooker full of beef and vegetables into proper pot roast dinner.

Slow Cooker Pot Roast Recipe Card

Recipe at a Glance

Prep time20 minutes
Cook time8 to 10 hours on LOW, or 5 to 6 hours on HIGH
Total time5 hours 20 minutes to 10 hours 20 minutes, depending on HIGH or LOW setting
Servings6 to 8
Best slow cooker size6-quart for a 3 to 4 lb roast; 7 to 8-quart for a 5 lb roast with vegetables
Best cutBeef chuck roast
Best settingLOW
TextureTender, sliceable, or shreddable

Equipment

  • 6-quart slow cooker
  • Large skillet or Dutch oven for searing
  • Tongs
  • Cutting board
  • Small bowl and whisk for the cornstarch slurry
  • Ladle or measuring cup for the cooking juices

Ingredients

For the pot roast:

IngredientAmount
Beef chuck roast3 to 4 lb / 1.4 to 1.8 kg
Olive oil or avocado oil2 tbsp / 30 ml
Fine salt1½ to 2 tsp / 9 to 12 g
Black pepper1 tsp / 2 to 3 g
Garlic powder1 tsp / about 3 g
Onion powder1 tsp / about 2 to 3 g
Paprika, sweet or smoked1 tsp / about 2 to 3 g
Dried thyme1 tsp / about 1 g
Dried rosemary½ tsp / about 0.5 g
Yellow onion, sliced thick1 large / about 250 g
Garlic cloves, minced or smashed4 to 6 cloves / about 15 to 25 g
Carrots, cut into large pieces1 lb / 450 g
Baby potatoes, Yukon gold, or red potatoes1½ to 2 lb / 680 to 900 g
Beef broth1½ cups / 360 ml
Worcestershire sauce1 to 2 tbsp / 15 to 30 ml
Tomato paste1 to 2 tbsp / 16 to 32 g
Bay leaves1 to 2

For the gravy:

IngredientAmount
Hot cooking juices1½ to 2 cups / 360 to 480 ml
Cornstarch2 tbsp / about 16 g
Cold water3 tbsp / 45 ml

Instructions

  1. Dry and season the roast. Pat the chuck roast dry. Mix the salt, pepper, garlic powder, onion powder, paprika, thyme, and rosemary, then rub the seasoning over every side of the beef.
  2. Sear for deeper flavor. Heat oil in a large skillet over medium-high heat. Brown the roast for 3 to 4 minutes per side. Skipping the sear still works; the finished flavor will simply be lighter.
  3. Layer the vegetables. Add the onion, carrots, and potatoes to the slow cooker. Keep the pieces large so they hold up during the long cook.
  4. Add the roast. Place the roast on top of or slightly between the vegetables. The lid should close easily.
  5. Add the broth mixture. Stir together the beef broth, Worcestershire sauce, tomato paste, garlic, and bay leaves. Pour around the roast. The beef should sit in some liquid but not be fully covered.
  6. Cook low and slow. Cover and cook on LOW for 8 to 10 hours, or on HIGH for 5 to 6 hours. Keep the lid on as much as possible.
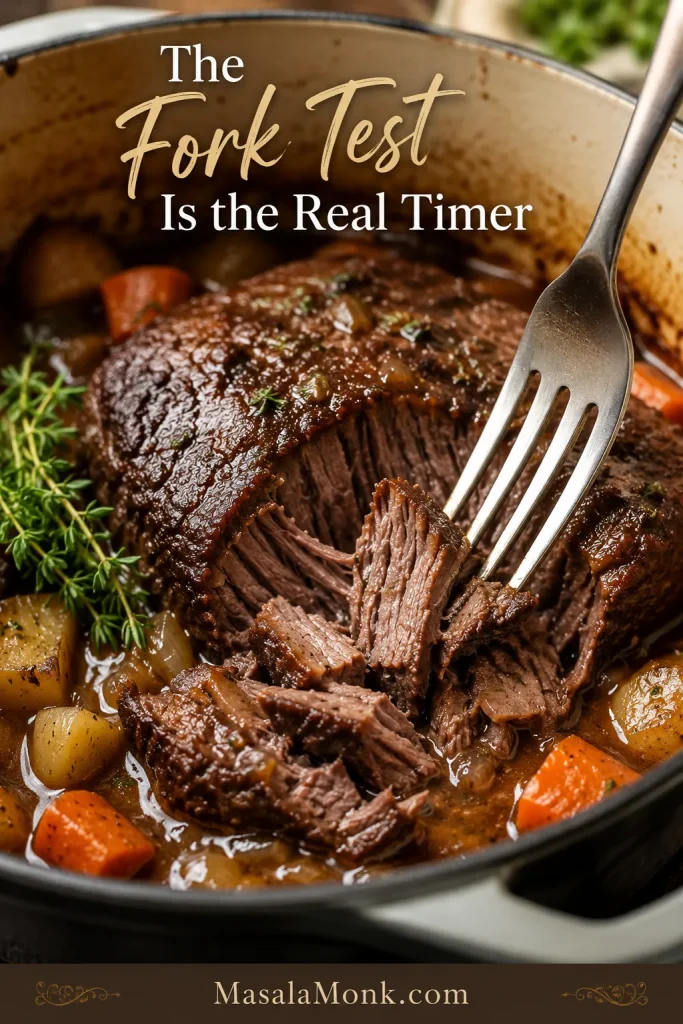
  7. Check for tenderness. The roast is ready when a fork slides in easily and the meat pulls apart with gentle pressure. A tight or rubbery roast needs more cooking time.
  8. Rest the beef. Transfer the roast to a cutting board and the vegetables to a serving dish. Rest the beef for about 10 minutes while you make the gravy.
  9. Make the gravy. Ladle 1½ to 2 cups hot cooking juices into a saucepan. Whisk cornstarch with cold water, then whisk the slurry into the simmering liquid. Cook for 2 to 3 minutes, until glossy and thickened.
  10. Slice or shred. Slice across the grain for neat pieces, or pull into large chunks for a fall-apart pot roast.
  11. Serve. Spoon the gravy over the beef, potatoes, and carrots.

Recipe Notes

  • Start with thawed beef, not frozen.
  • Use 1½ cups / 360 ml broth for balanced flavor and a concentrated gravy base. Use up to 2 cups / 480 ml if you want more sauce, but plan to simmer and thicken it.
  • For best cooking, the slow cooker should be about half to two-thirds full. A tightly packed cooker or barely closed lid can slow the recipe down.
  • For firmer potatoes and carrots, add them after the first 2 to 3 hours instead of at the beginning.
  • Reduce the salt if using salted broth, bouillon, onion soup mix, ranch seasoning, au jus mix, or brown gravy packets.

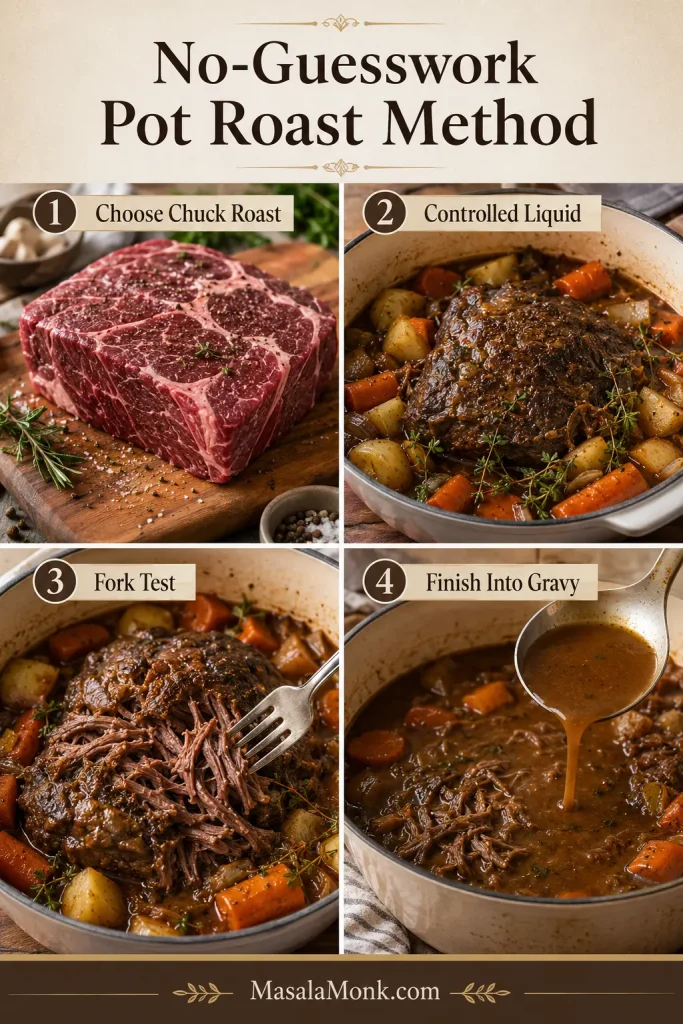
The No-Guesswork Pot Roast Method

Pot roast is not difficult, but a few choices decide whether it turns out rich and tender or thin and disappointing. This method keeps the recipe simple by focusing on the four things that matter most.

  1. Choose chuck roast. It has the marbling and connective tissue that soften during long cooking.
  2. Use controlled liquid. The slow cooker gives liquid back to you as the beef and vegetables cook.
  3. Cook until the fork test works. The timer is a guide; tenderness is the goal.
  4. Finish the juices into gravy. Simmer and thicken them so they taste like sauce, not plain broth.
Four-panel pot roast method board showing chuck roast, controlled liquid, fork-test doneness, and finished gravy.
The no-guesswork method is simple: choose chuck roast, control the liquid, trust the fork test, and finish the juices into gravy.

The biggest mistake with slow cooker pot roast is treating the liquid like soup. A little broth is enough to braise the beef; the real magic happens when those juices are finished into gravy.

Your Pot Roast Is Right When…

  • A fork slides into the beef with little resistance.
  • The roast separates into large tender chunks instead of springing back.
  • The potatoes and carrots are soft but not completely collapsed.
  • The gravy coats the back of a spoon after thickening.
  • The finished sauce tastes savory and concentrated, not weak or broth-like.

The best moment is when the roast stops resisting. The fork goes in, the beef pulls into soft pieces, and the onions have almost disappeared into the sauce. That is when the slow cooker has done its job.

Jump to What You Need

Why This Pot Roast Turns Tender Instead of Tough

Pot roast becomes tender because a tougher, well-marbled cut of beef cooks gently for a long time. Chuck roast has connective tissue that softens during slow cooking. That is what gives you the rich, fall-apart texture people want from a classic slow cooker pot roast.

The controlled liquid matters too. A slow cooker traps steam, and the beef, onions, carrots, and potatoes all release moisture. Starting with 1½ cups / 360 ml broth gives you enough moisture for cooking and enough concentrated flavor for the sauce at the end.

Searing adds deeper color and a more roasted flavor, but it is not what makes the roast tender. Tenderness comes from the cut, the gentle heat, and enough time. The final sauce step is where the meal comes together: thin juices become a glossy finish that coats the beef and vegetables instead of running past them.

The clock gets you close, but the fork tells you the truth. Once the beef gives, the whole slow-cooker promise finally pays off.

Best Cut for Slow Cooker Pot Roast

The best cut for slow cooker pot roast is beef chuck roast. It has the right balance of beefy flavor, fat, and connective tissue. When cooked low and slow, it becomes tender enough to slice into soft pieces or pull apart into large chunks.

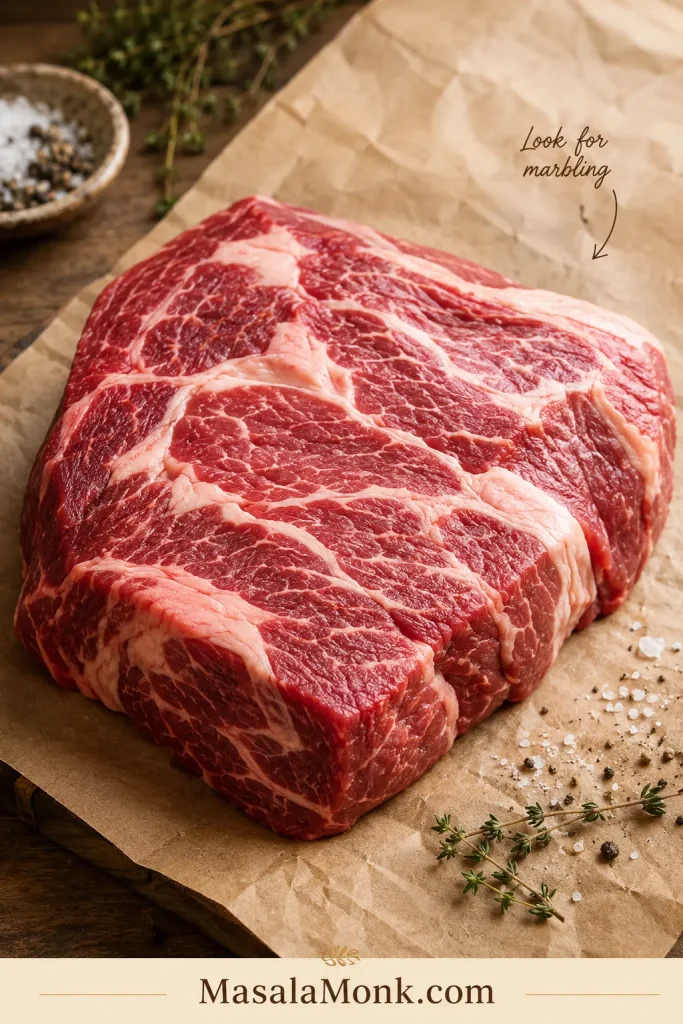
Labels may say chuck roast, chuck shoulder, shoulder roast, arm roast, blade roast, or pot roast. Look for visible marbling and a roast meant for slow cooking or braising. A very lean, smooth-looking roast may be better sliced than shredded.

Raw chuck roast on butcher paper with visible marbling, ready for slow cooker pot roast.
Clear marbling is what helps chuck roast stay moist and tender during long slow cooking.
Cut of BeefGood for Slow Cooker Pot Roast?Best Result
Chuck roastBest choiceTender, juicy, classic fall-apart pot roast
Chuck shoulder roastYesSimilar to chuck roast, rich and tender
Arm roastYesGood slow-cooker cut, often sliceable
Blade roastYesFlavorful and tender when cooked low and slow
BrisketYesRich, beefy, usually better sliced
Rump roastWorks, but leanerBetter sliced than shredded
Bottom round roastWorks carefullyLeaner, can dry out; slice thinly across the grain
Eye of roundNot idealToo lean for classic fall-apart pot roast

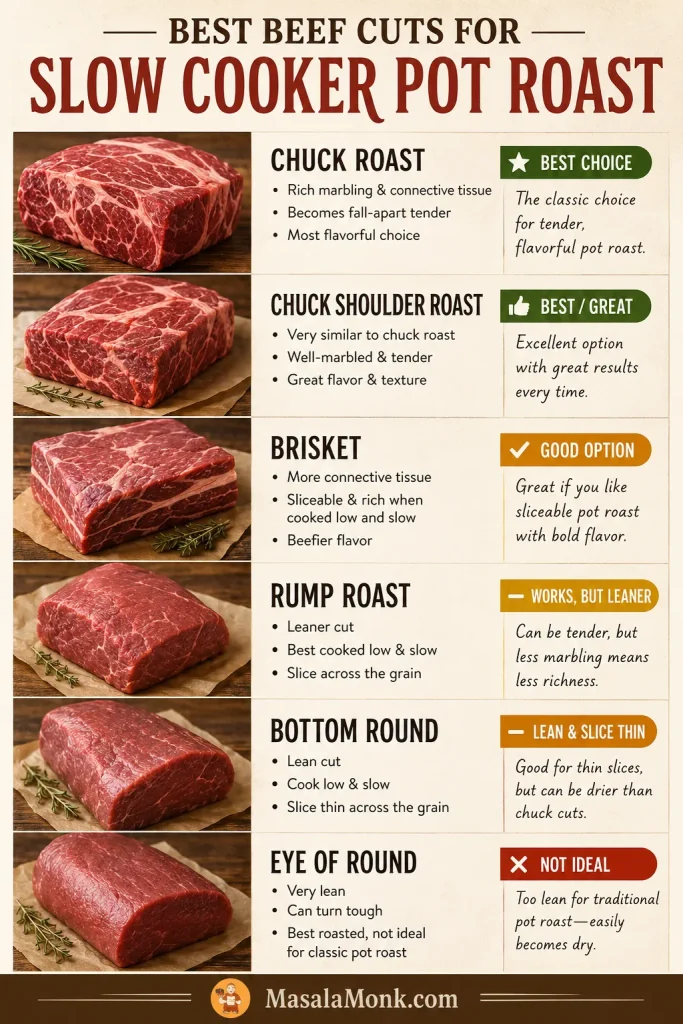
Which Beef Cuts Work Best for Pot Roast?

This comparison separates classic fall-apart pot roast cuts from leaner roasts that usually need slicing, careful timing, and extra sauce.

Beef cut comparison board for slow cooker pot roast showing chuck roast, shoulder roast, brisket, rump roast, bottom round, and eye of round.
Chuck roast is the safest pick, while leaner cuts usually work best when sliced instead of shredded.

For the most forgiving result, choose chuck roast. Shoulder roast or arm roast can still make a good dinner. Rump roast and bottom round work better when sliced thinly with plenty of sauce.

If you are specifically using shoulder roast instead of chuck, MasalaMonk’s beef shoulder roast crock pot recipe goes deeper into that cut.

Ingredients That Build Tender Beef and Rich Gravy

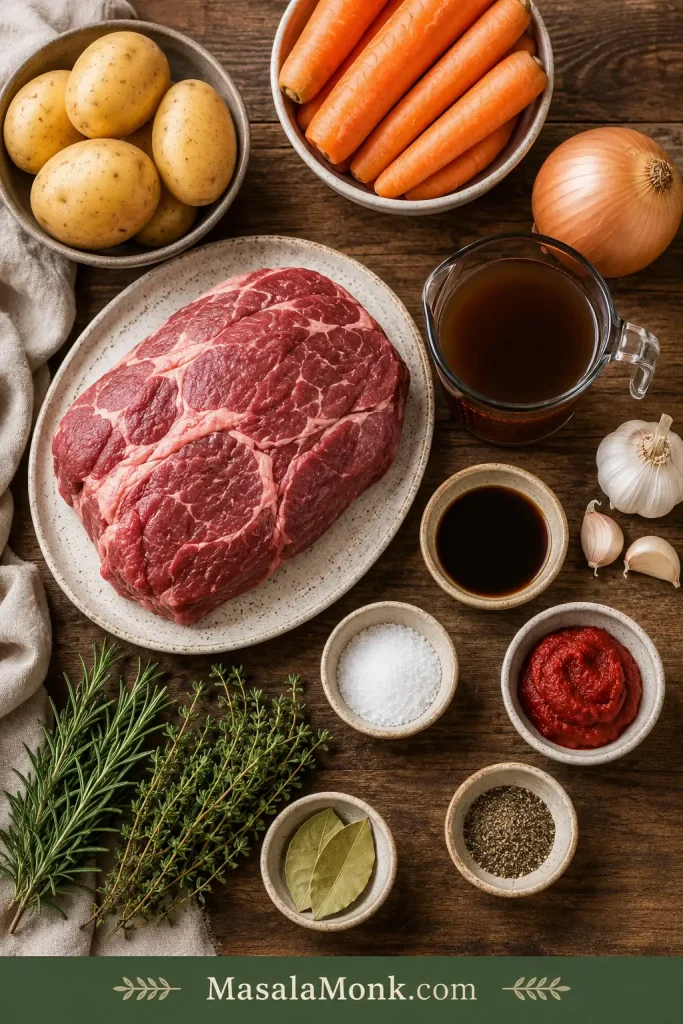
Before the slow cooker starts, the recipe is really about balance: a marbled roast, sturdy vegetables, savory broth, and a few small ingredients that make the sauce taste complete.

Overhead flat lay of slow cooker pot roast ingredients including chuck roast, carrots, potatoes, onion, garlic, broth, Worcestershire sauce, tomato paste, and herbs.
Keeping the ingredients organized makes the whole pot roast feel easier before it even starts cooking.

Beef

A 3 to 4 lb chuck roast fits well in a 6-quart slow cooker with vegetables. Smaller roasts cook faster. Larger roasts may need a bigger cooker and more time.

Some visible marbling is a good thing. Trim large hard fat caps if needed, but keep enough marbling to help the roast stay moist and flavorful.

If you prefer smaller beef pieces instead of one large roast, MasalaMonk’s slow cooker beef stew recipe is a better fit than cutting this pot roast into small cubes.

Vegetables

Baby potatoes, Yukon gold potatoes, and red potatoes hold their shape well. Cut larger potatoes into big chunks so they stay intact during the long cook.

Thick-cut carrots give the best texture. Baby carrots are fine when convenience matters; they will be softer, but they still belong in a cozy pot roast.

Onion and garlic build the base of the sauce. Slice the onion thick so it softens into the sauce without disappearing too early.

Flavor Builders

Beef broth gives the cooking juices body and flavor. Low-sodium broth is best if you plan to add bouillon, onion soup mix, ranch seasoning, au jus mix, or brown gravy packets.

Worcestershire sauce adds savory depth, while tomato paste gives the sauce color and richness without making the pot roast taste like tomato sauce. Thyme, rosemary, and bay leaf keep the flavor classic; go easy on dried rosemary because it can take over.

Mushrooms can release a lot of moisture in the slow cooker. Add them halfway through for better shape, or use MasalaMonk’s creamy mushroom sauce as a separate finish for potatoes, rice, or leftover roast.

Gravy Ingredients

Cornstarch makes a quick glossy gravy. Always mix it with cold water first, then whisk the slurry into hot juices. For a more old-fashioned gravy, use butter and flour instead.

How to Make Slow Cooker Pot Roast Step by Step

Step 1: Season the Roast

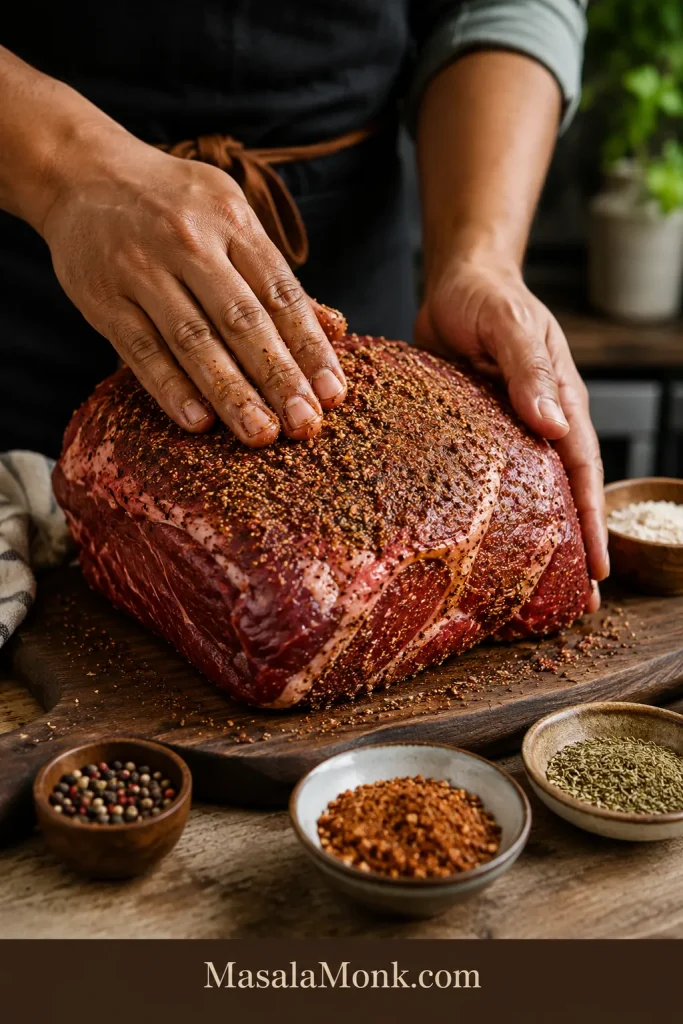
Pat the roast dry, then coat it with salt, pepper, garlic powder, onion powder, paprika, thyme, and rosemary. Season every side so each slice or shredded piece tastes finished.

Hands seasoning a chuck roast on a board with visible spice coverage for slow cooker pot roast.
Season every side well so the beef tastes finished all the way through, not just on the outside.

Step 2: Sear for Deeper Flavor

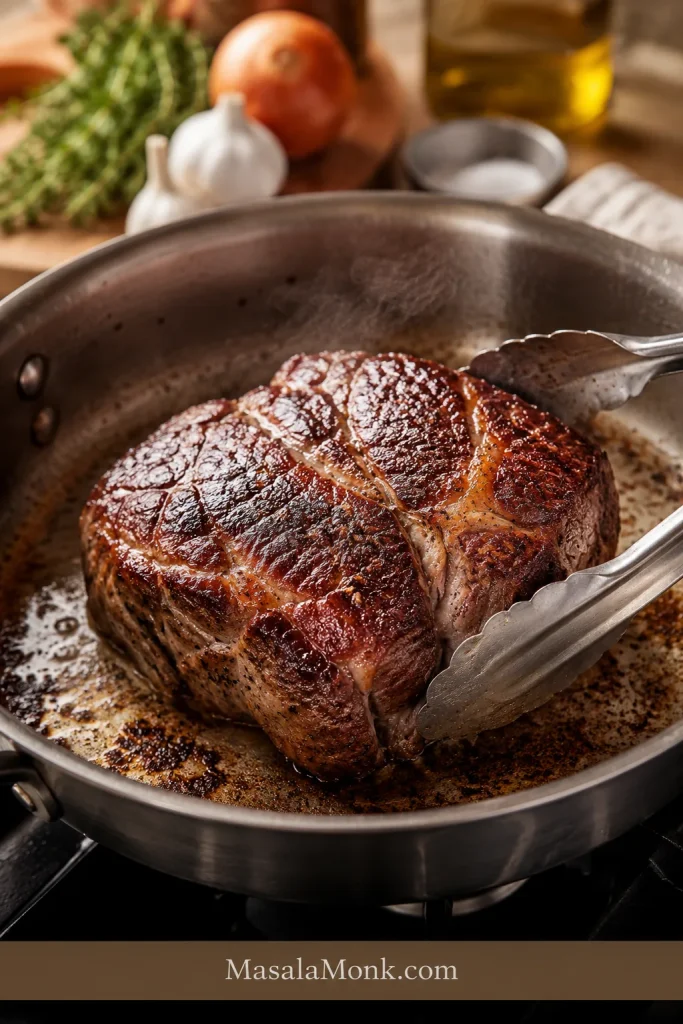
Heat oil in a skillet until hot, then brown the roast for 3 to 4 minutes per side. Let the crust form before turning. A good sear gives the gravy a deeper, roasted flavor.

Chuck roast searing in a skillet with a browned crust before going into the slow cooker.
Searing is optional, but it adds a deeper browned flavor that carries into the sauce.

Skipping the sear is still okay. On a busy morning, a well-seasoned no-sear pot roast is better than no pot roast at all.

Step 3: Layer the Vegetables

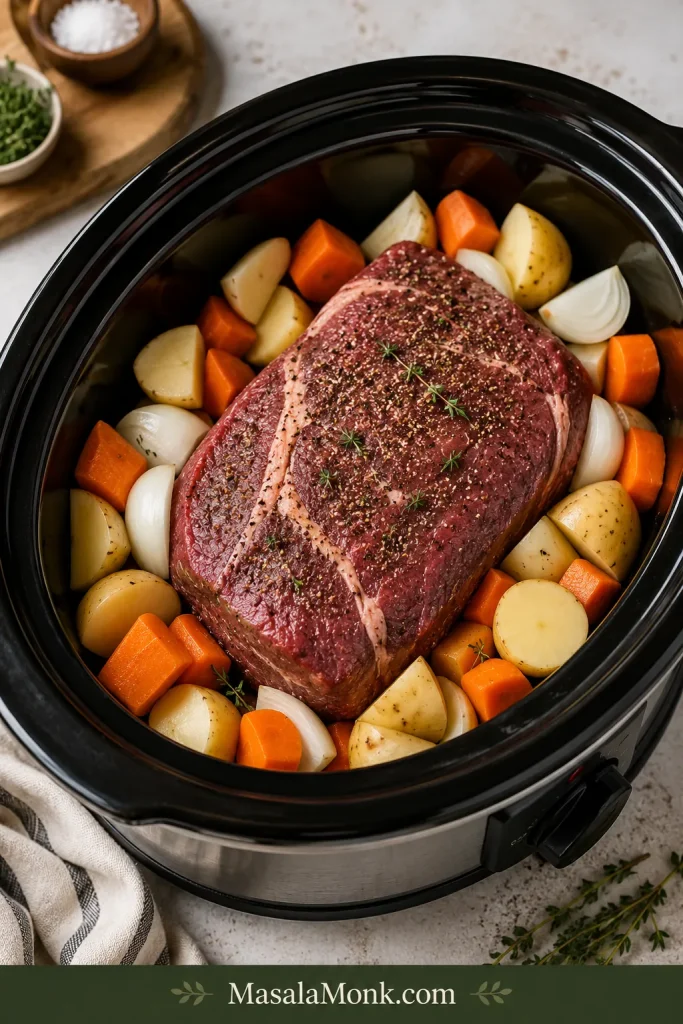
Add the onion, potatoes, and carrots to the slow cooker. Keep the pieces large. Place the roast on top of or slightly between the vegetables, leaving enough space for the lid to close comfortably.

Potatoes, carrots, onions, and chuck roast layered in a slow cooker for pot roast.
Large vegetable pieces go in first so they can hold their shape during the long cook.

A roast that does not fit can be cut into 2 or 3 large pieces. Large pieces still cook like pot roast; small stew-sized chunks cook differently.

Step 4: Add the Broth Mixture

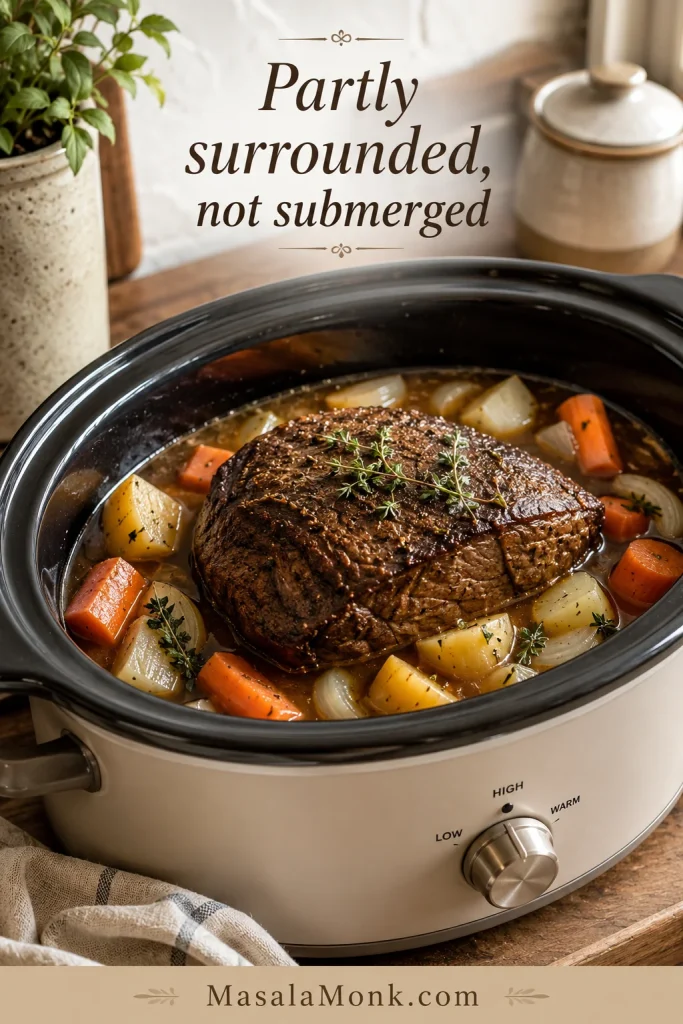
Stir together beef broth, Worcestershire sauce, tomato paste, garlic, and bay leaves. Pour it around the roast. The beef should sit in some liquid, but the top does not need to be covered.

Some recipes use enough broth to nearly cover the roast. This version uses less liquid on purpose so the juices stay concentrated enough to become sauce. Pot roast should braise gently, not cook like soup.

Slow cooker pot roast with the roast partly surrounded by broth, showing the correct liquid level.
The broth should braise the beef, not bury it; that balance keeps the flavor concentrated.

Step 5: Cook Until the Beef Gives

Cover and cook on LOW for 8 to 10 hours, or on HIGH for 5 to 6 hours. LOW gives chuck roast more time to soften and usually creates the best texture.

The roast is ready when a fork slides in easily and the meat pulls apart with gentle pressure. A tight or springy roast needs more time in the cooker.

Fork pulling apart tender slow cooker pot roast to show the fork test for doneness.
When the fork slides in easily, the roast is ready and the texture should feel soft, not tight.

Step 6: Rest, Make Gravy, and Serve

Move the roast to a cutting board and the vegetables to a serving dish. Rest the beef for 10 minutes while you make the sauce.

Ladle the cooking juices into a saucepan, skim excess fat if needed, and simmer. Whisk in a cornstarch slurry or make a flour gravy. Once the sauce coats the spoon, the whole dish changes from cooked beef and vegetables into proper pot roast dinner.

Slice across the grain for neat pieces, or pull the beef into large chunks. Spoon the glossy sauce over everything before serving.

What the Finished Slow Cooker Should Look Like

Before serving, the beef should look relaxed and tender, the vegetables should still be recognizable, and the cooking juices should be ready to finish into sauce.

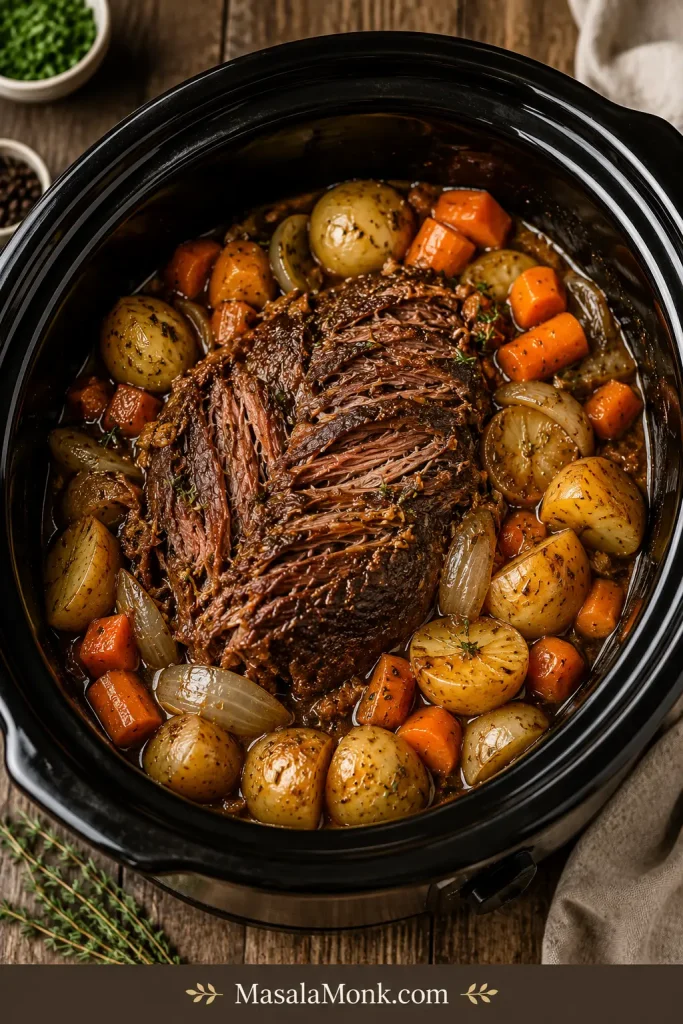
Finished pot roast in a slow cooker with tender beef, carrots, potatoes, onions, and glossy sauce.
This is the slow-cooker checkpoint: tender beef, intact vegetables, and enough juices to finish the meal.

Slow Cooker Pot Roast Cook Time Chart

Cook time depends on the size, thickness, cut, slow cooker, and how full the cooker is. Use this chart as a guide, then let tenderness decide.

Roast SizeLOW SettingHIGH SettingBest Result
2 lb / 900 g6 to 7 hours3½ to 4½ hoursTender, usually sliceable
3 lb / 1.4 kg8 to 9 hours4½ to 5½ hoursBest standard family size
4 lb / 1.8 kg9 to 10 hours5 to 6 hoursClassic fall-apart pot roast
5 lb / 2.25 kg10 to 11 hours6 to 7+ hoursLarge roast, needs patience

A thick 3 lb roast can take longer than a flatter 4 lb roast. Older slow cookers, very full cookers, and leaner cuts can also change the timing. The clock gets dinner close; the fork tells you when the beef is really ready.

Is It Better to Cook Pot Roast on LOW or HIGH?

LOW is better for slow cooker pot roast because chuck roast has more time to soften. LOW is the comfort setting. HIGH is the schedule setting.

HIGH works when dinner needs to happen faster, but it is less forgiving. The roast may still need extra time if it feels tight at the end.

SettingTime for 3 to 4 lb Chuck RoastResult
LOW8 to 10 hoursBest tenderness and texture
HIGH5 to 6 hoursFaster, still good when cooked until tender

How Much Liquid to Use for Slow Cooker Pot Roast

Use less liquid than you might think. A slow cooker traps steam, and the beef and vegetables release moisture as they cook. The visual cue from Step 4 still applies here: the roast should be partly surrounded by liquid, not submerged. Starting with too much broth can leave you with thin flavor and extra reducing at the end.

GoalLiquid Amount
Rich, concentrated pot roast1 to 1½ cups / 240 to 360 ml
Balanced pot roast with gravy1½ cups / 360 ml
Extra gravy2 cups / 480 ml
Very large 5 lb roast2 to 2½ cups / 480 to 600 ml

Keep the roast partly surrounded by liquid, not submerged. Extra broth is fine when you love a spoonable sauce, but plan to simmer and thicken the juices before serving.

How to Turn the Slow Cooker Juices into Gravy

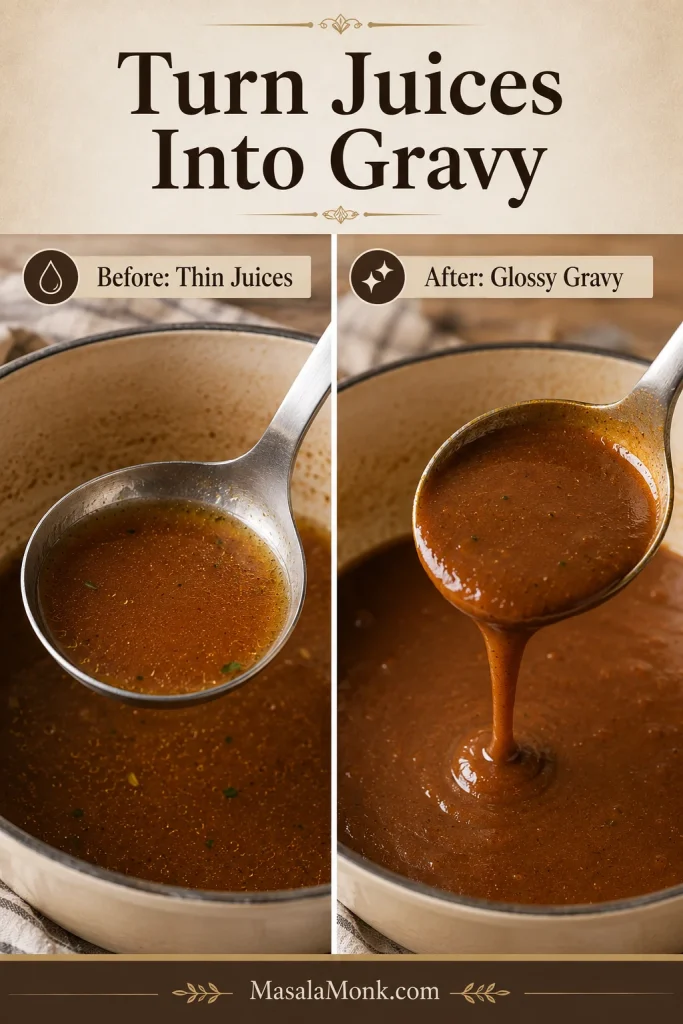
The juices in the slow cooker are one of the best parts of pot roast, but they need finishing. Straight from the cooker, they may be thin. After simmering and thickening, they become the rich sauce that pulls the plate together.

Two-panel pot roast gravy guide showing thin cooking juices before and glossy thick gravy after thickening.
Simmering and thickening turn thin cooking juices into a spoonable sauce.

Cornstarch Slurry Gravy

Choose this for a fast, glossy gravy.

IngredientAmount
Hot cooking juices1½ to 2 cups / 360 to 480 ml
Cornstarch2 tbsp / about 16 g
Cold water3 tbsp / 45 ml

Whisk the cornstarch and cold water in a small bowl until smooth. Bring the cooking juices to a simmer in a saucepan. Whisk in the slurry and cook for 2 to 3 minutes, until the sauce thickens and turns glossy.

Flour Gravy

Choose this for a more old-fashioned gravy.

IngredientAmount
Butter2 tbsp / about 28 g
Flour2 tbsp / about 16 g
Hot cooking juices1½ to 2 cups / 360 to 480 ml

Melt the butter in a saucepan. Whisk in the flour and cook for 1 to 2 minutes. Slowly whisk in the hot juices, then simmer until thickened.

Gravy Fixes

ProblemFix
Gravy is waterySimmer the juices to reduce, then thicken with slurry
Gravy is greasySkim fat before thickening
Gravy is blandAdd salt after reducing, plus pepper, Worcestershire sauce, or a pinch of bouillon
Gravy is too saltyAdd unsalted broth or potato water; avoid reducing further
Gravy tastes flatAdd a small splash of Worcestershire sauce or a pinch of thyme
Gravy is too thickWhisk in warm broth, a little at a time

Taste the gravy after it has reduced and thickened. The flavor is easier to judge once the sauce has body, and that glossy finish is what makes the beef, potatoes, and carrots feel like one complete dinner.

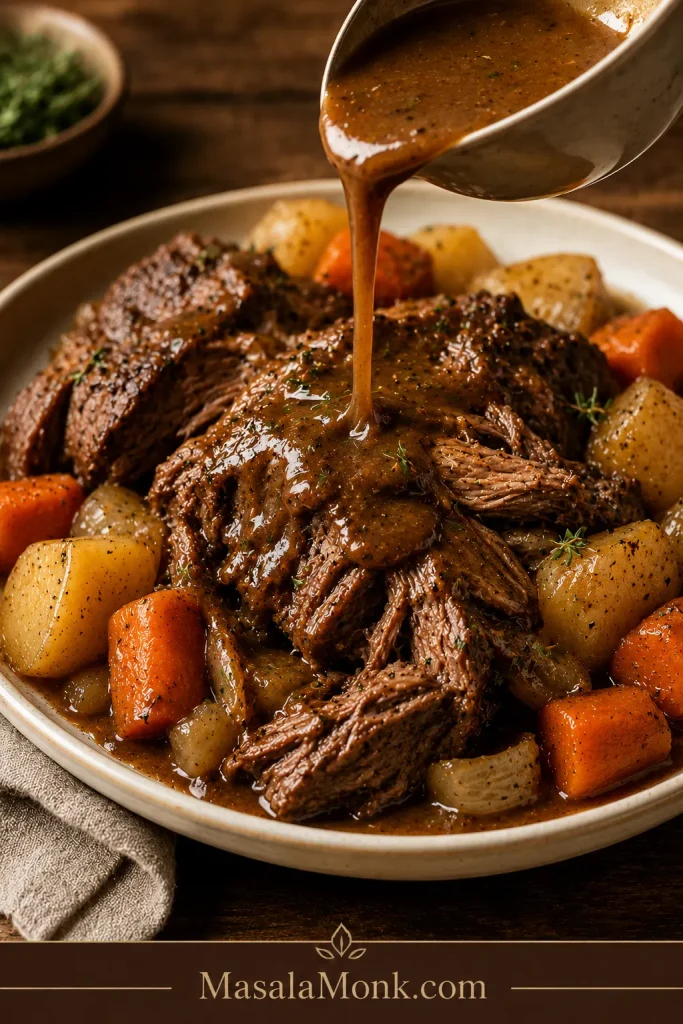
How the Finished Gravy Should Look

Once the gravy coats the beef and vegetables instead of running past them, the pot roast tastes richer and the whole plate feels finished.

Gravy being poured over tender slow cooker pot roast with carrots and potatoes on a rustic plate.
The finished sauce should coat the beef and vegetables instead of running off like broth.

When to Add Potatoes and Carrots

Most people expect slow cooker pot roast to come with soft carrots and potatoes. Add them at the beginning for that classic comfort-food texture, or add them later when you want more bite.

Desired TextureWhen to Add Potatoes and Carrots
Soft, classic pot roast vegetablesAdd at the beginning
Medium-soft vegetablesAdd after 2 hours
Firmer potatoes and carrotsAdd halfway through
Very soft carrotsUse baby carrots from the beginning
Less mushy potatoesUse baby potatoes, Yukon gold, or red potatoes in large pieces

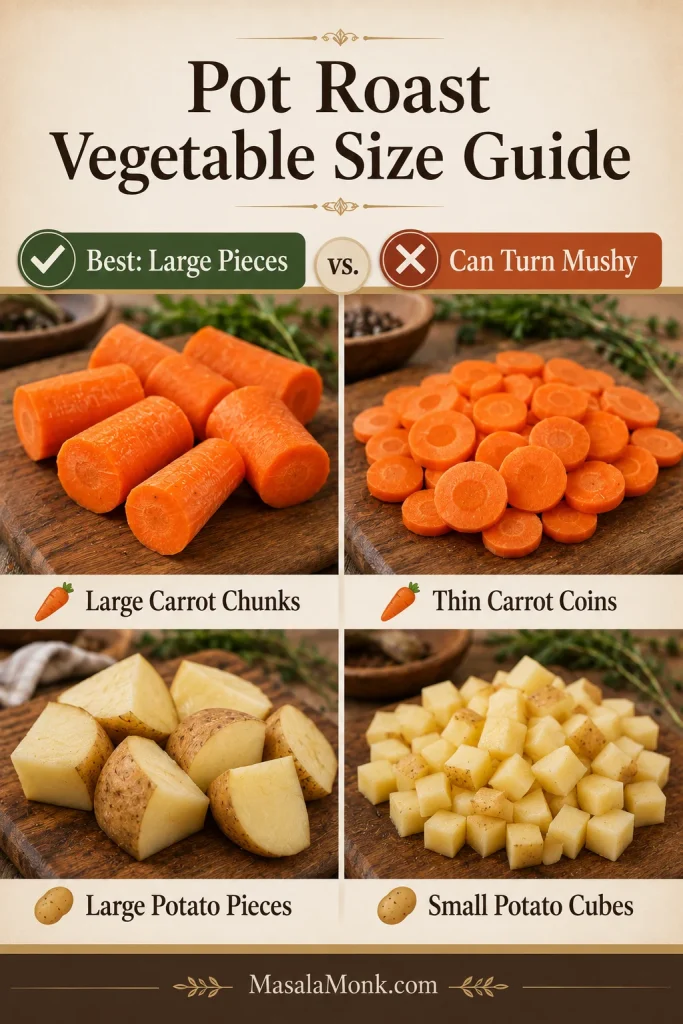
Large pieces hold up better during a long LOW cook. Thin carrot coins and small potato cubes soften quickly.

Pot roast vegetable size guide comparing large carrot chunks and potato pieces with smaller pieces that can turn mushy.
Bigger carrot and potato pieces hold up better during long cooking and are less likely to turn mushy.

No-Sear Slow Cooker Pot Roast

You can make slow cooker pot roast without searing it first. The roast will still become tender; the flavor will be lighter and less roasted.

MethodResult
Sear firstDeeper flavor, darker gravy, richer finish
No searEasier, still tender, lighter flavor

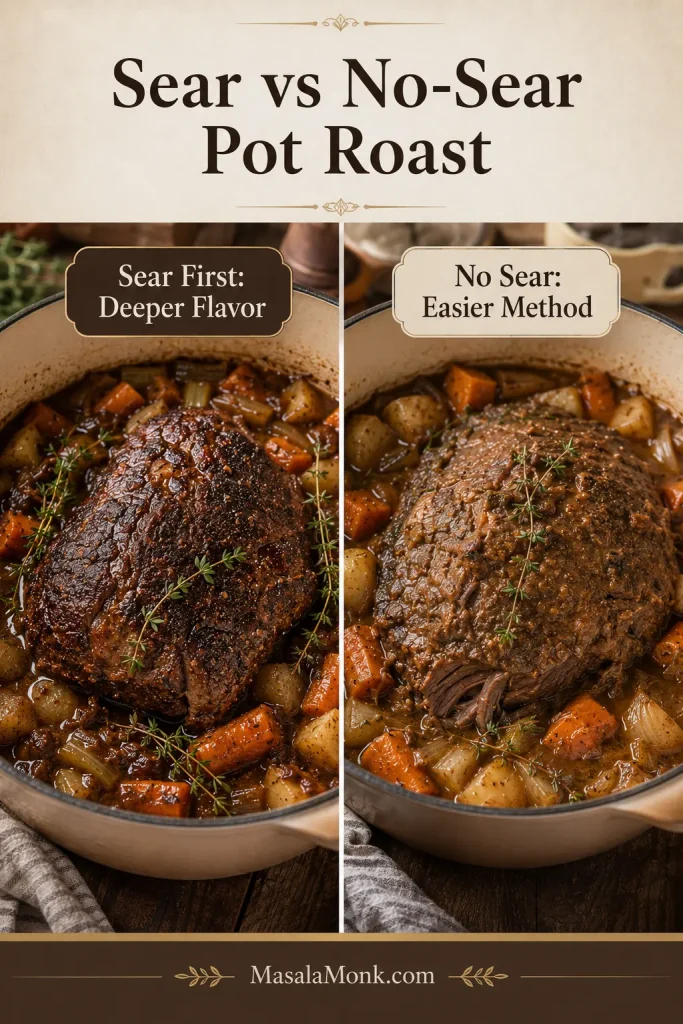
Sear vs No-Sear Comparison

This comparison shows why searing gives a darker finish, while the no-sear version still works when convenience matters most.

Side-by-side comparison of seared and no-sear pot roast showing the difference in flavor and finish.
Searing gives deeper flavor, but skipping it still works when you need the easier route.

For a no-sear pot roast, season the beef well and lean on Worcestershire sauce, tomato paste, onion, garlic, and good broth for flavor. A busy morning version can still become a generous dinner by evening.

Homemade Pot Roast Seasoning

This blend gives you familiar packet-style comfort without making the gravy too salty.

SeasoningAmount
Fine salt1½ tsp
Black pepper1 tsp
Garlic powder1 tsp
Onion powder1 tsp
Paprika1 tsp
Dried thyme1 tsp
Dried rosemary½ tsp
Dried parsley, optional½ tsp
Bouillon powder, optional½ tsp

Use this blend for a 3 to 4 lb roast. Use less salt when cooking with salted broth, onion soup mix, ranch seasoning, au jus mix, bouillon, or gravy packets.

For stronger flavor, season the roast up to 24 hours ahead and refrigerate it covered. Even 30 minutes helps. This blend also works for slow cooker beef stew, beef shoulder roast, and other slow-cooked beef dinners.

Shortcut Variations

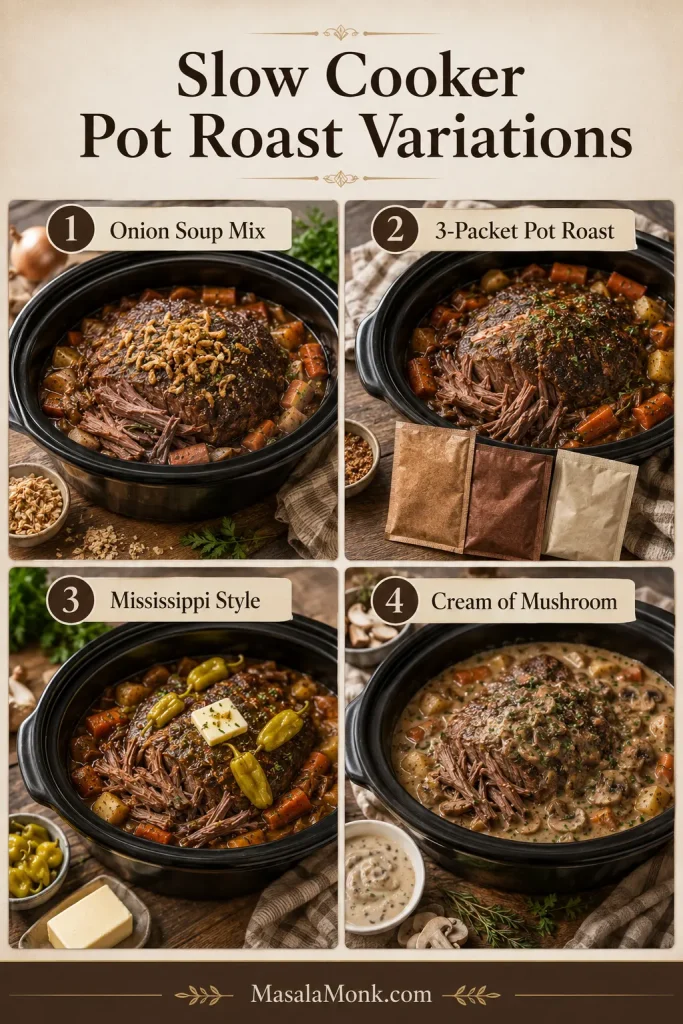
There is nothing wrong with a packet-style pot roast if that is the flavor your family loves. Think of these as quick variations; the same rules still apply — use the right cut, control the salt, and finish the juices like gravy.

Four-panel slow cooker pot roast variations board showing onion soup mix, 3-packet, Mississippi style, and cream of mushroom versions.
Shortcut versions can still taste rich when the salt, liquid, and final sauce stay controlled.

Onion Soup Mix Pot Roast

Use 1 packet onion soup mix with a 3 to 4 lb chuck roast, 1 to 1½ cups beef broth or water, potatoes, carrots, onions, and optional Worcestershire sauce. Treat the packet as seasoning, not as the whole gravy plan.

For another dinner built around onion soup mix and a proper gravy finish, MasalaMonk’s slow cooker French onion chicken is a good companion recipe.

3 Packet Pot Roast

A common 3-packet pot roast uses ranch seasoning mix, Italian dressing mix, and brown gravy mix. It is very flavorful, but salt can build fast, so use low-sodium broth and season carefully.

Mississippi Pot Roast Style

Mississippi pot roast usually uses ranch seasoning, au jus mix, pepperoncini, butter, and chuck roast. It is tangy, rich, and usually served shredded over mashed potatoes, rice, noodles, or sandwich rolls.

Cream of Mushroom Pot Roast

For an old-fashioned creamy version, add cream of mushroom soup and reduce the broth. Canned soup adds both liquid and body, so the recipe needs less extra broth.

Red Wine Pot Roast

Replace ½ cup / 120 ml of the broth with dry red wine. Keep the total liquid controlled so the sauce does not become thin.

Keto or Low-Carb Pot Roast

Skip the potatoes and use celery, mushrooms, turnips, radishes, or cauliflower mash. The beef and gravy are still the center of the meal.

Fixes for Tough, Watery, Bland, or Mushy Pot Roast

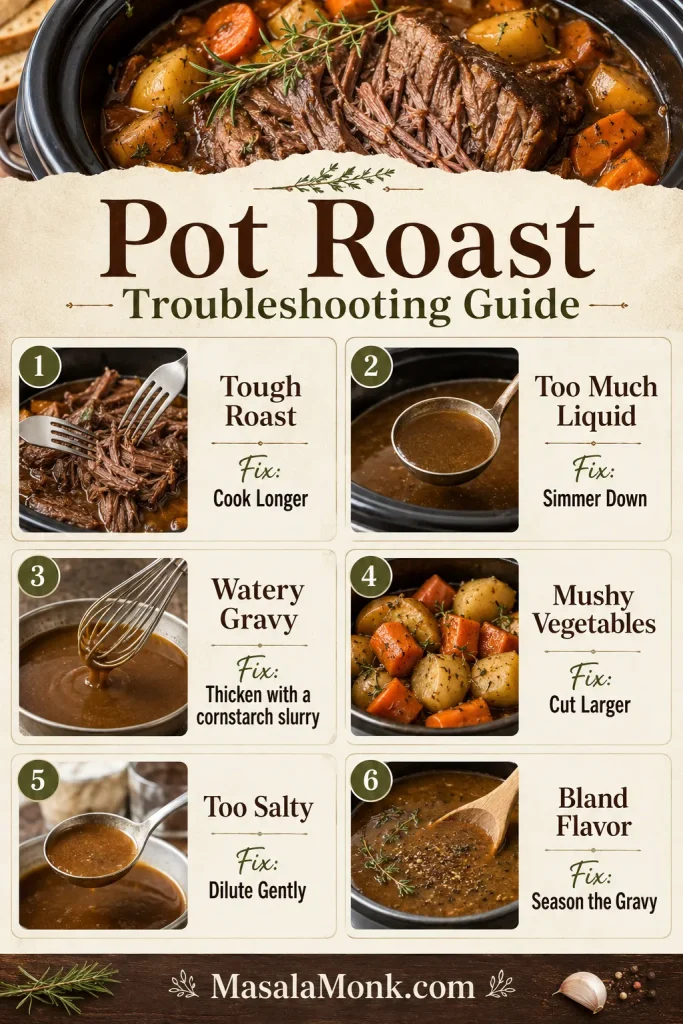
Most pot roast problems come down to cut, time, liquid, salt, or how the gravy was finished. Start with the simple fix before changing the whole recipe.

Pot roast troubleshooting guide showing fixes for tough roast, too much liquid, watery gravy, mushy vegetables, salty gravy, and bland flavor.
Use this as a quick rescue map for cut, time, liquid, salt, texture, and flavor.
ProblemMost Likely CauseBest Fix
Roast is toughNeeds more time or is too leanKeep cooking if it is chuck; slice thinly if it is lean
Roast is dryLean cut, overholding, or not enough sauceSlice thinly and serve with plenty of sauce
Too much liquidBeef and vegetables released moistureSimmer the juices down before thickening
Gravy is weakToo much broth or not reducedReduce, thicken, then season
Vegetables are mushyPieces were small or cooked too longUse larger pieces or add them later next time
Pot roast is blandNot enough seasoning or browningSeason the finished sauce and add Worcestershire sauce if needed
Too saltyPackets, bouillon, salted broth, or reduced gravyAdd unsalted broth or potato water; avoid further reducing

Most pot roast problems feel bigger in the moment than they really are. Once the beef is tender and the sauce has body, dinner usually comes back together.

Why Is My Slow Cooker Pot Roast Tough?

A chuck roast that feels tight, chewy, or hard to pull apart usually needs more time. The connective tissue has not softened yet. Keep the lid on, cook longer, and check again near the end.

A leaner cut like rump roast or bottom round may never shred like chuck. Slice it thinly across the grain and serve it with sauce.

What If Dinner Is Close and the Roast Is Still Tough?

Move the vegetables out if they are ready, then let the beef keep cooking in the juices. For a stovetop rescue, transfer the beef and liquid to a covered pot and keep it at a gentle simmer. A hard boil can tighten the outside before the inside softens.

Why Is My Roast Chewy Even Though It Reached a Safe Temperature?

Safe temperature and tender pot roast are not the same thing. Beef roast can reach a safe temperature before chuck roast has cooked long enough to become soft and pull-apart tender.

Why Is There So Much Liquid in My Slow Cooker?

The roast and vegetables release moisture as they cook. Remove the meat and vegetables, simmer the juices in a saucepan, then thicken them into gravy. Next time, start with less broth unless extra sauce is the goal.

Why Are My Potatoes and Carrots Mushy?

They cooked too long or were cut too small. Large pieces of carrot and sturdy potatoes like baby potatoes, Yukon gold, or red potatoes hold up better. For firmer vegetables, add them after the first 2 to 3 hours.

Can I Cook a Frozen Roast in the Slow Cooker?

It is better to thaw the roast first. USDA guidance says to thaw meat or poultry before putting it into a slow cooker, because frozen meat can take too long to heat safely and may cook unevenly. You can read more in the USDA’s slow cooker food safety guidance.

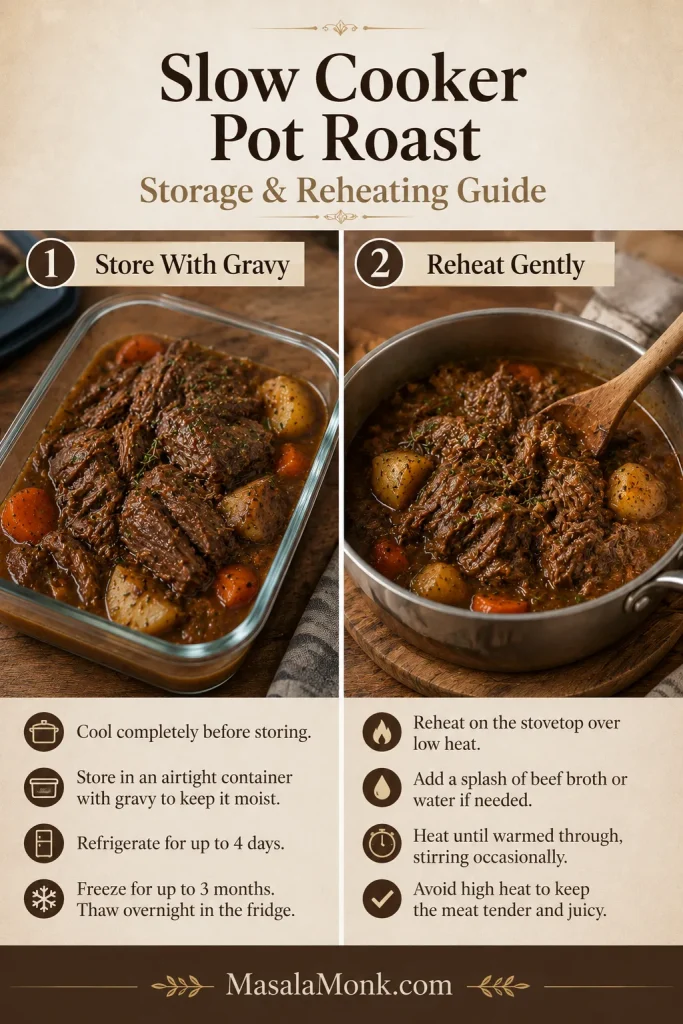
How to Store and Reheat Without Drying It Out

Pot roast keeps best when the beef is stored with sauce. That moisture protects the meat from drying out and makes reheating easier.

Storage and reheating guide showing pot roast stored with gravy in a container and reheated gently in a saucepan.
Store leftovers with sauce so the beef reheats gently instead of drying out.
Storage MethodBest Practice
RefrigeratorStore beef, vegetables, and gravy in airtight containers for 3 to 4 days
FreezerFreeze beef with gravy for 2 to 3 months
Best freezer methodFreeze sliced or shredded beef with gravy, not dry
ReheatingReheat gently with gravy on the stovetop or in the microwave
Potatoes after freezingPotatoes may soften after thawing

For the best freezer result, freeze the beef with its sauce and make fresh potatoes later.

Can You Make Pot Roast Ahead?

Yes. Pot roast is one of those dinners that often tastes even better the next day, especially when the beef is stored with sauce. Cook it fully, cool it, and refrigerate the beef with the cooking juices. The next day, skim any hardened fat from the top and reheat gently until hot.

The beef and sauce usually hold up better than the potatoes after chilling, so fresh potatoes or a fresh side can make leftovers feel new again.

Can You Hold Pot Roast on Warm?

You can hold pot roast on WARM for 1 to 2 hours after it is tender, as long as the food stays hot and the beef remains moist. Use LOW or HIGH until the roast is actually tender; WARM is for holding, not finishing.

Leftover Pot Roast Ideas

Leftover pot roast is one of the best reasons to make a large roast. Keep the beef with sauce, then turn it into easy meals for the next day.

  • Pot roast sandwiches with melted cheese
  • Pot roast grilled cheese
  • Beef over mashed potatoes
  • Pot roast tacos
  • Rice bowls with sauce and vegetables
  • Pot roast soup
  • Pot roast stroganoff
  • Loaded baked potatoes
  • Breakfast hash with eggs
  • Sliders with horseradish sauce
  • Egg noodles with beef and sauce
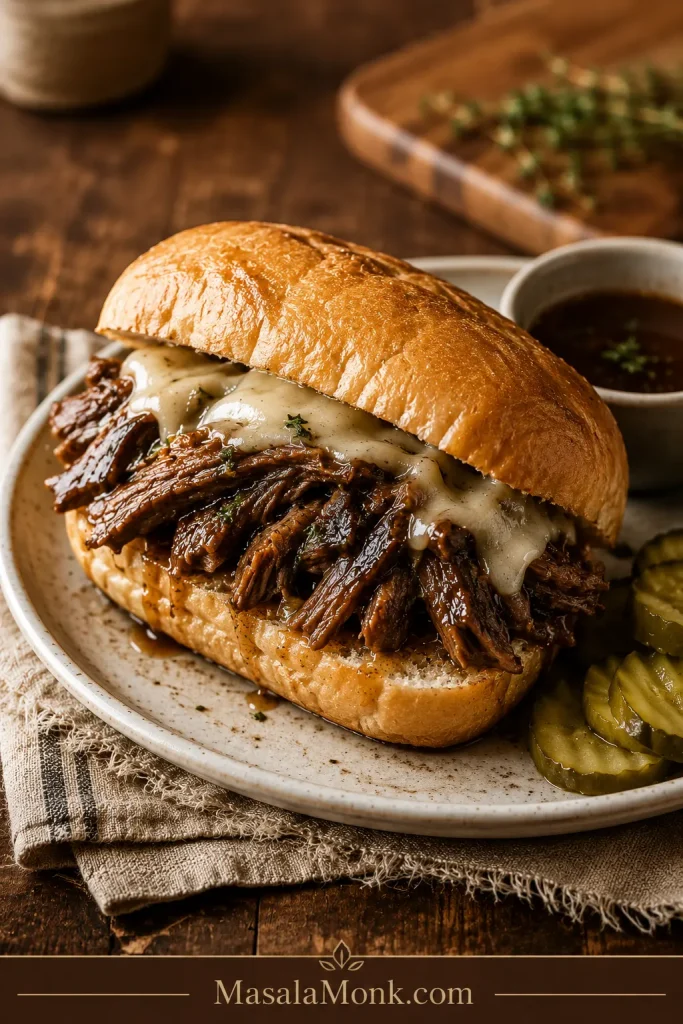
Leftover pot roast sandwich with tender beef, melted cheese, pickles, and a cup of gravy on the side.
Leftover pot roast makes a great sandwich when the beef stays moist and the filling is warmed through.

If you are turning leftovers into rice bowls, MasalaMonk’s how to cook rice guide helps keep the grains fluffy enough to catch the sauce without turning gummy.

If leftover sandwiches, sliders, bowls, and loaded potatoes are what you like most, MasalaMonk’s slow cooker pulled pork follows that same make-once, eat-many-ways comfort-food logic.

What to Serve With Pot Roast and Gravy

This recipe already includes potatoes and carrots, so it can be a full meal on its own. To stretch it or make the plate feel more complete, serve it with something that catches the sauce or balances the richness.

By the time it reaches the table, the meal should feel complete without needing anything fancy: tender beef, sweet carrots, soft potatoes, and enough sauce to pull it all together.

  • Mashed potatoes
  • Dinner rolls
  • Egg noodles
  • Rice
  • Green beans
  • Buttered peas
  • Roasted broccoli
  • Simple green salad
  • Creamed spinach
  • Biscuits
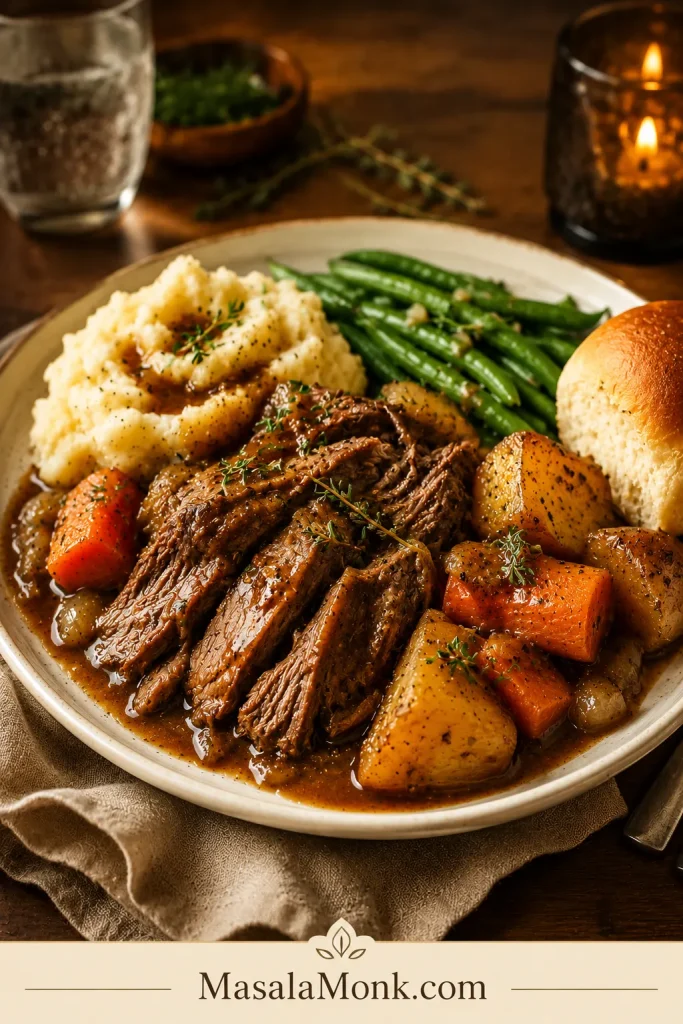
Finished slow cooker pot roast dinner plate with tender beef, carrots, potatoes, gravy, and sides on a cream plate.
The final plate should feel complete without fuss: tender beef, sweet carrots, soft potatoes, and sauce in every bite.

If you skip the potatoes in the slow cooker, serve the beef and gravy over MasalaMonk’s mashed potatoes recipe for the most classic plate.

Because pot roast is rich and gravy-heavy, a cold side can help the plate feel fresher. This cucumber salad recipe gives you that crisp, tangy contrast.

If you want another slow-cooker beef dinner with brown gravy, MasalaMonk’s crock pot Salisbury steak keeps the same mashed-potatoes-and-gravy comfort.

FAQs

What is the best cut of meat for slow cooker pot roast?

Chuck roast is the best cut for slow cooker pot roast. It has enough marbling and connective tissue to become tender during long cooking. Chuck shoulder, arm roast, and blade roast can also work well. Rump roast and bottom round are leaner, so they are better sliced than shredded.

Is this the same as Crock Pot pot roast?

Yes. Crock Pot is a popular slow cooker brand, so this recipe works as a Crock Pot pot roast or any 6-quart slow cooker pot roast. The timing and tenderness cues are the same.

Is it better to cook pot roast on LOW or HIGH?

LOW is better for the most tender pot roast. A 3 to 4 lb chuck roast usually needs 8 to 10 hours on LOW. HIGH works when needed and usually takes 5 to 6 hours, but the texture is often better on LOW.

How long does a 3 lb chuck roast take in the slow cooker?

A 3 lb chuck roast usually takes 8 to 9 hours on LOW or about 4½ to 5½ hours on HIGH. The exact time depends on the thickness of the roast and your slow cooker. Cook until a fork slides in easily.

How much liquid should I add to slow cooker pot roast?

For a rich, concentrated pot roast, start with 1 to 1½ cups / 240 to 360 ml. Use 2 cups / 480 ml for extra gravy. The slow cooker will create more liquid as the beef and vegetables cook, so the meat does not need to be fully covered.

How full should my slow cooker be?

For best results, aim for the slow cooker to be about half to two-thirds full. A cooker packed to the top can heat unevenly and may slow the recipe down.

Do potatoes and carrots go in at the beginning?

They can. Add potatoes and carrots at the beginning for soft, classic pot roast vegetables. For firmer vegetables, add them after the first 2 to 3 hours or halfway through cooking.

Do I have to sear the roast first?

No. Searing adds deeper flavor and a richer gravy, but the roast can still become tender without it. Season the beef well and use good broth, Worcestershire sauce, tomato paste, onion, and garlic.

What if the roast does not fit in the slow cooker?

Cut it into 2 or 3 large pieces. Avoid cutting it into small cubes unless you want a stew-like texture instead of classic pot roast.

How do I make gravy from the slow cooker juices?

Remove the meat and vegetables, then ladle 1½ to 2 cups of hot cooking juices into a saucepan. Simmer them, then whisk in a slurry made from 2 tablespoons cornstarch and 3 tablespoons cold water. Cook for 2 to 3 minutes until thickened.

Why is my pot roast still tough?

It usually needs more time. Chuck roast becomes tender after long, slow cooking. If it does not pull apart easily, keep cooking and check again near the end of the cooking window.

Can I use onion soup mix for slow cooker pot roast?

Yes. Use 1 packet onion soup mix with the broth, but reduce the added salt. Onion soup mix is already salty and flavorful, so taste the gravy before adding more seasoning.

Can I make pot roast ahead of time?

Yes. Pot roast often tastes even better the next day when the beef is stored with gravy. The sauce keeps it moist and makes reheating easier. Cook it fully, refrigerate the beef with the gravy, skim any hardened fat the next day, and reheat gently until hot.

Can I hold pot roast on warm?

Yes, once the roast is already tender. Keep it on WARM for 1 to 2 hours with gravy, as long as the food stays hot. Use LOW or HIGH to finish cooking a firm roast.

What if my slow cooker turns off during cooking?

If the slow cooker turns off during cooking and you do not know how long the food sat without heat, it is safest to discard it. If the interruption was very brief and the food is still steaming hot, restart cooking and use a thermometer, but do not guess with meat that may have cooled for a long time.

Can I freeze leftover pot roast?

Yes. Freeze sliced or shredded pot roast with gravy for the best texture. The gravy helps protect the beef so it reheats more gently. Use within 2 to 3 months. Potatoes can soften after freezing, so freeze the beef and gravy separately if you want the best reheated result.

What internal temperature should pot roast reach?

Beef roasts are safely cooked at 145°F / 63°C with a 3-minute rest, according to FoodSafety.gov’s safe minimum internal temperature chart. For pot roast, safe temperature is not the same as tenderness. Chuck roast usually needs much longer cooking before it becomes tender enough to pull apart.

Final Note

Slow cooker pot roast is at its best when it feels calm and generous: tender beef, soft vegetables, and enough gravy to spoon over every bite. Choose chuck roast when you can, keep the liquid controlled, and let the fork, not the clock, tell you when dinner is ready.

If you make it, leave a comment with your roast size, cut, slow cooker setting, liquid amount, and cook time — especially if you adjusted anything. Those details help other readers and make pot roast problems much easier to solve.

Posted on Leave a comment

Seafood Boil Sauce Recipe: Garlic Butter Cajun Sauce for Shrimp, Crab & Crawfish

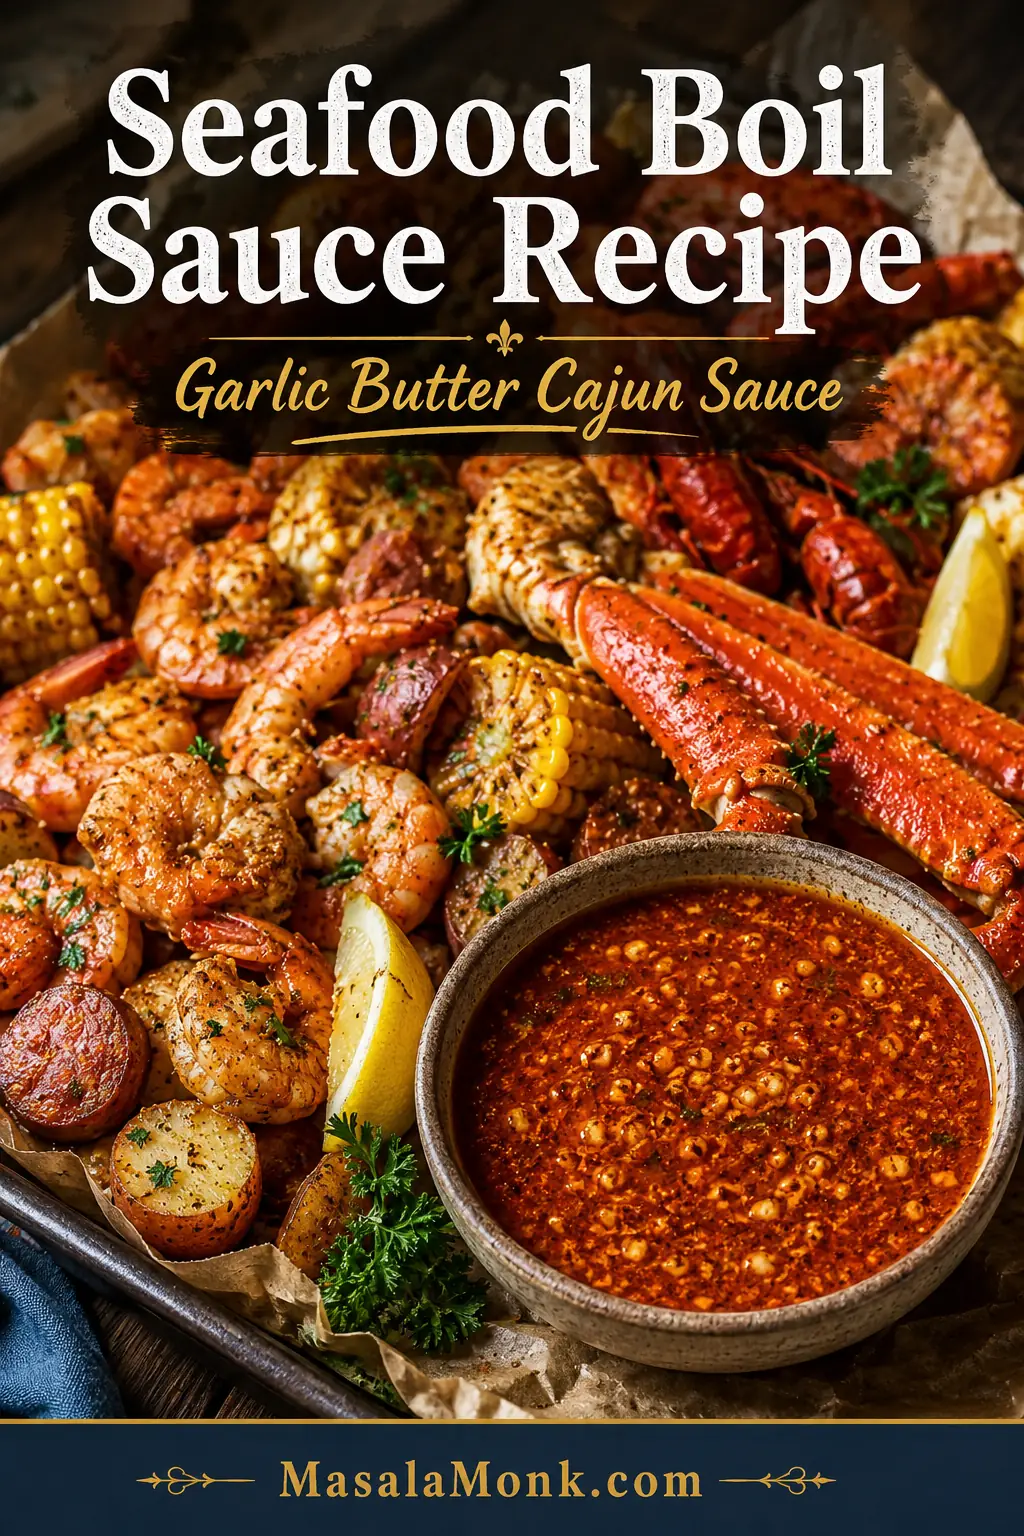
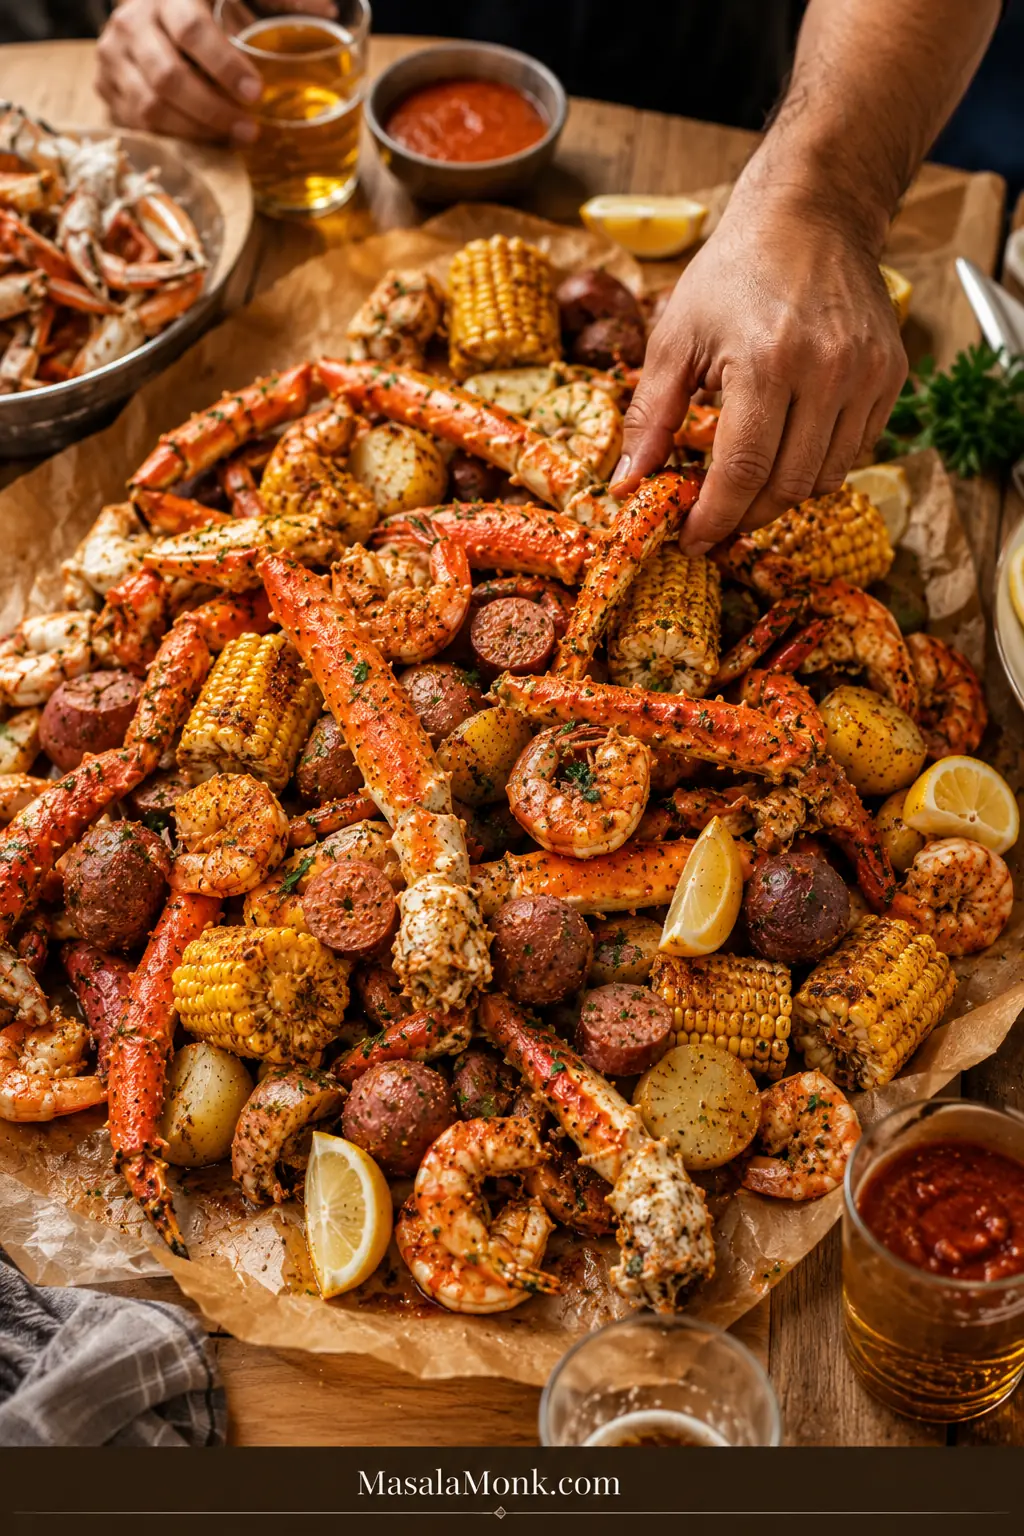
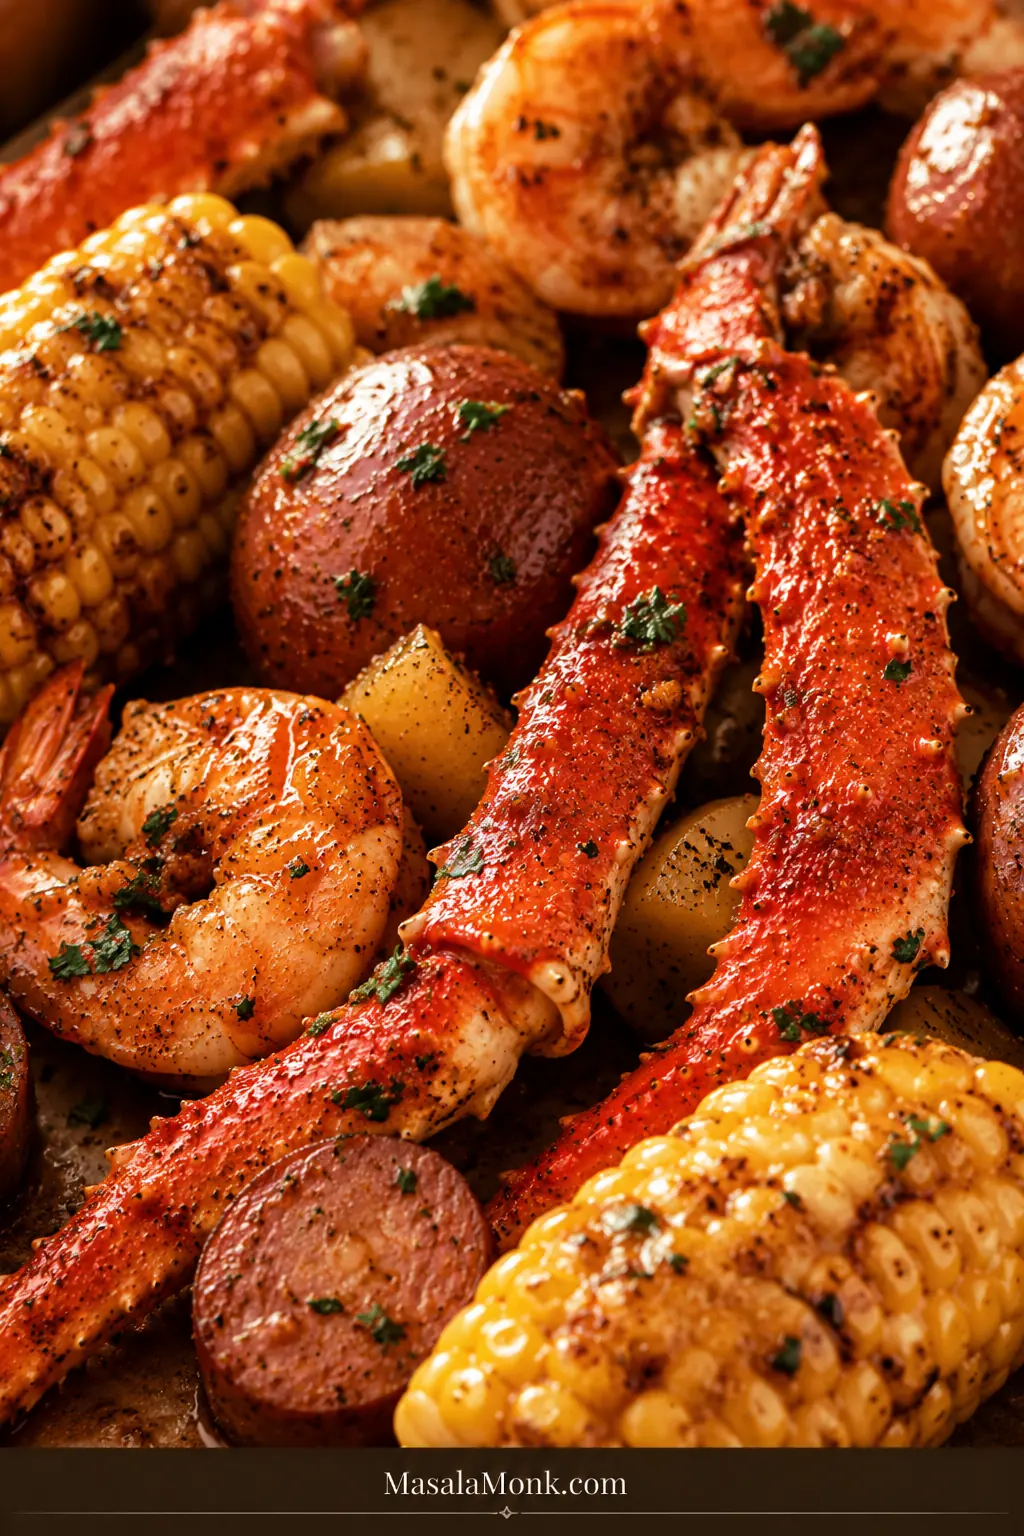
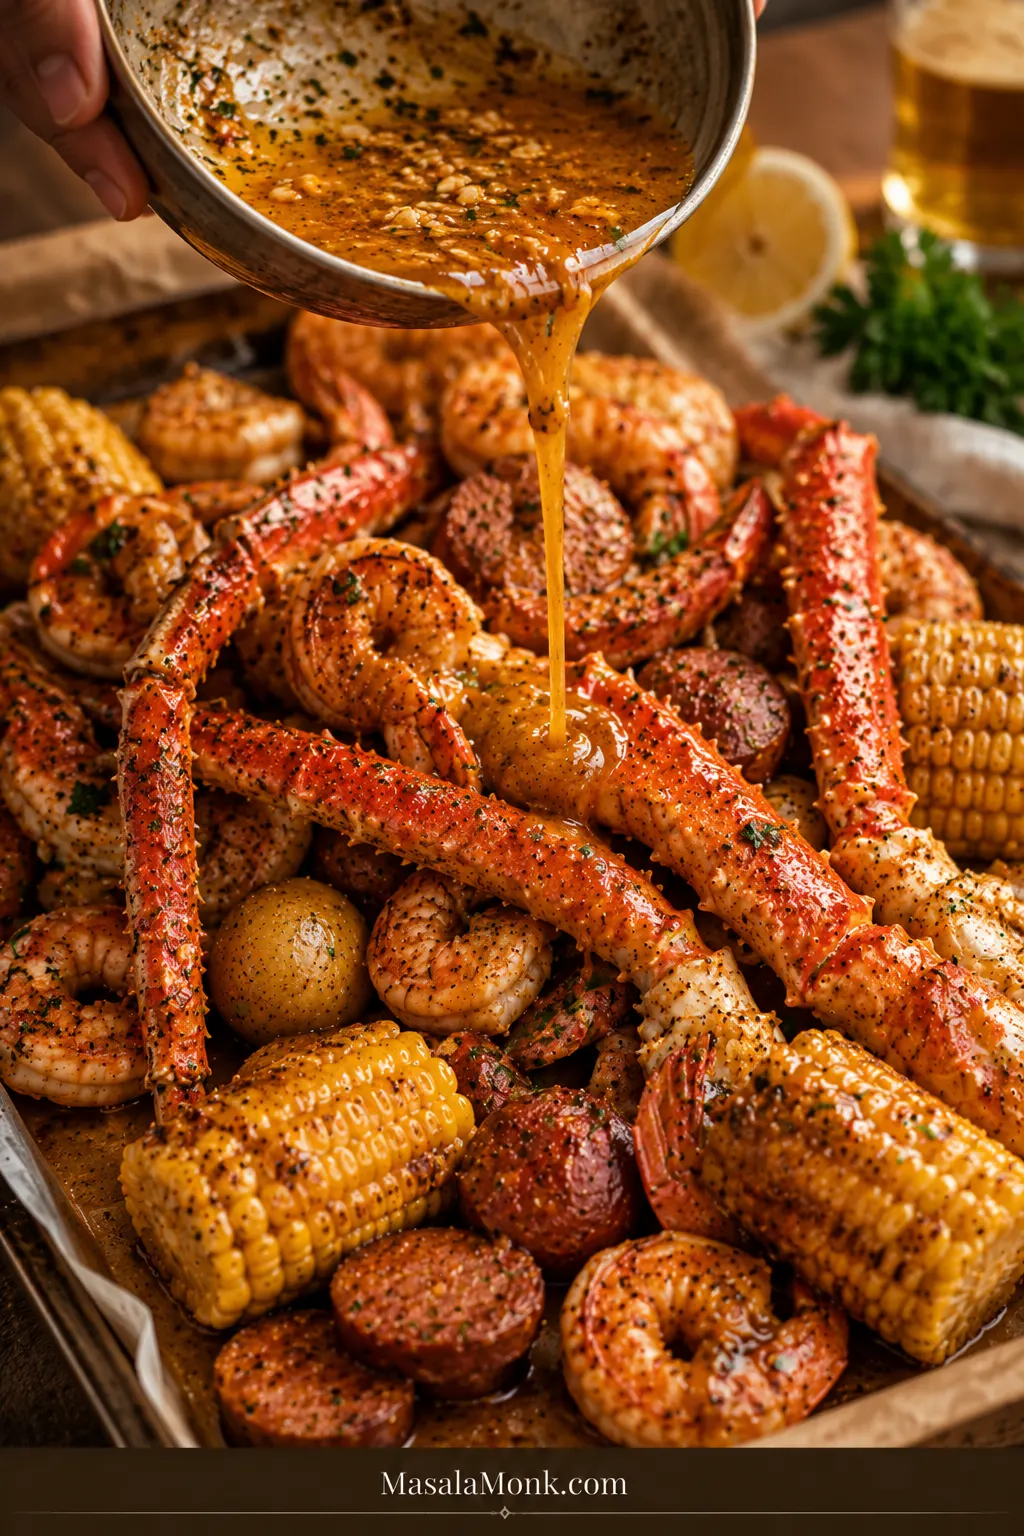
A tray of shrimp, crab legs, corn, baby potatoes, sausage, lemon wedges, parsley, and red-orange garlic butter Cajun seafood boil sauce.

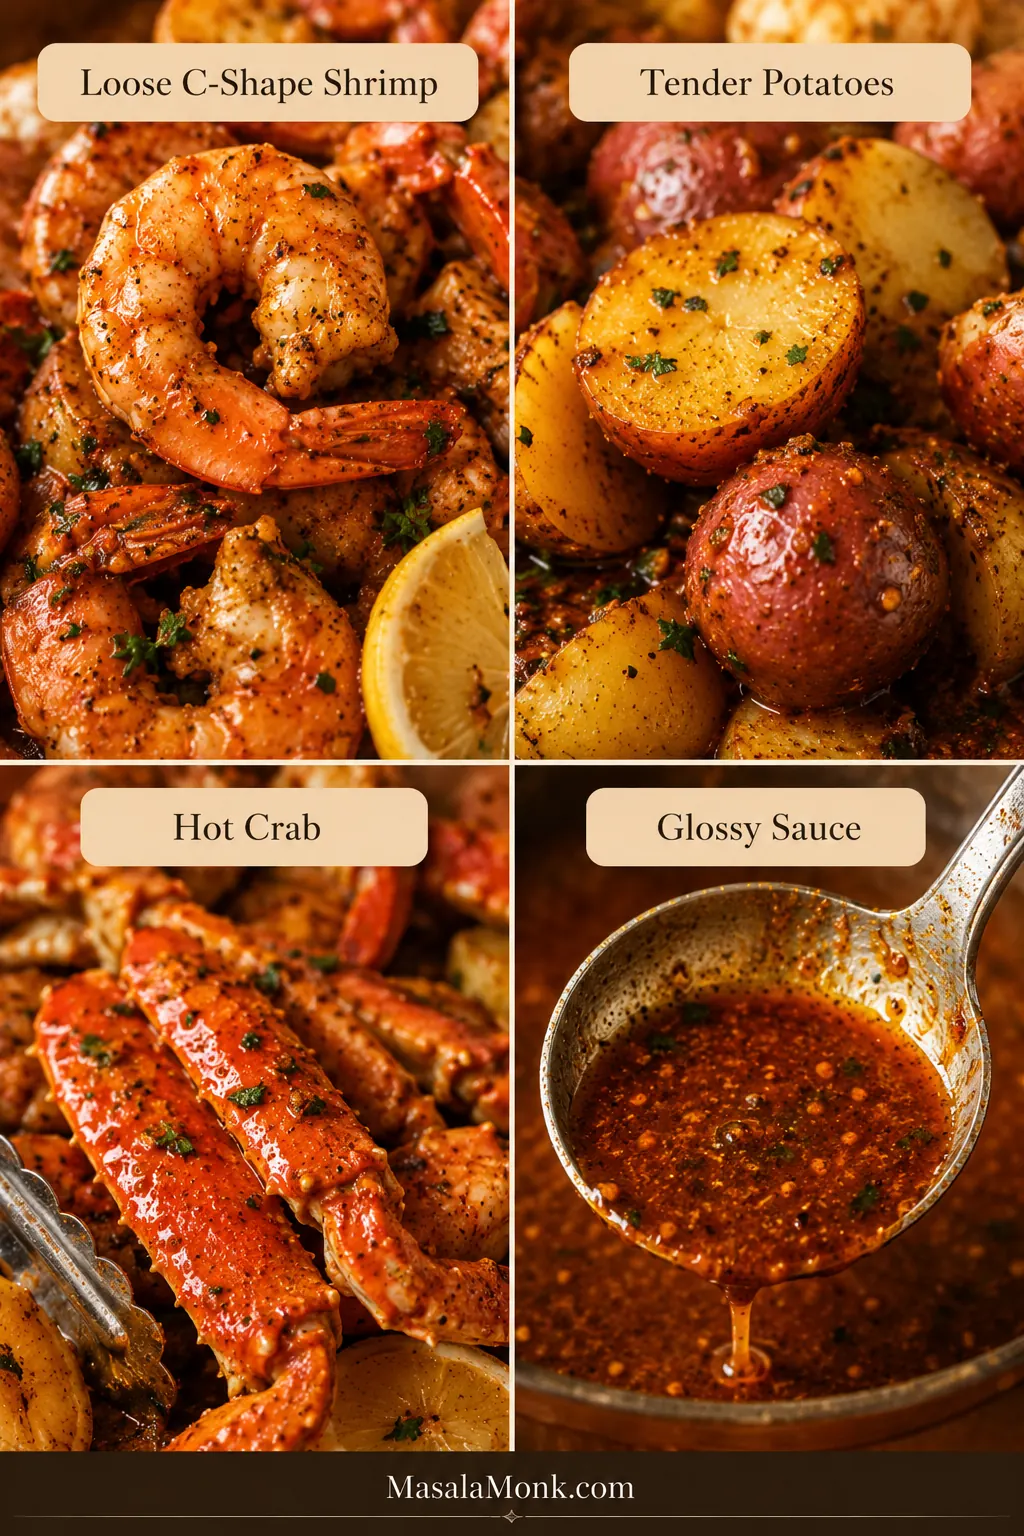
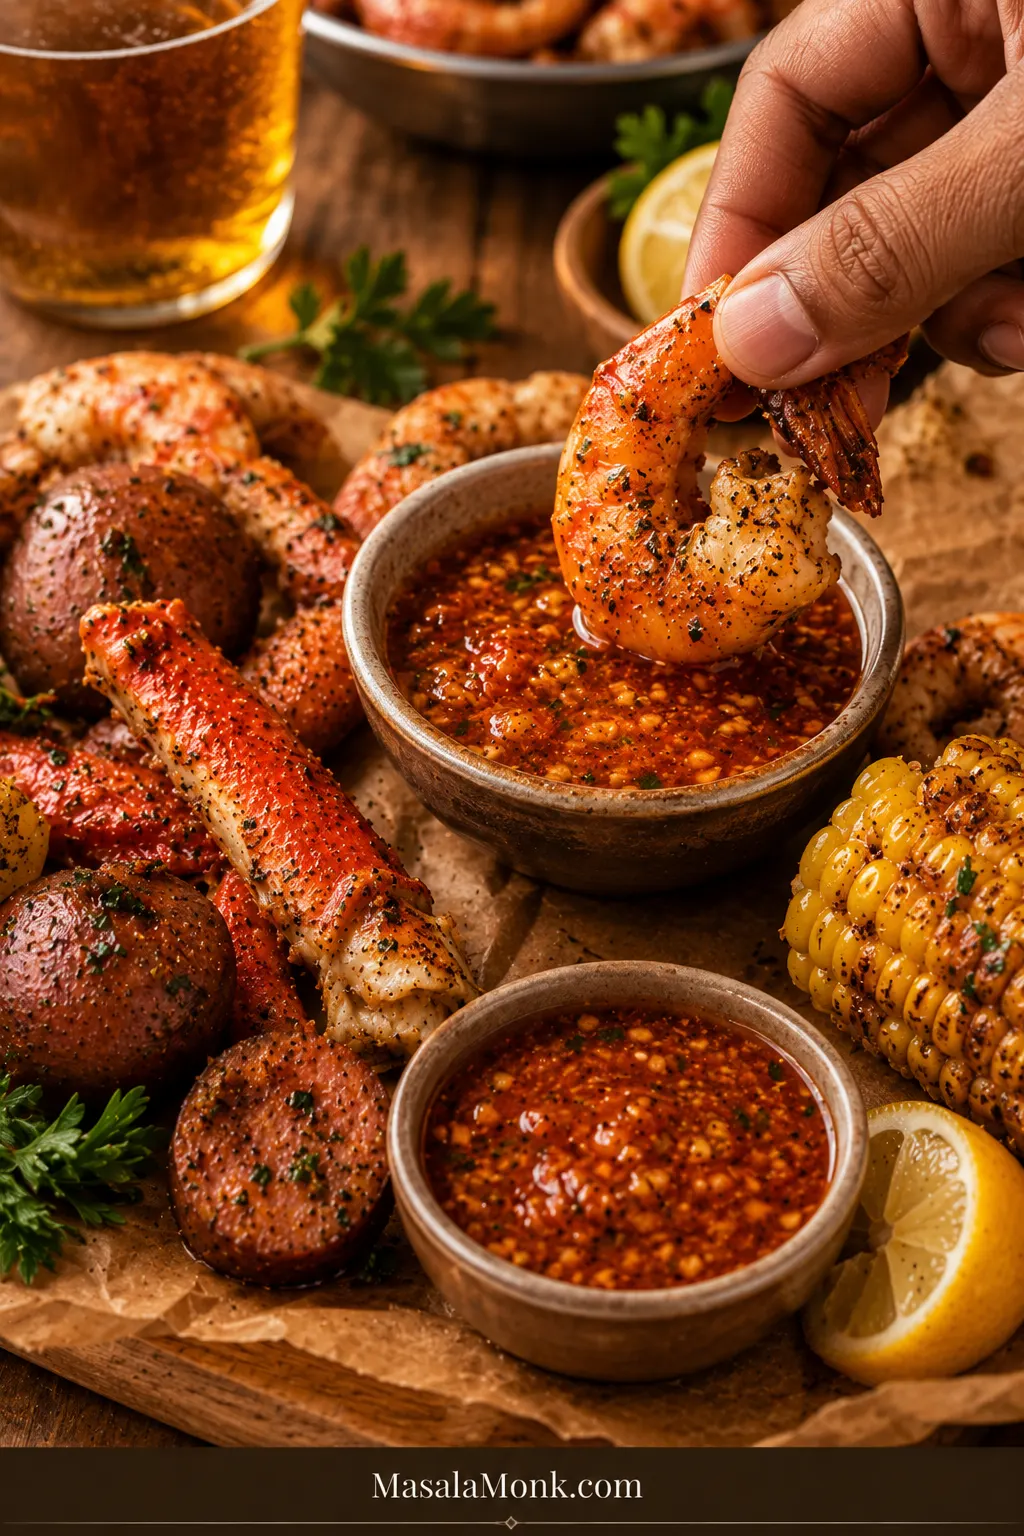
A great seafood boil sauce should do more than taste buttery. It should cling to crab legs, gloss over shrimp, soak into corn and potatoes, and leave enough garlicky Cajun butter at the bottom of the tray for one last swipe of bread.

This is the sauce that turns a pile of boiled seafood into the messy, glossy, pass-the-napkins kind of meal. It is rich, garlicky, smoky, lemony, a little spicy, and easy to adjust for dipping, pouring, tossing, or serving on the side.

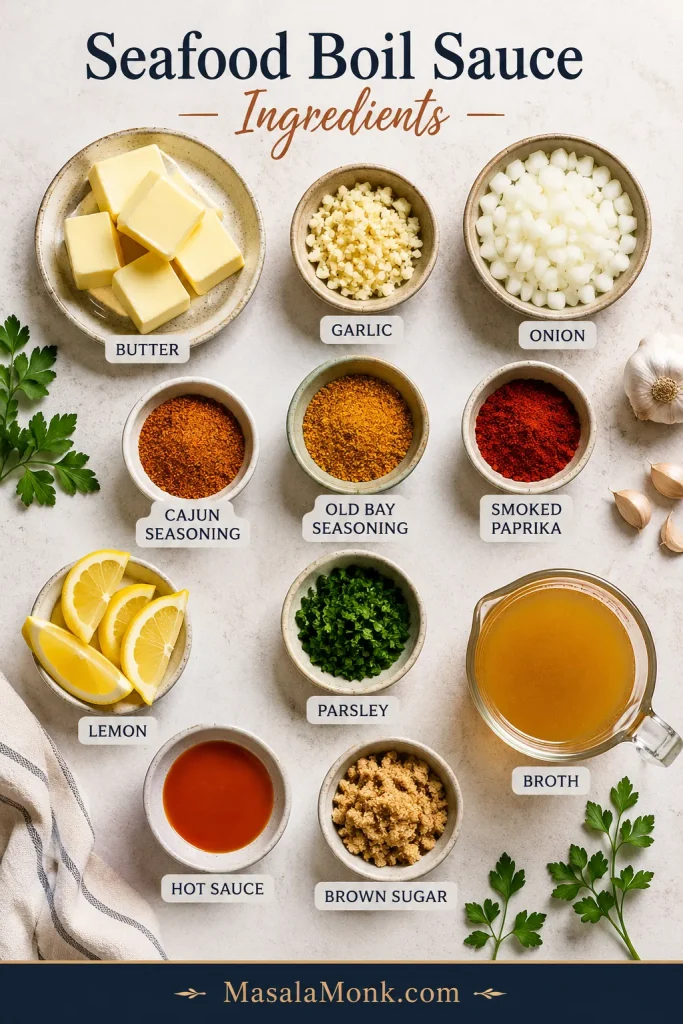
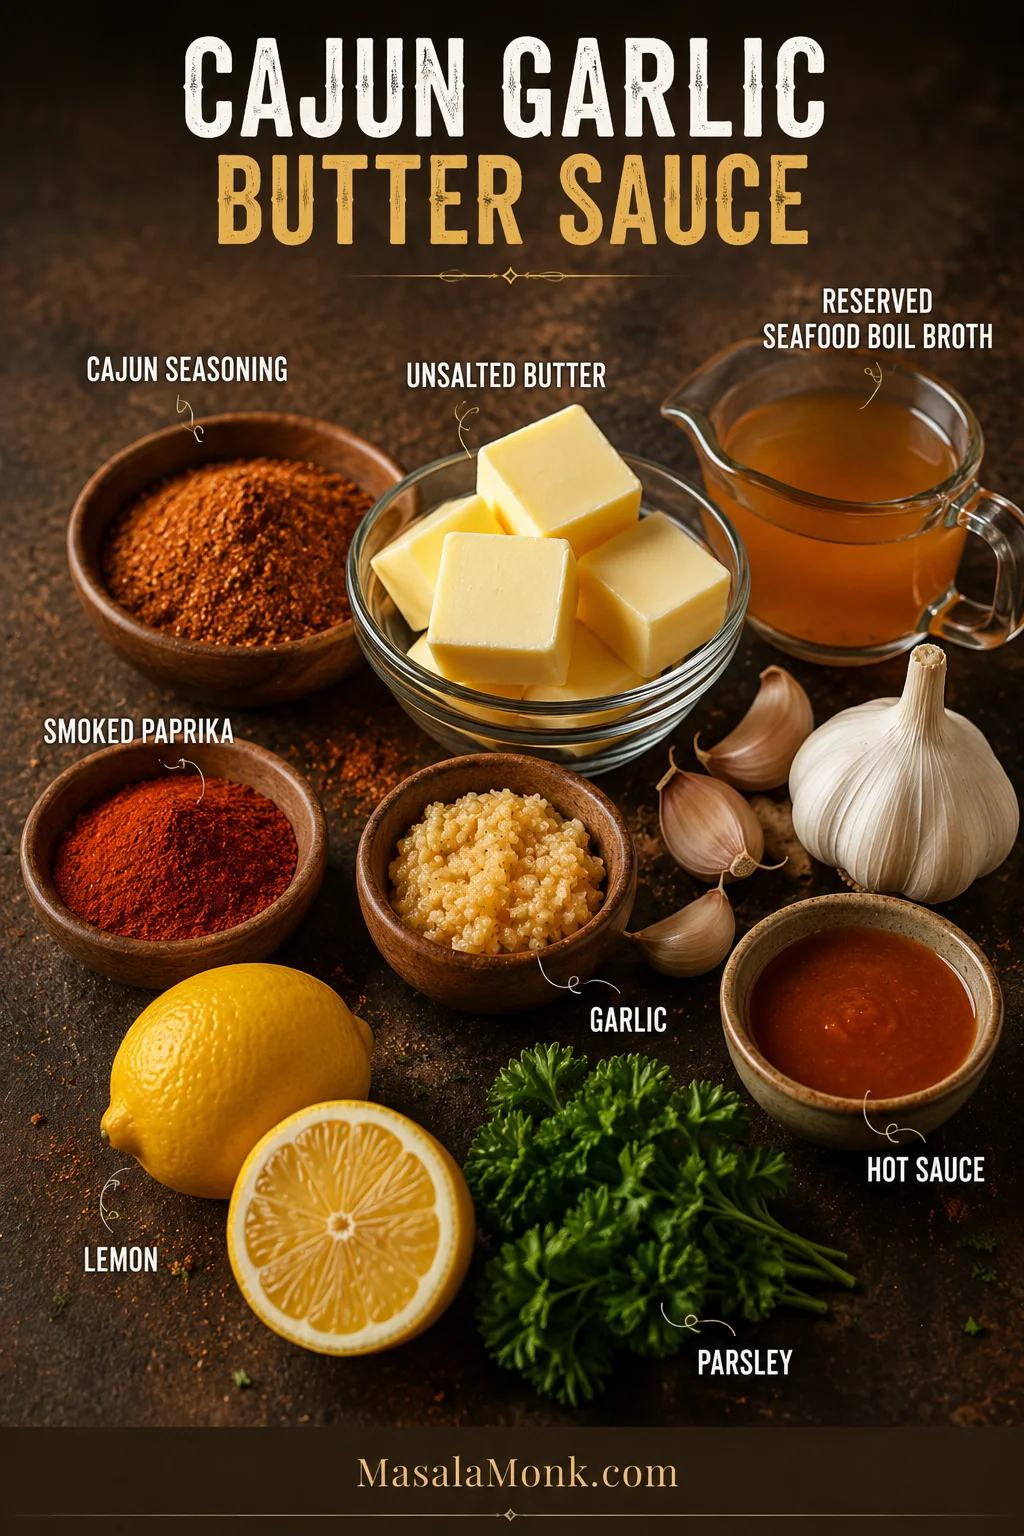
The goal is not just heat or butter. The goal is a sauce that tastes bold but still lets the seafood taste like seafood. The base is simple — butter, garlic, Cajun seasoning, Old Bay, smoked paprika, lemon, and a splash of broth or reserved seafood boil liquid — but the control is what makes it work.

Quick Answer: What Is Seafood Boil Sauce?

Seafood boil sauce is a bold garlic butter sauce made with butter, garlic, Cajun seasoning, Old Bay seasoning, lemon juice, paprika, and a little heat. It should taste rich first, then garlicky and smoky, with enough lemon to make every bite of shrimp, crab, corn, and potatoes feel bright instead of heavy.

For a thick dipping sauce, use less liquid. For a pour-over sauce, add more broth, seafood stock, or reserved seafood boil liquid. For a seafood boil bag sauce, keep it medium-thick so it coats shrimp, crab, crawfish, corn, potatoes, and sausage without becoming watery.

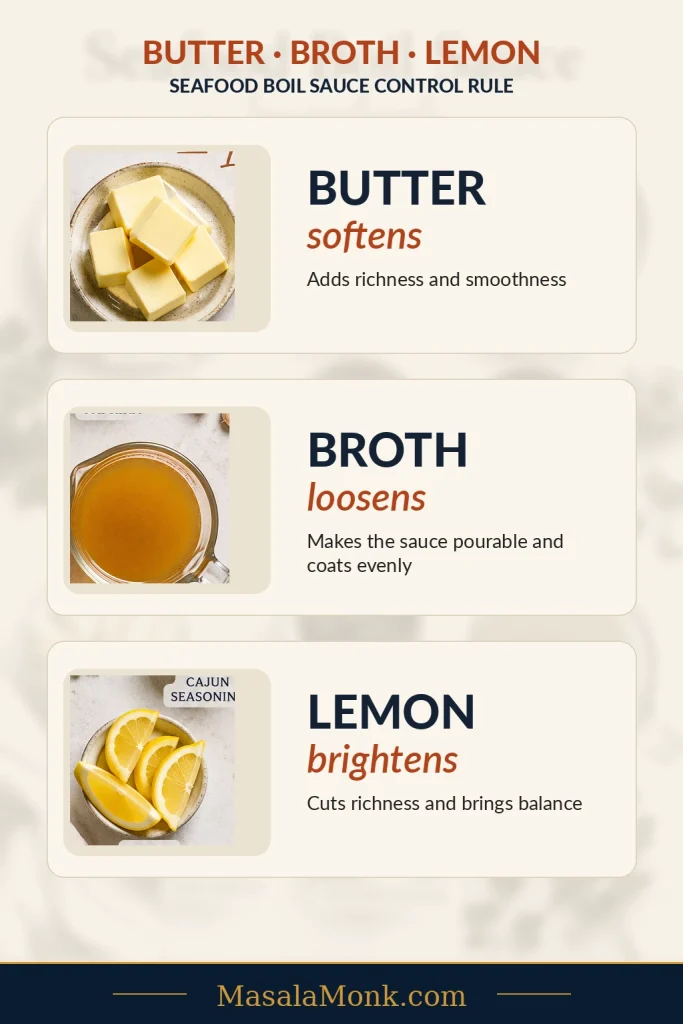
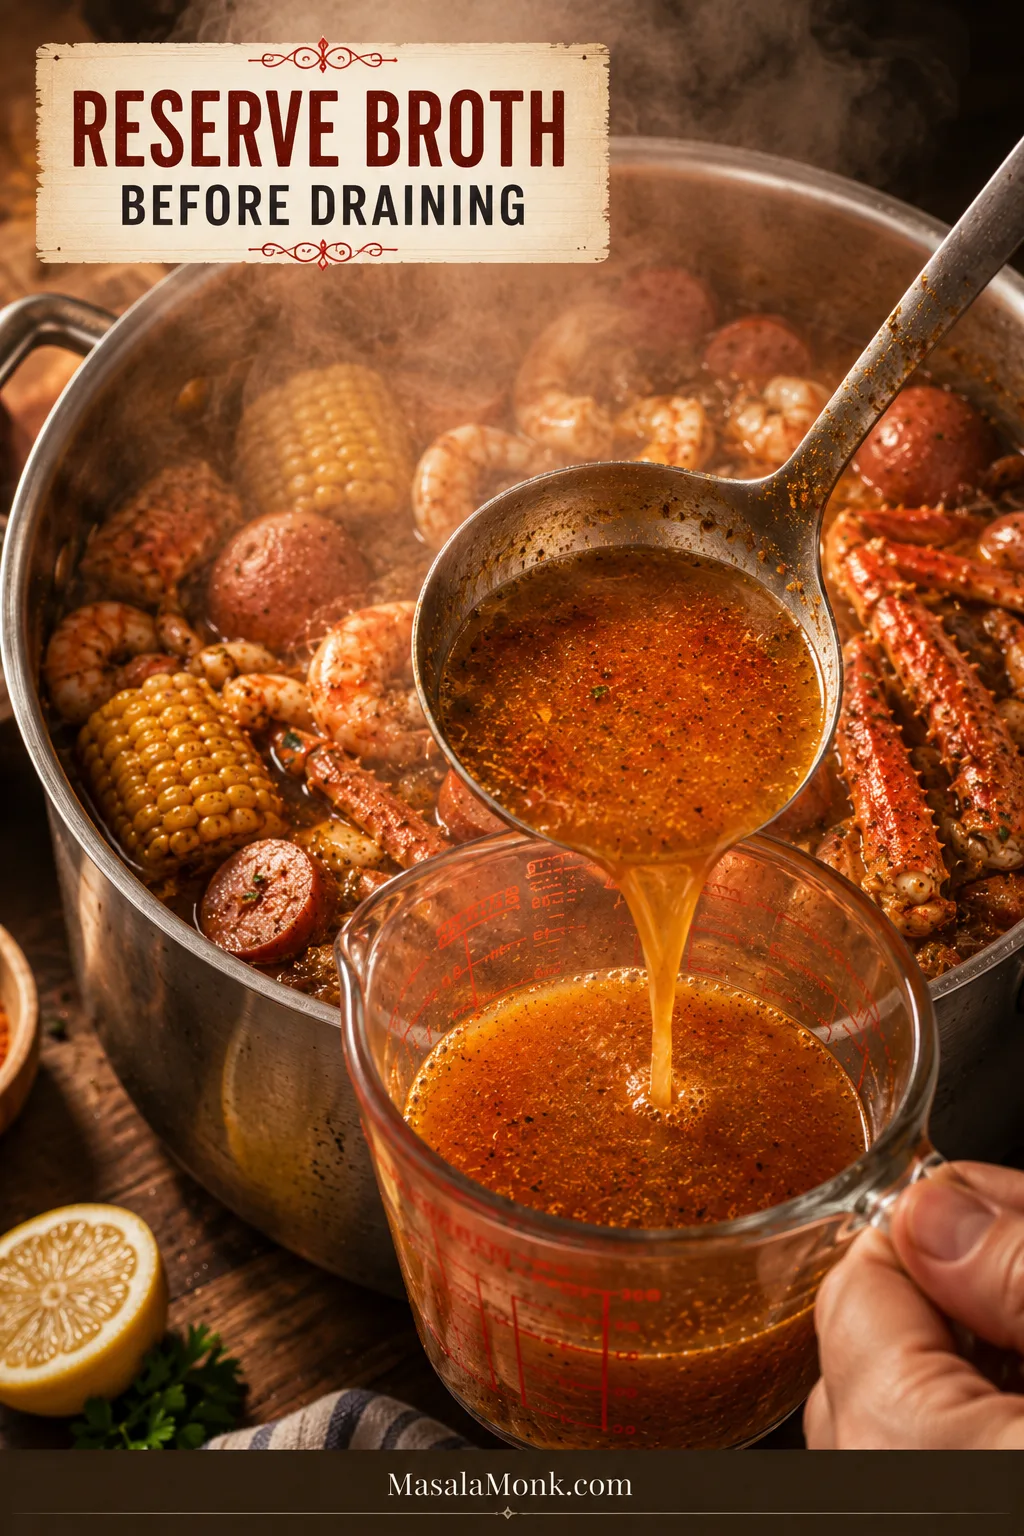
Butter-Broth-Lemon Rule

Use the butter-broth-lemon rule: butter softens, broth loosens, and lemon brightens. Choose your sauce style first — thick and buttery for crab-leg dipping, loose and glossy for shrimp and corn, or medium-thick for seafood boil bags. The recipe below starts in the middle so you can adjust either way.

Butter, broth, and lemon showing the butter-broth-lemon rule for seafood boil sauce.
When the sauce needs a fix, this is the fastest rule to remember: butter softens, broth loosens, and lemon brightens.

The best version is bold, glossy, and adjustable: rich enough for crab, bright enough for shrimp, loose enough for corn and potatoes, and balanced enough that it does not hide the seafood.

Make It Now: Seafood Boil Sauce Recipe

This is the main garlic butter Cajun seafood boil sauce. It makes about 2 cups / 480 ml, enough for about 2½–3 lb / 1.1–1.35 kg seafood as a light-to-generous pour-over sauce, depending on how much corn, potatoes, sausage, and eggs are on the tray.

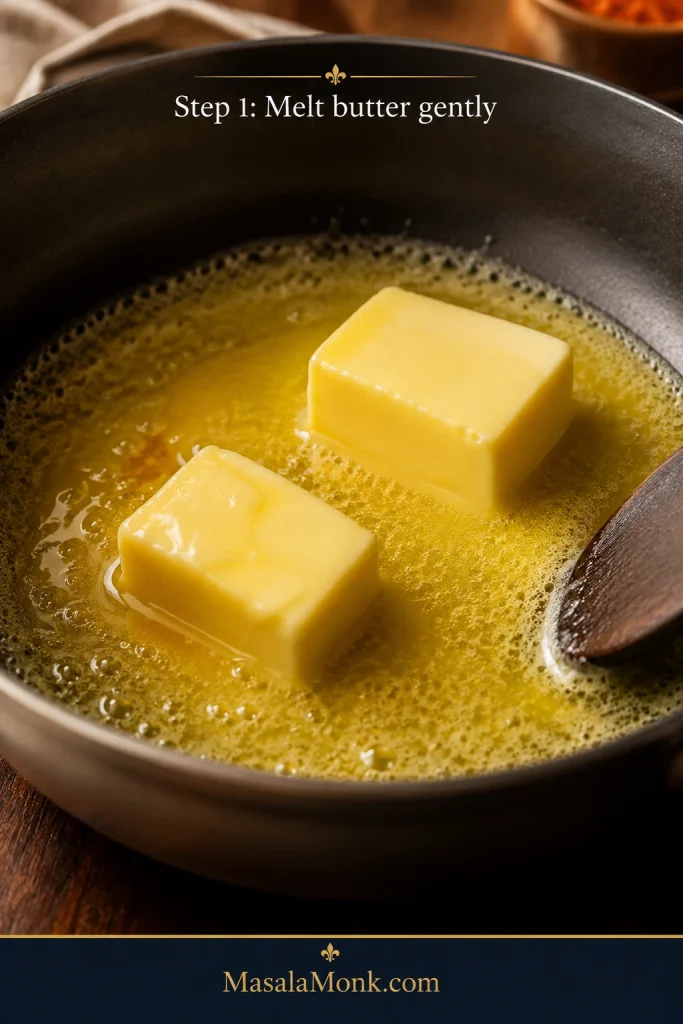
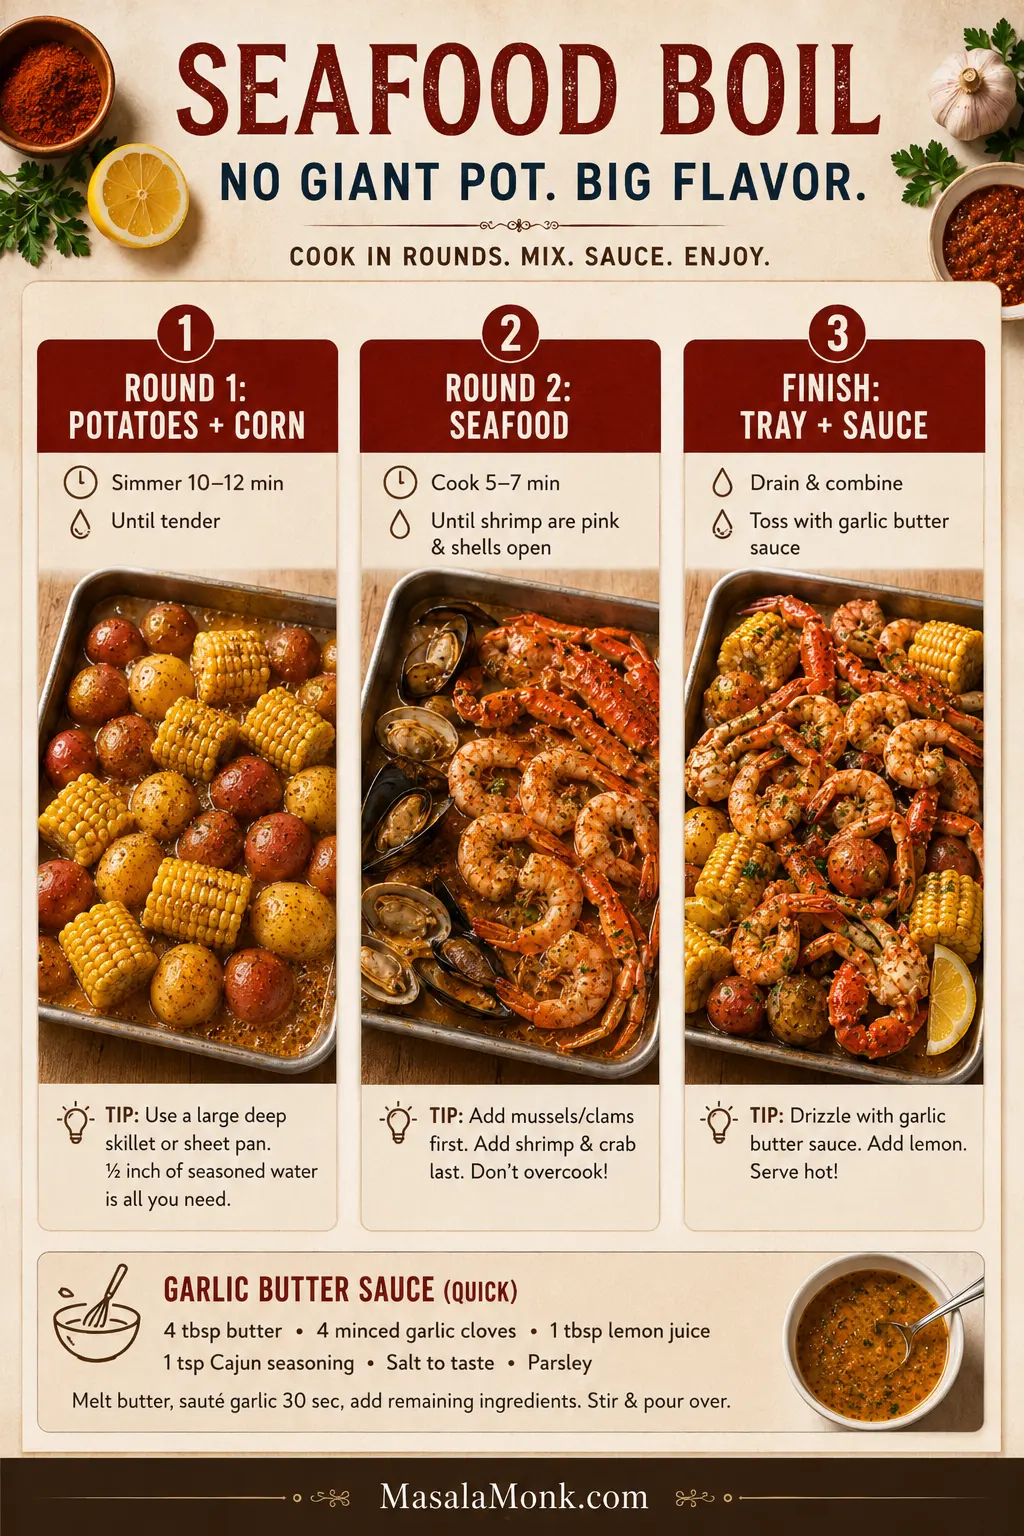
You only need one pan, low heat, and about 20 minutes. Melt the butter, soften the aromatics, bloom the spices, loosen with broth, then finish with lemon.

Prep time: 10 minutes
Cook time: 12 minutes
Total time: 22 minutes
Yield: About 2 cups / 480 ml sauce
Serves: 4–6 as pour-over sauce, 8–10 as dipping sauce because dipping uses less per person
Equipment: Large skillet or medium saucepan, whisk, measuring spoons, microplane or garlic press

Scaling: Double the sauce for a large tray or seafood boil bag. Keep the heat low and use a wider pan so the garlic and spices cook evenly.

Before you pour: Taste the sauce with one shrimp, potato, or piece of corn. The salt order is simple: season first, loosen second, salt last.

Ingredients

IngredientUS MeasureMetric
Unsalted butter1 cup / 2 sticks / 8 oz226 g
Garlic, minced or grated8–10 cloves30–40 g
Yellow onion, very finely minced½ small onion / about ⅓ cup50–60 g
Cajun seasoning1½ tablespoons12–15 g
Old Bay seasoning2 teaspoons5–6 g
Smoked paprika1 tablespoon6–7 g
Onion powder1 teaspoon2–3 g
Brown sugar1–2 teaspoons4–8 g
Hot sauce1–2 teaspoons5–10 ml
Reserved seafood boil liquid, seafood stock, low-sodium chicken broth, or vegetable broth½ cup120 ml
Lemon juice2 tablespoons30 ml
Lemon zest1 teaspoonOptional
Fresh parsley, chopped2 tablespoons6–8 g

Optional heat: Add ¼–½ teaspoon cayenne or red pepper flakes if you want a spicier Cajun butter sauce.

Salt note: Do not add extra salt until the sauce is finished and tasted. Cajun seasoning, Old Bay, broth, and reserved boil liquid can all bring salt.

Measurement note: Gram weights for seasoning blends are approximate because Cajun seasoning and seafood seasonings vary by brand. Use the spoon measures first, then adjust after tasting.

Instructions

  1. Melt the butter in a large skillet or medium saucepan over low to medium-low heat.
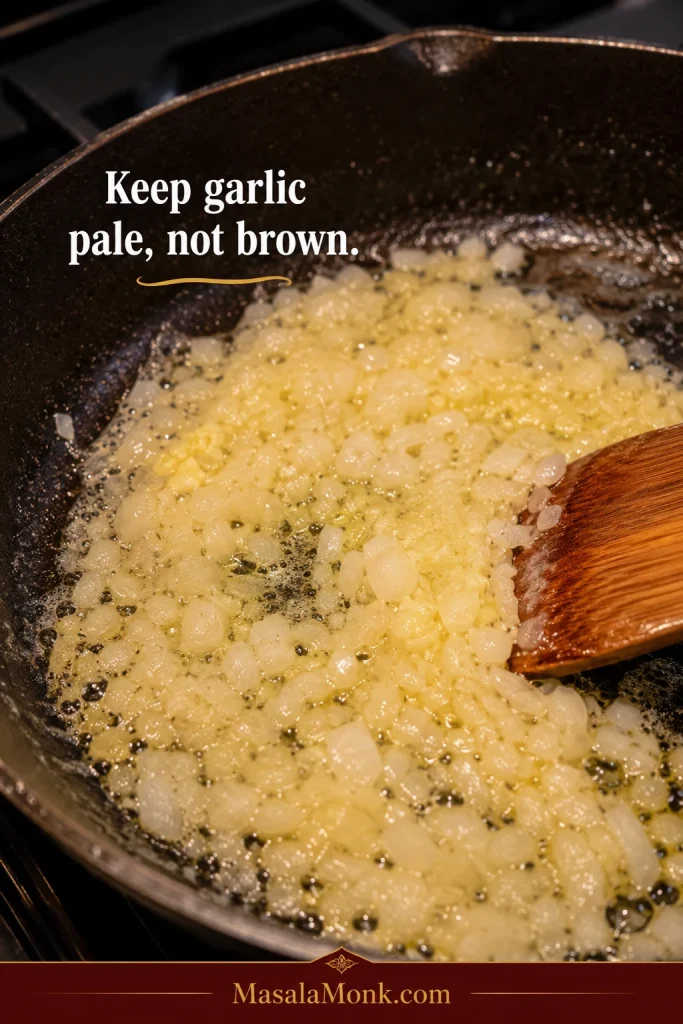
  2. Add the finely minced onion and cook for 3–4 minutes, until softened and glossy but not browned.
  3. Add the garlic and cook for 60–90 seconds, just until fragrant. Keep it pale, not brown.
  4. Stir in the Cajun seasoning, Old Bay, smoked paprika, onion powder, brown sugar, and optional cayenne or red pepper flakes.
  5. Cook the spices in the butter for 30–60 seconds, until the butter smells toasty and the spices look absorbed into the butter, not sandy on the surface.
  6. Slowly whisk in the reserved boil liquid, stock, or broth.
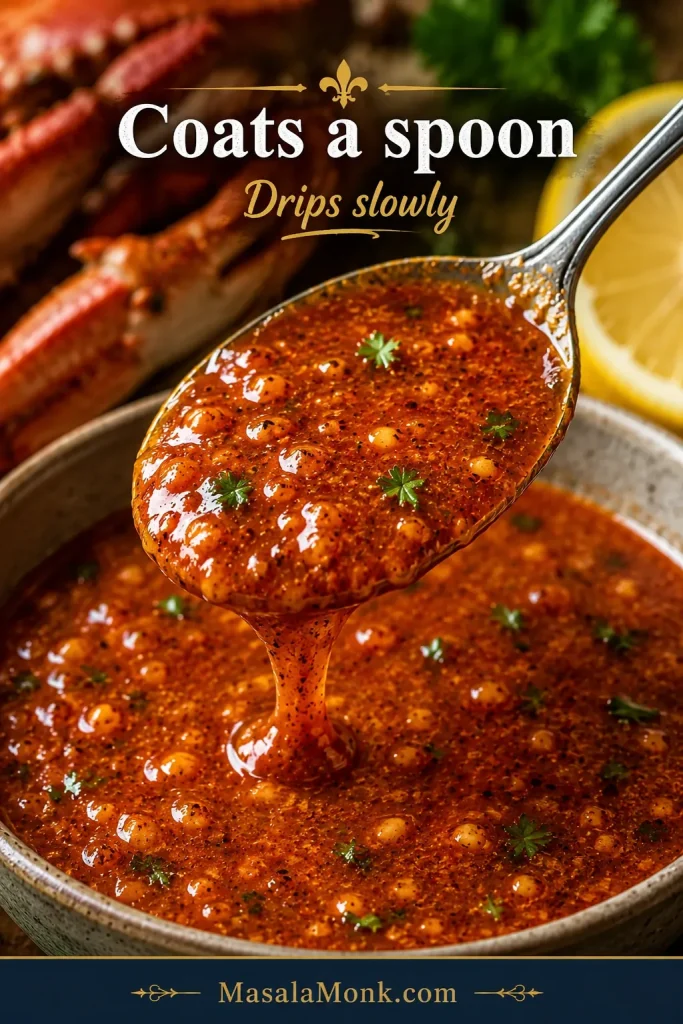
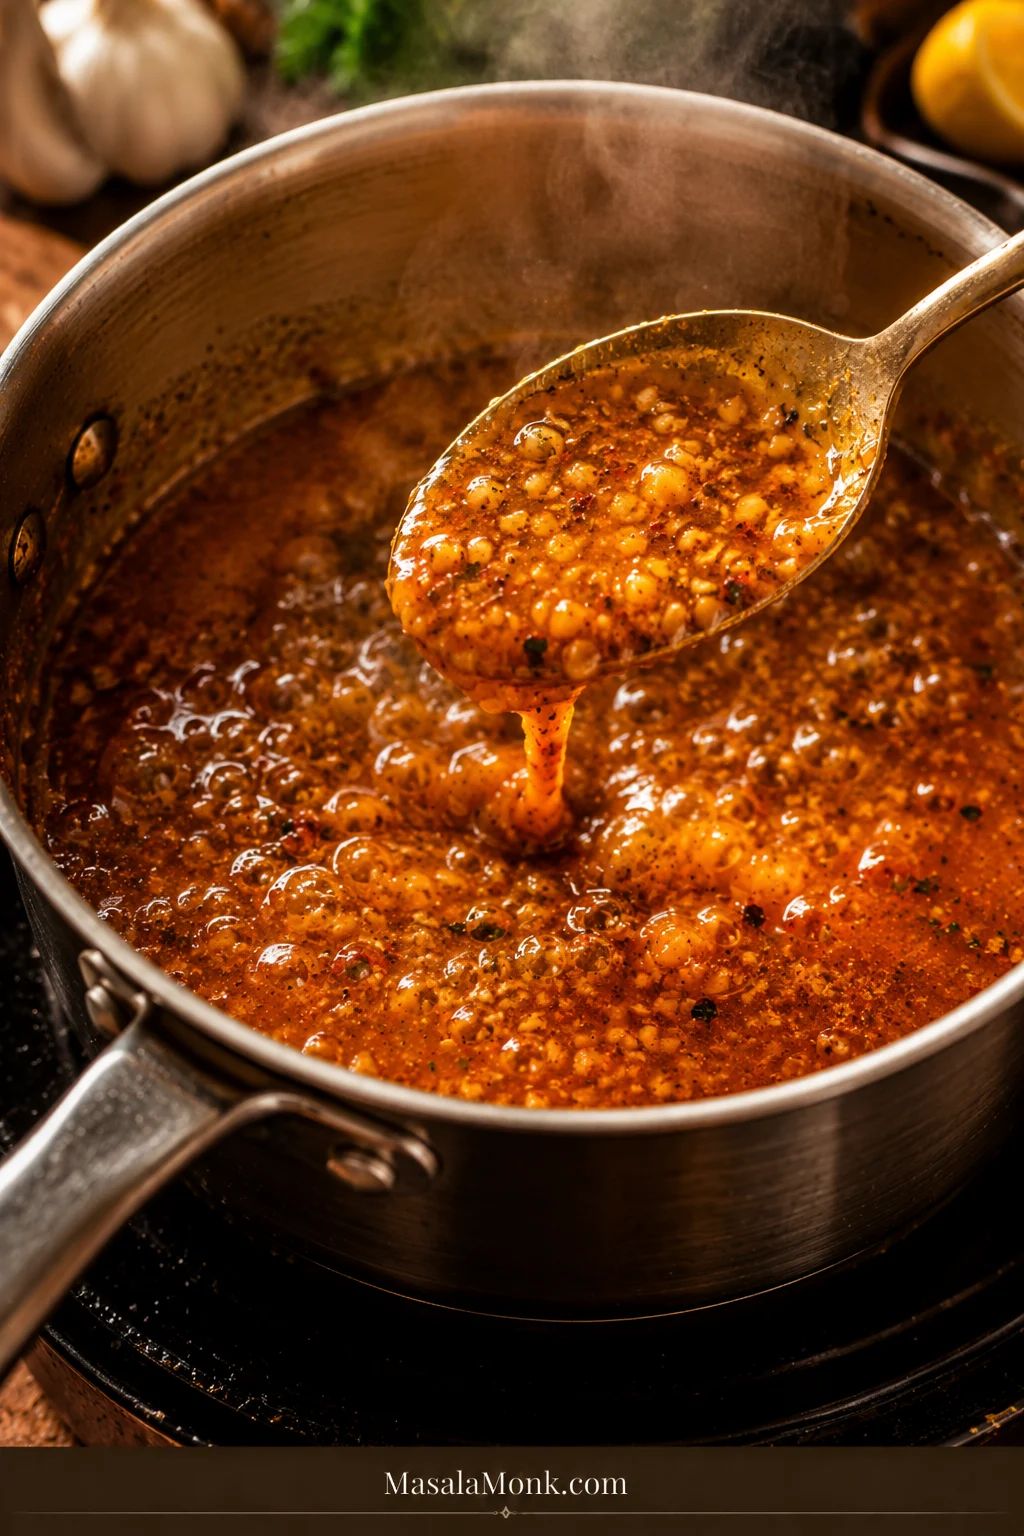
  7. Let the sauce gently simmer for 3–5 minutes, stirring often, until glossy and spoonable.
  8. Turn off the heat. Stir in the lemon juice, lemon zest, hot sauce, and parsley.
  9. Taste and adjust. Add more lemon for brightness, broth for a looser sauce, butter for richness, or hot sauce for more heat.
  10. Taste with one shrimp, potato, or piece of corn before coating the full seafood tray.
  11. Serve warm as a dipping sauce, pour-over sauce, or seafood boil bag sauce.

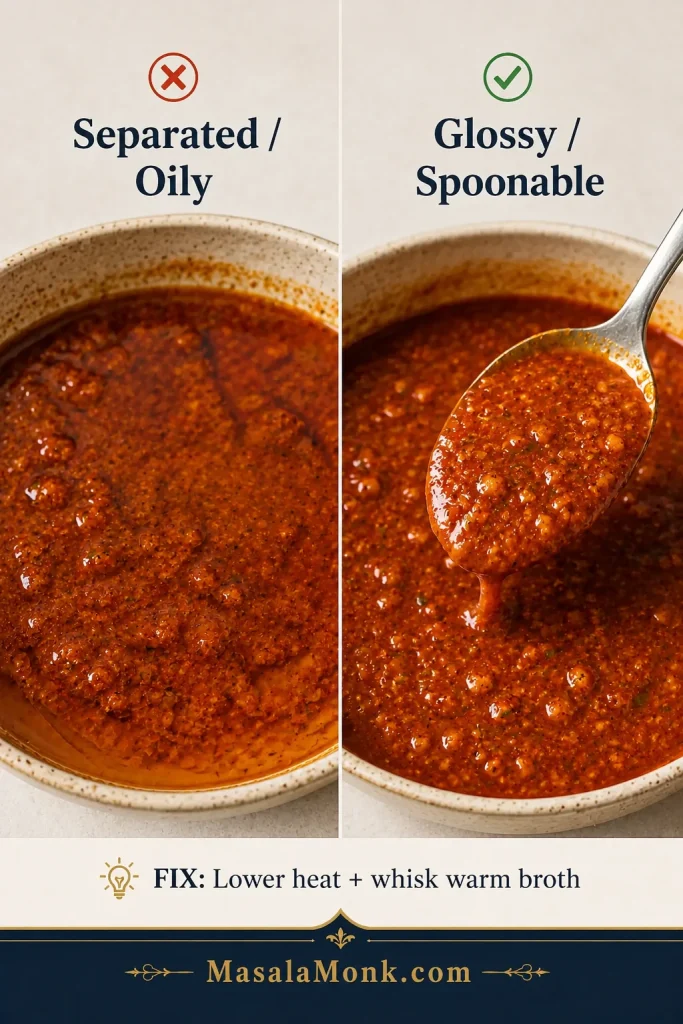
Important: Keep the sauce at a gentle simmer and it stays glossy. A hard boil can make the butter separate and the garlic taste harsh.

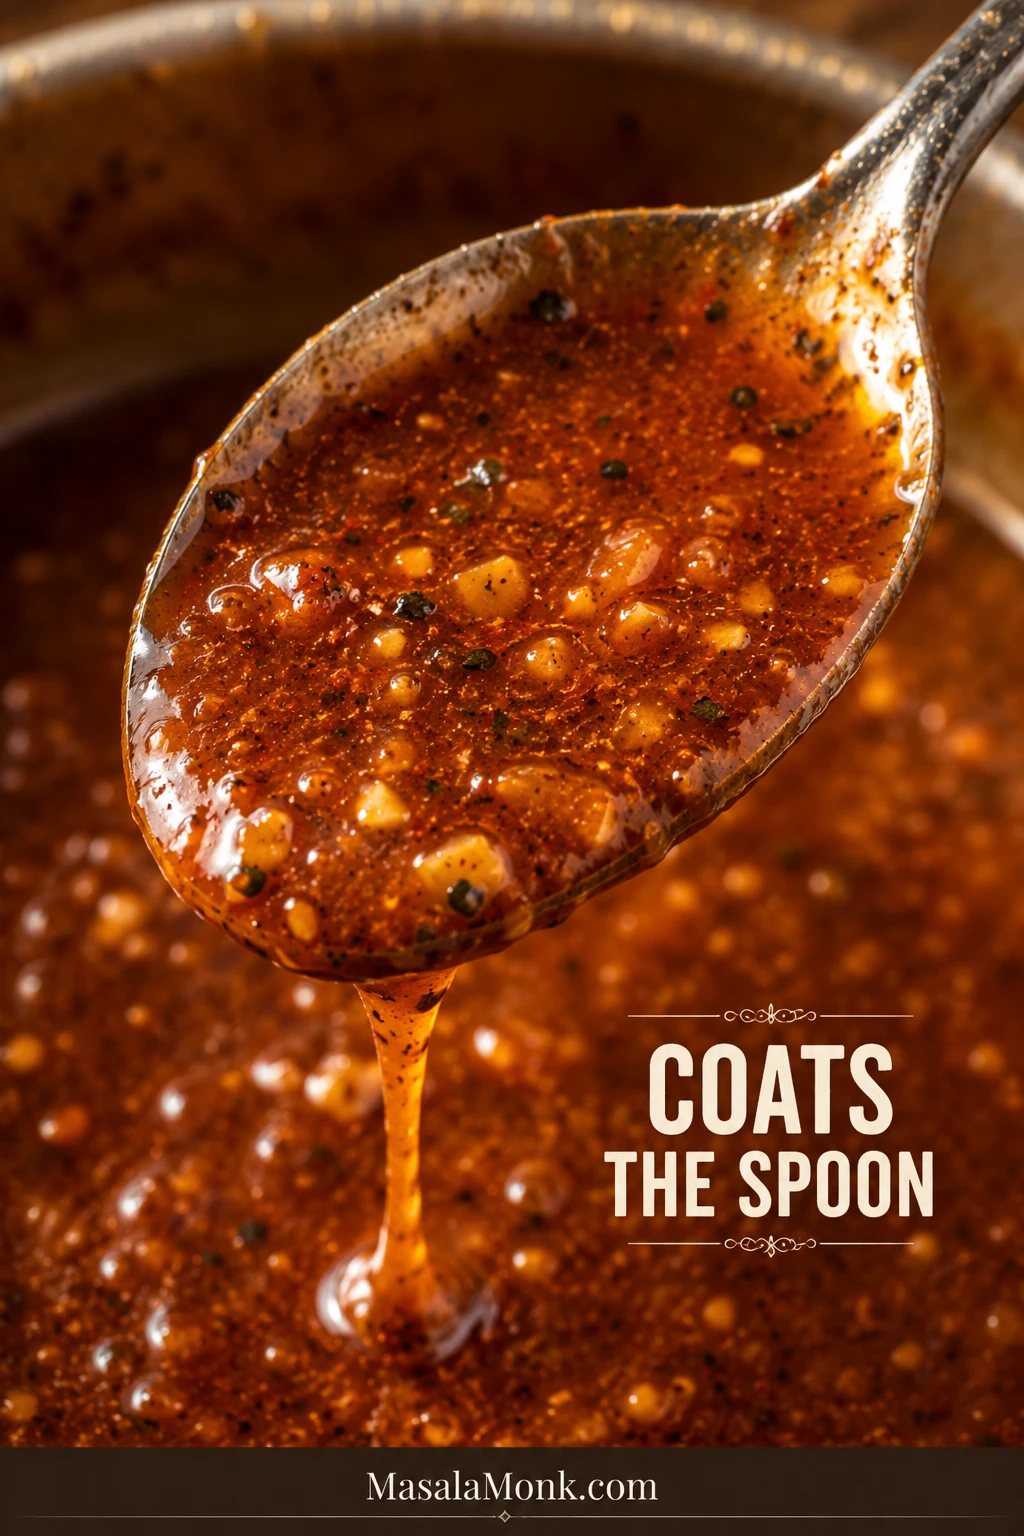
The sauce should look bold before it tastes aggressive: red-orange, glossy, garlicky, and loose enough to spoon over the tray without drowning the seafood.

Seafood Boil Sauce Success Cues

Use these cues while cooking. They matter more than the clock.

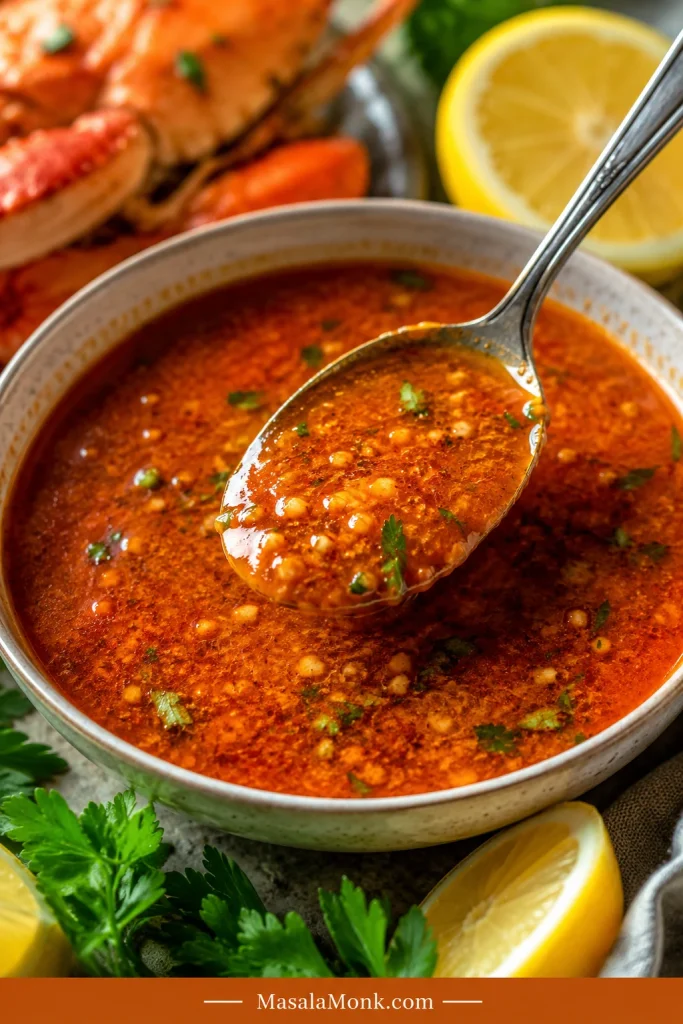
A close-up bowl of red-orange garlic butter Cajun seafood boil sauce with parsley, garlic, and lemon.
The finished sauce should look glossy and spoonable, with visible spice and garlic but no greasy separation.
CueWhat You Want
GarlicFragrant and pale, not brown
OnionSoft, glossy, and slightly translucent
SpicesToasty and buttery, not dry or sandy
Sauce textureGlossy and spoonable, not broken or greasy
SaltBold and savory, not sharp or harsh
HeatWarm Cajun spice first, extra fire only if you want it
LemonBright enough to cut the butter
Finished sauceButtery, garlicky, smoky, lemony, and easy to drizzle

When the sauce hits these cues, it tastes big without tasting heavy — rich enough for crab, bright enough for shrimp, and loose enough to find its way into the corn and potatoes.

Adjust, Fix and Serve the Sauce

Use the rest of this guide to choose the right texture, adjust the flavor, fix common problems, and store leftovers safely.

Dipping Sauce vs Pour-Over Sauce

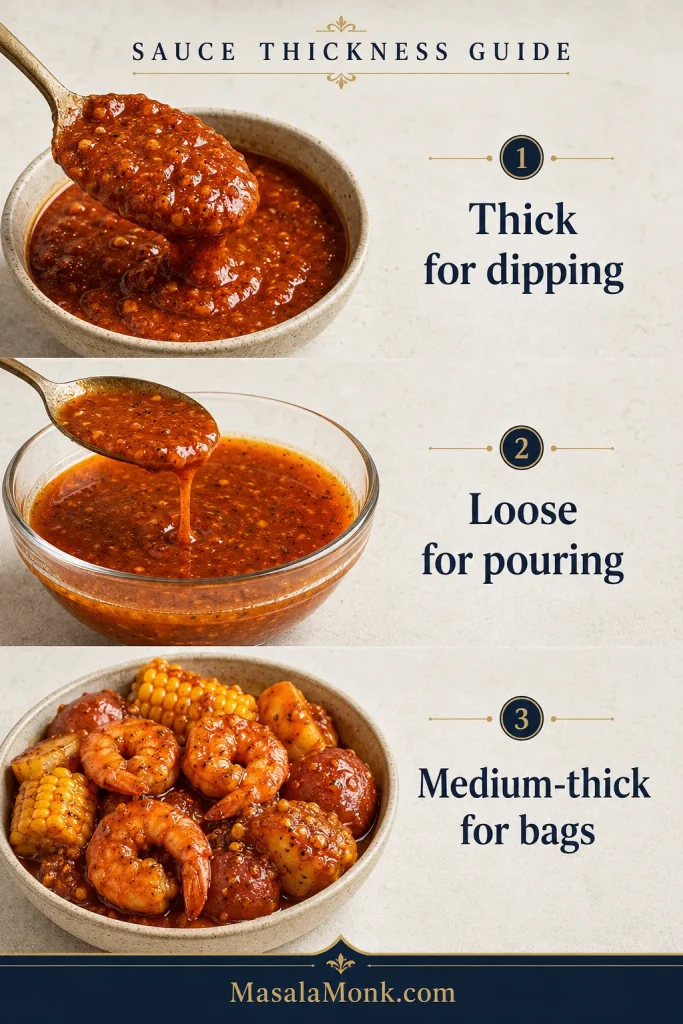
This is where the sauce becomes yours. Some people want a thick bowl of butter for crab legs; others want a loose, glossy sauce that runs into the corn and potatoes. The same base can do both.

Seafood boil sauce thickness guide showing thick dipping sauce, loose pour-over sauce, and medium-thick bag sauce.
Thickness decides the job, so keep it thicker for dipping, looser for pouring, and medium-thick for bags.
UseTextureHow to Adjust
Dipping sauceThick, buttery, clingyUse ¼ cup / 60 ml liquid and simmer slightly longer.
Pour-over sauceGlossy, loose, spoonableUse ½ cup / 120 ml liquid.
Seafood boil bag sauceMedium-thick, coating sauceUse ½–¾ cup / 120–180 ml liquid.
Big tray sauceLooser and more spreadableUse ¾–1 cup / 180–240 ml liquid.
Crab leg dipping sauceRich and butteryKeep it thicker and serve lemon wedges on the side.

Crab people usually want the thick bowl. Shrimp, corn, and potatoes usually want the loose spoon-over version. If your table is divided, make the base sauce medium-thick, then loosen half for pouring and keep half rich for dipping.
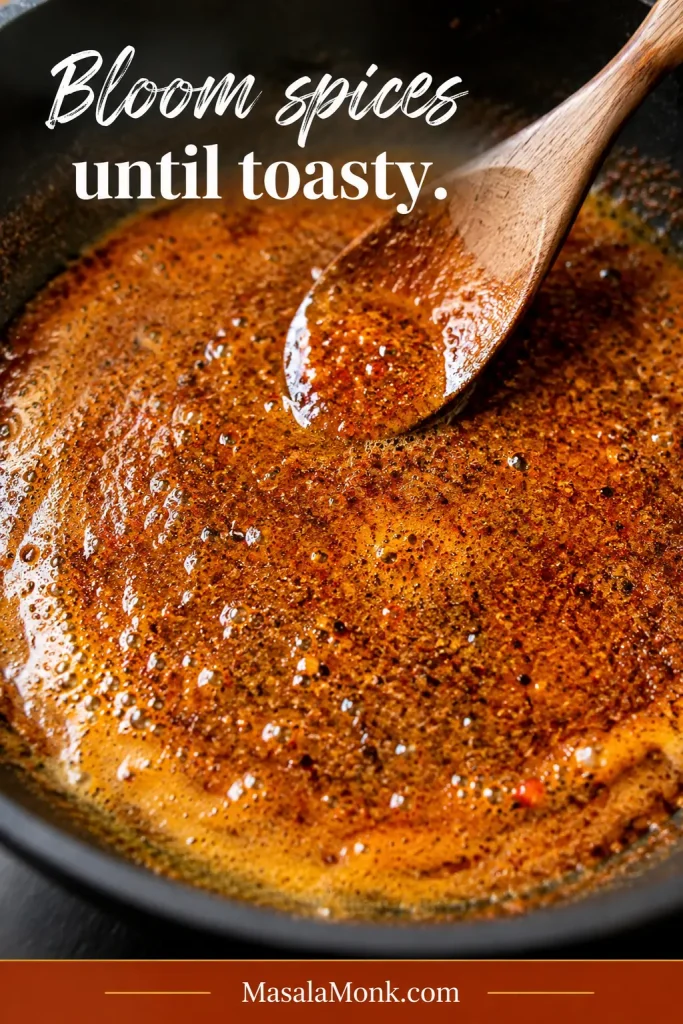
Think of the broth or boil liquid like a volume knob. Add a little for a thick dip. Add more for a sauce that covers a whole tray.

How Much Seafood Boil Sauce Do You Need?

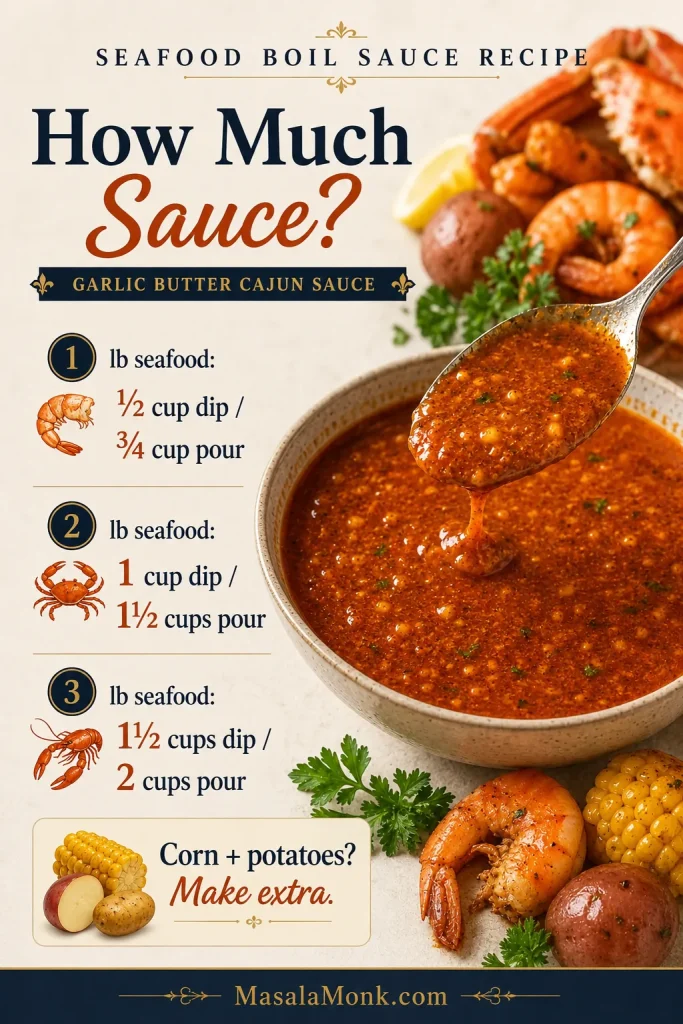
The only sad seafood boil sauce is the one that runs out too early. If the tray has corn and potatoes, make extra. They absorb sauce faster than the seafood does.

Guide showing how much seafood boil sauce to make by pounds of seafood.
Corn and potatoes always change the math, so make extra when the tray has more than just shrimp or crab.

By Seafood Weight

Seafood AmountDipping SaucePour-Over Sauce
1 lb / 450 g seafood½ cup / 120 ml¾ cup / 180 ml
2 lb / 900 g seafood1 cup / 240 ml1½ cups / 360 ml
3 lb / 1.35 kg seafood1½ cups / 360 ml2–2¼ cups / 480–540 ml
5 lb / 2.25 kg seafood2½ cups / 600 ml3–4 cups / 720–960 ml
Party trayMake extraServe extra on the side

By Number of People

PeopleSauce for DippingSauce for Pouring/Tossing
2 people½–¾ cup / 120–180 ml1 cup / 240 ml
4 people1–1½ cups / 240–360 ml2 cups / 480 ml
6 people1½–2 cups / 360–480 ml3 cups / 720 ml
8 people2–3 cups / 480–720 ml4 cups / 960 ml

This recipe makes about 2 cups / 480 ml sauce. That is enough for about 2½–3 lb / 1.1–1.35 kg seafood as a pour-over sauce, or more if you are mainly serving it for dipping.

Extra sauce never feels like a mistake at a seafood boil. Running out does.

Once you know how thick the sauce should be and how much to make, the next step is understanding why the balance works.

Why This Seafood Boil Sauce Works

The flavor works because it balances richness, garlic, heat, salt, sweetness, and acidity.

Butter gives the sauce body. Garlic makes it bold and fragrant. Cajun seasoning brings peppery heat and Southern-style depth. Old Bay adds the classic seafood-boil flavor many people expect with crab, shrimp, and crawfish. Smoked paprika gives the butter sauce its warm red-orange color. Lemon keeps it from feeling heavy.

The small amount of brown sugar is not there to make the sauce sweet. It rounds out salt and spice, especially if your seasoning blend is intense. A little broth or reserved boil liquid turns plain melted butter into something glossy, spoonable, and better connected to the seafood.

When it is right, the sauce should taste buttery first, then garlicky, smoky, salty-spicy, and finally bright from lemon.

The method matters too. Garlic needs gentle heat, spices taste better when they bloom briefly in butter, and lemon tastes brighter when added near the end.

That balance is why the sauce can be bold enough for sausage and potatoes but still bright enough for shrimp, crab, and lobster.

Ingredients You Need

The recipe card gives you the amounts. This section explains what each ingredient does and how to adjust if your seasoning blend is stronger, smokier, hotter, or saltier than expected.

Ingredients for seafood boil sauce including butter, garlic, Cajun seasoning, Old Bay, lemon, parsley, and broth.
Every ingredient earns its place here, because Cajun seasoning, Old Bay, garlic, lemon, and broth all help the sauce stay bold without getting heavy.

Butter

Unsalted butter gives you the best control because seafood boil seasonings can be salty. If you only have salted butter, make the sauce first, then taste before adding anything salty at the end.

For a richer party-style version, whisk in 2–4 extra tablespoons of butter after the sauce simmers.

Garlic

Fresh garlic gives this Cajun butter sauce its best flavor. Minced garlic gives a rustic texture; grated garlic or garlic paste makes the sauce smoother and more restaurant-style.

Keep the garlic pale and fragrant. Dark brown garlic can taste bitter.

Onion

Onion is optional, but it gives the sauce body and natural sweetness. Mince it very finely so it melts into the butter, or grate it for a smoother finish.

Cajun Seasoning

Cajun seasoning gives the sauce its bold, peppery, spicy base. Different brands vary a lot, so taste yours before you add extra heat or salt.

Old Bay Seasoning

Old Bay gives the sauce that classic seafood flavor. It works especially well with shrimp, crab legs, crawfish, potatoes, and corn.

No Old Bay in the pantry? You can still make a good boil sauce with Cajun seasoning, smoked paprika, garlic powder, onion powder, and a small pinch of celery salt or celery seed.

Smoked Paprika

Smoked paprika adds color, warmth, and a gentle smoky note. It helps create the deep red-orange look people associate with Cajun seafood butter.

Brown Sugar

Brown sugar is optional but useful. It rounds out salt, spice, and heat without making the sauce taste sweet, and it helps create a slightly glossy finish.

Broth, Seafood Stock, or Reserved Boil Liquid

This is what changes the sauce from a thick buttery dip into something you can spoon over a whole tray. Reserved boil liquid, stock, or broth loosens the sauce so it pours instead of sitting like straight melted butter.

Reserved boil liquid gives the strongest seafood-boil flavor because it already carries seasoning from the pot. If it tastes very salty, use half boil liquid and half low-sodium broth or water.

Lemon Juice and Lemon Zest

Lemon cuts through the butter and brightens the whole sauce. Add lemon juice near the end so it tastes fresh. Lemon zest is optional, but it makes the sauce smell brighter.

Hot Sauce, Cayenne, or Red Pepper Flakes

Hot sauce gives smoother heat. Cayenne adds stronger fire. Red pepper flakes bring visible spicy texture. Add heat slowly because it is much easier to make the sauce spicier than it is to calm it down.

Equipment

  • Large skillet or medium saucepan
  • Whisk
  • Measuring cups and spoons
  • Microplane, garlic press, or sharp knife
  • Heatproof spatula or spoon
  • Optional immersion blender for a smoother sauce

A skillet gives the spices room to bloom and lets the sauce reduce slightly; a medium saucepan works well for smaller batches or easier pouring.

How to Make It Glossy, Not Greasy

The recipe card above has the short version. These details help if you want a smoother, glossier, more controlled sauce.
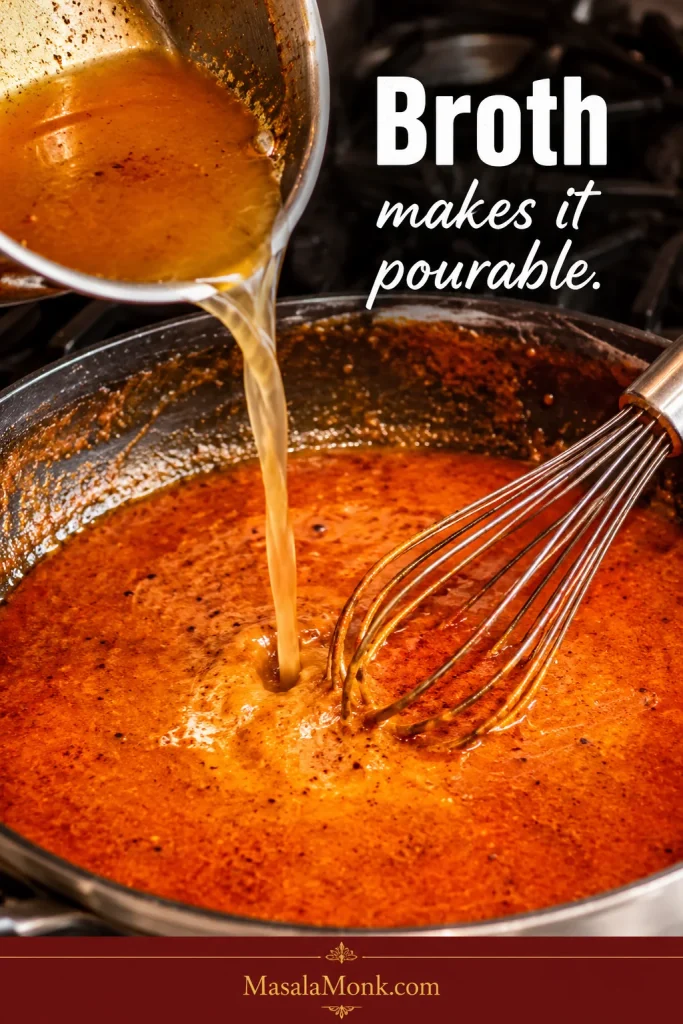
Spoonable Sauce Texture

Before you pour the sauce over seafood, check the spoon. A glossy sauce should coat it lightly, then drip back slowly instead of running like water or sitting like straight melted butter.

Seafood boil sauce coating a spoon and dripping slowly back into the bowl.
If it coats the spoon and drips slowly, the sauce is in the right place: clingy enough for seafood, but not oily or thin.

1. Melt the Butter Gently

Melt the butter over low to medium-low heat. Starting gently keeps the butter from separating and gives the garlic time to flavor the sauce without burning.

Butter melting in a skillet for seafood boil sauce.
Start low and gentle, because butter should melt slowly before the garlic and spices go in.

2. Soften the Onion and Garlic

Cook the onion until soft and glossy, then add the garlic for 60–90 seconds. The garlic should smell fragrant but stay pale.

Garlic and onion cooking gently in melted butter for seafood boil sauce.
Once the onion softens and the garlic stays pale, the base turns sweeter and the sauce stays out of bitter territory.

3. Bloom the Seasonings

Stir the Cajun seasoning, Old Bay, smoked paprika, onion powder, brown sugar, and optional heat into the butter. Cook briefly until the butter turns red-orange and the spices look absorbed, not dry or dusty.

Cajun seasoning, Old Bay, and smoked paprika blooming in melted butter.
Blooming the spices in butter is what gives seafood boil sauce its deep red-orange color and that toasty Cajun flavor.

4. Loosen and Finish

Whisk in the broth or reserved boil liquid slowly, then simmer gently until glossy. Turn off the heat before adding lemon juice, lemon zest, hot sauce, and parsley.

Broth being whisked into Cajun garlic butter seafood boil sauce.
As soon as the broth goes in, the sauce loosens into a glossy pour-over texture that works better for shrimp, crab, and vegetables.

Finish With Lemon and Parsley

After the sauce is glossy, take it off the heat before adding lemon and parsley. That small timing choice keeps the seafood boil sauce brighter and fresher.

Lemon juice and parsley being added to seafood boil sauce.
Lemon and parsley go in at the end, because that final bright note keeps the sauce fresh instead of flat.

5. Test Before You Pour

Dip one shrimp, one potato, or one piece of corn into the sauce before coating the full tray. Fix the sauce in the pan, not after it has already coated three pounds of seafood.

Do You Add Seafood Boil Sauce Before or After Cooking?

This is a finishing sauce, not the cooking liquid. Let the boil season and cook the seafood, then let the garlic butter sauce coat it.

Add this garlic butter Cajun sauce after the seafood is cooked and drained. The sauce is for pouring, tossing, bagging, or dipping after cooking.

If you are unsure whether the seafood itself is fully cooked, FoodSafety.gov’s safe minimum internal temperatures chart is a useful reference for fish and shellfish.

The best method is simple: cook the seafood, drain it well, taste the sauce, then spoon or toss the warm sauce over the hot seafood. Keep extra sauce on the side for dipping crab, shrimp, corn, and potatoes.

Best Sauce for Shrimp, Crab, Crawfish and More

The same base works across the tray, but each seafood and side likes a slightly different sauce texture.

Guide showing the best seafood boil sauce texture for shrimp, crab, crawfish, lobster, corn, and potatoes.
Shrimp usually wants a looser, lemon-bright sauce, while crab does better with a thicker, buttery finish that stays on the meat.
FoodBest Sauce StyleAdjustment
ShrimpPour-over or tossAdd slightly more lemon and keep the sauce looser.
Crab legsDipping sauceKeep it thicker, buttery, and rich.
CrawfishSpicy Cajun sauceAdd extra Cajun seasoning, paprika, or hot sauce.
Lobster tailsGarlic lemon butterUse less Cajun, more lemon and parsley.
Mussels and clamsLoose pour-over sauceAdd more broth so it reaches the shells.
CornPour-over sauceMake it looser so it soaks into the kernels.
PotatoesPour-over sauceAdd enough broth so the sauce coats well.
SausageSmoky spicy sauceSmoked paprika and Cajun seasoning work well.
Boiled eggsMedium-thick sauceSpoon sauce over just before serving.

For Shrimp

Shrimp tastes best with a sauce that is garlicky, lemony, and not too heavy. Keep the texture slightly loose so the shrimp stays juicy.

For another shrimp dinner built around garlic, butter, and lemon, this shrimp scampi recipe keeps the same bright butter-sauce idea in a pasta-friendly direction.

For Crab Legs

Crab legs are perfect for a thicker dipping sauce. Keep it buttery and clingy, then serve extra lemon on the side so each bite can be brightened at the table.

For Crawfish

Crawfish can handle stronger heat. Add extra Cajun seasoning, hot sauce, cayenne, or red pepper flakes if you want a spicy crawfish boil sauce.

For Lobster

Lobster is sweeter and more delicate than crawfish or sausage, so go easier on the Cajun seasoning. More garlic, lemon, parsley, and butter usually works better than extra heat.

For a lobster meal that stays buttery but much simpler, this lobster roll recipe covers both the warm buttered Connecticut style and the cool Maine-style version.
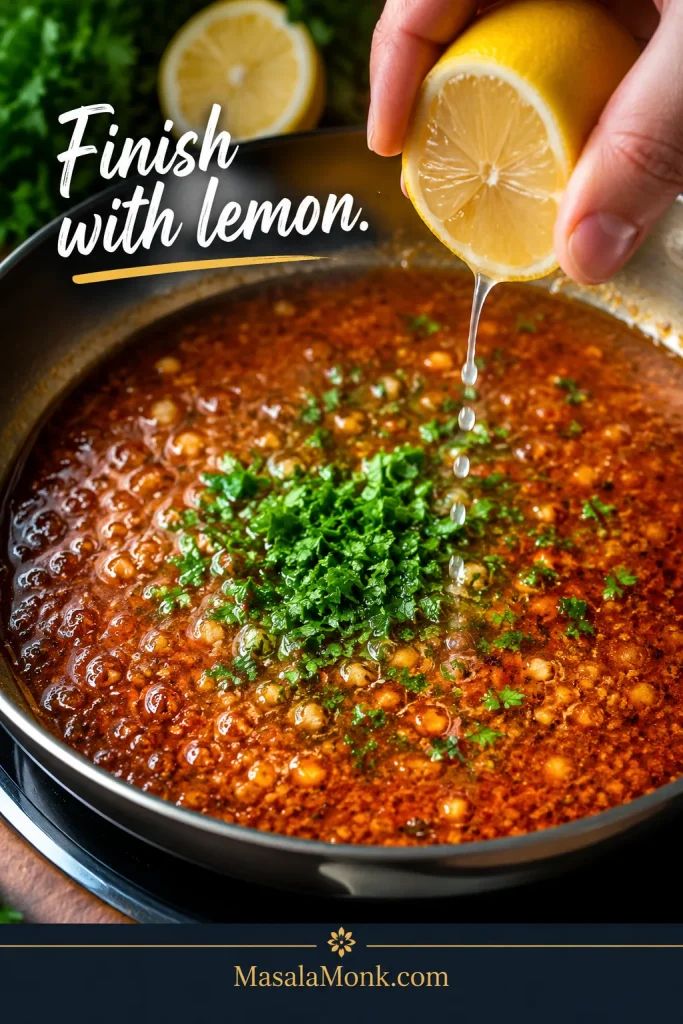
For Corn and Potatoes

Corn and potatoes need a looser sauce. Add more broth or reserved boil liquid so the sauce can soak in instead of sitting on top.

Cajun vs Old Bay Seafood Boil Sauce

Cajun seasoning and Old Bay are both common in seafood boil sauce, but they do different jobs. Think of Cajun seasoning as the heat and depth, and Old Bay as the classic seafood-boil note. Together they make the sauce taste fuller, but together they can also make it salty fast.

Do not increase Cajun seasoning and Old Bay heavily at the same time unless you know both blends are low-salt.

Cajun versus Old Bay seafood boil sauce guide.
Cajun seasoning brings heat and depth, while Old Bay brings that classic seafood flavor, so the two work best when the salt stays under control.
  • For more Cajun flavor: Increase Cajun seasoning slightly, add smoked paprika, and finish with hot sauce.
  • For more Old Bay flavor: Increase Old Bay, reduce Cajun, and keep the lemon bright.
  • For a less salty sauce: Use unsalted butter, low-sodium broth, less Old Bay, and more lemon.
  • If you have no Old Bay: Use Cajun seasoning, smoked paprika, garlic powder, onion powder, and a tiny pinch of celery salt or celery seed.
  • If you have no Cajun seasoning: Use Old Bay, smoked paprika, garlic powder, onion powder, black pepper, and cayenne.

Seafood Boil Sauce Variations

Think of the recipe as one base sauce with two kinds of choices: texture choices for how you serve it, and flavor choices for how spicy, garlicky, or Old Bay-forward you want it.

Want the Sauce…Do This
More garlickyUse 10–12 cloves garlic or grated garlic.
More CajunAdd extra Cajun seasoning and smoked paprika.
More Old BayIncrease Old Bay and reduce Cajun seasoning.
MildSkip cayenne, use mild Cajun seasoning, add more broth and lemon.
SpicyAdd cayenne, hot sauce, red pepper flakes, or spicy Cajun seasoning.
Thicker for dippingUse ¼ cup / 60 ml liquid.
Looser for a trayUse ¾–1 cup / 180–240 ml liquid.
Restaurant-style sauceUse grated onion, extra paprika, brown sugar, less liquid, and optional blending.

Garlic Butter Seafood Boil Sauce

A stronger garlic butter version starts with 10 cloves of garlic and slightly less Cajun seasoning. Keep the lemon juice strong and add parsley at the end. This version is excellent for crab legs, lobster tails, and shrimp.

Spicy Seafood Boil Sauce

For a spicier sauce, add cayenne, red pepper flakes, hot sauce, spicy Cajun seasoning, or hot paprika. Add heat slowly and taste after simmering before adding more.

Mild Seafood Boil Sauce

The mild version uses mild Cajun seasoning, slightly less Old Bay, no cayenne, and extra broth and lemon. It is better for kids, mild eaters, lobster, and anyone who wants buttery garlic flavor without too much heat.

Old Bay Seafood Boil Sauce

An Old Bay-forward sauce works best when Old Bay increases to 1 tablespoon and Cajun seasoning drops to 1 teaspoon. Keep the butter, garlic, lemon, and parsley the same.

Lemon Pepper Seafood Boil Sauce

Add 1–2 teaspoons lemon pepper seasoning and increase the lemon zest. Reduce extra salt because lemon pepper blends can be salty. This version works beautifully with shrimp, lobster, and crab.

Creamy Seafood Boil Sauce

A creamy version needs only 2–4 tablespoons of cream at the end over low heat. This makes the sauce richer and softer, but it is less traditional than garlic butter Cajun sauce.

Restaurant-Style Sauce Adjustments

This is the part that makes the tray look like something people want to gather around. Restaurant-style seafood boils feel different because the sauce arrives hot, glossy, and clingy. It coats the shells, runs into the potatoes, stains the corn, and still leaves enough at the bottom for dipping.

  • For redder color, add a little more smoked paprika.
  • For deeper flavor, bloom the spices a little longer over low heat.
  • For a clingier sauce, use less broth.
  • For smoother texture, use grated garlic and grated onion.
  • For a glossy finish, add 1–2 teaspoons brown sugar.
  • For a smooth restaurant-style sauce, blend briefly with an immersion blender.

Taste Adjustment Ladder

This is the part where the sauce stops being a formula and starts tasting like yours. Most fixes come back to the butter-broth-lemon rule: butter softens, broth loosens, and lemon brightens.

If the Sauce Tastes…Add This
Too saltyUnsalted butter first, then warm broth, then lemon.
Too buttery or heavyLemon juice first, then a splash of broth.
Too thinSimmer a few minutes longer.
Too thickWarm broth, seafood stock, or reserved boil liquid.
Too spicyButter and broth, then a tiny pinch of brown sugar if needed.
Too flatLemon first, then Cajun seasoning or Old Bay.
Too sharpA small knob of butter or a tiny pinch of brown sugar.
Not garlicky enoughA small amount of garlic powder, or gently cooked grated garlic.
Not smoky enoughA little more smoked paprika.

Make one adjustment at a time, then taste again. This keeps the sauce from swinging too far in the other direction.

Quick 2-Minute Seafood Boil Sauce

When the seafood is already cooked and you just need something buttery fast, this shortcut version gets you there.

IngredientAmount
Melted butter½ cup / 113 g
Old Bay or Cajun seasoning1–2 teaspoons
Garlic powder or 1 minced garlic clove½ teaspoon garlic powder or 1 clove
Lemon juice1 tablespoon / 15 ml
Hot sauceOptional, to taste

This quick version is not as deep or layered as the full sauce, but it works well as a fast seafood dipping sauce when the seafood is already cooked. For better flavor, warm everything together gently for 1–2 minutes instead of just stirring it cold.

When you want a cold, creamy seafood dip instead of warm butter, this homemade tartar sauce recipe fits that lane better.

Substitutions and Swaps

The base is forgiving. Missing one ingredient does not ruin the sauce; it just changes which direction you lean.

Missing IngredientUse Instead
No Old BayCajun seasoning + smoked paprika + pinch of celery salt or celery seed
No Cajun seasoningOld Bay + smoked paprika + garlic powder + onion powder + cayenne
No seafood boil liquidSeafood stock, low-sodium chicken broth, vegetable broth, beer, or water with lemon
No fresh garlicGarlic paste or garlic powder
No onionSkip it, or use ½ teaspoon onion powder
Not enough butterUse part butter and part olive oil. If using no butter, use vegan butter or olive oil, but expect a lighter sauce.
No lemonLime juice or a small splash of vinegar
No brown sugarHoney, maple syrup, or skip it
No parsleyChives, green onion, or skip it

If you are using store-bought seafood boil seasoning packets, start with less seasoning than you think you need. Packets can be very salty. Use unsalted butter, taste before adding salt, and loosen the sauce with broth or lemon juice if it tastes too intense.

How to Toss and Serve It Restaurant-Style

This is the point where the sauce becomes the meal. The crab legs get glossy, the shrimp pick up the garlic butter, the corn turns red-orange in the grooves, and the potatoes catch everything the seafood leaves behind.

A restaurant-style finish is not about making the sauce complicated. It is about timing, texture, and serving it while everything is still hot and glossy.

Restaurant-Style Seafood Boil Sauce Finish

Use the sauce while it is warm and glossy, then coat the seafood in layers so the tray looks generous without turning watery.

Restaurant-style seafood boil tray with shrimp, crab, corn, potatoes, sausage, and glossy garlic butter sauce.
A great seafood boil tray looks glossy and generous, with enough sauce to coat the seafood and leave some behind for dipping.
  • Warm the seafood before saucing. Cold seafood makes butter firm up quickly.
  • Drain the seafood well so water does not dilute the sauce.
  • Toss or spoon in layers instead of dumping all the sauce at once.
  • Keep extra sauce warm on the side for dipping.
  • Add parsley and lemon at the end so the tray looks and tastes fresh.
  • Serve immediately. Garlic butter sauce is at its best while warm and glossy.

Seafood Boil Bag Sauce

For seafood boil bag sauce: use the medium-thick texture. Add cooked seafood and warm sauce to the bag, seal carefully, and toss until everything is coated. The sauce should move when tossed, coat the shells red-orange, and leave a little buttery pool at the bottom for dipping. If it is too watery, it will pool instead of clinging to shrimp, crab, corn, and potatoes.

Seafood boil bag with shrimp, crab, corn, and potatoes coated in red-orange garlic butter sauce.
Medium-thick is the sweet spot for seafood boil bags, because the sauce needs to move when tossed and still coat every shell.

Common Mistakes to Avoid

Most sauce problems are easier to fix in the pan than on the tray. Use this as a quick check before the sauce goes over the seafood.

  • Starting too salty: Use unsalted butter when you can, and taste before adding any extra salt.
  • Using heat that is too high: Low to medium-low heat keeps the garlic pale and the butter glossy.
  • Skipping the taste test: Try the sauce with one shrimp, potato, or piece of corn before coating the full tray.
  • Pouring sauce over watery seafood: Drain the seafood well so the sauce stays bold instead of diluted.
  • Using one texture for every purpose: Dipping, pouring, and seafood boil bags all need slightly different thickness.

Troubleshooting Seafood Boil Sauce

Butter sauces can go sideways quickly, but you usually do not need to start over. Catch the problem while the sauce is still in the pan, and the fix is usually simple.

Comparison of separated oily seafood boil sauce and glossy spoonable seafood boil sauce.
When the sauce looks oily or split, lower the heat and whisk in warm broth, because glossy always wins over greasy.
ProblemLikely CauseFix
Too saltySalted butter, salty Cajun seasoning, too much Old BayAdd unsalted butter, broth, lemon juice, or a little brown sugar.
Too spicyToo much cayenne, hot sauce, or spicy Cajun seasoningAdd butter, broth, lemon, or a little sweetness.
Too oilyToo much butter, not enough liquidWhisk in warm broth slowly.
Too thinToo much broth or boil liquidSimmer uncovered for a few minutes.
Sauce separatedHeat too high or liquid added too fastLower the heat and whisk in warm liquid gradually.
Bitter garlicGarlic browned or burnedCook garlic gently for only 60–90 seconds.
Grainy spicesSpices were not bloomed or too much dry seasoning was addedBloom spices in butter and loosen with broth.
Not flavorful enoughToo much liquid or weak seasoningAdd Cajun seasoning, Old Bay, lemon, garlic, or hot sauce slowly.

How to Fix Salty Seafood Boil Sauce

Do not add water first. Water can make the sauce thinner without fixing the flavor. Instead, add unsalted butter, warm broth, lemon juice, or a small pinch of brown sugar. If you are serving the sauce with a full seafood boil, extra potatoes and corn can also help absorb some of the salty flavor on the tray.

How to Fix Separated Seafood Boil Sauce

Lower the heat. Whisk in 1–2 tablespoons of warm broth at a time until the sauce looks glossy again. If it still looks broken, use an immersion blender for a few seconds.

How to Make It Thicker

Simmer it uncovered for a few minutes. You can also use less broth next time or add a little more butter. For a thicker dipping sauce, start with only ¼ cup / 60 ml liquid.

How to Make It Thinner

Whisk in warm broth, seafood stock, reserved boil liquid, or water with lemon juice. Add a little at a time until the sauce pours the way you want.

How to Store and Reheat the Sauce

Do not worry if the sauce turns solid in the fridge. That is just the butter doing what butter does. The texture comes back when the sauce is reheated and whisked.

Refrigerating

Store unused sauce in an airtight container in the refrigerator for 4–5 days.

If the sauce has touched seafood, shells, fingers, or a shared dipping bowl, treat it like a seafood leftover. Cool it quickly, refrigerate it promptly, and use it within 1–2 days for best quality.

For broader leftover safety, the USDA’s leftovers and food safety guide is a useful reference.

Reheating

For clean, unused sauce, reheat gently in a saucepan over low heat, stirring often. Add a splash of broth, water, or reserved boil liquid if the sauce is too thick.

For sauce that has touched seafood or leftovers, reheat until steaming hot, ideally to 165°F / 74°C, then whisk to bring the texture back. A food thermometer is the safest way to check.

You can also microwave clean unused sauce in short bursts, stirring every 15–20 seconds. If reheating sauce with seafood leftovers, stir well and make sure the food is steaming hot throughout before serving.

Freezing

Freeze unused seafood boil sauce for up to 2–3 months. Thaw overnight in the refrigerator, then reheat gently over low heat. If the sauce separates slightly, whisk in warm broth or blend briefly with an immersion blender.

What to Serve With Seafood Boil Sauce

The best use is still the simplest: hot seafood, warm sauce, extra napkins, and something starchy to catch the butter.

Classic Seafood Boil Uses

  • Shrimp
  • Crab legs
  • Crawfish
  • Lobster tails
  • Mussels
  • Clams
  • Corn on the cob
  • Baby potatoes
  • Smoked sausage
  • Boiled eggs

Other Good Uses

  • Garlic bread
  • Rice
  • Roasted potatoes
  • Grilled corn
  • Roasted vegetables
  • Grilled fish
  • Pan-seared scallops
  • Salmon
  • Lemon wedges on the side

For other seafood dinners, this baked haddock recipe keeps the butter-and-lemon idea gentler, while this honey garlic salmon recipe goes sticky, sweet, and skillet-style.

For a full crispy seafood comfort plate instead of a boil, this fish and chips recipe pairs fried fish with tartar sauce, curry sauce, vinegar, and lemon.

For a full seafood boil tray, serve some sauce poured over the seafood and extra sauce on the side for dipping. For a cleaner dinner, serve the sauce in small bowls and let everyone dip shrimp, crab, corn, potatoes, and bread as they eat.

Frequently Asked Questions

What is seafood boil sauce made of?

It is usually made with butter, garlic, Cajun seasoning, Old Bay seasoning, lemon juice, paprika, hot sauce, and broth or reserved seafood boil liquid. Some versions also include onion, brown sugar, parsley, cayenne, or lemon pepper.

Is seafood boil sauce the same as garlic butter sauce?

It is a type of garlic butter sauce, but it is usually more seasoned. Basic garlic butter may only have butter, garlic, lemon, and herbs. Seafood boil sauce usually adds Cajun seasoning, Old Bay, paprika, heat, and sometimes broth or boil liquid.

Is this a Blove’s-style seafood boil sauce?

This is not a Blove’s copycat sauce. Blove’s-style seafood boil sauces are usually heavier, sweeter, and more spice-loaded, often with extra butter, garlic, hot sauce, Worcestershire, ginger, lemon pepper, and a larger seasoning mix. This version is a balanced Cajun garlic butter seafood boil sauce made for dipping, pouring, and tossing without hiding the flavor of the seafood.

Do you put seafood boil sauce in the pot?

No. It is better to add the sauce after the seafood is cooked and drained. This is a finishing sauce, not the cooking liquid.

What sauce goes with shrimp boil?

Garlic butter Cajun sauce is one of the best sauces for shrimp boil. Use a slightly looser sauce with lemon juice so the shrimp stays bright and juicy instead of feeling too heavy.

What sauce is best for crab boil?

A thick garlic butter seafood sauce is best for crab boil because it clings well to crab meat. Keep it buttery, garlicky, and slightly lemony, with Old Bay or Cajun seasoning for classic seafood flavor.

Is this good as a dipping sauce?

It is excellent as a dipping sauce. Reduce the liquid to about ¼ cup / 60 ml and simmer the sauce a little longer. This keeps it thick, buttery, and clingy.

Does it work as a pour-over sauce?

It works well as a pour-over sauce. Use about ½ cup / 120 ml broth or reserved boil liquid, then add more if you want it loose enough to cover a big tray of shrimp, crab, crawfish, corn, potatoes, and sausage.

How do I make it thicker?

Use less liquid or simmer the sauce uncovered for a few minutes. For a thick dipping sauce, start with ¼ cup / 60 ml liquid instead of ½ cup / 120 ml.

How do I make it less salty?

Add unsalted butter, warm broth, lemon juice, or a small pinch of brown sugar. If serving with a full seafood boil, potatoes and corn can also help absorb some of the salty flavor.

Can I make seafood boil sauce without Old Bay?

You can. Use Cajun seasoning, smoked paprika, garlic powder, onion powder, black pepper, and a tiny pinch of celery salt or celery seed if you have it. The flavor will be slightly different, but still good.

Can I make seafood boil sauce without Cajun seasoning?

You can. Use Old Bay, smoked paprika, garlic powder, onion powder, black pepper, and a little cayenne or hot sauce for heat.

Why did it separate?

The heat may have been too high, or the liquid may have been added too quickly. Keep the sauce at a gentle simmer and whisk in broth gradually. If it separates, lower the heat and whisk in a little warm liquid.

How much sauce do I need for a seafood boil?

For dipping, plan on about ½ cup / 120 ml sauce per 1 lb / 450 g seafood. For pouring over a seafood boil tray, plan on about ¾ cup / 180 ml per 1 lb / 450 g seafood. Make extra if you are serving corn, potatoes, sausage, and eggs because they absorb sauce.

Did You Make This Seafood Boil Sauce?

Once you make this sauce once, it stops feeling like an add-on. It becomes the thing that pulls the whole seafood boil together: the shrimp, the crab, the corn, the potatoes, the sausage, the bread at the end, and everyone reaching back for one more dip.

A piece of bread dipped into leftover garlic butter seafood boil sauce.
The final swipe of bread is the payoff, because the best seafood boil sauce always leaves one more bite at the bottom of the tray.

Taste it while it is warm, adjust it until it feels balanced, then pour it over the tray and serve extra on the side. That is the moment the meal comes together.

Did you make it thick for dipping, loose for pouring, or extra spicy for crawfish? Leave a rating and a comment with your seafood mix, sauce thickness, and heat level so other readers can adjust their own seafood boil sauce with confidence.

Posted on Leave a comment

Cajun Seafood Boil Recipe with Garlic Butter Sauce

Cajun seafood boil with shrimp, crab legs, corn, potatoes, smoked sausage, lemon wedges, parsley, and garlic butter on a tray.

A Cajun seafood boil is the kind of dinner that turns the table into the event: sweet shrimp, juicy crab legs, smoky sausage, corn, potatoes, lemon, garlic, Cajun seasoning, and a glossy garlic butter sauce that gets into every shell, every potato, and every bite of corn.

Timing is the part that makes people nervous. Seafood is expensive, shrimp overcooks fast, crab legs are often already cooked, and potatoes need a head start if you want them seasoned all the way through. This recipe keeps the feast feeling big, but the method stays calm: build a bold broth, add everything in the right order, save a little broth for the sauce, then finish the whole tray with Cajun garlic butter.

This recipe works as your main home-kitchen seafood boil: shrimp or prawns, crab legs, smoked sausage, corn, potatoes, Cajun seasoning, and garlic butter sauce. Crawfish, lobster tails, mussels, and clams can join the pot, but they are not required for a saucy, satisfying boil.

Quick Answer: How Do You Make a Cajun Seafood Boil?

A Cajun seafood boil is made by simmering potatoes, sausage, corn, crab legs, and shrimp in a seasoned Cajun broth, then finishing everything with garlic butter sauce. Cook the ingredients in stages: potatoes first, sausage next, corn and crab after that, and shrimp last. Reserve some broth for the butter sauce before draining.

A 6-serving home version uses a 10 to 12 quart / 9.5 to 11.4 L pot, about 4 quarts / 3.8 L total liquid, 2 lb / 900 g crab legs, 1.5 to 2 lb / 680 to 900 g shrimp, 12 to 14 oz / 340 to 400 g sausage, 1.5 lb / 680 g baby potatoes, and 4 to 6 ears of corn.

Simple rule: potatoes early, shrimp last, sauce at the end. That one order keeps the potatoes flavorful, the crab sweet, and the shrimp tender instead of rubbery.

Even if this is your first seafood boil, you do not have to manage everything at once. Prep first, cook in stages, and keep the shrimp for the very end. The pot builds flavor; the sauce delivers it.

Best first-time path: make the classic shrimp-and-crab version, use the normal coating sauce, keep the heat medium, and skip a long soak. This gives you a full, saucy tray without overcomplicating the pot.

Communal seafood boil table with shrimp, crab, corn, potatoes, sausage, sauce bowls, lemon wedges, and serving tools on parchment paper.
Meanwhile, this is where seafood boil turns into a meal people gather around, because the tray, the sauce bowls, and the shells all belong at the table.

Cajun Seafood Boil Recipe Card

Cajun Seafood Boil With Garlic Butter Sauce

A bold home-kitchen Cajun seafood boil with shrimp, crab legs, smoked sausage, corn, potatoes, lemon, garlic, Cajun seasoning, and buttery garlic sauce. The ingredients move in stages so the potatoes absorb the broth, the crab heats gently, and the shrimp stays tender.

Close-up of sauced shrimp, crab, corn, and potatoes coated in glossy Cajun garlic butter.
Notice how the butter clings to the shells and corn instead of pooling away; that glossy coat is what makes each bite feel richer.
Prep Time20 minutes
Cook Time35 minutes
Total Time55 minutes, plus 5 to 10 minutes if soaking
Servings6
MethodStovetop
Pot Size10 to 12 quart / 9.5 to 11.4 L stockpot
Best CueShrimp just cooked; potatoes tender; crab heated through

Seafood Boil Ingredients

  • 4 quarts / 3.8 L total liquid: water, or mostly water plus 12 oz / 355 ml beer
  • 1 large onion, quartered
  • 1 to 2 heads garlic, halved crosswise
  • 2 lemons, halved, plus extra wedges for serving
  • 2 to 3 bay leaves
  • 1/4 cup Cajun seasoning to start, up to 1/2 cup only if your blend is low-salt or salt-free
  • 1 to 2 tablespoons Old Bay or seafood seasoning, optional
  • 1.5 lb / 680 g baby potatoes
  • 12 to 14 oz / 340 to 400 g andouille or smoked sausage, sliced into thick rounds
  • 4 to 6 ears corn, cut into halves or thirds
  • 2 lb / 900 g snow crab legs or crab clusters, usually precooked
  • 1.5 to 2 lb / 680 to 900 g jumbo raw shrimp or prawns, easy-peel or deveined shell-on if possible
  • Salt, only if needed after tasting the broth
  • Fresh parsley, for serving

Why the seasoning amount looks large: this seasons the water, potatoes, corn, shells, and seafood, not just the surface of the shrimp. Start with 1/4 cup if your blend contains salt.

Optional Add-Ins

  • 1 to 2 lb / 450 to 900 g cooked or properly prepared crawfish; for live crawfish, use crawfish-specific cleaning and cooking guidance
  • 2 to 3 lobster tails
  • 1 lb / 450 g mussels or clams, cleaned
  • 4 to 6 peeled hard-boiled eggs, warm or room-temperature, added after draining

Cajun Garlic Butter Sauce

  • 1 cup / 227 g unsalted butter
  • 6 to 8 garlic cloves, finely minced
  • 1 tablespoon Cajun seasoning
  • 1 teaspoon smoked paprika
  • 1 to 2 tablespoons lemon juice
  • 1/4 to 1/2 cup / 60 to 120 ml reserved seafood boil broth
  • 1 to 2 teaspoons hot sauce, optional
  • 2 tablespoons chopped parsley

Method

  1. Prep everything first. Cut the corn, slice the sausage, halve the lemons and garlic, rinse the seafood, and thaw frozen seafood if needed.
  2. Build the broth. Add the liquid, onion, garlic, lemons, bay leaves, 1/4 cup Cajun seasoning, and optional Old Bay to a large stockpot. Bring to a rolling boil and simmer for 5 to 10 minutes, until it smells garlicky, lemony, and spicy.
  3. Taste the broth. It should be bold, but not harsh or unpleasantly salty. Add more seasoning only if needed.
  4. Add the potatoes and cook for 8 to 12 minutes, then add the sausage and cook for 5 minutes.
  5. Reduce the heat slightly if the pot is violently boiling. Add corn and crab legs; cook for 4 to 7 minutes, just until the corn is tender and the crab is heated through.
  6. Add lobster tails, mussels, or clams if using. Cook for 4 to 6 minutes, until lobster is opaque and mussels or clams have opened.
  7. Add shrimp last. Cook for 3 to 5 minutes, just until pink, opaque, and curled into a loose C-shape. For smaller shrimp, turn off the heat and let the covered pot finish them gently.
  8. Reserve 1 cup / 240 ml seasoned broth, then drain the boil carefully.
  9. Make the sauce. Melt butter, cook garlic briefly, then stir in Cajun seasoning, paprika, lemon juice, reserved broth, hot sauce if using, and parsley.
  10. Transfer everything to a large tray or serving platter. Add boiled eggs now if using. Spoon the Cajun garlic butter over the crab joints, corn, potatoes, shrimp, sausage, and eggs, or serve extra on the side for dipping.

Salt note: Cajun seasoning, Old Bay, seafood boil seasoning, and crab boil blends can all contain salt. Start lower if your blend is salty, taste the broth before adding seafood, and adjust slowly.

Success cues:

  • Potatoes: tender, but not splitting apart.
  • Corn: bright, juicy, and tender when pierced.
  • Crab: steaming hot and fragrant.
  • Lobster: opaque and firm, not tight.
  • Mussels/clams: opened after cooking; discard closed ones.
  • Shrimp: pink and curled into a loose C-shape.
  • Sauce: shiny, spoonable, and coating instead of watery.
Premium guide showing loose C-shape shrimp, tender potatoes, hot crab, and glossy sauce doneness cues.
After the cook, this is the quickest way to check your timing: loose shrimp, tender potatoes, hot crab, and sauce that still looks rich.

What this recipe is built to prevent: bland potatoes, overcooked shrimp, cold crab, salty broth, watery sauce, and a crowded pot. The timing is staged so the sturdy ingredients get flavor first and the delicate seafood stays tender.

Checklist-style graphic showing problems this seafood boil recipe helps prevent, including bland potatoes, overcooked shrimp, cold crab, salty broth, watery sauce, and a crowded pot.
Just as important as the method itself, this recipe is built to help you avoid the mistakes that make a boil feel flat or overdone.

Do not aim for a perfect-looking tray. Aim for hot crab, tender shrimp, juicy corn, potatoes that taste seasoned inside, and enough finishing butter that people start passing bowls around.

Why This Seafood Boil Works

  • The broth builds flavor first. Garlic, lemon, onion, bay leaves, and Cajun seasoning get time to season the water before the potatoes go in.
  • The pot moves in waves. Potatoes and sausage can handle time; shrimp cannot, so the delicate seafood waits.
  • The heat stays steady. A strong boil builds the broth and cooks the potatoes, but seafood does better with a lively simmer or controlled boil.
  • The sauce finishes the feast. Reserved broth ties the garlic butter back to the pot, so it tastes like the boil instead of a separate topping.

Make this when you need a messy weekend seafood dinner, a casual birthday tray, a game-day spread, or a restaurant-style boil at home without a giant pot. This is a hands-on dinner, not a quiet plated one: shells cracking, corn turning glossy, potatoes disappearing first, and sauce bowls being passed around the table.

Choose Your Seafood Boil Version

Before you shop, decide what kind of tray you are making. The method stays the same, but this helps you choose the right seafood, sauce level, and pot plan.

VersionBest forHow to adjust
Classic shrimp and crabThe all-purpose family-style trayUse the recipe as written
Shrimp-onlyFastest, easiest, most budget-friendly versionSkip crab and use 2.5 to 3 lb / 1.1 to 1.4 kg shrimp
Crab-heavyA special-occasion platterUse more crab legs and slightly less shrimp
Extra saucyRestaurant-style garlic butter loversUse the larger butter sauce option
No giant potApartment kitchens or smaller stockpotsMake a half batch or cook in rounds

Quick Decision Guide

If this is your situationDo this
First seafood boilShrimp + precooked crab, normal sauce, no long soak
Small kitchenHalf batch or cook in rounds
Mixed spice crowdMedium broth, hotter sauce on the side
Budget versionShrimp-only with sausage, corn, and potatoes
Special occasionCrab-heavy or add lobster tails
Nervous about shrimpAdd shrimp off heat and cover

Once you choose the version, the rest becomes easier: buy the right seafood, give the pot enough room, and let the sauce make the whole platter feel generous.

Comparison graphic showing shrimp-only, classic shrimp and crab, and special-occasion seafood boil versions.
Once you choose the version you want, shopping gets easier too: shrimp-only is fastest, classic shrimp-and-crab is the all-purpose move, and lobster is the upgrade.

Before you shop: for the easiest version, buy raw jumbo shrimp, precooked snow crab legs, smoked sausage, baby potatoes, corn, lemons, garlic, unsalted butter, and one Cajun seasoning you like. Avoid precooked shrimp for the main boil when possible; when that is all you have, add it off heat at the very end just to warm through. Large crab clusters may need a little less total seafood or a two-pot plan.

More help below: ingredients, pot size, seafood per person, seasoning guide, cook order, setup checklist, sauce, no-giant-pot options, storage, troubleshooting, and FAQs.

How This Home Seafood Boil Works

This version is built for a normal home kitchen, not a huge outdoor crawfish pot. Shrimp and crab legs are the default because they are easy to find, quick to cook, and generous on the tray. Crawfish, lobster, mussels, clams, and eggs are optional add-ins, not requirements.

The promise is a bold, saucy seafood platter without special equipment. You season the broth, cook in stages, keep the seafood gentle, and finish everything with Cajun butter.

Ingredients You Need

Ingredients break naturally into four groups: seafood, vegetables, sausage, and sauce. For the lowest-stress first boil, buy raw shell-on shrimp and precooked crab legs. That combination gives you the seafood boil feeling without making the timing complicated.

Ingredient spread for Cajun seafood boil with shrimp, crab legs, sausage, corn, baby potatoes, lemons, garlic, butter, Cajun seasoning, and parsley.
Before the pot starts, gather everything first so the boil can move in stages and the seafood never has to wait too long at the end.

Shrimp or Prawns

Jumbo shrimp or large prawns work best. Easy-peel or deveined shell-on shrimp are ideal because they hold their texture better, bring more flavor to the broth, and are easier to eat at the table. Peeled shrimp work too, but they cook faster, so add them right at the end.

The best cue is color and shape. Shrimp should be pink, opaque, and curled into a loose C-shape. A tight curl and bouncy texture usually mean they have gone too far. Since shrimp keeps cooking from carryover heat while you drain, sauce, and serve, it waits until the end.

If your shrimp are still frozen and you need a separate no-thaw method for another night, this frozen shrimp in air fryer guide is useful for timing, size cues, and checking whether the shrimp is raw or already cooked.

Split shopping guide showing raw shell-on shrimp and precooked crab legs with labels for each.
If this is your first boil, raw shrimp and precooked crab are the easiest pairing because they keep the timing simple and predictable.

Crab Legs or Crab Clusters

Snow crab legs are the easiest way to make the tray feel generous without making the cooking harder. They are sweet, easy to crack open at the table, and usually sold already cooked, which means you are mostly warming them through.

King crab legs work too, but they are larger, pricier, and need more room in the pot. Very large clusters are easier to manage in a 12-quart pot or in two rounds.

Still-icy crab legs need a head start. Add them before the corn or give them a few extra minutes before the shrimp goes in, so you do not end up choosing between cold crab and overcooked shrimp.

Raw crab needs proper cooking time. Precooked crab needs gentle reheating so the meat stays sweet instead of dry.

Crawfish, Lobster, Mussels, or Clams

Crawfish is classic in many Louisiana-style boils, but this recipe is written mainly around shrimp and crab. Add crawfish, lobster tails, mussels, or clams only when you know whether they are fresh, frozen, raw, or precooked.

For mussels and clams, discard any that stay open after a firm tap before cooking, and discard any that stay closed after cooking.

Smoked Sausage or Andouille

Andouille gives the most classic smoky Cajun-style flavor, but any good smoked sausage can work. Cut it into thick rounds so it stays juicy. As it simmers, the sausage releases smoky flavor into the broth, and the potatoes and corn pick that up.

Corn and Potatoes

Baby potatoes are ideal because they hold their shape and soak up the Cajun broth. If your potatoes are larger, cut them in half. They are ready when a knife slides in with light resistance, not when they are breaking apart.

Corn adds sweetness and gives you those buttery, spicy bites that make the tray feel complete. The potatoes are often the sleeper hit; give them enough time in the broth and they taste seasoned all the way through.

Onion, Garlic, Lemon, and Bay Leaves

These aromatics turn seasoned water into a proper boil broth. Garlic gives depth, lemon brightens the seafood, onion adds sweetness, and bay leaves bring a gentle savory background note.

When the steam smells like lemon, garlic, bay, and pepper, the pot is ready for the potatoes.

What Size Pot Do You Need for a Cajun Seafood Boil?

A 10 to 12 quart / 9.5 to 11.4 L stockpot is the best home-kitchen size for this recipe. You need enough space for liquid, potatoes, corn, sausage, crab legs, shrimp, and bubbling room.

Keep the pot no more than about two-thirds full once everything is inside. A crowded pot makes the cook nervous; a roomy pot makes the tray better.

Batch sizeSuggested pot sizeBest for
2 to 3 people6 to 7 qt / 5.7 to 6.6 LShrimp, sausage, corn, potatoes
4 to 6 people10 to 12 qt / 9.5 to 11.4 LShrimp and crab legs
6 to 8 people16 qt / about 15 LA fuller boil with extra shellfish
8+ people20 to 30 qt / 19 to 28 LParty-size seafood boil or crawfish boil

A smaller pot does not mean a smaller dinner. Cook in smarter rounds and let the finishing sauce make everything feel like one big tray. You do not need outdoor equipment for this version. The tray is what makes it feel abundant, not the size of the pot.

Pot size infographic showing 6–7 quart, 10–12 quart, 16 quart, and 20+ quart pots with batch-size guidance.
In practice, a roomy pot is easier to manage, so match the pot to the batch instead of forcing everything into one tight space.
Split comparison of a crowded seafood boil pot versus a roomy pot with better spacing and bubbling room.
The difference is simple: a crowded pot fights the cook, while a roomy pot keeps the boil moving and the ingredients easier to handle.

How Much Seafood Per Person?

Shell-on seafood looks generous on the tray, but the shells also count toward the weight. A pound of crab legs or shell-on shrimp does not mean a pound of edible meat.

AppetiteSeafood per personGood for
Light meal1/2 lb / 225 g shell-on seafoodSmaller servings with plenty of sides
Normal seafood boil3/4 lb / 340 g shell-on seafoodMost home boils
Big feast1 lb / 450 g shell-on seafoodHungry guests or seafood-heavy meals

A good 6-person mix is about 2 lb / 900 g crab legs plus 1.5 to 2 lb / 680 to 900 g shrimp. Add crawfish, lobster, mussels, or clams by reducing the shrimp or crab slightly, not by overfilling the pot.

Seafood-per-person chart showing light, normal, and feast portions for shell-on seafood.
Since shell-on seafood includes shell weight, this quick guide helps you plan portions with enough room for a proper feast.

Cajun Seasoning vs Seafood Boil Seasoning vs Old Bay

Seasoning can turn too salty here. Cajun seasoning, seafood boil seasoning, Old Bay, crab boil packets, and liquid crab boil are not always interchangeable in equal amounts.

SeasoningWhat it usually tastes likeHow to use it here
Cajun seasoningPaprika, garlic, onion, pepper, herbs, cayenne; salt level variesMain seasoning base
Seafood boil seasoningOften stronger and saltier; made for large pots of waterUse carefully and taste the broth
Old BayCelery salt-forward seafood seasoning with warm spicesGood as a supporting seasoning
Creole seasoningSimilar to Cajun seasoning, often herbier and sometimes milderCan replace Cajun seasoning if needed
Liquid crab boilVery concentrated, spicy, and aromaticUse only a small amount if you know the product

Seasoning the water should smell exciting; it should not make you wince. Choose one main seasoning base, then build slowly. A salt-free Cajun blend may need more salt. A salted Cajun blend plus Old Bay or seafood boil seasoning may not need any extra salt.

Seasoning comparison graphic with Cajun seasoning, seafood boil seasoning, Old Bay, and Creole seasoning.
Because seasoning blends do not all carry the same salt level, it helps to compare them before the seafood ever touches the pot.

Before adding the seafood: taste a spoonful of the broth. It should taste stronger than soup because it has to season potatoes, corn, shells, and seafood, but it should not taste harsh or unpleasantly salty.

Quick Homemade Cajun Seafood Boil Seasoning

For a quick salt-aware blend, keep the seasoning unsalted at first when using Old Bay, seafood boil seasoning, or salted stock.

Homemade Cajun seafood boil seasoning ingredients shown in small bowls and spice piles.
If you prefer to mix your own, this blend keeps the Cajun flavor bold while still letting you control the salt and heat.
  • 2 tablespoons paprika
  • 1 tablespoon smoked paprika
  • 1 tablespoon garlic powder
  • 1 tablespoon onion powder
  • 2 teaspoons black pepper
  • 1 teaspoon dried oregano
  • 1 teaspoon dried thyme
  • 1/2 to 2 teaspoons cayenne pepper, to taste
  • Optional salt, only if you are not using salty seasoning elsewhere

This homemade blend works well as the Cajun seasoning base. Start with 1/4 cup in the boil broth, taste, then add more if needed. For the butter sauce, use 1 tablespoon of the blend, then adjust heat with hot sauce or cayenne.

Big Seafood Boil Mistakes to Avoid

Most seafood boil problems start before the tray ever reaches the table. Keep these habits in mind and the whole recipe becomes easier.

  • Add in stages, not all at once. Potatoes need time, but shrimp does not.
  • Build seasoning slowly. Cajun seasoning, Old Bay, crab boil, and seafood boil blends can all bring salt.
  • Give the pot room. Crowding drops the temperature, slows cooking, and makes stirring difficult.
  • Steady the boil. Use a strong boil for the broth and potatoes, then a gentler boil once seafood goes in.
  • Keep shrimp gentle. Add it last and stop when it is no longer translucent and has curled loosely.
  • Save some broth. A little seasoned broth makes the butter taste connected to the boil.
  • Reheat gently later. Reboiling cooked seafood usually makes it tough.

Think of the pot in waves. The sturdy things go first, the delicate things wait, and the spicy butter brings everyone together at the end.

Cajun Seafood Boil Cook Order Chart

This is the part that saves the seafood. The pot should feel organized, not rushed: potatoes first, shrimp last, and everything else in between.

Step-by-step seafood boil cook order guide showing broth, potatoes, sausage, corn and crab, optional shellfish, shrimp last, and sauce.
The cook order is what protects the seafood: broth first, potatoes next, then sausage, corn, crab, and shrimp only at the end.

Use the chart, then trust the cues. The minutes help you plan, but the best seafood boil is still cooked by watching the pot.

StepAddTimeWhat to watch for
1Water or water-beer mix, onion, garlic, lemon, bay leaves, seasoningBoil 5 to 10 minBroth smells bold, garlicky, lemony, and fragrant
2Baby potatoes8 to 12 minKnife slides in with light resistance
3Sausage5 minSmoky aroma begins seasoning the broth
4Corn and precooked crab legs4 to 7 minCorn bright and juicy; crab steaming hot
5Lobster tails, mussels, or clams, if using4 to 6 minLobster opaque; mussels/clams opened
6Shrimp or prawns3 to 5 minPink, opaque, and curled into a loose C-shape
7Drain, reserve broth, toss with sauce5 minEverything glossy, hot, and coated

Small or peeled shrimp are easier to overcook. Turn off the heat before adding them, cover the pot, and let them cook gently in the residual heat for more control.

Should You Soak Seafood Boil Before Draining?

A short soak can help seafood, potatoes, corn, and sausage absorb more flavor from the broth. The risk is shrimp sitting too long in very hot liquid.

For this home version, the safest default is to cook the shrimp until just done, reserve broth, drain, and finish with garlic butter sauce.

For deeper boil flavor, use a controlled short soak. Turn off the heat once the shrimp is nearly done and let the bubbling settle for a minute. If the broth is still very hot and active, add a handful of ice or a splash of cold water, cover the pot, and let everything sit for 5 to 10 minutes. Then reserve broth, drain, and sauce.

Best soak rule: short soak for shrimp-heavy boils, longer soak only if the pot is mostly crab, crawfish, potatoes, corn, and sausage. Avoid hot-soaking small peeled shrimp for a long time.

Set Up Before You Drain

Seafood boils move fast at the end. Set the table before you drain the pot so the tray can go out hot, glossy, and ready to eat.

Seafood boil serving setup with a tray, parchment paper, crab crackers, tongs, shell bowl, napkins, lemon wedges, and sauce bowls.
Before the drain-and-toss moment, set out the tray, tools, napkins, and lemon wedges so the finish feels calm instead of rushed.
You needWhy it helps
Large tray, sheet pan, or paper-lined tableGives the boil room to spread out
Spider strainer or tongsHelps lift seafood without breaking it
Crab crackers or kitchen shearsMakes crab easier to eat
Shell bowlKeeps the table usable
Napkins or wet towelsSeafood boils are messy
Extra lemon and warm butterLets people finish their own bites

How to Make Cajun Seafood Boil

1. Prep Everything Before You Start

Once the pot is hot, things move quickly. Cut the corn into halves or thirds, slice the sausage, halve the lemons, cut the garlic heads across the middle, rinse the seafood, and thaw frozen seafood if needed.

Check your seafood before it goes near the pot. Precooked crab legs need gentle heating. Raw lobster needs enough time to turn opaque. Peeled shrimp cook faster than shell-on shrimp. Mussels and clams should be cleaned and checked carefully.

Seafood is simple to cook, but it is still worth handling carefully. For general buying, thawing, and handling guidance, the FDA has a helpful guide to selecting and serving fresh and frozen seafood safely.

2. Build the Cajun Boil Broth

Add the water or water-beer mix, onion, garlic, lemons, bay leaves, Cajun seasoning, and optional Old Bay to your stockpot. Bring it to a rolling boil, then let it boil for 5 to 10 minutes before adding the main ingredients.

Stockpot of seafood boil broth with lemons, garlic, onion, bay leaves, Cajun seasoning, and steam.
Start with the broth, because garlic, lemon, onion, and Cajun seasoning do the real flavor-building before anything else goes in.

This short simmer wakes up the garlic, lemon, onion, bay leaves, and spices. The broth should smell garlicky, lemony, and spicy before the potatoes go in.

3. Add the Potatoes First

Add the baby potatoes and cook for 8 to 12 minutes. They should be starting to soften but not falling apart. Larger potatoes should be halved so they cook more evenly.

Baby potatoes simmering in Cajun seafood boil broth with steam, garlic, lemon, and bay leaves.
Potatoes need the earliest start, and that extra simmer time is what lets them taste seasoned all the way through.

Give this step its time. A knife should slide in with light resistance. When the potatoes get enough time in the broth, they become the bites people keep stealing from the tray.

4. Add the Sausage

Add the sliced sausage and cook for about 5 minutes. The broth should start smelling smoky and savory. Taste again here and adjust carefully if needed.

Smoked sausage rounds and corn being added to a seafood boil pot with potatoes already simmering.
Next, the sausage adds smoke while the corn brings sweetness, and the broth keeps building flavor at every stage.

5. Add the Corn and Crab Legs

Add the corn and crab legs. Cook for 4 to 7 minutes, depending on size. Most frozen crab legs are already cooked, so you are heating them through rather than cooking them aggressively.

Crab legs being added to a steaming seafood boil pot with corn, potatoes, and sausage visible.
Once the crab goes in, the boil starts to feel like a feast, but the pot still needs space so everything stays tender.

Large crab clusters may need a little extra time. Smaller clusters should stay on the shorter side so they remain sweet and tender. If the pot looks angry instead of lively, lower the heat slightly before the delicate seafood goes in.

6. Add Optional Lobster, Mussels, or Clams

Lobster tails, mussels, and clams should go in after the crab has started heating. Lobster tails usually need about 4 to 6 minutes, depending on size. Mussels and clams are done when they open.

Discard any mussels or clams that do not open after cooking. Do not force them open and eat them.

7. Add the Shrimp Last

Shrimp should be the final ingredient. Add it to the hot broth and cook for 3 to 5 minutes, just until pink, opaque, and gently curled. Large shell-on shrimp can handle a few minutes of simmering. Smaller peeled shrimp should be cooked more gently.

Shrimp being added last to a hot seafood boil pot after crab, corn, potatoes, and sausage.
Shrimp only needs a few minutes, so it should always go in last if you want it tender instead of tight and rubbery.

For extra control, turn off the heat, add the shrimp, cover the pot, and let the residual heat cook them. This is especially helpful for small shrimp or nervous first-time boils.

8. Reserve Broth, Drain, and Sauce

Scoop out 1 cup / 240 ml of the seasoned broth before draining. Use some of it in the garlic butter sauce. Drain the boil carefully, then transfer everything to a large tray, sheet pan, or paper-lined table.

Ladle scooping seasoned seafood boil broth into a measuring cup before draining the pot.
Save the broth before draining, because that seasoned liquid is what makes the sauce taste like part of the boil.

Pour the Cajun butter over the tray and toss gently, or serve the dip on the side. Spoon extra over the crab joints, corn, potatoes, shrimp, sausage, and boiled eggs if using.

Cajun Garlic Butter Sauce

The broth gives the boil its backbone, but the butter sauce is what people remember. It catches in the crab shells, glosses the shrimp, and turns the potatoes and corn into the bites people keep reaching for.

The sauce is not just decoration here. It is the final seasoning layer, the dip, and the thing that makes the potatoes and corn disappear first.

Ingredient spread for Cajun garlic butter sauce with butter, garlic, seasoning, lemon, parsley, hot sauce, and reserved broth.
This sauce starts simple—butter, garlic, Cajun seasoning, paprika, lemon, parsley, hot sauce, and reserved broth—and still finishes the whole dish.

A good sauce should run off a spoon in a smooth stream and leave a buttery coating behind.

If it looks thin and watery, simmer briefly or add more butter. If it feels heavy or salty, loosen it with unsalted broth or water and brighten it with lemon.

Close-up spoon lifted from Cajun garlic butter sauce with a glossy coating and slow drip.
A proper Cajun butter sauce should coat the spoon first; if it runs off too quickly, it still needs a little more body.

For a coated tray, use the normal sauce. For sauce bowls and extra dipping, double it.

Normal Coating Sauce

This amount is enough to coat a 6-serving seafood tray without drowning it.

IngredientAmount
Unsalted butter1 cup / 227 g
Garlic6 to 8 cloves, minced
Cajun seasoning1 tablespoon
Smoked paprika1 teaspoon
Lemon juice1 to 2 tablespoons
Reserved boil broth1/4 to 1/2 cup / 60 to 120 ml
Hot sauceOptional, to taste
Parsley2 tablespoons, chopped

Extra Saucy Restaurant-Style Version

Use this version for a very buttery platter with plenty of dipping sauce.

IngredientAmount
Unsalted butter2 cups / 454 g
Garlic8 to 10 cloves, minced
Cajun seasoning2 tablespoons
Old Bay or seafood seasoning1 tablespoon, optional
Reserved boil broth1/2 to 1 cup / 120 to 240 ml
Lemon juice2 tablespoons
Hot sauceOptional, to taste
Brown sugarOptional pinch, for balance
Parsley1/4 cup, chopped

How to Make the Sauce

Melt the butter in a saucepan over medium-low heat. Add the garlic and cook for 30 to 60 seconds, just until fragrant. Keep the garlic pale; deeply browned garlic can make the sauce bitter.

Cajun garlic butter sauce simmering in a saucepan with garlic, spices, and a glossy reddish-gold finish.
As the sauce simmers, keep the heat gentle so the butter stays rich and the garlic turns fragrant without burning.

Stir in Cajun seasoning, smoked paprika, lemon juice, and a little reserved broth. Add hot sauce for more heat. Simmer gently for 1 to 2 minutes, then stir in parsley. The sauce should coat the spoon before it coats the tray.

Taste the reserved broth before adding it to the sauce. If the broth is very salty, use water or unsalted stock instead. A flat sauce needs lemon; an intense sauce needs more butter or broth.

Coating Sauce vs Dipping Sauce

A coating sauce uses less broth so the butter clings to the seafood, corn, and potatoes. For a dipping sauce, add a little more broth so it stays loose and spoonable. You can also split it: toss half with the boil and serve the rest in small bowls at the table.

For the saucy restaurant-style finish, do not pour all the butter in one spot. Pour slowly, toss gently, and let it run into the crab joints, between the corn pieces, across the potatoes, and around the shrimp.

Cajun garlic butter being poured over a seafood boil tray with crab legs, shrimp, corn, potatoes, and sausage.
When the sauce goes over the tray, pour slowly so it reaches the crab joints, potatoes, corn, and shrimp instead of sitting in one spot.

If garlic butter shrimp is the part of the tray you love most, this shrimp scampi recipe gives you the same lemon-garlic-butter comfort in a quicker pasta-friendly format.

Make-Ahead and Leftover Sauce

You can make the butter sauce 2 to 3 days ahead. Store it in the refrigerator, then rewarm it gently over low heat. Add a splash of reserved broth, stock, or water if it thickens too much.

Leftover sauce is worth saving. Spoon it over shrimp, crab legs, lobster tails, corn, potatoes, garlic bread, roasted vegetables, rice, or pasta. Freeze extra sauce in small portions for an easy Cajun butter finish another day.

That extra bowl is also excellent with torn pieces of homemade garlic bread, especially when you need something simple to catch the spicy, lemony butter.

No Giant Pot? Here Are Your Options

The classic version can be huge, but a normal kitchen can still make a satisfying batch. The tray does not care whether everything cooked in one pot. The sauce makes it feel united.

Option 1: Split the Recipe Between Two Pots

If you have two medium stockpots, divide the broth, potatoes, corn, sausage, and seafood between them. Keep the timing the same, but watch each pot separately. This is the easiest way to make the full recipe without overcrowding one pot.

Option 2: Make a Half Batch

For 2 to 3 people, cut the recipe in half and use a 6 to 7 quart / 5.7 to 6.6 L Dutch oven or stockpot. A shrimp-and-crab version works especially well for a smaller batch.

For a quieter seafood dinner with no big pot at all, this baked haddock recipe follows the same gentle-cooking idea: season well, avoid overcooking, and let the fish stay tender.

Option 3: Boil First, Sauce Later

If your pot is too small for everything at once, cook the potatoes and corn first, remove them, then cook the seafood separately. Combine everything on a tray and pour the hot Cajun garlic butter sauce over the top. You still get the same messy, saucy feeling without needing a massive pot.

Three-panel guide showing round 1 potatoes and corn, round 2 seafood, and finishing the seafood boil on a tray with sauce.
If you are cooking in a smaller kitchen, this is the easiest workaround: boil in rounds, then combine everything on the tray and finish with sauce.

What About a Seafood Boil Bag?

For a seafood boil bag, use this same seasoning and sauce logic, but treat it as a separate oven-bag method: cooked potatoes and corn, raw shrimp added late, and sauce sealed in or tossed after cooking. This stovetop version gives more classic broth flavor because everything cooks in seasoned liquid.

Seafood Swaps and Variations

Use the seafood that is fresh, available, and reasonably priced where you live. The pot does not need to look exactly like anyone else’s; it just needs to be timed well and sauced generously.

If you do not haveUse this instead
CrawfishShrimp, prawns, crab legs, or lobster tails
Snow crabKing crab, blue crab, local crab, or extra shrimp
AndouilleSmoked sausage, chicken sausage, or chorizo-style sausage
Old BayA little extra Cajun seasoning, celery salt, paprika, garlic powder, and black pepper
Mussels or clamsSkip them or add more shrimp and crab
LemonLime in a pinch
BeerMore water, seafood stock, chicken stock, or vegetable stock
Boiled eggsSkip them or add peeled hard-boiled eggs after draining

Shrimp-Only Cajun Seafood Boil

For an easier version, skip the crab and use 2.5 to 3 lb / 1.1 to 1.4 kg large shell-on shrimp. Keep the potatoes, corn, sausage, and garlic butter sauce. Add the shrimp at the very end so it does not overcook.

For another quick shrimp dinner where timing matters just as much, these shrimp tacos use the same idea: cook the shrimp hot and fast, then build the fresh parts around it.

Crab-Lovers Seafood Boil

Use 3 to 4 lb / 1.4 to 1.8 kg crab legs and reduce the shrimp slightly. Since crab legs are usually precooked, focus on heating them gently and coating them well with Cajun butter.

Crawfish-Style Boil

If crawfish is available, add it with or shortly before the shrimp, depending on whether it is fresh, frozen, raw, or precooked. Crawfish boils often use stronger seafood boil seasoning, so be extra careful with salt and spice levels.

If crawfish is already cooked, treat it more like crab and warm it gently. If it is raw or live, use crawfish-specific cleaning and cooking guidance rather than relying on the shrimp timing in this recipe. This recipe can borrow crawfish-boil flavors, but it is not a full live-crawfish boil tutorial.

Lobster Tail Upgrade

Add 2 to 3 lobster tails for a more special-occasion boil. Cut the shells slightly so the seasoning and butter can reach the meat. Lobster tails usually need only a few minutes and should be opaque, not tough.

If you end up with extra cooked lobster meat, save it for a buttery lobster roll instead of reheating it hard in the pot again.

Boiled Egg Add-In

Boiled eggs are optional, but they are great on a restaurant-style seafood tray. Add peeled hard-boiled eggs after draining and spoon Cajun butter over them. They do not need to boil with the seafood; they just need the sauce.

How Spicy Should Cajun Seafood Boil Be?

The boil should be bold, but it does not have to be painfully hot. Keep the broth flavorful and serve extra heat in the butter sauce or hot sauce on the side.

  • Mild: use less cayenne, skip hot sauce, and rely on paprika, garlic, lemon, and herbs.
  • Medium: use regular Cajun seasoning and a small amount of hot sauce in the butter.
  • Spicy: add cayenne, hot sauce, or crushed red pepper to the sauce.
  • Extra spicy: add more cayenne or a very small amount of liquid crab boil if you know its strength.
  • Family-style: keep the pot medium and serve spicy garlic butter separately.

For a mixed group, keep the pot medium and let people add heat at the table. It is easier to make one bowl of sauce hotter than to rescue potatoes, corn, and shrimp that are too spicy for some people to enjoy.

What to Serve With Cajun Seafood Boil

The tray already has protein, potatoes, corn, and sauce, so sides can stay simple. Think fresh, crisp, buttery, or bread-based sides that balance the spice and soak up the sauce.

A cold, crunchy side helps balance the butter and spice. This coleslaw recipe is the cleanest fit when you need something creamy, tangy, and crisp beside the seafood tray.

  • Garlic bread or crusty bread for soaking up sauce
  • Coleslaw or a crisp cabbage salad
  • Green salad with lemony dressing
  • Extra lemon wedges
  • Pickles or quick-pickled onions
  • Steamed rice, if you need to stretch the meal
  • Cold drinks, iced tea, lemonade, or beer

To make the meal feel heartier and more Louisiana-style, red beans and rice makes more sense than adding another heavy seafood dish beside it.

For serving, spread the drained boil on a large tray, sheet pan, or paper-lined table. Spoon the garlic butter sauce over everything while it is hot. Keep extra sauce in bowls for dipping crab, shrimp, corn, and potatoes.

Small bowls of Cajun garlic butter sauce with shrimp, crab, corn, lemon, and parsley nearby.
Some people like the tray coated, while others prefer extra sauce for dipping; either way, the butter should stay warm and glossy.
Shell bowl, napkins, lemon wedges, crab crackers, and a bowl of garlic butter sauce on a warm table.
A good seafood boil table needs a shell bowl, a few napkins, and lemon nearby, because the best trays are delicious and a little messy.

Bring the tray to the table while it is hot, saucy, and just cooked. The first crack of crab, the lemon squeezed over the shrimp, and the butter running into the corn are the whole point.

The best part is that everyone has to slow down a little: crack crab, peel shrimp, pass lemon, steal another potato, and reach for the sauce again.

Storage and Reheating

This meal is best served fresh, but leftovers can still be good if you reheat them gently. The main rule is simple: do not reboil cooked seafood. Reboiling usually makes shrimp tough and crab dry.

How to Store Leftovers

  • Let leftovers cool, then transfer them to airtight containers.
  • Refrigerate for up to 2 days.
  • Store extra garlic butter sauce separately if possible.
  • Remove seafood from shells before storing if you want easier reheating.
  • Do not leave cooked seafood sitting out for long.

Leftovers are where texture and safety both matter. For general leftover safety, the USDA’s leftovers and food safety guide is a useful reference. For this seafood boil, the shorter 2-day window is best for quality and texture.

Best Way to Reheat Seafood Boil

For the best texture, reheat leftovers in a covered skillet over low heat with a spoonful of butter, broth, or sauce. Warm just until heated through. A covered oven-safe dish at low heat also works for larger portions.

The microwave works in a pinch, but use short bursts and low or medium power if possible. Shrimp can go from warm to rubbery quickly.

If you shell extra shrimp before storing, turn it into shrimp fried rice the next day instead of reheating the whole tray again.

Can You Freeze Seafood Boil?

You can freeze cooked seafood, but the texture may change, especially for shrimp and potatoes. Extra sauce freezes better than the full boil, so save that separately when possible.

Troubleshooting Cajun Seafood Boil

If something feels off, do not panic. Most seafood boil problems come down to timing, salt, or heat, and all three are easier to fix when you catch them early.

Why Is My Shrimp Rubbery?

The shrimp was probably added too early, boiled too hard, or cooked too long. Add shrimp last and stop when it is pink, opaque, and gently curled. Smaller shrimp are safer with residual heat than a rolling boil.

Split comparison of perfect loose C-shape shrimp versus overcooked tight-curl shrimp in a seafood boil.
If the shrimp looks too tight, it likely stayed in the pot too long; the better cue is a loose C-shape with a pink, opaque finish.

Why Are My Potatoes Bland?

The broth may not have been seasoned enough before the potatoes went in, or the potatoes did not spend enough time in the seasoned liquid. Potatoes need a head start so they can absorb flavor from the Cajun broth.

Why Is My Seafood Boil Too Salty?

Salt usually builds up when salted Cajun seasoning, Old Bay, seafood boil seasoning, and extra salt are all used together. Stop adding seasoning.

If the seafood is already cooked, lift it out before fixing the broth. Dilute with unsalted water or stock, taste again, and use unsalted butter and lemon in the sauce to soften the salt.

Why Is My Garlic Butter Sauce Watery?

Too much reserved broth was added. Simmer the sauce gently for a minute or add more butter to bring back richness. For a thicker coating, use less broth and spoon it over the seafood while hot.

Split comparison of watery garlic butter sauce versus glossy coating sauce with spoon texture.
A good coating sauce should look rich and spoonable, while a watery version usually means the broth went a little too far.

Why Did My Garlic Butter Sauce Break?

The heat was probably too high, or too much broth was added too quickly. Keep the butter over medium-low heat and stir in broth gradually. Even if the sauce separates slightly, it will still taste good spooned over the seafood.

Can I Use Frozen Seafood?

Yes. Thaw shrimp and lobster tails before cooking when possible so they cook evenly. Precooked frozen crab legs usually only need to be heated through. Frozen seafood added straight to the pot will drop the broth temperature and may change the timing.

Can I Make Seafood Boil Ahead?

You can prep the vegetables, cut the sausage, clean the seafood, and make the butter sauce ahead. For the best texture, cook the seafood close to serving time. The tray is much better freshly cooked than reheated for a crowd.

FAQs About Cajun Seafood Boil

What seafood is best for a Cajun seafood boil?

Shrimp and crab legs are the easiest home combination. Crawfish, lobster tails, mussels, and clams also work if you know whether they are raw, frozen, fresh, or precooked.

What seasoning do you use for Cajun seafood boil?

Use Cajun seasoning as the main flavor base. A little Old Bay or seafood boil seasoning can help, but check salt levels first. The broth should taste bold, not sharp or salty.

Is Cajun seasoning the same as seafood boil seasoning?

Not exactly. Cajun seasoning is usually a spice blend with paprika, garlic, onion, herbs, pepper, and cayenne. Seafood boil seasoning is often stronger and saltier because it seasons a large pot of water.

How much Cajun seasoning should I use?

For this 6-serving recipe, start with 1/4 cup. Use up to 1/2 cup only if your blend is low-salt or salt-free. Taste the broth before adding seafood.

Should I use salted or unsalted butter?

Use unsalted butter if possible. The broth and seasonings already bring salt, so unsalted butter gives you room to adjust the final sauce.

Do I need beer in a seafood boil?

No. Beer adds depth, but water works. Seafood stock, chicken stock, or vegetable stock can make the broth taste fuller.

What order do you add seafood boil ingredients?

Start with seasoned broth, then add potatoes, sausage, corn and crab, optional lobster or shellfish, and shrimp last. Think sturdy to delicate.

How long should shrimp cook in a seafood boil?

Large shrimp usually need 3 to 5 minutes. They are done when pink, opaque, and gently curled. Smaller shrimp can finish off heat in the covered pot.

Do crab legs need to be cooked or just reheated?

Most frozen crab legs sold at grocery stores are already cooked, so they only need reheating. Raw crab needs proper cooking time.

Should I thaw frozen shrimp before seafood boil?

Yes, thaw shrimp when possible. Thawed shrimp cook more evenly and are easier to time. Frozen shrimp drops the broth temperature and may cook unevenly.

Can I use precooked shrimp?

Yes, but raw shrimp is better for the main boil. Add precooked shrimp off heat at the very end and let the covered pot warm it gently.

What sausage works best?

Andouille is classic, but any smoky sausage that holds its shape can work.

How do you make Cajun garlic butter sauce?

Melt unsalted butter over medium-low heat, cook minced garlic briefly, then stir in Cajun seasoning, smoked paprika, lemon juice, a little reserved broth, hot sauce, and parsley.

How do I make seafood boil less spicy?

Use less cayenne, skip hot sauce, and choose a mild Cajun seasoning. Keep the broth medium and serve hotter butter on the side.

What can I use instead of crawfish?

Shrimp and crab legs are the easiest substitute. Lobster tails, mussels, or clams can make the tray feel fuller.

Can I add boiled eggs to seafood boil?

Yes. Add peeled hard-boiled eggs after draining and spoon Cajun garlic butter over them. They do not need to boil with the seafood.

Can I make seafood boil in a bag?

Yes, but treat it as a different method. Use cooked potatoes and corn, add raw shrimp late, and use Cajun butter as the finishing sauce. The stovetop version gives more broth flavor.

How do you keep seafood boil warm for serving?

Keep the drained seafood, potatoes, corn, and sausage on a warm tray loosely covered with foil. Hold extra butter warm separately and spoon it over right before serving.

How do you make seafood boil without a large pot?

Make a half batch, split the recipe between two pots, or cook in rounds and combine everything on a tray with hot Cajun butter.

How do you reheat seafood boil leftovers?

Reheat gently in a covered skillet with a little butter, broth, or sauce. Warm just until hot so the seafood does not cook a second time.

Final Tips for the Best Cajun Seafood Boil

The secret to a good Cajun seafood boil is calm control: bold broth, patient potatoes, gentle seafood, and butter sauce at the end. Keep extra lemon nearby, adapt the seafood based on what is available, and avoid overcrowding the pot just to make the tray look bigger.

Do not worry about making it look perfect. A seafood boil is supposed to look abundant, saucy, and a little chaotic. That is part of the fun.

When everything comes together, you get the kind of meal people lean into: crab shells cracking, shrimp dipped in spicy butter, corn dripping with sauce, potatoes soaked with Cajun broth, and a table that feels full before anyone even takes the first bite.

If you make it, tell me what went into your tray and what you changed: shrimp and crab, lobster tails, extra sausage, more spice, less spice, no giant pot, boiled eggs, or the full feast. Those details help the next reader plan their own boil.

Posted on Leave a comment

Lobster Bisque Recipe: Easy Creamy Homemade Lobster Bisque With Lobster Tails

Creamy lobster bisque in a white bowl with lobster pieces, chives, cream swirl, crusty bread, spoon, and navy linen.

Lobster bisque feels intimidating for one honest reason: lobster is expensive, and the soup shows every shortcut. Weak stock tastes flat. Boiled cream can turn grainy. Lobster meat that sits in the pot too long becomes rubbery instead of sweet and tender.

This version is built to avoid those problems. It gives you a creamy, silky, restaurant-style bowl using lobster tails, seafood stock, aromatics, tomato paste, dry sherry or white wine, and cream. You can keep it simple with clean-tasting seafood stock, or take the fuller route and simmer the lobster shells into that same stock for a sweeter, more layered base.

It is still an easy lobster bisque built around lobster tails, but when you have an extra 25 minutes, the shells give the stock that deeper restaurant-style flavor.

The goal is simple: make the bowl taste like you used the expensive, old-school method, while giving you a calmer lobster-tail path that is much harder to ruin.

You do not need live lobster. There is no chef-only technique hiding in the fine print. You just need to treat the lobster with care, let the shells do some of the flavor work, and keep the cream stage low and steady instead of boiling hard.

It is the kind of soup that makes dinner feel planned and generous, whether you serve it as a holiday starter, a date-night bowl, or a quiet weekend dinner with bread on the side.

Quick Answer: How to Make Lobster Bisque

To make lobster bisque, briefly poach lobster tails in seafood stock just until the meat turns opaque. Remove the meat, save the shells, and use that same stock as the flavor base. For deeper flavor, simmer the shells with aromatics, tomato paste, herbs, and wine if using, then strain and measure the stock.

In a heavy pot, cook onion, celery, carrot, garlic, and tomato paste in butter, add flour, deglaze with dry sherry or white wine, pour in the prepared stock, and simmer until the vegetables are tender. Blend, strain if you want a polished finish, stir in cream over low heat, adjust the base, and add the lobster meat right before serving.

The whole method is about restraint: build flavor from the shells, then protect the cream and lobster at the finish.

For most home cooks, the best balance is the middle path: lobster tails poached in seafood stock, shells simmered back into that same stock, then cream and lobster added only once the base is ready.

Ready to cook? Go straight to the recipe card, or compare the easy, better, and best lobster bisque methods before you start.

This visual keeps the lobster bisque order simple: cook the tails briefly, use the shells for flavor, smooth the base, and protect the cream and lobster at the finish.

Vertical step-by-step guide showing lobster tails poaching, shells simmering, bisque blending, cream being added, and lobster added last.
First poach the tails, then simmer the shells, blend the base, add cream, and warm the lobster last; that order protects both flavor and texture.

Lobster Bisque at a Glance

Main lobster choiceLobster tails
Servings4 generous bowls or 6 appetizer servings
Finished amountAbout 5½ to 6 cups / 1.3 to 1.4 liters
Total timeAbout 1 hour 20 minutes to 1 hour 30 minutes
Texture goalSmooth, creamy, silky, lightly spoon-coating
Recommended pathPoach tails, simmer shells into the same stock, then finish with cream and lobster
Fullest stock optionSeafood stock simmered with lobster shells
Shortcut stock optionClean-tasting seafood or lobster stock
Main thickenerFlour roux, with gluten-free options below
Classic alcohol optionDry sherry, dry white wine, or a little brandy
No-alcohol optionExtra seafood stock plus lemon juice or sherry vinegar
Make-ahead tipMake the base ahead; add cream and lobster before serving
Freezer tipFreeze the base before adding cream and lobster

As a serving guide, a generous bowl is about 1⅓ to 1½ cups. An appetizer serving is closer to 1 cup.

Lobster Bisque Recipe Card

Creamy Lobster Bisque With Lobster Tails

This creamy lobster bisque is made with lobster tails, seafood stock, aromatics, tomato paste, dry sherry or white wine, and cream. The recommended path is simple: poach the lobster tails in stock, simmer the shells into that same stock for deeper flavor, build the bisque base, blend, strain, add cream, adjust the base, and warm the lobster only right before serving.

Prep Time20 minutes
Cook Time1 hour to 1 hour 10 minutes
Total Time1 hour 20 minutes to 1 hour 30 minutes
Servings4 generous bowls or 6 appetizer servings
YieldAbout 5½ to 6 cups / 1.3 to 1.4 liters

Main path: this card uses the shell-enhanced method because it gives the richest flavor without requiring whole live lobsters. For shortcuts, cooked lobster, no-alcohol swaps, and gluten-free thickening, see the quick notes after the card.

Read this before starting: the same 4 cups of stock are used first to poach the lobster, then simmered with the shells, then measured again for the bisque. You are not starting with 8 cups of stock.

Infographic showing one measuring jug of lobster stock used to poach tails, simmer shells, and measure again for lobster bisque.
The same 4 cups of stock do three jobs: poach the lobster, pull flavor from the shells, and become the measured base for the bisque.

Ingredients

For the lobster and shell-enhanced stock
  • 4 lobster tails, 4 to 5 oz each / 115 to 140 g each
  • 4 cups clean-tasting seafood stock or lobster stock / 960 ml, preferably low-sodium
  • 1 tablespoon olive oil or butter
  • ½ small onion, roughly chopped
  • 1 celery rib, roughly chopped
  • 1 small carrot, roughly chopped
  • 2 garlic cloves, smashed
  • 1 tablespoon tomato paste
  • ½ cup dry white wine / 120 ml, optional for the shell stock
  • Up to 1 cup water or extra seafood stock / 240 ml, only if needed to top up after simmering
  • 1 bay leaf
  • 2 sprigs thyme, or ½ teaspoon dried thyme
For the bisque base
  • 4 tablespoons unsalted butter / 56 g
  • 1 medium onion, finely chopped / about 150 g
  • 2 celery ribs, finely chopped / about 100 g
  • 1 medium carrot, finely chopped / about 75 g
  • 3 garlic cloves, minced
  • 2 tablespoons tomato paste / about 32 g, or 3 tablespoons for deeper color
  • 3 tablespoons all-purpose flour / about 24 g
  • ½ cup dry white wine / 120 ml
  • ¼ cup dry sherry / 60 ml
  • 4 cups prepared lobster-shell stock from above / 960 ml
  • ½ teaspoon sweet paprika
  • Pinch of cayenne pepper, optional
  • ½ teaspoon dried thyme, or 1 teaspoon fresh thyme leaves
  • ¾ to 1 cup heavy cream / 180 to 240 ml
  • 1 teaspoon lemon juice or sherry vinegar, plus more to taste
  • Salt and black pepper, to taste
  • 1 tablespoon chopped chives, parsley, or tarragon, for finishing

Stock note: after simmering and straining, measure the liquid again. You need 4 cups / 960 ml for the bisque. If you are short, top it up with water or more seafood stock.

Instructions

Lobster and shell stock
  1. Prepare the lobster tails. Use kitchen shears to cut along the top of each shell. Leave the meat inside for the brief poach; you will remove it after cooking.
  2. Poach the lobster in the stock. Bring the 4 cups seafood or lobster stock to a low simmer. Add the lobster tails and cook for 3 to 5 minutes, depending on size, just until the meat turns opaque. Remove the tails from the stock. When cool enough to handle, pull out the meat, chop it into bite-size pieces, and set it aside. Save the shells and keep the stock.
  3. Build the shell stock. In a pot, heat 1 tablespoon olive oil or butter. Add the lobster shells, rough-chopped onion, celery, carrot, garlic, and tomato paste. Cook for 5 to 7 minutes, stirring often, until the shells smell fragrant and the tomato paste darkens slightly. Add wine if using, then pour in the lobster-poaching stock. Then add bay leaf and thyme. Simmer for 25 to 35 minutes.
  4. Strain and measure the stock. Pass the shell stock through a fine mesh strainer. Measure the liquid. You need 4 cups / 960 ml for the bisque. If you have less, top it up with water or seafood stock. Extra stock can be saved for thinning the soup or reheating leftovers.
Build and smooth the bisque base
  1. Start the bisque base. In a heavy Dutch oven or soup pot, melt the butter over medium heat. Add finely chopped onion, celery, and carrot. Cook for 6 to 8 minutes, until softened and sweet-smelling but not browned.
  2. Build the garlic and tomato paste base. Stir in the garlic and cook for 30 seconds. Add tomato paste and cook for 2 to 3 minutes, stirring often, until it deepens from bright red to brick-red and smells savory.
  3. Make the roux. Sprinkle in the flour and stir for 1 to 2 minutes. The mixture should look thick and pasty, like the vegetables are coated in a soft roux. If it looks dry, lower the heat and keep stirring.
  4. Deglaze. Slowly pour in the white wine and sherry, scraping the bottom of the pot. Let it bubble for 2 to 3 minutes so the sharp alcohol smell softens.
  5. Pour in stock and simmer. Add 4 cups prepared stock, paprika, cayenne if using, thyme, and a small pinch of salt and pepper. Bring to a steady simmer and cook for 18 to 22 minutes, until the vegetables are very tender and the broth tastes full. Salt gradually because seafood stock, clam juice, and lobster base can be salty.
  6. Blend. Carefully blend the soup until smooth using an immersion blender or countertop blender. If using a countertop blender, work in batches and vent the lid slightly so steam can escape.
  7. Strain for a silkier texture. For the most polished finish, pass the blended soup through a fine mesh strainer into a clean pot. Press with a ladle for liquid, then leave the gritty bits behind.
Finish with cream and lobster
  1. Add cream over low heat. Set the pot over low heat. Stir in ¾ cup cream. Add more cream if you want a richer bowl. The soup should look smooth and shiny, with steam rising but no hard bubbling.
  2. Finish the bisque base. Taste and adjust salt, pepper, lemon juice, or sherry vinegar. The finished base should lightly coat a spoon, smell sweet and buttery, and taste balanced. If it tastes heavy, add lemon juice or sherry vinegar. A thin base needs a little more simmering before the lobster goes in. Flat flavor usually means salt should be checked first.
  3. Add the lobster and serve. Stir in the chopped lobster meat and warm it for 1 to 2 minutes. For the safest texture, divide the lobster among bowls and ladle the hot bisque over it. Garnish with chives, parsley, or tarragon and serve hot, not boiling.

Shortcuts, Swaps, and Special Cases

Use these notes when real life does not match the main path exactly: no shells, cooked lobster, no wine, gluten-free needs, or making the base ahead. The recipe is forgiving as long as you protect the stock, cream, and lobster texture.

  • Easy version: poach the lobster in seafood stock, skip the shell-simmering step, and use that stock directly in the bisque.
  • Flavor upgrade: poach the lobster in stock, then simmer the shells in that same stock before making the soup.
  • Cooked lobster meat: skip poaching, use 4 cups seafood stock, and add the cooked lobster only right before serving.
  • Without lobster shells: use lobster stock if possible, or strengthen seafood stock with ¼ to ½ cup clam juice or a small spoonful of lobster base. Add salty bases carefully and taste before adding more salt.
  • No alcohol: replace the ½ cup wine and ¼ cup sherry in the bisque base with ¾ cup extra seafood stock. If you are also skipping the optional wine in the shell stock, use another ½ cup stock there too. Finish with lemon juice or sherry vinegar for brightness.
  • Gluten-free: skip the flour. After blending, whisk 1½ tablespoons cornstarch with 2 tablespoons cold water, stir it into the warm soup, and simmer for 1 to 2 minutes. You can also simmer 2 tablespoons uncooked white rice in the stock until tender, then blend it into the base.
  • Dairy-free: use cashew cream for the most neutral finish. Add it near the end over low heat, just as you would heavy cream.
  • Freezing: freeze the base before adding cream and lobster for the smoothest texture.

Back to top

Why This Lobster Bisque Works

The whole recipe is built around one idea: poach the lobster carefully, use the shells to deepen the stock if you can, blend the base smooth, add cream over low heat, and warm the lobster only right before serving. That path gives you a rich, polished bowl without buying whole live lobsters or guessing through the most expensive part of the process.

Method board with lobster tails, saved shells, golden stock, cream, and a finished bowl of lobster bisque.
Lobster tails keep the method approachable, while the saved shells add the deeper stock flavor that makes the bisque taste more restaurant-style.

The tails give you tender meat for the finished bowl, while the shells turn ordinary seafood stock into something sweeter and more seafood-rich. The aromatics soften in butter until sweet. Tomato paste cooks until it turns brick-red, which gives the soup color and savory depth. Wine and sherry brighten the base so the cream does not make everything taste heavy.

The shell step is the one shortcut I would not skip when I have the shells in front of me. It adds more flavor than extra cream ever will.

The final texture comes from three small choices: simmering the vegetables until tender, blending the base thoroughly, and straining if you want a smoother finish. Cream goes in after blending, and the lobster goes in right before serving. That is the quiet trick: the lobster is the prize, so do not make it do extra work in the pot.

What Is Lobster Bisque?

Lobster bisque is the smooth, creamy side of seafood soup: less chunky than chowder, more polished than stew, and built around shellfish stock, aromatics, tomato paste, wine or sherry, and cream. When it is done well, it tastes rich but not heavy, sweet with lobster but not fishy, and smooth enough to feel special.

Thickness is not the real goal. Balance is: a full seafood base, a little sweetness from the aromatics and tomato paste, enough acidity to wake everything up, and cream that makes the soup plush without muting the lobster.

Equipment You Need

You do not need a restaurant kitchen here. A heavy pot builds flavor, a blender smooths the base, and a fine mesh strainer gives the soup its polished finish.

  • Heavy Dutch oven or soup pot: for sautéing, simmering, and finishing the soup.
  • Kitchen shears: for cutting open lobster shells cleanly.
  • Cutting board and sharp knife: for chopping aromatics and lobster meat.
  • Blender or immersion blender: for smoothing the base.
  • Fine mesh strainer: for a silkier, more polished texture.
  • Whisk: for working flour into the base without clumps.
  • Ladle and measuring cup: for straining, measuring, and adjusting stock.

The fine mesh strainer is not mandatory, but it is the difference between a rustic homemade soup and a smooth bisque. Use it if you have one. If you use a countertop blender, blend hot soup in batches and vent the lid slightly so steam can escape.

Ingredients for Lobster Bisque

Once the method makes sense, the ingredient list feels much less fancy. Each item is there to build sweetness, body, brightness, or shellfish depth.

Overhead ingredient board with lobster tails, seafood stock, onion, celery, carrot, garlic, tomato paste, cream, wine, herbs, lemon, and butter.
Once the lobster tails, seafood stock, aromatics, tomato paste, cream, herbs, and lemon are laid out, the recipe feels organized instead of intimidating.

Lobster Tails

For homemade bisque, lobster tails are the most practical choice. They are easier to find than whole live lobsters, simpler to cook, and still give you shells for stock. Four tails, about 4 to 5 oz each, give enough lobster for 4 generous bowls or 6 appetizer portions.

Frozen lobster tails work well. Thaw them overnight in the refrigerator, or place them in a sealed bag in cold water if you need a faster thaw. Pat them dry before cooking so they do not water down the base.

If you bought extra lobster meat and want a colder, buttery seafood-shack style meal later, save some for these lobster rolls with extra lobster meat.

Lobster Shells or Seafood Stock

The shells are where much of the deep lobster flavor lives. You can make a solid soup with store-bought seafood stock, but simmering the tail shells in that stock makes the base taste fuller and more special.

Taste the stock before using it. If it tastes harsh, stale, metallic, or aggressively salty, it will show up in the finished soup. Lobster bisque does not hide bad stock well.

Without shells, use the cleanest seafood or lobster stock you can find. Clam juice can help in a pinch, but it can be salty, so use it carefully. Chicken stock is an emergency backup, not the ideal choice, because it does not give the same seafood depth.

Onion, Celery, Carrot, and Garlic

These aromatics create the savory foundation. Chop them finely for the bisque itself so they soften quickly and blend smoothly. For the shell stock, rough chopping is fine because everything gets strained.

Tomato Paste

This paste is not there to make the bisque taste like tomato soup. Once it cooks to a brick-red color, it gives the soup warmth, sweetness, color, and a savory base note.

Flour or Thickener

You only need a small amount of flour. It gives the soup body without turning it into gravy. For a gluten-free version, cornstarch slurry is the quickest fix, while rice gives a softer, old-school texture once blended.

Sherry, Wine, or Brandy

Dry sherry is classic here. A dry white wine is easier to find and works beautifully. Brandy or cognac can add a deeper special-occasion note. Use dry alcohol, not sweet dessert-style wine.

Heavy Cream

Cream should make the bisque feel plush, not dull. Add it after blending so the lobster and stock still stay in front.

Herbs and Seasoning

Thyme, tarragon, chives, parsley, paprika, and a tiny pinch of cayenne all work well with lobster. Keep the seasoning warm and supportive. The lobster should still be the main flavor.

Best Lobster to Use

You have more options than you might think. The right choice depends on how much work you want to do, how much shellfish depth you want in the stock, and whether you are starting with raw or cooked meat.

Lobster optionWorks?Use it for
Raw lobster tailsYesMost practical default for homemade bisque
Frozen lobster tailsYesThaw first, then cook briefly
Cooked lobster meatYesAdd near serving so it does not overcook
Whole lobsterYesDeepest flavor, but more work
Lobster shells onlyYesUse for stock; add separate cooked lobster if serving
LangostinoYesBudget-friendly variation or pasta add-in
Shrimp or crabYesUseful variation, but not classic lobster bisque

If you are buying lobster tails specifically for this recipe, look for tails that smell clean and mild, not fishy. Avoid tails with gray patches, strong odor, or freezer burn. For more buying context before shopping, NOAA’s American lobster guide is a helpful reference on flavor, texture, and seafood basics. Read NOAA’s American lobster seafood guide.

Choose Your Lobster Bisque Method

Use this table when you are deciding how much time, lobster flavor, and shortcut help you want. The middle path is the sweet spot for most kitchens: easy enough to manage, but deep enough to taste special.

MethodWhat you doFlavor levelUse it for
EasyPoach lobster tails in seafood stock and use that stock directlyClean and simpleWeekends, first-time bisque, simpler cooking
BetterPoach the tails, then simmer the shells in that same stockFuller and sweeterMost home cooks who want deeper flavor
BestMake a fuller lobster stock from shells, bodies, aromatics, and wineDeepest and most layeredSpecial occasions, dinner parties, holiday starters
ShortcutUse lobster base or clam juice with seafood stockStrong but salt-sensitiveWhen you need flavor fast

Most balanced path: poach the lobster tails in seafood stock, then simmer the shells in that same stock for 25 to 35 minutes. It is not much harder than the easy version, but the broth tastes much fuller.

Infographic comparing easy, better, and best lobster bisque methods with stock-only, simmered shells, and fuller lobster stock options.
The middle path is the sweet spot: poach lobster tails in stock, then simmer the shells back into that stock before building the bisque.

How to Make Quick Lobster Stock From Shells

If you have lobster shells, do not throw them away. A quick shell stock turns a simple base into a much better one. This is the step where the soup starts to smell expensive.

Lobster shells cooking in a pot with onion, celery, carrot, garlic, thyme, and tomato paste.
Sautéing lobster shells with aromatics and tomato paste gives the stock a sweeter, deeper base than seafood stock alone.

After poaching the lobster tails in seafood stock, save that stock. Heat a tablespoon of butter or olive oil in a pot. Add the shells and cook them for a few minutes until they smell fragrant. Then add onion, celery, carrot, garlic, and a spoonful of tomato paste. Once the paste darkens slightly, deglaze with dry white wine if using. Add the lobster-poaching stock, a bay leaf, and thyme. Simmer for 25 to 35 minutes, then strain well.

Golden lobster shell stock being strained through a fine mesh strainer with shells and vegetables left behind.
After simmering, strain for liquid rather than solids: press gently for flavor, then leave the gritty shell bits behind.

Next, measure the liquid. Use 4 cups / 960 ml for the bisque. Short on stock? Top it up with water or seafood stock. Extra stock is a bonus — save it for thinning the soup, reheating leftovers, or making a small seafood sauce.

Glass measuring jug filled with golden lobster stock exactly at the 4-cup mark, with herbs and lobster shells in the background.
Measure the strained stock before moving on, because the bisque base needs the right amount of liquid to cook and blend properly.

The simmer should be steady but not rough. A lazy bubble is enough. Press on the shells and vegetables while straining to extract the liquid, then leave the gritty bits behind.

If your stock smells sweet, buttery, and seafood-rich here, you have already done the most important flavor work. That is when the recipe starts to feel less like a gamble and more like a plan.

Success Checkpoints for Lobster Bisque

Use these checkpoints as you cook. They turn the recipe from a list of steps into something you can read with your eyes, nose, and spoon.

Infographic listing lobster bisque success checkpoints with small visuals for lobster, shell stock, tomato paste, spoon texture, cream, and final lobster.
Use the visual checkpoints as you cook, because color, aroma, texture, and timing matter more than the clock alone.
StageCorrect signProblem sign
Lobster poachMeat turns opaque but still looks tenderTight curl, rubbery texture, or long simmering
Shell stockSweet, buttery, seafood-rich aromaHarsh, stale, or aggressively salty smell
Tomato pasteBrick-red and savory-smellingBright red and raw-smelling
Simmered baseVegetables are very softCarrot or celery still feels firm
Blended soupSmooth and lightly spoon-coatingPasty, gritty, watery, or fibrous
Cream stageSmooth, shiny, and not boiling hardGrainy, split, or aggressively bubbling
Final lobsterWarmed through for 1 to 2 minutesLeft to simmer in the finished soup

If the soup lightly coats a spoon before the lobster goes in, the texture is already close. The lobster only needs to warm through at the finish; that restraint is what keeps it tender.

Once those signs are there, the hard part is behind you. From here, the bisque is less about effort and more about finishing it with restraint.

Before you start the detailed method, use the cook-time table below with the success checkpoints. The lobster should turn opaque and tender before it ever reaches the final bisque.

How Long to Cook Lobster Tails for Bisque

Lobster tails for bisque should be cooked briefly. The meat should turn opaque and firm up slightly, but it should not become tight or chewy.

Lobster tail sizeApproximate cook timeWhat to look for
4 oz / 115 g3 to 4 minutesOpaque meat, still tender
5 oz / 140 g4 to 5 minutesOpaque and just firm
6 oz / 170 g5 to 6 minutesCooked through but not tight
Cooked lobster meatWarm only 1 to 2 minutesDo not simmer for long

When in doubt, slightly undercook the lobster during the first step. It will warm again in the finished soup. Overcooked lobster is the main reason homemade bisque feels disappointing.

Cooked lobster tail meat beside its shell, looking pearly white, opaque, and tender on a clean plate.
Stop when the lobster meat is opaque and tender-looking; meanwhile, a tight curl usually warns that it has gone too far.

For food safety, the FDA says shrimp, lobster, and crab should be cooked until the flesh is pearly and opaque. In this recipe, that means cooking the tails briefly, then warming the chopped meat near serving instead of letting it simmer in the pot. See the FDA safe food handling guidance.

Now that the timing and doneness cues are clear, follow the step-by-step method and keep the lobster out of long simmering.

Step-by-Step Instructions

1. Prep the Lobster Tails

Cut along the top of each shell with kitchen shears. Leave the meat inside for the brief poach. The cut helps heat reach the meat and makes the meat easier to remove after cooking.

Hands using kitchen shears to cut along the top shell of raw lobster tails on a white cutting board.
Cutting along the top shell helps the lobster tail cook evenly and, later, makes the meat easier to remove without tearing.

2. Poach the Lobster Briefly

Bring the seafood stock to a low simmer, then add the tails. For most 4 to 5 oz tails, 3 to 5 minutes is enough. The meat should turn opaque, but it should not tighten into a rubbery curl. Remove the tails right away, cool them slightly, then pull out and chop the meat.

This is the moment to be conservative. The lobster does not need to be fully pampered yet; it only needs to be protected.

Lobster tails poaching gently in golden seafood stock inside a pot with steam and a low simmer.
Keep the poach brief and gentle; the lobster only needs to turn opaque because it warms once more in the finished bisque.

3. Separate Meat, Shells, and Stock

Save both the shells and the poaching stock. The stock already has a little lobster flavor now, and the shells can make it taste even more layered.

Saved lobster shells and chopped lobster meat separated into bowls with kitchen tools nearby.
Once the tails are poached, the shells go back into the stock, while the meat waits safely for the final warm-through.

4. Make the Shell-Enhanced Stock

Cook the shells with rough-chopped aromatics and tomato paste until the pot smells sweet, buttery, and seafood-rich. Add wine if using, then pour in the lobster-poaching stock. Simmer, strain, measure, and use 4 cups for the bisque.

5. Sauté the Aromatics

Melt butter in a heavy pot and add onion, celery, and carrot. Cook until the vegetables soften and smell sweet, about 6 to 8 minutes. Soft vegetables blend more smoothly and create a better base.

Chopped onion, celery, and carrot softening in butter inside a heavy pot.
Softened onion, celery, and carrot give the bisque a sweeter foundation and help the blended base turn smoother later.

6. Build Brick-Red Tomato Paste Flavor

Add garlic and tomato paste. Stir until the paste darkens from bright red to a deeper brick-red color. That little bit of cooking improves the color and removes raw tomato sharpness.

Close-up of brick-red tomato paste cooked with lobster shells, vegetables, and a wooden spoon.
Cook the tomato paste until it turns brick-red; that small color change adds warmth, depth, and a less raw tomato taste.

7. Add Flour

Sprinkle flour over the vegetables and stir until everything looks thick and coated. It should look like a soft paste, not a dry clump. This gives the soup body without making it heavy.

Flour stirred into softened vegetables in a pot, forming a thick roux-like paste.
Before adding liquid, the flour should coat the vegetables like a soft paste; this gives the lobster bisque body without heaviness.

8. Deglaze With Wine and Sherry

Pour in the wine and sherry slowly, scraping up the bottom of the pot. Let it bubble briefly so the sharp alcohol smell softens. This is where the base starts to smell like classic bisque instead of simple vegetable soup.

9. Build the Simmering Base

Pour in the prepared stock, then season with paprika, thyme, cayenne if using, and a little salt and pepper. Simmer until the vegetables are very soft and the broth tastes full. Add salt gradually; stock and seafood bases can sneak up on you.

Golden lobster stock being poured into a brick-red bisque base in a pot.
When the shell stock meets the tomato-aromatic base, the pot shifts from simple vegetables into a true lobster bisque foundation.

10. Smooth the Bisque Base

Use an immersion blender or countertop blender to smooth the base. An immersion blender is convenient, but a countertop blender usually gives the smoothest result. Work in batches if needed and be careful with steam.

Immersion blender blending coral-orange lobster bisque base in a pot.
Blend only after the vegetables are tender; otherwise, the base can stay fibrous instead of turning silky.

11. Strain for a Polished Finish

For the silkiest finish, strain the blended soup through a fine mesh strainer. If you want the bowl to feel like restaurant bisque, this is the extra minute that pays you back.

Smooth coral-orange lobster bisque being pressed through a fine mesh strainer into a clean pot.
Straining after blending is optional, but it is the step that makes homemade lobster bisque feel polished and restaurant-smooth.

12. Add Cream Over Low Heat

Return the strained soup to the pot and lower the heat. Stir in the cream slowly. The soup should look smooth and shiny, not bubbling like it is still cooking hard.

Heavy cream being poured into smooth coral-orange lobster bisque in a pot.
Add cream over low heat, then keep the soup steaming rather than boiling so the texture stays smooth and silky.

13. Finish the Bisque Base

Taste the base before the lobster goes in. It should lightly coat a spoon, smell sweet and buttery, and taste balanced. If it tastes heavy, add lemon juice or sherry vinegar. A thin base needs a little more simmering. Flat flavor usually means salt should be checked first.

Spoon lifted from creamy coral-orange lobster bisque showing a light coating on the back of the spoon.
The base should lightly coat a spoon before the lobster goes in; thick enough to feel silky, but not heavy like gravy.

14. Warm Lobster Right Before Serving

Stir in the chopped lobster meat during the final minute or two, just long enough to warm it. You can also place it directly in bowls and ladle the hot bisque over it. The soup should arrive at the table hot, smooth, and composed — not bubbling like it is still cooking.

Close-up bowl of silky lobster bisque with lobster tail pieces, chives, cream swirl, and a spoon nearby.
Add the lobster only at the end so the bisque stays creamy and the tail meat remains tender in the finished bowl.

The three texture rules: save the lobster-poaching stock, keep the cream below a hard boil, and keep the lobster out of the long simmer so it stays tender.

If the bisque tastes flat, looks thin, feels too thick, or the cream seems grainy, go to troubleshooting lobster bisque before adding more cream.

Back to top

How to Make Lobster Bisque Smooth and Silky

A well-made bisque should feel creamy and smooth, not grainy or chunky. The easiest way to get that texture is to cook the vegetables until fully tender, blend thoroughly, and strain the soup after blending.

  • Cook the vegetables long enough. Hard carrot or celery pieces will not blend smoothly.
  • Use enough liquid. A very thick base can turn pasty in the blender.
  • Blend in batches if needed. Do not overfill a countertop blender with hot soup.
  • Strain for a smoother finish. This is optional, but it makes the bowl feel more polished.
  • Add cream after blending. Cream finishes the texture instead of getting cooked hard from the beginning.

If the soup looks a little plain before the cream, do not worry; the final richness comes later. When it is thicker than you like after blending, loosen it with warm stock before adding more cream. More cream makes it richer, but stock keeps the lobster flavor cleaner.

How to Thicken Lobster Bisque

The soup should have body, but it should not feel like gravy. The goal is a light spoon-coating texture, not a heavy sauce.

ThickenerUse it forHow it affects texture
Flour rouxClassic creamy bisqueSmooth, reliable, familiar
Cornstarch slurryGluten-free quick fixGlossy and fast-thickening
Cooked riceOld-school silky textureVelvety once blended
ReductionStronger flavorDeepens taste but takes longer
Blended vegetablesLighter bodyNatural thickness, less rich

If the bisque is too thin, simmer it uncovered for a few minutes, or whisk 1 teaspoon cornstarch with 1 tablespoon cold water and stir it into the warm soup. For a fully gluten-free version from the start, skip the flour and use 1½ tablespoons cornstarch mixed with 2 tablespoons cold water after blending. Simmer for 1 to 2 minutes so it thickens.

If it is too thick, loosen it with warm seafood stock. Adding dry flour directly to finished soup can clump and leave a raw flour taste, so use a slurry or reduction instead.

Sherry, Wine, Brandy, and No-Alcohol Options

Lobster bisque often uses alcohol because it adds aroma and balances the richness of cream and shellfish. You have several reliable options.

OptionFlavorUse it for
Dry sherryClassic, nutty, mellowTraditional lobster bisque flavor
Dry white wineBright and cleanEveryday version
Brandy or cognacDeep and special-occasionA more luxurious bowl
No alcoholMilder, still balancedUse extra stock plus lemon or sherry vinegar

For the most balanced version, use white wine and a little dry sherry. To make it without alcohol, replace the ½ cup wine and ¼ cup sherry in the bisque base with ¾ cup extra seafood stock. If you are also skipping the optional wine in the shell stock, use another ½ cup stock there too. Finish with lemon juice or sherry vinegar so the soup still tastes bright.

No-alcohol does not mean flat. The stock gives body, while lemon juice or sherry vinegar gives the lift that wine would normally bring.

The same no-wine idea works beautifully in seafood pasta too. This shrimp scampi without wine uses garlic, lemon, butter, and stock when you want a brighter seafood dinner without opening wine.

Skip sweet sherry unless you intentionally want a sweeter soup. Dry sherry is the safer choice for classic flavor.

Troubleshooting Lobster Bisque

If the soup is not where you want it yet, do not assume it is ruined. Bisque usually needs one clear adjustment: salt, acid, stock, cream, or lower heat.

Before you fix the soup, taste it in this order: salt first, then acid, then stock depth, then cream. Most bland bisque is not missing more cream; it is missing balance.

Troubleshooting infographic for bland lobster bisque with numbered steps for salt, acid, stock depth, and cream.
Before adding more cream, fix bland lobster bisque in order: salt first, then acid, then stock depth, and only then richness.

Bland Lobster Bisque

If the bisque tastes bland, do not panic. Check salt first, then add a little lemon juice or sherry vinegar. If it still tastes thin or hollow, the stock may need more shell flavor, reduction, or a small amount of lobster base. Add more cream only after the soup already tastes balanced.

Fishy-Tasting Bisque

A fishy taste usually comes from old seafood, poor-quality stock, or over-reduced briny liquid. Use fresh-smelling lobster, simmer the shells steadily but not aggressively, and balance the finished soup with lemon, herbs, cream, and enough aromatics.

Rubbery Lobster

Chewy lobster almost always means the meat spent too much time in heat. The soup can still taste good, but next time, treat lobster like the finishing touch, not an ingredient that needs to cook in the pot. If you already have cooked lobster, put it in the bowls and ladle hot bisque over it.

Bisque That Is Too Thin

Simmer it uncovered for a few minutes to reduce, or add a small cornstarch slurry. You can also blend in more of the cooked vegetables if you have not strained the soup yet.

Bisque That Is Too Thick

Add warm seafood stock a little at a time until the texture feels right. Use more cream only if you also want it richer.

Split or Grainy Cream

The heat was probably too high after the cream was added. Keep the soup low enough that it steams rather than bubbles hard. If it looks slightly separated, blending can help, but prevention is better.

How to Make Lobster Bisque Pasta or Use Bisque as Pasta Sauce

Lobster bisque pasta is a smart way to use leftover homemade bisque or upgrade a container of store-bought bisque. Think of the soup as a creamy seafood sauce first: reduce it slightly, loosen it with pasta water, and add seafood only near the finish.

Quick lobster bisque pasta formula for 2 servings: use 1½ to 2 cups lobster bisque, 6 to 8 oz pasta / 170 to 225 g, ¼ cup reserved pasta water / 60 ml, and 4 to 6 oz cooked lobster, shrimp, crab, scallops, or langostino.

Creamy lobster bisque pasta with noodles, lobster pieces, herbs, lemon zest, black pepper, and a fork.
Leftover lobster bisque becomes a creamy seafood pasta sauce when you reduce it slightly, toss with noodles, and loosen with pasta water.

To make it, simmer the bisque for 3 to 5 minutes so it thickens slightly. Add cooked pasta and toss with a splash of pasta water until the sauce coats the noodles. Then fold in lobster, shrimp, crab, scallops, or langostino near the end, and finish with lemon juice, black pepper, and herbs.

Pasta shapes that work well include linguine, fettuccine, rigatoni, fusilli, farfalle, and lobster ravioli. Use Parmesan lightly if you like, but do not overdo it. The sauce is already rich, and too much cheese can hide the seafood flavor.

For another creamy seafood pasta that uses pasta water to keep the sauce silky instead of heavy, this creamy salmon pasta with lemon and garlic follows the same gentle-sauce logic with tender fish.

  • Thick sauce: add pasta water.
  • Thin sauce: reduce it before adding pasta.
  • Overly rich: add lemon juice or a little chili.
  • Flat flavor: add herbs, black pepper, or a splash of sherry vinegar.

How to Upgrade Store-Bought Lobster Bisque

Homemade gives you the cleanest lobster flavor, but store-bought bisque can still be useful as a shortcut for soup, lobster bisque pasta, seafood sauce, or a quick starter. Most store-bought lobster bisque needs one of two things: more body or more brightness.

Store-bought problemQuick rescue
WaterySimmer to reduce before serving or tossing with pasta
BlandAdd lemon juice, sherry vinegar, herbs, or a small splash of dry sherry
Lacks lobsterAdd cooked lobster, shrimp, crab, scallops, or langostino
Too saltyLoosen with unsalted stock or cream, not more seafood base
Heavy and flatAdd lemon, herbs, black pepper, or a small splash of acid

If it tastes salty and heavy at the same time, do not add more seafood base. Loosen it with unsalted stock or a little cream, then add lemon or herbs to make it taste cleaner.

Overhead board showing lobster bisque with lemon, herbs, seafood, cream, pasta, and upgrade notes for store-bought bisque.
Store-bought lobster bisque usually needs one clear fix: reduce watery soup, brighten with lemon and herbs, add seafood, or loosen saltiness.

For ravioli, reduce the bisque until it lightly coats a spoon, then use it as a sauce instead of a full bowl of soup. If the store-bought bisque already contains cream, warm it over low heat so the texture stays smooth.

Back to top

Lobster Bisque Variations

These variations all work best when the core bisque base is balanced first. After that, shrimp, crab, spice, gluten-free thickeners, or dairy-free cream can change the bowl without changing the method.

Lobster bisque variations board with a central soup bowl and surrounding shrimp, crab, chili, gluten-free thickener, and dairy-free cream cues.
Use the same bisque base for shrimp, crab, spicy, gluten-free, or dairy-free variations without changing the core method.

Shrimp and Lobster Bisque

When you want the bowl to feel fuller without buying extra lobster, shrimp is the easiest helper. Add shrimp shells to the stock for extra seafood flavor, then add peeled shrimp during the final few minutes of cooking.

Crab and Lobster Bisque

For a softer, sweeter bowl, crab works especially well when you want delicate pieces of seafood in each spoonful. Stir lump crab meat into the finished soup after the cream and fold carefully so the crab stays in pieces.

Langostino Lobster Bisque

Use langostino when the bisque is heading toward pasta, ravioli, or a budget-friendly seafood dinner. Add it near serving, just long enough to warm through.

Spicy Lobster Bisque

A little heat can make the bisque feel even cozier, especially when you are serving it with bread, rice, or pasta. Add cayenne, smoked paprika, chili flakes, or a small amount of Cajun seasoning, but keep the spice supportive rather than overpowering.

Gluten-Free Lobster Bisque

Skip the flour and thicken after blending with cornstarch slurry, rice, or gluten-free flour. Cornstarch is the quickest route, while rice gives a softer, more old-school texture and a classic blended body.

Dairy-Free Lobster Bisque

Use cashew cream for the most neutral dairy-free option. Coconut milk can work, but it will change the flavor and make the soup taste sweeter. Add dairy-free cream near the end over low heat, just as you would heavy cream.

Lighter Lobster Bisque

Use less cream, rely more on blended vegetables, and finish with lemon juice for brightness. The soup will be lighter, though less rich than the classic version.
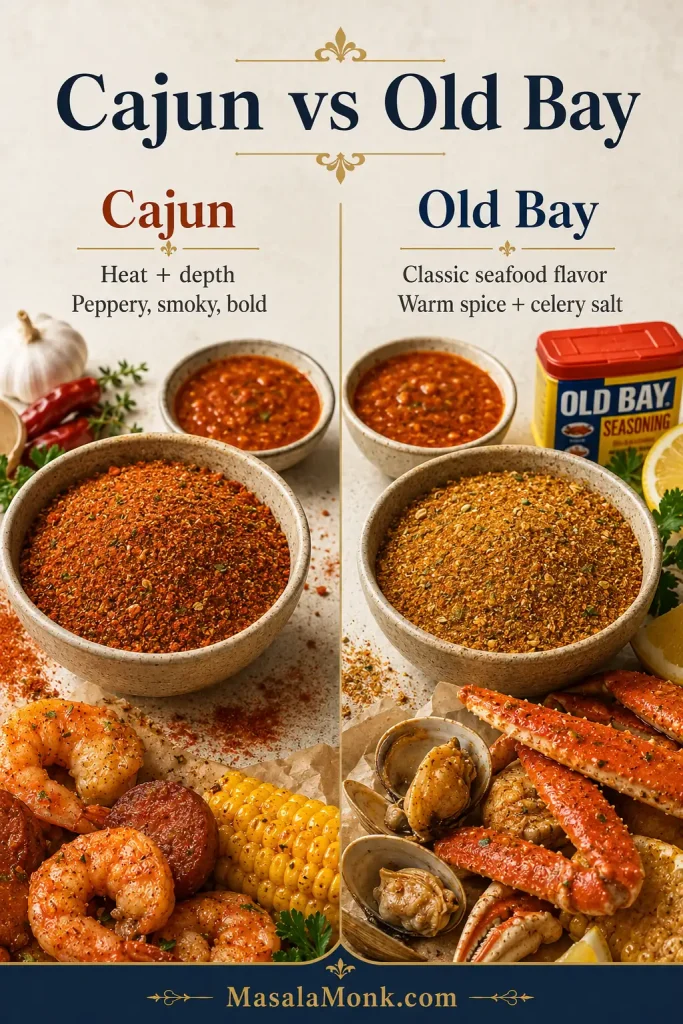
Lobster Bisque vs Lobster Soup vs Lobster Chowder

These names are often used loosely, but they are not exactly the same.

DishTextureTypical style
Lobster bisqueSmooth, blended, creamySilky soup made with shellfish stock and cream
Lobster soupVariesBroad term for any lobster-based soup
Lobster chowderChunkyOften includes potatoes, cream, and larger pieces
Lobster stewRusticUsually lobster-forward and less blended

If you want a classic bisque, keep it smooth and strain it if possible. For a chowder-style lobster soup, add potatoes and skip the final fine straining.

Another creamy seafood soup that stays chunkier and simpler than bisque is this salmon soup recipe: potatoes, dill, lemon, cream, and tender salmon added near the end.

What to Serve With Lobster Bisque

This is the kind of soup that does not need a crowded plate around it. A small bowl, good bread, and something crisp on the side are enough to make it feel like a planned meal, whether you serve it as a starter, a light dinner, or part of a special seafood spread.

Lobster bisque served with garlic bread, green salad, lemon wedges, spoon, navy linen, and a warm table setting.
Because lobster bisque is rich, pair it with crusty bread or garlic bread plus something crisp, fresh, and lemony.

Crusty bread is the easiest pairing, but a warm garlic bread loaf from scratch makes the bowl feel more like a full dinner.

  • Good crusty bread or garlic bread
  • Simple green salad with lemony dressing
  • Roasted asparagus or green beans
  • Baked potatoes or twice-baked potatoes
  • Steak for a surf-and-turf dinner
  • Lobster rolls if you have extra lobster meat
  • Shrimp scampi for a seafood dinner spread
  • Light pasta or lobster ravioli

For another cozy starter with a restaurant-style feel, this French onion soup for a cozy starter gives you the same slow, savory comfort in a non-seafood direction.
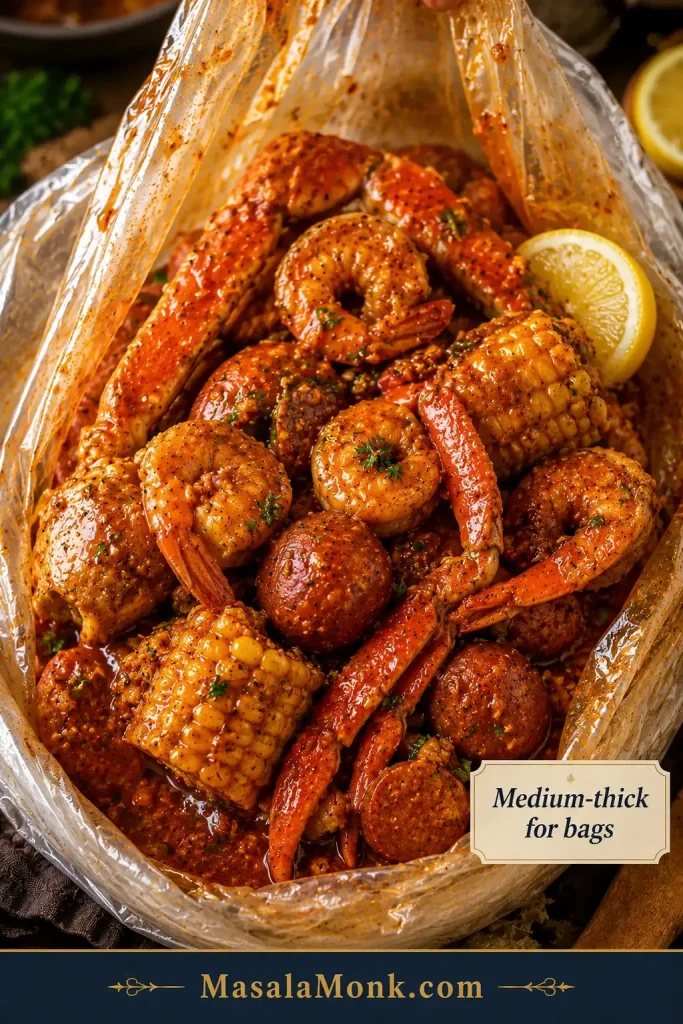
Make-Ahead, Storage, Freezing, and Reheating

Plan Ahead

The strongest make-ahead method is to prepare the base through the blending and straining step, then refrigerate it before adding cream and lobster. When ready to serve, warm the base, add cream, and finish with lobster.

For dinner-party timing, make the base up to 1 day ahead. Reheat it over low heat, add cream shortly before serving, and warm the lobster in the bowls or in the soup for only the final minute. That approach keeps the soup smooth and lets you serve it like it was finished fresh, even if most of the work happened yesterday.

Refrigerate

Store leftovers in an airtight container in the refrigerator for up to 2 to 3 days. Reheat over low heat.

Freeze

For the smoothest texture, freeze the base before adding cream and lobster. Cream-based soups can separate after freezing, and lobster meat can become less tender after repeated heating. Freeze the base for up to 2 to 3 months, thaw overnight in the refrigerator, then reheat and add cream and lobster just before serving.

Reheat

Warm the soup over low heat, stirring often. Keep the heat low enough that the soup steams rather than bubbles hard. If it thickens in the refrigerator, loosen it with a splash of seafood stock or cream.
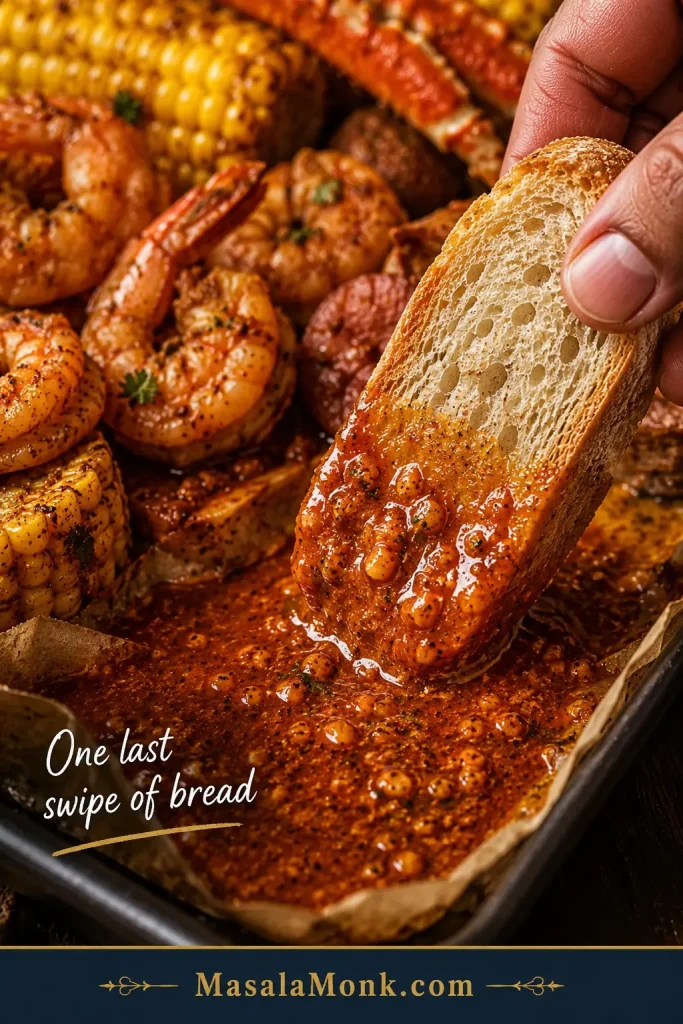
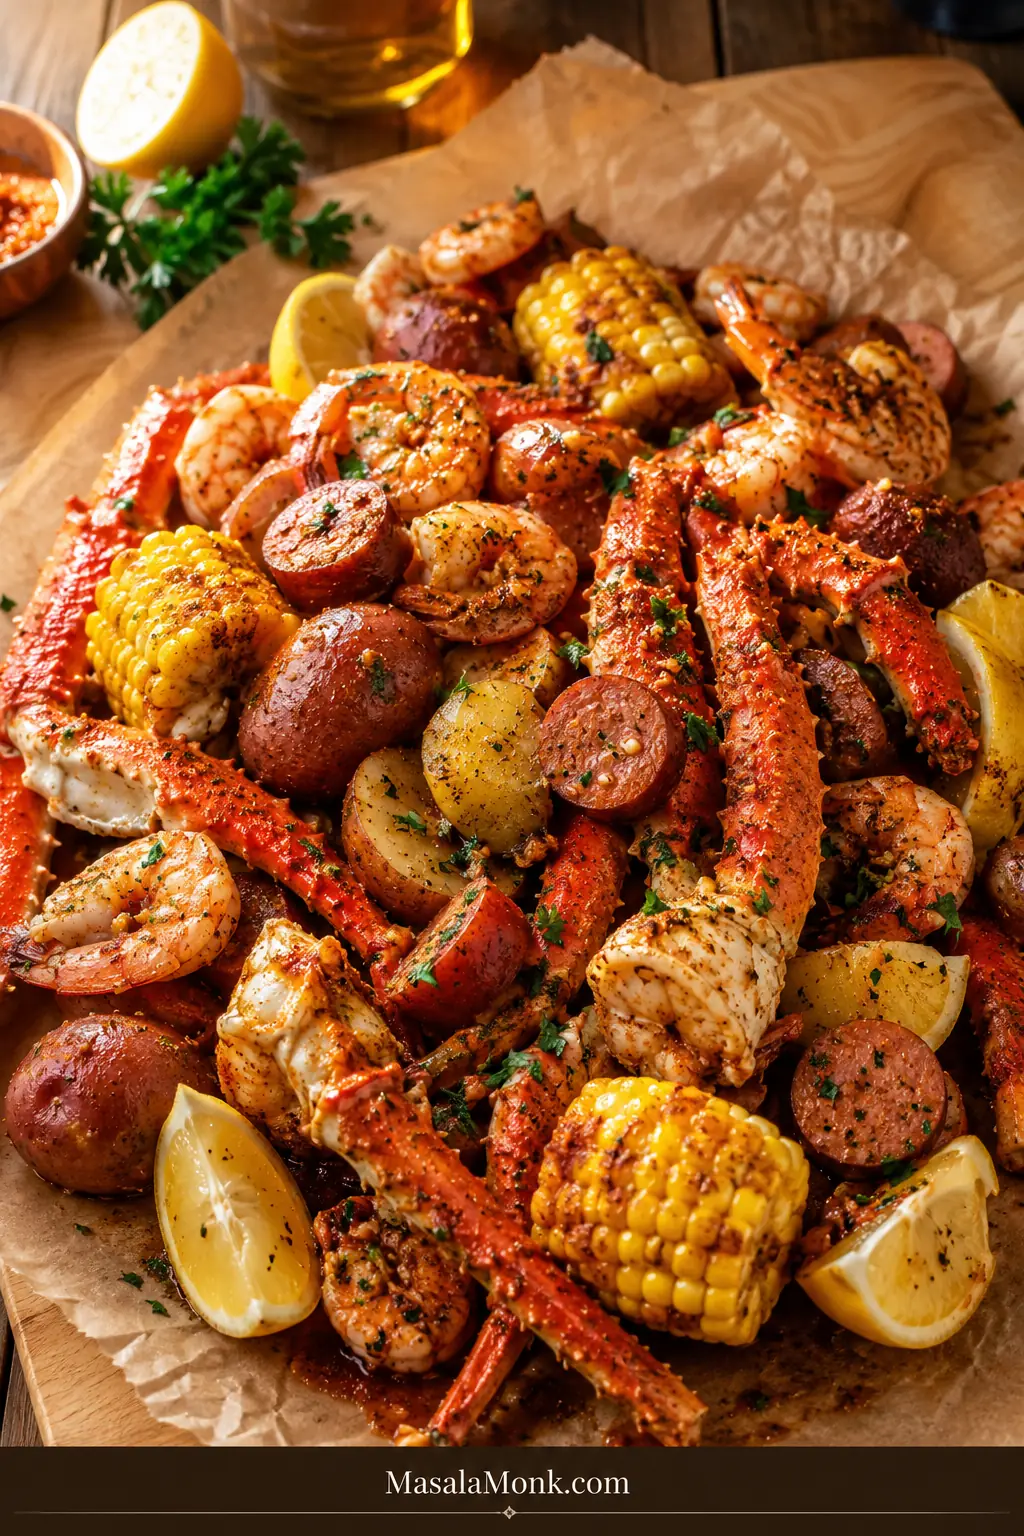

Use Leftovers

Leftover bisque is excellent as a pasta sauce, seafood sauce, or base for lobster ravioli. Reduce it, add pasta water if needed, and finish with lemon or herbs.

Have extra bisque? Turn it into lobster bisque pasta, use it as a seafood sauce, or see how to upgrade store-bought lobster bisque with the same balancing tricks.

That is the quiet bonus of a good bisque base: even a small amount can turn pasta, ravioli, or seafood into another special meal.

FAQ

These are the quick answers for the questions that usually come up once you start adapting the recipe.

Can I make lobster bisque with lobster tails?

Yes. Lobster tails are the most practical choice for homemade lobster bisque because they give you tender meat and shells for stock. You get the ease of tails while still building deeper flavor from the shells.

Are lobster shells required?

No, but lobster shells are the easiest way to make homemade bisque taste fuller and sweeter. If you do not have shells, use the cleanest lobster or seafood stock you can find, then balance the finished soup with lemon juice or sherry vinegar.

What if I already have cooked lobster meat?

Add cooked lobster only right before serving, just long enough to warm it. Since cooked meat gives you no shells for stock, use lobster stock if possible or strengthen seafood stock carefully with clam juice or lobster base.

Which stock works best?

Lobster stock or shell-enhanced seafood stock gives the fullest flavor. Clean seafood stock is the next best option, clam juice can help in small amounts, and chicken stock should be treated as an emergency backup because it lacks seafood depth.

How do I make it without wine or sherry?

Replace the ½ cup wine and ¼ cup sherry in the base with ¾ cup seafood stock. Finish with lemon juice or sherry vinegar so the soup still has brightness and does not taste flat.

What thickens lobster bisque best?

A flour roux is the classic choice. For gluten-free bisque, use cornstarch slurry or blended rice. To make a thinner finished soup, reduce it instead of adding more cream.

Why does my lobster bisque taste bland?

Start with salt, then add acid, then check stock depth. A little lemon juice or sherry vinegar often wakes up the soup, but if the stock itself is weak, shells, reduction, or a small amount of lobster base may be needed.

Why does lobster turn rubbery in bisque?

Lobster turns rubbery when it spends too long in heat. Treat it like the finishing touch, not an ingredient that needs to simmer: cook it briefly, remove it, and warm it only right before serving.

Is lobster bisque gluten-free?

It can be. Skip the flour and thicken after blending with cornstarch slurry, rice, or gluten-free flour. Cornstarch is fastest, while rice gives a softer blended texture and a more classic old-school body.

Can lobster bisque be dairy-free?

Yes, but it will taste less classic. Cashew cream is the most neutral option; coconut milk works, but it can make the soup sweeter. Add dairy-free cream near the end over low heat, just as you would heavy cream.

Does lobster bisque freeze well?

The base freezes better than the finished soup. Freeze before adding cream and lobster, then use within 2 to 3 months. Add cream and lobster only after reheating so the texture stays smoother and the seafood stays tender.

Can lobster bisque be used as pasta sauce?

Yes. Lobster bisque pasta works best when the bisque is reduced slightly, tossed with pasta, loosened with pasta water, and finished with seafood, lemon, and herbs.

What is the difference between lobster bisque and lobster chowder?

Lobster bisque is smooth, blended, and creamy. By contrast, lobster chowder is chunkier and often includes potatoes, cream, and larger pieces of seafood or vegetables.

What should I serve with lobster bisque?

Serve lobster bisque with crusty bread, garlic bread, a lemony salad, roasted vegetables, baked potatoes, or steak for a surf-and-turf meal. The best pairings are simple, crisp, or bread-like because the soup is already rich.

Lobster bisque should feel special, but it does not need to feel stressful. Start with lobster tails, use a stock you would happily taste on its own, save the shells if you can, and keep the lobster meat out of the long simmer. The best lobster bisque is not the one with the most complicated method. It is the one where the stock tastes clean, the cream stays silky, and the lobster is still tender when the spoon reaches the bowl.

Back to top