
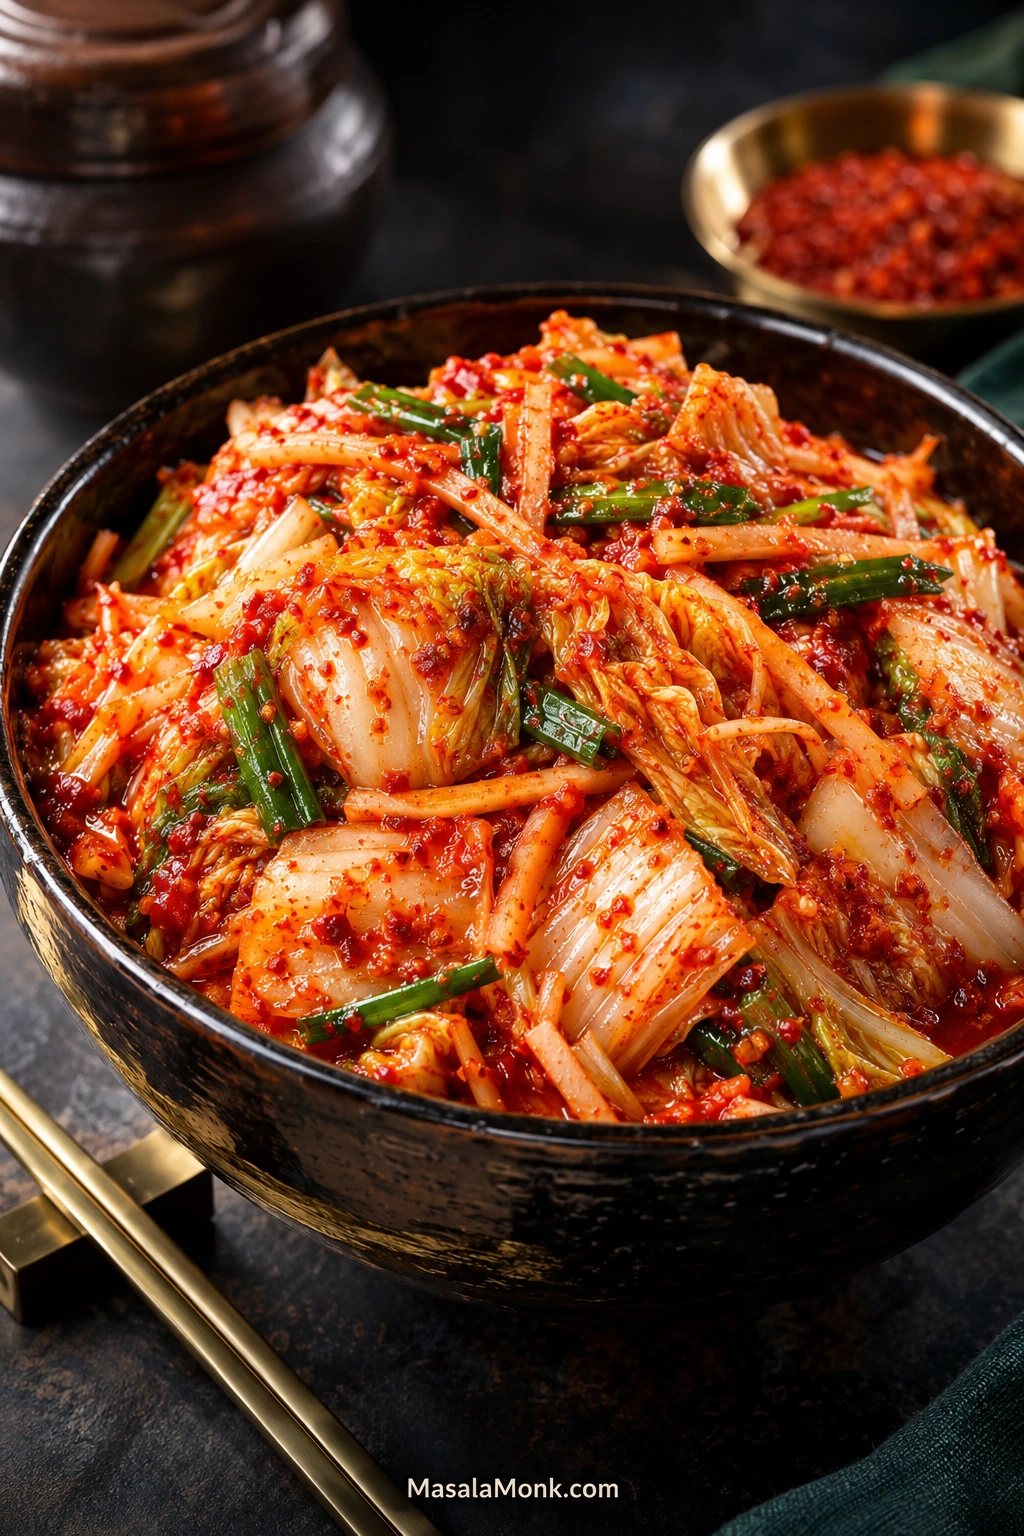
Freshly mixed kimchi has a pleasure of its own. The napa cabbage is cold and juicy, the thick ribs still have a firm crunch, and garlic, scallion and gochugaru cling to every fold. As the kimchi matures, the same cabbage becomes tangier, deeper and more distinctly fermented.
This easy kimchi recipe starts with one manageable head of napa cabbage and uses the chopped mak-kimchi method. Because the cabbage is cut before salting and seasoning, it is easier to handle than a whole-leaf batch. There are many kinds of kimchi; this is the spicy red napa-cabbage style.
The first time you make kimchi, some of the changes can look more dramatic than they really are. The cabbage collapses in the bowl, liquid appears in the container, and later the lid may hiss when you open it. You do not need specialist fermentation equipment for this batch. What matters more is learning how the cabbage should bend, taste and drain—and what the kimchi is telling you once fermentation begins.
Four Checks Before You Trust the Clock
The clock gets you close; the cabbage tells you when you are there. Every head carries a slightly different amount of water, and different salts behave differently too.
| Stage | What to Look For |
|---|---|
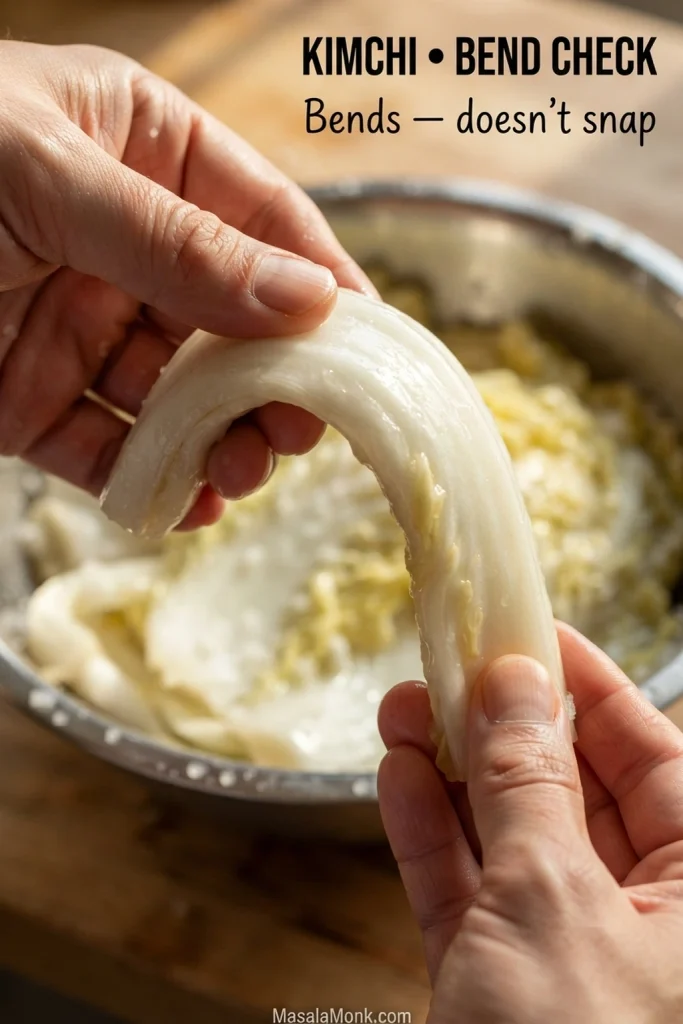
| Salted cabbage | A thick white rib bends readily instead of snapping, but still has some structure. |
| Rinsed cabbage | A piece with some of the thick white rib tastes pleasantly salty, not like concentrated brine. |
| Drained cabbage | The leaves are damp, but water is no longer trapped in the folds or pooling underneath. |
| Fermenting kimchi | Temperature and increasing acidity tell you more than a fixed number of days. |
Easy Kimchi Recipe
- Batch: 1 medium napa cabbage, 1.3–1.4 kg / about 3 lb
- Hands-on time: about 30–40 minutes
- Time before fermentation: about 2½–3 hours, much of it unattended
- Packed volume: usually around 2 L / 2 qt; cabbage size and packing will shift this a little
- Container: 3–4 L / 3–4 qt capacity, leaving generous room for liquid and gas
This formula is built around 1.3–1.4 kg / about 3 lb of cabbage. If your head is substantially smaller or larger, scale the ingredient amounts rather than using the listed quantities unchanged.
Before you begin: wash your hands and start with clean equipment and work surfaces.
Equipment
You will need a large nonreactive bowl, colander, kitchen scale, sharp knife and cutting board, small saucepan and a clean 3–4 L / 3–4 qt glass or food-safe plastic container. Food-safe gloves are useful when mixing the chile seasoning, and a plate or tray under the container will catch any overflow.
Kimchi Ingredients
Napa Cabbage and Salt
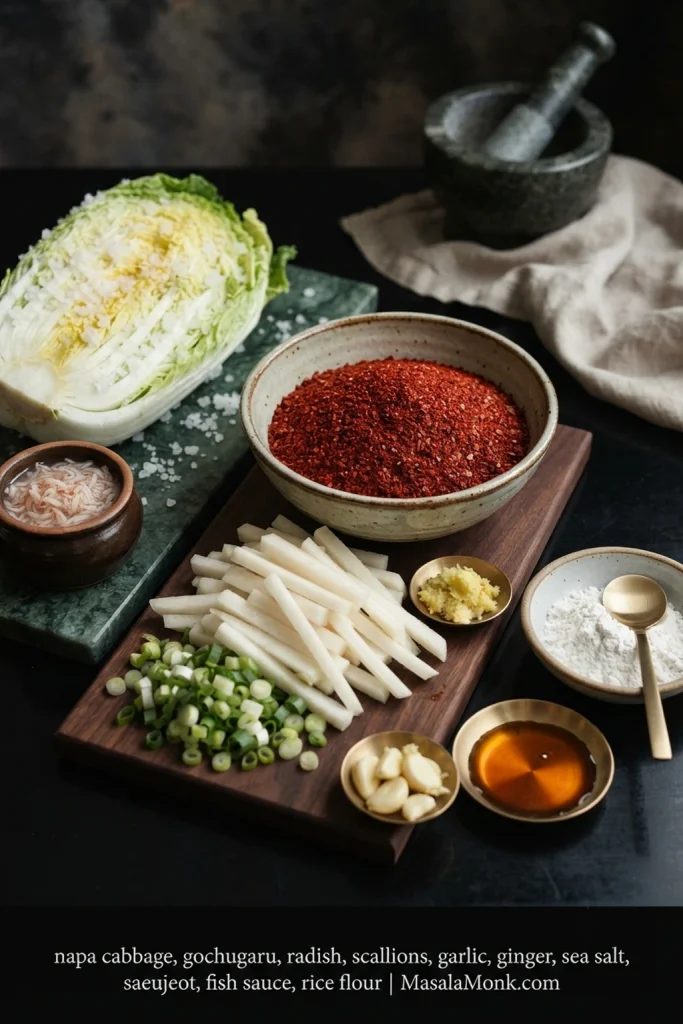
- 1 medium napa cabbage, 1.3–1.4 kg / about 3 lb
- 70 g / 2.5 oz Korean coarse sea salt, preferably non-iodized and without anti-caking additives
Choose a head that feels heavy for its size, with crisp pale ribs and fresh-looking leaves. Skip badly wilted cabbage, extensive bruising or slimy damaged spots. Napa cabbage may also be sold as Chinese cabbage. Softer warm-season cabbage can salt faster than dense cold-weather heads, so begin checking the ribs early.
Use the salt weight if you can. Coarse Korean sea salt, kosher salt and fine sea salt occupy very different amounts of space, so volume measurements do not translate neatly between them.
Rice Slurry
- 150 ml water, about ⅔ cup
- 15 g sweet rice flour, about 1½ tablespoons; also sold as glutinous or sticky rice flour
- 8 g sugar, about 2 teaspoons, optional
Sweet rice flour gives the seasoning body so it clings to the cabbage. Kimchi can ferment without it. “Glutinous” means sticky here; it does not mean the flour contains gluten. The optional sugar rounds the seasoning; it is not required to start fermentation.
Seasoning
- 50 g gochugaru, roughly ½ cup depending on the flakes, for a medium-hot batch; use 30–35 g for milder kimchi or 60–65 g if your gochugaru is mild and you want more heat
- 25 g garlic, about 6 large cloves, finely grated or minced
- 7 g fresh ginger, about 1½ teaspoons finely grated
- 30 ml Korean anchovy fish sauce, 2 tablespoons
- 15 g saeujeot, about 1 tablespoon of Korean salted shrimp, finely chopped
- 200 g / 7 oz Korean radish, cut into thin matchsticks
- 60 g scallions, about 4–5 scallions, cut into 4–5 cm / 1½–2 inch lengths
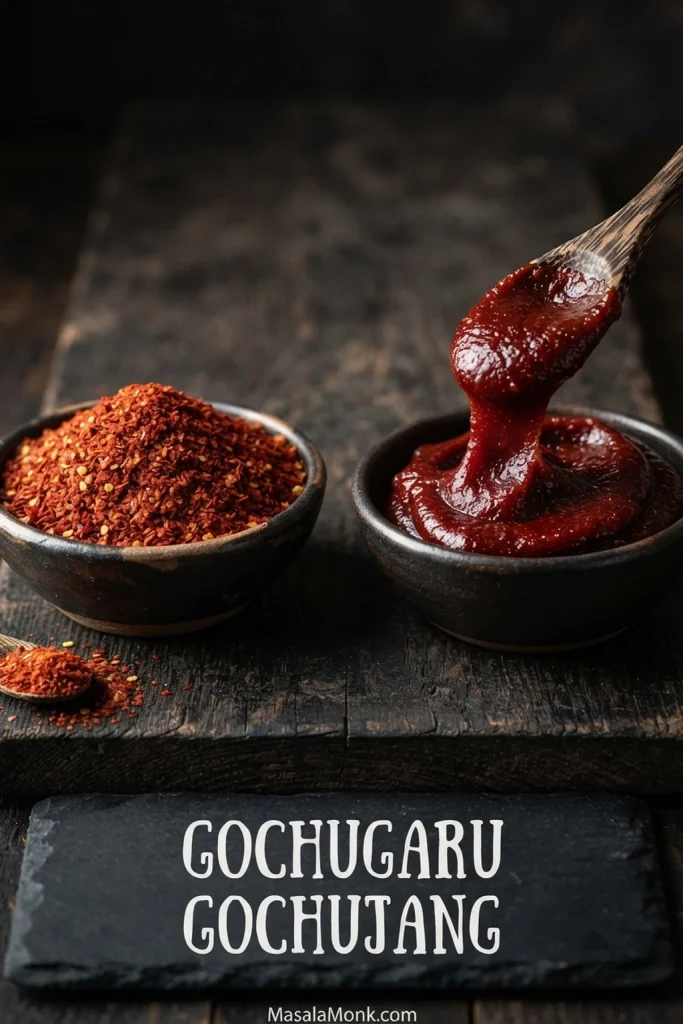
Gochugaru vs Gochujang
Look for Korean red pepper flakes labeled for kimchi, usually coarse or medium rather than powder-fine. Taste a tiny pinch before deciding how much to use because heat varies considerably between brands. Gochugaru is very different from gochujang, the thick fermented chile paste used in dishes such as the glaze on our Korean fried chicken.
Ingredient Notes and Substitutions
Korean radish is ideal here. Daikon works when that is what you can find, though it is generally a little less dense and more watery.
If you cannot find saeujeot, leave it out and increase the fish sauce to about 40 ml / 2 tablespoons plus 2 teaspoons. The finished kimchi will have a little less fermented-shrimp depth, but the seasoning will still be plenty savory.
Seafood-free note: this exact formula is not calibrated for simply omitting both fish sauce and saeujeot. A vegan or vegetarian version needs its own salt-balanced seasoning, so do not treat white miso as a 1:1 replacement here.
How to Make Kimchi
Cut and Salt the Cabbage
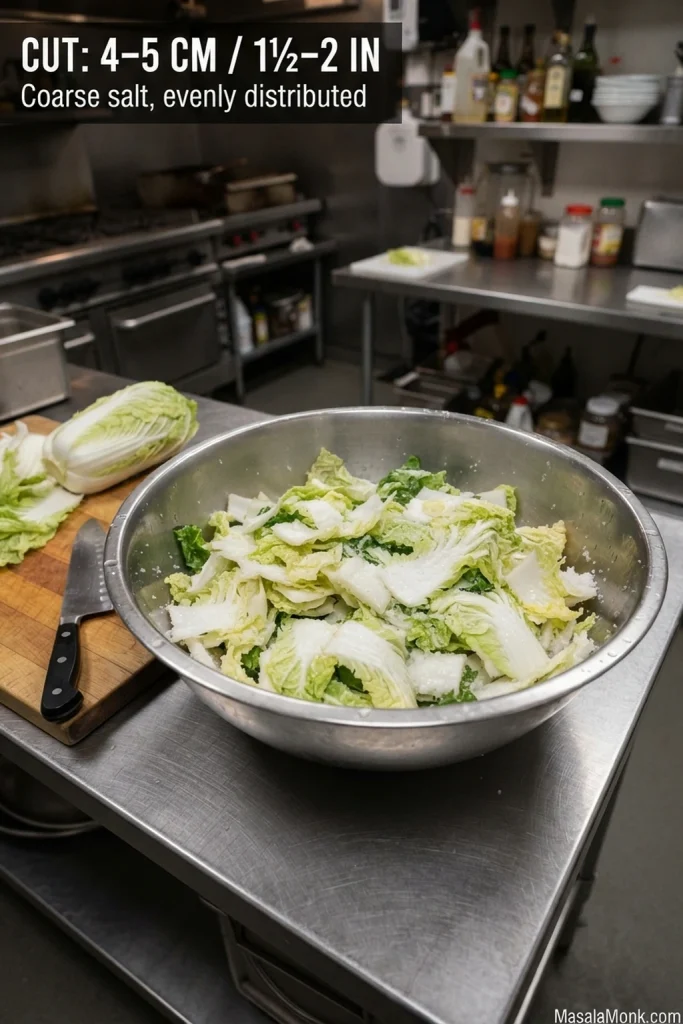
- Cut the cabbage. Remove badly damaged outer leaves. Quarter the cabbage lengthwise, trim away most of the dense core, then cut across the leaves into pieces about 4–5 cm / 1½–2 inches wide. Keep plenty of the pale ribs in the mix; they give the finished kimchi much of its crunch. Rinse once under cool water and drain briefly so the leaves remain damp.
- Salt it and check the bend. Layer the cabbage and salt in the bowl, then toss thoroughly. Leave for roughly 1½–2 hours, turning every 30 minutes. The pile will shrink dramatically as water leaves the cabbage. Bend check: start testing before the full 2 hours. A thick white rib should bend easily instead of snapping while still retaining some structure.
Rinse, Taste and Drain
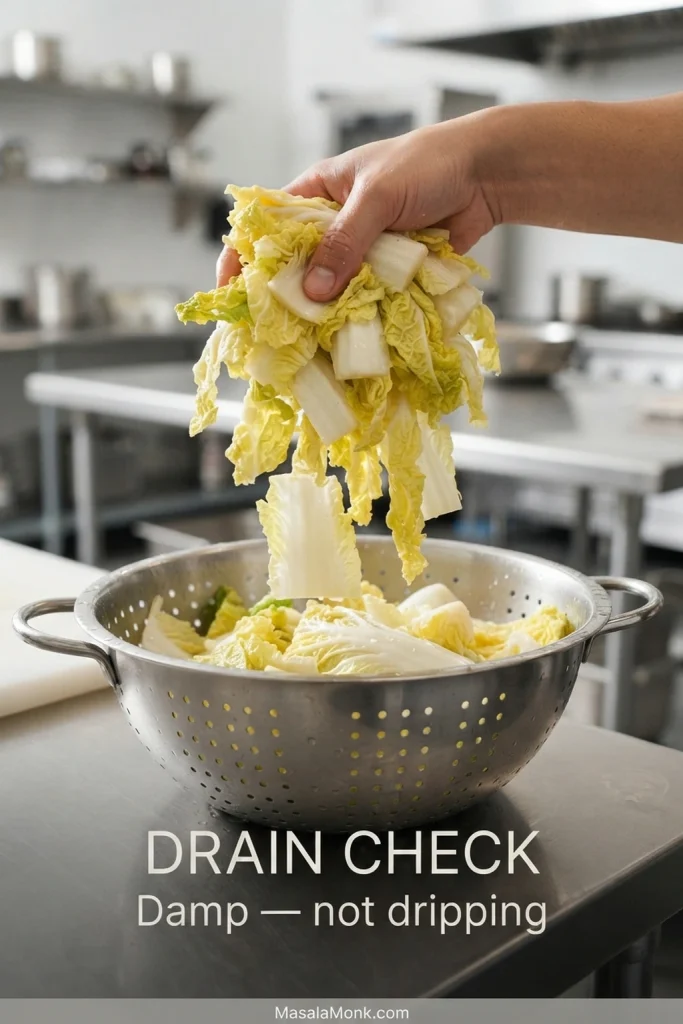
- Rinse, taste and drain. Rinse thoroughly three times with cool water, opening the folds so trapped salt washes away. Taste check: a piece with some thick white rib should taste pleasantly salty, not like concentrated brine; rinse again if necessary. Drain for 20–30 minutes, turning once or twice. Water hides surprisingly well between napa-cabbage leaves. Drain check: the cabbage should feel damp without streaming water when you lift a handful.
Make the Kimchi Seasoning
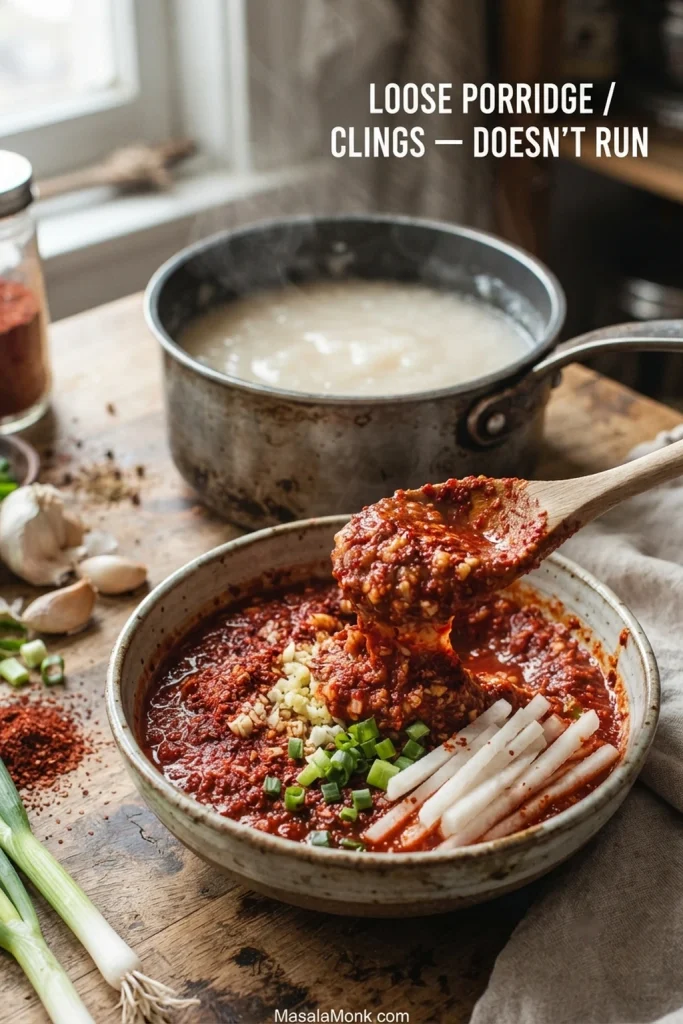
- Cook the rice slurry. Whisk the water and sweet rice flour together in the saucepan. Cook gently, stirring, until it thickens into a loose porridge. Stir in the sugar if using, then let the slurry cool to room temperature.
- Make the seasoning. Mix the cooled slurry with the gochugaru, garlic, ginger, fish sauce and saeujeot. Fold in the radish and scallions. Consistency check: the seasoning should spread easily but stay on a cabbage leaf instead of running straight back off.
Coat the Cabbage and Check the Bowl
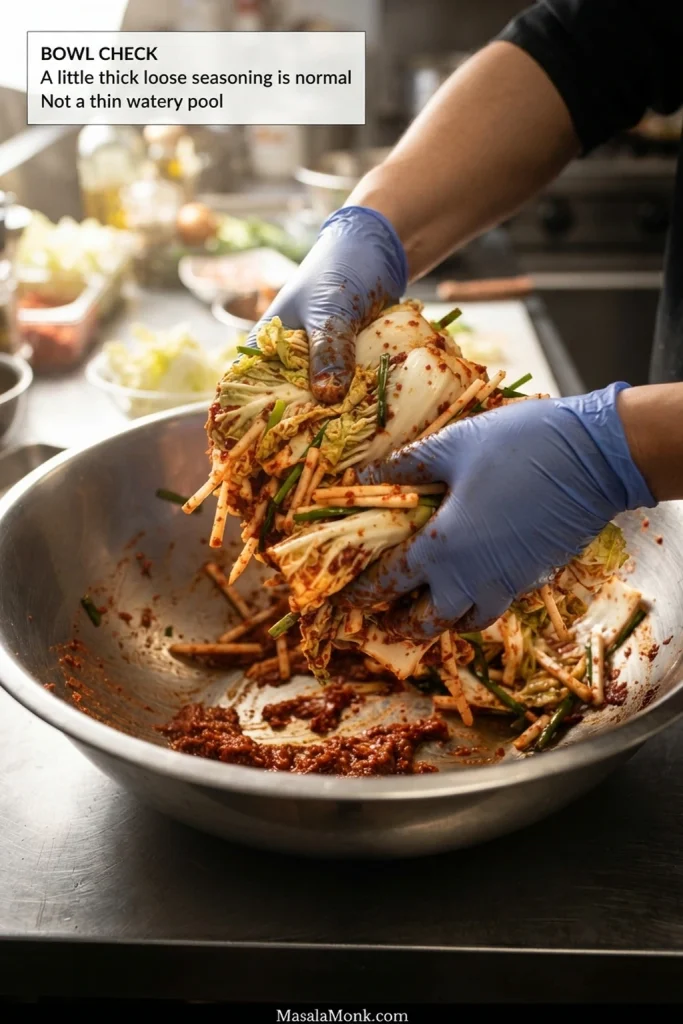
- Coat the cabbage and check the bowl. Put on gloves and fold the drained cabbage through the seasoning until every piece is coated. Fresh garlic and ginger are at their loudest now, so the mixture will taste sharper than it does later. A little loose seasoning in the bowl is expected. Bowl check: a large pool of very thin liquid immediately after mixing can point to excess rinse water. Do not strain the seasoned kimchi now; just drain more thoroughly next time.
Pack the Kimchi
- Pack the container. Transfer the kimchi to the clean container and press it down firmly enough to remove large pockets of air without crushing the cabbage. Do not fill the container more than about two-thirds to three-quarters full, leaving room for additional liquid and fermentation gas. Set it on a plate or tray.
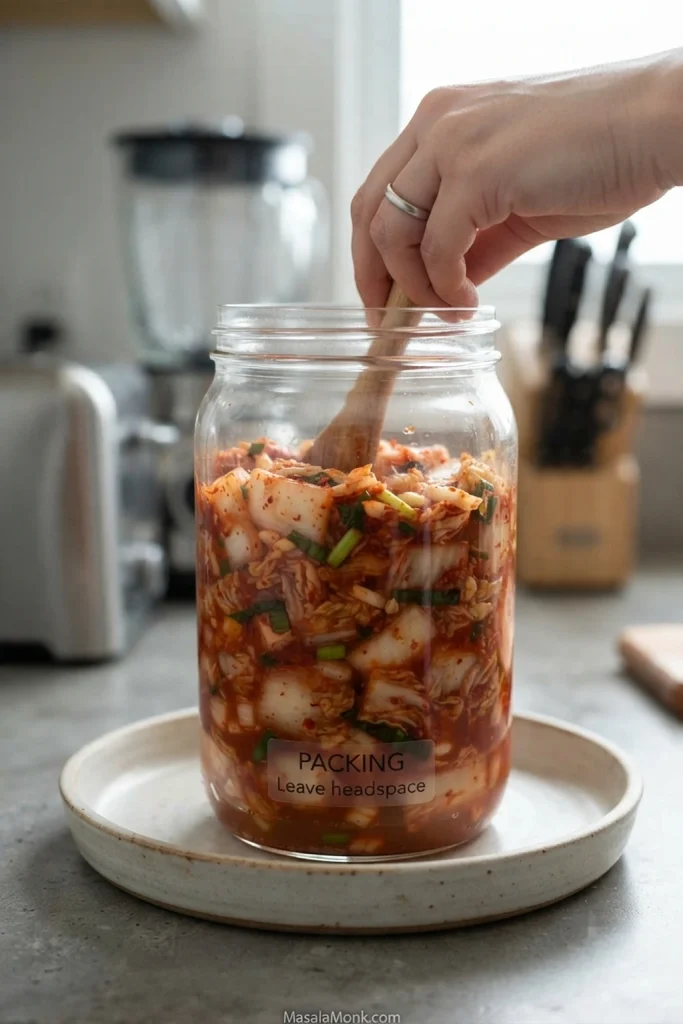
- Close the container. During an active room-temperature ferment, close an ordinary screw-top lid without cranking it excessively tight. Carbon dioxide builds as kimchi ferments. Follow the manufacturer’s directions for an airlock or fermentation lid. Even refrigerated kimchi can remain lively, so open a pressurized container carefully.
Once the kimchi is packed, the hands-on work is mostly over. You can eat some fresh now or let it ferment; from here, time and temperature do most of the work.
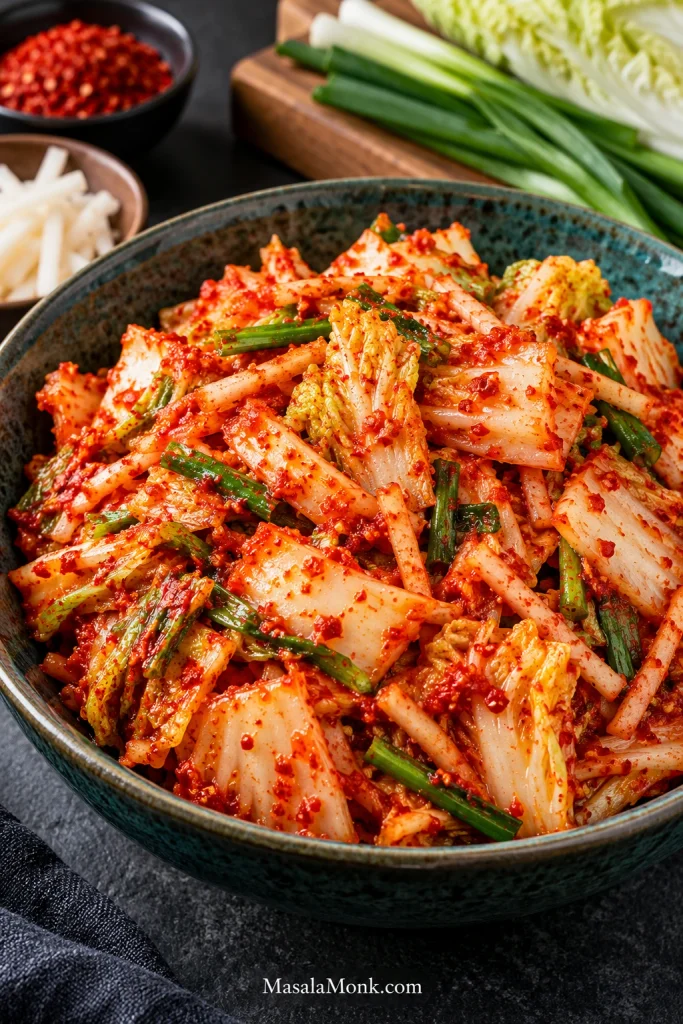
Fresh Kimchi: Eat Some Now
Kimchi is also eaten fresh, before full fermentation. If you want to eat some at this stage, keep that portion continuously refrigerated and use it within three days.
How to Ferment Kimchi
How long does kimchi take to ferment? At a cool room temperature around 18–22°C / 64–72°F, noticeable fermentation often develops within about 1–2 days. Refrigerator-first kimchi changes much more slowly, with sourness developing over several days and continuing to deepen afterward.
Refrigerator-First
For the simplest route, put the packed kimchi directly into the refrigerator. The raw garlic edge settles first. Then acidity becomes easier to taste and the seasoning starts feeling less like separate ingredients and more like one flavor. Cold fermentation moves slowly, so a quiet container can still be changing.
Cool-Room Fermentation
For a faster start, keep the packed kimchi somewhere cool, around 18–22°C / 64–72°F, and begin checking it within the first day. A warmer kitchen speeds things up and may soften the cabbage sooner, so refrigerate the kimchi earlier if it is developing faster than you want.
For fermented kimchi, Colorado State University Extension recommends verifying a pH of 4.6 or lower before eating it. Follow the instructions for a suitable food-safe pH strip or calibrated meter and test the surrounding liquid. If the pH is not falling as expected, do not simply keep extending room-temperature fermentation.
How the Flavor Changes
| Stage | What You May Notice |
|---|---|
| Fresh | Crunchy pale ribs, vivid garlic and chile, and almost no fermented acidity. |
| Starting to ferment | A first clean tang appears, more liquid gathers and you may notice a little fizz or gas. |
| Ripe | Seasoning tastes rounder and more unified, sourness is clear and the cabbage still keeps some crunch. |
| Well-aged | Cabbage softens, acidity becomes stronger and the deeper fermented flavor becomes particularly useful for cooking. |
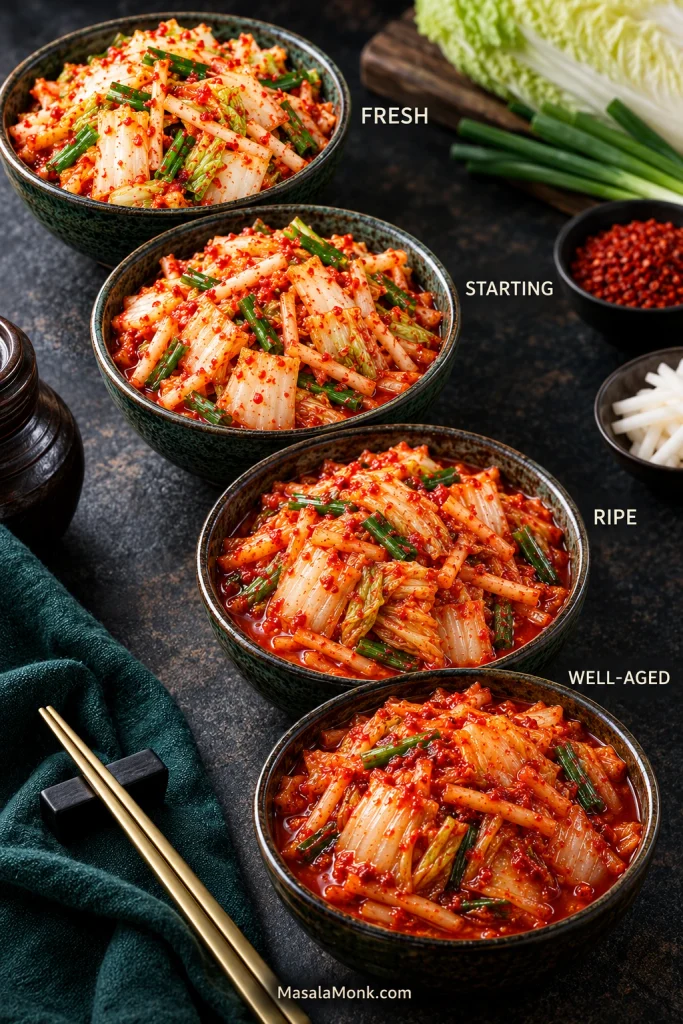
The first real tang is often easier to taste than to see. No single bubble, smell or spoonful of liquid tells the whole story; read time, temperature, acidity and texture together.
An active ferment can make a harmless hiss or sudden rise in liquid look surprisingly dramatic. Before assuming something went wrong, look at what the kimchi is actually doing.
Is This Normal? Signs Your Kimchi Is Fermenting
| What You Notice | What It Usually Means |
|---|---|
| More liquid | The cabbage is continuing to release moisture. This is expected. |
| Not completely submerged on Day 0 | Freshly packed kimchi may not have much free liquid yet. Press the cabbage firmly into its seasoning and minimize dry exposed pieces; more juice usually appears as it sits. |
| Small bubbles or fizz | Fermentation is producing carbon dioxide. |
| No visible bubbles | A cold ferment can be surprisingly quiet. Bubbles are only one clue. |
| A hiss when you open it | Gas has accumulated inside the container. |
| A little overflow | The kimchi released liquid, fermentation became active or the container needed more headspace. |
| A powerful sour, garlic or sulfur smell | Mature kimchi can smell extremely strong while remaining perfectly sound. |
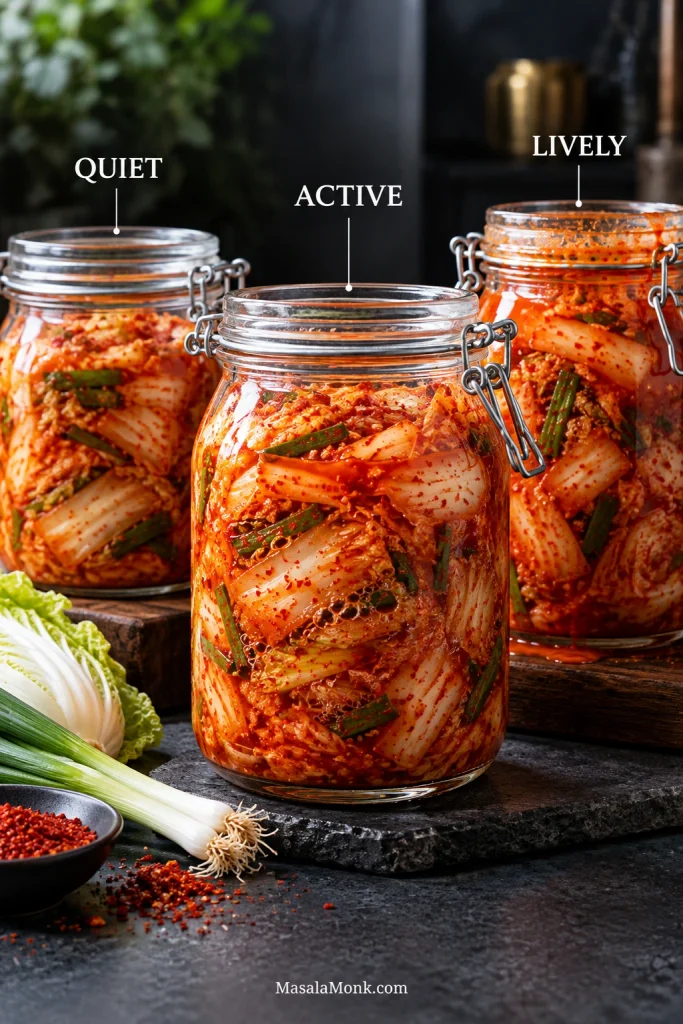
If the container repeatedly pushes liquid out, give the kimchi more room. Moving some into a second clean container is better than repeatedly forcing an overfilled batch back under the lid.
Fix My Kimchi
Before fermentation, salt, seasoning and drainage are still relatively easy to correct. Once fermentation begins, time and temperature matter more.
Before Fermentation: Salt, Seasoning and Water
Too salty after rinsing? Fix it now. Rinse once more before the seasoning goes on.
Tastes underseasoned before packing? Add a small measured amount of fish sauce or salt, mix thoroughly and taste again. This is much easier to adjust now than after the kimchi has fermented.
Watery and bland? This usually starts before fermentation. Cabbage that was not salted enough or did not drain well can release enough water to dilute the seasoning. Juicy kimchi is part of the process; washed-out flavor points to a balance problem. On the next batch, repeat the bend check and drainage check carefully.
After Fermentation Starts
Not sour yet—or seeing no bubbles? Bubbles alone tell you very little. Recheck the signs your kimchi is fermenting, then look at how long the batch has been fermenting, its temperature, whether the flavor is becoming more acidic and whether the texture is changing. Use the pH check above when you need an objective acidification check.
Soured much faster than expected? Warmth is the likely reason. Compare the fermentation routes and temperature guidance above, refrigerate the batch now and shorten or skip the countertop stage next time.
Already fermented and a little too salty? Do not rinse finished kimchi; you will wash away much of the seasoning along with the salt. Cook with it instead. Chopped into egg fried rice, the kimchi can provide much of the salt and flavor for the pan.
Tastes bitter? Sometimes a very young batch tastes rough before the flavors settle. Too much ginger or garlic can add bitterness too. If everything else looks and smells sound, refrigerate it and taste again after a few days. Fermentation continues more slowly in the cold, and some of that rough young flavor may settle as the batch matures.
Too spicy? There is no practical way to remove the chile once it is mixed throughout the kimchi. Eat it with plain rice, eggs or tofu, or cook with it so the heat is spread through a larger dish.
Mushy already? Gradual softening as kimchi ages is expected; a young batch turning unexpectedly mushy is different. Improper salting, excessive warmth or faulty fermentation can cause it. If a young ferment becomes abnormally mushy rather than simply softer with age, discard it rather than trying to rescue the texture.
How to Tell if Kimchi Has Gone Bad
This is when to stop trying to rescue the batch. Kimchi can be sour, fizzy, pungent and full of cloudy red liquid without being spoiled.
- Fuzzy or colored mold
- Ropey or stringy slime stretching in threads between pieces
- An unmistakably rotten or putrid odor
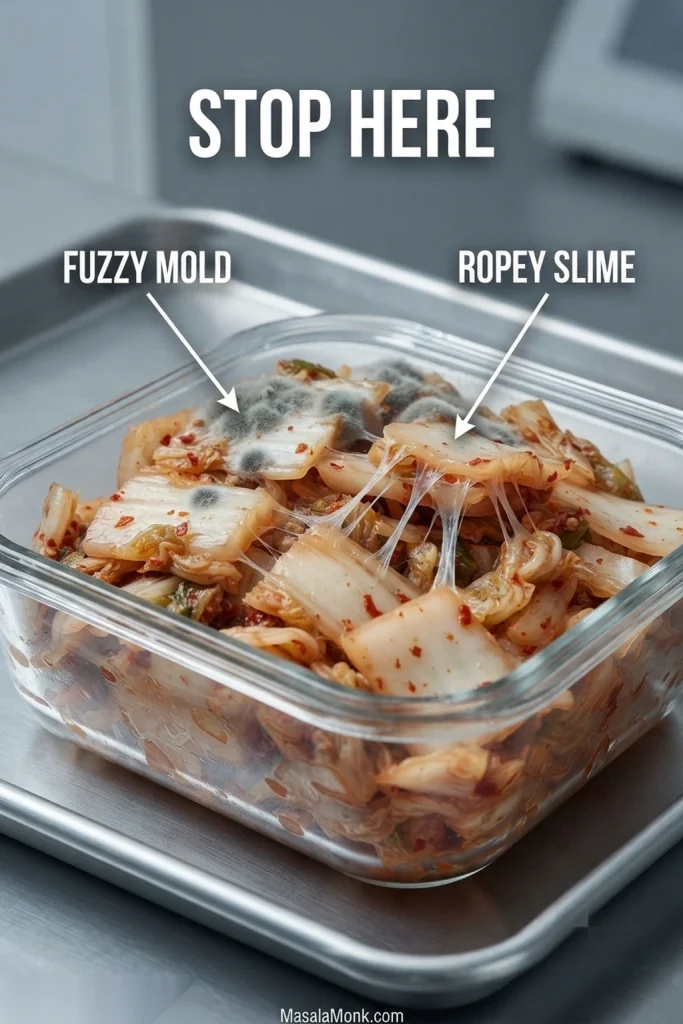
Kimchi liquid can naturally become thick with chile paste and vegetable juices. Ropey slime is different. If you see suspicious surface growth and are not sure what it is, discard the batch rather than taste-testing it.
If none of those warning signs are present and the kimchi is simply becoming sourer, that is usually maturation—not a reason to throw the batch away.
What to Do as Your Kimchi Gets Sour
A batch of kimchi does not have one perfect eating day. Its best use simply changes as the acidity develops.
Young Kimchi: Serve It Cold
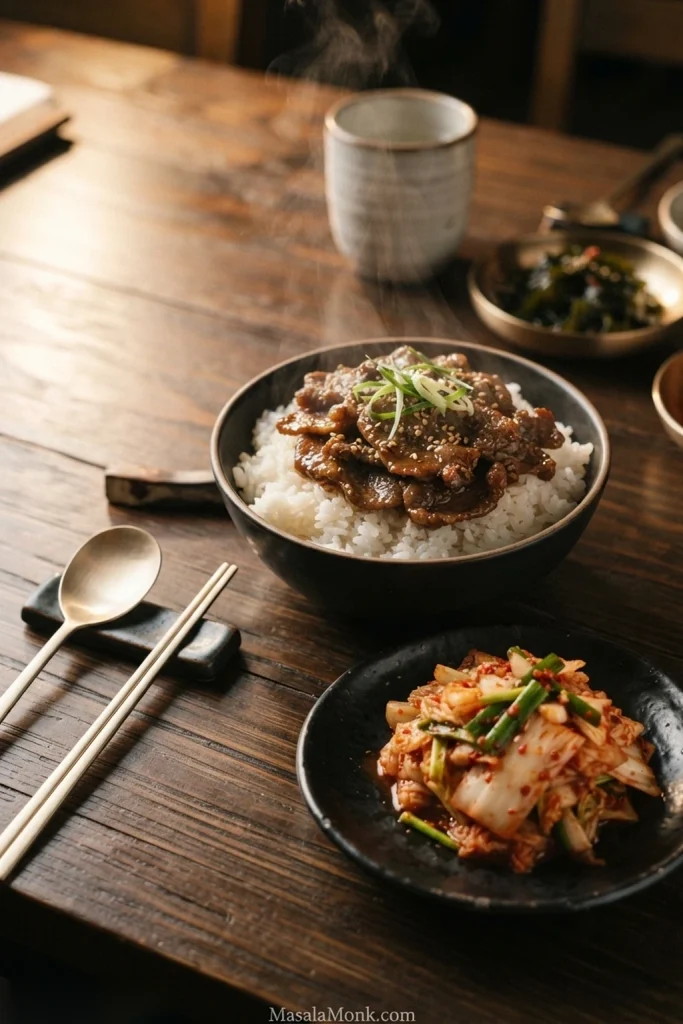
While it is young and sharply crunchy, eat it cold with hot steamed rice, eggs, tofu or something rich such as bulgogi. The cool cabbage and growing acidity are especially good against sweet-savory beef.
Sour Kimchi: Cook With It
Once the kimchi becomes properly sour, start cooking with it. Chop it into fried rice, fold it into kimchi pancakes or add it to noodles. In a hot pan, the sharp sourness mellows and the flavor becomes deeper and rounder. Mature kimchi also brings moisture, so dry rice and a hot pan become especially useful.

When the kimchi tastes almost too sharp to enjoy cold, it may be exactly right for kimchi jjigae. That strong acidity becomes deep and savory once the cabbage simmers with pork, tofu and broth.
How Long Does Homemade Kimchi Last in the Fridge?
Properly fermented kimchi can continue maturing in the refrigerator for months, although its crispest texture is usually in the first few weeks. As it ages, it becomes progressively sourer and softer; use the spoilage signs above rather than expecting one universal expiration day.
Keep fermented kimchi covered and refrigerated at 4°C / 40°F or colder. Use clean utensils when taking kimchi from the container and, where practical, press the vegetables back into their seasoning and liquid instead of leaving dry pieces exposed at the top.
Freezing is possible, but it damages the cabbage’s crisp texture. Thawed kimchi is much better for cooking than serving cold.
If your first batch does something you were not expecting, leave a comment with the room temperature, how long the kimchi has been fermenting, and what you are seeing, smelling or tasting. Those details make fermentation problems much easier to work through.
The first batch makes every hiss, extra spoonful of liquid and powerful smell feel important. After one successful batch, the pattern becomes much easier to read. You do not need to catch the kimchi at one perfect moment: eat some while it is crunchy, keep some long enough to turn tangy, and let the rest become properly sour. By then, the kimchi you no longer reach for straight from the container may be exactly what you want beside the stove.








