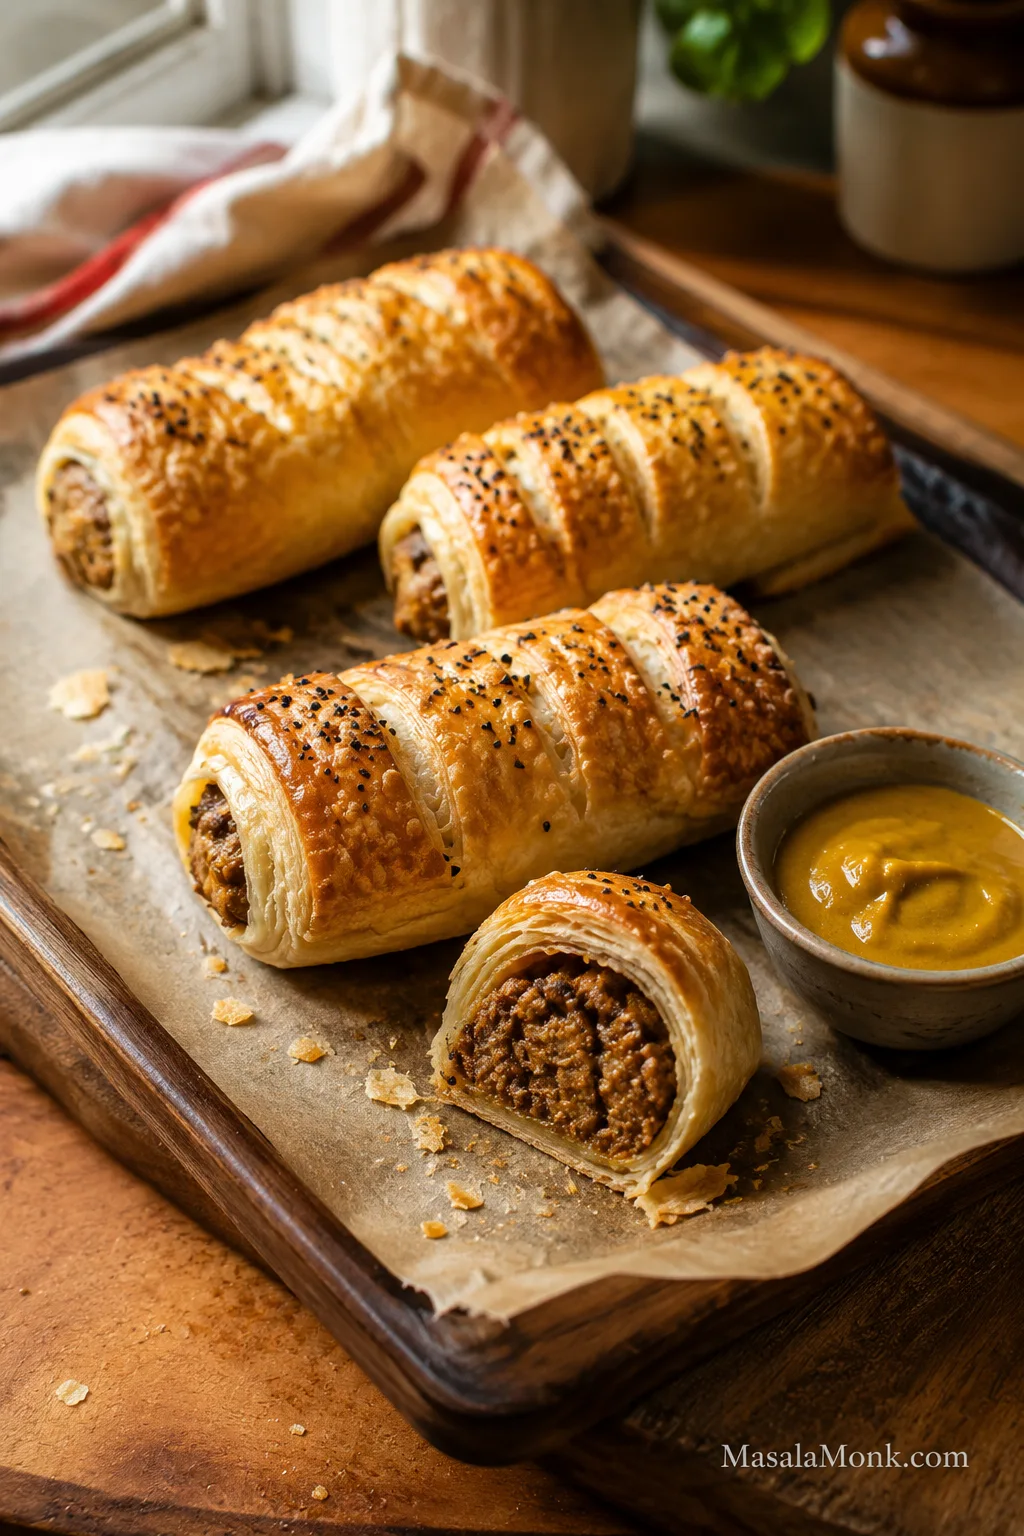
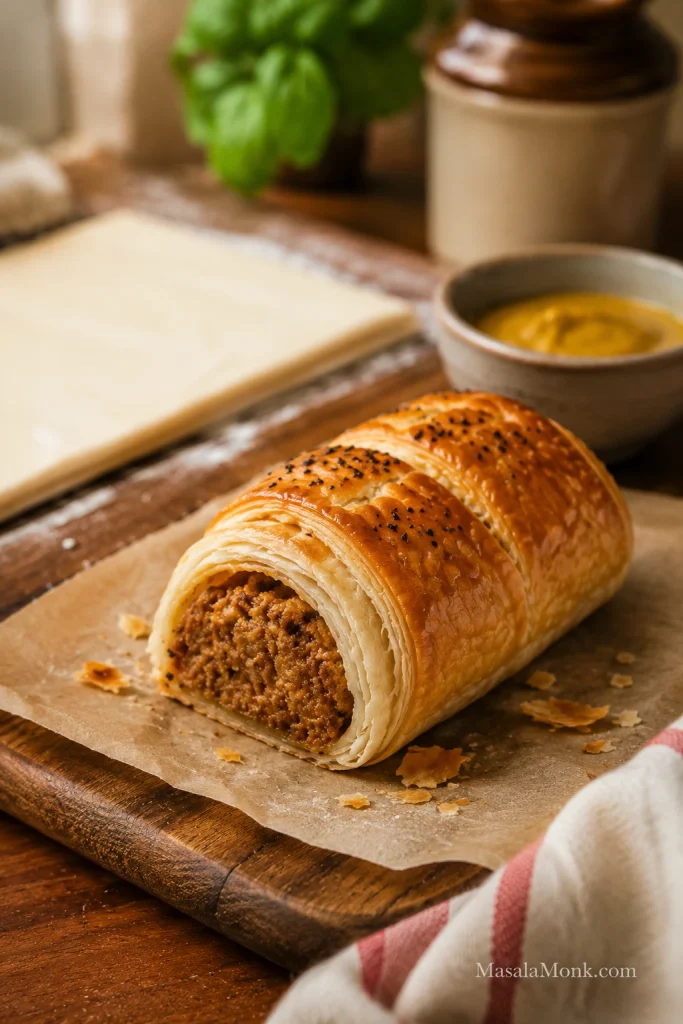
If you have puff pastry and sausages, you are already close to a tray of homemade sausage rolls: buttery layers, savory filling, crisp bottoms, and the kind of warm snack people reach for before you have even moved the tray to the table.
Sausage rolls are savory pastry rolls filled with seasoned sausage meat and baked until flaky, golden, and hot in the center. This version keeps the classic idea but makes it practical for real kitchens: store-bought puff pastry, everyday sausages if that is what you have, clear cutting sizes, and enough small technique to avoid greasy, soft pastry.
The method itself is simple: fill, roll, seal, cut, glaze, and bake. You do not need special sausage meat, you do not need to guess the bake time, and you do not have to settle for soggy bottoms.
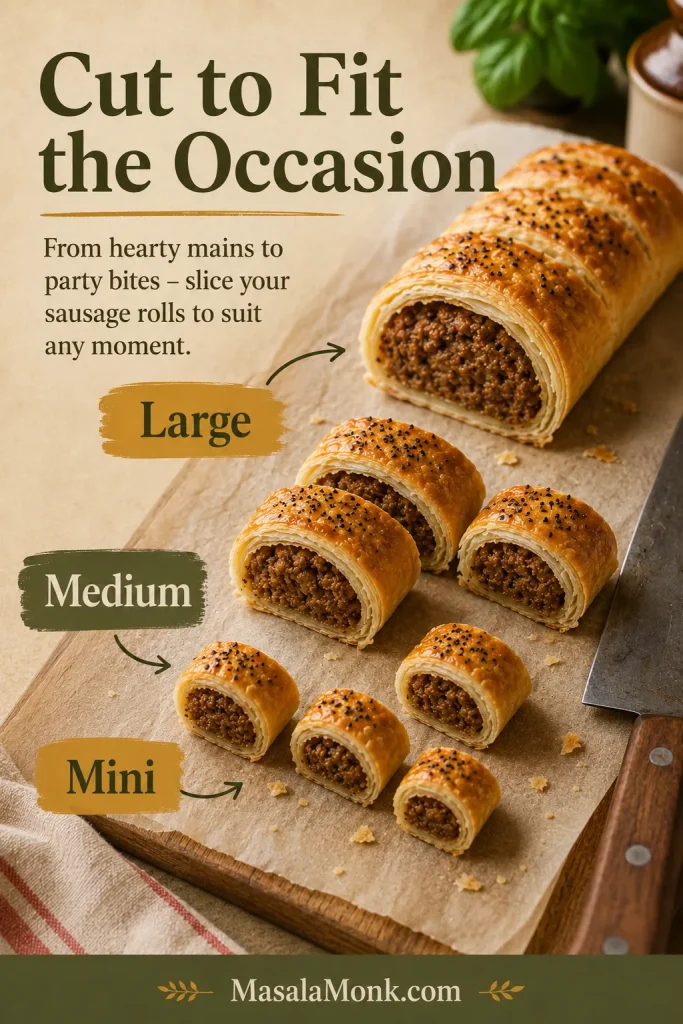
Make them large for dinner, small for parties, or freeze them unbaked for later. Once you know the basic shape, the same method works for lunchboxes, snack trays, and the kind of warm batch that disappears faster than expected.
Quick Answer: How to Make Sausage Rolls
To make sausage rolls, fill cool puff pastry with seasoned sausage meat or regular sausages with the skins removed, roll and seal the pastry, brush with egg wash, then bake at 200°C / 400°F, or 180°C fan / convection, until the pastry is puffed and well browned.
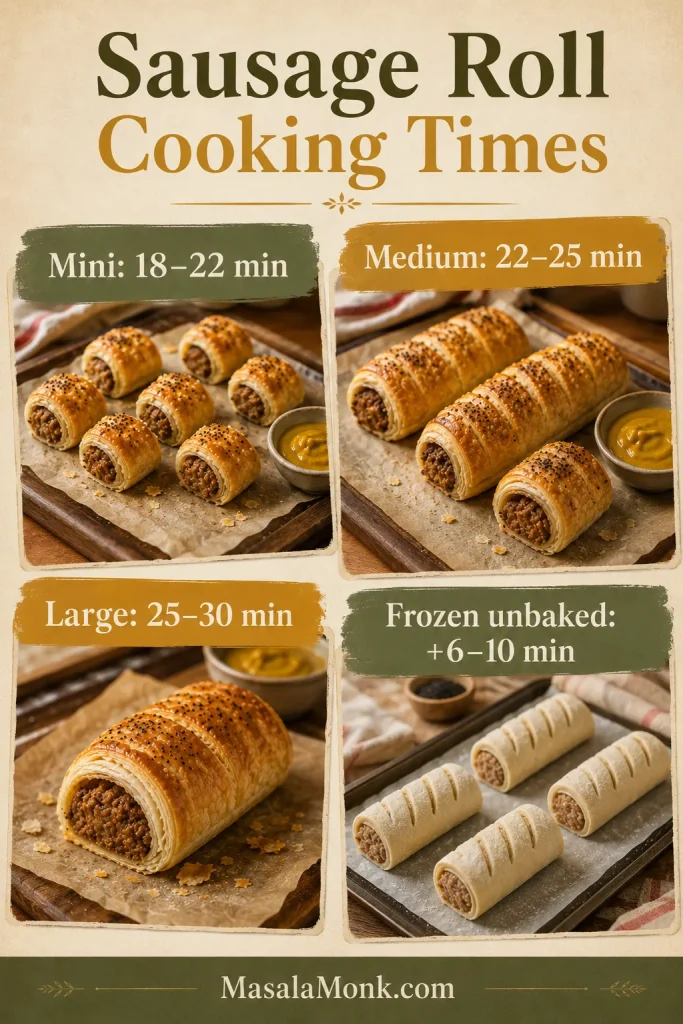
Large sausage rolls usually take 25–30 minutes, 16 medium rolls usually take 22–25 minutes, and mini sausage rolls usually take 18–22 minutes.
The easiest version uses puff pastry, sausages, and egg wash. The better version adds softened onion, breadcrumbs, herbs, and a little mustard, so the filling tastes rounder, stays juicy, and does not soak the pastry as it bakes.
For pork or beef sausage rolls, the filling should reach 160°F / 71°C in the center. For chicken or turkey sausage rolls, use 165°F / 74°C. If the pastry browns before the center is done, lower the oven slightly and bake a few minutes longer.
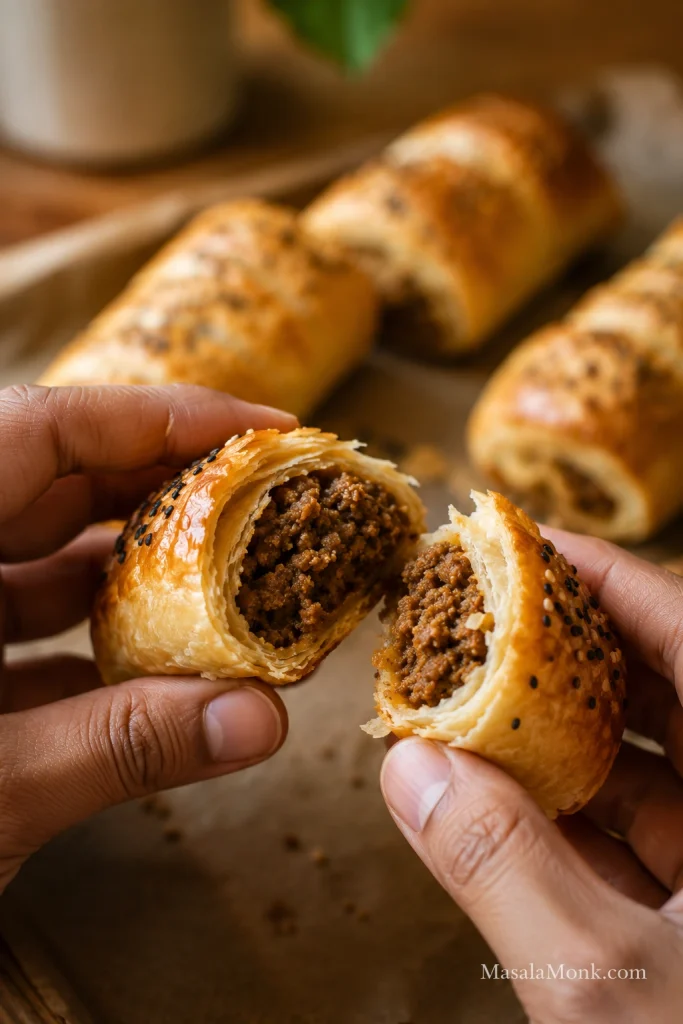
When they come out right, you get the best kind of contrast: flaky pastry on top, a clean, crisp base, and a savory filling that stays juicy without soaking through.
Sausage Rolls Recipe Card
Easy Homemade Puff Pastry Sausage Rolls
This recipe makes flaky homemade sausage rolls with ready-rolled puff pastry and sausage meat, or regular sausages with the skins removed. Make them big enough for lunchboxes, small enough for party trays, or somewhere in the middle for the kind of snack that disappears while it is still warm.
| Prep time | 20 minutes |
| Optional chill time | 10–20 minutes |
| Cook time | 18–30 minutes, depending on size |
| Total time | 40–60 minutes |
| Yield | 8 large, 16 medium, or 24–32 mini sausage rolls |
| Oven | 200°C / 400°F, or 180°C fan / convection |
Equipment: You need a baking sheet, parchment paper, mixing bowl, small pan, sharp knife, pastry brush, and wire rack. An instant-read thermometer is helpful for large rolls or chicken and turkey fillings.
Sausage Roll Ingredients
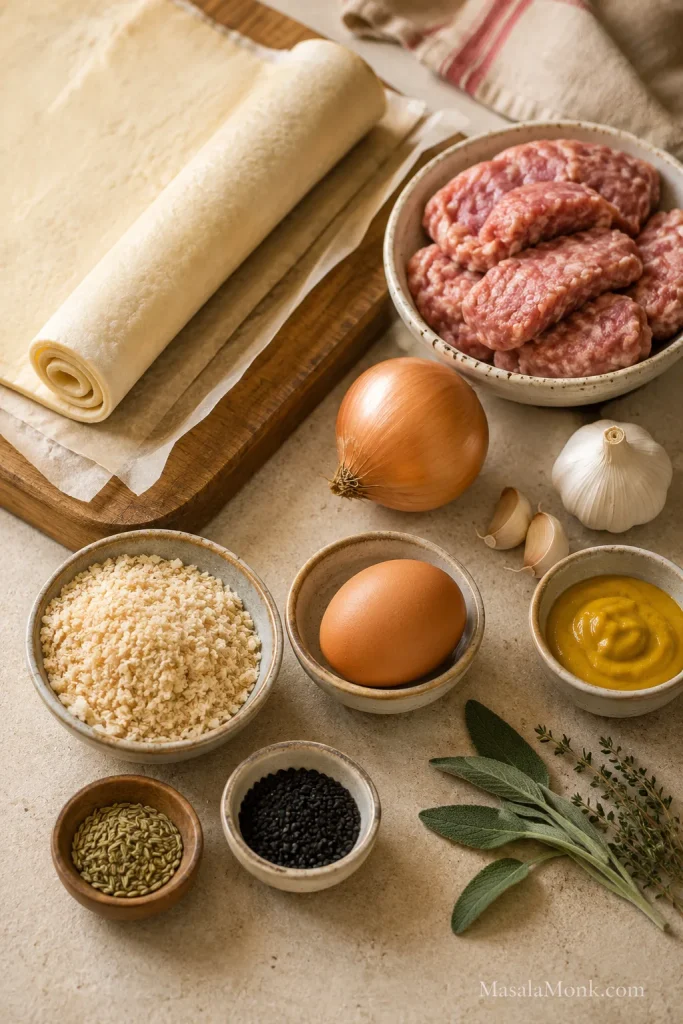
- 320–375g / 11–13 oz ready-rolled puff pastry, thawed if frozen but still cool
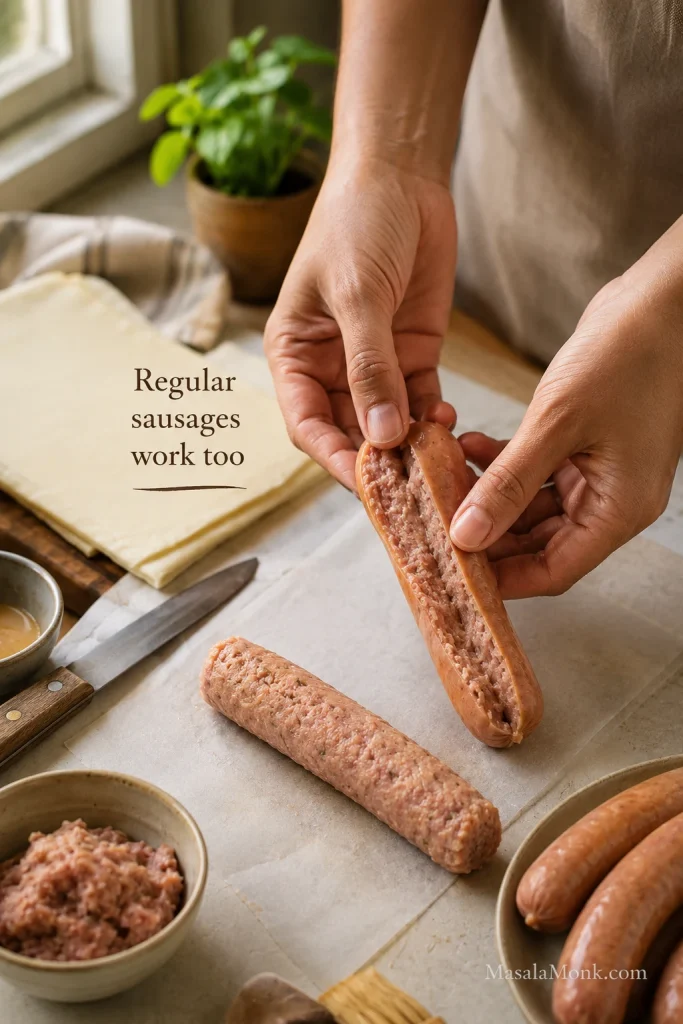
- 450–500g / about 1 lb sausage meat, or 6–8 medium sausages with skins removed
- 1 teaspoon oil or butter, for softening the onion
- 1 small onion, about 70–90g / ½ cup very finely chopped
- 1–2 garlic cloves, minced
- 35–40g / about ½ cup panko breadcrumbs or fresh breadcrumbs, plus more if the filling feels loose
- 1 egg for the filling
- 1 egg for egg wash
- 1 tablespoon / 15ml Dijon mustard or English mustard, optional
- 1 teaspoon dried sage or thyme, or 1 tablespoon finely chopped fresh herbs
- ½–1 teaspoon fennel seeds, lightly crushed, optional
- Black pepper, to taste
- Salt, only if using plain ground meat instead of seasoned sausage meat or sausages
- Sesame seeds or nigella seeds, optional topping
If using plain ground pork or beef: start with about ¾ teaspoon fine salt per 500g / 1 lb meat. To check the seasoning safely, cook a tiny pinch of the filling in a pan before shaping the rolls.
Make the Filling and Shape the Rolls
- Preheat and line the tray. Preheat the oven to 200°C / 400°F, or 180°C fan / convection. Line a large baking sheet with parchment paper.
- Prepare the pastry. If frozen, thaw the puff pastry until flexible but still cool. It should unroll without cracking.
- Cook the onion. Warm the oil or butter in a small pan. Soften the onion for a few minutes, then add garlic for 30 seconds. Cool completely.
- Prepare the sausage meat. If using regular sausages, slit the skins lengthwise and squeeze the meat into a mixing bowl.
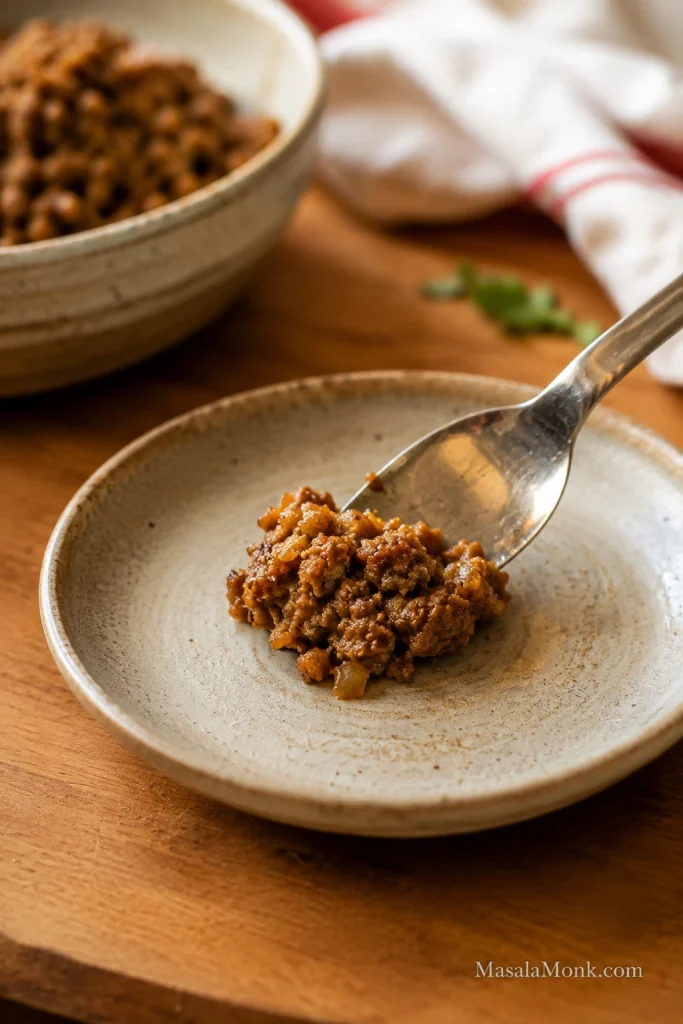
- Mix the filling. Combine sausage meat, cooled onion and garlic, breadcrumbs, 1 egg, mustard, herbs, optional fennel, and black pepper. Mix gently.
- Check the texture. You want a soft log that holds together without spreading like paste or crumbling apart. Add 1–2 tablespoons more panko if it feels loose, or 1–2 teaspoons cold water or milk if it feels dry.
- Cut the pastry. For one 320–375g sheet, cut the pastry in half lengthwise to make 2 long strips. If your pastry sheet is a different size, aim for strips wide enough to wrap around the filling without stretching.
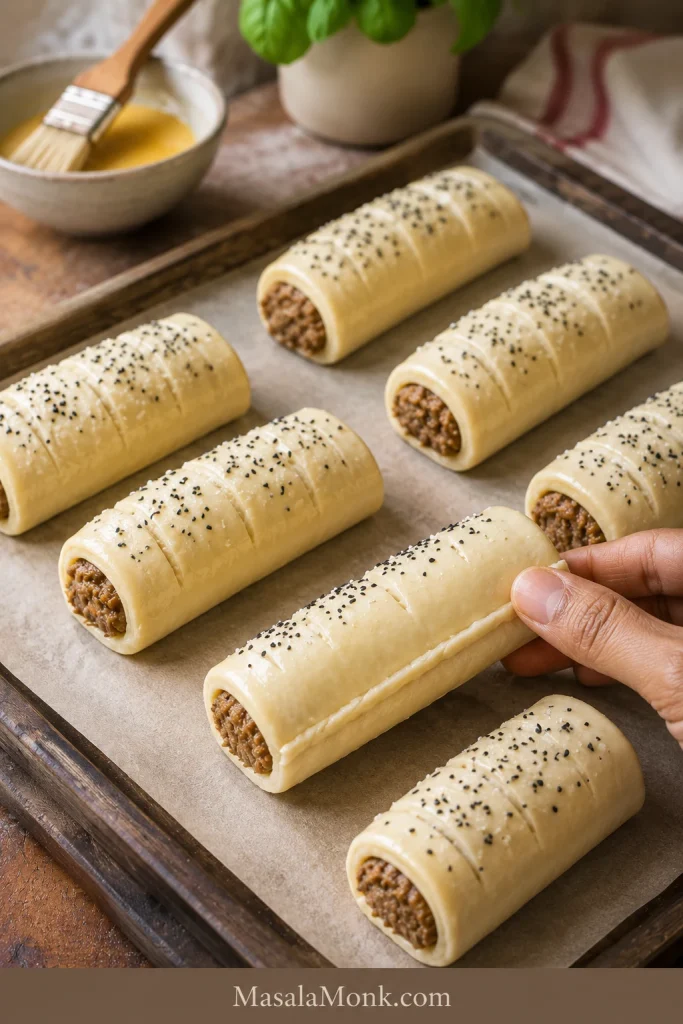
- Add the filling. Divide the sausage filling into 2 even logs and place one log down the center of each pastry strip. For mini sausage rolls, shape thinner logs rather than simply cutting overfilled rolls smaller.
- Seal. Leave a small border beside the filling. Brush the edge lightly with beaten egg, fold the pastry over, and press just enough to close. Place seam-side down. Too much egg wash can make the edge slippery, and too much pressure can flatten the layers.
- Chill if soft. Chill the shaped rolls for 10–20 minutes if the pastry feels sticky, warm, or loose.
Cut, Bake, and Cool
- Cut and glaze. Cut each long roll into 4 pieces for 8 large rolls, 8 pieces for 16 medium rolls, or 12–16 pieces for 24–32 mini rolls. Brush tops with egg wash, add seeds if using, and slash lightly.
- Bake. Space the rolls at least 2.5cm / 1 inch apart on the baking sheet. Bake large rolls for 25–30 minutes, 16 medium rolls for 22–25 minutes, or mini rolls for 18–22 minutes.
- Cool. Rest for a few minutes on the tray, then move to a wire rack so the bottoms stay crisp.
Doneness: Look for well-browned pastry and cooked-through filling. Pork or beef sausage filling should reach 160°F / 71°C. Chicken or turkey filling should reach 165°F / 74°C.
What good looks like: the rolls should feel firm before baking, sit seam-side down, and come out browned on top with crisp bottoms and hot filling.
Freezer note: For best texture, freeze sausage rolls unbaked after shaping and cutting. Bake from frozen at 200°C / 400°F, or 180°C fan / convection, and add extra time. Do not thaw first unless your pastry packet specifically recommends it.
First batch recommendation: make the full version with onion, breadcrumbs, mustard, and herbs. It gives you the best balance of juicy filling and crisp pastry. Once you know how your pastry and sausages behave, use the 3-ingredient shortcut for faster batches.
The 3 Rules for Better Sausage Rolls
Good sausage rolls do not need fancy pastry or special sausage meat. They need three small things done well: filling that tastes good before it goes in, pastry that stays cool enough to puff, and a filling log slim enough for the pastry to close without a fight.
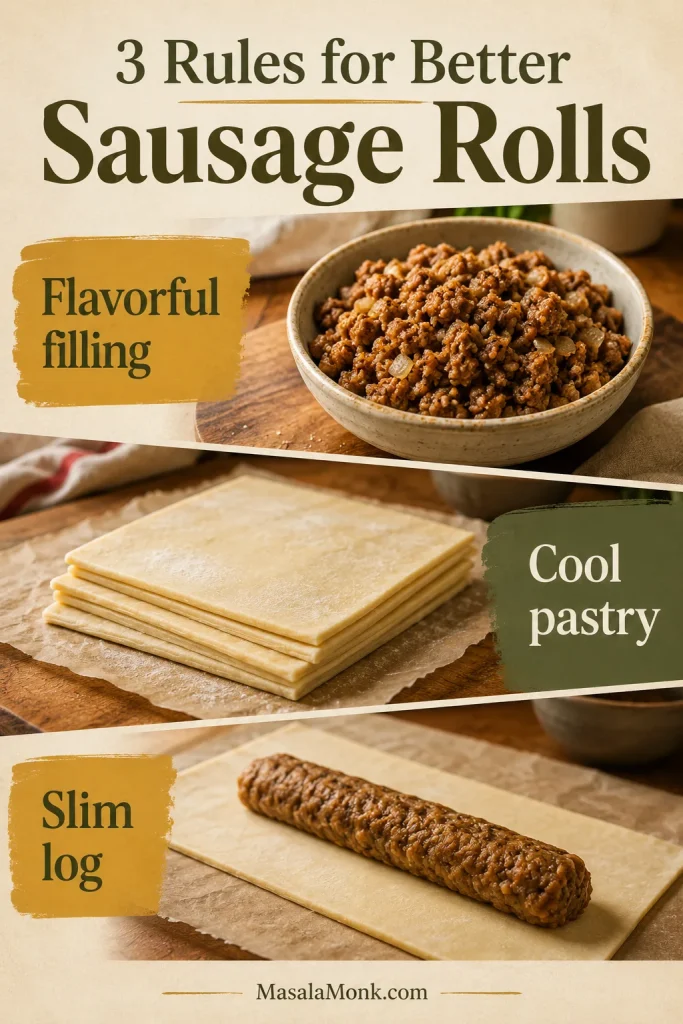
- Use filling that tastes good before it goes in. Sausage rolls are simple, so bland sausage has nowhere to hide.
- Keep the pastry cool. Sticky, greasy, or slack pastry is a sign to pause and chill the tray.
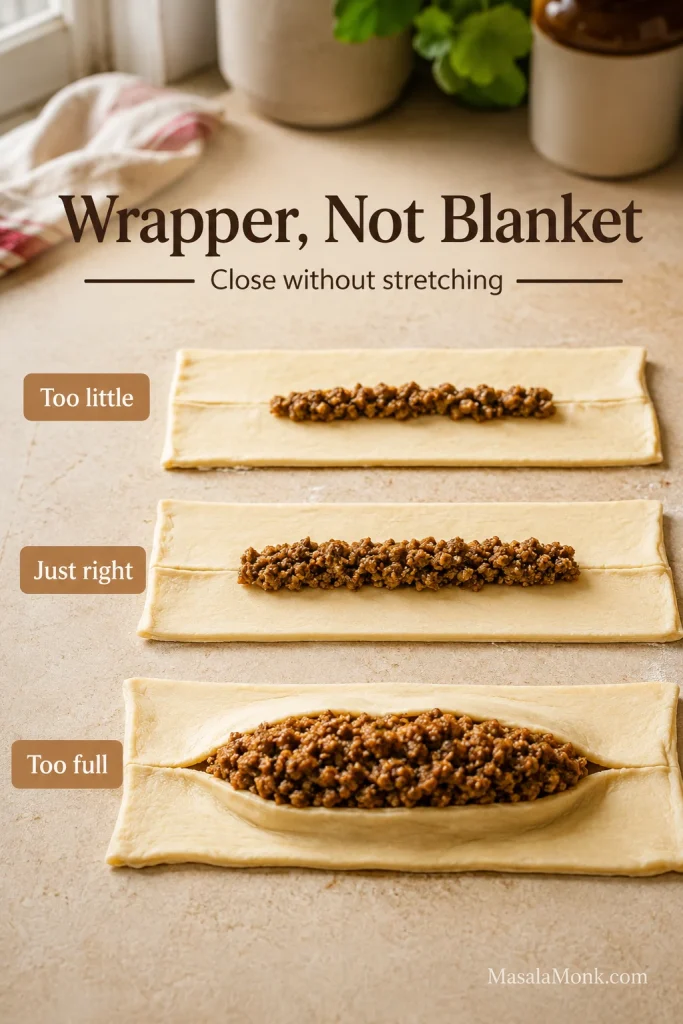
- Shape thinner than you think. The pastry should close like a wrapper, not stretch like a blanket.
Get those right and the rolls bake neater, crisper, and juicier, with fewer split seams, fewer soggy bottoms, and a center that cooks through before the pastry over-browns. Next, choose the filling, pastry, and size that fit the batch you actually want to make.
Need the exact amounts now? Jump back to the recipe card, or compare options in Choose the Sausage Roll Version You Want.
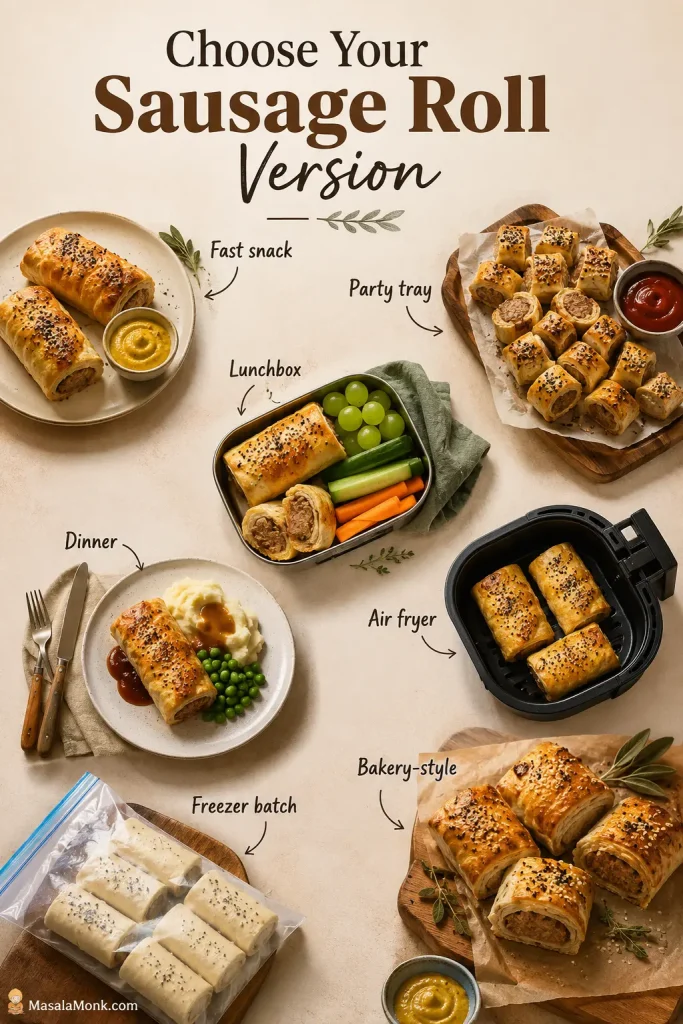
Choose the Sausage Roll Version You Want
A party tray, lunchbox roll, freezer batch, and fast snack all use the same base method, but the size and filling choices change slightly. Start with the version that fits the moment, then use the rest of the guide to fine-tune it.
| Situation | Best sausage roll version |
|---|---|
| Fast snack | 3-ingredient sausage rolls with puff pastry, sausages, and egg wash |
| Best flavor | Main recipe with onion, breadcrumbs, mustard, herbs, and optional fennel |
| Party tray | Mini sausage rolls, shaped thinner and frozen unbaked if making ahead |
| Lunchboxes | Medium rolls, cooled completely before packing |
| Dinner | Larger rolls with salad, beans, soup, or potatoes |
| Air fryer batch | Mini or medium rolls cooked in one layer |
| Rich bakery-style | Pork sausage, all-butter puff pastry, generous egg wash, and a short chill before baking |
Can I Use Regular Sausages?
Yes. Most people do not buy “sausage meat” every week. Regular sausages are usually easier to find, and they work beautifully when the flavor is already good. Slit the skins, squeeze out the meat, and loosen it with a fork so it shapes evenly inside the pastry.
Choose sausages you already like because the filling is the main flavor of the roll. If the sausage tastes bland before it goes in, the pastry cannot fix it.
Ingredient note: In the UK and Australia, “sausage meat” usually means seasoned loose sausage filling. In the US, look for bulk sausage, breakfast sausage meat, or simply remove the meat from sausages. Plain ground pork works too, but it needs proper seasoning.
- Sausage meat: fastest and most classic, but check salt before adding more.
- Regular sausages: easiest supermarket shortcut; slit the skins and use the filling.
- Plain ground pork or beef: works if you season it properly and keep enough fat or moisture for juiciness.
- Chicken, turkey, or vegetarian sausage: useful alternatives, but watch dryness or excess moisture.
Check the Seasoning Safely
Salt note: most sausages are already seasoned, so cook a tiny test piece before adding more salt. If you are using plain ground pork or beef instead, season it properly and test a small cooked piece before shaping.
Which Sausages Make the Best Filling?
The best sausage rolls start with sausages you would happily eat on their own: savory, well-seasoned, and juicy without flooding the pan. Pork sausages are the classic choice because they usually have enough fat to stay tender. Breakfast sausage, Cumberland-style sausage, mild Italian sausage, chicken, turkey, and vegetarian sausage can all work too, as long as they are not too lean or watery.
For your first batch, avoid sausages that release a lot of liquid in the pan. Extra moisture can soften the pastry before it has time to crisp.
Simple rule: use sausage meat when you want speed, sausages when that is what you already have, and plain ground meat only when you are ready to season the filling properly.
What Pastry Is Best for Sausage Rolls?
Puff pastry is best for classic sausage rolls because it gives them lift, flakes, and crisp edges. Store-bought puff pastry is the right choice here because the point is a reliable homemade roll, not a pastry project.
All-butter puff pastry gives the richest flavor and the cleanest flaky bite: the kind that shatters a little when you bite in. Standard ready-rolled puff pastry still works well, especially if it stays cold and is not stretched around too much filling.
Shortcrust pastry gives a firmer, more crumbly shell. Crescent roll dough makes a softer, breadier shortcut. Both can work, but neither gives the same flaky puff pastry bite.
How Much Filling Fits the Pastry?
Puff pastry sheets vary by country and brand. Use this table to avoid overfilling the pastry.
| Pastry amount | Filling amount | Best use |
|---|---|---|
| 280g / 10 oz puff pastry | 350–400g / 12–14 oz filling | Smaller batch or mini rolls |
| 320g / 11 oz puff pastry | 400–450g / 14–16 oz filling | One ready-rolled sheet |
| 375g / 13 oz puff pastry | 450–500g / about 1 lb filling | Standard full batch |
| 1 smaller US puff pastry sheet, about 225–250g / 8–9 oz | 275–350g / 10–12 oz filling | Small batch |
| 2 US puff pastry sheets, about 450–500g / 16–18 oz | 450–500g / about 1 lb filling | Full batch |
When in doubt, use the visual cue: the filling log should let the pastry wrap around it without stretching. Think slim log, not stuffed tube. A sausage roll that looks slightly modest before baking often comes out neater, flakier, and better balanced after the pastry puffs.
The pastry is a wrapper, not a stretchable blanket. If you have to pull it hard to close, the roll is overfilled.
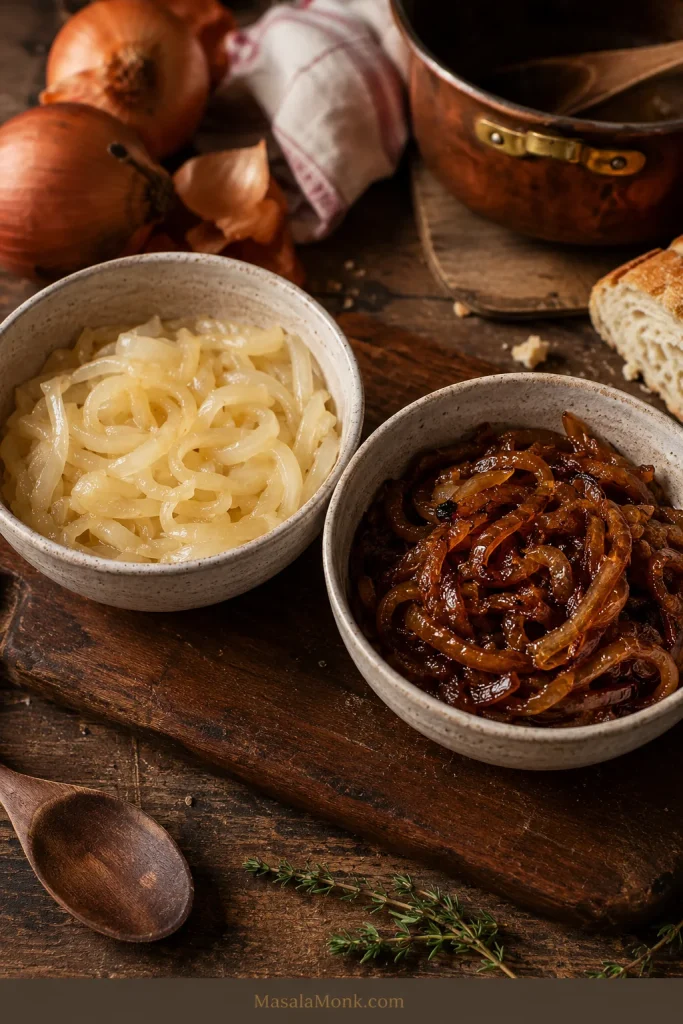
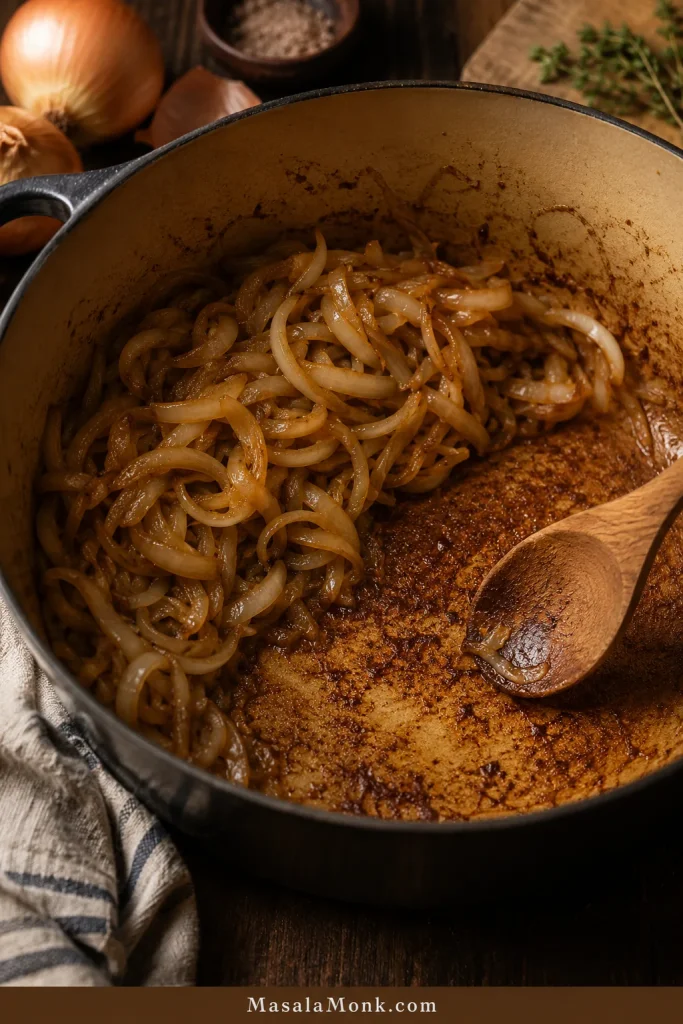
What Makes the Filling Better?
Cooked onion gives the filling deeper flavor without raw sharpness. Breadcrumbs are not just filler; they catch juices from the sausage so the filling stays tender without soaking the base. Mustard adds lift, sage and thyme bring classic savory flavor, and fennel seeds give pork sausage rolls a more aromatic, bakery-style finish.
Egg wash note: A whole beaten egg gives good shine and color. Egg yolk gives a deeper golden finish. Milk gives a softer, lighter color. For vegan sausage rolls, use plant milk, aquafaba, or a little oil depending on the finish you want.
The 3-Ingredient Sausage Roll Shortcut
Yes, you can make 3-ingredient sausage rolls with puff pastry, sausages, and egg wash. They will be simpler than the full recipe, but still good if the sausages are well seasoned and the pastry stays cool.
Use the full recipe when you want a juicier filling with onion, breadcrumbs, mustard, and herbs.
- Unroll the pastry and cut it into strips.
- Remove the sausage skins and shape the meat into logs.
- Roll, seal, brush with beaten egg, and bake until golden and cooked through.
Step-by-Step Visual Cues for Better Sausage Rolls
The recipe card tells you what to do. This section shows you what to look for, because sausage rolls are much easier when you know how the pastry and filling should feel before they go into the oven.
1. Look for Pastry That Bends Without Grease
The puff pastry needs to unroll without cracking while still feeling cool to the touch. Sticky pastry is a sign to pause, not push through. A few minutes in the fridge gives the butter a cleaner start in the oven.
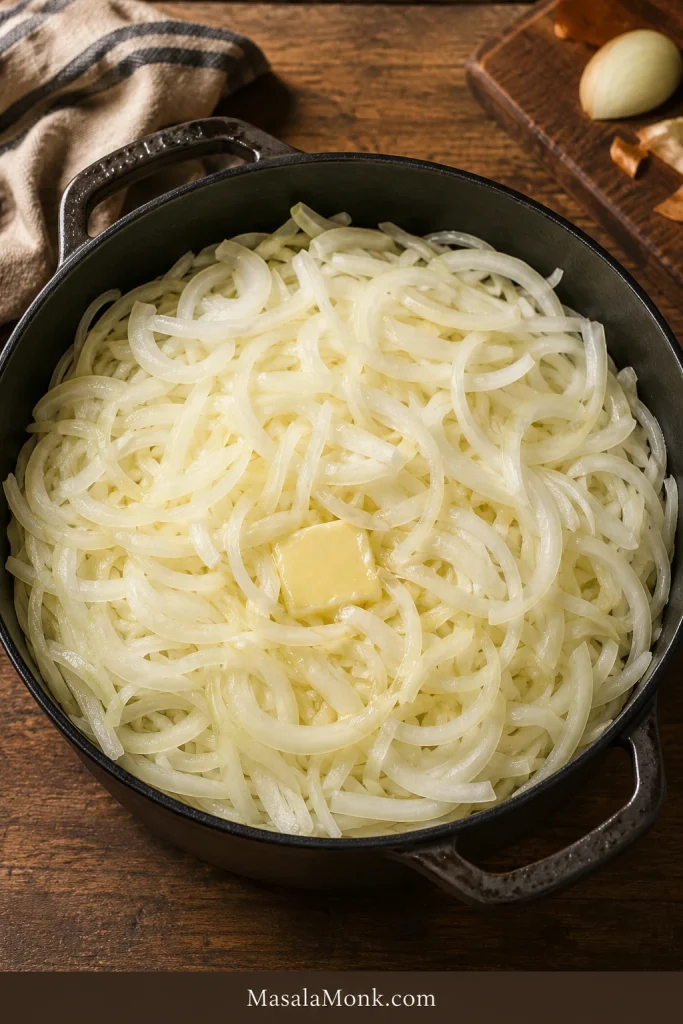
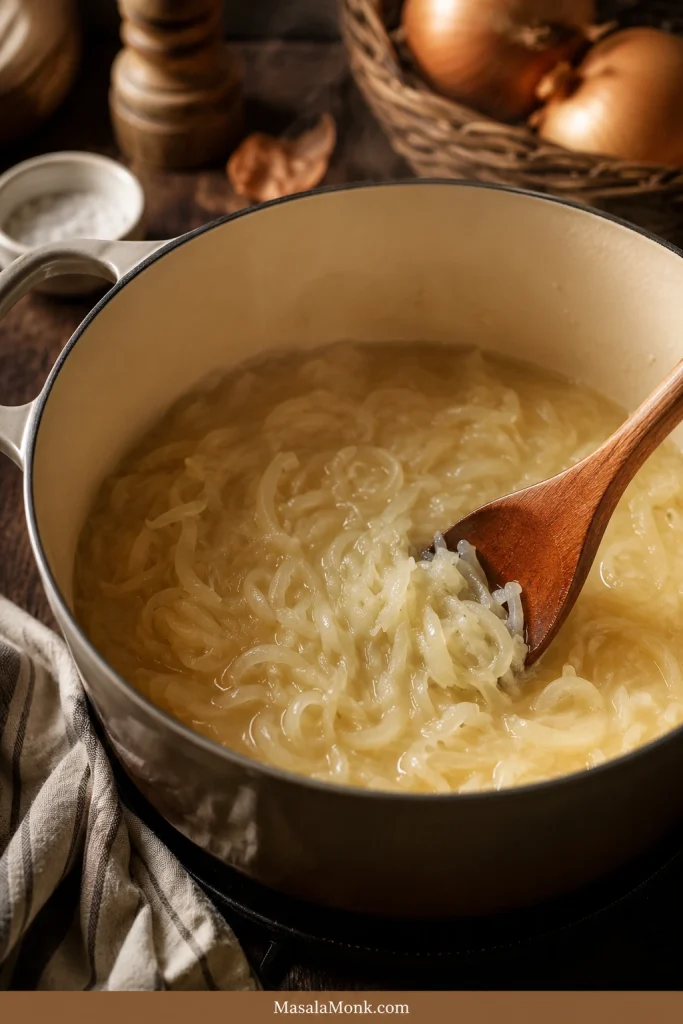
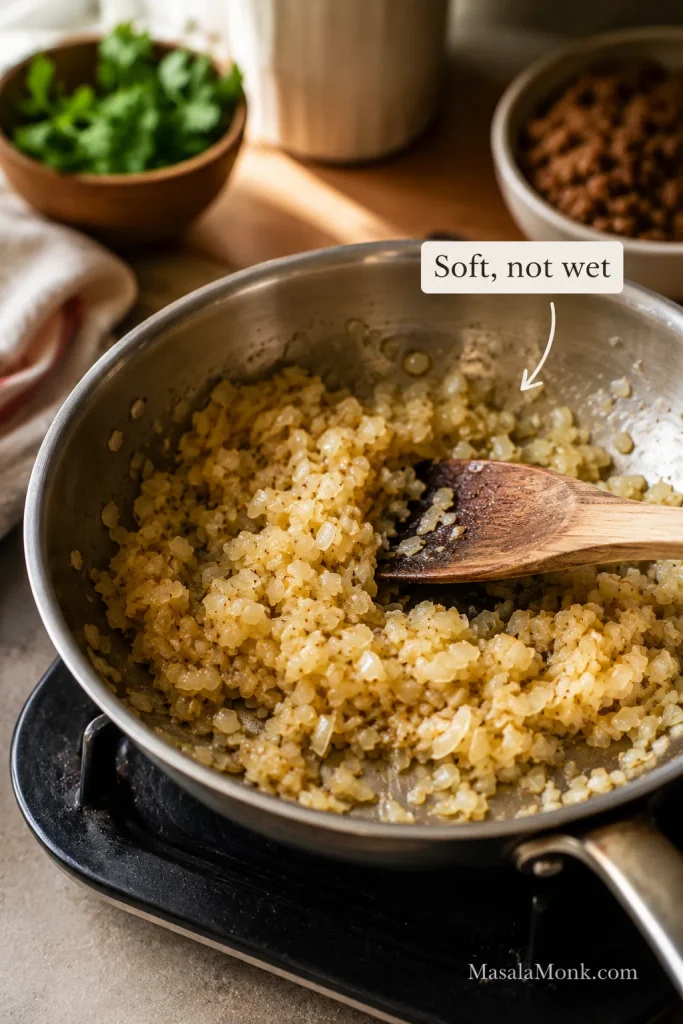
2. Cook the Onion Until Soft, Not Wet
The onion should be soft and fragrant before it goes into the sausage mixture, but not watery. Cooking it first gives sweetness and keeps raw onion moisture from softening the pastry.
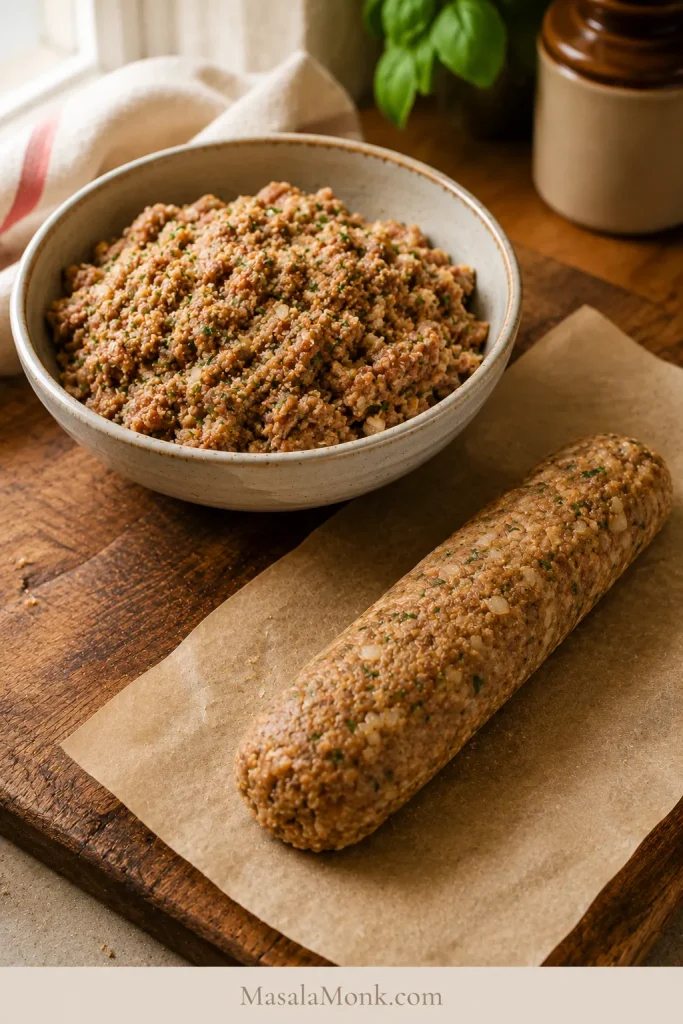
3. Shape a Filling Log That Holds Together
A good filling log holds its shape without slumping across the pastry. Loose filling needs a little more panko before it reaches the pastry. Dry, crumbly filling can take a teaspoon or two of cold water or milk.
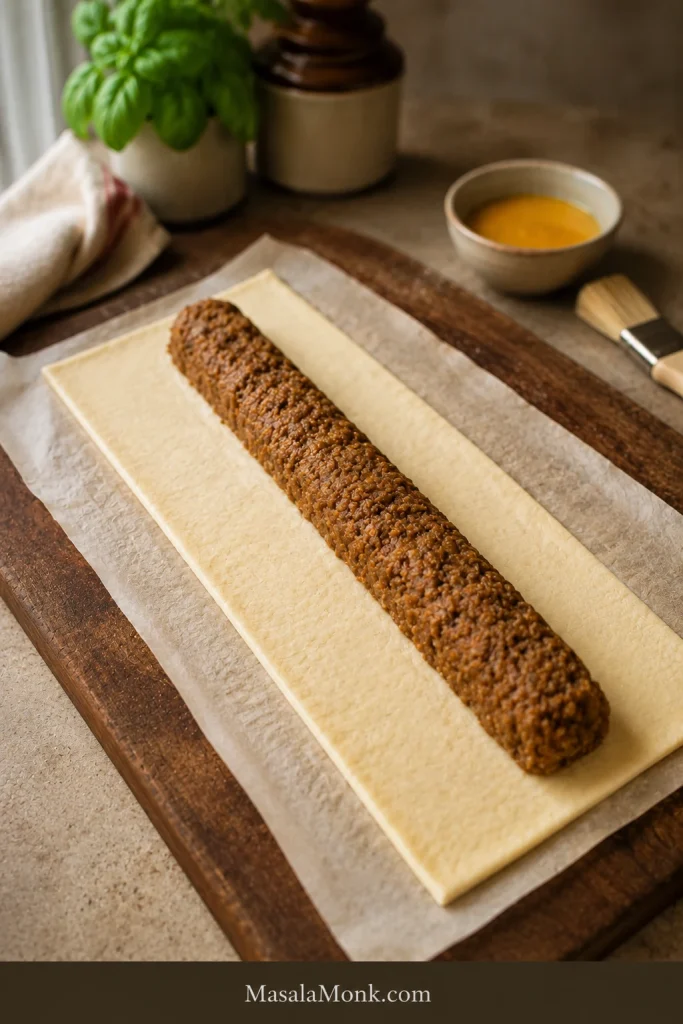
4. Place the Filling on the Pastry
The pastry needs to wrap easily around the filling. If you have to pull hard to close it, the log is too thick. Shape thinner than you think, especially for mini sausage rolls.
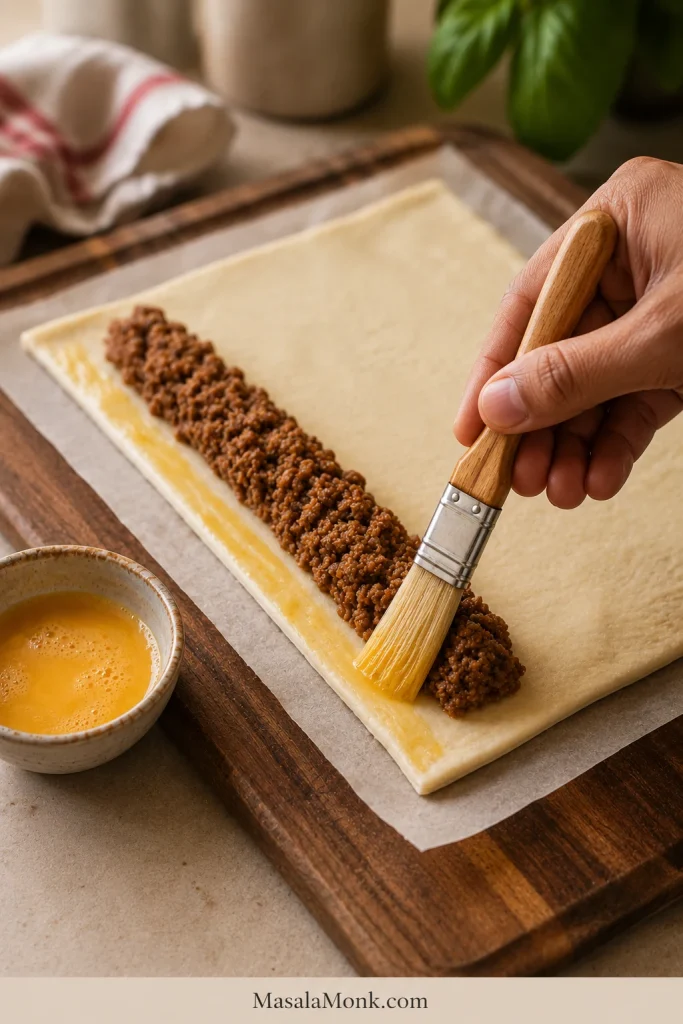
5. Seal with a Light Line of Egg Wash
Brush the edge lightly with egg wash, fold the pastry over, and press just enough to close. The seam needs to hold, but the layers should not be flattened.
6. Bake Seam-Side Down
The sealed edge should sit against the tray, not face up. That way, the baking sheet supports the roll while the filling heats and the pastry expands.
7. Cut Large, Medium, or Mini Sausage Rolls
Cut larger rolls for dinner or lunchboxes, medium rolls for snacks, and mini rolls for parties. Small rolls need thinner filling logs, not just shorter pieces of an overfilled roll.
8. What the Tray Should Look Like Before Baking
The final tray should look tidy but not crowded: glossy tops, clear gaps between rolls, and pastry that still holds its shape when moved.
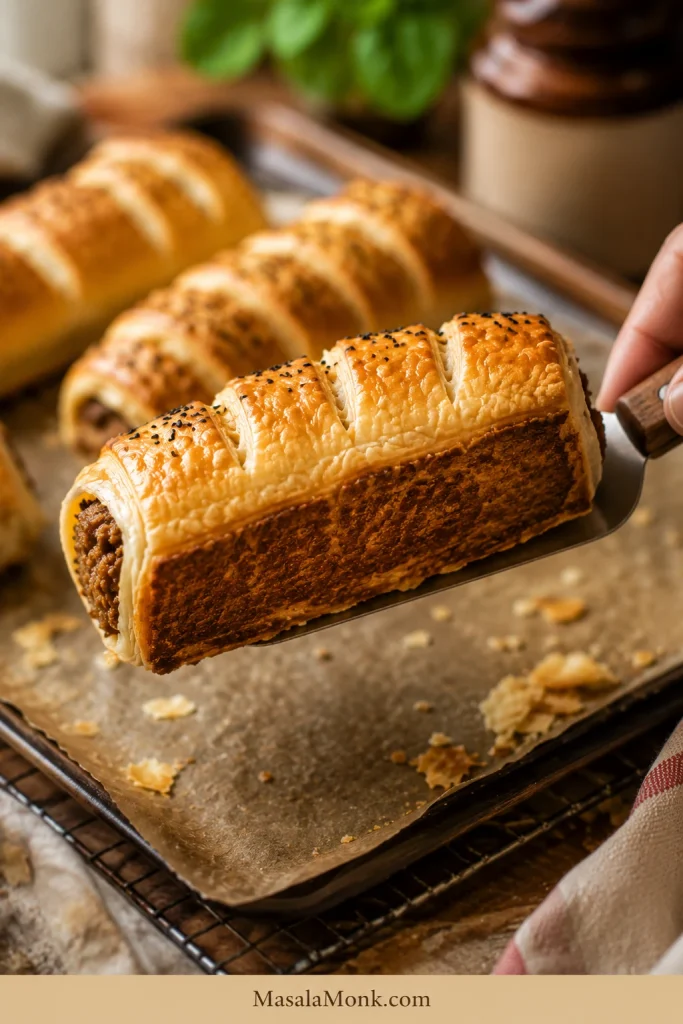
9. Look for Bronzed Tops and Clean Bottoms
Look for deeply browned tops, set seams, and bottoms that lift cleanly from the paper. If the pastry bends or feels damp underneath, it likely needs more time or better air circulation after baking.
10. Cool on a Rack, Not a Plate
Let the rolls sit briefly on the tray, then move them to a wire rack. A plate traps steam underneath; a rack keeps the base crisp while the filling settles.
Before baking check: the rolls should be easy to lift, not stretched tight, with the seam tucked underneath and small gaps between each piece. If the pastry feels greasy or the filling is bulging through the seam, chill the tray before baking.
Changing the size? Check sausage roll cooking times before baking. If the pastry feels soft or crowded, go to How to Stop Soggy Sausage Rolls.
How Long to Cook Sausage Rolls
Once the rolls pass that before-baking check, size matters more than anything else. A mini party roll and a thick lunchbox roll should not bake for the same amount of time.
Most homemade sausage rolls bake best at 200°C / 400°F, or 180°C fan / convection. That temperature is hot enough to puff and brown the pastry while giving the sausage filling time to cook through.
The goal is not pale pastry with cooked meat, or dark pastry with a doubtful center. The sweet spot is a bronzed top, a clean base, and filling that is hot all the way through.
| Type | Temperature | Approx. time | Doneness cue |
|---|---|---|---|
| Large fresh sausage rolls, 8 pieces | 200°C / 400°F, or 180°C fan | 25–30 min | Well browned pastry, hot center |
| Medium sausage rolls, 16 pieces | 200°C / 400°F, or 180°C fan | 22–25 min | Golden, crisp, cooked through |
| Mini sausage rolls, 24–32 pieces | 200°C / 400°F, or 180°C fan | 18–22 min | Puffed, browned, and crisp |
| Frozen unbaked sausage rolls | 200°C / 400°F, or 180°C fan | Add 6–10 min to the fresh time for that size | Golden pastry with bubbling edges |
| Reheating baked rolls | 180°C / 350°F, or 160°C fan | 8–12 min | Hot center and crisp pastry |
When they are ready, look for bronzed, firm tops, set seams, and bottoms that lift cleanly from the paper instead of bending or feeling damp.
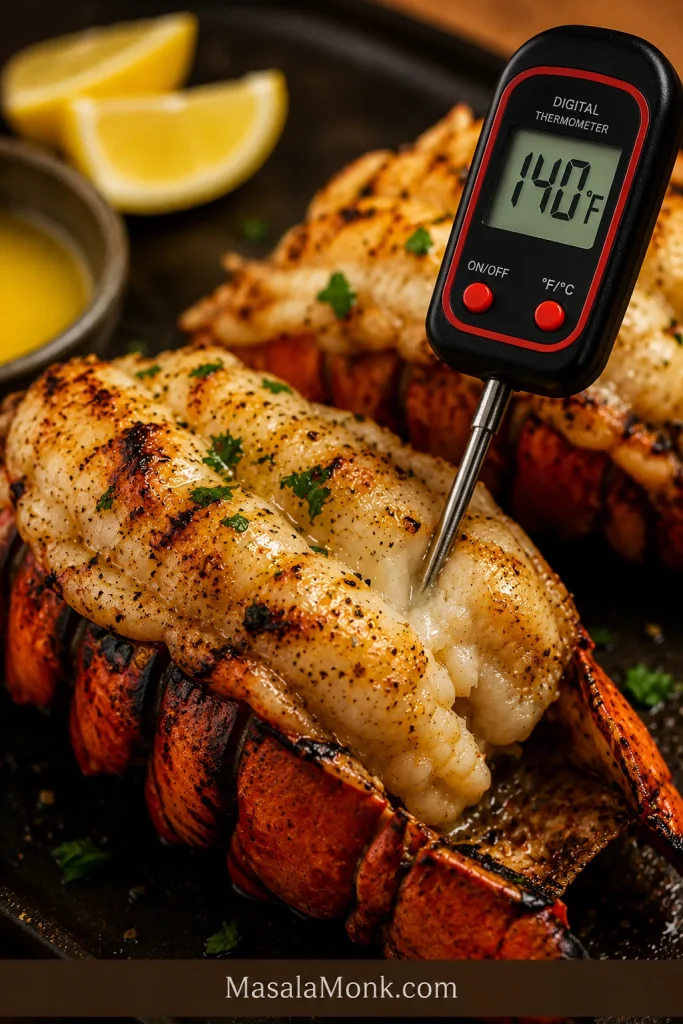
Check the Internal Temperature
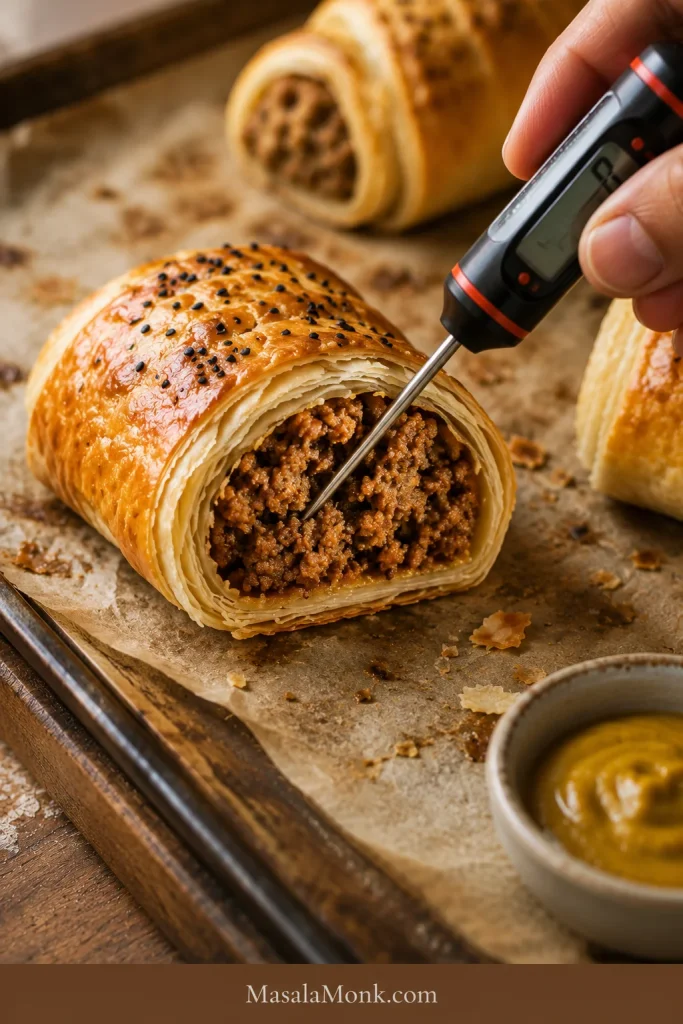
Use color as a clue, not the only test. Puff pastry should look well browned, but thick rolls can brown before the center is fully cooked. For a safe check, use an instant-read thermometer in the thickest part of the filling. For the official temperature chart, FoodSafety.gov has a simple safe minimum internal temperatures guide.
Making a batch for later? Go to Freezing, Reheating, and Making Ahead, or jump back to the recipe card.
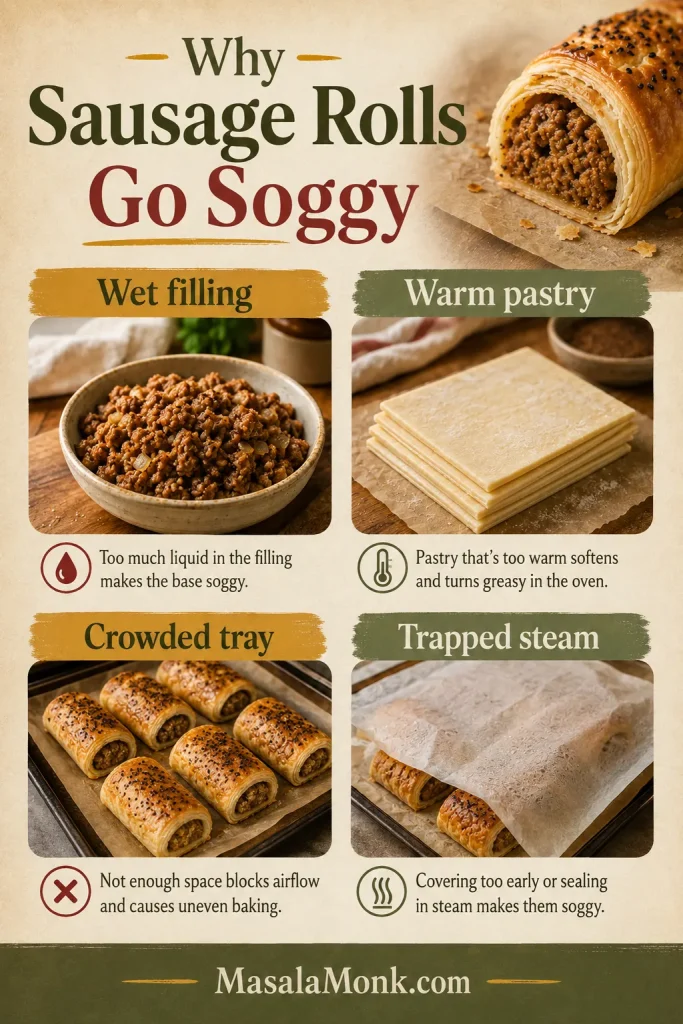
How to Stop Soggy Sausage Rolls
Soggy sausage rolls are disappointing, but they are rarely mysterious. If the base is soft, the seam opens, or fat leaks around the edges, the problem usually started before the tray went into the oven: wet filling, warm pastry, overfilling, or trapped steam after baking.
The oven can brown pastry, but it cannot fully rescue a filling that went in too wet.
| Problem | Likely cause | Fix |
|---|---|---|
| Soggy bottom | Wet filling or pastry sitting in steam | Use breadcrumbs, cool cooked onion, avoid watery vegetables, and move baked rolls to a wire rack. |
| Pastry leaking fat | Very fatty filling, warm pastry, or oven too low | Chill the shaped rolls if needed, bake at the right heat, and space rolls apart. |
| Pastry split open | Overfilled rolls or weak seal | Use egg wash on the edge, press firmly, and bake seam-side down. |
| Pale pastry | Weak egg wash or underbaking | Brush well with beaten egg and bake until golden and firm. |
| Dry filling | Meat too lean or filling overmixed | Use sausage with enough fat, mix gently, and do not overbake. |
| Soft after baking | Rolls cooled on a plate or covered too tightly | Cool on a wire rack and avoid trapping steam. |
A sturdy metal baking sheet also helps. Very thin trays can brown unevenly, and crowded trays trap steam. For extra-crisp bottoms, place the rolls on parchment on a hot tray only if you can transfer them safely.
What a Crisp Bottom Looks Like
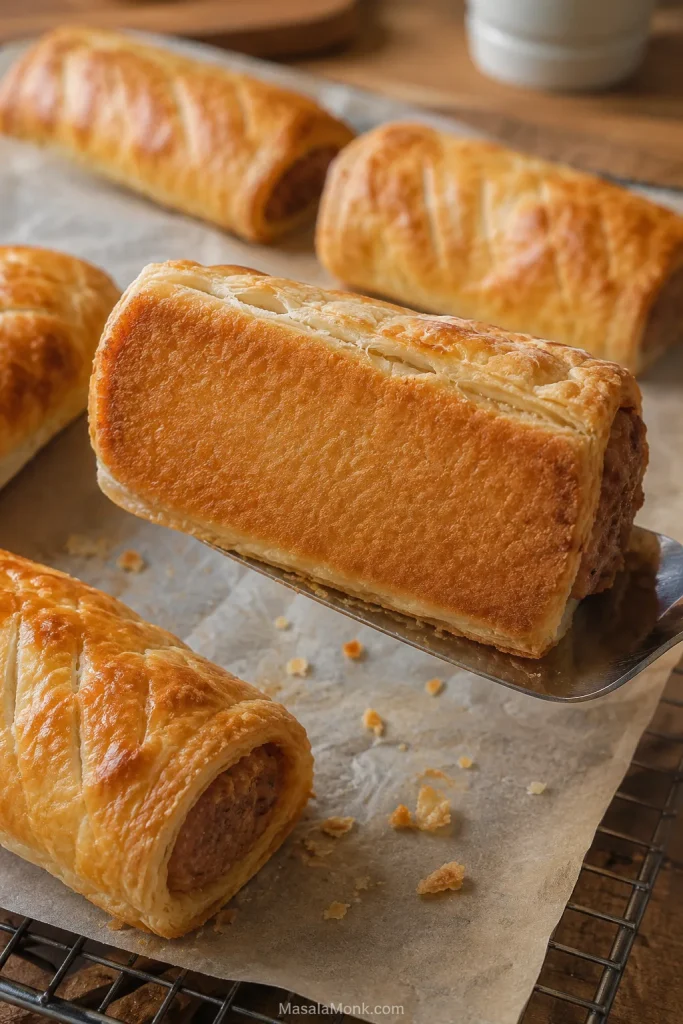
Cold pastry, confident bake: if the puff pastry feels greasy, sticky, or slack, pause and chill the tray before it goes into the oven.
Most batches do not need every fix here. If the pastry is cool, the rolls are not overfilled, and the tops are deeply browned, you are already most of the way there.
That is the sweet spot: hot filling, crisp base, and pastry that flakes instead of bending.
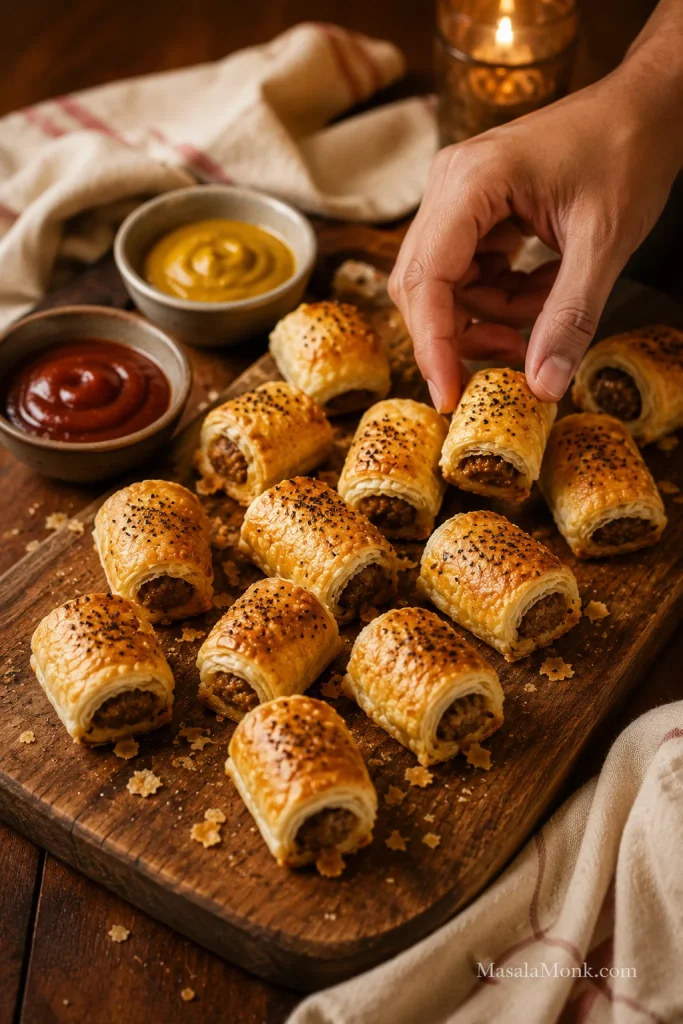
Mini Sausage Rolls for Parties, Lunchboxes, and Snacks
Mini sausage rolls are the party version for a reason: they bake faster, serve neatly, and disappear from a platter while people are still deciding what to drink. They are the thing people pick up while talking, then return for before they realize they have already had three.
- Cut each long roll into 12–16 small pieces for party-size sausage rolls.
- Bake mini sausage rolls at 200°C / 400°F, or 180°C fan, for 18–22 minutes.
- Shape thinner filling logs so each mini roll is balanced, not overstuffed.
- Leave space between pieces so the pastry can puff.
- Use sesame or nigella seeds if you want a more finished party-platter look.
- Cool fully before packing into lunchboxes so steam does not soften the pastry.
Party math is simple: plan on 3–4 mini sausage rolls per person if they are one of several snacks, and more if these are the main warm bite on the table. Think two-bite snacks, not tiny overstuffed parcels.
How to Keep Sausage Rolls Warm for a Party
Keep baked sausage rolls in a low oven, loosely covered, so steam can escape. Wrapping them tightly in foil while hot softens the pastry. Softened rolls come back quickly in the oven or air fryer for a few minutes before serving.
For another easy party appetizer in the same make-ahead lane, these grape jelly meatballs are a useful option beside mini sausage rolls.
If you are baking a full party tray, the oven is still easier. For a handful of mini rolls, leftovers, or a small frozen batch, the air fryer is the faster tool.
Baking only a few? The air fryer section covers small batches. Planning ahead? Go to freezing and reheating.
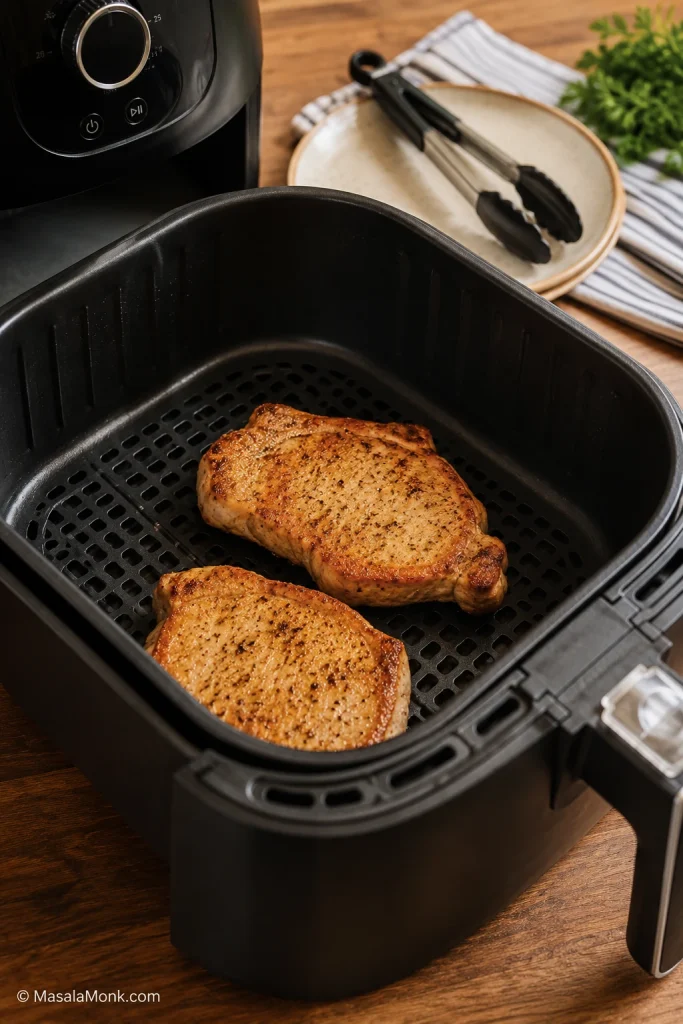
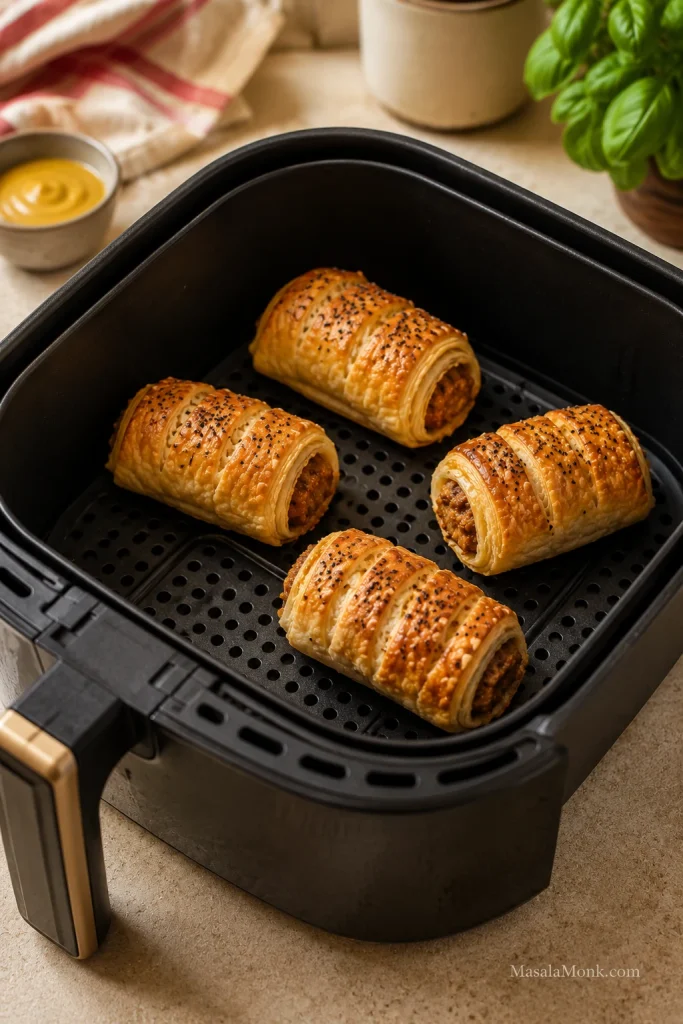
Air Fryer Sausage Rolls
The air fryer is not the best tool for a full tray, but it is excellent for small batches, leftovers, and frozen mini sausage rolls when you want hot pastry without heating the oven.
It is especially useful for the last few frozen rolls in the bag: enough for a snack, not enough to justify a full oven.
| Air fryer use | Temperature | Approx. time |
|---|---|---|
| Fresh mini sausage rolls | 180–190°C / 350–375°F | 10–14 min |
| Fresh medium sausage rolls | 190°C / 375°F | 13–16 min |
| Frozen unbaked sausage rolls | 180°C / 350°F | 18–22 min |
| Reheating cooked sausage rolls | 180°C / 350°F | 4–6 min |
These air fryer times are for homemade sausage rolls. Store-bought frozen mini sausage rolls can vary by brand, so start checking early and use the package instructions as the first guide.
Air fryer timing is most reliable for mini and medium rolls. Cook in one layer with space for the pastry to expand, and start checking early the first time because machines vary. Large rolls can brown outside before the middle is hot, so lower the heat and cook a little longer if needed.
Freezing, Reheating, and Making Ahead
This is the kind of tray that earns its keep: hot enough for dinner, small enough for a party, and easy enough to freeze before you need it.
Freeze sausage rolls unbaked for the best texture. Shape, cut, freeze on a tray, then bake from frozen with extra time whenever you want a hot batch later.
When the rolls bake for the first time from frozen, the pastry stays fresher than it does after being baked, frozen, and reheated. It is the quiet freezer win: a tray you shaped when you had time, ready to bake when you do not.
That is the freezer version at its best: no flour on the counter, no filling bowl to wash, just a cold tray becoming hot, flaky sausage rolls when you need them.
Freezing Unbaked Sausage Rolls
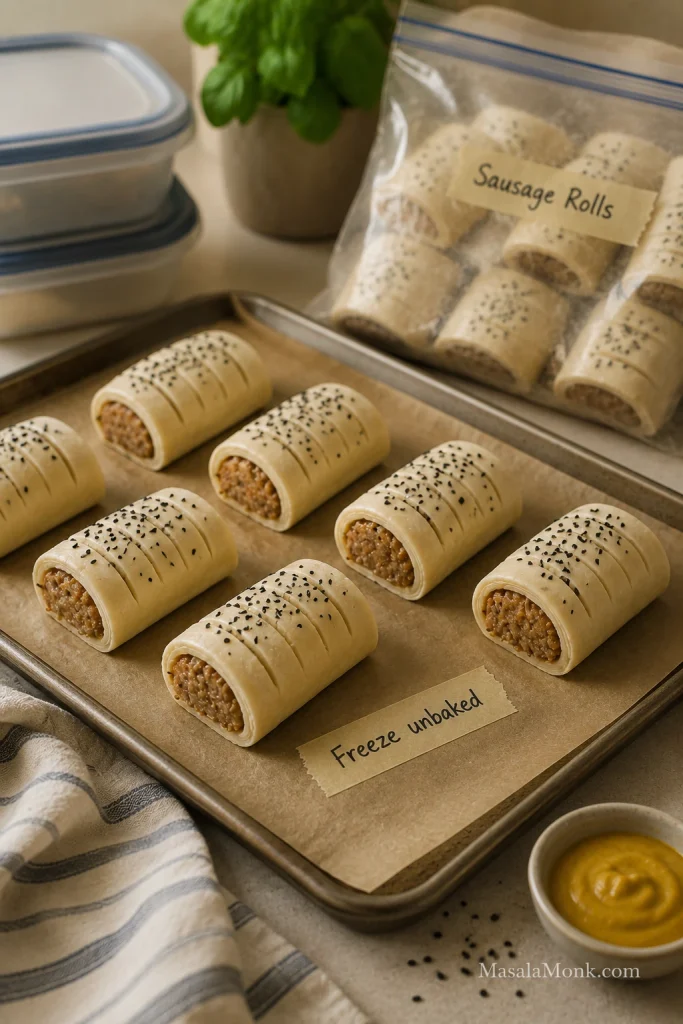
- Shape and cut the sausage rolls.
- Place them on a parchment-lined tray.
- Freeze until firm.
- Transfer to a freezer-safe bag or container.
- Bake from frozen at 200°C / 400°F, or 180°C fan, adding extra time.
Frozen unbaked sausage rolls usually need 6–10 minutes longer than fresh rolls, depending on size; very large rolls may need a few minutes more. Brush with egg wash before baking if possible. If the egg wash does not stick well to frozen pastry, bake the rolls plain or brush lightly after the first few minutes. Bake unbaked frozen rolls straight from the freezer unless the pastry packet says otherwise.
Simple Party-Day Plan
- A few hours ahead: shape and cut the sausage rolls, then refrigerate until baking.
- The day before or earlier: freeze them unbaked for the best texture.
- Before guests arrive: brush with egg wash and bake until golden and cooked through.
- To hold briefly: keep warm in a low oven, loosely covered, so steam can escape.
- To refresh: return softened rolls to the oven or air fryer for a few minutes instead of wrapping them tightly.
- For the table: serve with mustard or chutney, one creamy dip, and one fresh side so the pastry does not feel too heavy.
Can You Freeze Baked Sausage Rolls?
Yes, baked sausage rolls can be frozen, but the pastry is usually better when the rolls are frozen unbaked. If you freeze baked rolls, cool them completely first, pack airtight, and reheat in the oven or air fryer until hot and crisp again.
Storing Leftovers
Sausage rolls are best the day they are baked, especially while the pastry is crisp. Once cooled, store leftovers in an airtight container in the fridge for up to 3 days. Try to refrigerate them within 2 hours of baking.
Reheating Without Soft Pastry
Reheat baked sausage rolls in the oven at 180°C / 350°F, or 160°C fan, for 8–12 minutes. You can also use the air fryer at 180°C / 350°F for 4–6 minutes. Avoid the microwave when you want crisp pastry. It heats quickly, but it makes puff pastry soft.
Making Them Ahead
You can assemble sausage rolls a few hours ahead and keep them covered in the fridge until baking. For longer storage, freeze them unbaked. If the pastry softens while sitting, give the tray a short fridge rest before baking.
Serving a tray now? See what to serve with sausage rolls, or go back to top.
Sausage Roll Variations
Once the base recipe works, sausage rolls become easy to riff on. Keep the filling savory and not too wet, then change the mood: fennel for bakery-style rolls, apple for sweetness, cheddar for comfort, chili for heat, or cranberry and sage for a holiday tray.
- Pork and fennel sausage rolls: add ½–1 teaspoon lightly crushed fennel seeds for an aromatic, bakery-style finish.
- Pork and apple sausage rolls: add a small amount of grated apple, squeezed dry, for gentle sweetness.
- Beef sausage rolls: use beef sausage meat and stronger seasoning such as mustard, pepper, or Worcestershire-style flavor.
- Chicken sausage rolls: use chicken sausage or ground chicken and cook to 165°F / 74°C.
- Cheese and onion sausage rolls: add grated cheddar and softened onion for a richer, more savory filling, but avoid overfilling.
- Spicy sausage rolls: add chili flakes, smoked paprika, black pepper, or mustard.
- Christmas sausage rolls: use sage, onion, apple, cranberry, chutney, or a little stuffing-style seasoning.
- Bakery-style sausage rolls: keep the filling simple, use well-seasoned sausages, chill before baking, and egg wash generously.
When adding vegetables, be careful with moisture. Carrot, zucchini, mushrooms, spinach, and apple can all work, but watery ingredients should be cooked, squeezed, or used sparingly so the pastry does not turn soggy. For a completely different sausage dinner, this smoky kielbasa pasta is better when you want a full meal instead of a pastry snack.
Vegetarian, Vegan, Gluten-Free, and Lighter Sausage Rolls
Vegetarian, vegan, gluten-free, and lighter sausage rolls can all work, but they need the same care as the classic version. The filling needs body, the pastry needs to stay cool, and anything watery needs to be cooked, squeezed, or used sparingly before it is wrapped.
Vegetarian Sausage Rolls
For vegetarian sausage rolls, build savoriness first. Mushrooms, lentils, cheese, paneer, onions, herbs, and plant-based sausage can all work, but the mixture should be thick enough to shape into a log. If it slumps before baking, it will likely soften the pastry.
Vegan Sausage Rolls
For vegan sausage rolls, use vegan puff pastry and a plant-based filling. Replace egg wash with plant milk, aquafaba, or a little oil depending on the finish you want. Check both the pastry and the filling: many puff pastries are accidentally vegan, but not all are.
Gluten-Free Sausage Rolls
For gluten-free sausage rolls, check the pastry, sausage, breadcrumbs, mustard, and sauces. Gluten-free pastry can crack more easily, so let it soften just enough to fold, then chill again before baking if it turns sticky or fragile.
Healthy or Lighter Sausage Rolls
For a lighter version, make smaller rolls, use leaner sausage or chicken/turkey filling, add cooked vegetables, and serve with salad instead of heavier sides. Keep the promise honest: these are lighter sausage rolls, not diet food. Puff pastry and sausage are still rich ingredients.
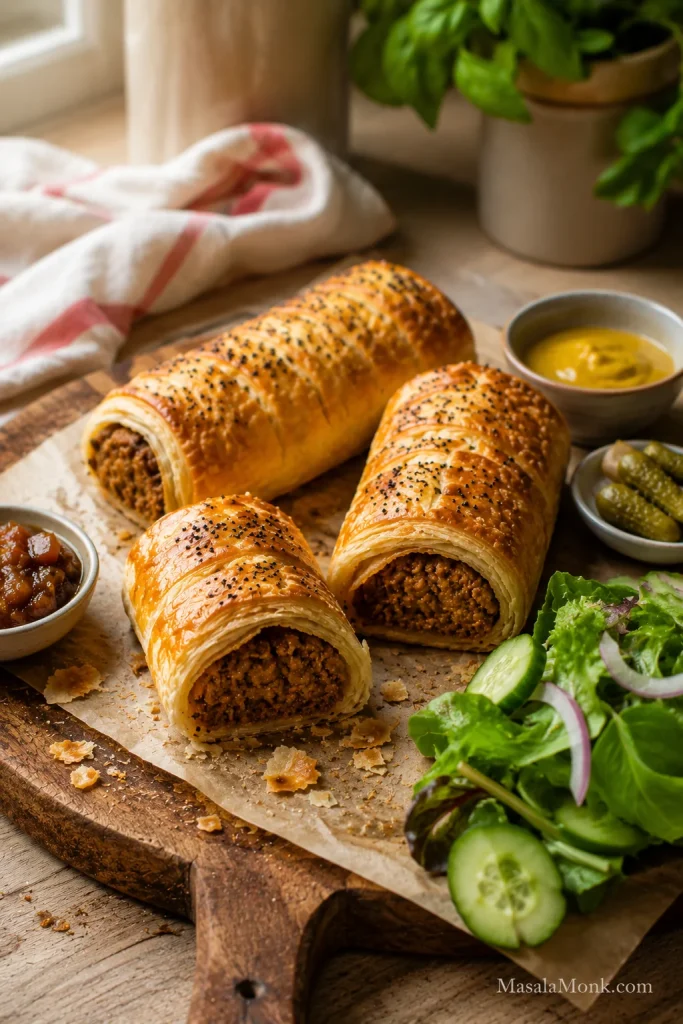
What to Serve with Sausage Rolls
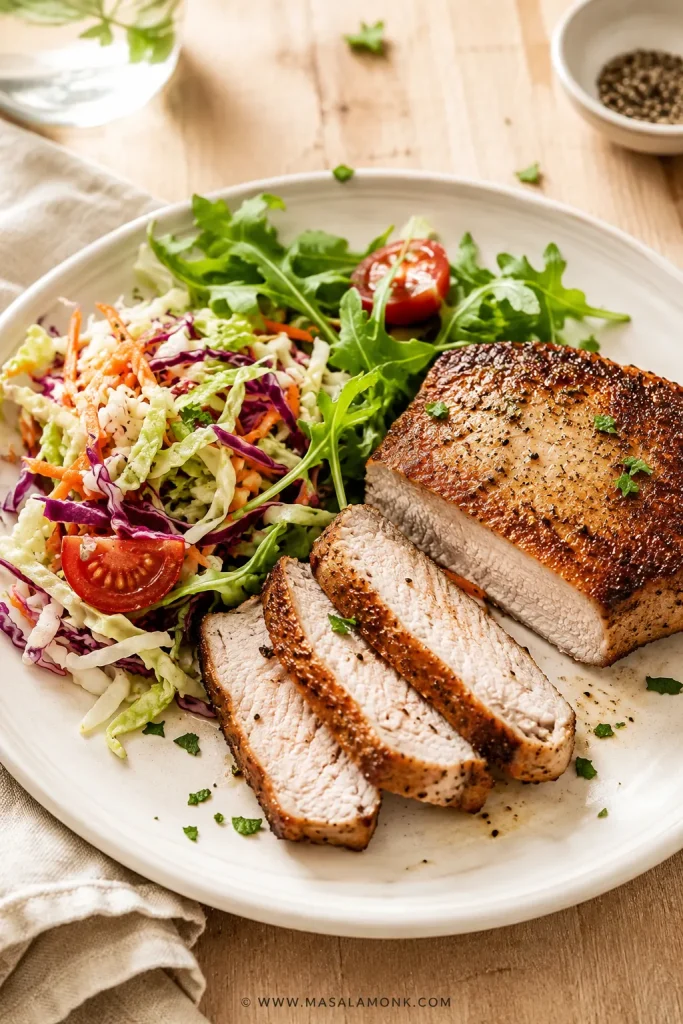
The best sausage rolls do not need much around them; they just need contrast. Add one sharp thing, one fresh thing, or one dip that cuts through the buttery pastry and makes people reach for another. A crisp wedge salad works especially well because the cold lettuce and creamy dressing balance the hot, flaky pastry.
- Sharp: English mustard, Dijon mustard, brown sauce, steak sauce, onion chutney, apple chutney, or pickles.
- Fresh: green salad, wedge salad, slaw, cucumber salad, or a simple tomato salad.
- Cozy: baked beans, soup, mashed potatoes, potato wedges, or chips.
- Party-style: ketchup, creamy dips, chutney, mustard, pickles, or a cheese ball.
For a party platter, serve mini sausage rolls with two or three dips rather than too many sides. In lunchboxes, cool the rolls completely before packing so the pastry does not steam itself soft. On another sausage dinner night, this slow cooker sausage casserole gives you the opposite comfort-food mood: soft sausages, beans, vegetables, and a spoonable sauce.
FAQs About Sausage Rolls
Do you need sausage meat for sausage rolls?
No. Sausage meat is convenient, but regular sausages work well. Slit the skins, squeeze out the meat, and loosen the filling before shaping.
Do you cook sausage meat before making sausage rolls?
No. The sausage meat usually goes into the pastry raw and cooks as the pastry bakes. Cook only the onion, garlic, or watery vegetables first, then cool them before mixing. The filling is done at 160°F / 71°C for pork or beef, and 165°F / 74°C for chicken or turkey.
How do you make sausage rolls with regular sausages?
Remove the skins, loosen the meat with a fork, shape it into logs, and roll it inside cool puff pastry. Season only if needed because most sausages are already salted.
What pastry is best for sausage rolls?
Puff pastry is best for classic sausage rolls because it bakes flaky, crisp, and golden. All-butter puff pastry gives the richest flavor, but standard ready-rolled puff pastry works well if you keep it cool.
Can you use crescent dough instead of puff pastry?
Yes, but the result will be softer and breadier. Puff pastry gives the classic flaky sausage roll texture. Crescent dough is better for a quick shortcut than for a bakery-style sausage roll.
How long do sausage rolls take to cook?
Large sausage rolls usually take 25–30 minutes at 200°C / 400°F, or 180°C fan. Medium rolls usually take 22–25 minutes, while mini sausage rolls usually take 18–22 minutes. Frozen unbaked rolls need extra time.
What temperature should sausage rolls be cooked at?
Cook sausage rolls at 200°C / 400°F, or 180°C fan, for the best balance of puffed pastry and cooked filling. For reheating, use a slightly lower temperature such as 180°C / 350°F, or 160°C fan.
How do you know sausage rolls are cooked inside?
Use three checks: browned pastry, a base that lifts cleanly from the paper, and hot filling in the center. For thick rolls, use a thermometer rather than color alone.
Why is my sausage roll filling still pink?
Some sausage fillings stay slightly pink because of seasoning, curing ingredients, or the type of meat used. Use temperature, not color alone, as the final check. Pork or beef filling should reach 160°F / 71°C, and chicken or turkey filling should reach 165°F / 74°C.
Why are my sausage rolls soggy underneath?
Usually, moisture got trapped somewhere: wet filling, warm pastry, underbaking, or cooling on a tray. Breadcrumbs, a hot bake, and a wire rack solve most of it.
Why did my sausage rolls burst open?
Sausage rolls usually burst open when they are overfilled, sealed weakly, or baked seam-side up. Leave a pastry border, seal with a little egg wash, press gently, and bake seam-side down.
Should sausage rolls be frozen before or after baking?
Before baking is best. Shape and cut the rolls, freeze them on a tray, then store them in a freezer-safe bag or container. They bake up fresher because the pastry gets its first full bake from frozen.
Can sausage rolls be served cold?
Yes, sausage rolls can be served cold once they are fully cooked and properly cooled. They are best warm if you want crisp pastry, but cold rolls work well for lunchboxes, picnics, and party platters. Keep leftovers refrigerated.
How do you keep sausage rolls warm for a party?
Keep sausage rolls in a low oven, loosely covered, so steam can escape. Avoid wrapping them tightly while hot. If the pastry softens, refresh the rolls in the oven or air fryer for a few minutes before serving.
How do you reheat sausage rolls without making them soft?
Reheat sausage rolls in the oven at 180°C / 350°F for 8–12 minutes or in the air fryer for 4–6 minutes. Avoid the microwave if you want crisp pastry.
What is the best way to make mini sausage rolls?
Use thinner filling logs, then cut each long roll into small pieces before baking. Mini sausage rolls usually bake in 18–22 minutes at 200°C / 400°F, or 180°C fan.
Final Tip for Better Sausage Rolls
Good sausage rolls come down to three things: filling that tastes good before it goes in, pastry that stays cool and relaxed, and a bake that goes far enough for real color. Once those are right, the same base method works for regular sausages, mini party rolls, freezer batches, and air fryer snacks.
Make the first batch plain and classic. After that, sausage rolls become the kind of recipe you can adapt without overthinking: a warm tray for dinner, a freezer stash for later, lunchbox rolls for the next day, or the party snack people keep circling back to while pretending they are only having one more.