A good chai latte should smell like crushed cardamom and ginger before you even take the first sip. It should land creamy and smooth, but still taste like spiced black tea — not warm milk with cinnamon dust on top.
Many homemade versions go wrong in small ways: too much water, too little tea, gritty ground spices, or a bottled concentrate that tastes more like syrup than chai. Iced chai makes those problems even more obvious because melting ice weakens the drink quickly.
This chai latte recipe gives you the creamy drink many cafés call a chai latte or chai tea latte, but built with real chai logic: full-bodied tea first, warm spices next, and milk only after the tea and spices can hold their own.
The result is soft and café-style, but still tastes like cardamom, ginger, black tea, and warmth.
In This Guide
Make the Latte
Quick Answer: How to Make a Chai Latte
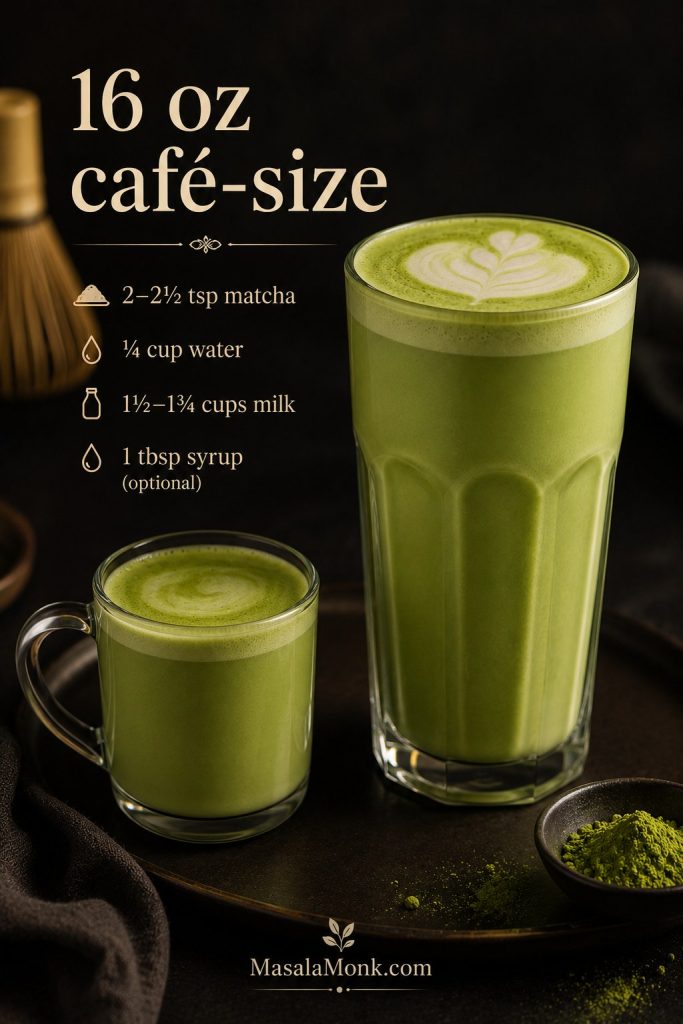
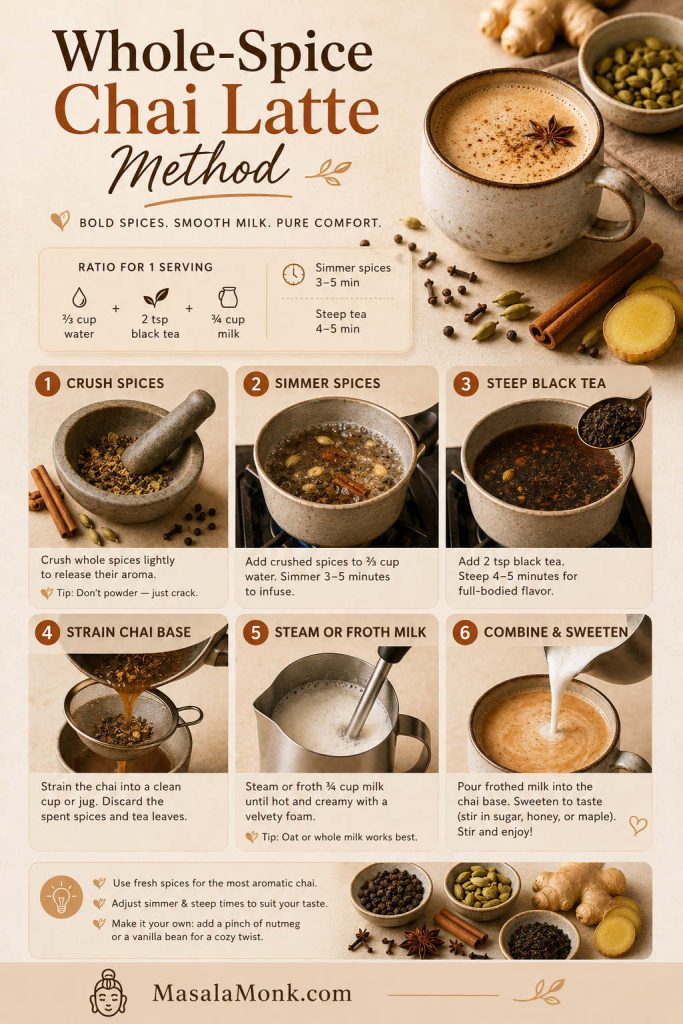
To make a chai latte, simmer crushed spices in water for 3–5 minutes, steep black tea off heat or on very low heat for 4–5 minutes, strain, then mix ½ cup / 120 ml chai concentrate with ¾ cup / 180 ml steamed milk.
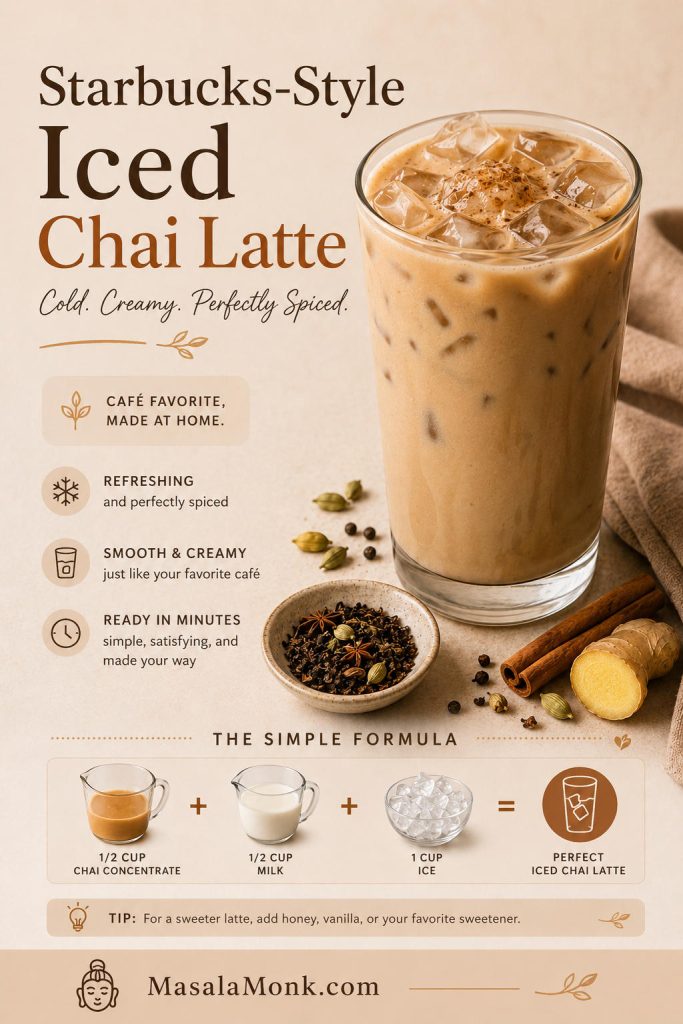
Sweeten with 1–2 teaspoons sugar, honey, maple syrup, or jaggery syrup to start, then add more after tasting for a sweeter coffeehouse-style cup. For iced chai, use ½ cup / 120 ml cold chai concentrate, ½ cup / 120 ml cold milk, and 1 cup / about 120–140g ice.
If you already have chai concentrate, the drink takes about 5 minutes. If you are making the base fresh, expect about 7 minutes for the tea-bag version and about 15 minutes for the whole-spice version.
Need the fastest path? Go to the tea-bag method. Want the best aroma? Use the whole-spice method. Making drinks for the week? Start with the make-ahead chai concentrate.
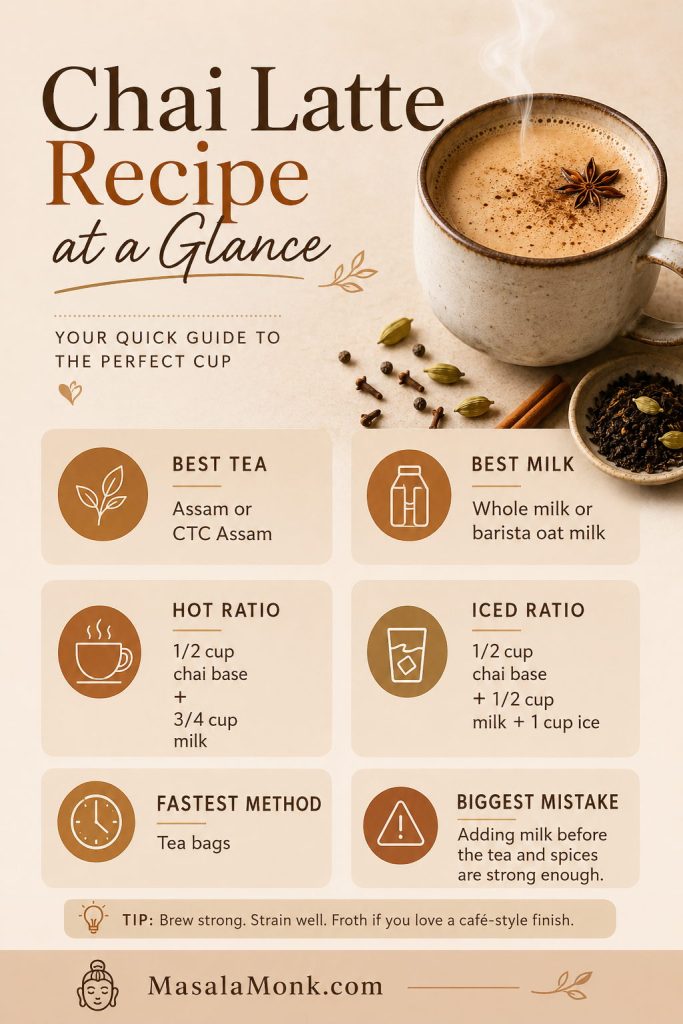
At a Glance
These are the numbers and choices that keep the drink from becoming pale, watery, or syrup-heavy.
Once the ratio makes sense, the drink stops feeling fussy. You can make it stronger for ice, sweeter for a coffeehouse-style cup, less milky for dirty chai, or softer when you want a creamier evening drink.
For the full hot, iced, creamier iced, and dirty chai measurements, see the chai-to-milk ratio guide.
Why This Recipe Works
In good chai, milk should round the flavor, not erase it. That is why the tea and spices are extracted before milk enters the picture. The tea-spice mixture should taste slightly more intense than the final drink because milk, ice, oat milk, and espresso all change the balance once they enter the cup.
- The tea has body. The drink does not collapse into warm milk.
- The spices are well extracted. Cardamom, ginger, cinnamon, cloves, and pepper actually show up in the cup.
- The tea is not overboiled. Spices can simmer longer, but black tea turns bitter when pushed too hard.
The best check is simple: before milk, the chai should taste slightly too strong. After milk, it should taste balanced. If it tastes balanced before milk, it will taste weak after.
Chai Latte Mistakes That Make It Taste Weak
Most disappointing chai lattes fail before the milk is added. The tea is too dilute, the spices are barely extracted, or the drink is built over ice before the chai has enough flavor to survive dilution.
- Too much water for one tea bag gives you color without enough body.
- Boiling black tea hard for too long makes it bitter; simmer spices first, then steep tea gently.
- Milk should come after the tea and spices have real flavor, not before.
- Too-sweet concentrate needs unsweetened black tea, not only more milk.
- If the tea already tastes weak, ice will only make the problem louder.
- Ground spices are convenient, but they need a light hand and a good strain.
Already made a weak, bitter, gritty, or too-sweet cup? Jump to the troubleshooting guide for quick fixes.
The Best Chai-to-Milk Ratio
If you remember only one thing, remember this: milk hides weak tea. Start with a tea-forward chai concentrate, then soften it with milk.
The exact ratio matters more than the garnish. Once the base is right, cinnamon on top is optional.
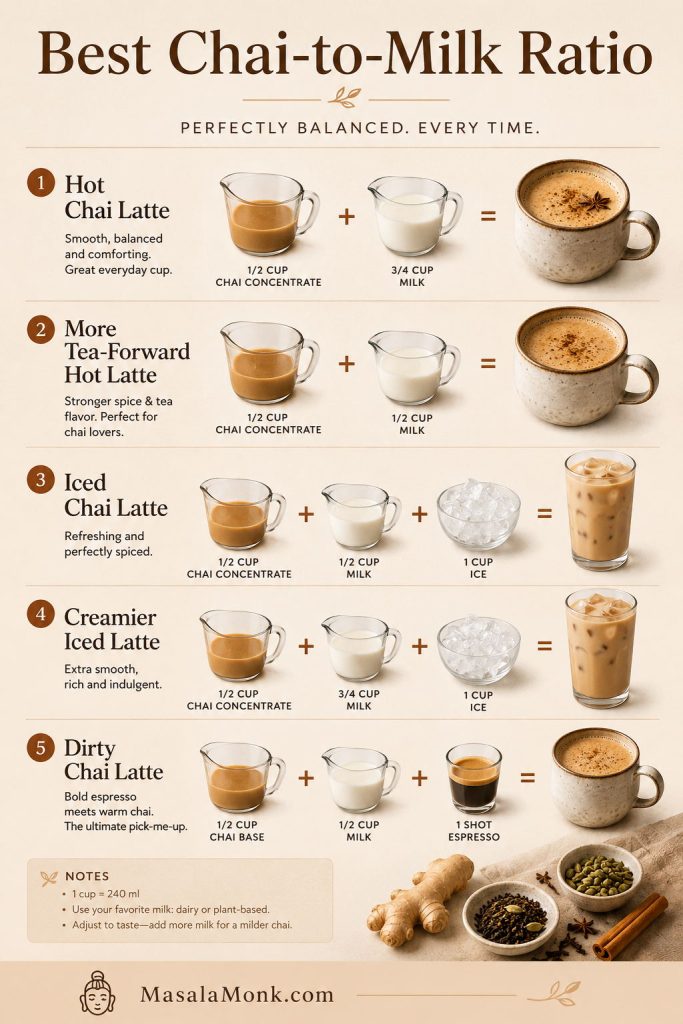
| Drink | Chai concentrate | Milk | Ice | Best result |
|---|---|---|---|---|
| Hot chai latte | ½ cup / 120 ml | ¾ cup / 180 ml | None | Creamy and balanced |
| More tea-forward hot latte | ½ cup / 120 ml | ½ cup / 120 ml | None | More tea-forward, less milky |
| Iced chai latte | ½ cup / 120 ml | ½ cup / 120 ml | 1 cup / 120–140g | Holds up to ice |
| Creamier iced latte | ½ cup / 120 ml | ¾ cup / 180 ml | 1 cup / 120–140g | Softer and milkier |
| Dirty chai latte | ½ cup / 120 ml | ½ cup / 120 ml | Optional | Add 1 espresso shot / 30 ml |
Hot chai can handle a little more milk because there is no ice dilution. Iced chai needs a tighter ratio, so taste the base and milk before adding ice; it should taste a little more tea-forward than your final target.
Which Method Should You Use?
Pick your path first. You do not need every version today — just the one that fits the drink you want right now.
| Reader situation | Best path | Why it works |
|---|---|---|
| I want one hot chai latte now | Tea-bag method | Ready in about 5–7 minutes with minimal equipment |
| I want the best homemade flavor | Whole-spice method | Freshly crushed spices taste brighter and cleaner |
| I want iced chai all week | Make-ahead concentrate | One batch works for hot, iced, dirty, and Starbucks-style drinks |
| I want Starbucks-style iced chai | Store-bought or sweetened concentrate path | Closest to the coffeehouse concentrate-and-milk format |
| I want coffee in it | Dirty chai path | A well-spiced base keeps the coffee from taking over |
| I want dairy-free | Water-based base + oat or soy milk | Creamy without dairy, and easier to heat gently |
First time making it? Use the whole-spice single-serve method for the most fragrant cup. In a hurry, use the tea-bag method. For weekday drinks, make the concentrate batch.
How to Make Chai Latte at Home
All three methods follow the same principle: brew the chai first, then add milk. That is what keeps the finished drink creamy without becoming flat, pale, or watery.
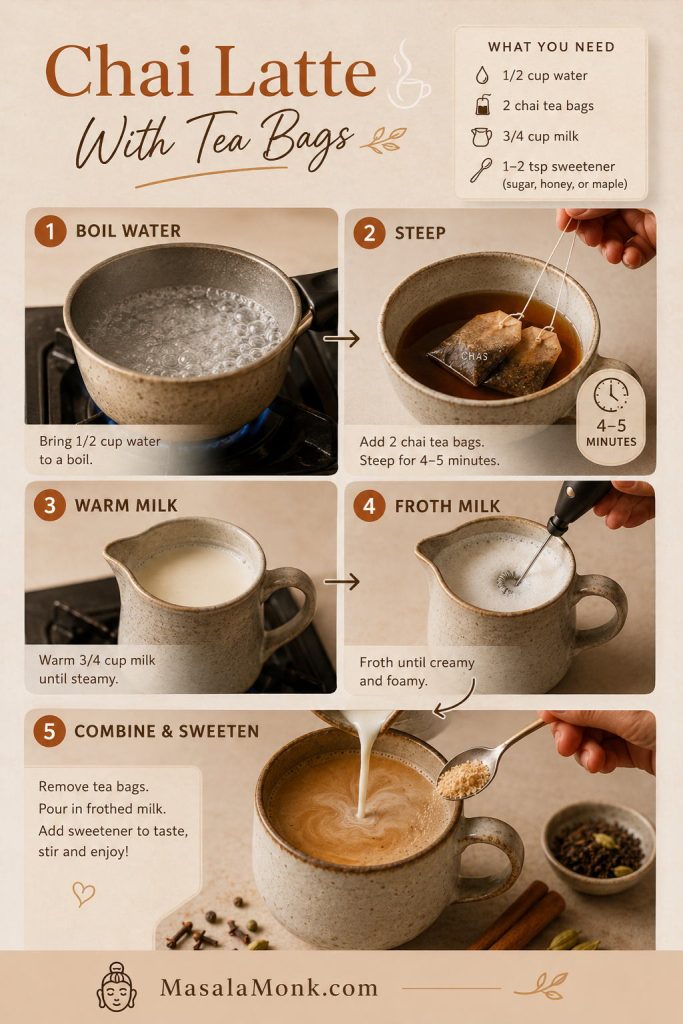
How to Make It With Tea Bags
This is the version for the afternoon when you want comfort now, not a spice project.
Use this ratio for one quick cup
- ½ cup / 120 ml water
- 2 black-tea-based chai tea bags
- ¾ cup / 180 ml milk
- 1–2 teaspoons sugar, honey, maple syrup, or jaggery syrup to start
- ¼ teaspoon vanilla, optional
Method
- Bring the water to a boil, then turn off the heat.
- Add the chai tea bags and steep for 4–5 minutes.
- Remove the tea bags gently. Do not squeeze them hard, or the drink may taste harsh.
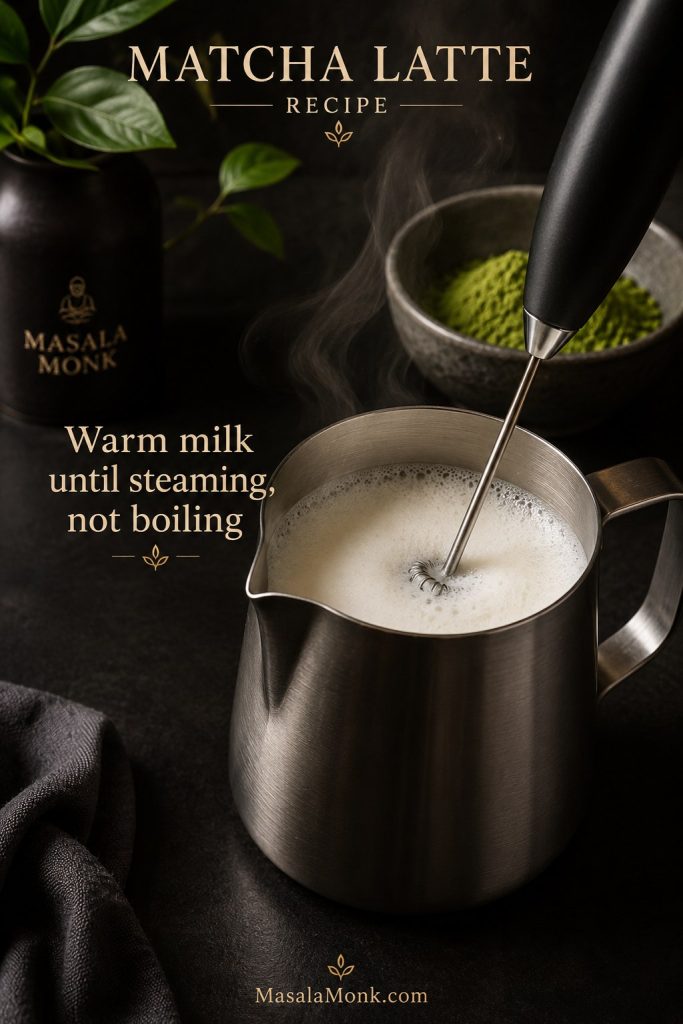
- Warm the milk until steaming, not boiling.
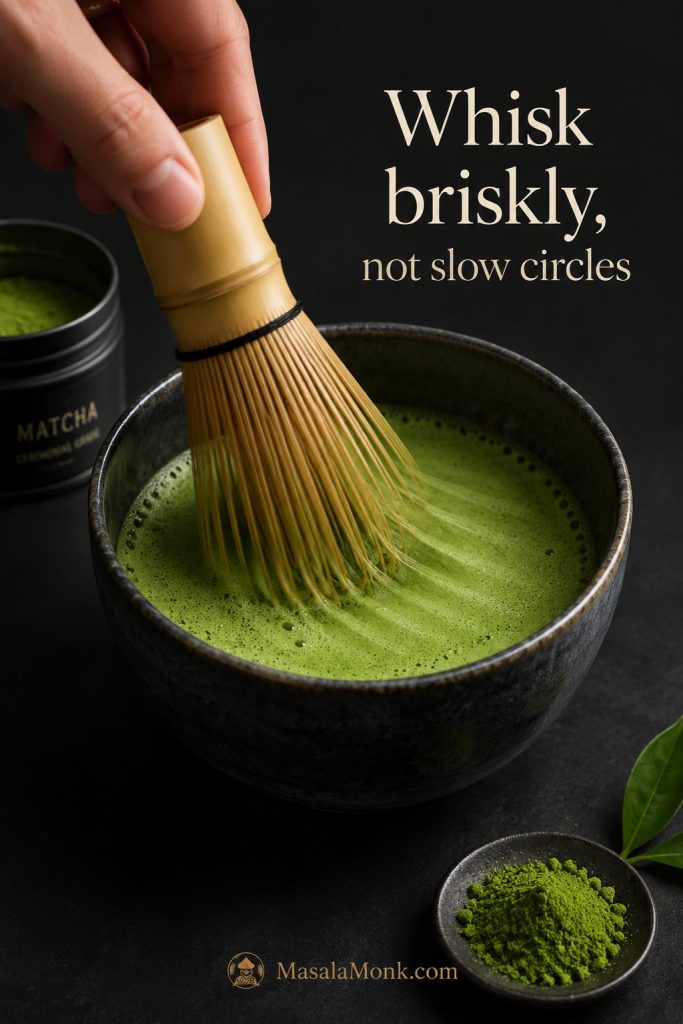
- Froth the milk with a frother, whisk, French press, or jar.
- Pour the tea into a mug, add sweetener, then pour in the milk.
- Taste and adjust sweetness.
Two tea bags give the cup body without forcing one bag to oversteep into bitterness. Choose a black-tea-based chai bag, not a delicate herbal chai, unless you intentionally want a caffeine-free drink.
Whole-Spice Single-Serve Method
This is the cup to make when you have five extra minutes and want the kitchen to smell like chai, not just tea. Freshly crushed spices give a cleaner aroma and a deeper cup than most powdered spice blends.
For one large latte
- ⅔ cup / 160 ml water
- 2 teaspoons / about 4g loose black tea, or 2 black tea bags
- 3–4 green cardamom pods
- 1 small piece cinnamon stick, about 1 inch / 2.5 cm
- 2 cloves
- 3–4 black peppercorns
- ½ inch / 5g fresh ginger, sliced or lightly crushed
- ¾ cup / 180 ml milk
- 1–2 teaspoons sugar, honey, maple syrup, or jaggery syrup to start
- ¼ teaspoon vanilla, optional
Method
- Lightly crush the cardamom, cinnamon, cloves, peppercorns, and ginger.
- Add the spices and water to a small saucepan.
- Bring to a boil, then simmer for 3–5 minutes, until the water smells clearly of cardamom and ginger.
- Add the tea, turn off the heat or keep it very low, and steep for 4–5 minutes.
- For a deeper cup, let it sit off heat for another 2–3 minutes before straining.
- Strain into a mug. You should have about ½ cup / 120 ml dark, fragrant chai that tastes slightly too strong before milk.
- Warm the milk until steaming, then froth it.
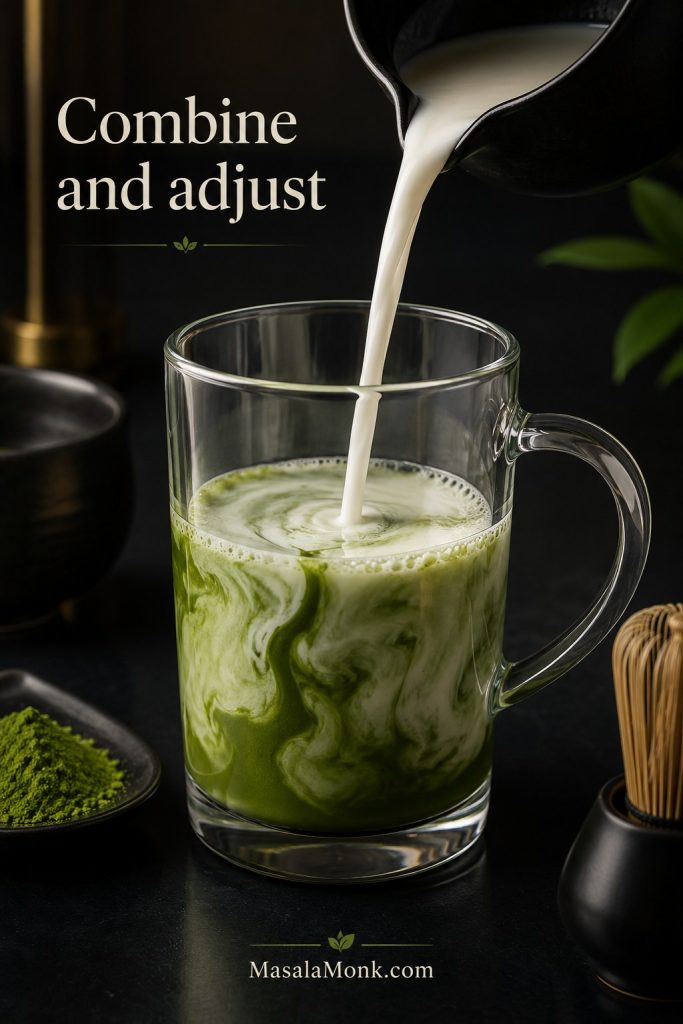
- Combine the chai and milk. Sweeten to taste.
The timing matters. Spices can simmer longer, but black tea becomes bitter if boiled too hard for too long. Extract the spices first, then add the tea.
Make-Ahead Chai Concentrate
Make-ahead chai concentrate keeps the hard part ready: a strong spiced tea base that can become a hot latte, iced chai, dirty chai, vegan chai, or Starbucks-style drink in minutes.
This batch starts with 2½–2⅔ cups / 600–640 ml water and yields about 2 cups / 480 ml concentrate after simmering, steeping, absorption, and straining. That is enough for about 4 lattes if you use ½ cup / 120 ml per drink.
If you are making this for iced chai, dirty chai, or different milk types, keep the batch unsweetened the first time. Sweeten each glass after mixing so you can adjust without weakening the tea.

Ingredients for 4 lattes
- 2½–2⅔ cups / 600–640 ml water
- 6–8 teaspoons / about 12–16g loose black tea, or 6–8 black tea bags
- 10–12 green cardamom pods
- 2 small cinnamon sticks, about 2–3 inches / 5–7.5 cm each
- 5–6 cloves
- 10–12 black peppercorns
- 15–20g fresh ginger, sliced or crushed
- 2–4 tablespoons sugar, optional
- ½ teaspoon vanilla, optional
Method
- Lightly crush the cardamom, cinnamon, cloves, peppercorns, and ginger.
- Add the spices and water to a saucepan.
- Bring to a boil, then simmer for 3–5 minutes, until the water smells clearly spiced.
- Add the tea, turn off the heat or keep it very low, and steep for 4–5 minutes.
- Let the mixture sit off heat for another 5 minutes if you want a deeper concentrate.
- Strain through a fine mesh strainer.
- You should have about 2 cups / 480 ml. If you are only a little short, top it up with a splash of hot water. If you have much less, leave it as-is and use slightly less per drink.
- Stir in sugar while the chai is warm, if you want a sweetened batch.
- Add vanilla, if using.
- Cool completely, then refrigerate in a clean jar.
Sweetened or unsweetened? Sweeten the whole batch if everyone likes the same sweetness. Leave it unsweetened if you want to use it for lower-sugar drinks, dirty chai, different milk types, or people with different sweetness preferences.
After that, the daily choice is simple: tea bags for speed, whole spices for aroma, and a fridge jar when you want the same good cup tomorrow.
Chai Latte vs Masala Chai
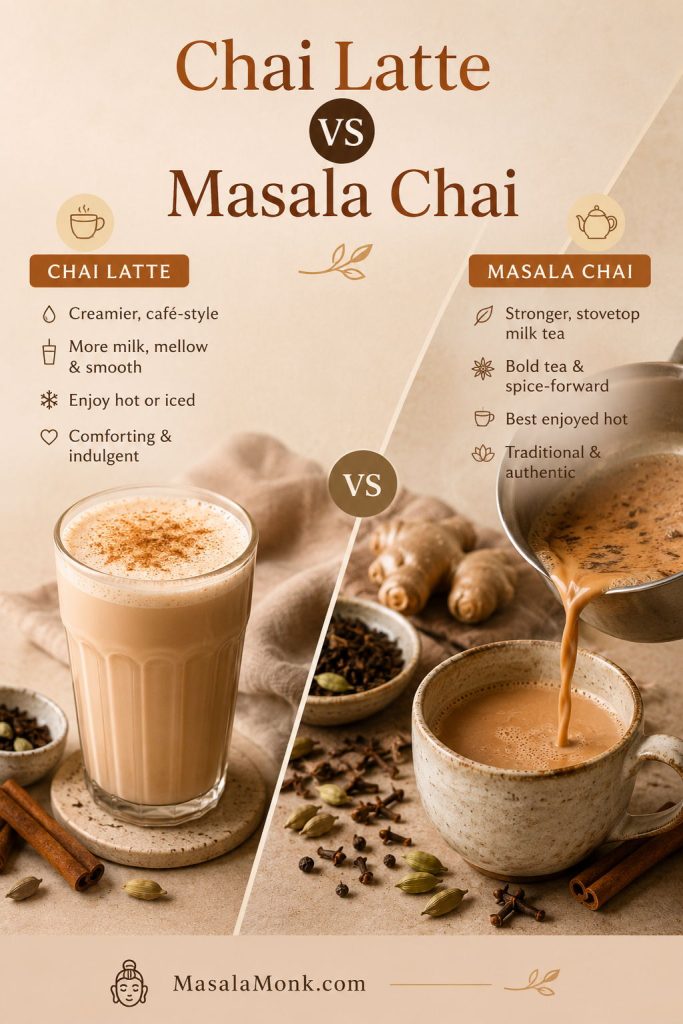
A chai latte is not trying to replace masala chai. It borrows the tea-and-spice soul, then changes the format: more milk, a softer texture, easier iced versions, and a café-style feel. The mistake is not making it latte-like; the mistake is making it so milky that the chai disappears.
You may also see it called a chai tea latte. Technically, chai already means tea, but “chai tea latte” is the common café phrase for the same style of drink.
- Masala chai: Indian spiced milk tea, usually simmered or boiled with tea, milk, spices, and sweetener. It is more direct, warming, and tea-forward.
- Chai latte: spiced tea concentrate or brewed chai mixed with more milk. It is creamier, softer, and easier to serve hot or iced.
- Dirty chai: chai latte with espresso. It keeps the creamy spiced base, but adds a coffee edge.
For a more traditional stovetop cup, MasalaMonk’s masala chai masterclass goes deeper into Indian chai technique.
Ingredients That Matter
Here is how each ingredient changes the final cup: tea gives backbone, spices give warmth, milk turns it into a latte, and sweetener rounds the edges.
Tea
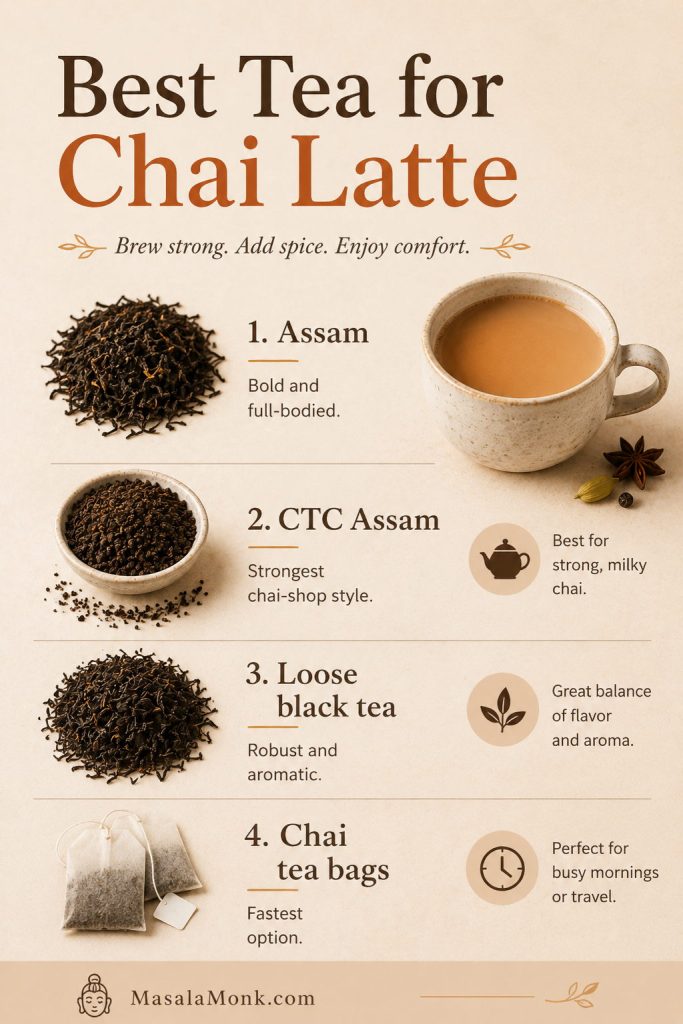
Start with a full-bodied black tea. Assam is excellent because it has the weight to stand up to milk, but any full-bodied black tea works. Loose tea usually gives a more robust result than delicate tea bags, though tea bags are perfect for the quick version.
If you have CTC Assam, it gives the most chai-shop-style body because it extracts quickly and stands up well to milk. Tea bags are fine for speed, but use two for one latte so the milk does not flatten the drink.
If your drink tastes weak, do not fix it by steeping one tea bag forever. Use more tea, less water, or crush the spices more thoroughly before simmering. Oversteeping can make the tea bitter without making the latte taste richer.
Spices
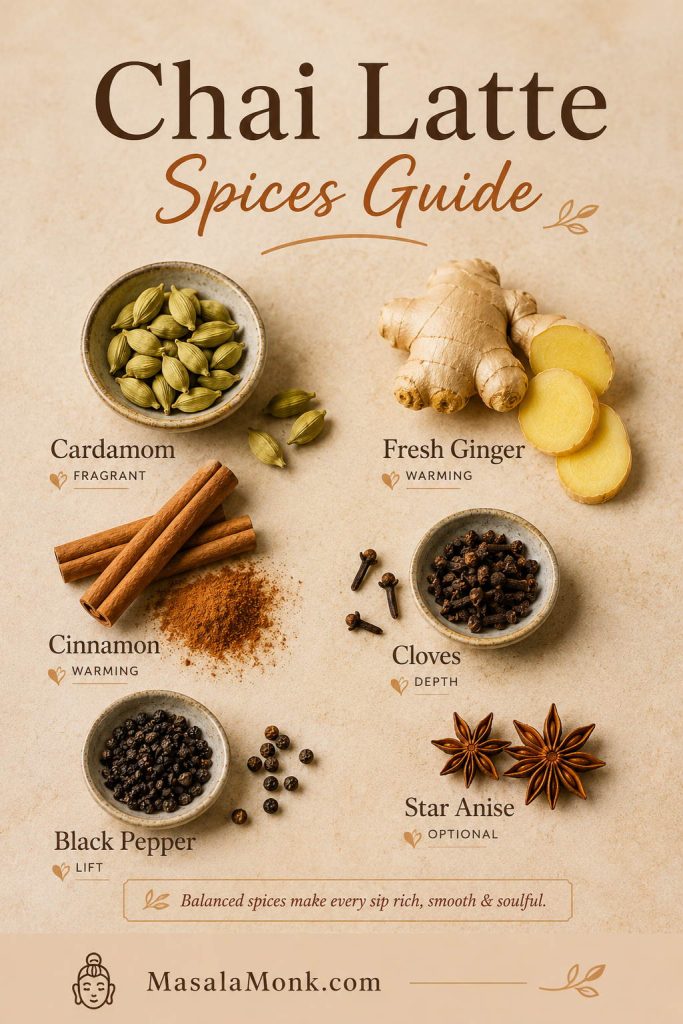
The core spices are cardamom, cinnamon, cloves, black pepper, and ginger. Star anise is optional. Vanilla is also optional, but it gives the drink a softer finish.
- Cardamom: gives the classic fragrant chai aroma.
- Cinnamon: adds warmth and natural sweetness.
- Cloves: bring depth, so use them carefully.
- Black pepper: gives the drink a gentle lift.
- Fresh ginger: makes the cup brighter and more warming.
- Star anise: adds a polished spiced note, but too much can dominate.
Milk
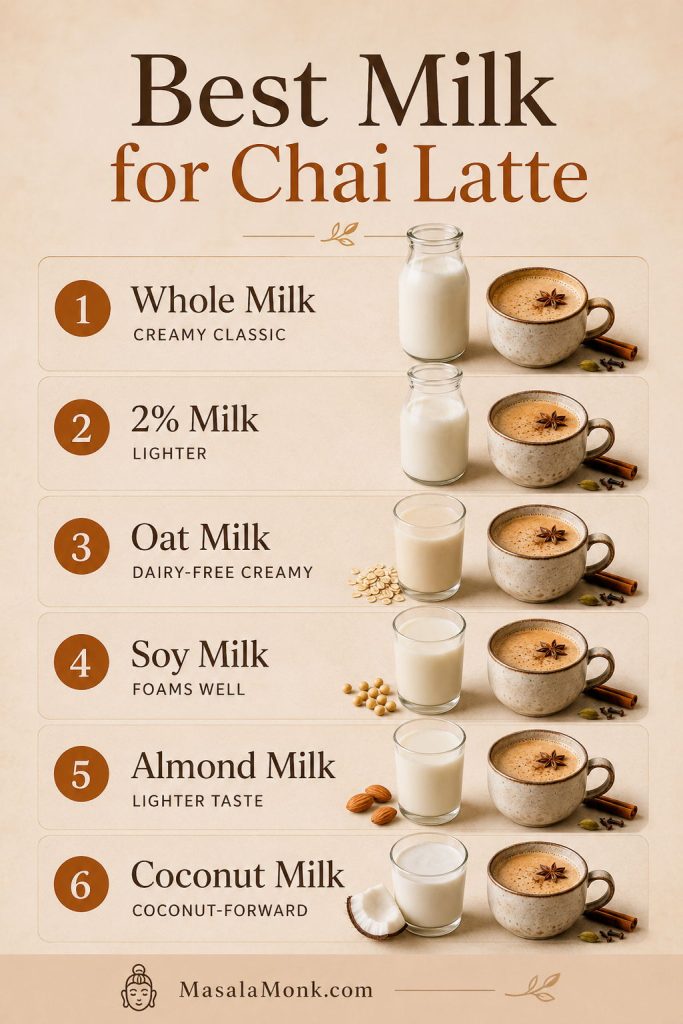
Choose milk for body, not just foam. Whole milk gives plushness, oat milk gives dairy-free creaminess, almond milk tastes lighter, soy milk foams well, and coconut milk changes the flavor completely.
| Milk | Best use | Watch out for |
|---|---|---|
| Whole milk | Classic hot chai latte | Can taste heavy if the chai base is weak |
| 2% milk | Coffeehouse-style hot or iced chai | Less plush than whole milk |
| Barista oat milk | Vegan or iced chai latte | Can soften spice slightly |
| Soy milk | Hot vegan chai with foam | Heat gently to avoid splitting |
| Almond milk | Lighter iced chai | Can taste thin |
| Coconut milk | Coconut chai variation | Can dominate cardamom and ginger |
Sweetener
Sugar keeps the sweetness clean, while brown sugar adds a warmer caramel note. Honey gives floral warmth, maple syrup works beautifully in dairy-free cups, and jaggery brings a deeper Indian-style sweetness. For a lower-sugar version, keep the tea and spice layer flavorful so the drink does not need extra syrup to feel complete.
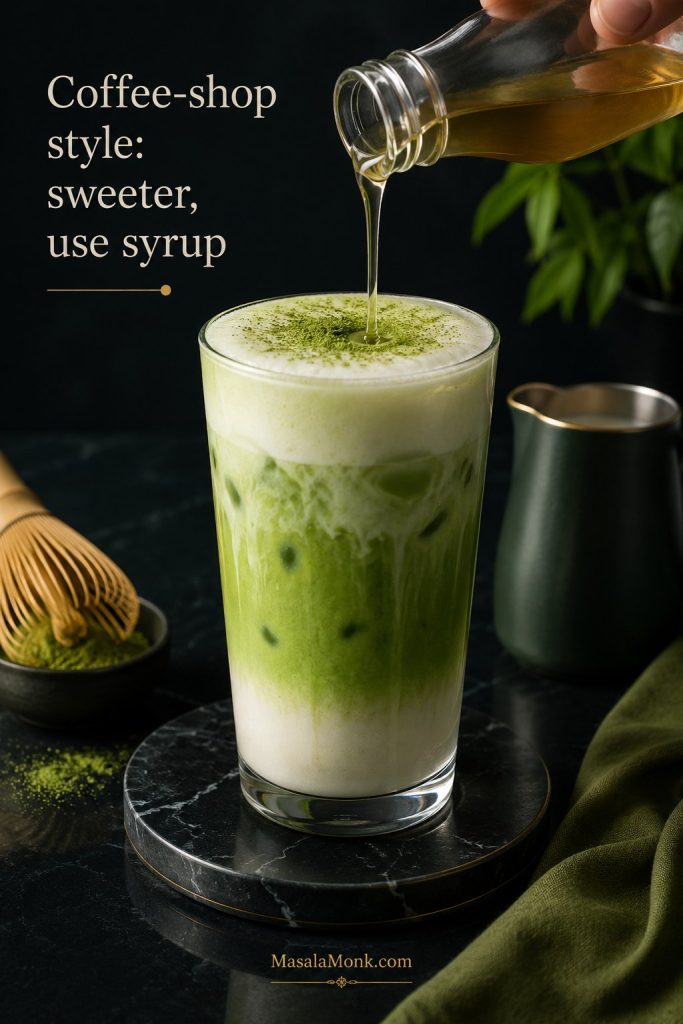
Cold drinks need sweetness that dissolves easily, so vanilla syrup, brown sugar syrup, or simple syrup work better than dry sugar once the chai is chilled. Granulated sugar works best while the chai base is still warm.
- White sugar: clean and classic.
- Brown sugar: warm and caramel-like.
- Honey: floral and cozy, best in hot drinks.
- Maple syrup: soft and rounded, good for dairy-free drinks.
- Jaggery: deeper, earthier, and more Indian-style.
- Date syrup: rich and fruity for a no-refined-sugar version.
- Vanilla syrup: sweeter and more coffeehouse-style.
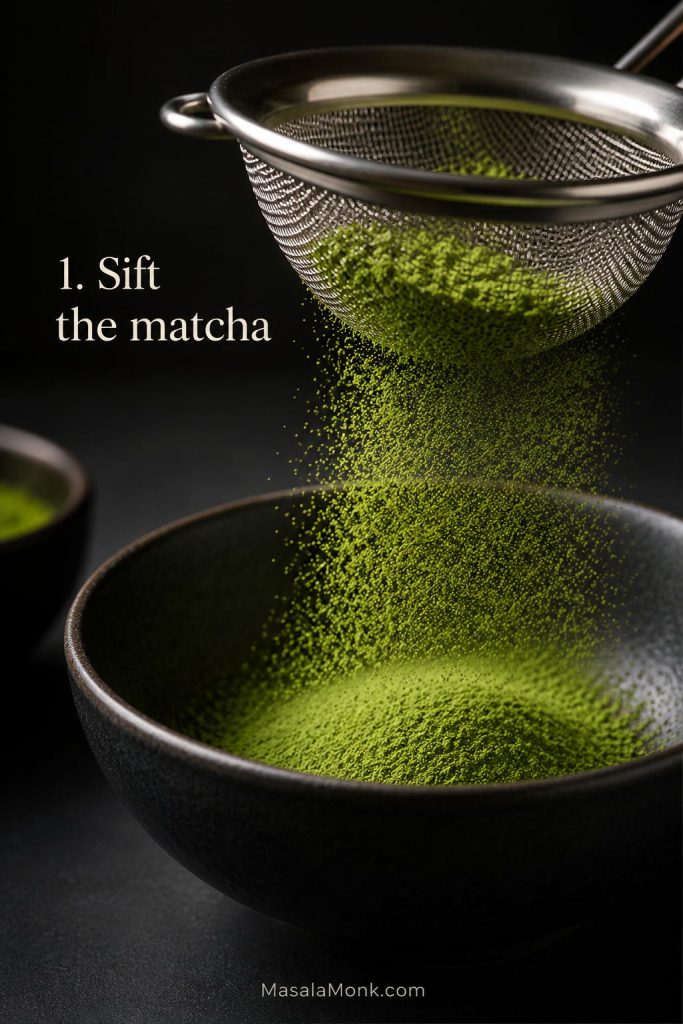
Whole Spices, Ground Spices or Chai Mix?
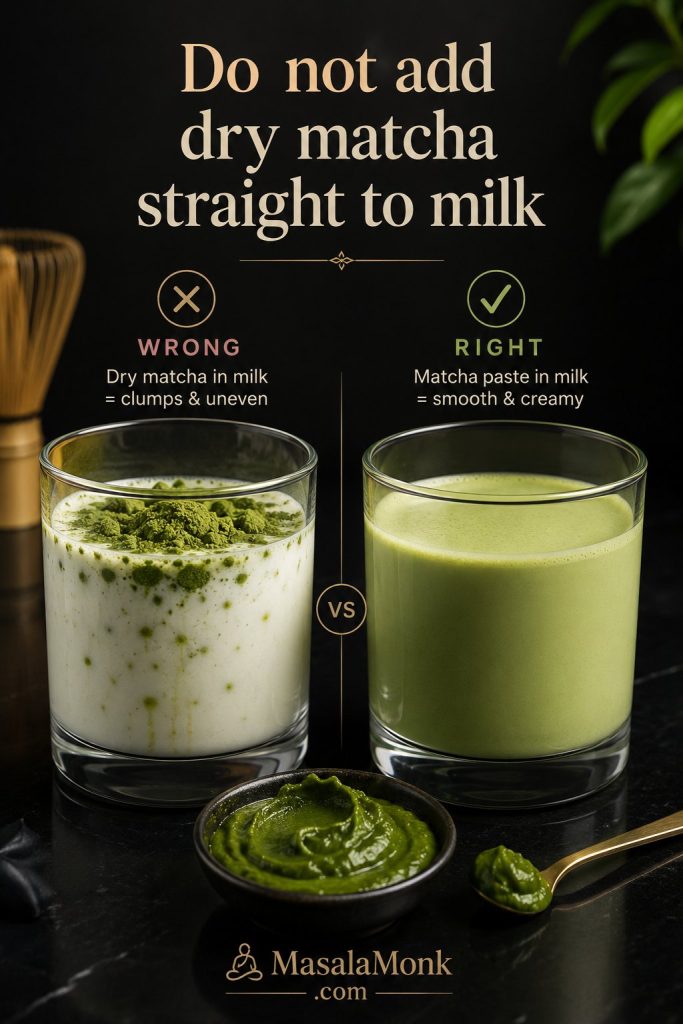
Whole spices give the cleanest flavor and texture, but they need crushing and straining. Ground spices are fast, but they can settle at the bottom and make the drink feel gritty. Chai spice mix is convenient for busy mornings, but the result depends heavily on the blend.
For the smoothest cup, use whole spices and strain the concentrate. If using ground spices, chai powder, or a homemade chai masala, use a small amount and strain before adding milk.
Using ground spices? For one latte, start with ¼ teaspoon cinnamon, ⅛ teaspoon ground ginger, ⅛ teaspoon ground cardamom, and the tiniest pinch each of clove and black pepper. Simmer with the water, then strain before adding milk. A little sediment may remain, so use less than you think; ground spices turn intense and gritty fast.
Equipment You Need
You do not need an espresso machine. A saucepan and strainer are enough. A frother helps with the silky top, but you can still make a very good cup without one.
- Small saucepan
- Fine mesh strainer
- Spoon or whisk
- Milk frother, French press, immersion blender, or clean jar
- Mortar and pestle, optional, for crushing whole spices
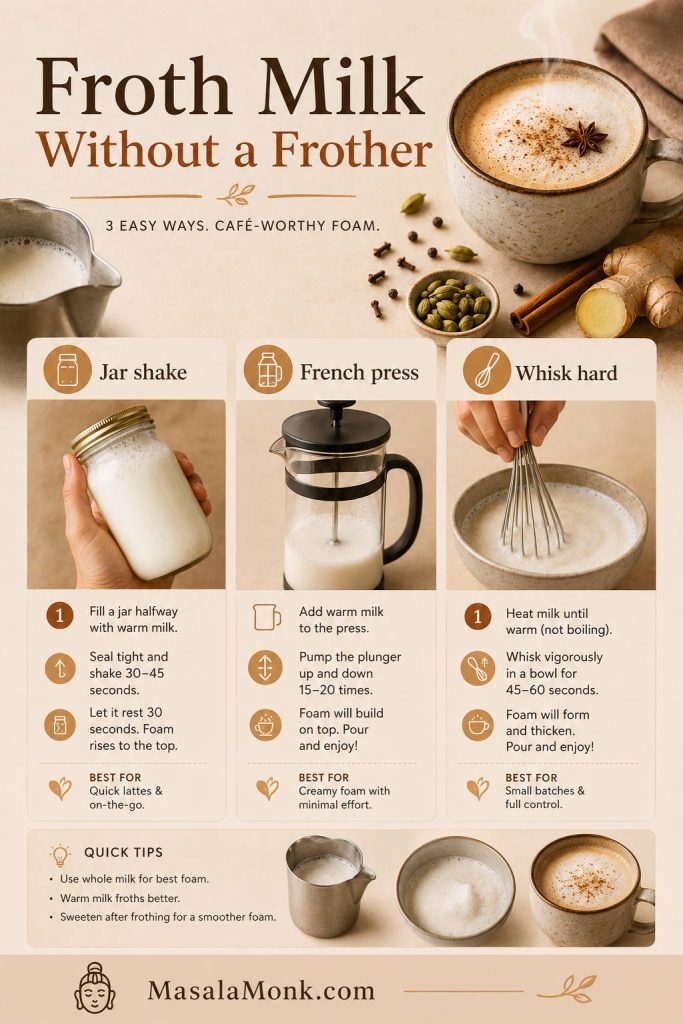
Froth Milk Without a Frother
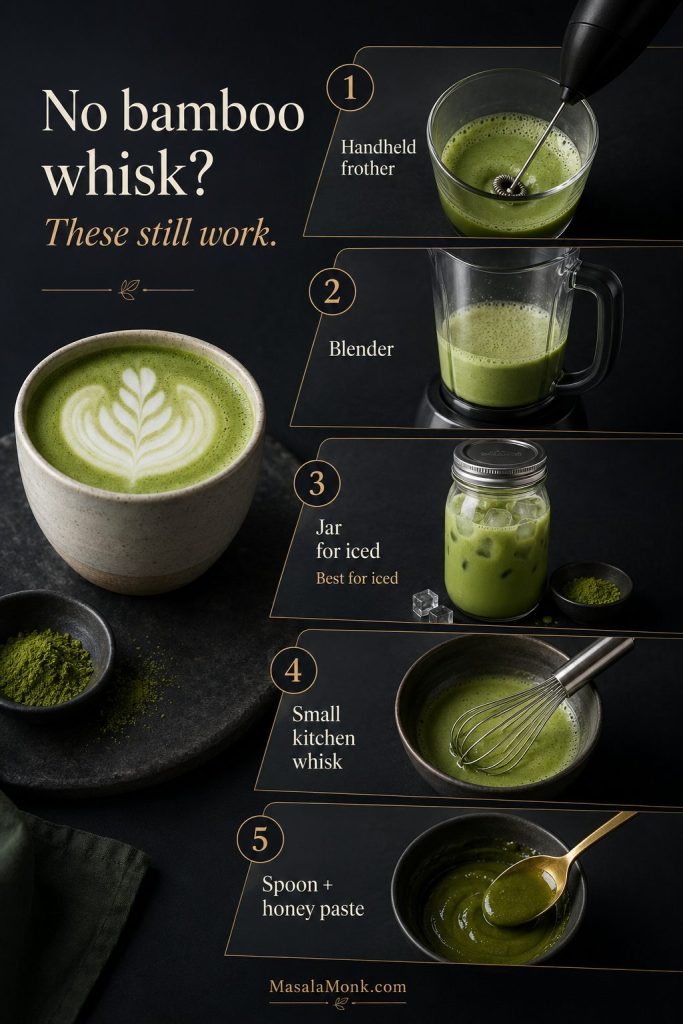
No frother? Warm the milk, pour it into a clean jar with empty space at the top, close the lid tightly, and shake for 20–30 seconds. You can also pump warm milk in a French press for 15–20 seconds or whisk it hard in the saucepan.
For more no-machine milk foam tips, MasalaMonk’s cappuccino recipe is useful too.
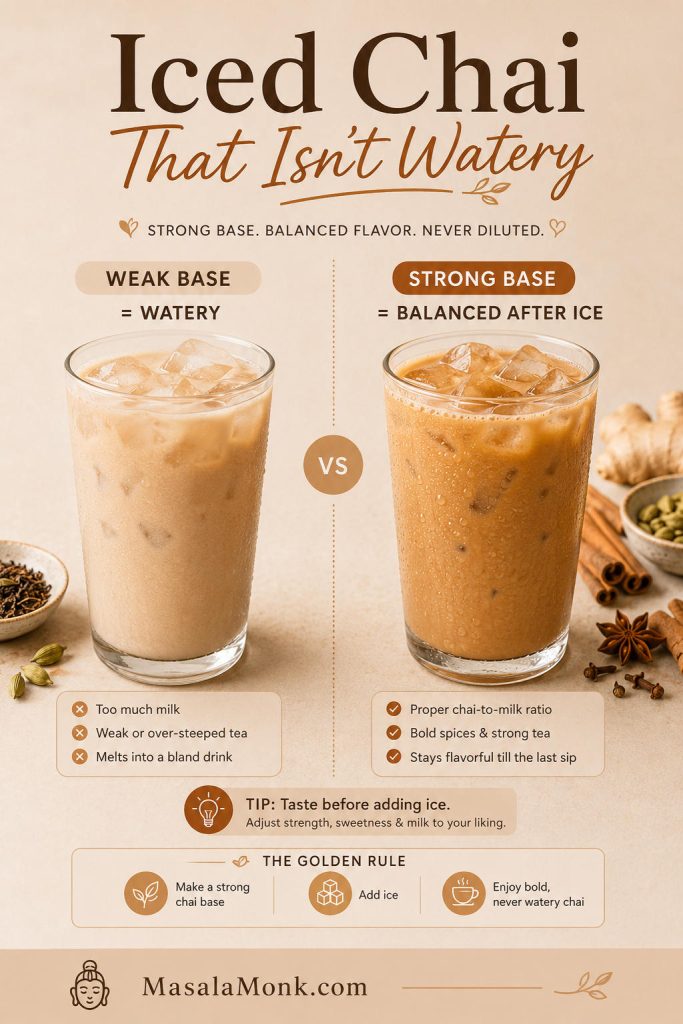
How to Make an Iced Chai Latte
If your iced chai tastes good for two sips and watery by the fifth, the base was not strong enough before the ice went in. Cold dulls spice, ice dilutes tea, and milk softens the edges, so iced chai should taste a little too strong before the ice is added.
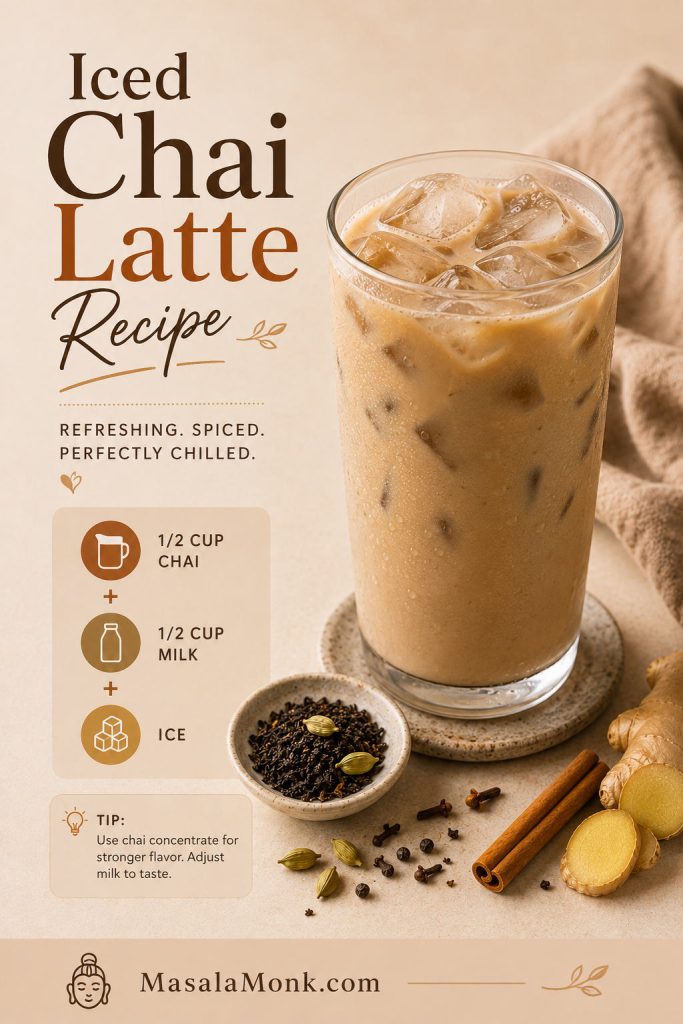
Iced ratio
- ½ cup / 120 ml cold chai concentrate
- ½ cup / 120 ml cold milk
- 1 cup / about 120–140g ice
- Sweetener only if needed
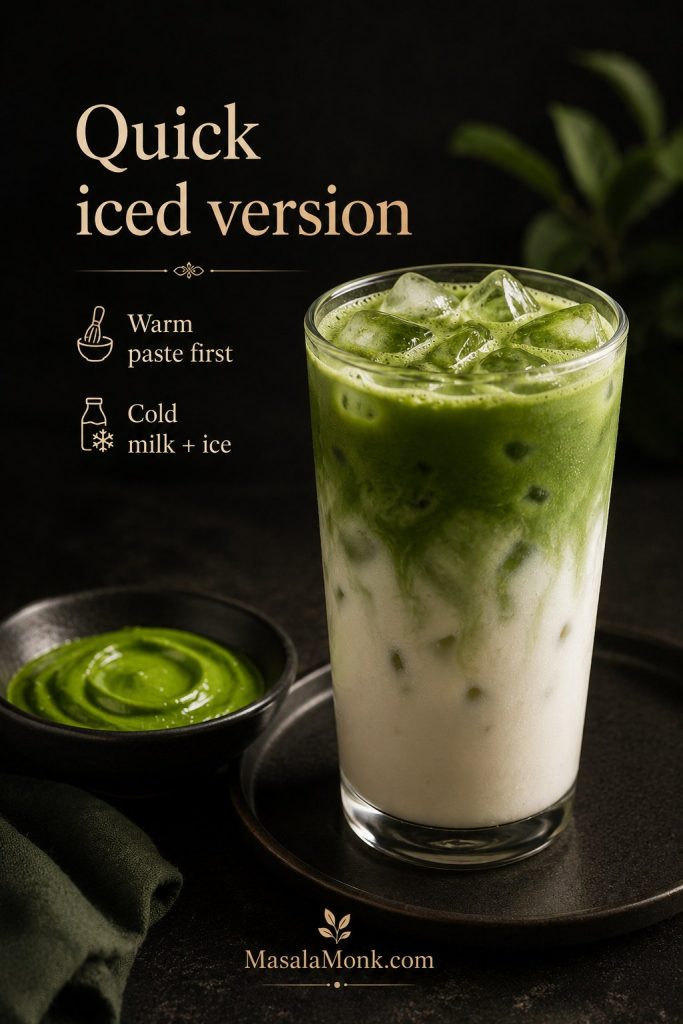
Method
- Start with the cold chai base in a tall glass.
- Add cold milk and stir well.
- Taste before adding ice. It should taste a little more tea-forward than you want the final drink.
- Add ice last.
- Stir again and serve immediately.
How to Keep Iced Chai From Turning Watery
For iced chai that still tastes clear after a few minutes, taste the chai and milk before adding ice. If it already tastes perfect, it will usually taste weak once the ice starts melting.
For more weak, watery, or bitter chai fixes, see the troubleshooting table.
| Style | Concentrate | Milk | Ice |
|---|---|---|---|
| Classic iced chai latte | ½ cup / 120 ml | ½ cup / 120 ml | 1 cup / 120–140g |
| Creamier iced chai latte | ½ cup / 120 ml | ¾ cup / 180 ml | 1 cup / 120–140g |
| More tea-forward iced chai latte | ¾ cup / 180 ml concentrate | ½ cup / 120 ml milk | 1 cup / 120–140g |
Iced chai is where body matters most: whole milk tastes round, 2% feels coffeehouse-balanced, barista oat gives dairy-free creaminess, and almond milk keeps the drink lighter.
For iced chai that still tastes alive after the ice melts: freeze leftover chai in an ice cube tray and use those cubes instead of plain ice.
Starbucks-Style Chai at Home
This is not an official Starbucks recipe, but it gives you the same sweet, cold, café-style comfort with more control over how much chai and how much sweetness you actually want.
2-Minute Starbucks-Style Iced Chai With Store-Bought Concentrate
For the fastest Starbucks-style iced chai, use ½ cup / 120 ml sweet chai concentrate, ½ cup / 120 ml cold milk, and 1 cup / 120–140g ice. Stir the concentrate and milk first, then add ice so the drink mixes evenly. If it tastes too sweet, cut the concentrate with unsweetened black tea instead of adding more milk.
That is the coffeehouse shortcut. The home advantage is control: make the tea-spice base clear first, then sweeten only as much as you want.
For a less syrupy homemade version, use the make-ahead chai concentrate and sweeten each glass after mixing.
Hot coffeehouse-style ratio
- ½ cup / 120 ml sweet chai concentrate
- ¾ cup / 180 ml steamed milk
- Foam on top, optional
- Pinch cinnamon, optional
Using store-bought concentrate? Taste it first. If it is mostly sweet spice syrup, cut it with unsweetened black tea before adding more milk.
Dirty Chai Latte
A dirty chai latte is chai with espresso. It is the drink to make when you want the warmth of chai and the deeper edge of coffee in the same cup.
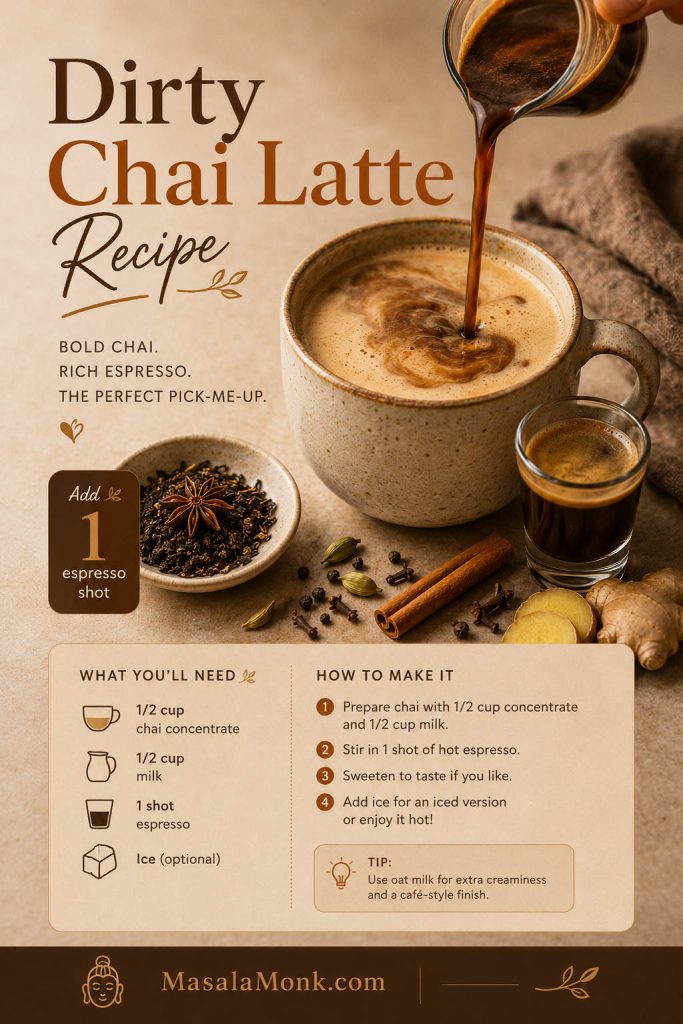
Hot dirty chai ratio
- ½ cup / 120 ml chai base
- ½ cup / 120 ml steamed milk
- 1 espresso shot / 30 ml
- Sweetener to taste
Iced dirty chai ratio
- ½ cup / 120 ml cold chai base
- ½ cup / 120 ml cold milk
- 1 espresso shot / 30 ml, cooled slightly
- 1 cup / about 120–140g ice
- 1 espresso shot / 30 ml: balanced dirty chai.
- 2 espresso shots / 60 ml: double dirty chai with more coffee edge.
- 2–3 tablespoons very strong coffee: gentle coffee note without an espresso machine.
- Cold brew concentrate: smoother iced dirty chai.
- Regular brewed coffee: milder and thinner coffee flavor.
Espresso does not hide weak chai; it exposes it. Start with a well-spiced base before adding coffee. No espresso machine? Use 2–3 tablespoons very strong brewed coffee for a gentle coffee note, or 2–3 oz strong coffee for a milder coffee-shop drink.
For the base measurement before espresso, use the dirty chai ratio or make a stronger batch from the chai concentrate section.
If you like chilled café drinks, MasalaMonk’s iced coffee recipes are useful when you want the coffee side of dirty chai.
Vegan, Dairy-Free and Lower-Sugar Versions
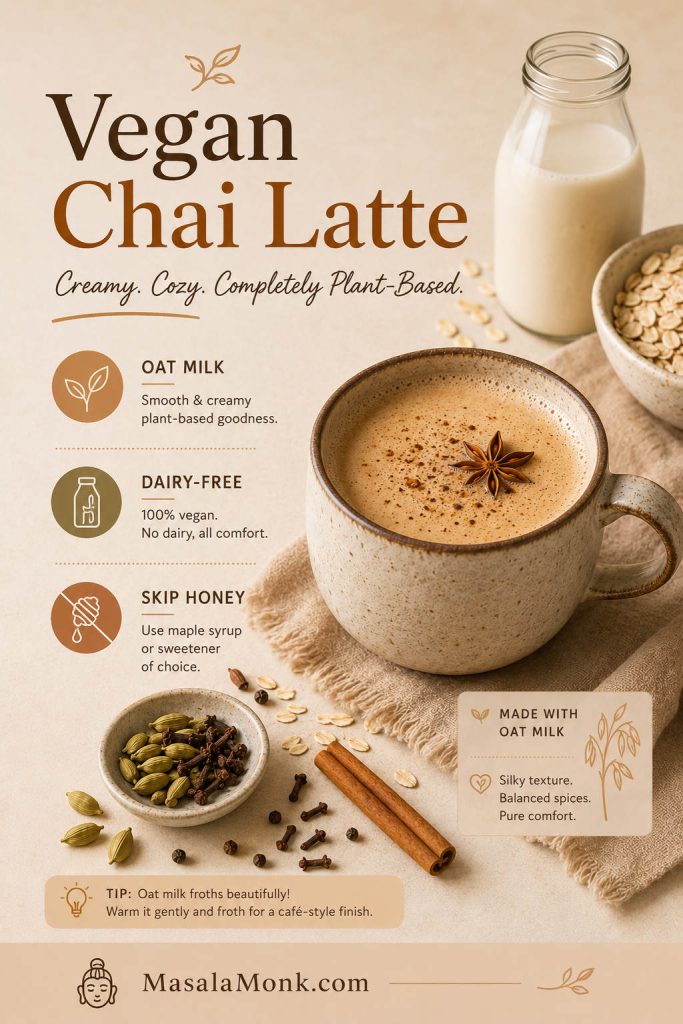
Vegan Chai Latte
Plant milk cannot rescue weak chai. For a vegan chai latte that still tastes full, make the tea-spice base with water first, then let oat milk, soy milk, almond milk, or coconut milk soften it.
- Use ½ cup / 120 ml chai base.
- Add ¾ cup / 180 ml oat milk for a hot vegan latte.
- For iced, use ½ cup chai base + ½ cup oat milk + 1 cup ice.
- Sweeten with sugar, maple syrup, brown sugar, jaggery, or date syrup; skip honey for a strictly vegan cup.
Oat milk gives the creamiest dairy-free cup, soy milk gives good body and foam, almond milk tastes lighter, and coconut milk works when you want coconut to become part of the flavor. Heat plant milk gently and avoid boiling it, because some dairy-free milks split or turn chalky when overheated.
For how oat, soy, almond, coconut, and dairy milk behave in chai, use the milk guide above; for homemade oat milk, MasalaMonk’s easy homemade oat milk guide is the best starting point.
Lower-Sugar Version That Still Tastes Complete
Less sugar only works when the spice layer is doing its job. Keep the tea and spice layer full, sweeten by the teaspoon, and add ginger or cardamom before reaching for more syrup.
- Make the base unsweetened.
- Use full-bodied black tea and freshly crushed spices.
- Sweeten the finished drink by the teaspoon after milk is added.
When the cup tastes flat, spice usually helps more than extra syrup. Add more ginger, cardamom, or a tiny pinch of salt before adding more sweetener.
Flavor Variations
Once the base is strong, variations are simple: change the milk, sweetener, or add-in without letting the chai disappear.
Vanilla Chai Latte
Add ¼ teaspoon vanilla extract to one hot drink, or use vanilla syrup for a sweeter coffeehouse-style cup.
Brown Sugar Chai Latte
Brown sugar gives the drink a warmer caramel note, especially in iced chai and dirty chai. Start with 1–2 teaspoons and adjust after the milk is added.
Iced Oat Milk Chai Latte
Equal parts cold chai concentrate and barista-style oat milk make the easiest iced oat milk version. Oat milk turns the drink creamy without dairy, but a little extra ginger or cardamom helps the spice stay clear.
Coconut Chai Latte
Coconut milk works best when you want its flavor to become part of the drink. Because coconut can dominate delicate spices, use a slightly stronger tea-spice base and consider adding extra ginger or cardamom.
Pumpkin Chai Latte
Add 1–2 tablespoons pumpkin purée and a small pinch of homemade pumpkin pie spice to the hot version. For a more classic fall drink, MasalaMonk’s healthy pumpkin spice latte is another useful guide.
Caffeine-Free Chai Latte
For a lower-caffeine cup, decaf black tea keeps the flavor closest to the original. Rooibos works for a naturally caffeine-free spiced latte, although it tastes softer and less tea-forward than black tea, so use extra ginger, cardamom, and cinnamon for a more chai-like flavor.
How to Store and Reheat Chai Concentrate
Let the chai base cool completely, then store it in a clean jar or bottle in the refrigerator for up to 5 days. Shake before using because fine spice particles may settle.
For longer storage, freeze the chai base in ice cube trays for up to 3 months. Frozen chai cubes are especially useful for iced chai because they chill the glass without watering down the flavor.
To reheat, warm the base gently on the stove or in the microwave. Heat the milk separately if you want better foam. Do not boil the finished drink after milk is added, because it can taste cooked and lose the fresh spice aroma.
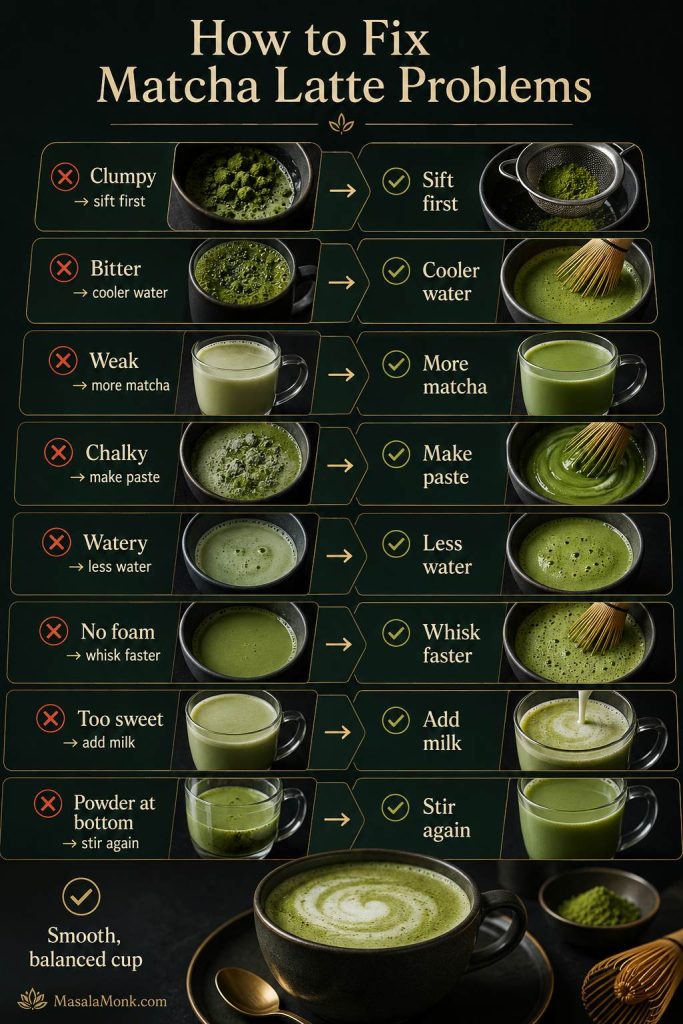
Troubleshooting
If your first cup is not perfect, it is usually easy to rescue. Most failed chai lattes are not really failures — they are ratio problems. Once you know what is off, the fix is usually simple.
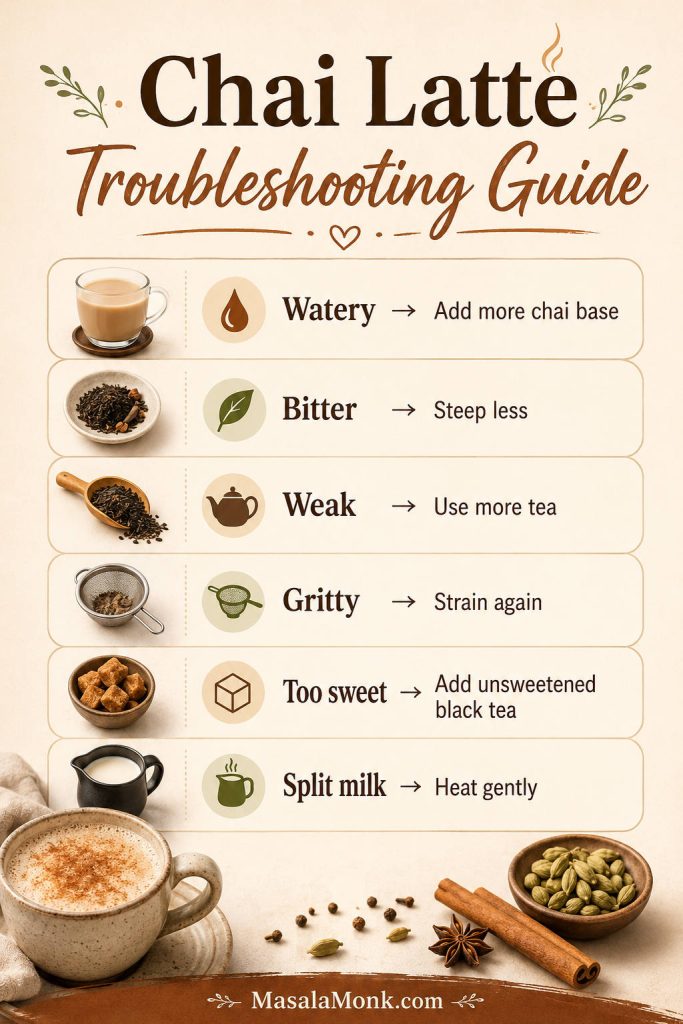
| Problem | Fix now | Fix next time |
|---|---|---|
| Watery | Add more concentrate or a splash of unsweetened black tea | Use less water, more tea, or frozen chai cubes for iced drinks |
| Bitter | Add milk and a little sweetener to soften it | Steep tea for less time and avoid boiling it hard |
| Weak | Add more chai base or a second steeped tea bag | Use 2 tea bags, loose black tea, or freshly crushed spices |
| Gritty | Strain again through a fine mesh strainer | Use whole spices or less ground spice |
| Too sweet | Add unsweetened black tea, not just more milk | Store the base unsweetened and sweeten each cup |
| Too spicy or peppery | Add milk and a little sweetener | Use fewer peppercorns and cloves |
| Bland but not weak | Add ginger, cardamom, or a tiny pinch of salt | Use fresher spices and crush them before simmering |
| Milk split | Stop heating and strain if needed | Heat plant milk gently and avoid boiling |
Why does it taste watery?
This usually means the tea was too dilute before milk or ice was added. For iced chai, mix the base and milk first, taste, then add ice last.
Why does it taste bitter?
The tea may have steeped too long or boiled too hard. Simmer the spices first, then add the tea off heat or on very low heat for 4–5 minutes.
Why did the milk split?
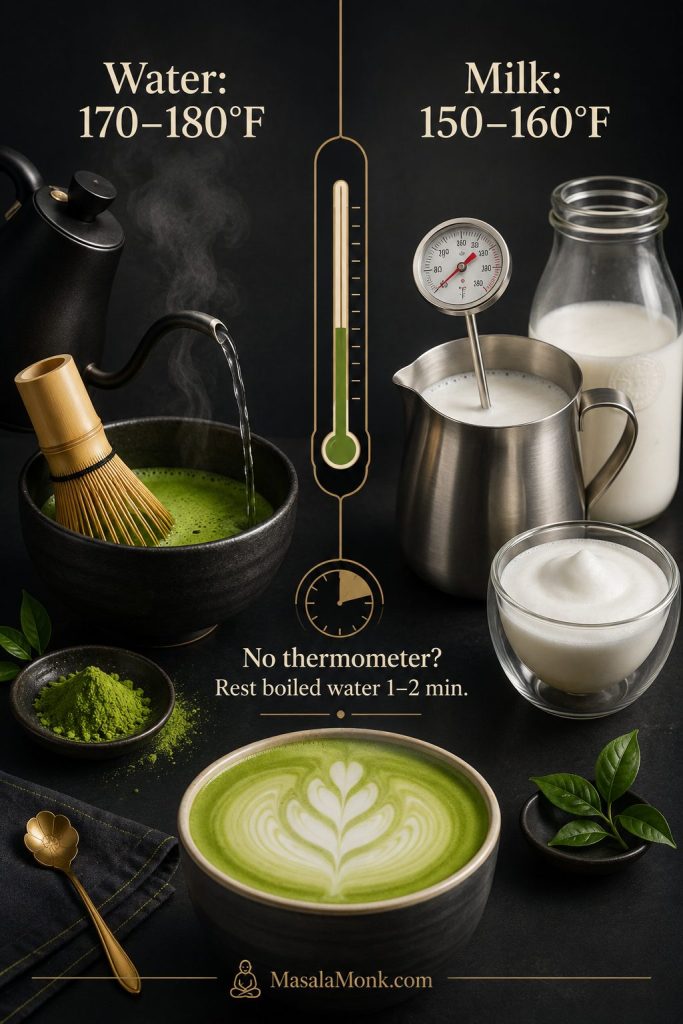
The milk may have overheated, especially if it was plant milk. If using a thermometer, dairy milk is usually best around 140–155°F / 60–68°C. Without one, stop when the milk is steaming and hot to the touch, but not boiling. For plant milk, use gentle heat and stop before it bubbles hard.
FAQs
Is chai latte the same as masala chai?
Not exactly. Masala chai is usually a stovetop spiced milk tea with a more direct tea-and-spice flavor, while a chai latte is milkier, softer, and more latte-style.
What tea works best for this drink?
A full-bodied black tea works best, especially one with enough weight to hold up under milk. Assam is a great choice; CTC Assam gives the most chai-shop-style body if you have it.
Is chai latte coffee?
No. A regular chai latte is a tea drink made with spiced black tea and milk. If you add espresso, it becomes a dirty chai.
How much caffeine is in it?
It depends on the tea and steeping time. As a general reference, Mayo Clinic lists brewed black tea at about 48 mg caffeine per 8 oz / 237 ml serving. Dirty chai has more because espresso joins the cup too.
Is chai latte sweet?
It can be, especially when made with bottled concentrate. Homemade chai lets you keep sweetness separate from spice: make the tea-spice base clear first, then sweeten the finished drink by the teaspoon.
How do I make iced chai that is not weak?
Use equal parts cold chai base and milk, then add ice last. If it tastes perfect before ice, it will taste weak after five minutes. Frozen chai cubes help.
What makes it dirty chai?
Espresso makes it dirty chai. One shot gives a balanced coffee edge; two shots make it coffee-forward, so the chai base needs to be bold.
Can I make it without a frother?
Yes. Shake warm milk in a tightly closed jar, whisk it in the saucepan, pump it in a French press, or use an immersion blender. The foam will be softer than café foam, but the drink will still taste creamy.
Can I use store-bought chai concentrate?
Yes. Taste it first because bottled concentrates vary widely: some are tea-forward, while others are mostly sweet spice syrup. If yours is too sweet, dilute it with unsweetened black tea rather than only adding more milk.
Can I use chai powder or chai spice mix?
Yes, but use less than you think. Ground spices bloom quickly and settle easily, so simmer them with the tea base and strain before adding milk.
How long does homemade concentrate last?
It keeps in the refrigerator for up to 5 days in a clean jar. For longer storage, freeze the chai base in ice cube trays for up to 3 months.
Chai Latte Recipe Card
The card below gives you the most fragrant version first, because whole spices make the cup feel alive. The shortcuts are in the notes when speed matters more than ceremony.
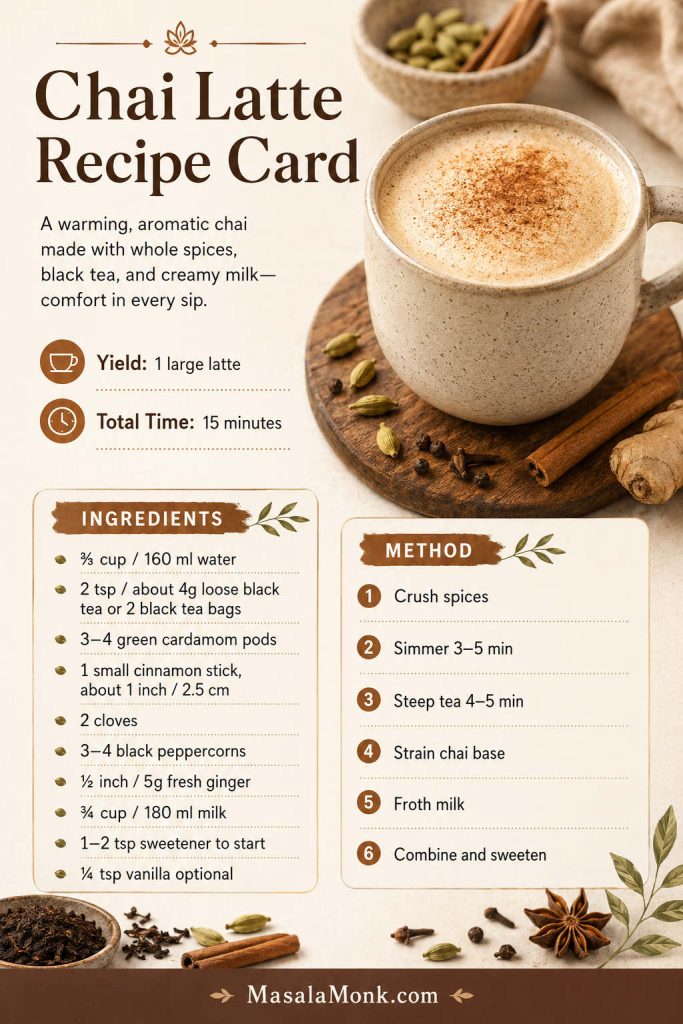
Chai Latte Recipe: Whole-Spice Method
This recipe card uses the whole-spice method for the best flavor. The strained chai is your concentrate or chai base; tea-bag, iced, dirty chai, Starbucks-style, vegan, and make-ahead notes are below.
Ingredients
For the chai concentrate
- ⅔ cup / 160 ml water
- 2 black tea bags, or 2 teaspoons / about 4g loose black tea
- 3–4 green cardamom pods
- 1 small piece cinnamon stick, about 1 inch / 2.5 cm
- 2 cloves
- 3–4 black peppercorns
- ½ inch / 5g fresh ginger, sliced or lightly crushed
- 1–2 teaspoons sugar, honey, maple syrup, or jaggery syrup to start
- ¼ teaspoon vanilla, optional
For the latte
- ½ cup / 120 ml chai concentrate, from above
- ¾ cup / 180 ml milk of choice
- Extra sweetener, if needed
- Pinch cinnamon, optional
Instructions
- Lightly crush the cardamom, cinnamon, cloves, peppercorns, and ginger.
- Add the spices and water to a small saucepan.
- Bring to a boil, then simmer for 3–5 minutes, until the water smells clearly of cardamom and ginger.
- Add the tea, turn off the heat or keep it very low, and steep for 4–5 minutes.
- Strain into a mug. You should have about ½ cup / 120 ml dark, fragrant chai that tastes slightly too strong before milk.
- Stir in sweetener while the chai is warm.
- Heat the milk until steaming but not boiling.
- Froth the milk using a frother, whisk, French press, or jar.
- Pour the milk into the chai.
- Taste and adjust sweetness. Finish with a pinch of cinnamon if desired.
Notes
- Tea-bag shortcut: Steep 2 black-tea-based chai bags in ½ cup / 120 ml hot water for 4–5 minutes, then add ¾ cup / 180 ml steamed milk.
- Iced chai: Use ½ cup / 120 ml cold chai base, ½ cup / 120 ml cold milk, and 1 cup / about 120–140g ice.
- Dirty chai: Add 1 espresso shot / 30 ml, or 2 shots for a coffee-forward double dirty chai.
- Starbucks-style: Use sweet chai base with milk; for iced, start with equal parts chai and milk before adding ice.
- Vegan: Use oat or soy milk and avoid honey if you want it strictly vegan.
- Low sugar: Keep the base unsweetened, then sweeten each cup lightly after mixing.
- Milk temperature: Heat dairy milk to about 140–155°F / 60–68°C, or stop when steaming but not boiling.
- Scaling and make-ahead: Double for 2 lattes. For more, use the make-ahead batch; refrigerate the base up to 5 days or freeze it up to 3 months.
Make-Ahead Concentrate for 4 Lattes
For 4 lattes, use the make-ahead concentrate formula. It yields about 2 cups / 480 ml, enough for 4 drinks at ½ cup / 120 ml per latte.
Once you learn to make the chai louder than the milk, the whole drink changes. It tastes creamy without going flat, sweet without turning syrupy, and spiced enough that the cardamom and ginger are still there at the last sip.