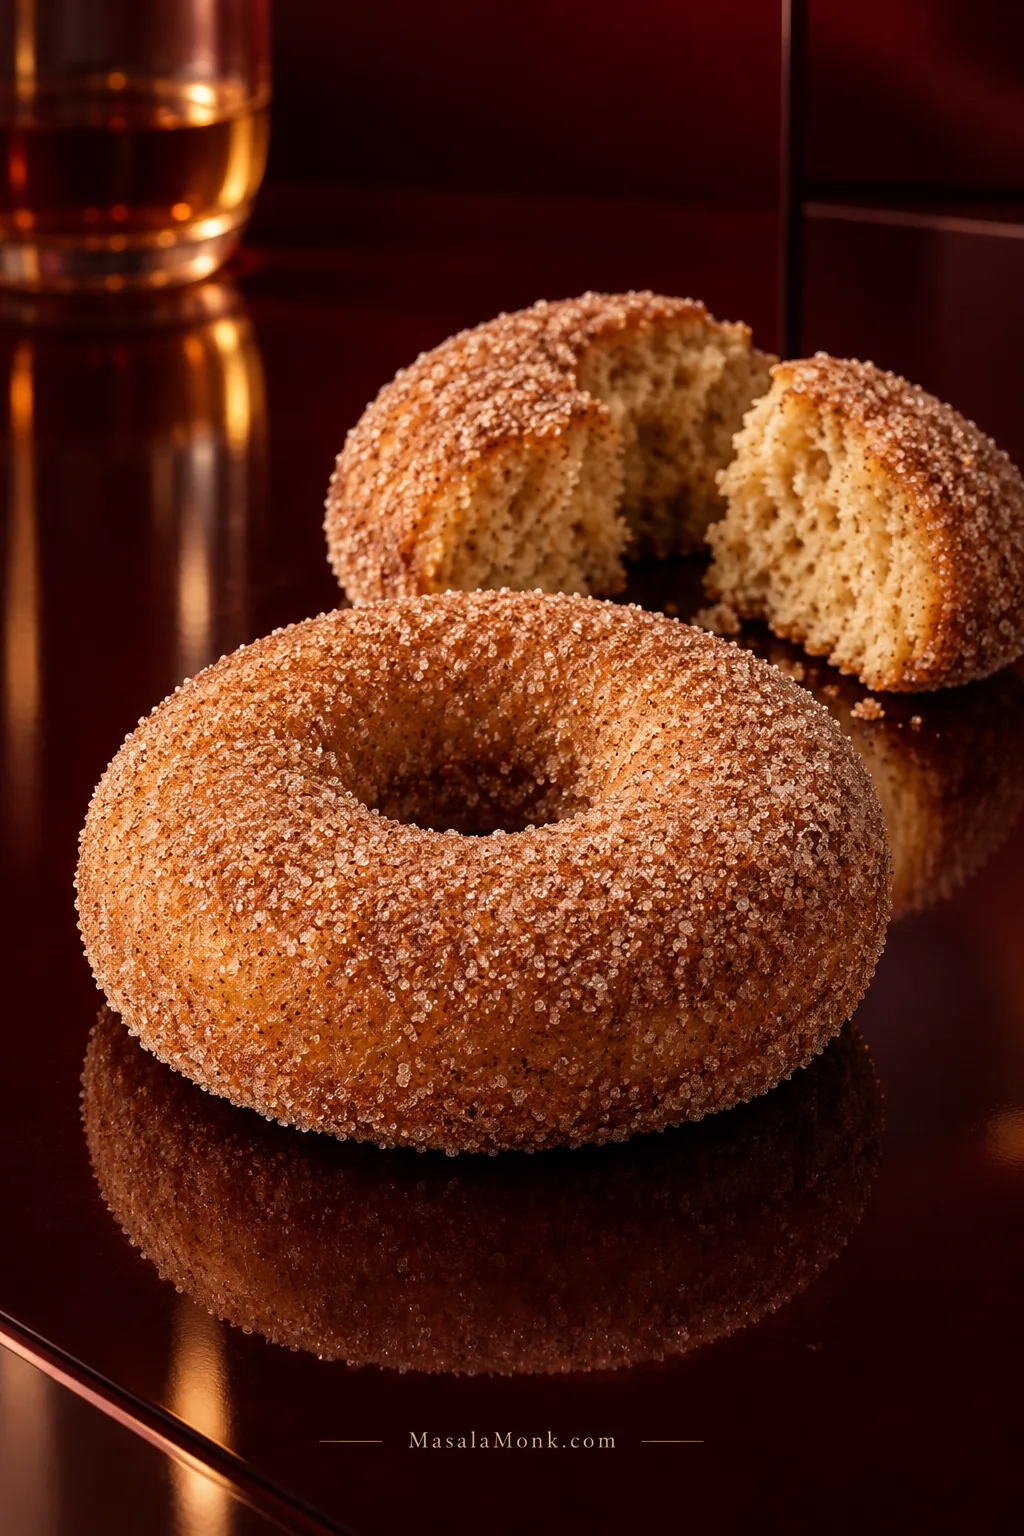
Warm apple cider, cinnamon sugar on your fingers, and a soft cake-donut crumb with enough body to feel like a real donut: going gluten-free should not mean missing the best part of cider-donut season.
If fall usually means passing up the cider donuts at the orchard or bakery, getting the texture right matters just as much as making them gluten-free. The aim here is a good cider donut first, with the gluten-free flour doing its job quietly in the background.
These gluten free apple cider donuts are baked, tender and cider-forward, with a fine cake-donut crumb and a dry cinnamon-sugar finish. Reducing the cider first keeps the apple flavor clear instead of letting the spice do all the talking.
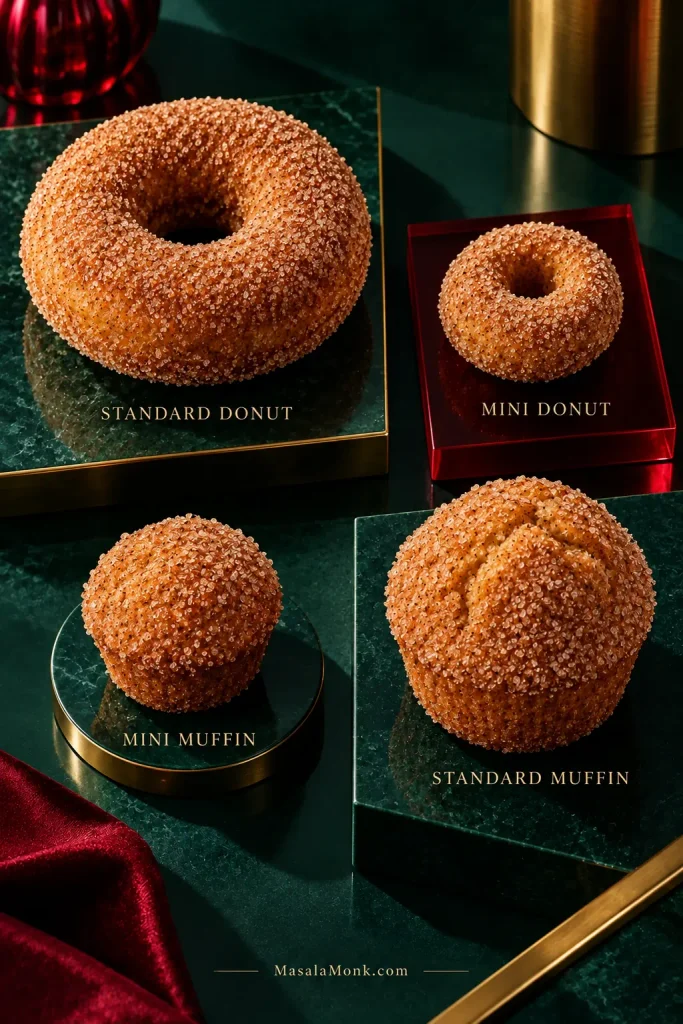
Because they’re baked, you get the familiar cider-donut shape and cinnamon-sugar finish without setting up a fryer or pot of hot oil. If you don’t need the gluten-free formula and want the traditional fried version instead, use our classic apple cider donuts recipe. This baked recipe makes about 12 donuts in roughly 50–60 minutes with two pans, with most of the flavor coming from concentrated cider rather than extra spice.
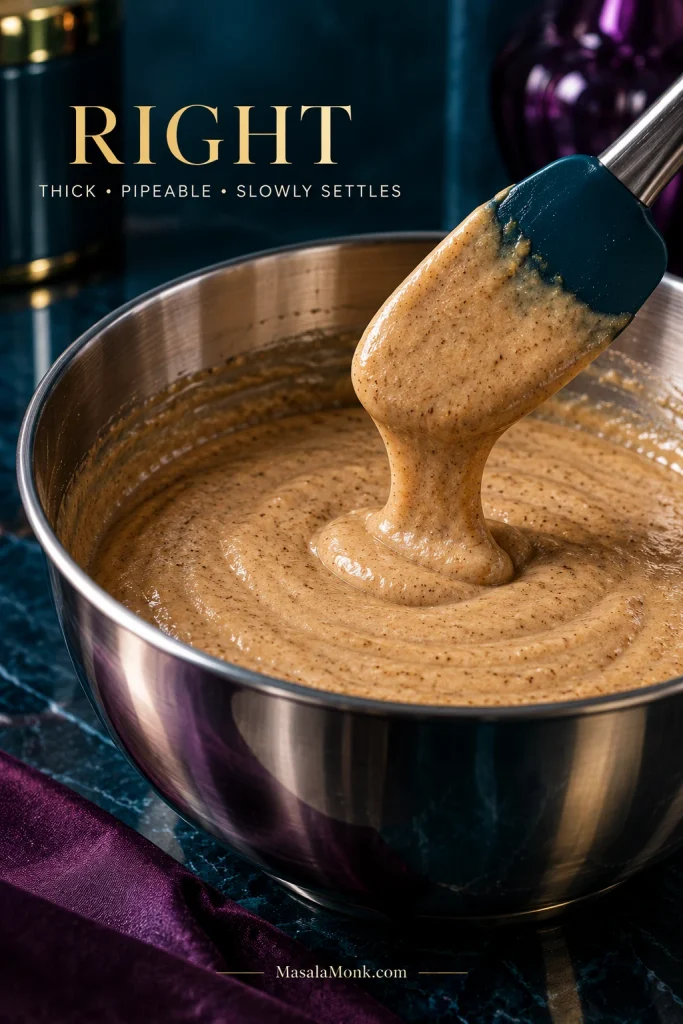
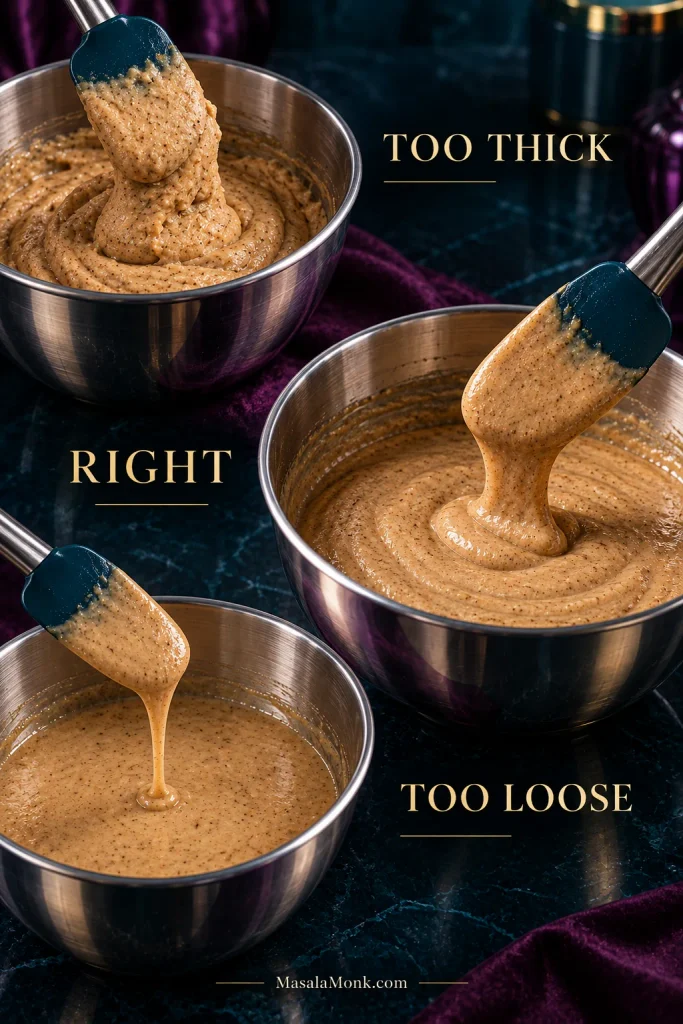
The batter is thick enough to pipe but loose enough to settle into the pan. Once baked, the donuts stay soft through the middle, lightly firm around the edges and sturdy enough to hold their cinnamon sugar.
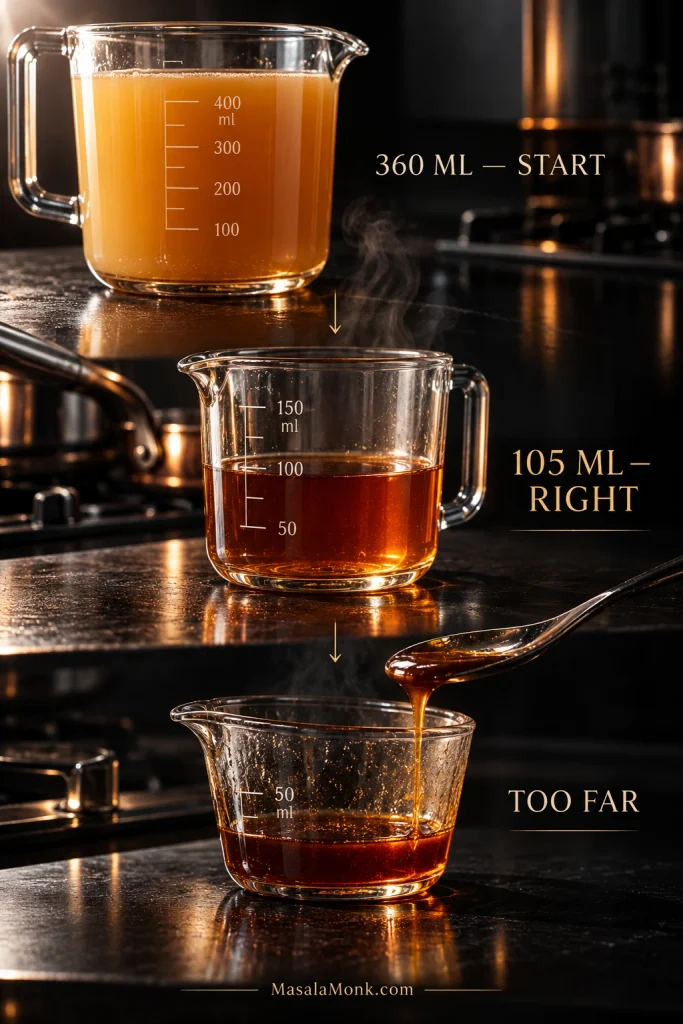
Quick answer: These are baked, no-fry cider donuts that make about 12. Reduce 1½ cups (12 fl oz / 360 ml) apple cider to about 7 tablespoons (3½ fl oz / 105 ml) and let it cool. Mix with 250 g gluten-free 1:1 baking flour, two eggs, milk, oil and spices. Pipe into a greased donut pan and bake at 350°F / 175°C for about 10–14 minutes, until the tops spring back and the centers are set. Brush the warm donuts lightly with melted butter and coat with cinnamon sugar.
You can make the full recipe from this section alone. The rest explains the texture cues, substitutions, troubleshooting and storage.
Yield: about 12 standard donuts Prep: about 35–40 minutes, including reducing and cooling the cider Bake: 10–14 minutes per batch Total: about 50–60 minutes with two pans; longer with one 6-cavity pan Oven: 350°F / 175°C conventional Pan: Two standard 6-cavity donut pans, or one used in two rounds Style: Baked gluten-free cake donut Finish: Cinnamon sugar
Before You Mix
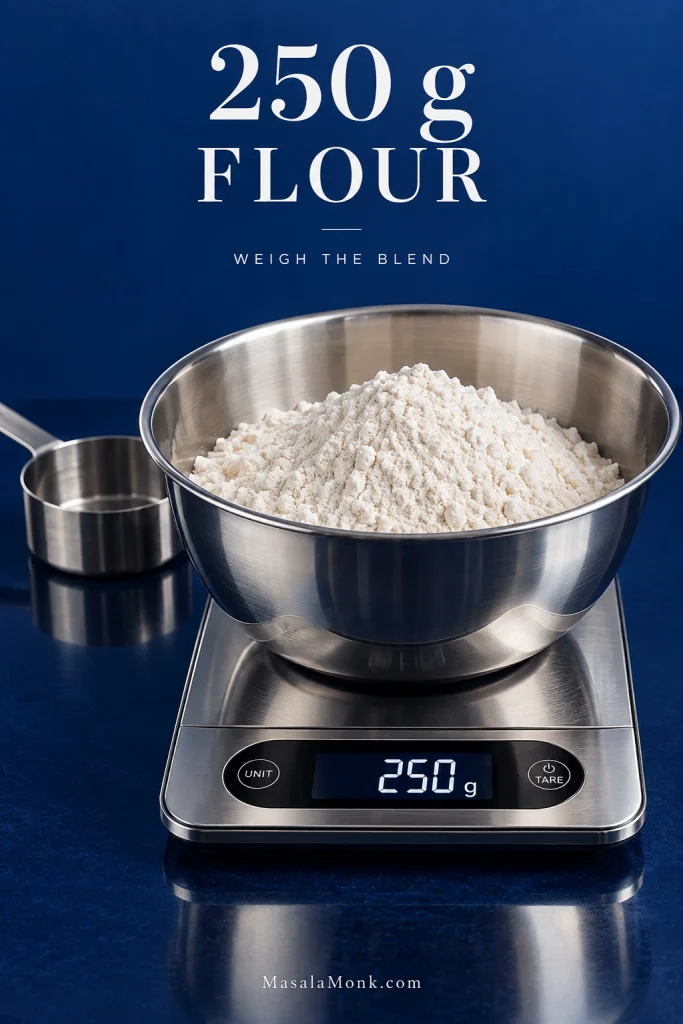
Use the 1:1 gluten-free baking blend you already trust for cakes or muffins, provided it contains xanthan gum or another suitable binder. Weigh 250 g for the most consistent result; cup volume varies between blends.
Reduce the cider first and let it cool to room temperature or until barely warm before it meets the eggs. Pouring the measured reduction into a small heatproof jug while you gather the other ingredients helps it cool faster.
Grease the donut pan well, including the center posts. Get the cider and batter right before filling the pan; both are easy to correct at that stage and much harder to rescue later.
Cider brings apple flavor; eggs set structure; oil keeps the crumb tender; milk controls flow. Keep cinnamon and nutmeg in the background.
Ingredients
For the Donuts
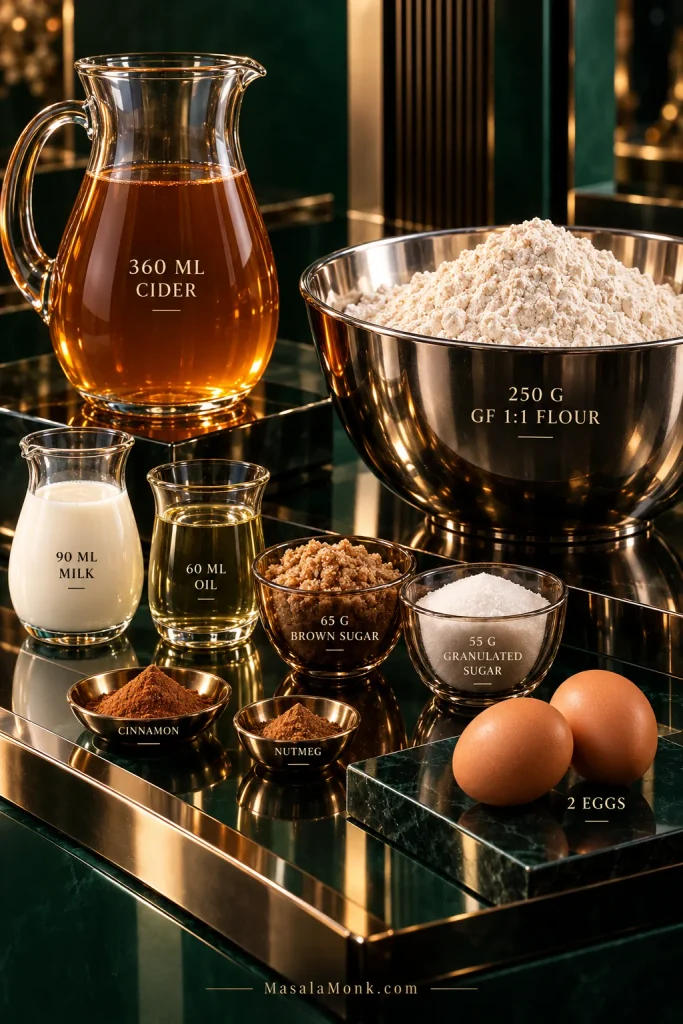
1½ cups (12 fl oz / 360 ml) nonalcoholic apple cider, meaning the cloudy pressed apple drink, not vinegar; reduce to about 7 tablespoons (3½ fl oz / 105 ml)
250 g gluten-free 1:1 baking flour containing xanthan gum or another binder
2 teaspoons (about 8 g) baking powder
1 teaspoon ground cinnamon
¼ teaspoon ground nutmeg
½ teaspoon fine salt
2 large eggs
65 g light brown sugar, about ⅓ cup packed
55 g granulated sugar, about ¼ cup
¼ cup (2 fl oz / 60 ml) neutral oil
6 tablespoons (3 fl oz / 90 ml) milk
1½ teaspoons vanilla extract
For the Cinnamon Sugar
¾ cup (150 g) granulated sugar
2½ teaspoons ground cinnamon
3 tablespoons (42 g) unsalted butter, melted; you may not need all of it
Method
Reduce the cider. Pour 1½ cups / 360 ml apple cider into a saucepan and bring it to a steady, lively simmer. Reduce to about 7 tablespoons / 105 ml; depending on the pan and heat, this often takes around 15–25 minutes. Start measuring early rather than waiting for the clock. Pour the finished reduction into a small heatproof jug and let it cool to room temperature or until barely warm.
Heat the oven and grease the pans. Heat the oven to 350°F / 175°C with a rack near the center. Grease about 12 standard donut cavities thoroughly, especially around the center posts.
Mix the dry ingredients. Whisk together the gluten-free flour, baking powder, cinnamon, nutmeg and salt.
Mix the wet ingredients. In a larger bowl, whisk the eggs with the brown sugar and granulated sugar. Add the oil, milk, vanilla and cooled cider and whisk again.
Combine. Stir the dry ingredients into the wet mixture until no dry pockets remain. There is no need to keep mixing once the batter is even.
Let the flour hydrate. Leave the batter for 5–10 minutes. It will usually thicken as it sits.
Finish the Batter, Bake & Coat
Check the consistency. The batter should fall in a heavy ribbon and pipe cleanly. If it is genuinely too stiff after resting, add milk 1 tablespoon / 15 ml at a time.
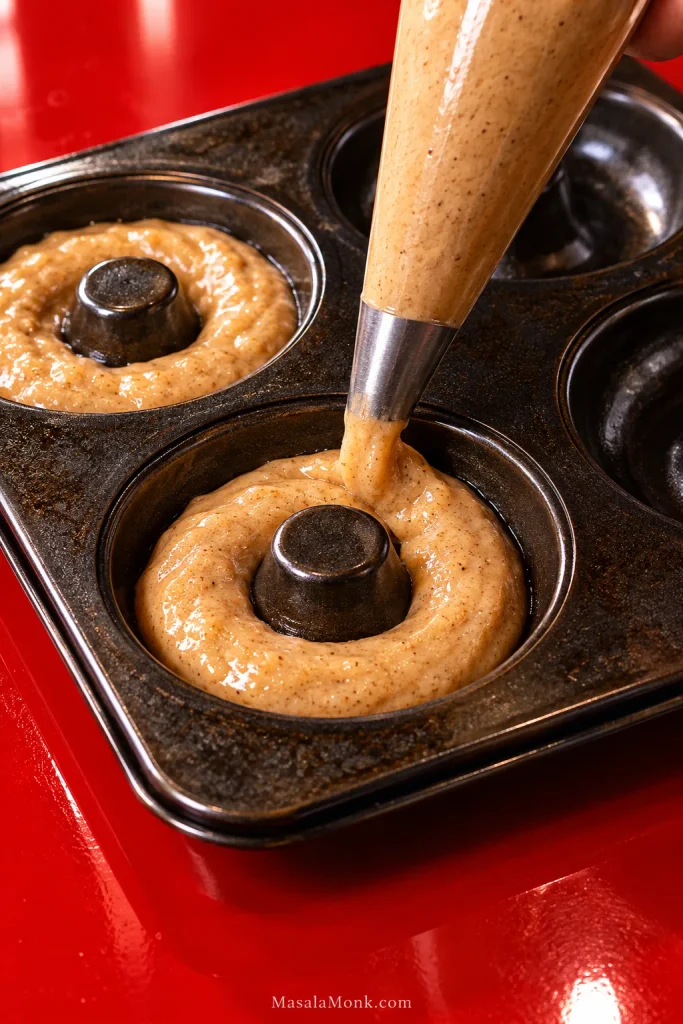
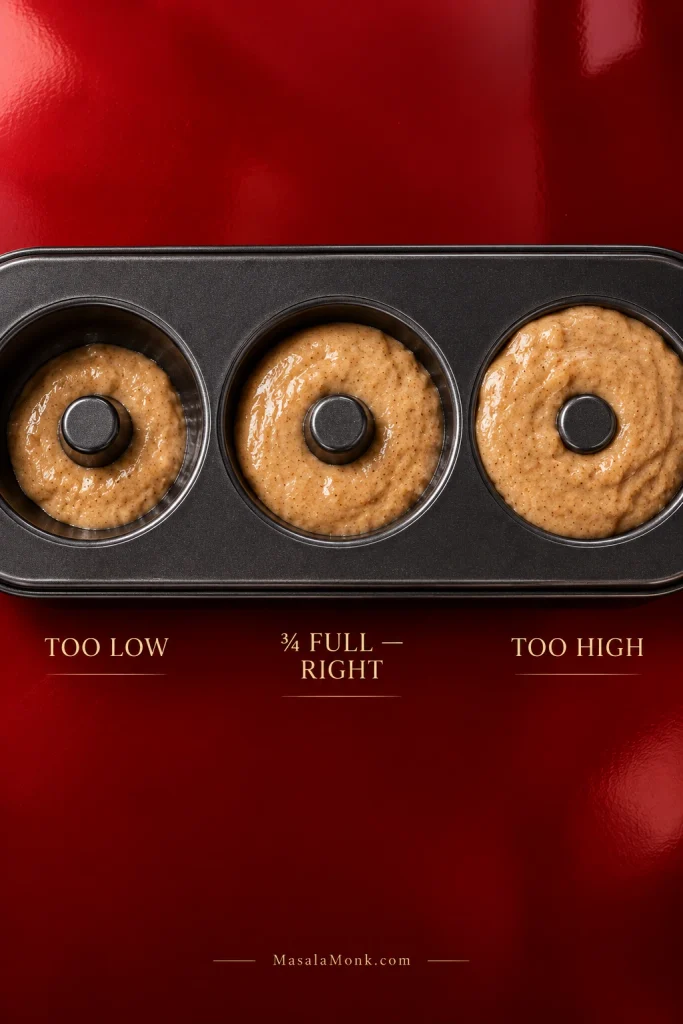
Fill the pan. Transfer the batter to a piping bag or large zip-top bag and snip off a corner. Fill each cavity about three-quarters full, keeping the center post exposed. The rings do not need to look perfectly neat before they bake.
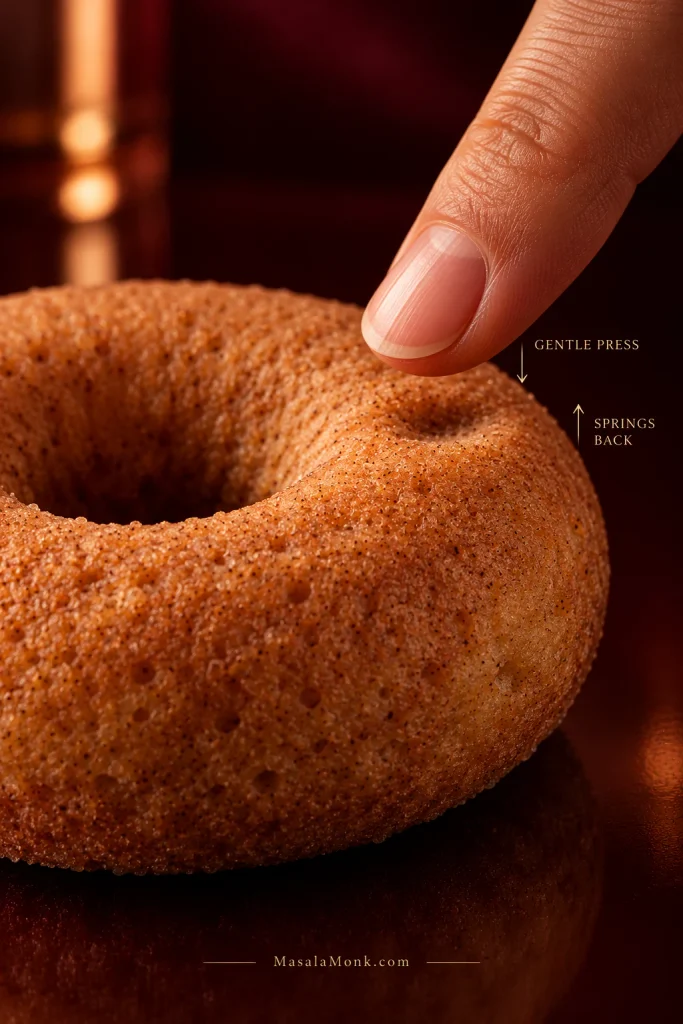
Bake. Start looking at them around 10 minutes. Most standard donuts take roughly 10–14 minutes. The tops lose their wet shine and spring back when pressed lightly. A toothpick through the thickest part should come out without raw batter.
Rest briefly. Leave the donuts in the pan for 3–5 minutes, then loosen them gently and move them to a rack.
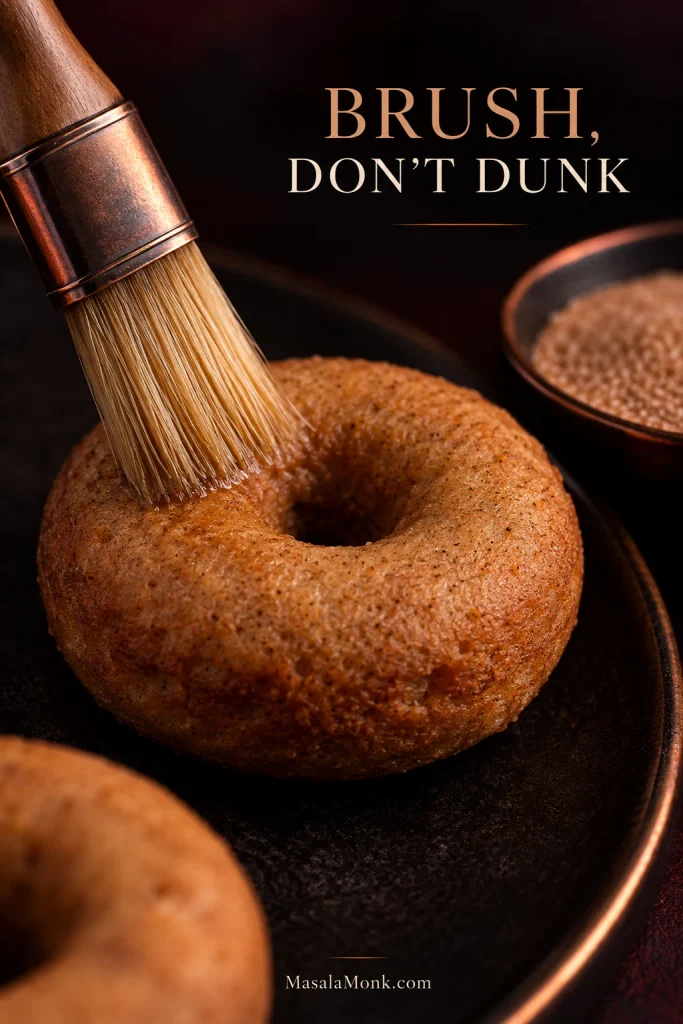
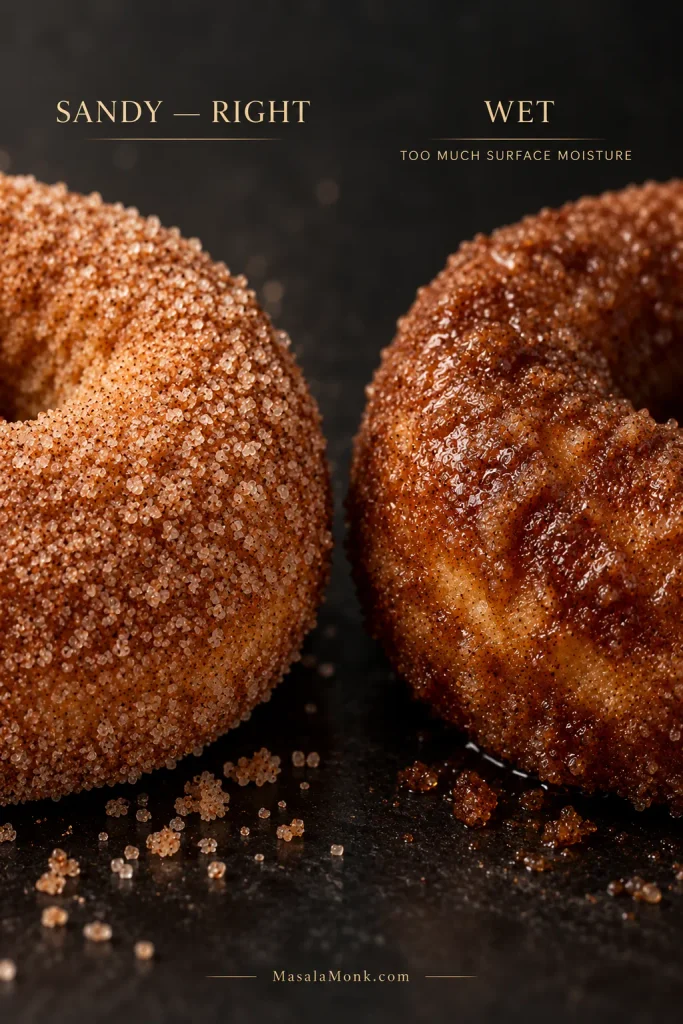
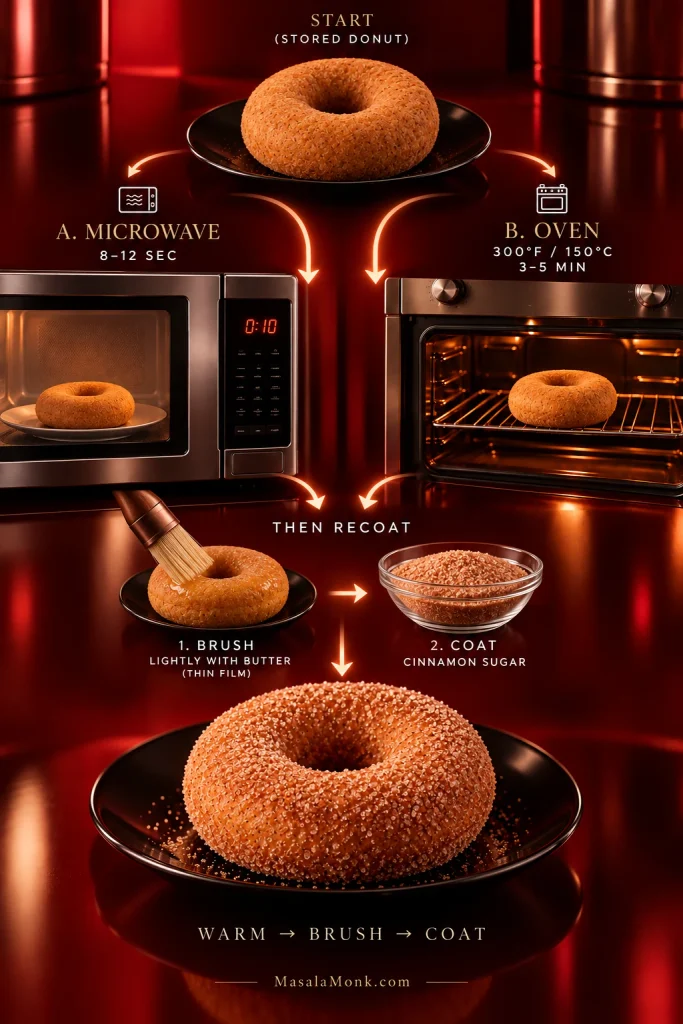
Brush and coat. Mix the sugar and cinnamon in a shallow bowl. Brush each warm donut with a thin film of melted butter, then turn it in the cinnamon sugar. The coating should stay sandy rather than glossy. For a lighter finish, coat only the top and outer edge.
Give the sugar a minute to cling, then eat the first one while the center is still warm.
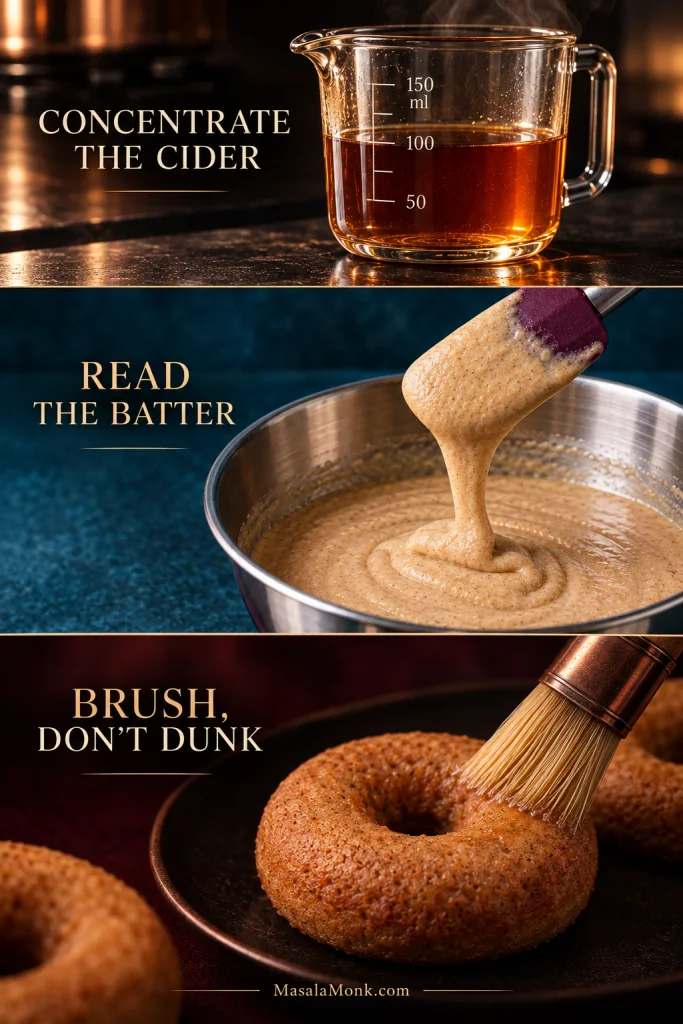
If you remember only three things: Concentrate the cider. Read the batter. Brush, don’t dunk.
Think flavor → structure → finish: concentrate the cider, read the batter, then use just enough butter for the sugar to cling.
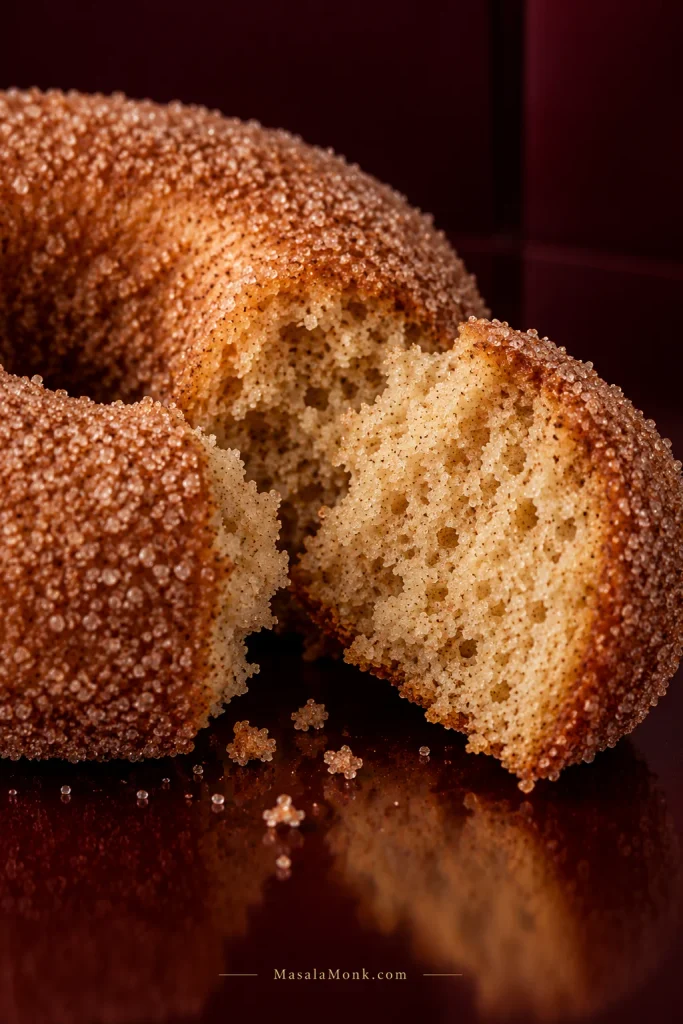
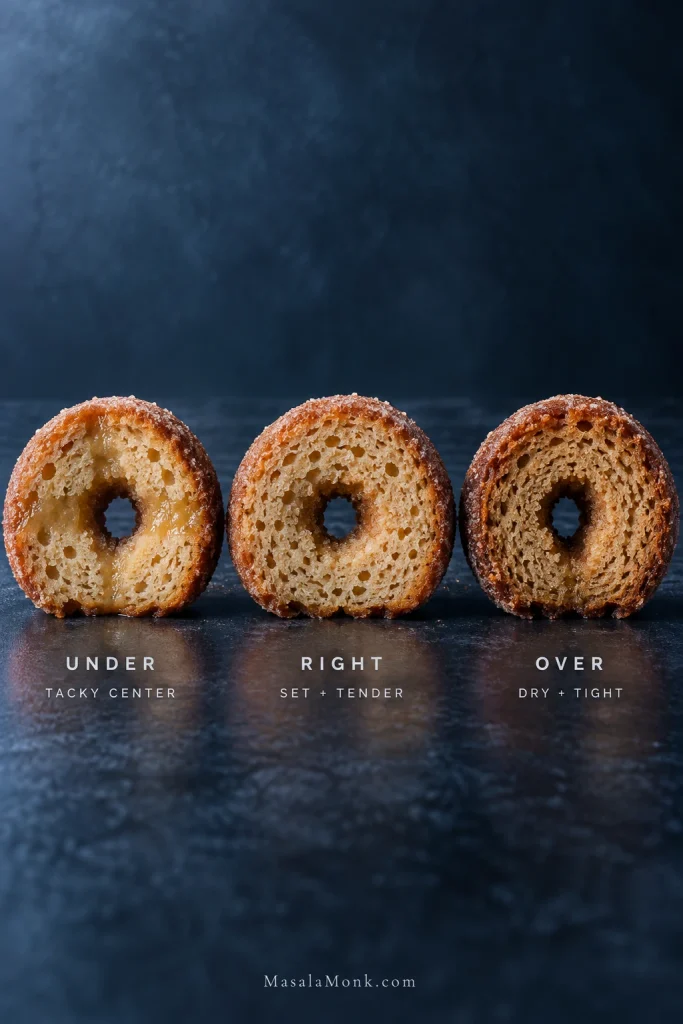
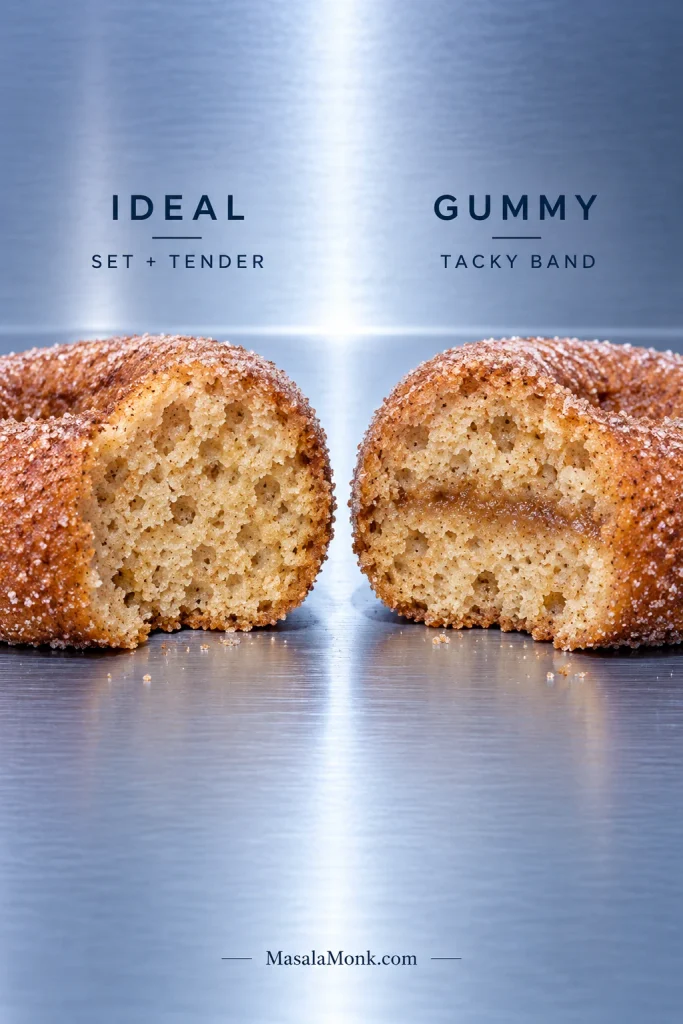
A good baked cider donut is soft but not fragile, cake-like without slipping into cupcake territory, and moist without feeling gummy. The crumb has fine, fairly even pores and holds together cleanly when you bite into it.
Break one open. The center should look evenly baked, without a wet or glossy streak through the middle. The outside will be slightly firmer than the center, especially from a metal pan.
A good baked cider donut tears cleanly and looks matte-set inside. Shiny, compressed patches matter more than an occasional larger air pocket.
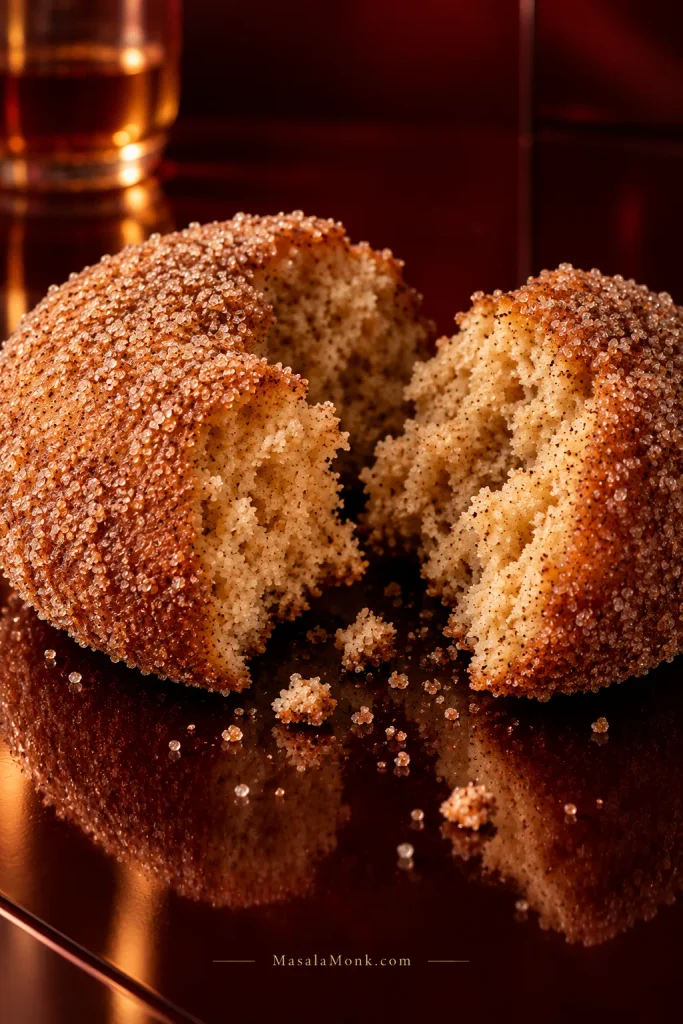
The coating should stay dry enough for a faint sandy crunch before the soft crumb gives way. Underneath the cinnamon, the apple should still be there.
Reduce the Cider to About 105 ml
Start with 1½ cups / 360 ml cider and simmer until about 7 tablespoons / 105 ml remain. That’s the target; the clock is not.
Reducing 360 ml to 105 ml concentrates apple flavor while removing enough water to keep the batter balanced.
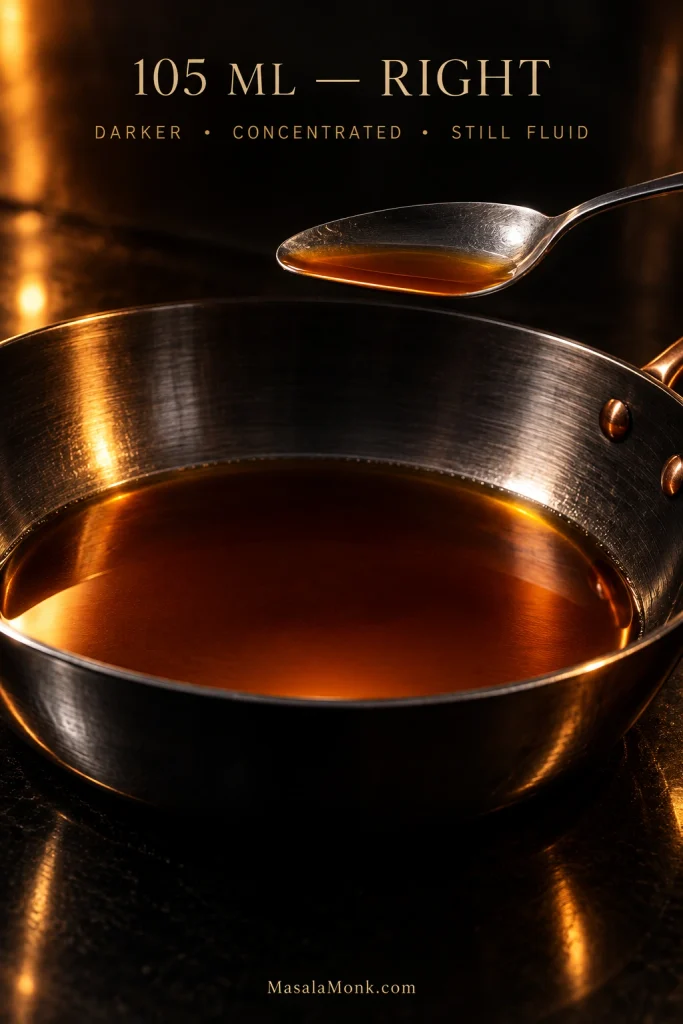
Pan width and burner strength change the timing. Near the end, the cider darkens, smells intensely of apples and still pours easily. Honey-thick means it has gone farther than this batter needs.
Correctly reduced cider should run quickly when the pan tilts. If it creeps or ropes, it has gone too far.
Reduced it too far? Add enough fresh cider to bring the amount back near 105 ml.
Commercial boiled cider is different. It is reduced much further and can become thick like honey, so it should not replace this homemade reduction measure-for-measure. King Arthur’s boiled-cider guide shows how concentrated it can become.
Choose the Right Gluten-Free Flour
Use a 1:1 blend intended for general baking and already containing xanthan gum or another suitable binder. The blend you already trust for cakes or muffins is a good place to start.
Use 250 g as the fixed baseline. Then batter differences are more likely to come from the flour blend than the scoop.
What Different Blends Can Do
Finely milled rice-and-starch blends tend to work well here. Coarse rice flour can leave the crumb gritty, very starch-heavy blends may bake up tackier, and strongly bean-based blends can bring an earthy flavor. If your blend already contains xanthan, don’t add more.
A slightly thicker or softer batter is not automatically a problem; let it rest, then judge how it pipes.
Check Your Batter Before You Pipe It
After the 5–10 minute rest, the batter should be thick, smooth and pipeable. Lift some with a spatula: it should fall in a heavy ribbon and leave a ridge that slowly softens. You’re looking for batter that holds its shape long enough to pipe, then gradually settles into the ring.
After resting, judge batter by movement: it should pipe cleanly and relax gradually, even if it still feels a little sticky.
Batter Too Thick
If it is still too stiff to pipe after the full rest, add milk 1 tablespoon / 15 ml at a time. Stop as soon as it moves easily through the bag.
Stiff batter holds its ridge; correct batter slowly softens; loose batter levels quickly. Movement tells you more than surface smoothness.
Gritty Batter
A short rest can smooth out fine rice flour. If the finished donut still feels gritty, the blend itself is the likely culprit.
Don’t panic over a slightly sticky batter. If it pipes cleanly, you’re in the right neighborhood. Sticky batter, a gummy center and wet cinnamon sugar are three different problems.
Pipe and Fill the Pan
Once the batter is rested and pipeable, transfer it to a piping bag and work around each ring without covering the center post.
Keep the ring reasonably even; the batter will soften and settle as the pan heats.
Before the pan goes into the oven, compare the batter height with the center post. About three-quarters full leaves enough room for the ring to rise without crowding the middle.
Use the center post as your gauge: about three-quarters full leaves room for the ring to rise cleanly.
How to Know When They’re Done
Start looking at the donuts around 10 minutes. Color is the least useful cue here.
Similar exteriors can hide different centers. Use crumb set, spring-back and the toothpick together rather than waiting for one shade of brown.
The top has lost its wet shine.
A gentle press springs back.
The edge may begin to release from the pan.
A toothpick through a thick section comes out without raw batter.
Press the thickest part of the ring. Spring-back there tells you more about the center than pressing the firmer edge.
That’s fine. Bake the first six, let the pan cool until it is comfortable to handle, then grease it again before piping the second round. Keep the remaining batter covered at room temperature while the first batch bakes.
Metal or Silicone?
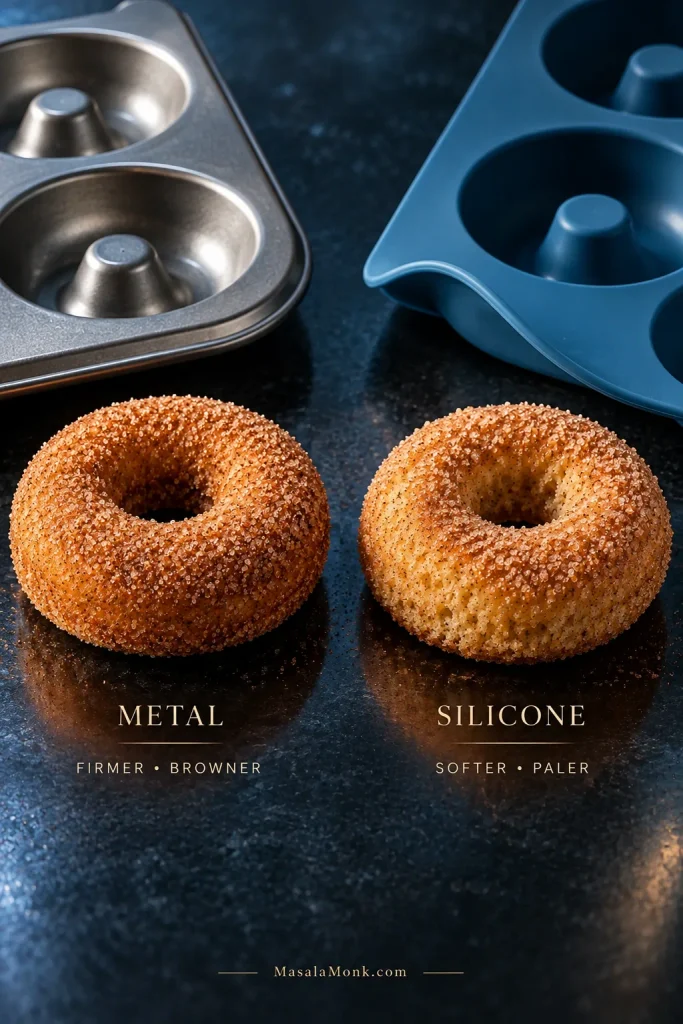
Metal gives the nicest crust here. Silicone molds usually leave the sides paler and softer and may need longer.
Silicone can stay pale even when done; metal browns faster. Treat surface color as context and let the center decide.
Brush, Don’t Dunk
Brush the butter on; don’t dunk the donut in it. The butter is there to make the cinnamon sugar stick. That’s all it needs to do.
Butter is adhesive here, not extra richness. A barely visible film is enough for cinnamon sugar to cling.
A thin film is enough. Too much butter disappears into the cake and leaves the sugar wet instead of sandy.
You should still be able to see and feel individual grains of sugar. That little crunch against the soft center is part of what makes the donut work.
For a Lighter Coating
Coat only the top and outer edge. You still get the cinnamon aroma and texture without a thick layer of sugar around the whole donut.
If the Sugar Turns Sticky
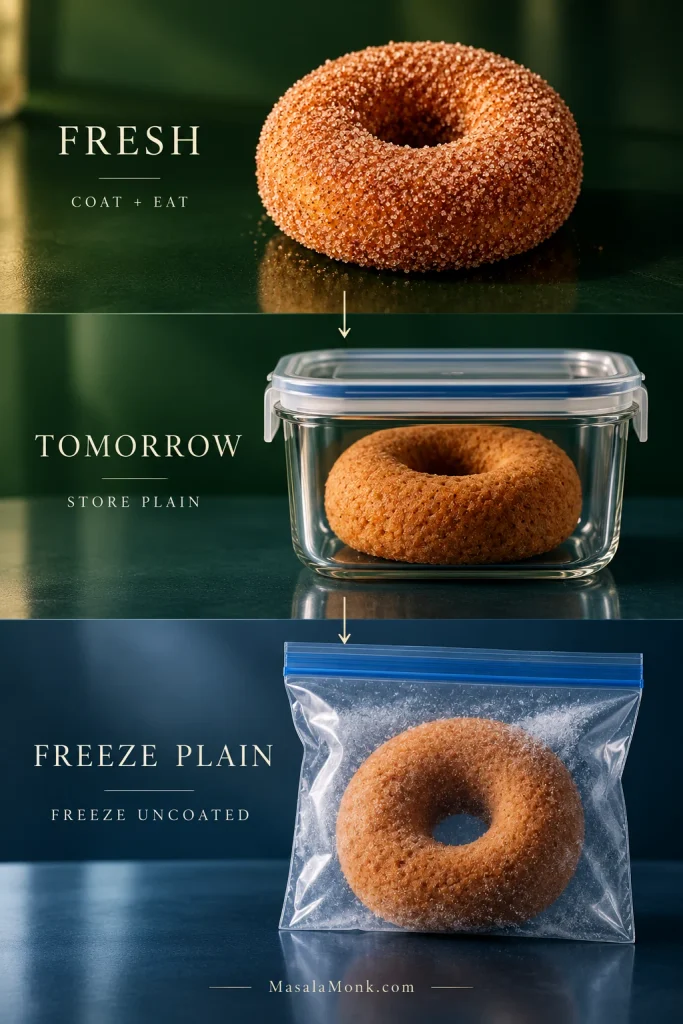
Humidity, too much butter and sealing the donuts before they are completely cool can soften the coating. Saving some for tomorrow? Leave those plain and coat them after reheating.
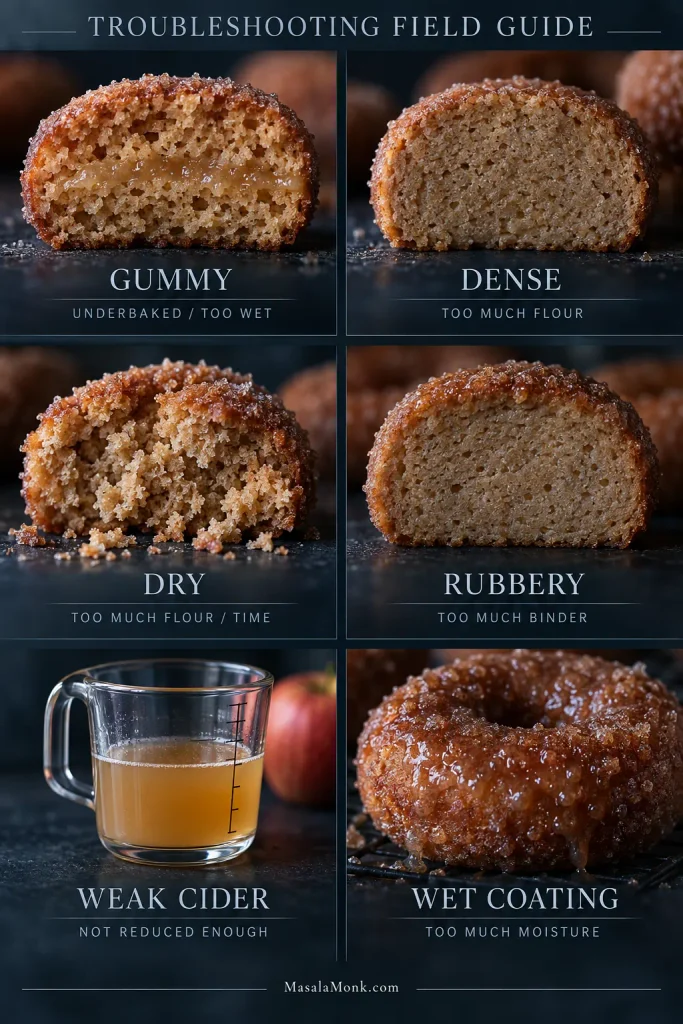
A glossy coating is a surface problem, not proof the crumb needs more oven time. Fix moisture and butter instead.
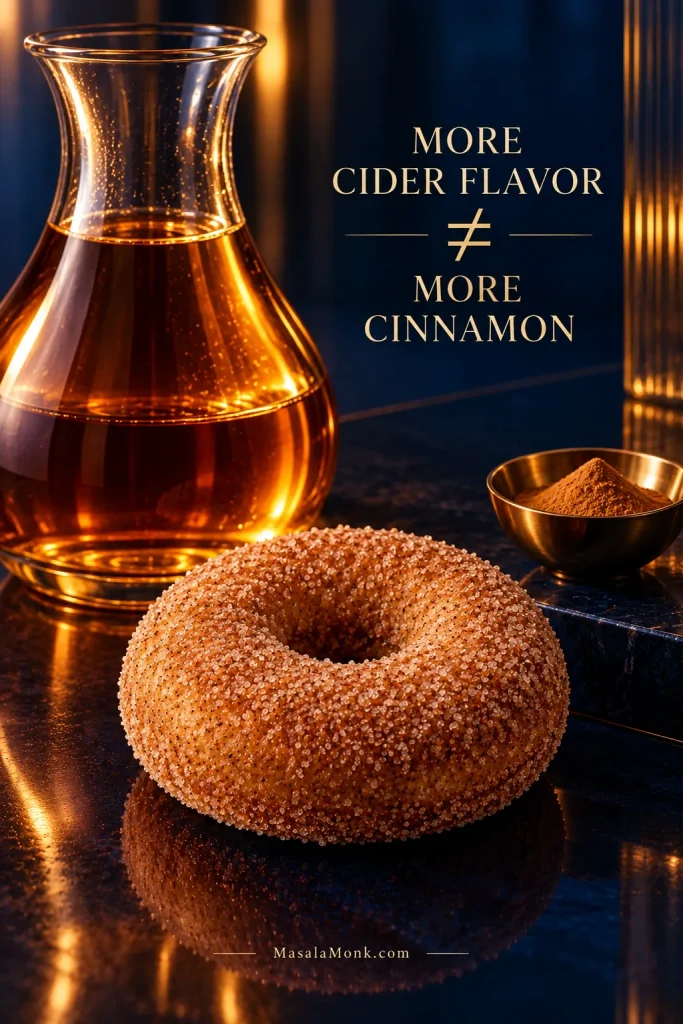
For More Cider Flavor, Start With the Cider
A donut can be intensely spiced and still barely taste of cider.
Use a flavorful cider and reduce it properly. Brown sugar brings some caramel depth, while cinnamon and nutmeg should sit behind the apple rather than bury it. A cider donut shouldn’t need a blast of cinnamon to taste like fall.
Build apple flavor first. Extra cinnamon can make the aroma stronger, but it cannot replace a weak cider base.
For a more layered spice profile, replace part of the cinnamon and nutmeg with a little homemade apple pie spice. Go easy with clove and allspice; both can take over quickly.
What You Can Substitute
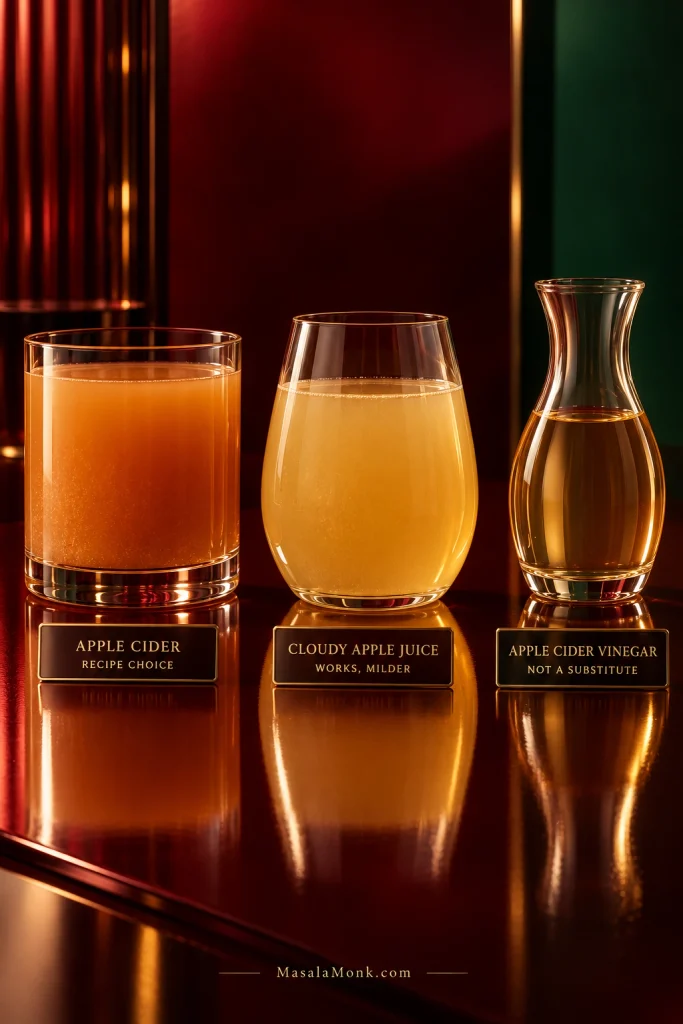
Start with the apple liquid: cider, cloudy apple juice and apple cider vinegar sound related, but they do not play the same role in this recipe.
Cloudy apple juice is the closest substitute for cider. Apple cider vinegar is not—it serves a completely different purpose.
Ingredient
What to Do
Dairy milk
Use the same amount of unsweetened neutral plant milk.
Butter for coating
Use dairy-free butter if needed.
Apple cider
Unsweetened cloudy apple juice can be reduced to the same amount; the flavor will be milder.
Commercial boiled cider
Use a recipe or conversion designed for it because it is much more concentrated.
Almond flour
Do not swap it gram-for-gram for the 1:1 blend; it needs a different formula.
Eggs
There is no simple direct swap that gives the same texture.
Apple cider vinegar
Do not use it in place of apple cider.
Don’t turn this into a flour experiment. Oat flour, coconut flour and other single flours behave differently enough that they need formulas built around them.
Vegan or Egg-Free
The eggs help the donuts rise and hold together. Applesauce, flax mixtures and commercial egg replacers all change the texture differently. For a reliable egg-free donut, start with a formula designed without eggs. If egg-free is the non-negotiable part and the donut shape is not, this apple crisp recipe keeps the apple-cinnamon direction and also includes gluten-free and dairy-free guidance.
Troubleshooting the Bake & Finished Donuts
Change one variable at a time. Otherwise, you cannot tell whether flour, cider concentration or bake time actually fixed the problem.
As They Come Out of the Oven
What You See
What It Usually Means
What to Do
Center hole has closed
The cavity was filled too high
Fill the next round lower.
Pale, soft sides
Often a silicone-pan effect
Judge the center before adding more time.
Donut tears when lifted
It may be too hot, underbaked or stuck
Give it the 3–5 minute pan rest and grease more thoroughly next time.
Center still looks wet
It needs more oven time
Return it to the oven and look again after 1–2 minutes.
After the First Bite
Gummy Center
Let a very hot donut cool for a few minutes before judging it. Moist is welcome; a wet, tacky streak through the middle is not. If it stays gummy, start with the bake, then the cider amount and flour blend.
A gummy center shows a compressed, tacky band through otherwise baked crumb—not the normal softness of a donut that is still hot.
Dense Crumb
Too much flour is the first place I’d look. A packed measuring cup can add considerably more than intended, which is why 250 g is the safer measure. An especially absorbent blend or old, inactive baking powder can also leave the crumb heavy.
Dry Donuts
Too much flour or too much oven time usually causes it. Look at the donuts around 10 minutes rather than treating 14 as the target.
Rubbery Crumb
The flour label is worth checking. A blend that already contains xanthan usually does not need more. Too much binder can make the crumb unusually elastic.
Weak Cider Flavor
Before adding more spice, go back to the cider. Mild cider gives a milder donut, and reducing it properly matters more than another spoonful of cinnamon.
Bitter or Odd Flavor
Bitter or metallic: the baking-powder quantity may be off, or it may not have been mixed evenly.
Earthy or bean-like: the flour blend may be contributing a strong flavor.
Perfumy or overly intense: pull back on strong spices such as clove, allspice or nutmeg.
These donuts are best on day one, when the crumb is soft and the cinnamon sugar is dry and granular. For the best texture, let them cool completely, store them airtight at room temperature and use them within 2 days. Coated donuts will keep, but the sugar softens; for planned leftovers, store them plain and coat after reheating.
The crumb keeps better than the coating. Store planned leftovers plain so you can restore the cinnamon-sugar finish later.
Make Ahead
The reduced cider and dry ingredients can both be prepared up to 2 days ahead. Keep the cider refrigerated and the dry mix airtight at room temperature. Let the chilled cider reduction lose its chill before mixing, and make the complete batter shortly before baking.
If you are choosing a bake specifically because it needs to hold well until tomorrow, a moist applesauce cake is more forgiving overnight than a freshly coated cider donut.
Reheat One
Microwave briefly—about 8–12 seconds in many microwaves—just until slightly warm, or use a 300°F / 150°C oven for 3–5 minutes for a firmer exterior. If the donut was stored plain, coat it after reheating.
Microwave for a softer center; use a low oven for a firmer exterior. Warm first, then add fresh cinnamon sugar.
Freezing
They freeze well enough for leftovers, although the crumb is best fresh. Freeze uncoated for up to about 2 months for best quality, thaw at room temperature, warm briefly, then add the butter and cinnamon sugar.
Questions About Gluten-Free Apple Cider Donuts
1. Are apple cider donuts normally gluten-free?
No. Traditional cider donuts are usually made with wheat flour unless they are specifically made or sold as gluten-free.
2. What does “apple cider” mean here?
The sweet, nonalcoholic cloudy apple drink commonly sold as cider in North America. In places where “cider” usually means alcohol, look for cloudy pressed apple juice.
No. Apple cider vinegar is vinegar and cannot replace the apple drink used in this recipe.
5. Can I use apple juice?
Yes. Reduce unsweetened cloudy apple juice to the same amount. The finished flavor will usually be milder.
6. Why are my gluten-free apple cider donuts gummy?
Gummy centers usually come from underbaking, excess moisture or a flour blend that behaves differently. Let the donuts cool briefly before judging them, then start with the bake, cider reduction and flour quantity.
7. Can I fry these instead of baking them?
Not with this batter. Fried cider donuts need a different dough and cooking method; this recipe is specifically for baking. If you don’t need a gluten-free formula and want a donut method that avoids deep-frying, these air fryer donuts are built for the air-fryer basket instead.
8. Can I make them vegan?
There is no simple egg swap that gives the same texture. For a reliable vegan version, start with a recipe formulated without eggs.
Eat the First One Warm
Coat the donuts while they are still a little warm and eat one before the sugar has had time to soften. That is when they are at their best.
The best contrast is right after coating: warm, soft crumb against dry, granular cinnamon sugar.
Still in an apple-baking mood? For fresh apple pieces and a no-mixer cake, try this easy fresh apple cake.
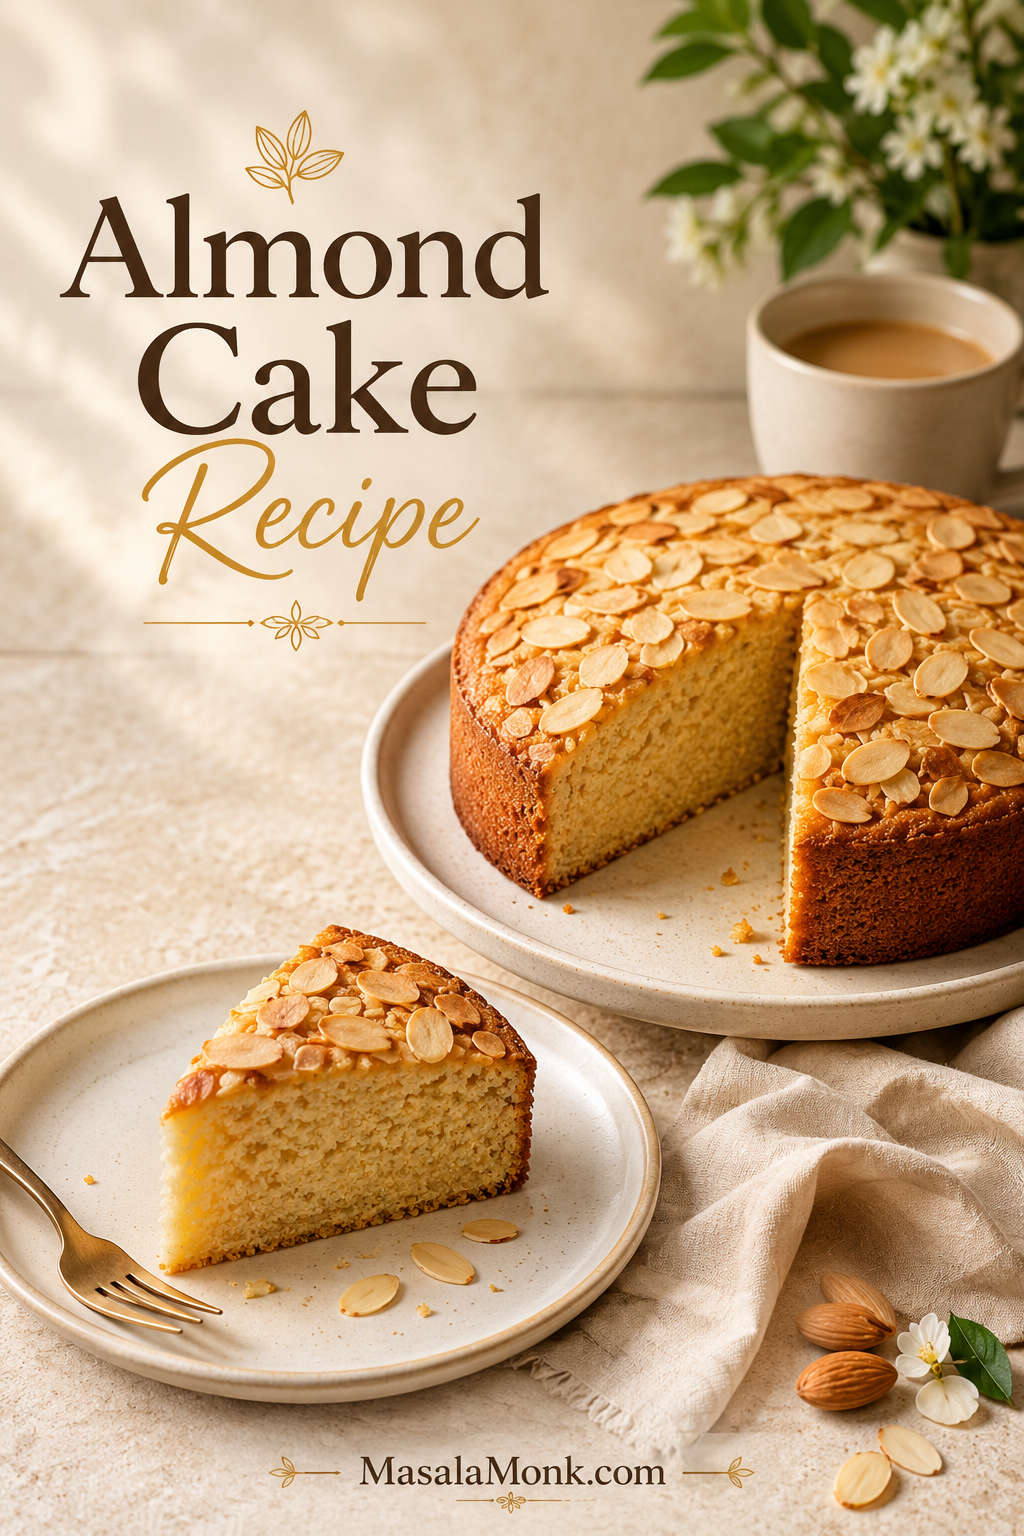
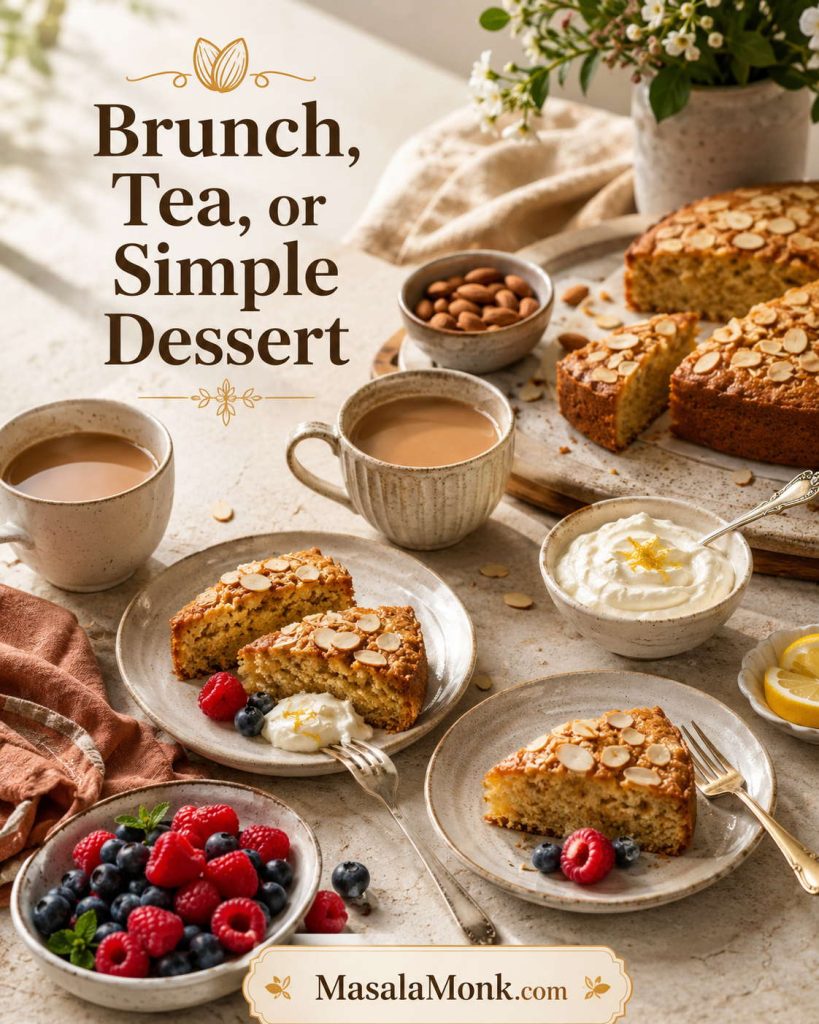
This almond cake recipe is for the moment when you want a golden, tender dessert that feels elegant without frosting. It has a sliced-almond top, a gently rich middle, and just enough lemon or orange zest to keep every bite bright. Once cooled, it cuts cleanly and looks simple, polished, and special on the table without needing much decoration.
Almond flour cakes can be beautiful, but they reward a lighter hand than wheat cakes. Packed flour makes the batter heavy. Cold eggs do not whip as well. A thin pan can brown the edges before the middle is ready. And if you cut the cake while it is still warm, the slice can look damp even when the bake was close.
This version is built around those common almond cake problems: dense centers, oily texture, gritty almond meal, overheated edges, weak egg whites, and cakes that look golden before they are fully baked. The goal is a single-layer almond flour cake that is naturally gluten-free when made with certified gluten-free ingredients, easy enough for tea or brunch, and reliable enough for a guest dessert with berries and cream.
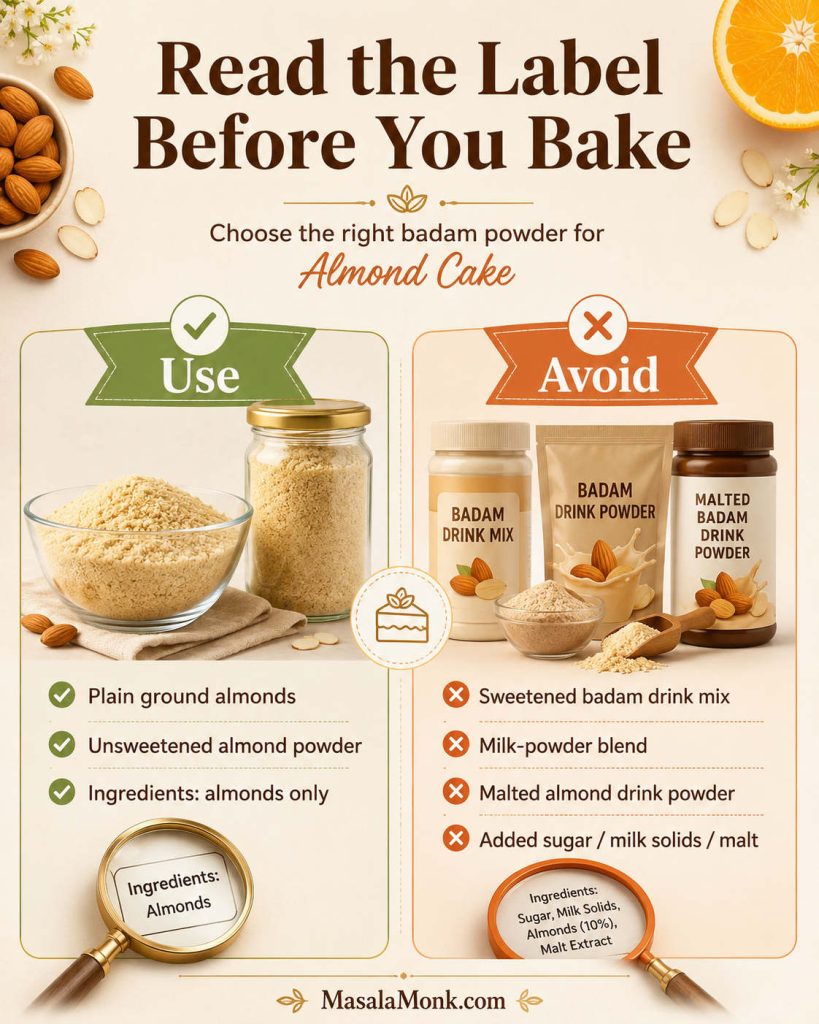
Quick warning for Indian shoppers: if your packet says badam powder, check the label carefully. This recipe needs plain ground almonds, not sweetened badam drink mix, malted almond powder, or milk-powder blends. For the full comparison, see almond flour vs almond meal vs badam powder.
The finished cake should smell like toasted almonds and citrus, feel delicate without falling apart, and settle into clean slices after a few hours. It is the kind of cake that works with powdered sugar, coffee, fruit, cream, or nothing at all.
Quick Answer: How to Make a Tender Almond Flour Cake
To make a tender almond flour cake, use fine blanched almond flour, room-temperature eggs, sugar, baking powder, salt, vanilla, a little almond extract, and lemon or orange zest. Separate the eggs, beat the yolks with sugar, fold in the almond flour, then fold in softly whipped egg whites. Bake in a lined 8-inch / 20 cm round pan at 180°C / 350°F until the top is golden, the middle no longer wobbles, and a toothpick shows moist crumbs rather than wet batter.
The two most important success points are measuring the almond flour lightly, preferably by weight, and letting the cake cool before slicing. Those two details prevent most dense, oily, or fragile results.
Question
Best answer for this recipe
Best ground almond product
Fine blanched almond flour for the cleanest, most delicate result.
Almond meal
Works by weight, but the cake will be darker, nuttier, and more rustic.
Almond powder
Use only plain unsweetened ground almonds, never badam drink mix.
Best pan
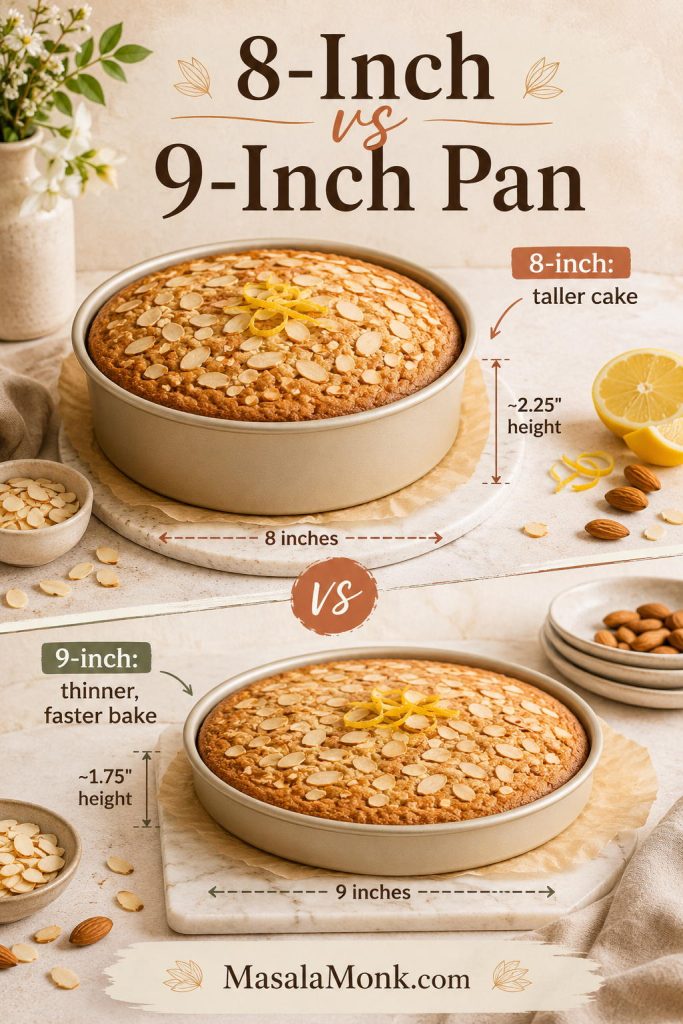
8-inch / 20 cm round for a taller cake; 9-inch / 23 cm for a thinner cake.
Oven temperature
180°C / 350°F conventional or OTG; 160°C / 320°F fan.
Bake time
26–32 minutes in an 8-inch pan; 23–28 minutes in a 9-inch pan.
Gluten-free status
Naturally gluten-free if every ingredient is certified gluten-free.
Eggless swap
Not a direct swap; this batter needs eggs to rise, set, and slice cleanly.
Quick success cue: the batter will be thicker than wheat cake batter, the top should bake to a soft gold, and the toothpick should show moist crumbs, not shiny wet batter. Near the end, the cake should smell lightly toasty and citrusy.
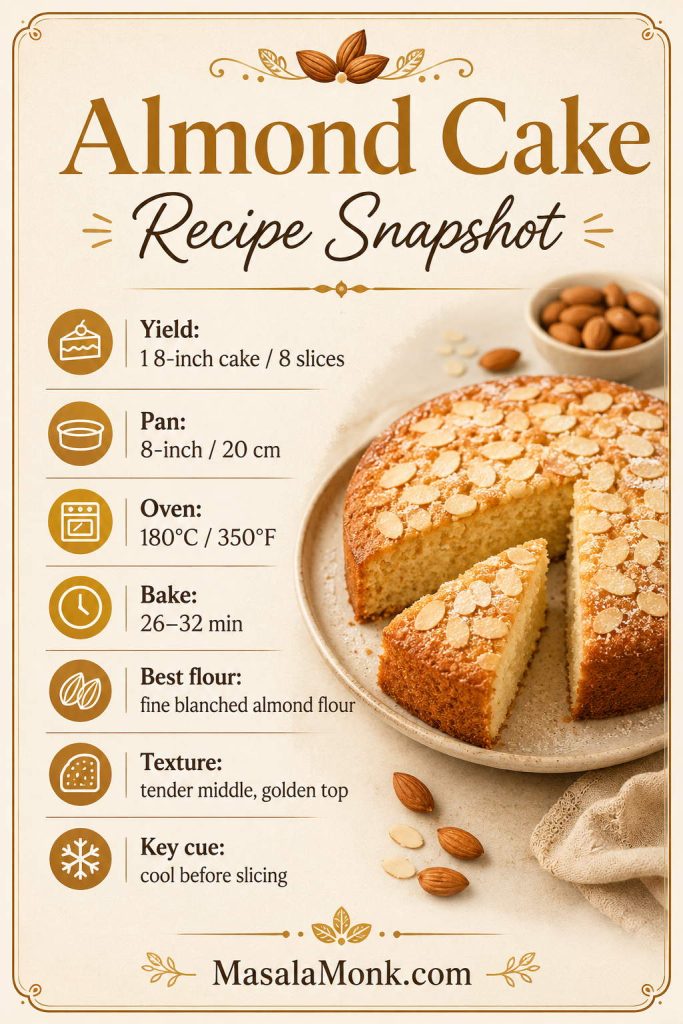
Best for Tea, coffee, brunch, or a simple gluten-free dessert
Best first pan 8-inch / 20 cm light-colored metal round pan
Best flour Fine blanched almond flour
Oven 180°C / 350°F conventional; 160°C / 320°F fan
Make-ahead note Flavor and texture improve after resting
Texture target Tender middle, golden top, clean-cut slices
Watch out for Packed flour, weak whites, hot pans, early slicing
Flavor choice Choose lemon for brightness, orange for warmth
Use this almond cake snapshot as a pre-bake check: pan size, oven temperature, flour choice, and cooling time all affect the final texture.
Keep these details in mind before you start. The safest first bake uses fine almond flour, a sturdy 8-inch pan, and a full cooling time. For ingredient confusion, jump to flour vs meal; for timing doubts, use the doneness cues.
What Kind of Almond Cake Is This?
This is a simple, single-layer almond flour cake made mainly with ground almonds instead of wheat flour. It is closer to a tender tea cake than a tall sponge cake or frosted celebration cake.
If you want…
This recipe gives you…
A simple almond flour cake
Yes — a single-layer cake with a tender, clean-cut center.
A naturally gluten-free dessert
Yes, when all ingredients are certified gluten-free.
A tea cake, brunch cake, or coffee cake
Yes — this is where the recipe works best.
A frosted birthday-style almond cake
Use a bakery-style layer cake instead.
A whole-orange almond cake
Use a whole-orange method with boiled oranges and a longer bake.
An eggless almond cake
Use a separate eggless formula rather than removing the eggs here.
Almond cake can mean several different things. Some versions are wheat cakes flavored with almond extract; others use boiled oranges, yogurt, or mixed flours. This one stays focused on a dependable almond flour base, so the final texture is easier to predict.
What This Almond Cake Tastes Like
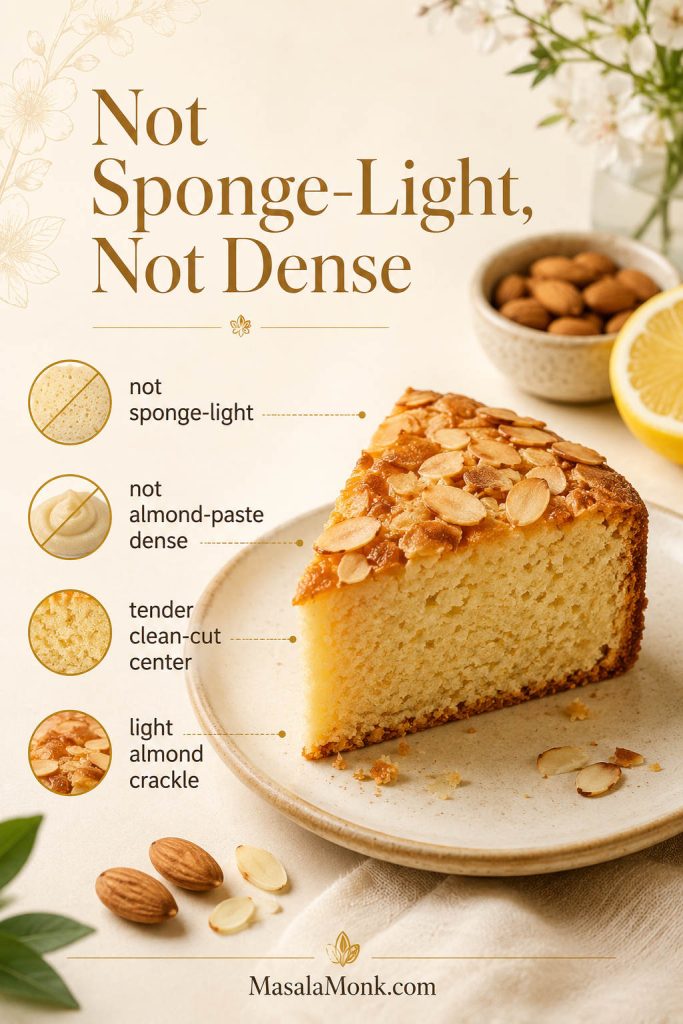
The slice should feel tender and gently rich, not airy like a sponge cake and not dense like almond paste. Almond flour gives the middle a plush, nutty texture, while the sliced almonds on top add a light crackle. Lemon zest makes the cake brighter and more tea-cake-like; orange zest makes it warmer and more dessert-like.
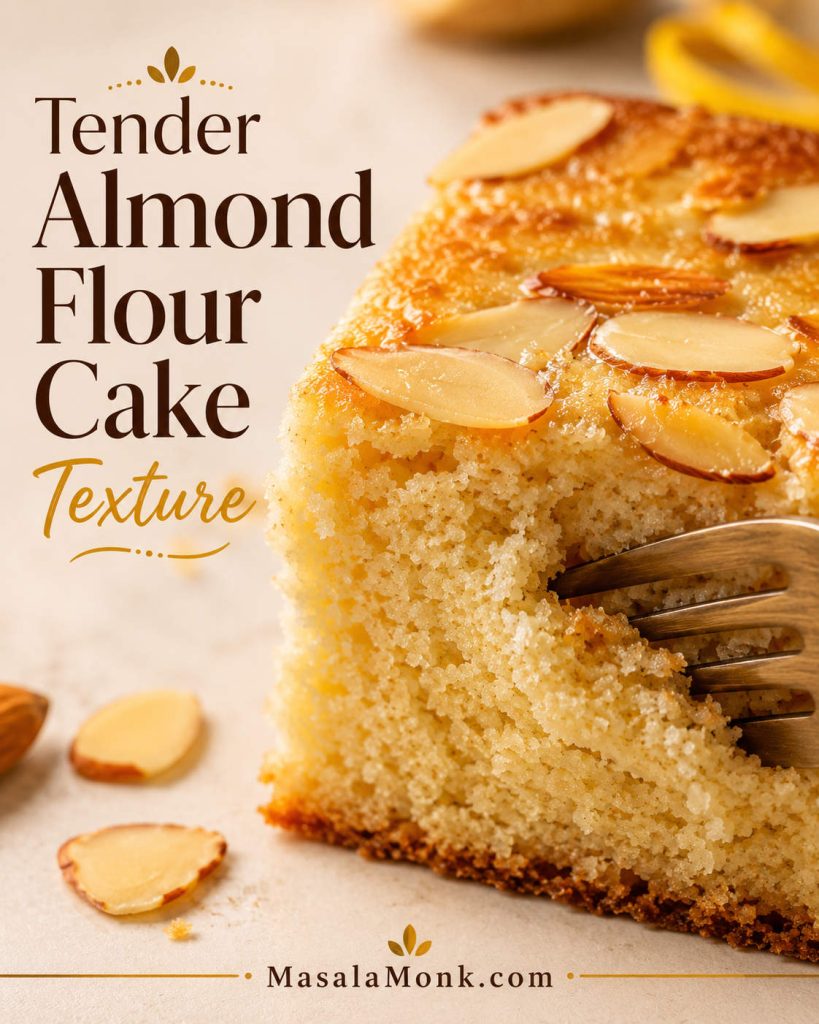
Almond Cake Slice Texture
The slice should bend tender rather than crumble apart. If it looks wet in the center, the cake may be underbaked or cut too warm; if it falls apart, the batter may have been overmeasured, overbaked, or sliced before cooling.
The best almond flour cake slice should feel gently rich, not wet or pasty; the cut edge should still look neat enough to serve cleanly.
Texture Target for Almond Flour Cake
As the cake cools, the center settles and the flavor rounds out. That resting time is part of why the slice cuts neatly instead of crumbling. The best bite has a fragrant almond top, a clean-cut center, and enough citrus lift to keep the richness from feeling heavy.
Almond flour naturally makes cake richer than wheat flour; therefore, the goal is a plush tea-cake bite, not a heavy almond-paste dessert.
A light dusting of powdered sugar is enough. Add berries and cream if you want dessert, or serve it plain with coffee and let the toasted almond top do the work.
When to Make This Almond Cake
Make it when you need a cake that feels special without frosting: a weekend coffee slice, a brunch cake with berries, or a simple gluten-free dessert that does not taste like a compromise. It is also a good choice when frosting feels like too much work but you still want something polished enough for guests.
This is a useful make-ahead cake because it slices better after resting. Bake it in the morning, carry it without worrying about frosting, and serve it later with powdered sugar, fruit, yogurt, or cream. It works for quiet tea, a dessert plate, or the kind of table where you want the cake to look pretty without needing much decoration.
This is a useful make-ahead cake for brunch, tea, coffee, or a gluten-free dessert plate because it feels finished with only fruit or cream.
Before You Bake: 5 Things That Matter
Weigh the almond flour if you can. If using cups, spoon it lightly and level it.
Use room-temperature eggs. They whip better and blend more smoothly.
Keep the egg-white bowl clean and grease-free. Even a little yolk or oil can stop the whites from whipping properly.
Line the pan with parchment. Almond cakes are delicate and need help releasing cleanly.
Cool before slicing. The center firms as it rests, so warm slices can look damp or broken.
Think of cooling as part of the recipe, not just waiting. A lined pan, a steady oven, and a full rest make the difference between a fragile cake and one that lifts, cuts, and serves cleanly. Already worried about timing or pan size? Check pan size and bake time before you preheat.
Recipe Card: Tender Almond Flour Cake
A tender almond flour cake with a golden sliced-almond top, clean-cut center, and bright lemon or orange zest. This cake is naturally gluten-free when made with certified gluten-free ingredients.
Yield 1 8-inch cake / 8 slices
Prep Time 15 minutes
Bake Time 26–32 minutes
Total Time About 1 hour 30 minutes, including cooling
Equipment
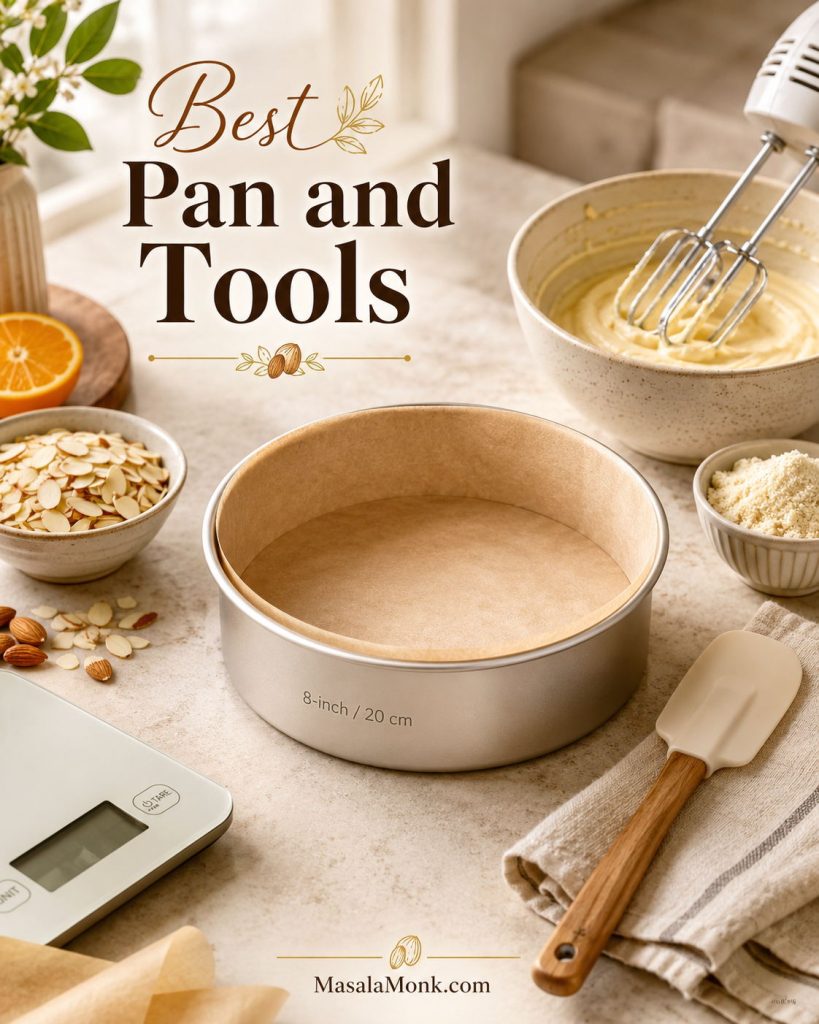
8-inch / 20 cm light-colored metal round cake pan
Parchment paper
Two mixing bowls
Hand mixer or balloon whisk
Flexible spatula
Kitchen scale, strongly recommended
Wire rack
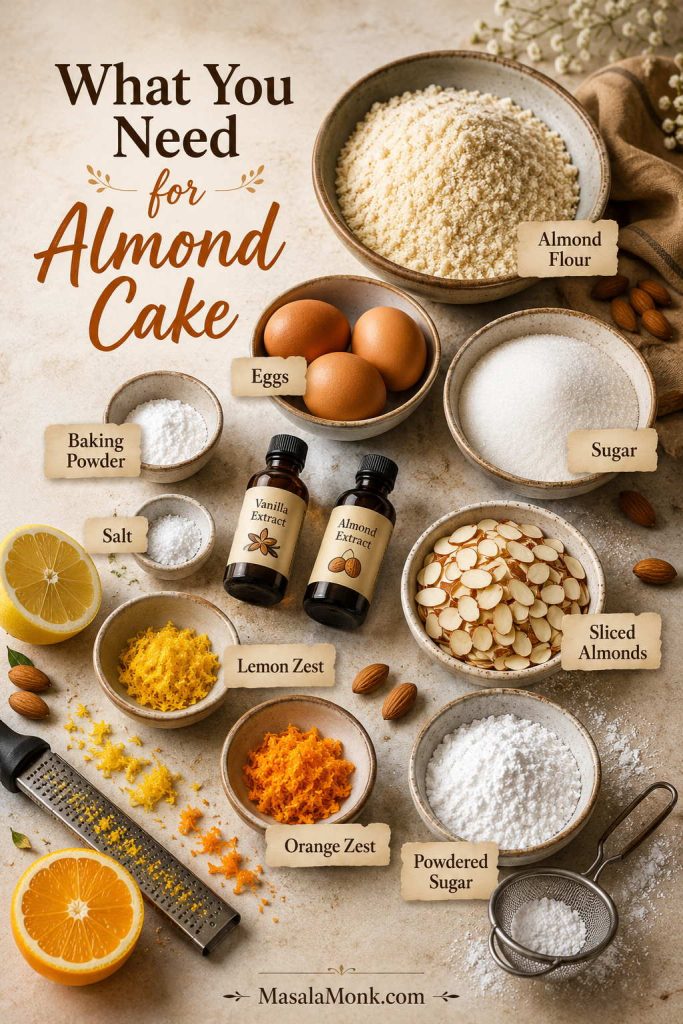
Ingredients
150 g / 5.3 oz fine blanched almond flour, about 1 1/2 cups lightly spooned and leveled
1 teaspoon / 4 g baking powder
1/4 teaspoon fine salt
4 large eggs, room temperature, separated
100 g / 3.5 oz granulated sugar, about 1/2 cup
1 teaspoon / 5 ml vanilla extract
1/4 teaspoon / 1.25 ml almond extract, optional but useful
1 tablespoon finely grated lemon zest or orange zest
25 g / 0.9 oz sliced almonds, about 1/4 cup, for topping
1 tablespoon powdered sugar, optional, for serving
Method
Preheat the oven to 180°C / 350°F. For fan or convection ovens, use 160°C / 320°F. Grease an 8-inch / 20 cm round cake pan, line the base with parchment paper, and lightly grease the sides.
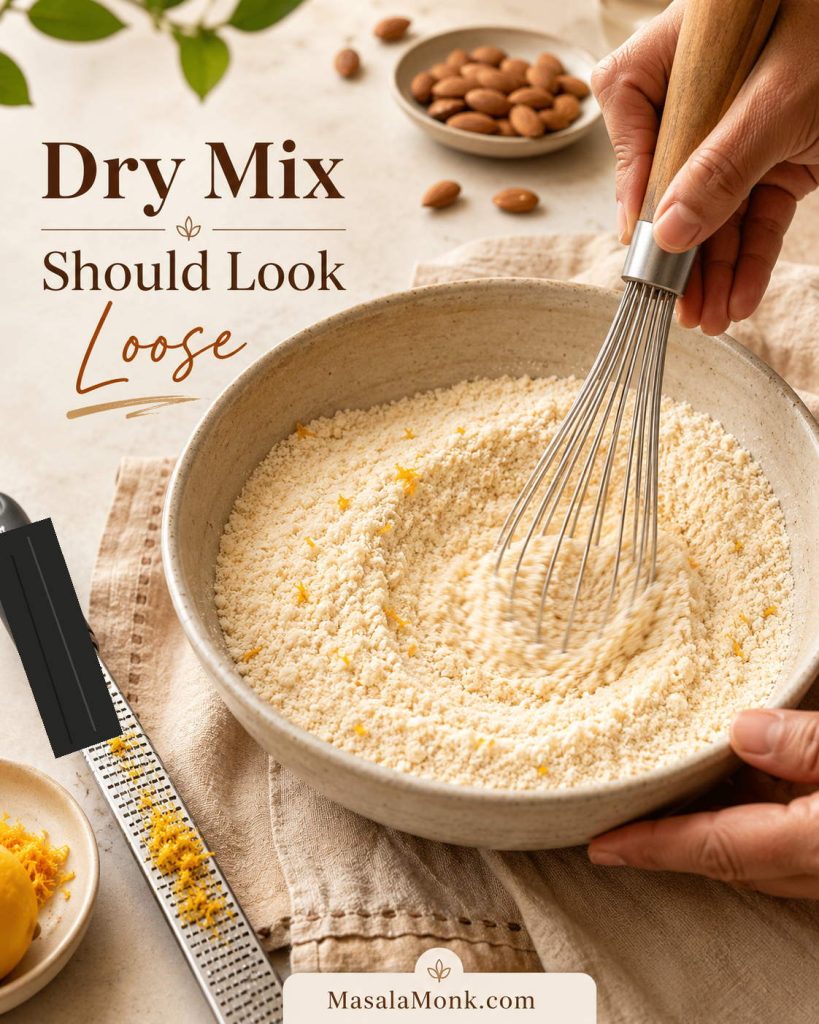
Whisk together the almond flour, baking powder, salt, and citrus zest. Break up any clumps so the mixture looks loose, not packed.
Separate the eggs. Put the yolks in one large bowl and the whites in a clean, dry, grease-free bowl.
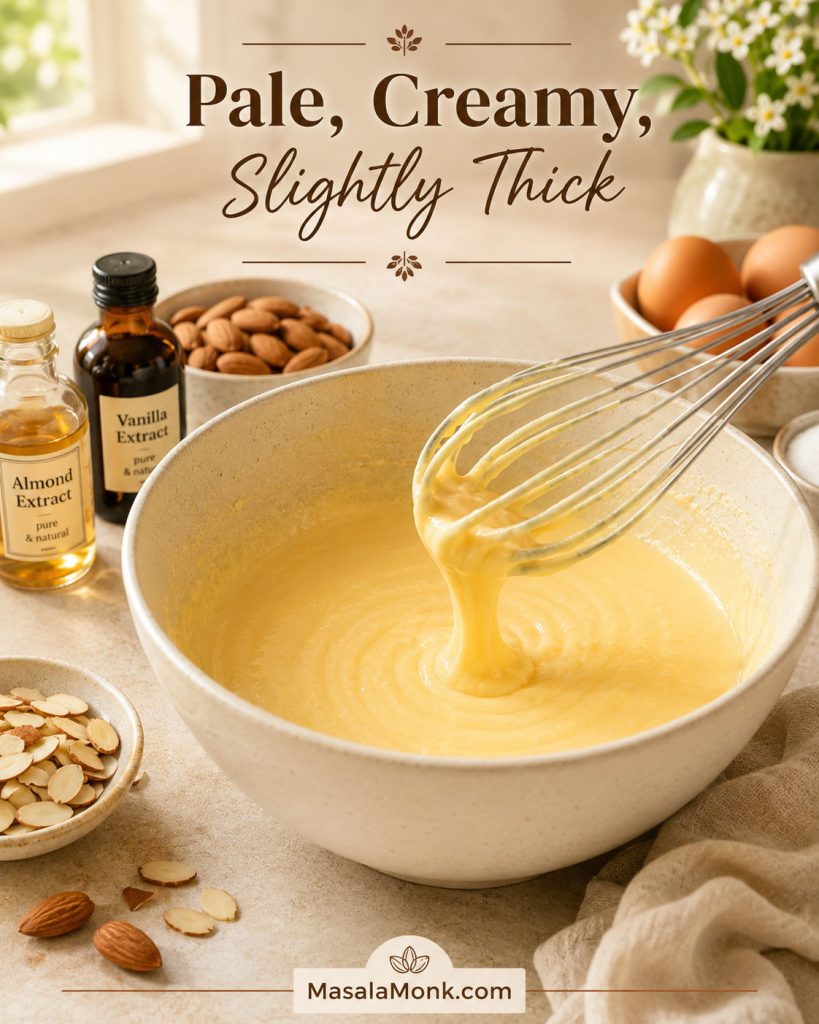
Beat the yolks with the sugar, vanilla, and almond extract for 2–3 minutes, until paler, creamy, and slightly thickened.
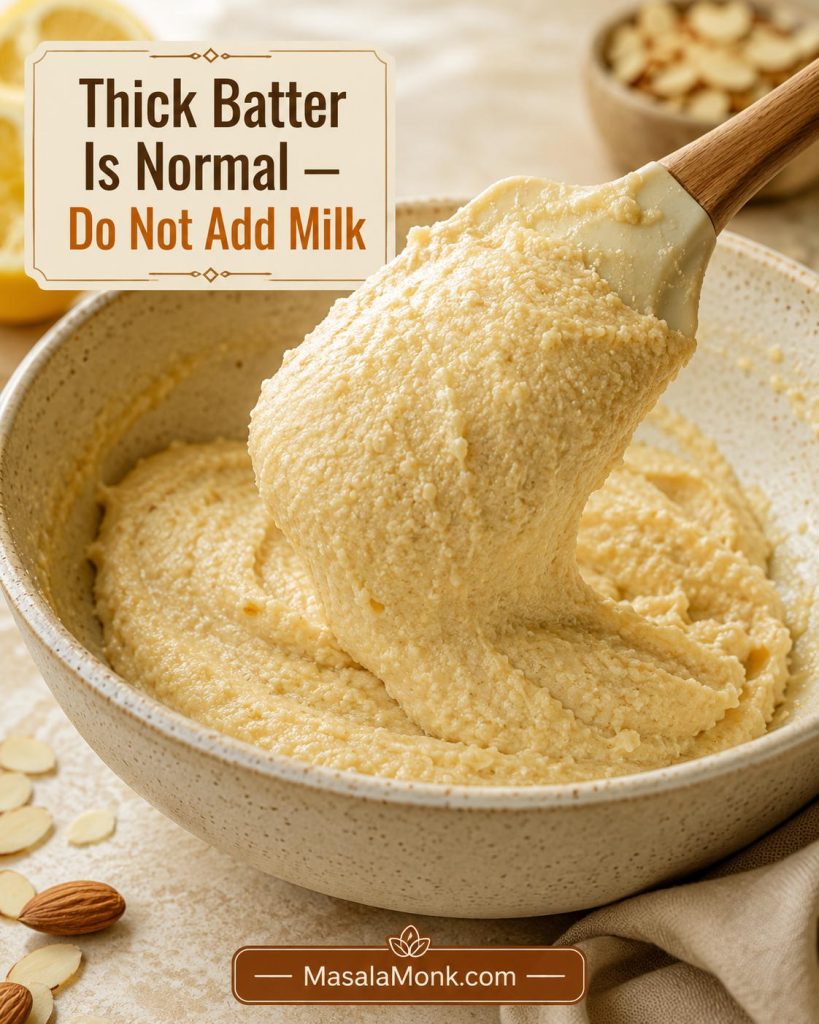
Fold the almond flour mixture into the yolk mixture. The batter will look thick, almost like a soft almond paste. That is normal.
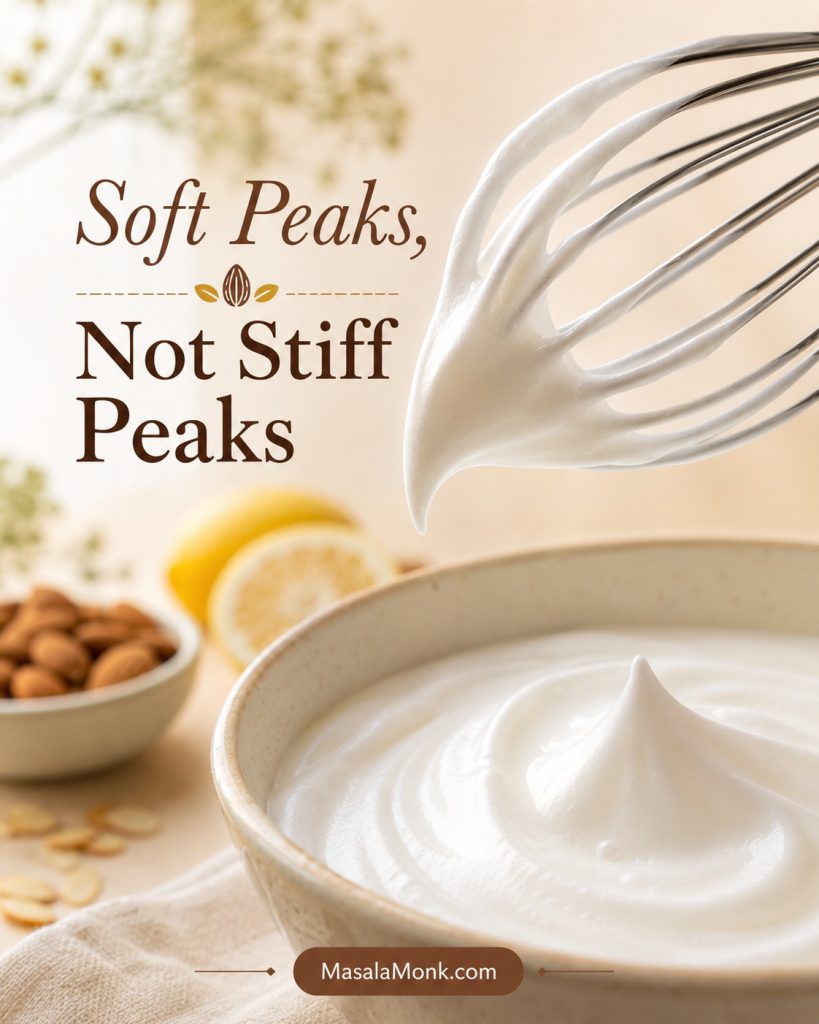
Beat the egg whites until they hold soft peaks. They should look glossy, and the peaks should bend slightly when you lift the whisk.
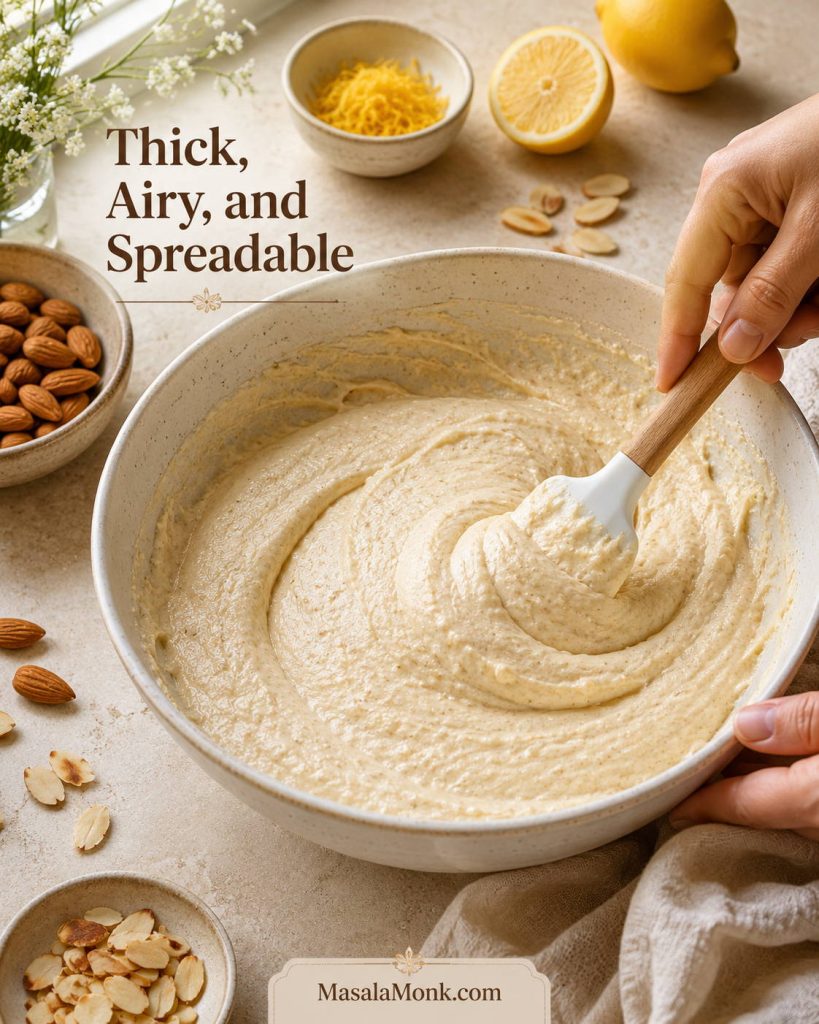
Fold one-third of the whites into the almond batter first to loosen it. Gently fold in the remaining whites in two additions. The final batter should be thick, airy, and spreadable, with no large white streaks.
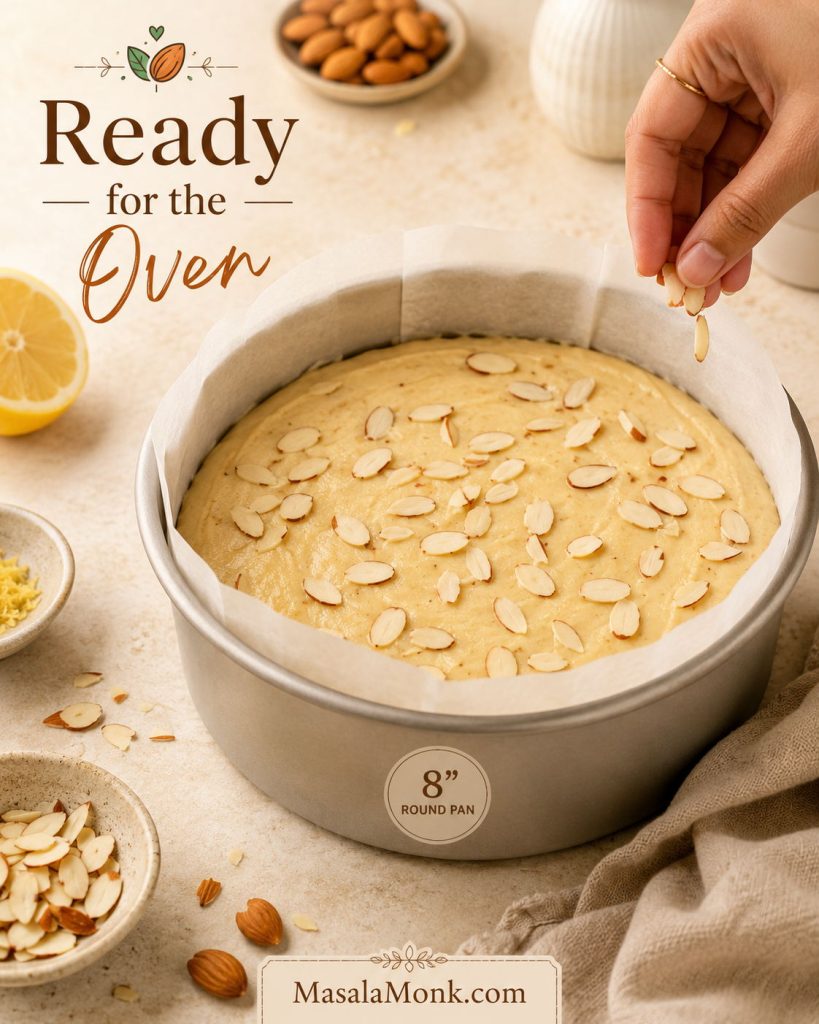
Spread the batter into the prepared pan and smooth the top. Scatter sliced almonds over the surface.
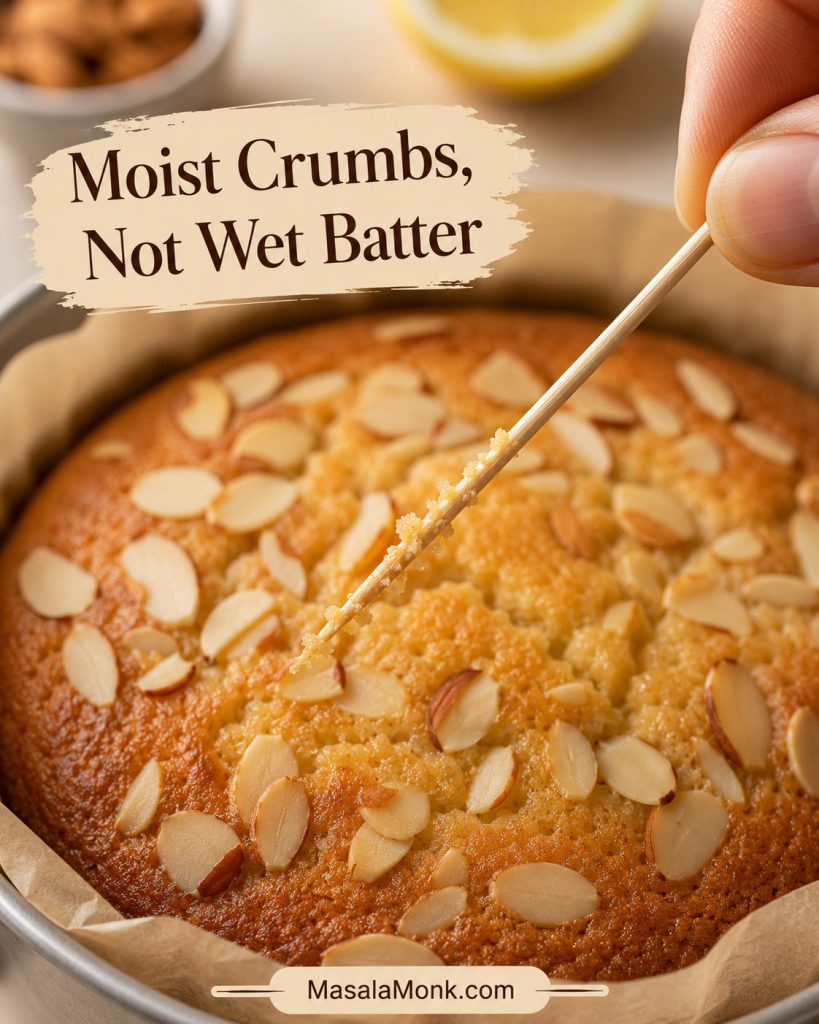
Bake for 26–32 minutes, until the top is golden, the center feels set, and a toothpick inserted into the middle comes out with moist crumbs but no wet batter.
Cool in the pan for 15 minutes, then remove carefully and cool fully on a wire rack before slicing. A slight settling on top is normal.
Dust lightly with powdered sugar before serving, if you like.
Recipe Notes
For a 9-inch / 23 cm pan, start checking around 23 minutes. The cake will be thinner.
Almond meal can be used by weight, but the result will be coarser and more rustic.
If using an instant-read thermometer, the center should be about 93–96°C / 200–205°F.
This batter makes about 9–10 standard cupcakes; bake them for 13–17 minutes.
If the sliced almonds brown too quickly, tent the cake loosely with foil near the end of baking.
Almond flour brings flavor, tenderness, and natural richness, but it does not bring gluten. That means the cake depends on eggs, gentle folding, the right pan, and cooling time to hold a clean slice.
Almond flour keeps the middle tender without needing a butter-heavy batter.
Egg yolks add richness, while the whites help lighten the batter.
Whipped egg whites prevent the center from feeling heavy when they are folded in gently.
Sugar supports browning and texture, not just sweetness.
Lemon or orange zest lifts the almond flavor so the cake does not taste flat or oily.
Added fat stays low on purpose. Ground almonds already contain natural oils, so extra butter or oil can push the texture toward greasy. In this recipe, moisture comes from the almonds and eggs; lightness comes from the whipped whites; and the clean slice comes from baking the center fully, then letting it rest.
What shaped this version: the structure is built around the places almond flour cakes usually go wrong — packed flour, cold eggs, weak whites, hot pans, and slicing before the center has settled. That is why the recipe focuses less on adding more liquid or fat and more on measurement, egg structure, pan heat, and cooling time.
If you enjoy almond flour in other bakes, almond flour cookies are a useful comparison because the same ingredient can turn crisp, chewy, tender, or heavy depending on the formula.
Ingredients for Almond Cake
The ingredient list is short, so each item has a real job. Keep the base steady on the first bake; once you know how the batter should feel, the flavor variations are easier.
Almond Cake Ingredients at a Glance
Before you start, check that your almond flour is plain and finely ground, your eggs are at room temperature, and your citrus zest is ready. With a short ingredient list, small details affect the final cake more than they would in a heavier wheat-flour batter.
Short ingredient lists need more precision, not less: each bowl here affects lift, browning, almond flavor, or how neatly the cake slices.
Almond Flour
Fine blanched almond flour gives the most delicate result. It is made from almonds without skins and is usually ground more finely than almond meal. If measuring by volume, spoon it lightly into the cup and level it rather than scooping from the bag. For a broader baking reference, King Arthur Baking’s ingredient weight chart lists almond flour and almond meal separately.
If you have extra almond flour after making this cake, use it in almond flour pancakes, where the same ingredient gives a softer breakfast-style texture.
Eggs
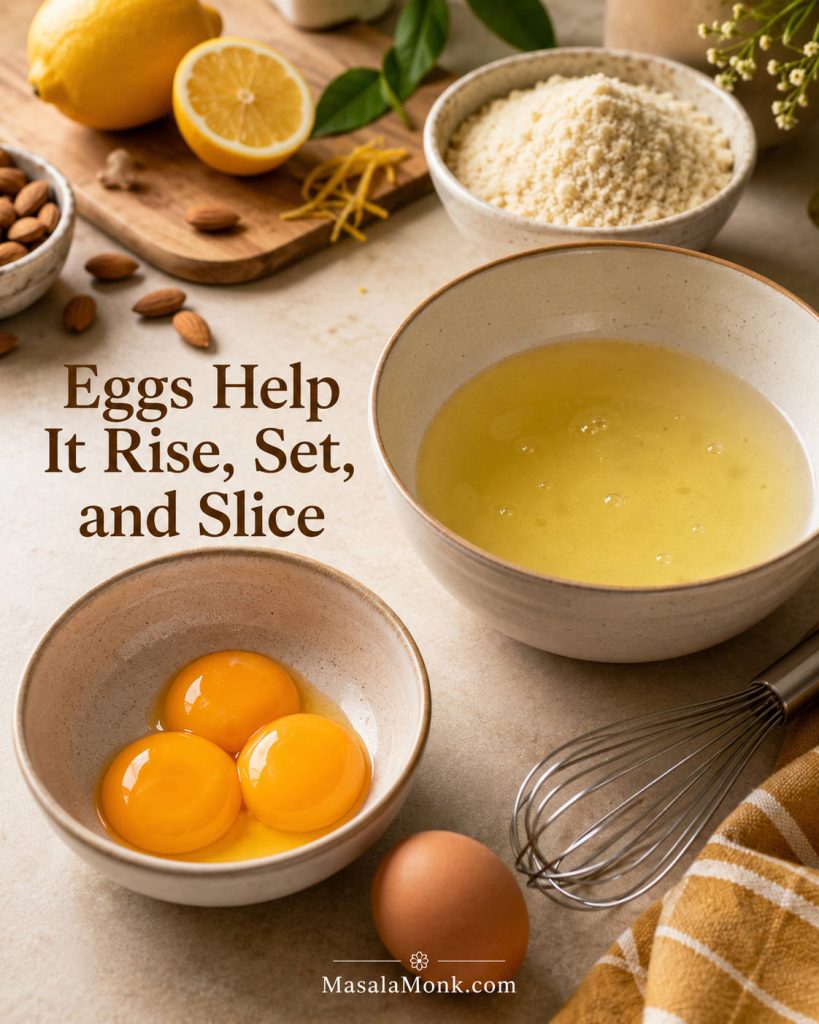
Eggs do the main structural work here. They help the cake rise, set, and hold together without wheat flour. Room-temperature eggs whip more easily; if you forget to take them out early, place the whole eggs in a bowl of warm water for 5–10 minutes before cracking them.
In this almond flour cake, separated eggs are doing structure work: yolks enrich the base, while whipped whites help the batter lift.
Need an egg-free version? Read the eggless almond cake note before trying a flax, chia, or yogurt swap.
Sugar
Sugar is not only for sweetness. It helps the top brown, supports the texture, and keeps the cake from tasting flat. Coconut sugar or light brown sugar can work, although the cake will bake darker and taste more caramel-like. Honey or maple syrup need a different formula because liquid sweeteners change the moisture balance.
Vanilla and Almond Extract
Vanilla makes the flavor rounder. Almond extract is optional, but a tiny amount makes the almond note more noticeable. Use it carefully; a few drops can taste bakery-like, while too much can turn bitter, artificial, or perfume-like.
Lemon Zest or Orange Zest
Use lemon zest for a brighter tea-cake flavor or orange zest for a warmer dessert-style cake. In both cases, zest only the colored part of the peel, not the bitter white pith underneath.
Lemon keeps the almond cake brighter and tea-friendly; orange makes the same base warmer and more dessert-like.
Baking Powder and Salt
Baking powder supports the lift from the eggs. Salt balances the sweetness and makes the almond flavor taste fuller. If you need a strictly gluten-free cake, check that your baking powder is labeled gluten-free.
Sliced Almonds
Sliced almonds give the top a classic look and a delicate crunch. They also make the cake feel finished without frosting. If they brown too quickly, loosely tent the pan with foil near the end of baking.
Almond Flour vs Almond Meal vs Almond Powder for Almond Cake
Almond flour, almond meal, ground almonds, and almond powder are often used loosely, but they do not always behave the same way in cake.
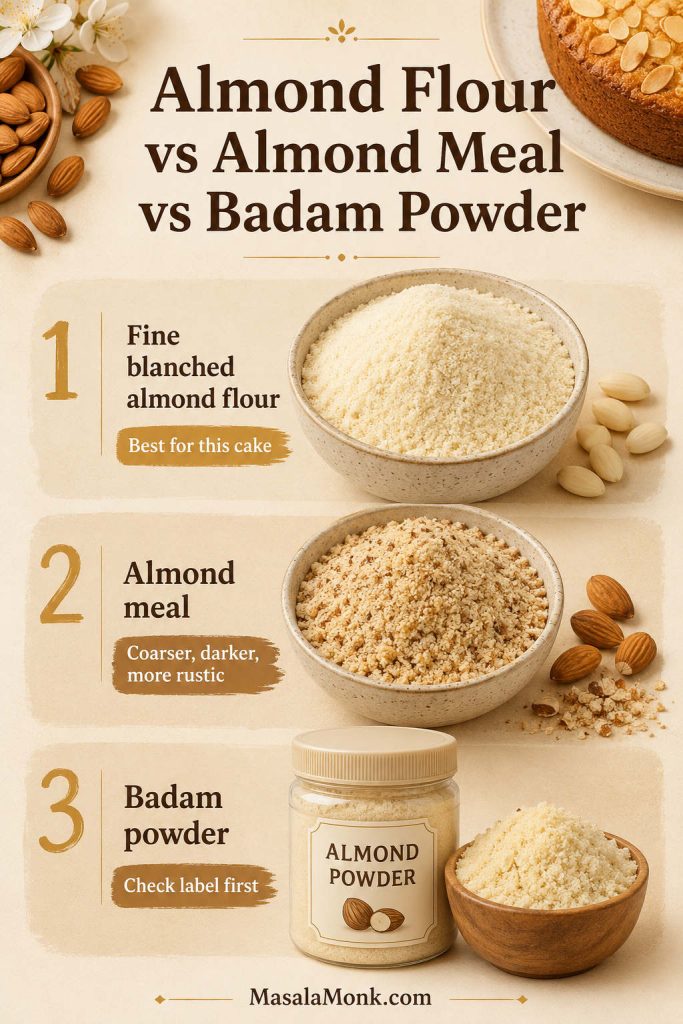
For almond cake, the grind matters as much as the name; fine flour bakes smoother, almond meal bakes heartier, and badam powder needs checking.
Ingredient
What it usually means
Best use in this cake
Texture result
Fine blanched almond flour
Almonds without skins, ground finely
Best choice for the recipe
Lightest, most delicate result
Almond meal / ground almonds
Often coarser; may include almond skins
Works by weight, but gives a rustic cake
Darker, nuttier, slightly grainier texture
Almond powder / badam powder
Can mean ground almonds, but sometimes means sweetened drink mix
Use only if unsweetened and finely ground
Depends on grind; sift if clumpy
For the cleanest first bake, use fine blanched almond flour. If you use almond meal, use the same weight, not a packed cup-for-cup swap. Almond meal is often heavier by volume, and it may include skins, so the finished cake will be darker and more textured.
Badam Powder Check for Almond Cake
Almond powder needs extra caution. If you are in India and buying “badam powder,” read the label carefully. You want plain unsweetened ground almonds, not badam milk mix, malted almond drink powder, milk-powder blend, or sweetened beverage mix. Those mixes can make a warm badam drink taste rich, but they do not behave like plain ground almonds in cake batter.
Before using badam powder in almond cake, check that almonds are the main ingredient; otherwise, sugar, milk solids, or malt can throw off the batter.
Simple rule: fine almond flour gives the cleanest cake. Almond meal gives a rustic cake. Sweetened badam drink mix does not belong in this recipe.
How to Make Almond Cake
The recipe card gives the short method. These cues show what the mixture should look and feel like at each stage, which matters more with almond flour than with a regular wheat batter.
1. Prepare the pan first
Grease the pan and line the base with parchment before you start mixing. A light-colored metal 8-inch / 20 cm round pan gives the most even result. Glass and ceramic hold heat differently and may need extra time, so metal is the safest first choice.
A lined metal pan is not just cleanup insurance; it helps this delicate almond cake release cleanly after the edges set.
2. Mix the dry ingredients
Whisk almond flour, baking powder, salt, and citrus zest together. The mixture should look loose and clump-free, not compacted. If the flour has small lumps, break them up now so the finished texture is smoother.
Break up almond flour clumps while the mix is still dry; once wet ingredients go in, those clumps are harder to smooth out.
3. Beat the yolks with sugar
Beat the egg yolks with sugar, vanilla, and almond extract for 2–3 minutes, until the mixture looks paler, creamy, and slightly thick. It does not need to be fluffy like whipped cream, but it should no longer look dry or grainy.
The yolk mixture should look pale and creamy before the almond flour goes in, so the batter starts smoother and blends more evenly.
4. Fold in the almond flour
Add the dry mixture to the yolks and fold until combined. The batter will look thick, almost like a soft almond paste. That is normal; do not loosen it with milk or water. The egg whites will lighten it in the next step.
Thick batter is expected with almond flour, so resist adding milk or water; the next fold with egg whites is what loosens it properly.
5. Whip the egg whites to soft peaks
Beat the egg whites until they hold soft peaks. The whites should look glossy, and the peak should bend slightly when you lift the whisk. Stop before the whites become stiff, dry, or clumpy.
Stop at soft peaks because they fold into almond cake batter more easily than stiff whites and help prevent dry, clumpy pockets.
6. Fold until the batter is thick, airy, and spreadable
Fold one-third of the whites into the thick batter first; it should visibly loosen. Then fold in the rest gently until the mixture is thick, airy, and spreadable, with no large white streaks. Do not beat the batter at this point.
After folding, the batter should look lighter but not runny; that balance helps the almond cake rise while still keeping its rich texture.
7. Fill the pan and bake
Spread the batter into the pan, add sliced almonds, and bake on the middle rack. The top may settle slightly as the cake cools; that is normal. Let it rest in the pan for 15 minutes, then move it to a wire rack. The slice will be cleaner once the center has fully settled.
Scatter the sliced almonds after smoothing the batter so they toast on the surface instead of disappearing into the cake.
Pan Size, Oven Temperature, and Bake Time
Pan size matters because the edges can brown before the center finishes baking. A deeper cake needs more time; a wider cake bakes faster and can dry out if you use the same timing.
8-Inch vs 9-Inch Pan for Almond Cake
The 8-inch pan is the safest first choice because it gives the cake a little height. A 9-inch pan still works, but it spreads the batter thinner, so the cake finishes sooner and needs earlier checking.
A 9-inch pan spreads the batter thinner, so the cake bakes faster. Start checking earlier than you would with an 8-inch pan.
Best first pan: use an 8-inch / 20 cm light-colored metal round pan. A 9-inch pan works, but the cake will be thinner and will bake faster.
Pan
Result
Approximate bake time
Notes
8-inch / 20 cm round
Taller cake with a tender center
26–32 minutes
Best default for this recipe.
9-inch / 23 cm round
Thinner cake, slightly faster bake
23–28 minutes
Start checking early.
8-inch square
Easy square slices
24–30 minutes
Good for snack-cake style serving.
Cupcake pan
About 9–10 small cakes
13–17 minutes
Fill cups about two-thirds full.
Loaf pan
Deeper center
Not ideal for this exact batter
Higher risk of dark edges and underbaked middle.
For a conventional oven or OTG, use 180°C / 350°F. For fan or convection ovens, use 160°C / 320°F and start checking early. Bake on the middle rack so the top does not brown before the center is ready.
If you use a springform pan, choose a sturdy one. Very thin pans can overbake the edges while leaving the middle slightly underdone. If your oven runs hot or the almond topping browns too fast, loosely tent the cake with foil for the final 5–10 minutes.
Once you choose the pan, use the doneness section rather than bake time alone.
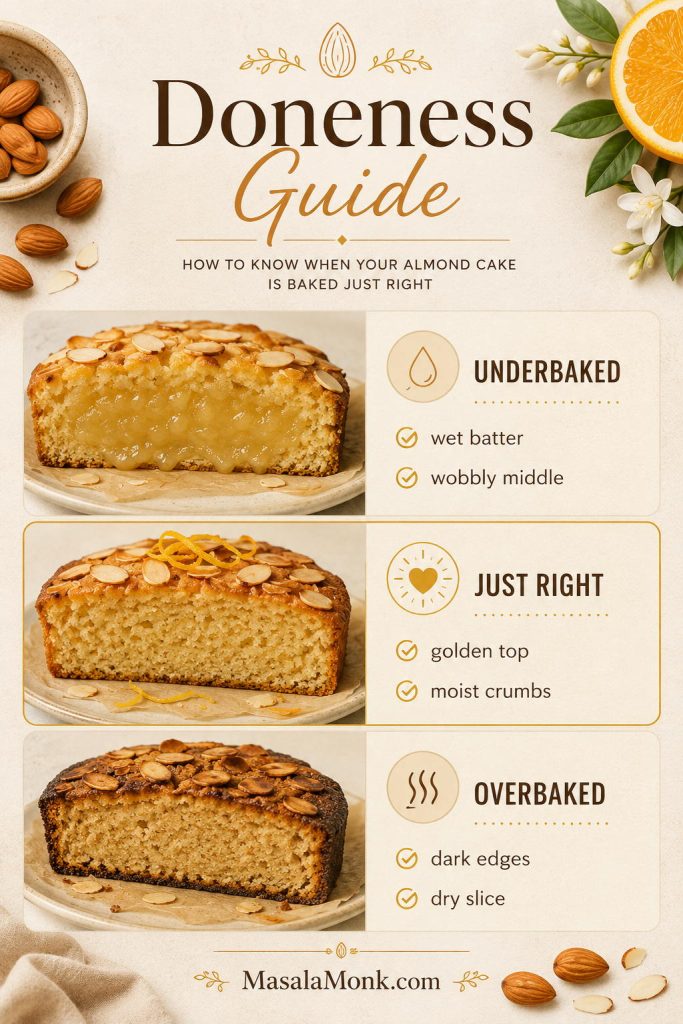
How to Know Almond Cake Is Done
The top may look golden before the middle is fully baked, so use more than color as your guide.
Almond cake can look golden before the center is ready, so use the toothpick and the middle of the cake together, not color alone.
The top is golden and the sliced almonds are lightly toasted.
The center feels set when touched gently.
The edges pull slightly away from the pan.
A toothpick inserted into the center comes out with moist crumbs, not shiny batter.
The cake does not wobble in the middle when the pan is gently moved.
A few damp-looking crumbs are fine. Shiny wet batter means the cake needs more time. If the top is already brown, tent it loosely with foil and continue baking. For extra precision, the center should be about 93–96°C / 200–205°F on an instant-read thermometer.
Toothpick Test for Almond Cake
Insert the toothpick into the center, not the edge. The edge sets first, so it can make the cake seem done while the middle still needs a few more minutes.
Moist crumbs on the toothpick are the sweet spot. Shiny batter means underbaked; a bone-dry toothpick can mean overbaked.
The cake does not need to look dramatic when it comes out of the oven. A softly golden surface, lightly toasted almonds, and a middle that no longer wobbles are enough. The finished texture shows after cooling, when the center has had time to settle.
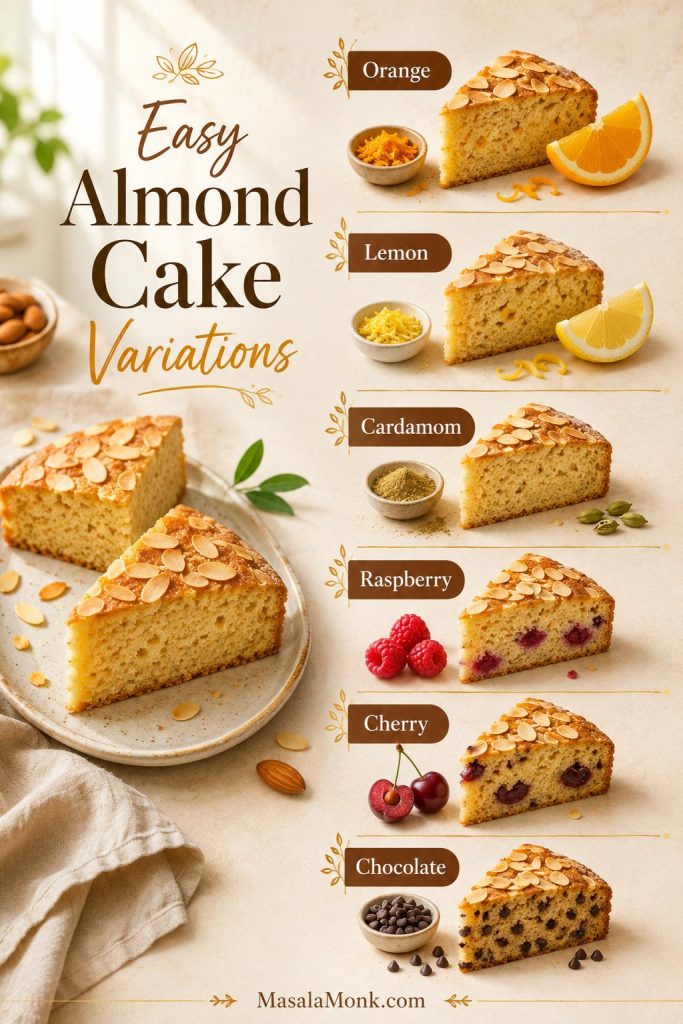
Almond Cake Variations
Keep the first bake simple, then change flavorings and toppings in small ways. That way the cake stays familiar even when you shift the flavor.
Once the base almond cake is reliable, small add-ins work best; start with zest, spice, berries, cherries, or a few chocolate chips rather than changing the whole formula.
Variation
How to do it
Important note
Orange almond cake
Use 1 tablespoon orange zest. Optional glaze: 60 g powdered sugar + 1–2 teaspoons orange juice.
Warmer and more dessert-like than lemon.
Lemon almond cake
Use 1 tablespoon lemon zest. Optional glaze: 60 g powdered sugar + 1–2 teaspoons lemon juice.
Best first variation because it adds brightness without much moisture.
Cardamom almond cake
Add 1/4 teaspoon ground cardamom with the dry ingredients.
Good for a badam-style note; do not overdo it.
Raspberry almond cake
Scatter 1/3 cup raspberries over the top before baking.
Too many berries can make the center sink.
Cherry almond cake
Use 1/3 cup pitted, halved cherries on top of the batter.
Keep cherries near the top because they release moisture.
Chocolate almond cake
Fold in 1/4 cup mini chocolate chips after the egg whites are mostly incorporated.
For a true chocolate cake, use a separate cocoa-based formula.
Almond meal cake
Use 150 g almond meal instead of fine almond flour.
Expect a darker, nuttier, more rustic result.
Olive oil almond cake
Add 1 tablespoon mild olive oil to the yolk mixture.
Do not add more on the first attempt; ground almonds already contain fat.
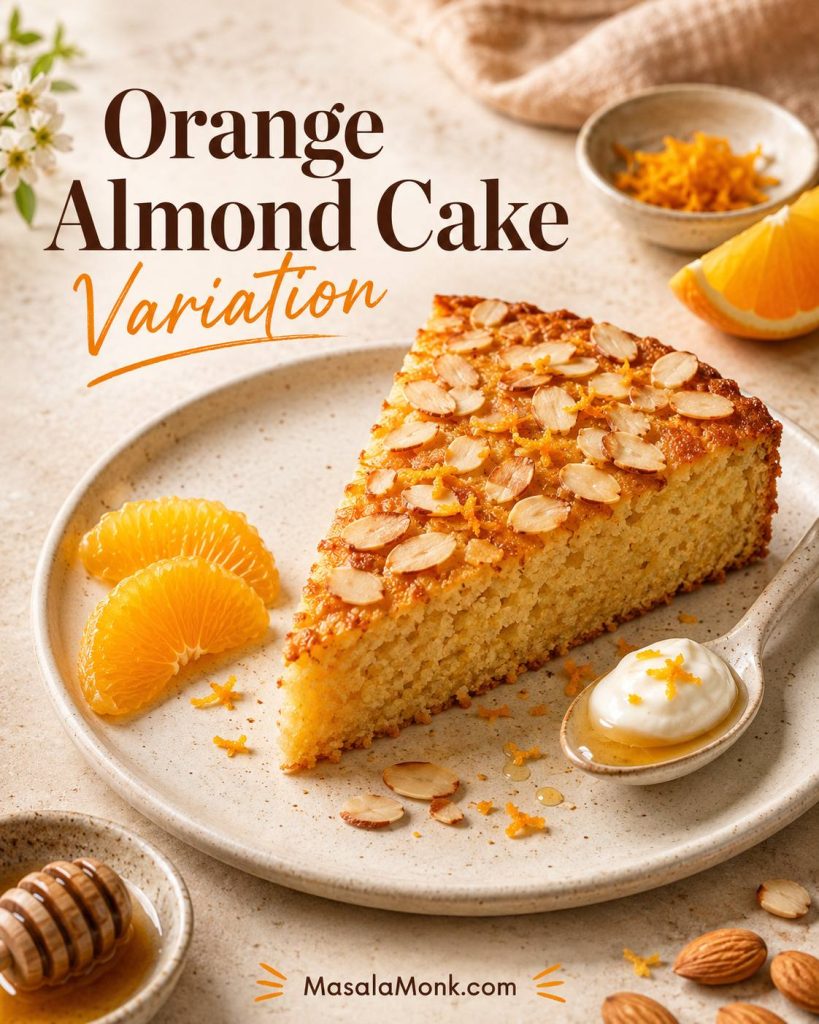
Orange Almond Cake Variation
For orange almond cake, use orange zest instead of lemon zest. A very light glaze can work after cooling, but do not cover the sliced-almond top so heavily that the cake turns sticky.
Orange almond cake works best when the citrus stays fragrant, not heavy; a little honey or yogurt adds dessert energy without covering the almond top.
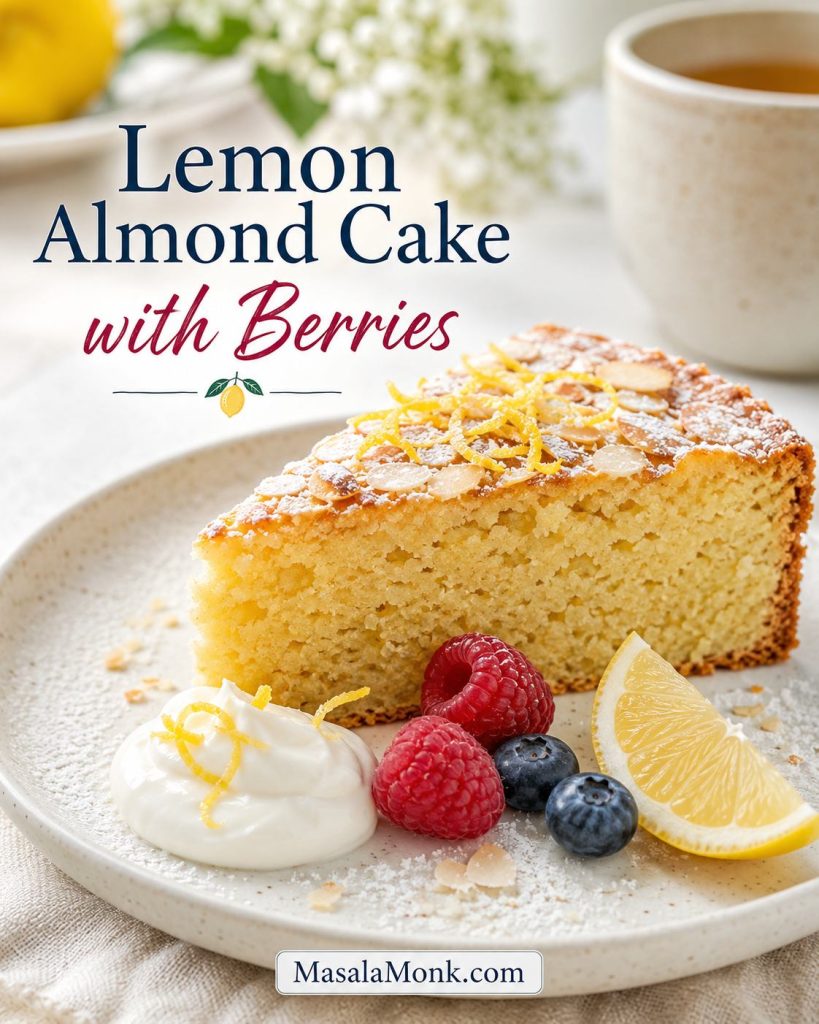
Lemon Almond Cake with Berries
For lemon almond cake, use lemon zest and keep the serving style bright. Berries and cream make the cake feel fresh without adding extra moisture to the batter itself.
Lemon almond cake with berries is the brightest serving route, especially when you want a slice that feels fresh enough for brunch.
Whole-orange almond cake is different: that style usually uses boiled whole oranges, almond meal, eggs, sugar, and a longer, lower bake. It has a damp, marmalade-like texture and often needs a blender or food processor.
Can This Almond Cake Be Made Eggless?
For this exact cake, eggs are structural. They help the almond flour rise, set, and hold a clean slice, so flax eggs, chia eggs, or only yogurt will not behave like a simple one-for-one swap.
Eggless almond cake usually needs a recipe built differently from the start. It often uses yogurt, all-purpose flour or a gluten-free flour blend, extra leavening, and sometimes milk or oil to help the cake rise, set, and cut cleanly. A 100% almond flour eggless cake is especially difficult because ground almonds do not have enough starch or gluten-like binding on their own.
Honest baking note: if you need an eggless almond cake, use a recipe built for that job. A yogurt-based version with some flour support will usually perform better than removing the eggs from this batter.
Is This a Keto Almond Cake?
This recipe uses almond flour, but it is not a keto cake because it uses regular sugar. Almond flour lowers the wheat-flour load, but sugar still makes this a standard dessert. Sugar also affects browning, moisture, and structure, so a keto version needs its own sweetener formula rather than a direct cup-for-cup swap.
For low-carb baking context, this guide to keto-friendly flours explains how almond flour behaves compared with other low-carb flour options. If blood sugar is a concern, dessert still needs portion awareness; this guide on almond flour and diabetes covers the ingredient side in more detail.
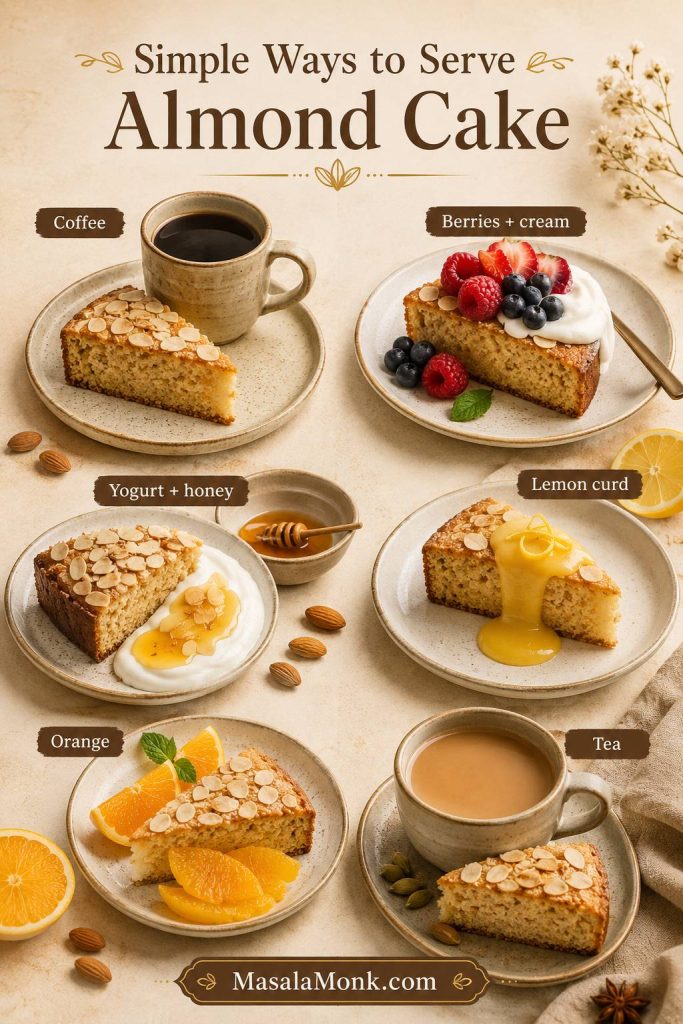
How to Serve Almond Cake
This cake does not need frosting. A light dusting of powdered sugar is enough for a simple tea cake, but you can dress it up depending on the occasion.
Pair almond cake with light toppings instead of heavy frosting; coffee, tea, fruit, yogurt, honey, citrus, and lemon curd all support the almond flavor.
Because the middle is already rich and tender, keep toppings light. A little cream, fruit, citrus, or honey works better than heavy frosting and keeps the toasted almond flavor in front. Choose lemon with berries and cream for a brighter tea-cake finish; choose orange with honey or yogurt for a warmer dessert plate.
Choosing between lemon and orange? The variation table gives the easiest flavor adjustments.
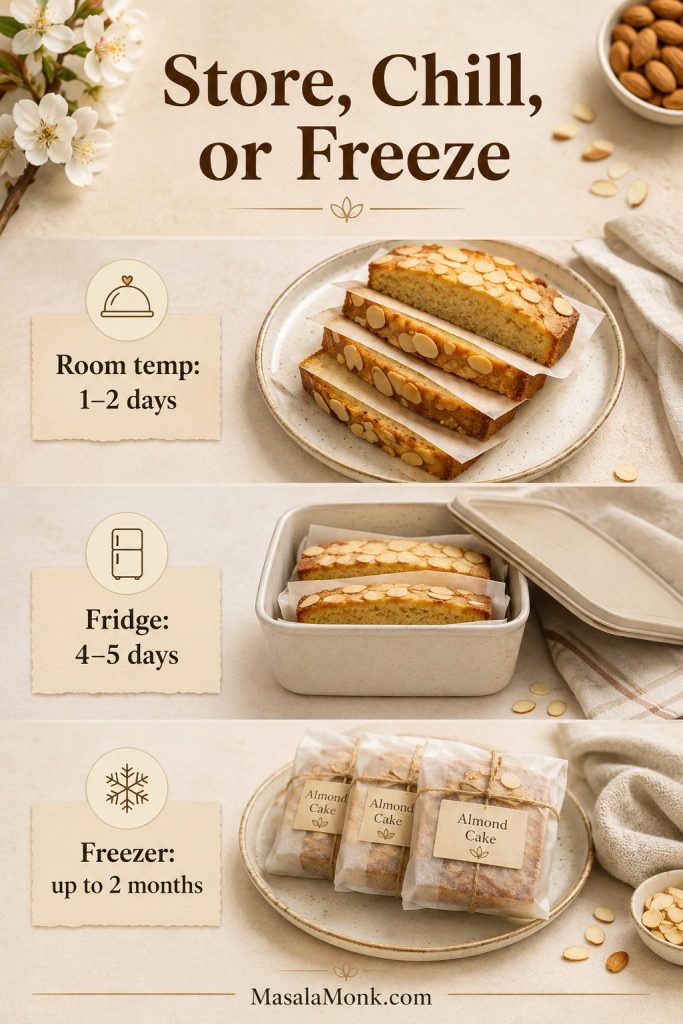
How to Store Almond Cake
Almond cake keeps well because ground almonds naturally hold moisture. In fact, the cake often tastes better after a few hours of resting because the texture settles and the flavor becomes rounder.
Store almond cake only after it cools completely; then parchment between slices keeps make-ahead portions clean, separate, and easy to serve.
Room temperature: store in an airtight container for 1–2 days.
Fridge: store for 4–5 days. Bring slices to room temperature before serving.
Freezer: freeze slices for up to 2 months. Place parchment between slices so they do not stick together.
Make-ahead: bake the cake one day ahead, cool completely, wrap well, and dust with powdered sugar just before serving.
If the cake has been refrigerated, let it sit at room temperature for 20–30 minutes before serving. Cold almond cake can taste firmer and less fragrant than a room-temperature slice.
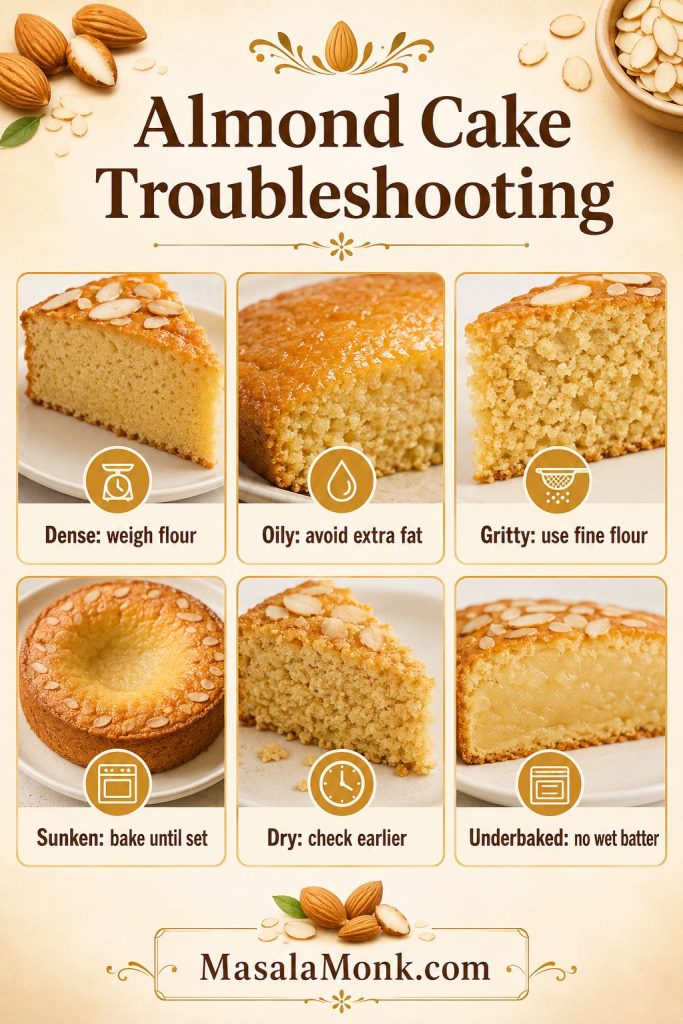
Most almond cake problems come from too much almond flour, an underbaked center, or cutting the cake before the middle has settled. If you are still mixing, check the step-by-step cues; if the cake is already in the oven, go straight to doneness.
When almond cake fails, start with the basics first: flour weight, egg-white structure, pan heat, bake time, and cooling before slicing.
Fix-now mindset: if the cake is already baked, cool it fully, dust with powdered sugar, serve with yogurt or cream, or cut smaller slices. For the next bake, focus on flour weight, egg whites, pan size, oven heat, and cooling time.
Texture Problems: Dense, Oily, Gritty, or Dry Almond Cake
Problem
Likely reason
Fix now
Fix next time
Cake is dense
Too much almond flour, deflated whites, or overmixed batter.
Serve thin slices with cream, yogurt, or berries.
Weigh the flour, whip whites to soft peaks, and fold gently.
Cake is oily
Coarse/oily almond flour, packed flour, or too much added fat.
Chill briefly and serve small slices.
Use fresh fine almond flour and avoid extra oil in the base recipe.
Cake is gritty
Coarse almond meal or clumpy almond powder.
Serve with whipped cream or yogurt to soften the bite.
Use fine blanched almond flour or sift almond powder before mixing.
Cake is dry
Overbaked, too wide a pan, or fan oven too hot.
Serve with yogurt, cream, honey, or fruit.
Check earlier, use an 8-inch pan, and reduce fan oven temperature.
Cake smells eggy
Slightly underbaked, weak flavor balance, or served too warm.
Cool fully and serve with citrus or cream.
Bake fully, use zest and vanilla, and cool before serving.
Cake tastes bitter
Too much almond extract, citrus pith, old almond flour, or burnt sliced almonds.
Serve with sweetened cream or powdered sugar.
Use only 1/4 teaspoon almond extract, zest lightly, and tent the top if needed.
Baking and Cooling Problems: Sunken, Raw, Cracked, or Stuck Cake
Problem
Likely reason
Fix now
Fix next time
Center sank
Underbaked center, early oven opening, or overmixed batter.
Dust with powdered sugar or cover with berries.
Bake until the middle is set and avoid opening the oven too soon.
Edges browned but center stayed raw
Pan too thin, oven too hot, or cake baked too high in the oven.
Return to oven loosely covered with foil if still very wet.
Use a sturdy pan, bake on the middle rack, and tent with foil if needed.
Almond slices burned
Oven runs hot or cake was baked too high.
Brush off the darkest almonds before serving.
Bake on the middle rack and tent once the top is golden.
Top cracked
Oven heat was strong or batter rose quickly.
Dust with powdered sugar; a small crack is normal.
Use the correct temperature and avoid overbeating the whites.
Cake is too flat
Wide pan, deflated whites, or old baking powder.
Serve as a thin tea cake.
Use an 8-inch pan, fresh baking powder, and fold gently.
Cake stuck to the pan
No parchment or cake was removed too hot.
Serve rustic pieces with cream or fruit.
Line the base with parchment and cool 15 minutes before removing.
Bottom feels wet
Underbaked, cooled too long in the pan, or stored before fully cool.
Let slices air out briefly before serving.
Bake until set, cool 15 minutes in pan, then move to a wire rack.
FAQs About Almond Cake
Is almond cake the same as almond flour cake?
Often, yes. In this recipe, almond cake means a cake made mainly with almond flour instead of wheat flour. Some bakery-style almond cakes use wheat flour and almond extract, so they have a different texture.
Almond meal instead of almond flour: what changes?
Use the same weight of almond meal, but expect a darker, nuttier, more rustic cake. Fine blanched almond flour gives the most delicate result.
Is almond powder the same as almond flour?
Sometimes. Plain finely ground almonds can work. Sweetened badam drink mix, malted almond powder, or milk-powder blends should not be used for this cake.
Is this almond cake gluten-free?
It is naturally gluten-free if every ingredient is gluten-free. Check baking powder, extracts, toppings, and cross-contact if you are baking for someone with strict gluten-free needs. The Celiac Disease Foundation’s gluten-free foods guide is a helpful reference.
Why did my almond cake sink in the middle?
The center was likely underbaked, the oven was opened too early, or the egg whites deflated during mixing. Bake until the middle feels set and the toothpick shows moist crumbs, not wet batter.
Why is my almond cake oily?
Almond flour contains natural fat, so the cake can feel oily if the flour is packed, the almond meal is coarse, or extra fat is added. Use fresh fine almond flour, avoid extra oil in the base recipe, and measure by weight when possible.
Why eggs matter in this almond flour cake
Eggs are doing the structure work here. They help the almond flour batter lift, set, and hold a clean slice. That is why a flax, chia, or yogurt swap will not behave the same way.
How to turn this into orange almond cake
Use orange zest instead of lemon zest for a simple orange almond cake. You can also drizzle the cooled cake with a light orange glaze. A whole-orange almond cake is a different recipe with a longer bake time.
Best pan size if you do not have an 8-inch pan
A 9-inch pan works, but the cake will be thinner and bake faster. Start checking around 23 minutes and remove it when the center is set.
Freezing almond cake without drying it out
Freeze the cake only after it has cooled completely. Slice it first, place parchment between the slices, and store airtight for up to 2 months.
Once the cake has cooled, the reward is in its simplicity: a golden almond top, a clean slice, and a citrus-almond flavor that works with coffee, berries, cream, or nothing at all. It does not need frosting or complicated decoration to feel finished.
Give the batter a light hand, give the cake enough time to settle, and the result is a tender almond flour cake that feels special without trying too hard.
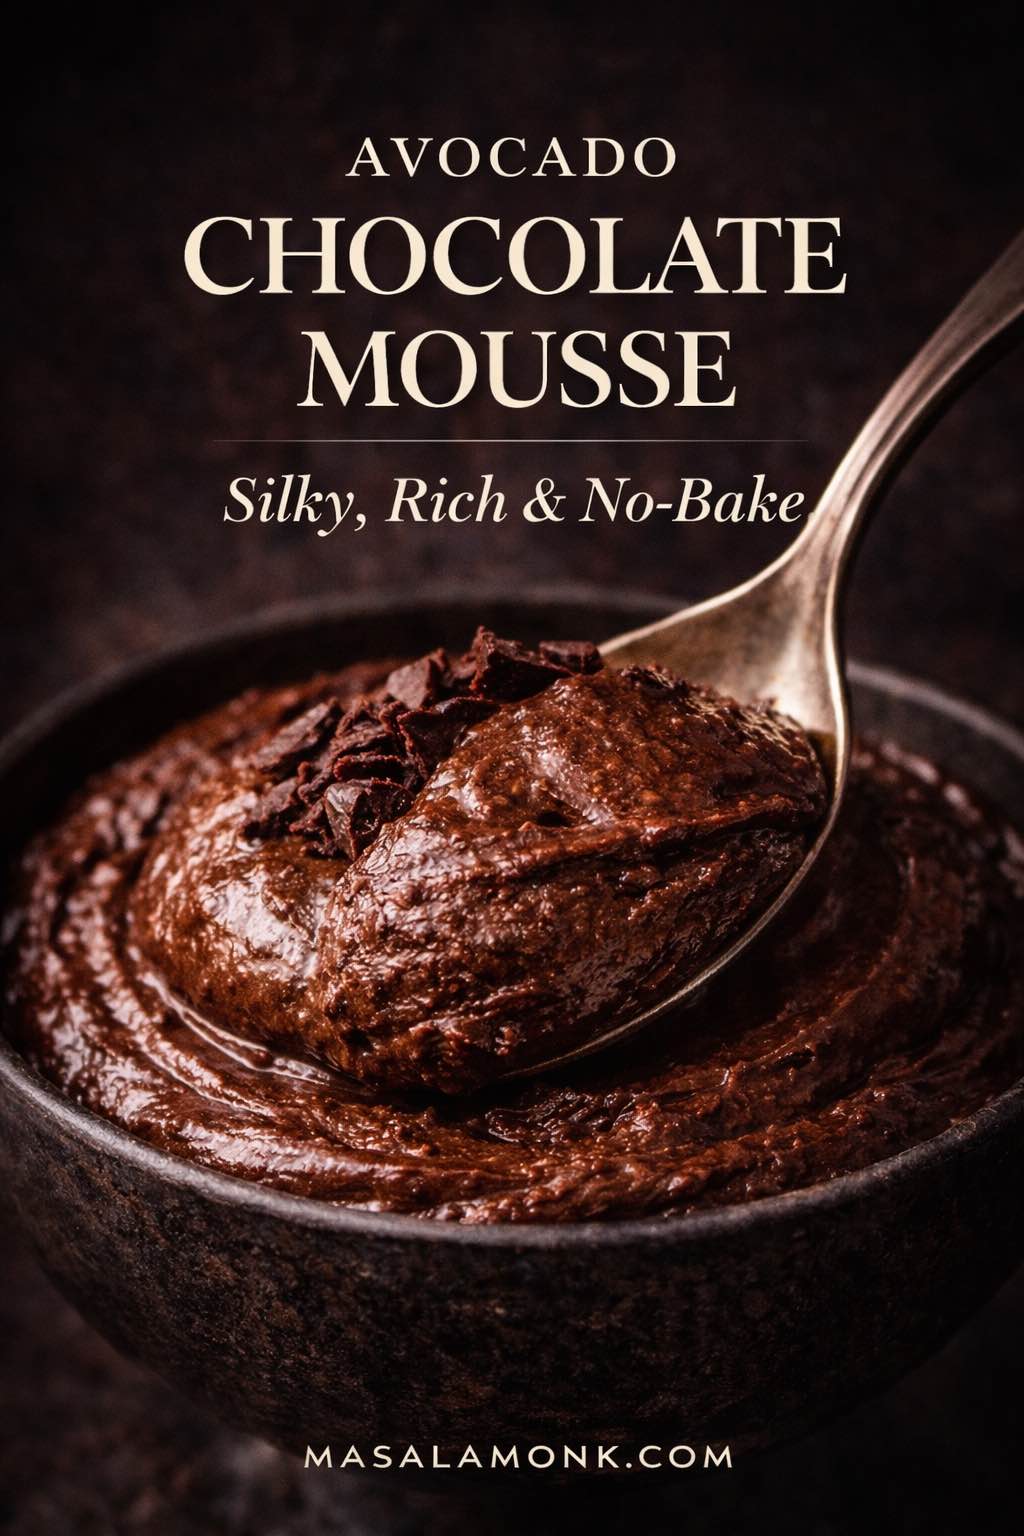
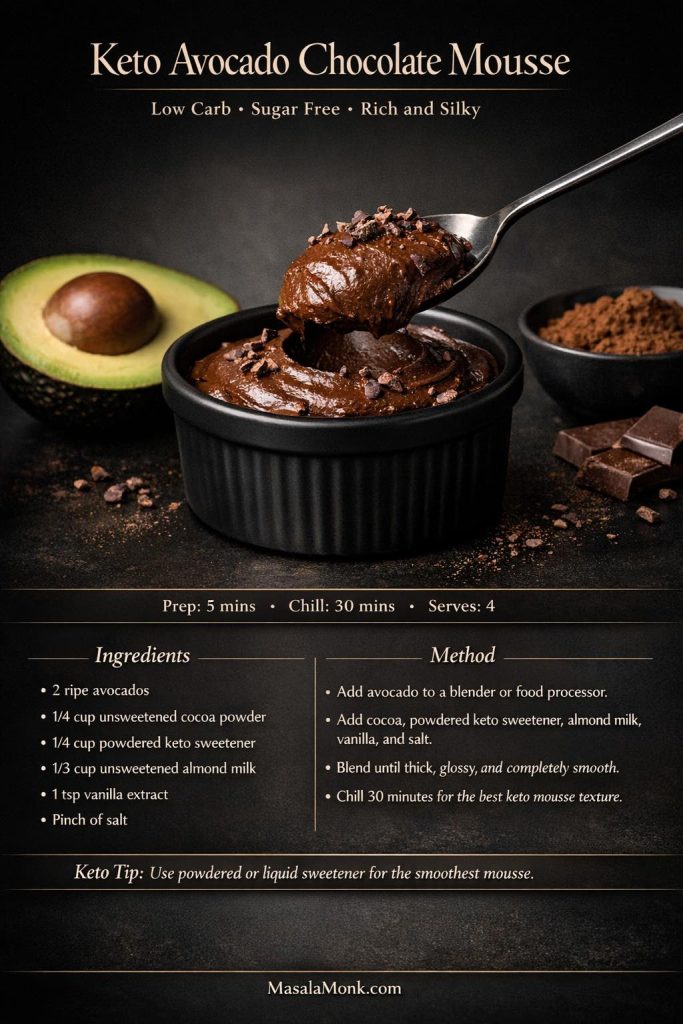
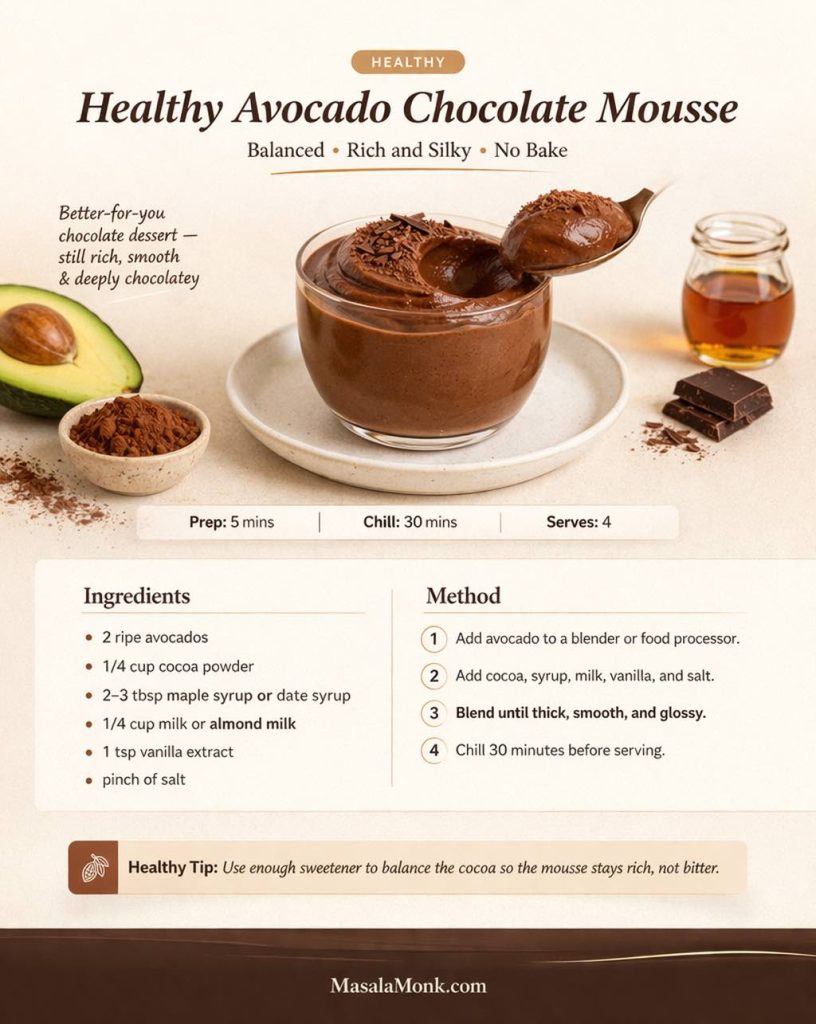
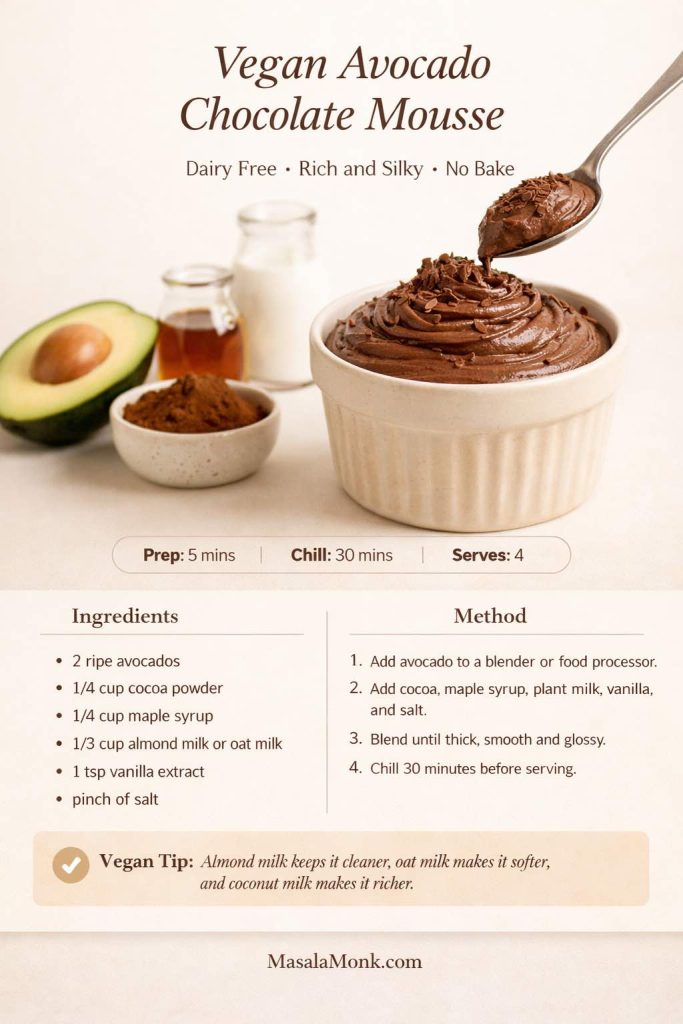
Avocado chocolate mousse has a way of sounding unexpected until the first spoonful makes the whole idea feel obvious. With avocado chocolate mousse, the avocado melts quietly into the chocolate, the texture turns almost impossibly smooth, and the dessert lands somewhere between a classic mousse, a rich pudding, and a dark chocolate cream that happens to come together with very little effort. Once you make it properly, it stops feeling like a novelty and starts feeling like one of those recipes you quietly return to whenever you want something deeply chocolatey without pulling out a mixer, turning on the oven, or building an elaborate dessert from scratch.
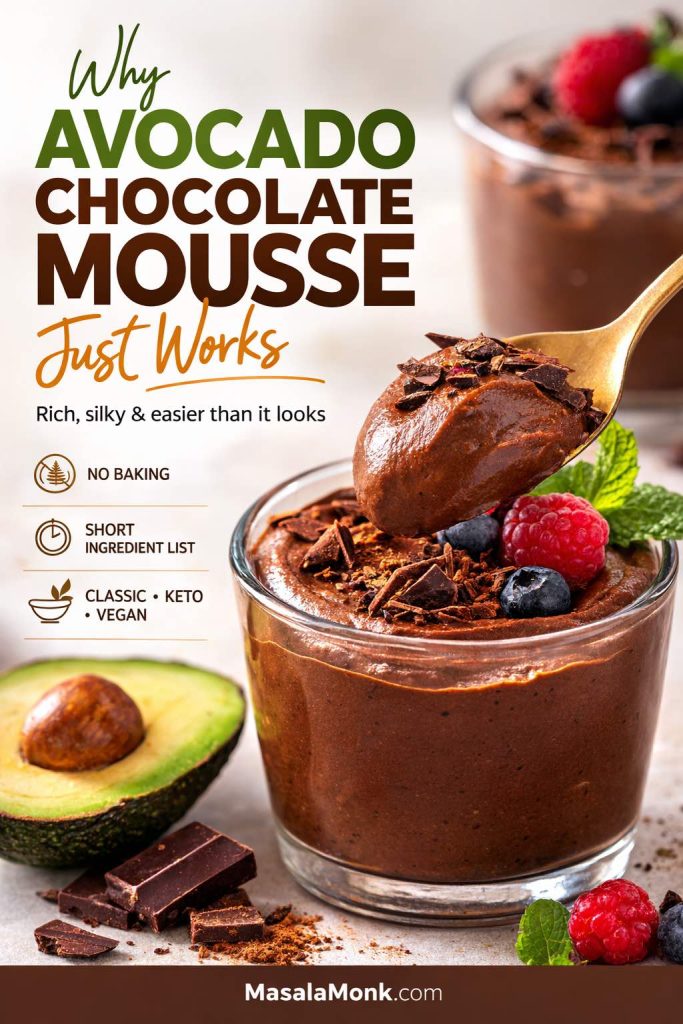
That ease, however, is only part of the appeal. What makes avocado chocolate mousse so satisfying is the balance between richness and restraint. It tastes luxurious, yet it is built from a short ingredient list. It feels indulgent, yet it can shift naturally into a healthy avocado chocolate mousse, a vegan avocado chocolate mousse, or a keto avocado chocolate mousse without losing the creamy, dessert-first character that makes it worth craving in the first place.
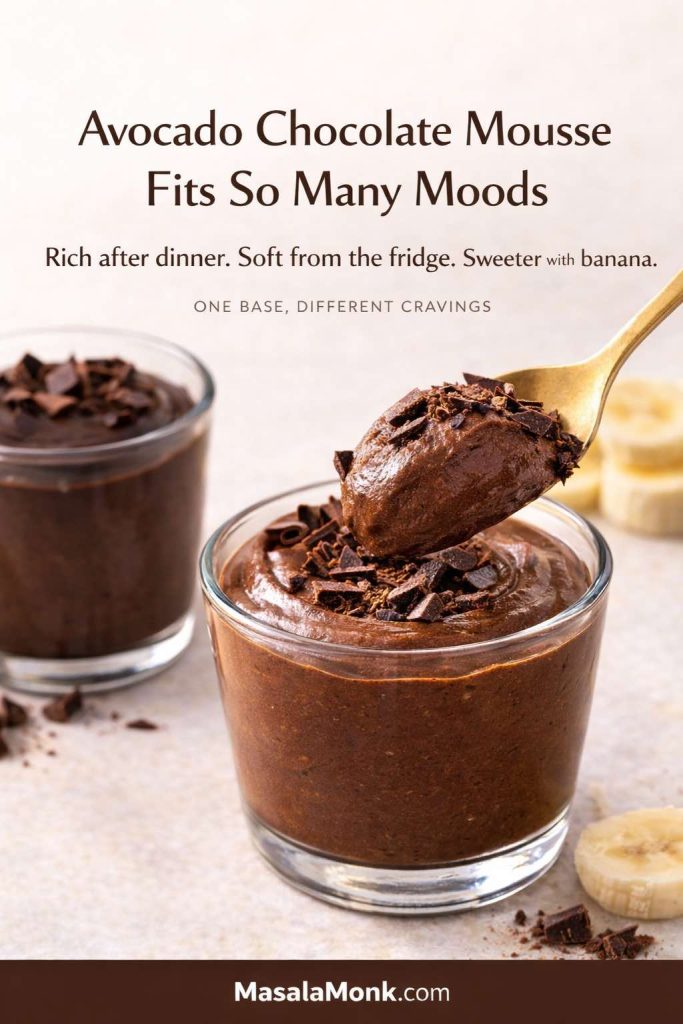
Why avocado chocolate mousse fits so many moods
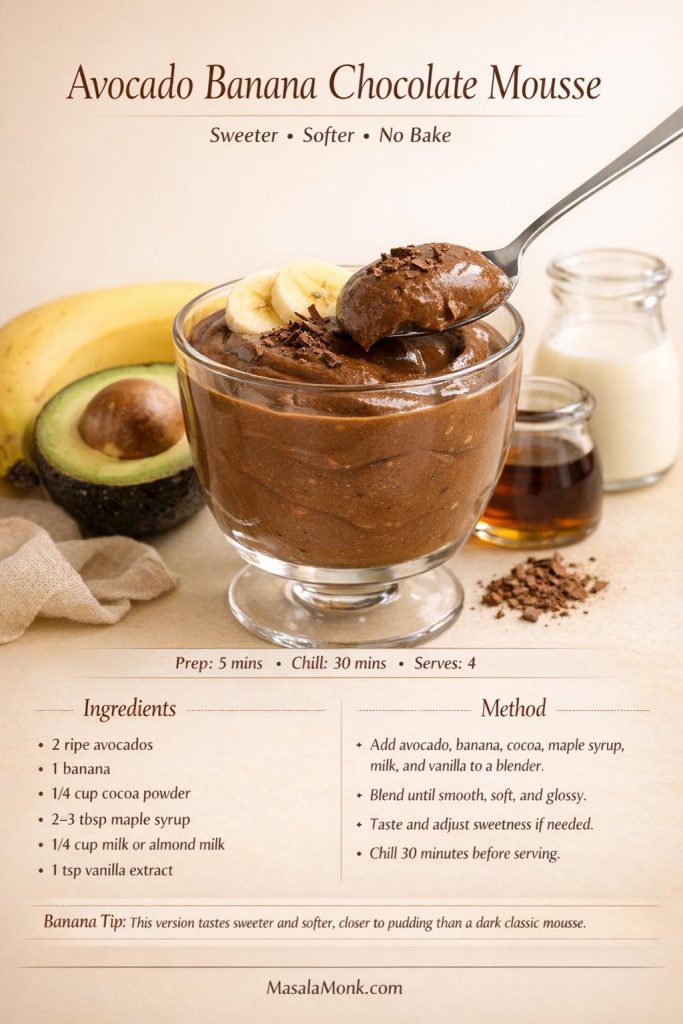
In one kitchen, it becomes a dark, bittersweet avocado mousse dessert served in little glasses after dinner. In another, it leans toward a softer avocado chocolate pudding for an afternoon sweet bite from the fridge. On another day, it turns into an avocado banana chocolate mousse that feels gentler, sweeter, and more familiar. That range is part of its charm. It can be polished enough for guests, easy enough for a weekday craving, and flexible enough to move with whatever kind of chocolate dessert feels right in the moment.
That adaptability is exactly why this recipe deserves more than a quick blend-and-hope approach. A rushed version can still taste good, but the best avocado chocolate mousse recipe depends on understanding a few quiet details: how ripe the avocado should be, how cocoa behaves differently from cacao or melted dark chocolate, why sweetness matters for more than sweetness alone, and how a tiny splash of liquid can shift the dessert from firm mousse into spoon-soft pudding. Once those details become clear, the entire recipe opens up.
The first spoonful is where avocado chocolate mousse starts making sense. When the avocado is ripe and the chocolate is balanced properly, the result tastes rich, dark, and silky rather than overtly fruity, which is exactly why this dessert works so well in classic, healthy, keto, and vegan versions alike.
Why the best avocado chocolate mousse recipe is more than a shortcut
Suddenly, you are not just following one formula. You are learning how to make avocado chocolate mousse in a way that suits your mood, your pantry, and the kind of dessert you actually want to eat. That difference matters because this is not merely a recipe to complete once. It is the kind of dessert structure you can return to and reshape depending on whether you want something darker, lighter, sweeter, silkier, firmer, or more relaxed.
There is another reason this recipe wins people over so quickly. It does not ask you to compromise on pleasure in order to feel clever about ingredients. The point of avocado and chocolate mousse is not to trick anyone into eating avocado. The point is to make something genuinely delicious. Ripe avocado simply happens to bring a buttery body that works beautifully with chocolate. It gives the dessert structure, fullness, and that velvety glide that makes each spoonful feel richer than the ingredient list would suggest.
Why it keeps surprising people
If you have ever wanted a chocolate dessert that feels lush without becoming heavy, this is where avocado mousse earns its place. It does not rely on spectacle. Instead, it wins on texture, balance, and the quiet satisfaction of a dessert that tastes more luxurious than its effort level suggests. That is why it tends to convert skeptics so quickly. The idea may sound unusual, yet the result feels familiar in all the best ways: creamy, dark, spoonable, and deeply comforting.
At first glance, avocado and chocolate may seem like an odd pair. Then again, when you think about what avocado really contributes, the pairing starts to make perfect sense. Avocado is mild, creamy, and full-bodied. Chocolate is bold, aromatic, and naturally suited to smooth textures. Put them together, and the avocado becomes less of a flavor and more of a structural advantage. That is why chocolate mousse using avocado can taste so complete even when the ingredient list stays relatively short.
It works because avocado supports rather than dominates
In other words, avocado is there to support the dessert rather than dominate it. When the fruit is ripe, it blends into something almost buttery, giving the mousse a dense silkiness that would otherwise require cream, egg yolks, or another rich base. Serious Eats makes a similar point in its avocado chocolate mousse recipe, noting that ripe avocados provide rich, buttery body while a small amount of liquid helps the mixture blend smoothly into a velvety dessert.
That is exactly the strength of this recipe: the avocado does not announce itself. Instead, it creates the texture that allows the chocolate to feel more luxurious. For that reason, the dessert often feels more familiar than people expect. You taste chocolate, depth, softness, and a gently creamy finish. The avocado is doing important work, yet it is doing it quietly.
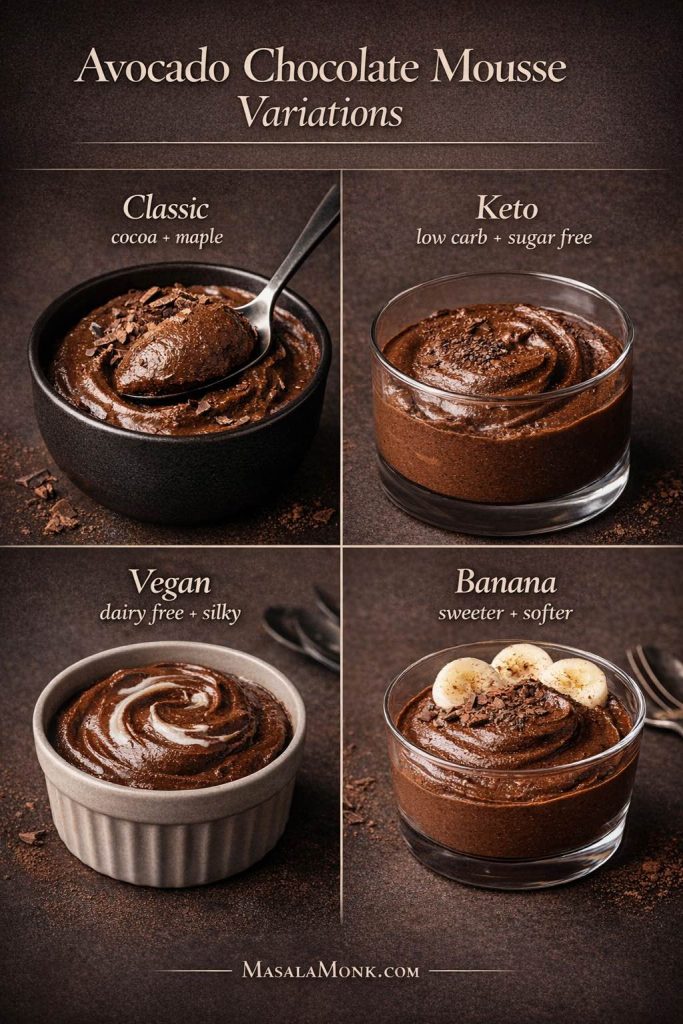
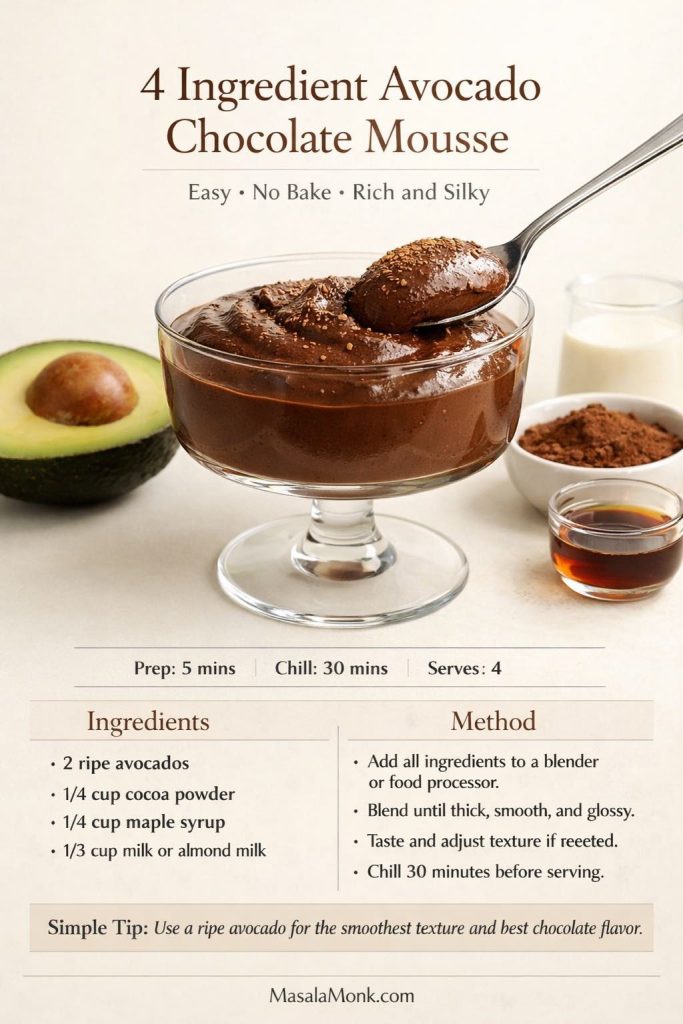
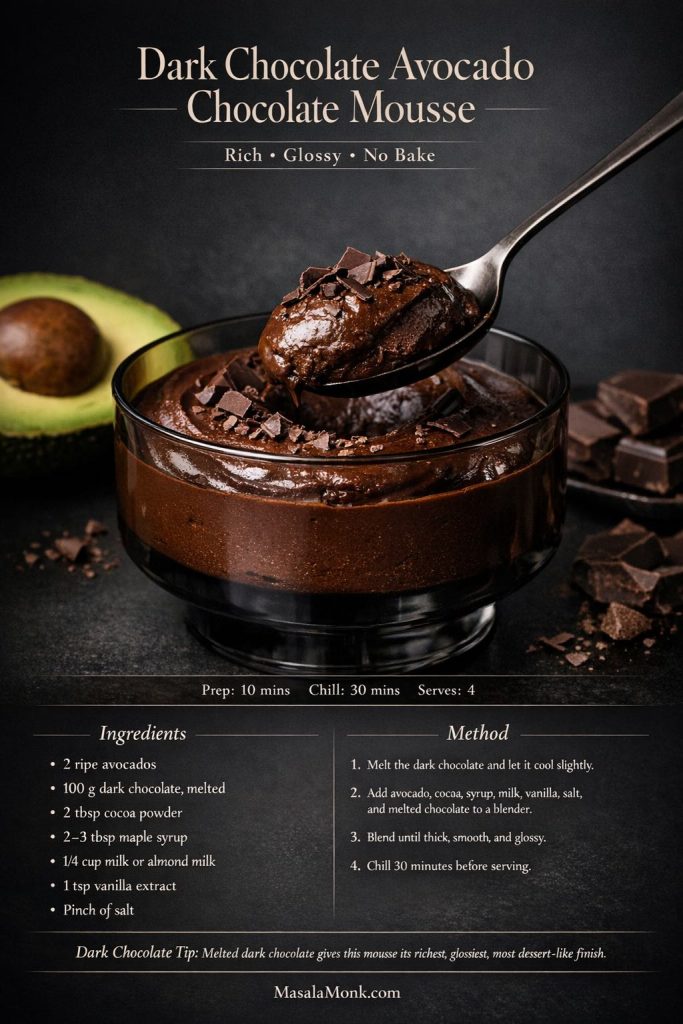
Avocado chocolate mousse is one of those rare desserts that can shift with your craving without losing what makes it special. This image supports the idea that the same creamy chocolate base can feel polished enough for after-dinner dessert, soft enough for a chilled fridge treat, or gentler and sweeter with banana — which is exactly why avocado chocolate mousse keeps earning a place as a flexible, easy, deeply satisfying no-bake chocolate dessert.
Why it tastes fuller than many quick desserts
Moreover, avocado has enough fat to round out the sharper edges of cocoa. A cocoa-only dessert can sometimes feel dry on the palate or slightly harsh if the sweetness is low. By contrast, avocado and chocolate mousse tends to feel softer and fuller, with the bitterness of the cocoa tucked into a creamier frame. That is one reason even a simple avocado cocoa mousse can taste far more finished than its ingredient list might suggest.
That versatility is one of the biggest strengths of the dessert. In a healthy avocado chocolate mousse, the avocado keeps the texture creamy even when the sweetness is dialed back. A keto avocado chocolate mousse benefits from that same richness, especially when sugar is no longer doing part of the heavy lifting. Meanwhile, in a vegan avocado chocolate mousse, avocado gives the dessert body and silkiness without relying on cream or eggs. In every case, the same ingredient solves a slightly different problem.
The texture is its real secret
Texture matters every bit as much as flavor here. A classic mousse often depends on trapped air. Avocado mousse works differently. It is not airy in the same whipped sense, yet it still feels elegant because the texture is dense, glossy, and smooth rather than flat or stodgy. That difference is important. This is not trying to mimic a French mousse exactly. Instead, it offers its own style of richness—quietly thick, spoonable, and satisfying in a more immediate way.
Why it is such a practical dessert
There is also a practical reason the recipe works so well. Because avocado is already soft and creamy, the path from ingredients to dessert is short. You do not need to temper eggs, whip cream, or set gelatin. You do not even need a stovetop. With a blender or food processor, the mixture comes together in minutes. That ease is part of why avocado mousse recipe variations show up in so many kitchens, from quick weekday desserts to low-carb meal-prep sweets to plant-based chocolate treats that do not feel like substitutes.
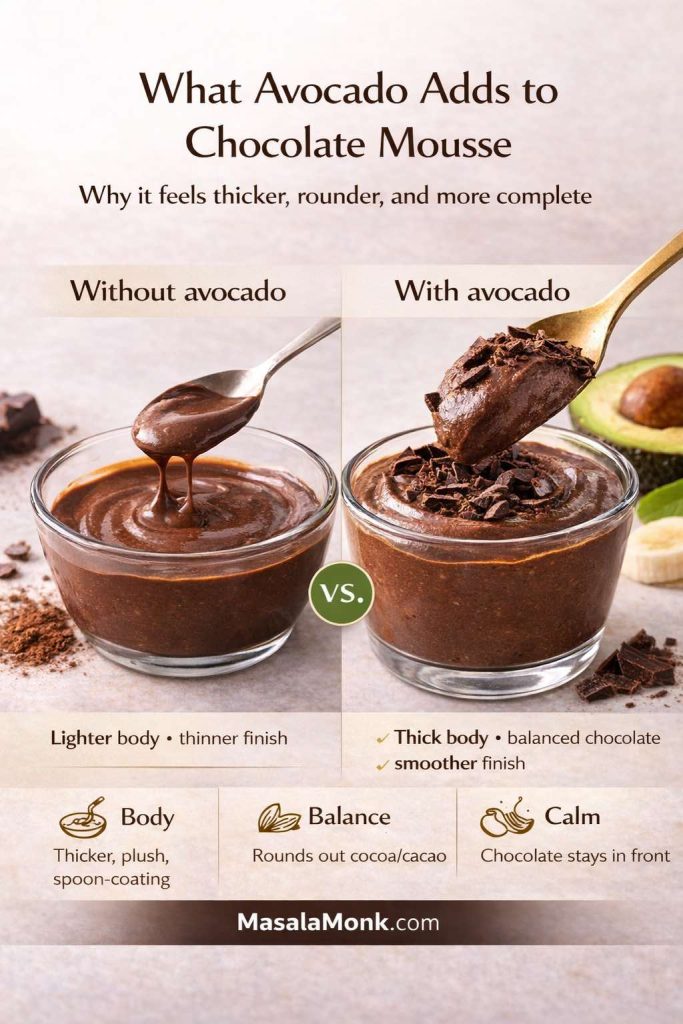
Avocado brings three main gifts to this dessert: body, balance, and calm. Those gifts may sound understated, yet together they are exactly what make the dessert work. Without avocado, the mixture could still taste chocolatey. What it would lack is that quiet sense of completeness—the feeling that the mousse is not merely blended, but beautifully held together.
Avocado is what gives this dessert its quiet luxury. It adds body that makes the mousse feel plush on the spoon, helps cocoa or cacao taste rounder and less harsh, and keeps the texture creamy without relying on heavy cream, eggs, or a more complicated base.
Body: why this mousse feels so plush
The body is obvious the moment the mixture starts blending. Ripe avocado thickens the dessert almost immediately. It gives the mousse that plush, spoon-coating texture that makes the chocolate linger rather than disappear too fast. Without it, cocoa and sweetener mixed with a little milk would taste more like a drinkable chocolate cream. With avocado, the mixture becomes mousse.
That body is also why avocado chocolate mousse can feel generous even in small portions. It does not need a huge bowl to satisfy. A few spoonfuls already feel rich, which makes it a particularly nice dessert when you want something intense but not overwhelming.
Balance: why avocado softens cocoa and cacao
Balance is the less visible part. Chocolate, especially dark cocoa or cacao, can sometimes feel one-dimensional when it is not paired with enough fat or enough sweetness. Avocado fills that gap. It softens the harsher notes and spreads the flavor more evenly across the palate. That is why even a healthy chocolate mousse can still feel lush when avocado is doing the heavy lifting.
This becomes especially useful when you start experimenting with avocado and cacao mousse or darker chocolate versions. The stronger the chocolate note becomes, the more helpful that avocado balance feels. It turns the dessert from merely intense into genuinely pleasurable.
Calm: why this recipe does not taste aggressively fruity
Then there is the calm avocado brings to the flavor. Avocado is gentle. It does not carry a strong perfume or a bright fruit acidity. It stays soft around the edges. That softness is exactly what allows chocolate to sit in front. In fact, when the avocado is ripe and the proportions are right, the dessert reads as chocolate first, avocado almost not at all.
Sugar Free Londoner makes the same reassurance central to its version, saying that you cannot taste the avocado when the ingredients are balanced properly. That promise sounds bold until you actually make a good batch and realize how true it is. The avocado is present, certainly, but more as texture and background than as a leading flavor.
A gentle nutrition bonus
From a nutrition standpoint, avocado also contributes fiber and unsaturated fat. Harvard’s avocado overview notes that avocados are rich in monounsaturated fat and fiber, two reasons they are often included in meals that aim to be both satisfying and balanced. The USDA’s avocado entries similarly show the fruit’s broader nutrient profile. Still, the real reason to choose avocado in this recipe is not to turn dessert into a lecture. It is to make the dessert creamy in a way that feels natural.
Why avocado chocolate mousse feels luxurious without becoming heavy
That last point matters because it gets to the heart of why this dessert is so appealing. Plenty of chocolate desserts are rich. Fewer manage to feel rich and light on effort at the same time. Avocado mousse finds that balance beautifully. It delivers the sensation of indulgence without the heaviness that can follow more cream-laden desserts. As a result, it feels both comforting and surprisingly clean on the palate.
The beauty of this dessert lies in how few ingredients it asks from you. Nonetheless, each one has a precise role. Remove one or choose carelessly, and the mousse can become dull, bitter, or oddly thick. Get them right, and the result is the kind of avocado chocolate mousse recipe you can memorize after one or two rounds.
Ripe avocado
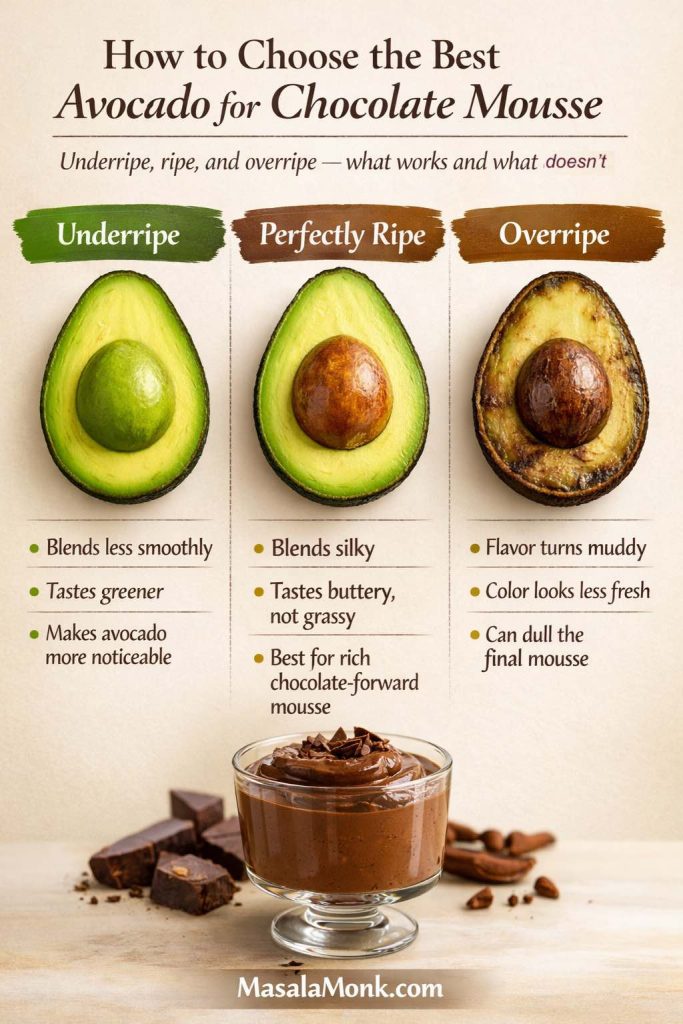
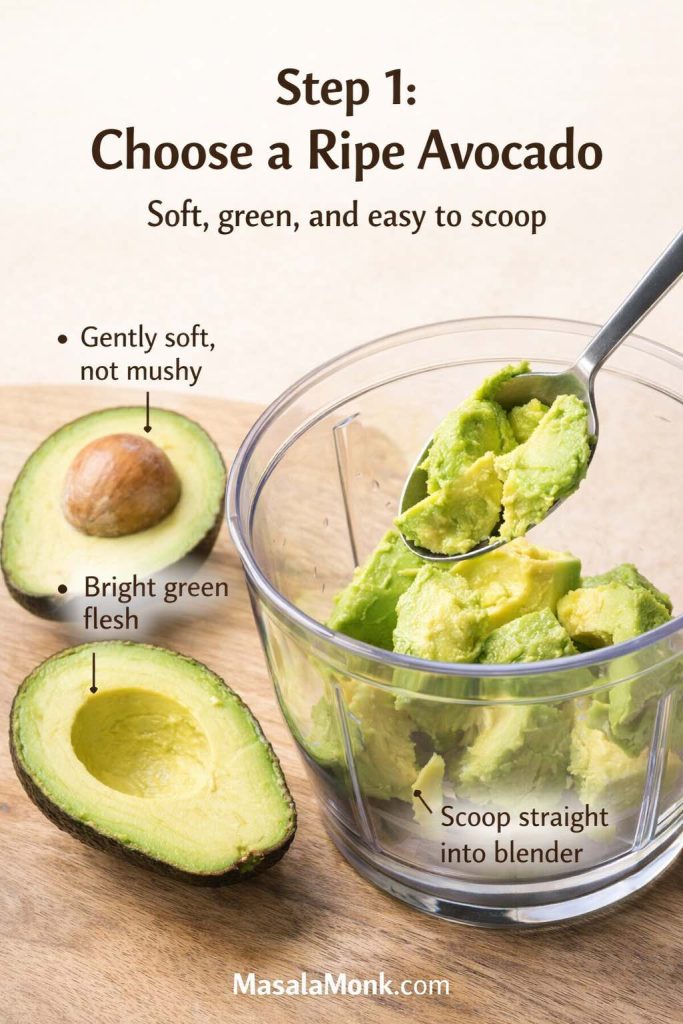
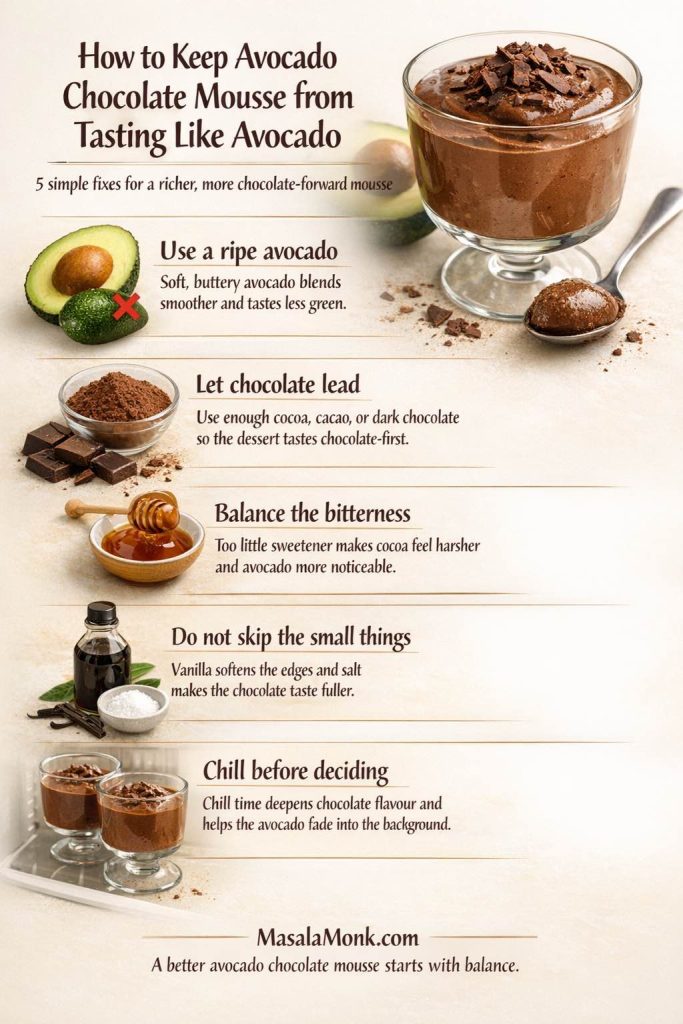
Everything begins with the avocado. It needs to be ripe, but not tired. When gently pressed, it should yield slightly rather than fight back. The flesh inside should look clean and mostly green, with no tough strings and no sour smell. If the avocado is underripe, the mousse will taste greener, blend less smoothly, and stubbornly hold onto a vegetable-like edge no amount of cocoa can completely hide. If it is overripe, the flavor becomes muddy and the freshness disappears.
The California Avocado Commission offers practical advice for choosing a ripe avocado, recommending fruit that yields to gentle pressure without feeling mushy. That is the exact sweet spot you want here. If you have ever wondered why one avocado mousse healthy recipe tastes elegant while another feels rough and vaguely grassy, ripeness is often the missing answer.
Choosing the right avocado is one of the biggest reasons avocado chocolate mousse turns out silky, rich, and chocolate-forward instead of grassy or uneven. A perfectly ripe avocado blends smoothly, tastes buttery rather than green, and gives the mousse its best texture from the start, while underripe or overripe fruit can pull the dessert off balance.
Cocoa, cacao, or dark chocolate
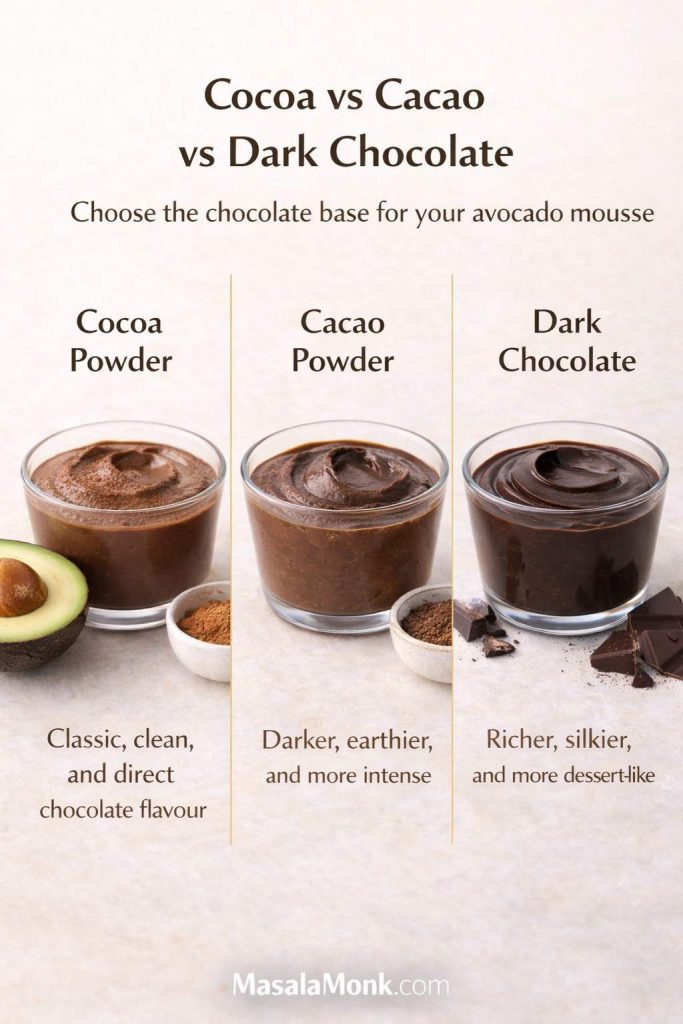
Next comes the chocolate element, and this is where the personality of the dessert starts to reveal itself. Cocoa powder gives the mousse a clean, direct chocolate character. It keeps the ingredient list short and lets the avocado handle the bulk of the texture. Cacao powder can be used in much the same way, although it often tastes a little earthier and more intense. That makes avocado and cacao mousse especially appealing if you like a darker, slightly less sweet finish.
Your choice of chocolate decides the personality of the mousse. Cocoa powder gives a clean, classic chocolate flavor, cacao leans darker and earthier, and melted dark chocolate creates the richest, glossiest, most dessert-like finish of the three.
Melted dark chocolate, on the other hand, changes the entire mood. The mousse becomes fuller, smoother, and more dessert-shop-like. It reads as more decadent, more polished, and a touch less wholesome in the best possible sense. Feel Good Foodie takes that route by using melted dark chocolate in its version, creating a mousse that leans closer to a classic chocolate dessert while still relying on avocado for creaminess.
If you enjoy understanding the difference between these chocolate paths, the MasalaMonk guide on cacao vs chocolate vs dark chocolate is a useful companion. Likewise, homemade hot chocolate with cocoa powder is a good reminder that cocoa intensity can vary more than people expect. Serious Eats also has a helpful explanation of Dutch vs natural cocoa powder, which matters because cocoa type influences not only bitterness and depth but also the final color of the mousse.
Sweetener options for avocado chocolate mousse
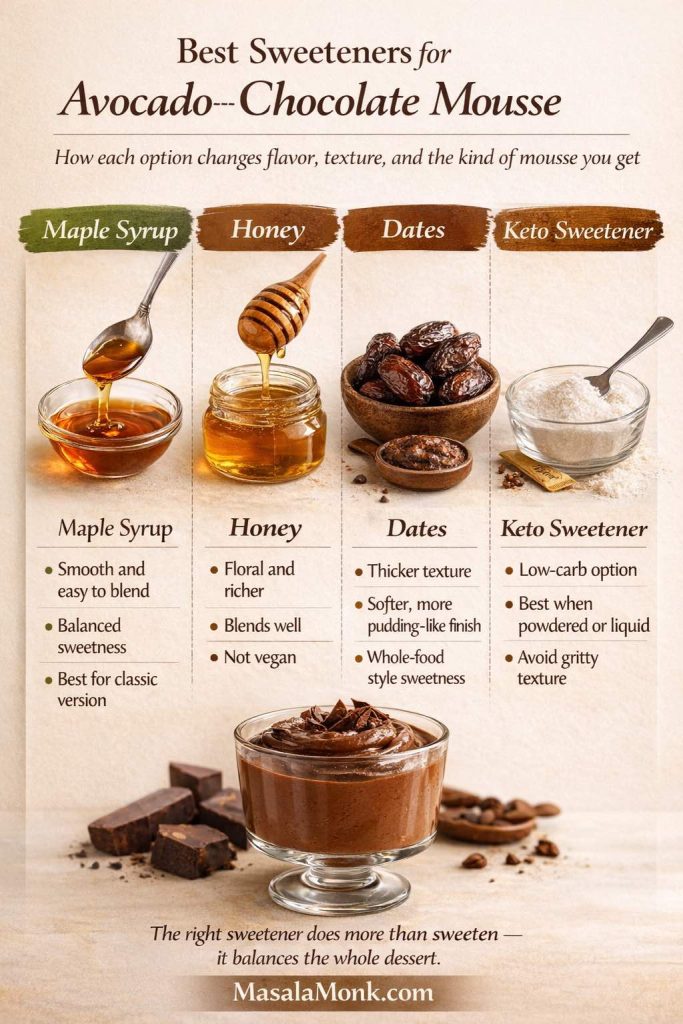
Sweetener does far more than make the mousse sweet. It balances bitterness, softens the green edge of the avocado, and helps determine whether the dessert feels sleek or heavy.
Maple syrup is one of the easiest choices because it blends smoothly and adds a gentle warmth. Honey works well if you are not making a vegan avocado chocolate mousse. Dates can be lovely in an avocado and chocolate pudding style version, although they pull the texture toward something thicker and more comfort-food-like. If you are aiming for keto avocado chocolate mousse, a powdered or liquid low-carb sweetener is usually better than a gritty granulated one.
This is one of those ingredients that deserves attention because under-sweetening is a common reason avocado chocolate mousse healthy versions disappoint people. The issue is not that they are healthier. The issue is that insufficient sweetness leaves bitterness unchecked and makes the avocado more noticeable. A mousse does not need to be sugary, but it does need balance.
The sweetener in avocado chocolate mousse does much more than make the dessert sweet. It helps balance bitterness, softens how noticeable the avocado tastes, and influences whether the final texture feels silky, rich, pudding-like, or better suited to a keto version. This guide compares maple syrup, honey, dates, and keto sweetener so readers can choose the option that best matches the kind of avocado chocolate mousse they want to make.
Milk or another liquid
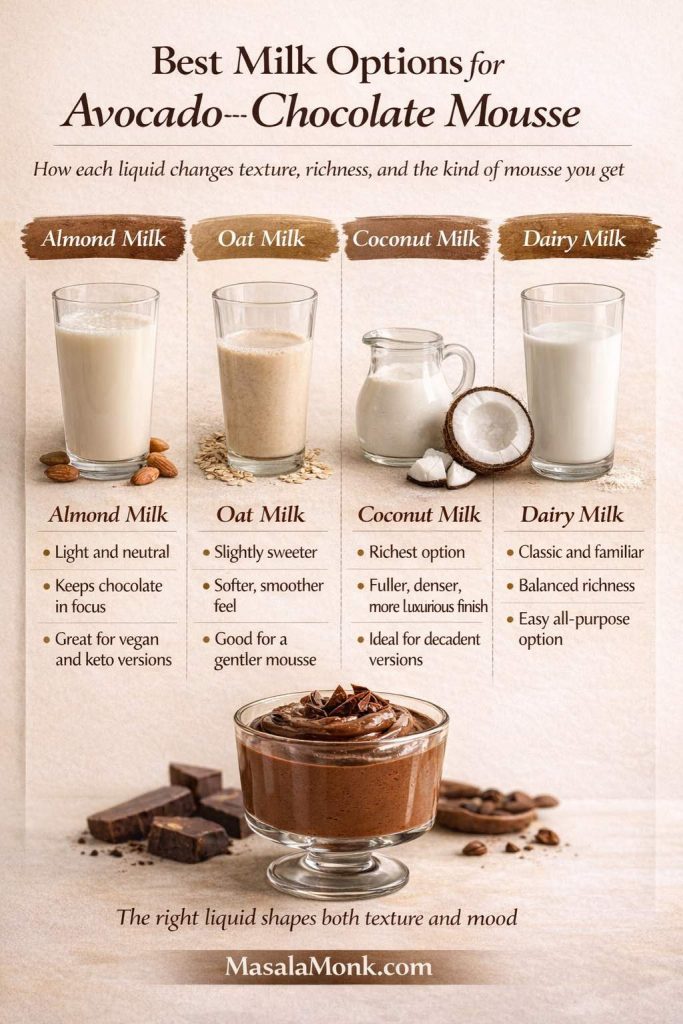
A small amount of liquid gives you control. Too little and the blender may struggle. Too much and the dessert slides from mousse toward pudding. Almond milk works beautifully in keto avocado mousse and vegan avocado mousse because it keeps the flavor clean. Coconut milk brings extra richness and makes the dessert feel more luxurious. Dairy milk works perfectly well if you are not trying to keep the recipe dairy-free.
The liquid choice also nudges the flavor. Almond milk stays neutral. Oat milk makes the mousse a little softer and slightly sweeter. Coconut milk makes everything feel fuller, almost truffle-like, especially when paired with dark chocolate.
The liquid in avocado chocolate mousse does more than help the blender move. It shapes the texture, richness, and overall feel of the dessert. Almond milk keeps the finish light and chocolate-forward, oat milk makes it softer and gentler, coconut milk brings the richest, most luxurious texture, and dairy milk offers a familiar middle ground.
Vanilla and salt
These seem minor, but they are not optional in spirit. Vanilla deepens the chocolate and softens the avocado. Salt sharpens everything into focus. Without them, even a technically correct avocado mousse recipe can taste flat. With them, the dessert becomes more complete.
The actual method is uncomplicated, which is one reason this dessert is so easy to love. Even so, the best avocado chocolate mousse recipe comes from respecting the sequence rather than dumping everything in carelessly and hoping for the best.
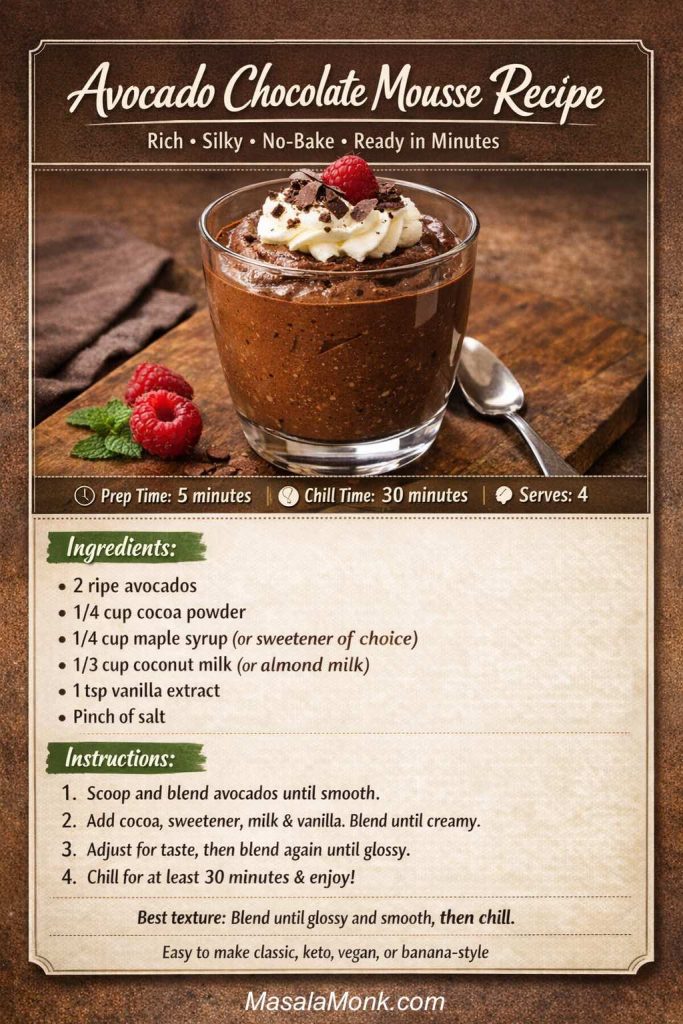
This is the core avocado chocolate mousse recipe at a glance: ripe avocado for body, chocolate for depth, sweetener for balance, a little liquid for movement, and enough blending and chill time to turn everything into a rich, spoonable dessert that tastes far more indulgent than the method suggests.
Step 1: Choose and prep the avocado
Cut the avocado, remove the pit, and scoop the flesh into a blender or food processor. Before you move on, take a moment to inspect what you have. If there are dark strings, discolored spots, or a sour smell, it is worth starting with another fruit. A clean avocado gives the mousse a clean finish.
This may sound like a small point, yet it matters more than almost anything else. If you want to know how to make avocado chocolate mousse that tastes undeniably dessert-like, begin with fruit that tastes neutral and buttery rather than aggressively green.
Good mousse starts before the blender does. Using avocado that is clean-tasting, soft, and buttery rather than firm or stringy gives the dessert a smoother texture and makes it much easier for the chocolate flavor to take the lead.
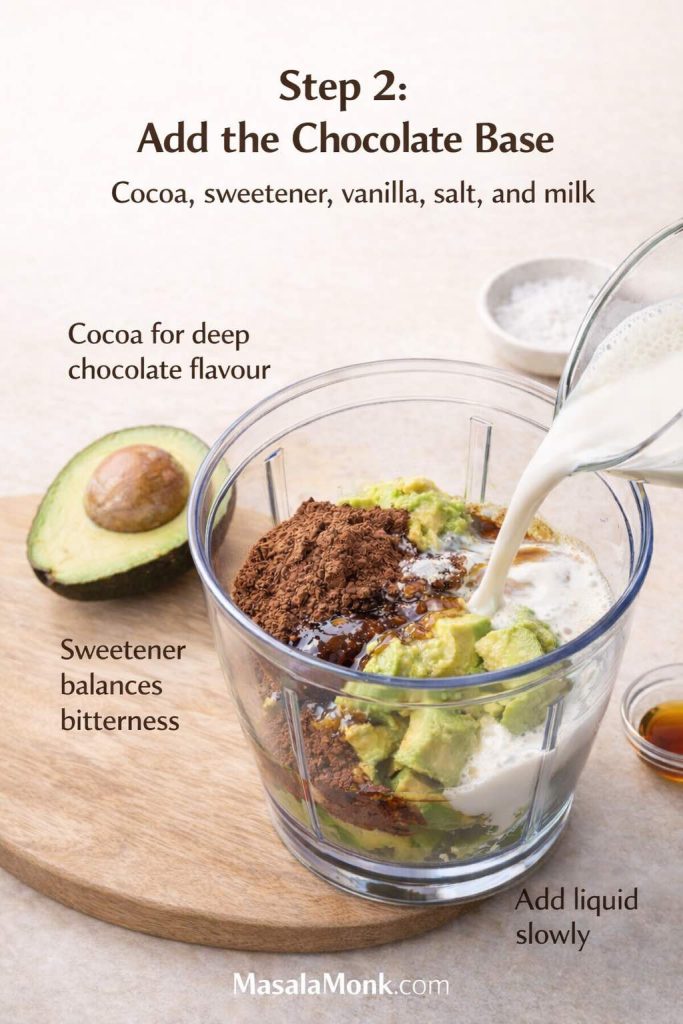
Step 2: Add cocoa, sweetener, vanilla, salt, and a little liquid
Add your cocoa powder, cacao, or melted dark chocolate, depending on the version you want. Then add your sweetener, vanilla, a pinch of salt, and just enough liquid to help the blender begin. Resist the urge to pour in too much milk at this stage. The mixture can always be loosened, but thickening it again is not so easy.
A simple avocado chocolate mousse recipe can be beautifully satisfying with nothing more than cocoa powder and maple syrup. If you want a deeper, more luxurious finish, avocado dark chocolate mousse made with melted chocolate is a lovely direction to take. For a keto chocolate mousse avocado version, unsweetened cocoa, almond milk, and a smooth low-carb sweetener create a strong, reliable base.
This is where the dessert begins to take shape. Cocoa or dark chocolate builds the flavor, sweetener rounds out bitterness, and the liquid should be added with restraint so the mixture stays thick enough for mousse rather than slipping too quickly into pudding territory.
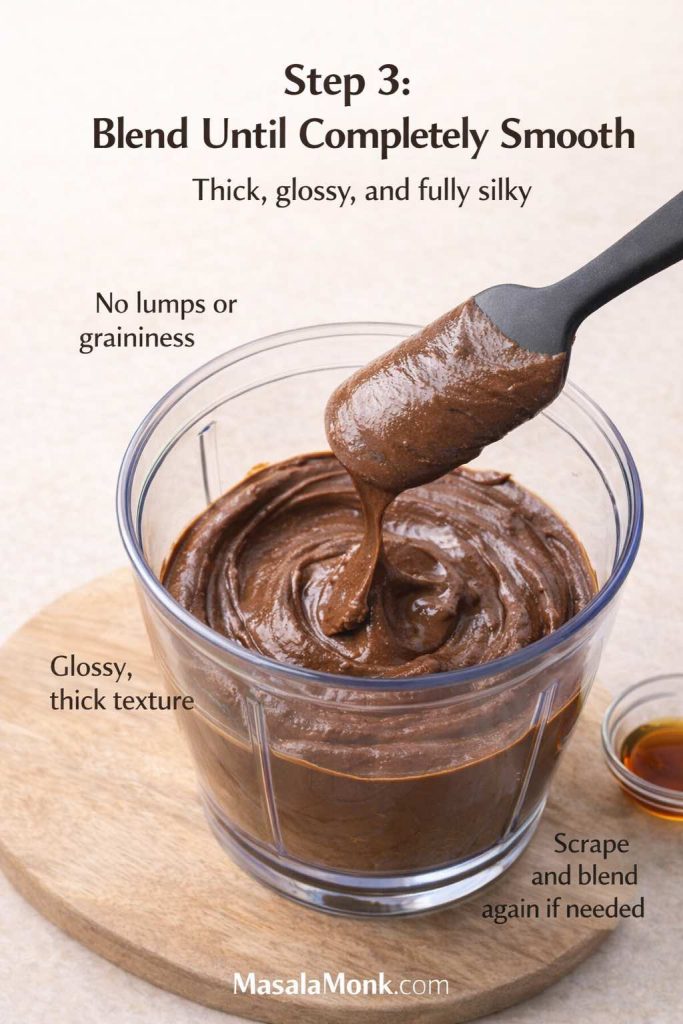
Step 3: Blend until completely smooth
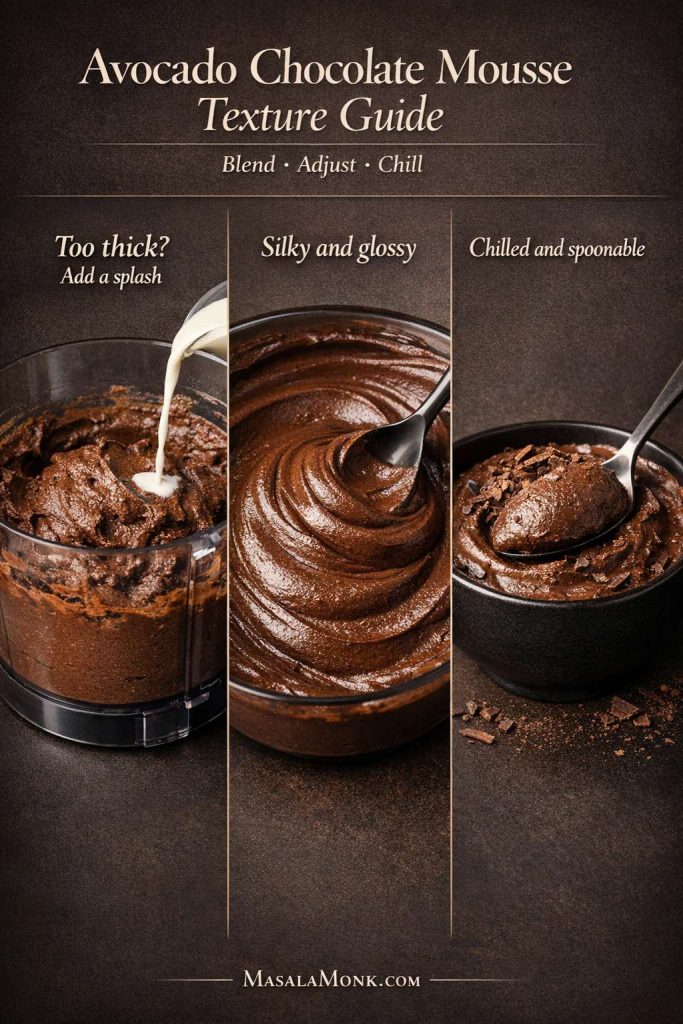
Blend. Then blend more. Then scrape down the sides and blend again. The dessert becomes special only when the texture turns fully silky. Any graininess left in the bowl will feel more obvious after chilling.
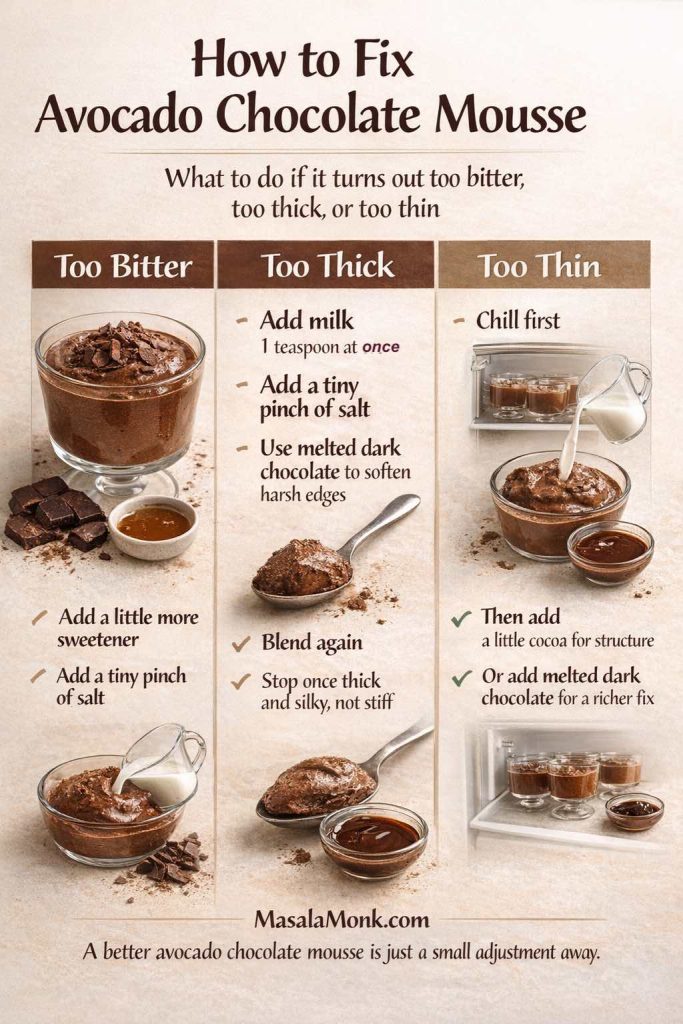
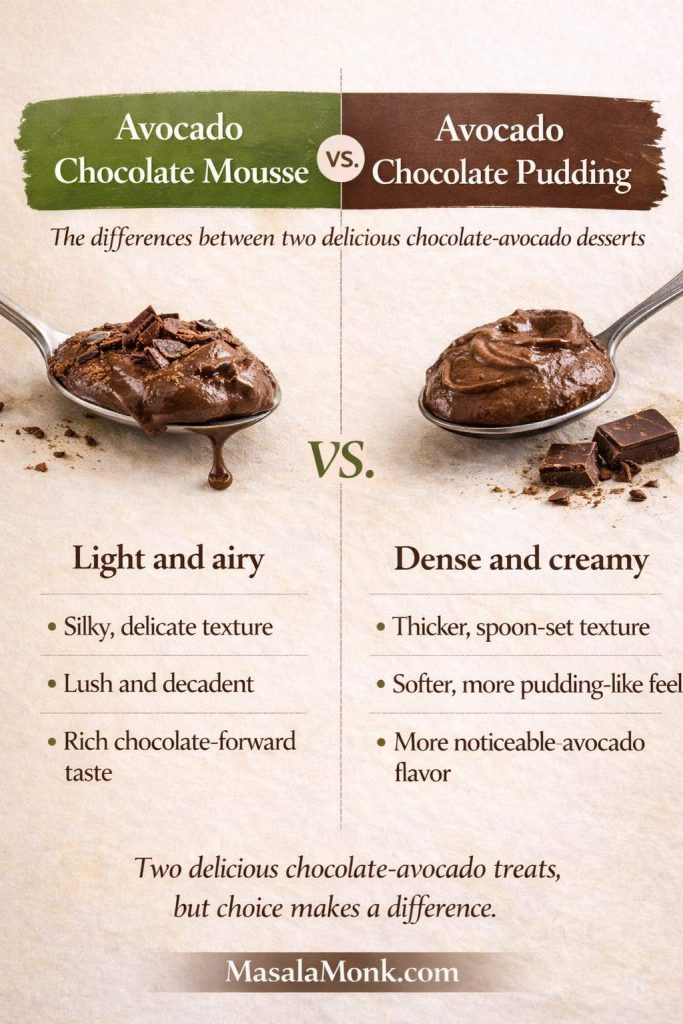
If the blender struggles, add liquid a teaspoon at a time. This is where patience pays off. A small addition can transform the mixture. Too much, though, and the avocado mousse dessert shifts into pudding territory. That is not inherently a problem—avocado chocolate pudding is delicious in its own right—but the texture choice should be yours.
The difference between a decent batch and a beautiful one usually comes down to blending. The mixture should look completely smooth, glossy, and thick before chilling, because any roughness left at this stage will feel even more noticeable once the mousse is cold.
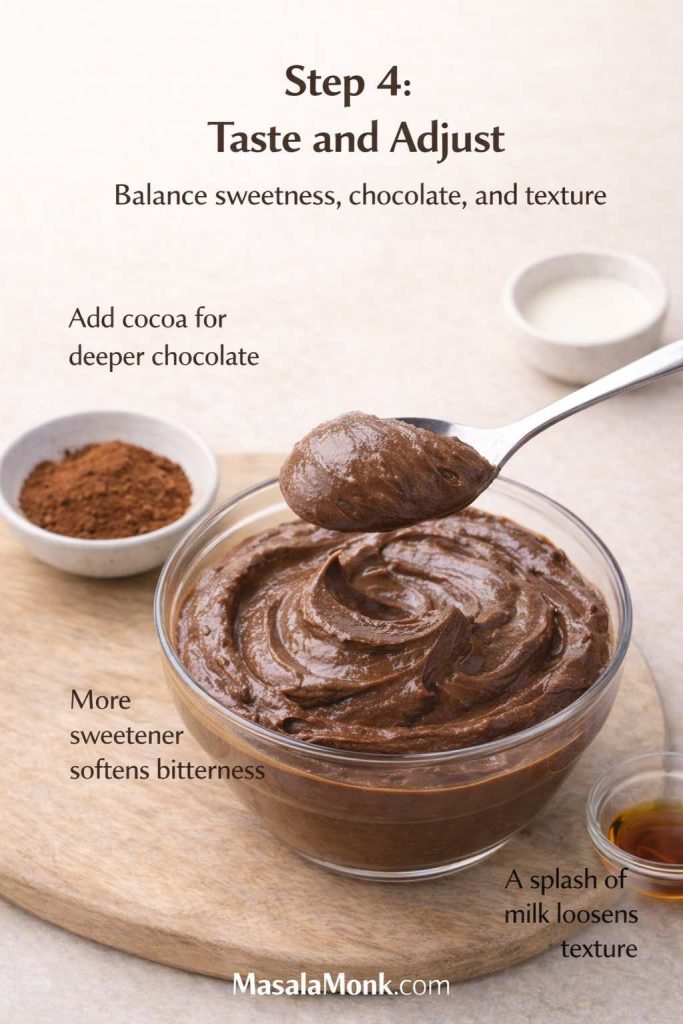
Step 4: Taste and adjust
This is the moment when the recipe starts to feel like your own. Taste the mixture before chilling and adjust it according to what it needs. More sweetener or a small pinch of salt usually helps if the flavor feels too bitter. When the avocado note stands out more than you want, a little extra cocoa, a touch more vanilla, or even some time in the fridge can bring it back into balance. Should the texture seem too dense, loosen it with a small amount of liquid. If it feels softer than expected, let it chill before assuming anything has gone wrong.
This adjustment stage is the difference between following a rigid avocado mousse recipe and understanding how the dessert works. Once you get comfortable here, you stop needing exact formulas.
This is the moment to correct the balance before the fridge sets the tone. A little more sweetener can soften bitterness, extra cocoa can deepen the chocolate, and a small splash of milk can loosen the texture without sacrificing the thick, silky character that makes avocado chocolate mousse so satisfying.
Step 5: Chill the mousse
Transfer the mixture into bowls or glasses and chill. The difference this makes is remarkable. The chocolate flavor settles in, the avocado note recedes even further, and the texture firms into a smoother, more elegant finish.
You can eat it immediately if you want a softer, more casual dessert. Still, avocado chocolate mousse almost always improves with a little cold time. That rest is what helps it become mousse rather than just a freshly blended chocolate cream.
Chilling is part of the recipe, not just storage. The rest in the fridge helps the chocolate settle, firms the texture into something more mousse-like, and pushes the avocado even further into the background so the final dessert tastes calmer, richer, and more complete.
Step 6: Serve simply
A dusting of cocoa, a few chocolate shavings, chopped nuts, or berries are all you need. The dessert is already doing a lot. A complicated garnish often adds less than people expect. Better to keep the finish clean and let the texture speak.
Avocado chocolate mousse does not need much to feel finished. A little cocoa, a few chocolate shavings, some berries, or chopped nuts are usually enough to add contrast while still letting the smooth, dark, creamy texture remain the real focus of the dessert.
How smooth avocado chocolate mousse should look before chilling
Before it goes into the fridge, the mousse should look glossy and thick. It should move slowly off a spoon, neither sitting like frosting nor flowing like a drink. If you drag a spoon through it, the path should hold briefly before softening.
The ideal avocado chocolate mousse should look thick and glossy before chilling, then hold softly on the spoon once cold. If it is too stiff before the fridge, it may feel heavy; if it pours too easily, you are drifting closer to avocado chocolate pudding than mousse.
That visual cue matters because many people assume they need an extremely stiff mixture before chilling. In reality, the fridge will help the mousse set. On the other hand, if the mixture already pours easily like a milkshake, it is probably headed toward avocado and chocolate pudding instead of mousse.
There is nothing wrong with that softer result. In fact, recipe for avocado chocolate pudding variations can be wonderful, especially when banana, dates, or extra milk are involved. Yet if your goal is avocado chocolate mousse, aim for thickness with a little movement, not density without flow.
Why avocado chocolate mousse can taste better after chilling
This dessert has a quiet magic after time in the fridge. Freshly blended, it often tastes good. Chilled, it tastes finished. The cold firms the avocado, the cocoa settles, and the sweetness feels more integrated.
In addition, chilling gives the avocado’s mild flavor even less room to stand out. This is part of why people sometimes judge the mousse too early. A warm or room-temperature batch may still seem a little greener than they want. After chilling, that concern often fades dramatically.
Feel Good Foodie recommends chilling its version for exactly this reason, noting that the texture becomes thicker and more mousse-like after some time in the refrigerator. The same logic applies across almost every version of this dessert.
The best avocado mousse recipe is less about complexity and more about paying attention in the right places.
Start with a ripe avocado. Choose cocoa or chocolate you actually enjoy. Use enough sweetener to balance, not merely decorate. Blend thoroughly. Chill before judging. Season with salt and vanilla. These are not glamorous insights, yet they are exactly what separate a beautiful avocado chocolate mousse recipe from one that feels merely functional.
It is worth remembering that ingredients never behave in exactly the same way from batch to batch. One avocado may be larger and creamier than the next, while one cocoa powder may taste softer and another darker and more bitter. Sweeteners vary too, with some blending in cleanly and others leaving a more noticeable finish. Because of that, the smartest approach is not to force every version into one rigid expectation, but to understand the structure and adjust with confidence.
That flexibility is the secret strength of mousse made with avocado. Once you understand the moving parts, the recipe becomes easy to improvise. It can turn darker, softer, sweeter, firmer, more minimal, or more indulgent without losing what makes it special.
How to keep it from tasting like avocado
This is the question that hovers over nearly every first-time batch, and thankfully the answer is straightforward.
First, use a ripe avocado. This cannot be overstated. Underripe fruit tastes greener and more obvious. Second, use enough chocolate presence. That can mean cocoa powder, cacao powder, melted dark chocolate, or a combination. Third, add enough sweetener to round the bitterness and soften the avocado note. Fourth, do not skip the vanilla and salt. Finally, chill the dessert before deciding whether it tastes too much like avocado.
If you are worried your avocado chocolate mousse will taste too green, the fix is usually balance rather than disguise. A ripe avocado, enough chocolate, the right amount of sweetness, a little vanilla and salt, and some chill time help the dessert taste rich, smooth, and unmistakably chocolate-forward.
Chocolate Covered Katie also emphasizes that the avocado flavor should disappear beneath the chocolate when the dessert is made properly. That reassurance matters because the idea of avocado chocolate can sound stranger than it tastes. In practice, most people notice the texture far more than the fruit.
If a batch still reads too green, add more cocoa, a little more sweetener, and a drop more vanilla. Those small adjustments often fix the issue faster than adding more liquid ever could.
How to fix avocado chocolate mousse if it tastes bitter
Bitterness usually comes from strong cocoa, insufficient sweetness, or a lack of salt. Occasionally, it also comes from a cacao powder that is more intense than expected.
Start by increasing the sweetener a little. Then add a very small pinch of salt. Taste again. If the mousse still feels sharp, melted dark chocolate can help soften the edges and add a rounder finish. This is especially helpful in avocado cacao mousse versions, where the earthy notes of cacao can feel stern if the sweetness is kept very low.
That said, bitterness is not always a flaw. Some people prefer a darker, more adult finish in avocado dark chocolate mousse. The key is making sure the bitterness feels intentional rather than accidental.
If your avocado chocolate mousse turns out too bitter, too thick, or too thin, a few small adjustments can usually bring it back into balance. A little more sweetener or a tiny pinch of salt can soften bitterness, a spoonful of milk can loosen a mousse that feels too dense, and chilling or extra cocoa can help a softer mixture settle into a better texture.
How to adjust avocado chocolate mousse if it is too thick
If the mousse looks heavy, refuses to blend, or feels pasty rather than silky, add liquid in very small increments. Almond milk, oat milk, coconut milk, or dairy milk can all work. What matters is moving slowly.
This is the moment where many recipes go wrong. A big splash of milk feels harmless, yet it can quickly turn mousse made with avocado into chocolate pudding avocado texture. Since the dessert will firm in the fridge, there is no need to chase final texture entirely in the blender. Stop when it feels smooth and thick, not when it seems already set.
A thin mousse usually comes from too much liquid, an oversized avocado relative to the chocolate, or a sweetener that loosens the mixture more than expected.
The simplest fix is chilling. Quite often, the mousse thickens enough after resting. If that is not enough, add a little more cocoa powder or a small amount of melted dark chocolate and blend again. Either choice will strengthen the structure. Cocoa keeps the recipe lighter. Dark chocolate makes it richer.
This is also where the dessert begins to define itself. If the texture is soft but luscious, you may decide to embrace it as avocado chocolate pudding rather than force it into a firmer mousse identity.
Once you understand the base recipe, avocado chocolate mousse becomes highly adaptable. The classic version stays rich and balanced, the keto version keeps things low carb without losing creaminess, the vegan version feels naturally at home with plant-based ingredients, and banana turns the dessert softer, sweeter, and more familiar.
Keto avocado chocolate mousse
A keto avocado chocolate mousse can feel every bit as indulgent as the classic version, which is part of its charm. The avocado already supplies richness, so you do not need sugar to make the dessert satisfying. Instead, the focus shifts to choosing the right sweetener and keeping the texture smooth.
Use unsweetened cocoa or dark chocolate, a keto-friendly sweetener that dissolves cleanly, and a modest amount of unsweetened almond milk or coconut milk. That foundation creates a mousse that feels rich and chocolatey rather than compromise-driven. If you enjoy other low-carb chocolate comforts, recipes like keto hot chocolate or keto chia pudding with almond milk live in a similar neighborhood of satisfying, creamy simplicity.
This keto avocado chocolate mousse gives the low-carb version its own clear formula instead of asking readers to mentally adapt the classic recipe. The biggest win here is texture: when the sweetener is right and the mousse is blended until fully glossy, the result still feels rich, thick, and dessert-like rather than compromise-driven. It is the version to use when you want a sugar-free chocolate mousse that still feels indulgent.
The most common pitfall in keto avocado mousse is a gritty texture from the sweetener. Powdered or liquid sweeteners tend to solve that immediately. Sugar Free Londoner leans into this low-carb direction, highlighting the recipe’s keto credentials and pudding-like creaminess while keeping the ingredient list compact. That overlap between mousse and pudding is actually useful because keto avocado chocolate mousse can drift either way depending on how much liquid you use.
Best milk options for keto version
Almond milk keeps the flavor neat and understated. Coconut milk makes the dessert thicker and richer, especially in a dark chocolate version. Neither is wrong. Almond milk suits a cleaner finish. Coconut milk suits a more luxurious one.
Healthy avocado chocolate mousse can mean different things depending on the cook, and that flexibility is part of its appeal. For one person, it may mean using less refined sugar. For someone else, it may be a dairy-free chocolate dessert that still feels rich and satisfying. Another cook may define it through ingredients that feel more familiar, whole, or minimally processed. The beauty of the recipe is that it can comfortably hold all of those interpretations.
Healthy avocado chocolate mousse works best when it still feels like dessert, and that is exactly what this version protects. The cocoa and avocado give the mousse its body and chocolate depth, while the sweetener is kept balanced enough to avoid the bitter, grassy edge that can make lighter versions less satisfying. This is the one to reach for when you want a more everyday chocolate dessert that still feels rich, smooth, and complete.
Maple syrup is a lovely option when you want sweetness without sharpness. Dates make the mousse feel more rustic and whole-food-driven, though they also thicken it and nudge it toward pudding. Cacao powder can make the flavor feel more robust and slightly less sweet, which some people love in a healthy avocado mousse. Meanwhile, dark chocolate can be used in moderation to create a richer dessert without abandoning that more wholesome spirit.
Harvard’s overview of dark chocolate explains that cocoa-rich chocolate contains flavanols, although the amount can vary depending on processing. Harvard Health also notes that cocoa powder is a source of beneficial compounds, though dessert should still be enjoyed with perspective rather than grand claims. That is the right tone for this recipe. A healthy chocolate mousse is still dessert. It just happens to be one that can fit beautifully into a balanced way of eating.
If you enjoy that broader better-for-you dessert lane, healthy oat protein bars and high-protein overnight oats offer different kinds of creamy or satisfying sweetness without leaving the comfort-food world behind.
Cocoa powder vs dark chocolate in healthy variant
Cocoa powder gives you a cleaner ingredient line and a sharper chocolate profile. Melted dark chocolate creates deeper richness and a more classic dessert feel. If you want the best of both, use cocoa as the main base and a little dark chocolate for depth. That combination often produces the best avocado chocolate mousse recipe for people who want both flavor and restraint.
Vegan avocado chocolate mousse
Vegan avocado chocolate mousse is one of the easiest versions to make because avocado does most of the work that dairy would normally do. Use maple syrup or another vegan sweetener, choose almond milk, oat milk, or coconut milk, and make sure your dark chocolate is dairy-free if you decide to use it.
Vegan avocado chocolate mousse feels most successful when it is treated as a real dessert rather than a substitute, and this version does that well. The plant milk choice matters more than it first seems: almond milk keeps the finish cleaner, oat milk softens it, and richer options can make the mousse feel fuller and more indulgent. It is the version to use when you want the dairy-free route to stay silky, chocolate-forward, and fully satisfying.
The result can be deeply satisfying, not merely acceptable. In fact, avocado mousse vegan versions often feel especially natural because nothing about the recipe depends on eggs or cream to begin with. The avocado already makes the dessert lush. The rest is simply a matter of balance.
For readers who enjoy dairy-free chocolate baking and desserts beyond mousse, vegan chocolate cake recipes offer another useful trail through that world. The relationship is not one-to-one, of course, but the same broader idea applies: plant-based chocolate desserts can feel rich, complete, and fully dessert-like when texture is handled properly.
Best dairy-free milk for vegan alternative
Almond milk is clean and neutral. Oat milk is softer and naturally a bit sweeter. Coconut milk makes the mousse richer and denser. Choose based on the finish you want rather than chasing a universal rule.
Avocado chocolate pudding vs avocado chocolate mousse
This distinction matters more than it might seem. Some recipes live clearly in mousse territory. Others are really avocado chocolate pudding with a more elegant name. Still others sit right in the middle.
Mousse should hold shape on the spoon, feel thick and velvety, and become slightly firmer after chilling. Pudding should feel softer, looser, and more comfort-oriented. Neither is inherently better. They simply scratch different itches.
Avocado chocolate mousse and avocado chocolate pudding may begin with similar ingredients, yet they land very differently on the spoon. Mousse should feel thicker, silkier, and more chocolate-forward, while pudding turns softer, denser, and more comfort-led. If your mixture feels looser than expected, you may be closer to pudding territory—and that is not necessarily a bad thing, just a different dessert.
Sugar Free Londoner even uses pudding language within its mousse recipe, which reflects how fluid this boundary can be. Allrecipes, meanwhile, leans more directly into the pudding identity with its chocolate avocado pudding. That overlap is not confusion so much as a reminder that avocado-based chocolate desserts sit on a spectrum.
If you love that softer, spoonable family of desserts, creative chia pudding variations or no-bake banana pudding make sense as related pleasures. Avocado and chocolate pudding belongs to that same comforting lineage. Avocado chocolate mousse simply edges a little closer to elegance.
When avocado chocolate mousse feels more like pudding
This usually happens because there is too much liquid, the sweetener is especially dense, or the avocado is large relative to the chocolate. It can also happen when banana or dates are added. Again, that is not failure. It is simply a softer destination.
Banana changes the character of the dessert more than almost any other variation. It brings sweetness, softness, and a familiar fruity dessert note that can make avocado and banana chocolate mousse feel instantly approachable.
If someone is hesitant about avocado chocolate mousse, banana can act as a gentle bridge. It smooths bitterness, adds natural sweetness, and gives the dessert a flavor profile that feels comforting rather than mysterious. That is why avocado banana chocolate mousse can be such a useful variation, especially when serving children or anyone unsure about avocado in dessert.
Banana changes this mousse in a meaningful way: it makes the flavour softer, the sweetness gentler, and the whole dessert more immediately approachable. That makes this version especially useful for readers who want avocado chocolate mousse to feel less dark and more familiar, or who prefer a spoon dessert that leans a little closer to pudding than to a firmer classic mousse.
At the same time, banana absolutely announces itself. Unlike avocado, it is not a quiet ingredient here. So if your goal is the purest avocado chocolate mousse recipe, banana is not the move. If your goal is a softer, sweeter, more casual dessert, it is a wonderful addition.
Chocolate mousse with avocado and banana also tends to drift toward pudding texture. Banana adds body, but it adds a different kind of body—less sleek, more plush. That can be lovely, particularly if you enjoy the comfort-dessert direction of a banana pudding.
When to add banana
Add banana when you want more natural sweetness, when your cocoa tastes too intense, or when you want the dessert to feel more familiar and fruit-forward. Skip it when you want a darker, cleaner, more adult chocolate profile.
Cacao powder changes the dessert in a subtle but noticeable way. The flavor tends to feel deeper, earthier, and slightly more intense than many supermarket cocoa powders. That makes avocado and cacao mousse a lovely option for people who enjoy dark chocolate flavors without needing a lot of sweetness.
Because cacao can feel more assertive, balance becomes especially important. A pinch of salt matters more. Sweetness matters more. Chilling matters more. When it all comes together, however, the result can be deeply satisfying—less like a sweet treat for everyone, more like a dark, quiet dessert you savor slowly.
If you prefer this direction, you may also find yourself leaning toward melted dark chocolate as a companion ingredient rather than using cacao alone. That mix preserves the intensity while giving the mousse a rounder, more luxurious finish.
4 ingredient avocado chocolate mousse
There is a certain appeal to keeping this dessert as stripped-down as possible. In its simplest form, a 4 ingredient avocado chocolate mousse might include avocado, cocoa powder, sweetener, and a splash of milk or other liquid. If the avocado is ripe and the cocoa is good, that can absolutely work.
When you want avocado chocolate mousse to stay simple, this is the version to reach for. It keeps the ingredient list short but still gives you the thick, smooth, chocolate-forward texture that makes the dessert feel satisfying rather than stripped down. It is especially useful for quick cravings, beginner cooks, or days when you want an easy no-bake chocolate dessert without moving into a longer ingredient list.
Still, the extra ingredients—especially vanilla and salt—do more than their small quantities suggest. A four-ingredient version is charming in its simplicity, yet the fuller version usually tastes more complete. That is why I think of the 4 ingredient avocado chocolate mousse as a useful starting point rather than the ultimate destination. It shows how easy the recipe can be. Then, once you understand the framework, you can decide where to add complexity for depth.
When you are making this for yourself, a cocoa-and-maple version may be all you need. When you are making it for guests, a slightly more luxurious path can be worth it.
Use a very ripe avocado, good cocoa, a little melted dark chocolate, vanilla, salt, and enough sweetener to keep the flavor smooth. Blend until the texture is flawless. Chill thoroughly. Serve in small glasses with a few chocolate shavings or a light dusting of cocoa.
This is the richest version of avocado chocolate mousse in the post, and it earns that distinction by using melted dark chocolate rather than relying on cocoa alone. The result is a mousse that feels glossier, fuller, and more polished on the spoon, with a more classic dessert finish that works especially well when you want the recipe to feel guest-worthy rather than simply quick and healthy. It is the version to choose when depth, texture, and presentation matter most.
This is where avocado dark chocolate mousse really shines. The dessert looks deeper, tastes rounder, and feels more polished. It is also the version most likely to surprise people who hear “avocado chocolate” and expect compromise. Instead, they get something elegant and fully dessert-like.
What to serve with avocado chocolate mousse
Although the mousse stands beautifully on its own, a few companions can make it feel even more complete.
Fresh berries cut through the richness. Chopped toasted nuts add contrast. A little whipped coconut cream works well if you are serving a vegan avocado chocolate mousse. Thin slices of banana make sense if you are already leaning in that direction. If the mousse is especially dark, a tiny pinch of flaky salt on top can sharpen the chocolate.
That said, this is not a dessert that needs fuss. One of its strengths is how self-contained it feels. The texture is already the main event.
How to store the mousse
Store the mousse in individual servings or in one airtight container. Pressing a piece of wrap gently against the surface can help minimize air exposure if you are storing it a little longer. In general, the dessert is best within a day or two, when the flavor still feels fresh and the color remains appealing.
If you are dealing with avocados before making the mousse, the USDA SNAP-Ed avocado page offers simple guidance on ripening and storage, including leaving firm avocados at room temperature until they soften and then refrigerating them once ripe. That basic handling advice is useful because the quality of the fruit matters so much in the final dessert.
Once blended, avocado mousse is a naturally make-ahead-friendly sweet. That convenience is part of its enduring charm. You can make it in advance, chill it, and have dessert ready without last-minute drama.
Some recipes make an impression once and then quietly disappear. It usually works the other way around. What begins as a curiosity soon turns into something practical, reliable, and surprisingly elegant. It is quick to make, easy to adapt, and versatile enough to suit different ways of eating. On one evening, it answers a simple chocolate craving; on another, it becomes the final touch to a dinner where dessert needs to feel thoughtful without taking over the day.
Perhaps even more importantly, this dessert rewards repetition. The more often you make it, the less it feels like a fixed formula and the more it becomes a language you understand naturally. Over time, you start to notice how much liquid keeps it in mousse territory rather than drifting into pudding. You begin to sense when cocoa alone is enough and when dark chocolate will add the depth the dessert needs. Banana becomes a deliberate choice rather than an afterthought, useful in some versions and distracting in others. Eventually, the question stops being whether avocado belongs in dessert at all, because by then you are simply enjoying everything it does so well.
That is why this recipe has such staying power. It is not clever for the sake of being clever. It is simply useful, delicious, and adaptable in a way that fits real life.
A final spoonful
The best mousse recipe is not necessarily the most minimal one or the richest one or the strictest one. It is the one that understands what makes this dessert special: ripe avocado for texture, chocolate for depth, sweetener for balance, and enough patience to chill the mixture until it becomes silky, calm, and complete.
Once you understand the structure, the possibilities widen beautifully. The classic route with cocoa and maple syrup is always there when you want something simple. A keto avocado chocolate mousse can feel just as indulgent without relying on sugar, while a vegan avocado mousse made with almond or oat milk brings its own quiet richness. If a softer spoon dessert sounds better, the mixture can lean naturally toward avocado chocolate pudding. Beyond that, banana adds sweetness, cacao brings intensity, and dark chocolate gives the whole dessert a more luxurious finish.
So whether you came here looking for how to make avocado mousse, a healthy chocolate mousse, a vegan avocado chocolate mousse, recipe chocolate avocado mousse inspiration, or simply the best avocado mousse recipe you can make in minutes, the heart of the answer stays the same. Start with a ripe avocado. Let chocolate lead. Blend thoroughly. Adjust thoughtfully. Chill well.
Then take a spoonful and let the texture do the convincing.
Avocado chocolate mousse is a smooth, spoonable chocolate dessert made by blending ripe avocado with cocoa powder, cacao, or dark chocolate along with a sweetener and a little liquid. Although it sounds unusual at first, the avocado mainly adds body and creaminess rather than a strong fruit flavor.
2. Can you taste avocado in avocado chocolate mousse?
When the avocado is properly ripe and the balance of chocolate, sweetener, vanilla, and salt is right, avocado chocolate mousse should taste mostly like chocolate rather than avocado. Even so, an underripe avocado or too little cocoa can make the avocado note more noticeable.
3. How do you make avocado chocolate mousse?
To make avocado chocolate mousse, blend ripe avocado with cocoa powder or melted dark chocolate, sweetener, vanilla, a pinch of salt, and just enough milk or dairy-free milk to help it turn silky. After that, taste, adjust, and chill until the texture becomes richer and more mousse-like.
4. What is the best avocado chocolate mousse recipe for beginners?
The best avocado chocolate mousse recipe for beginners is usually the simplest one: ripe avocado, cocoa powder, maple syrup, vanilla, salt, and a small splash of milk. That version is easy to balance, easy to blend, and easy to adjust if you want it sweeter, darker, or thicker.
5. Can I make a 4 ingredient avocado chocolate mousse?
Yes, a 4 ingredient avocado chocolate mousse can work very well. In most cases, that means avocado, cocoa powder, sweetener, and milk or another liquid. Still, vanilla and salt make the flavor noticeably rounder, so the fuller version often tastes more complete.
6. Is avocado chocolate mousse healthy?
Healthy avocado chocolate mousse can mean different things depending on how you make it. In general, it is often seen as a lighter-feeling dessert because avocado adds creaminess without heavy cream, and the sweetness can be adjusted to suit your preference. Even then, it is still meant to be enjoyed as dessert.
7. Can I make healthy avocado chocolate mousse with less sugar?
Yes, you can make healthy avocado chocolate mousse with less sugar, but the balance still matters. If the sweetness drops too low, the cocoa may taste bitter and the avocado may come forward more than you want. Therefore, it helps to reduce sweetener gradually rather than all at once.
8. Is avocado chocolate mousse keto?
Avocado chocolate mousse can be keto when made with unsweetened cocoa or dark chocolate and a suitable low-carb sweetener. In that version, almond milk or coconut milk usually works well, and the avocado helps maintain a rich texture without needing sugar.
9. What sweetener works best in keto avocado chocolate mousse?
For keto avocado chocolate mousse, powdered or liquid sweeteners usually work better than coarse granulated ones because they blend more smoothly. As a result, the mousse tastes creamier and avoids the gritty texture that can sometimes happen with low-carb desserts.
10. Is avocado chocolate mousse vegan?
Yes, avocado chocolate mousse can be naturally vegan if you use a plant-based sweetener such as maple syrup and a dairy-free milk like almond, oat, or coconut milk. If you add melted chocolate, just make sure the chocolate itself is dairy-free.
11. What milk is best for vegan avocado chocolate mousse?
Almond milk is a popular choice for vegan avocado chocolate mousse because it keeps the flavor clean and lets the chocolate stay in focus. Oat milk makes the dessert a bit softer, whereas coconut milk gives it a richer, fuller finish.
12. What is the difference between avocado chocolate mousse and avocado chocolate pudding?
Avocado chocolate mousse is usually thicker, firmer, and more set after chilling, while avocado chocolate pudding tends to be softer and looser. Even so, the line between the two can be fairly thin, especially if the recipe uses more liquid or a heavier sweetener.
13. Why is my avocado chocolate mousse too thin?
Avocado chocolate mousse can turn out too thin if there is too much liquid, if the avocado is especially large, or if the sweetener loosens the mixture more than expected. In many cases, chilling helps first. Otherwise, a little more cocoa powder or melted dark chocolate can bring the texture back into balance.
14. Why is my avocado chocolate mousse too thick?
If avocado chocolate mousse feels too thick, the mixture probably needs just a little more liquid to blend and soften properly. Add it slowly, though, because a small amount can make a big difference. Otherwise, the mousse can shift quickly toward pudding.
15. Why does my avocado chocolate mousse taste bitter?
Bitterness usually comes from strong cocoa, not enough sweetener, or too little salt. Sometimes cacao powder can also taste more intense than expected. In that case, a bit more sweetener, a pinch of salt, or some melted dark chocolate often helps smooth the flavor out.
16. Why does my avocado chocolate mousse taste like avocado?
That usually happens when the avocado is underripe, the chocolate flavor is too light, or the dessert has not been chilled long enough. More cocoa, a touch more vanilla, and a little extra sweetener often help. Most importantly, start with a ripe avocado whenever possible.
17. Can I use cacao instead of cocoa in avocado chocolate mousse?
Yes, you can use cacao instead of cocoa in avocado chocolate mousse. The flavor may taste a little darker or earthier, so you may want to adjust the sweetness slightly. Nevertheless, it can be a very good choice if you prefer a deeper chocolate profile.
18. Can I use dark chocolate instead of cocoa powder?
Yes, dark chocolate can be used instead of cocoa powder, or alongside it, in avocado chocolate mousse. Melted dark chocolate usually makes the dessert feel richer, smoother, and more luxurious, while cocoa powder keeps it a bit lighter and more direct in flavor.
19. Can I add banana to avocado chocolate mousse?
Absolutely. Avocado banana chocolate mousse is a softer, sweeter variation that can feel more familiar to people who are unsure about avocado in dessert. On the other hand, banana adds its own flavor clearly, so it changes the character of the mousse more than most other add-ins.
20. How long does avocado chocolate mousse last in the fridge?
Avocado chocolate mousse is usually best within one to two days in the refrigerator, when the flavor and color still feel fresh. Keep it in an airtight container, and try to limit air exposure as much as possible.
21. Can you freeze avocado chocolate mousse?
Yes, avocado chocolate mousse can be frozen, although the texture may change slightly after thawing. Because of that, it is usually best enjoyed fresh or chilled from the fridge. Still, freezing can work if you want to save leftovers rather than waste them.
22. Is avocado chocolate mousse a good make-ahead dessert?
Yes, avocado chocolate mousse is an excellent make-ahead dessert because chilling actually improves the texture. In fact, many versions taste better after some time in the fridge, once the chocolate settles and the mousse firms up.
23. What toppings go well with avocado chocolate mousse?
A light dusting of cocoa powder, dark chocolate shavings, chopped nuts, berries, or a little whipped coconut cream all work well. Since the mousse is already rich, simple toppings usually feel best.
24. Can I make avocado mousse without chocolate?
You can make avocado mousse without chocolate, but it becomes a different dessert altogether. Chocolate is what gives avocado chocolate mousse its depth and helps the avocado stay in the background. Without it, the avocado flavor will be much more noticeable.
25. What makes the best avocado mousse recipe turn out silky?
The best avocado mousse recipe turns silky when you use a ripe avocado, blend thoroughly, and add liquid gradually rather than all at once. In addition, tasting before chilling helps you correct bitterness, sweetness, and thickness before the texture sets.