Posted on — 7 Comments

Low Carb Chia Pudding Recipes

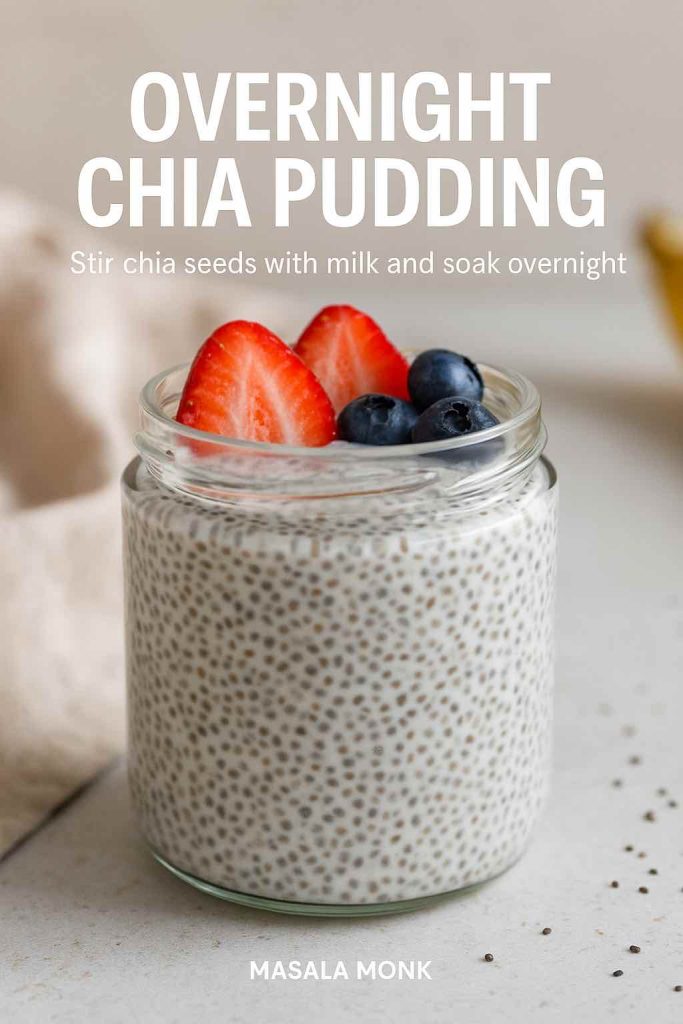
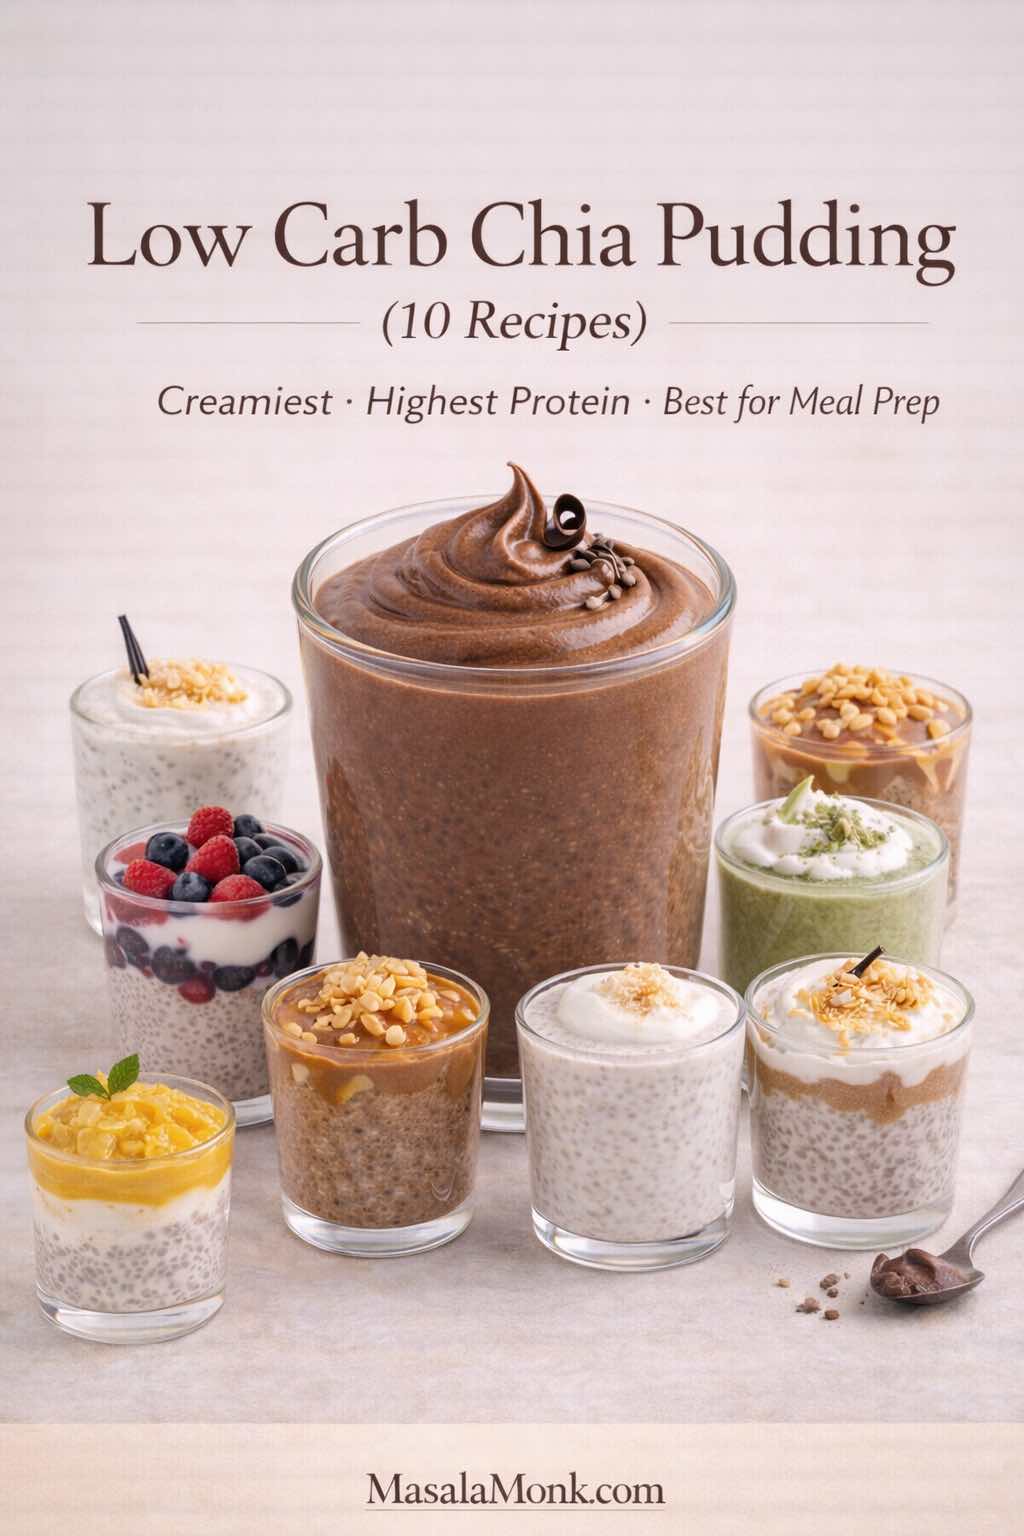
Cover image showing a premium glass jar of low carb chia pudding with a smooth whipped topping on a warm-cream seamless background. Editorial food photography style for “Low Carb Chia Pudding” featuring 10 recipes including keto, high protein, dairy-free, and blended options, with MasalaMonk.com branding.

This post was last updated on

Looking for low carb chia pudding recipes for weight loss? The most useful place to start is the pudding itself. Chia is not a fat burner, but a make-ahead serving can be easy to portion, simple to build with protein, and satisfying without relying on much added sugar. Here you can make it light with almond milk, thick and tangy with Greek yogurt, rich with coconut milk, chocolatey with protein powder, or completely smooth after blending.

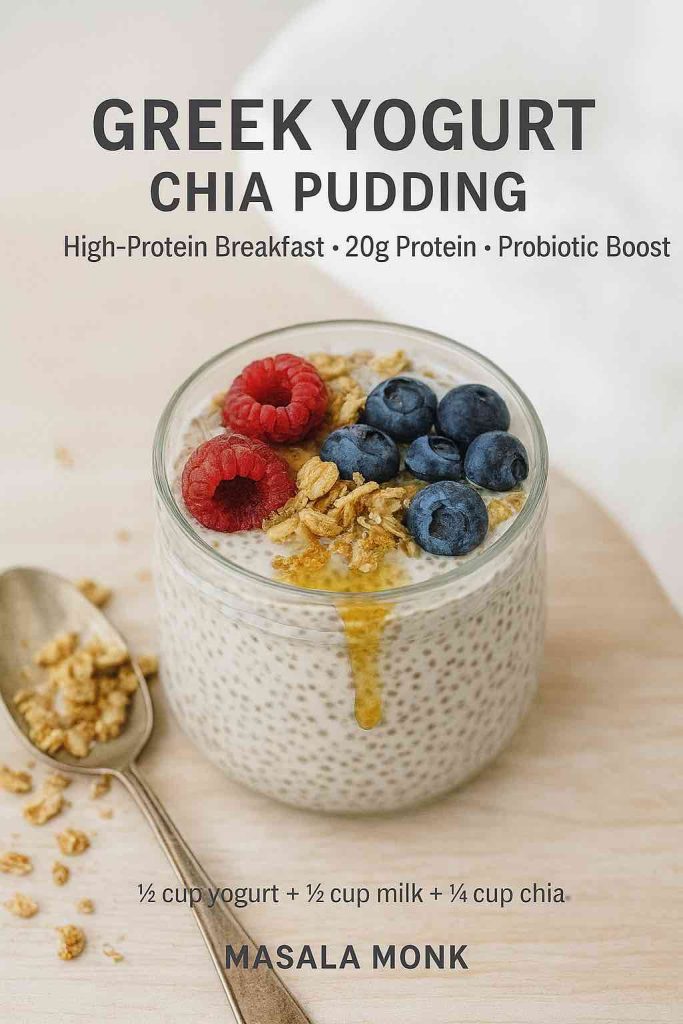
Here for the thick Greek-yogurt chia pudding? Start with ¾ cup plain Greek yogurt + 3 tablespoons chia seeds + ¼ cup / 60 ml unsweetened almond milk or water. Stir again after 10 minutes, then chill for at least 2 hours. Jump to the full Greek yogurt chia pudding recipe ↓
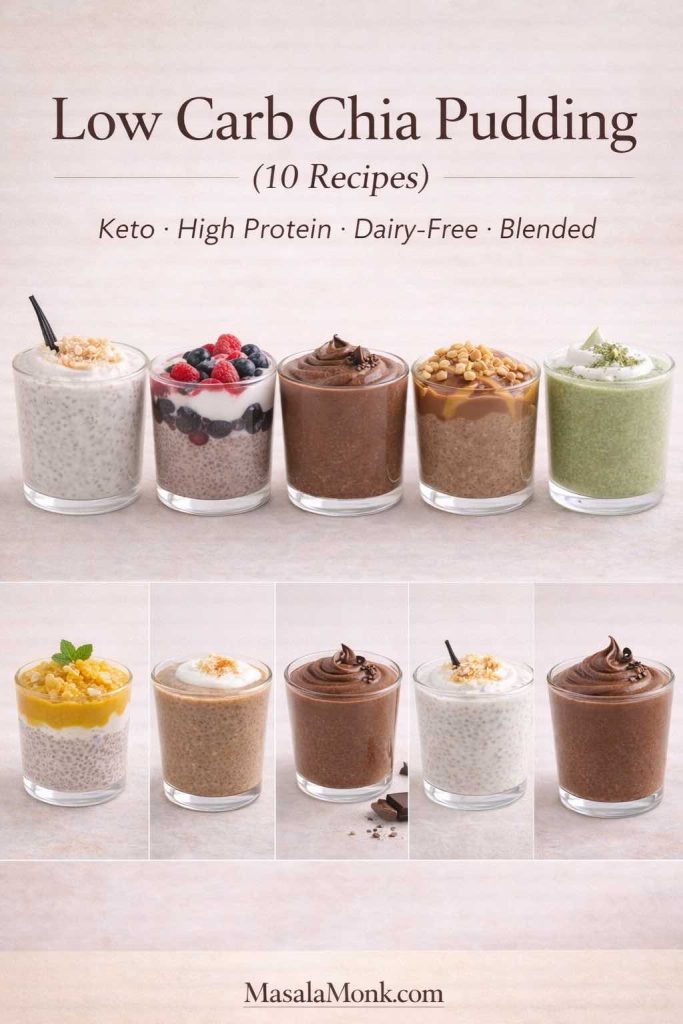
Collage showing ten low carb chia pudding cups including vanilla, Greek yogurt, chocolate, peanut butter, matcha, mango, coconut and blended mousse variations.
All 10 chia pudding recipes at a glance—from thick Greek yogurt and keto coconut milk to chocolate protein pudding, fruit layers and smooth blended mousse.

You do not need to read this guide from top to bottom. Use the jumps above if you already know what you want, or use the table of contents to solve the ratio, liquid, protein, meal-prep, or troubleshooting question that brought you here.


Low Carb Chia Pudding for Weight Loss: What Actually Matters

Chia pudding is not a fat burner, and a jar does not cause weight loss by itself. What makes it useful in a weight-management routine is practical: chia is easy to portion ahead, it creates a substantial gel-like texture when hydrated, and it can be paired with protein-rich ingredients such as Greek yogurt or protein powder.

The rest of the jar matters just as much. Canned coconut milk, nut butter, nuts, granola, fruit, sweeteners, and large portions can quickly change both calories and carbohydrates. A chia pudding that replaces a less satisfying breakfast is a different situation from adding a rich pudding on top of everything else you already eat.

  • Start unsweetened: choose unsweetened almond milk, plain Greek yogurt, or an unsweetened coconut base when keeping added sugar low matters.
  • Add protein when the jar needs to function as a meal: Greek yogurt or a protein powder you already tolerate well are the easiest routes.
  • Measure calorie-dense toppings: nut butter, nuts, seeds, coconut and granola are easy to overserve.
  • Use fruit deliberately: berries are easy to portion; mango and apple work better as measured flavor accents when carbs matter.
  • Do not confuse “keto” or “low carb” with automatically low-calorie: coconut milk and nut butter can make an excellent low-carb pudding while still creating a very energy-dense jar.

That is the reason this guide includes several styles rather than one “perfect” weight-loss pudding: the best jar is the one whose portion, protein, texture, and toppings fit the rest of your day.


Why Chia Pudding Works So Well as a Breakfast

A good chia pudding does two practical things well: it gives you a breakfast you can prepare ahead, and it creates a thick, substantial texture from very little morning work. Chia seeds absorb liquid as they hydrate, while Greek yogurt, protein powder, nuts, or richer milks can make the finished jar feel more complete.
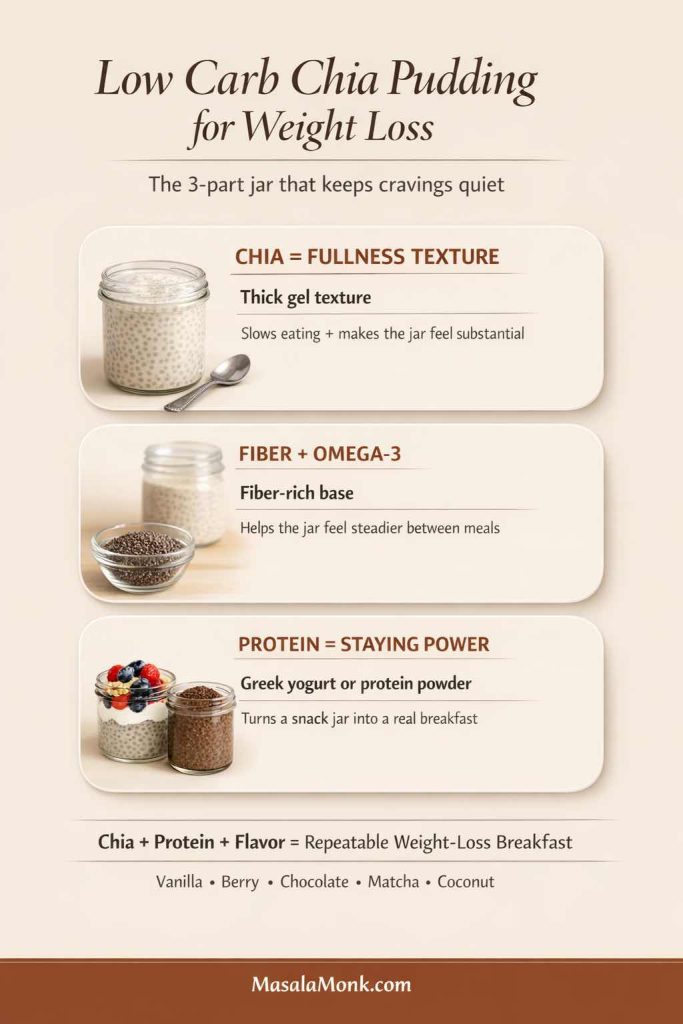
Infographic explaining how chia creates a thick gel texture and can be combined with protein such as Greek yogurt or protein powder.
Chia supplies the pudding structure; protein and the rest of the ingredients determine whether the jar behaves more like a snack or a full breakfast.

Chia seeds are naturally rich in fiber and contain alpha-linolenic acid, a plant-based omega-3 fat. For a useful evidence-based overview rather than exaggerated claims, see the Harvard Nutrition Source guide to chia seeds.

Protein is the easiest way to make the jar feel more meal-like

Plain chia and milk can work perfectly well as a snack, but Greek yogurt or protein powder gives you another lever when you want the jar to function as breakfast. Greek yogurt also changes the texture immediately: instead of waiting for milk alone to become pudding-like, you start with a thick, creamy base.
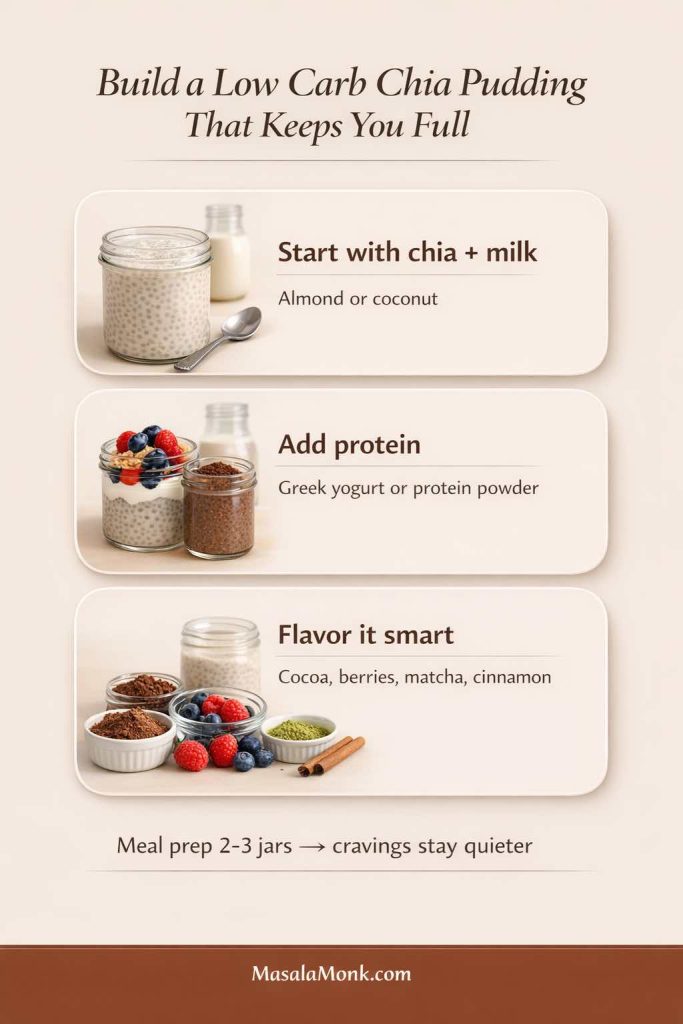
Three-step low carb chia pudding builder showing chia and milk, an optional protein addition, and flavor options such as cocoa, berries, matcha and cinnamon.
Think of the jar in three layers: chia + liquid for structure, an optional protein source for a more substantial breakfast, then flavors you genuinely want to eat.

Low Carb Chia Pudding Ratio: The Base Recipe That Prevents Clumps

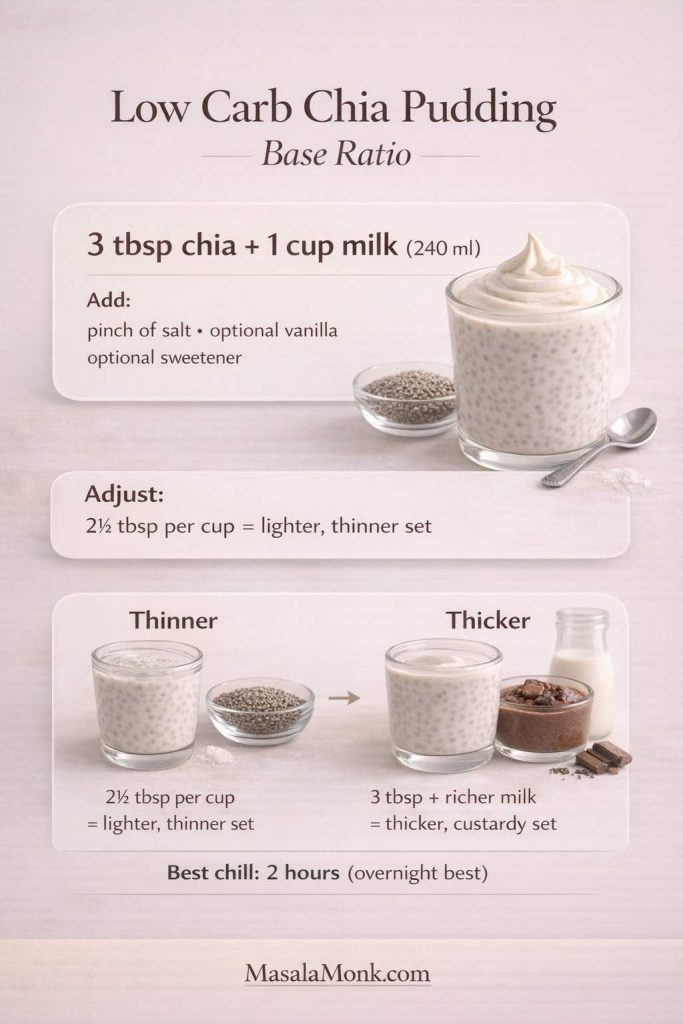
For a classic milk-based chia pudding, this is the dependable starting point:

  • 3 tablespoons chia seeds (roughly 30–35 g, depending on how you measure)
  • 1 cup / 240 ml liquid
  • Pinch of salt
  • ½ teaspoon vanilla, optional
  • Sweetener to taste, optional
Chia pudding ratio infographic showing 3 tablespoons chia seeds to 1 cup or 240 ml milk, with adjustments for thinner or thicker pudding.
Start with 3 tablespoons chia to 1 cup / 240 ml liquid. Use a little less chia for a softer set, or keep the full amount and use a richer liquid for a denser pudding.

The exact result changes with your liquid. Thin almond milk gives a lighter pudding, while canned coconut milk sets much richer. Greek yogurt needs far less added liquid because the yogurt already provides most of the body.

The stir-rest-stir method

  1. Whisk the liquid with vanilla, salt, sweetener, cocoa, protein powder, or other smooth flavorings first.
  2. Add the chia and whisk vigorously for 20–30 seconds.
  3. Let the mixture stand for 10 minutes.
  4. Whisk or stir thoroughly a second time.
  5. Cover and refrigerate for at least 2 hours; overnight gives the most settled texture.
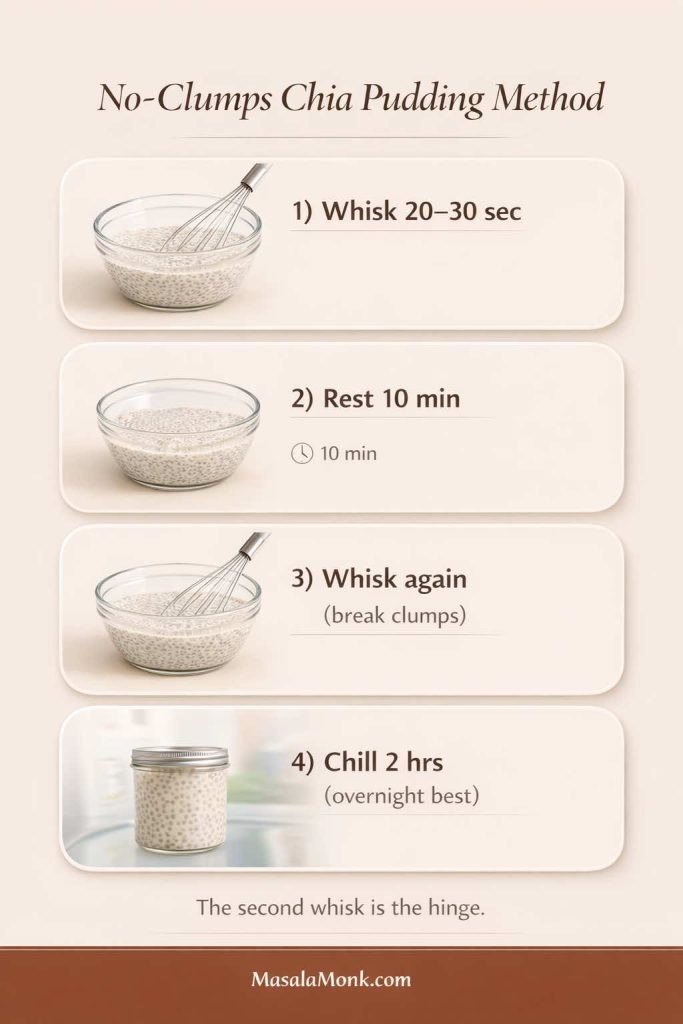
No-clumps chia pudding method showing whisking, a 10-minute rest, a second whisk and a final chill.
The second stir is the important one: the seeds have started hydrating but have not fully set, so this is your chance to break up clusters before they become permanent.

Can you make quick chia pudding?

Yes, although “quick” still means giving chia time to hydrate. Follow the same method and chill for 30–45 minutes. The texture will be softer than an overnight jar. Greek yogurt is particularly useful when you want a thick pudding sooner because much of the thickness is already present before the chia sets.

Give the chia enough time to hydrate

Chia thickens because the seeds absorb liquid over time. For pudding, use them fully hydrated rather than judging the mixture immediately after stirring. If the texture still seems thin after 30 minutes, give it more time before adding extra seeds; the biggest change usually happens during the longer refrigerator rest.


Choosing Your Liquid: Almond Milk, Coconut Milk, Yogurt, Oat Milk & More

Your liquid controls far more than flavor. It changes thickness, richness, carbohydrate content, and how much additional chia you may need. Choose the liquid first, then fine-tune the jar.
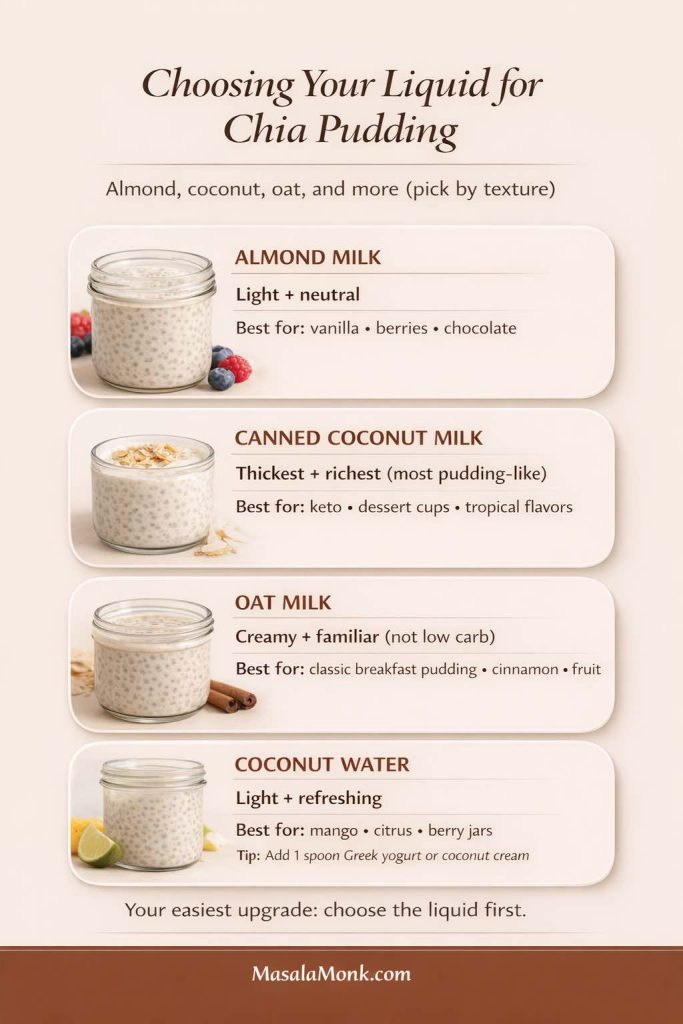
Guide comparing almond milk, canned coconut milk, oat milk and coconut water for chia pudding, including texture and best-use notes.
Almond milk stays light, canned coconut milk gives the richest set, oat milk is creamy but usually higher in carbohydrate, and coconut water creates a lighter fruit-friendly chia gel.

Almond milk: light and versatile

Unsweetened almond milk is an easy low-carb base because its flavor stays out of the way. It works especially well with vanilla, chocolate, cinnamon, berries, matcha, and nut butter.

Canned coconut milk: richest and thickest

If you want a pudding that feels especially rich, canned coconut milk is hard to beat. Because brands vary in thickness, whisk in enough water to make the mixture comfortably pourable before adding chia. Very thick coconut milk can otherwise produce dense pockets before the seeds hydrate evenly.

Greek yogurt: thick before it even chills

Greek yogurt works differently from milk. Instead of using a full cup of liquid, start with yogurt and loosen it gradually. For our full high-protein version, ¾ cup Greek yogurt + ¼ cup / 60 ml water or unsweetened almond milk creates a creamy starting mixture before the chia goes in.

Jump to the Greek yogurt chia pudding recipe →

Oat milk: creamy, but usually not low carb

Oat milk produces a mild, familiar breakfast-pudding flavor. It can still be used with any of the methods in this guide, but check the nutrition label if keeping carbohydrates low is an important part of your goal.

Coconut water: light and fruit-friendly

Coconut water produces a much lighter gel than milk. It pairs particularly well with mango, lime and berries, but it will not taste as creamy unless you add a spoonful of Greek yogurt or coconut cream. If you would rather drink your chia than turn it into pudding, our Chia Seed Water guide uses a much lighter chia-to-liquid ratio and covers plain, lemon, coconut-water and overnight versions.

Dairy-Free Chia Pudding: The Easiest Swaps

Several recipes in this collection are naturally dairy-free when you use plant milk and skip optional Greek yogurt. Unsweetened almond milk is the lightest neutral base; canned coconut milk gives the richest dairy-free texture; and a lighter coconut-milk beverage works well for matcha, mango, apple-cinnamon, and gingerbread.

If you use protein powder in a dairy-free jar, check the ingredient label: whey and casein are dairy proteins, while many pea, soy, rice, and blended plant proteins are dairy-free.


High Protein Chia Pudding: Greek Yogurt, Protein Powder & Collagen

There are three straightforward ways to increase the protein in a chia jar. Greek yogurt gives you protein and immediate thickness. Protein powder can add more protein and flavor but needs to be dissolved well. Collagen peptides dissolve easily, although they do not thicken the pudding the way yogurt does. If collagen is part of your routine, Harvard Health has a measured overview of what collagen supplements can and cannot reasonably claim.
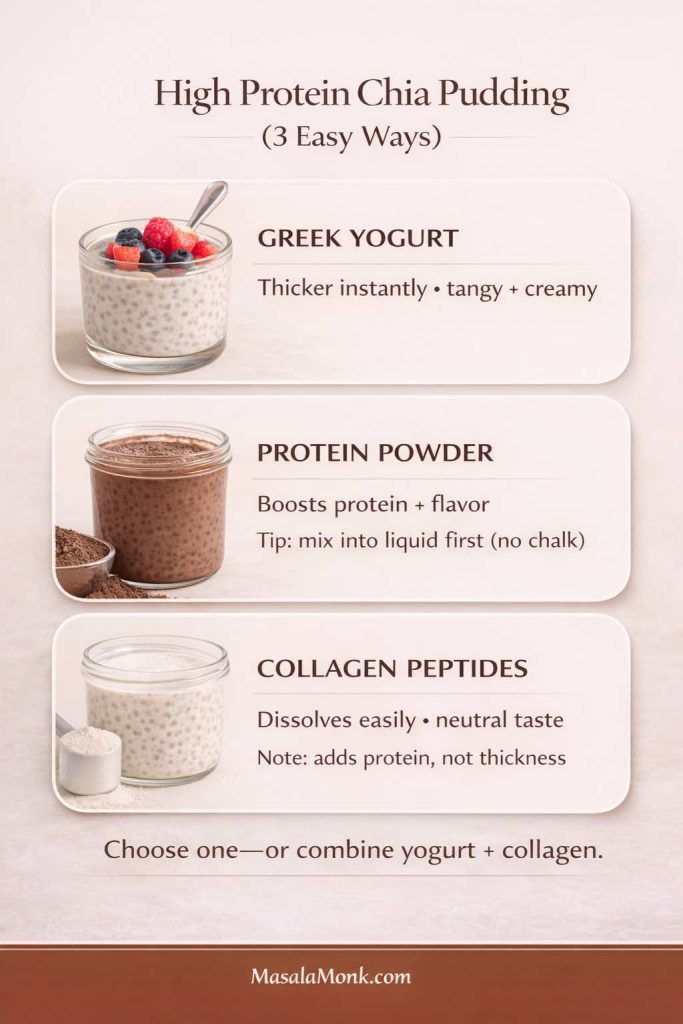
High protein chia pudding comparison showing Greek yogurt, protein powder and collagen peptides as three ways to add protein.
Greek yogurt changes both protein and texture; protein powder is a bigger flavor lever; collagen dissolves easily but contributes little to thickness.

How to add protein powder without a chalky texture

Do not dump dry protein powder into a finished chia pudding. Whisk it completely into the milk first, then add the chia. If your powder is stubborn, make a smooth paste with a small amount of liquid before gradually whisking in the rest.

Keep extra liquid nearby: protein powders absorb liquid very differently. After the 10-minute rest, add 2–4 tablespoons milk if the mixture has become unusually thick before it goes into the refrigerator.
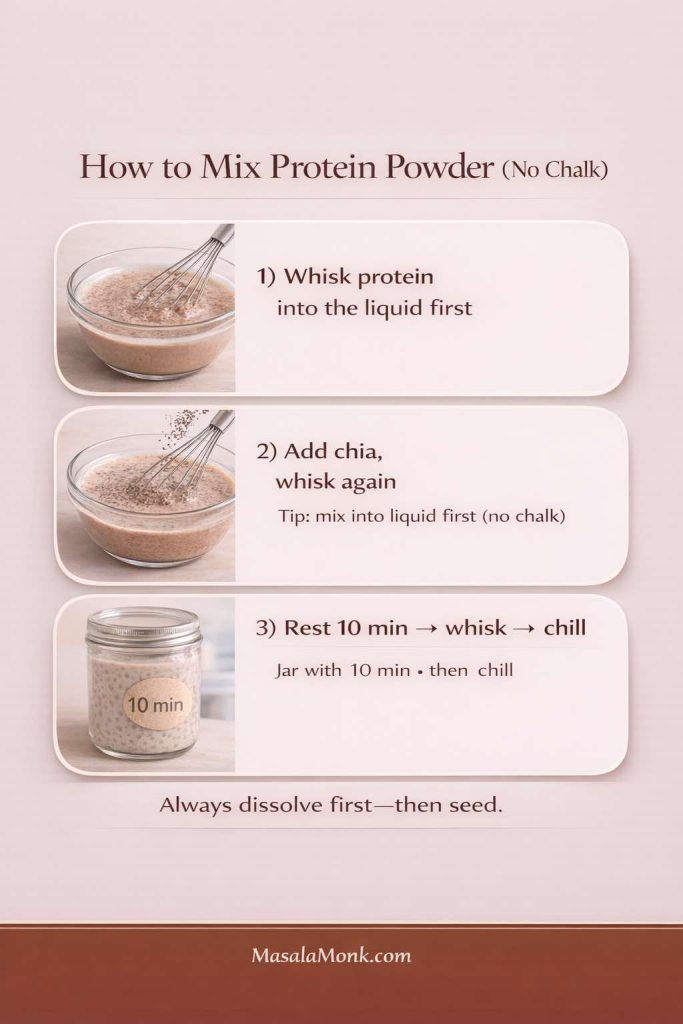
Three-step guide showing protein powder whisked into liquid first, followed by chia seeds and a final 10-minute rest and second stir.
For smooth protein chia pudding: dissolve the powder first, add the seeds second, then use the same 10-minute rest and second-stir method.

10 Low Carb Chia Pudding Recipes

Each recipe below makes roughly 2 small servings or 1 generous serving, depending on appetite and toppings. For meal prep, multiply the ingredients and portion the finished mixture into individual jars.

Low-carb vs keto: these recipes are not all equally low in carbohydrate. The unsweetened almond-milk, Greek-yogurt, chocolate, and coconut versions are the easiest to keep very low carb. Mango and apple are fruit-forward options; use the fruit as a measured accent if carbohydrate intake is a priority.
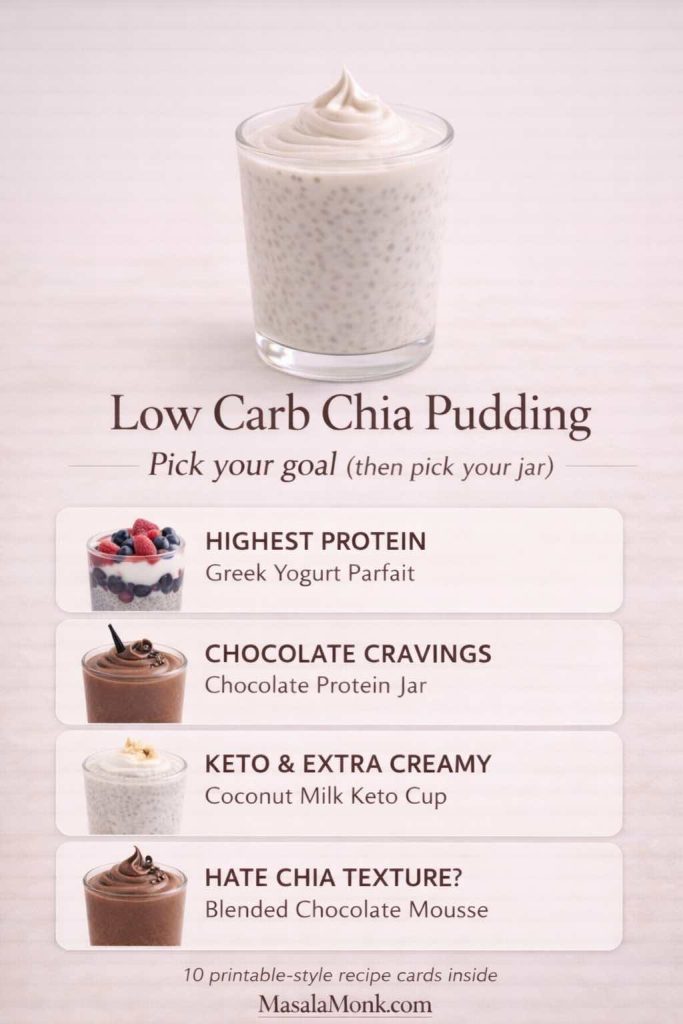
Goal-based chia pudding chooser showing Greek yogurt for highest protein, chocolate protein pudding for chocolate cravings, coconut milk for extra-creamy keto pudding and blended chocolate mousse for people who dislike whole chia texture.
Start with the result you want: Greek yogurt for thick and protein-forward, chocolate protein for cocoa cravings, coconut milk for the richest keto texture, or blended mousse if whole chia seeds are the problem.
If you want…Make this one
Thickest high-protein jarGreek Yogurt Chia Pudding
Simple everyday keto baseVanilla Almond Milk
Chocolate + proteinChocolate Protein
Chocolate dessert feelChocolate Peanut Butter
Fresh café-style flavorMatcha
Fruit-forwardMango
Cozy breakfastApple Cinnamon
Warm-spice dessert flavorGingerbread
Richest keto textureCoconut Milk
No whole-seed textureBlended Chocolate Mousse

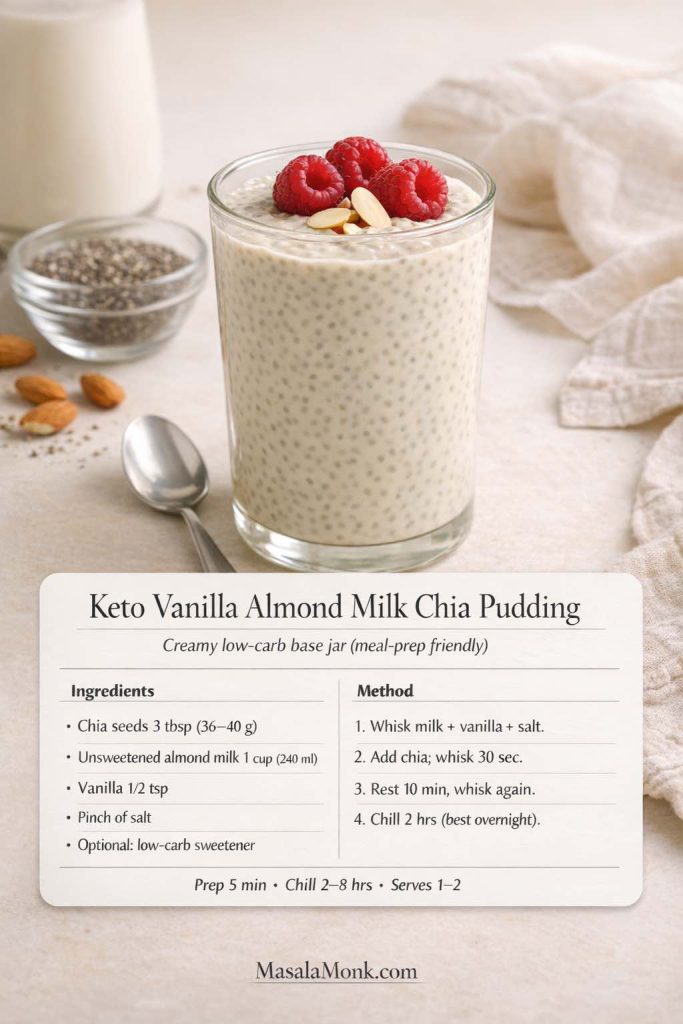
1) Keto Chia Pudding with Almond Milk

This is the easiest everyday low carb chia pudding to memorize. Vanilla keeps it neutral enough for berries, nuts, cocoa, cinnamon, or nut butter later.

Ingredients

  • 3 tablespoons chia seeds
  • 1 cup / 240 ml unsweetened almond milk
  • ½ teaspoon vanilla extract
  • Pinch of salt
  • Optional low-carb sweetener, to taste
Keto vanilla almond milk chia pudding topped with raspberries and sliced almonds.
The almond-milk jar is the useful blank canvas of the collection: light enough for fruit, but easy to make richer with yogurt, nuts or nut butter.

Method

  1. Whisk almond milk, vanilla, salt and sweetener, if using.
  2. Add the chia and whisk vigorously for 20–30 seconds.
  3. Rest 10 minutes, then whisk again.
  4. Cover and refrigerate for at least 2 hours or overnight.

Easy variations: add ½ teaspoon cinnamon; stir in 1 tablespoon unsweetened shredded coconut; or add 1–2 tablespoons Greek yogurt at serving time for a creamier finish.

For a deeper single-recipe treatment, see the keto chia pudding with almond milk.


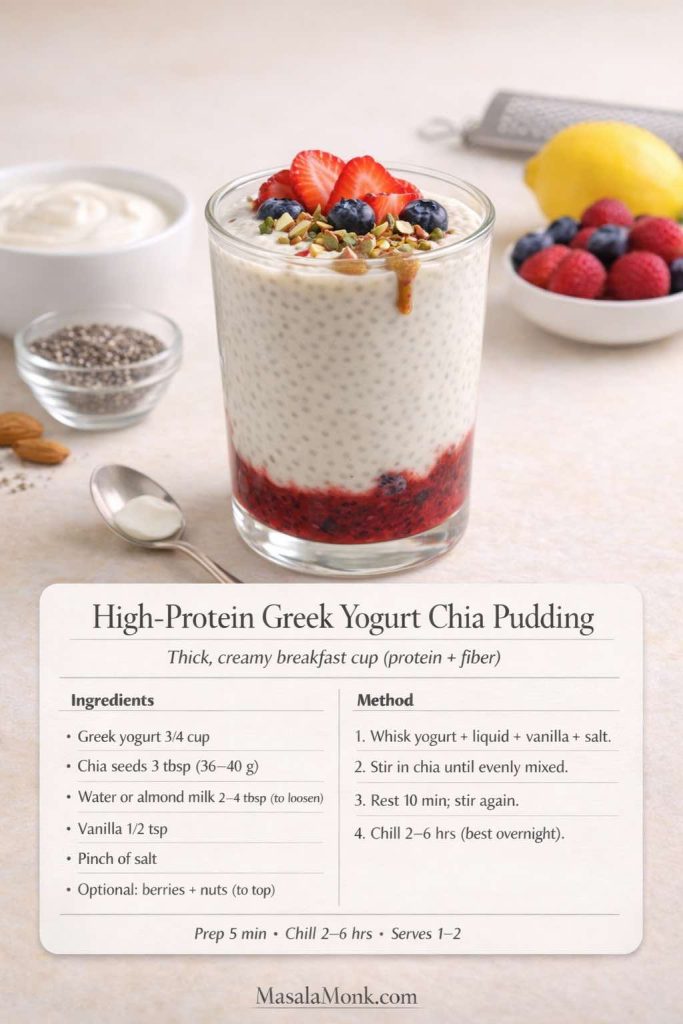
2) Chia Pudding with Greek Yogurt: High Protein & Ultra Creamy

If the chia pudding you want is thick, creamy and closer to cheesecake filling than a glass of soaked seeds, start here. Greek yogurt gives the jar body before the chia has even finished hydrating, while a small amount of liquid keeps the mixture creamy rather than pasty.

Ingredients

  • ¾ cup plain Greek yogurt
  • 3 tablespoons chia seeds
  • ¼ cup / 60 ml unsweetened almond milk or water, plus 1–2 tablespoons more after chilling if needed
  • ½ teaspoon vanilla extract
  • Pinch of salt
  • Optional sweetener, to taste
Thick high-protein Greek yogurt chia pudding layered with berries and topped with strawberries, blueberries, nuts and a small nut-butter drizzle.
This is the thickest protein-forward version in the collection: tangy Greek yogurt, hydrated chia and enough added liquid to keep the pudding creamy rather than stiff.

Method

  1. Whisk the Greek yogurt, vanilla, salt and ¼ cup / 60 ml water or almond milk until completely smooth.
  2. Stir in the chia seeds until evenly distributed.
  3. Rest for 10 minutes, then stir again so no dense chia pockets remain.
  4. Refrigerate for at least 2 hours. Overnight is fine.
  5. Stir before serving and add another 1–2 tablespoons liquid if you want it looser.

How thick should it look before chilling?

It should already be thick, but it should still move easily when stirred. If it looks like a stiff paste before going into the refrigerator, add another tablespoon or two of liquid. The chia will absorb more as it sits.

Can you use nonfat or regular yogurt?

Yes. Nonfat Greek yogurt works, although the finished pudding can taste a little sharper and less rich. Regular yogurt is thinner, so start with less added liquid and check the texture after hydration. Different yogurts vary enough that the final splash of liquid should be adjusted by texture rather than treated as an exact requirement.

Can you add protein powder too?

Yes. Whisk the protein powder into the yogurt and loosening liquid before adding chia. Protein powders absorb liquid differently, so expect to add another 1–3 tablespoons milk if the mixture becomes unusually stiff after the 10-minute rest.

Best toppings and variations

For a cheesecake-style jar, use vanilla, berries and a little lemon zest. For chocolate, whisk cocoa into the yogurt before adding chia. Peanut butter, chopped nuts, cacao nibs and a small berry layer all work well because they add contrast without turning the pudding watery.

If this thick, tangy, almost-cheesecake style is the chia pudding you actually want, keep going with our 10 Creative Chia Pudding Recipes. That collection branches into Greek-yogurt, cheesecake, chocolate, blueberry-lemon, mango and coconut-cream directions, so you can keep the texture you like and change the flavor.


3) Chocolate Protein Chia Pudding

This is the jar to make when you want chocolate flavor without turning breakfast into a sugar-heavy dessert. The important technique is dissolving the protein powder and cocoa before the chia goes in.

  • 1 cup / 240 ml unsweetened almond milk or dairy milk
  • 1 scoop chocolate protein powder, or vanilla protein plus extra cocoa
  • 2 tablespoons cocoa or cacao powder
  • 3 tablespoons chia seeds
  • Pinch of salt
  • Optional sweetener, to taste
  • Optional: 1 tablespoon Greek yogurt for extra creaminess
  • 2–4 tablespoons extra milk, only if your protein powder makes the mixture unusually thick
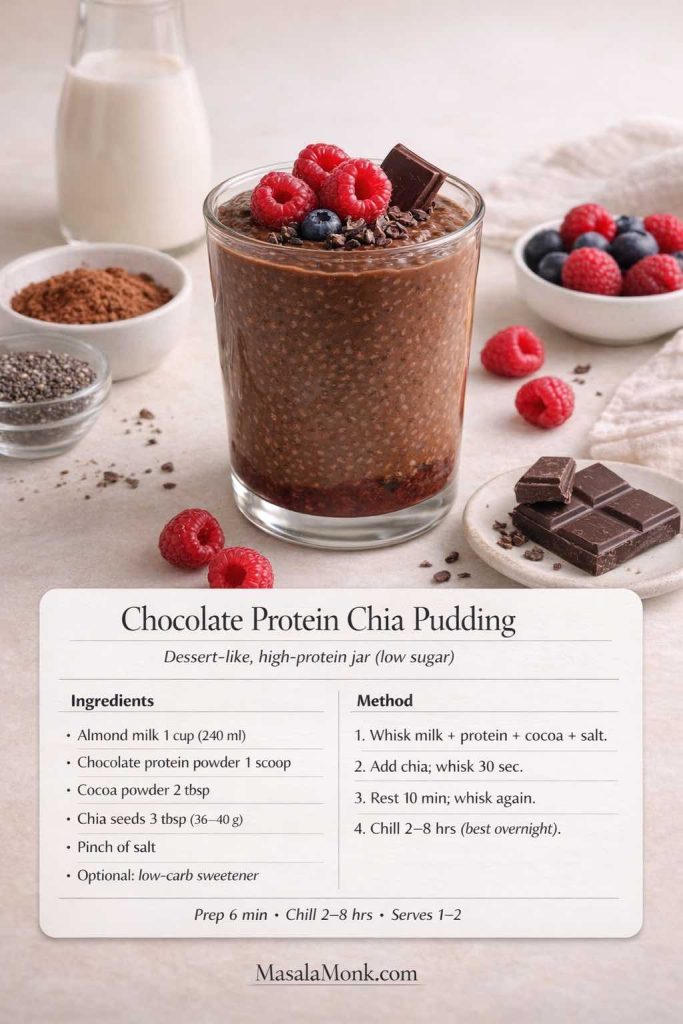
Chocolate protein chia pudding topped with raspberries, cacao nibs and dark chocolate.
Cocoa and protein powder make this the most direct chocolate-for-breakfast jar in the collection.
  1. Whisk the milk, protein powder, cocoa, salt and sweetener until completely smooth.
  2. Add chia and whisk again.
  3. Rest 10 minutes, then stir thoroughly. If it already looks very thick, add 2–4 tablespoons extra milk.
  4. Refrigerate for at least 2 hours; overnight gives the most settled texture.

If it tastes chalky: whisk the protein powder with a small amount of milk into a smooth paste first, then gradually add the rest of the milk.


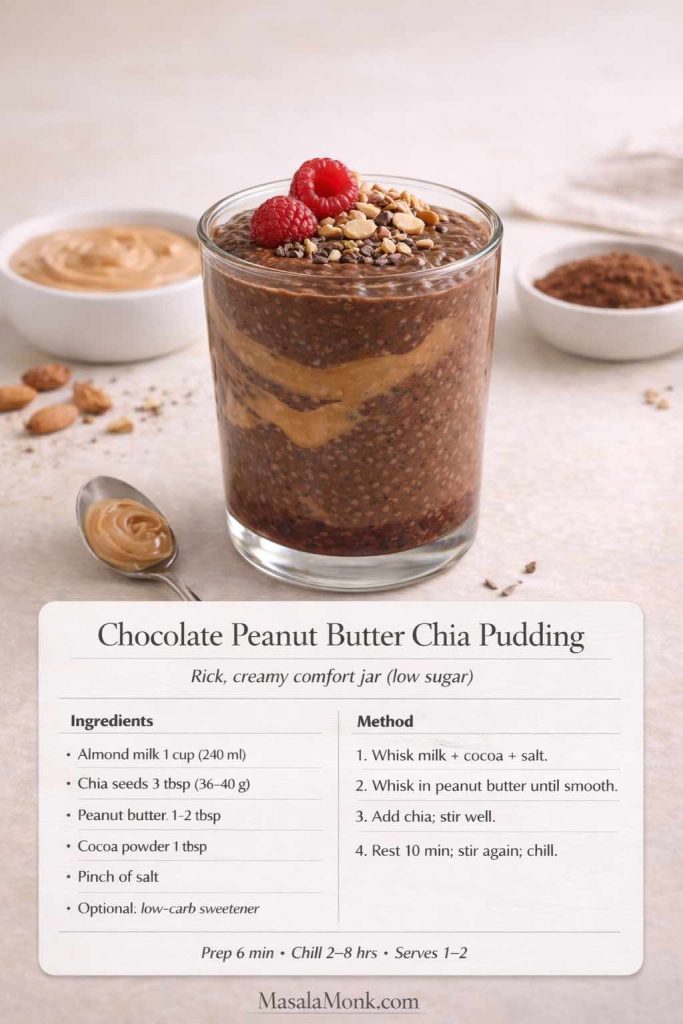
4) Chocolate Peanut Butter Chia Pudding

Peanut butter supplies richness and makes chocolate taste fuller even when you keep the pudding only lightly sweetened.

  • 1 cup / 240 ml almond milk or dairy milk
  • 3 tablespoons chia seeds
  • 1–2 tablespoons peanut butter
  • 1 tablespoon cocoa powder
  • Pinch of salt
  • Optional sweetener
Chocolate peanut butter chia pudding with a peanut butter swirl, raspberries, chopped peanuts and cacao nibs.
Chocolate and peanut butter create a richer dessert-style jar without needing much additional sweetness.
  1. Whisk milk, cocoa, salt and sweetener until smooth.
  2. Whisk in the peanut butter until evenly incorporated.
  3. Add chia, rest 10 minutes and stir again.
  4. Refrigerate for at least 2 hours.

A tiny splash of vanilla or pinch of cinnamon can make the cocoa taste deeper. Top with berries, roasted nuts or a few cacao nibs.


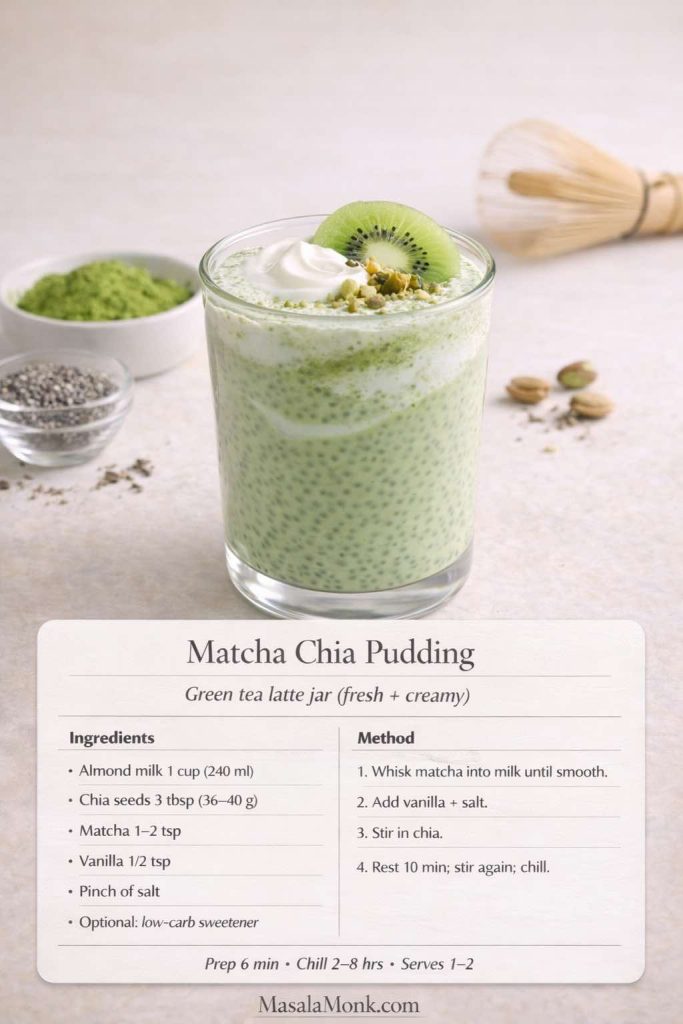
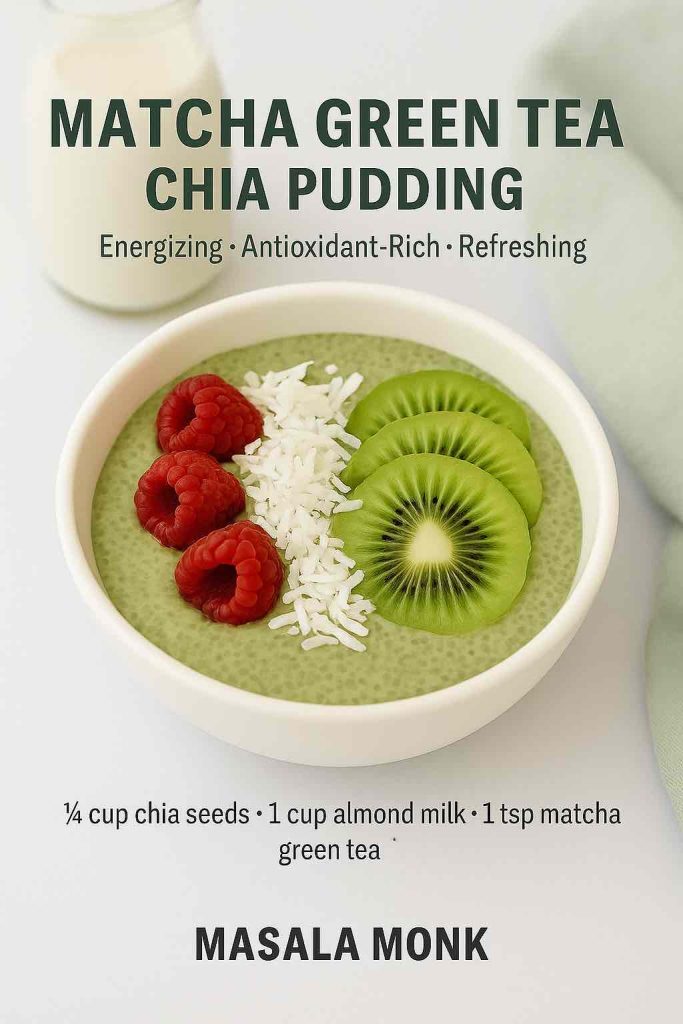
5) Matcha Chia Pudding

Matcha gives chia pudding a clean green-tea flavor that works especially well with vanilla and a small pinch of salt.

  • 1 cup / 240 ml unsweetened almond milk or light coconut-milk beverage
  • 3 tablespoons chia seeds
  • 1–2 teaspoons matcha powder
  • ½ teaspoon vanilla
  • Pinch of salt
  • Optional sweetener
Creamy matcha chia pudding topped with kiwi, pistachio and a small spoonful of yogurt.
Matcha creates a lighter, café-style change of pace between the richer chocolate and coconut puddings.
  1. Whisk or sift matcha into the milk until smooth.
  2. Add vanilla, salt and sweetener, if using.
  3. Add chia, rest 10 minutes, stir again and refrigerate.

If your matcha clumps, whisk it first with 1–2 tablespoons warm water to form a smooth paste. Matcha contains caffeine, so use less or enjoy it earlier in the day if you are sensitive to it.


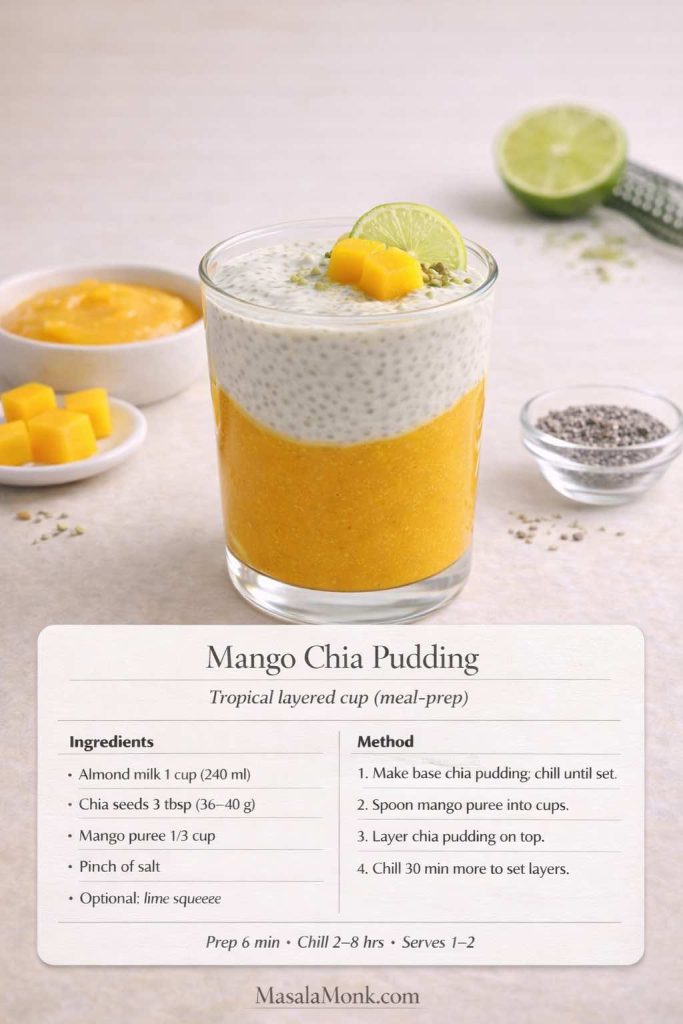
6) Mango Chia Pudding

Mango gives you plenty of flavor from a relatively small amount of fruit. Lime and a pinch of salt help the mango taste brighter, so you do not need to turn the whole jar into mango puree.

  • 1 cup / 240 ml almond milk or coconut-milk beverage
  • 3 tablespoons chia seeds
  • ⅓ cup mango puree or finely diced mango
  • Pinch of salt
  • Optional squeeze of lime
Layered mango chia pudding with bright mango puree, creamy chia pudding, mango pieces and lime.
Layering the mango rather than mixing a large quantity through the whole jar gives you strong tropical flavor without overwhelming the chia base.
  1. Make the chia base with milk, chia and salt.
  2. Chill until set.
  3. Fold in the mango just before eating, or layer the puree at the bottom of the jar.
  4. Finish with lime, if using.

If the tropical-fruit direction is what you like, try our pineapple chia pudding next. It uses the same two-stir logic but goes deeper on pineapple, yogurt, texture, and how to keep the pudding spoonable rather than watery.


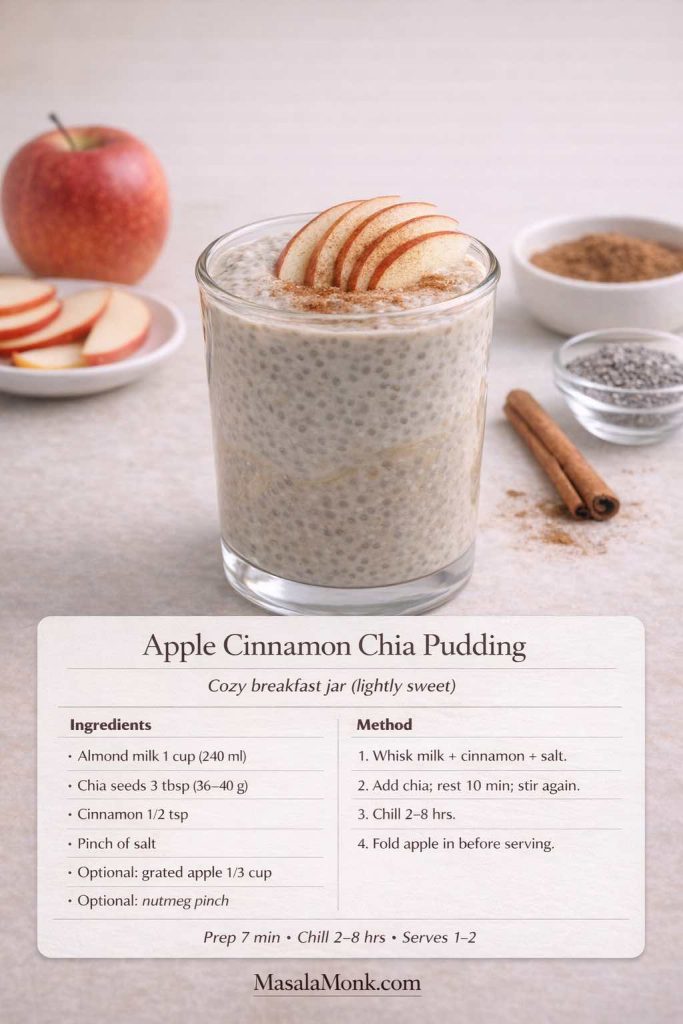
7) Apple Cinnamon Chia Pudding

This version gets most of its cozy character from cinnamon, vanilla and nutmeg, so the apple can stay a relatively small accent.

  • 1 cup / 240 ml unsweetened almond milk
  • 3 tablespoons chia seeds
  • ½ teaspoon cinnamon
  • Pinch of salt
  • Optional: ⅓ cup grated apple
  • Optional: pinch of nutmeg
Apple cinnamon chia pudding topped with thin apple slices and cinnamon.
For the freshest texture, add grated apple shortly before serving rather than letting it sit in the pudding for several days.
  1. Whisk milk, cinnamon, salt and nutmeg.
  2. Add chia, rest 10 minutes, stir again and chill.
  3. Fold in grated apple shortly before serving.

Stricter low-carb version: skip the apple and use cinnamon, vanilla and chopped pecans for a cinnamon-pecan jar.


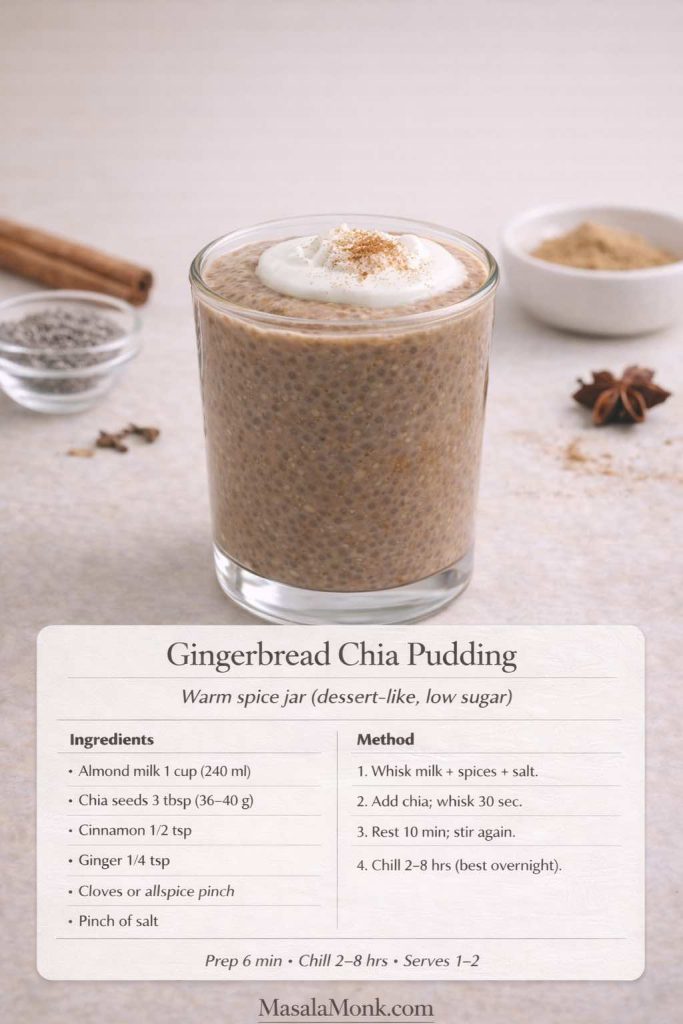
8) Gingerbread Chia Pudding

Gingerbread chia pudding is about warm-spice flavor rather than a health halo: cinnamon, ginger and cloves turn the same neutral base into something that feels much more dessert-like.

  • 1 cup / 240 ml almond milk or coconut-milk beverage
  • 3 tablespoons chia seeds
  • ½ teaspoon cinnamon
  • ¼ teaspoon ground ginger
  • Pinch of cloves or allspice
  • Pinch of salt
  • Optional sweetener
Gingerbread chia pudding topped with yogurt and cinnamon.
Warm spices transform a basic chia-and-milk jar without needing a complicated ingredient list.
  1. Whisk the spices, salt and sweetener into the milk.
  2. Add chia, rest 10 minutes, stir again and refrigerate.
  3. Serve with chopped nuts, Greek yogurt or coconut cream.

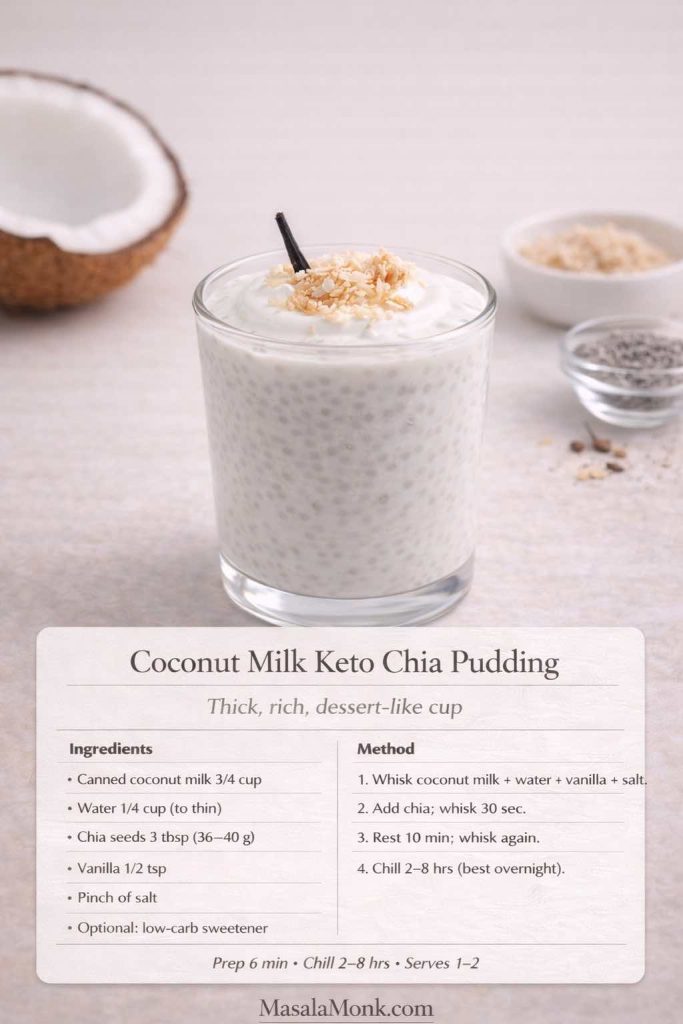
9) Keto Chia Pudding with Coconut Milk

This is the richest milk-based pudding in the collection. Canned coconut milk gives you much more body than almond milk, but thinning it slightly helps the chia hydrate evenly.

  • 3 tablespoons chia seeds
  • ¾ cup / 180 ml canned coconut milk
  • ¼ cup / 60 ml water, plus more if needed
  • ½ teaspoon vanilla
  • Pinch of salt
  • Optional sweetener
Rich coconut milk keto chia pudding topped with toasted coconut and vanilla.
Canned coconut milk produces the densest, richest milk-based chia pudding in this collection.
  1. Whisk coconut milk, water, vanilla, salt and sweetener until smooth.
  2. Add chia, rest 10 minutes and stir again.
  3. Refrigerate for at least 2 hours.
  4. If it becomes extremely thick overnight, loosen it with a splash of water before serving.

10) Blended Chia Pudding: Smooth Chocolate Mousse

If the idea of chia appeals to you but the whole-seed texture does not, this is the recipe worth trying. Let the chia hydrate first, then blend the finished pudding until glossy and smooth.

  • 1 cup / 240 ml almond milk or dairy milk
  • 3 tablespoons chia seeds
  • 1–2 tablespoons cocoa or cacao powder
  • Pinch of salt
  • Optional sweetener
  • Optional: 1 tablespoon peanut butter or 2 tablespoons Greek yogurt
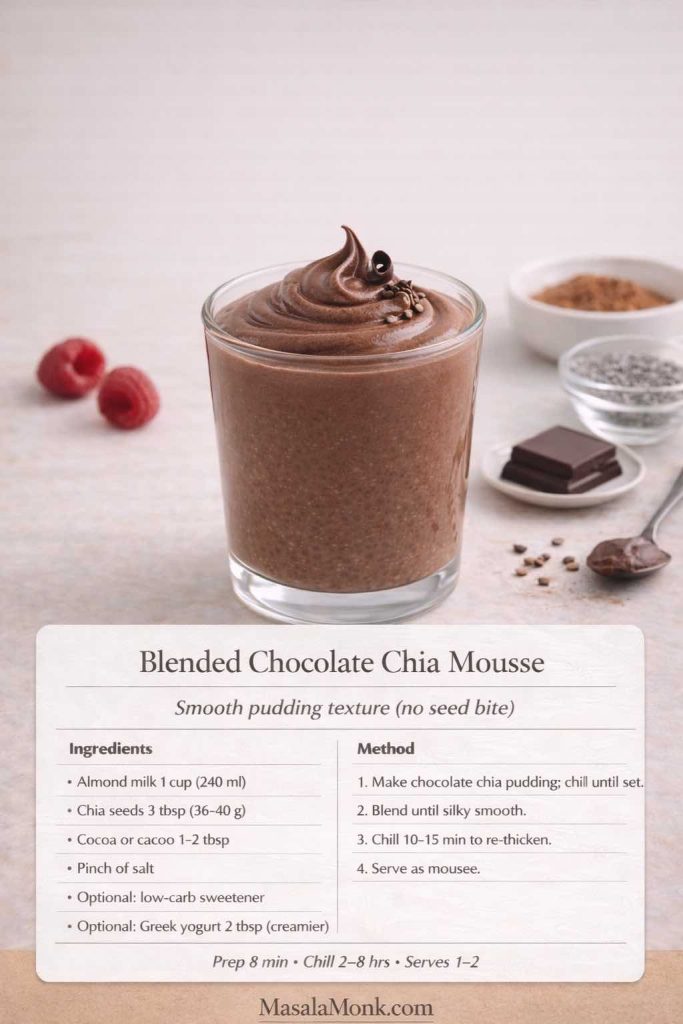
Silky blended chocolate chia mousse topped with dark chocolate and cacao nibs.
Hydrate first and blend second: that is what changes chia from a seedy pudding into a much smoother mousse-like texture.
  1. Make a standard chocolate chia pudding and refrigerate it for at least 2 hours.
  2. Blend until completely smooth and glossy.
  3. Add Greek yogurt or peanut butter if you want a richer finish.
  4. Chill for another 10–15 minutes before serving.

If protein powder is part of the recipe, blending after the chia has set can also smooth out small powdery pockets.

Whichever flavor you choose, texture is the part most likely to need adjusting. The fixes below are designed so you can rescue the pudding you already made instead of starting over.


Chia Pudding Troubleshooting: Runny, Too Thick, Lumpy or Bland

Most disappointing chia pudding can be traced to the ratio, hydration time, stirring pattern, or the thickness of the liquid you started with. Fix the texture before abandoning the jar.

ProblemWhat probably happenedWhat to do now
Runny after 2+ hoursToo much liquid, too little chia, or very thin milkAdd 1 teaspoon chia at a time, stir well and chill another 30–60 minutes.
Too thick or pastyRich coconut milk, thick yogurt, extra protein powder, or too much chiaStir in milk or water 1 tablespoon at a time until creamy.
Large chia clumpsThe seeds settled together before fully hydratingBreak them up thoroughly; next time use the 10-minute second stir.
Seeds still crunchyNot enough hydration time or liquidAdd a small splash of liquid and give the pudding more time.
Protein powder tastes chalkyPowder was added after the chia or not dissolved firstBlend the pudding, or next time dissolve powder completely before adding seeds.
Watery fruit layerJuicy fruit sat in the jar too longKeep berries and other watery toppings separate until serving.
Flavor is flatNot enough salt, aroma, richness or acidityAdd a pinch of salt plus vanilla, cinnamon, cocoa, nut butter, citrus zest or berries.
You hate the seed textureThe pudding may be fine; the texture simply is not for youBlend it into chocolate chia mousse.

One important correction: if a milk-based pudding is only slightly soft at the 30-minute mark, do not keep throwing chia into it. Give it the full two hours first. Chia continues absorbing liquid as it rests.


Chia Pudding Meal Prep & Storage

The easiest way to meal prep chia is to make one plain base and create several flavors from it rather than mixing four completely separate recipes.

  • Whisk the base in a bowl where you can easily break up clumps.
  • Do the 10-minute second stir.
  • Portion into three or four jars.
  • Flavor the jars in different directions—vanilla, cocoa, matcha, cinnamon, yogurt.
  • Keep crunchy toppings and watery fruit separate until serving.
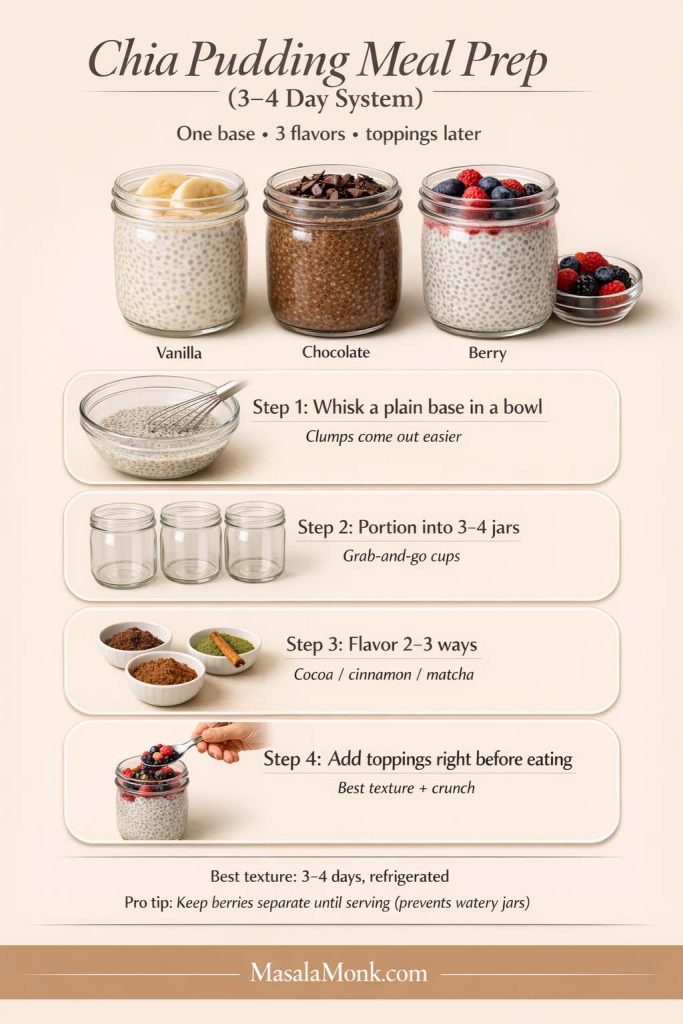
Chia pudding meal-prep system showing one base divided into several jars and flavored with vanilla, chocolate and berries, with toppings kept separate until serving.
One base, several flavors, toppings added later: this is much easier to repeat than making a completely different pudding every morning.

For quality, most chia puddings are best eaten within about 3–4 days when refrigerated. Yogurt- and milk-based versions should stay cold, and fruit is usually best added closer to serving. Follow normal refrigerated food-safety practices and discard anything that develops an unusual smell, appearance or signs of spoilage.

If what you really enjoy is the make-it-tonight, grab-it-tomorrow routine rather than chia specifically, our high protein overnight oats give you the same fridge-ready breakfast rhythm with oats, yogurt, protein-powder and dairy-free routes.


How to Make Chia Pudding Taste Better

If chia pudding tastes like a health chore, the problem is usually not the chia. A plain mixture of seeds and unsweetened milk needs flavor structure just like any other pudding.

  • Salt: a small pinch makes chocolate, vanilla, fruit and nut butter taste fuller.
  • Vanilla or warm spice: vanilla, cinnamon, ginger or nutmeg give the jar aroma without requiring much sweetness.
  • Depth: cocoa, cacao or matcha create a strong flavor identity.
  • Creaminess: Greek yogurt, canned coconut milk or nut butter changes both flavor and mouthfeel.
  • Contrast: berries, chopped nuts, toasted coconut and cacao nibs stop every spoonful feeling the same.
  • Acidity: lemon or lime zest can make fruit flavors brighter.
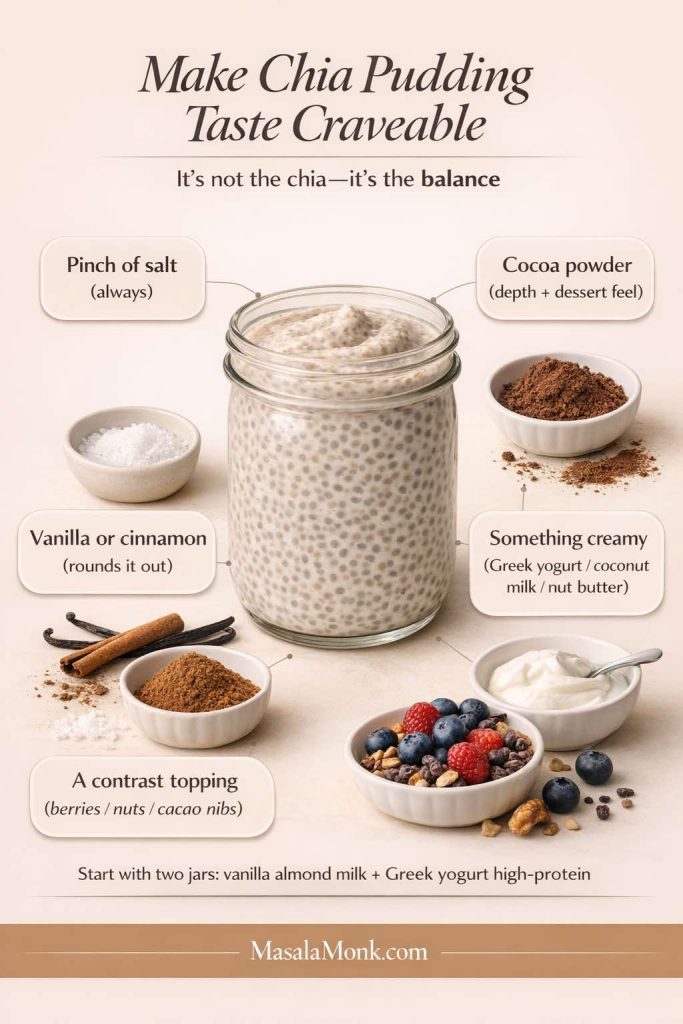
Flavor-balance guide for chia pudding showing salt, vanilla or cinnamon, cocoa, creamy ingredients and contrasting toppings.
Good chia pudding needs the same things other desserts do: seasoning, aroma, richness and contrast.

If you are making chia pudding for the first time, a useful two-jar experiment is one vanilla almond-milk jar and one Greek-yogurt jar. You will immediately learn whether you prefer a lighter gel-style pudding or a thicker, tangier texture.


Frequently Asked Questions

1) What is the best chia pudding ratio?

For a milk-based pudding, start with 3 tablespoons chia seeds to 1 cup / 240 ml liquid. Use a little less chia for a softer pudding. Greek-yogurt chia pudding uses a different ratio because yogurt already supplies most of the thickness.

2) How long does chia pudding need to set?

Give it at least 2 hours for a dependable set. A 30–45 minute quick version is possible but softer. Overnight works especially well for meal prep.

3) Why is my chia pudding watery?

It may need more time, more chia, or a better second stir. If it is still runny after at least two hours, add about 1 teaspoon chia, stir thoroughly and chill for another 30–60 minutes.

4) Why is my chia pudding too thick?

Thick Greek yogurt, canned coconut milk, protein powder and slightly heavy chia measurements can all produce an unexpectedly dense pudding. Stir in water or milk a tablespoon at a time until it becomes creamy again.

5) How do I stop chia seeds clumping together?

Whisk immediately after adding the seeds, then stir or whisk again after about 10 minutes. That second stir redistributes the seeds just as they begin to gel.

6) Can I make chia pudding with Greek yogurt and no milk?

Yes. Use water instead of milk to loosen the yogurt. Start with ¾ cup Greek yogurt, 3 tablespoons chia and ¼ cup / 60 ml water, then add another tablespoon or two after chilling if the pudding is too stiff.

7) Is Greek yogurt better than regular yogurt for chia pudding?

Neither is inherently better, but they behave differently. Greek yogurt is thicker and generally higher in protein, so it gives a firmer pudding. Regular yogurt starts looser, meaning you may need less added liquid or slightly more chia.

8) Can I add protein powder to chia pudding?

Yes. For the smoothest texture, dissolve the protein powder in the milk or yogurt mixture before adding the chia seeds. Because powders absorb liquid differently, keep a little extra milk nearby and adjust after the 10-minute rest.

9) Can I make chia pudding with almond milk?

Yes. Unsweetened almond milk is one of the easiest bases for low carb chia pudding because its flavor is mild and it works well with vanilla, cocoa, cinnamon, berries, matcha and nut butter.

10) Can I make chia pudding with coconut milk?

Yes. Canned coconut milk makes an especially rich pudding. If the coconut milk is very thick, dilute it with a little water before adding chia so the seeds hydrate evenly.

11) Can I make chia pudding with oat milk?

Yes. Oat milk creates a mild, creamy pudding, although many oat milks contain substantially more carbohydrate than unsweetened almond milk, so check the label if low carb is your priority.

12) Can I make dairy-free chia pudding?

Yes. Use unsweetened almond milk, coconut milk, or another dairy-free milk you enjoy. If adding protein powder, check whether it contains whey or casein; those are dairy proteins.

13) Can I make blended chia pudding?

Yes, and it is one of the best solutions if you dislike whole chia seeds. Let the pudding hydrate first, then blend until smooth. Cocoa, peanut butter or Greek yogurt can make the result even more mousse-like.

14) What is the easiest three-ingredient chia pudding?

A simple version is chia seeds + unsweetened almond milk + vanilla. Another is chia + coconut milk + cocoa. Add a pinch of salt if possible; it makes a surprisingly large difference to the finished flavor.

15) Can I use frozen berries in chia pudding?

Yes. Thawed berries release juice, which can be useful as a swirl or compote-style layer. For meal prep, keep very juicy berries separate until serving if you do not want them loosening the pudding.

16) How can I sweeten chia pudding without much sugar?

Start by improving flavor before simply increasing sweetness. Vanilla, cinnamon, cocoa, nut butter, coconut milk, berries, citrus zest and a pinch of salt can all make the pudding taste more complete. If you use a low-carb sweetener, add only enough to suit your taste.

17) Is chia pudding keto-friendly?

It can fit many low-carb or ketogenic eating patterns when made with ingredients such as unsweetened almond milk or coconut milk and appropriate toppings. The final carbohydrate content depends on your milk, yogurt, fruit, sweetener and serving size, so check the ingredients you actually use rather than relying on the word “keto” alone.

18) How long does chia pudding last in the fridge?

For quality, aim to eat most homemade chia pudding within about 3–4 days, refrigerated. Keep toppings such as nuts separate for crunch and add juicy fruit later if you want the pudding to stay thick.

19) Which chia pudding should I make first?

If you want the simplest base, start with vanilla almond milk chia pudding. If you came for the thick, creamy version, make the Greek yogurt chia pudding. And if chia’s seed texture has always bothered you, go directly to the blended chocolate mousse.
Posted on — 7 Comments

10 Vegan Chocolate Cake Recipes (Easy, Moist, & Dairy-Free)

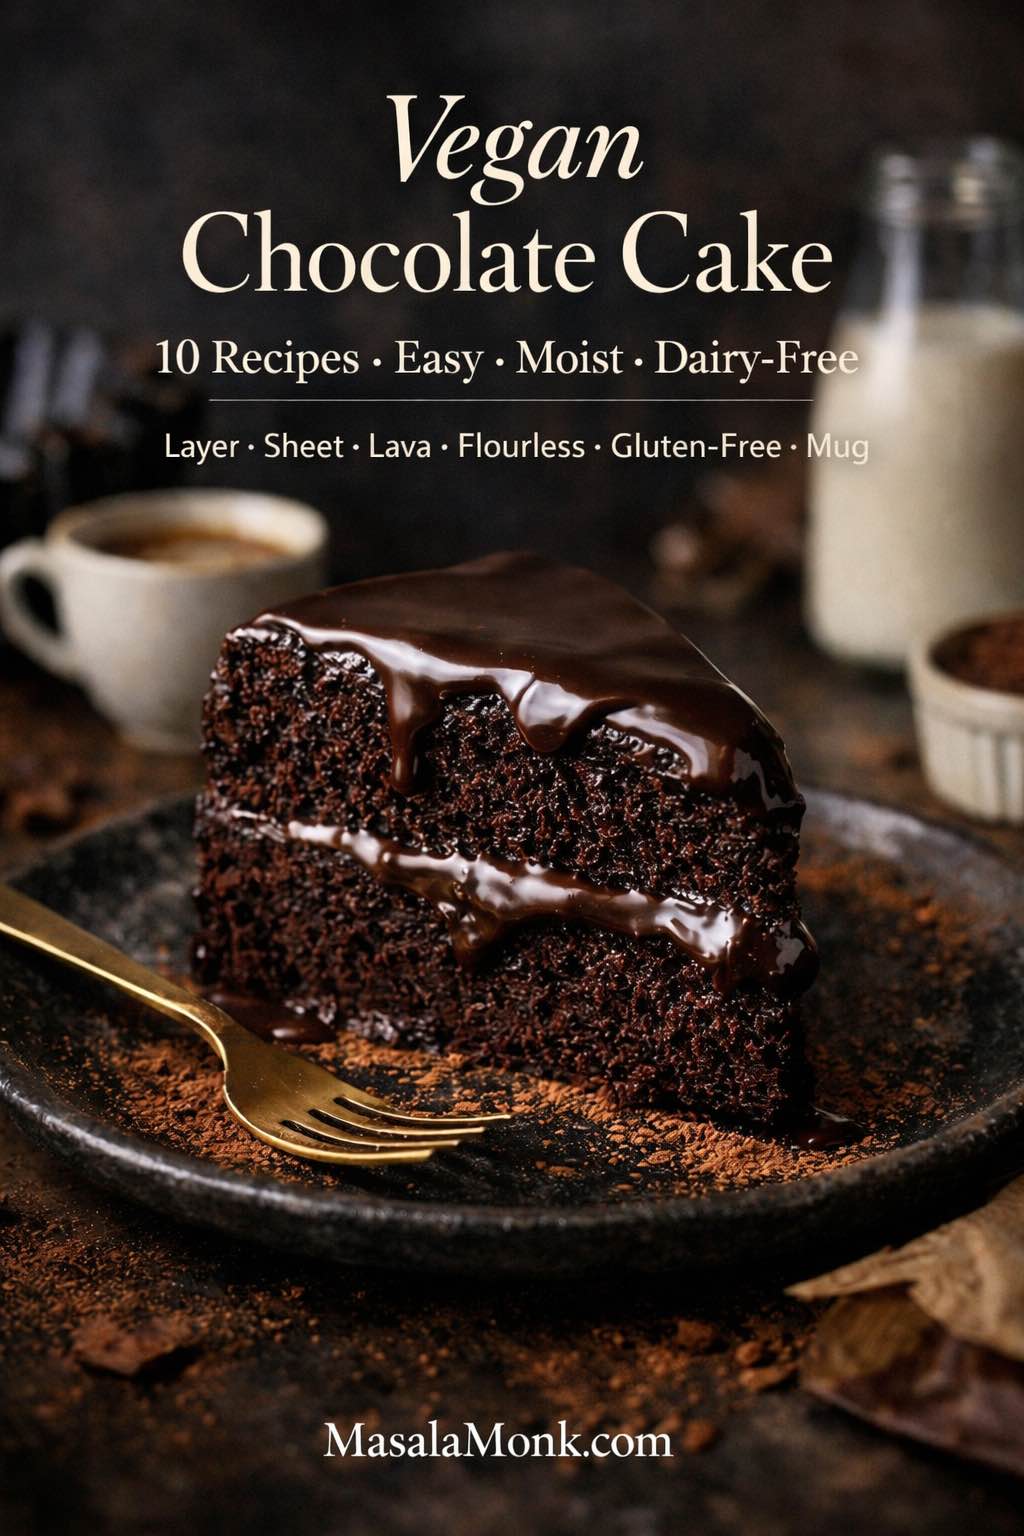
Slice of vegan chocolate cake with glossy ganache, cocoa dusting, and coffee—cover image for 10 vegan chocolate cake recipes (easy, moist, dairy-free).

If you want vegan chocolate cake that tastes like the real thing—deep cocoa aroma, soft crumb, and a finish that feels genuinely indulgent—this roundup of Vegan Chocolate Cake Recipes is for you. Not “good for vegan,” not “surprisingly decent,” but the kind of cake you’d happily serve to anyone who loves chocolate. Better still, these recipes are built to be repeatable, so you can bake a simple vegan chocolate cake on a quiet evening, then turn around and make a party-ready vegan chocolate layer cake the next weekend without relearning everything from scratch.

Chocolate cake has a strange superpower: it can be both nostalgic and endlessly new. On one day, you want a plush slice with frosting and candles. On another, you want a quick vegan chocolate mug cake with a spoon straight from the cup. Meanwhile, when you’re feeding a crowd, a vegan chocolate sheet cake is often the most sensible move—easy to transport, easy to portion, and still every bit as satisfying. And then there are the cakes that feel like a dessert menu finale: a flourless vegan chocolate cake that slices like a torte, or vegan chocolate lava cakes that spill molten chocolate onto a plate.

Because each craving has its own logic, the ten recipes below cover a range of textures and formats—layer, sheet, bundt, loaf, flourless, molten, gluten-free, mug, beetroot, and avocado—while staying anchored in the same promise: strong chocolate flavour, reliable structure, and a moist crumb that doesn’t dry out by tomorrow.

Before we start baking, though, it’s worth getting a few fundamentals in place. Once those are clear, every recipe becomes easier, and every variation feels less like guesswork and more like cooking.


Vegan chocolate cake basics that make everything easier

1) Cocoa powder: the flavour choice that also affects rise

Cocoa powder isn’t just flavour. It changes how a cake behaves, especially when baking soda is involved.

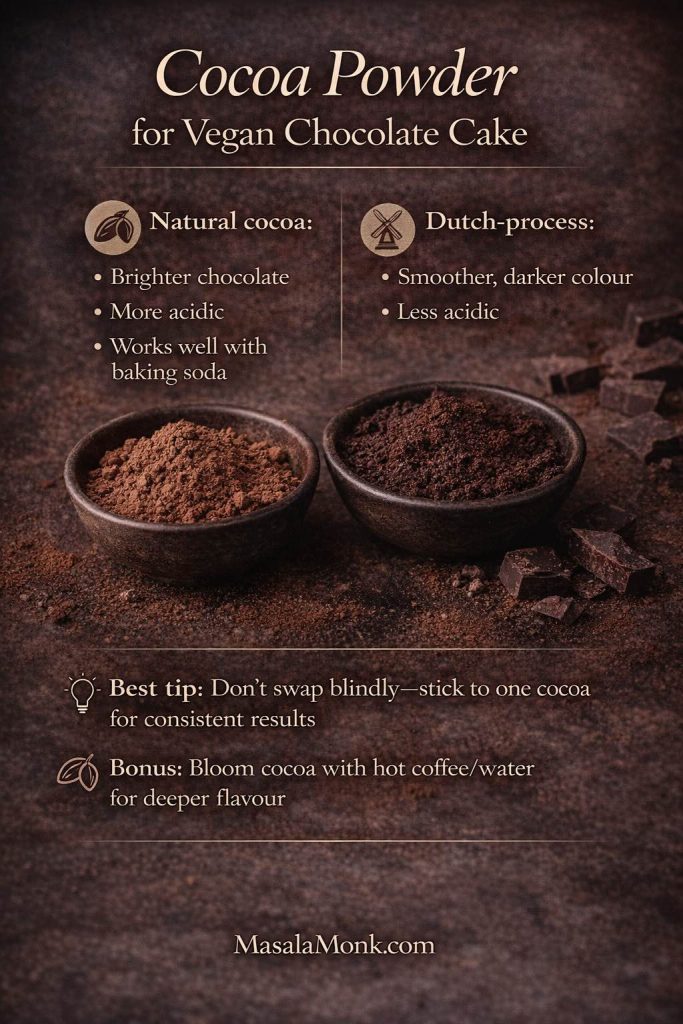
  • Natural cocoa is typically more acidic. It can taste brighter, sometimes slightly sharper, and it often plays very nicely with baking soda.
  • Dutch-process cocoa is alkalised. It tends to taste smoother and darker, and it can make cakes look deeper in colour.
Natural cocoa vs Dutch-process cocoa infographic for vegan chocolate cake, explaining flavour and acidity differences plus tips for consistent results and blooming cocoa with hot coffee or water.
Natural vs Dutch-process cocoa for vegan chocolate cake: use this quick guide to choose the flavour you want—and bloom cocoa with hot coffee or water for deeper chocolate.

Both are excellent, yet they don’t always perform identically if you swap one for the other without adjusting anything else. If you enjoy knowing the “why” (without it turning into a science lesson), these two guides are genuinely helpful: Dutch-process vs. natural cocoa and The A-B-C’s of cocoa. If you want a broader, easy read on cacao vs cocoa vs chocolate, MasalaMonk’s breakdown is a great companion: What is Cacao?: Cacao vs. Chocolate vs. Dark Chocolate.

Practical way to think about it: pick a cocoa you love, then bake with it consistently. Once you know how that cocoa behaves in your oven, you’ll get “your” signature vegan chocolate cake every time.


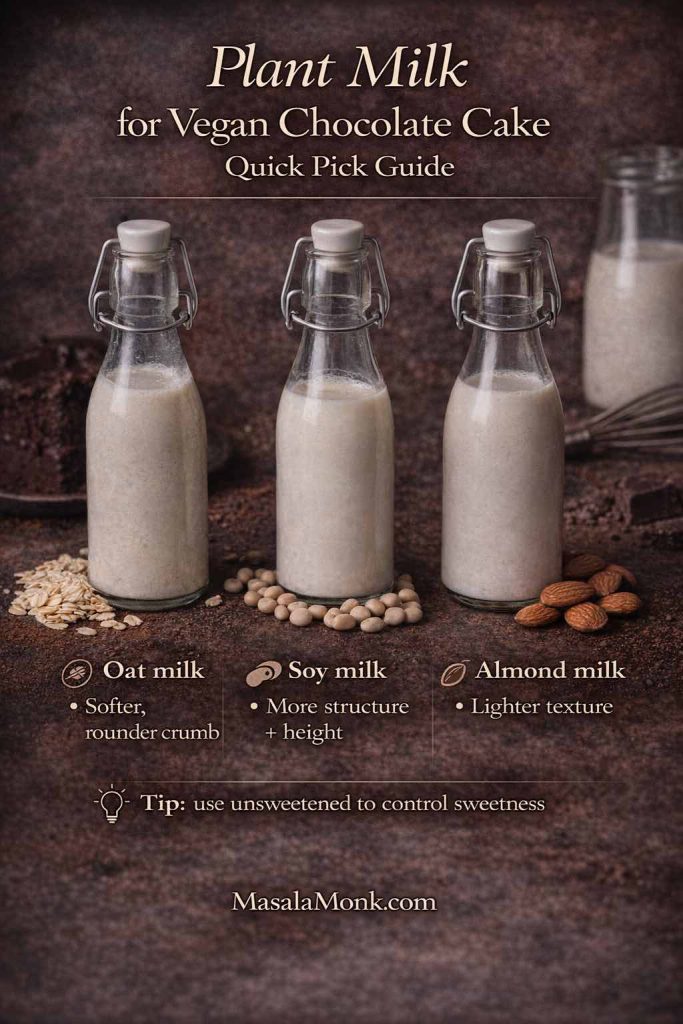
2) Plant milk: use what you like, but know what it nudges

Most plant milks will work. Still, they can push texture subtly:

  • Oat milk often gives a softer, rounder crumb.
  • Soy milk can build structure and height.
  • Almond milk is lighter, so cakes may feel a touch less plush (not bad—just different).
Plant milk guide for vegan chocolate cake comparing oat milk, soy milk, and almond milk, with notes on crumb texture, structure, and a tip to use unsweetened milk.
Best plant milk for vegan chocolate cake: choose oat for a softer crumb, soy for more structure and height, or almond for a lighter texture—then use unsweetened to control sweetness.

If you like making basics at home, Easy Homemade Oats Milk is a handy internal reference, especially when you want a neutral, budget-friendly baking milk.


3) Oil vs vegan butter: choose based on the texture you want

For many vegan chocolate cake recipes, oil is the shortcut to moisture. Cakes stay tender longer, they resist drying out, and they’re forgiving if you slightly overbake. Vegan butter can be lovely too; however, it firms up in the fridge, so butter-based cakes can feel denser when cold.

If you’ve ever noticed how oil-based cakes stay moist, you’ll see that principle clearly in Orange Olive Oil Cake – Ridiculously Easy and Super Moist. Even though it’s citrus rather than chocolate, the crumb logic carries over perfectly.


4) The acid trick: why vinegar appears in so many dairy-free chocolate cake recipes

A small amount of vinegar (or lemon juice) shows up in vegan baking because it helps baking soda do its job. It isn’t there to make cake taste sour; rather, it supports lift and tenderness. As a result, cakes rise more evenly and feel lighter.


5) “Blooming” cocoa: the easiest way to make chocolate taste bigger

You’ll notice several recipes use hot coffee or hot water. This is one of the simplest upgrades in chocolate baking: hot liquid helps cocoa dissolve and intensifies aroma.

  • If you love deep chocolate, use coffee.
  • If you don’t like coffee, use hot water. You’ll still get the cocoa bloom effect; you just won’t add coffee’s roast notes.

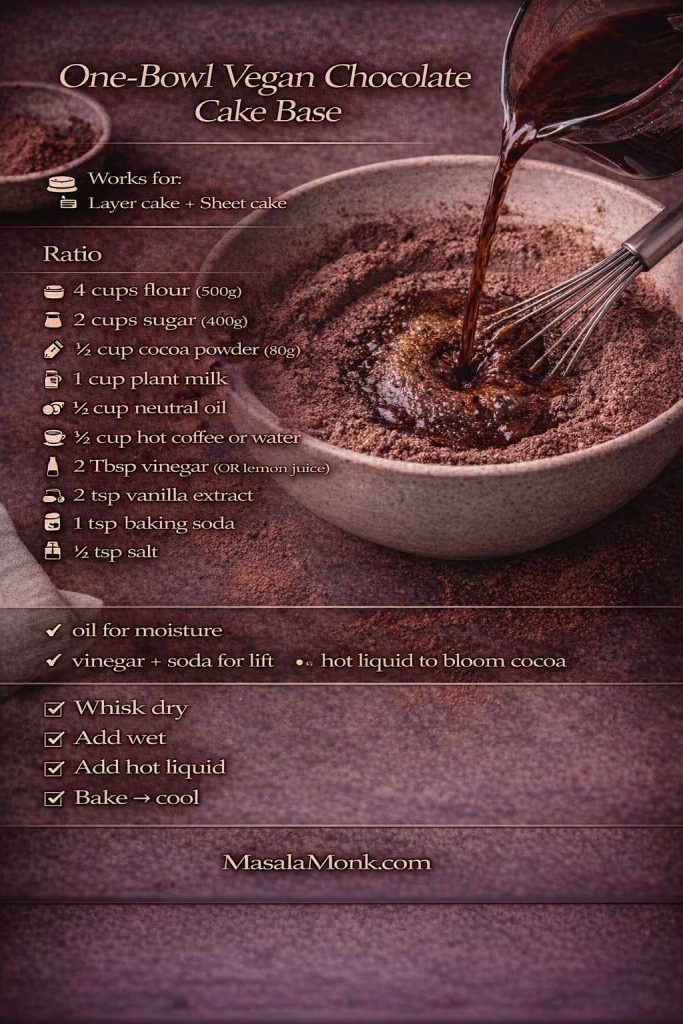
6) Mixing: stop sooner than your instincts suggest

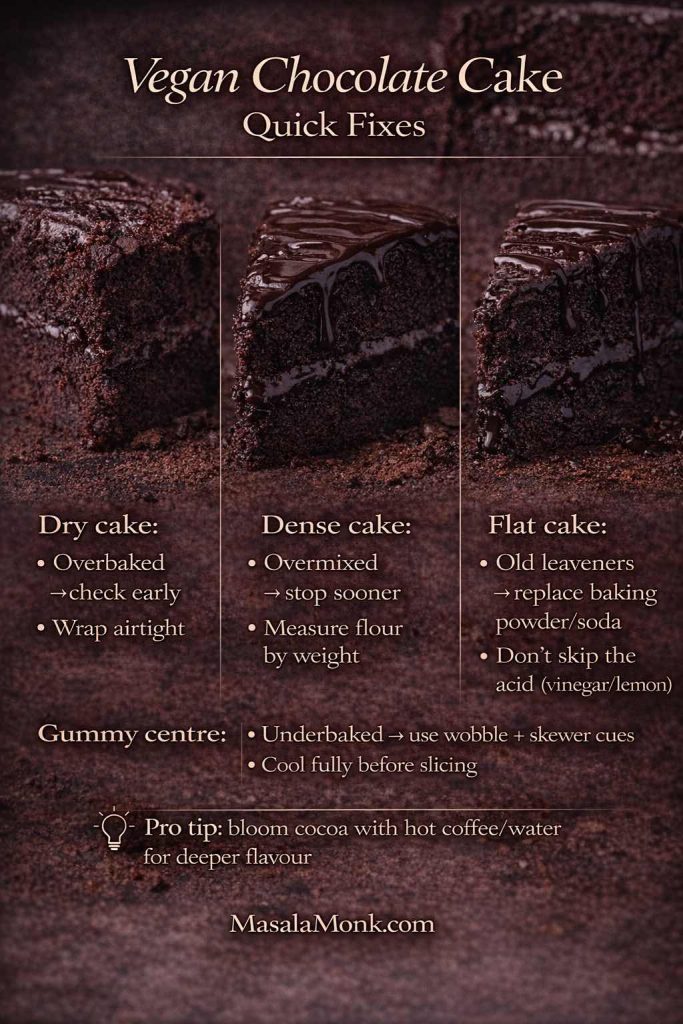
Chocolate batter often looks gorgeous long before it’s actually mixed evenly, which is why it tempts you to keep going. Nevertheless, overmixing can tighten crumb. Instead, aim for smooth and combined, then stop.

One-bowl vegan chocolate cake base recipe card showing a mixing bowl with cocoa and hot coffee being poured in, plus ingredient ratios, quick steps, and tips for moisture and lift.
One-bowl vegan chocolate cake base you can reuse: this quick ratios card works for layer cake or sheet cake, with the simple ‘hot liquid to bloom cocoa’ step for deeper chocolate flavour.

A calm sequence helps:

  1. Whisk dry ingredients thoroughly (especially cocoa).
  2. Whisk wet ingredients thoroughly.
  3. Combine wet into dry until smooth.
  4. Add hot liquid last, then mix briefly.

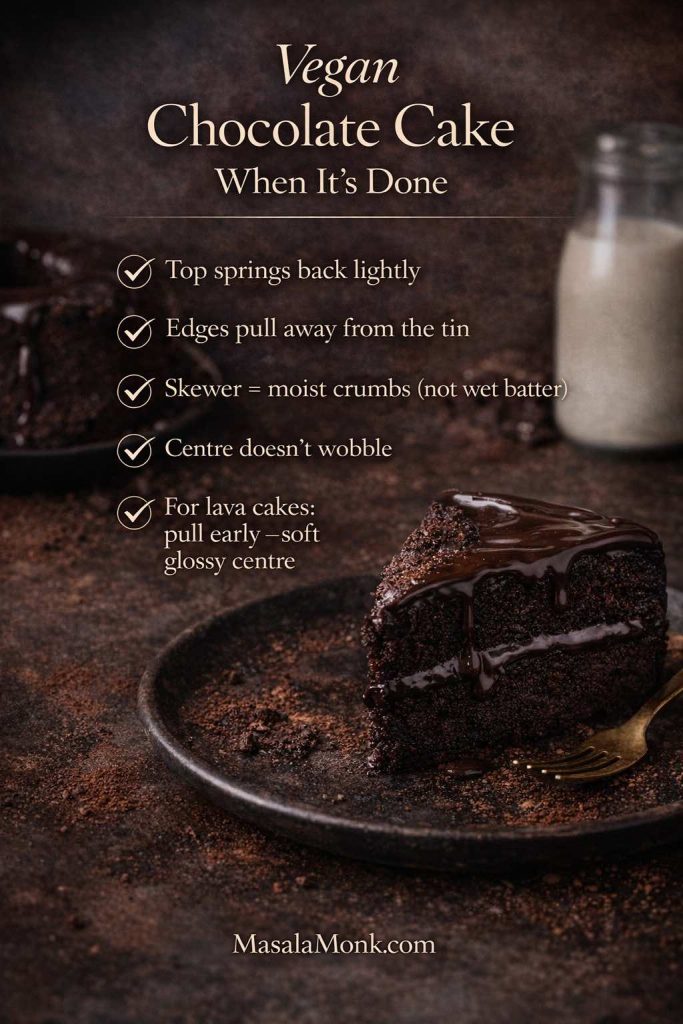
7) Baking cues: what “done” looks like in chocolate cake

Because chocolate cakes are dark, they can hide underbaking. Use multiple cues:

  • The top springs back lightly when pressed.
  • The edges pull slightly away from the tin.
  • A skewer comes out with a few moist crumbs (not wet batter).
  • The centre doesn’t wobble like liquid.
Vegan chocolate cake doneness checklist graphic showing baking cues: top springs back, edges pull away, skewer has moist crumbs, centre doesn’t wobble, plus a lava cake timing note.
How to tell when vegan chocolate cake is done: use these quick baking cues for a moist crumb—and pull lava cakes early for that soft, glossy centre.

Molten cakes are different—there, you want underdone centres. We’ll cover that later.


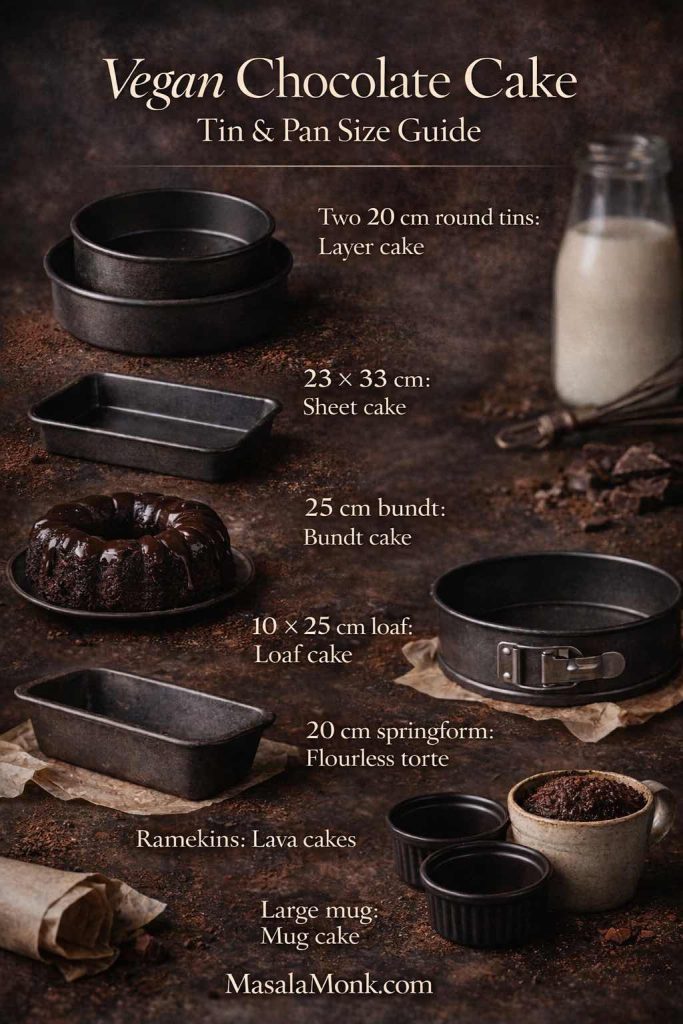
8) Tin guide: choose the format that fits your day

Sometimes the best cake is the one that matches your schedule:

  • Layer cake (20 cm rounds): celebration vibe, frosting-friendly.
  • Sheet cake (23 × 33 cm): effortless portions, travel-friendly.
  • Bundt cake (25 cm bundt pan): looks fancy with minimal decorating.
  • Loaf cake (10 × 25 cm): sliceable, giftable, everyday perfect.
  • Torte (20 cm springform): intense, truffle-like, small slices.
  • Mug cake: instant comfort.
Vegan chocolate cake tin and pan size guide showing two 20 cm round tins for layer cake, 23 × 33 cm for sheet cake, 25 cm bundt, 10 × 25 cm loaf, 20 cm springform, ramekins for lava cakes, and a large mug for mug cake.
Baking pan confusion solved: use this tin-size guide to pick the right format for your vegan chocolate cake—layers, sheet cake, bundt, loaf, flourless torte, lava cakes, or a quick mug cake.

9) A note on “eggless” and “dairy-free”

Every cake here is vegan, which means it’s inherently eggless and dairy-free. That said, textures can vary depending on which binder you use (if any). Some recipes rely purely on flour structure and leavening; others use starch or purée for a fudgier crumb. Either way, the outcome is meant to feel like cake—not a compromise.

If you want a clear, trustworthy overview of vegan egg replacers and what each one is best at, this guide is a useful reference: Egg substitutes for baking.

Also Read: Strawberry Smoothie Recipes (12 Easy Blends + Bowls & Protein Shakes)


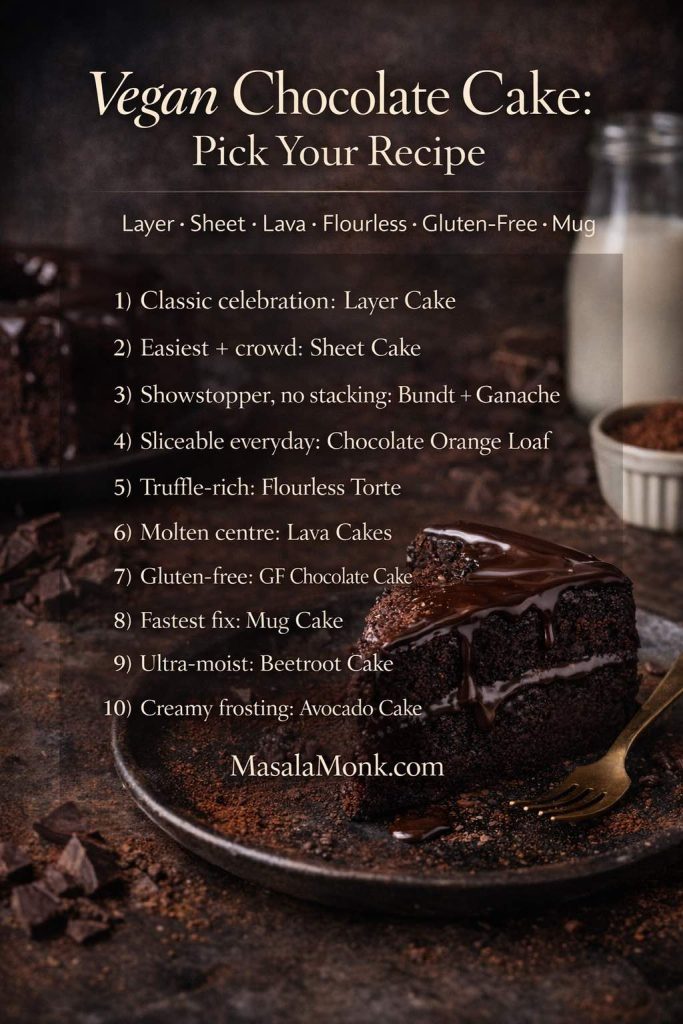
A quick way to choose your recipe today

If you’d rather not overthink it, start here:

  • Want the classic? Make the vegan chocolate layer cake (#1).
  • Want the easiest? Make the easy vegan chocolate sheet cake (#2).
  • Want “wow” without stacking? Make the vegan chocolate bundt cake (#3).
  • Want bright flavour? Make the chocolate orange vegan chocolate loaf (#4).
  • Want truffle intensity? Make the flourless vegan chocolate cake (#5).
  • Want molten drama? Make the vegan chocolate lava cakes (#6).
  • Need gluten-free? Make the vegan gluten-free chocolate cake (#7).
  • Want instant comfort? Make the vegan chocolate mug cake (#8).
  • Want ultra-moist? Make the beetroot vegan chocolate cake (#9).
  • Want creamy frosting that isn’t sugar-bomb sweet? Make the avocado vegan chocolate cake (#10).
Vegan chocolate cake recipes guide card showing how to pick the right recipe—layer, sheet, bundt, loaf, flourless, lava, gluten-free, mug, beetroot, and avocado.
Not sure which vegan chocolate cake to bake? Use this quick picker to match your craving—classic layers, easiest sheet cake, molten lava, flourless torte, gluten-free, or a fast mug cake.

Now, let’s bake.


1) Vegan Chocolate Layer Cake Recipe (Classic, Moist, Celebration-Ready)

This is the cake you bake when you want that unmistakable “proper chocolate cake” moment: soft crumb, even rise, and enough structure to stack confidently. At the same time, it’s forgiving—so even if you’re not a frequent layer-cake maker, you’ll still land somewhere delicious.

What makes it work so well

To begin with, oil keeps the crumb tender for longer than butter typically does. In addition, a small amount of vinegar supports lift and keeps the flavour clean. Finally, hot coffee (or hot water) blooms cocoa, so the chocolate aroma feels bigger without adding extra sweetness.

If you ever want the quick explanation of cocoa differences—especially if you’re deciding between natural cocoa and Dutch-process—the two clearest guides are Dutch-process vs. natural cocoa and The A-B-C’s of cocoa. For a broader foundation, MasalaMonk’s What is Cacao?: Cacao vs. Chocolate vs. Dark Chocolate is a satisfying read.

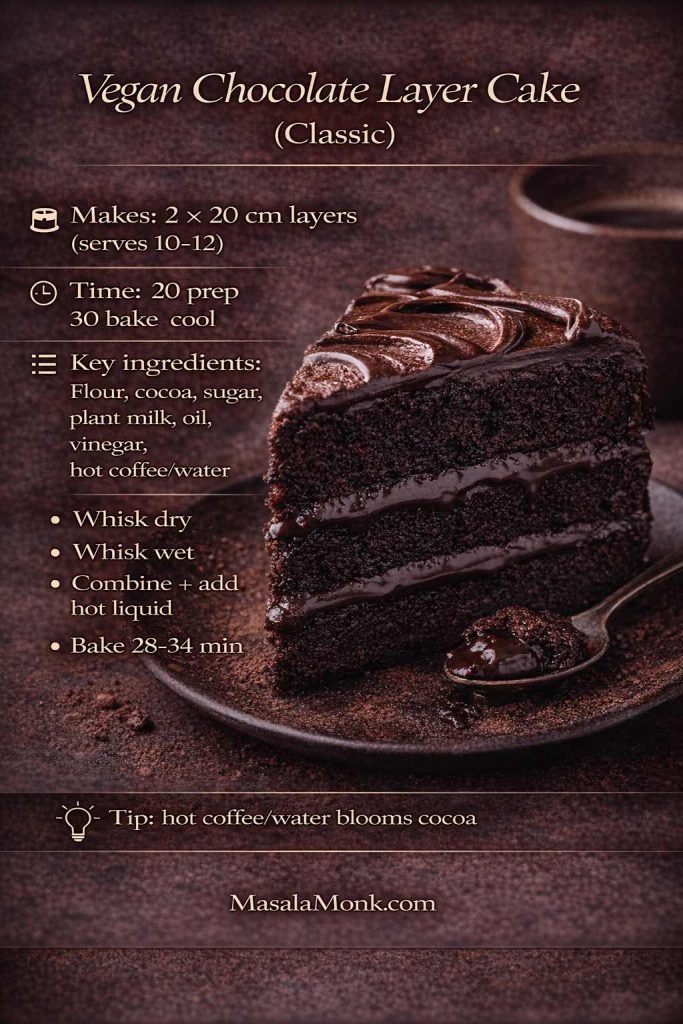
Makes: 1 layer cake (two 20 cm rounds) | Serves: 10–12
Time: 20 mins prep + 28–34 mins bake + 60–90 mins cooling | Difficulty: Easy–Medium
Oven/Tin: 175°C | two 20 cm round tins

Dry

  • 250 g plain flour
  • 300 g caster sugar
  • 70 g cocoa powder
  • 10 g baking powder
  • 5 g bicarbonate of soda
  • 3 g fine salt

Wet

  • 420 ml plant milk
  • 120 ml neutral oil
  • 15 ml vinegar (apple cider or white)
  • 10 ml vanilla extract

Bloom

  • 180 ml hot coffee or hot water
Vegan chocolate layer cake recipe card showing a sliced chocolate layer cake with frosting, plus key ingredients, simple steps, bake time, and a tip to bloom cocoa with hot coffee or water.
Classic vegan chocolate layer cake, made repeatable: this quick recipe card covers the essentials—key ingredients, simple steps, and bake time—for a moist, dairy-free celebration cake.

Method (detailed, step-by-step)

  1. Prep your tins before anything else. Heat the oven to 175°C. Line two 20 cm tins with baking paper on the base, then lightly oil the sides. If you want extra insurance against sticking, dust the oiled sides with a teaspoon of cocoa powder and tap out the excess.
  2. Make cocoa behave. In a large bowl, whisk the flour, sugar, cocoa powder, baking powder, bicarbonate of soda, and salt for a full 30–45 seconds. This isn’t busywork—cocoa clumps are stubborn, and thorough whisking prevents bitter pockets.
  3. Mix your wet ingredients until they look unified. In a jug, whisk plant milk, oil, vinegar, and vanilla until the mixture looks uniform rather than separated. That little bit of emulsifying up front helps the batter come together quickly.
  4. Combine without overworking. Pour the wet mixture into the dry. Whisk gently—just until the batter looks smooth and you don’t see dry flour at the bottom. If you’re tempted to keep whisking because the batter looks glossy, pause and check the bowl instead: scrape down the sides, then stop.
  5. Bloom the cocoa at the end. Pour in the hot coffee (or hot water) and whisk briefly until the batter turns evenly silky and slightly looser. Thin batter is normal here, and it bakes up surprisingly plush.
  6. Divide evenly for level layers. Split the batter between tins. If you have a kitchen scale, weigh the tins so the layers bake to the same height. Next, tap each tin once on the counter to release large air bubbles.
  7. Bake with cues, not only time. Bake 28–34 minutes. Start checking at 28 minutes:
    • The centre should spring back lightly when pressed.
    • The edges should pull away slightly from the tin.
    • A skewer should come out with moist crumbs, not wet batter.
  8. Cool in stages (this matters for texture). Let the cakes cool in the tins for 10 minutes. Then turn them out onto a rack, peel off the base paper, and cool completely before frosting. If you frost while warm, you’ll get melting and sliding instead of clean layers.

Vegan chocolate cake frosting (classic cocoa buttercream)

This buttercream is dependable and not overly fussy. It also holds its shape well, which helps if you’re doing swirls or a slightly thicker coat.

  • 115 g vegan butter, softened
  • 300 g icing sugar, sifted
  • 50 g cocoa powder, sifted
  • 10 ml vanilla extract
  • 30–60 ml plant milk (as needed)
  • 1–2 g salt (to taste)

How to make it smoothly

  1. Beat vegan butter for 2–3 minutes until creamy and lighter in colour.
  2. Add cocoa and icing sugar in 3 additions, mixing gently at first so you don’t get a sugar cloud.
  3. Add vanilla and salt.
  4. Add plant milk gradually until spreadable. Stop when it feels soft and swoopy, not runny.

Assemble like a pro (without overthinking it)

  • If your layers have a dome, trim the top lightly with a serrated knife for a stable stack.
  • Spread a thin layer of frosting on the first layer, add the second layer, then cover the cake.
  • For cleaner slices, chill the frosted cake 20–30 minutes before cutting.

Optional upgrade: glossy ganache finish

If you want a more “gateau” look, skip buttercream and use the ganache from recipe #3 instead.

A gentle internal detour (if you love moist oil-based cakes)

If this cake’s tenderness makes you happy, you’ll probably enjoy MasalaMonk’s Orange Olive Oil Cake – Ridiculously Easy and Super Moist. Different flavour, same kind of soft crumb logic.

Notes / substitutions for Vegan Chocolate Layer Cake Recipe

  • Plant milk: soy = tallest structure; oat = softer crumb; almond = lighter texture.
  • Coffee: hot water works if you don’t want coffee flavour (still blooms cocoa).
  • Cocoa: natural cocoa gives brighter chocolate; Dutch-process tastes smoother/darker (either works—stick to one for consistency).
  • No 2 tins? Bake in one 20 cm tin longer (expect ~45–55 mins), then slice into layers once fully cool.

Also Read: 7 Pizza Sauce Recipes | Marinara, White Garlic, Alfredo, Buffalo, BBQ, Vodka & Ranch


2) Easy Vegan Chocolate Sheet Cake Recipe (One Bowl, Crowd-Friendly)

This is the unfussy hero: mix, pour, bake, slice. It’s the kind of cake that makes you look organised even if you aren’t. Because it bakes in one layer, you get even doneness, easy portions, and less risk of drying out. Furthermore, it’s perfect for quick toppings—drizzle, glaze, or syrup.

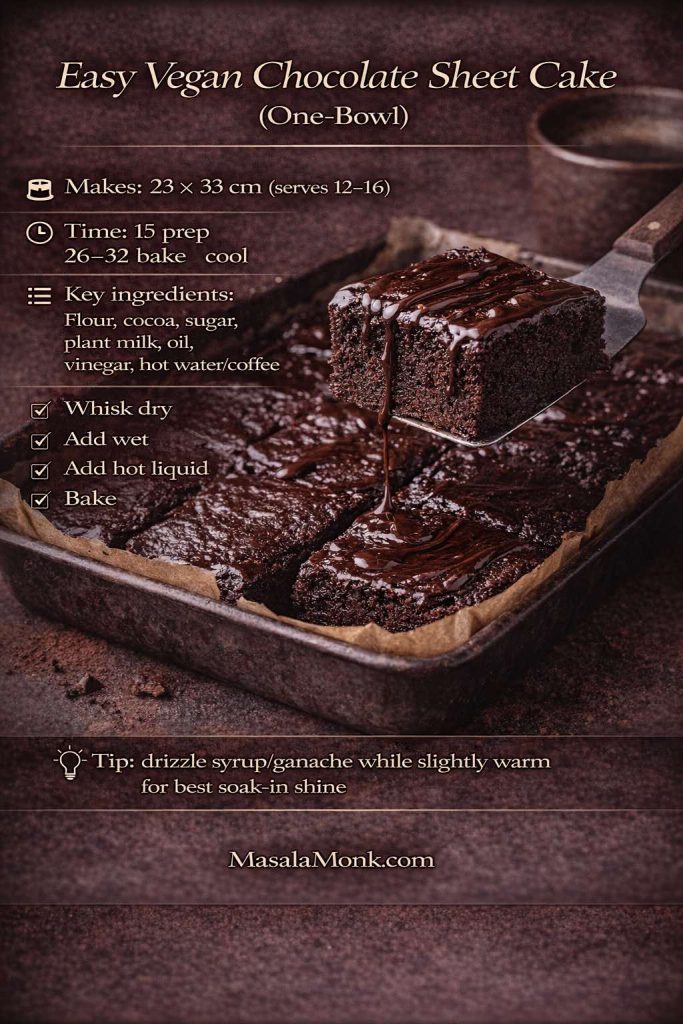
Makes: 1 sheet cake (23 × 33 cm) | Serves: 12–16
Time: 15 mins prep + 26–32 mins bake + 45–60 mins cooling | Difficulty: Easy
Oven/Tin: 175°C | 23 × 33 cm tin

Ingredients

  • 250 g plain flour
  • 250 g caster sugar
  • 55 g cocoa powder
  • 10 g baking powder
  • 3 g bicarbonate of soda
  • 3 g fine salt
  • 360 ml plant milk
  • 120 ml neutral oil
  • 15 ml vinegar
  • 10 ml vanilla extract
  • 120 ml hot water or hot coffee
Easy vegan chocolate sheet cake recipe card showing moist chocolate cake squares with glossy drizzle, plus pan size, bake time, key ingredients, simple steps, and a tip to drizzle ganache or syrup while warm.
Easy vegan chocolate sheet cake (one-bowl): this recipe card gives the essentials—pan size, timing, and quick steps—for a moist, dairy-free cake that slices beautifully for a crowd.

Method (Eggless Cake Recipe with extra clarity)

  1. Set up first. Heat oven to 175°C. Line a 23 × 33 cm tin with baking paper, leaving a bit of overhang on the long sides so you can lift the cake out later.
  2. Whisk dry ingredients thoroughly. In a large bowl, whisk flour, sugar, cocoa, baking powder, bicarbonate of soda, and salt. Keep going until the cocoa looks evenly dispersed; that’s the difference between “good” and “wow” in a sheet cake.
  3. Add wet ingredients in one go. Pour in plant milk, oil, vinegar, and vanilla. Whisk until smooth. If the batter looks a little thick at this stage, that’s fine.
  4. Finish with hot liquid. Add hot water or coffee and whisk briefly. The batter will loosen and look glossy.
  5. Bake and check the centre. Pour into the tin and bake 26–32 minutes. Start checking at 26 minutes; the middle should spring back lightly and a skewer should show moist crumbs.
  6. Cool for clean slices. Cool in the tin for at least 20 minutes. If you want very neat squares, let it cool fully before cutting.

Fast topping that makes it feel finished

A simple drizzle can transform the whole cake. MasalaMonk’s 3 Minutes Homemade Chocolate Syrup is ideal here—especially if you drizzle it over slightly warm cake so it sinks in just a little.

Variations (easy changes to Vegan Chocolate Sheet Cake, big payoff)

  • Fudgier sheet cake: fold in 150 g chopped dark chocolate before baking.
  • Chocolate oat cake direction: swap 50 g flour for 50 g oat flour for a softer, warmer crumb.
  • Quick party finish: sprinkle chopped toasted nuts or cocoa nibs over syrup while it’s still tacky.

If you enjoy the “one base, multiple personalities” style, MasalaMonk’s Double Chocolate Chip Cookies – One Dough, 7 Ways scratches the same itch.

Notes / substitutions for Vegan Chocolate Sheet Cake Recipe

  • Tin size: if smaller/deeper, bake longer; start checking +5 mins and use skewer cues.
  • Sweeter/fudgier: fold in 150 g chopped dark chocolate.
  • Oil: any neutral oil works; olive oil gives a noticeable flavour (nice if you want it).
  • Topping: syrup drizzle for fastest finish; ganache if you want “party cake” vibes.

Also Read: Sandwich for Breakfast: Breakfast Sandwich Recipe + 10 Variations


3) Vegan Chocolate Bundt Cake (With Glossy Vegan Chocolate Ganache)

Bundt cakes feel festive without asking you to frost and stack. As long as you grease the pan properly, the rest is straightforward. Afterwards, ganache does the styling for you—no piping bag required.

Makes: 1 bundt cake (25 cm bundt pan) | Serves: 12
Time: 20 mins prep + 45–55 mins bake + 60–90 mins cooling (+ 10 mins ganache) | Difficulty: Easy–Medium
Oven/Tin: 175°C | 25 cm bundt pan

Ingredients

Cake

  • 310 g plain flour
  • 350 g caster sugar
  • 75 g cocoa powder
  • 10 g baking powder
  • 5 g bicarbonate of soda
  • 4 g fine salt
  • 480 ml plant milk
  • 180 ml neutral oil
  • 15 ml vinegar
  • 10 ml vanilla extract
  • 120 ml hot coffee or hot water

Ganache

  • 200 g dark chocolate, chopped
  • 200 ml coconut cream (or thick plant cream)
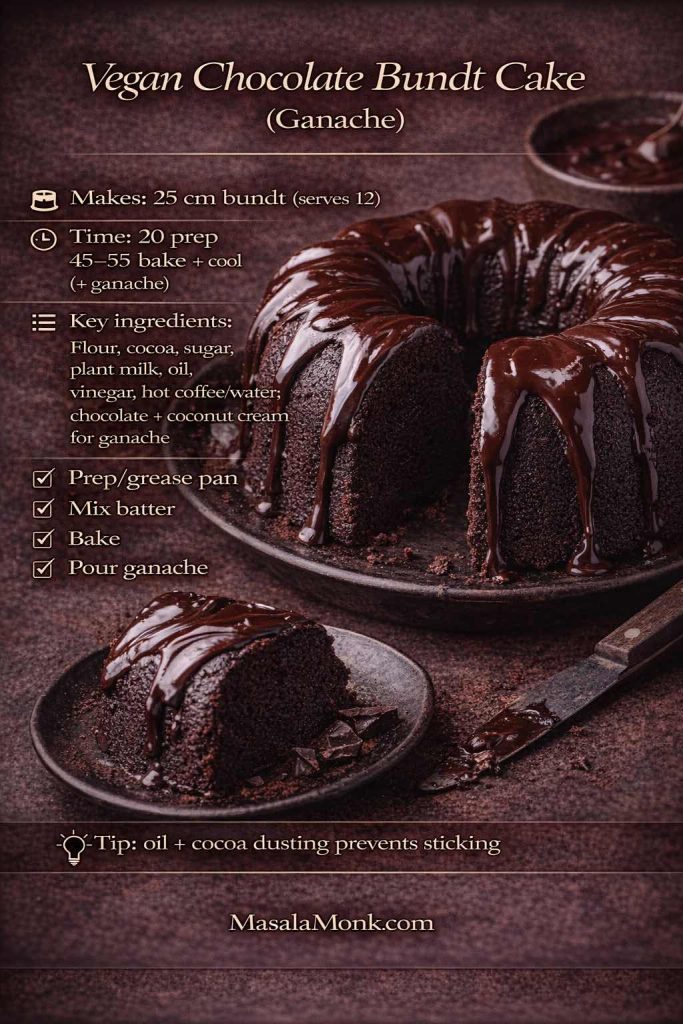
Vegan chocolate bundt cake with ganache recipe card showing a sliced bundt cake with glossy chocolate ganache, plus pan size, timing, key ingredients, simple steps, and a tip to oil and cocoa-dust the pan to prevent sticking.
Vegan chocolate bundt cake with ganache, made stress-free: this recipe card covers pan size, timing, and the no-stick tip (oil + cocoa dusting) for clean release and a glossy finish.

Method (Dairy-Free & Eggless with bundt-specific detail)

  1. Grease like you mean it. Heat oven to 175°C. Coat every ridge of the bundt pan with oil. Then dust lightly with cocoa powder and tap out the excess. This two-step is worth it.
  2. Whisk the dry ingredients. Combine flour, sugar, cocoa, baking powder, bicarbonate of soda, and salt. Whisk well so cocoa is evenly distributed.
  3. Add wet, then bloom. Add plant milk, oil, vinegar, and vanilla. Whisk until smooth. Then pour in hot coffee/water and whisk briefly again.
  4. Bake until the cake tells you it’s ready. Bake 45–55 minutes. Start checking at 45:
    • The cake should spring back when pressed.
    • A skewer should come out with moist crumbs.
    • The edges often pull away slightly from the pan.
  5. Cool in the pan, but not forever. Let the bundt cool 15 minutes, then invert onto a rack. Too soon and it can tear; too late and it may stick.

Ganache Recipe (silky, shiny, not grainy)

  1. Chop the chocolate finely; smaller pieces melt more evenly.
  2. Warm the coconut cream until steaming (not boiling).
  3. Pour over chocolate, wait 2 minutes, then stir gently from the centre outward.
  4. Let it thicken slightly, then pour over the cooled cake.

If you like understanding how cocoa type shifts colour and flavour, this is a good companion: Types of cocoa, explained.

Variations of Vegan Chocolate Bundt Cake

  • Add orange zest for a chocolate-orange bundt mood.
  • Add espresso powder for a darker, roastier finish.
  • Sprinkle chopped nuts on the ganache before it sets for texture.

Notes / substitutions for Vegan Chocolate Bundt Cake Recipe

  • Pan release is everything: oil + cocoa dusting prevents sticking better than flour for chocolate cakes.
  • Coconut cream: use thick plant cream if preferred; thinner milks won’t set ganache as well.
  • No bundt pan? Bake as a 23 × 33 cm sheet (reduce bake time; check at ~30 mins).
  • Chocolate: choose one you’d happily eat straight—ganache shows quality.

Also Read: Vodka Pasta (Penne alla Vodka) + Spicy Rigatoni, Chicken, and Gigi Recipes


4) Chocolate Orange Vegan Chocolate Loaf Cake (Bright, Sliceable)

This loaf is for the days you want chocolate but also want lift—something fragrant and slightly fresh. Orange zest does that beautifully. Because it’s a loaf, it slices neatly and travels well, which makes it a great “bring along” cake.

Makes: 1 loaf (10 × 25 cm) | Serves: 8–10
Time: 15 mins prep + 45–55 mins bake + 60 mins cooling | Difficulty: Easy
Oven/Tin: 175°C | 10 × 25 cm loaf tin

Ingredients

  • 220 g plain flour
  • 200 g caster sugar
  • 55 g cocoa powder
  • 10 g baking powder
  • 3 g bicarbonate of soda
  • 3 g fine salt
  • Zest of 2 oranges
  • 300 ml plant milk
  • 120 ml neutral oil
  • 30 ml orange juice
  • 15 ml vinegar
  • 10 ml vanilla extract
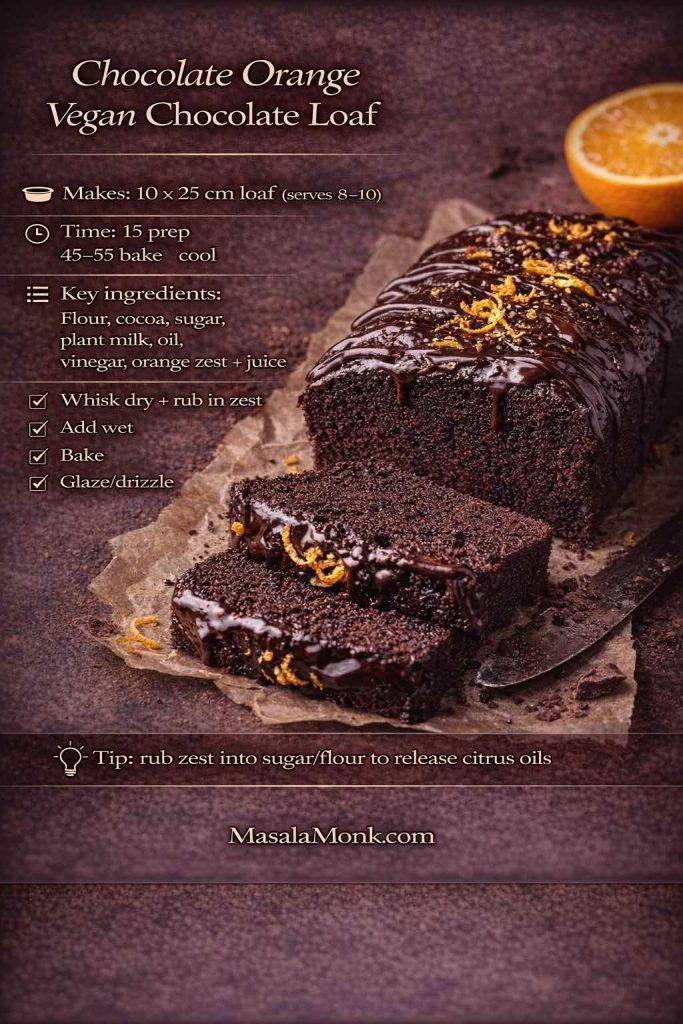
Chocolate orange vegan chocolate loaf recipe card showing a sliced chocolate loaf with glossy drizzle and orange zest, plus loaf tin size, timing, key ingredients, quick steps, and a tip to rub zest into sugar or flour.
Chocolate orange vegan chocolate loaf, simplified: this recipe card includes the loaf tin size, timing, and quick steps—plus the zest-rubbing tip that makes the citrus flavour pop.

Method (extra loaf guidance that is Eggless & Dairy Free)

  1. Heat oven to 175°C. Line the loaf tin with baking paper, leaving overhang for easy lifting.
  2. Whisk flour, sugar, cocoa, baking powder, bicarbonate of soda, and salt. Then rub the orange zest into the dry mixture with your fingertips. This small step releases citrus oils and makes the loaf smell incredible.
  3. Whisk plant milk, oil, orange juice, vinegar, and vanilla. Pour into the dry ingredients and whisk just until smooth.
  4. Pour batter into the tin and level the top. Bake 45–55 minutes. Start checking at 45 minutes; loaf cakes often need the full time.
  5. Cool in the tin for 15 minutes, then lift out and cool fully before glazing.

Finish options for Chocolate Orange Vegan Chocolate Loaf Cake

  • Orange glaze: 180 g icing sugar + 25–35 ml orange juice + zest.
  • Chocolate drizzle: a spoonful of MasalaMonk’s homemade chocolate syrup over slices.

If you love citrus bakes in general, MasalaMonk’s Wholewheat Carrot Orange Tea Cake is another bright, cosy option.

Notes / substitutions for Chocolate Orange Vegan Chocolate Loaf Cake

  • Orange intensity: use zest + a little juice; for extra punch, add ½ tsp orange extract (optional).
  • Loaf pan sizes vary: if your pan is smaller/deeper, bake longer; tent with foil if top browns early.
  • Chocolate chips: 100–150 g chips make it more “dessert loaf.”
  • Glaze options: orange glaze = bright; chocolate drizzle = richer.

Also Read: Tomato Sauce From Fresh Tomatoes (Food Mill Method & Recipe)


5) Flourless Vegan Chocolate Cake (Torte-Style, Truffle-Rich)

This is the “dessert menu” cake: dense, glossy, and intensely chocolatey. Since it’s so rich, smaller slices feel generous. Additionally, it’s great for hosting because you can make it ahead, chill it, then slice cleanly when guests arrive.

Makes: 1 torte (20 cm springform) | Serves: 10
Time: 15 mins prep + 22–28 mins bake + 4 hrs chilling | Difficulty: Easy–Medium
Oven/Tin: 165°C | 20 cm springform tin

Ingredients

  • 300 g dark chocolate, chopped
  • 180 ml coconut cream
  • 60 ml maple syrup (or 70 g caster sugar)
  • 20 g cocoa powder
  • 20 g cornflour (cornstarch) or potato starch
  • 10 ml vanilla extract
  • 2 g fine salt
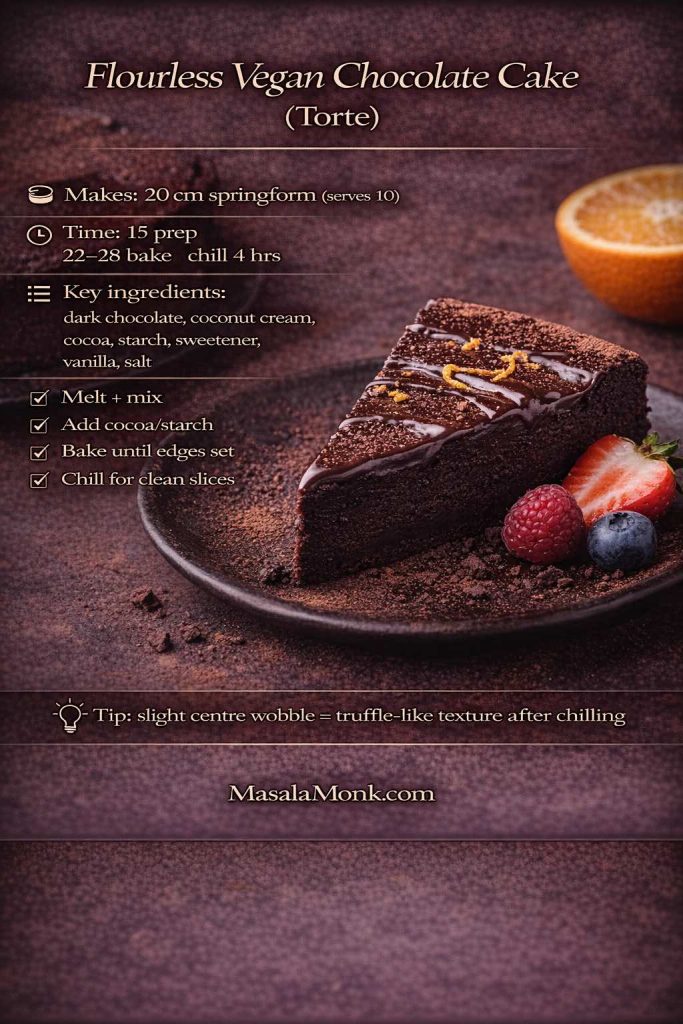
Flourless vegan chocolate cake torte recipe card showing a glossy chocolate torte slice with berries, plus springform size, timing, key ingredients, quick steps, and a tip to chill for clean truffle-like slices.
Flourless vegan chocolate cake (torte) made simple: this recipe card highlights the chill-and-slice method for a truffle-rich, dairy-free dessert with clean, glossy slices.

Method (with torte cues)

  1. Heat oven to 165°C. Line the base of a 20 cm springform tin and lightly oil the sides.
  2. Melt the chocolate and coconut cream gently. Stir until smooth and glossy, then remove from heat.
  3. Whisk in maple syrup (or sugar) while the mixture is still warm. Then whisk in cocoa powder, starch, vanilla, and salt until fully smooth. If you see tiny lumps, whisk a little more—but avoid vigorous beating.
  4. Pour into the tin and smooth the top. Bake 22–28 minutes. The edges should look set while the centre can still wobble slightly.
  5. Cool at room temperature, then chill at least 4 hours. This chilling step is what turns it into clean, truffle-like slices.

Serving ideas for Egg & Flourless Vegan Chocolate Cake

Notes / substitutions for Flourless Vegan Chocolate Cake

  • Sweetener: maple syrup or sugar both work—maple adds a gentle caramel note.
  • Starch: cornflour/cornstarch or potato starch works; it helps slice cleanly.
  • Texture control: slightly underbake (wobbly centre) for truffle-soft slices after chilling.
  • Serving: bring to room temp 15–20 mins for best flavour.

Also Read: Green Chutney Recipe (Coriander–Mint / Cilantro Chutney)


6) Vegan Chocolate Lava Cakes (Molten Centres)

These are dramatic in the best way: warm edges, molten centres, and a spoon-breaking moment that feels like a reward. Even though lava cakes look fancy, the batter is straightforward. The real skill is pulling them at the right moment.

Makes: 4 lava cakes | Serves: 4
Time: 15 mins prep + 9–12 mins bake | Difficulty: Easy–Medium
Oven/Tin: 220°C | 4 ramekins

  • 120 g dark chocolate
  • 80 ml coconut cream
  • 50 g caster sugar
  • 60 ml neutral oil
  • 65 g plain flour
  • 15 g cocoa powder
  • 5 g baking powder
  • 1 g fine salt
  • 5 ml vanilla extract
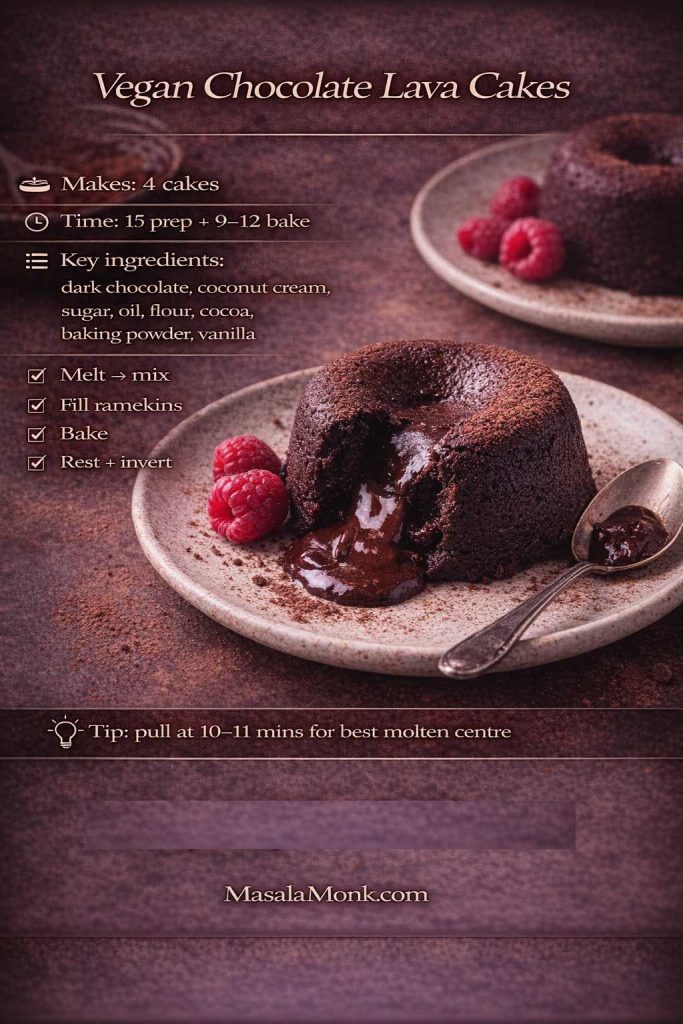
Vegan chocolate lava cakes recipe card showing a molten-centre lava cake with raspberries, plus makes 4, bake time 9–12 minutes, key ingredients, quick steps, and a tip to pull at 10–11 minutes for best molten centre.
Vegan chocolate lava cakes with a molten centre: this recipe card gives the essentials—ingredients, timing, and the 10–11 minute cue—for a reliable lava moment every time.

Method (timing-focused Recipe for Vegan Chocolate Lava Cakes)

  1. Heat oven to 220°C. Grease four ramekins thoroughly. For extra release, dust with cocoa powder and tap out excess.
  2. Melt chocolate and coconut cream until smooth. Let it cool for 2–3 minutes so it doesn’t overheat the flour later.
  3. Whisk in sugar, oil, and vanilla. Then add flour, cocoa, baking powder, and salt. Whisk until smooth and thick.
  4. Divide batter evenly between ramekins. Place ramekins on a tray for easy movement.
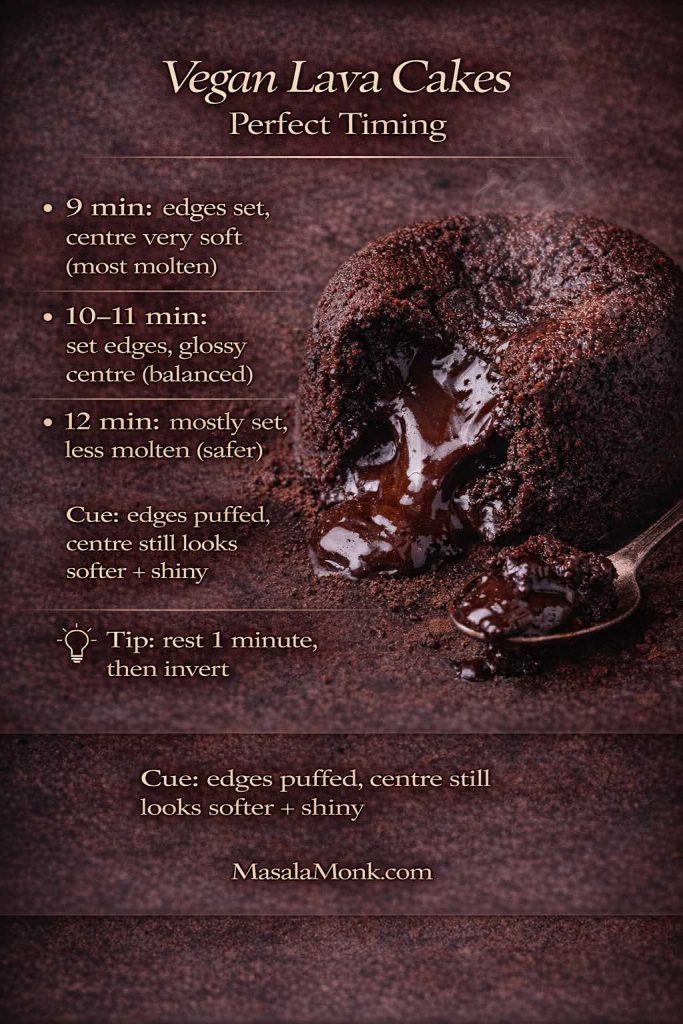
  5. Bake 9–12 minutes. Start checking at 9 minutes:
    • Edges should look set and slightly puffed.
    • Centres should still look softer and a little glossy.
  6. Rest 1 minute. Run a thin knife around the edge, invert onto a plate, then lift off the ramekin.

If you like understanding vegan structure tricks, Serious Eats has excellent aquafaba resources: The Science Behind Vegan Meringues and Aquafaba meringue frosting.

Vegan chocolate lava cakes perfect timing guide showing 9 minutes for most molten, 10–11 minutes balanced, 12 minutes safer, plus doneness cues and a rest-then-invert tip.
Vegan chocolate lava cakes made predictable: use this timing guide and visual cues to get a molten centre every time—then rest 1 minute before inverting.

Notes / substitutions for Dairy & Egg Free Vegan Chocolate Lava Cakes

  • Molten centre depends on timing: start checking at 9 mins; pull when edges set but centre looks softer/glossy.
  • Ramekins: grease thoroughly + cocoa dusting = clean unmoulding.
  • Make-ahead: chill filled ramekins 30 mins; add ~1 minute bake time.
  • No ramekins: use a muffin tray (grease well); bake time usually similar—watch cues.

Also Read: Iced Coffee: 15 Drink Recipes—Latte, Cold Brew, Frappe & More


7) Vegan Gluten-Free Chocolate Cake (Tender, Balanced)

Gluten-free cakes can be gorgeous when they’re built intentionally. Here, a 1:1 blend handles most of the work, while careful mixing and cooling ensure the crumb stays cohesive.

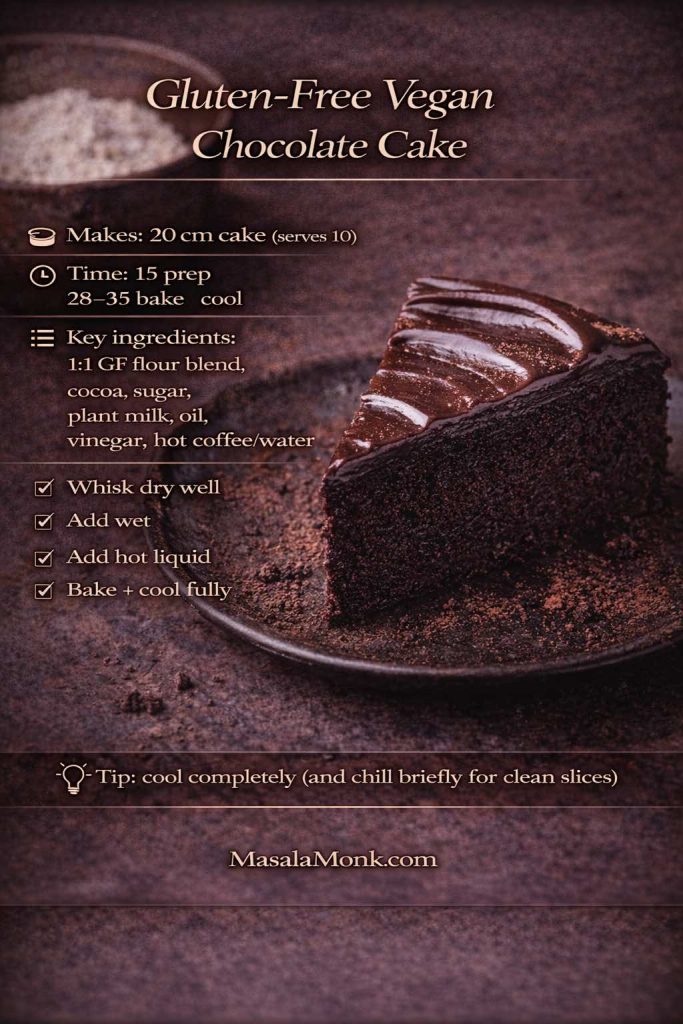
Makes: 1 cake (20 cm) | Serves: 10
Time: 15 mins prep + 28–35 mins bake + 60–90 mins cooling | Difficulty: Easy
Oven/Tin: 175°C | 20 cm round tin

Ingredients

  • 245 g gluten-free 1:1 flour blend
  • 200 g caster sugar
  • 55 g cocoa powder
  • 10 g baking powder
  • 3 g bicarbonate of soda
  • 3 g fine salt
  • 1 g xanthan gum (skip if blend already contains it)
  • 300 ml plant milk
  • 80 ml neutral oil
  • 15 ml vinegar
  • 10 ml vanilla extract
  • 120 ml hot coffee or hot water
Gluten-free vegan chocolate cake recipe card showing a frosted chocolate cake slice with cocoa dusting, plus makes/serves, bake time, key ingredients, quick method steps, and a tip to cool completely for clean slices.
Gluten-free vegan chocolate cake, made reliable: this recipe card includes the 20 cm cake size, timing, and the key cooling tip so slices stay neat, tender, and moist.

Method (gluten-free friendly)

  1. Heat oven to 175°C. Line a 20 cm tin.
  2. Whisk dry ingredients thoroughly. With gluten-free flour, this step matters even more because you want the leaveners and cocoa evenly distributed.
  3. Add plant milk, oil, vinegar, and vanilla. Whisk smooth. Then add hot coffee/water and mix briefly.
  4. Bake 28–35 minutes. Cool fully in the tin for 15 minutes, then transfer to a rack and cool completely before slicing.

Gluten-free Vegan Chocolate Cake success cues

  • Let it cool fully before cutting; warm gluten-free cake is more fragile.
  • If you want extra security, chill the cooled cake briefly before slicing.

For clear guidance on conversions and xanthan gum, these are helpful: Gluten-free baking conversion conundrum and A guide to xanthan gum.

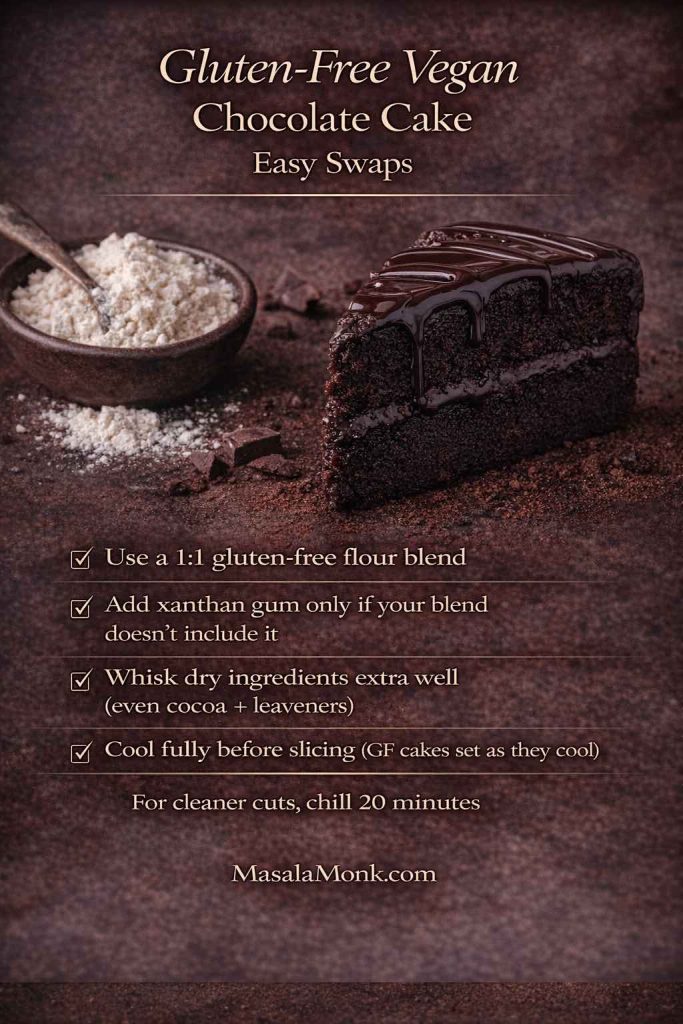
Gluten-free vegan chocolate cake swaps graphic showing tips to use a 1:1 gluten-free flour blend, add xanthan gum only if needed, whisk dry ingredients well, and cool fully before slicing.
Gluten-free vegan chocolate cake made easier: use a 1:1 flour blend, add xanthan gum only if your mix needs it, and let the cake cool completely for neat, tender slices.

Notes / substitutions fo Vegan Gluten-Free Chocolate Cake

  • GF flour blend: use a 1:1 blend; if it already has xanthan gum, skip extra.
  • Cooling matters: GF cakes slice best fully cool (even chilled 20 mins for neat cuts).
  • Plant milk: soy helps structure; oat keeps it softer.
  • Pan swap: works as cupcakes too—start checking at ~18 mins.

Also Read: Cold Brew Espresso Martini: How to Make It (Step-by-Step Recipe)


8) Vegan Chocolate Mug Cake Recipe (Microwave Comfort)

This is warm, quick comfort—nothing more and nothing less. It’s also the easiest way to experiment with cocoa, sweetness, or add-ins without committing to an entire cake.

Makes: 1 mug cake | Serves: 1
Time: 5 mins prep + 60–90 secs cook + 1 min rest | Difficulty: Easy
Microwave/Mug: 1 large microwave-safe mug (350–400 ml)

Ingredients

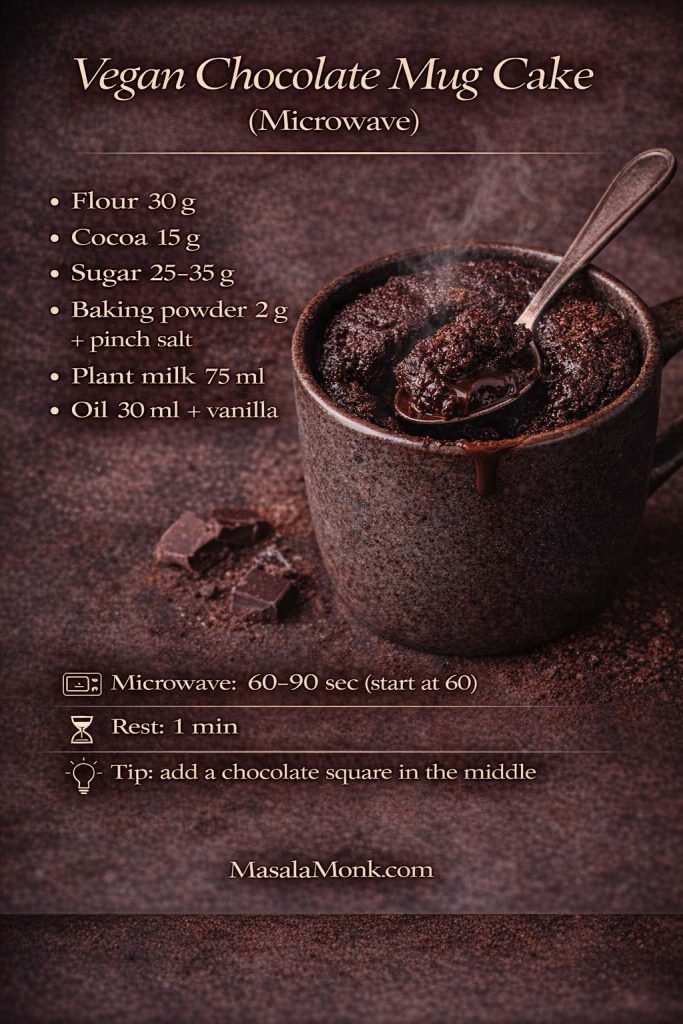
  • 30 g plain flour
  • 15 g cocoa powder
  • 25–35 g caster sugar (to taste)
  • 2 g baking powder
  • 1 g fine salt
  • 75 ml plant milk
  • 30 ml neutral oil
  • 5 ml vanilla extract
Vegan chocolate mug cake recipe card for the microwave showing ingredients, 60–90 second cook time, 1 minute rest, and a tip to add a chocolate square for a molten centre.
Vegan chocolate mug cake in minutes: this microwave recipe card gives the exact ratios, cook time, and a molten-centre tip for a quick dairy-free chocolate fix.

Method (so it stays tender, eggless and dairy free)

  1. Whisk flour, cocoa, sugar, baking powder, and salt in a microwave-safe mug.
  2. Add plant milk, oil, and vanilla. Stir until smooth, scraping the bottom so no flour hides.
  3. Microwave 60–90 seconds. Start at 60 seconds, then add 10-second bursts as needed. Overcooking is the fastest route to a rubbery mug cake.
  4. Rest 1 minute. This short rest helps the crumb settle and stay softer.

Upgrades for Vegan Chocolate Mug Cake

  • Add a square of dark chocolate in the middle for a molten pocket.
  • Drizzle with homemade chocolate syrup and finish with a pinch of salt.
  • Add orange zest for a brighter aroma.

Notes / substitutions Vegan Chocolate Mug Cake Recipe

  • Microwave power varies: start at 60 secs; add 10-sec bursts—overcooking makes it rubbery.
  • Oil: keeps it tender; melted vegan butter works but firms as it cools.
  • Add-ins: chocolate square in the middle = molten pocket.
  • Mug size: use a large mug (at least 350–400 ml) to prevent overflow.

Also Read: Manhattan Cocktail Recipe (Classic + 6 Variations)


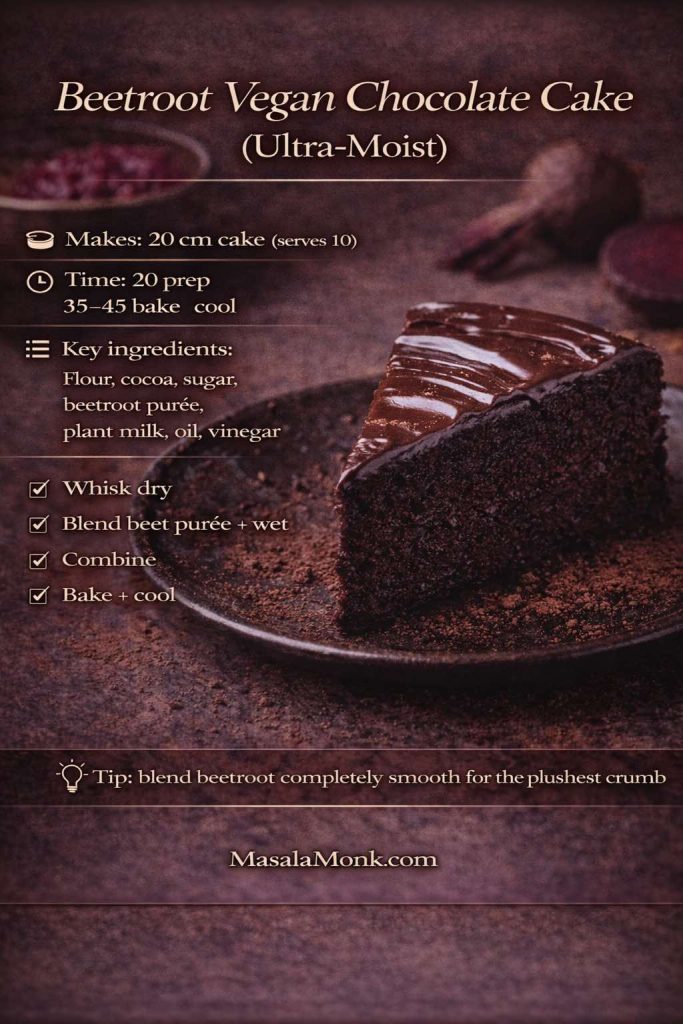
9) Beetroot Vegan Chocolate Cake (Ultra-Moist)

Beetroot adds moisture and depth, so this cake stays tender for days. In other words, it’s ideal when you’re baking ahead. The key is blending the beetroot purée until silky smooth so the crumb feels plush rather than fibrous.

Makes: 1 cake (20 cm) | Serves: 10
Time: 20 mins prep + 35–45 mins bake + 60–90 mins cooling | Difficulty: Easy
Oven/Tin: 175°C | 20 cm round tin

Ingredients

  • 220 g plain flour
  • 180 g caster sugar
  • 55 g cocoa powder
  • 10 g baking powder
  • 3 g bicarbonate of soda
  • 3 g fine salt
  • 250 g beetroot purée (cooked beetroot, blended smooth)
  • 180 ml plant milk
  • 80 ml neutral oil
  • 15 ml vinegar
  • 5 ml vanilla extract
Beetroot vegan chocolate cake recipe card showing a glossy ganache-topped chocolate cake slice, with makes/serves, timing, key ingredients including beetroot purée, quick steps, and a tip to blend beetroot smooth for a plush crumb.
Beetroot vegan chocolate cake, ultra-moist and surprisingly chocolate-forward: this recipe card gives the key ratios, bake time, and the blend-it-smooth tip for the plushest crumb.

Method

  1. Heat oven to 175°C. Line a 20 cm tin.
  2. Whisk dry ingredients thoroughly so cocoa disperses evenly.
  3. Whisk beetroot purée, plant milk, oil, vinegar, and vanilla until smooth. If the purée is thick, whisk a little longer to loosen it.
  4. Combine wet and dry until the batter is smooth, then pour into the tin.
  5. Bake 35–45 minutes. Cool fully before slicing.

Beetroot-specific cues for Vegan Chocolate Cake

  • If you want the cake to read “pure chocolate,” use a darker cocoa and consider adding 2 g espresso powder.
  • For a brighter edge, add orange zest—especially lovely if you glaze it.

If you want more cozy baking ideas after this, MasalaMonk’s Baking category is a great place to keep exploring.

Notes / substitutions for Beetroot Vegan Chocolate Cake

  • Beetroot prep: blend until completely smooth; texture depends on a silky purée.
  • Flavour balance: add ½ tsp espresso powder for deeper chocolate (optional).
  • Moisture: beetroot varies—if batter seems very thick, add a splash more plant milk.
  • Make-ahead: this one stays moist for days; great for baking ahead.

Also Read: Cappuccino Recipe: How to Make a Perfect Cappuccino at Home


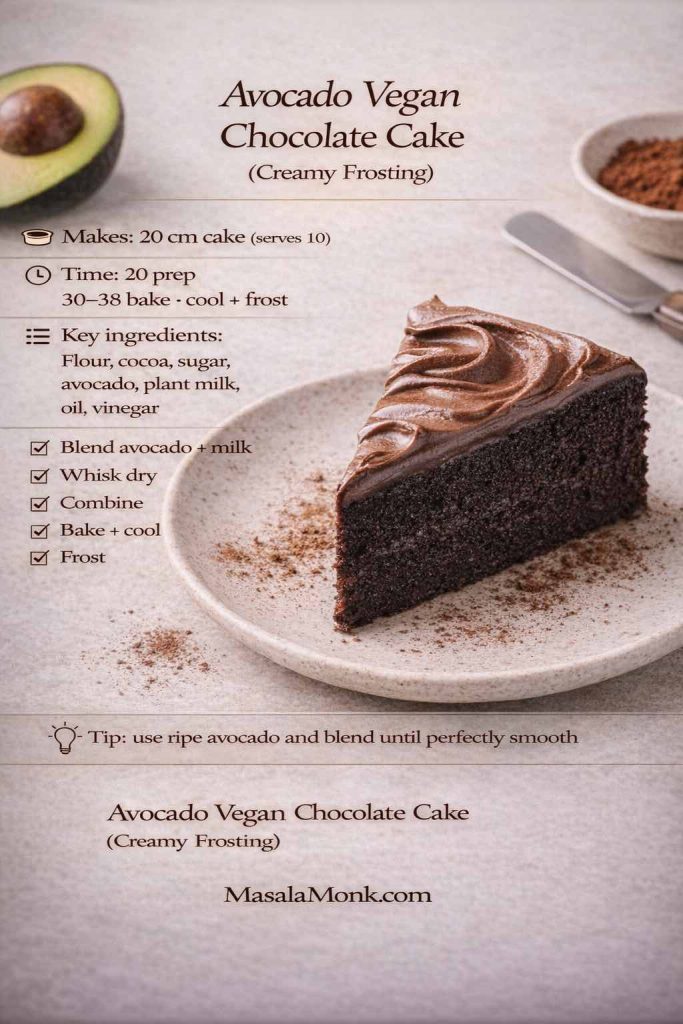
10) Avocado Vegan Chocolate Cake (Recipe With Creamy Chocolate Frosting)

Avocado brings softness and a creamy mouthfeel. Done well, it doesn’t dominate the flavour—it simply makes the cake feel richer. In addition, the frosting can be silky without relying heavily on icing sugar.

Makes: 1 cake (20 cm) | Serves: 10
Time: 20 mins prep + 30–38 mins bake + 60–90 mins cooling (+ 10 mins frosting) | Difficulty: Easy
Oven/Tin: 175°C | 20 cm round tin

Cake

  • 220 g plain flour
  • 200 g caster sugar
  • 55 g cocoa powder
  • 10 g baking powder
  • 3 g bicarbonate of soda
  • 3 g fine salt
  • 150 g ripe avocado flesh
  • 300 ml plant milk
  • 80 ml neutral oil
  • 15 ml vinegar
  • 10 ml vanilla extract

Creamy avocado frosting

  • 150 g ripe avocado flesh
  • 25 g cocoa powder
  • 60 ml maple syrup (to taste)
  • 5 ml vanilla extract
  • 1–2 g fine salt
Avocado vegan chocolate cake recipe card showing a slice of chocolate cake with creamy chocolate frosting, plus makes/serves, bake time, key ingredients including avocado and plant milk, quick steps, and a tip to blend avocado until perfectly smooth.
Avocado vegan chocolate cake with creamy frosting: this recipe card gives the quick steps and timing for a moist dairy-free cake—plus the key tip for silky-smooth avocado frosting.

Method

  1. Heat oven to 175°C. Line a 20 cm tin.
  2. Blend avocado with plant milk until completely smooth. This matters—any lumps will show up in texture.
  3. Whisk dry ingredients in a bowl.
  4. Whisk the avocado mixture with oil, vinegar, and vanilla. Then pour into dry ingredients and whisk until smooth.
  5. Bake 30–38 minutes. Cool completely before frosting.

Frosting

Blend avocado, cocoa, maple syrup, vanilla, and salt until silky. Chill 10–15 minutes to thicken. Spread over cooled cake.

Serving ideas

  • Finish with cocoa dusting for a clean look.
  • Add orange zest for brightness.
  • Add chopped toasted nuts for crunch.

If you like making plant milk at home for baking, MasalaMonk’s Easy Homemade Oats Milk is a handy reference.

Notes / substitutions for Avocado Vegan Chocolate Cake Recipe

  • Avocado must be ripe: blend until totally smooth or you’ll feel lumps.
  • Frosting storage: because it’s fresh avocado, keep frosted cake refrigerated; bring slices to room temp before serving.
  • Sweetness: maple syrup in frosting is adjustable—start lower, then add to taste.
  • No avocado frosting? Use ganache (from #3) or the buttercream (from #1).

Also Read: Baked Ziti Recipe Collection: 15 Easy Variations


Before you go: serving ideas that keep vegan chocolate cake feeling new

Even a truly excellent vegan chocolate cake can start to feel familiar if it always shows up the same way. Fortunately, you don’t need a new recipe to make it feel different—you just need a new finish. With that in mind, rotate your toppings and pairings so each bake has its own personality, even when the cake underneath is a repeat favourite.

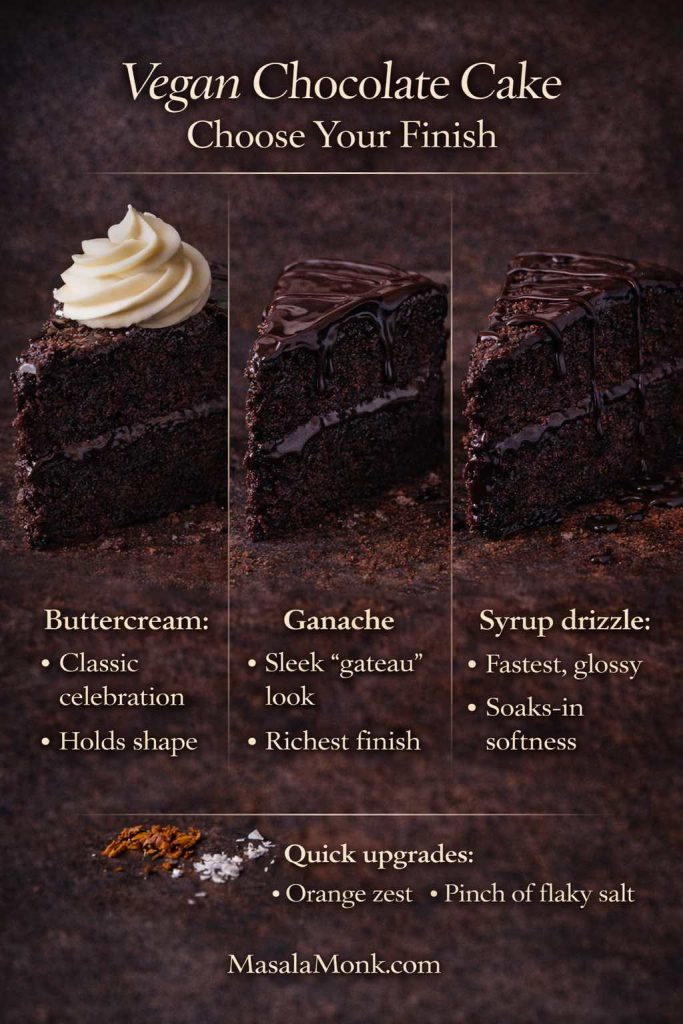
Switch the finish, change the whole vibe

  • Syrup drizzle (quick, glossy, instantly dessert-like): Warm a spoonful of 3 Minutes Homemade Chocolate Syrup and let it ribbon over slices. As it cools, it clings beautifully, so every bite gets a little shine.
  • Ganache pour (sleek, dramatic, surprisingly easy): If you’ve made the bundt ganache, you’re already set. Instead of saving it only for bundt cakes, pour it over sheet cake, loaf cake, or even a simple single-layer round. Better still, if you let the ganache thicken slightly before pouring, you’ll get a slow, elegant drape rather than a runaway puddle.
  • Citrus lift (bright, fragrant, not overly sweet): Orange zest over chocolate is a small move with a big payoff. It’s particularly lovely on beetroot cake, where the zest adds sparkle and keeps the chocolate tasting lively rather than heavy.
  • Salt finish (tiny detail, big flavour shift): A pinch of flaky salt over warm slices doesn’t make the cake salty—it makes the chocolate taste clearer. In the same way that salt sharpens caramel, it pulls chocolate into focus.

Add texture and contrast without extra work

If you want a little more than a topping, a few low-effort contrasts can make the plate feel complete:

  • Crunch: chopped toasted nuts or cocoa nibs scattered over syrup or ganache while it’s still tacky.
  • Creamy + cool: a spoon of thick coconut yoghurt or a scoop of dairy-free ice cream next to warm cake.
  • Fresh: berries or orange segments to lighten the richness, especially with flourless torte or lava cakes.

Building a dessert table that complements chocolate

When you’re putting together a dessert spread, variety matters more than quantity. So instead of adding another cake, choose one contrasting sweet that brings a different texture—creamy, crisp, or bite-sized.


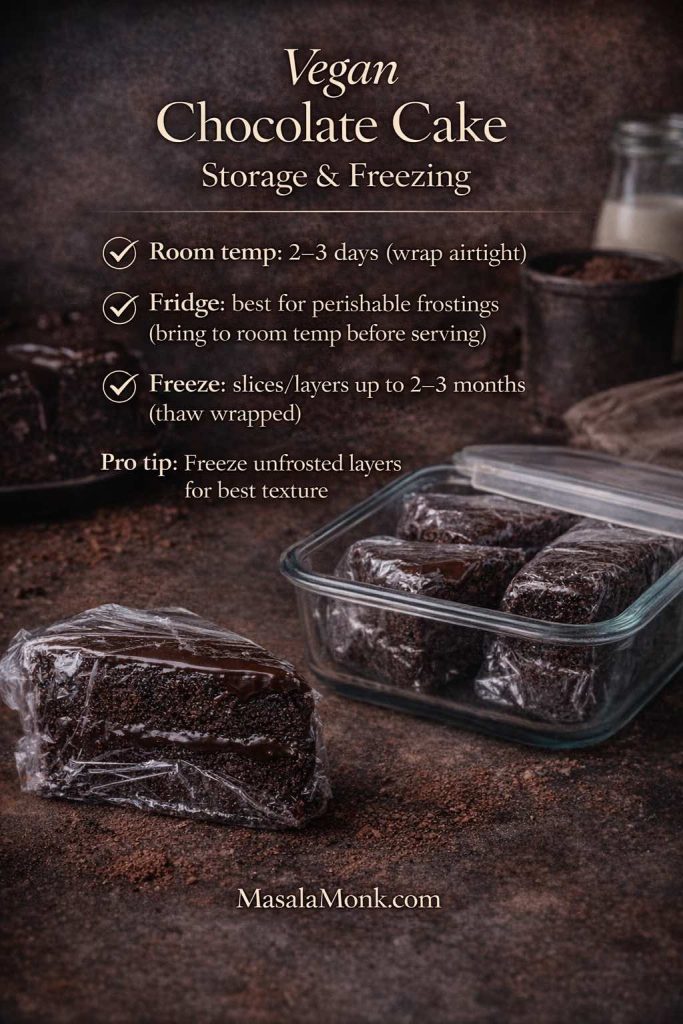
Storage, chilling, and freezing vegan chocolate cake

Because most of these cakes lean on oil for tenderness, they keep beautifully. Even so, storage still makes a difference—especially once frosting enters the picture. The goal is simple: protect moisture, prevent off-flavours, and keep texture as close to fresh-baked as possible.

Vegan chocolate cake storage and freezing guide showing how long it keeps at room temperature, when to refrigerate for perishable frostings, and how to freeze slices or layers for later.
Store vegan chocolate cake the smart way: keep it wrapped airtight at room temp for 2–3 days, chill cakes with perishable frostings, or freeze slices/layers for an anytime chocolate fix.

Room temperature (best for most unfrosted cakes)

If the cake is unfrosted—or topped with something stable like a syrup drizzle—wrap it tightly and store it at room temperature for 2–3 days. For loaf and sheet cakes in particular, this often preserves softness better than refrigeration.

How to wrap it well: once the cake is fully cool, wrap it snugly so air can’t circulate. If you’ve sliced it, press a piece of baking paper against the cut side first, then wrap.

Refrigeration (best for perishable toppings)

If you’ve used avocado frosting or you simply prefer a chilled finish, refrigerate the cake. However, for the best flavour and texture, bring slices back to room temperature before serving. Otherwise, the crumb can feel firmer and the chocolate can taste muted.

A good rhythm: slice what you need, then let those pieces sit out for 20–30 minutes before eating.

Freezing (best for planning ahead)

If you like having cake “on standby,” freezing is your friend. Wrap slices or layers tightly, then seal in an airtight container. When you’re ready, thaw at room temperature while still wrapped; that way, condensation forms on the wrap instead of soaking into the cake.

If you want clear, official guidance, here are the references that keep things straightforward: USDA Freezing and Food Safety, the UK’s How to chill, freeze and defrost food safely, and the FDA’s Refrigerator & Freezer Storage Chart (PDF).

Also Read: Hot Chocolate Coffee: 3 Easy Recipes (Cocoa, Mix, or Espresso)


A simple “choose your finish” guide

If you’re ever unsure what topping fits which cake, this quick guide helps you decide without overthinking:

Vegan chocolate frosting and ganache ratios guide showing classic cocoa buttercream, 1:1 chocolate ganache with coconut cream, and a quick chocolate syrup drizzle, with tips for fixing too-thick or too-thin toppings.
Vegan chocolate frosting made easy: use this quick ratios card for cocoa buttercream, 1:1 ganache, or a fast syrup drizzle—plus simple fixes if your topping turns out too thick or too thin.
Vegan chocolate cake finish guide comparing buttercream frosting, chocolate ganache, and syrup drizzle, with quick upgrades like orange zest and flaky salt.
Not sure how to finish vegan chocolate cake? Choose buttercream for a classic celebration look, ganache for a sleek rich finish, or a syrup drizzle for the fastest glossy upgrade.
  • Layer cake: buttercream for classic celebration, ganache for a sleek “gateau” mood.
  • Sheet cake: syrup drizzle for speed, quick glaze for neat slices, ganache if you want it to feel more formal.
  • Bundt cake: ganache is the easiest way to make the shape look intentional; meanwhile, a light dusting of cocoa keeps it elegant.
  • Loaf cake: citrus glaze or syrup drizzle for simple charm; ganache if you want it to look like a gift cake.
  • Flourless torte: cocoa dusting plus berries keeps it refined; alternatively, a thin ganache layer makes it feel ultra-luxurious.
  • Lava cakes: keep toppings minimal—syrup, berries, or a pinch of salt—so the molten centre stays the star.
  • Mug cake: syrup and salt are all you need; if you want more, add a square of chocolate inside next time.

Also Read: Cranberry Moscow Mule Recipe: A Festive Holiday Cocktail With Easy Variations


One last nudge (because variations are the fun part)

Once you’ve baked one of these cakes, it’s surprisingly satisfying to remix it. Swap the shape. Change the topping. Add orange zest one time and espresso the next. Suddenly, you’re not repeating yourself—you’re building a repertoire.

If you enjoy that “one dependable base, then smart variations” energy, you might also like Double Chocolate Chip Cookies – One Dough, 7 Ways. It’s the same spirit: familiar comfort first, then playful twists that keep baking exciting.

Also Read: Kahlua Drinks: 10 Easy Cocktail Recipes (Milk, Vodka, Coffee)

Vegan chocolate cake troubleshooting graphic with quick fixes for dry cake, dense cake, flat cake, and gummy centre, including tips on mixing, leaveners, baking cues, and blooming cocoa.
Vegan chocolate cake troubleshooting made simple: fix dry cake, dense crumb, flat rise, or gummy centres with these quick checks—so your next bake stays moist and reliable.

Vegan Chocolate Cake FAQ

1) What’s the best vegan chocolate cake recipe if I want it truly moist?

Go for an oil-based batter and a “bloom” step with hot coffee or hot water. Oil keeps the crumb tender for longer, while hot liquid wakes up cocoa so the chocolate tastes bigger. Also, bake to cues: stop when a skewer shows moist crumbs rather than waiting for it to come out completely clean.

2) Are vegan chocolate cake recipes automatically dairy-free and eggless?

Yes—vegan means no dairy and no eggs by definition. Still, “eggless” texture can vary because structure comes from different places: sometimes it’s mostly flour + leavening, while other recipes add starch, avocado, or beetroot for a fudgier, denser feel.

3) What’s the easiest vegan chocolate cake for beginners?

A one-bowl sheet cake is usually the simplest starting point. Because it bakes in a single layer, you get more even doneness, fewer steps, and less risk of overhandling. Plus, you can finish it with a quick drizzle or ganache and it still feels special.

4) Can I make a vegan chocolate cake without coffee?

Definitely. Coffee intensifies cocoa, yet hot water gives you the same “blooming” effect without any coffee notes. In other words, you’ll still get a deep chocolate aroma—just cleaner and more neutral.

5) Which cocoa powder should I use: natural or Dutch-process?

Natural cocoa tends to taste brighter and slightly sharper, while Dutch-process usually tastes smoother and looks darker. Either can work, although results won’t be identical. Consequently, once you find a cocoa you love, stick with it so your cake becomes consistent from bake to bake.

6) What plant milk is best for vegan chocolate cake?

Soy milk often gives a bit more structure and height, oat milk tends to make the crumb softer and rounder, and almond milk is lighter and can feel slightly less plush. That said, any unsweetened plant milk will generally work—choose based on what you keep in the fridge.

7) How do I make a vegan chocolate cake more “fudgy” instead of fluffy?

Use more melted chocolate or add chopped dark chocolate to the batter, then avoid overbaking. Additionally, choose a sheet cake format or a flourless/torte-style recipe, since both naturally lean richer and denser. Finally, let the cake cool fully—fudgy texture often sets as it rests.

8) Can I make vegan chocolate cake gluten-free and still keep it tender?

Yes, especially with a good 1:1 gluten-free flour blend. Because gluten-free cakes are more fragile when warm, let it cool completely before slicing. If you want extra neat slices, chill the cooled cake briefly—texture tightens and cuts cleaner.

9) Why do so many dairy-free chocolate cake recipes use vinegar?

Vinegar (or lemon juice) reacts with baking soda, which helps the cake rise and keeps the crumb lighter. Importantly, it shouldn’t make the cake taste sour—the amount is small and it disappears into the chocolate.

10) Why is my vegan chocolate cake dry, and how do I prevent it next time?

Dryness usually comes from overbaking or measuring too much flour. Next time, weigh ingredients if you can, start checking earlier, and pull the cake when the centre springs back and the skewer shows moist crumbs. Moreover, wrap the cooled cake well—air is what steals softness fastest.

11) Can I bake vegan chocolate cake as cupcakes, a loaf, or a bundt?

Yes—this batter family is flexible. Cupcakes bake faster (start checking around 18–22 minutes), loaf cakes need longer and benefit from a foil tent if the top browns early, and bundt cakes demand thorough greasing for clean release. As a result, the format you choose should match your time and how you plan to serve it.

12) How long does vegan chocolate cake last, and can I freeze it?

Most oil-based vegan chocolate cakes keep well at room temperature for 2–3 days if wrapped tightly. For frosted cakes—especially avocado frosting—refrigerate, then bring slices back to room temp for the best flavour. For longer storage, freeze slices or layers tightly wrapped; thaw while still wrapped so condensation stays on the wrap, not in the cake.

13) What’s the quickest vegan chocolate dessert when I want chocolate right now?

A vegan chocolate mug cake is the fastest option. It’s ready in minutes, and you can adjust sweetness or add a chocolate square in the centre for a molten pocket. Just microwave in short bursts, since overcooking is the main reason mug cakes turn rubbery.

14) Which vegan chocolate cake is best for birthdays and celebrations?

A classic vegan chocolate layer cake is the most “party-ready” because it stacks well and holds frosting cleanly. Alternatively, a bundt cake looks festive with almost no decorating—ganache does the work and the shape carries the drama.

Posted on — 5 Comments

Quinoa vs Rice: Nutrition, Glycemic Index, and When to Choose Each

Hand scooping cooked quinoa beside a bowl of white rice; magazine-style cover comparing calories, carbs and glycemic index to choose the healthier base

We reach for rice or quinoa because both are comforting. They carry flavor, welcome vegetables and both of them make a plate feel complete. Yet, when you compare them closely, they behave differently in your body and in your kitchen. This guide unpacks quinoa vs rice with practical numbers, plain language, and easy cooking moves you can use tonight.

Although both are starches, they do not play the same role. Quinoa brings more protein and more fiber. Rice, especially white rice, brings a softer texture and a neutral base. As a result, each shines in different meals. In the sections below, you will see where quinoa wins. You will also see where rice still fits beautifully. Most importantly, you will learn how to choose the right base for your goals and your taste.

Before we dive in, remember one key fact. Quinoa is a seed. It cooks like a grain, but botanically it is not a cereal. This small detail explains some of its unique traits. It also explains why its protein and fiber numbers stand out.

Also Read: Glycemic Index (GI) VS Glycemic Load (GL)


Quinoa vs Rice: the short, honest take

Let’s set the stage with a clear summary. Then we will build details under it.

  • Quinoa offers more protein and fiber per cooked cup. Therefore, it usually keeps you full longer.
  • White rice is slightly lower in calories per cup. It tastes neutral. It lets sauces and curries take center stage.
  • For steadier energy, quinoa, brown rice, and basmati are generally better picks than standard white or jasmine.

If you want more context on varieties, skim our explainer on basmati rice and glycemic index. For a simple primer on blood sugar and carbs, read Harvard’s guide to carbohydrates and blood sugar. Both links will help you turn this article into action.


Quinoa vs Rice: nutrition, per cooked cup

Numbers make decisions easier. Let’s compare typical cooked portions you see in bowls and plates.

Two hands holding bowls of cooked quinoa vs white rice with text showing protein and fiber per cup.
Why quinoa keeps you fuller: more protein and fiber per cup compared with standard white rice.

Which has fewer calories per cup? White rice does, by a modest margin.
Which supports fullness better? Quinoa does, because of protein and fiber.
Is quinoa lower carb than rice? Per cup, quinoa has slightly fewer carbs than many white rices. The gap is small. The bigger win is quinoa’s fiber and protein.

Prefer metric? No problem. Per 100 g cooked, quinoa averages about 4.4 g protein and ~2.8 g fiber. White rice averages roughly 2.7 g protein and ~0.4–0.6 g fiber. Consequently, quinoa sticks a bit longer and often delivers better satiety. Rice, meanwhile, usually needs support from protein and vegetables to keep hunger steady and digests faster unless you add partners like beans, tofu, eggs, fish, or chicken.

Now step back. Nutrition is not only macros. Micronutrients matter. So do amino acids. Quinoa offers a broader amino acid profile and helpful minerals. Rice offers consistency, digestibility, and a clean flavor stage. Therefore, let your meal goal guide your choice. Are you building a lean, filling bowl for lunch? Quinoa might serve you well. Are you plating a rich curry that needs a soft base? White or basmati rice may be perfect.

Also Read: Glycemic Index and Secrets of Weight Loss


Overhead bowls of quinoa, white, brown, basmati and jasmine rice labeled with calories per cooked cup for quinoa vs rice types.
Quick glance: typical calories per cooked cup across quinoa and common rice varieties—use it to portion bowls fast.

Quinoa vs Rice: per cup and per 100 g at a glance

Per cup (cooked)

1 cup cookedCaloriesCarbsProteinFiber
Quinoa (~185 g)~222~39 g~8 g~5 g
White rice (~158 g)~205~45 g~4 g<1 g
Brown rice (~195 g)~216~45 g~5 g~3.5 g
Comparing Quinoa VS Rice Macros, based on Per Cup Serving.

Source the quinoa and white rice figures from USDA/MyFoodData for quinoa and USDA/MyFoodData for white rice. Values vary by brand and moisture, but the pattern remains stable.

Tip: Use the cup table for quick menu planning. Use the gram table below for macro tracking.

Per 100 g (cooked)

Food (100 g)CaloriesCarbsProteinFiber
Quinoa~120~21.3 g~4.4 g~2.8 g
White rice~130~28.3 g~2.7 g~0.4–0.6 g
Brown rice~123~25.6 g~2.7–2.9 g~1.6–1.8 g
Basmati (white)~121–130~25–28 g~2.7–3.0 g~0.4–0.8 g
Jasmine (white)~129–135~28–30 g~2.7–3.0 g~0.4–0.8 g
Comparing Quinoa VS Rice Macros, based on Per 100 gm Serving.

These tables helps in calories vs carbs vs protein comparison. They also support quick menu planning. If you build bowls by volume, the per-cup table helps. If you track macros by weight, the 100 g snapshot helps more. You can now place the base that matches your day.


Glycemic index in quinoa vs rice (and why it matters)

The glycemic index (GI) estimates how fast a carb-rich food raises blood sugar. As a rule of thumb, ≤55 is low, 56–69 is medium, and ≥70 is high. For clear definitions and practical examples, read Harvard’s overview on carbohydrates and blood sugar. If you want to look up specific foods or brands, use the University of Sydney GI database.

Five bowls of rice varieties labeled with approximate glycemic index values including basmati, jasmine, brown and white.
Variety matters: basmati tends to test lower on GI than many white rices, while jasmine often trends higher.

Here is the part that matters for your day.

  • Quinoa is generally low-GI, often reported around the low 50s. Its fiber and protein contribute to that steadier curve. That is why quinoa bowls often feel satisfying for longer.
  • Rice spans a wide range. Brown rice averages around the low-to-medium boundary. Standard white rice sits medium on average. Basmati often lands lower among white rices. Jasmine tends to land higher.

Here it is important to keep on mind cooking changes starch, GI can shift with methods. Cooling cooked rice and then reheating increases resistant starch. That change can soften the post-meal rise for some people. Pairings matter too. When you add protein, fiber, and healthy fats, digestion slows. Therefore, you can keep rice in rotation and still aim for steady energy.

Summarizing GI in quinoa vs rice

  • What is the GI of quinoa vs rice? Quinoa is generally low-GI (often ~53). Rice varies widely by type.
  • Which rice types run lower GI? Brown rice often averages ~55. Basmati is frequently lower among white rices.
  • Which rice types run higher GI? Jasmine tends to be higher. Many standard white rices fall in the medium range.

Is quinoa healthier than rice for blood sugar? Often yes, because quinoa starts low-GI and brings fiber and protein. However, brown rice and basmati can also be smart picks. Therefore, choose variety first, then use cooking methods that encourage steadier curves.

If you want practical levers, walk through our guide to reducing the glycemic impact of rice. You will see how cook → cool → reheat, slightly firmer texture, and protein-fiber pairings smooth the ride. For a neutral, health-organization perspective on using GI wisely, review Diabetes UK’s GI overview.


GI by rice variety (white, brown, basmati, jasmine)

Variety matters. So do cultivar and cooking. Here is a quick comparison you can trust.

  • White rice (general): medium GI on average. Soft and easy to over-serve.
  • Brown rice: low-to-medium GI. More fiber than standard white. Chewier bite and nutty notes.
  • Basmati (white): often lower GI among white rices. Higher amylose helps keep grains separate.
  • Jasmine (white): often higher GI. Plush texture and a perfumed aroma.

For a broader context on GI and health outcomes, skim Harvard’s overview of rice. For brand or product specifics, check entries in the University of Sydney GI database.


How cooking and pairing change GI (so rice stays in your life)

Small technique shifts change how grains behave.

Pot of cooked white rice and bowl of quinoa with text explaining the cook–cool–reheat method to lower GI.
Batch smart: chill cooked grains and reheat—resistant starch goes up, and meals feel steadier.
  1. Cook → cool → reheat. Cooling cooked rice forms resistant starch. That starch resists digestion and can blunt the spike.
  2. Keep grains slightly firm. Very soft grains digest faster. Slightly firmer grains slow things down.
  3. Pair smartly. Add protein, fiber, and healthy fats. Beans, tofu, eggs, fish, chicken, vegetables, nuts, and seeds all help.
  4. Mind portions. A modest scoop leaves room for vegetables and protein. You get the texture you love without losing balance.

For a clear walkthrough, open our practical guide on reducing rice’s GI. The methods are simple, repeatable, and budget-friendly.


Quinoa vs Rice for different goals

This section folds several “which is better” questions directly into the guidance. That way, you decide by goal, not by hype.

Quinoa vs Rice for fullness and everyday nutrition

Which is healthier, rice or quinoa, for satiety? Quinoa usually wins. If satiety is your priority, start with quinoa. It delivers more protein and more fiber per cup. Those two levers slow digestion. They also help curb snack cravings later. For the full panel, compare USDA/MyFoodData for quinoa with USDA/MyFoodData for white rice. For a friendly overview, read Harvard Nutrition Source on quinoa.

Even so, rice can still support fullness when you structure the plate. First, add bulk with non-starchy vegetables. Next, add protein. Then finish with a little fat for flavor and texture. Together, those pieces change how the whole meal feels.

What about brown rice vs quinoa? That contest is closer. Brown rice is a whole grain with moderate fiber and low-to-medium GI. However, quinoa still edges it on protein and often on fiber per cup. If you love the chew of brown rice, you can still get great meals. Just add beans or tofu to push protein higher.

Quinoa vs Rice for steady energy and blood sugar

If you want stable post-meal energy, lean on low- or medium-GI bases. Quinoa is a reliable choice. Brown rice and basmati are strong options too. Moreover, dial in technique. Use the cook-cool-reheat sequence. Keep grains a touch firm. Pair with protein, vegetables, and healthy fats. For a clean, balanced view from a health organization, read Diabetes UK on the GI.

Does quinoa have a lower GI than jasmine rice? Usually yes. Jasmine often trends higher. If you love jasmine for aroma, balance the plate. Add vegetables and protein. Keep the serving controlled.

Quinoa vs Rice for weight management

Is quinoa better than rice for weight loss? Sometimes. Weight management is about patterns, not single foods. Still, the base matters. White rice is slightly lower in calories per cup than quinoa. That small edge can help when you want a lighter base. However, quinoa’s higher protein and fiber can improve fullness. Consequently, the “better” choice depends on the rest of the plate.

Here are two simple frameworks:

  • Quinoa-forward bowl: quinoa base + beans or tofu + mixed vegetables + yogurt-tahini dressing + lemon.
  • Light rice bowl: modest scoop of white or basmati rice + vegetable-heavy stir-fry + lean chicken or shrimp + crunchy side salad.

Is quinoa more filling than rice? Often yes. The protein and fiber explain that feeling. But remember preference and texture. If rice helps you enjoy more vegetables and lean protein, that also supports the goal. If you want more structure, explore our guide on choosing the best rice for weight loss. It shows how to set portions and choose cooking methods that support a calorie plan.

Quinoa vs Rice for bodybuilding and training days

Training changes needs. Sometimes you want faster carb delivery. Other times you want meals that stick. Therefore, match the base to the session.

  • Around training: white or basmati rice digests a bit faster. That can help when you need quick refueling. Pair with lean protein and a small amount of fat.
  • Away from training: quinoa brings more protein and fiber. That helps fullness as you spread meals through the day. Add legumes, eggs, tofu, or fish for extra protein.

As always, test and notice. Your body will tell you which base supports your work.

Also Read: Quinoa for Weight Loss: Benefits, Nutrition, and How to Cook Ideas


Quinoa vs Rice by variety (white, brown, basmati, jasmine)

As the risk of repeating ourselves, however for sake of more clarity on topic, let’s now fold some comparisons directly into short, practical sub-sections. Each one answers “which is better” in the specific context.

Quinoa vs White Rice

White rice is plush and neutral. It absorbs sauces and lets other flavors lead. On average, it is medium GI and low in fiber. Therefore, watch portions. Pair it with vegetables and protein. In contrast, quinoa is typically lower GI and higher in protein and fiber. It brings a nutty note and a slight pop to each bite.

For facts while you cook, keep USDA/MyFoodData for white rice open in a tab. For quinoa context, browse Harvard Nutrition Source on quinoa. If you want a broad view of rice varieties, read Harvard Nutrition Source on rice.

When to choose which: use white rice when the dish is rich and saucy. Use quinoa when you want the base to contribute protein and fiber. Or mix them half-and-half for a balanced compromise.

Quinoa vs Brown Rice

Here the gap narrows. Brown rice is a whole grain. It keeps the bran and germ. As a result, it carries more fiber and micronutrients than standard white rice. Its GI usually sits in the low-to-medium band. If you enjoy the chewier bite and nutty flavor, it can anchor meals beautifully. Quinoa still edges brown rice on protein and fiber per cup. That edge can aid fullness when calories are tight.

For averages and a sensible overview, see Harvard’s rice page. For a narrative comparison of brown and white rice, skim Harvard Health’s head-to-head explainer.

When to choose which: pick brown rice when you want the rice experience with extra texture and a friendlier GI. Pick quinoa when you want more protein, more fiber, and quicker cooking.

Quinoa vs Basmati Rice

Among white rices, basmati is a standout. It often lands lower on the GI spectrum than many standard white rices. Higher amylose helps keep grains separate. The aroma is a bonus. If you want a white rice experience with a gentler curve, basmati is a smart choice. For deeper detail and cooking notes, open our basmati GI analysis. If you want brand-specific values, search the University of Sydney GI database.

When to choose which: pick basmati when you want long, separate, fragrant grains. Pick quinoa when you want more protein and fiber in the base. Or serve basmati with lentils or chickpeas to boost protein and fiber.

Also Read: ‘Quinoa’ Instead of ‘Chicken’: 5 High Protein Plant-Based Meal Prep Ideas

Quinoa vs Jasmine Rice

Jasmine rice is aromatic and soft. It is lovely with Thai curries and dishes that want a perfumed base. However, jasmine tends to sit higher on the GI than basmati and many brown rices. Therefore, if blood sugar steadiness is a priority, choose jasmine less often. For variety differences and a clear overview, read Harvard’s rice page.

When to choose which: pick jasmine for aroma and softness. Pick quinoa when you want steadier energy and extra protein.


Top-down view of a bowl split 50–50 with cooked quinoa and white rice, showing an easy transition strategy.
Start with a 50–50 base—quinoa for protein and fiber, rice for comfort—then shift to 60–40 as your taste adapts.

Other rice styles in brief (so you can branch out)

There are so many rice varieties, it’s hard to cover them all, however some of the more popular ones and which keep trending every now and then are covered below in comparison with Quinoa.

Wild rice vs quinoa

Wild rice is a grass seed, much like quinoa is a seed. It brings a chewy bite and an earthy, nutty flavor. It has more protein than many standard white rices. Choose wild rice when you want texture and a whole-grain feel. Choose quinoa when you want more protein per cup and a faster cook.

Red and black rice vs quinoa

Red and black rices keep their bran. They bring color, antioxidants, and a bit more fiber than standard white rice. They usually land in the medium-GI range. Choose them when you want a classic rice experience with extra character. Choose quinoa when you want more protein and a typically lower GI.

Parboiled rice vs quinoa

Parboiled rice is steamed in the husk before milling. That process helps retain some nutrients. It also tends to keep grains separate and can yield a lower GI than standard white rice. Use parboiled rice when you want distinct grains for pilaf. Use quinoa when you want higher protein and fiber in the base.

Cauliflower rice and shirataki rice vs quinoa

Cauliflower and shirataki “rice” are low-calorie substitutes, not grains. They drastically reduce carbs and calories. However, they change texture and flavor. Use them for low-carb meals or as volume extenders. Use quinoa or rice when you want true grain structure and lasting fullness.

Also Read: Healthy Oat Protein Bars – 5 Easy No Sugar Recipes for Snacks


Taste, texture, and kitchen behavior (so your swaps stick)

Food should satisfy. Numbers help, but flavor keeps habits alive. Therefore, pay attention to texture and taste.

Quinoa tastes nutty with a gentle chew. Rinse it well to remove saponins. For extra depth, toast the dry grains for a minute or two. Then add water. A 1:2 quinoa-to-water ratio works for many cooks. Simmer until you see tiny germ rings and the pot looks just dry. Cover and rest for five minutes. Finally, fluff and season. A drizzle of olive oil and a squeeze of lemon go a long way.

Spoon lifting cooked quinoa above a pot with tip to rinse before cooking to reduce bitterness.
Pro tip: rinsing removes saponins so quinoa tastes cleaner and pairs better with delicate sauces.

White rice is soft and neutral. It lets sauces sing and stews shine. Brown rice is chewier and slightly nutty. Basmati cooks fragrant and separate, which makes it ideal for pilafs. Jasmine is plush and perfumed, perfect for Thai and Southeast Asian flavors.

If you are not ready for a full swap, start gently. Mix half quinoa and half rice. The bowl will feel familiar yet more filling. Over time, you can push the ratio toward your goals without losing comfort.

Does quinoa taste like rice? Not exactly. It is nuttier and slightly chewy. However, with the right dressing or sauce, most eaters enjoy the swap quickly.


Real-world plates you can build tonight

Real life asks for simple moves, you do not need new recipes to start. You only need patterns that repeat well, here are patterns that work.

Protein-forward quinoa bowl
Base: quinoa. Add roasted chickpeas or grilled tofu. Pile on vegetables. Finish with a yogurt-tahini drizzle and lemon. Because quinoa brings protein and fiber, the bowl satisfies. For more ideas, see quinoa meal-prep ideas.

Light, saucy rice bowl
Base: a modest scoop of white or basmati rice. Top with a vegetable-heavy stir-fry. Add lean chicken or shrimp. Add a crunchy side salad. The plate stays light yet complete.

Basmati pilaf with legumes
Toast basmati with spices. Simmer until long and separate. Fold in cooked lentils and herbs. Serve with a bright cucumber salad. The dish tastes rich but lands gently.

Half-and-half “transition” bowl
Mix equal parts cooked quinoa and cooked brown rice. Add roasted vegetables, a protein, and a nutty dressing. You get rice comfort and quinoa’s staying power.

Cold grain salad for busy weeks
Toss cooked and cooled quinoa with chopped greens, beans, cucumbers, tomatoes, olives, and a lemon vinaigrette. Store for lunches. Because quinoa holds texture, the salad keeps well. For higher-protein patterns, explore high-protein quinoa strategies.


Quinoa vs Rice: cooking smarter for better curves

You can improve rice’s glycemic profile without abandoning it, which means you can keep rice and still aim for steady energy. Use these simple levers.

  • Cook → cool → reheat. Resistant starch goes up. The glycemic hit can soften.
  • Pair with protein, fiber, and healthy fats. Beans, eggs, tofu, fish, chicken, leafy greens, nuts, and seeds slow digestion.
  • Keep texture slightly firm. Very soft grains digest faster.
  • Scale portions down. A smaller scoop plus more vegetables often feels better.
  • Prefer lower-GI choices. Basmati and brown rice are friendlier than standard white or jasmine.

For step-by-step help, read reducing the glycemic impact of rice. For a neutral, health-org perspective on using GI well, see Diabetes UK’s GI overview.


Pantry, storage, and prep notes that make the habit easy

Logistics shape success. Set up your kitchen so good choices happen on autopilot.

  • Store uncooked grains in airtight jars away from heat and light.
  • Cool cooked grains quickly, then refrigerate within two hours.
  • Use cooked grains within three to four days, or freeze flat for later.
  • Reheat with a splash of water and cover to restore moisture.
  • Batch once; eat many times. Cook big on one night. Portion into containers. Rotate through bowl formulas all week.
  • Season simply. Try lemon zest, garlic, toasted cumin, turmeric, parsley, cilantro, sesame, or a spoon of pesto. Little touches amplify flavor.

When you cook a pot, cook a little extra. Future-you will thank present-you.


Pulling it together: how to choose with confidence

You now have the facts and the levers. Let’s convert them into confident choices.

  • Choose quinoa when you want more protein and fiber, generally lower GI, and a base that can stand on its own in bowls and salads. For numbers and context, revisit USDA quinoa and Harvard’s quinoa guide.
  • Choose brown or basmati rice when you want a classic rice experience with a gentler glycemic impact than standard white. For a balanced overview of varieties, see Harvard’s rice page.
  • Choose white rice when you need a lighter-calorie, neutral base that keeps the spotlight on the main dish. Then round out the plate with vegetables and protein so the meal satisfies and digests steadily. For exact cup-for-cup figures, compare white rice per cup with quinoa per cup.

If blood sugar steadiness is a priority, focus on technique. Cook, cool, and reheat. Keep grains slightly firm. Pair with protein and vegetables. Favor lower-GI varieties. For simple steps, use our guide to reducing rice’s GI. For a neutral, health-org stance on GI, read Diabetes UK’s overview.

Finally, keep cooking joyful. Food is fuel, but it is also comfort. Try one new method this week. Swap in a half-and-half mix. Add a bright pickle or a crunchy salad. Notice how the plate feels. Then iterate. With a little curiosity, quinoa vs rice stops being an argument. It becomes a flexible toolkit you can use with ease.

FAQs

1) What is the glycemic index of quinoa vs rice?

Generally, quinoa sits in the low-GI range, while rice varies widely by type. Consequently, brown and basmati rice tend to be friendlier than standard white or jasmine. Even so, cooking, cooling, and reheating can shift the numbers a bit.

2) Which is healthier overall: quinoa or rice?

It depends on your goal. Typically, quinoa wins on protein, fiber, and a steadier blood-sugar response. However, white rice is slightly lower in calories per cup and works well as a neutral base when portions and pairings are smart.

3) Is quinoa better than rice for weight loss?

Often, yes—because quinoa’s extra protein and fiber can improve fullness. Nevertheless, a modest serving of rice with plenty of vegetables and lean protein can also fit well.

4) Brown rice vs quinoa: which should I choose?

Both are solid. Brown rice offers a whole-grain experience with chew and moderate fiber. Meanwhile, quinoa usually brings more protein and fiber per cup. Therefore, choose by texture preference and how long you want the meal to keep you satisfied.

5) Basmati rice vs quinoa: which has the advantage?

Each brings different strengths. Basmati often lands lower on the GI spectrum among white rices and has a fragrant, separate grain. Conversely, quinoa adds more protein and fiber. As a result, you might even combine them.

6) Jasmine rice vs quinoa: which supports steadier energy?

Typically quinoa. Jasmine rice is delicious and plush, yet it often trends higher on the GI scale. Thus, if you choose jasmine, balance the plate with vegetables, protein, and mindful portions.

7) Does quinoa have fewer carbs than rice?

Per cooked cup, quinoa usually has slightly fewer carbs than many white rices. Still, the difference is small. Instead, quinoa’s bigger edge is its protein and fiber.

8) Quinoa vs white rice: which has fewer calories?

White rice, by a modest margin. Even so, quinoa often feels more filling thanks to its higher protein and fiber content.

9) Protein in quinoa vs rice: how do they compare?

Quinoa commonly provides about twice the protein per cup compared with white rice. Consequently, it can help when you want more protein from the base itself.

10) Fiber in quinoa vs brown rice: who wins?

Quinoa usually edges out brown rice on fiber per cup. Nevertheless, both beat standard white rice. Therefore, either can help you build more satisfying bowls.

11) What is the difference between quinoa and rice?

Botanically, quinoa is a seed that cooks like a grain, while rice is a cereal grain. Hence, quinoa tends to carry more protein and fiber, whereas rice delivers a softer, more neutral canvas.

12) Is quinoa better than rice for diabetics?

Often yes, due to lower GI and higher fiber. That said, brown rice and basmati can also be sensible choices. Furthermore, pairings, portions, and cooking methods matter just as much.

13) Which is better for bodybuilding or training days: quinoa or rice?

It depends on timing. Around workouts, white or basmati rice can digest a bit faster. Conversely, away from training, quinoa’s extra protein and fiber can help with satiety across the day.

14) Quinoa vs rice for weight loss: what portion strategies work?

First, keep the base modest. Next, pack in vegetables. Then, add lean protein and a little fat for flavor. Consequently, both quinoa bowls and rice bowls can fit your plan.

15) Wild, red, or black rice vs quinoa: how do these compare?

These colorful rices retain more of the grain and usually bring extra texture and character. Even so, quinoa still tends to offer more protein per cup. Thus, choose based on flavor and the role you want the base to play.

16) Parboiled rice vs quinoa: which should I use?

Parboiled rice often cooks into separate grains and can be gentler than some standard white rices. Nevertheless, quinoa remains stronger on protein and fiber. Therefore, pick parboiled for pilafs and quinoa for protein-forward bowls.

17) Cauliflower rice or shirataki rice vs quinoa: which is “lighter”?

Those substitutes are extremely low in calories and carbs. However, they change texture and flavor dramatically. Meanwhile, quinoa behaves like a true grain and offers staying power. Hence, use the alternatives for very low-carb plates and quinoa for fuller meals.

18) Does quinoa taste like rice?

Not exactly. Quinoa is nutty with a slight chew; rice is softer and more neutral. That said, with dressings, sauces, and herbs, the swap feels natural surprisingly quickly.

19) Can I mix quinoa and rice in one dish?

Absolutely. In fact, a half-and-half mix is an easy transition strategy. As a result, you get rice’s familiarity and quinoa’s extra protein and fiber in the same bowl.

20) Is quinoa more expensive than rice?

In many markets, yes, because quinoa is less widely grown and processed differently. Even so, mixing quinoa with rice or using quinoa for specific meals can manage cost while preserving benefits.

21) Quinoa vs rice calories per 100 g vs per cup: which view should I use?

Use the per 100 g view for precise macro tracking. Alternatively, use the per cup view for quick home cooking decisions. Either way, keep consistency in your method.

22) Which is healthier: brown rice or quinoa?

Often quinoa, thanks to protein and fiber. Nonetheless, brown rice remains a strong whole-grain option. Therefore, rotate both and pick based on texture, budget, and the rest of the plate.

23) Is quinoa or rice better for beginners who want steadier energy?

Start with quinoa or basmati, since both usually support a smoother glucose response than many standard white rices. Additionally, keep portions steady and add protein.

24) Why do cooking methods change the GI of rice?

Because heat, cooling, and reheating alter starch structure. Specifically, cooling increases resistant starch, which resists digestion. Consequently, the post-meal rise can be gentler.

25) How do I choose between quinoa and rice on busy weeks?

Plan for versatility. Batch-cook one pot of quinoa and one of rice. Then, alternate: quinoa bowls on high-satiety days; rice bowls when you want a lighter base or faster digestion.

Posted on — 19 Comments

10 Creative Chia Pudding Recipes for Every Taste

Food blog cover showing four different chia pudding recipes in jars.

The best chia pudding recipes look almost too easy: stir chia seeds into milk, chill, and eat. What makes the difference is the chia-to-liquid ratio — and knowing how to fix the pudding when it turns out too thin, too thick, or clumpy.

This guide gives you a dependable base recipe first, then 10 chia pudding recipes ranging from overnight and almond-milk versions to Greek yogurt, chocolate, mango, matcha, cheesecake, and coconut cream. You’ll also find a flavor chooser, storage guidance, and a troubleshooting table so you can adjust the pudding instead of starting over.

Quick answer: for a thick, spoonable chia pudding, start with ¼ cup chia seeds to 1 cup liquid. Stir once when you mix it, stir again after 5–10 minutes, then chill for at least 2 hours. If you prefer a slightly softer pudding, start with 3 tablespoons chia per cup and adjust after chilling.

In this guide


Basic Chia Pudding Recipe: The 2-Ingredient Base

Every flavor below starts with the same idea: chia seeds need enough liquid and enough time to hydrate. This version makes one generous breakfast serving or two smaller snack portions.

Prep time5 minutes
Chill time2 hours minimum; overnight works well
Cook timeNone
Yield1 large or 2 small servings
Starting ratio¼ cup chia seeds : 1 cup liquid

Ingredients

  • ¼ cup chia seeds
  • 1 cup milk or other liquid: dairy milk, almond milk, soy milk, oat milk, coconut milk beverage, or another option you enjoy

Method

  1. Add the chia seeds and liquid to a bowl or jar and stir thoroughly, scraping the bottom so no dry seeds remain.
  2. Let the mixture stand for 5–10 minutes, then stir again. This second stir is the simplest way to prevent dense chia clumps.
  3. Cover and refrigerate for at least 2 hours. For a make-ahead breakfast, leave it overnight.
  4. Stir before serving. If it is thicker than you like, loosen it with a splash of milk; if it is still thin, use the troubleshooting guide below.

Vanilla, cinnamon, cocoa, fruit puree, nut butter, honey, maple syrup, jaggery, or another sweetener can all be added after you have the base texture right.


Which Chia Pudding Should You Make?

If you do not want to scroll through ten recipes before deciding, start here. Pick by texture, flavor, or what you already have in the fridge.

RecipeFlavor / textureBest for
Overnight chia puddingClassic, creamyEasy meal prep
Almond milk chia puddingLight, nuttyVegan / dairy-free
Greek yogurt chia puddingThick, tangyHigher-protein breakfast
Blueberry lemonBright, fruityFresh summer flavor
Chocolate chia puddingRich, cocoa-forwardDessert-style breakfast or snack
Mango chia puddingTropical, fruityMango season
Banana bread chia puddingCozy, cinnamon-bananaNaturally sweeter flavor
Matcha chia puddingEarthy, lightly bitterMatcha lovers
Cheesecake chia puddingRich, tangyBrunch or dessert
Coconut cream chia puddingVery thick, richDairy-free dessert

10 Chia Pudding Recipes to Try

1. Overnight Chia Pudding Recipe

If mornings are always rushed, this overnight chia pudding recipe is a lifesaver. With just 5 minutes of prep the night before, you can wake up to a ready-made, creamy, and satisfying breakfast. The chia seeds absorb the liquid overnight, creating a pudding-like texture without any effort.

Ingredients:

  • ¼ cup chia seeds
  • 1 cup almond milk (or coconut milk for richness)
  • 1 tsp vanilla extract
  • 1–2 tsp honey, maple syrup, or stevia (optional)

Instructions:

  1. Combine chia seeds, almond milk, vanilla, and sweetener in a jar.
  2. Stir well, wait 5 minutes, then stir again to prevent clumping.
  3. Cover and refrigerate overnight.
  4. Stir before serving and add toppings of choice.
Overnight chia pudding recipe card with a jar topped with strawberries and blueberries.
The second stir after 5–10 minutes is what keeps this overnight chia pudding evenly set instead of clumping at the bottom.

Topping Ideas:

  • Fresh berries (blueberries, raspberries, strawberries)
  • Sliced banana
  • Granola or toasted nuts for crunch
  • A sprinkle of cinnamon or cocoa powder

Variations:

  • Make it keto-friendly by using unsweetened almond milk + stevia.
  • Blend the mixture before chilling for a smooth, mousse-like pudding.
  • Stir in cocoa powder for a chocolate overnight chia pudding.

If you like breakfasts you can prep the night before, compare this with our overnight oats recipe, which has its own ratio, storage, and texture-fix guide.


2. Chia Pudding with Almond Milk (Vegan-Friendly)

This chia pudding with almond milk is light, dairy-free, and endlessly versatile. Almond milk gives a subtle nutty flavor and pairs beautifully with fruit or nut butter. It’s the base recipe many vegans swear by.

Ingredients:

  • ¼ cup chia seeds
  • 1 cup unsweetened almond milk
  • 1 tbsp almond butter (optional, for richness)
  • 1 tsp vanilla extract
  • 1–2 tsp maple syrup or agave

Instructions:

  1. Mix chia seeds, almond milk, vanilla, and sweetener in a jar.
  2. Stir well and refrigerate for at least 2 hours (overnight preferred).
  3. Stir again before serving.
  4. Add toppings for extra texture.
Almond milk chia pudding recipe card with banana, strawberries, and slivered almonds.
Almond milk keeps the base light; banana, strawberries, and almonds add sweetness and crunch at serving time.

Topping Ideas:

  • Sliced bananas + almond butter drizzle
  • Fresh strawberries or blueberries
  • Chopped almonds or walnuts
  • Dark chocolate shavings

Variations:

  • Add cocoa powder for a chocolate almond chia pudding.
  • Blend in a handful of frozen berries for a fruity version.
  • Use flavored almond milk (like vanilla) for a natural twist.

Using almond milk often? You can also make almond milk at home and control the sweetness and thickness yourself.


3. Greek Yogurt Chia Pudding (High-Protein)

This Greek yogurt chia pudding recipe is creamy, tangy, and higher in protein than a milk-only version. With ¼ cup chia seeds plus ½ cup Greek yogurt, many combinations land around the 20 g protein range shown in the image, though the exact amount depends on the yogurt and milk you use. Greek yogurt also makes the pudding noticeably thicker; products with live cultures can provide probiotics too.

Ingredients:

  • ¼ cup chia seeds
  • ½ cup almond or dairy milk
  • 1 tbsp honey or stevia
  • ½ cup Greek yogurt
  • ½ tsp vanilla extract

Instructions:

  1. Mix chia seeds, milk, Greek yogurt, vanilla, and sweetener in a bowl.
  2. Stir well until combined.
  3. Refrigerate for at least 2 hours or overnight.
  4. Stir again and add toppings before serving.
Greek yogurt chia pudding recipe card with berries, granola, and honey drizzle.
Greek yogurt makes the base thicker and raises the protein; the exact protein amount depends on the yogurt and milk you choose.

Topping Ideas:

  • Granola or muesli
  • Fresh berries
  • Walnuts or pecans
  • A drizzle of nut butter

Variations:

  • Add a scoop of protein powder for an extra high-protein chia pudding.
  • Use flavored Greek yogurt for a fun twist.
  • Add a spoonful of fruit compote for tangy sweetness.

4. Blueberry Lemon Chia Pudding

This blueberry chia pudding gets its bright flavor from lemon zest and fresh or blended blueberries. The fruit can be layered over the set pudding or blended into the milk for a purple base, while a spoonful of yogurt adds a cheesecake-like tang.

Ingredients:

  • ¼ cup chia seeds
  • 1 cup almond milk
  • 1 tsp lemon zest
  • ½ cup fresh or blended blueberries
  • 1 tbsp honey or maple syrup

Instructions:

  1. Mix chia seeds, almond milk, lemon zest, and sweetener in a jar.
  2. Refrigerate for 2 hours or overnight.
  3. Layer pudding with blueberries before serving.
Blueberry lemon chia pudding recipe card with lemon zest, yogurt, and fresh blueberries.
The yogurt shown here is an optional topping; lemon zest goes into the chia base, while blueberries can be layered or spooned on top.

Topping Ideas:

  • Lemon zest curls
  • Blueberry compote
  • A dollop of Greek yogurt
  • Crushed graham crackers (for cheesecake vibes)

Variations:

  • Blend blueberries into the almond milk for a vibrant purple pudding.
  • Use kefir instead of almond milk for a probiotic-rich version.
  • Add vanilla protein powder for extra nutrition.

Blueberries work especially well here; if you use them often, our guide to the health benefits of blueberries goes deeper into the fruit itself.


5. Chocolate Chia Pudding

This chocolate chia pudding recipe turns the basic chia base into something richer and more dessert-like. The important step is whisking the cocoa into the milk before the chia goes in; that prevents dry cocoa pockets and gives the pudding a more even chocolate flavor.

Ingredients:

  • ¼ cup chia seeds
  • 1 cup milk (almond, coconut, or dairy)
  • 2 tbsp cocoa powder or cacao
  • 1–2 tbsp maple syrup, honey, or stevia
  • ½ tsp vanilla extract

Instructions:

  1. Whisk cocoa into the milk until smooth.
  2. Stir in chia seeds, vanilla, and sweetener.
  3. Refrigerate at least 2 hours or overnight.
  4. Stir well before serving.
Chocolate chia pudding recipe card with raspberries, coconut, and chocolate pieces.
Whisk cocoa into the milk before adding chia to avoid dry cocoa pockets; raspberries, coconut, and chocolate add contrast on top.

Topping Ideas:

  • Dark chocolate shavings
  • Fresh raspberries or strawberries
  • Coconut flakes
  • Peanut butter drizzle

Variations:

  • Add chocolate protein powder for a higher-protein chocolate chia pudding.
  • Use coconut cream instead of milk for a mousse-like texture.
  • Add espresso powder for a mocha chia pudding.

Want another chocolatey make-ahead idea? Our keto hot chocolate guide also shows how a cocoa mix can be repurposed into a chia pudding cup.


6. Mango Chia Pudding

This mango chia pudding recipe brings tropical vibes to your table. Sweet mango puree layered with creamy chia pudding makes a dessert-like breakfast that’s both refreshing and filling.

Ingredients:

  • ¼ cup chia seeds
  • 1 cup coconut milk
  • 1 ripe mango (pureed)
  • 1 tsp lime juice (optional, for tang)

Instructions:

  1. Mix chia seeds and coconut milk, then refrigerate overnight.
  2. Puree mango and layer it over the chia pudding.
  3. Garnish with extra mango or lime zest.
Glass of chia pudding layered with coconut milk and topped with mango purée and lime zest.
Set the coconut chia base first, then add the mango purée so the two layers stay distinct.

Topping Ideas:

  • Fresh mango chunks
  • Shredded coconut
  • Pistachios
  • A squeeze of lime juice

Variations:

  • Blend mango puree into the base for a smooth, golden pudding.
  • Mix with passionfruit for a tropical combo.
  • Use dairy milk + yogurt for a creamy mango lassi-style pudding.

If mango is the flavor you came for, go next to 5 creative mango chia pudding ideas for more tropical combinations.


7. Banana Bread Chia Pudding

Think of this banana chia pudding as banana bread flavors in a jar. Mashed banana, cinnamon, and vanilla go into the base, while walnuts and fresh banana on top add the contrast that makes the flavor feel more complete — with no baking required.

Ingredients:

  • ¼ cup chia seeds
  • 1 cup almond or dairy milk
  • 1 ripe banana (mashed)
  • ½ tsp cinnamon
  • ½ tsp vanilla extract
  • 2 tbsp chopped walnuts (optional)
Glass jar of chia pudding with bananas and walnuts on top, inspired by banana bread flavors.
Mashed banana and cinnamon flavor the base; fresh banana slices and walnuts are best added just before serving.

Instructions:

  1. Mash banana and whisk with milk, cinnamon, and vanilla.
  2. Stir in chia seeds.
  3. Refrigerate overnight.
  4. Add walnuts and extra banana slices before serving.

Topping Ideas:

  • Chopped walnuts or pecans
  • Raisins or dates
  • Banana slices
  • A dusting of cinnamon

Variations:

  • Add cocoa powder for a chocolate banana version.
  • Use Greek yogurt instead of milk for extra protein.
  • Stir in nut butter for a richer flavor.

For more banana-and-chia combinations, see these banana pudding breakfast twists.


8. Matcha Green Tea Chia Pudding

This matcha chia pudding recipe has the earthy, slightly bitter flavor and green color of matcha. Whisking the powder into the milk first keeps it smooth, and because matcha contains caffeine, this version makes more sense earlier in the day if you are sensitive to it.

Ingredients:

  • ¼ cup chia seeds
  • 1 cup warm almond milk
  • 1 tsp matcha green tea powder
  • 1 tsp honey, maple syrup, or stevia
Bowl of green matcha chia pudding with sliced kiwi, raspberries, and shredded coconut.
Whisk matcha into the milk before adding chia so the powder disperses smoothly without green clumps.

Instructions:

  1. Whisk matcha into warm almond milk until no lumps remain.
  2. Stir in chia seeds and sweetener.
  3. Refrigerate overnight.
  4. Stir before serving and add toppings.

Topping Ideas:

  • Fresh raspberries
  • Shredded coconut
  • Sliced kiwi
  • Granola clusters

Variations:

  • Blend banana into the base for natural sweetness.
  • Add vanilla protein powder for a high-protein matcha pudding.
  • Use coconut milk for a creamier, dessert-like version.

If you prefer a smoother texture, this matcha version also works well blended after it has set; the same technique is covered in the troubleshooting guide below.


9. Cheesecake Chia Pudding

Yes, you can have cheesecake for breakfast — with this cheesecake chia pudding recipe. Cream cheese (or Greek yogurt for a lighter version) makes the base rich and tangy, while crushed biscuits and berries give it that dessert feel.

Ingredients:

  • ¼ cup chia seeds
  • 1 cup almond or dairy milk
  • 1 tbsp honey or maple syrup
  • ¼ cup cream cheese (or Greek yogurt)
  • ½ tsp vanilla extract
  • 2 tbsp crushed biscuits or granola (for topping)
  • Fresh berries

Instructions:

  1. Blend milk, cream cheese, honey, and vanilla until smooth.
  2. Stir in chia seeds.
  3. Refrigerate overnight.
  4. Top with crushed biscuits and fresh berries.
Jar of cheesecake-style chia pudding with cream cheese base, graham cracker topping, strawberries, and blueberries.
Cream cheese gives the base its tang; graham crumbs and berries are added after chilling so the topping keeps its texture.

Topping Ideas:

  • Strawberries or blueberries
  • Graham cracker crumbs
  • Lemon zest
  • Berry coulis

Variations:

  • Use flavored yogurt for different cheesecake vibes.
  • Add cocoa powder for a chocolate cheesecake chia pudding.
  • Stir in lemon juice for a tangy New York-style cheesecake twist.

Love the berry-cheesecake direction? You may also like our no-bake blueberry cheesecake.


10. Chia Pudding with Coconut Cream

This chia pudding with coconut cream is thick, rich, and incredibly indulgent — almost like a mousse. It’s naturally dairy-free but tastes luxurious enough for dessert.
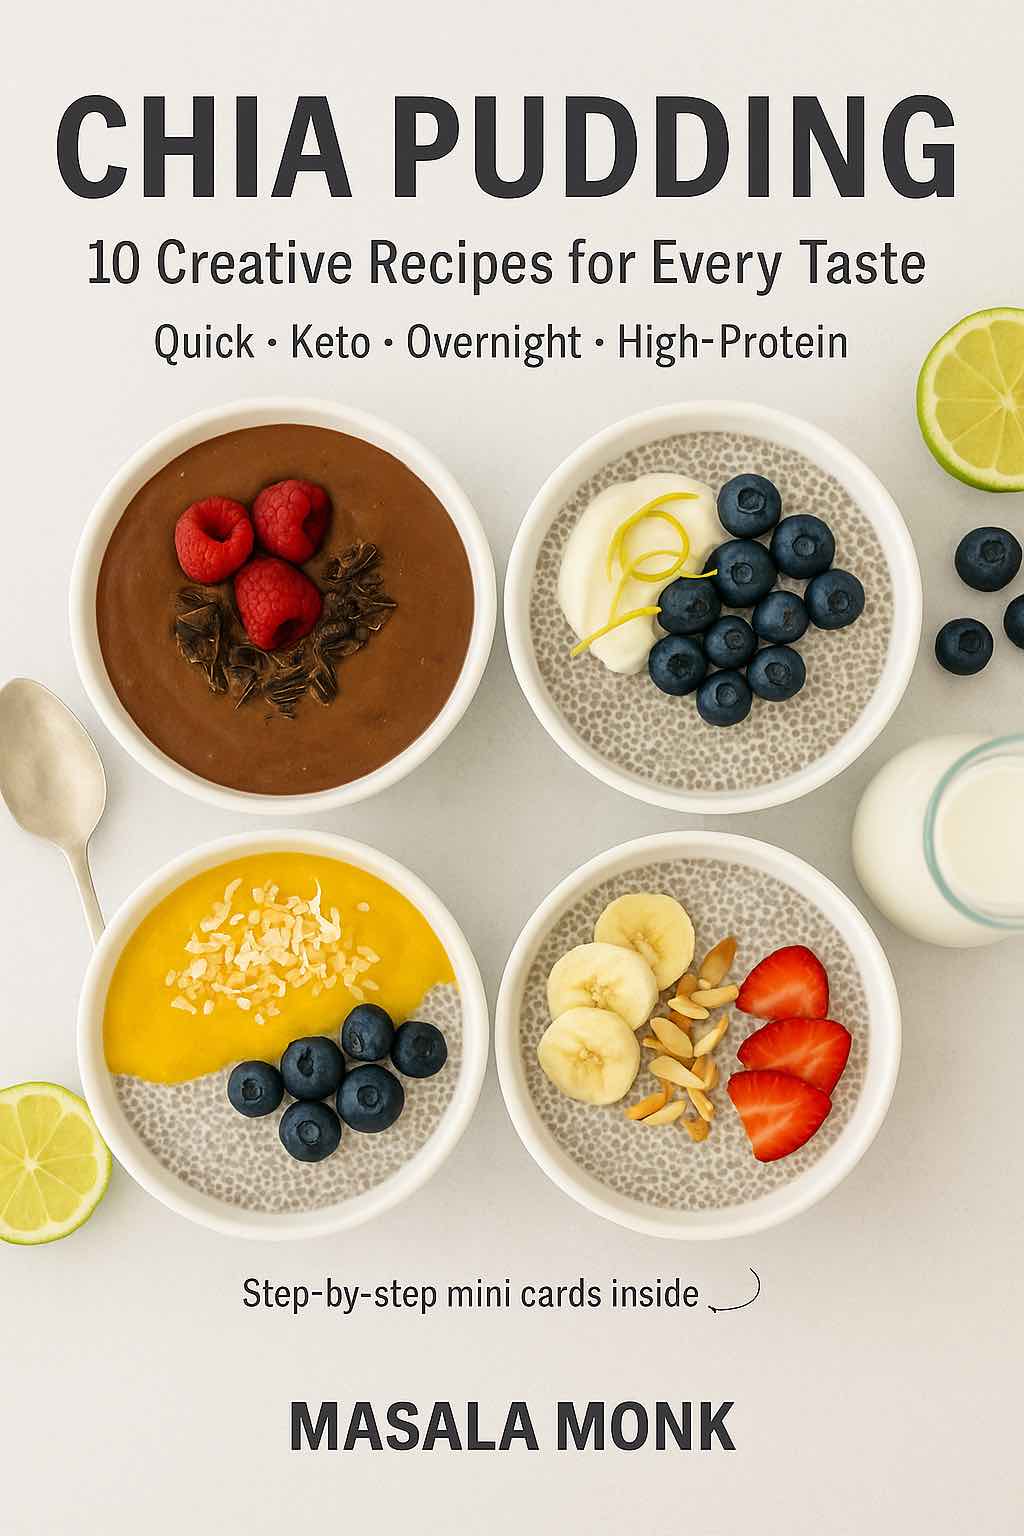
Ingredients:

  • ¼ cup chia seeds
  • 1 cup coconut cream
  • 1 tbsp honey, maple syrup, or stevia
  • 1 tsp vanilla extract

Texture note: coconut cream varies a lot by brand. If yours is spoon-thick straight from the container, whisk in a little coconut milk or another milk before adding the chia rather than waiting until the pudding becomes nearly solid.

Instructions:

  1. Mix coconut cream, chia seeds, vanilla, and sweetener.
  2. Stir well, let sit for 5 minutes, then stir again.
  3. Refrigerate overnight until thick.
  4. Garnish before serving.
Bowl of chia pudding with coconut cream, mango chunks, and toasted coconut flakes.
Coconut cream makes the richest, firmest pudding in the set; thin it with a little milk if your brand sets too densely.

Topping Ideas:

  • Toasted coconut flakes
  • Mango chunks
  • Dark chocolate drizzle
  • Crushed nuts

Variations:

  • Blend in cocoa for a chocolate coconut chia pudding.
  • Add pineapple for a pina colada-inspired pudding.
  • Use spiced jaggery syrup for an Indian twist.

For another tropical direction, try our pineapple chia pudding.


Chia Pudding Ratio, Texture & Troubleshooting

Most chia pudding problems are fixable. The important variables are the amount of chia, the thickness of your liquid, how well you stirred, and how long the mixture has had to hydrate.

Common Chia Pudding Problems and Fixes

ProblemLikely causeWhat to do
Too runnyNot enough chia, very thin liquid, or too little chill timeStir first. If it is still loose, add 1 teaspoon chia, wait 15–30 minutes, and check again. Next time, use slightly more chia or less liquid.
Too thickToo much chia or a thick base such as yogurt or coconut creamStir in milk 1 tablespoon at a time. Next time, reduce the chia or start with more liquid.
ClumpyThe seeds gelled together before they were evenly dispersedBreak up the clumps with a spoon or whisk and add a splash of milk if needed. Stir again 5–10 minutes after mixing next time.
Seeds still crunchyThe chia needs more hydration timeRefrigerate longer and check again. Two hours is a useful minimum; overnight is easier when you are meal-prepping.
Cocoa or matcha has lumpsDry powder was added directly to the chia mixtureWhisk or blend briefly now. Next time, whisk cocoa or matcha into the milk before adding chia.
Too dense with yogurtBoth yogurt and chia are thickening the mixtureLoosen it with milk. Half yogurt and half milk is a useful starting point.
Coconut cream version is almost solidCoconut cream is much thicker than a coconut milk beverageThin with coconut milk or another milk. Use coconut cream when you want a dessert-style result; use coconut milk beverage for a lighter pudding.
You dislike the seed textureThe pudding is set correctly, but you do not enjoy the tapioca-like textureBlend the chilled pudding until smooth and treat it as a chia mousse instead.

Adjust the Ratio to Your Ingredients

The ratio is a starting point, not a law. Different milks, yogurt, fruit puree, cocoa, protein powder, and coconut cream all change how thick the final pudding feels, so make small adjustments rather than doubling ingredients at once.


Milk, Protein & Dietary Swaps

BaseWhat it doesUseful for
Unsweetened almond milkLight, neutral, relatively thinEveryday dairy-free pudding
Soy milkCreamier than many nut milks and naturally contains more proteinVegan higher-protein base
Dairy milkClassic creamy textureGeneral-purpose pudding
Oat milkSoft, naturally sweeter-tastingFruit and cinnamon flavors
Coconut milk beverageLight tropical flavorMango, pineapple, chocolate
Canned coconut milk / coconut creamMuch richer and thickerDessert-style pudding
Greek yogurt + milkThickens the pudding and adds more proteinMore substantial breakfast

Vegan: use a plant milk and a plant-based sweetener such as maple syrup if you want one. For more protein: Greek yogurt, soy milk, or protein powder can help; because protein powder thickens as it sits, keep extra milk handy. Keeping it keto: choose unsweetened low-carb milk and sweetener, then watch fruit, granola, and other toppings; our dedicated keto chia pudding with almond milk goes deeper into that version.


How to Store Chia Pudding for Meal Prep

Meal prep is easiest when you portion the pudding into sealed jars or containers and refrigerate it. A plain chia base generally keeps well for about 4–5 days; fruit, yogurt, and other add-ins can affect the best storage window, so use your judgment and follow the storage guidance for those ingredients too.

  • Keep crunch separate: granola, toasted nuts, coconut chips, and similar toppings are better added right before eating.
  • Add delicate fruit later: fresh banana and very juicy fruit can soften or release liquid if they sit for several days.
  • Expect thickening: chia pudding often gets thicker as it sits. Stir in a splash of milk before eating if needed.
  • Freeze individual portions: a plain chia pudding can be frozen for about 1 month in an airtight container. Thaw it overnight in the refrigerator, stir well, and add fresh fruit or crunchy toppings after thawing; the texture may be slightly softer.
  • Batch in one bowl: when making several servings, mix the base in a large bowl first, do the second stir there, and then divide it into jars for more even texture.

If make-ahead breakfasts are a regular part of your week, the same topping-timing idea appears in our overnight oats storage and texture guide: soft mix-ins can go in early, while crunch usually belongs at serving time.


Chia Seed Nutrition: Useful Food, Not a Magic Ingredient

Nutritionally, chia seeds are dense for their size, but it is worth separating that from the bigger claims often made about “superfoods.” Harvard’s Nutrition Source notes that 2 tablespoons (about 28 g) of chia seeds provide roughly 140 calories, 4 g protein, 11 g fiber, unsaturated fat, calcium, and other minerals. They are also a plant source of the omega-3 fat ALA.

The practical reason chia works so well in pudding is its fiber and mucilage: when the seeds meet liquid, they form a gel that creates the familiar spoonable texture. That fiber can contribute to fullness as part of a meal, but chia by itself should not be treated as a weight-loss, blood-sugar, or heart-health treatment. Harvard’s review notes that controlled human studies have produced mixed results, while a 2024 systematic review of randomized trials found some modest changes in selected metabolic markers rather than a universal effect.

In other words: enjoy chia pudding because it is convenient, fiber-rich, flexible, and easy to build into a balanced breakfast or snack—not because one ingredient needs to carry the entire health story. If you are specifically interested in glucose, our separate guide looks at chia seeds and blood sugar in more detail.


Frequently Asked Questions About Chia Pudding

What is the best chia pudding ratio?

For a thick, spoonable pudding, start with ¼ cup chia seeds to 1 cup liquid. If you prefer a softer result, try 3 tablespoons per cup. The thickness of your milk and any yogurt, fruit puree, cocoa, or protein powder will also affect the final texture.

How long does chia pudding need to set?

Give it at least 2 hours in the refrigerator. Overnight is convenient and gives the seeds plenty of time to hydrate. Stirring again after the first 5–10 minutes helps the pudding set more evenly.

Why is my chia pudding still runny?

First stir it again—sometimes the seeds have settled instead of thickening evenly. If it is still thin after enough chill time, add about 1 teaspoon chia, mix well, and let it sit another 15–30 minutes. Very thin plant milks and watery fruit can also loosen the pudding.

Can you make chia pudding with yogurt?

Yes. Greek yogurt makes chia pudding thicker and usually raises the protein compared with a milk-only version. A simple starting point is half yogurt and half milk, then adjust with more milk if the mixture becomes too dense.
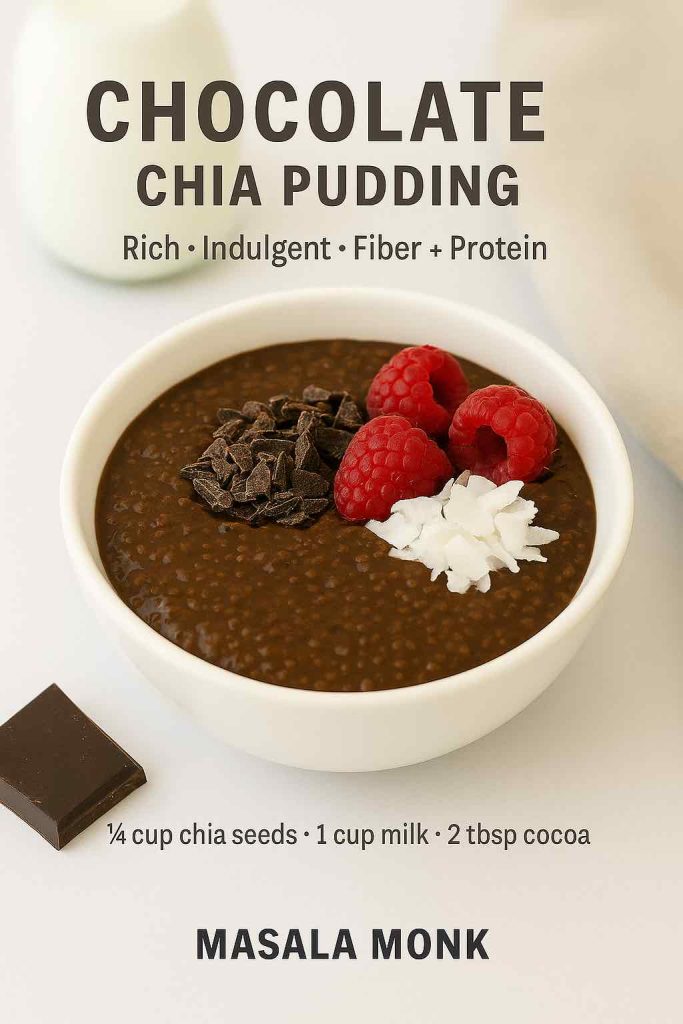
Can you add protein powder to chia pudding?

Yes. Whisk the protein powder into the milk before adding chia so it disperses more evenly. Because many powders thicken as they hydrate, check the pudding after chilling and add extra milk if it becomes stiff.

Is chia pudding keto-friendly?

It can be. Use an unsweetened low-carb milk, choose an appropriate sweetener if you want one, and be mindful of fruit, granola, and other toppings. For exact low-carb combinations, use the dedicated keto chia pudding recipe.
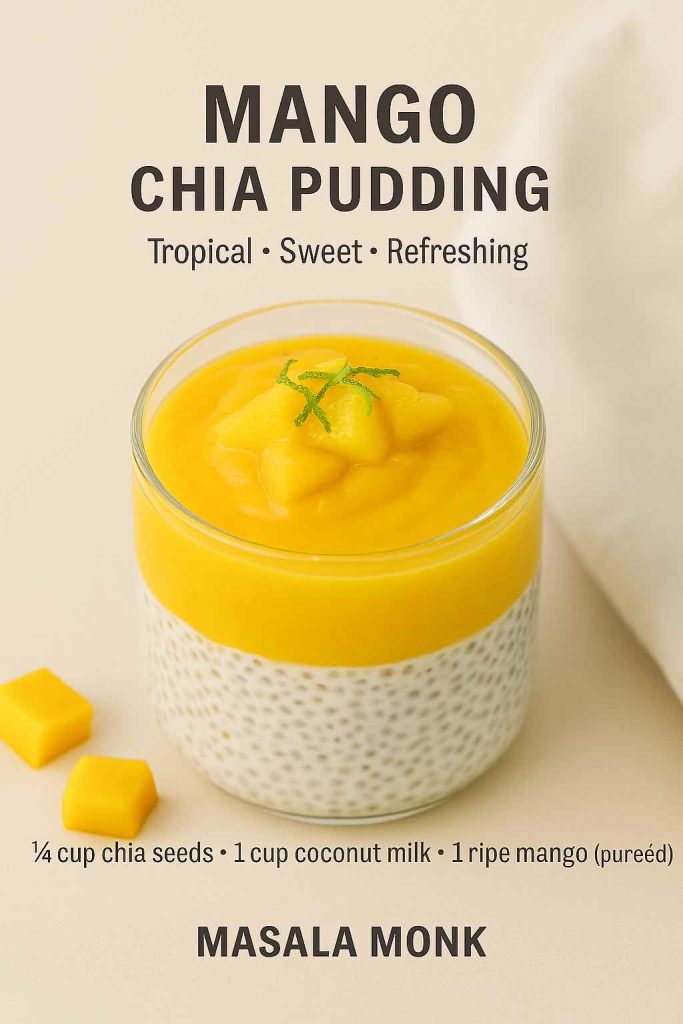
How long does chia pudding last in the fridge?

A plain chia pudding base generally keeps well for about 4–5 days in a sealed refrigerator container. Add crunchy toppings at serving time, and remember that fresh fruit, yogurt, or other perishable add-ins can change the practical storage window.

Can you freeze chia pudding?

Yes. Freeze plain chia pudding in individual airtight portions for about 1 month, then thaw it overnight in the refrigerator and stir before serving. Fruit, yogurt, and richer coconut versions can change texture more noticeably after freezing, so add fresh toppings after thawing.

Can you blend chia pudding?

Absolutely. Chill it until the seeds have hydrated, then blend until smooth. This turns the tapioca-like seed texture into something closer to a mousse and works particularly well with chocolate, banana, mango, and nut butter.

What is the best milk for chia pudding?

There is no single healthiest or best milk for everyone. Almond milk gives a lighter pudding, dairy or soy milk can add more protein, oat milk tastes naturally sweeter, and coconut milk makes tropical flavors richer. Choose based on texture, flavor, dietary needs, and the nutrition of the specific product you use.

Is chia pudding good for weight loss?

Chia pudding can fit into a weight-management eating pattern because chia contributes fiber and the recipe can be portioned easily, but it is not automatically low-calorie and chia seeds are not a weight-loss treatment. Milk, coconut cream, sweeteners, nut butter, granola, chocolate, and other toppings can change the energy content substantially.


The Takeaway

Start with the ratio, stir twice, and give the chia enough time to hydrate. Once the base is right, the rest is mostly preference: almond milk for something lighter, yogurt for more body, cocoa for dessert energy, mango or berries for fruit, or a quick blend when you want the texture completely smooth.

The ten recipes above are meant to be starting points rather than ten separate rules. Pick the version that sounds good, use the troubleshooting table if the texture needs adjusting, and change the toppings when you want the same basic jar to feel new again.

Posted on — 4 Comments

Are Lentils Good for Weight Loss? Benefits, Recipes, and Science Explained

ARE LENTILS GOOD FOR WEIGHT LOSS? WHY EAT LENTILS FOR WEIGHT LOSS?

Lentils have been a dietary staple around the world for thousands of years, valued for their affordability, quick cooking time, and dense nutritional profile. In recent years, however, they’ve gained special recognition for their potential to support weight loss and fat reduction. So if you’ve ever wondered, “Are lentils good for weight loss?” or “Can lentils help you shed fat naturally?”, you’re not alone. These questions have become increasingly common as more people turn to whole foods for sustainable health results.

In this post, we’ll walk you through everything you need to know about lentils and weight loss—starting with the science behind their nutritional benefits, then moving into the best lentil types, cooking tips, and practical ways to incorporate them into your daily meals. Along the way, we’ll also answer common questions and share low-calorie lentil recipes that align with your weight management goals.

By the end, you’ll understand why lentils are often called a superfood for weight loss—and how you can use them strategically in your diet without worrying about unwanted weight gain.

My Person experience 147 Kgs to 90 Kgs: 3 Lentils for Fat Loss Win.


Why Lentils Are a Hidden Gem for Weight Loss

Let’s start with the basics. Lentils are small, mighty legumes packed with nutrients. But what makes them especially powerful for weight loss is their low calorie density, high fiber, and protein content. These three factors work together to keep you full, satisfied, and energized without overeating.

One cup of cooked lentils provides 230 calories, 18 grams of protein, and 15 grams of fiber — a simple way to stay full while losing weight.
Infographic showing nutritional facts of lentils per 1 cup cooked: 230 calories, 18g protein, 15g fiber, low glycemic index, and rich in iron.

A Look at the Numbers

Here’s what one cup (about 198 grams) of cooked lentils offers:

  • Calories: ~230
  • Protein: ~18 grams
  • Fiber: ~15 grams
  • Fat: Less than 1 gram
  • Glycemic Index: Low (21–30 depending on type)

In simple terms: You get a lot of food volume and nutrients, for relatively few calories. That’s a winning combo for weight loss.


Nutritional Profile of Lentils: Why They’re Great for Weight Loss

Before exploring how lentils affect weight loss directly, it’s important to understand their nutritional foundation.

1. Calorie Content

Lentils are relatively low in calories compared to many other protein-rich foods. For instance, one cup (about 198 grams) of cooked lentils provides approximately 230 calories. This makes them an excellent choice for those looking to reduce their calorie intake without sacrificing satisfaction or fullness.

2. High Protein Content

Protein plays a crucial role in weight loss because it helps maintain lean muscle mass while promoting satiety. Lentils offer around 18 grams of protein per cooked cup, which is impressive for a plant-based source. As a result, they serve as a smart alternative to animal proteins, especially for vegetarians and vegans focused on weight management.

3. Fiber-Rich Food

Another key benefit of lentils is their fiber content. A single cooked cup delivers about 15 grams of dietary fiber. This not only slows digestion and extends the feeling of fullness but also helps regulate blood sugar levels. Together, these effects can reduce overeating and curb unhealthy snacking—two essential factors in successful fat loss.

4. Low Glycemic Index

Lentils have a low glycemic index (GI), which means they release glucose into the bloodstream gradually. This helps maintain steady energy levels and reduces fat storage associated with insulin spikes. It’s especially beneficial for individuals managing insulin resistance or type 2 diabetes, which are commonly linked to excess weight.

5. Rich in Micronutrients

Beyond macronutrients, lentils provide a variety of essential vitamins and minerals that support metabolic health. These include:

  • Iron, which aids in energy production and oxygen transport
  • Magnesium, important for metabolism and muscle function
  • Folate, which supports cell repair and DNA synthesis
  • Potassium, which regulates fluid balance and blood pressure

These nutrients work together to support healthy metabolism and energy balance, both of which are foundational for sustainable weight loss.

Summary: Why Lentils Are Nutrient-Dense for Weight Loss

  • Low in calories (230 per cooked cup)
  • High in protein (18g) to promote satiety and preserve muscle
  • Packed with fiber (15g) to aid digestion and reduce cravings
  • Low glycemic index to support blood sugar control
  • Rich in essential vitamins and minerals that fuel metabolism

Taken together, these attributes make lentils one of the best foods for healthy, long-term weight loss.


Are Lentils Good for Weight Loss? What Does the Science Say?

So, are lentils truly good for weight loss? The evidence strongly suggests they are.

How Lentils Promote Weight Loss

Lentils support fat loss through several mechanisms. First, their combination of protein and fiber increases satiety, helping you feel full longer and reduce overall calorie intake. Second, the fiber slows digestion and stabilizes blood sugar levels, preventing insulin spikes that lead to fat storage and sugar cravings.

Additionally, lentils contain prebiotic fibers that feed beneficial gut bacteria. An increasingly large body of research links a healthy gut microbiome with better weight regulation, reduced inflammation, and improved metabolic health.

Lentils are also low in caloric density, which means you can eat satisfying portions without consuming excessive calories. This makes them a great option for people who want to feel full while still creating a calorie deficit.

What the Research Really Says About Lentils and Weight Loss

When it comes to losing weight in a healthy, sustainable way, lentils offer more than just nutrition—they’re backed by science. From supporting satiety and gut health to regulating blood sugar and improving metabolic markers, here’s what the research shows.

Lentils Can Help You Eat Less Without Feeling Hungry

A systematic review and meta-analysis found that eating just one serving of pulses like lentils per day helped people lose weight—without making any other dietary changes. Participants also experienced improved cholesterol levels, further reinforcing lentils’ heart-healthy benefits.

Smiling young woman eating a healthy lentil salad, with overlay text saying ‘Stay Full, Snack Less — Protein + Fiber keep hunger away for hours’.
Enjoying a fresh lentil salad — protein and fiber together help you stay full and snack less.

They Improve Blood Sugar and Inflammation

In a 2024 clinical trial, adults at higher metabolic risk who replaced meat with lentils saw notable improvements in their blood sugar response and inflammation markers—without reporting digestive discomfort. You can read more about that here.

Fiber and Resistant Starch Support Your Gut and Metabolism

Lentils are rich in both soluble and insoluble fiber, as well as resistant starch—components that help stabilize blood sugar, prolong fullness, and feed beneficial gut bacteria. According to Harvard’s School of Public Health, these properties make lentils a powerful tool in managing weight and improving digestion over time.

Lentils vs. Animal Protein: Why It Matters

Unlike red meat or cheese, lentils contain no cholesterol, are low in fat, and offer more fiber per gram. That’s why the Cleveland Clinic lists lentils as one of the best plant-based proteins for improving heart health and supporting weight loss.

Higher Fiber = Lower Risk of Disease and Death

A large 2022 study involving over 86,000 adults found that higher dietary fiber intake—including from lentils—was linked to significantly reduced risk of death from heart disease and cancer. For the full breakdown, check the Health.com report.


Which Lentils Are Best for Weight Loss?

While all lentils are healthy, some varieties may be slightly more effective for supporting weight loss due to their specific nutritional profiles.

Red Lentils

These cook quickly and have a soft texture, making them ideal for soups and purees. They’re slightly lower in calories and still provide a solid amount of protein and fiber.

If you’re looking for easy ways to use them, don’t miss these red lentil recipes that support weight loss.

Green Lentils

Known for holding their shape after cooking, green lentils are excellent in salads and side dishes. They typically contain more fiber and slightly more protein compared to red lentils.

Brown Lentils

As the most commonly available type, brown lentils are highly versatile. They have a balanced ratio of protein to fiber and work well in stews, curries, and mixed dishes.

Black Lentils (Beluga)

These small, shiny lentils are dense in protein, fiber, and antioxidants. They also have the lowest caloric content per gram, making them especially nutrient-dense for those focused on weight loss.

You can explore some of our favorite black lentil recipes designed for weight loss.

Which Lentil is Best?

If you’re targeting maximum fiber and protein per serving, green and black lentils are excellent choices. However, all lentil types contribute positively to a weight loss plan. Feel free to choose based on your preferred flavor, texture, or recipe.


How to Eat Lentils for Weight Loss

Your preparation method can significantly influence how lentils support your weight loss goals.

Portion Control

Aim for one to two cups of cooked lentils per day to ensure you’re getting adequate protein and fiber without consuming too many calories. Keep in mind that lentils expand as they cook—one cup of dry lentils yields roughly 2.5 cups cooked.

Cooking Tips

Stick to healthy preparation methods. Avoid frying or using cream-based sauces, and instead opt for boiling, pressure cooking, or simmering in broth. Flavor them with herbs, spices, lemon juice, or low-calorie sauces.

You can also pair lentils with nutrient-dense, non-starchy vegetables like spinach, bell peppers, or cucumbers to add bulk and enhance their fat-burning benefits.

Eating Lentils Daily

Adding lentils to your meals every day can help reduce appetite, improve blood sugar stability, and promote steady energy throughout the day. Many people report feeling fuller and more satisfied when lentils are a regular part of their diet.


Healthy Recipe Ideas to Enjoy Lentils and Lose Weight

One of the best things about lentils—besides their nutrition—is how incredibly versatile and delicious they are. Whether you’re craving something warm and comforting, light and refreshing, or even something with a bit of a spicy kick, there’s a lentil recipe that fits. Here are some easy, healthy ideas to get you started.

Recipe graphic showing three healthy lentil dishes: lentil soup cooked with tomatoes and spices, a colorful lentil salad with vegetables, and whole-grain tortillas filled with seasoned lentils and avocado.
Healthy lentil recipes made simple — from cozy lentil soup to refreshing salad and nourishing lentil tacos.

Lentil Soup (Comfort in a Bowl)

When you’re in the mood for something hearty and nourishing, lentil soup is a perfect choice. Start with a base of low-sodium vegetable broth, then add in diced tomatoes, chopped onions, garlic, and your favorite vegetables. To give it depth and warmth, season generously with spices like turmeric, cumin, paprika, and black pepper. Let it simmer until everything is tender and fragrant. It’s the kind of meal that feels like a hug on a cold day—and it just so happens to be great for your waistline, too.

For more inspiration, check out our vegan lentil soup recipes for weight loss.

Lentil Salad (Light, Fresh & Filling)

If you prefer something cooler and crisp, lentil salad is quick to throw together and endlessly customizable. Mix cooked green or brown lentils with chopped cucumbers, tomatoes, bell peppers, and red onions. Then drizzle with fresh lemon juice and olive oil, and toss in some fresh herbs like parsley or cilantro. For extra flavor, add a pinch of cumin or a splash of apple cider vinegar. It’s a refreshing meal or side that keeps you full without weighing you down.

Lentil Tacos (Plant-Based and Packed with Flavor)

Looking for a fun and creative way to use lentils? Try turning them into taco filling! Cook lentils with onions, garlic, cumin, chili powder, and a bit of tomato paste or crushed tomatoes. Once thickened, scoop the mixture into crisp lettuce wraps or whole-grain tortillas. Top with shredded cabbage, avocado slices, fresh salsa, or a dollop of Greek yogurt. It’s a satisfying, protein-rich dinner that even meat-lovers will enjoy—plus it’s completely customizable.

Lentil Curry (Rich, Warming, and Satisfying)

Nothing beats a cozy lentil curry when you want something deeply satisfying but still healthy. Red or brown lentils work especially well here. Sauté garlic, onions, and ginger in a bit of oil, then add curry powder, cumin, and turmeric. Stir in crushed tomatoes and your lentils, and let everything simmer until soft and creamy. You can toss in some spinach or cauliflower for added fiber and nutrients. Serve with a small portion of brown rice or enjoy it on its own for a one-pot, plant-powered meal.


Lentil Diet Plans and Tips for Weight Loss

Incorporating lentils into your daily meals doesn’t have to be complicated. In fact, once you get into the rhythm of it, they can become the foundation of a delicious, nutrient-dense eating routine that supports steady, sustainable fat loss.

To help you get started, here’s a simple one-day sample meal plan that shows how easy it is to make lentils a part of your day. Of course, you can mix and match ingredients to suit your tastes, and feel free to swap in seasonal produce or different proteins as needed.

For those who like to prep ahead, here are some plant-based high-protein lentil meal prep ideas that work beautifully for weight loss.

🥣 Breakfast: Light, Energizing, and Fiber-Filled

Begin your day with a breakfast that’s both light and satisfying. A fruit and nut bowl is a great place to start—think sliced banana, berries, a handful of almonds or walnuts, and maybe a sprinkle of chia or flax seeds for added fiber. This kind of meal helps regulate your appetite and sets the stage for more mindful eating throughout the day.

Alternatively, if you’re someone who prefers to drink their breakfast, a smoothie is a fantastic option. Blend almond milk or oat milk with a scoop of protein powder, frozen berries, spinach, and a spoonful of nut butter or flaxseed. It’s quick, refreshing, and keeps you fueled all morning.

🥗 Lunch: Refreshing, Filling, and Balanced

By midday, you’ll want something that’s hearty enough to fill you up, yet balanced enough to avoid that post-lunch slump. A lentil salad checks all the boxes. Start with a base of cooked green or brown lentils, and add in chopped cucumber, cherry tomatoes, red onion, and mixed greens. Then drizzle on a dressing of lemon juice and olive oil for a fresh, zesty flavor.

For an extra protein boost, consider adding grilled tofu, a boiled egg, or lean grilled chicken. This kind of lunch offers the perfect mix of fiber, protein, and healthy fats to carry you through the afternoon without cravings.

🥕 Snack: Crunchy, Satisfying, and Guilt-Free

Rather than letting hunger sneak up on you later in the day, plan ahead with a simple, wholesome snack. Raw vegetables like carrots, bell peppers, or cucumber slices pair well with a few tablespoons of hummus. If you’re in the mood for something crunchy, try roasted chickpeas or a small handful of almonds or pumpkin seeds.

Not only do these snacks satisfy your taste buds, but they also help keep your energy levels steady between meals—so you’re less likely to overeat at dinner.

🍛 Dinner: Comforting, Nutrient-Dense, and Easy to Prepare

As the day winds down, dinner should be comforting yet light enough to support restful digestion and sleep. A bowl of lentil soup or a gently spiced lentil curry makes for the perfect evening meal. Use ingredients like garlic, onion, tomatoes, ginger, turmeric, and cumin to boost both flavor and health benefits.

To round out your plate, add a serving of steamed vegetables—such as broccoli, zucchini, or spinach—and if you need a little more substance, include a small portion of whole grains like brown rice or quinoa. This combination is not only delicious but also deeply nourishing and naturally supportive of your weight loss goals.

Key Tips

  • Balance your meals by combining lentils with healthy fats and lean proteins
  • Stay hydrated, especially when increasing your fiber intake
  • Vary your meals to avoid boredom and improve nutrient diversity
  • Exercise regularly to maximize fat loss
  • Watch portions, even with healthy foods

Want More Lentil Inspiration?

If you’re excited to start cooking with lentils but want a bit more variety or meal prep guidance, we’ve got you covered. Whether you’re into comforting soups, quick salads, or prepping ahead for the week, these posts will give you fresh, weight-loss-friendly ideas.

Explore These Reader Favorites:

These posts are full of practical tips, balanced meal ideas, and step-by-step recipes to keep your lentil journey exciting and effective.


Can You Eat Only Lentils?

Lentils are highly nutritious, but eating only lentils isn’t advisable for the long term. Your body requires a wide range of nutrients that only a varied diet can provide. For best results, use lentils as a base and build your meals around them using other whole foods.


Nutrition Chart of Common Types of Lentils (per 1 cup cooked, ~198g):

Type of LentilCaloriesProtein (g)Fiber (g)Carbs (g)Fat (g)Iron (% DV)Glycemic Index
Red Lentils23017.815.639.90.837%Low (21–29)
Green Lentils23018.015.639.00.835%Low (22–30)
Brown Lentils23018.015.039.90.836%Low (29–32)
Black Lentils (Beluga)18024.017.930.00.740%Very Low (~21)
Yellow Lentils (Split Moong)21014.015.438.00.728%Moderate (~32–35)
Masoor Dal (Split Red Lentils)23018.015.640.00.837%Low (21–29)

⚠️ Note:

  • Nutritional values can vary slightly by source, preparation method, and origin of lentils.
  • %DV (Daily Value) is based on a 2,000-calorie diet.
  • Glycemic Index (GI) estimates are approximate and vary depending on processing and how lentils are cooked.

Key Takeaways:

  • Best for Weight Loss (Fiber + Protein): Black lentils (Beluga)
  • Most Versatile: Brown and green lentils (hold shape well, good for salads and soups)
  • Quickest Cooking & Best for Soups/Purees: Red lentils and Masoor dal
  • Gentlest on Digestion: Yellow lentils (Split Moong)

If you’re curious how to cook Beluga or Black Lentil creatively, don’t miss our guide on Beluga lentil benefits and recipes for fat loss.


Common Questions and Myths About Lentils and Weight Loss

Are lentils fattening?

Not at all. Lentils are naturally low in fat and calories, and they’re packed with fiber and protein—both of which actually help prevent overeating. As long as you’re not adding heavy cream or frying them in oil, lentils are one of the least “fattening” foods you can eat.

Can lentils cause weight gain?

Only if you’re consistently eating more calories than your body needs—including from lentils. But on their own, lentils are unlikely to cause weight gain. In fact, most people find that lentils help them feel full on fewer calories, which makes weight gain less likely.

Are lentils really good for weight loss?

Yes, absolutely. Lentils support weight loss in multiple ways—they keep you full, stabilize your blood sugar, and offer a high amount of protein and fiber without a lot of calories. Plus, they’re inexpensive and easy to prepare, which makes healthy eating more sustainable.

Is dal good for weight loss?

It can be! Dal—essentially lentil stew—is great for weight loss when made with minimal oil and plenty of vegetables. Use spices like cumin, turmeric, and coriander to add flavor without the extra calories. Just avoid adding too much ghee, butter, or fried toppings.

How much lentils should I eat per day to lose weight?

Around 1 to 2 cups of cooked lentils per day is a good target. That gives you enough fiber and protein to feel full and satisfied without going overboard on calories.

Can I eat lentils every day?

Yes, and many people do. Lentils are gentle on digestion, easy to cook, and work well in a variety of meals. Just be sure to also eat a range of other foods—like vegetables, fruits, whole grains, and healthy fats—for balanced nutrition.

Which lentils are best for weight loss?

Green and black lentils are often considered the best for weight loss because they’re slightly higher in fiber and protein. But all lentils—red, brown, yellow—are good choices, so feel free to mix it up based on what you enjoy eating.

What’s the best way to cook lentils for fat loss?

Boiling or pressure cooking is best. Avoid frying or adding high-calorie ingredients like cream or lots of oil. Instead, season with herbs, lemon, garlic, or low-sodium broth for flavor without the calories.

Do lentils help with belly fat?

Lentils won’t “target” belly fat specifically, but because they help reduce overall calorie intake and improve blood sugar balance, they can support full-body fat loss—including belly fat—when combined with a healthy diet and regular exercise.

What happens if I eat lentils for 30 days?

Most likely, you’ll feel more full, snack less, and notice more stable energy levels. Some people even report weight loss just from swapping processed carbs with lentil-based meals. Just be sure to keep meals balanced with other nutrient-rich foods.

Are lentils high in carbs?

They do contain carbohydrates, but they’re complex carbs paired with fiber and protein—which means they’re digested slowly and don’t cause blood sugar spikes. Unlike refined carbs, lentils keep you full and energized.

Can I eat lentils at night?

Yes, lentils are a great dinner option. Their fiber and protein can actually help prevent late-night snacking. Just keep portions reasonable and avoid pairing them with heavy, oily foods.

What’s healthier—lentils or rice?

Both can be part of a healthy diet, but lentils generally offer more protein, fiber, and nutrients per calorie. That said, combining lentils with small portions of whole grains like brown rice or quinoa gives you a balanced, satisfying meal.

Can lentils help reduce sugar cravings?

They can! Because they stabilize blood sugar and promote satiety, lentils help curb the cravings that come from energy crashes. Try having a lentil-based lunch and see how much more stable your afternoon energy feels.

Do I need to soak lentils?

Not always. Most lentils (especially red and yellow varieties) don’t require soaking. However, soaking can help reduce cooking time and may improve digestion for some people.

A rustic bowl filled with cooked lentils with bold text overlay reading ‘Lentils for Weight Loss’ highlighting how lentils are affordable, nutritious, and backed by science.
Lentils for weight loss — affordable, nutritious, and backed by science at MasalaMonk.

Final Thoughts: Why Lentils Are a Weight Loss Superfood

Lentils combine all the key qualities that support weight loss:

  • Low in calories yet nutrient-dense
  • High protein to preserve muscle and reduce appetite
  • Rich fiber to control hunger and stabilize blood sugar
  • Versatile and easy to incorporate into many meals
  • Affordable and accessible for most diets

In summary, lentils offer a unique combination of nutrients that make them ideal for weight loss: they’re low in calories, yet rich in protein and fiber, which helps keep you full and satisfied.

Unlike many processed weight-loss products, lentils are natural, unprocessed, and incredibly versatile. Whether you prefer soups, salads, curries, or tacos, lentils can easily be integrated into your meals without sacrificing flavor or nutrition.

Moreover, their high fiber content aids digestion, their low glycemic index stabilizes blood sugar, and their impressive micronutrient profile supports your metabolism. All things considered, lentils are not just weight-loss-friendly—they’re one of the most effective, affordable, and accessible foods for anyone looking to lose weight in a healthy, sustainable way.

So, whether you’re starting your weight loss journey or looking to optimize your current diet, lentils deserve a place on your plate. By including lentils regularly in your diet—whether as soups, salads, curries, or snacks—you can enhance fullness, reduce overall calorie intake, and promote healthy fat loss without feeling deprived.