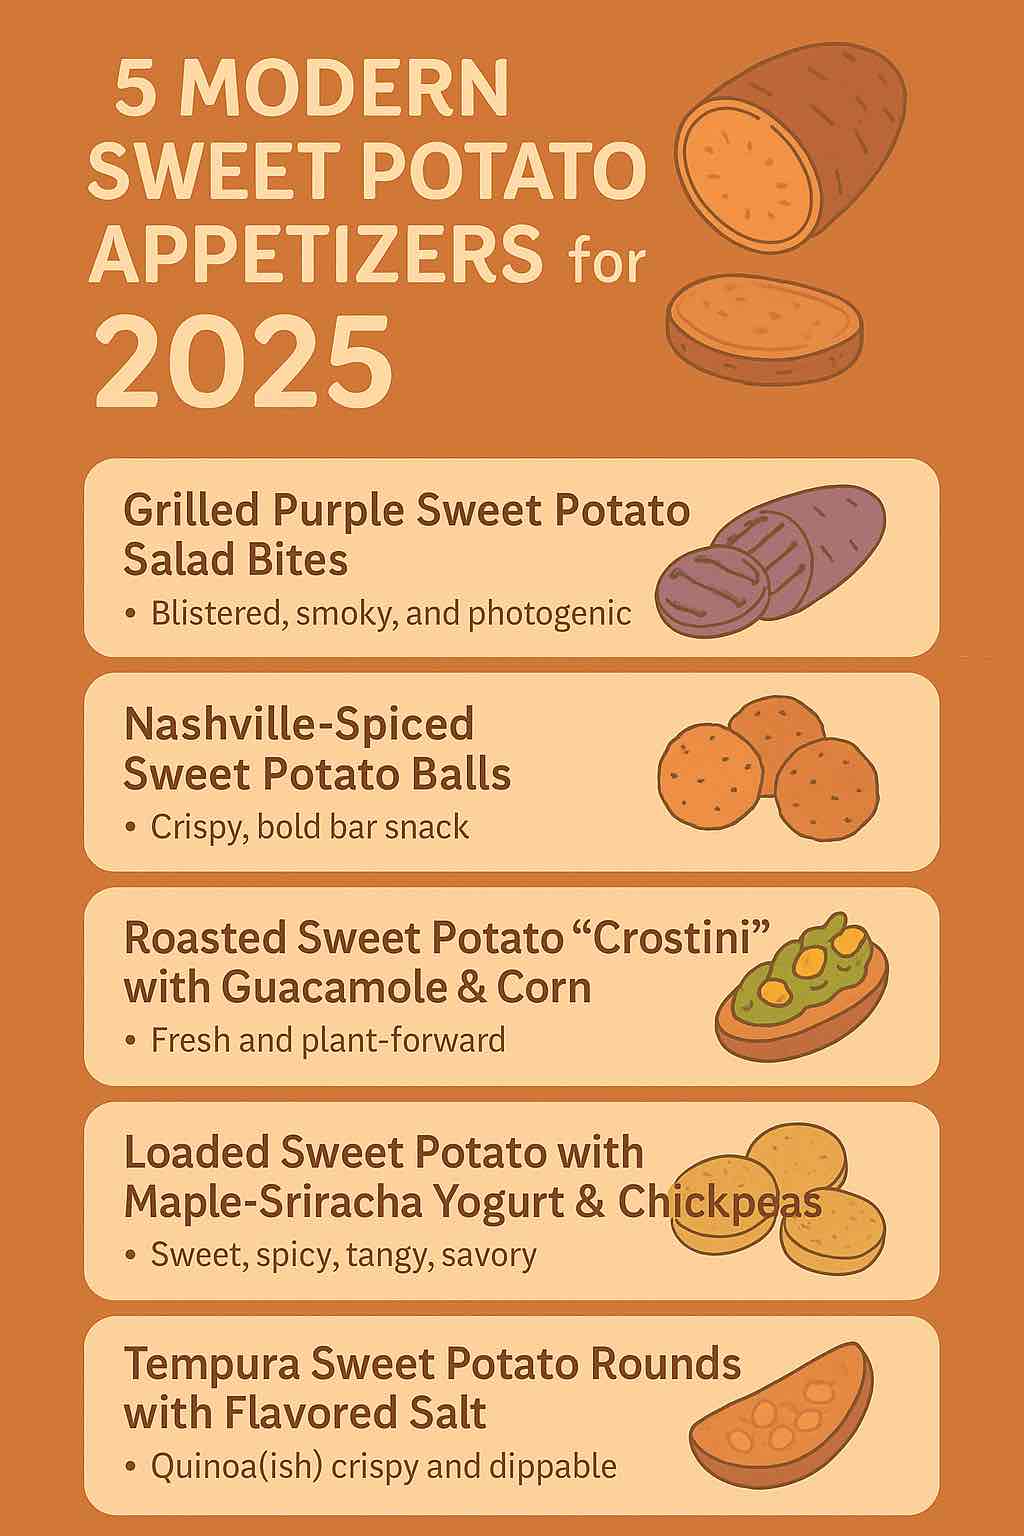
Sweet potatoes have officially moved beyond the Thanksgiving table and into the culinary spotlight as a versatile, healthful, and flavor-packed ingredient. Whether you’re a home chef or running a professional kitchen, the latest trends in sweet potato appetizers are all about global flavors, striking visuals, and creative textures.
In this post, we dive deep into five trending sweet potato appetizers for 2025, blending research from top food publications, chef menus, and recent product innovations. Each idea is presented with a chef’s rationale, practical how-to guidance, and tips for home and pro kitchens alike.
1. Grilled Purple Sweet Potato Salad Bites
Why It’s Trending: Purple sweet potatoes are a visual knockout and rich in antioxidants. Recently featured by Bon Appétit (July 2025), grilling intensifies their natural sweetness while adding smokiness—a modern update for plant-forward appetizers.
How to Make It Practical:
Slice purple sweet potatoes into ½-inch rounds.
Toss with olive oil, salt, and pepper.
Grill on high heat until blistered and tender (about 4 minutes per side).
Dress with a creamy sesame-mayo or a lemony vinaigrette.
Top with scallions, toasted sesame seeds, and microgreens.
Pro Tip: For parties, skewer grilled rounds and serve with the dressing on the side for dipping. The color and char will stand out on any appetizer tray.
2. Nashville-Spiced Sweet Potato Balls
The Inspiration: A twist on classic croquettes, these crispy, spice-laden balls are inspired by the hot chicken craze, but made for vegetarians and flexitarians. Recent recipes (Cherry on My Sundae, June 2025) blend sweet potato with smoky paprika, cayenne, and a crunchy coating.
How to Make Them Practical:
Roast and mash sweet potatoes.
Mix with breadcrumbs, Nashville-style spices, finely diced green onions, and (optional) shredded cheese or bacon bits.
Form into balls; dredge in flour, egg, and panko.
Fry or bake until golden and crisp.
Serve with a creamy ranch or tangy comeback sauce.
Pro Kitchen Variation: Pipe spiced sweet potato puree into mini choux pastry shells for an upscale passed hors d’oeuvre.
3. Roasted Sweet Potato “Crostini” with Guacamole & Corn
Why Chefs Love It: Bread-free “crostini” are trending among gluten-free diners and those seeking lighter fare. Roasted sweet potato rounds are the perfect vehicle for colorful, bold toppings. This concept is popular with food bloggers and professional caterers alike (A Couple Cooks, Jan 2025).
How to Make at Home or Work:
Slice sweet potatoes into thick rounds (about ½ inch).
Roast with olive oil, cumin, and smoked paprika at 425°F until caramelized (20–25 minutes).
Top each round with a dollop of guacamole, roasted corn kernels, diced red onion, and chopped cilantro.
Finish with lime juice and a sprinkle of cotija cheese.
Chef’s Tip: Try different toppings, such as whipped feta with pomegranate seeds or spicy black bean mash with pickled jalapeños.
4. Loaded Sweet Potato with Maple-Sriracha Yogurt & Crispy Chickpeas
On the Cutting Edge: Loaded sweet potatoes are evolving, now being downsized into appetizer “boats” for maximum flavor and visual impact. The latest takes layer sweet, spicy, tangy, and crunchy elements for a full flavor experience (Good Mood Food, April 2025).
How to Make Them Practical:
Halve small sweet potatoes lengthwise; roast until just soft.
Scoop out a little center to make a well (save the scooped flesh for another use).
Fill with maple-sriracha Greek yogurt, crispy roasted chickpeas, crumbled feta, and pickled onions.
Drizzle with almond salsa verde (blend toasted almonds, parsley, lemon, olive oil, and a pinch of chili).
Meal Prep Friendly: Both the yogurt sauce and chickpeas can be made days in advance, making this ideal for parties.
5. Tempura Sweet Potato Rounds with Flavored Salt
The Industry Insight: Pre-cooked, tempura-battered sweet potato slices are gaining traction in restaurant and catering sectors for their crispness and convenience (US Foods Chef’s Line, 2025). This idea translates well to home kitchens using basic tempura batter.
How to Bring to Your Table:
Cut sweet potato into ½-inch thick rounds.
Dip in a simple tempura batter (flour, cornstarch, cold seltzer).
Fry in hot oil until golden and crispy.
Sprinkle immediately with flavored salt (smoked paprika, garlic powder, or furikake).
Serve with a dipping sauce—try spicy mayo, ponzu, or garlic aioli.
Entertaining Tip: Offer a trio of dips and salts, and let guests mix and match.
Expert Tips for Sweet Potato Appetizer Success
Visual Appeal: Use a mix of purple, orange, and white sweet potatoes for color contrast.
Batch Prep: Many components (roasted rounds, sauces, toppings) can be made ahead for fast assembly.
Texture Matters: Combine creamy, crunchy, and chewy elements for memorable bites.
Global Flavors: Don’t be afraid to borrow from global cuisines—sriracha, gochujang, furikake, and curry powder all pair beautifully with sweet potatoes.
Final Thoughts
From smoky grilled salads to street-food-inspired croquettes, sweet potato appetizers are having a major moment in 2025. They’re healthy, photogenic, endlessly adaptable, and equally at home at a casual party or a fine-dining table. Whether you’re looking for a new plant-based favorite or a show-stopping party snack, these ideas bring the best of today’s trends straight to your kitchen.
Ready to experiment? Which idea will you try first? Let us know in the comments or share your own sweet potato creations!
FAQs
1. Can I use regular potatoes instead of sweet potatoes in these recipes?
Answer: Yes, you can substitute regular potatoes for sweet potatoes in most appetizer recipes, but you’ll lose the characteristic sweetness and vibrant color. Adjust seasonings to balance flavors accordingly.
2. How do I keep sweet potato rounds from getting soggy when roasting or grilling?
Answer: Slice rounds evenly (about ½ inch), don’t overcrowd the pan, and roast or grill at high heat (425°F/220°C) to encourage caramelization. Let them cool on a wire rack to preserve crispness.
3. Can I make sweet potato appetizers ahead of time?
Answer: Yes! Many components (roasted rounds, dips, toppings) can be made a day ahead. Store separately and assemble just before serving for best texture and flavor.
4. What are some gluten-free options for breading or crisping sweet potatoes?
Answer: Use gluten-free panko, crushed rice crackers, or cornmeal for coating. Tempura batter can be made with rice flour and cornstarch.
5. How do I make sweet potato appetizers vegan?
Answer: Omit dairy (cheese, yogurt) and use plant-based alternatives like cashew cream, vegan cheese, or dairy-free yogurt. Use aquafaba or flaxseed “egg” for binding in fritters or balls.
6. What’s the best oil for frying sweet potato appetizers?
Answer: Use oils with a high smoke point like canola, peanut, or avocado oil. For added flavor, try a touch of sesame oil in the batter or as a finishing drizzle.
7. Can I air-fry sweet potato appetizers instead of deep frying?
Answer: Absolutely! Air frying is a healthier alternative and works well for rounds, wedges, and even “balls.” Toss lightly in oil, arrange in a single layer, and cook at 375°F/190°C, flipping halfway.
8. How do I add more flavor to plain sweet potato appetizers?
Answer: Experiment with spice blends (cajun, za’atar, curry powder), citrus zest, fresh herbs, or flavored salts. Don’t be afraid to use bold, global-inspired dips.
9. Are these sweet potato appetizers suitable for kids?
Answer: Yes! They’re naturally sweet and can be made mild by adjusting spices. Offer a range of dips and let kids assemble their own bites for fun.
10. How should I store leftovers, and can I reheat sweet potato appetizers?
Answer: Store leftovers in an airtight container in the fridge for up to 3 days. Reheat in a hot oven or air fryer to restore crispness; avoid microwaving as it makes them soggy.
A good butter chicken has contrast, and keto doesn’t change that.
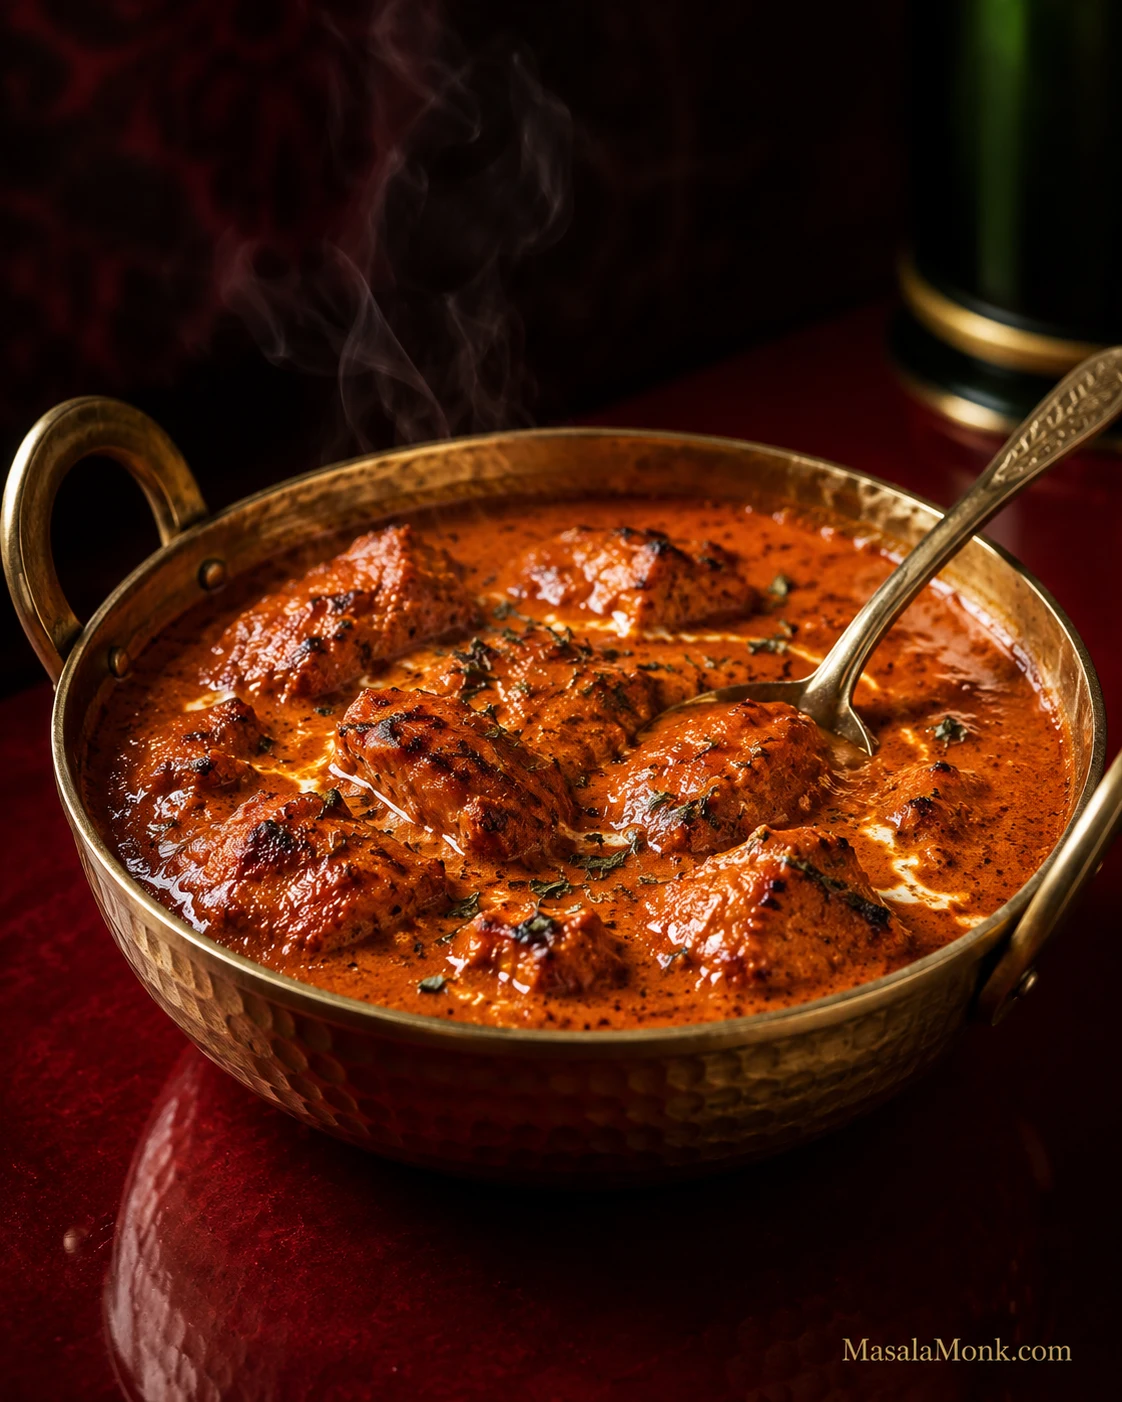
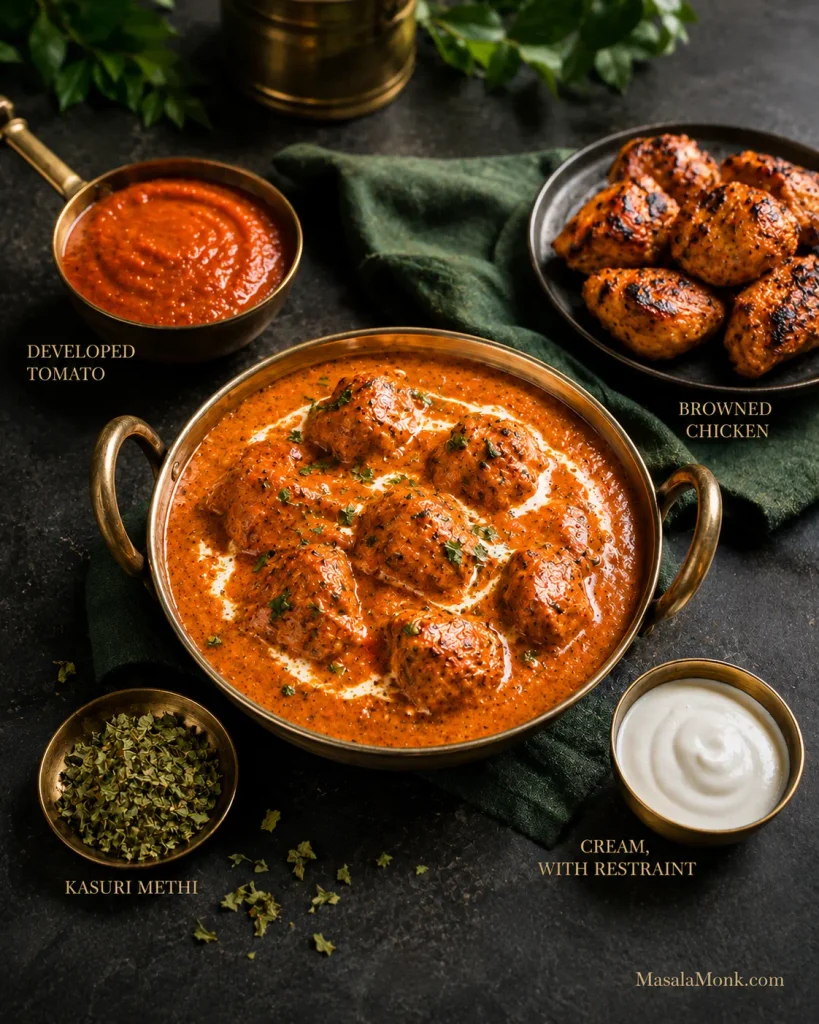
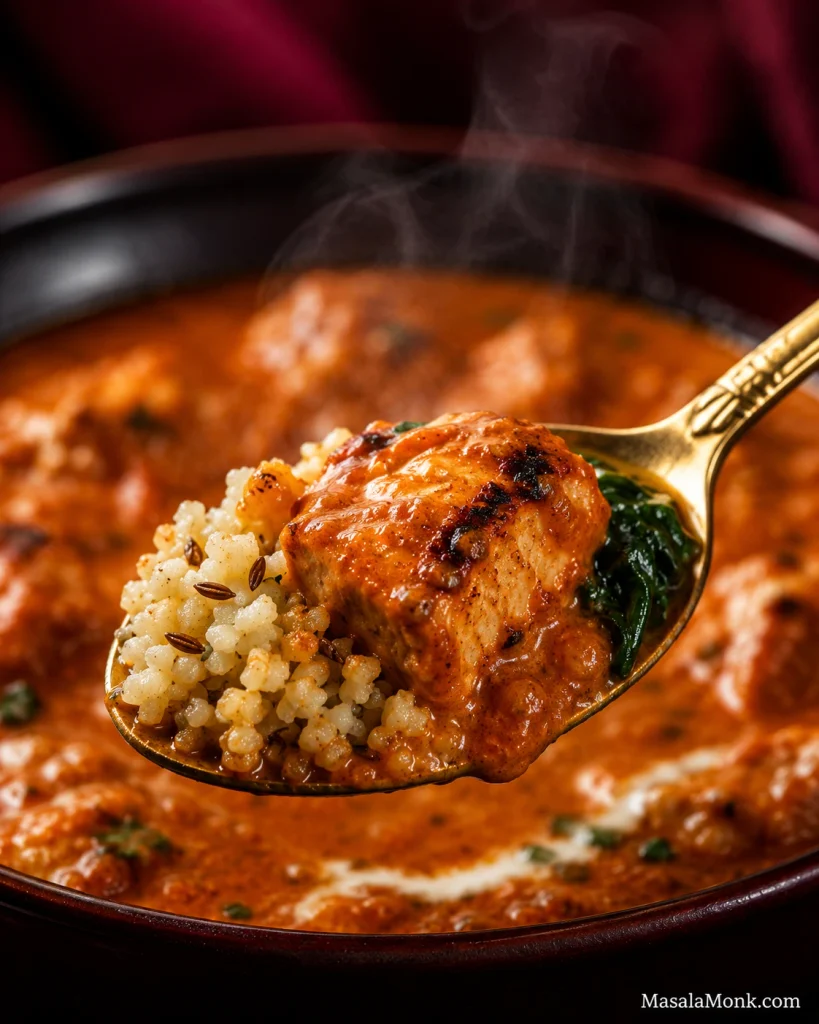
The chicken should have browned, sometimes lightly charred edges. The gravy should cling to those pieces and still move around them, with a soft butter sheen. Tomato gives the sauce its backbone, cream smooths the acidity, and crushed kasuri methi leaves the aroma that makes the finished curry recognizably butter chicken.
If butter chicken is one of the dinners you’ve been missing since cutting back on carbs, most of what makes it worth eating can stay. Or maybe you’ve already tried a low-carb version and ended up with perfectly decent creamy tomato chicken that somehow never quite became butter chicken. This recipe is meant to solve both problems.
This version is savory and tomato-deep, with browned chicken, a smooth orange-red gravy, moderate cream and kasuri methi still noticeable after the bite. A favourite takeaway may be much sweeter or richer. If yours is, this will taste different—and nothing has gone wrong.
Butter chicken—murgh makhani—already starts with plenty of ingredients that fit naturally into a lower-carb meal. Most of the carb difference comes from added sugar, how much tomato and onion go into the gravy, cashews or starches, prepared sauces and, very often, the rice and naan served with it.
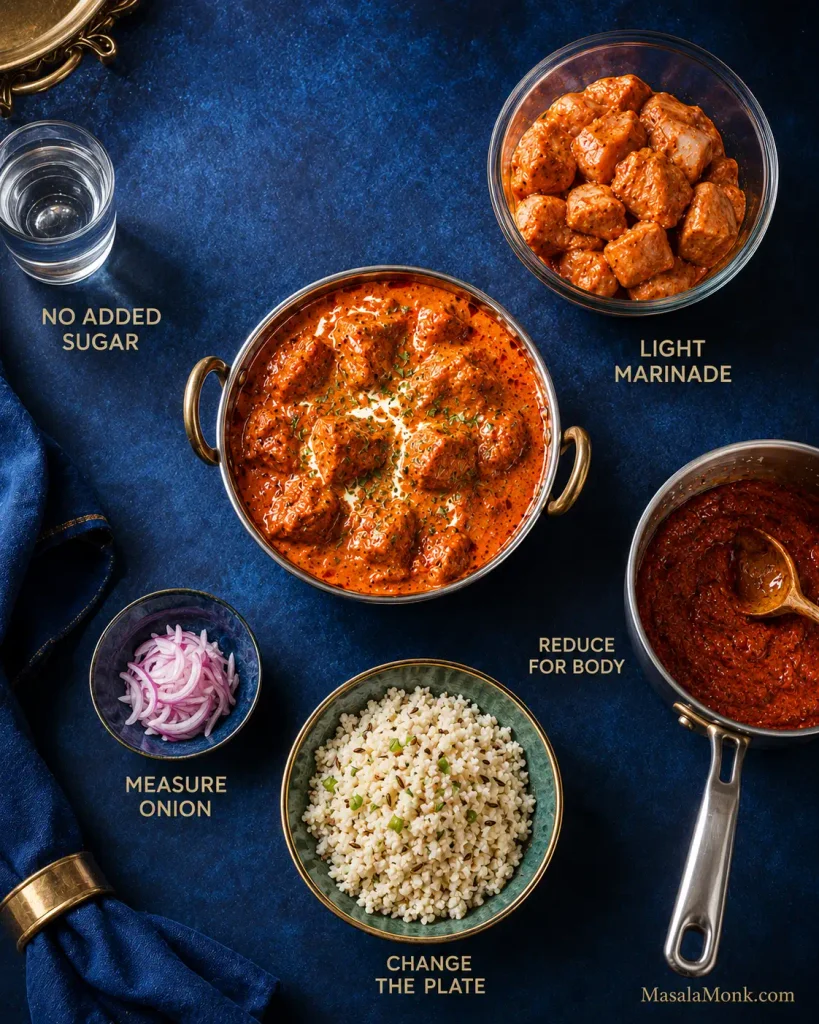
Keep the butter chicken. Change the carbs that matter.
Yes. Homemade butter chicken can be keto-friendly. This version comes to roughly 7g net carbs per serving, with no added sugar, cashews or flour-based thickener.
Chicken, butter, ghee, cream and spices contribute relatively little carbohydrate in the amounts used here. Tomato, onion and plain yogurt contribute some. Restaurant and packaged gravies may add sugar, ketchup, flour, cornstarch, cashews or simply a much larger amount of sauce.
Homemade is easier to calculate because you know what went into the pan. Whether roughly 7g net carbs fits your day depends on the carbohydrate target you’re following.
Skip the added sugar. Give the tomato enough time to lose its raw, sharp edge before deciding the sauce needs sweetness.
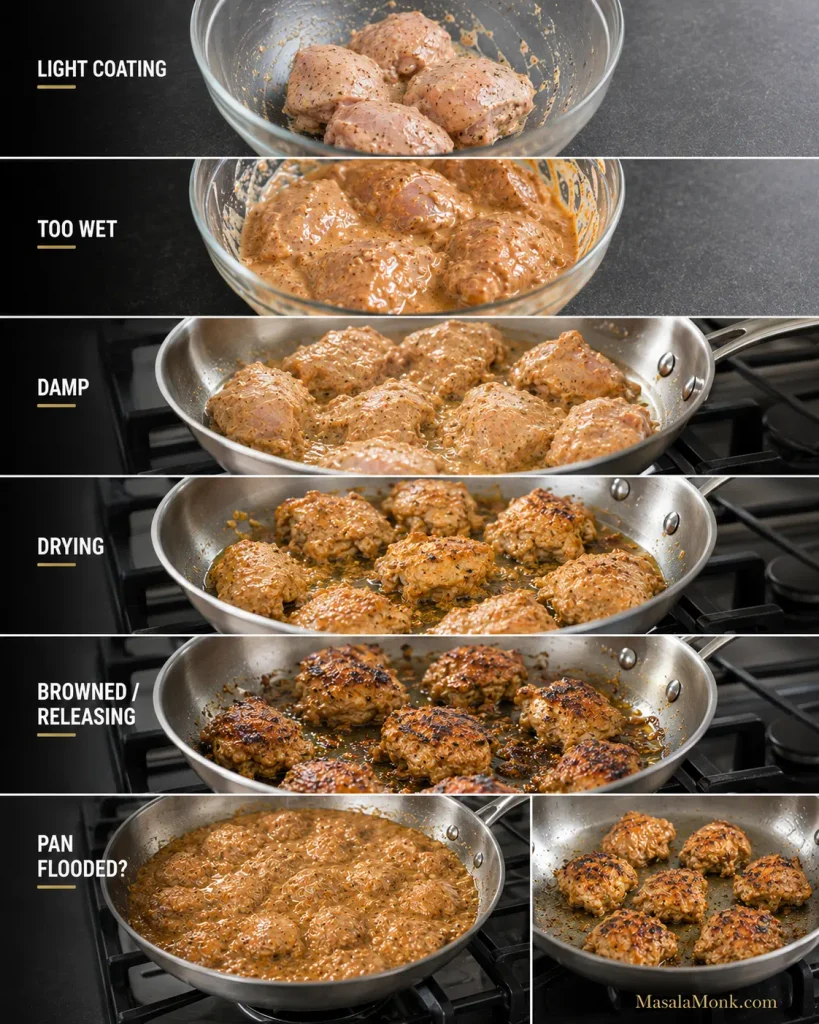
Keep the yogurt-and-lemon marinade. Leave only a light coating on the chicken before browning so the spices stay with the meat without flooding the pan.
Let the gravy thicken through cooking. Tomato reduction and blending give this sauce plenty of body. Flour and specialty keto thickeners are unnecessary.
Measure the onion; skip the cashews in this version. A modest amount of onion still gives the gravy body and sweetness, while the tomato, butter and cream supply enough richness.
Look at the whole plate. Jeera cauliflower rice, greens and something crisp can save more carbohydrates than stripping character out of the curry itself.
That’s most of the keto work. From here, cook it like butter chicken.
No specialty keto thickeners are needed here: reduction, measured gravy ingredients and the plate do the work.
Keto Butter Chicken Recipe
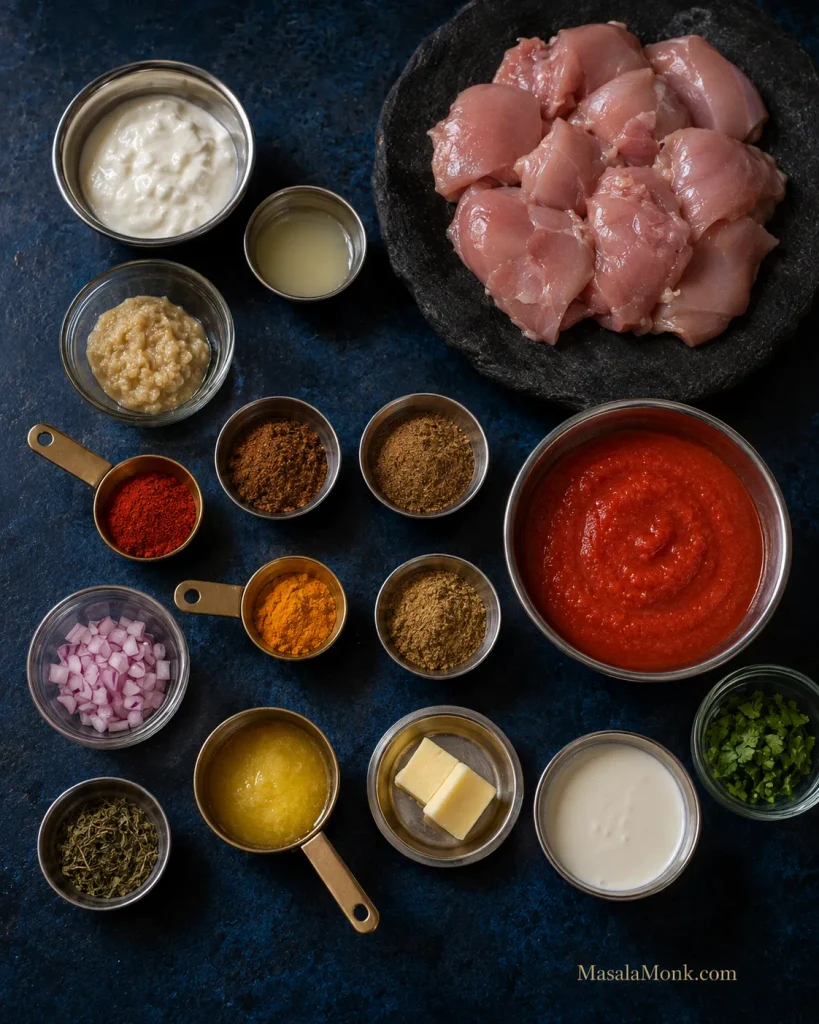
The ingredient list looks long, but the cooking itself is straightforward. Most of the work is measuring, browning the chicken and giving the tomato enough time.
If other people at the table aren’t eating low-carb, you do not need a second curry. Put rice or naan on their side of the table and cauliflower rice or vegetables on yours.
At a Glance
Detail
What to expect
Serves
4 generous main-course portions
Chicken
700g / 1½ lb boneless skinless thighs
Prep
About 15 minutes
Marinating
30 minutes minimum; 2–4 hours is better
Cook
About 30–40 minutes
Minimum elapsed time
About 1¼–1½ hours
Pan
11–12in / 28–30cm wide, reasonably deep skillet or sauté pan
Heat level
Mild to medium
Estimated net carbs
About 7g per serving, before sides
Equipment
11–12in / 28–30cm wide, reasonably deep skillet or sauté pan
mixing bowl
knife and cutting board
instant-read thermometer
immersion blender, recommended for a smoother gravy
digital kitchen scale, useful but not essential
A countertop blender works too. If the gravy is too shallow for an immersion blender to stay submerged, transfer it to a tall heatproof jug. Let very hot gravy settle briefly and follow your blender manufacturer’s guidance for hot liquids. A fine-mesh strainer is optional.
For carb tracking, weigh the tomato and onion first; tiny spice differences matter far less.
80g / ⅓ cup thick plain full-fat yogurt or dahi; mild full-fat Greek yogurt also works
15ml / 1 tbsp lemon juice
15g / 1 tbsp ginger-garlic paste
1 tsp Kashmiri red chilli powder
1 tsp garam masala
½ tsp ground cumin
4g / about ¾ tsp fine sea salt
Makhani Gravy
14g / 1 tbsp ghee, for browning the chicken
14g / 1 tbsp ghee or butter, for the gravy
50g / roughly ½ small onion, finely chopped
15g / 1 tbsp ginger-garlic paste
1 tsp ground coriander
½ tsp ground cumin
½ tsp garam masala
¼ tsp ground turmeric
¼–½ tsp Kashmiri red chilli powder
225g / 8oz / scant 1 cup plain passata or strained tomatoes, with no added sugar
60ml / ¼ cup hot water or unsalted/lightly salted chicken stock, plus more if needed
3g / about ½ tsp fine sea salt
To Finish
120ml / ½ cup heavy or whipping cream
14g / 1 tbsp butter
1 tsp dried kasuri methi
fresh coriander/cilantro, optional
A fresh cream around 25% milk fat works too. The gravy will be slightly lighter and looser and may need another minute of gentle reduction. The nutrition estimate later in the post assumes heavier cream in roughly the 30–36% range.
Kashmiri chilli is being used mainly for colour and gentle warmth. Add cayenne or a hotter Indian chilli powder separately when you want more heat. For a mixed table, keeping the main pan mild and sharpening individual portions at the end is usually easier.
1. Marinate the Chicken
Mix the yogurt, lemon juice, ginger-garlic paste, Kashmiri chilli, garam masala, cumin and salt. Add the chicken and turn until every piece carries a light coating.
Cover and refrigerate for at least 30 minutes. Two to four hours works particularly well, and overnight is fine when that suits your schedule.
Before cooking, lift the chicken from the bowl and scrape or shake away the heavy excess marinade. Discard what remains after contact with the raw chicken. A little yogurt-spice coating should stay on the meat, but there should not be enough to form a puddle in the pan.
2. Brown the Chicken
Heat the pan over medium-high heat and add the ghee. If you’re cooking in two batches, divide that tablespoon between them. Arrange the chicken in a single layer with some room around the pieces.
At first you’ll hear a damp hiss as moisture leaves the surface. As the pan dries, the sound becomes sharper and the yogurt-spice coating begins catching and darkening around the edges. Give the first side roughly 2–3 minutes before checking it. Chicken that still grips the pan usually needs another few moments; once the surface has browned properly, it releases more easily.
Turn and colour the second side briefly, then transfer the chicken to a plate while the centre is still underdone. A few uneven dark patches are exactly what you want. The pieces do not need to look identical.
Pan filling with water? Stop adding chicken. Remove the pieces if necessary, let the excess liquid evaporate, add a touch of ghee once the pan is dry again and continue in smaller batches.
Between batches, let the pan get hot and dry again before adding more yogurt-marinated chicken. Otherwise, the next batch inherits the moisture from the last one.
For stronger tandoori-style edges, the marinated chicken can go under a very hot broiler/grill until a few spots blister, then finish cooking in the gravy.
3. Build the Makhani Base
Lower the heat to medium and add the second tablespoon of ghee or butter. Add the onion and measured salt and cook for about 4–6 minutes, until the onion softens and loses its sharp raw smell. A little gold around the edges is welcome.
Add the ginger-garlic paste and cook for roughly 30 seconds, until its raw aroma mellows. Stir in the coriander, cumin, garam masala, turmeric and Kashmiri chilli for another 20–30 seconds. Lower the heat if the spices begin sticking or darkening quickly.
4. Give the Tomato Enough Time
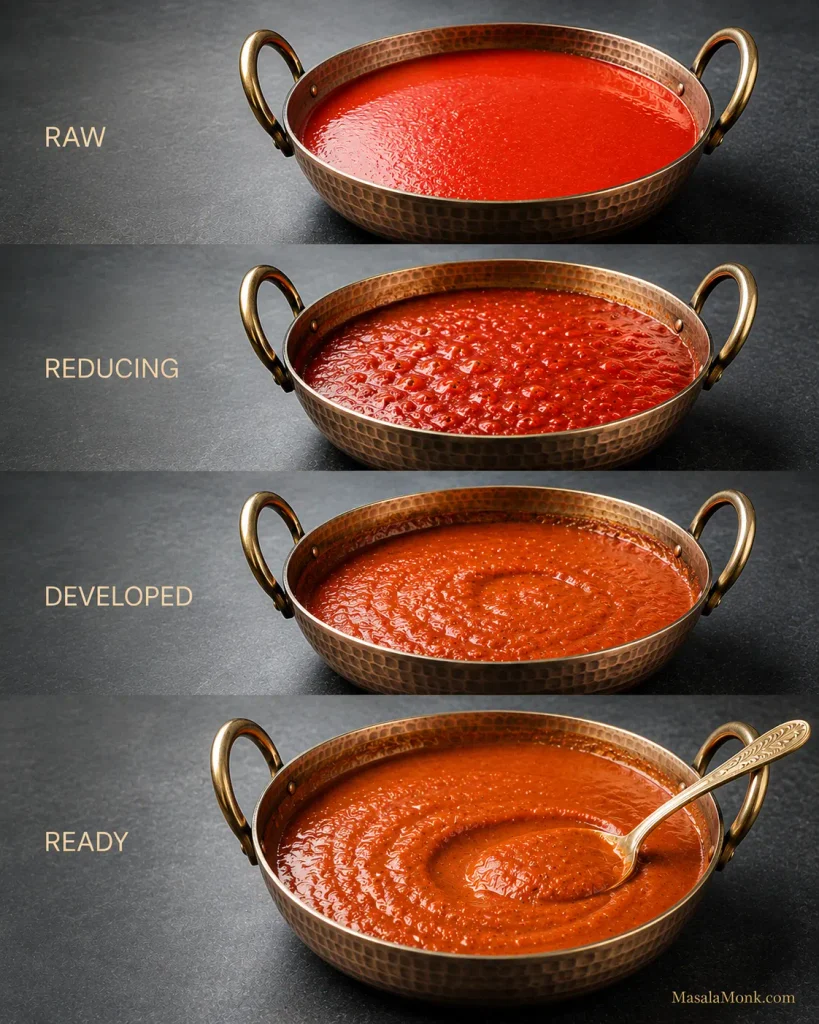
Pour in the passata and scrape the bottom of the pan to release the browned chicken and spice residue. Cook uncovered over medium to medium-low heat, stirring regularly.
Expect roughly 8–15 minutes, sometimes longer. Tomato products vary, and so do burners and pans. If yours needs 18 minutes, nothing has gone wrong.
The sauce starts bright and loose. As water cooks away, the colour deepens, the texture tightens and the obvious bottled-tomato smell fades. Draw a spoon through the pan: the trail should remain visible briefly before the sauce flows back. Small beads or streaks of fat may appear near the edges; you do not need a dramatic oil layer.
Taste a little. A sharp, raw tomato flavour means it needs more cooking. Extra tomato paste makes the colour stronger, but it can push the gravy towards a concentrated pasta-sauce flavour. Use it only when the tomato product itself is unusually pale or weak.
A wide pan speeds evaporation, concentrating passata without flour, cornstarch or another gravy thickener.
5. Blend the Gravy, Then Finish the Chicken
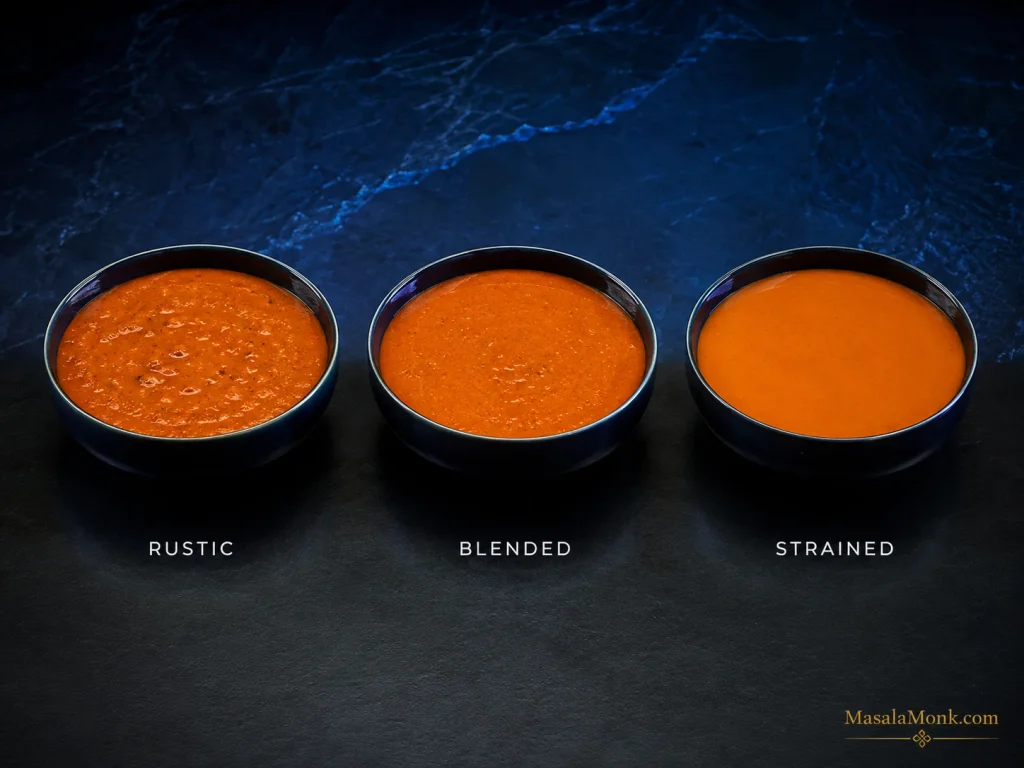
Pour in 60ml / ¼ cup hot water or stock and remove the pan briefly from the heat. Blend until smooth. For an especially silky gravy, strain it before returning it to the pan. Leaving it a little rustic is fine too.
Return the blended gravy to medium-low heat for 2–3 minutes, stirring as it comes back together and thickens slightly. Tiny beads of fat may appear around the edge.
If the gravy tightens before the chicken is ready, add hot water or stock 1 tbsp / 15ml at a time.
6. Finish With Cream, Butter and Kasuri Methi
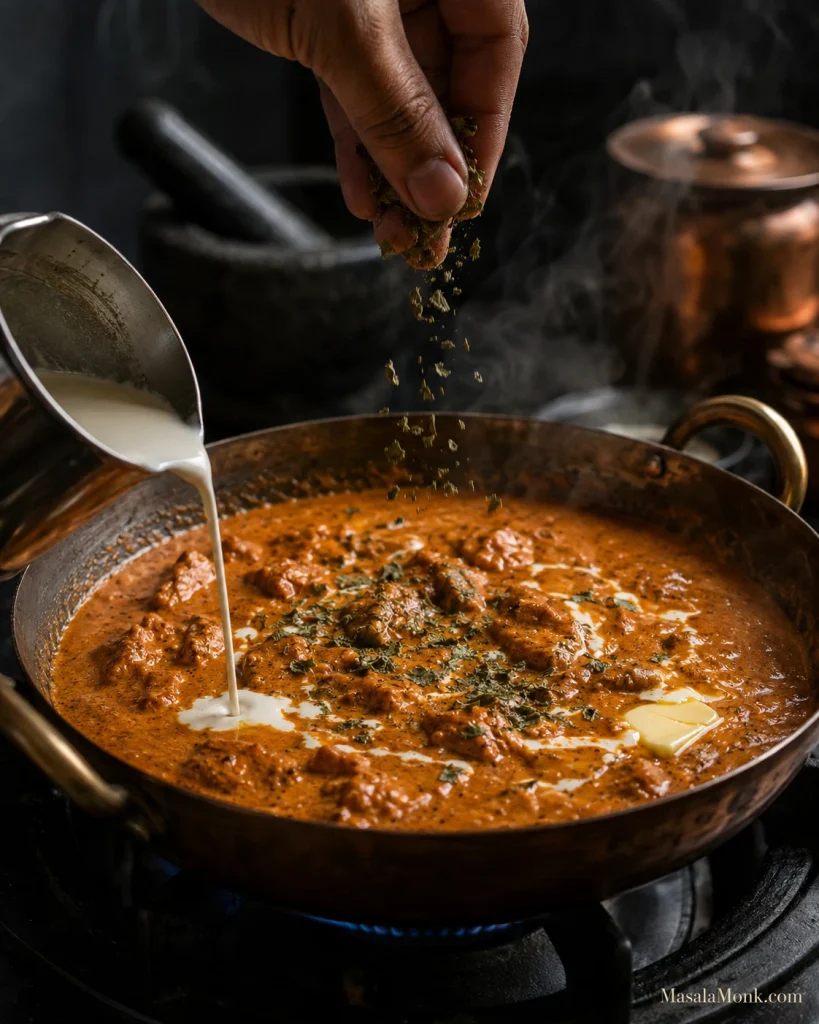
Reduce the heat to low and let hard bubbling settle. Stir in the cream, then crush 1 teaspoon kasuri methi between your palms over the pan and add it with the finishing butter. Warm everything gently for another minute.
Once the cream is in, keep the heat gentle. A hard boil can split the dairy, while prolonged cooking also softens the fresh aroma of butter and kasuri methi.
Taste and check the salt first. After that, make only the adjustment the gravy needs: another ¼ teaspoon methi, a touch more heat, a small finishing pinch of garam masala, a spoonful of water or perhaps one more spoonful of cream.
If the tomato is still sharply acidic after it has cooked fully and the salt, butter and cream are in place, a very small amount of your preferred low-carb sweetener can help. Add it only at the end and only if the sauce genuinely needs it.
Turn off the heat and let the curry rest for about 5 minutes.
The Finished Butter Chicken
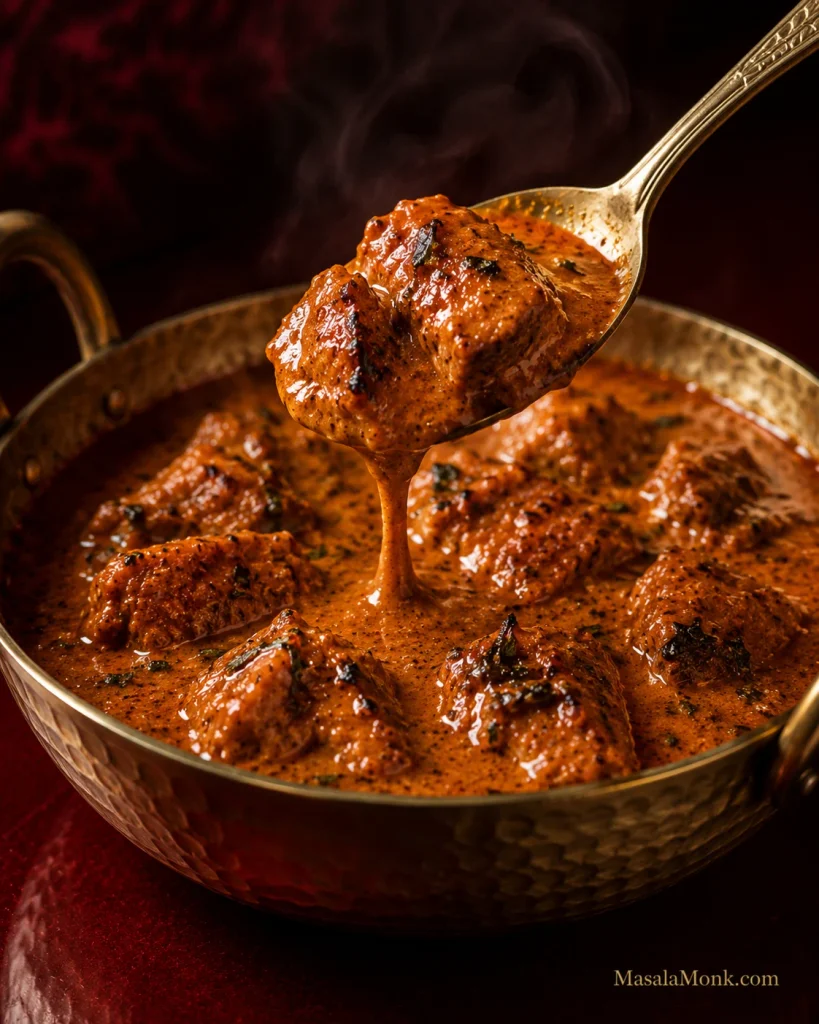
Some of the yogurt-spice coating should have darkened around the chicken while the centre stays juicy. The gravy should settle naturally around the pieces, with no watery pool underneath. The raw tomato edge should be gone, but you should still taste tomato, ginger, chilli and spice after the cream goes in.
Kasuri methi should be easy to notice when you lean over the pan. Drag a spoon through the gravy; the line should stay open for a moment and then slowly close. Lift the spoon and the sauce should cling before falling back in a slow ribbon.
Too thick? Stir in 1 tbsp / 15ml hot water. Too loose? Give it another minute or two uncovered.
Perfect texture can still mean too much sauce. Fix the ratio, not the chicken.
Then stop adjusting.
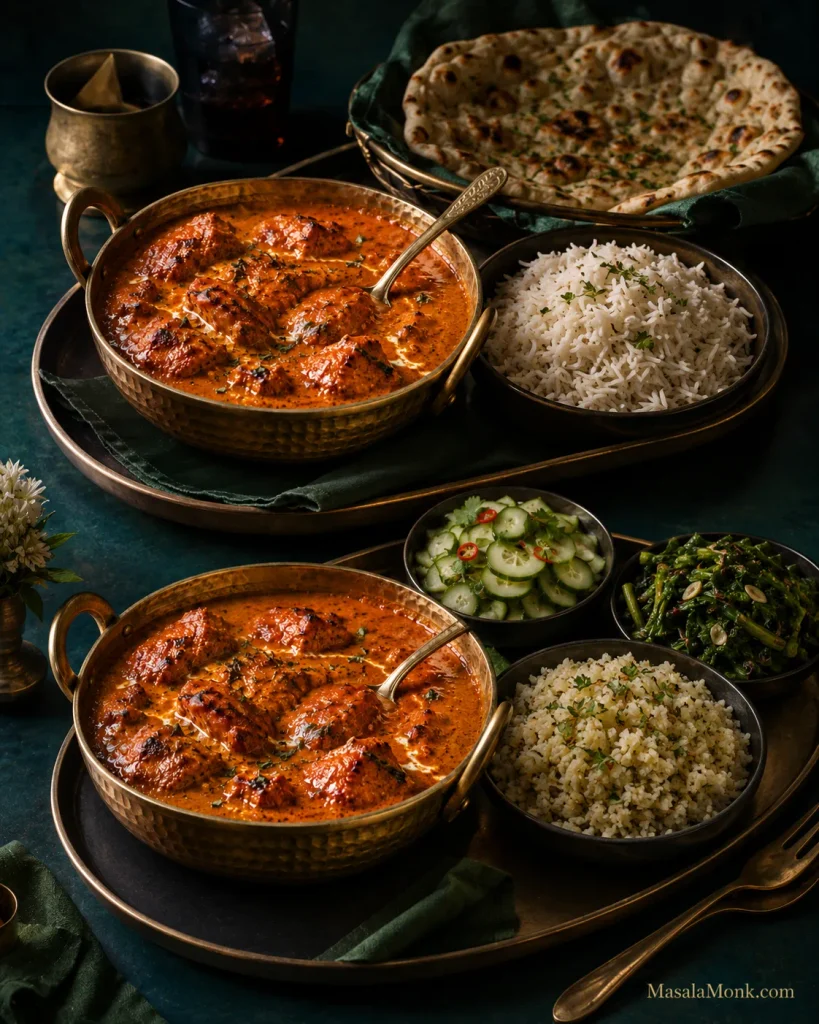
Spoon it over hot jeera cauliflower rice and get some browned chicken and gravy in the first bite. At that point, nobody needs to be thinking about what was removed.
If dinner is already on the table, stop here and eat. Everything below is for the question that comes next: why another recipe claims fewer carbs, why a gravy tastes wrong, what changes at a restaurant or how to make the next batch easier.
What Makes Butter Chicken Taste Like Butter Chicken?
The hardest butter chicken to diagnose is the one that isn’t bad. The chicken is tender, the sauce is creamy and the seasoning seems reasonable, yet the first bite still tastes like generic tomato curry.
Usually there isn’t one secret ingredient missing. Tomato that has cooked far enough, properly browned chicken, enough salt and a sensible amount of cream all matter. Kasuri methi adds one of the most recognizable aromas in the finished gravy, and even a small amount can change the character of the sauce.
If the curry tastes seasoned but still smells anonymous, smell the kasuri methi before reaching for another spoonful of spice.
When butter chicken tastes almost right, change one variable at a time: check salt first, then char and kasuri methi before adding more cream or another spoonful of spice.
Where the Carbs in Butter Chicken Come From
Two bowls of butter chicken can look nearly identical and still produce very different nutrition numbers. Much of that variation comes from the gravy and from what somebody has decided counts as one serving.
Variable
Lower-carb direction
Higher-carb direction
Tomato
Measured tomato base
Large tomato-heavy gravy
Onion
Small measured amount
Onion-heavy base
Added sweetness
None
Sugar, honey or ketchup
Cashews
None or a little
Cashew-rich gravy
Yogurt
Plain and measured
Sweetened or larger amounts
Thickening
Reduction
Flour or cornstarch
Prepared sauce
Plain/no-added-sugar
Sweetened commercial gravy
Serving size
Clearly defined
Tiny or vague
The plate
Vegetables or cauliflower rice
Rice plus naan
For this recipe, one serving means one-quarter of the finished curry.
The 225g / 8oz tomato gives the gravy enough acidity and fruitiness without making tomato the whole story. Once properly cooked, it tastes much less dominant than it does straight from the bottle.
Some butter chicken is sweet and some isn’t. This version starts without added sugar because cooked tomato, salt, butter and cream usually provide enough balance.
The 50g onion contributes body and natural sweetness while keeping the quantity predictable. Cashew paste can make a lovely rich butter chicken gravy, but this sauce does not need it.
Same curry, different plate: hold the portion steady and let the sides change the carb load.
Ingredient Notes That Change the Result
Thick yogurt helps the seasoning cling to the chicken, and lemon adds brightness. Moisture is the part to watch during browning: a heavy yogurt coating cools the pan, releases water and can leave pale coagulated clumps. Plain unsweetened yogurt or dahi works well. A particularly tangy Greek yogurt can make the finished curry noticeably more sour.
Chicken thighs are more forgiving through browning and the final simmer. Breast works too; keep the pieces evenly sized and avoid cooking them through during the first sear. MasalaMonk’s baked chicken breast recipe goes deeper into thickness, temperature and keeping lean breast meat juicy.
For the tomato, smooth plain passata is the easiest choice. Finely crushed tomatoes can be used too and may need more cooking and blending. Sweet pasta sauce, ketchup and seasoned marinara change the flavour substantially. Tomato paste is far more concentrated, so save it for the rare batch where the tomato itself seems unusually pale or weak.
Spices, Kasuri Methi and Cream
Kashmiri chilli gives deep colour with moderate heat. Paprika can provide much of that colour when Kashmiri chilli is unavailable, with stronger chilli added separately. Garam masala varies considerably from brand to brand, so a small finishing pinch can help when its aroma seems muted.
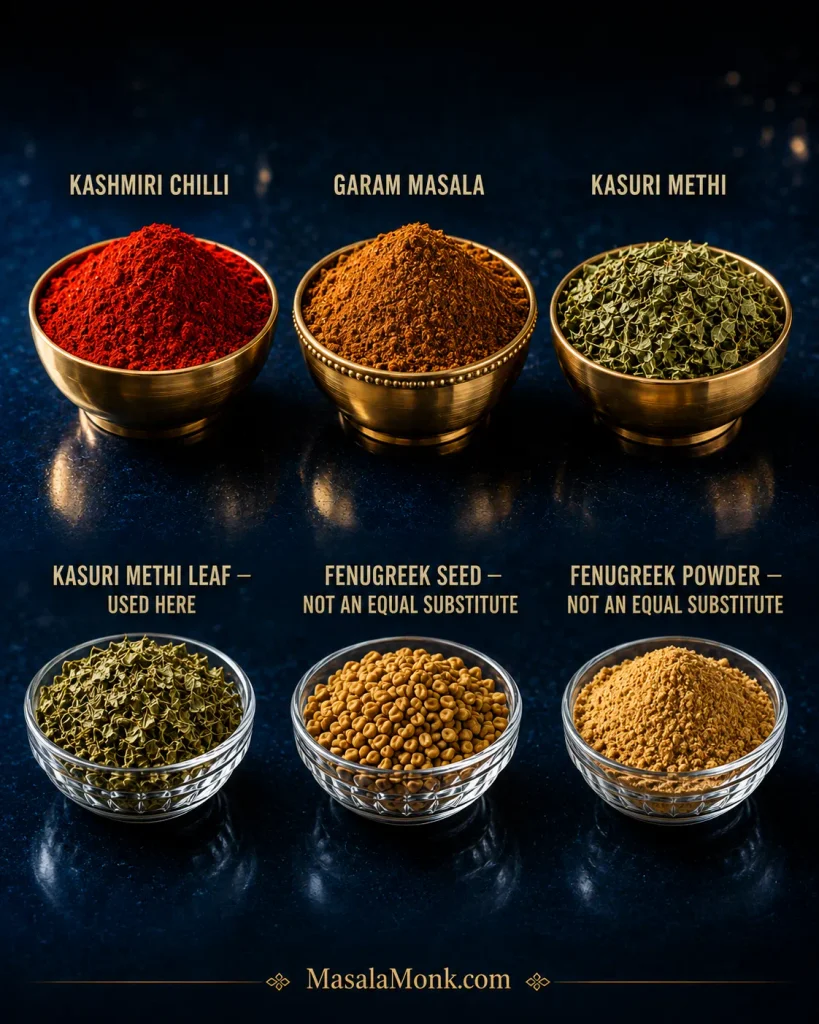
Kasuri methi is dried fenugreek leaf. Fenugreek seed and ground fenugreek are much stronger and should not replace it measure-for-measure. Start with 1 teaspoon of the leaves and increase in ¼-teaspoon steps only after tasting. If you cannot find kasuri methi, leaving it out is safer than substituting the same quantity of seed or powder.
At the shop, look for “kasuri methi” or “dried fenugreek leaves” on the packet. Then crush the leaves just before finishing the gravy to release more of their aroma.
The 120ml / ½ cup cream used here softens the tomato and carries the spices through the gravy. Add much more and the curry can turn pale while the ginger, chilli and methi recede into the background.
Want a Smoother, More Restaurant-Style Finish?
Restaurant butter chicken is not one fixed flavour. Some gravies are sweeter, some tangier and some substantially richer with cream or cashew. You can reproduce much of the char, silkiness and aroma at home, but a particular restaurant may still taste quite different.
A very hot broiler or grill gives the chicken darker blistered edges than most home pans can manage when they are full. A few charred spots are enough.
For the gravy, thorough blending makes the biggest difference. Straining takes the texture one step further when you specifically want the very smooth finish found in many restaurant versions.
Keep the butter and kasuri methi for the end so their aroma stays fresh. A brief dhungar smoke can add another layer when that is a technique you already use comfortably. Good chicken char gets you a long way without it.
Blending gets you most of the silkiness; straining is optional polish.
Fix Your Butter Chicken
Butter chicken problems often sound alike. “Too tomatoey,” “bland” and “thin” can each describe more than one failure, and throwing more cream or spice at a confused gravy rarely helps. Work out what is actually wrong first.
Problem
Likely cause
First move
Raw or harsh tomato
Tomato base undercooked
Keep reducing
Tastes like pasta sauce
Too much concentrate or underdeveloped gravy
Cook the base further
Bland
Salt, char or finishing aroma lacking
Check salt first
Too sour
Acidic or undercooked tomato
Cook, then balance
Too sweet
Too much sweetener
Restore salt and spice balance
Generic creamy curry
Weak char, little methi or rushed tomato
Correct those elements
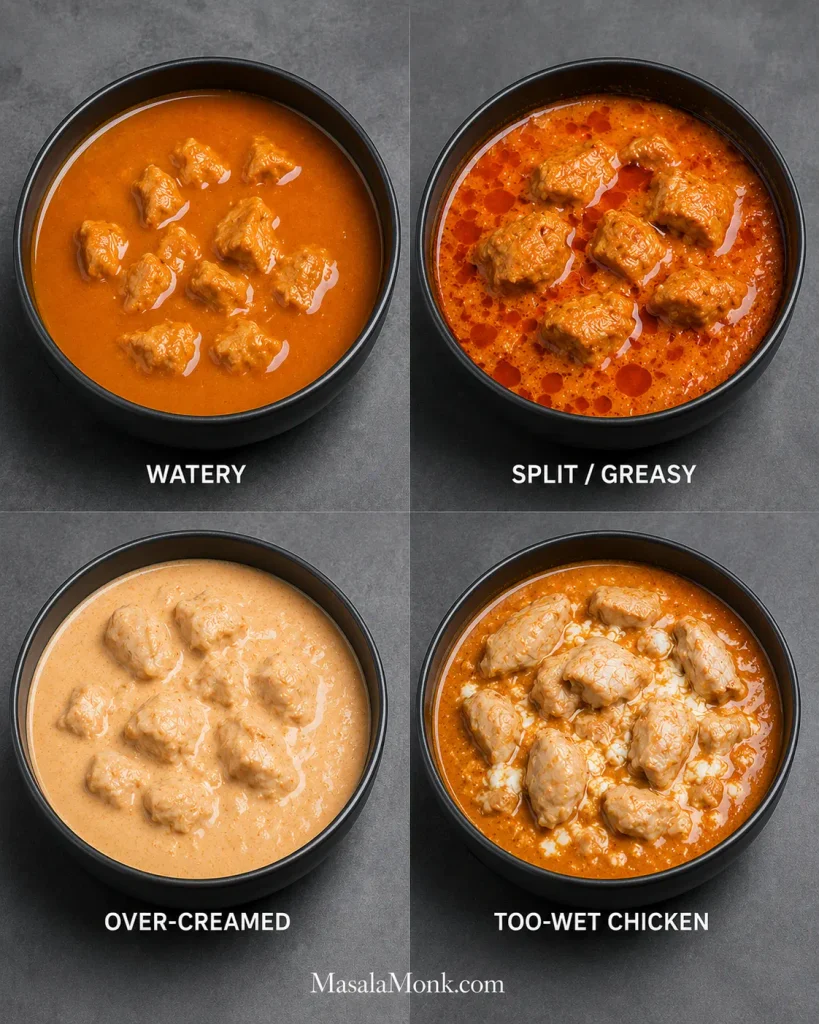
Watery
Too much liquid
Remove chicken and reduce
Pasty
Over-reduced
Add hot water 15ml at a time
Too much gravy
Sauce volume drifted upward
Remove some sauce
Chicken released lots of water
Wet coating, cool pan, crowding or high-water chicken
Dry the pan and brown smaller batches
White yogurt clumps
Wet marinade or crowded/cool pan
Less coating, more heat, smaller batches
Greasy or split
Excess fat or hard boiling after dairy
Lower the heat
Dry chicken
Overcooked during both stages
Brown first; finish only to 165°F / 74°C
Bitter methi
Too much kasuri methi
Dilute if possible
Too spicy
Excess hot chilli
Add a little cream
Too pale
Too much cream
Use less next time
Read the pan before changing the seasoning. Pooling liquid, separated fat, pale gravy and yogurt clumps describe four different failures—and therefore four different fixes.
Too Tomatoey or Too Sour
Bright, raw tomato needs more cooking. A heavy concentrated-tomato flavour is different and often comes from too much tomato paste. For sourness, make sure the tomato is fully cooked and then check the salt. Butter or a little more cream can soften what remains; sweetener comes last.
Bland—or Just Not Tasting Like Butter Chicken?
Flat flavour usually calls for salt first. A curry that is already seasoned but still tastes generic needs a different diagnosis: check the chicken browning, tomato development and kasuri methi. Smell the garam masala and methi straight from their containers too. Old spices can be present in the recipe and almost absent in the bowl.
Watery Sauce
Once the chicken reaches temperature, take it out. Reduce the gravy uncovered and return the chicken only long enough to coat and warm through.
Great Sauce, Wrong Ratio?
Sometimes the gravy is perfectly thick and there is simply too much of it. An oversized onion, extra tomato or accidentally scaled-up sauce can do that. Remove some and save it for another meal instead of continuing to cook the chicken.
White Yogurt Clumps
The pan was probably too cool, too crowded or carrying too much wet marinade. The curry is still edible. Next time, leave only a light coating on the chicken and give the pieces more space.
Bitter Kasuri Methi
Once too much methi is in the sauce, there is no clean way to remove it. Extra unsweetened gravy or a little cream can dilute the bitterness. Starting with the first teaspoon and increasing slowly is much easier than rescuing an over-methi’d pan.
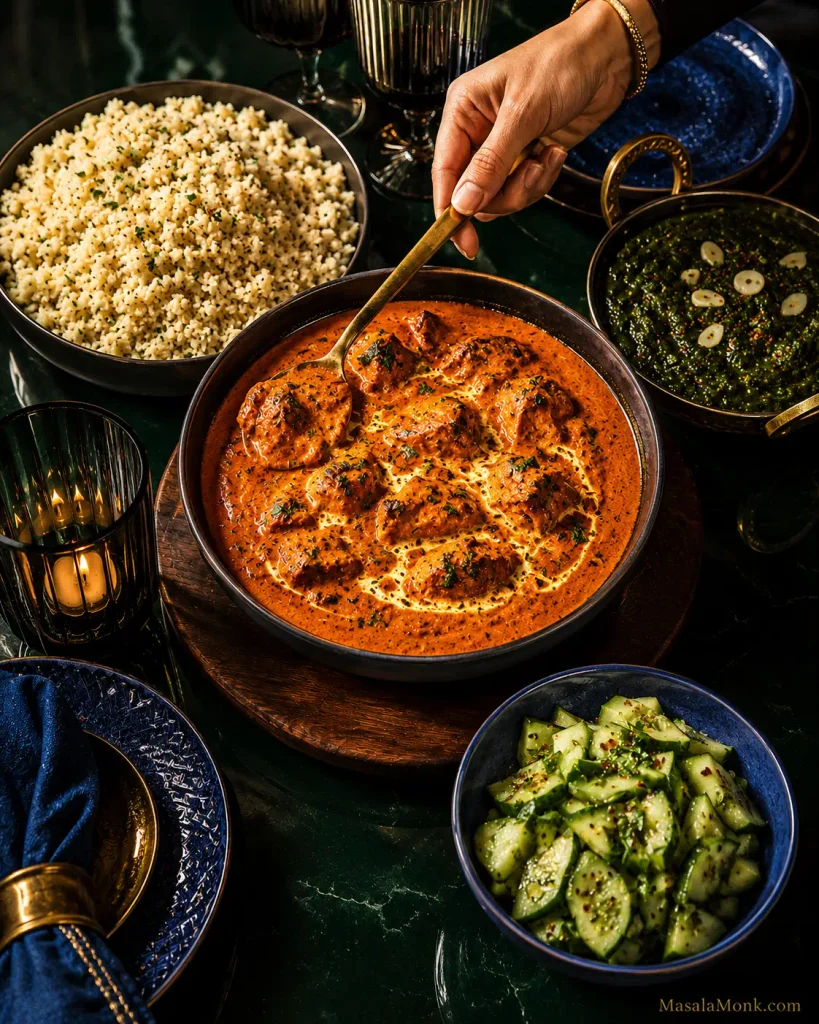
A lower-carb butter chicken dinner does not need to look like curry surrounded by substitutes you’re merely tolerating. Give the gravy something warm to sit on, something green to cut through the richness and something cold and crisp beside it.
Jeera Cauliflower Rice
Cumin makes cauliflower rice feel like part of dinner.
Serves 4
Ingredients: 600g / about 6 cups cauliflower rice, 1 tbsp ghee or butter, 1 tsp cumin seeds, ½–¾ tsp salt, plus coriander and a small squeeze of lemon if you like.
Heat a wide pan over medium heat and add the ghee. Let the cumin seeds sizzle for 20–30 seconds, until fragrant, then add the cauliflower rice and salt. Increase the heat to medium-high and cook uncovered for about 5–7 minutes.
There will be plenty of steam at first. As it eases, the cauliflower should become tender while the small grains remain separate. Stop before it turns soft and wet.
Garlic spinach is especially good here because its slight bitterness cuts through the buttery gravy. Roasted cauliflower, cabbage, broccoli and green beans are easy alternatives.
Something Cold and Crisp
Cucumber, coriander, mint and lemon bring crunch and acidity. MasalaMonk’s cucumber salad recipe gives you several ways to build that fresh side.
If You Miss Naan
A low-carb naan or roti can make the meal feel much closer to the dinner you were craving. With packaged low-carb breads, check the actual carbohydrate amount and serving size on the label.
Cauliflower rice, one green vegetable and something cold already make a generous plate.
Put the hot jeera cauliflower rice under the curry so it catches the makhani gravy; keep cucumber alongside it so the crunch, acidity and temperature contrast stay intact.
Is Restaurant Butter Chicken Keto?
Restaurant butter chicken is harder to calculate because the gravy has usually made most of its decisions before you sit down.
It may contain sugar or honey, ketchup, more onion, cashew paste, flour or cornstarch, sweetened tomato products or a premade curry base. Because that gravy is often prepared in a large batch, asking for “no sugar” may not change what is already in the pot.
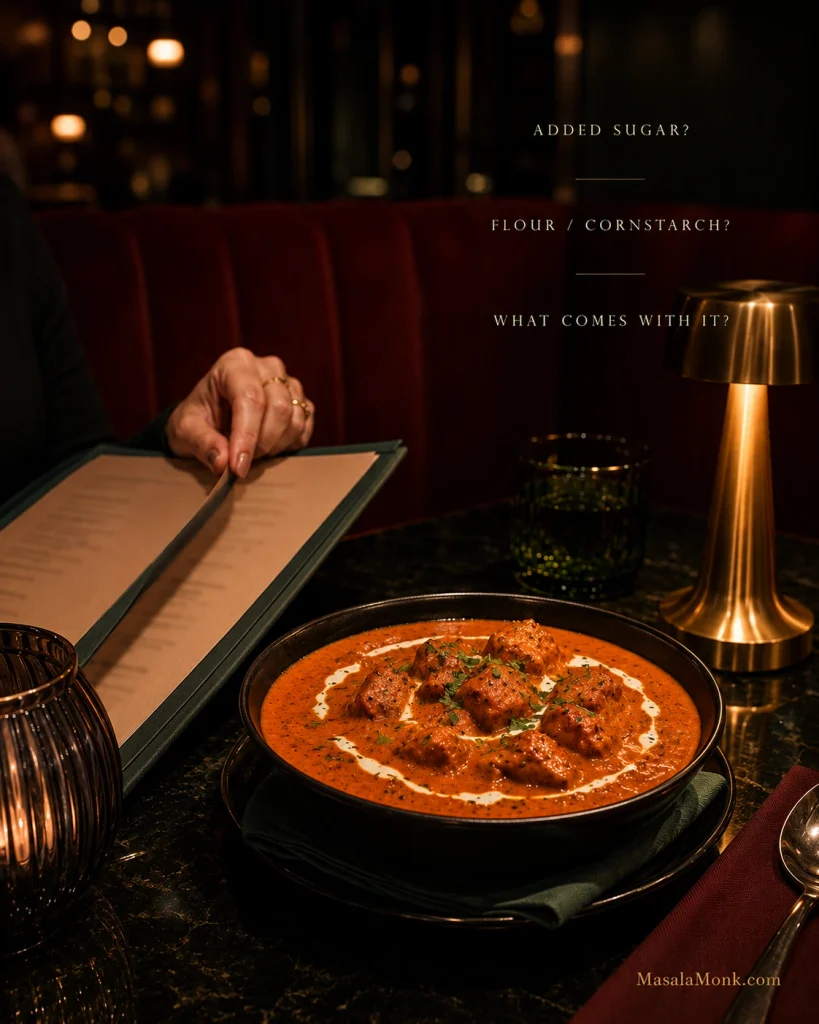
The most useful question is simple: Does the butter chicken gravy contain added sugar or flour/cornstarch?
Can’t get a clear answer? Simpler grilled dishes are easier to judge when you’re keeping carbohydrates particularly low: tandoori chicken, chicken tikka, kebabs, grilled fish and some dry-style meat preparations. MasalaMonk’s green chutney recipe is a natural partner for those dishes.
Then look at the rest of the order. Rice, naan and sweet chutneys can change the meal far more than a measured amount of tomato in the curry.
Your favourite takeaway may taste quite different from this recipe even when both are good butter chicken. Some house gravies are much sweeter, saltier or richer. If that is exactly the butter chicken you love, a different result at home does not mean the recipe failed; you’re simply aiming at another style.
Batch gravy may already contain sugar or starch; when it does, a simpler grilled dish is easier to estimate.
A jarred butter chicken sauce can make dinner much faster. Check the total carbohydrates, added sugars, flour or starch, stated serving size and how much sauce you will actually use. A sauce that fits your numbers but tastes flat can often be improved with a little butter, cream and crushed kasuri methi.
The full recipe takes roughly 45–55 minutes of active work plus at least a short marinade. For a quicker weeknight, marinate the chicken first and use those 20–30 minutes to chop and measure everything else. Smooth passata and skipping the optional straining save time without giving up the chicken browning or tomato reduction.
For nights when fifteen minutes really is the limit, MasalaMonk’s 15-minute sesame ground chicken works well over cauliflower rice, sautéed cabbage or lettuce.
Instant Pot
Pressure cooking traps moisture, so the finished gravy tends to be thinner. Use Sauté for the aromatics, deglaze the pot thoroughly and follow the minimum-liquid requirement for your cooker. Once the chicken is cooked, remove it and reduce a loose sauce with Sauté uncovered before adding the chicken back with the cream, butter and kasuri methi.
Slow Cooker
Slow cooking gives tenderness but very little browning, so sear the marinated chicken first when you can. For boneless pieces, 2–3 hours on High or 4–6 hours on Low is a reasonable starting range; the chicken still needs to reach 165°F / 74°C. Add the cream and finishing butter near the end, and reduce a thin gravy separately.
Make Ahead, Store and Reheat
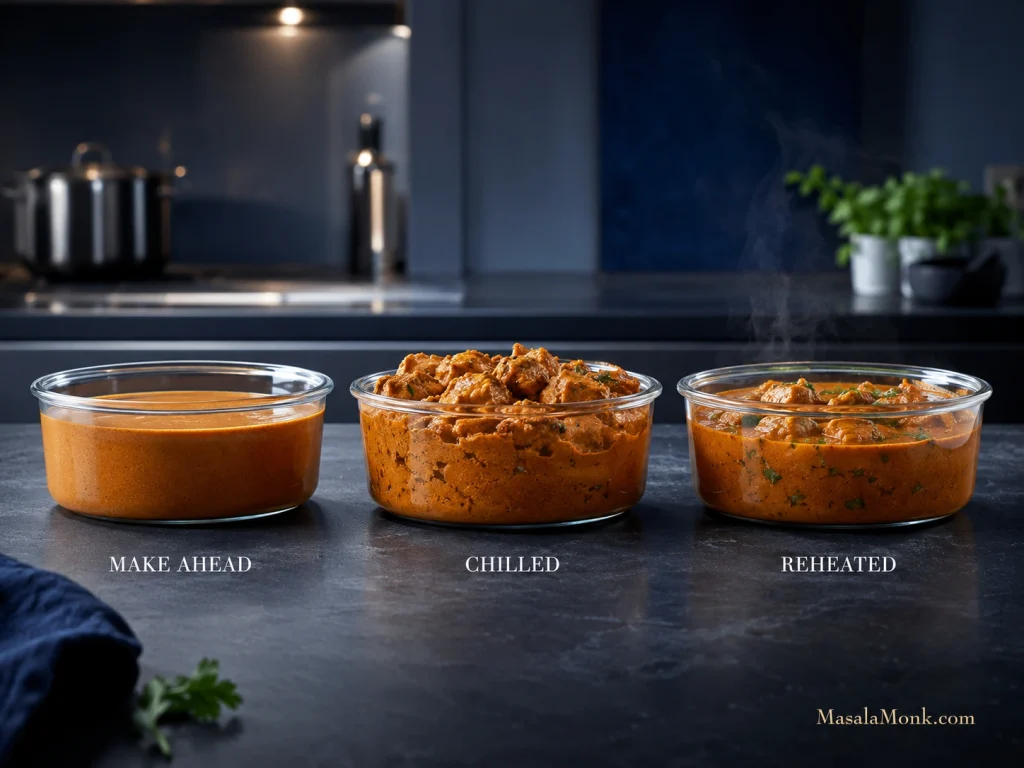
The chicken can be marinated the day before. The blended tomato gravy can also be cooked ahead. If dinner is for tomorrow, refrigerate the gravy before adding the final cream, butter and kasuri methi, then add those as you reheat it.
Cool leftovers promptly and refrigerate them in a covered container. Use them within 3–4 days, in line with USDA leftover-storage guidance.
Cold butter chicken will look much thicker after a night in the refrigerator. That is normal. Warm it gently and add a splash of water or stock as the gravy loosens. Bring reheated leftovers back to 165°F / 74°C.
Butter chicken freezes well too. Portion it before freezing and aim to use it within about 3 months for best quality.
Reheat first, then thin only if needed; melted fats loosen chilled gravy naturally.
Keto Butter Chicken Nutrition
Based on typical nutrition values for the ingredients listed, one-quarter of the finished curry is approximately:
Per serving
Estimated amount
Calories
About 500 kcal
Protein
About 36g
Fat
About 36g
Total carbohydrates
About 9g
Fiber
About 2g
Estimated net carbohydrates
About 7g
Here, net carbs means total carbohydrate minus fiber. The estimate assumes full-fat plain yogurt and heavy/whipping cream in roughly the 30–36% fat range; a lighter fresh cream will lower the fat and calorie numbers somewhat.
The calculation includes the chicken, yogurt, lemon, onion, tomato, ginger, garlic, ghee, butter, cream and measured spices. It does not include cauliflower rice, bread, optional sweetener, extra cream at serving or other sides.
1 serving = ¼ of the finished curry. If you track carbohydrates closely, the labels on the ingredients in your own kitchen are the most relevant numbers.
Frequently Asked Questions
Does Butter Chicken Usually Contain Sugar?
Sometimes. Some home and restaurant versions add sugar or honey to soften tomato acidity; many others don’t. It isn’t required here. Cook the tomato fully and balance the gravy before deciding it needs sweetness.
Do I Really Need Kasuri Methi?
You can make good creamy tomato chicken without it, but kasuri methi contributes an aroma closely associated with butter chicken. Use dried fenugreek leaves, not the same quantity of fenugreek seed or powder. If the leaves are unavailable, omission is safer than an equal substitution.
Can I Make This Dairy-Free?
Yes, although the flavour will shift. Use plain unsweetened dairy-free yogurt in the marinade and full-fat coconut cream in the gravy, along with a suitable non-dairy cooking fat. The finished sauce becomes more coconut-forward and moves away from classic murgh makhani.
If you’re avoiding dairy because of a milk allergy, don’t assume ghee is automatically suitable.
Is This Butter Chicken Gluten-Free?
The recipe itself doesn’t use wheat flour. Stocks, packaged spice blends and prepared sauces can vary, so check labels when avoiding gluten strictly.
Can I Make It Without a Blender?
Absolutely. Use smooth passata, chop the onion finely and leave the gravy a little more rustic. You lose some silkiness, not dinner.
Keep the Butter Chicken
Once the bowl reaches the table, “keto” shouldn’t be the first thing you notice.
There should be a browned edge on the chicken and enough gravy to drag through whatever is underneath it. The tomato should taste deep and fully cooked, the cream should leave the spices easy to taste, and the butter should give the sauce a soft sheen.
The kasuri methi lingers after the bite.
Cauliflower rice does not need to impersonate basmati. Here its job is simpler: catch the silky makhani gravy and bring toasted cumin into the same bite as the charred chicken.
Keep the butter chicken. Change the carbs that matter.
Eggs have long been heralded as a powerhouse of nutrition. Whether you’re a fitness enthusiast, a busy professional, or someone looking for a reliable source of quality protein, boiled eggs are often at the top of the list. But how much protein is really in two boiled eggs? And what makes them such a staple in diets worldwide?
Let’s break it all down — from grams and amino acids to digestibility and practical tips.
Quick Answer: How Much Protein in Two Boiled Eggs?
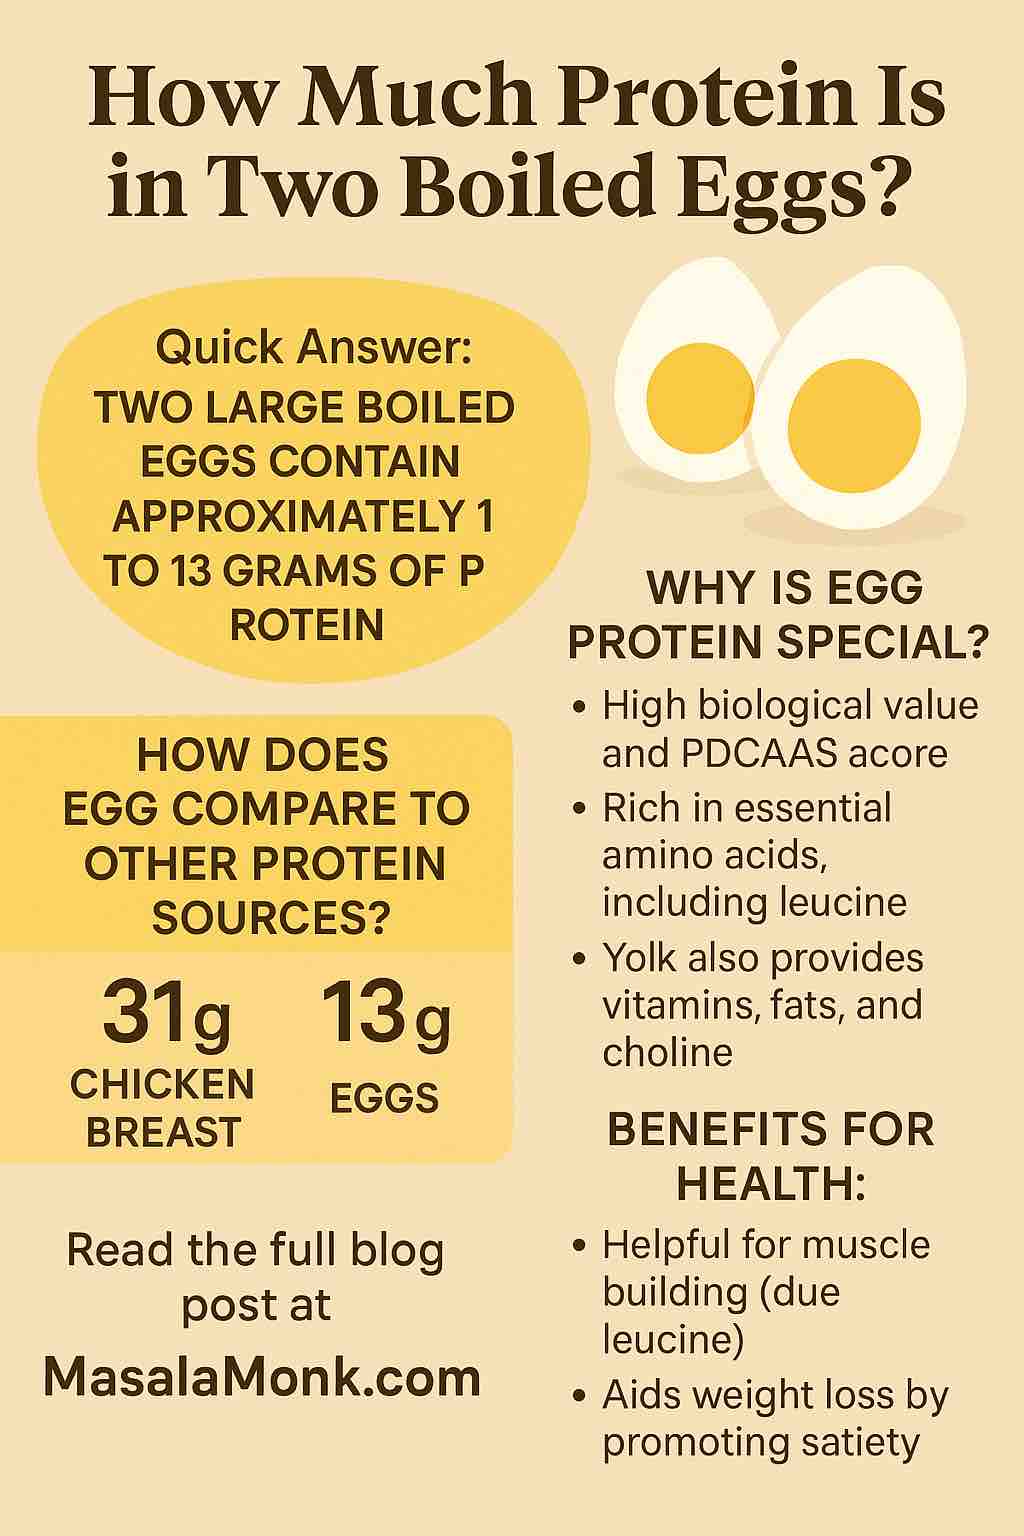
A single large boiled egg contains approximately 6 to 6.5 grams of protein, depending on size and cooking method. Therefore:
➡️ Two large boiled eggs contain approximately 12 to 13 grams of protein.
But numbers alone don’t tell the whole story. Let’s understand why this protein is valuable, how it compares to other sources, and how you can best utilize it in your diet.
What Makes Egg Protein So Special?
Protein is not just about quantity — it’s about quality, too.
Egg protein is considered a complete protein, meaning it contains all nine essential amino acids in the right ratios your body needs. These amino acids can’t be synthesized by the body and must be obtained from food.
✅ Highlights of Egg Protein:
High Biological Value (BV): Eggs score a perfect 100 on the BV scale, meaning their protein is highly bioavailable and easily utilized by the body.
PDCAAS Score: On the Protein Digestibility Corrected Amino Acid Score (PDCAAS), eggs also score 1.0 — the highest possible score, shared with whey and casein.
Rich in Leucine: Leucine is a key amino acid for muscle protein synthesis, and eggs offer a good dose per serving.
Egg Whites vs. Egg Yolks: Where Is the Protein?
A common misconception is that all the protein is in the egg white. While whites contain a significant portion, the yolk also contributes.
Egg Component
Protein (approx.)
Other Nutrients
Egg White
3.6 grams
Almost no fat; some B vitamins
Egg Yolk
2.7 grams
Fats, vitamins A, D, E, K, and cholesterol
So, skipping the yolk not only reduces the protein content by almost 45%, but also discards valuable nutrients like choline, vital for brain function.
Protein Needs: How Do Two Eggs Fit In?
The Recommended Dietary Allowance (RDA) for protein is around:
0.8g per kg of body weight for a sedentary adult
1.2–2.0g per kg for active individuals or athletes
For a 70kg (154 lb) person:
Basic RDA: ~56g protein/day
Active needs: up to 140g/day
Two boiled eggs provide ~13g — that’s about 23% of the RDA for a sedentary person, and still a meaningful chunk for athletes as part of a balanced meal plan.
Comparing Eggs to Other Protein Sources
Let’s put eggs into context by comparing with other common protein-rich foods:
Food Item
Protein (per 100g)
Boiled Eggs
~13g
Chicken Breast
~31g
Greek Yogurt
~10g
Tofu (Firm)
~8g
Lentils (cooked)
~9g
Almonds
~21g (but high fat)
Whey Protein (1 scoop)
~20-25g
While eggs don’t have the highest protein content by weight, their convenience, completeness, and nutrient density make them stand out.
Boiled Eggs for Muscle Building and Weight Loss
💪 For Muscle Gain:
Eggs are anabolic-friendly — thanks to leucine and high bioavailability.
Pairing eggs with resistance training supports muscle hypertrophy.
🥗 For Weight Loss:
Eggs are filling and score high on the satiety index.
The fat and protein in eggs help reduce overall calorie intake.
Best Time to Eat Boiled Eggs
Morning: Protein kickstart to your metabolism.
Pre/Post Workout: Ideal due to leucine content and digestibility.
Evening: Great for satiety and overnight recovery.
They’re also a perfect snack — portable, non-messy, and naturally portion-controlled.
Boiled vs. Fried vs. Scrambled: Does It Affect Protein?
Frying may add extra fats (depending on the oil used).
Overcooking can slightly reduce bioavailability.
Boiling is one of the cleanest methods — no added fat, minimal nutrient loss.
Exploring the Nutritional World of Eggs and Delicious Egg Recipes
Before we delve into the nutritional profiles of various egg preparations, let’s start with a culinary adventure featuring 10 Examples of Egg Dishes with 2 Eggs. This post showcases ten delightful egg dishes prepared with just two eggs each. It offers creative culinary ideas and expands your options for incorporating eggs into your meals, making it a delightful introduction to the world of eggs.
Now, let’s continue our exploration of the nutritional aspects of eggs with the following articles:
How Much Protein in Two Boiled Eggs: This article emphasizes the high protein content in boiled eggs, detailing their comprehensive nutritional profile, including calories, fats, vitamins, and minerals. It’s a must-read for those looking to understand the full nutritional value of this simple yet powerful food.
Egg Yolks or Yellow: Nutritional Protein Profile: Focusing on the often-debated egg yolk, this post explores its rich nutrient content, including proteins, vitamins, minerals, and fatty acids. It’s an essential read for understanding the health benefits and culinary uses of egg yolks.
Calories & Nutrition in Egg Whites: This article delves into the low-calorie and high-protein profile of egg whites, discussing their role in various diets and their versatility in cooking. It’s particularly useful for those interested in weight management and muscle building.
Protein in 3 Scrambled Eggs: Nutritional Insights and Benefits: Highlighting the protein-rich nature of scrambled eggs, this post provides insights into their caloric and fat content, along with tips for healthier preparation. It’s a great guide for anyone looking to incorporate scrambled eggs into a balanced diet.
These articles collectively offer a well-rounded perspective on the nutritional aspects of eggs, catering to fitness enthusiasts, health-conscious individuals, and culinary aficionados alike. Whether you’re exploring delectable egg dishes, understanding the protein-packed world of boiled eggs, delving into the nutrient-rich yolk, or opting for the lean protein of egg whites, these posts provide valuable information to enhance your dietary choices and cooking repertoire.
Tips to Maximize Protein from Eggs
Combine with whole grain toast or vegetables for a balanced meal.
Add eggs to salads, sandwiches, or bowls for an easy protein upgrade.
Use eggs as a post-workout snack with fruit or a small carb.
Conclusion: Tiny Package, Powerful Punch
So how much protein is in two boiled eggs? Roughly 12 to 13 grams — but that’s just scratching the surface.
What makes boiled eggs a superstar is their nutritional profile, versatility, and efficiency. They’re not just a protein source — they’re a complete, accessible, and budget-friendly superfood that deserves a place in almost every diet.
Whether you’re looking to bulk up, slim down, or just eat cleaner, two boiled eggs might be the simplest and smartest addition to your plate.
FAQs
What is the exact protein content in two large boiled eggs? Two large boiled eggs typically contain about 13 grams of high-quality protein. This amount can slightly vary depending on the size of the eggs.
Are boiled eggs good for weight loss? Yes, due to their high protein content and moderate calorie count, boiled eggs can be a great addition to a weight loss diet. The protein helps in keeping you full for longer, reducing the urge to snack.
Can boiled eggs help in muscle building? Absolutely! The complete protein in boiled eggs, containing all essential amino acids, is crucial for muscle repair and growth, making them a popular choice among athletes and fitness enthusiasts.
How many calories are in two boiled eggs? Two large boiled eggs contain around 155 calories. The calorie content can be less if you choose to eat only the egg whites.
Is there a difference in nutritional value between soft and hard-boiled eggs? The cooking method (soft-boiled vs. hard-boiled) does not significantly affect the nutritional value of the eggs, including their protein content.
Can people on a low-carb or keto diet eat boiled eggs? Yes, boiled eggs are an excellent choice for low-carb and keto diets due to their high protein and fat content and virtually zero carbohydrates.
How do the fats in boiled eggs impact heart health? Boiled eggs contain mostly unsaturated fats, which are healthier for the heart. However, they also have dietary cholesterol, so individuals with specific heart conditions should consult a healthcare provider.
What other nutrients do boiled eggs provide besides protein? Boiled eggs are rich in several vitamins and minerals, including Vitamin A, B vitamins, Vitamin D, selenium, and zinc. They are also a source of healthy fats.
Are boiled eggs suitable for a diabetic diet? Yes, the low carbohydrate content in boiled eggs makes them a suitable option for people managing diabetes.
How should boiled eggs be stored for maximum freshness? Store boiled eggs in their shells in the refrigerator. They can be kept for up to a week, ensuring they retain their taste and nutritional quality.
Sugar is one of the most common ingredients in kitchens worldwide, sweetening everything from your morning coffee to decadent desserts. But not all sugars are created equal. If you’ve ever stood in the baking aisle wondering whether to grab raw sugar or white sugar, you’re not alone. Each has its loyal fans and claims about flavor, health benefits, and sweetness.
In this blog post, we’ll unravel the mysteries behind raw sugar and white sugar, comparing their production, sweetness, nutrition, culinary uses, and health impacts — so you can make the sweetest choice for your needs.
What Exactly Is Raw Sugar?
Raw sugar, also known as turbinado or demerara sugar (depending on the brand and processing), is sugar that has undergone minimal refining. It’s derived from sugarcane juice, which is boiled and crystallized but not fully stripped of molasses, the dark syrupy component naturally found in sugarcane.
Key features of raw sugar:
Light golden to amber color.
Coarser, larger crystals.
Slightly sticky texture due to residual molasses.
Subtle caramel or toffee-like flavor notes.
Because raw sugar retains some molasses, it offers more complex flavors than white sugar — which might explain why it’s popular for sprinkling on baked goods or in specialty coffee drinks.
What About White Sugar?
White sugar, or granulated sugar, undergoes a rigorous refining process that removes molasses entirely. The sugar crystals you find in white sugar are nearly pure sucrose, typically over 99.9%, resulting in a bright white, fine, and uniform texture.
Key features of white sugar:
Pure white color.
Fine, uniform crystals.
Clean, neutral sweetness without additional flavors.
Dissolves quickly and evenly.
White sugar’s neutral flavor and smooth texture make it extremely versatile in cooking and baking, where uniform sweetness and texture are critical.
The Sweetness Showdown: Raw Sugar vs. White Sugar
When it comes to sweetness, what matters most chemically is the sucrose content—the sugar compound responsible for sweetness perception. Here’s what science tells us:
White sugar is about 99.9% sucrose.
Raw sugar is roughly 96-99% sucrose.
This slight difference means white sugar is purer, but does it make it sweeter? Not necessarily.
Why? The molasses in raw sugar adds flavor complexity but can slightly mask the pure sweet taste of sucrose. So while chemically white sugar might edge out raw sugar in pure sucrose content, raw sugar offers a richer flavor profile that some might perceive as less sweet but more nuanced.
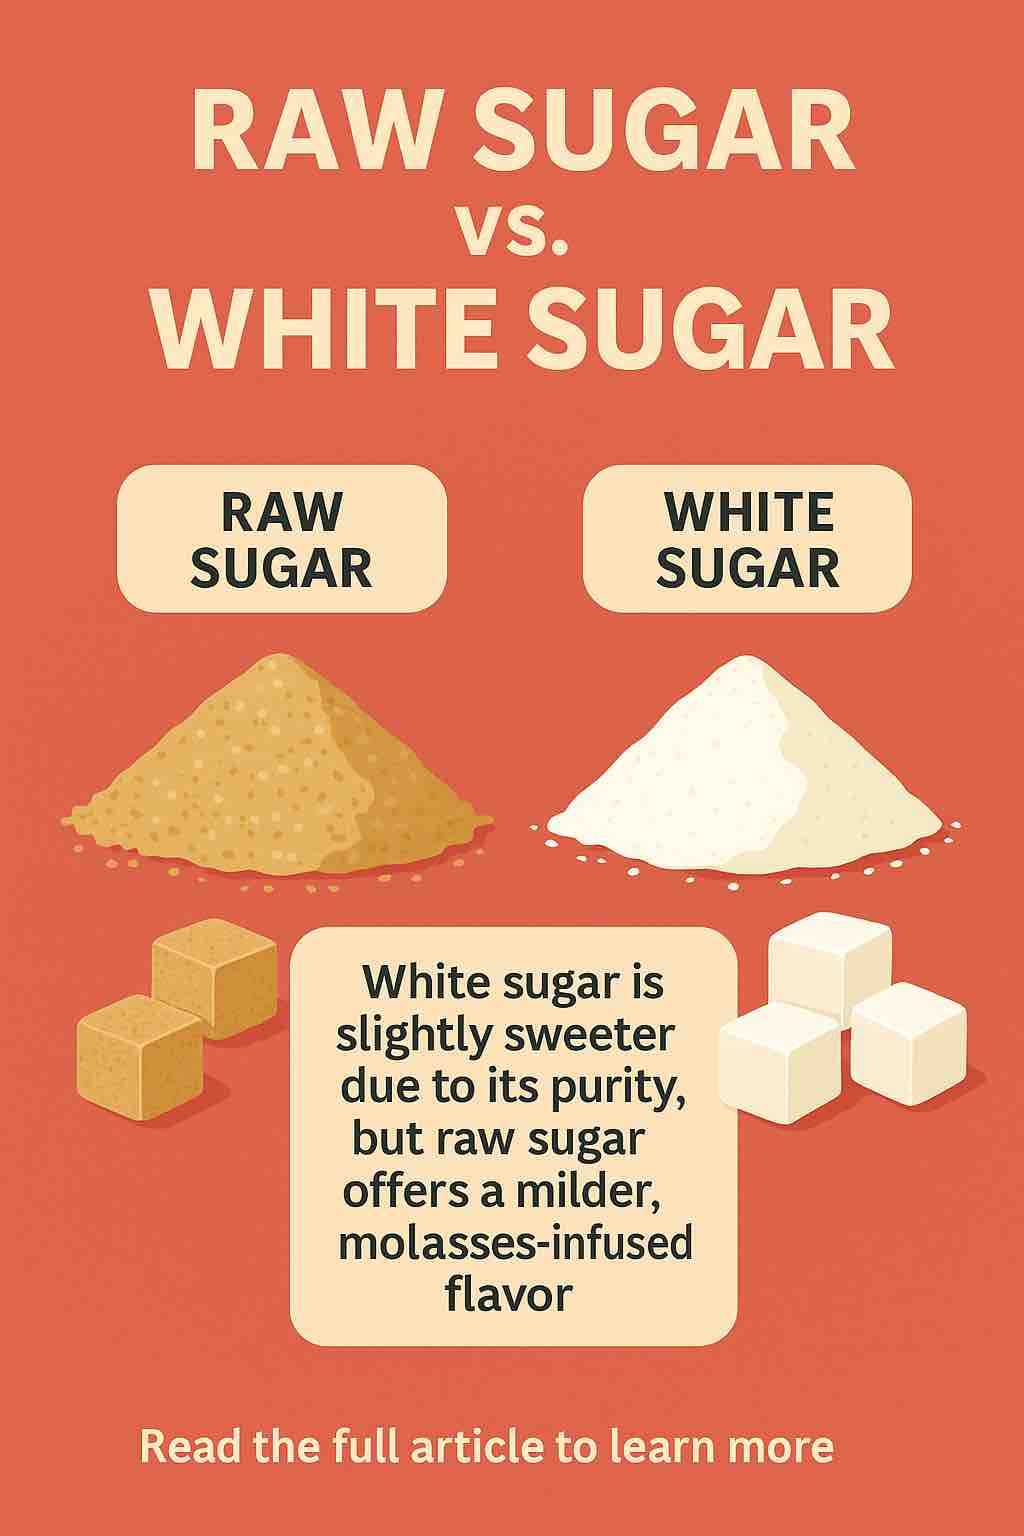
Bottom line: In terms of pure sweetness intensity, white sugar is often perceived as sweeter, but raw sugar offers a pleasant, rounded sweetness due to molasses.
Nutritional Face-Off: Is Raw Sugar Healthier?
A popular myth is that raw sugar is a healthier alternative to white sugar because it contains “natural minerals” from molasses. While this is partly true, the reality is a bit underwhelming.
Nutritional facts per teaspoon:
Nutrient
White Sugar
Raw Sugar
Calories
~16 kcal
~18 kcal
Sucrose
99.9%
96–99%
Trace Minerals
None
Tiny amounts of calcium, iron, potassium
The trace minerals in raw sugar come from molasses, but they are so minimal that they don’t provide meaningful nutritional benefits. The caloric content is almost the same. Both sugars will have similar effects on blood sugar, as their glycemic index hovers around 65, classified as a medium GI food.
So, if you’re choosing raw sugar thinking it’s a “healthier” option, it’s not a significant upgrade over white sugar.
How Do They Perform in Cooking and Baking?
If you’re a baker or home chef, this section is especially important.
White sugar:
Dissolves quickly.
Provides consistent sweetness.
Contributes to the texture and color of baked goods without altering flavor.
Ideal for delicate recipes where precise sweetness is essential.
Raw sugar:
Larger, coarser crystals.
Adds crunch and a mild caramel flavor.
Often used as a topping on muffins, cookies, and crumbles.
Works well in recipes where a slight molasses flavor is desirable.
Pro tip: If you substitute raw sugar in recipes designed for white sugar, expect changes in texture and flavor. Raw sugar crystals don’t dissolve as quickly and can result in grainier textures if not adjusted properly.
The Health Perspective: What Should You Know?
Neither raw sugar nor white sugar is a health food. Excessive sugar intake is linked to weight gain, increased risk of type 2 diabetes, heart disease, and dental problems.
The trace minerals in raw sugar don’t offset the negative effects of sugar consumption.
Both sugars should be consumed in moderation.
For better health, focus on reducing total added sugar intake regardless of the type.
If you want to reduce sugar impact, exploring natural sweeteners like stevia, monk fruit, or erythritol could be a smarter choice.
Glycemic Index (GI)
Both raw and white sugars have a medium glycemic index of approximately 65, indicating a moderate impact on blood glucose levels. This is comparable to the GI of sucrose, which is also around 65 .
So, Which Sugar Should You Choose?
If sweetness is your only concern: White sugar offers a slightly more intense sweet taste due to its purity.
If you want flavor complexity: Raw sugar’s molasses content delivers subtle caramel notes that enhance certain recipes and beverages.
If you’re thinking health: Neither sugar offers significant benefits. Moderation is key.
If you bake: Consider texture and dissolution—white sugar is more versatile, but raw sugar adds a lovely crunch and flavor boost when used appropriately.
Final Thoughts
Choosing between raw sugar and white sugar often comes down to personal preference and specific culinary needs rather than sweetness or health superiority. Both provide the same core ingredient—sucrose—and behave similarly in your body.
The next time you reach for sugar, think about what you want to achieve:
Pure sweetness? White sugar.
A hint of caramel flavor? Raw sugar.
Health benefits? Neither—cut back on sugar overall.
Sweetness is subjective, but with the facts in hand, your choice can be a more informed one.
If you found this post helpful, share it with your friends who love baking or enjoy a good cup of coffee! Got questions or want to dive deeper into sugar science? Drop a comment below — I’m here to help.
Embarking on your culinary journey, especially with Indian cuisine, can be both exciting and daunting. Indian cooking is known for its rich flavors, diverse ingredients, and intricate techniques. If you’re a beginner looking to dive into this world, finding the right resources is crucial. Here’s a quick guide to the top 10 YouTube channels that will help you master Indian cooking, even if you’re starting from scratch.
1. Your Food Lab
Host: Sanjyot Keer
Why It’s Great: “Your Food Lab” offers a fantastic mix of traditional and contemporary recipes. Sanjyot’s clear instructions, exact measurements, and focus on technique make it easier for beginners to follow along and achieve great results.
Why It’s Great: Vahchef is one of the pioneers in Indian cooking on YouTube. His early videos are especially useful for beginners, with a fun presentation and thorough explanations of each step.
Why It’s Great: Yaman’s channel covers a wide range of recipes, from simple snacks to elaborate meals. His straightforward instructions and practical tips make it an excellent resource for novice cooks.
Why It’s Great: Bharat’s approachable style and emphasis on home cooking make this channel ideal for beginners. His recipes often use easily available ingredients and focus on everyday meals.
Why It’s Great: Chef Ranveer combines storytelling with cooking, making his videos both informative and entertaining. While some dishes may be advanced, he often includes tips for beginners.
Why It’s Great: Focused on vegetarian recipes, Nisha’s channel is a treasure trove for those looking to explore Indian cuisine. Her calm demeanor and clear instructions are perfect for new cooks.
Why It’s Great: Specializing in Bengali cuisine, Bong Eats offers detailed explanations and a focus on authenticity. The videos are designed for both novice and experienced cooks, making complex dishes accessible.
Start Simple: Begin with recipes that require minimal ingredients and steps to build your confidence.
Master Basic Techniques: Focus on learning basic cooking techniques like chopping, sautéing, and boiling.
Follow Along: Watch the entire video once before starting to cook to get an overview of the process.
Be Patient: Cooking is a skill that improves with practice. Don’t be discouraged by initial failures.
Experiment: Once you’re comfortable, start experimenting with flavors and ingredients to make the recipes your own.
Conclusion
Learning to cook Indian cuisine can be a rewarding experience that opens up a world of flavors and techniques. These YouTube channels provide a wealth of knowledge and guidance to help you become a confident cook. So, pick a recipe, gather your ingredients, and start your culinary adventure!
Do let us know your thoughts if you are already familiar with some channel or you end up trying any from the above.