Posted on 5 Comments

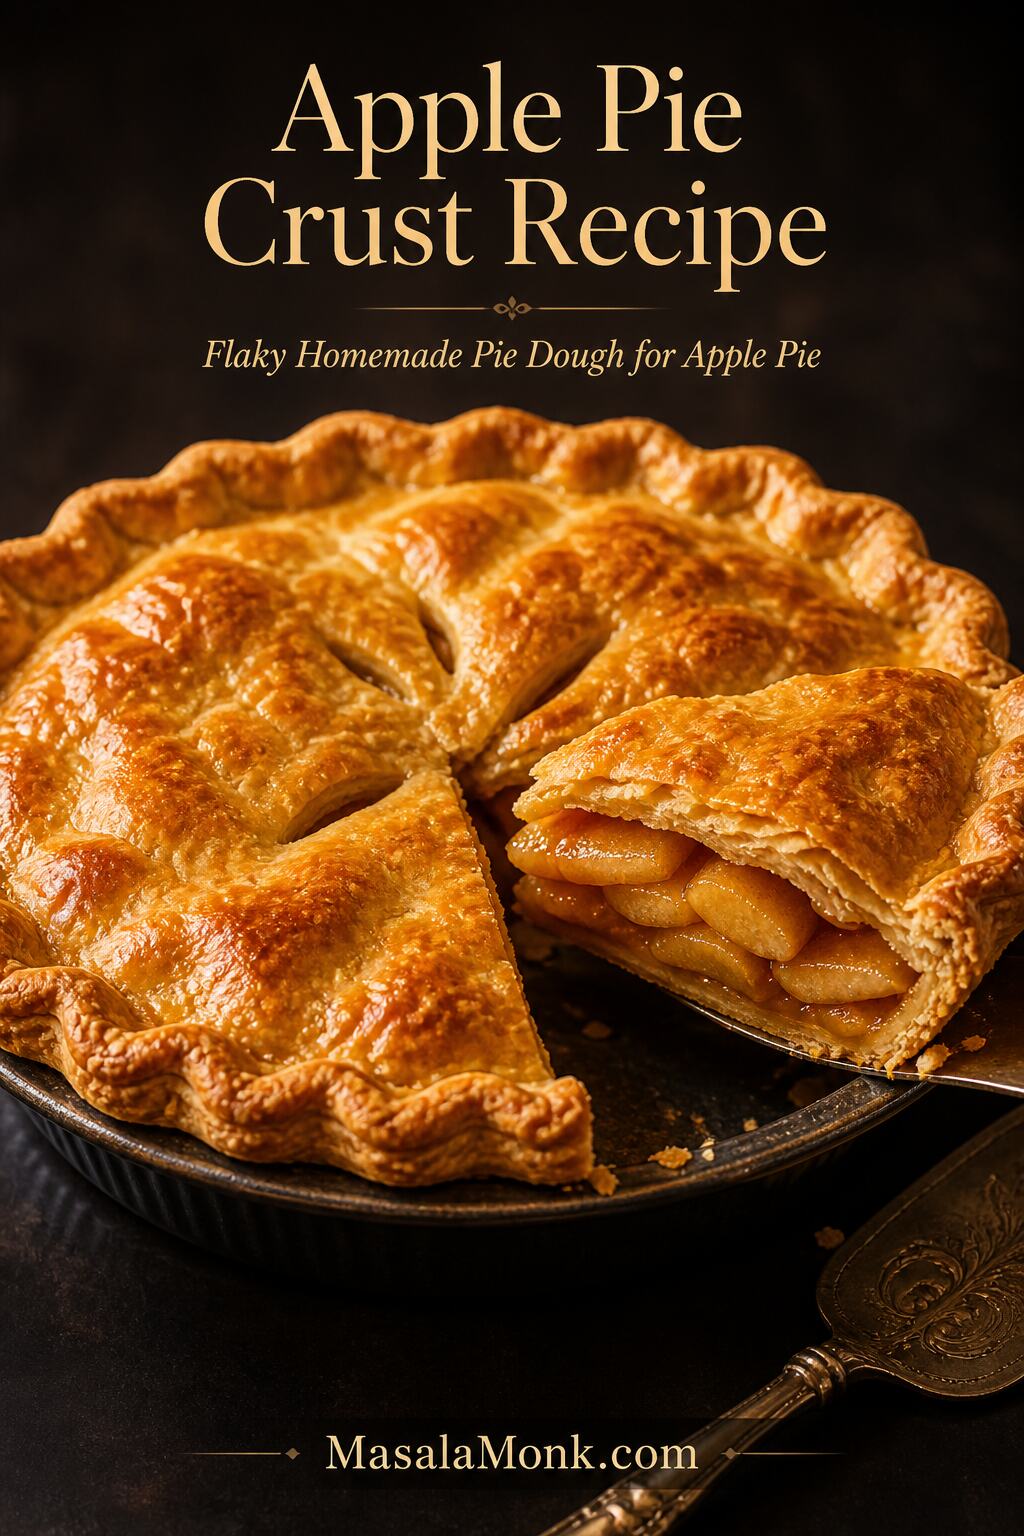
Apple Pie Crust Recipe: Flaky Homemade Pie Dough for Apple Pie

A flaky apple pie crust starts with cold butter, gentle handling, and enough baking time. Once it is deeply golden, the crust can hold the apple filling without turning soft or heavy.

A good apple pie crust recipe should give you dough that is buttery, flaky, and strong enough to hold a juicy apple filling without turning tough or soggy. The crust is often the part that makes people nervous: butter softens, dough cracks, bottoms turn pale, and filling leaks where it should not. However, once the dough is cold enough and hydrated just enough, the whole process becomes much calmer.

This homemade pie dough is made for a classic 9-inch / 23-cm apple pie. It gives you enough for a bottom crust and a top crust, so you can make a full double-crust pie, a lattice pie, or a single-crust pie if you want to save the second disk for later. Because apple filling is heavier and juicier than many dessert fillings, the dough needs to be tender without being weak.

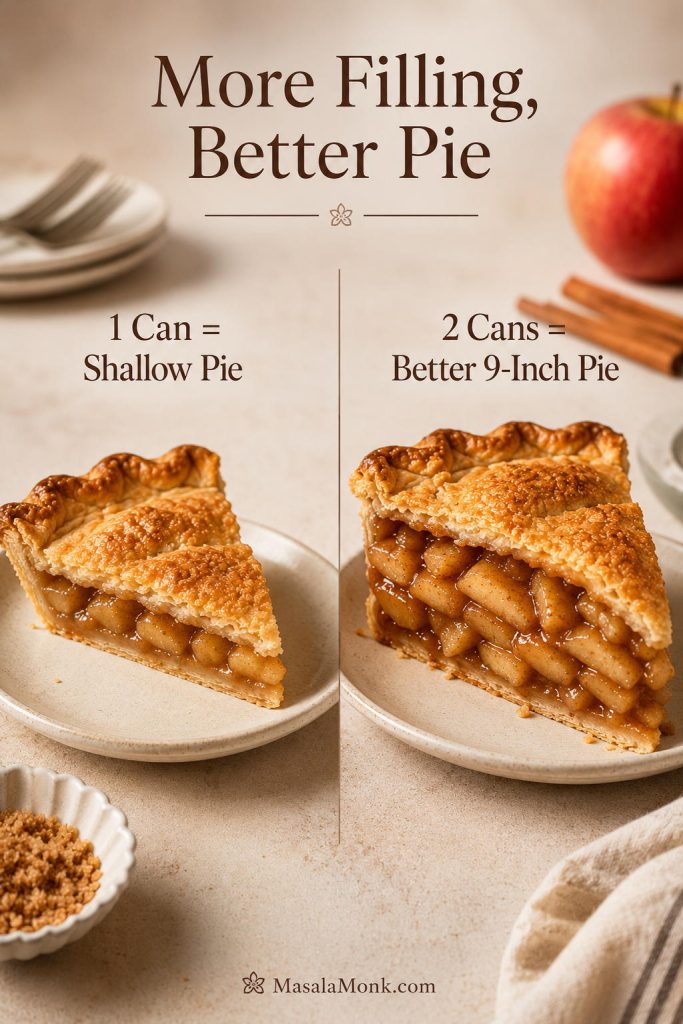
The method is simple, but the details matter. Keep the butter cold, add the water slowly, chill the dough before rolling, and avoid stretching it into the pie plate. Then, when you are ready to fill it, use a thick and cooled filling like this homemade apple pie filling recipe so the bottom crust has a better chance of baking up crisp and flaky.

The goal here is not a fancy pastry-school crust. It is a reliable apple pie crust that rolls without falling apart, seals cleanly around the filling, and bakes up flaky enough for a holiday pie. If the dough cracks a little or needs a patch, that is fine. Pie crust is more forgiving than it looks once you keep the butter cold and stop trying to make the dough perfectly smooth.

Quick Answer: The Best Crust for Apple Pie

The best crust for apple pie is a flaky, buttery pie dough that can hold fruit filling without collapsing, cracking apart, or turning soggy on the bottom. For a classic 9-inch / 23-cm apple pie, make a double batch of dough: one round for the bottom crust and one for the top crust or lattice.

This apple pie crust recipe uses all-purpose flour, cold butter, salt, a little sugar, and ice water. The butter gives the crust its rich flavor and flaky layers. Meanwhile, the chill time helps the dough relax, roll more cleanly, and shrink less once it hits the oven.

For a traditional double-crust apple pie, you usually do not need to prebake the bottom crust. Instead, use a filling that is thick rather than watery, let it cool before adding it to the pastry, vent the top crust, and bake until the crust is deeply golden. If you are making a single-crust apple pie with crumb topping, partial prebaking can sometimes help the bottom stay crisp.

A crust choice is not just decoration. It changes how the pie bakes, how steam escapes, and how sturdy the slices feel later. A double-crust pie, a crumb-topped pie, a graham cracker crust pie, and a puff pastry apple dessert all need slightly different handling, so it helps to choose the direction before you start rolling dough.

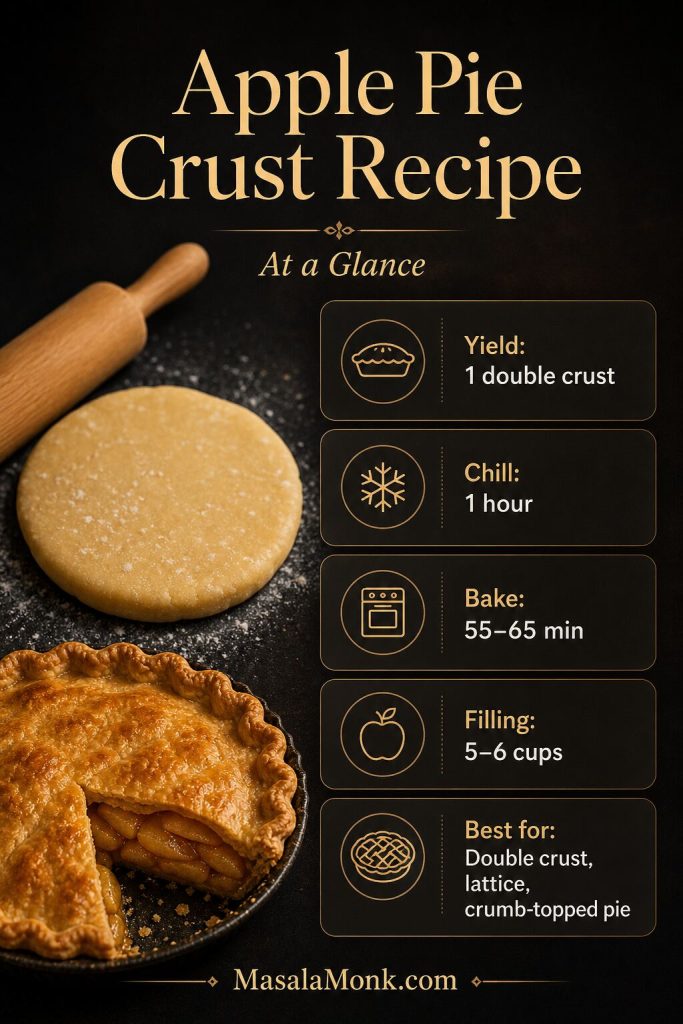
Apple Pie Crust at a Glance

Yield: this recipe makes enough crust for one 9-inch / 23-cm apple pie or two single-crust pies
Best for: classic apple pie, lattice pie, and crumb-topped single-crust pie
Dough chill time: at least 1 hour
Rest before rolling: 5 to 10 minutes if the dough is very firm
Assembled pie chill: 15 to 20 minutes if the dough has softened
Full pie bake time: about 55 to 65 minutes, plus 2 to 3 hours cooling
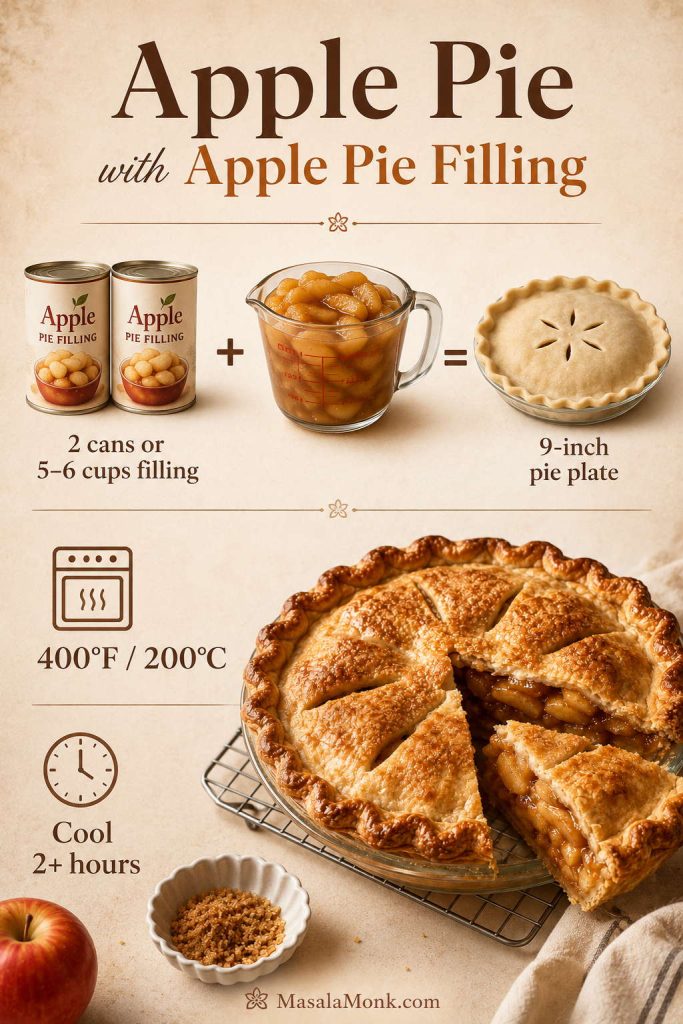
Filling amount: 5 to 6 cups / about 1.1 to 1.4 kg / 2.5 to 3 lb cooled apple pie filling
Prebake? Usually no for double-crust apple pie; sometimes yes for single-crust crumb pies
At-a-glance apple pie crust recipe board showing yield, chill time, bake time, filling amount, and best uses.
Before you start, check the timing and yield. This apple pie crust recipe makes one double crust, needs at least 1 hour of chilling, and works best with thick cooled apple filling.

Apple Pie Crust Help

Use these sections to make flaky pie dough, choose the right crust style, and fix the most common apple pie crust problems.

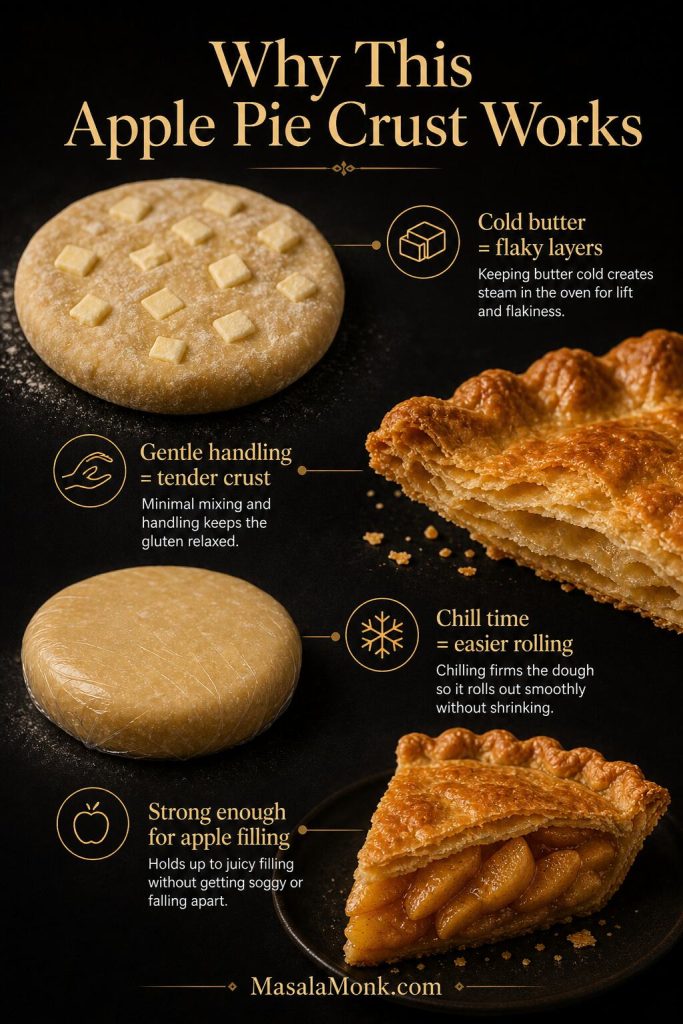
Why This Apple Pie Dough Works

Apple pie is harder on crust than it looks. The filling is juicy, the bake time is long, and the bottom pastry has to hold up while the apples soften and bubble. Because of that, a crust that works for a cream pie or a tiny tart may not always behave the same way under a heavy apple filling.

In this apple pie crust recipe, cold butter, careful hydration, and enough chill time work together. None of those details is complicated on its own, but together they make the dough easier to roll and much less likely to bake up tough or greasy.

Cold butter creates flaky layers

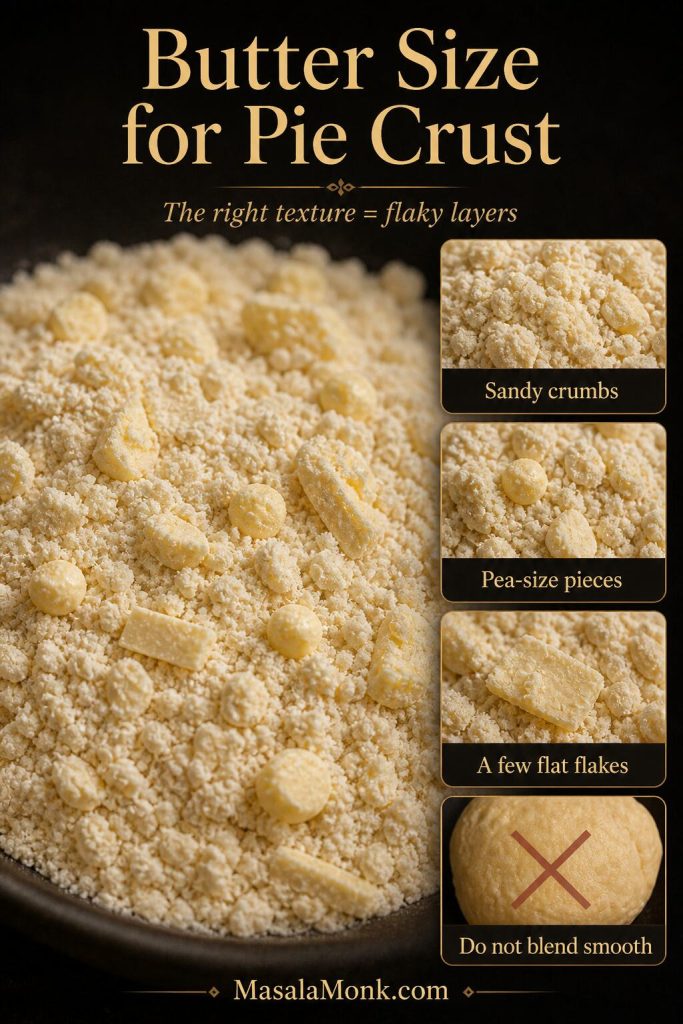
Cold butter does most of the visible work. As the pie bakes, the butter melts and releases steam, which helps separate the dough into flaky layers. That is why you want sandy crumbs, pea-size butter pieces, and a few flat flakes instead of a perfectly smooth mixture.

If the butter gets too warm before baking, it can melt into the flour too early. Then the crust may taste rich, but it will not have the same light, flaky structure. So whenever the dough feels soft or greasy, chilling is the fix.

Gentle handling keeps the crust tender

Flour gives the pastry enough structure to hold apple filling, but too much mixing can make the crust tough. The goal is to bring the dough together just until it holds when pressed, not to knead it until it looks smooth.

A little sugar helps with browning, while salt keeps the crust from tasting flat. Meanwhile, slow hydration helps you avoid adding too much water, which is one of the most common reasons homemade pie dough turns hard instead of tender.

Chill time makes the dough easier to roll

Resting the dough gives the flour time to hydrate and the butter time to firm up again. As a result, the dough rolls more smoothly, seals more easily, and shrinks less in the oven.

You do not need a food processor for this dough. A bowl, your fingertips, a pastry cutter, or two forks are enough, and working by hand also makes it easier to feel when the butter and water are right.

Once those details are handled, the crust becomes reliable enough for a classic apple pie: sturdy around the fruit filling, tender at the bite, and flaky enough to feel properly homemade.

Apple pie crust explanation board with dough, butter, flaky crust, and callouts for cold butter, gentle handling, chill time, and apple filling support.
This dough works because the butter stays cold, the dough is handled gently, and the chill time lets it relax. As a result, the crust rolls more easily and bakes into flaky layers.

Before You Start: What Matters Most

If you remember only three things, keep the butter cold, add water slowly, and do not stretch the dough into the pie plate. Everything else is easier to fix. A small crack can be patched, a sticky dough can be chilled, and uneven edges can be trimmed after the crust is in the plate.

A perfect-looking dough disk is not the goal. You want dough that is cold, lightly hydrated, and just gathered enough to roll. Once it rests, it becomes easier to handle.

Equipment You Need

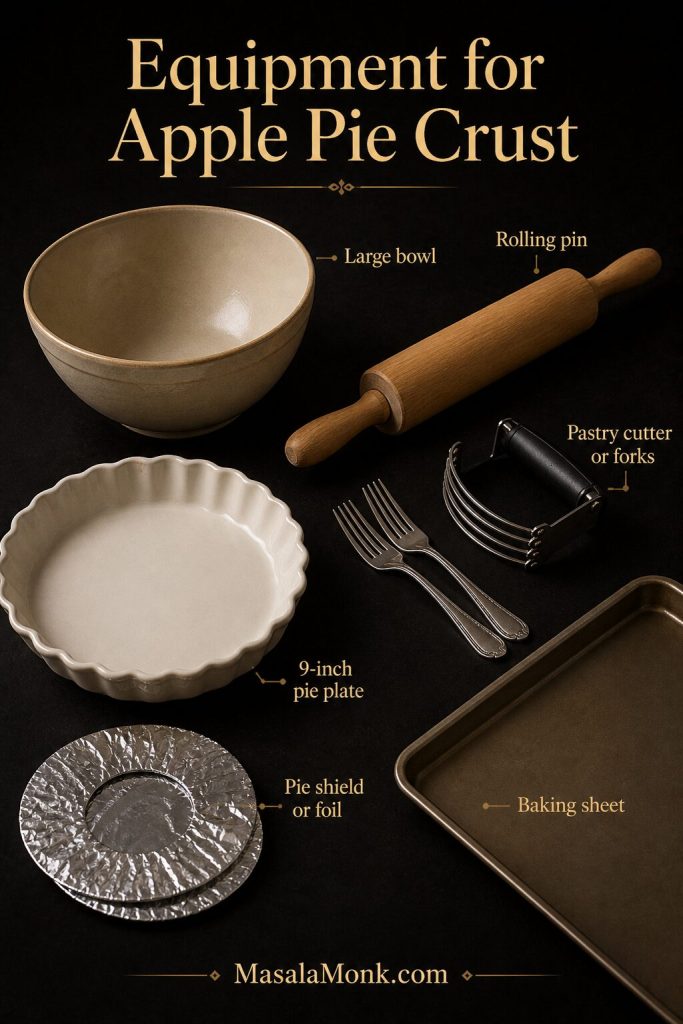
You do not need special equipment for this apple pie crust recipe, but a few basic tools make the dough easier to handle. If you do not have a pastry cutter, use your fingertips or two forks instead.

Tool Why it helps
Large mixing bowl Gives you enough room to toss the flour, butter, and water without overworking the dough.
Pastry cutter, fork, or fingertips Helps cut cold butter into the flour without needing a food processor.
Rolling pin Rolls the dough into a 12- to 13-inch / 30- to 33-cm round.
9-inch / 23-cm pie plate The recipe is sized for a standard 9-inch apple pie.
Baking sheet Catches drips and can help give the bottom crust stronger heat.
Foil or pie shield Protects the edges if they brown before the center is done.
Apple pie crust equipment guide showing mixing bowl, rolling pin, pastry cutter or forks, 9-inch pie plate, baking sheet, and pie shield or foil.
You do not need fancy pastry tools for homemade apple pie crust. However, a rolling pin, mixing bowl, pie plate, baking sheet, and simple shield for the edges make the process much easier.

Can You Make Pie Crust in a Food Processor?

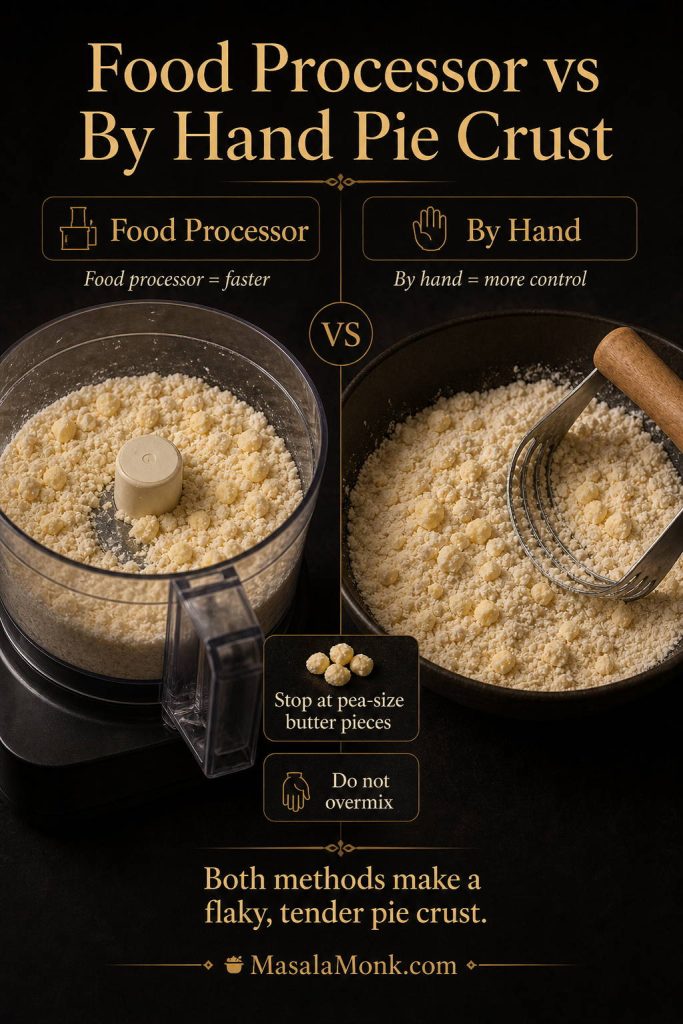
Yes, a food processor can make apple pie crust faster, but it also makes overmixing easier. Pulse the flour, salt, and sugar first, then add the cold butter and pulse only until pea-size pieces remain. After that, add ice water slowly and stop as soon as the dough begins to clump.

By hand, you get more control because you can feel the butter and dough changing as you work. In a food processor, the key is restraint: do not let the dough turn into a smooth ball in the machine. Once it reaches the shaggy stage, finish gathering it by hand.

Comparison board showing pie crust made in a food processor and by hand, with pea-size butter pieces and do-not-overmix reminders.
A food processor is faster, but mixing by hand gives you more control. Either way, stop when pea-size butter pieces remain, because overmixing can make the crust tough.

Apple Pie Crust Ingredients

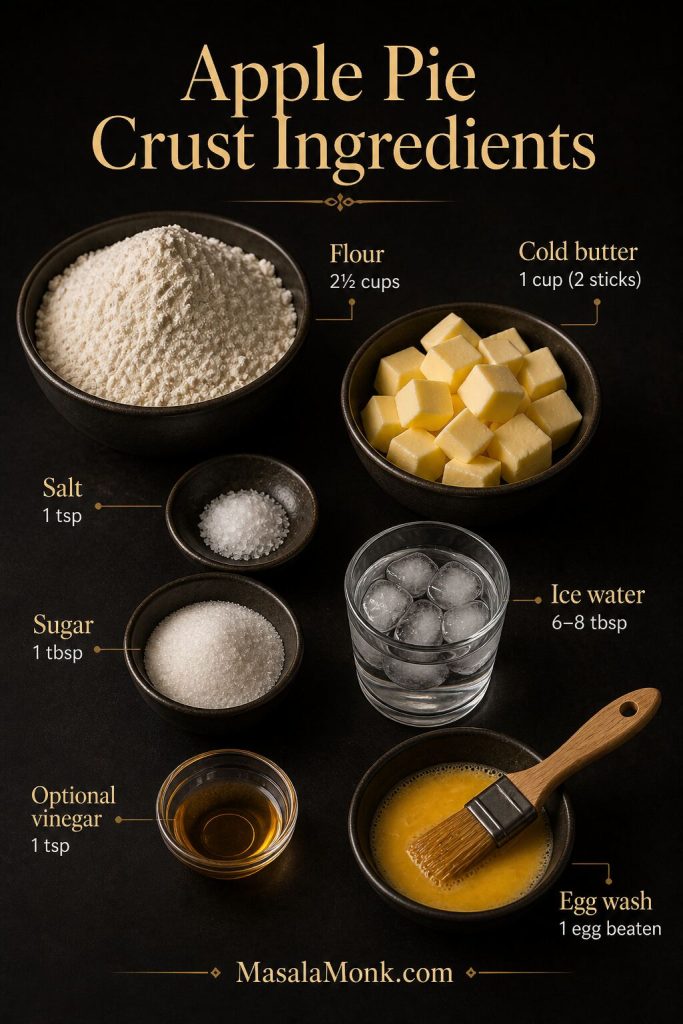
You only need a few ingredients for this apple pie crust recipe, but each one affects the final texture. Since pie dough is so simple, measuring carefully and keeping everything cold will make a noticeable difference.

Apple pie crust ingredients board with flour, cold butter, salt, sugar, ice water, optional vinegar, and egg wash.
Because pie dough has so few ingredients, each one matters. Cold butter creates flakiness, flour gives structure, and ice water brings the dough together without making it tough.

All-purpose flour

All-purpose flour gives the crust enough strength to hold apple filling without making the pastry heavy. If you use cups, spoon the flour into the measuring cup and level it off. Otherwise, too much flour can make the dough dry, crumbly, and difficult to roll.

Cold unsalted butter

Butter gives the crust its best flavor. It also helps create those flaky layers that make homemade pastry worth the effort. Cut the butter into small cubes, then keep it cold until you are ready to mix. You want a mix of sandy crumbs, pea-size butter pieces, and a few flatter flakes of butter in the dough.

Most importantly, do not work the butter in until it disappears completely. Those visible butter pieces may look imperfect, but they help the crust bake up flaky instead of dense.

Close-up pie dough mixture showing sandy crumbs, pea-size butter pieces, flat butter flakes, and a do-not-blend-smooth reminder.
Instead of blending the butter completely into the flour, leave a mix of sandy crumbs, pea-size pieces, and a few flat flakes. Those uneven butter pieces help create a flaky pie crust.

Salt

Salt keeps the pastry from tasting dull. Even though apple pie is sweet, the crust still needs balance. Without enough salt, the butter flavor and apple filling will both taste flatter.

A little sugar

Sugar is not always necessary in pie crust, but it works well here because it helps the dough brown and adds a gentle warmth to the pastry. Use only a small amount, though. The crust should still taste like pastry, not like a cookie.

The crust itself stays simple, but the filling can lean warmer if you like more spice. Cinnamon is usually enough for apple pie, although a small pinch of homemade pumpkin pie spice can add ginger, nutmeg, allspice, and clove notes.

Ice water

Ice water brings the dough together. Add it slowly, because flour does not always absorb the same amount of water every time. On a humid day, you may need less. In a dry kitchen, you may need a little more. So the feel of the dough matters more than the exact tablespoon count.

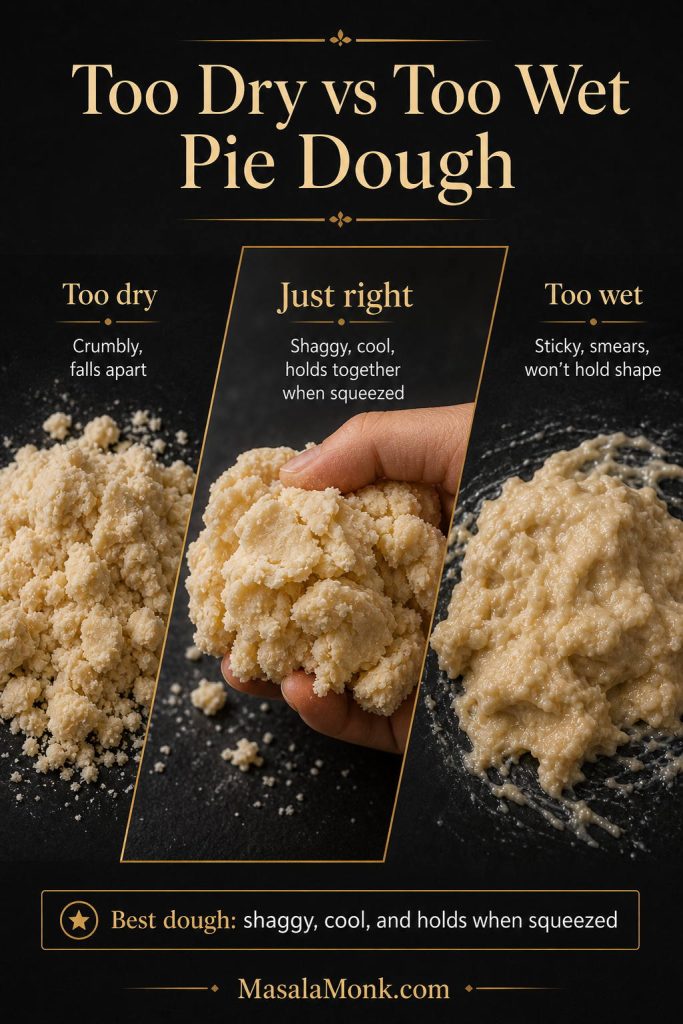
The dough is ready when it holds together after you squeeze it in your hand. It should still look shaggy, not wet or smooth.

Optional apple cider vinegar

A small splash of apple cider vinegar can make the dough a little more forgiving. It is optional, and the crust will not taste sour. However, if you often end up with tough pastry, it can be a helpful backup.

Egg wash

Egg wash is used after the pie is assembled, not inside the dough. It helps the top crust bake up glossy and golden. For a simple finish, beat one egg with a tablespoon / 15 ml of milk or water, then brush it lightly over the chilled top crust before baking.

How to Make Apple Pie Crust

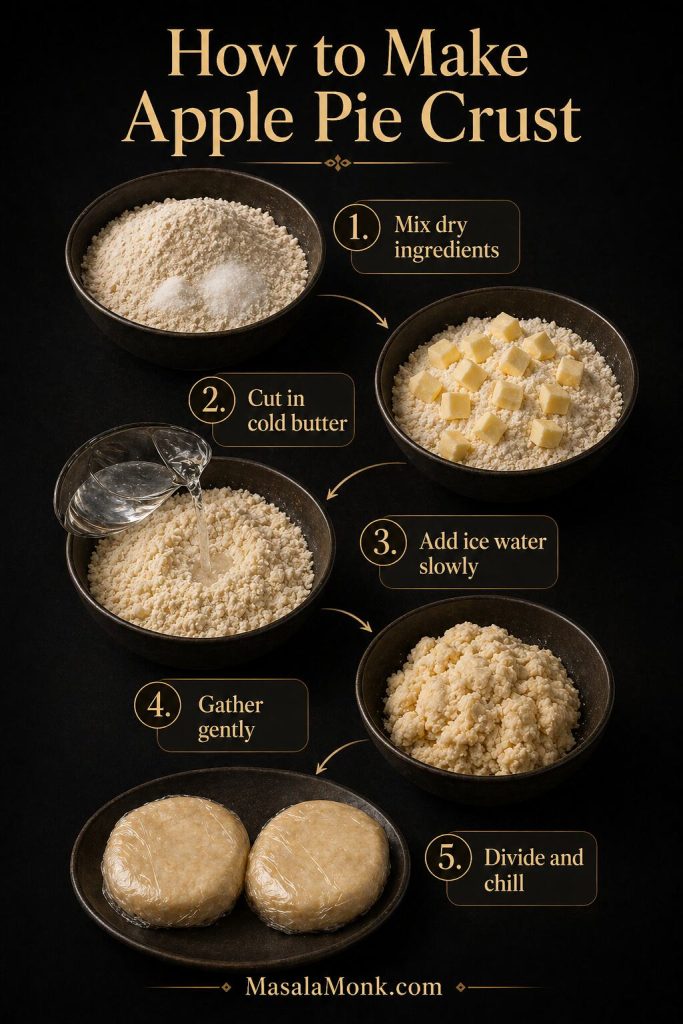
The main rule in any good apple pie crust recipe is simple: keep the butter cold and handle the dough gently. You are not kneading bread dough. Instead, you are bringing pastry together just enough so it can roll, chill, and bake into flaky layers.

If pie dough has ever cracked on you or turned sticky halfway through rolling, you are not doing anything unusual. Most crust problems are temperature problems. Chill the dough, use a little flour, patch what tears, and keep going.

Step-by-step apple pie crust board showing dry ingredients, cold butter, ice water, gathered dough, and chilled dough disks.
The method is simple, but the order matters. First mix the dry ingredients, then cut in cold butter, add ice water slowly, gather gently, and chill before rolling.

1. Mix the dry ingredients

Add the flour, salt, and sugar to a large mixing bowl. Then whisk them together so the salt and sugar are evenly distributed before the butter goes in.

This step is quick, but it matters. If the salt is not mixed evenly, some bites of crust can taste bland while others taste too salty.

2. Cut in the cold butter

Add the cold butter cubes to the flour mixture. Use your fingertips, a pastry cutter, or two forks to work the butter into the flour. Stop when the mixture has sandy crumbs, pea-size butter pieces, and a few thin, flat flakes of butter.

At this stage, the mixture should not look smooth. In fact, a little unevenness is useful because those butter pieces create steam pockets in the oven. If the butter starts to soften or smear, place the bowl in the refrigerator for 10 to 15 minutes before moving on.

3. Add ice water slowly

Drizzle in 1 tablespoon / 15 ml of ice water at a time, tossing the mixture with a fork after each addition. At first, the dough will look dry and loose. After several tablespoons, it will begin to clump together.

Stop adding water when a handful of dough holds together when squeezed. If the dough is sticky in the bowl, it has probably gone too far. On the other hand, if it falls apart completely, add another teaspoon or two of water and toss again.

4. Bring the dough together

Turn the shaggy dough onto a lightly floured surface. Then gather it gently with your hands and press it together until no large dry patches remain. Avoid kneading it smooth, because too much handling can make the crust tough.

If a few crumbly spots remain, press them into the dough with your hands. If needed, dampen your fingers lightly and pat the dry spots together. However, do not add water just to make the dough look neat. Pie dough should look a little rough before it chills.

5. Divide and chill the dough

Divide the dough into two equal pieces. Shape each piece into a flat disk about 1 inch / 2.5 cm thick. A disk chills faster and rolls more evenly than a ball of dough, so this small step makes rolling easier later.

Wrap each disk tightly and refrigerate for at least 1 hour. During that time, the flour hydrates, the butter firms up again, and the gluten relaxes. As a result, the dough becomes easier to roll and less likely to shrink in the oven.

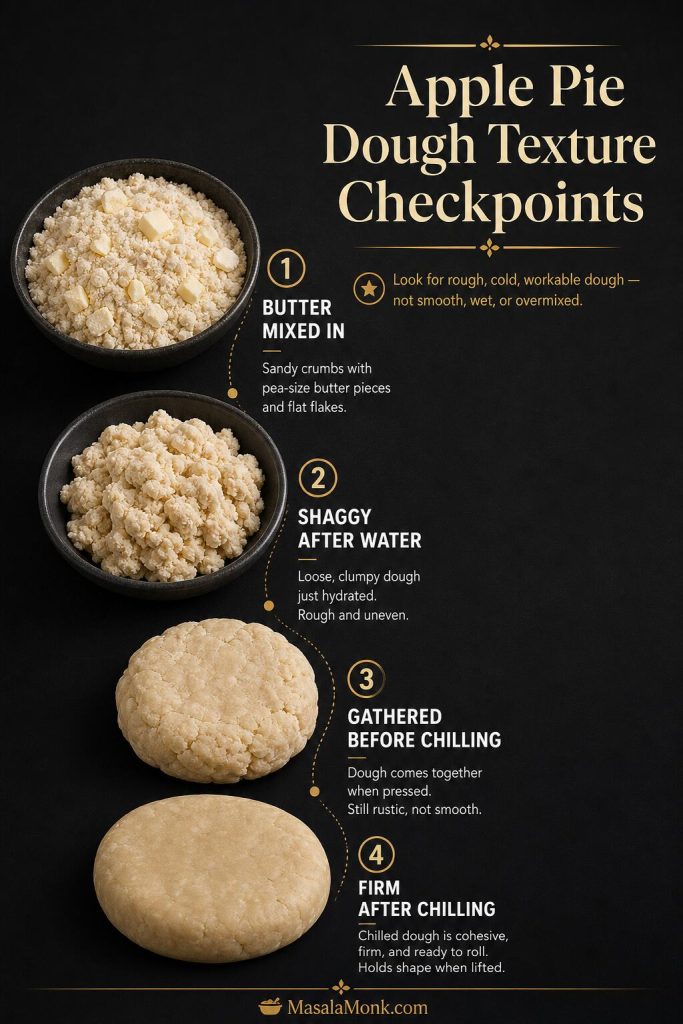
Apple Pie Dough Texture Checkpoints

Pie dough is easier when you know what each stage should feel like. Instead of trying to make it look perfect, use these checkpoints as you work.

Stage What it should look or feel like What to do if it is wrong
Butter mixed into flour Sandy crumbs with pea-size pieces and a few flat flakes of butter If the butter smears, chill the bowl for 10 to 15 minutes.
After adding water Shaggy dough that holds together when squeezed If it falls apart, add water 1 teaspoon at a time.
Before chilling Rough but gathered, not smooth or sticky If sticky, dust lightly with flour and chill sooner.
After chilling Firm but rollable after a few minutes at room temperature If it cracks hard, rest it 5 more minutes before rolling.
Apple pie dough texture checkpoint board showing butter mixed in, shaggy dough after water, gathered dough before chilling, and firm chilled dough.
Each stage should look rough, cold, and workable rather than smooth or wet. Press a small handful together; when it holds without smearing, the dough is usually hydrated enough.
Comparison board showing too-dry crumbly pie dough, just-right shaggy dough held in a hand, and too-wet sticky dough.
Crumbly dough usually needs ice water a teaspoon at a time. Sticky or smeary dough usually needs chilling instead. The best pie dough is shaggy, cool, and firm enough to hold when squeezed.

How to Roll Apple Pie Dough

Let the chilled dough soften slightly

Once the dough has chilled, let one disk sit at room temperature for 5 to 10 minutes if it feels too firm to roll. It should be cool but not rock-hard. If it cracks immediately under the rolling pin, give it another minute or two.

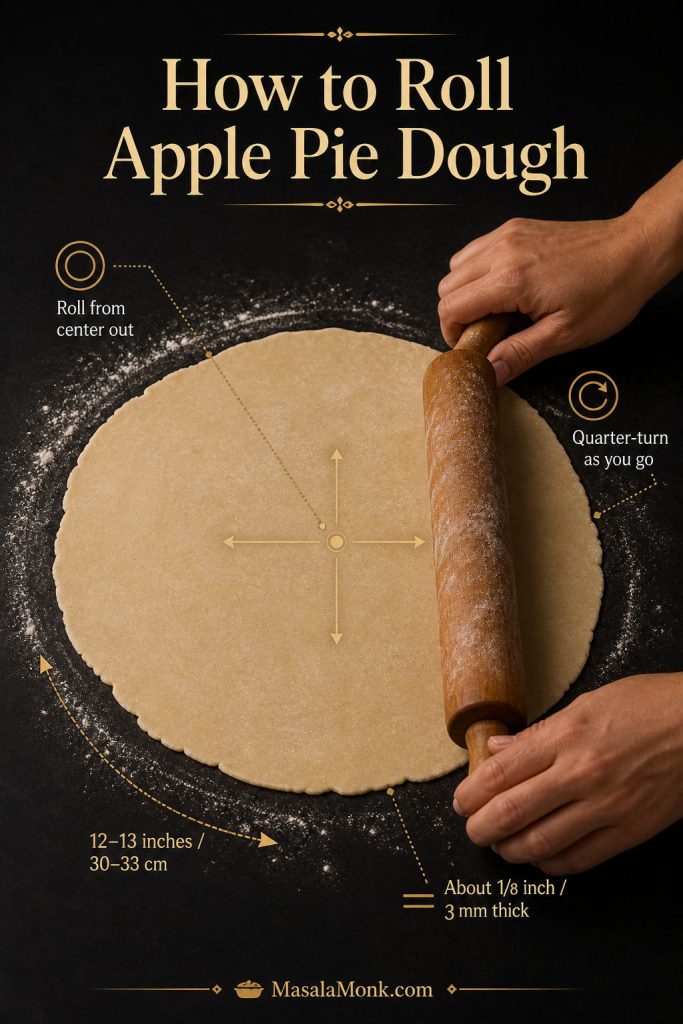
Lightly flour your work surface and rolling pin. Then roll from the center outward, rotating the dough a quarter turn every few rolls. This keeps the round even and helps prevent sticking without forcing the dough into shape.

Hands rolling round apple pie dough with callouts for rolling from the center, quarter-turning, 12 to 13 inch size, and 1/8 inch thickness.
For a 9-inch apple pie, roll the dough from the center outward and turn it as you go. This keeps the crust round, even, and wide enough to fit the pie plate without stretching.

Roll to the right size and thickness

For a 9-inch / 23-cm apple pie, roll the bottom crust into a 12- to 13-inch / 30- to 33-cm round. Aim for a crust that is about 1/8 inch / 3 mm thick. If it is much thicker, it may bake up heavy; if it is much thinner, it can tear or soften under the filling.

For this apple pie crust recipe, that size gives you enough dough to settle into the pie plate and still leave a little overhang for trimming and crimping. Add small amounts of flour only as needed, because too much loose flour can make the crust dry.

Fit the dough without stretching it

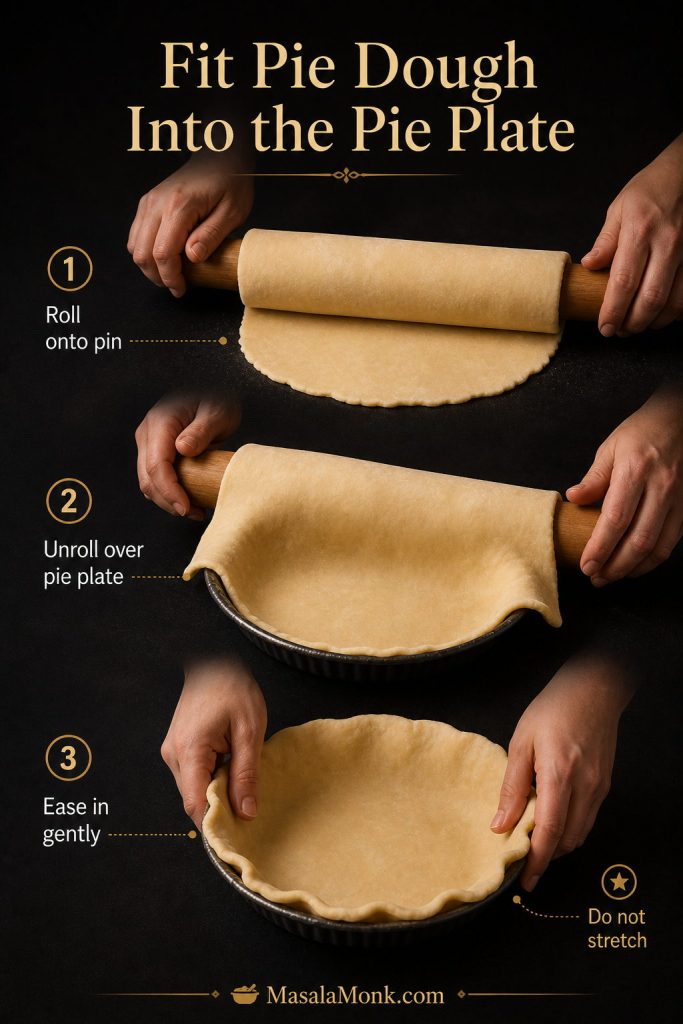
To transfer the dough, loosely roll it around the rolling pin, then unroll it over the pie plate. After that, ease the dough into the bottom and sides without pulling it tight. Stretching may seem harmless, but it is one of the most common reasons pie crust shrinks while baking.

Three-step guide showing pie dough rolled onto a pin, unrolled over a pie plate, and gently eased into the dish without stretching.
Once the dough is rolled, move it gently instead of pulling it into place. Rolling it over the pin, unrolling it over the plate, and easing it in helps prevent shrinking.

If the dough tears, patch it with a small piece from the edge and press it gently into place. Once the filling goes in and the pie bakes, small patches will not matter.

Double Crust vs Single Crust Apple Pie

Classic apple pie is usually a double-crust pie, which means it has a bottom crust and a top crust. However, not every apple pie needs two pastry layers. A crumb-topped pie, for example, only needs a bottom crust, while a graham cracker crust pie behaves more like a no-roll dessert.

Crust style Best for What to know
Double crust Classic apple pie Uses one crust on the bottom and one on top. It is the most traditional choice for homemade apple pie.
Lattice crust Apple pies with juicy filling Looks beautiful and lets steam escape through the open spaces, which can help the filling bake evenly.
Single crust Crumb topping or Dutch apple pie Easier than a double crust and useful when you do not want to roll a top crust.
Graham cracker crust No-roll apple pie Better for crumb-topped apple pie than for a classic sealed double-crust pie.
Puff pastry Quick apple desserts More tart-like or turnover-like than traditional apple pie crust.
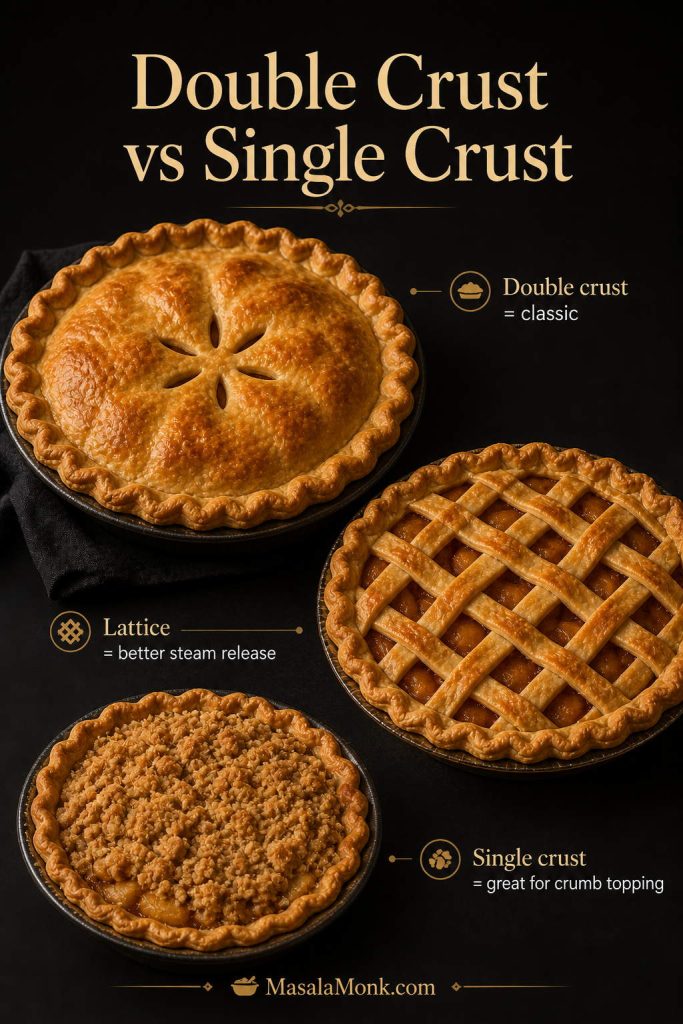
Comparison of double-crust apple pie, lattice apple pie, and single-crust crumb-topped apple pie on a dark background.
A double crust gives apple pie its classic look, while lattice helps steam escape. Meanwhile, a single crust works beautifully when you want a crumb-topped apple pie.

If you are making homemade apple pie for the first time, a double crust or lattice crust is the safest place to start. Both use the same dough, and both pair well with a thick apple filling.

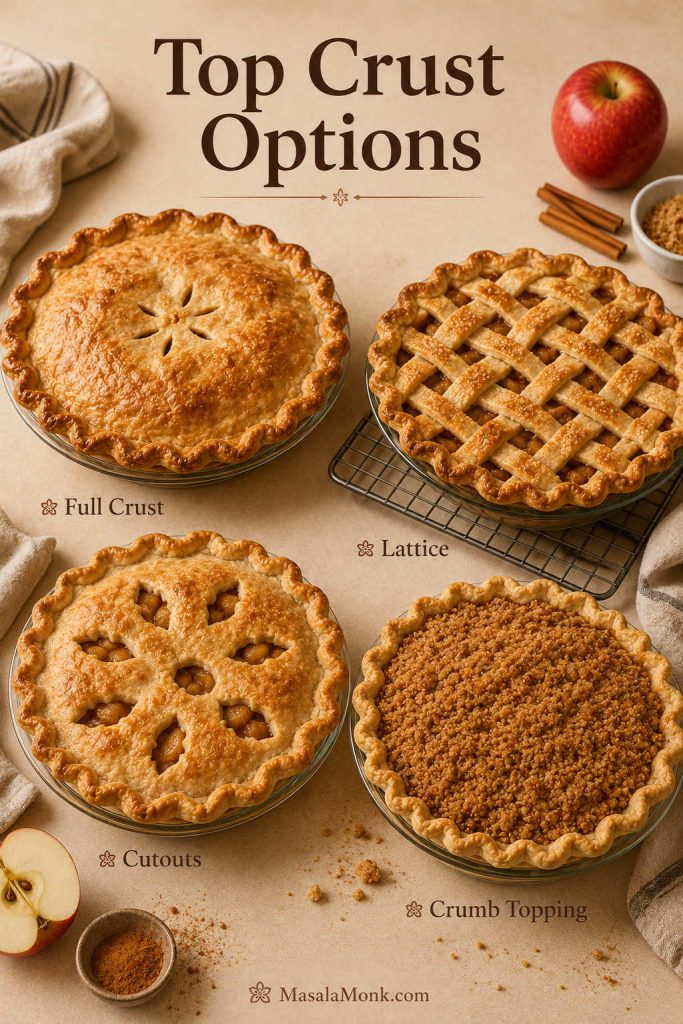
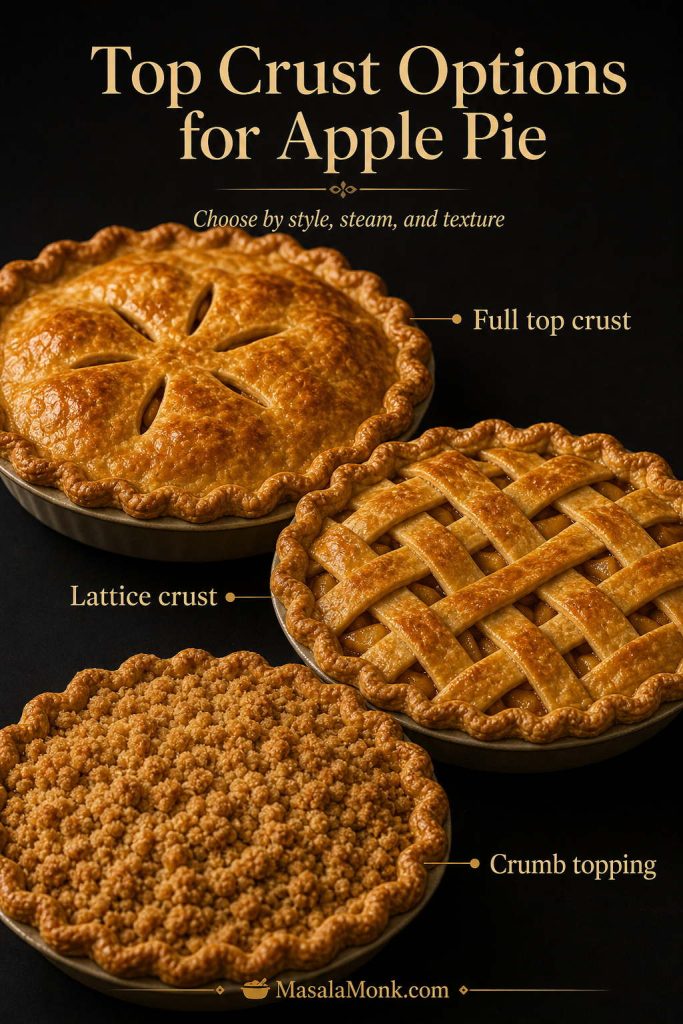
Full Top Crust, Lattice, or Crumb Topping?

A full top crust gives apple pie its most traditional look. After adding the filling, roll out the second disk of dough, lay it over the apples, trim the overhang, seal the edges, and cut vents in the top. Those vents are important because apple filling releases steam as it bakes.

A lattice crust is slightly more decorative, but it is not only for looks. Because the top is open in places, steam can escape naturally. To make a lattice, roll the second disk of dough, cut it into strips, weave the strips over the filling, and then seal and crimp the edges.

A crumb topping changes the pie completely. Instead of covering the apples with pastry, you cover them with a buttery crumble. This is closer to Dutch apple pie or apple crumble pie. It is also a good choice when you want a single-crust apple pie or when you do not feel like rolling a top crust.

For a classic apple pie, this crust works as a full top, lattice, or single bottom layer with crumb topping. If you use only one disk for a crumb-topped pie, wrap and freeze the second disk for another bake.

Top crust options for apple pie showing a full top crust, lattice crust, and crumb topping with labels.
The top crust changes more than appearance. A full crust feels classic, a lattice lets steam escape, and crumb topping gives a softer, buttery contrast to the apple filling.

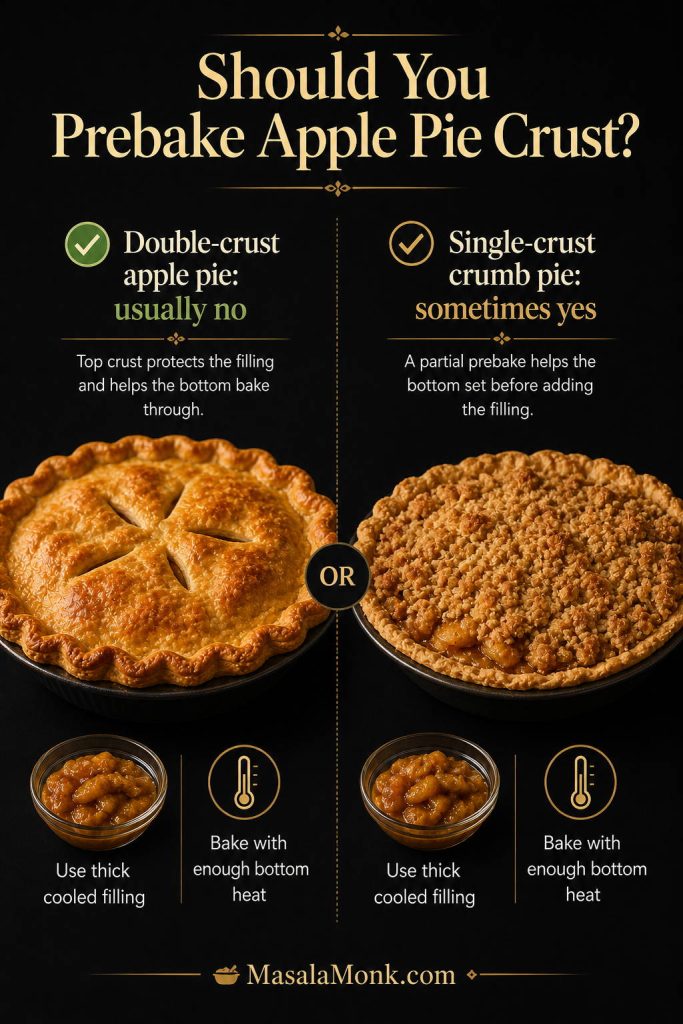
Should You Prebake Apple Pie Crust?

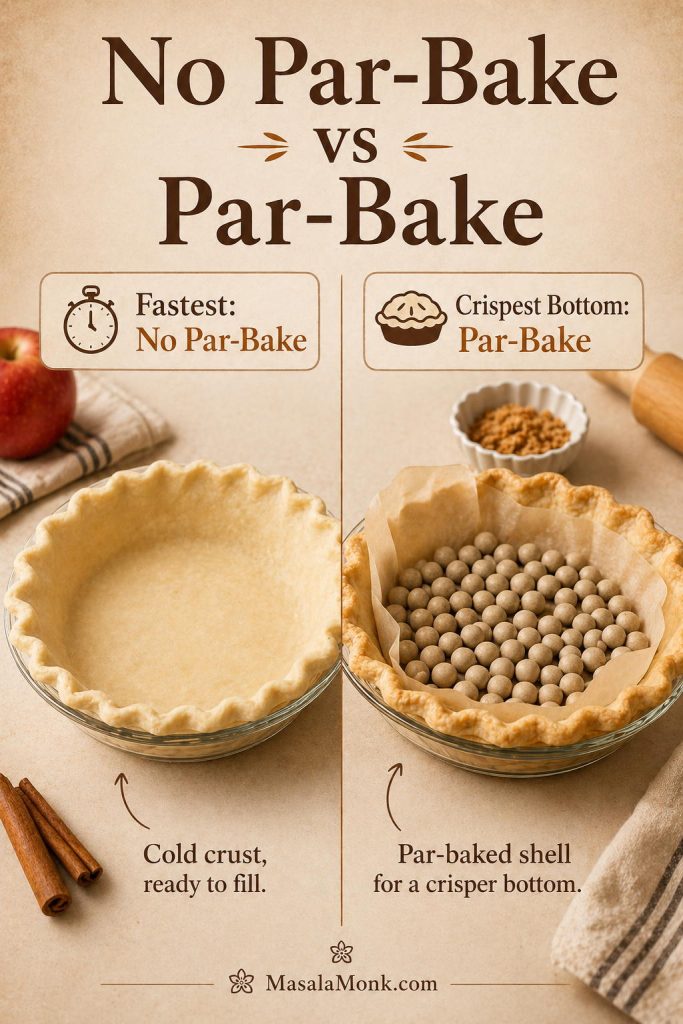
For a traditional double-crust apple pie, you usually should not fully prebake the bottom crust. Once the bottom crust is baked, it becomes harder to seal it to a raw top crust. In addition, a classic apple pie bakes long enough for the bottom crust to cook through as long as the filling is not too wet.

Instead of fully prebaking, focus on the details that help this apple pie crust recipe bake properly: use cooled filling, keep the dough cold, avoid stretching it, bake long enough, and place the pie where it gets enough bottom heat.

Single-crust apple pie is different. If you are making a pie with crumb topping, partial prebaking can help when your bottom crust often turns pale or soft. Since there is no raw top crust to seal, you have more flexibility. King Arthur’s guide to prebaking pie crust makes the same practical distinction between single-crust pies and double-crust fruit pies.

Also, do not poke holes in the bottom crust for a raw fruit pie unless you are blind baking it first. Docking is useful for some empty crusts, but in a juicy apple pie, those holes can let filling leak underneath the pastry.

Simple rule: do not fully prebake crust for classic double-crust apple pie. However, consider partial prebaking for a single-crust apple pie with crumb topping if soggy bottoms are a recurring problem.
Decision board explaining that double-crust apple pie usually does not need prebaking, while single-crust crumb pie sometimes does.
For classic double-crust apple pie, prebaking is usually not needed. However, a single-crust crumb pie may benefit from a partial prebake if soggy bottoms are a recurring problem.

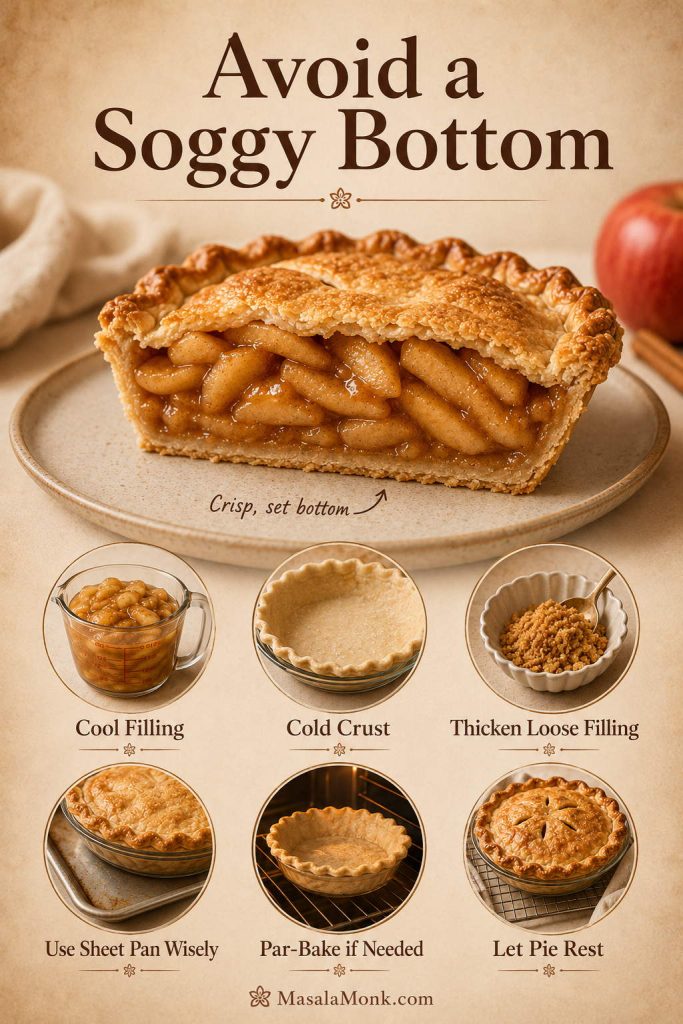
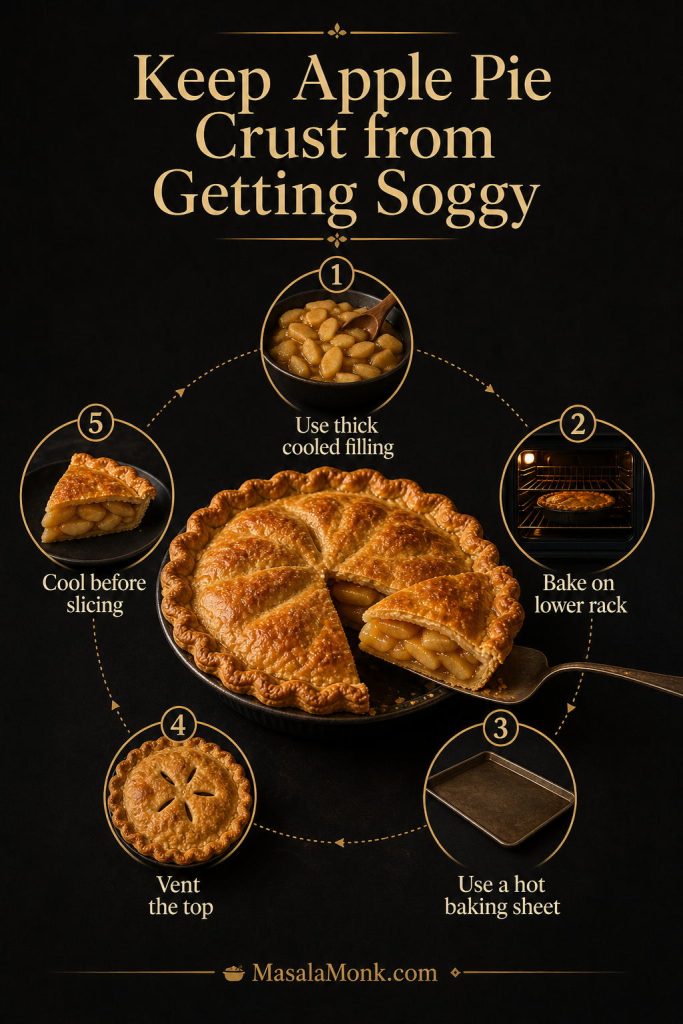
How to Keep Apple Pie Crust from Getting Soggy

Soggy bottom crust usually comes from excess moisture, hot filling, weak bottom heat, or underbaking. Fortunately, most of those problems are easy to prevent once you know where the moisture is coming from.

Soggy apple pie crust prevention guide with thick cooled filling, lower oven rack, hot baking sheet, vented top crust, and cooling before slicing.
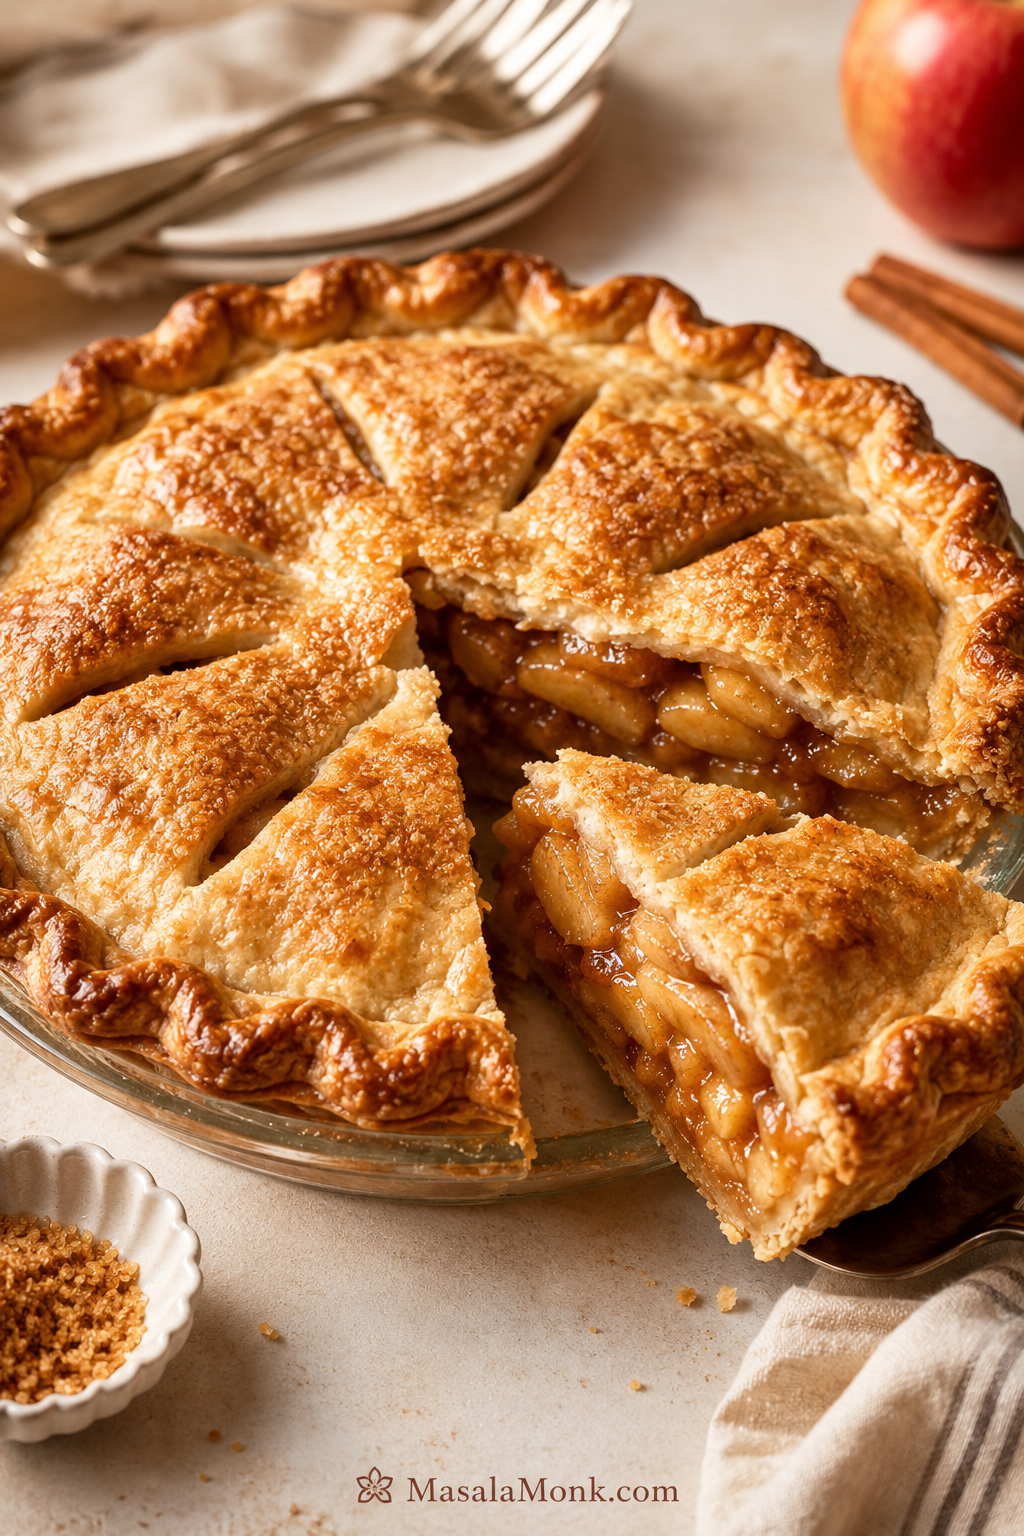
To avoid a soggy bottom crust, start with thick cooled filling, bake with enough bottom heat, vent the top, and let the pie cool before slicing. Together, these steps protect the crust.
Start with thick, cooled filling

First, use thick apple pie filling. If the filling is loose and watery, the crust will absorb that liquid before it has time to set. A cooked, glossy filling gives you more control because the apples have already released some of their moisture before the pie goes into the oven.

Second, cool the filling before adding it to the crust. Hot filling melts the butter in the dough too early, which can make the pastry soft or greasy before baking even begins. So the filling should be spoonable and glossy, not steaming hot, when it goes into the pie shell.
Give the bottom crust enough heat

Third, bake the pie long enough for the bottom crust to cook through. A golden top does not always mean the bottom is done. If your oven runs cool or your pie plate is thick, the bottom may need more time.

Finally, use bottom heat to your advantage. Bake on a lower oven rack or place the pie plate on a preheated baking sheet. For another helpful reference, this apple pie crust guidance from Martha Stewart also emphasizes giving the bottom crust enough heat and enough time to brown properly.

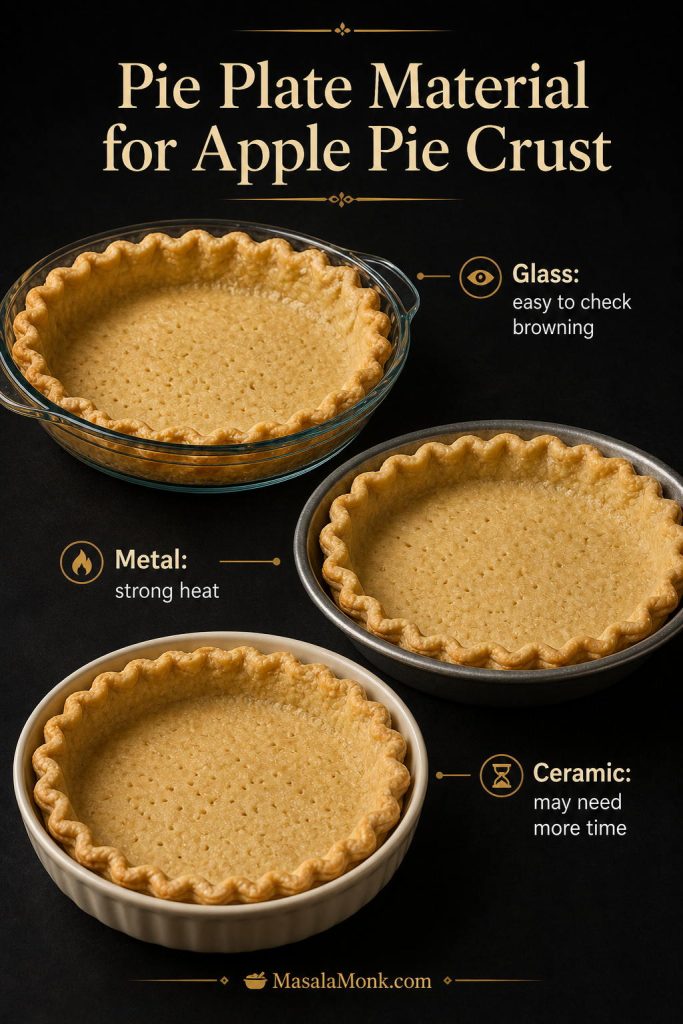
Choose the right pie plate

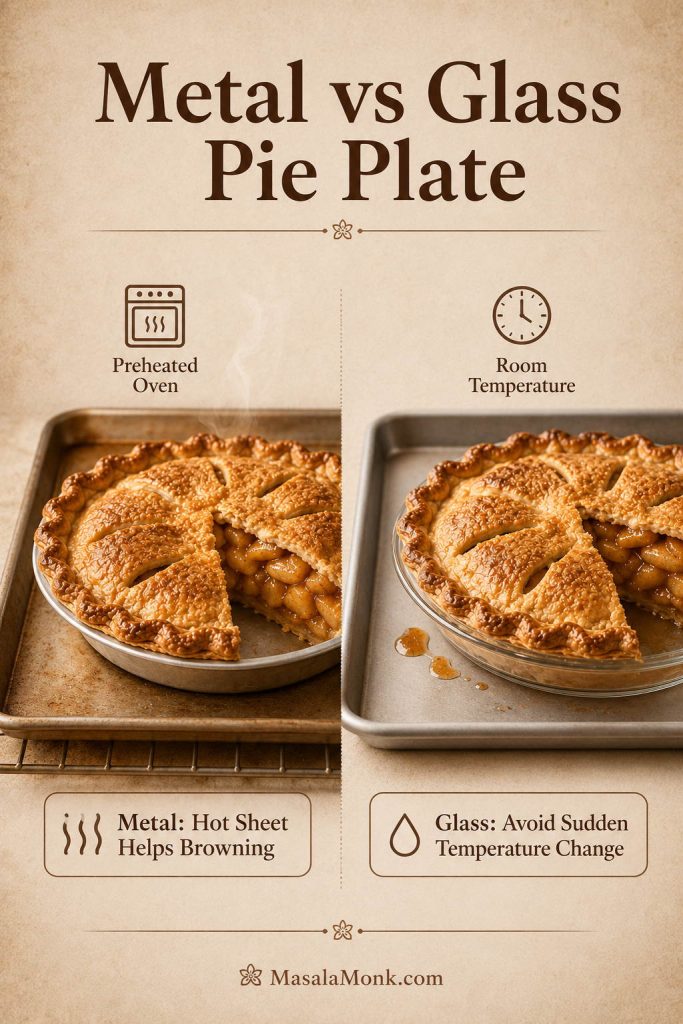
Pie plate material also matters. A glass pie plate makes it easier to check whether the bottom crust is browning, while metal usually conducts heat more quickly. Thick ceramic dishes can work beautifully, but they often need enough time and a lower oven rack so the bottom crust can finish baking.

Pie plate material guide comparing glass, metal, and ceramic dishes for apple pie crust browning and baking time.
The pie plate affects how the bottom crust bakes. Glass makes browning easier to check, metal conducts heat well, and ceramic may need a little more time.
Problem Best fix
Filling is watery Use thick apple pie filling and avoid pouring loose liquid into the crust.
Filling is hot Cool the filling before adding it to the dough.
Bottom crust is pale Bake on a lower rack or place the pie on a preheated baking sheet.
Top crust traps steam Cut vents in a full top crust or use a lattice crust.
Pie is sliced too soon Let the pie cool for at least 2 to 3 hours so the filling can thicken and settle.

For the easiest pairing, use this crust with cooled apple pie filling. The filling should be glossy and spoonable, not loose, watery, or steaming hot.

How to Know Apple Pie Crust Is Fully Baked

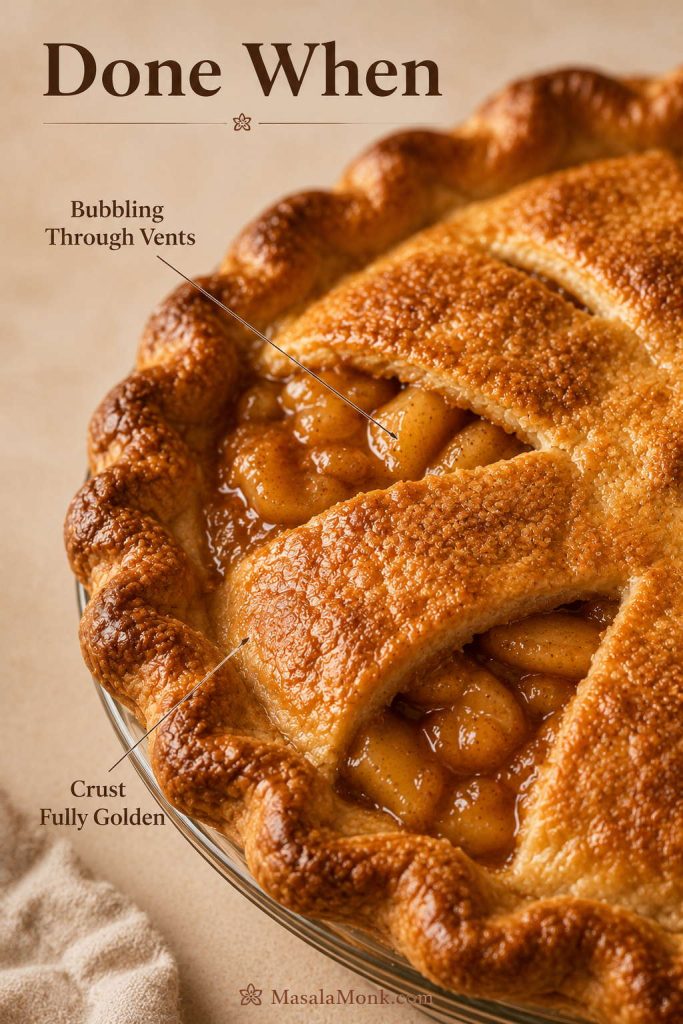
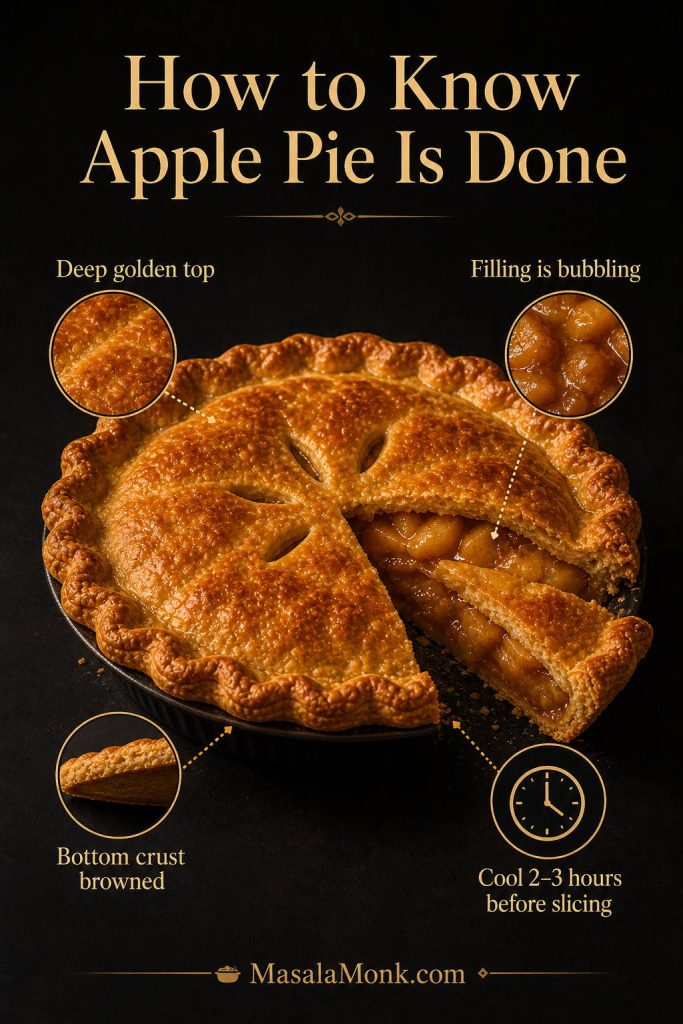
Apple pie is done when the top crust is deeply golden, the filling is bubbling through the vents or lattice, and the bottom crust has had enough time to brown. If the top looks ready but the bottom still seems pale, cover the edges loosely with foil and give the pie more time on the lower rack.

After baking, let the pie cool for at least 2 to 3 hours before slicing. Otherwise, even a well-baked crust can seem soft because the filling has not had time to thicken and settle.

Finished apple pie with callouts for deep golden top crust, bubbling filling, browned bottom crust, and cooling 2 to 3 hours before slicing.
A finished apple pie should be more than lightly golden. Look for a deep golden top, bubbling filling, and a browned bottom crust; then let it cool so the filling can settle.

Other Crusts You Can Use for Apple Pie

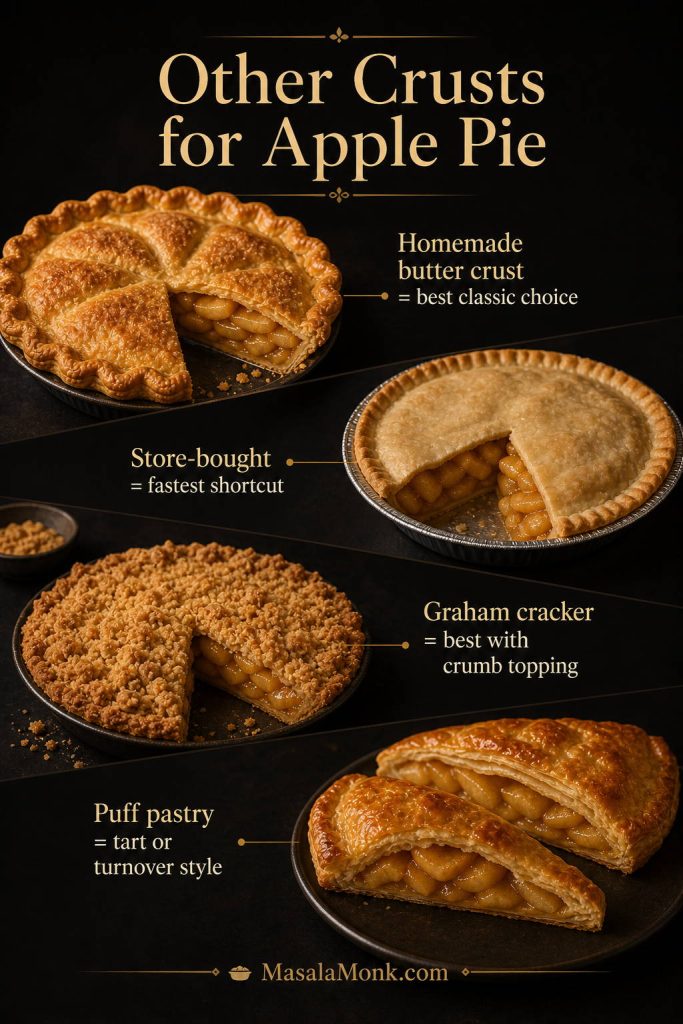
Homemade butter crust is the best choice for a classic apple pie, but it is not the only option. Sometimes convenience matters. Other times, you may want a no-roll crust, a crumb topping, or a quicker apple dessert. In those cases, the main thing is to match the crust to the kind of pie you are actually making.

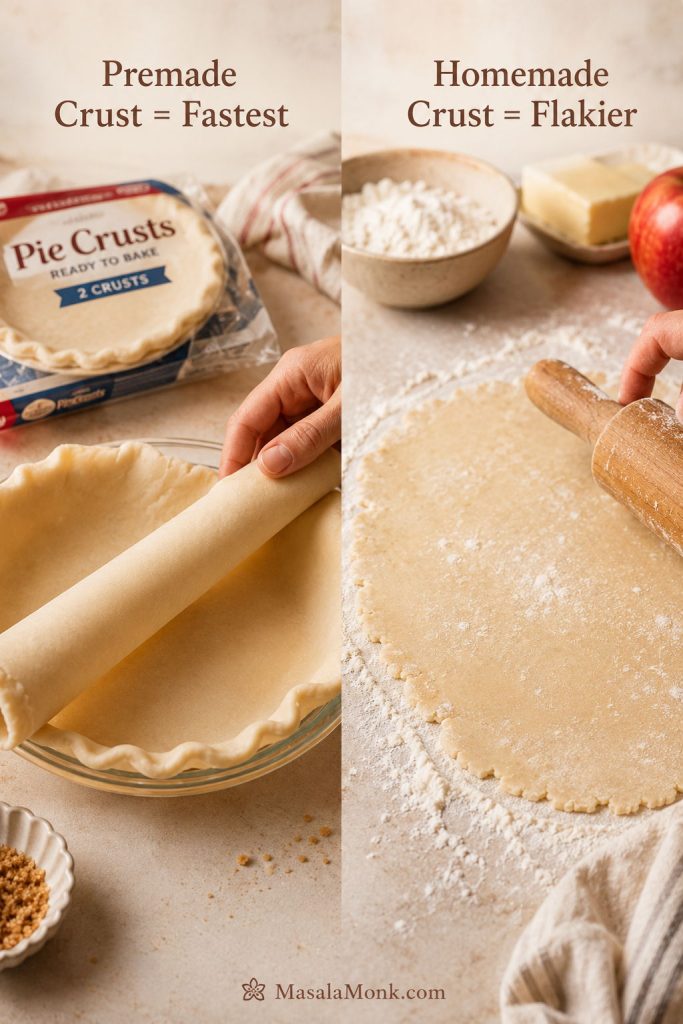
For classic apple pie, use this homemade butter crust. If speed matters, store-bought crust can still make a good apple pie when the filling is thick and the crust stays cold. For a no-roll version, graham cracker crust works better with crumb topping than with a sealed top crust. For a faster pastry-style dessert, puff pastry is useful, although it behaves more like a tart or turnover than classic pie crust.
Other crusts for apple pie board showing homemade butter crust, store-bought crust, graham cracker crumb pie, and puff pastry turnovers.
Homemade butter crust is best for classic apple pie. Still, store-bought crust, graham cracker crust, and puff pastry can work when you match each one to the right style of dessert.

Can I use store-bought crust?

Yes. Keep the crust cold, use a filling that is thick rather than runny, and cut vents in the top so steam can escape. Homemade dough tastes better and usually bakes flakier, but a premade crust can still make a solid apple pie when the filling and baking are handled well.

Can I use graham cracker crust?

Yes, although it works better for a single-crust apple pie with crumb topping than for a traditional double-crust pie. Graham cracker crust cannot form a sealed pastry top, so treat it as a different dessert style rather than a direct swap for pie dough.

Can I use puff pastry?

Yes, but puff pastry gives you a quicker, more tart-like apple dessert. It works well for turnovers, slab-style bakes, and apple pie-inspired pastries. However, it does not have the same tender, sturdy bite as homemade apple pie crust.
Is shortcrust pastry the same thing?

In many kitchens, pie crust, pie dough, pie pastry, shortcrust pastry, and pie shell describe similar flour-and-fat doughs. The exact formula can vary, but the goal for apple pie is the same: a tender crust that can hold fruit filling and bake into a flaky shell.

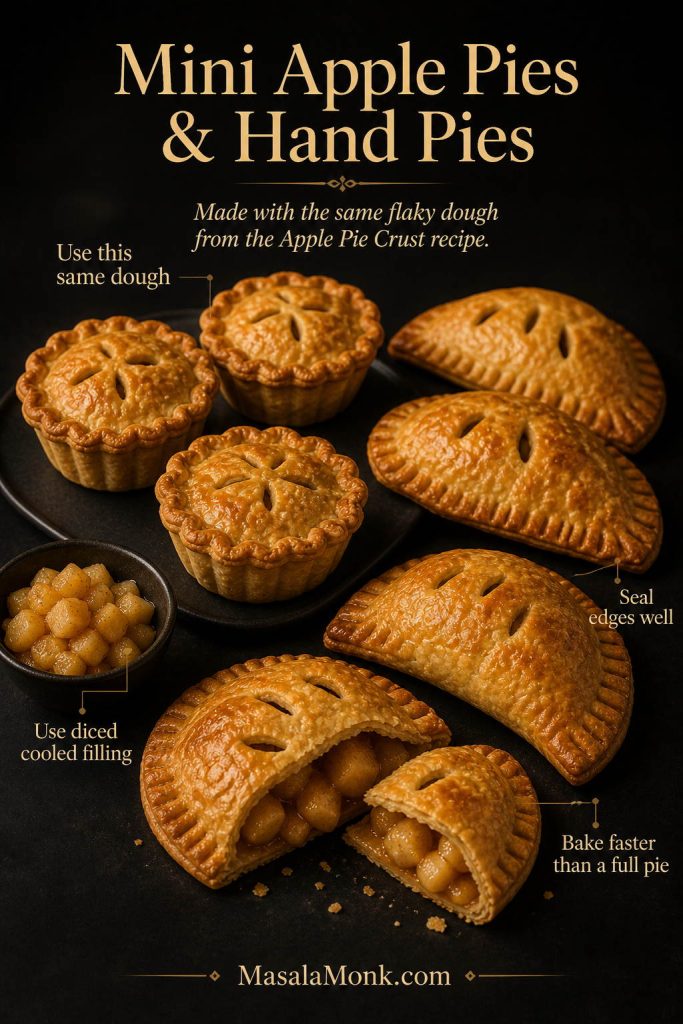
Using This Dough for Mini Apple Pies and Hand Pies

This apple pie crust dough also works for mini apple pies and hand pies, but the handling changes slightly. Smaller pastries need a thinner roll, less filling, tighter sealing, and a closer eye in the oven because they bake faster than a full 9-inch / 23-cm apple pie.

For mini apple pies, roll the dough a little thinner than you would for a deep pie, then cut rounds large enough to fit a muffin pan, mini pie pans, or small tart tins. Press the dough in gently without stretching it, add a small spoonful of cooled apple filling, and avoid overfilling so the juices do not leak over the edges.

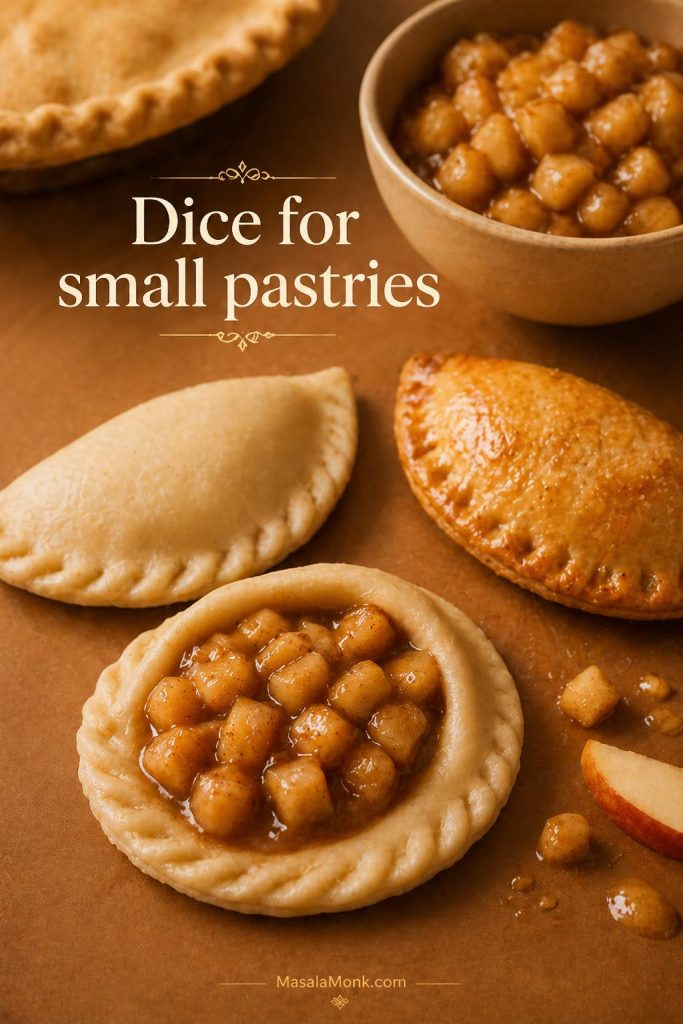
For hand pies, diced cooled apple filling works better than long apple slices because it fits neatly inside the dough and seals more easily. After filling, press the edges firmly with a fork, cut a small vent in the top, and chill the shaped pies briefly before baking. That short chill helps the crust hold its shape and gives the filling less chance to burst out.

The same rules still matter: keep the dough cold, use thick filling, and do not stretch the pastry. Since mini pies and hand pies are smaller, start checking them earlier and pull them when the crust is golden and the filling is bubbling.

Mini apple pies and hand pies made with golden flaky dough, diced apple filling, sealed edges, and one cut-open hand pie showing filling.
This same dough can also make mini apple pies and hand pies. Because smaller pastries bake faster, use diced cooled filling, seal the edges well, and watch the crust color closely.
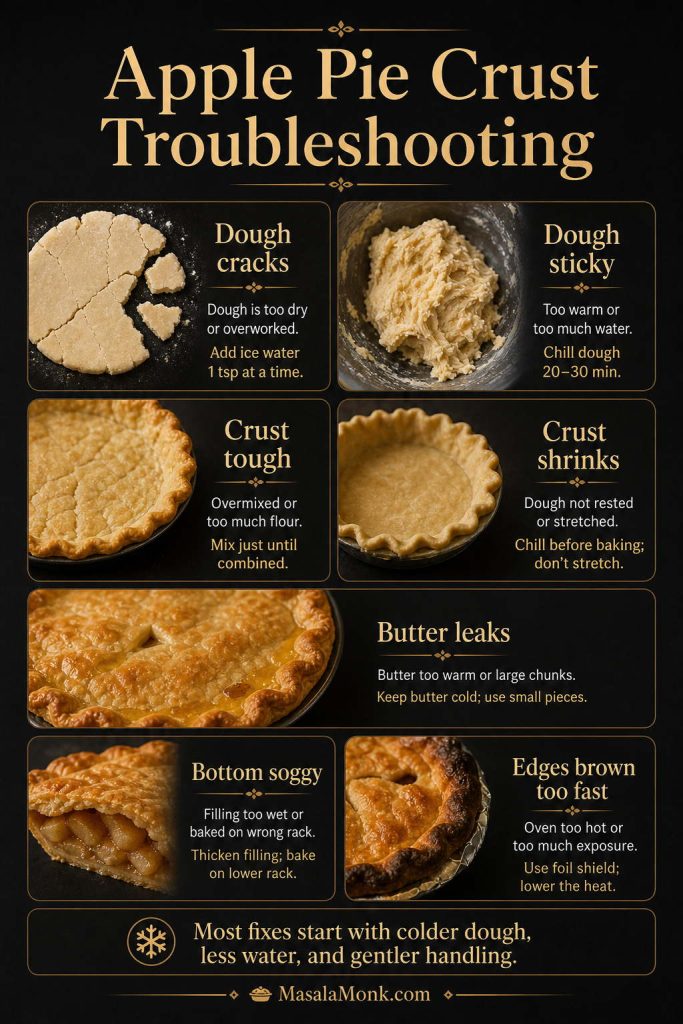
Most apple pie crust problems come from five things: warm butter, too much water, overworking the dough, stretching the crust into the pie plate, or adding hot/watery filling.

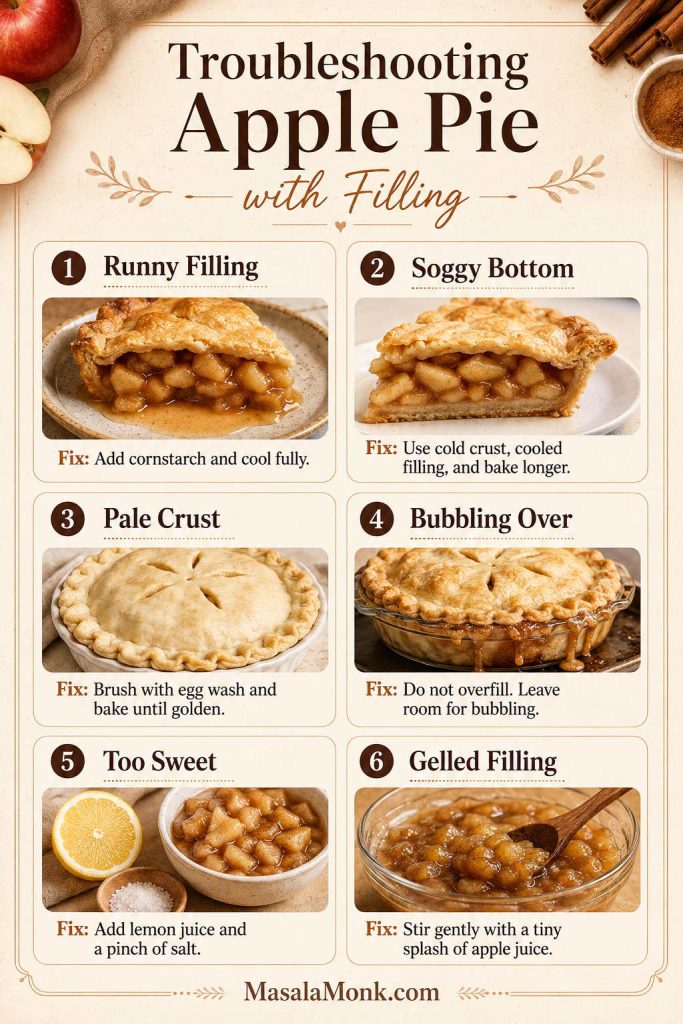
Apple Pie Crust Troubleshooting

Pie crust problems are common, especially if your kitchen is warm or you are making dough for the first time. Still, most issues come from a few fixable causes: warm butter, too much water, overworking, stretching the dough, or using filling that is too wet.

What went wrong Likely cause How to fix it next time
Dough cracks while rolling Too dry or too cold Let it rest for 5 minutes, then patch small cracks with damp fingers.
Dough feels sticky Too much water or butter is warming Dust lightly with flour and chill the dough before continuing.
Crust is tough Too much water or too much handling Add water slowly and stop mixing once the dough holds together.
Crust shrinks Dough was stretched or not chilled Ease the dough into the plate without pulling, then chill before baking.
Butter leaks out Dough got too warm Keep the butter cold and chill the assembled pie before baking.
Bottom crust is soggy Wet filling, hot filling, or not enough bottom heat Use cooled thick filling and bake on a lower rack or hot baking sheet.
Edges brown too fast Edges are thinner than the rest of the crust Use a pie shield or loose foil once the edges are golden.
Filling bubbles over Pie is overfilled or not vented well Leave a little space, cut vents, and bake on a lined sheet pan.
Apple pie crust troubleshooting board showing cracked dough, sticky dough, tough crust, shrinking crust, butter leaks, soggy bottom, and over-browned edges.
Most apple pie crust problems trace back to temperature, moisture, or handling. Therefore, many fixes begin with colder dough, less water, gentler mixing, and enough time to chill.

If the dough gives you trouble, do not panic. Chill it, patch it, and keep going. Small cracks and rough edges usually disappear once the pie is filled, sealed, brushed with egg wash, and baked until golden.

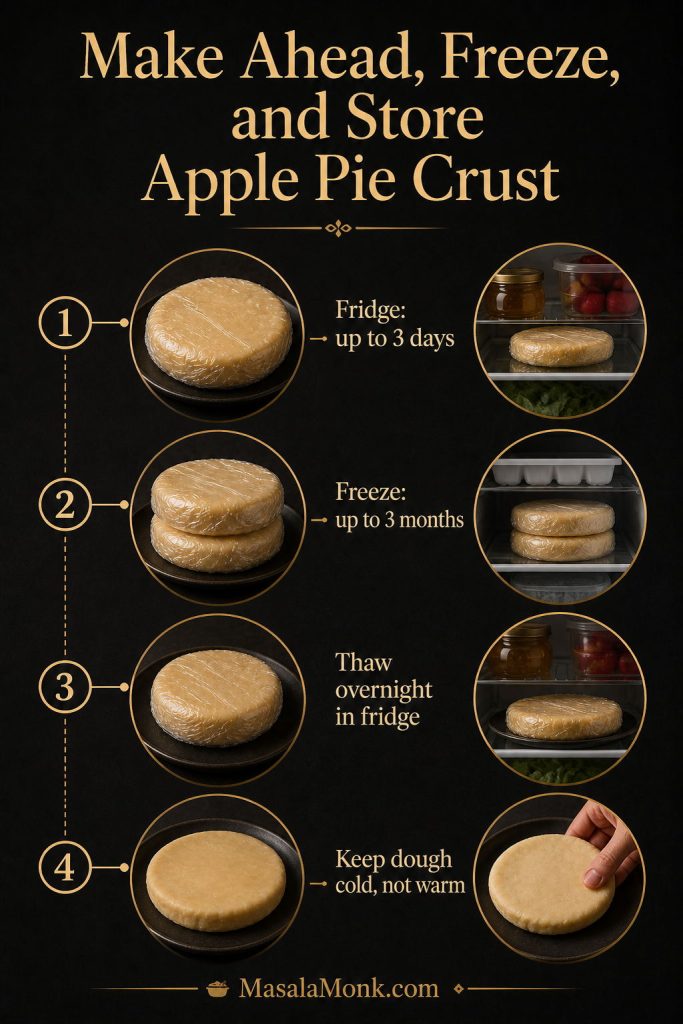
Make Ahead, Freeze, and Store

Apple pie crust is a good make-ahead recipe because the dough actually benefits from chilling. You can make the disks in advance, keep them wrapped in the refrigerator, and roll them when you are ready to assemble the pie.

For short-term storage, wrap the dough disks tightly and refrigerate them for up to 3 days. For longer storage, place the wrapped disks in a freezer bag and freeze them for up to 3 months.

When you are ready to use frozen dough, thaw it overnight in the refrigerator. If it feels too firm to roll, let it sit at room temperature for a few minutes. However, do not let it become warm or greasy, because softened butter can make the crust bake up heavy.

You can also roll the bottom crust, fit it into the pie plate, cover it well, and refrigerate it before filling. This is useful when you want to prepare the crust ahead but assemble the apple pie closer to baking time.

If you have extra cooked apples or leftover filling, you do not have to make another pie right away. Spoon them over buttermilk pancakes with stewed cinnamon apples for a softer breakfast-style use.

Make-ahead apple pie crust storage guide showing wrapped dough disks, fridge storage, freezer storage, thawing overnight, and keeping dough cold.
Pie dough is a good make-ahead recipe because chilling helps it relax. For best results, refrigerate it up to 3 days, freeze it up to 3 months, and thaw it overnight in the fridge.

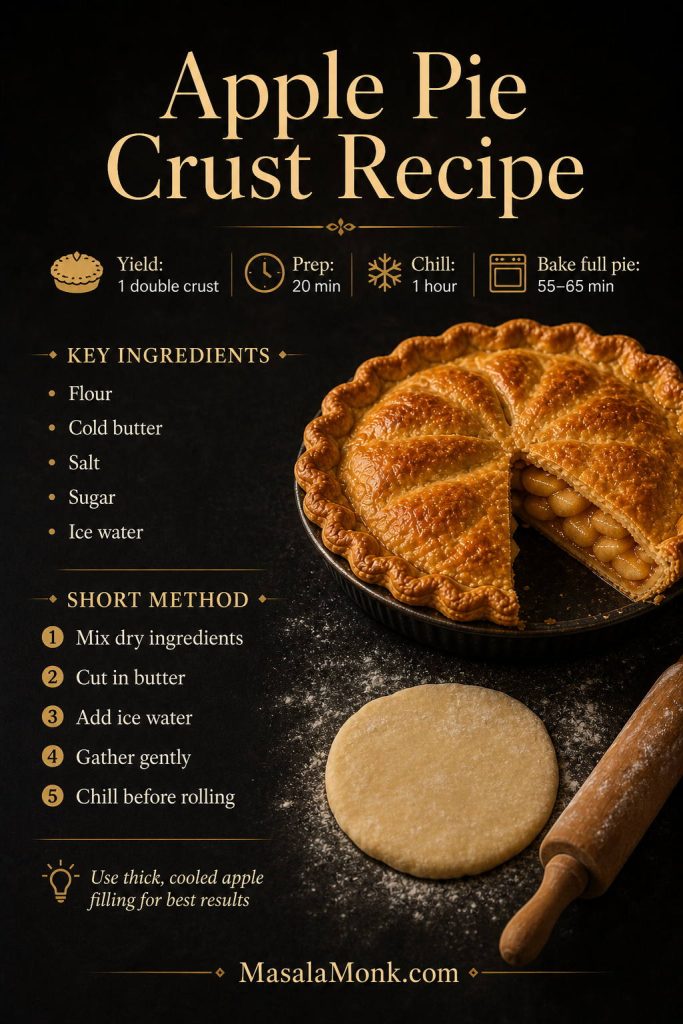
Apple Pie Crust Recipe Card

Apple Pie Crust Recipe: Flaky Homemade Pie Dough

This buttery apple pie crust recipe makes enough dough for one 9-inch / 23-cm double-crust apple pie or two single-crust pies.

Prep Time20 minutes
Chill Time1 hour
Total Dough Time1 hour 20 minutes
Yield1 double crust

Ingredients

  • 2 1/2 cups all-purpose flour, or 315 g / about 11 oz
  • 1 teaspoon fine salt
  • 1 tablespoon granulated sugar, or about 12 g
  • 1 cup cold unsalted butter, cut into cubes, or 226 g / 8 oz
  • 6 to 8 tablespoons ice water, or 90 to 120 ml / 3 to 4 fl oz, plus more only if needed
  • Optional: 1 teaspoon / 5 ml apple cider vinegar

For finishing and filling

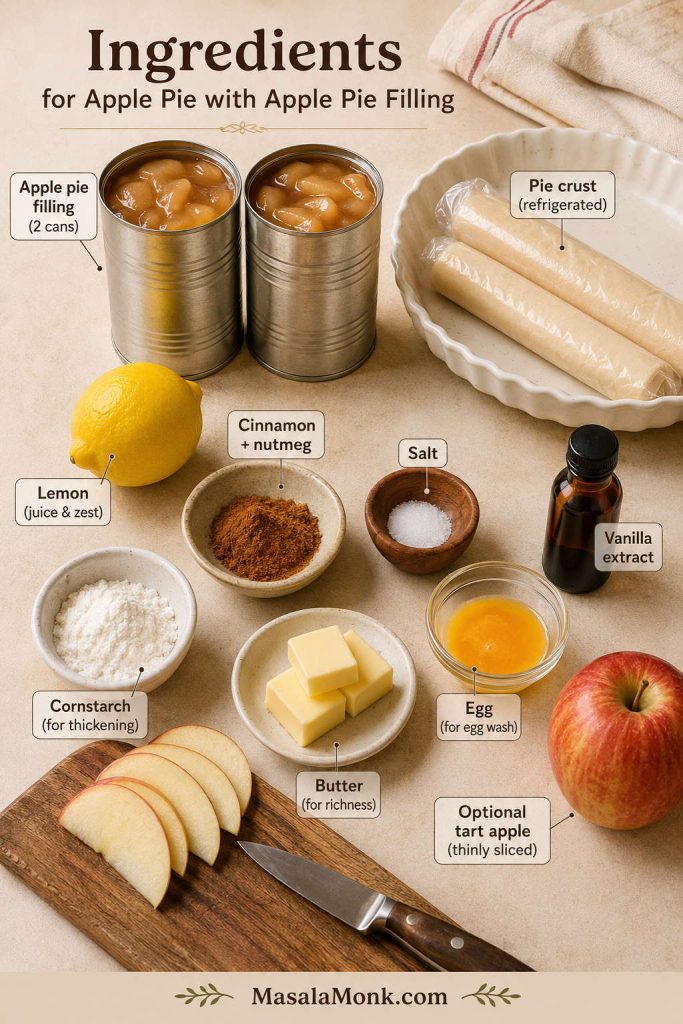
  • 5 to 6 cups cooled apple pie filling, about 1.1 to 1.4 kg / 2.5 to 3 lb, if baking a full 9-inch / 23-cm apple pie
  • 1 egg
  • 1 tablespoon / 15 ml milk or water
  • Optional coarse sugar for sprinkling

Instructions

  1. Whisk the flour, salt, and sugar together in a large bowl.
  2. Add the cold butter cubes and cut them into the flour until the mixture has sandy crumbs, pea-size butter pieces, and a few flatter butter flakes.
  3. Add ice water 1 tablespoon / 15 ml at a time, tossing with a fork after each addition.
  4. Stop adding water when the dough holds together when squeezed. It should look shaggy, not wet or smooth.
  5. Turn the dough onto a lightly floured surface and gather it gently with your hands. Do not knead it smooth.
  6. Divide the dough into two equal pieces, flatten each into a disk about 1 inch / 2.5 cm thick, wrap tightly, and refrigerate for at least 1 hour.

To use this crust for a full apple pie

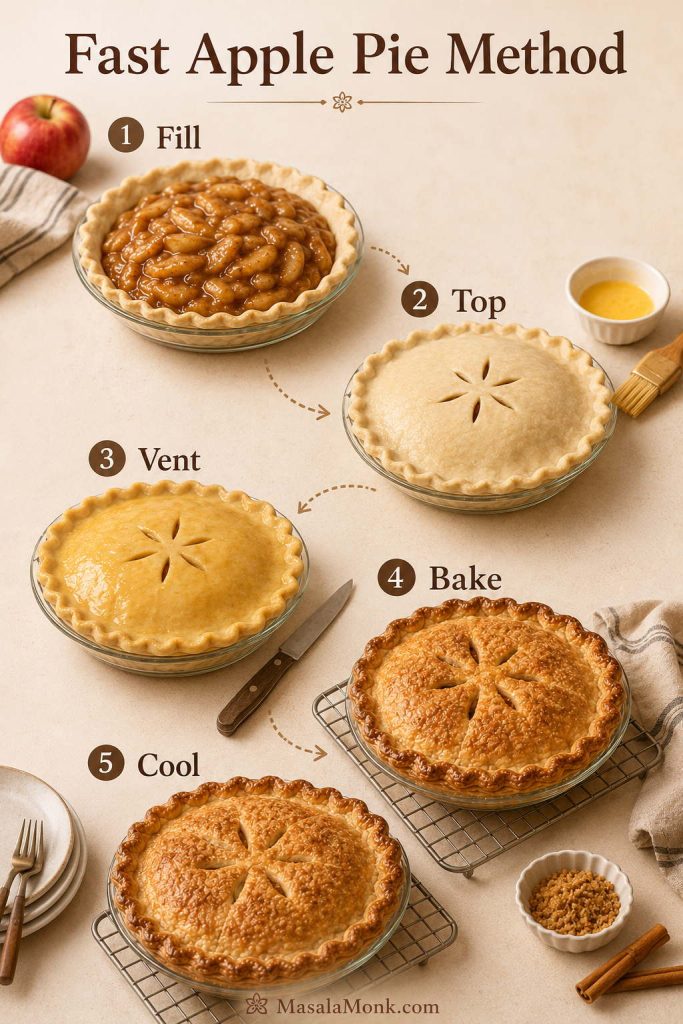
  1. Place a rack in the lower third of the oven and preheat to 425°F / 220°C. For extra bottom heat, place a baking sheet in the oven while it preheats.
  2. Roll one disk into a 12- to 13-inch / 30- to 33-cm round, about 1/8 inch / 3 mm thick, and fit it into a 9-inch / 23-cm pie plate without stretching.
  3. Add 5 to 6 cups cooled apple pie filling, about 1.1 to 1.4 kg / 2.5 to 3 lb, or enough to fill the pie without mounding it too aggressively.
  4. Roll the second disk for a full top crust, or cut it into strips for lattice. Then seal and crimp the edges.
  5. Chill the assembled pie for 15 to 20 minutes if the dough has softened.
  6. Beat the egg with milk or water, then brush lightly over the top crust. Sprinkle with coarse sugar if using.
  7. Bake at 425°F / 220°C for 20 minutes. Then reduce the heat to 375°F / 190°C and continue baking for 35 to 45 minutes, or until the crust is deeply golden and the filling is bubbling. If the edges brown too quickly, cover them loosely with foil or a pie shield.
  8. Let the pie cool for at least 2 to 3 hours before slicing so the filling can thicken and settle.

Notes

  • Keep the butter cold for the flakiest crust.
  • Add water slowly; too much water can make the crust tough.
  • Do not knead the dough until smooth. Gentle handling keeps the pastry tender.
  • For classic double-crust apple pie, do not fully prebake the bottom crust.
  • Use thick, cooled apple pie filling to help prevent a soggy bottom crust.
  • The dough can be refrigerated for up to 3 days or frozen for up to 3 months.
Apple pie crust recipe card with yield, prep time, chill time, bake time, key ingredients, short method, and a finished apple pie.
Use this quick recipe card when you need the basic apple pie crust steps in one place: mix, cut in butter, add ice water, gather gently, and chill before rolling.

FAQs

What makes this a good apple pie crust recipe?

It uses cold butter for flaky layers, enough dough for a 9-inch / 23-cm apple pie, and clear chilling, rolling, and baking cues so the crust stays tender instead of tough.

Is apple pie crust the same as pie dough?

Usually, yes. Apple pie crust, pie dough, pie pastry, and pie shell often mean the same basic flour-and-fat dough. For apple pie, however, the dough should be flaky but sturdy enough to hold fruit filling.

Do I need two crusts for apple pie?

For a classic double-crust pie, yes. You need one crust on the bottom and one on top. However, if you are making a crumb-topped or Dutch-style apple pie, one bottom crust is enough.

Should apple pie crust be prebaked?

For a traditional double-crust pie, usually no. Instead, use cooled filling, keep the dough cold, and bake the pie long enough for the bottom crust to brown. For a single-crust pie with crumb topping, partial prebaking can help if the bottom often turns soft.

Why is my apple pie crust tough?

Tough crust usually comes from too much water, too much mixing, or kneading the dough until smooth. So add water slowly and stop handling the dough once it holds together.

Why is my bottom crust soggy?

The filling may have been too wet or too hot, or the pie may not have baked long enough. Use cooled, thick filling and bake on a lower rack or preheated baking sheet so the bottom gets enough heat.

Can I use this crust for lattice apple pie?

Yes. This dough makes enough for a bottom crust and lattice top. Roll the second disk, cut it into strips, weave the strips over the filling, and then seal the edges well.

Can I use store-bought crust instead?

Yes. Keep the crust cold, use thick filling, and vent the top so steam can escape. Homemade dough usually tastes better, but premade crust can still make a good apple pie.

Can I use graham cracker crust for apple pie?

Yes, but it works best for a crumb-topped apple pie rather than a sealed double-crust pie. Since graham cracker crust cannot form a pastry top, treat it as a separate no-roll apple pie style.

Can I use puff pastry for apple pie?

Yes, but puff pastry works better for apple turnovers, slab-style apple desserts, or tart-like bakes than for a classic deep apple pie. Keep it cold, avoid overfilling it, seal the edges well, and cut vents so steam can escape.

Can I make apple pie crust ahead?

Yes. Wrap the dough disks tightly and refrigerate them for up to 3 days or freeze them for up to 3 months. Then thaw frozen dough overnight in the refrigerator before rolling.

Final Tips for Flaky Apple Pie Crust

A reliable apple pie crust recipe comes down to cold butter, gentle handling, enough chill time, and filling that is thick rather than watery. Once the dough is ready, add cooled apple pie filling, seal the edges well, vent the top, and bake until the crust is deeply golden.

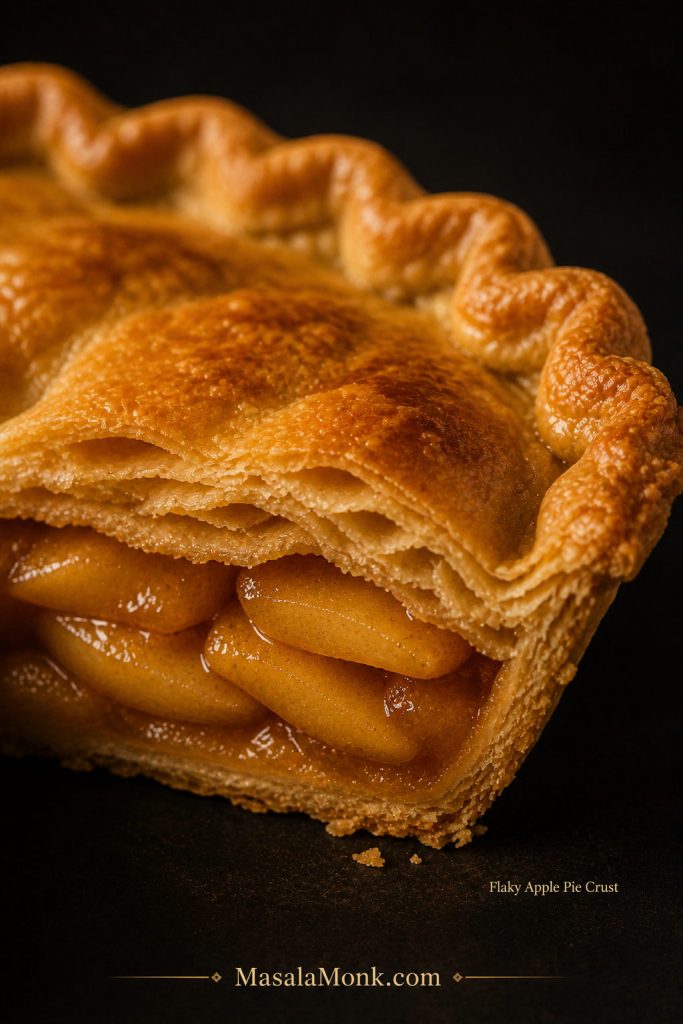
Close-up of flaky golden apple pie crust layers with glossy apple filling inside.
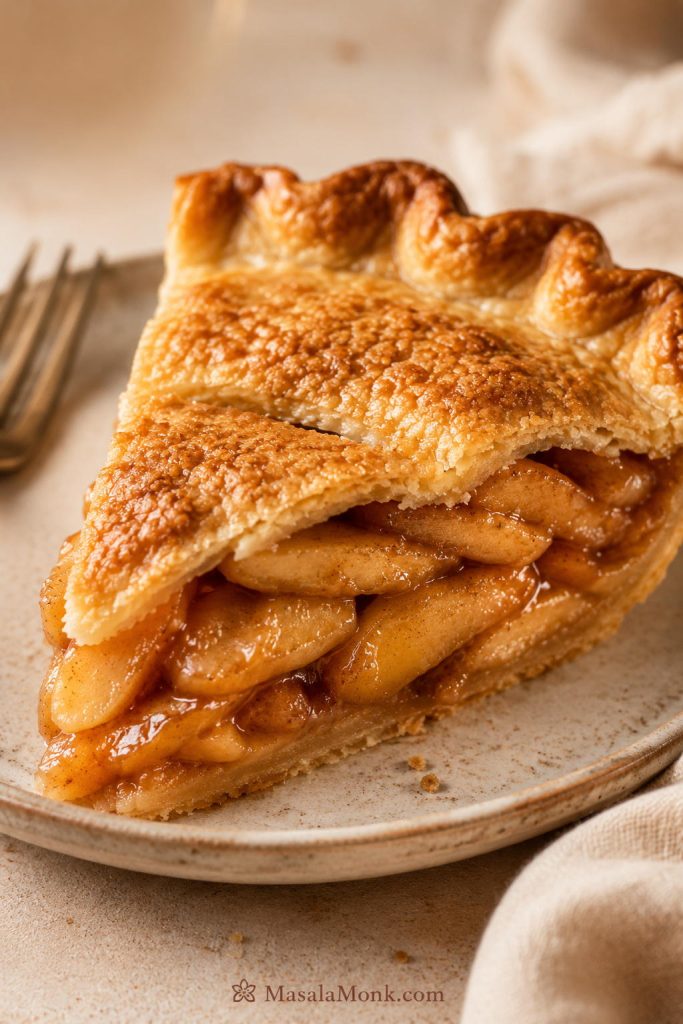
A good apple pie crust should look flaky at the edges and sturdy around the filling. When the layers are golden and crisp, every slice feels more homemade.

If your first pie is not perfect, the fix is usually simple. Next time, chill the dough longer, add less water, avoid stretching the crust into the plate, and make sure the filling is not hot when it touches the pastry.

A perfect-looking crust is not the goal. A crust that tastes buttery, holds the filling, and flakes when you cut into it is already a win.

If you try this crust with a different apple pie filling, crumb topping, or pie plate, leave a note with what changed. Those small details often help the next baker more than a perfect-looking slice ever could.

Posted on 9 Comments

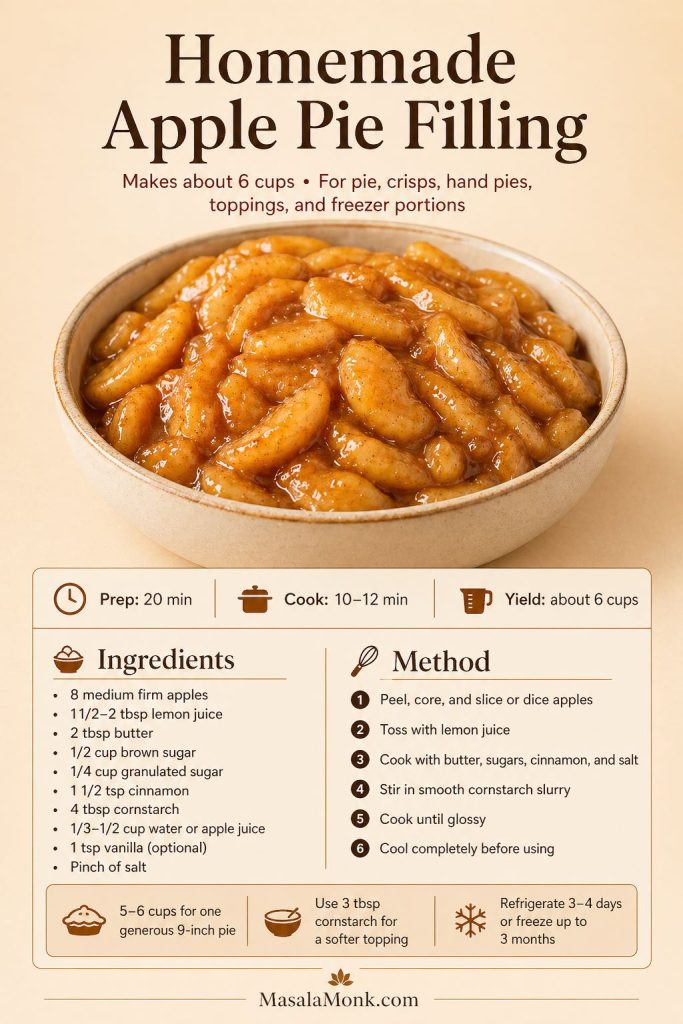
Apple Pie Filling Recipe for Pies, Crisps and Freezing

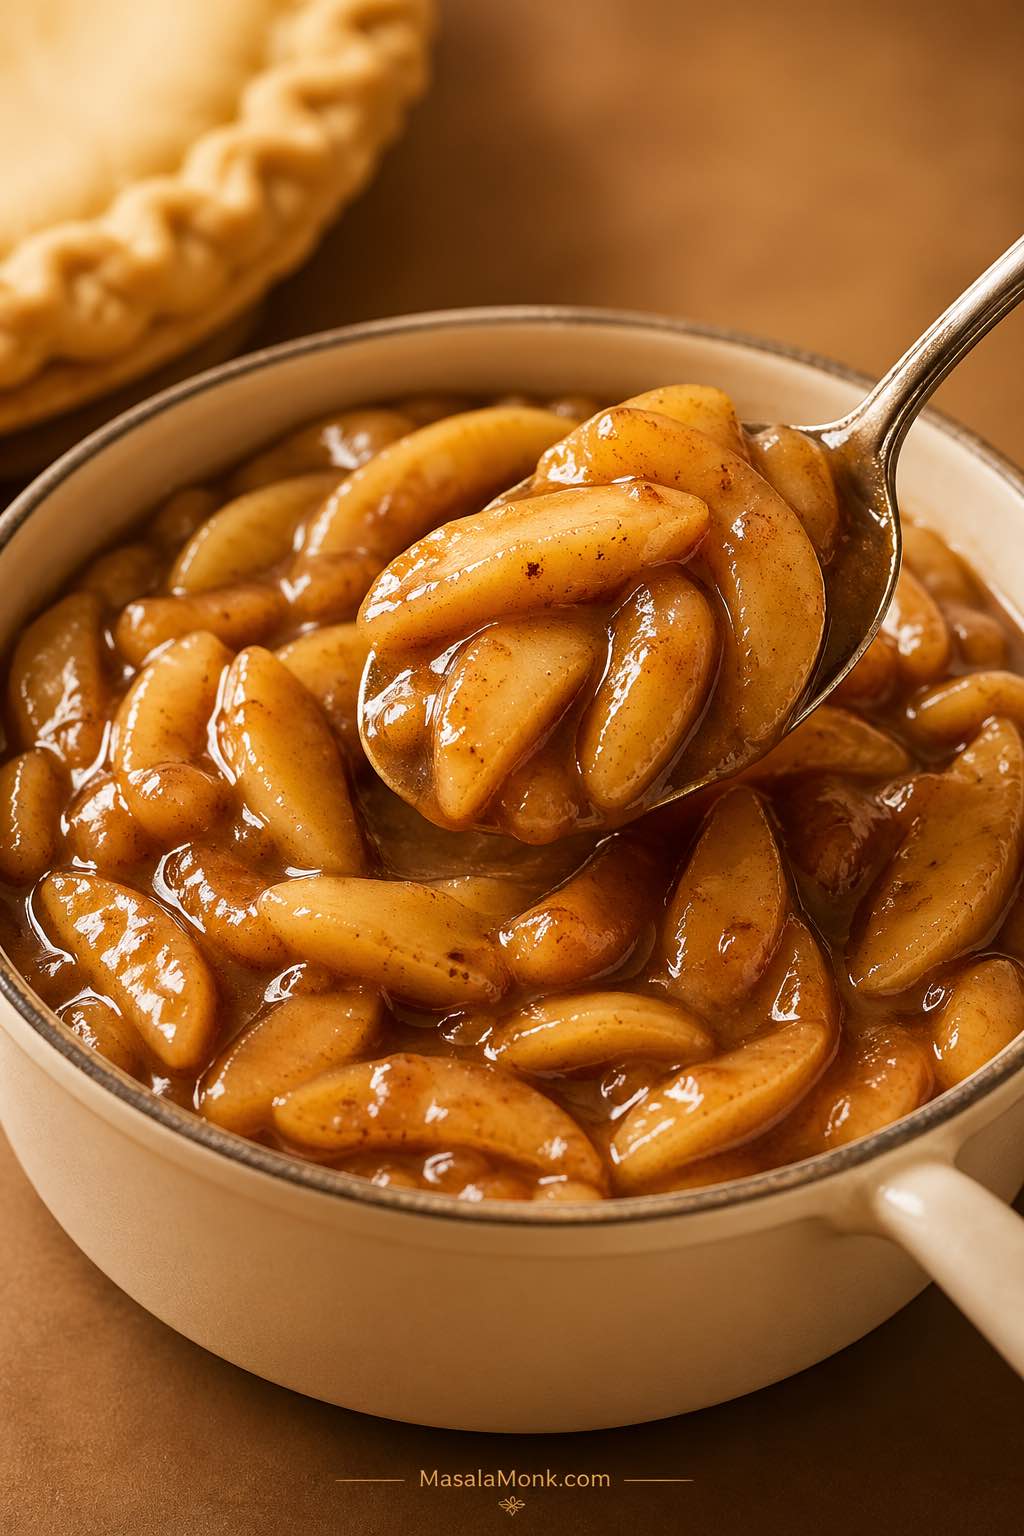
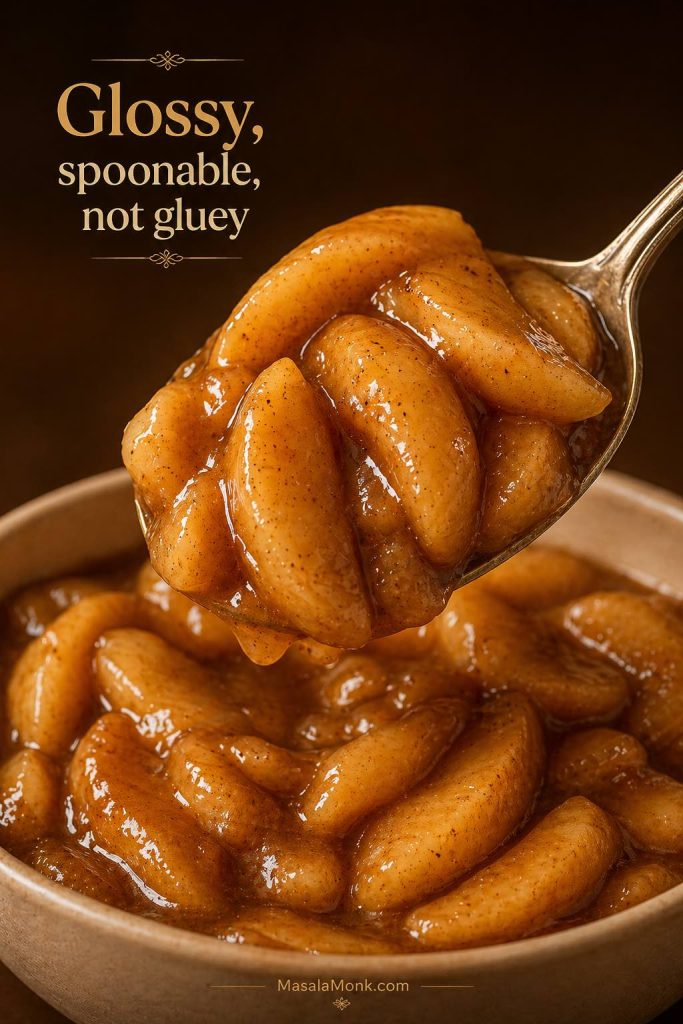
Homemade apple pie filling recipe with glossy cinnamon-coated apple slices lifted on a spoon.

A good apple pie filling recipe should give you tender apple pieces, warm cinnamon flavor, and a thick, glossy sauce that holds together without turning gluey. This stovetop method cooks the filling before baking, so you can control the apple texture, sauce thickness, sweetness, and final use before anything goes into pie crust, crisp topping, hand pies, turnovers, freezer bags, or breakfast bowls.

The best part is that one batch can do several jobs. Use sliced apple filling for classic pie and crisp, diced apple filling for hand pies and turnovers, or a softer spoonable version for pancakes, waffles, oatmeal, yogurt, and ice cream.

Because this recipe makes a cooked apple filling before it ever reaches pie crust, you can taste, thicken, cool, and portion the batch with much more control. As a result, the same recipe works for a full apple pie, canned-style replacement portions, freezer bags, crisps, toppings, and small pastries without guessing later.

Quick Answer: How to Make Apple Pie Filling

To make apple pie filling, cook peeled and sliced or diced apple pieces with butter, brown sugar, granulated sugar, cinnamon, lemon juice, and a pinch of salt. Once the apple pieces begin to soften and release their juices, stir in a cornstarch slurry and cook briefly until the sauce turns glossy and coats the filling.

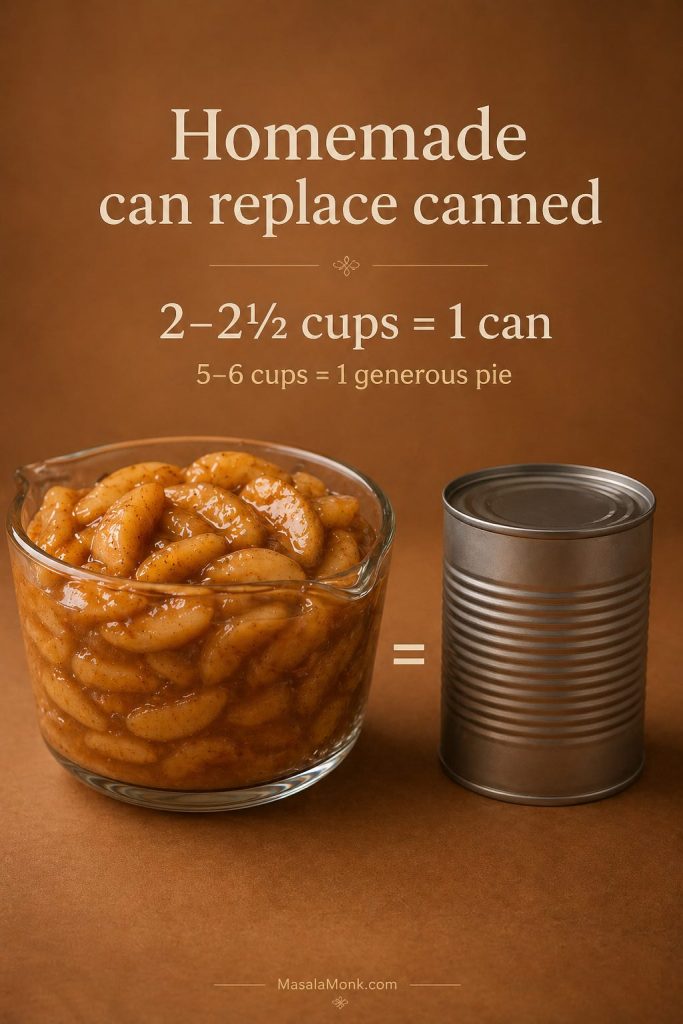
This apple pie filling recipe makes about 6 cups / 1.4 liters of homemade filling. That is enough for one generous 9-inch pie, one 9×9 apple crisp, several hand pies, or a few smaller freezer portions. For a canned-style replacement, portion about 2 to 2 1/2 cups into a container or freezer bag.

In other words, this recipe gives you apple filling that can go straight into pie or be saved for later desserts. Since the filling is cooked first, it is easier to adjust than a raw apple mixture that releases liquid inside the oven.

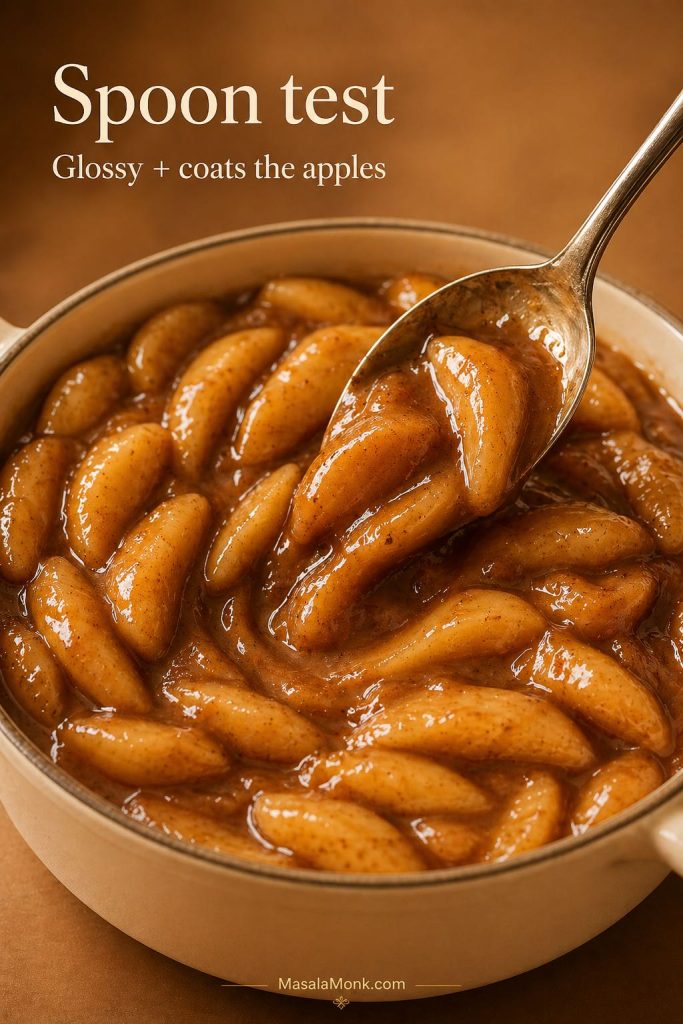
Close-up spoon lifting glossy cinnamon apple pie filling, with thick sauce clinging to sliced apples.
Before cooling, the sauce should cling to the apples but still move when spooned. If it looks slightly loose while hot, that is fine because the filling thickens more as it rests.

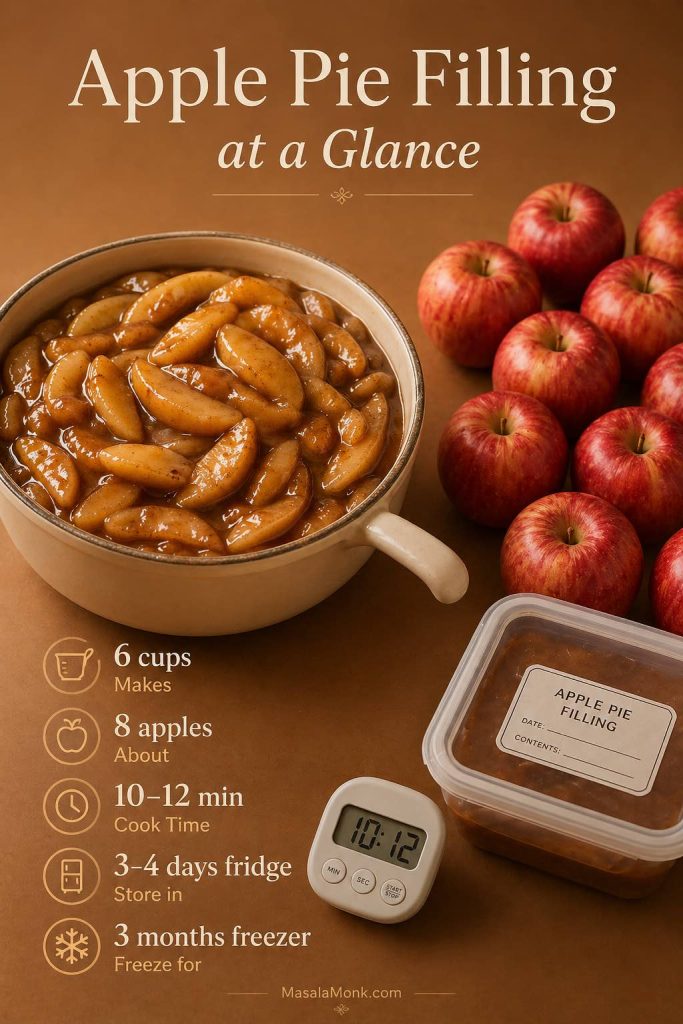
Apple Pie Filling at a Glance

Yield
About 6 cups / 1.4 liters
Apple Amount
8 medium firm apples
Cook Time
10–12 minutes
Storage
3–4 days fridge, 3 months freezer
Apple pie filling guide showing 6 cups yield, 8 apples, 10 to 12 minutes cook time, 3 to 4 days refrigerator storage, and 3 months freezer storage.
One full batch gives about 6 cups from 8 medium apples. Plan on 10–12 minutes of cooking, then store the cooled filling for 3–4 days in the fridge or up to 3 months in the freezer.
Detail Best Choice
Best apple cut for pie 1/4-inch / 6 mm slices
Best apple cut for hand pies and toppings 1/2-inch / 1.25 cm dice
Best thickener for this recipe Cornstarch slurry
Canned filling replacement 2 to 2 1/2 cups replaces one 20–21 oz can
Canning Do not can this recipe; use tested canning guidance

Why This Apple Pie Filling Recipe Works

This recipe works because the apple filling thickens in the pan instead of releasing extra liquid inside the pie. Rather than hoping raw apple pieces bake down evenly under the crust, you soften the fruit briefly on the stovetop and thicken the juices before baking.

As the apple pieces cook, they release enough liquid to form a cinnamon-apple sauce. From there, the cornstarch slurry turns those juices glossy and spoonable. Therefore, the recipe is easier to fix if the filling looks too loose, too stiff, or too sweet before it goes into pie.

  • The apple pieces stay tender, not mushy. They cook only until they begin to soften, so they can still hold their shape in pies, crisps, and pastries.
  • The sauce turns glossy. A cornstarch slurry thickens the apple juices into a smooth filling without making it heavy.
  • The cut changes the use. Slices are best for pie, while diced apple filling works better for hand pies, turnovers, and toppings.
  • The batch size is practical. Six cups gives you enough for one generous 9-inch pie or several smaller freezer portions.
  • The texture can be adjusted. For toppings, use slightly less cornstarch; for pies and turnovers, keep the filling thicker.

Ingredients for Apple Pie Filling

Although this recipe uses simple ingredients, the timing and balance matter. Choose firm apples, brighten them with lemon, let the sugar pull out their juices, and then thicken those juices with a smooth slurry once the apples have started to soften.

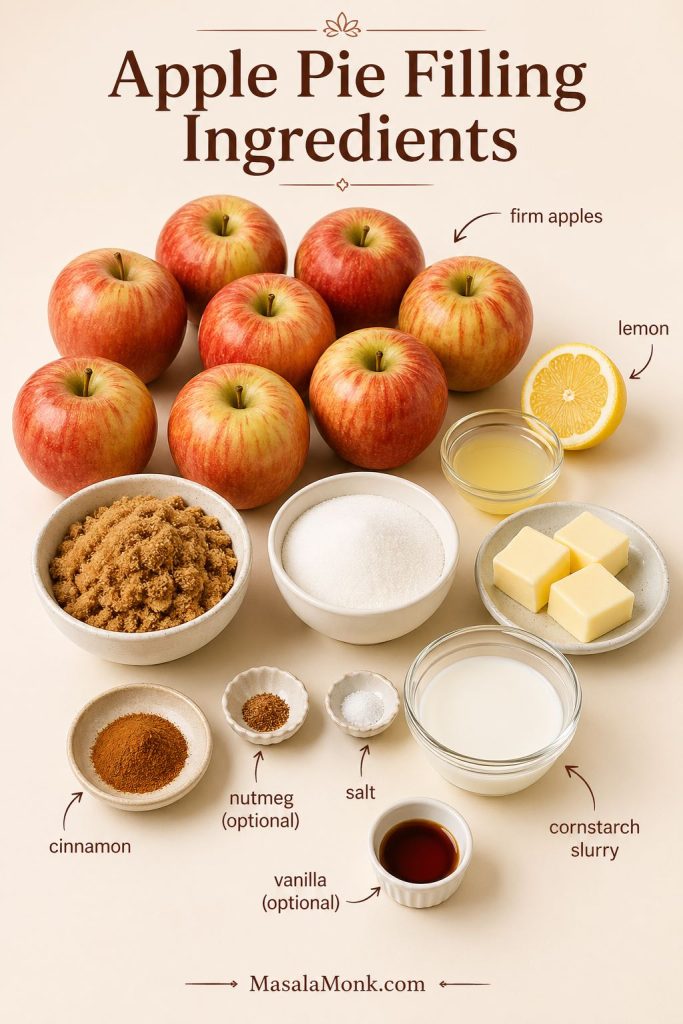
Ingredient guide for apple pie filling with firm apples, lemon, butter, brown sugar, granulated sugar, cinnamon, nutmeg, salt, cornstarch slurry, and vanilla.
Use firm apples as the base, then thicken the released juices with 4 tablespoons cornstarch mixed into 1/3 cup water or apple juice. Add extra liquid only if the sauce tightens too much.

Firm Apples

Start with firm baking apples that can soften without collapsing. Granny Smith, Honeycrisp, Pink Lady, Braeburn, and similar firm apples all work well. For deeper flavor, use a mix of tart and sweet apples instead of relying on only one variety.

For pie, this recipe works best when the apple filling has enough structure to survive a second bake. That is why very soft or mealy apples are better saved for applesauce-style toppings, not a filling that needs to hold its shape.

Lemon Juice

Lemon juice keeps the filling bright and balances the sweetness. It also helps slow browning while you prep the apples. For a fuller prep guide, see MasalaMonk’s guide on how to prevent sliced apples from turning brown. Use 1 1/2 to 2 tablespoons lemon juice in this filling, depending on how tart your apples are.

For example, this recipe uses lemon juice to keep the apple flavor bright while cornstarch helps the filling set cleanly in pie. That said, if you are following a tested canning recipe, use the type and amount of acid that source specifies because acidity matters for shelf-stable storage.

Brown Sugar and Granulated Sugar

Brown sugar gives the filling a warmer, slightly caramel-like flavor, while granulated sugar keeps the sweetness cleaner and helps draw juice from the apple pieces. If your apples are already very sweet, reduce the granulated sugar first before cutting the brown sugar.

Together, the two sugars give the sauce enough body without making it taste heavy. As the apples cook, they release juice into the pan, which then becomes the base of the glossy cinnamon sauce.

Butter

A little butter gives the sauce a richer finish without making it greasy or heavy. It also helps the cinnamon and sugar taste rounder once the filling cools.

Cinnamon, Nutmeg and Salt

Cinnamon is the main spice here. Nutmeg is optional, but a small amount adds warmth. Salt is just as important because it keeps the filling from tasting flat and makes the apple flavor clearer.

Cornstarch Slurry

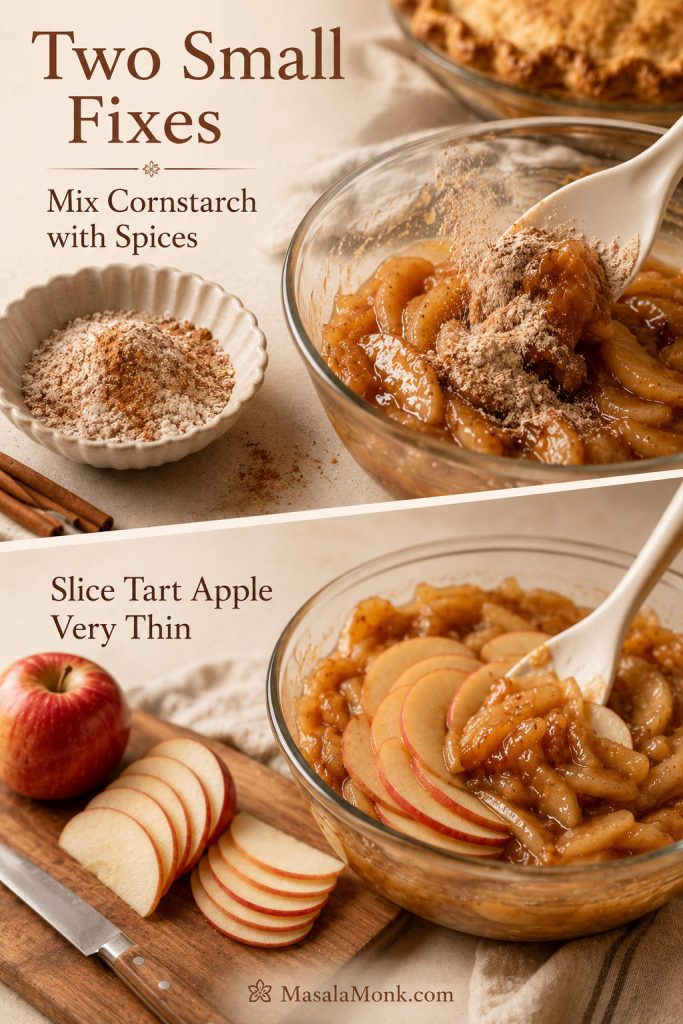
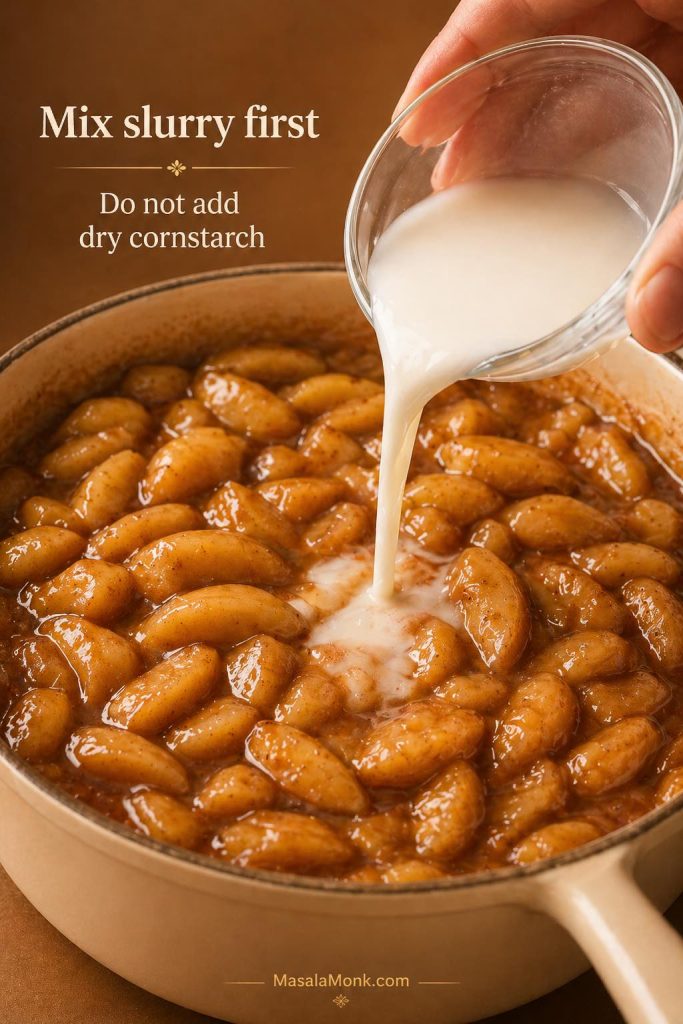
This is an apple pie filling with cornstarch, so the sauce should turn glossy once it bubbles. Before adding the thickener to the pan, mix the cornstarch with water or apple juice until smooth. Do not sprinkle dry cornstarch directly into the apple pieces, because it can clump.

At this stage, the change should be easy to see. The sauce will go from thin and slightly cloudy to shiny and thicker within a minute or two. The apple pieces should look coated with filling, not buried in a heavy paste.

Once the slurry goes in, the recipe should turn the apple juices into a glossy filling that can hold its shape in pie. However, long overcooking can make the sauce too stiff or cloudy, so stop once the filling thickens and coats the fruit.

Can You Make Apple Pie Filling Without Cornstarch?

You can make refrigerator or freezer apple filling without cornstarch, but the recipe will behave differently in pie. Tapioca starch can give a slightly more elastic finish, arrowroot can look glossy but may thin if overheated, and flour makes the sauce more opaque and rustic.

For the cleanest stovetop apple pie filling, cornstarch is still the easiest choice. If you are making shelf-stable canned pie filling, do not swap thickeners casually; use a tested canning recipe with the approved thickener and processing method.

Vanilla

Vanilla is optional. It works especially well when the cooked apple filling will be used as a topping for pancakes, waffles, oatmeal, yogurt, or ice cream.

Best Apples for Apple Pie Filling

The best apples for apple pie filling are firm apples that hold their shape after cooking. A blend of tart and sweet apples usually tastes better than a single variety because the filling gets both brightness and natural sweetness.

In most kitchens, you do not need one perfect apple variety to make this work. The best flavor usually comes from mixing one tart apple with one sweeter, firmer apple. In addition, a mixed-apple recipe gives the filling more depth once it bakes inside pie.

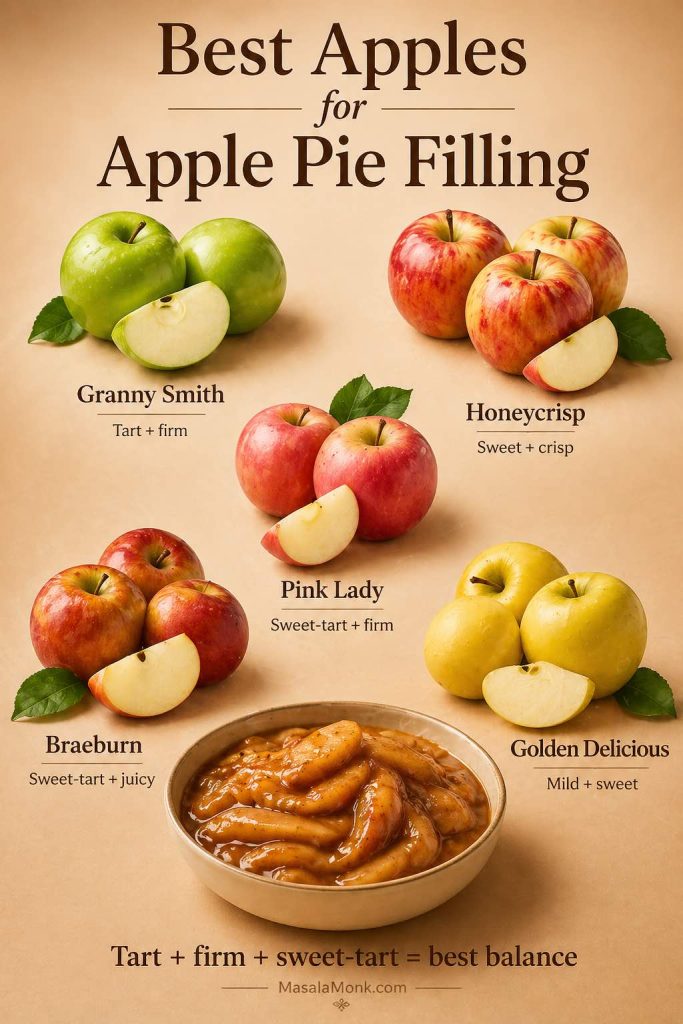
Best apples for apple pie filling, including Granny Smith, Honeycrisp, Pink Lady, Braeburn, and Golden Delicious, with a tart and firm apple balance note.
For better pie texture, pair a tart firm apple such as Granny Smith with a sweeter firm apple such as Honeycrisp, Pink Lady, or Braeburn. That mix gives brightness, sweetness, and structure.
Apple Flavor Texture Best Use
Granny Smith Tart Very firm Best tart base for pies
Honeycrisp Sweet-tart Firm and juicy Great blended with Granny Smith
Pink Lady Bright and balanced Firm Good all-purpose filling apple
Braeburn Sweet-tart and aromatic Holds well Good for pies and crisps
Golden Delicious Sweet and mellow Softer Best blended, not used alone
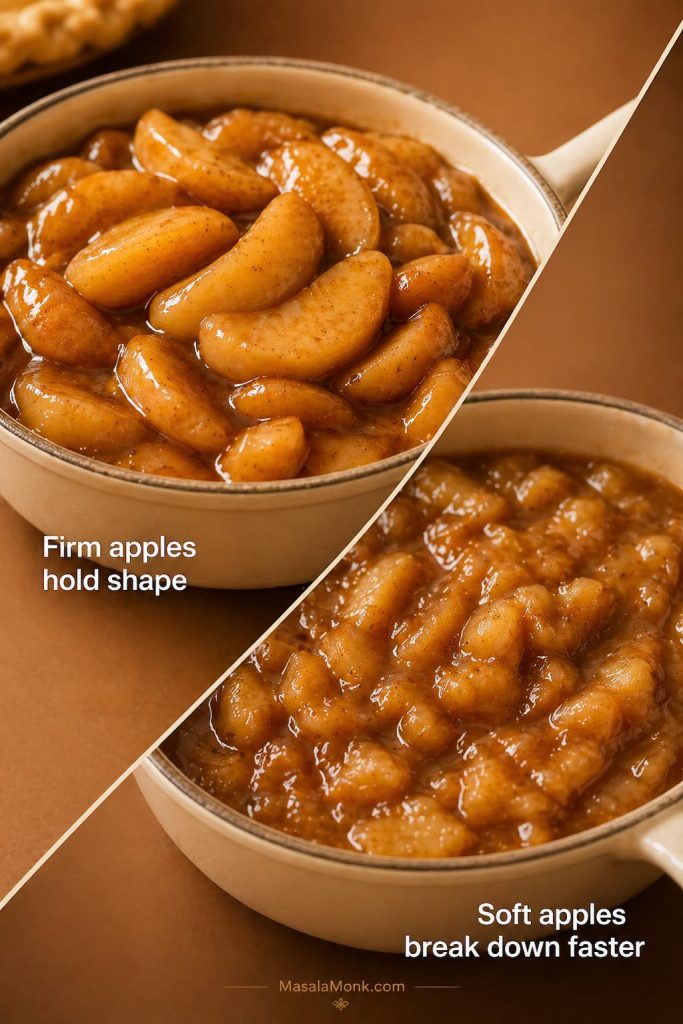
Comparison of firm apples holding their shape in apple pie filling and soft apples breaking down into a looser texture.
Firm apples are best when the filling will be baked again in pie, crisp, hand pies, or turnovers. Softer apples can work for toppings, but they break down faster and give a looser texture.

Avoid very soft or mealy apples if you want distinct apple pieces. Softer apples can work for toppings, but they are more likely to break down if you cook them on the stovetop and then bake them again in a pie or crisp.

Sliced vs Diced Apples for Apple Pie Filling

The apple cut may seem like a small detail, but it changes how the filling behaves once it goes into pastry, crisp topping, or a spoonable dessert. Before cooking, decide whether this recipe is headed for a full apple pie or a diced filling for smaller pastries.

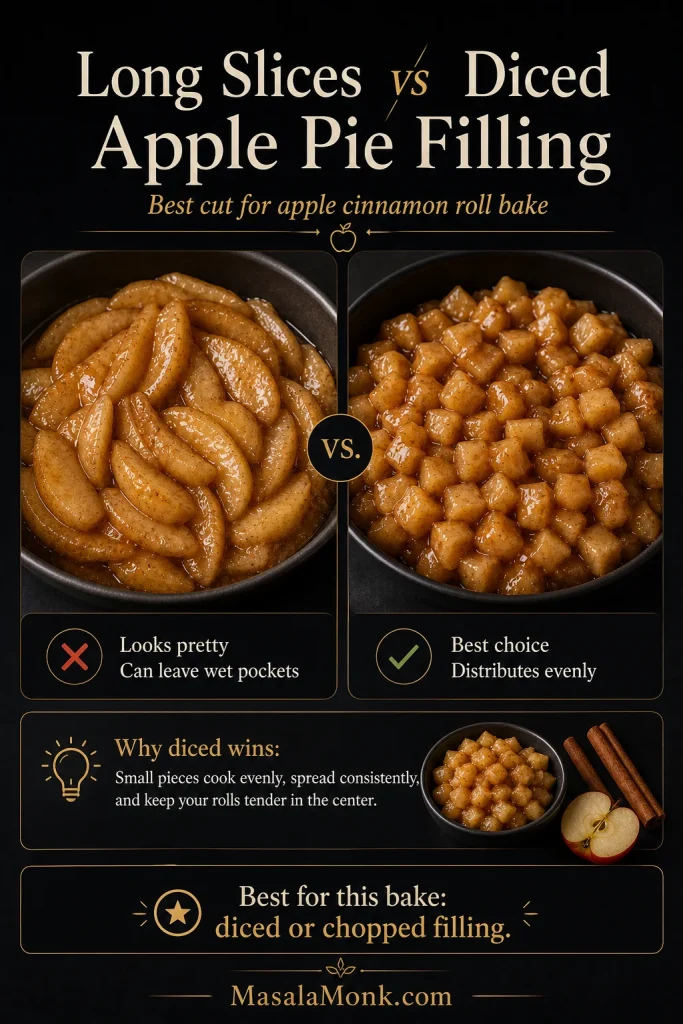
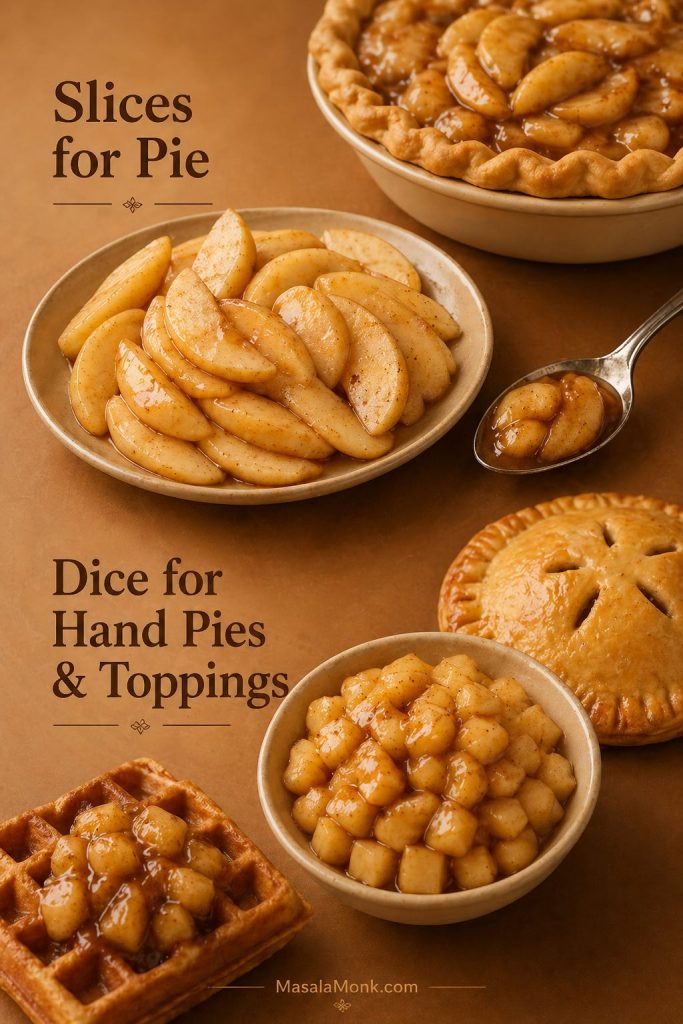
For pie, this recipe works best when the apple filling is sliced thin enough to layer neatly inside the crust. For hand pies, turnovers, and toppings, diced apple filling is easier to spoon, seal, freeze, and reheat.

Once you know how you want to use the filling, the cut becomes much easier to choose: slices for pie, dice for pastries, and smaller pieces for toppings. That small choice matters, because a slice that feels perfect in a pie can be awkward inside a hand pie.

Guide comparing sliced apples for pie with diced apples for hand pies, turnovers, waffles, and toppings.
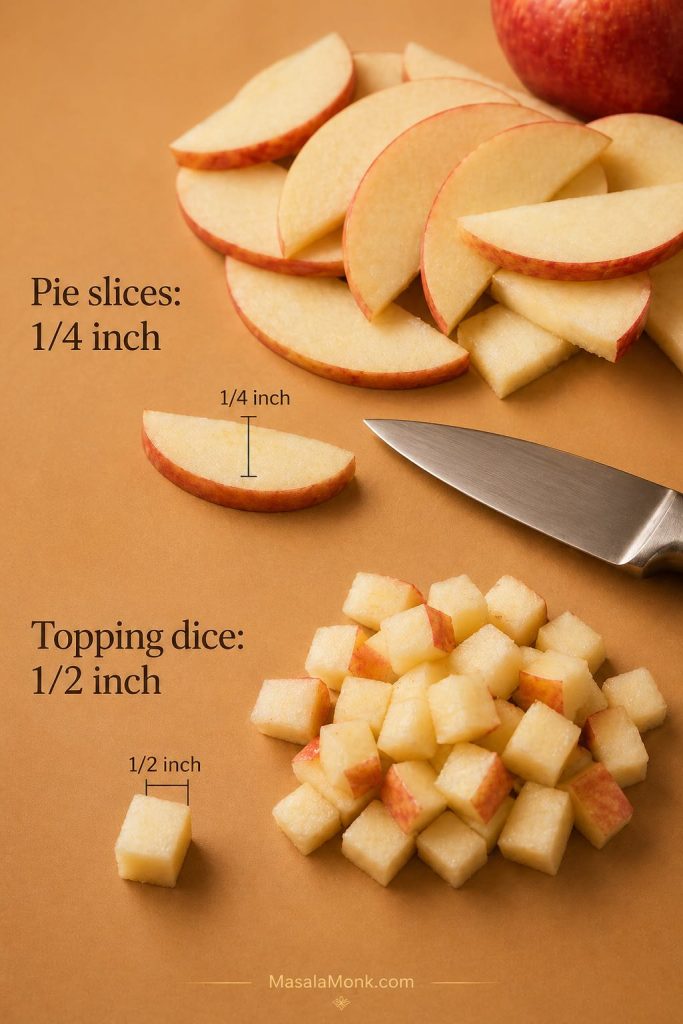
Use 1/4-inch slices when the filling is headed for a classic 9-inch pie. Use 1/2-inch dice for hand pies, turnovers, oatmeal, waffles, yogurt bowls, or anything that needs spoonable pieces.
Final Use Best Apple Cut Why It Works
Classic apple pie 1/4-inch / 6 mm slices Layers neatly and feels like pie
Deep-dish pie 1/4- to 1/3-inch slices Holds structure in a taller pie
Apple crisp or crumble Slices or chunky dice Both work depending on texture
Hand pies 1/2-inch / 1.25 cm dice Easier to seal inside pastry
Turnovers 1/2-inch dice Prevents large pieces from tearing pastry
Cinnamon roll bake Small dice or chopped slices Mixes better with dough
Pancakes, waffles and oatmeal Dice Easier to spoon and serve
Apple cut-size guide showing 1/4-inch slices for pie and 1/2-inch diced apples for toppings and small pastries.
Even cutting matters more than perfect cutting. Thick apple pieces may stay firm after the sauce is done, while very thin or uneven pieces can soften too much before the filling thickens.

When in doubt, dice the apples if you want the most flexible batch. Diced filling is easier to freeze, spoon, seal into pastry, and reheat for quick desserts.

How to Make Apple Pie Filling

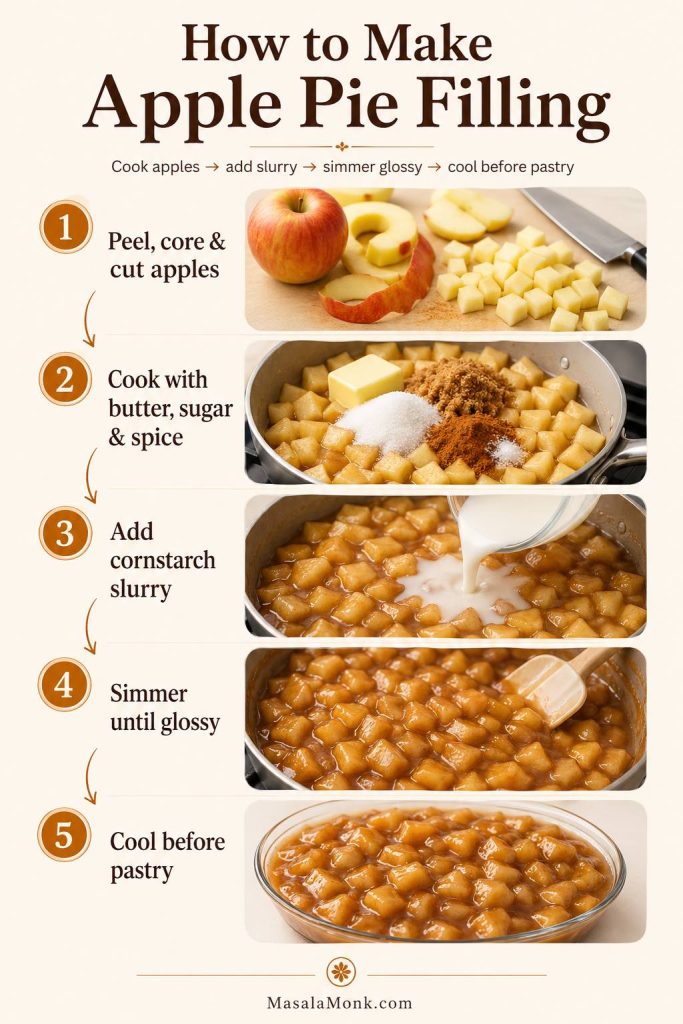
This stovetop method is simple, but the texture cues matter. First, cook the apple pieces until they begin to soften. Next, thicken the juices briefly. Finally, cool the filling before using it in pastry so the crust does not soften too early.

The goal is not applesauce, though. You only want firm apple pieces to become partly tender, with enough structure left to survive a second bake in pie, crisp, or pastry.

Five-step apple pie filling board showing apples cut, cooked with butter, sugar and spice, thickened with slurry, simmered until glossy, and cooled before pastry.
Cook the apples covered for 4–6 minutes until they start releasing juice, then add the slurry and simmer 1–2 minutes. After the sauce turns glossy, cool the filling completely before pastry.

1. Peel, Core and Cut the Apples

First, peel and core the apples. Then slice or dice them depending on how you plan to use the filling. For pie, cut 1/4-inch / 6 mm slices. For hand pies, turnovers, cinnamon roll bakes, pancakes, waffles, or oatmeal, use 1/2-inch / 1.25 cm dice.

2. Toss with Lemon Juice

After cutting the apples, toss them with lemon juice right away. This keeps the flavor bright and slows browning while you prepare the rest of the ingredients.

3. Cook the Apples with Butter, Sugar and Spices

Melt the butter in a wide pan over medium heat. Add the apples, brown sugar, granulated sugar, cinnamon, nutmeg, and salt. Cook covered for 4 to 6 minutes, stirring once or twice, until the apple pieces begin to release juice and soften slightly.

At this stage, the apples should bend a little when stirred, but they should not be falling apart. Meanwhile, a wide pan helps the pieces cook more evenly and gives the juices room to reduce slightly before the slurry goes in.

4. Add the Cornstarch Slurry

Before adding the thickener, whisk the cornstarch with water or apple juice until smooth. From there, stir the slurry into the apples. This helps it blend into the filling more evenly than dry cornstarch and gives the sauce a cleaner, glossier finish.

Smooth cornstarch slurry being poured into simmering apple pie filling, with a warning to mix slurry first and not add dry cornstarch.
Whisk cornstarch with water or apple juice before adding it to the pan. Dry cornstarch can clump quickly, but a smooth slurry blends into the apple juices and thickens the sauce evenly.

5. Cook Until Glossy

After the slurry goes in, cook for 1 to 2 minutes, stirring gently. The filling is ready when the sauce turns glossy, the liquid thickens enough to coat the apple pieces, and the pieces still hold their shape.

A good cue is the spoon test: drag a spoon through the filling and watch the sauce cling lightly to the apples instead of running back into a thin puddle. If it looks pasty, loosen it with a small splash of apple juice or water.

Spoon test for apple pie filling showing glossy sauce coating sliced apples while the apple pieces stay intact.
After the slurry goes in, use texture rather than time alone. If the sauce coats the apples and looks shiny, stop cooking; if it still runs like syrup, simmer 1 minute more.

By the end of cooking, this recipe should give you apple filling that looks glossy enough for toppings and sturdy enough for pie. If it still looks watery, let it bubble for another minute before adding more starch.

6. Cool Before Using

Remove the pan from the heat and stir in vanilla, if using. Spread the filling in a shallow dish so it cools faster. Before adding it to pie crust, hand pies, turnovers, or freezer bags, cool it completely.

Do not overcook the apples: This recipe should make apple pie filling, not applesauce. Stop when the apple pieces are partly tender and the sauce is glossy, because the filling may cook again in pie, crisp, or pastry.

How Thick Should Apple Pie Filling Be?

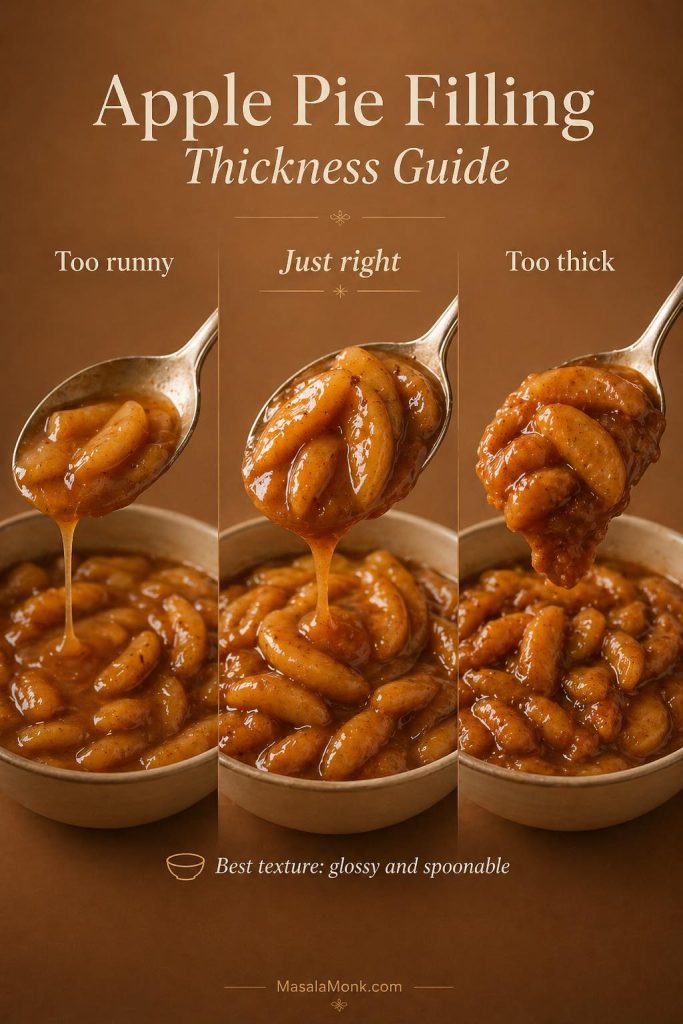
The best apple pie filling should look shiny and loose enough to spoon, but thick enough that the sauce clings to the apple pieces. In other words, the hot filling should look a little looser than the final cooled filling because it will thicken more as it rests.

For pie, this recipe should give you apple filling that mounds softly on a spoon instead of running like syrup. However, if you are using the recipe as a topping, the filling can stay slightly looser and more spoonable.

By the time it cools, the apple filling should look glossy and thick enough to sit inside a pie crust without spreading everywhere. If it turns stiff or pasty, loosen it gently with apple juice or water before using.

Three-texture apple pie filling guide comparing too runny, just right, and too thick, with the best texture labeled glossy and spoonable.
For a softer topping, use about 3 tablespoons cornstarch. For an all-purpose batch, use 4 tablespoons; for pie, hand pies, or turnovers that need more hold, use 4–5 tablespoons.
Use Cornstarch for 6 Cups Filling Texture Goal
Pancakes, waffles, oatmeal, yogurt 3 tbsp / 24 g Soft and spoonable
Crisps, crumbles, cobblers 3 1/2 to 4 tbsp / 28–32 g Glossy but not stiff
Pies, hand pies, turnovers 4 to 5 tbsp / 32–40 g Holds shape better
Canning Do not use this recipe Use tested canning guidance

The base version uses 4 tablespoons / about 32 g cornstarch, which is the best middle ground for pies, crisps, freezer portions, and spoonable desserts. For a softer topping-style filling, reduce the cornstarch slightly.

Since apple juiciness varies, start with 1/3 cup liquid in the slurry and add more only if the filling becomes too stiff. It is much easier to loosen a thick filling than to fix one that starts watery.

How Much Apple Pie Filling for One Pie?

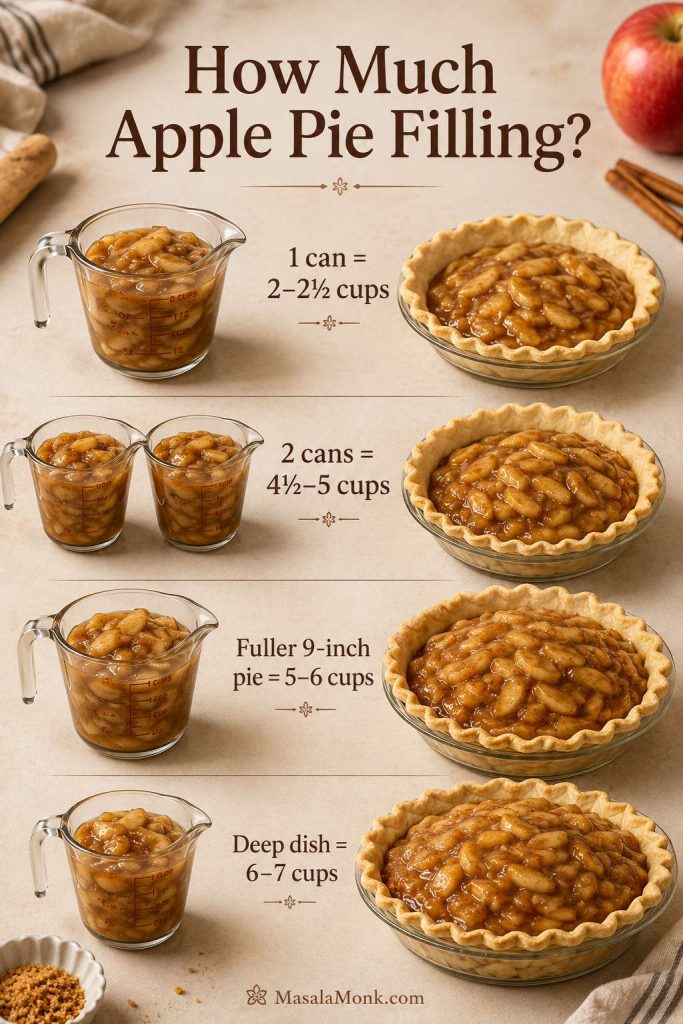
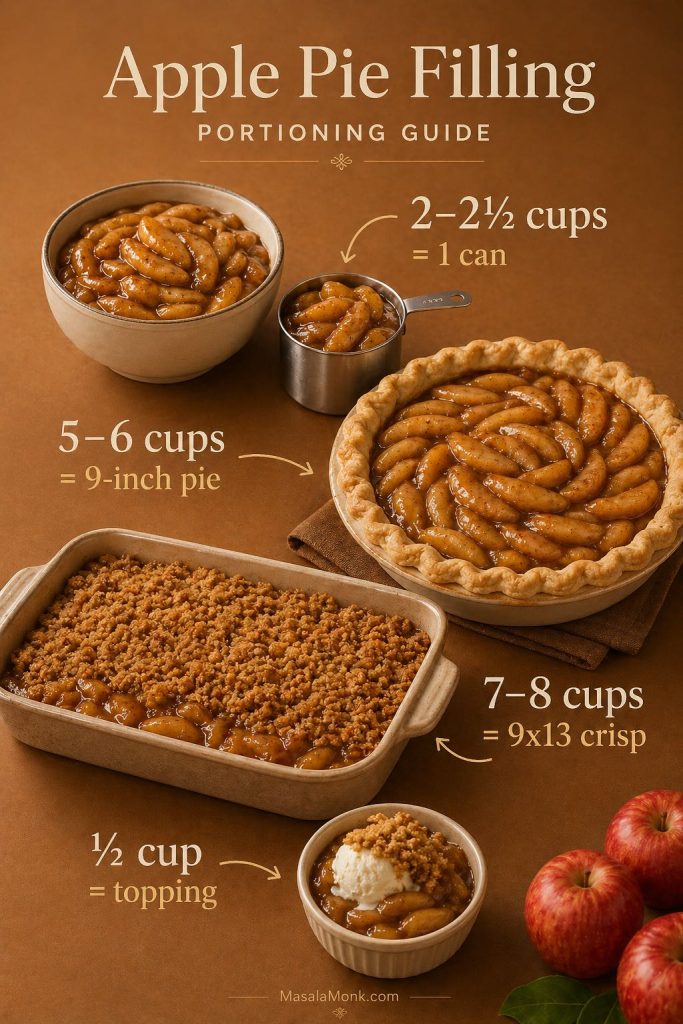
For one generous apple pie, this recipe gives you about 5 to 6 cups of filling. A shallower 8- or 9-inch pie may need closer to 4 to 5 cups, while a deep-dish pie may need 6 to 7 cups.

At this point, the filling becomes easier to use if you think in portions. The right amount depends less on the dessert name and more on the pan size, crust style, and how full you want the finished bake to be.

For a shallower pie, this recipe may need only 4 to 5 cups of apple filling. For deep-dish pie, the recipe may need to be scaled so you have closer to 6 to 7 cups of filling.

Portion guide for apple pie filling showing 2 to 2 1/2 cups for one can, 5 to 6 cups for a 9-inch pie, 7 to 8 cups for a 9x13 crisp, and 1/2 cup for topping.
Portion before storing so the filling is easy to use later: 2–2 1/2 cups replaces one can, 5–6 cups fills a 9-inch pie, 7–8 cups works for a 9×13 crisp, and 1/2 cup is enough for one topping.
Use Filling Amount
Standard 8- or 9-inch pie 4–5 cups
Generous 9-inch pie 5–6 cups
Deep-dish 9-inch pie 6–7 cups
One 20–21 oz can replacement 2 to 2 1/2 cups
8×8 apple crisp 3–4 cups
9×9 apple crisp 4–5 cups
9×13 apple crisp 7–8 cups
Hand pies 2–3 cups
Turnovers 2–3 cups
Large 9×13 cinnamon roll bake 4 1/2–5 1/2 cups
Pancake or waffle topping About 1/2 cup per serving

Using the filling right away? Go to how to use it in apple pie, ways to use apple pie filling, or freezer portions.

Small-Batch Apple Pie Filling

If you only need enough apple pie filling for pancakes, waffles, oatmeal, mini desserts, or one small crisp, make a half batch instead of freezing leftovers. Use 4 medium firm apples, 3/4 to 1 tablespoon lemon juice, 1 tablespoon butter, 1/4 cup brown sugar, 2 tablespoons granulated sugar, 3/4 teaspoon cinnamon, a pinch of salt, 2 tablespoons cornstarch, and 3 to 4 tablespoons water or apple juice.

The method stays the same, but the cooking time may be slightly shorter because there are fewer apples in the pan. From there, add the slurry and cook just until the sauce turns glossy.

This smaller recipe is handy when you want apple filling for a quick dessert or a small pie-style topping without committing to a full batch.

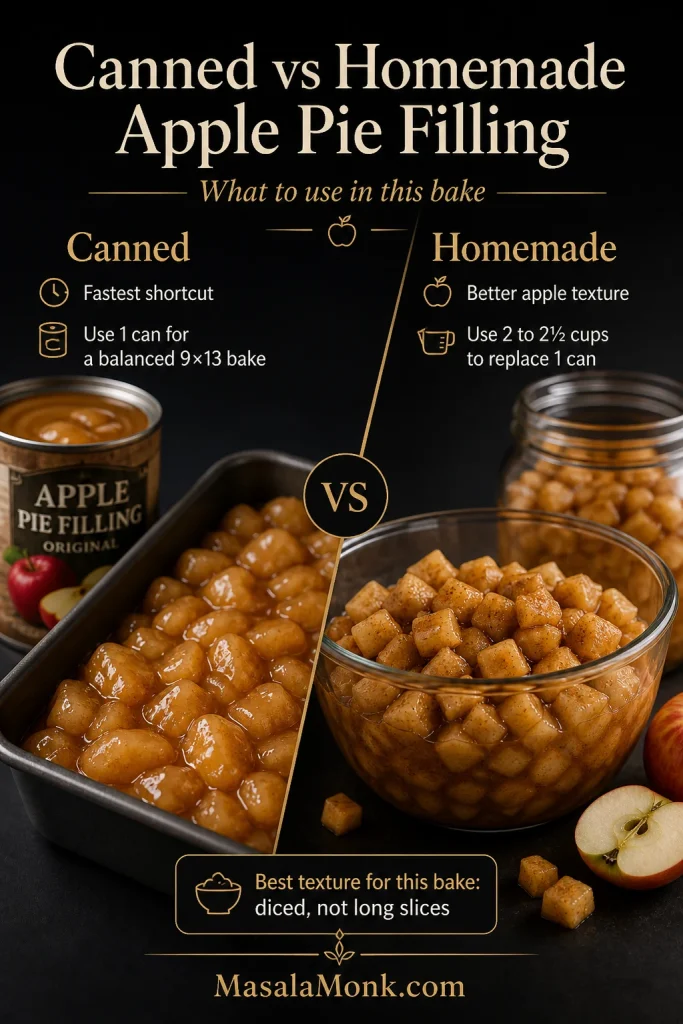
Can This Replace Canned Apple Pie Filling?

Yes. This homemade filling can replace canned filling in many desserts. Use about 2 to 2 1/2 cups as a rough replacement for one standard 20- to 21-ounce can. For one generous 9-inch pie, use about 5 to 6 cups.

Homemade apple pie filling beside a plain can, showing that 2 to 2 1/2 cups replaces one can and 5 to 6 cups makes one generous pie.
Replace one 20–21 oz can with 2–2 1/2 cups homemade filling. For recipes that call for two cans, start with about 4 1/2–5 cups, then adjust if the dessert needs more sauce.

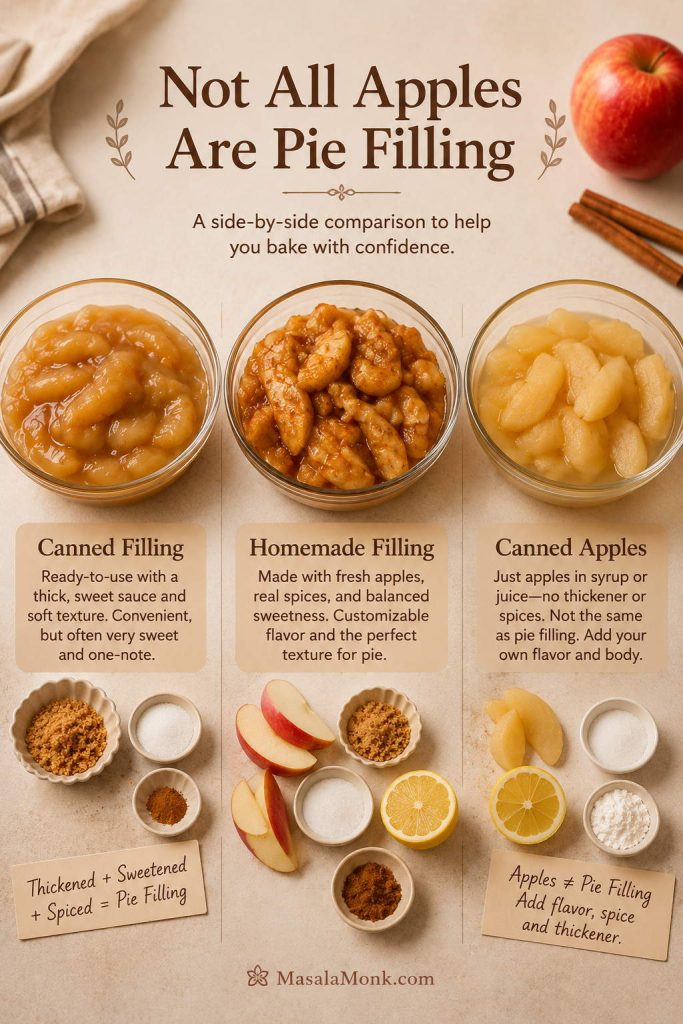
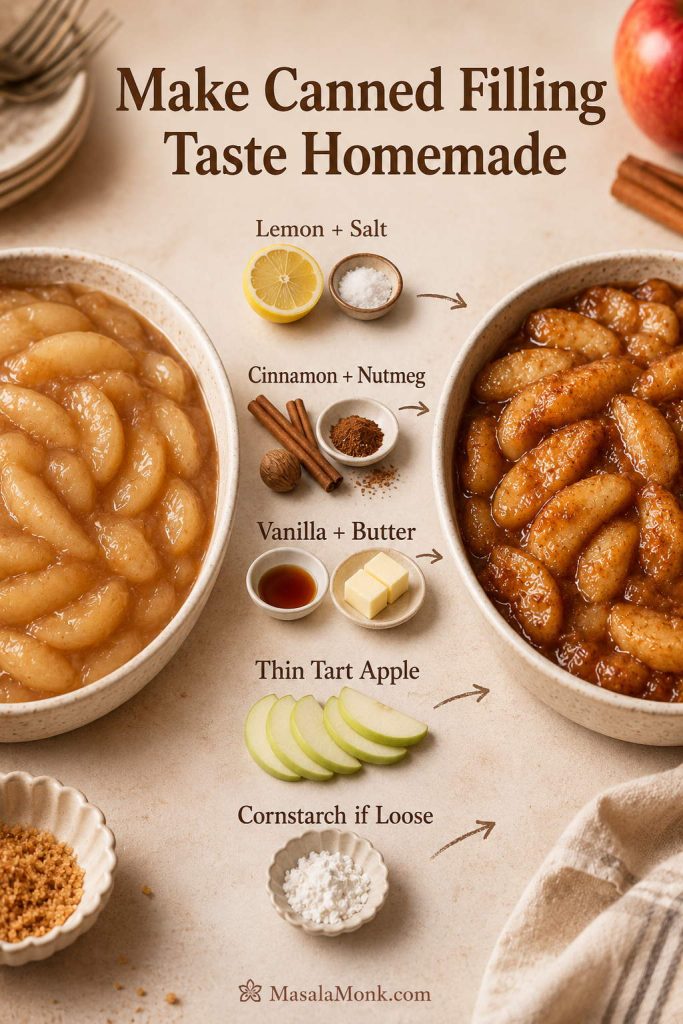
In many desserts, this recipe can replace canned apple pie filling without making the final dish overly syrupy. Compared with canned filling, the homemade version is usually less sweet, less gelled, and easier to adjust with lemon juice or a pinch of salt.

For one standard can, use about 2 to 2 1/2 cups of apple filling from this recipe in pie-style desserts. If a dessert calls for two cans of apple pie filling, this recipe usually replaces them with about 4 1/2 to 5 cups.

The full 6-cup batch gives you a little extra, which helps if you want a fuller pie, a deeper crisp, or a small topping portion left over. If you are replacing canned filling in a dessert, check the quick use chart for pie, crisp, cinnamon roll bake, dump cake, and toppings.

How to Use This Apple Pie Filling in a Pie

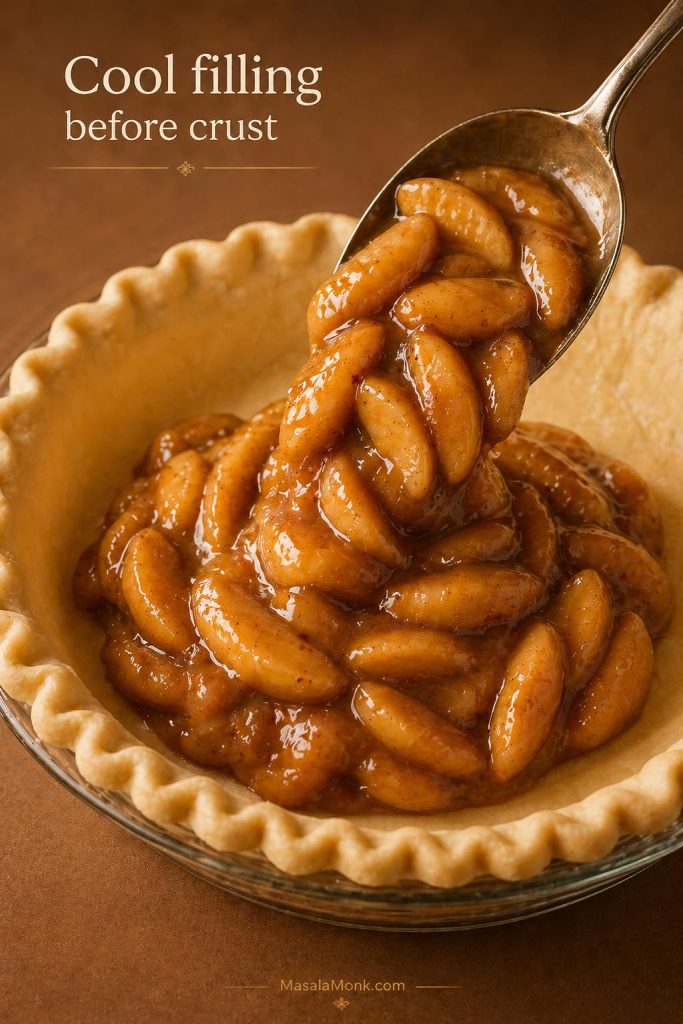
Although this is not a full pie-crust recipe, you can use the filling to make a classic apple pie. The key is to cool the batch first so it does not soften the crust before the pie goes into the oven.

For pie, this recipe works best when the apple filling is cooled completely before it meets the dough. Use the timing below as a starting point because pie crust thickness, pie plate material, and oven behavior can all change the final bake time.

Cooled apple pie filling being spooned into an unbaked pie crust before baking.
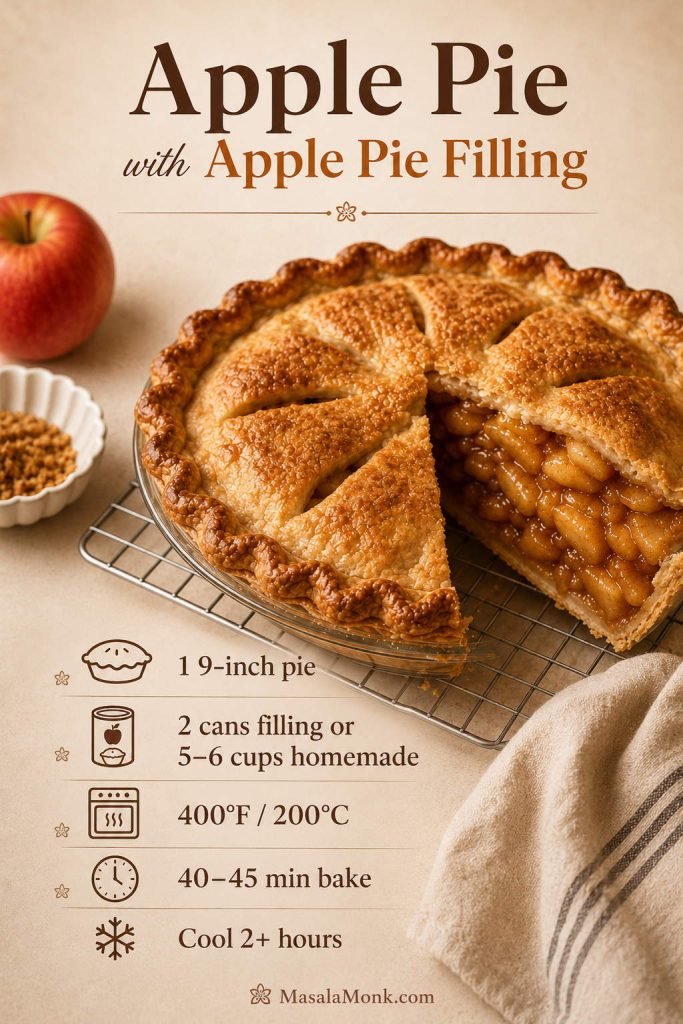
Use cooled or chilled filling before it touches pie dough. For a full pie, bake 20 minutes at 400°F, then reduce to 375°F for 30–35 minutes, until the crust is golden and the center bubbles.
Step What to Do
Filling amount Use 5–6 cups cooled filling for one generous 9-inch pie
Crust Use one bottom crust and one top crust, lattice, or crumble topping
Filling temperature Use cooled or chilled filling, not hot filling
Oven temperature Start at 400°F / 200°C, then reduce to 375°F / 190°C
Bake time Bake 20 minutes at 400°F, then 30–35 minutes at 375°F
Done when The crust is deep golden and the filling bubbles through the vents
Cooling Cool at least 2–3 hours before slicing

With the apple filling already cooked, the oven time is mostly about baking the crust and heating the pie until the center bubbles. If the crust browns too quickly, cover the edges with foil or a pie shield.

Recipes with Apple Pie Filling: How to Use It

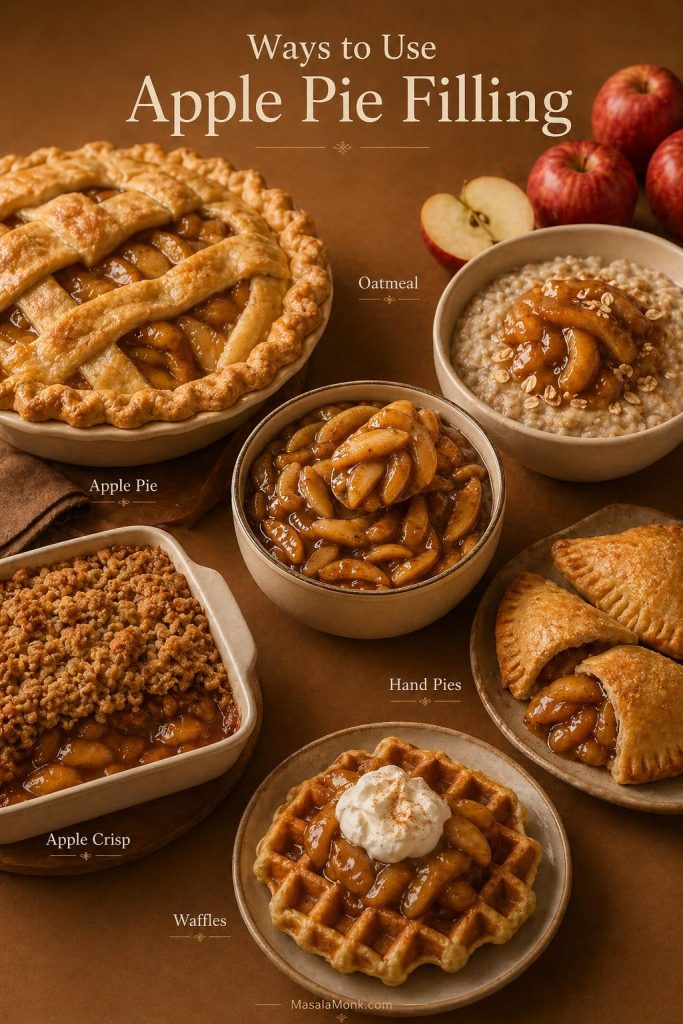
Once the apple filling is cooked and cooled, it can go far beyond pie. In real use, the important part is matching the cut, thickness, and amount to the dessert you are making.

Ways to use apple pie filling in apple pie, apple crisp, hand pies, waffles, and oatmeal.
Match the amount to the dessert: 5–6 cups for pie, 3–4 cups for an 8×8 crisp, 4 1/2–5 1/2 cups for a 9×13 cinnamon roll bake, or about 1/2 cup per breakfast serving.

Use this chart as a starting point, not a full recipe card for every dessert. That way, you can quickly see how much filling to use, what temperature usually works, and what “done” should look like before you commit to a separate recipe.

Use Filling Amount Temperature Approx. Time Done When
9-inch apple pie 5–6 cups 400°F, then 375°F 20 min, then 30–35 min Crust golden, filling bubbling
8×8 apple crisp 3–4 cups 350°F / 175°C 25–35 min Topping browned, edges bubbling
9×9 apple crisp 4–5 cups 350°F / 175°C 30–40 min Topping golden, filling hot
9×13 cinnamon roll bake 4 1/2–5 1/2 cups 350°F / 175°C 45–50 min Center dough baked through
Dump cake 4 1/2–5 1/2 cups 350°F / 175°C 45–60 min Top golden, filling bubbling
Pancake or waffle topping 1/2 cup per serving Low stovetop heat 3–5 min Warm and spoonable

Apple Pie

For one generous 9-inch apple pie, 5 to 6 cups of cooled filling is usually the right amount. Since the apple pieces are already cooked, focus on baking the crust until deeply golden and crisp. Do not add hot filling to chilled pie dough, or the bottom crust can soften before baking.

Apple Crisp or Apple Crumble with Apple Pie Filling

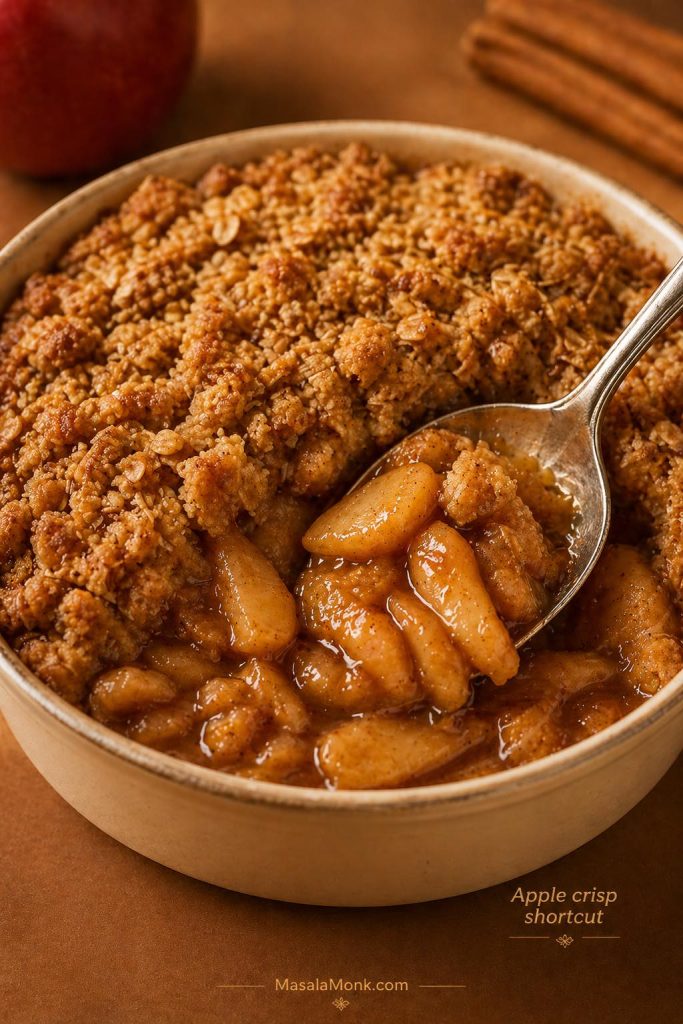
Apple crisp is one of the easiest desserts to make with this filling because the apple pieces are already cooked and the sauce is already thickened. Use 3 to 4 cups for an 8×8 pan, 4 to 5 cups for a 9×9 pan, or 7 to 8 cups for a larger 9×13 dessert. Spread the filling evenly, add a buttery oat crumble or simple flour crumble, and bake until the topping is golden and the edges are bubbling.

Apple crisp with golden crumble topping and glossy apple pie filling underneath.
For an 8×8 apple crisp, spread 3–4 cups filling in the dish and bake at 350°F for 25–35 minutes. The topping should brown and the filling should bubble around the edges.

For a quick crumble topping, mix 3/4 cup oats, 1/2 cup flour, 1/2 cup brown sugar, 1/2 teaspoon cinnamon, a pinch of salt, and 6 tablespoons cold butter until crumbly. Then scatter it over 3 to 4 cups of filling for an 8×8 crisp and bake until the edges bubble and the topping is golden.

Because this homemade apple filling is usually less syrupy than canned pie filling, do not make the crumble topping too dry. If the recipe has thickened a lot after chilling, loosen the filling with a spoonful of apple juice or water before baking.

Hand Pies and Turnovers

Small pastries do not forgive large apple slices. For hand pies and turnovers, diced filling is easier to seal inside pastry and less likely to leak. After the cooked apple filling cools completely, use a modest spoonful in each pastry so it does not push through the edges.

Diced apple pie filling used in small pastries, with open, sealed, and baked hand pie or turnover stages.
For hand pies and turnovers, diced filling is easier to seal than long slices. Use modest spoonfuls; 2–3 cups of filling is usually enough for a batch of small pastries.

Mini Apple Pies

Diced filling works better than long slices for muffin-tin mini pies. Since the pieces are smaller, they sit neatly inside small crust rounds and make the pies easier to eat.

Cinnamon Roll Bake

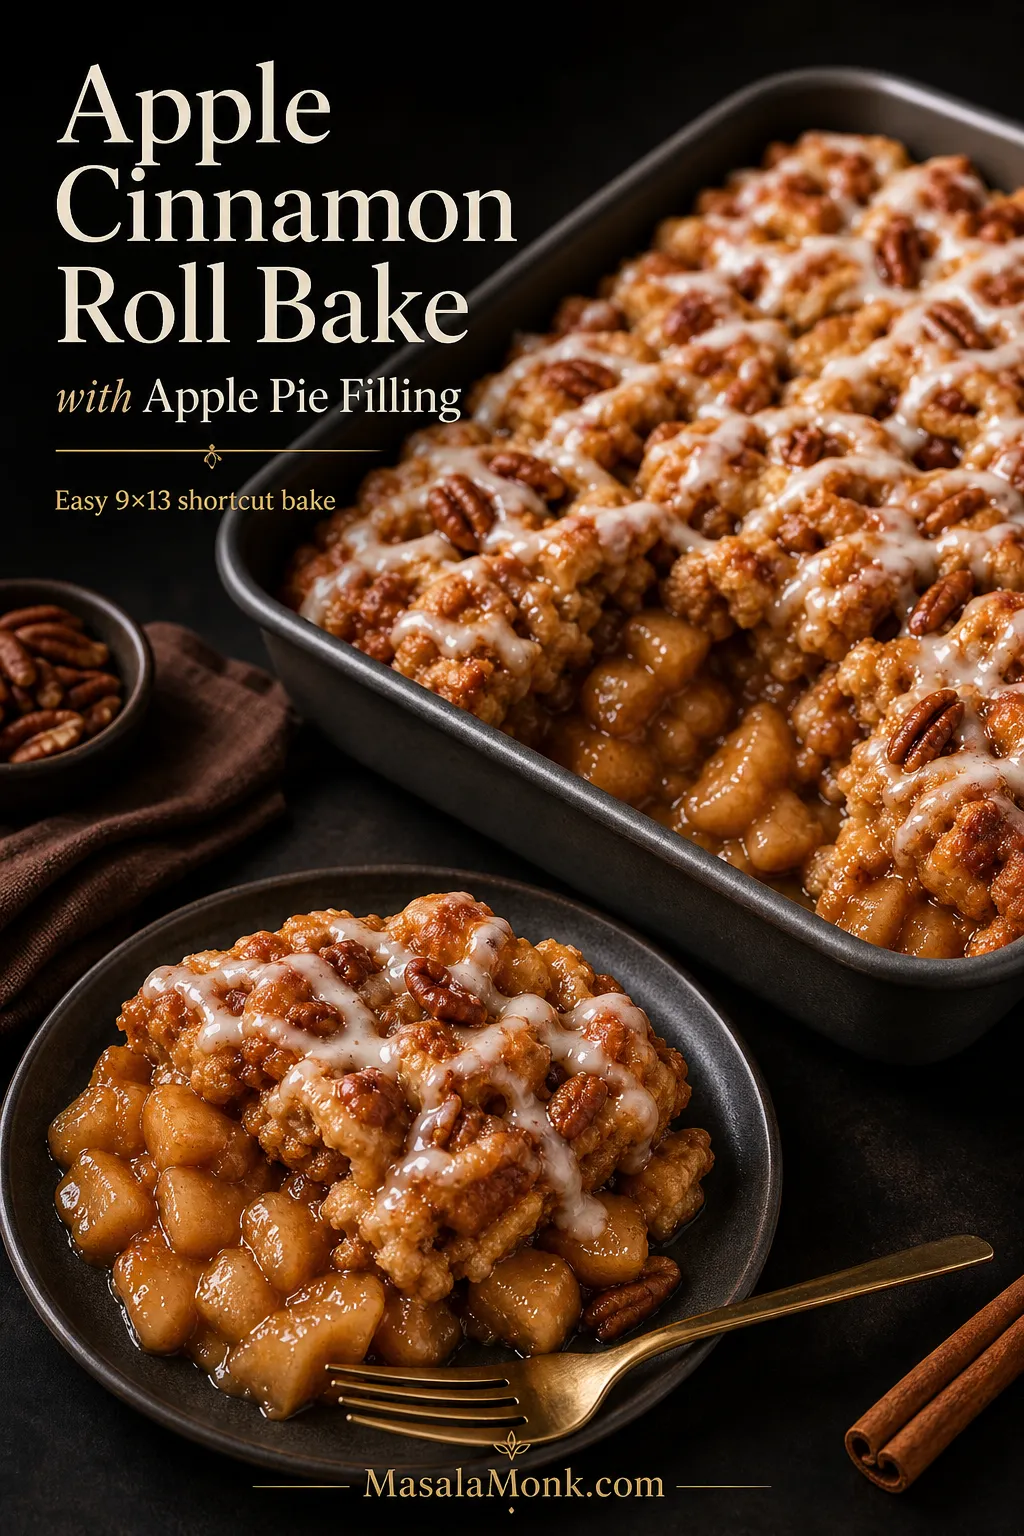
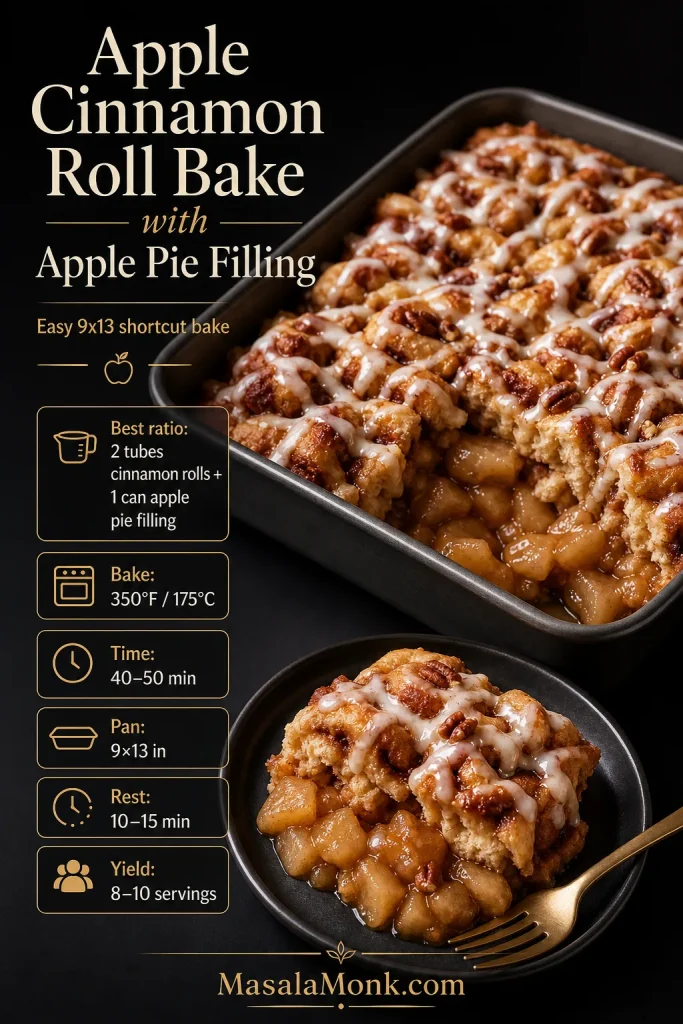
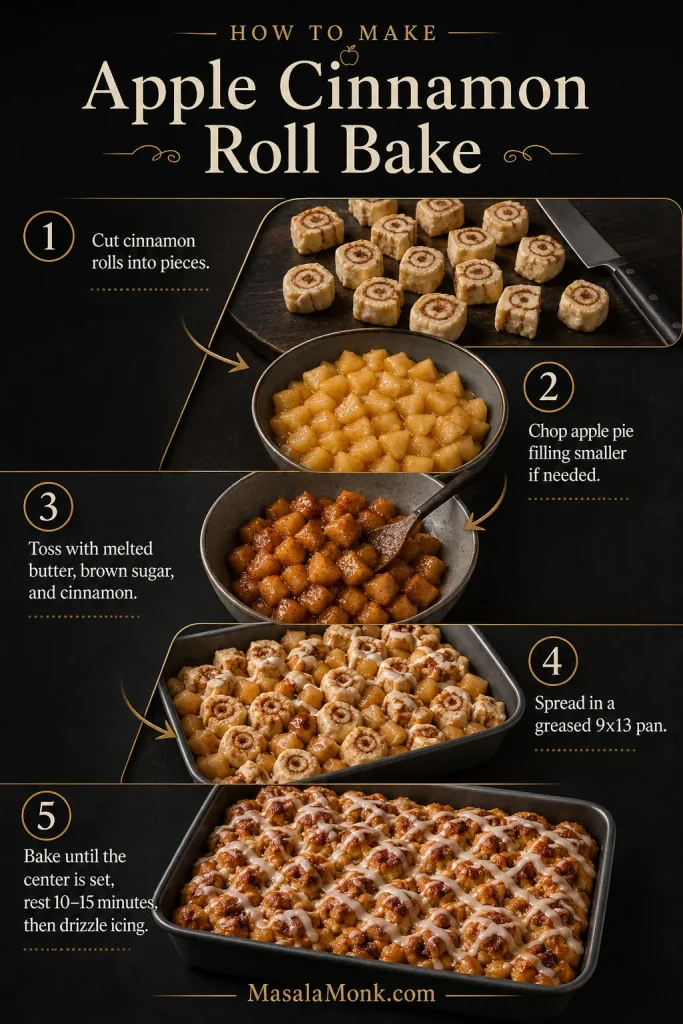
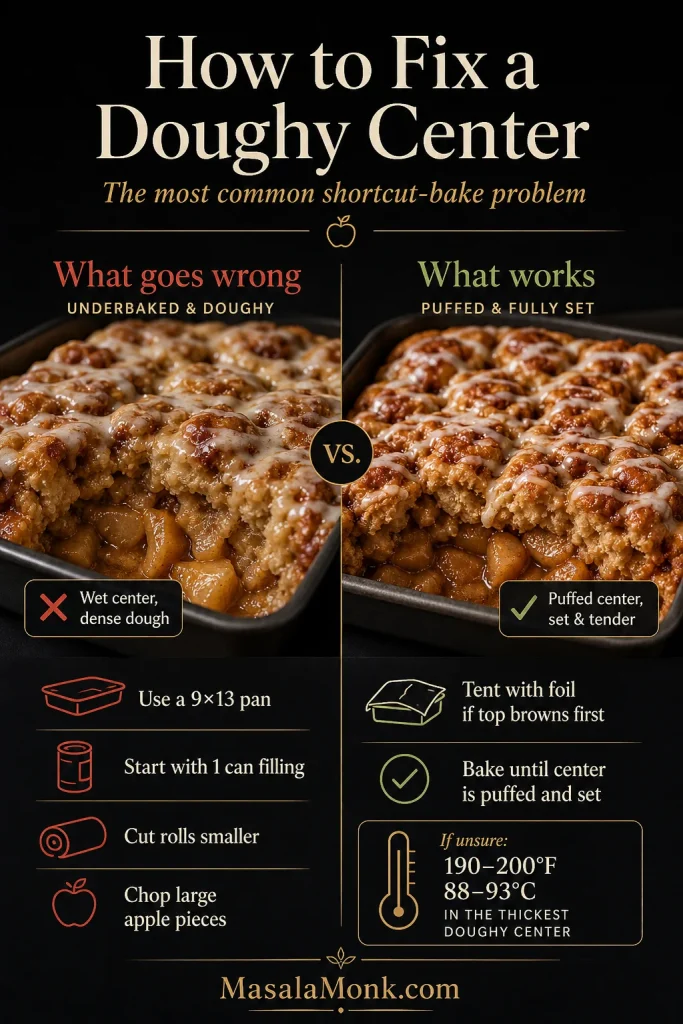
For a large 9×13 cinnamon roll bake, use about 4 1/2 to 5 1/2 cups of chopped or diced apple pie filling with two tubes of cinnamon roll dough. For a smaller one-tube bake, use about 2 to 2 1/2 cups. If the filling has long slices, chop them roughly before combining so the center can bake through more evenly.

Apple Dump Cake

Use about 4 1/2 to 5 1/2 cups of this homemade filling as a replacement for two standard cans in many dump cake-style desserts. Homemade filling may be less syrupy than canned filling, so spread it evenly before adding the topping.

Pancakes, Waffles, Oatmeal, Yogurt and Ice Cream

If the filling is headed for breakfast bowls or ice cream, keep it a little softer. It should spoon easily over pancakes, waffles, oatmeal, yogurt, or ice cream instead of sitting stiffly on top. It works especially well over fluffy buttermilk pancakes, oat pancakes, almond flour pancakes, or a warm bowl of protein oatmeal.

Making the filling ahead instead? Jump to make-ahead tips, freezing and portioning, or the recipe card.

Low-Sugar and No-Added-Sugar Apple Pie Filling

If you want a lower-sugar version, you can reduce the sugar, but the texture will change slightly. Sugar does more than sweeten the apples; it also helps pull out juice and gives the sauce a fuller, glossier finish. As a result, a low-sugar batch may taste brighter and less syrupy than a classic pie filling.

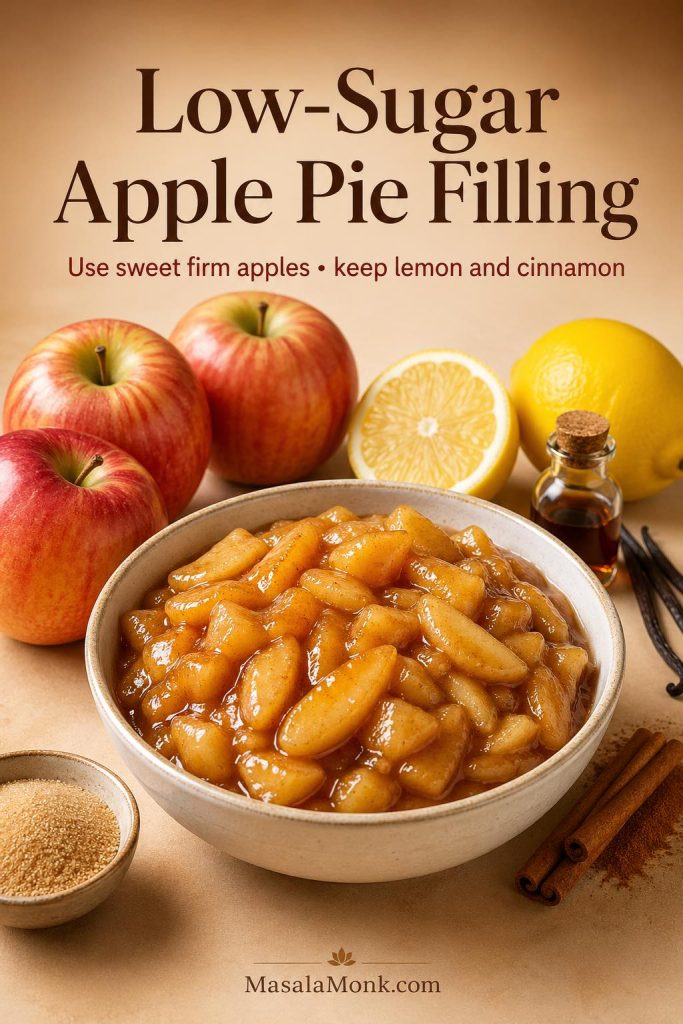
For a lower-sugar recipe, use naturally sweet apple varieties and keep enough thickener for the filling to hold in pie. Reduce the granulated sugar first, keep some brown sugar for warmth if possible, and use lemon juice, cinnamon, vanilla, and a pinch of salt so the filling does not taste flat.

Low-sugar apple pie filling with sweet firm apples, lemon, cinnamon, vanilla, and a small amount of sugar.
For a lightly reduced-sugar batch, use 1/2 cup brown sugar and skip the granulated sugar. For a lower-sugar version, start with 1/4–1/3 cup brown sugar and adjust with lemon, salt, cinnamon, or vanilla.
Version How to Adjust Best Use
Lightly reduced sugar Use 1/2 cup brown sugar and skip the granulated sugar Pies, crisps, toppings
Low sugar Use 1/4 to 1/3 cup brown sugar total Breakfast bowls, pancakes, oatmeal
No-added-sugar style Use sweet apples and a heat-stable sweetener to taste, or skip sweetener for a tart topping Toppings and freezer portions

If you remove most of the sugar, taste the filling before cooling. A little extra lemon juice can make it brighter, while a pinch of salt and a splash of vanilla can make the apple flavor taste rounder without adding more sweetness.

Can You Make Apple Pie Filling Ahead?

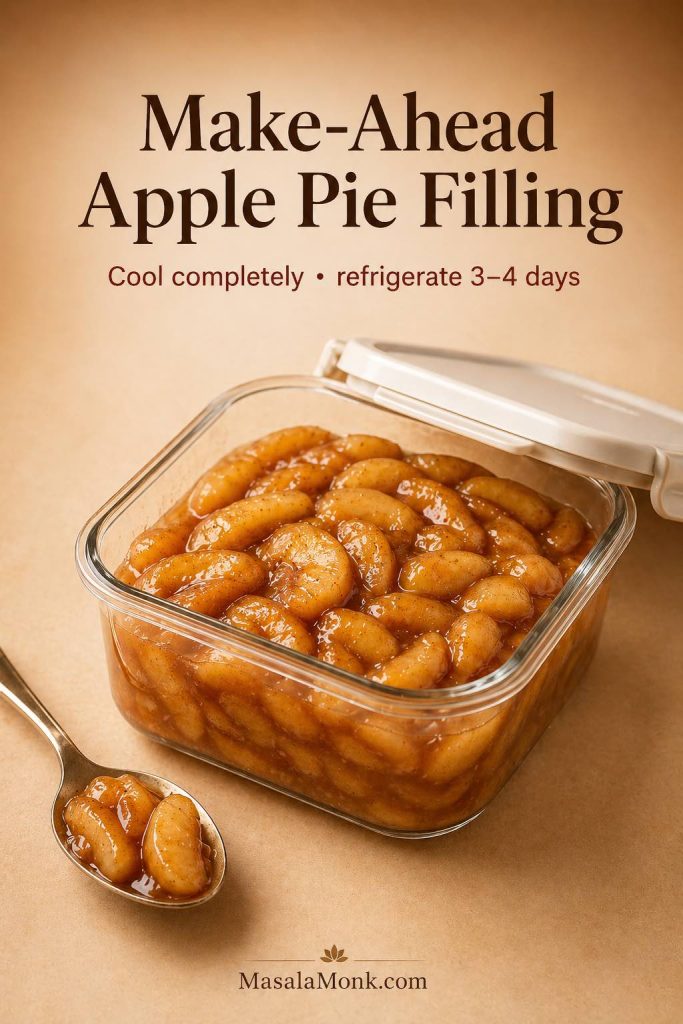
Yes. This filling is a strong make-ahead option because the cooked batch chills, portions, and freezes well. After cooking, cool it completely and refrigerate it in an airtight container for 3 to 4 days.

Make-ahead apple pie filling in an airtight container for refrigerator storage, with a note to cool completely and refrigerate 3 to 4 days.
Cool the filling completely before storing, then refrigerate it airtight for 3–4 days. For pie dough, hand pies, or turnovers, use the filling chilled or at room temperature instead of hot.

For pie, hand pies, turnovers, or other pastry desserts, use the filling chilled or at room temperature rather than hot. Hot filling can soften dough before baking, especially in bottom crusts and small pastries.

Because this recipe freezes well, you can portion the apple filling for one pie, one can replacement, or small breakfast toppings. However, when the batch is meant specifically for pie, sliced apple filling gives you a more classic texture.

For apple-cinnamon meal prep, this same flavor direction also works well in oat-based snacks like healthy oat protein bars. Keep this filling softer if you plan to spoon it over bars, bowls, or breakfast jars instead of baking it inside pastry.

Freezer shortcut: If you freeze this filling in 2 to 2 1/2 cup portions, each bag can work like one can of apple pie filling for quick desserts.

How to Freeze Apple Pie Filling

The most useful freezer bag is the one you can use without thinking later. Since this batch makes about 6 cups, you can freeze it as one full pie batch or divide it into smaller canned-style replacement portions.

Before freezing, decide how you will use the apple filling later. For example, a 1-cup breakfast topping portion is very different from a full pie batch, so label each bag by amount as well as date.

  1. Cook the filling until glossy and thickened.
  2. Spread it in a shallow dish and cool completely.
  3. Portion it into freezer bags or airtight freezer-safe containers.
  4. Label each portion with the date and amount.
  5. If using bags, freeze them flat so they stack easily.
  6. Use within 3 months for best quality.
  7. Before using in pastry, thaw overnight in the refrigerator.
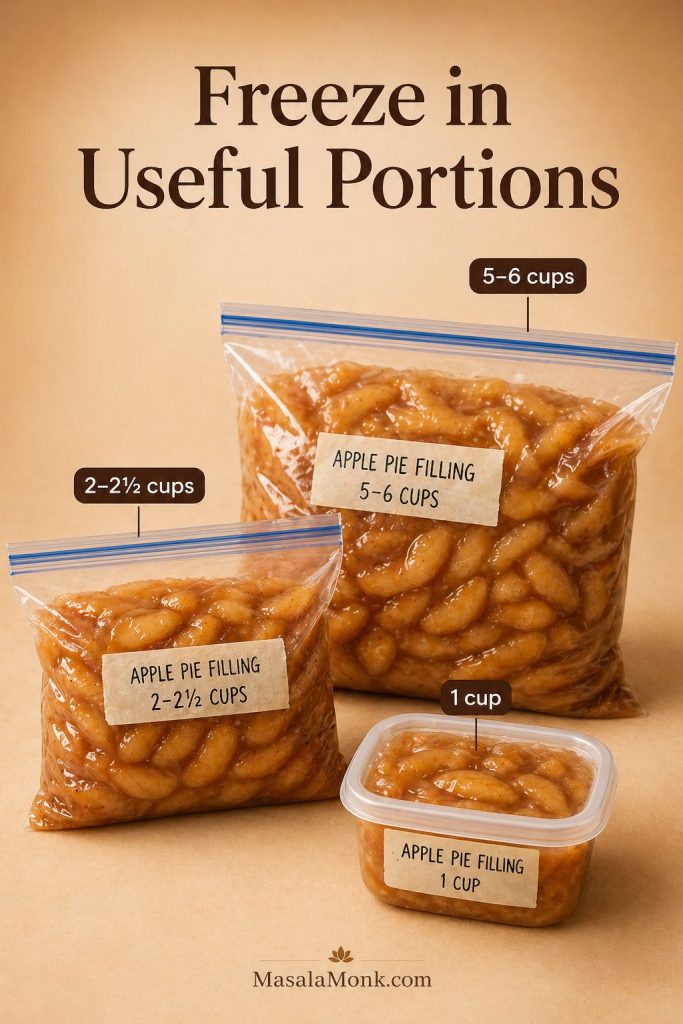
Freezer portions of apple pie filling labeled 1 cup, 2 to 2 1/2 cups, and 5 to 6 cups.
Freeze by future use: 1-cup bags for toppings, 2–2 1/2 cup bags for canned-style replacement, and 5–6 cup bags for one 9-inch pie. Flat freezer bags stack better and thaw faster.

Best Freezer Portions

For later pie baking, freeze the recipe in a 5- to 6-cup apple filling portion so the full batch is ready to thaw at once. For quick desserts, smaller bags are easier to thaw than one full pie-size portion.

Portion Best Use
1 cup Oatmeal, waffles, pancakes, yogurt
2 to 2 1/2 cups One-can replacement
3 to 4 cups Small apple crisp or crumble
5 to 6 cups One 9-inch apple pie
7 to 8 cups 9×13 crisp or larger dessert

How to Thaw Frozen Apple Pie Filling

For pastry, thaw frozen filling overnight in the refrigerator and use it cold or at room temperature. That way, the filling is thick enough to handle and does not soften the dough before baking.

For small breakfast portions, 1-cup bags are the most useful. They thaw quickly and can be warmed for pancakes, yogurt bowls, or oatmeal. For a cold breakfast option, spoon a small amount over high protein overnight oats.

If using a rigid freezer container, leave a little headspace because the filling can expand as it freezes. If using freezer bags, press out excess air before sealing.

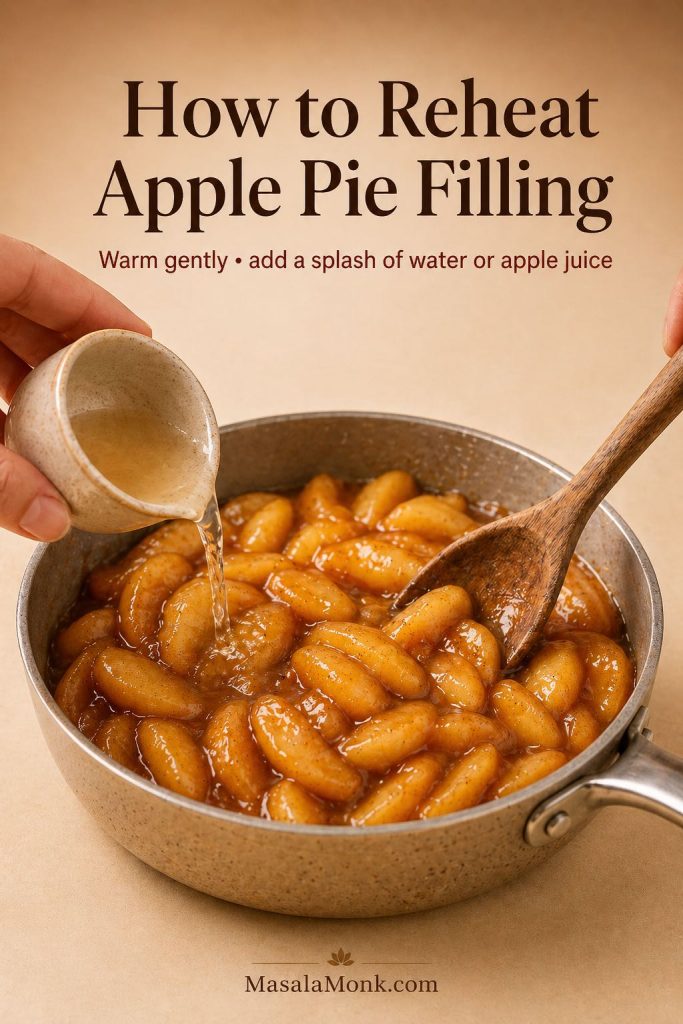
How to Reheat Apple Pie Filling

For toppings, reheat apple pie filling gently in a small pan over low heat. Add a splash of water or apple juice if the sauce has thickened in the refrigerator, then stir often and warm only until the filling is spoonable.

Apple pie filling reheated gently in a pan with a splash of water or apple juice.
For toppings, reheat over low heat for 3–5 minutes, stirring often. Add a small splash of water or apple juice only if the sauce has tightened too much in the fridge.

For pie, hand pies, turnovers, and other pastry desserts, thaw frozen filling overnight in the refrigerator and use it cold or at room temperature rather than hot. This helps protect the pastry and keeps the filling from loosening too much before baking.

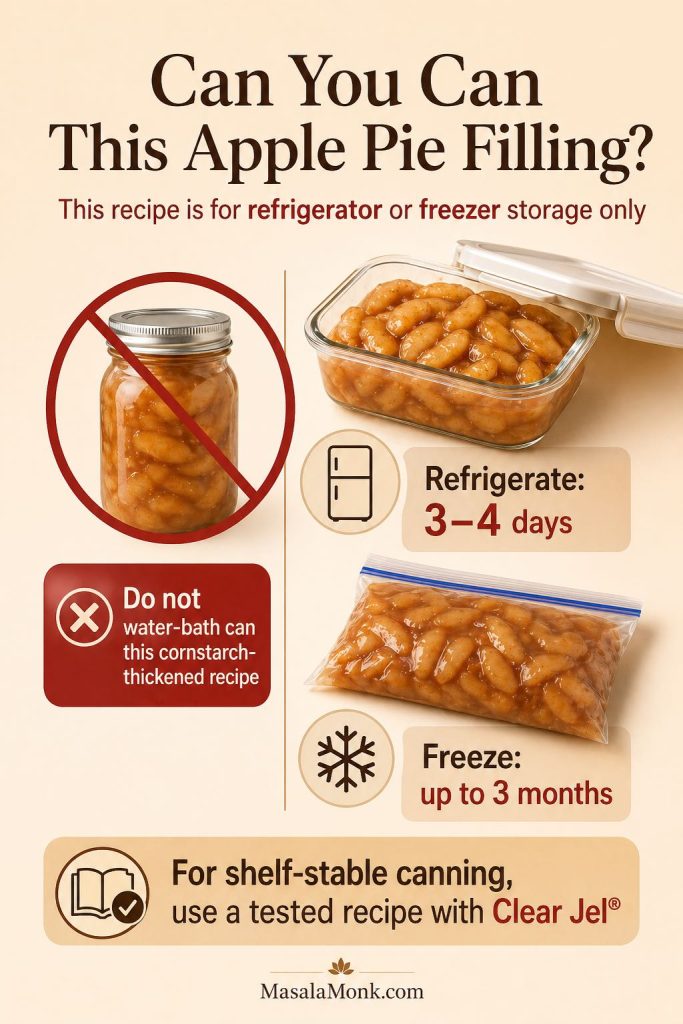
Can You Can This Apple Pie Filling?

Not this version. This is a refrigerator and freezer apple pie filling recipe, not a shelf-stable canning recipe. Don’t water-bath can this cornstarch-thickened filling. Safe home-canned pie fillings require tested formulas, correct acidity, proper processing, and approved thickeners such as cook-type Clear Jel®.

Canning safety guide for apple pie filling warning not to water-bath can this cornstarch-thickened recipe, with refrigerator, freezer, and tested Clear Jel recipe guidance.
Do not water-bath can this cornstarch-thickened filling. Keep it refrigerated for 3–4 days, freeze it up to 3 months, or use a tested Clear Jel® formula when you want pantry-safe jars.

Instead, keep this recipe as a refrigerator or freezer apple filling, and use tested canning guidance for pantry-safe pie filling. If you want to can apple pie filling for pantry storage, use a trusted extension or food-preservation source, such as the National Center for Home Food Preservation apple pie filling instructions.

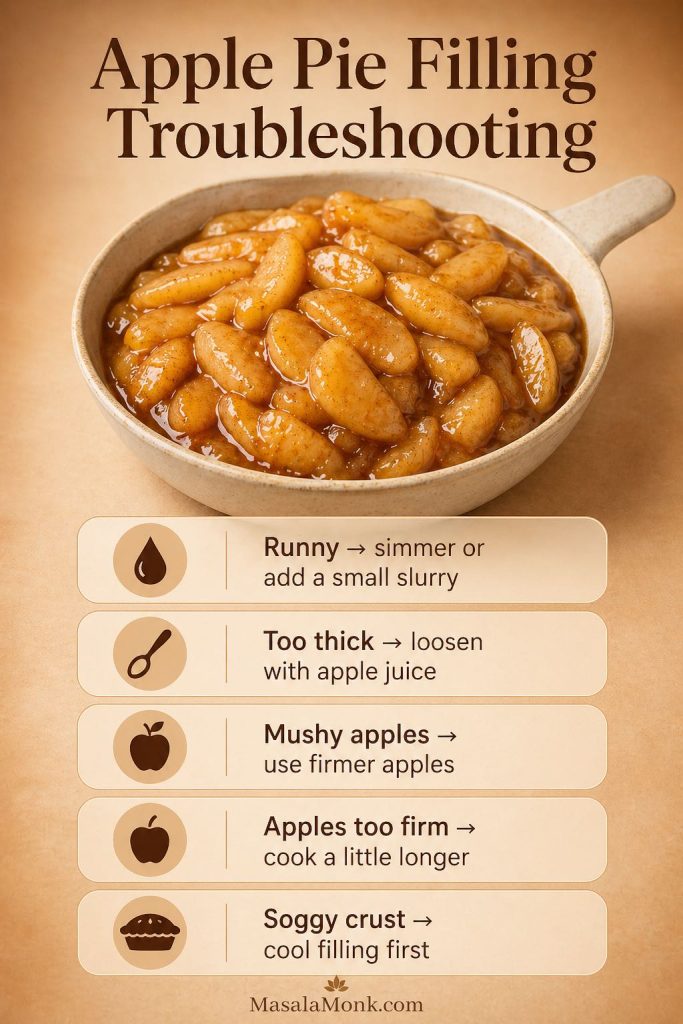
Troubleshooting Apple Pie Filling

Most filling problems are fixable before the apples go into pastry. If the sauce looks too loose, too thick, or too cloudy, adjust it in the pan instead of hoping the oven will solve it later.

Usually, the cause is apple choice, cut size, cooking time, or starch. Luckily, the fix is often simple if you catch it before baking the filling into pie, crisp, or pastry.

Troubleshooting guide for apple pie filling with fixes for runny filling, too-thick filling, mushy apples, apples that are too firm, and soggy crust.
Fix texture before the filling goes into pastry. If it is runny, simmer 1–2 minutes more or add a small slurry; if it is too thick, loosen it with apple juice or water.
Problem Why It Happened Fix
Filling is runny Not enough starch, not bubbled long enough, or very juicy apples Simmer 1–2 minutes more or add a small cornstarch slurry
Filling is too thick Too much cornstarch or overcooking Loosen with a splash of apple juice or water
Apple pieces are mushy Soft apples or too much cooking Use firmer apples and cook only until partly tender
Apple pieces are too firm Pieces are too thick or undercooked Slice thinner or cook covered a few minutes longer
Filling is too sweet Very sweet apples plus too much sugar Add lemon juice and a pinch of salt
Filling is too tart All tart apples or too much lemon Add brown sugar or blend in sweeter apples next time
Pie crust gets soggy Hot filling added to pastry Cool the filling completely before filling the pie
Filling looks cloudy Starch was overheated, clumped, or flour was used Use a smooth cornstarch slurry and simmer briefly

If the recipe gives you apple filling that looks runny before it goes into pie, fix it in the pan. After baking, the same problem is much harder to correct.

Apple Pie Filling Recipe

Recipe card for homemade apple pie filling with yield, prep and cook time, ingredients, method, storage, and pie-use notes.
The full recipe uses 8 medium apples, 4 tablespoons cornstarch, and 10–12 minutes of cooking to make about 6 cups. For a softer topping, reduce the cornstarch to 3 tablespoons.

Homemade Apple Pie Filling

This apple pie filling recipe makes about 6 cups of thick, glossy cinnamon apple filling for pies, crisps, hand pies, turnovers, toppings, and freezer portions.

Prep Time
20 minutes
Cook Time
10–12 minutes
Total Time
30–35 minutes, plus cooling
Yield
About 6 cups / 1.4 liters

Ingredients

  • 8 medium firm apples, about 3 lb / 1.35 kg whole apples, or about 900 g to 1 kg after peeling and coring, sliced or diced
  • 1 1/2 to 2 tablespoons lemon juice / 22–30 ml
  • 2 tablespoons unsalted butter / 28 g
  • 1/2 cup packed brown sugar / 100 g
  • 1/4 cup granulated sugar / 50 g
  • 1 1/2 teaspoons ground cinnamon / about 4 g
  • 1/8 to 1/4 teaspoon ground nutmeg, optional
  • 1/4 teaspoon fine salt
  • 4 tablespoons cornstarch / about 32 g
  • 1/3 to 1/2 cup water or apple juice / 80–120 ml
  • 1 teaspoon vanilla extract / 5 ml, optional

Method

  1. Peel, core, and cut the apples. Use 1/4-inch / 6 mm slices for pie or 1/2-inch / 1.25 cm dice for hand pies, turnovers, toppings, and cinnamon roll bakes.
  2. Toss the apples with lemon juice.
  3. Melt the butter in a wide pan over medium heat. Add the apples, brown sugar, granulated sugar, cinnamon, nutmeg, and salt.
  4. Cook covered for 4–6 minutes, stirring once or twice, until the apple pieces begin to release juice and soften slightly. They should bend a little but still hold their shape.
  5. Meanwhile, in a small bowl, whisk the cornstarch with 1/3 cup water or apple juice until smooth.
  6. Stir the slurry into the apples. Cook for 1–2 minutes, stirring gently, until the sauce turns glossy and thick enough to coat the apple pieces. Add a little more water or apple juice only if the filling looks too stiff.
  7. Remove the pan from the heat and stir in vanilla, if using.
  8. Spread the filling in a shallow dish and cool it completely before using in pie crust, hand pies, turnovers, or freezer bags.

Notes

  • For one generous 9-inch pie, use 5 to 6 cups of filling.
  • For a softer topping-style filling, reduce cornstarch to 3 tablespoons.
  • For hand pies or turnovers, dice the apples instead of slicing them.
  • Cool the filling before adding it to pastry to reduce sogginess.
  • This recipe is for refrigerator or freezer storage, not shelf-stable canning.

Storage

Refrigerate cooled filling in an airtight container for 3–4 days, or freeze in labeled portions for best quality within 3 months. Thaw overnight in the refrigerator before using.

Slice of apple pie with thick glossy homemade apple filling holding together inside a flaky crust.
Let a baked pie cool for at least 2–3 hours before slicing. That resting time helps the filling set so the slice holds together instead of spilling out of the crust.

FAQs About Apple Pie Filling

How much apple pie filling do I need for one pie?

For one apple pie, this recipe gives you about 5 to 6 cups of filling. A shallower pie may need 4 to 5 cups, while a deep-dish pie may need 6 to 7 cups.

How many apples do I need for apple pie filling?

For this apple pie filling recipe, use about 8 medium firm apples, or about 3 pounds / 1.35 kg whole apples. After peeling and coring, that gives enough apple pieces for about 6 cups of cooked filling.

Do you have to peel apples for apple pie filling?

For classic apple pie filling, peeling the apples gives the smoothest texture. That said, you can leave the peels on for a more rustic filling, especially if you are using it for crisps, oatmeal, yogurt, or pancake toppings.

Can I use this instead of canned apple pie filling?

For most recipes, use about 2 to 2 1/2 cups of this homemade filling as a rough replacement for one standard 20- to 21-ounce can of apple pie filling. For a full 9-inch pie, use about 5 to 6 cups.

Can I freeze apple pie filling?

To freeze the recipe, cool the apple filling completely, portion it into bags, and thaw it overnight before using it in pie. For best quality, use frozen portions within 3 months.

Can I make apple pie filling ahead?

For make-ahead baking, prepare the filling 3 to 4 days in advance and keep it refrigerated in an airtight container. Before using it in pies, hand pies, turnovers, or other pastry desserts, let it stay chilled or come to room temperature rather than adding it hot.

Should I slice or dice the apples?

Slice the apples for classic apple pie and crisps. Dice the apples for hand pies, turnovers, cinnamon roll bakes, pancakes, waffles, oatmeal, yogurt, and ice cream toppings.

Can I use apple pie spice instead of cinnamon?

Yes. Replace the cinnamon and nutmeg with about 1 1/2 to 2 teaspoons apple pie spice. Start with the smaller amount if your blend contains cloves, allspice, or ginger, because those spices can become strong quickly.

Should apple pie filling be cooked before baking?

For this recipe, yes. Cooking the filling first gives you better control over apple texture and sauce thickness. It also helps prevent surprises like watery pie filling after baking.

Is cornstarch or flour better for apple pie filling?

Cornstarch gives apple pie filling a glossier, cleaner sauce. Flour gives a duller, more rustic filling and can look cloudier. For this stovetop filling, cornstarch is the better choice.

Why is my apple pie filling runny?

Apple pie filling is usually runny because there was too little thickener, the slurry did not bubble long enough, or the apples released more juice than expected. The easiest fix is to simmer the filling a little longer, or add a small extra cornstarch slurry if needed.

Can I make apple pie filling without cornstarch?

You can make refrigerator or freezer apple filling without cornstarch, but the recipe will behave differently in pie. Arrowroot, tapioca starch, or flour can work in some cases, although each one thickens differently. If you are making shelf-stable canned filling, do not substitute casually; use a tested canning recipe.

Can I make low-sugar apple pie filling?

For a lower-sugar recipe, use naturally sweet apple varieties and keep enough thickener for the filling to hold in pie. Since a lower-sugar filling may be less syrupy, taste before cooling and adjust with lemon juice, salt, cinnamon, or vanilla as needed.

Can I can this apple pie filling?

Not this version. This cornstarch-thickened filling is for refrigerator or freezer storage only. For shelf-stable canning, use a tested canning formula with approved ingredients and processing instructions.

What can I make with apple pie filling?

You can use apple pie filling in apple pie, apple crisp, apple crumble, hand pies, turnovers, mini pies, cinnamon roll bakes, dump cakes, pancakes, waffles, oatmeal, yogurt bowls, cheesecake topping, or ice cream topping.

Warm apple pie slice served with a bowl of homemade apple pie filling and a spoon.
Extra filling is useful beyond pie: reheat it over low heat for 3–5 minutes and serve about 1/2 cup over pancakes, waffles, oatmeal, yogurt, or ice cream.

Back to top