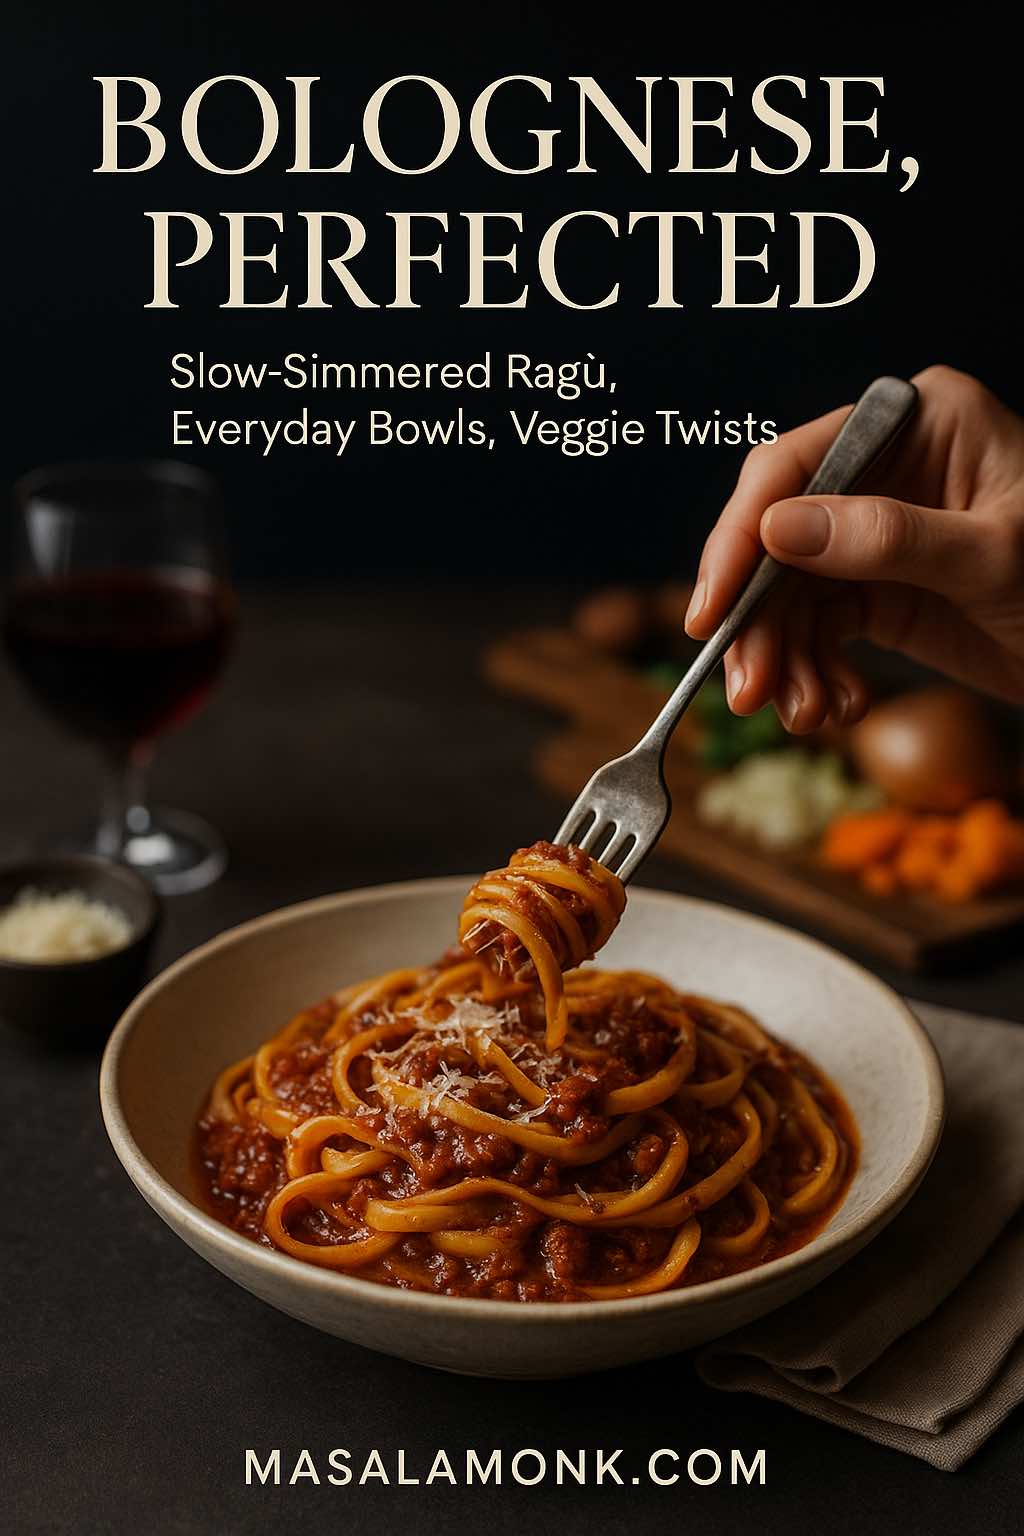
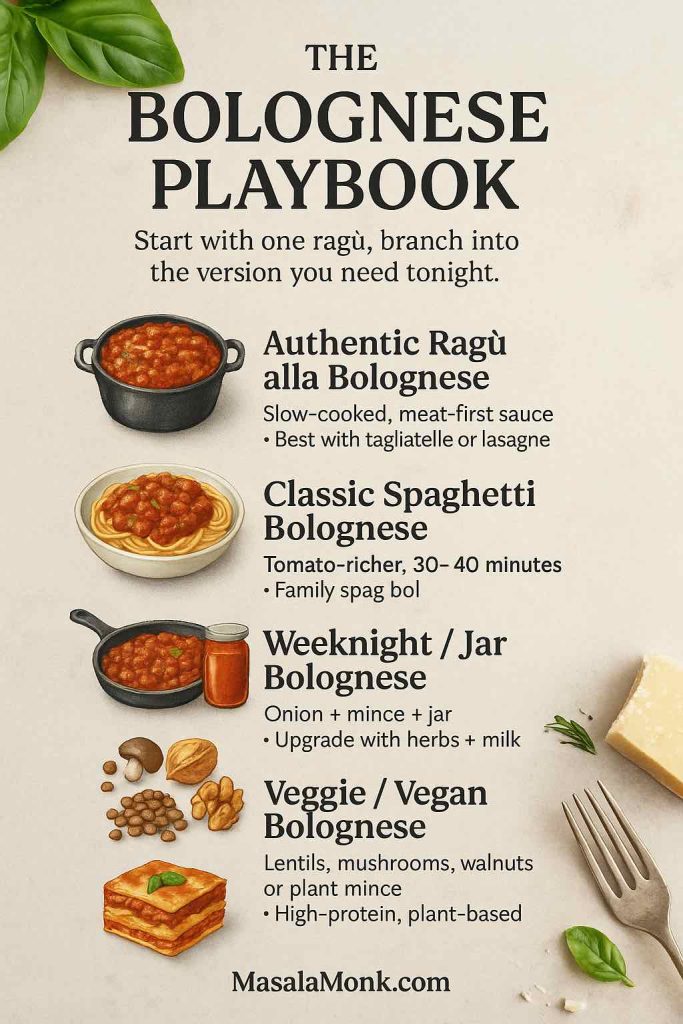
Some recipes are just dinner. A really good bolognese sauce recipe becomes a whole system.
Once you’ve got a pot of slow-cooked ragù on the stove, you can spin it into classic spaghetti bolognese, tagliatelle al ragù that feels straight out of Emilia-Romagna, cosy lasagna bolognese, baked bolognese pasta, gnocchi bolognese on a chilly night, or even lighter veggie spaghetti bolognese and lentil bolognese bowls for busy weekdays.
This guide goes deep into bolognese in all its forms:
- The authentic Italian ragù alla bolognese from Bologna
- Home-style spag bol and traditional spaghetti bolognese
- Quick, weeknight bolognese shortcuts and jar-sauce hacks
- Vegetarian bolognese, vegan bolognese sauce, and mushroom bolognese
- Ideas for lasagne ragu bolognese, baked bolognese pasta, and every pasta shape from rigatoni to tagliatelle
By the end, “bolognese” won’t be one recipe in your head—it’ll be a whole category you can play with.
What Bolognese Actually Is (and Why Italians Side-Eye Spag Bol)
If you’ve ever had an Italian tell you that “spaghetti bolognese doesn’t exist,” they’re not (entirely) being dramatic.
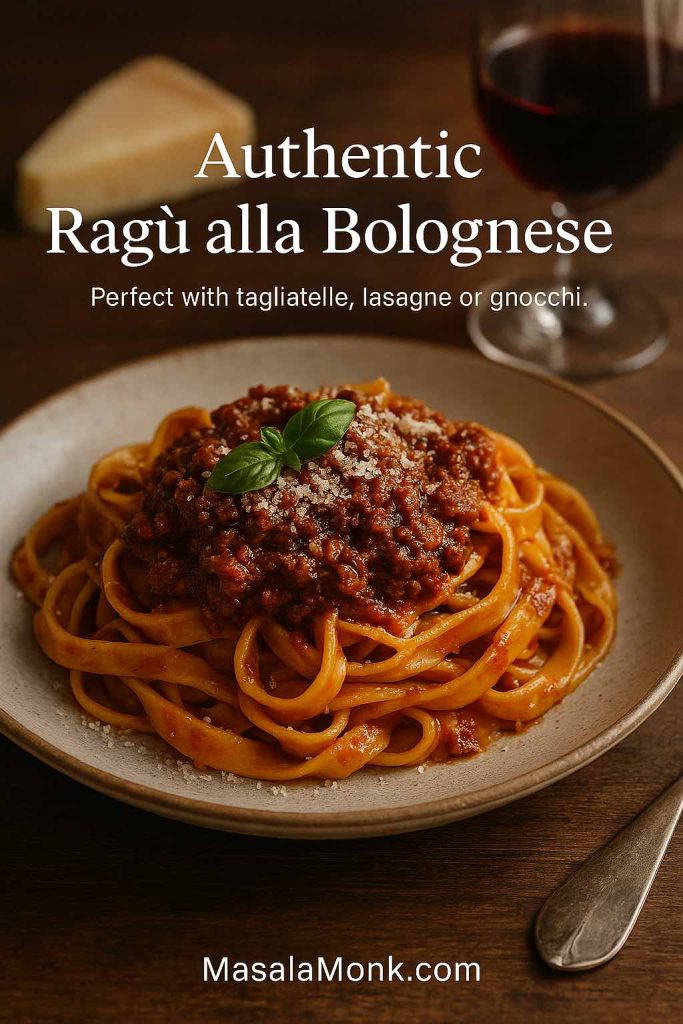
In Bologna, ragù alla bolognese is a very specific thing. The Accademia Italiana della Cucina even filed an official ragù recipe with the Chamber of Commerce, with coarsely ground beef, pancetta, onion, carrot, celery, wine, tomato, stock, and milk, cooked for hours until thick and glossy. It’s a meat sauce first, not a tomato sauce with mince floating in it, and it’s meant for fresh egg pasta like tagliatelle, not dry spaghetti.
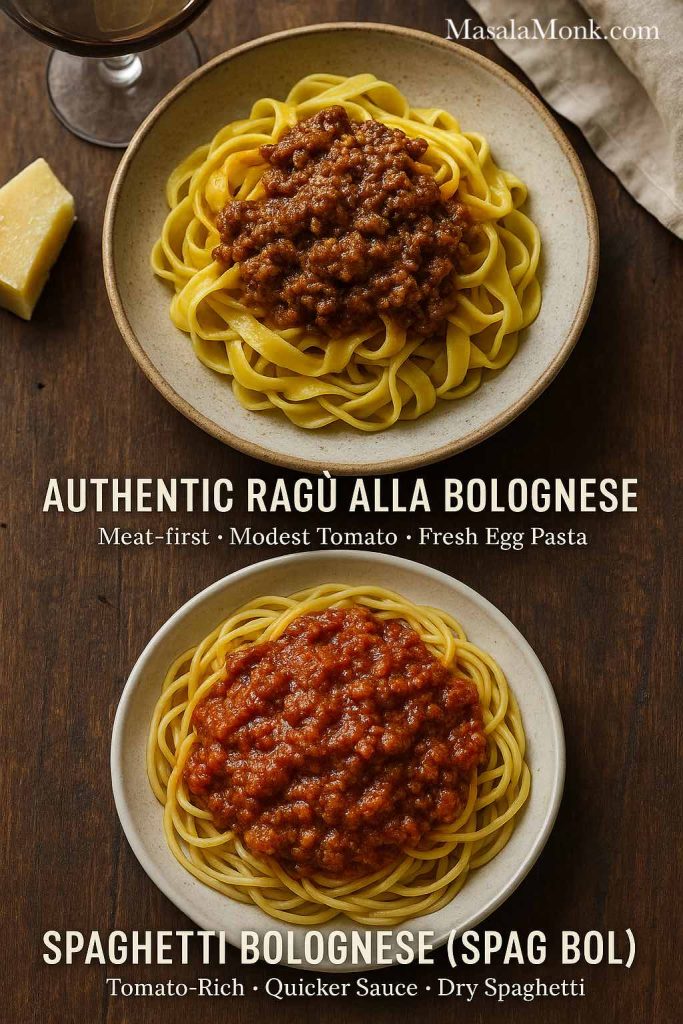
That “real bolognese” has a few defining features:
- The sauce is meat-forward, with tomato playing a supporting role
- Milk or cream is added later to soften the acidity and give a subtle creamy bolognese texture
- It’s traditionally served as tagliatelle al ragù or used as bolognese for lasagna, not piled on spaghetti
Outside Italy, the story twists. In the UK, Australia and beyond, “bolognese” usually means something closer to a rich tomato meat sauce. Classic spaghetti bolognese, basic spag bol recipe versions, healthy spag bol with hidden veg, easy spaghetti bolognese sauce made with a jar—all of those grew from the same idea, but in a different direction.
Instead of choosing between “authentic” and “comfort,” you can have both. Start with a traditional bolognese recipe that respects its roots, then build outwards into weeknight bolognese, veggie hack bolognese, and everything else you actually want to eat during the week.
Also Read: Authentic Chimichurri Recipe (Argentine Steak Sauce)
Traditional Ingredients for Bolognese Sauce Recipe
Every variation starts with a few simple, powerful building blocks. If you understand those, you can improvise comfortably, whether you’re aiming for an authentic bolognese recipe, a healthier spag bol, or a vegetarian bolognese sauce.
Aromatic Sofritto
At the base of almost every traditional bolognese sauce recipe sits soffritto: finely chopped onion, carrot and celery gently cooked in fat until sweet and soft. This mixture is what gives depth and sweetness to both traditional spaghetti bolognese and more modern bolognese pasta recipes.
For four to six servings, a classic soffritto might be:
- 1 small onion
- 1 small carrot
- 1 celery stalk
If you’re making a big pot for bolognese for lasagna, baked bolognese pasta or bolognese lasagne, you can easily double that.
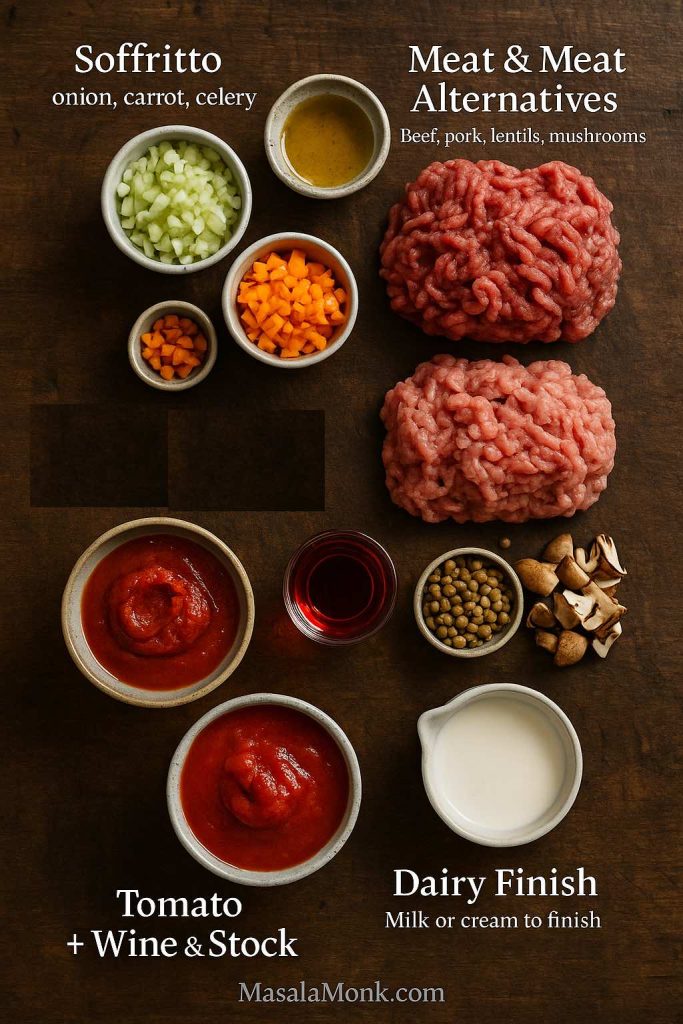
The Meat (or Meat Alternatives)
Traditional bolognese ingredients usually include:
- Minced beef (often from a flavourful cut like chuck)
- Sometimes pork mince or pancetta for sweetness and fat
That’s the foundation of beef bolognese, beef bolognese sauce and the best bolognese meat sauce recipes. However, the same structure works brilliantly with:
- Pork mince for a softer bolognese with pork mince
- A mix of beef and pork in classic spaghetti bolognese recipe variations
- Turkey mince bolognese for a leaner, healthy spaghetti bolognese
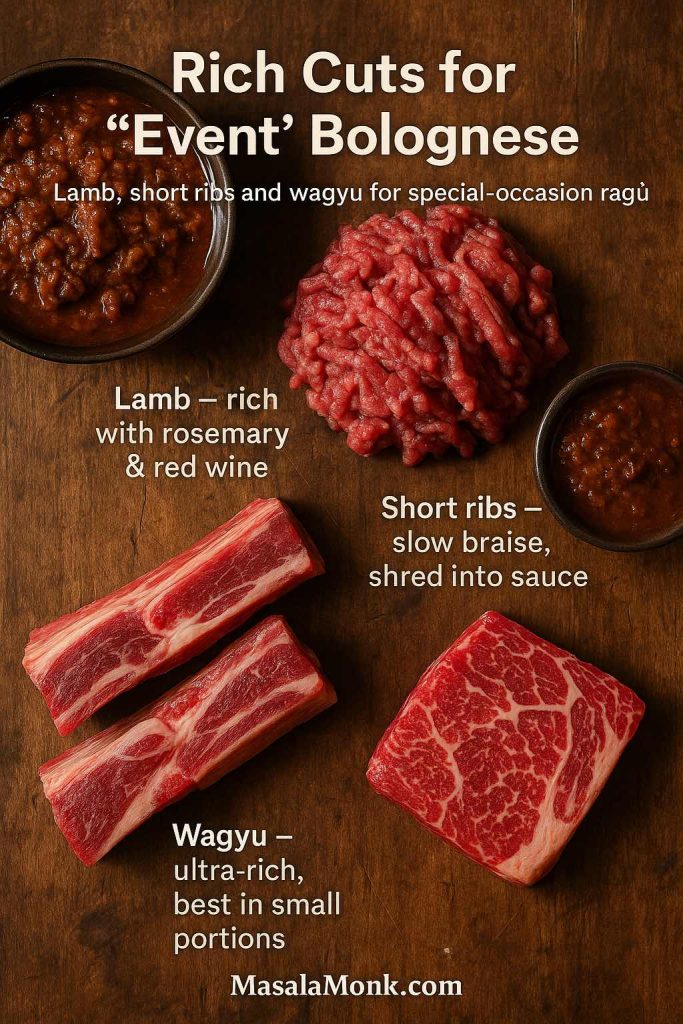
- Lamb mince for a slightly gamey, richer bolognese meat
- Short ribs or even wagyu in special-occasion bolognese with short ribs or wagyu bolognese
- Quorn bolognese with soya or mycoprotein mince for a vegetarian spaghetti bolognese
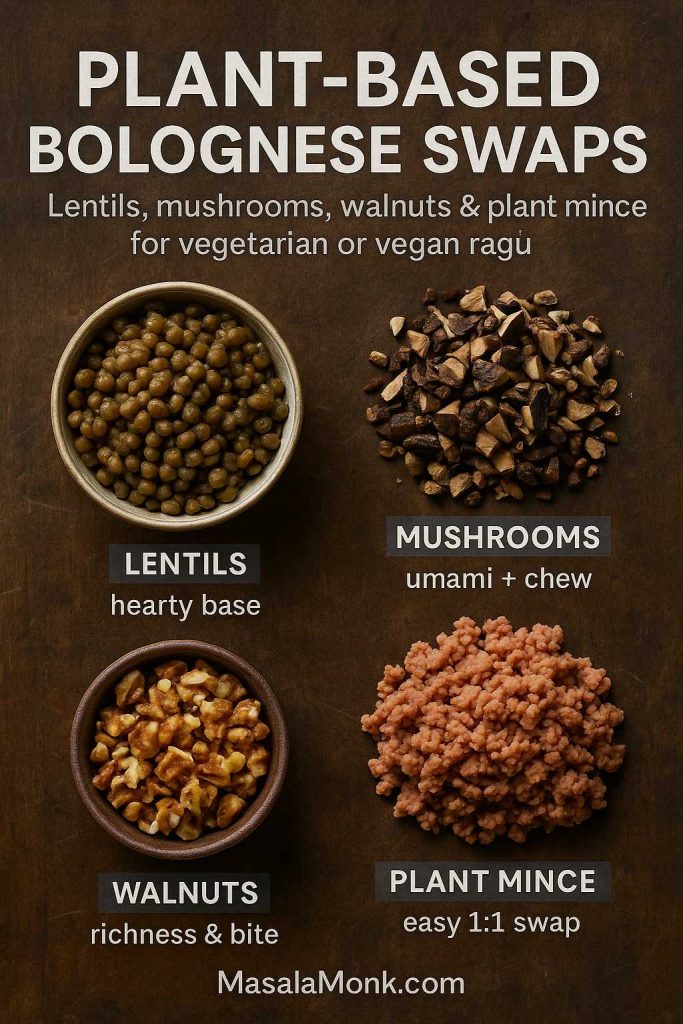
And beyond meat, lentils, mushrooms and walnuts can create a surprisingly convincing plant based bolognese, which we’ll get to in detail later.
Tomato, Wine and Stock
Authentic Italian bolognese sauce ingredients keep tomatoes modest. Instead of drowning the meat, tomato supports it:
- A spoonful of tomato paste for colour and savoury depth
- A cup or so of passata or crushed tomatoes
- A good splash of red or white wine
- Enough stock to give the sauce room to simmer and reduce
In more modern bolognese spaghetti bolognese recipes, you might see more tomato, especially in quick spag bol recipe easy variants or easy bolognese pasta that lean towards marinara. That’s still fine, as long as you keep the flavours balanced and let it cook down until rich rather than watery.
Dairy: Milk and Cream
One of the most surprising traditional bolognese sauce ingredients is milk. Many home cooks first meet this idea via Marcella Hazan’s bolognese, a justly famous recipe that finishes the ragù with warm milk to soften acidity and add silkiness.
Whether you’re following Marcella Hazan bolognese, a Serious Eats style authentic bolognese ragu recipe or your own family version, adding milk or a splash of cream at the end turns a basic meat and tomato sauce into something closer to classic bolognese sauce.
Also Read: Double Chocolate Chip Cookies – Easy Recipe with 7 Variations
Authentic Bolognese Sauce (Traditional Ragù alla Bolognese Recipe)
Let’s start with an authentic bolognese sauce recipe you’d be happy to serve to an Italian. It’s a little closer to the official Bologna versions and to classic recipes from cooks like Marcella Hazan, but written for a home kitchen.
Think of this as your traditional bolognese recipe: deep, savoury, and patient. It’s perfect for bolognese lasagne, bolognese rigatoni or bolognese tagliatelle, and can still double up as a killer spaghetti bolognese sauce if that’s what the table expects.
Ingredients for Traditional Bolognese
For about 6–8 portions of classic bolognese sauce:
- 2 tbsp olive oil or a mix of oil and butter
- 75–100 g finely diced pancetta or streaky bacon
- 1 small onion, finely chopped
- 1 small carrot, finely chopped
- 1 small celery stalk, finely chopped
- 500 g beef mince (20% fat works well)
- 150–200 g pork mince or extra beef (for bolognese with pork mince, just split 50/50)
- 150 ml dry red or white wine
- 350–400 g tomato passata or crushed tomatoes
- 1–2 tbsp tomato paste
- 400–500 ml light stock (beef, chicken or vegetable)
- 200 ml whole milk (for that silky, creamy bolognese sauce finish)
- Salt, black pepper
- Pinch of nutmeg (classic in authentic bolognese sauce)
Those same ingredients work as the core bolognese ingredients list whether you’re doing tagliatelle bolognese, bolognese lasagne, or a big pan of bolognese rigatoni. You’ll notice how close this is to the Bologna and Accademia versions – same structure, just rounded in home-cook language.
Step-by-Step Method of Authentic Bolognese Sauce Recipe
Step 1 – Start with the pancetta and soffritto
Pour the olive oil into a heavy-bottomed pot (a Dutch oven is ideal) and set it over low–medium heat. Add the diced pancetta to the cold oil so the fat has time to slowly render rather than seize up and burn.
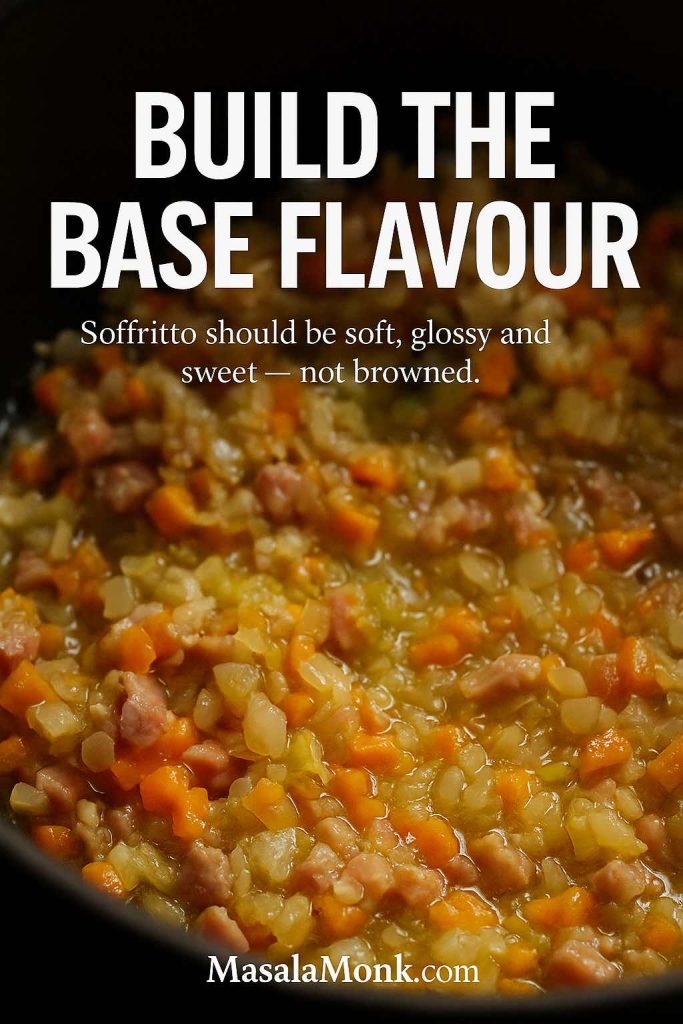
As the pancetta turns lightly golden and the fat melts out, stir in the finely chopped onion, carrot and celery. Keep the heat gentle; you’re sweating the vegetables, not frying them.
- Stir every few minutes so nothing catches.
- If the edges start to brown too fast, lower the heat.
- After 10–15 minutes, the soffritto should be soft, glossy and smell sweet rather than sharp.
You’re building the foundation of flavour here. A patient soffritto is what makes the sauce taste like bolognese, not just “mince in tomato.”
Step 2 – Brown the mince properly
Once the vegetables are silky and fragrant, add the beef and pork mince to the pot along with a generous pinch of salt. Use a wooden spoon to break the mince up into small pieces, mixing it thoroughly through the soffritto.
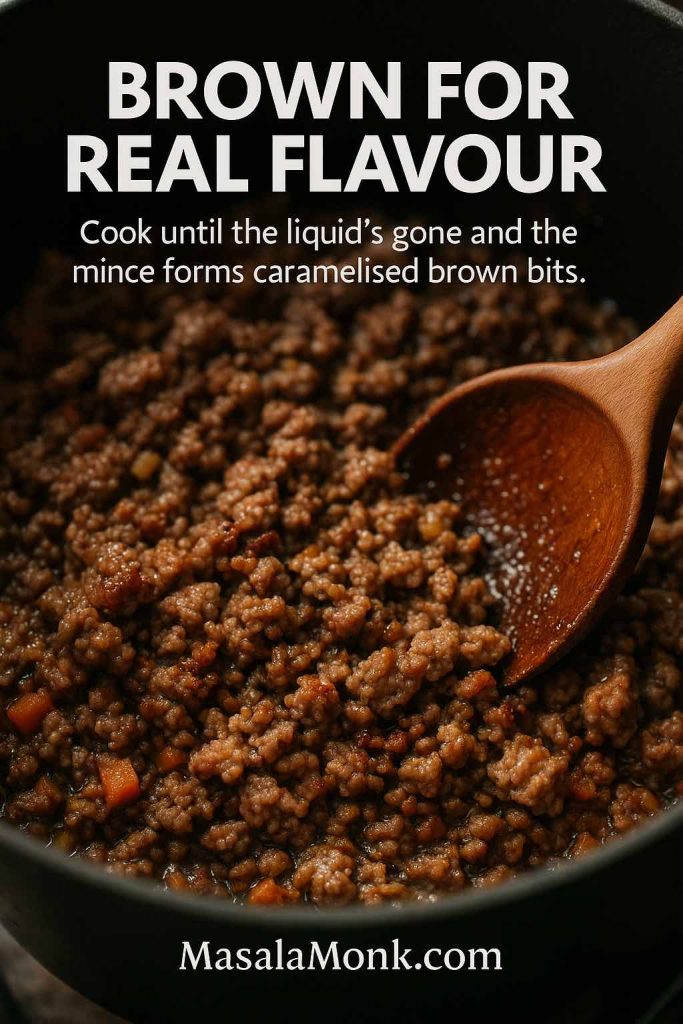
Raise the heat slightly so the meat sizzles rather than steams.
- At first, the mince will release liquid and look grey. Keep going.
- Continue cooking, stirring occasionally and scraping the bottom, until that liquid evaporates.
- You’re aiming for the meat to lose its raw colour and start taking on little browned, caramelised spots.
This is the point where the mince moves from “cooked” to “tasty.” The browning reactions happening here are what give a real bolognese ragù its deep savoury backbone. Don’t rush this step; it’s often the difference between an average sauce and a great one.
Step 3 – Deglaze with wine
When the mince is evenly browned and you can see some browned bits stuck to the bottom of the pot, pour in the wine. You should hear a lively hiss as the liquid hits the hot surface.

With your spoon, scrape along the base of the pot to loosen those caramelised bits into the wine. That’s pure flavour dissolving back into the sauce.
- Let the wine bubble briskly for a few minutes.
- You’ll see the steam change from sharp and alcoholic to softer and winey.
- Stop when the pot looks mostly dry again and the meat smells rich, not boozy.
Deglazing does two things at once: it cleans the bottom of the pot and pulls all that stuck-on goodness into the sauce, while the acidity of the wine brightens the eventual richness of the ragù.
Step 4 – Add tomato and stock
Now stir in the tomato paste and cook it for a minute or so, letting it darken slightly. This cooks off any raw acidity and boosts the tomato flavour.
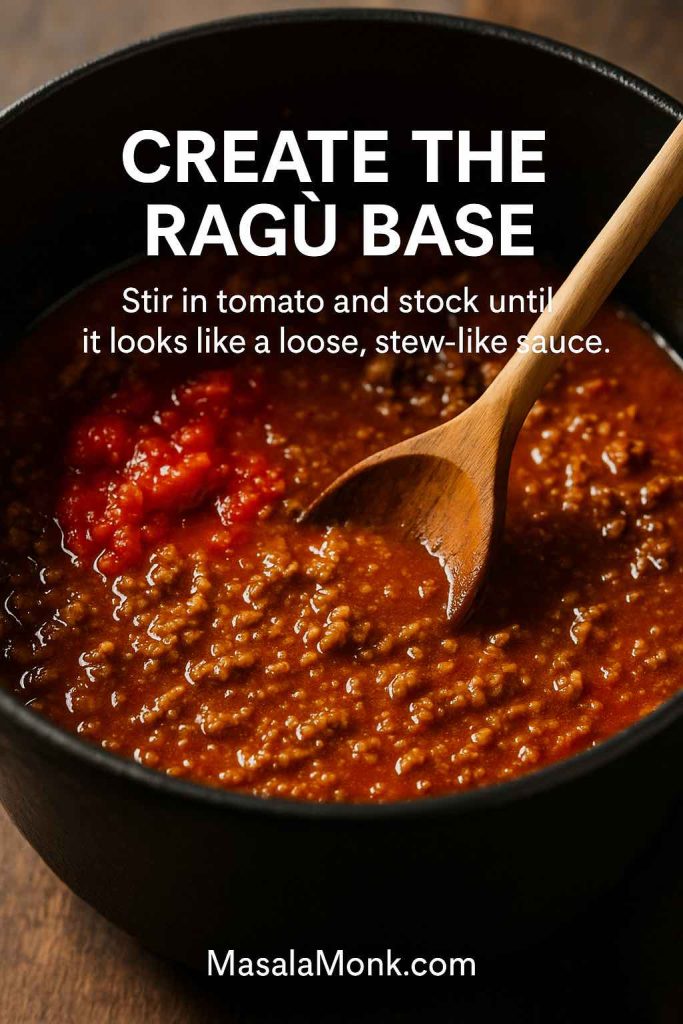
Next, add the passata or crushed tomatoes and pour in enough stock to loosen everything into a thick, stew-like mixture. The meat should be fully submerged but the sauce should still feel substantial, not watery.
- Give everything a good stir so the tomato, stock and mince are evenly mixed.
- At this stage, the sauce will look looser than a finished bolognese—that’s exactly how it should be.
You’ve assembled all the players. The rest of the magic comes from low, slow cooking.
Step 5 – Simmer low and slow
Bring the pot just up to a simmer. As soon as you see steady bubbles, lower the heat to the point where you only see the occasional lazy blip on the surface.
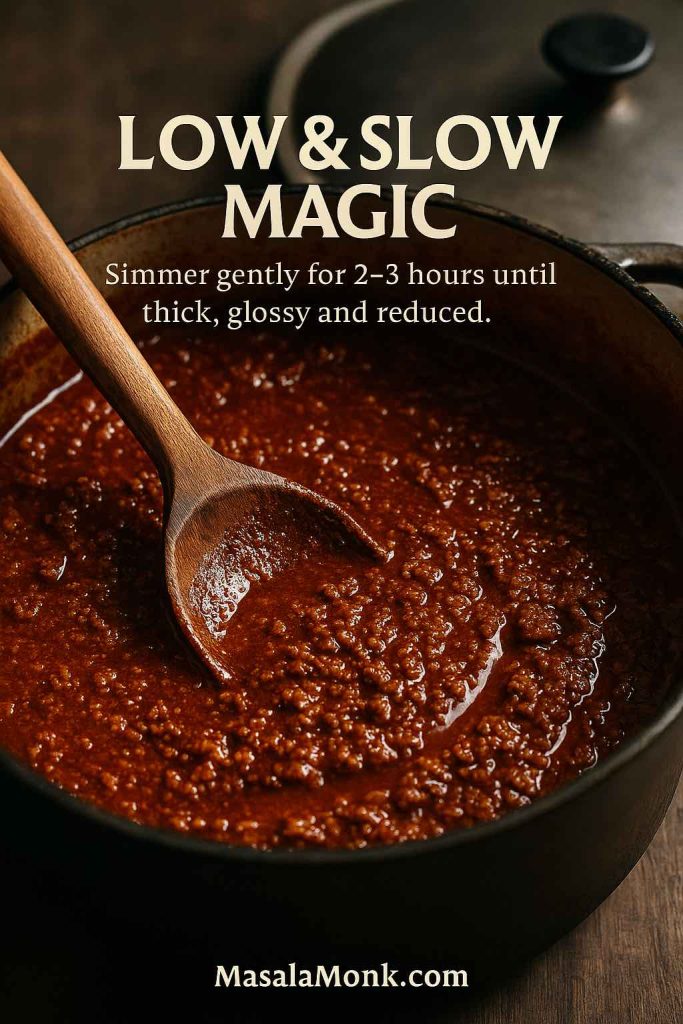
Set the lid slightly ajar so steam can escape and the sauce can reduce. Now let time do its work.
- Stir every 20–30 minutes, making sure nothing is sticking at the bottom.
- If the sauce looks too thick or starts to catch, add a small splash of stock or water.
- If it still looks quite liquid after an hour, don’t worry—flavour is concentrating as it reduces.
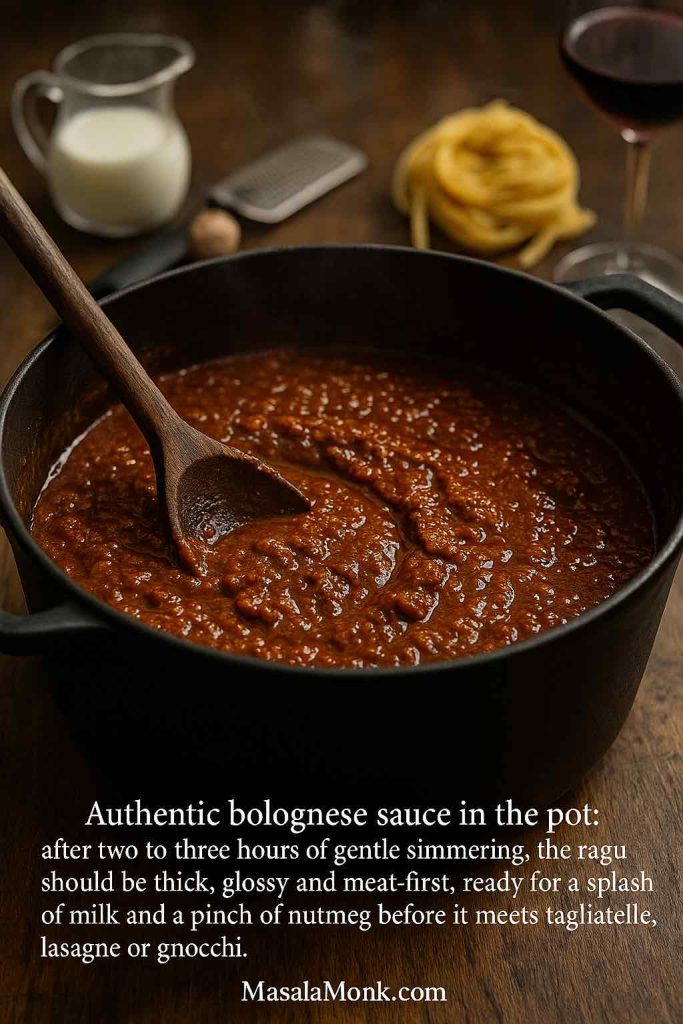
Over two to three hours, the ragù will gradually transform:
- The sauce thickens and clings to the spoon.
- The fat and liquid emulsify rather than separating into layers.
- The vegetables almost disappear into the sauce, leaving sweetness behind.
You’ll know it’s close when a spoon dragged across the bottom leaves a faint trail before the sauce slowly flows back.
Step 6 – Finish with milk and nutmeg
When the ragù is thick, unified and deeply fragrant, pour in the milk (or milk and cream mixture). Stir it through and keep the heat low so it barely simmers.
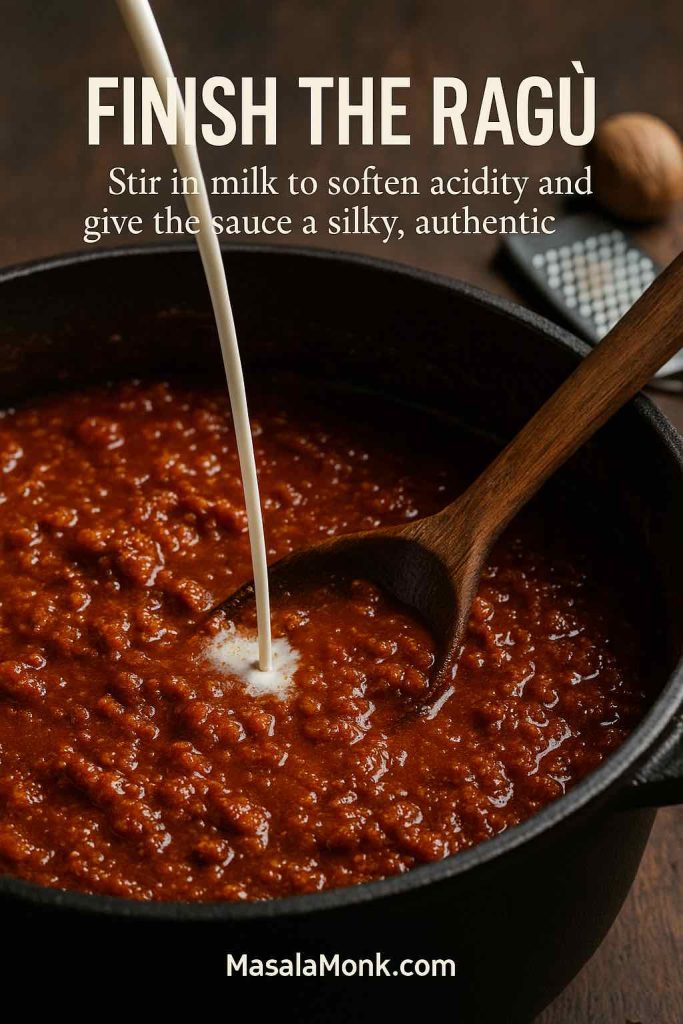
Let it cook gently for another 20–30 minutes. The dairy will:
- Soften any remaining sharpness from the wine and tomato
- Give the sauce a subtle, velvety richness
- Add that characteristic mellow note you notice in authentic bolognese
Taste and adjust the seasoning with salt and pepper. If you like, grate in a small pinch of nutmeg—a traditional touch that adds warmth without making the sauce taste “spiced.”
Result
At this point, the ragù should be:
- Thick but still spoonable
- Glossy, with no oily layer sitting on top
- Savoury, gently sweet, and in no way overtly tomatoey
That’s your “real bolognese sauce”—the sort of ragù you’d happily ladle over fresh tagliatelle or fold into a lasagne ragu bolognese with béchamel, cuddle with gnocchi, or be portioned into containers for future pasta nights.. If you want to compare ratios and methods, Marcella Hazan’s bolognese sauce is still one of the most respected versions in English, and you’ll see how similar the bones really are.
This traditional bolognese sauce recipe is your workhorse. Use it for:
- Tagliatelle with bolognese sauce or linguine with bolognese sauce
- Bolognese for lasagna (with béchamel or cottage cheese layers)
- Baked gnocchi bolognese or baked bolognese spaghetti in one pot
For a faster but still rich variation, a pressure cooker bolognese or oven-braised version in the Kenji / Serious Eats style works beautifully when you’re short on time but still want depth.
Also Read: One-Pot Chicken Bacon Ranch Pasta (Easy & Creamy Recipe)
Classic Spaghetti Bolognese (Easy, Traditional Spag Bol)
Now for the dish most people actually cook every week: spaghetti bolognese. It may not be canonical in Bologna, where they prefer egg pasta, spaghetti bolognese is a classic in countless homes isn’t going anywhere – so let’s make it as good as it can be.
Classic Spaghetti Bolognese (Home-Style Sauce Recipe)
Here’s a straightforward spaghetti bolognese recipe that gives you that cosy, slightly tomato-richer flavour a lot of families love:
Ingredients for Classic Spaghetti Bolognese
- 2 tablespoons olive oil
- 1 onion, finely diced
- 1 carrot and 1 celery stalk, finely diced
- 2 cloves garlic, minced
- 500 g beef mince (or a mix of beef and pork)
- 150 ml red wine (optional but nice)
- 400 g can chopped tomatoes
- 1 tablespoon tomato paste
- 250–300 ml beef or vegetable stock
- 1–2 teaspoons dried mixed Italian herbs
- Salt, pepper, pinch of sugar if needed
- 400–500 g dried spaghetti
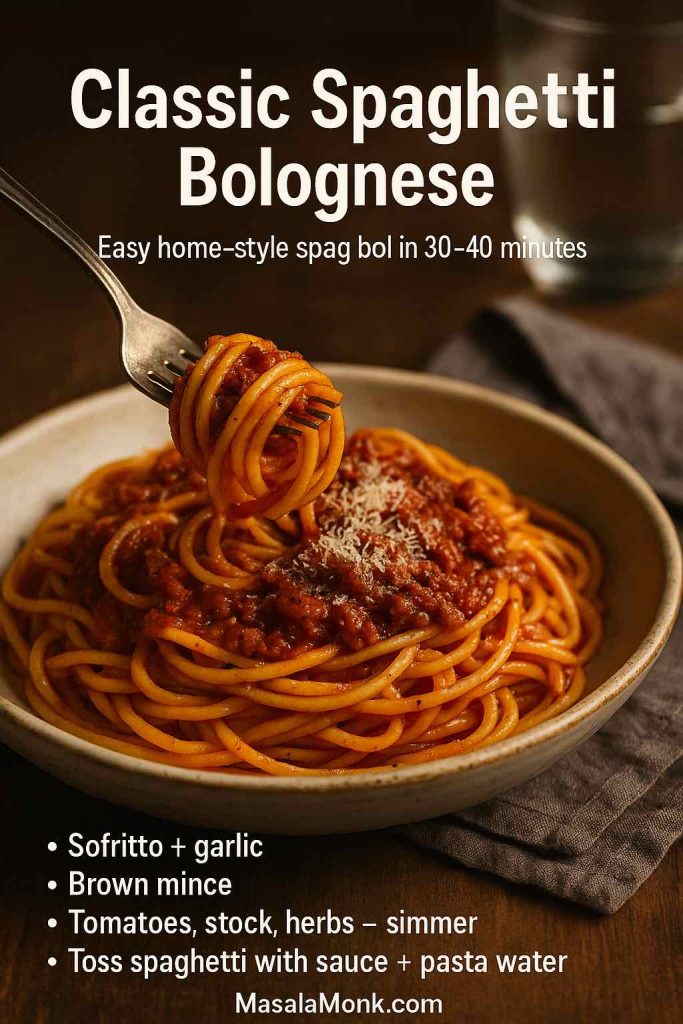
How to Make Classic Spaghetti Bolognese
- Sauté onion, carrot, and celery in olive oil until soft and lightly golden.
- Add the garlic and cook for a minute.
- Stir in the mince with salt and pepper, then cook until browned.
- Mix in the tomato paste and let it toast slightly.
- Pour in the wine and let it simmer down.
- Add chopped tomatoes, stock, and dried herbs.
- Let everything simmer for 30–40 minutes, stirring occasionally, until thick.
Meanwhile, cook the spaghetti until al dente. Instead of dumping sauce on top of plain pasta, toss the spaghetti into a pan with the sauce and a ladle of pasta water. Stir over the heat for a minute so the starch, water, and sauce form a light coating that clings, the way every good spaghetti bolognese sauce should.
From that basic structure, you can riff endlessly:
- Make a traditional spaghetti bolognese by adding a splash of milk near the end.
- Turn it into healthy spaghetti bolognese by swapping some of the mince for mushrooms and grated carrot.
- Use pork mince spaghetti bolognese for a slightly softer, milder profile.
- Make a simple bolognese recipe with no wine by just using extra stock and tomato.
The ingredients to make spaghetti bolognese are also forgiving. A handful of chopped mushrooms or zucchini can disappear into the pot and give you a subtle bolognese with veggies effect without making it feel like a health compromise.
Also Read: French 75 Cocktail Recipe: 7 Easy Variations
Quick Bolognese, Weeknight Bolognese and Jar Hacks
On a Wednesday night, you may not feel like simmering a sauce for hours. That’s when easy bolognese recipes and jar-sauce upgrades get you out of trouble.
Easy Bolognese Sauce Recipe with Jarred Sauce
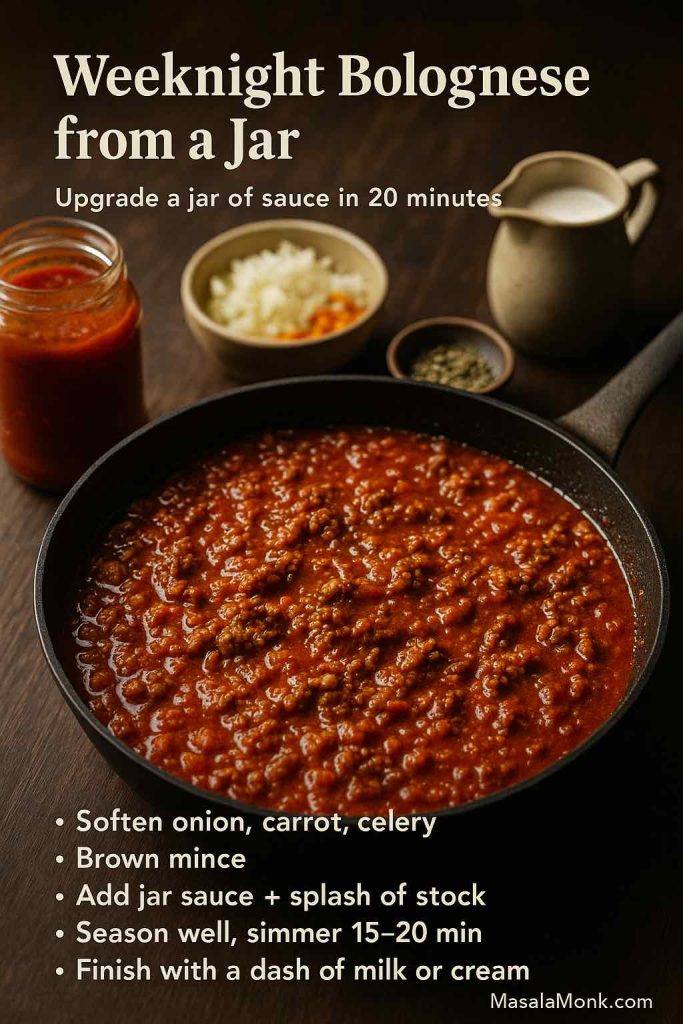
Think of this as “weeknight bolognese” rather than “perfect ragu”, a quick weeknight bolognese or easy spaghetti bolognese sauce can still be serious:
- Soften a chopped onion and a small amount of carrot and celery in olive oil.
- Brown 400–500 g mince (beef, turkey, or a mix) in the same pan.
- Pour in a jar of decent tomato sauce or plain passata.
- Rinse the jar with a little stock or water and add that too.
- Season with bay leaf, oregano, thyme, salt, and pepper.
- Simmer for 15–20 minutes while you cook the pasta.
- Stir in a dash of milk or cream at the end to give it that almost creamy bolognese sauce feel.
To make a bolognese mix like this taste homemade, spices for spag bol really matter. You don’t need anything exotic—just use fresh dried herbs, grind your pepper, and let the sauce cook for at least a bit so flavours meld instead of tasting raw.
You can then:
- Toss through penne for a quick penne bolognese
- Turn it into baked bolognese pasta by mixing with rigatoni, topping with cheese and baking
- Layer it with lasagna sheets and béchamel for a very speedy lasagna bolognese
If you want more inspiration for turning jarred sauces into satisfying meals, the cottage cheese lasagna recipe on MasalaMonk is a good example of how a few simple tweaks can upgrade convenience ingredients into something that feels handmade.
One-Pot Bolognese Sauce Recipe and Baked Variations
Once you’ve accepted that weeknight bolognese can be quick, it opens up other possibilities:
- One pot pasta bolognese: toast the pasta briefly in the pot, then add sauce and water and cook until everything is done at once.
- Baked bolognese spaghetti: parboil spaghetti, mix with a thick sauce, scatter mozzarella and Parmesan, and bake until bubbling.
- Baked gnocchi bolognese: toss gnocchi with sauce in a baking dish, top with cheese, and cook until the top is crisp and the inside is soft and saucy.
For a soupier, spoonable take on these flavours, MasalaMonk’s crock pot lasagna soup shows how to translate a thick meat sauce into a brothy, noodle-filled bowl. You can absolutely use leftover bolognese for that.
Meat Variations: Beef, Pork, Turkey, Lamb & Short Ribs
Once your basic bolognese sauce recipe is under control, changing the meat is an easy way to keep things interesting.
Everyday Mince: Beef, Pork, Turkey
The classic is beef bolognese sauce: all beef, cooked slowly until deep-flavoured. For a slightly sweeter, softer ragu, bolognese with pork mince or a half-and-half beef and pork mixture works beautifully.
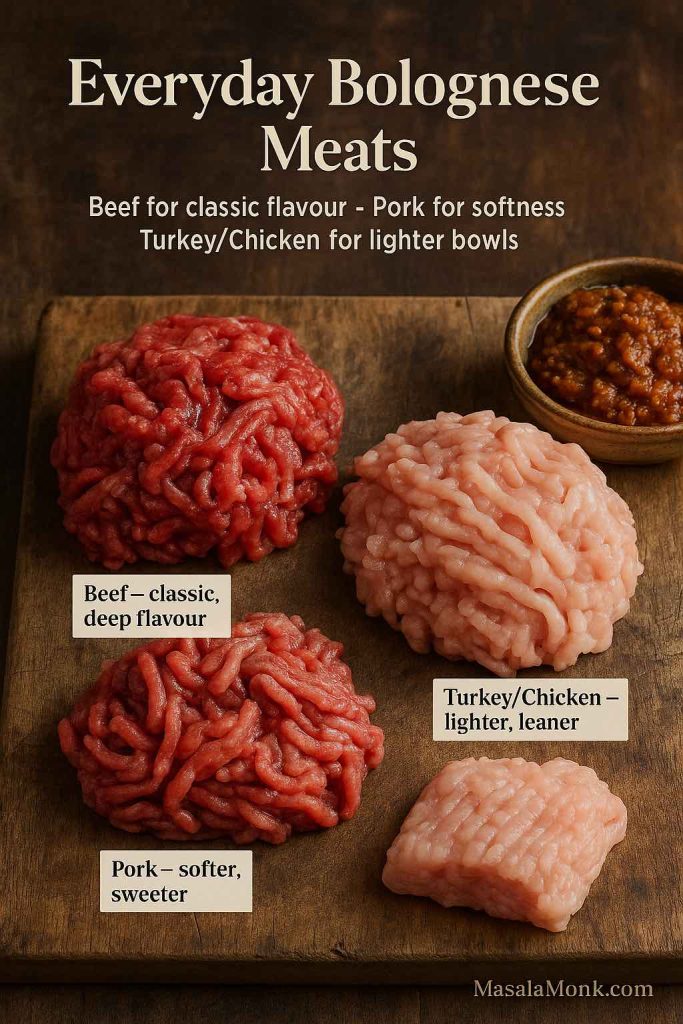
When you want something lighter, turkey bolognese and turkey mince bolognese can be surprisingly satisfying. Turkey needs a bit more help from olive oil, soffritto and stock, but if you give it time, you still get a rich, clingy sauce that pairs nicely with penne, rigatoni or spaghetti.
Chicken mince behaves in a similar way. Combined with white wine, plenty of herbs and maybe a little cream, it leads toward a lighter bolognese cream sauce that feels somewhere between ragù and a rustic chicken pasta.
Rich Cuts and Slow Braises
Then there are the “event” versions:
- Lamb bolognese: fantastic with rosemary, red wine, and pappardelle.
- Wagyu bolognese: intensely rich, so best with sturdier pasta and smaller portions.
- Beef short rib bolognese or bolognese with short ribs: braise the ribs in the sauce, shred the meat, and fold it back in.
These richer versions shine in bolognese bechamel lasagna or in a big tray of rigatoni bolognese baked under a blanket of cheese. Once you’ve put in that kind of effort, it’s also worth stretching the leftovers: spooning some of the sauce over rice, polenta, or even into a bolognese and rice bake for a second dinner.
Also Read: Coconut Water Cocktails: 10 Easy, Refreshing Drinks
Vegetarian, Vegan & Lentil Bolognese Recipes
A vegetarian bolognese recipe shouldn’t feel like a consolation prize. The best versions still lean on soffritto, browning, deglazing and long simmering; they just use a different “mince.”
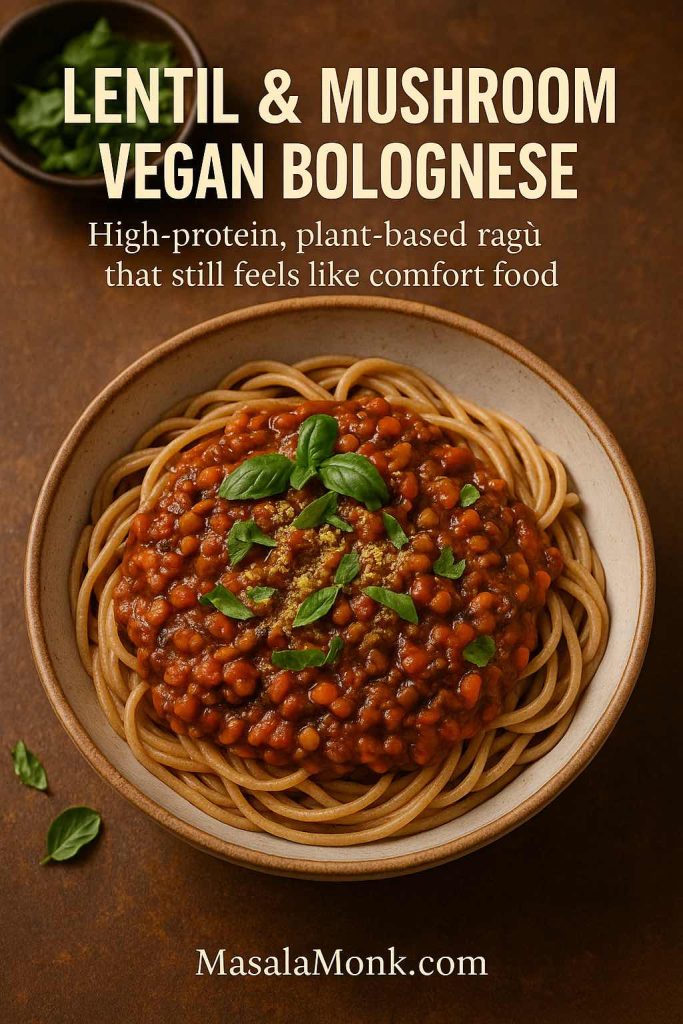
Lentil Bolognese Sauce: The Classic Plant-Based Recipe
For a basic lentil bolognese recipe, you can follow almost exactly the same steps as the meat version:
- Cook onion, carrot, and celery slowly in olive oil.
- Add a cup of rinsed green or brown lentils and toast them briefly.
- Stir in tomato paste, chopped tomatoes, herbs and stock.
- Simmer until the lentils are tender and the sauce is thick.
The result is a lentil bolognese sauce that’s earthy, robust, and surprisingly “meaty” over spaghetti or tagliatelle. For a stripped-back, pantry-friendly version, this red lentil bolognese from Rainbow Plant Life is a brilliant reference: just a handful of ingredients, but a lot of depth thanks to wine, nuts and long simmering.
If you’re curious about using lentils instead of meat more broadly, MasalaMonk’s lentil meal prep ideas show how lentil bolognese slots into a week of plant-based high-protein meals alongside curries, stews and salads.
Mushroom Bolognese Sauce and Veggie Hack Bolognese Recipe
When you want something closer in appearance to mince, mushroom bolognese is your friend:
- Finely chop mushrooms (a food processor helps)
- Dry-fry them until they release their water and start browning
- Build the rest of the sauce around them as usual
This style of mushroom bolognese works nicely in traditional spaghetti bolognese recipes, but it really shines with rigatoni, macaroni or other short pasta shapes where the mushroom pieces can tuck into the hollow spaces.
For a seriously convincing plant based bolognese, combining mushrooms and lentils gives you both chew and richness. The lentil and mushroom bolognese at Lazy Cat Kitchen is a textbook example: a deep, umami-packed ragù that just happens to be vegan.
Fully Vegan Recipe of Bolognese Sauce
A good vegan bolognese recipe still relies on:
- Soffritto for sweetness
- Mushrooms for savoury depth
- Lentils, textured soy, or plant mince for protein
- Wine, stock and tomato for structure
If you swap dairy milk for oat, soy or cashew milk at the end, and use olive oil plus nutritional yeast instead of butter and Parmesan, you end up with a vegan bolognese sauce that behaves almost exactly like the traditional ragù.
For a glimpse at how hearty that can be, Lazy Cat Kitchen’s protein-rich vegan bolognese pairs wholemeal pasta with lentils and walnuts in a way that feels like a post-gym meal more than a “diet dish”.
And if you like building whole weeks of plant-based meals around pasta, sauce, and high-protein ingredients, MasalaMonk’s high-protein pasta dishes are full of ideas that sit comfortably next to a veggie bolognese on your rotation.
Pasta for Bolognese: Tagliatelle, Rigatoni, Penne, Gnocchi & More
Once the sauce is ready, the shape of the pasta changes everything. Each shape has its own vibe, and bolognese plays differently with each.
Tagliatelle, Pappardelle and “Proper” Pairings
In Bologna, the canonical order is tagliatelle al ragù: fresh egg pasta ribbons with a slightly rough surface that cling to the sauce. When you see tagliatelle with bolognese sauce on a menu in Italy, that’s usually what you’re getting.
You can extend that logic to:
- Bolognese tagliatelle for Sunday lunch
- Bolognese with pappardelle when you’ve got a richer, chunkier sauce
- Lasagne ragu bolognese, where sheets of pasta alternate with ragù and béchamel
These pairings make the most sense when you’re using a more traditional bolognese sauce recipe—meat-forward, modest tomato, a long simmer.
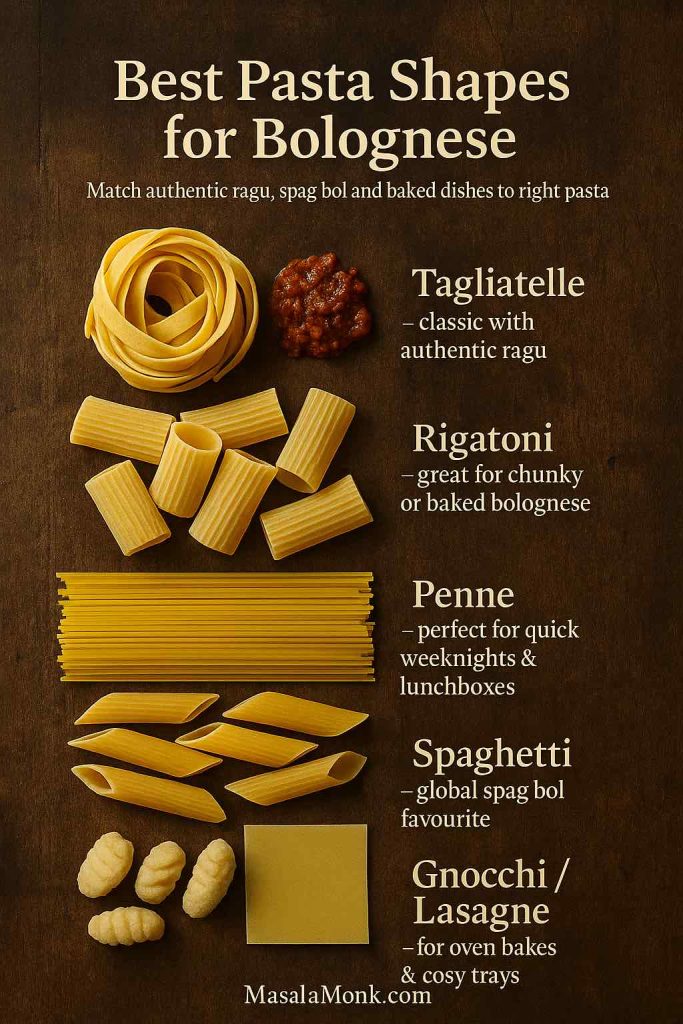
Everyday Shapes: Spaghetti, Rigatoni, Penne, Macaroni
In real life, you’re often cooking with whatever’s in the cupboard. Happily, bolognese is democratic:
- Spaghetti bolognese: the iconic spag bol, easy to twirl and kid-friendly.
- Rigatoni bolognese: hollow tubes that hold little pockets of sauce, perfect for chunkier ragù.
- Penne with bolognese sauce: easy to eat with just a fork, brilliant in lunchboxes.
- Bolognese macaroni: a comfort classic that feels like a halfway point between ragù and mac and cheese.
As long as you cook the pasta to al dente and finish it in the sauce with a bit of pasta water, nearly any shape will work. If you want to switch things up entirely, you can even step into low-carb territory and turn a thick sauce into spaghetti squash bolognese or spoon it over roasted vegetables.
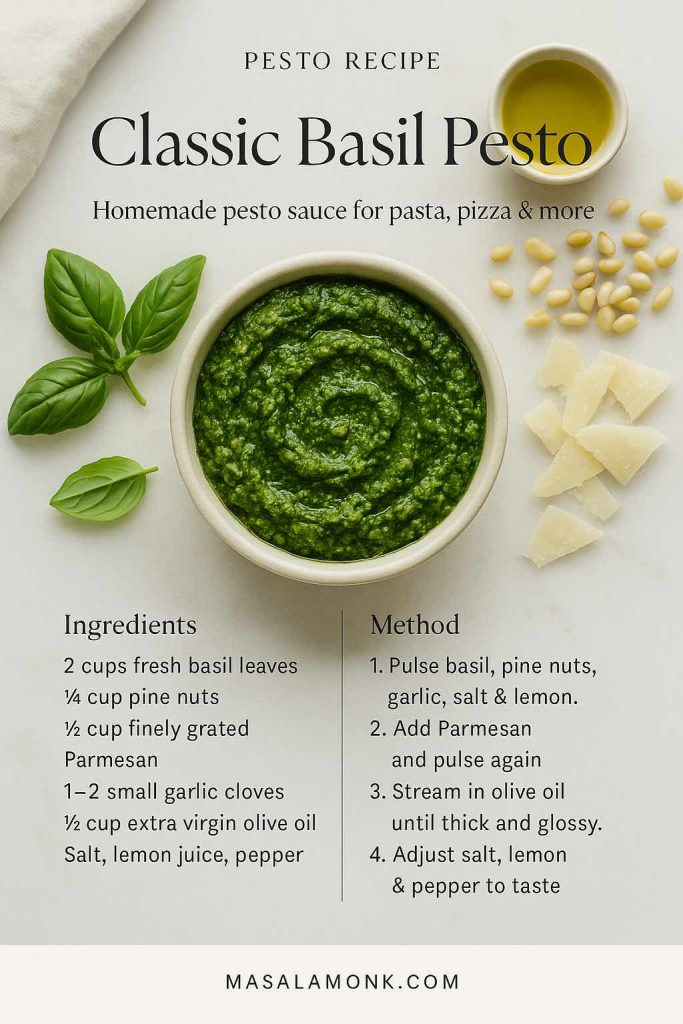
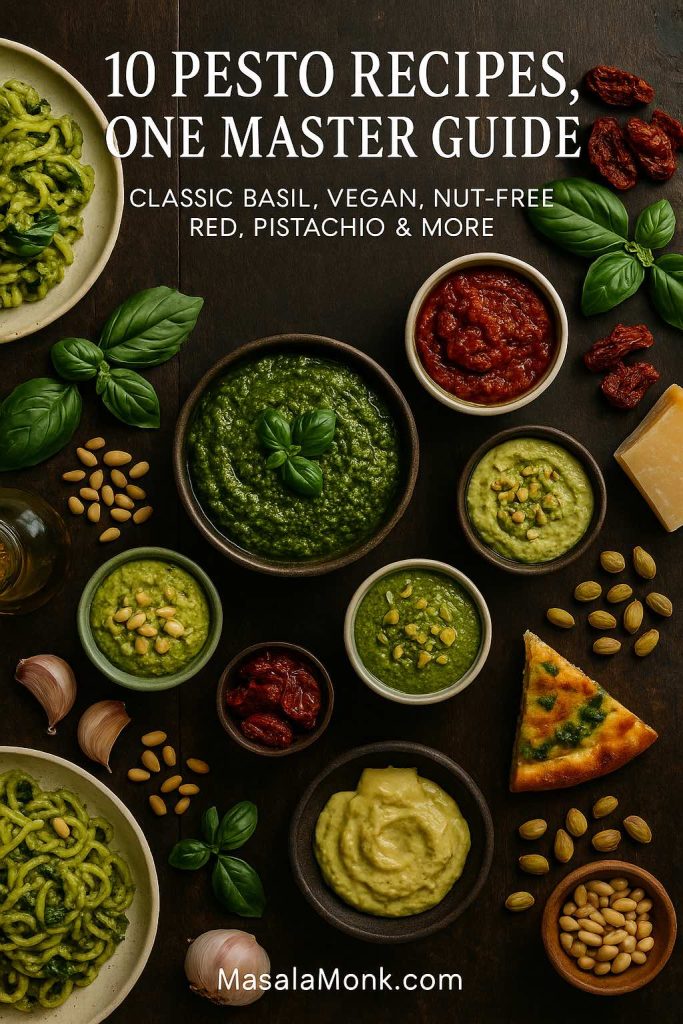
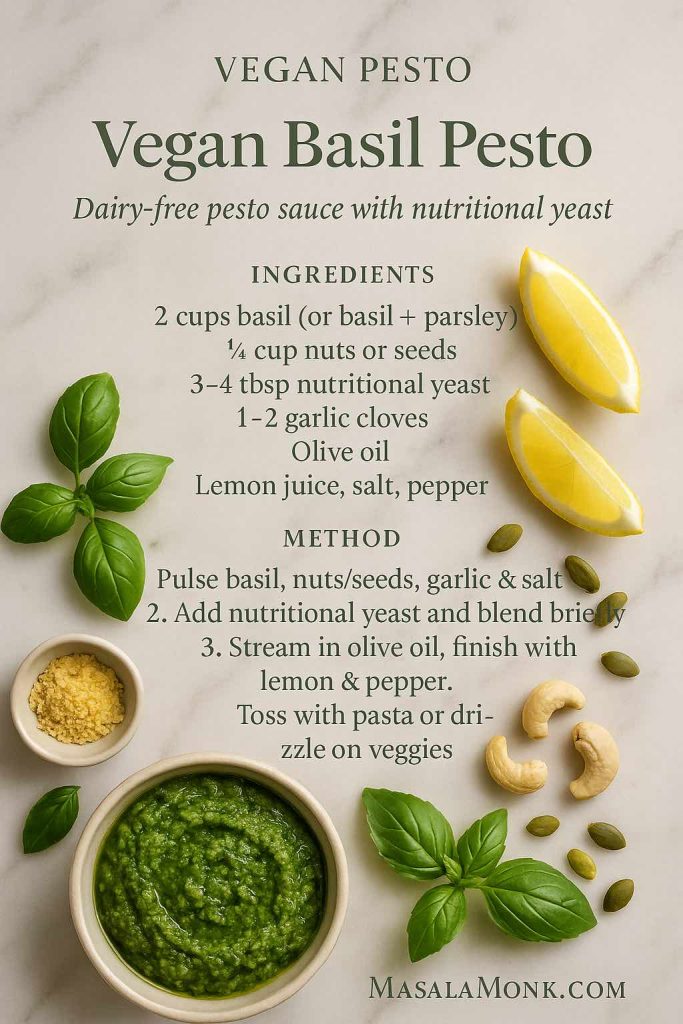
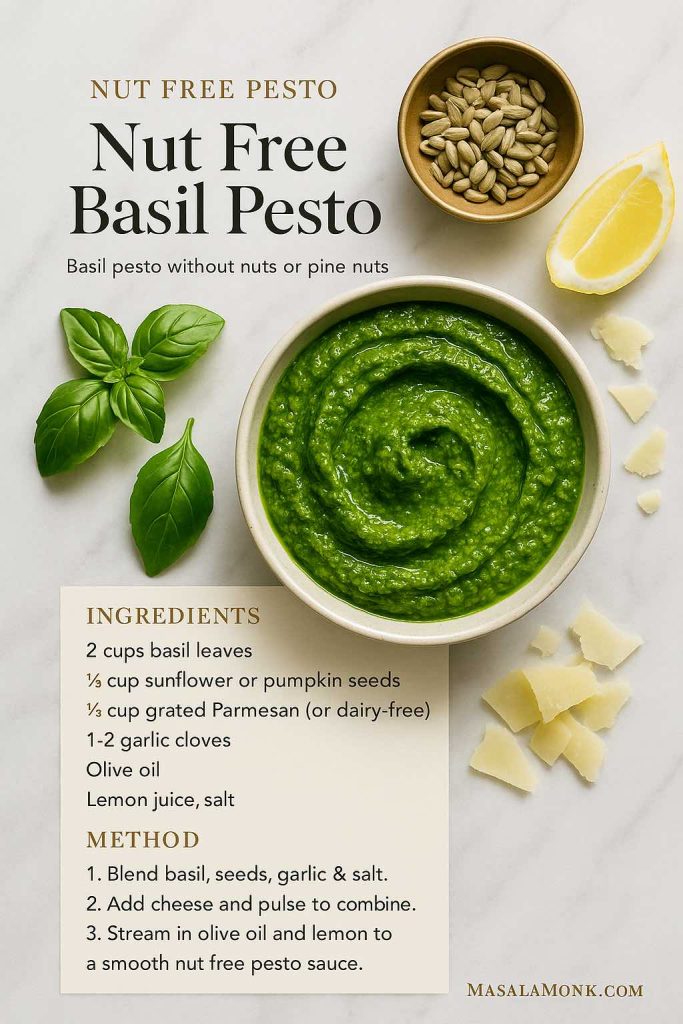
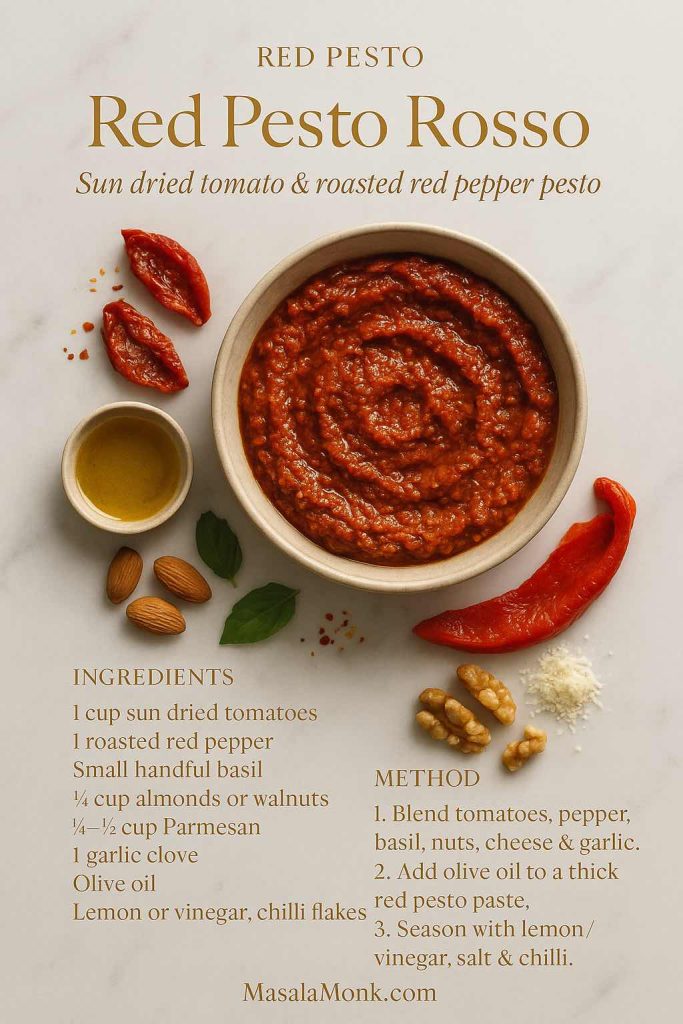
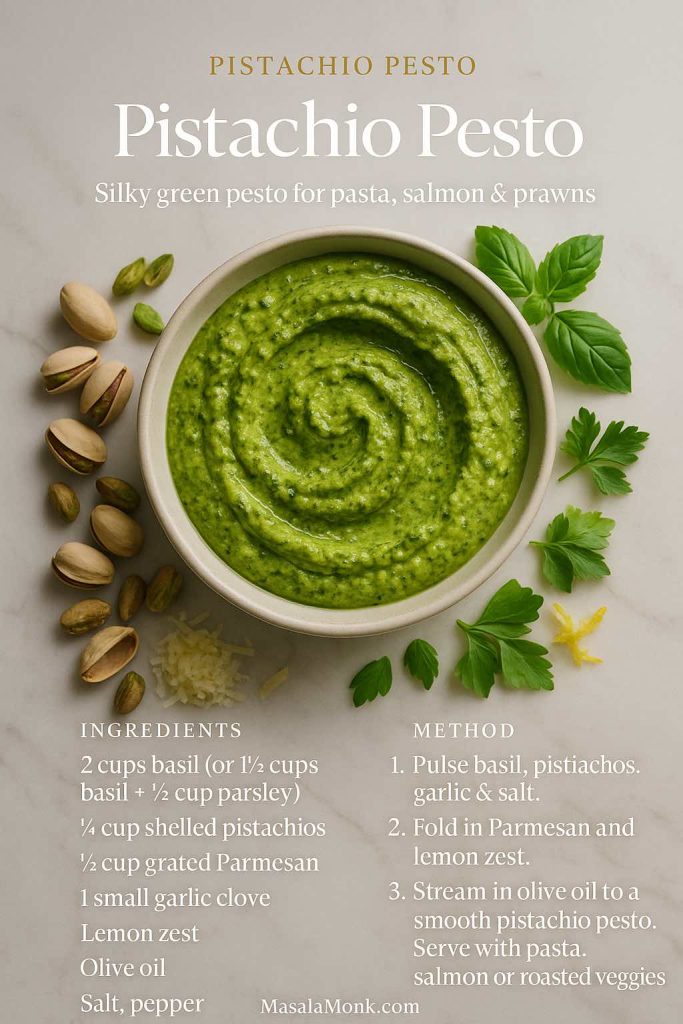
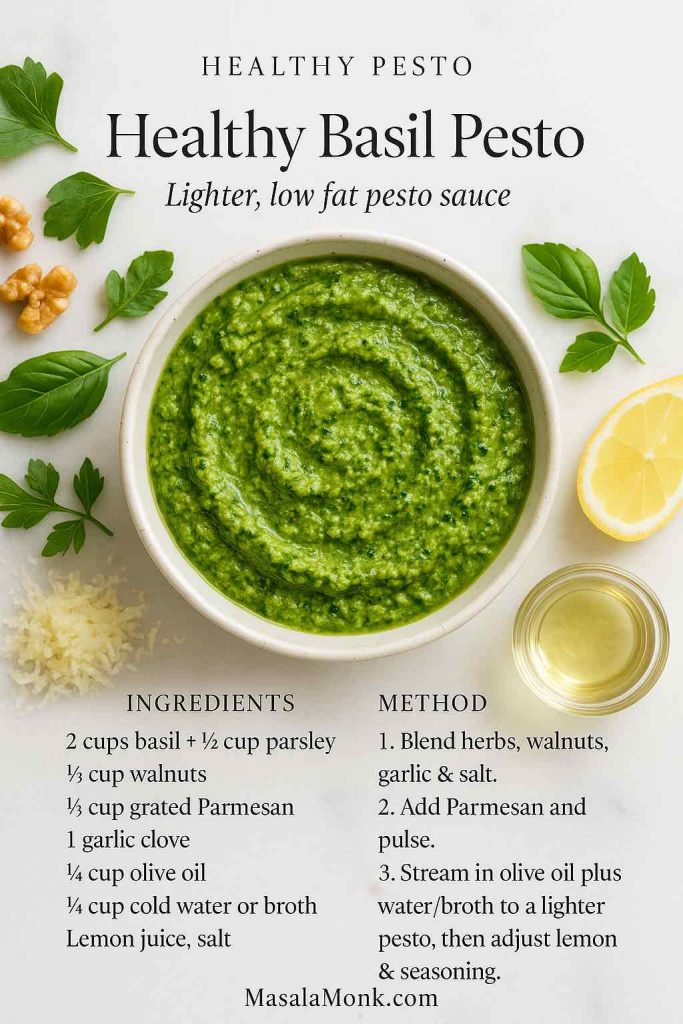
If you’re in a pasta-sauce mood generally, and not just in a bolognese one, MasalaMonk’s pesto recipes are a nice counterpoint: classic basil pesto, vegan pesto, and even Indian-twist pesto for the days when you want something fresh and herb-forward rather than slow-cooked and meaty.
Lasagna, Gnocchi and Other Vehicles for Bolognese
Bolognese doesn’t have to live only on pasta shapes. It’s just as happy:
- Layered in a lasagna bolognese with béchamel and Parmesan
- Stirred through gnocchi and baked under a cheesy crust
- Spread on toasted bread as a kind of Italian sloppy joe
- Spoon-ladled over polenta or mashed potatoes on a cold night

If you’re in a lasagna mood, the béchamel sauce for lasagna guide on MasalaMonk walks through not only classic white sauce but also cottage-cheese-based and vegan versions, so you can tune your lasagna bolognese recipe to your crowd.
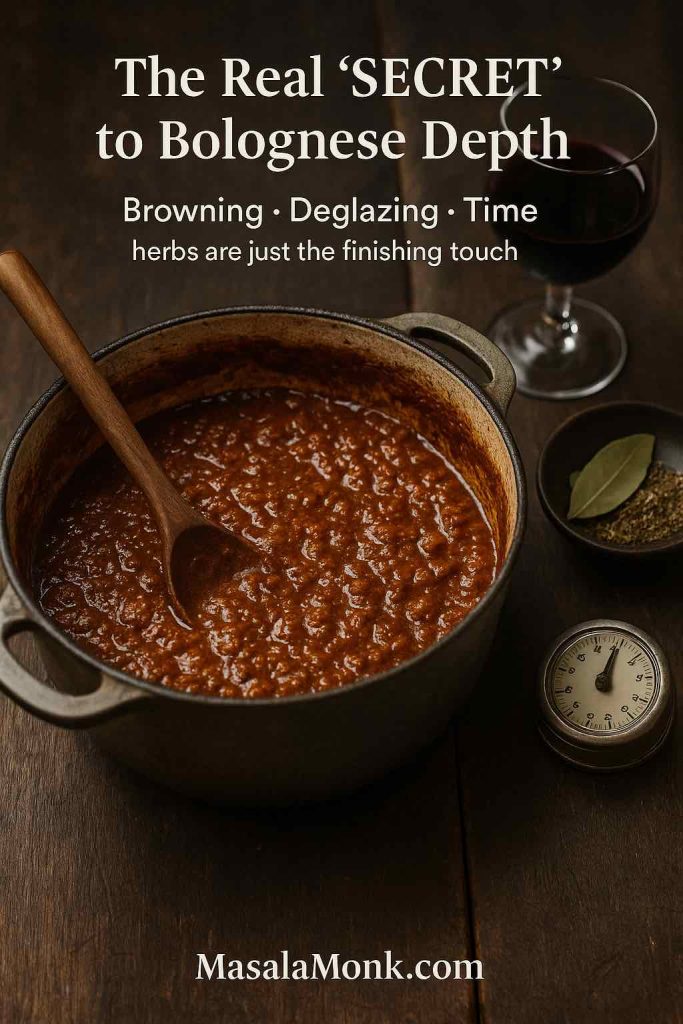
Seasoning, Spices and That “Secret” Bolognese Depth
A lot of people look for bolognese seasoning or spices for spag bol as if there’s a magic sachet that turns mince and tomato into a traditional bolognese sauce. In reality, the “secret” is more about technique than ingredients.
What Really Makes a Bolognese Taste Deep
Three habits matter more than any spice mix:
- Browning
Let the meat and vegetables brown slowly. Colour equals flavour, especially on the bottom of the pan. - Deglazing and reducing
Use wine or stock to dissolve those browned bits, then reduce until the sauce tastes concentrated instead of watery. - Time
Whether you’re using a slow cooker bolognese recipe, a stovetop pot, or even a pressure cooker, it takes time for everything to meld into a unified ragù instead of feeling like separate components.
For herbs and spices in a proper bolognese recipe:
- Keep it classic: bay leaf, oregano, thyme, black pepper
- Go easy on strong dried herbs so the meat shines
- Use a pinch of nutmeg in the milk phase for warmth
Once you’ve built that base, you can safely adjust heat (chilli flakes), sweetness (a tiny pinch of sugar if tomatoes are sharp) or richness (extra olive oil or butter at the end).
Also Read: Greek Tzatziki Sauce Recipe (1 Master Sauce + 10 Easy Variations)
Healthy Spaghetti Bolognese & Lighter Bolognese Ideas
Because bolognese is rich, people often look for healthy spaghetti bolognese, healthy pasta bolognese, or lighter spag bol ideas that don’t feel like punishment.

Here are a few ways to nudge your bolognese in that direction without losing what makes it comforting:
- Swap part of the mince for finely chopped mushrooms and grated carrot: this instantly turns it into a quiet bolognese with veggies.
- Use lentils in place of half (or all) of the meat for a lentil bolognese recipe that’s high in fibre and protein.
- Choose wholegrain pasta, legume pasta, or even serve the sauce over roasted vegetables or spaghetti squash.
- Skim excess fat from the surface of the sauce after it cools; the flavour stays, but the heaviness goes down.
It also helps to think of bolognese as one rich meal among many. If you combine bowls of classic spaghetti bolognese or lasagna bolognese with days built around high-protein salads and lighter pasta dishes—like the healthy tuna salad bowls or plant-based pasta ideas on MasalaMonk—you get the comfort without feeling weighed down by it.
Pulling It All Together
By now, bolognese should feel less like a single fixed recipe and more like a whole family of dishes:
- Authentic bolognese ragu for long, lazy cooking days
- Classic spaghetti bolognese and traditional spag bol for weeknight comfort
- Easy bolognese sauce recipe variations with jarred sauce when time is tight
- Rich bolognese with pork mince, turkey bolognese, lamb ragù or short rib bolognese depending on your mood
- Vegetarian bolognese sauce, vegan bolognese, lentil bolognese and mushroom bolognese when you want plant-based days
- Lasagna bolognese, baked bolognese pasta, and gnocchi bolognese for oven-baked cosiness
Once you’ve made this kind of bolognese sauce recipe a few times, you stop worrying about exact amounts and start cooking by feel: a little more stock here, a little longer on the simmer there, maybe an extra splash of milk at the end. The sauce tells you what it needs.
And the best part? Leftovers never feel like leftovers. They feel like a head start on the next meal—whether that’s a quick bowl of pasta bolognese, a slice of lasagne ragu bolognese, or a new experiment you haven’t named yet.
Also Read: Katsu Curry Rice (Japanese Recipe, with Chicken Cutlet)
FAQs About Bolognese Sauce & Its Recipe
1. What makes an authentic bolognese sauce recipe different from regular meat sauce?
An authentic bolognese sauce recipe is built around slowly cooked meat and soffritto rather than a big hit of tomato. The sauce is thick, savoury and almost stew-like, with wine, stock and milk creating depth and balance. By contrast, a basic meat sauce or quick spag bol is usually more tomato-led, brighter, and cooked in a fraction of the time.
2. Is spaghetti bolognese actually Italian?
Spaghetti bolognese as most people know it is more of an international classic than a dish you’ll find in traditional trattorias in Bologna. In Italy, ragù alla bolognese is normally served with fresh tagliatelle or tucked into lasagne. Even so, spaghetti bolognese has become a beloved comfort food in many countries, so you can still enjoy it without feeling “wrong.”
3. Which pasta shape really works best for bolognese sauce?
For a truly authentic feel, fresh tagliatelle is considered the ideal partner for ragù alla bolognese because its broad, slightly rough ribbons capture the sauce so well. Nevertheless, rigatoni, penne, pappardelle and even macaroni bolognese all carry a hearty meat sauce beautifully. Spaghetti bolognese remains popular too, especially for everyday family dinners.
4. How is ragù alla bolognese different from a simple spag bol recipe?
Ragù alla bolognese is traditionally cooked for hours with a modest amount of tomato, plenty of soffritto, wine, stock and milk, resulting in a dense, clingy sauce. A simple spag bol recipe tends to be quicker, more tomato-heavy and often uses more dried herbs and garlic. Both are tasty, but the ragù is usually deeper and more rounded in flavour.
5. How long should I simmer an authentic bolognese sauce?
For a traditional bolognese sauce recipe, you’ll usually want at least two hours of gentle simmering, and three is even better if you have the time. During that period, the liquid reduces, the flavours concentrate and the meat softens into the sauce. Once the ragù is thick, glossy and no longer tastes sharply of tomato or wine, it’s ready.
6. Can I still make a good easy bolognese recipe on a weeknight?
You can absolutely create a satisfying easy bolognese recipe without devoting your whole evening to it. If you brown the mince properly, use a quick soffritto, add a decent tomato base and let it simmer even for 20–30 minutes, you’ll get far better flavour than a five-minute fry-up. A dash of milk or cream at the end nudges it closer to classic ragù.
7. Why does my bolognese sauce sometimes turn out watery?
A watery bolognese usually means too much liquid and not enough reduction time. If the sauce still looks thin, keep simmering with the lid off so steam can escape and the ragù can thicken naturally. Reducing slowly allows the flavours to concentrate instead of leaving you with a diluted, soupy bolognese.
8. What role does milk or cream play in bolognese sauce?
Milk or cream softens the acidity of the tomatoes and wine while giving the sauce a subtle silkiness. It also helps the fat and liquids emulsify so the ragù looks unified rather than split. Traditionally, dairy is added near the end of cooking so it gently transforms the sauce without curdling.
9. How can I make a healthier spaghetti bolognese without losing flavour?
For a healthier spaghetti bolognese, you can replace some of the mince with finely chopped mushrooms, lentils or extra vegetables like grated carrot and zucchini. You might also use leaner turkey or chicken mince and pair the sauce with wholegrain or legume pasta. With good browning and patient simmering, you’ll still get plenty of flavour even with these lighter tweaks.
10. What meat mixture works best in a classic bolognese meat sauce?
A blend of beef and pork mince is often considered the sweet spot for a classic bolognese meat sauce. The beef brings a deep, robust flavour, while the pork adds tenderness and a faint sweetness. You can adjust the ratio either way depending on whether you prefer something richer or more straightforward.
11. Can I use turkey or chicken mince for bolognese instead of beef?
Turkey mince bolognese and chicken versions are perfectly workable and can be lighter in fat. Because these meats are lean, it helps to use a generous soffritto, enough olive oil and a good stock to keep the sauce moist and flavourful. With a bit of extra patience, you’ll end up with a comforting but less heavy bolognese.
12. How is beef short rib bolognese different from regular mince bolognese?
Beef short rib bolognese starts with whole ribs slowly braised in the sauce until the meat falls off the bone. Once shredded, the beef has a luxurious, silky texture and a deeper flavour than standard mince. This style of ragù is particularly suited to pappardelle or lasagna bolognese for special occasions.
13. Which spices and herbs are best for spag bol seasoning?
Simple, classic flavours tend to work best for spag bol seasoning: bay leaf, oregano, thyme, black pepper and a hint of nutmeg. When you brown the meat properly and deglaze the pan with wine, you often need only modest amounts of dried herbs. Heavy-handed seasoning can overwhelm the slow-cooked taste that makes bolognese special.
14. Can vegetarian bolognese really feel as satisfying as the meat version?
A well-made vegetarian bolognese can be every bit as comforting as a traditional one if you treat it with the same care. Lentils, mushrooms, or plant-based mince can be browned, deglazed and simmered with soffritto, tomato and stock just like meat. The result is a sauce with real body and depth rather than a thin vegetable stew.
15. How do I turn a regular bolognese into a vegan bolognese sauce?
To make a vegan bolognese sauce, simply replace the meat with lentils, mushrooms or plant mince and use vegetable stock instead of meat stock. Later on, swap dairy milk for a plant milk such as oat or soy, or skip the milk entirely and finish with olive oil and nutritional yeast. The method stays the same, so you keep the comforting ragù texture.
16. Is lentil bolognese a good option for spaghetti or just for other shapes?
Lentil bolognese works very well with spaghetti because the lentils cling nicely to the long strands. Green or brown lentils give a pleasantly firm texture, while red lentils melt into a softer, creamier sauce. Either way, you get a high-protein, high-fibre bowl that still tastes like a proper pasta bolognese.
17. What exactly is mushroom bolognese and how should I use it?
Mushroom bolognese relies on finely chopped mushrooms browned until they mimic the texture and flavour of mince. Once they’re deeply golden, you add the usual soffritto, tomato and herbs so the sauce develops that familiar bolognese profile. It’s fantastic with tagliatelle, rigatoni or even layered into a vegetarian lasagne.
18. Can I use bolognese sauce directly for lasagna ragu bolognese?
Yes, bolognese sauce is the classic base for lasagna ragu bolognese, as long as it’s thick enough to hold its shape between layers. You simply combine it with sheets of pasta and a béchamel or white sauce before baking. If your sauce is a bit thin, simmer it a little longer until it becomes more concentrated.
19. Is bolognese good for pasta bakes like baked gnocchi bolognese?
Bolognese is ideal for pasta bakes because it already has the rich, clingy texture you want. You can mix it with cooked gnocchi, penne or rigatoni, add cheese on top and bake until bubbling. The oven time adds a new layer of flavour, turning leftover ragù into an entirely fresh meal.
20. How much bolognese sauce should I use per portion of pasta?
As a rough guide, many cooks aim for enough bolognese to generously coat the pasta without creating a soup. Typically, that means pairing 80–100 grams of dry pasta with about one good ladle or two large spoonfuls of sauce. If the pasta looks pale or dry after tossing, you can always add a little more.
21. Can I cook bolognese in a slow cooker or crock pot?
Bolognese adapts very well to slow cookers because it thrives on long, gentle heat. It’s still worth browning the soffritto and mince in a pan first, then transferring everything to the slow cooker with tomato, stock and seasoning. Several hours on low will give you a mellow, deeply flavoured slow-cooker bolognese.
22. Is it acceptable to use jarred sauce in an easy bolognese recipe?
Using jarred sauce is perfectly practical when you’re short on time. If you first build flavour with soffritto and browned mince, then pour in a jar of tomato sauce, you can still achieve a robust weeknight bolognese. Allowing it to simmer briefly and finishing with milk or cream makes it taste far more homemade.
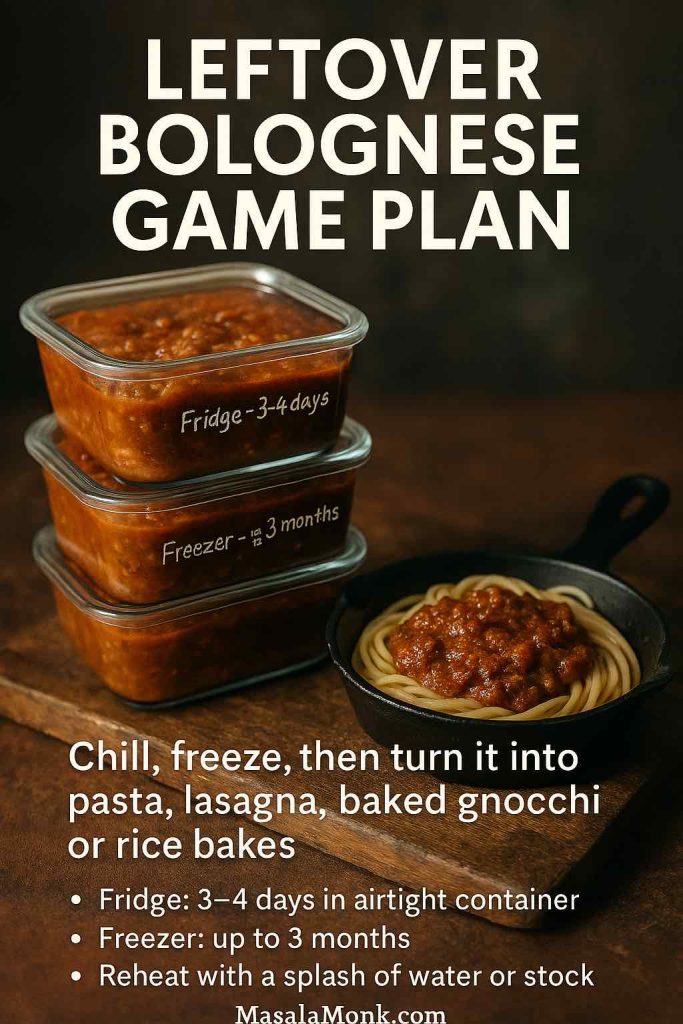
23. How long can homemade bolognese sauce be kept in the fridge?
Homemade bolognese usually keeps well in the fridge for about three to four days if stored in an airtight container. It often tastes even better the next day after the flavours settle. Just be sure to reheat it thoroughly and add a splash of water or stock if it has thickened too much.
24. Can I freeze bolognese sauce, and if so, how should I do it?
Bolognese freezes extremely well, which makes it perfect for batch cooking. Once the sauce has cooled completely, portion it into containers or freezer bags and store it for up to three months. Later, you can thaw it gently in the fridge and reheat on the hob, adjusting the thickness with a little liquid if needed.
25. Why does my bolognese sometimes taste bland even after a long cook?
If your bolognese tastes flat, it often means something was missing at the browning stage or the sauce wasn’t reduced enough. Thoroughly caramelising the meat and vegetables at the start and letting the ragù cook down until concentrated usually solves this. A final check for salt, pepper and a tiny splash of acid (like extra wine or tomato) can bring it to life.
26. Can I make a bolognese sauce recipe without wine?
You can absolutely skip wine if you prefer not to cook with alcohol. In that case, you can use extra stock and perhaps a little tomato juice or vinegar to bring some brightness. As long as you still brown the meat properly and simmer the sauce long enough, you’ll end up with a satisfying bolognese.
27. What’s the best way to reheat leftover spaghetti bolognese?
For the best texture, it’s ideal to reheat the bolognese sauce separately and toss it with freshly cooked pasta. However, if everything is already mixed, warm it in a pan with a splash of water, stirring gently so the spaghetti doesn’t break too much. Once heated through, you can finish with a little fresh cheese or olive oil.
28. How do I turn regular bolognese into a richer, creamy bolognese sauce?
To create a creamier bolognese, you can stir in some milk, cream or mascarpone near the end of cooking and let it simmer briefly. This technique softens the sauce and adds a luscious texture without turning it into a full cream pasta. It works beautifully over tagliatelle or as a base for bolognese lasagne.
29. Is it a good idea to add extra vegetables to my bolognese?
Adding extra vegetables is a great way to build a veggie bolognese without losing the essence of the dish. Finely chopped mushrooms, carrots, celery, peppers or spinach can all melt into the sauce and boost nutrition. When they’re cooked down properly, you still taste “bolognese” rather than a random vegetable stew.
30. What can I do with leftover bolognese sauce apart from serving it with pasta?
Leftover bolognese is incredibly versatile, so it rarely needs to go back on spaghetti unless you want it to. You can spoon it over baked potatoes, tuck it into stuffed peppers, layer it into a small lasagne or bake it with gnocchi and cheese. It also makes a fantastic filling for toasted sandwiches, pies or even a bolognese and rice bake.