Posted on Leave a comment

Baked Brie Recipe: Easy, Gooey, With Honey, Jam, Cranberry or Puff Pastry

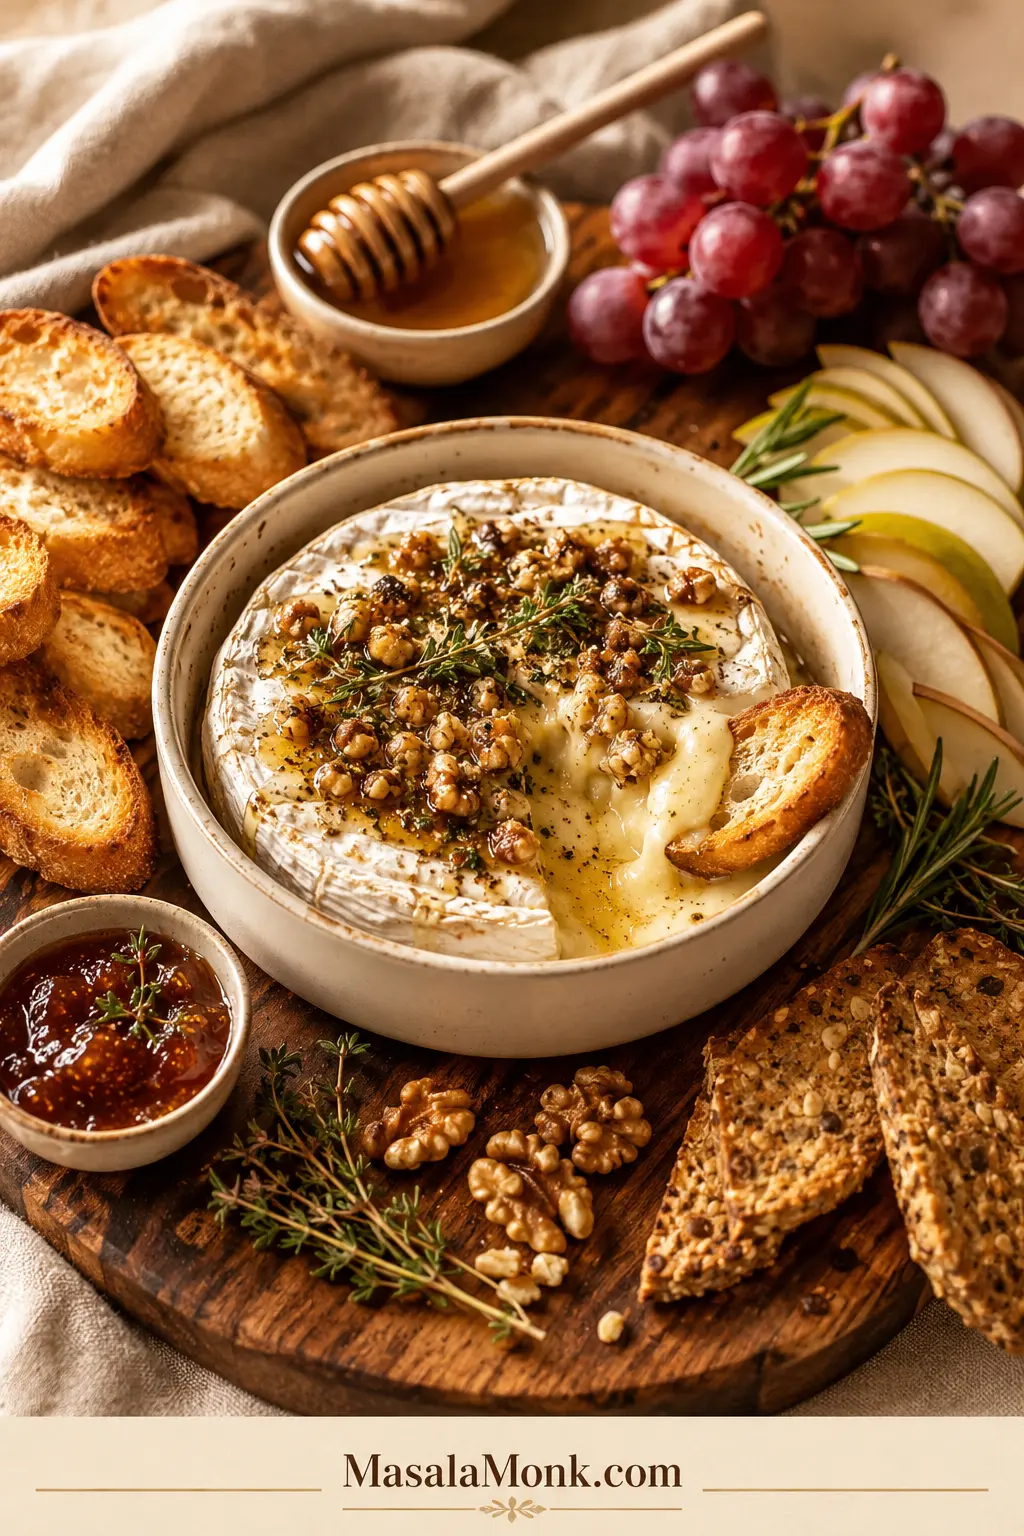
Warm baked brie with honey, nuts, herbs, crackers, crostini, pear slices, grapes, and a serving knife on a wooden board.

Baked brie is the appetizer that makes people drift toward the table before dinner is ready: a warm wheel of cheese, a soft center, something glossy on top, and crackers or bread waiting for the first scoop.

The trick is not making baked brie complicated. What matters most is knowing when to stop. Brie should be warm and soft in the middle, not collapsed into oil; easy to scoop, not so runny that it escapes before guests reach the board.

Start with the easy no-pastry version. It gets to the table in about 15 minutes, teaches you exactly how baked brie should feel, and lets toppings like honey, jam, cranberry sauce, fig jam, nuts, and herbs do the work.

That kind of appetizer looks generous before anyone realizes how little work it took; most of the magic is just heat, timing, and one good topping.

Quick Answer: How to Bake Brie

For easy baked brie without pastry, bake a cold 8 oz / 225 g wheel at 350°F / 175°C for 8–12 minutes, until the center feels soft when gently pressed. Leave the rind on so the cheese holds its shape.

Finish with honey, jam, cranberry sauce, fig jam, pepper jelly, nuts, herbs, or flaky salt. Keep crackers, crostini, baguette, apples, pears, or grapes ready so the brie can be served while warm. For baked brie in puff pastry, use 400°F / 200°C, bake until the pastry is golden, usually 35–40 minutes, and rest for 5–10 minutes before cutting.
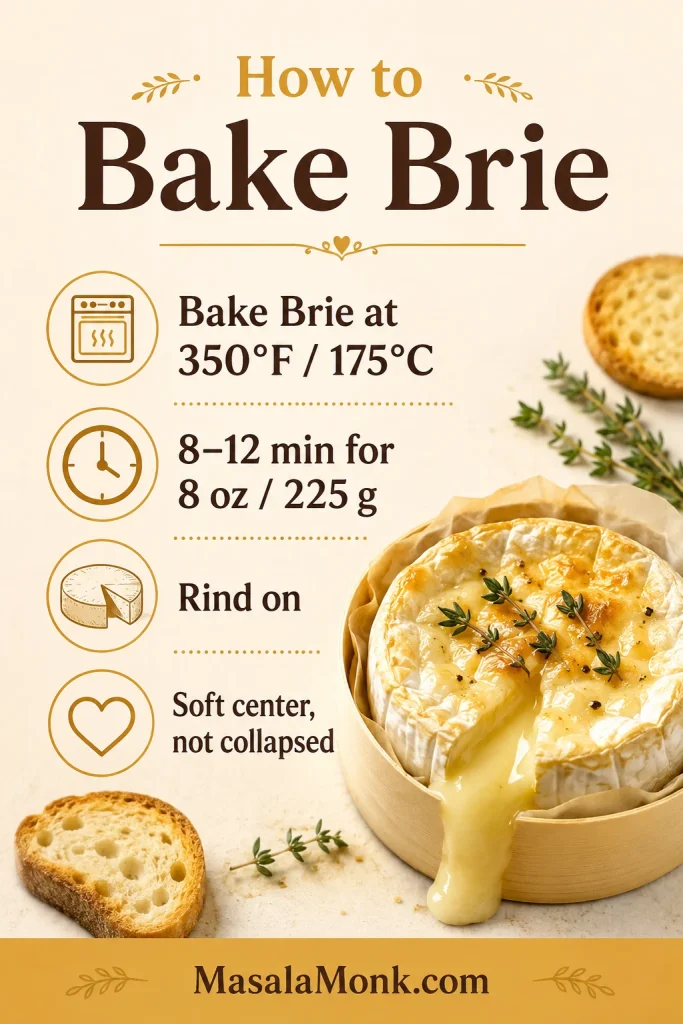
Infographic showing how to bake brie at 350°F for 8 to 12 minutes with the rind on and the center soft but not collapsed.
A standard 8 oz wheel usually needs 8–12 minutes at 350°F; then stop when the center feels soft rather than waiting for the cheese to collapse.

First-scoop check: the center should move easily while the rind still keeps the wheel mostly together.
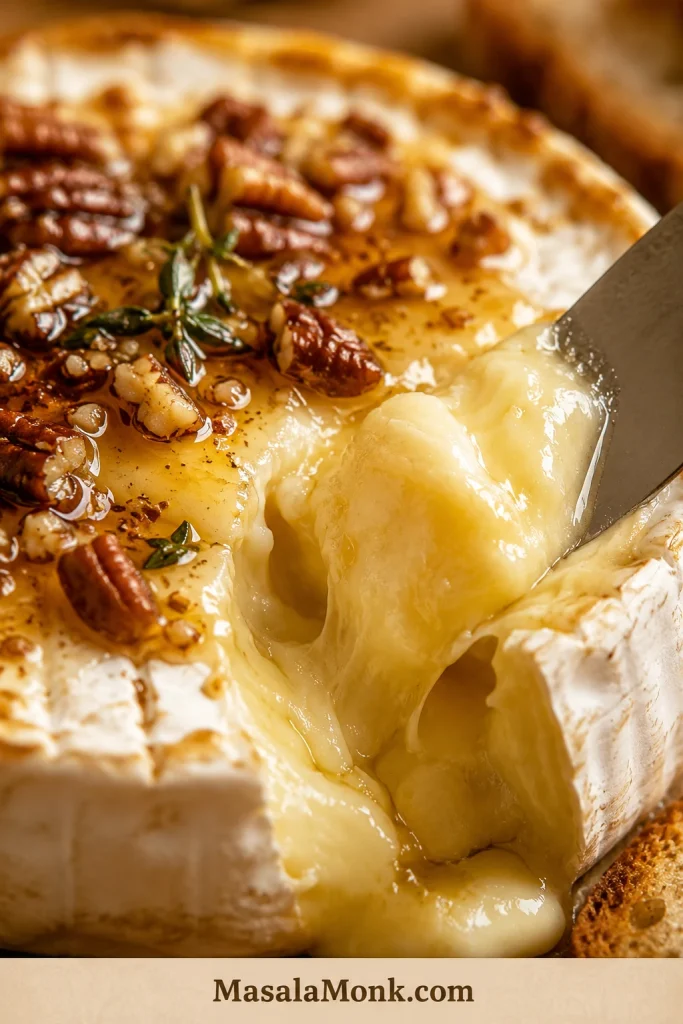
Close-up of a cracker scooping soft baked brie with honey, nuts, herbs, and melted cheese in the center.
The first scoop should move smoothly through the creamy center while the rind keeps the baked brie neat enough for serving.

Need the next step? Go to the easy baked brie recipe, check the bake time chart, or compare baked brie toppings.

Jump to What You Need

Make It

Choose a Version

Serve and Fix

Easy No-Pastry Baked Brie

No-pastry baked brie is the best first version because it teaches timing, shows off toppings, and reaches the table fast. There is no wrapping dough, no sealing pastry, no waiting for a crust to brown — just warm cheese, a good topping, and something sturdy to scoop it with.
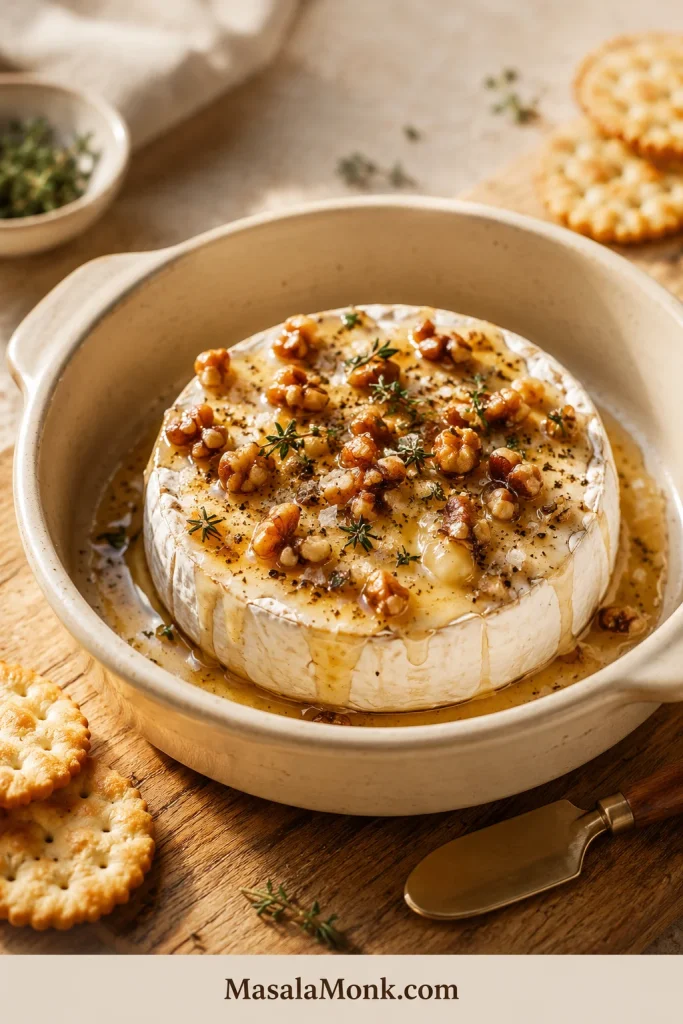
No-pastry baked brie in a cream ceramic dish with honey, walnuts, thyme, crackers, and a small serving knife.
Because the rind contains the cheese, no-pastry baked brie is the easiest version to master while honey, nuts, and herbs add flavor without extra dough.

Easy Baked Brie: Ingredients and Instructions

A fast no-pastry baked brie that lands on the table warm, soft-centered, and ready for crackers. This is the version to make when you want an easy appetizer that still feels generous.

  • Prep time: 5 minutes
  • Bake time: 8–12 minutes
  • Total time: 15–20 minutes
  • Servings: 4–6
  • Brie size: 8 oz / 225 g wheel
  • Oven: 350°F / 175°C
  • Texture: soft-centered, scoopable, not collapsed

Baked Brie Ingredients
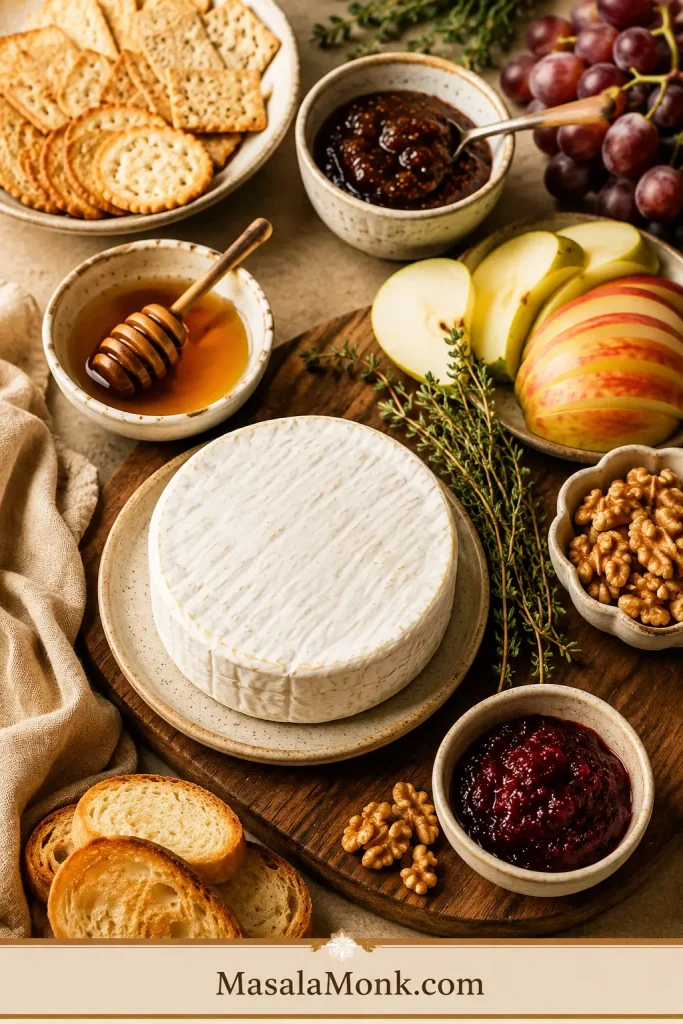
Ingredients for baked brie arranged on a board, including brie, honey, jam, nuts, herbs, crackers, apples, pears, and grapes.
A reliable baked brie appetizer starts with one wheel of brie, one sweet topping, one crunchy element, fresh herbs, and dippers ready before the cheese leaves the oven.
  • 1 cold brie wheel, about 8 oz / 225 g
  • 2–3 tablespoons / 30–45 ml honey, fig jam, cranberry sauce, raspberry jam, apricot preserves, or pepper jelly
  • 2–4 tablespoons / about 15–30 g chopped pecans, walnuts, almonds, or pistachios
  • 1–2 teaspoons / about 1–2 g fresh thyme or rosemary, optional
  • Pinch of flaky salt, optional
  • Crackers, crostini, sliced baguette, apple slices, pear slices, or grapes, for serving

Instructions

  1. Preheat the oven to 350°F / 175°C.
  2. Keep the brie cold until baking. Leave the rind on; it helps contain the soft center.
  3. Place the brie on parchment, in a shallow oven-safe dish, or in a small cast iron skillet.
  4. For thick jam or cranberry sauce warmed into the top, spoon it over the brie now. Honey, loose jam, fresh herbs, and flaky salt usually look better after baking.
  5. Bake for 8–12 minutes, until the center feels soft when gently pressed.
  6. Finish with honey, jam, cranberry sauce, fig jam, nuts, herbs, and a small pinch of flaky salt as needed.
  7. Rest for 2–3 minutes if the cheese looks very runny, then serve warm with crackers, bread, or fruit.

Recipe note: Start checking early. Soft and gently wobbly is better than burst and oily. This is the part to check, not the clock.

Before you bake: Check how long to bake brie, confirm doneness cues, or jump to what to serve with baked brie.

Fastest 3-Ingredient Baked Brie

Use brie + honey or jam + nuts. Bake the cold brie until soft, spoon honey or jam over the top, add chopped pecans or walnuts, and serve warm. That is enough to put something warm, golden, and generous on the table in about 15 minutes.
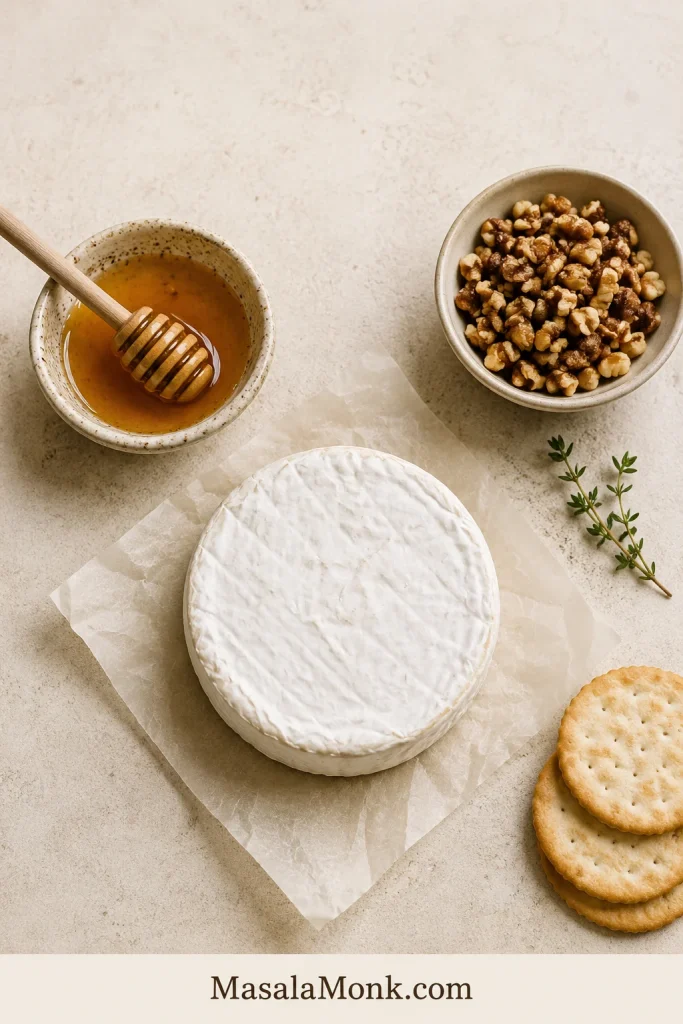
Minimal three-ingredient baked brie setup with a cold brie wheel, honey, chopped walnuts, crackers, and fresh thyme.
When time is short, brie, honey or jam, and chopped nuts are enough to make a warm baked brie appetizer that still feels generous.

Bake the brie last, not first. The board can wait; the cheese cannot. Have the crackers, bread, fruit, topping, and spreader ready before the brie leaves the oven, and the whole appetizer feels calm instead of rushed.

What Makes This Baked Brie Work

Baked brie is a timing recipe more than an ingredient recipe. The cheese needs just enough heat to turn soft in the center, while the rind still holds everything together.

That is why the no-pastry version is the best place to start. It teaches you how baked brie should feel: warm, scoopable, gently wobbly, and still neat enough to bring to the table.

  • Keep the rind on: it acts like a small edible bowl.
  • Check early: soft and wobbly is better than burst and oily.
  • Use contrast: honey, jam, cranberry, fig, nuts, herbs, or flaky salt keep the cheese from feeling too rich.
  • Serve immediately: baked brie is at its best while the first scoop is still warm.

Baked brie with a soft center being scooped while the rind holds the round wheel of cheese in place.
The rind helps baked brie keep its round shape while the center warms into a creamy layer that is easy to scoop.

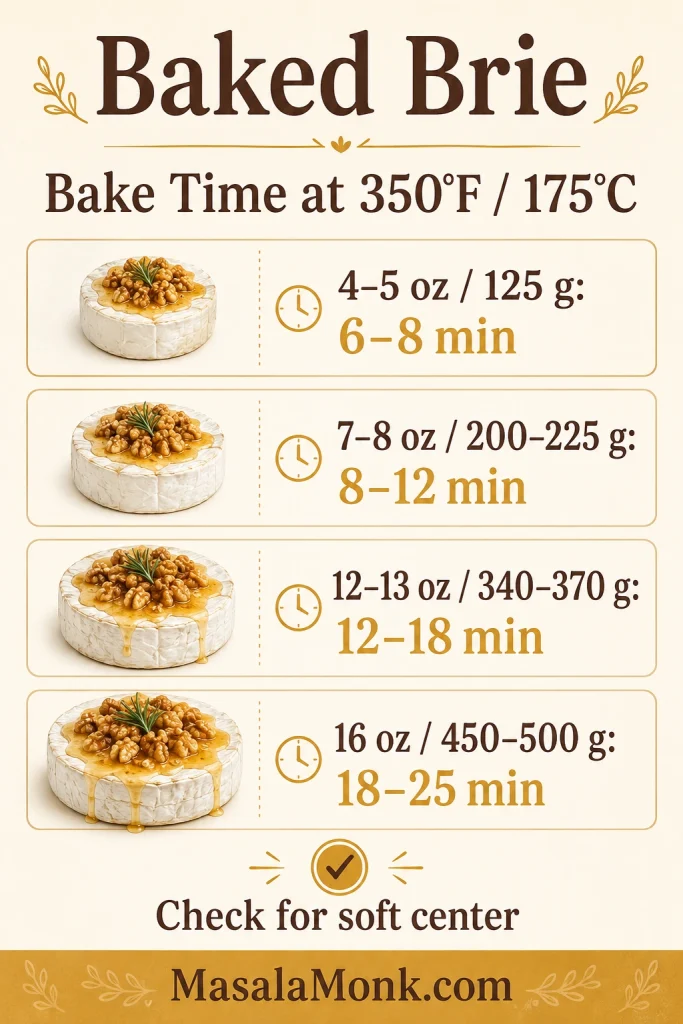
How Long to Bake Brie at 350°F

At 350°F / 175°C, a standard 8 oz / 225 g wheel of brie usually takes 8–12 minutes. Smaller wheels soften faster, while larger wheels need more time for the center to warm through.

Brie SizeMetricOven TempBake TimeUse For
Small wheel4–5 oz / 125 g350°F / 175°C6–8 min2–4 people
Standard wheel7–8 oz / 200–225 g350°F / 175°C8–12 min4–6 people
Medium wheel12–13 oz / 340–370 g350°F / 175°C12–18 min6–8 people
Large wheel16 oz / 450–500 g350°F / 175°C18–25 min8–10 people
Baked brie bake time chart showing small, standard, medium, and large brie wheels with baking times at 350°F.
Use the size of the wheel to choose a bake-time range, then check for a soft center before adding toppings or moving the brie to the board.

If your brie takes longer than the chart, nothing is wrong. Some wheels are thicker, colder, or packed more firmly. Use the chart as a starting point and the soft-center test as the final check.

How to Know When Baked Brie Is Done

Baked brie is done when the center feels soft under the rind and the wheel relaxes slightly at the edges. Look for wobble, not collapse.
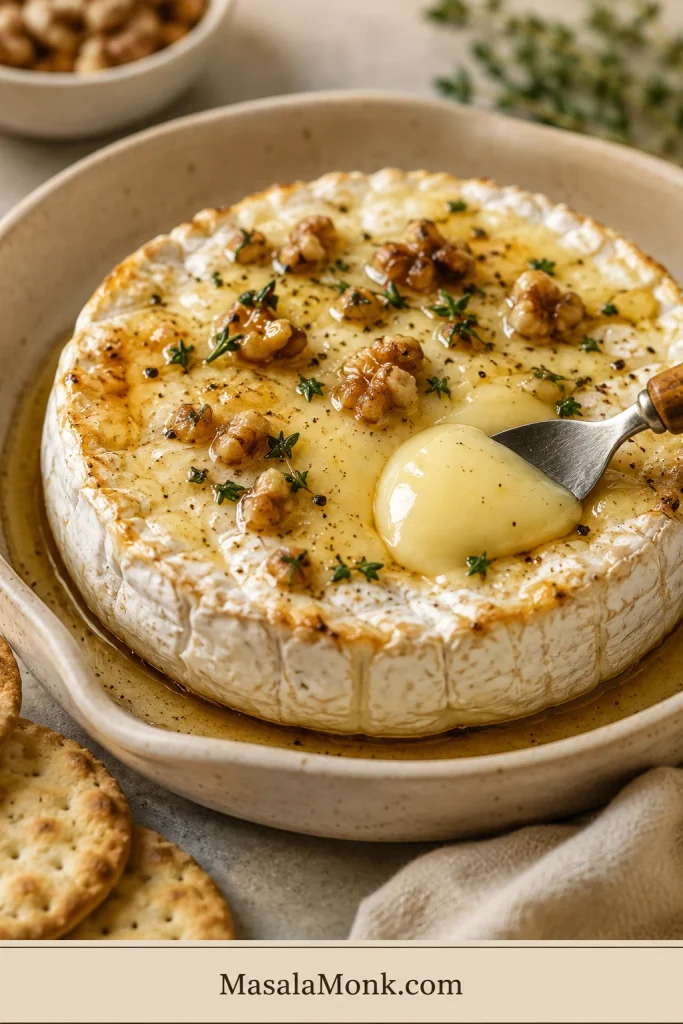
Perfectly done baked brie with relaxed edges, a soft center, walnuts, thyme, and a serving knife in a shallow dish.
Baked brie is done when the edges relax, the center gives gently under a spoon, and the rind still looks intact.
  • Too firm: bake 2–3 minutes more and check again.
  • Soft and gently wobbly: ready.
  • Split, leaking, or oily: overbaked, but still fine to serve from the dish.

Too Firm, Perfect, or Overbaked

Use the visual cues together: a firm wheel needs a few minutes, a gentle wobble is ready, and a split rind means it is time to serve from the dish.

Doneness guide comparing three baked brie wheels labeled too firm, perfect, and overbaked.
This baked brie doneness guide shows why you want wobble, not collapse: too firm needs more time, while overbaked brie can split and turn oily.

For an 8 oz wheel, 8–10 minutes gives you a neater brie. Around 10–12 minutes gives you a gooier center. After that, leaking becomes more likely.

A tiny bit of cheese escaping is not a disaster. The real problem is when the whole wheel splits and floods the dish, so check early and stop when the center feels soft.

Should You Score Brie Before Baking?

You can score the top rind before baking brie, but keep the cuts shallow. Scoring helps honey, jam, herbs, and nuts settle into the top of the cheese, but cutting too deeply gives the melted center a place to leak.
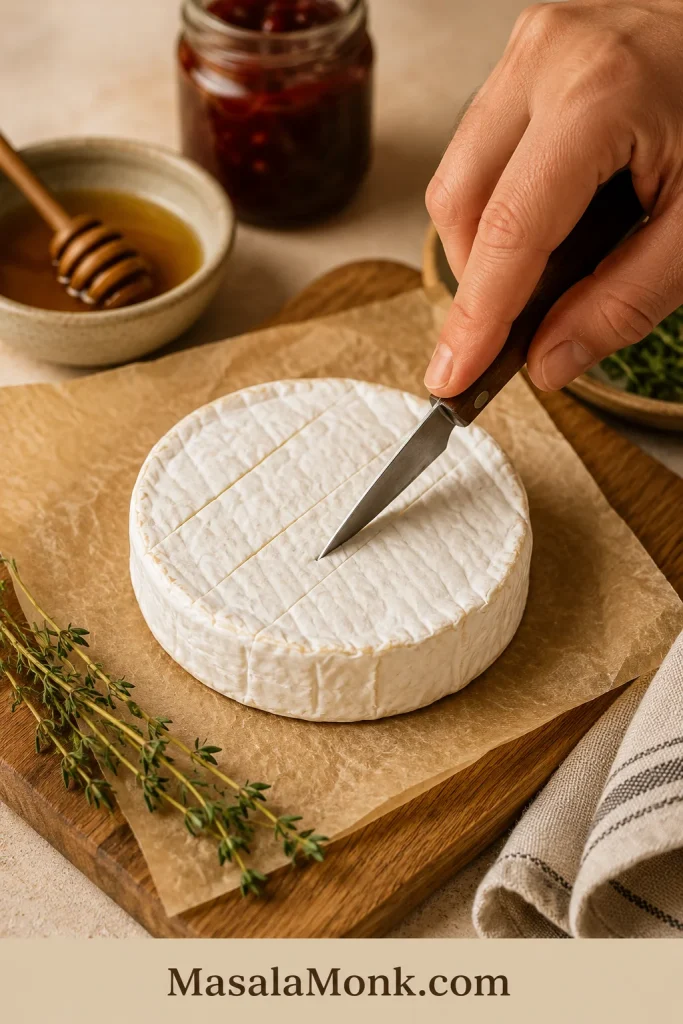
Hand using a small knife to score shallow lines across the top rind of a cold brie wheel on parchment.
Score only the top rind lightly so honey or jam can settle in; deep side cuts can make melted brie leak too early.

For no-pastry baked brie, make shallow lines only across the top. Do not cut down the sides. For puff pastry baked brie, keep the wheel mostly intact so the cheese stays contained inside the pastry.

The rind is edible and helps the brie hold its shape. If you dislike the flavor, lightly scrape or shallow-score the top, but do not remove the rind or cut into the sides before baking.

Worried about leaks? See the puff pastry baked brie tips or jump to troubleshooting baked brie.

Choose Your Baked Brie Version

Now choose the style that fits the kind of table you are building. If you are unsure, choose honey for easy, cranberry for festive, fig jam for elegant, and puff pastry for drama.

Guide showing four baked brie versions with honey, cranberry, fig jam, and puff pastry.
Match the topping to the occasion: honey keeps things simple, cranberry adds holiday color, fig jam feels polished, and puff pastry makes it a centerpiece.
VersionUse WhenApprox. TimeTopping Idea
No-pastry baked brieYou want the fastest appetizer10–15 minHoney, nuts, thyme
Baked brie with jamYou want easy sweet-savory flavor10–15 minFig, raspberry, apricot, pepper jelly
Cranberry baked brieYou are making a holiday board15–20 minCranberry sauce, pecans, orange zest
Baked brie with honeyYou want something classic and simple10–15 minHoney, walnuts, flaky salt
Baked brie with fig jamYou want a cheese-board feel10–15 minFig jam, walnuts, rosemary
Puff pastry baked brieYou want a dramatic centerpiece35–45 minFig jam, cranberry, honey
Crescent roll baked brieYou want a shortcut dough option25–35 minJam or cranberry sauce
Phyllo baked brieYou want a crisp, flaky wrapper25–35 minHoney, fig jam, walnuts
Air fryer baked brieYou are making a small batch6–10 minHoney or jam
Brie bitesYou want party-tray finger food20–30 minCranberry, fig jam, pepper jelly

Ingredients and Topping Basics

Brie

Use a round wheel of brie if possible. A standard wheel is usually 7–8 oz / 200–225 g and serves 4–6 people as an appetizer. For a party or holiday board, a larger 12–16 oz wheel works better. Wedges can be warmed, but a wheel holds its shape better and looks cleaner when guests start scooping.

You do not need the most expensive brie for baking. A good everyday wheel works well because the cheese is being warmed and topped; save very delicate or expensive brie for a room-temperature cheese board.

Honey, Jam, Cranberry Sauce, or Fig Jam

For an 8 oz / 225 g wheel, use 2–3 tablespoons / 30–45 ml honey, jam, cranberry sauce, fig jam, or pepper jelly, plus 2–4 tablespoons / about 15–30 g chopped nuts if using. That is enough to flavor the cheese without drowning it.

If you already have homemade jam, preserves, or leftover cranberry sauce, baked brie is one of the easiest ways to turn it into an appetizer.

Nuts, Herbs, and Dippers

Pecans, walnuts, almonds, and pistachios add the crunch that keeps each bite interesting. Thyme and rosemary add aroma. Crackers, crostini, baguette, apples, pears, and grapes should be ready before the cheese goes into the oven. Warm brie should never be waiting on crackers.

Best Baked Brie Toppings

Use this chart like a shortcut to the mood you want: simple, festive, elegant, spicy, or savory.

The best bite has all three things: creamy cheese, glossy topping, and something crisp enough to carry it.
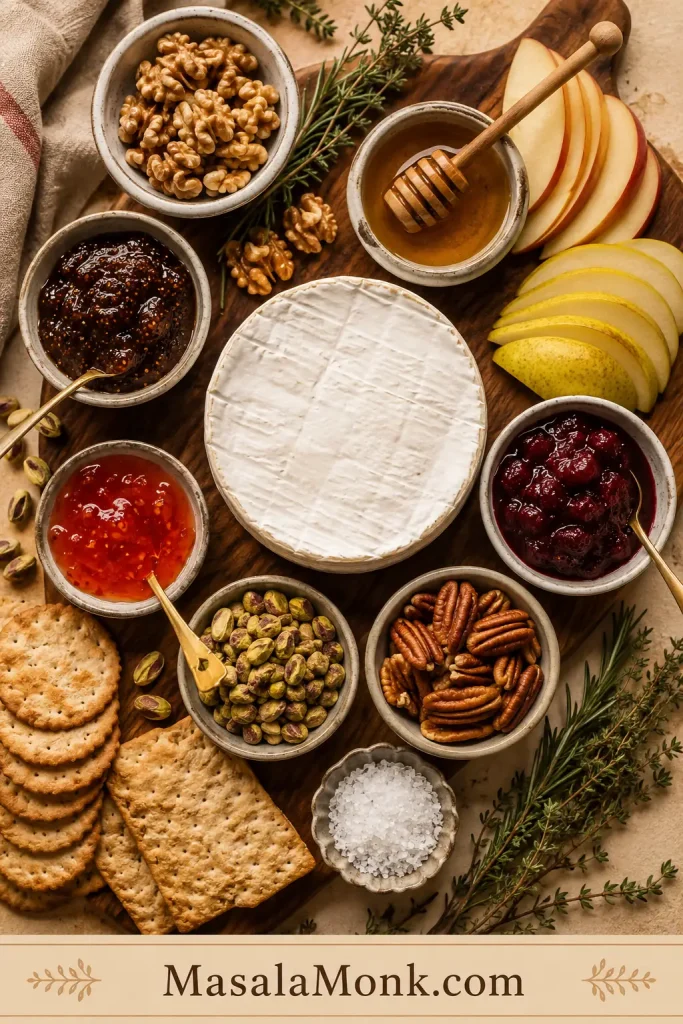
Overhead board of baked brie toppings including honey, fig jam, cranberry sauce, pepper jelly, nuts, herbs, fruit, crackers, and flaky salt.
Great baked brie toppings add contrast, so pair creamy cheese with something sweet, tart, crunchy, herby, salty, or lightly spicy.
ToppingPair WithFlavor
HoneyPecans, walnuts, thymeSweet, simple, glossy
Fig jamWalnuts, pistachios, rosemaryRich, elegant, cheese-board style
Cranberry saucePecans, orange zest, rosemaryTart, festive, holiday-ready
Raspberry jamAlmonds, pistachiosBright and sweet-tart
Apricot preservesAlmonds, honeyMild, fruity, crowd-friendly
Pepper jellyPecans, crackers, charcuterie boardsSweet-spicy and bold
Hot honeyWalnuts, pecans, plain crackersSweet-spicy and bold
Apple or pearWalnuts, honey, thymeFresh and fall-style
Garlic and herbsOlive oil, rosemary, thymeSavory and aromatic

Nut-Free Baked Brie Toppings

For a nut-free baked brie, use honey with flaky salt, cranberry sauce with orange zest, fig jam with rosemary, pepper jelly with herbs, or apple slices and pomegranate seeds around the board.
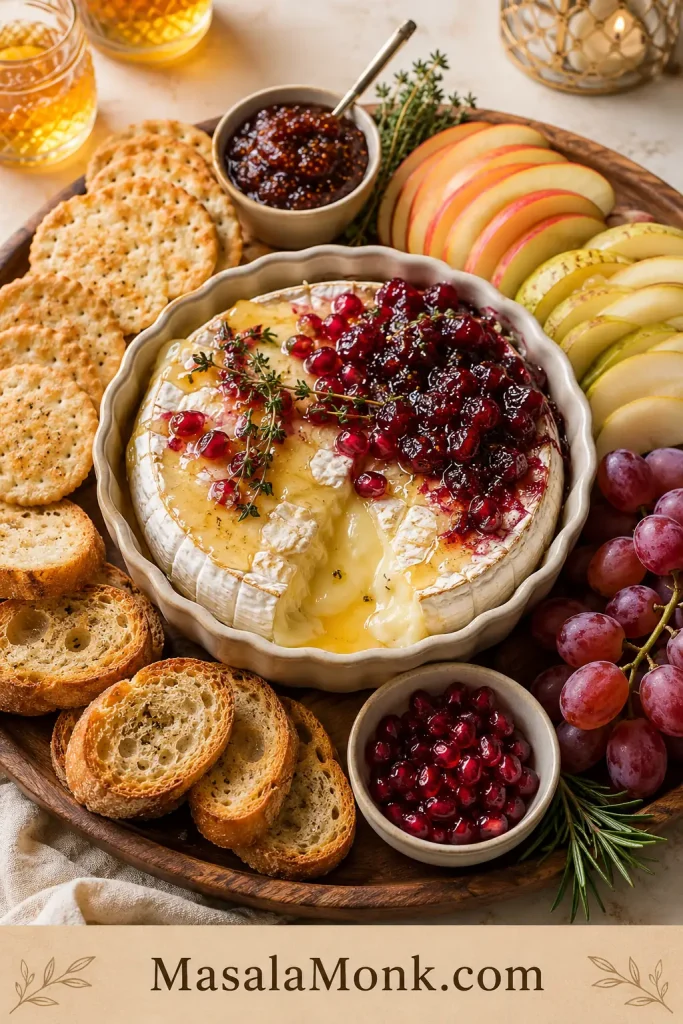
Nut-free baked brie board with honey, cranberry sauce, fig jam, pomegranate seeds, apples, pears, grapes, herbs, crackers, and crostini.
For nut-free baked brie, lean on fruit, herbs, pomegranate, honey, cranberry sauce, fig jam, and sturdy crackers to keep the board full and balanced.

Baked Brie With Jam

Jam turns warm brie into a sweet-savory appetizer with almost no extra work. When the jam warms slightly, it softens into the top of the brie and gives each cracker a little sweet-tart edge.
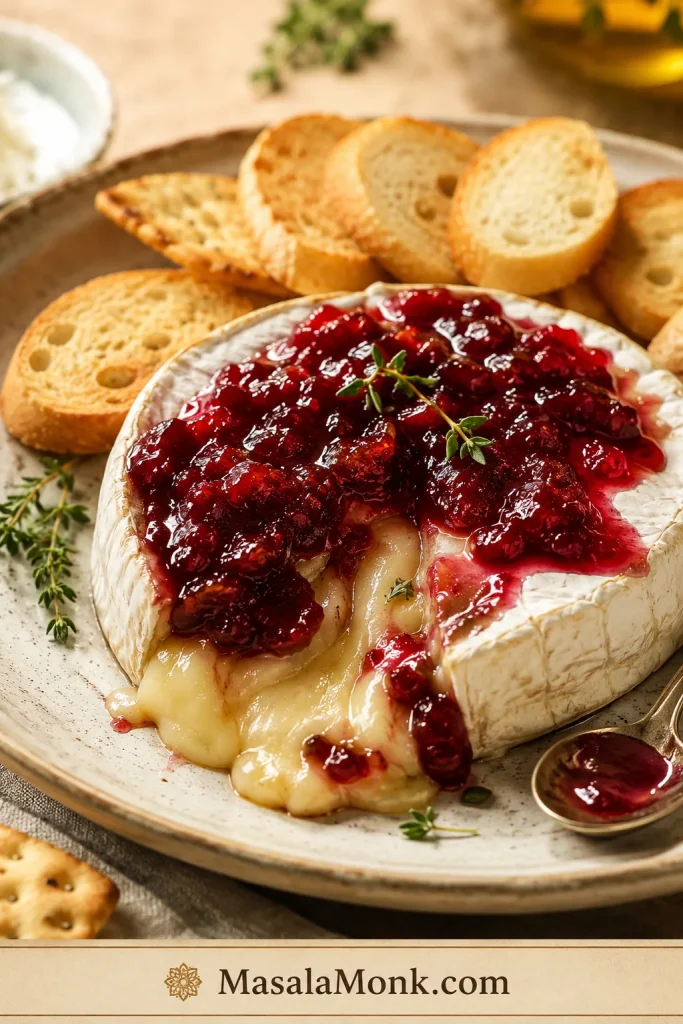
Baked brie with ruby red jam melting over the top, served with crostini, crackers, and fresh thyme.
A thicker jam works best here because it warms into the top of the cheese without immediately sliding off or flooding the dish.

Baked Brie With Jam: Before or After Baking?

Add thick jam before baking if you want it warmed into the top of the cheese. For a brighter, glossier finish, spoon loose jam on after baking. Either way, keep the layer modest so the topping does not slide off or flood the dish.
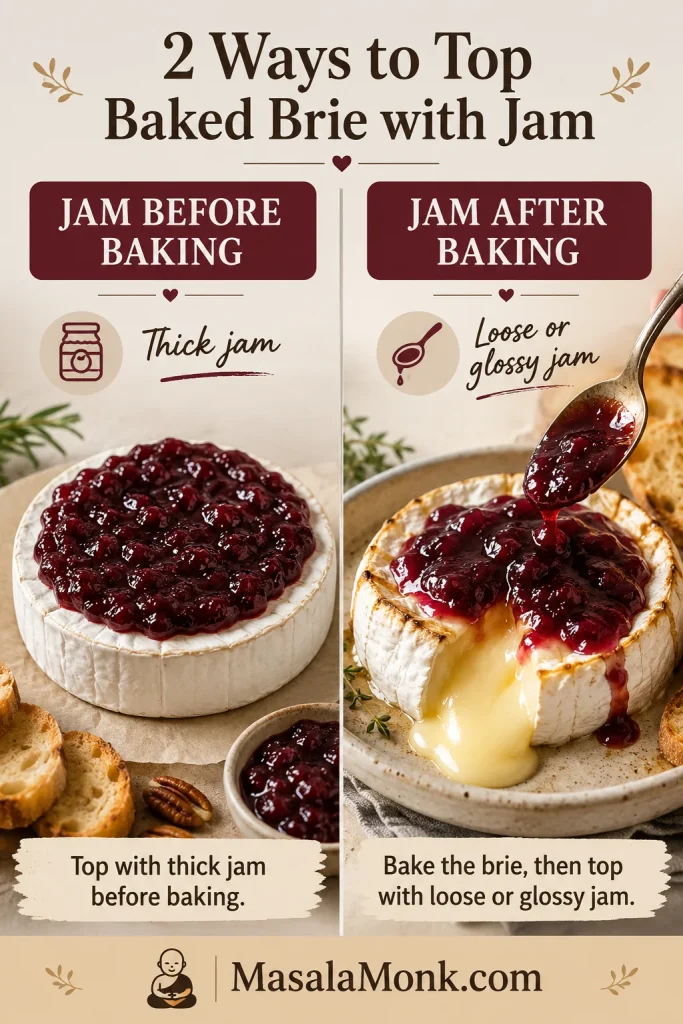
Split guide showing thick jam on brie before baking and loose jam spooned onto warm baked brie after baking.
Add thick jam before baking for a warmer topping; spoon loose or glossy jam on after baking when you want a cleaner finish.

Fig jam, raspberry jam, apricot preserves, cherry jam, blackberry jam, cranberry sauce, and pepper jelly all work. For a sweeter, brighter twist, especially if you like sweet-fruity pairings, a small spoon of pineapple jam can also work with plain crackers or toasted baguette.

Use fig jam with walnuts and rosemary for a deeper cheese-board flavor. Raspberry jam with pistachios makes a brighter party appetizer, while apricot preserves with almonds are mild and crowd-friendly. Pepper jelly with sturdy crackers gives the brie a sweet-spicy edge.

Baked Brie With Honey

Honey is the easiest pretty choice: simple, golden, and good with almost any cracker or bread. Bake the brie first, then drizzle honey over the top and finish with nuts, herbs, and a small pinch of flaky salt.
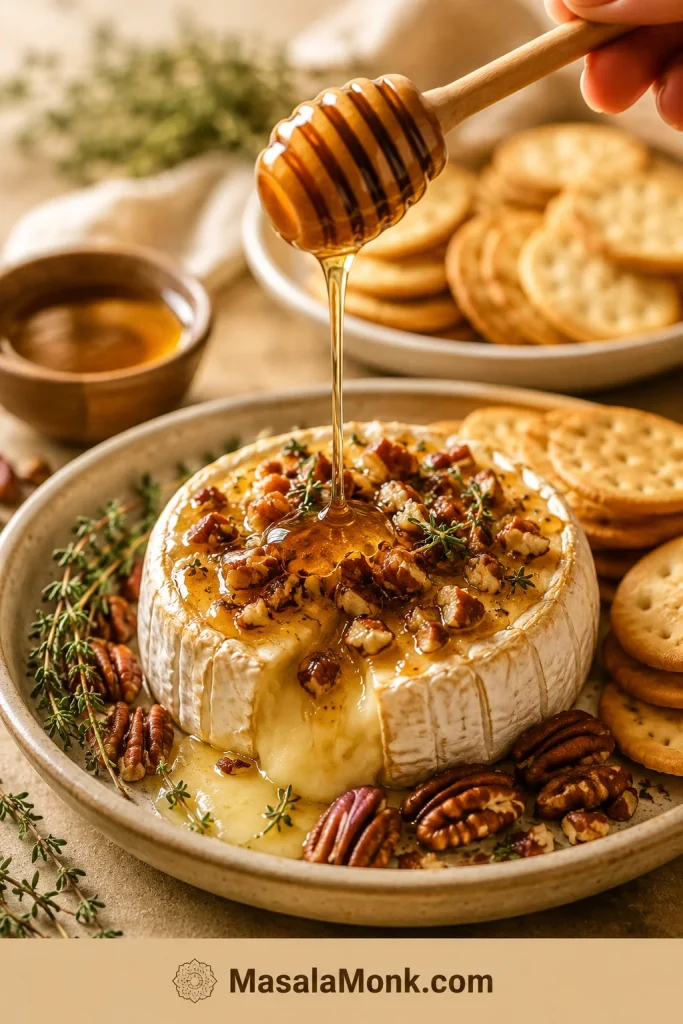
Honey being drizzled from a wooden dipper over baked brie with pecans, thyme, crackers, and a soft center.
After baking, drizzle honey so it stays golden on top, then add nuts, herbs, and a pinch of salt to balance the rich cheese.

The honey should sit on top in a thin shiny layer, not drown the cheese. A little flaky salt and a few toasted nuts make each scoop taste fuller.

Maple syrup can stand in for honey when you want a deeper, cozier flavor. Pair it with pecans or walnuts, especially for fall or holiday appetizer boards.

Cranberry Baked Brie

Cranberry baked brie is the holiday choice that brings color to the board. For Thanksgiving, Christmas, New Year’s Eve, or any winter table, cranberry sauce gives the cheese tartness and brightness.
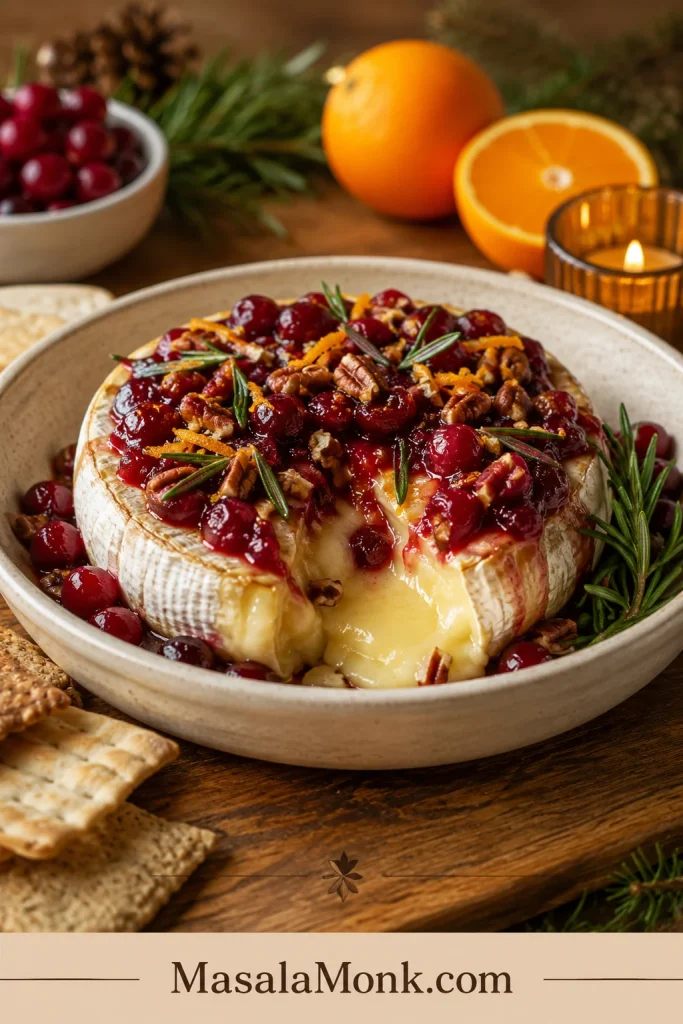
Cranberry baked brie with pecans, orange zest, rosemary, crackers, and melted cheese in a cream dish.
Cranberry baked brie works especially well for holiday boards because tart cranberry sauce, orange zest, rosemary, and pecans brighten the creamy cheese.

Add chopped pecans or walnuts, a little orange zest, and a few rosemary leaves for a more holiday-ready look and flavor. Leftover cranberry sauce works beautifully here, especially with orange or warm spices.

Homemade cranberry sauce with orange juice is especially good because the orange brightens the warm cheese and keeps the topping from feeling too heavy.

Baked Brie With Fig Jam

For the most cheese-board-style choice, reach for fig jam. It tastes rich and elegant with warm brie, especially when paired with walnuts, pistachios, rosemary, thyme, apples, grapes, or crostini.

Baked brie with dark fig jam, fresh figs, pistachios, walnuts, rosemary, crostini, and melted cheese.
Fig jam gives baked brie a richer cheese-board flavor, while fresh figs, rosemary, nuts, and crostini make the board feel elegant without extra work.

Bake the brie until soft, spoon the fig jam over the top, then finish with nuts and herbs. A tiny drizzle of honey can make it glossier, but you do not need much.

This is also a useful way to turn homemade fig jam into a party appetizer without making anything complicated.

Baked Brie With or Without Puff Pastry

You can bake brie with or without puff pastry. No pastry is faster and lets the topping shine. Puff pastry turns baked brie from easy appetizer into a golden centerpiece, but it also asks for a little more patience.

VersionOven TempTimeKey Tip
No pastry350°F / 175°C8–12 minKeep brie cold and check early
Puff pastry400°F / 200°C35–40 minSeal pastry well and rest before cutting
Crescent rolls350°F / 175°C20–24 minSeal every seam
Phyllo375°F / 190°C20–30 minBrush layers with butter
Air fryer350°F / 175°C6–10 minUse parchment or a small air-fryer-safe dish
Brie bites375°F / 190°C18–22 minUse a mini muffin tin

Puff Pastry Baked Brie

Use puff pastry when you want the dramatic version. You will need 1 thawed puff pastry sheet, an 8–12 oz brie wheel, egg wash, and optional jam, honey, cranberry sauce, or nuts.

How to Wrap Brie in Puff Pastry

Keep the pastry cold and the filling thin before sealing, because puff pastry bakes cleaner when it is not stretched or overloaded.
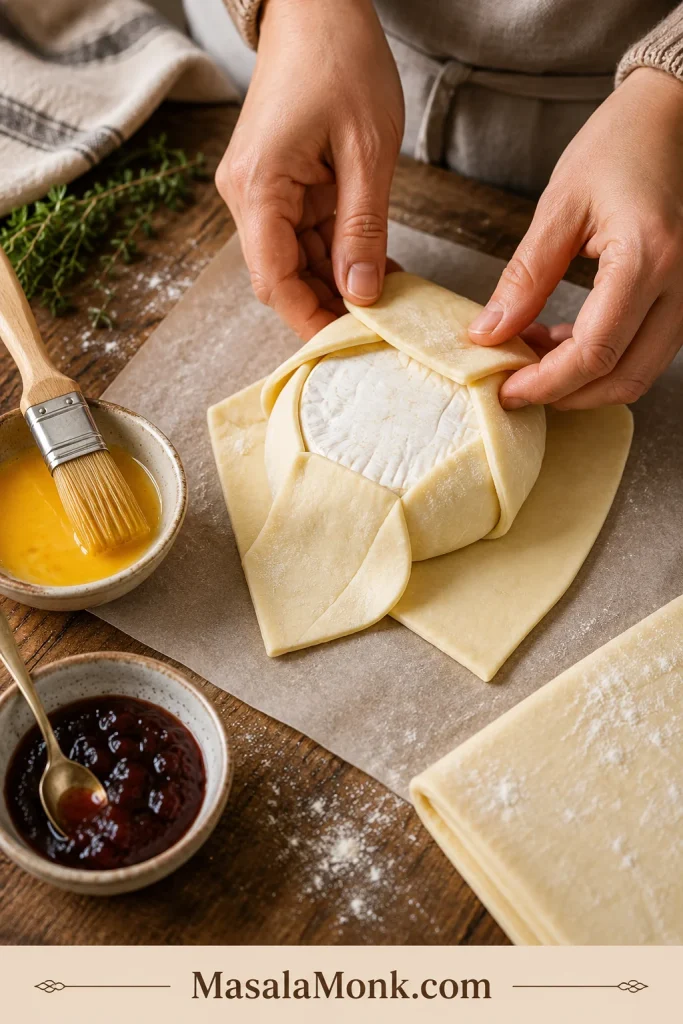
Hands folding puff pastry around a brie wheel with egg wash, jam, parchment, flour, and a pastry brush nearby.
Keep puff pastry cold, use only a thin layer of filling, and seal the seams well so the brie stays contained while the crust turns golden.
  1. Heat the oven to 400°F / 200°C.
  2. Roll the puff pastry into a square large enough to wrap the brie, usually about 10–11 inches wide.
  3. Place the brie in the center and add a thin layer of jam, honey, or cranberry sauce if using.
  4. Wrap the pastry around the brie and seal the seams well.
  5. Brush with beaten egg.
  6. Bake for 35–40 minutes, or until the pastry is golden.
  7. Rest for 5–10 minutes before cutting.

Here is where people usually go wrong: too much filling, warm pastry, or cutting too soon. Use less jam than you think, chill the wrapped brie if the pastry gets soft, and let the baked pastry rest before slicing so the cheese does not gush out before guests can scoop it.

Warm pastry stretches and tears more easily, which is why chilling the wrapped brie helps it bake up cleaner and leak less.

Rest Before Cutting Puff Pastry Baked Brie

Resting gives the pastry a cleaner cut and gives the melted brie a moment to settle before the first scoop.
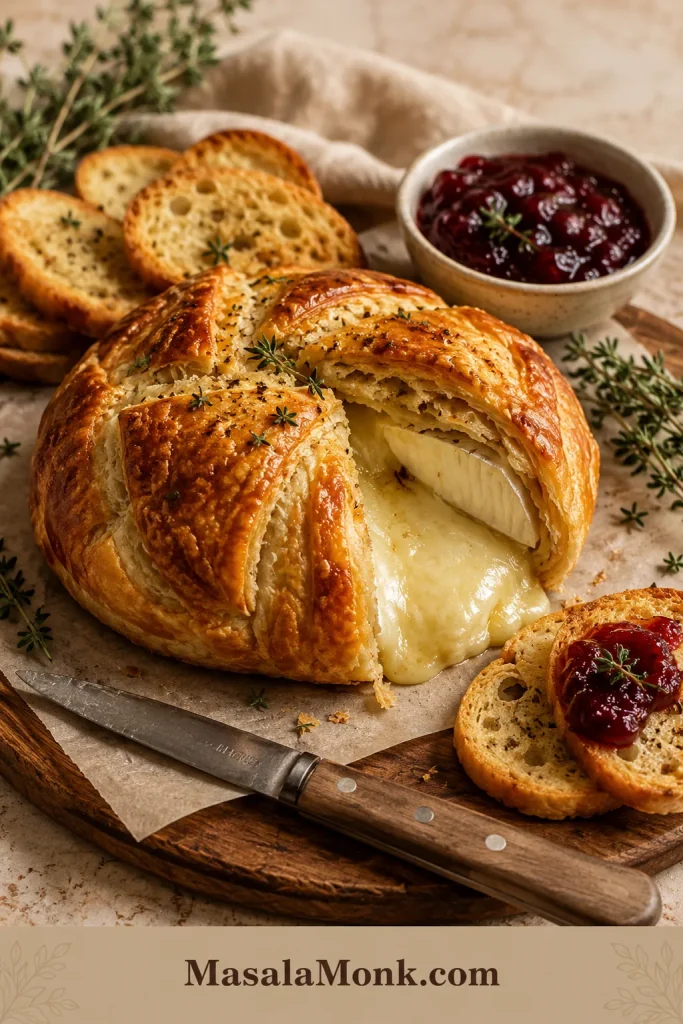
Golden puff pastry baked brie cut open with melted brie inside, crostini, cranberry jam, thyme, and a knife nearby.
After resting, puff pastry baked brie slices more neatly while the crust stays crisp and the melted cheese remains scoopable.

If you are building a non-vegetarian puff pastry appetizer tray, these puff pastry sausage rolls make a heartier companion beside the brie.

Crescent Roll Baked Brie

Crescent dough is the casual shortcut. Wrap the brie completely, add jam or cranberry sauce if you like, brush with egg wash, and bake at 350°F / 175°C for 20–24 minutes. Let it rest for about 15 minutes before cutting.

Phyllo Baked Brie

Phyllo gives baked brie a crisp, flaky shell that feels lighter than puff pastry. Brush the phyllo sheets with melted butter, layer them around the brie, add a small amount of jam or honey, and bake until golden and crisp. Keep the filling modest so the layers stay crisp.

Air Fryer Baked Brie

For a quick few-people option, air fryer baked brie works well with a small wheel. Use parchment or a small air-fryer-safe dish, keep the rind on, and air fry at 350°F / 175°C for 6–10 minutes, depending on the size and thickness of the brie. Check early because air fryers heat quickly.

Baked Brie Bites

For a grazing table or party tray, brie bites are easier than asking everyone to gather around one wheel. Cut puff pastry into small squares, press them into a mini muffin tin, add small pieces of cold brie, and bake until the pastry is golden.

For a full party tray, cut the pastry and brie into 24 small pieces, keep the brie cold until assembly, and use only a small spoon of jam, cranberry sauce, fig jam, or pepper jelly in each cup so the bites stay neat.

Air Fryer Brie or Brie Bites?

Choose air fryer brie for a small wheel, or use brie bites when you want tidy portions for a party tray.

Split guide showing air fryer baked brie in parchment and baked brie bites in a mini muffin tin with jam.
Use the air fryer for a small brie wheel, or make brie bites in a mini muffin tin when you want easier party-size servings.

What to Bake Brie In

You do not need a special brie baker, but the right dish makes serving easier. Baked brie is hot, soft, and delicate when it comes out of the oven, so use something that helps you move or serve it without stress.

Equipment guide showing parchment, shallow dish, cast iron skillet, brie baker, pie plate, and mini muffin tin for baking brie.
Choose a shallow dish, skillet, or brie baker when you want to catch melted cheese and serve the baked brie straight from oven to table.
EquipmentUse It For
Parchment-lined baking sheetEasy cleanup and transfer
Shallow oven-safe dishServing directly from the oven
Small cast iron skilletRustic presentation and better heat retention
Ceramic brie bakerHolding toppings and melted cheese neatly
Pie platePuff pastry baked brie
Mini muffin tinBaked brie bites

If you are serving guests, a small dish or skillet is less stressful than trying to move a soft wheel from a flat pan. Serve the brie straight from the dish if you are nervous; it looks relaxed, catches any melted cheese, and keeps the appetizer warmer for a little longer.

What to Serve With Baked Brie

This is the kind of appetizer people naturally gather around, so make the scooping easy and the board relaxed.

Place the brie down first, then build around it. Tuck crackers and bread close enough for scooping, add fruit where the board needs color, nuts where it needs crunch, and one salty bite so the whole board does not feel too sweet.
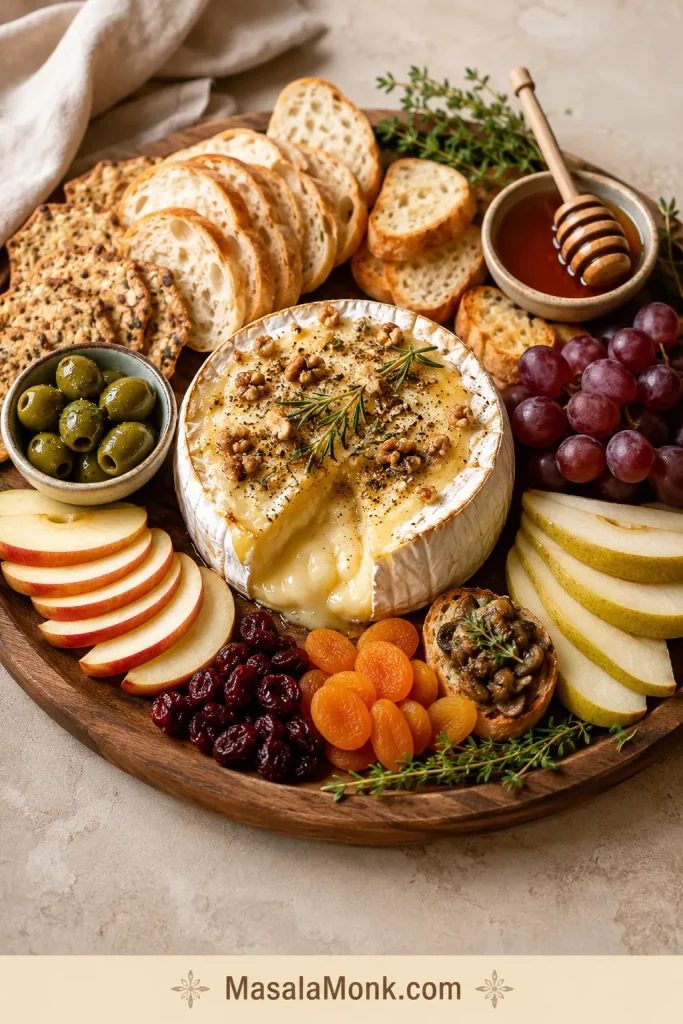
Baked brie serving board with crackers, sliced baguette, apples, pears, grapes, olives, dried fruit, honey, herbs, and crostini.
Build the board around the brie with sturdy crackers, bread, fruit, and savory bites so every scoop has contrast.

Keep the dippers close. People should be able to scoop without chasing the cheese across the board.

Simple Baked Brie Board Formula

Use one warm brie + one crunchy cracker + one bread + one fresh fruit + one sweet topping + one salty or savory bite. That gives the board enough contrast without making it crowded.

For a fuller grazing board, the 3-3-3-3 charcuterie board rule is a useful way to balance cheeses, crackers or breads, fruit, nuts, pickles, and savory bites without overcrowding the board.

Good Dippers for Baked Brie

  • Crunchy: water crackers, butter crackers, seeded crackers, crostini
  • Bread: sliced baguette, toasted sourdough, crusty bread
  • Fresh: apple slices, pear slices, grapes
  • Sweet: dried apricots, dried cherries, fresh figs, pomegranate seeds

Apples and pears are especially useful because they cut through the richness of the cheese, while grapes and dried fruit make the board feel fuller with almost no prep.

Savory Board Additions

  • Olives
  • Roasted nuts
  • Caramelized onions
  • Roasted peppers
  • Prosciutto or salami, if you are making a non-vegetarian board

If people are standing around the board instead of asking when dinner is ready, the brie did its job.

Back to quick answer · Jump to recipe

Make-Ahead, Storage, and Reheating

Can You Make Baked Brie Ahead?

You can do almost everything ahead except the actual melting. Get the topping, nuts, herbs, crackers, bread, and fruit ready first, then bake the cheese close to serving time.

For guests, set the board first, bake the brie 10–15 minutes before serving, and let the warm cheese be the last thing that lands on the table.

Do not fully bake no-pastry brie hours ahead for a party. It firms as it cools, and reheating works, but it never feels quite as fresh as baking it close to serving.

VersionMake-Ahead Advice
No-pastry briePrep toppings ahead; bake close to serving
Puff pastry brieWrap up to 1 day ahead; brush with egg before baking
Crescent roll brieAssemble and chill; bake fresh
Brie bitesAssemble ahead if needed; bake close to serving
LeftoversRefrigerate and reheat gently

For another appetizer that can be shaped and chilled ahead, a make-ahead cheese ball works well with many of the same crackers, nuts, herbs, and board items.

If you are building a warmer appetizer table, a creamy spinach artichoke dip gives guests another scoopable option while the brie is at its melty best.

How Long Does Baked Brie Stay Gooey?

Baked brie is at its gooey best for about 10–15 minutes after baking. It stays warm a little longer in a ceramic dish or cast iron skillet. As it cools, it becomes thicker and more spreadable rather than runny.

If the brie cools before everyone gets to it, do not worry. It becomes spreadable rather than ruined, and a few gentle minutes in the oven can soften it again.

How to Store Leftovers

Store leftover baked brie in an airtight container in the refrigerator for 2–3 days. This stays within the USDA’s general guidance for refrigerated leftovers. The texture will be firmer once chilled, but it can be warmed again.

For safety, do not leave baked brie sitting out for hours. Once the appetizer has cooled and the serving window is over, refrigerate leftovers rather than keeping the cheese on the table all evening.

How to Reheat Baked Brie

Reheat no-pastry baked brie gently in a low oven until soft again. A temperature between 300°F and 350°F / 150°C and 175°C works well. Low heat is better because brie can turn oily when it is warmed too aggressively a second time.

If the brie is wrapped in puff pastry, reheat it in the oven instead of the microwave so the pastry does not turn soft and soggy.

Troubleshooting Baked Brie

A messy baked brie is still baked brie. Most problems come from too much heat, cuts that are too deep, or a board that is not ready when the cheese is warm.
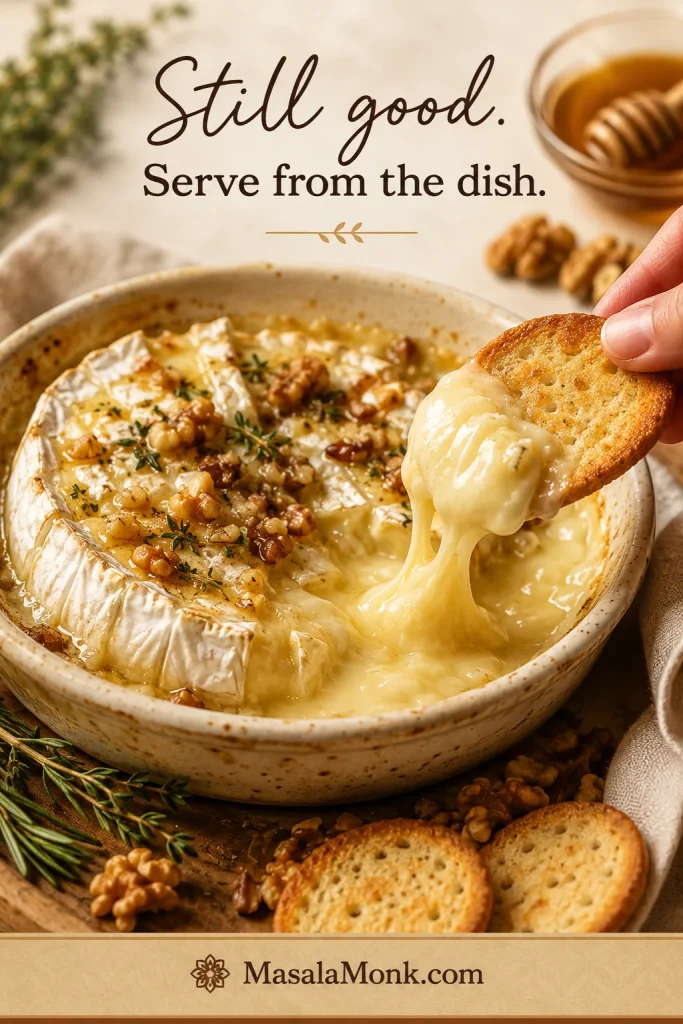
Leaked baked brie served from a shallow dish with a cracker lifting melted cheese, honey, walnuts, and herbs nearby.
A leaking brie is still useful; instead of moving it, add crackers to the dish and serve the extra-melty cheese while warm.

My Brie Did Not Melt

It probably needed more time. Larger wheels take longer, and some brie is thicker than others. Return it to the oven for 2–5 minutes and check again. The center should feel soft when gently pressed.

My Brie Leaked Everywhere

If the brie leaked everywhere, it was probably overbaked, cut too deeply, or given an escape route through an unsealed pastry seam. Next time, keep the rind intact, avoid cutting down the sides, and use a shallow dish to catch any melted cheese.

My Puff Pastry Is Soggy

The pastry may have been too warm, the filling may have been too wet, or the brie may have been cut too soon after baking. Use less jam inside, keep the pastry cold, bake until deeply golden, and let it rest before slicing.

My Brie Turned Oily or Rubbery

That usually means it was baked or reheated too long. Brie should be warmed until soft, not cooked until it fully collapses. Start checking early, especially with smaller wheels.

The Topping Slid Off

Use less topping or add some of it after baking. A small amount of jam or honey goes a long way. Chopped nuts can also help hold the topping in place.

The Brie Cooled Too Fast

Bake it close to serving time and serve it in the dish it was baked in. A small cast iron skillet or ceramic dish helps the cheese stay warm longer than a flat sheet pan.

The Flavor Is Too Sweet

Add balance. Use less honey or jam next time, finish with flaky salt, add fresh herbs, and serve with plain crackers, tart apple slices, or savory board items.

Trying again? Go back to the easy baked brie recipe, check the timing chart, or return to the quick answer.

Baked Brie FAQ

Do you remove the rind before baking brie?

No. The rind is edible and helps the brie hold its shape while the inside melts. US Dairy notes that bloomy rinds like brie are generally edible. You can lightly score or scrape the top if you prefer, but avoid cutting deeply into the sides.

How long do you bake brie?

A standard 8 oz / 225 g wheel usually takes 8–12 minutes at 350°F / 175°C. Larger wheels can take 18–25 minutes. If the center still feels firm, bake it a few minutes more and check again.

What temperature is best for baked brie?

Use 350°F / 175°C for no-pastry baked brie. Puff pastry baked brie needs 400°F / 200°C so the pastry can brown properly.

Do you bake brie covered or uncovered?

Bake no-pastry brie uncovered so you can see when the edges relax and the center softens. Puff pastry baked brie is also baked uncovered so the pastry can turn golden and crisp.

Can you bake brie without puff pastry?

Yes. No-pastry baked brie is often the easiest and most reliable version. It is usually ready in about 10–15 minutes and lets honey, jam, cranberry sauce, nuts, and herbs shine without needing dough.

What jam goes best with baked brie?

Fig jam is rich and elegant, cranberry sauce is tart and festive, raspberry jam is bright, apricot preserves are mild and crowd-friendly, and pepper jelly gives the brie a sweet-spicy edge.

Should toppings go on before or after baking?

Thick jam or cranberry sauce can go on before baking. Honey, loose sauces, fresh herbs, and flaky salt usually look better after baking. Nuts can go on before baking if you want them lightly toasted, or after baking if you want more crunch.

Can you make baked brie ahead of time?

For no-pastry brie, prep the toppings ahead but bake the cheese close to serving. Puff pastry brie can be wrapped ahead and refrigerated, then brushed with egg wash and baked fresh.

Can you bake Camembert instead of brie?

Yes. Camembert can be baked in a similar way, but it usually has a stronger, earthier flavor. Use the same soft-center test and check early, especially with small wheels.

Can you microwave brie?

You can microwave brie briefly, but the oven gives better control and presentation. If using the microwave, warm it in short bursts on a microwave-safe plate and stop as soon as the center softens.

What crackers go with baked brie?

Water crackers, butter crackers, seeded crackers, crostini, and toasted baguette all work well. Choose sturdy crackers that can scoop warm cheese without breaking.

How long does baked brie stay gooey?

Baked brie is usually gooey for about 10–15 minutes. It stays warm longer in a small cast iron skillet, ceramic dish, or brie baker.

Can you bake brie in an air fryer?

Yes. A small wheel of brie can usually be warmed in an air fryer at 350°F / 175°C for 6–10 minutes, depending on size. Use parchment or an air-fryer-safe dish to keep the cheese contained.

The Easiest Fancy Appetizer

Baked brie works because it gives you a lot of payoff for very little effort. Keep the cheese cold, bake it gently, choose one good topping, and have your crackers or bread ready before it comes out of the oven.

Bake it last, serve it warm, and let the first scoop do the work.
Posted on Leave a comment

Crockpot Buffalo Chicken Dip Recipe

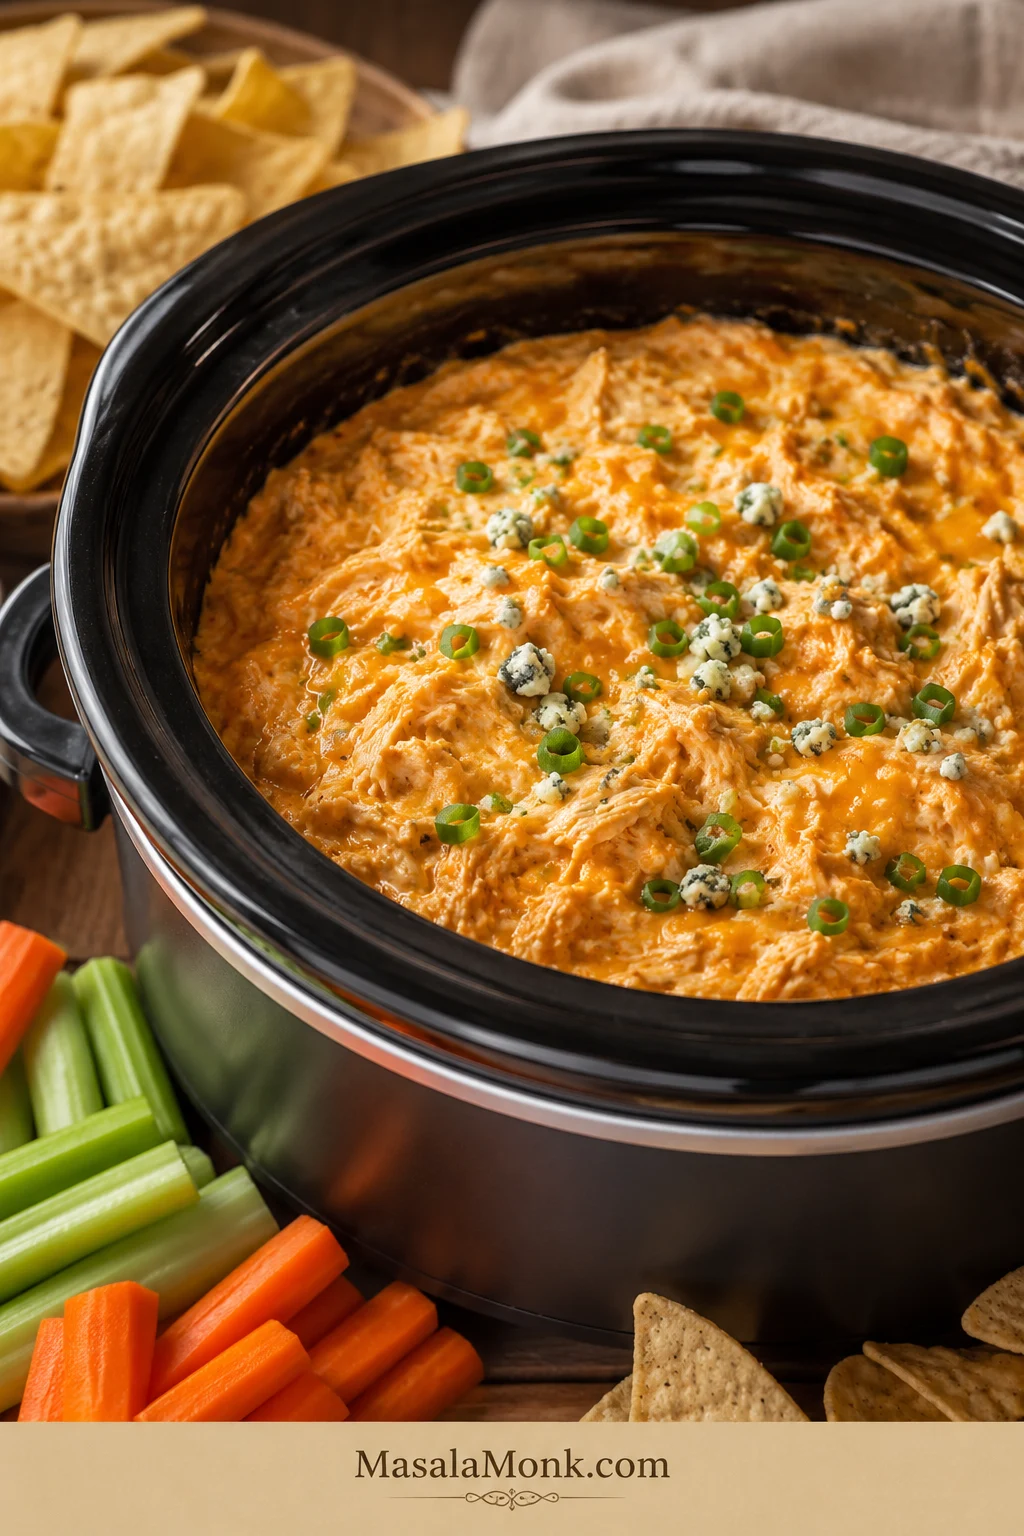
Creamy crockpot buffalo chicken dip in a dark slow cooker with green onions, blue cheese crumbles, tortilla chips, celery, and carrots.

You have people coming over, a slow cooker on the counter, and you need the dip to stay creamy instead of splitting, drying out, or turning into buffalo soup. This crockpot buffalo chicken dip is built for exactly that moment: spicy, cheesy, scoopable, and warm enough for everyone to keep coming back with “just one more chip.”

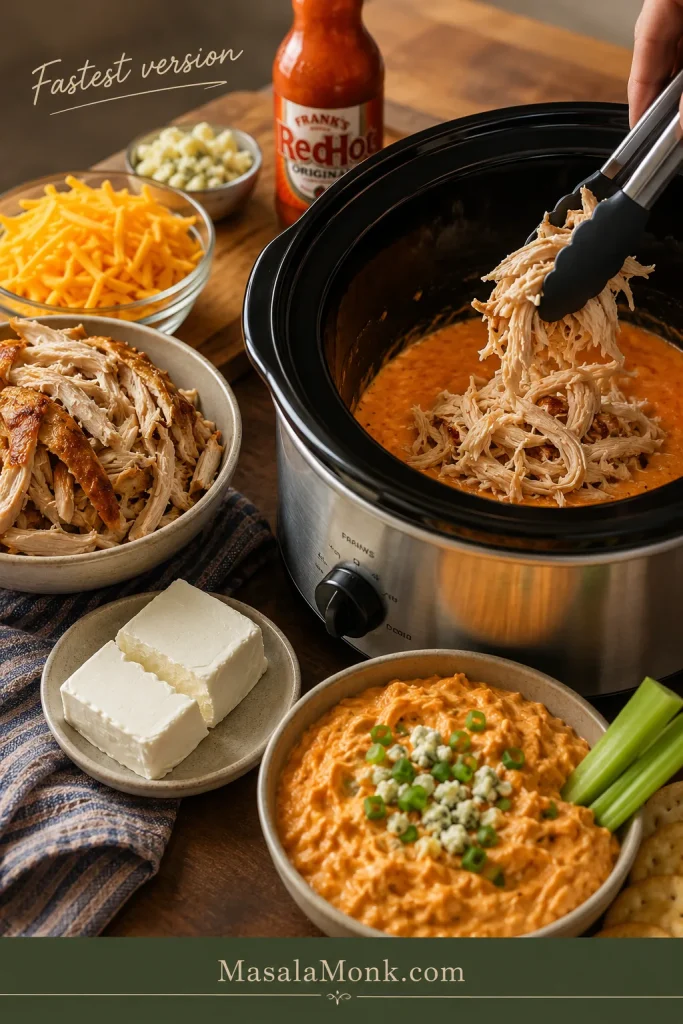
The easiest version uses cooked shredded chicken or rotisserie chicken, cream cheese, buffalo sauce, ranch or blue cheese dressing, and shredded cheese. As it heats, the slow cooker melts everything together gently, then keeps the dip warm for game day, potlucks, holidays, movie nights, and snack tables where the crockpot quietly becomes the most popular thing in the room.

When it is right, the dip should drag slowly from a chip, hold together in soft cheesy ribbons, and taste like buffalo wings turned into something warmer and easier to share. This guide also helps with the real questions that come up once the crockpot is already on: raw chicken, canned chicken, Frank’s RedHot, ranch vs blue cheese, slow cooker size, party timing, and quick fixes for watery, greasy, lumpy, thick, or too-spicy dip.

For baked, stovetop, Instant Pot, healthy, vegetarian, and vegan versions, see the full Buffalo Chicken Dip Recipe guide.

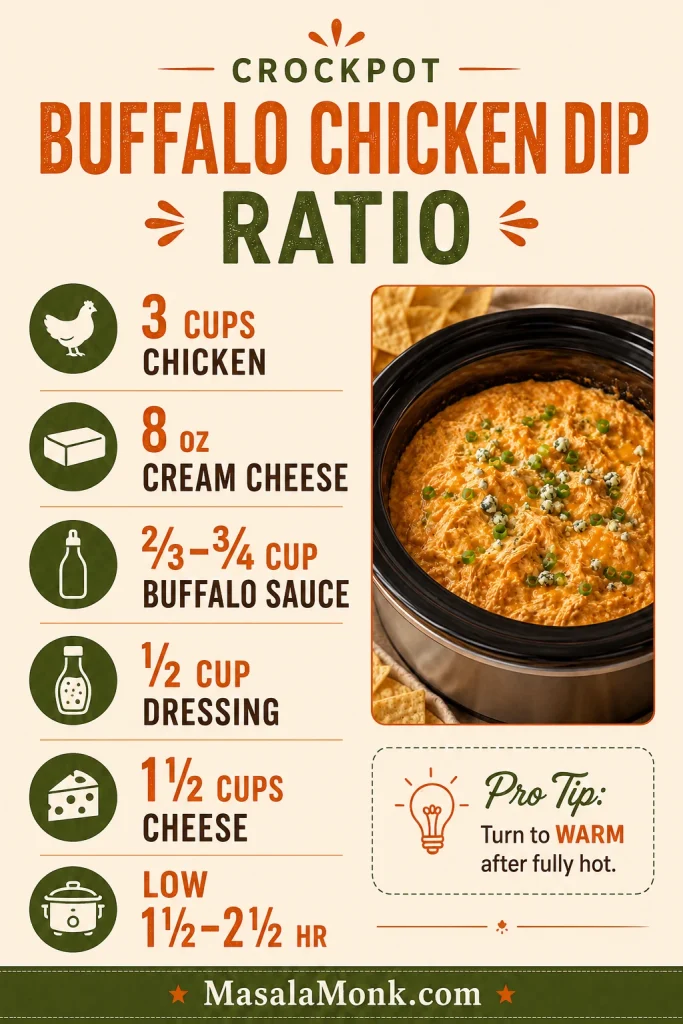
Quick Answer: The Crockpot Buffalo Chicken Dip Ratio

For one easy batch of crockpot buffalo chicken dip, use 3 cups cooked shredded chicken, 8 oz cream cheese, ⅔ to ¾ cup buffalo wing sauce, ½ cup ranch or blue cheese dressing, and 1½ cups shredded cheese. Cook on LOW for 1½ to 2½ hours or HIGH for 1 to 2 hours, stirring once or twice, then hold the finished dip on WARM for serving.

The dip is ready when the cream cheese has melted into the sauce, the edges are gently bubbling, the center is hot, and the texture is glossy, spoonable, and thick enough to hold on a chip. Use rotisserie chicken for the fastest version, canned chicken for a pantry shortcut, and raw thawed chicken only if you follow the raw chicken method below.

What the Finished Dip Should Look Like

Look for a dip that is melted through, glossy, and thick enough to scoop without running off the chip. That one visual check tells you more than the clock.

Tortilla chip holding a thick scoop of buffalo chicken dip with shredded chicken, melted cheese, and green onion garnish.
This chip test is the easiest doneness cue: if the dip holds its shape on a tortilla chip, the chicken, cream cheese, buffalo sauce, and cheese have melted into balance.

Need the full method? Go straight to the recipe card, or check the quick fixes if your dip is already heating.

Make This Now

  • Fastest version: rotisserie chicken + cream cheese + buffalo sauce + ranch + shredded cheese.
  • Right slow cooker size: 2 to 3 quart for one batch; 5 to 6 quart for a double batch.
  • Smoother sauce choice: buffalo wing sauce or Frank’s Buffalo Wings Sauce for a milder, rounder flavor.
  • Gentlest setting: LOW for smooth melting, then WARM after the dip is fully hot.
  • Raw chicken rule: cook thawed chicken first to 165°F / 74°C, then add the dairy.

Crockpot Buffalo Chicken Dip Recipe Card

Crockpot Buffalo Chicken Dip

A creamy, cheesy slow cooker buffalo chicken dip that melts into a thick, scoopable hot appetizer and stays warm right in the crockpot. Serve with chips, celery, carrots, crackers, or bread.

Prep Time10 minutes
Cook Time1½ to 2½ hours
Total TimeAbout 2 hours, depending on slow cooker size
Servings10 to 12 appetizer servings
Slow Cooker2 to 3 quart for one batch

Ingredients

  • 3 cups cooked shredded chicken or rotisserie chicken, about 420 g
  • 8 oz cream cheese, softened and cubed, 226 g
  • ⅔ to ¾ cup buffalo wing sauce or Frank’s Buffalo Wings Sauce, 160 to 180 ml; or ½ to ⅔ cup Frank’s RedHot Original for a sharper, hotter dip
  • ½ cup ranch dressing or blue cheese dressing, 120 ml
  • 1½ cups shredded cheddar, Colby Jack, or Monterey Jack cheese, about 170 g
  • ½ teaspoon garlic powder, optional
  • 2 tablespoons sliced green onions, optional
  • ¼ cup blue cheese crumbles, optional
  • Tortilla chips, celery sticks, carrot sticks, crackers, pita chips, or toasted bread, for serving

Instructions

  1. Add the cooked shredded chicken, softened cream cheese, buffalo sauce, ranch or blue cheese dressing, garlic powder, and 1 cup of shredded cheese to the slow cooker.
  2. Stir lightly. The mixture does not need to look smooth yet; the cream cheese will melt as it heats.
  3. Cover and cook on LOW for 1½ to 2½ hours, stirring once or twice, until the cream cheese melts into the sauce and the center is hot.
  4. Stir well, then sprinkle the remaining ½ cup shredded cheese over the top. Cover for another 10 to 15 minutes, just until the cheese melts.
  5. Turn the slow cooker down to WARM. Garnish with green onions or blue cheese crumbles if using, then serve with chips, celery, carrots, crackers, or bread.

Doneness Cue

The dip is ready when the edges bubble gently, the center is hot, and there are no cold cream cheese pockets left. It should look glossy and hold on a chip without running off.

Recipe Notes

  • Rotisserie chicken gives the fastest and most flavorful result.
  • Soften and cube the cream cheese so it melts without lumps.
  • Choose buffalo wing sauce for a milder dip and Frank’s RedHot Original for sharper heat.
  • Follow the raw chicken method below if starting with uncooked chicken.
  • Drain canned chicken very well before adding it to the slow cooker.
  • Move from cooking mode to WARM only after the center is hot and the cream cheese has melted into the sauce.

Save the Basic Dip Ratio

Once you know the basic ratio, the recipe becomes easier to scale, soften, spice up, or double for a bigger slow cooker.

Recipe ratio card for crockpot buffalo chicken dip with chicken, cream cheese, buffalo sauce, dressing, shredded cheese, and slow cooker timing.
Once the basic ratio is familiar, this crockpot buffalo chicken dip becomes easy to double, make milder, spice up, or resize for a smaller slow cooker.

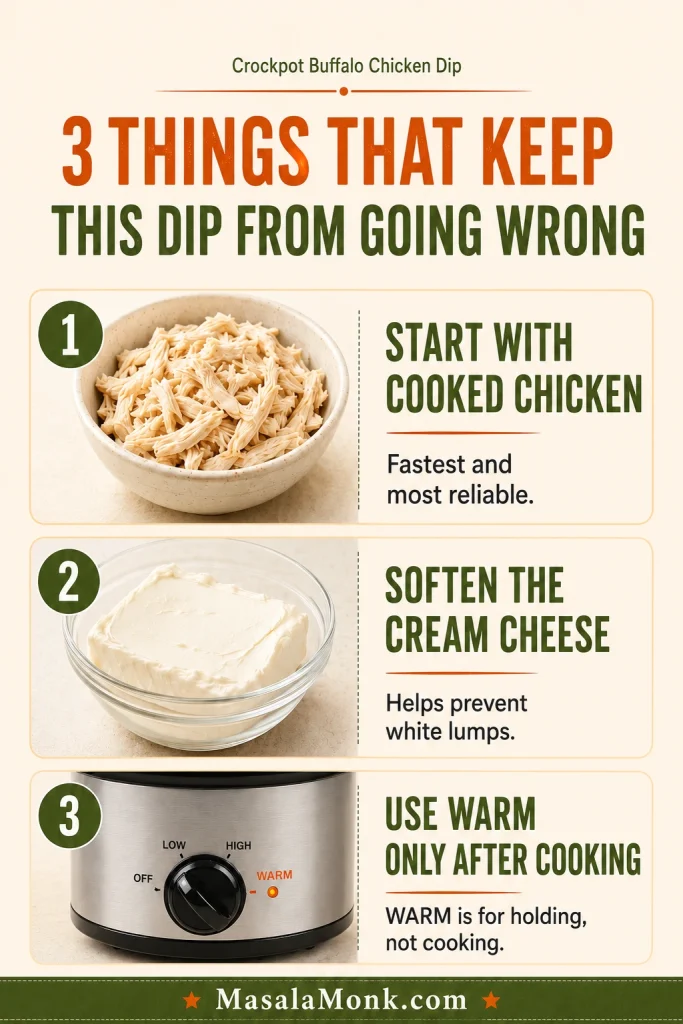
3 Things That Keep This Dip from Going Wrong

Buffalo chicken dip is easy, but a few small choices make the difference between a smooth party dip and a crockpot full of oily, lumpy sauce.

  • Start with cooked or rotisserie chicken when you can. It gives you the fastest, safest, most predictable version.
  • Soften the cream cheese first. Cold blocks melt slowly and can leave white pockets in the dip.
  • Use WARM only after the dip is finished. WARM holds the dip for serving; it does not cook raw chicken or melt a cold batch quickly.
Infographic with three crockpot buffalo chicken dip tips: use cooked chicken, soften cream cheese, and use WARM only after cooking.
Before the slow cooker starts, fix the three things that cause most failures: cold cream cheese, uncooked chicken shortcuts, and using WARM as if it were a cooking setting.

From here, use the section you need most: choose your chicken, compare wing sauce vs hot sauce, check slow cooker size, hold it on WARM for a party, or jump to quick fixes.

Choose Your Chicken

There is no single “right” chicken here. The best choice is the one that matches your time, your texture preference, and what is already in your kitchen.

Chicken TypeUse It ForHow to Use It
Rotisserie chickenFastest version with the most flavorRemove skin and bones, shred the meat, and add it directly to the slow cooker.
Cooked shredded chickenClassic homemade versionUse leftover cooked chicken breast, thighs, or poached chicken. Shred finely so it scoops well.
Raw thawed chickenWhen you want the slow cooker to cook the chicken tooCook the chicken first, shred it, then add cream cheese, dressing, and cheese near the end.
Canned chickenPantry shortcut or last-minute party dipDrain very well, flake gently, and fold into the dip without over-stirring.

Best Shortcut: Rotisserie Chicken

For the fullest flavor and easiest texture, rotisserie chicken is the move. When the pantry is doing the work, canned chicken will still get the job done. If you like cooking once and using the leftovers in several ways, a whole chicken in a crock pot gives you juicy shredded meat for dips, sandwiches, wraps, quesadillas, and easy weeknight meals.

Shredded rotisserie chicken with cream cheese, buffalo sauce, shredded cheese, and a slow cooker for buffalo chicken dip.
Rotisserie chicken is the best speed shortcut because the meat is already cooked, seasoned, and tender, so the crockpot only has to melt and marry the flavors.

Starting with raw chicken? Cook the chicken first, then add the dairy so the dip stays creamy instead of greasy or split.

Already know your chicken? Jump to the main crockpot method, the raw chicken method, or the canned chicken shortcut.

Equipment That Makes This Easier

A 2 to 3 quart slow cooker is the easiest fit for one standard batch. The slow cooker does not have to be perfect, but the dip needs enough depth to melt gently without drying around the edges.

  • 2 to 3 quart slow cooker: ideal for one standard batch.
  • 4 quart slow cooker: useful if that is what you already have.
  • 5 to 6 quart slow cooker: better for a double batch or a larger party.
  • Rubber spatula: helpful for scraping melted cheese and cream cheese from the sides.
  • Instant-read thermometer: important if making the raw chicken version.
  • Serving spoon: keep one nearby once the dip is on WARM.

A single batch in a large 6 quart slow cooker will spread thinner and may heat faster. That is not a disaster, but it asks for earlier stirring. Move to WARM as soon as the center is hot and the dairy has melted in.

Using a bigger crockpot for a party? See batch scaling and how to keep the dip warm before serving.

Ingredient Notes

What Goes Into the Dip

The ingredient list is short, but each part has a job: chicken gives structure, cream cheese gives body, buffalo sauce brings heat, dressing rounds the edges, and shredded cheese makes the dip rich.

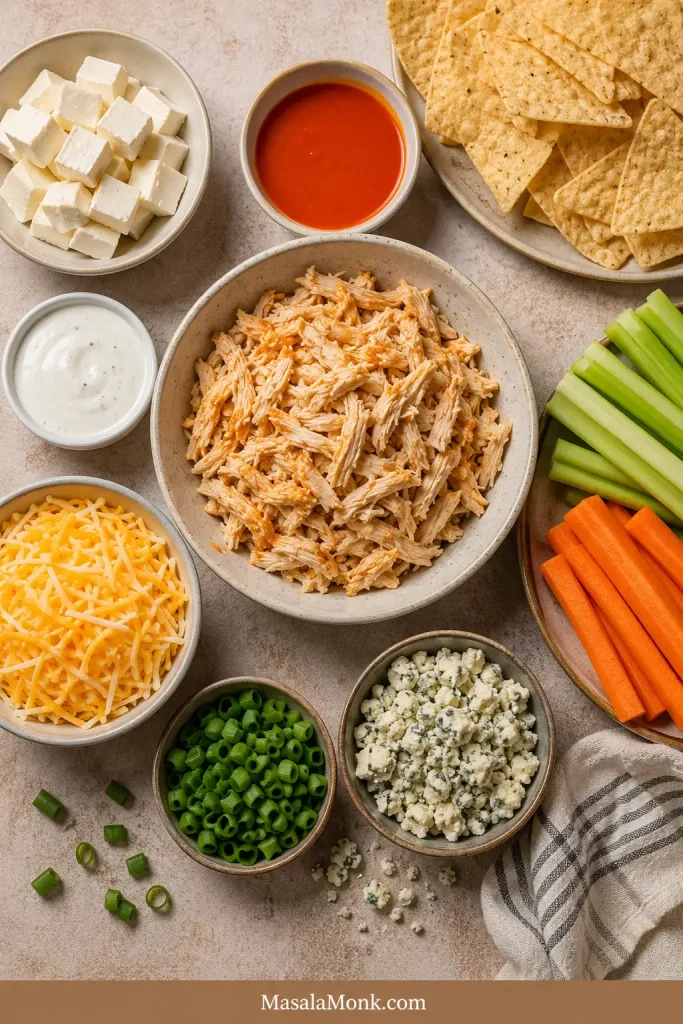
Overhead ingredient board with shredded chicken, cream cheese, buffalo sauce, ranch dressing, shredded cheese, green onions, blue cheese crumbles, chips, celery, and carrots.
Start with the core five — chicken, cream cheese, buffalo sauce, dressing, and shredded cheese — then finish with green onions or blue cheese for freshness, tang, and color.

Chicken: Cooked shredded chicken or rotisserie chicken is the easiest default. It is fast, flavorful, and less likely to make the dip watery. Canned chicken and raw thawed chicken both work, but each needs its own method.

Cream cheese: One 8 oz block gives the dip body without making it overly heavy. This is what turns the buffalo chicken mixture into a proper dip instead of saucy shredded chicken, so give it time to melt. Softened cubes disappear into the sauce faster and leave fewer stubborn white pockets.

Buffalo sauce: Buffalo wing sauce gives the smoothest flavor for a mixed crowd. Frank’s RedHot Original is sharper, hotter, and thinner, so start with a little less and adjust after the dip melts.

Ranch or blue cheese dressing: Ranch dressing is usually the easiest choice for a mixed group. Blue cheese dressing brings a sharper wing-bar flavor. For parties, put ranch in the dip and blue cheese on the side so people can choose their own level of tang.

Shredded cheese: Cheddar, Colby Jack, Monterey Jack, or a blend all work. Freshly shredded cheese usually melts smoother than bagged pre-shredded cheese. If using bagged cheese, stir gently and avoid overheating; the anti-caking starches can make the dip a little thicker.

Optional extras: Garlic powder adds depth. Green onions add freshness. Blue cheese crumbles add tang. A little extra cheese on top makes the crockpot look more finished when it hits the table.

Once the ingredients are clear, go to the main method, compare Frank’s RedHot options, or choose ranch vs blue cheese.

How to Make Crockpot Buffalo Chicken Dip

Add cooked chicken or rotisserie chicken, softened cream cheese, buffalo sauce, ranch or blue cheese dressing, garlic powder, and most of the shredded cheese to the slow cooker. Stir lightly, cover, and cook on LOW until the cream cheese loosens into the sauce.

What the Dip Looks Like as It Melts

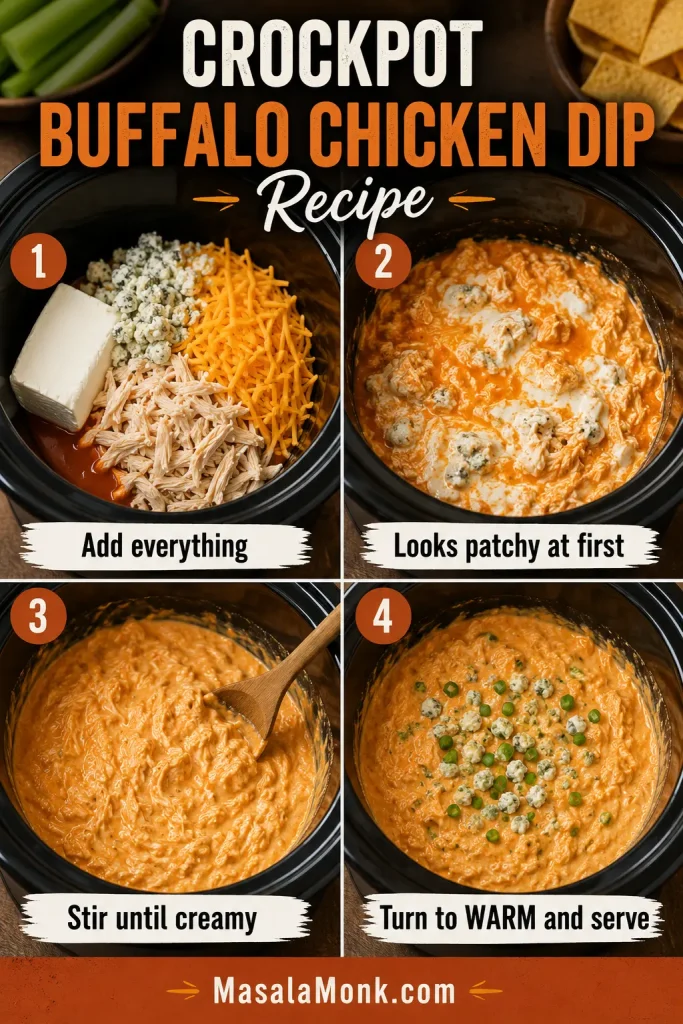
The mixture may look patchy at first. Cream cheese often sits in white pockets before it melts, and the sauce can gather near the edges before the final stir brings everything together. Scrape the sides and bottom once or twice as it warms.

Four-step collage showing buffalo chicken dip ingredients added to a slow cooker, melting, stirred smooth, and finished on WARM.
At first, the mixture can look broken or patchy; however, steady heat and a good stir turn it into the creamy slow cooker buffalo chicken dip you want.

When the center is hot and the buffalo chicken mixture looks creamy instead of patchy, scatter the last bit of cheese over the top. Cover for a few minutes, then turn the slow cooker down for serving. The finished dip should be thick enough to scoop with a chip but soft enough to drag through celery, crackers, or toasted bread.

Texture cue: Do not judge the dip too early. It can look rough before it looks delicious. Once the cream cheese melts and the chicken is evenly mixed through, it usually tightens into a smooth, dippable texture.

Why This Crockpot Buffalo Chicken Dip Works

The slow cooker acts as both the cooking vessel and the serving dish. That matters for parties because baked dip cools quickly, while crockpot buffalo chicken dip can stay warm and spoonable as people snack.

The balance is simple: cream cheese gives body, buffalo sauce brings heat and tang, dressing softens the sharpness, shredded cheese adds richness, and chicken keeps the dip from feeling like straight sauce. Aim for rounded buffalo flavor — spicy first, creamy next, then cheesy and savory enough that the celery sticks disappear too.

Call it crockpot, crock pot, or slow cooker buffalo chicken dip — the goal is the same: hot buffalo flavor, melted cheese, and a dip that holds warm without needing the oven.

Think of it as slow cooker buffalo chicken wing dip: the flavor of wings, the comfort of melted cheese, and none of the pressure of frying or baking trays of chicken while guests are already hungry.

Back to recipe card · Back to top

Crockpot Buffalo Chicken Dip with Frank’s RedHot

Frank’s RedHot gives buffalo chicken dip that familiar cayenne-pepper wing flavor. Reach for Frank’s Buffalo Wings Sauce when you want a smoother, milder dip. Choose Frank’s RedHot Original when you want sharper heat and a more classic hot-sauce bite.

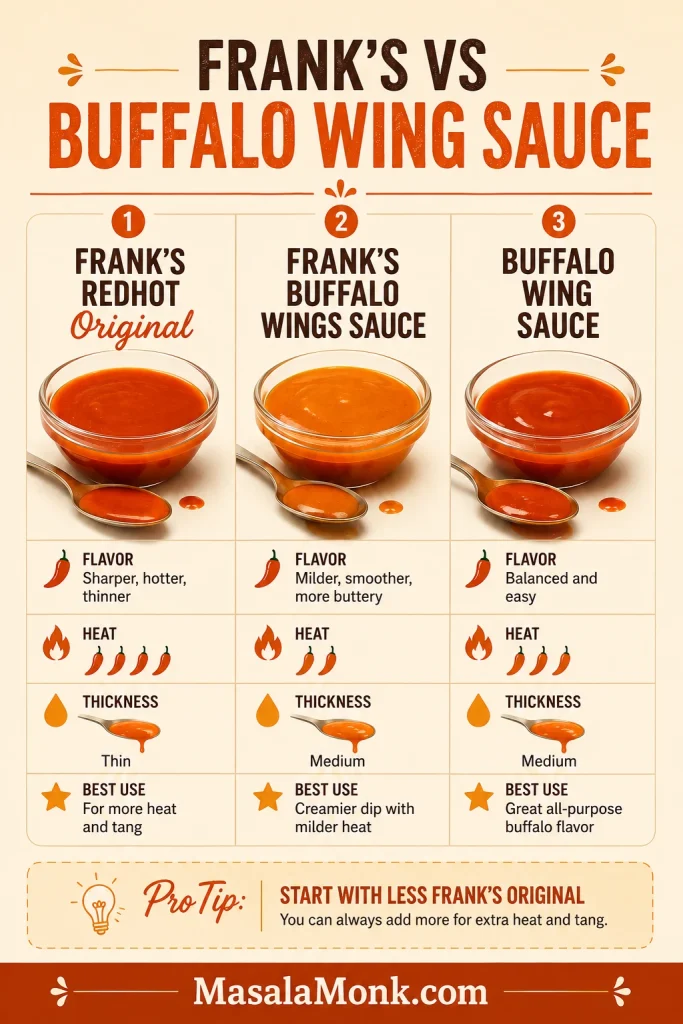
Comparison chart of Frank’s RedHot Original, Frank’s Buffalo Wings Sauce, and buffalo wing sauce for crockpot buffalo chicken dip.
Frank’s RedHot Original gives sharper heat and tang, whereas buffalo wing sauce is smoother and milder; start with less, then adjust once the dip is melted.

If using Frank’s RedHot Original, start with ½ to ⅔ cup instead of the full ¾ cup. It is thinner and hotter than many buffalo wing sauces, so a smaller amount keeps the dip balanced. You can always stir in more after the cheese and cream cheese have melted.

SauceFlavorUse It For
Frank’s RedHot OriginalSharper, tangier, hotterClassic buffalo heat; start with less
Frank’s Buffalo Wings SauceMilder, smoother, more butteryParty dip where not everyone wants strong heat
Generic buffalo wing sauceBalanced and easyReliable everyday version
Plain hot sauceThin and sharpUse carefully, then balance with dairy if needed

Heat too strong after melting? Do not add water. Stir in more cream cheese, ranch, sour cream, Greek yogurt, or shredded chicken. Dairy and chicken calm the heat while keeping the dip thick.

If the dip tastes too hot after melting, jump to troubleshooting for ways to cool the heat without watering it down.

How to Make Crockpot Buffalo Chicken Dip with Raw Chicken

Yes, you can make crockpot buffalo chicken dip with raw chicken, but cook the chicken first and add the dairy after shredding. This keeps the chicken safe and prevents the cream cheese and shredded cheese from sitting over heat for hours.

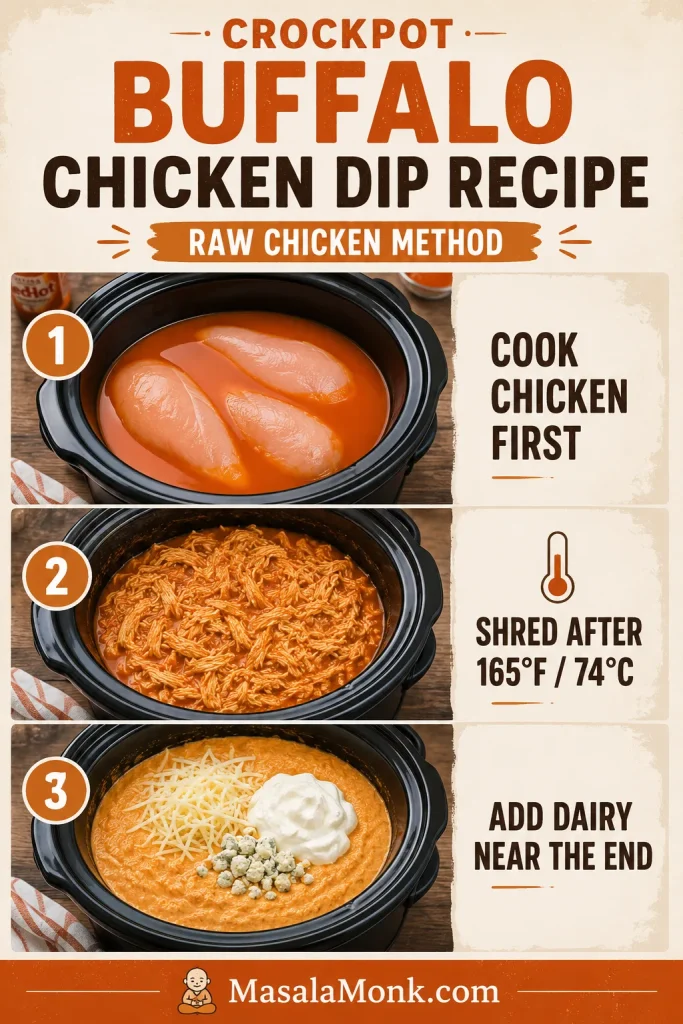
Add 1½ pounds / about 680 g thawed boneless skinless chicken breasts or thighs to the slow cooker with ¾ cup / 180 ml buffalo sauce and ¼ cup / 60 ml broth, water, or ranch dressing. Cook on HIGH for about 2½ to 3½ hours or LOW for about 4 to 6 hours, until the chicken reaches 165°F / 74°C.

Cook the Chicken First, Then Add the Dairy

The thermometer matters more than the clock. Once the chicken is cooked, shred it with two forks. After that, the stressful part is over; the rest is just melting and stirring.

Raw chicken method for buffalo chicken dip showing chicken cooked in buffalo sauce, shredded after reaching 165°F, and mixed with dairy near the end.
For raw chicken, separate the cooking stage from the creamy stage: cook to 165°F / 74°C first, shred, then add dairy so the final dip stays safe and smooth.

Stir in 8 oz / 226 g cream cheese, ½ cup / 120 ml ranch or blue cheese dressing, and 1 to 1½ cups shredded cheese. Cook another 30 to 45 minutes, stirring once or twice, until the mixture turns smooth and dippable.

Important food safety note: Do not use the WARM setting to cook raw chicken. WARM is only for holding finished dip. For safe chicken guidance, FoodSafety.gov lists poultry at 165°F / 74°C. See the FoodSafety.gov safe minimum internal temperature chart.

For best results, thaw chicken before slow cooking. Starting with frozen chicken can make timing unpredictable, especially in a creamy dip where the dairy can overheat before the center of the chicken is safely cooked. For more slow-cooker timing ideas beyond this dip, these crock pot chicken breast recipes are useful for keeping chicken tender instead of dry.

Back to recipe card · Chicken options · Back to top

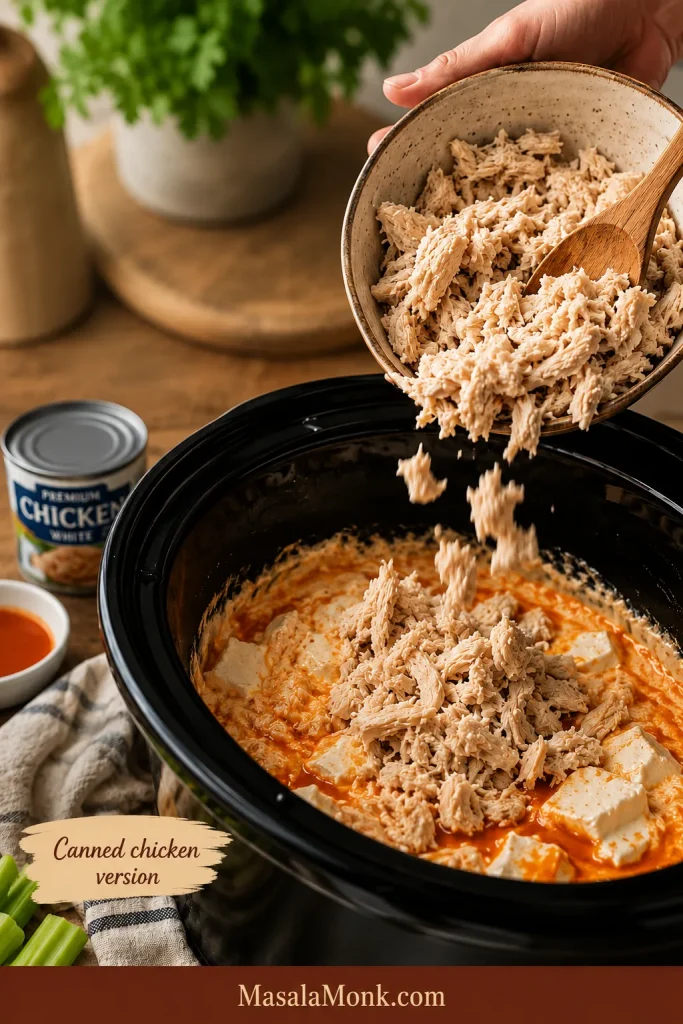
Crockpot Buffalo Chicken Dip with Canned Chicken

Canned chicken is the no-stress pantry route when the party snack has to happen with what is already in the cupboard. It will not give you the same chunky bite as rotisserie chicken, but it absolutely works for a quick crockpot buffalo chicken dip.

Drain the canned chicken very well. Flake it gently with a fork, then add it to the slow cooker with the cream cheese, buffalo sauce, dressing, and shredded cheese. Stir enough to combine, but do not aggressively mash it once the dip is hot.

Drained canned chicken being added to a slow cooker with cream cheese and buffalo sauce for buffalo chicken dip.
Canned chicken can save the day, but draining is the difference-maker; extra liquid thins the dip, while gently folded chicken keeps it thicker and more scoopable.

Canned chicken is softer than rotisserie chicken, so gentle folding keeps the texture better. Use canned chicken when speed matters. Reach for rotisserie chicken when you want a chunkier bite and deeper chicken flavor.

If the canned chicken made the dip softer than expected, use the watery dip fixes before serving.

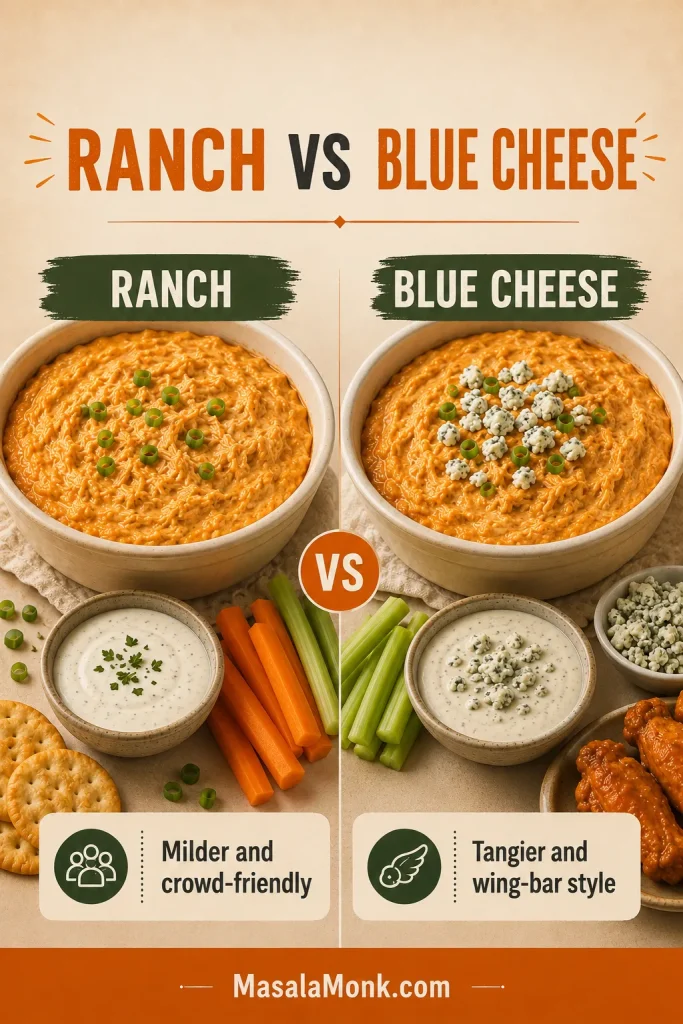
Ranch or Blue Cheese Dressing?

Ranch dressing is usually the easiest choice for a mixed group. It softens the buffalo sauce, rounds out the heat, and gives the dip a familiar flavor that works for most snack tables.

Side-by-side ranch and blue cheese comparison for buffalo chicken dip with bowls of dip, vegetables, and dippers.
Ranch keeps buffalo chicken dip crowd-friendly, while blue cheese makes it taste closer to wings; for parties, ranch inside and blue cheese on the side is the safest play.

Blue cheese dressing gives the dip a tangier, more classic wing-bar taste. If your table leans more wing-night than ranch-party, this blue cheese dip for wings gives you more ways to bring that cooling, tangy flavor into the spread.

For parties, put ranch in the dip and blue cheese on the side. That keeps the dip friendly without losing the wing-bar option.

Buffalo Wing Sauce vs Hot Sauce

Buffalo wing sauce is usually thicker, smoother, and more balanced than plain hot sauce. It often has that buttery wing-sauce flavor already built in, which makes it easier for party dips.

Plain hot sauce is sharper and thinner. It can make the dip taste hotter and slightly looser if you use the same amount. Start with less, let the dip melt, then adjust with more sauce, ranch, cream cheese, or chicken until the flavor lands where you want it.

Slow Cooker Size and Timing

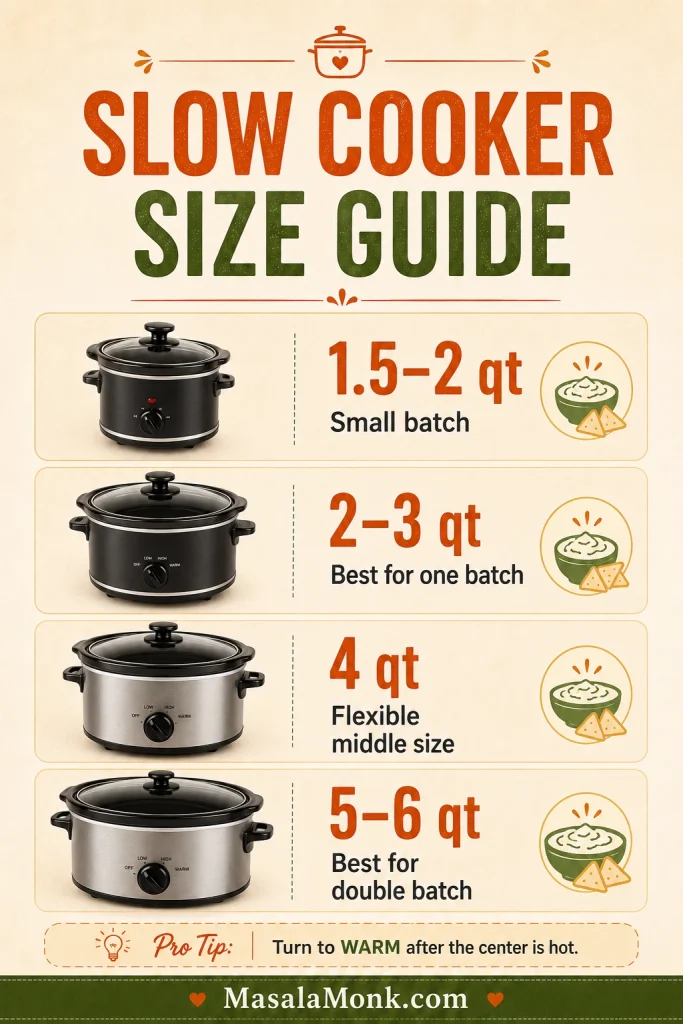
A 2 to 3 quart slow cooker is the sweet spot for one normal batch of buffalo chicken dip. That snug fit gives you a deeper, cozier dip texture; a huge cooker still works, but it asks for earlier stirring. Use a 5 to 6 quart slow cooker for a double batch.

Slow cooker size guide showing 1.5 to 2 quart, 2 to 3 quart, 4 quart, and 5 to 6 quart cookers for buffalo chicken dip.
For one standard batch, a 2 to 3 quart slow cooker usually gives the best depth, helping the dip melt evenly instead of drying out in a too-wide cooker.
Slow Cooker SizeUse It ForTiming Note
1.5 to 2 quartSmall batchGood for 6 to 8 people
2 to 3 quartOne standard batchLOW for 1½ to 2 hours
4 quartFlexible middle sizeLOW for 1½ to 2½ hours
5 to 6 quartDouble batchSingle batch may heat faster and spread thinner
Any sizeServingTurn to WARM after the center is hot and the dip has melted together

LOW is usually better for dairy-heavy dips because it melts everything more gently. HIGH works when you are short on time, but stir more often and turn the slow cooker down as soon as the center is hot. Slow cookers vary, so the visual cues matter more than the clock: melted cream cheese, bubbling edges, and a hot center.

A freshly mixed batch often melts closer to 1½ to 2 hours. Cold make-ahead batches may need closer to 2½ hours.

Batch Size and Crowd Scaling

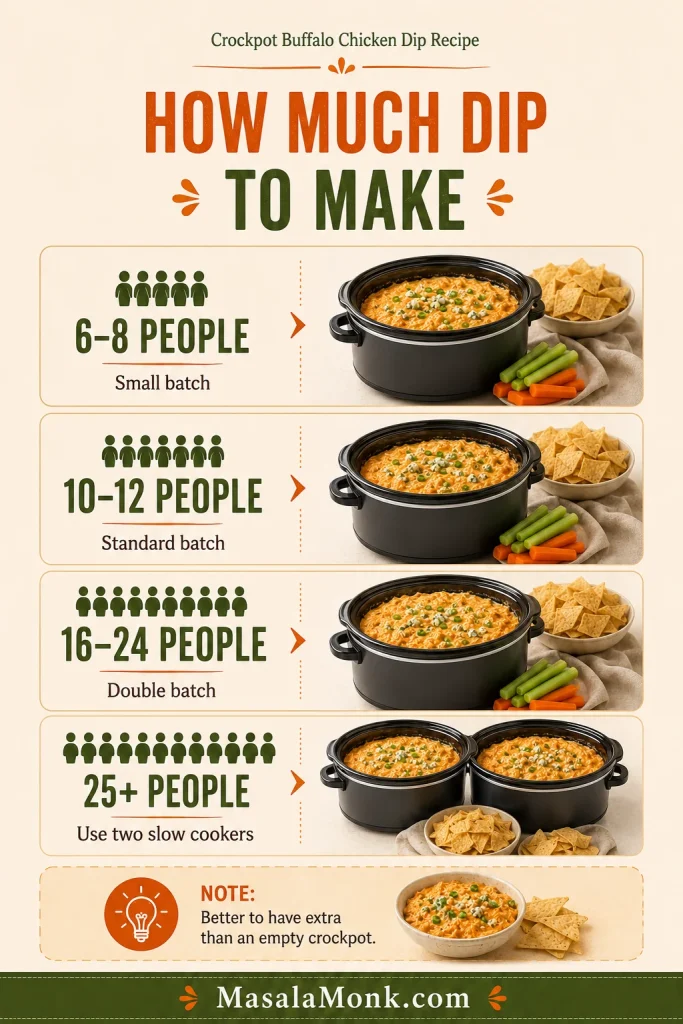
For a small gathering, one batch is usually enough. At a game-day table or potluck where this is one of the main snacks, plan more generously. Buffalo chicken dip disappears faster than people expect, especially when it stays warm in the slow cooker.

For parties, it is better to have a little extra than to watch the bottom of the crockpot get scraped clean before everyone has had a turn.

Crowd scaling guide for buffalo chicken dip showing small batch, standard batch, double batch, and two slow cookers for large parties.
Instead of guessing party portions, match the dip to the room: one batch for most snack tables, a double batch for bigger groups, and two crockpots for heavy grazing.
Crowd SizeBatch SizeSlow CookerNotes
6 to 8 peopleSmall batch1.5 to 2 quartGood when there are other appetizers.
10 to 12 peopleStandard batch2 to 3 quartMatches the recipe card.
16 to 24 peopleDouble batch5 to 6 quartStir well and allow extra time if starting cold.
25+ peopleTwo batchesTwo slow cookersBetter texture than one overloaded cooker.

Ingredient Scaling

BatchChickenCream CheeseBuffalo SauceDressingShredded Cheese
Half batch1½ cups4 oz⅓ cup¼ cup¾ cup
Standard batch3 cups8 oz⅔ to ¾ cup½ cup1½ cups
Double batch6 cups16 oz1⅓ to 1½ cups1 cup3 cups

For a double batch, stir from the bottom so the center melts evenly. A larger batch may need extra time, especially if the ingredients start cold.

Keep warm for serving · Serving ideas · Back to recipe card · Back to top

How to Keep Buffalo Chicken Dip Warm for a Party

Once the dip is hot and melted, hold it on WARM for serving. The slow cooker should make hosting easier, not give you another thing to babysit.

Crockpot buffalo chicken dip on a party table with chips, celery, carrots, crackers, pretzels, plates, napkins, and a serving spoon.
Once the center is hot, WARM becomes your serving tool: it keeps the buffalo chicken dip soft and scoopable without needing oven space or last-minute reheating.

This is the kind of dip people hover near, because it smells like wings, stays warm, and does not ask anyone to sit down with a plate. Set out the dippers, keep a spoon nearby, and let the crockpot do the quiet work.

Condensation can make the top look watery. Leave the lid slightly ajar for a few minutes and stir well. Too thick? Loosen it with a splash of ranch, milk, or buffalo sauce. Greasy around the edges? Lower the heat if possible and stir in a little extra chicken or softened cream cheese.

For a long party, give the dip a slow stir every so often. That small move keeps the edges from drying and helps the mixture stay soft instead of crusty.

If you want a second hot, cheesy dip on the same table, this Rotel dip recipe brings the same warm party energy with a different flavor profile.

Party safety note: Do not leave the dip sitting out cold. Keep it warm in the slow cooker during serving, then refrigerate leftovers once the party is over. A shallow container helps leftovers cool faster in the fridge.

Make Ahead, Transport, and Party Timing

This is the section that saves you from stirring cheese dip while people are ringing the doorbell. You can mix the dip ahead, let the slow cooker handle the heat, and focus on the rest of the table.

Mix the cooked chicken, cream cheese, buffalo sauce, dressing, garlic powder, and shredded cheese in the slow cooker insert or in a covered container. Refrigerate until you are ready to cook. A cold mixture needs extra time, so stir once the cream cheese begins to soften.

For transport, cook the dip before leaving if the party is nearby, then keep it covered and plug in the slow cooker when you arrive. Stir before serving. If it thickened on the way, loosen it with a splash of ranch, milk, or buffalo sauce once it warms again.

If you want another make-ahead party snack for the same table, this easy cheese ball recipe gives you a cold, sliceable option while the buffalo chicken dip stays warm in the slow cooker.

When Guests ArrivePlan
In 30 minutesSoften the cream cheese and warm the mixture on the stovetop or in the microwave first, then transfer to the slow cooker on WARM.
In 1 to 2 hoursUse cooked chicken and cook on HIGH, stirring often.
In 2+ hoursUse LOW for the smoothest texture.
TomorrowPrep the mixture ahead, refrigerate, and cook fresh the next day.

Troubleshooting Crockpot Buffalo Chicken Dip

Half-melted buffalo chicken dip can look alarming before it looks delicious. Cream cheese sits in white pockets, sauce gathers at the edges, and the top may look oily before the final stir. Do not panic yet — most crockpot dip problems are fixable while the dip is still warm.

Quick Fixes at a Glance

Use the visual guide first if you are standing over the crockpot and need a fast rescue. The full table below gives the likely cause and the best fix.

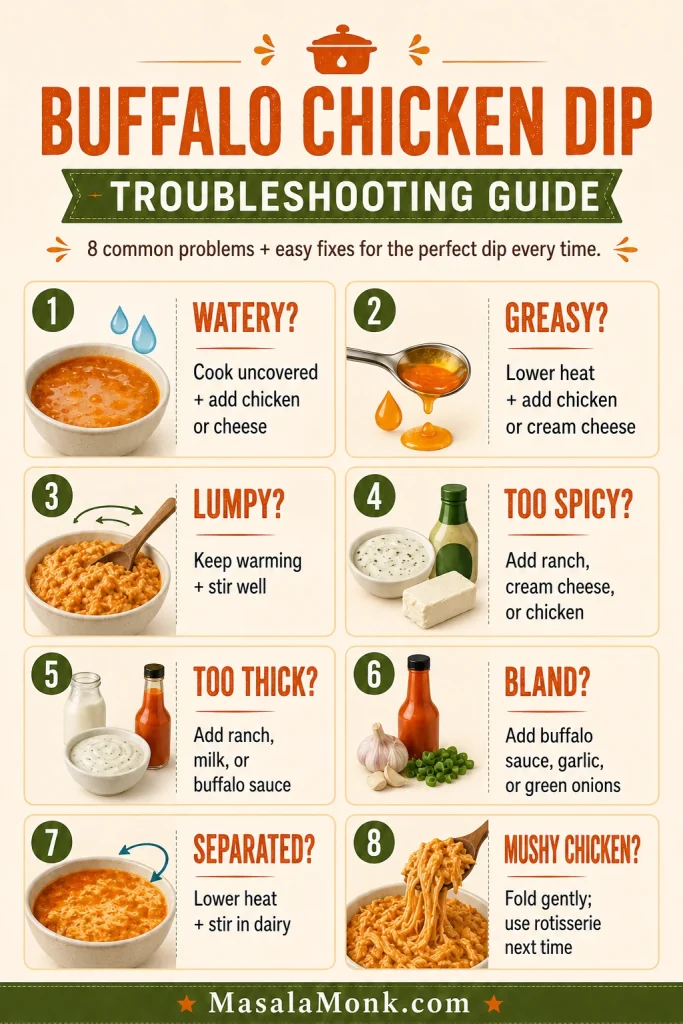
Troubleshooting infographic for buffalo chicken dip with fixes for watery, greasy, lumpy, too spicy, too thick, bland, separated, and mushy dip.
If the dip looks wrong, do not panic; watery, greasy, lumpy, bland, thick, or spicy buffalo chicken dip can usually be corrected while it is still warm.
ProblemLikely CauseFix
Watery dipCanned chicken was not drained, too much sauce, or lid condensationCook uncovered for 10 to 15 minutes, stir well, or add more shredded chicken or cheese.
Greasy dipCooked too hot, too much cheese, or oily dressingSwitch to LOW or WARM and stir in extra chicken, softened cream cheese, or a spoonful of Greek yogurt.
Lumpy cream cheeseCream cheese was too cold or added in large piecesLet it keep warming, then stir well. Next time, soften and cube the cream cheese first.
Too spicyHot sauce was stronger than expectedAdd ranch, cream cheese, sour cream, Greek yogurt, or more chicken.
Too thickToo much chicken or cheese, or it sat on WARM for a whileStir in a splash of ranch, milk, or buffalo sauce.
BlandNot enough buffalo sauce, salt, or tangAdd more buffalo sauce, garlic powder, green onions, or blue cheese crumbles.
SeparatedDairy sat too hot for too longLower the heat, stir well, and add a small spoonful of cream cheese, sour cream, or Greek yogurt.
Mushy chicken textureCanned chicken was over-stirred or too softFold gently and use rotisserie chicken next time for a chunkier bite.

Back to recipe card · Go to serving ideas · Back to top

What to Serve with Crockpot Buffalo Chicken Dip

Build the board around contrast: hot dip, cold crunch, salty chips, fresh vegetables, and one or two crispy sides. Tortilla chips are the classic choice, but celery, carrots, cucumber rounds, bell pepper strips, crackers, bread, soft pretzels, fries, potato skins, and slider buns all work.

Build a Better Buffalo Chicken Dip Board

Give people more than one way to scoop. Fresh vegetables cut the richness, while chips, crackers, pretzels, bread, fries, wings, or sliders make the spread feel like a real party table.

Serving board with buffalo chicken dip, tortilla chips, celery, carrots, crackers, pretzels, pita chips, toasted bread, wings, sliders, and potato skins.
Build the board with contrast in mind: rich buffalo chicken dip needs crisp vegetables, salty chips, sturdy crackers, pretzels, fries, sliders, or wings to balance each bite.

For a bigger game-day table, pair the dip with crispy air fryer chicken wings or pub-style battered fries. The dip brings the creamy buffalo flavor, while the wings and fries bring the crispy, salty bite people expect from a snack spread.

Not everything on the table has to be spicy. For contrast, add spinach artichoke dip for another hot dip or 7 layer dip for a cold, colorful chips-and-dip option.

A Final Serving Setup

When the dip is the main snack, keep the final setup simple: creamy buffalo chicken in the center, fresh crunch around it, and enough sturdy dippers for people to keep coming back.

Overhead board of finished buffalo chicken dip with tortilla chips, celery, carrots, crackers, ranch, blue cheese crumbles, and green onions.
Finally, keep the serving setup simple: creamy buffalo chicken dip in the center, fresh vegetables for crunch, and salty dippers around the edges for easy scooping.

Leftover Buffalo Chicken Dip Ideas

Leftovers are the cook’s bonus. The dip firms up in the fridge, then melts back into a spicy chicken filling the next day. It already has chicken, cheese, sauce, and seasoning, so it can turn into another snack or quick meal with very little effort.

Leftover buffalo chicken dip stored in a glass container and reused in quesadillas, sliders, and loaded fries.
After chilling, the dip firms into a ready-made filling, so leftovers can become quesadillas, sliders, wraps, baked potatoes, or loaded fries with gentle reheating.
  • Spread it inside quesadillas.
  • Spoon it onto slider buns.
  • Use it in grilled cheese.
  • Add it to wraps with lettuce and celery.
  • Spoon it over baked potatoes.
  • Use it on loaded fries.
  • Stir a little into pasta.
  • Use it as a pizza topping.
  • Stuff it into mushrooms or mini peppers.

Very thick leftover dip can be warmed gently with a splash of milk, ranch, or buffalo sauce before using it as a filling.

Storage, Reheating, and Freezing

Store leftover buffalo chicken dip in an airtight container in the refrigerator for up to 3 to 4 days. Reheat small portions in the microwave, stirring halfway through. For a larger amount, return it to the slow cooker on LOW, stir occasionally, and add a splash of milk, ranch, or buffalo sauce if it looks too thick.

Reheat gently until the dip is hot through the center. If reheating a larger batch, a food thermometer should read 165°F / 74°C in the center before serving. Gentle reheating gives the dip a better chance of coming back close to party texture instead of turning oily or tight.

You can freeze buffalo chicken dip, but the texture may change because of the cream cheese and dressing. It may look slightly grainy or separated after thawing. For best results, thaw it in the refrigerator, reheat gently, and stir in a little fresh cream cheese or dressing to bring it back together.

Back to recipe card · Leftover ideas · Back to top

Easy Variations

Extra Cheesy Buffalo Chicken Dip

Cheese-pull people can use 2 cups shredded cheese instead of 1½ cups. Stir part of it into the dip and save the rest for the top near the end.

Mild Buffalo Chicken Dip

For mixed crowds, use a mild buffalo wing sauce, reduce the sauce to ½ cup, and add an extra spoonful of ranch or cream cheese.

Spicy Buffalo Chicken Dip

Wing-night heat starts with Frank’s RedHot Original or another sharper hot sauce. Add a pinch of cayenne, then finish with blue cheese crumbles or sliced jalapeños.

High-Protein Buffalo Chicken Dip

To make it lighter but still creamy, replace part of the cream cheese with blended cottage cheese or thick Greek yogurt. Add it gently and avoid boiling or overheating so the texture stays smooth.

No Cream Cheese Buffalo Chicken Dip

Without cream cheese, the texture will be looser and tangier. Use sour cream plus a little mayo, or try blended cottage cheese for a lighter version. Keep the heat gentle so the dip does not separate.

Keto or Low-Carb Buffalo Chicken Dip

The dip itself can fit a low-carb style if your sauce and dressing are low in sugar. Serve it with celery, cucumbers, bell peppers, or low-carb crackers instead of tortilla chips.

Dairy-Free Note

A dairy-free version works best with dairy-free cream cheese, dairy-free ranch, and a dairy-free shredded cheese that melts well. The texture will vary by brand, so heat gently and stir often.

FAQs About Crockpot Buffalo Chicken Dip

How long does buffalo chicken dip take in the crockpot?

With cooked or rotisserie chicken, buffalo chicken dip usually takes 1½ to 2½ hours on LOW or 1 to 2 hours on HIGH. A cold make-ahead batch may need a little longer.

Can you make crockpot buffalo chicken dip with raw chicken?

Yes, but use thawed raw chicken and cook it first. Once the chicken reaches 165°F / 74°C, shred it, then add the cream cheese, dressing, and shredded cheese near the end.

Should frozen chicken go straight into the slow cooker?

Thaw the chicken before adding it to the slow cooker. Frozen chicken can heat unevenly, especially in a creamy dip where the dairy may overheat before the chicken is properly cooked.

Is canned chicken okay for buffalo chicken dip?

Yes. Drain canned chicken very well, flake it gently, and fold it into the dip. It gives a softer texture than rotisserie chicken, but it works well for a quick pantry version.

What cheese melts best?

Cheddar, Colby Jack, Monterey Jack, or a blend all work. Freshly shredded cheese usually melts smoother, while pre-shredded cheese is convenient but can make the dip slightly thicker because of anti-caking starches.

Does buffalo wing sauce taste different from hot sauce?

Yes. Buffalo wing sauce is usually smoother and more balanced. Plain hot sauce is sharper and thinner, so start with less and adjust after the dip melts.

How do I hold buffalo chicken dip warm?

Once the dip is hot through the center, turn the slow cooker to WARM. Stir occasionally and loosen with a splash of ranch, milk, or buffalo sauce if it thickens.

How much buffalo chicken dip should I make for a party?

One standard batch serves about 10 to 12 people as an appetizer. For 16 to 24 people, make a double batch in a 5 to 6 quart slow cooker. With a larger crowd, two separate slow cookers usually work better than one overloaded cooker.

Why did my dip turn greasy?

Greasy buffalo chicken dip usually means the dairy or cheese got too hot. Lower the heat, stir well, and add more chicken, softened cream cheese, or a spoonful of Greek yogurt to bring it back together.

Why is my buffalo chicken dip watery?

Watery dip can happen if canned chicken was not drained well, too much sauce was added, or condensation dripped from the lid. Cook uncovered briefly, stir well, or add more chicken or shredded cheese.

Can this be made ahead?

Yes. Mix the ingredients ahead, refrigerate, then cook in the slow cooker when needed. A cold mixture needs extra time, so stir once the cream cheese begins to soften.

Can buffalo chicken dip be frozen?

It can be frozen, but the texture may change because of the cream cheese and dressing. Thaw in the refrigerator, reheat gently, and stir in a little fresh cream cheese or dressing if needed.

What should I serve with it?

Serve buffalo chicken dip with tortilla chips, celery, carrots, crackers, pita chips, cucumber rounds, bell pepper strips, toasted bread, pretzels, fries, or slider buns. A mix of fresh vegetables and salty chips works best because the dip is rich, cheesy, and spicy.

Back to recipe card · Back to top

Did your crowd like it better with ranch, blue cheese, canned chicken, rotisserie chicken, or extra Frank’s? Leave a comment with what worked — it helps the next person planning a game-day table.

When the dip is melted through and clinging to every chip, turn the slow cooker to WARM, set out something crunchy, and let people gather around it. That is the whole magic of crockpot buffalo chicken dip: simple ingredients, low effort, and a party snack that keeps taking care of itself.

Posted on Leave a comment

Cherry Pie Filling Recipe: Fresh, Frozen or Canned Cherries

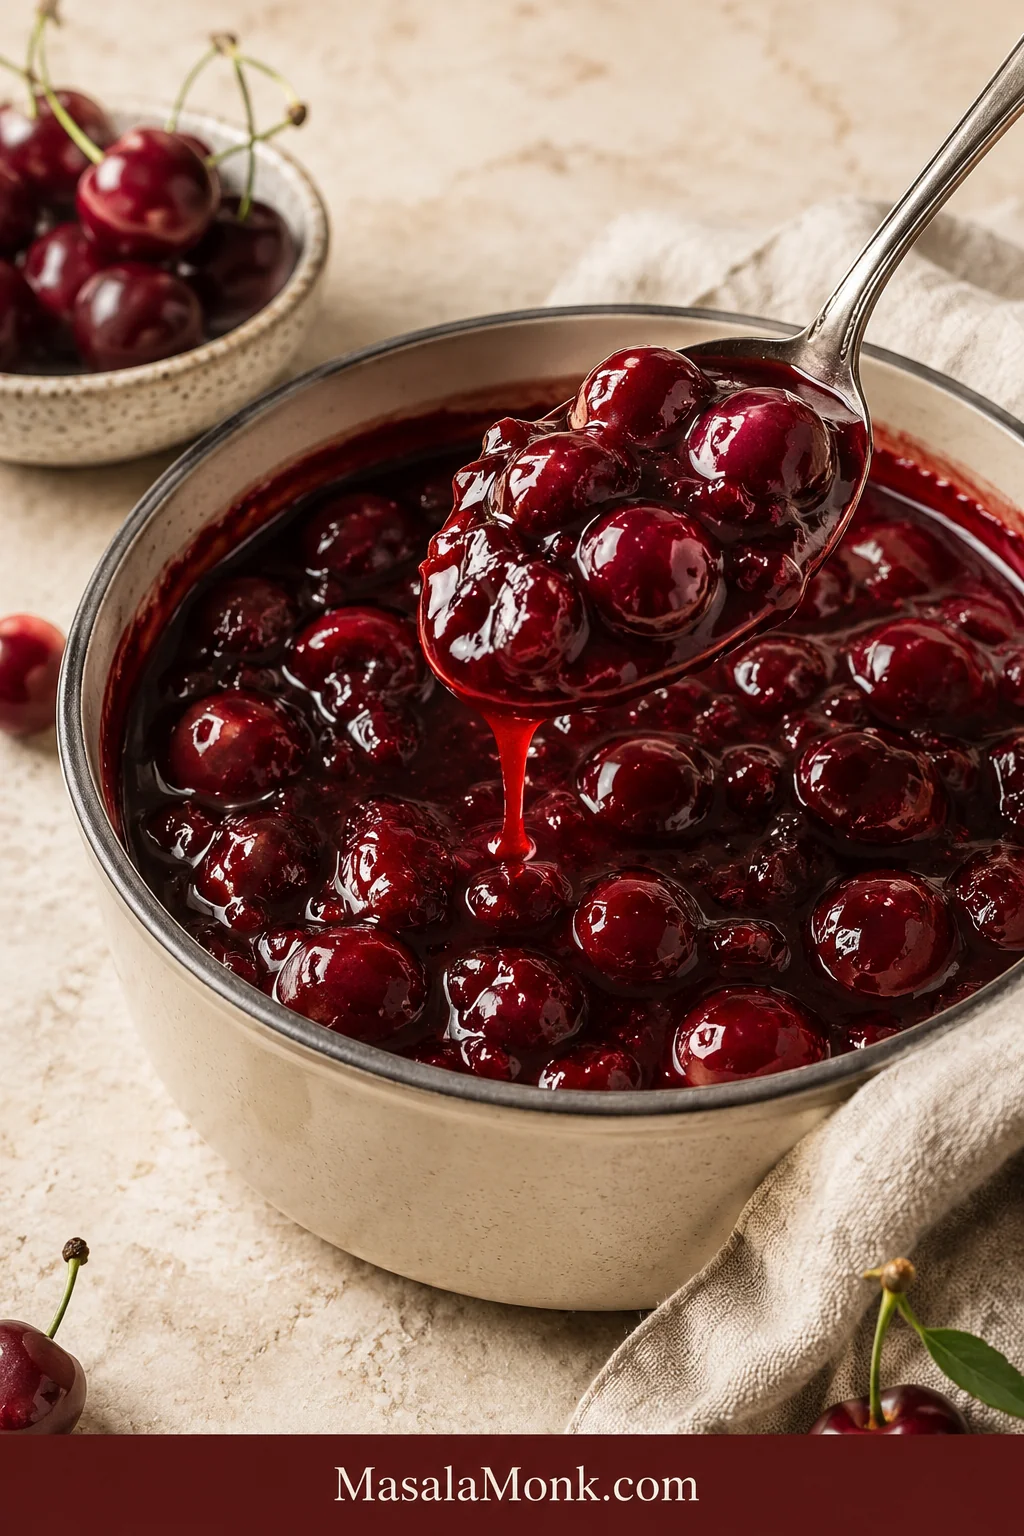
Glossy cherry pie filling with whole cherries being lifted from a saucepan on a spoon.

Cherry pie filling should taste like cherries first. It should be glossy, bright, thick enough to hold, and full of fruit — not watery, gummy, flat, or so sweet that it tastes more like syrup than cherries.

This cherry pie filling recipe is built for the way people actually cook. You may have fresh cherries because they looked too good to skip. There may be a bag of frozen cherries in the freezer. Or maybe you bought canned cherries, or already have canned cherry pie filling and just want it to taste more homemade. All of those can work.

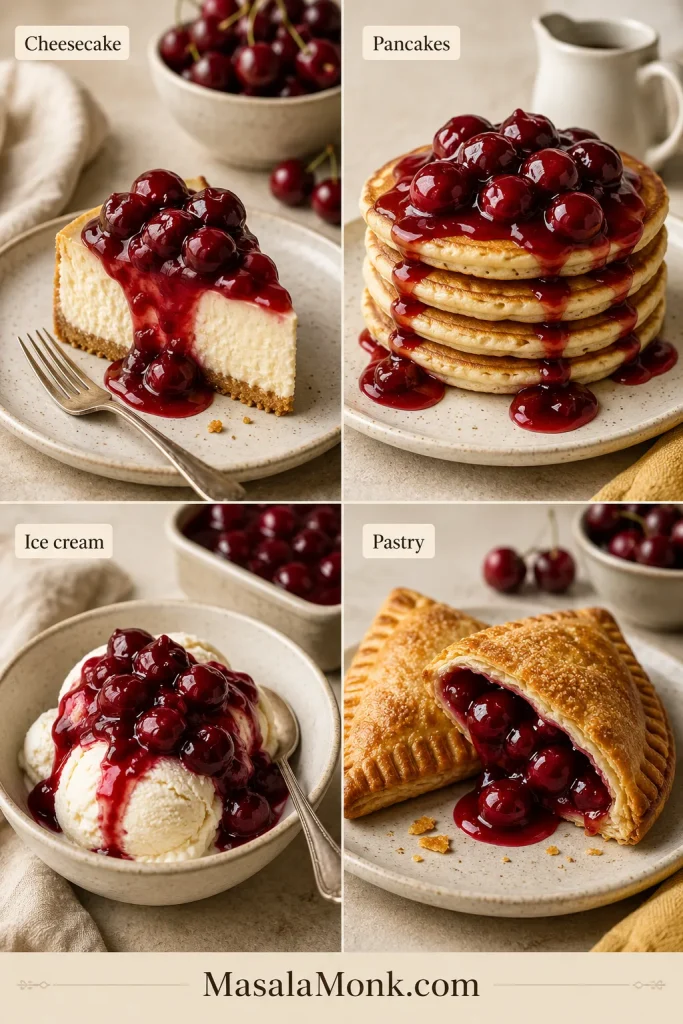
The base recipe makes about 4 cups / 950 ml, enough for one standard 9-inch cherry pie. You can also spoon it over cheesecake, pancakes, waffles, yogurt, ice cream, French toast, crepes, cakes, bars, hand pies, puff pastry turnovers, and no-bake desserts.

This is for the moment when you have cherries and a pie plan, but you are worried the filling will turn runny, dull, too sweet, or too stiff. The fix is not perfect cherries; it is knowing how much liquid, sugar, acid, and thickener your cherries need.

No-guesswork rule: sweet cherries need lemon, tart cherries need sugar, frozen cherries need patience, canned cherries need liquid control, and canned cherry pie filling needs brightening.

Quick Answer: How to Make Cherry Pie Filling

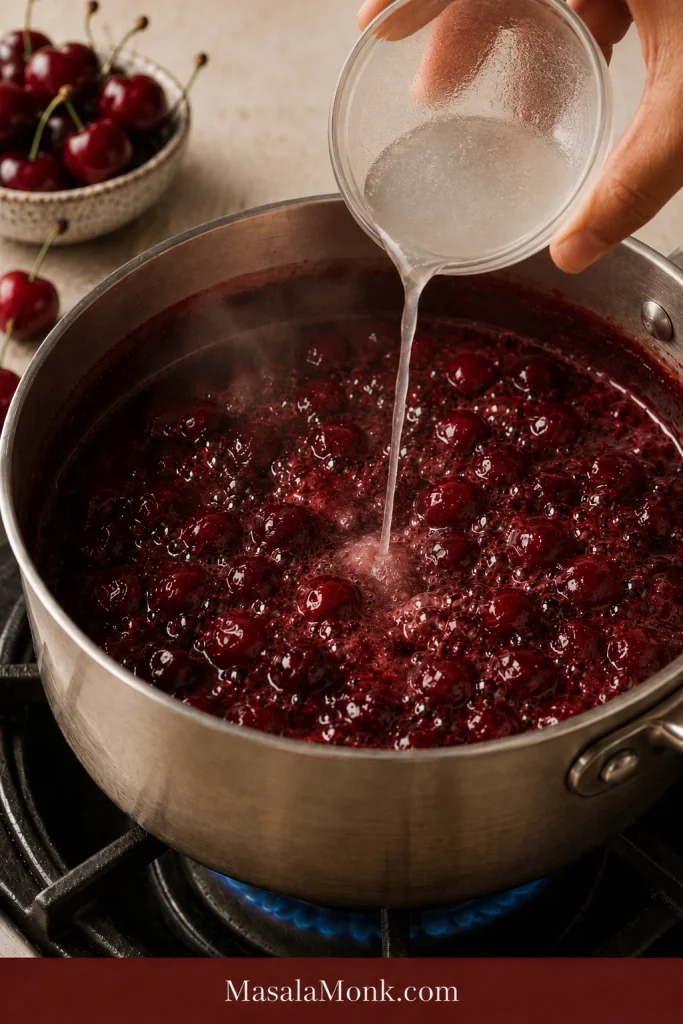
The basic method is simple: cook cherries until they release juice, then thicken those juices into a glossy, spoon-coating sauce with cornstarch.

To make one standard 9-inch pie, cook about 4 1/2 to 5 cups pitted cherries with 1/2 to 2/3 cup sugar, 1 to 2 tablespoons lemon juice, 1/4 cup water or cherry juice, and 3 to 4 tablespoons cornstarch until the sauce turns deep red and thick enough to coat a spoon.

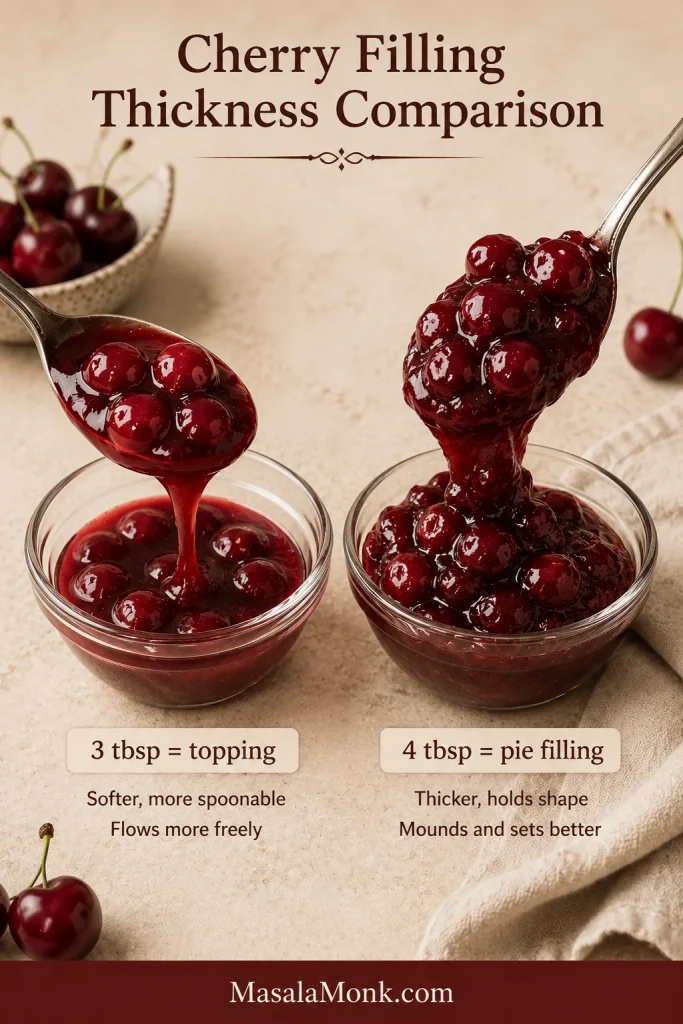
For a softer topping for cheesecake, pancakes, waffles, yogurt, or ice cream, use 3 tablespoons cornstarch. Choose 4 tablespoons cornstarch when the filling needs to hold better inside a pie.

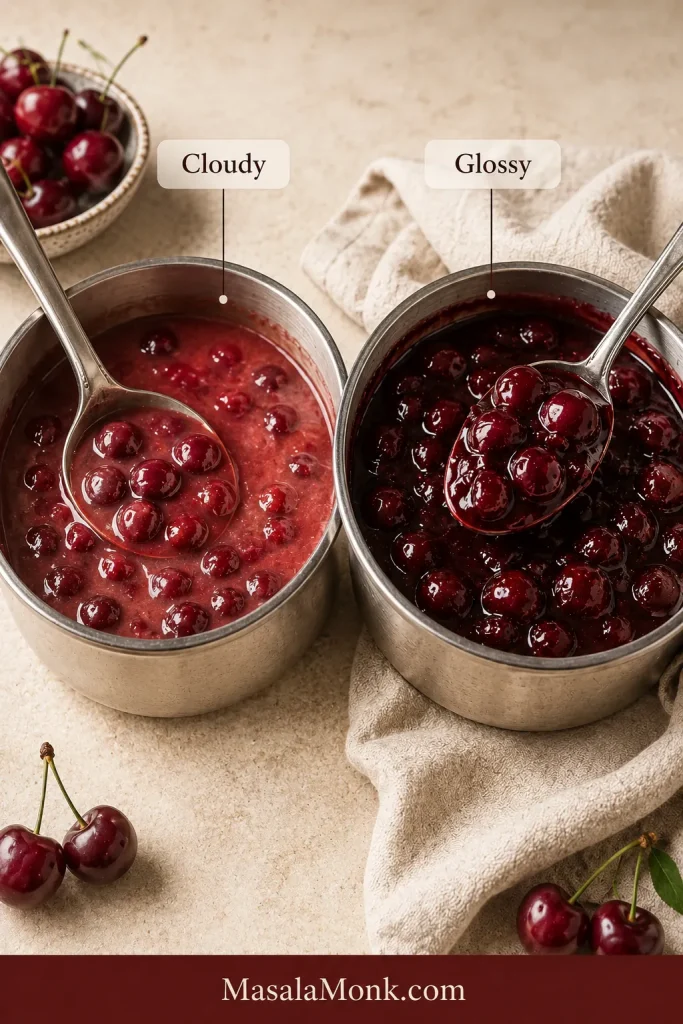
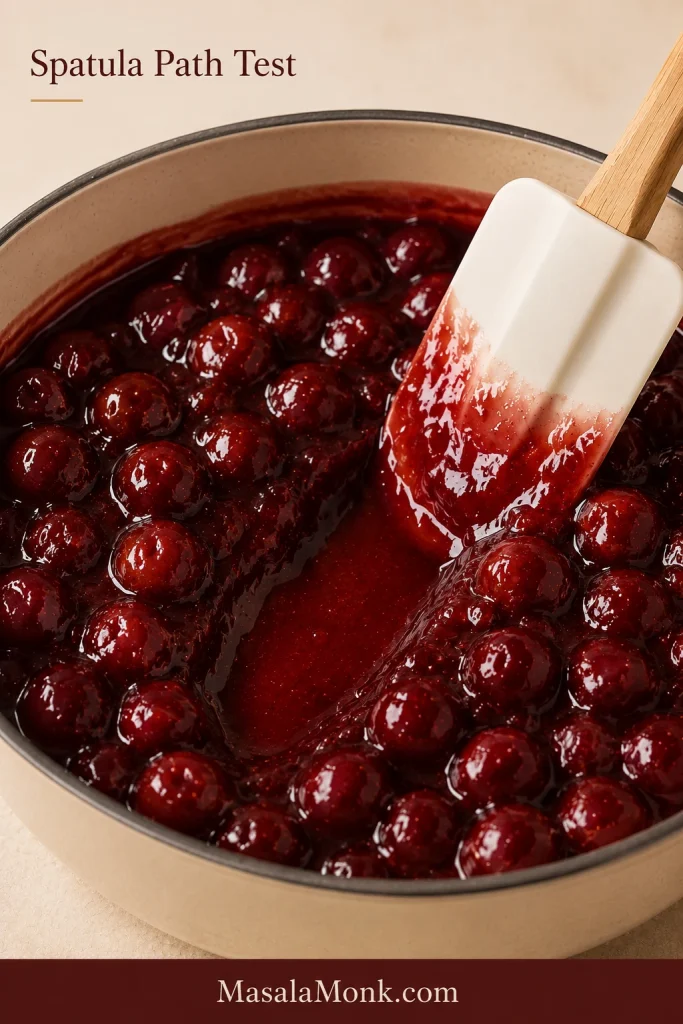
Finished texture should be jammy but not stiff. The cherries should sit in a glossy ruby sauce that slowly slides from the spoon instead of running like juice.

Helpful next: Jump to the recipe card · choose pie vs topping thickness · upgrade canned cherry pie filling

Cherry Pie Filling Recipe

This is the base homemade version. It makes a fruit-rich cherry filling that can be used in pie or spooned over desserts. Adjust the sugar, lemon, liquid, and cornstarch depending on the cherries you have and the texture you want.

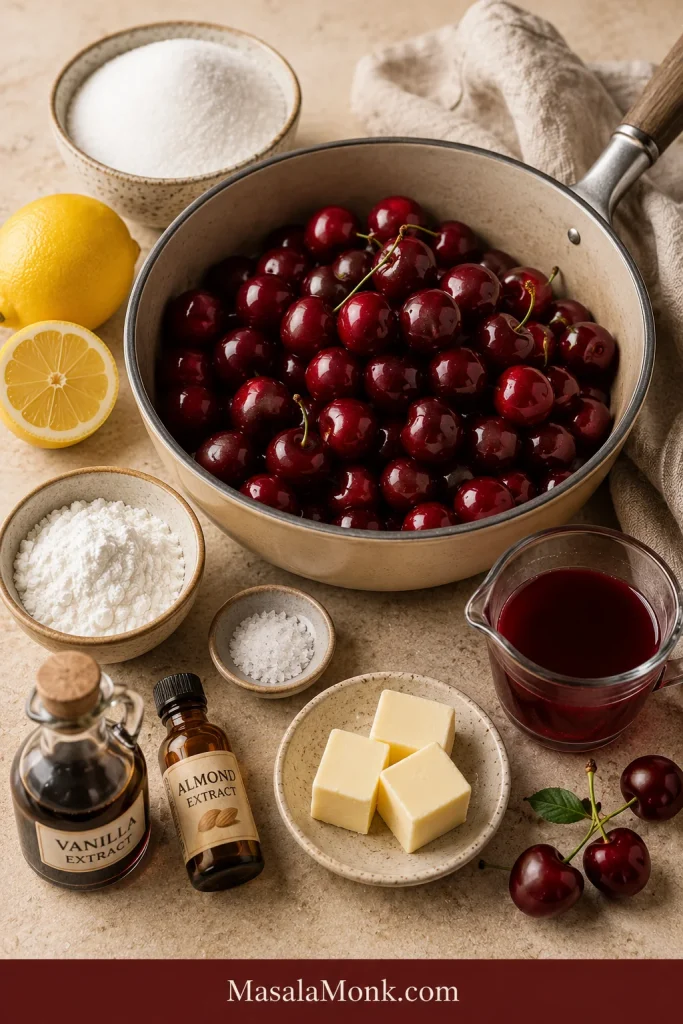
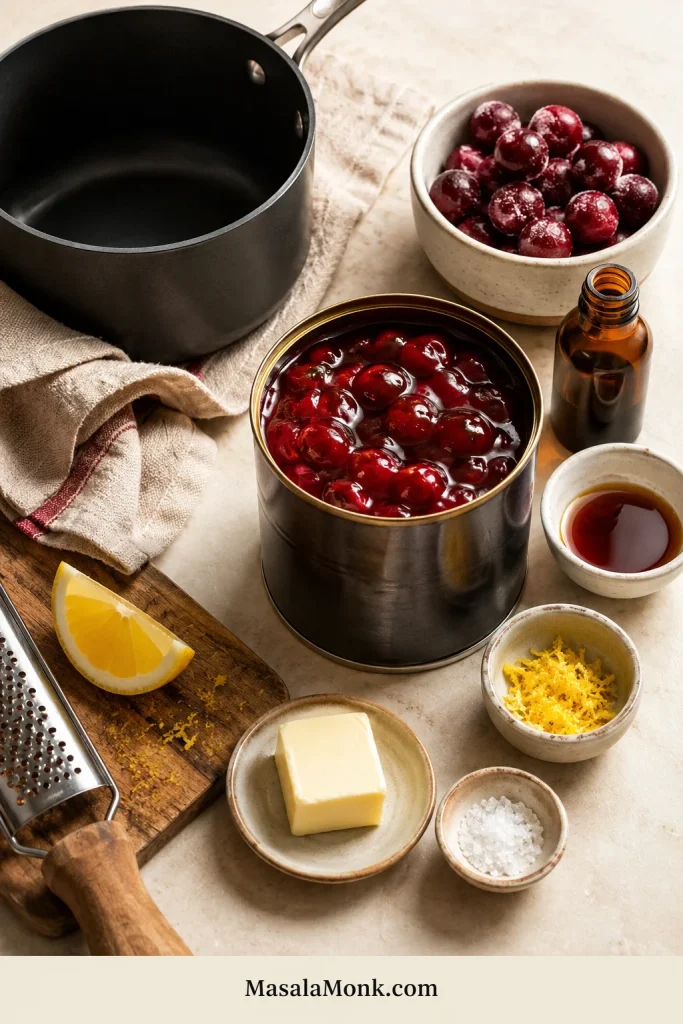
Cherries, sugar, lemon, cornstarch, salt, vanilla, almond extract, butter, and cherry juice arranged for homemade cherry pie filling.
Homemade cherry pie filling starts with a simple base: cherries for body, lemon for brightness, cornstarch for structure, and small flavor boosters for depth.

Yield: about 4 cups / 950 ml
Enough for: one standard 9-inch pie
Prep time: 10–20 minutes
Cook time: 10–15 minutes, sometimes a little longer for frozen cherries
Total time: about 25–35 minutes, plus cooling
Storage: fridge 3–5 days; freezer up to 3 months; not for canning as written

Ingredients

  • Pitted cherries: 4 1/2 to 5 cups / about 690–770 g, fresh or frozen
  • Granulated sugar: 1/2 to 2/3 cup / 100–135 g, adjusted to taste
  • Cornstarch: 3 to 4 tablespoons / about 24–32 g
  • Lemon juice: 1 to 2 tablespoons / 15–30 ml
  • Water or reserved cherry juice: 1/4 cup / 60 ml, plus more only if needed
  • Fine salt: 1/8 teaspoon
  • Almond extract: 1/4 teaspoon, optional
  • Vanilla extract: 1 teaspoon, optional
  • Butter: 1 tablespoon / 14 g, optional for richer pie-style filling

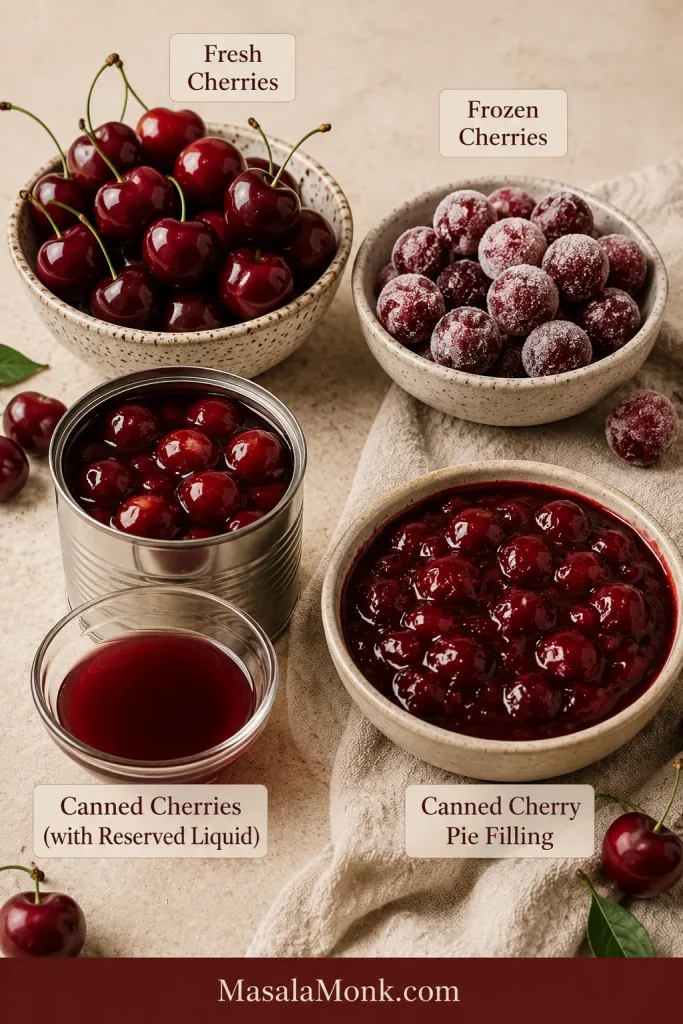
For canned cherries: use about two to three 14.5 oz / 411 g cans of tart cherries packed in water or juice, depending on drained fruit amount. Aim for roughly 4 to 5 cups drained cherries when possible. Drain and reserve the liquid. Start with 1/4 cup reserved cherry liquid, then add more only if the pan looks dry. Reduce the sugar if the cherries are packed in syrup.

Drained fruit amounts vary by brand, so a batch made with canned cherries may be slightly saucier than one made with fresh or frozen fruit. Add the reserved liquid slowly instead of pouring it all in at once.

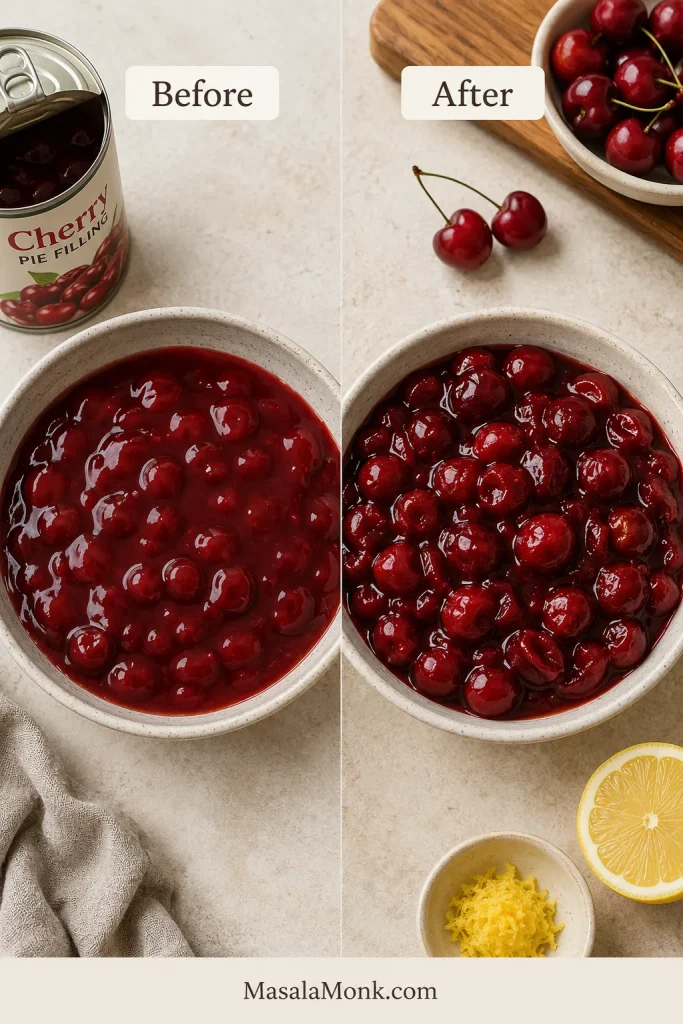
For canned cherry pie filling: do not use it as raw cherries in this recipe. It is already sweetened and thickened. Use the upgrade section below instead.

Instructions

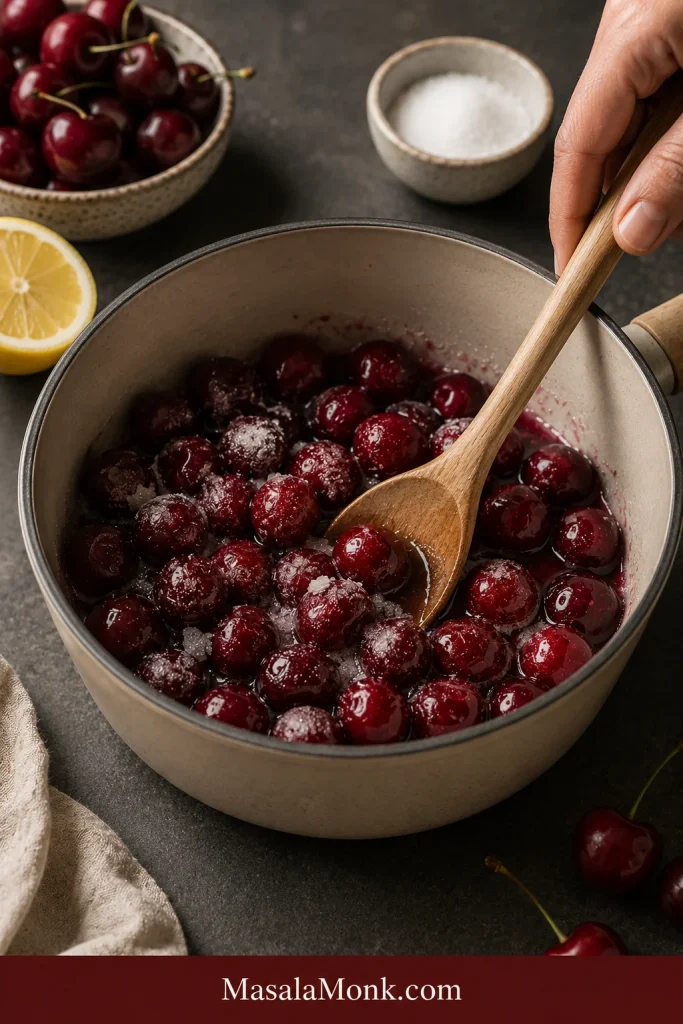
  1. Add the cherries, sugar, lemon juice, salt, and water or cherry juice to a medium saucepan.
  2. Cook over medium heat, stirring often, until the cherries release juice and the mixture begins to bubble.
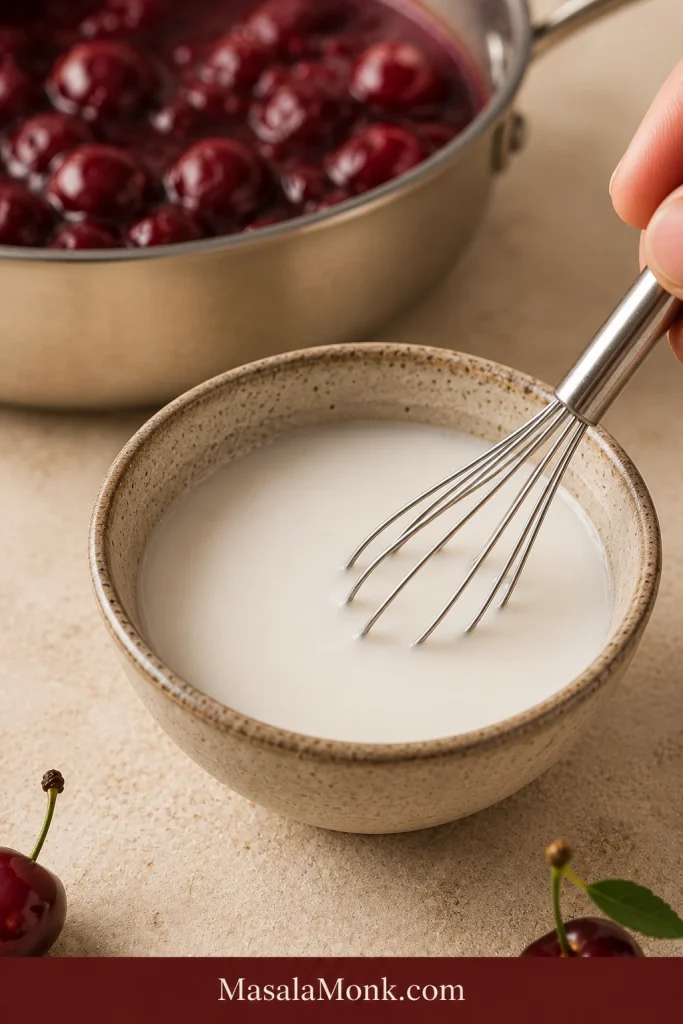
  3. In a small bowl, mix the cornstarch with 2 to 3 tablespoons cold water or cold cherry juice until smooth.
  4. Stir the cornstarch slurry into the bubbling cherries.
  5. Simmer for 3 to 5 minutes, stirring constantly near the end, until the sauce thickens and coats the cherries.
  6. Let the thickened filling bubble for about 1 minute to cook out the raw starch taste.
  7. Remove from heat. Stir in almond extract, vanilla, or butter if using.
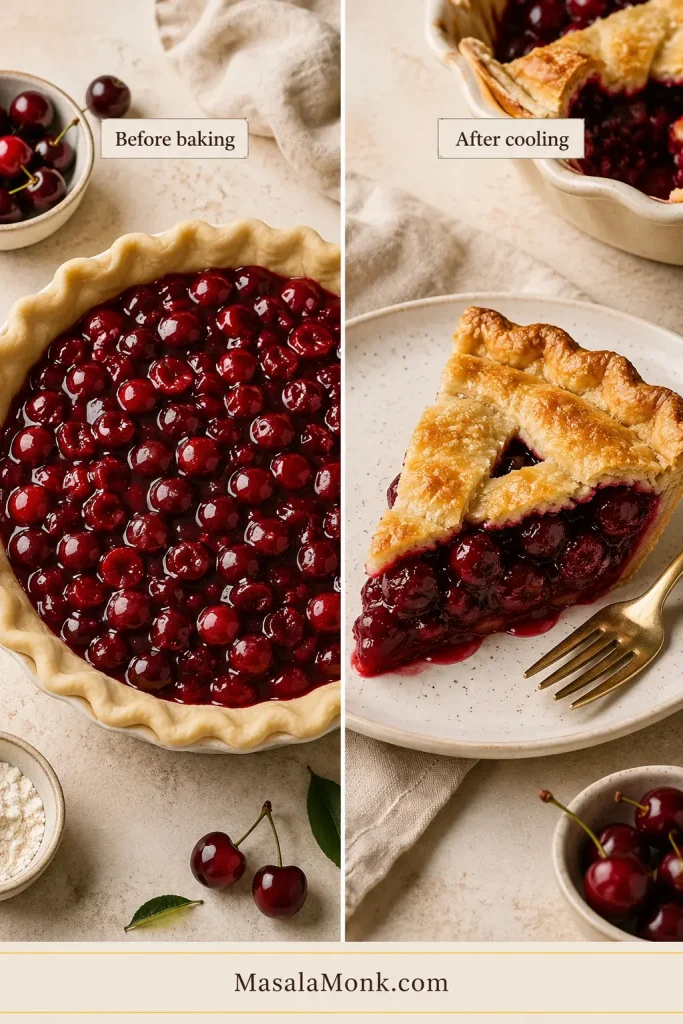
  8. Cool before using. The filling thickens more as it cools.

Recipe note: use 3 tablespoons cornstarch for a softer topping and 4 tablespoons for pie filling. For frozen cherries, give the extra juices enough time to thicken. With canned cherries, use the reserved cherry liquid instead of water and adjust the sugar to taste.

Before you adjust anything: choose your cherry format · check the texture cues · fix a runny filling

Cherry Pie Filling at a Glance

YieldAbout 4 cups / 950 ml
Enough forOne standard 9-inch cherry pie
Cherry optionsFresh cherries, frozen cherries, canned cherries, or upgraded canned cherry pie filling
Prep time10–20 minutes, depending on pitting
Cook time10–15 minutes; frozen cherries may take a little longer
Cooling time30–60 minutes before pie; longer for a baked pie to slice cleanly
Best cueDeep red sauce that coats a spoon
Common mistakeAdding too much liquid or judging the filling before it cools

If you like this style of cooked fruit filling, this apple pie filling recipe is another useful one to keep handy for pies, toppings, and quick desserts.

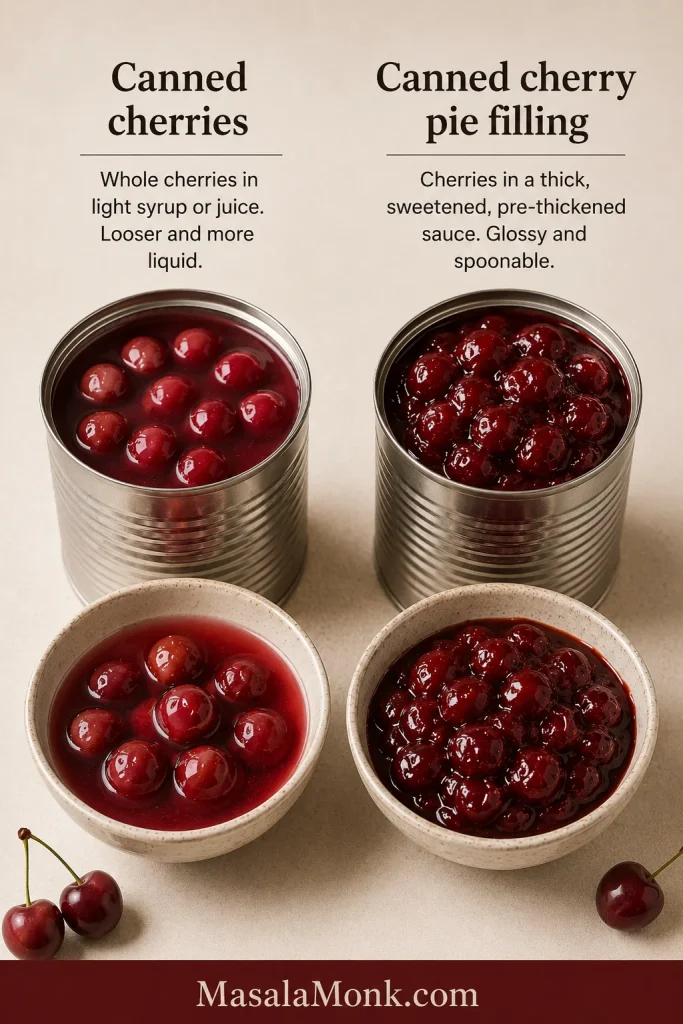
Canned Cherries vs Canned Cherry Pie Filling

This is the one shortcut detail worth checking before you cook. They are not the same thing.

Canned cherries in loose syrup shown beside canned cherry pie filling in a thick glossy sauce.
Plain canned cherries are fruit packed in liquid, while canned cherry pie filling is already sweetened and thickened, so they need different handling.
If the can says…What you haveWhat to do
Cherries in water or juicePlain fruit with liquidUse in the base recipe. Reserve the liquid.
Cherries in syrupSweetened fruitUse in the base recipe, but reduce the sugar.
Cherry pie fillingAlready sweetened and thickened dessert fillingDo not cook it like raw fruit. Warm and upgrade it instead.

The plain canned cherries can become homemade filling. Canned cherry pie filling has already been sweetened and thickened, so it usually needs brightness, extra fruit, or a flavor boost rather than a full remake.

Pie Filling vs Topping: Choose the Right Thickness

Not every cherry filling needs the same thickness. A spoonable dessert topping should be softer than a pie filling that needs to hold inside a slice.

Two cherry fillings comparing a softer topping made with 3 tablespoons cornstarch and a thicker pie filling made with 4 tablespoons cornstarch.
For a softer cherry topping, use 3 tablespoons cornstarch; for a pie filling that slices more cleanly, use 4 tablespoons.
What you wantUse thisWhy
Soft dessert topping3 tablespoons cornstarchSpoonable for cheesecake, pancakes, waffles, yogurt, or ice cream
Sliceable pie filling4 tablespoons cornstarchThicker set for a 9-inch pie
Extra juicy frozen cherries4 tablespoons, or simmer longerFrozen fruit releases more liquid
Shortcut canned pie fillingNo extra thickener unless looseIt is already sweetened and thickened
Shelf-stable canningTested Clear Jel recipe onlyRegular cornstarch filling is not for canning

When in doubt, choose 4 tablespoons for pie and 3 tablespoons for spooning over desserts. That one decision solves most texture problems before they start.

Choose Your Cherries First

Before changing sugar or starch, look at the cherries. Sweet, tart, frozen, canned, and pre-thickened filling all behave differently.

The goal is not to use the “perfect” cherries. Instead, understand what your cherries are giving you — sweetness, tartness, juice, or thickness — and adjust from there.

Fresh cherries, frozen cherries, canned cherries with liquid, and canned cherry pie filling shown as options for making cherry filling.
Fresh, frozen, canned cherries, and canned cherry pie filling can all work, but the liquid, sugar, and thickening step should change with the cherry format.
What you haveHow to use itWhat to adjust
Fresh sweet cherriesBase recipeLess sugar, more brightness from lemon
Fresh tart cherriesBase recipeMore sugar, modest lemon
Frozen cherriesCook from frozen or thaw firstExtra liquid and a little more cooking time
Canned cherries in water or juiceUse like fruitReserved liquid, less added water, sugar to taste
Canned cherry pie fillingUpgrade separatelyBrighten and balance; do not treat like raw fruit

Use the table as your guide. Once you know what kind of cherries you have, the sugar, lemon, liquid, and cooking time become much easier to adjust.

Why This Cherry Pie Filling Works

This recipe works because it controls the two things that usually ruin cherry filling: extra juice and dull flavor. The cherries cook just long enough to release their juices, then the cornstarch turns those juices into a spoon-coating sauce instead of a watery syrup.

  • Less added liquid keeps the filling from turning soupy. Cherries release juice as they cook, especially frozen cherries.
  • Lemon wakes up sweet cherries. It does not make the filling taste lemony; it makes the cherry flavor brighter.
  • Enough sugar rounds out tart cherries. Sour cherries make classic pie filling, but they need enough sweetness to taste full instead of sharp.
  • Proper simmering removes the cloudy starch look. The sauce should look deeper red and less cloudy before you stop cooking.
  • Cooling gives the filling time to settle. Warm filling always looks looser, especially when it is inside a pie.

How to Adjust the Filling to Your Cherries

Each ingredient controls something important: sweetness, brightness, thickness, or richness. Small adjustments are what make the filling taste cherry-forward instead of flat, syrupy, or heavy.

Cherries: Fresh cherries give the brightest seasonal flavor. Frozen cherries are convenient and reliable year-round. Canned tart cherries are useful when you want classic sour cherry flavor without pitting fresh fruit.

Sugar: Sugar sweetens the fruit and helps create the syrup. Use less for dark sweet cherries and more for sour or tart cherries. If using canned cherries packed in syrup, reduce the sugar and taste before adding more.

Lemon juice: Lemon juice keeps the filling from tasting flat. It is especially helpful with sweet cherries and canned cherry pie filling, which can taste heavy without a little acidity.

Cornstarch: Cornstarch thickens the cherry juices into a spoonable sauce. Use 3 tablespoons for a softer topping or 4 tablespoons for a thicker pie filling.

Water or cherry juice: Use just enough liquid to help the cherries cook and the cornstarch dissolve. Juice from thawed frozen cherries or canned cherries can replace plain water.

Salt: A tiny pinch of salt makes the cherry flavor taste fuller and less one-dimensional.

Almond extract: Almond extract gives cherry desserts that bakery-style flavor. Use a small amount because it can easily overpower the fruit.

Vanilla and butter: Vanilla softens the flavor, while butter adds richness. Both are optional, but they are especially nice if the filling is going into pie, cheesecake, or a cake layer.

Equipment You Need

The pan and spoon matter more than fancy tools. These basics make the process easier and cleaner.

  • Medium heavy-bottomed saucepan: gives the fruit room to bubble and helps prevent scorching.
  • Whisk: makes a smooth cornstarch slurry.
  • Spatula or wooden spoon: helps stir the bottom and sides of the pan.
  • Measuring cups and spoons: keep sugar, lemon, liquid, and thickener accurate.
  • Cherry pitter: useful if you are starting with fresh cherries.
  • 9-inch pie plate and rimmed baking sheet: useful if you are turning the filling into a full pie.

If you are turning this filling into pie and want more help with dough, this flaky homemade pie crust guide covers chilling, rolling, lattice, and soggy-bottom fixes that also apply to cherry pie.

How to Make Cherry Pie Filling

As the cherries cook, the juice and starch turn into a pie-ready sauce. Watch the pan more than the timer.

Start the Cherries Gently

Add the cherries, sugar, lemon juice, salt, and a small amount of water or cherry juice to a saucepan. Cook over medium heat until the cherries begin to soften and release juice. Stir often so the sugar dissolves and the fruit does not catch at the bottom.

Cherries, sugar, lemon juice, and a small amount of liquid being stirred in a saucepan.
Start with only a small amount of liquid because cherries release juice as they warm and the sugar begins drawing moisture from the fruit.

Make a Smooth Cornstarch Slurry

Mix the cornstarch with cold water or cold cherry juice in a small bowl. This creates a smooth slurry. Adding dry cornstarch directly to hot filling can create lumps, so always mix it with cold liquid first.

Cornstarch slurry being whisked in a small bowl before adding it to cherry filling.
A cold cornstarch slurry helps thicken cherry pie filling smoothly because dry cornstarch can clump when it touches hot fruit.

Cook Until the Sauce Turns Glossy

Do not worry if the sauce looks cloudy right after the slurry goes in. That is normal. Keep stirring and watch for it to turn darker, glossier, and heavier on the spoon.

Thin cornstarch slurry being poured into bubbling cherries in a saucepan.
Once the cherries are bubbling, pour in the slurry slowly while stirring so the sauce thickens evenly around the fruit.

As the cornstarch activates, the sauce thickens and the bubbles slow down. Once it coats the cherries, let it bubble for about 1 minute. That short extra cook helps remove the raw starch taste.

Remove the pan from the heat, then stir in almond extract, vanilla, or butter if using. Let the mixture cool before using it in a pie crust, cheesecake, cake layer, or pastry. Serve it warm only when you want a softer topping.

After cooking: check the thickness · use it in cherry pie · store or freeze the filling · back to top

How Thick Should Cherry Pie Filling Be?

The fruit mixture should be thick enough to coat a spoon and mound slightly, but not so stiff that it looks like paste. For pie, it should hold together when stirred. Over pancakes, waffles, cheesecake, yogurt, or ice cream, it can stay softer and more spoonable.

Best texture cue: the sauce should change from cloudy to glossy. It should look deep red, bubble slowly, and coat the spoon. The spoon test matters more than the clock.

Cherry filling shown cloudy after cornstarch is added and glossy after cooking longer.
Right after the slurry goes in, the sauce may look cloudy; keep cooking until it turns clearer, glossier, and deeper red.

Bubbles should look slower and heavier, not fast and watery. For an extra check, drag a spatula across the bottom of the pan. If the sauce briefly leaves a path before flowing back, it is close.

A spatula dragged through thick cherry pie filling, leaving a visible path in the sauce.
Use the spatula path test before turning off the heat: the filling should briefly separate, then slowly flow back together.

Warm fruit filling always looks looser than it really is. Let it cool before deciding whether it needs fixing. If it is going into pie, cooling is part of the set.

How Much Cherry Pie Filling for One Pie?

A standard 9-inch cherry pie needs about 4 cups / 950 ml of filling. That is the yield of this recipe. Deep-dish pies may need 4 1/2 to 5 cups.

UseAmount
Standard 9-inch pieAbout 4 cups / 950 ml
Deep-dish 9-inch pie4 1/2 to 5 cups
Cheesecake topping1 1/2 to 2 cups
Hand pies or turnovers1 to 2 tablespoons each
Pancakes, waffles, yogurt, ice creamUse warm or chilled

Using This Filling in a Cherry Pie

This recipe makes enough for one standard 9-inch cherry pie. Let the filling cool before adding it to the crust. Hot filling can soften the dough and make the pie harder to handle.

Cherry filling in an unbaked pie crust shown beside a cooled cherry pie slice holding its shape.
For cherry pie, cool the filling before adding it to the crust, then let the baked pie cool again so the slice holds instead of running.
  • Use one full batch, about 4 cups / 950 ml, for a standard 9-inch pie.
  • Keep the bottom crust chilled so it stays easier to handle.
  • Add a lattice crust, full top crust with vents, or crumble topping.
  • Place the pie on a rimmed baking sheet in case the filling bubbles over.
  • Bake until the crust is golden and the filling bubbles through the vents.
  • Cool the baked pie for at least 3 hours before slicing, and longer if you want cleaner slices.

For the full pie version with fresh, frozen, canned, or shortcut filling, use this cherry pie recipe.

A warm cherry pie will almost always look looser when sliced. That does not mean the filling failed. Fruit pies need time for the filling to settle.

Fresh, Frozen and Canned Cherry Notes

The same method works across fresh, frozen, and canned cherries, but each one asks for a slightly different adjustment.

Using Fresh Cherries

Fresh cherries are wonderful when they are ripe, firm, and flavorful. Keep them cold until you are ready to pit them. Pit just before cooking when possible, because pitted cherries soften and release juice faster.

Measure the fruit after pitting. This gives you a more accurate amount for the filling.

Sweet cherries are easy to find and make a softer, sweeter filling. They usually need lemon juice so the flavor does not taste dull. Tart cherries give the most classic cherry pie flavor, but they need enough sugar to round out their sharpness.

Montmorency and Morello are common tart cherry names you may see for baking and pie filling.

Using Frozen Cherries

A bag of frozen cherries is one of the easiest ways to make this filling year-round. You do not have to wait for cherry season, and you do not have to pit anything. Frozen cherries are not a compromise here; they just need time for their juices to cook down.

You can cook frozen cherries straight from frozen. Start over medium-low heat until they soften and release juice, then continue with the sugar, lemon, and thickener. You can also thaw them first. If you thaw them, keep the juice and use it as part of the recipe liquid.

Frozen cherries often look like they are making the filling too watery at first. Give them time before adding more starch. Keep the heat moderate and let the fruit release juice before judging the texture.

Frozen cherries with frost thawing in a saucepan and releasing red juice.
Frozen cherries often look watery at first, but that extra juice will cook down into a glossy sauce as the filling thickens.

If there is a large pool of juice after thawing, use that juice as the recipe liquid instead of adding water. For a raw fruit pie filling that bakes directly inside the crust, thawing and draining frozen cherries first gives you more control over extra liquid.

Using Canned Cherries

When plain canned cherries are what you have, use them. Just treat the liquid in the can as part of the recipe instead of adding extra water automatically.

Drain the cherries, reserve the liquid, and start with 1/4 cup of that liquid in the saucepan. Add more only if the pan looks dry. If the cherries are packed in syrup, reduce the sugar.

When the fruit is very soft, stir gently so it does not break apart too much. Canned tart cherries are especially useful for pie-style filling because they bring the bright sour cherry flavor many people expect from cherry pie.

If the canned liquid tastes thin or watery, simmer it briefly before or after thickening so the flavor concentrates. Canned cherry pie filling is different. It is already sweetened and thickened, so it should be upgraded rather than cooked like raw cherries.

How to Make Canned Cherry Pie Filling Taste Homemade

Canned cherry pie filling is a shortcut, not a failure. The usual problems are simple: it can taste too sweet, too flat, too syrupy, or slightly artificial. A few small upgrades can make it taste brighter and more homemade.

Canned filling is already thickened. You are not cooking it to set it; you are warming it gently to balance the sweetness and adjust the texture if needed. The goal is brighter cherry flavor, less syrupy sweetness, and a cleaner finish.

What to Add to Canned Cherry Pie Filling

For one 21 oz / 595 g can, warm the filling gently in a saucepan and add one or more of these:

Canned cherry pie filling with lemon, zest, vanilla, almond extract, butter, salt, extra cherries, and a saucepan.
Use lemon for brightness, vanilla or almond extract for depth, butter for richness, and salt to balance sweetness in canned cherry pie filling.
  • Lemon: 1 to 2 teaspoons lemon juice, or a little lemon zest
  • Almond extract: 1/8 teaspoon
  • Vanilla extract: 1/2 teaspoon
  • Salt: a tiny pinch
  • Butter: 1 tablespoon
  • Extra cherries: 1/2 to 1 cup fresh or frozen cherries

Taste after each addition. Both lemon and almond extract can take over quickly, so add a little, stir, taste, and then decide if it needs more.

Adjust the Texture Gently

If it is too loose, mix 1 teaspoon cornstarch with 1 tablespoon cold water, stir it in, and simmer briefly until it tightens and coats the spoon. Do not boil canned filling aggressively after it thickens, or it can turn gluey.

Use the Upgraded Filling

A can of filling can still become a dessert you are happy to serve. This upgraded shortcut works well for quick pies, cheesecake topping, dump cake, puff pastry turnovers, crepes, waffles, and ice cream.

Before and after comparison of canned cherry pie filling, with a smoother canned version beside a brighter upgraded version with more cherries.
After a quick upgrade, canned cherry pie filling should look more fruit-forward and taste less flat, with brighter flavor and better cherry texture.

Taste and Texture Adjustments

When the batch is almost right but needs one small nudge, adjust slowly. Stir well, taste, and then add more only if it still needs help.

ProblemAdd thisWhy it helps
Too sweetLemon juice and a tiny pinch of saltCuts syrupy sweetness and sharpens the cherry flavor
Too tartSugar, 1 tablespoon at a timeRounds out sharp cherries without over-sweetening
Too flatLemon zest, almond extract, vanilla, or saltAdds lift and depth
Too syrupyExtra cherries or a longer gentle simmerAdds fruit and concentrates the sauce
Too thickCherry juice or water, 1 tablespoon at a timeLoosens without flooding the filling
Too pale or thin-tastingSimmer a little longer; use reserved cherry juice if availableConcentrates color and flavor

Taste while the filling is warm, but judge the final thickness after it cools.

The best filling tastes bright, rounded, and cherry-forward. It should feel jammy but not heavy, with enough sauce to coat the fruit without drowning it.

Cornstarch vs Tapioca vs Clear Jel

Cornstarch is the easiest path, but other thickeners behave differently. The right choice depends on whether you want a quick stovetop filling, a sliceable pie filling, a freezer-friendly filling, or a tested canning recipe.

ThickenerBest forWhat to know
CornstarchEasy stovetop fillingGlossy and simple; too much can turn gummy
Tapioca starch/flourPie filling and freezingGood texture; too much can feel stretchy
FlourBackup optionLess glossy and more opaque
ArrowrootSome toppingsCan thin with long cooking
Clear JelTested canning recipesDo not replace it with cornstarch for shelf-stable canning

If you are replacing cornstarch, expect the texture to change. Tapioca starch is the closest everyday swap for pie-style filling. Flour works in a pinch, but it makes the sauce less glossy. Clear Jel is best kept for tested canning recipes unless you already know how to use it.

More thickener is not always better. If the filling tastes dull, pasty, or heavy, it may have too much starch. Start with the amount that matches your use: 3 tablespoons for spoonable topping, 4 tablespoons for firmer pie filling.

A loose filling is not a disaster. It usually means the sauce needs more time, more cooling, or a small slurry — not that the whole batch is ruined.

Troubleshooting Cherry Pie Filling

Why is my cherry pie filling runny?

Start by letting it cool. Hot cherry filling can look thinner than it really is. If it is still watery after cooling, return it to the saucepan and simmer for a few more minutes.

For extra help, mix 1 teaspoon cornstarch with 1 tablespoon cold water and stir the slurry into the bubbling filling. Repeat only if needed. Too much cornstarch can make the texture gummy.

Why is my filling cloudy?

A little cloudiness right after adding the slurry is normal. Keep the filling at a gentle bubble and it should turn glossier, deeper red, and less cloudy as the starch cooks.

Why is my filling too thick or gummy?

Too much thickener or too much boiling after thickening can make the texture gummy. Warm it gently and loosen it with a spoonful of cherry juice, water, or lemon juice. Add liquid slowly so it does not swing from too thick to too runny.

Why does my filling taste flat?

It probably needs balance. Add a little lemon juice, a tiny pinch of salt, or a very small amount of almond extract. Sweet cherries and canned filling often need brightness more than they need extra sugar.

Can I fix a runny cherry pie after baking?

Let the pie cool completely first. Hot fruit pies often look runny when sliced too soon. If the pie is still loose after cooling, it cannot be fully re-thickened inside the crust, but it can still be served chilled or spooned like a softer cobbler-style dessert.

Make Ahead, Storage, Freezing and Canning

Once the cherry mixture tastes right and has cooled, storing it is simple. Warm fruit filling traps steam, which can thin the texture later.

Can you make cherry pie filling ahead?

Yes. Make it 1 to 2 days ahead, cool it completely, and refrigerate it in an airtight container. Stir before using. If it is too thick from chilling, warm it gently with a spoonful of cherry juice or water.

How to store cherry pie filling

Store cooled filling in an airtight container in the fridge for 3 to 5 days. It will thicken as it chills. To use it again, warm it gently and loosen it with a spoonful of water or cherry juice if needed.

Can you freeze cherry pie filling?

Yes. Cool the filling completely, then freeze it in airtight containers or freezer bags for up to 3 months. Thaw overnight in the fridge, stir well, and reheat gently before using.

If the thawed batch looks too thick, warm it with a spoonful of water or cherry juice. When it looks too loose, simmer it briefly until the sauce tightens again.

Can you can this cherry pie filling?

This regular cornstarch cherry pie filling is for the fridge or freezer. Do not can this recipe as written for shelf-stable storage.

This is not because the filling is bad. It is because shelf-stable canning needs a tested thickener, tested acidity, and tested processing time.

For shelf-stable home-canned cherry pie filling, use a tested canning recipe with Clear Jel and bottled lemon juice. The National Center for Home Food Preservation has tested cherry pie filling guidance. Do not swap regular cornstarch or tapioca into a canning recipe unless the tested recipe specifically allows it.

Ways to Use Cherry Pie Filling

Cherry pie filling is one of those recipes that keeps working after pie day. Once you have a batch ready, it can become a quick dessert shortcut, a breakfast topping, or a cake filling.

Cherry pie filling served on cheesecake, pancakes, vanilla ice cream, and puff pastry.
Leftover cherry pie filling can go beyond pie: spoon it over cheesecake, pancakes, waffles, ice cream, pastries, cakes, or no-bake desserts.
UseIdeas
Pie dessertsClassic pie, lattice pie, crumble pie, hand pies, galette
Creamy dessertsCheesecake, cream cheese pie, no-bake desserts
Cakes and barsDump cake, Black Forest-style cake, layer cake, cherry bars
PastryPuff pastry turnovers, danishes, strudel, crescent pockets
Breakfast and toppingsPancakes, waffles, crepes, French toast, yogurt, oatmeal, ice cream

For creamy desserts, let the filling cool completely before spooning it over cheesecake. A simple no-bake cheesecake recipe makes a good base because the cool, creamy layer balances the bright cherry topping.

For breakfast, warm the filling just enough to loosen the sauce, then spoon it over pancakes, waffles, or crepes. It also pairs naturally with these protein rich cherry pancakes.

For a quick finish, serve the filling with vanilla ice cream and a spoonful of homemade whipped cream. That is enough to make a simple dessert feel finished.

Once you understand the thickness, the cherries, and the cooling time, this filling becomes much less intimidating. The questions below cover the common last-minute doubts.

Still deciding? read the FAQ · back to the recipe card · back to top

FAQ

Can I make cherry pie filling with frozen cherries?

Frozen cherries work well. Cook them straight from frozen or thaw them first. They may look watery at first; keep cooking until the sauce thickens properly.

Do I need to thaw frozen cherries first?

Not for this stovetop filling. You can cook frozen cherries directly in the saucepan. If you thaw them, keep the juice and use it as part of the recipe liquid.

Can I use canned cherries instead of fresh cherries?

Yes. Use canned cherries packed in water or juice, reserve the liquid, and reduce added water. For cherries packed in syrup, reduce the sugar.

Is canned cherry pie filling the same as canned cherries?

No. Canned cherries are fruit packed in water, juice, or syrup. The pie filling version is already sweetened and thickened, so it should be upgraded rather than cooked like raw cherries.

How do I make canned cherry pie filling taste homemade?

Add lemon juice or zest, a tiny pinch of salt, almond extract or vanilla, and a little butter. Extra fresh or frozen cherries also make canned filling taste fuller and less flat.

What are the best cherries for cherry pie filling?

Sour or tart cherries give the most classic pie flavor. Sweet cherries also work, especially when balanced with lemon juice. Frozen dark sweet cherries are a good year-round option.

Are sour cherries or sweet cherries better?

Sour cherries are more traditional for pie because they balance sugar beautifully. Sweet cherries are easier to find and make a softer, sweeter filling. Both work when sugar and lemon are adjusted.

How do I thicken cherry pie filling?

Use cornstarch mixed with cold water or cold cherry juice. Stir the slurry into bubbling cherries and cook until the sauce is thick enough to coat a spoon.

Can I make cherry pie filling without cornstarch?

Tapioca starch, tapioca flour, arrowroot, or flour can be used in some fruit fillings, but the texture will change. For shelf-stable canning, use a tested Clear Jel recipe.

How much cherry pie filling do I need for one pie?

A standard 9-inch cherry pie needs about 4 cups / 950 ml. Deep-dish pies may need 4 1/2 to 5 cups.

Can I make cherry pie filling ahead of time?

Make it 1 to 2 days ahead, cool it completely, and refrigerate it in an airtight container. Stir before using and loosen gently with a spoonful of water or cherry juice if needed.

Can I freeze cherry pie filling?

Cool it completely, freeze it in airtight containers or freezer bags for up to 3 months, and thaw overnight in the fridge before using.

Can I can homemade cherry pie filling?

Do not can this cornstarch version as written. It is safe for the fridge or freezer, but shelf-stable canning needs a tested recipe with Clear Jel, bottled lemon juice, and proper processing instructions.

Final Tips

  • Use less sugar for sweet cherries and more sugar for tart or sour cherries.
  • Start with less liquid, especially with frozen or canned cherries.
  • Cook until the sauce turns thick and deep red, not just until the fruit gets hot.
  • Cool the filling before adding it to pie crust.
  • Use almond extract sparingly because it is strong.
  • Keep this cornstarch version for fridge or freezer storage, not shelf-stable canning.

You do not need perfect cherries. Instead, learn what your cherries need. Once the sweetness, liquid, and thickness are in balance, almost any cherry can become a glossy, cherry-forward filling. Spoon it into pie, chill it over cheesecake, or warm it for pancakes — it should taste bright, fruity, and homemade, not syrupy or stiff.

Back to top

Posted on Leave a comment

Slow Cooker Chicken Fajitas: Easy Crock Pot Chicken Fajita Recipe

Slow cooker chicken fajitas served with shredded chicken, colorful bell peppers, onions, warm tortillas, lime wedges, salsa, avocado, cilantro, and hot sauce on a dinner table.

These slow cooker chicken fajitas are for the nights when you want the Crock Pot to handle dinner, but you still want the meal to feel fresh when everyone sits down. You get smoky, lime-bright chicken with sweet peppers and soft onions, ready to tuck into warm tortillas or spoon over rice.

The only tricky part is knowing what the slow cooker will do once the lid goes on. It traps moisture, so fajitas can become too wet, too soft, or a little flat if everything cooks together with too much liquid. This version keeps the method easy but gives you one simple rule to remember: less liquid, later peppers, lime at the end.

By the time you warm the tortillas and cut the lime, the chicken is tender, the peppers are sweet, the onions are soft, and dinner feels like more than something you simply left in the slow cooker. Use the cooked chicken and peppers for classic fajitas, tacos, bowls, quesadillas, nachos, or easy leftovers.

It will not have the same char as skillet or sheet pan fajitas, but it gives you an easy, reliable Crock Pot dinner with very little hands-on work.

Quick Answer: How to Make Slow Cooker Chicken Fajitas

To make slow cooker chicken fajitas, add boneless chicken breasts or thighs to a 5.5 to 6 quart slow cooker with sliced bell peppers, onion, garlic, fajita seasoning, and ¾ to 1 cup salsa, Rotel, or diced tomatoes. Cook on low for 4 to 6 hours or high for 2½ to 3½ hours, until the chicken reaches 165°F / 74°C. Slice or shred the chicken, return it with only enough juices to coat, finish with lime, and serve in tortillas, bowls, tacos, salads, or quesadillas.

The three keys are less liquid, later peppers, and lime at the end. For better texture, add only half the peppers and onions at the beginning. Add the rest during the last 30 to 60 minutes so they stay brighter, firmer, and less watery.

For the easiest version, add everything at the beginning and drain before serving. If you want better texture, save some peppers for the end, keep the filling glossy, and finish with lime. The rest of the guide helps you make it tighter for tortillas, saucier for bowls, or softer for shredded leftovers.

Start with Less Liquid

This is the first texture decision in slow cooker chicken fajitas: add enough salsa or Rotel to season the chicken, but not so much that the pot turns soupy.

Salsa being poured from a measuring cup into a slow cooker with chicken, bell peppers, onions, garlic, and fajita seasoning.
First, control the liquid. For tortilla-style slow cooker chicken fajitas, about ¾ cup salsa or Rotel seasons the chicken without flooding the pot or making the filling hard to fold.

Slow Cooker Chicken Fajitas at a Glance

Slow cooker size5.5 to 6 quart / 5.2 to 5.7 L
Fill levelAim for about half to two-thirds full for even cooking
Chicken amount2 lb / 900 g
Chicken to useBreasts for slicing, thighs for juicier shredded fajitas
Liquid amount¾ cup for tortillas, up to 1 cup for bowls
Low cook time4 to 6 hours
High cook time2½ to 3½ hours
Pepper methodHalf early, half late
Safe chicken temperature165°F / 74°C
Finish withFresh lime juice after cooking
Serve asFajitas, tacos, bowls, quesadillas, salads, nachos, meal prep

Slow Cooker Chicken Fajitas Recipe

Description: Easy Crock Pot chicken fajitas with juicy chicken, sweet peppers, soft onions, smoky fajita seasoning, lime, and just enough salsa or Rotel to keep everything flavorful without turning watery.

Prep time: 10 to 15 minutes
Cook time: 2½ to 3½ hours on high, or 4 to 6 hours on low
Total time: About 2 hours 45 minutes to 6 hours 15 minutes
Servings: 6
Yield: Enough chicken and peppers for 8 to 12 fajitas, depending on tortilla size
Equipment: 5.5 to 6 quart / 5.2 to 5.7 L slow cooker, knife, cutting board, tongs, slotted spoon, instant-read thermometer

Ingredients

  • 2 lb / 900 g boneless skinless chicken breasts or thighs
  • 3 large bell peppers / 420 to 500 g, sliced, preferably mixed colors
  • 1 large onion / 180 to 220 g, sliced
  • ¾ to 1 cup / 180 to 240 ml salsa, Rotel, or diced tomatoes
  • 3 to 4 garlic cloves / 12 to 16 g, minced
  • 2½ to 3 tablespoons / 22 to 28 g fajita seasoning, homemade or store-bought
  • 2 tablespoons / 30 ml fresh lime juice, plus extra lime wedges for serving
  • 8 to 12 tortillas, flour or corn
  • Optional toppings: sour cream, avocado, guacamole, cilantro, shredded cheese, salsa, jalapeños, lettuce, or hot sauce

Use ¾ cup / 180 ml salsa or Rotel for thicker tortilla-friendly fajitas. For juicier bowls or meal prep, use closer to 1 cup / 240 ml.

Instructions

  1. Slice the vegetables. Cut the bell peppers and onion into strips. Set aside about half of them to add near the end of cooking.
  2. Layer the slow cooker. Add the first half of the peppers and onions to the bottom of the slow cooker. Place the chicken on top.
  3. Add flavor. Sprinkle the chicken with fajita seasoning and garlic. Pour the salsa, Rotel, or diced tomatoes over the top. Do not add extra water.
  4. Cook. Cover and cook on high for 2½ to 3½ hours or low for 4 to 6 hours, until the chicken reaches 165°F / 74°C. Very thick chicken breasts may need the longer end of the range.
  5. Add the remaining peppers. Stir in the reserved peppers and onions during the last 30 to 60 minutes. Use 30 minutes for firmer peppers and 60 minutes for softer peppers.
  6. Slice or shred. Remove the chicken. Rest it for 5 minutes if slicing, or shred it with two forks. Shredded fajitas should pull apart easily. Sliced fajitas should cut cleanly after resting.
  7. Adjust the juices. If there is a lot of liquid in the slow cooker, ladle some out. Return the chicken with only enough juices to coat the meat and vegetables.
  8. Finish with lime. Stir in the lime juice. Taste and adjust salt, seasoning, or lime.
  9. Serve. Fill warm tortillas with the chicken and peppers, or spoon them into bowls, quesadillas, or leftover meals.

Recipe Notes

  • Use ¾ cup / 180 ml salsa or Rotel for tortillas, or up to 1 cup / 240 ml for bowls.
  • Do not add extra water. The chicken, peppers, onions, and tomatoes release liquid as they cook.
  • Add half the peppers and onions late if you want better texture.
  • Thaw frozen chicken before using it in a slow cooker.
  • Finish with lime juice after cooking so the flavor stays fresh.
  • For tortillas, think glossy, not soupy. Drain or lift with tongs before filling tortillas.

Want better texture? See when to add peppers. Need to fix extra liquid? Read the watery fajitas section. Planning leftovers? Jump to storage and meal prep.

Why You’ll Make This Again

This is the kind of recipe that earns its place on a weeknight because it does more than make one dinner. It helps when the day is long, the chicken is already in the fridge, and you need something that can turn into warm tortillas tonight and easy leftovers tomorrow.

  • Mostly hands-off. Once the slow cooker is loaded, dinner is already moving.
  • It works with shortcuts. Use homemade fajita seasoning, a packet, salsa, Rotel, or diced tomatoes.
  • It solves the usual slow-cooker problems. The filling stays glossy instead of watery.
  • It can be tight or saucy. Keep it neat for tortillas or leave it juicier for bowls.
  • It turns into more than fajitas. Use the same batch for tacos, bowls, quesadillas, and leftovers.

Once the basic method is set, you can decide whether you want a tighter tortilla filling, a saucier bowl, or soft shredded chicken for leftovers.

Why This Crock Pot Chicken Fajita Recipe Works

A slow cooker does not brown food, so the flavor has to come from seasoning, acidity, vegetables, and the way you manage the juices. That is why this recipe uses a controlled amount of salsa or Rotel, adds some peppers late, and finishes with lime instead of relying on char.

A lot of Crock Pot chicken fajita recipes are easy, but they make the same mistake: too much liquid, all the peppers added too early, and no clear plan for what to do with the juices at the end. The result can still taste good, but it often behaves more like wet shredded chicken than fajita filling.

Here, you still get the easy Crock Pot dinner, but the chicken stays juicy and the peppers do not all collapse into the sauce. A smaller amount of salsa or Rotel gives the meat enough moisture without drowning it. Some peppers and onions go in early to flavor the chicken, while the rest go in near the end so the finished chicken and peppers still have color and bite. Lime juice goes in after cooking, when it can wake up the smoky seasoning and sweet peppers instead of disappearing into the pot.

  • Controlled liquid keeps the chicken useful for tortillas.
  • Two-stage peppers give you flavor and better texture.
  • Chicken breasts or thighs both work depending on your goal.
  • Sliced or shredded chicken lets you choose classic fajita-style strips or easier pulled chicken.
  • Fresh lime at the end keeps the flavor lively.

Do Slow Cooker Fajitas Taste Like Skillet Fajitas?

Not exactly, and that is worth saying clearly. This is not the sizzling-pan version. It is the weeknight version: softer, juicier, easier, and still bright enough to feel fresh when the tortillas hit the table.

Expect soft, juicy fajita chicken with sweet peppers, smoky seasoning, and a fresh lime finish. It is not charred or sizzling, but it should taste bright, savory, and easy to fold into warm tortillas.

To make the slow-cooked version taste more fajita-like, add some peppers near the end, finish with fresh lime, avoid too much liquid, and use smoked paprika in the seasoning. For more roasted edges and oven-style flavor, try these sheet pan chicken fajitas. They give you the same chicken, peppers, and onion idea with more browning and less slow-cooker softness.

Ingredients You Need

The ingredient list is simple, but each part matters. Good slow cooker fajitas need enough seasoning to stand up to the long cook, enough moisture to keep the chicken juicy, and not so much liquid that the finished chicken and peppers become soupy.

Ingredient checkpoint: the chicken, peppers, onion, seasoning, salsa or Rotel, lime, tortillas, and toppings all support a different part of the final fajita texture.

Ingredients for slow cooker chicken fajitas arranged on a prep surface, including chicken, bell peppers, onion, salsa, fajita seasoning, garlic, lime, tortillas, and cilantro.
Chicken, peppers, onion, seasoning, salsa or Rotel, lime, and tortillas each support a different part of the finished fajita texture.
IngredientWhat it doesUse
ChickenMain proteinBreasts for leaner sliced fajitas; thighs for juicier shredded fajitas
Bell peppersSweetness, color, fajita flavorUse mixed colors for better flavor and appearance
OnionSavory sweetnessYellow, white, or red onion all work
Fajita seasoningMain flavor baseHomemade, packet fajita seasoning, or taco seasoning in a pinch
Salsa, Rotel, or tomatoesMoisture and flavorUse less for tortillas and more for bowls
GarlicDepth and aromaFresh garlic is ideal; garlic powder works if needed
Lime juiceFreshness and balanceAdd after cooking for the liveliest flavor
Tortillas and toppingsTurn the chicken and peppers into dinnerUse tortillas, rice, lettuce cups, or bowls

Chicken Breast vs Chicken Thighs

Choose chicken breasts if you want leaner pieces that can be sliced into strips. They cook well here, but they can dry out if they sit too long, so start checking closer to the shorter end of the timing range.

If chicken breast is your default cut and dry slow-cooker chicken is a recurring problem, this guide to crock pot chicken breast recipes goes deeper into timing, sauce, and keeping lean chicken useful for bowls, wraps, and leftovers.

Choose chicken thighs if you want the most forgiving version. They stay juicier, shred easily, and are especially good for tacos, bowls, and meal prep. If your slow cooker runs hot or dinner timing is unpredictable, thighs are usually easier to work with.

Both breasts and thighs should reach 165°F / 74°C before serving.

Homemade Fajita Seasoning, Packet Seasoning, or Taco Seasoning?

Use what fits the night. A packet of fajita seasoning is fast, easy, and completely acceptable for a weeknight slow cooker dinner. Homemade fajita seasoning gives you more control over salt, heat, smoke, and sweetness.

Taco seasoning also works in a pinch. It may taste a little more like taco chicken than fajitas, but the peppers, onions, lime, and smoked paprika help pull it back toward fajita flavor. If you use a packet, wait until the end before adding extra salt because many store-bought blends are already salty.

Simple Homemade Fajita Seasoning

SpiceAmount
Chili powder1 tablespoon
Ground cumin2 teaspoons
Smoked paprika1 teaspoon
Garlic powder1 teaspoon
Onion powder1 teaspoon
Dried oregano½ teaspoon
Ground coriander½ teaspoon
Black pepper½ teaspoon
Salt1 to 1½ teaspoons
Cayenne pepper⅛ to ¼ teaspoon, optional

This amount seasons about 2 lb / 900 g chicken. If your chili powder or store-bought seasoning already contains salt, reduce the added salt and adjust after cooking.

How to Make Slow Cooker Chicken Fajitas

The easiest method is to add everything at once and cook. That works, especially for shredded tacos and bowls. The better method is almost as easy: add some vegetables at the beginning and some near the end. That small move makes the dish feel more like fajitas and less like slow-cooker chicken stew.

Step 1: Slice the Peppers and Onion

Slice the bell peppers and onion into strips. Keep them similar in size so they cook evenly. Set aside about half of the peppers and onions if you want better texture in the finished fajitas.

Step 2: Build the First Layer

Add half the peppers and onions to the bottom of the slow cooker. This gives the chicken a flavorful base and helps season the cooking juices.

Step 3: Add Chicken, Garlic, Seasoning, and Salsa

Place the chicken on top of the vegetables. Sprinkle the fajita seasoning and garlic over the chicken, then add the salsa, Rotel, or diced tomatoes. Do not add extra water. In most slow cookers, the chicken, peppers, onions, and tomatoes release more liquid than you expect.

Before the lid goes on: the pot should look seasoned and lightly sauced, not flooded. That setup helps the chicken cook juicy without creating a watery tortilla filling later.

Raw chicken breasts layered in a slow cooker with sliced bell peppers, onions, salsa, garlic, and fajita seasoning before cooking.
Before cooking, the pot should look coated, not drowned. That controlled start keeps the final fajita filling easier to serve.

Step 4: Cook Until the Chicken Is Done

Cook on high for 2½ to 3½ hours or low for 4 to 6 hours. Chicken breasts are usually best closer to the shorter end if you want slices that hold together. Thighs can handle a longer cook and are better for shredding.

Step 5: Add the Remaining Peppers and Onions

Add the reserved peppers and onions during the last 30 to 60 minutes. Use 30 minutes for more bite, or go closer to 60 minutes if you want them softer but still fresher than the vegetables that cooked from the beginning.

Step 6: Slice or Shred the Chicken

Once the chicken reaches 165°F / 74°C, remove it from the slow cooker. Rest it for a few minutes before slicing, or shred it with two forks if you want pulled chicken for tacos, bowls, or leftovers.

Step 7: Manage the Cooking Juices

If the slow cooker has a lot of liquid, ladle some out before returning the chicken. The finished chicken should look shiny and coated, with a little sauce clinging to the peppers, not a pool of liquid under every tortilla. You are not trying to make dry chicken. Instead, keep the chicken and peppers juicy enough to taste good but firm enough to pick up in a tortilla.

Step 8: Finish with Lime and Serve

Stir in fresh lime juice at the end. When the lime goes in, the whole pot should smell brighter. Taste and adjust salt, seasoning, or lime. Serve with warm tortillas, bowls, or whatever leftovers need rescuing tomorrow.

Slow Cooker Timing: Low vs High

Once the pot is set up, timing is the main thing to watch. The goal is not just cooked chicken. It is chicken that is done before it turns stringy.

Slow cookers are not all the same, and chicken breast can go from juicy to dry faster than people expect. Use the times below as a guide, then let temperature and texture decide when the chicken is done. Chicken should reach 165°F / 74°C. You can confirm poultry temperature guidance from FoodSafety.gov.

Temperature checkpoint: once the chicken reaches 165°F / 74°C, you can safely slice or shred it and then decide how much cooking juice to keep.

Instant-read thermometer inserted into cooked chicken fajitas in a slow cooker with bell peppers and onions around the chicken.
Use temperature, not just time. Once the chicken reaches 165°F / 74°C, you can safely slice, shred, and finish the filling.
GoalSettingTimeWhat to know
Sliced chicken fajitasLow4 to 5 hoursHelpful when you want the chicken to hold its shape
Shredded chicken fajitasLow5 to 6 hoursWorks well for tacos, bowls, quesadillas, and meal prep
Faster dinnerHigh2½ to 3½ hoursUseful, but check early to avoid dry chicken breast
Chicken thighsLow5 to 6 hoursJuicier and more forgiving than breasts
Holding after cookingWarmAs short as possibleLong holding can make chicken breast dry or stringy

Very thick chicken breasts may need the longer end of the range. If the chicken is done before dinner, remove it from the slow cooker and keep it covered. Return it to the warm chicken and peppers closer to serving time so lean breast meat does not keep cooking while the vegetables sit in the hot pot.

How to Keep Slow Cooker Chicken Fajitas from Getting Watery

If there is one place slow cooker fajitas usually go wrong, it is the liquid. The chicken may taste good, but if it drips through the tortilla, dinner becomes messy fast.

Do not panic if the slow cooker looks juicy when you open the lid. That is normal. The trick is deciding how much of that liquid belongs in the final tortilla filling.

Look for Glossy, Not Soupy

This is the visual cue for tortilla fajitas. The chicken and peppers should be coated with seasoned juices, but the filling should not be loose enough to run through a warm tortilla.

Tongs lifting glossy slow cooker chicken fajita filling with colorful bell peppers and onions from the slow cooker.
This is the texture cue to remember: glossy, not soupy. The chicken and peppers should be coated with seasoned juices, but not swimming if they are going into tortillas.

If past slow-cooker chicken has turned out watery or bland, this is the part that changes it: start with less liquid, add some peppers later, and brighten the pot at the end. A few small choices make the difference between juicy and soggy. For tortillas, think glossy, not soupy. Bowls can stay a little juicier because rice, quinoa, or cauliflower rice can soak up the seasoned liquid.

ProblemFix
Too much salsa, Rotel, or tomatoUse ¾ cup / 180 ml for 2 lb / 900 g chicken if serving in tortillas
Peppers release too much waterAdd half the peppers near the end instead of all at the beginning
Chicken releases a lot of juiceRemove extra liquid before returning sliced or shredded chicken
Tortillas get soggyServe with tongs or a slotted spoon
The pot looks soupyAfter the chicken reaches 165°F / 74°C, remove the lid or set it slightly ajar on high for 20 to 30 minutes to reduce excess liquid
You want bowl-style fajitasLeave it a little juicier for rice, quinoa, or cauliflower rice

How to Fix Watery Fajitas

If the pot gave you more liquid than expected, treat it as a final adjustment instead of a failure. Drain, reduce, or lift the filling with tongs so the flavor stays concentrated.

Before and after comparison showing watery slow cooker chicken fajitas on one side and drained glossy chicken fajita filling on the other.
If the pot looks watery, do not panic. Lift the chicken and peppers with tongs, drain or reduce the extra liquid, then add lime so the filling tastes bright instead of diluted.

Before serving, look at the bottom of the slow cooker. A little seasoned juice is fine. However, a pool of liquid means the chicken and peppers should be lifted with tongs, drained with a slotted spoon, or reduced briefly before they go into tortillas.

After the extra liquid is out of the way, the filling tastes more concentrated: smoky, bright, and juicy enough to fold into a tortilla without losing half of it on the plate.

Do not add water at the beginning unless your slow cooker is unusually dry. For most slow cookers, the chicken, vegetables, and salsa or tomatoes create enough moisture on their own.

Use the Tortilla Test Before Serving

Before the filling goes to the table, try one tortilla. If it folds neatly and tastes juicy without dripping, the texture is right for fajitas.

Hand holding a warm tortilla filled with slow cooker chicken fajitas, bell peppers, onions, salsa, avocado, and lime nearby.
Then, use the tortilla test. The filling should be juicy enough to taste good, but controlled enough to fold into warm tortillas without soaking, tearing, or dripping everywhere.

Choose Your Version: Tortillas, Bowls, Meal Prep, or Dump-and-Go

One pot can give you a few different dinners, depending on how much juice you leave behind. Choose the tighter version for tortillas, the juicier version for bowls, the shredded version for meal prep, and the late-pepper version when you want the freshest texture.

Use the visual guide: one batch can become tighter tortilla fajitas, juicier bowls, shredded meal prep, dump-and-go dinner, or creamy low-carb fajita chicken.

Visual guide showing slow cooker chicken fajitas served as tortillas, rice bowls, meal prep containers, dump-and-go style, and creamy low-carb fajita chicken.
Once the chicken is cooked, choose the version that fits the meal. Keep it tighter for tortillas, saucier for rice bowls, shredded for meal prep, or creamy for a low-carb plate.
What you wantLiquidChickenPeppersFinish
Tortilla fajitas¾ cup / 180 mlSliced or chunkyHalf early, half lateDrain well, then add lime
Rice bowls1 cup / 240 mlShredded or chunkyEarly or half-lateKeep some juices
Meal prep¾ to 1 cup / 180 to 240 mlShreddedSofter is finePack toppings separately
Best texture¾ cup / 180 mlSlicedAdd some peppers lateUse lime and tongs
Dump-and-go¾ to 1 cup / 180 to 240 mlShreddedAll at the beginningDrain before serving
Creamy low-carb¾ cup / 180 mlShreddedHalf-lateAdd cream cheese at the end

After the juices are right and the lime goes in, the same batch can become warm tortillas tonight, rice bowls tomorrow, or easy leftovers for lunch.

Dump-and-Go vs Best Texture

Both paths work. The fastest path is dump-and-go, while the best-texture version keeps some peppers back so the finished fajitas look brighter and eat less soft.

Comparison of dump-and-go slow cooker chicken fajitas with uncooked ingredients in the pot and best-texture fajitas with cooked chicken and bright peppers.
Dump-and-go is the easiest route, while the best-texture version saves some peppers for the end. That one timing change keeps Crock Pot chicken fajitas brighter and less mushy.

When to Add Peppers and Onions

Once you know whether you are making tortillas, bowls, or meal prep, the next choice is how fresh you want the peppers to feel.

Peppers are where slow cooker fajitas can either feel fresh or fall flat. If they cook for the full time, they become soft and saucy. That is fine for shredded chicken bowls or tacos, but it does not feel as much like classic fajitas.

For the best balance, use the half early, half late method. Early vegetables flavor the chicken. The late peppers should still look colorful and taste sweet, not faded into the sauce.

Add Some Peppers Late

Late peppers are the simplest way to make slow cooker fajitas feel more like fajitas. They add color, sweetness, and bite without requiring a separate skillet.

Fresh sliced red, yellow, orange, and green bell peppers being added to cooked chicken fajitas in a slow cooker.
Add some peppers during the last 30 to 60 minutes when you want more color and bite. This keeps slow cooker fajitas lively without adding another pan to dinner.

If using frozen sliced peppers, add them late and expect a softer, juicier result. Fresh peppers give the best color and bite, but frozen peppers are still useful for quick bowls, tacos, and weeknight dinners.

When you add themResultUse when
At the beginningVery soft peppers and onionsYou want the easiest dump-and-go dinner
Halfway throughBalanced textureYou want a simple family dinner
Last 30 to 60 minutesBrighter, firmer peppersYou want more fajita-like texture
Sauté separatelyMost bite and closest skillet feelYou do not mind one extra pan
Half early, half lateFlavor plus textureYou want the most practical slow cooker method

Shredded vs Sliced Slow Cooker Chicken Fajitas

Once the liquid is under control, the next choice is how you want to eat the chicken. Traditional fajitas usually use sliced meat, but Crock Pot chicken naturally becomes tender enough to shred. Neither option is wrong.

Shredded vs Sliced Chicken

Sliced chicken feels more classic in tortillas. Shredded chicken is easier for tacos, bowls, quesadillas, and leftovers, especially when the juices are controlled.

Side-by-side comparison of sliced slow cooker chicken fajitas and shredded chicken fajita filling with peppers, tortillas, lime, salsa, and cilantro.
Slice the chicken for a more classic fajita feel, or shred it for bowls, tacos, quesadillas, and leftovers. Either way, return it with just enough juice to coat.
StyleUse forHow to do it
Sliced chicken fajitasClassic tortillasCook just until done, rest 5 minutes, then slice across the grain
Shredded chicken fajitasTacos, bowls, quesadillas, leftoversCook until fork-tender, shred with two forks, toss with controlled juices
Chunky chicken fajitasRice bowls and saladsCut cooked chicken into thick pieces and fold back into the peppers and onions

For the most classic fajita feel, slice the chicken and add some peppers late. The easiest meal prep option is shredded chicken with just enough juice to coat.

Troubleshooting Slow Cooker Chicken Fajitas

If the pot looks a little messy at the end, that is normal. Slow cooker fajitas usually need one final adjustment before they become dinner.

If the pot does not look the way you hoped, it is usually one of four easy fixes: too much liquid, peppers that cooked too long, chicken breast that stayed on heat too long, or a finish that needs lime and salt.

Quick Fixes for Common Slow Cooker Fajita Problems

ProblemLikely causeFix
The pot is wateryToo much salsa, Rotel, tomato, or trapped steamDrain extra liquid, reduce it after the chicken is fully cooked, or use ¾ cup liquid next time
Peppers are mushyAll the peppers cooked from the beginningAdd half the peppers in the last 30 to 60 minutes
Chicken breast is dryCooked too long or held on warm too longCheck early, use thighs next time, and return chicken with some juices
Flavor tastes flatSlow cooking muted the seasoningAdd lime juice, salt, smoked paprika, hot sauce, or fresh cilantro
Tortillas get soggyThe chicken and peppers are too wet when assembledUse tongs or a slotted spoon and let liquid drip back into the cooker
Fajitas do not taste fajita-likeNo char, soft peppers, or too much sauceAdd peppers late, sauté peppers separately, or use the sheet pan method next time
Chicken is too dry after chillingIt absorbed liquid in the fridgeReheat with a spoonful of salsa, water, or reserved cooking liquid
Too loose for quesadillasToo much cooking juice left in the meatDrain well and reheat uncovered before adding to tortillas with cheese

From there, the fix is simple: drain a little, brighten with lime, or save the extra juice for bowls. Tortillas need a tighter filling. Quesadillas need the chicken drained well so the cheese and tortilla can crisp instead of steam.

Variations: Dump-and-Go, Rotel, No Tomato, and Creamy Low-Carb

Once the texture is handled, the flavor base can flex around what you have: Rotel, salsa, taco seasoning, no tomatoes, or a creamy finish.

You do not need the exact same jar, can, or seasoning blend every time. Use this section when you want the fastest version, a Rotel version, a no-tomato version, or a creamy low-carb fajita chicken.

Rotel, Salsa, or No Tomato

This choice changes both flavor and moisture. Tomato-based options add a red base, while the no-tomato version stays lighter and depends more on peppers, seasoning, garlic, and lime.

Three slow cooker chicken fajita variations labeled Rotel, Salsa, and No Tomato, each served in tortillas with peppers, onions, lime, and cilantro.
Rotel gives tomato-chile flavor, salsa keeps the recipe shortcut-friendly, and the no-tomato version stays lighter and less saucy. Choose the base based on flavor, moisture, and texture.
VariationWhat changesBest for
4-ingredientUse chicken, peppers and onions, seasoning, and salsa or RotelBusiest nights
RotelUse one 10 oz / 285 g can; drain lightly if very juicyTomato-chile flavor
No tomatoUse seasoning, garlic, lime, peppers, onions, and a small splash of broth only if neededLess watery fajitas
Cream cheeseAdd 3 to 4 oz / 85 to 115 g cream cheese during the last 20 to 30 minutesBowls, lettuce cups, low-carb plates
Taco seasoningUse a packet and adjust salt after cookingShortcut version
Salsa verde toppingAdd after cooking or at the tableBrighter green flavor

Rotel is canned diced tomatoes with green chiles. If you do not have it, use diced tomatoes plus a little chopped green chile, mild salsa, or another tomato-chile blend you like.

No-tomato fajitas need a little extra lime, smoked paprika, garlic, and seasoning so the chicken does not taste flat. For creamy fajita chicken, use the lower amount of salsa or Rotel so the sauce does not become loose.

Creamy Low-Carb Fajita Chicken

Add cream cheese near the end so the sauce stays smooth and the peppers do not disappear into a heavy base. This version works especially well with cauliflower rice or lettuce cups.

Creamy low-carb slow cooker fajita chicken served in a bowl with bell peppers, avocado slices, lime, cilantro, and cauliflower rice.
For creamy low-carb fajita chicken, stir in cream cheese near the end instead of at the beginning. The sauce should turn smooth and glossy while peppers, lime, and avocado keep the bowl balanced.

A fast dump-and-go Crock Pot chicken fajitas version can be made with chicken, fajita seasoning, one can Rotel, peppers, onions, and lime. It will still work; just drain before serving if the pot looks juicy.

For a brighter green topping instead of more red salsa, a spoon of salsa verde works especially well with the chicken, peppers, lime, and tortillas.

Can You Add Rice to the Slow Cooker?

Cook the rice separately. It is the safer, fluffier option because uncooked rice changes the liquid balance in this recipe and can turn mushy in the slow cooker. For reliable bowls, spoon the chicken, peppers, onions, and some of the juices over cooked rice instead.

Serve It Over Rice

Rice bowls are the place to keep a little more seasoned juice. The rice catches the sauce, while avocado, salsa, cilantro, and lime keep the bowl balanced.

Slow cooker chicken fajita rice bowl with seasoned chicken, bell peppers, white rice, avocado, lime, salsa, cilantro, and a slow cooker in the background.
Rice bowls can stay a little juicier because the rice absorbs the seasoned fajita juices.

If rice texture is where dinner usually goes wrong, this guide on how to cook rice covers stovetop, rice cooker, and Instant Pot timing so your bowl base stays fluffy instead of wet or gummy.

For meal prep, pack the rice and fajita chicken together only after both have cooled. Keep fresh toppings like lettuce, sour cream, avocado, and cilantro separate until serving.

Can You Use Frozen Chicken for Slow Cooker Fajitas?

No. Thaw the chicken first before using it in this recipe. Slow cookers heat gradually, and frozen chicken can take too long to move through unsafe temperatures. FoodSafety.gov’s slow-cooker guidance says frozen meat, poultry, or seafood should be thawed safely before adding it to the slow cooker.

Forgot to thaw? Use a pressure cooker method or cook the chicken separately from frozen with a faster method, then combine it with the peppers, seasoning, salsa, and lime after it is fully cooked. Check that the chicken reaches 165°F / 74°C before serving.

What to Serve with Slow Cooker Chicken Fajitas

Warm tortillas are the classic choice, but this chicken is flexible. One batch can become dinner tonight and a different lunch tomorrow.

Warm tortillas in a dry skillet for 20 to 30 seconds per side, or wrap a stack in foil and place it in a 250°F / 120°C oven until soft. Soft, warm tortillas fold better, hold the chicken more neatly, and make even a simple Crock Pot dinner feel fresher.

Put the tortillas, lime wedges, avocado, salsa, and hot sauce on the table and let everyone build their own. That is where this slow cooker dinner starts to feel fresh.

Table setup: set the chicken and peppers beside warm tortillas and fresh toppings so everyone can build the fajita they want.

Build-your-own fajita table with slow cooker chicken and peppers, tortillas, lime wedges, guacamole, salsa, sour cream, cilantro, jalapeños, hot sauce, and hands assembling fajitas.
Set out warm tortillas, glossy chicken, peppers, lime, salsa, guacamole, and hot sauce so everyone can build their own fajitas.
Serving ideaWhy it fits
Flour or corn tortillasClassic fajita dinner
Rice bowlsEasy meal prep and filling lunches
Cauliflower riceLower-carb bowl option
Lettuce cupsLighter fajita wraps
TacosFamily-friendly and easy to assemble
QuesadillasOne of the best uses for leftovers
SaladHigh-protein lunch with avocado, lime, and crisp vegetables
NachosCasual snack or game-day style dinner
Pasta or pasta bakeComfort-food variation
CasseroleGood for stretching leftovers into another family dinner

Best Toppings for Chicken Fajitas

Because the chicken is warm and saucy, the best toppings are the ones that wake it up: lime, cilantro, avocado, salsa, crunch, or heat.

  • Sour cream or Greek yogurt
  • Avocado or guacamole
  • Fresh cilantro
  • Lime wedges
  • Shredded lettuce
  • Cheese, shredded or crumbled
  • Salsa or pico de gallo
  • Pickled jalapeños
  • Hot sauce
  • Crushed tortilla chips for bowls or salads

For the creamy avocado route, this guacamole recipe is the easiest topping to put beside warm tortillas, salsa, lime, and fajita chicken.

If you like heat at the table, a thin vinegar-style hot sauce, jalapeño sauce, or smoky chile sauce can wake up the whole plate. This pepper sauce guide gives you several directions, from bright and sharp to smoky and fruity.

Storage, Freezing, and Reheating

Slow cooker chicken fajita filling stores well. Keep tortillas, rice, lettuce, and fresh toppings separate so they do not become soggy.

Pack It for Meal Prep

Cool the rice and chicken before packing, then keep wet or fresh toppings separate. That one step keeps fajita bowls from turning soggy in the fridge.

Meal prep containers filled with slow cooker chicken fajitas, rice, peppers, lime wedges, shredded cheese, pico de gallo, guacamole, and separate toppings.
Cool the rice and fajita filling first, then add salsa, guacamole, cheese, and lime after reheating.
Storage methodHow to do it
FridgeStore cooked chicken and peppers in an airtight container for 3 to 4 days
FreezerFreeze cooked chicken and vegetables for 2 to 3 months
Freezer tipFreeze without tortillas or fresh toppings
ReheatingReheat in a skillet or microwave until hot
Meal prep tipPack rice or tortillas separately and add toppings after reheating
To avoid sogginessDrain extra liquid before packing tortillas, tacos, or wraps

If the chicken looks dry after refrigeration, reheat it with a spoonful of salsa, water, or reserved cooking liquid. When it looks too wet, reheat it uncovered in a skillet for a few minutes so some moisture evaporates.

Leftover fajita chicken can also become a baked dinner using the same shredded chicken-and-tortilla logic in this chicken enchilada casserole.

Slow Cooker Chicken Fajitas FAQ

How long do chicken fajitas take in the slow cooker?

Most chicken fajitas take 4 to 6 hours on low or 2½ to 3½ hours on high. Chicken breasts are usually better closer to the shorter end if you want slices. For shredded chicken, cook until the meat is fork-tender and reaches 165°F / 74°C.

Is low or high better for Crock Pot chicken fajitas?

Low is usually better for juicier chicken and more even cooking. High works when you need dinner faster, but chicken breast can dry out if it cooks too long. Start checking around 2½ hours on high, especially if the chicken pieces are not very thick.

Why are my slow cooker fajitas watery?

They are usually watery because a covered slow cooker traps steam while chicken, peppers, onions, salsa, and tomatoes release liquid. Use less salsa, add some peppers late, and drain before filling tortillas.

When should I add peppers and onions?

Add all the peppers and onions at the beginning for the easiest dump-and-go version. For better texture, add half at the beginning and half during the last 30 to 60 minutes so every pepper strip does not turn soft.

Should the chicken be shredded or sliced?

Either works. Sliced chicken feels more like classic fajitas. Shredded chicken is easier in the slow cooker and works well for tacos, rice bowls, quesadillas, nachos, and meal prep.

Can I use taco seasoning instead of fajita seasoning?

Yes. Taco seasoning works in a pinch. It may taste slightly more like taco chicken, but peppers, onions, smoked paprika, and lime help pull the flavor back toward fajitas.

Is Rotel good in Crock Pot fajitas?

Yes. Rotel adds tomatoes, green chiles, and flavor in one can. For 2 lb / 900 g chicken, one 10 oz / 285 g can works well. If the can is very juicy, drain a little first or remove excess liquid after cooking.

Can I make chicken fajitas without tomatoes?

Yes. Skip the salsa, Rotel, or diced tomatoes. Use chicken, peppers, onions, garlic, fajita seasoning, lime, and only a small splash of broth if your slow cooker needs moisture. Add extra lime, smoked paprika, garlic, or seasoning if the flavor tastes flat.

Can I use frozen chicken in the slow cooker?

For this recipe, thaw it first. Slow cookers heat gradually, and frozen chicken can take too long to cook safely. Use a pressure cooker or another faster method if you need to cook chicken from frozen, then check that it reaches 165°F / 74°C.

Can I add rice to the same slow cooker?

Cook rice separately and serve the fajita chicken over it. Uncooked rice changes the liquid ratio and can become mushy in this recipe. For meal prep, cool the rice and chicken before packing them together.

What can I make with leftover chicken fajitas?

Use leftovers in quesadillas, tacos, rice bowls, salads, nachos, or casseroles. Drain juicy chicken before adding it to tortillas or quesadillas. Reheat dry leftovers with a spoonful of salsa or cooking liquid.

Final Note

This slow cooker dinner works because it solves the hard part before dinner starts. Keep the filling glossy, add a handful of peppers late, squeeze in lime at the end, and the pot tastes brighter than a slow cooker dinner usually does.

That is the kind of dinner that feels easy before you eat it and useful again the next day.

If you make it, leave a comment with the version you chose: tighter tortilla fajitas, saucier bowls, dump-and-go, or creamy low-carb. That choice helps other readers decide which path to take.

Posted on Leave a comment

Butternut Squash Soup Recipe

Creamy butternut squash soup in a matte ceramic bowl with pumpkin seeds, chili oil, herbs, black pepper, a cream swirl, and toast on the side.

This is the butternut squash soup for the nights when you want something creamy and comforting, but still balanced rather than heavy — sweet from the squash, savory from onion and garlic, and bright enough at the end that the bowl never tastes flat.

Butternut squash soup can easily go watery, bland, baby-food sweet, or too heavy if the liquid, salt, and finish are not handled carefully. This version avoids that with one simple idea: cook the squash until tender, blend first, thin later, then brighten the pot at the end.

You can roast the squash for deeper caramelized flavor, or make the whole soup on the stovetop when you want something faster. It also works with fresh squash, pre-cut cubes, frozen squash, canned puree, or leftover roasted squash — and you can finish it with cream, coconut milk, olive oil, butter, or no cream at all.

Here is the goal: a smooth, cozy bowl that does not turn watery, bland, or too sweet. At the finish, the soup should coat a spoon, taste savory before it tastes sweet, and end with just enough brightness to make you want the next bite. It is the kind of bowl that makes a piece of toast feel like dinner, especially when the top has something crunchy, creamy, or a little spicy.

Jump to Recipe · Quick Answer · Make It Now · Less-Broth-First Method · Roasted vs Stovetop · Cream, Coconut Milk, or No Cream · Fix Bland or Thin Soup

Use this quick visual check before you adjust the pot: watery, bland, and overly sweet butternut squash soup each need a different fix.

Four-panel comparison showing watery butternut squash soup, bland puree-style soup, overly sweet soup, and a thick glossy finished soup.
Before fixing the pot, identify the real problem: thin soup needs body, flat soup needs seasoning, and overly sweet soup needs acid, heat, or savoriness.

Quick Answer: How to Make Butternut Squash Soup

To make butternut squash soup, cook butternut squash until very tender, then blend it with sautéed onion, garlic, carrot, broth, herbs, and seasoning until smooth. Roast the squash at 425°F / 220°C when you want the deepest flavor. When speed matters, simmer peeled squash cubes directly in the pot with broth until soft.

If peeling raw squash feels annoying, roast the halves first and scoop the soft flesh out later. That gives you deeper flavor and skips the hardest part of squash prep.

The most important technique is to use less liquid at first. Start with 3 cups / 720 ml broth, blend the soup, then loosen it only once the texture is clear. That keeps the bowl creamy instead of watery, whether you finish it with cream, coconut milk, olive oil, butter, or no cream at all.

Before serving, taste once and wake the pot with lemon juice, lime juice, or apple cider vinegar. A small acidic finish keeps the squash from tasting dessert-sweet.

Need exact amounts? Go straight to the recipe card. Still choosing a method? Compare roasted vs stovetop, or check the fresh, frozen, pre-cut, and canned squash guide.

Make It Now: The Best Default Version

Do not overthink the versions yet. When in doubt, make the MasalaMonk default: roasted squash, a simple onion-carrot-garlic base, herbs, 3 cups / 720 ml broth, and the creamy finish that fits your bowl — cream, coconut milk, butter, or olive oil.

For the safest, most flavorful bowl tonight, roast one large butternut squash, sauté the onion, carrot, garlic, and herbs in a soup pot, add the roasted squash and broth, then blend until silky. Finish with either ½ cup / 120 ml cream, 1 cup / 240 ml coconut milk, or 1–2 tablespoons butter or olive oil.

Before serving, taste the soup and add a small splash of lemon juice, lime juice, or apple cider vinegar. That simple order keeps the soup thick, smooth, and balanced instead of watery, grainy, or too sweet.

NeedBest Choice
Best flavorRoast the squash first
Fastest methodUse the stovetop method with peeled cubes
No raw peelingRoast squash halves, then scoop the flesh
Dairy-free creamy soupUse full-fat coconut milk
No-cream soupBlend well and finish with olive oil, butter, lemon, or lime
Thicker soupStart with less broth and adjust the body at the end

Butternut Squash Soup Recipe Card

Creamy Butternut Squash Soup

This creamy butternut squash soup is smooth, comforting, and easy to adjust. Roast the squash for deeper flavor, or make it fully on the stovetop for a faster weeknight soup. Finish it with cream, coconut milk, butter, olive oil, or a simple splash of lemon or lime for a lighter version.

Prep Time15 minutes
Cook Time45 minutes roasted / 30 minutes stovetop
Total TimeAbout 1 hour roasted / 45 minutes stovetop
Servings6
YieldAbout 8 cups / 1.9 L soup
Main MethodRoasted or stovetop
Diet NotesVegetarian; gluten-free if using gluten-free stock; vegan and dairy-free options included

Timing note: the roasted total assumes you prep and sauté the aromatics while the squash finishes roasting.

Ingredients

  • 1 large butternut squash, about 3 lb / 1.3–1.4 kg whole, or about 8 cups / 1.1–1.2 kg peeled cubes
  • 2 tablespoons / 30 ml olive oil, plus a little more if roasting cubes
  • 1 large yellow onion, about 200 g, chopped
  • Carrot: 1 large, about 150 g, chopped
  • 3–4 garlic cloves, minced
  • 1 teaspoon grated fresh ginger, optional
  • 3 cups / 720 ml vegetable broth to start, plus up to 1 cup / 240 ml more as needed
  • 1 teaspoon fine salt, plus more to taste
  • ½ teaspoon black pepper
  • ½ teaspoon smoked paprika or ⅛ teaspoon ground nutmeg
  • 1 teaspoon dried thyme, sage, or rosemary, or 1 tablespoon chopped fresh herbs
  • Finish with 1–2 teaspoons lemon juice, lime juice, or apple cider vinegar

Choose One Creamy Finish

  • Classic creamy soup: ½ cup / 120 ml heavy cream
  • Dairy-free creamy soup: 1 cup / 240 ml full-fat coconut milk
  • Creamy soup without cream: 1–2 tablespoons butter or olive oil
  • Lighter soup: skip the creamy finish and use lemon, lime, herbs, and black pepper to brighten the bowl

Equipment

  • Large baking sheet, if roasting
  • Parchment paper, optional
  • Sharp chef’s knife
  • Vegetable peeler, if making the stovetop cube version
  • Large spoon for removing seeds
  • Dutch oven or heavy-bottomed soup pot
  • Immersion blender or countertop blender
  • Ladle
  • Measuring cups and spoons
  • Kitchen scale, optional but helpful

Roasted Method

  1. Heat the oven to 425°F / 220°C.
  2. Cut the butternut squash in half lengthwise and scoop out the seeds. For faster roasting, peel and cube the squash instead.
  3. Rub the squash with 1 tablespoon olive oil and a pinch of salt. If roasting cubes, use enough oil to lightly coat them.
  4. Roast cut-side down on a baking sheet for 40–50 minutes, or until the flesh is very tender and the edges smell sweet and nutty. If using cubes, roast for 35–40 minutes, tossing once, until lightly caramelized.
  5. Heat the remaining 1 tablespoon olive oil in a Dutch oven or soup pot over medium heat.
  6. Add the onion and carrot. Cook for 6–8 minutes, stirring occasionally, until softened.
  7. Add garlic, ginger if using, herbs, smoked paprika or nutmeg, black pepper, and salt. Cook for 30–60 seconds, just until fragrant.
  8. Scoop the roasted squash flesh into the pot. Add 3 cups / 720 ml broth.
  9. Simmer for 5–10 minutes so the flavors come together.
  10. Blend until completely smooth using an immersion blender or countertop blender.
  11. Thin the soup in small splashes until it reaches your preferred texture.
  12. Stir in your chosen creamy finish, if using.
  13. Finish with lemon juice, lime juice, or apple cider vinegar. Taste and adjust salt, pepper, and acidity before serving.

Stovetop Method

  1. Peel, seed, and cube the butternut squash.
  2. Heat 2 tablespoons olive oil in a Dutch oven or soup pot over medium heat.
  3. Add onion and carrot. Cook for 6–8 minutes, until softened.
  4. Add garlic, ginger if using, herbs, smoked paprika or nutmeg, salt, and pepper. Cook for 30–60 seconds.
  5. Add the squash cubes and 3 cups / 720 ml broth.
  6. Bring to a boil, then reduce to a simmer.
  7. Cover and cook for 20–30 minutes, or until the squash is very soft.
  8. Blend until smooth.
  9. Loosen the soup only if it needs more liquid.
  10. Stir in your chosen creamy finish, if using.
  11. Finish with lemon juice, lime juice, or apple cider vinegar, then adjust seasoning.

Important texture note: start with 3 cups / 720 ml broth, not the full amount. Squash size and water content can vary. It is much easier to thin the soup after blending than to fix a watery pot later.

Vegan note: use vegetable broth, olive oil, and coconut milk or cashew cream instead of butter or heavy cream.

Now tune the bowl: texture method · creamy finish · toppings · troubleshooting.

What’s Inside

The recipe above gives you the main bowl. From there, the guide below helps you tune it to your kitchen — the squash you have, the method you prefer, the finish you want, and the fixes that save the pot if something tastes off.

Start Here

Choose Your Version

Serve, Store, Fix

The Less-Broth-First Method

This recipe uses the Less-Broth-First Method: start with 3 cups / 720 ml broth, blend the cooked squash until smooth, then thin only after you know the soup’s real texture.

That one method is what makes the recipe flexible. If your squash is huge, watery, frozen, canned, or already roasted, the soup still works because the final thickness is adjusted after blending, not guessed before cooking.

The finished soup should feel velvety on the spoon, not loose like broth and not stiff like puree. Once the texture is right, salt, richness, herbs, and a little acid make the flavor complete.

Three-panel guide showing thick blended butternut squash soup, a small amount of broth being added, and a spoonful of smooth soup with spoon-coating texture.
Because squash varies in moisture, blend the soup thick first; then loosen it gradually so it stays creamy instead of turning watery.

Why This Butternut Squash Soup Works

This soup tastes complete when the squash’s sweetness has something savory, rich, and bright around it. Onion, garlic, carrot, herbs, spice, salt, fat, and acidity all help the bowl taste full instead of flat.

Roasting brings out deeper, caramelized flavor. The stovetop method is faster and still gives you a smooth, comforting result, especially when the onion, garlic, carrot, and spices are cooked properly before the broth goes in.

When the cut side comes out deeply golden and the kitchen smells sweet and nutty, you know the soup already has a head start. Those roasted edges are where the bowl gets its deeper, almost nutty sweetness.

Seasoning the aromatics before the broth goes in keeps the soup from tasting diluted later. Carrot helps the soup taste rounder and look brighter, while ginger, herbs, black pepper, smoked paprika, or nutmeg add warmth. Lemon juice, lime juice, or apple cider vinegar keeps the final spoonful lively.

Ingredient Notes: What Each One Does

None of the ingredients are here just for show. Squash brings body and sweetness. Onion, garlic, and carrot make the soup savory. Herbs, ginger, and spices add warmth. Broth controls thickness. Your creamy finish decides how rich the final bowl feels.

Ingredients for butternut squash soup arranged on a wooden board, including squash, onion, carrot, garlic, ginger, herbs, broth, cream, olive oil, lime, salt, and pepper.
Notice the balance before cooking: squash brings body, aromatics build depth, broth controls texture, and citrus wakes up the final flavor.

Butternut Squash

Butternut squash is naturally sweet, creamy when blended, and perfect for soup. One large squash, about 3 lb / 1.3–1.4 kg, is usually enough for 6 servings.

Whole fresh squash, peeled cubes, frozen squash, canned puree, and leftover roasted squash can all work. The method changes slightly depending on what you have, but the same rule stays true: cook it until very tender before blending.

Onion, Garlic, and Carrot

Onion and garlic give the soup its savory base. Carrot is part of the default version because it rounds out the flavor and deepens the color. You can skip it if you do not have one, but the bowl may taste slightly less full.

Ginger, Herbs, and Spices

Fresh ginger adds warmth and keeps the soup from tasting heavy. Sage, thyme, rosemary, nutmeg, smoked paprika, curry powder, garam masala, and black pepper all work well here.

Classic version: use sage, thyme, rosemary, or nutmeg. For a warmer spiced bowl, add ginger with a little curry powder or garam masala and finish with lime.

Broth

Vegetable broth keeps the recipe vegetarian and works well with the natural sweetness of the squash. Chicken broth can also be used if you are not keeping the soup vegetarian.

Think of broth as an adjustment, not the whole base. The soup should coat a spoon, not pour like thin broth. Add more only after blending if the texture needs it.

Cream, Coconut Milk, Butter, or Olive Oil

You do not need heavy cream to make this soup creamy. Creaminess comes from fully cooked squash, controlled broth, and thorough blending first. The blender should turn the squash glossy before any cream goes in.

Cream, coconut milk, butter, or olive oil can add richness, but they should not be doing all the work. Coconut milk is the easiest dairy-free finish. For more ways to use it in cooking, see this guide to coconut milk benefits and uses.
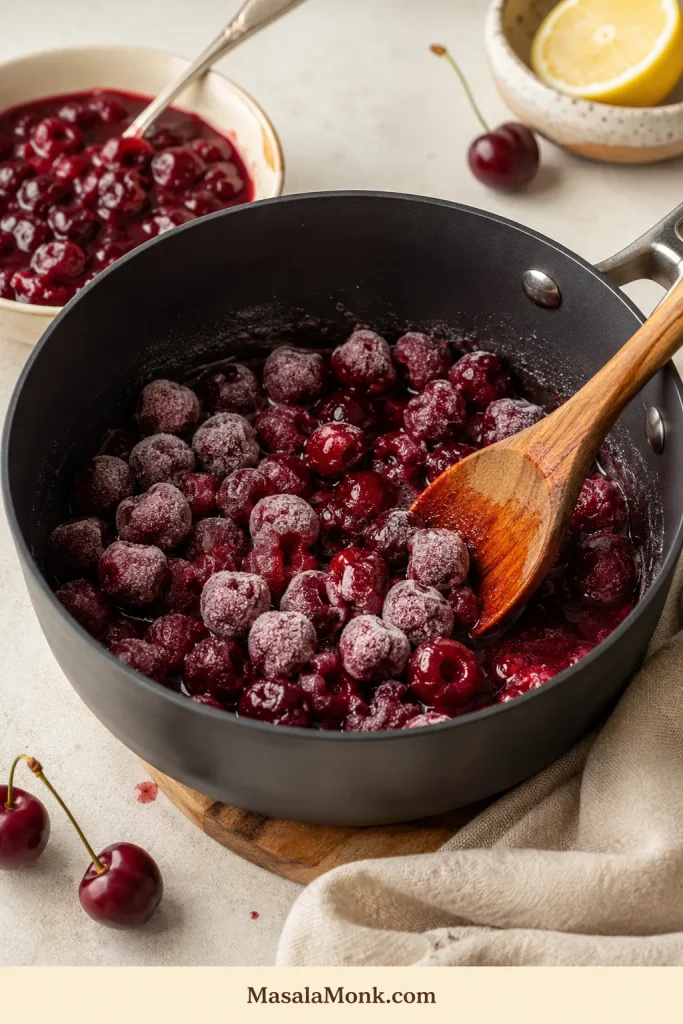
Lemon, Lime, or Apple Cider Vinegar

This is the small step that makes the soup taste finished. Use lemon juice for a clean finish, lime juice for a spiced or coconut version, and apple cider vinegar for a warmer fall-style bowl.

Fresh, Frozen, Pre-Cut, or Canned Squash

Fresh, frozen, pre-cut, canned, and leftover roasted squash can all make a good soup. The handling changes, but the method stays forgiving: cook the squash until fully soft, blend, then adjust the texture and flavor.

Guide showing whole fresh butternut squash, pre-cut squash cubes, frozen squash cubes, butternut squash puree, and leftover roasted squash.
Whether you use fresh, frozen, pre-cut, canned puree, or leftover roasted squash, adjust the liquid after blending because moisture levels change.

Choose the Squash You Have

What You HaveAmount for This RecipeWhat to Adjust
Whole fresh butternut squash1 large squash, about 3 lb / 1.3–1.4 kgBest flavor. Roast halves or cubes, or peel and simmer on the stovetop.
Pre-cut fresh squashAbout 8 cups / 1.1–1.2 kg cubesGreat shortcut. Roast for flavor or simmer for speed. Check that the cubes are firm and fresh.
Frozen butternut squash cubesAbout 8 cups / 1.1–1.2 kg cubesAdd directly to the pot. Frozen cubes may release extra water, so start with less broth.
Canned or packaged squash pureeAbout 4 cups / 900–950 g pureeSauté onion, garlic, and spices first. Then whisk in the puree and broth slowly.
Frozen squash pureeAbout 4 cups / 900–950 g pureeWarm gently, then blend with cooked aromatics and hot broth.
Leftover roasted squashAbout 4 cups mashed or scooped fleshFastest option. Blend with sautéed onion, garlic, and hot broth.

Frozen squash may look watery at first. Let it simmer until very soft, blend well, then adjust the body after blending.

Canned or packaged puree can taste flatter than roasted squash, so give the onion, garlic, and spices time to bloom before adding it. A small splash of lemon juice or apple cider vinegar at the end helps wake up the flavor.

Leftover roasted squash makes this almost instant. Since the squash is already cooked, focus on building a good onion-garlic base, then blend with hot broth and finish with salt, fat, and acidity.

Once you know your squash type, compare roasted vs stovetop or move into how to make the soup.

Roasted vs Stovetop Butternut Squash Soup

Both methods work. Pick based on the night you are having: the oven when you want deeper flavor, the stovetop when you want dinner faster.
Side-by-side comparison of roasted butternut squash soup and stovetop butternut squash soup served in two bowls.
For deeper caramelized flavor, choose roasted squash; for a faster butternut squash soup with a softer taste, use the stovetop method.
MethodBest ForFlavorTime
Roasted squashBest overall flavorSweet, caramelized, deepLonger
StovetopFast weeknight soupSmooth, clean, lighterFaster
Pre-cut or frozen squashConvenienceGood if seasoned wellFastest
Leftover roasted squashQuickest rich soupDeep and already cookedVery fast

Use the roasted method when you want the best flavor. Roasting concentrates the squash and adds caramelized edges, which makes the final soup taste richer.

The stovetop method is better when you want a faster, simpler dinner. It will still be smooth and cozy, but it may need a little more seasoning, spice, or acidity at the end.

Pre-cut or frozen squash is for the nights when convenience matters. The bowl can still be very good, especially if you build flavor with onion, garlic, ginger, herbs, and enough salt.

Chosen your route? Go to how to make butternut squash soup, or return to the recipe card.

How to Make Butternut Squash Soup

Use this quick method guide as the visual map for the full process: cook the squash, build the savory base, blend until smooth, then thin only if needed.

Four-step guide showing roasted or simmered squash, sautéed aromatics, blended smooth soup, and finished soup thinned only if needed.
First cook the squash, then build the flavor base, blend until silky, and adjust thickness only once you can see the final texture.

1. Prepare the Squash

For roasted soup, cut the squash in half lengthwise and scoop out the seeds. Roast it cut-side down, then scoop out the soft flesh later. This route avoids peeling raw squash.

Roasted butternut squash halves on parchment paper with soft orange flesh being scooped from the skin using a spoon.
Instead of peeling raw squash, roast the halves first; once tender, the flesh scoops out cleanly and blends into a smoother soup.

With the stovetop method, peel the squash, remove the seeds, and cut it into cubes. Smaller pieces cook faster. Pre-cut or frozen cubes can go straight into the pot with only small broth adjustments.

2. Roast or Simmer Until Very Tender

In the roasted method, cook the squash at 425°F / 220°C until the flesh is soft and the edges have some color. This usually takes 40–50 minutes for halves or 35–40 minutes for cubes.

Close-up of roasted butternut squash cubes with browned edges, caramelized spots, black pepper, and steam on a baking sheet.
After roasting, look for browned edges and caramelized spots; that color is what gives roasted butternut squash soup deeper, rounder flavor.

On the stovetop, simmer the cubes with broth for 20–30 minutes, until they are soft enough to mash with a spoon. Do not rush this step. Undercooked squash can make the soup taste grainy instead of silky.

3. Build the Flavor Base

Cook onion and carrot in olive oil until softened. Add garlic, ginger, herbs, and spices only after the onion has softened. Garlic and ground spices can burn if they cook too long over dry heat.

This base is what keeps the soup from tasting like plain squash puree.

Onion, carrot, garlic, ginger, herbs, spices, and bay leaf sautéing in a green Dutch oven with a wooden spoon.
Meanwhile, soften the onion, carrot, garlic, ginger, and herbs before adding broth so the soup starts savory instead of turning flat later.

4. Add Broth Carefully

Add 3 cups / 720 ml broth first. After blending, add more only if the soup is too thick. If too much liquid goes in early, simmer uncovered or blend in more cooked squash, sweet potato, carrots, lentils, or beans.

5. Blend Until Smooth

An immersion blender lets you blend directly in the pot. A countertop blender usually gives the silkiest finish, especially after roasting.

If using a countertop blender, blend in batches and do not fill the jar too high. Hot soup expands when blended. Start on low speed and protect your hand with a towel if steam can escape from the lid.

Blend longer than you think you need to. That extra time helps the squash turn glossy and silky instead of pulpy.

Smooth orange butternut squash soup being poured from a blender into a Dutch oven on the stove.
Once blended, the soup should pour in a smooth ribbon with a glossy surface; that is the cue that it is silky, not grainy.

6. Finish and Balance

After blending, choose your finish: heavy cream for classic richness, coconut milk for dairy-free creaminess, butter or olive oil for no-cream richness, or lemon/lime for brightness.

A good batch tastes mellow first, then bright at the end. If it feels sleepy, add salt before adding more spice, then finish with a small splash of lemon, lime, or vinegar.

Instant Pot, Slow Cooker, and Blender Notes

For after-work soup, use the stovetop or Instant Pot method. When you have a little more time, roast the squash and let the oven do the flavor work.
MethodHow to Do ItBest Tip
Instant PotSauté onion, carrot, garlic, ginger, and spices. Add peeled squash cubes and 3 cups / 720 ml broth. Pressure cook on high for 10 minutes, let it naturally release for 5 minutes, then quick release, blend, and finish.Add cream or coconut milk after pressure cooking.
Slow cookerFor best flavor, sauté the onion, carrot, garlic, and spices first. Add them to the slow cooker with peeled squash cubes, broth, herbs, salt, and pepper. Cook on high for 3–4 hours or low for 6–8 hours, until very soft. Blend and finish.Use less broth at first; slow-cooked vegetables release liquid.
High-speed blenderRoast or simmer the squash first, then blend with hot broth and cooked aromatics. Use a heated soup cycle only if your blender is designed for it.Hot soup expands, so blend carefully and never overfill.
Immersion blenderBlend directly in the pot after the squash is fully cooked.Easy and safe, but may not be as silky as a countertop blender.

A countertop blender gives the smoothest result. An immersion blender is less fussy and easier to clean, so use whichever one makes the soup more likely to happen tonight.

If the slow cooker is your favorite route for cozy soups, this slow cooker broccoli cheese soup follows the same gentle-finish idea for keeping creamy soups smooth.

How to Make Butternut Squash Soup Creamy

Creaminess does not have to mean heavy cream. It comes from fully tender squash, careful broth, and enough blending. Once the base is smooth, you can make the bowl rich, dairy-free, light, or extra silky with one finishing choice.

Four bowls of butternut squash soup showing cream, coconut milk, olive oil or butter, and no-cream finishing options.
With a smooth base, choose your finish: cream adds richness, coconut milk softens it, olive oil adds gloss, and no cream keeps it lighter.
Creamy OptionBest ForHow to Use It
Heavy creamClassic creamy soupStir in ½ cup / 120 ml after blending. Do not boil hard.
Coconut milkDairy-free or vegan soupAdd 1 cup / 240 ml after blending. Great with ginger, curry, chili, and lime.
ButterCreamy without creamBlend in 1–2 tablespoons at the end.
Olive oilLighter no-cream versionDrizzle in after blending or blend in 1 tablespoon.
Cashew creamVegan richnessBlend soaked cashews with water, then stir in.
Sweet potato or potatoThicker bodyReplace part of the squash or add a small amount while simmering.
No creamLightest versionBlend very well and finish with lemon/lime and a little olive oil.

A coconut milk version works best with full-fat coconut milk. Light coconut milk is fine, but the soup will be thinner and less silky.
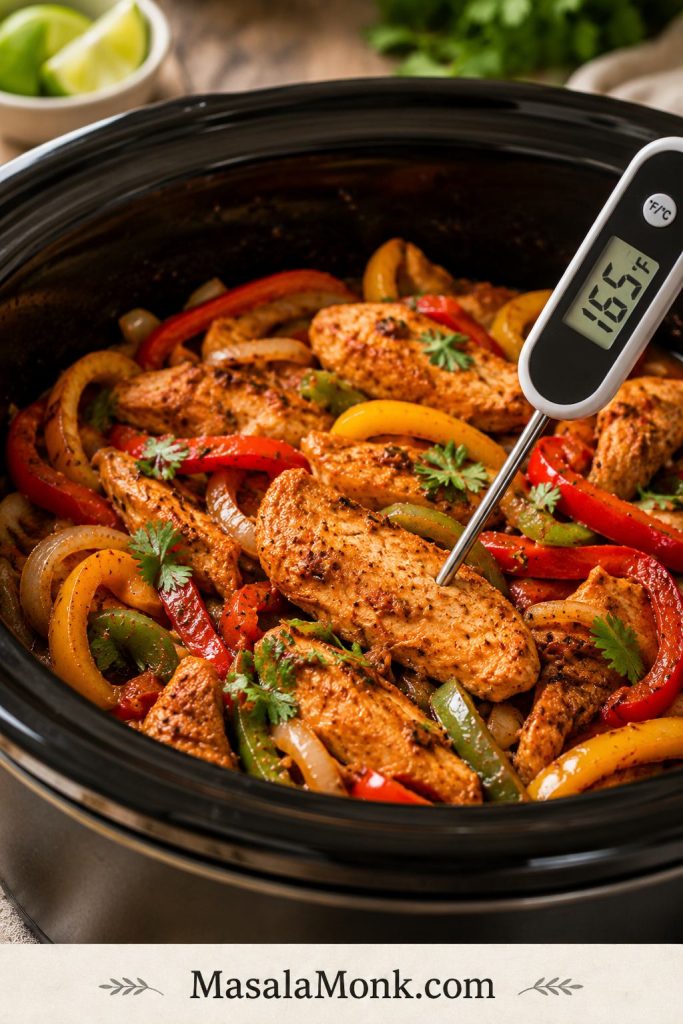
For a vegan bowl, use vegetable broth, olive oil, coconut milk or cashew cream, and plant-based toppings like pumpkin seeds, roasted chickpeas, herbs, or chili oil.

Add cream, coconut milk, or cashew cream near the end, after blending. This keeps the texture smoother and prevents dairy from boiling too hard.

After choosing your finish, try a flavor variation or use troubleshooting if the soup tastes flat, thin, or too sweet.

Butternut Squash Soup Variations

Think of the variations as small turns, not separate recipes. The soup stays familiar; only the mood changes.

Six small bowls of butternut squash soup variations labeled classic, curried, coconut ginger, spicy, apple, and lentil.
Start with the same base, then shift the mood: curry adds warmth, ginger adds brightness, lentils add body, and apple brings autumn sweetness.
VersionWhat to Add
Classic butternut squash soupSage, thyme, rosemary, black pepper, and a little nutmeg
Curried butternut squash soupCurry powder or garam masala, ginger, coconut milk, and lime
Spicy butternut squash soupChili flakes, chili oil, chipotle, or black pepper
Coconut ginger soupCoconut milk, fresh ginger, lime, and cilantro
Apple autumn soup1 peeled apple, cinnamon, nutmeg, and a small drizzle of maple syrup
Sweet potato butternut soupReplace 2 cups of squash with sweet potato cubes
Carrot butternut soupAdd 2–3 carrots and ½ cup extra broth if the soup gets too thick
Lentil butternut soupAdd ½ cup red lentils and 1–1½ cups extra broth for a thicker, meal-style soup
Roasted garlic soupRoast garlic with the squash and blend it in
No-cream light soupSkip cream and finish with lemon, herbs, and olive oil

For a warm spiced version, add ginger, a little curry powder or garam masala, coconut milk, black pepper, and lime juice. It gives the soup depth without making it heavy.

Lentils are the easiest way to turn this into a heartier vegetarian meal. This guide to vegan lentil soup recipes has more ideas for using lentils in cozy, filling bowls.

For the apple-autumn version, a small pinch of homemade pumpkin pie spice can bring cinnamon, ginger, nutmeg, allspice, and clove notes without needing several jars on the counter.

When the flavor lane is set, finish the bowl with toppings or turn it into dinner with serving ideas.

Best Toppings for Butternut Squash Soup

Once the soup is blended and balanced, toppings are where the bowl stops feeling like plain puree and starts feeling like dinner. A silky soup needs something that crunches, swirls, snaps, or wakes it up — seeds, herbs, chili oil, cream, yogurt, roasted chickpeas, or crisp toast.

Bowl of butternut squash soup surrounded by pumpkin seeds, chili oil, herbs, croutons, roasted chickpeas, apple slices, nuts, black pepper, and toast.
Because creamy soup is soft by nature, toppings should add contrast: crunch, heat, herbs, pepper, toast, or something bright.
What the Soup NeedsGood Toppings
CrunchToasted pumpkin seeds, croutons, roasted chickpeas, toasted almonds, walnuts, or pecans
Creamy contrastCream swirl, coconut milk, yogurt, sour cream, or cashew cream
HeatChili oil, chili crisp, red pepper flakes, black pepper, sambal, or hot sauce
FreshnessCilantro, parsley, chives, scallions, basil, or dill
Sweet-salty contrastDiced apple, crispy bacon, blue cheese, feta, or dried cranberries
Meal upgradeRoasted chickpeas, cooked lentils, beans, grilled cheese cubes, or toasted bread

Think of toppings as balance. Sweeter batches need heat, salt, herbs, or acidity. For a fuller meal, add chickpeas, lentils, beans, seeds, or toast.

Easy Topping Combos

StyleUse This Combo
ClassicCream swirl + black pepper + toasted pumpkin seeds
VeganCoconut milk + chili oil + cilantro + roasted chickpeas
Fall dinnerToasted pecans + diced apple + thyme
SpicedLime + chili oil + toasted seeds + cilantro
Protein boostLentils or roasted chickpeas + yogurt or coconut milk
Simple lunchCroutons + olive oil + black pepper + parsley

A swirl of cream softens the edges, pumpkin seeds snap against the silky soup, and chili oil or lime keeps the sweetness awake.

To make the bowl feel more like lunch, serve it with a scoop of chickpea salad on the side. Chickpeas add protein and texture without making the meal feel heavy.

What to Serve With Butternut Squash Soup

This soup can be a starter, lunch, or light dinner. To make it more filling, serve it with something crisp, toasted, or protein-rich.

Butternut squash soup served with garlic toast, cucumber salad, chickpea salad, and rustic bread on a cozy table.
Turn butternut squash soup into dinner by pairing the bowl with crisp toast, garlic bread, chickpea salad, or cucumber salad.
  • Crusty bread
  • Garlic bread
  • Grilled cheese
  • Cheese toast
  • Simple green salad
  • Roasted chickpeas
  • Lentil salad
  • Quinoa bowl
  • Baked potato
  • Sandwiches
  • Roasted vegetables

Bread turns this into the kind of meal people linger over. A warm slice of homemade garlic bread loaf works especially well because it adds crunch, butteriness, and something sturdy to dip.

Cucumber salad keeps the meal from feeling too soft or sweet. The vinegar, dill, and onion cut through the squash’s natural sweetness.

If you love cozy soup dinners, try this French onion soup next. For tonight, keep this butternut squash soup as the main bowl with toast, salad, and crunchy toppings.

Storage, Freezing, and Reheating

This soup is excellent for meal prep because it stores and reheats well. It may look thicker the next day, but that is normal; a splash of broth, water, cream, or coconut milk brings it back.

Four-panel guide showing butternut squash soup in a storage container, thick reheated soup, liquid being stirred in, and smooth soup on a spoon.
As the soup chills, it thickens. Reheat gently and stir in a small splash of broth, water, cream, or coconut milk until smooth again.
Storage MethodGuidance
FridgeStore in an airtight container for up to 4 days.
FreezerFreeze for up to 3 months for best texture and flavor.
Reheating on stoveWarm gently over medium-low heat, stirring often.
Reheating in microwaveHeat in short intervals, stirring between each one.
If too thick after chillingAdd broth, water, cream, or coconut milk a little at a time.
If separated after freezingWhisk well or blend briefly after reheating.

For general food safety, the USDA leftover safety guidance recommends using refrigerated leftovers within 3–4 days.

Cream-based soup can sometimes separate slightly after freezing. It is still fine to eat, but the texture may need whisking or blending.

Coconut milk versions usually freeze well, though they may also need stirring after reheating.

For the smoothest freezer results, freeze the soup before adding cream, then add cream or coconut milk after reheating.

Need to rescue leftovers or a tricky batch? Jump to fixes for thick, thin, bland, grainy, or separated soup.

Avoid These Common Mistakes

Most problems are easy to avoid if you control the liquid, cook the squash fully, and balance the flavor at the end.

  • Do not add all the broth at once. Start with 3 cups / 720 ml and thin after blending.
  • Do not blend undercooked squash. The squash should be soft enough to mash easily with a spoon.
  • Do not skip salt and acid. Butternut squash is sweet, so it needs seasoning and brightness.
  • Do not boil hard after adding cream. Add cream or coconut milk near the end and heat gently.
  • Do not rely only on sweetness. Use onion, garlic, herbs, ginger, spice, or acidity for balance.
  • Do not judge the texture before blending. The soup often looks chunky or loose before it turns smooth.

Troubleshooting Butternut Squash Soup

If the pot is already made and something feels off, do not start over. A bland or thin soup is not a failure — it usually just needs salt, acid, time, or a little more body.

Why is my butternut squash soup bland?

Most bland soup needs salt first, then acid. Add salt gradually, then wake it up with lemon juice, lime juice, or apple cider vinegar. Still flat? Add black pepper, smoked paprika, curry powder, ginger, or a small amount of butter or olive oil.

Why does my soup taste like plain puree?

If the soup tastes like plain puree or too sweet and one-note, it usually needs contrast. Add salt first, then try lemon, lime, vinegar, black pepper, chili oil, toasted seeds, herbs, roasted chickpeas, or crisp toast on top.

Why is my soup too sweet?

Butternut squash is naturally sweet. Balance it with lemon juice, lime juice, vinegar, black pepper, chili flakes, curry powder, or a little extra broth. Savory toppings like roasted chickpeas, pumpkin seeds, yogurt, or herbs also help.

How do I fix soup that is too thick?

Add hot broth ¼ cup / 60 ml at a time, blending or stirring after each addition, until the soup reaches the texture you want.

How do I fix soup that is too thin?

Simmer it uncovered until some liquid evaporates. You can also blend in more roasted squash, cooked sweet potato, cooked carrots, red lentils, or beans.

Why is my soup grainy?

The squash may not have cooked long enough, or the soup may need more blending. Simmer until the squash is very soft, then blend thoroughly. A countertop blender usually gives the smoothest texture.

Why did my soup separate after freezing?

Cream and coconut milk can separate slightly after freezing and reheating. Warm the soup gently and whisk well. If needed, blend it briefly to bring the texture back together.

How do I make the soup richer without cream?

Blend in 1–2 tablespoons butter, a drizzle of olive oil, coconut milk, cashew cream, or a small amount of cooked sweet potato. Roasting the squash first also gives the soup deeper flavor without needing extra cream.

Is Butternut Squash Soup Healthy?

It can be a nourishing, vegetable-heavy soup, but the final nutrition depends on broth, cream, toppings, and serving size. The base is naturally smooth, so you do not need a lot of cream to make it satisfying.

A lighter version still feels satisfying because the squash does the creamy work before any cream goes in. For the lightest bowl, use broth, olive oil, lemon, herbs, and crunchy seeds.

A more filling vegetarian version can use lentils, beans, chickpeas, Greek yogurt, or pumpkin seeds. Richer cream-or-butter versions work best in smaller bowls.

If you are not keeping it vegetarian, grilled chicken or turkey also works. For lower sodium, use low-sodium broth and adjust salt at the end.

To check ingredient-level nutrition details, search for raw or cooked butternut squash in USDA FoodData Central.

For a low-carb or keto-style approach, butternut squash needs more care because it is naturally starchy. This guide to butternut squash on keto explains that angle in more detail.

Frequently Asked Questions

Do you need to peel butternut squash for soup?

If you are roasting the squash in halves, you do not need to peel it first. Roast it until soft, then scoop the flesh out of the skin. If you are making the stovetop version with cubes, peel it before cooking.

Is roasted butternut squash soup better than stovetop?

Roasting usually gives deeper flavor because the squash caramelizes in the oven. The stovetop version is faster and easier, but it may need a little extra seasoning, spice, or acidity to taste as rich.

What makes butternut squash soup creamy?

Butternut squash itself becomes creamy when cooked until soft and blended well. Cream, coconut milk, butter, olive oil, cashew cream, sweet potato, or potato can make it richer, but good blending and broth control matter most.

How do you make butternut squash soup without cream?

Skip the cream and blend the soup very well. Use less broth at first, then thin only as needed. Finish with olive oil, butter if not vegan, coconut milk, cashew cream, or a splash of lemon or lime juice for balance.

Does coconut milk work in butternut squash soup?

Yes — especially with ginger, curry powder, chili, lime, and cilantro. Full-fat coconut milk gives the creamiest texture.

When should you add cream or coconut milk?

Add cream or coconut milk after the squash is cooked and the soup is blended. Warm it gently after adding. Avoid boiling hard once cream has been added because the texture can become less smooth.

Why does my butternut squash soup taste bland?

Most bland soup needs salt first, then acid. Add salt gradually, then brighten it with lemon juice, lime juice, or apple cider vinegar. For more flavor, add ginger, black pepper, smoked paprika, curry powder, sage, thyme, or chili oil.

How do you thicken butternut squash soup?

Simmer it uncovered, or blend in more cooked squash, sweet potato, carrots, lentils, beans, or potato. For best results, avoid adding too much broth before blending.

What spices go well with butternut squash soup?

Sage, thyme, rosemary, nutmeg, black pepper, smoked paprika, ginger, curry powder, cinnamon, chili flakes, and garam masala all work well here.

Can frozen butternut squash be used for soup?

Yes — use about 8 cups / 1.1–1.2 kg frozen cubes for this recipe. Add them directly to the pot and simmer until very soft. Start with less broth because frozen squash can release extra water.

How much butternut squash puree equals one squash for soup?

For this recipe, use about 4 cups / 900–950 g puree in place of one large 3 lb / 1.3–1.4 kg squash. Sauté the onion, garlic, carrot, and spices first, then whisk in the puree and broth slowly.

Can you make butternut squash soup in an Instant Pot or slow cooker?

Yes. For Instant Pot soup, sauté the aromatics, add squash and broth, pressure cook on high for 10 minutes, naturally release for 5 minutes, then blend and finish. Slow cooker soup takes 3–4 hours on high or 6–8 hours on low, until the squash is very soft. Add cream or coconut milk after cooking.

How long does butternut squash soup last?

It lasts up to 4 days in the fridge when stored in an airtight container. You can also freeze it for up to 3 months. For the best texture, freeze the soup before adding cream, then add cream or coconut milk after reheating.

Back to Recipe Card · Back to Top

Final Tips for the Best Butternut Squash Soup

Use roasted squash when you have time and the stovetop method when dinner needs to happen faster. Start with less broth, blend until the soup turns glossy, then loosen it only if needed.

Before serving, taste once. If the bowl feels flat, add salt first, then a small splash of lemon, lime, or vinegar. Too thick? Loosen it gently. Too sweet? Give it herbs, heat, crunch, or acidity.

That is the bowl you want: creamy without being dull, sweet without being sugary, warm without being heavy, and easy enough to make again next week — especially with toast, seeds, or a little chili oil on top.