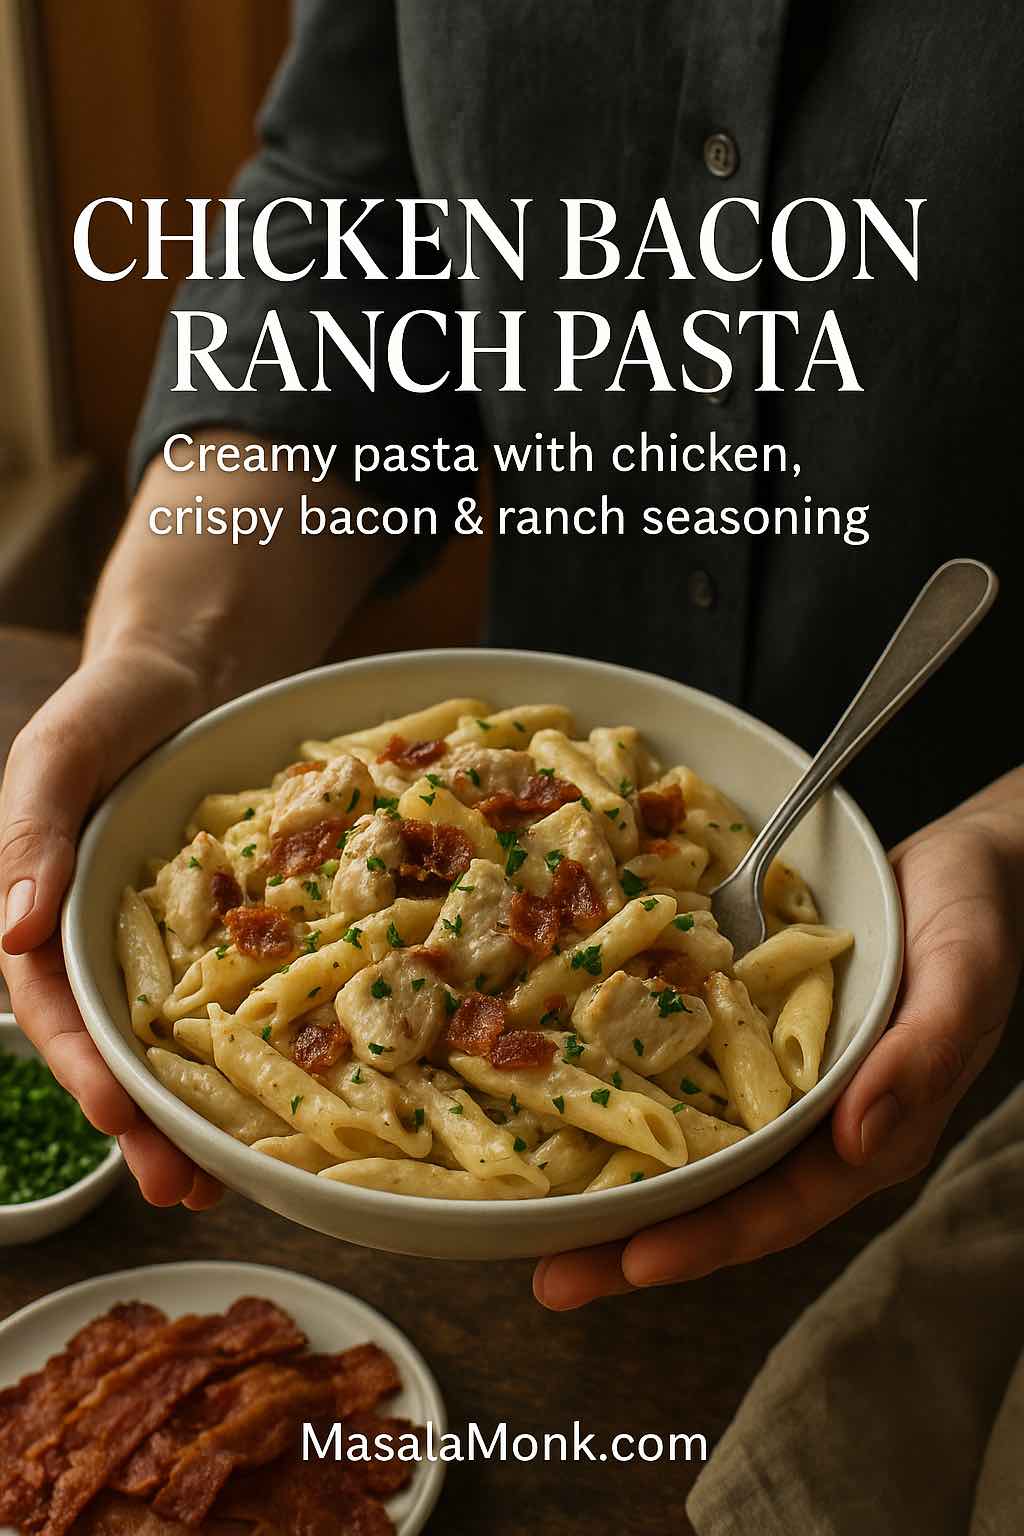
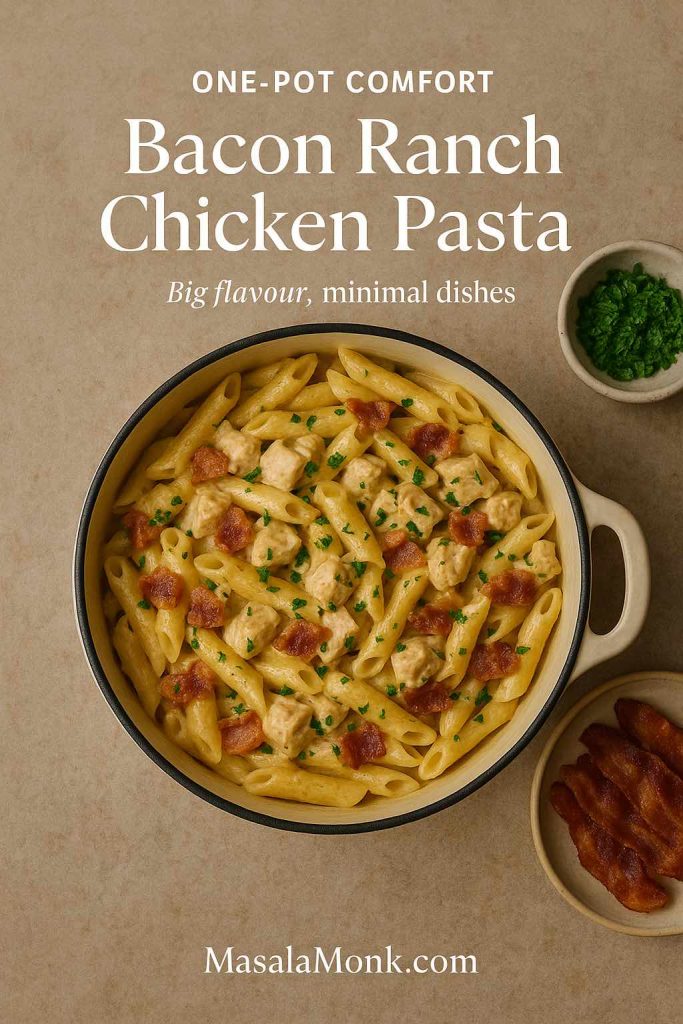
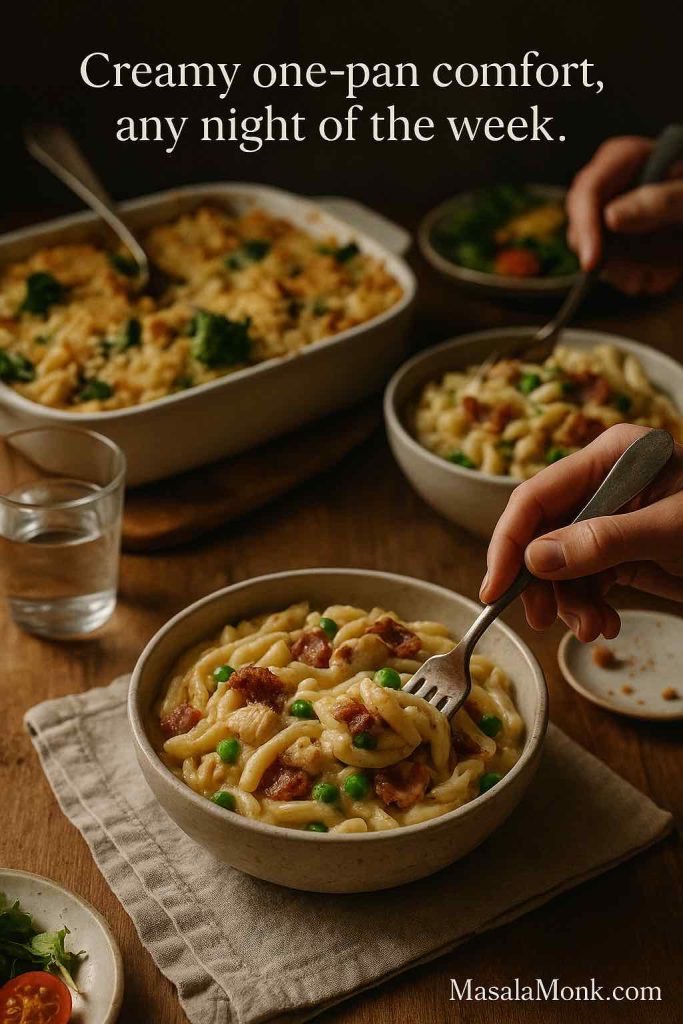
Some evenings call for salad and restraint. Other evenings call for a big, bubbling pan of chicken, bacon and ranch–coated pasta and absolutely no apologies. This one-pot Chicken Bacon Ranch Pasta is made for those nights.
Everything happens in a single pan: tender pasta, juicy chicken, crispy bacon and a silky, ranch-flavoured cheese sauce that clings to every bite. It has all the flavours people love in baked casseroles, slow cooker bacon ranch chicken and pasta dishes, and Instant Pot versions, yet you can make it quickly on the stove with very little fuss.
Once you know the base method, it’s easy to steer this towards a baked bacon ranch pasta casserole, a crock pot version, a lighter chicken ranch pasta without bacon, Alfredo-style twists, spicy Cajun variations, veggie-loaded bowls or even cold pasta salad for the next day.
If creamy pasta nights are your thing, you might also enjoy MasalaMonk’s guide to chicken Alfredo pasta, five ways, or curl up later with their creamy macaroni and cheese – stovetop, baked and Southern-style.
Why This Bacon Ranch Chicken Pasta Works So Well
Before diving into the ingredients, it helps to see why this combination has become such a favourite.
One pot, big flavour
Instead of boiling pasta in one pot, crisping bacon in another and making a sauce in a third, everything cooks together in one deep pan or Dutch oven. The pasta simmers directly in ranch-spiked liquid, soaking up flavours and releasing starch that naturally thickens the sauce.
You end up with something that tastes as indulgent as a cheesy casserole, but without a long oven bake or a pile of dishes. Popular recipes from sites like Belly Full, The Cookie Rookie and The Real Food Dietitians lean into exactly this one-pan approach, because it hits the sweet spot between restaurant-style comfort food and genuine weeknight practicality.
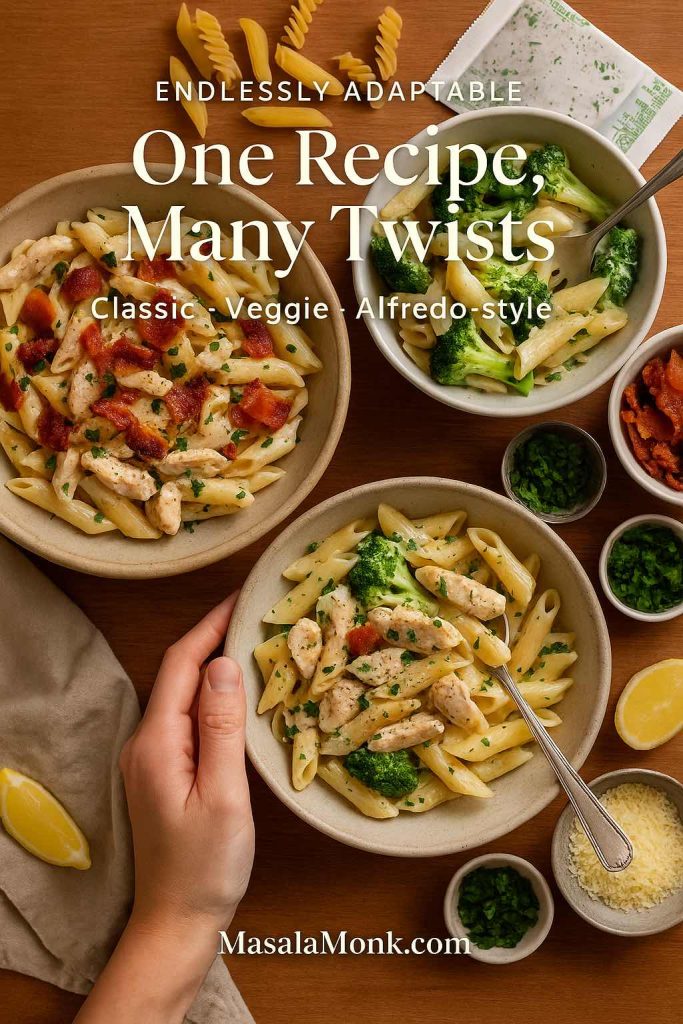
Endlessly adaptable
Once you’ve tried the simple version, you can nudge it in so many directions:
- Make it extra rich with an Alfredo twist.
- Strip it back to a super-simple chicken ranch pasta inspired by 5-ingredient recipes like The Tex-Mex Mom’s one-pot dish.
- Skip pork for a lighter chicken and ranch pasta with vegetables.
- Add broccoli or spinach for a more balanced one-pan dinner.
- Switch the shape to penne, rotini, shells, bowties, spaghetti or even tortellini.
The basic idea stays the same, while the flavours and textures shift to match what you’re craving.
Friendly to shortcuts
This is the kind of recipe that actually likes shortcuts:
- A packet of dry ranch mix (think Hidden Valley style) gives you instant tangy, herby flavour.
- Leftover shredded chicken (for example from a whole chicken cooked in a crock pot) drops straight in.
- Pre-cooked bacon or strips made ahead using this oven-baked bacon method make prep even easier.
Also Read: 10 Best Espresso Martini Recipe Variations (Bar-Tested)
Ingredients for Creamy Ranch Chicken Bacon Pasta
You don’t need fancy ingredients to make this comforting bowl of goodness, but understanding each component makes it easy to customise.
Chicken
Use whichever cut suits you:
- Boneless, skinless breasts for a leaner dish
- Thighs for extra juiciness
- Leftover roast or slow-cooker chicken for speed
Dice raw chicken into bite-sized pieces so it cooks quickly and evenly. If you’re using pre-cooked meat, add it later so it warms through gently instead of drying out.
Bacon
Bacon brings smokiness, salt and texture. Thick-cut slices give you meaty chunks that stay satisfying inside the sauce.
You can:
- Fry chopped bacon directly in the pot at the beginning
- Or prepare a batch ahead of time using the no-mess oven method in this bacon guide
The rendered fat becomes the base for browning your chicken and aromatic ingredients, so you don’t need much added oil.

Pasta
Most short shapes are ideal:
- Penne, rotini, shells and bowties are sturdy and hold sauce well.
- Fusilli or cavatappi trap the creamy coating in their curls.
- Spaghetti or linguine give the dish a “bacon ranch chicken spaghetti” feel that’s slightly more elegant, but just as comforting.
If you’re curious about gluten-free or low-carb options, chickpea, lentil or speciality low-carb pastas can be used too. MasalaMonk explores a range of alternatives in their look at whether pasta has a place in a keto diet.
Ranch flavour
There are several ways to bring that familiar flavour into the pan:
- Dry ranch packet: the classic option, especially if you’re used to Hidden Valley style dishes.
- Homemade seasoning blend: dried dill, parsley, garlic, onion and buttermilk powder let you control the salt.
- Bottled ranch dressing: useful when you want a richer, pourable sauce and a very simple “pasta with ranch dressing” style dinner.
Dry seasoning is especially handy in one-pot and slow cooker recipes, because it disperses easily without thinning the sauce too much.
Also Read: Whole Chicken in Crock Pot Recipe (Slow Cooker “Roast” Chicken with Veggies)
Dairy and creaminess
To create that silky coating, you can combine:
- Chicken stock for savoury depth
- Milk for a lighter base
- Cream or half-and-half for extra richness
- Cream cheese for a velvety finish that many slow cooker and pressure cooker recipes rely on
- Or a little Greek yogurt added at the end for tang and extra protein
Recipes that aim to be a bit lighter, like the healthy meal-prep bowls with Greek-yogurt ranch on MasalaMonk, can inspire how you tweak your own mixture.
Cheese
Parmesan gives the sauce saltiness and depth. To make it more indulgent, you can also use:
- Cheddar, for a flavour close to mac and cheese
- Mozzarella, for stretchy strings when you lift the fork
- Colby Jack or Monterey Jack, which melt smoothly and pair well with Cajun seasoning
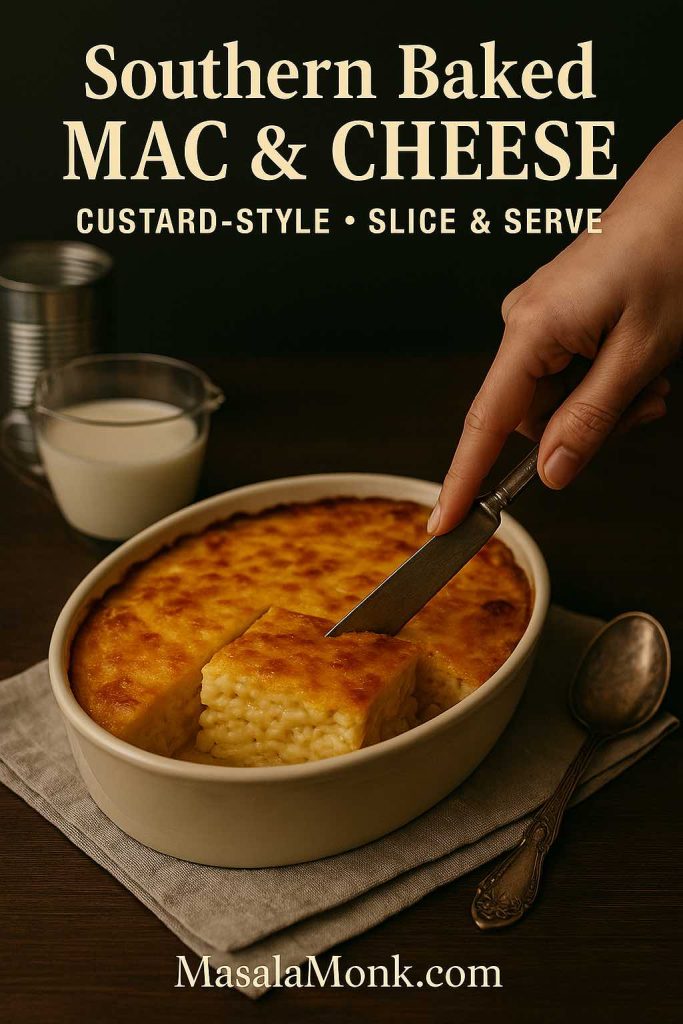
The overall effect is similar to a ranch-flavoured version of MasalaMonk’s creamy macaroni and cheese.
Vegetables and extras
You can keep things simple or build the dish out into a one-pan meal:
- Broccoli florets: classic with both cheese and ranch; think of it as a pasta cousin to cheesy chicken broccoli rice.
- Baby spinach: wilts down into the hot sauce, adding colour and nutrients.
- Peas or sweetcorn: bring sweetness and pops of texture.
- Cajun seasoning or chilli flakes: for those who prefer a spicy kick.
Also Read: Easy Lemon Pepper Chicken Wings (Air Fryer, Oven & Fried Recipe)
Step-by-Step: One-Pot Ranch Chicken Pasta with Bacon
Here’s how to turn the ingredients into a pan of bubbling, creamy comfort, without using more than one pot.
Crisp the bacon
Set a large, heavy-bottomed skillet or Dutch oven over medium heat. Add your chopped bacon and cook, stirring occasionally, until the pieces are crisp at the edges and the fat has rendered.
Scoop the bacon onto a plate lined with paper towel, leaving 2–3 tablespoons of bacon fat in the pan. If the pan looks very dry, you can top it up with a little olive oil.
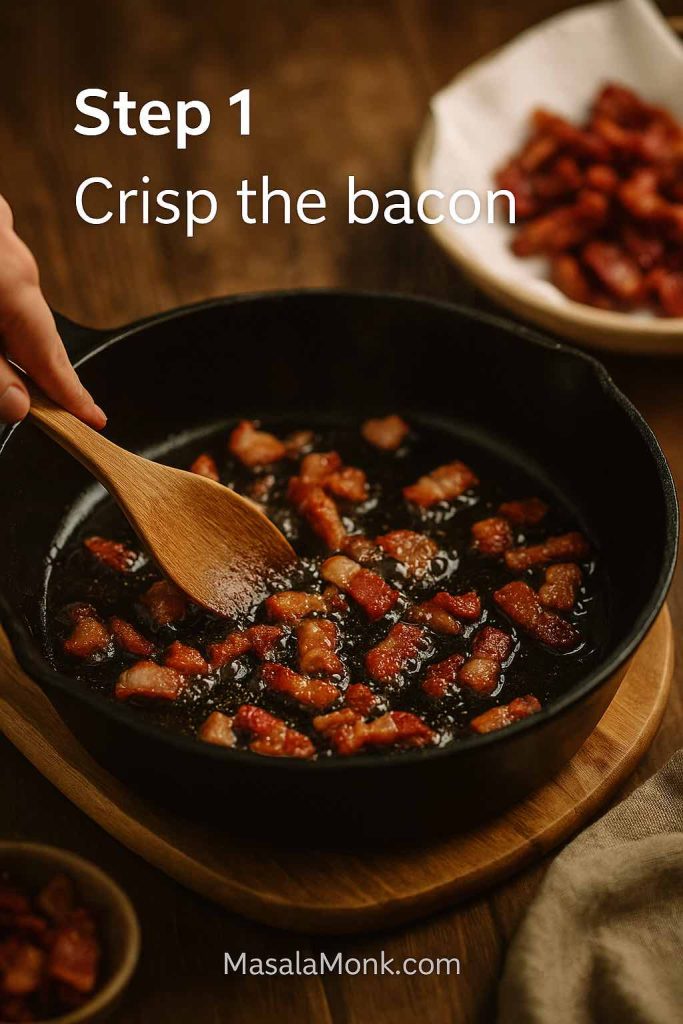
Starting this way means your chicken bacon ranch pasta stovetop version already tastes like it spent extra time developing flavour, even though it’s still a relatively quick dish.
Brown the chicken
Season the cubed chicken lightly with salt, pepper and a teaspoon or so of ranch seasoning. Add it to the hot bacon fat and cook until the edges are golden. It doesn’t need to be fully cooked through yet; it will simmer further with the pasta.
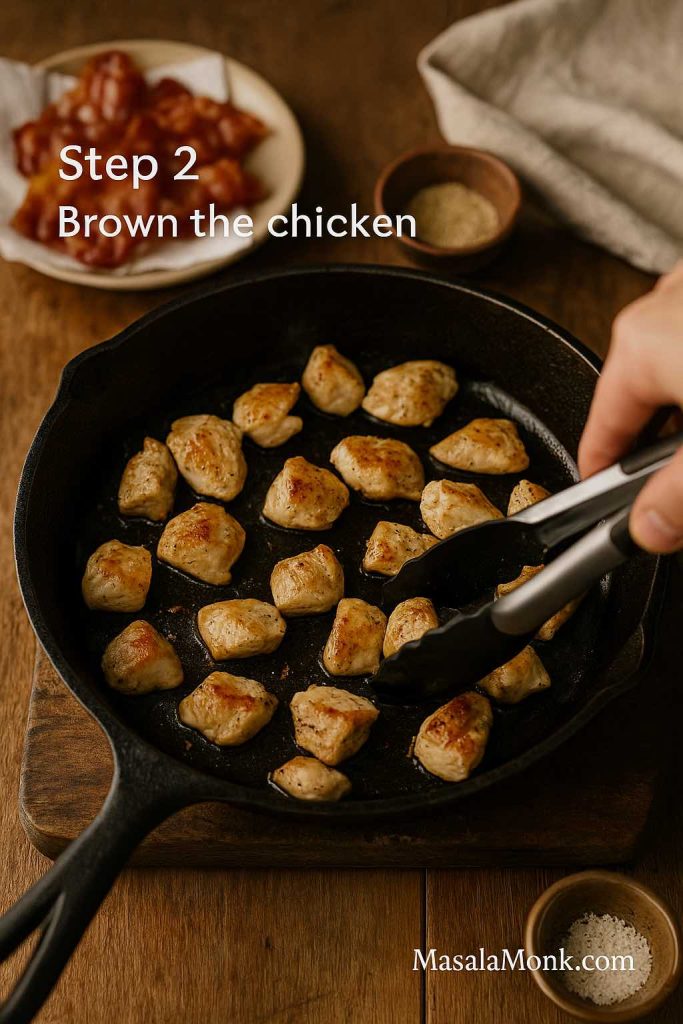
As the chicken browns, it picks up smoky notes from the bacon and ranch. Many popular recipes from places like The Forked Spoon and The Cookie Rookie rely on this same succession of bacon first, chicken second, for maximum flavour.
Remove the chicken to the same plate as the bacon if the pan is very crowded, or simply push it aside if there’s still space to sauté your aromatics.
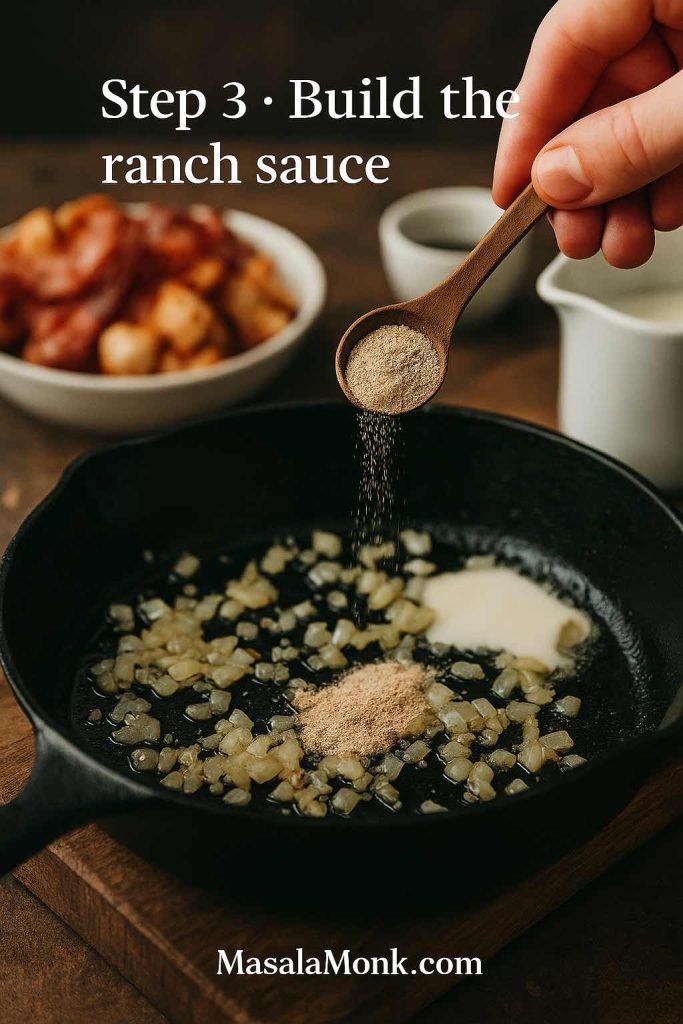
Build the ranch-scented base
Lower the heat slightly and add chopped onion (if using) to the pan. Cook until softened, then stir in minced garlic. When everything smells fragrant, sprinkle in most of your ranch seasoning, keeping a little back for later.
Pour in the chicken stock and milk or cream, scraping up any browned bits from the bottom. This is your fundamental ranch pasta recipe base. If you’re modelling it after classic Hidden Valley ranch chicken pasta dishes, you can dissolve a full envelope of their seasoning into the liquid now.
If you like a creamier texture along the lines of cheesy bacon ranch chicken pasta, whisk in a few spoonfuls of cream cheese until smooth. That technique echoes many bacon ranch chicken pasta slow cooker and Instant Pot creamy chicken bacon ranch pasta recipes, which use cream cheese to stabilise the sauce.
Cook the Pasta Right in the Chicken Bacon Ranch Sauce
Bring the liquid up to a gentle simmer. Tip in your dry pasta, stir well, and let it cook uncovered for a minute or two so the shapes start to soften.
Next, return the browned chicken (and any juices) to the pan, tucking the pieces down into the liquid. Cover the pot and let everything cook, stirring occasionally, until the pasta is just al dente. The exact time will depend on shape—penne and rotini usually take a little longer than smaller shells or elbows, while spaghetti for chicken bacon ranch noodles softens faster.
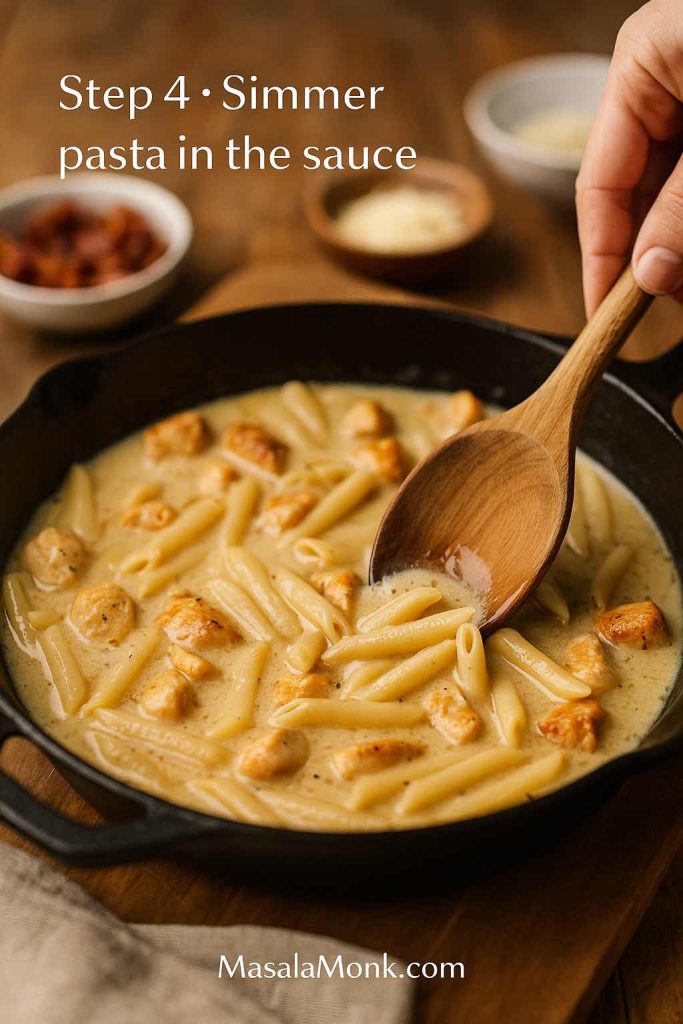
Because the pasta cooks directly in the sauce, you get that luscious, clingy texture similar to a dedicated chicken bacon ranch pasta skillet or one pot chicken ranch pasta recipe. The starch from the pasta turns the stock, dairy and ranch into a glossy coating without needing a separate roux.
If the liquid seems to be reducing too quickly before the pasta is tender, simply splash in a bit more stock or water and keep going.
Finish with cheese and bacon
When the pasta is cooked and the sauce has thickened to your liking, drop the heat right down. Stir in the parmesan and any extra melting cheese you’re using—cheddar for a cheddar bacon ranch pasta vibe, or mozzarella for maximum stretch.
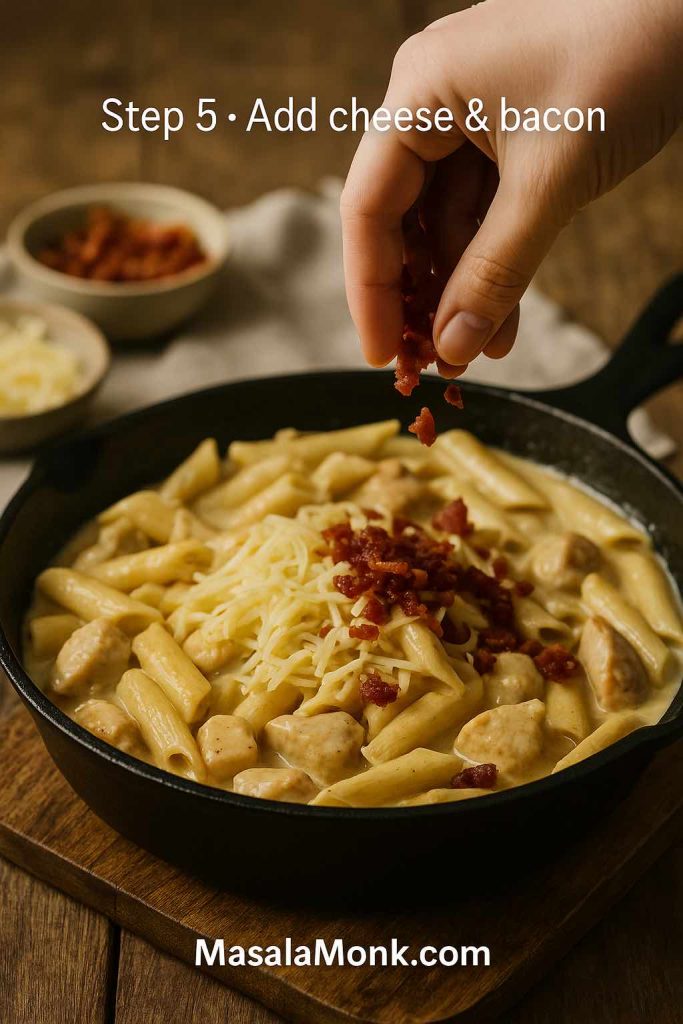
Once the cheese has melted smoothly, fold in most of the crispy bacon, keeping a handful for sprinkling over the top. Taste and adjust the seasoning with more ranch mix, salt or pepper.
At this stage, you have the comforting pan of easy chicken bacon ranch pasta that most people picture: creamy, cheesy, studded with chicken and bacon in every forkful.
Also Read: Katsu Curry Rice (Japanese Recipe, with Chicken Cutlet)
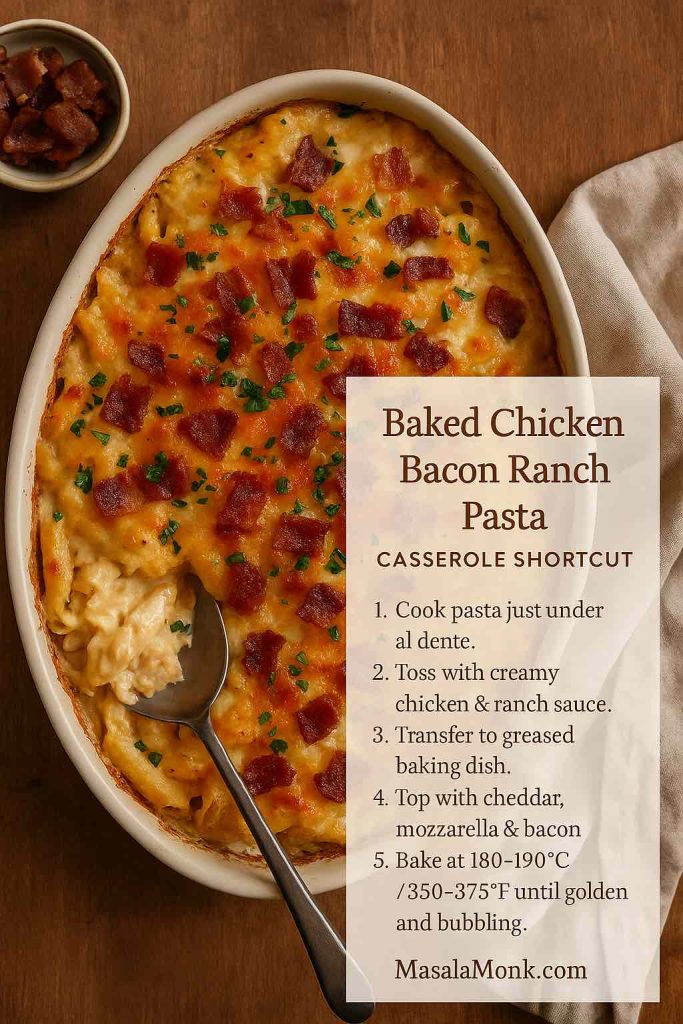
Turning It Into a Baked Chicken Bacon Ranch Pasta Casserole
Sometimes you want browned edges and a crust of bubbling cheese. It’s easy to transform this dish into an oven-baked pasta.
- Cook the pasta slightly under al dente on the stove.
- Grease a baking dish and pour in the pasta mixture.
- Top with extra cheddar, mozzarella and some of the reserved bacon.
- Bake at 180–190°C (350–375°F) until the top is golden and the sauce is bubbling at the sides.
This method gives you a comforting casserole similar in spirit to MasalaMonk’s cheesy chicken broccoli rice bakes or their classic macaroni and cheese, but with the tang of ranch and the smokiness of bacon woven through.
If you prefer a more layered, lasagna-style feel, you can borrow ideas from MasalaMonk’s béchamel sauce for lasagna and swirl a thicker white sauce into some of the pasta before baking.
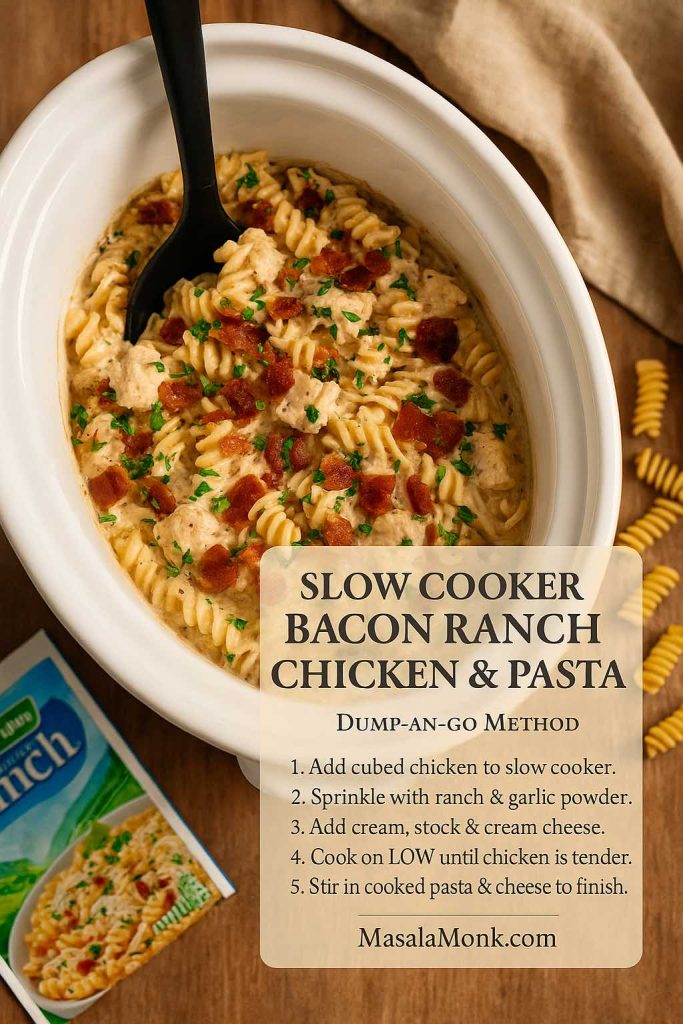
Slow Cooker Bacon Ranch Chicken and Pasta
For days when you want dinner to cook itself while you do other things, the same flavours adapt beautifully to the slow cooker.
A simple approach looks like this:
- Add cubed chicken to the slow cooker.
- Sprinkle over ranch seasoning and garlic powder.
- Dot with cream cheese or pour in a mixture of stock and cream.
- Cook on low until the chicken is tender and shreddable.
- Stir in cooked pasta and cheese towards the end, or cook spaghetti directly in the sauce if your slow cooker runs hot enough.
This “dump and go” style echoes popular recipes, which offer straightforward, family-friendly versions of slow cooker chicken with ranch and bacon.
If you’d like to keep closer to your one-pot stovetop version, you can still brown your bacon and chicken in a pan first, then deglaze with a bit of stock and transfer everything into the slow cooker. You’ll get the same deep flavour, with less attention required while it cooks.
Also Read: Crispy Homemade French Fries From Fresh Potatoes (Recipe Plus Variations)
Instant Pot Ranch Chicken Pasta with Bacon
Pressure cookers are made for recipes where pasta cooks in a seasoned liquid, so this dish is a natural fit. Many well-rated versions, come together in well under 30 minutes.
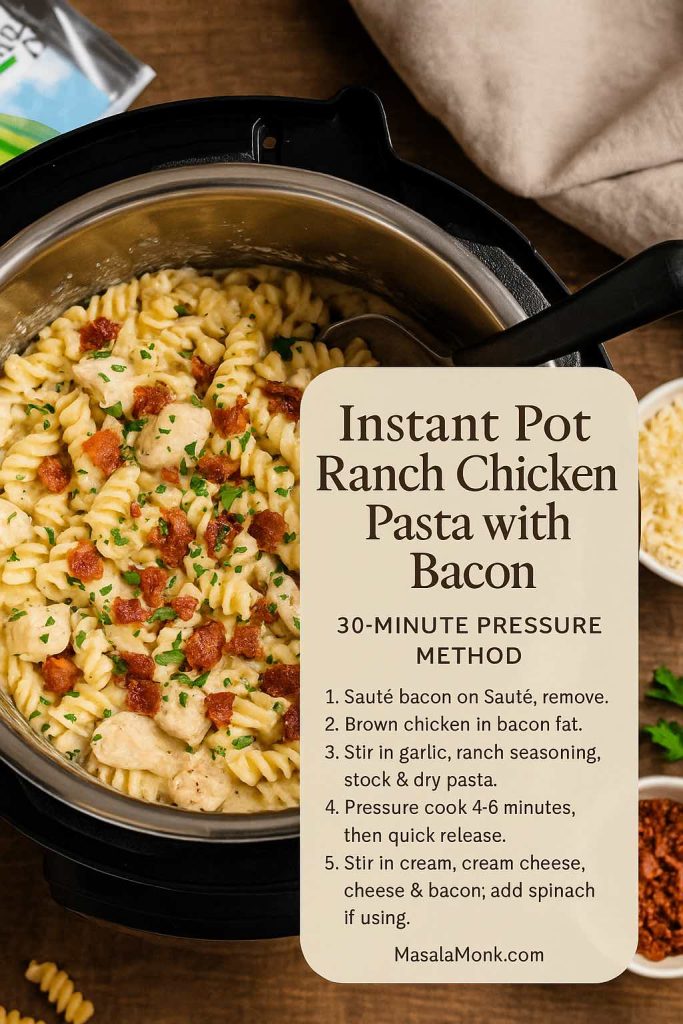
A basic Instant Pot method goes like this:
- Use Sauté mode to crisp bacon. Remove it and leave a thin layer of fat.
- Sauté the chicken until lightly browned.
- Stir in garlic and ranch seasoning.
- Add stock and dry pasta, making sure the pasta is mostly submerged.
- Seal the lid and cook on high pressure for a short time (often 4–6 minutes, depending on pasta shape).
- Quick release the pressure.
- Stir in cream, cream cheese and cheese until the sauce is smooth and thick.
- Fold in bacon and any wilt-in vegetables such as spinach.
You get the same comforting combination—tender pasta, savoury chicken, bacon and creamy ranch sauce—without having to watch the stove. If you like this style of cooking, there are more cosy ideas in MasalaMonk’s pressure-friendly dishes such as their one-pot cheesy chicken broccoli rice.
Alfredo, Cajun and Extra Cheesy Chicken Bacon Ranch Pasta Twists
Once the basic flavours are familiar, it’s fun to play with the sauce and spices.
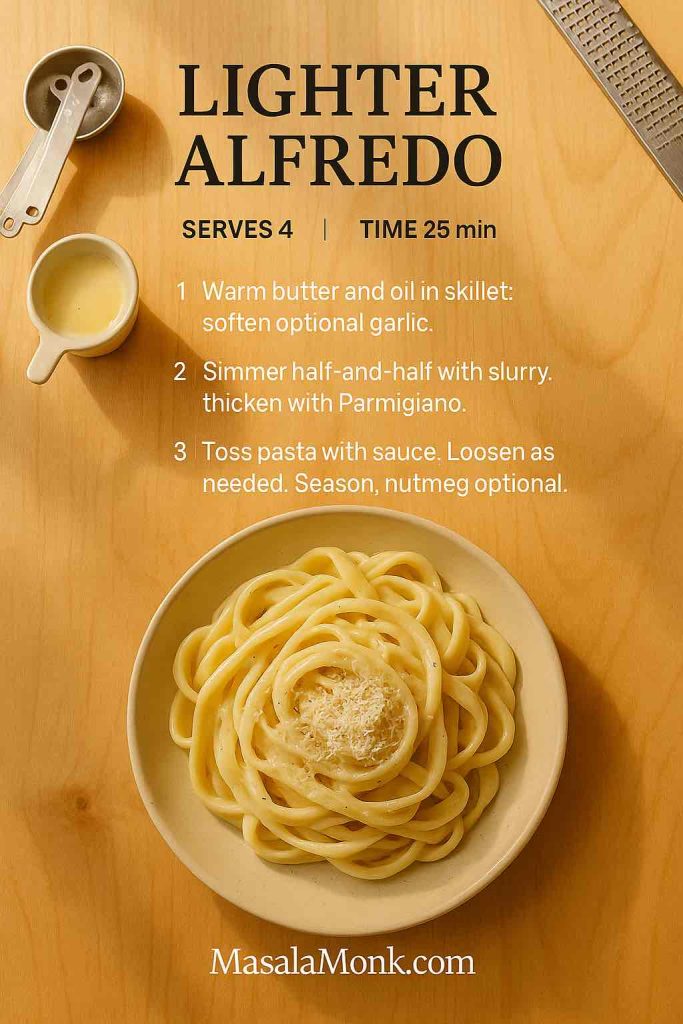
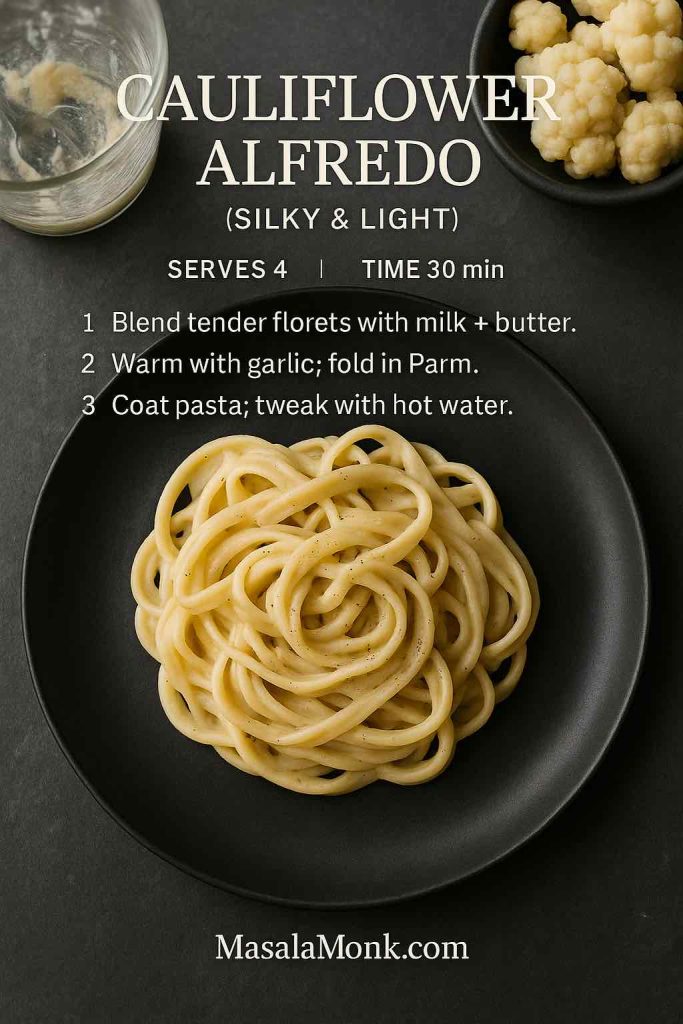
Alfredo-inspired variation
To lean towards Alfredo, you can:
- Swap a portion of the milk and cream for a jar of Alfredo sauce or a homemade version.
- Keep ranch seasoning on the lighter side so the Alfredo character still comes through.
- Add extra parmesan and a little butter at the end.
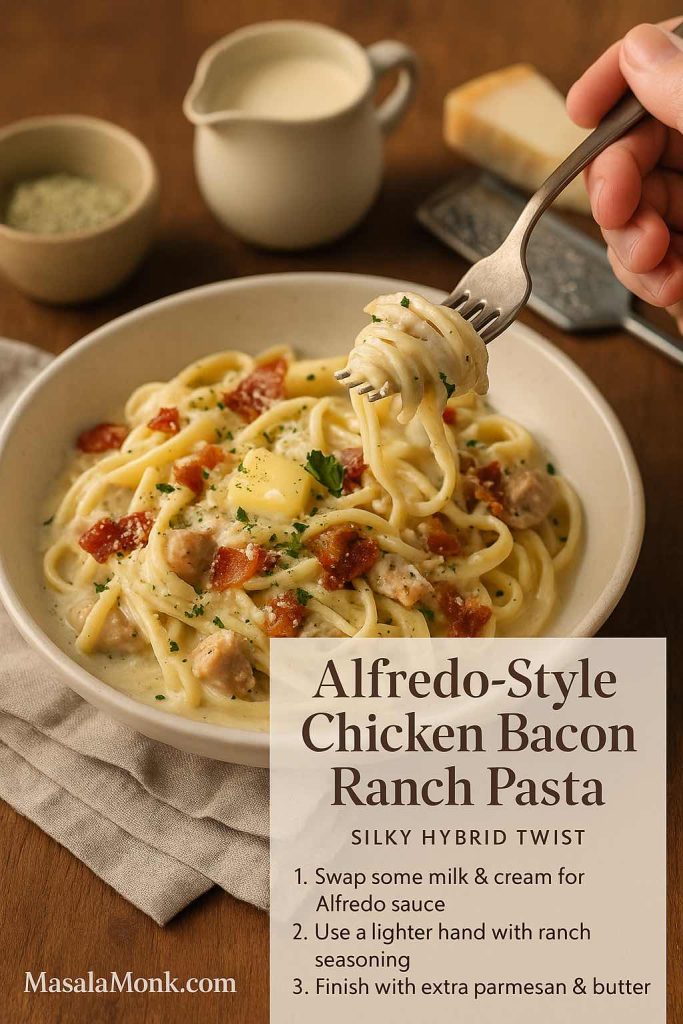
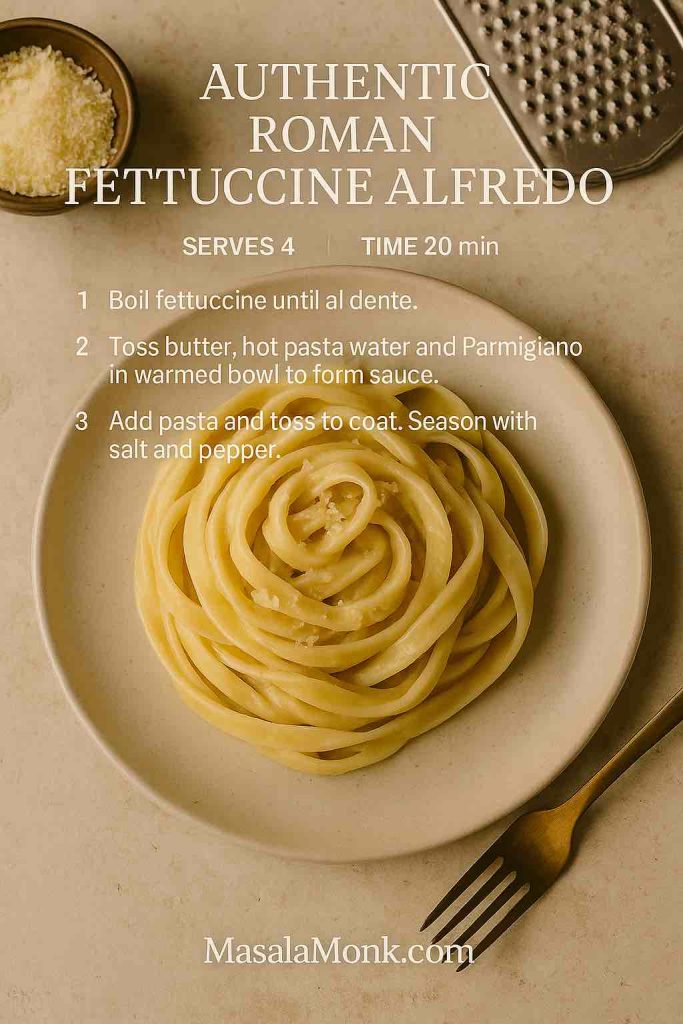
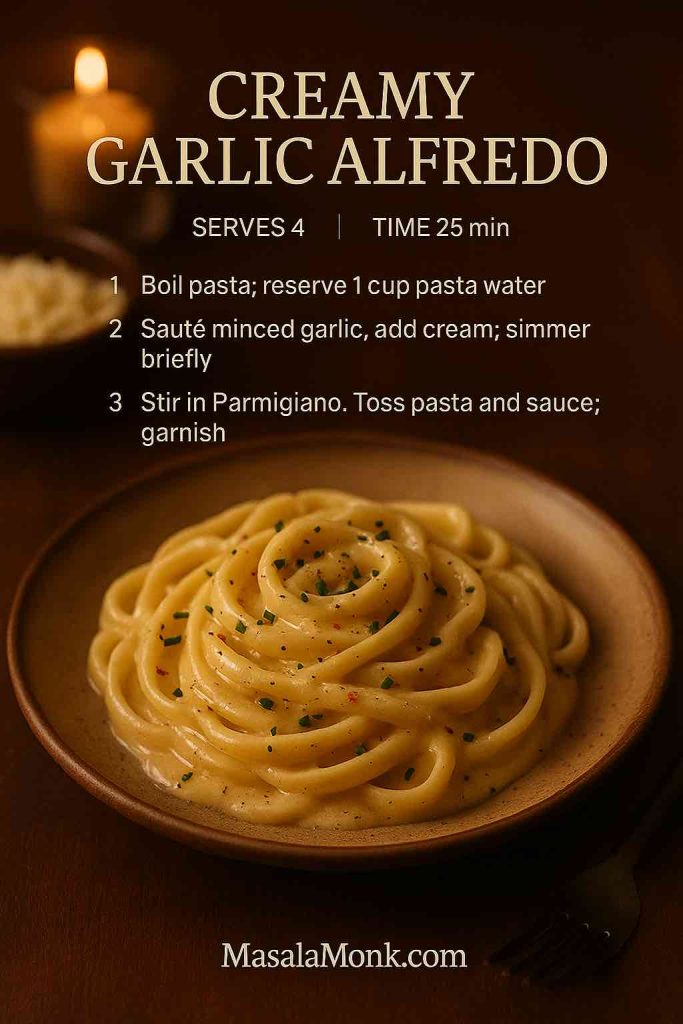
You’ll get a silky, indulgent hybrid of Alfredo and ranch. For more detailed sauce technique and inspiration, MasalaMonk’s guides to classic vs authentic Alfredo and Indian-inspired Alfredo twists are both helpful.
Spicy and Cajun version
If you enjoy heat, Cajun seasoning pairs beautifully with ranch and bacon:
- Add a spoonful to the chicken as it browns.
- Stir a little into the sauce alongside the ranch mix.
- Finish with a pinch of chilli flakes or sliced jalapeños on top.

The result is a bolder, smoky bowl of pasta with just enough kick to keep each bite exciting.
Extra-cheesy “mac and cheese” style
For full mac and cheese energy:
- Use a mix of cheddar and mozzarella along with parmesan.
- Bake the dish with a light breadcrumb topping until crisp.

You’ll end up with a casserole that sits somewhere between traditional mac and cheese and a ranch-flavoured chicken bacon bake, reminiscent of MasalaMonk’s macaroni and cheese recipe.
Lighter Chicken Bacon Ranch Pasta Options
This is undeniably comfort food, yet there are a few ways to nudge it in a lighter direction without losing its character.
With broccoli, peas and less bacon
For a more balanced pan of pasta:
- Start with a smaller amount of bacon for flavour and crisp garnish.
- Use olive oil for the rest of the cooking fat.
- Add plenty of broccoli florets, peas or both to the pan while the pasta cooks.
- Use more milk than cream, and go easy on the cheese.
This kind of approach is similar in spirit to Eat the Gains’ chicken ranch pasta with broccoli and Slimming Eats’ easy creamy chicken ranch pasta, which aim to keep things creamy but not overly heavy.

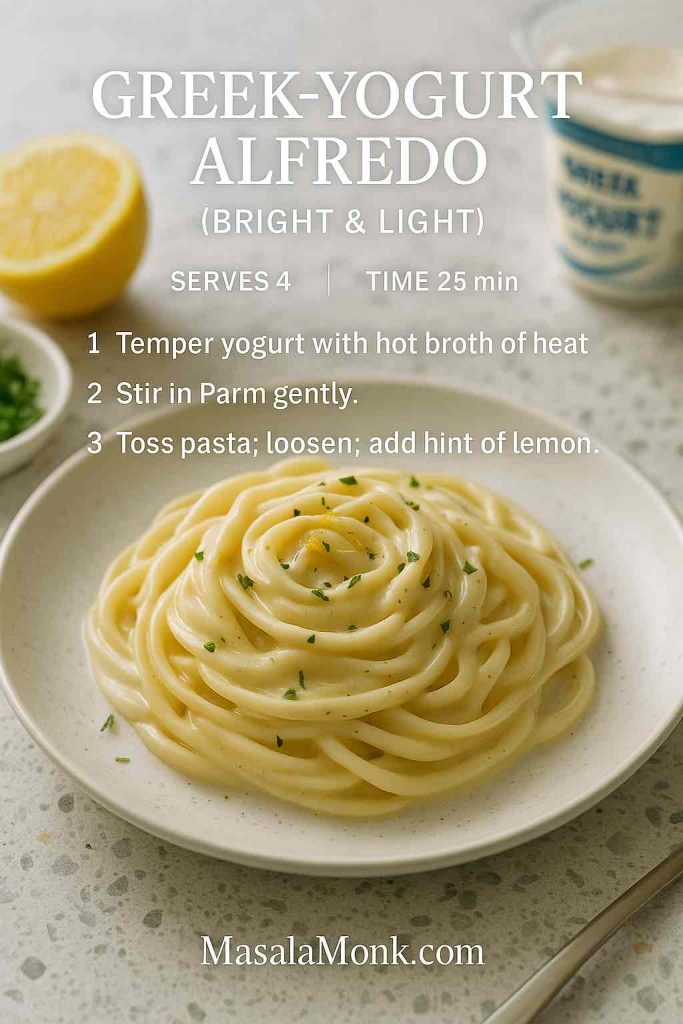
With Greek yogurt and lighter ranch
Another option is to stir in Greek yogurt at the end instead of using all cream. Off the heat, it blends into the sauce and adds tang without splitting.
You can also use a lighter, yogurt-based ranch dressing like the ones MasalaMonk uses in their healthy 5-day meal prep bowls. It’s a good way to keep the flavour profile you love while dialing back richness.
Pasta Shapes for Chicken Bacon Ranch Pasta and Using Leftovers
Because everything cooks in one pot, pasta shape affects not only texture but also how the sauce behaves.
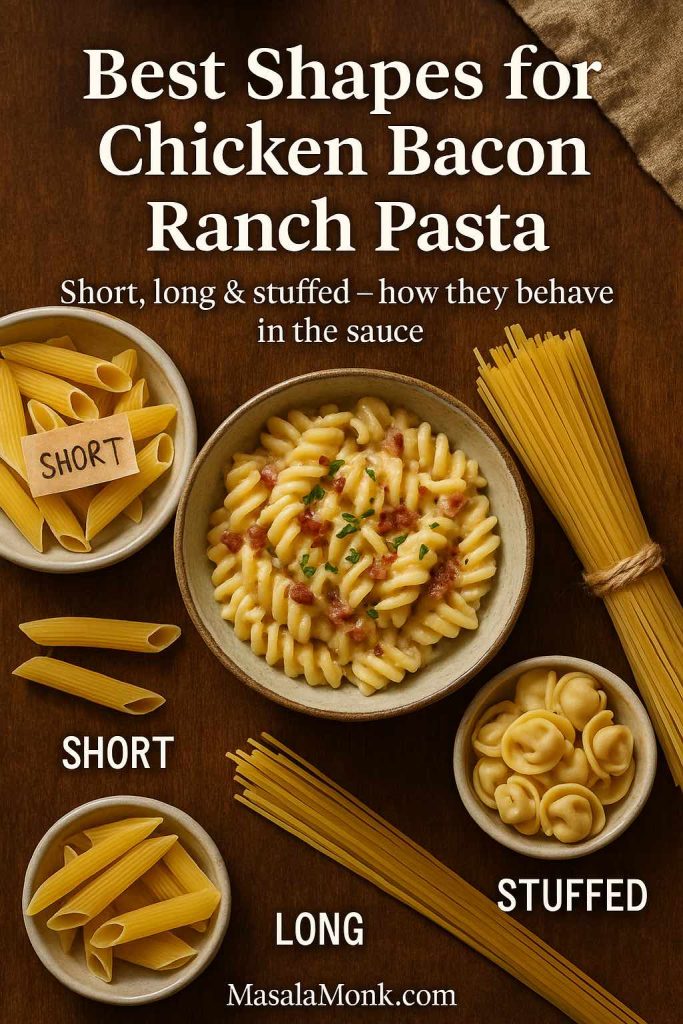
Short shapes
Penne, rotini, shells, bowties and similar shapes:
- Hold sauce in ridges and hollows
- Reheat well the next day
- Are forgiving if you need to simmer a little longer
These are ideal if you’re planning lunches from leftovers or turning the dish into a baked casserole.
Long noodles
Spaghetti, linguine and fettuccine give the dish a slightly more refined feel. They’re great if you like slurpable strands coated in creamy sauce.
Stir a bit more often to prevent clumping, and consider breaking the strands in half before adding them to the pot.
Also Read: Simple Bloody Mary Recipe – Classic, Bloody Maria, Virgin & More
Stuffed pasta
Cheese-filled tortellini or similar shapes turn this into something even more decadent. They’re a fun way to take the recipe in a special-occasion direction with hardly any extra work.
Storing and reusing
Leftovers keep well in the fridge for a couple of days. As the dish cools, the sauce thickens, giving you a texture not unlike pasta salad.
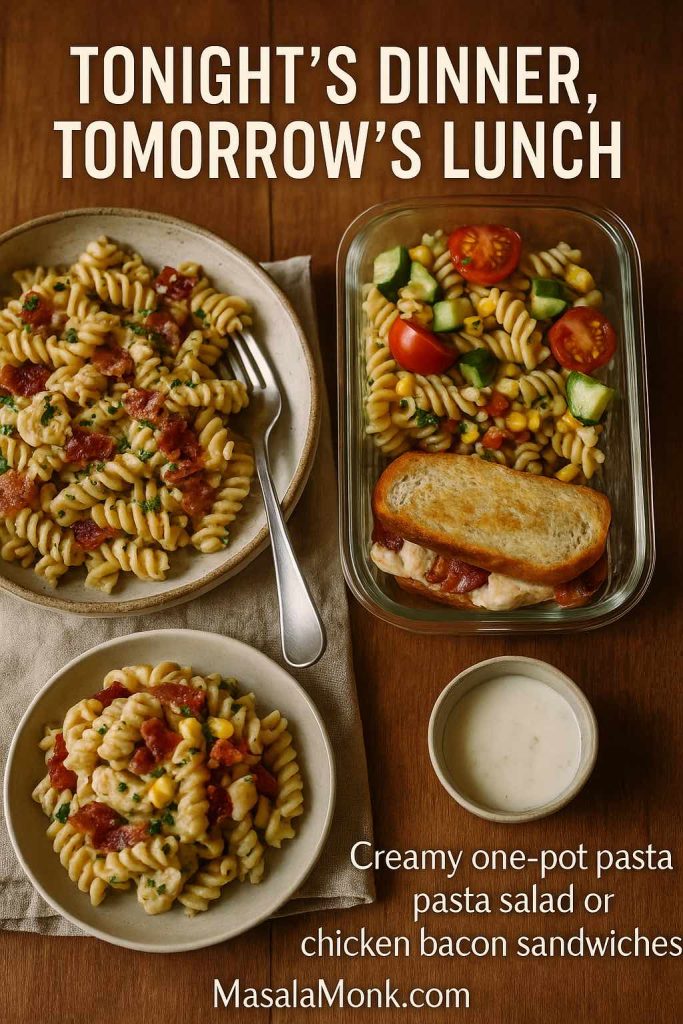
With leftovers of chicken bacon ranch pasta you can:
- Loosen it with a spoonful of milk or ranch dressing before reheating.
- Turn it cold into a hearty pasta salad by adding cherry tomatoes, cucumber and sweetcorn, then adjusting the seasoning.
- Use leftover chicken and bacon pieces in sandwiches the next day; MasalaMonk’s collection of chicken sandwich recipes includes ideas that pair perfectly with a smaller scoop of reheated pasta on the side.
What to Serve with Chicken Bacon Ranch Pasta
Because this dish is rich and comforting, a few simple sides help balance the plate.

Fresh and crisp
A crunchy salad with a sharp vinaigrette or lemony dressing cuts through the creaminess. Sliced cucumbers, cherry tomatoes and red onion tossed with a light yogurt ranch dressings also work nicely.
If you enjoy dips and spreads, MasalaMonk’s selection of spinach dip recipes can inspire a small platter of raw vegetables and crackers to nibble alongside.
Bread and “sauce catchers”
Garlic bread, crusty rolls or toasted baguette slices are natural companions. They’re wonderful for scooping up any remaining sauce and bacon bits from the bottom of the bowl.
Also Read: French 75 Cocktail Recipe: 7 Easy Variations
By the time you’ve cooked this a couple of times, you’ll have a reliable, flexible one-pan dinner up your sleeve that can shapeshift into all kinds of variations. Some nights it might be a quick stovetop bowl of creamy ranch chicken pasta with bacon and peas; others it might become a deeply cheesy, oven-baked casserole with broccoli tucked in and crumbs on top.
Either way, it’s the sort of dish that makes the table go quiet for a few minutes while everyone just eats, and sometimes that’s exactly what dinner should do.
FAQs for Chicken Bacon Ranch Pasta
1. Can I make chicken bacon ranch pasta ahead of time?
Yes, chicken bacon ranch pasta keeps well, so you can absolutely make it in advance. Cool it quickly, then store it in an airtight container in the fridge for up to 3 days. When reheating, add a splash of milk, cream, or even a spoonful of ranch dressing to loosen the sauce, since it thickens as it chills. Warm it gently on the stove over low heat, stirring often, or reheat in the microwave in short bursts so the chicken doesn’t dry out.
2. How do I stop the sauce from curdling when I reheat chicken bacon ranch pasta?
Curdling usually happens when dairy gets too hot too fast. To avoid that, reheat chicken bacon ranch pasta over low heat and stir frequently. Add a little extra liquid first (milk, cream, or stock), and bring everything up to temperature slowly rather than blasting it on high. If you’re using Greek yogurt in a lighter chicken ranch pasta, always stir it in off the heat and avoid boiling once it has been added.
3. Can I make chicken bacon ranch pasta without cream cheese?
You can definitely skip cream cheese and still end up with a rich chicken bacon ranch pasta. In that case, rely on a combination of stock, milk or cream, and grated cheese to make the sauce velvety. Simmer the pasta in the liquid until it has released enough starch to thicken everything naturally. If you still want a bit more body, whisk in a small knob of butter or a spoonful of extra parmesan at the end instead of cream cheese.
4. Is there a way to make chicken bacon ranch pasta a bit healthier?
There are several easy tweaks. Swap some or all of the cream for milk or evaporated milk, and use less cheese overall while choosing a strongly flavoured one like parmesan so a small amount goes further. Reduce the amount of bacon and keep most of it as a crunchy topping rather than mixing it all into the sauce. Furthermore, add plenty of vegetables such as broccoli, peas, spinach or bell peppers so the final bowl has more colour and fibre. For an even lighter chicken ranch pasta, you can omit bacon entirely and rely on herbs, garlic and ranch seasoning.
5. What’s the best pasta shape for chicken bacon ranch pasta?
Short shapes like penne, rotini, shells and bowties are usually the most forgiving because they hold onto the ranch sauce and stand up well to one-pot cooking and reheating. However, spaghetti, linguine or fettuccine are great if you like long strands coated in a silky bacon ranch sauce, you just need to stir more often to prevent clumping. Stuffed shapes like cheese tortellini also work if you’re after an ultra-indulgent version, though they tend to be better in a slightly looser sauce so the filling doesn’t dry out.
6. Can I make chicken bacon ranch pasta in the slow cooker?
You can, and it’s surprisingly straightforward. Put the chicken, ranch seasoning, garlic and cream cheese (or cream) into the slow cooker with enough stock to cover. Cook on low until the chicken is tender and shreddable. Toward the end, stir in cooked pasta and grated cheese so it doesn’t overcook. Some people like to cook the pasta directly in the slow cooker; if you try that, add it near the end and keep an eye on the texture so it doesn’t turn mushy.
7. How do I adapt this to Instant Pot chicken bacon ranch pasta?
To make an Instant Pot version, use Sauté mode to cook the bacon first, then brown the chicken in the rendered fat. Stir in ranch seasoning, garlic and stock, followed by the dry pasta, making sure the pasta is mostly submerged. Pressure cook for a short time, release the pressure, and then stir in cream, cream cheese and cheese until smooth. Finally, fold in the bacon and any soft vegetables like spinach. It’s a fast way to get chicken bacon ranch pasta on the table with very little hands-on time.
8. Can I use bottled ranch dressing instead of a dry ranch packet?
Yes, bottled ranch dressing works, though it gives a slightly different result. Dry ranch seasoning is concentrated and doesn’t dilute the sauce, which is why it’s popular in many one-pot and slow cooker chicken ranch pasta recipes. Bottled dressing adds flavour and creaminess but also thins the sauce. If you use bottled ranch, reduce the amount of other liquid slightly and taste as you go; you may need less salt because dressing is often quite seasoned already.
9. How do I make a good chicken bacon ranch pasta without bacon?
For a bacon-free version, cook the chicken in olive oil or butter with garlic, onion and ranch seasoning. Build the sauce with stock, milk or cream, then add plenty of vegetables for texture and flavour. You might want a little extra parmesan or a pinch of smoked paprika to replace the bacon’s savoury edge. This style of chicken ranch pasta still feels creamy and comforting, only lighter and friendlier for people who don’t eat pork.
10. What cheeses work best in chicken bacon ranch pasta?
Parmesan is almost always a good starting point thanks to its salty, nutty flavour. Cheddar is excellent if you want a mac-and-cheese-style chicken bacon ranch pasta bake, while mozzarella provides that classic stretch when you lift your fork. Jack-style cheeses melt very smoothly and are ideal if you plan to add Cajun seasoning or chilli for a spicier twist. Start with parmesan, then layer one or two melting cheeses depending on how gooey you want the final dish.
11. Can chicken bacon ranch pasta be frozen?
It can be frozen, although the texture changes slightly. For best results, undercook the pasta a little, cool everything quickly, then portion into freezer-safe containers. When you reheat, thaw in the fridge overnight if possible, add a splash of milk or stock, and warm it slowly on the stove, stirring often. The sauce may separate a bit at first but usually comes back together as you stir in the extra liquid and gently heat it through.
12. How can I turn leftover chicken bacon ranch pasta into a pasta salad?
Leftovers make a great base for a cold pasta dish. Once chilled, the sauce thickens and clings to the pasta. To transform it, stir in a spoonful or two of ranch dressing or plain yogurt to loosen the coating. After that, add chopped tomatoes, cucumber, sweetcorn, red onion or olives, then taste and adjust with a little extra salt, pepper or lemon juice. Serve it straight from the fridge as a hearty chicken ranch pasta salad.
13. Is there a good way to make spicy chicken bacon ranch pasta?
To add heat, mix Cajun seasoning or chilli flakes into the dish at different stages. You can season the chicken while it browns, add more spice with the ranch seasoning when building the sauce, and finish with extra chilli on top. Jalapeños, hot sauce or smoked paprika also work well. The key is to taste gradually so the heat complements the creamy ranch instead of drowning it out.
14. How can I keep the bacon crispy in chicken bacon ranch pasta?
If you want truly crisp bacon pieces, cook the bacon until well rendered and crunchy, then set most of it aside. Stir just a portion into the sauce so it flavours the dish, and sprinkle the rest over the top right before serving. You can also cook bacon separately in the oven, which tends to dry it out pleasantly and keep it crunchy even when scattered over a creamy pasta.
15. What side dishes go well with chicken bacon ranch pasta?
Because this dish is rich, lighter sides work beautifully. Simple salads with lemony dressing, crisp cucumber and tomato bowls, or green beans with garlic are all excellent choices. Additionally, crusty bread, garlic toast or warm rolls are handy for catching every last streak of sauce. If you’re feeding a crowd, you can round things out with a tray of roasted vegetables or a big bowl of slaw to balance the creamy pasta.