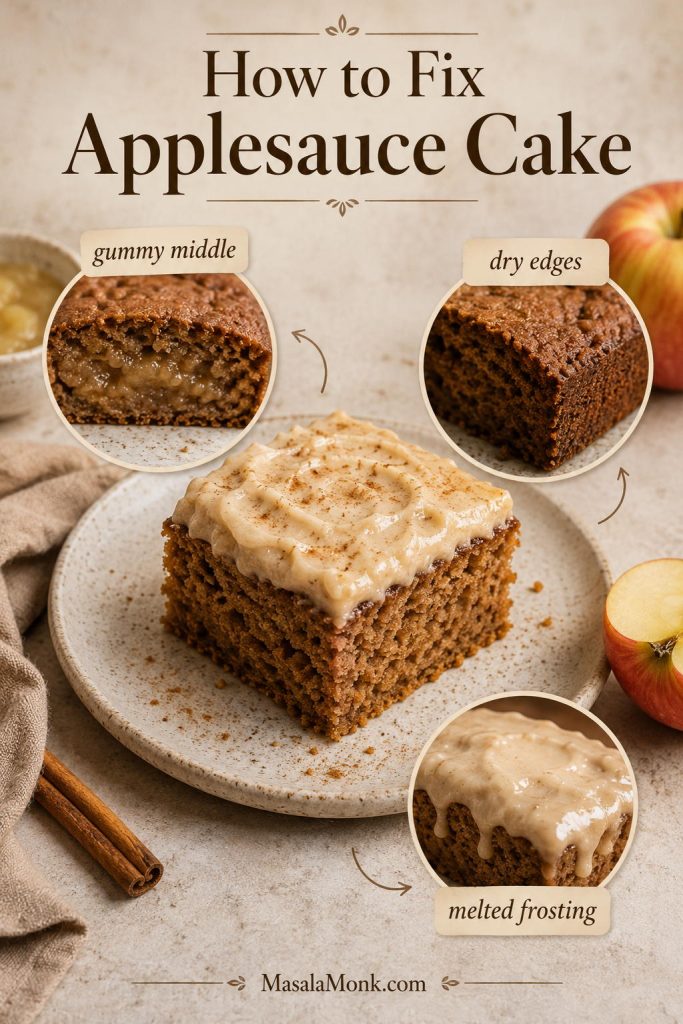
Applesauce cake usually starts with one very specific craving: a soft, warmly spiced cake that feels old-fashioned without being dry, heavy, or fussy. This applesauce cake recipe is built around that craving, but also around the problems that can sneak in. Applesauce sounds like it should guarantee moisture, yet the middle can still turn gummy, the edges can dry out, the spices can taste flat, or the frosting can melt because the cake was still warm underneath.
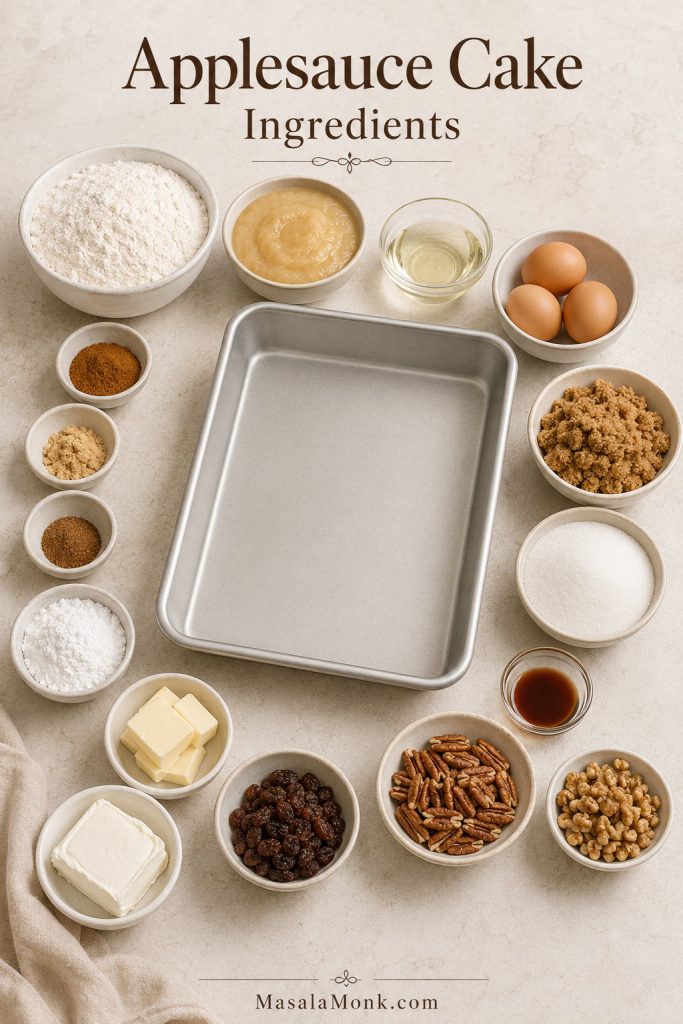
The goal here is to prevent those problems before they happen. This easy applesauce cake bakes in a 9×13 pan with unsweetened applesauce, brown sugar, neutral oil, eggs, vanilla, cinnamon, ginger, nutmeg, and a small pinch of clove or allspice. Applesauce keeps the cake moist, while oil keeps the crumb tender after it cools.
The flavor is apple-spice rather than fresh-apple-chunk cake: cinnamon first, brown sugar underneath, gentle apple in the background, and a tangy cream cheese finish if you frost it. Think of it as an old-fashioned snack cake dressed up just enough for dessert. Dust it with powdered sugar when you want something simple with coffee, or fold in raisins and walnuts when you want the kind of cake that tastes like it came from an older recipe box.
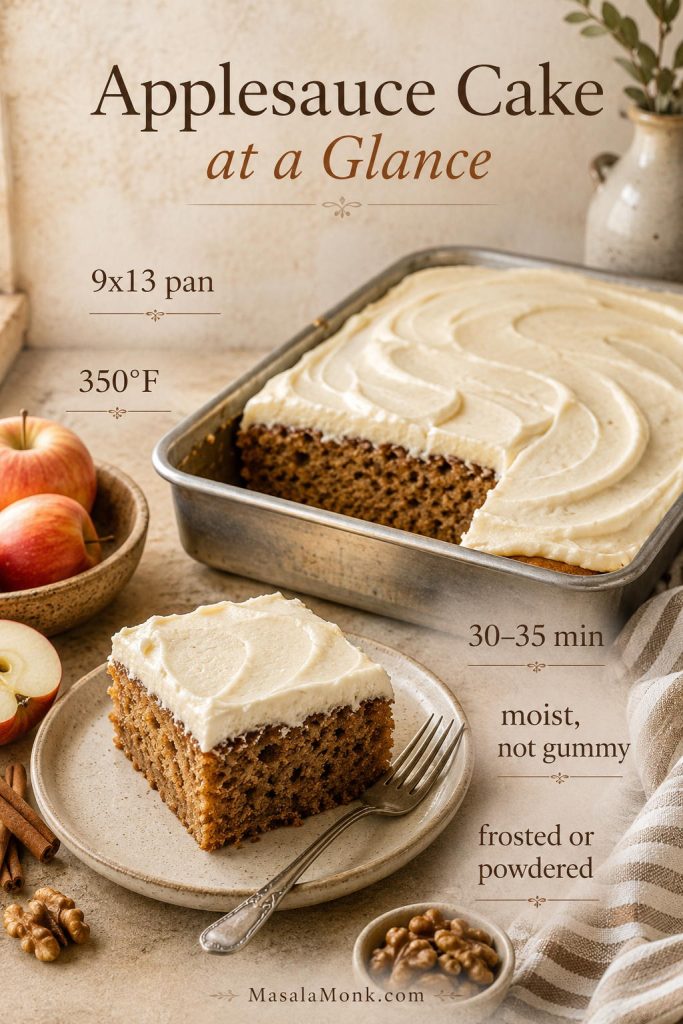
Applesauce Cake at a Glance
What This Applesauce Cake Guide Covers
Use this guide for the full cake, frosting choices, pan swaps, shortcut options, storage, and the small baking decisions that keep this cake moist instead of gummy.
Make the Cake
Fix, Change, and Store It
Quick Answer: Moist 9×13 Applesauce Cake
For a moist applesauce cake, bake a 9×13-inch pan at 350°F / 175°C for about 30 to 35 minutes. Use unsweetened applesauce, brown sugar, eggs, warm spices, vanilla, and a moderate amount of neutral oil. The cake is done when the center springs back lightly and a toothpick comes out clean or with a few moist crumbs.
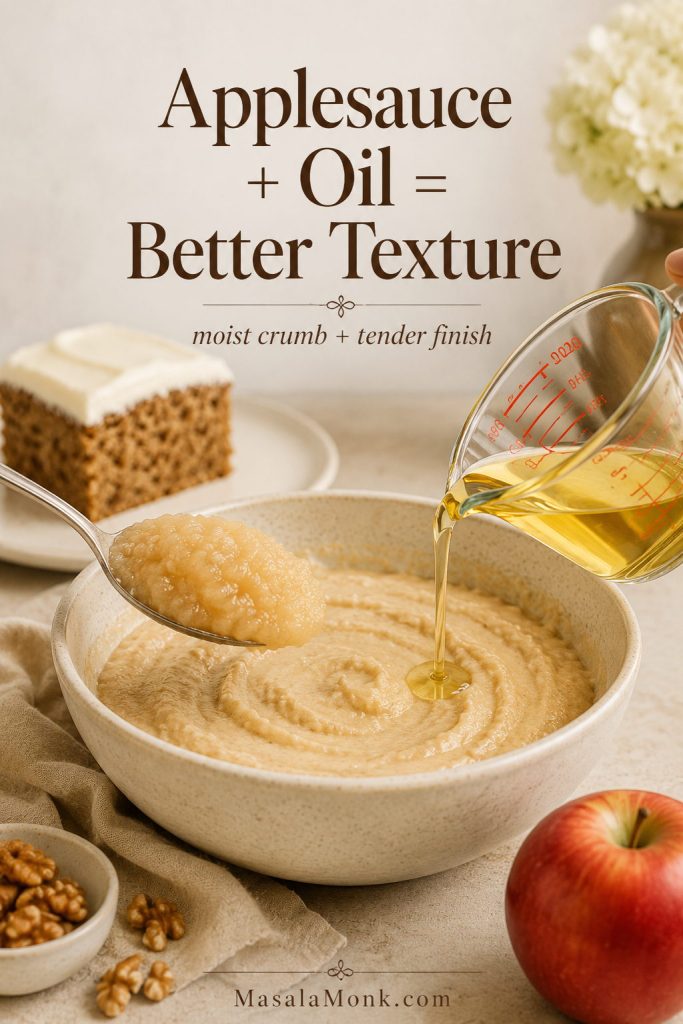
The most important texture rule is simple: applesauce adds moisture, but it does not replace fat perfectly. A no-oil version may sound appealing, but it is much more likely to bake up dense, chewy, or gummy. A little oil gives the crumb softness, especially after the cake has cooled and rested.
Need the visual cues before baking? Jump to the Applesauce Cake Texture Checklist before you mix the batter.
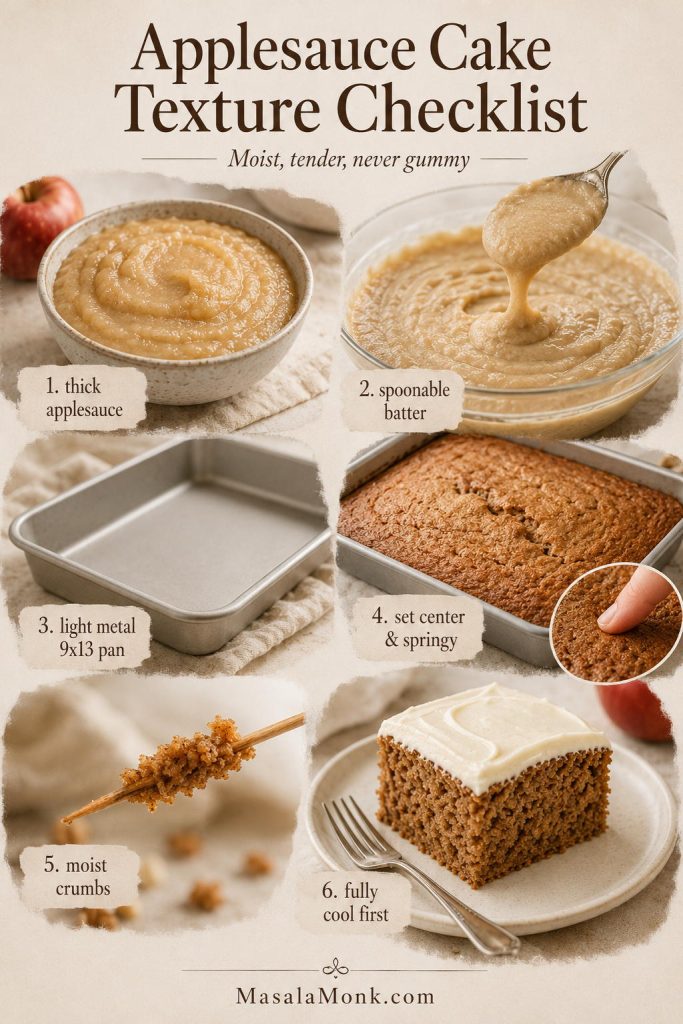
Applesauce Cake Texture Checklist
Once those cues make sense, go straight to how to make applesauce cake without a gummy center, or use the recipe card if you are ready to bake.
Why This Recipe Works
The texture comes down to balance: enough applesauce for moisture, enough oil for tenderness, and enough structure for clean slices. Applesauce gives the cake its soft, damp crumb and quiet apple flavor, but oil is what keeps that crumb tender after the pan cools. Eggs help it set cleanly, while brown sugar, cinnamon, and the supporting spices make the apple flavor feel fuller.
A 9×13 pan helps too. It gives the batter enough room to bake evenly, cools faster than a deep Bundt or loaf, and makes the finished cake easy to frost, slice, store, and share. This is the kind of pan cake that works for potlucks, after-school snacks, holiday tables, and casual weekends when you want the house to smell like cinnamon without building a layer cake.
Resting does this cake a favor. Warm spice cakes often taste fuller after a few hours because the cinnamon, applesauce, brown sugar, and vanilla have time to settle into the crumb. That makes this a useful make-ahead dessert, especially if you bake it one day and frost it the next.
There is one place where this recipe stays deliberately practical: it does not remove every bit of fat just because applesauce is in the batter. Applesauce can replace some oil or melted butter in certain bakes, but replacing too much can change the texture. Bon Appétit has a helpful explainer on using applesauce as an oil or butter replacement; the same lesson applies here. Applesauce brings moisture, but fat still matters for tenderness.
What Makes This an Old-Fashioned Applesauce Cake?
Old-fashioned applesauce cake is not just about the ingredient list. It is about the mood of the cake: simple pan, pantry ingredients, warm spice, soft crumb, and a flavor that feels better the next day. It should not need decoration to be good. A square dusted with powdered sugar should still feel complete.
The old-fashioned feeling stays, but the method gets a little more precise. The base cake is soft and spiced, the frosting is optional rather than mandatory, and the add-ins are flexible. In some families, raisins and walnuts are expected. Others want a plain soft square with powdered sugar. For dessert people, cream cheese frosting is what makes the cake feel complete. This recipe can handle all three camps.
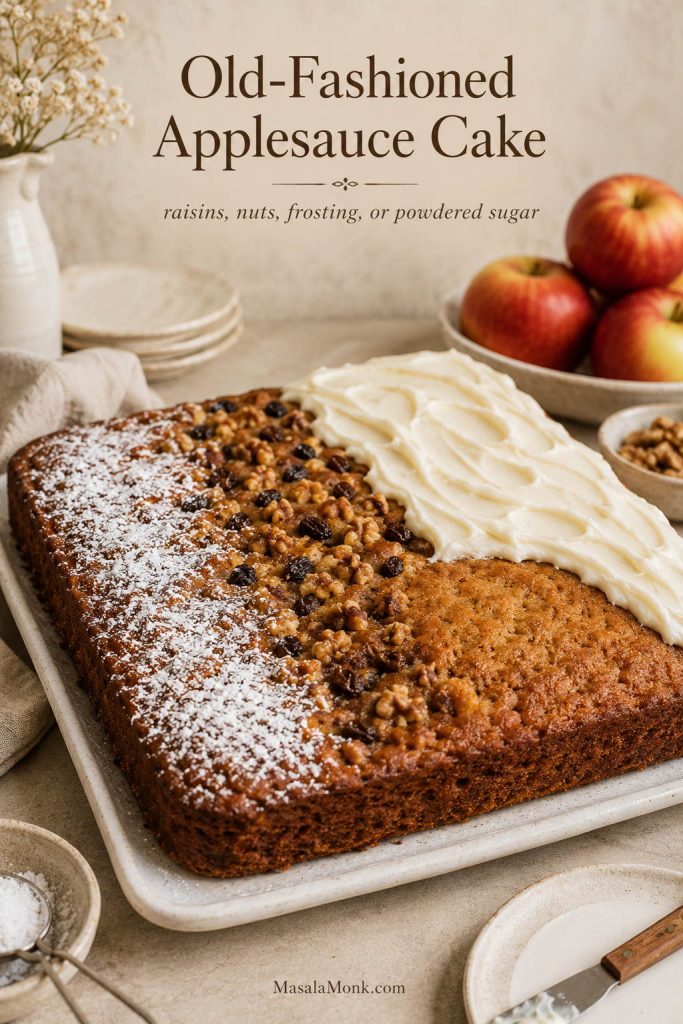
If you grew up with applesauce cake, you probably already know which camp your family was in: raisins, no raisins, nuts, no nuts, frosting, or just powdered sugar. This is also the kind of cake that behaves well in real kitchens. Cut it into neat squares for guests, or let people shave off uneven little pieces all day. It is exactly the sort of cake that quietly disappears from the pan before anyone admits they had a second slice.
Ingredients That Keep the Cake Moist
The ingredient list is simple; the texture depends on how you handle a few key choices. Use smooth unsweetened applesauce, measure the flour carefully, keep some oil in the batter, and make sure the spices still smell fresh before you add them. The batter should already smell cozy before it goes into the oven: cinnamon first, then brown sugar, vanilla, and that quiet apple note from the applesauce.
Best Applesauce to Use
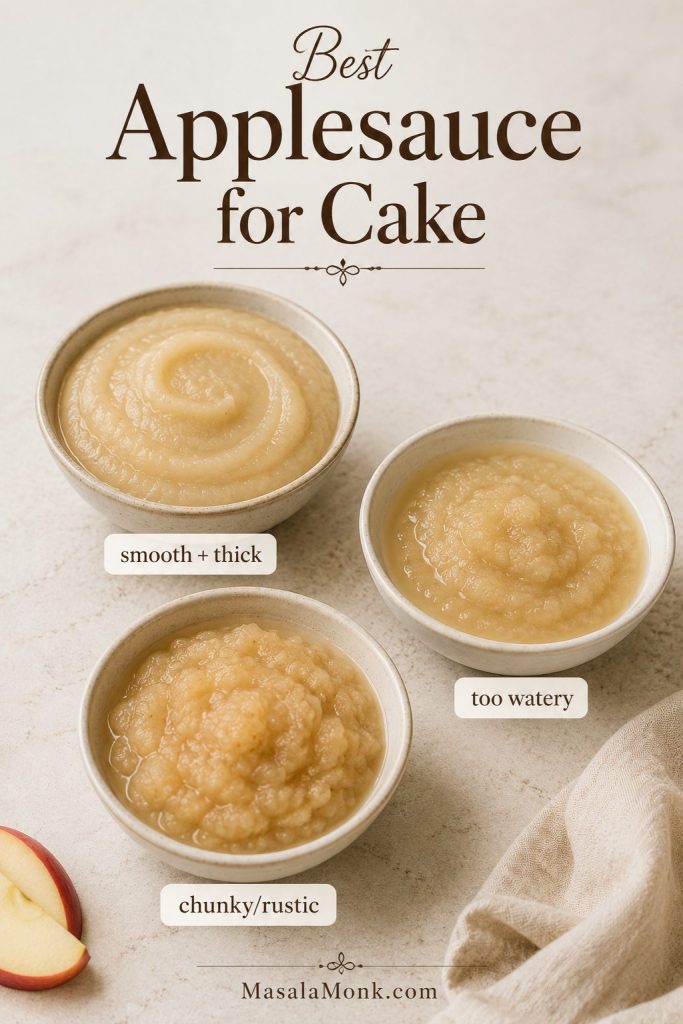
Unsweetened applesauce is the cleanest choice because the batter already has brown sugar and granulated sugar. Sweetened applesauce will work, but the cake can taste more sugary than balanced. Cinnamon applesauce can also work, although it gives you less control over the spice level.
Smooth applesauce gives the most even crumb, which is what you want if this is the kind of cake you plan to frost, slice, and carry to a table without fuss. Chunky applesauce makes the texture more rustic, but large pieces may create damp pockets unless the sauce is thick and the chunks are small. Homemade applesauce is fine as long as it is not watery. If it looks loose, simmer it briefly or drain off extra liquid before measuring.
If your applesauce looks loose, keep the troubleshooting guide nearby so you know how to avoid a wet or gummy center.
Why This Recipe Uses Applesauce and Oil
Applesauce gives the cake moisture, fruit solids, and mild apple flavor. Oil brings fat, which keeps the crumb soft after baking. Because the batter uses both, the finished squares stay moist without turning rubbery. That balance matters most after cooling, when leaner versions can start to feel dense or chewy.
For a slightly lighter cake, reduce the oil from 3/4 cup to 1/2 cup and add 1/4 cup extra applesauce. The full amount gives the most plush first-bake texture, though. Do not remove all the oil unless you are comfortable with a denser, more snack-cake-style result.
For a lighter version, check the variations section before reducing the oil too aggressively.
Flour, Leavening, and Salt
All-purpose flour gives the cake enough structure to slice cleanly. Spoon and level the flour, or weigh it if you can. Too much flour is one of the easiest ways to lose the soft, snack-cake crumb that makes this recipe work.
This recipe uses both baking powder and baking soda. Baking powder helps lift the batter, while baking soda supports browning and works with the acidity in the applesauce and brown sugar. Salt is not optional here; it keeps the sweetness and spice from tasting flat.
Warm Spices for Old-Fashioned Flavor
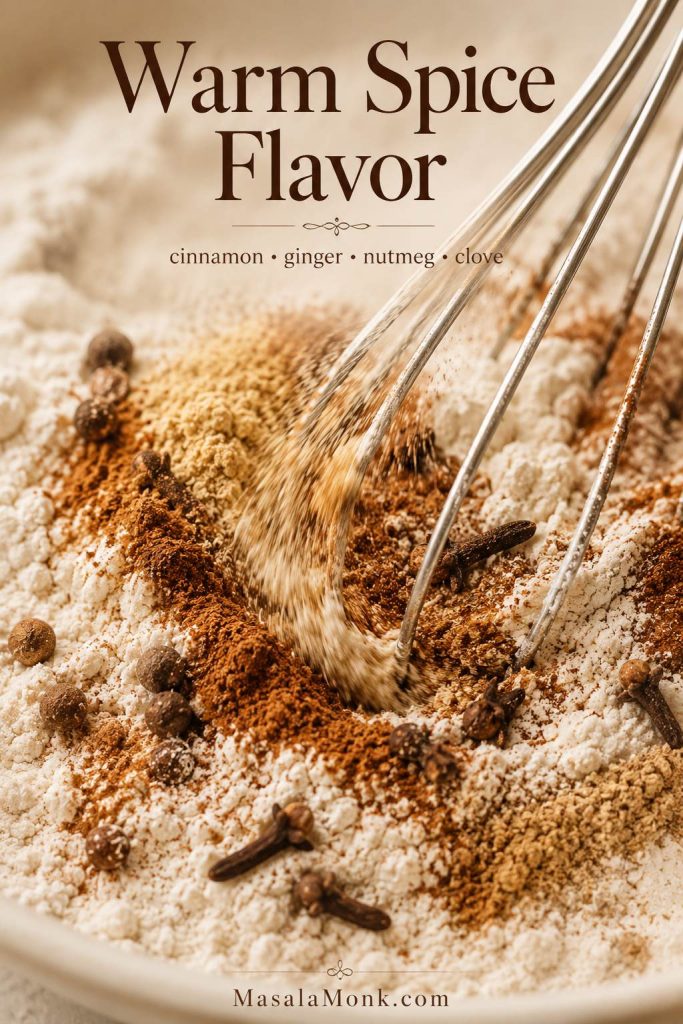
Cinnamon does most of the work, but it should not be alone. Ginger adds warmth, nutmeg adds roundness, and a small amount of clove or allspice gives the cake that old-fashioned spice-cake finish. Keep the clove light. Too much can cover the applesauce flavor instead of supporting it.
Before mixing, smell your cinnamon. If it does not make you think of fall before the cake even bakes, it probably will not carry the flavor once it is in the batter. Applesauce is gentle, so the spice blend has to carry the aroma.
Optional Raisins, Walnuts, and Pecans
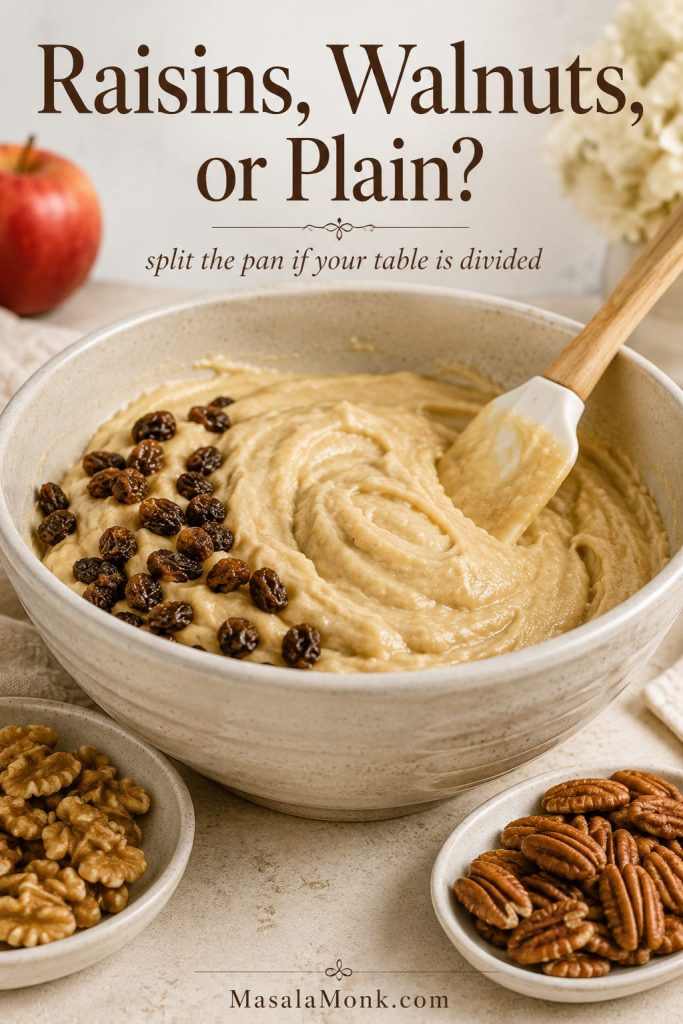
Walnuts make the cake taste classic and slightly earthy. Pecans make it richer and sweeter. Raisins add soft little pockets of fruit, especially if they are soaked in hot water for 10 minutes and drained well before mixing.
To keep add-ins from sinking, toss them with a tablespoon of flour before folding them into the batter. If your table is divided on raisins, leave the batter plain and sprinkle nuts over only half the frosting. Raisins, walnuts, frosting, and powdered sugar all seem to create strong opinions around this cake, which is why a half-and-half pan works so well.
How to Make Applesauce Cake Without a Gummy Center
This is a stir-together cake, not a fussy layer cake. You do not need to cream butter, separate eggs, or use a mixer for the batter. The most important steps are preparing the pan, mixing gently, and baking until the center is truly set.
Already comfortable with the steps? Jump to the recipe card. Unsure how the center should look? Use the doneness cues before pulling the pan.
1. Prepare the Pan and Oven
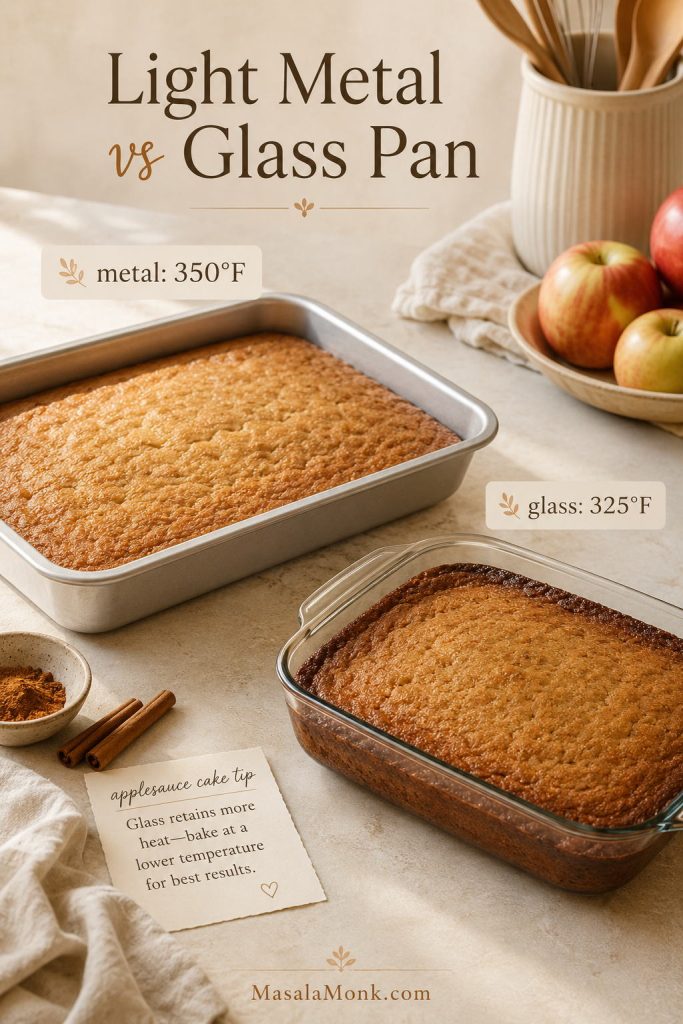
Heat the oven to 350°F / 175°C. Grease a 9×13-inch light metal baking pan, or line it with parchment if you want to lift the cooled cake out for cleaner slices. A light metal pan gives the most reliable, even bake.

When using a glass pan, reduce the oven temperature to 325°F / 165°C. Glass keeps radiating heat differently than metal, so the edges can race ahead while the center still needs time. The lower temperature gives the middle a better chance to catch up.
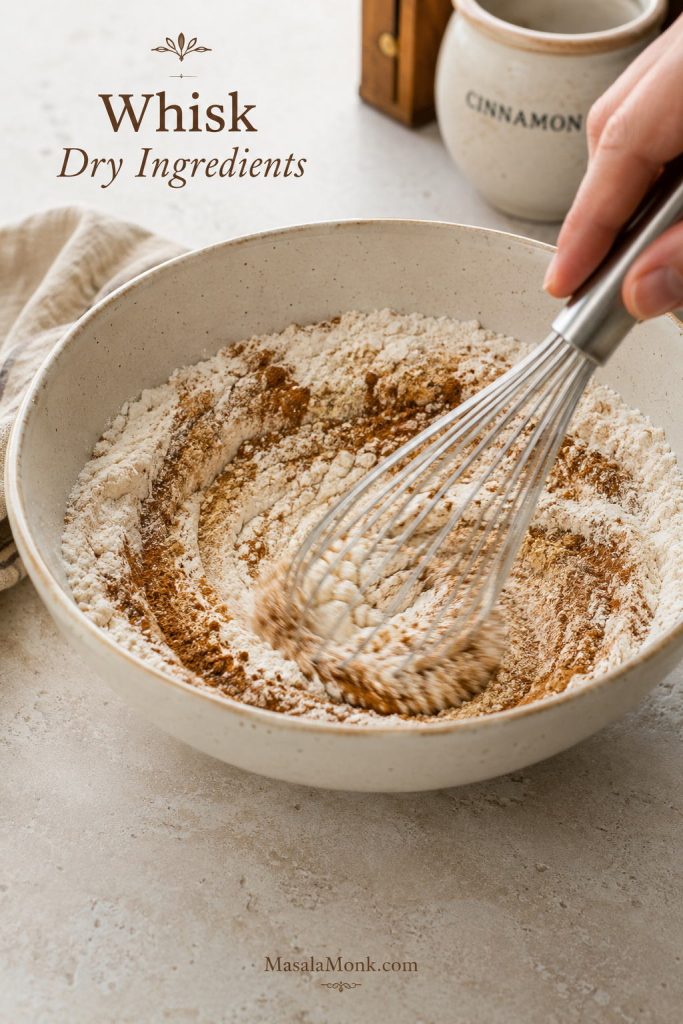
2. Whisk the Dry Ingredients
In a medium bowl, whisk the flour, baking powder, baking soda, salt, cinnamon, ginger, nutmeg, and clove or allspice. This spreads the leavening and spices evenly through the flour, so the cake rises well and does not end up with bitter pockets of baking soda or dull patches of spice.
3. Mix the Applesauce, Oil, Eggs, Sugars, and Vanilla
In a larger bowl, whisk the applesauce, oil, eggs, brown sugar, granulated sugar, and vanilla until smooth. The mixture should look loose, glossy, and tan. Break up any lumps of brown sugar now, before the flour goes in.
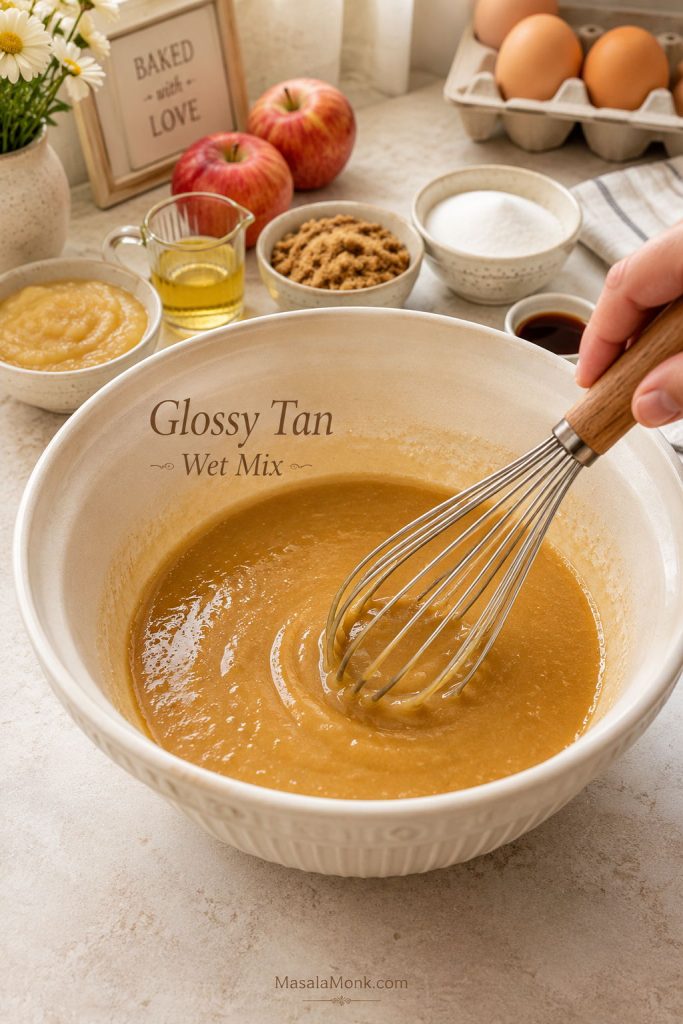
Room-temperature eggs blend more easily, but the cake will still work if you forget. Just whisk the wet ingredients until the eggs are fully incorporated and the mixture looks even. This is the point where the batter starts to smell like the cake you are hoping for: cinnamon, brown sugar, vanilla, and just enough apple to make it feel old-fashioned.
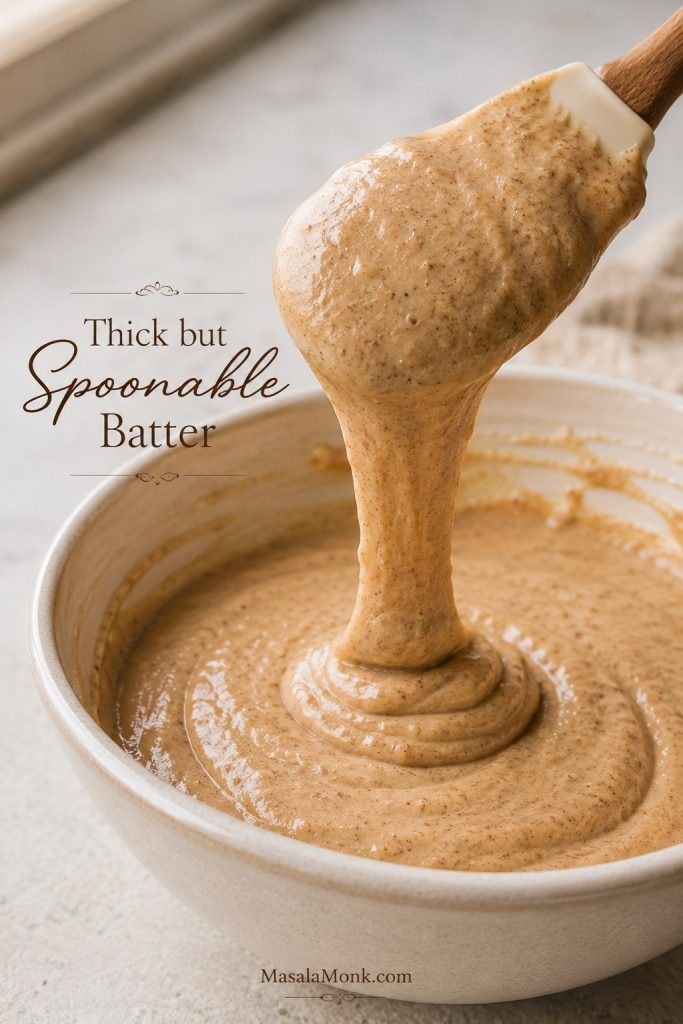
4. Combine Without Overmixing
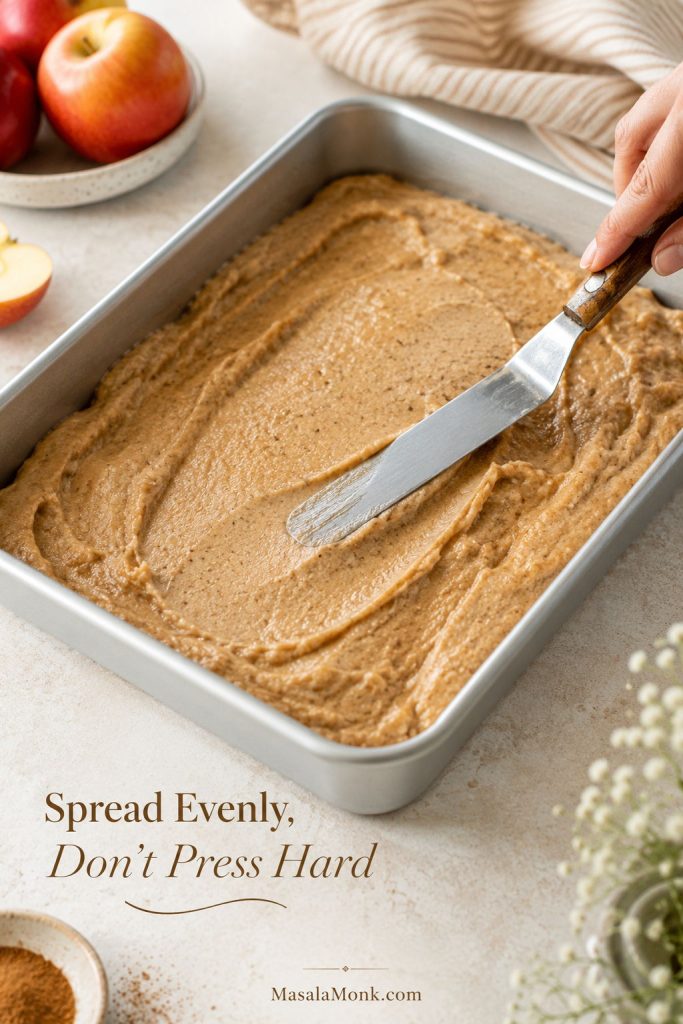
Add the dry ingredients to the wet ingredients and fold just until the flour disappears. The batter should be thick but spoonable, not runny and not stiff like cookie dough. Stop as soon as it comes together. Overmixing develops the flour too much and can make the cake feel tough or gummy.
Fold in walnuts, pecans, or raisins at the end if you are using them. Spread the batter evenly into the pan and smooth the top without pressing it down too firmly.
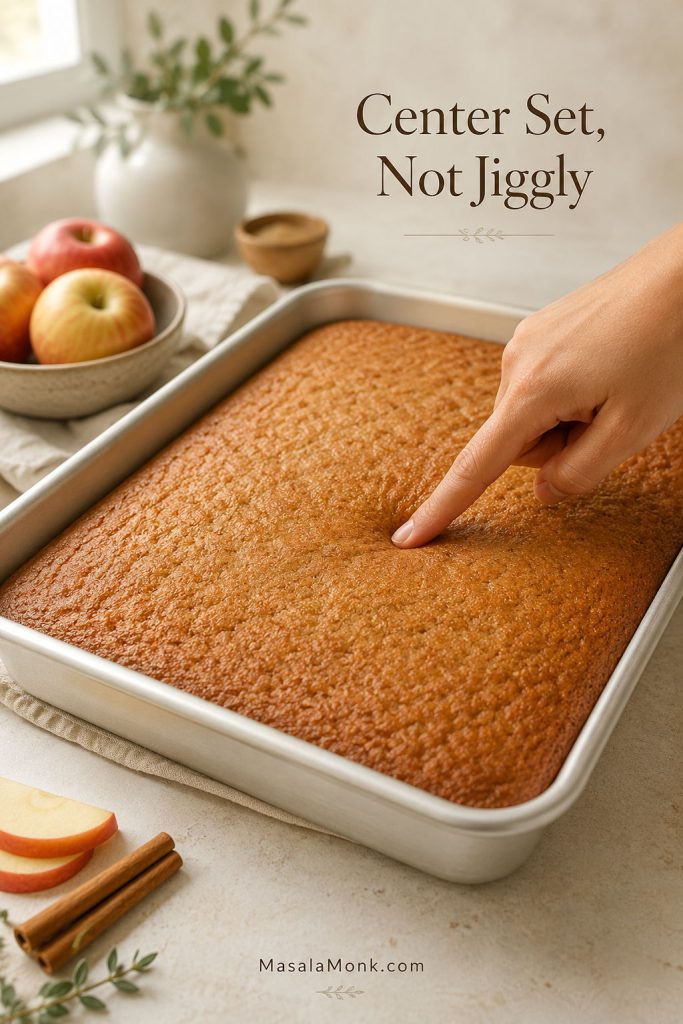
5. Bake Until Moist, Not Gummy
Bake for 30 to 35 minutes, checking near the center around the 30-minute mark. The top should spring back lightly, and a toothpick inserted near the center should come out clean or with a few moist crumbs. Wet batter means the cake needs more time.
The center is the part that lies to you. The edges may look finished while the middle still needs a few more minutes. Since applesauce adds so much moisture, pulling the cake too early is the fastest route to a gummy square in the middle of the pan.
Before removing the cake from the oven, compare it with the doneness cues so the edges do not trick you into underbaking the center.
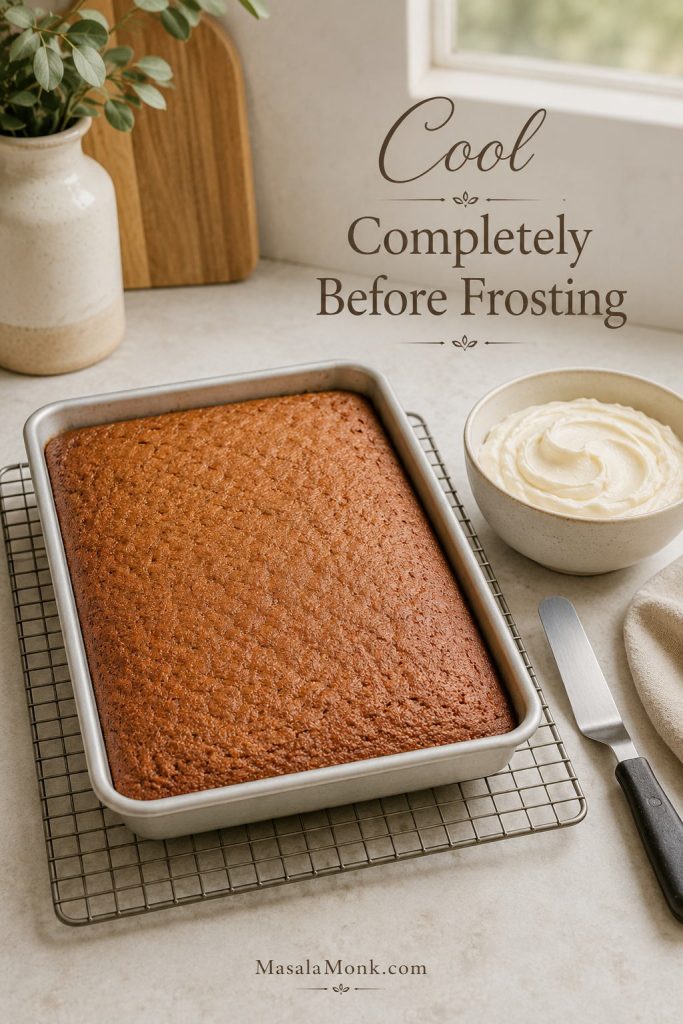
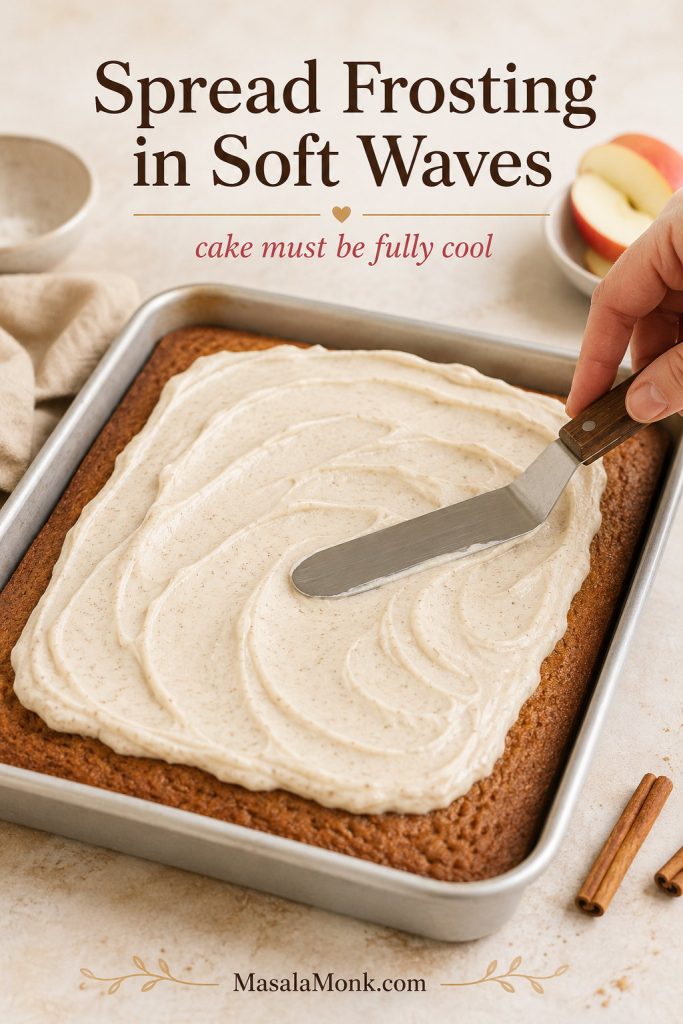
6. Cool Completely Before Frosting
Let the cake cool completely before frosting. Cream cheese frosting melts quickly on a warm cake, and even a slightly warm center can make the frosting slide, soften, or turn greasy. If you are baking ahead, cool the cake, cover it, and frost it the next day.
Can You Make It in One Bowl?
You can make a one-bowl version, but two bowls are more reliable. Whisking the flour, leavening, salt, and spices separately helps the cake rise evenly and keeps the spice flavor consistent. For the easiest cleanup, use one medium bowl for the dry ingredients and one large bowl for everything else.
The visual recipe card below keeps the main bake cues close before the full printable-style details.
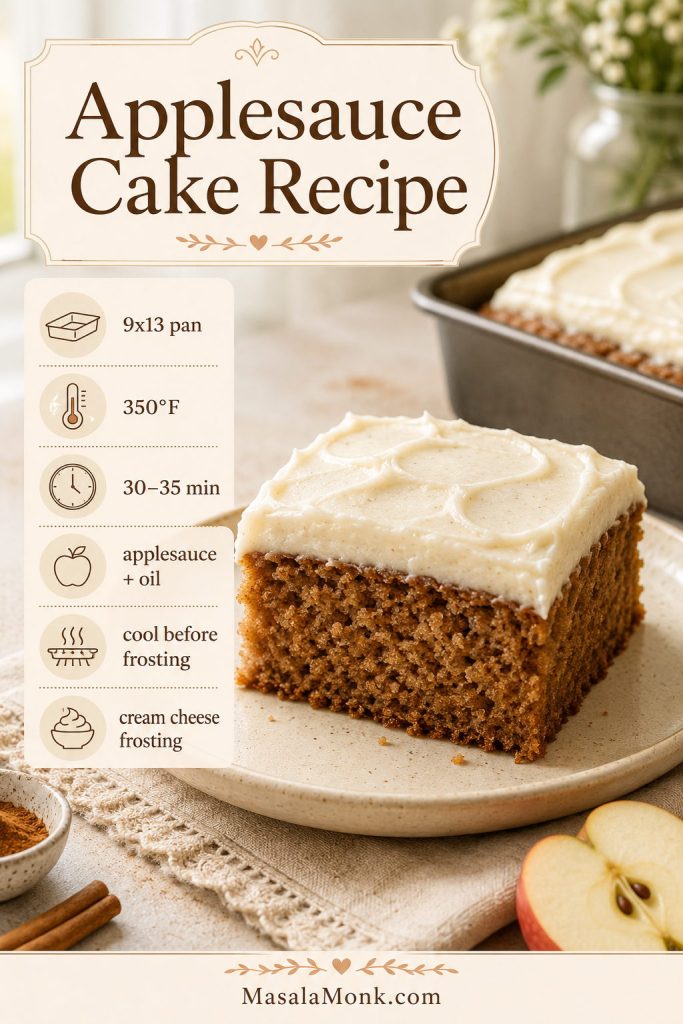
Applesauce Cake Recipe Card
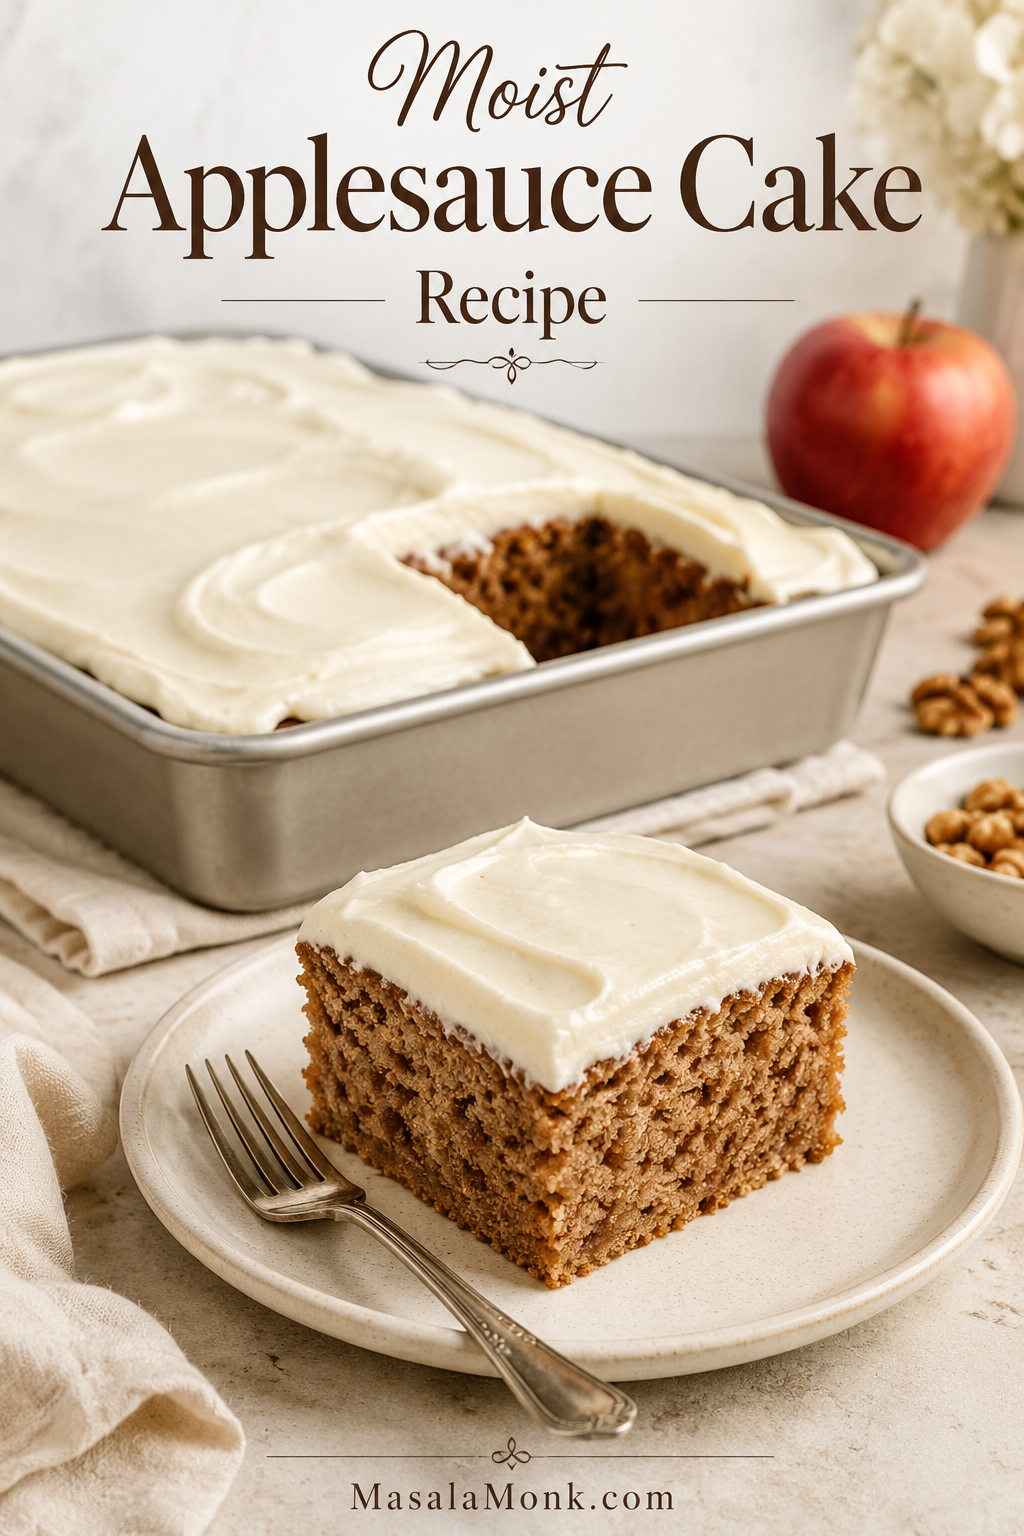
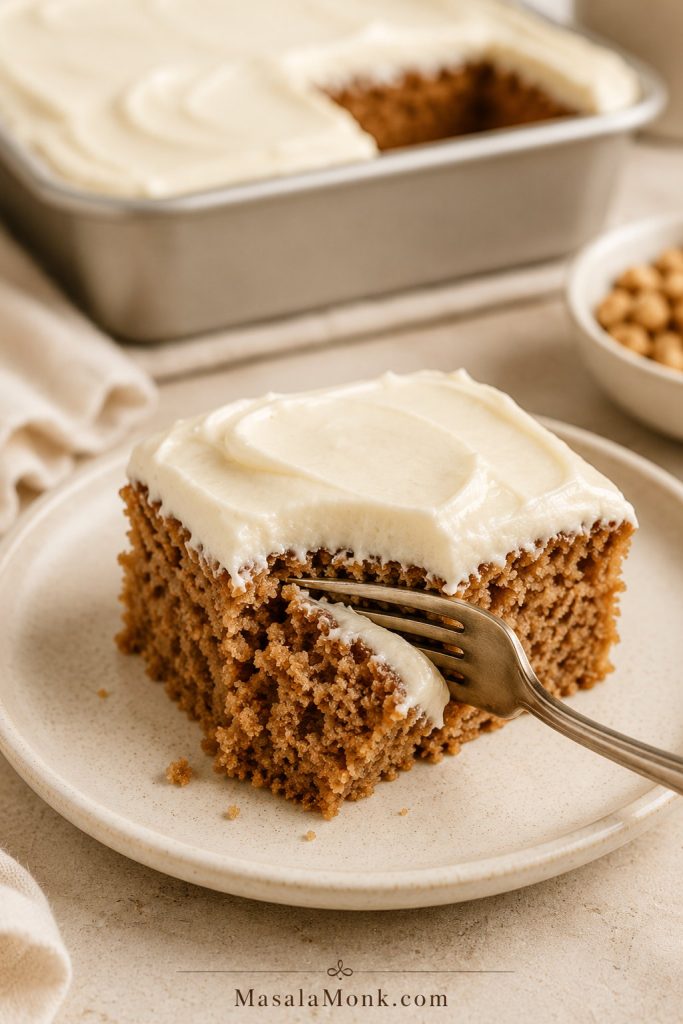
This easy 9×13 applesauce cake recipe has a soft, plush crumb, warm cinnamon-spice flavor, and just enough oil to stay tender after cooling. Frost it with cinnamon cream cheese frosting for a classic dessert finish, or leave it unfrosted for an old-fashioned snack cake.
Equipment
- 9×13-inch baking pan, preferably light metal
- Mixing bowls
- Whisk and silicone spatula
- Measuring cups/spoons or kitchen scale
- Toothpick, cake tester, or instant-read thermometer
- Wire cooling rack
- Hand mixer or stand mixer for frosting
- Offset spatula, optional
Ingredients
For the Cake
- 2 1/2 cups all-purpose flour, spooned and leveled, about 300–315g
- 2 teaspoons baking powder
- 1 teaspoon baking soda
- 3/4 teaspoon fine salt
- 1 tablespoon ground cinnamon
- 1/2 teaspoon ground ginger
- 1/2 teaspoon ground nutmeg
- 1/4 teaspoon ground cloves or allspice
- 2 cups smooth unsweetened applesauce, about 490–500g
- 3/4 cup neutral oil, 180ml
- 2 large eggs, room temperature if possible
- 3/4 cup packed light brown sugar, about 150g
- 1/2 cup granulated sugar, about 100g
- 2 teaspoons vanilla extract
- 3/4 cup chopped walnuts or pecans, optional
- 1/2 cup raisins, optional
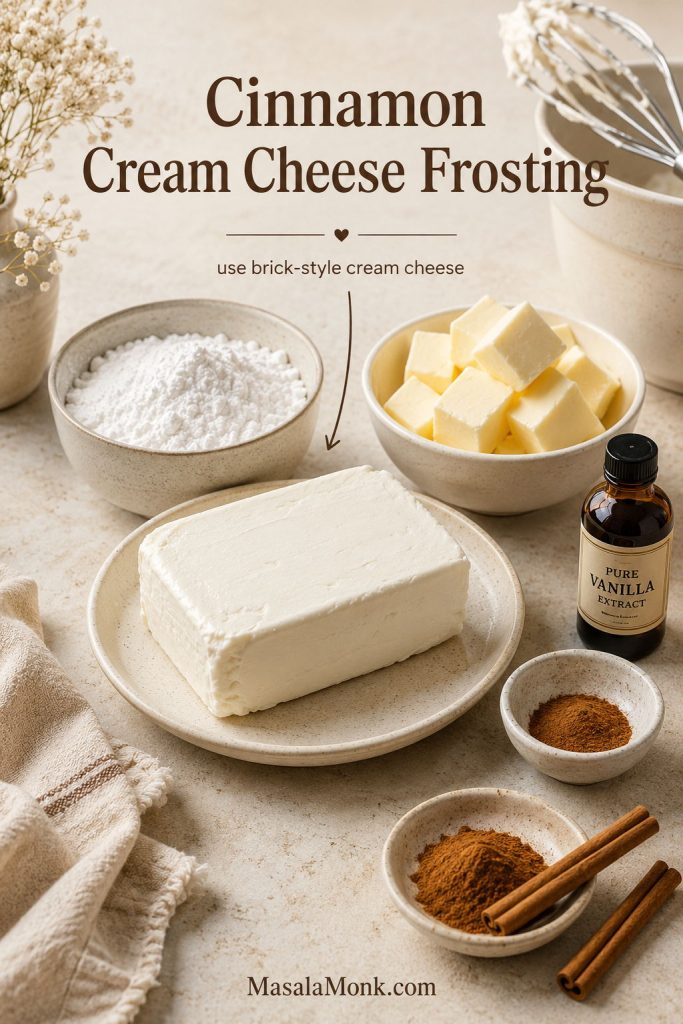
For the Cinnamon Cream Cheese Frosting
- 8 oz brick-style cream cheese, softened, 226g
- 6 tablespoons unsalted butter, softened, 85g
- 2 1/2 to 3 cups powdered sugar, 300–360g
- 1 teaspoon vanilla extract
- 1/4 to 1/2 teaspoon cinnamon
- Pinch of salt
Instructions
- Heat the oven. Preheat to 350°F / 175°C. Grease a 9×13-inch light metal baking pan or line it with parchment.
- Whisk the dry ingredients. In a medium bowl, whisk flour, baking powder, baking soda, salt, cinnamon, ginger, nutmeg, and cloves or allspice.
- Mix the wet ingredients. In a large bowl, whisk applesauce, oil, eggs, brown sugar, granulated sugar, and vanilla until smooth.
- Combine. Add the dry ingredients to the wet ingredients and fold just until no dry streaks remain. Fold in nuts or raisins if using.
- Bake. Spread the batter into the pan. Bake for 30 to 35 minutes, until the center no longer jiggles, springs back lightly, and a toothpick comes out clean or with a few moist crumbs.
- Cool. Let the cake cool completely in the pan before frosting.
- Make the frosting. Beat cream cheese and butter until smooth. Add powdered sugar, vanilla, cinnamon, and salt. Beat until creamy, using more powdered sugar for a thicker frosting.
- Frost and slice. Spread over the cooled cake, slice into squares, and serve.
How to Tell When the Cake Is Done
Do not pull the pan from the oven just because the edges look set. The center matters most. Look for three signs together: the top springs back lightly, the middle no longer jiggles, and a toothpick inserted near the center comes out clean or with a few moist crumbs.
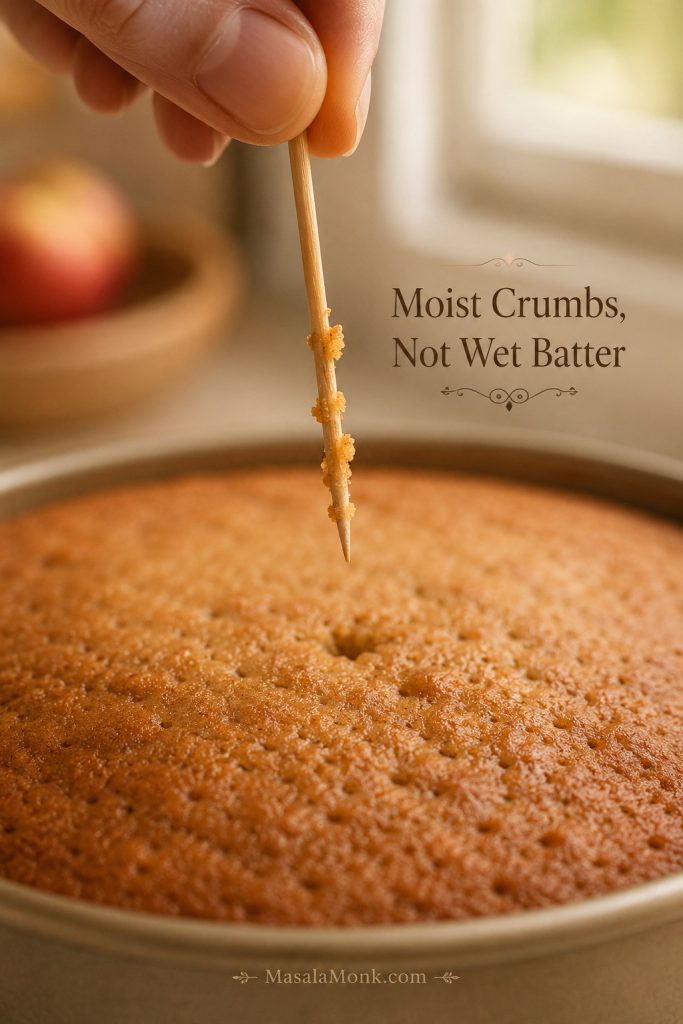
A few soft crumbs are fine. Wet batter is not. Since applesauce keeps the batter moist, an underbaked center can seem acceptable while warm but turn dense and gummy as the cake cools. When in doubt, bake another 3 to 5 minutes and check again.
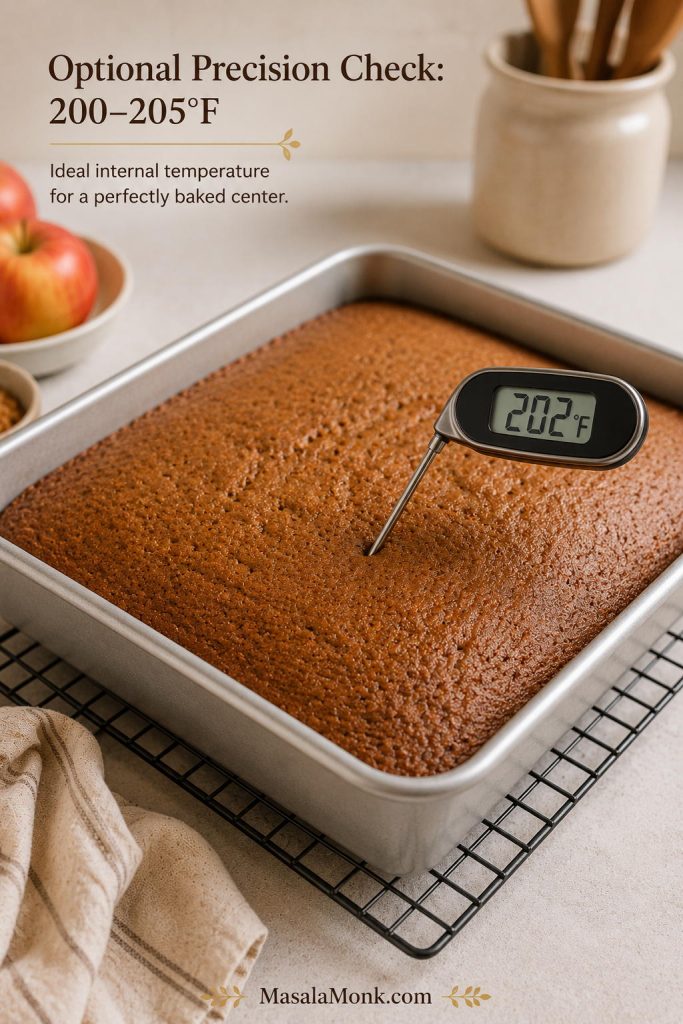
For extra precision, the center should be around 200–205°F / 93–96°C on an instant-read thermometer. You do not need to check this every time, but it helps if your oven runs cool, your pan is glass, or you are adapting the batter to a deeper pan.
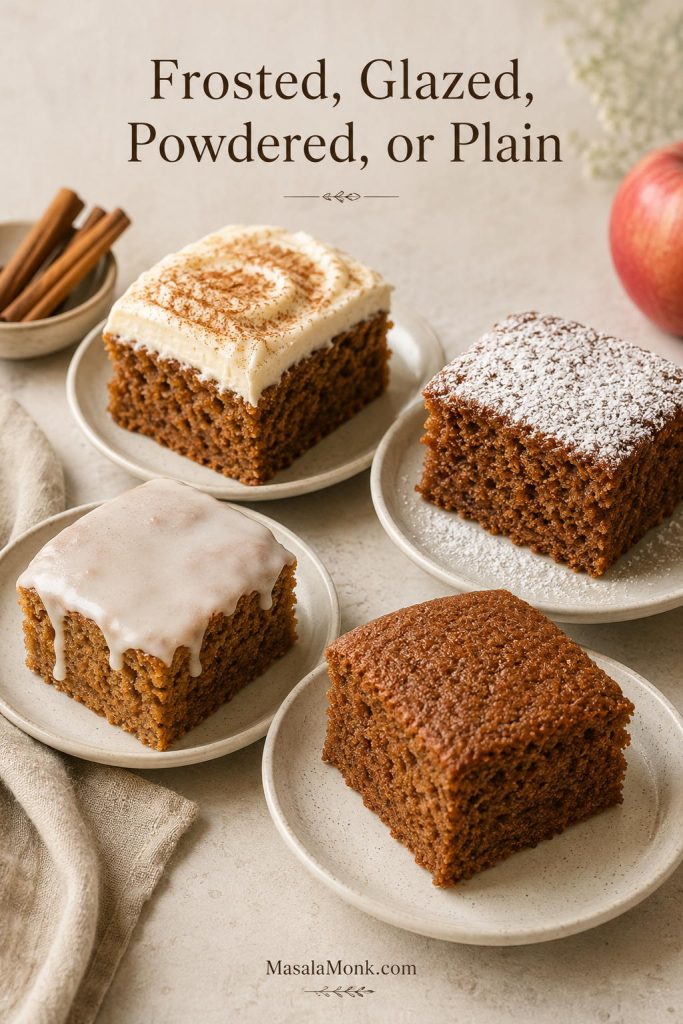
Cream Cheese Frosting, Glaze, or Powdered Sugar?
Cream cheese frosting is the classic dessert finish. The tang balances the brown sugar and warm spices, while the cinnamon ties the frosting back into the cake. Make this version when you want a soft square to feel like dessert rather than an everyday snack.
Powdered sugar makes the cake feel more old-fashioned. A thin vanilla glaze suits Bundt cakes and loaf cakes because it sets neatly and slices cleanly. No frosting at all works when you want the spice and applesauce flavor to stay in front.
The topping is where this cake changes personality, and it is also where families tend to have the strongest opinions. Frosted, it feels like dessert. Unfrosted, it feels like the kind of cake you cut in small squares with coffee, then somehow return to again before dinner. If the cake is for lunchboxes or a room-temperature table, powdered sugar or glaze is easier than cream cheese frosting.
Applesauce Cake Topping Options
| Topping | Best For | Flavor |
|---|---|---|
| Cinnamon cream cheese frosting | Classic dessert-style cake | Tangy, creamy, warmly spiced |
| Brown butter cream cheese frosting | Holiday or potluck version | Nutty, rich, deeper |
| Powdered sugar | Old-fashioned snack cake | Simple and not too sweet |
| Vanilla glaze | Bundt cake or loaf cake | Sweet, neat, easy to slice |
| No frosting | Breakfast, lunchbox, or coffee break | More spice-forward |
Applesauce Cake Pan Swaps and Bake-Time Changes
Start with the 9×13 Pan
A 9×13 pan is the most reliable first bake because the batter has room to set evenly. Deeper pans need more patience in the center, while wider pans bake faster and can dry out if you wait too long to check them.
Use the table below as a starting point, but let the center make the final call. This cake can look finished at the edges before the middle is ready, especially in glass, Bundt, or loaf pans.
Pan Size and Bake-Time Guide
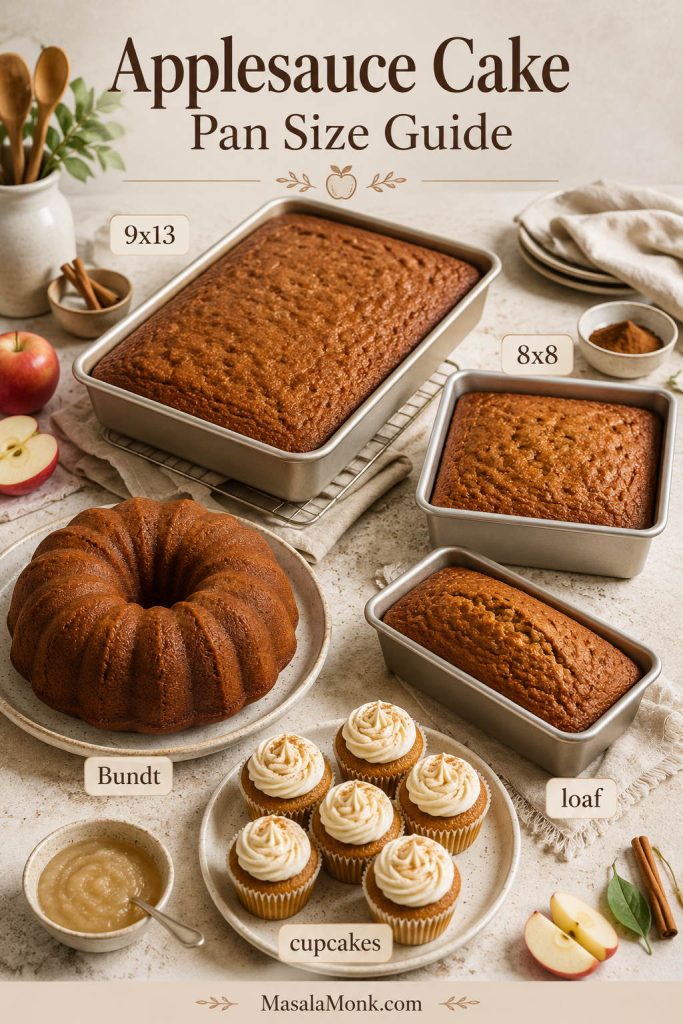
| Pan | Oven | Approximate Bake Time | Notes |
|---|---|---|---|
| 9×13 metal pan | 350°F / 175°C | 30–35 minutes | Most reliable default for this recipe. |
| 9×13 glass pan | 325°F / 165°C | 35–42 minutes | Lower heat helps protect the edges. |
| 8×8 half batch | 350°F / 175°C | 30–38 minutes | Use half the batter or halve the recipe. |
| 15×10 sheet pan | 350°F / 175°C | 18–22 minutes | Thinner cake; check early. |
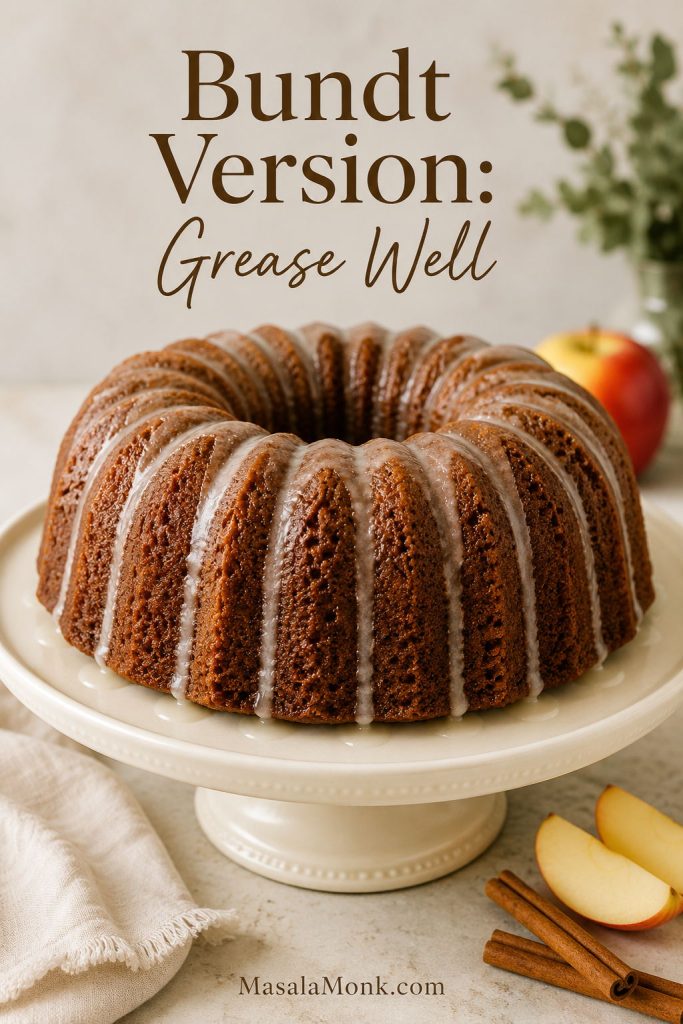
| Bundt pan | 350°F / 175°C | 45–60 minutes | Grease very well and check the deepest part. |
| Two 8-inch round pans | 350°F / 175°C | 25–32 minutes | Useful for a simple layer cake. |
| Cupcakes | 350°F / 175°C | 18–22 minutes | Fill liners about two-thirds full. |
| Two 9×5 loaf pans | 350°F / 175°C | 50–60 minutes | Tent loosely if the tops brown too quickly. |
If changing the pan changes the texture, use the problem-solving guide to diagnose whether the cake needed more time, less moisture, or gentler mixing.
Bundt Pan Release Tips
Bundt pans need special care because moist cakes are more likely to stick in the ridges. Grease every detail of the pan carefully, let the cake cool before unmolding, and use a glaze instead of soft frosting. King Arthur Baking has a useful guide to preventing Bundt cakes from sticking if you bake in shaped pans often.
Variations and Easy Changes
Once the base cake is right, it can move in several directions without losing its soft crumb. The first bake teaches you what the texture should feel like; after that, these variations make more sense.
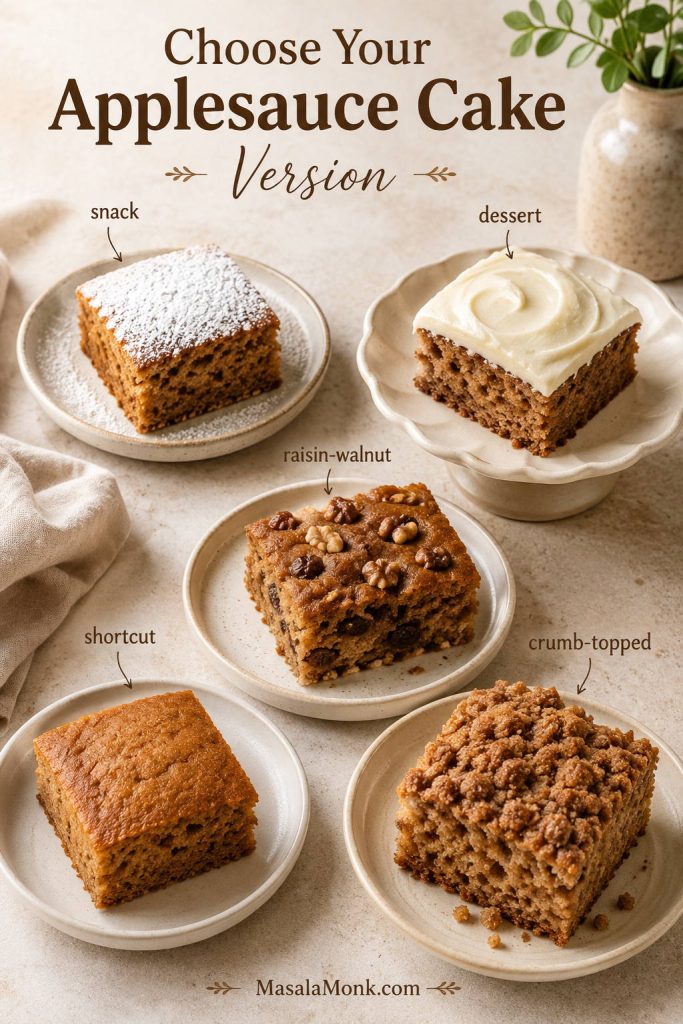
| Version | Choose It When | What to Change |
|---|---|---|
| Less sweet | You want a snack cake | Skip frosting or use powdered sugar. |
| More dessert-like | You want a potluck or holiday cake | Use full oil and cream cheese frosting. |
| More old-fashioned | You like recipe-box flavor | Add raisins and walnuts. |
| Shortcut version | You want almost no measuring | Use cake mix, applesauce, and eggs. |
| Brunch-style | You want coffee cake energy | Use crumb topping and a light glaze. |
Old-Fashioned Raisin-Walnut Version
Fold in 1/2 cup raisins and 3/4 cup chopped walnuts or pecans. Skip the frosting and dust the cooled cake with powdered sugar for a more old-fashioned coffee-cake feel, or keep the cream cheese frosting when you want a richer dessert.
This version feels closest to an older recipe-box cake: soft crumb, warm spice, little bites of fruit and nuts, and a flavor that deepens overnight. It is especially good with coffee or black tea.
Cake Mix Shortcut
This is not the same cake as the from-scratch version, but it is useful when you want the applesauce-spice idea with almost no measuring. For the simplest shortcut, use a 15.25 oz box of yellow or spice cake mix, 1 1/2 cups applesauce, and 3 large eggs. Bake in a greased 9×13 pan at 350°F until set, usually around 25 to 35 minutes depending on the mix and pan.
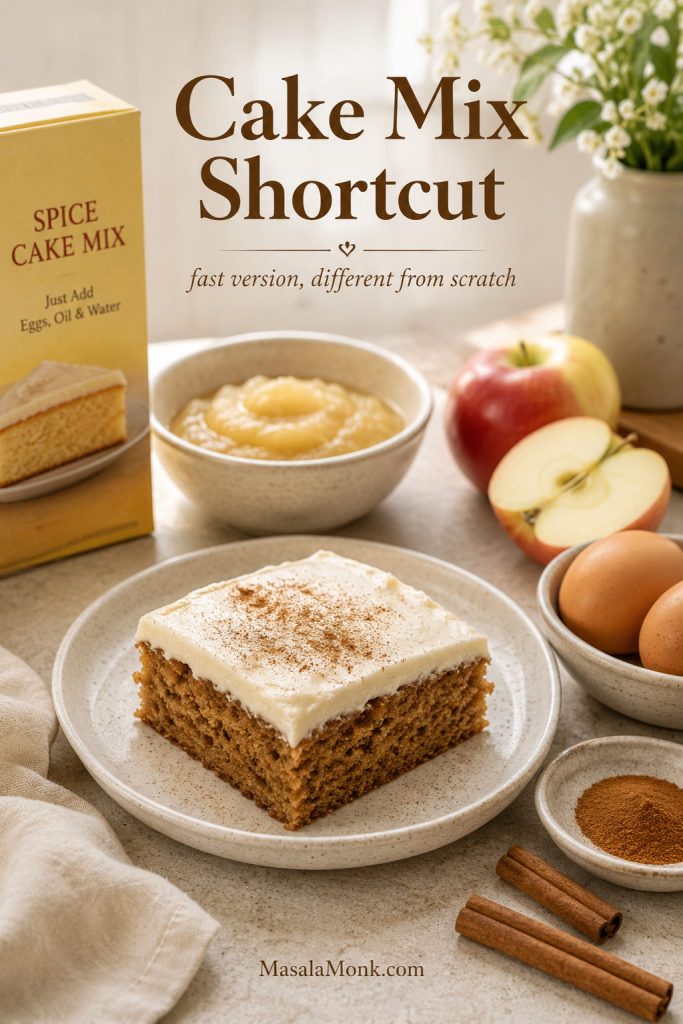
The three-ingredient version wins on speed. The version with a little oil or melted butter tastes softer, richer, and less lean. For that style, add 2 to 4 tablespoons oil or melted butter and 1 to 2 teaspoons cinnamon.
If shortcut apple desserts are what you reach for most often, the same easy-bake mood also works in an apple cinnamon roll bake with apple pie filling, where refrigerated cinnamon rolls and apple filling turn into a warm 9×13 dessert.
Crumb Cake or Coffee Cake Style
To move this cake toward crumb cake, skip the cream cheese frosting and add a cinnamon brown sugar crumb topping before baking. Use a moderate layer of crumb at first because this batter is already moist. A very heavy topping can slow down the center and make the cake harder to bake evenly.
For a brunch-style version, add chopped nuts or oats to the crumb and finish with a thin vanilla glaze after cooling. Because the crumb topping changes how heat moves through the cake, check the center carefully and expect the bake time to shift slightly.
Bundt Cake Version
A Bundt version works well with vanilla glaze, maple glaze, or brown butter glaze. Grease every ridge of the pan, bake longer, and cool the cake before turning it out. The deepest part should be fully set before unmolding.
Gluten-Free or Almond Flour Version
For the closest gluten-free version, use a tested 1:1 gluten-free flour blend in place of the all-purpose flour. The texture may still be a little different, but the structure is more predictable than an almond flour swap.
Do not replace the flour with almond flour 1:1 in this batter. Almond flour needs different liquid, egg, and structure. Because applesauce already adds moisture, a casual almond flour swap can turn the cake oily, fragile, or gummy. For an almond flour version, use a formula written for almond flour from the start.
Vegan or Eggless Version
Eggless applesauce cake is possible, but this batter should not be converted by simply adding more applesauce. Applesauce is already the main moisture ingredient here, so using extra applesauce as an egg replacement can push the cake toward gummy.
For an egg-free version, start with a formula built that way from the beginning. This batter already gets so much moisture from applesauce that simply adding more can make the center heavy instead of soft.
Lighter or Lower-Sugar Version
For a lighter cake, use unsweetened applesauce, reduce the granulated sugar slightly, and serve the cake unfrosted or with a thin glaze. You can also cut the oil to 1/2 cup and add 1/4 cup extra applesauce, but the crumb will be a bit less plush.
Avoid removing all the oil on the first attempt. A little fat keeps the cake softer and prevents the texture from becoming rubbery. If you enjoy using applesauce in breakfast-style baking, it can also work as a moisture helper in recipes like oat pancakes, where softness and natural sweetness matter.
Common Applesauce Cake Problems and Fixes
When this cake disappoints, the problem usually comes from one of a few places: too much moisture, too much flour, not enough bake time, or overmixing. Once you know which one is working against you, the next pan is much easier to fix.
Texture, Bake-Time, and Flavor Problems
| Problem | Likely Cause | Fix |
|---|---|---|
| Gummy middle | Underbaked cake, watery applesauce, too much applesauce, or overmixed batter | Bake until the center is fully set; use thick applesauce; mix only until combined. |
| Dry cake | Too much flour or overbaking | Spoon and level flour or use grams; start checking around 30 minutes. |
| Sank in the center | Opened oven early or pulled the pan before the center set | Do not open the oven too early; check the center, not just the edges. |
| Bland flavor | Old spices, not enough salt, or too little vanilla | Use fresh cinnamon and the full spice blend; do not skip the salt. |
| Weak apple flavor | Applesauce flavor is naturally mild | Expect spice-cake flavor with gentle apple in the background, or add a small amount of finely diced apple. |
Pan, Add-In, and Frosting Problems
| Problem | Likely Cause | Fix |
|---|---|---|
| Frosting melted | Cake was still warm | Cool completely before frosting. |
| Edges too dark | Dark pan, glass pan, or overbaking | Use a light metal pan or reduce heat for glass. |
| Nuts or raisins sank | Add-ins were heavy or batter was loose | Toss add-ins with 1 tablespoon flour before folding in. |
| Baking soda aftertaste | Leavening was unevenly mixed or measured heavily | Measure carefully and whisk the dry ingredients thoroughly. |
| Frosting too loose | Tub cream cheese, warm butter, or too little powdered sugar | Use brick cream cheese, softened butter, and add powdered sugar gradually. |
Once you know what went wrong, return to the texture checklist before your next bake.
How to Store, Freeze, and Make Ahead
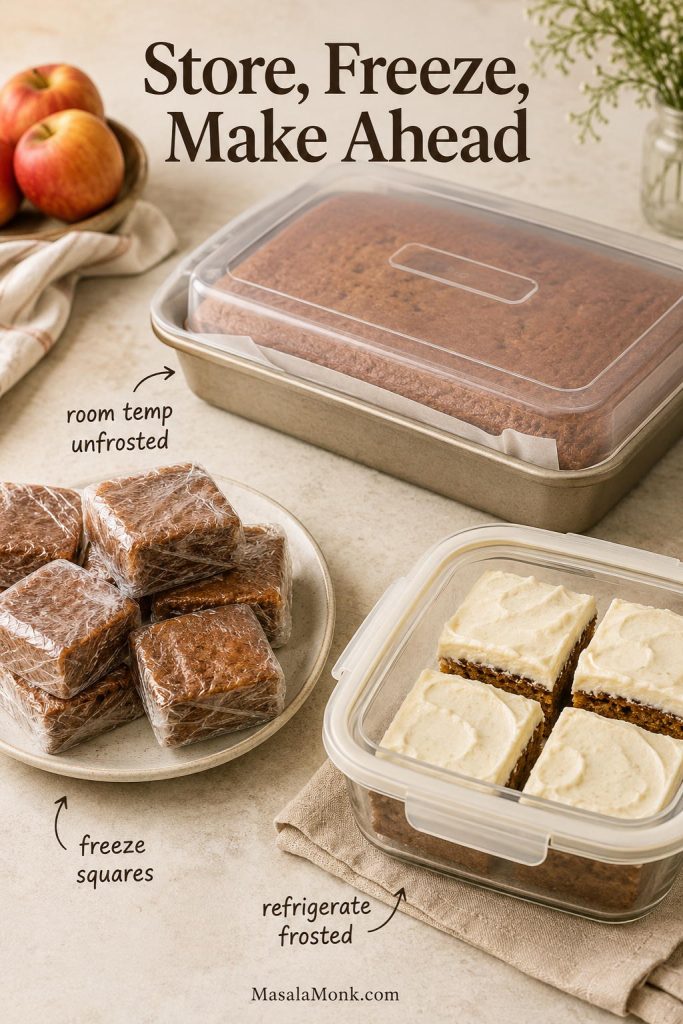
Unfrosted cake can be covered and stored at room temperature for about 2 days if your kitchen is cool. Once it has cream cheese frosting, refrigerate it. Let chilled slices sit at room temperature for 15 to 20 minutes before serving so the frosting softens and the crumb tastes tender again instead of cold and tight.
To freeze, wrap unfrosted squares tightly and freeze for up to 2 to 3 months. Thaw overnight in the refrigerator or at room temperature, then frost after thawing for the freshest texture.
This applesauce cake recipe is also easy to make ahead. Bake the cake one day ahead, cool it completely, cover it, and frost it the next day. The spice flavor often improves after resting because the cinnamon, brown sugar, and applesauce have time to settle into the crumb.
If you are baking ahead for a gathering, choose the topping from the frosting and topping guide after deciding how long the cake needs to sit out.
What to Serve with Applesauce Cake
This cake does not need much beside it. A square with coffee, black tea, chai, or cold milk is enough for an afternoon snack. If you want the whole table to lean into fall, a mug of healthy pumpkin spice latte keeps the cinnamon-and-spice mood going without adding another heavy dessert.
For dessert, serve it with vanilla ice cream, lightly whipped cream, caramel drizzle, or a few toasted walnuts scattered over the frosting. For brunch, cut it into smaller squares and keep the topping simple. Powdered sugar or a thin glaze works better than a heavy frosting when the cake is sharing the table with eggs, pancakes, fruit, and savory dishes.
For a fall dessert spread, pair this soft spice cake with pumpkin desserts, fruit crisps, or a shortcut pie like apple pie with apple pie filling. The cake brings warm spice and cream cheese frosting, while the pie brings flaky crust and glossy apple filling.
If you are making the apple side of the table from scratch, keep a batch of homemade apple pie filling ready for pies, waffles, pancakes, yogurt, or ice cream. It sits in a fruitier lane than this soft spice cake, so the two do not feel repetitive together.
Applesauce Cake FAQs
What does applesauce do in cake?
Applesauce adds moisture, mild apple flavor, and softness. However, it is not the same as fat. That is why this recipe uses applesauce and oil together for a tender crumb.
Sweetened or unsweetened applesauce?
Unsweetened applesauce is the better choice because it gives you control over the cake’s sweetness. Sweetened applesauce works, but the finished cake may taste sweeter than intended.
Oil or no oil: what happens?
You can reduce the oil, but removing it completely changes the texture. A no-oil version is usually denser and more likely to taste gummy. For the most reliable first bake, keep the oil.
Bundt pan timing
A Bundt pan works, but the bake time will be longer, usually around 45 to 60 minutes. Grease the pan very well, check the deepest part, and cool before turning it out.
Frosted or unfrosted?
Frosting is optional. Cream cheese frosting makes it feel like dessert, while powdered sugar, vanilla glaze, or no topping at all keeps it closer to an old-fashioned snack cake.
Why did the middle turn gummy?
The usual reasons are underbaking, watery applesauce, too much applesauce, not enough fat, or overmixing the batter. Bake until the center is fully set and fold the flour in gently.
Fresh apples: helpful or too wet?
A small amount of finely diced apple is fine, but do not add too much. Fresh apples release moisture as they bake, which can make the center wetter. For the first bake, keep the recipe focused on applesauce, then experiment later.
Homemade applesauce texture
Homemade applesauce works well as long as it is thick enough for baking. If it looks loose, simmer it briefly to thicken or drain off excess liquid before measuring. Smooth, thick applesauce gives the most reliable texture.
Make-ahead timing
This cake is a good make-ahead dessert. Bake it one day ahead, cool it completely, cover it, and frost it the next day. The spice flavor often improves after resting.
Applesauce instead of eggs?
Not in this recipe as a simple swap. Applesauce is already part of the batter, and adding more in place of eggs can make the cake too wet or gummy. Use a tested eggless formula if you need an egg-free version.
Final Thoughts
A good applesauce cake should feel simple, but not careless. The best version is soft in the middle, lightly spiced, easy to slice, and moist without being wet. That comes from treating it like the soft spice cake it is: enough moisture, enough tenderness, fresh spices, and enough patience for the center to set.
Serve it frosted when you want dessert, dust it with powdered sugar when you want something old-fashioned, or fold in raisins and walnuts when you want the cake to taste like it came from an older recipe box. Either way, this is the kind of 9×13 cake that quietly disappears one square at a time — first as dessert, then with coffee, then in those uneven little “just one more” slices everyone pretends do not count.