Posted on Leave a comment

Appletini Recipe: Crisp, Cold Apple Martini with Vodka

Pale green Appletini in a chilled coupe glass with a thin green apple slice garnish on a dark bar surface.

The Appletini is better than its reputation. When it is made badly, it can taste like melted green candy. Done well, it is icy, sharp, apple-bright, and genuinely fun to sip.

This version keeps the green apple snap people expect, but balances it with real apple juice and fresh lemon, so the drink tastes crisp instead of syrupy. It still feels like the classic apple martini, just cleaner, colder, and more grown-up.

The mood should feel playful, not childish — bright enough for a retro cocktail night and sharp enough to serve before dinner with salty snacks.

Quick answer: an Appletini, also called an apple martini, is a chilled vodka cocktail usually made with vodka, sour apple schnapps or sour apple liqueur, apple juice, fresh lemon juice, and ice. Shake it hard, strain it into a chilled martini glass or coupe, and garnish with a thin green apple slice.

Make this tonight:

  • Use the ratio: 1 1/2 oz vodka, 1 oz sour apple liqueur, 1 oz apple juice, and 1/2 oz fresh lemon juice.
  • Start tart: add simple syrup only after tasting.
  • Serve it ice-cold: shake hard with plenty of ice and pour into a chilled glass.

Appletini Recipe

Make this version first. It gives you the green apple flavor people expect from an Appletini without the heavy sweet finish. Once you taste this balance, every variation becomes easier.

The best version smells lightly of green apple before you even sip it. On the first taste, it should land cold and sharp, turn apple-sweet in the middle, and finish clean with lemon.

Prep time: 5 minutes
Total time: 5 minutes
Yield: 1 cocktail
Glass: Chilled martini glass or coupe
Equipment: Cocktail shaker, jigger or small measuring cup, strainer

Ingredients

  • 1 1/2 oz / 45 ml vodka
  • 1 oz / 30 ml sour apple schnapps, sour apple liqueur, or apple pucker
  • 1 oz / 30 ml apple juice, preferably cloudy or unfiltered
  • 1/2 oz / 15 ml fresh lemon juice
  • 1/4 oz / 7.5 ml simple syrup, optional
  • Ice
  • Thin green apple slice, for garnish

Instructions

  1. Chill a martini glass or coupe while you measure the ingredients.
  2. Add the vodka, sour apple liqueur, apple juice, lemon juice, and optional simple syrup to a cocktail shaker.
  3. Fill the shaker with plenty of fresh ice.
  4. Shake hard for 15 to 20 seconds, until the outside of the shaker feels very cold.
  5. Strain into the chilled glass.
  6. Garnish with a thin green apple slice. Brush or dip the apple slice in lemon juice first so it stays fresh-looking.

Recipe note: start without simple syrup when your sour apple liqueur is already sweet. If the balance still feels off, use the taste-fixing guide below.

Before You Mix

A good Appletini should look playful but taste clean. Apple should show up before sugar.

You do not need a full bar setup. A jar, a tablespoon, fresh lemon, and enough ice will get you most of the way there.

  • No jigger? Use tablespoons: 1 oz = 2 tablespoons, 1/2 oz = 1 tablespoon, and 1/4 oz = 1 1/2 teaspoons.
  • No shaker? Use a clean mason jar, protein shaker, or sturdy jar with a tight lid. Shake carefully, then strain through a small sieve when needed.
  • Greener drink? Use a brighter sour apple liqueur or apple pucker, but keep the pour controlled.
  • Fresher drink? Use cloudy or unfiltered apple juice and keep the syrup optional.
  • Glassware note: A coupe is a shallow stemmed cocktail glass. Either a coupe or martini glass works; chilling it matters more than the shape.

What Is an Appletini, Exactly?

An Appletini, or apple martini, is a vodka cocktail flavored with apple. It is not a classic martini in the dry gin-and-vermouth sense; it is a modern vodka cocktail with a martini-glass attitude.

The old-school green version is usually shaken with sour apple schnapps or sour apple liqueur and served cold in a stemmed glass. “Apple martini” can also describe fresher versions made with apple juice, apple cider, or apple brandy. This recipe sits in the middle: bright green apple flavor, real apple body, and enough fresh lemon to keep the drink balanced.

Which Appletini Do You Want?

Not every Appletini uses the same apple ingredient. Maybe you want the neon-green bar drink, a cleaner apple martini, or simply a way to use the bottle already on your shelf.

You Want Use This Result
Old-school green Appletini Sour apple schnapps or apple pucker Bright, sweet-tart, nostalgic
Less sweet apple martini Less liqueur, no syrup, more lemon Cleaner and sharper
Fresh apple martini Cloudy or unfiltered apple juice Less neon, more real apple
Fall apple martini Apple cider and maple syrup Warmer and deeper
Sour apple martini Apple pucker plus extra lemon or lime Sharper and more bar-style
Non-alcoholic Appletini Apple juice, lemon, optional syrup, sparkling water Fresh apple mocktail

For a first try, stay with the main recipe. It gives you the expected green apple flavor without going too sweet.

Why This Appletini Works

The liqueur gives the snap, the juice gives the apple body, and the lemon keeps the drink balanced. That is the whole trick.

One ounce of sour apple liqueur is enough to give the Appletini its identity without letting the bottle take over. Apple juice makes the cocktail taste more like actual apple. Fresh lemon keeps the finish bright. Vodka gives the drink structure without covering the fruit.

The 1/2 oz lemon pour is deliberate: less can leave the drink flat, while more pushes it toward a sharper sour apple martini. Cold matters too. The drink should hit like a frosted Granny Smith slice, not a melted sour candy.
I would rather start with a tart Appletini and sweeten it later than try to rescue one that already tastes heavy. Fresh lemon is the easiest way to make the apple taste brighter, the same way citrus keeps a Lemon Drop Martini from tasting flat.

Appletini Ingredients and Smart Swaps

You do not need the perfect bottle to make a good Appletini. You need a clear balance: apple, citrus, cold, and restraint.

Quick chooser: use apple pucker or sour apple schnapps for the nostalgic green Appletini, cloudy apple juice for a fresher less-sweet version, and non-alcoholic apple cider for a deeper fall-style apple martini.

Vodka, sour apple liqueur, apple juice, lemons, simple syrup, ice, and green apples arranged for an Appletini recipe.
A balanced Appletini starts before you shake: vodka for structure, sour apple liqueur for snap, apple juice for body, lemon for lift, and syrup only if needed.

Vodka

The base spirit is here to stay out of the way. Apple and lemon should be the parts you notice first. Use a smooth vodka you enjoy in cocktails; it does not need to be expensive, but it should not taste harsh.

A flavored vodka also works, but it can push the drink sweeter and more perfumed. For the adjusted balance, use the apple vodka Appletini version below. Gin can be used for a botanical variation, but vodka gives the expected Appletini flavor.

Sour Apple Schnapps, Sour Apple Liqueur, or Apple Pucker

This is the ingredient that gives the Appletini its green apple snap. Sour apple schnapps, sour apple liqueur, and apple pucker all work, but they can taste very different from bottle to bottle.

The most old-school green Appletini comes from sour apple schnapps or apple pucker. A slightly cleaner version starts with a sour apple liqueur that is not aggressively sweet. Begin with 1 oz / 30 ml, then adjust with lemon juice or apple juice rather than adding more liqueur immediately.

Small bottles and pour glasses of green apple cocktail ingredients with green apple and lemon nearby.
Apple pucker, sour apple schnapps, and sour apple liqueur can all work, but they do not taste equally sweet. Taste your bottle first, then adjust lemon and syrup from there.

Use whatever sour apple bottle you have. The only rule is to taste before adding syrup, because some bottles are already sweet enough.

Apple Juice

This is what makes the drink taste like apple, not just apple-flavored alcohol. Cloudy apple juice, also sold as unfiltered apple juice, gives the fullest flavor. Clear apple juice is lighter and often sweeter, so unsweetened juice gives you the most control. The drink should taste like apple before it tastes like sugar.

Apple Cider

For this recipe, apple cider means non-alcoholic apple cider: unfiltered apple juice with a deeper, rounder flavor. In some countries, “cider” means alcoholic cider; that is not what this Appletini variation needs unless a recipe specifically says so.

Use apple juice or sour apple liqueur for the bright green look. For a deeper fall version, cider gives the drink a softer color and warmer apple flavor; the apple cider martini variation shows how to make that swap.

Two small glasses of cloudy apple juice and darker apple cider with an Appletini glass blurred in the background.
Apple juice keeps the drink closer to a bright classic Appletini. Meanwhile, non-alcoholic apple cider makes a warmer apple cider martini variation with deeper fruit flavor.

Fresh Lemon Juice

Lemon is the difference between a drink that tastes bracing and one that tastes like green syrup. Without enough citrus, an Appletini can taste flat, even when the measurements are technically correct.

Fresh lemon juice is best because this cocktail has only a few ingredients, so the citrus flavor stands out. Lime juice also works for a sharper sour apple edge. For more easy ways to use lemon with vodka, this vodka with lemon guide has simple citrus-forward ideas.

Simple Syrup

This is the ingredient to add last, not first. Shake the drink without syrup when your sour apple liqueur is sweet. Taste, then add a small splash only when the cocktail feels too sharp.

For a cider variation, maple syrup can replace simple syrup, but use it lightly because it moves the drink into fall-cocktail territory.

Green Apple Garnish

A thin green apple slice makes the drink look intentional, not just green. Granny Smith works especially well because it is tart, bright, and crisp. Brush or dip the slice in lemon juice before garnishing so it does not brown.

Thin green apple slices being brushed with lemon juice beside a lemon half and a small bowl.
Thin green apple slices look beautiful, but they brown quickly. A little lemon juice keeps the Appletini garnish fresh-looking while you finish the drinks.

For cider or caramel apple variations, a cinnamon-sugar rim can be delicious. For the main Appletini, keep the garnish simple so the drink stays sharp rather than dessert-like.

How to Make an Appletini Cold, Crisp, and Balanced

The recipe card gives the quick version; this section shows the small technique choices that make the drink taste colder, cleaner, and less sweet.

Pour the Sour Apple Liqueur

Measure the sour apple liqueur instead of guessing. A controlled pour keeps the apple flavor bright without letting sweetness take over the drink.

Green sour apple liqueur being poured into a cocktail shaker with apple juice, lemon, ice, and green apple nearby.
Sour apple liqueur gives the Appletini its color and snap, but the pour needs control. Lemon juice keeps that green apple flavor tart instead of candy-sweet.

Shake the Appletini With Plenty of Ice

Fill the shaker with fresh ice and shake until the outside feels very cold. This is where the cocktail gets its clean texture, quick chill, and just enough dilution.

Cocktail shaker being shaken with ice on a dark bar surface with green apple slices and lemon nearby.
A hard shake makes a real difference here. It chills the Appletini quickly, lightly dilutes the alcohol, and helps the apple and lemon taste brighter together.

Strain Into a Chilled Glass

Empty the ice water from the glass if you used it, then strain the Appletini immediately. A chilled coupe or martini glass keeps the first sip sharp instead of soft.

Pale green Appletini being strained from a metal cocktail shaker into a chilled coupe glass.
Strain the Appletini into a chilled glass so the texture stays smooth and the first sip lands cold. This small step gives the cocktail its clean martini-style finish.

Step-by-Step Method

  1. Chill the glass. Put your martini glass or coupe in the freezer for a few minutes, or fill it with ice water while you make the drink.
  2. Measure the ingredients. Add vodka, sour apple liqueur, apple juice, lemon juice, and optional syrup to a cocktail shaker.
  3. Add plenty of ice. Fill the shaker with fresh, clean-tasting ice so the drink chills quickly. Old freezer ice can dull a simple cocktail.
  4. Shake hard. Shake for 15 to 20 seconds, until the shaker feels icy cold on the outside.
  5. Taste if needed. If it tastes sweet, add a squeeze of lemon. If it tastes sharp, add a small splash of syrup.
  6. Strain. Pour the cocktail into the chilled glass.
  7. Garnish. Add a lemon-dipped green apple slice, lemon twist, or cocktail cherry.

The finished drink should be smooth, frosty, and clean — not thick or slushy.

The Best Appletini Ratio for a Crisp, Less-Sweet Drink

Save this Appletini ratio:

1 1/2 : 1 : 1 : 1/2

Vodka : sour apple liqueur : apple juice : lemon juice

Four measured Appletini ingredients in small glasses with green apple, lemon, and bar tools nearby.
Use the Appletini ratio as a starting point. Shake, taste, then sweeten only if the apple and lemon feel too sharp.

This is the ratio to remember. It keeps the Appletini recognizable, but stops it from becoming heavy.

  • Vodka gives the cocktail structure.
  • Sour apple liqueur gives the Appletini flavor.
  • Apple juice gives real apple body.
  • Lemon juice balances the sweetness.
  • Simple syrup is optional, not automatic.

The ratio is flexible, but the order of adjustment matters: fix sweetness with citrus first, then syrup only if needed. A pale green Appletini that tastes snappy and fresh is better than a neon one that tastes heavy. More color usually means more liqueur and more sweetness.

That is the sweet spot: enough green apple to feel like an Appletini, enough lemon to make you want the next sip.

How to Fix the Taste: Less Sweet, More Tart, or Stronger

Use this after the first shake, not before. Cocktail balance depends on the bottle of liqueur, the sweetness of the juice, and how cold the drink is.

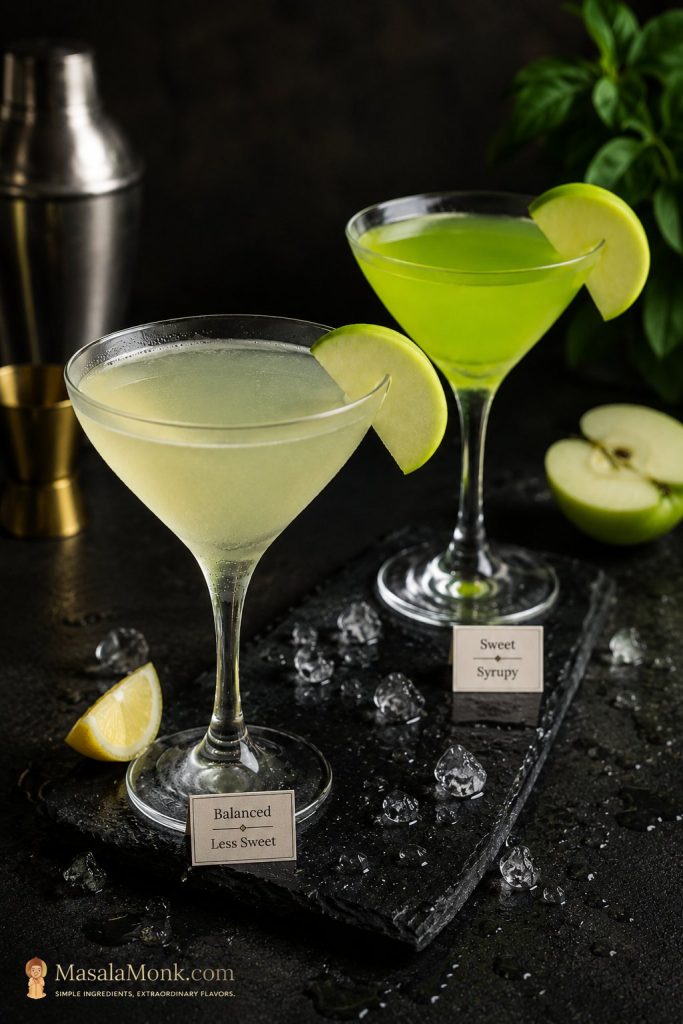
Two Appletini cocktails compared on a dark surface, one pale and balanced and one brighter green and sweeter-looking.
A less-sweet Appletini should taste brighter, not weaker. Real apple juice and enough lemon pull the green apple flavor into focus.
Problem How to Fix It
Overly sweet Add a little more lemon or lime juice, reduce the sour apple liqueur next time, and skip the syrup.
Too tart Add 1/4 oz / 7.5 ml simple syrup or use a slightly sweeter apple juice.
Weak or thin Add a little more vodka, not more liqueur.
Strong alcohol bite Add more apple juice and shake again with plenty of ice.
Heavy finish Use less sour apple liqueur and more cloudy or unfiltered apple juice.
Flat flavor Add a touch more fresh citrus and make sure the drink is very cold.
Needs more green color Use a brighter sour apple liqueur, but avoid extra syrup. A green apple garnish also helps the look.

Most bad Appletinis are not mysterious. They are too warm, too sweet, or both. Fix the cold and citrus, and the whole cocktail suddenly makes sense.

Appletini Variations

Think of the variations as moods: sour and sharp, fresh and quiet, fall and rounded, or dessert-like and playful. Start with the main recipe, then jump to the version that matches the bottle, season, or crowd you are mixing for.

None of these versions need to feel serious. The Appletini’s charm is that it gets to be fun — it just does not have to be cloying.

Sour Apple Martini

Use 1 1/2 oz vodka, 1 oz sour apple liqueur or apple pucker, 1/2 oz lemon or lime juice, and only 1/2 oz apple juice. Skip the syrup unless the drink tastes too sharp.

Bright green sour apple martini in a coupe glass with a green apple garnish, ice, lemon, and bar tools nearby.
For a sharper sour apple martini, let apple pucker or sour apple liqueur bring the punch, then balance it with lemon or lime. The contrast keeps the drink snappy.

Green Apple Martini

Use a bright sour apple liqueur and garnish with a thin Granny Smith slice. To make the drink greener without making it much sweeter, keep the liqueur to 1 oz / 30 ml and let the garnish help with the color.

Green apple martini in a coupe glass with a fan of thin Granny Smith apple slices on the rim.
A Granny Smith garnish instantly says green apple martini. Keep the slices thin and the fan proportional so the glass looks polished instead of overloaded.

Fresh Apple Martini

Reduce the sour apple liqueur to 1/2 oz / 15 ml and use 1 1/2 oz / 45 ml cloudy or unfiltered apple juice. Add 1/2 oz / 15 ml lemon juice and a small amount of simple syrup only when needed. This version will not look as green, and that is the point.

Pale apple martini in a coupe glass with cloudy apple juice, lemon peel, green apple, ice, and bar tools on a light surface.
Cloudy apple juice gives a fresh apple martini more body and a softer color. Use it when you want real apple flavor without leaning on a neon-green bar look.

Apple Cider Martini

Replace the apple juice with apple cider and use maple syrup instead of simple syrup. This is no longer the bright green bar-style Appletini; it is a deeper apple martini with a rounder cider flavor.

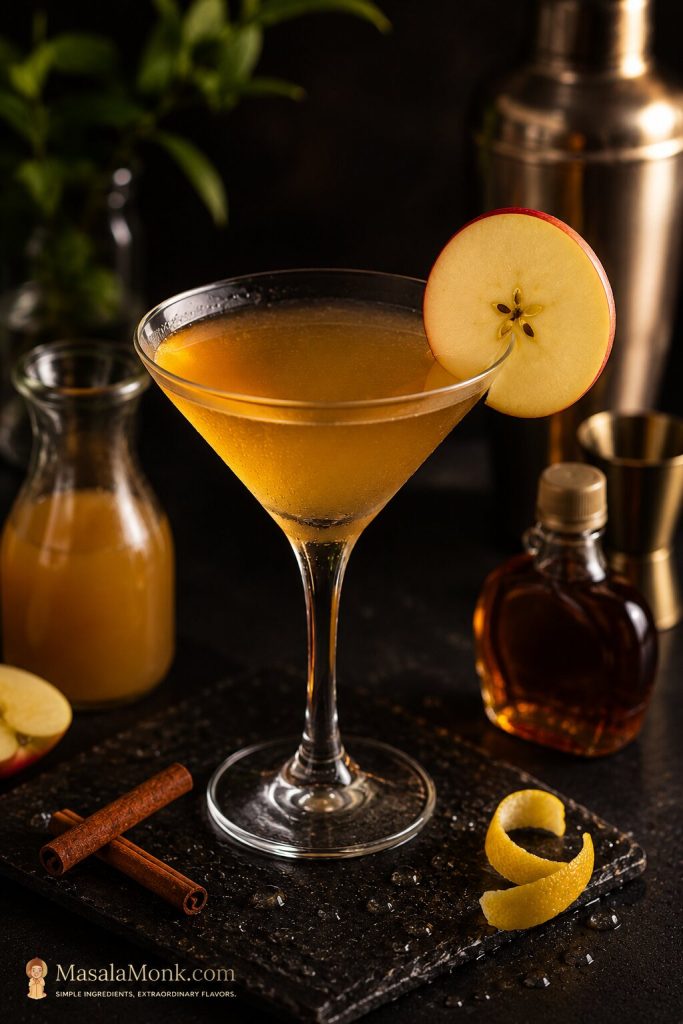
Amber apple cider martini in a coupe glass with an apple slice garnish, cinnamon sticks, lemon peel, apple cider, and a small syrup bottle.
For a fall-style Appletini, swap in non-alcoholic apple cider and keep the garnish simple. Cinnamon, lemon peel, and a small maple cue make it seasonal without turning it heavy.

Caramel Apple Martini

Add a small splash of butterscotch schnapps or use caramel vodka. Keep the lemon juice in the drink so the caramel does not make it heavy. A caramel drizzle or cinnamon-sugar rim works, but use it lightly.

Pale green-gold caramel apple martini in a coupe glass with a light caramel rim, apple slice garnish, cinnamon sticks, and bar tools.
Caramel belongs in an apple martini as an accent, not the base. A light rim or small drizzle gives dessert flavor, while lemon keeps the cocktail from becoming sticky.

Appletini With Apple Vodka

Use 1 1/2 oz / 45 ml apple vodka, 3/4 oz / 22.5 ml sour apple liqueur, 1 oz / 30 ml apple juice, and 1/2 oz / 15 ml lemon juice. Skip the simple syrup unless needed. With apple vodka, keep the liqueur and syrup lighter so the drink stays bright instead of turning into apple candy.

Apple vodka, sour apple liqueur, lemon juice, sliced green apples, and a pale green Appletini arranged on a dark bar surface.
Apple vodka can make an Appletini smell more aromatic, but it may also push the drink sweeter. Start by reducing syrup, then use lemon to keep the finish clean.

Non-Alcoholic Appletini or Virgin Appletini

Shake 2 oz / 60 ml apple juice, 1/2 oz / 15 ml lemon juice, and 1/4 oz / 7.5 ml simple syrup only when needed with ice. Strain into a chilled glass and top with sparkling water. Use ginger ale for a sweeter mocktail.

Non-alcoholic green apple mocktail in a coupe glass with bubbles, green apple garnish, lemon, ice, and apple slices.
A virgin Appletini should still feel like a cocktail, not plain apple juice in a fancy glass. Lemon brings brightness, sparkling water adds lift, and green apple keeps the look classic.

For something apple-forward without the vodka, MasalaMonk’s apple juice mocktails are a natural next step.

Can You Use Appletini Mix or Sour Mix?

Yes, but start small. Appletini mix, sour apple mix, and sweet-and-sour mix are usually already sweetened, so they can push the drink heavy fast.

With sweet-and-sour mix, shake 1 1/2 oz vodka, 1 oz sour apple liqueur, 1/2 oz apple juice, and 1/2 oz sour mix with ice. Taste before adding more sour mix or any syrup. Fresh lemon and apple juice simply make the drink taste more alive.

Appletini sour mix setup with measured glasses of vodka, sour apple liqueur, apple juice, and sour mix beside a shaker and green apples.
Sour mix is useful when you need speed, but it is often already sweetened. Measure it carefully, shake the drink, and taste before adding any extra simple syrup.

Common Appletini Mistakes

Check this when the drink tastes almost right but not quite. Most Appletini problems come from the same few places.

  • Using too much sour apple liqueur: keep it around 1 oz / 30 ml so the drink tastes like apple, not syrup.
  • Adding syrup automatically: many apple liqueurs are already sweet, so taste first.
  • Skipping fresh lemon: citrus is what keeps the cocktail bright.
  • Shaking too lightly: the drink needs enough cold and dilution to taste clean.
  • Batching without dilution: add a little cold water when serving straight from a pitcher.
  • Cutting garnish too early: brush or dip apple slices in lemon juice so they do not brown.

Make-Ahead, 2-Drink, and Pitcher Appletinis

You can scale this recipe, but a pitcher Appletini needs help from cold and dilution because it misses the shake. Whenever possible, batch the ingredients, chill them, then shake individual portions with ice before serving.

A pitcher Appletini should still feel like a cocktail, not a bowl of green punch.

For 2 Appletinis

  • 3 oz / 90 ml vodka
  • 2 oz / 60 ml sour apple liqueur
  • 2 oz / 60 ml apple juice
  • 1 oz / 30 ml fresh lemon juice
  • 1/2 oz / 15 ml simple syrup, optional
  • Ice, for shaking

Shake with ice and strain into two chilled glasses.

Pitcher Appletini for 8 Cocktails

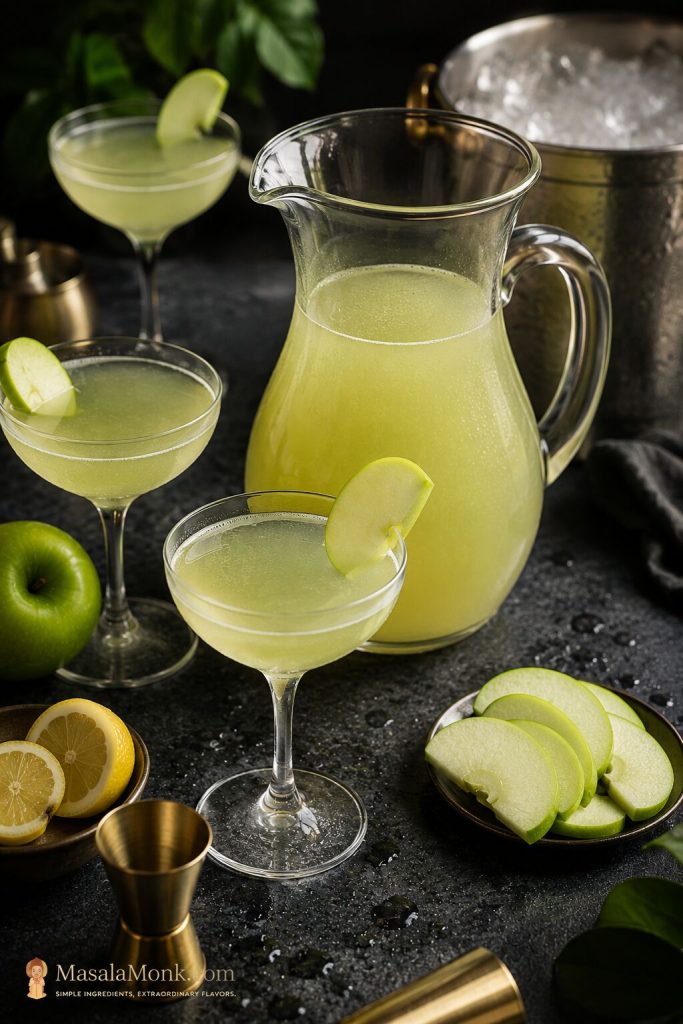
Glass pitcher of pale green Appletinis with chilled coupe glasses, green apple slices, lemon, an ice bucket, and bar tools.
For pitcher Appletinis, chill the mixture before guests arrive and keep ice out of the pitcher. That way, each pour stays cold and crisp instead of watered down.
  • 12 oz / 360 ml vodka
  • 8 oz / 240 ml sour apple liqueur
  • 8 oz / 240 ml apple juice
  • 4 oz / 120 ml fresh lemon juice
  • 2 oz / 60 ml simple syrup, optional
  • 4 to 6 oz / 120 to 180 ml cold water, when serving straight from the pitcher without shaking

Stir everything except ice in a pitcher and refrigerate until very cold. When ready to serve, shake individual portions with ice when possible, then strain into chilled glasses. This gives the best texture and balance.

Serving straight from the pitcher? Start with 4 oz / 120 ml cold water. Taste after chilling and add up to 2 oz / 60 ml more water when the batch tastes too sharp or strong.

Keep ice out of the pitcher unless you are serving immediately. Ice will melt and water down the whole batch. Garnish each glass just before serving so the apple slices look fresh. This is still a cocktail batch, not a light punch, so pour modest servings and keep it chilled.

Can You Make Appletinis Ahead?

Yes. Mix the vodka, sour apple liqueur, apple juice, and lemon juice up to 4 hours ahead and refrigerate. Add ice only when shaking or serving.

For the freshest flavor, shake with ice right before pouring. Citrus can taste dull when it sits too long, so this drink is best mixed ahead only for same-day serving. Slice the apple garnish right before serving, or hold slices briefly in lemon water and pat dry before using.

Serve It Up or On the Rocks

An Appletini is usually served “up,” meaning shaken with ice and strained into a stemmed glass without ice. That gives it the clean martini-style feel.

You can also serve it over fresh ice in a rocks glass for a colder, slower-sipping drink. On the rocks, the cocktail becomes more diluted as the ice melts. That can make sweeter versions easier to drink, but it will soften the sharp apple flavor over time.

For vodka cocktails served tall or over ice, a Moscow Mule may be more your style than a strained martini glass drink.

Is an Appletini Strong?

An Appletini can be stronger than it tastes because the main recipe has 1 1/2 oz vodka plus 1 oz sour apple liqueur. The apple juice and citrus make it taste smooth and fruity, so serve it in small martini portions rather than oversized pours.

For general drink-size context, the NIAAA standard drink guide explains how distilled spirits are counted in standard servings. Sip slowly and serve responsibly.

What to Serve With an Appletini

The tart apple edge cuts through creamy cheese beautifully, and the lemony finish wakes up salty snacks. Think sharp cheddar, brie, salted nuts, olives, prosciutto, fried cheese bites, pork sliders, or spicy chicken bites.

Appletini served beside a snack board with cheese, olives, nuts, crackers, cured meat, fried bites, and green apple garnish.
Salty snacks make a tart Appletini taste even brighter. Cheese, olives, nuts, crackers, cured meat, and fried bites all work because they balance the green apple finish.

For a simple snack table, pair Appletinis with a charcuterie board and something creamy like an easy cheese ball. The salty, creamy bites make the apple and lemon feel even brighter.

For caramel apple or apple cider martini variations, serve light desserts, apple tart, cinnamon cookies, or vanilla-forward sweets. Keep the food less sweet when the cocktail itself is on the sweeter side.

Why the Appletini Deserves a Better Reputation

The Appletini is one of those cocktails people either remember fondly or dismiss too quickly. Its retro reputation came from very sweet, very green versions, but the idea itself is solid: cold vodka, apple, citrus, and enough tartness to make the fruit taste brighter.

The Appletini does not need to apologize for being retro. It just needs enough citrus and cold to be worth drinking now.

Retro Green Appletini Party

This is where the drink earns its comeback: not as a novelty shot, but as a cold, bright cocktail that still feels fun with friends.

Three pale green Appletini cocktails in coupe glasses with green apple garnishes, olives, nuts, crackers, cheese, and bar tools on a dark table.
The Appletini should still feel fun and retro — just colder, cleaner, and better balanced. Serve it with salty snacks when you want a playful cocktail-night drink that does not taste syrupy.

For a little cocktail history, the Appletini is widely associated with the 1990s apple martini wave and the Lola’s West Hollywood origin story.

This recipe keeps the fun part of the drink — the green apple snap — and fixes the part that usually goes wrong: too much sweetness.

FAQs

What is in an Appletini?

An Appletini usually contains vodka, sour apple schnapps or sour apple liqueur, apple juice, lemon juice, and ice. The best versions taste cold and tart, not just sweet and green.

How do you make an Appletini?

Shake vodka, sour apple liqueur, apple juice, and fresh lemon juice with ice for 15 to 20 seconds. Strain into a chilled martini glass and garnish with a thin green apple slice.

Is an Appletini the same as an apple martini?

Appletini is the common nickname for an apple martini. The name often suggests the bright green sour apple version, while “apple martini” can also describe fresher apple juice or cider versions.

Is an Appletini made with vodka or gin?

Vodka is the usual base for an Appletini. Gin can be used for a botanical variation, but it will taste less like the expected apple martini.

What does an Appletini taste like?

An Appletini should taste cold, sweet-tart, and apple-forward, with a sharp green apple finish. If it tastes like syrup first and apple second, it needs more citrus or less liqueur.

Why is my Appletini too sweet?

An Appletini tastes too sweet when the sour apple liqueur, sour mix, apple juice, or syrup adds too much sugar. Fix it with fresh lemon or lime juice, skip the syrup, and reduce the apple liqueur next time.

How do I make an Appletini less sweet?

Use the same vodka, but reduce the sour apple liqueur, skip the syrup, choose unsweetened apple juice, and add fresh lemon or lime a little at a time.

Can I make an Appletini without sour apple schnapps?

You can make an Appletini without sour apple schnapps by using apple juice or apple cider with vodka, fresh lemon juice, and a little simple syrup or maple syrup when needed. It will taste more like a fresh apple martini than the bright green bar-style version, but still crisp and apple-flavored.

Can I use apple juice instead of apple pucker?

Apple juice works well when you want a softer, fresher apple flavor. For a bolder sour green apple flavor, apple pucker is the stronger choice, and using both gives classic Appletini flavor with more real apple body.

Can I use apple cider instead of apple juice?

Use non-alcoholic apple cider or unfiltered apple juice when you want a deeper, more fall-flavored version. It will not look as bright green as a classic Appletini, but it works well with lemon, maple syrup, and a cinnamon garnish.

What is the best garnish for an Appletini?

A thin green apple slice is the classic garnish. Brush it with lemon juice to slow browning. A lemon twist or cocktail cherry also works.

Can I make a pitcher of Appletinis?

Batch the vodka, sour apple liqueur, apple juice, and lemon juice in a pitcher and chill well. Keep ice out of the pitcher, and add a little cold water when serving without shaking individual drinks.

Can I make a non-alcoholic Appletini?

Shake apple juice, lemon juice, and a little simple syrup only when needed with ice, then strain into a chilled glass. Top with sparkling water for a lighter non-alcoholic Appletini, or use ginger ale for a sweeter version.

More Cocktail Recipes

For crisp vodka cocktails, try a Screwdriver or Moscow Mule. For another martini-style drink, try an Espresso Martini.

Serve only to adults of legal drinking age and enjoy responsibly.

The best Appletini keeps the fun — the green glass, the retro wink, the first icy sip — and loses the syrupy finish. Make it cold, keep the lemon fresh, and let the apple taste like apple.

Posted on Leave a comment

Pina Colada Recipe: Frozen, Virgin, Malibu & Mix Tips

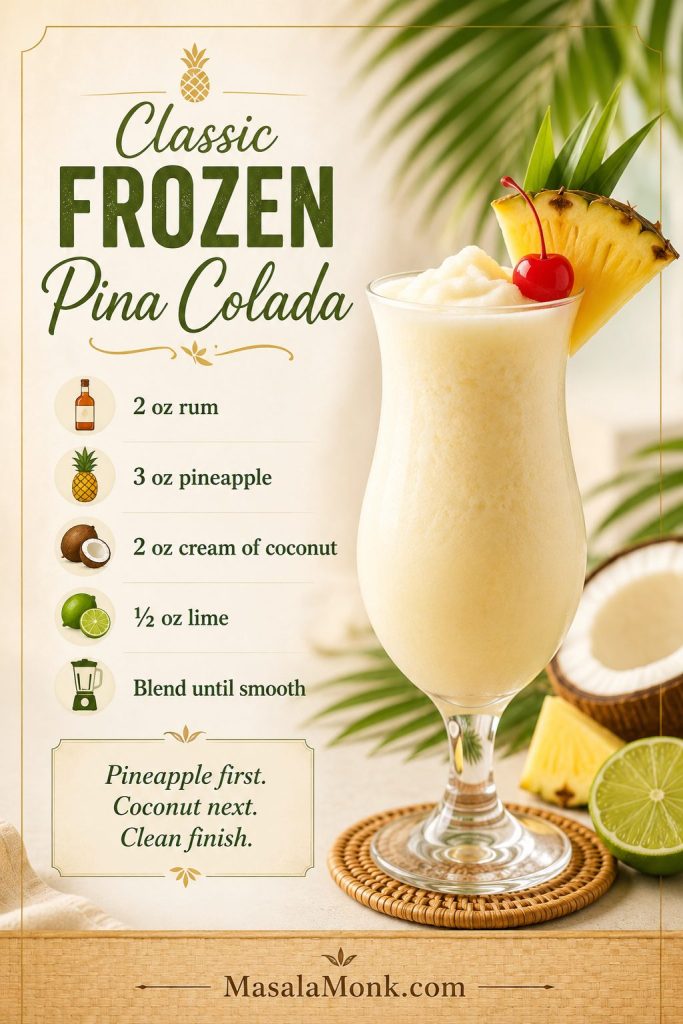
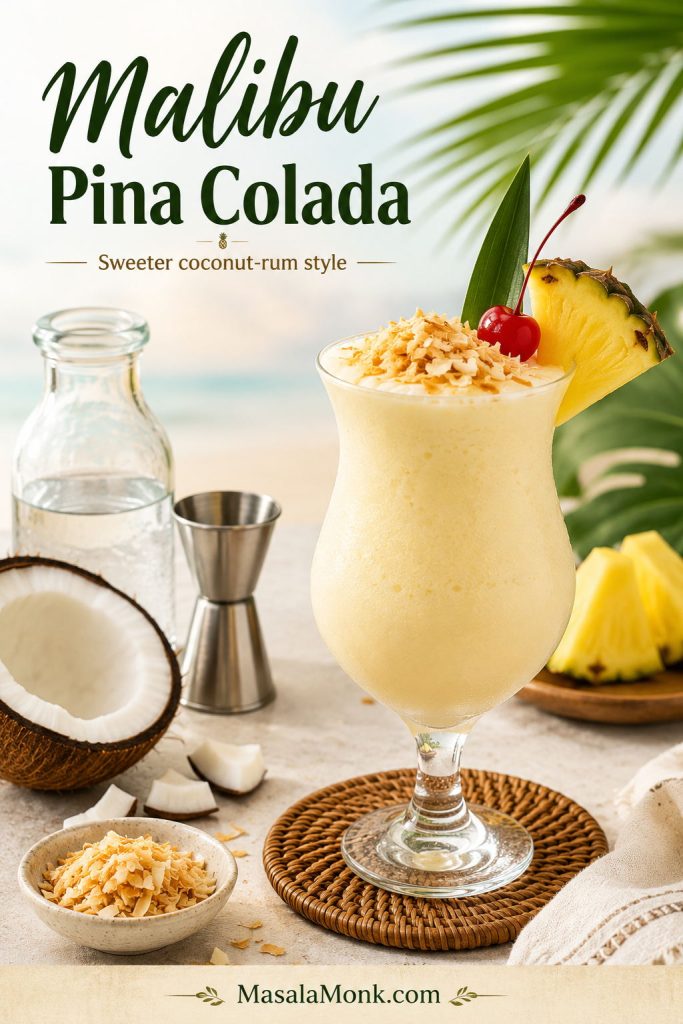
Frozen pina colada in a hurricane glass with a pineapple wedge, cherry garnish, coconut pieces, and MasalaMonk.com footer branding.

Most disappointing piña coladas fail for the same few reasons: the drink turns thin, tastes like straight sugar, or the alcohol-free version feels empty once the rum is gone. A great piña colada recipe — often searched as a pina colada recipe — solves that with the right coconut base, enough pineapple, the right chill, and a small hit of lime.

The first sip should taste cold before it tastes sweet: pineapple first, coconut next, rum in the background, and a clean finish that makes the glass feel refreshing instead of heavy.

Start with the frozen blender version, then use the same balance to make it shaken, virgin, Malibu-style, lighter with coconut milk, mixed ahead, or batched for a party. The promise is simple: a piña colada that stays smooth, avoids syrupy sweetness, and tells you exactly which coconut product belongs in the glass.

Quick Answer: The Best Pina Colada Recipe Ratio

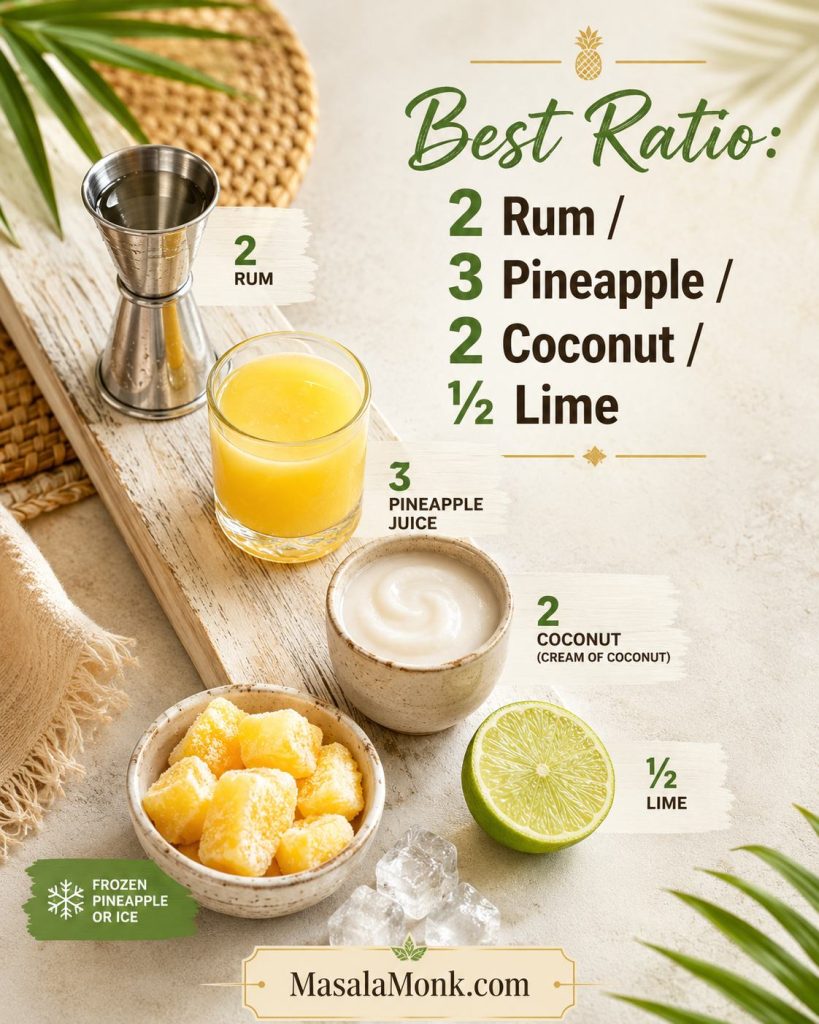
For one frozen piña colada, use 2 oz white rum, 3 oz pineapple juice, 2 oz cream of coconut, ½ oz fresh lime juice, and 1 to 1½ cups ice. For a thicker, fruitier drink, add ½ cup frozen pineapple.

Frozen, shaken, or alcohol-free shortcuts

No blender? Shake 2 oz white rum, 2 oz pineapple juice, 1½ oz cream of coconut, and ½ oz lime juice, then strain into a fresh glass over fresh ice. No alcohol? Blend frozen pineapple, pineapple juice, cream of coconut, lime, and a tiny pinch of salt so the mocktail still has depth.

Need a different route? Go straight to the on-the-rocks version, the virgin pina colada, or the pina colada mix section.

The classic flavor is simple — rum, pineapple, coconut — but the texture depends on measurement. Cream of coconut gives the familiar sweet body, while lime keeps the finish from turning sticky.

Measured ratio for one drink

IngredientAmount for 1 drinkJob in the glass
White rum2 oz / 60 mlClean cocktail base that lets the fruit lead.
Pineapple juice3 oz / 90 mlMain tropical flavor and blending liquid.
Cream of coconut2 oz / 60 mlSweet coconut body and classic richness.
Fresh lime juice½ oz / 15 mlClean finish and better balance.
Ice1–1½ cups / 140–210 gCold, frosty texture.
Frozen pineapple½ cup / 70–75 g, optionalFruitier thickness without dulling the flavor.

Once the base ratio makes sense, use the version guide to pick your path or the success checks to fine-tune the glass.

Measured pina colada ingredients showing rum, pineapple juice, cream of coconut, lime, and frozen fruit with a best ratio guide.
The best pina colada ratio gives you a reliable base before you start adjusting. Once rum, pineapple, coconut, and lime are balanced, texture fixes become much easier.

Best first batch: measure the coconut base and frozen ingredients once. After that, you can adjust by feel without turning the drink thin, syrupy, or heavy.

Pina Colada at a Glance: Choose Your Version

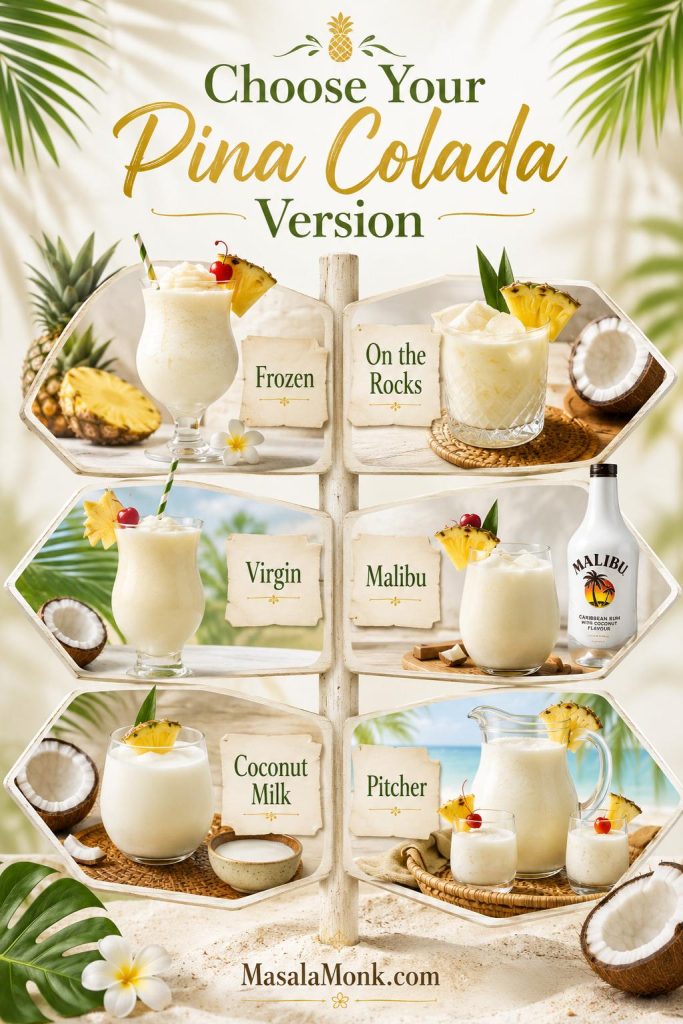
The best version depends on the glass you want: thick and vacation-style, lighter and shaken, alcohol-free but still complete, or party-ready without turning watery. Start with the classic frozen version once, then use this guide to choose your path.

VersionBest forTextureKey adjustment
Frozen Pina Colada RecipeClassic resort-style drinkFrosty, smooth, sippableUse the base ratio and optional frozen fruit.
Pina Colada on the RocksNo blender, lighter cocktailChilled and frothyShake hard; serve right away.
Virgin Pina Colada MocktailNon-drinkers and family-friendly glassesCreamy and fruit-forwardUse lime, salt, and pineapple for depth.
Malibu Pina Colada RecipeSweeter coconut-rum flavorSoft and coconut-forwardUse less cream of coconut.
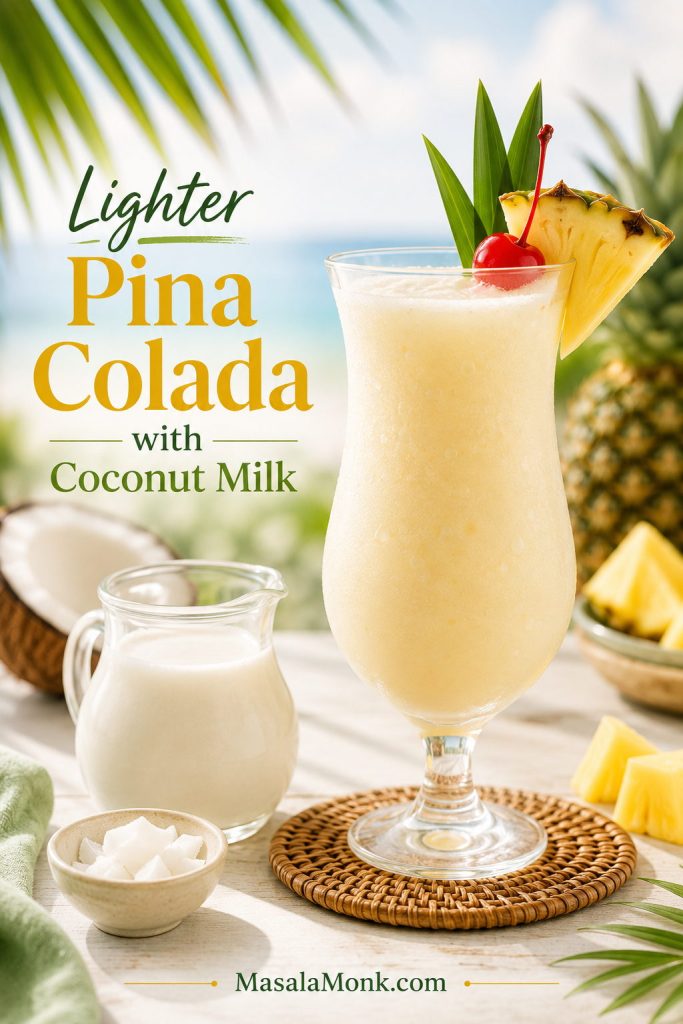
Pina Colada with Coconut MilkLighter, less dessert-like drinkThinner and fresherAdd sweetener only if needed.
Pina Colada PitcherPartiesDepends on serving methodChill the base; finish at serving.
Six-panel pina colada version guide showing frozen, on the rocks, virgin, Malibu, coconut milk, and pitcher options.
The right pina colada version depends on the moment. Choose frozen for plush texture, on the rocks for no-blender ease, virgin for alcohol-free depth, or pitcher-style when you are serving more than one glass.

Why This Pina Colada Ratio Works

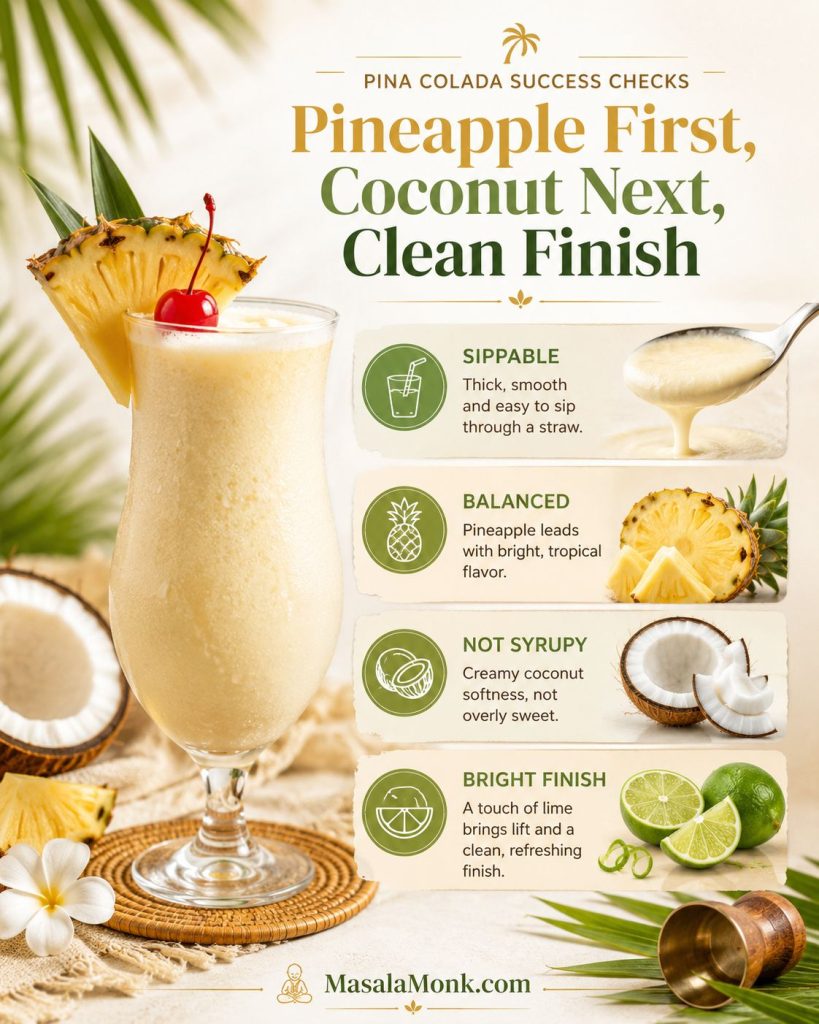
This recipe is built around three checks: the drink should pour thick but sip easily, taste pineapple-first, and finish clean instead of sticky. That is the difference between a lush piña colada and a glass of sweet melted slush.

Success checkWhat you should noticeAdjustment
TextureFrosty pour, but still sippable through a straw.Too heavy? Add a splash of juice. Too thin? Add frozen fruit.
Flavor orderPineapple first, coconut second, rum in the background.If rum dominates, add a little more pineapple or coconut base.
SweetnessSoft and tropical, not candy-like.Use less cream of coconut next time, or add a small squeeze of lime now.
FinishCool, clean, and refreshing.Flat drinks need acid or a tiny pinch of salt, not more sugar.
Pina colada success-check graphic with pineapple first, coconut next, clean finish, and cues for sippable balanced texture.
Use this as the final taste test before serving. If the drink feels heavy, sharp, or candy-sweet, adjust one small thing instead of rebuilding the whole blender jar.

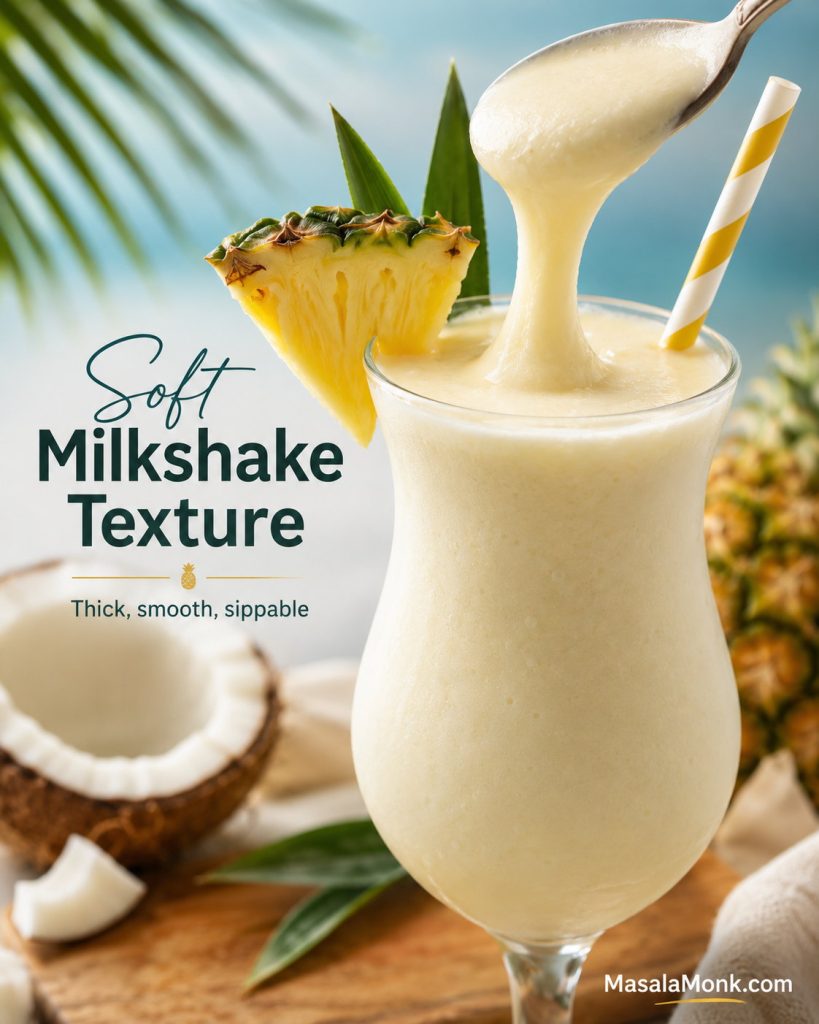
What success looks like: a good frozen pina colada should move like a soft milkshake, not crushed ice in juice. It should feel lush for the first sip and still clean by the last.

Pina Colada Recipe Card

Classic Frozen Pina Colada Recipe

This frozen pina colada is pineapple-forward, coconut-rich, cold, smooth, and balanced with fresh lime. It makes one generous drink or two smaller cocktail glasses.

Prep Time
5 minutes
Total Time
5 minutes
Yield
1 large or 2 small drinks
Method
Blended / frozen

Equipment

  • Blender
  • Jigger, measuring cup, or kitchen scale
  • Hurricane glass, highball, or tall glass

Ingredients

  • 2 oz / 60 ml white rum
  • 3 oz / 90 ml pineapple juice, chilled if possible
  • 2 oz / 60 ml cream of coconut, shaken or stirred well before measuring
  • ½ oz / 15 ml fresh lime juice
  • 1 cup / about 140 g ice, plus more only if needed
  • ½ cup / about 70–75 g frozen pineapple chunks, optional but recommended
  • Pineapple wedge and maraschino cherry, optional

Method

  1. Add the pineapple juice, white rum, cream of coconut, and lime juice to the blender.
  2. Add the frozen pineapple, if using, then add the ice.
  3. Blend for 20–30 seconds, just until smooth and frosty.
  4. Check before pouring: it should look thick but still sip easily through a straw.
  5. Too thick? Blend in 1 tablespoon pineapple juice. Too thin? Add a little frozen pineapple and blend briefly.
  6. Pour into a chilled glass, garnish if you like, and serve immediately.

Success Cue

Before serving, check three things: the drink should sip easily, taste pineapple-first, and finish clean rather than sticky. Thin drinks need frozen fruit; heavy drinks need pineapple juice; overly sweet drinks need lime.

Recipe Notes

  • Prefer it less sweet? Use 1½ oz cream of coconut.
  • Want a lighter cocktail? Use 1½ oz rum.
  • Want more rum warmth? Use up to 2½ oz rum and keep the finish bright.
  • Making it alcohol-free? Use the mocktail formula below instead of simply removing the rum.
Classic frozen pina colada recipe card with rum, pineapple, cream of coconut, lime, and blend-until-smooth instructions.
This frozen pina colada card is the quick-save version of the recipe. Keep the base measured, then use the texture cue to decide whether the drink needs more fruit or more flow.

What Is a Pina Colada?

A piña colada is a tropical cocktail made with rum, pineapple, coconut, and a cold blended or shaken texture. It is strongly associated with Puerto Rico, but home versions vary because shoppers often find cream of coconut, coconut cream, coconut milk, and coconut water sitting near each other.

Classic formulas are simple; the home-cocktail confusion usually starts in the coconut aisle. Cream of coconut gives the familiar sweet resort-style body, coconut cream creates a richer but less sweet path, and coconut milk makes a lighter glass. The biggest mistake usually happens before the blender starts: choosing the wrong can.

Pina Colada Ingredients

The ingredient list is short, so each choice shows up clearly in the glass. Use the classic route when you want a sweet, creamy vacation-style drink; use the lighter swaps only when you actually want a fresher, less dessert-like result.

If the coconut aisle is the confusing part, jump to the cream of coconut vs coconut cream guide before you start blending.

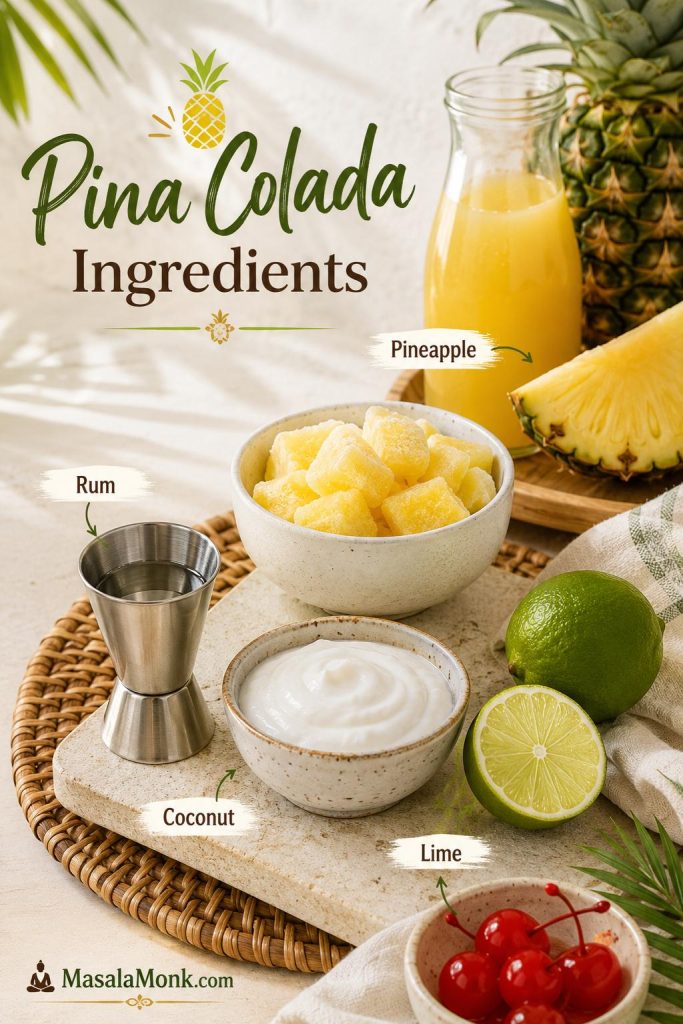
Pina colada ingredients arranged with rum, pineapple juice, cream of coconut, lime, frozen pineapple, pineapple garnish, and cherry.
A short ingredient list leaves less room to hide mistakes. For the best pina colada, use pineapple for lift, cream of coconut for structure, lime for contrast, and rum as the background note.

White rum

White rum is the best default because it keeps the drink clean, sunny, and pineapple-forward. Coconut rum is softer and sweeter. Dark or aged rum adds warmth, especially as a small float.

Pineapple

Use 100% pineapple juice for the smooth base. Fresh juice tastes vivid but varies by fruit; canned juice is more consistent. Avoid pineapple juice cocktail unless you are prepared to reduce sweetness elsewhere.

Frozen pineapple chunks are the easiest upgrade for a blender version because they add structure and real fruit flavor. Drained canned chunks can work, but syrup-packed fruit may push the drink too sweet.

Pineapple juice vs frozen pineapple

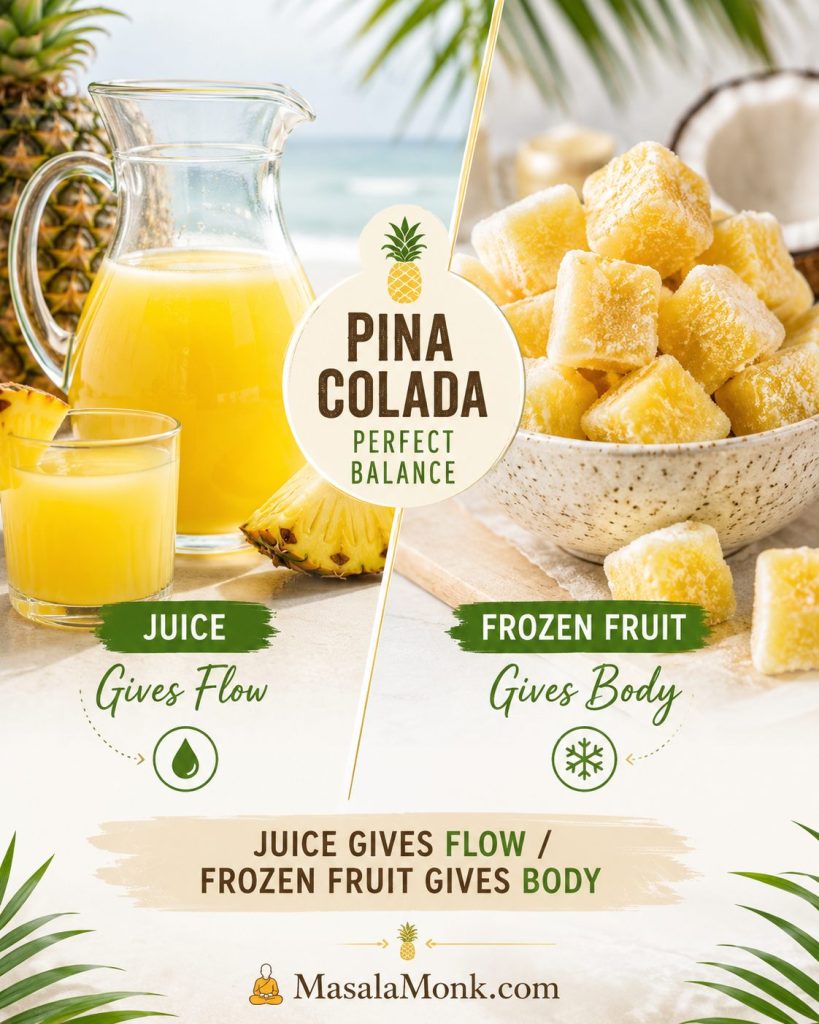
Use pineapple juice when the blender needs flow and frozen pineapple when the drink needs body. Together, they create a frozen pina colada that tastes like fruit rather than diluted ice.

Split graphic comparing pineapple juice for flow with frozen pineapple chunks for body in a pina colada.
Pineapple juice and frozen pineapple solve different problems. Juice keeps the drink pourable, while frozen fruit adds body and helps prevent a watery blender drink.

Cream of coconut

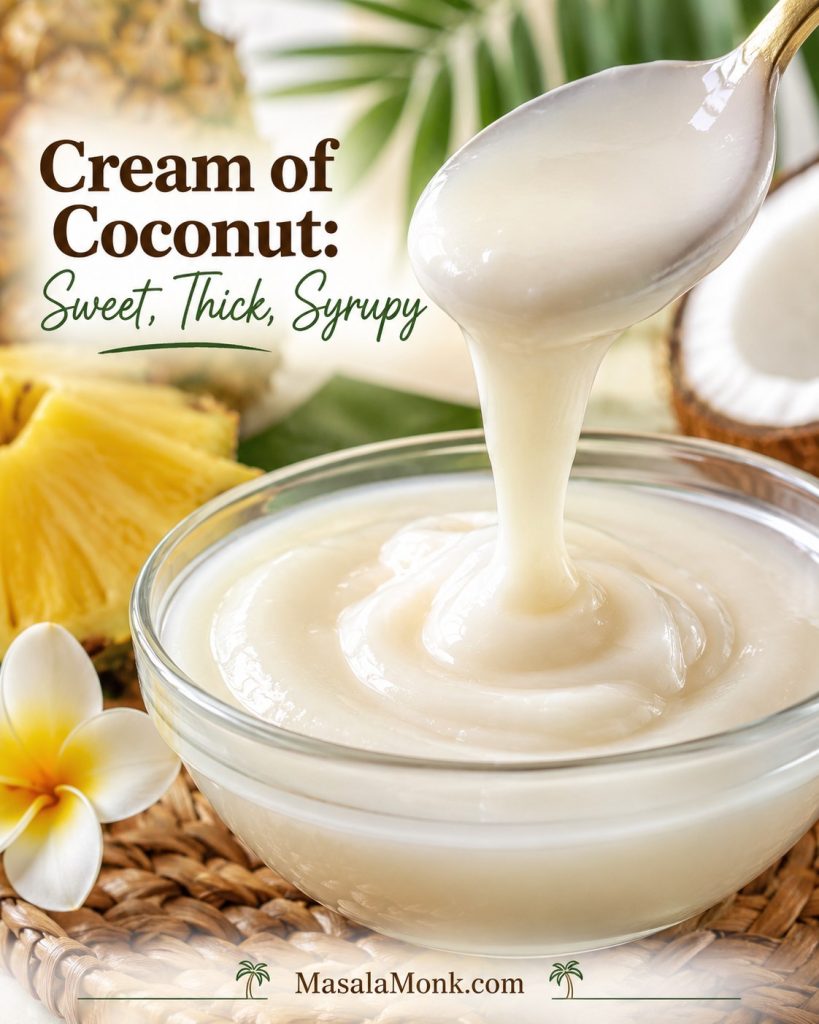
Cream of coconut is sweetened, thick, and syrupy. It gives the familiar body most people expect from a classic pina colada, so shake or stir the can well before measuring.

If it is too thick to pour, warm the closed container in a bowl of warm water for a few minutes, then shake again. Brands vary, so taste before making big adjustments.

Fresh lime juice

Lime is the small polish move. It is not required in every traditional formula, but it keeps the coconut from tasting heavy and makes the pineapple feel brighter.

Frozen texture ingredients

For a frozen drink, measured ice gives chill while frozen fruit gives body. Too much plain ice can dull the flavor, so use pineapple chunks when you want a thicker drink that still tastes tropical.

Cream of Coconut vs Coconut Cream vs Coconut Milk

This is the aisle where many homemade piña coladas are won or lost. The names sound close, but the products do not behave the same way. If you have ever stood in front of coconut milk, coconut cream, and cream of coconut wondering which one the recipe actually means, this is the part that saves the drink.

ProductSweetened?TextureBest use in a pina colada
Sweetened cream of coconutYesThick, syrupy, richClassic sweet, creamy version.
Unsweetened coconut creamUsually noThick and richLess sweet version when paired with simple syrup or agave.
Full-fat coconut milkUsually noThinner and fluidLighter drink with a fresher, less dessert-like finish.
Coconut waterNoThin and refreshingSkinny or hydrating variation, not a classic creamy one.
Homemade coconut syrupYesAdjustableFallback when bottled cream of coconut is not available.
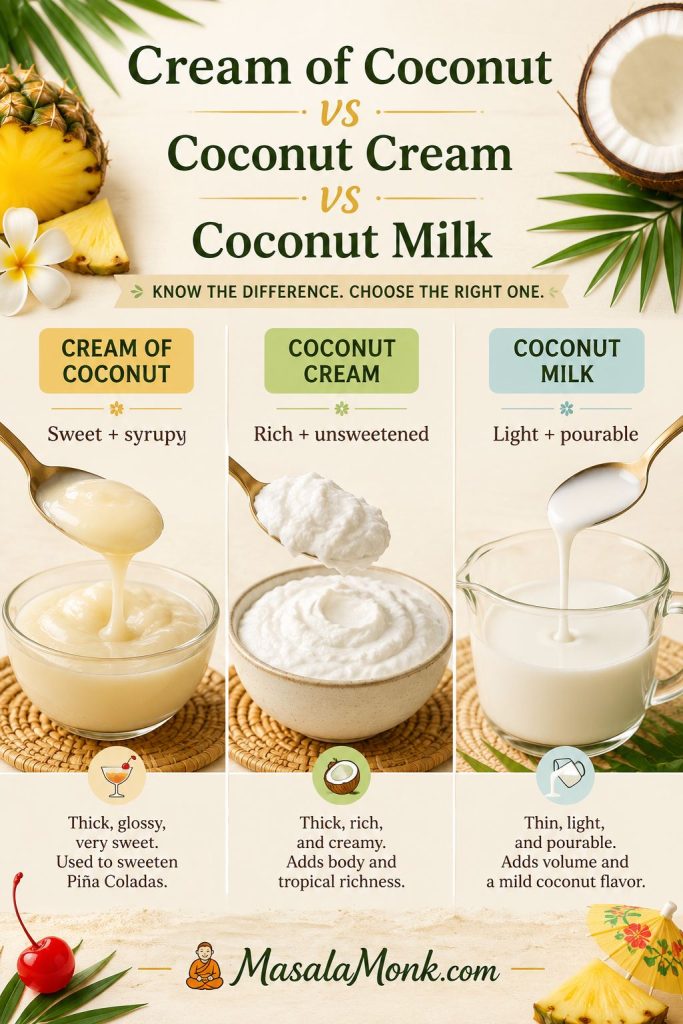
Comparison graphic showing cream of coconut, coconut cream, and coconut milk with texture and sweetness differences.
Cream of coconut, coconut cream, and coconut milk do not behave the same way. Choosing the right one is one of the fastest ways to control sweetness, body, and classic pina colada texture.

Already have the right coconut base? Move to the frozen method, the coconut milk version, or the fix guide if your drink is too thin, too sweet, or not creamy enough.

For the safest classic choice, use cream of coconut. A less-sweet modern route starts with coconut cream plus sweetener. If you want a lighter glass, use full-fat coconut milk with extra pineapple for body.

What cream of coconut should look like

Look for a thick, glossy pour. That texture is what gives the classic pina colada its familiar body without needing to overdo the ice.

Close-up of thick cream of coconut being poured slowly, showing a glossy syrupy texture.
Cream of coconut should move slowly, almost like a glossy syrup. If your coconut ingredient pours thin like milk, the finished pina colada will usually taste lighter and less classic.

Quick homemade fallback: gently warm 1 cup full-fat coconut milk or coconut cream with ¾ cup sugar and a small pinch of salt, stirring until dissolved. Cool, refrigerate in a clean jar, and use within about 1 week. Shake before measuring.

For more detail on the coconut-aisle confusion, Epicurious has a helpful guide to cream of coconut, coconut cream, and coconut milk.

If the coconut-water direction sounds more refreshing than creamy, our coconut water cocktails guide has more long, bright drinks built around coconut water, lime, and ice.

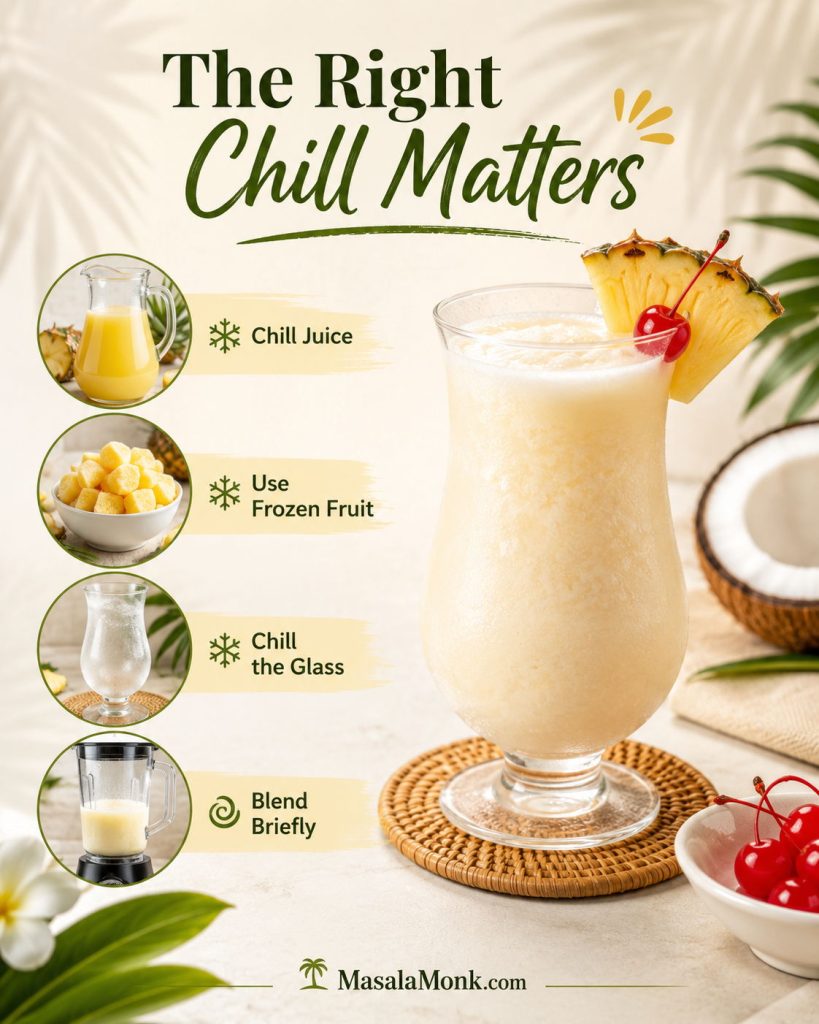
Equipment and Cold Control

A piña colada has no cooking temperature, but it does have a temperature problem: once it warms up, the tropical flavor turns dull and the texture collapses.

  • Use a blender for the frozen version and a shaker or clean jar for the on-the-rocks version.
  • Chill the juice when possible so the drink starts cold.
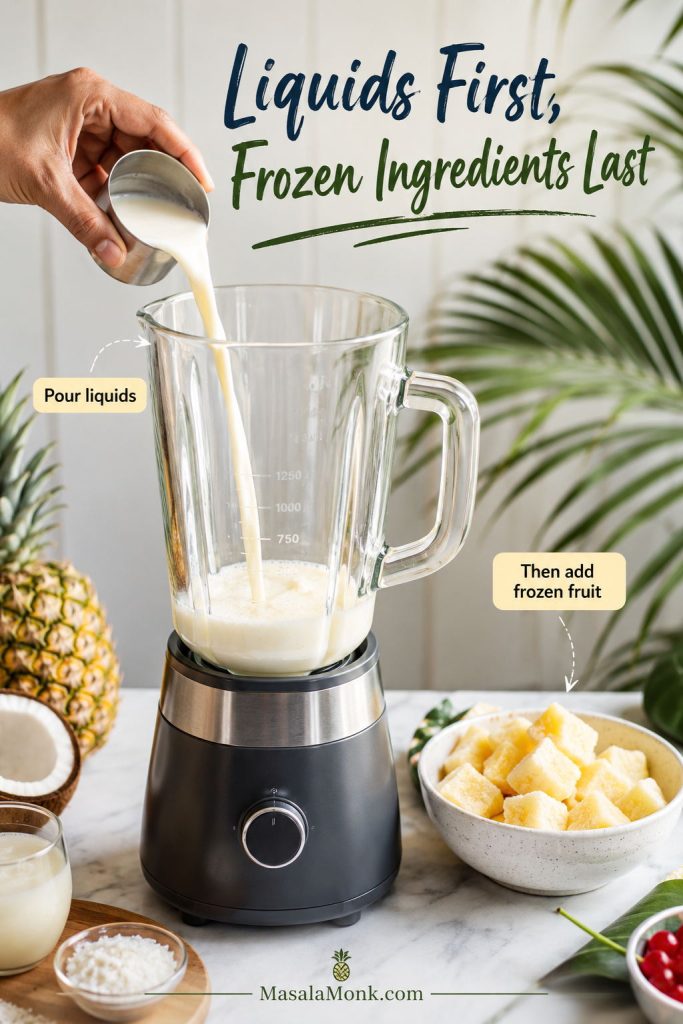
  • Add liquids first so the blender catches before the frozen ingredients settle around the blades.
  • Blend briefly, usually 20–30 seconds, then stop once smooth.
  • For pitchers, chill the base ahead and finish each round right before serving.
Cold control guide for pina colada showing chilled juice, frozen fruit, a chilled glass, and brief blending tips.
Cold control matters more than simply adding more ice. Chilled juice, frozen fruit, a cold glass, and brief blending help a creamy pina colada stay smooth instead of melting too quickly.

These small moves protect the drink’s first-sip feeling: frosty, lush, and refreshing instead of loose and tired.

Avoid these common mistakes: do not use unsweetened coconut milk as a direct cream-of-coconut swap, do not over-blend after the drink turns smooth, and do not fix a flat mocktail with more sugar. Use acid and a tiny pinch of salt instead.

How to Make a Frozen Pina Colada

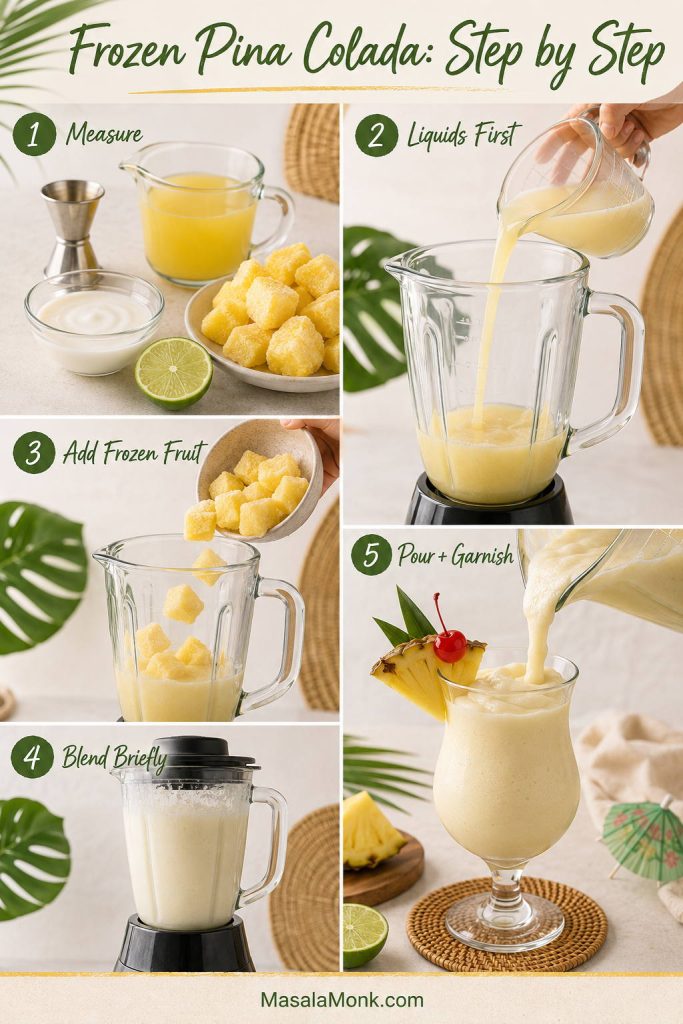
A frozen pina colada should pour thick, then relax slightly in the glass. It should not scoop like sorbet or run like juice.

Step-by-step frozen pina colada guide showing measuring, adding liquids, adding frozen fruit, blending briefly, and pouring to garnish.
The frozen method works best when the blender gets help from the start. Add liquids first, then frozen fruit, so the drink blends quickly without losing its thick, sippable texture.

Add pineapple juice, rum, cream of coconut, and lime to the blender first. Add frozen pineapple and ice last so the blades can catch and move smoothly.

Blender jar with liquid being poured in first and frozen pineapple waiting nearby for a pina colada blender order guide.
Blender order can change the final texture. Liquids first help the blades move freely; after that, frozen pineapple can thicken the pina colada without turning it into a frozen block.

Blend for 20–30 seconds, just until smooth. If the blender struggles, start with less frozen material, blend the liquid and fruit, then add the rest gradually.

Texture target: thick enough to look lush, loose enough to sip. Too heavy? Add pineapple juice. Too thin? Add frozen pineapple. Too sweet? Add lime.

Frozen pina colada texture target

Use this texture cue before you pour. A frozen pina colada should look plush, but it should still move through a straw without effort.

Finished frozen pina colada with thick, smooth, sippable texture shown close up with garnish and MasalaMonk.com footer.
The ideal frozen pina colada should move like a soft milkshake. If it scoops like sorbet, loosen it; if it runs like juice, add more frozen pineapple.

Too thin, just right, or too heavy?

For quick rescue, compare your drink with this texture guide or jump to the full pina colada troubleshooting section.

Three-part pina colada texture comparison showing too thin, just right, and too heavy with quick fix cues.
Texture fixes work better when you identify the problem first. A thin pina colada needs more frozen body, while a heavy one needs pineapple juice to bring back flow.

The same frozen-fruit logic is useful in a frozen strawberry daiquiri: fruit gives body, lime keeps it bright, and the blender stays on your side instead of against you.

If you want to compare this with a bartender-style baseline, the International Bartenders Association lists a simple white-rum, pineapple, and coconut piña colada formula.

How to Make a Pina Colada on the Rocks

A pina colada on the rocks is the cleaner, faster version: same pineapple-coconut flavor, but lighter on the palate and less dessert-like than the frozen drink. Choose it when you want a chilled cocktail that still feels tropical without turning into a smoothie.

Pina colada on the rocks in a tall glass with fresh ice, pineapple garnish, lime, and cocktail shaker in the background.
A pina colada on the rocks is the best route when you want the flavor without the blender. Shake it hard, strain over fresh ice, and the drink stays lighter while still tasting tropical.
IngredientAmount for 1 drink
White rum2 oz / 60 ml
Pineapple juice2 oz / 60 ml
Cream of coconut1½ oz / 45 ml
Fresh lime juice½ oz / 15 ml
Fresh iceFor shaking and serving

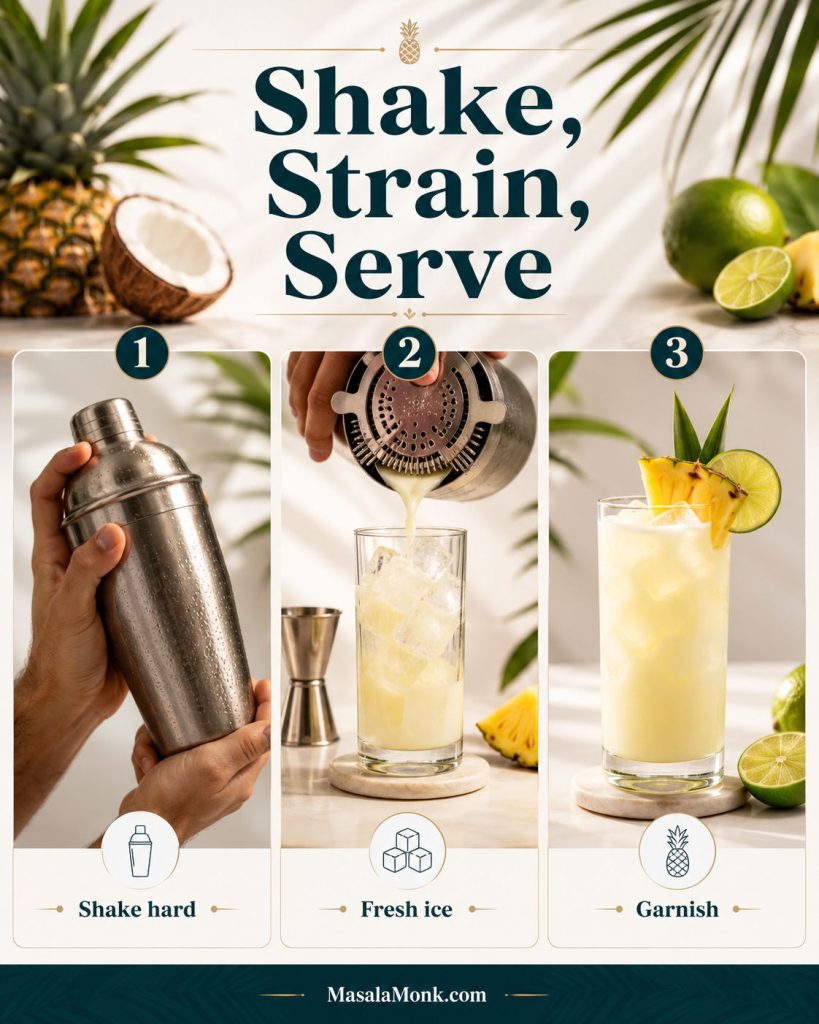
Add the rum, pineapple juice, cream of coconut, and lime juice to a cocktail shaker. Shake hard for 12–20 seconds, until the outside feels cold and the drink looks lightly frothy. Strain into a fresh glass over fresh ice.

Three-step on-the-rocks pina colada guide showing shake hard, strain over fresh ice, and garnish.
For a no-blender pina colada, fresh ice is not just decoration. It keeps the shaken drink crisp, cold, and clean instead of letting it turn loose in the glass.

The shorter ratio matters because this version has no blender full of frozen fruit to soften the drink. It should land silky and cold, with coconut on the edges rather than a thick milkshake texture.

No cocktail shaker? Use a clean jar with a tight lid. No strainer? Pour carefully or use a small sieve. If your coconut base is very thick, stir it with the pineapple juice first so it shakes evenly.

If you like the cleaner shaken style, a classic daiquiri is the leaner rum-lime cousin: no coconut, no blender, just balance.

Virgin Pina Colada / Non-Alcoholic Pina Colada Mocktail

For one generous virgin pina colada, blend 1 cup frozen pineapple, ½ cup pineapple juice, ⅓–½ cup cream of coconut, 1 tablespoon lime juice, ½–1 cup ice, and a tiny pinch of salt. Use the smaller amount of coconut for a less sweet adult mocktail and the larger amount for a creamier dessert-style drink.

Virgin pina colada mocktail in an elegant glass with pineapple and cherry garnish, lime, and tropical styling.
A virgin pina colada should feel complete, not like rum was simply removed. Frozen pineapple, lime, and a tiny salt cue help the mocktail keep depth and brightness.

A good non-alcoholic pina colada should not taste like the rum was simply removed. Lime, frozen fruit, and a tiny pinch of salt replace some of the bite and depth, while the coconut keeps the drink smooth. The mocktail should still feel like a drink someone chose, not the version left after the rum was removed.

Non-alcoholic pina colada formula

IngredientClassic sweet mocktailLess sweet mocktail
Frozen pineapple1 cup / about 140 g1 cup / about 140 g
Pineapple juice½ cup / 120 ml½ cup / 120 ml
Cream of coconut½ cup / 120 ml⅓ cup / 80 ml
Coconut milk or coconut waterOptional splash2–3 tablespoons
Fresh lime juice1 tablespoon / 15 ml1 tablespoon / 15 ml
Ice½–1 cup, as needed½–1 cup, as needed
Optional depthTiny pinch of salt, 2–3 drops vanilla, or non-alcoholic rumTiny pinch of salt, 2–3 drops vanilla, or non-alcoholic rum
Non-alcoholic pina colada formula graphic showing frozen pineapple, pineapple juice, cream of coconut, lime, and a tiny pinch of salt.
The non-alcoholic pina colada formula needs more than pineapple and coconut. A little lime and a tiny pinch of salt make the alcohol-free version taste fuller without making it salty.

Serving both versions? Use the pitcher section to make a shared pineapple-coconut base, then add rum only to the glasses that need it.

Blend until smooth, then taste before serving. Too sweet? Add lime. Dull? Add the smallest pinch of salt. Too thick? Loosen it with pineapple juice, coconut milk, or coconut water.

For a more grown-up mocktail, add a few drops of vanilla or a splash of non-alcoholic rum. If you are also serving lighter alcohol-free drinks, our low-sugar mocktails guide has more ideas.

Classic vs virgin pina colada

Use the same care with garnish, texture, and balance for both versions. That is what makes the non-alcoholic glass feel intentional instead of secondary.

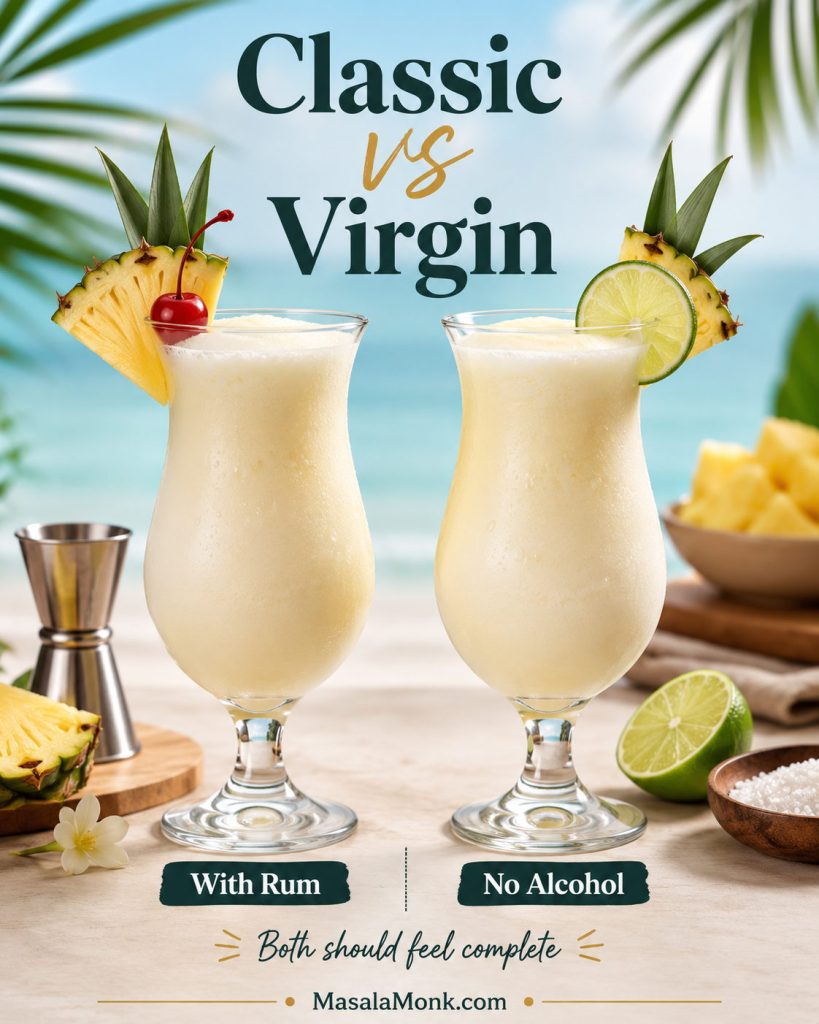
Side-by-side classic and virgin pina coladas, showing one with rum and one alcohol-free, both garnished and served in tropical glasses.
Classic and virgin pina coladas should both feel worth choosing. Keep the same care with texture, garnish, and bright finish so the mocktail does not feel like a backup drink.

Best Rum for Pina Colada

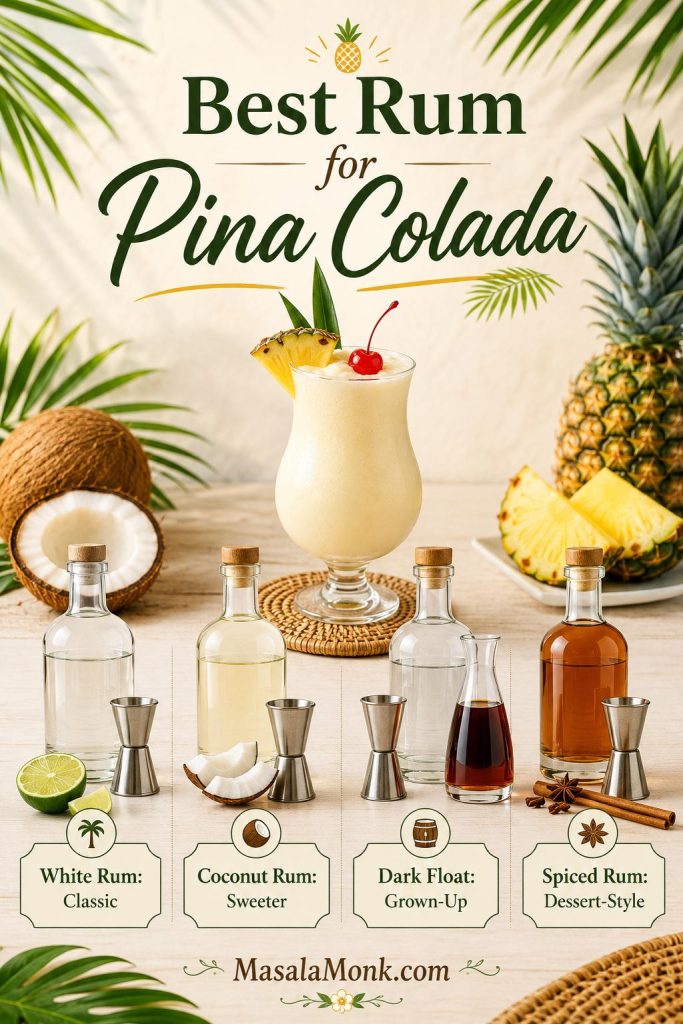
The best rum for a pina colada depends on the mood of the drink. Choose white rum for the clean classic. Coconut rum gives you a sweeter party glass. For a more grown-up finish, keep white rum as the base and add a small dark rum float.

Rum choiceBest useWhat to adjust
White rumBest default for the classic pineapple-coconut flavor.Use the main recipe as written.
Malibu or coconut rumBest sweet party version.Reduce cream of coconut so the drink does not turn candy-sweet.
White rum + dark rum floatBest deeper, more grown-up version.Keep the base light, then float a little dark rum on top.
Spiced rumDessert-style variation, not the clean classic.Use extra lime and keep the coconut controlled.
Rum chooser graphic for pina colada with white rum, coconut rum, dark rum float, and spiced rum options.
For the best rum in a pina colada, start with white rum if you want the classic to taste clean. Then move to coconut rum, a dark float, or spiced rum when you want a sweeter or deeper variation.

First time making this recipe? Start with white rum. It lets the pineapple and coconut stay in front, which is the easiest way to understand the drink before you make it sweeter, darker, or warmer.

Malibu Pina Colada

For one Malibu pina colada, use 2 oz Malibu or coconut rum, 2 oz pineapple juice, 1 oz cream of coconut, ½ oz fresh lime juice, and ice. Because Malibu is already sweet and coconut-flavored, do not use the full classic amount of cream of coconut unless you want a very sweet drink.

IngredientAmount for 1 drink
Malibu or coconut rum2 oz / 60 ml
Pineapple juice2 oz / 60 ml
Cream of coconut1 oz / 30 ml
Fresh lime juice½ oz / 15 ml, optional but useful
IceFor shaking or blending
Malibu-style pina colada with toasted coconut topping, pineapple wedge, cherry, and coconut pieces.
A Malibu pina colada leans sweeter because coconut rum already brings flavor and sugar. Reduce extra sweetness or add a little more lime to keep the drink balanced.

Shake the ingredients with ice and strain over fresh ice, or blend with about 1 cup ice for a frozen drink. Too sweet? Add lime. Too light? Use half Malibu and half white rum. Want it more coconutty without making it sugary? Add a splash of unsweetened coconut milk instead of more cream of coconut.

Pina Colada with Coconut Milk

A pina colada with coconut milk is lighter than the cream-of-coconut version. Choose it when you want the pineapple to feel brighter and the coconut to whisper rather than coat the glass.

Use full-fat coconut milk, not watery light coconut milk. Because it is usually unsweetened, add a little simple syrup, maple syrup, or agave only if the drink tastes sharp or thin.

IngredientAmount for 1 lighter drink
White rum2 oz / 60 ml
Pineapple juice3 oz / 90 ml
Full-fat coconut milk2 oz / 60 ml
Fresh lime juice½ oz / 15 ml
Simple syrup, maple syrup, or agave½–1 oz / 15–30 ml, to taste
Frozen pineapple½ cup / about 70–75 g
Ice½–1 cup, as needed
Lighter pina colada made with coconut milk, shown with a coconut milk pitcher, pineapple garnish, cherry, and tropical background.
A coconut milk pina colada tastes lighter and brighter than the classic. Because coconut milk is thinner and less sweet, the drink needs help from pineapple and careful chilling.

Blend just until smooth. Thin? Add more frozen pineapple. Sharp? Add sweetener gradually. Want it richer? Add 1 tablespoon cream of coconut or coconut cream.

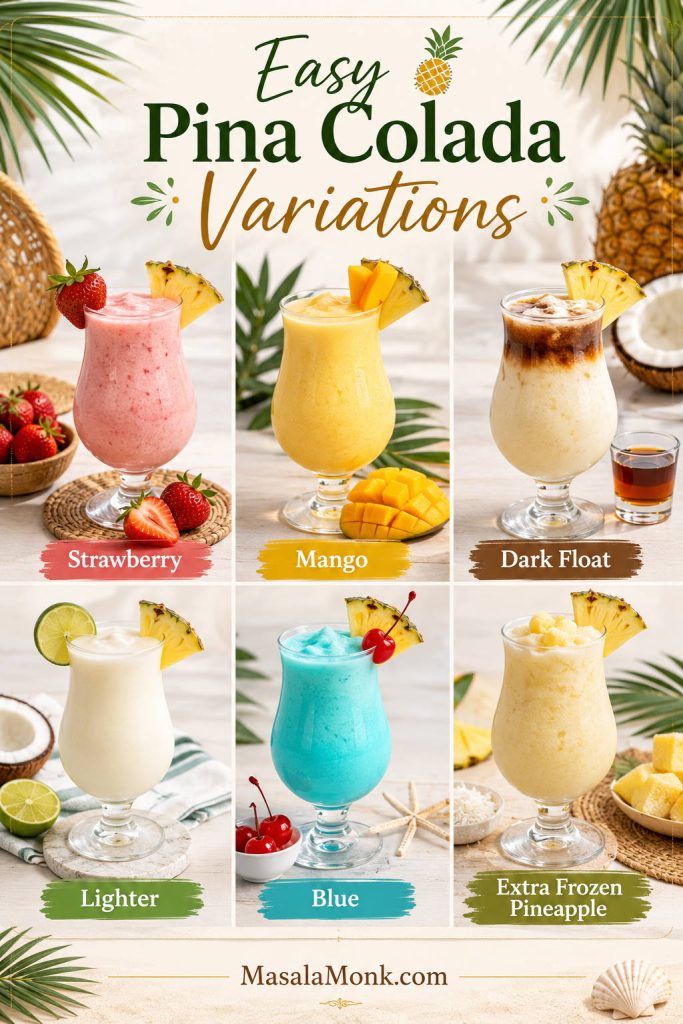
Easy Pina Colada Variations

Once the base ratio is clear, variations become easy. Keep the pineapple-coconut structure, then change one thing at a time: fruit, rum, sweetness, or finish.

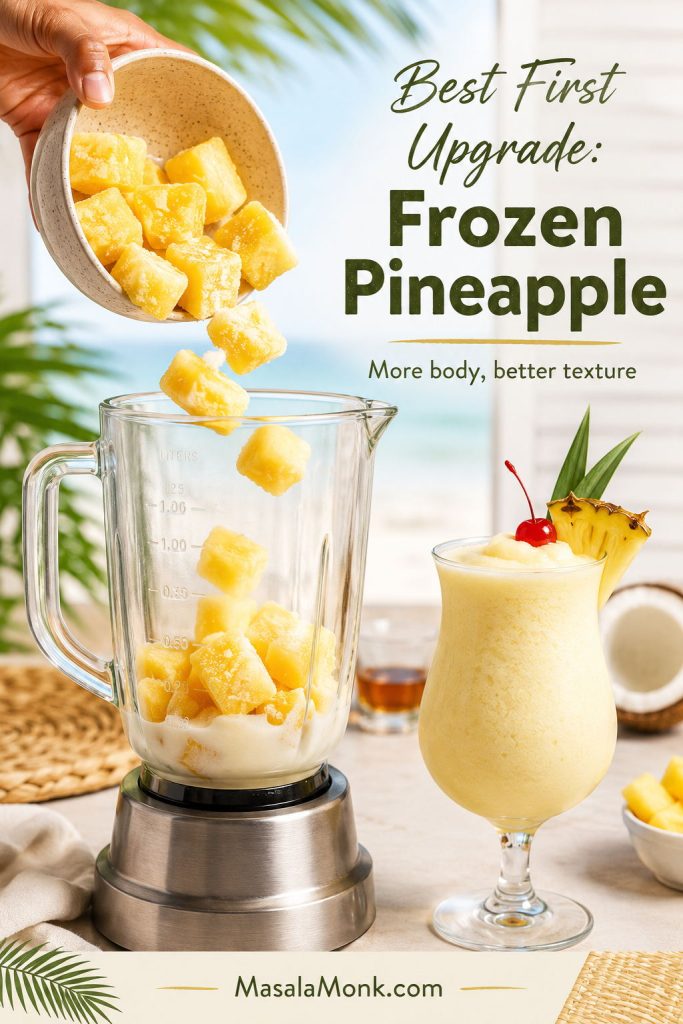
If you only try one variation first, make the frozen pineapple version. It improves body and fruit flavor without changing the identity of the drink.

Frozen pineapple chunks being poured into a blender for a thicker pina colada, with a finished drink beside it.
Frozen pineapple is the best first upgrade for a frozen pina colada. It adds body, keeps the flavor tropical, and reduces the need for extra ice.
VariationHow to make it
Strawberry pina coladaAdd ½–1 cup frozen strawberries and keep the coconut slightly lighter.
Mango pina coladaAdd ½ cup frozen mango for a thicker, golden tropical version.
Frozen pineapple pina coladaUse more frozen pineapple for stronger fruit flavor and a smoother pour.
Blue pina coladaAdd a small amount of blue curaçao and reduce other sweet elements.
Dark rum floatMake the classic recipe, then float a little dark rum on top before serving.
Skinny pina coladaUse coconut water or coconut milk, frozen fruit, and less cream of coconut.
Pina colada variations board showing strawberry, mango, dark float, lighter, blue, and extra frozen pineapple versions.
Pina colada variations work best when you change one lever at a time. Add fruit for flavor, a dark rum float for depth, or extra frozen pineapple for thicker texture.

For a deeper list of flavor twists, see our full guide to Piña Colada variations, including strawberry, mango, coconut rum, frozen pineapple, and non-alcoholic versions.

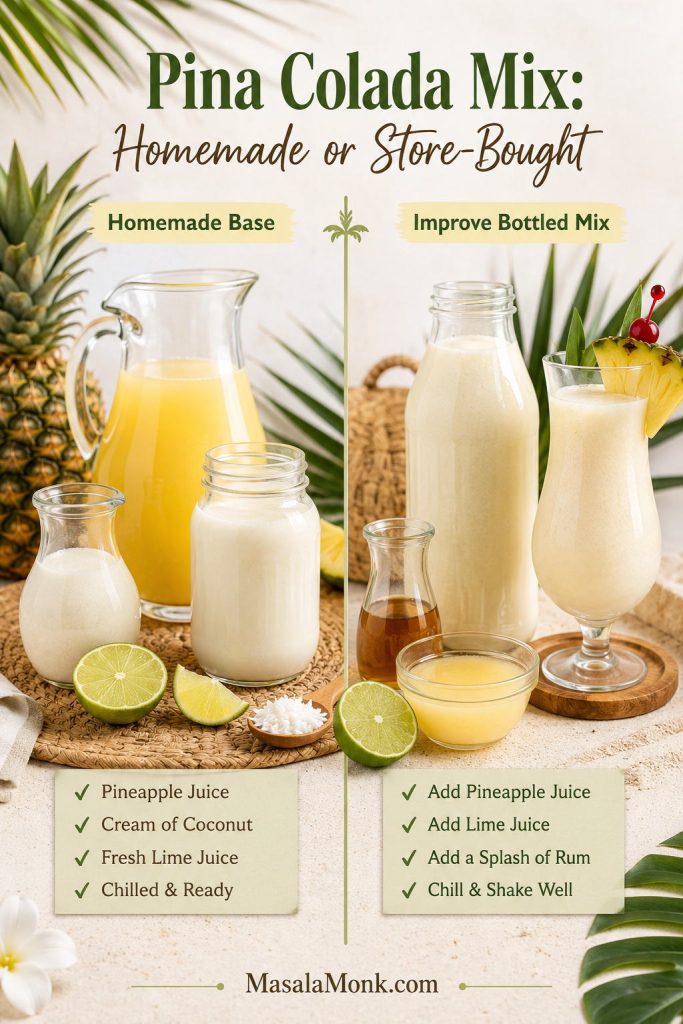
Pina Colada Mix: Homemade or Store-Bought

Pina colada mix is useful when speed matters, but it can taste dull if you only add rum and blend. Store-bought mix is not a failure; it just needs freshness added back. Treat it as a shortcut base, then wake it up with acid, cold, and real pineapple flavor.

Pina colada mix guide comparing homemade base with improved bottled mix using pineapple juice, cream of coconut, lime, and a finished drink.
A homemade pina colada mix gives you control over sweetness, coconut body, and lime. Bottled mix can still work, but it usually needs freshness added back before serving.

Homemade pina colada mix

Homemade mix ingredientAmount
Cream of coconut1 cup
Pineapple juice¾ cup
Fresh lime juice3 tablespoons

Stir or blend until smooth, then refrigerate in an airtight container for 2–3 days. This is the liquid base, not the finished cocktail.

How much mix per drink?

Use about 4 oz homemade mix with 2 oz white rum. Blend for a frozen drink or shake for an on-the-rocks version. For a mocktail, skip the rum and add pineapple or coconut water if the glass needs loosening.

Using bottled mix for a party? The pitcher guide and store-bought mix fixes will help keep the drink fresh instead of flat.

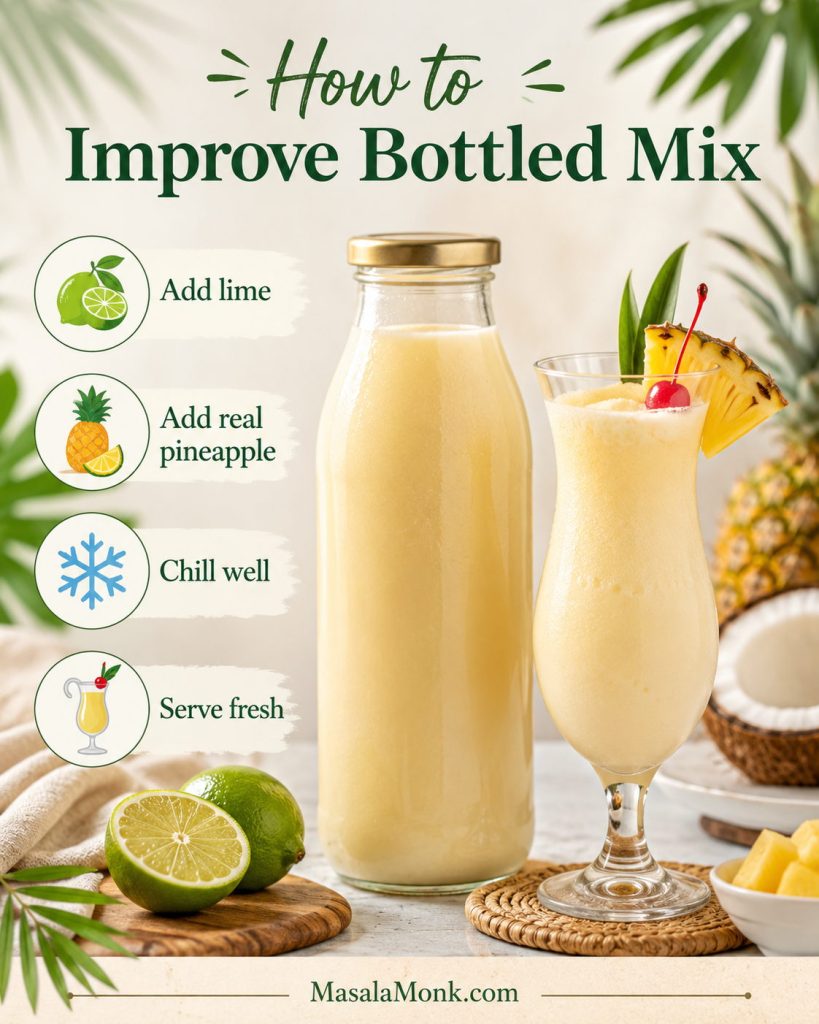
How to improve store-bought pina colada mix

  • Add fresh lime if it tastes syrupy.
  • Use white rum instead of coconut rum when the mix is already very sweet.
  • Add frozen pineapple if the flavor feels thin.
  • Avoid extra cream of coconut unless the drink truly lacks body.
Guide to improving bottled pina colada mix with lime, real pineapple, chilling, and fresh serving cues.
Store-bought pina colada mix often tastes dull because it lacks fresh edges. Start with lime and real pineapple flavor, then chill well so the shortcut still tastes alive.

If you are making a big non-blended bowl instead, this punch with pineapple juice guide is better for ginger ale, Sprite, sherbet, cranberry, lemonade, and party punch variations.

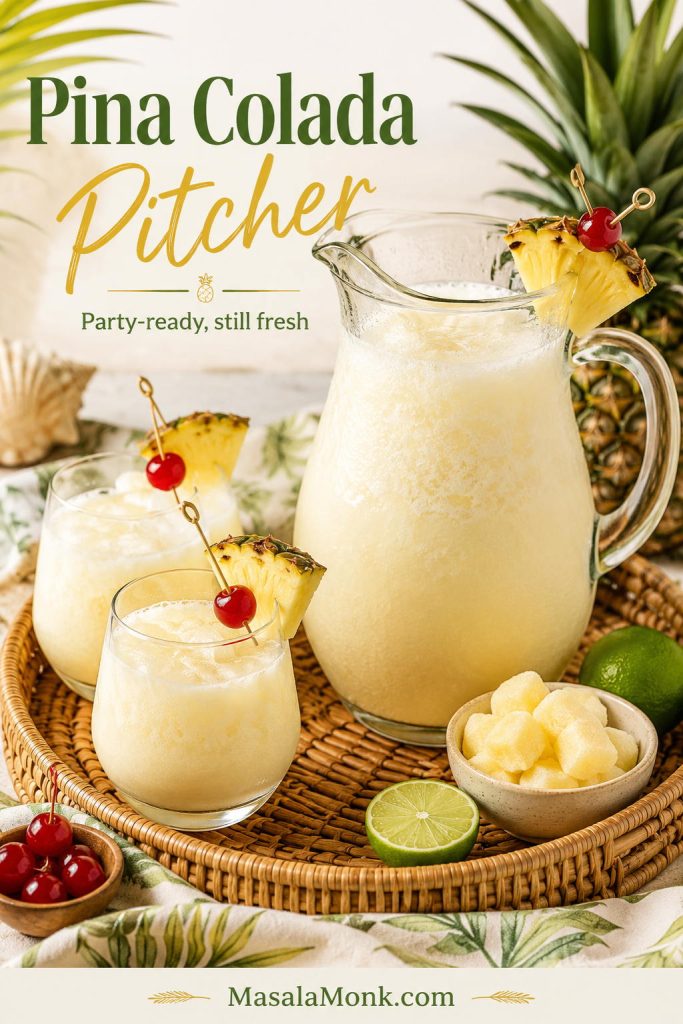
Pina Colada Pitcher for a Party

A pitcher works best when you make the liquid base ahead and finish each round at serving. Do not blend the whole pitcher and park it in the fridge; that is how a good piña colada becomes sweet pineapple-coconut water.

IngredientFor 4 drinks
White rum1 cup / 240 ml
Pineapple juice1½ cups / 360 ml
Cream of coconut1 cup / 240 ml
Fresh lime juice¼ cup / 60 ml
Pina colada pitcher with serving glasses, pineapple wedges, cherries, lime, frozen pineapple, and rattan tray styling.
A pina colada pitcher should be party-ready without tasting tired. Keep the base cold and serve close to drinking time so each glass tastes fresh, not leftover.

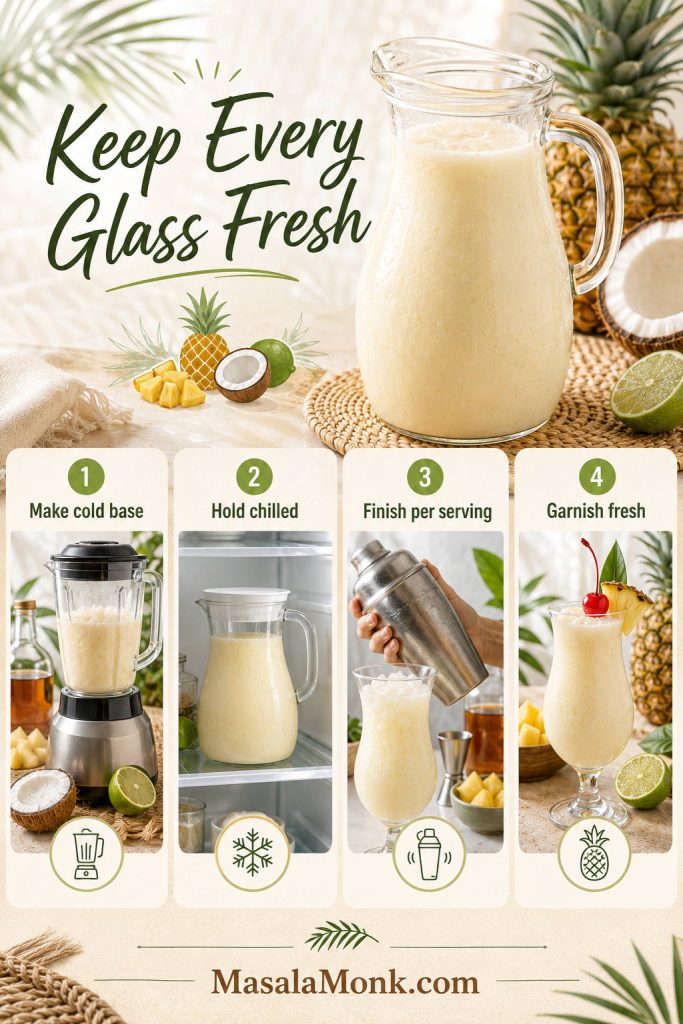
Whisk or blend the base until smooth, then refrigerate. For frozen drinks, blend in 1–2 drink portions. For on-the-rocks drinks, shake individual servings or stir the base well over fresh crushed ice. This way, every glass tastes like the first one, not the leftover one.

Batch pina colada guide showing make cold base, hold chilled, finish per serving, and garnish fresh steps.
Batch the base, not the finished frozen drink. This keeps the pina colada smooth and bright, especially when you want every guest’s glass to taste like the first one.

If serving both alcoholic and alcohol-free drinks, make a pineapple-coconut-lime base without rum. Add rum to individual glasses for adults and label the alcohol-free batch clearly.

For alcohol-free guests, use the virgin pina colada formula. For texture problems during serving, use the troubleshooting table.

If you want a pitcher-first tropical drink rather than individual frozen glasses, this rum punch recipe is built for fruit juice, lime, rum, and party-style serving.

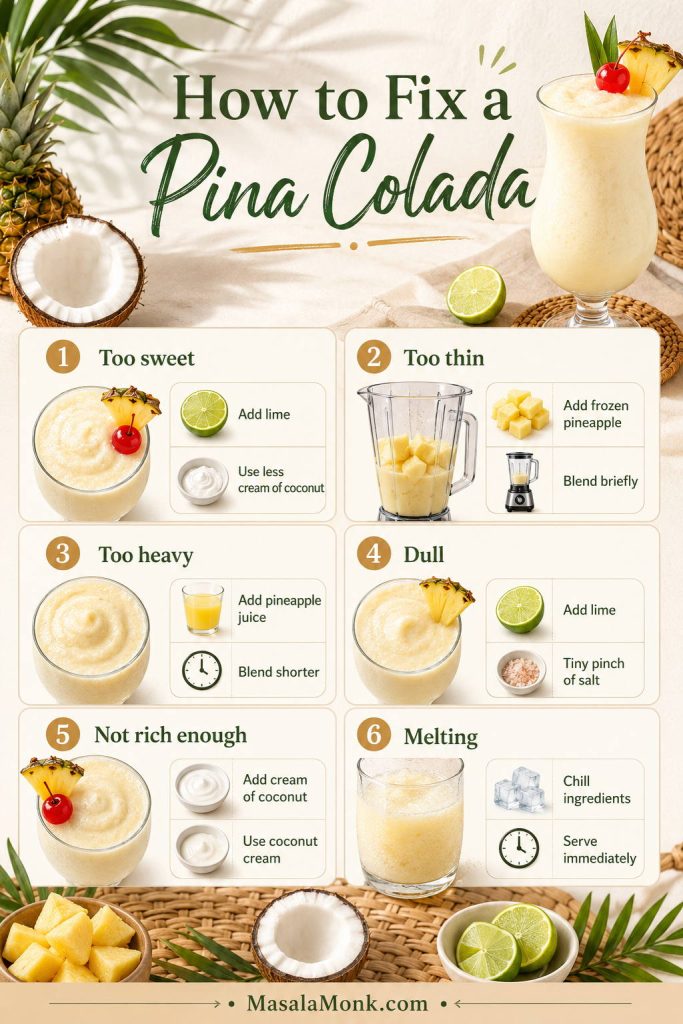
How to Fix a Pina Colada

Most piña colada problems are easy to fix once you know what caused them. Taste first, then adjust one thing at a time.

Fast rescue guide: thin? Add frozen pineapple. Heavy? Add pineapple juice. Too sweet? Add lime. Dull? Add lime and a tiny pinch of salt. Not rich enough? Add a little more coconut base.

Pina colada troubleshooting guide with fixes for too sweet, too thin, too heavy, dull, not rich enough, and melting drinks.
Troubleshoot by fixing the biggest problem first. Too sweet needs lime, too thin needs frozen pineapple, too heavy needs pineapple juice, and melting usually means the ingredients were not cold enough.
ProblemLikely reasonFix
Too wateryToo much liquid, melted dilution, or over-blendingAdd frozen pineapple, then blend briefly.
Too thickToo much frozen fruit or not enough liquidAdd pineapple juice 1 tablespoon at a time.
Too sweetToo much cream of coconut or coconut rumAdd lime juice, pineapple juice, or a splash of white rum.
Not creamyCoconut milk was used instead of cream of coconutAdd cream of coconut or coconut cream.
Bland or flatNot enough acid or contrastAdd fresh lime and a tiny pinch of salt.
SeparatingThe drink sat too long or the coconut was not mixed wellStir, shake, or re-blend briefly and serve immediately.
Too icyToo much frozen bulk and not enough creamy liquidAdd pineapple juice or coconut base and blend briefly.

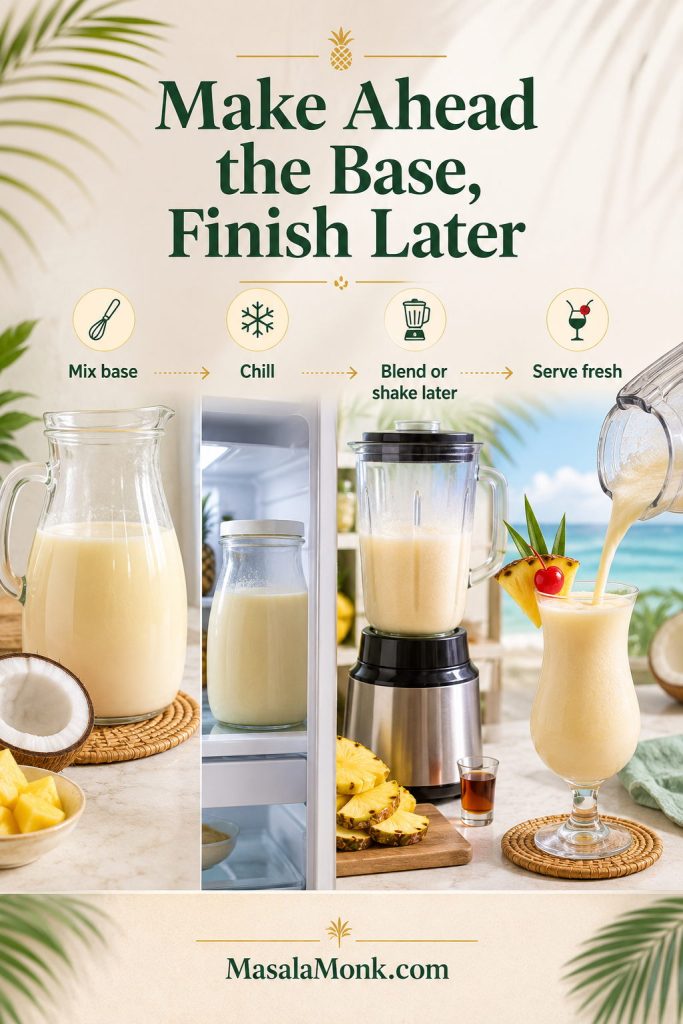
Make-Ahead and Storage

A pina colada is best served immediately, especially when frozen. The make-ahead move is simple: prepare the pineapple-coconut-rum base, chill it, then finish the drink right before serving.

Make-ahead pina colada guide showing cold base, chill step, blend or shake later, and serve fresh.
For a make-ahead pina colada, prepare the base early but finish the drink later. That way, the flavor is ready and the texture still tastes freshly blended or shaken.

An alcohol-free base works the same way. Keep it cold, then blend or shake when guests are ready. Leftover blended drink can be frozen and re-blended with a splash of pineapple juice, but the fresh texture will always be better.

Pina Colada FAQs

What are the three main ingredients in a pina colada?

Rum, pineapple, and coconut are the core ingredients. Most creamy home versions also need a frozen element, and fresh lime makes the finish cleaner.

What is the best alcohol for a pina colada?

White rum is the best classic choice. Coconut rum is sweeter, while a small dark rum float gives a deeper finish.

Should I use cream of coconut or coconut milk?

Use cream of coconut for the classic sweet, creamy piña colada. Use coconut milk only when you want a lighter drink and are willing to adjust sweetness.

Is cream of coconut the same as coconut cream?

No. Cream of coconut is sweetened and syrupy; coconut cream is usually unsweetened and rich, so it needs added sweetener in most recipes.

How do I make a non-alcoholic pina colada taste less flat?

Use frozen pineapple, lime, and a tiny pinch of salt. Vanilla or non-alcoholic rum can add some of the depth that regular rum normally brings.

How do I make a pina colada without a blender?

Shake rum, pineapple juice, cream of coconut, and lime hard until cold, then serve in a fresh glass. It will be frothy and chilled, not frozen.

What makes a pina colada too watery?

Too much liquid, melted dilution, weak coconut body, or over-blending can make it watery. Measure the first batch and serve right away.

How do I make a pina colada less sweet?

Use less cream of coconut, choose white rum instead of coconut rum, or add fresh lime. Make small changes so the drink stays balanced.

Can I make pina coladas ahead of time?

Yes, but make only the liquid base ahead. Chill it, then blend or shake with the frozen/cold ingredients when ready to serve.

What is the difference between a pina colada and a Chi-Chi?

A pina colada is usually made with rum. A Chi-Chi is the similar pineapple-coconut drink made with vodka instead.

Final Sip

A good piña colada should taste cold before it tastes sweet: pineapple first, coconut next, rum in the background, and lime keeping the finish clean. Once that balance is right, the rest is easy — frozen, shaken, virgin, Malibu, lighter with coconut milk, or batched for a party.

Make the classic version once with measured ingredients. After that, you will know exactly how the drink should feel: tropical, smooth, refreshing, and just rich enough to feel like a small vacation in the glass.

Back to top

Posted on Leave a comment

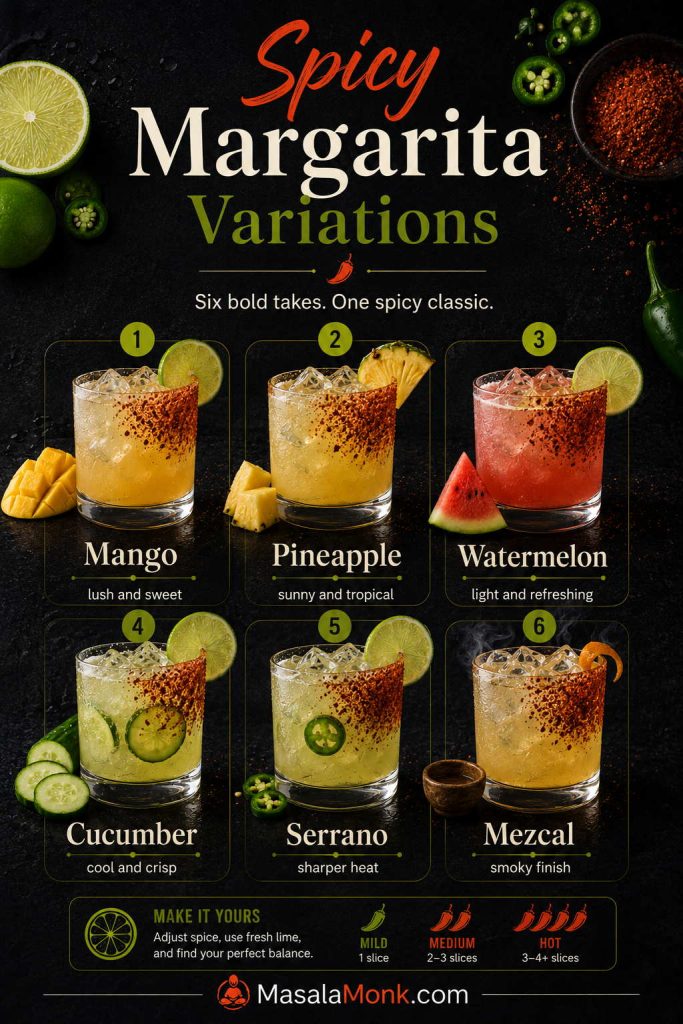
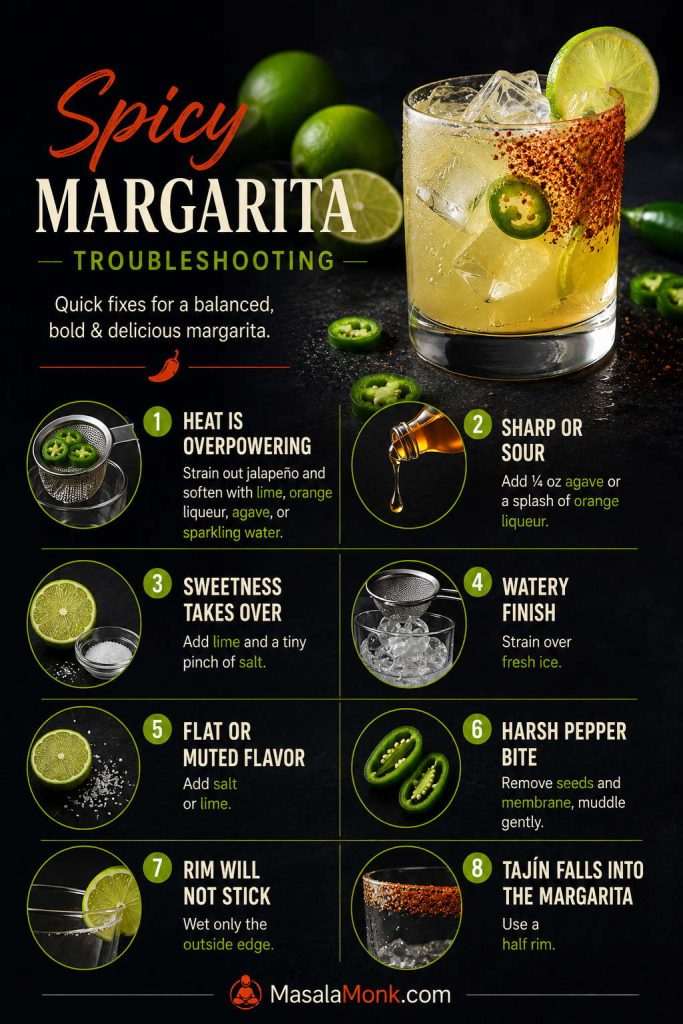
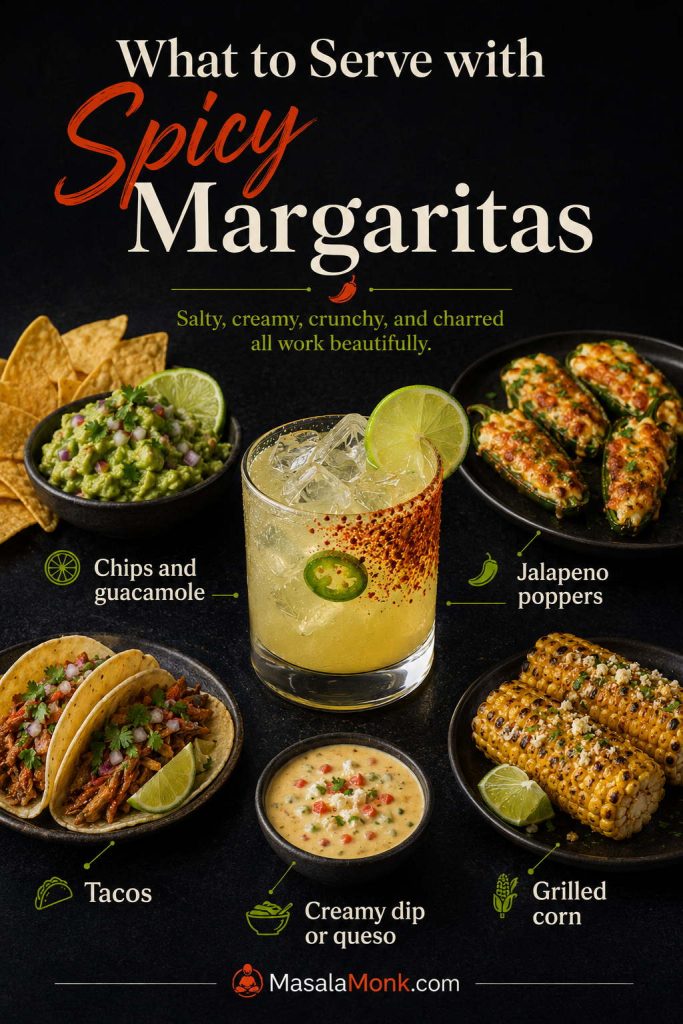
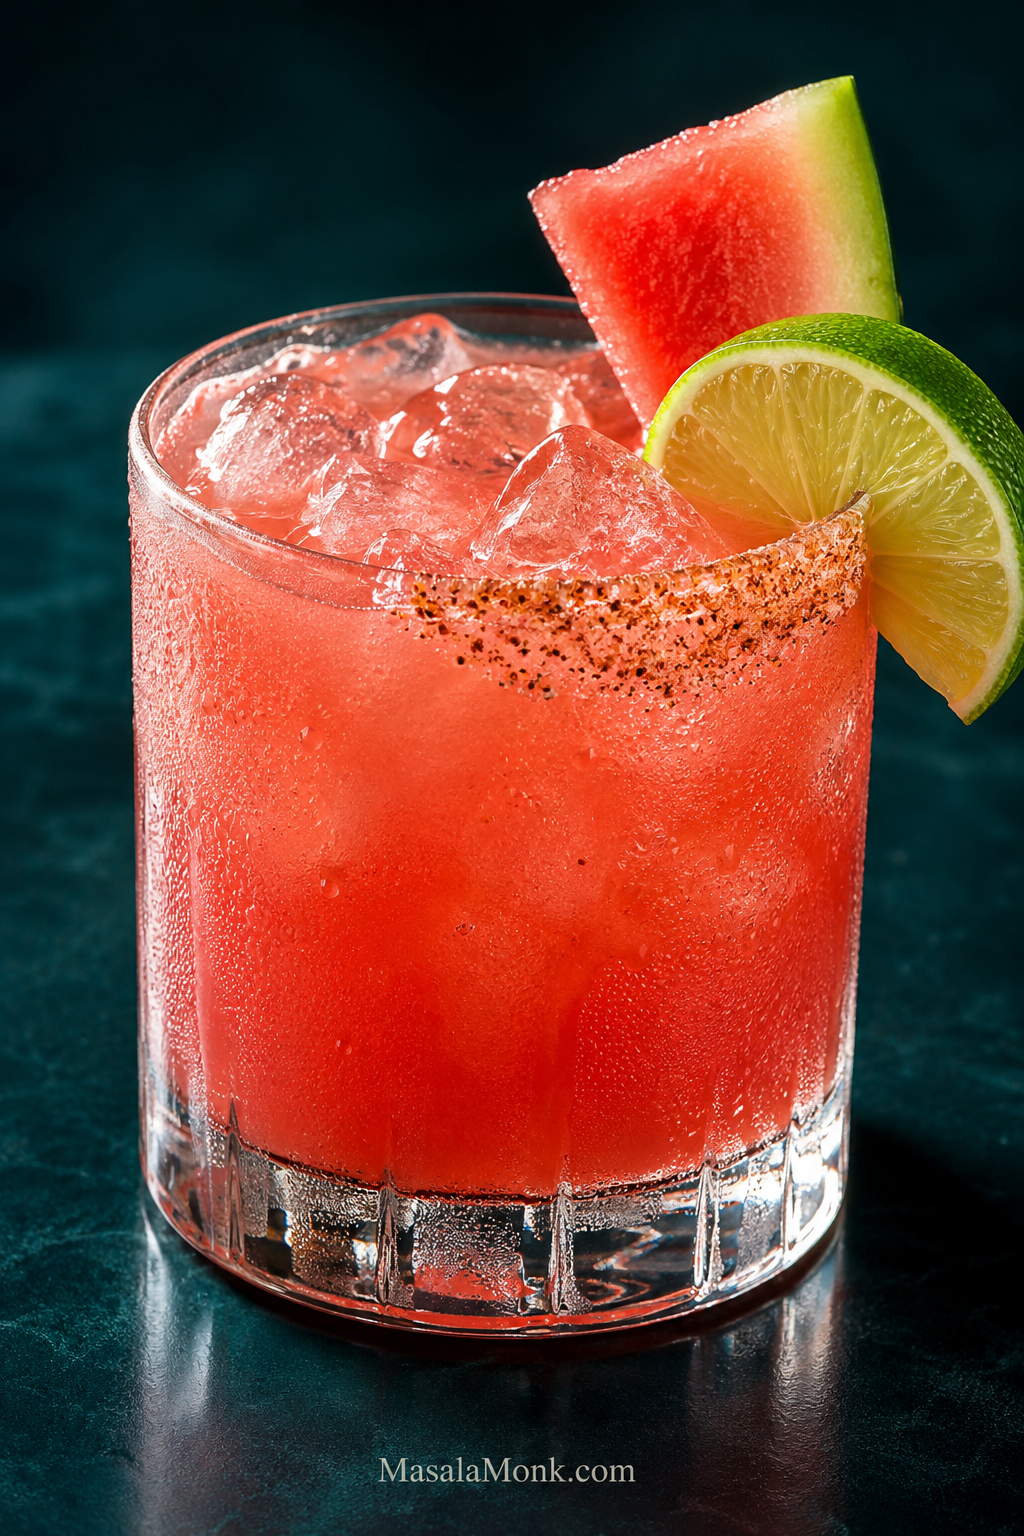
Spicy Margarita Recipe

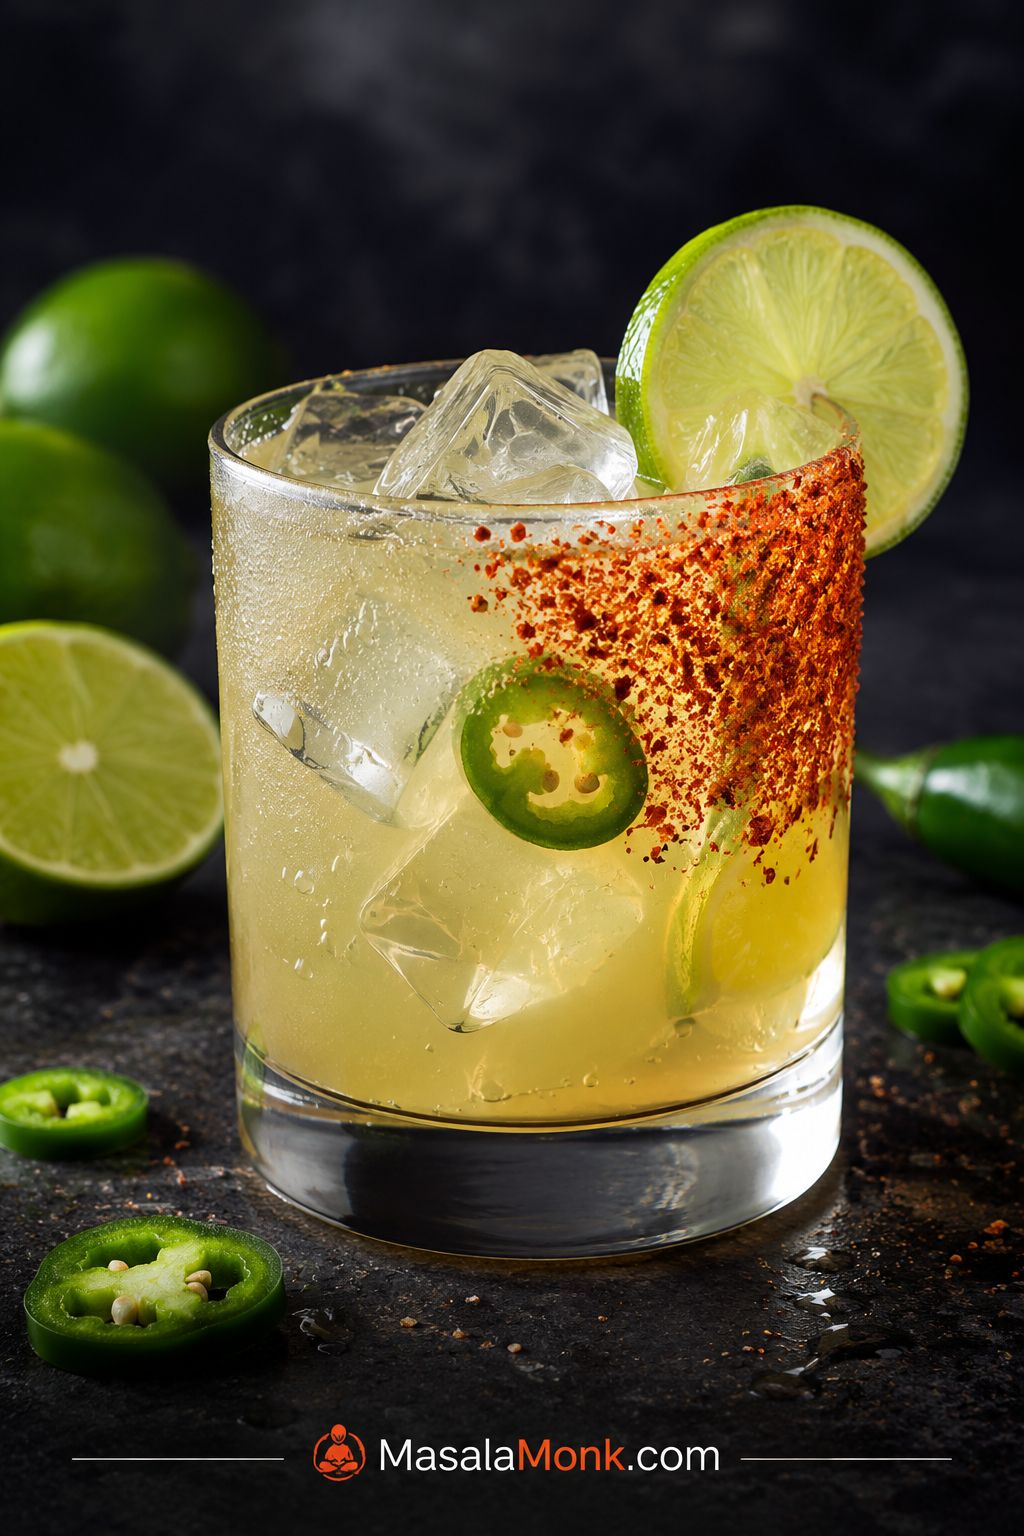
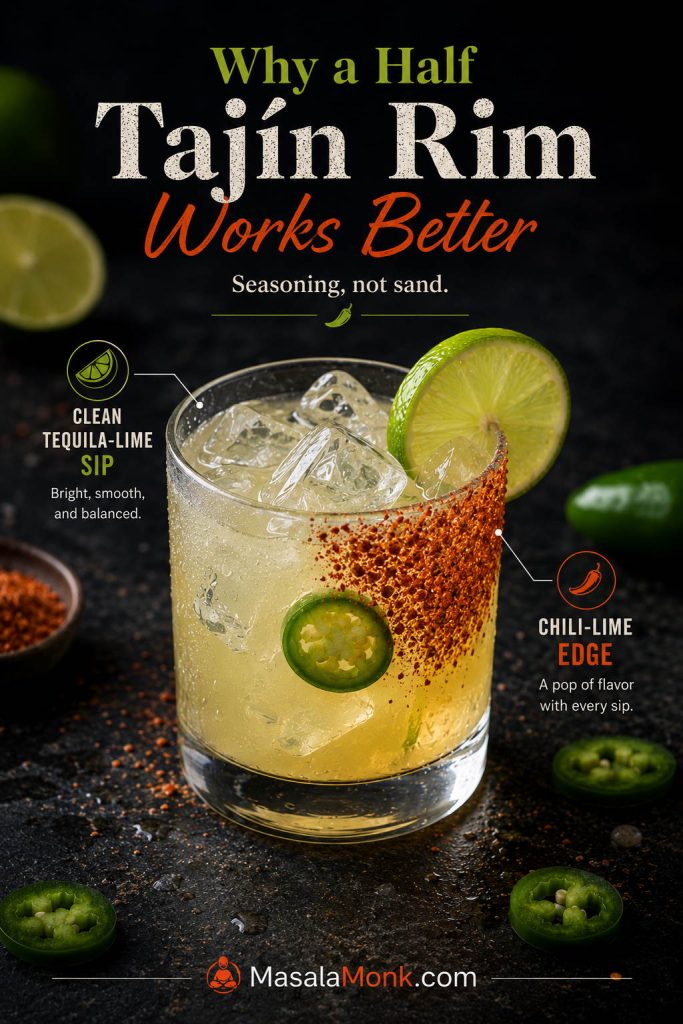
Spicy margarita on the rocks with a half Tajín rim, lime garnish, jalapeño slice, clear ice, and condensation on the glass.

A spicy margarita should hit cold first, then lime-bright, then finish with a clean jalapeño kick and a salty chili-lime edge from the rim. This version keeps the classic margarita balance — tequila, just-squeezed lime juice, orange liqueur, and just enough agave — while making the pepper easy to adjust.

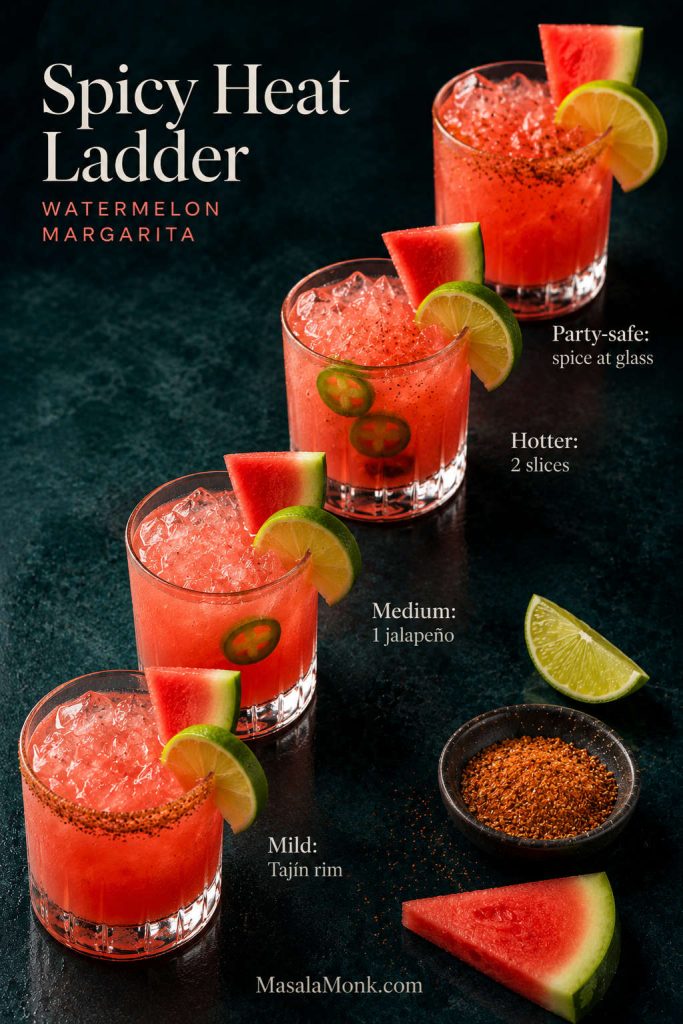
The trick is not simply adding more jalapeño. A great spicy margarita recipe needs the right ratio, enough citrus, just enough sweetness to soften the pepper, and a rim that supports the cocktail instead of taking over every sip. That is why this recipe uses a half Tajín rim, 2–3 seedless jalapeño slices, and a clear heat ladder for mild, medium, hot, or restaurant-style heat.

The result is sharp, cold, lightly sweet, and spicy in the right place — not a cocktail that burns before you can taste the lime.

Start with the quick ratio when you want one drink now, then use the heat levels, half-rim tips, pitcher timing, frozen texture notes, and zero-proof or lower-sugar versions when you want to adjust the drink.

Spicy Margarita Guide

Use this guide to jump to the part you need, whether you are mixing one glass, choosing the right heat level, rimming the glass, or making a pitcher.

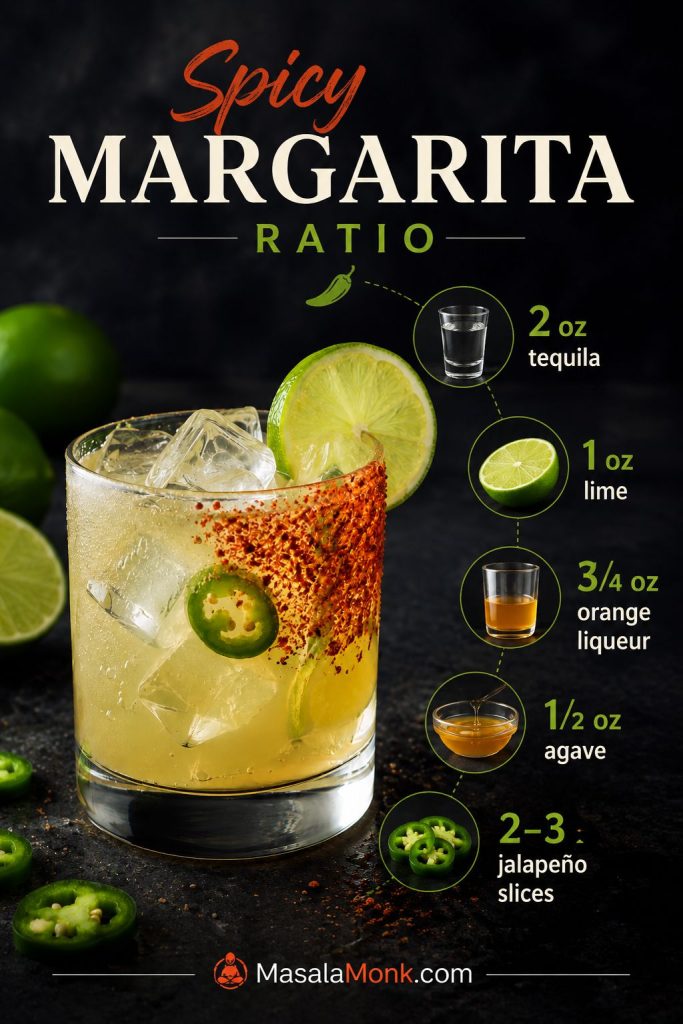
Quick Answer: Spicy Margarita Ratio

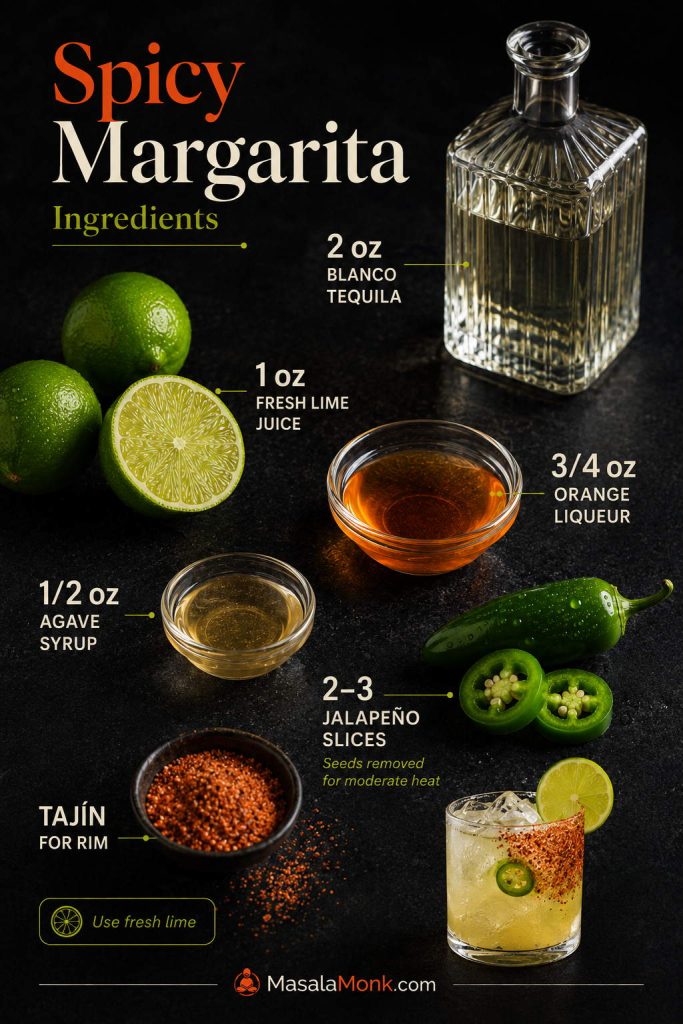
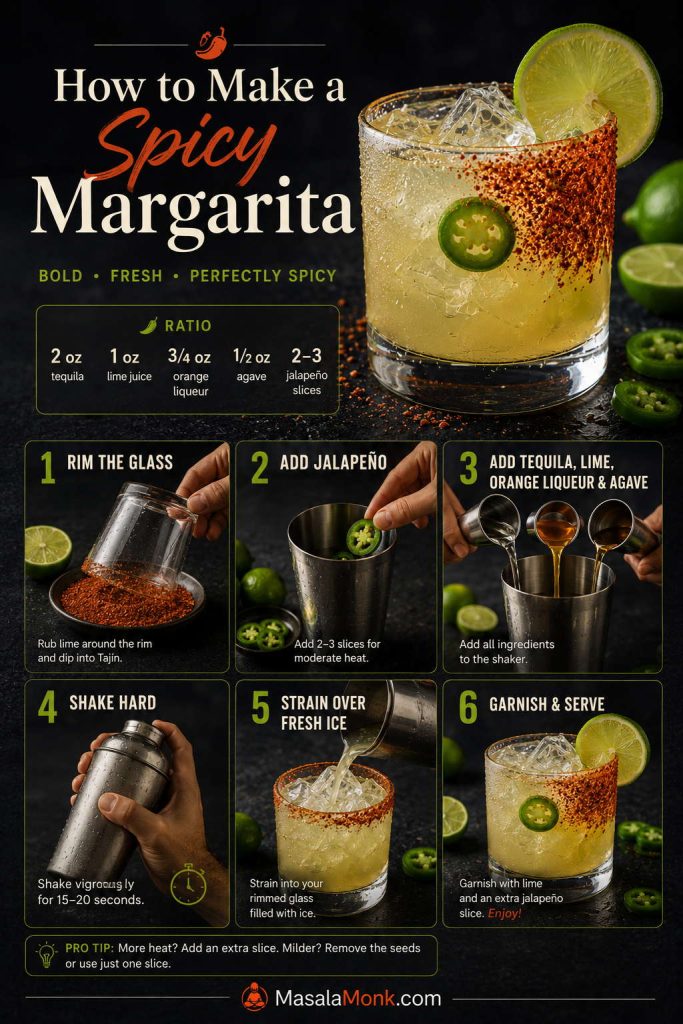
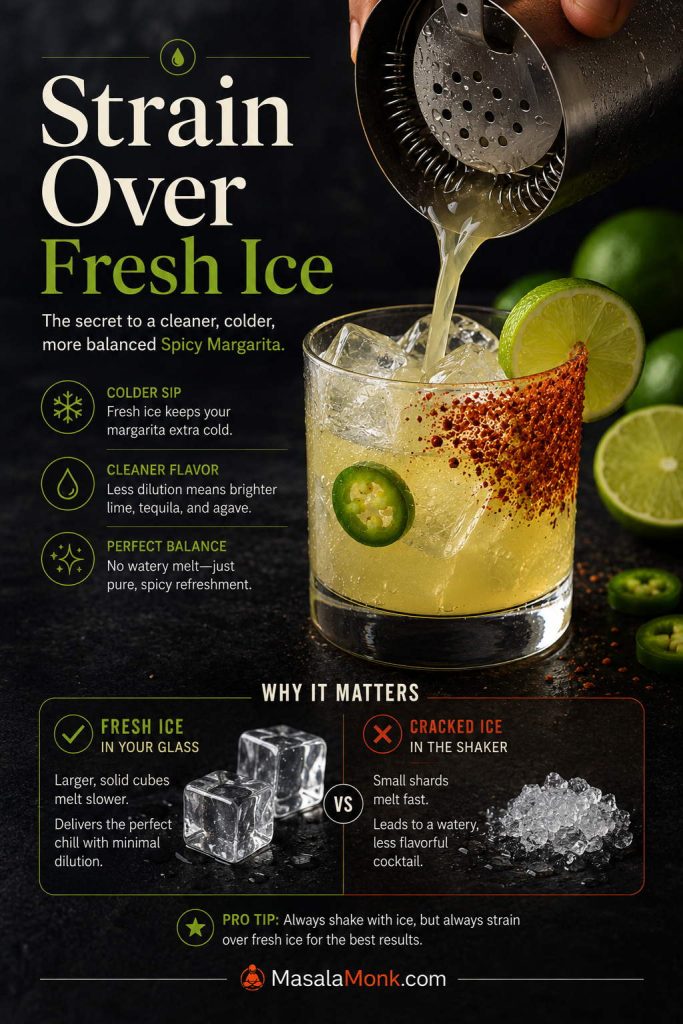
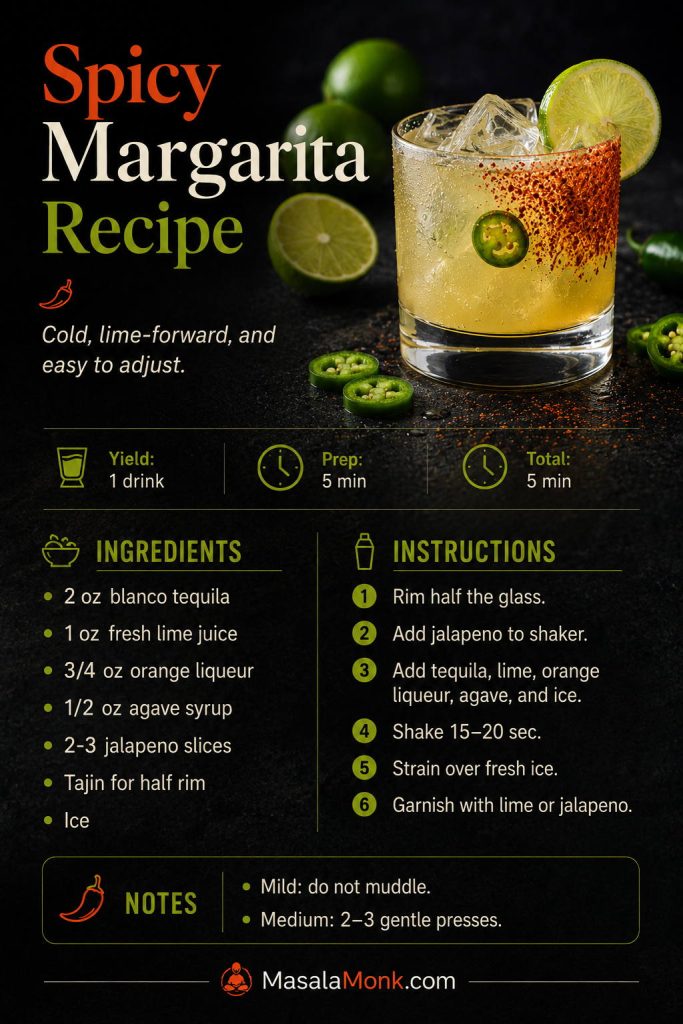
For one balanced spicy margarita, shake 2 oz blanco tequila, 1 oz fresh lime juice, ¾ oz orange liqueur, ½ oz agave syrup, and 2–3 thin jalapeño slices with ice. Strain over fresh ice into a rocks glass with a half Tajín rim.

This main version is a spicy margarita on the rocks, not a frozen margarita. Shaking and straining over fresh ice gives you a colder, cleaner, more classic margarita.

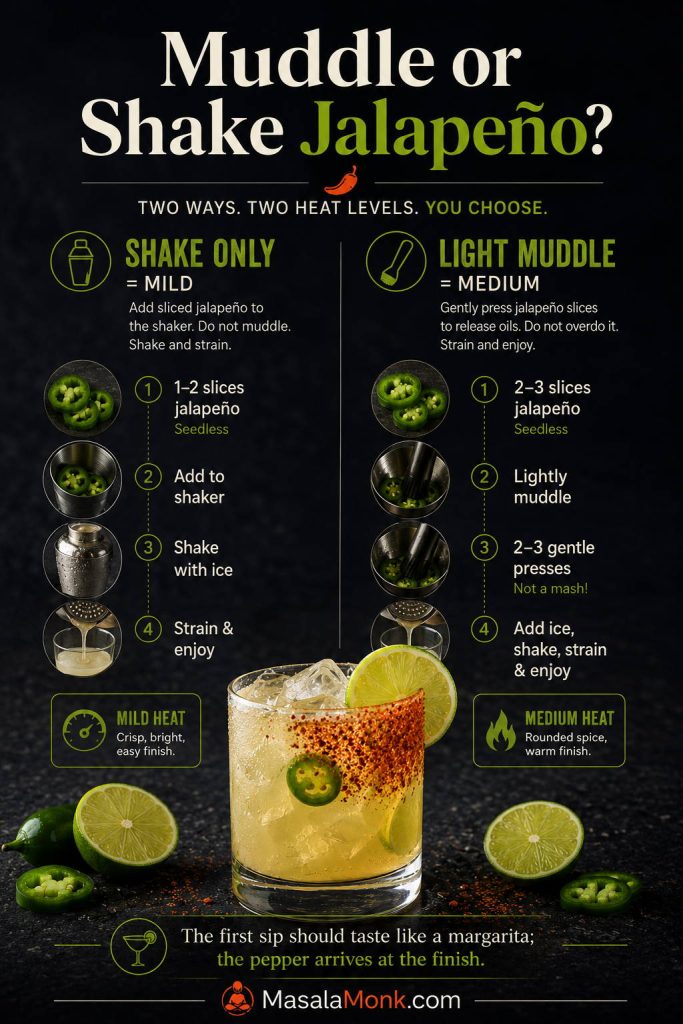
Start with 2 seedless jalapeño slices if you are unsure. Shake them without muddling for a gentler margarita, or muddle them lightly for more heat. The first sip should taste like a margarita; the pepper should arrive at the end.

For a milder or hotter version, adjust the jalapeño method before changing the recipe ratio.

Ingredient Amount Why it matters
Blanco tequila 2 oz / 60 ml Gives the cocktail its agave backbone.
Fresh lime juice 1 oz / 30 ml Brings the sharp citrus structure a margarita needs.
Orange liqueur ¾ oz / 22 ml Rounds the lime without making the pour too sweet.
Agave syrup or simple syrup ½ oz / 15 ml Softens the lime and jalapeño heat.
Jalapeño 2–3 thin slices Adds adjustable pepper heat.
Tajín or chili-lime salt About 1 tbsp / 8–10 g Creates the salty, spicy, limey rim.
Spicy margarita ratio board showing tequila, lime juice, orange liqueur, agave syrup, jalapeño slices, and Tajín.
Use this spicy margarita ratio as your baseline before adjusting heat, sweetness, or the rim; it keeps tequila, lime, and jalapeño in balance.

Spicy Margarita at a Glance

Start here if you want the safest first round: cold, citrusy, lightly sweet, and spicy without going overboard.

Best tequilaBlanco tequila
GlassRocks glass
RimHalf Tajín rim
Heat2–3 seedless jalapeño slices
Shake time15–20 seconds
ServeOver fresh ice
Make aheadMix base first; add jalapeño later
Best garnishLime wedge or jalapeño slice

What Is a Spicy Margarita?

A spicy margarita is a classic margarita with a heat source added. Most home versions use sliced jalapeño, so a spicy margarita and a jalapeño margarita often mean almost the same thing: tequila, lime juice, orange liqueur, a little sweetener, ice, and jalapeño shaken together.

The best versions do not taste like jalapeño juice. They taste like a classic margarita first, with a pepper finish that makes the next sip more tempting.

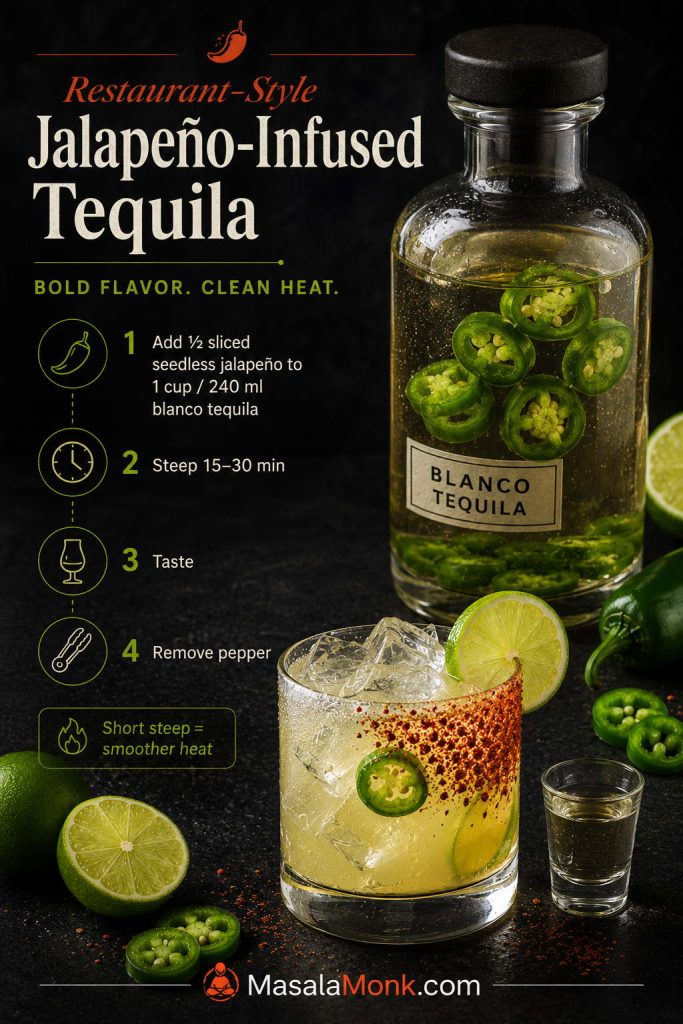
Some versions use serrano, chili syrup, hot sauce, or spicy infused tequila. However, jalapeño is the easiest place to start because you can adjust the cocktail by changing the number of slices, removing the seeds and membrane, or deciding whether to muddle the pepper or simply shake it with the liquid.

You may also see this style called a chili margarita or chilli margarita. The idea is the same: a lime-forward margarita with a spicy edge, usually finished with salt, Tajín, or a chili-lime rim.

If you like the tequila-and-citrus side of this cocktail but want something lighter and fizzier next time, MasalaMonk’s Paloma recipe is the natural next pour.

Why This Recipe Works

The reason this version works is that the heat is treated like seasoning, not the main event. You still get the snap of lime, the clean pull of tequila, the soft orange roundness, and that salty chili-lime edge from the rim.

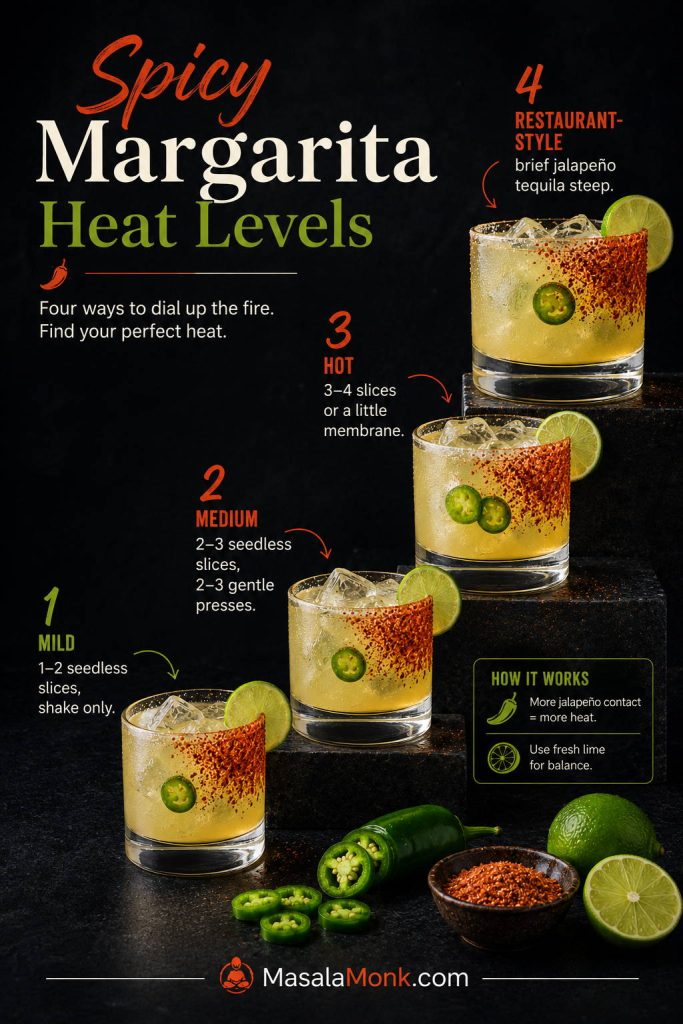
The jalapeño shows up at the finish, where it should — enough to make the next sip tempting, not so much that the cocktail turns into a dare. Shake the slices without muddling for a gentle tingle, muddle them lightly for medium heat, or use a short tequila steep for a smoother restaurant-style spicy margarita.

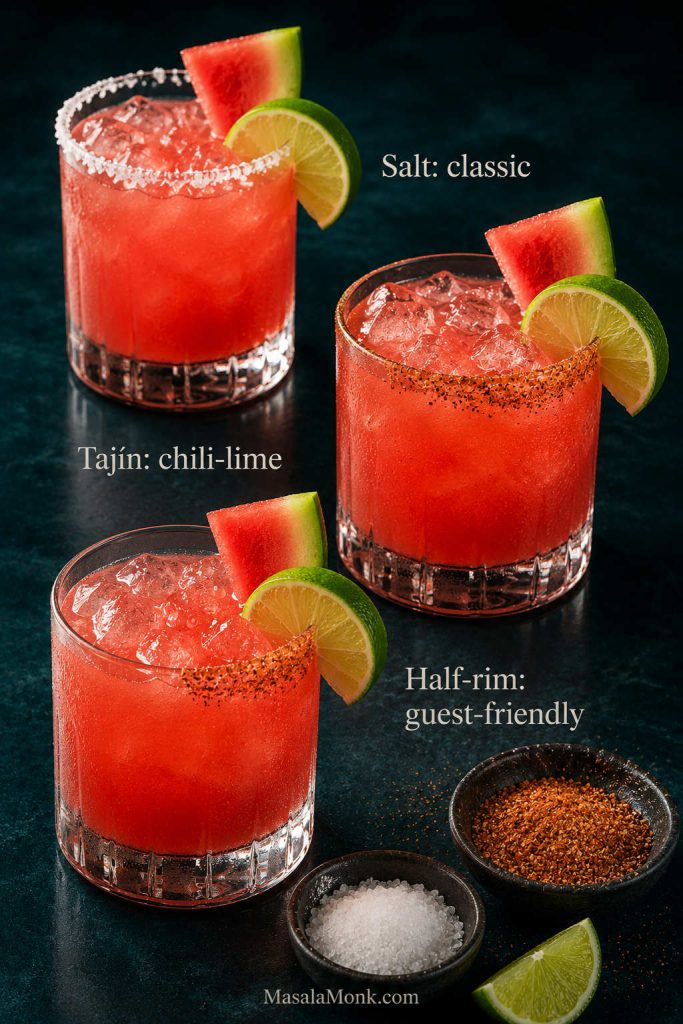
Meanwhile, the half Tajín rim gives you a salty chili-lime sip when you want one, while leaving part of the glass clean. That is what keeps this margarita party-friendly: people get a pepper kick, not a mouthful of raw chile.

The best starting point

Begin with 2 seedless jalapeño slices, a half Tajín rim, and the base ratio in this recipe. Taste the margarita before making the next round hotter. Jalapeños can vary a lot from one pepper to the next.

Spicy Margarita Ingredients

You only need a few ingredients, but each one changes the cocktail. A spicy margarita should taste rounded and refreshing, not like tequila buried under heat and salt.

Ingredients for a spicy margarita including blanco tequila, fresh lime juice, orange liqueur, agave syrup, jalapeño slices, and Tajín.
Because the ingredient list is short, every choice has a job: lime brings brightness, agave rounds the heat, and jalapeño should season rather than overpower.

Blanco Tequila

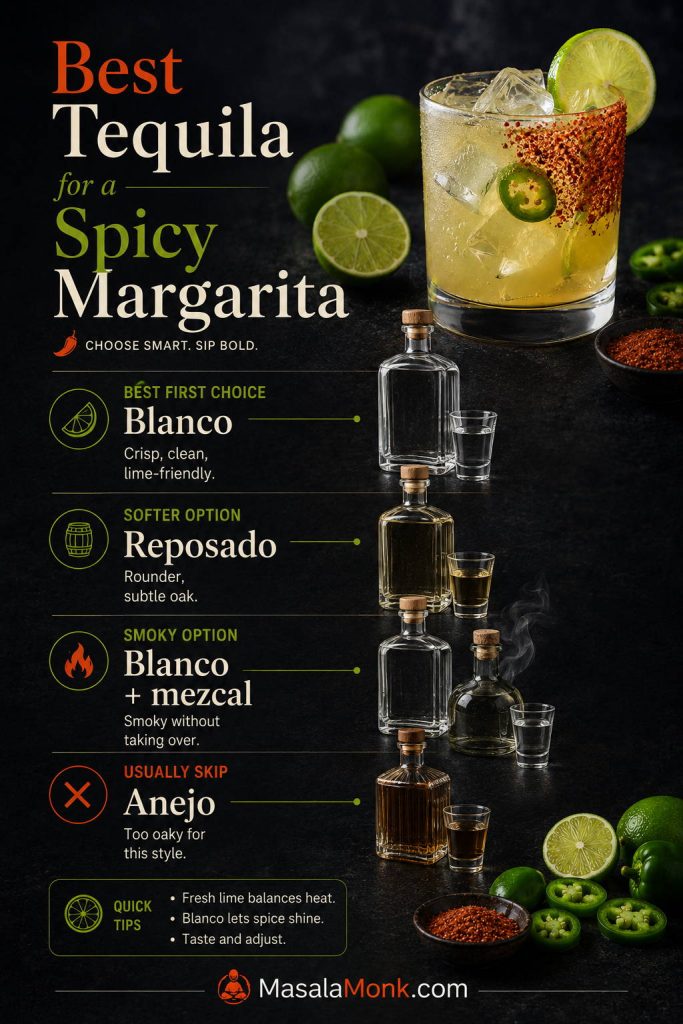
Blanco tequila is the best first choice because it tastes crisp and agave-forward. It does not fight the lime, jalapeño, or Tajín rim. Look for 100% agave tequila when possible.

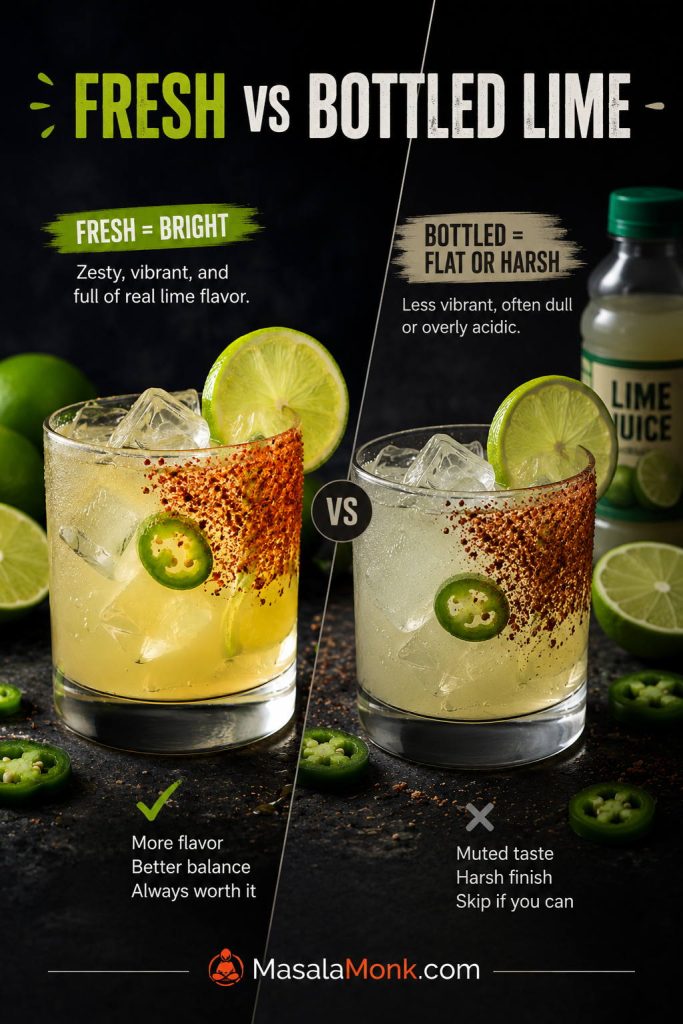
Fresh Lime Juice

Use just-squeezed lime juice here. Bottled lime can make the margarita taste flat, harsh, or metallic, especially when jalapeño and salt are involved. One juicy lime usually gives close to 1 oz / 30 ml, but measuring keeps the cocktail reliable.

Fresh lime juice compared with bottled lime juice for making a spicy margarita.
Fresh lime juice keeps a spicy margarita sharp and clean; bottled lime can turn flat or metallic once tequila, salt, and jalapeño are in the mix.

Orange Liqueur

Orange liqueur gives the margarita its classic roundness. Triple sec, Cointreau-style orange liqueur, or another clear orange liqueur will work. This recipe uses ¾ oz / 22 ml, or roughly 20–25 ml, which keeps the finished cocktail rounded without making it too sweet.

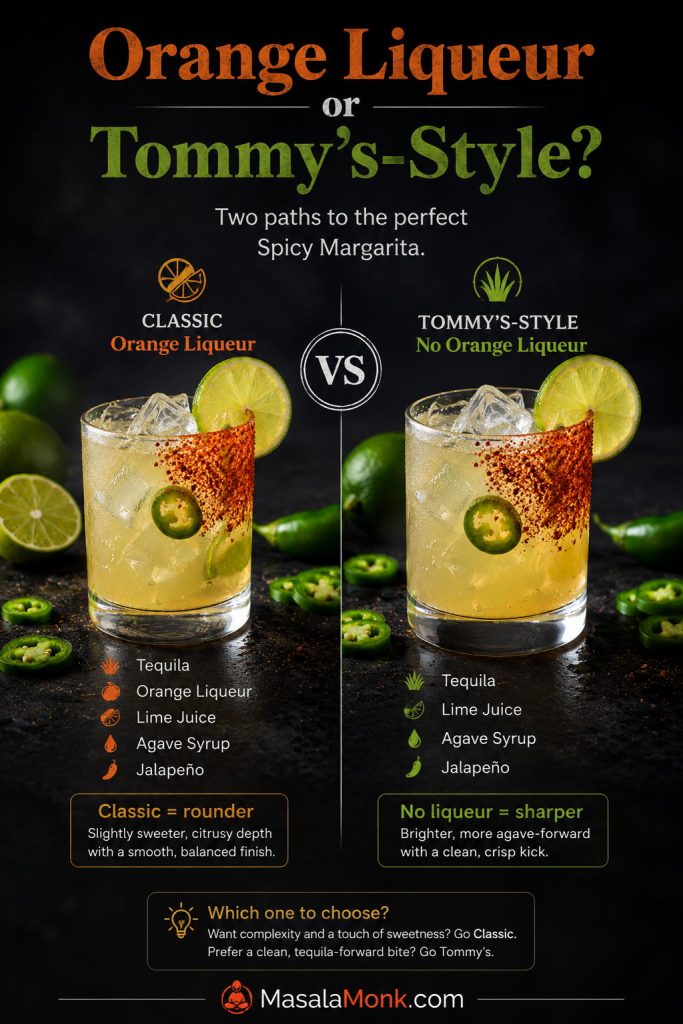
Can You Make It Without Orange Liqueur?

Yes. Skipping orange liqueur makes the drink closer to a spicy Tommy’s-style margarita. Use 2 oz tequila, 1 oz fresh lime juice, ½–¾ oz agave syrup, and 2 jalapeño slices. It will taste cleaner, sharper, and more tequila-forward.

If you want the classic version first, use the main spicy margarita recipe card, then try this sharper variation next.

Classic spicy margarita with orange liqueur compared with a Tommy’s-style spicy margarita without orange liqueur.
Orange liqueur makes the drink rounder and more classic; however, skipping it gives a sharper Tommy’s-style spicy margarita with more tequila-lime focus.

Jalapeño

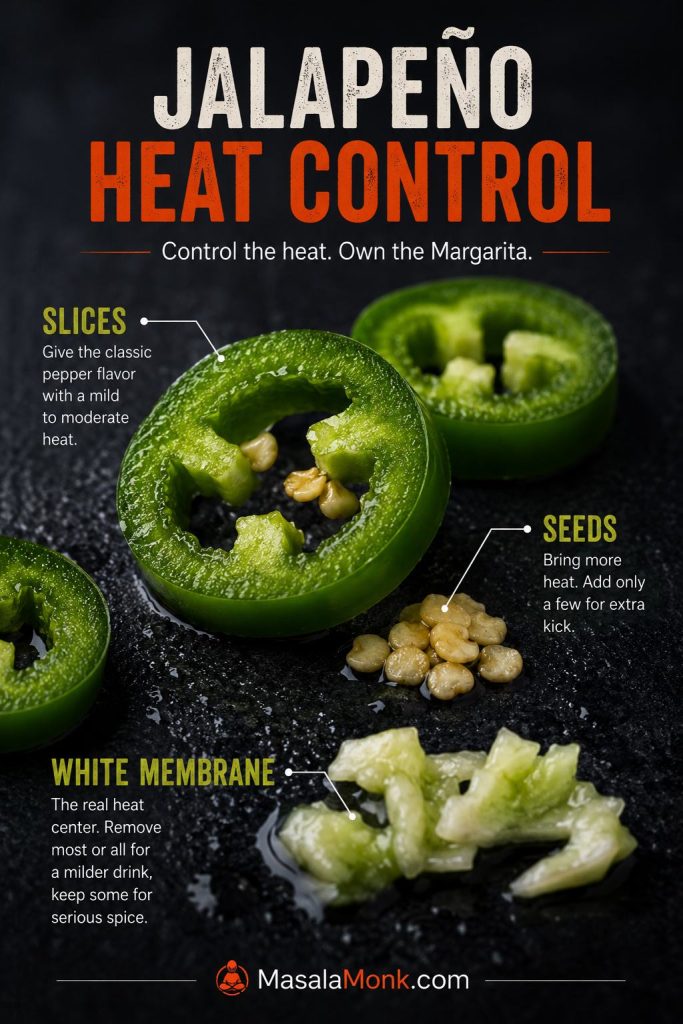
Use jalapeño cut into thin slices. For predictable heat, remove the seeds and white membrane before shaking or muddling. The membrane holds much of the heat, so leaving it in can make the margarita much hotter.

The seeds can taste hot because they touch the membrane, but the white membrane is the real part to watch. Remove both before slicing when you want a milder, more controlled first round.

Jalapeño heat control guide showing sliced jalapeño, seeds, and white membrane for adjusting margarita spice level.
For better heat control, remove the white membrane before shaking or muddling; it is the part most likely to push the margarita from spicy to harsh.

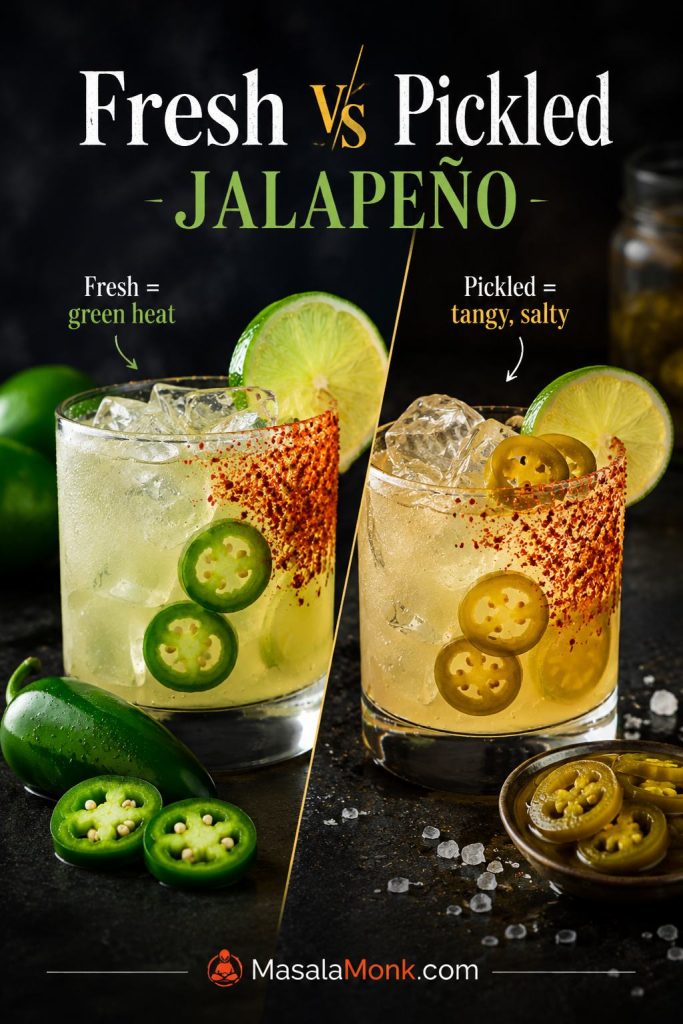
Fresh jalapeño gives the cleanest green pepper heat. Pickled jalapeño works in a pinch, but it makes the margarita tangier, saltier, and more bar-snack flavored, so use it carefully.

Fresh jalapeño slices and pickled jalapeño slices compared for use in a spicy margarita.
Fresh jalapeño gives clean green heat, whereas pickled jalapeño adds tang and salt, so use it only when that sharper flavor fits the drink.

For the full mild, medium, hot, and restaurant-style breakdown, jump to the spicy margarita heat levels.

Agave or Simple Syrup

Agave syrup pairs naturally with tequila, but simple syrup also works. The sweetener is not there to make the cocktail sugary. It softens the lime and pepper so the spicy margarita tastes rounded instead of sharp.

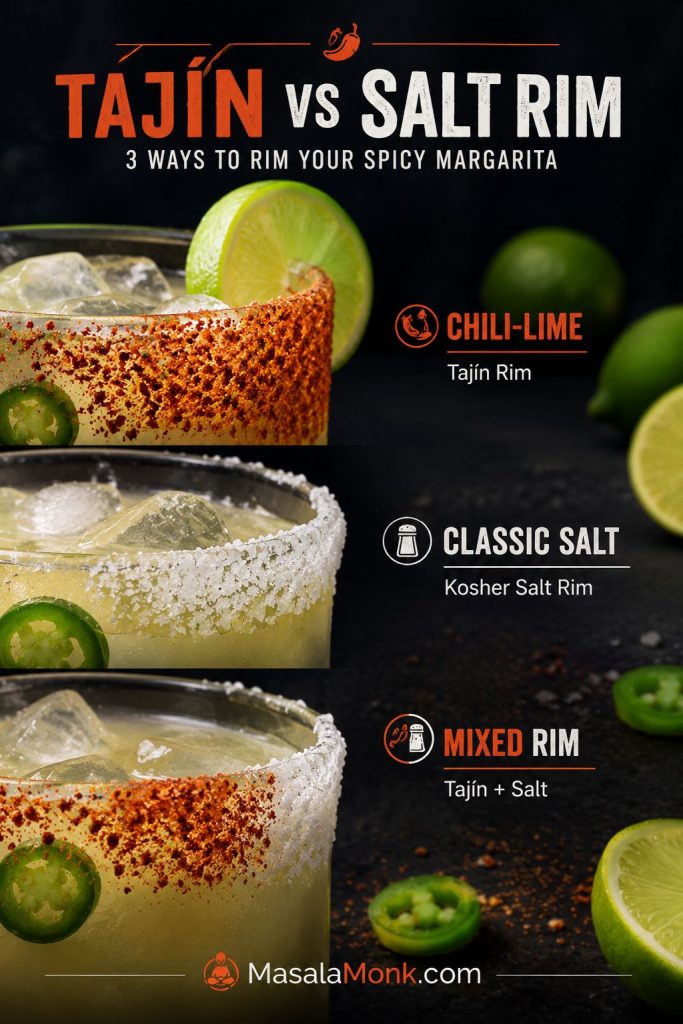
Tajín, Salt, or Chili-Lime Rim

Tajín gives the rim a chili-lime tang that works especially well with jalapeño and fruit variations. Kosher salt gives a cleaner classic margarita feel. A mix of Tajín and kosher salt is a good middle ground if you want less tang and more balance.

Tajín rim, kosher salt rim, and mixed chili-lime salt rim options for a spicy margarita.
Tajín adds chili-lime punch, kosher salt keeps the rim classic, and a mixed rim gives you spice without making every sip too intense.

Equipment You Need

You do not need a full bar setup. A shaker or sealed jar, a way to measure, a rocks glass, fresh ice, and something to strain with will get you most of the way there.

  • Shaker or sealed jar: chills and blends the cocktail.
  • Jigger or measuring spoon: keeps the tequila, lime, and sweetener in balance.
  • Rocks glass: best for a spicy margarita on the rocks.
  • Strainer: keeps jalapeño pieces and cracked shaker ice out of the glass.
  • Muddler or wooden spoon handle: helpful for medium or hotter pepper flavor.
  • Citrus juicer and small plate: useful for lime juice and rimming, but not dealbreakers.

How to Make a Spicy Margarita

The method is simple, but the little choices matter: rim before you shake, use enough ice, and keep the jalapeño in check so the cocktail tastes cold and bright instead of hot and muddy.

Step-by-step spicy margarita guide showing rimming the glass, adding jalapeño, adding liquids, shaking, straining over fresh ice, and garnishing.
Rimming first, shaking hard, and straining over fresh ice are the small steps that make a spicy margarita taste colder, cleaner, and more polished.

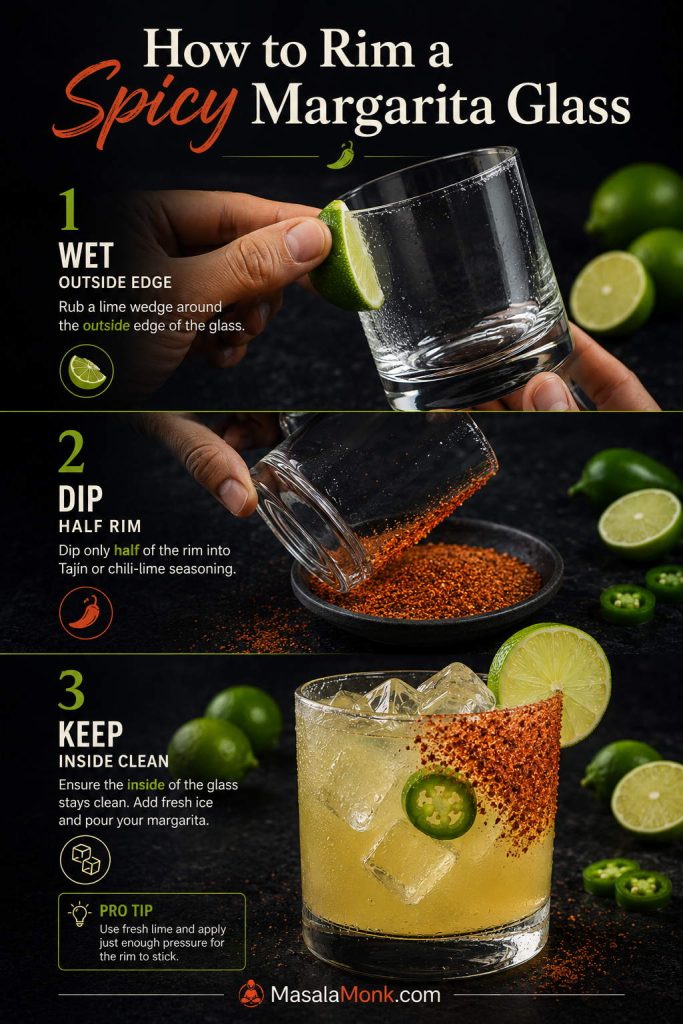
Rim the Glass

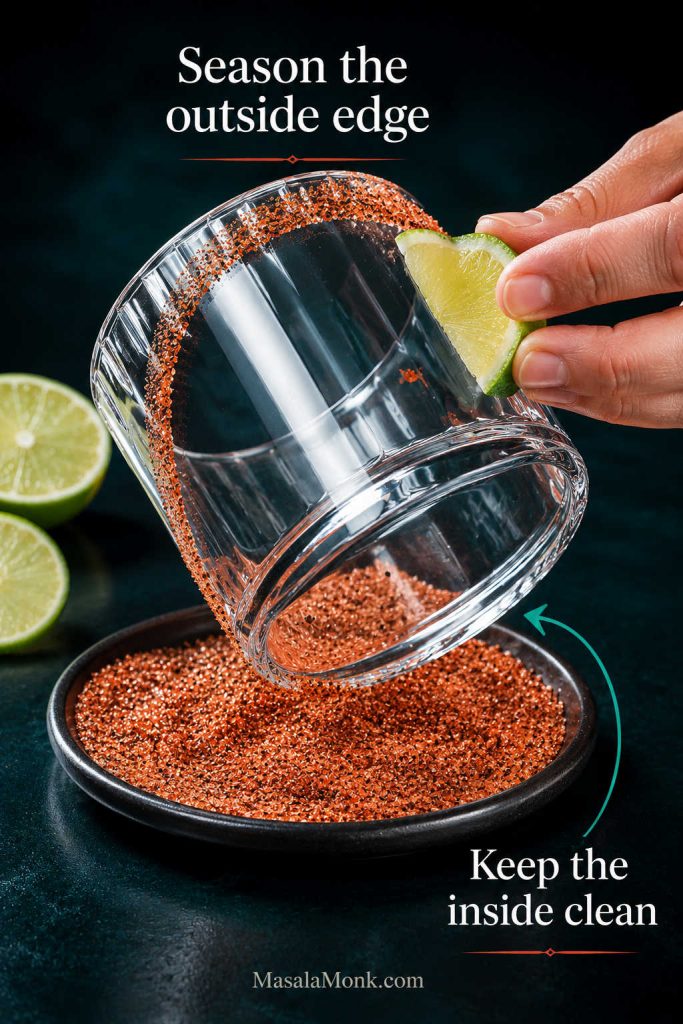
Run a lime wedge around the outside edge of a rocks glass. Dip or roll half the rim into Tajín, chili-lime salt, or kosher salt. Fill the glass with fresh ice and set it aside so it is ready the moment the cocktail is cold.

Step-by-step guide showing a rocks glass rimmed with lime and dipped halfway into Tajín for a spicy margarita.
Wet only the outside edge before dipping the rim; this keeps Tajín on the glass instead of letting it fall into the margarita.

Muddle or Shake the Jalapeño

Add 2–3 thin jalapeño slices to the shaker. For a mild margarita, leave them unmuddled and simply shake them with the liquid. For medium heat, press them gently 2–3 times with a muddler or the handle of a wooden spoon. Do not crush them aggressively unless you want a much hotter, greener pepper flavor.

Comparison showing jalapeño slices shaken for mild heat and lightly muddled for medium spicy margarita heat.
Shake jalapeño slices for a mild pepper finish, or muddle gently for medium heat; either way, avoid crushing the pepper into a bitter mash.

Shake Until Cold

Add tequila, lime juice, orange liqueur, agave, and ice to the shaker. Shake hard for 15–20 seconds, until the shaker feels very cold. That chill and dilution are what keep the lime sharp but not harsh.

Strain Over Fresh Ice

Strain the margarita into the prepared glass over fresh ice. Do not pour the broken shaker ice into the glass; it is already cracked, diluted, and melting fast.

Spicy margarita being strained from a shaker over fresh ice with a comparison to cracked shaker ice.
Fresh ice melts more slowly than cracked shaker ice, so straining over solid cubes keeps the margarita colder, brighter, and less watery.

Taste and Adjust

Taste the first sip and adjust from there. A tart margarita needs a small splash of agave; a sweet one needs more lime. When the flavor feels muted, add a tiny pinch of salt or a squeeze of lime. When the heat goes too far, strain away the jalapeño and soften the pour with lime, orange liqueur, agave, or sparkling water.

For more specific fixes, use the troubleshooting guide before remaking the drink.

How Spicy Should It Be?

The best spicy margarita is not automatically the hottest one. You want a pepper finish, not a dare. Heat should make the next sip more tempting, not make people brace before they drink.

Start gentler than you think you need to, especially with a new jalapeño. Treat the pepper like seasoning, not the main ingredient.

Heat level Jalapeño method Best for
Mild 1–2 seedless slices, shaken but not muddled First-time spicy margarita drinkers or anyone who wants only a light pepper tingle.
Medium 2–3 seedless slices, muddled with 2–3 gentle presses The best default version: clearly spicy, but still controlled.
Hot 3–4 slices or a tiny piece of membrane People who already know they like heat in cocktails.
Very hot Brief jalapeño tequila steep, tasted carefully Restaurant-style heat or pitchers, but only with careful timing.
Spicy margarita heat level guide showing mild, medium, hot, and restaurant-style jalapeño heat options.
Heat depends on pepper contact as much as pepper quantity, so start mild and move toward muddled or infused jalapeño only after tasting.

Mild Spicy Margarita

Start with 1–2 seedless jalapeño slices and do not muddle them. Shake the slices with the cocktail, then strain well. This gives a light pepper aroma and a gentle finish without much burn.

Medium Spicy Margarita

For the best default version, gently muddle 2–3 seedless jalapeño slices with only 2–3 presses before adding the liquids. The margarita should taste clearly spicy without overpowering the tequila and lime.

Hot Spicy Margarita

For more heat, add 3–4 slices or include a small amount of the white membrane. Avoid adding lots of seeds unless you already know the pepper is mild. Seeds and membrane can push the margarita from pleasantly hot to harsh very quickly.

Restaurant-Style Jalapeño-Infused Tequila Option

For a smoother restaurant-style spicy margarita, infuse the tequila briefly instead of muddling jalapeño into every glass. Add ½ sliced seedless jalapeño to 1 cup / 240 ml blanco tequila, steep for 15–30 minutes, then taste. Remove the pepper once the tequila has the heat you want.

Longer infusions can taste deeper, but they are easier to overdo because every jalapeño is different. For a party, a short controlled steep is safer than leaving pepper in the tequila for hours.

Jalapeño-infused tequila guide with sliced jalapeño steeping in blanco tequila for a restaurant-style spicy margarita.
A short jalapeño tequila steep gives smoother restaurant-style heat, but tasting early and removing the pepper keeps the infusion controlled.

How to Make It Less Spicy

Strain the cocktail away from the jalapeño immediately. Add more lime juice, orange liqueur, agave, or sparkling water to soften the heat. If the margarita is still too hot, pour it over extra ice and let it dilute slightly before serving.

Tajín Rim or Spicy Salt Rim

The rim should support the cocktail, not dominate it. A full Tajín rim looks dramatic, but a half rim usually drinks better.

Why a Half Tajín Rim Works Better

A good rim should feel like seasoning, not sand. The half rim lets you choose the sip: chili-lime edge on one side, clean tequila-lime brightness on the other.

Close-up of a spicy margarita with a half Tajín rim showing one seasoned side and one clean sipping side.
A half Tajín rim gives you two sipping options: chili-lime seasoning on one side and clean tequila-lime brightness on the other.

Which Rim Style Works Best?

Rim style Best for How to use it
Half Tajín rim Best default Rim only one side of the glass so every sip does not have to taste salty and spicy.
Full Tajín rim Big chili-lime flavor Use when the margarita is very limey or fruit-based.
Kosher salt rim Classic margarita feel Cleaner and less tangy than Tajín.
Tajín + kosher salt Balanced spicy rim Mix equal parts for a softer, less sour rim.
Chamoy + Tajín Sweet, sticky, dramatic rim Best with mango, pineapple, or watermelon versions.
No rim Cleaner sip Choose this when you want less salt or the margarita already tastes bold enough.

How to Keep Tajín Out of the Margarita

For the neatest rim, wet only the outside edge of the glass. The seasoning stays where your lips touch it, instead of sliding into the margarita and turning the bottom of the glass gritty.

If your rim tastes too intense, mix Tajín with kosher salt or rim only one small section of the glass. The rim should season the cocktail, not make every sip taste dusty or salty.

The same half-rim idea works beautifully with fruit margaritas too. MasalaMonk’s watermelon margarita recipe uses salt, Tajín, chili-salt, and half-rim logic to keep sweet fruit tasting sharper and colder.
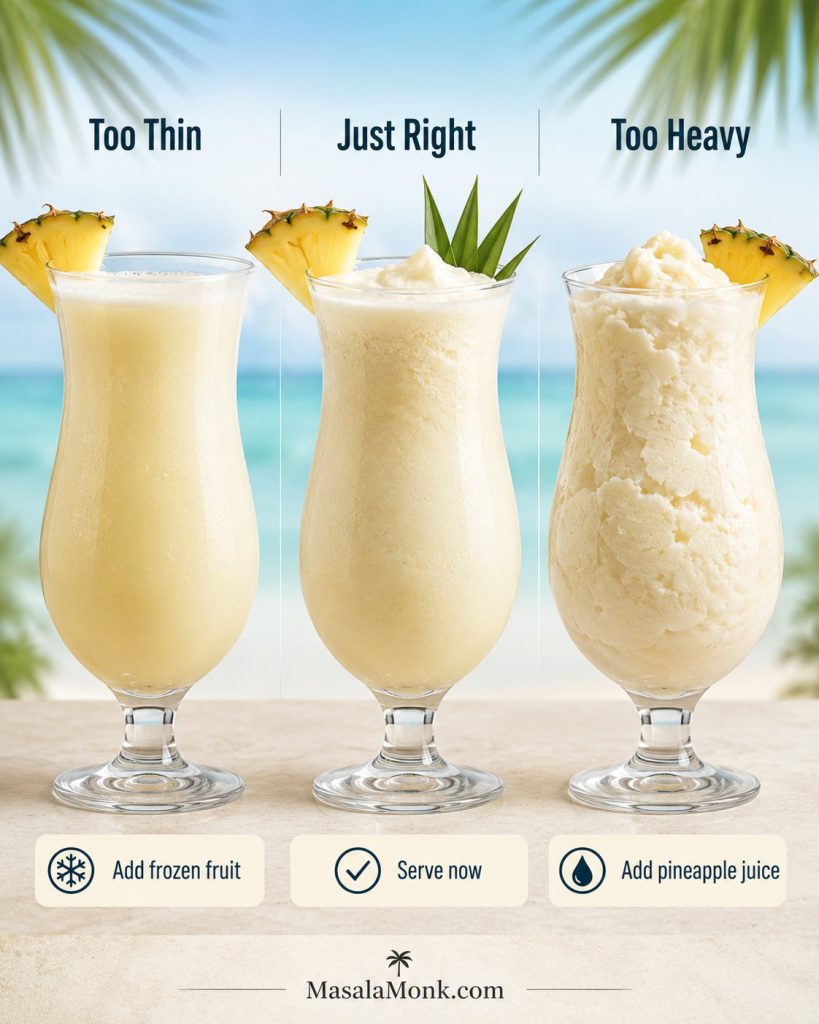
Tajín works beautifully on chili-lime rims, but for this homemade version, a simple half rim is usually cleaner, easier, and better balanced. The official Tajín spicy margarita also uses a coated section of the glass rather than a heavy full rim.

Need the cleanest technique? Go back to how to rim the glass before dipping into Tajín or salt.

Spicy Margarita Recipe Card

A cold, lime-forward spicy margarita with blanco tequila, fresh lime juice, orange liqueur, agave, jalapeño, and a half Tajín rim. Shake it mild, medium, or hot, then serve over fresh ice for a clean pepper finish.

Yield1 drink
Prep Time5 minutes
Cook Time0 minutes
Total Time5 minutes

Equipment

  • Rocks glass
  • Cocktail shaker or sealed jar
  • Jigger or measuring spoon
  • Strainer
  • Muddler or wooden spoon handle
  • Small plate for the rim

Ingredients

  • 2 oz / 60 ml blanco tequila
  • 1 oz / 30 ml fresh lime juice
  • ¾ oz / 22 ml orange liqueur
  • ½ oz / 15 ml agave syrup or simple syrup
  • 2–3 thin jalapeño slices, seeds and most white membrane removed for moderate heat
  • 1 tbsp Tajín, chili-lime salt, or kosher salt, for the rim
  • 1 lime wedge, for rimming and garnish
  • Ice

Instructions

  1. Rub a lime wedge around the outside edge of a rocks glass. Dip half the rim into Tajín, chili-lime salt, or kosher salt.
  2. Fill the glass with fresh ice and set it aside.
  3. Add jalapeño slices to a cocktail shaker. Muddle with 2–3 gentle presses for medium heat, or leave them unmuddled for a milder margarita.
  4. Add tequila, lime juice, orange liqueur, agave, and ice.
  5. Shake hard for 15–20 seconds, until the shaker feels very cold.
  6. Strain over fresh ice into the prepared glass.
  7. Garnish with lime or jalapeño. Taste and adjust the next round with more lime, agave, or jalapeño if needed.
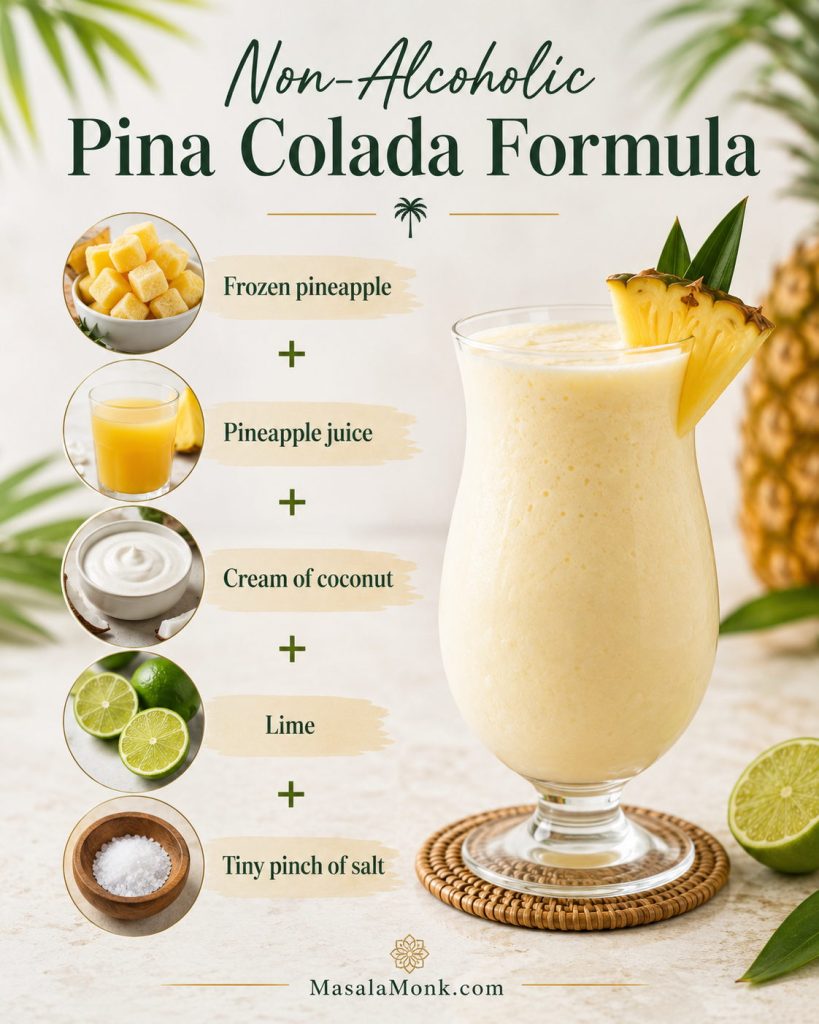
Notes

  • For mild heat, use 1–2 seedless jalapeño slices and do not muddle.
  • For medium heat, gently press 2–3 seedless slices only 2–3 times.
  • Jalapeños vary, so start lower when using a new pepper.
  • A half Tajín rim gives better sip control than a full rim.
  • Wet only the outside edge of the glass so Tajín does not fall into the margarita.
  • For pitchers, steep jalapeño for 10–20 minutes, then remove it once the heat tastes right.
  • Serve right after shaking, over fresh ice rather than broken shaker ice.
Saveable spicy margarita recipe card with tequila, lime juice, orange liqueur, agave syrup, jalapeño slices, Tajín, ice, and instructions.
Save this spicy margarita recipe card for the core ratio, then use the heat notes to decide whether to shake the jalapeño for mild heat or muddle it for medium heat.

Making drinks for a group? Use the spicy margarita pitcher instead of scaling glass by glass.

Best Tequila for a Spicy Margarita

Once the base ratio is set, tequila choice is mostly about the kind of finish you want: crisp, round, or smoky. For most people, 100% agave blanco tequila is the best first choice because it keeps the margarita sharp and lime-forward.

  • Best first choice: blanco tequila for a bright, clean, lime-friendly spicy margarita.
  • Softer option: reposado tequila if you want rounder oak and vanilla notes behind the citrus.
  • Smoky option: half blanco tequila and half mezcal for smoke without overwhelming the cocktail.
  • Usually skip: añejo tequila, because the oak and age can fight the lime, jalapeño, and Tajín.

If you want smoke without losing the lime, see the spicy mezcal margarita variation.

Tequila chooser board for spicy margaritas showing blanco tequila, reposado tequila, blanco with mezcal, and añejo as an option to skip.
Blanco tequila keeps the drink crisp, reposado makes it rounder, and a blanco-mezcal split adds smoke without overwhelming the lime and jalapeño.
For a classic benchmark, Liquor.com’s spicy margarita also uses blanco tequila, lime, orange liqueur, agave, and jalapeño as the core structure.
Skinny Spicy Margarita / Lower-Sugar Version

For a lighter margarita, reduce the sweetener before you reduce the flavor. The mistake with skinny margaritas is making them so lean that they taste like plain tequila and lime over ice.

The goal is not to strip the cocktail down until it tastes thin. Keep the lime, salt, and jalapeño bright while using less sweetener, reducing the orange liqueur, or adding a splash of sparkling water when the margarita tastes too sharp.

Skinny spicy margarita board with tequila, lime juice, reduced agave, jalapeño slices, optional sparkling water, and optional orange juice.
A skinny spicy margarita should reduce sugar without losing structure; keep the lime, salt, and jalapeño bright so the drink still feels complete.
Ingredient Amount
Blanco tequila 2 oz / 60 ml
Fresh lime juice 1 oz / 30 ml
Agave syrup ¼–½ oz / 7–15 ml
Jalapeño 2 thin slices
Orange juice ½ oz / 15 ml, optional
Sparkling water 1–2 oz / 30–60 ml, optional
Tajín or salt rim Optional

Shake the tequila, lime, agave, and jalapeño with ice. Strain over fresh ice, then top with sparkling water when you want a lighter, longer pour. Add orange juice only if you miss the roundness that orange liqueur normally gives.

For another lighter tequila-lime direction, MasalaMonk’s coconut water cocktails guide includes a coconut water margarita that lengthens the drink without turning it into a sugary mix.

For a no-alcohol version with the same lime-jalapeño idea, use the virgin spicy margarita.

Virgin Spicy Margarita / Non-Alcoholic Version

Without tequila, the mocktail needs something to replace that edge. Lime, orange, jalapeño, salt, and bubbles do the job better than simply topping juice with soda water.

This works best when it tastes like a zero-proof cocktail, not citrus soda with a jalapeño floating in it. The tiny pinch of salt matters because tequila normally brings body and bite; without alcohol, salt, orange, jalapeño, and sparkle help the mocktail taste complete.

Virgin spicy margarita mocktail with lime juice, orange juice, agave, jalapeño slices, salt, sparkling water, and a Tajín rim.
Without tequila, the mocktail needs lime, orange, salt, jalapeño, and bubbles to create enough bite for a zero-proof spicy margarita.
  • 1 oz / 30 ml fresh lime juice
  • 1 oz / 30 ml orange juice
  • ½ oz / 15 ml agave syrup or simple syrup
  • 2 thin jalapeño slices
  • Tiny pinch of salt, optional but helpful
  • 3 oz / 90 ml sparkling water, added after shaking
  • Tajín rim, recommended

Shake the lime juice, orange juice, agave, jalapeño, salt, and ice first. Strain over fresh ice in a rimmed glass, then top with sparkling water. Do not shake the sparkling water or the mocktail will lose its fizz.

For a broader zero-proof path, MasalaMonk’s margarita mocktail guide is a useful next stop for building non-alcoholic margarita-style drinks.

Frozen Spicy Margarita

Blending changes the problem: now texture matters as much as balance. A frozen spicy margarita is fun, but plain ice can make the pour watery and sharp. Frozen fruit helps the texture more than simply adding extra ice.

Frozen spicy margarita with tequila, lime juice, orange liqueur, agave, jalapeño, ice, optional frozen fruit, and Tajín rim.
Frozen fruit gives better texture than extra plain ice, while using less jalapeño keeps the pepper from tasting sharp as the frozen margarita melts.
  • 2 oz / 60 ml blanco tequila
  • 1 oz / 30 ml fresh lime juice
  • ¾ oz / 22 ml orange liqueur
  • ½ oz / 15 ml agave syrup
  • 1–2 thin jalapeño slices
  • 1½ cups ice, plus more as needed
  • ½ cup frozen mango, pineapple, or watermelon, optional but helpful for texture

Blend the liquid ingredients first, then add ice and frozen fruit. This helps the jalapeño and lime distribute before the margarita thickens. If the mixture is too thick, add 1–2 tablespoons of cold water or lime juice. If it is too thin, blend in more ice or frozen fruit.

Use slightly less jalapeño in frozen versions; cold dulls some flavors, but raw pepper can taste sharper as the margarita melts.

A plain frozen spicy margarita melts faster than a fruit-based one. For a thicker slush, frozen mango, pineapple, or watermelon will give better texture than adding more plain ice.

For fruit directions that also work on the rocks, see the spicy margarita variations.

Spicy Margarita Pitcher for a Crowd

A spicy margarita pitcher should taste like the first round of the party, not the dare people regret halfway through. The main mistake is letting jalapeño sit in the batch too long.

This is the version to make when people are hovering around the snack table and you do not want to shake drinks one at a time all night.

Spicy margarita pitcher recipe board with tequila, lime juice, orange liqueur, agave, jalapeño, Tajín, an ice-free pitcher, and rimmed glasses with fresh ice.
For a spicy margarita pitcher, chill the base without ice, steep jalapeño briefly, and pour over fresh ice so the batch stays controlled and undiluted.

What You Can Make Ahead

Mix the tequila, lime juice, orange liqueur, and agave a few hours ahead, then chill the base. Add jalapeño only 10–20 minutes before serving, then remove it once the heat tastes right. Rim glasses separately and pour over fresh ice.

Make-ahead spicy margarita guide showing the tequila-lime base mixed ahead, chilled, jalapeño added later, jalapeño removed, glasses rimmed separately, and drinks poured over fresh ice.
Mix the tequila-lime base ahead, but add jalapeño close to serving so the pitcher stays fresh without letting the pepper take over.
Ingredient For 8 drinks
Blanco tequila 16 oz / 480 ml
Fresh lime juice 8 oz / 240 ml
Orange liqueur 6 oz / 180 ml
Agave syrup or simple syrup 4 oz / 120 ml
Jalapeño 1 seedless jalapeño, thinly sliced
Ice For serving, not for storing in the pitcher
Tajín or salt For rimming glasses separately

Stir the tequila, lime juice, orange liqueur, and agave in a pitcher. Add the jalapeño slices and let them steep for 10–20 minutes. Taste the batch, then remove the jalapeño once the heat is where you want it.

Chill the pitcher base until serving. Rim the glasses separately and pour the margaritas over fresh ice only when serving. Do not store the pitcher with ice in it, or the batch will dilute before guests pour their first glass.

Party tip

Keep the pitcher slightly less spicy than your personal glass. Guests can add a jalapeño slice to their own pour, but you cannot rescue the whole batch once the pepper takes over. A small bowl of extra jalapeño slices beside the glasses works better than leaving pepper in the pitcher.

If the batch gets hotter than planned, use the troubleshooting fixes instead of adding more ice to the pitcher.

Because pitcher drinks can taste easygoing even when they are strong, keep the pours modest and serve them with food.

Spicy Margarita Variations

Once the classic version is balanced, the variations become easy to control. Choose the mood before you change the ratio: mango for lush sweetness, pineapple for a louder tropical glass, watermelon for something lighter, cucumber for cooling green freshness, serrano for sharper heat, or mezcal for smoke.

Spicy margarita variations board showing mango, pineapple, watermelon, cucumber, serrano, and mezcal versions.
Once the base ratio works, variations are easier: mango turns lush, pineapple goes tropical, cucumber cools the heat, serrano sharpens it, and mezcal adds smoke.

Spicy Mango Margarita

Add mango nectar, mango puree, or blended fresh mango to the base cocktail. Mango loves Tajín, chamoy, lime, and jalapeño, so this is one of the strongest spicy margarita variations. For a dedicated fruit version, use MasalaMonk’s mango margarita recipe and add the jalapeño heat level you prefer.

Pineapple Jalapeño Margarita

Pineapple makes the margarita sweeter, sunnier, and more tropical, so it usually needs less agave and loves a chili-lime rim. Use pineapple juice or muddled pineapple with the same tequila-lime-jalapeño base.

Spicy Watermelon Margarita

Use watermelon juice, lime, tequila, jalapeño, and a Tajín rim. Watermelon is softer than mango or pineapple, so keep the jalapeño moderate and avoid over-sweetening. A pinch of salt or a half rim makes the fruit taste colder, sharper, and more refreshing.

Cucumber Jalapeño Margarita

Muddle a few cucumber slices gently with the jalapeño, then double strain the cocktail so cucumber pulp does not cloud the glass. Cucumber cools the pepper heat, so the whole pour feels greener, cleaner, and more refreshing.

Serrano Margarita

Use serrano instead of jalapeño when you want a sharper, hotter pepper finish. Start with 1 thin slice, especially if you are muddling, because serrano can take over the margarita quickly.

Spicy Mezcal Margarita

Swap part or all of the tequila for mezcal. A half tequila, half mezcal split is the easiest first step because it gives smoke without overwhelming the lime and jalapeño.

If you want a citrus-forward margarita instead of a pepper-forward one, MasalaMonk’s blood orange margarita recipe is a good next drink to try.

Troubleshooting

Spicy margaritas are forgiving. Most problems come down to balance: heat, acid, sweetness, salt, dilution, or the way the jalapeño was handled.

Spicy margarita troubleshooting board showing fixes for heat, sourness, sweetness, watery texture, muted flavor, harsh pepper, and rim problems.
Most spicy margarita problems are balance problems; lime, agave, salt, fresh ice, or shorter jalapeño contact can usually bring the cocktail back.
Problem Fix
Heat is overpowering Strain out the jalapeño. Add lime, orange liqueur, agave, or sparkling water to soften the heat.
Sharp or sour Add ¼ oz agave syrup or a small splash of orange liqueur.
Sweetness takes over Add fresh lime juice and a tiny pinch of salt.
Flavor feels weak Use a full 2 oz tequila next time, shake hard but not too long, and avoid serving with melted shaker ice.
Watery finish Strain over fresh ice, not broken shaker ice. Do not store pitcher margaritas with ice.
Flat or muted flavor Add a tiny pinch of salt, a squeeze of lime, or a little fresh ice. Make sure the lime juice is fresh.
Harsh pepper bite Remove seeds and membrane, muddle more gently, or use fewer jalapeño slices.
Metallic edge Use fresh lime juice instead of bottled lime, remove jalapeño membrane, and avoid over-muddling.
Green or vegetal taste Use fewer jalapeño slices, avoid aggressive muddling, and remove the membrane before shaking.
Rim will not stick Rub lime on the outside edge only, then dip or roll the rim while it is still wet.
Tajín falls into the margarita Rim only the outside edge of the glass or use a half rim.

What to Serve with Spicy Margaritas

Spicy margaritas love salty, creamy, crunchy food — chips, salsa, guacamole, grilled corn, shrimp, tacos, creamy dips, and anything with a little char. The lime and jalapeño cut through richness, while the Tajín rim makes snacky, chili-lime flavors feel even brighter.

Food pairing board for spicy margaritas showing chips and guacamole, jalapeño poppers, tacos, creamy dip, grilled corn, and a spicy margarita.
Spicy margaritas work best with salty, creamy, crunchy food that can stand up to lime, jalapeño, and a chili-lime rim.

For a party tray, baked jalapeño poppers are the obvious match: creamy filling, pepper heat, and crisp edges beside a cold margarita. For something cooler and scoopable, a jalapeño-style cheese ball recipe gives guests a richer bite between citrusy sips.

Once the ratio is right, this is the kind of cocktail that disappears fast: cold glass, lime on the rim, a little pepper at the end, and just enough salt to make you want the next sip.

FAQs

These quick answers cover the decisions most people run into while mixing a spicy margarita at home.

Is a spicy margarita the same as a jalapeño margarita?

In most home recipes, yes. “Spicy margarita” is the broader name, while “jalapeño margarita” tells you the heat source. Some spicy margaritas use serrano, chili syrup, hot sauce, or infused tequila, but sliced jalapeño is the easiest and most reliable home method.

What is in a spicy margarita?

A classic spicy margarita usually has tequila, fresh lime juice, orange liqueur, agave or simple syrup, jalapeño, ice, and a salt or Tajín rim. This recipe uses blanco tequila, 1 oz fresh lime juice, ¾ oz orange liqueur, ½ oz agave, and 2–3 jalapeño slices.

Should I muddle the jalapeño?

Muddle it only when you want clear pepper heat. For a mild spicy margarita, shake the jalapeño slices without muddling. For medium heat, press the slices 2–3 times; do not crush them into a paste.

How do I make a spicy margarita less spicy?

Use fewer jalapeño slices, remove seeds and membrane, and shake the slices without muddling. If the margarita is already too spicy, strain it away from the jalapeño and soften it with lime, agave, orange liqueur, or sparkling water.

What makes a spicy margarita hotter?

More jalapeño, muddling, membrane, seeds, longer steeping, or infused tequila will make the cocktail hotter. For most people, 2–3 seedless slices gently muddled is enough.

Can I use serrano instead of jalapeño?

Serrano works, but it needs a lighter hand. It is usually sharper and hotter than jalapeño, so begin with 1 thin slice and muddle gently.

Should I use Tajín or salt on the rim?

Tajín gives the rim chili-lime flavor, especially with jalapeño or fruit margaritas. Kosher salt gives a cleaner classic margarita taste. A half Tajín rim is the best default because it gives you spicy-salty control without overwhelming every sip.

What tequila works best in a spicy margarita?

Blanco tequila is the best first choice because it is clean, bright, and lime-friendly. Reposado makes the cocktail rounder, while mezcal adds smoke. Añejo tequila is usually too oaky and expensive for this style of margarita.

Can I make a spicy margarita without orange liqueur?

Yes. Skip the orange liqueur and use 2 oz tequila, 1 oz fresh lime juice, ½–¾ oz agave syrup, and 2 jalapeño slices. The result is sharper, cleaner, and more tequila-forward.

How do I make a skinny spicy margarita?

For a lower-sugar version, keep the tequila and lime intact, reduce the agave to ¼–½ oz, and top with sparkling water if you want a longer pour. Keep the jalapeño and salt so it still tastes like a cocktail.

What is the best non-alcoholic spicy margarita method?

Shake fresh lime juice, orange juice, agave, jalapeño, a tiny pinch of salt, and ice. Strain over fresh ice in a Tajín-rimmed glass, then top with sparkling water. Add the sparkling water last so the drink stays fizzy.

Can margarita mix work in a spicy margarita?

It can, but fresh lime and orange liqueur taste better. If using margarita mix, shake it with 1–2 jalapeño slices and add a squeeze of lime to brighten the margarita. Use less sweetener because most mixes are already sweet.

A tiny splash of pickled jalapeño brine can add quick spicy-salty tang, but it changes the flavor from fresh pepper to pickled pepper.

How far ahead can I make a spicy margarita pitcher?

You can mix the tequila, lime juice, orange liqueur, and agave a few hours ahead and chill it. Add jalapeño only 10–20 minutes before serving, taste, then remove it once the heat is right. Rim glasses separately and serve over fresh ice.

Posted on 1 Comment

Watermelon Margarita Recipe

Fresh watermelon margarita on the rocks in a short glass with clear ice, a half-rim, lime wedge, and watermelon garnish.

This watermelon margarita recipe is cold, juicy, lime-bright, and built for ripe summer watermelon. Blend the fruit into fresh juice, shake it with blanco tequila and lime, then pour it over fresh ice with a salt or Tajín rim so every sip tastes crisp instead of watery.

The main version is a watermelon margarita on the rocks, because that is the cleanest way to taste the fruit without turning the drink into accidental slush. From there, you can make it stronger, softer, spicy, frozen, alcohol-free, or pitcher-friendly without guessing your way through the ratios.

You do not need a complicated cocktail setup, and you do not need to drown the drink in ice. Fresh watermelon juice, blanco tequila, lime, and a good rim do most of the work. Orange liqueur is optional, and sweetener only belongs in the glass when the watermelon needs a little help.

Table of Contents

Use this guide to make a fresh watermelon margarita on the rocks, adjust the ratio, scale it for a pitcher, or turn it into a frozen, spicy, or alcohol-free version.

Quick Answer: Best Watermelon Margarita Ratio

For one drink, this watermelon margarita recipe uses 4 oz watermelon juice, 1½ to 2 oz blanco tequila, ¾ oz fresh lime juice, and ½ oz orange liqueur if you want a rounder classic margarita flavor. Shake with ice, then strain over fresh ice so the drink stays cold without turning watery.

Very sweet watermelon usually needs no added sugar. If the fruit tastes bland, add ¼ oz agave or simple syrup. For a cleaner watermelon margarita without triple sec, leave out the orange liqueur and let the watermelon, tequila, and lime stay sharper and more fruit-forward.

Ingredient One Drink Metric Why It Matters
Fresh watermelon juice 4 oz 120 ml Gives the drink its fresh fruit flavor and natural sweetness.
Blanco tequila 1½–2 oz 45–60 ml Use 1½ oz for an easier drink or 2 oz for a stronger cocktail.
Fresh lime juice ¾ oz 22 ml Balances sweet watermelon and keeps the drink from tasting flat.
Orange liqueur ½ oz, optional 15 ml Adds classic margarita roundness; skip it for a cleaner no triple sec version.
Agave or simple syrup 0–¼ oz 0–7 ml Only needed if the watermelon is not naturally sweet.

The first sip should be cold, juicy, lightly salty, and clearly watermelon-forward — not like tequila hiding in fruit juice, and not like watered-down slush. When it tastes flat, add lime or salt. Sharpness usually means it needs more watermelon, while a heavy finish usually means the next round needs less sweetener.

Watermelon margarita ratio graphic showing watermelon juice, tequila, lime juice, optional orange liqueur, and a finished drink.
Use this watermelon margarita ratio as the first pour, not the final law. Because watermelon sweetness changes so much, mix the drink first, taste it cold, and only then decide whether it needs sweetener.

Watermelon Margarita at a Glance

Making this watermelon margarita recipe for the first time? Start here. These choices give you the freshest flavor, the cleanest texture, and the lowest risk of a watery drink.

Serving style On the rocks, shaken and strained over fresh ice
Tequila Blanco or silver tequila
Juice Fresh blended watermelon juice
Rim Salt for classic, Tajín or chili-lime seasoning for tangy watermelon flavor
Sweetener Only when the watermelon tastes bland or underripe
Pitcher tip Mix ahead, chill, and add ice only to glasses
Frozen tip Use frozen watermelon cubes instead of lots of plain ice
At-a-glance watermelon margarita guide with a finished drink, watermelon juice, tequila, lime, rim seasoning, frozen watermelon, and pitcher cues.
This visual gives the fastest decision path: fresh juice for flavor, blanco tequila for a clean finish, ice in the glass for control, and frozen watermelon only when you are making the blended version.

Why This Recipe Works

Watermelon brings a lot of juice and natural sweetness, but it is also delicate. Too much tequila makes it disappear, too much lime makes it sharp, and too much syrup turns it candy-like. This ratio keeps the drink fresh first: watermelon leads, tequila supports, lime sharpens, and the rim makes each sip pop.

A lot of watermelon margaritas go wrong because they treat watermelon like a bold citrus juice. It is not. The fruit is gentle, watery, and easily buried, so this drink needs measured lime, enough salt, and fresh ice more than it needs extra syrup.

Because this watermelon margarita recipe starts with real watermelon juice, you can taste and adjust the drink before it ever reaches the glass.

You are not locked into one exact formula either. Add orange liqueur when a rounder classic margarita feel sounds right, or leave it out when something cleaner and more fruit-forward fits the moment. Choose salt for a crisp rim, Tajín or another chili-lime seasoning for a tangy edge, or a half-rim when every sip should feel a little different.

In a classic margarita, tequila, lime, orange liqueur, and salt do the heavy lifting. Watermelon changes that balance because it brings both juice and sweetness, so this version usually needs less added sweetener than a sharper citrus margarita.

Watermelon Margarita Ingredients

The main ingredients in this watermelon margarita recipe are simple: ripe watermelon, blanco tequila, fresh lime, ice, and a salt or Tajín rim. Orange liqueur and sweetener are useful, but they should stay optional because watermelon can vary a lot in sweetness.

Before you mix the drink, taste the watermelon by itself. A great watermelon needs almost no sweetener. A flat or underripe one may need a tiny splash of agave, a better rim, or a little more lime to wake it up.

Watermelon margarita ingredients on a dark surface, including watermelon cubes, lime, tequila, orange liqueur, sweetener, salt, Tajín, and ice.
Each ingredient has a job. Watermelon brings body, lime gives the drink lift, tequila adds structure, and salt or Tajín keeps the sip from tasting one-note.
Ingredient Good Choice How to Use It
Watermelon Ripe seedless watermelon Blend, strain if desired, then measure the juice after blending.
Tequila Blanco or silver tequila Clean and crisp, so it does not hide the watermelon.
Lime Fresh lime juice Do not skip it; lime is what keeps the drink from tasting like plain watermelon juice.
Orange liqueur Cointreau, triple sec, or another orange liqueur Optional. Use it for a rounder classic margarita flavor.
Sweetener Agave or simple syrup Add only if the watermelon tastes bland or the drink is too sharp.
Rim Salt, Tajín, or chili-lime seasoning Balances the sweetness and makes the watermelon taste brighter.

Best Tequila for a Watermelon Margarita

Reposado tequila can work when you like a rounder drink, but it can pull the flavor warmer and softer. Blanco keeps the watermelon cleaner. For orange liqueur, Cointreau-style options usually taste cleaner and stronger, while basic triple sec is often sweeter and softer.

Blanco and reposado tequila comparison for watermelon margaritas, with two watermelon-colored cocktails and bottle cues.
Blanco tequila is the safest first choice for a fresh watermelon margarita because it stays crisp and lets the fruit lead. Reposado works when you want a rounder, warmer drink.

If this is the kind of tequila drink you like, the Paloma recipe is a good next one: still bright, salty, and citrusy, but lighter and sparkling with grapefruit instead of watermelon.

How Much Watermelon Do You Need?

Start with about 1 to 1½ cups diced ripe watermelon for one drink, then blend and strain it to measure 4 oz / 120 ml fresh watermelon juice. Watermelon yield changes depending on ripeness and how watery the fruit is, so measure the juice after blending instead of relying only on the diced fruit amount.

As a useful weight guide, 1 cup diced watermelon is about 152 g. That means 1 to 1½ cups diced watermelon is roughly 150–225 g before blending.

Watermelon yield guide showing diced watermelon, a blender, and about 4 ounces of watermelon juice for one margarita.
Diced watermelon does not always give the same amount of juice, so measure after blending instead of guessing. Blending extra fruit gives you room to adjust, especially when making more than one margarita.
Amount of Diced Watermelon Approx. Weight Use It For
1 to 1½ cups 150–225 g Usually enough for 1 margarita after blending and straining.
3 to 4 cups 455–610 g A good starting amount for 4 drinks, depending on how juicy the watermelon is.
6 to 8 cups 910 g–1.2 kg A good starting amount for a larger pitcher or party batch.
Useful tip: Blend more watermelon than you think you need, then measure the juice after straining. If the fruit tastes sweet and juicy on its own, skip extra sweetener. If it tastes flat, use lime, salt, or a tiny splash of agave to wake it up.

Fresh Watermelon vs Bottled Watermelon Juice

Fresh watermelon gives this drink the cleanest flavor, brightest color, and most natural summer feel. When the fruit is ripe and sweet, the margarita may not need added sugar at all.

Bottled watermelon juice works as a shortcut, especially when watermelon is out of season or you do not want to blend fruit. Choose an unsweetened or lightly sweetened juice if possible. Some bottled juices taste cooked, flat, or candy-like, and those flavors become more obvious once tequila and lime are added.

Fresh watermelon juice compared with bottled watermelon juice for making watermelon margaritas.
Fresh watermelon juice usually gives the brightest color and cleanest flavor. Bottled juice can still work as a shortcut; however, taste it first because some versions are already sweet or slightly flat.

For the brightest version, use freshly blended watermelon, especially when the fruit is cold, ripe, and naturally sweet.

Frozen watermelon cubes are a different tool. They are better for a blended frozen margarita than for a shaken on-the-rocks drink, because they give the blender body without diluting the cocktail with too much plain ice.

The balance is similar to other fruit margaritas: ripe fruit adds body and sweetness, while lime, tequila, and the rim keep everything sharp. If you want another fruit-forward example, this mango margarita recipe follows the same idea with a thicker, sweeter fruit base.

How to Make Fresh Watermelon Juice

Fresh watermelon juice takes only a few minutes. Use ripe, chilled watermelon if you have it; cold fruit makes the drink taste brighter and helps the margarita stay crisp once it hits the ice.

Watermelon cubes being blended and strained to make fresh juice for watermelon margaritas.
Watermelon releases enough liquid on its own, so there is no need to add water to the blender. Keeping the juice undiluted gives the margarita a stronger fruit flavor from the start.
  1. Cut the watermelon into cubes. Remove the rind and any large black seeds.
  2. Blend until smooth. Use a blender or high-speed blender. No water is needed.
  3. Strain if you want a smoother drink. Pour through a fine-mesh strainer and press gently with a spoon.
  4. Then measure the juice. For one drink, use 4 oz / 120 ml watermelon juice after blending and straining.
  5. Chill if making ahead. Store covered in the fridge and stir before using, because watermelon juice naturally separates.
Do not add water to the blender. Watermelon releases plenty of juice on its own. Extra water makes the margarita taste thin before it even reaches the shaker.

Strained vs Pulpy Watermelon Juice

Strain or not? Strain the juice for a smoother cocktail-bar texture. Skip straining if you like a slightly pulpy, fresh-fruit feel. For a pitcher, straining is usually better because the drink pours cleaner and settles less heavily.
Pulpy and strained watermelon juice shown in two glasses with a fine-mesh strainer nearby.
Strained watermelon juice gives a smoother cocktail texture, while pulpy juice feels more casual and fruit-forward. For pitchers, straining is usually better because pulp settles as the batch sits.

How to Make a Watermelon Margarita on the Rocks

The main method for this watermelon margarita recipe is shaken and served over fresh ice. Shaking chills and blends the lime, tequila, and watermelon juice quickly; fresh ice in the glass keeps the drink bright instead of watery.

Shaking gives you a colder, cleaner watermelon margarita than blending with a lot of ice. The drink stays juicy and bright, not foamy, diluted, or slushy by accident.

Watermelon margarita method image showing rimming a glass, adding ingredients to a shaker, shaking, and straining over fresh ice.
The on-the-rocks method keeps the drink controlled: rim the glass, shake the cocktail cold, then strain it over fresh ice. That sequence gives you chill without turning the drink into accidental slush.
  1. Rim the glass. Rub a lime wedge around the rim of a rocks glass, then dip the glass into salt, Tajín, or chili-lime seasoning. Fill with fresh ice.
  2. Add the drink ingredients to a shaker. Use 4 oz watermelon juice, 1½ to 2 oz blanco tequila, ¾ oz fresh lime juice, optional ½ oz orange liqueur, and optional ¼ oz agave if needed.
  3. Shake with ice. Shake for 15–20 seconds, until the shaker feels cold.
  4. Strain over fresh ice. Do not pour the used shaker ice into the glass; fresh ice keeps the drink cleaner.
  5. Garnish and taste. Add a lime wedge, small watermelon wedge, or mint sprig. Taste once before serving and adjust if needed.

Why Fresh Ice Matters

Do not worry if the first sip is not perfect. Watermelon changes a lot from fruit to fruit, so small adjustments are part of the recipe. When in doubt, adjust with lime and salt before adding more syrup.

Watermelon margarita being poured from a shaker into a glass filled with fresh ice.
Fresh ice gives the finished drink a clean start. Instead of carrying over half-melted shaker ice, strain into a cold glass so the watermelon and lime stay lively longer.
Problem Quick Fix
Tart or sharp Add a little more watermelon juice first; then use ¼ oz agave or simple syrup only when needed.
Overly sweet Add a squeeze of fresh lime and use a salt or Tajín rim to bring the drink back into balance.
Alcohol-heavy Add more watermelon juice or a small splash of cold sparkling water.
Flat Add more lime, a better rim, or a tiny pinch of salt before adding more syrup.

Ratio Guide: Lighter, Balanced, or Stronger

The right ratio depends on how sweet the fruit is and how strong you want the drink. Start with the balanced version, then move lighter, brighter, or stronger from there.

Four watermelon margaritas labeled Light and Juicy, Balanced Classic, Bright and Tart, and No Triple Sec.
This ratio guide turns the recipe into a choice. Go lighter for easy sipping, balanced for the first batch, brighter for very sweet fruit, or no triple sec when you want the cleanest watermelon-tequila finish.
Style Watermelon Juice Tequila Lime Orange Liqueur Use It When
Light & Juicy 4 oz / 120 ml 1½ oz / 45 ml ¾ oz / 22 ml Optional You want a softer daytime drink for a pool day, patio drink, or easy first round.
Balanced Classic 4 oz / 120 ml 2 oz / 60 ml ¾ oz / 22 ml ½ oz / 15 ml You want the main version: fresh, cold, citrusy, and clearly margarita-like.
Bright & Tart 3 oz / 90 ml 2 oz / 60 ml 1 oz / 30 ml ½ oz / 15 ml Your watermelon is very sweet or you prefer a sharper lime-forward margarita.
No Triple Sec 4 oz / 120 ml 1½–2 oz / 45–60 ml ¾ oz / 22 ml Skip it You want a cleaner tequila-watermelon-lime flavor without orange liqueur.

Start with the Balanced Classic for your first batch. If guests are coming, use the Light & Juicy version with a half-rim. When the watermelon is very sweet, move to the Bright & Tart version so the drink tastes crisp instead of like spiked juice.

As a result, this watermelon margarita recipe can lean light and juicy, balanced and classic, or sharper and stronger without changing the whole method.

The balanced classic is a good first pour: 4 oz watermelon juice, 2 oz tequila, ¾ oz lime, and ½ oz orange liqueur. If your watermelon is delicate or you want an easier patio drink, use 1½ oz tequila instead.

Watermelon Margarita Without Triple Sec

This watermelon margarita recipe also works beautifully without triple sec because watermelon already brings sweetness and aroma. Without orange liqueur, the drink tastes cleaner, sharper, and more watermelon-forward.

Skip triple sec when your watermelon is ripe, sweet, and fragrant. Add it when the drink tastes too much like tequila-watermelon juice and not enough like a classic margarita.

Watermelon margarita without triple sec in a rimmed glass with lime and watermelon garnish.
A watermelon margarita without triple sec works best when the fruit is already ripe and fragrant. Instead of adding orange sweetness, this version keeps the flavor closer to watermelon, lime, and tequila.

This is the version to make when the watermelon is already sweet enough to eat by itself and you want the drink to stay clean, fresh, and fruit-forward.

Use this no triple sec ratio for one drink:

  • 4 oz / 120 ml fresh watermelon juice
  • 1½–2 oz / 45–60 ml blanco tequila
  • ¾ oz / 22 ml fresh lime juice
  • 0–¼ oz / 0–7 ml agave or simple syrup, only if needed
  • Salt or Tajín rim
  • Ice

If the drink tastes a little too sharp without triple sec, do not rush to add a lot of syrup. First add a splash more watermelon juice. Then add a small amount of agave only if the fruit still tastes weak or underripe.

Orange liqueur is still useful when you want a more classic citrus-margarita profile. It rounds the edges of the drink and makes the watermelon taste more like a margarita than a tequila watermelon cooler. For a deeper citrus version, the blood orange margarita recipe shows how orange juice, lime, tequila, and orange liqueur work together.

Salt, Tajín, or Chili-Salt Rim

The rim is not just decoration. Watermelon is sweet and watery, so salt or chili-lime seasoning helps the drink taste sharper, colder, and more complete.

This is where the drink can lean classic, playful, or spicy. Salt keeps it crisp, Tajín makes it taste like summer street fruit, and chili-salt gives it a drier savory edge.

Three watermelon margaritas showing a salt rim, a Tajín rim, and a half-rim option.
The rim changes the mood of the drink. Salt keeps the margarita classic and crisp, Tajín adds chili-lime energy, and a half-rim gives guests control over how salty each sip feels.
Rim Flavor When to Use It
Salt Clean, classic, sharp Use for the most classic version.
Tajín or chili-lime seasoning Tangy, lightly spicy, snack-like Use when you want the watermelon to taste brighter and more playful.
Chili-salt Spicy, savory, flexible Good when you want spice without adding jalapeño to the drink.
Half-rim Controlled saltiness Great for guests because they can choose salted or clean sips.
  • Salt is the cleanest choice for a classic watermelon margarita.
  • Tajín is best when you want the drink to taste like cold watermelon with chili and lime.
  • A half-rim works best for guests, because not everyone wants salt in every sip.

How to Rim the Glass

To rim the glass, rub a lime wedge around the outside edge, then dip it into a small plate of salt, Tajín, or chili-salt. Keep most of the seasoning on the outside of the glass; otherwise, the first few sips can taste harsh instead of bright.

Close-up of a cocktail glass being rimmed with lime and seasoning on the outside edge.
Seasoning the outside edge of the glass gives the drink contrast without overwhelming the first sip. It is a small technique, but it makes the rim taste cleaner and more intentional.
Party tip: Use a half-rim. It looks polished, keeps the drink from becoming too salty, and lets each person decide how much rim they want with each sip.

Watermelon Margarita Pitcher for a Crowd

This watermelon margarita recipe also scales easily into a pitcher for a cookout, taco night, pool day, or any moment when shaking one drink at a time gets in the way of hosting.

Keep the ice out of the pitcher until serving. That way, the first round tastes cold and bright, and the second round does not turn thin or watery.

For a small gathering, use the 4-drink batch. For cookouts, parties, or make-ahead hosting, the 8-drink batch is the better starting point.

Pitcher of watermelon margaritas with rimmed glasses, lime wedges, watermelon garnish, and ice in the glasses.
A pitcher is easiest when the base is handled early and the finishing touches happen late. Rim the glasses, add ice, and garnish right before serving so each pour still feels fresh.

Use the pitcher version when guests are coming, the watermelon is already cut, and you want the drinks handled before the food hits the table.

Pitcher Measurements

Watermelon margarita pitcher measurement graphic showing amounts for 4 drinks and 8 drinks, with a note that ice goes in the glasses.
Once the single-drink ratio tastes right, scaling becomes simple. Use the pitcher amounts as a guide, then keep the ice separate so the batch does not slowly dilute.
Ingredient 4 Drinks 8 Drinks
Fresh watermelon juice 2 cups / 480 ml 4 cups / 960 ml
Blanco tequila 6–8 oz / 180–240 ml 12–16 oz / 360–480 ml
Fresh lime juice 3 oz / 90 ml 6 oz / 180 ml
Orange liqueur 2 oz / 60 ml, optional 4 oz / 120 ml, optional
Agave or simple syrup 0–1 oz / 0–30 ml 0–2 oz / 0–60 ml

If you skip the orange liqueur in a pitcher, do not replace it with more tequila automatically. Instead, taste first, then add a little extra watermelon juice for softness or a small splash of agave if the batch tastes too sharp.

How to Mix the Pitcher

  1. Blend and strain enough watermelon juice for the batch.
  2. Stir the watermelon juice, tequila, lime juice, orange liqueur, and optional sweetener in a pitcher.
  3. Then chill the pitcher mixture until ready to serve.
  4. Before serving, stir again because watermelon juice naturally settles.
  5. Rim glasses with salt or Tajín, fill with fresh ice, and pour the margarita over the ice.

Mix the pitcher before guests arrive, but save the ice, rims, and garnishes for the last minute. That small delay keeps the batch fresher and makes each glass feel more intentional.

Make-Ahead and Ice Tips

Comparison of a diluted watermelon margarita pitcher with early ice and a chilled pitcher served with fresh-ice glasses.
Make-ahead watermelon margaritas work when chilling and dilution are treated separately. Chill the mixed batch first; afterward, pour over fresh ice so the pitcher keeps its color and flavor.
Make-ahead limit: You can mix the watermelon juice, tequila, lime, and optional orange liqueur up to 6 hours ahead. Keep it chilled, stir again before serving, and pour over fresh ice.
Pitcher rule: Keep ice out of the pitcher until the last moment. Ice belongs in the glasses, not sitting in the batch for an hour.

Frozen Watermelon Margarita

To turn this watermelon margarita recipe into a frozen version, frozen watermelon cubes are your friend. They make the drink thick, cold, and slushy without watering down the flavor the way too much plain ice can.

Frozen watermelon margarita in a chilled glass with thick slushy texture, lime wedge, and watermelon garnish.
The frozen version should be thick and cold but still drinkable. Frozen watermelon cubes create that slushy texture while keeping the fruit flavor stronger than plain ice would.

Plain ice makes the drink colder, but frozen watermelon makes it colder and more flavorful.

Frozen Watermelon vs Plain Ice

Comparison of a thinner frozen margarita made with plain ice and a thicker frozen watermelon margarita made with frozen fruit.
Plain ice can make a frozen margarita colder, but it also thins the fruit. Frozen watermelon does the better job because it chills the drink while adding more watermelon flavor.

The best frozen version tastes like a watermelon slushie that still knows it is a margarita: cold, thick, lime-bright, and not watered down.

To make one frozen version, freeze diced watermelon for at least 4–6 hours or overnight. Blend about 2 cups frozen watermelon cubes with 1½ to 2 oz blanco tequila, ¾ oz fresh lime juice, ½ oz orange liqueur if using, and a small splash of agave only if needed. Add a tablespoon or two of cold water only if your blender needs help moving.

  • Thin texture? Add more frozen watermelon, not more ice.
  • Overly thick? Add 1 tablespoon cold water or watermelon juice at a time.
  • Weak flavor? Use less added liquid next time and serve immediately after blending.
  • Icy texture? Use more frozen fruit and less plain ice.

For more frozen-fruit cocktail texture help, this frozen strawberry daiquiri recipe shows how frozen fruit builds body without watering down the drink. If you want the same watermelon-lime idea with rum instead of tequila, try this watermelon daiquiri.

Spicy Watermelon Margarita

Watermelon loves heat. Jalapeño, chili, and Tajín or chili-lime seasoning cut through the fruit’s sweetness and make the drink taste brighter, not just hotter. Start small, though, because spice builds quickly in a cold cocktail.

Spicy watermelon margarita heat ladder with four drinks labeled Mild, Medium, Hotter, and Party-safe, using Tajín and jalapeño cues.
Heat is easier to control when you build it in layers. Start with a Tajín rim for gentle spice, then use jalapeño only when you want the drink to move from bright and tangy to noticeably spicy.
  • Mild: Use a Tajín or chili-lime rim only.
  • Medium: Shake with 1 thin jalapeño slice, then strain.
  • Hotter: Shake with 2 slices or use jalapeño syrup.
  • Party-safe: Keep the pitcher mild and let guests add jalapeño or Tajín at the glass.

Start mild, especially for a pitcher. Cold cocktails can hide heat at first, but jalapeño builds as the drink sits.

If you want more creative twists, these watermelon margarita variations include smoky, spicy, coconut, and sparkling directions.

Virgin Watermelon Margarita

A virgin watermelon margarita should still feel like a real drink: bright lime, juicy watermelon, a salty rim, and a little sparkle. The goal is not just watermelon juice in a fancy glass; it should still have contrast.

Virgin watermelon margarita with sparkling bubbles, lime, watermelon garnish, and a seasoned rim.
The alcohol-free version still needs structure. Sparkle gives it lift, lime keeps it sharp, and a salted or Tajín rim helps it feel like a real drink rather than plain watermelon juice.

For one alcohol-free version, combine 4 oz fresh watermelon juice, ¾ oz fresh lime juice, ¼ oz agave if needed, and a pinch of salt. Shake with ice, strain over fresh ice, and top with a splash of sparkling water. Serve with a salt or Tajín rim.

For a deeper alcohol-free version, this margarita mocktail guide explains how to keep lime, sweetness, salt, and bitterness balanced without tequila. For more summer drinks without alcohol, these watermelon mocktails give you mint, coconut, lime, and party-friendly ideas.

How to Serve a Watermelon Margarita in a Watermelon

Serving the drink in a watermelon is more of a party presentation than a different recipe. The safest way to do it is to make the margarita separately, then pour it back into a hollowed watermelon shell right before serving.

Watermelon margarita served in a hollowed watermelon shell with glasses, lime wedges, and a serving ladle nearby.
A watermelon shell is best used as a serving bowl, not the place where you balance the drink. Mix and taste the margarita separately first, then pour it into the shell for a cleaner party presentation.

Treat the watermelon shell like a serving bowl, not a mixing tool. The drink will taste cleaner if you blend, strain, and balance it separately first.

  1. Choose a small stable watermelon or a large watermelon that can sit flat without rolling.
  2. Cut off the top and scoop out the flesh.
  3. Blend and strain the watermelon flesh to make juice.
  4. Mix the margarita in a pitcher using the ratio above.
  5. Pour the chilled drink back into the watermelon shell just before serving.
  6. Finally, add ice only at serving time so it does not become watery.

If the watermelon shell feels unstable, skip the risk and use a pitcher. A good cold pitcher tastes better than a dramatic container that is hard to pour from.

How to Fix a Watermelon Margarita

Watermelon margaritas are easy to fix once you know what went wrong. Most problems come from weak fruit, too much melted ice, not enough lime, or too much sweetener. Use the recipe as a starting point, then make one small adjustment at a time.

Troubleshooting guide showing watery, too sweet, too tart, and flat watermelon margaritas leading to a balanced final drink.
Most watermelon margarita problems can be fixed with one small move. Add lime or salt for dull sweetness, more watermelon for sharpness, and fresh ice when dilution is the real issue.
Problem Why It Happened How to Fix It
Watery The watermelon was weak, the drink sat on ice, or the pitcher was iced too early. Use fresh ice in glasses, keep ice out of the pitcher, and add a little more lime and tequila to sharpen the batch.
Overly sweet The watermelon was very sweet or too much syrup was added. Add fresh lime juice and use a salt or Tajín rim.
Very tart The lime was strong or the watermelon was not sweet enough. Add more watermelon juice first, then a small splash of agave if needed.
Alcohol-heavy The tequila ratio is high for your taste. Add more watermelon juice or a splash of cold sparkling water.
Weak flavor The drink has weak fruit, too much melted ice, or not enough contrast. Add a squeeze of lime, a pinch of salt, or a small splash of tequila depending on whether it tastes flat, dull, or diluted.
Pulpy The watermelon juice was not strained. Strain the juice through a fine-mesh strainer before shaking or batching.
Flat flavor The drink needs contrast. Add lime, a pinch of salt, or a better rim before adding more syrup.

Watermelon Margarita Recipe Card

Recipe card for a fresh watermelon margarita showing one drink, 10 minutes, watermelon juice, tequila, lime, and optional orange liqueur.
This saveable recipe card keeps the core formula easy to repeat. Once the base ratio is familiar, you can adjust the style, make another glass, or scale the drink into a pitcher.

Fresh Watermelon Margarita Recipe on the Rocks

This watermelon margarita recipe is made with fresh watermelon juice, blanco tequila, lime, and a salt or Tajín rim. Serve it on the rocks when you want the cleanest fruit flavor, or scale the same ratio into a pitcher for a small crowd.

Yield1 drink
Prep Time10 minutes
Cook Time0 minutes
Total Time10 minutes

Equipment

  • Blender
  • Fine-mesh strainer, optional but recommended
  • Cocktail shaker or mason jar with lid
  • Jigger or measuring cup
  • Rocks glass or double old fashioned glass
  • Small plate for salt or Tajín rim

Ingredients

  • 1 to 1½ cups diced ripe watermelon, about 150–225 g, or enough to measure 4 oz / 120 ml juice after blending and straining
  • 1½–2 oz / 45–60 ml blanco tequila
  • ¾ oz / 22 ml fresh lime juice
  • ½ oz / 15 ml orange liqueur, optional
  • 0–¼ oz / 0–7 ml agave or simple syrup, only if needed
  • Ice
  • Salt, Tajín, or chili-lime seasoning, for the rim
  • Lime wedge and small watermelon wedge, for garnish

Instructions

  1. Blend the diced watermelon until smooth. Strain through a fine-mesh strainer if you want a smoother drink, then measure 4 oz / 120 ml watermelon juice.
  2. Rub a lime wedge around the rim of a rocks glass. Dip the rim into salt, Tajín, or chili-lime seasoning. Fill the glass with fresh ice.
  3. Add watermelon juice, tequila, lime juice, optional orange liqueur, and optional agave to a cocktail shaker with ice.
  4. Shake for 15–20 seconds, until cold.
  5. Strain over fresh ice in the prepared glass.
  6. Garnish with lime and watermelon. Taste and adjust with more lime, watermelon juice, or a tiny splash of agave if needed.

Notes

  • Use 1½ oz tequila for an easier, fruitier drink or 2 oz for a stronger classic margarita.
  • Skip the orange liqueur for a cleaner watermelon margarita without triple sec.
  • Add sweetener only if the watermelon is bland or underripe.
  • For a pitcher, mix the drink up to 6 hours ahead, keep it chilled, stir before serving, and add ice only to the glasses.
  • For a frozen version, use frozen watermelon cubes instead of lots of plain ice.

What to Serve with Watermelon Margaritas

Serve these cold and close to the moment they are made. The drink is especially good with salty snacks, grilled food, tacos, spicy paneer, corn, shrimp, or anything with lime and chili. For a party, keep the pitcher cold, rim the glasses late, and let guests choose salt, Tajín, or a clean rim.

Watermelon margaritas served with tacos, grilled corn, chips, lime wedges, and spicy snacks.
Watermelon margaritas fit naturally with salty, spicy, and grilled foods because lime and salt connect the drink to the plate. Tacos, corn, chips, and chili-lime snacks all make sense here.

FAQs

What is the best tequila for a watermelon margarita?

Blanco or silver tequila is the easiest default because it tastes clean and crisp. It lets the watermelon, lime, and rim stay bright instead of covering the fruit with heavy oak or caramel notes. That is why this watermelon margarita recipe uses blanco tequila as the default.

Does a watermelon margarita need triple sec?

Triple sec is optional. Add ½ oz orange liqueur when you want a rounder, more classic margarita flavor; skip it when the watermelon is ripe and you want a cleaner, fresher tequila-watermelon drink.

Fresh watermelon or bottled watermelon juice: which is better?

Fresh watermelon gives the brightest flavor and color. Bottled watermelon juice is fine for a shortcut, especially when watermelon is out of season, but choose an unsweetened or lightly sweetened one and taste it before adding syrup. Still, the freshest version of this watermelon margarita recipe comes from blending ripe watermelon and measuring the juice after straining.

Should watermelon juice be strained for margaritas?

Straining gives the smoothest drink and is especially useful for pitchers because watermelon pulp settles as the batch sits. Leaving it unstrained is fine for one casual drink when you like a fresh-fruit texture, but strained juice gives the cleanest on-the-rocks margarita.

How do you make a watermelon margarita less watery?

Use ripe watermelon, measure the juice after blending, shake the drink with ice, then strain it over fresh ice. For pitchers, keep ice out of the batch until serving. Melted ice is the fastest way to turn a fresh watermelon margarita watery.

How far ahead can you make watermelon margaritas?

Mix the watermelon juice, tequila, lime, and optional orange liqueur up to 6 hours ahead. Keep the batch chilled, stir again before serving because watermelon juice settles, and pour over fresh ice.

What rim tastes best with watermelon margaritas?

Salt is the classic choice, Tajín or chili-lime seasoning is the most watermelon-friendly choice, and chili-salt is best if you want a savory spicy edge. A half-rim is ideal for guests because it gives control over each sip.

How do you make a spicy watermelon margarita?

Keep the drink itself clean for mild heat by using a Tajín or chili-lime rim. Medium heat comes from shaking the drink with one thin jalapeño slice. In a pitcher, jalapeño syrup is more predictable than loose pepper slices because the heat spreads evenly.

How do you make a frozen watermelon margarita?

Freeze diced watermelon for 4–6 hours or overnight, then blend the frozen cubes with tequila, lime, optional orange liqueur, and a small amount of sweetener if needed. Use frozen watermelon for body instead of adding lots of ice.

What goes well with watermelon margaritas?

Watermelon margaritas work well with salty, spicy, and grilled food: chips and salsa, tacos, grilled corn, shrimp, paneer tikka, spicy potatoes, or anything with lime and chili. If the mint garnish is your favorite part, this mojito recipe makes mint the main character instead of just a finishing note.

Posted on Leave a comment

Mezcal Mule Recipe

Mezcal mule recipe in a copper mug with ice and lime garnish on a dark background.

A mezcal mule recipe gives you the cold ginger-and-lime snap of a classic Moscow Mule, but with a smokier, more characterful base than vodka can bring. It is one of the easiest ways to make mezcal feel bright, refreshing, and immediately worth pouring again.

Online, “mezcal mule” can point to two different drinks: a simple mezcal, lime, and ginger beer highball, or a more cocktail-bar riff built with extras like cucumber, passion fruit, agave, or chile. This post starts with the cleaner home version, then shows the dressed-up riff later so the main drink stays clear from the start.

Quick Answer: What Is a Mezcal Mule?

A mezcal mule is a mule made with mezcal instead of vodka. It drinks smoky up front, lime-bright through the middle, and finishes with a cold ginger bite.

The best first glass for most readers is 2 ounces mezcal (60 ml), 3/4 ounce fresh lime juice (22 ml), and 4 ounces chilled ginger beer (120 ml) over plenty of ice. That build keeps the drink crisp, smoky, and clearly mule-like without losing the mezcal itself.

If you already enjoy a Moscow mule, an Irish Mule, or a Kentucky Mule, this is an easy next step because the format stays familiar even though the flavor turns darker and smokier.

How to Make a Mezcal Mule

This is the page’s standard build: bright enough to stay crisp, smoky enough to taste like mezcal, and structured enough to still feel like a proper mule.

Yield: 1 drink
Prep time: 5 minutes
Total time: 5 minutes
Glassware: lined copper mug or tall glass
Flavor profile: smoky, lime-bright, crisp, gingery

Best ingredients for the first glass: start with a balanced espadín mezcal, a crisp ginger beer with some bite, and the full 3/4 ounce of lime if your ginger beer runs sweet.

Ingredients

  • 2 ounces mezcal (60 ml)
  • 3/4 ounce fresh lime juice (22 ml)
  • 4 ounces chilled ginger beer (120 ml)
  • Ice
  • 1 lime wedge or lime wheel, for garnish
  • Optional mint sprig, for garnish

Note: Choose a ginger beer with some spice and bite rather than a very sweet one. Sweeter bottles usually need the full lime measure to stay sharp.

Method

  1. Fill a lined copper mug or tall glass with plenty of ice.
  2. Add the mezcal and fresh lime juice.
  3. Top with the chilled ginger beer.
  4. Stir gently just enough to combine.
  5. Garnish with a lime wedge or wheel. Add mint if you want a fresher aromatic finish.
How to make a mezcal mule in five steps with ice, mezcal, fresh lime juice, chilled ginger beer, and lime garnish.
Build a mezcal mule directly over ice: add mezcal and fresh lime, top with chilled ginger beer, stir gently, and finish with lime so the drink stays cold, crisp, and fizzy.

Notes

  • This is the page’s standard mezcal mule build.
  • If your mezcal is especially assertive, or you want a softer first glass, reduce the lime to 1/2 ounce (15 ml) and use 4 to 5 ounces ginger beer (120 to 150 ml).
  • If your ginger beer runs sweet, keep the full 3/4 ounce lime (22 ml) for balance.

Make-Ahead

Mix the mezcal and lime ahead if needed, then add the ginger beer only right before serving so the drink stays fizzy and lively.

Finished mezcal mule recipe in a clear tall glass with ice, lime garnish, mint, and a crisp dark editorial presentation.
A properly made mezcal mule should look cold, crisp, and bright, with plenty of ice, a clear lime garnish, and enough lift to feel refreshing rather than heavy.

Mezcal Mule Ratio Guide

A mezcal mule recipe looks simple on paper, but small ratio changes move the drink fast. More ginger beer softens it, more lime sharpens it, and a smokier mezcal can make the same build feel much bolder.

If you already know you prefer the softer, sweeter lift of ginger ale rather than the spicier structure that ginger beer gives a mule, you may actually prefer a Whiskey Ginger-style drink instead.

StyleMezcalLimeGinger BeerBest for
Balanced2 ounces (60 ml)3/4 ounce (22 ml)4 ounces (120 ml)Best first glass
Softer2 ounces (60 ml)1/2 ounce (15 ml)4 to 5 ounces (120 to 150 ml)Easier, rounder drink
Stronger2 ounces (60 ml)3/4 ounce (22 ml)3 1/2 to 4 ounces (105 to 120 ml)Drier, more spirit-forward
Mezcal mule ratio guide showing balanced, softer, and stronger drink ratios with mezcal, lime juice, and ginger beer measurements.
Use this mezcal mule ratio guide to choose your best starting point: balanced for the classic first glass, softer for a rounder easier drink, or stronger for a drier more spirit-forward build.

Best Balanced Mezcal Mule Ratio

Start here: 2 ounces mezcal (60 ml) + 3/4 ounce lime juice (22 ml) + 4 ounces ginger beer (120 ml)

This is the most dependable version because the fuller lime measure keeps the finish brighter, especially when the ginger beer runs sweet.

Softer Mezcal Mule Ratio

Use this for an easier first glass: 2 ounces mezcal (60 ml) + 1/2 ounce lime juice (15 ml) + 4 to 5 ounces ginger beer (120 to 150 ml)

This version is rounder and easier, so it works well if you are new to mezcal or using a bottle with more obvious smoke.

Stronger Mezcal Mule Ratio

Use this for a drier, more spirit-forward drink: 2 ounces mezcal (60 ml) + 3/4 ounce lime juice (22 ml) + 3 1/2 to 4 ounces ginger beer (105 to 120 ml)

With slightly less ginger beer, the mezcal shows up more clearly and the finish lands sharper.

How to Fix a Mezcal Mule That Tastes Too Sweet, Too Sharp, Too Smoky, or Too Soft

Too much sweetness usually means the drink needs more lime or a slightly smaller pour of ginger beer. Too much sharpness points to extra lime or not enough mixer. Heavy smoke is easiest to fix with a gentler mezcal or the softer ratio. Once the drink feels soft and muted, cut the ginger beer back so the mezcal and lime show up again.

Why This Mezcal Mule Recipe Works

This drink works because nothing in it is wasted: mezcal brings the smoke, lime keeps the finish sharp, and ginger beer supplies the snap that makes the whole thing feel like a mule instead of a generic highball.

Mezcal Brings Smoke Without Making the Drink Heavy

Mezcal changes the whole tone of the drink on its own. You do not need syrups, liqueurs, or multiple juices to make it interesting. The smoke is already built in.

Lime Keeps the Finish Bright and Crisp

Fresh lime stops the drink from tasting muddy or overly sweet. At the same time, it lifts the ginger and makes the mezcal feel fresher rather than heavier.

Ginger Beer Gives the Mezcal Mule Its Structure

Without the ginger component, this stops feeling like a mule very quickly. Ginger beer gives the drink spice, fizz, and the cold snap that holds the whole build together.

The Short Build Makes It Easy to Adjust

Because the ingredient list is short, every tweak is noticeable. Once the first glass is in front of you, it becomes much easier to steer the next one where you want it to go.

Best Mezcal for a Mule

There is no need to use your most complex sipping mezcal here. In a mezcal mule, the better choice is a cocktail-friendly bottle with enough smoke to show up through lime and ginger beer without turning the drink blunt.

Best mezcal for a mule guide showing rounded espadín as the best starting choice, what to avoid, and how to adjust if using smokier mezcal.
A rounded espadín-style mezcal is the easiest place to start for a mezcal mule. Use a cocktail-friendly bottle with enough smoke to show through, but avoid overly aggressive or delicate sipping mezcals.

Best Mezcal for a Mule: Start With Espadín

A rounded espadín-style mezcal is the easiest place to start. It usually brings enough smoke to make the drink feel clearly like a mezcal mule without overwhelming the rest of the glass.

If you want more background before choosing a bottle, a simple guide to mezcal and agave types helps explain why espadín is such a common starting point.

What to Avoid in a Mezcal Mule

Very aggressive smoke can flatten the contrast that makes this drink refreshing. Very delicate sipping bottles can feel wasted in a long fizzy cocktail. For this drink, a balanced mixer-friendly mezcal makes more sense than an especially precious one.

When a Smokier Mezcal Works Better

A smokier mezcal works best when you also use a punchier ginger beer and a slightly brighter lime balance. Otherwise, the drink can start to feel dense rather than lively.

Ginger Beer vs Ginger Ale in a Mezcal Mule

This choice changes the drink more than the garnish and more than the mug.

Ginger beer vs ginger ale comparison for a mezcal mule, showing ginger beer as spicier and more mule-like while ginger ale is softer and sweeter.
Ginger beer gives a mezcal mule its sharper, spicier mule identity, while ginger ale makes the drink softer and sweeter. Start with ginger beer if you want the cleanest mezcal mule profile.

Why Ginger Beer Is Better in a Mezcal Mule

If you want the clearest mule identity, start with ginger beer. It is spicier, more assertive, and more structurally right for the drink, so the mezcal has something vivid to play against.

What Kind of Ginger Beer Works Best?

A drier, crisper ginger beer usually works better than a very sweet one. You want enough bite to stand up to the mezcal, not a soda-like finish that turns the drink soft.

When Ginger Ale Works in a Mezcal Mule

Ginger ale can work when you want a gentler, sweeter, easier drink. The result usually feels less sharp and less recognizably mule-like, so it is better treated as a softer variation than the default build.

Should You Start With Ginger Beer or Ginger Ale?

For a true mezcal mule profile, start with ginger beer. Ginger ale makes a softer, sweeter drink and moves the glass closer to a mezcal ginger highball than a classic mule.

Tips for Making a Better Mezcal Mule

The basic method is easy, but a few small technique moves improve the drink noticeably.

Use Plenty of Ice

A mezcal mule should hit cold and sharp from the first sip, not halfway through the glass. Fill the mug or glass generously so the drink stays brisk instead of turning watery too quickly.

Add Ginger Beer Last

Add the ginger beer after the mezcal and lime so you keep more fizz in the finished drink.

Stir Gently, Not Aggressively

A quick gentle stir is enough. Over-stirring knocks out carbonation and makes the drink feel flatter than it should.

Use Lime as a Flavor Cue, Not Just a Garnish

A lime wedge or wheel is not just decorative. It reinforces the brightness the drink needs on the nose and on the palate.

Mezcal Mule vs Moscow Mule vs Mexican Mule

These drinks live in the same family, but they do not point in the same flavor direction.

Mezcal Mule vs Moscow Mule vs Mexican Mule comparison showing base spirits, flavor differences, and which mule drink to choose.
A mezcal mule is the smoky agave option, a Moscow mule is the clean vodka classic, and a Mexican mule usually means tequila. Use this comparison to choose the mule that matches the flavor you want.
DrinkBase spiritFlavor directionBest for
Mezcal MuleMezcalSmoky, deeper, bolderReaders who want more character
Moscow MuleVodkaClean, neutral, crispThe most classic mule profile
Mexican MuleTequilaBrighter agave, less smokeReaders who want tequila over smoke

Mezcal Mule vs Moscow Mule

A Moscow mule uses vodka, so it feels cleaner, more neutral, and more about the ginger-lime frame. A mezcal mule uses mezcal, so it lands smokier, deeper, and more distinctive.

Mezcal Mule vs Mexican Mule

In most recipe contexts, a Mexican Mule means the tequila version, not the mezcal one. A Moscow mule uses vodka, a Mexican mule uses tequila, and a mezcal mule uses mezcal. That naming is worth keeping clear because the flavor direction changes with the spirit.

Which Mule Should You Make?

For the cleanest, most neutral version, go with a Moscow mule. A Mexican mule brings a brighter agave note because tequila leads the drink. For more smoke and depth, the mezcal mule is the strongest of the three.

If bourbon sounds better than smoky agave, the warmer, rounder direction is closer to a Kentucky Mule. If grapefruit sounds better than ginger, the next agave drink to try is a Paloma.

Cocktail-Bar Mezcal Mule Riff

This is a riff, not the best first mezcal mule recipe for most readers. Use it when you want the cucumber-and-passion-fruit branch of the drink, not the cleanest smoky mule.

Cocktail-bar mezcal mule riff with cucumber, passion fruit, lime, ice, and a pale golden drink in a clear glass.
This cocktail-bar mezcal mule riff keeps the ginger, lime, and mezcal core but adds cucumber and passion fruit for a more polished, layered version of the drink.

What Makes This Riff Different?

Rather than keeping the build minimal, this version adds texture and layered flavor. It tastes more polished, more detailed, and a little less casual than the base drink above.

Typical Add-Ins: Cucumber, Agave, Passion Fruit, and Chile

This branch can bring in muddled cucumber, a small amount of agave, passion fruit, candied ginger, or a chile accent. The goal is not to bury the mule format, but to dress it up without losing the smoke, lime, and ginger core.

Easy Cocktail-Bar Mezcal Mule Build

Try 2 ounces mezcal (60 ml), 1/2 ounce lime juice (15 ml), 1/4 ounce agave (7 ml), 1/2 ounce passion fruit (15 ml), 3 ounces ginger beer (90 ml), and 2 to 3 cucumber slices. It should still taste like a mule, just with a more dressed-up cocktail-bar edge.

Shake the mezcal, lime, agave, passion fruit, and cucumber briefly with ice, strain over fresh ice, then top with the ginger beer and stir gently.

Easy Mezcal Mule Variations

Once you know the base build, it is easy to move the drink in a few different directions without losing the mule identity.

Easy mezcal mule variations guide showing spicy, pineapple, mint or basil, and softer party-friendly versions with simple flavor adjustments.
Once the base mezcal mule is balanced, small additions can move it in different directions. Use jalapeño or Tajín for heat, pineapple for a rounder tropical note, mint or basil for freshness, or a gentler mezcal and extra ginger beer for an easier party-friendly version.

Spicy Mezcal Mule

Add 1 thin jalapeño slice to the mug or use a Tajín-style rim if you want more heat and a sharper edge. Keep it restrained so the spice supports the ginger instead of taking over.

Pineapple Mezcal Mule

Add 1/2 to 1 ounce pineapple juice (15 to 30 ml) when you want the drink to feel rounder and a little more tropical, then reduce the ginger beer slightly so the finish does not lose its edge.

Mint or Basil Mezcal Mule

Add a mint sprig for a cooler finish, or lightly clap 1 small basil sprig for a greener, slightly more savory aromatic edge.

Softer Party-Friendly Mezcal Mule

Use the softer mezcal mule ratio with a gentler mezcal and 5 ounces of ginger beer. It will not be the boldest build, but it is often the easiest version for a group to like immediately.

If you like the smoky-fruit direction more than the ginger direction, a citrus-forward agave drink like a Blood Orange Margarita is a better next build.

How to Make Mezcal Mules for a Crowd

Once the standard mezcal mule recipe is fixed, the crowd version becomes straightforward: scale the same ratio, chill the mezcal-and-lime base, and add the ginger beer only at serving time.

How to batch mezcal mules for a crowd, showing scaled amounts for 4 and 8 drinks plus prep-ahead and serving tips.
Batch the mezcal and lime ahead, but add the ginger beer only right before serving. That keeps mezcal mules cold, fizzy, and fresh for a crowd.

Mezcal Mule for 4

  • 8 ounces mezcal (240 ml)
  • 3 ounces fresh lime juice (90 ml)
  • 16 ounces chilled ginger beer (480 ml)
  • Ice
  • Lime wedges or wheels, for garnish

Mix the mezcal and lime juice, chill well, then divide over ice-filled mugs or glasses. Top the four drinks with the ginger beer right before serving.

Mezcal Mule for 8

  • 16 ounces mezcal (480 ml)
  • 6 ounces fresh lime juice (180 ml)
  • 32 ounces chilled ginger beer (960 ml)
  • Ice
  • Lime wedges or wheels, for garnish

Mix the mezcal and lime juice, chill well, then divide over ice-filled mugs or glasses. Top the eight drinks with the ginger beer right before serving.

Best Party Setup

Keep the mezcal-and-lime base chilled in a pitcher, keep the ginger beer cold separately, and build each drink over fresh ice. Do not mix the ginger beer into the full batch ahead of time or the drinks will lose their lift.

Troubleshooting

This is a simple cocktail, so balance problems are easy to notice and fix.

How to fix a mezcal mule that tastes too sweet, too sharp, too smoky, or too flat, with quick adjustment tips for lime, ginger beer, mezcal, ice, and stirring.
A mezcal mule is easy to adjust once you know what went wrong. Add lime or reduce ginger beer for sweetness, soften sharpness with more mixer, use gentler mezcal for heavy smoke, and keep the drink cold and fizzy to avoid a flat finish.

Why Does My Mezcal Mule Taste Too Sweet?

Your ginger beer is usually the main reason. Try a drier bottle, use a little more lime, or reduce the pour slightly.

Why Does It Taste Too Sharp?

Too much lime or too little ginger beer can make the drink feel pointed. Pull the lime back slightly or soften the build with a fuller ginger beer pour.

Why Does It Taste Too Smoky?

Your mezcal may be more assertive than the ratio wants. Switch to a gentler bottle, add a little more ginger beer, or move to the softer ratio.

Why Does It Taste Flat?

Flat ginger beer, too little ice, or too much stirring can all do that. Start colder, stir less, and use a freshly opened bottle or can of ginger beer.

Mezcal Mule Recipe FAQs

What Is in a Mezcal Mule?

A mezcal mule usually includes mezcal, fresh lime juice, ginger beer, and ice, with lime as the standard garnish.

Is a Mezcal Mule the Same as a Mexican Mule?

No. In most recipe contexts, a Mexican mule is tequila-based, while a mezcal mule uses mezcal and tastes smokier.

Can I Make This Mezcal Mule Recipe With Ginger Ale?

Yes, but it will taste softer and sweeter than the ginger beer version. It works best when you want an easier, less spicy drink rather than the clearest mule profile.

What Mezcal Is Best for a Mule?

A balanced espadín-style mezcal is the best place to start because it gives the drink smoke without overwhelming the ginger and lime.

Is a Mezcal Mule Smoky?

Yes, although how smoky it tastes depends on the bottle you use and how much ginger beer and lime are in the build.

Can I Serve a Mezcal Mule in a Copper Mug?

Yes. A lined copper mug is traditional, while a tall glass works just as well.

Can I Make a Mezcal Mule Ahead of Time?

You can mix the mezcal and lime ahead of time, but add the ginger beer only right before serving so the drink stays fizzy.

What Garnish Goes Best With a Mezcal Mule?

A lime wedge or wheel is the best first garnish because it reinforces the brightness the drink needs. Mint works well too if you want a fresher aromatic finish.

Final Take

This mezcal mule recipe earns its place because it gives you real mezcal character without asking for a complicated build. Start with 2 ounces mezcal (60 ml), 3/4 ounce fresh lime juice (22 ml), and 4 ounces chilled ginger beer (120 ml), keep the ginger beer cold, and adjust from there based on how smoky your mezcal is and how sharp you want the finish.

Once the balance clicks, it becomes one of the easiest smoky cocktails to make well at home: bright, cold, gingery, and distinctive enough to feel worth making again.

↑ Back to top