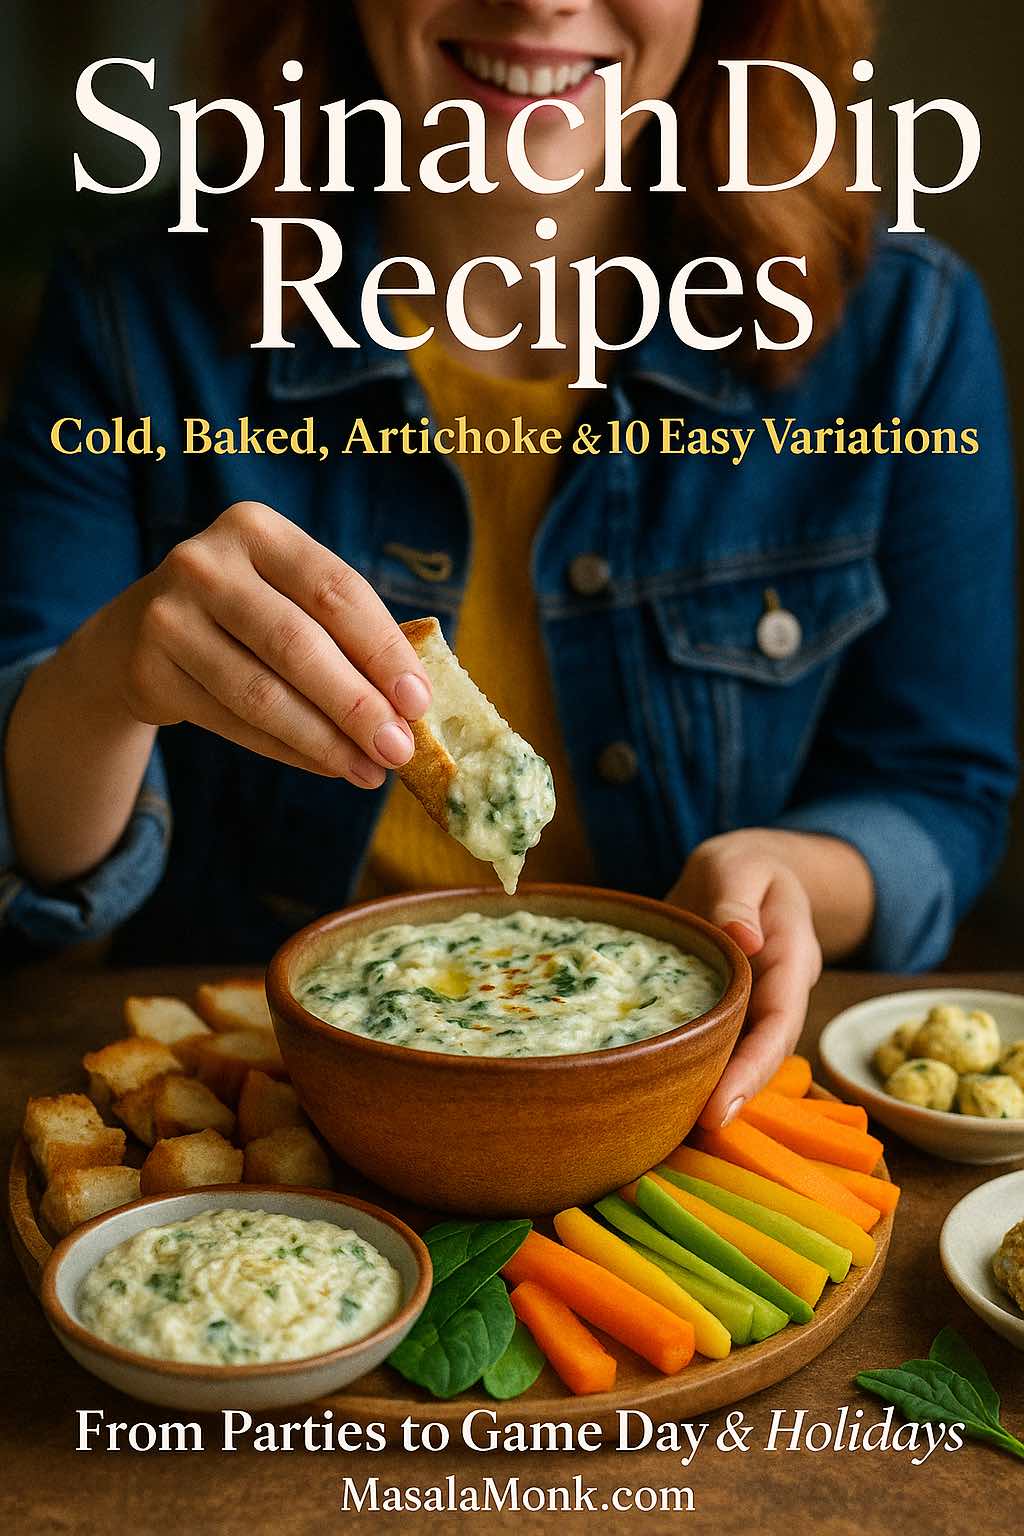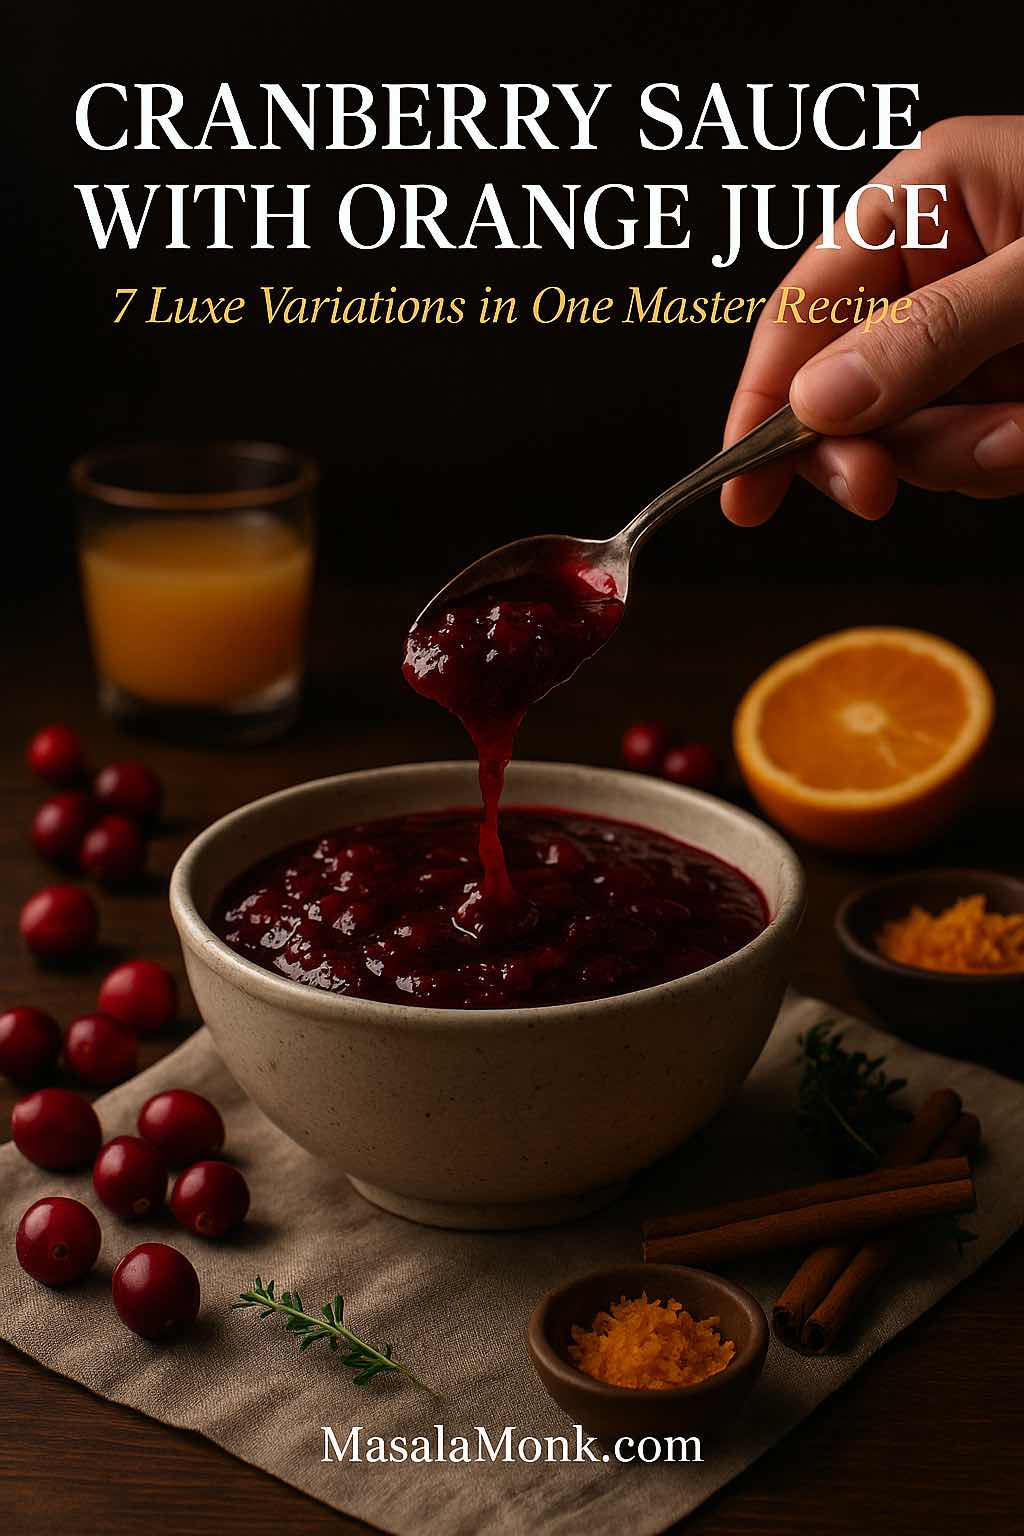
Cranberry sauce is one of those dishes that looks fancy, but once you strip it down, it’s just cranberries, sugar, and liquid. Swap in orange juice for plain water and you suddenly have a bright, zesty homemade cranberry sauce with orange juice that tastes like pure holiday cheer.
This post is built around that idea: one reliable recipe for cranberry sauce with orange juice, plus a whole family of twists you can spin from the same pot. You’ll find:
- A classic, easy cranberry sauce with orange juice that feels familiar and comforting
- A brown-butter and vanilla twist that turns into a cosy gourmet cranberry sauce recipe
- Naturally sweetened maple or honey versions
- Low sugar, sugar-free and keto-style options
- A boozy orange liqueur or whiskey version
- A fresh, no-cook cranberry orange relish
- A tangy apple cranberry chutney that leans savoury
Along the way, we’ll talk about texture and cooking science, how to make your cranberry and orange juice sauce in the slow cooker, how far ahead you can prep for cranberry sauce Thanksgiving dinners, and plenty of ideas for using leftovers so nothing quietly dies in the back of the fridge.
If you’d like to get deeper into what cranberries do for your body—antioxidants, vitamin C, and more—you can follow up later with this cranberry nutrition and benefits breakdown.
Easy Homemade Cranberry Sauce with Orange Juice
Let’s start with the base. This is a simple cranberry sauce recipe with orange juice that you can make on autopilot once you’ve done it once or twice. It works whether you’re cooking for a small dinner or a full Thanksgiving crowd.
Ingredients for the Classic Version
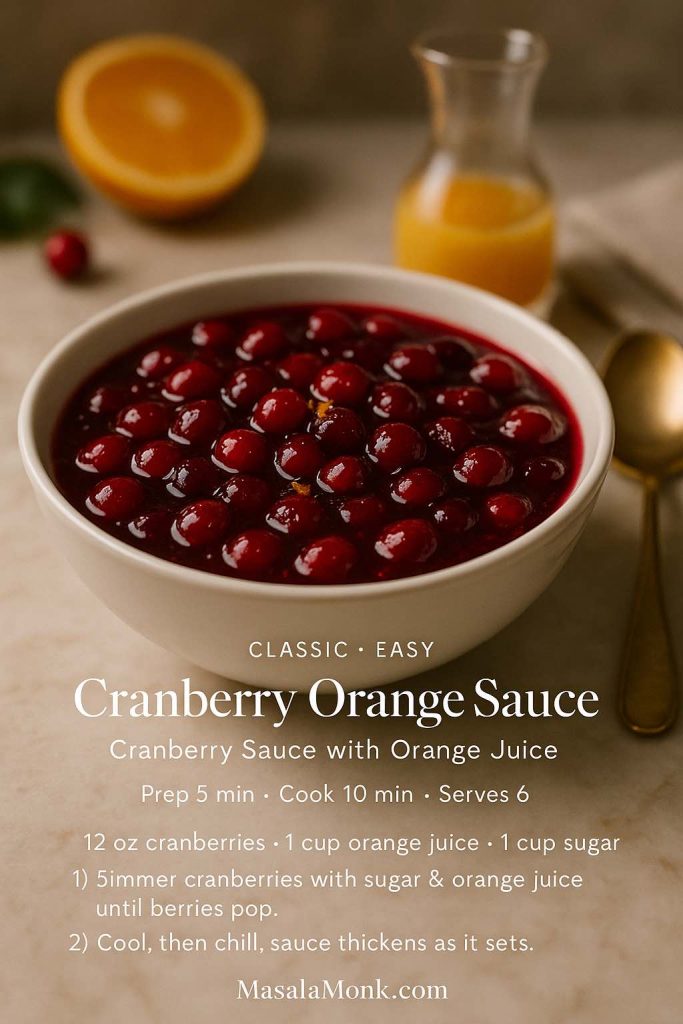
- 12 oz (340 g) fresh or frozen cranberries, rinsed and picked over
- 1 cup (200 g) granulated sugar
- 1 cup (240 ml) orange juice (freshly squeezed if possible)
- 1–2 teaspoons finely grated orange zest
- Pinch of fine salt
- 2–3 tablespoons water, if needed
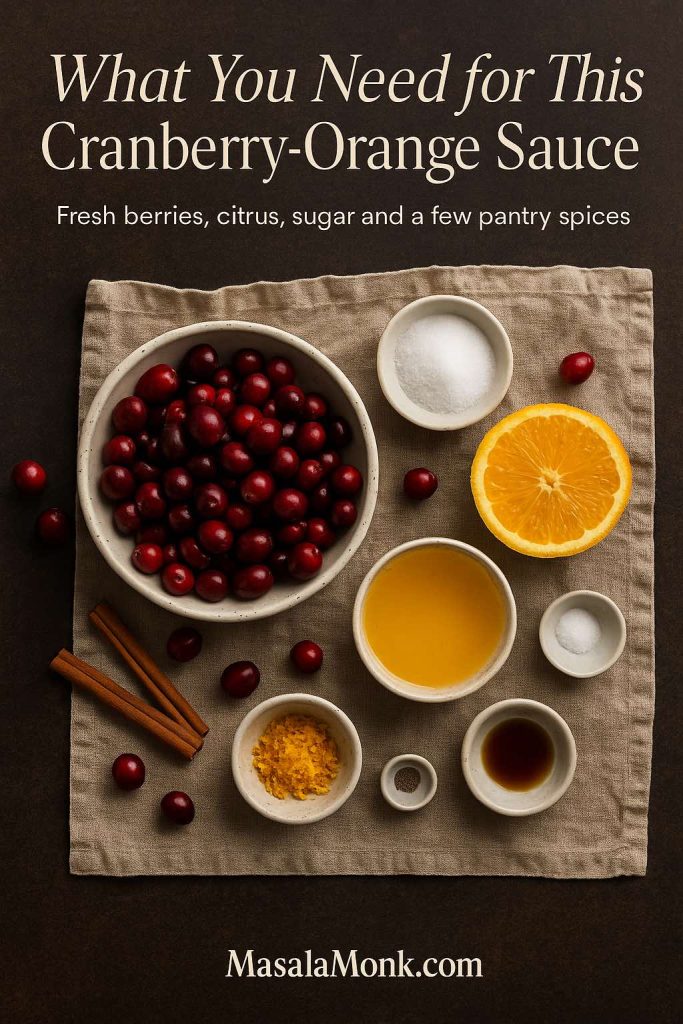
Optional flavour boosters:
- 1 teaspoon vanilla extract
- 1 small cinnamon stick or ¼ teaspoon ground cinnamon
This is a fairly classic recipe cranberry sauce formula; the twist is that orange juice replaces water, bringing sweetness and citrusy perfume. It’s in the same family as well-loved minimalist recipes such as Bon Appétit’s easiest cranberry sauce, but the orange plays a bigger role here.
How to Cook Cranberry Sauce with Orange Juice (Step-by-Step)
- Set up the base.
Tip the cranberries into a medium saucepan. Add sugar, orange juice, orange zest, salt, and the cinnamon stick if you’re using one. Give everything a stir so the cranberries are coated. - Dissolve the sugar gently.
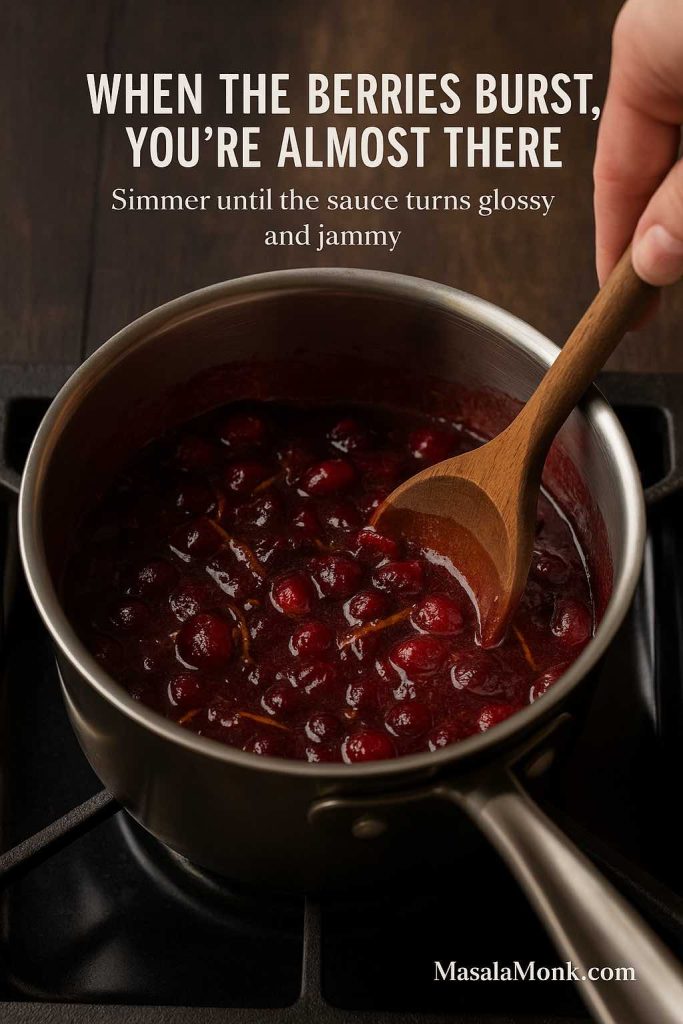
Place the pan over medium heat. Stir every minute or so until the sugar dissolves and the liquid turns glossy. This usually takes 3–5 minutes. If things look very thick and the berries aren’t relaxing into the liquid, add a couple of tablespoons of water. - Bring it to a gentle boil.
Increase the heat slightly until the surface starts to bubble. You don’t want a wild, splattering boil—just a steady simmer that lets the cranberries soften. - Simmer until the berries burst.
Cook for 8–10 minutes, stirring occasionally. You’ll hear and see the cranberries pop. The sauce will start to thicken and look jammy. When you’re making cranberry sauce, the most important thing to remember is that it continues to thicken as it cools, so don’t wait for it to look like jelly in the pan. - Finish with flavour.
Take the pan off the heat. Pull out the cinnamon stick, if you added it. Stir in the vanilla extract. Taste carefully (it will be very hot) and decide whether you want more sugar for sweetness or a squeeze of extra orange juice for a sharper finish. - Cool and chill.
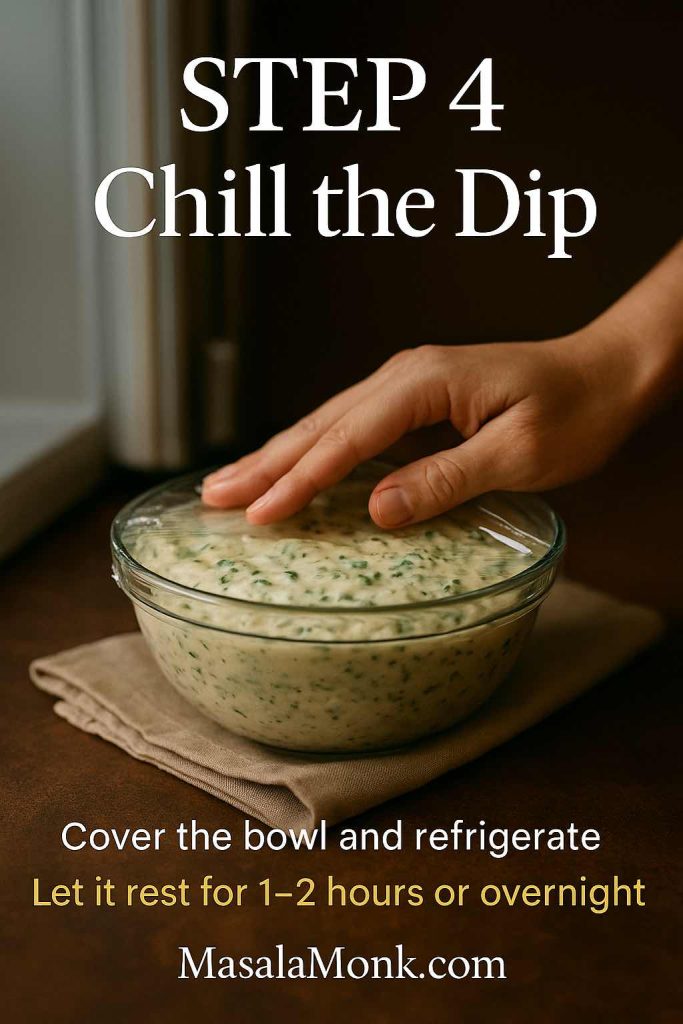
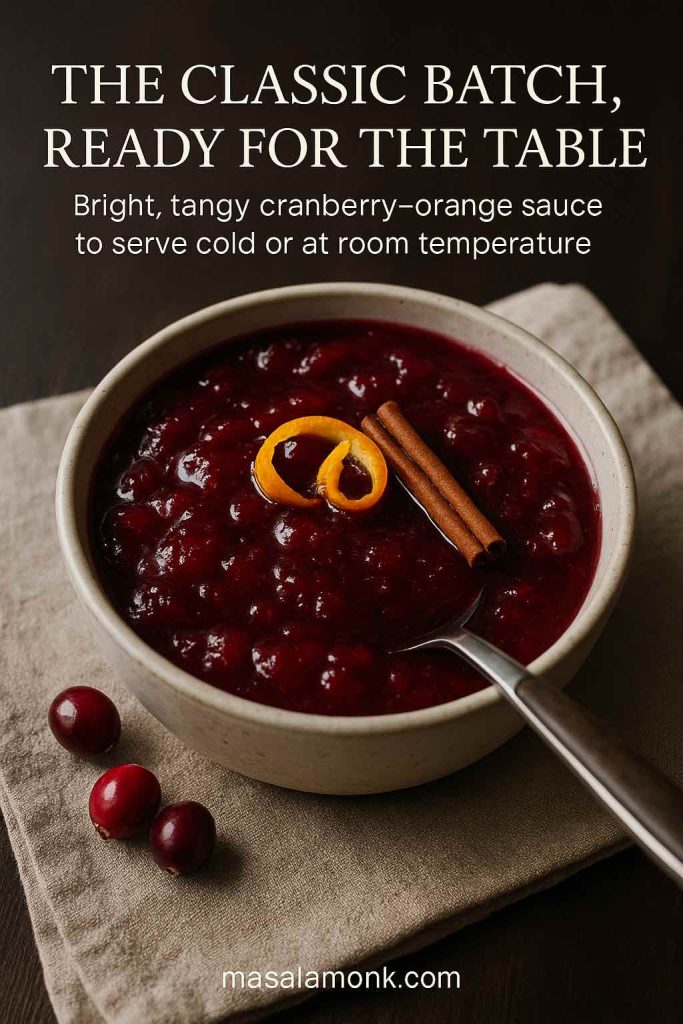
Let the homemade cranberry sauce cool to room temperature in the pan. It will look looser at this stage. Once it’s no longer steaming, transfer it to a glass or ceramic container and refrigerate for at least 2 hours, preferably overnight. Cold time is when the texture settles into that glossy, spoonable consistency everyone expects.
If you just want a basic cranberry sauce, you can skip the vanilla and cinnamon and stick to cranberries, sugar, and orange juice.
What This Classic Cranberry Sauce Tastes Like
This base cranberry sauce made with orange juice is bright and tangy, but not painfully sharp. The sugar balances the natural acidity of cranberries, while orange juice and zest add sweet citrus flavour and a gentle bitterness from the peel. Cinnamon and vanilla stay in the background; they shouldn’t make it taste like a full-on dessert, just a little warmer and more rounded.
Serve it straight from the fridge as a cranberry side dish next to turkey, chicken, duck, nut roasts, or even a rich main like macaroni and cheese. A spoonful on the plate does a lot of work cutting through fat and salt.
Understanding Cranberries: Fresh, Frozen & Dried
Before we layer on variations, it helps to know what’s happening in the pot.
Fresh vs Frozen Cranberries
For this cranberry sauce recipe fresh cranberries are ideal when they’re in season (usually October through December). They’re firm, shiny, and snap when you bite one. If you’re using frozen cranberries, there’s no need to thaw. Add them straight to the pan; you may need an extra minute or two of simmering.
Frozen berries are picked at peak ripeness and frozen quickly, so they behave very similarly to fresh. If anything, they sometimes release water more readily, which can help the sauce set nicely.
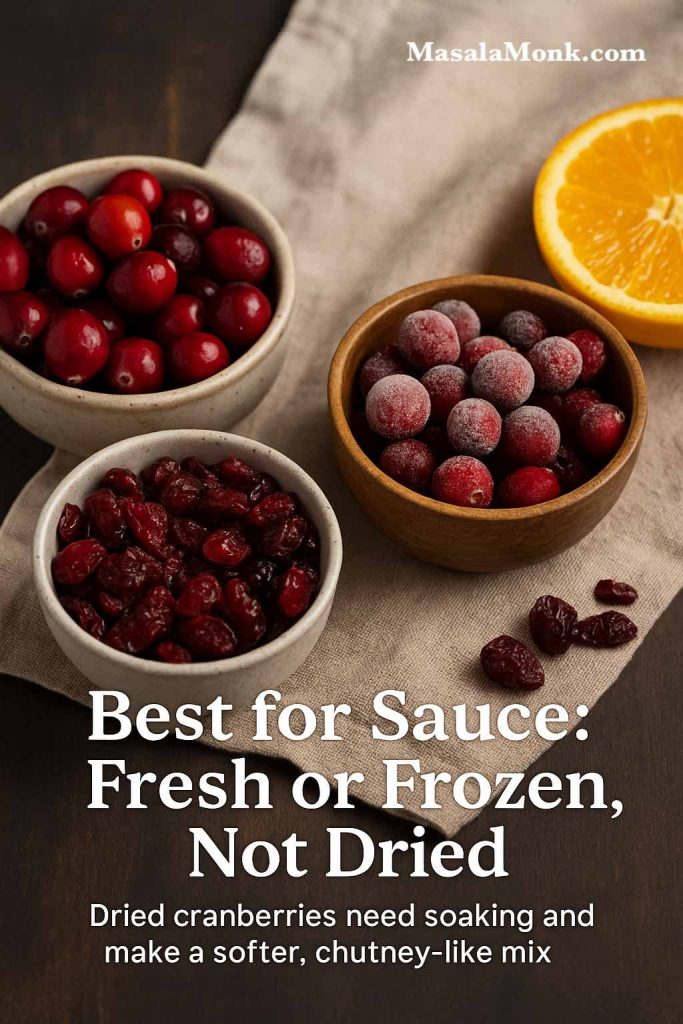
What About Dried Cranberries?
Dried cranberries are great for salads and baking, but they’re not a straight swap in a standard cranberry sauce recipe using orange juice. They’ve already been sweetened and dehydrated, so they won’t burst and gel in the same way.
If you really want to use dried cranberries:
- Soak them first in warm orange juice and water for at least 30 minutes
- Use more liquid than the fresh recipe calls for
- Expect a softer, chutney-like texture rather than a classic sauce
That kind of approach can work in a cranberry sauce recipe from dried cranberries, but for a traditional Thanksgiving-style sauce, fresh or frozen is the way to go.
Why Cranberry Sauce Thickens on Its Own
Cranberries are naturally high in pectin, a type of soluble fibre that gels when combined with acid and sugar. Orange juice adds acidity and sugar, so when you simmer everything together, you’re quietly making a soft, homemade jelly.
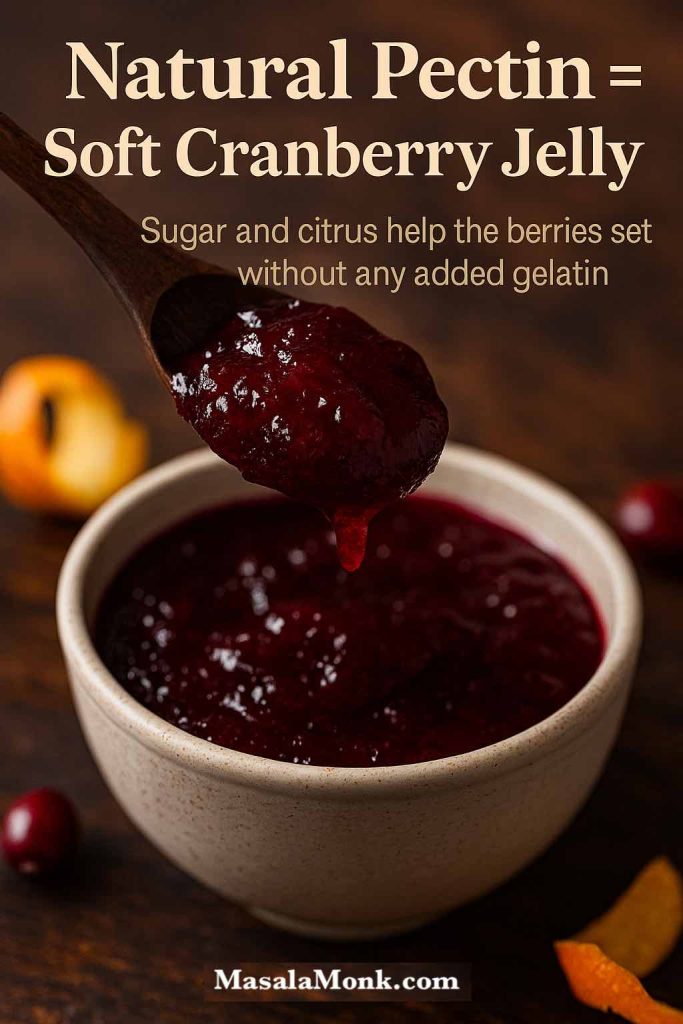
This is why:
- A basic cranberry sauce recipe doesn’t need gelatin or cornstarch
- The sauce looks runnier in the pan than it does once chilled
- High-sugar versions often set more firmly than low-sugar or sugar-free ones
Once you understand that, it’s easier to trust the process. When in doubt, err on the side of stopping the simmer a little early. You can always thicken slightly later, but rescuing an over-thick, sticky sauce is more tricky.
Also Read: Pesto Recipe: Classic Basil Pesto Sauce & 10 Variations
Texture, Taste, and Tweaks for the Classic Sauce
A simple easy cranberry sauce can feel completely different depending on how long you cook it and how much you mash it.
Choosing Your Texture
Think about your crowd:
- For people who like whole berries and a bit of bite, aim for a chunky cranberry and orange juice sauce. Simmer just until most berries pop and stop there.
- If you prefer a jammy, spreadable texture that sits neatly on turkey or bread, cook it a couple of minutes longer until the liquid coats the back of a spoon. This makes a rich cranberry orange juice sauce that doubles as a spread.
- For kids or anyone who dislikes “bits”, use a potato masher to break everything down once it’s off the heat. For an extra-smooth finish, give it a brief whizz with an immersion blender.
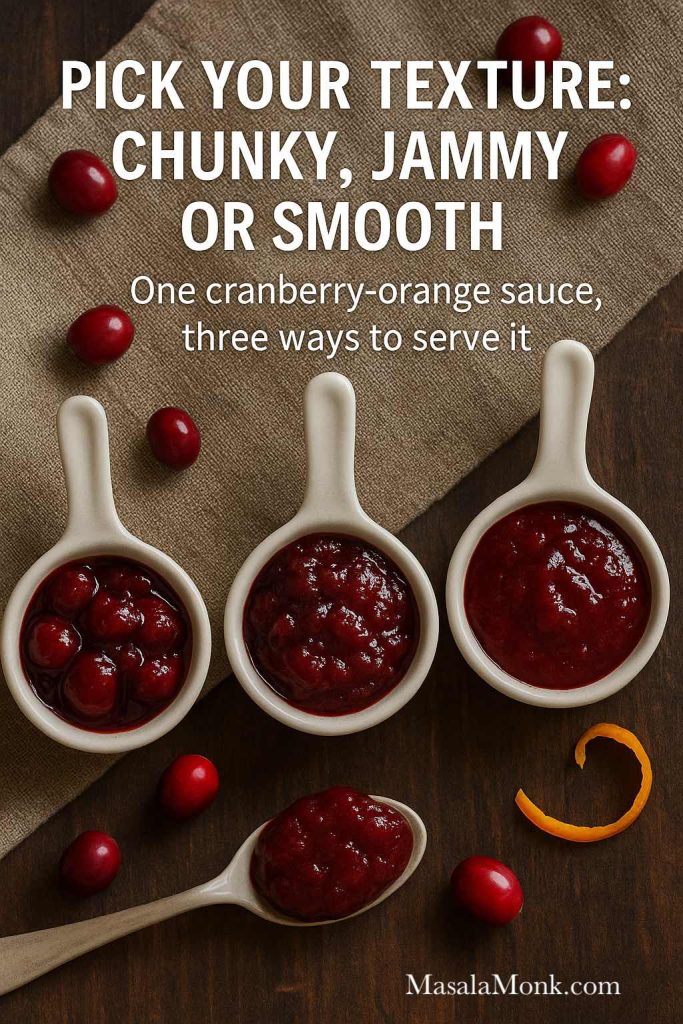
You can even split a batch: half left chunky, half blended, so your homemade cranberry sauce recipe covers both preferences without extra effort.
Adjusting Sweetness and Tartness of Cranberry Sauce with Orange Juice
Taste before chilling, but keep in mind flavours soften in the fridge. If you know your family likes sweeter sauces (maybe they’re used to canned), add a touch more sugar while it’s still warm. If you prefer a sharper profile, hold back on the sugar and add extra orange zest instead of more juice.
You can also:
- Add a spoonful of brown sugar for a caramel note
- Stir in a little maple syrup at the end for a healthy cranberry sauce feel with more nuanced sweet notes
- Balance too much sweetness with a splash of extra orange juice or a squeeze of lemon
Balancing Spices in Cranberry Sauce with Orange Juice
Cranberries can handle quite a bit of spice, but for a classic cranberry sauce Thanksgiving vibe, it’s best not to go too wild in the base recipe. A cinnamon stick or pinch of ground cinnamon is usually enough. Save bolder flavours like cloves, star anise, or cardamom for one of the twists below, so your main pot stays broadly appealing.
Also Read: Katsu Curry Rice (Japanese Recipe, with Chicken Cutlet)
Flavor Variations on Cranberry Sauce with Orange Juice
Once your base is sorted, you can treat it like a master sauce and spin it several ways. Think of the following as mini recipes that sit on top of the same core idea: a cranberry sauce with orange juice that you understand and trust.
Brown Butter & Vanilla Cranberry Sauce (Gourmet Twist)
When you want something that feels restaurant-level without extra stress, this brown butter version is your best friend. It’s still recognisably cranberry sauce, just with deeper, nutty notes.
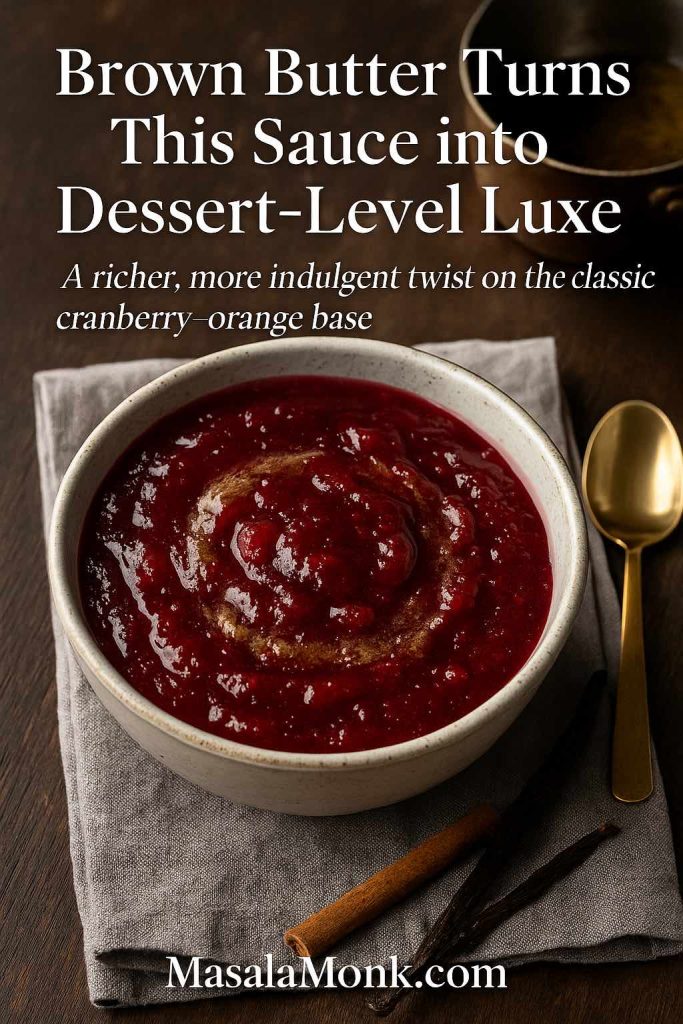
You’ll need:
- Classic batch of cranberry sauce with orange juice
- 2 tablespoons unsalted butter
- Extra ½ teaspoon vanilla extract
How to make it:
- In a small light-coloured pan, melt the butter over medium heat.
- Continue cooking, swirling the pan, until the butter foams and the milk solids at the bottom turn golden and smell nutty. Take off the heat; this is brown butter.
- Prepare the base cranberry sauce recipe using orange juice as usual.
- Once the sauce is off the heat, fish out the cinnamon stick if you used one, then stir in the brown butter and extra vanilla.
- Taste and adjust; brown butter adds richness but not sweetness, so you may want a teaspoon of extra sugar or maple if you like a softer edge.
- Cool and chill.
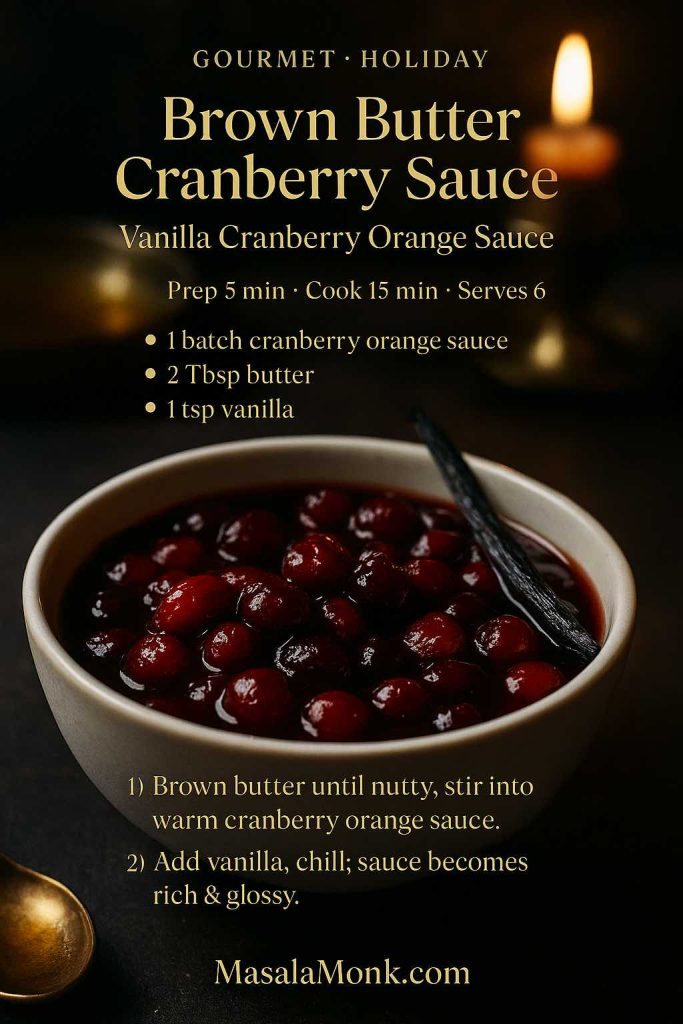
The result is a cosy gourmet cranberry sauce recipe that works for Thanksgiving, Christmas dinners, or even alongside duck breast, pork fillet, or a rich vegetarian main. If you like building “one master sauce + many ways to use it”, this approach is very similar in spirit to how we handle yogurt sauces in our Greek tzatziki guide.
Naturally Sweetened Cranberry Sauce with Orange Juice (Maple or Honey)
For guests who like slightly “cleaner” flavours, a naturally sweetened version hits the spot. This variation keeps the orange but swaps white sugar for maple syrup or honey, so it fits neatly into the healthy cranberry sauce and low sugar cranberry sauce camp.
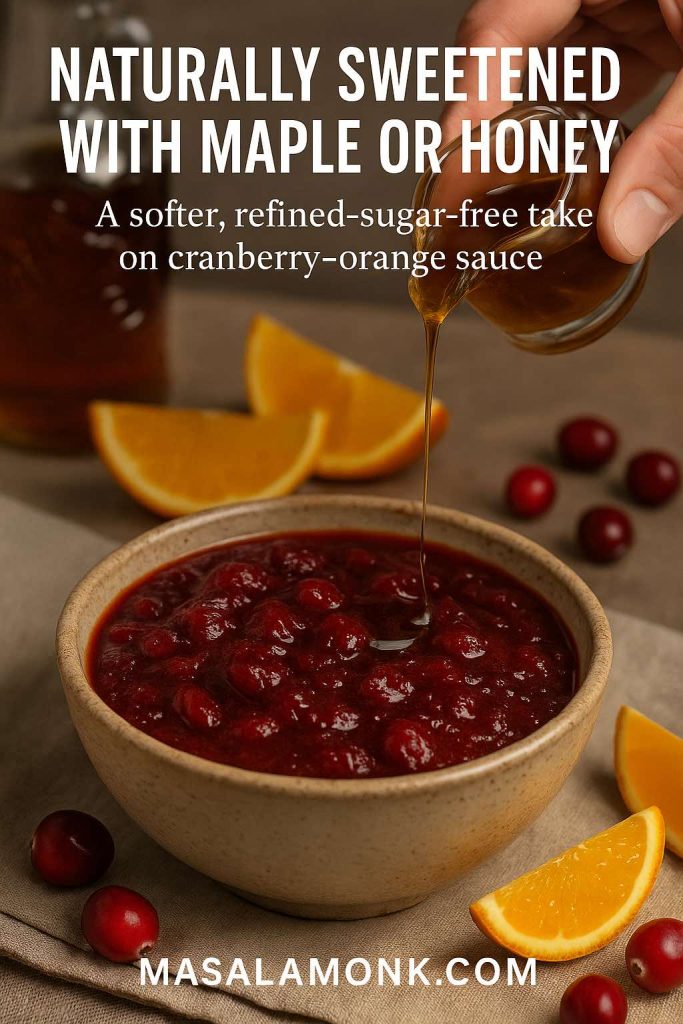
Ingredients (Maple Version):
- 12 oz (340 g) cranberries
- ½–¾ cup (120–180 ml) pure maple syrup
- ¾ cup (180 ml) orange juice
- ¼ cup (60 ml) water
- 1–2 teaspoons orange zest
- Pinch of salt
- Optional: cinnamon stick, 1 teaspoon vanilla
Method:
- Combine cranberries, maple syrup, orange juice, water, zest, salt and optional cinnamon in a saucepan.
- Bring to a gentle boil over medium heat.
- Simmer 10–12 minutes until most berries burst and the sauce thickens.
- Remove from the heat, stir in vanilla if using, and taste. Add more maple syrup if you’d like a sweeter cranberry sauce less sugar style.
- Cool and chill.
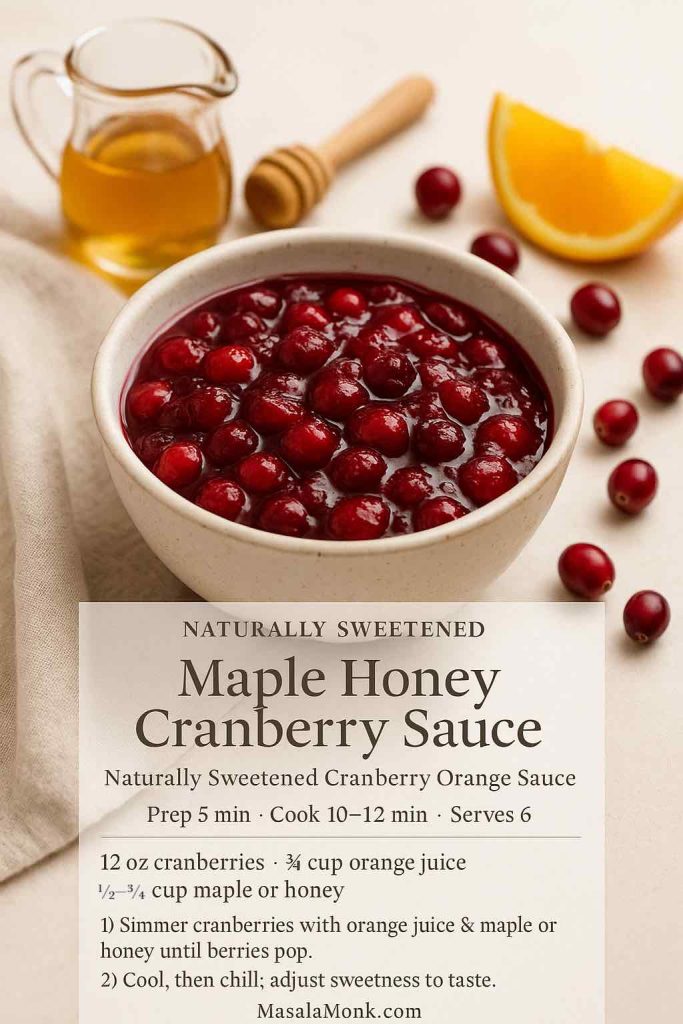
Honey works similarly, though it tastes sweeter than sugar or maple. Start with ½ cup, taste towards the end of cooking, and add more gradually if needed.
For more inspiration, Ambitious Kitchen has a lovely naturally sweetened orange cranberry sauce using orange juice, maple or honey, and vanilla. Cookie and Kate’s naturally sweetened cranberry sauce is another strong example of a cranberry sauce recipe healthy that skips refined sugar.
Low Sugar, Sugar-Free & Keto Cranberry Sauce with Orange Juice
Sometimes you need a sugar free cranberry sauce that still feels festive: maybe you’re cooking for someone watching their blood sugar, or for guests who prefer low-carb options. This variation stays tart and bright, with orange notes, but uses sugar-free sweetener instead of sugar.
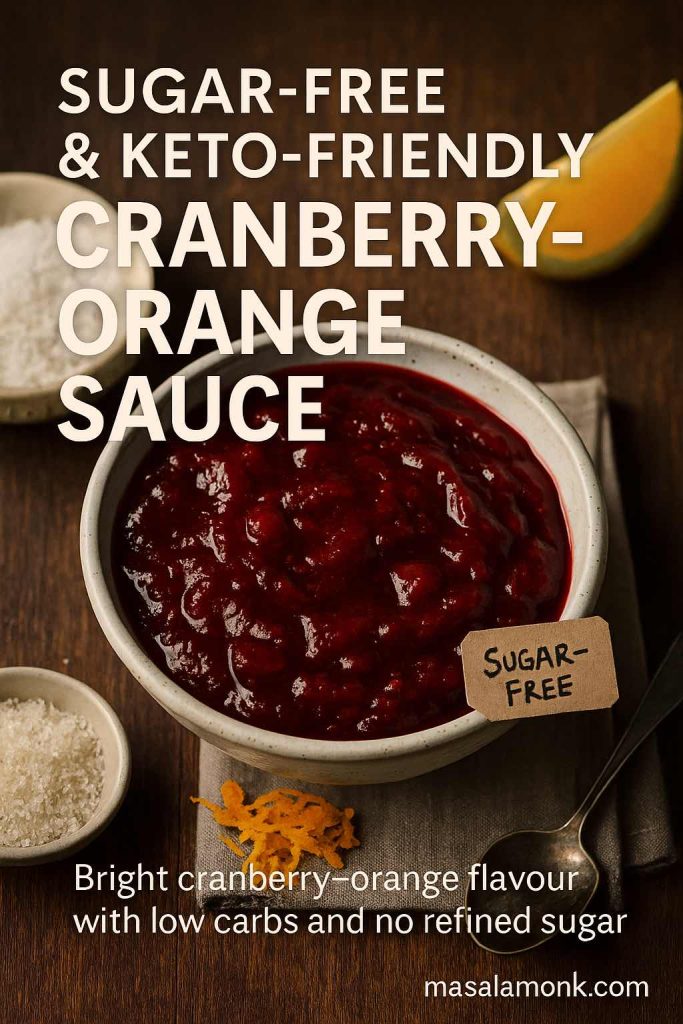
Ingredients:
- 12 oz (340 g) cranberries
- ¾ cup (180 ml) orange juice
- ½ cup (120 ml) water
- ½–⅔ cup granular sugar-free sweetener (such as a monkfruit–erythritol blend)
- 1–2 teaspoons orange zest
- Pinch of salt
- Optional: cinnamon stick, vanilla extract
Steps:
- Combine cranberries, orange juice, water, sweetener, zest, and salt in a saucepan.
- Bring to a gentle boil over medium heat.
- Simmer for 10–12 minutes, stirring often, until the sauce thickens and most berries have popped.
- Remove from heat and stir in vanilla if you like.
- Taste while still warm. Sugar-free sweeteners can taste slightly less sweet once chilled, so make it just a touch sweeter than you think you want.
- Cool, then refrigerate to let it set.
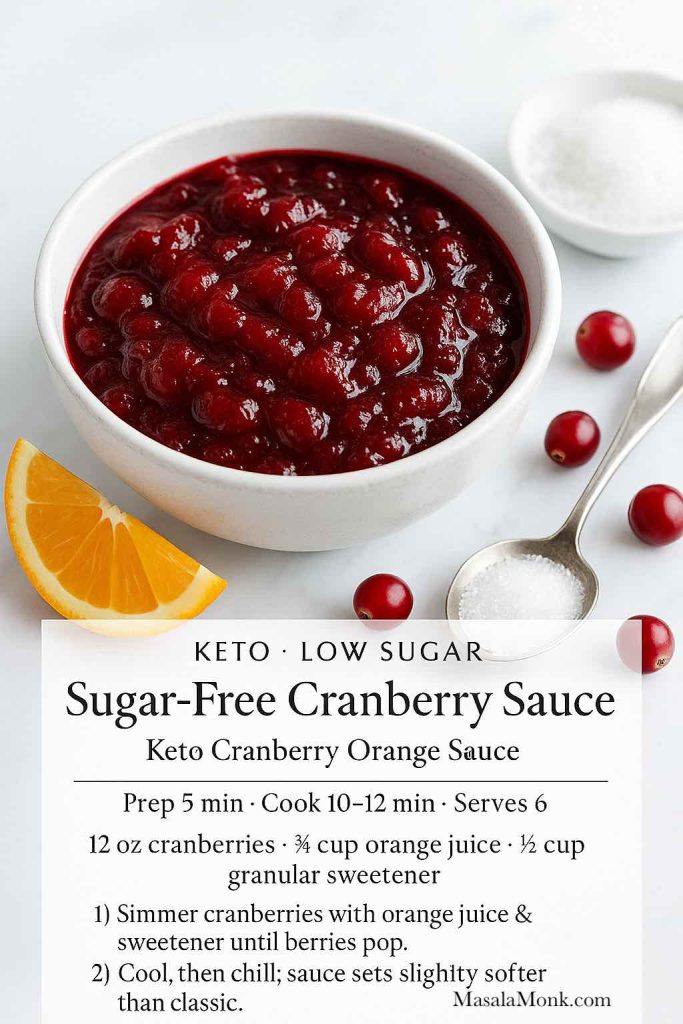
This style fits well with requirements of keto cranberry sauce, no sugar added cranberry sauce, and low carb cranberry sauce. For a different take, Wholesome Yum’s low-carb cranberry sauce leans on allulose and orange zest for a very low net-carb result.
Quick note: if anyone at your table has diabetes or other health concerns, remind them to chat with their doctor before relying on “diabetic cranberry sauce” or juice drinks as part of treatment. For a broader look at how cranberry juice fits into weight management, there’s a helpful summary here on cranberry juice and weight loss.
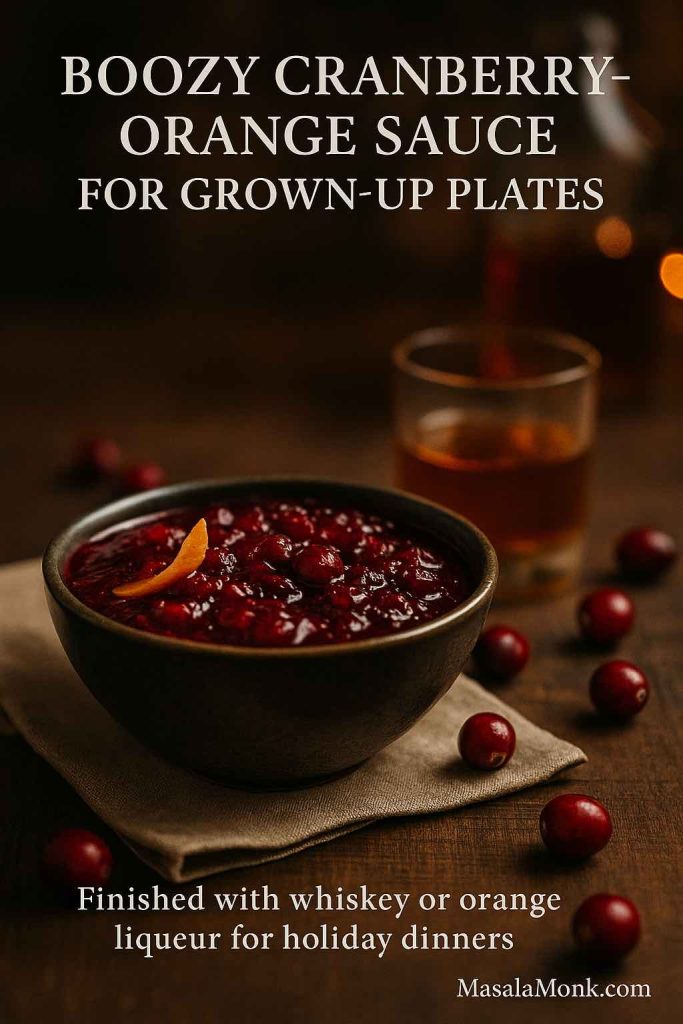
Boozy Holiday Cranberry and Orange Juice Sauce
For adults-only dinners, adding a splash of alcohol turns your basic cranberry and orange juice sauce into something that tastes like it fell off a restaurant dessert menu.
You’ll need:
- One batch of classic cranberry sauce with orange juice
- 2–4 tablespoons orange liqueur (like Cointreau or Grand Marnier) or whiskey/bourbon
How to build it:
- Make the base easy cranberry sauce recipe as usual, but reduce the orange juice by 2–4 tablespoons to make room for the alcohol.
- Once you’ve turned off the heat, stir in the liqueur or whiskey.
- Taste and adjust. Alcohol can slightly amplify bitterness, so an extra teaspoon of sugar or maple can round things out if desired.
- Cool and chill; the boozy edge softens overnight.
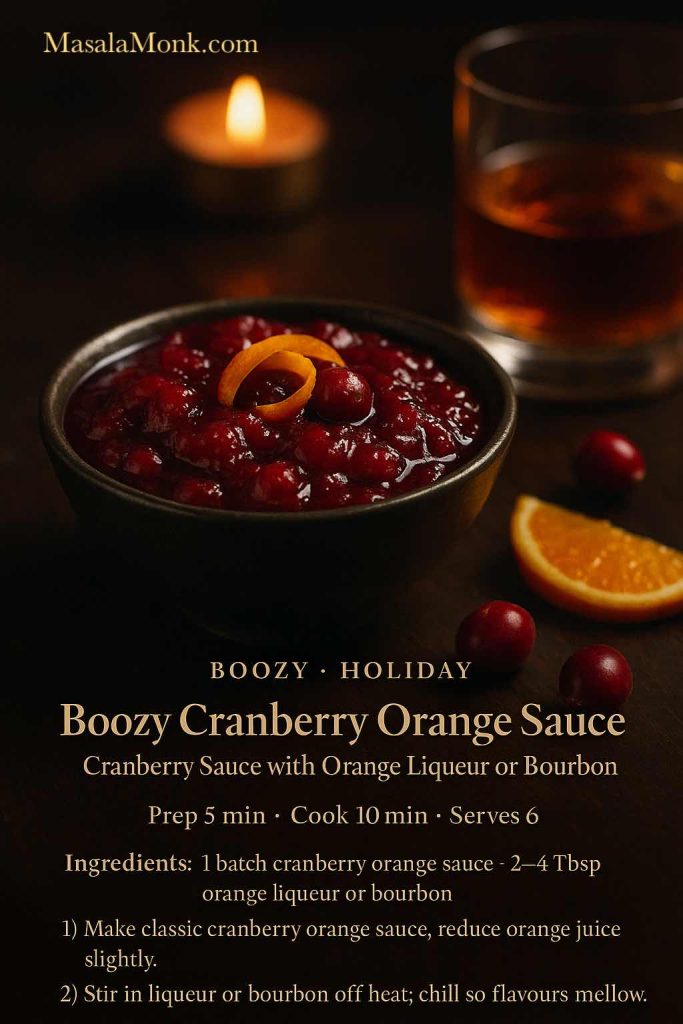
This twist is wonderful with roast duck, glazed ham, and beef roasts. Leftover boozy cranberry sauce can double as a quick pan sauce: deglaze a roasting pan with a splash of stock, whisk in a spoonful of cranberry sauce, and simmer briefly.
If you like playing with citrusy cocktails, a spoonful of this sauce blends beautifully into a whiskey sour or adds flavour and colour to the sugar rim on a lemon drop martini.
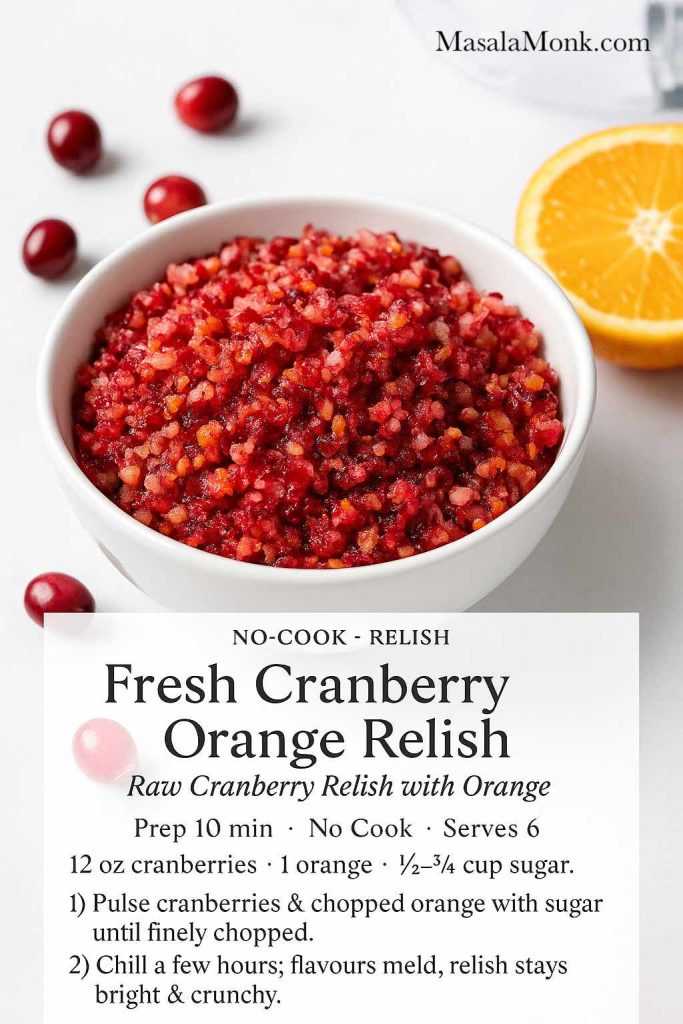
Fresh Cranberry Orange Relish (No Cook)
For some people, the ultimate cranberry orange relish isn’t cooked at all. Instead of simmering, you blitz everything raw in a food processor and let time in the fridge meld the flavours.
This no-cook cranberry relish recipe with orange juice is bright, crunchy, and a little sharp.
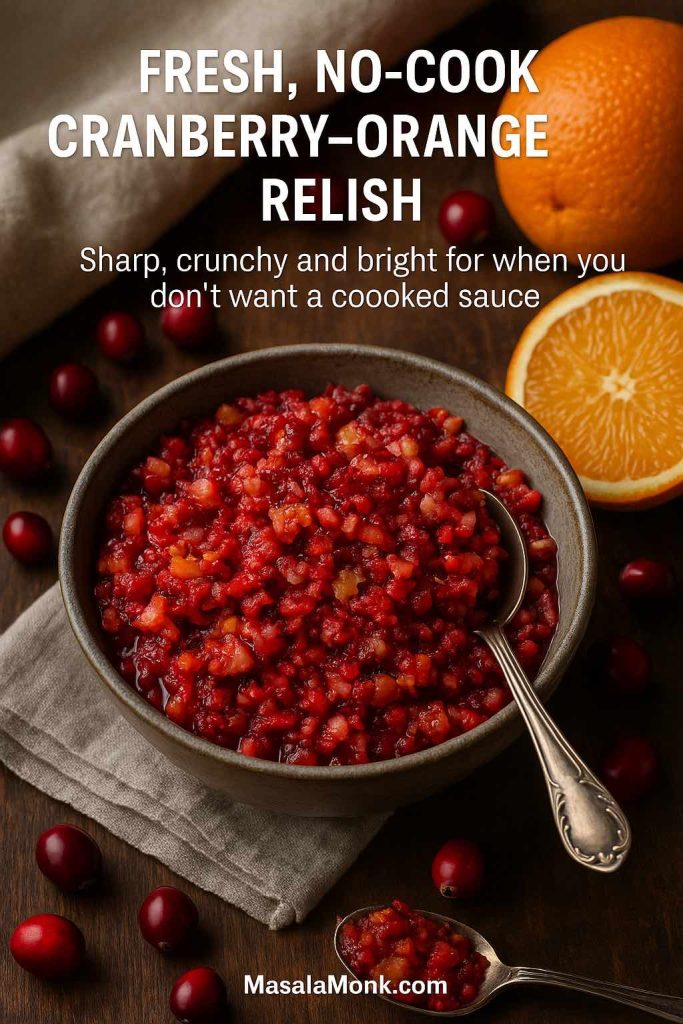
Ingredients:
- 12 oz (340 g) fresh cranberries
- 1 thin-skinned orange, scrubbed (remove seeds, keep peel)
- ½–¾ cup (100–150 g) sugar, or more to taste
- Splash of orange juice if needed
- Pinch of salt
Method:
- Roughly chop the orange, removing any seeds.
- Add the cranberries and orange pieces to a food processor.
- Pulse until everything is finely chopped but not pureed; scrape down the sides as needed.
- Sprinkle over ½ cup sugar and the salt. Pulse again to combine.
- Taste and add more sugar if you’d like a sweeter fresh cranberry orange relish. If the mixture seems very dry, add a spoonful of orange juice.
- Transfer to a container and chill for at least 2 hours, preferably overnight.
The texture is closer to a chutney than to a smooth sauce, which makes it fantastic with cold turkey sandwiches, cheese boards, and rich mains. It’s also lovely spooned on top of savoury breakfast dishes like upma and other wholesome brunch bowls.
Because it’s raw, this variation particularly benefits from good-quality fruit. It’s a great way to use cranberries for Thanksgiving dinner when you want something sharper and fresher than cooked sauce.
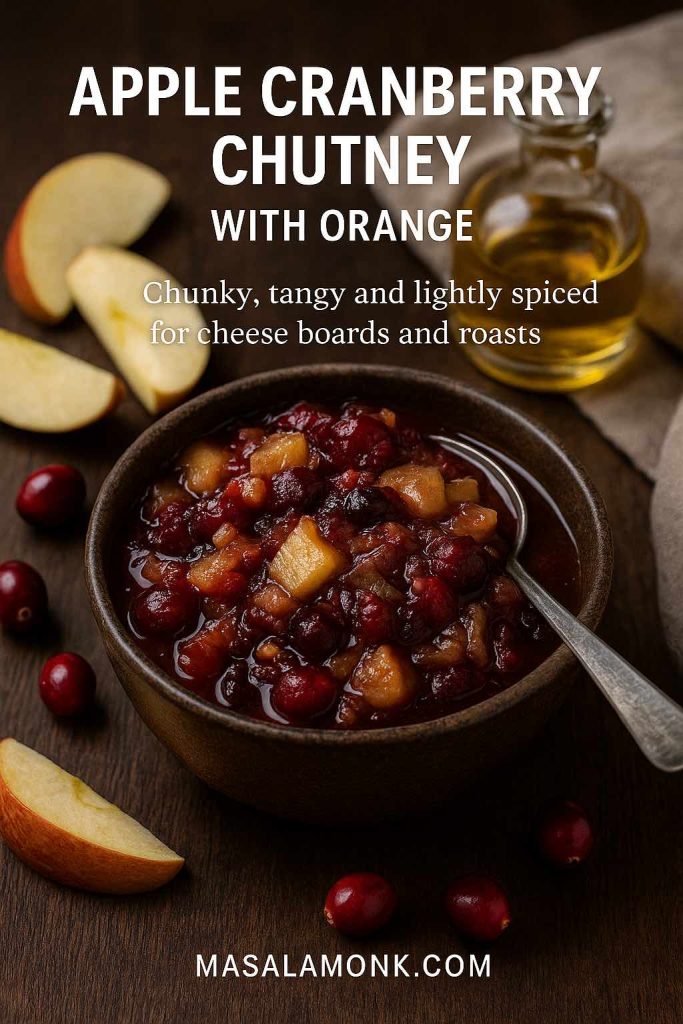
Apple Cranberry Chutney with Orange
Finally, if you want something that bridges the gap between jammy sauce and savoury chutney, this apple-forward variation is a keeper. It leans into vinegar, onion and ginger, making it a brilliant cranberry side dish for roasted meats, charcuterie, and cheese.
Ingredients:
- 8 oz (225 g) cranberries
- 1 medium apple, peeled and finely diced
- ½ cup (100 g) sugar (or ¼ cup white, ¼ cup brown)
- ½ cup (120 ml) orange juice
- ¼ cup (60 ml) apple cider vinegar
- ¼ cup (40 g) finely chopped onion
- ¼ teaspoon ground ginger or 1 teaspoon freshly grated ginger
- Pinch of salt
- Pinch of ground cinnamon
How to make it:
- Add cranberries, apple, sugar, orange juice, vinegar, onion, ginger, salt, and cinnamon to a saucepan.
- Bring to a gentle simmer over medium heat.
- Cook 15–20 minutes, stirring from time to time, until the cranberries burst, the apples soften, and the chutney is thick and glossy.
- Taste and adjust balance: more sugar for sweetness, more vinegar for tang, or a little extra salt for savouriness.
- Cool and chill.
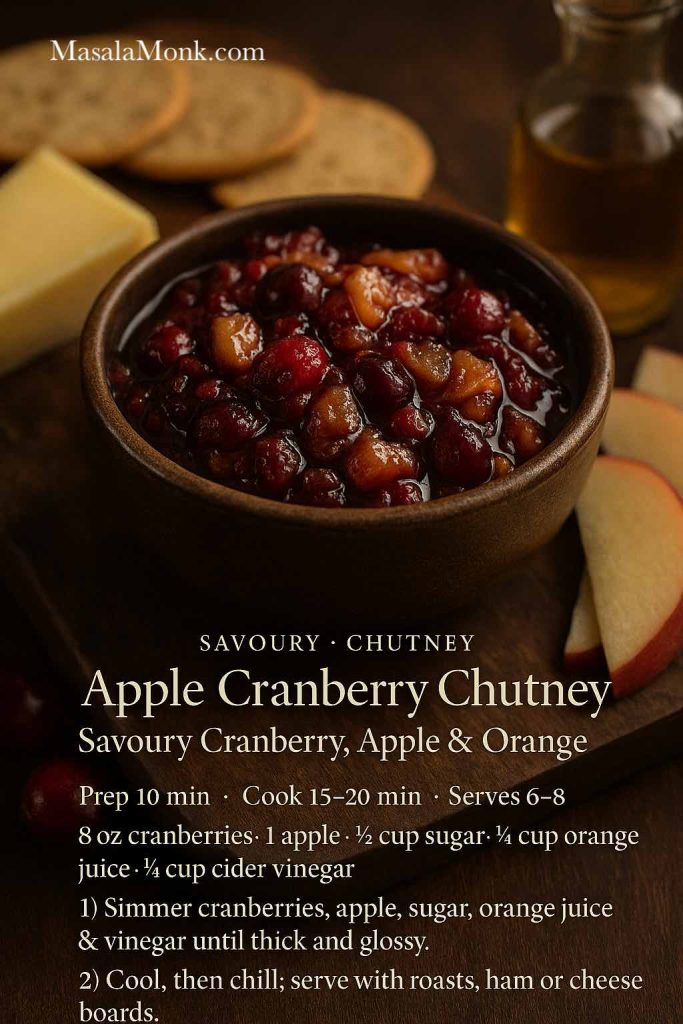
This apple cranberry chutney sits nicely next to roast pork, ham, or a vegetarian roast, and it pairs beautifully with a platter of cheeses and crackers. It also doesn’t feel limited to November; you can happily serve it any time you’re craving something fruity and savoury.
Also Read: Peanut Butter Cookies (Classic Recipe & 3 Variations)
Slow Cooker, Make-Ahead & Freezer Tips
Cranberry sauce is one of the easiest dishes to prepare ahead for a big holiday meal. Whether you’re going traditional stove-top or want a cranberry sauce crock pot method, it’s extremely forgiving.
Slow Cooker Cranberry Sauce
The slow cooker version is ideal if all your burners are busy or if you want a cranberry sauce in slow cooker approach that gently simmers away in the background.
Basic method:
- Add all the ingredients for any of the cooked variations (classic, maple, sugar-free, or boozy) into a small slow cooker.
- Stir to combine.
- Cook on LOW for 3–4 hours or HIGH for about 2 hours, stirring once or twice if convenient.
- Once the cranberries have burst and the sauce looks thick around the edges, switch the slow cooker off.
- Let it cool slightly, then transfer to a container and refrigerate.
Because the slow cooker retains moisture, sauces from this method sometimes look a tiny bit looser. If needed, you can move the sauce to a saucepan and simmer for a couple of minutes to tighten it up.
How Far in Advance Can You Make Cranberry Sauce with Orange Juice?
For stress-free cranberry recipes for Thanksgiving, aim to make your sauce at least one day ahead; three days is even better. The flavours deepen, and it’s one less thing on your day-of list.
Rough guidelines:
- Fridge life: about 7 days, tightly covered
- Freezer life: up to 2 months in an airtight container, leaving a little headroom for expansion
To serve from frozen, thaw overnight in the fridge, stir well, and warm gently in a saucepan or let it come to room temperature.
A smooth, properly set cranberry sauce recipe homemade will thicken slightly in the cold. If it’s too stiff, stir in a splash of water or orange juice over low heat until you like the consistency.
Also Read: Tres Leches – Mexican 3 Milk Cake Recipe
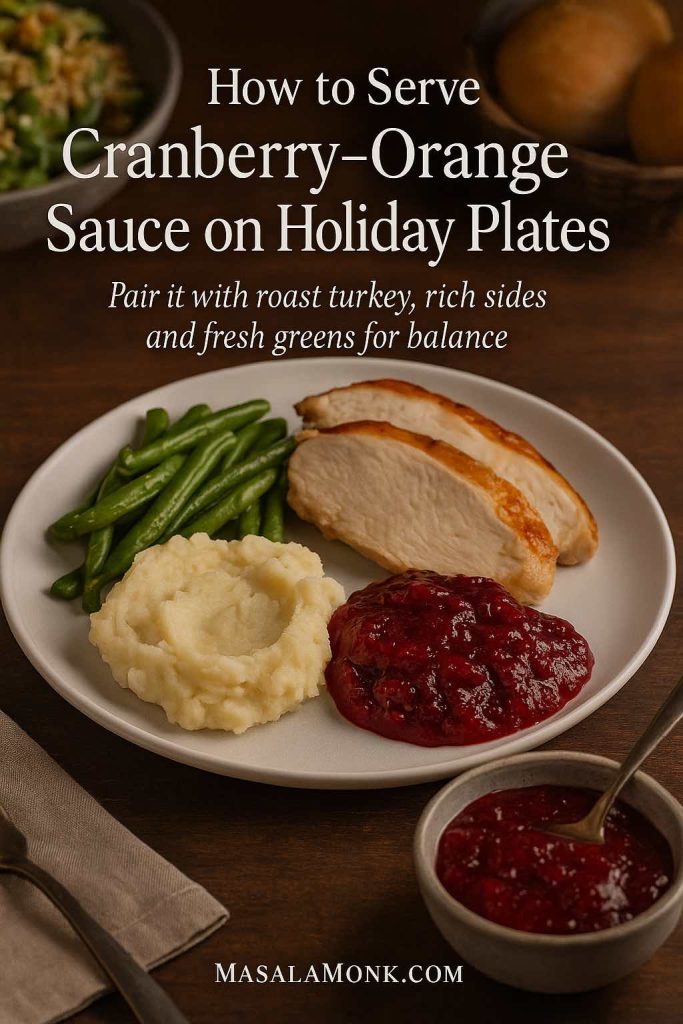
Serving Suggestions & Menu Pairings
Once you have a reliable best cranberry sauce for Thanksgiving in your back pocket, it’s fun to think beyond the turkey.
Classic Holiday Plates
Your sauce is an obvious match for:
- Roast turkey (whole or breast)
- Roast chicken or Cornish hens
- Baked ham
- Nut roasts or lentil loaves
On the side, consider a mix of creamy, crunchy, and green elements. A spoonful of cranberry sauce with orange juice feels right at home with:
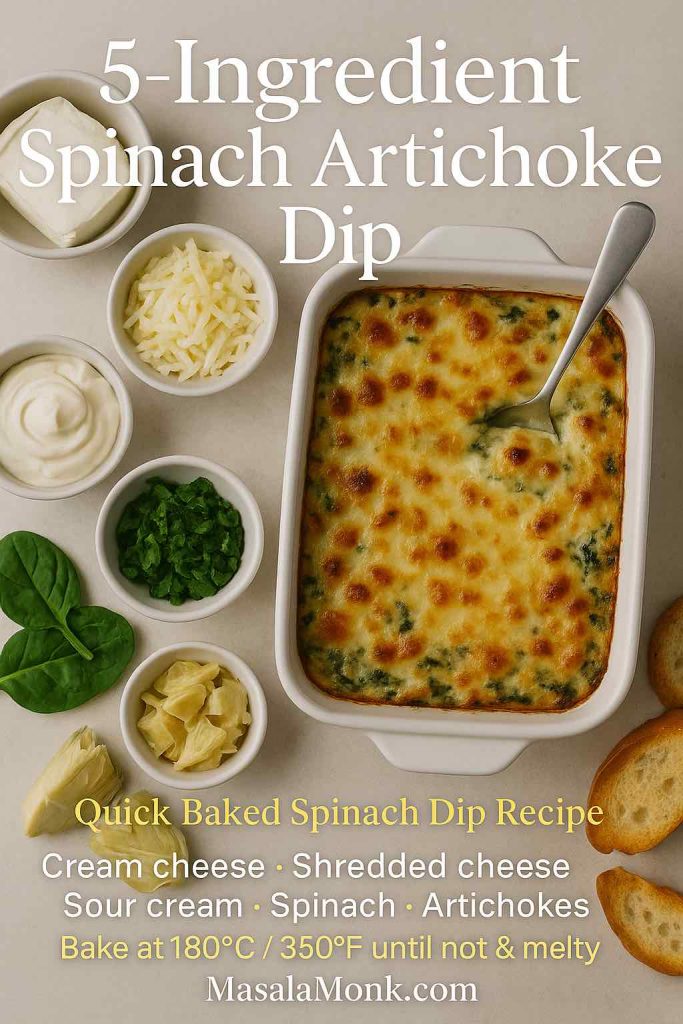
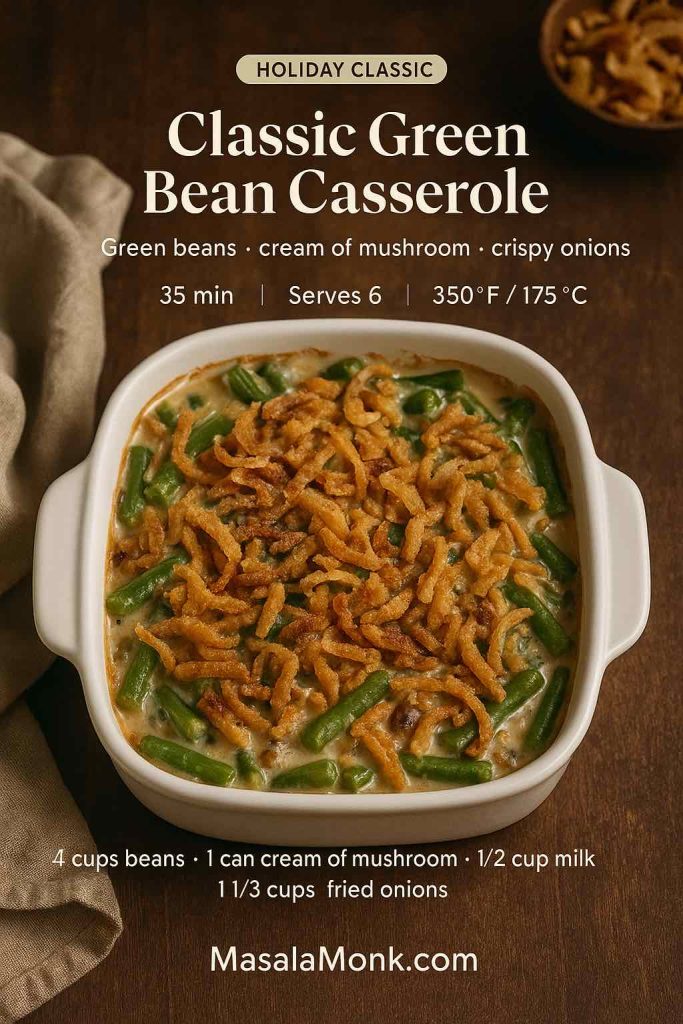
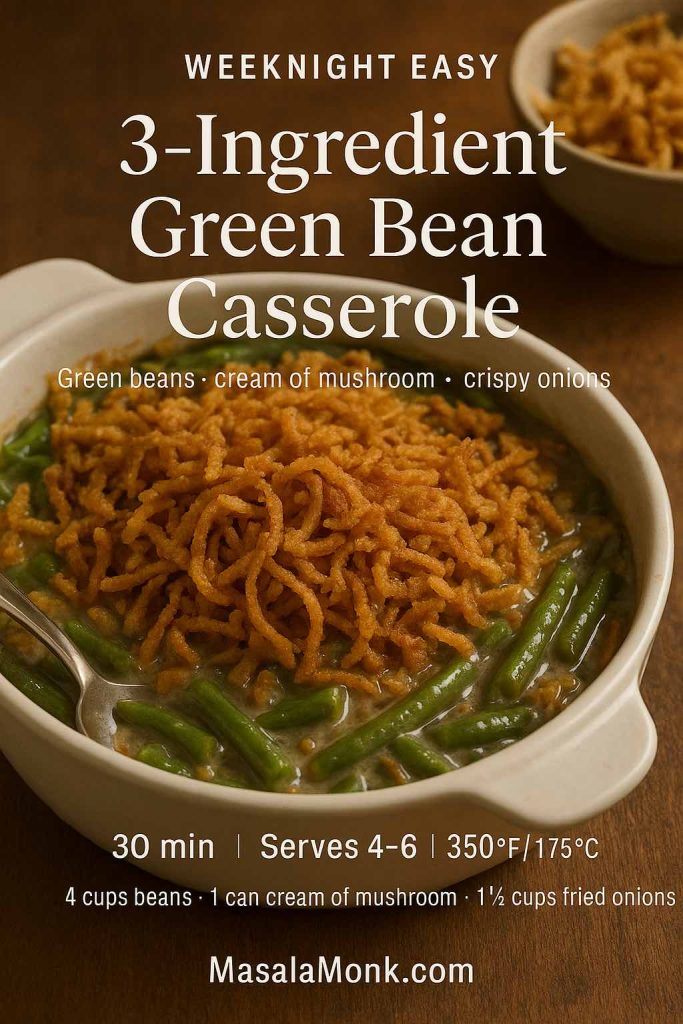
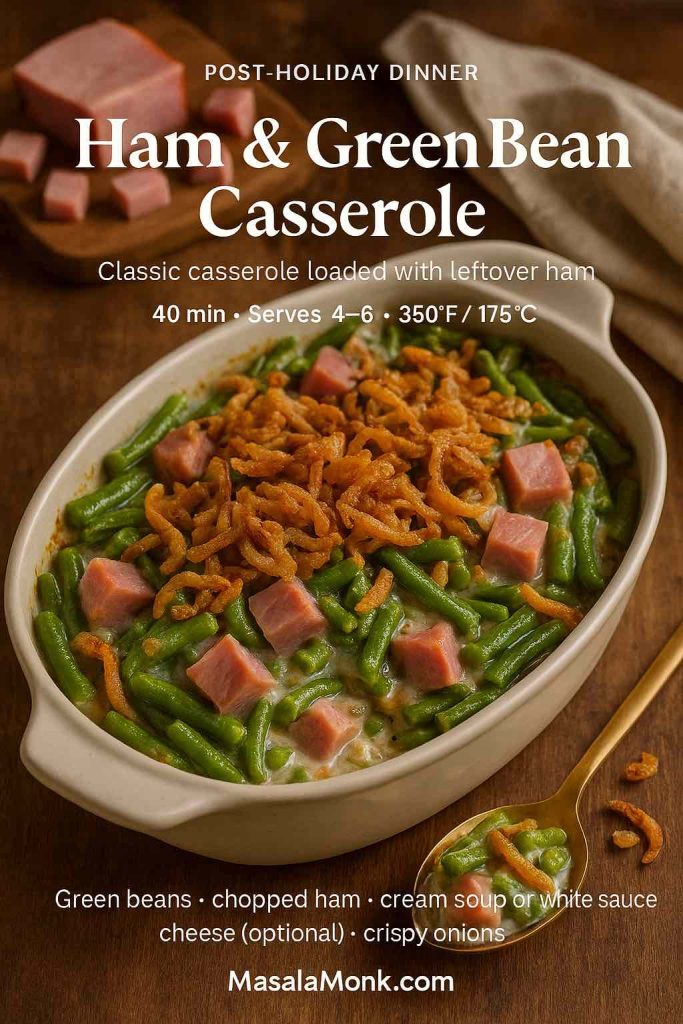
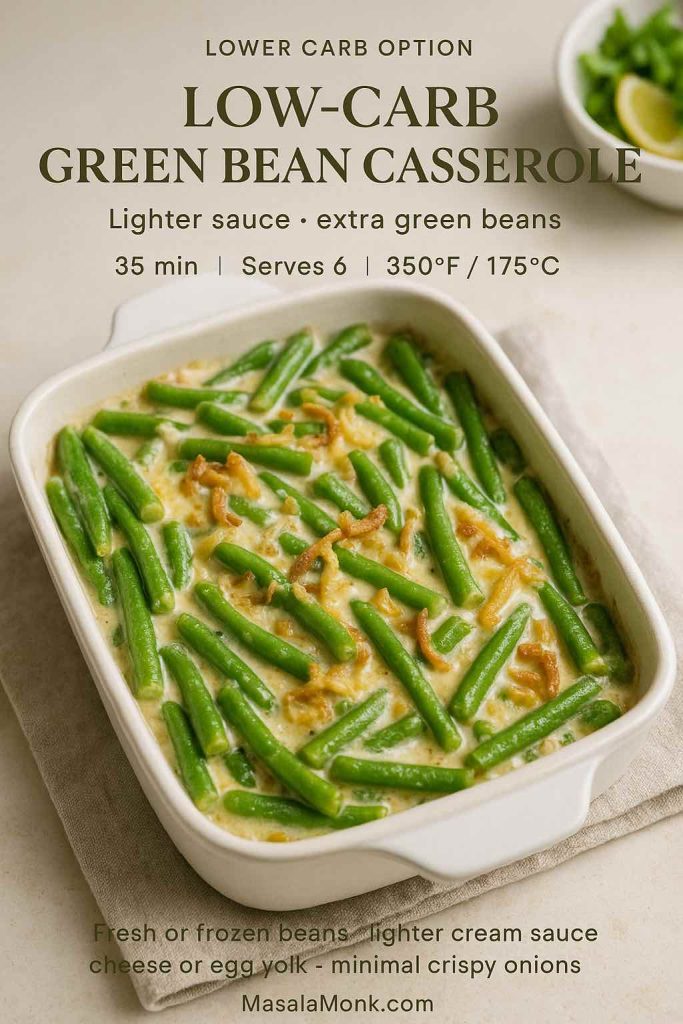
- A bubbling green bean casserole
- Buttery mashed potatoes or potato gratin
- Crisp salad, or even a generous bowl of potato salad, German- or Russian-style for a different vibe
- A tray of roasted carrots, parsnips, and Brussels sprouts
All together, they build the kind of plate people dream about when they search for the best cranberry sauce recipe for Thanksgiving.
Casual Comfort Dinners
Cranberry sauce isn’t limited to one Thursday in November. The same bright-tart spoonful can cut through:
- Rich pasta dishes like creamy carbonara or one-pot chicken bacon ranch pasta
- A bowl of Louisiana red beans and rice, especially if you like sweet-and-savory contrasts
- Grilled sausages or pan-fried pork chops
You don’t have to serve it in a huge mound; even a small dish on the table lets everyone add that burst of colour and acidity where they like.
Brunch & Grazing Boards
On more relaxed days, your cranberry orange sauce also belongs on brunch spreads:
- Dolloped next to cheeses, nuts, and crackers
- Served with buttery scones or biscuits
- Paired with savoury egg dishes and fresh fruit
It sits nicely next to a jug of mimosa variations or a tray of strawberry mojito mocktails that you can also adapt with cranberry and orange.
Using Leftover Cranberry Sauce with Orange Juice
One of the hidden strengths of a good cranberry sauce with orange juice is how flexible the leftovers are. A cup or two in the fridge can quietly upgrade meals all week. All of these recipes with cranberry sauce turn leftovers into easy meals and snacks.
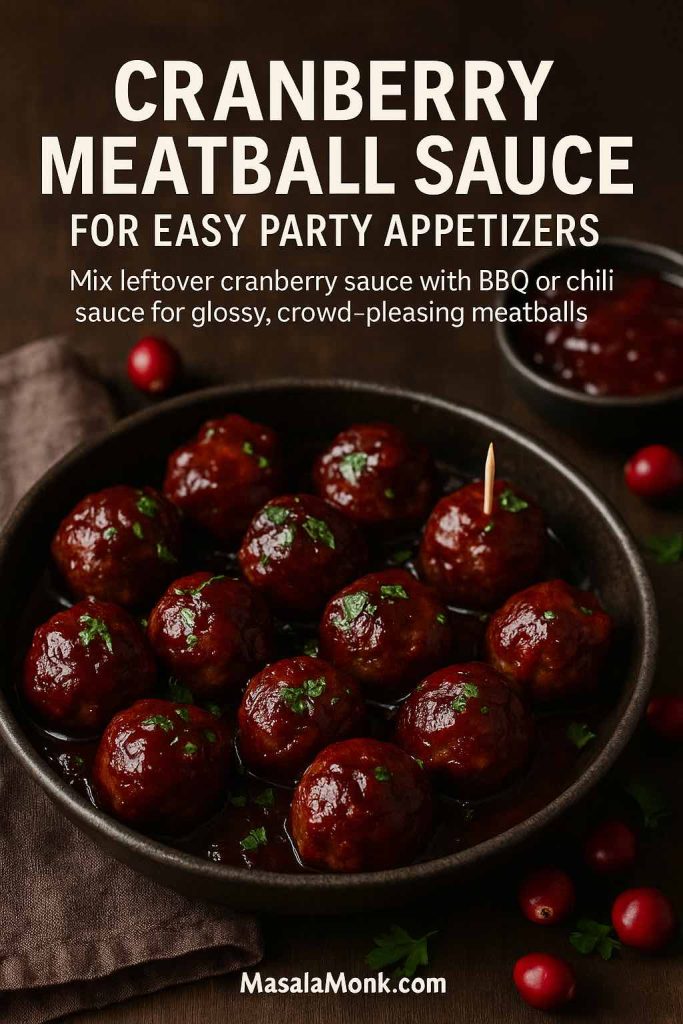
Cranberry Meatball Sauce
Turn your sauce into a sticky, tangy glaze for meatballs:
- Mix equal parts cranberry sauce and your favourite BBQ or chili sauce.
- Add a splash of soy sauce or Worcestershire for savouriness.
- Warm in a pan until smooth.
- Add cooked meatballs and simmer a few minutes so they’re coated and hot.
This simple trick gives you a cranberry meatball sauce that works as a party appetizer or a quick dinner over rice or mashed potatoes.
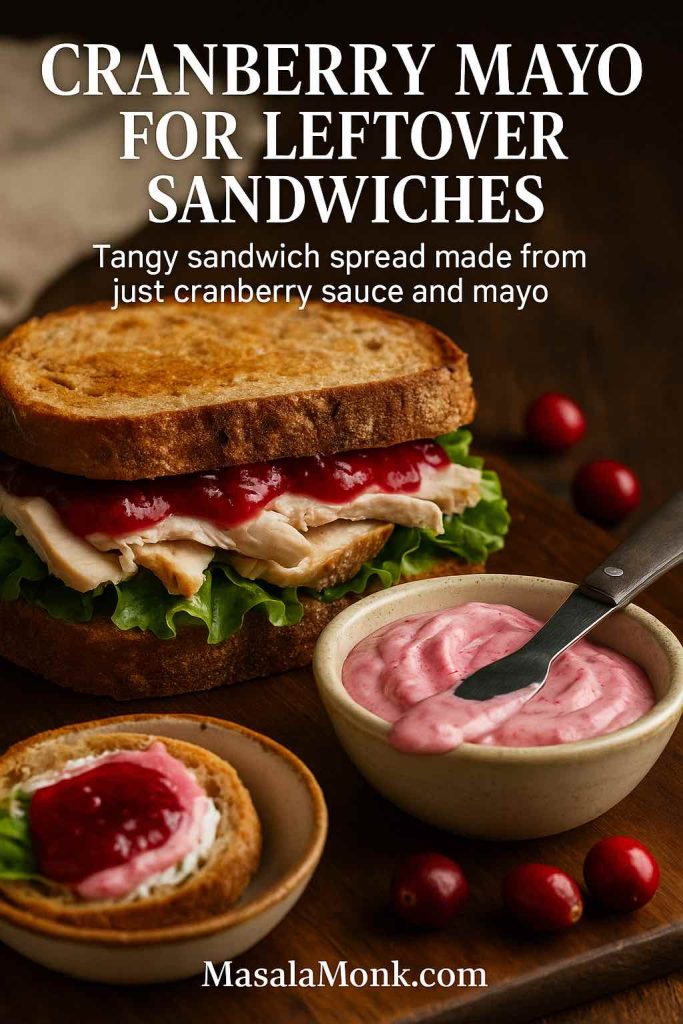
Cranberry Mayo for Sandwiches
A spoonful of cranberry sauce goes a long way in sandwich spreads:
- Stir 1 tablespoon cranberry sauce into 2 tablespoons mayonnaise.
- Taste and add more mayo if you want it milder.
- Spread on bread for turkey or chicken sandwiches.
The result is a tangy, creamy cranberry sauce for sandwiches that plays nicely with roasted poultry, cheese, and salad leaves. For more ideas, you can look at flavour combos from this collection of chicken sandwich recipes.
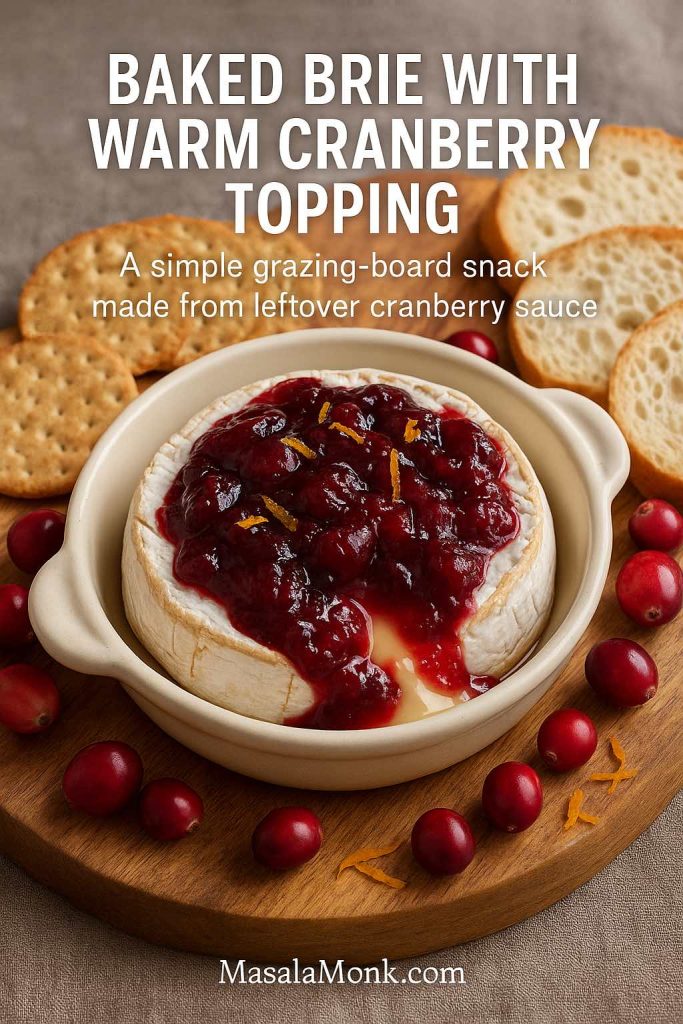
Baked Brie with Cranberry Topping
If you love grazing boards, baked brie topped with cranberry orange relish is a near-perfect snack:
- Place a small wheel of brie in an oven-safe dish.
- Spoon cranberry sauce on top—classic, brown butter, or even apple cranberry chutney all work.
- Bake at 180°C / 350°F for 10–15 minutes until the cheese is soft and oozing.
- Serve with crackers or sliced baguette.
If you’re pregnant or feeding pregnant guests, it’s worth checking which soft cheeses are safe before you plan the board; this guide to soft cheese and pregnancy is a handy starting point.
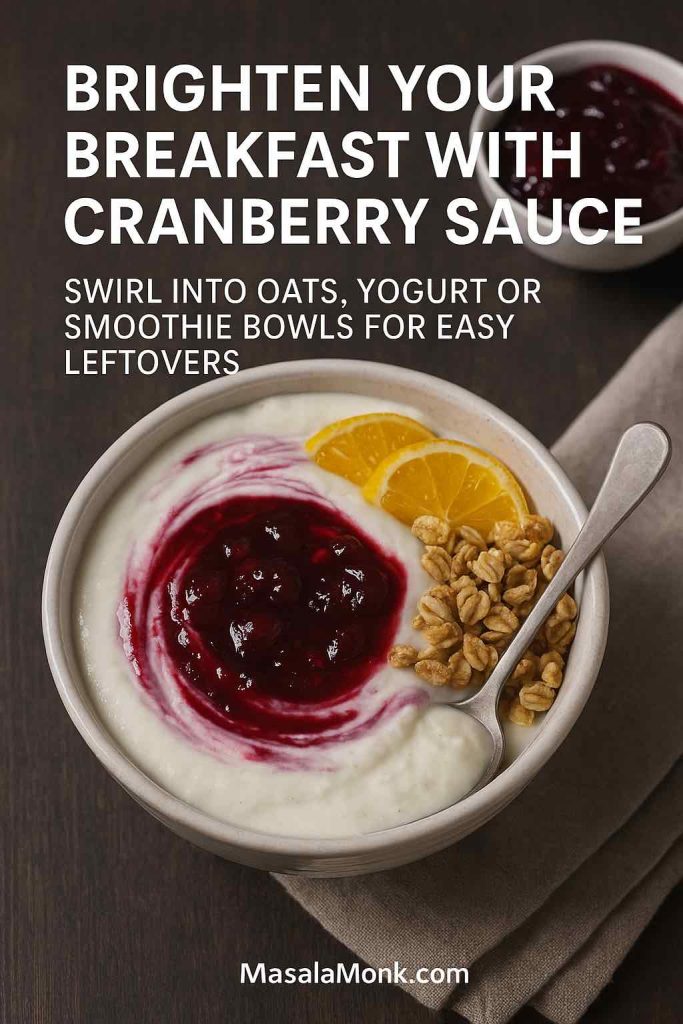
Breakfast Bowls and Oats
Cranberry sauce can also brighten breakfast:
- Swirl into Greek yogurt with granola
- Spoon over overnight oats
- Stir into warm porridge
A solid base like this protein oatmeal formula turns leftover sauce into a colourful topping that adds both flavour and a bit of natural sweetness, especially if you’ve made a low sugar cranberry sauce or naturally sweetened cranberry sauce.
Dessert Ideas
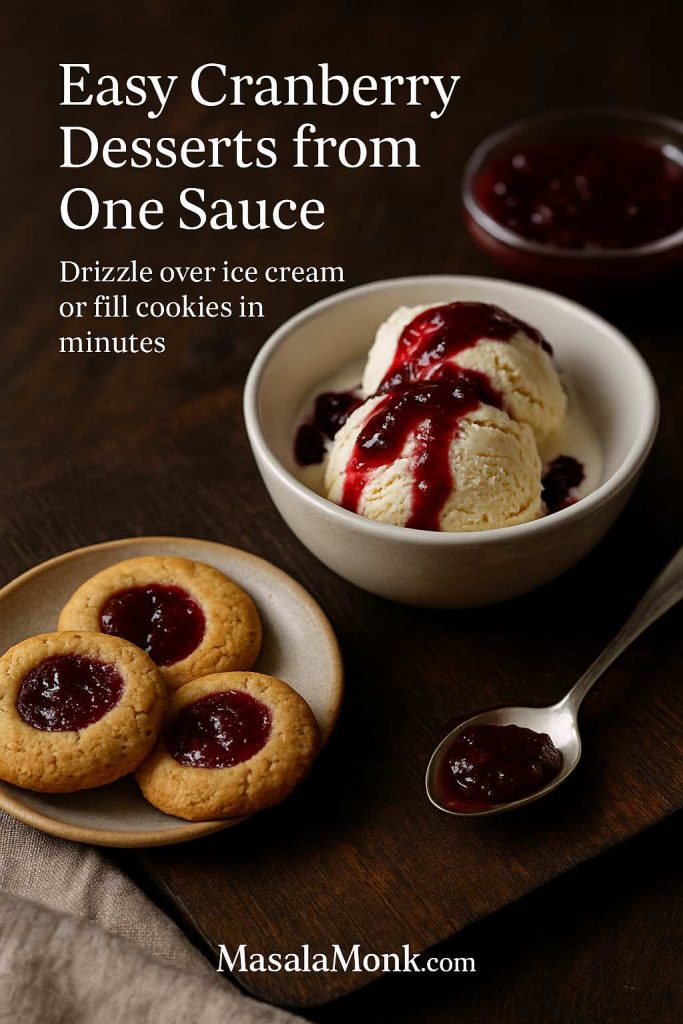
Cranberry’s tartness pairs beautifully with chocolate and cream:
- Warm lightly and drizzle over vanilla ice cream or cheesecake
- Use as a filling for thumbprint cookies or sandwich cookies
- Layer into parfaits with whipped cream and crushed biscuits
A plate of cranberry thumbprints goes especially well alongside something rich like these double chocolate chip cookies. For cosy nights in, stir a spoonful of cranberry orange sauce into a mug of homemade hot chocolate for a wintery twist.
Drinks & Mocktails
Leftover sauce also loves a glass:
- Shake a spoonful with lemon juice, simple syrup, and whiskey for a cranberry take on a sour
- Stir into sparkling water with extra orange juice for a quick mocktail
- Use as a flavour base in mocktails similar to those in our ACV & cranberry mocktail ideas
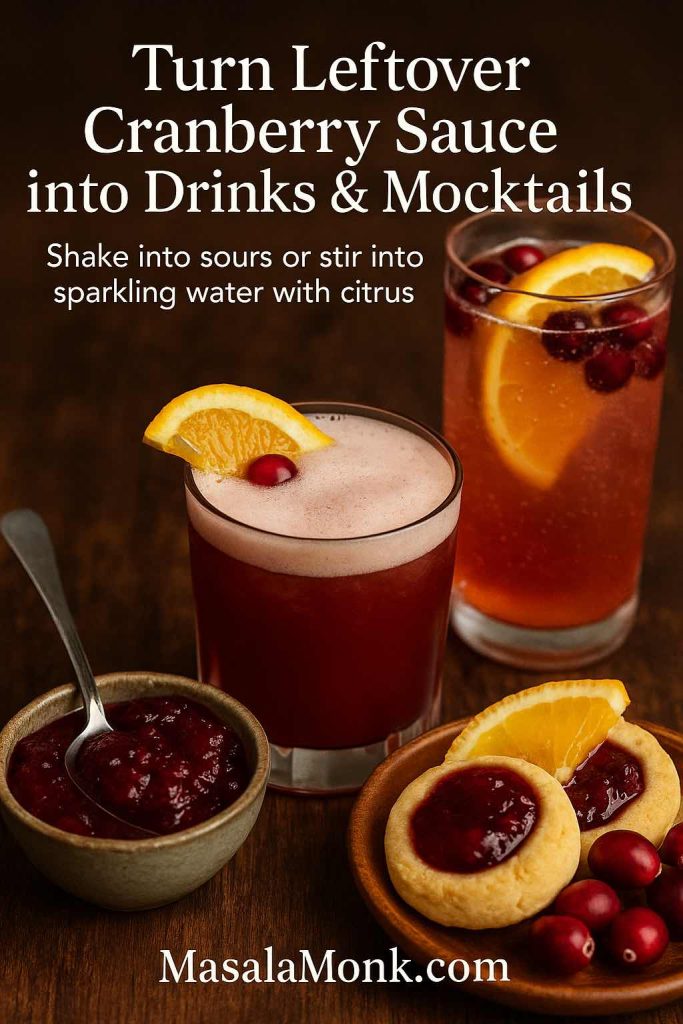
All of these are small, low-effort ways to make sure your recipes using cranberry sauce don’t stop at the main meal.
A Little More on Cranberries & Health
Even though most versions of cranberry sauce with orange juice are treats rather than health foods, it’s still nice to know what’s inside those jewel-coloured berries.
Cranberries offer:
- Vitamin C
- Manganese
- Dietary fibre
- Various polyphenol antioxidants
Healthline’s overview of cranberry nutrition and health benefits explains how cranberries may help support urinary tract health, reduce oxidative stress, and influence some heart-health markers. The Cranberry Institute collects research summaries on cranberry bioactives, particularly around proanthocyanidins (PACs), the compounds thought to help prevent certain bacteria from sticking to urinary tract walls.
On the flip side, most holiday sauces also contain a decent amount of sugar, so they’re still in the “enjoy in moderation” category. If you’re looking for something lighter, lean on your naturally sweetened cranberry sauce or no sugar added cranberry sauce variation, and perhaps save the biggest spoonfuls for big meals rather than everyday snacks.
For those balancing rich holiday food with lighter days, homemade hydration and detox-style drinks featuring cranberry and apple cider vinegar can feel like a reset; you’ll find several precise formulas in this guide to cranberry-ACV detox drinks and these homemade electrolyte recipes for fasting.
Conclusion
With this one post, you’ve got:
- A reliable, classic cranberry sauce with orange juice
- A set of seven easy recipes and variations (from cranberry orange relish to apple cranberry chutney)
- Options that cover classic, gourmet, low-sugar, sugar-free, and boozy moods
- Plenty of ideas for recipes using cranberry sauce the next day and beyond
From here, you can keep things as simple as a single pot of sauce—or build a whole cranberry “universe” across your Thanksgiving, Christmas and everyday menus.
FAQs about Cranberry Sauce with Orange Juice
1. Can I make cranberry sauce with orange juice instead of water?
Yes, absolutely. A cranberry sauce with orange juice is simply a classic cranberry sauce recipe where orange juice replaces some or all of the water. This gives you a brighter flavour, gentle sweetness, and a more “holiday” feel. Any basic cranberry sauce recipe using orange juice can follow the same ratios as a water-based sauce; just watch the simmer time so it doesn’t reduce too much and turn too thick.
2. What’s the difference between cranberry sauce and cranberry orange relish?
Cranberry sauce is cooked: the berries burst over heat and the mixture thickens into a glossy, jammy side dish. A cranberry orange relish is usually raw, often made in a food processor with whole orange, sugar, and fresh cranberries. So, a cranberry relish recipe with orange juice or whole orange has more crunch, brighter acidity, and a slightly bitter edge from the peel. In short, sauce is smooth and spoonable; relish is chopped and zippy.
3. How do I fix cranberry sauce that’s too runny or too thick?
If your cranberry sauce made with orange juice is too runny after chilling, return it to the pan and simmer for a few minutes until it reduces and coats the back of a spoon. Conversely, if it ends up too thick, stir in extra orange juice or a little water, a tablespoon at a time, over low heat until it loosens. Always remember: a cranberry orange juice sauce thickens as it cools, so judge consistency after it’s chilled, not just while it’s hot.
4. Can I make cranberry sauce ahead of time or freeze it?
Yes, homemade cranberry sauce is perfect for making in advance. It keeps in the fridge for about a week, so you can prepare your cranberry sauce with orange juice several days before Thanksgiving or Christmas. It also freezes well for up to a couple of months; just thaw in the fridge and stir before serving. This make-ahead option frees up time and stove space on busy days.
5. Can I use frozen cranberries instead of fresh?
Frozen cranberries work just as well in a cranberry sauce recipe using orange juice. There’s no need to thaw them; simply add straight from the freezer and extend the simmer time by a minute or two. The texture and flavour will be very close to fresh, and your homemade cranberry sauce recipe will still set thanks to the natural pectin in the berries.
6. How can I make a low sugar or sugar free cranberry sauce?
To create a low sugar cranberry sauce, reduce the sugar and balance with more orange zest rather than extra juice, keeping the flavour bright without over-sweetening. For a sugar free cranberry sauce, swap sugar for a granular sweetener such as a monkfruit–erythritol blend and follow the same method. This style fits low-carb, keto and “diabetic-friendly” needs, although individual health conditions may still require personal adjustments. Expect the set to be slightly softer than a traditional full-sugar sauce.
7. Is cranberry sauce vegan and gluten free?
Most homemade cranberry sauce recipes are naturally vegan and gluten free, especially a simple cranberry sauce with orange juice made from fruit, sugar, and spices. Just avoid butter-based variations if you’re cooking for vegans, or use plant-based butter in gourmet versions like brown-butter-style twists. Likewise, check labels on alternative sweeteners if you’re making keto cranberry sauce or sugar-free versions.
8. Can I make cranberry sauce without orange juice?
Certainly. If you don’t want citrus, you can make a basic cranberry sauce recipe with water and sugar, then add a little lemon zest, apple juice, or even pomegranate juice for complexity. On the other hand, if you enjoy fruitier flavours but have no oranges, apple juice gives a softer, sweeter profile than a sharp cranberry sauce with orange juice. Just keep the overall liquid-to-cranberry ratio similar so the sauce still sets properly.
9. How much cranberry sauce do I need per person?
As a general guide, plan about ¼ to ⅓ cup of cranberry sauce per person. If you know your crowd loves it—especially if you’re also serving cranberry orange relish or chutney—lean towards the higher end. Leftovers are incredibly versatile, so making a bit extra rarely goes to waste. They can be used in recipes with cranberry sauce like meatball glaze, sandwich spread, or dessert toppings.
10. What can I do with leftover cranberry sauce?
Leftovers are gold. You can turn them into cranberry sauce for sandwiches, whisk them into a quick pan sauce for pork or chicken, or use them as a glaze for meatballs. Additionally, leftover cranberry and orange juice sauce works in baking—think thumbprint cookies, bars, or swirled cheesecakes—and even in breakfast bowls with yogurt and oats. In other words, recipes using cranberry sauce don’t have to stop at the holiday table.
11. How do I make my cranberry sauce more “gourmet”?
To transform a simple easy cranberry sauce into something special, add brown butter, vanilla, warm spices, or a splash of orange liqueur or bourbon at the end of cooking. These small tweaks create a richer, more complex gourmet cranberry sauce recipe without complicating the method. You can also fold in toasted nuts or dried fruit for extra texture, keeping the core cranberry sauce with orange juice base as your foundation.
12. What’s the best way to serve cranberry sauce for Thanksgiving?
For cranberry recipes for Thanksgiving, serve the sauce chilled or at cool room temperature so it holds its shape on the plate. Place it in a small bowl or shallow dish so the colour is visible, and pair it with classic sides like stuffing, mashed potatoes, green bean casserole, and roasted vegetables. A well-balanced cranberry sauce Thanksgiving spread often includes a smooth sauce plus a chunky relish or chutney, giving guests a choice of textures and flavours.