If you’re trying to eat healthier or just want a speedy breakfast, you’ve probably noticed two convenient oat choices in every store: quick oats and instant oats. But are they actually the same thing? Why are there so many options—and does it matter which you choose for your porridge, overnight oats, or baking? Here’s the full story, with practical tips, cooking advice, and nutrition facts so you can pick the best oats for your lifestyle.
What Exactly Are Quick Oats?
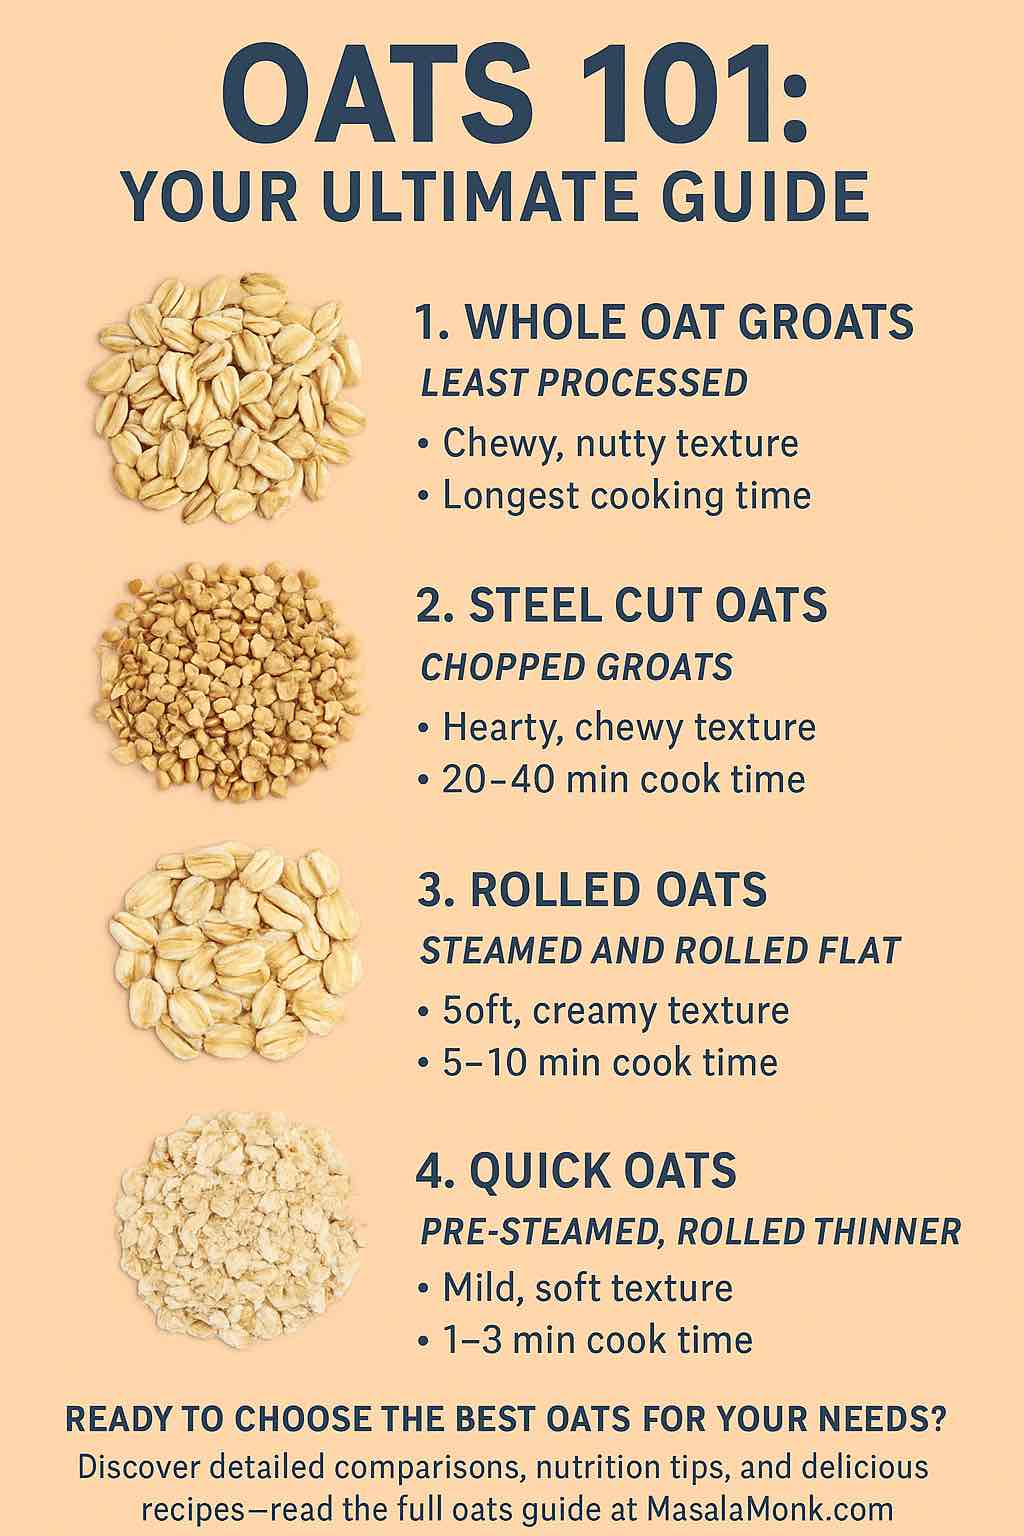
Quick oats (also called “quick-cooking oats”) start with the same whole oat groats used for all oat products. These groats are first steamed, then rolled thinner and sometimes cut into smaller pieces than traditional rolled (old-fashioned) oats. The extra processing makes them cook faster and break down more easily when prepared.
- Texture: Soft and fluffy, but still has some bite.
- Cooking time: Just 1–3 minutes on the stovetop or microwave.
- Best uses: Hot porridge, overnight oats, soft cookies, pancakes, and quick breads.
Quick oats give you a hot breakfast or recipe base in almost no time—no need for long simmering.
If you’re curious about the differences between rolled oats, old-fashioned oats, and when you can swap them, check out our detailed guide on substituting old-fashioned oats for rolled oats.
Instant Oats: Even Faster, Even Softer
Instant oats (often found as “instant oatmeal”) take processing a step further. Oat groats are steamed, fully cooked, dried, rolled even thinner than quick oats, and then sometimes chopped so they cook immediately when you add hot water or microwave them. Most commonly, instant oats are sold in single-serve packets, often with flavorings and sugar already mixed in.
- Texture: Creamy, smooth, and very soft—almost pudding-like when cooked.
- Cooking time: Instantly ready with boiling water or in 1 minute in the microwave.
- Best uses: Instant breakfast, office snacks, travel, camping, or for kids who prefer a smoother texture.
It’s important to note that instant oats in packets are often pre-flavored and sweetened. The added sugars, salt, and flavorings can make them less healthy than plain oats. For ultimate control, buy plain instant oats and add your own healthy toppings at home.
Quick Oats vs Instant Oats: What Really Matters?
Although both are designed for speed, quick oats and instant oats are not identical. The differences matter in real-life cooking, texture, and health:
| Feature | Quick Oats | Instant Oats |
|---|---|---|
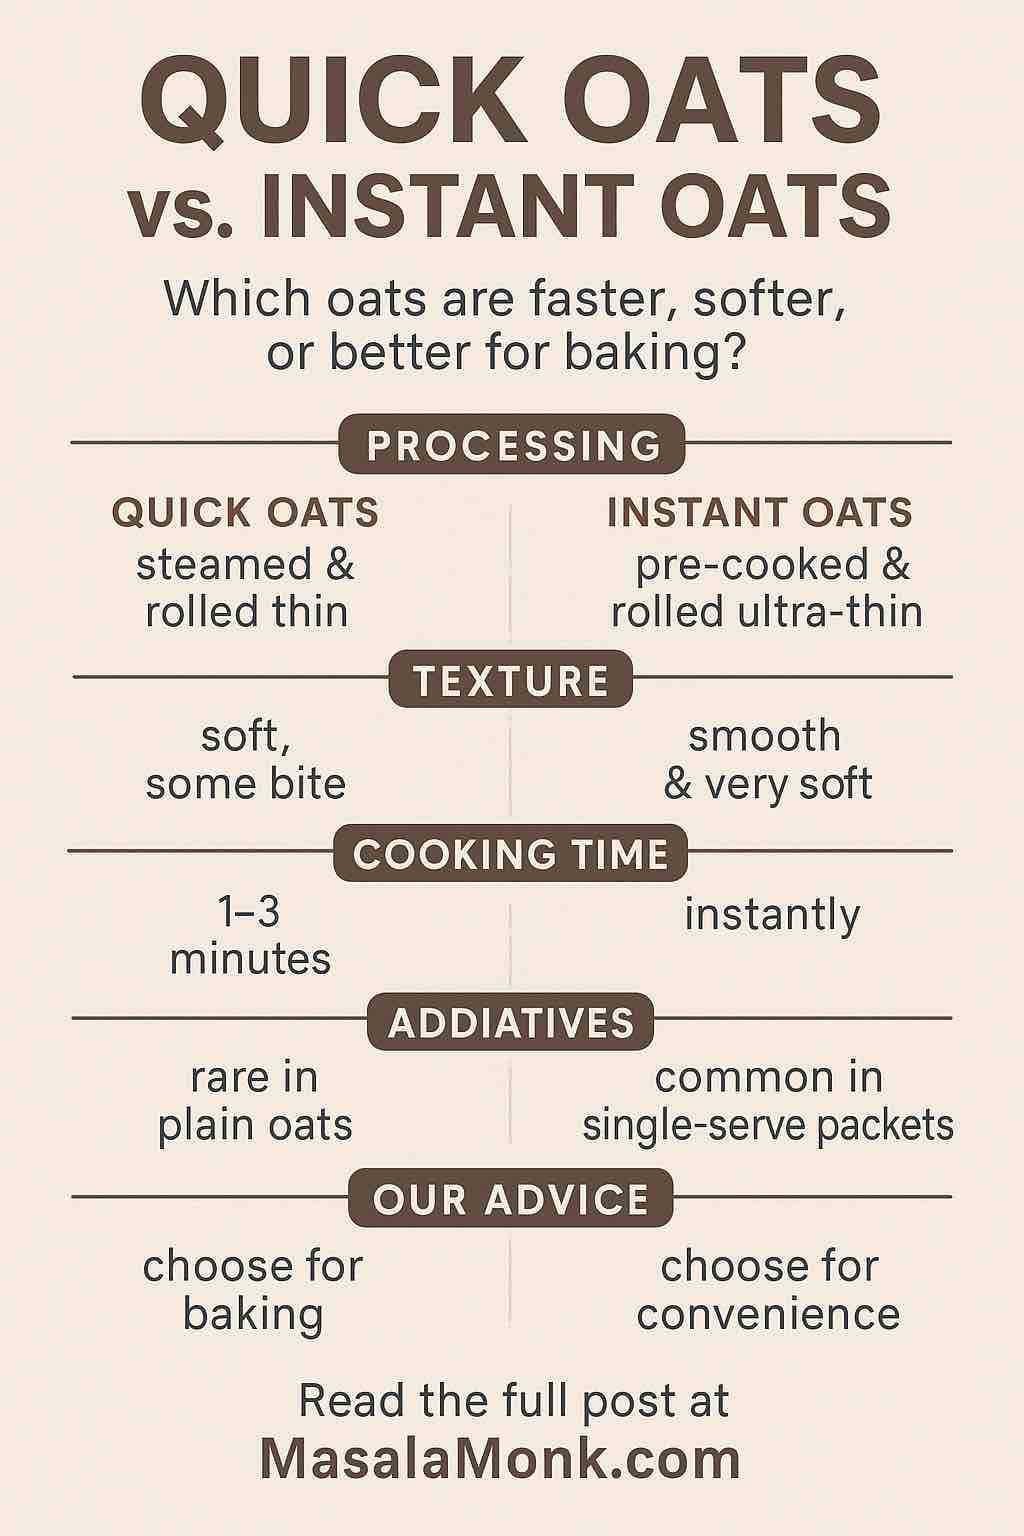
| Processing | Steamed & rolled thin | Pre-cooked, rolled ultra-thin, often chopped |
| Texture | Soft, still some bite | Silky, very soft, can be mushy |
| Cook Time | 1–3 minutes | Instant—just add hot water |
| Packaging | Sold in bulk | Often single-serve flavored packets |
| Additives | Rare in plain quick oats | Common in instant oat packets (sugar, salt) |
| Recipe use | Great for baking | Not ideal for baking (gets too mushy) |
When it comes to taste and mouthfeel:
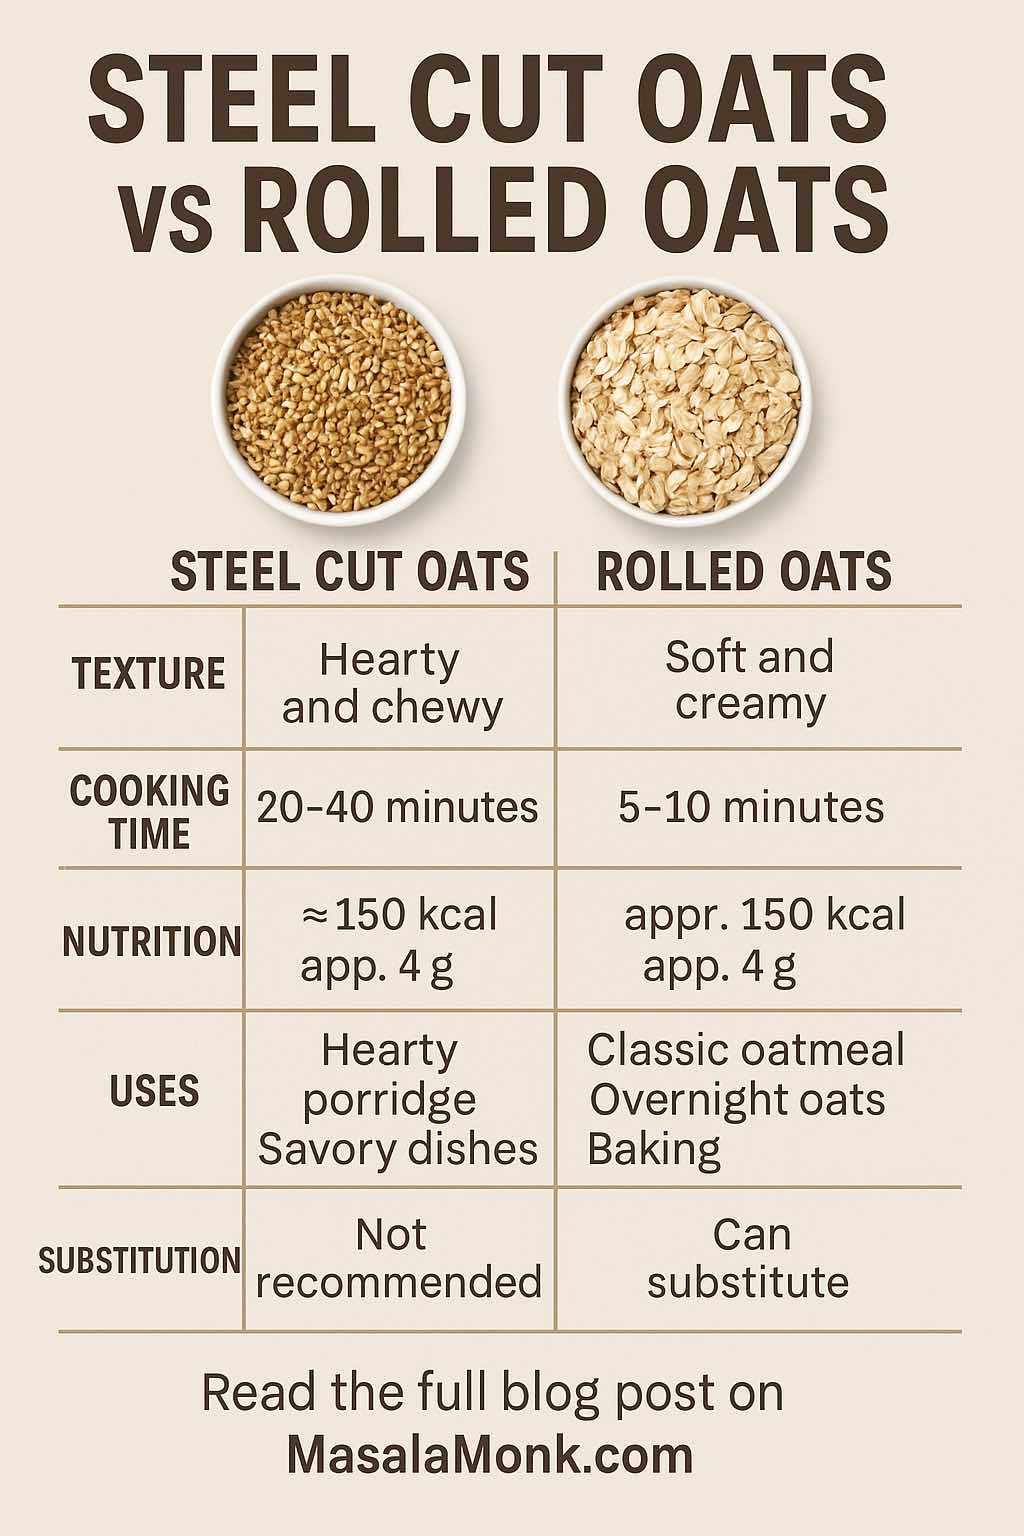
- Quick oats make a thicker, heartier porridge or baked good with a little more chew.
- Instant oats dissolve into a creamy, very smooth mixture—great if you like a super-soft texture.
If you want a breakdown of how all major oat types compare (including steel cut and rolled), don’t miss our Ultimate Guide to Oats: Types, Nutrition, and Differences Explained.
Practical Kitchen Advice: When to Use Each
Quick oats are your best friend for:
- Hot oatmeal when you’re short on time but still want real oat texture.
- Adding to muffin or pancake batters for extra fiber.
- Thickening smoothies (just toss them in raw).
- Making “overnight oats” with a softer texture, perfect for meal prep.
Instant oats shine when:
- You need breakfast or a snack instantly—just pour boiling water and stir.
- You’re traveling, camping, or need food on the go.
- You’re serving kids, or anyone who prefers a creamy, pudding-like bowl.
If you love baking or making granola, quick oats will hold up much better than instant oats. Instant oats will break down and make recipes mushy—so stick to using them in porridge or as a speedy meal.
Nutrition: Is One Healthier?
Plain quick oats and plain instant oats are virtually identical in nutrition, with about 150 calories, 4 grams of fiber, and 5 grams of protein per serving. Both deliver the heart-healthy benefits of oats, including beta-glucan fiber.
BUT:
Instant oat packets are often loaded with sugar, salt, and flavorings—sometimes as much as a dessert! Always check the ingredients, and whenever possible, choose unsweetened varieties so you can control the flavors and sweetness.
If you’re interested in how glycemic index, satiety, and fiber stack up across all oat types (including steel cut and rolled), you’ll find a full comparison in our oat guide.
Can You Substitute Quick Oats for Instant Oats (and Vice Versa)?
- For hot porridge, you can swap them—just expect a difference in texture: quick oats are thicker, instant oats are silkier.
- In baking, quick oats are better; instant oats can turn recipes gooey or pasty.
- For overnight oats, quick oats work best; instant oats will dissolve and become almost like pudding.
Whenever a recipe simply says “oats,” check the texture you want. If you’re unsure, read up on the difference between oats, oatmeal, and which oat type is best for every recipe.
The Real-World Bottom Line
Both quick oats and instant oats offer convenience, whole grain nutrition, and the versatility to fit your lifestyle.
- Choose quick oats if you want speed, texture, and more flexibility for cooking and baking.
- Choose instant oats if you value pure convenience (and be sure to read the label for added sugar and sodium).
Still unsure which oat is best for you? See how they all stack up in our comprehensive oats guide.
Explore more about using different oats in baking and porridge, and discover when to swap or stick with each in Can You Substitute Old-Fashioned Oats for Rolled Oats?
And if you’re comparing all oats head to head (steel cut, rolled, quick, instant), our “Steel Cut Oats vs Rolled Oats: Nutrition, Taste, Cooking & More” post breaks it down further:
Read the in-depth comparison
Conclusion
Quick oats and instant oats are both designed to help you get nutritious, hearty meals on the table—fast. Their key differences are in texture, use in recipes, and (with instant) the likelihood of extra additives. For the healthiest choice, stick to plain varieties and add your own flavors at home.
Want to learn even more about all things oats? Browse our Ultimate Guide to Oats for practical cooking tips, nutrition details, and the best ways to enjoy oats every day!
10 FAQs – Are Quick Oats the Same as Instant Oats?
1. Are quick oats and instant oats the same thing?
No. Quick oats are rolled thinner and cut smaller to cook faster, but instant oats are pre-cooked, dried, and rolled even thinner for truly instant preparation.
2. Can I substitute quick oats for instant oats in recipes?
In hot cereal, yes—the texture will just be thicker. In baking, quick oats are usually better; instant oats may make recipes too mushy.
3. Are instant oats less healthy than quick oats?
Plain instant oats have similar nutrition to quick oats. However, most instant oats packets have added sugar, salt, and flavors—check labels!
4. Why do instant oats cook faster than quick oats?
Instant oats are pre-cooked and rolled much thinner than quick oats, allowing them to absorb water and soften immediately.
5. Can I use instant oats for overnight oats?
You can, but they will dissolve and become very soft, almost pudding-like. Quick oats work better for classic overnight oats texture.
6. Do quick oats and instant oats taste the same?
They’re both mild, but instant oats have a smoother, softer texture and can taste sweeter if flavored.
7. Are quick oats and instant oats gluten-free?
Oats are naturally gluten-free, but always check for certified gluten-free labeling, as cross-contamination can occur during processing.
8. Which is better for baking: quick oats or instant oats?
Quick oats are better. Instant oats tend to break down and make baked goods mushy.
9. Do quick oats and instant oats have the same calories and nutrients?
Yes, if both are plain and unsweetened. Most differences come from flavorings and additives, not the oats themselves.
10. Which should I choose for the healthiest breakfast?
Choose plain quick oats or plain instant oats, and add your own fruit or nuts. Avoid flavored instant oat packets with added sugar.