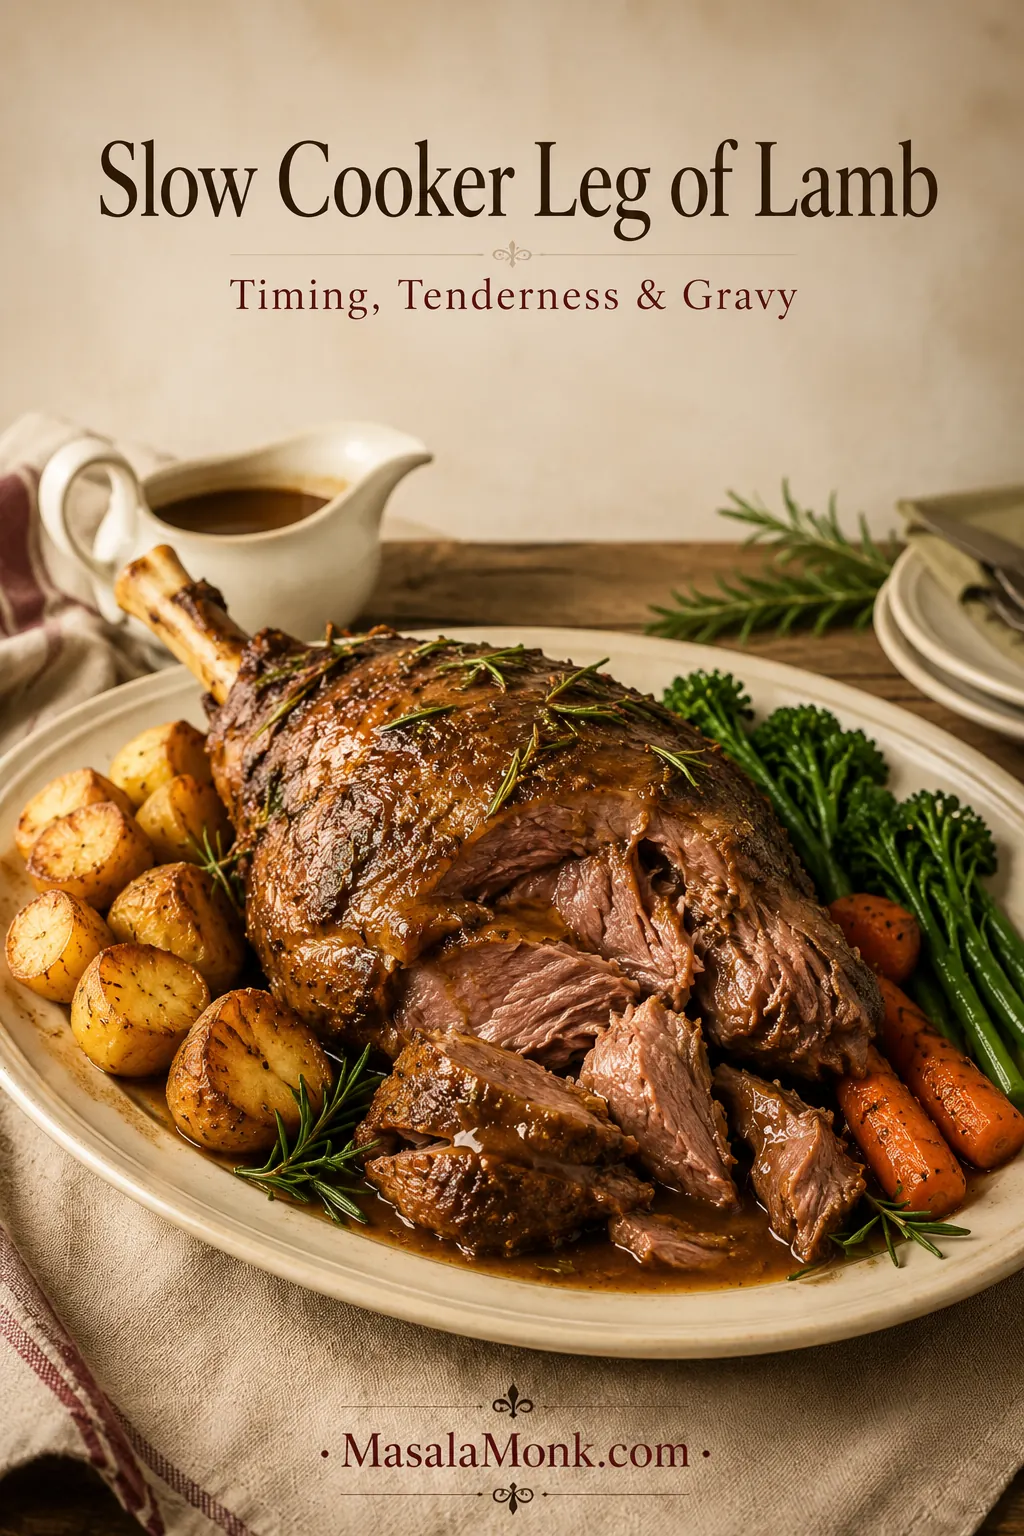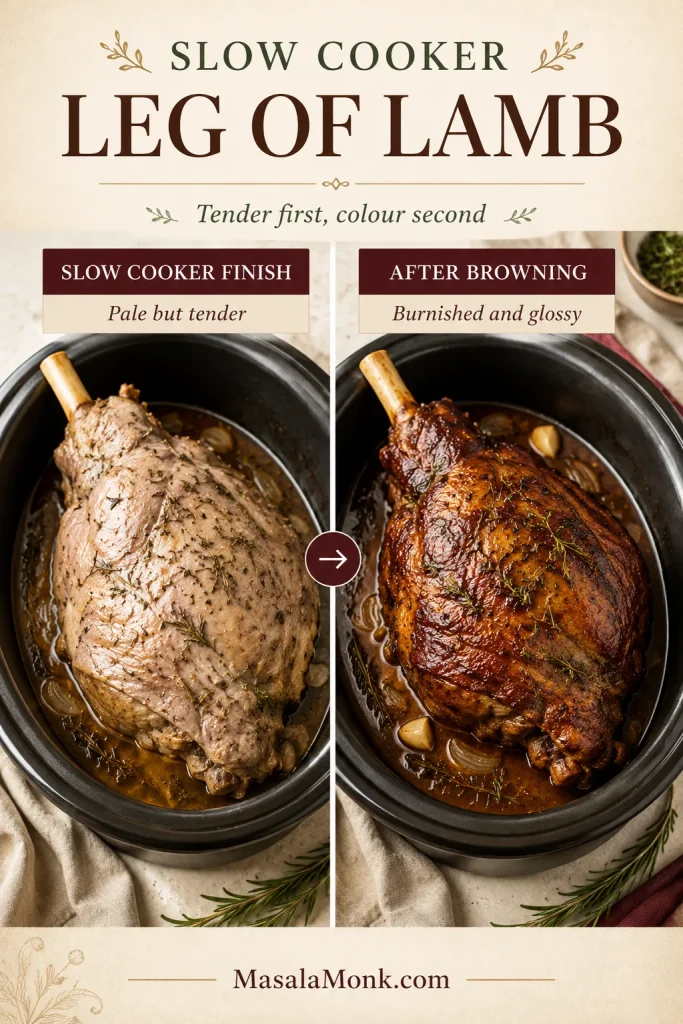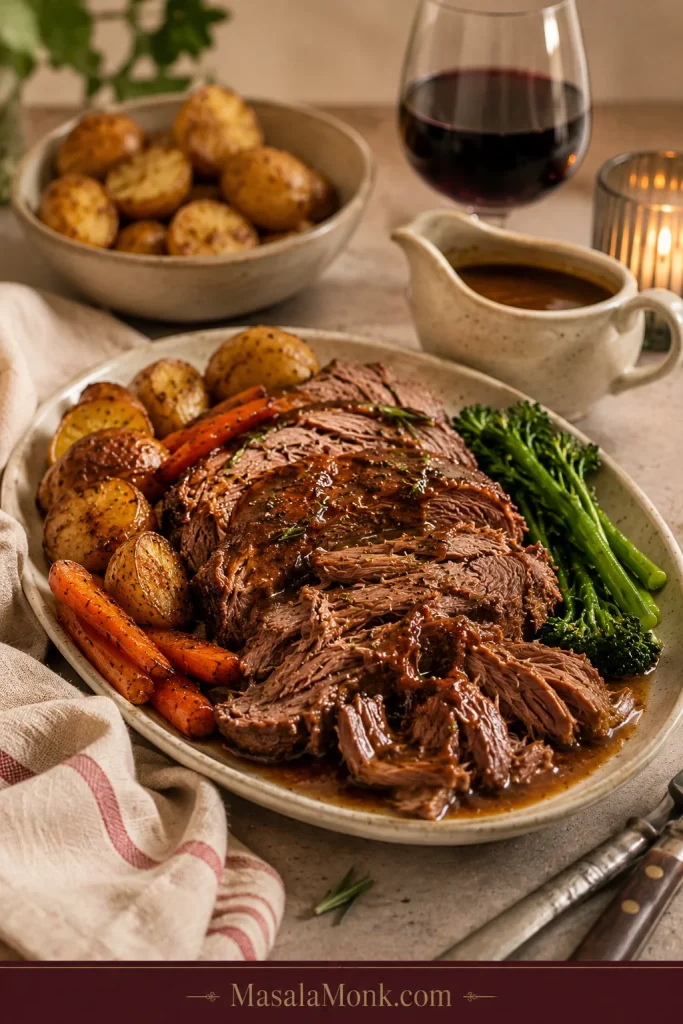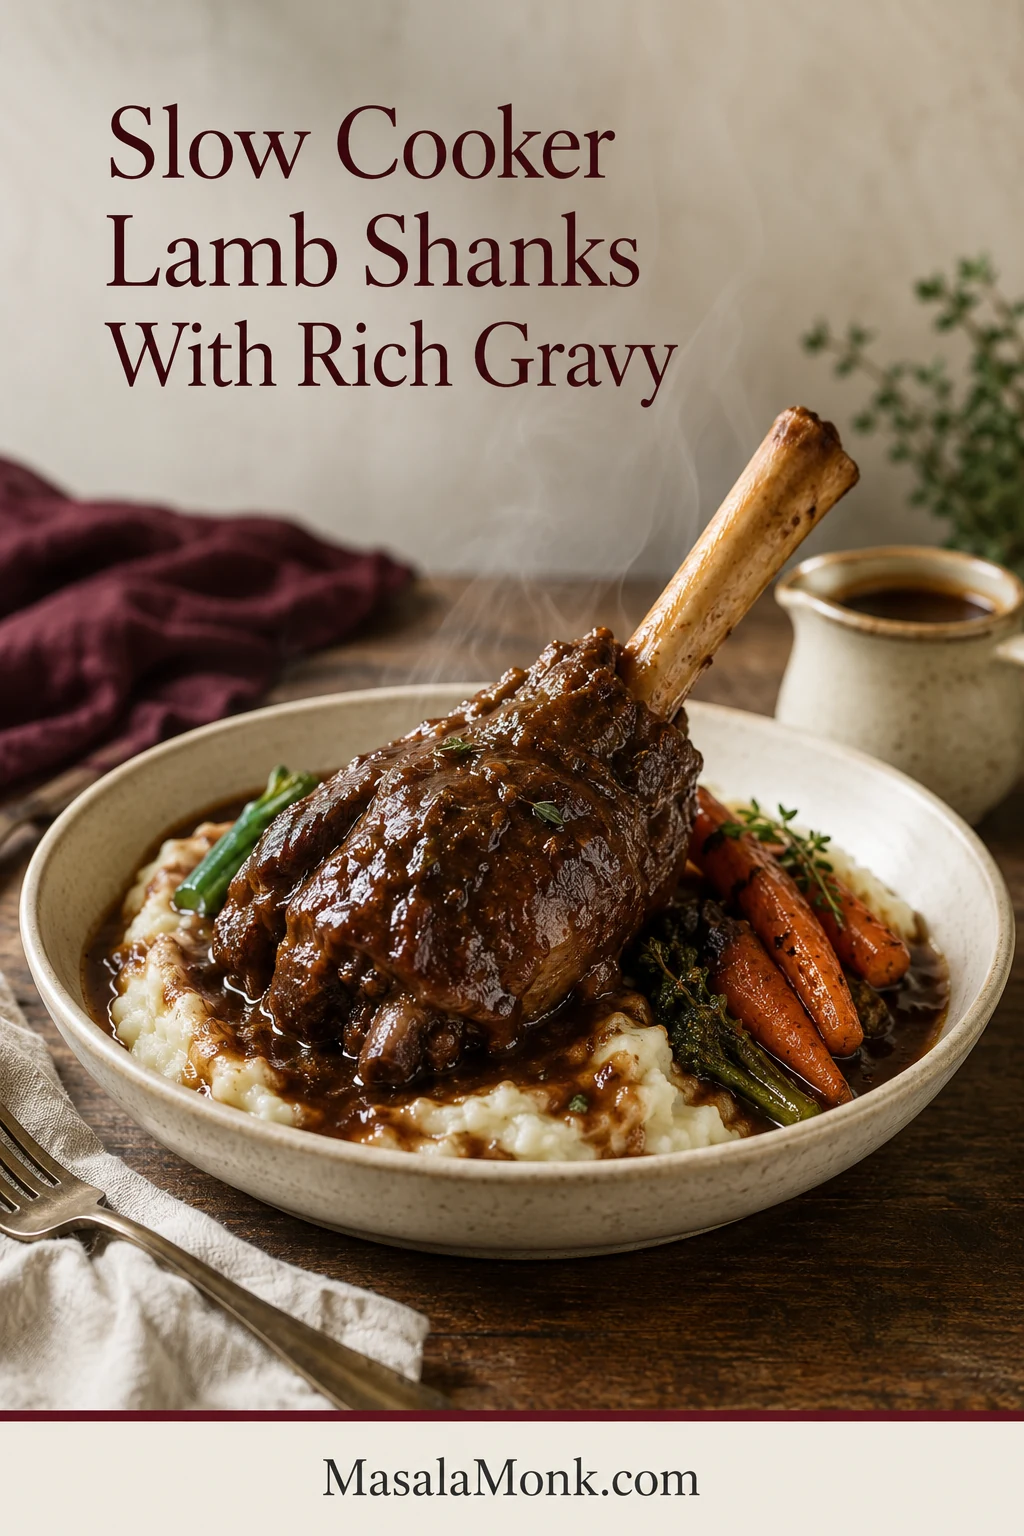
The best moment comes before the first bite. You slide a spoon beneath the lamb, lift gently, and the meat gives around the bone without collapsing into dry threads. The gravy settles over the shank in a dark, glossy layer, then runs into the mashed potatoes underneath.
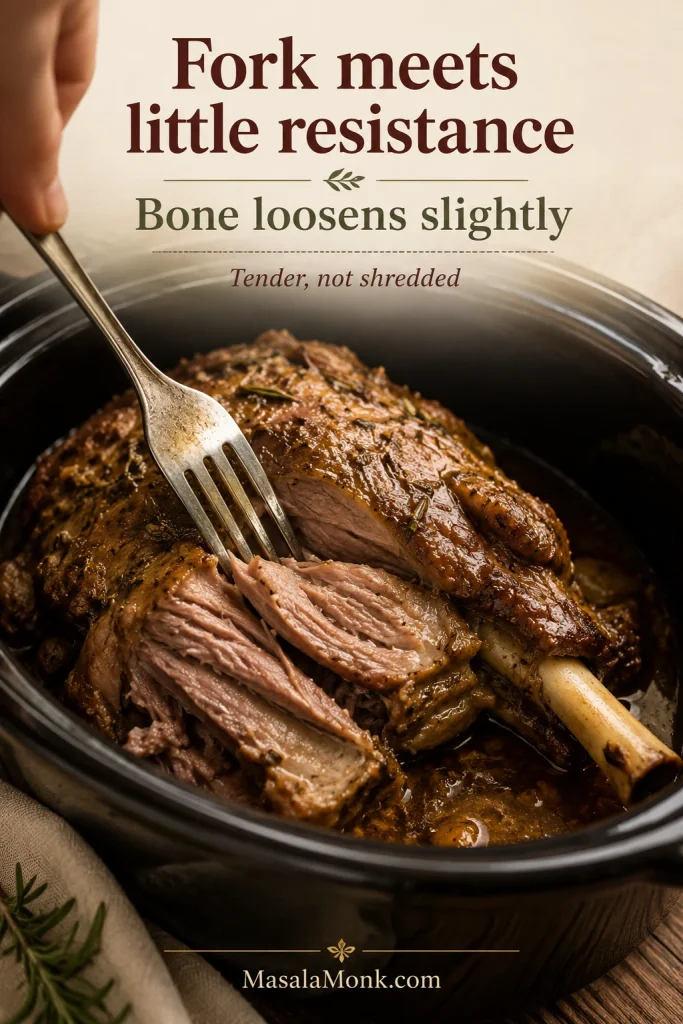
Fall-apart tender does not have to mean collapsed in the slow cooker. The ideal shank still reaches the plate intact, then yields as soon as a fork presses into the meat.
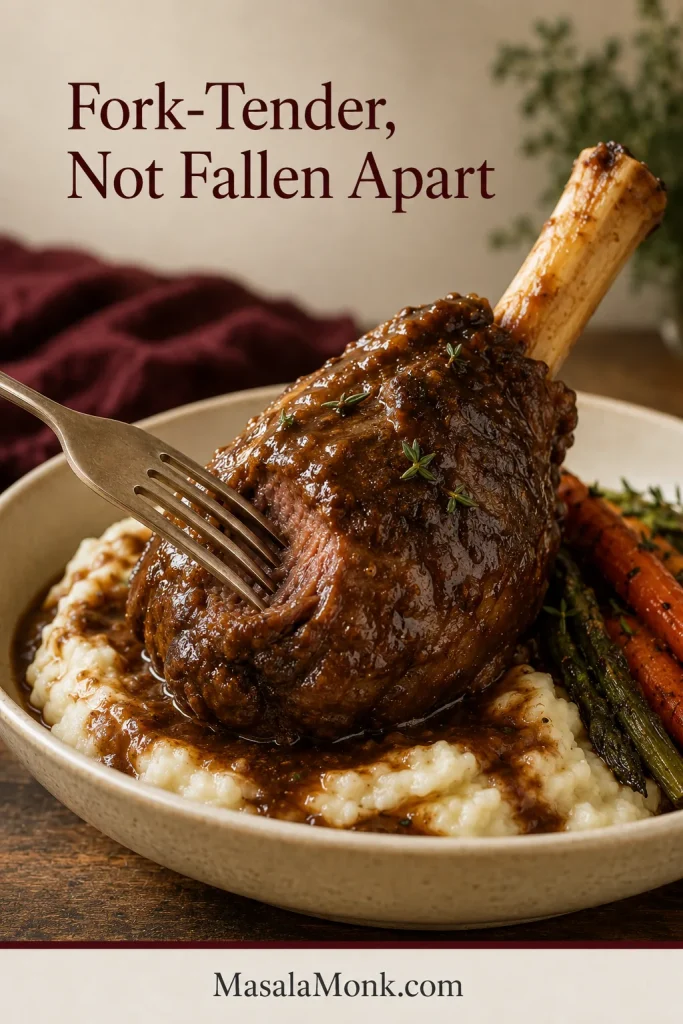
These slow cooker lamb shanks feel like an occasion dinner, yet almost all the work happens long before anyone sits down. This is a patient dinner, not a difficult one. By the time dinner approaches, the chopping and browning are behind you, and the kitchen smells of rosemary, browned lamb and a darkening sauce.
Whether the appliance says slow cooker or Crock-Pot, keep one rule in mind: the fork decides when the lamb is ready, and the saucepan decides when the gravy is ready.
Choose Your Lamb Shank Version
For the deepest classic flavour, start with the red-wine version. Use the table when you need a wine-free, tomato-free or no-sear alternative.
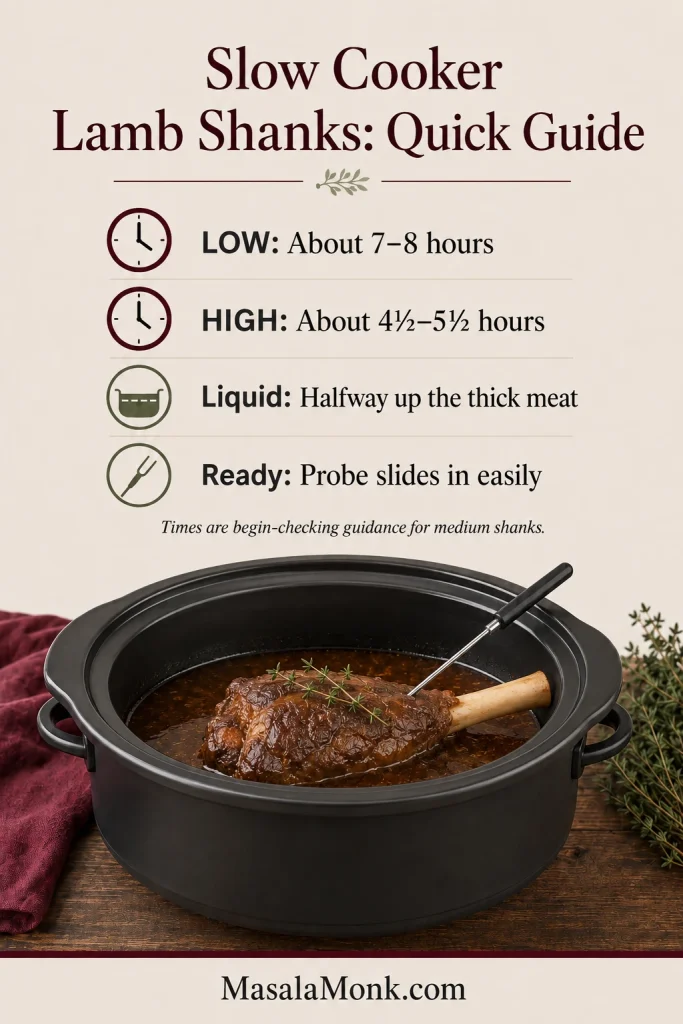
Medium lamb shanks weighing 12–14 oz / 350–400 g each usually need about 7–8 hours on LOW or 4½–5½ hours on HIGH. Keep the thick meaty portions about halfway in the braising liquid, then cook until a fork or thin probe slides through with almost no resistance.
| If you want… | Choose this path |
|---|---|
| The richest classic gravy | Brown the shanks and follow the red-wine recipe as written. |
| No wine | Use extra stock, 100% red grape juice with no added sugar and a little balsamic vinegar. |
| No tomato | Omit the paste, brown more deeply and adjust the acidity after reducing. |
| The least stovetop work | Skip the sear, whisk the braising liquid together, then reduce and season the lighter gravy at the end. |
Slow Cooker Lamb Shanks With Rich Gravy
Four medium lamb shanks cook slowly in a red-wine braising liquid with onion, carrot, celery, garlic, herbs and a small amount of tomato paste. Once the meat is tender, the cooking liquid is skimmed and reduced into a dark, glossy gravy.
Recipe at a glance
- Serves: 4
- Shank size: 12–14 oz / 350–400 g each
- Prep and stovetop work: About 30–40 minutes
- LOW: About 7–8 hours, sometimes longer
- HIGH: About 4½–5½ hours, sometimes longer
- Gravy finishing: About 10–15 minutes
- Doneness: A fork or thin probe slides in with almost no resistance
- Gravy yield: Generous for four servings; final volume depends on reduction
Essential equipment
- 6-quart / 5.7-litre slow cooker, preferably oval
- Large heavy frying pan or skillet
- Sturdy kitchen tongs
- Wide saucepan for finishing the gravy
Helpful, but not required
- Wide spoon or spatula for supporting the tender meat
- Fine-mesh strainer or immersion blender
- Fat separator
- Instant-read thermometer
Ingredients
For the lamb
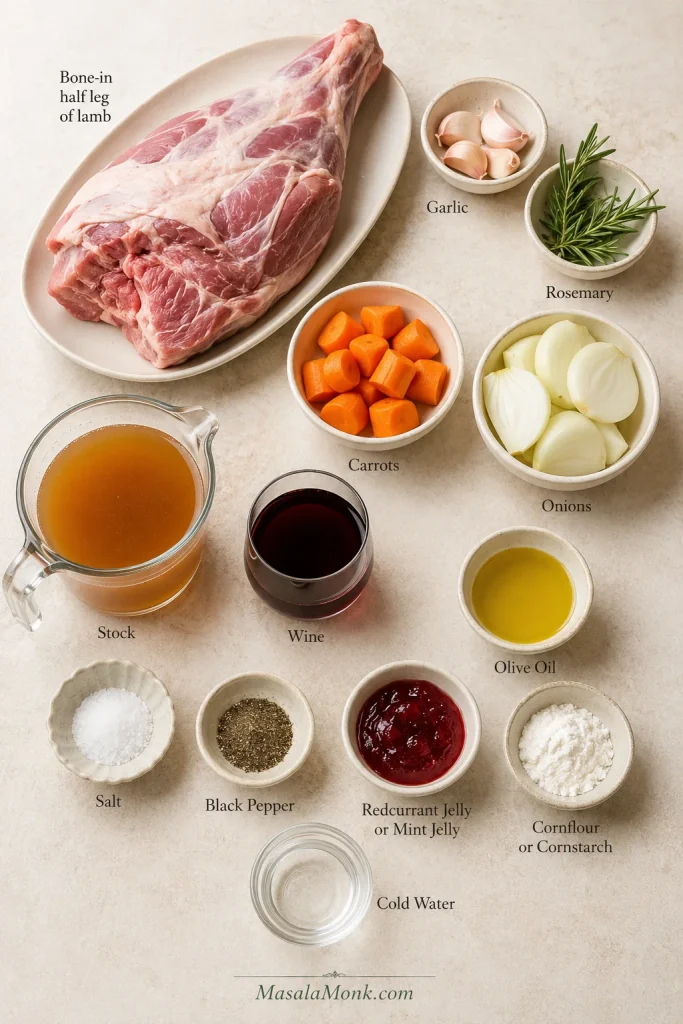
- 4 lamb shanks, about 12–14 oz / 350–400 g each, 3.1–3.5 lb / 1.4–1.6 kg total
- 8 g fine sea salt, about 1⅓ teaspoons, divided
- 1 teaspoon freshly ground black pepper
- 2 tablespoons / 30 ml olive oil, plus a little more if the pan becomes dry
For the braising liquid
- 1 large yellow onion, diced, about 7–8 oz / 200–225 g
- 2 medium carrots, diced, about 6 oz / 170–180 g
- 2 celery ribs, diced, about 3½ oz / 100 g
- 5 garlic cloves, finely chopped or grated, about ¾ oz / 20 g
- 2 tablespoons / 30 g tomato paste
- 1 cup / 240 ml dry red wine
- 1⅔ cups / 400 ml low-sodium lamb or beef stock
- Up to ⅓ cup / 80 ml additional low-sodium stock, held in reserve and added only if needed
- 1 tablespoon / 15 ml Worcestershire sauce
- 2 fresh rosemary sprigs
- 4 fresh thyme sprigs
- 2 bay leaves
To finish the gravy
- 1 tablespoon / 8 g cornstarch (cornflour), optional
- 1 tablespoon / 15 ml cold water, optional
- 1 tablespoon / 14 g unsalted butter, optional
- Fine sea salt and black pepper, as needed after reducing
Instructions
Prepare and Brown the Lamb
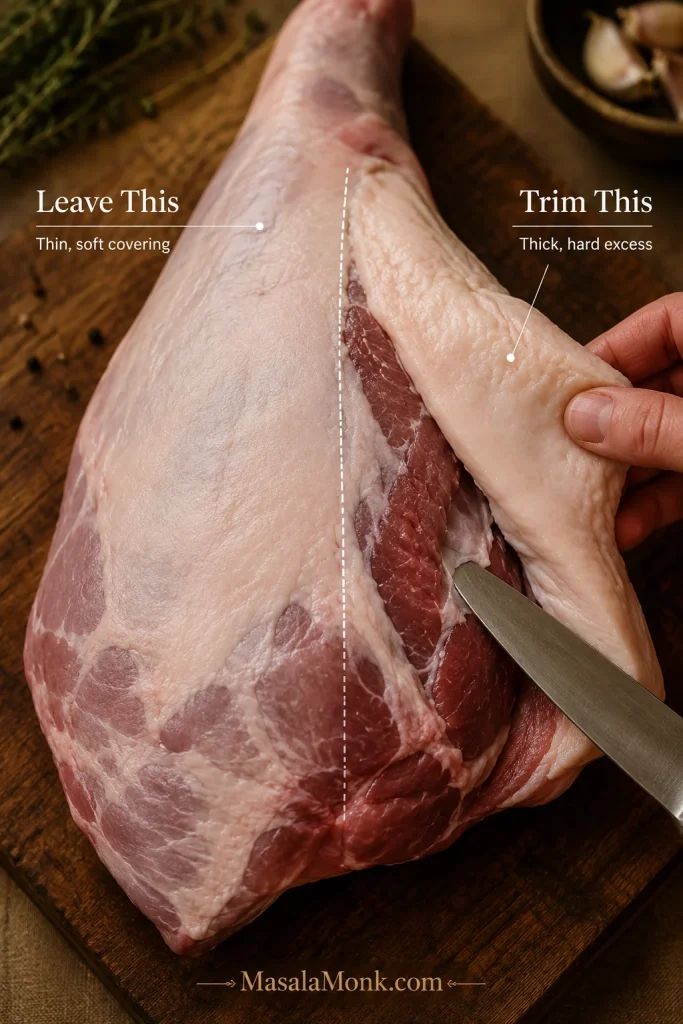
- Prepare the lamb. Pat the shanks dry. Trim only large loose flaps of hard fat or silverskin—the shiny, tough membrane on the surface. Season with 6 g / about 1 teaspoon salt and all the black pepper; reserve the remaining 2 g / about ⅓ teaspoon salt for the finished gravy.
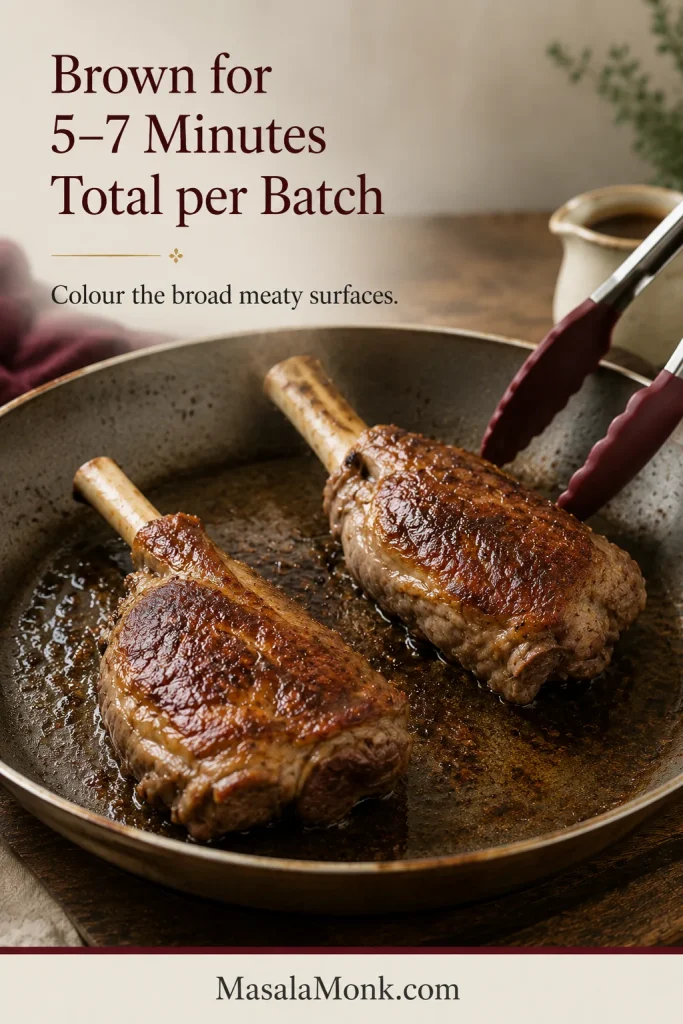
- Brown the shanks. Heat 1 tablespoon oil in a large frying pan or skillet over medium-high heat. Work in one or two batches as needed and brown each batch for 5–7 minutes total, turning to colour the broad meaty surfaces. Add a little more oil if the pan becomes dry, then transfer the shanks to the slow cooker.
Build the Flavour Base
- Cook the vegetables. Reduce the heat to medium and add the remaining oil. Cook the onion, carrot and celery for 6–8 minutes, stirring and scraping the pan, until the onion has softened and begun to colour.
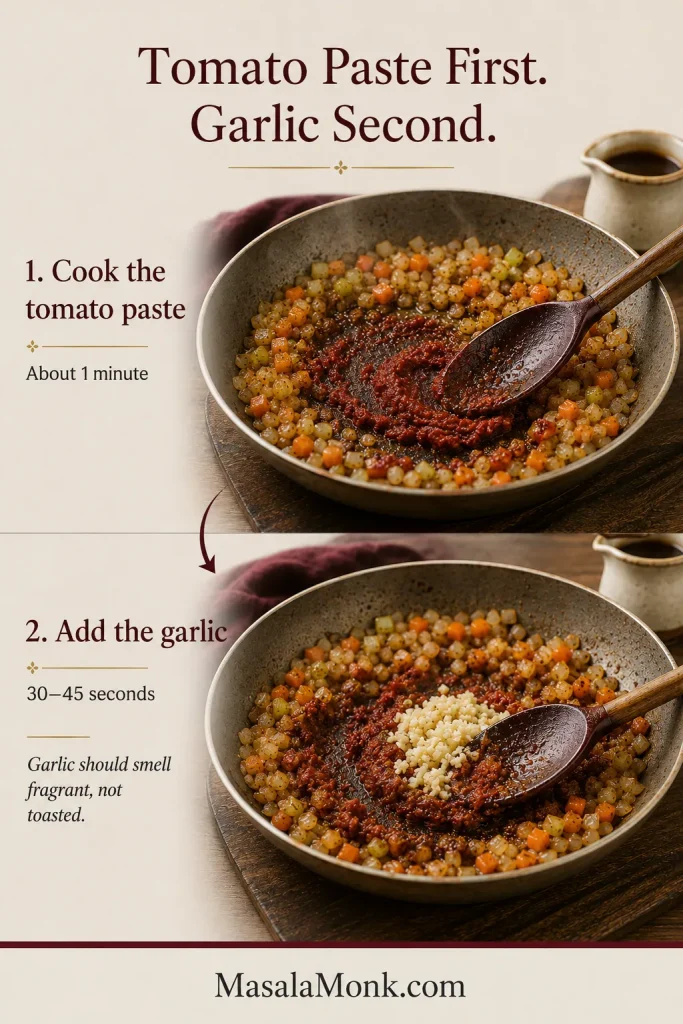
- Cook the tomato paste, then the garlic. Stir the tomato paste through the vegetables for about 1 minute, until it darkens slightly. Add the garlic and cook for another 30–45 seconds, just until fragrant. If the garlic is finely grated, add it only during the final 30 seconds.
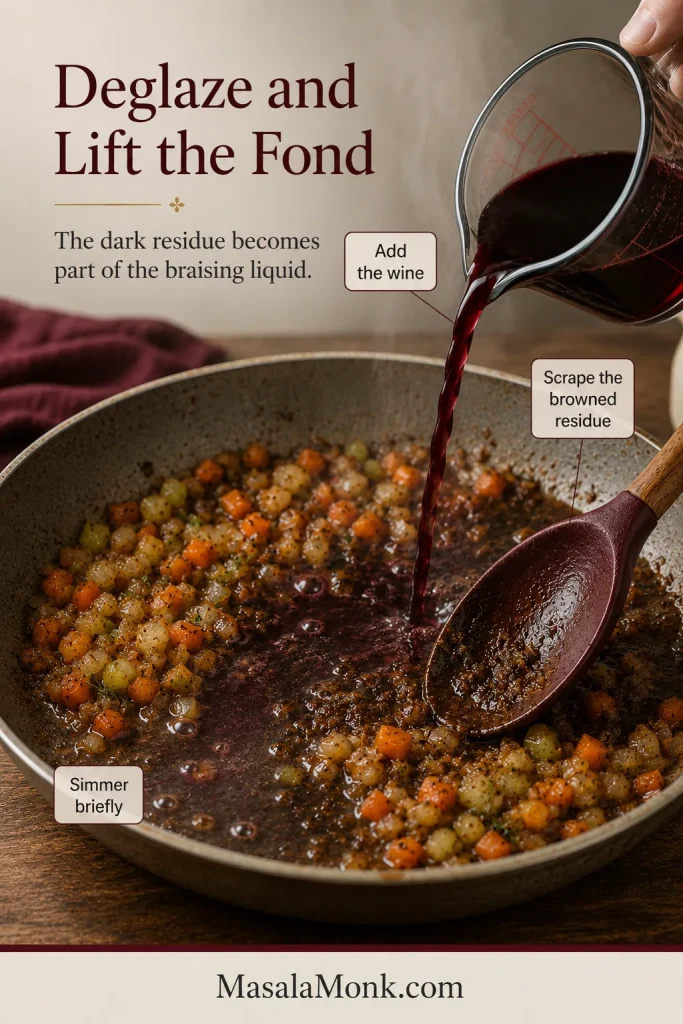
- Deglaze with wine. Pour in the red wine and scrape the browned residue from the base of the pan. Simmer for 3–4 minutes, until the sharp raw-wine aroma softens and the liquid reduces slightly.
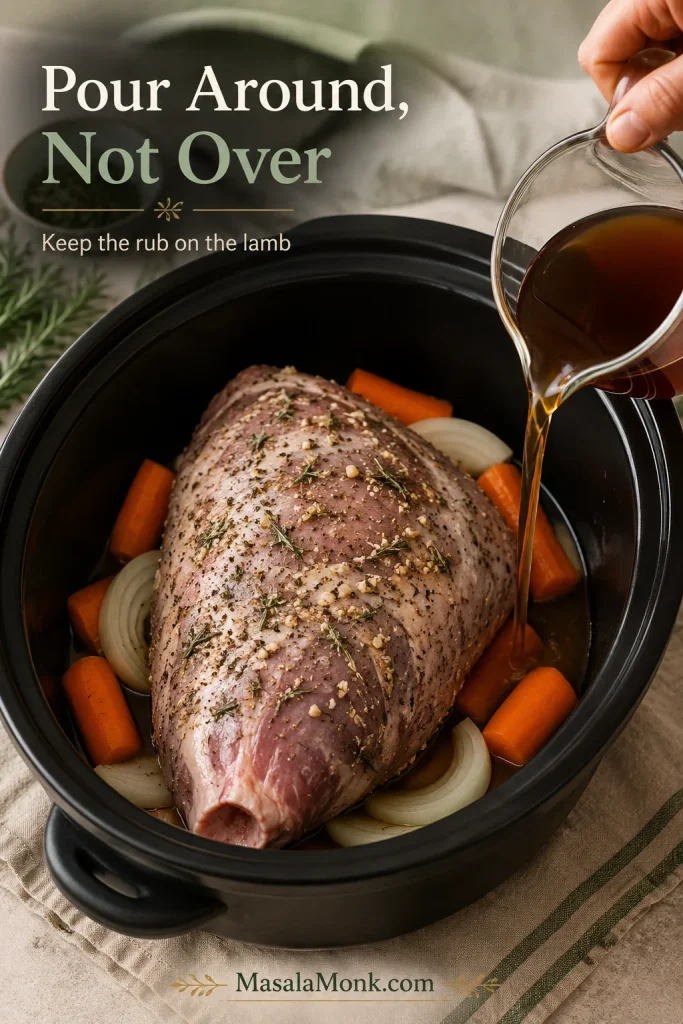
- Build the braising liquid. Stir in the 400 ml stock and Worcestershire sauce. Bring to a gentle simmer, then pour the vegetables and liquid around the lamb in the slow cooker. Add the rosemary, thyme and bay leaves.
Arrange and Slow Cook
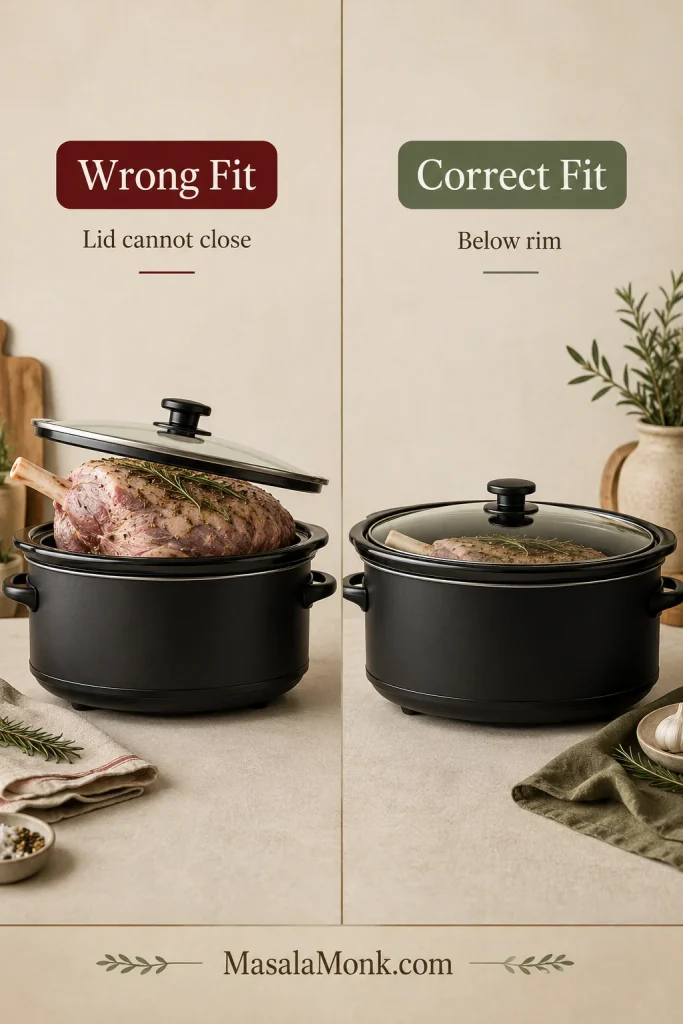
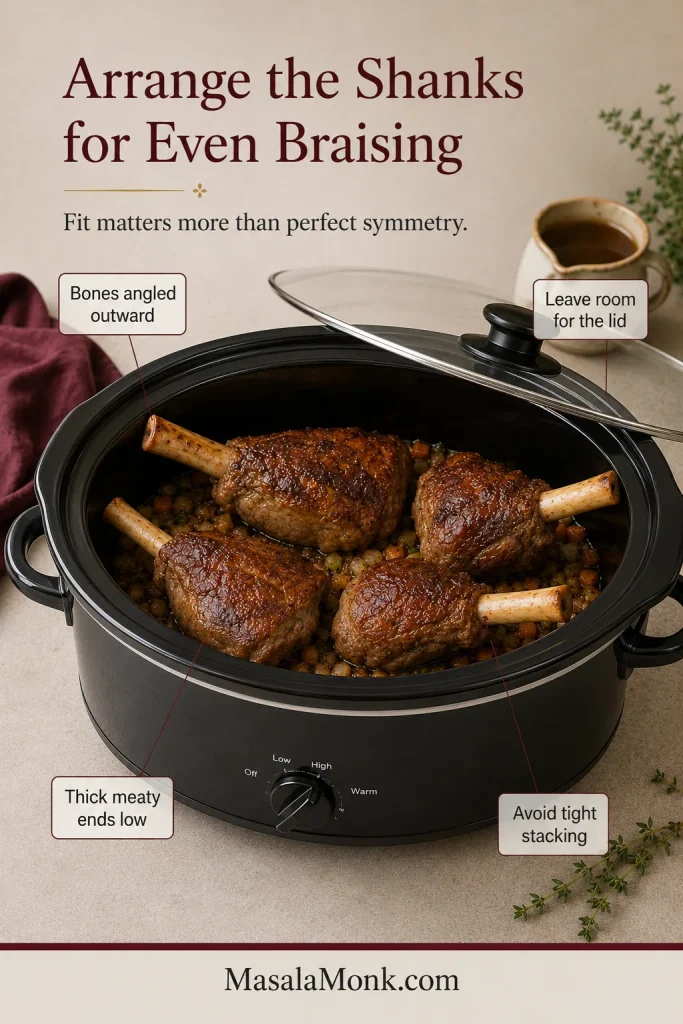
- Check the liquid level. Arrange the thick ends of the shanks in the liquid. The shanks may overlap slightly as long as the lid closes securely and each thick end touches the braising liquid. Add reserved stock only as needed to bring the liquid close to halfway up the thick meaty portions. The bones and upper surfaces can remain exposed.
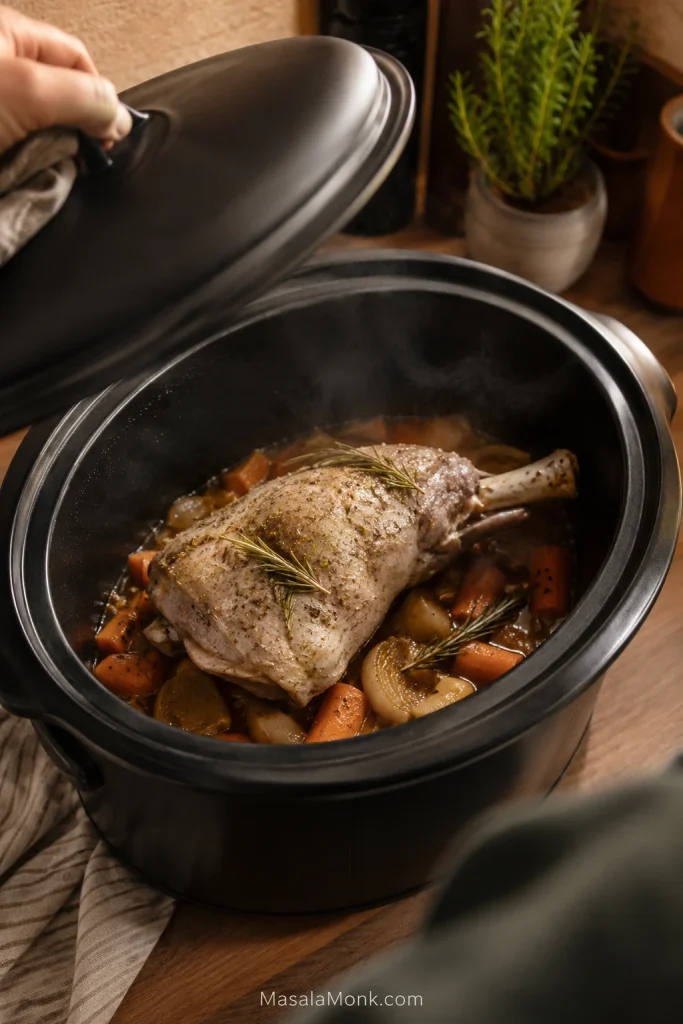
- Slow cook. Cover and cook on LOW for about 7–8 hours or HIGH for about 4½–5½ hours for shanks in the stated size range. Keep the lid closed until the checking window; turning is usually unnecessary when the meat is positioned as directed. When the lid first lifts, the meat should look looser around the bone.
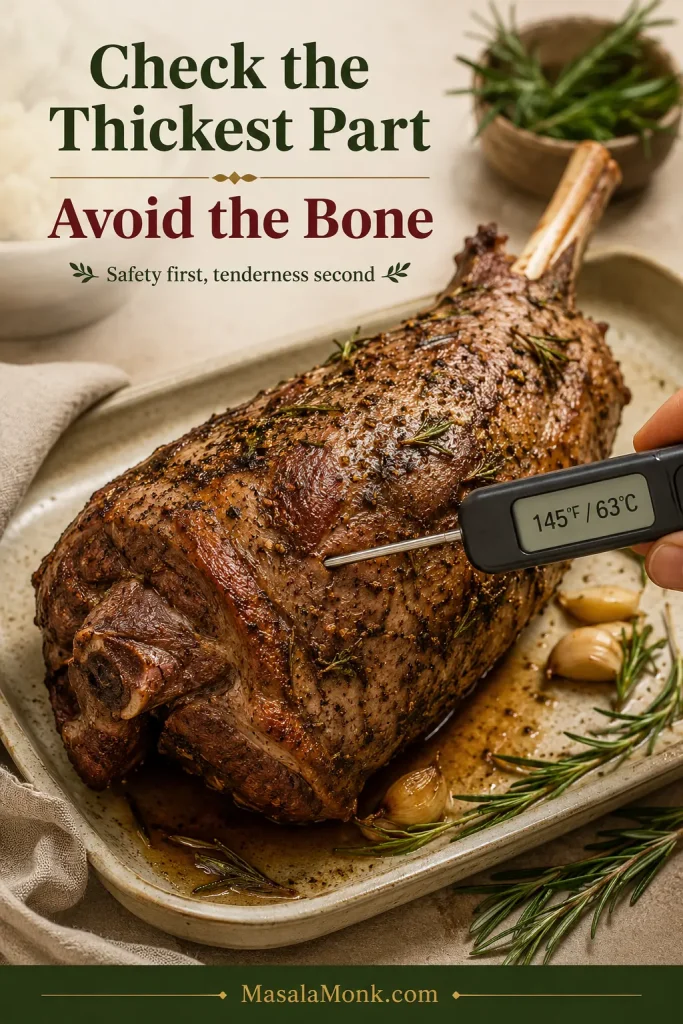
- Check tenderness. Insert a fork, skewer or thin thermometer probe into the thickest meat without touching the bone. It should slide in with very little resistance. If the meat still feels firm or springy, cover and continue cooking in 30-minute increments.
Lift the Lamb and Finish the Gravy
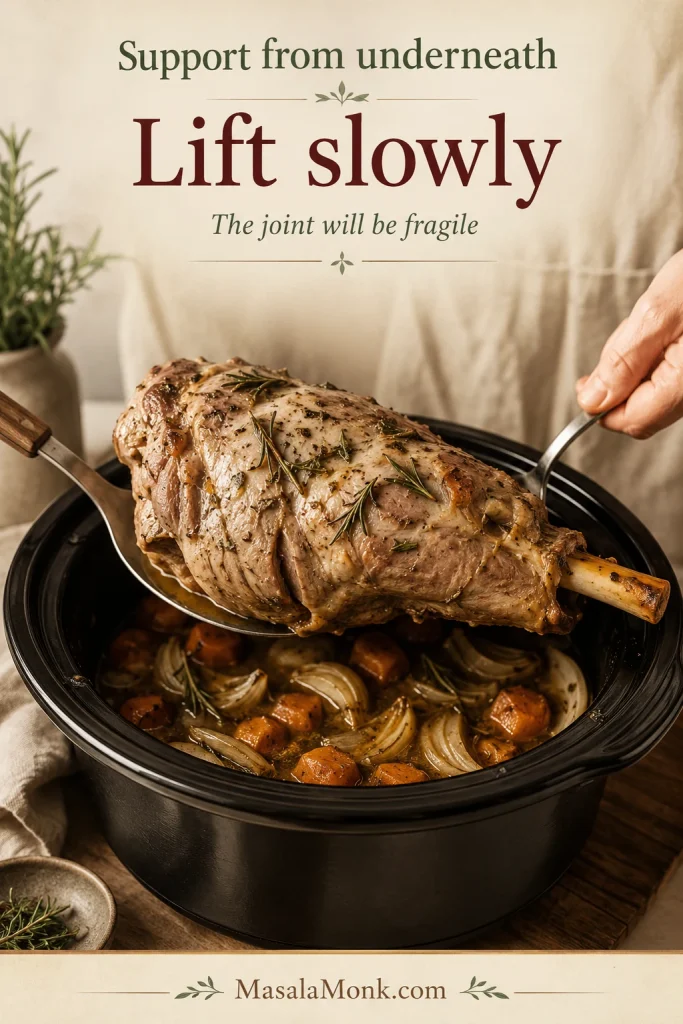
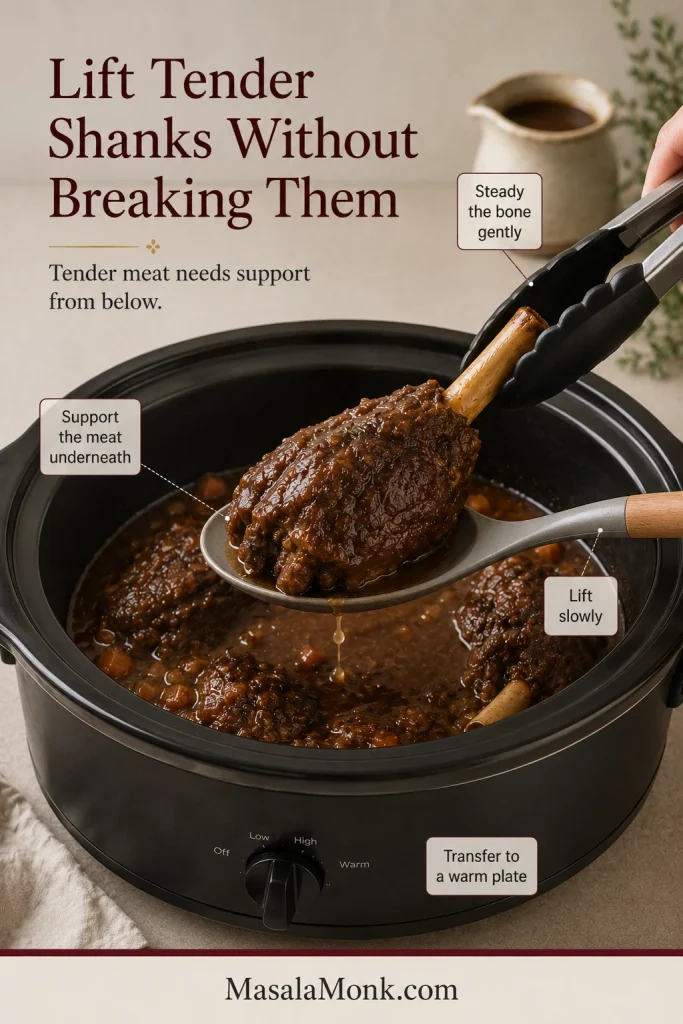
- Lift the shanks carefully. Hold each bone gently with tongs while supporting the meat underneath with a wide spoon or spatula. Transfer to a warm platter and cover loosely.
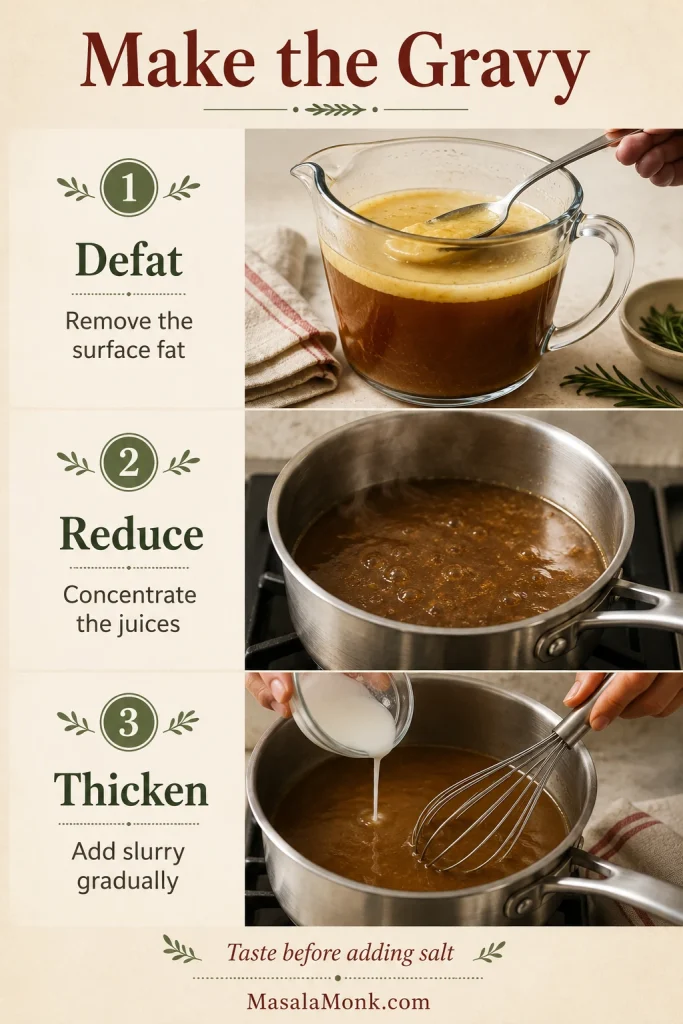
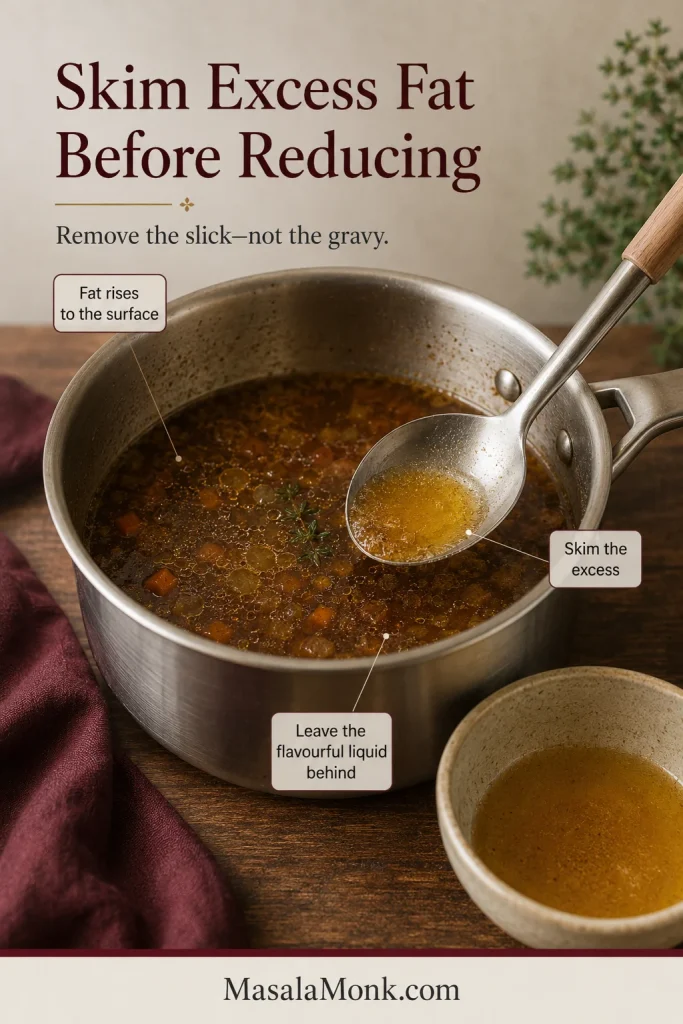
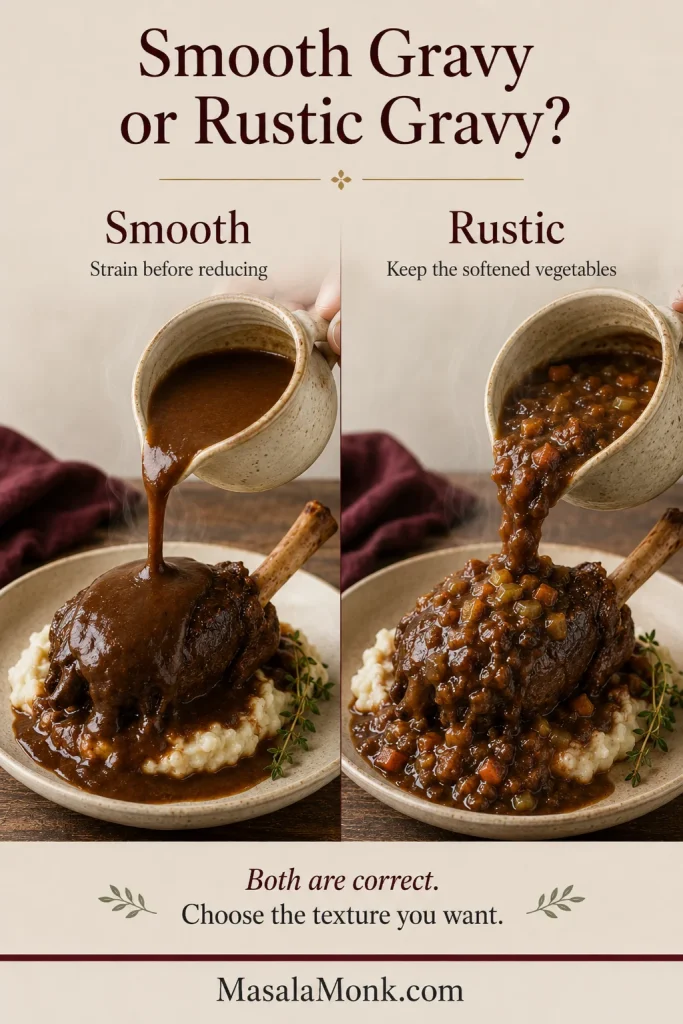
- Finish the gravy. Remove the herb stems and bay leaves. Skim visible fat. Strain the cooking liquid for a smooth gravy or blend some of the vegetables into it for a rustic gravy. Simmer in a wide saucepan for about 10–15 minutes, until concentrated and lightly spoon-coating.
- Thicken only if needed. Mix the cornstarch with cold water until smooth. Whisk it gradually into the simmering gravy; you may not need all of it after reduction. Cook for 1–2 minutes, taste, then adjust the salt and pepper. Whisk in the optional butter off the heat and spoon the gravy over the lamb.
Need More Help? Use This Guide as You Cook
Why the Lamb Turns Tender and the Gravy Stays Rich
The recipe starts with a hard-working cut and a relatively thin braising liquid. Browning gives the gravy its dark, roasted base. The slow cooker softens the meat while the lamb and vegetables release their own moisture. Once the shanks are tender, the saucepan concentrates what remains into a sauce that clings without becoming heavy.
Choosing Lamb Shanks
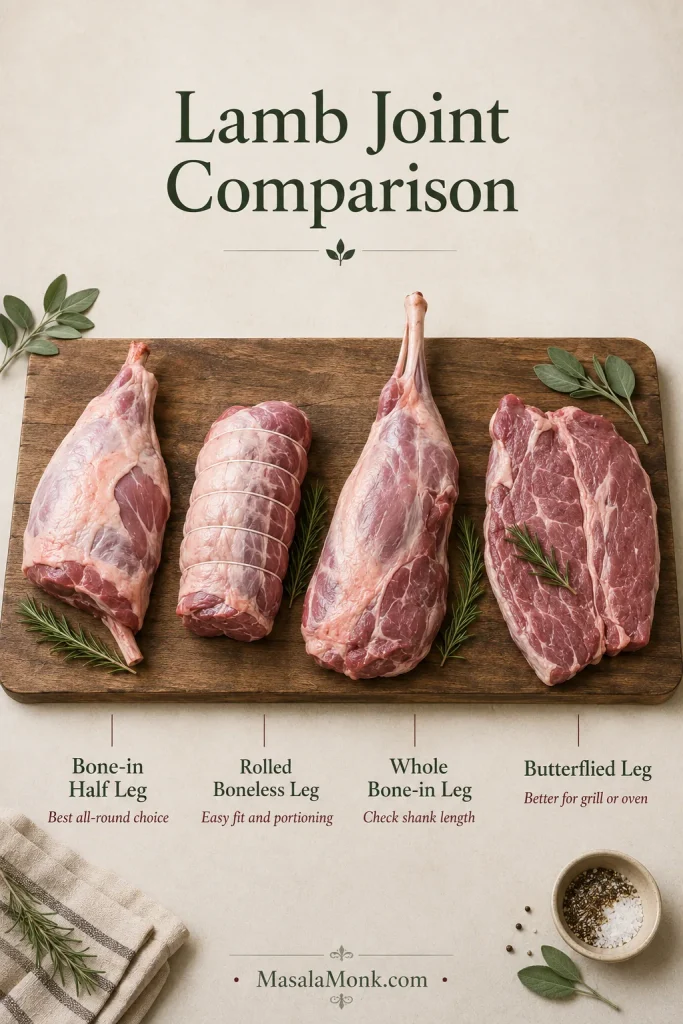
A lamb shank is the lower part of the leg: a bone-in, hard-working cut with plenty of connective tissue. It begins firm and becomes rich and tender only after a long, moist cook.
Plan on one medium shank per adult. At the butcher counter, matching weight matters more than matching appearance. Similar-sized pieces are more likely to become tender together.
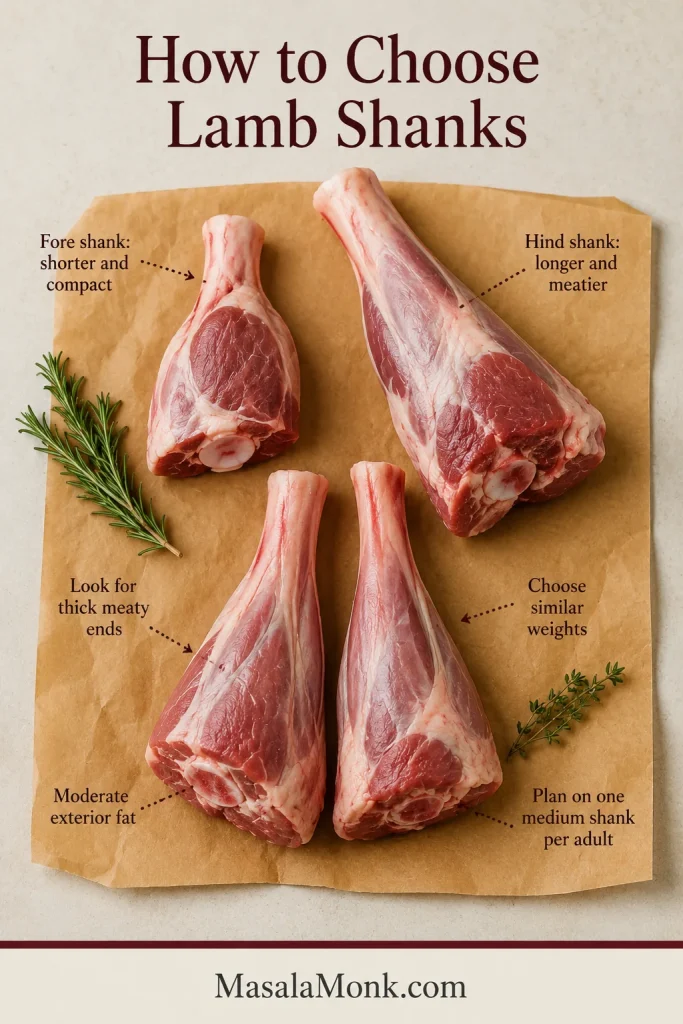
| What to check | Why it matters |
|---|---|
| Similar-sized pieces | They are more likely to become tender together. |
| About 12–14 oz / 350–400 g each | The main cooking window is based on shanks in this range. |
| A thick, meaty section | You get a more satisfying portion after accounting for the bone. |
| Moderate exterior fat | Some fat adds flavour; thick hard deposits can make the gravy oily. |
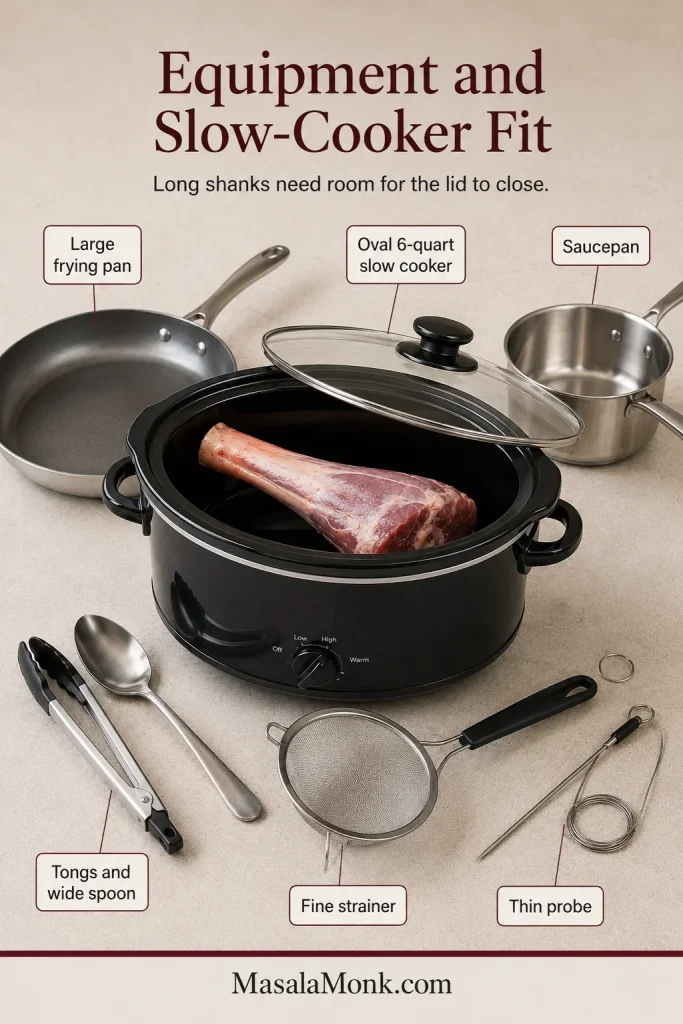
| Enough room beneath the lid | The cooker must close securely without the bones forcing the lid upward. |
Fore Shanks vs Hind Shanks
Fore shanks come from the front legs and are usually smaller. Hind shanks come from the rear legs and are often larger and meatier. Either works, but very long hind shanks fit more comfortably in a wide oval cooker. The pieces may overlap slightly; if the exposed bones prevent the lid from closing, ask the butcher to shorten them.
Can You Use Mutton Shanks?
Yes. Mutton comes from an older animal, so the shanks may be larger and need a longer cooking window. Use the same method and keep going until a probe slides easily through the thickest meat.
Check the label carefully: Lamb Henry is a bone-in shoulder portion rather than a standard shank. Products sold as lamb hock or knuckle vary by region, so use their weight and tenderness instead of applying the shank table automatically. Boneless lamb shoulder can use the same flavour profile, but it may become tender sooner and will not have the same bone-in presentation.
Ingredients That Build the Gravy
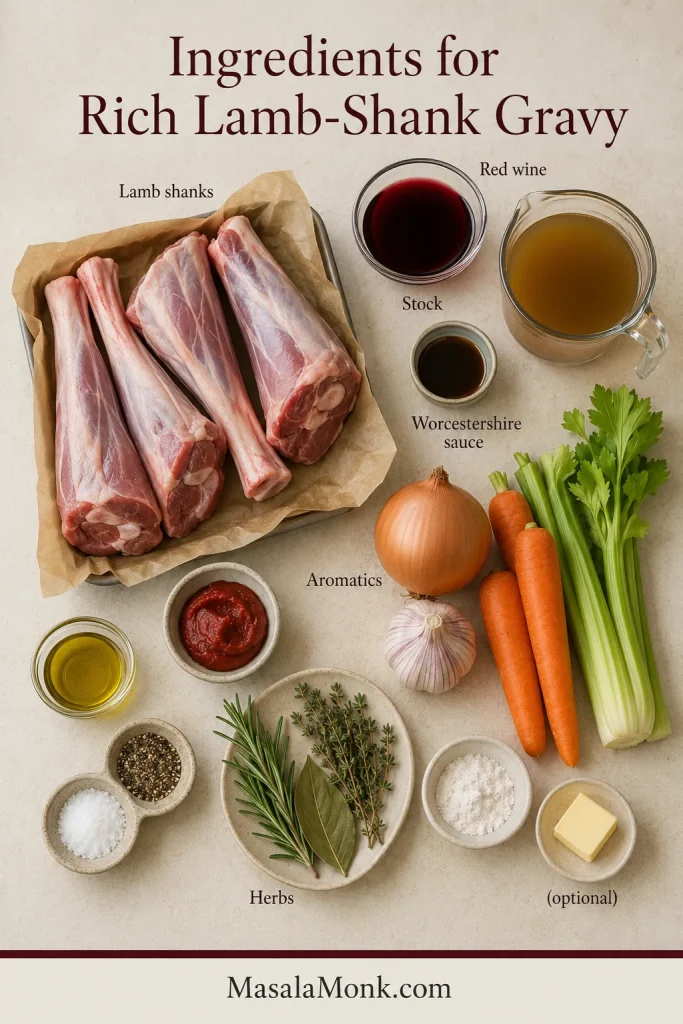
The ingredients are familiar. Wine and stock carry the lamb flavour, the browned vegetables soften into the sauce, and a small amount of tomato paste gives the gravy body without making it taste like tomato sauce. Rosemary and thyme keep it fragrant rather than heavy.
Red Wine
Use a dry, medium-bodied red wine that tastes pleasant enough to drink. It does not need to be expensive. Merlot and everyday red blends are dependable, while noticeably sweet wines are best avoided. By the end of the cook, the wine should no longer announce itself—it should simply make the gravy taste darker and more complete.
Some alcohol cooks off during deglazing, slow cooking and the final reduction, but the finished dish should not be treated as alcohol-free. Use the no-wine path when complete avoidance matters.
Stock and Tomato Paste
Lamb stock is ideal when you can find a good one, but low-sodium beef stock is easier to buy and gives the gravy plenty of depth. Robust chicken stock also works. Low-sodium stock matters because the sauce becomes saltier as it reduces.
Tomato paste gives the liquid colour and body without making the dish taste like tomato sauce. Let it cook against the pan for about a minute before adding the wine; that brief contact softens its raw edge and deepens the finished gravy.
Aromatics, Herbs and Worcestershire
Onion, carrot and celery form the savoury-sweet base. They soften into the cooking liquid, round out the wine and give a rustic blended gravy much of its body.
Two rosemary sprigs perfume the gravy without allowing the herb to dominate after a long cook. When fresh herbs are unavailable, use about ½ teaspoon dried rosemary and ½ teaspoon dried thyme.
Worcestershire sauce adds savoury depth, especially when the wine is omitted. For a fish allergy or fish-free diet, use a clearly labelled fish-free Worcestershire-style sauce because many traditional brands contain anchovies.
How to Make Slow Cooker Lamb Shanks
Prepare and Brown the Shanks
Dry shanks brown more efficiently than damp ones. Pat every surface well, then trim only large loose sheets of hard fat or silverskin. Leave the connective tissue within the meat in place; it softens and enriches a long braise.
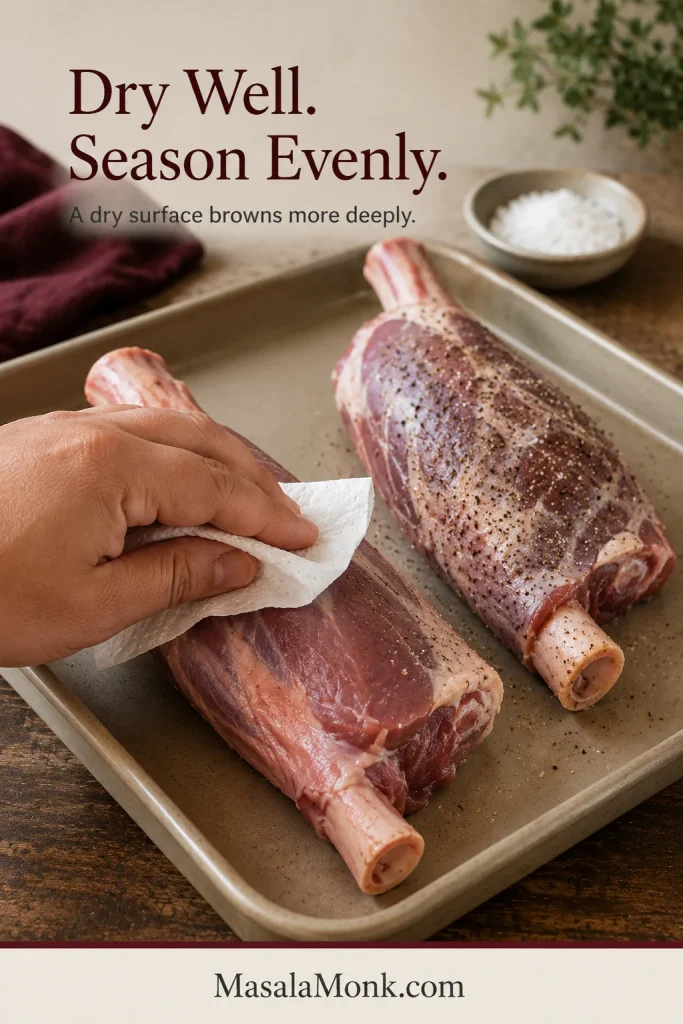
Use a broad, heavy pan and work in batches when necessary. Crowding traps steam and turns the surface grey. Let the broad meaty surfaces develop a deep brown crust; those dark patches and the browned residue in the pan give the finished gravy its roasted depth.
Build and Deglaze the Flavour Base
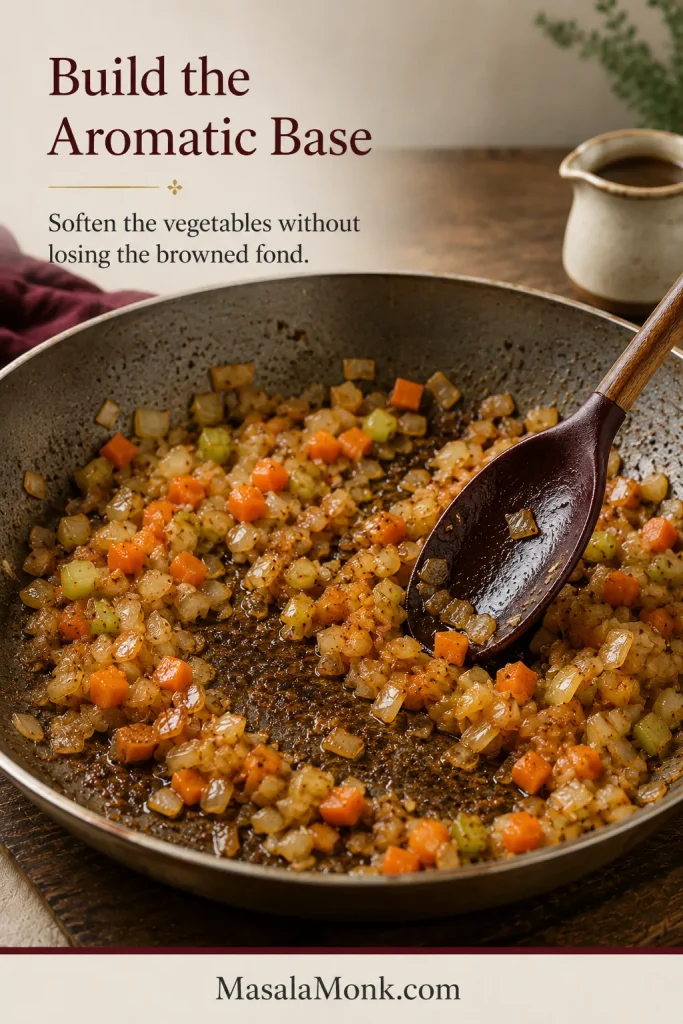
Cook the onion, carrot and celery in the browned pan, scraping as their moisture loosens the browned bits. Cook the tomato paste after the vegetables soften, then add the garlic briefly so neither scorches.
Pour in the wine, scrape the base thoroughly and simmer for a few minutes until the sharp raw aroma softens. The liquid does not need to reduce to syrup before it goes into the cooker.
How Much Liquid Should Be in the Slow Cooker?
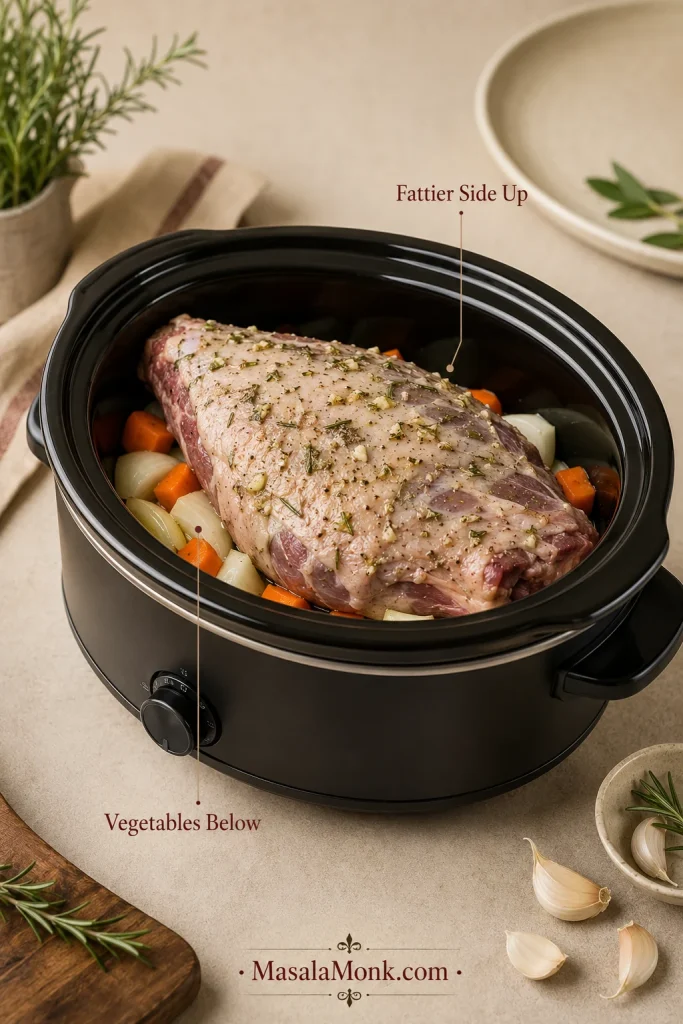
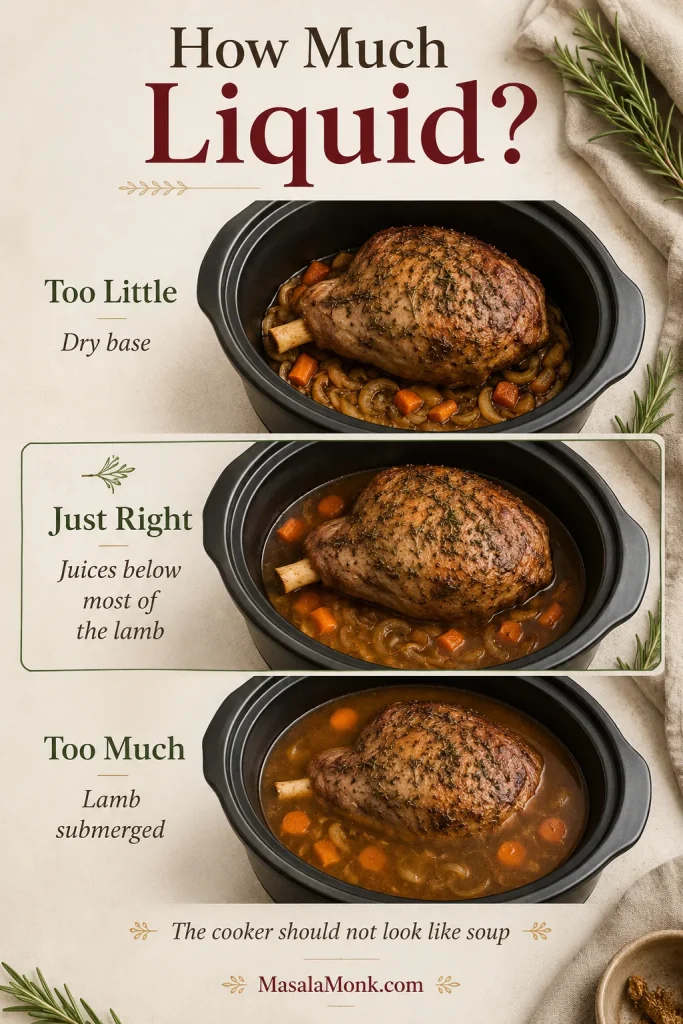
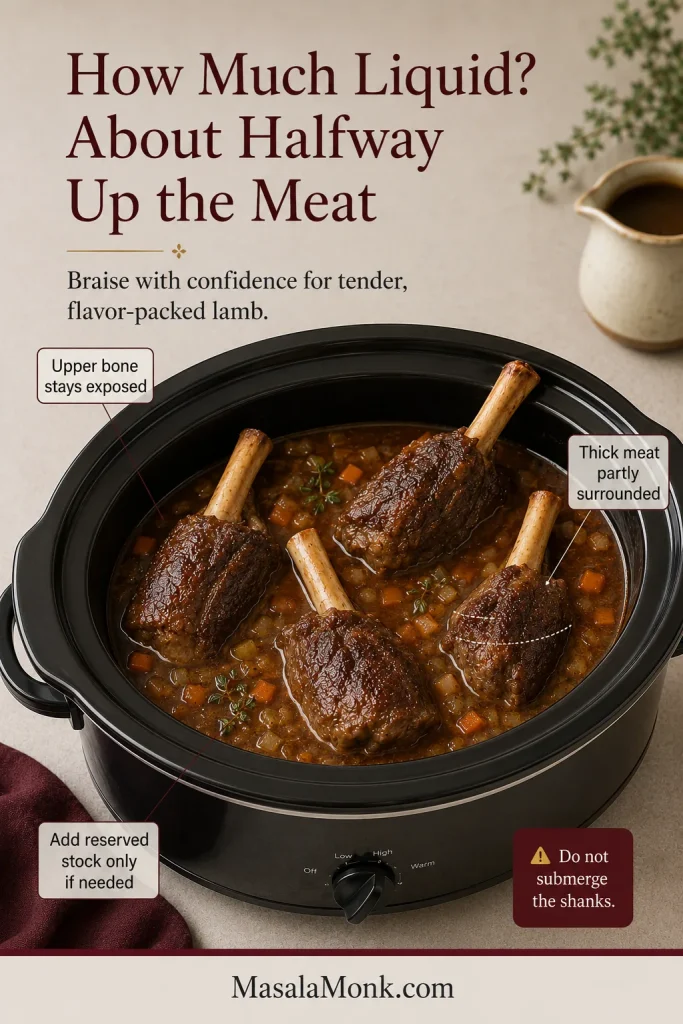
Position the thick ends of the shanks in the braising liquid. The liquid should initially reach around halfway up the meaty portions; in a wide cooker, it may sit closer to two-thirds. The bones may remain almost entirely exposed.
Why the Bones Can Stay Exposed
If your first instinct is to cover those exposed bones, pause. Slow cookers lose little moisture, while the lamb, onion, carrot and celery all release more liquid as they cook.
The liquid rule
Cover the thick meat with flavour, not the entire bone with stock. Too much starting liquid is a common reason a slow-cooker sauce tastes diluted.
Do You Need to Turn Lamb Shanks?
Turning is usually unnecessary when the meat is positioned as directed. Once the lid goes on, leave it alone unless the cooker leaves a large patch of meat unusually exposed and dry.
There is otherwise very little to gain from checking early. Every unnecessary look releases heat and steam, so leave the cooker alone until the beginning of the expected tenderness window.
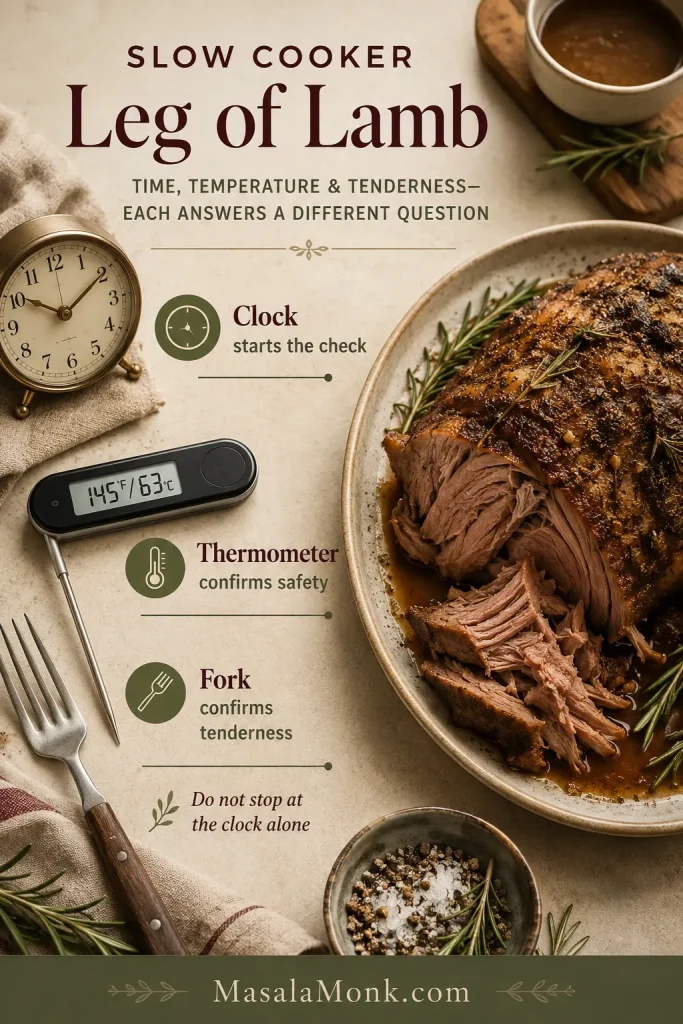
The Fork Test Matters More Than the Timer
Insert a fork, skewer or thin thermometer probe into the thickest part of the meat without touching the bone. It should slide through with very little resistance. The meat usually pulls back from part of the bone, and the bone may wiggle slightly when nudged.
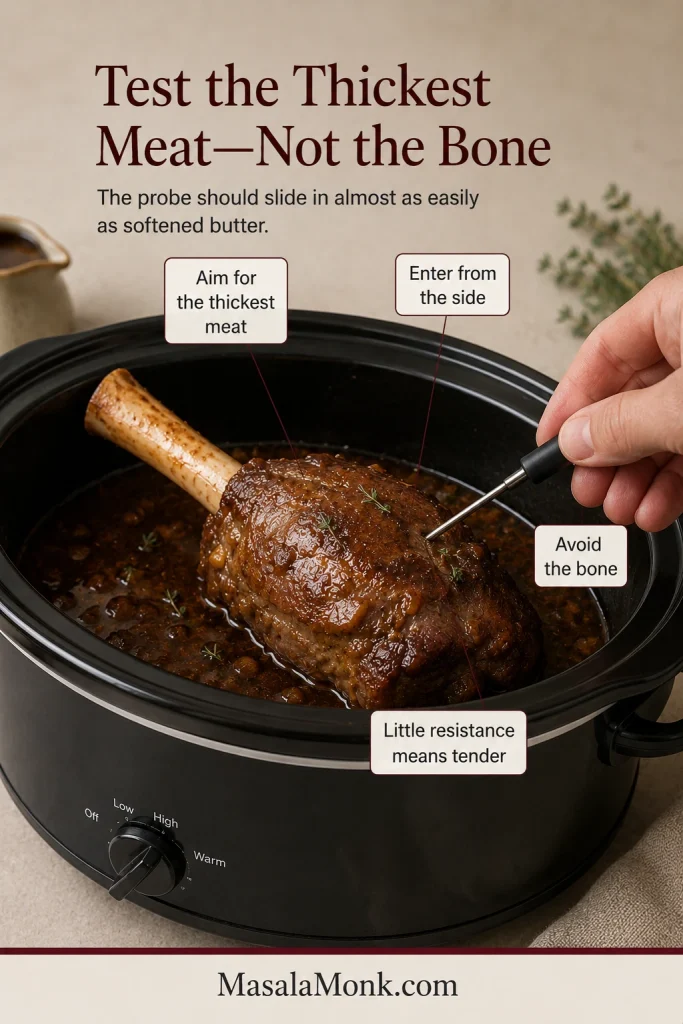
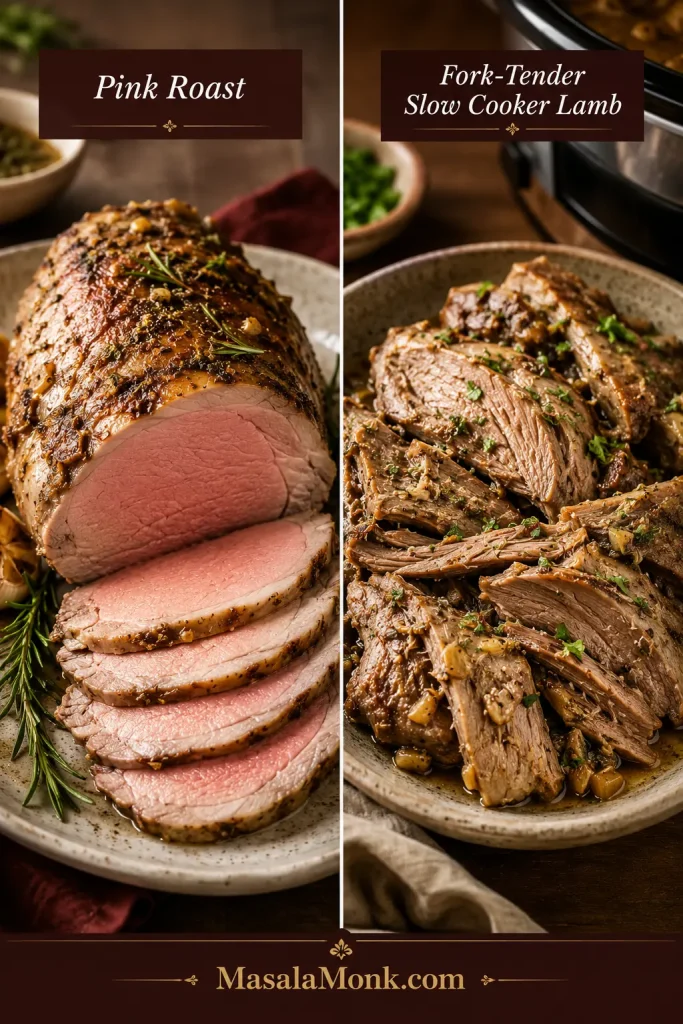
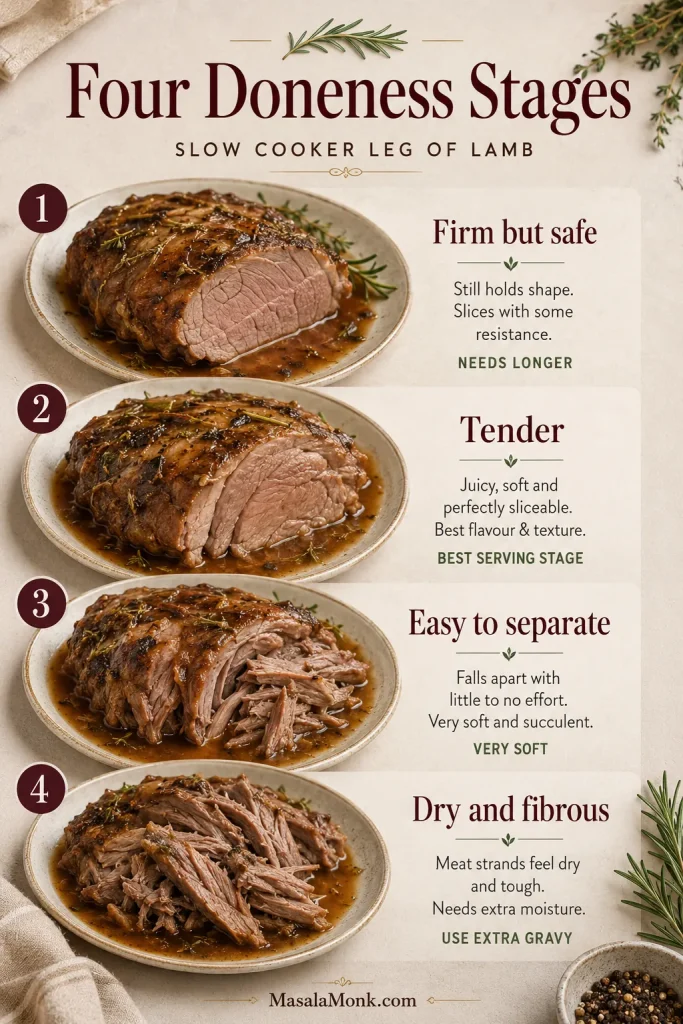
A shank can be tender without collapsing completely. That gives you a better chance of moving it neatly to the serving plate before it falls apart under the fork.
How Long Lamb Shanks Take
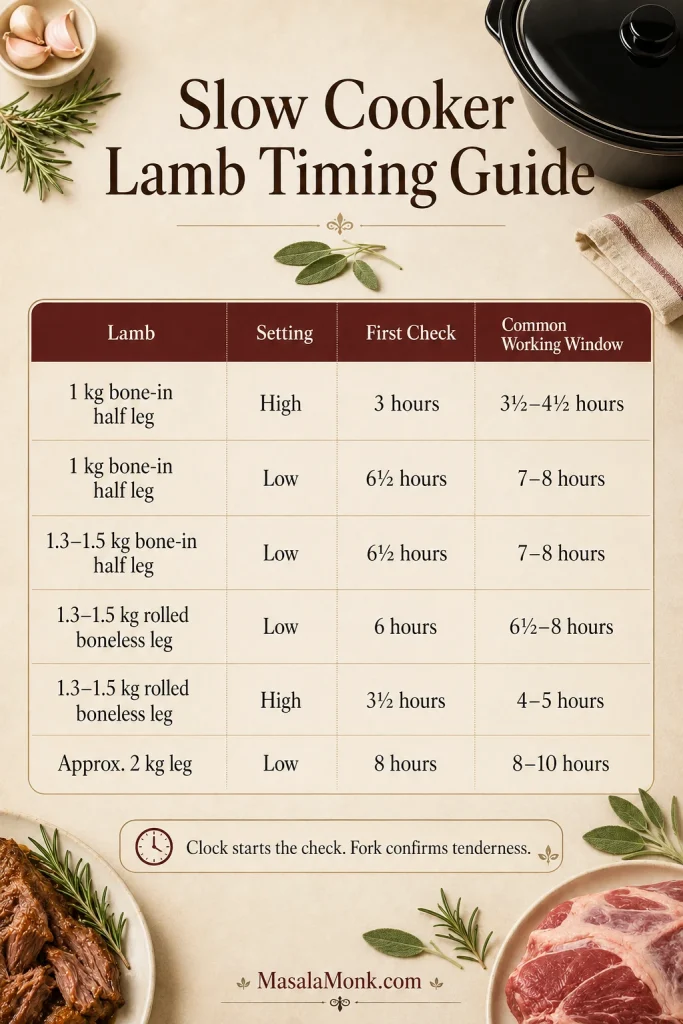
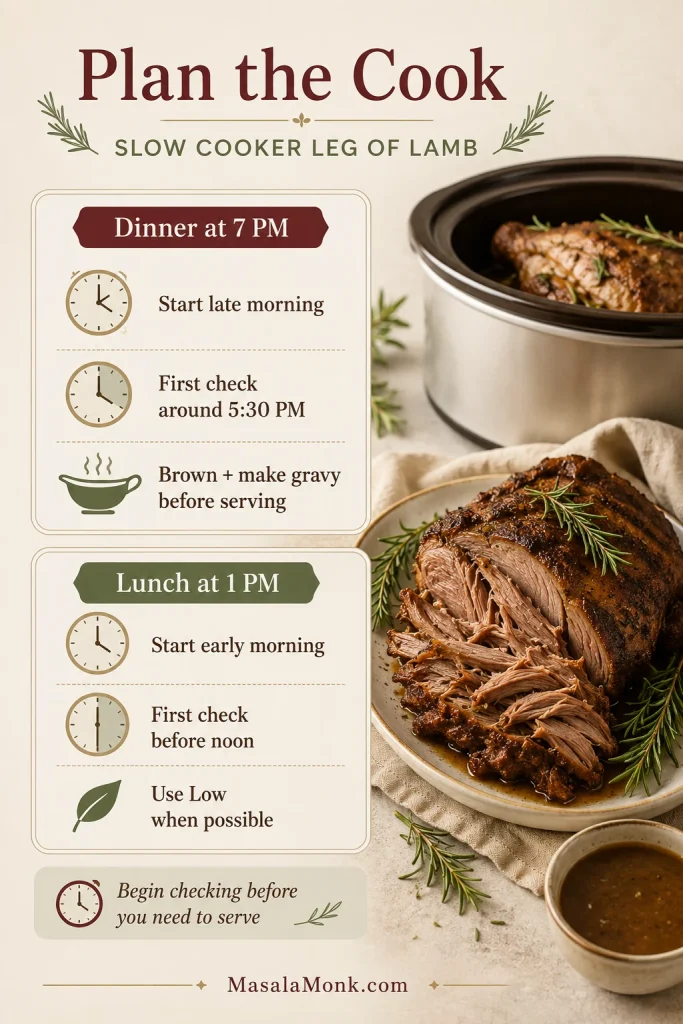
The timer brings you into the right window; it does not overrule what the meat is telling you. Use the table as a planning guide, and leave a little room before serving because a shank that needs another 30 minutes cannot be hurried.
| Approximate shank size | Begin checking on LOW | Begin checking on HIGH |
|---|---|---|
| 9–11 oz / 250–325 g | About 6½ hours | About 4 hours |
| 12–14 oz / 350–400 g | About 7 hours | About 4½ hours |
| 16–19 oz / 450–550 g | About 8 hours | About 5 hours |
These are checking points rather than promised finish times. Continue in 30-minute intervals until the meat is tender; shank thickness, animal age, cooker heat and how tightly the pot is loaded can all move the final time.
LOW vs HIGH—and When to Start Checking
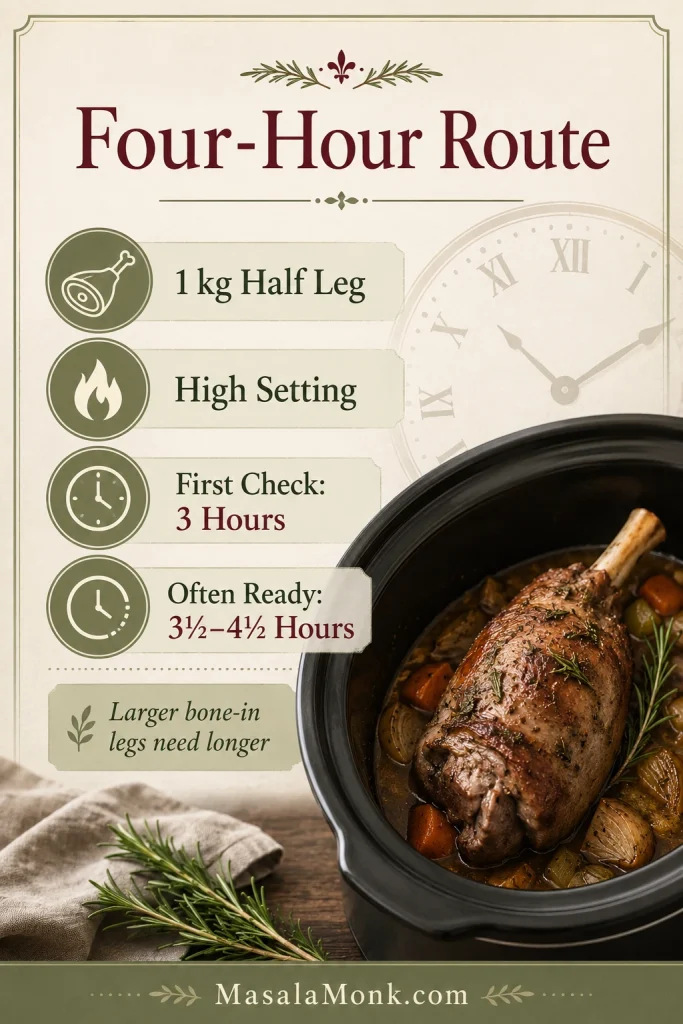
LOW is usually the easier setting to plan around and gives the connective tissue time to soften gradually. HIGH is also valid when dinner needs to happen sooner; begin checking promptly and stop once the meat is tender.
Small or medium shanks can sometimes be ready at about four hours on HIGH, especially in an appliance that runs hot. Treat four hours as the start of a checking window, not a universal promise.
Safe Temperature vs Tender Temperature
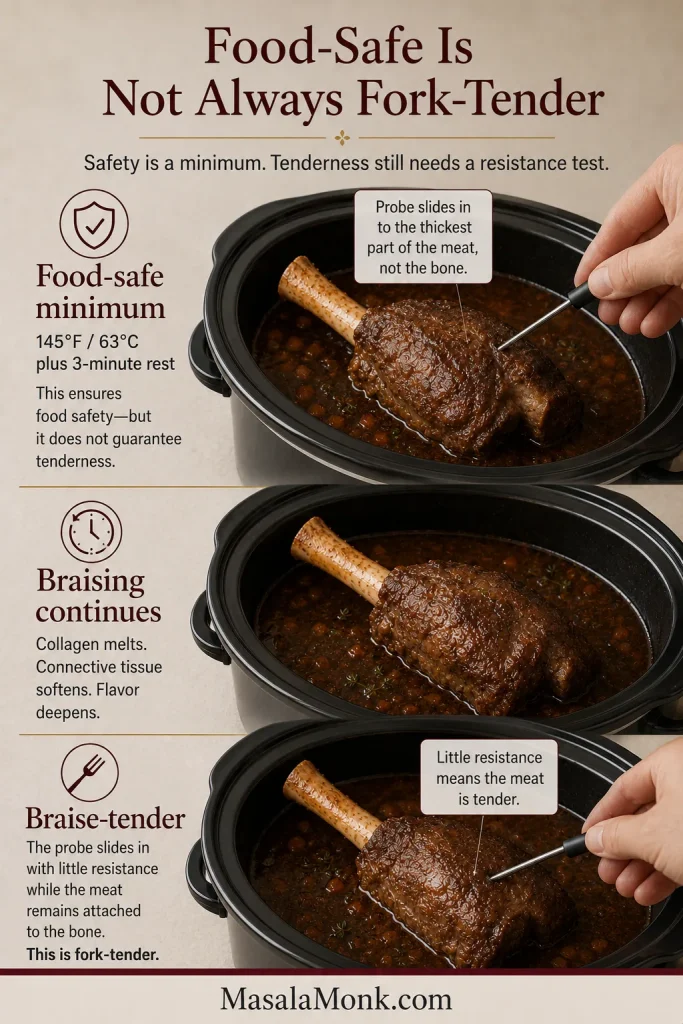
The USDA minimum for whole cuts of lamb is 145°F / 63°C followed by a three-minute rest (opens in a new tab). A shank will normally still feel firm at that temperature.
A tender braised shank will usually cook well beyond the food-safe minimum, but temperature remains supporting evidence. The decisive sign is a fork or probe sliding through the thickest meat with almost no resistance; one shank may soften before another even when their readings look similar.
When the Timer Ends but the Lamb Is Still Tough
If dinner time is approaching and the meat still grips the probe, it is frustrating—but it is not a lost dinner. Cover the cooker and give it another 30 minutes. Large shanks, mutton shanks, a full cooker or a gently heated appliance can all extend the process. Tough braised meat is usually asking for more time, not more liquid or higher heat.
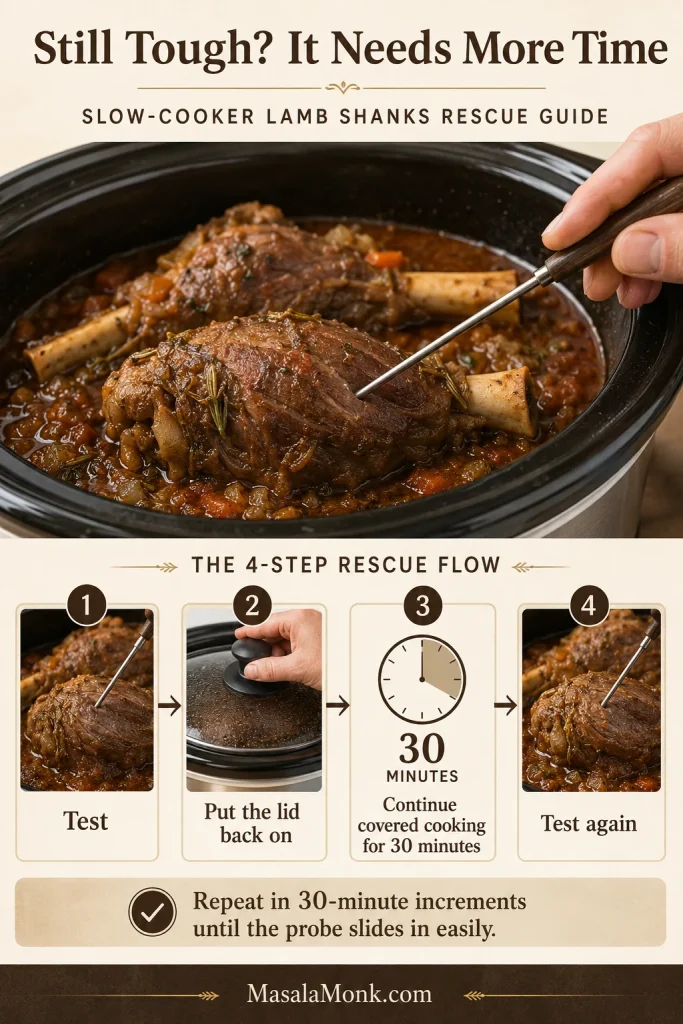
The same late-softening behaviour appears in a slow-cooked beef shoulder roast: meat can be safely cooked before it becomes fork-tender.
From Braising Liquid to Rich, Glossy Gravy
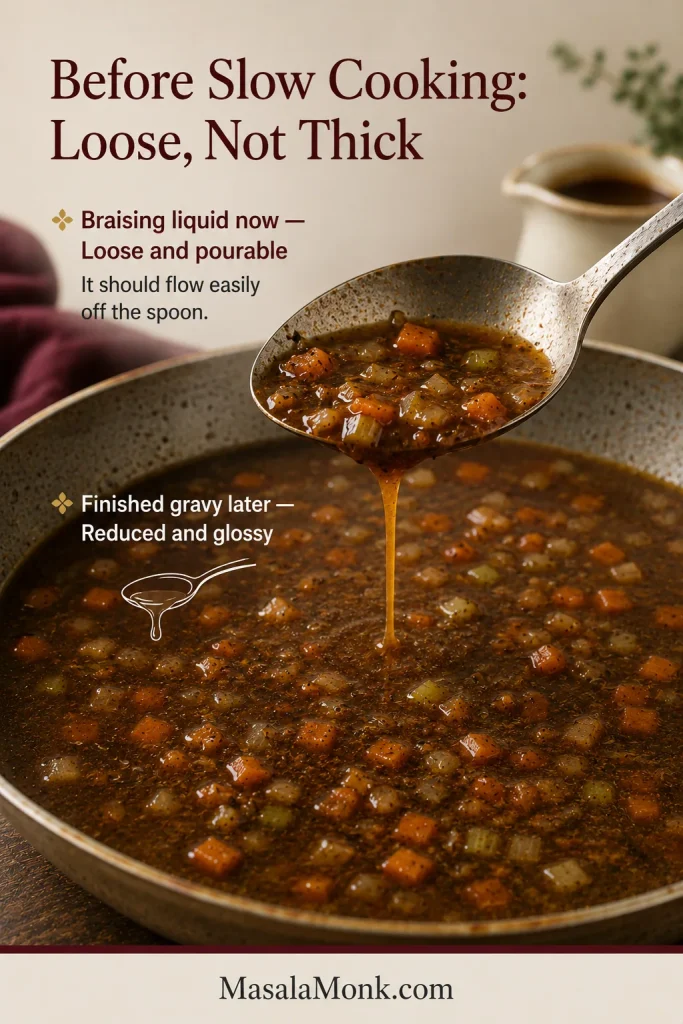
The cooking liquid may look disappointingly thin when the lamb first comes out. That is normal. The flavour is already there; a wide saucepan concentrates it and gives you control over the final texture.
Lift the Shanks and Remove Excess Fat
When the meat looks as though it might slip from the bone, support it from underneath rather than gripping it harder. Hold the bone gently with tongs, slide a broad spoon or spatula beneath the meat, and move the shanks to a warm platter.
Spoon fat from the liquid, use a fat separator, or chill the dish and lift away the firm layer the next day. Removing excess fat makes the lamb flavour clearer; it does not make the gravy less rich.
Choose Smooth or Rustic Gravy
For a smooth gravy, remove the herbs and strain out the vegetables, pressing lightly to recover their juices. For a rustic gravy, remove the woody stems and bay leaves, then blend some or all of the softened vegetables into the liquid.
Reduce Until the Spoon Leaves a Trail
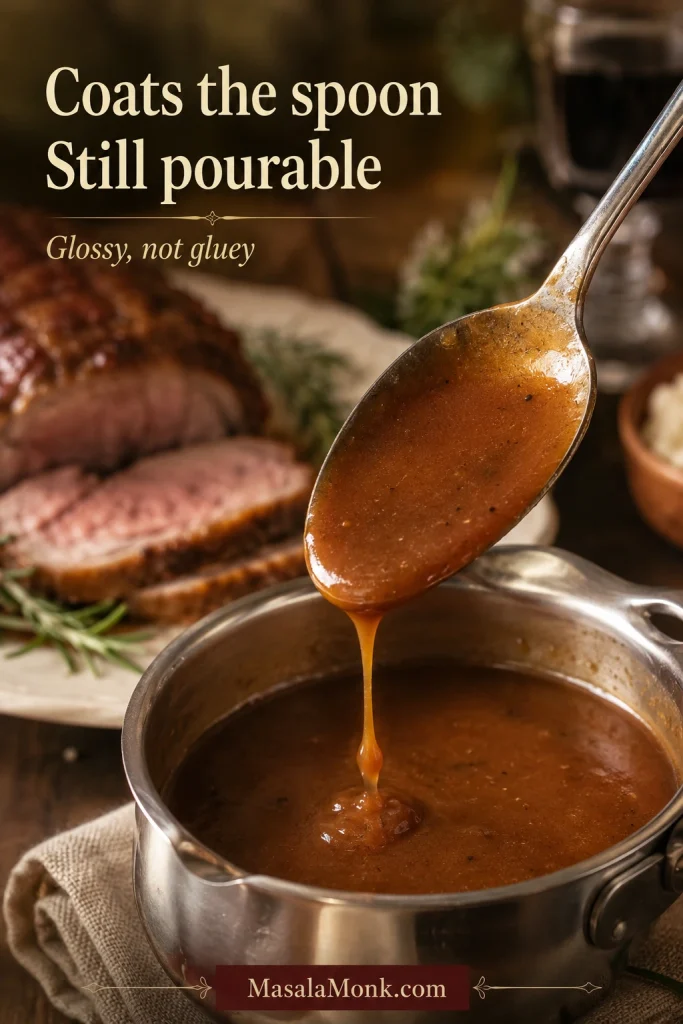
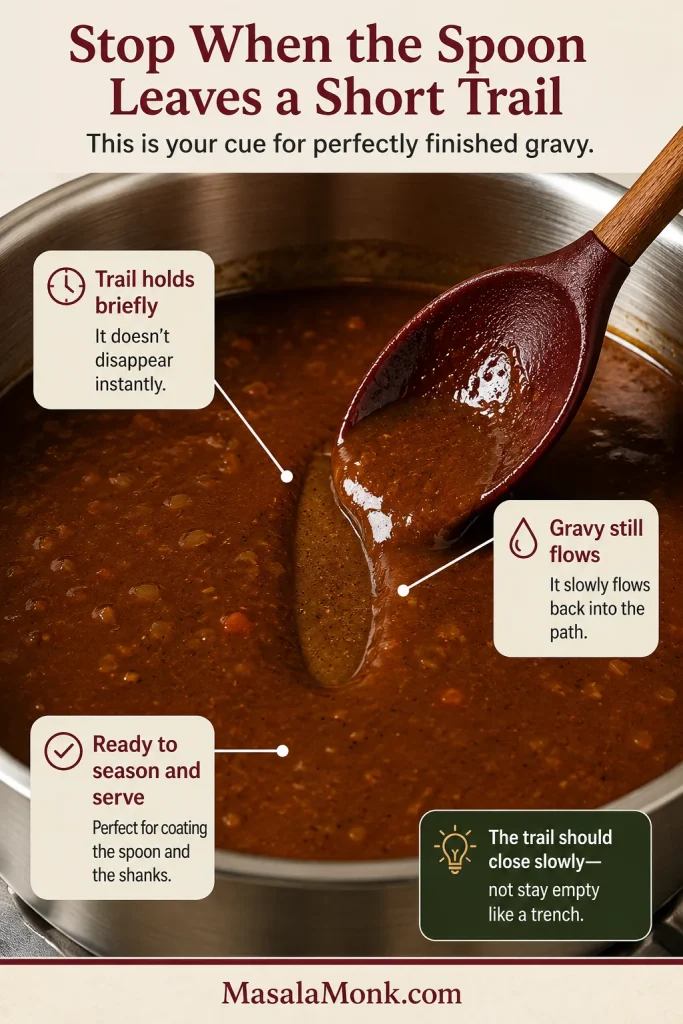
Simmer the gravy in a wide saucepan. As water evaporates, it darkens, becomes glossier and starts clinging to the small ridges left by the spoon. Draw a careful line across the back: the trail should remain visible for a moment while the sauce still flows.
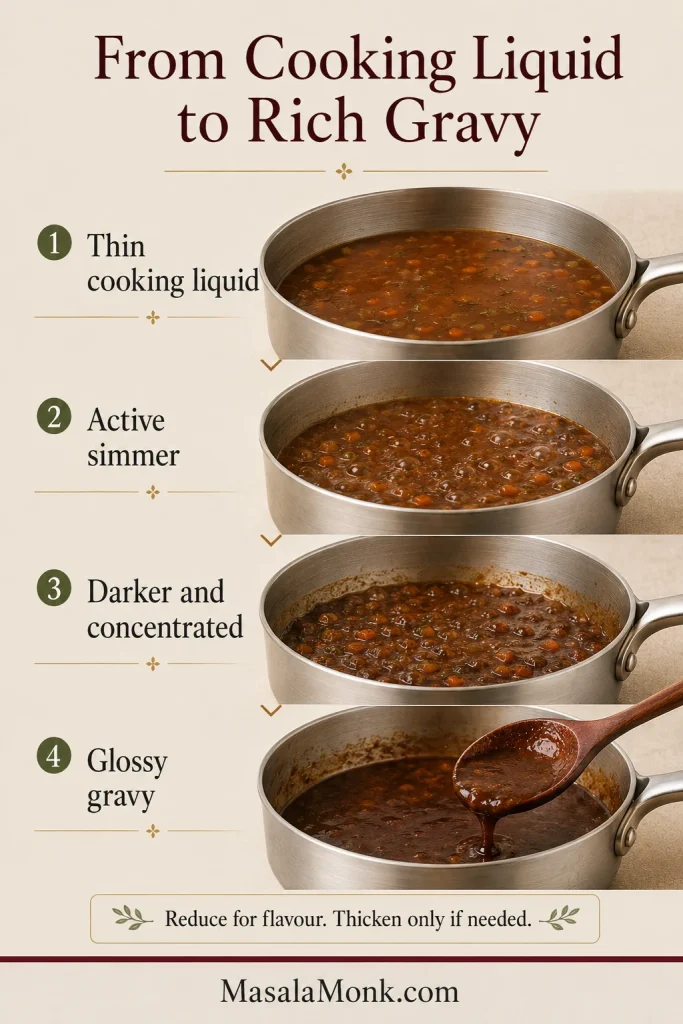
Once the gravy looks glossy and the simmer slows, draw a spoon through it and watch how quickly the trail closes.
Thicken Only When Reduction Is Not Enough
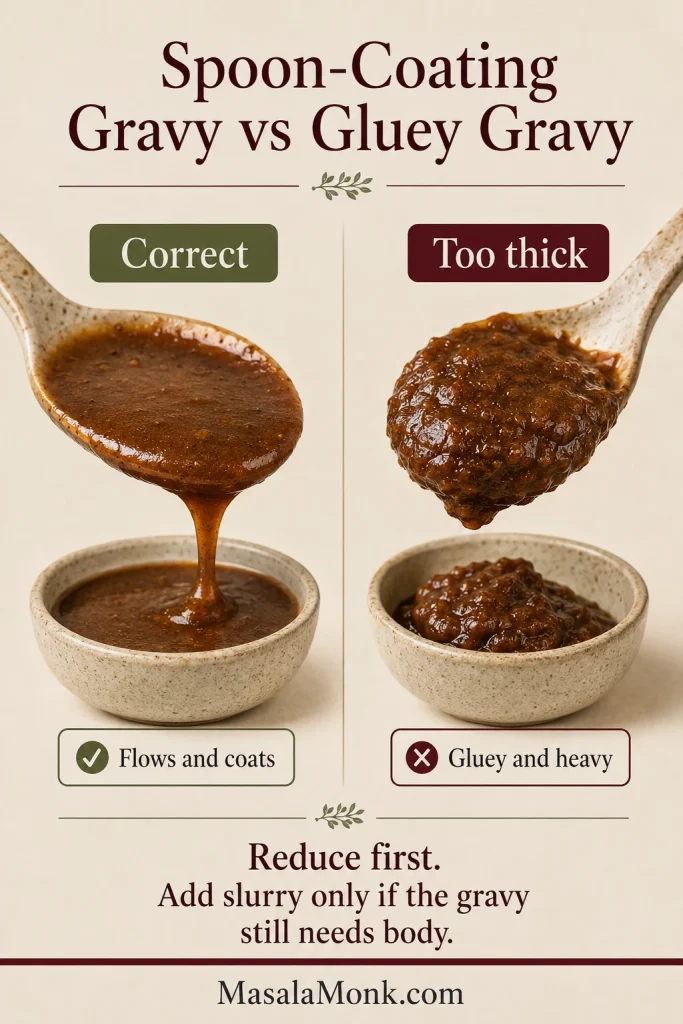
Mix the cornstarch completely with cold water. Whisk the slurry into the simmering gravy a little at a time, allowing it to cook for a minute before deciding whether it needs more. After reduction, you may not need all of it.
The finished gravy should settle into the soft ridges of creamy garlic mashed potatoes, not sit on the plate like paste.
Remember
Reduce for flavour; thicken for body. Keep simmering while the gravy tastes weak. Once the flavour is full but the sauce still flows too freely, add a little slurry.
Fixing Tough Lamb and Thin Gravy
Firm lamb or unexpectedly thin gravy does not mean dinner has failed. The shanks usually need more time, while the sauce usually needs reduction after the meat comes out.
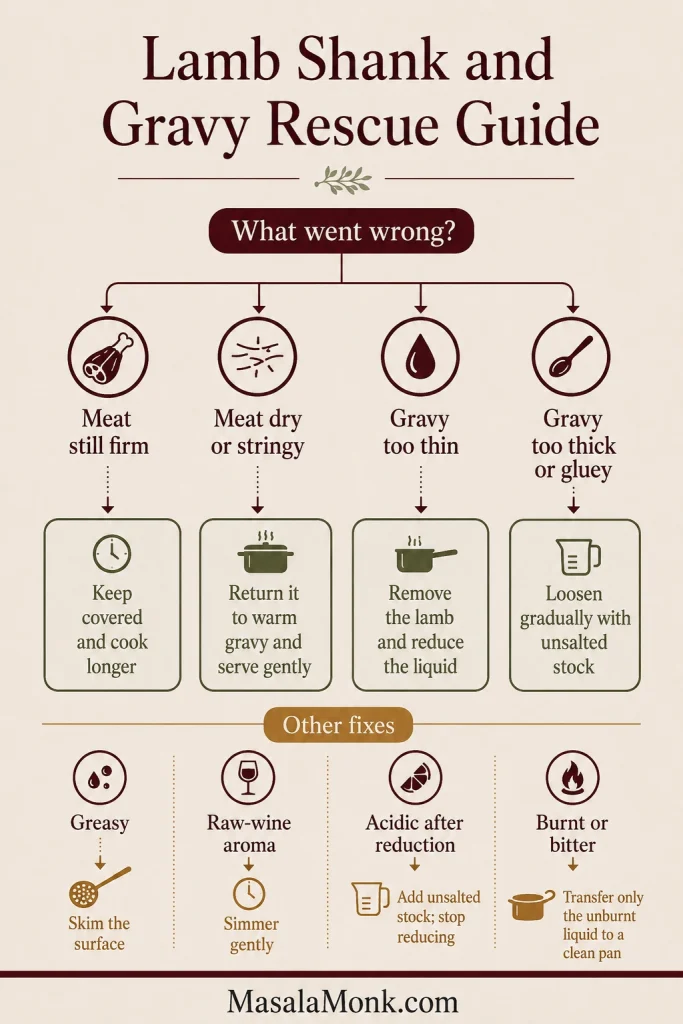
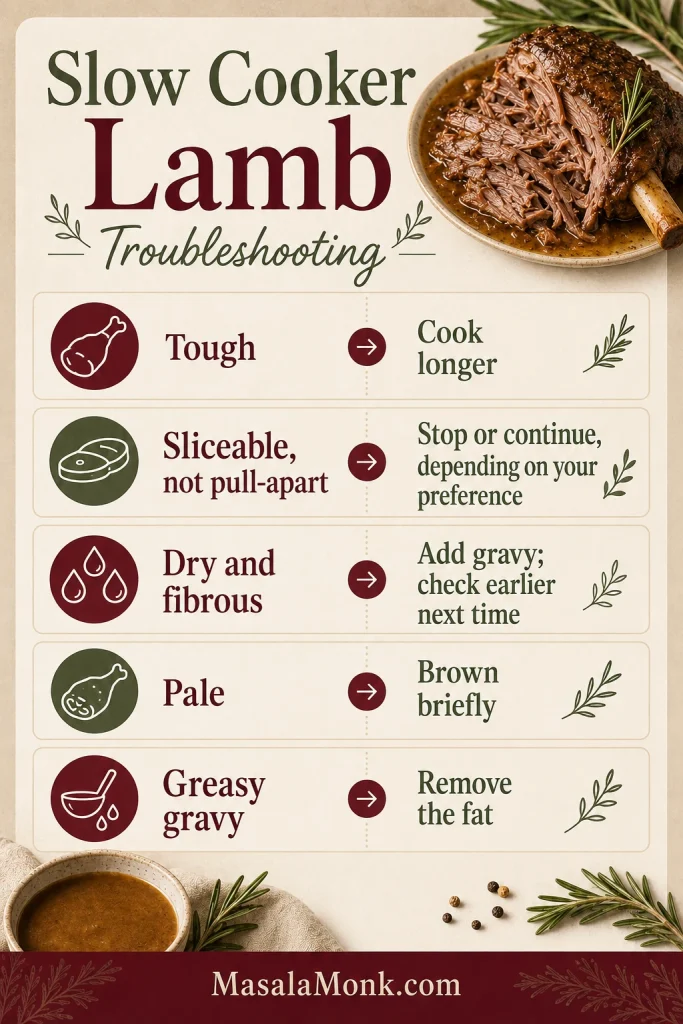
Lamb and Slow-Cooker Problems
| Meat or cooker problem | Likely cause | Best fix |
|---|---|---|
| Lamb is still tough. | The connective tissue has not softened. | Continue cooking in 30-minute increments. |
| Meat is dry or stringy. | It cooked well beyond tenderness or stayed on WARM too long. | Serve with gravy or shred for ragu, pie or soup. |
| Shanks break while lifting. | The meat is extremely tender. | Support it underneath with a broad spoon or spatula. |
| Slow cooker is overfull. | The meat exceeds the fill line or prevents the lid from closing. | Transfer to a larger cooker or remove some shanks. Removing liquid alone does not fix overcrowding. |
Lamb Gravy Problems
| Gravy problem | Likely cause | Best fix |
|---|---|---|
| Gravy is watery. | Too much starting liquid or normal moisture released during cooking. | Remove the lamb and reduce the liquid uncovered. |
| Gravy is thick but weak. | Starch was added before the flavour concentrated. | Loosen with unsalted stock, then correct the seasoning. Do not reduce it back to a gluey texture. |
| Gravy is greasy. | The shanks released substantial fat. | Skim, use a fat separator or chill and remove the firm layer. |
| Gravy is too salty. | Stock or seasoning became concentrated during reduction. | Add unsalted stock or water gradually and stop reducing. |
| Gravy smells sharply of wine. | The wine needs more cooking. | Simmer gently until the raw aroma softens. |
| Gravy tastes acidic after reduction. | The acidity became concentrated. | Add unsalted stock gradually and optional butter. Stop reducing. |
| Gravy tastes bitter. | Garlic, tomato paste or pan residue burned. | Move the unburned liquid to a clean pan and dilute cautiously. Strongly burnt gravy may need replacing. |
| Gravy is lumpy. | Dry starch was added directly or the slurry was not smooth. | Strain out the lumps. If the gravy still needs thickening, use a fully mixed cold-water slurry. |
| Gravy is gluey. | Too much starch. | Whisk in unsalted stock until the gravy loosens. |
Variations and Substitutions
No wine or tomato on hand—or avoiding either ingredient? The shanks can still cook by the same method, though the finished gravy will taste different.
Slow Cooker Lamb Shanks Without Wine
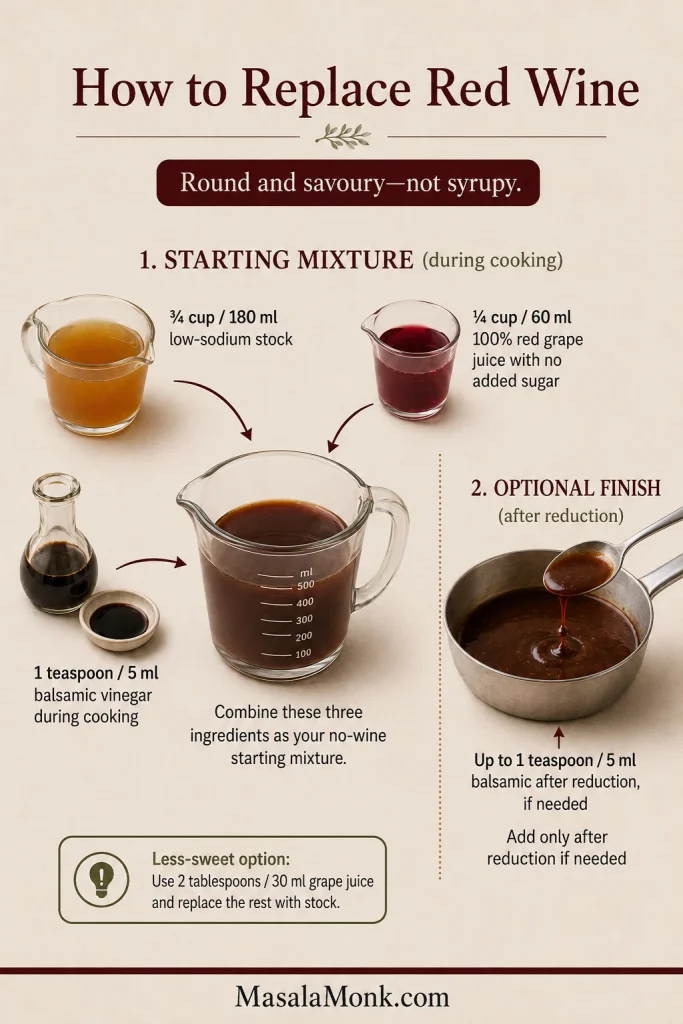
Replace the 1 cup / 240 ml red wine with:
- ¾ cup / 180 ml additional low-sodium stock
- ¼ cup / 60 ml 100% red grape juice with no added sugar—not grape drink or cranberry cocktail
- 1 teaspoon / 5 ml balsamic vinegar during cooking
- Up to 1 additional teaspoon / 5 ml balsamic vinegar after reduction, only if the gravy needs brightness
The no-wine gravy is slightly rounder and lacks the dry red-wine character, but browning, vegetables and reduction keep it savoury. For a less sweet result, use 2 tablespoons / 30 ml grape juice and replace the remaining amount with stock.
Slow Cooker Lamb Shanks Without Tomato
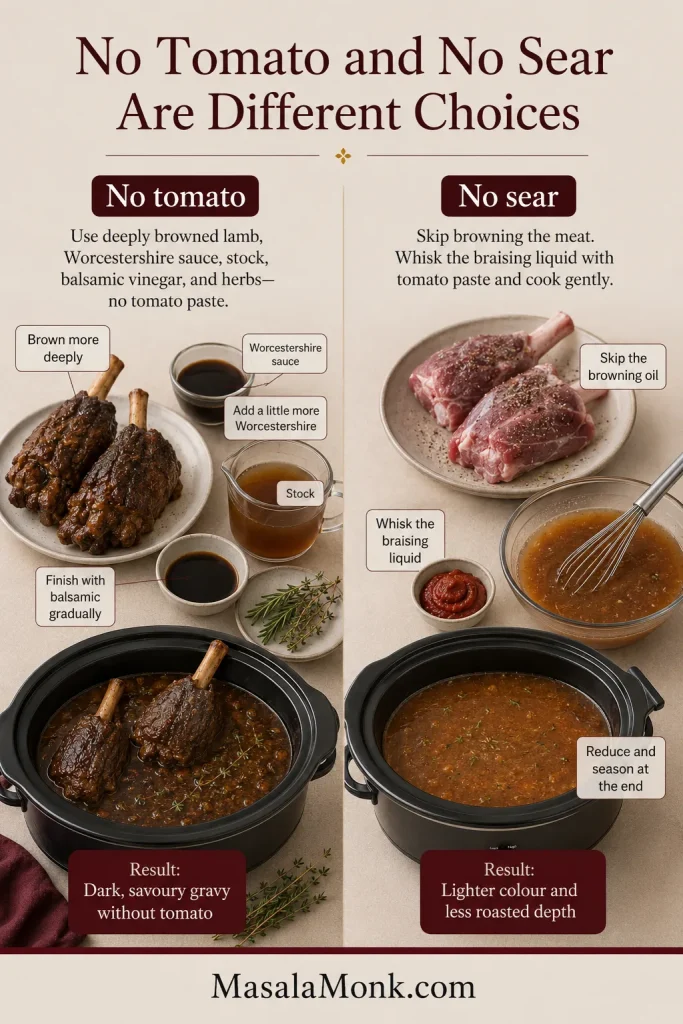
Omit the tomato paste. Brown the meat and vegetables particularly well, add 1 extra teaspoon Worcestershire sauce, and finish the reduced gravy with 1–2 teaspoons balsamic vinegar as needed. Add it a little at a time, stopping while the sauce still tastes rounded and savoury.
No-Sear Slow Cooker Lamb Shanks
Skipping the sear changes the gravy, not the tenderness. The lamb will still soften, but the finished sauce will be paler and have less roasted depth.
Place the seasoned shanks, onion, carrot and celery in the slow cooker. Whisk the tomato paste into the wine and stock, pour it around the lamb, then add the garlic, Worcestershire sauce and herbs. Omit the browning oil and continue with the slow-cooking and gravy-finishing steps.
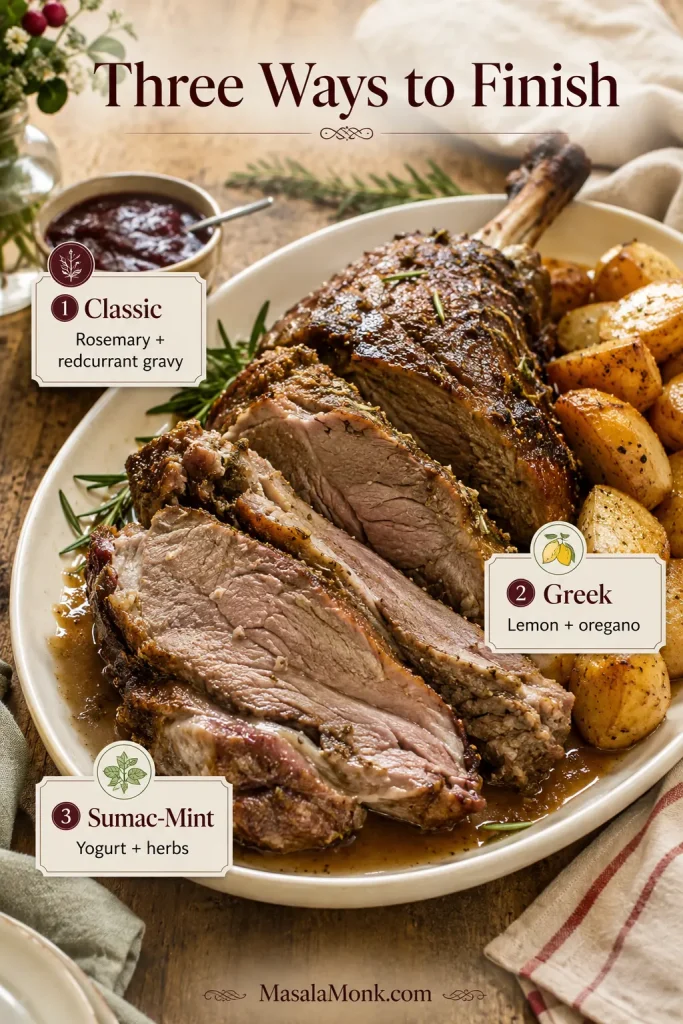
Herb Variations: Rosemary, Garlic or Mint
For a more aromatic rosemary-and-garlic version, add one extra rosemary sprig and one or two extra garlic cloves. Avoid a large handful of rosemary; its flavour intensifies during a long cook.
For minted lamb shanks, stir concentrated mint sauce into the finished gravy, starting with 1 teaspoon. Taste before adding more because brands vary considerably in sweetness, vinegar and strength.
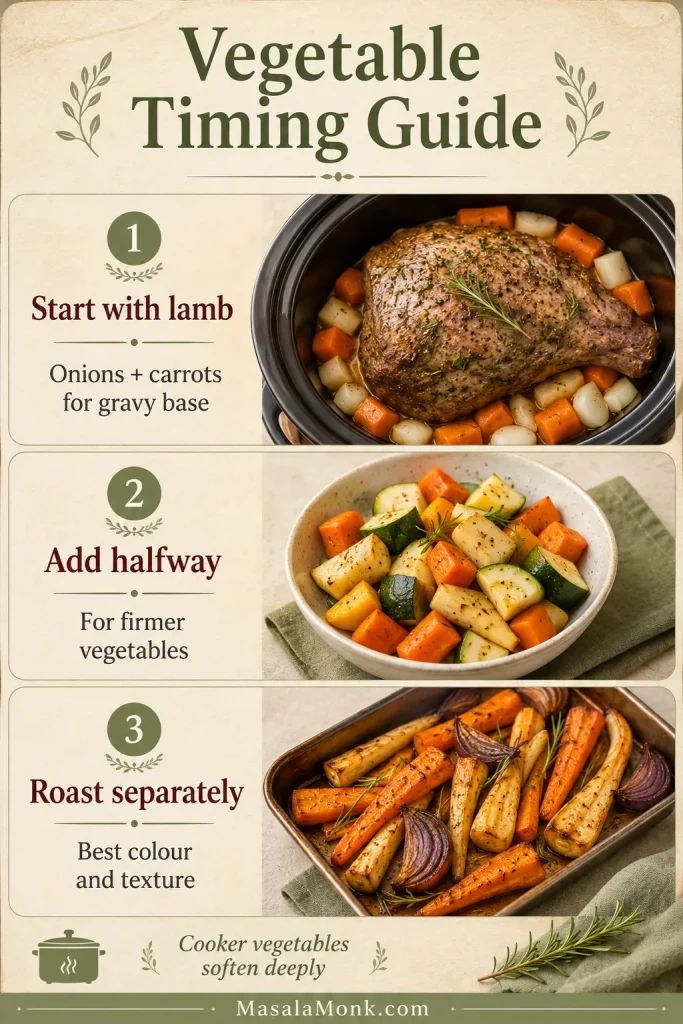
Can You Add Potatoes to the Slow Cooker?
Yes. Use about 1 lb / 450 g waxy potatoes or Yukon Golds, cut into large 1½–2-inch / 4–5 cm pieces. Nestle them around and beneath the shanks without exceeding the slow cooker’s fill line. Small floury pieces may disintegrate during an eight-hour cook.
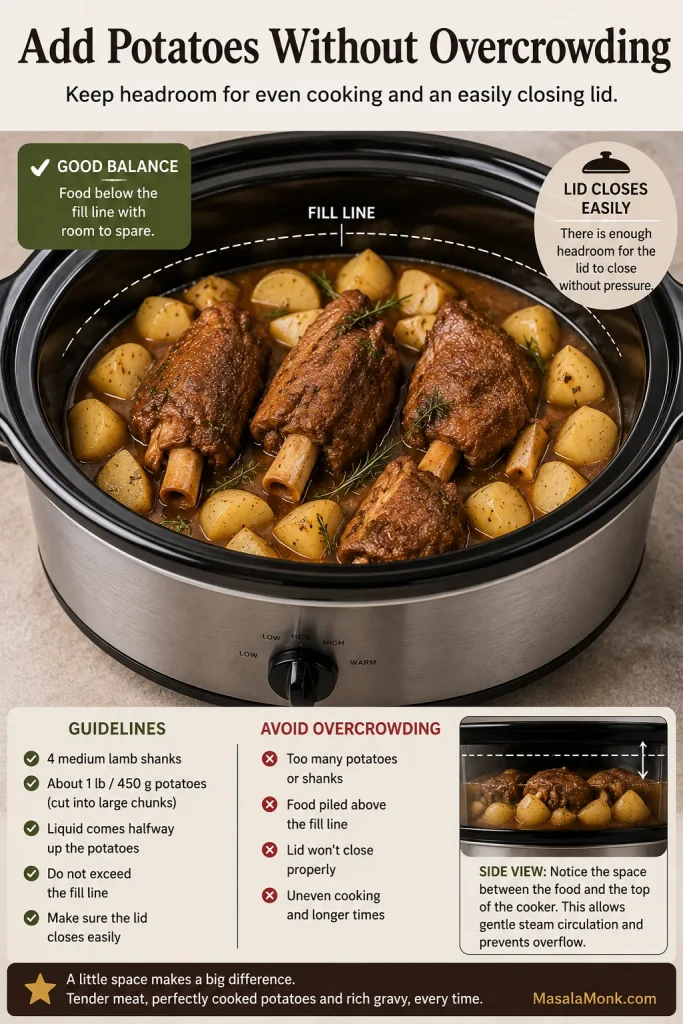
Potatoes absorb seasoning and reduce the available cooker space, so check that the lid still closes easily and taste the gravy before adding more salt.
Dietary notes: For gluten-free gravy, use clearly labelled stock and Worcestershire sauce and thicken with cornstarch. For dairy-free gravy, omit the optional butter.
How to Cook Two Lamb Shanks
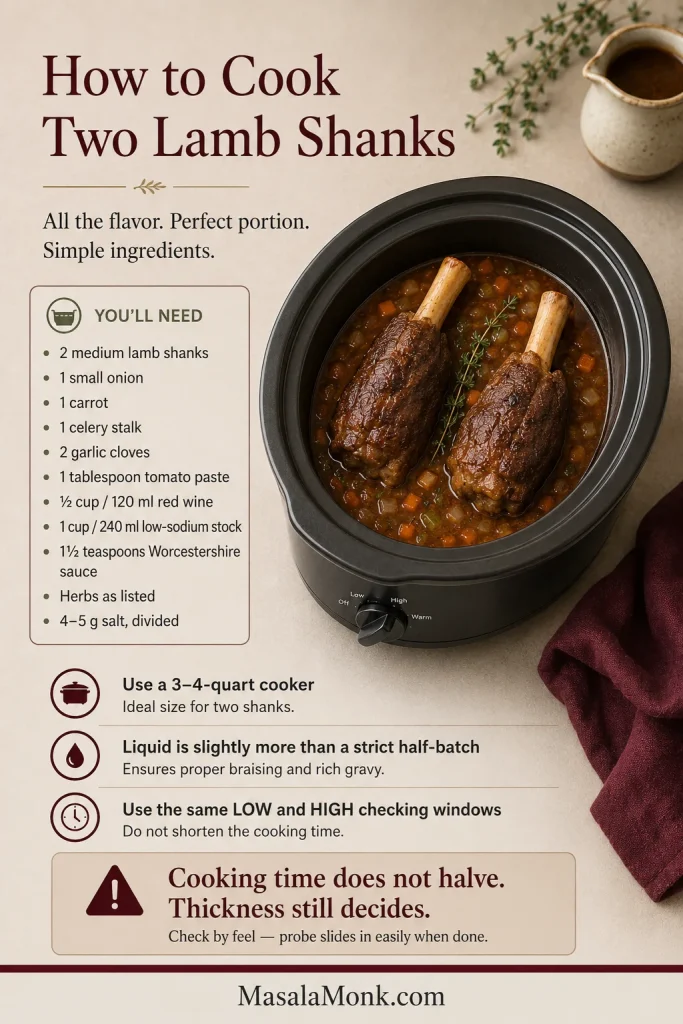
Two shanks take almost the same time as four when the pieces are equally thick. Use a smaller 3–4-quart / 3–4-litre cooker so the braising liquid reaches the meat without requiring unnecessary extra stock.
Scaled Quantities for Two Shanks
For two medium shanks, use:
- 2 lamb shanks, about 12–14 oz / 350–400 g each
- 4–5 g fine sea salt, using about 3–4 g on the lamb and reserving the remainder for the gravy, plus ½ teaspoon black pepper
- 1 tablespoon olive oil, plus more if needed
- ½ large onion, about 3½–4 oz / 100–115 g
- 1 medium carrot, about 3 oz / 85–90 g
- 1 celery rib, about 1¾ oz / 50 g
- 3 garlic cloves and 1 tablespoon / 15 g tomato paste
- ⅔ cup / 160 ml red wine
- 1 cup / 240 ml low-sodium stock, plus up to ¼ cup / 60 ml if needed
- 2 teaspoons Worcestershire sauce
- 1 rosemary sprig, 2 thyme sprigs and 1 bay leaf
Timing and Liquid for a Smaller Batch
The liquid is slightly more than a strict half-batch because two shanks still need enough depth around the meat. A smaller cooker avoids the need for additional stock, and the same LOW and HIGH checking windows still apply because shank thickness matters more than piece count.
What to Serve With Slow Cooker Lamb Shanks
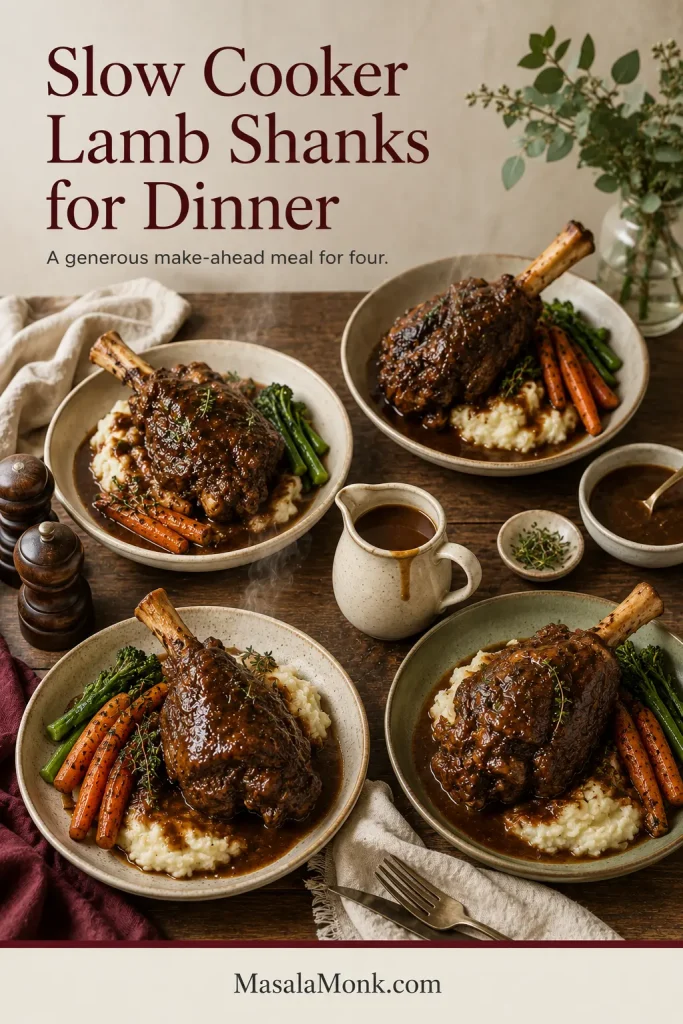
The best sides catch the gravy without competing with the lamb. Creamy mashed potatoes are the classic choice because their soft ridges hold the sauce around the meat.
Other Good Bases for the Gravy
- Soft polenta
- Buttered egg noodles
- Steamed rice
- Crusty bread
- Cauliflower mash
Vegetables for Contrast
- Green beans
- Peas
- Roasted carrots
- Brussels sprouts
- Wilted greens
- A crisp green salad with a sharp dressing
One shank per bowl makes the dinner feel generous before anyone has taken a bite. Spoon mashed potatoes into a shallow bowl, rest the lamb over them and pour the gravy across both.
Something green and sharp matters here—not because the plate needs decoration, but because each fresh bite makes the next spoonful of gravy taste richer. A green vegetable works well; for a colder contrast, this crisp cucumber salad cuts through the richness without competing with the sauce.
Make Ahead, Store, Freeze and Reheat
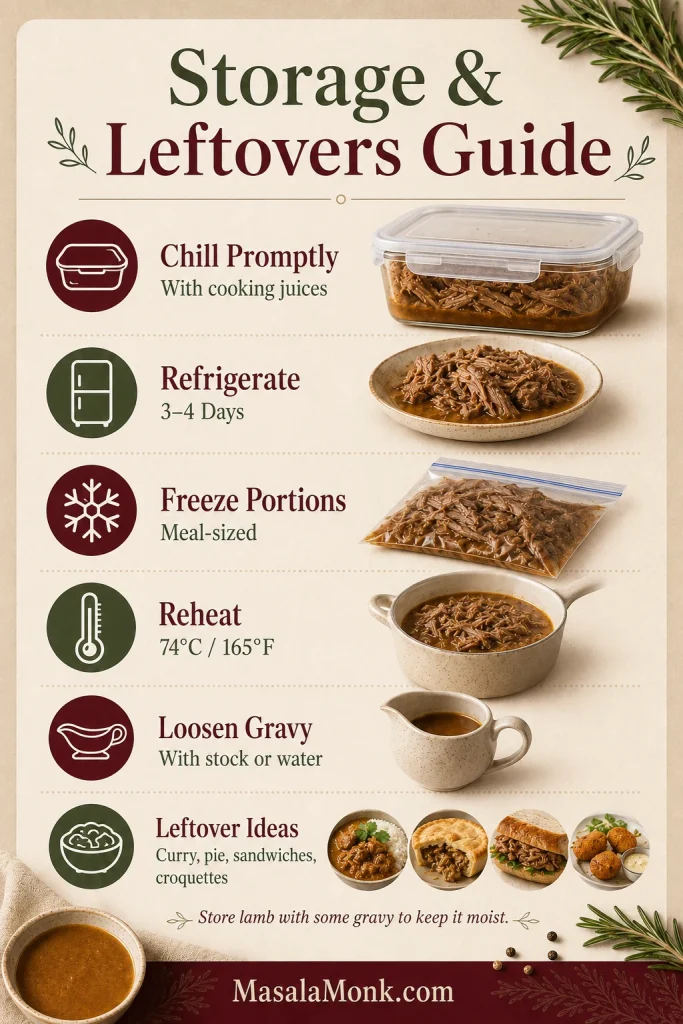
Lamb shanks reheat particularly well because the gravy protects the meat. Cool them promptly, store the lamb and gravy together, and reheat them thoroughly.
Making Lamb Shanks Ahead
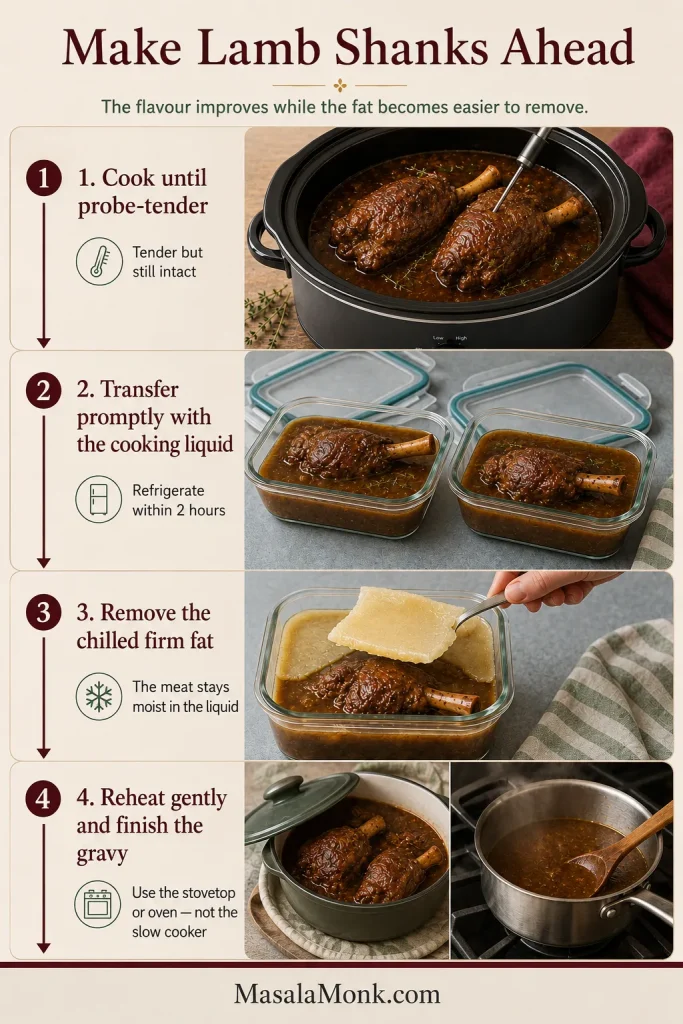
Making the dish a day ahead moves the uncertain tenderness window out of the hours before guests arrive. The chilled fat also lifts away cleanly, leaving the final gravy easier to control.
- Cook the lamb until tender, transfer the shanks and braising liquid to shallow containers, then cool promptly and refrigerate.
- The next day, lift away the firm fat from the surface.
- Reheat the shanks gently in part of the liquid.
- Reduce and finish the remaining gravy shortly before serving.
Can You Cook Lamb Shanks Overnight?
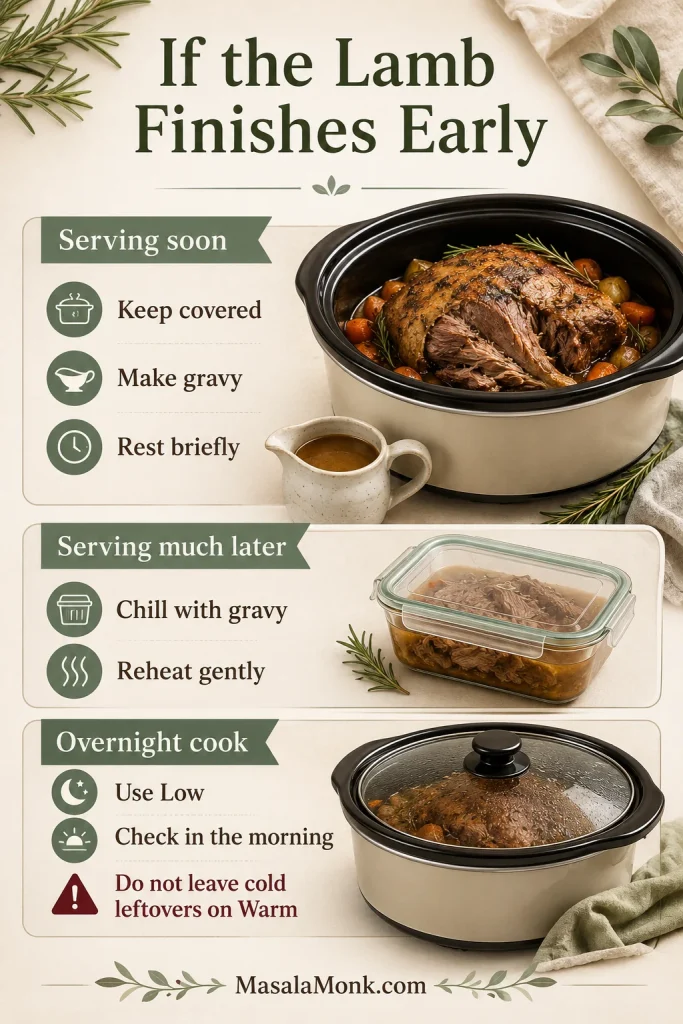
Overnight cooking works when the LOW cooking window suits the shank size and the cooker switches reliably to WARM. Start immediately—never on delay—and plan around the 7–8 hour window. Several extra hours on WARM can leave the meat softer and drier.
A switched-off slow cooker is not a safe place for overnight cooling. Move the lamb and gravy into shallow containers and refrigerate promptly.
Refrigerating and Freezing
Refrigerate the lamb and gravy within two hours and use them within 3–4 days. For longer storage, freeze the shanks with enough gravy to protect the meat in airtight freezer-safe containers. For the best texture and flavour, use within about 3 months.
Thaw in the refrigerator. Large bone-in shanks can take longer than expected to thaw completely.
Reheating
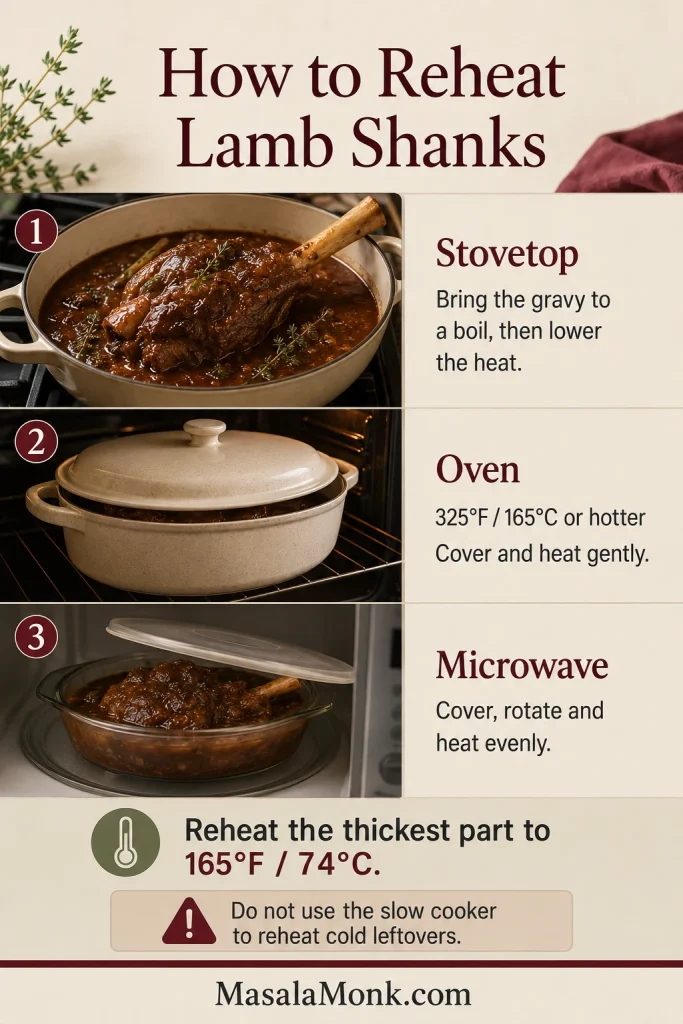
Reheat the lamb, covered with its gravy, on the stovetop, in an oven set to at least 325°F / 165°C, or in the microwave until the thickest part reaches 165°F / 74°C. On the stovetop, bring the gravy to a boil, then lower the heat and warm the lamb gently. Baste as needed so the meat heats evenly.
A slow cooker warms refrigerator-cold leftovers too gradually. Once the food is hot, a preheated slow cooker may hold it at 140°F / 60°C or above for serving. Read the full slow cooker food-safety guidance (opens in a new tab).
Starting with frozen raw shanks: thaw them in the refrigerator before slow cooking. Large, tightly packed bone-in pieces may need up to two days; load the cooker and start it immediately once they are thawed.
Using commercially pre-cooked shanks: follow the package reheating directions rather than giving them another all-day cook. Keep the meat in its sauce while heating so it stays moist.
What to Do With Leftover Lamb Shanks
Even one leftover shank can become another meal once the meat is removed from the bone and folded through the remaining gravy.
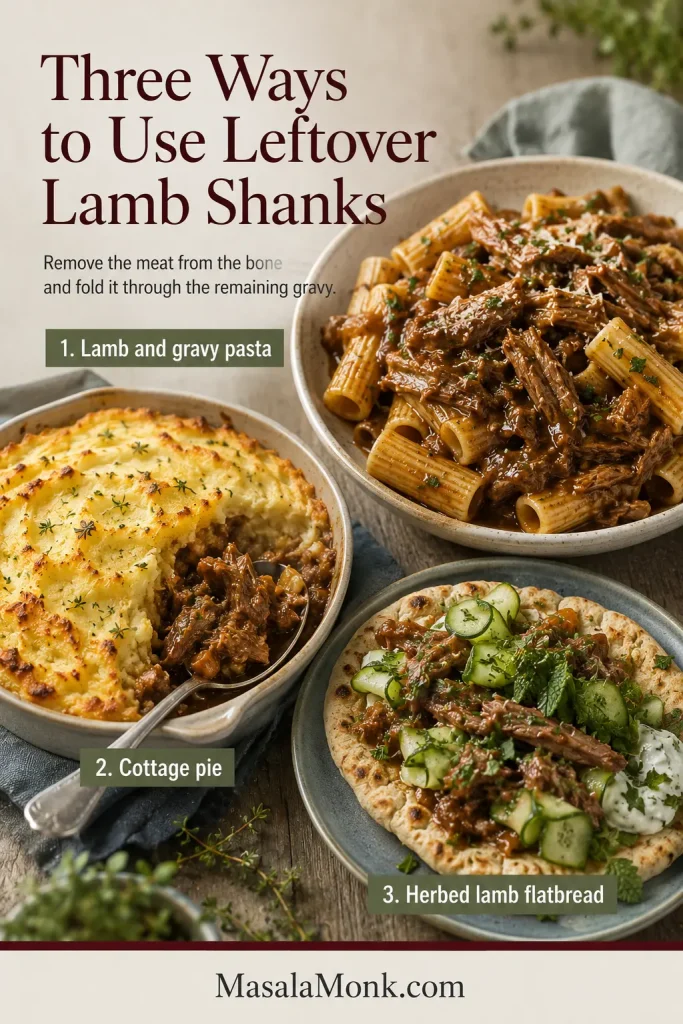
- Lamb ragu: Shred the meat and simmer it with the gravy, tomatoes if desired and enough stock to loosen the sauce. Toss with pasta.
- Shepherd’s pie: Combine chopped lamb with thickened gravy and vegetables, then cover with mashed potatoes and bake. The potato-topping and moisture-control principles in this slow cooker cottage pie recipe are useful here too.
- Lamb and barley soup: Thin the gravy with stock and add barley, carrots and greens.
- Pie filling: Chop the meat, reduce the gravy until thick and cool before adding pastry.
- Flatbreads or wraps: Reheat shredded lamb with a spoonful of gravy and add yoghurt, herbs and a sharp salad.
Slow Cooker Lamb Shanks FAQ
Do lamb shanks need to be submerged?
They do not need to be submerged. Keep the thick ends partly surrounded by liquid and let the bones remain exposed.
Can you overcook lamb shanks in a slow cooker?
Yes. Once the meat is tender, several more hours on HIGH or prolonged holding on WARM can make it stringy and cause it to collapse from the bone.
Do I have to brown lamb shanks first?
Browning is optional. It deepens the flavour and colour, while the long cook creates the tenderness.
Can I make lamb shanks without red wine?
Red wine is optional. Extra low-sodium stock, a little 100% red grape juice with no added sugar and balsamic vinegar create a rounder but still savoury gravy.
Why are my lamb shanks still tough after eight hours?
They usually need more time. Continue in 30-minute intervals until a fork or probe slides easily into the thickest meat.
Can frozen lamb shanks go straight into the slow cooker?
Frozen raw shanks should be thawed in the refrigerator before the cooker is loaded and started.
If you make these, tell us the shank size, when the meat became tender and whether you used wine. A note about that extra half hour may be exactly what another cook needs while dinner is still in the slow cooker.
The goal is not meat that disintegrates somewhere inside the cooker. It is a shank that reaches the table intact, yields under the fork and leaves enough dark gravy behind for the potatoes to matter.