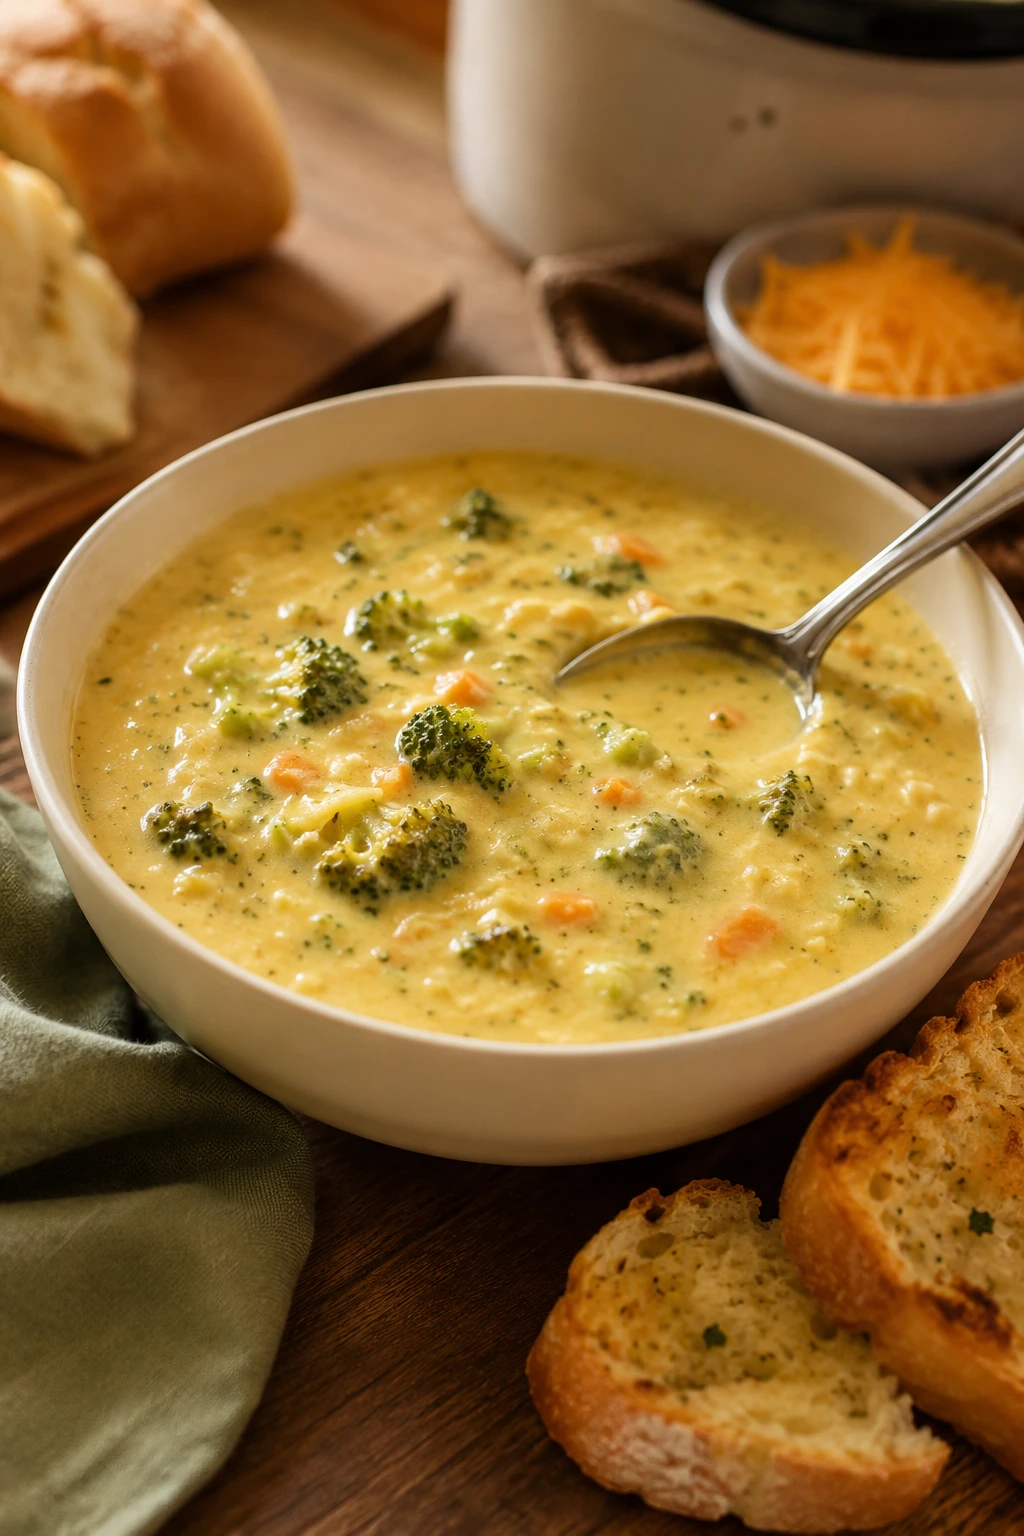
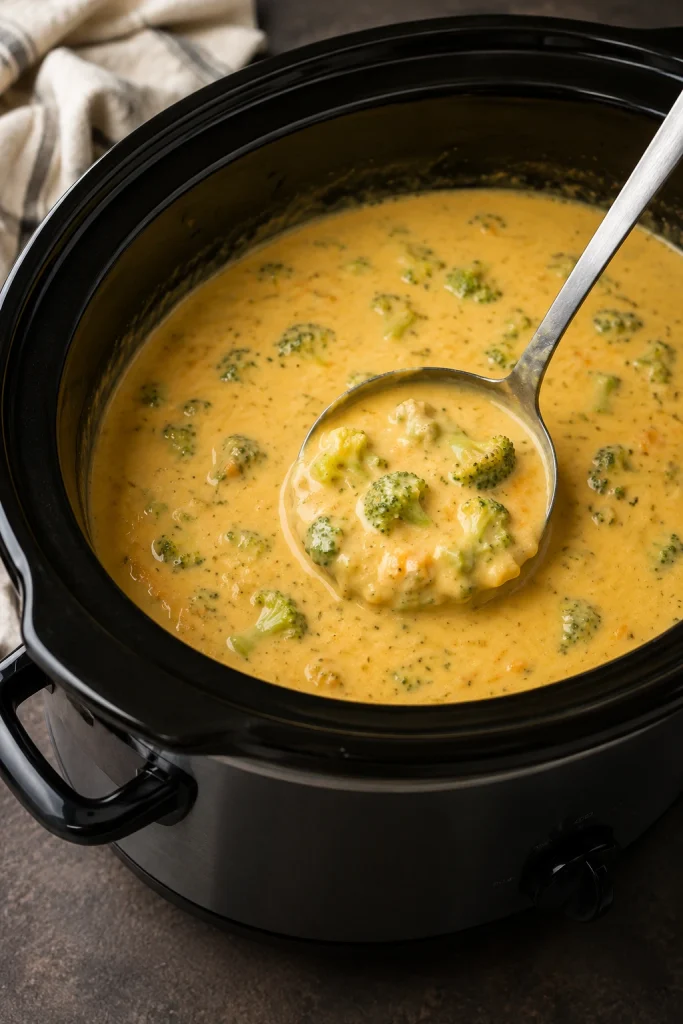
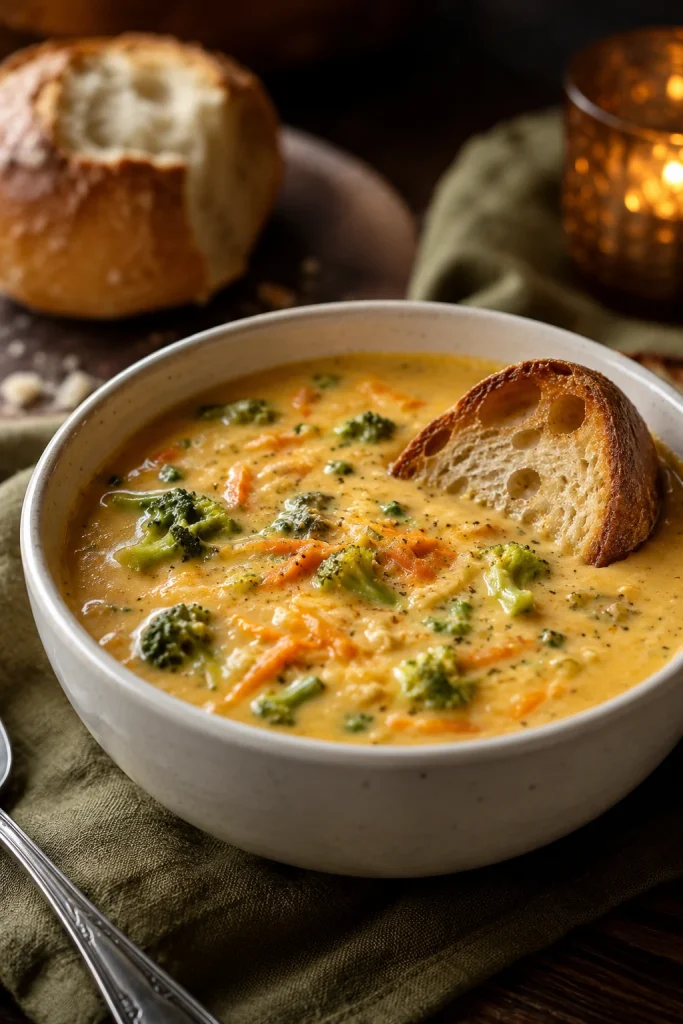
A good slow cooker broccoli cheese soup should feel like a full bowl of comfort: thick, creamy, cheddar-rich, and loaded with soft broccoli. It should be cozy enough for a cold night, simple enough for a weeknight, and sturdy enough to hold up to bread, crackers, or a grilled cheese on the side.
This is the slow cooker broccoli cheese soup for people who want real cheddar flavor without a grainy pot. No canned soup, no hours of cooked cheddar, just tender broccoli, a spoonable base, and cheese melted at the finish.
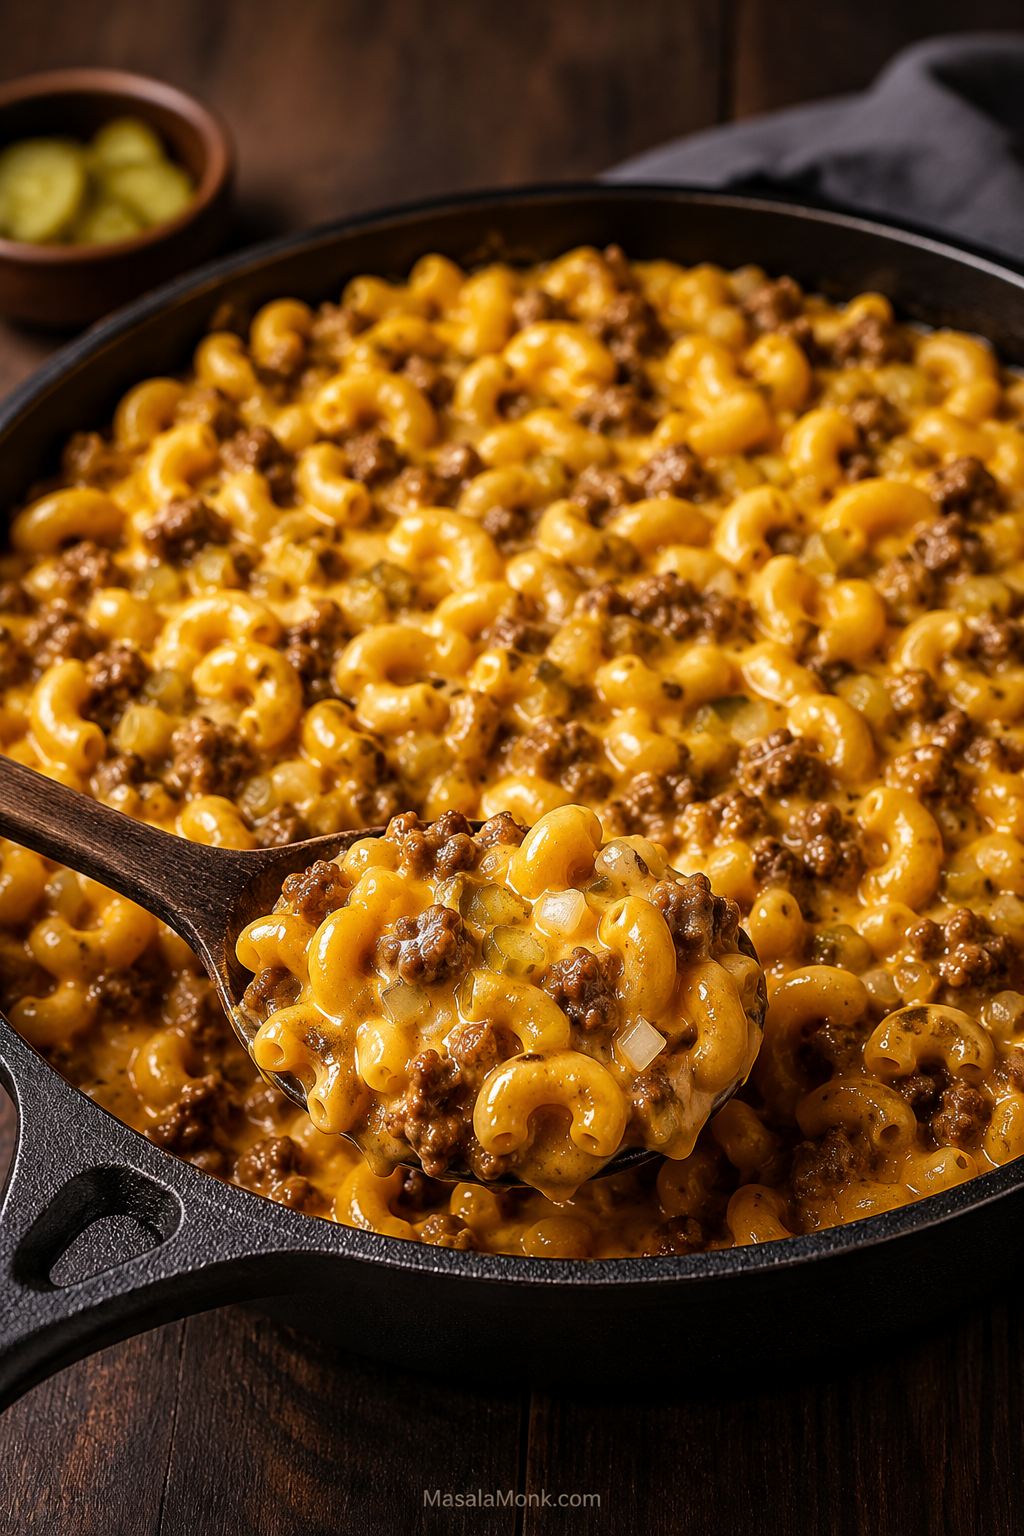
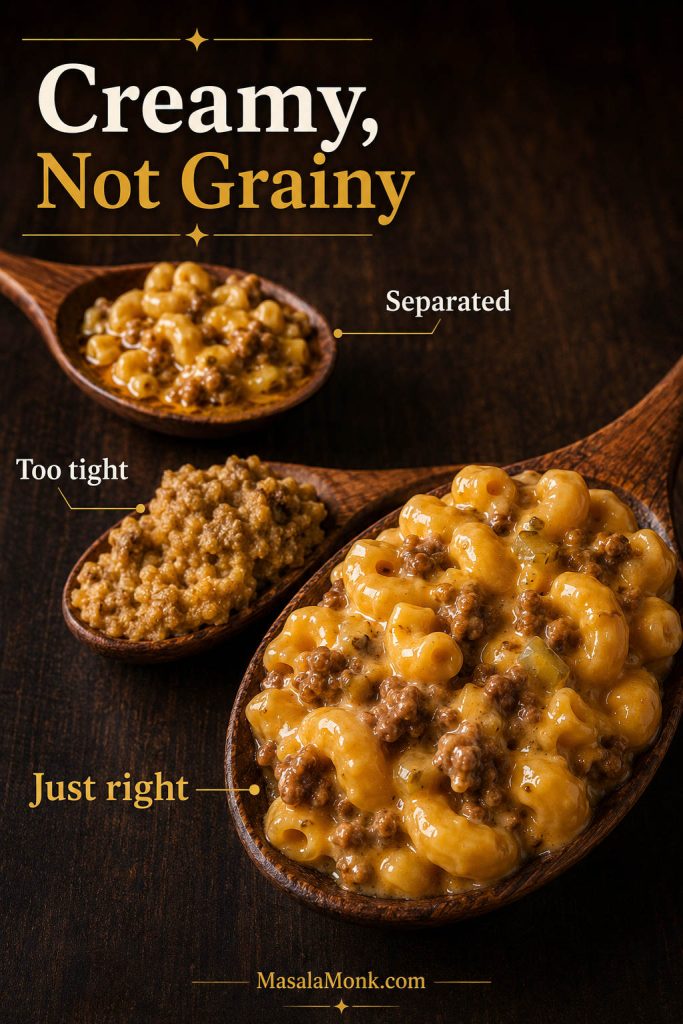
The finished bowl coats the spoon, keeps broccoli in every bite, and tastes cozy instead of heavy. It feels like dinner before you add anything else: warm, creamy, familiar, and balanced with enough broccoli to keep the cheddar from taking over.
Ready to cook? Jump straight to the recipe, or skim the quick notes below if you want the soup thicker, smoother, more Panera-style, or easier to make with what you already have.
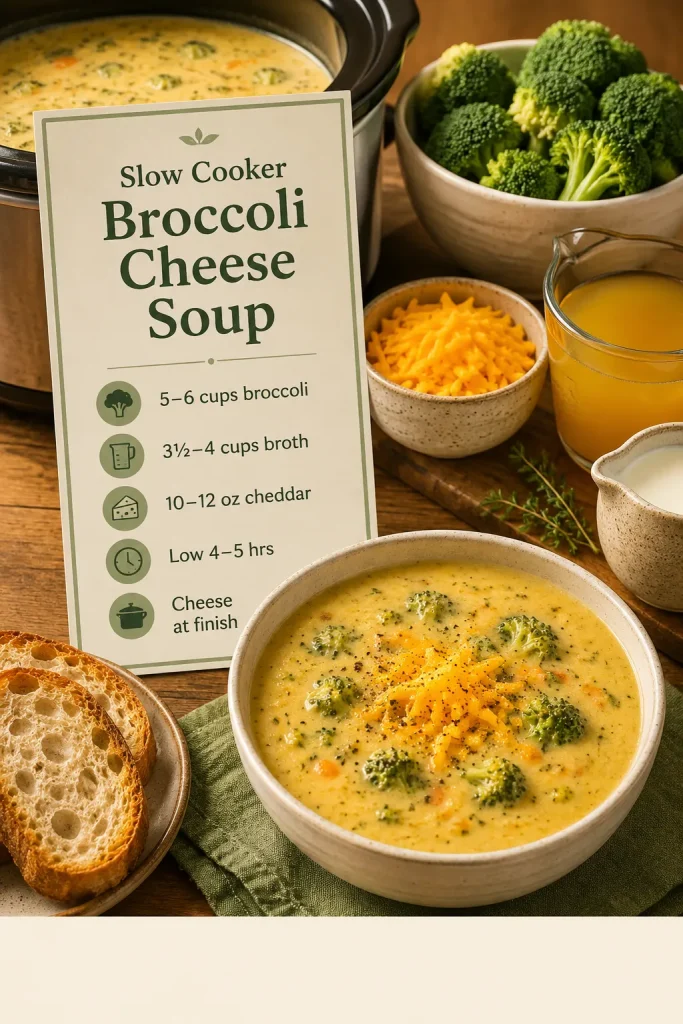
Make this tonight:
- Base ratio: 5 to 6 cups / 450 to 500 g broccoli, 3 1/2 to 4 cups / 840 to 960 ml broth, and 10 to 12 oz / 285 to 340 g cheddar.
- Timing: low for 4 to 5 hours or high for 2 to 3 hours, until the broccoli is tender.
- Cheese stage: add cheddar at the end, after the heat settles.
- Thickening: use cornstarch slurry, partial blending, cream cheese, or a potato variation.
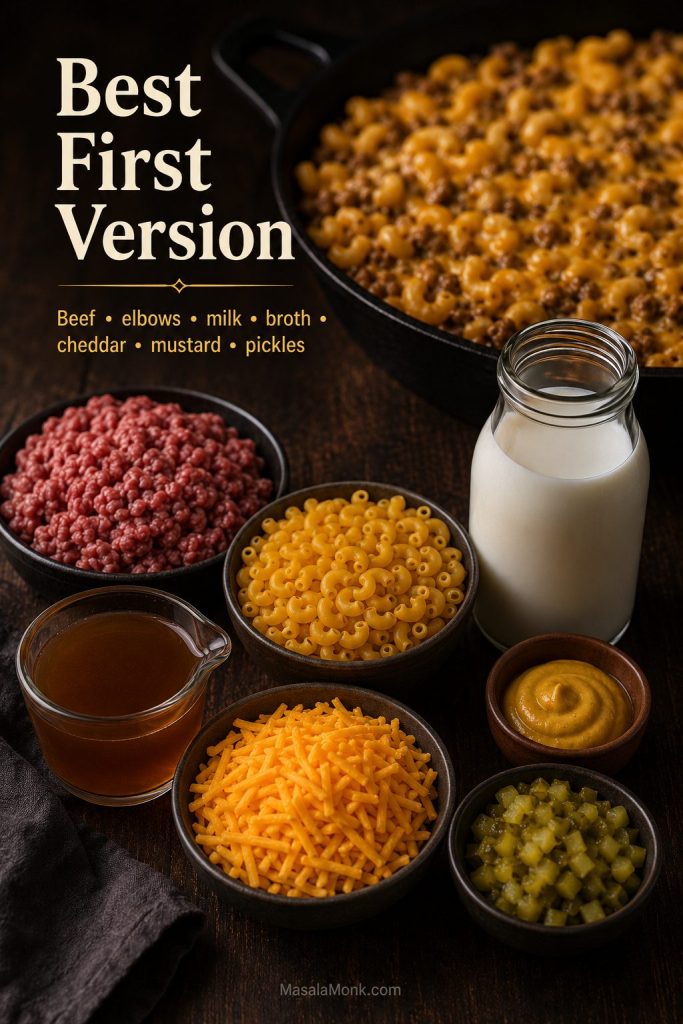
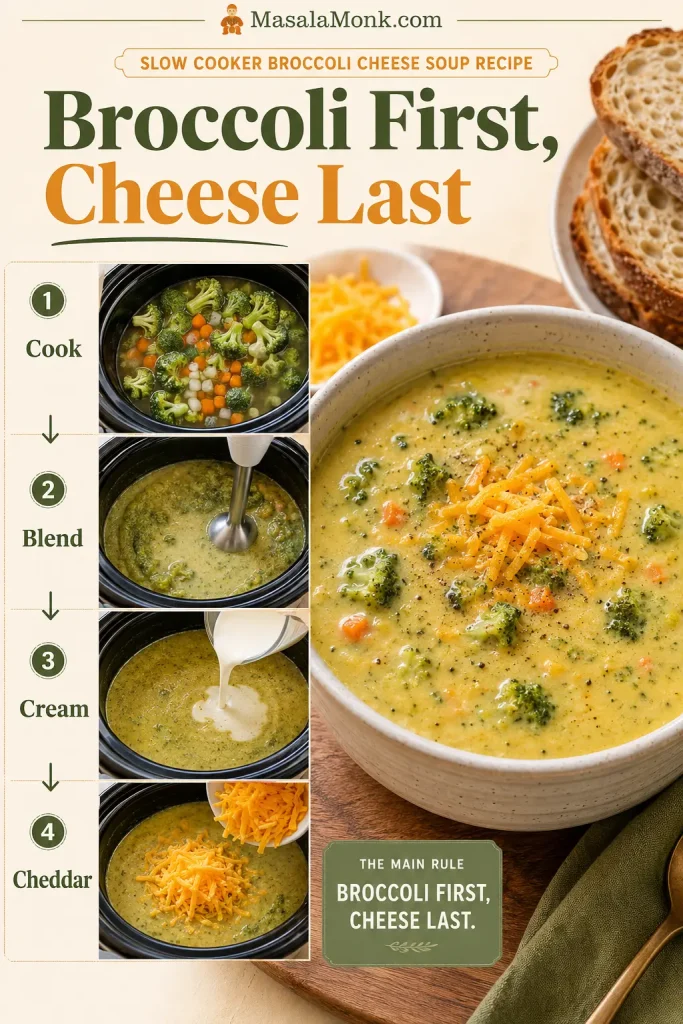
Best version for most people: Use fresh broccoli, 3 1/2 cups broth, evaporated milk or heavy cream, and freshly shredded sharp cheddar. The body comes from broccoli, a small cornstarch slurry, partial blending, and cheese added at the end. The simple rule is broccoli first, cheese last.
In This Guide
- Quick Answer
- The Recipe
- At a Glance
- Choose Your Version
- Why This Works
- Ingredients
- How to Make It
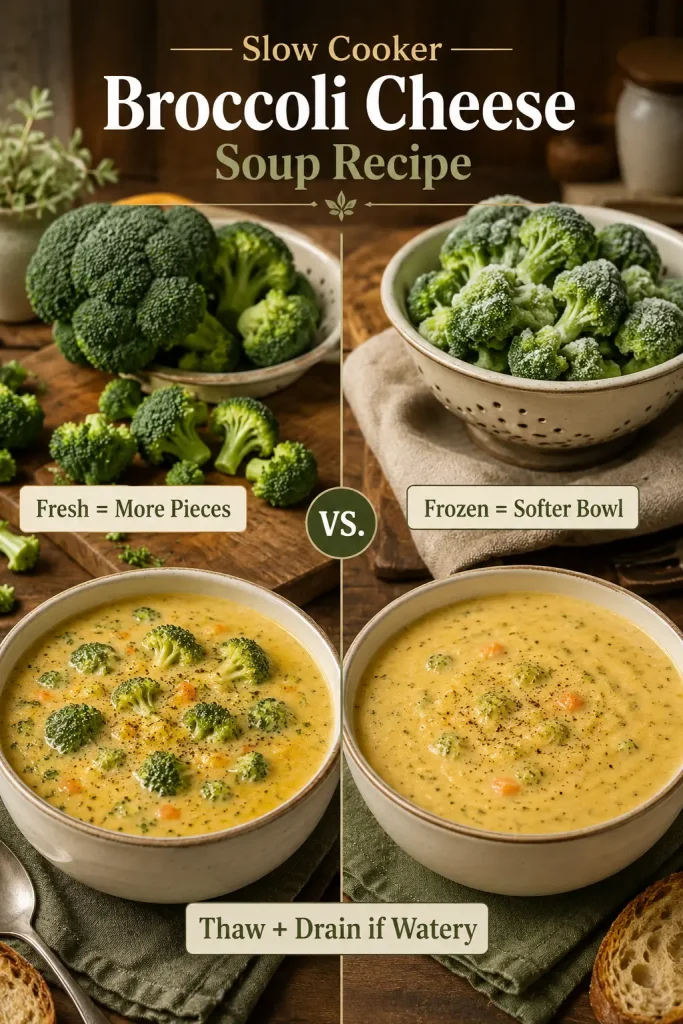
- Fresh vs Frozen Broccoli
- Cheese Choices
- Thickening
- Troubleshooting
- Storage and Reheating
- Serving Ideas
- FAQs
Quick Answer: Slow Cooker Broccoli Cheese Soup
For creamy slow cooker broccoli cheese soup, cook the broccoli, onion, carrot, garlic, broth, and cornstarch slurry first. Once the broccoli is tender, blend about one-third of the soup, turn the slow cooker to warm, low, or off, then stir in cream or evaporated milk and freshly shredded cheddar.
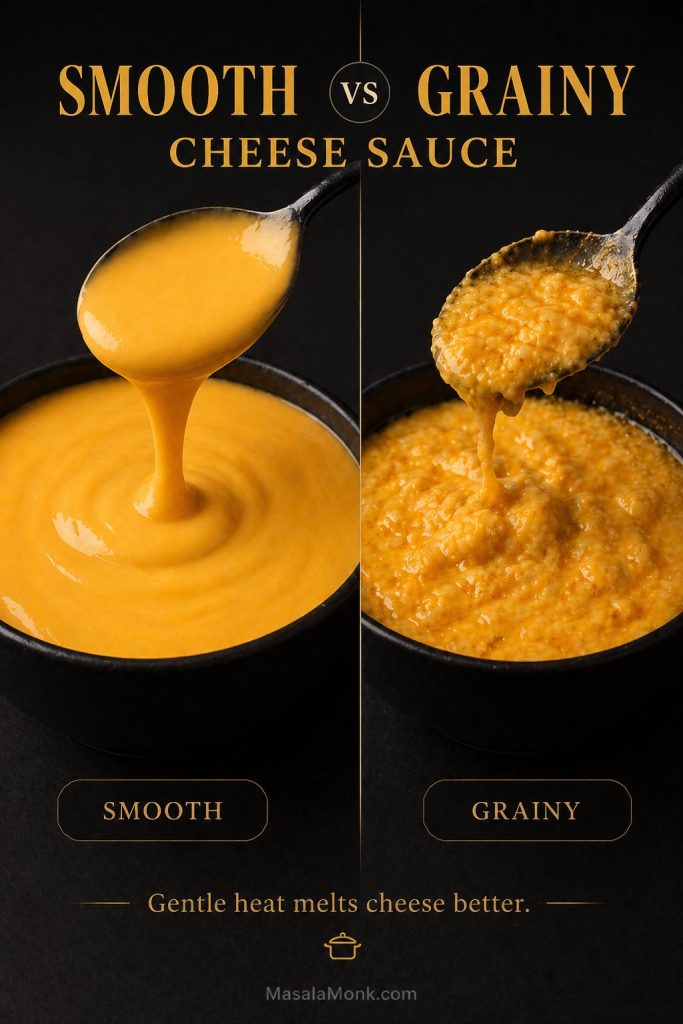
Cheddar belongs near the end, not at the beginning. It can turn grainy when it sits in high heat for hours. Add it by handfuls, stir slowly, and let the finished pot rest for 5 to 10 minutes before serving.
For your first batch: use fresh broccoli, low heat, freshly shredded sharp cheddar, 3 1/2 cups broth for a thicker soup, and evaporated milk or cream added at the end. Frozen broccoli works when convenience matters, and a little Velveeta helps when you want the smoothest finish.
The Recipe
Start here when you are ready to cook. The recipe works as written. Use the notes below only when you want to adjust the pot: frozen broccoli, missing cream, grainy cheese, a too-thin base, or a more Panera-style finish.
You do not need to read every note before cooking. The order matters more than perfection: once the broccoli is tender and the cheese melts over soft heat, the soup is on the right track.
Recipe Details
Serves: 6 bowls · Prep: 15 minutes · Cook: 4 to 5 hours on low or 2 to 3 hours on high · Finish: 10 to 15 minutes · Equipment: 5 to 6 quart slow cooker, box grater, whisk, small bowl, ladle, optional immersion blender.
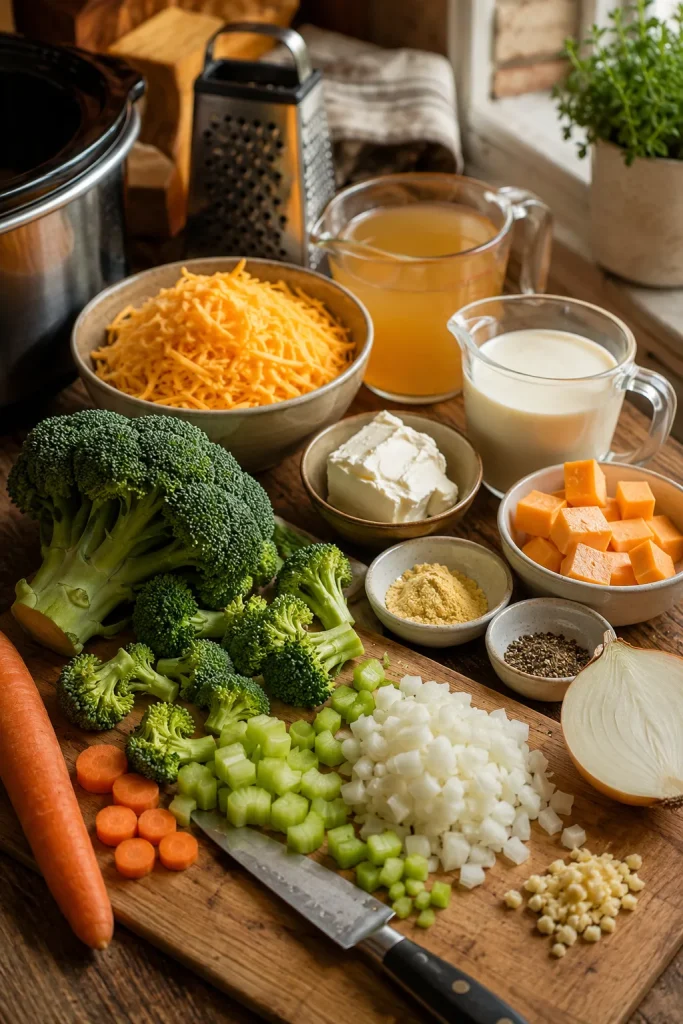
Ingredients
| Ingredient | US Amount | Metric / Notes |
|---|---|---|
| Broccoli florets, chopped | 5 to 6 cups | 450 to 500 g / about 1 lb |
| Yellow onion, finely chopped | 1 small | 100 to 120 g |
| Carrot, shredded or finely diced | 1 medium / about 1 cup | 80 to 100 g |
| Celery, finely chopped, optional | 1 stalk | 40 to 50 g |
| Garlic, minced | 2 to 3 cloves | 10 to 15 g |
| Chicken broth or vegetable broth | 3 1/2 to 4 cups | 840 to 960 ml |
| Cornstarch | 2 tablespoons | About 16 g |
| Heavy cream or evaporated milk | 1 cup heavy cream, or 1 cup to one 12 oz can evaporated milk | 240 ml cream; use 240 to 355 ml evaporated milk depending on how creamy or loose you want it |
| Sharp cheddar, freshly shredded | 10 to 12 oz | 285 to 340 g |
| Velveeta, optional | 4 to 8 oz as a partial cheddar replacement | 115 to 225 g, cubed small |
| Cream cheese, optional | 2 oz | 55 g, cubed small and softened |
| Parmesan, optional | 1/4 cup | About 25 g |
| Butter, optional | 2 tablespoons | 28 g |
| Fine salt | 3/4 to 1 teaspoon to start | Add more to taste at the end |
| Black pepper | 1/2 teaspoon | Freshly ground if possible |
| Mustard powder or Dijon mustard, optional | 1/2 teaspoon powder or 1 teaspoon Dijon | Boosts cheddar flavor |
| Nutmeg, optional | Pinch | Rounds out the creaminess |
| Cayenne or paprika, optional | Pinch to 1/4 teaspoon | For warmth, not heat |
Use less salt with salty broth, Parmesan, Velveeta, bacon, or ham. For a full 12 oz can of evaporated milk, start with 3 1/2 cups broth. When using Velveeta, replace part of the cheddar instead of adding it on top.
Instructions
- Make the slurry. Whisk the cornstarch with 1/2 cup cold broth until smooth.
- Load the slow cooker. Add the broccoli, onion, carrot, celery if using, garlic, remaining broth, slurry, salt, pepper, and butter if using.
- Cook until tender. Cover and cook on low for 4 to 5 hours or high for 2 to 3 hours, until the broccoli presses easily against the side of the pot.
- Blend for body. Blend about one-third of the soup, or mash some broccoli against the side. Leave pieces for a chunkier bowl.
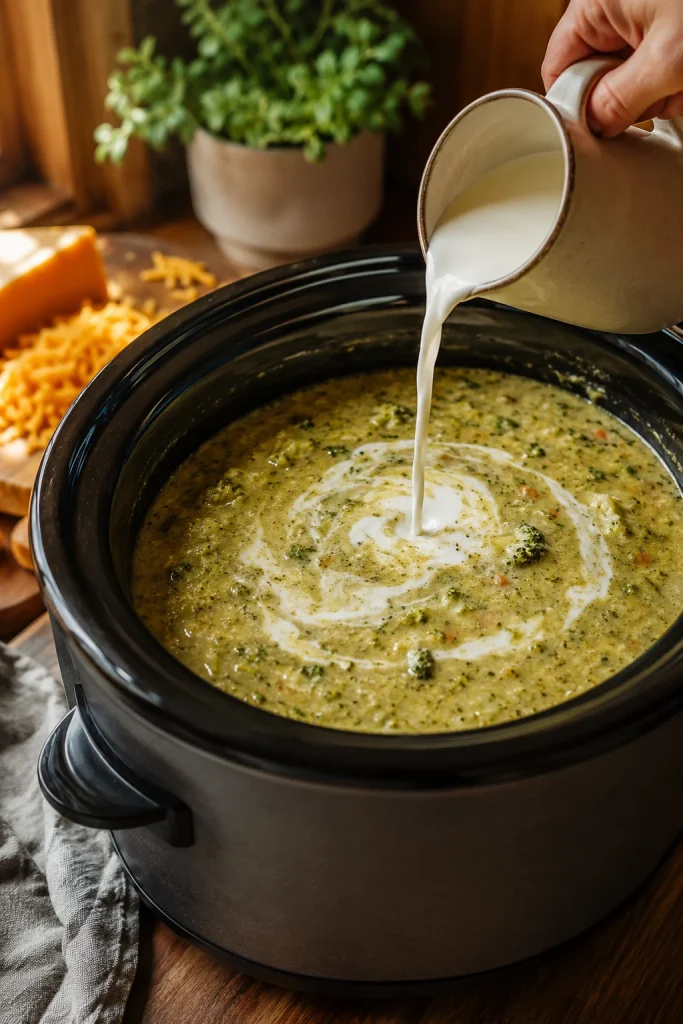
- Lower the heat. Turn the slow cooker to warm, low, or off. Stir in the cream or evaporated milk. Add softened cream cheese now if using.
- Add cheese gradually. Fold in shredded cheddar by handfuls, stirring after each addition. Add small Velveeta cubes with or just before the cheddar if using.
- Rest and thicken. Cover for 5 to 10 minutes, then stir again. Aim for a creamy cheddar base with visible broccoli and a spoon-coating texture.
- Adjust before serving. Add salt, pepper, mustard powder, cayenne, or Parmesan if needed. Loosen thick soup with warm broth or milk, or use the thickening fixes below if it is thin.
Important: hot enough to melt, not hot enough to boil — that is the creamy zone after the cheddar is added.
Need to adjust the pot? Jump to Choose Your Version, Fresh vs Frozen Broccoli, Cheese Choices, or Thickening.
Slow Cooker Broccoli Cheese Soup at a Glance
Use this quick table when you want the main numbers without rereading the full recipe.
| Slow cooker size | 5 to 6 quart slow cooker for a standard batch |
| Broccoli amount | 5 to 6 cups / 450 to 500 g chopped broccoli |
| Broth range | 3 1/2 cups / 840 ml for thicker soup; 4 cups / 960 ml for looser soup |
| Cook time | Low for 4 to 5 hours or high for 2 to 3 hours, until broccoli is tender |
| Cheese | Freshly shredded sharp cheddar; optional Velveeta or cream cheese for smoother texture |
| Texture target | Creamy, thick, spoonable, with visible broccoli pieces |
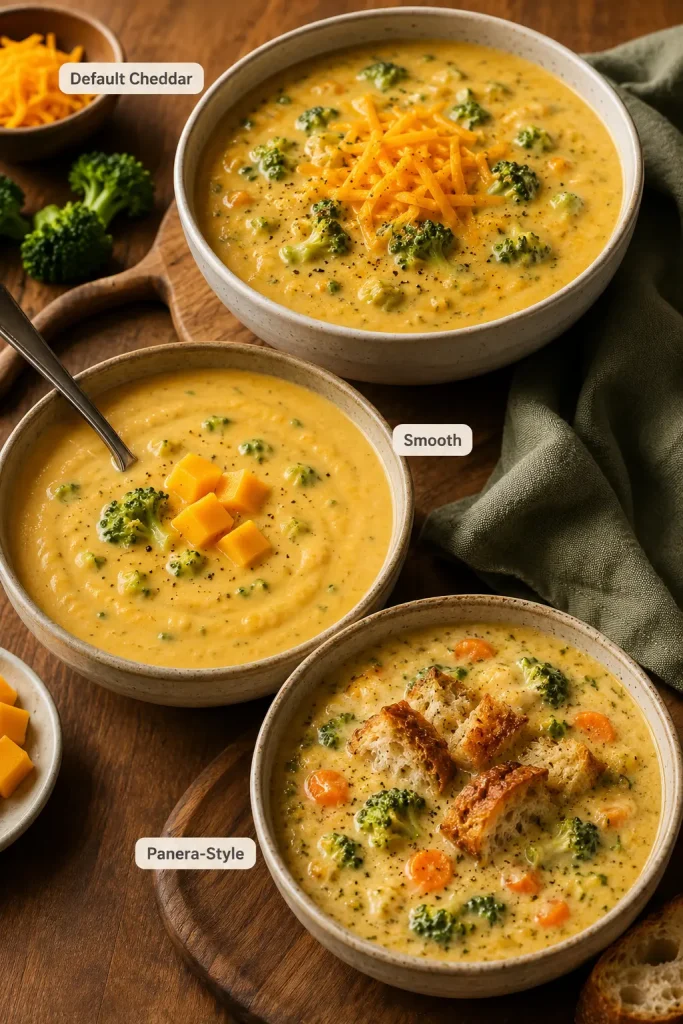
Choose Your Version
Start with the fresh-broccoli, sharp-cheddar version. Once that base is clear, every variation is easier: smoother, thicker, lighter, more shortcut-friendly, or more like a restaurant-style broccoli cheddar soup.
| What You Want | Use This | Smart Move |
|---|---|---|
| Best default version | Fresh broccoli + freshly shredded sharp cheddar | Use 3 1/2 cups broth and melt cheddar at the end |
| Smooth family-style bowl | Cheddar + 4 to 8 oz Velveeta | Cube Velveeta small so it melts easily |
| Frozen broccoli version | Frozen broccoli + evaporated milk + cheddar | Drain thawed broccoli or reduce broth slightly |
| Thicker bowl | Lower broth amount + cream cheese + partial blending | Let the soup rest before serving |
| Panera-style | Carrot, onion, sharp cheddar, mustard powder, partial blending | Serve with crusty bread or a bread bowl |
| Hearty dinner | Add diced potatoes at the start | Cook until potatoes are fully tender before adding cheese |
Why This Recipe Works
The slow cooker is great at softening vegetables, but it is not great at reducing liquid or babysitting cheese. This recipe works because it gives the slow cooker the job it does best and saves the cheddar for the finish.
That is the structure: let the pot soften the vegetables, use a little blending for body, then finish with cheddar once the base is ready.
- Moderate broth keeps the soup from turning watery. Slow cookers do not reduce liquid like stovetop pots, so the recipe starts with 3 1/2 to 4 cups broth instead of drowning the broccoli.
- Cornstarch gives the base an easy head start. It helps the soup thicken without needing a stovetop roux.
- Partial blending adds body naturally. Blending some broccoli makes the soup feel thicker without making it heavy.
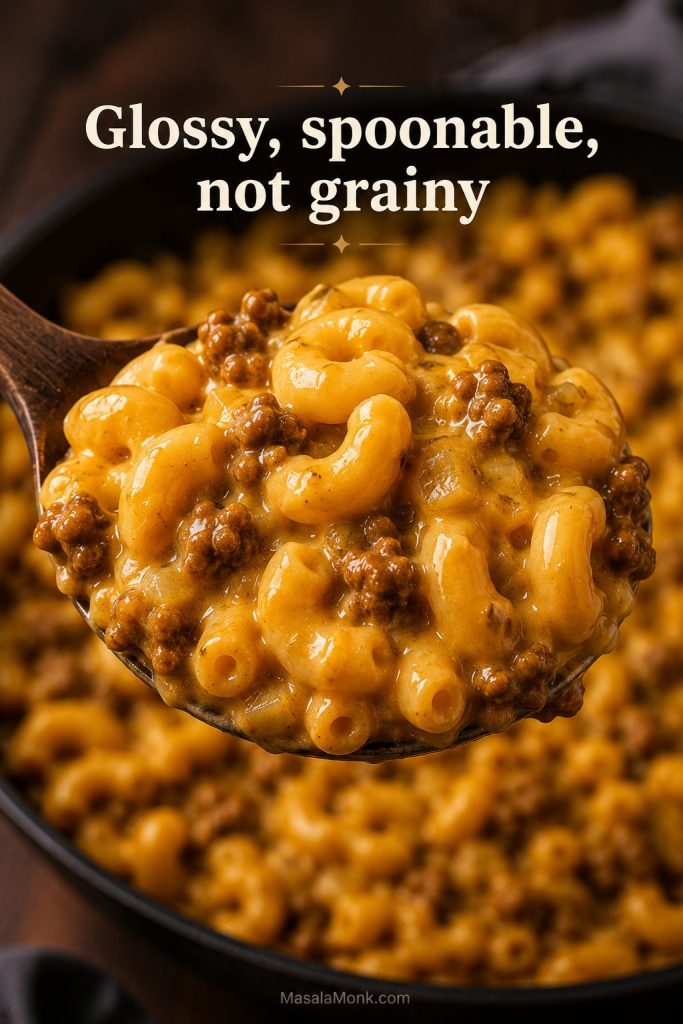
- Cheddar finishes the soup. This protects the melt and keeps the bowl creamy instead of oily or gritty.
- Freshly shredded cheese melts better. It gives stronger flavor and a cleaner finish than many pre-shredded cheeses.
If you have ever had a cheese sauce split before, the lesson is the same whether it is soup or a creamy macaroni and cheese recipe: low heat wins.
You want the spoon to drag gently through the soup, not splash through it. The broccoli softens into the base, the cheese melts into the cream, and the finished bowl feels thick without turning pasty.

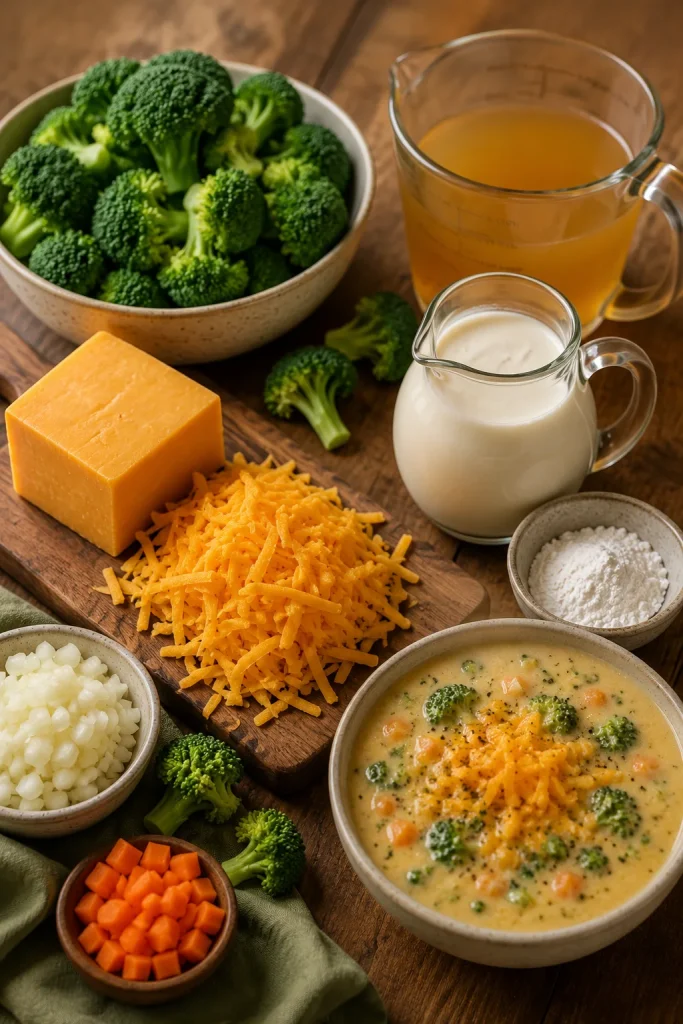
Ingredients and What Each One Does
Nothing here is fancy; every ingredient has a job. The broccoli gives the bowl its heart, the aromatics make it taste like dinner, the broth sets the body, and the cheese brings the comfort.
Broccoli
Use 5 to 6 cups of chopped broccoli florets, about 450 to 500 grams. Fresh broccoli gives steady texture, especially if you like visible pieces in the soup. Frozen broccoli works too, but it usually creates a softer, more blended bowl and can release extra water. Tender peeled broccoli stems can go in as well; chop them small so they soften at the same pace as the florets.
Onion, Carrot, Celery, and Garlic
These are what keep the soup from tasting like cheese melted into broth. Onion adds sweetness, carrot gives color and a mild Panera-style note, celery adds savory depth, and garlic keeps the base from tasting flat. If you dislike celery, skip it. For a smoother soup, chop everything small.
Broth
Chicken broth gives the richest flavor, while vegetable broth keeps the soup vegetarian. Use 3 1/2 cups if you like a thick soup and 4 cups if you prefer it slightly looser. When your broth is salty, start with less added salt and adjust at the end.
Cornstarch
Cornstarch is the easiest thickener for this slow cooker version. Whisk it into cold broth before it goes into the cooker so it spreads evenly. You can also use an extra slurry at the end if the base looks thinner than you want.
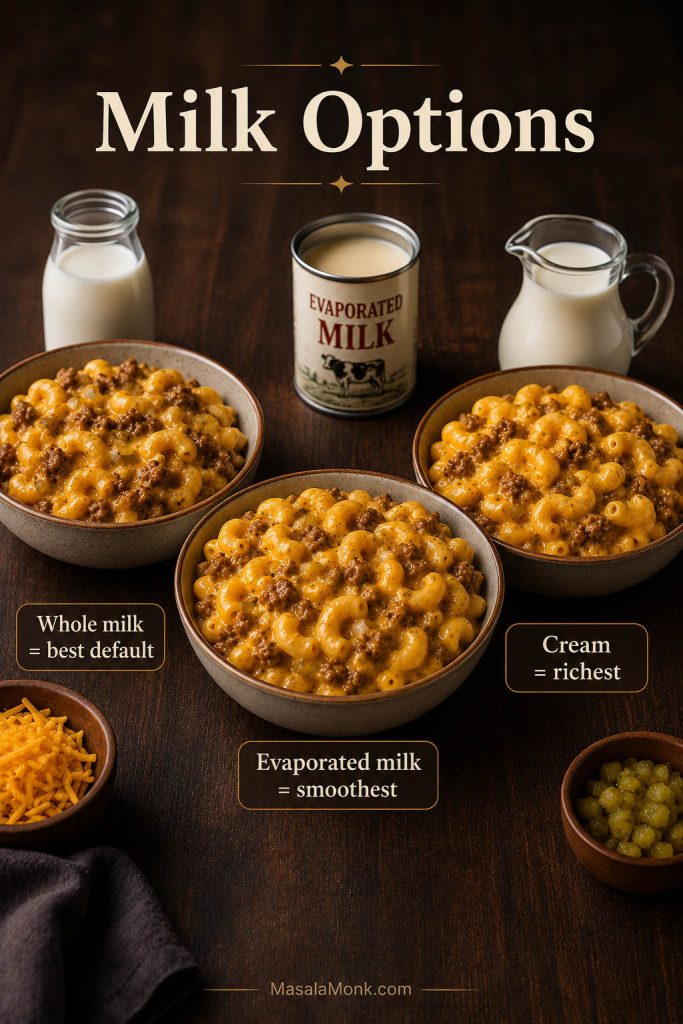
Heavy Cream or Evaporated Milk
Heavy cream gives the richest soup. Evaporated milk gives a creamy, stable finish that is a little lighter than cream. Regular milk can work, but it is thinner and more likely to split if overheated, so add it carefully and keep the pot below a hard bubble after the cheddar melts in.
Cheddar
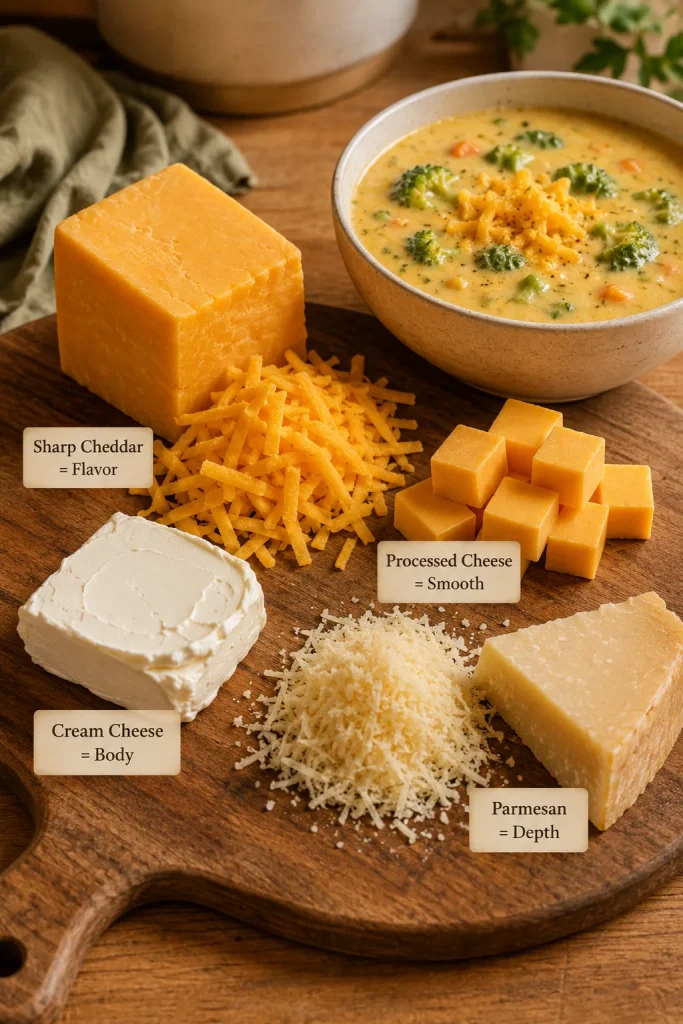
Sharp cheddar gives the strongest broccoli cheddar flavor. Buy a block and shred it yourself if you can. Pre-shredded cheese is convenient, but it often contains anti-caking ingredients that can make the melt less even. For a deeper look at smooth melting, this cheese sauce recipe walks through the same gentle-heat idea in a stovetop sauce.
Velveeta
Velveeta is optional, but it is useful if you want the soup extra smooth and kid-friendly. It does not give the same sharp cheddar flavor as real cheddar, so the most balanced compromise is usually a mix: cheddar for flavor, Velveeta for easy melting.
Cream Cheese
Cream cheese is optional, but helpful. It adds body and helps the soup taste richer. Use block cream cheese, not whipped cream cheese. Cut it into small cubes and let it soften for a few minutes so it melts more easily.
Mustard, Nutmeg, Cayenne, or Paprika
These are small flavor boosters, so they should stay in the background. Mustard powder or Dijon makes cheddar taste sharper. Nutmeg rounds out creamy soups. Cayenne or paprika adds warmth and keeps the bowl from tasting one-note.
Substitutions: No Milk, No Cream, No Chicken Broth, No Carrots
Real weeknight cooking means the fridge is rarely perfectly stocked. This soup can still work as long as you protect the liquid level and keep the cheese heat gentle.
The swaps below help when you are missing one ingredient. They do not make the soup dairy-free unless you also replace the cheese and cream with dairy-free alternatives. The best swaps keep the bowl creamy without flooding the pot.
Practical Swap Guide
| Need | Most Practical Swap | What Changes |
|---|---|---|
| No milk | Use evaporated milk, heavy cream, or extra broth plus cream cheese | Evaporated milk is creamy and stable; broth alone makes a lighter soup |
| No heavy cream | Use evaporated milk or half-and-half | The soup will be slightly lighter but still creamy |
| No evaporated milk | Use heavy cream or half-and-half | Add near the end and keep the pot below a hard bubble |
| No chicken broth | Use vegetable broth | Keeps the soup vegetarian and still flavorful |
| No carrots | Skip them | The soup loses a little sweetness and color, but still works |
| No onion | Use 1/2 teaspoon onion powder or add extra garlic | Less depth, but still cozy |
| No celery | Skip it | No major change; celery is optional |
| No flour | Use cornstarch and partial blending | Simple thickening route for this recipe |
| No Velveeta | Use freshly shredded cheddar and optional cream cheese | Better real-cheese flavor, slightly more heat-sensitive |
| No cream cheese | Use extra cheddar, partial blending, or a little more slurry | Soup may be slightly less rich |
As long as you protect the liquid level and the cheese stage, the recipe gives you room to improvise.
Slow Cooker Size and Scaling
The only trick with slow cooker size is giving yourself room to stir. A 5 to 6 quart slow cooker gives the broccoli space to cook and leaves enough room to add the dairy and cheese at the end.
Half Batch, Standard Batch, and Double Batch
| Batch | Cooker Size | Broccoli | Broth | Cheddar |
|---|---|---|---|---|
| Half batch | 2 to 3 quart | 2 1/2 to 3 cups / 225 to 250 g | 1 3/4 to 2 cups / 420 to 480 ml | 5 to 6 oz / 140 to 170 g |
| Standard batch | 5 to 6 quart | 5 to 6 cups / 450 to 500 g | 3 1/2 to 4 cups / 840 to 960 ml | 10 to 12 oz / 285 to 340 g |
| Double batch | 6 to 8 quart | 10 to 12 cups / 900 g to 1 kg | 7 to 8 cups / 1.7 to 1.9 L | 20 to 24 oz / 570 to 680 g |
For half or double batches, scale the remaining ingredients in the same direction, but start lower with salt and adjust after the cheese melts. The soup scales well, but the cheese stage still needs space. A too-full slow cooker makes it harder to melt cheddar evenly.
If your slow cooker runs hot, check the broccoli early. Once the dairy goes in, slow down and let the soup settle.
How to Make Slow Cooker Broccoli Cheese Soup
The recipe card gives you the exact steps. This section shows what the pot looks and feels like as you cook, which is especially helpful if your slow cooker runs hot or your broccoli pieces are larger.
Step 1: Build a base that looks full, not flooded
Add the broccoli, onion, carrot, celery, garlic, broth, salt, pepper, and cornstarch slurry to the slow cooker. The vegetables need enough liquid to cook, but they do not need to swim. Slow cookers trap steam, so moderate broth helps the final soup stay spoonable.
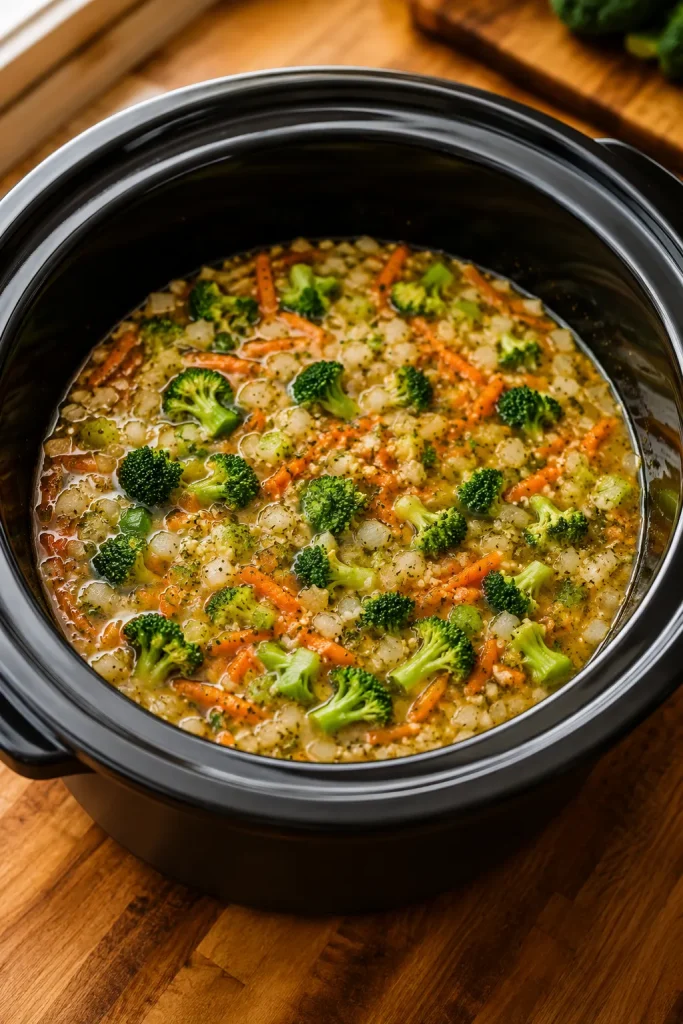
Step 2: Cook until the broccoli gives in
The broccoli is ready when it presses easily against the side of the slow cooker with a spoon. If it still feels firm, give it more time before adding dairy. This is the stage where the soup builds body.
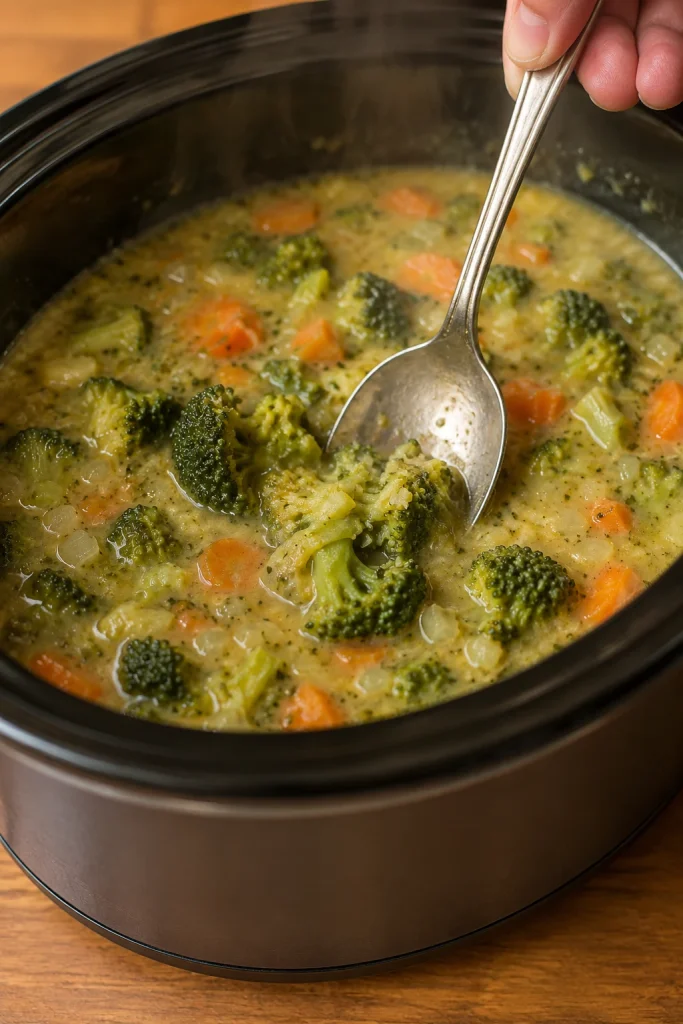
Step 3: Blend just enough for body
Blend about one-third of the soup, or mash some broccoli into the base. You are not trying to erase every piece. A good bowl has creamy body and visible broccoli, so stop while it still looks like broccoli cheese soup, not a completely smooth puree.

Step 4: Let the heat settle before dairy
Look for a steaming base without a hard bubble. Stir in the cream, evaporated milk, or cream cheese after turning the slow cooker down. If the surface is actively boiling, wait a few minutes. Residual heat is enough to bring everything together.
Step 5: Melt the cheddar with patience
Fold in the cheddar by handfuls and let each handful disappear before adding the next. The base should turn glossy and creamy, not stringy. This is the part where you do less, not more: slow down and let the hot base do the melting.

Low vs High Slow Cooker Timing
Low is the calmer route. It gives the broccoli time to soften without rushing the pot, while high works when dinner needs to happen faster. Either way, the broccoli needs to be tender before the dairy and cheese go in.
- Low: 4 to 5 hours for steady broccoli texture.
- High: 2 to 3 hours when dinner needs to happen faster.
- Cheese finish: 5 to 15 minutes after the heat settles.
- Potato variation: allow extra time if needed because potatoes must be fully tender before cheese goes in.
The pot will tell you more than the timer. Look for tender broccoli first, then move into the dairy and cheese finish.
For general slow cooker safety, the USDA slow cooker food safety guide notes that slow cookers cook at low temperatures over time. For this recipe, the practical cue is still texture: broccoli tender first, cheese added after, and no hard boiling once the cheese goes in.
Fresh vs Frozen Broccoli
This is one of the few broccoli soups where frozen broccoli can absolutely work. Use fresh broccoli for the best first batch. Use frozen when convenience matters and a softer soup is okay. Fresh holds shape; frozen melts into the bowl.
If this soup puts you in a broccoli mood but you want something fork-twirly instead of spoonable, this Broccoli Pasta Recipe goes in a garlic-Parmesan direction.
| Broccoli Type | How to Use It | Result |
|---|---|---|
| Fresh chopped florets | Add at the start | Classic texture and visible broccoli pieces |
| Larger fresh florets | Add at the start, then chop or mash after cooking | Chunkier soup with more broccoli shape |
| Frozen chopped broccoli | Add from frozen or thaw and drain first | Softer, creamier, more blended soup |
| Frozen florets | Add during the last 1 to 2 hours if you want more shape | Less mushy than cooking frozen broccoli from the start |
| Watery frozen broccoli | Thaw and drain, or reduce broth slightly | Helps prevent thin soup |
For a softer soup, add frozen broccoli at the beginning. For more visible pieces, add frozen florets later or use fresh broccoli next time.
If frozen broccoli makes the pot look loose, go straight to How to Thicken or Troubleshooting.
Cheese Choices for Smooth Broccoli Cheese Soup
Cheese decides whether this soup tastes sharp and homemade, smooth and kid-friendly, or rich enough to feel restaurant-style. For most batches, use freshly shredded sharp cheddar. Add Velveeta only if smoothness matters more than sharp cheddar flavor.
Pick the cheese based on the finish you want, not just what is in the fridge. The right cheese melts into the base instead of sitting on top of it.
| Cheese | Good For | Watch Out For |
|---|---|---|
| Sharp cheddar | Classic broccoli cheddar flavor | Can turn grainy if overheated |
| Mild cheddar | Smoother, less sharp flavor | Less depth than sharp cheddar |
| Freshly shredded block cheddar | Smooth melt and stronger flavor | Takes a few extra minutes to grate |
| Pre-shredded cheddar | Convenience | Can melt less evenly |
| Velveeta | Smooth shortcut, kid-friendly texture | Less real-cheddar flavor |
| Cream cheese | Thicker, more stable soup | Can taste tangy if too much is used |
| Parmesan | Salty depth and savory finish | Too strong to use as the main cheese |
Freshly shredded sharp cheddar gives the most balanced result. If you want the soup extra smooth, replace 4 to 8 ounces of the cheddar with Velveeta or add 2 ounces of cream cheese before the cheddar.
Worried about grainy texture? Check When to Add the Cheese before the troubleshooting table.
When to Add the Cheese
The whole pot depends on this moment. Once the vegetables are tender, the slow cooker has done the hard part. From here, the cheese only needs steady warmth.
Cheddar behaves best as a finish, not a long-cooked ingredient. If it cooks for hours in the slow cooker, it can become oily, stringy, grainy, or clumpy. Let the heat already in the soup do the melting.
- Shred the cheddar yourself if possible.
- Turn the slow cooker down before adding cheese.
- Fold in cheese one handful at a time.
- Stir after each addition.
- Let the soup rest for 5 to 10 minutes after the cheese melts.
That cheese-at-the-end habit is useful beyond this soup. It also helps in recipes like Slow Cooker French Onion Chicken, where the slow cooker does the tender cooking first and the cheese works better as a finish.
If you are using cream cheese, add it before the cheddar so it has time to soften into the hot soup. If using Velveeta, cube it small so it melts easily into the base.
How to Thicken Slow Cooker Broccoli Cheese Soup
A thin soup can feel disappointing, especially when the kitchen already smells like dinner. Luckily, this is one of the easiest problems to fix if you catch it before boiling the cheese.
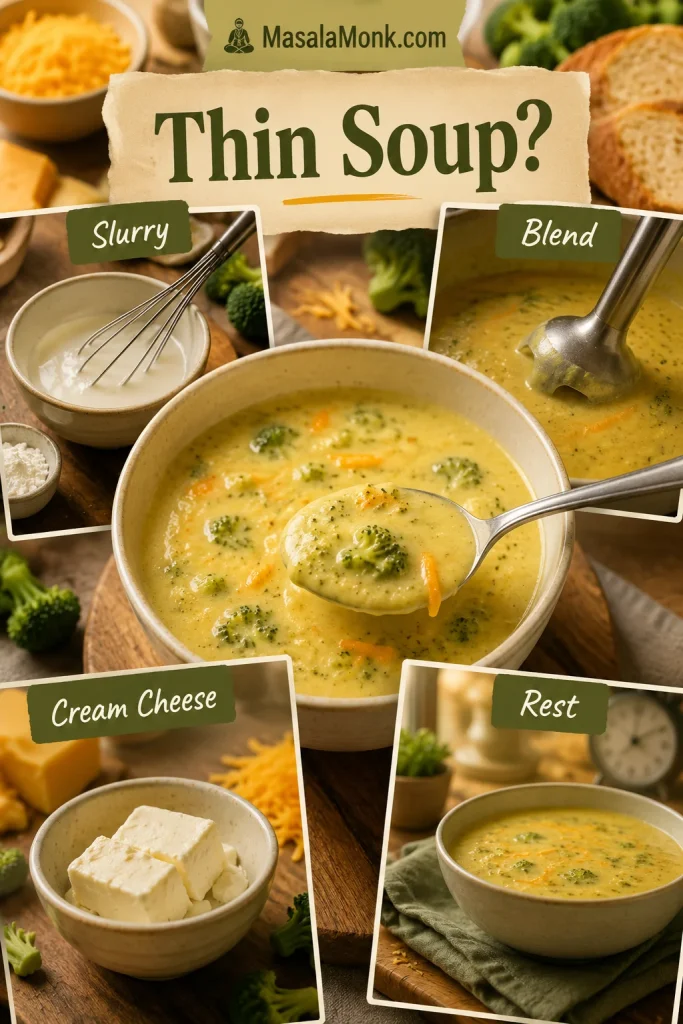
To thicken slow cooker broccoli cheese soup, blend part of the cooked broccoli, use a cornstarch slurry, add softened cream cheese, or let the soup rest after the cheese melts. A thin base needs slurry before cheddar; a loose finished pot usually needs a short rest before any extra fix.
Best Thickening Fixes
| Thickening Method | Good For | How to Use It |
|---|---|---|
| Cornstarch slurry | Easy thickening | Whisk 1 tablespoon cornstarch with 1 tablespoon cold water or broth, then stir into hot soup |
| Partial blending | Natural body | Blend one-third of the soup after broccoli is tender |
| Cream cheese | Rich, stable texture | Add small softened cubes before cheddar |
| Potato | Heartier soup | Add diced potato at the beginning and cook until tender |
| Roux | Classic creamy body | Cook butter and flour separately, then stir into the soup base |
| Extra cheese | Flavor and body | Add at the end, after the heat settles |
A roux gives classic cream-soup body, but it adds a skillet step. The cornstarch and partial-blending route is simpler for this slow cooker version and still gives a thick, spoonable soup.
If the soup is only slightly thin, let it rest for 10 minutes after adding the cheese. Cheese soups often thicken as they sit.
Flavor Boosters for Better Broccoli Cheddar Soup
If the soup tastes creamy but a little flat, it usually needs sharper cheese, a touch more salt, or one small background flavor. You do not need to make it spicy or complicated. A tiny amount of the right ingredient can make the cheddar taste more like cheddar.
You should not notice the mustard or nutmeg as separate flavors. They are there to make the cheddar taste fuller.
- Mustard powder: add 1/2 teaspoon to make cheddar taste sharper without making the soup taste mustardy.
- Dijon mustard: add 1 teaspoon for gentle tang and a more restaurant-style finish.
- Nutmeg: add a pinch to round out the creaminess.
- Cayenne: add a pinch for warmth without making the soup hot.
- Parmesan: add 1/4 cup for salty, savory depth.
- Extra sharp cheddar: use it for part or all of the cheddar when you want stronger cheese flavor.
- Worcestershire sauce: add 1/2 to 1 teaspoon for savory depth, especially in non-vegetarian versions.
Add flavor boosters near the end, then taste again. Once the cheese melts, the salt and sharpness of the soup can change quickly.
Cheddar Version vs Velveeta Version
Some nights you want real cheddar sharpness; some nights you want the soup to melt smoothly with zero drama. The hybrid version gives you both.
Freshly shredded sharp cheddar gives the most homemade broccoli cheddar soup flavor. Velveeta creates the smoothest, most forgiving texture. A mix gives you both flavor and easy melting.
- Real cheddar version: use 10 to 12 oz freshly shredded sharp cheddar for the strongest flavor. Melt it carefully because real cheddar is more heat-sensitive.
- Hybrid cheddar-Velveeta version: use 6 to 8 oz cheddar plus 4 to 8 oz Velveeta for a smooth but still flavorful soup.
- Velveeta-style version: use 12 to 16 oz Velveeta and 1 to 2 cups cheddar if you want the smoothest shortcut version.
- Three-cheese version: add Parmesan or Colby Jack with cheddar for a richer, deeper cheese flavor.
For most people, the hybrid version is the easiest win: sharp cheddar for flavor, a little Velveeta or cream cheese for smoothness.
Slow Cooker Panera-Style Broccoli Cheddar Soup
This is not an exact Panera copycat, but it moves the soup toward that familiar Panera-style broccoli cheddar bowl: creamy base, visible broccoli, shredded carrot, sharp cheddar, and bread on the side.
When you want the Panera-style feeling, focus on three things: shredded carrot, sharp cheddar, and a creamy base that still leaves little pieces of broccoli in the spoon.
- Use sharp cheddar, not only mild cheddar.
- Keep the carrot in the recipe for color and sweetness.
- Add onion and garlic for a deeper base.
- Use evaporated milk or cream for a smooth, creamy finish.
- Blend part of the soup so it is creamy but still has broccoli pieces.
- Add a small amount of Dijon or mustard powder to wake up the cheese flavor.
- Serve it with crusty bread or in a bread bowl.
For a bread-bowl feeling without making actual bread bowls, toast thick slices from a homemade garlic bread loaf and serve them on the side for dipping.
If you want the soup thicker and more restaurant-style, use the lower broth amount, add cream cheese, and let the finished soup rest for 10 minutes before serving.
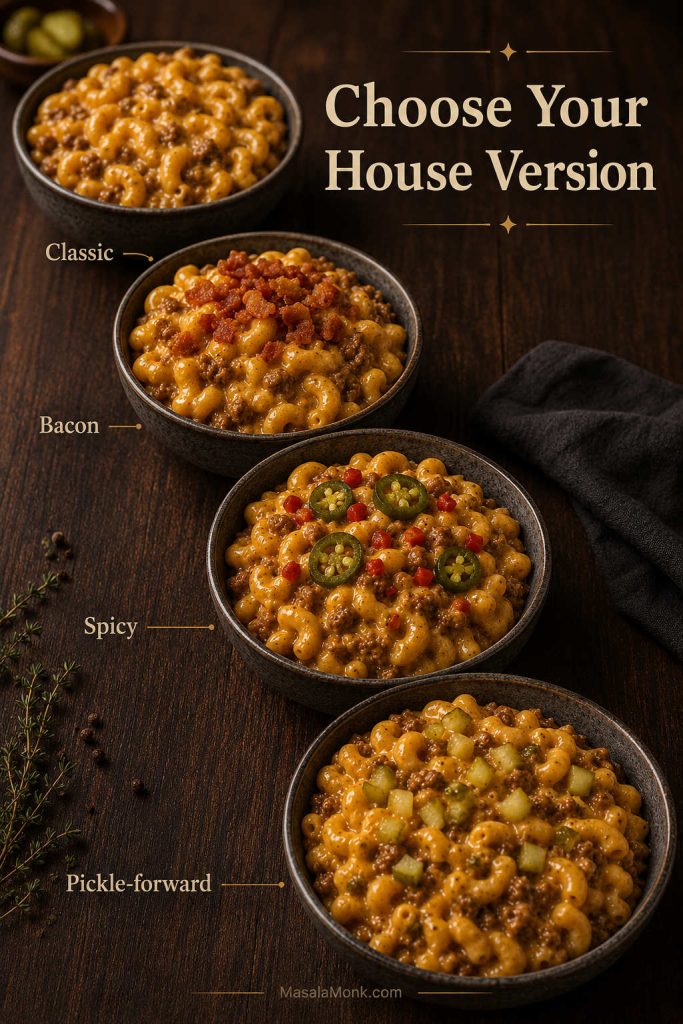
Potato, Chicken, Bacon, and Ham Variations
Once the base is creamy, the soup can turn into dinner in a few different ways. Add-ins work best when they support the soup instead of making it watery, greasy, or overcooked.
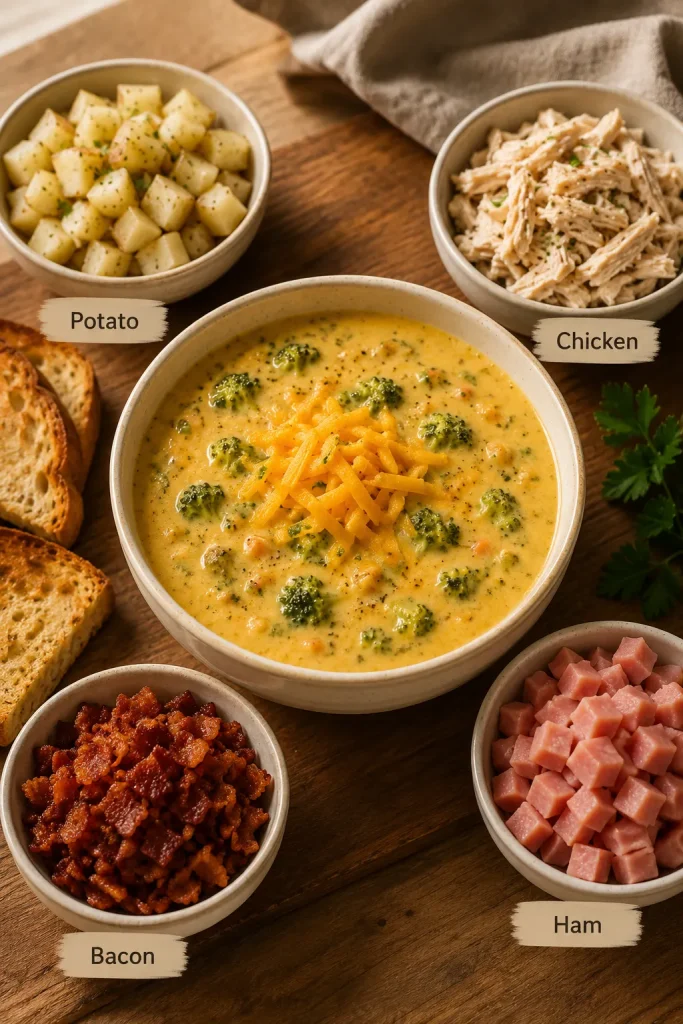
Easy Add-In Ideas
| Variation | How to Adapt It | Notes |
|---|---|---|
| Broccoli cheddar potato soup | Add 1 1/2 to 2 cups small diced potatoes at the start | Cook until potatoes are fully tender before adding cheese |
| Chicken broccoli cheese soup | Add cooked shredded chicken near the end | Rotisserie chicken works well |
| Bacon broccoli cheese soup | Top with cooked crumbled bacon before serving | Do not slow cook raw bacon in the soup |
| Ham broccoli cheese soup | Add diced cooked ham near the end | Good for leftover ham; reduce salt if ham is salty |
| Broccoli cauliflower cheese soup | Replace 1 to 2 cups broccoli with cauliflower | Cauliflower makes the soup milder and creamier |
| Gluten-free version | Use cornstarch, not flour, and check broth and cheese labels | Best handled with simple ingredients |
| Keto or low-carb version | Skip potatoes and reduce or skip carrots; use cream, cheese, and partial blending for body | For stricter low-carb cooking, avoid flour and use only a small amount of cornstarch or a keto-friendly thickener |
| Lighter version | Use evaporated milk instead of heavy cream | Still creamy, but less rich |
For the chicken version, stir in cooked shredded chicken near the end so it stays tender. If you want the same broccoli-cheese comfort in a rice-based dinner, make this Cheesy Chicken Broccoli Rice on another night.
For the ham version, keep the salt lower and add diced cooked ham near the end. If you still have ham left after soup night, this Ham and Cheese Quiche turns it into an easy brunch-style meal.
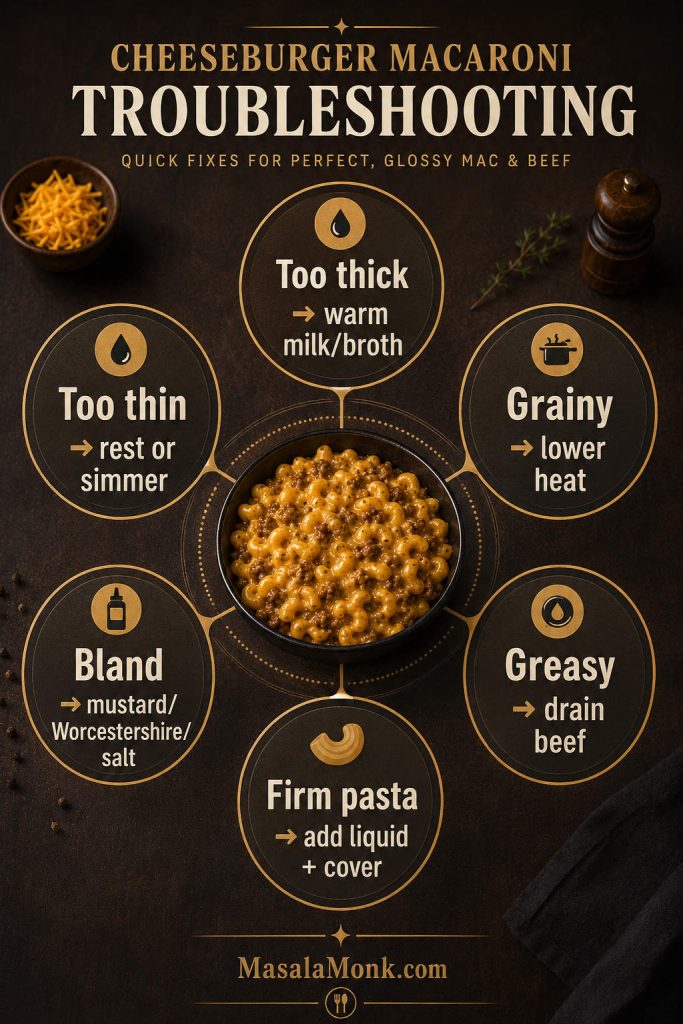
Troubleshooting Slow Cooker Broccoli Cheese Soup
If the soup looks thinner, thicker, or less smooth than you hoped, do not panic. Most broccoli cheese soup problems are easier to fix before the pot gets too hot again.
Match the symptom to the fix below, then bring the soup back slowly.
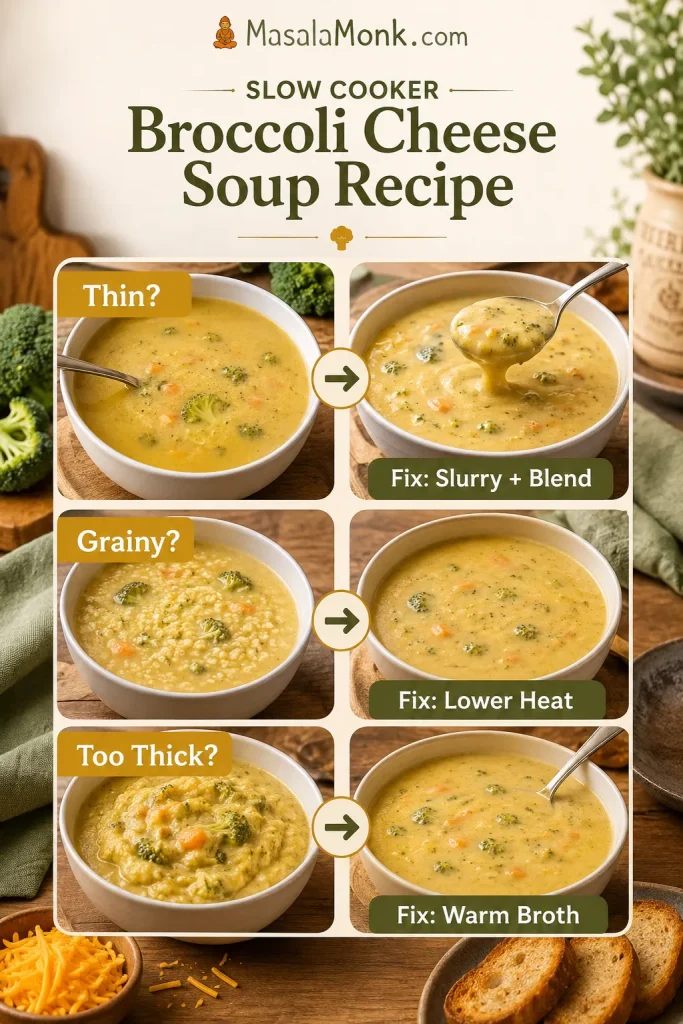
Problem and Fix Guide
| Problem | Likely Cause | Fix |
|---|---|---|
| Soup is grainy or gritty | Cheese overheated, soup boiled after cheese, or pre-shredded cheese was used | Lower the heat, whisk slowly, add a splash of cream, and use block cheese next time |
| Cheese clumped | Cheese was added too fast or the soup was too hot | Add cheese by handfuls on warm, low, or off |
| Soup is watery | Too much broth, frozen broccoli released water, or not enough thickener | Add slurry, blend part of the soup, or let it rest after adding cheese |
| Soup is too thick | Too much cheese, starch, cream cheese, or potato | Add warm broth or milk a little at a time |
| Broccoli is mushy | Cooked too long or frozen broccoli was added early | Blend part of the soup and use the soft broccoli as body |
| Soup tastes bland | Mild cheese, weak broth, or too little salt | Add salt, mustard powder, cayenne, Parmesan, or sharper cheddar |
| Cream cheese has lumps | Added cold in large pieces | Cube it small, soften it first, or blend it with a ladle of hot soup |
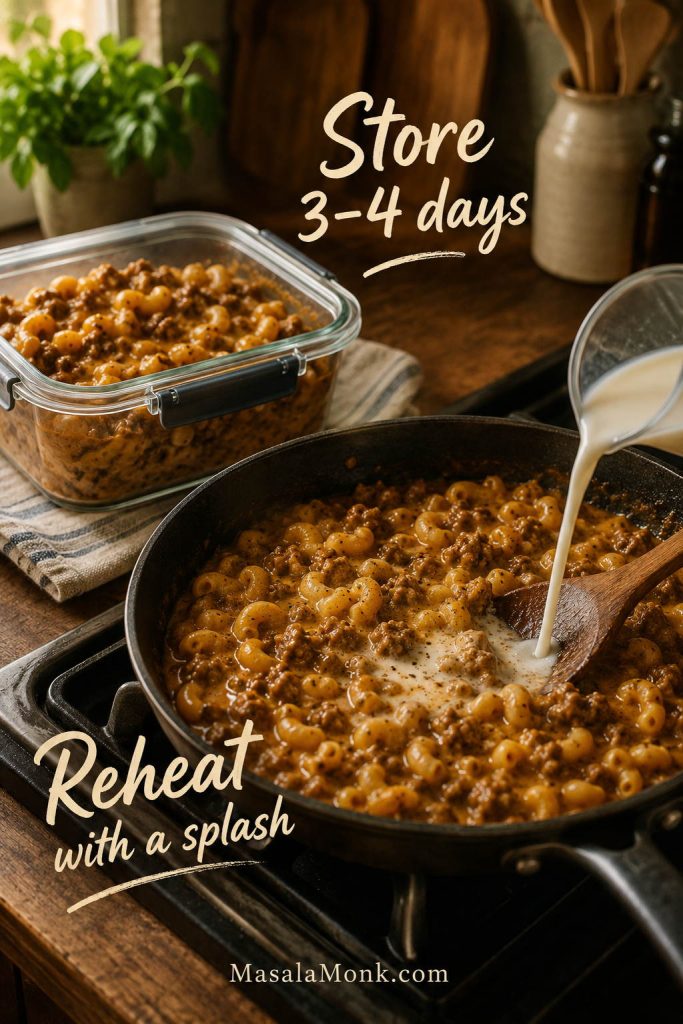
| Soup split while reheating | Reheated too quickly or boiled | Reheat slowly with a splash of milk or broth and whisk gently |
If the soup breaks badly, blend a portion of it and stir it back in. It may not become perfectly smooth again, but it will usually become creamy enough to serve.
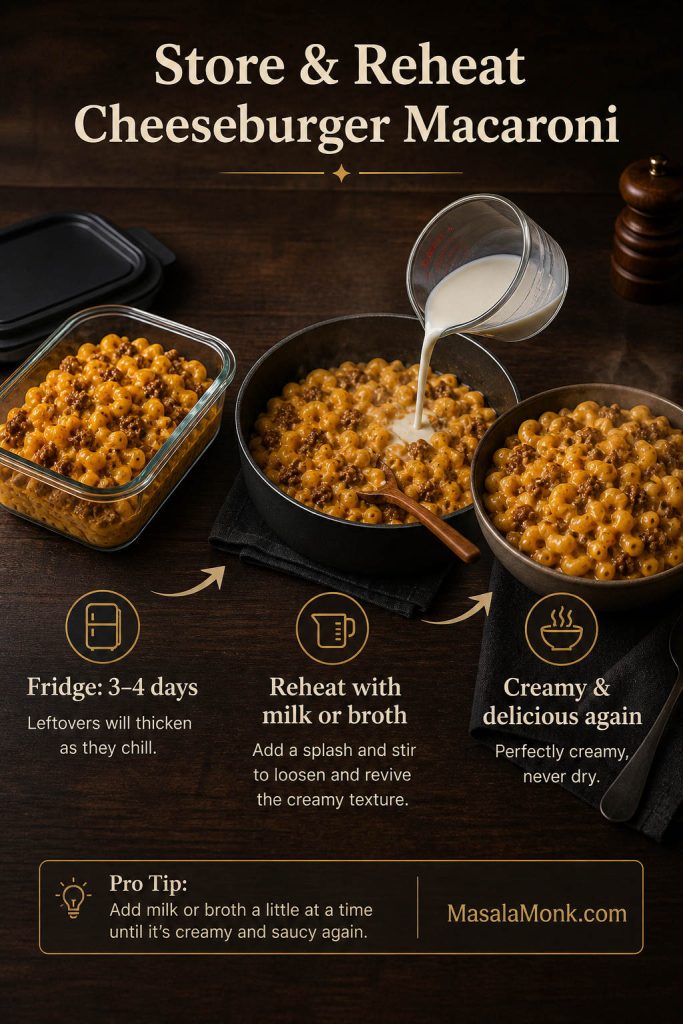
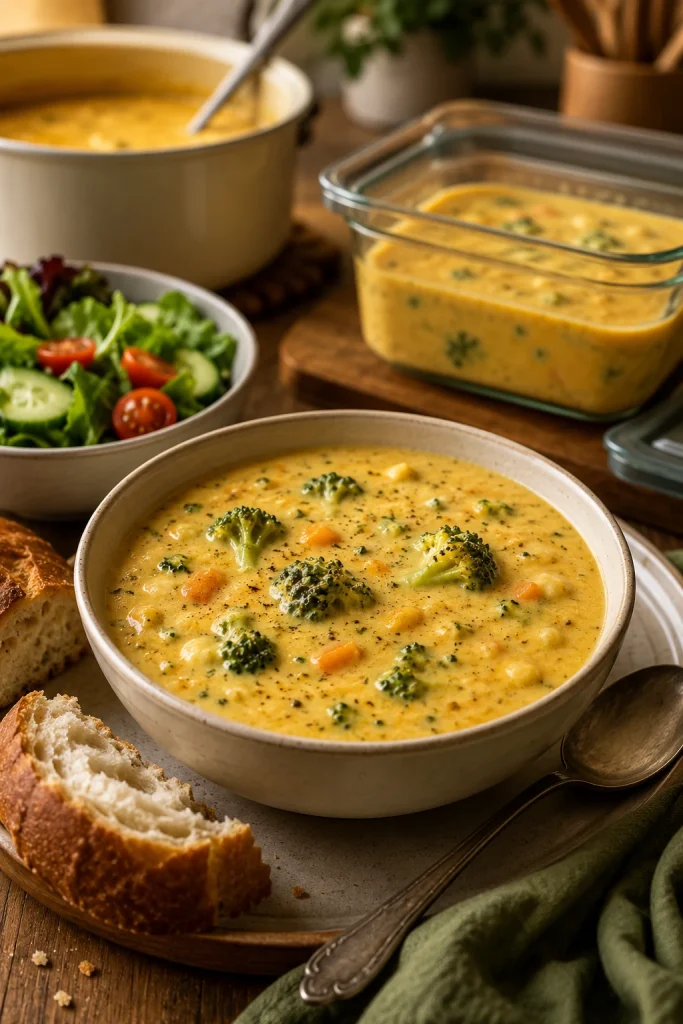
Storage, Freezing, and Reheating
Leftovers are worth saving, but cheese soup asks for patience on the reheat. The goal is to warm the bowl back up without pushing the cheese too hard.
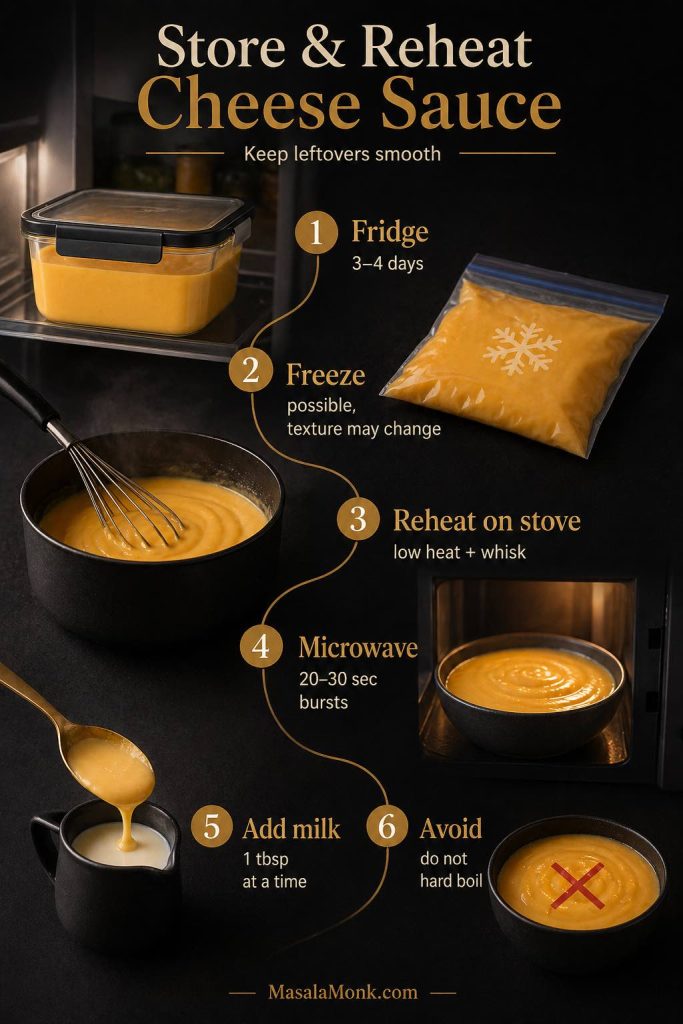
- Refrigerator: Store cooled soup in an airtight container for 3 to 4 days.
- Reheating: Warm on low heat on the stove or in the microwave at lower power, stirring often.
- Loosening leftovers: Add a splash of milk, cream, or broth while reheating.
- Do not boil leftovers: Boiling can make the cheese split or turn grainy.
- Freezing: Possible, but not ideal. Dairy-based cheese soups can separate or look grainy after thawing.
For make-ahead cooking, the best texture comes from cooking the vegetable base first, then adding dairy and cheese closer to serving.
If you want this for lunches, store it in single portions and reheat slowly. A splash of milk or broth brings the bowl back to life without pushing the cheese too hard.
For the freezer, a vegetable-and-bean soup is usually easier than a dairy-heavy cheese soup. This Minestrone Soup Recipe is a better make-ahead option when you want something lighter to keep on hand.
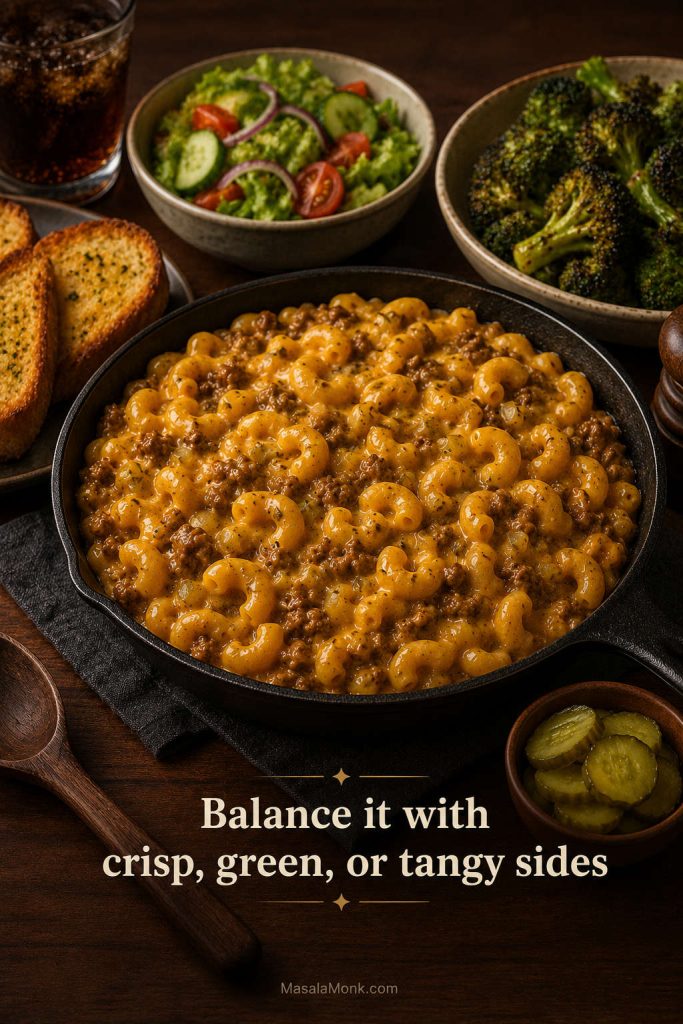
What to Serve with Broccoli Cheese Soup
This soup can stand alone, but the right side makes it feel like the kind of dinner people come back to for seconds. A bowl this rich loves contrast: something crunchy, something toasted, or something cold and crisp on the side.
This is the kind of bowl that makes bread disappear fast.
- Crusty bread
- Garlic toast
- Bread bowls
- Ranch Oyster Crackers for a crunchy topping
- Wedge Salad Recipe for a cold, crisp side
- Roasted vegetables
- Grilled cheese sandwich
- Baked potatoes
- Cooked chicken or ham for a heartier meal
For a bigger comfort-food spread, serve the soup with something crisp or baked rather than another heavy, creamy dish. That contrast makes the bowl feel more satisfying.
FAQs
Here are the quick fixes and common questions readers usually need once the soup is in the slow cooker.
Can raw broccoli go straight into the slow cooker?
Yes. Raw chopped broccoli can go straight into the slow cooker with the broth, onion, carrot, garlic, and seasonings. Cut it into small pieces so it softens evenly. Add dairy and cheese only after the broccoli is tender.
When should cheese go into slow cooker broccoli cheese soup?
Add cheese near the end, after the broccoli is tender and the slow cooker has been turned to warm, low, or off. That keeps the cheddar in the creamy zone instead of pushing it into grainy territory.
Why did my broccoli cheese soup turn grainy?
Grainy soup usually comes from overheated cheese, boiling after dairy is added, or using cheese that does not melt smoothly. Use freshly shredded block cheddar, add it gradually, and keep the heat gentle once the cheese goes in.
Can I use pre-shredded cheese?
You can, but freshly shredded block cheddar usually melts more evenly. Pre-shredded cheese is convenient, but it can make broccoli cheese soup more likely to turn grainy or slightly clumpy.
Is frozen broccoli okay for crock pot broccoli cheese soup?
Frozen broccoli works, especially if you like a softer, creamier bowl. For better texture, use frozen florets and add them during the last 1 to 2 hours, or thaw and drain frozen broccoli before using it.
Do you need to thaw frozen broccoli first?
Not always. Frozen broccoli can go in from frozen if you want a softer soup, but thawing and draining helps prevent a watery pot. For more visible broccoli pieces, add frozen florets during the last 1 to 2 hours.
What cheese melts best in broccoli cheese soup?
Freshly shredded block cheddar gives strong flavor and a smoother melt. Velveeta is the smoothest shortcut. A mix of sharp cheddar and a small amount of Velveeta gives both flavor and easy melting.
How do you make crock pot broccoli cheese soup thicker?
Use a cornstarch slurry, blend part of the soup, add a little cream cheese, or let the soup rest after adding cheese. Potato also thickens the pot, but it turns the recipe into a heartier broccoli cheddar potato soup.
Should this cook on low or high?
Low gives steadier texture. Cook on low for 4 to 5 hours, or use high for 2 to 3 hours if you need it faster. Either way, add the cheese only after the broccoli is tender.
How long can broccoli cheese soup stay on warm?
It can sit on warm for a short serving window, but avoid holding it for hours after the cheese goes in. Stir occasionally, keep it below a boil, and loosen with warm broth or milk if it thickens too much.
Does Velveeta work in slow cooker broccoli cheese soup?
Velveeta works well when smoothness matters most. Replace part of the cheddar with it for a creamier, more forgiving pot.
How do you make it more like Panera broccoli cheddar soup?
Use sharp cheddar, keep the carrot, add onion and garlic, blend part of the soup, and add a little Dijon or mustard powder. Serve it with crusty bread or in a bread bowl for a more restaurant-style feel.
Can this soup be vegetarian?
Yes. Use vegetable broth and skip bacon, ham, chicken, and Worcestershire sauce, or use a vegetarian-friendly alternative. If cheese labels matter to you, check those as well.
Can the vegetable base be made ahead?
Yes. Cook the broccoli, vegetables, broth, and thickener ahead, then refrigerate the base. Reheat it gently and add cream and cheese shortly before serving for the smoothest texture.
What size slow cooker works best?
A 5 to 6 quart slow cooker is the easiest size for a standard batch. Use a 2 quart slow cooker only for a half batch, and a 6 to 8 quart slow cooker if doubling.
Is this the same as cream of broccoli soup?
It is similar, but this soup is cheesier and more cheddar-forward. Cream of broccoli soup is usually more cream-focused and may use less cheese.
Does broccoli cheese soup freeze well?
Freezing is possible, but this is not the soup that comes back perfectly every time. Dairy and cheese can separate after thawing, so reheat gently with a splash of milk, cream, or broth.
Back to the recipe · Back to the guide
Final Tips for Better Broccoli Cheese Soup
Once you know the order, this soup becomes easy to trust. Let the slow cooker handle the broccoli, keep the cheese for the finish, and give the pot a few quiet minutes to settle.
Choose sharp cheddar when flavor matters most. Reach for Velveeta when smoothness matters most. Fresh broccoli gives steadier texture, while frozen broccoli keeps the recipe convenient. The result is creamy, cheddar-rich, familiar, and easy to trust the next time you need a warm bowl fast.