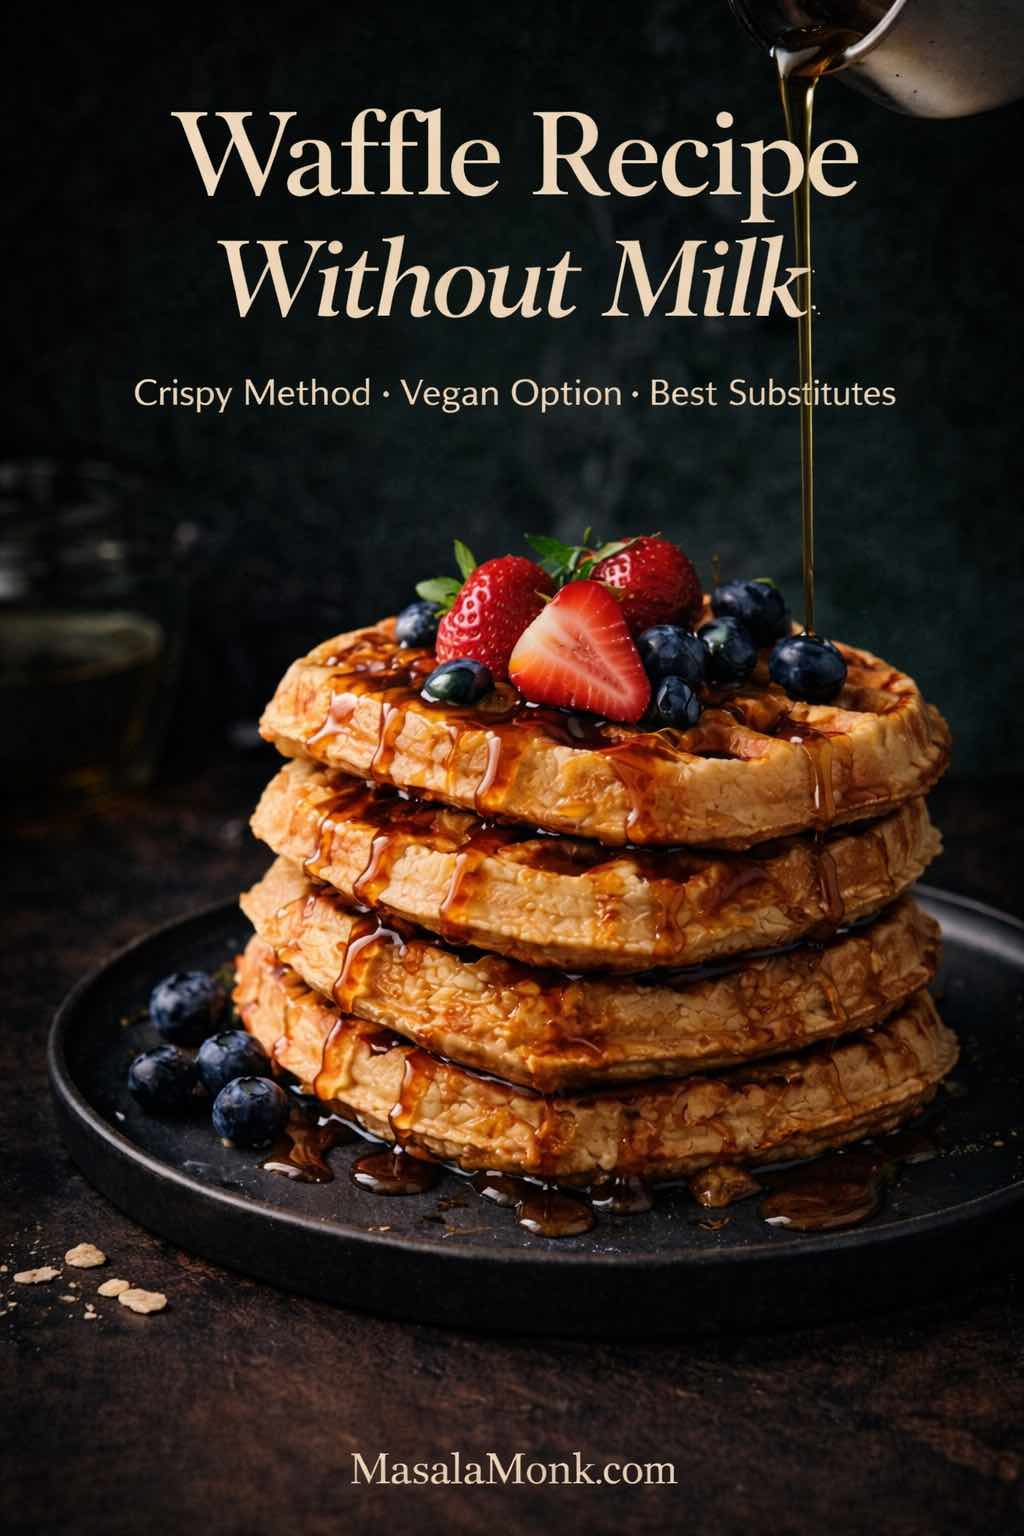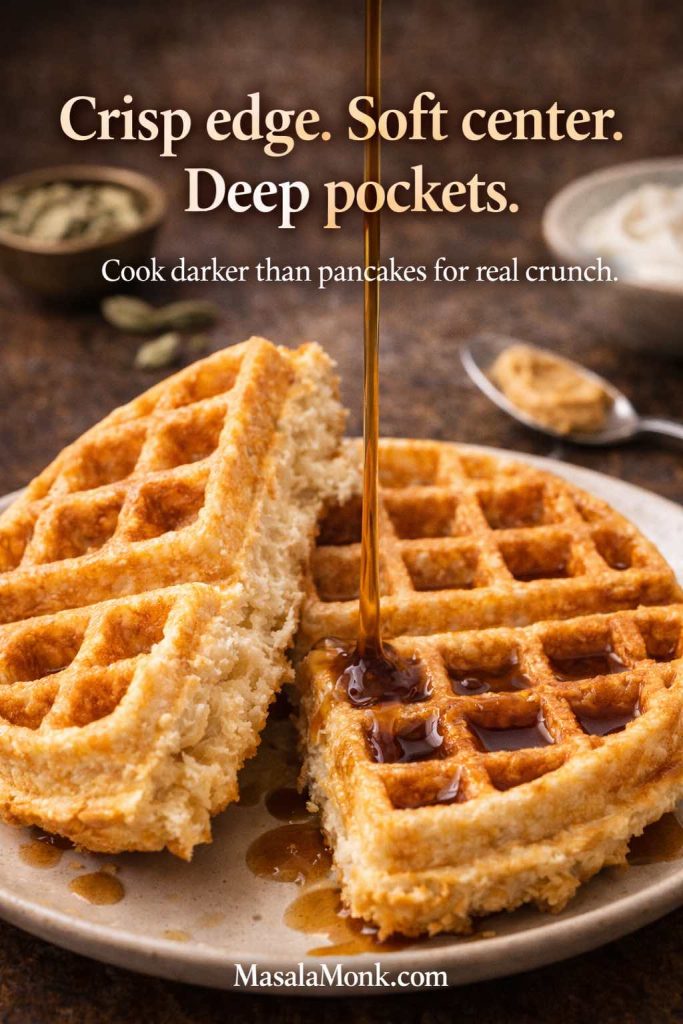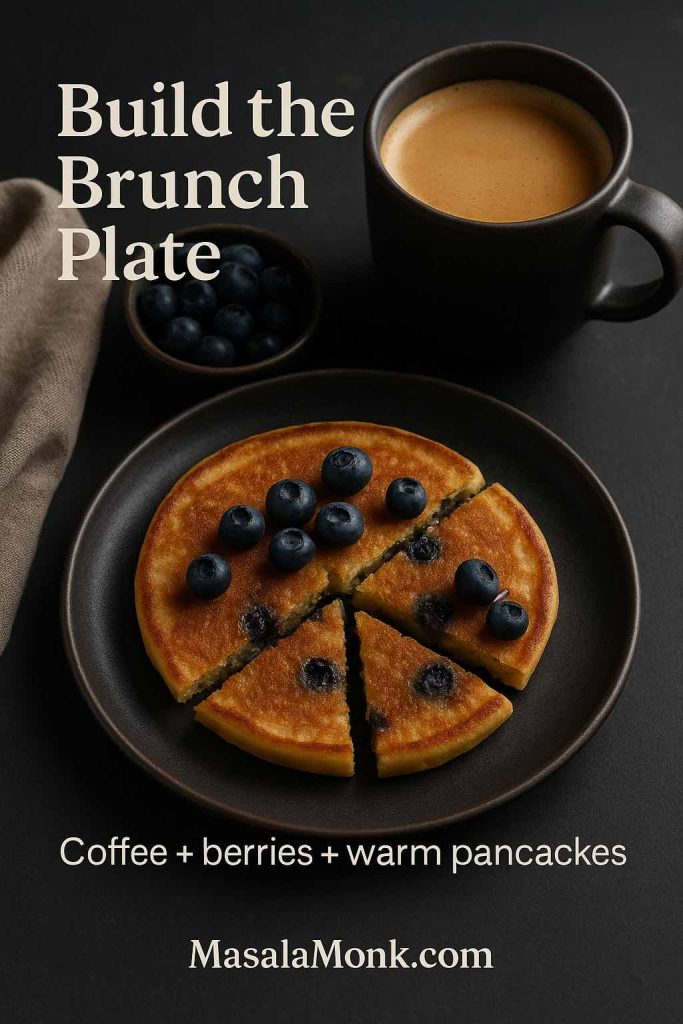
There are breakfasts that feel like a rush job, and then there are breakfasts that feel like a small reset. Pancakes fall firmly into the second category. Even when you’re short on time, there’s something about that first warm pancake hitting the plate that makes the day feel a little more manageable. Oat pancakes live in that same comforting space, with an extra bonus: they’re easy to adapt.
You can make them with rolled oats you already have, quick oats when you’re in a hurry, or a bag of oat flour when you want the smoothest crumb. From there, the batter can take you in all kinds of directions—banana oatmeal pancakes when you want natural sweetness, vegan oatmeal pancakes when you’re skipping eggs and dairy, applesauce oatmeal pancakes on a cozy morning, blueberry oat pancakes when you want something bright, or cottage cheese oat pancakes when you’d like extra tenderness and protein without reaching for powders.
What makes them special isn’t that they’re “better” than regular pancakes. It’s that pancakes from oatmeal give you flexibility. The oats bring a gentle nuttiness, a soft bite, and a kind of steady satisfaction that keeps you happy long after the last forkful.
If you’ve tried oat pancake recipes before and ended up with pancakes that felt gritty, gummy, or oddly flat, don’t worry—you’re not alone. With oats, a few small choices matter: what kind of oats you use, how fine you blend them, how long you let the batter sit, and how hot your pan is.
So let’s make a stack that actually feels worth it—fluffy, tender, and reliable—then we’ll play with variations that cover nearly every craving.
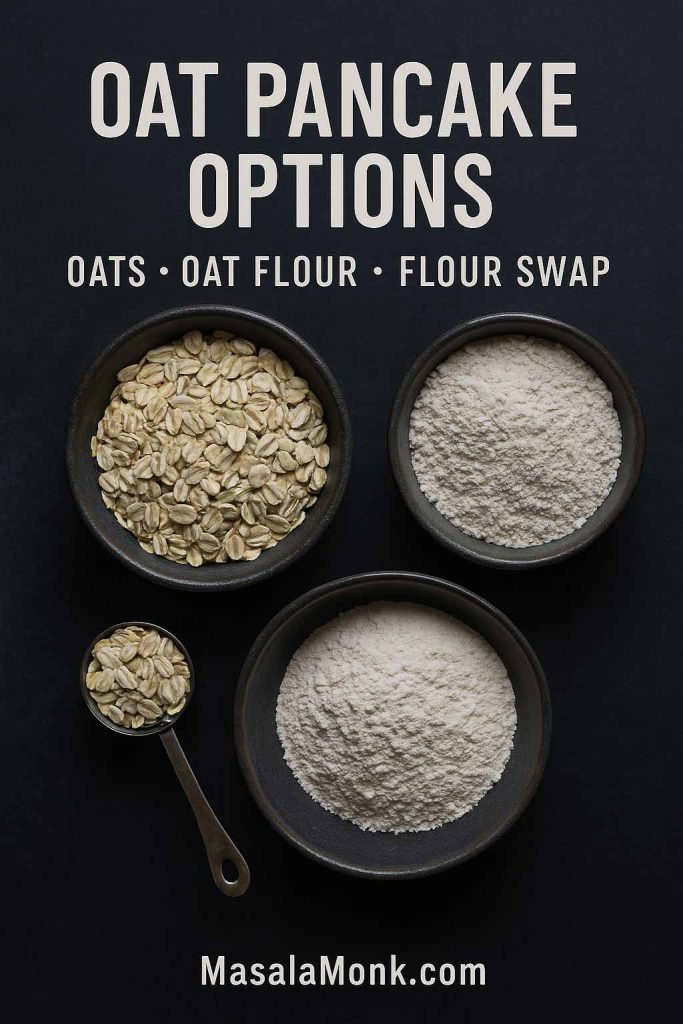
Start with the oats: what works best for pancakes from oatmeal
Oats aren’t one single ingredient. They’re the same grain in different forms, and those forms absorb liquid at different speeds. That’s why one pancake oat recipe can feel perfect with rolled oats, yet turn heavy with instant oats if you don’t adjust anything.
If you want a deeper primer on oat types, MasalaMonk has a straightforward overview here: Guide to Oats: Types, Nutrition, and Differences Explained. And if you’ve ever wondered why people use “oats” and “oatmeal” interchangeably, this clears it up: Oats vs Oatmeal: What’s the Difference?.
Here’s the practical breakdown for pancakes:
Rolled oats (old-fashioned oats)
Rolled oats are the most forgiving choice for a pancake recipe using oats. Blend them and you get a flour-like texture that cooks evenly and rises well. Leave them slightly coarser and you’ll get a heartier crumb that feels rustic—in a good way—so long as you give the batter time to hydrate.
If you’re ever unsure whether “rolled” and “old-fashioned” are truly interchangeable, MasalaMonk addresses that directly: Can You Substitute Old-Fashioned Oats for Rolled Oats?.
Quick oats
Quick oats hydrate faster because they’re thinner. That can be convenient when you want oat hotcakes recipe-style pancakes without much waiting. At the same time, quick oats can turn a batter thick very quickly, so you may need a splash more milk after resting.
If you keep mixing up quick oats and instant oats, MasalaMonk makes it clear: Are Quick Oats the Same as Instant Oats?.
Instant oats (plain)
Plain instant oats can work, but the texture tends to be softer and more uniform. If you like a very smooth pancake, that can be a plus. Flavored instant packets, on the other hand, usually bring added sugar and thickeners that can make the batter behave unpredictably, so they’re not ideal here.
Steel-cut oats
Steel-cut oats are wonderful in a bowl, yet they don’t really belong in pancakes from oatmeal unless they’re cooked first. Raw steel-cut pieces stay chewy in a way that fights the tender pancake bite.
If you want the full comparison, this is helpful: Steel Cut Oats vs Rolled Oats.
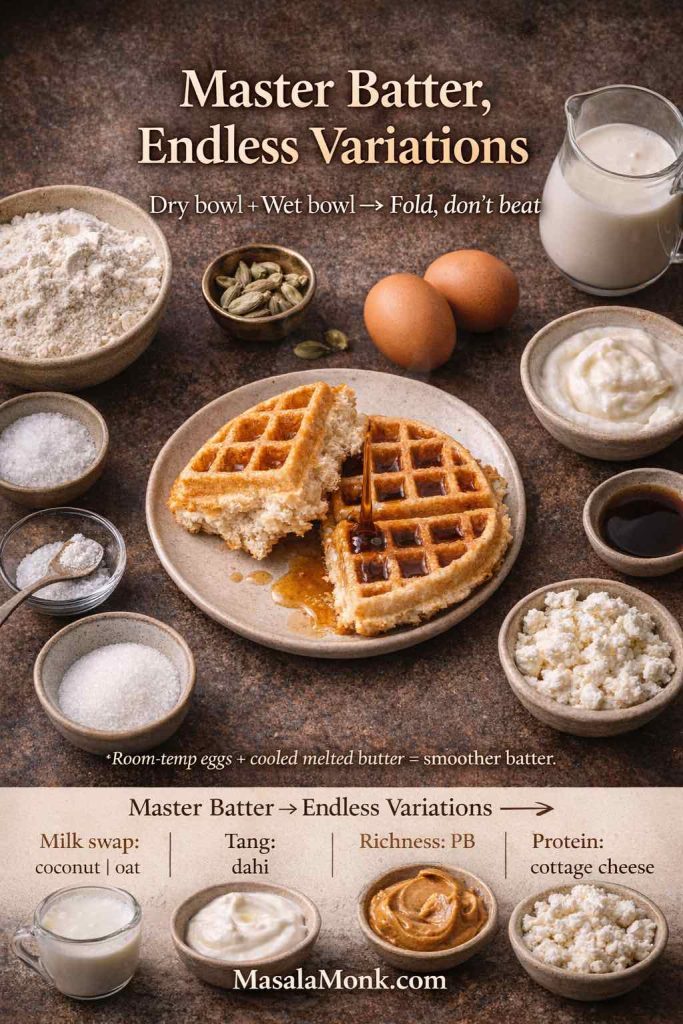
The base oat pancakes recipe you can build on
This is the batter I’d recommend starting with. It’s simple, it cooks evenly, and it’s designed to be remixed. You can make it as oat flour pancakes or as blended-oat pancakes, and it’s easy to turn into banana and oat pancakes, vegan oat pancakes, apple oat pancakes, or blueberry oatmeal pancake stacks.
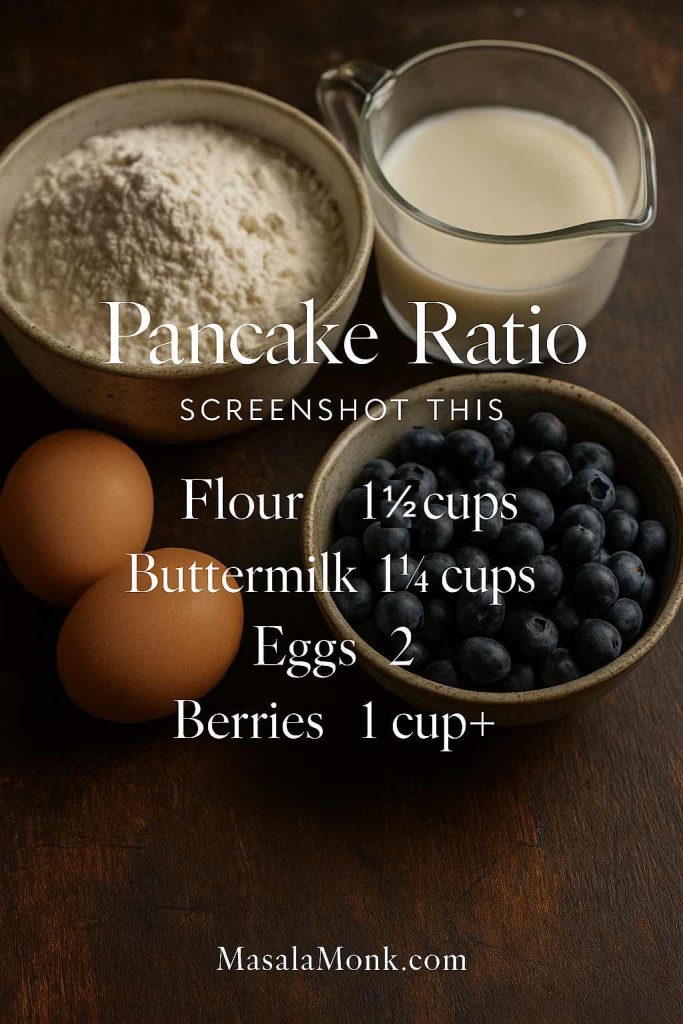
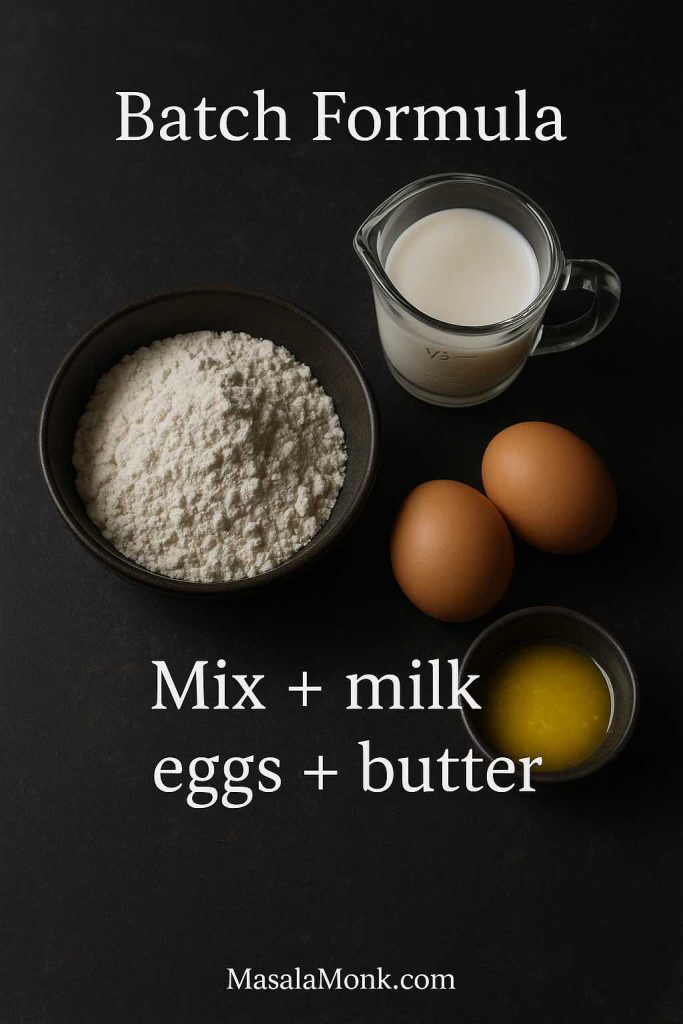
Ingredients (8–10 medium pancakes)
- 1 cup rolled oats or quick oats
(or ¾ cup oat flour) - 1 cup milk (dairy or plant milk)
- 1 large egg
- 1½ teaspoons baking powder
- ¼ teaspoon salt
- 1 tablespoon oil or melted butter
- 1 tablespoon sweetener (optional; adjust based on add-ins)
- ½ teaspoon vanilla (optional)
- ½ teaspoon cinnamon (optional)
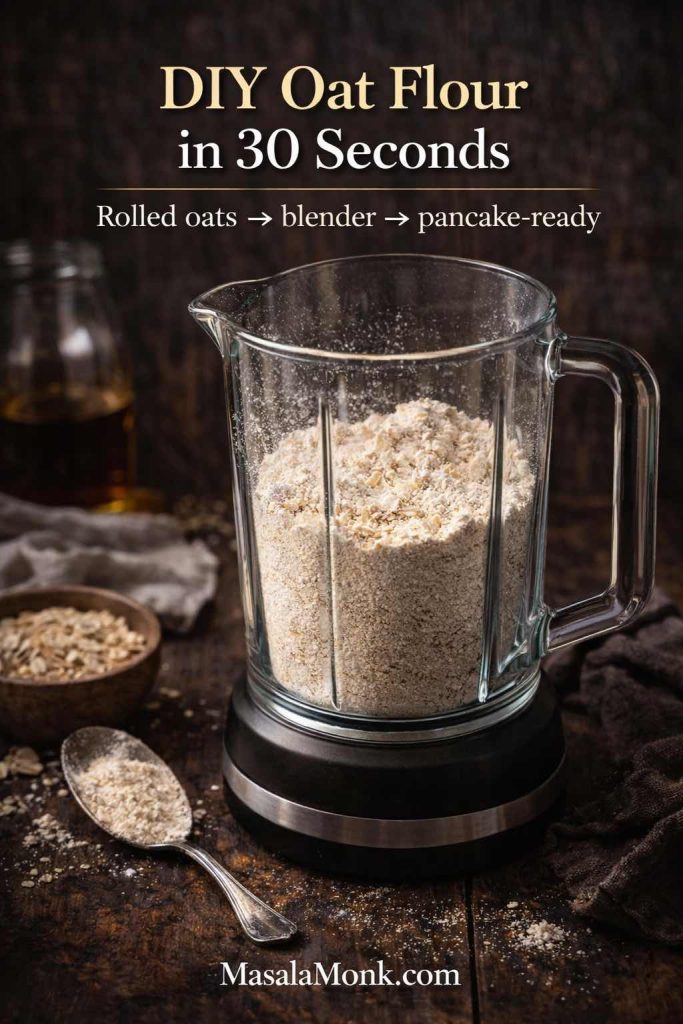
Step 1: Make your oat “flour” (if using oats)
Add oats to a blender and pulse until they look like coarse flour. You’re not aiming for perfection; a little texture is fine. In fact, those tiny flecks can make the pancakes feel more tender.
If you’re using store-bought oat flour, skip this step and move on.
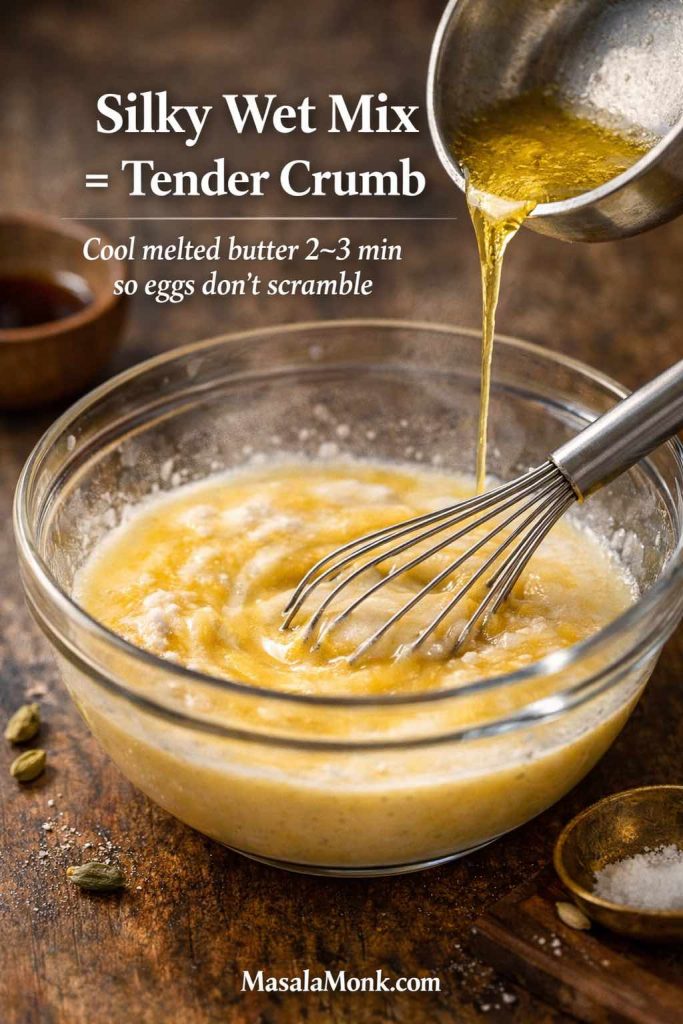
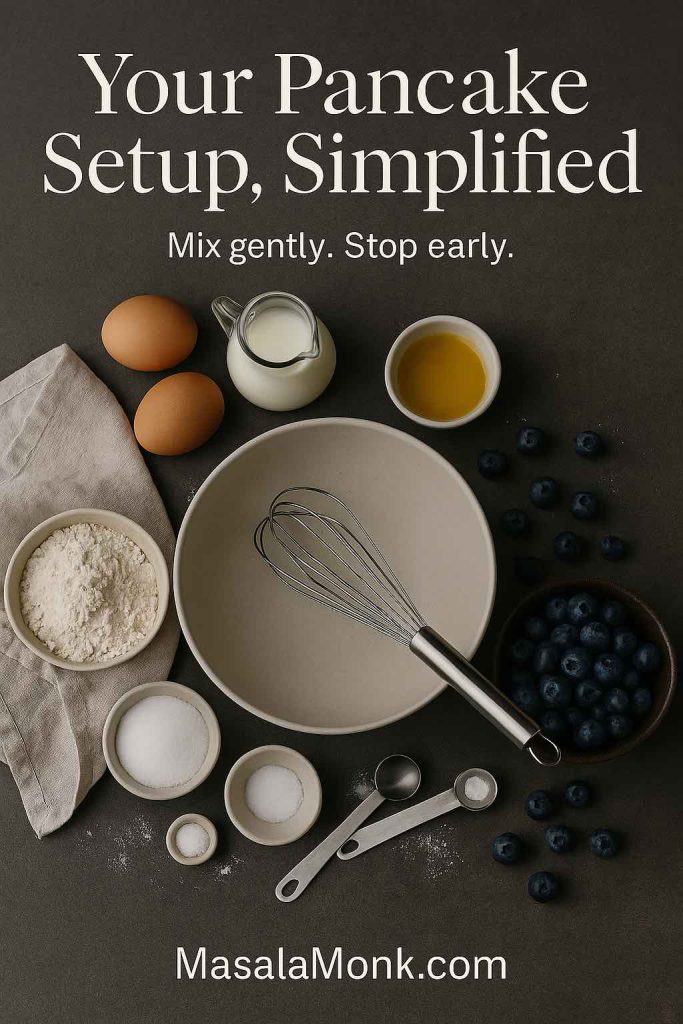
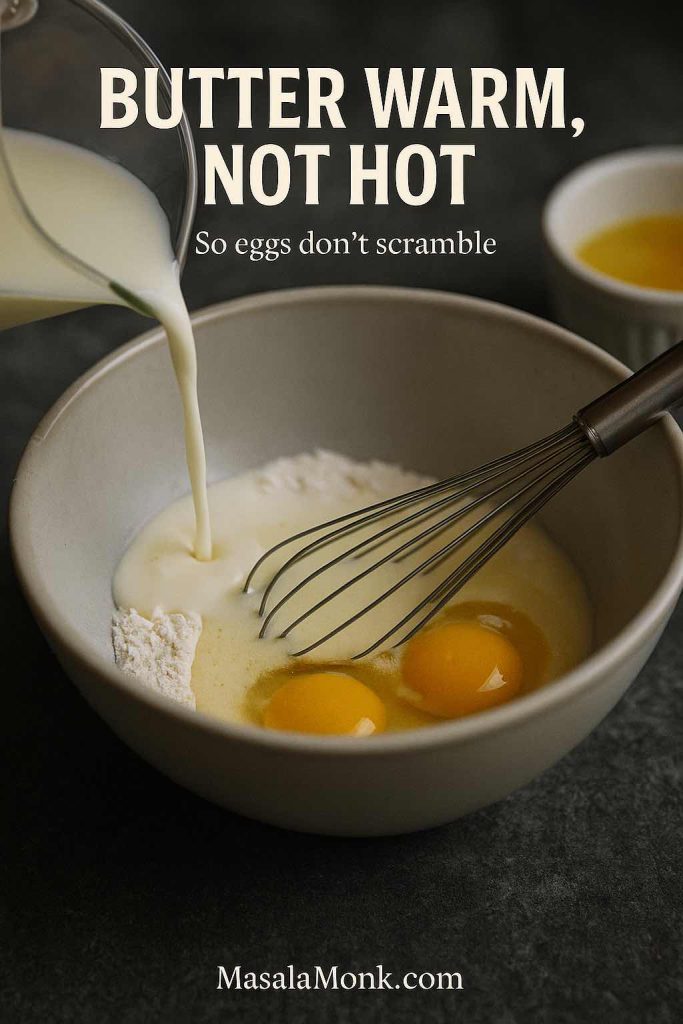
Step 2: Whisk the wet ingredients
In a bowl, whisk milk, egg, oil/butter, sweetener, and vanilla until smooth. This matters because it helps you mix less later.
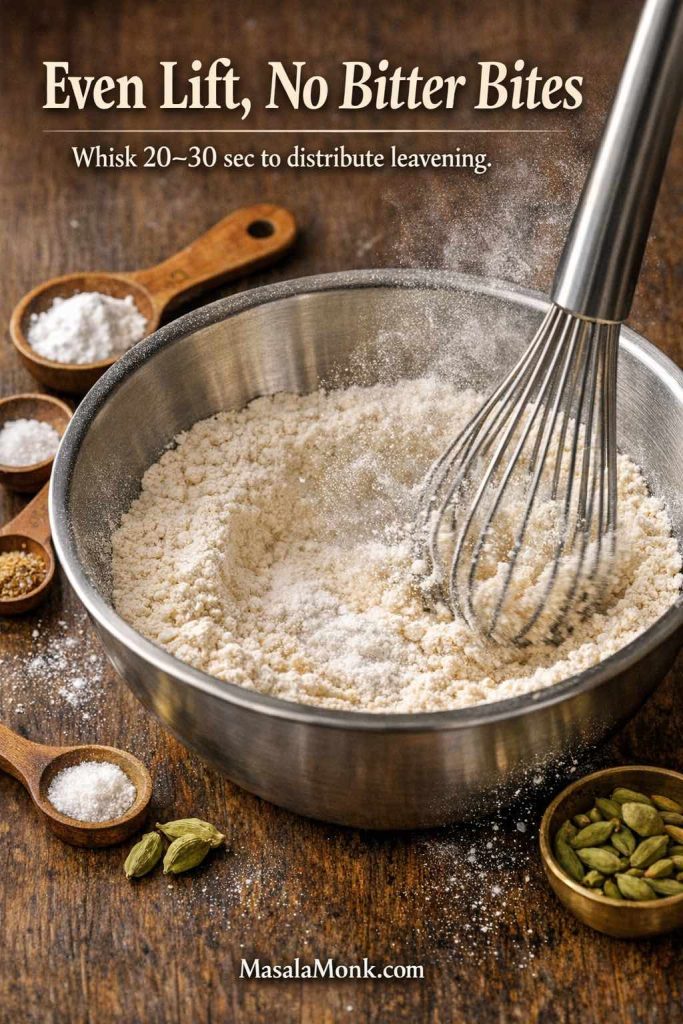
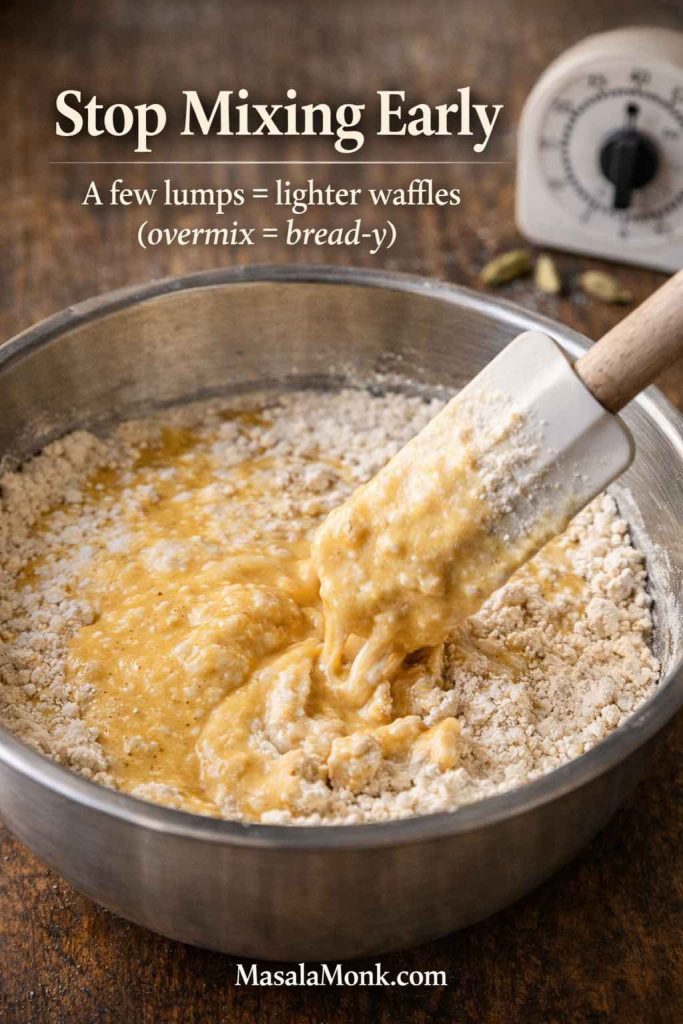
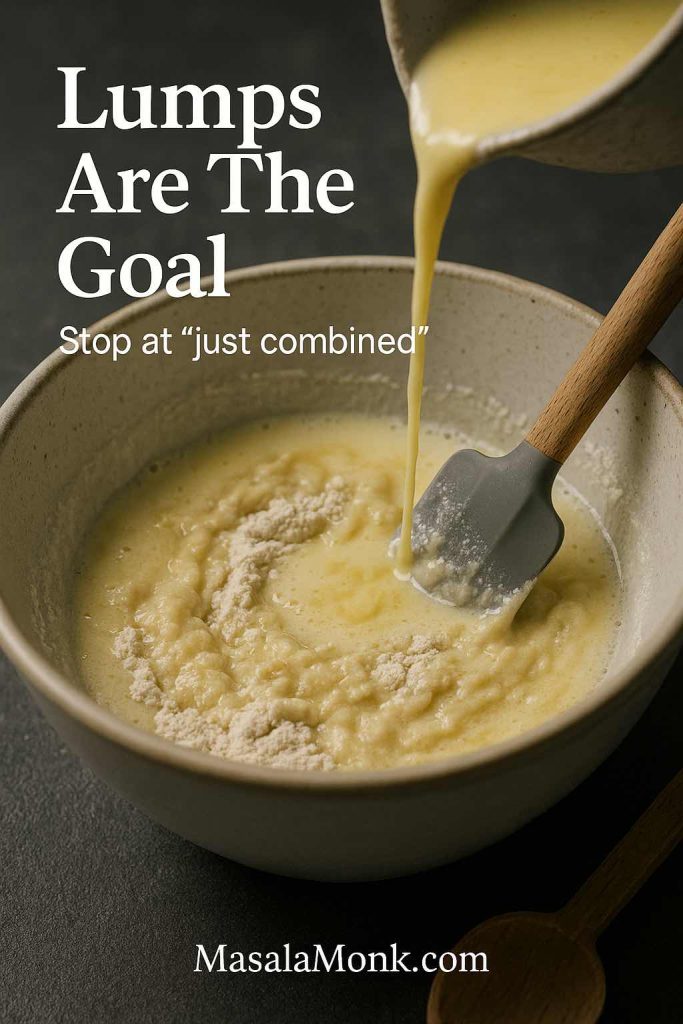
Step 3: Add the dry ingredients and stir gently
Add your blended oat flour (or oat flour), baking powder, salt, and cinnamon. Stir just until you don’t see dry streaks.
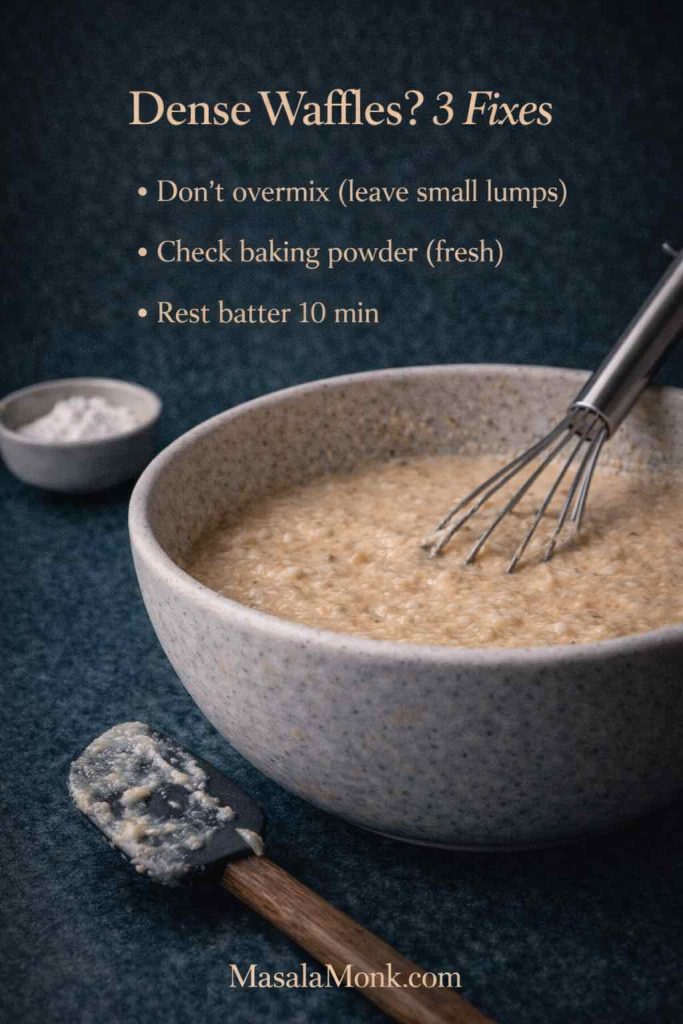
A small note that changes everything: pancake batter doesn’t want aggressive mixing. If you overwork it, it can lose the lightness you want.
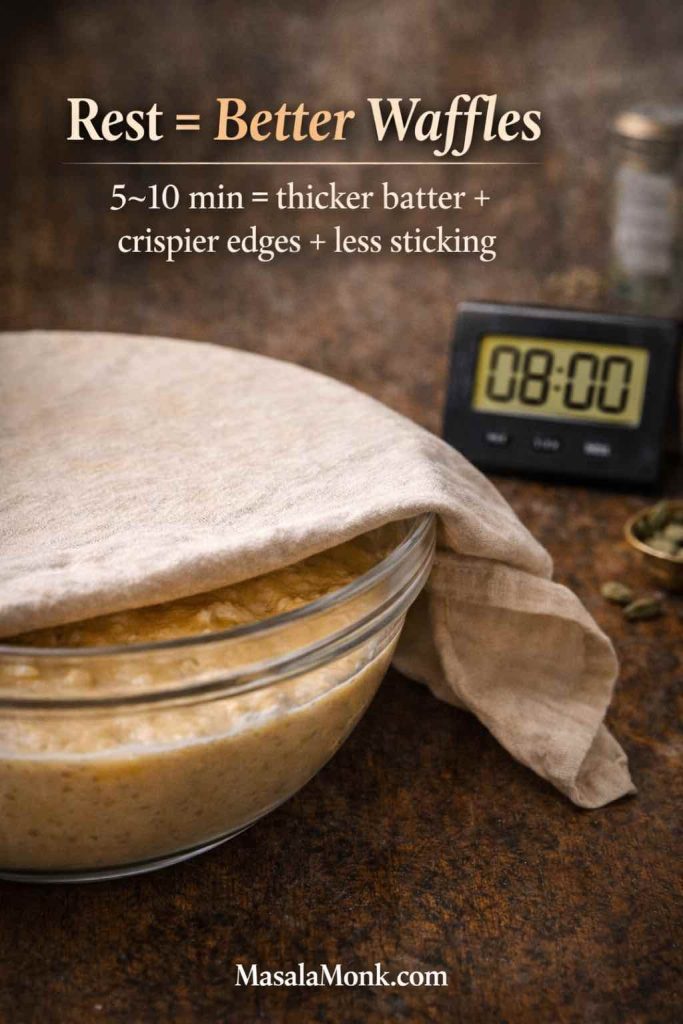
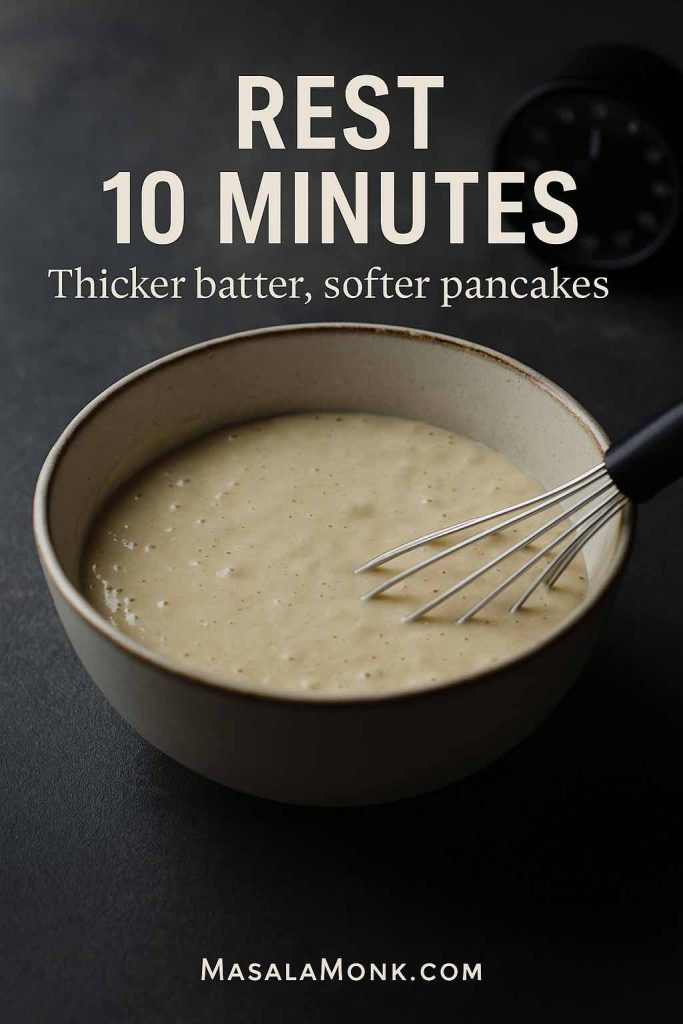
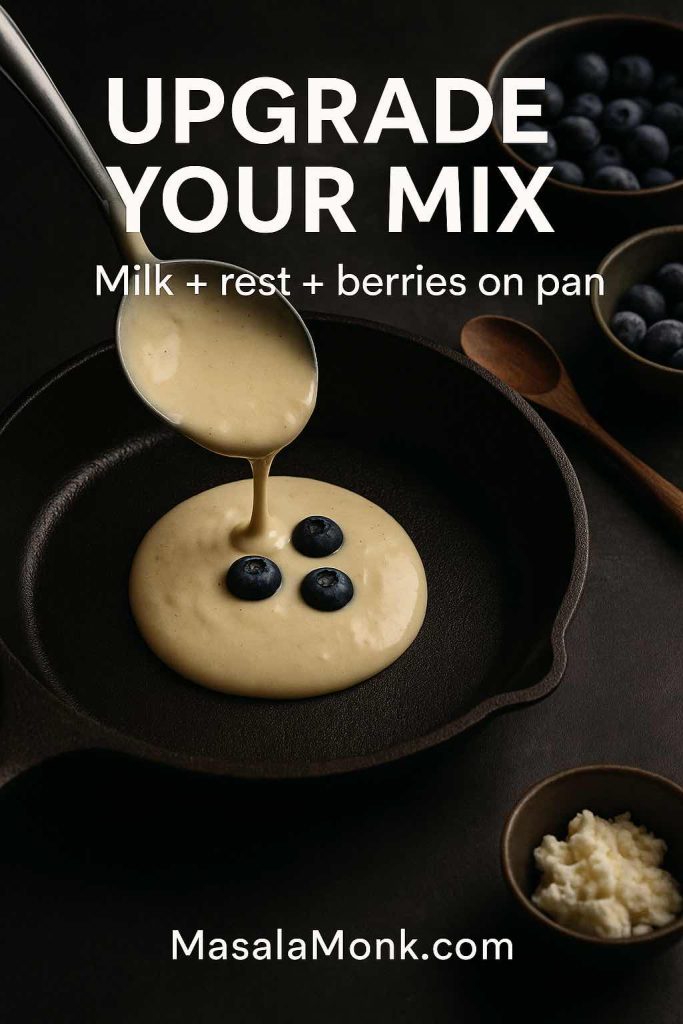
Step 4: Rest the batter (10–15 minutes)
Oats need time to hydrate. During the rest, the batter will thicken slightly and become more cohesive. As a result, the pancakes cook up fluffier and the texture feels smoother.

If you’re curious about the “why” behind resting batter, Serious Eats has a good explainer on pancake technique and batter resting: Serious Eats pancake guidance.
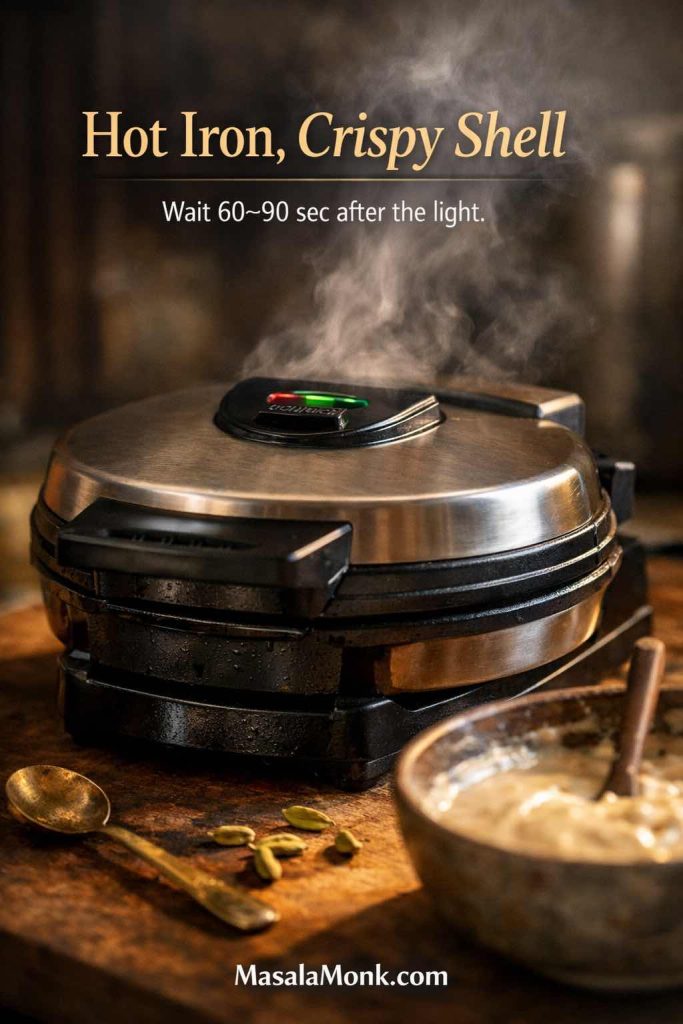
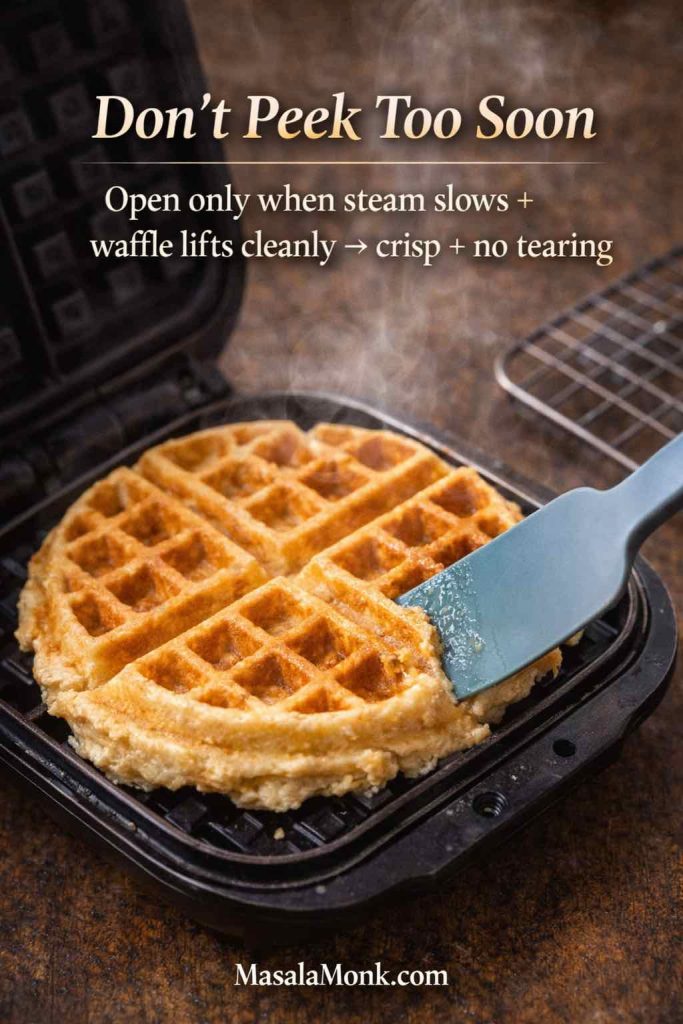
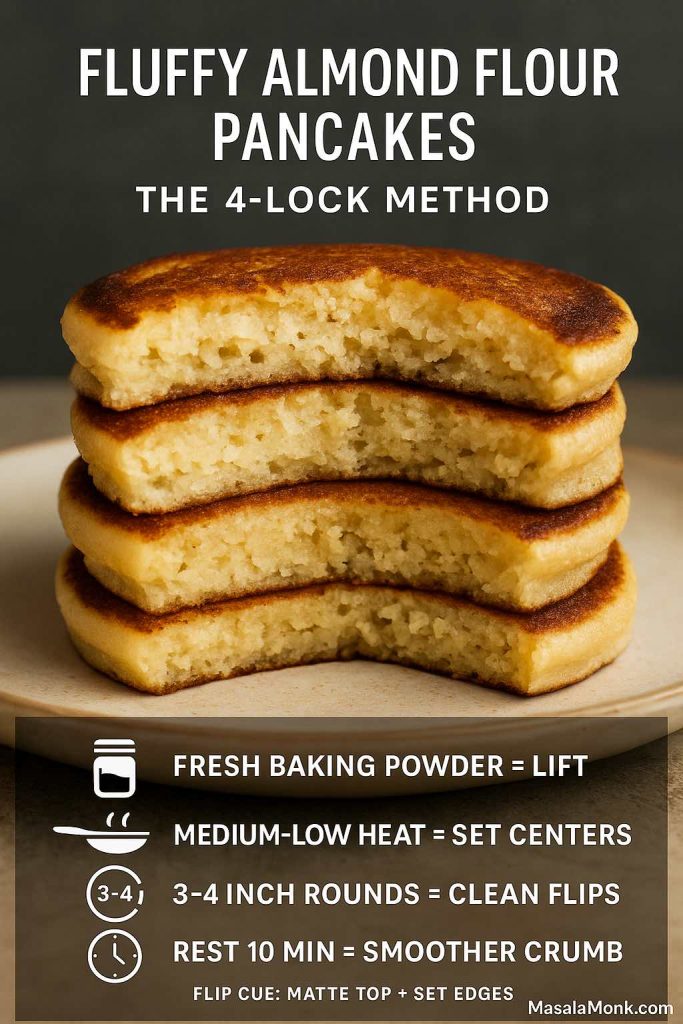
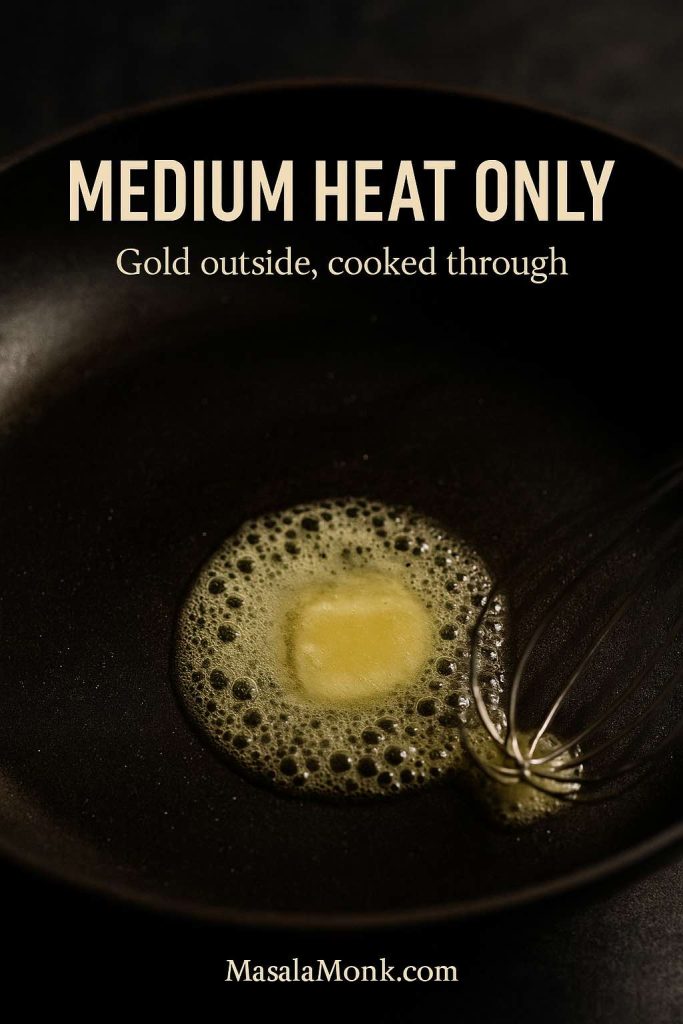
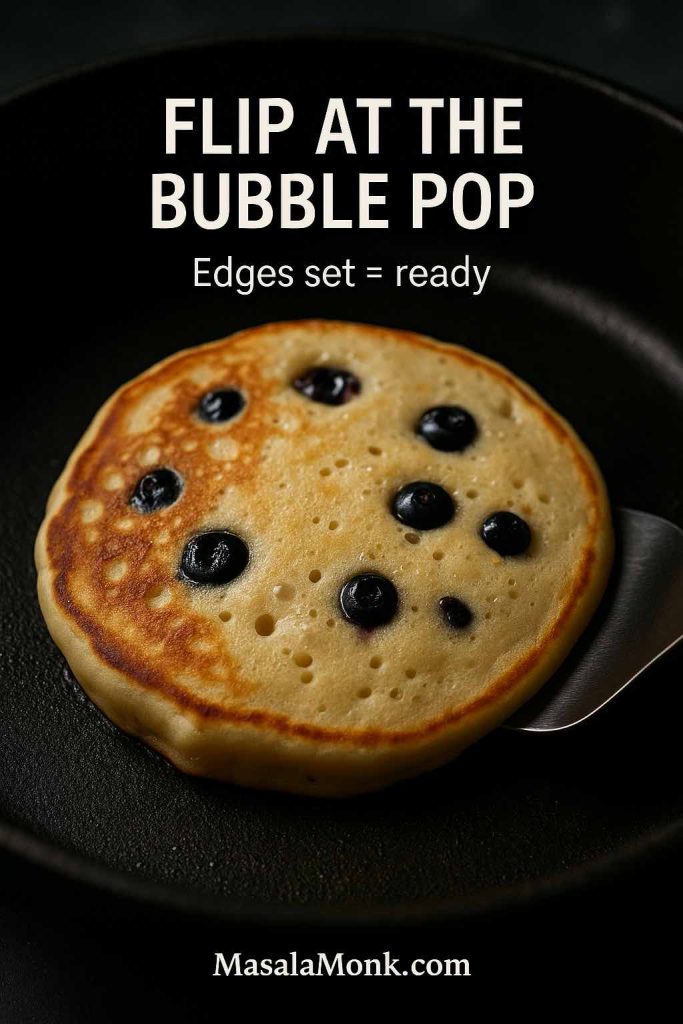
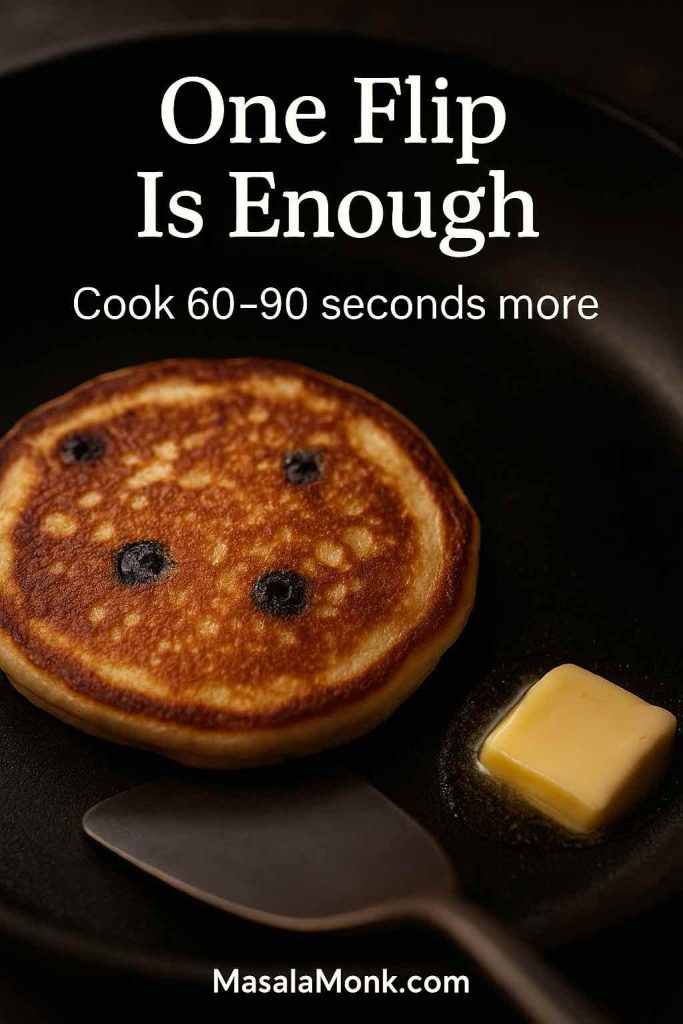
Step 5: Cook on medium heat
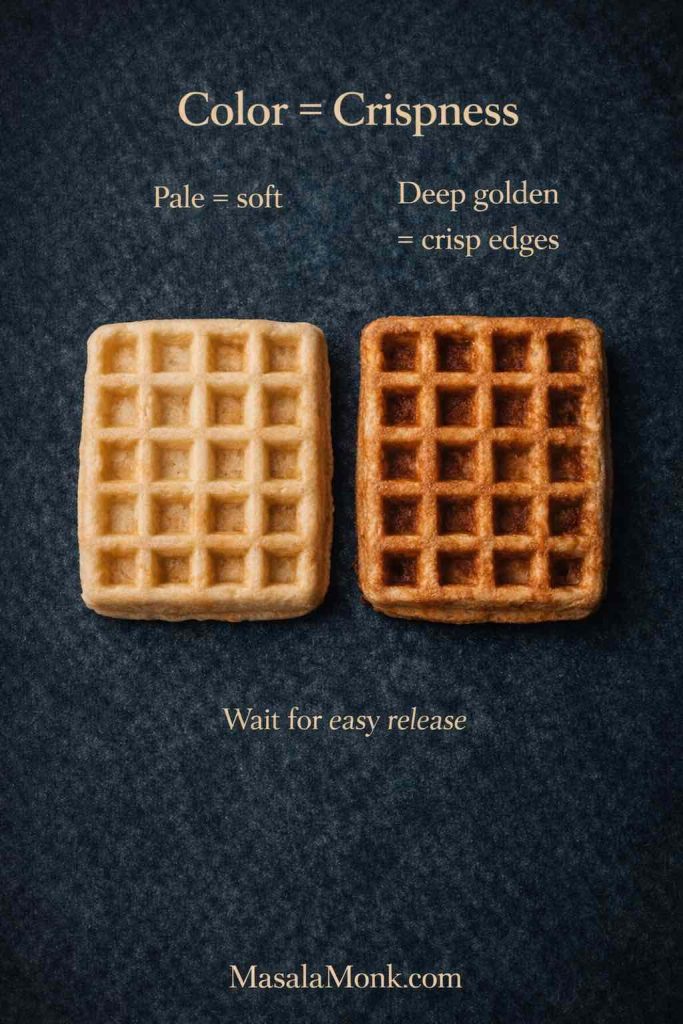
Warm a pan or griddle over medium heat. Grease lightly. Pour batter, cook until bubbles appear and the edges look set, flip, then cook the second side until golden.
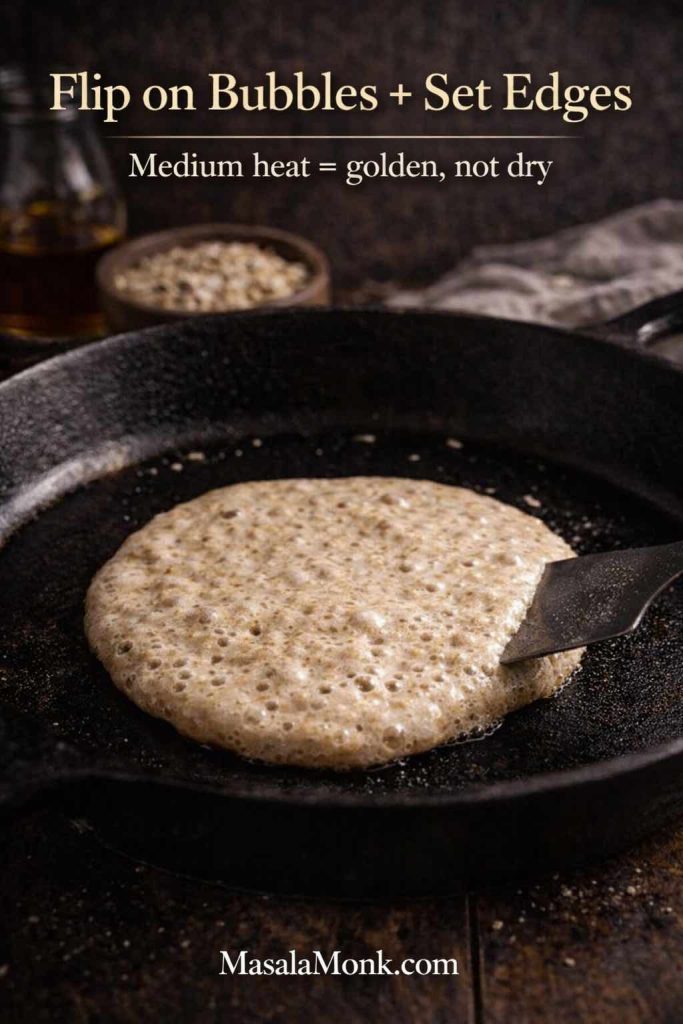
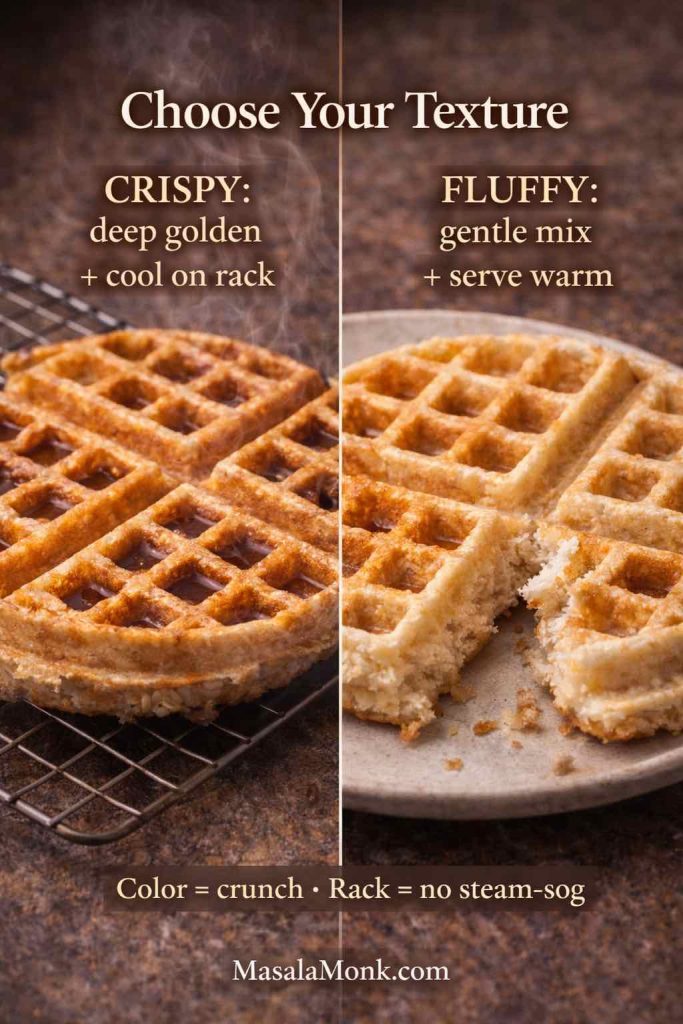
If your first pancake is pale and soft, the pan may be too cool. If it browns too fast while the center stays wet, the pan is too hot. Once you find the sweet spot, the rest of the batch becomes easy.
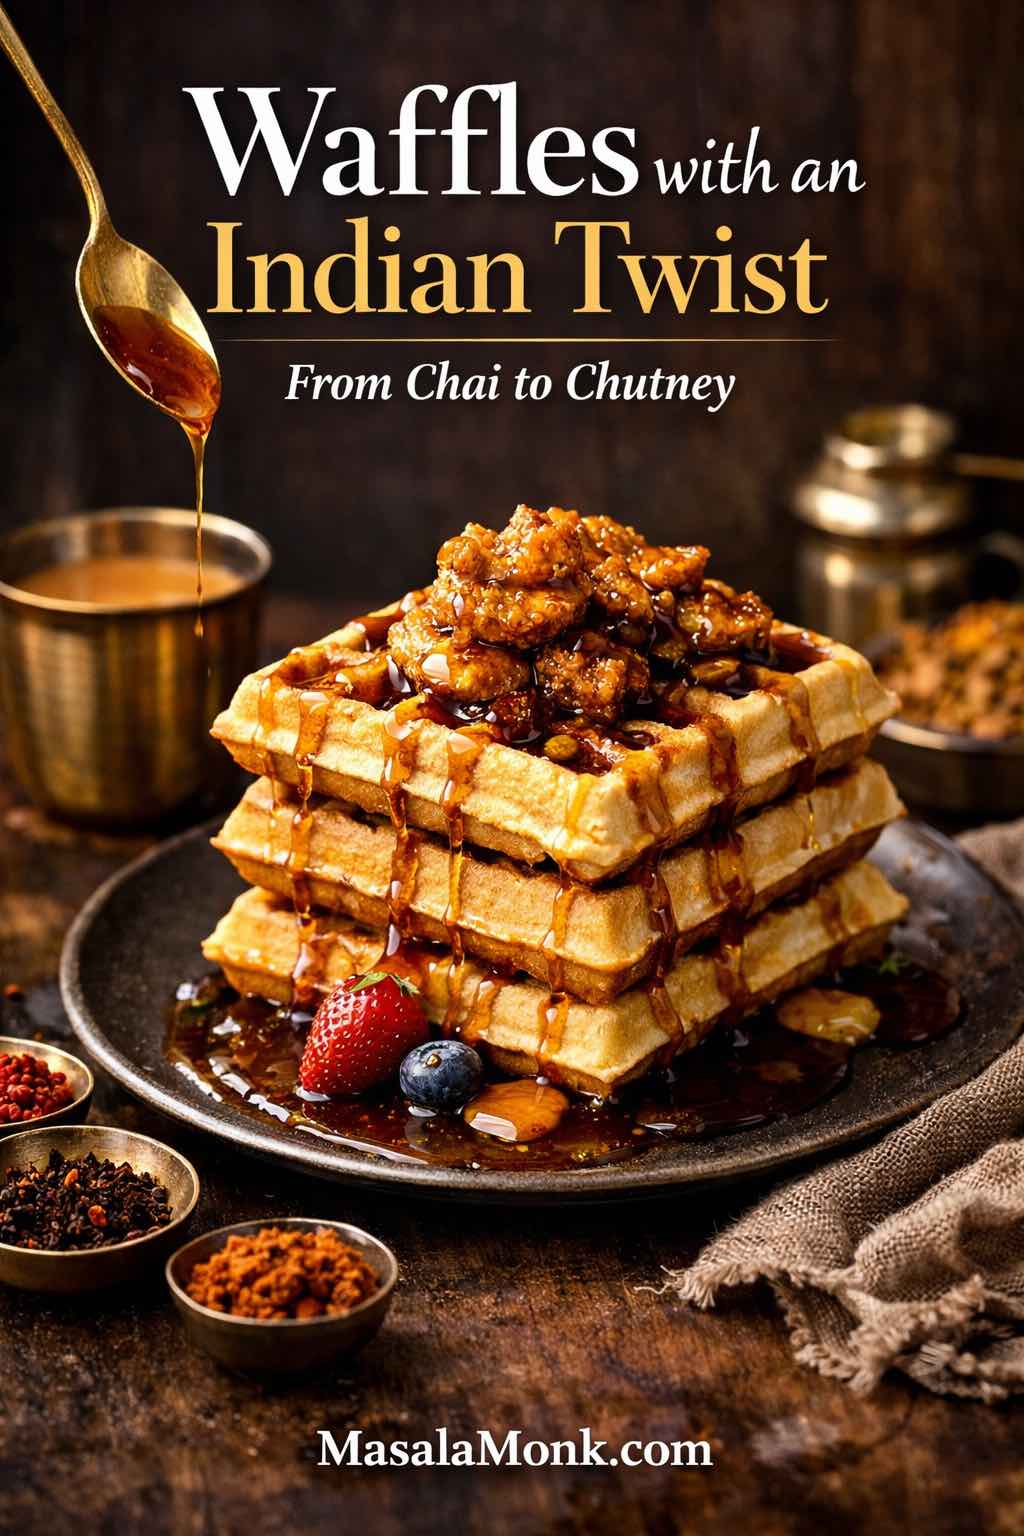
Also Read: Belgian Waffle Recipe + 5 Indian Twists on a Breakfast Classic
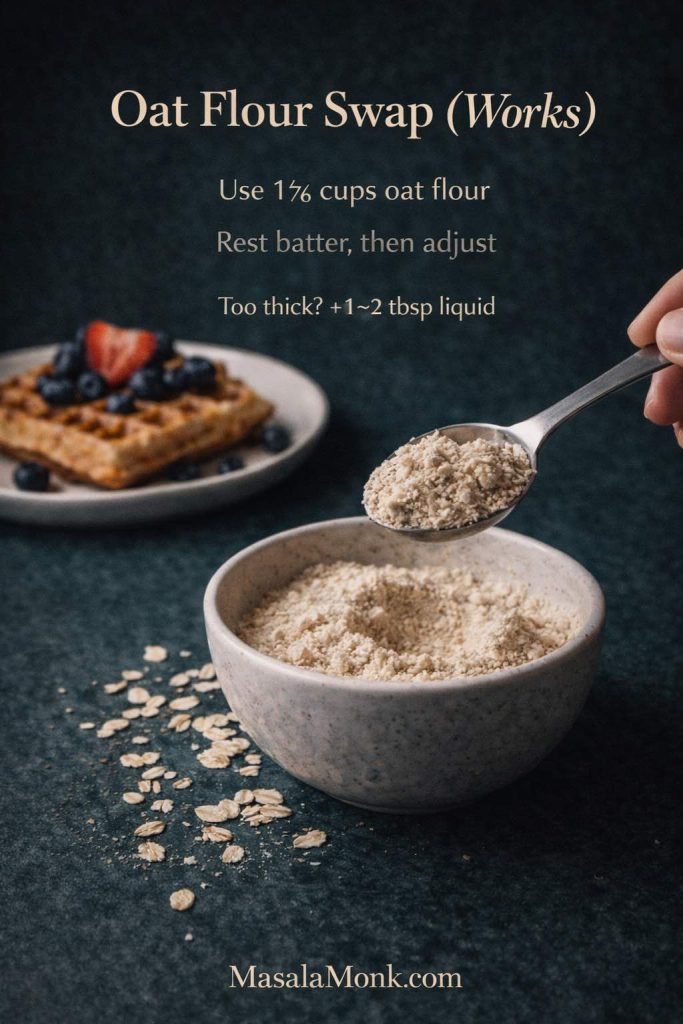
Oat flour pancake recipe: oatmeal flour pancakes with a smoother crumb
Sometimes you want the smoothest possible pancake—especially if you’re cooking for someone who doesn’t love “texture.” That’s when oat flour pancakes shine.
To make an oat flour pancake recipe with the base above:
- use ¾ cup oat flour instead of blending oats
- keep everything else the same
- expect the batter to thicken a little faster
Because oat flour can absorb liquid quickly, the batter might look perfectly pourable when you mix it, then become noticeably thicker after resting. If that happens, add a splash of milk and stir gently.
If you like baking-style technique guidance, King Arthur has consistently solid pancake tips: King Arthur Baking.
Also Read: Vegan Mayo Recipe Guide: 5 Plant-Based Mayonnaise
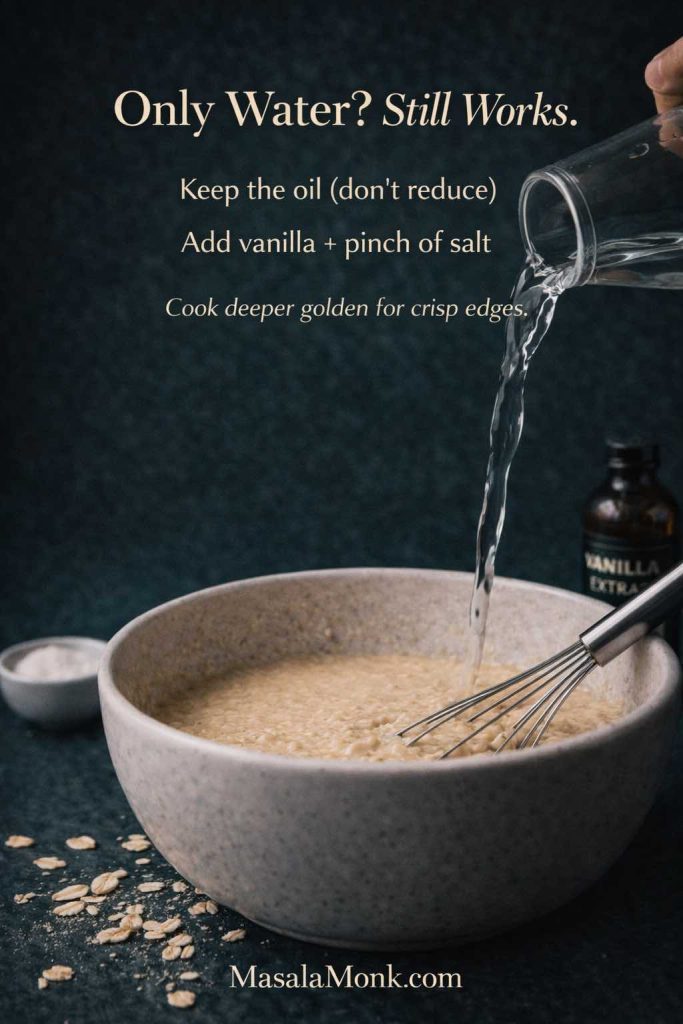
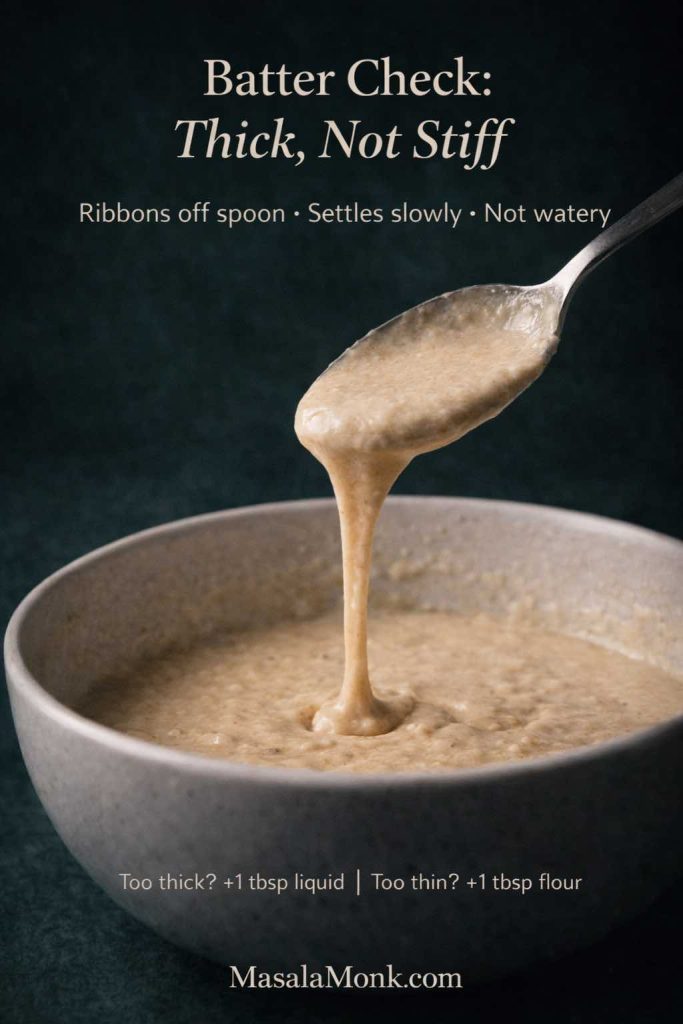
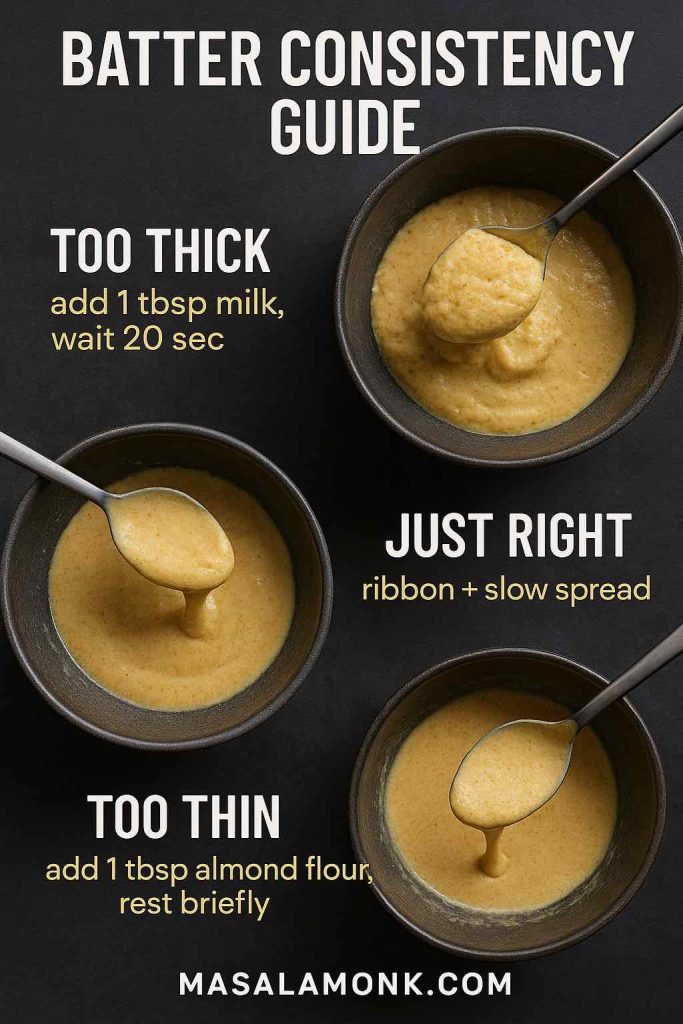
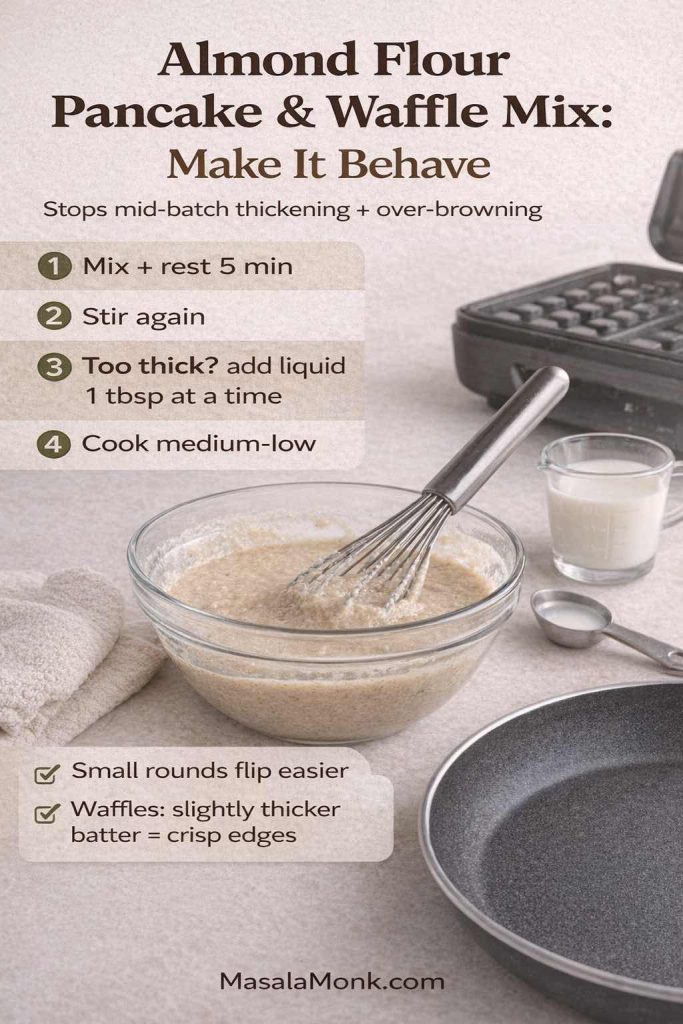
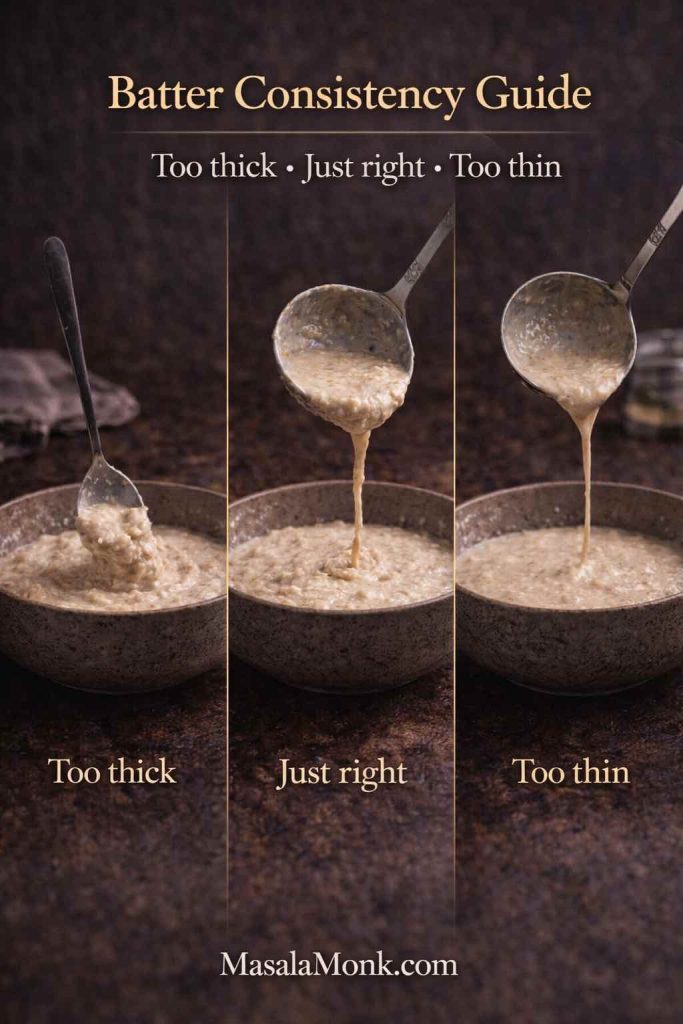
The batter consistency you’re aiming for
Oat batters vary more than wheat-flour batters because oats don’t behave exactly like flour. Different brands, different grind sizes, and different oat types can shift the thickness.
You want a batter that pours slowly and spreads a bit, but doesn’t run like water. It should feel like it has body.
If it’s too thick:
- add milk a tablespoon at a time
- stir gently between additions
If it’s too thin:
- give it another few minutes to rest
- or add a tablespoon of oat flour (or blended oats), then wait again
That “wait again” part is important because oats keep thickening as they sit.
Also Read: Healthy Tuna Salad – 10 Easy Recipes (Avocado, Mediterranean, No Mayo & More)
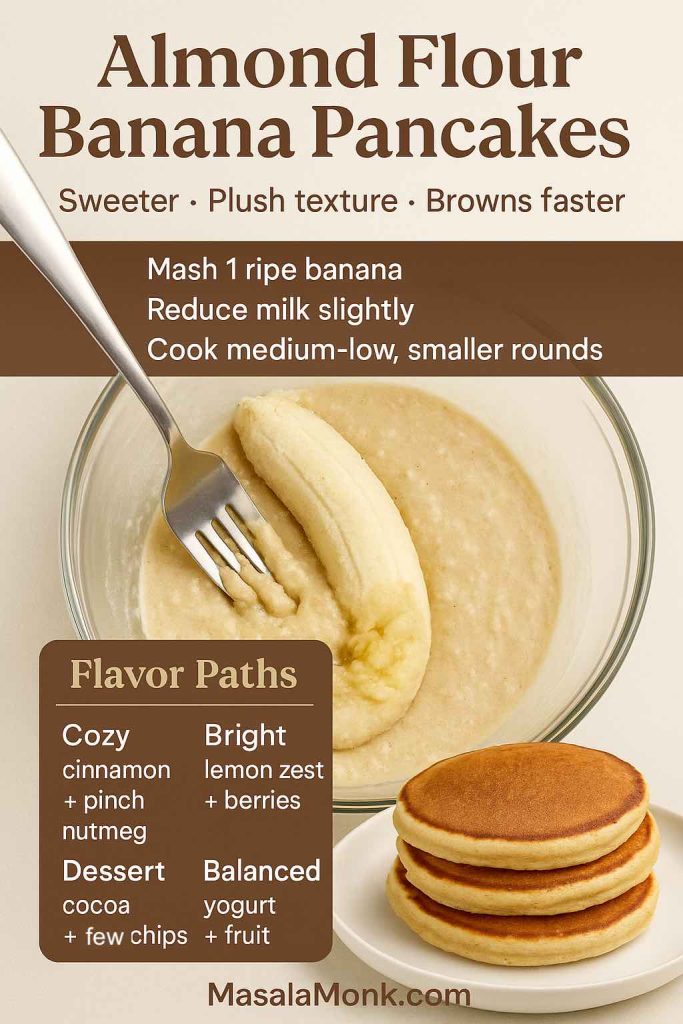
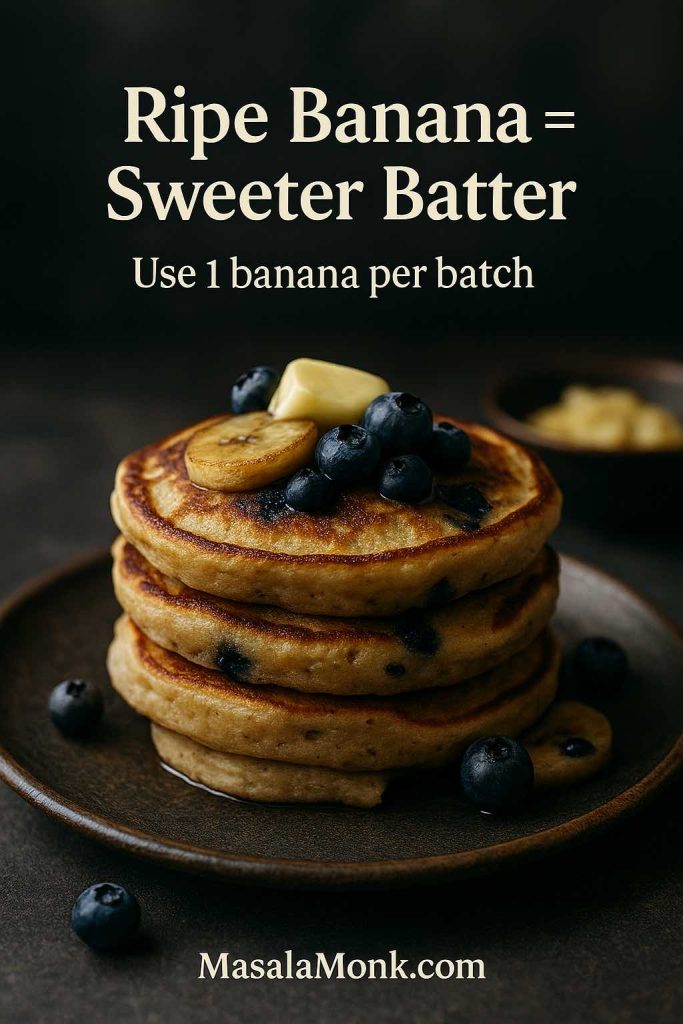
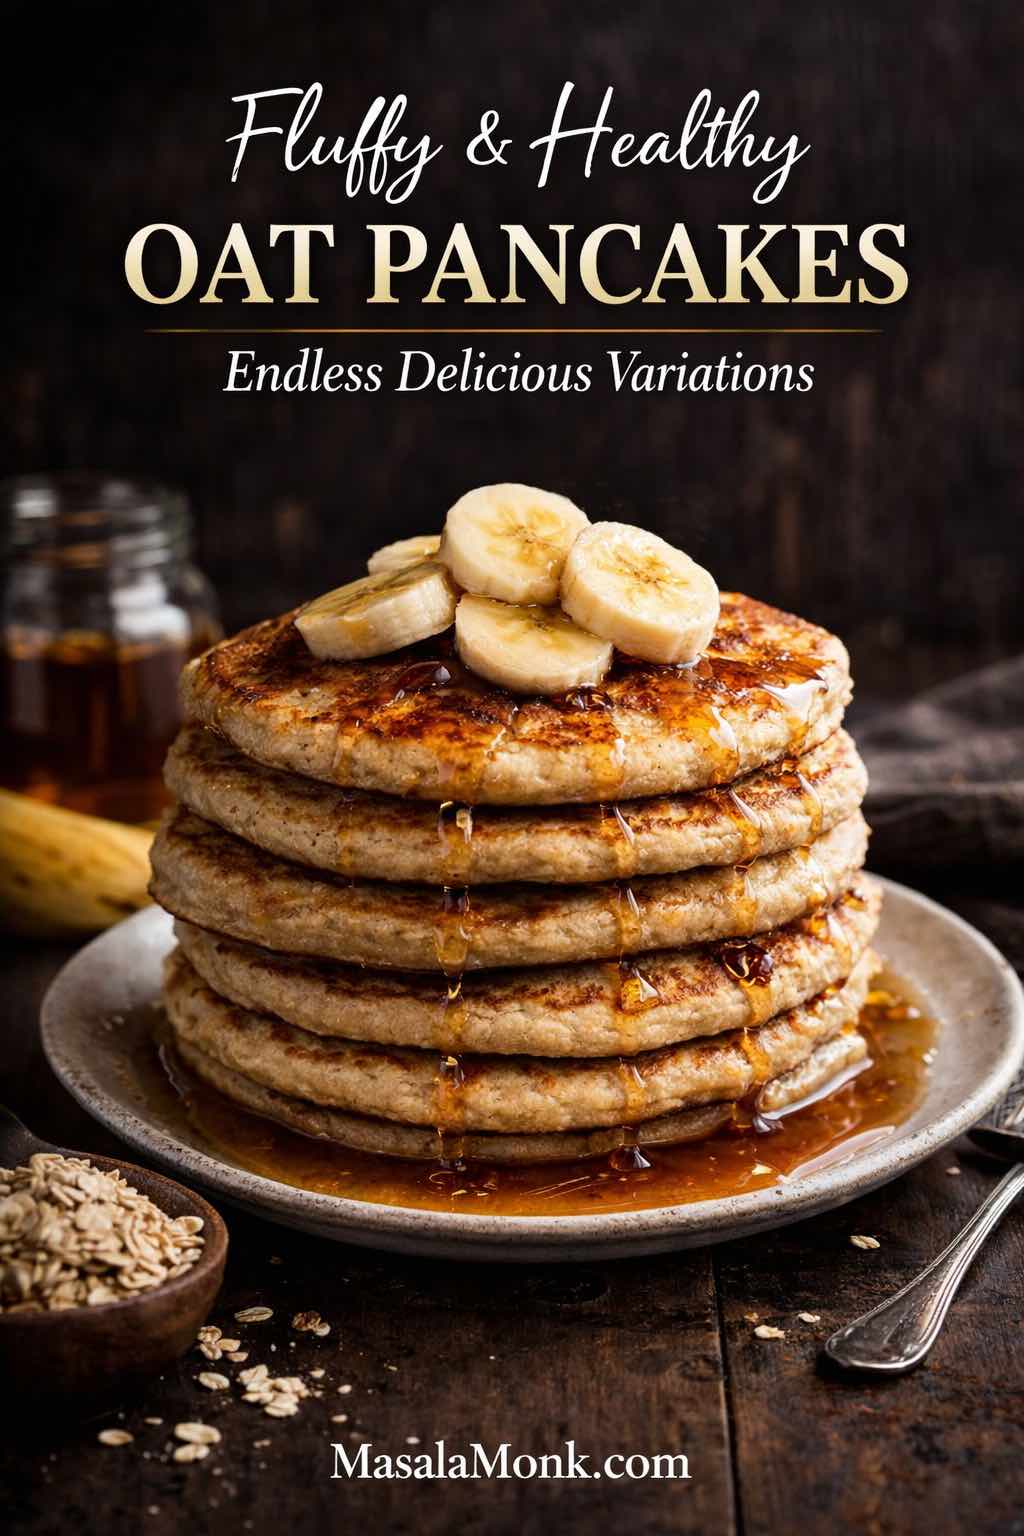
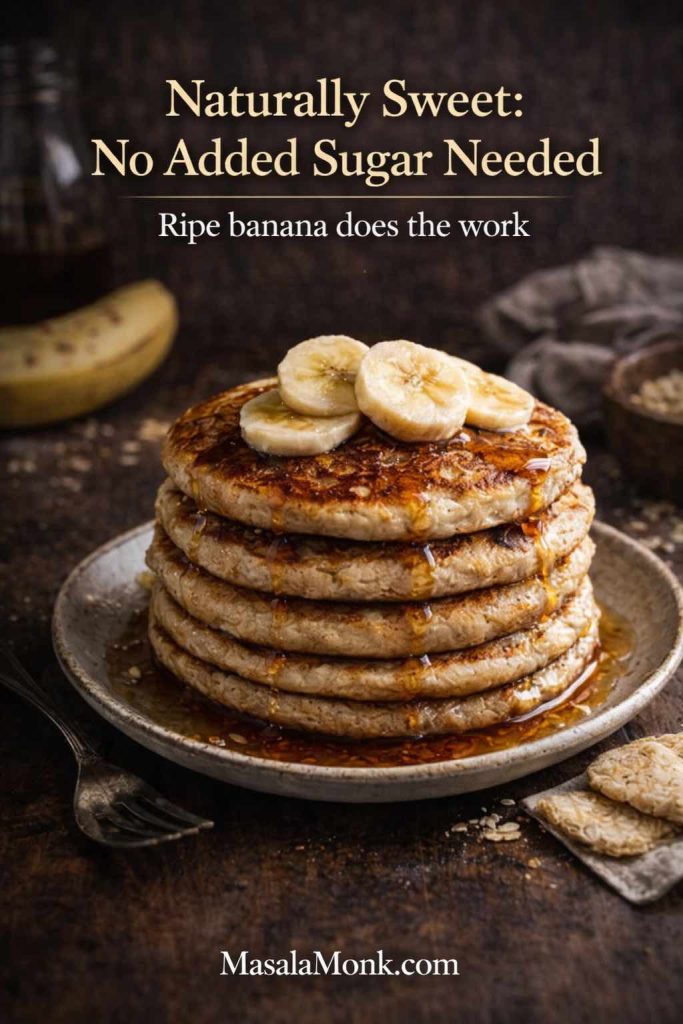
Banana oat pancakes: banana oatmeal pancakes that feel like comfort food
Banana oatmeal pancakes are popular for a reason. While banana adds sweetness, fragrance, and moisture, they also makes the pancakes more forgiving if you slightly overcook them.
This is also the variation that tends to satisfy a whole family of cravings: banana and oat pancakes for the classic version, banana blender pancakes when you want fewer dishes, and even banana porridge pancakes when you lean into a softer, more custardy style.
Banana oatmeal pancakes (easy method)
Use the base recipe, then mash 1 ripe banana into the wet ingredients before adding the dry ingredients.
After resting, check thickness. Banana can make batter thicker, so you may want a splash more milk.
If your banana is very ripe, you can often skip sweetener entirely, especially if you’re adding syrup later.
Banana blender pancakes (smooth and fast)
If you want a smoother batter:
- blend banana + milk + egg until completely smooth
- pour into a bowl
- stir in blended oats (or oat flour), baking powder, salt, and cinnamon
- rest briefly, then cook
This method feels almost effortless, and the flavor comes through beautifully.
Banana pancakes with oat flour
If you prefer oat flour pancakes, you can still do banana easily. Use oat flour in the base recipe, then mash banana into the wet ingredients. The result tends to be extra tender, with a very even crumb.
Banana oatmeal pancakes no eggs
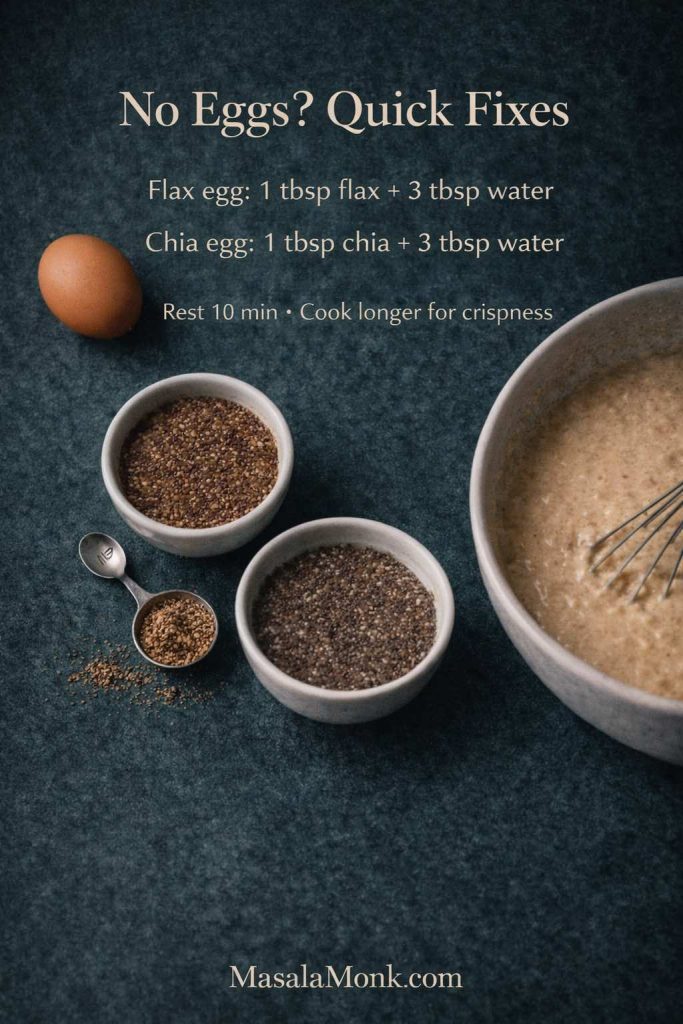
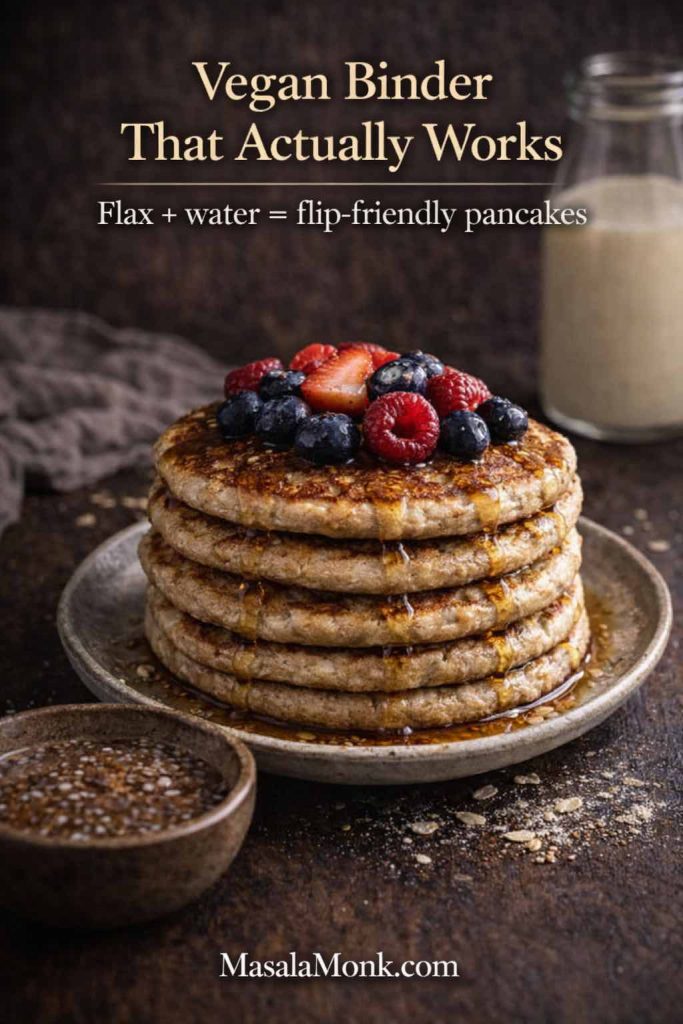
If you’re looking for oatmeal pancakes without eggs, banana can help with binding, but it’s usually best paired with another binder so the pancakes don’t fall apart.
A reliable approach:
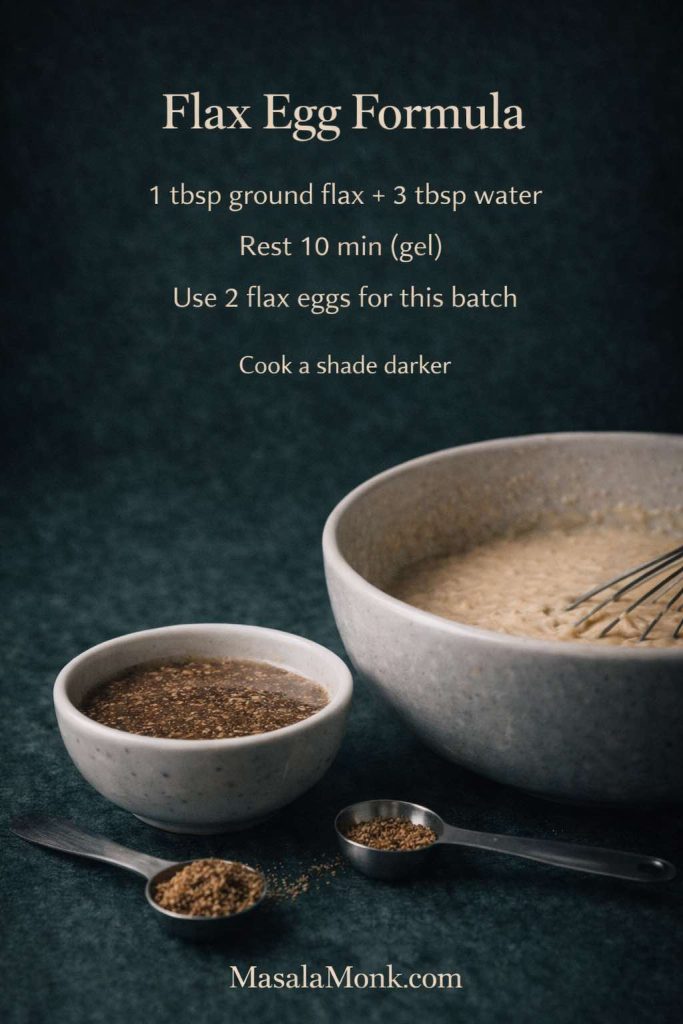
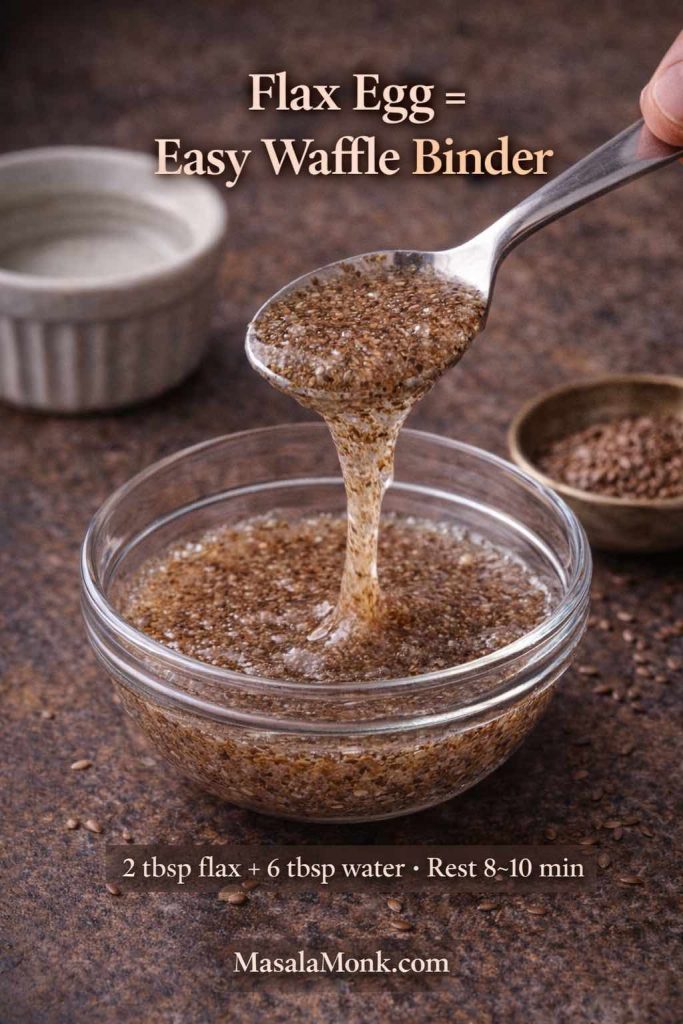
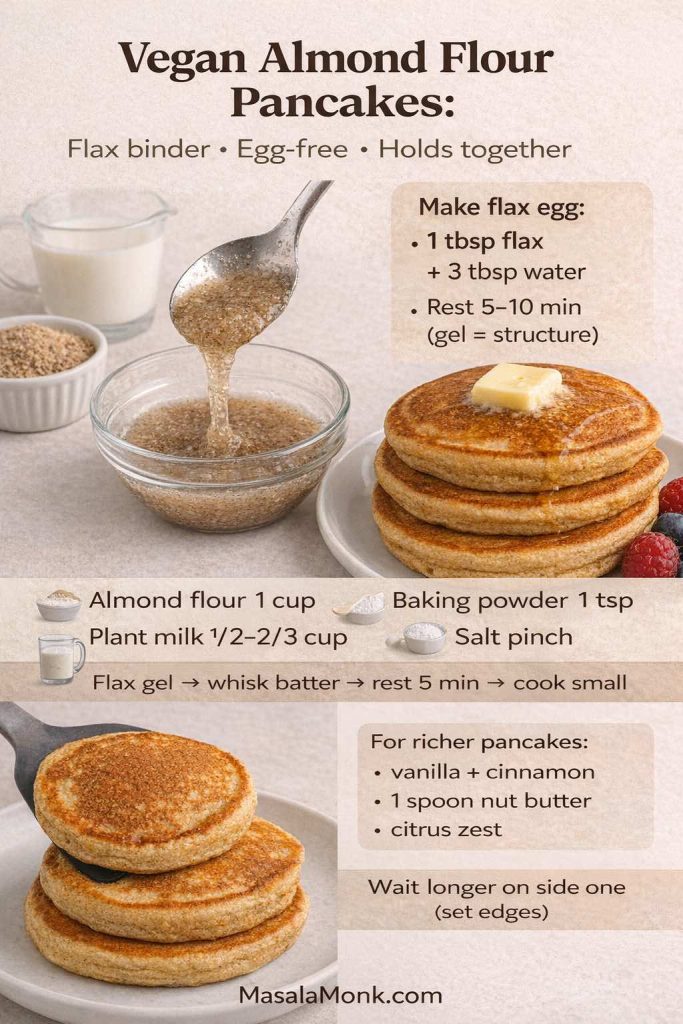
- replace the egg with a flax “egg” (1 tablespoon ground flax + 3 tablespoons water, rested until gelled)
- keep the banana
- cook on medium-low so the center sets nicely
That combination works well for banana oat pancakes vegan too.
Banana oat pancakes healthy (without feeling like a “healthy recipe”)
If you want the satisfying, steady feeling of oats and banana without going heavy:
- keep the batter thick enough to rise
- use cinnamon and vanilla for aroma
- top with yogurt and fruit rather than drowning everything in syrup
It still tastes like a treat—just a calmer one.
Also Read: Upma Recipe: 10+ Easy Variations (Rava, Millet, Oats, Semiya & More)
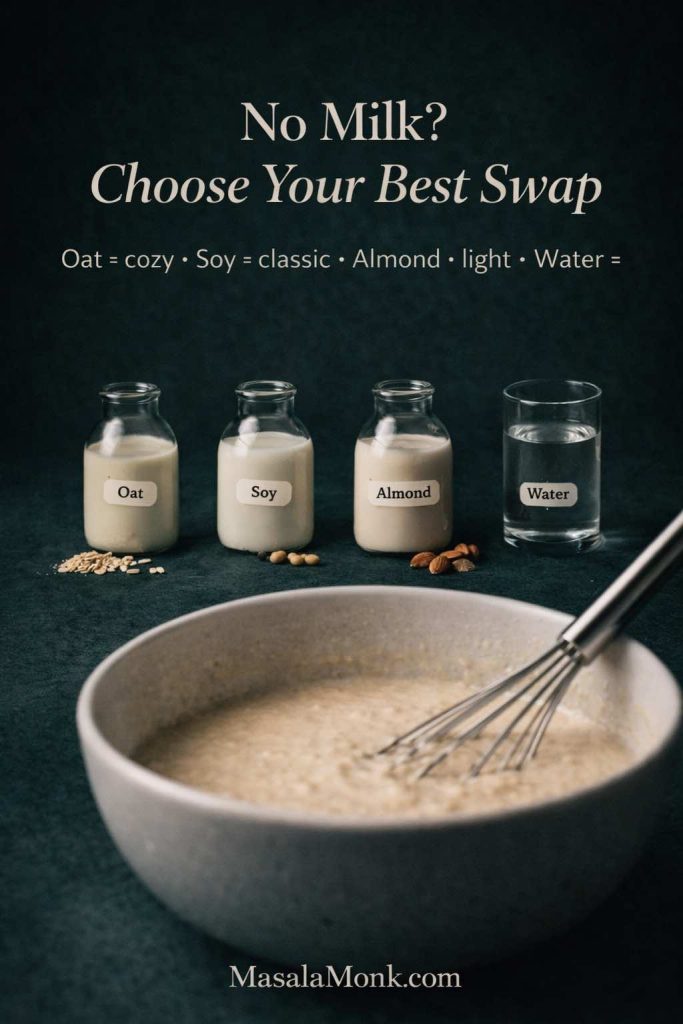
Vegan oat pancakes: vegan oatmeal pancakes that flip and hold together
Vegan oat pancakes don’t need to be fragile. Oats naturally help bind batter, so once you use a good egg replacement and keep the heat steady, you’ll get pancakes that flip well and stay fluffy.
Vegan oatmeal pancakes (base vegan version)
Start with the base recipe and swap:
- egg → flax “egg” (1 tablespoon ground flax + 3 tablespoons water, rested)
- milk → plant milk
- butter → oil
Then cook over medium or medium-low.
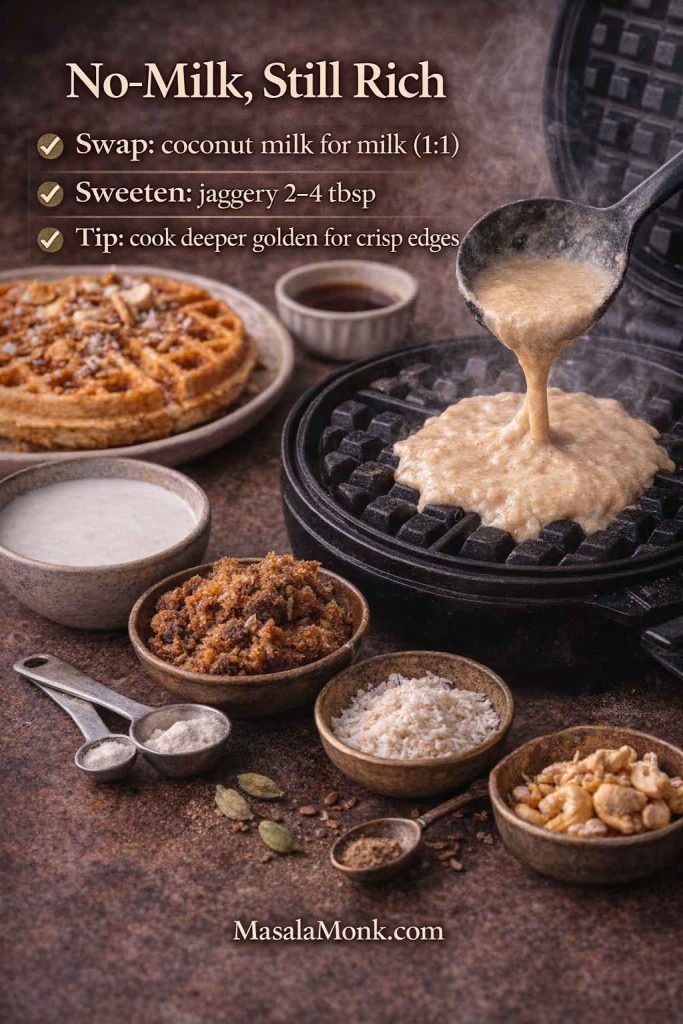
Plant milks vary, so the batter thickness might shift. Oat milk tends to make a cozy, mellow pancake; almond milk makes a slightly lighter one; soy milk can make a sturdier crumb.
Oat milk pancakes
Pancakes made with oat milk are especially nice because oat milk has a naturally rounded flavor that pairs perfectly with oats.
If you prefer homemade oat milk, and you’ve ever struggled with slimy texture, MasalaMonk’s approach is helpful: Easy Homemade Oats Milk with Just One Ingredient.
Vegan pancakes with oats and banana
If you want vegan pancakes with oats and banana, add mashed banana to the wet ingredients along with the flax egg. This creates a soft, tender crumb with built-in sweetness.
Also Read: Double Chocolate Chip Cookies – Easy Recipe with 7 Variations
Apple oat pancakes: applesauce oatmeal pancakes for cozy mornings
Apple and oats feel like the kind of pairing you’d find in a warm kitchen on a quiet morning. You can go two ways: applesauce for ease and moisture, or fresh apple for fragrance and texture.
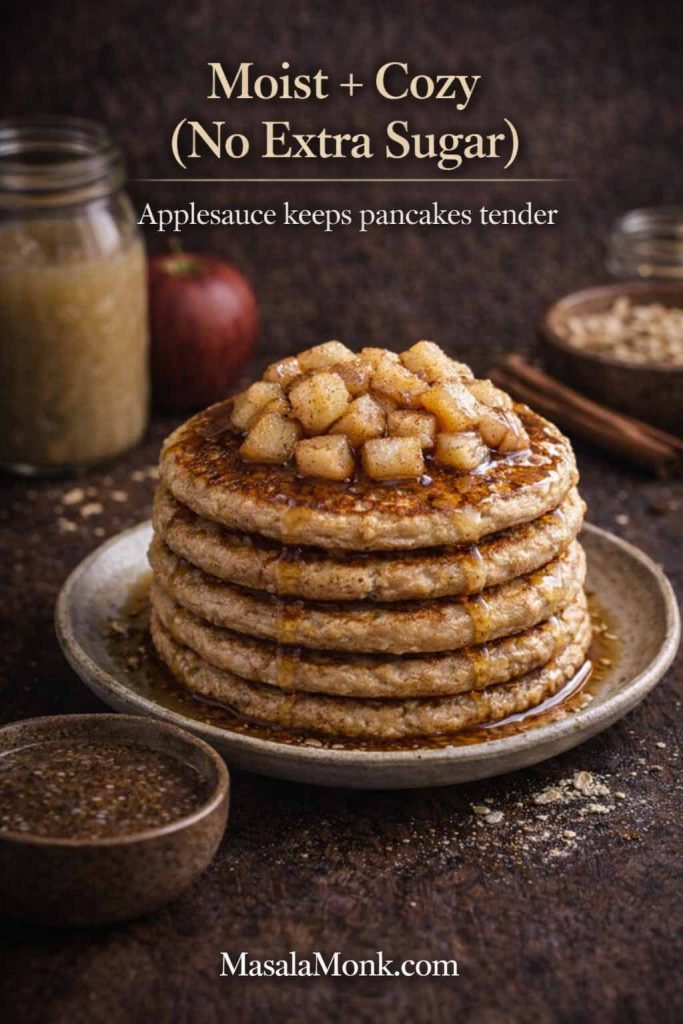
Applesauce oatmeal pancakes
Use the base recipe and replace about ¼ cup of the milk with ¼ cup applesauce. Add cinnamon if you like.
The applesauce brings sweetness and tenderness, so you can often reduce added sweetener.
Apple oat pancakes with grated apple
If you’d rather use fresh apple:
- grate ½ cup apple finely
- fold it into the batter after mixing
- rest the batter, then cook
Grated apple melts into the pancake. Chopped apple stays crunchy unless you pre-cook it, which is more work than most mornings call for.
Also Read: Mimosa Recipe: 10 Easy Versions from Classic to Caramel Apple
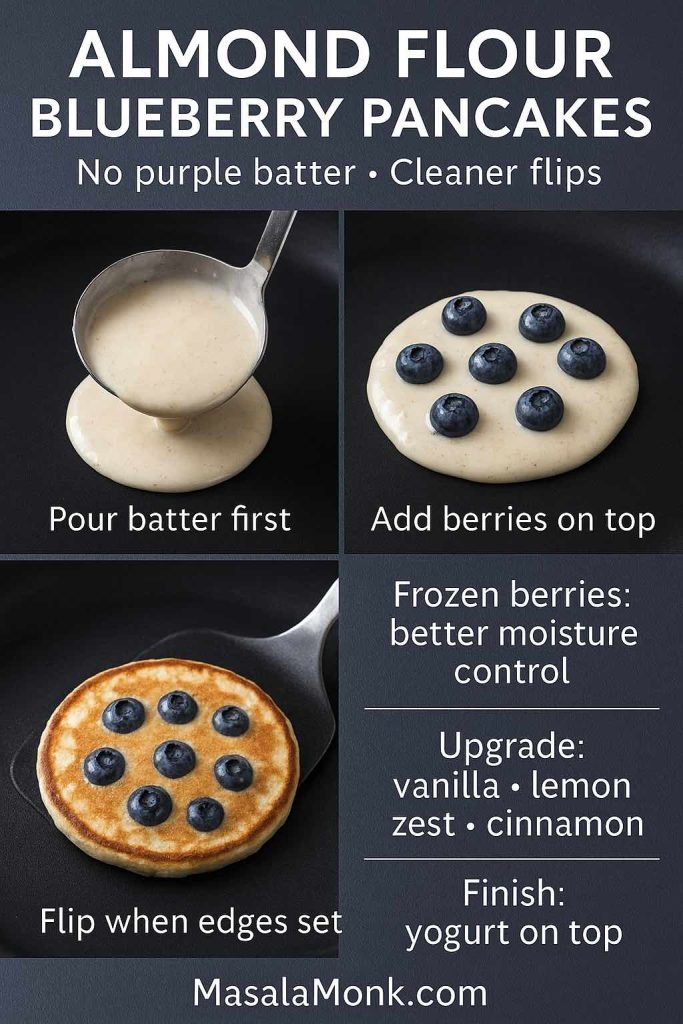
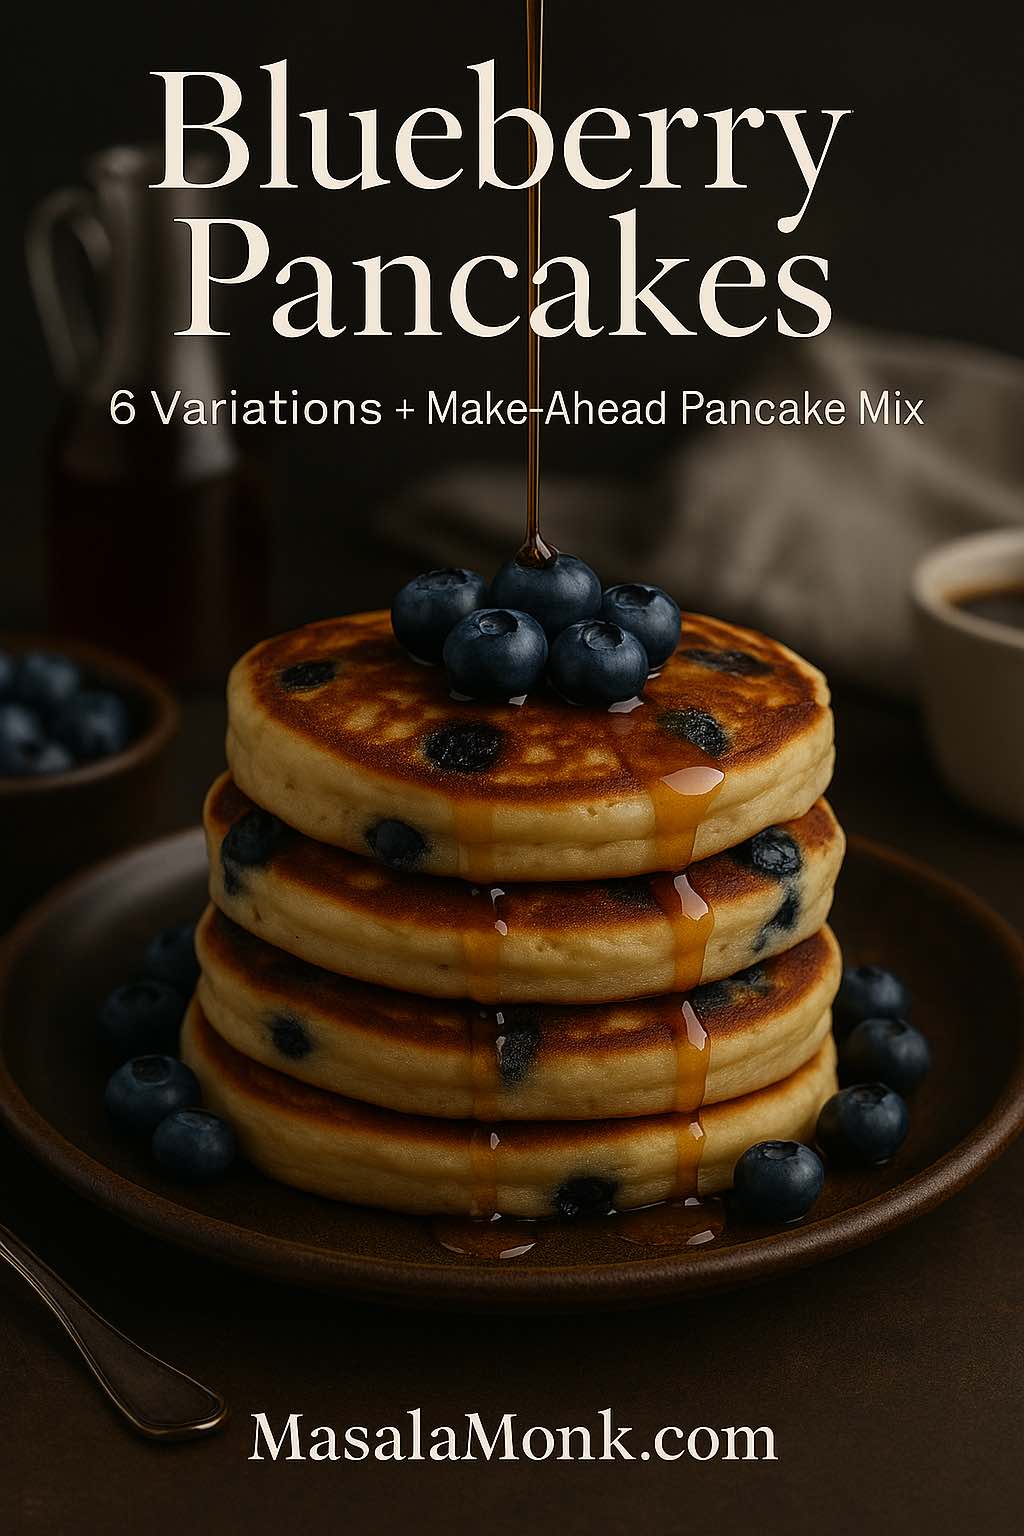
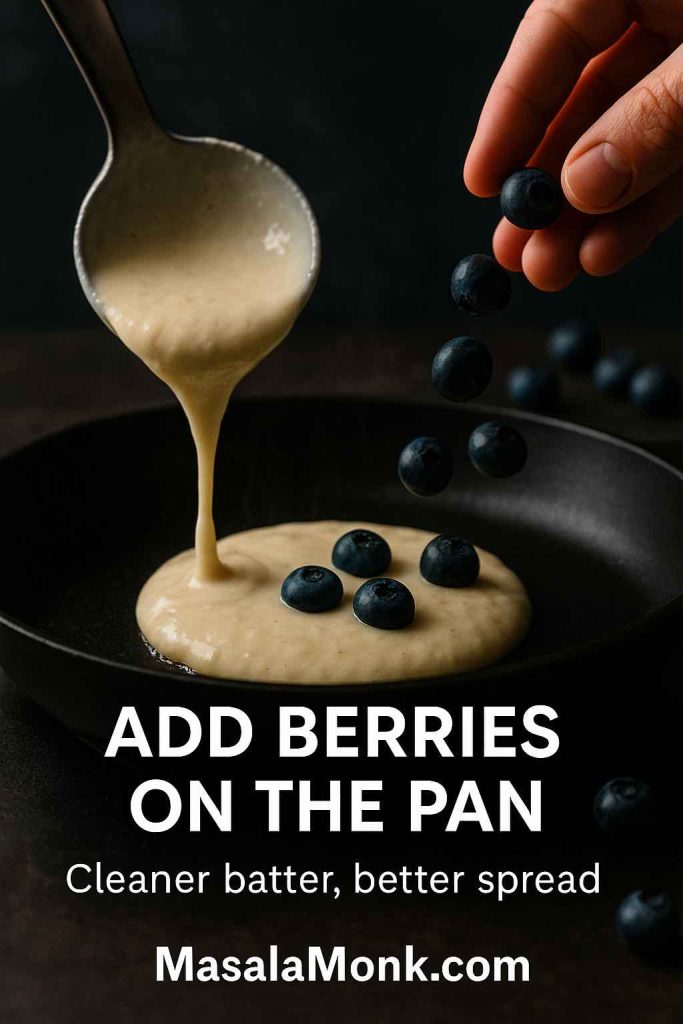
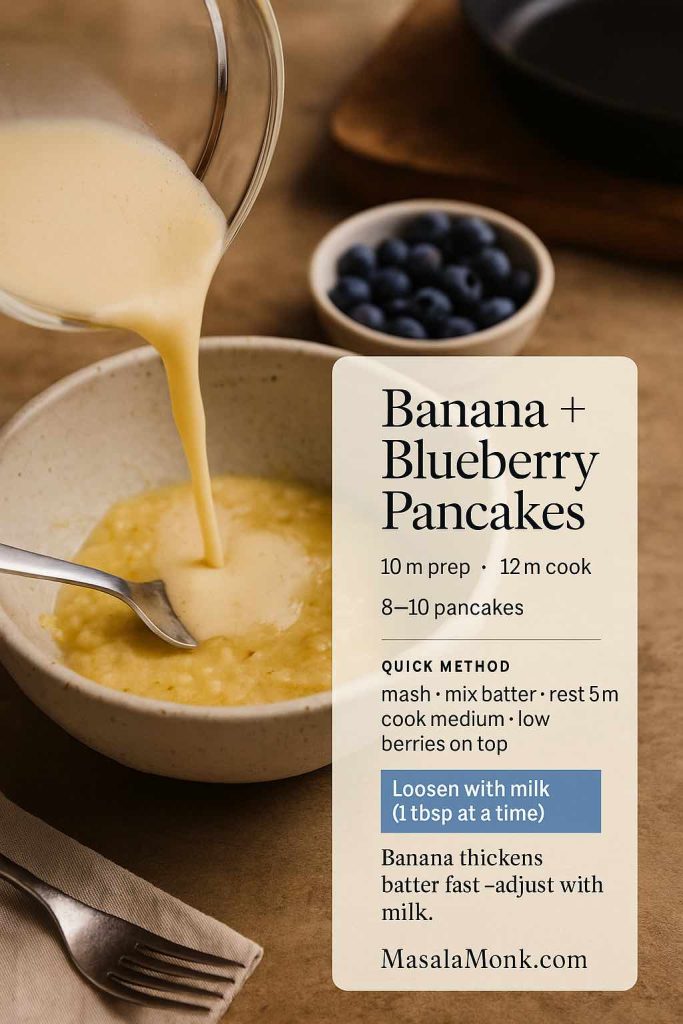
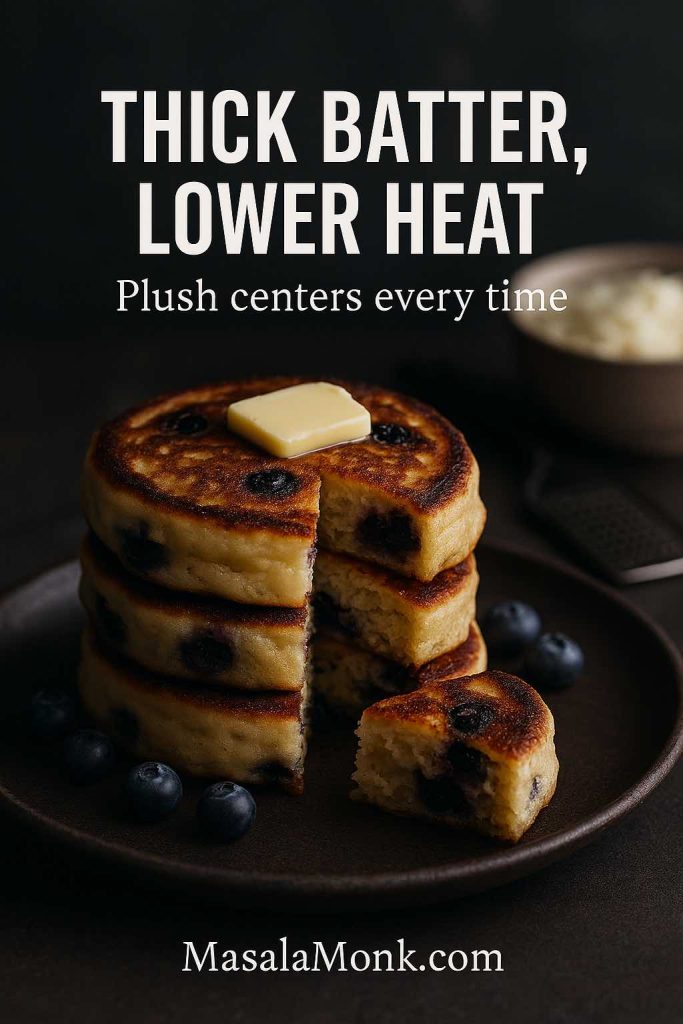
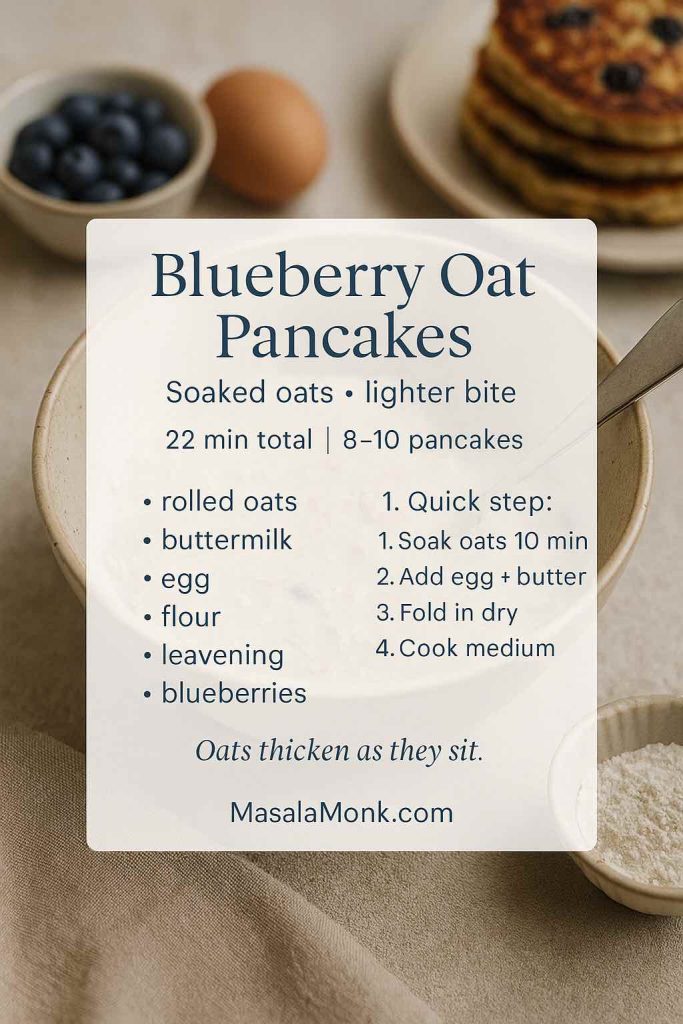
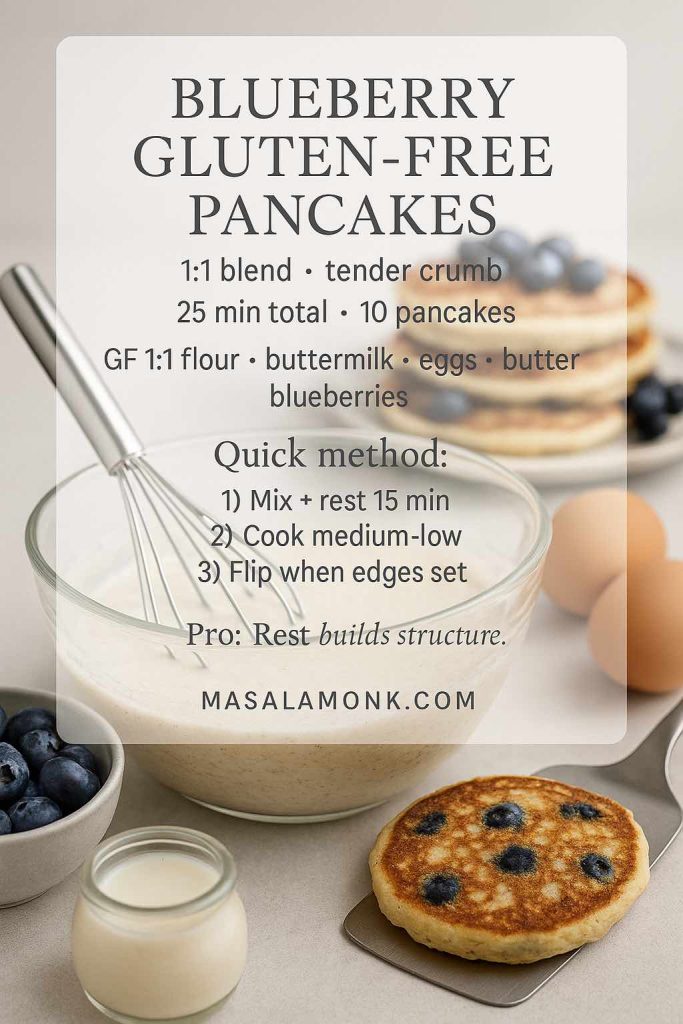
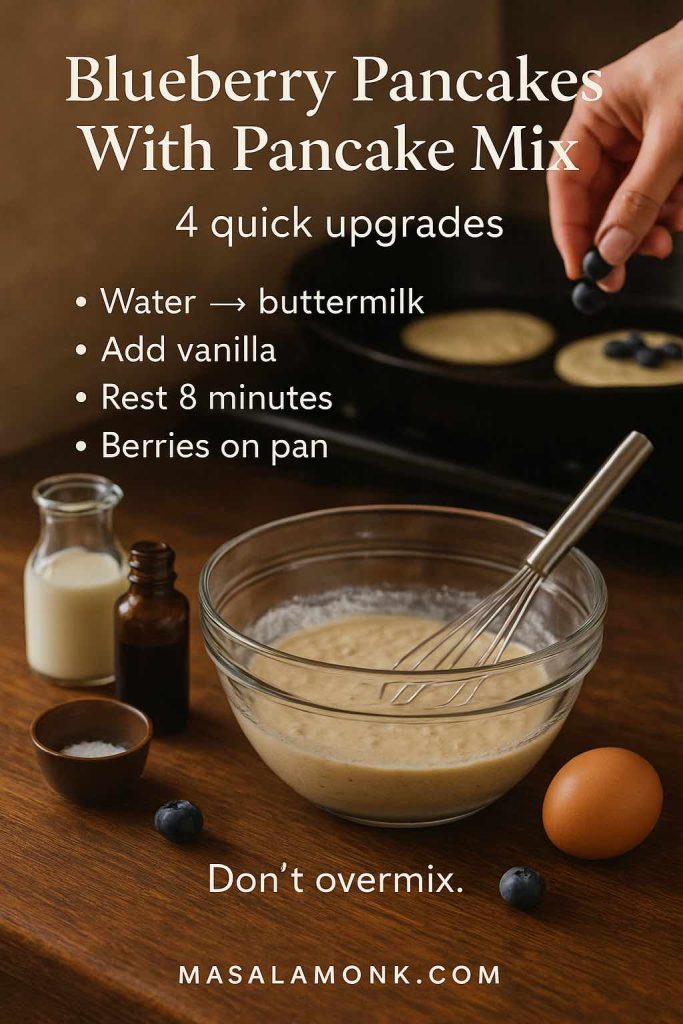
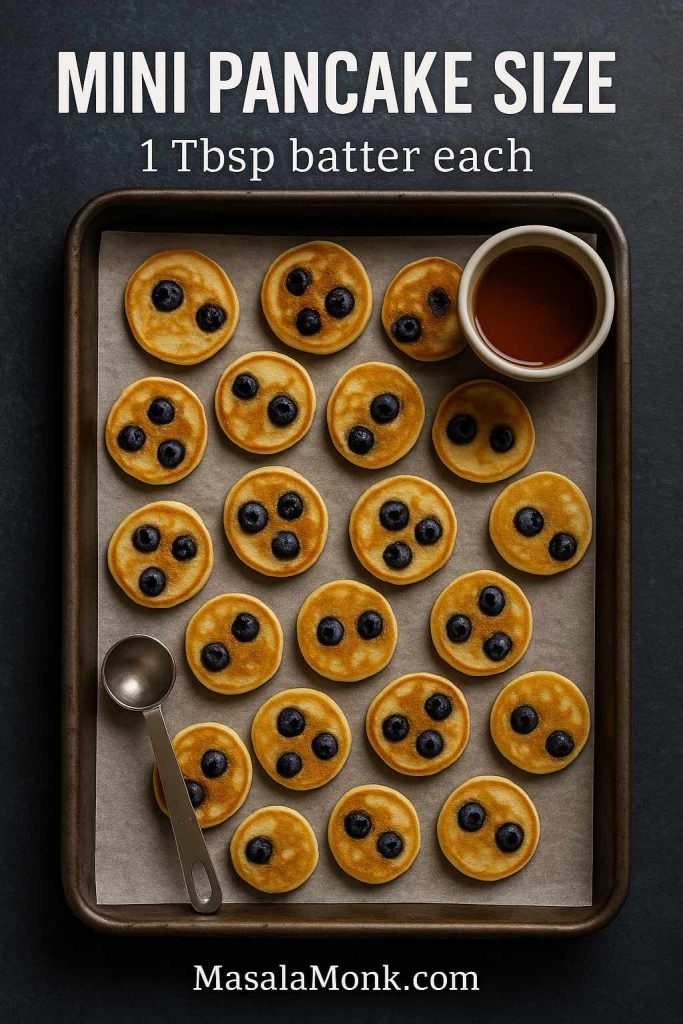
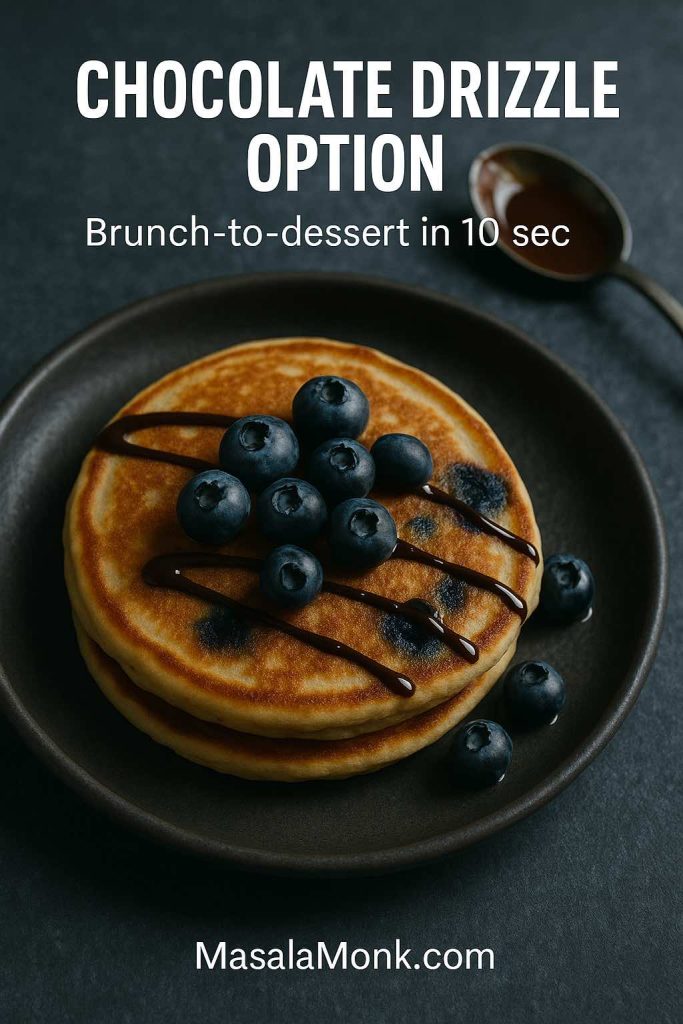
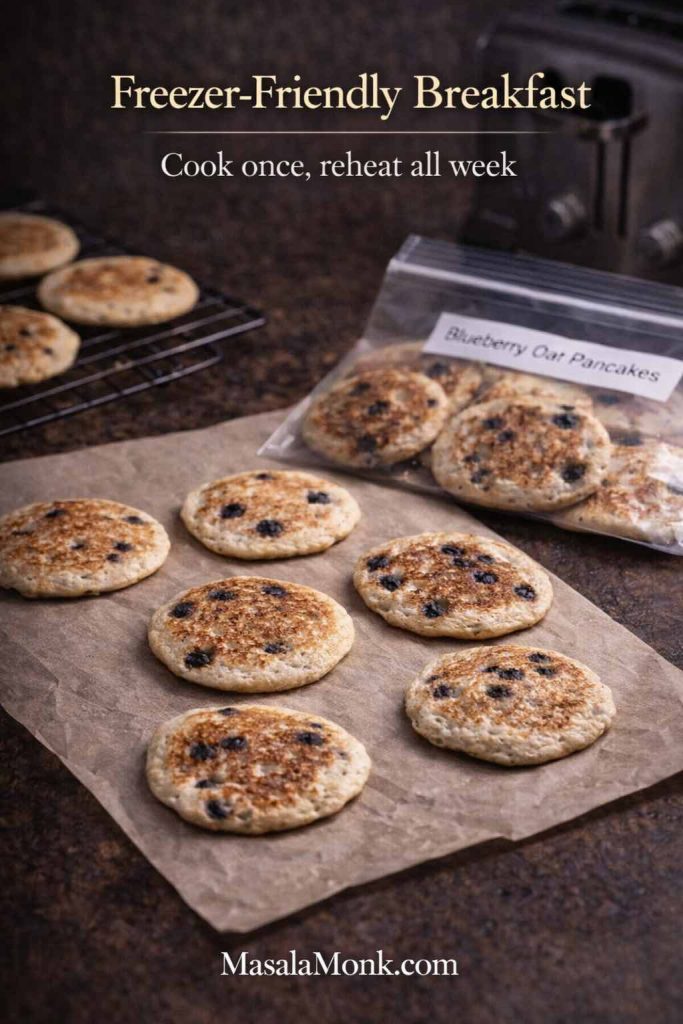
Blueberry oat pancakes: bright, juicy, and easy to love
Blueberry oat pancakes feel like weekend breakfast energy even when it isn’t the weekend. They’re also one of the easiest ways to make the base recipe feel completely new.
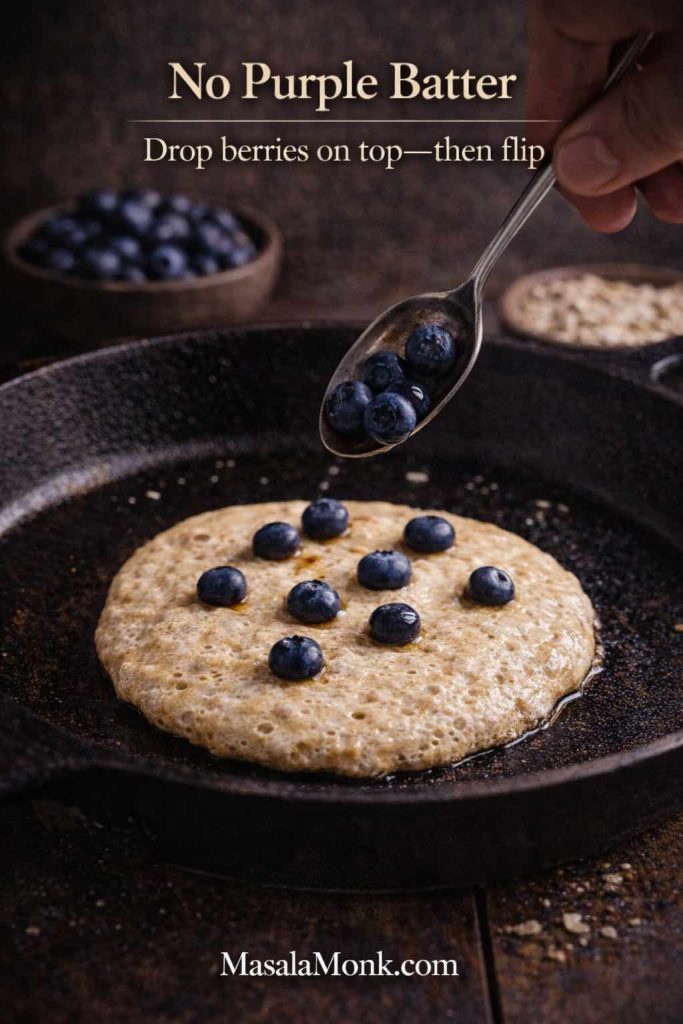
Blueberry oatmeal pancake variation
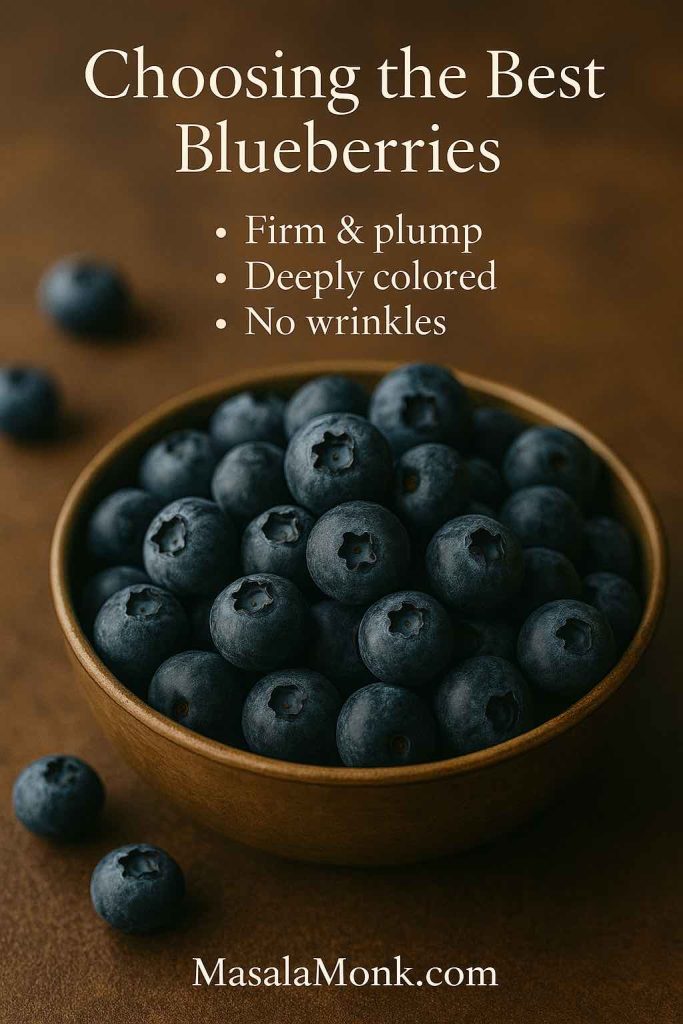
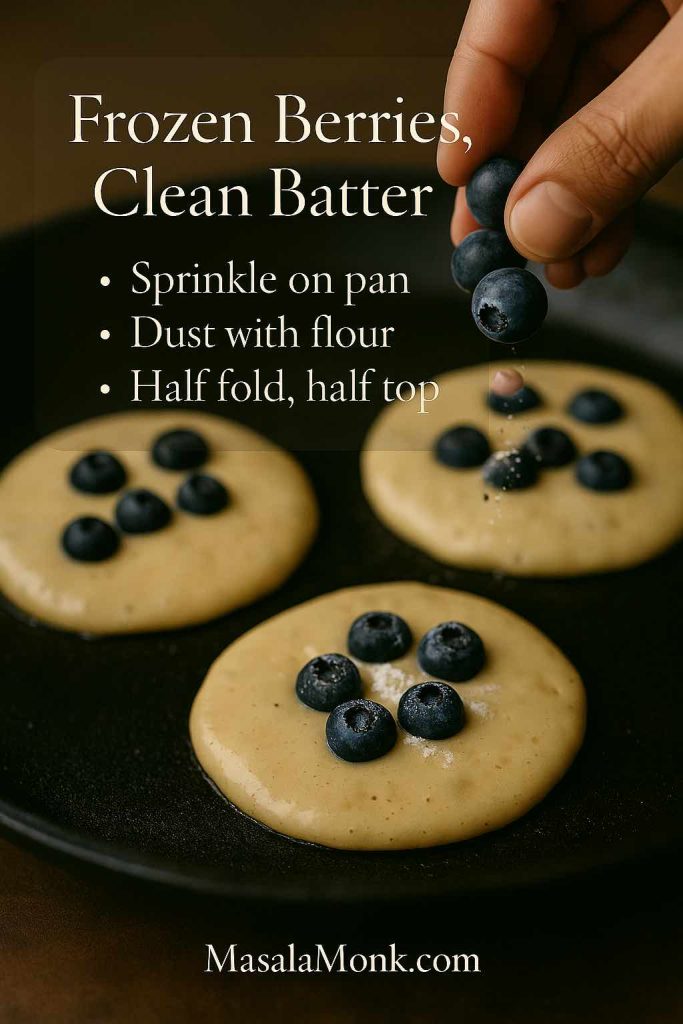
Use the base recipe and fold in about ½ cup blueberries.
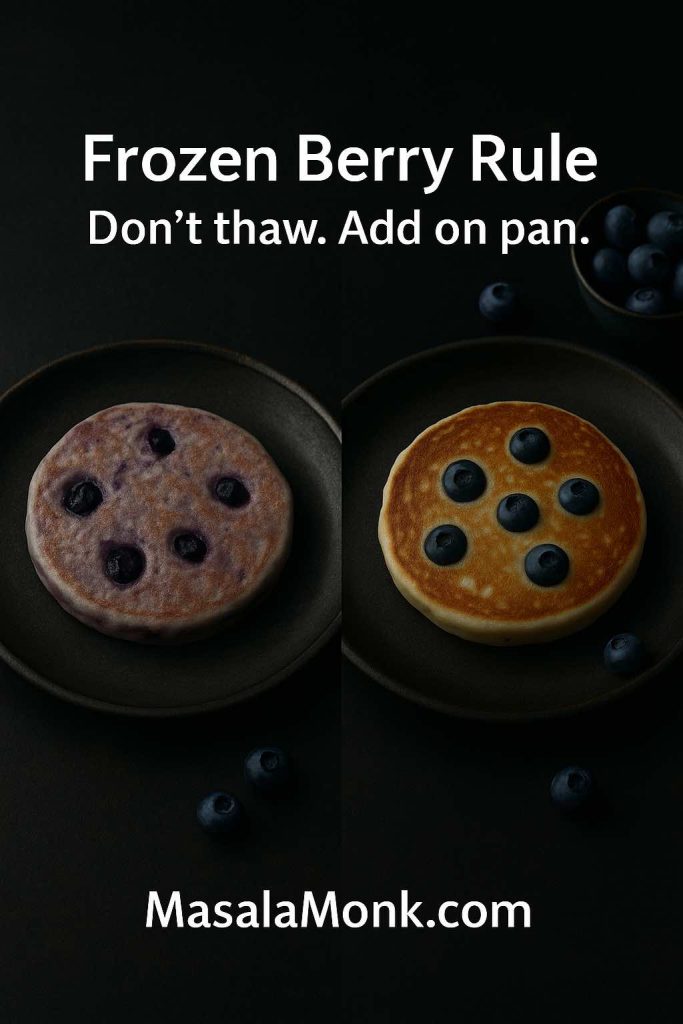
If your berries are frozen, add them to the pancake after pouring the batter onto the pan. This helps prevent the batter from turning purple and keeps the pancakes lighter.
If you want more blueberry ideas to keep the breakfast momentum going, MasalaMonk’s roundup is a fun rabbit hole: Blueberry Pancakes (6 Recipes) + Homemade Pancake Mix.
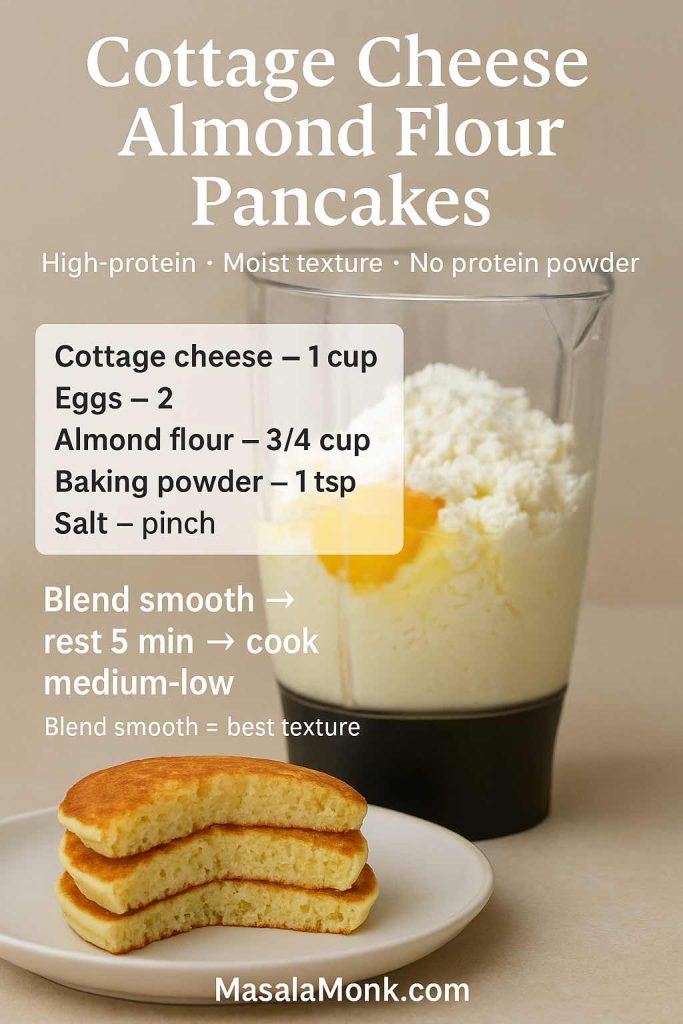
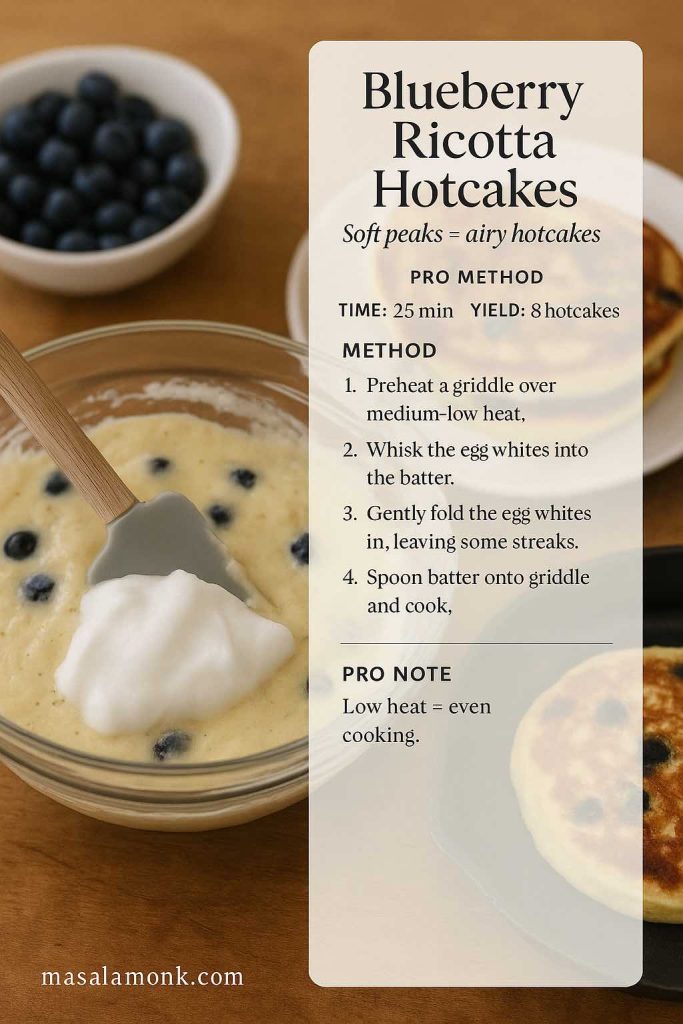
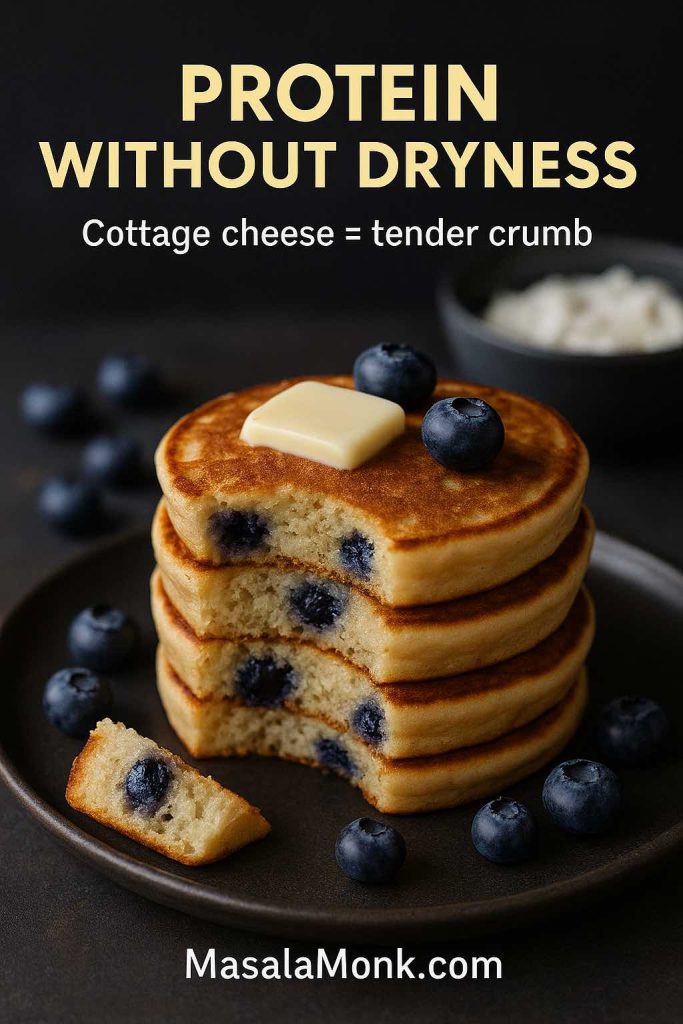
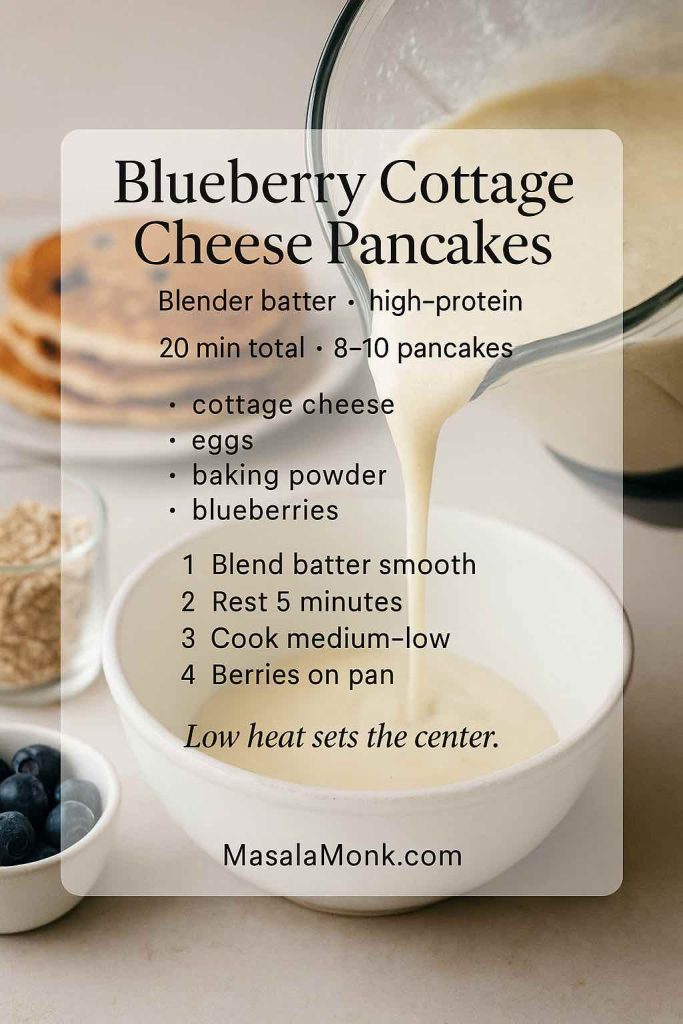
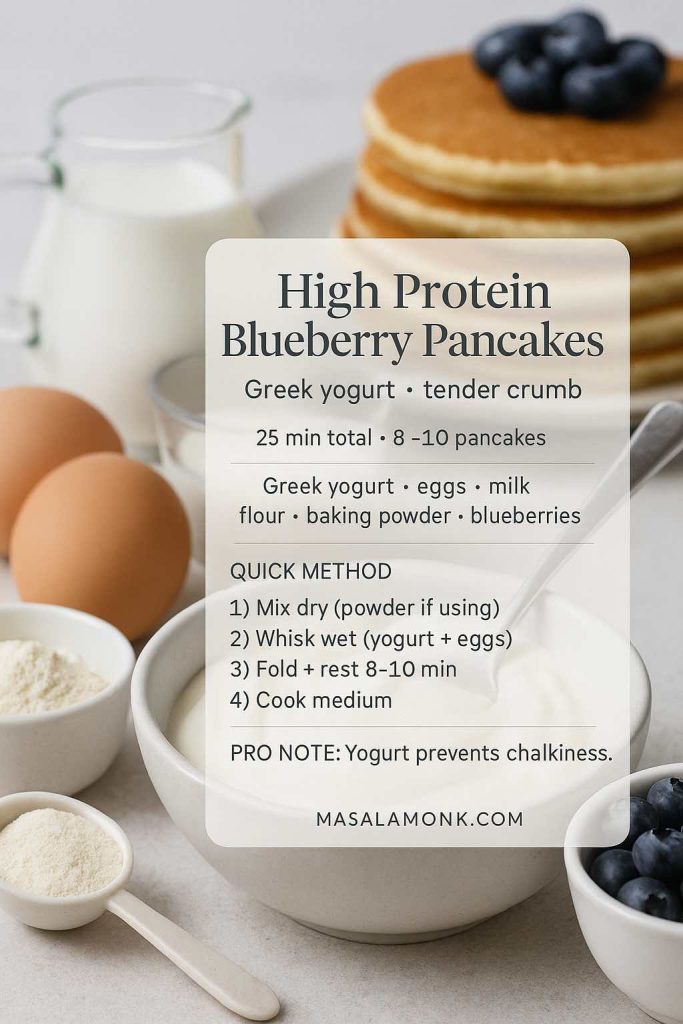
Cottage cheese oat pancakes: the tender, protein-friendly stack
Oat pancakes made with cottage cheese are one of those “sounds weird, tastes amazing” situations. Cottage cheese brings moisture and richness, which means the pancakes stay tender even after cooling. It also adds protein without any powdery aftertaste.
Cottage cheese oatmeal pancake-style batter
Use the base recipe and add ½ cup cottage cheese. If you dislike curds, blend cottage cheese into the wet ingredients before adding the dry ingredients.
Because cottage cheese can thicken batter, you may need a splash of milk after resting. The goal is still a batter that pours slowly rather than dropping in a lump.
If you enjoy exploring different flour options too, MasalaMonk’s Almond Flour Pancakes are another satisfying direction—different texture, same cozy payoff.
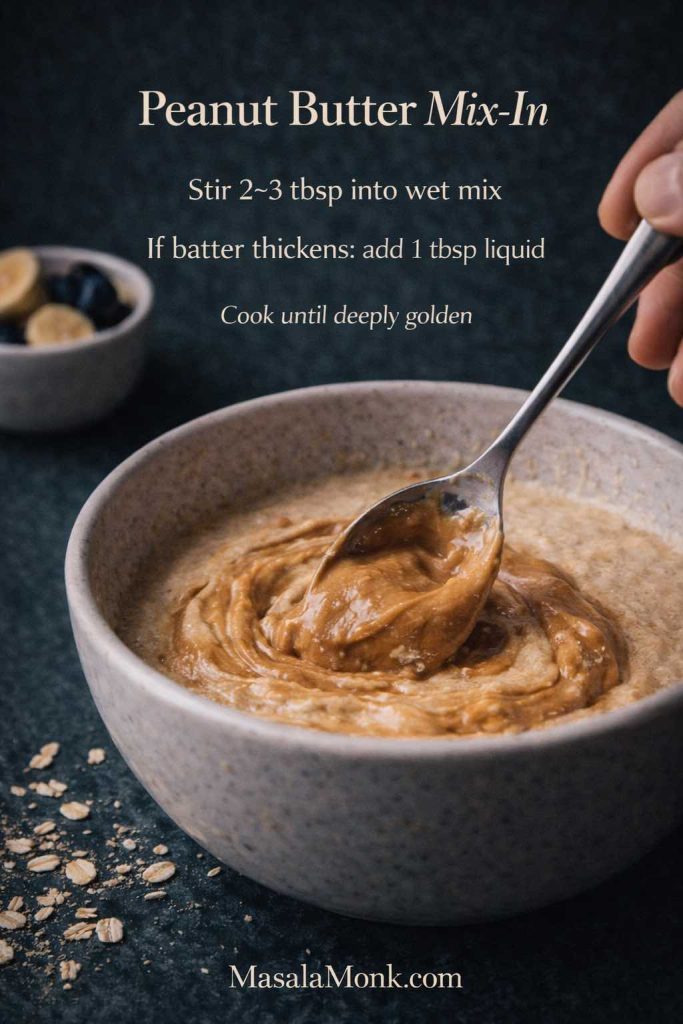
Protein oat pancakes without protein powder
A lot of “protein pancake” recipes taste like supplements. If what you want is protein pancakes no powder, the easiest way is to start with a genuinely good oat pancake recipe and add protein through normal foods that also improve texture.
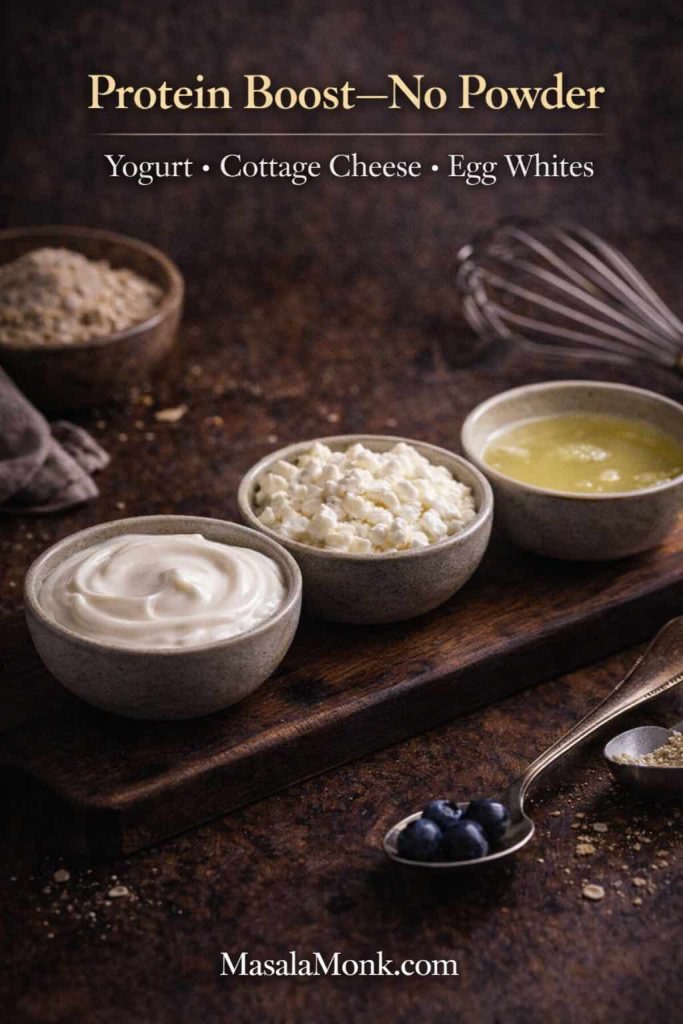
Here are a few options that keep things delicious:
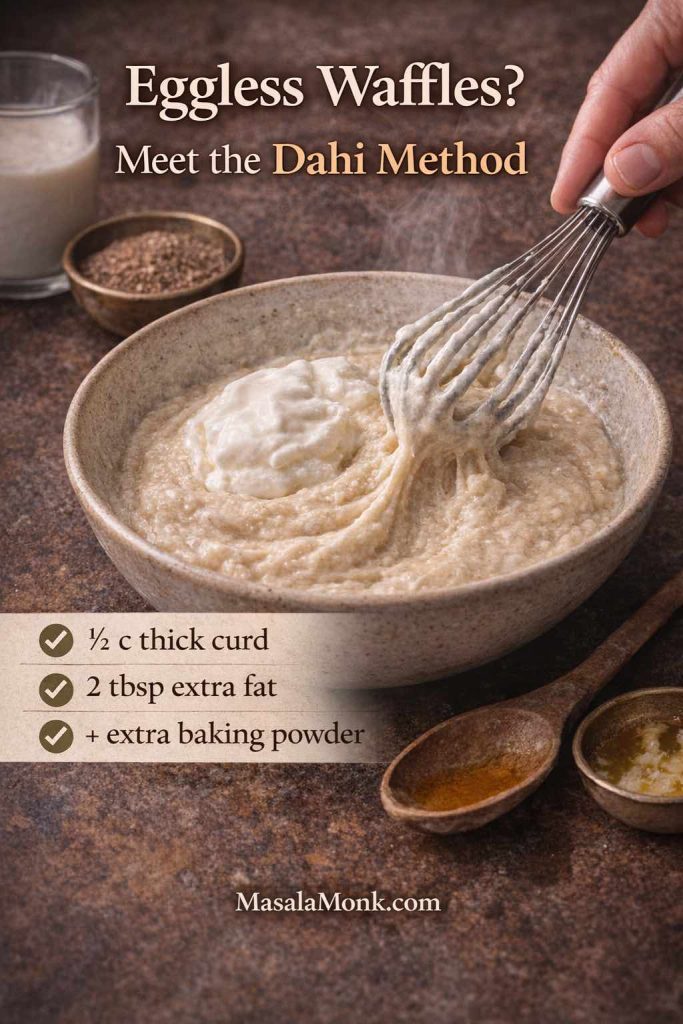
Yogurt-based protein pancakes
Replace about ¼ cup of milk with thick yogurt (Greek yogurt or hung curd). The pancakes come out softer and slightly richer.
Egg-white variation
Use egg whites instead of a whole egg for a lighter, airy crumb. Keep the oil/butter for tenderness.
Cottage cheese route
Use the cottage cheese version above. It’s one of the best protein pancakes no powder options for meal prep because it reheats so well.
If you like building protein into breakfasts in general, MasalaMonk’s guide is a nice companion read: Protein Oatmeal: Turn Plain Oats into a High-Protein Meal.
Egg and oat pancakes: oats and eggs pancake variations for simple mornings
Sometimes you want the shortest ingredient list possible. That’s where egg and oat pancakes come in—also searched as oat egg pancakes or oats and eggs pancake versions.
A simple version:
- blend 1 cup oats into flour
- whisk with 2 eggs
- add ½ to ¾ cup milk
- add baking powder and salt
Cook them on medium-low so they set evenly.
If you keep the batter slightly thicker and let it rest, the pancakes lean more toward oat hotcakes recipe territory—thicker, softer, and nicely risen. If you thin the batter, you’ll get something closer to a crepe-pancake hybrid that’s excellent with fruit and yogurt.
Also Read: Classic Deviled Eggs (Easy) + 8 Flavorful Variations
No flour oat pancakes: oat pancakes no flour without feeling “alternative”
No flour oat pancakes sound dramatic, but the idea is simple: the oats are your flour. If you blend them and let them hydrate, they behave like a gentle flour substitute.
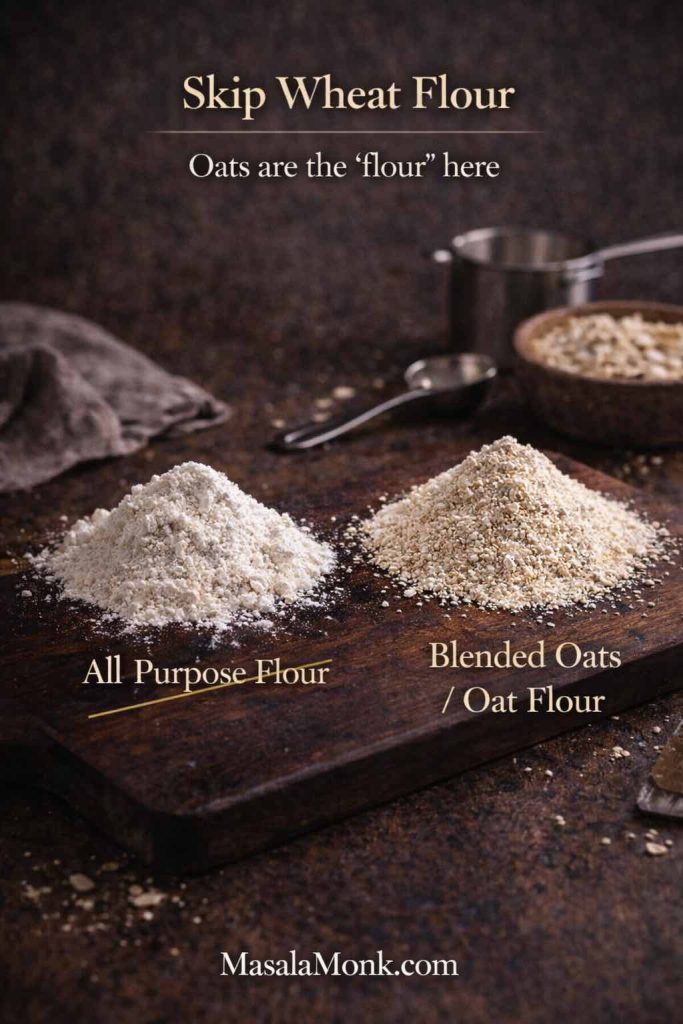
In practice, the base recipe already makes oat pancakes no flour in the “no wheat flour” sense. The main difference is how thick you keep the batter. A slightly thicker batter gives you that classic hotcake feel.
3 ingredient oatmeal pancakes: the fastest version
Three ingredient oatmeal pancakes are popular because they’re fast, sweet, and easy to memorize.
Blend:
- 1 banana
- 2 eggs (or a flax egg if you’re avoiding eggs)
- ½ to 1 cup oats
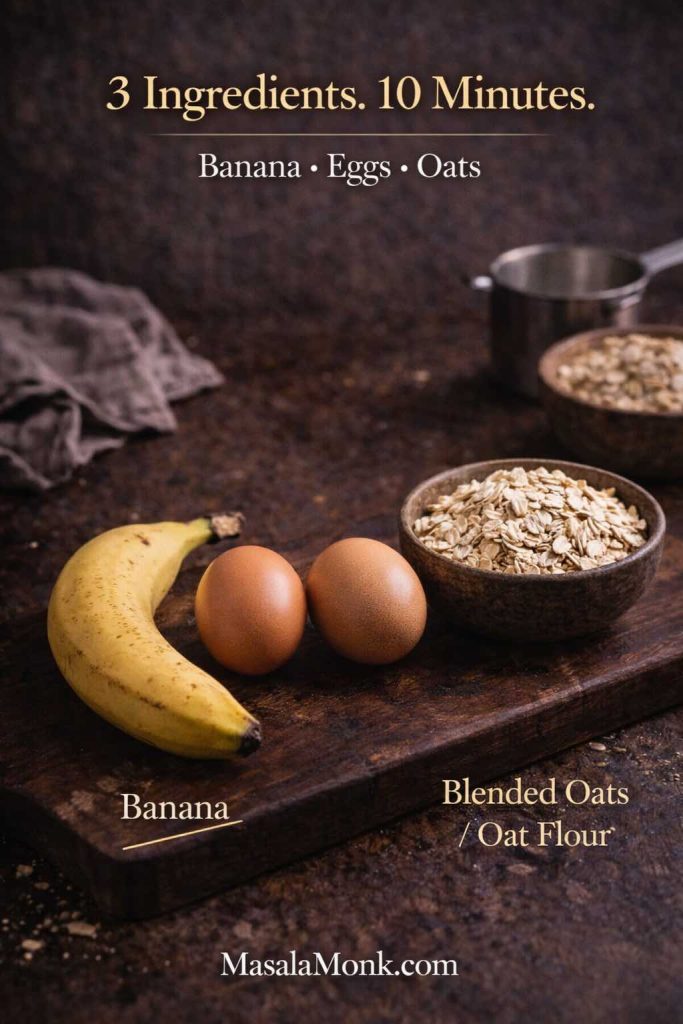
Cook on medium-low.
These pancakes tend to be softer than the baking-powder base. If you want them fluffier, add baking powder and a pinch of salt. That tiny upgrade changes the texture in a big way.
Also Read: One-Pot Chicken Bacon Ranch Pasta (Easy & Creamy Recipe)
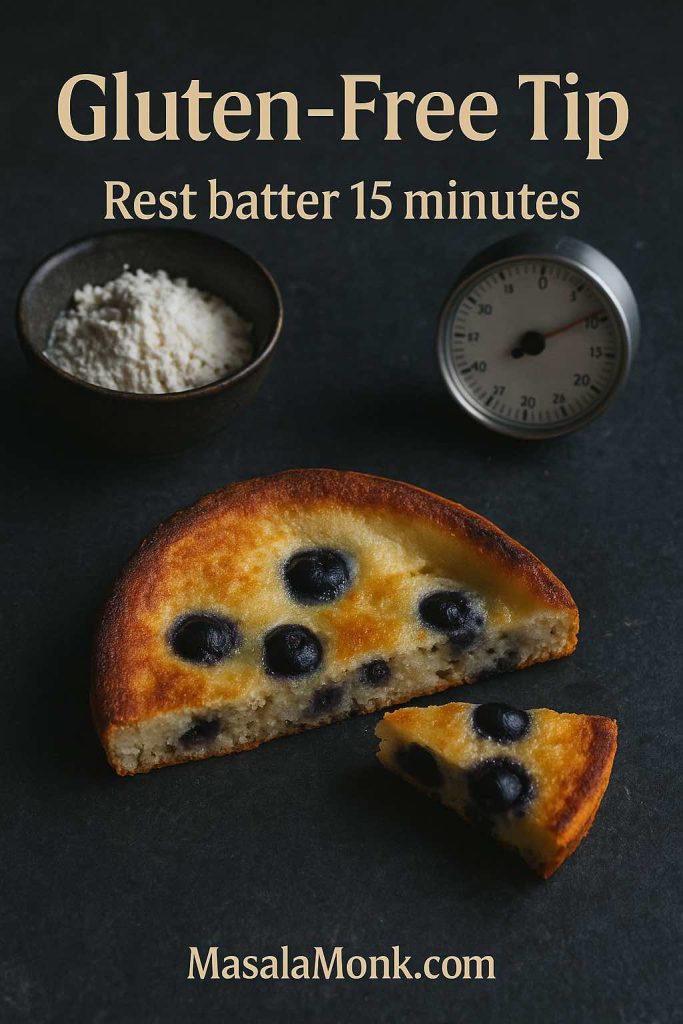
A note on gluten-free oats
Oats are naturally gluten-free, but cross-contact is common during growing and processing. If you’re cooking for someone with celiac disease or strict gluten avoidance, certified gluten-free oats are generally the safer choice.
If you want to read more, these are clear explanations:
This matters for gluten free banana oat pancakes too—certified oats are the easiest way to keep that version safe.
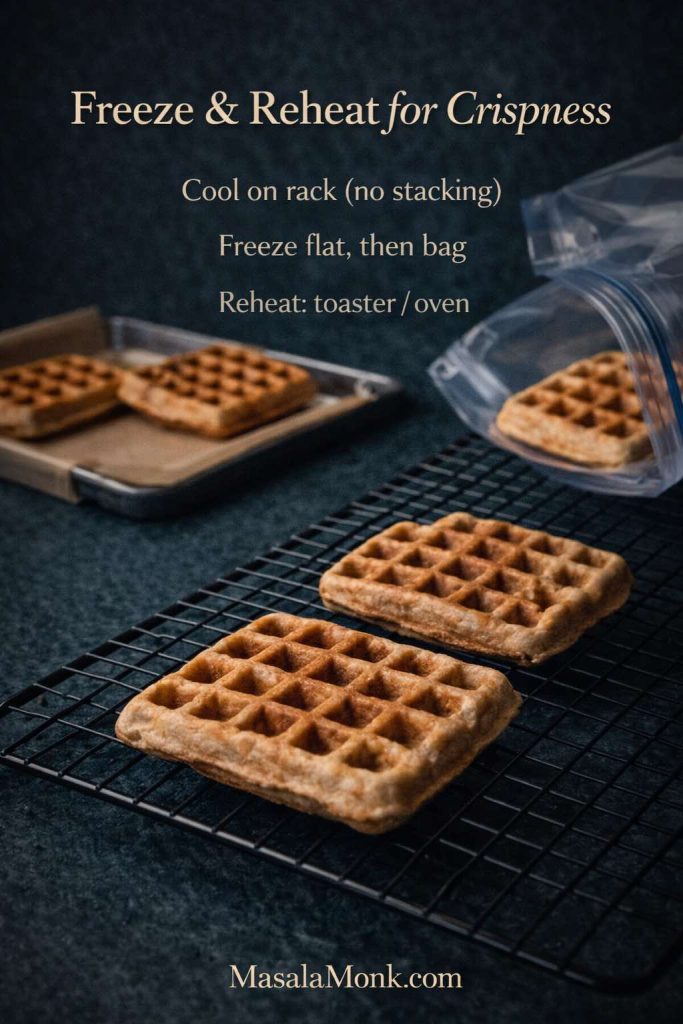
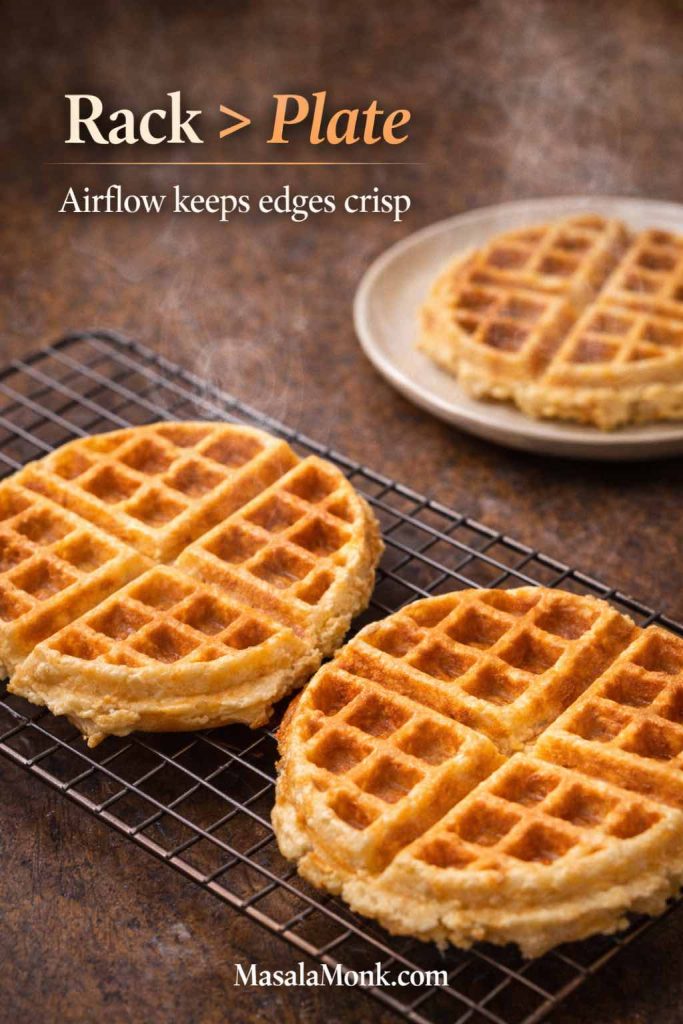
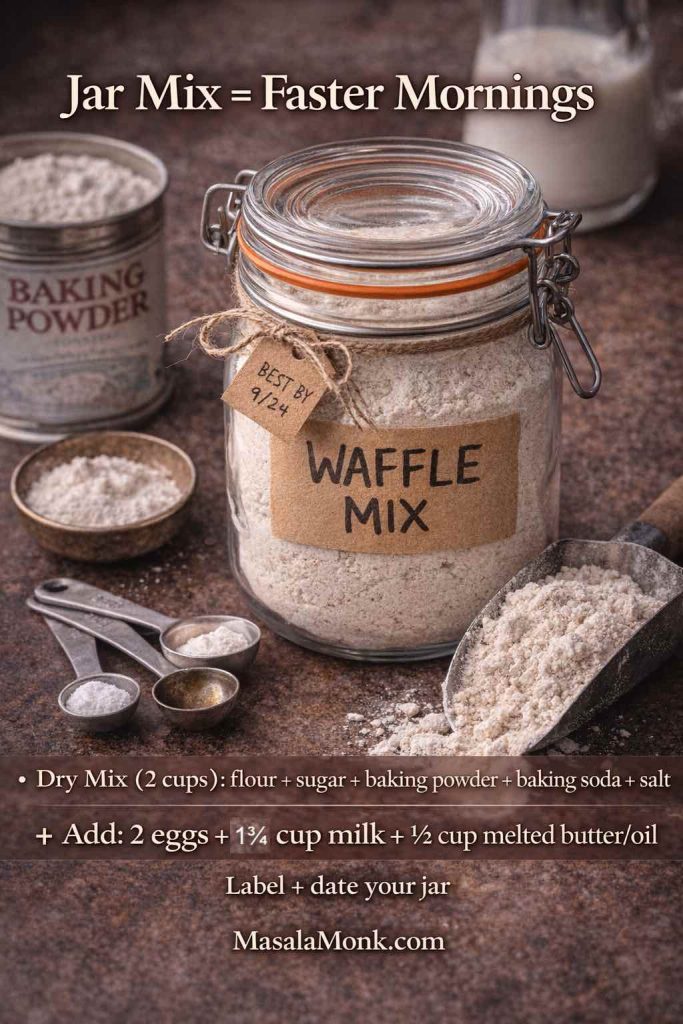
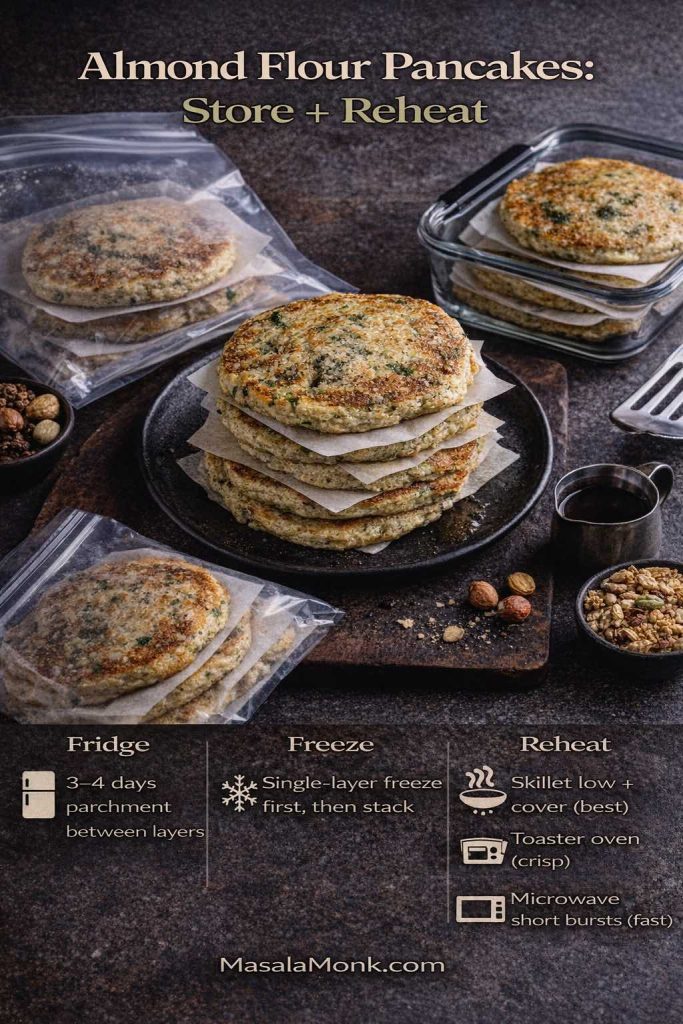
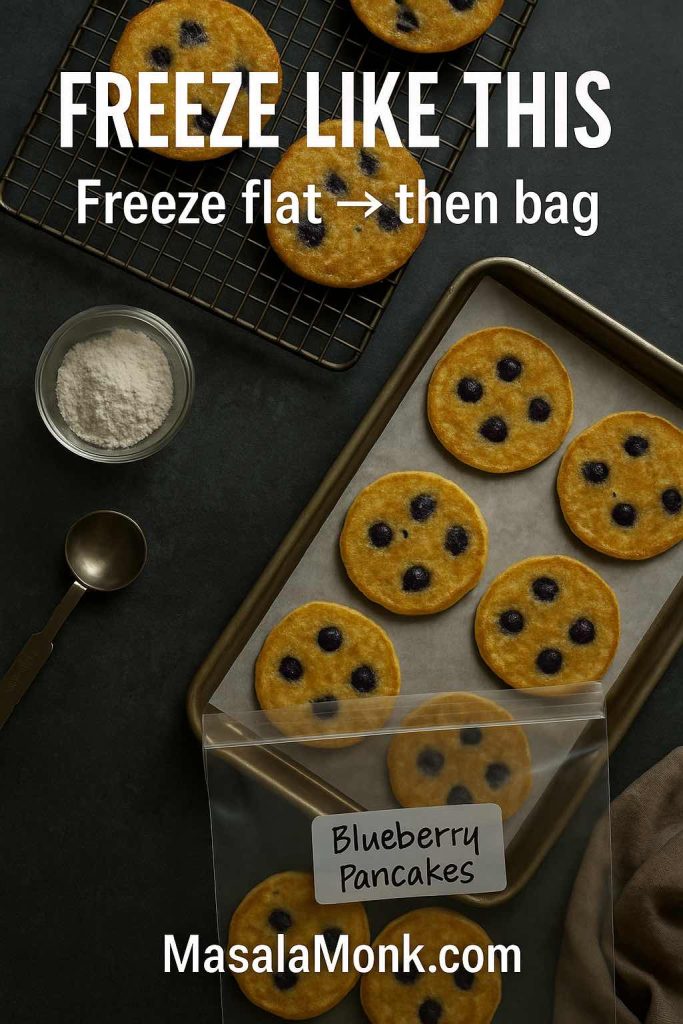
Make-ahead pancakes from oatmeal: storing and reheating
Oat pancakes are one of the best “cook once, eat twice” breakfasts. Instead of storing batter overnight (which tends to thicken and lose lift), it’s usually better to cook the whole batch and store the pancakes.
If you like meal-prep breakfasts, these pair nicely with pancakes and keep mornings easy:
Refrigerating
Let pancakes cool completely, then store in an airtight container. They keep well for a few days.
Freezing
Freeze pancakes in a single layer first, then move them to a freezer bag. This prevents sticking and makes it easier to grab only what you need.
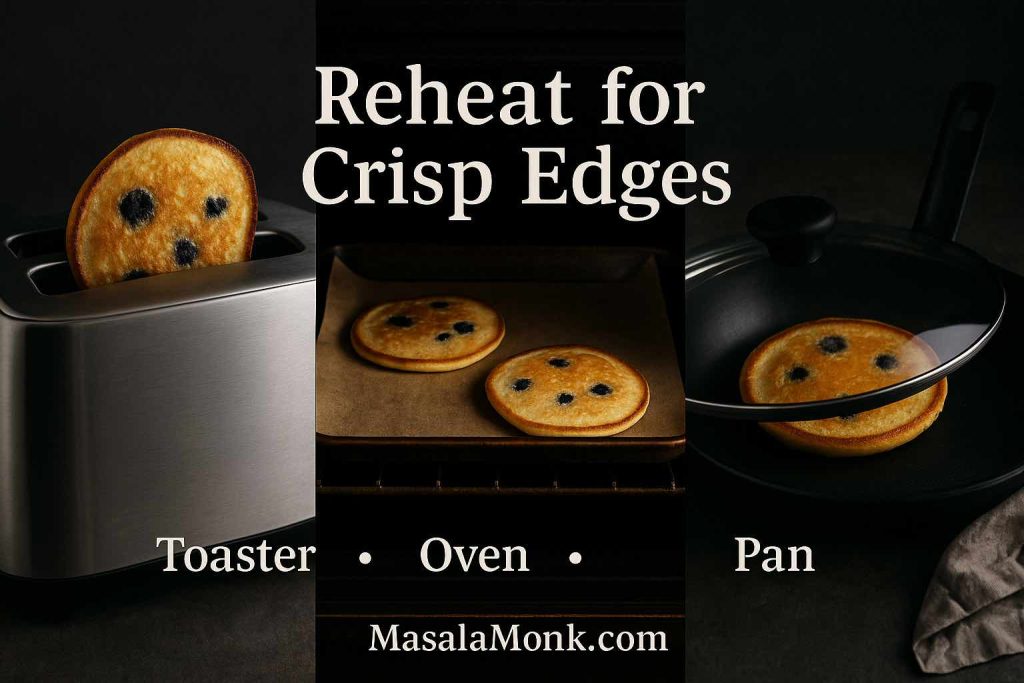
Reheating
- In the oven, pancakes warm evenly and keep a pleasant edge.
- In the toaster, thinner pancakes reheat beautifully.
- In the microwave, use short bursts so they stay tender rather than rubbery.
Also Read: Simple Bloody Mary Recipe – Classic, Bloody Maria, Virgin & More
A quick safety reminder about tasting raw batter
It’s tempting to taste batter, especially when it smells like banana and cinnamon. Still, uncooked flour and raw eggs can carry germs. If you want official guidance:
Bringing it all together
The real charm of oat pancakes is how easily they fit into real life. Keep the base version for days you want simple comfort. Lean into fruit the moment you’re craving something brighter—banana oatmeal pancakes and blueberry oat pancakes both deliver that naturally sweet, cozy feel. If eggs aren’t on the table, vegan oatmeal pancakes follow the same familiar rhythm and still turn out beautifully. For a little extra tenderness (and a protein lift that doesn’t taste like a supplement), cottage cheese oat pancakes feel like an effortless upgrade. And on rushed mornings, 3 ingredient oatmeal pancakes make it possible to get a warm stack on the plate with almost no planning.
After you’ve made the base a few times, the process becomes second nature: blend, whisk, rest, cook. From there, it’s just a matter of choosing the version that suits your mood—and that’s exactly what makes this recipe one you’ll actually come back to.
Also Read: How to Make Pineapple Chia Pudding: A Refreshing Low-Carb Breakfast Option
FAQs
1. What are oat pancakes, and how are they different from regular pancakes?
Oat pancakes are pancakes where the main “flour” comes from oats—either blended oats or oat flour—so the flavor is slightly nutty and the texture is often more tender and hearty than classic all-purpose-flour pancakes.
2. Can I really make pancakes from oatmeal, or do I need flour?
Yes—pancakes from oatmeal work well because blended oats behave like flour once they absorb liquid. In other words, you can skip wheat flour entirely and still get a proper pancake stack.
3. Which oats work best: rolled oats, quick oats, or instant oats?
Rolled oats are the most reliable for a fluffy result. Quick oats also work, although the batter thickens faster. Instant oats can work in a pinch, yet the texture tends to turn softer and more uniform.
4. How do I make an oat flour pancake recipe if I only have rolled oats?
Simply blend rolled oats until they look like fine flour, then use that as your oat flour. After that, treat it like an oat flour pancake recipe: mix gently and rest the batter so it hydrates.
5. Are oatmeal flour pancakes the same thing as oat flour pancakes?
Most of the time, yes. “Oatmeal flour” is often just another way people refer to oat flour (ground oats). The main difference is whether the grind is very fine (smoother) or slightly coarse (more rustic).
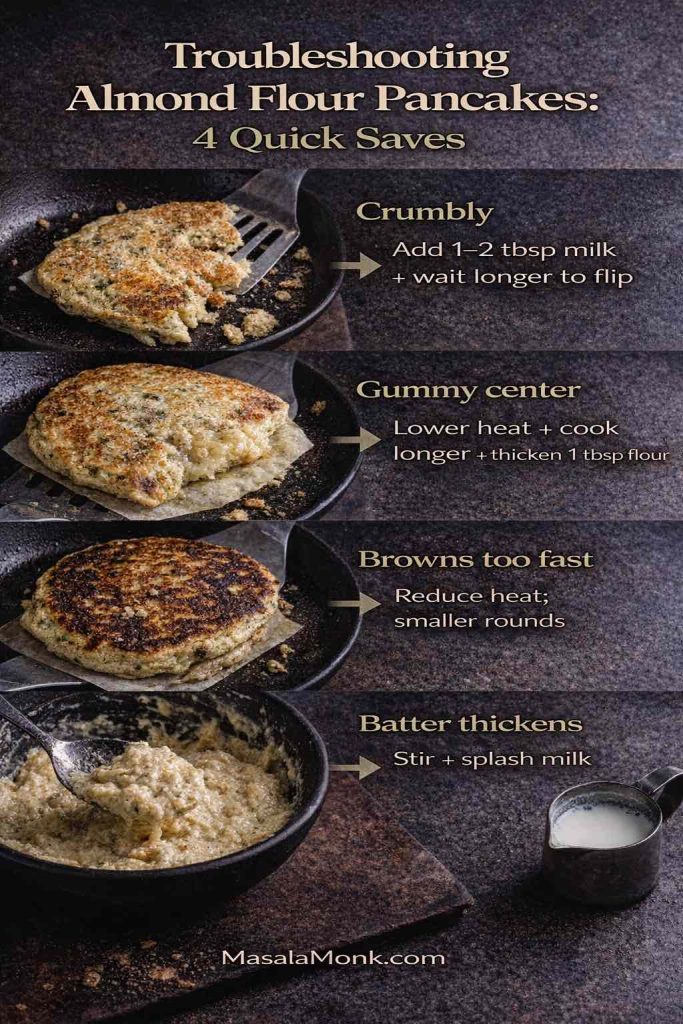
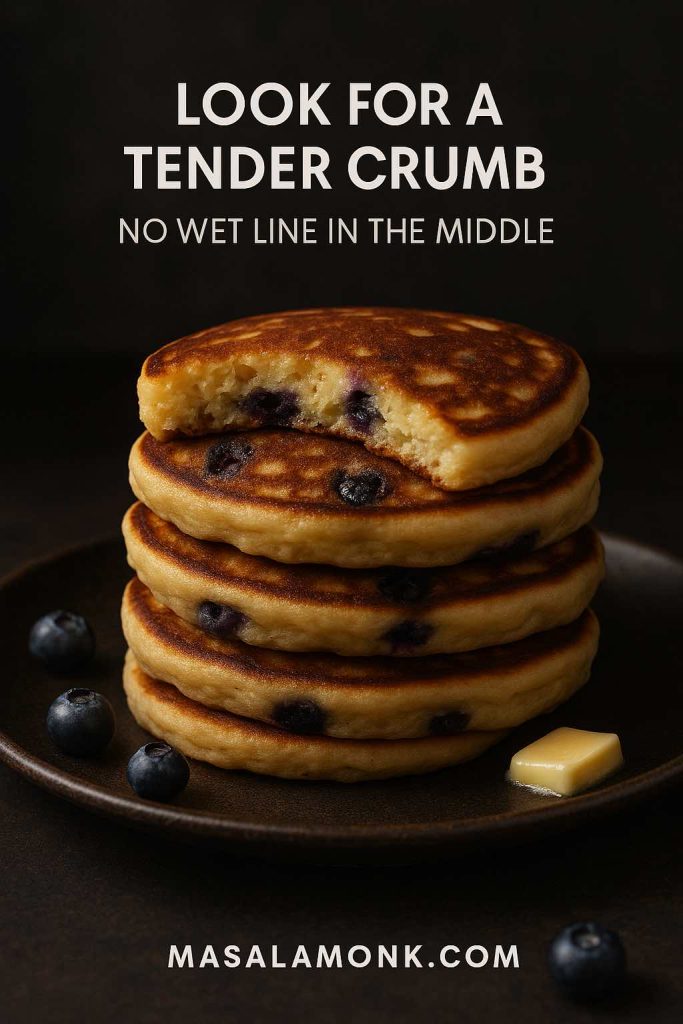
6. Why do my oat pancake recipes turn out gummy or dense?
Usually it’s one of three things: the batter was overmixed, the oats didn’t get time to hydrate, or the pan heat was too high (browning the outside before the center sets). A short rest and steady medium heat typically fix it.
7. Do I have to rest the batter for oat pancakes?
It’s not mandatory, but it’s a big upgrade. A 10–15 minute rest helps oats absorb liquid, which improves texture and makes pancakes hold together better—especially for pancakes from oatmeal.
8. How do I adjust the batter if it gets too thick?
Add milk one splash at a time and stir gently. Oat batters continue thickening as they sit, so a small adjustment often goes a long way.
9. Can I make banana oat pancakes without added sugar?
Absolutely. Ripe banana adds plenty of sweetness on its own. If you’re making banana oatmeal pancakes with a very ripe banana, you can often skip sweetener entirely and still get a satisfying flavor.
10. How do I make vegan oat pancakes that don’t fall apart?
Use a reliable binder like a flax “egg” (ground flax + water), then cook on medium or medium-low. Also, avoid flipping too early—vegan oatmeal pancakes firm up nicely once the first side is fully set.
11. Can I make oat pancakes no egg without going fully vegan?
Yes. Options include a flax egg, applesauce, or thick yogurt (if dairy is okay). Each changes texture slightly, so pick based on what you like: flax gives structure, applesauce adds softness, yogurt adds richness.
12. What’s the best approach for protein pancakes no powder?
Use ingredients that boost protein while improving texture: Greek yogurt, cottage cheese, or egg whites. Cottage cheese oat pancakes are especially popular because they stay tender and reheat well.
13. How do I make cottage cheese oatmeal pancake batter smooth?
Blend the cottage cheese with the wet ingredients first. That way, the curds disappear into the batter and you get a more uniform pancake crumb.
14. Are applesauce oatmeal pancakes good for kids (and picky eaters)?
Yes—applesauce makes pancakes naturally sweeter and softer, which many kids prefer. Plus, the apple flavor pairs well with cinnamon, so it tastes like a treat without needing much syrup.
15. How do I keep blueberry oat pancakes from turning purple?
Fold blueberries in gently and avoid over-stirring. If using frozen berries, it helps to add them to each pancake after you pour the batter onto the pan, rather than mixing them into the whole bowl.
16. Are no flour oat pancakes actually “no flour”?
They’re “no wheat flour.” Oats are still functioning as the flour ingredient, just in oat form. So oat pancakes no flour usually means the recipe uses blended oats or oat flour instead of all-purpose flour.
17. Do 3 ingredient oatmeal pancakes get fluffy like regular pancakes?
They can be softer and less fluffy because many versions skip baking powder. For more lift, add baking powder and a pinch of salt; the texture becomes much closer to classic pancakes while staying simple.
18. Are oat milk pancakes different from using regular milk?
Oat milk pancakes often taste slightly sweeter and rounder, and the batter can feel a bit creamier. If your oat milk is sweetened, reduce added sweetener so the pancakes don’t taste overly sweet.
19. Can I make oatmeal pancakes healthy without them tasting “diet”?
Yes—focus on texture and balance rather than stripping ingredients. Use fruit for sweetness, add yogurt or cottage cheese for satisfaction, and cook on steady heat for a fluffy bite that feels like real pancakes.
20. Can I meal-prep oat pancakes, and what’s the best way to store them?
Definitely. Cook the full batch, cool completely, then refrigerate for a few days or freeze for longer storage. Reheat gently (toaster or warm oven works well) so the pancakes stay tender instead of rubbery.