Posted on 7 Comments

How to Cook Perfect Rice Every Time (Recipe)

How to cook perfect rice — uncooked white rice pours from a measuring cup into a steaming black pot, with warm spices around; fluffy, not gummy.

Rice ought to be effortless. Nevertheless, a little too much water or a quick peek under the lid can turn a pot of promise into clumpy frustration. This guide shows how to cook perfect rice across methods and varieties—with crystal-clear steps, practical ratios, and why the small moves matter. You’ll learn a base stovetop technique, then branch into basmati, jasmine, sushi, and brown rice; after that, we’ll cover rice cookers and Instant Pots, storing and reheating safely, and turning leftovers into fast, satisfying meals. Along the way, you’ll find carefully chosen links for follow-up reading and technique deep dives woven naturally into the text.

The Baseline: How to Cook Perfect Rice on the Stovetop

If you only remember one method, make it this one. It delivers fluffy, separate grains without gimmicks, and it adapts to most long-grain white rices.

Daylight kitchen: water pours from a glass measuring cup into a pot of rinsed white rice; stovetop method—boil, cover, low 12 minutes, rest 10.
Perfect White Rice (Stovetop): Rinse well, bring to a boil, cover and cook on low for 12 minutes, then rest 10 before fluffing—reliable, fluffy results every time.

You’ll need: 1 cup long-grain white rice, 1½ cups water, a pinch of salt, a heavy pot with a tight lid, and a fork.

  1. Rinse thoroughly. Place the rice in a fine-mesh strainer and rinse under cold water, swishing with your hand until the water runs mostly clear. This removes excess surface starch so grains don’t glue together later.
  2. Measure precisely. For long-grain white rice on the stovetop, use 1½ cups water per 1 cup rice. Add a pinch of salt if you like.
  3. Boil, then cover. Bring the water to a rolling boil, stir in the rice once to break up any clumps, clamp on the lid, and immediately reduce the heat to low.
  4. Simmer gently for 12 minutes. No peeking. Lifting the lid dumps steam and derails even cooking.
  5. Rest for 10 minutes, still covered. The residual heat finishes the centers without overcooking the outer layers.
  6. Fluff and vent. Off the heat, uncover and fluff with a fork. If you want extra-dry, restaurant-style grains, briefly vent another 2–3 minutes.

As an optional flourish, place a clean kitchen towel between the pot and the lid during the rest; it absorbs condensation and prevents drip-back, yielding lighter, drier rice. For a quick visual explanation of this trick, see the concise breakdown of the towel-under-lid rest.

Why this works

Rinsing reduces sticky surface starch; an immediate drop to low heat stabilizes simmering; the undisturbed rest lets steam equalize moisture from the outside in. Moreover, the ratios here are calibrated for typical long-grain white rice; once you navigate specialty varieties, you’ll tweak the numbers a bit, but the underlying logic stays consistent.

Also Read: Homemade Hot Chocolate with Cocoa Powder Recipe

At-a-Glance Cheatsheet for Cooking Perfect Rice

Standard Water Ratios (by volume) for Making Rice by various Methods

Rice typeRinse?Soak?Stovetop water : riceRice cookerInstant Pot (HP)Microwave rice cooker
Long-grain whiteYesNo1.5 : 11.1–1.2 : 1 (or to line)1 : 1, 3–4 min + 10 min NR1.5 : 1, 10–12 min, 5 min rest
JasmineYes10 min (optional)1.25–1.33 : 1~1.1–1.2 : 11 : 1, 3 min + 10 min NR1.5 : 1, 10–12 min
BasmatiRinse very well20–30 min1.5 : 11.2 : 11 : 1, 6 min + 10 min NR1.5 : 1, 12–14 min
Short-grain / SushiRinse until clear20–30 min1.1–1.2 : 1~1.1 : 11 : 1, 5 min + 10 min NR1.25–1.33 : 1, 10–12 min
Brown (long-grain)Rinse20 min (optional)2–2.25 : 11.4–1.5 : 11.25–1.33 : 1, 22–25 min + 10 min NR2 : 1, 20–22 min
Cheat Sheet for How to Cook different types of Rice at Home using various methods & devices.

NR = Natural Release (don’t vent; let pressure drop for the stated time).

Also Read: Peanut Butter Cookies (Classic Recipe & 3 Variations)

How to Cook Perfect Rice for Basmati

Basmati rewards gentle handling and a short soak. Its hallmark is long, elegant grains that stay separate, so our moves aim to protect structure rather than chase stickiness.

Black enamel pot with steam and soaked basmati; soak 20–30 min, boil → cover → low 10–12, rest 10; 1:1.5 water.
Perfect Basmati Rice: Rinse well, soak 20–30, drain thoroughly, boil → cover → low 10–12, rest 10. Ratio 1 cup : 1½ cups water.
  1. Rinse very well until the water is almost clear—this usually takes 2–3 changes.
  2. Soak 20–30 minutes. Hydrating the core ensures the grains elongate without bursting. Drain thoroughly.
  3. Use 1½ cups water per cup of rice on the stovetop. Bring to a boil, cover, reduce to low, and simmer 10–12 minutes.
  4. Rest 10 minutes covered, then fluff. For even airier grains, spread the rice on a tray for 2–3 minutes to vent.

Beyond texture, many cooks pick basmati for its gentler impact on blood sugar compared with some other white rices. If that angle matters to you, explore a compact primer on basmati rice GI and nutrition and a broader look at GI vs GL across rice types. Because context helps, you might also skim a practical guide to reducing the glycemic impact of rice using cook-cool-reheat strategies you can fold into weekly meal prep.

How to Cook Perfect Jasmine Rice

Jasmine sits between fluffy and plush. It wants slightly less water than standard long-grain; too much and it edges toward soft and clingy.

Black enamel pot with steaming jasmine rice; no soak needed; 1¼–1⅓ water; boil, cover, low ~12, rest 10.
Jasmine Rice (Stovetop): Slightly less water than standard long-grain keeps jasmine plush—not soggy.
  • Rinse until the water mostly clears; an optional 10-minute soak can soften the core.
  • Measure 1¼–1⅓ cups water per cup of rice, depending on how dry or tender you prefer it.
  • Cook like the baseline: boil → cover → low simmer ~12 minutes10-minute rest.

For a ratio-first discussion that aligns with testing across brands, skim this practical stovetop jasmine/white rice method. It mirrors the idea that jasmine benefits from slightly less water than old “2:1” rules of thumb.

Also Read: Green Tea Shot with Jameson | Recipe & 10 Variations

How to Cook Perfect Rice for Sushi (Short-Grain)

Sushi rice is meant to cling. Nevertheless, the goal is glossy and supple—not mushy—so gentle handling and proper seasoning matter.

Hangiri filled with glossy sushi rice; rinse and soak 20–30 minutes, boil then cover and cook on low with ~1.1–1.2:1 water; rest 10 minutes and season warm.
Perfect Sushi Rice: Rinse, soak 20–30 min, cook with ~1.1–1.2 : 1 water, rest 10, then season while warm for shine and gentle cling.
  1. Rinse until the water is nearly clear to remove powdery starch.
  2. Soak 20–30 minutes; drain. This gives the short grains an even, tender finish.
  3. Use ~1.1–1.2 : 1 water to rice on the stovetop or your cooker’s dedicated “sushi” line.
  4. Cook, rest 10 minutes, then season while warm with sushi vinegar (rice vinegar plus sugar and salt).
  5. Fold, don’t mash. Fan as you cut and turn the rice to keep grains intact and shiny.

For well-illustrated steps and classic proportions, follow a reliable reference like Just One Cookbook’s sushi rice method. And because short-grain techniques differ from long-grain instincts, returning to photos mid-process can be surprisingly helpful.

Also Read: Béchamel Sauce for Lasagna: Classic, Vegan & Ricotta Sauce Recipe

How to Cook Perfect Brown Rice (Tender Without the Chalk)

Brown rice asks for more water and time because the bran and germ slow hydration. Still, done right, it’s deeply satisfying—nutty, chewy, and never chalky.

Cast-iron pot of cooked brown rice; stovetop absorption method—rinse, 2–2¼ cups water per cup rice, boil then cover and low simmer 35–45 minutes, rest 10.
Brown Rice (Stovetop): Rinse well, use 2–2¼ : 1 water, boil → cover → low simmer 35–45, then rest 10 for nutty, tender grains.
  • Stovetop: Use 2–2¼ : 1 water to rice. Bring to a boil, cover, and simmer 35–45 minutes until the water is absorbed; rest 10 minutes before fluffing.
  • Instant Pot: Measure 1.25–1.33 : 1 water to rice. Cook 22–25 minutes on high pressure, then let it naturally release for 10 minutes before venting.

If nutrition is part of your decision tree, it’s worth reading the FDA’s consumer resources on arsenic in rice and rice products and the agency’s technical risk assessment overview. Among practical takeaways, an excess-water method (boil in plenty of water, then drain) can reduce inorganic arsenic—a trade-off to consider if that aligns with your health priorities. Meanwhile, if you’re comparing grains for weekly menus, this side-by-side look at quinoa vs rice is a handy complement.

Also Read: Crock Pot Lasagna Soup (Easy Base + Cozy Slow-Cooker Recipes)

Rice Cookers Demystified

A good rice cooker is like cruise control: set it and focus on something else. Still, understanding its logic helps you get the most out of it.

  • Trust the lines. Most cookers calibrate for specific varieties; fill to the marked lines instead of relying on generic kitchen ratios. If you want brand-specific guidance, browse Zojirushi’s concise white rice instructions or the broader manuals page.
  • Rinse and drain well. Excess water clinging to the grains can skew the cooker’s assumptions.
  • Let it rest. When the switch flips to “warm,” give the rice 10 minutes before opening; this small pause improves texture noticeably.
  • Fluff and vent briefly. Loosen the rice, then leave the lid ajar for a minute or two for drier, separate grains—especially useful when the next stop is a stir-fry.

Even in the cooker, basmati appreciates a 20–30-minute soak and jasmine benefits from slightly less water than standard long-grain. Sushi rice, on the other hand, thrives when you follow your model’s dedicated short-grain settings.

Also Read: Cottage Cheese Lasagna Recipe | Chicken, Spinach, & Ricotta

Instant Pot and Pressure Cooker Shortcuts

Pressure cookers shine when you want predictability. Because they operate in a sealed environment, small ratio changes matter; nevertheless, the results are consistent once dialed in.

  • White rice (long-grain or jasmine): 1:1 water to rice, 3–4 minutes on high pressure, 10-minute natural release.
  • Basmati: 1:1, 6 minutes on high, 10-minute natural release.
  • Short-grain for sushi: 1:1, 5 minutes on high, 10-minute natural release.
  • Brown: 1.25–1.33:1, 22–25 minutes on high, 10-minute natural release.

For model-specific variations, it’s wise to refer to the manufacturer’s documentation; start at the Instant Pot manuals hub and, if you want a baseline reference recipe, browse an official white rice example by Instant Pot. Because factors like altitude and personal texture preference play a role, adjust subsequent batches a tablespoon or two of water at a time rather than reinventing ratios from scratch.

Also Read: How to Make Churros (Authentic + Easy Recipe)

Texture Control: From Feather-Light to Just-Sticky-Enough

Understanding what affects texture allows you to steer the outcome. Consider these levers:

  • Rinse level. More rinsing = more separation. Minimal rinsing = more cling. Consequently, long-grain white benefits from thorough rinsing; sushi demands cleaning but then recruits seasoning to achieve stickiness.
  • Soaking. Basmati and sushi gain even doneness from soaking; jasmine may soften slightly with a short soak but doesn’t require it.
  • Agitation. Stir only once after adding rice to boiling water; further agitation releases starch, which binds grains.
  • Lid discipline. Steam is your friend; lifting the lid mid-cook vents heat, lengthens cooking, and risks uneven texture.
  • Rest time. A 10-minute rest evens moisture and turns “good” rice into “great” rice. Additionally, a towel-under-lid rest (during the off-heat phase) curbs condensation and keeps the top layer from turning soggy—see the towel trick for a quick demo.

Also Read: How to Cook Bacon in the Oven (Crispy, No-Mess, Crowd-Ready Recipe)

Scaling Up Without Guesswork

Perhaps you’re cooking for a crowd. Fortunately, the math scales cleanly as long as your pot is wide enough and the heat stays gentle.

  • 1 cup rice → 1½ cups water (stovetop long-grain white)
  • 3 cups rice → 4½ cups water
  • 4 cups rice → 6 cups water

For jasmine, aim for 1¼–1⅓ : 1; for basmati, 1½ : 1 with a soak; for brown, 2–2¼ : 1 on the stove or 1.25–1.33 : 1 under pressure. Rather than leap to big changes when scaling, adjust by 2–3 tablespoons of water per cup of rice after your first larger batch to match your stove, pot, and preference.

Also Read: French Toast Sticks (Air Fryer + Oven Recipe) — Crispy Outside, Custardy Inside

Storing, Cooling, and Reheating Safely

Rice is easy to make ahead, but it deserves the same diligence you’d give to chicken or soup. Cool it quickly, refrigerate promptly, and reheat thoroughly.

  • Cool fast. Spread hot rice on a sheet pan to release steam; once warmth dissipates, pack into shallow containers.
  • Refrigerate within 1–2 hours. The quicker you chill, the safer your leftovers.
  • Reheat to 165°F/74°C. In the microwave, sprinkle a tablespoon of water over each cup of rice, cover, and heat until piping hot; on the stovetop, add a spoonful of water and steam briefly. For authoritative guidance, bookmark the USDA’s page on leftovers and safe reheating.

If you’re exploring broader nutrition or contaminant questions around rice varieties and cooking methods, take a moment with the FDA’s resources on arsenic in rice and products. They’re balanced, practical, and help you decide when to use absorption versus excess-water techniques.

Also Read: 10 Best Chicken Sandwich Recipes (BBQ, Parm, Buffalo & More)

How to Cook Perfect Rice on Busy Weeknights

Life happens. Even so, you can still put excellent rice on the table without hovering over a pot.

  • Use the Instant Pot for white rice when you’re juggling multiple dishes. Measure 1:1, set 3 minutes on high, and walk away; dinner’s starch will be ready right as you need it.
  • Batch-cook basmati on Sunday. Soak, cook, fluff, cool quickly, and refrigerate. Basmati reheats beautifully and still eats light.
  • Lean on a rice cooker for hands-off consistency. Follow the model’s lines, then give it a 10-minute warm rest before fluffing. If you’re new to your machine, the brand’s manuals page is a shortcut to specifics.

Meanwhile, finishers make weeknight rice feel special: a pat of butter or ghee, a thread of olive oil, or a splash of toasted sesame oil right before serving. Even a few slices of ginger bloomed in oil at the start can transform a plain bowl.

Also Read: 10 Best Espresso Martini Recipe Variations (Bar-Tested)

Flavor Boosters and Simple Add-Ins

Before adding water, briefly warm 1 teaspoon oil or ghee in the pot and bloom aromatics—sliced garlic, crushed cardamom, or a bay leaf. During the rest, fold in chopped herbs (cilantro, scallions, or dill) or a handful of frozen peas for color. As you explore, keep a few ideas in your back pocket:

  • For an almost effortless rice bowl, toss hot grains with a splash of balsamic and olive oil, then crown with roasted vegetables. It’s a fast route to a satisfying dinner when time is scarce.
  • When a craving for dessert strikes, pivot to a silky Thai-style treat using coconut milk and ripe fruit—this approachable walkthrough on mango + coconut milk turns pantry items into a crowd-pleaser: creamy mango-coconut how-to. If you want a festival-worthy finish with sticky rice, try the kitchen’s fully detailed authentic mango sticky rice recipe.

Also Read: Macaroni & Cheese Recipe: Creamy Stovetop, Baked & Southern

Leftovers You’ll Look Forward To

Great rice rarely goes to waste, but planning for leftovers turns tomorrow’s meal into an easy win.

Same-Day Fried Rice (When You Just Cooked the Rice)

When fried rice is on tonight’s menu, lower the water for your white rice by 2 tablespoons per cup, then spread the cooked rice on a tray and chill it for 15–20 minutes. This brief drying step helps the grains sear rather than steam in the pan. For a crisp, minimal baseline, use a straightforward, wok-friendly technique like this classic egg fried rice walkthrough. If you prefer a vegetable-forward version loaded with texture, Kenji’s method-first approach shows how to balance heat, oil, and moisture for vivid results: easy vegetable fried rice.

Also Read: Vegan French Toast: 6 Easy Recipes (Pan, Air Fryer, GF & High-Protein)

Day-Old Transformations

Day-old rice is ideal for fried rice, obviously, yet it also shines in croquettes and stuffed vegetables. For a snack that feels special, use those leftovers to make crisp, melty arancini; the step-by-step guide to shaping, breading, and frying is here: turn leftover rice into arancini. Serve with a quick marinara or a garlicky yogurt dip and you’ve got a win either way.

How to Cook Perfect Rice for Meals that Fit Your Goals

If you’re mindful of post-meal energy or simply tracking macros, small technique choices can help. Cooling and reheating can modestly increase resistant starch, while your choice of variety matters too. For a practical, non-dogmatic overview that connects kitchen moves to outcomes, start with this field guide to reducing the glycemic impact of rice. For a zoomed-out look across varieties and contexts, the side-by-side on GI vs GL for common rices is useful; pair it with the FDA resources on arsenic in foods if you’re choosing methods with both texture and safety in mind.

Also Read: Homemade Electrolytes for Fasting: 7 Precise Recipes

Frequently Used Ratios and Timings, Explained in Plain Language

Because recipes scatter numbers everywhere, let’s unify the essentials so you can adjust confidently.

  • Long-grain white (stovetop): 1.5 : 1 water → 12-minute simmer, 10-minute rest. This yields about 3 cups cooked per cup raw.
  • Jasmine (stovetop): 1¼–1⅓ : 1 water → 12 minutes, 10-minute rest; tenderness sits between fluffy and plush. A thorough overview appears in this tested stovetop ratio piece.
  • Basmati (stovetop): 1.5 : 1 water after a 20–30-minute soak10–12 minutes, 10-minute rest; texture is light and separate. For health context, see the basmati GI briefing.
  • Sushi/short-grain: ~1.1–1.2 : 1 water after a 20–30-minute soakcook + 10-minute rest, then season gently; technique photos here: sushi rice guide.
  • Brown (Instant Pot): 1.25–1.33 : 1 water → 22–25 minutes high pressure, 10-minute natural release; for stovetop, plan 2–2¼ : 1 water and 35–45 minutes simmer time.
  • Rice cooker: Follow the unit’s water lines for your variety; it’s the design assumption. If you’re curious how manufacturers expect you to use those markings, peek at Zojirushi’s white rice instructions and their manuals page.

Also Read: Pumpkin Spice, Your Way: Master Blend, Variations & Real-World Recipes

Troubleshooting: Fix It Today, Improve It Tomorrow

Even experienced cooks occasionally miss by a little. Here’s how to correct in the moment and calibrate for next time.

  • Too wet or soft? You likely used too much water or lifted the lid. Spread the rice on a tray and let it vent for a few minutes; next time, reduce the water by 2–3 tablespoons per cup and resist peeking.
  • Undercooked in the center? Sprinkle over 2–4 tablespoons of hot water, cover, and cook on the lowest heat for 3–5 minutes; extend the rest before fluffing.
  • Starchy clumps? Rinse more thoroughly and avoid stirring after the initial boil. If you want extra separation, adopt the towel-under-lid rest technique—again, the quick explainer for that move is here: how the towel rest helps.
  • Scorched base? The heat was too high or the pot too thin. Use a heavier pan, lower the flame, and keep ratios consistent.
  • Basmati breaking? The soak ran too long or you stirred during the simmer. Keep the pre-cook soak to 20–30 minutes, then handle gently.

Because kitchens vary—burners, pots, even the mineral content of your water—log your favorite ratio the first time you nail it. From then on, you’re just repeating success.

Also Read: Homemade & DIY Coffee Creamer: 16 Flavor Recipes (French Vanilla, Pumpkin Spice & More)

How to Cook Perfect Rice, Then Make It Sing

Mastering the basics is liberating. Once you can produce perfect rice without thinking, it becomes a canvas for flavor.

  • Ghee and cumin (jeera rice). Warm a spoon of ghee, bloom cumin seeds until fragrant, then add cooked rice to coat.
  • Ginger-garlic steam. Start the pot with a few slices of ginger and a crushed clove of garlic before adding water; the aroma perfumes the whole batch.
  • Pandan or bay leaf. Add either to the pot and retrieve before fluffing for a subtle, sophisticated note.
  • Coconut finish. Fold a splash of coconut milk into hot rice for a plush side that loves grilled fish and veggies.
  • Curd rice twist. For cooling comfort, stir yogurt, mustard seeds, and a little tempering into leftover rice; if you want a vivid variation, the beet-brightened take is here: curd rice with beetroot.

Meanwhile, when you want a sweet ending, keep it simple: ripe mango, creamy coconut milk, and warm rice are an unbeatable trio; the pantry-friendly method is spelled out in this mango + coconut milk guide, and for a celebration-level classic, make the authentic mango sticky rice.

Also Read: Classic vs. Authentic Alfredo: 5 Essential Recipes

Putting It All Together

At this point, how to cook perfect rice should feel far less mysterious. Start with the baseline stovetop method—rinse, 1.5 : 1 water, 12-minute simmer, 10-minute rest—and you’ll win most nights. For basmati, soak briefly and keep the water at 1.5 : 1. If its jasmine, dial water down to 1¼–1⅓ : 1. For sushi, rinse thoroughly, soak, and season gently after cooking. And when cooking brown, commit to more time or use pressure for convenience. When using machines, trust rice cooker lines and lean on manufacturer documents like Zojirushi’s manuals or the Instant Pot manuals hub. For nuanced texture, adopt the towel-under-lid rest demonstrated in the towel trick explainer.

Finally, keep your leftovers safe and delicious: cool quickly, refrigerate promptly, and reheat to 165°F/74°C, following the USDA’s guidance on leftovers and safe reheating. Then have some fun—turn a bowl into egg fried rice with this reliable wok-side walkthrough, go veg-heavy with Kenji’s stir-fry method, or roll day-old grains into golden arancini.

When a staple tastes this good and works this reliably, dinner stops being a question mark. It becomes a rhythm: measure, simmer, rest, fluff—and enjoy.

Also Read: Lemon Drop Martini Recipe (Classic, 3-Ingredient, & More)

FAQs

1) How to cook perfect rice on the stove without it getting mushy?

Rinse until the water runs mostly clear, then use a precise water-to-rice ratio (typically 1.5:1 for long-grain white). Bring to a boil, cover, reduce to low, simmer about 12 minutes, and let it rest covered for 10 minutes before fluffing. Consequently, grains stay separate and tender.

2) What is the best water-to-rice ratio for white rice?

Generally, long-grain white rice thrives at about 1.5 cups water per 1 cup rice on the stovetop. For slightly drier rice, reduce the water by 2–3 tablespoons per cup; for softer results, add the same amount. Thus, you can fine-tune texture to taste.

3) How long does it take to cook rice?

For white or jasmine rice on the stove, expect roughly 12 minutes of gentle simmering plus a 10-minute rest. Brown rice usually needs 35–45 minutes on the stove. Meanwhile, pressure cooking shortens the timeline considerably.

4) How to cook perfect rice in a rice cooker?

Rinse, drain well, and fill water to your cooker’s variety line (or use the same ratios you’d use on the stove). Start the cycle, then allow a 10-minute warm rest before you open. Afterwards, fluff and briefly vent for drier, separate grains.

5) How to cook perfect rice in an Instant Pot or pressure cooker?

Use a 1:1 ratio for most white rices (3–4 minutes high pressure, 10 minutes natural release). For basmati, still 1:1 but about 6 minutes high; for brown, 1.25–1.33:1 and 22–25 minutes high. Importantly, let pressure drop naturally before venting for the best texture.

6) How much water for jasmine rice?

Jasmine prefers slightly less water than standard long-grain: about 1¼–1⅓ cups water per cup of rice on the stovetop. Moreover, an optional 10-minute soak softens the core without making it soggy.

7) How to make basmati rice fluffy and long?

Rinse thoroughly, soak 20–30 minutes, drain well, then cook at roughly 1.5:1 water to rice. Keep heat low and the lid tight; rest 10 minutes. Consequently, grains elongate beautifully without breaking.

8) Do I need to soak rice?

Not always. Basmati and sushi benefit from soaking (20–30 minutes) for even doneness. Conversely, most long-grain white and jasmine work fine without soaking, though a brief soak can soften edges slightly.

9) How to cook perfect rice for sushi (short-grain)?

Rinse until nearly clear, soak 20–30 minutes, drain, then use about 1.1–1.2:1 water. Cook gently, rest 10 minutes, and season warm rice with a vinegar mixture while folding—never mashing. Hence, you get glossy, clinging grains.

10) How to keep rice from sticking together?

Rinse thoroughly to remove surface starch, avoid stirring once it returns to a simmer, and let it rest before fluffing. Additionally, use a heavy pot and steady low heat so the bottom doesn’t scorch and glue the batch.

11) How to make fluffy rice every time?

Measure accurately, keep the simmer gentle, and give that 10-minute covered rest. Likewise, a quick post-cook vent (lid off 2–3 minutes) drives off excess steam for lighter, more separate grains.

12) How much water for 1 cup, 3 cups, or 4 cups of rice?

For long-grain white on the stove, start at 1.5:1. That’s 1.5 cups water for 1 cup rice; 4.5 cups water for 3 cups rice; 6 cups water for 4 cups rice. Notably, different varieties may require small adjustments.

13) How to cook perfect brown rice that isn’t chalky?

Use 2–2¼ cups water per cup on the stove (35–45 minutes simmering), or 1.25–1.33:1 in a pressure cooker (22–25 minutes high). Afterward, rest 10 minutes before fluffing to let moisture even out.

14) Can I make rice in the microwave?

Yes. In a microwave-safe bowl or microwave rice cooker, use about 1.5:1 for white rice. Cook on high 10–12 minutes for 1 cup (your microwave may vary), rest 5 minutes covered, then fluff. Remarkably convenient for small batches.

15) How to cook perfect rice for fried rice the same day?

Cook white rice with 2 tablespoons less water per cup, spread it on a tray, and chill 15–20 minutes to dry. Thereafter, stir-fry over high heat with minimal moisture so the grains sear rather than steam.

16) Why is my rice gummy or clumpy?

Usually, either insufficient rinsing, too much water, or stirring after boiling. Reduce water slightly, rinse more, and avoid agitation during the simmer. Ultimately, a calm pot yields cleaner texture.

17) Why is the bottom of my rice pot scorched?

Heat was too high, the pot too thin, or water too low. Next time, use a heavier pot, lower the flame, and follow proven ratios. Furthermore, never lift the lid during the cook, which can trigger uneven heating.

18) How to reheat rice so it tastes fresh?

Add a spoonful of water, cover, and steam until piping hot (microwave or stovetop). Break up clumps gently with a fork halfway through. Consequently, grains regain moisture without turning soggy.

19) How to boil rice vs. steam/absorption—what’s the difference?

Boiling in excess water and draining offers forgiving doneness but slightly less aroma retention; absorption (our standard method) locks flavor in the pot and produces fluffier texture. Nevertheless, both work—choose based on preference and variety.

20) How to cook perfect rice if my tap water is hard or soft?

Hard water can firm grains; soft water can push them toward mushy. Therefore, if your batches are consistently too firm, add a tablespoon or two of extra water per cup; if too soft, subtract the same amount.

21) How to make plain rice taste great without heavy sauces?

Bloom a teaspoon of ghee or oil with aromatics (garlic, ginger, cumin, bay, or pandan) before adding rice and water. Then, finish with butter or toasted sesame oil and a pinch of salt. Instantly more character, minimal effort.

22) Is “balsamic rice” the same as basmati rice?

Often it’s a typo or mishearing of “basmati.” However, if you literally want balsamic-glazed rice, toss hot cooked white rice with a little balsamic and olive oil, then season. Simple, bright, and surprisingly good.

23) How to cook perfect rice when doubling or tripling a recipe?

Scale water linearly (keep the same ratio) and use a wider pot so steam circulates evenly. Keep the simmer gentle and extend the rest by a couple of minutes. Consequently, larger batches finish evenly without soggy centers.

24) Should I salt the water for rice?

Yes—seasoning the water yields rice that tastes good on its own. Start with about ½ teaspoon fine salt per cup of raw rice. Alternatively, swap some water for light broth if you prefer layered flavor.

25) How to store cooked rice safely?

Cool quickly in shallow containers, refrigerate promptly, and eat within a few days. Reheat until steaming hot. As a result, you keep texture appealing while maintaining good food safety habits.

26) How to cook perfect rice when I want it extra dry?

After the 10-minute rest, fluff and leave the lid off for 2–3 minutes to vent steam. Alternatively, reduce water by 1–2 tablespoons per cup of rice next time. Subtle tweaks deliver a distinctly lighter bite.

27) What’s the difference between jasmine and basmati in cooking?

Jasmine leans softer and uses a touch less water; basmati prefers a soak and keeps a firmer, longer grain with a standard 1.5:1 ratio. Consequently, match your technique to the variety for best results.

28) How much rice per person should I cook?

As a side, plan ¼–⅓ cup raw rice per person (about ¾–1 cup cooked). For rice-centric meals or big appetites, move toward ½ cup raw per person. Naturally, leftovers are easy to repurpose.

29) How to cook perfect rice with oil or butter—before or after?

Either works. A teaspoon of fat before cooking blooms aromatics and improves mouthfeel; a small knob after cooking adds gloss and flavor. Nevertheless, keep amounts modest so grains don’t turn heavy.

30) Can I skip rinsing?

You can, but expect more stickiness, especially with long-grain white. For fluffy, non-sticky results, rinsing pays off. Even so, for sushi, you’ll still rinse—then you’ll deliberately add seasoning to achieve cling by design.

Posted on 9 Comments

Homemade Hot Chocolate with Cocoa Powder Recipe

Hot chocolate with cocoa powder being poured from a saucepan into a rustic mug, with whisk, cocoa and cinnamon on a dark table.

Sometimes you crave a mug that’s pure comfort—nothing fancy, nothing fussy—just deep chocolate flavor, gentle sweetness, and the kind of steam that fogs the window while you stir. This hot chocolate with cocoa powder takes you there in minutes. It’s pantry-friendly, it scales for a crowd, and it’s endlessly adaptable for darker, milkier, lighter, or dairy-free moods. Along the way, you’ll see exactly how to dial in the texture, choose between natural and Dutch-process cocoa, and even shake up a cold chocolate milk for warmer days—without losing the spirit of a classic stovetop cup.

Before we heat anything, here’s the single biggest secret to café-smooth results: start with a paste. Cocoa powder (especially unsweetened) doesn’t want to dissolve right away. Whisking it with a splash of milk and sugar first means every sip turns out silky, never gritty.

Also Read: Peanut Butter Cookies (Classic Recipe & 3 Variations)


Ingredients for the best hot chocolate with cocoa powder (2 mugs)

  • 2 tbsp unsweetened cocoa powder (natural or Dutch-process)
  • 2 tbsp sugar (or 1–2 tbsp maple or honey, to taste)
  • Pinch of fine salt
  • 1 cup (240 ml) milk of choice, plus ½ cup (120 ml) water
  • ½ tsp vanilla extract (optional, but lovely)

Want a quick refresher on cocoa styles and why one might taste smoother or darker than the other? King Arthur’s plain-English guide to Dutch-process vs natural cocoa is a great starting point. For an overview of other cocoa types in baking and drinks, their types of cocoa, explained expands the nuance even further.


Recipe: classic stovetop hot chocolate with cocoa powder

  1. Make the paste. Off the heat, whisk the cocoa, sugar, and salt with 2 tablespoons milk until the mixture is glossy and lump-free. This takes 15–30 seconds and makes all the difference.
  2. Heat gently. Whisk in the rest of the milk and the water. Set the pan over medium heat and warm until steaming and hot—but not at a rough boil. Gentle heat keeps the mouthfeel creamy and prevents “cooked” flavors.
  3. Finish with fragrance. Take the pan off the heat and stir in the vanilla. Froth briefly with a whisk or handheld frother for that café-style lightness. Pour into warm mugs.
Recipe card for hot chocolate with cocoa powder: milk pouring into a copper saucepan with a whisk and cinnamon; 8-minute stovetop steps shown on image.
How to make Hot chocolate with cocoa powder—per mug: 1 tbsp cocoa, 1 tbsp sugar, 3/4–1 cup milk or water, pinch of salt. Whisk a paste, heat to steaming (don’t boil), stir in 1/2 tsp vanilla. MasalaMonk.com

While that first sip is still hugging your hands, you might be wondering about cacao versus cocoa. They’re related, of course, yet not identical in processing or flavor. For a practical, balanced read on how cacao differs from cocoa (and why cacao can taste fruitier while cocoa blends more smoothly), see this explainer on MasalaMonk and the concise overview from Healthline on cacao vs cocoa.


Texture, temperature, and the power of a whisk

Even excellent cocoa powder needs a little help to bloom. The paste stage hydrates the particles so they disperse evenly when you add more liquid. Beyond that, moderate heat (think “steaming” rather than turbulent simmer) coaxes out chocolate aromas without pushing milk proteins too far. If you’ve ever had a cup that felt thin, chalky, or strangely “cooked,” it likely skipped one or both steps.

For extra lift, whisk in quick, tight circles right after you add vanilla. Just 10–15 seconds can transform the surface from flat to glossy with a delicate foam. If you own a small frother, this is its moment to shine. Otherwise, a sturdy balloon whisk is more than enough.

Also Read: Green Tea Shot with Jameson | Recipe & 10 Variations


Sweetness, salt, and balance

Sugar sweetens, yes, but it also rounds the cocoa’s bitter edges so the flavor reads chocolaty rather than merely “cocoa-y.” Start with the 2 tablespoons in the base recipe and adjust a teaspoon at a time next time you make it. Maple and honey add their own accents—maple gives a caramelly finish; honey feels floral—so you can tune the personality of your mug without changing the core ratio.

Don’t skip the pinch of salt. It’s not about making a “salty” drink; it’s about focus. That tiny amount tightens the flavor so the chocolate tastes bolder at the same sweetness.

Also Read: Béchamel Sauce for Lasagna: Classic, Vegan & Ricotta Sauce Recipe


Milk or water? Finding your comfort zone

A lot of classic hot cocoa recipes use a mix of milk and water. There’s a reason. Milk gives body and richness; water lightens the profile and lets the chocolate notes pop. This base splits the difference—1 cup milk plus ½ cup water per two mugs—so you get a creamy backbone without heaviness. Prefer extra body? Go all milk (1½ cups / 360 ml). Want something lighter after dinner? Use more water and finish with a splash of cream to restore a silky finish.

If you’re making this dairy-free, barista-style oat milk drinks especially well, as do cashew and soy. Almond milk stays thinner but tastes clean and toasty, which some people adore in a nighttime cup.

Also Read: Crock Pot Lasagna Soup (Easy Base + Cozy Slow-Cooker Recipes)


Natural vs Dutch: how it changes your mug

Let’s talk flavor and feel. Natural cocoa is lighter in color and usually tastes a touch brighter, sometimes with a hint of fruit or acidity. It makes a classic, snappy-tasting hot chocolate with cocoa powder—the kind you might remember from childhood, just elevated by technique.

Dutch-process cocoa has been alkalized to tame acidity. In the cup, it reads darker, smoother, and often creamier at the same ratio. Because the edges are softer, many people find it dissolves more easily and gives a rounded finish. If your top priority is silky texture and a deep color, Dutch is the move. If you love lively, punchy chocolate, natural sings.

Curious which to stock? For a quick reference beyond this recipe, King Arthur’s types of cocoa, explained lays out how different powders behave in both baking and drinking.

Also Read: Cottage Cheese Lasagna Recipe | Chicken, Spinach, & Ricotta


Make-it-yours: small tweaks that change the whole cup

  • Extra-dark hot chocolate with cocoa powder: Add 1–2 teaspoons more cocoa during the paste stage. You can nudge sweetness up by ½–1 teaspoon if needed, or keep it punchy.
  • Lower sugar: Swap in allulose or erythritol. Because these sweeteners taste slightly cooler and less rounded than sugar, add a drop of vanilla or a tiny extra pinch of salt to keep the flavor full.
  • Dairy-free richness: Barista oat, soy, and cashew milk foam beautifully. For even more body, whisk in 1–2 teaspoons coconut cream at the finish.
  • Mocha moment: Stir in 1–2 teaspoons strong coffee or a splash of espresso. The coffee doesn’t steal the show; it just deepens the chocolate.
  • Finishing swirl: A ribbon of homemade chocolate syrup turns a simple mug into something that feels café-made—perfect when you want a quick flourish without melting chocolate.

Also Read: How to Make Churros (Authentic + Easy Recipe)


Spiced variation (Mexican-style recipe)

Keep the base the same, but in the paste stage whisk in ¼ teaspoon ground cinnamon and the tiniest pinch of cayenne. As the mixture warms, the cinnamon blooms and the heat lingers, not as a burn but as a gentle hum under the chocolate. Finish with vanilla, then whisk vigorously or use a frother to aerate the surface. If you’re going for a cozy dessert board, dunking something crisp is half the fun—homemade churros are a nostalgic, wildly satisfying pairing.

Mexican-style hot chocolate recipe card: hand whisking with a molinillo in a rustic mug, with cinnamon sticks and cayenne; per-mug ratios and steps visible.
Mexican-style hot chocolate Recipe—per mug: 1 tbsp cocoa, 1 tbsp sugar, 3/4–1 cup milk or water, pinch of salt. Add 1/4 tsp cinnamon and a tiny pinch of cayenne to the paste, whisk vigorously, and finish with 1/4 tsp vanilla. MasalaMonk.com

Cold spin: chocolate milk with cocoa powder (no syrup, no sludge)

Not every craving arrives with a cold night. For summer afternoons or quick post-workout comfort, make a cold chocolate milk that dissolves fully and tastes balanced:

  1. In a tall glass or a lidded jar, combine 1 tablespoon cocoa, 1–1½ tablespoons sweetener, a pinch of salt, and 1–2 teaspoons milk. Stir or shake into a silky paste.
  2. Add 1 cup cold milk gradually, whisking (or shaking) until smooth. The paste method saves you from floating clumps and gives a glossy finish.

If you like make-ahead chocolate treats with a lighter footprint, chia pudding recipes can lean cocoa-rich, dessert-ish, or breakfast-bright—handy when you want chocolate without the stovetop.


Heat, hold, and reheat: the practical bits

Heating: Keep it to medium. You want steam, not aggressive bubbles. Harsh boiling can press the proteins too far and leave a grainy impression even if you made a great paste.

Holding: If you’re hosting, keep hot chocolate warm on the lowest heat with a lid slightly ajar and whisk briefly every 10 minutes to keep it silky.

Reheating: Gentle is again the rule. If you’ve made a larger batch, rewarm on low and whisk as you go. A splash of fresh milk can refresh the body after prolonged holding.

Also Read: How to Cook Bacon in the Oven (Crispy, No-Mess, Crowd-Ready Recipe)


Serving ideas, garnishes, and textures for Hot Chocolate with Cocoa Powder

  • Classic marshmallow cap: Homemade or store-bought, marshmallows soften into a creamy top layer that acts like a flavor filter—each sip pulls through vanilla sweetness.
  • Light whipped cream: Soft peaks add air without weight. Dust the top with a whisper of cocoa for a café finish.
  • Citrus twist: A tiny strip of orange zest rubbed over the cup perfumes the steam.
  • Spice dust: A little cinnamon or nutmeg on the foam moves the aroma forward as you lift the mug.
  • Cocoa-nib crunch: For a fun contrast, float a pinch of cocoa nibs; they’ll soften at the edges but keep a little bite.
Also Read: French Toast Sticks (Air Fryer + Oven Recipe) — Crispy Outside, Custardy Inside

White hot chocolate recipe card: milk pouring into a copper saucepan with whisk, vanilla pod, and white chocolate chips; do-not-boil method.
White hot chocolate—per mug: 3 tbsp white chocolate powder or 1/4 cup chips, 3/4–1 cup milk, pinch of salt. Heat to steaming, whisk in, finish with 1/4 tsp vanilla. MasalaMonk.com

Troubleshooting Hot Chocolate with Cocoa Powder

  • Gritty sip: The paste likely wasn’t fully smooth. Next time, whisk the cocoa and sugar with a larger splash of milk until glossy before adding the rest.
  • Too thin: Use all milk (1½ cups total) or whisk in ½–1 teaspoon cornstarch while cold, then heat gently until lightly thickened.
  • Too sweet or flat: Add a pinch of salt, then nudge sweetness down next round. Cocoa flavor wakes up when the sweet–salty balance clicks.
  • Dairy-free but watery: Try a barista-style oat or soy, or add 1–2 teaspoons coconut cream off heat.
  • Lacks depth: Fold in a teaspoon of instant espresso powder or a few drops of vanilla. Tiny adjustments go a long way.

Also Read: 10 Best Chicken Sandwich Recipes (BBQ, Parm, Buffalo & More)


Choosing cocoa: pantry strategy that pays off

If you drink hot chocolate with cocoa powder even a few times a month, keeping two cocoas on hand is a clever move:

  • Everyday natural cocoa for a bright, classic cup and baking.
  • A Dutch-process cocoa for company or nights when you want a deep, plush mug.

This way, you can lean one direction or blend them. Many home cooks discover a 50/50 mix hits their sweet spot: vibrant yet smooth, dark yet lively.

For flavor clarity, sift your cocoa into a jar when you first open it—this breaks early clumps and keeps it ready for paste-making. Store in a cool, dry cabinet away from the stove so heat and steam don’t encourage caking.

Also Read: 10 Best Espresso Martini Recipe Variations (Bar-Tested)


A quick note on cacao (and when to use it)

Cacao powder is less processed than typical cocoa and often tastes fruitier and more delicate. If you prefer a “healthy-leaning” cup with a lighter body, warm your milk gently (hot but not boiling), then whisk in cacao, sweetener, and salt.

Cacao hot chocolate recipe card on light marble: hand whisking in a small saucepan with cacao powder, maple syrup, oat milk, and cacao nibs; gentle-heat method shown.
Cacao hot chocolate—per mug: 1 tbsp cacao, 1–2 tsp maple, 3/4–1 cup milk, pinch of salt. Warm (don’t boil), whisk in cacao + maple + salt; finish with 1/2 tsp vanilla. MasalaMonk.com

Because cacao’s edges are softer, it can feel more transparent in milk—some people love that, especially with maple syrup. If you’d like context on how cacao relates to chocolate and dark chocolate more broadly, this MasalaMonk guide maps the landscape in everyday language, while Healthline’s overview covers processing differences without getting fussy.

Also Read: Pumpkin Spice, Your Way: Master Blend, Variations & Real-World Recipes


Nutrition whisper: perspective without the lecture

Cocoa powder brings a small amount of minerals to the party, including magnesium. That doesn’t turn a mug into a supplement, of course, but it’s a pleasant bonus. If you’re curious about broader wellness angles that include cocoa or dark chocolate in a wider diet, you might enjoy MasalaMonk’s look at magnesium-rich foods. For technical nutrition data per serving, the USDA’s FoodData Central is the neutral reference many dietitians use; search their database for “cocoa powder, unsweetened” to compare brands and serving sizes.


Scaling up: a crowd-pleasing pot of Hot Chocolate with Cocoa Powder

When you’re pouring for a game night or movie marathon, multiply everything and grab a heavier pot (4–5 liters for 8–10 servings). The method stays the same: paste first, gentle heat, vanilla off heat, quick whisk for foam. Here are a few patterns that work well:

  • 8 mugs: 8 tbsp cocoa, 8 tbsp sugar, big pinch salt, 6 cups milk + 2 cups water, 2 tsp vanilla.
  • 12 mugs: 12 tbsp cocoa, 12 tbsp sugar, generous pinch salt, 9 cups milk + 3 cups water, 1 tbsp vanilla.

Keep a small ladle nearby so guests can top themselves. Offer cinnamon, shaved chocolate, and a jar of homemade chocolate syrup for custom finishing.

Also Read: Healthy Pumpkin Spice Latte (Low Cal, Real Pumpkin)


Make-ahead components that speed up weeknights

If you want to cut prep to practically zero, you have two low-effort options:

  1. Dry base mix: In a small jar, combine cocoa, sugar, and salt for 4–6 servings. When you’re ready, scoop out what you need, add milk+water, and go straight to the heat step.
  2. Syrup shortcut: Keep a jar of 3-minute chocolate syrup in the fridge. Stir a spoonful into hot milk for an on-the-fly cup, or drizzle the finished mug for a café look without extra tools.

Either way, you retain control over quality and sweetness while shaving prep down to the whisking.

Also Read: Vegan French Toast: 6 Easy Recipes (Pan, Air Fryer, GF & High-Protein)

DIY hot cocoa mix recipe card on white marble: glass jar labeled “Hot Cocoa Mix” with wooden scoop, bowl of milk powder, black tablespoon of cocoa, and cinnamon sticks; instructions show 3 Tbsp mix per 3/4–1 cup hot milk or water.
DIY hot cocoa mix—combine 2 cups powdered sugar, 1 cup cocoa, 1 cup milk powder, and 1/2 tsp salt. To serve, whisk 3 Tbsp mix into 3/4–1 cup hot milk or water. Stores airtight up to 6 months. MasalaMonk.com

Seasonal riffs that keep Hot Chocolate with Cocoa Powder interesting

  • Peppermint steam: Add 1–2 drops peppermint extract at the finish.
  • Orange glow: Infuse the milk with a strip of orange peel while heating; remove before serving.
  • Ginger warmth: Simmer thin slices of fresh ginger with the milk and water, then strain.
  • Nutty whisper: A teaspoon of hazelnut or almond extract can evoke chocolate-hazelnut vibes without turning the cup into dessert.

Rotate these through the colder months and your “same” hot chocolate with cocoa powder never feels repetitive.

Also Read: Classic vs. Authentic Alfredo: 5 Essential Recipes


A note on quality: small upgrades, big rewards

  • Freshness matters: If your cocoa has been open for a year and lives near the stove, the aroma might have faded. Move it to a cool cabinet and refresh the supply every few months if you make cocoa often.
  • Sifted and ready: Pre-sifting into a jar means paste-making is quick and clump-free.
  • Vanilla restraint: Vanilla is beautiful here, but it’s a supporting actor. Go light so it frames the chocolate rather than masking it.

Chocolate-forward pairings

Hot chocolate practically begs for a snack to dunk. Crisp-edged churros are a classic. If you’d like something lighter, cocoa-leaning chia puddings deliver chocolate notes in an entirely different texture—cool, spoonable, and meal-prep-friendly. Meanwhile, if you’re curious about broader chocolate and cacao territory (bars, bakes, and the space between), this MasalaMonk cocoa/cacao explainer is a handy compass.


Why this ratio works (and when to break it)

Per mug, this recipe lands at roughly 1 tablespoon cocoa : 1 tablespoon sugar : ¾–1 cup liquid. That’s the sweet spot for most palates—enough cocoa to read as chocolate rather than faintly flavored milk; enough sugar to polish the edges; enough liquid to feel sippable, not heavy. Nevertheless, ratios are invitations, not rules. If you adore a darker profile, lift the cocoa and reduce the sugar slightly. If you’re serving kids, tipping the sweetness up a teaspoon can feel more familiar. You can shift the milk-to-water balance too: all milk for a plush nightcap; all water with a splash of cream for something featherlight yet still cozy.

Also Read: Lemon Drop Martini Recipe (Classic, 3-Ingredient, & More)


Beyond the mug: a chocolate-forward pantry

Once you dial in hot chocolate with cocoa powder, you’ve effectively cracked a handful of other winter comforts:

  • Mocha oatmeal: Stir a teaspoon of cocoa and a little sugar into hot oats; finish with a splash of milk and vanilla.
  • Quick chocolate sauce: Whisk cocoa, sugar, a pinch of salt, and hot water into a thick drizzle; enrich with a knob of butter or a splash of cream. Or, take the faster route with this three-minute chocolate syrup.
  • Hot cocoa base for bakes: The paste technique is the backbone of cocoa glazes and certain stovetop frostings; once you see how smoothly cocoa bloomed in milk behaves, you’ll start applying it elsewhere.

Cold weather ritual, warm weather habit

In winter, this recipe is ritual: steam curling, cinnamon nearby, a soft blanket waiting. In summer, the cold chocolate milk variation takes over—we shake, we pour over ice, we sip on the balcony. Either way, it’s still the same foundation: a quick paste, gentle heat (or no heat at all), and a minute of whisking to make it feel special.


If you’re exploring further

  • For clear, non-technical answers about cocoa styles, King Arthur’s guides on Dutch vs. natural cocoa and cocoa types are reader-friendly.
  • For a grounded look at cacao versus cocoa and where chocolate sits in that spectrum, try MasalaMonk’s explainer, and for broader processing context, Healthline’s cacao vs cocoa piece is a good supplement.
  • If nutrition tables help you calibrate your own serving, the USDA’s FoodData Central is a straightforward database—useful if you compare brands or track macros.

One last mug

The difference between a forgettable cup and a memorable one almost always comes down to the same simple moves: bloom the cocoa in a paste, warm gently, finish with something fragrant, and whisk for a breath of foam. From there, you can veer darker or lighter, dairy-rich or dairy-free, spiced or straight, hot or ice-cold. That’s the charm of hot chocolate with cocoa powder—it gives you a classic to return to and endless little detours to enjoy along the way.

Also Read: Daiquiri Recipe (Classic, Strawberry & Frozen Cocktails)

FAQs on Hot Chocolate with Cocoa Powder

1) Can I make hot chocolate with baking cocoa?

Absolutely. Baking cocoa is simply unsweetened cocoa powder, so it’s perfect for hot chocolate with cocoa powder. First, whisk it into a smooth paste with a little milk and sugar, then add the remaining liquid and heat gently.

2) What’s the best cocoa powder for drinking?

Generally, Dutch-process gives a darker color and smoother taste, while natural cocoa delivers a brighter, classic chocolate snap. For everyday hot chocolate with cocoa powder, either works; choose Dutch for silkiness or natural for lively flavor.

3) How do I make hot chocolate with cocoa powder extra creamy?

Use all milk instead of milk + water, keep the heat moderate, and finish with a quick whisk or frother. Optionally, add a teaspoon of cream or coconut cream at the end.

4) Can I make hot chocolate with cocoa powder without sugar?

Yes. Swap sugar for allulose, erythritol, or a liquid sweetener like maple. Because some alternatives taste less rounded, balance with a tiny pinch of salt and a drop of vanilla.

5) Does milk type matter for hot chocolate with cocoa powder?

Definitely. Whole dairy milk gives the richest body; barista-style oat, cashew, and soy foam well and taste silky. Almond reads lighter and toasty; coconut adds tropical richness.

6) How do I stop cocoa from clumping?

Begin with a paste: whisk cocoa, sugar, and a spoon or two of milk until glossy, then add the rest of the liquid. This quick step prevents gritty, floating specks.

7) What ratio should I use per mug?

A reliable baseline is 1 tbsp cocoa : 1 tbsp sugar : ¾–1 cup milk (or milk + water) with a pinch of salt. Adjust darker by adding ½–1 tsp extra cocoa, or sweeter by 1–2 tsp sugar.

8) Can I make low-carb hot chocolate with cocoa powder?

Certainly. Use unsweetened almond or cashew milk, choose a zero-calorie sweetener, and keep the classic ratio. For body, whisk a splash of cream or a bit of coconut cream after heating.

9) How do I make Mexican-style hot chocolate with cocoa powder?

Stir ¼ tsp ground cinnamon and a tiny pinch of cayenne into the paste. Warm gently, finish with vanilla, then whisk vigorously for a frothy top.

10) Is cacao powder good for hot chocolate?

Yes—cacao tastes fruitier and more delicate. Heat your milk just to hot (not boiling), then whisk in cacao and sweetener. Expect a lighter body than typical hot chocolate with cocoa powder.

11) Can I prepare hot chocolate ahead of time?

You can. Mix the dry base (cocoa, sugar, salt) in a jar and store airtight. When ready, add milk and heat. If holding a cooked batch, keep it warm on low and whisk occasionally.

12) How do I reheat leftover hot chocolate?

Warm on low heat until steaming, not boiling. If it thickened or sat for a while, whisk in a splash of fresh milk to restore creaminess.

13) What’s the difference between hot cocoa and drinking chocolate?

Hot cocoa uses cocoa powder and is lighter; drinking chocolate melts real chocolate, so it’s richer and thicker. Choose based on mood—weeknight comfort or decadent treat.

14) Can I make hot chocolate with cocoa powder using water only?

Yes. Water highlights the chocolate notes and keeps things lighter. For a silkier finish, add a small splash of milk or cream after heating.

15) How can I boost chocolate flavor without extra sugar?

Add a pinch more salt, a few drops of vanilla, or ½–1 tsp instant espresso powder. These amplify chocolate depth without increasing sweetness.

16) What’s the ideal temperature for hot chocolate with cocoa powder?

Aim for “steaming hot” rather than a rolling boil. Gentle heat preserves a smooth mouthfeel and prevents a cooked-milk aftertaste.

17) Can I scale this recipe for a crowd?

Definitely. Multiply the ratio, use a heavy pot, and still start with a paste. Keep warm on low and whisk every 10–15 minutes to maintain a silky texture.

18) Why does my hot chocolate taste thin?

Use all milk instead of part water, increase cocoa by ½–1 tsp per mug, or add ½–1 tsp cornstarch while the mixture is cold and then heat until lightly thickened.

19) How can I make hot chocolate with cocoa powder more “dark chocolate” forward?

Increase cocoa by 1–2 tsp per mug, reduce sugar slightly, and finish with a tiny pinch of salt. For extra depth, add a touch of espresso powder.

20) What toppings work best without overpowering the drink?

Softly whipped cream, a dusting of cocoa or cinnamon, micro-grated orange zest, or a few cocoa nibs. Keep the layer light so the chocolate remains the star.

Posted on 6 Comments

Peanut Butter Cookies (Classic Recipe & 3 Variations)

Hands breaking a soft, chewy peanut butter cookie over a cooling rack with classic crosshatch; jar of peanut butter and oats in the background—peanut butter cookies with 3 variations.

Some cookies are a craving; peanut butter cookies are a promise. A promise of soft centers, a hint of salt, and that crosshatch pattern that whispers, “You’ve come to the right kitchen.” If you’ve been hunting for a reliable peanut butter cookies recipe that you can memorize, customize, and bake on a weeknight without fuss, this is the one. We’ll start with the classic base, then—without complicating your life—branch into three popular riffs: 3-ingredient (flourless and naturally gluten-free), peanut butter chocolate chip (for the days you want pockets of melty sweetness), and peanut butter oatmeal (chewier, heartier, still quick).

Along the way, you’ll see natural, reader-friendly links if you want to go deeper on technique and ingredients—like making homemade peanut butter or choosing the right kind of oats with this guide to oats: types and differences. Use them as reference points; skip them if you’re already preheating the oven.


The Baseline Peanut Butter Cookies Recipe (Soft & Chewy)

At its heart, a dependable peanut butter cookies recipe does a few simple things really well:

  • Creams fat and sugar thoroughly (so the cookies lift rather than spread into puddles).
  • Balances white and brown sugar (for crisp edges and tender middles).
  • Uses just enough flour (to hold structure without becoming cakey).
  • Bakes quickly, then finishes on the sheet (carryover heat equals soft centers).

If you like a technical north star for ratios and method, the classic peanut butter cookies from King Arthur Baking mirror this approach—same gentle oven temp, same creaming logic, same quick bake.

Ingredients, at a glance

  • Creamy peanut butter (no-stir works most predictably; more on that below)
  • Butter, softened (unsalted lets you control salt)
  • Granulated sugar + light brown sugar (structure + moisture + caramel notes)
  • Egg + vanilla (binding + aroma)
  • All-purpose flour, baking soda, baking powder, salt (structure + lift + clarity of flavor)

Why “no-stir” peanut butter behaves so nicely

Natural peanut butter can absolutely work, and many bakers love its purer peanut flavor. Nevertheless, if consistency is your priority, stabilized (emulsified) peanut butter is a smart choice: it doesn’t separate, it creams smoothly with butter, and it yields less graininess in tender batters. If you’re curious about the “why,” this Serious Eats piece makes the case in practical, baker-friendly terms: best peanut butter for baking (emulsified vs natural).

Prefer to control every ingredient? You can skip added sugars and oils entirely and make homemade peanut butter in minutes; it’s just roasted peanuts and a pinch of salt blitzed until glossy.

How to Make Peanut Butter Cookies

  1. Cream the butter, peanut butter, and both sugars until light and fluffy. You’re dissolving some sugar and trapping air; it should look pale and seem a bit billowy.
  2. Beat in the egg and vanilla until the mixture looks silky.
  3. Fold in your whisked dry ingredients (flour, baking soda, baking powder, salt) until just combined—no streaks, no overmixing.
  4. Scoop 1 to 1½-tablespoon portions, roll in a little sugar if you like delicate crunch, then crosshatch each ball gently with a fork.
  5. Bake at 175°C / 350°F until the edges set and tops are faintly matte—usually 9–11 minutes.
  6. Rest on the sheet for 5 minutes before moving to a rack; they finish cooking to that soft-chewy sweet spot.

And yes—this single bowl of dough is your on-ramp to all three variations below.

Also Read: Baked Jalapeño Poppers (Oven) — Time, Temp & Bacon Tips


Ingredient Notes You’ll Actually Use

Because small choices make big differences, here are the handful that matter—nothing fussy, just reality-tested tweaks that improve your peanut butter cookies recipe immediately.

Peanut butter: natural, no-stir, or homemade?

  • No-stir (emulsified) peanut butter is drama-free: it mixes evenly and bakes dependably. If a batter tends to feel sandy or seize when you add chips or cocoa, emulsified PB helps. See this walkthrough on baking with emulsified PB for texture reasons and examples.
  • Natural PB (peanuts, maybe salt) brings bold peanut flavor. If the jar has separated, stir thoroughly. When using it in cookie dough, a 15–30 minute chill tightens the fat matrix and helps control spread. If you want to minimize separation in your everyday jar, this test-driven guide is handy: how to prevent nut butter separation.
  • DIY PB gives you total control. If you prefer a short, clean ingredient list, whip up homemade peanut butter and season it to taste.

Flour, mixing, and that just-right bake

The most common cause of crumbly PB cookies is too much flour or overbaking. Use the spoon-and-level method (or weigh flour), stop mixing once the last streak disappears, and remove the cookies when their edges set but centers still look soft. King Arthur’s classic method is an excellent cue card for timing and texture checks.

Storage and food-safety basics

Baked cookies keep well in an airtight tin at room temp. Dough is a little different: the USDA suggests 2–4 days in the fridge and about 2 months in the freezer for homemade cookie dough. If you love prep-ahead baking days, portion dough balls, freeze solid on a tray, then bag and label: cookie dough storage guidelines. If you’re wondering about peanut butter itself (pantry vs. fridge), here’s a practical explainer on storage differences between conventional and natural styles: does peanut go bad?

Also Read: How to Make Churros (Authentic + Easy Recipe)


Classic Peanut Butter Cookies Recipe (Primary Method)

Because clarity is kindness, here’s the base peanut butter cookies recipe laid out cleanly, ready to riff.

You’ll need

  • ½ cup (113g) unsalted butter, softened
  • ½ cup (120g) creamy peanut butter (no-stir recommended for most consistent texture)
  • ½ cup (100g) granulated sugar
  • ½ cup (110g) light brown sugar, packed
  • 1 large egg (room temperature)
  • 1 teaspoon vanilla extract
  • 1¼ cups (150g) all-purpose flour
  • ½ teaspoon baking soda
  • ¼ teaspoon baking powder
  • ¼ teaspoon fine salt
Soft and chewy peanut butter cookies recipe—hands breaking a crosshatched cookie over a cooling rack with a jar of peanut butter in the background.
Soft & Chewy Classic Peanut Butter Cookies — ready in 25–30 minutes and makes about 24; a dependable base for 3-ingredient, chocolate chip, and oatmeal variations.

Step-by-step

  1. Preheat oven to 175°C / 350°F. Line two baking sheets.
  2. Cream butter, peanut butter, and both sugars on medium speed for 2–3 minutes, until pale and slightly fluffy.
  3. Beat in egg and vanilla until glossy and smooth.
  4. Whisk flour, baking soda, baking powder, and salt; fold into the wet ingredients just until combined.
  5. Scoop 1 to 1½ tablespoons of dough per cookie. Optionally roll in granulated sugar. Place on trays with space to spread.
  6. Crosshatch each ball lightly with a fork (two perpendicular presses). Flatten to roughly 1 cm thickness.
  7. Bake 9–11 minutes until edges are set and tops look just dry.
  8. Cool on the tray for 5 minutes, then move to a rack. Enjoy when fully set (they’ll be extra soft while warm).

Make it yours, gently: For thicker cookies, chill 30–60 minutes before baking. For slightly crisp edges, extend the bake by 30–60 seconds. For heightened peanut flavor, use salted PB and reduce added salt a touch.

Also Read: Green Tea Shot with Jameson | Recipe & 10 Variations


3-Ingredient Peanut Butter Cookies (Flourless, Naturally GF)

Sometimes you want cookies now. Not in an hour—now. This minimalist peanut butter cookies recipe uses just three ingredients, and yet it nails the essential soft-chewy PB experience. Because there’s no flour, these stay naturally gluten-free with clean, bold peanut flavor.

What goes in

  • 1 cup (250g) creamy peanut butter (no-stir is the safest choice here)
  • ¾ cup (150g) granulated sugar (or ½ cup granulated + 2 Tbsp brown for deeper chew)
  • 1 large egg
3-ingredient peanut butter cookies recipe, flourless and naturally gluten-free, hand placing a crosshatched cookie on a stack on marble.
3-Ingredient Peanut Butter Cookies — flourless, naturally gluten-free; ready in 20 minutes and makes about 18.

What to do

  1. Heat oven to 175°C / 350°F and line a tray.
  2. Stir peanut butter, sugar, and egg until glossy and cohesive; the dough will thicken as you stir.
  3. Scoop 1-tablespoon portions, crosshatch lightly, and bake 8–10 minutes until edges set.
  4. Cool fully before lifting—flourless cookies are delicate when hot but turn fudgy as they set.

If you prefer a flour-based gluten-free option that mimics the classic’s crumb more closely, you can adapt ratios from gluten-free peanut butter cookies, which use a GF blend or self-rising flour for lift and bite.
Also Read: Vegan French Toast: 6 Easy Recipes (Pan, Air Fryer, GF & High-Protein)


Peanut Butter Chocolate Chip Cookies (Simple Add-In, Big Payoff)

On some days, a little chocolate turns good into irresistible. Happily, you don’t need a separate peanut butter cookies recipe for this: the classic dough above is sturdy enough to carry chips without turning greasy or fragile—especially if you used a no-stir PB or thoroughly mixed natural PB.

Peanut butter chocolate chip cookies with gooey melted chips—hand breaking a warm cookie on a rustic wood surface, soft center visible.
Peanut Butter Chocolate Chip Cookies — soft-centered with melty chips; makes about 24 in 25–30 minutes using the classic PB dough plus chocolate chips.

How to adapt the base

  • Mix-in: Fold 1 to 1½ cups chocolate chips into the finished classic dough.
  • Scoop & bake as usual—same crosshatch, same time frame.
  • Finish: If you like, dot a few extra chips on top right out of the oven for an artisanal look.

Because emulsified peanut butter blends seamlessly with butter, you’ll notice fewer sandy spots once chips are in the mix; if you’re curious about why that texture holds, this explainer is a good read: best PB for baking (why emulsifiers help).

Also Read: Béchamel Sauce for Lasagna: Classic, Vegan & Ricotta Sauce Recipe


Peanut Butter Oatmeal Cookies (Chewy, Hearty, Still Fast)

When you want a cookie that eats a bit like an afternoon snack, oats are your secret weapon. They add chew, fiber, and a warm cereal note that loves peanut butter. You can make this variation two ways—rolled oats for chew or quick oats for a softer, more uniform bite. If you’re deciding which bag to buy (or which jar to open), skim MasalaMonk’s practical explainer on oat types: guide to oats: types and differences and this compact refresher, oats vs oatmeal: what’s the difference?
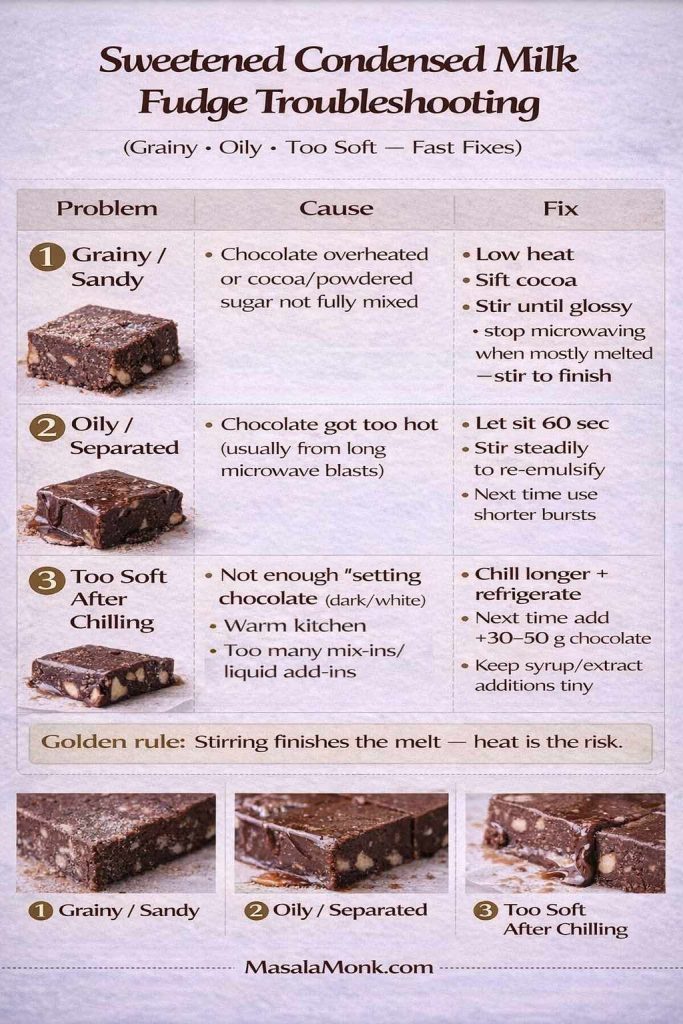
Chewy peanut butter oatmeal cookies on a cooling rack—hand lifting one cookie with scattered rolled oats; hearty texture, makes about 24 in 25–30 minutes.
Chewy Peanut Butter Oatmeal Cookies — hearty and satisfying with rolled or quick oats and brown sugar; ready in 25–30 minutes and yields roughly 24.

How to adapt the base

  • Add: Fold 1 cup oats into the finished classic dough.
  • Balance: If the dough seems stiff, splash in 1 tablespoon milk to keep the crumb tender.
  • Choose your texture:
    • Rolled (old-fashioned) oats → more chew and visible oat flakes.
    • Quick oats → softer, more uniform crumb.
    • Skip steel-cut for cookies; they stay too hard. See the why here: steel-cut vs rolled oats

Want to keep the oat momentum going during the week? Bake a tray of healthy oat cookies (no sugar, no butter) or tuck a pan of oat protein bars into the fridge for grab-and-go breakfasts.

Also Read: Crock Pot Lasagna Soup (Easy Base + Cozy Slow-Cooker Recipes)


Texture Tuning Peanut Butter Cookies: Softer, Chewier, Thicker

Because you’re the baker, you get to decide the cookie you want today. Here’s how to steer the same peanut butter cookies recipe toward different textures—without rewriting the ingredient list.

  • Extra soft: Pull them at the first hint of set edges and let them finish on the tray.
  • Chewier: Increase the brown sugar by 1–2 tablespoons and decrease white sugar by the same; brown sugar’s molasses boosts moisture retention.
  • Thicker: Chill the portioned dough 30–60 minutes, then bake. Cold fat slows spread.
  • Crispier edges: Bake 30–60 seconds longer and cool completely on a rack.
  • Stronger peanut impact: Use salted PB or add a tiny pinch of fine salt to the dough.

If you’re using natural PB and want to minimize separation over time (both in the jar and in your batter), experiment with the methods in this separation-prevention test. It’s a small upstream fix that yields smoother creaming and more even crumb.

Also Read: Cottage Cheese Lasagna Recipe | Chicken, Spinach, & Ricotta


Ingredient Swaps That Actually Work

Yes, you can tweak things. No, you don’t have to guess. Use these swaps when your pantry is half full—or when you’re leaning toward a dietary preference.

  • No brown sugar today? Use all white sugar and add 1 teaspoon honey or a drizzle of molasses for depth.
  • No butter handy? Use the same weight of neutral oil; chill the dough 30 minutes to re-firm the fat for better edges.
  • Egg-free mood? Make a flax egg (1 tablespoon ground flax + 3 tablespoons water; sit 5 minutes). Expect a touch more tenderness.
  • Gluten-free route: Choose the 3-ingredient variation (naturally GF) or adapt a 1:1 GF flour blend following ratios like these GF PB cookies.
  • Less sweet overall? Drop total sugar by 2 tablespoons in the classic; cookies will be slightly drier, so don’t overbake.

Also Read: How to Cook Bacon in the Oven (Crispy, No-Mess, Crowd-Ready Recipe)


The Pantry Question: Where to Store Peanut Butter and Dough

Because you’ll be baking this peanut butter cookies recipe more than once, it helps to know where everything should live between batches.

  • Peanut butter storage: Conventional (stabilized) PB is pantry-friendly; natural PB benefits from the fridge to prevent rancidity. For a practical, no-alarm-bells overview of why, read does peanut butter go bad?
  • Dough storage: Homemade cookie dough is happiest in an airtight container 2–4 days in the refrigerator or about 2 months in the freezer, per USDA guidance.
  • Bake straight from frozen: Add 1–3 minutes to the baking time and watch the edges; no other changes needed.

Also Read: French Toast Sticks (Air Fryer + Oven Recipe) — Crispy Outside, Custardy Inside


Troubleshooting Peanut Butter Cookies Recipe

You don’t need a helpline; you just need a short list.

  • Crumbly cookies: Usually too much flour or overbaking. Weigh flour if possible; pull the pan as soon as edges set.
  • Greasy look after cooling: Either over-measured fat or natural PB with separation. Stir natural PB thoroughly and consider a short chill for the dough.
  • Too thick, not spreading: Dough too cold or flour slightly high. Let portions warm a few minutes, or press the crosshatch a bit deeper.
  • Dry bite: Over-baked by a minute or two. Next round, check a minute earlier; aim for matte tops but tender centers.
  • Oat “hard bits”: Steel-cut oats will never soften fully in this bake; use rolled or quick oats instead. If you’re weighing options, skim rolled vs steel-cut before you scoop.

Also Read: 10 Best Chicken Sandwich Recipes (BBQ, Parm, Buffalo & More)


Variation Playbook: When and Why to Use Each One

Bake the classic when you’re feeding a mixed crowd and want predictable results with pantry ingredients.
Choose 3-ingredient when time is tight, gluten-free guests are coming, or you simply love the clean peanut punch.
Pick peanut butter chocolate chip if you’re sending a care package or want little bursts of chocolate in each bite.
Go peanut butter oatmeal when you’re after a sturdier afternoon snack that pairs well with tea or coffee.

If you wind up with extra oats, keep the baking train rolling with healthy oat cookies (no sugar, no butter) or stash oat protein bars for after-gym snacks. And if you’re feeling especially peanut-forward another day, King Arthur’s nostalgic peanut-butter-centered treats like Magic in the Middles pair beautifully with this dough’s flavor profile.


Your Baking Rhythm, Simplified

There’s an easy weekly cadence that turns this peanut butter cookies recipe into a stress-free habit:

  • Sunday: Make a double batch of the classic dough; bake one tray for now, then portion the rest into balls and freeze.
  • Midweek: On a busy evening, bake the 3-ingredient version while dinner rests—10 minutes of oven time and dessert is done.
  • Friday: Turn leftover classic dough into peanut butter chocolate chip cookies with a quick handful of chips; same bake, instant variety.
  • Weekend: Fold oats into the remaining dough to make peanut butter oatmeal cookies for a hike, a movie night, or a potluck.

Because the base is so forgiving—and because you now know exactly how to store dough and peanut butter safely (see cookie dough storage basics and PB storage pointers)—you can keep the rhythm without wasting a single scoop.

Also Read: 10 Best Espresso Martini Recipe Variations (Bar-Tested)


Classic + 3 Variations: Quick Reference for Peanut Butter Cookies

Classic Peanut Butter Cookies
Cream butter, PB, and sugars; beat in egg/vanilla; fold in dry; scoop, crosshatch, bake 9–11 minutes. Soft centers, lightly crisp edges. Use this classic method for timing and texture cues.

3-Ingredient (Flourless)
PB + sugar + egg. Stir, scoop, crosshatch, bake 8–10 minutes. Naturally GF, deeply peanutty. For a flour-based GF path, adapt this self-rising/GF framework.

Peanut Butter Chocolate Chip
Fold 1 to 1½ cups chips into the classic dough. Same scoop, same bake. For reliably smooth batters, see why emulsified PB helps.

Peanut Butter Oatmeal
Fold 1 cup oats into the classic dough (rolled for chew, quick for softness). If stiff, add 1 Tbsp milk. Skip steel-cut; they don’t soften enough—rolled vs steel-cut explained. Keep the oat theme going with healthy oat cookies or oat protein bars.


A Last Word Before You Preheat

Recipes are roadmaps, not handcuffs. Bake the classic once as written so you have a feel for texture and timing, then adjust—sweeter or less sweet, thicker or thinner, with or without oats, with chocolate or without. The goal is a peanut butter cookies recipe that feels like yours, not a script you’re afraid to edit.

And because a dependable source is a baker’s best friend, here are the few links you’ll probably return to most:

Now—scoop, crosshatch, bake. And if your first tray disappears while the second is still in the oven, well, that’s exactly how peanut butter cookie nights are supposed to go.

Also Read: 6 Wellness Shot Recipes to Boost Your Immune System

FAQs

1) What makes a peanut butter cookies recipe soft and chewy?

Soft, chewy results come from balanced fat and sugar, minimal mixing after flour goes in, and a brief bake. Moreover, pull the tray when edges just set; carryover heat finishes the centers without drying them out.

2) How do I keep peanut butter cookies from spreading too much?

First, chill portioned dough for 20–30 minutes if your kitchen is warm or you’re using natural peanut butter. Additionally, measure flour accurately and avoid over-creaming butter (too much air can cause excessive spread).

3) Can I use natural peanut butter in this peanut butter cookies recipe?

Yes. Nevertheless, stir it thoroughly to recombine oil and solids. For extra insurance, chill the dough briefly so the fat firms up, resulting in cleaner edges and better lift.

4) Why do we press the classic crosshatch on top?

The dough is dense; consequently, the crosshatch flattens it for even baking. It also signals the signature texture and helps achieve that crisp rim with a tender middle.

5) How do I make thicker peanut butter cookies without changing ingredients?

Simply chill scooped dough 30–60 minutes, then bake. Conversely, if you want thinner, slightly crisper cookies, skip chilling and press the crosshatch a bit deeper.

6) What’s the best sugar ratio for chew?

Light brown sugar adds moisture and chew; granulated provides structure. Furthermore, a small tilt toward brown sugar (by a tablespoon or two) deepens flavor without turning the cookie cakey.

7) Can I reduce the sweetness but keep texture?

Certainly. Reduce total sugar by 1–2 tablespoons; as a result, don’t extend bake time. Otherwise, they may lean dry. For balance, a tiny pinch of extra salt can sharpen the peanut flavor.

8) Do I need baking soda and baking powder, or just one?

Use both in small amounts. Soda encourages spread and browning; powder supports gentle lift. Similarly, combining them yields those classic crackles with soft interiors.

9) How do I prevent crumbly cookies?

Measure flour precisely and stop mixing once the flour disappears. Beyond that, avoid overbaking; even 30–60 seconds too long can make the texture sandy instead of fudgy.

10) Can I make a peanut butter cookies recipe without butter?

Absolutely. Substitute an equal weight of neutral oil. However, chill the dough afterwards so it doesn’t over-spread, and watch the final minute closely.

11) How do I adapt the recipe for gluten-free baking?

Two routes work well. First, the flourless 3-ingredient version is naturally gluten-free. Alternatively, a quality 1:1 gluten-free blend can replace all-purpose; nevertheless, mix gently to maintain tenderness.

12) What’s the simplest 3-ingredient version—and does it taste like the classic?

Peanut butter, sugar, and egg—stir, scoop, and bake. Notably, it’s peanut-forward and slightly denser. Even so, the chew is excellent when you avoid overbaking and let the cookies cool fully.

13) How can I make the flavor more peanut-forward?

Use salted peanut butter or add a small extra pinch of fine salt. Additionally, underbake by about 30 seconds for a creamier center that amplifies the peanut aroma.

14) What’s the ideal thickness before baking?

After scooping, press to about 1 cm with the crosshatch. Consequently, you’ll get even doneness: crisp rims, soft centers, and consistent texture across the batch.

15) Why did my cookies look greasy after cooling?

Oil separation in natural peanut butter or over-measured fat can cause sheen. Instead, stir natural peanut butter thoroughly and weigh ingredients; a short chill also helps stabilize the dough.

16) How do I keep edges crisp but centers soft?

Bake until edges turn just matte while centers still look slightly pale. Then, let the cookies rest on the sheet for 5 minutes. Ultimately, this sequence preserves the contrast you’re after.

17) Can I freeze the dough for later?

Yes—portion into balls, freeze on a tray, then bag. Additionally, bake straight from frozen and add 1–3 minutes, watching the edges rather than the clock.

18) What’s the best way to store baked cookies?

Airtight container at room temperature does the job. Conversely, if your climate is very humid, tuck a small piece of parchment between layers to discourage sticking.

19) How do I make egg-free peanut butter cookies?

Use a flax egg (1 tablespoon ground flax mixed with 3 tablespoons water, rested 5 minutes). Moreover, avoid overbaking, since egg-free doughs can firm up faster as they cool.

20) Can I add oats without drying the cookie?

Certainly. Fold in about 1 cup of oats per batch; if the dough feels stiff, add 1 tablespoon milk. Similarly, rolled oats give more chew, while quick oats create a softer, uniform crumb.

21) My cookies didn’t spread—what went wrong?

Likely the dough was too cold or flour ran high. Otherwise, the crosshatch press was too light. Let the scoops warm a few minutes or press slightly more before baking.

22) Does the peanut butter brand matter?

Not particularly; however, style does. Emulsified (no-stir) peanut butter is more predictable; natural works too, though it benefits from thorough stirring and a quick chill.

23) How can I boost aroma without extra sweetness?

Add ½ teaspoon vanilla and, if desired, a tiny pinch of espresso powder. Additionally, a light sprinkle of flaky salt after baking intensifies the peanut note without more sugar.

24) What oven rack and pan work best?

Middle rack with light-colored metal sheets promotes even browning. Meanwhile, line with parchment for consistent spread; dark trays brown faster, so shorten the bake slightly.

25) Can I double the peanut butter for stronger flavor?

Go cautiously. Increasing peanut butter too much can make cookies heavy and fragile. Instead, nudge flavor with a touch of salt, a hint more vanilla, and precise baking to keep centers plush.

26) How do I make small-batch peanut butter cookies?

Halve the ingredients. Furthermore, weigh everything for accuracy; smaller batches are less forgiving, and precise measurements keep texture identical to the full recipe.

27) What’s the best way to get uniform cookies?

Use a #40 or #50 scoop for even portions. Consequently, the batch bakes consistently, and every cookie finishes at the same moment.

28) Can I make a dairy-free peanut butter cookies recipe?

Yes—swap butter for equal weight of dairy-free baking sticks or neutral oil. Additionally, chill dough to maintain shape, and keep an eye on the edges to avoid overbaking.

29) How do I avoid a sandy or gritty texture?

Cream thoroughly at the start, but stop once flour is added. Beyond that, ensure sugars dissolve slightly during creaming, and don’t skip the brief rest on the tray after baking.

30) What’s the simplest way to refresh day-old cookies?

Warm a few on a tray at 150°C / 300°F for 3–4 minutes. As a result, the edges regain delicate crispness while the centers relax back to chewy.

Posted on 3 Comments

Green Tea Shot with Jameson | Recipe & 10 Variations

Premium magazine-style cover showing a bartender pouring a green tea shot with Jameson, peach schnapps, and lemon-lime soda, styled with elegant bar props

Some shots ride a wave of hype and vanish; others stick because they’re simple, consistent, and fun. The green tea shot with Jameson is very much the latter. It looks playful, smells like citrus and stone fruit, and goes down with a soft, tea-like whisper even though—surprise—it contains no tea at all. Instead, you get Irish whiskey’s gentle grain notes, peach schnapps’ sunny sweetness, and a crisp sweet-and-sour finish lifted by the smallest splash of lemon-lime soda. Made well, it’s cold, foamy at the rim, and perfectly balanced. Below, you’ll find the polished build, why these proportions work, how to make a fresher sour mix, and several variations (including Jameson Orange and a lighter vodka “white tea” version). To help you explore further, you’ll also see natural anchor links to internal technique pieces and external reference recipes from respected cocktail publishers and brands.

The classic green tea shot with Jameson (2 shots, 2 minutes)

You’ll need

  • ½ oz (15 ml) Jameson Irish Whiskey
  • ½ oz (15 ml) peach schnapps
  • ½ oz (15 ml) sour mix
  • A small splash of lemon-lime soda (≈¼ oz / 7–10 ml total after shaking)
  • Ice
Magazine-style recipe card of a bartender pouring a classic green tea shot with Jameson, peach schnapps, sour mix, and a tiny lemon-lime soda splash; elegant bar props and MasalaMonk.com footer
Green Tea Shot with Jameson—equal parts, quick shake, soda whisper. Save this recipe card for perfect peach-citrus balance every time. MasalaMonk.com

How to make it

  1. Add Jameson, peach schnapps, and sour mix to an ice-filled shaker.
  2. Shake hard for 8–10 seconds.
  3. Fine-strain into two chilled shot glasses.
  4. Finish with a tiny splash of lemon-lime soda. Serve immediately.

If you like confirming ratios and steps against trusted sources, compare the build with the clear, home-bar walkthrough on Liquor.com’s Green Tea Shot, the milliliter-forward instruction at Difford’s Guide, and the brand’s own parts-based spec on Jameson’s recipe page. For a bit of cultural context—why it spread and who orders it—dip into VinePair’s take.

Why these equal parts work

At heart, this is a three-way conversation between grainy, honey-tinged Irish whiskey; ripe, candy-peach schnapps; and bright, citric sour mix. Equal portions mean the sweetness from the schnapps never overwhelms the citrus, and the whiskey’s soft character still peeks through. The brief, decisive shake does two things at once: it chills and it aerates. That’s why, even before the soda, the surface shows a fragile foam—as if you’d just poured milky green tea. Then the soda splash amplifies aroma and adds the slightest sparkle, turning the texture silky.

If you’re dialling in your shake and strain, you’ll find practical, bar-tested guidance in MasalaMonk’s technique-forward posts like the Daiquiri recipe (classic, strawberry & frozen) and the citrus-balancing notes inside the Lemon Drop Martini guide. Different drinks, same fundamentals: fresh juice, clean measures, committed shake.

Fresher flavor without fuss: DIY sour mix recipe

Bottle mixes are consistent, yet fresh citrus always brings a livelier snap. Make a small batch and you’re set for a week.

  • 1 cup (240 ml) fresh lemon juice
  • 1 cup (240 ml) fresh lime juice
  • 1½ cups (300 g) simple syrup (1:1 by weight or volume)

Whisk, bottle, and refrigerate for up to 7 days. Because sour mix is the drink’s backbone, brighter mix means greener color, tighter foam, and cleaner finish. Want a little more citrus craft? The quick long-drink ideas in Vodka with Lemon show how to nudge sweet-sour toward your palate without losing balance.

Ingredient choices that actually matter

Irish whiskey: Jameson as an alcohol, is soft, slightly floral, and blends without fighting the peach. Any good Irish will do, but if you want to explore riffs from the same family, poke around Jameson’s cocktail hub—it’s a fast way to sense where their flavor works best.

Peach schnapps: This is the dessert-forward note. If you prefer a leaner profile, choose a schnapps that’s less confected or dial it back by a barspoon. Alternatively, offset sweetness by increasing the citrus slightly.

Sour mix: Fresh wins on aroma and color. If you’re pouring for a crowd and need consistency, bottled sour mix is fine—just consider sharpening it with a squeeze of lemon per shaker.

Soda: Use just a whisper. Too much turns the shot into a spritzer and mutes the tea-like illusion.

Also Read: What to Mix with Jim Beam: Best Mixers & Easy Cocktails

Variations for Different Moods (Exact Specs, Real Flavor Payoffs)

The base spec is robust, which means it tolerates swaps without collapsing. Below are deliberate riffs with measurements in both ounces and milliliters, clear flavor notes, and straightforward “when to pour” cues—so you can match the drink to the moment instead of forcing the moment to the drink.

Jameson Orange Tea Shot Recipe (zest-first, brighter nose)

Substitute Jameson Orange for classic Jameson, keep schnapps and sour mix the same, and land an even brighter nose with orange-peel vibes. The result is zestier, with the peach riding as a secondary note. If you enjoy oranges-on-oranges builds, peek at the brand’s citrusy long drink like Jameson Orange Burst to see how they frame sweetness and zest in longer formats; then return to the shot and keep the soda splash tiny so the orange oil doesn’t get lost.
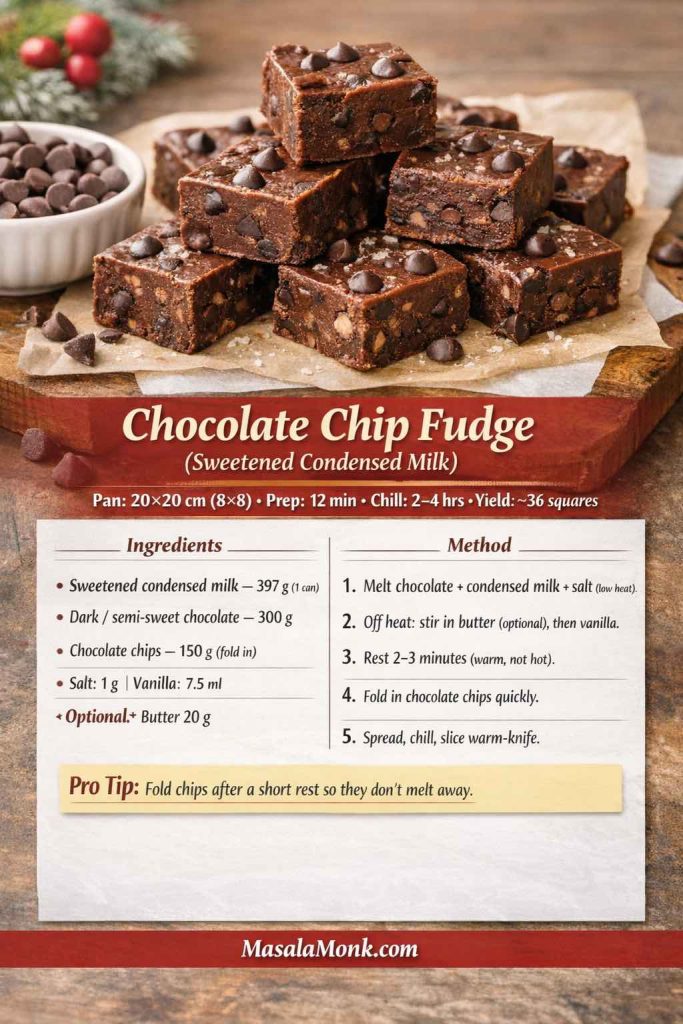
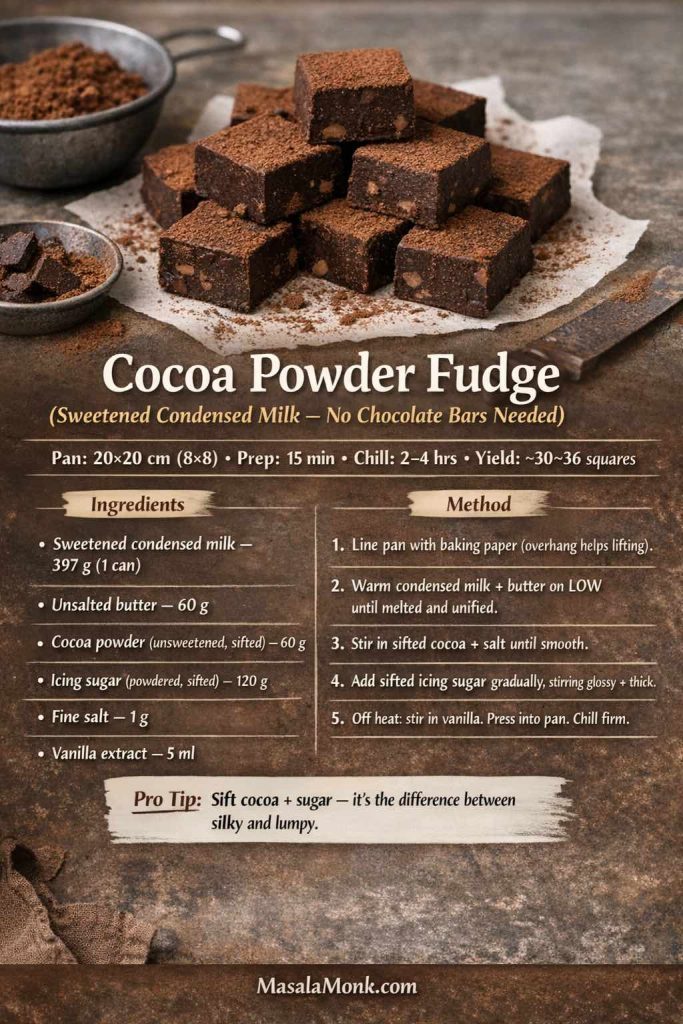
Why make it: When you want everything you love about a green tea shot with Jameson—plus orange peel aromatics that jump out of the glass.

You’ll need (2 shots)

  • ½ oz (15 ml) Jameson Orange
  • ½ oz (15 ml) peach schnapps
  • ½ oz (15 ml) sour mix
  • Tiny splash lemon-lime soda
  • Ice
Recipe card of a Jameson Orange tea shot being poured with peach schnapps, sour mix, and a tiny soda splash; bright citrus zest and elegant bar props; MasalaMonk.com footer
Jameson Orange Tea Shot—zesty, aromatic, and perfectly balanced. Get the exact 1:1:1 build with a soda whisper for lift. MasalaMonk.com

Method

  1. Shake whiskey, schnapps, and sour mix hard with ice for 8–10 seconds.
  2. Fine-strain into two chilled shot glasses.
  3. Dot each with a restrained soda splash.

Flavor & feel: The orange infusion brightens the top notes, nudging peach to the mid-palate. Citrus reads clearer, sweetness feels round rather than sticky, and the finish stays tea-like.

When to pour it: First round for citrus lovers; last round when palates are a bit dulled and need aromatic lift.

Make it yours: If the bottle leans sweet for you, shave the schnapps to ⅓ oz (10 ml) and bump sour mix to ⅔ oz (20 ml). For longer, citrus-zesty drinks, skim how the brand frames orange in highballs on Jameson’s cocktail hub, then translate that brightness back into your shot spec with a lighter soda touch.

Also Read: Whiskey and Warmth: 5 Cinnamon-Spiced Iced Tea Cocktails to Get You through Wednesday

White Tea Shot Recipe (vodka version, feather-light and crisp)

Despite the name, no tea here either—just a lighter spirit in the same pattern: ½ oz vodka, ½ oz peach schnapps, ½ oz sour mix, and a soda whisper. Guests who usually avoid whiskey will appreciate this softer version. If you’re on a citrus kick, the lemony long-drink ideas in Vodka with Lemon cross-train your palate for dialing sweetness with precision.

Why make it: Guests want the vibe without whiskey; you want something ultra-approachable that still tastes like a cocktail.

You’ll need (2 shots)

  • ½ oz (15 ml) vodka for alcohol
  • ½ oz (15 ml) peach schnapps
  • ½ oz (15 ml) sour mix
  • Whisper of lemon-lime soda
  • Ice
Recipe card of a White Tea Shot made with vodka, peach schnapps, and sour mix, finished with a tiny lemon-lime soda splash; frosted shot glasses and elegant bar props; MasalaMonk.com footer
White Tea Shot (Vodka)—equal parts, quick 8–10s shake, fine-strain, soda whisper. A lighter take on the green tea shot, ready to save and pour. MasalaMonk.com

Method—same as the classic: shake, fine-strain, soda whisper.

Flavor & feel: Cleaner nose, softer mid-palate. Without grain notes, peach and citrus do the talking; the soda keeps it lively.

When to pour it: Big mixed-crowd parties; first taste for someone who insists they’re “not a whiskey person.”

Make it yours: Use a neutral, well-filtered vodka. If your sour mix is super fresh, the drink will taste drier and more polished. For more citrus nuance, the bright balancing ideas in MasalaMonk’s Vodka with Lemon transfer perfectly.

Tequila Green Tea Shot Recipe (herbal, slightly peppery)

Blanco tequila brings gently herbal, peppery energy. Keep your equal parts (tequila, peach schnapps, sour mix) and still finish with that light soda topper. The peach brightens the agave; the citrus keeps it honest.

Why make it: You love agave’s snap and want a slightly drier, greener energy without losing the peach-citrus handshake.

You’ll need (2 shots)

  • ½ oz (15 ml) blanco tequila
  • ½ oz (15 ml) peach schnapps
  • ½ oz (15 ml) sour mix
  • Tiny splash lemon-lime soda
  • Ice
Recipe card of a Tequila Green Tea Shot made with blanco tequila, peach schnapps, and sour mix, finished with a tiny lemon-lime soda splash; elegant bar props and MasalaMonk.com footer
Tequila Green Tea Shot—herbal, lightly peppery, and peach-citrus bright. Equal parts, 8–10s shake, fine-strain, soda whisper. MasalaMonk.com

Method

  1. Shake all but soda with ice; fine-strain.
  2. Add a micro-splash of soda; serve.

Flavor & feel: Citrus frames the tequila’s herbal top notes; peach smooths the edges. The finish is brisk, not hot.

When to pour it: Taco night; summer porch sessions; anytime your crowd is already in a margarita mindset.

Make it yours: If your schnapps is very sweet, cut it by a barspoon and give that space to tequila. Alternatively, keep equal parts but add three drops of saline to tighten the line between sweet and sour.

Also Read: 10 Best Espresso Martini Recipe Variations (Bar-Tested)

“Green Tea Shot with Jameson” as a Full Drink (Recipe of highball you’ll keep making)

Sometimes you want more than a sip. In a tall glass with ice, combine 1½ oz Jameson, 1 oz peach schnapps, and 1 oz sour mix. Top with 3–4 oz lemon-lime soda and give it a quick stir. It reads like a riff on a citrus-peach spritz with whiskey backbone—refreshing without feeling sticky. If you’d rather build long drinks with more nuance, skim MasalaMonk’s highball-friendly framework inside Coconut Water Cocktails; the sequencing—light muddle, shake, top—transfers neatly to soda-lifted whiskey coolers.

Why make it: Sometimes everyone wants a sipper, not a quick hit—but with the same peachy-citrus profile.

You’ll need (one tall drink)

  • 1½ oz (45 ml) Jameson
  • 1 oz (30 ml) peach schnapps
  • 1 oz (30 ml) sour mix
  • 3–4 oz (90–120 ml) lemon-lime soda
  • Ice + tall glass
Image of a Green Tea Highball made with Jameson, peach schnapps, sour mix, and soda; tall glass with ice and lemon wheel; MasalaMonk.com footer.
Same signature, longer sip—peach-citrus whiskey spritz with a refreshing soda lift. MasalaMonk.com

Method

  1. Build whiskey, schnapps, and sour mix over ice.
  2. Top with soda; gentle single turn with a barspoon.

Flavor & feel: Refreshing, softly sweet, zesty on the nose. Think “peachy whiskey spritz” more than “shot stretched with bubbles.”

When to pour it: Warm evenings; second round for folks who loved the shot but want to linger.

Make it yours: Swap the lemon-lime soda for chilled club soda if you prefer a drier profile; backfill with a ¼ oz (7 ml) of simple syrup if it goes too lean. For broader highball structure—how to stack, stir, and top without knocking out bubbles—MasalaMonk’s Coconut Water Cocktails gives a tidy roadmap that translates beautifully.

Also Read: Crock Pot Lasagna Soup (Easy Base + Cozy Slow-Cooker Recipes)

Peach tea shot (Recipe with actual brewed tea)

Your friends might eventually ask for real tea flavor. For a soft, porch-sipper profile, shake ½ oz Jameson, ½ oz peach schnapps, ½ oz strong black tea, and ¼ oz lemon juice; strain and skip the soda. The color leans amber, the texture dries out a touch, and the aroma feels more like summer iced tea. If that direction appeals, you’ll love the whiskey-plus-tea combinations in MasalaMonk’s cinnamon-spiced iced tea cocktails and the sparkling bergamot tones in Earl Grey Elegance.

Why make it: Someone inevitably asks for real tea. This one answers kindly and keeps the flavor honest.

You’ll need (2 shots)

  • ½ oz (15 ml) Jameson
  • ½ oz (15 ml) peach schnapps
  • ½ oz (15 ml) strong black tea, cooled
  • ¼ oz (7 ml) fresh lemon juice (optional, for snap)
  • Ice
Magazine-style recipe card of a Peach Tea Shot made with Jameson, peach schnapps, strong brewed black tea, and a touch of lemon; amber-gold hue with elegant bar props; MasalaMonk.com footer
Peach Tea Shot—real brewed tea, drier finish, and fragrant citrus lift. Shake cold, fine-strain, no soda. Save this card for crisp, tea-forward balance. MasalaMonk.com

Method

  1. Shake all four ingredients with ice; fine-strain into two shots.
  2. Skip the soda—tea supplies structure.

Flavor & feel: More iced-tea than candy. Color turns amber-gold; finish dries out nicely.

When to pour it: Afternoon gatherings; tea-loving crowds; anytime soda feels too bubbly.

Make it yours: Steep tea a touch stronger than you’d drink; sweetness will soften in the shaker. If that world appeals, MasalaMonk’s tea-first series—like cinnamon-spiced iced tea cocktails and Earl Grey Elegance—maps out plenty of variations for bigger batches.

Turn the party peach-forward

Leaning into peach as a theme? Fold your shot service into a sweet-stone-fruit menu. For easy bridges—spritzes, long drinks, and fun desserts—MasalaMonk’s Crown Royal Peach roundups show how to steer peach toward bubbles, spice, and summer fruit in a way that still feels grown-up.

Green Tea Martini Recipe with Jameson (From Shot to Coupe)

You’ll need (1 cocktail)

  • 1½ oz (45 ml) Jameson
  • ¾ oz (22 ml) peach schnapps
  • ¾ oz (22 ml) sour mix
  • Lemon twist (optional)
Recipe card of a Green Tea Martini made with Jameson, peach schnapps, and sour mix, served in a chilled coupe with a lemon twist; elegant bar props and MasalaMonk.com footer
Green Tea Martini (Jameson)—same peach-citrus profile, silkier in a coupe. Shake 8–10s, fine-strain, express lemon for a bright, polished finish. MasalaMonk.com

Method Shake hard with ice; fine-strain into a chilled coupe; express lemon over the top.
Flavor & feel Colder, silkier, a shade drier; stemware concentrates aroma and slows the sip.
When to pour Date nights and small groups who prefer cocktails to quick rounds.

Also Read: Cottage Cheese Lasagna Recipe | Chicken, Spinach, & Ricotta


How to make Green Tea Jello Shots (Make-Ahead, Party-Tray Friendly)

You’ll need (20–24 minis)

  • 1 cup boiling water
  • 1 packet (3 oz / 85 g) lemon-lime gelatin
  • ¾ cup (180 ml) Jameson
  • ¾ cup (180 ml) peach schnapps
  • ¼ cup (60 ml) sour mix
Tray of Green Tea Jello Shots made with Jameson, peach schnapps, and lemon-lime gelatin; glossy set cubes with citrus accents; MasalaMonk.com footer
Green Tea Jello Shots—make-ahead, peach-citrus flavor with a gentle whiskey warmth. Exact ratios and quick set method inside. MasalaMonk.com

Method Dissolve gelatin; stir in spirits and sour; portion; chill 3–4 hours.
Flavor & feel Soft citrus-peach with whiskey warmth; stays lively if your sour mix is fresh.
Serve with Peach-leaning trays from Crown Royal Peach twists for a playful, coherent spread.


“Without Jameson” (Keeping the Silhouette, Changing the Grain)

You’ll need (2 shots)

  • ½ oz (15 ml) smooth Irish whiskey alternative (or bourbon/blend)
  • ½ oz (15 ml) peach schnapps
  • ½ oz (15 ml) sour mix
  • Tiny splash soda
Photo-real magazine-style recipe card showing a green tea shot made without Jameson—using an Irish whiskey alternative—plus peach schnapps, sour mix, and a tiny soda splash; elegant bar props and MasalaMonk.com footer.
Without Jameson (Irish Alt)—keep the same green tea shot silhouette with equal parts, 8–10s shake, fine-strain, and a micro-splash of soda for balance. MasalaMonk.com

Method Classic shake; fine-strain; micro-splash.
Flavor & feel With other Irish whiskeys, nearly identical; bourbon adds vanilla-caramel; blended Scotch leans malty and drier.
Tweak If the alternate whiskey is sweeter, trim schnapps by a barspoon; if it’s drier, add a touch more sour. Thus you keep the silhouette intact.

Also Read: How to Make Churros (Authentic + Easy Recipe)


Iced Tea Shot (Arnold-Palmer-ish, Ultra-Sessionable)

You’ll need (2 shots)

  • ½ oz (15 ml) Jameson
  • ½ oz (15 ml) peach schnapps
  • ½ oz (15 ml) sour mix
  • ½–¾ oz (15–22 ml) chilled black tea (or unsweetened iced tea)
Photo-real magazine-style recipe card of an Iced Tea Shot made with Jameson, peach schnapps, and sour mix, finished with a chilled black-tea float; elegant bar props and MasalaMonk.com footer
Iced Tea Shot—near-still texture, real tea aroma, lightly tart finish. Shake all but tea, fine-strain, then spoon a delicate float. MasalaMonk.com

Method Shake everything except tea; fine-strain; spoon a light float of tea.
Flavor & feel Nearly still; true tea aroma; lightly tart finish.
Serve when Daytime hangs, BBQs, or whenever guests want less fizz.

Also Read: How to Cook Bacon in the Oven (Crispy, No-Mess, Crowd-Ready Recipe)


“Shot into a Drink” Template (Turn Any Riff into a Tall Pour)

You’ll need (1 tall drink)

  • Spirit: 1½ oz (45 ml) (match your shot base)
  • Peach schnapps: 1 oz (30 ml)
  • Sour mix: 1 oz (30 ml)
  • Top: 3–4 oz (90–120 ml) soda or iced tea
  • Ice
Magazine-style card showing a tall green-tea-style highball built from the shot template—spirit, peach schnapps, sour mix, and soda or iced tea—elegant bar props, MasalaMonk.com footer.
Turn any green-tea-style shot into a refreshing sipper—build on ice, top, and give a single gentle stir. MasalaMonk.com

Method Build spirit, schnapps, and sour over ice; top; give a single gentle stir.
Flavor & feel Your shot’s signature becomes an anytime highball. For carbonation-care and top-off tactics, borrow the light-handed approach from Coconut Water Cocktails and adapt it here.


“Green Tea Drop Shot” (Playful, Lightly Sparkling Recipe)

You’ll need (per person)

  • In a shot: ½ oz (15 ml) Jameson, ½ oz (15 ml) peach schnapps, ¼ oz (7 ml) sour mix
  • In a rocks glass: 3 oz (90 ml) chilled lemon-lime soda (or lightly sweetened green tea soda)
Image showing a green tea drop shot—mixed shot dropped into a rocks glass of lemon-lime soda; elegant bar props; MasalaMonk.com footer.
Green Tea Drop Shot—instant foam, bright aroma, same peach-citrus profile with a lively pop. MasalaMonk.com

Method Build soda in the rocks glass; drop the shot; sip promptly.
Flavor & feel Instant foam lift; sweetness integrates on the fly; aroma pops.
When to pour Casual nights where a little spectacle energizes the room.

Also Read: French Toast Sticks (Air Fryer + Oven Recipe) — Crispy Outside, Custardy Inside


Arizona-Style & Kamoti-Style (Brand-Guided Tea Riffs)

Arizona-style Keep equal parts whiskey/schnapps/sour, then float Arizona Green Tea (or a favorite canned green tea) instead of soda. If the tea is sweet, trim the schnapps by a barspoon.

Photo-real magazine-style card of an Arizona-style green tea shot—Jameson, peach schnapps, sour mix—with a delicate canned green-tea float; elegant bar props; MasalaMonk.com footer.
Arizona Green Tea Shot—peach-citrus core with a sweet tea lift. Shake the base, then float chilled canned green tea for aroma and sheen. MasalaMonk.com


Kamoti-style Split the schnapps: ¼ oz (7 ml) peach schnapps + ¼ oz (7 ml) green tea liqueur, with ½ oz whiskey and ½ oz sour. Expect a real tea nose and a rounder, softer finish. If you’re drifting tea-first, comparing brand structures on Jameson’s site and ml-precise approaches on Difford’s Guide is illuminating.

Recipe card of a Kamoti-style green tea shot made with Jameson, peach schnapps, green tea liqueur, and sour mix; elegant bar props; MasalaMonk.com footer.
Kamoti Green Tea Shot—true tea aroma meets peach-citrus balance. Split the schnapps with green tea liqueur, shake hard, fine-strain, soda whisper. MasalaMonk.com

Also Read: 10 Best Chicken Sandwich Recipes (BBQ, Parm, Buffalo & More)

Texture, temperature, and that tea-like color

A great pour starts well before you touch the shaker. Chill your glassware so the foam collar lingers. Use dense, fresh ice to encourage tiny bubbles instead of a watery slosh. Shake with intent—firm arcs, quick snap, short window. Then fine-strain to keep the surface smooth. The light green hue arrives from a little cocktail alchemy: bright sour mix and peach schnapps over pale whiskey produce a spring-tinted tone, and that small soda float scatters light across the top. If you want to see how professionals balance color and carbonation in tea-linked long drinks, compare your highball to Liquor.com’s Green Tea Highball; different composition, same idea—spirit, tea, sparkle, clarity.

Making more without losing quality of Green Tea Shot with Jameson

Batching streamlines service without sacrificing snap. Combine equal parts Jameson, peach schnapps, and sour mix in a chilled bottle or pitcher; omit soda. Keep the premix very cold. For each shot, measure 1½ oz (45 ml) premix into a shaker with fresh ice, shake fast, strain, and add the soda kiss right before serving. That last-second splash preserves the foam and the tea-like impression even when you’re working quickly.

If your guests pivot to tall drinks, pour 2½–3 oz (75–90 ml) premix over ice, top with soda or tea, and give a single gentle turn. Meanwhile, for a broader peach-centric spread—spritzes, long drinks, and tray items—MasalaMonk’s Crown Royal Peach twists slide in comfortably beside jello shots and highballs. Prefer tropical-light textures instead? The breezy structures in Coconut Water Cocktails demonstrate how to soften acidity without losing refreshment—useful when you want a slower sip that still feels bright.

For more party-friendly ideas that retain zip in big batches, MasalaMonk’s mango vodka long-drink ratios offer a clear template for lengthening sweetness without turning flabby.

Choosing bottles and dialing sweetness

Which Irish whiskey? For the classic green tea shot with Jameson, you already know the pick. If the bar is stocked with an alternate Irish, don’t stress—this is a forgiving build. The goal is smooth, cereal-forward, and moderately light oak.

Which peach schnapps? You’re usually choosing between exuberantly sweet, candy-like brands and slightly cleaner, less viscous options. If your schnapps is extra sugary, shave a barspoon off and replace it with whiskey, or give your sour mix a touch more lemon to tighten the edges.

When to sweeten or sharpen? If a guest says “too tart,” drizzle a quarter-teaspoon more schnapps into the shaker; if they say “too sweet,” tip in a squeeze of lemon or a barspoon of your sour mix without syrup (equal lemon-lime, no sugar). The balancing mindset from the Lemon Drop Martini tutorial translates directly here: small nudges beat big swings.

Glass & ice details. Chilled shot glasses extend foam; dense cubes reduce melt. Even chilling your jigger and tin before a party softens thermal shock and speeds your rhythm.

Also Read: Punch with Pineapple Juice: Guide & 9 Party-Perfect Recipes

Serve with intention

Shots don’t have to be chaotic. Arrange chilled shot glasses on a tray, line them up, and pour in sequence for a tidy presentation. If you’re switching back and forth between shots and highballs, keep a separate scoop and glass of fresh ice just for shaking. Meanwhile, consider a simple garnish for the tall version—a lemon wheel or a thin strip of orange zest—so guests can smell citrus before the first sip. If you want a more aromatic, spice-curious table theme, MasalaMonk’s tea-cocktail series—like star anise iced tea cocktails and paprika-kissed iced tea ideas—shows how minimal garnishes shift the whole vibe.

When you actually want green tea in the glass

At some point, someone will ask, “Where’s the tea?” If you’re in the mood to answer with a proper tea-forward cocktail, you have options. Whisky plus chilled green tea makes a poised, adult highball when you favor balance over sweetness—see Liquor.com’s Green Tea Highball for a clear blueprint. Or, if you want a Jameson-branded recipe that features brewed tea as an ingredient, the Jameson Green Tea & Ginger Sour is brisk, gingery, and genuinely tea-aromatic. In both cases, you’re leaving the “shot” universe and entering a calm, sippable frame.

Also Read: Macaroni & Cheese Recipe: Creamy Stovetop, Baked & Southern

A smoother path to consistency

Even uncomplicated drinks benefit from a touch of craft. Use a jigger. Choose fresh citrus. Shake decisively, then strain immediately. Keep your sour mix cold. Cycle your ice so it’s crisp and not half-melted. These aren’t fussy rules; they’re the small habits that make the second round taste exactly like the first.

If you want to drill technique in a forgiving context, practice with classic three-ingredient templates. The evergreen Daiquiri primer teaches compact shaking and lime-sugar balance, while the Lemon Drop Martini walkthrough reinforces how a bright sour frame can feel plush, not sharp. Bring those instincts back to your shaker, and the green tea shot with Jameson will pour clean without you thinking twice.

Flavor notes to expect, sip by sip

First comes a cheerful peach aroma that hints at candy but doesn’t clobber. Then a lemon-lime lift; not soda-pop sweet, just sparkling. On the palate, the whiskey keeps everything grounded—grainy warmth, a little vanilla, and a finish that reads like sweet tea without actual leaves. Served icy, the texture is soft and quick. As the shot warms, the peach becomes more perfumed, so either serve promptly or lean into the highball version for a lingering drink.

For a contrasting, true-tea experience with a similar flavor family, try a chilled peach-black-tea highball or an Earl Grey spritz; MasalaMonk’s Earl Grey & Gin fizz shows how a modest line of lemon and bubbles reframes familiar aromatics in a longer pour.

If you love Green Tea Shot with Jameson, you’ll love these too

Once your crew warms to peach-citrus energy, adjacent pours make natural next steps. A peach-forward spritz keeps fruit emphatic while lightening the body—Crown Royal Peach twists offer clever spice bridges like cardamom and ginger. Prefer cooler, breezier textures? The tall templates in Coconut Water Cocktails soften acidity but preserve zip. Meanwhile, if the room splits between shot folks and coupe folks, slide into a bright, citrus-forward classic like the Lemon Drop Martini and circle back to shots when the playlist climbs. If you want a forgiving arena to practice repeatable shaking, the Daiquiri primer remains a masterclass in balance—skills you’ll feel immediately when you shake your next round of green tea shots.

The bottom line

Lean builds are often the most resilient. The green tea shot with Jameson thrives because it gives you just enough sweetness to be friendly, just enough citrus to stay clean, and just enough whiskey to feel like a real drink. Shake it cold, top it with restraint, and let the peachy-citrus perfume do the rest. When you’re ready to branch out, you can pivot to a long, soda-topped highball, a brewed-tea peach shot, or a true tea cocktail—all without abandoning the easygoing charm that made this little green-gold pour famous in the first place.

For deeper recipe cross-checks and ideas to keep the momentum going, browse Liquor.com’s recipe, the tidy ml measures at Difford’s Guide, and the brand spec on Jameson’s site. Then circle back to MasalaMonk’s technique vault—Daiquiri, Lemon Drop Martini, Vodka with Lemon, and Coconut Water Cocktails—so your next round tastes even better than the first.
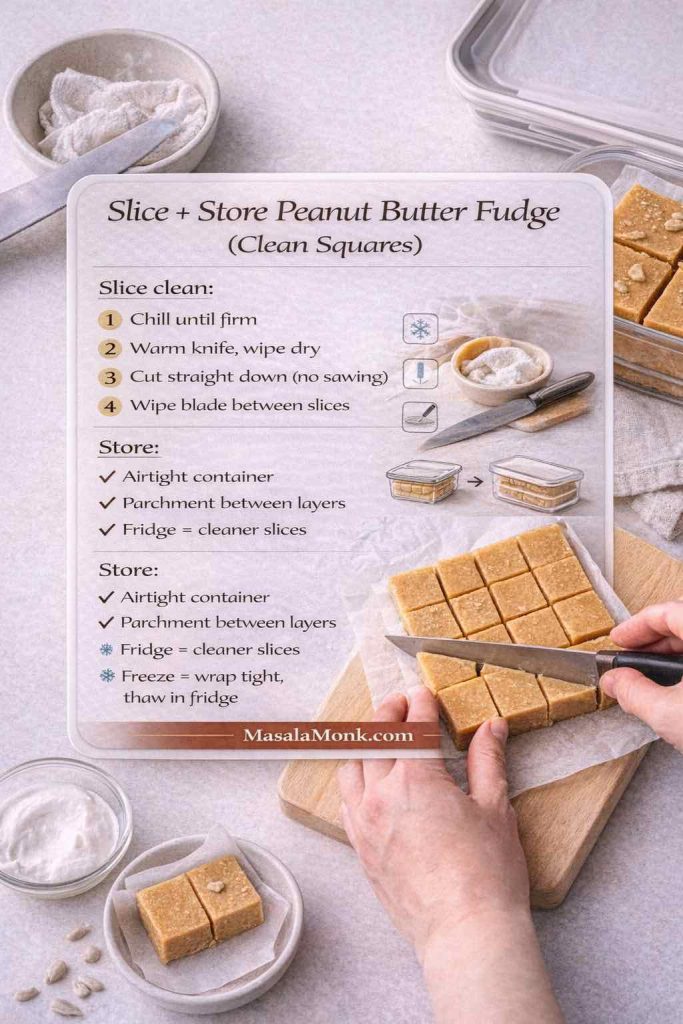
FAQs about Green Tea Shot with Jameson

1) What is a green tea shot with Jameson?

A green tea shot with Jameson is an equal-parts mini-cocktail made with Jameson Irish Whiskey, peach schnapps, and sour mix, finished with a tiny splash of lemon-lime soda. Crucially, it contains no actual tea; the name comes from the light green hue and sweet-tea vibe.

2) What are the ingredients in a green tea shot?

Standard ingredients: ½ oz (15 ml) Jameson, ½ oz (15 ml) peach schnapps, ½ oz (15 ml) sour mix, plus a restrained soda splash. Optionally, you can use fresh lemon-lime sour instead of bottled for brighter flavor.

3) How do you make a green tea shot with Jameson step-by-step?

Add Jameson, peach schnapps, and sour mix to an ice-filled shaker; shake hard for 8–10 seconds; fine-strain into two chilled shot glasses; finally, add a whisper of lemon-lime soda and serve immediately.

4) Does a green tea shot actually include tea?

Surprisingly, no. Despite the name, the classic recipe has zero tea. The “tea” impression comes from peach-citrus sweetness, pale color, and a delicate fizz.

5) What’s the best ratio for green tea shots?

As a rule, use equal parts (1:1:1): ½ oz Jameson + ½ oz peach schnapps + ½ oz sour mix per shot, then a micro-splash of soda for lift.

6) Can I make a green tea shot without Jameson?

Yes. Pragmatically, any smooth Irish whiskey works; comparatively, bourbon will taste sweeter/vanilla-leaning, while blended Scotch will land drier and malty. Keep the equal-parts formula and adjust sweetness by barspoons if needed.

7) What is a white tea shot vs. a green tea shot?

A white tea shot swaps the whiskey for vodka (½ oz vodka, ½ oz peach schnapps, ½ oz sour mix, soda whisper). It’s lighter and crisper, though the rest of the build is identical.

8) Can I make a green tea shot with tequila instead of whiskey?

Absolutely. Use ½ oz blanco tequila, ½ oz peach schnapps, ½ oz sour mix, and a tiny soda splash. Consequently, you’ll get herbal, lightly peppery notes with the same peach-citrus silhouette.

9) How do I make a Jameson Orange tea shot?

Substitute Jameson Orange for classic Jameson; otherwise, keep equal parts and the same method. Notably, you may trim schnapps slightly if sweetness blooms, or bump sour mix by a barspoon for extra snap.

10) What’s the “Arizona green tea shot” everyone mentions?

It’s a social riff where, instead of soda, you float a spoonful of canned Arizona Green Tea (or similar). Because many canned teas are sweet, you might reduce the schnapps a touch to maintain balance.

11) What is a Kamoti green tea shot?

That version uses a green-tea liqueur alongside (or in place of some) peach schnapps. For example: ½ oz Jameson, ¼ oz peach schnapps, ¼ oz green-tea liqueur, ½ oz sour; then a small soda topper for lift.

12) Can I turn the green tea shot into a full drink?

Yes—easily. Build in a tall glass: 1½ oz Jameson, 1 oz peach schnapps, 1 oz sour mix; top with 3–4 oz soda and give one gentle turn. Consequently, you get the same flavor in a refreshing highball.

13) What’s the best sour mix for green tea shots?

Ideally, fresh 1:1 simple syrup with equal parts lemon and lime juice (kept cold) tastes brightest. Nevertheless, bottled sour works for speed; if it seems flat, squeeze in a bit of fresh lemon at the shaker.

14) What does a green tea shot taste like?

Expect a peachy nose, bright lemon-lime mid-palate, soft grain from the whiskey, and a lightly sparkling finish that reads like sweet tea—albeit without any brewed leaves.

15) What’s the ABV and how strong is it?

Because it’s split three ways and lightly diluted in the shake (plus a soda kiss), one green tea shot with Jameson drinks softer than neat whiskey. Even so, it’s still alcohol—pace yourself accordingly.

16) How do I batch green tea shots for a party?

Subsequently, combine equal parts Jameson, peach schnapps, and sour mix in a chilled bottle; do not add soda. Shake each round with fresh ice to order, strain into shots, then add the soda whisper just before serving.

17) Can I make green tea jello shots with the same flavor?

Indeed. Dissolve lemon-lime gelatin in boiling water, then stir in measured Jameson, peach schnapps, and sour mix. Portion into mini cups and chill. The resulting set keeps the peach-citrus profile with a gentle whiskey warmth.

18) How long does homemade sour mix last in the fridge?

Typically, up to 7 days in a clean bottle, refrigerated. Moreover, shaking the bottle before service re-emulsifies citrus oils and restores brightness.

19) What’s the difference between “green tea shot drink,” “as a drink,” and “full drink”?

These phrases all refer to lengthening the shot into a highball (tall, over ice) using soda or iced tea. Conversely, the shot itself is a small, shaken, quickly served portion.

20) Can I use brewed tea in a green tea shot?

Yes—just choose the peach tea shot variation: replace the soda with strong, chilled black tea and optionally add a dash of fresh lemon. Consequently, the result turns more amber and finishes drier.

21) How do I order or describe it in Spanish?

Try: “Green Tea Shot con Jameson: 15 ml whiskey irlandés, 15 ml licor de durazno, 15 ml sour; un chorrito de gaseosa lima-limón. Agitar con hielo y colar.”

22) What’s in a green tea shot with Jameson Orange vs. classic Jameson?

Both share peach schnapps, sour mix, and soda; however, Jameson Orange adds zesty citrus aromatics and can taste slightly sweeter. Accordingly, you may reduce schnapps or raise the sour by a barspoon.

23) Can I make a green tea shot without peach schnapps?

You can, but flavor shifts. Likewise, consider splitting peach schnapps with green-tea liqueur or apricot liqueur; alternatively, add a barspoon of simple syrup and extra lemon to simulate peachy sweetness.

24) Is there a martini version of the green tea shot with Jameson?

Yes: shake 1½ oz Jameson, ¾ oz peach schnapps, ¾ oz sour mix; fine-strain into a chilled coupe. Consequently, you get a colder, silkier, slower-sipping profile with the same core flavors.

25) What if my green tea shot is too sweet—or too tart?

If too sweet, add a small squeeze of lemon or reduce schnapps by a barspoon. If too tart, increase schnapps slightly or add a tiny dash of simple syrup. Importantly, make micro-adjustments for repeatability.

26) Can I make a green tea shot with vodka and still call it “green tea shot”?

Commonly, yes (some menus do). Nevertheless, it’s more accurate to call it a white tea shot (vodka + peach schnapps + sour + soda whisper) to signal the lighter spirit.

27) What’s the “drop shot” version?

Place the mixed shot (Jameson + peach schnapps + sour) above a rocks glass of lemon-lime soda; drop the shot into the glass and drink promptly. Thus, you get instant foam and a lively aroma pop.

28) How do I keep the foam collar on top?

Use very cold glassware, dense ice, and a firm 8–10-second shake, then fine-strain and add only a micro-splash of soda. Consequently, the tiny bubbles linger instead of collapsing.

29) Can I make a “green tea shot with Jameson” gluten-free?

Jameson is commonly considered gluten-free by many due to distillation; however, sensitivities vary. Therefore, if in doubt, consult your dietary guidelines and choose certified products where necessary.

30) What’s the simplest two-ingredient whiskey and peach schnapps shot?

Stir or briefly shake ¾ oz Jameson with ¾ oz peach schnapps over ice and strain. Naturally, it’s sweeter and warmer than the classic (no citrus, no soda), but it’s fast and friendly.

31) What’s the ideal garnish?

For the tall “full drink,” a thin lemon wheel or a whisper of orange zest enhances aroma. By contrast, the shot itself generally needs none; restraint keeps the texture crisp and the look clean.

32) What’s the calorie range for a green tea shot with Jameson?

Estimates vary by brand, yet roughly 80–110 kcal per shot is typical once you account for schnapps, sour, and the small soda splash. Consequently, longer highballs add calories primarily via the top-off.

33) Should I use store-bought sour mix or fresh?

Fresh tastes brighter, smells cleaner, and foams better. That said, store-bought is convenient and consistent; accordingly, sharpen it with a quick squeeze of lemon if it seems dull.

34) Can I prep the shots ahead of time?

Mix the whiskey, schnapps, and sour in a chilled bottle; keep it cold. Subsequently, shake individual rounds with fresh ice and add the soda whisper right before serving to preserve texture.

35) Why does mine not look “green” enough?

Color depends on your sour and schnapps hue. For slightly greener tone, ensure the sour is fresh (lemon + lime) and don’t over-dilute with soda; the spring-green tint should appear after a vigorous shake.

Posted on 7 Comments

Béchamel Sauce for Lasagna: Classic, Vegan & Ricotta Sauce Recipe

Hand pouring silky béchamel onto a golden lasagna slice; copper saucepan and pasta sheets behind — Béchamel Sauce for Lasagna.

Some lasagne land on the plate as tidy, satiny squares, their layers distinct yet tender; others slouch apart, rich but oddly heavy. The difference, more often than not, is a confident Béchamel Sauce for Lasagna. This classic white sauce—built from a butter-and-flour roux whisked with milk—glues the pasta, ragù, and cheese together without weighing everything down. It’s one of the five “mother sauces” of French cuisine, a family of preparations that underpin countless dishes; if you’re curious about that lineage, the overview from the Auguste Escoffier School of Culinary Arts is a neat primer on why béchamel matters and how cooks riff on it across traditions (including the Mornay variation, which adds cheese) (learn more).

As we go, we’ll explore the classic method, a luscious ricotta–béchamel hybrid, and a plant-based version that behaves exactly like the dairy original. We’ll also walk through consistency cues, layering logic, and common mistakes—with calm, practical fixes—so your Béchamel Sauce for Lasagna performs beautifully every time.

Also Read: Crock Pot Lasagna Soup (Easy Base + Cozy Slow-Cooker Recipes)


What Béchamel Is—and What It Isn’t

At its heart, béchamel is simply milk thickened with a roux. You make a roux by cooking equal parts butter and flour until the paste foams and smells nutty. Keep it blond (not browned) for lasagna; a pale roux thickens more efficiently, giving you a sleeker sauce with less cooking. Season gently with salt, a pinch of white pepper, and just a whisper of fresh nutmeg. That’s it: no cheese yet, no garlic, no stock—just a neutral, creamy backbone ready to support the rest of the dish.

Add cheese to béchamel and you’ve made Mornay, which is wonderful in mac and cheese or as a gratin glue but a bit richer than you need for traditional lasagne. If you’d like to see how gently folding cheese into a hot white sauce creates that glossy, elastic finish (without turning grainy), our Macaroni & Cheese recipe offers a practical demonstration of melting off the heat and letting the sauce stabilize before serving.

Historically, Italian lasagne—especially the Bolognese style from Emilia-Romagna—embraces béchamel as a structural element rather than a dramatic flavor spike. It complements ragù; it doesn’t compete with it. La Cucina Italiana’s concise recipe for besciamella mirrors what generations of home cooks do: modest fat and flour, whisked with milk to a soft, spoon-coating body (classic Italian method).

Also Read: Cottage Cheese Lasagna Recipe | Chicken, Spinach, & Ricotta


Classic Béchamel Sauce for Lasagna: The Master Ratio and Why It Works

While plenty of cooks eyeball their béchamel by feel, a ratio keeps things reproducible—especially when you’re scaling up for guests. A widely used proportion is equal parts butter and flour by weight, then roughly ten parts warm milk by weight. For everyday home cooking, Italy’s common kitchen ratio—40 g butter + 40 g flour + 500 ml milk—is a friendly benchmark. It yields a softly thick sauce that clings to the back of a spoon (the classic nappe texture) without turning pasty.

Why blond matters. A pale roux maintains more thickening power than a darker one because less starch has broken down during toasting. That’s exactly what we want here: a silken texture at a gentle simmer, not a roasty, nutty profile that’d be more appropriate for gumbo or étouffée. If you want a deeper dive into roux behavior and the trade-off between flavor and thickening power, the science-forward guides at Serious Eats are terrific for grasping what’s happening in the pot and how to correct course if you overshoot the color (roux 101), (béchamel basics).

Texture, not time, is your compass. Rather than obsessing over minutes, watch how the sauce moves. When you lift the spoon, it should slide off in a continuous sheet, not in watery rivulets. Draw a finger along the spoon’s back; the line should stay clean. If the sauce feels sluggish, whisk in a spoon or two of warm milk. If it’s thin, simmer delicately for another minute and reassess. With that steady, patient approach, your Béchamel Sauce for Lasagna will end up glossy and cooperative, ready to layer.

Classic Béchamel Sauce for Lasagna being whisked in a copper pan; ratio 40 g butter, 40 g flour, 500 ml warm milk; melt, whisk to blond roux, add milk and simmer to nappe; yields about 4 cups.
Classic Béchamel Sauce for Lasagna—use the 40 g butter + 40 g flour + 500 ml milk ratio, whisk to a blond roux, then simmer to nappe for a silky base (≈4 cups, perfect for a standard 9×13).

Also Read: How to Make Churros (Authentic + Easy Recipe)


The Method, Step by Step – How to Make Béchamel Sauce for Lasagna

Although the technique is short, each move earns its keep. Let’s walk through it explicitly, so nothing feels rushed.

  1. Warm your milk first. Heat the milk separately until it’s steaming, not boiling. Warm liquid integrates into the roux more willingly, minimizing lumps and shaving time off the final simmer.
  2. Cook a blond roux. In a heavy-bottomed saucepan, melt butter over medium-low. Scatter in an equal weight of flour and whisk constantly for 2–3 minutes. You’re aiming for a gentle foam and a pale straw color.
  3. Off heat, add milk gradually. Take the pot off the burner. Whisk in a small splash of warm milk; when it’s smooth, add a little more, and a little more. As the mixture loosens and turns glossy, you can add the remaining milk in a steady stream.
  4. Return to low heat and simmer. Put the pot back over low heat and whisk until the sauce gently bubbles. Keep it just below a boil; vigorous bubbling can scorch milk solids or create a grainy mouthfeel.
  5. Season and adjust. Salt, a pinch of white pepper, and a tiny grating of nutmeg bring it into focus. Check texture; it should coat a spoon and flow slowly off the whisk.

That’s the base. From here, you can drive in several directions—straight into a lasagna pan, gently into ricotta for a smooth hybrid, or toward a vegan variant that behaves like this one but uses plant milk and olive oil.

Also Read: How to Cook Bacon in the Oven (Crispy, No-Mess, Crowd-Ready Recipe)


How Much Béchamel Sauce for Lasagna You Actually Need

Because pan depth and noodle thickness vary, it’s easier to think in ranges. For a standard 9×13-inch lasagna, 4 to 5 cups of béchamel usually lands you in the sweet spot. Spread a thin smear on the bottom to prevent sticking; then build in repeating layers: béchamel → noodles → ragù → béchamel → grated cheese. Keep the béchamel layers thin yet continuous—enough to gloss the pasta and moisten the ragù so everything fuses.

Traditional Lasagne alla Bolognese from Emilia-Romagna follows precisely this logic—pasta, ragù, béchamel, Parmigiano, and repeat—resulting in slices that hold shape without drying out. For a lovely regional perspective on that structure, browse the official travel resources from Emilia-Romagna or articles documenting the classic recipe; they consistently place béchamel as the quiet, essential binder rather than a showy flavor bomb (regional context).

If you enjoy ricotta’s milky sweetness, you can absolutely keep it in play; we’ll fold it into béchamel in a moment. Meanwhile, if you’re looking to cross-reference other layering styles (including a cottage-cheese-forward path that meal-preps well), peek at Cottage Cheese Lasagna: Chicken, Spinach & Ricotta and adapt the assembly by swapping your béchamel for part of the cheese mix.


Ricotta–Béchamel Recipe: The Ultra-Smooth Cheese Layer

Some cooks love ricotta’s flavor but don’t always love its grainy, slightly crumbly texture in baked layers. Béchamel Sauce for Lasagna solves that beautifully when you blend the two.

Top-down flatlay showing Ricotta–Béchamel Cheese Sauce for Lasagna: glass bowl of creamy sauce, small bowl of ricotta, wedge of Parmigiano, and lasagna sheets on a wooden board.
Ricotta–Béchamel Cheese Sauce—fold ricotta and finely grated Parmigiano into hot béchamel off heat for a glossy, non-grainy layer; makes about 5 cups, ideal for a standard 9×13 lasagna.

How to make it:

  • Start with 4 cups hot béchamel at nappe consistency.
  • Whisk in 1 cup finely grated Parmigiano Reggiano off the heat until melted and glossy.
  • Fold in ½–1 cup ricotta, choosing a smooth variety; if it’s dense, whisk it briefly to loosen before blending.
  • Taste for salt and, if needed, add an extra tablespoon of grated Parmesan to sharpen the finish.

This hybrid behaves like a mellow Mornay—silky, cohesive, and easy to spread—while preserving ricotta’s clean dairy notes. If you’re curious which cheese finishes the top layer best (for bronzing without greasy puddles), our primer on the difference between Parmesan and Parmigiano Reggiano explains why the real thing seasons with a savory snap and melts more cleanly than many pre-grated blends.


Vegan Béchamel Sauce for Lasagna: Same Feel, Plant-Based Recipe

The plant-based route is gratifyingly simple because the physics don’t change—only the fat and the milk do.

  • Fat: Use olive oil or a neutral vegan butter.
  • Flour: Stick to all-purpose. Chickpea or whole-grain flours can add flavor; if you enjoy that, use them sparingly at first.
  • Milk: Opt for unsweetened soy or oat milk. Unsweetened soy melts into the background; oat brings a subtle, round sweetness. Almond milk can work but is thinner and may need a minute more simmering.
  • Seasoning: Salt, white pepper, nutmeg, plus an optional teaspoon of onion powder for savory backbone. If you want a slightly “cheesy” direction without adding actual cheese, whisk in a tablespoon or two of nutritional yeast.
Vegan Béchamel Sauce for Lasagna whisked in a black pan—60 g olive oil, 60 g flour, 700 g unsweetened soy/oat milk—melt oil, whisk blond roux, add warm plant milk, simmer to nappe; yields about 4 cups.
Vegan Béchamel Sauce for Lasagna—use an olive-oil roux and warm unsweetened soy/oat milk, then simmer gently to nappe for a silky, slice-clean layer (≈4 cups in 12–15 minutes).

Technique-wise, everything mirrors the dairy version: warm the plant milk, cook a blond roux in oil, whisk off the heat, then return to a gentle simmer. If you’d like more ideas for building a fully vegan pasta night—high protein, big flavor—dip into our plant-based pasta collection for cashew-based sauces and other creamy profiles that pair beautifully with vegetables.


Seasoning and Aroma: Subtlety Wins

Because Béchamel Sauce for Lasagna plays a supporting role, restraint pays off. A scant pinch of nutmeg accentuates the sauce’s dairy sweetness without shouting; more than that can tilt perfumey. White pepper keeps flecks invisible and holds onto heat gently; black pepper works too, but the specks distract in a pale sauce. If your ragù is already intense, let béchamel stay quiet. Conversely, if your filling leans delicate—say, spinach and mushrooms—consider a whisper of fresh lemon zest to brighten the edges.

Crucially, avoid garlic in the béchamel itself; if you want a garlic presence, let it live in the ragù or a separate spinach layer, where it can sauté properly and won’t risk turning harsh in milk.

Also Read: 10 Best Espresso Martini Recipe Variations (Bar-Tested)


Layering Strategy: Structure Meets Tenderness

Successful layering is less about strict rules and more about a few guiding ideas:

  • Moisture distribution. Thin béchamel layers moisten the pasta while the ragù provides body. Too much béchamel in one spot can slip and puddle; too little leaves dry corners. Spread to the edges.
  • Cheese placement. Finely grate Parmigiano between layers rather than piling most of it on top. This encourages even melt and better slice integrity. Save a small handful for the surface to bronze.
  • Top management. Finish with a modest veil of béchamel and cheese, not a thick cap. That balance prevents rubbery tops and helps steam escape.
Layering Béchamel Sauce for Lasagna in a 9×13 pan—use about 4–5 cups; sequence: base smear, pasta, ragù, béchamel, Parmesan; repeat and finish with a thin béchamel cap; rest 10–15 minutes.
Layering Béchamel Sauce for Lasagna—plan ≈4–5 cups for a 9×13. Start with a base smear, then build pasta → ragù → béchamel → Parmesan; repeat, top lightly, and rest before slicing.

If you’re ever tempted to swap béchamel for a heavy cheese sauce on every layer, consider contrast. Let béchamel do the quiet binding and reserve richer, cheesier notes for a single inner layer or the finish. For a clear comparison of white sauces versus cream-based Alfredo styles (and when each shines), our Alfredo deep-dive lays out the differences so you can choose the right tool for the flavor you want.


Troubleshooting: Calm Fixes for Common Problems

Even experienced cooks run into little snags; the key is responding gracefully.

Lumps
If lumps form, kill the heat immediately. Whisk hard for 20–30 seconds; most will dissolve as the starch hydrates fully. Still not smooth? Pour the sauce through a fine sieve into a warm pot and carry on. Next time, remember to whisk off the heat when adding milk and add it gradually.

Too Thick or Too Thin
If your Béchamel Sauce for Lasagna feels gluey, whisk in warm milk a tablespoon at a time until it flows again. If it’s thin, give it a gentle simmer and the occasional whisk for another minute. Because a pale roux retains strong thickening power, tiny tweaks go a long way.

Nappe test for Béchamel Sauce for Lasagna—spoon coated with sauce showing a clean finger line, indicating pourable, spoon-coating consistency.
Nappe = the right thickness for béchamel: it coats the spoon, holds a clean finger line, and still pours smoothly—ideal for neat, sliceable lasagna layers.

Grainy After Adding Cheese
This usually means the cheese overheated or the sauce boiled after the cheese went in. Melt cheeses off heat and stop stirring once they dissolve. You can always rewarm gently if needed. For technique cues that keep melted cheese smooth, the process notes in our Macaroni & Cheese guide are directly transferable.

Scorching
Scorched milk is stubborn. If you catch the smell early, pour the unscorched top portion into a new pot, leaving any browned film behind. Keep heat low and whisk more frequently.

Breaking in the Oven
If a lasagna looks greasy on top, it’s often because the cheese was too fatty or piled too thickly. Use a firm grana like Parmigiano for most of the top and keep any mozzarella to a light sprinkle; you’ll get bronze without pools. Our Parmesan vs. Parmigiano Reggiano piece clarifies why the real stuff behaves better under heat.

Also Read: 10 Best Chicken Sandwich Recipes (BBQ, Parm, Buffalo & More)


Make-Ahead, Cooling, and Reheating

Béchamel is an ideal make-ahead component because it reheats predictably. After cooking, cool it quickly: transfer to a shallow container, press parchment or plastic directly onto the surface to prevent a skin, and refrigerate promptly. For general food-safety timing, U.S. guidelines recommend using refrigerated leftovers within 3–4 days, and, if you need a longer hold, freezing works well; thaw overnight and whisk while reheating, loosening with a splash of milk as needed (USDA/FSIS guidance), (FoodSafety.gov storage chart).

When reheating béchamel, keep the heat low and whisk patiently; it will return to its glossy self. If you’re turning it into a ricotta–béchamel blend, bring it to just-warm before whisking in cheese so everything integrates without curdling.

Also Read: French Toast Sticks (Air Fryer + Oven Recipe) — Crispy Outside, Custardy Inside

Side-by-side pans showing white roux and blond roux—the ideal stage for béchamel.
For Béchamel Sauce for Lasagna, cook the roux to blond: more thickening power and a silkier sauce.

Béchamel Sauce for Lasagna—Scaled Recipes You Can Memorize

Classic Béchamel (about 4 cups)

  • 60 g butter
  • 60 g all-purpose flour
  • 600 g whole milk, warmed
  • 1 tsp fine salt, pinch white pepper, tiny grating nutmeg

Directions: Make a blond roux (2–3 minutes). Off heat, whisk in warm milk gradually until smooth, then simmer gently for 6–8 minutes. Season and adjust to nappe.

Ricotta–Béchamel (for one 9×13-inch lasagna)

  • 4 cups hot béchamel
  • 1 cup finely grated Parmigiano Reggiano
  • ½–1 cup smooth ricotta

Directions: Off heat, whisk Parmesan into béchamel until glossy; fold in ricotta. Taste and season. Spread thinly between layers.

Vegan Béchamel (about 4 cups)

  • 60 g olive oil (or vegan butter)
  • 60 g all-purpose flour
  • 700 g unsweetened soy or oat milk, warmed (plant milks vary in body; start here)
  • 1–1½ tsp fine salt, pinch white pepper, tiny pinch nutmeg
  • Optional: 1 tsp onion powder; 1–2 tbsp nutritional yeast

Directions: Make a blond roux with oil; whisk in warm plant milk off heat; return to low simmer until nappe. Season and adjust with milk as needed.

Also Read: Lemon Drop Martini Recipe (Classic, 3-Ingredient, & More)


Beyond Lasagna: Using Béchamel Elsewhere (With Restraint)

Because béchamel is neutral and stabilizing, it shines in unexpected places:

  • Mac and Cheese. Fold in cheeses off heat to create a classic Mornay; the method used in our stovetop and baked mac & cheese keeps the sauce silky instead of clumpy.
  • Vegetable gratins. A modest layer underneath roasted cauliflower or leeks amplifies tenderness without drowning flavor.
  • Croque monsieur. Thin béchamel brushed onto the bread provides moisture insurance and browning potential.
  • Moussaka. A thicker béchamel (sometimes enriched with egg yolks) forms the custardy top; for a Greek-leaning lasagna night, it’s a lovely twist that still uses the same roux logic.

If you want to compare white-sauce approaches with cream-based pasta styles for variety in your weekly rotation, our Alfredo overview maps where béchamel-based sauces fit, and when to pivot to cream reductions instead.


Putting It All Together: A Calm, Confident Lasagna Flow

To bring the pieces together, work in an unhurried rhythm:

  1. Cook béchamel first. It holds well and gives you time to tweak texture.
  2. Taste your ragù. Salt it to where you want it, since béchamel will not compensate for underseasoning later.
  3. Par-cook or soak noodles as needed. No-boil sheets drink up moisture; béchamel helps, but be generous with sauce coverage so the edges don’t crisp prematurely.
  4. Layer lightly but completely. Each béchamel layer should be thin yet continuous, reaching every corner.
  5. Finish modestly. A veil of béchamel and Parmigiano on top will bronze and stay supple.
  6. Rest before slicing. Ten to fifteen minutes lets the starches set, giving you clean squares rather than slumps.

On nights when you want a lighter profile, choose the classic Béchamel Sauce for Lasagna and keep cheese modest. On nights when you crave dreamy richness, fold in ricotta for the hybrid. When cooking for plant-based friends, the vegan version slips into the stack quietly and delivers the same structure. Because the method is compact and forgiving, you’ll adjust by feel in no time.

Also Read: Pumpkin Spice, Your Way: Master Blend, Variations & Real-World Recipes


A Final Word on Confidence and Craft

Great béchamel is about attention, not fussiness. Warm the milk, whisk off heat, simmer gently, season with care, and trust your eyes more than the clock. Every pan, every burner, every batch of flour behaves a little differently; nonetheless, the cues never change. When the sauce coats a spoon and glides, when the layers spread thin and even, when the bake exhales a faint butter-and-nutmeg scent as it rests—you’ll know you’re there.

If you’d like more perspective on béchamel’s role in the wider culinary family, the Escoffier piece on mother sauces helps set the stage (read here). For nitty-gritty technique and starch science, Serious Eats offers clear, test-driven guidance on roux and white sauces (roux guide), (béchamel guide). And for your own kitchen reference, keeping an eye on safe cooling and storage windows will let you make sauce ahead without worry (USDA/FSIS), (FoodSafety.gov).

Meanwhile, for variations and related dishes in our repertoire, browse these companion reads on MasalaMonk:

Make your Béchamel Sauce for Lasagna once this way—patient, glossy, and balanced—and it will quietly upgrade every batch that follows.

FAQs

1) What is Béchamel Sauce for Lasagna, exactly?

Béchamel Sauce for Lasagna is a silky white sauce made from a blond roux (butter + flour) whisked with warm milk, lightly seasoned with salt, white pepper, and a hint of nutmeg. It binds layers, prevents dryness, and gives clean, sliceable structure.

2) What’s the ideal ratio for Béchamel Sauce for Lasagna?

Use equal parts butter and flour by weight, then about 10 parts milk by weight. For home cooking, 40 g butter + 40 g flour + 500 ml milk yields a classic, spoon-coating consistency.

3) How much béchamel do I need for a 9×13-inch pan?

Plan on 4–5 cups. Start with a thin smear in the pan, then use modest, even layers between noodles and ragù so everything fuses without becoming soupy.

4) Should I use béchamel, ricotta, or both?

Either works, yet combining them is lovely. Blend warm béchamel with ricotta and a little grated hard cheese for a smooth, cohesive “cheese sauce” that spreads evenly and bakes beautifully.

5) How thick should Béchamel Sauce for Lasagna be?

Aim for nappe: it should coat the back of a spoon and leave a clean line when you swipe a finger. If it’s too thick, add a splash of warm milk; if thin, simmer briefly to tighten.

6) Can I make Béchamel Sauce for Lasagna ahead of time?

Absolutely. Cool quickly, press parchment or plastic directly on the surface, and refrigerate. Reheat gently and whisk in a bit of milk to restore gloss.

7) Can I freeze béchamel?

Yes. Freeze in flat portions. Thaw overnight, reheat slowly, and whisk to smooth; add a spoon of milk if needed.

8) What’s the best milk to use?

Whole milk delivers classic body and flavor. For a lighter take, use 2% and simmer a minute longer. If you prefer richness, blend in up to 25% cream—but keep the texture pourable.

9) How do I fix lumpy béchamel?

Remove from heat and whisk vigorously; most lumps dissolve as starch hydrates. If needed, strain through a fine sieve into a warm pot and continue.

10) Why did my sauce turn grainy after adding cheese?

Cheese overheated. Next time, add cheese off heat and stir just until melted. For this recipe, keep béchamel plain between layers and use grated cheese sparingly for balance.

11) Can I make a vegan Béchamel Sauce for Lasagna?

Certainly. Swap butter for olive oil or vegan butter, use unsweetened soy or oat milk, and season as usual. Simmer a touch longer to remove any raw flour taste.

12) Is béchamel the same as white sauce?

Yes. “White sauce” is the common name for béchamel—milk thickened with a roux and gently seasoned. Add cheese and you’ve created a daughter sauce (often called Mornay).

13) Do I need nutmeg?

A small pinch accentuates dairy sweetness without dominating. Use a light hand so the sauce stays supportive rather than showy.

14) How do no-boil noodles change the amount of sauce?

No-boil sheets drink more liquid while baking. Consequently, keep your béchamel layers continuous (edge-to-edge) and lean toward the higher end of the 4–5 cup range.

15) Can I make gluten-free Béchamel Sauce for Lasagna?

Yes. Use a 1:1 gluten-free all-purpose blend for the roux. Cook the roux gently to remove raw flavors before whisking in warm milk.

16) How should I season béchamel for lasagna layers?

Season lightly—salt, white pepper, a whisper of nutmeg. Let the ragù and finishing cheeses carry most of the bold flavors, while béchamel provides balance and moisture.

17) Will béchamel make my lasagna watery?

Not if it’s cooked to nappe and spread thinly. Watery results usually come from under-reduced ragù, overpacked fillings, or uncooked vegetables releasing liquid.

18) What’s the best way to layer with Béchamel Sauce for Lasagna?

Begin with a thin béchamel smear in the pan, then alternate: noodles → ragù → béchamel → a light sprinkle of grated hard cheese. Finish with a modest veil of béchamel and cheese on top.

19) How long should lasagna rest after baking?

Give it 10–15 minutes. Resting allows starches and fats to settle, helping slices hold their shape.

20) Can I flavor béchamel with aromatics?

For lasagna, keep it quiet. If desired, infuse the milk with a bay leaf or onion, then strain. Avoid sautéed garlic in the béchamel itself; keep stronger flavors in the ragù or vegetable layers.

21) Why use Béchamel Sauce for Lasagna instead of heavy cream?

Béchamel delivers body without greasiness, sets cleanly, and prevents separation. Heavy cream alone can feel rich yet loose; béchamel provides dependable structure.

22) Does béchamel change the bake time?

Not meaningfully. Bake until bubbling around the edges and the top is lightly bronzed. If browning too fast, tent loosely with foil.

23) How much salt should I add?

Season béchamel modestly and taste the ragù separately. Since cheeses add salt, under-seasoning the béchamel a touch keeps the final dish balanced.

24) Can I add herbs to Béchamel Sauce for Lasagna?

If you like, whisk in finely chopped parsley or chives at the end, although restraint is key. The sauce should support, not overshadow, the other layers.

25) What’s the simplest way to scale béchamel?

Multiply the base ratio. For double, use 80 g butter + 80 g flour + 1 liter milk. Watch texture cues and adjust with a splash of milk if it thickens too much.