Fasting gets easier—and steadier—when your hydration plan is simple, precise, and sustainable. To that end, the homemade electrolytes for fasting below use gram-level measurements so you can mix, sip, and adjust without guesswork. Because many readers want clarity right away: strict fasting usually means zero calories (plain salts and unsweetened mineral drops are fine), while flexible fasting sometimes allows a few calories for taste or adherence. For context on when electrolytes actually help, skim Harvard Health’s practical overview and this clear Cleveland Clinic explainer.
If you’re just starting out, you might appreciate a quick primer on intermittent fasting patterns and food timing; this simple guide to foods for 16:8 intermittent fasting pairs well with today’s recipes. Likewise, because fruit confuses a lot of newcomers, this gentle breakdown on fruit during intermittent fasting keeps expectations realistic before we talk salts, drops, and flavor.
Why Homemade Electrolytes for Fasting Work So Well
Electrolytes—primarily sodium, potassium, and magnesium—support normal nerve signaling, steady muscle contractions, and fluid balance. During long fasts, hot weather, or active days, losses can increase, and that’s when headaches, fatigue, or cramps creep in. Building homemade electrolytes for fasting into your routine lets you adjust dosing quickly without relying on sugary sports drinks or flavored powders that may not fit your fasting rules.
Because not everyone needs the same amounts, think of today’s mixes as a solid baseline rather than a rigid prescription. Some will want more sodium on humid days; others might appreciate a touch of potassium during multi-day stretches. If you prefer to reintroduce flavor after your window closes, circle back later to our refreshing natural homemade electrolyte drink ideas for off-fast variety.
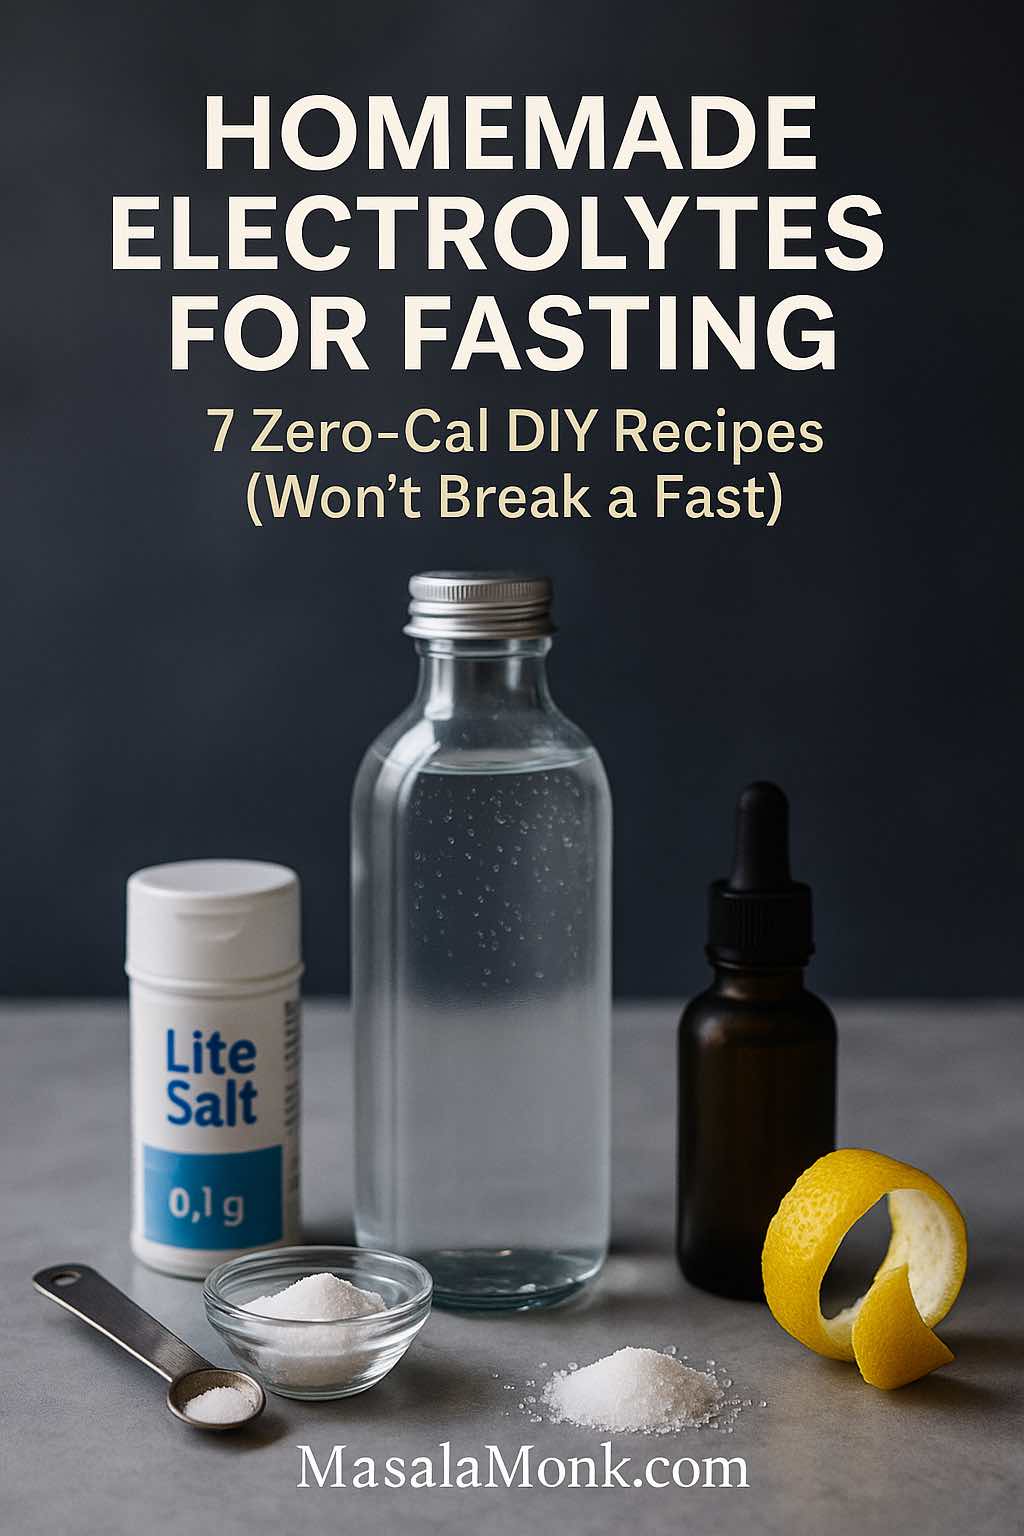
Strict-Zero: Homemade Electrolytes for Fasting (0 Calories)
These recipes are designed for strict windows. Each formula makes 1 liter. Weigh ingredients on a 0.1 g scale, add to a bottle, top with water, and shake until clear. Chilling often improves taste.
Basic Salty Water (simple, clean, dependable)
- 2.5 g fine table salt (≈ 1,000 mg sodium)
- 1 liter water
- Optional: 300–400 mg magnesium from unsweetened drops (follow label)
This minimalist mix is the backbone of homemade electrolytes for fasting: inexpensive, repeatable, and truly zero-calorie. If you’re sensitive to mineral flavor, cool it before sipping.
Lite-Salt Balance (adds gentle potassium, still zero-cal)
- 1.5 g table salt
- 1.5 g potassium chloride (often called “lite salt” or a salt substitute)
- 1 liter water
- Optional: ⅛ tsp baking soda to soften the edge
Taste is slightly bitter for some, so begin conservatively. Nevertheless, many fasters find this mild potassium addition smooths long days without complicating the plan.
Minimalist “Snake-Style” (conservative, tidy ratios)
- 2.5 g table salt
- 1.25 g potassium chloride
- 300 mg magnesium (unsweetened drops)
- 1 liter water
You may see higher-dose versions online, yet this more restrained take respects individual variability. If you manage blood pressure, kidney health, or heart conditions—or use diuretics—get personalized guidance; here’s a straightforward look at electrolyte imbalance signs.
Drop-In Zero-Cal Copycat (customizable without calories)
- Sodium: 1,000–1,500 mg (via salt)
- Magnesium: 200–400 mg (unsweetened mineral drops)
- Potassium: 0–300 mg (optional)
- 1 liter water
This template mirrors unsweetened concentrates that truly list 0 kcal per serving. If you’re curious about a label reference, see Keto Chow’s Fasting/Electrolyte Drops and their broader electrolytes FAQ, which clarifies that unflavored versions remain strict-fast friendly.
Also Read: Fasting and Cortisol: Is Intermittent Fasting Stressing Your Hormones?
Flexible Days: DIY Electrolyte Water for Fasting (Light-Cal Options)
Some protocols permit a few calories to improve adherence. If that’s your camp, these mixes add interest while staying restrained. Even so, because they are not zero-calorie, they do not belong in a strict window.
Citrus-Salt Sipper (barely-there acidity, ~3–5 kcal/L)
- 2.0 g fine table salt
- 10–15 ml lemon juice
- Optional: 300 mg magnesium (unsweetened drops)
- 1 liter water
The lemon rounds off saltiness and encourages steady sipping without turning your bottle into lemonade. And if you’re about to reopen your window, peek at these sensible foods to break a fast so the transition stays comfortable.
Herbal Salt Tea (cozy and simple)
- Peppermint or chamomile tea, brewed hot
- 1–2 g salt, stirred while warm
- 1 liter total after topping with hot water
- Optional: 200–300 mg magnesium (unsweetened drops)
When plain water feels monotonous, a warm, salty infusion can be surprisingly satisfying—especially in the evening. Keep it unsweetened to minimize calories.
Coconut-Lime Rehydrate (specifically after the fast)
- 250 ml unsweetened coconut water
- Pinch salt + squeeze lime
- Top with water and ice to 1 liter
Naturally sweet and potassium-rich, this mix is excellent after a long window or gentle training. For a different scenario, if you’re recovering from a social night, these targeted electrolytes for hangovers can be a helpful reset.
Product Reality Check: Will Commercial Mixes Break a Fast?
Because labels vary, it pays to verify. LMNT lists 1,000 mg sodium, 200 mg potassium, and 60 mg magnesium per stick and is marketed as sugar-free; however, certain flavors carry small but real calories, which means they don’t fit strict-zero rules. Confirm details on the LMNT product page and the company’s ingredients overview. Conversely, unsweetened mineral concentrates—like the Fasting/Electrolyte Drops mentioned earlier—indicate 0 kcal and are, therefore, compatible with strict windows (see the brand’s product details and FAQ).
Why do some formulas include sugar at all? Outside the fasting context, glucose improves sodium absorption in the gut through co-transport, which is the rationale behind oral rehydration solutions. If you’re curious, here’s the World Health Organization’s concise summary of ORS composition and use. That’s ideal for illness recovery, yet it introduces calories—so it sits outside strict fasting.
Meanwhile, if you’re tailoring fasting to hormonal shifts or training cycles, you may find this approachable overview on intermittent fasting for women helpful; it frames electrolyte choices without rigidity.
Fine-Tuning Intake: From Baseline to Personal Fit
Although the homemade electrolytes for fasting above provide sturdy starting points, needs change with temperature, altitude, sweat rate, caffeine, and even daily stress. Consequently, treat these as reliable baselines and iterate:
Sodium Targets (the main lever)
A practical starting point is ~1,000 mg sodium per liter, sipped to thirst through your active hours. On hot, humid days or during long walks, you may want more. If you experience persistent headaches or lightheadedness while fasting, consider whether your sodium is lagging before you assume anything else is wrong. For wider context on when electrolytes are truly necessary, this short Harvard guide is reassuringly balanced.
Potassium (useful but not mandatory)
A small amount can feel great during multi-day fasts or heavy sweating. Nevertheless, many people meet needs once eating resumes. Start conservatively; taste and muscle calm are simple guides.
Magnesium (sometimes the difference maker)
Not everyone benefits during the fast itself, yet 200–400 mg from unsweetened drops can reduce nighttime cramping for those who need it. If your sleep or calves improve, you’ll know quickly.
Safety, Sensibility, and Signals
Swelling, unusual fatigue, palpitations, or stomach upset tell you something’s off—ease up, drink plain water for a while, and reassess. If you have kidney, heart, or blood-pressure concerns, or you use medications that alter fluid balance, involve your clinician early. For a calm clinical primer, here’s a quick orientation to electrolyte panels and what doctors look at.
Also Read: Best Nuts for Intermittent Fasting: Maximizing Satiety and Nutritional Benefits
Practical Tips That Keep the Plan Effortless
Choose the Right Salt (predictable dissolving, predictable dosing)
Fine table salt dissolves quickly and measures consistently. If you prefer sea salt, weigh it—flake size makes teaspoons unreliable. Because precision matters for homemade electrolytes for fasting, that small digital scale is worth it.
Make a Bottle You Like (you’ll drink what you enjoy holding)
A wide-mouth liter bottle simplifies mixing and cleaning. If you prefer glass at home and plastic when traveling, set both out the night before—habit beats willpower.
Chill or Warm Strategically (taste follows temperature)
Cold water reduces mineral bite; lukewarm water feels easier on early-morning stomachs. Either way, taste perception changes with temperature, so experiment rather than tolerate.
Pre-Weigh Travel Packs (your future self will thank you)
Measure several sets of dry ingredients into tiny baggies. When your day gets hectic, you’ll appreciate how fast “add water, shake, go” becomes.
Track Gently (signal over noise)
Instead of obsessing over totals, jot down liters finished and how you felt. After a week, patterns emerge—maybe you always need more during late-afternoon errands or before evening walks.
If you like to add flavors once the window closes, keep things playful with cooling cucumber electrolyte water or gently spiced cardamom-ginger-mint infusions. Alternatively, if your day includes training, consider our straightforward post-workout electrolyte mixes once eating resumes.
A Short, Friendly Science Detour (So You Can Ignore the Noise)
Sodium dominates the extracellular fluid, pulling water with it and supporting blood volume. When you sweat, sodium losses can be meaningful—hence the immediate relief many people feel when they sip a salty liter during longer fasts. Potassium, meanwhile, lives mostly inside cells, partnering with sodium to maintain normal electrical gradients for nerves and muscles. Magnesium underpins hundreds of enzymatic reactions and aids muscle relaxation; no surprise some people sleep better when they meet modest needs.
Because the internet often conflates fasting hydration with medical rehydration, here’s a quick distinction: oral rehydration solutions include glucose to enhance sodium uptake in the small intestine (the SGLT1 co-transport mechanism). That’s superb during illness, yet those same calories break a strict fast. If you enjoy concise backgrounders, the WHO’s page on ORS composition and rationale is plain and to the point.
Equally important, you don’t need to turn this into a chemistry exam. Consistency beats perfection; the homemade electrolytes for fasting you’ll actually drink are better than an “optimal” formula you never mix.
Also Read: Tea and Intermittent Fasting
Bringing It Together for Fasting and Homemade Electrolytes
On strict days, choose the zero-calorie mixes: Basic Salty Water, Lite-Salt Balance, Minimalist Snake-Style, or the Drop-In Zero-Cal Copycat. They’re quick to prepare, easy on the wallet, and aligned with strict rules. On flexible days, lean into the Citrus-Salt Sipper, the Herbal Salt Tea, or the Coconut-Lime Rehydrate—each adds a little pleasure without turning into dessert.
When real life gets messy, adapt and continue. You’ll likely sip more in summer, less in winter. You may love a touch of potassium one week and skip it the next. If you want product convenience, read labels with a clear eye: LMNT is deliciously salty but carries small calories (details on their product and ingredients), while unsweetened mineral drops remain strict-fast friendly (see Keto Chow’s Fasting/Electrolyte Drops and the FAQ). Furthermore, if you’d like a broader nutritional frame for different life stages, consult this grounded overview of intermittent fasting for women.
In the end, the point isn’t perfection—it’s momentum. With homemade electrolytes for fasting dialed in, you’ll feel steadier, think more clearly, and keep your protocol simpler than ever. Mix thoughtfully, listen to your body, adjust with grace, and let consistency do the heavy lifting.
Also Read: Is Energy drink Gatorade Worth the Hype?
FAQs about Fasting and Homemade Electrolytes
1) Do homemade electrolytes for fasting break a strict fast?
Generally, homemade electrolytes for fasting made with plain salts and unsweetened mineral drops are zero-calorie and therefore compatible with strict fasting. However, flavored mixes or recipes that add juice, sweeteners, or coconut water introduce calories and, consequently, end a strict fast.
2) How much sodium, potassium, and magnesium should I target while fasting?
As a simple baseline, many fasters start near ~1,000 mg sodium per liter of water, then adjust to thirst, heat, and sweat. Potassium can sit in the 0–300 mg per liter range for gentle support, while magnesium often lands around 200–400 mg per day from unsweetened drops. Nevertheless, individual needs vary—tune gradually.
3) What are the best homemade electrolytes for fasting if I want zero calories?
Strict-fast options prioritize plain sodium chloride, optional potassium chloride, and unsweetened magnesium drops in water. In short, pick a simple salt-forward mix, keep dosing precise (grams, not “pinches”), and skip flavorings that add energy.
4) Will electrolyte water break intermittent fasting but not water fasting?
Both intermittent fasting and water fasting consider calories the key divider. Consequently, zero-calorie homemade electrolytes for fasting are typically fine for either style, while any recipe containing caloric ingredients will break both.
5) Can I drink electrolytes while fasting during workouts or hot weather?
Yes. Indeed, when sweat loss rises, modest sodium replacement during the fast often improves comfort, reduces headaches, and helps you stay consistent. Even so, avoid megadoses; increase in small steps and monitor how you feel.
6) What’s the best electrolyte drink for intermittent fasting if I allow a few calories?
If your protocol is flexible, a light-calorie option—such as a saline base with a splash of citrus—can aid adherence without turning into a sugary beverage. Importantly, label it as “flexible” in your routine so you keep strict days truly zero.
7) Do I need potassium in homemade electrolytes for fasting?
Often, a little potassium helps some people during longer or hotter days; others feel fine without it. Consequently, start with sodium, then add small potassium amounts only if cramps or muscle tightness persist.
8) How much should I drink per day?
Hydration targets depend on body size, climate, and activity. Broadly, sipping 1–2 liters of well-salted water across your active window suits many people, though some need more. Thus, let thirst, urine color, and symptoms guide your real-time adjustments.
9) Can electrolytes help with fasting headaches, dizziness, or muscle cramps?
Frequently, yes. Headaches and lightheadedness during fasting are often related to inadequate sodium; meanwhile, nighttime leg cramps can respond to small, consistent magnesium. That said, if symptoms are severe or unusual, pause and reassess your plan.
10) What electrolytes should I take while water fasting for multiple days?
For extended fasts, emphasize sodium first and consider potassium and magnesium in conservative amounts. Moreover, make changes slowly—steady dosing beats large sporadic hits.
11) Are there zero-calorie electrolytes for fasting that are premade?
Unsweetened mineral concentrates exist, and many are truly 0 kcal; nonetheless, always read labels carefully. Flavored powders can be sugar-free yet still contain small calories, which, by definition, break strict fasts.
12) Do electrolyte tablets or powders count as homemade electrolytes for fasting?
Technically, no; they’re commercial products. However, if you dissolve unflavored, zero-calorie mineral drops or salts in water yourself, the effect is similar to homemade electrolytes for fasting—with the advantage of fully controlling the dose.
13) How do I measure ingredients without a lab scale?
Use a 0.1 g digital kitchen scale for reliability. Alternatively—but less ideally—gradated micro-spoons can approximate tiny amounts. Still, for consistency and repeatability, weighing is strongly preferred.
14) Can I add citrus, apple cider vinegar, or herbs and still stay strict?
Citrus juice and vinegar add measurable calories, albeit small ones; therefore, they don’t fit strict rules. Nevertheless, non-caloric aromas (like a tiny twist of peel oils without juice) may make salt water more palatable without adding energy.
15) Do homemade electrolytes for fasting help on keto or low-carb diets?
Typically, yes. Lower insulin levels can increase sodium excretion; consequently, many low-carb fasters feel better with routine sodium and perhaps small amounts of potassium and magnesium.
16) Is dry fasting compatible with electrolytes?
No. By definition, dry fasting avoids water and dissolved minerals. More importantly, it carries higher risk of dehydration; as a rule, it’s prudent to avoid dry fasts unless you’ve consulted a qualified professional.
17) How do I prevent overdoing electrolytes?
Increase doses gradually, watch for swelling, unusual fatigue, palpitations, or stomach upset, and back off if anything feels wrong. Equally, remember that consistency with moderate amounts outperforms large, erratic boluses.
18) What’s the simplest starter recipe for homemade electrolytes for fasting?
Begin with 2.5 g fine table salt in 1 liter of water, then optionally add 200–400 mg magnesium (unsweetened) and a small amount of potassium if needed. Afterward, adjust by taste, weather, and symptoms.
19) Do homemade electrolytes for fasting differ for women?
Needs vary by size, cycle, and training load. Consequently, many women prefer to start at the lower end of sodium and scale up carefully, paying attention to comfort, sleep, and recovery.
20) Can I premix bottles or should I make them fresh?
You can premix for the day; nevertheless, shake before each sip since minerals can settle. For travel, pre-weigh dry packets, then add to water as you go—practical and consistent.
21) What if salty water tastes too strong?
Chill the bottle, use fine salt for faster dissolution, or split a liter into two half-liters to reduce perceived intensity. Additionally, very small bicarbonate (baking soda) can smooth harshness in some recipes.
22) Will homemade electrolytes for fasting affect sleep?
Sometimes in a good way. A modest magnesium dose may decrease nighttime cramps, and adequate sodium can reduce wake-ups from headaches or thirst. However, avoid large late-evening volumes if nocturnal bathroom trips disturb rest.
23) How do I scale recipes for larger bottles?
Multiply ingredients proportionally. For instance, if your bottle is 1.5 liters, multiply each gram amount by 1.5. Thus, a 2.5 g salt base becomes 3.75 g.
24) What’s the difference between electrolyte water for fasting and ORS (oral rehydration solution)?
ORS includes glucose to speed sodium absorption during illness; by contrast, homemade electrolytes for fasting are intentionally sugar-free to remain zero-calorie. Therefore, ORS is excellent for recovery, not for strict fasting.
25) Can I rely on thirst alone?
Often, yes; still, during intense heat or long walks, thirst can lag. Consequently, pairing thirst with a simple baseline (like 1–2 liters of salted water across the day) helps you stay ahead of symptoms without micromanaging.
26) What signs suggest I need more sodium during a fast?
Common cues include persistent headaches, salt cravings, lightheadedness on standing, or cramping that improves after a salty drink. If these resolve with a modest sodium bump, you likely found your gap.
27) Are sea salt and Himalayan salt better than table salt?
Functionally, sodium content is what matters most for fasting hydration. Micromineral differences are minor at the doses used. Practically speaking, fine table salt dissolves predictably and measures accurately.
28) Do homemade electrolytes for fasting help mental clarity?
Often. When sodium is adequate and hydration is steady, many people report fewer “foggy” moments during fasting windows. Thus, precision pays off in both body and brain.
29) Should I change my electrolyte plan on rest days?
Possibly. If you sweat less, you may need fewer salty liters. On balance, observe your cues and scale down gently rather than stopping abruptly.
30) What’s the smartest way to progress from beginner to advanced?
Start with the basic salty water recipe, track how you feel for a week, then layer optional potassium or magnesium if needed. Gradually, you’ll create a personalized set of homemade electrolytes for fasting that fit both your climate and routine.