If you’ve ever set out to “eat more protein,” you know it sounds simple—until you actually try to get 100 grams by dinner without living on chicken breast, shakes, or mystery powders. But here’s the truth: hitting 100 grams isn’t just doable, it can actually be delicious, rewarding, and even fun if you approach it like a real person—not a spreadsheet.
Let’s break it down, bust some myths, and make this a high-protein journey you’ll actually enjoy (and stick to).
Why Are So Many People Chasing 100 Grams of Protein?
There’s a reason you keep hearing about “100 grams of protein a day” on fitness podcasts, Instagram reels, and even at your office lunch table. For most active adults, that’s a sweet spot: enough to build and repair muscle, keep hunger in check, boost metabolism, and maintain your energy—even if you’re just trying to feel a bit stronger and not run a marathon.
It’s not just for bodybuilders—100g is about taking charge of your nutrition, one satisfying meal at a time.
Want to geek out on the science? What Is Protein? covers all the reasons protein is the true MVP of your diet.
How to Actually Hit 100 Grams a Day—No Math Degree Required
The secret isn’t protein powders, it’s habits. Here’s how real people do it:
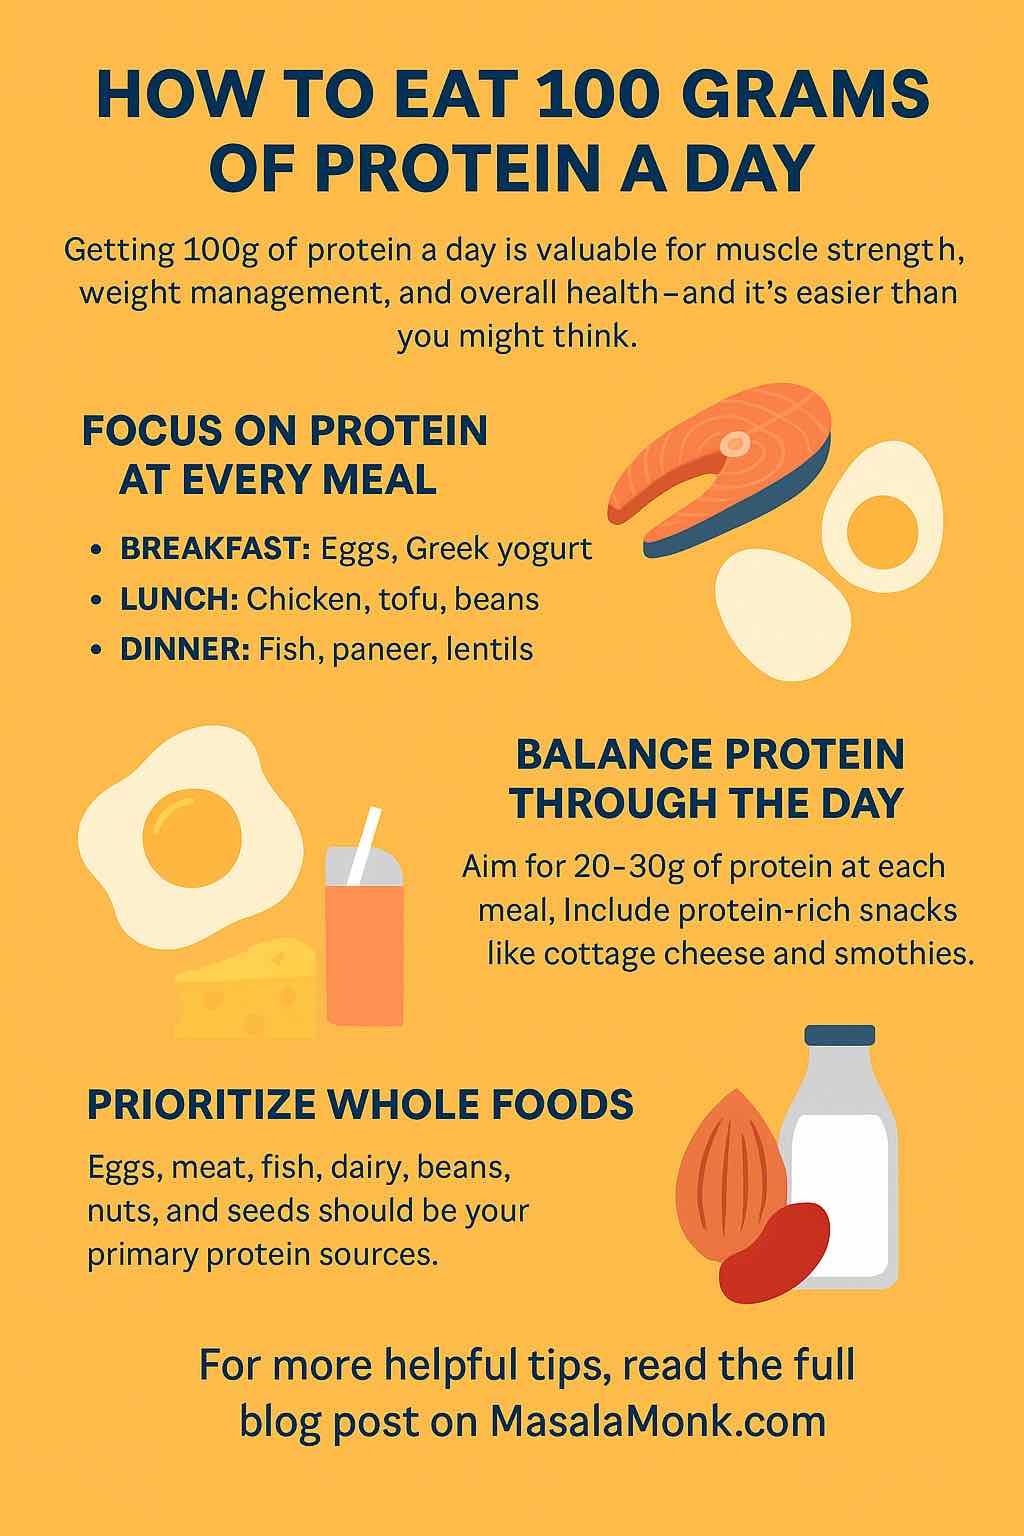
1. Build Every Meal Around Protein
Breakfast Start your day strong! Instead of toast-and-go, try a bowl of Greek yogurt (10g+ per cup), eggs (6g each), or an oat bowl made with ultra-filtered milk. Top with nuts or chia seeds for extra points.
Example day-starter: 2 eggs + 1 cup Greek yogurt = 22g protein before 10am.
Lunch Don’t let lunch be an afterthought! Go for a power salad with grilled chicken, tofu, or tempeh (100g of either gets you 19–27g), or pile chickpeas onto a hearty grain bowl. Even a quick dal and rice or a paneer wrap can pack serious protein.
Dinner Finish strong. Grill or bake fish (salmon = 22g/100g), toss cubes of paneer into curry, or scramble three eggs with veggies and a sprinkle of cheese for 25g+ in a single pan.
Snacks That Pull Their Weight Snack time is a secret weapon. Grab cottage cheese (12g per half cup), roasted chickpeas, edamame, or a mini protein smoothie (blend Greek yogurt, milk, spinach, nut butter for 15g+). Suddenly, 100 grams looks… totally doable.
2. Distribute Your Protein Like a Pro
Why space it out? Because your body uses protein best when you give it steady doses (20–30g per meal), instead of flooding it all at once. This means better muscle recovery, less snacky hunger, and stable energy. It’s like charging your phone little by little instead of one frantic sprint at the end of the day.
3. Prioritize Whole Foods (and Flavor!)
You don’t need a cupboard full of supplements to get to 100g. In fact, real foods are your secret weapon: they keep you fuller, taste better, and pack bonus vitamins, minerals, and fiber.
Top picks: Eggs, chicken, fish, paneer, Greek yogurt, cottage cheese, tofu, tempeh, lentils, beans, seeds, nuts, quinoa, and high-protein grains.
Vegetarian or vegan? Mix beans, lentils, tofu, tempeh, nuts, and seeds—combine them for complete protein.
Omnivore or pescatarian? Pair plant and animal sources for variety and maximum nutrition.
No matter your eating style, with a little mix-and-match, 100g is yours for the taking.
Real-Life Protein Hacks (That Don’t Suck)
Prep in Bulk: Cook a batch of chicken, lentils, or eggs so you’re always a step ahead.
Snack Smart: Keep cheese sticks, boiled eggs, protein bars, or roasted seeds in your bag or desk.
Upgrade Your Carbs: Use high-protein wraps, breads, or pasta to sneak in extra grams—effortlessly.
Smoothies Save Lives: A handful of spinach, scoop of yogurt, nut butter, and milk can turn a basic smoothie into a protein-packed meal in a cup.
Eat What You Like: Don’t force foods you hate. There’s always another protein source that fits your vibe.
Why the Fuss? The Benefits You’ll Actually Feel
More protein isn’t just a trend—it’s a real game-changer. Expect…
Sustained energy throughout the day (no more afternoon crashes)
Fewer cravings and snack attacks
Stronger muscles and faster recovery (even if you’re just chasing kids, not barbells)
Better hair, skin, and nails (thank those amino acids!)
More satisfaction from every meal
The Takeaway: Eat, Enjoy, and Repeat
Hitting 100 grams of protein a day isn’t about punishment or perfection—it’s about small, tasty upgrades and habits that actually make your life better. Build every meal (and snack) around protein, go for variety, and listen to what feels good in your body. The numbers will add up, and so will the results.
Hungry for more high-protein inspiration, meal prep tips, and myth-busting nutrition stories?
Head to MasalaMonk.com and dive into the rest of the blog—you’ll find dozens of guides, meal ideas, and science-backed answers to make eating well the easiest part of your day.
10 FAQs About Eating 100 Grams of Protein a Day
1. Is 100 grams of protein per day safe for everyone? For most healthy adults, yes. People with kidney issues or other medical conditions should consult their doctor before significantly increasing protein intake.
2. Can vegetarians or vegans hit 100g protein without supplements? Absolutely! By combining lentils, beans, tofu, tempeh, quinoa, nuts, and seeds throughout the day, plant-based eaters can easily reach 100g without protein powders.
3. What are the best protein sources for breakfast? Eggs, Greek yogurt, cottage cheese, tofu scramble, nut butter, protein-enriched oats, and ultra-filtered milk are all great choices.
4. How can I get enough protein if I have a small appetite? Distribute protein through smaller, more frequent meals/snacks—Greek yogurt, cheese, nuts, eggs, smoothies, or edamame work well in smaller portions.
5. Are protein bars and powders necessary to reach 100g? Not at all! Whole foods should be your foundation, though bars or powders can help on extra-busy days or when you need portable options.
6. How much protein should I eat at each meal? Aim for 20–30g per meal and use snacks (10–20g) to fill the gaps for the most even, effective intake.
7. Can I eat all my protein at dinner? You’ll absorb it, but research shows your body uses protein better if you spread it throughout the day for muscle maintenance and fullness.
8. How can I add more protein to plant-based meals? Incorporate legumes, lentils, tofu, tempeh, nuts, seeds, quinoa, and high-protein whole grains into your regular rotation.
9. Will eating 100g of protein help with weight loss? Higher protein can help you feel fuller, preserve muscle, and support healthy weight loss—especially when paired with balanced carbs and fats.
10. How do I know if I’m getting enough protein? Track your intake for a few days using a food diary or app, and adjust meals to fill the gaps. Over time, it gets easier and more intuitive.
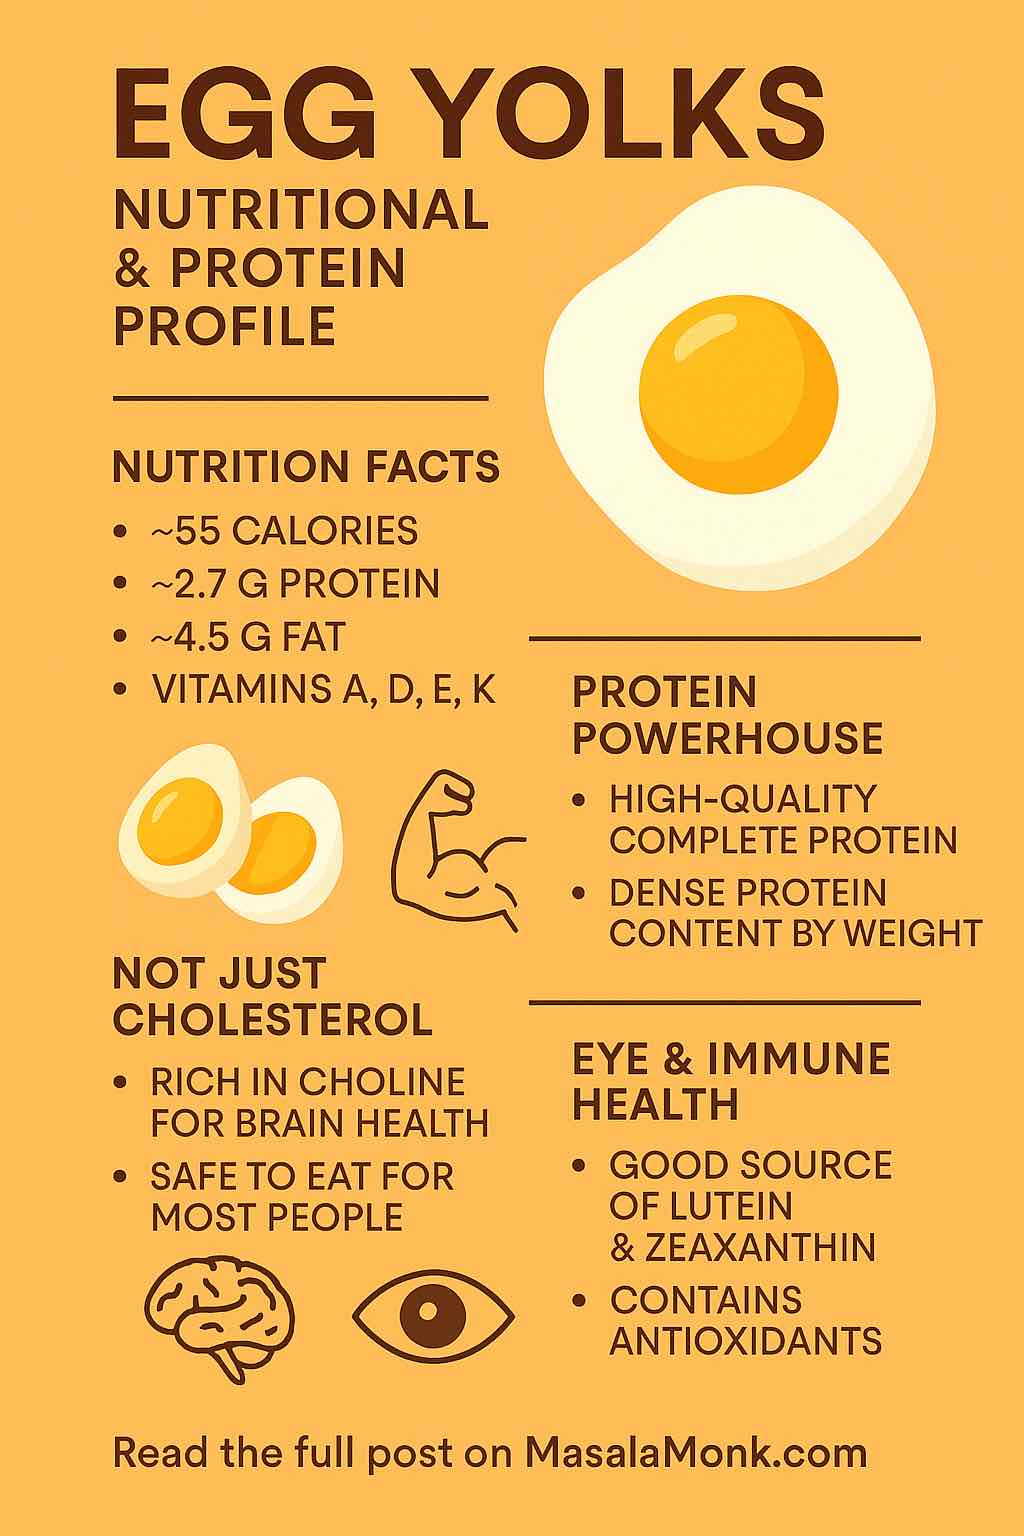
Egg yolks—often simply called the “yellow” of the egg—have spent decades unfairly demonized for their cholesterol content. But a surge of modern research is turning that reputation around. Far from being something to avoid, egg yolks are a nutritional treasure trove, crucial for muscle repair, brain function, eye health, and more. This post brings you the most up-to-date science, practical health tips, and smart answers to common questions about egg yolks, backed by both global research and related resources.
Egg yolks are nutritional multi-tools. Here’s what one large raw yolk (approx. 18g) delivers:
Nutrient
Amount (per yolk)
Calories
~55 kcal
Protein
~2.7 g (complete protein)
Fat
~4.5-5 g
Saturated Fat
~1.6 g
Cholesterol
~185 mg
Carbohydrates
~0.6 g
Choline
~147 mg
Vitamin A
64 µg
Vitamin D
18 IU
Vitamin E
0.5 mg
Vitamin K
0.1 µg
Folate
24 µg
Vitamin B12
0.33 µg
Iron
0.46 mg
Phosphorus
66 mg
Selenium
9.5 µg
Lutein + Zeaxanthin
250 mcg+
Key Takeaway: The yolk holds the vast majority of the egg’s vitamins, minerals, healthy fats, and almost half its total protein.
The Protein Power of Egg Yolks
Egg yolk is not just a fat source—it’s a potent, highly bioavailable protein food:
Complete Amino Acid Profile: All essential amino acids, crucial for muscle growth, tissue repair, and metabolic health.
Protein Density: Yolk is denser in protein than egg white by weight—~15.9% vs. 10.9% .
Superior Bioavailability: Egg protein is a gold standard—digestibility of cooked egg is over 90% compared to only 51% if eaten raw .
Muscle Health:
New Research: Egg protein—especially from yolk—directly boosts muscle protein synthesis after exercise, making it ideal for athletes, older adults, and anyone in recovery .
Choline is Essential: One yolk gives about 30% of your daily choline needs, crucial for brain development, memory, and nervous system health.
Cognitive Benefits:
A massive 2025 study found people who ate one egg per week had a 47% lower risk of Alzheimer’s disease, largely due to yolk-derived choline and its impact on neurotransmitter production .
Pregnancy & Development: Choline is critical for fetal brain development, so pregnant women especially benefit from including yolks.
Egg yolks contain about 185 mg cholesterol each. But here’s what current science actually says:
Dietary Cholesterol ≠ Blood Cholesterol: Most healthy people see little or no rise in blood cholesterol from eating eggs. Your saturated fat intake is a far bigger factor .
Some People (Hyper-responders): About 25% of the population may see a cholesterol increase, but not enough to significantly impact heart health in most.
Eggs in Context:
Recent clinical trials show eating two eggs per day can lower LDL cholesterol when part of a diet low in saturated fat .
Focus on whole-diet patterns: Mediterranean, DASH, or high-protein diets easily include whole eggs.
Cooking Egg Yolks: The Science for Maximum Nutrition
Best Cooking Methods:
Boiling and poaching retain the most nutrients.
Scrambling and frying can slightly reduce some vitamins but keep most protein.
Innovative Tip: “Periodic cooking” (cycling eggs between hot and tepid water) produces silkier, more nutrient-preserving yolks and boosts antioxidant polyphenols .
Bioactive Peptides: Gentle cooking preserves peptides and protein fractions (like phosvitin) that may support heart and brain health .
Healthy Adults: 1–2 whole eggs per day is safe for most people as part of a balanced diet.
Athletes, Pregnant Women, Seniors: Often benefit from higher intake due to greater protein, choline, and micronutrient needs.
Medical Conditions: If you have familial hypercholesterolemia, consult your doctor about dietary cholesterol.
Quick Questions
Is it safe to eat egg yolks every day? Yes, for most people. Recent studies and dietary guidelines confirm moderate daily yolk intake is safe and beneficial.
What about raw yolks? Cooking is best for digestibility and food safety. Raw eggs are less bioavailable and risk salmonella.
Can I just eat the whites? Whites offer lean protein, but you’ll miss out on most vitamins, minerals, choline, and healthy fats.
Egg yolks are among nature’s most concentrated sources of nutrition. Forget the outdated cholesterol scare—modern science celebrates the yolk for its brain-boosting choline, muscle-building protein, antioxidant carotenoids, and more. Whether you’re a fitness enthusiast, parent, senior, or simply care about your health, don’t toss the yellow! Eat the whole egg, experiment with cooking methods, and benefit from what may be the perfect, portable superfood.
Want more myth-busting, science-backed nutrition deep-dives?
Bookmark this blog and follow for updates on the foods that truly power your life.
10 FAQs About Egg Yolks or Yellow: Nutritional & Protein Profile
1. Are egg yolks bad for your cholesterol and heart health? No, recent research shows that for most healthy people, egg yolk cholesterol has little to no effect on blood cholesterol or heart disease risk. The bigger risk for heart health is high saturated fat and ultra-processed food intake, not eggs.
2. What makes egg yolks such a powerful source of nutrition? Egg yolks are rich in protein, healthy fats, choline (for brain health), vitamin D, vitamin A, vitamin B12, iron, phosphorus, lutein, and zeaxanthin—nutrients not all found in the white alone.
3. How much protein is in an egg yolk compared to the white? A large egg yolk contains about 2.7g of protein, while the white contains about 3.6g. The yolk’s protein is more nutrient-dense by weight and is a complete protein with all essential amino acids.
4. Is it safe to eat egg yolks every day? For most people, yes—up to one egg per day is safe and may be beneficial. Only those with rare genetic cholesterol conditions or egg allergies should limit yolks, and should consult their doctor.
5. Do darker (orange) egg yolks have more nutrition than pale ones? No. Yolk color only reflects the hen’s diet, not the nutrient content. Both orange and yellow yolks are nutritious, but pasture-raised or omega-3-enriched eggs may have slightly higher omega-3s.
6. What is choline, and why is it important? Choline is an essential nutrient vital for brain function, memory, nervous system health, and fetal development. Egg yolks are among the richest choline sources available.
7. Can eating egg yolks support muscle building and workout recovery? Absolutely. Egg yolks provide high-quality, easily digested protein and amino acids needed for muscle repair and growth—making them ideal for athletes and active people.
8. Are there health benefits to eating eggs at night? Yes. The protein and healthy fats in eggs (including the yolk) promote satiety, support overnight muscle repair, and may help regulate blood sugar, making them a smart evening snack for many.
9. What are the risks of eating raw egg yolks? Raw yolks carry a risk of salmonella infection and are less digestible than cooked. Cooking eggs improves safety and increases the body’s ability to absorb the protein and nutrients.
10. What’s the best way to cook eggs to preserve yolk nutrition? Boiling or poaching eggs preserves the most protein and nutrients, but all common methods (including scrambling and frying) retain most of the yolk’s nutritional value. Avoid overcooking to maximize benefits.
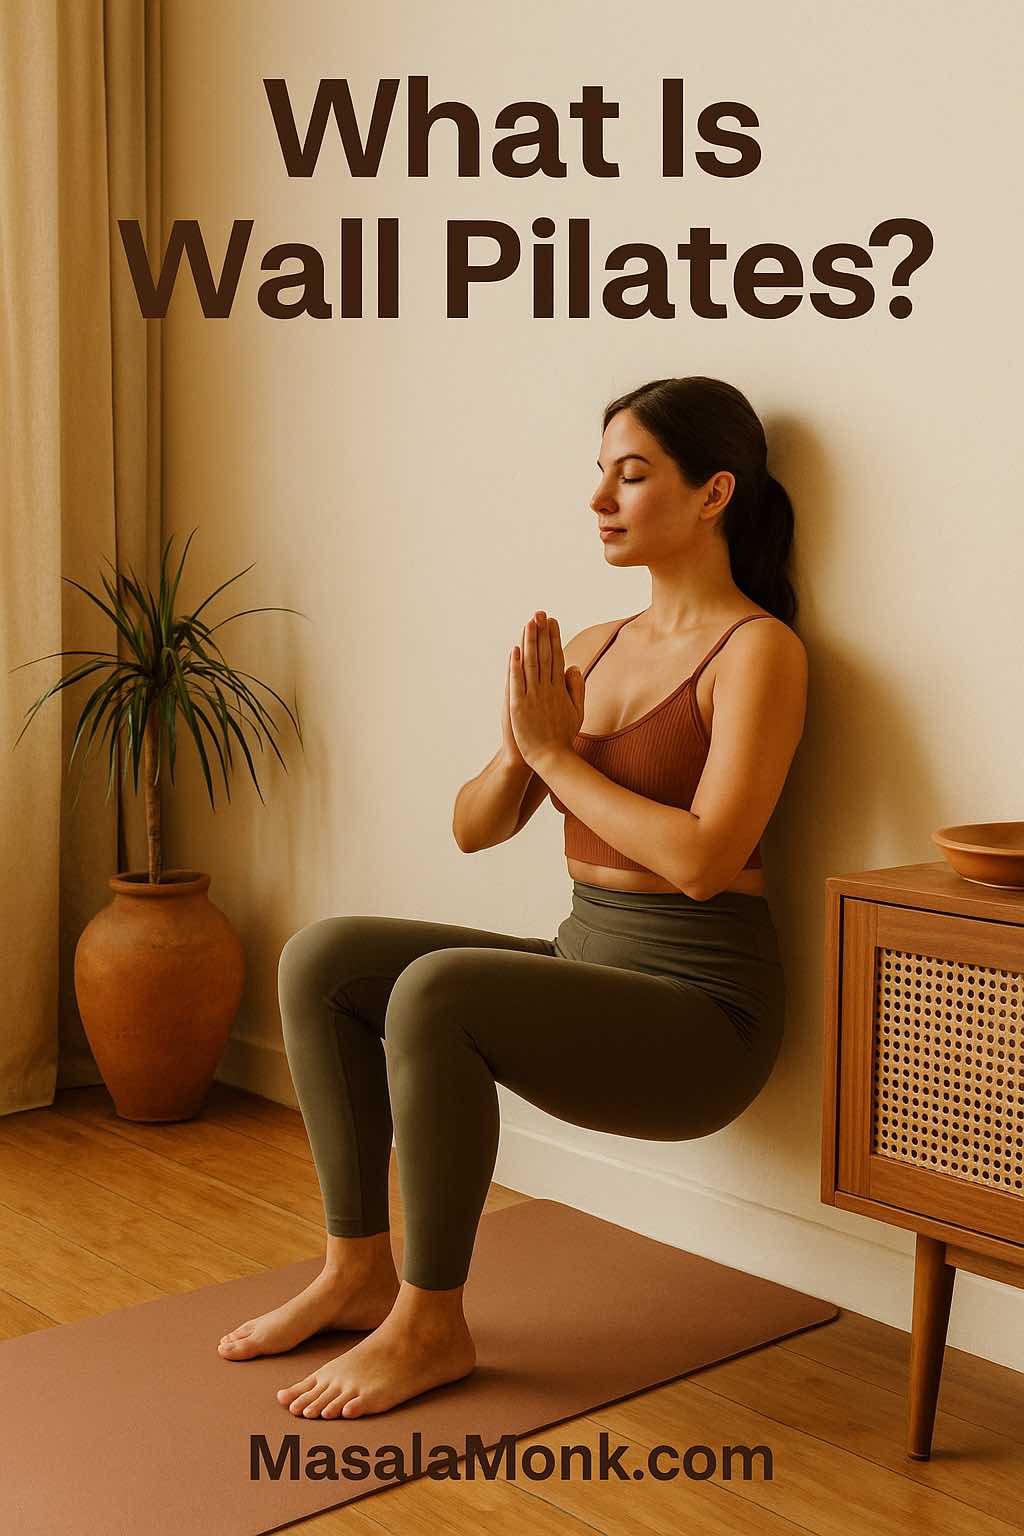
Have you ever looked at Pilates videos online and thought, “That looks amazing, but I don’t have a reformer or fancy studio”? Or maybe you tried Pilates on a mat but found yourself wobbling, unsure if your form was right, or just wishing you had a little more support. If so, you are not alone.
Most of us crave a way to feel stronger, more flexible, and upright in our bodies—without risking injury, spending hours in the gym, or buying expensive equipment. That’s where Wall Pilates comes in: a simple, genius method that turns your wall into the best fitness tool you never knew you had.
Whether you’re an absolute beginner, someone getting back into movement after a long break, or just curious about new ways to move, Wall Pilates offers a safe, gentle, and surprisingly powerful way to build a body you love—right at home.
To understand Wall Pilates, it helps to know a bit about traditional Pilates first. Invented by Joseph Pilates in the early 20th century, Pilates is all about core strength, mindful movement, and building balanced muscles. The problem? Classic Pilates routines often require either a mat (which can be tough for true beginners) or expensive studio equipment.
Wall Pilates flips the script. Instead of lying down on the floor and hoping you’re aligned, you use the wall as your guide. Pressing your back, feet, or hands into it, you get instant feedback on your posture—if your back isn’t flush against the wall, you’ll know! This makes learning the exercises safer, more intuitive, and way less intimidating.
Think of the wall as your built-in teacher, gently correcting you as you move.
Why Wall Pilates Is Suddenly Everywhere
You might have seen Wall Pilates popping up on social media or wellness blogs. The reason? It’s actually doable for regular people—no matter your fitness level, age, or body type.
Beginner-friendly: The wall keeps you stable, so there’s no fear of falling or “doing it wrong.”
Gentle on joints: Moves are low-impact, perfect for sensitive knees, hips, or lower backs.
Full-body focus: Expect to feel this in your core, glutes, arms, and even your posture muscles—often from the very first session.
Quick results: Many people notice improved posture and a stronger core within just a few weeks.
No gear, no excuses: All you need is a clear patch of wall, a mat if you like, and your own body.
If you love the idea of steady progress and variety, check out the 28-Day Wall Pilates Challenge on MasalaMonk. It offers a structured, progressive plan for anyone who wants to build consistency, even if you only have a few minutes a day.
Who Should Try Wall Pilates? (Hint: Almost Everyone)
One of the best things about Wall Pilates is how inclusive it is. You don’t need a dance background, you don’t need to “be flexible first,” and you definitely don’t need expensive activewear.
Wall Pilates is perfect for:
Beginners who want support and clear cues
Seniors and anyone who wants a gentle approach to movement
People returning from injury (with their doctor’s approval)
Busy parents, professionals, and students who only have a small window for exercise
Anyone in a small apartment or shared space
Those looking to boost posture, reduce back pain, or gently build strength
The wall not only supports you, but also “coaches” you to move in a safer, smarter way. That means fewer aches, less guesswork, and more wins for your body.
How Wall Pilates Works: The Magic of Feedback & Alignment
When you do Pilates on the floor, it can be easy to arch your back, tip your hips, or let your shoulders sneak up toward your ears. With Wall Pilates, the wall acts as a physical boundary. If your back leaves the wall during a squat, you’ll feel it immediately—and you’ll naturally correct your form.
This feedback helps you:
Activate the right muscles (especially your core and glutes)
Stay in a neutral spine position, protecting your back
Get more out of each rep, since you can’t “cheat” the movement
Build body awareness that carries over into daily life (like how you sit at your desk or carry groceries)
This focus on alignment makes Wall Pilates a favorite of physiotherapists, yoga teachers, and even personal trainers who want their clients to move better—not just more.
The Transformational Benefits of Wall Pilates
People fall in love with Wall Pilates because the benefits show up fast—and last.
1. Better Posture, Every Day
Many of us spend hours hunched over screens, developing tight hips and rounded shoulders. Wall Pilates exercises stretch the chest, open the hips, and teach your body what upright, healthy posture feels like. You’ll finish each session taller, lighter, and with a sense of ease in your movement.
2. Core Strength That Really Works
Unlike crunches or planks, Wall Pilates teaches you to engage your core dynamically. The wall provides gentle resistance, asking your abs and back to stabilize you throughout each move.
3. Safe, Joint-Friendly Movement
No jumping, no jarring landings, and no pressure to “keep up” with an instructor. Every move can be modified—great for those with past injuries, arthritis, or simply wanting to move more gently.
4. Increased Body Awareness
Wall Pilates invites you to slow down, listen to your body, and notice which muscles are firing. That mindfulness makes every session a mini stress-relief ritual, not just another workout to check off your list.
5. Full-Body Toning (Not Just Abs!)
Expect to feel your glutes, thighs, shoulders, and even arms working with the right routine. And because you’re using your own body weight, the results are long, lean, and functional—not bulky.
Want to see just how effective a short session can be? Many MasalaMonk readers rave about the 15-Minute Belly Fat Burning Wall Pilates Workout—it’s a great next step if you want to target your core and burn some extra calories, all without leaving your living room.
The Mind-Body Connection: Wall Pilates Beyond Fitness
One of the greatest “secrets” of Pilates (wall or otherwise) is how it ties the body and mind together. Slow, intentional movements demand focus, helping you tune into your breath and shut out distractions. Wall Pilates can be a moving meditation—a way to reset your mind while strengthening your body.
For even more support on your wellness journey, explore yoga routines like the Good Morning Yoga Routine on MasalaMonk, perfect for warming up, winding down, or finding calm on busy days. And if you’re curious how movement can ease stress and boost emotional resilience, Yoga for Mental Health: A Quick Guide offers simple, science-backed techniques anyone can try.
Getting Started: How to Begin Wall Pilates at Home
You don’t need much to get started:
A clean wall (move any pictures, plants, or obstacles)
A yoga mat or folded towel if you want a little cushion
Comfortable clothes
Willingness to listen to your body
Start with a gentle warm-up—walking around, shoulder rolls, or a few deep breaths. If you need more guidance or want a complete primer before your first session, MasalaMonk’s Wall Pilates for Beginners: The Ultimate Guide breaks everything down step by step, with helpful tips for absolute beginners.
If you find that you’re sitting or standing for long hours (hello, work-from-home life!), complementing your Wall Pilates with postural yoga can make a huge difference. The Yoga for Posture: 7 Yoga Poses for Software Engineers is a great resource for keeping your spine and shoulders healthy in the digital age.
How to Get the Most Out of Wall Pilates
Go slow. Rushing leads to poor form and less benefit. Savor each movement.
Breathe with intention. Exhale as you press or lift, inhale as you return to start.
Stay curious. Notice which muscles activate and which moves feel challenging.
Modify when needed. Use the wall as much or as little as you need for balance.
Celebrate your wins. Even five minutes counts—progress is progress!
And remember, you don’t have to do it all at once. Even a short, focused routine can bring big results if you stick with it. If you’re ready to expand your practice, try supplementing with the 10-Minute Love Handles and Lower Belly Fat Workout—another quick, effective routine that pairs well with Wall Pilates.
Try This: 10-Minute Beginner Wall Pilates Routine
Take a few deep breaths. Let this be a break from your day—a time to reconnect with your body and move with intention. Go slowly, notice how you feel, and remember: it’s not about “nailing” every move, but about building awareness and feeling good.
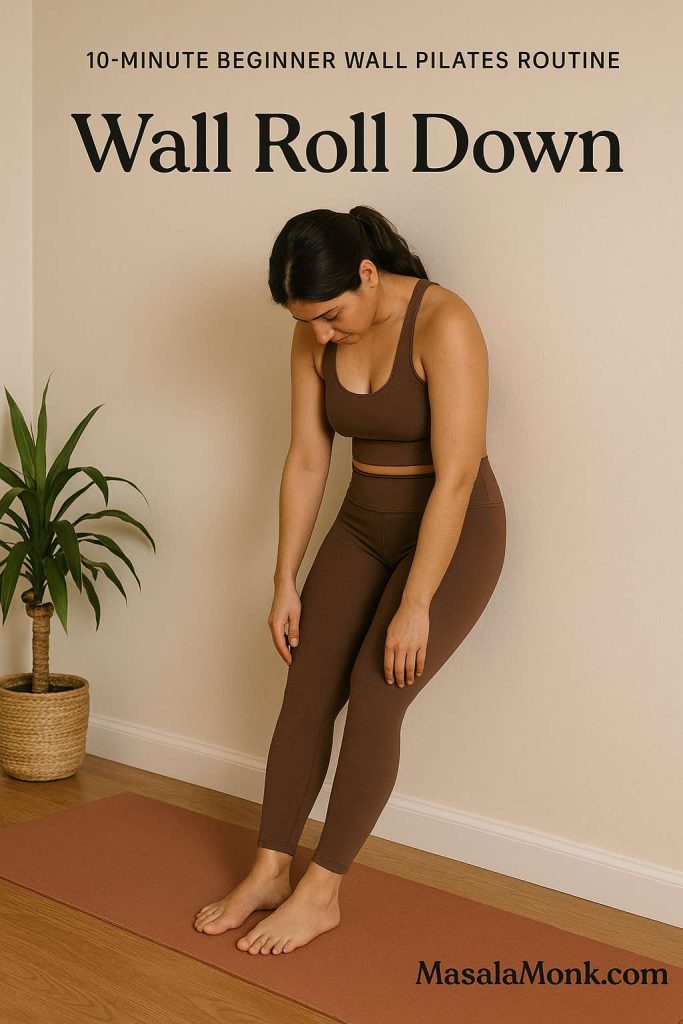
1. Wall Roll Down
How to Do It:
Stand with your back pressed against the wall, feet hip-width apart, about 12–18 inches from the base.
Relax your arms by your sides, palms facing in.
Take a breath in. As you exhale, gently drop your chin to your chest.
Begin to roll your spine down, peeling one vertebra at a time off the wall. Imagine your back “melting” away from the wall, bit by bit, letting your head and arms hang heavy.
Go as far as you comfortably can (maybe your fingertips reach your shins, maybe your toes).
Pause. Breathe here, feeling a gentle stretch in your back and hamstrings.
On your next inhale, press your feet into the floor and slowly stack your spine back up the wall, one vertebra at a time, until you’re standing tall again.
Wall Roll Down “Roll down the wall, one vertebra at a time, to stretch your spine and wake up your core.”
What to Notice:
Feel your back “unfurling,” and your core engaging to help you rise.
The wall provides a sense of reference for your spine’s alignment.
Common Mistakes:
Rushing: Rolling too quickly, missing the articulation through each vertebra.
Locked knees: Keep them soft to avoid straining your lower back.
Pulling with the arms: Let gravity, not your hands, guide the descent.
Modifications:
Bend your knees more if you have tight hamstrings.
Only roll down as far as feels comfortable—don’t force it.
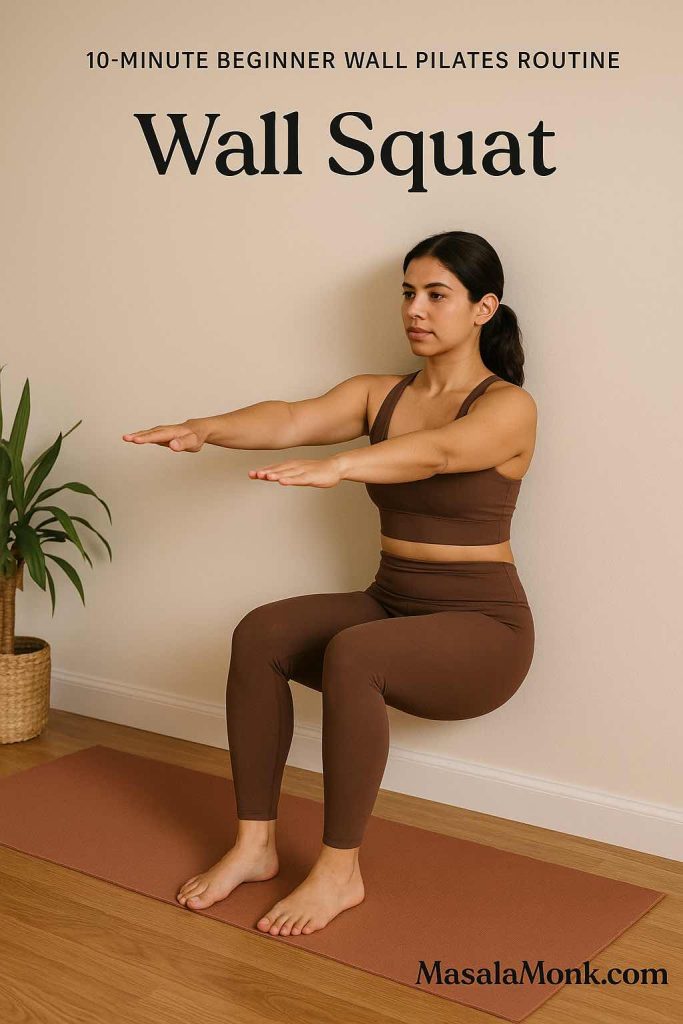
2. Wall Squat
How to Do It:
With your back against the wall, walk your feet forward about two feet, hip-width apart.
Slide your back down the wall until your thighs are parallel to the floor—like sitting in an invisible chair.
Knees should be directly above your ankles, not past your toes.
Press your lower back gently into the wall for support.
Hold here, breathing slowly for 20–30 seconds, then slide back up to stand.
Wall Squat “Sit low in a wall squat—feel the burn in your legs and glutes as you build strength.”
What to Notice:
The powerful work in your thighs and glutes as you hold.
Your back supported and lengthened by the wall.
Common Mistakes:
Knees caving in or drifting too far forward: Adjust your stance so knees are stacked over ankles.
Arching your lower back: Press your entire back into the wall to protect your spine.
Shoulders tensed up: Keep them relaxed and down.
Modifications:
Lower your squat depth if the full position is too intense.
Take breaks or hold for less time as needed.
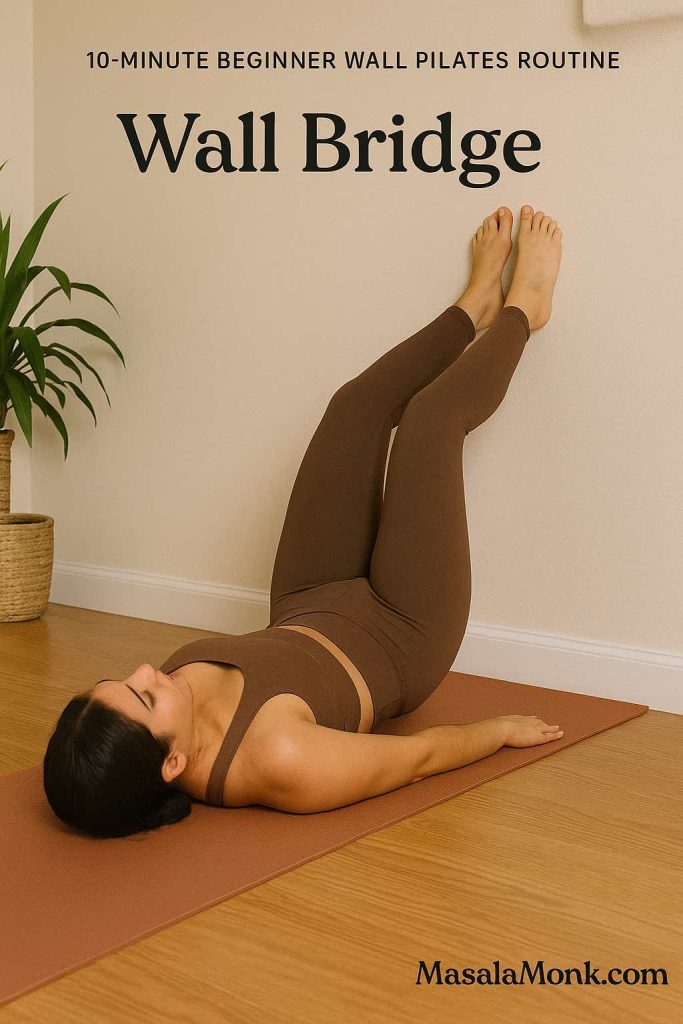
3. Wall Bridge
How to Do It:
Lie on your back with your hips near the wall and your feet pressed flat against it, knees bent about 90 degrees.
Rest your arms by your sides, palms down.
Press into your feet and lift your hips off the mat, forming a diagonal line from knees to shoulders.
Squeeze your glutes at the top, then lower down with control.
Repeat several times, moving with your breath.
Wall Bridge “Lift your hips into a bridge, pressing into the wall to activate your glutes and hamstrings.”
What to Notice:
Activation in the glutes and hamstrings as you lift.
Your shoulders and arms grounded for support.
Common Mistakes:
Feet too high or low on the wall: Aim for a 90-degree angle at your knees.
Overarching the back: Only lift as high as you can keep your ribs down and core engaged.
Letting knees splay out or in: Keep them tracking straight over your feet.
Modifications:
Don’t lift as high if you feel discomfort in your back.
Support your lower back with a pillow or folded towel if needed.
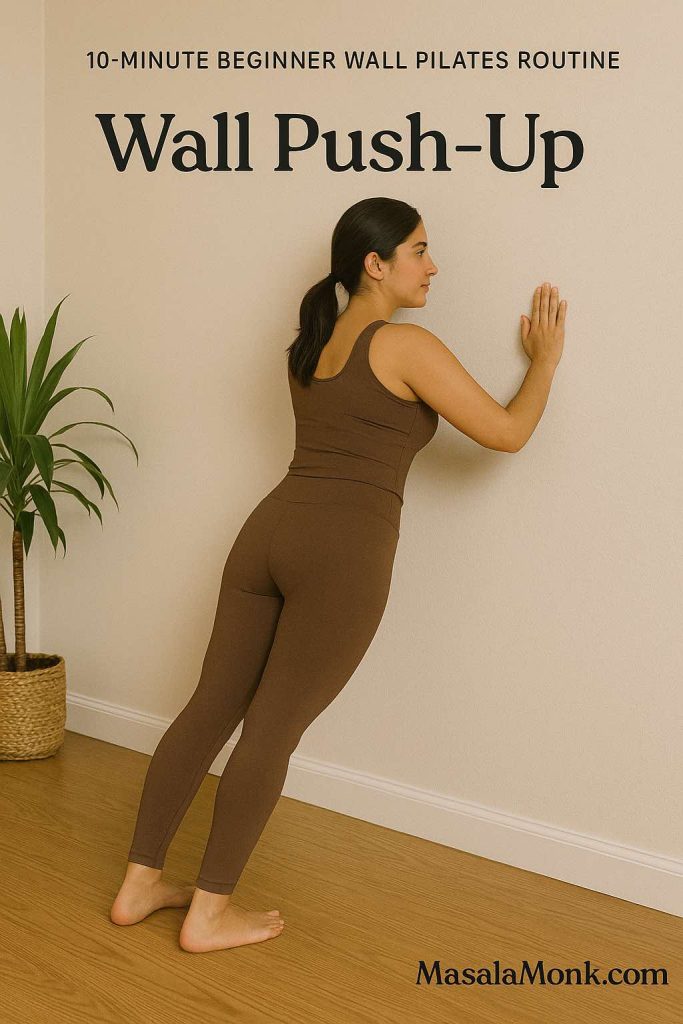
4. Wall Push-Up
How to Do It:
Stand facing the wall, feet hip-width and about arm’s length away.
Place your palms flat on the wall at shoulder height, fingers spread wide.
Inhale, bend your elbows, bringing your chest toward the wall—keep your body in a straight line from head to heels.
Exhale, press through your palms to return to standing tall.
Wall Push-Up “Press away from the wall with strong arms and a stable core—perfect for building upper body strength.”
What to Notice:
Core and chest muscles activating as you move.
Smooth, controlled movement—not momentum.
Common Mistakes:
Letting elbows flare out too wide: Keep them at about a 45-degree angle for shoulder safety.
Sagging or arching your back: Engage your abs to keep your body aligned.
Rushing the movement: Slow and steady builds strength.
Modifications:
Step closer to the wall for less intensity, or further for more challenge.
Try on your knees if standing is too difficult.
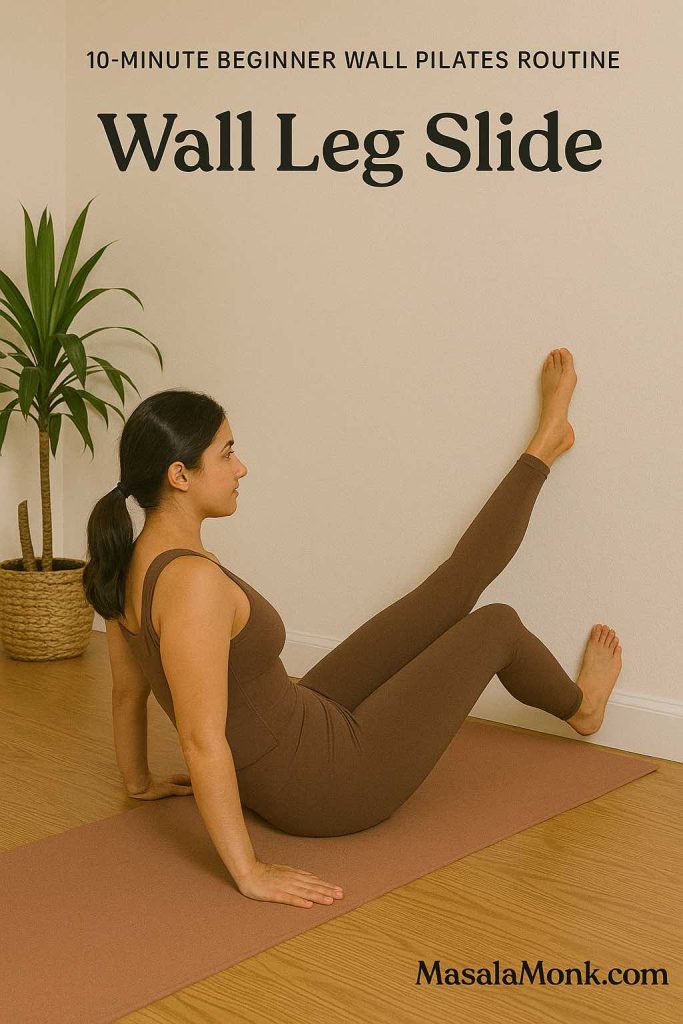
5. Wall Leg Slide
How to Do It:
Stand sideways to the wall, one hand gently resting on it for support.
Plant your standing leg firmly; keep your posture tall.
Slowly slide your outside leg up and down along the wall, like a slow-motion side kick.
Keep the movement controlled and your hips steady.
Repeat, then switch sides.
Wall Leg Slide “Slide your leg up and down the wall, firing up your outer hips and improving balance.”
What to Notice:
Engagement in the outer hip and thigh.
Your core working to keep your torso stable.
Common Mistakes:
Leaning into the wall: Use just a fingertip for balance, not to hold your weight.
Swinging the leg too fast: Move slowly and with intention.
Shrugging shoulders: Relax your neck and upper back.
Modifications:
Slide your leg only as high as is comfortable.
Hold onto a sturdy chair for additional balance.
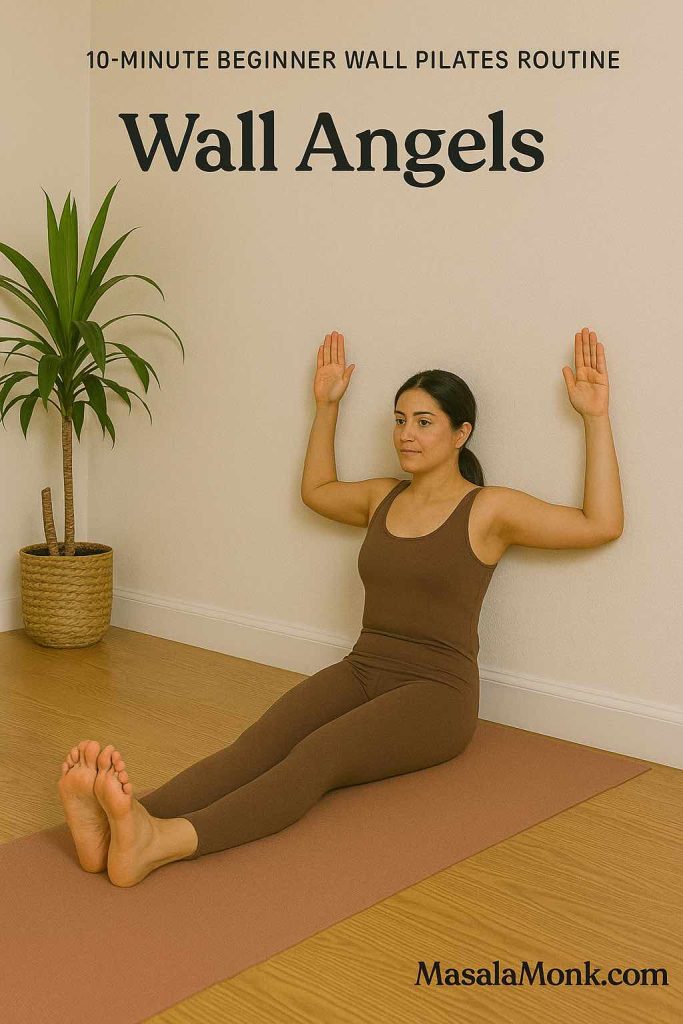
6. Wall Angels
How to Do It:
Stand with your back, head, and arms pressed flat against the wall, feet six inches away.
Bend your elbows so your arms form a “W.”
Slowly slide your arms up the wall, reaching overhead as far as you can without losing contact, then slide back down.
Move within a pain-free range, keeping your core engaged.
Wall Angels “Glide your arms overhead against the wall, opening your chest and strengthening your shoulders.”
What to Notice:
A gentle stretch across your chest and a strengthening in your upper back.
The wall helping to keep your shoulders aligned.
Common Mistakes:
Arching your lower back: Keep ribs down, abs gently engaged.
Losing contact with the wall: Go only as far as you can keep everything touching.
Tensing the neck: Let your neck stay relaxed.
Modifications:
Perform the move seated if standing is difficult.
Decrease range of motion if you have shoulder tightness.
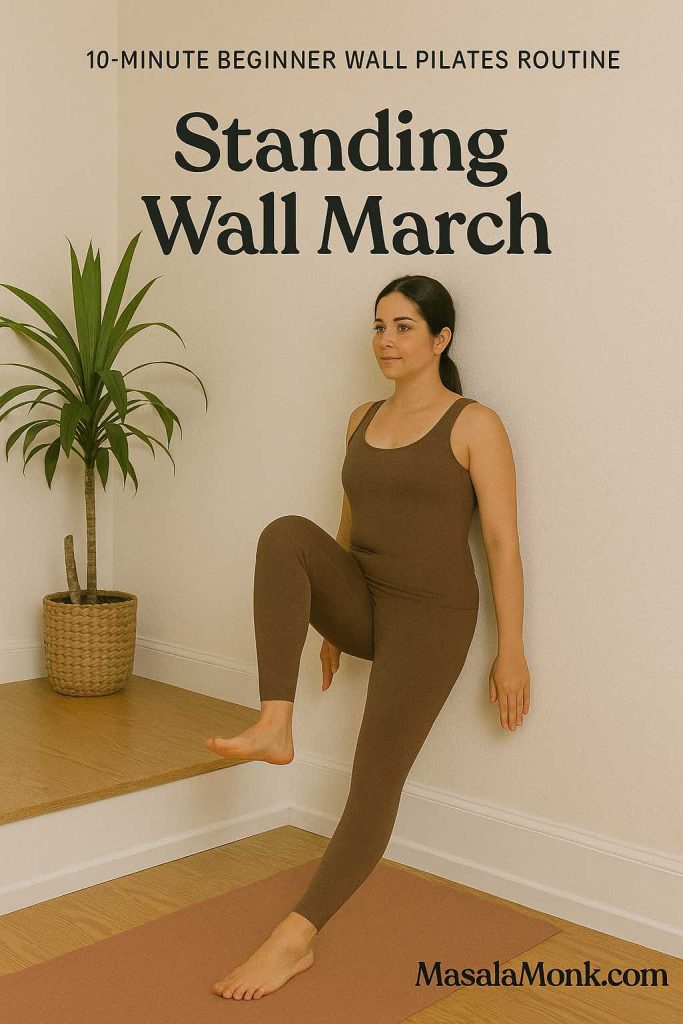
7. Standing Wall March
How to Do It:
Lean your upper back and head gently against the wall, arms relaxed by your sides.
Lift one knee up toward your chest, lower it, then lift the other.
Alternate slowly, marching in place with control.
Standing Wall March “March in place, leaning on the wall to challenge your balance and core.”
What to Notice:
Your core muscles stabilizing your torso.
The wall providing support so you can focus on alignment.
Common Mistakes:
Letting your back arch away from the wall: Press it gently into the wall.
Shrugging shoulders: Keep your upper body relaxed.
Marching too quickly: Slow, controlled lifts are more effective.
Modifications:
Lift knees only as high as is comfortable.
Hold the wall lightly if you need extra balance.
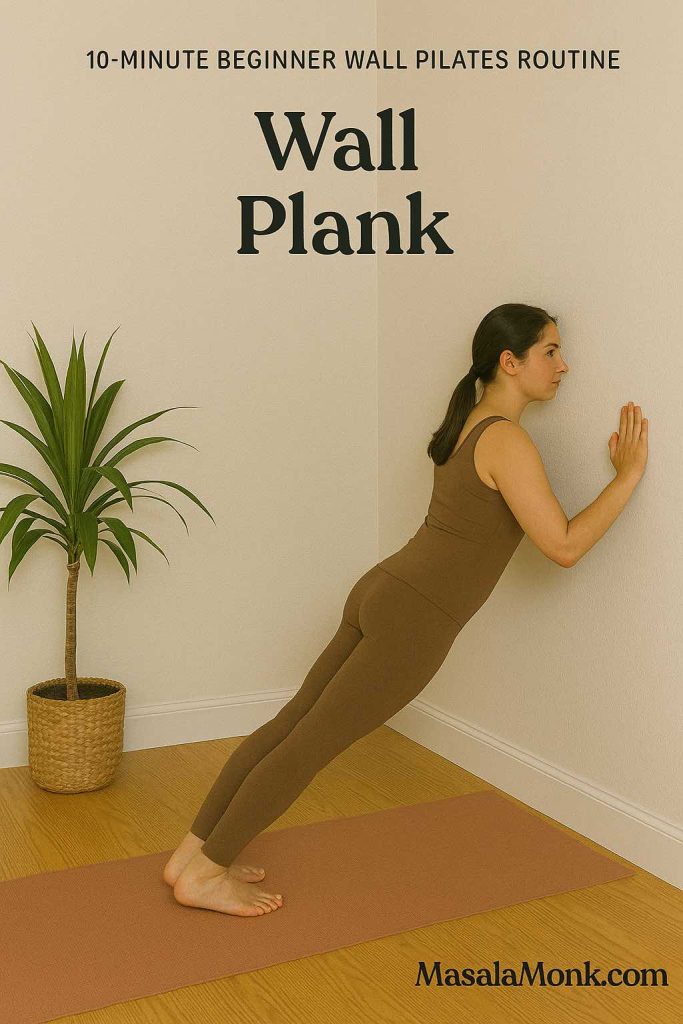
8. Wall Plank
How to Do It:
Start on your hands and knees with your feet near the base of the wall.
Place your hands on the mat, shoulder-width apart.
Carefully walk your feet up the wall, coming into a plank—body in a straight line, shoulders over wrists.
Hold, breathing deeply, and engage your abs and glutes.
Wall Plank “Hold a plank with feet on the wall, engaging your whole body for stability and strength.”
What to Notice:
Full-body activation, especially your core, shoulders, and legs.
A sense of length from head to heels.
Common Mistakes:
Letting hips sag or pike up: Keep your body in one straight line.
Locking elbows: Keep a micro-bend to protect joints.
Holding your breath: Keep breathing steadily.
Modifications:
Only walk your feet a little up the wall for a gentler angle.
Lower to your knees for less intensity.
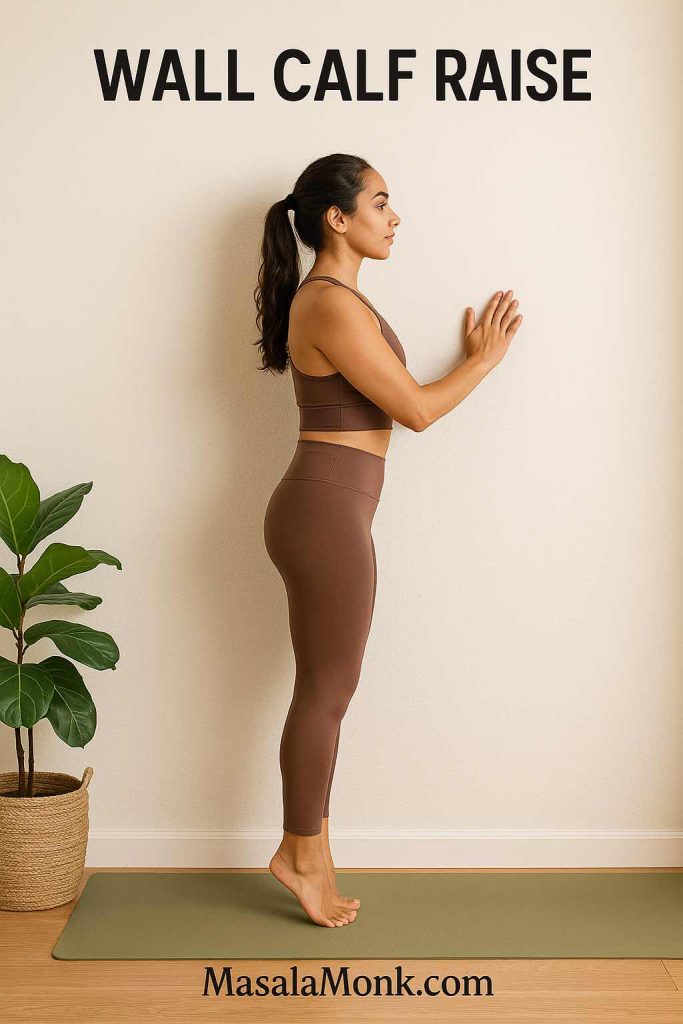
9. Wall Calf Raise
How to Do It:
Stand facing the wall, fingertips resting on it lightly for balance.
Rise up onto the balls of your feet, lifting your heels as high as possible.
Hold at the top for a breath, then slowly lower back down.
Repeat for several reps.
Wall Calf Raise “Rise onto your toes with control, using the wall for balance and sculpting strong calves.”
What to Notice:
Activation in your calf muscles and feet.
Balance challenge—use the wall as much as needed.
Common Mistakes:
Rocking forward: Lift straight up, not forward onto your toes.
Bouncing: Control the movement, especially on the way down.
Leaning too much into the wall: Use just enough support to stay upright.
Modifications:
Hold each raise at the top for longer to increase intensity.
Do one foot at a time for an extra challenge.
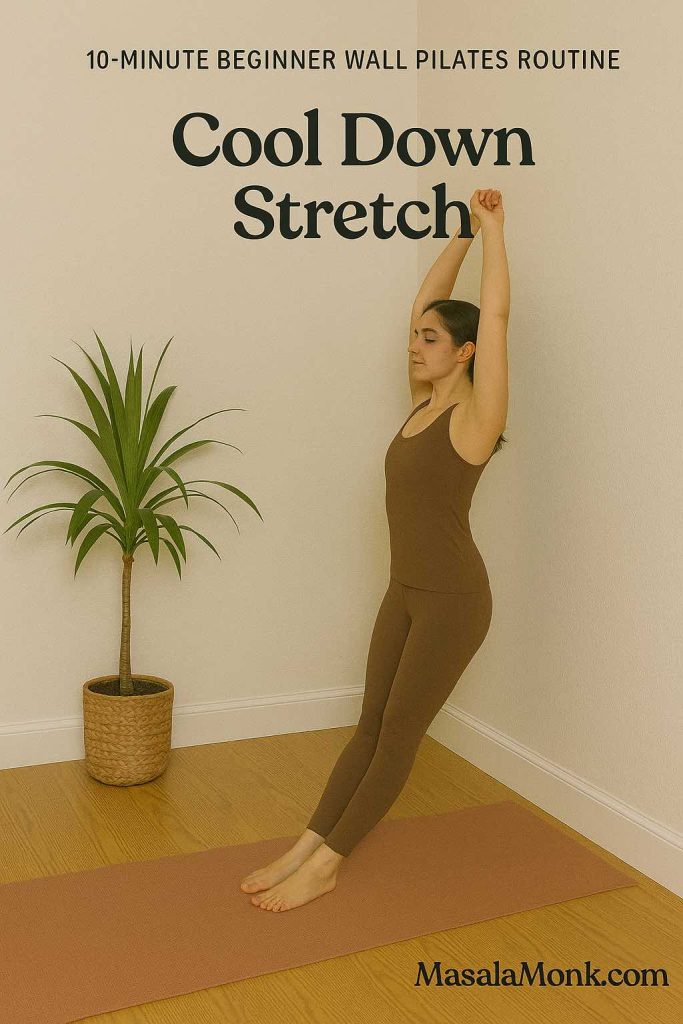
10. Cool Down Stretch
How to Do It:
Stand with your back to the wall, feet hip-width apart.
Cross your right ankle over your left knee, forming a figure-four.
Slowly sit your hips back, as if sitting in a chair, feeling a stretch in your outer hip.
Hold for 20–30 seconds, breathing deeply, then switch sides.
Cool Down Stretch “Cross one ankle over your knee and sit back to stretch and release your hips.”
What to Notice:
A gentle, opening stretch through the hip and glute.
The support of the wall allowing you to relax deeper.
Common Mistakes:
Collapsing the chest forward: Stay upright, using the wall to support your back.
Holding your breath: Inhale and exhale slowly to deepen the stretch.
Forcing the knee down: Let gravity and breath do the work; don’t push.
Modifications:
Keep the stretch higher (don’t squat as deep) for less intensity.
Use a chair for extra support if balancing is tough.
Breathe in, breathe out. Smile. You did it! Take a moment to notice how your body feels—lighter, taller, maybe even a little bit more “awake” all over. Remember, it’s not about perfection; it’s about progress and feeling good in your skin.
Every time you show up for yourself like this, you’re not just working out—you’re building confidence, resilience, and a deeper connection to your body.
If you enjoyed this flow, you can repeat it daily or mix and match your favorite moves. For more ideas and next-level routines, explore the other Pilates and yoga guides on MasalaMonk—your body (and your mind) will thank you.
Building a wellness routine is about more than just exercise—it’s about how you treat yourself all day long. Here are a few ways to keep the positive momentum going:
Start your day with gentle movement and deep breathing. The Good Morning Yoga Routine is a wonderful way to wake up your body before breakfast or after a long night’s sleep.
Need a break from your screen? Sneak in a few posture-fixing moves from the Yoga for Posture article. Your spine will thank you.
Feeling stressed or overwhelmed? Movement is medicine. The Yoga for Mental Health resource on MasalaMonk can guide you through easy practices for mind and mood.
Ready to make movement a daily habit? Join the supportive MasalaMonk community and explore challenges, new routines, and more.
Final Thoughts: Why Wall Pilates Might Be Exactly What You Need
Wall Pilates is more than just a trending workout—it’s a gentle, empowering approach to feeling stronger, taller, and more at ease in your body. You don’t need the perfect setup, a special background, or even a lot of time. All you need is a wall, your breath, and a willingness to begin.
Whether you’re a busy parent, a senior seeking safe movement, or anyone in between, Wall Pilates welcomes you. Every time you show up for yourself—even for a few minutes—you’re making an investment in your health, happiness, and confidence.
So next time you walk past that blank wall at home, see it for what it really is: your new workout buddy, teacher, and source of strength.
Let us know in the comments if you try Wall Pilates—what changed for you? What surprised you? And if you need ideas, support, or just a nudge to get started, we’re always here.
Visuals, stories, and support by MasalaMonk.com. Save or share this post if you found it useful, and keep an eye out for our upcoming 10-minute Wall Pilates routine!
FAQs: Wall Pilates
1. What is Wall Pilates and how is it different from regular Pilates? Wall Pilates adapts traditional Pilates exercises by using a wall for support and resistance, which helps with alignment, balance, and core engagement—making it more accessible for beginners and those who want extra feedback on their form.
2. Do I need any special equipment for Wall Pilates? No equipment is required—just a clear wall, a yoga mat (if you like extra comfort), and comfortable clothing.
3. Is Wall Pilates suitable for beginners? Yes, Wall Pilates is perfect for beginners! The wall acts as your guide, providing support and helping you learn the correct technique with less risk of strain or injury.
4. Can I do Wall Pilates if I have joint pain or am recovering from injury? Always check with your doctor first, but Wall Pilates is low-impact and can often be adapted for people with joint issues or those in rehabilitation, thanks to the wall’s support and the gentle, controlled movements.
5. How often should I practice Wall Pilates to see results? Aim for 2–4 sessions per week to build strength and flexibility, though even once a week is beneficial. Consistency matters more than duration!
6. What are the main benefits of Wall Pilates? Benefits include improved posture, stronger core and glutes, better balance, joint-friendly movement, and greater body awareness.
7. Can I lose weight or tone my body with Wall Pilates? Wall Pilates can help tone and sculpt your body, improve muscle definition, and support healthy weight loss when combined with good nutrition and regular activity.
8. Is Wall Pilates good for seniors or people with limited mobility? Yes, it’s very adaptable for seniors or anyone needing extra support. Moves can be modified for different abilities, and the wall makes balance and stability easier to manage.
9. How long does a typical Wall Pilates session last? A routine can be as short as 10 minutes or up to 30 minutes, depending on your time and fitness level. Even short, focused sessions are effective.
10. Can I combine Wall Pilates with other forms of exercise? Absolutely! Wall Pilates pairs well with walking, yoga, strength training, or even other Pilates routines, enhancing your overall fitness and flexibility.
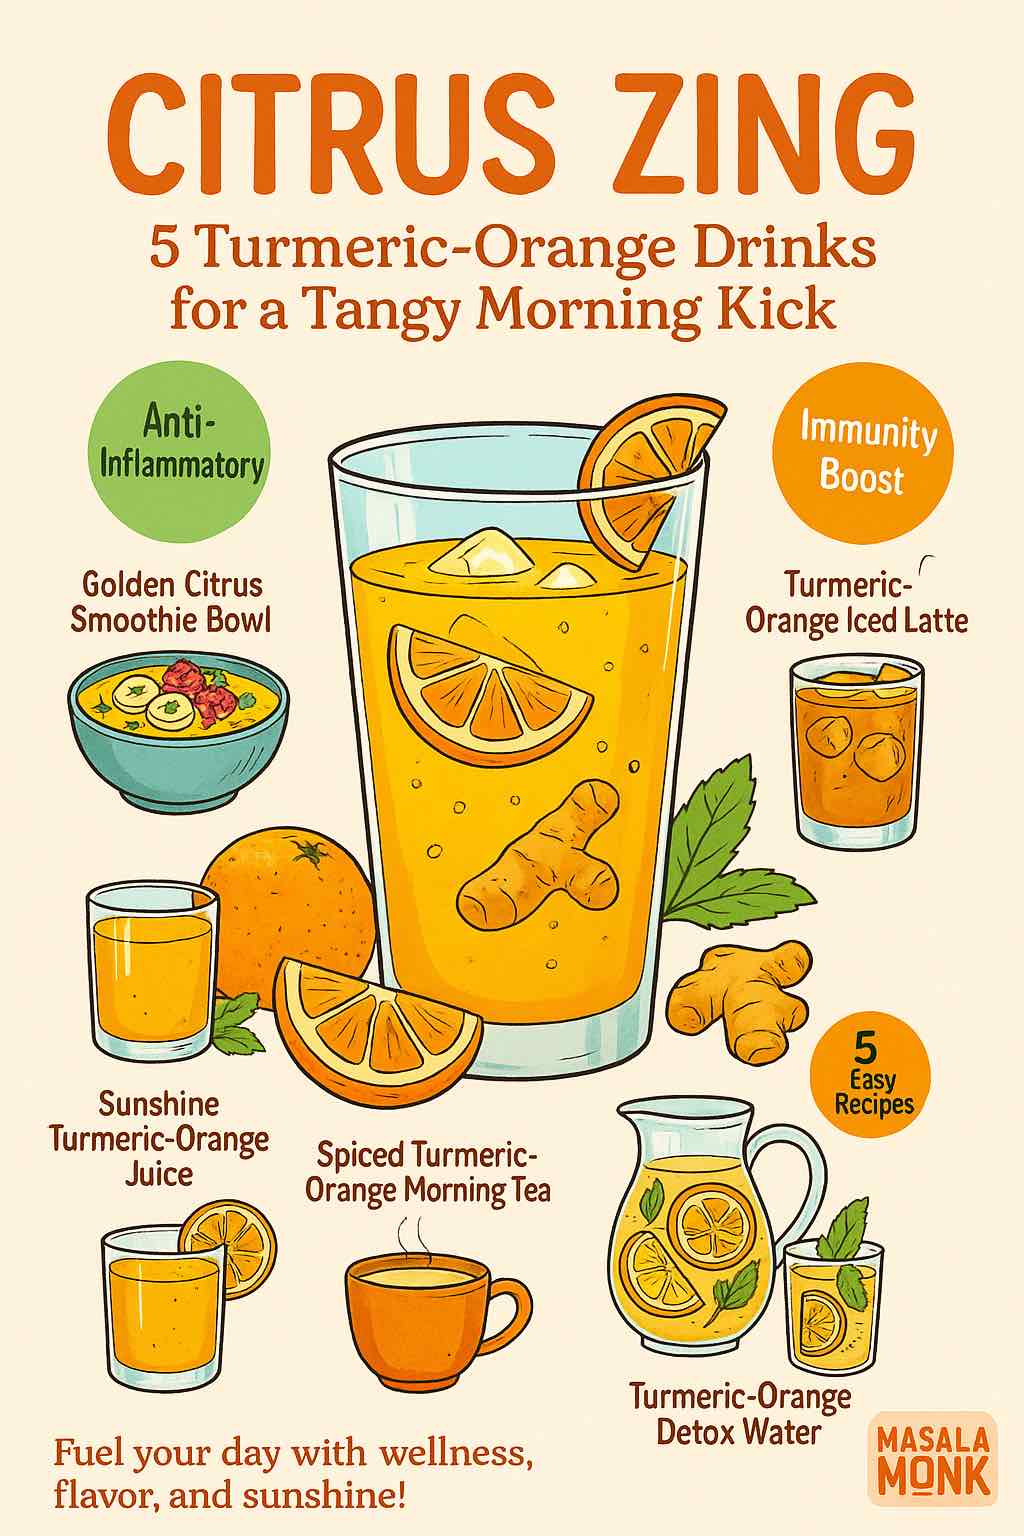
Do you ever wish your morning could start with more energy, clarity, and a touch of sunshine—even before you step out the door? If you’re tired of the same old cup of tea or coffee, you’re in for a treat! We’re sharing five vibrant, nourishing turmeric-orange drinks that will bring a tangy, golden “zing” to your morning routine. Each recipe is loaded with the natural goodness of oranges, the ancient healing of turmeric, and a little Masala Monk magic.
Why Turmeric and Orange? (And Why Now?)
There’s a reason why both turmeric and orange are trending superfoods. Let’s break it down:
Turmeric: This golden spice is a staple in Indian kitchens and Ayurvedic medicine. Modern research confirms what our ancestors knew—turmeric’s active ingredient, curcumin, is a powerhouse for fighting inflammation, easing joint pain, and boosting immunity. But curcumin is even more effective when paired with black pepper or a healthy fat (like coconut milk). (Looking for more healthy drinks? Dive into our 8 Anti-Inflammatory Drinks for Health & Wellness for a full rundown.)
Oranges: Sweet, juicy, and loaded with vitamin C, oranges are nature’s immune booster. They bring brightness, hydration, and a lovely tartness that balances turmeric’s earthiness.
Together, turmeric and orange are more than the sum of their parts. When you start your day with these two, you get a drink that’s refreshing, gently energizing, and truly good for you.
The Real Science: More Than Just Hype
Let’s get real: a lot of health claims online are exaggerated. Here’s what research (and experience) actually supports:
Curcumin (in turmeric) has been studied in clinical settings for its anti-inflammatory, joint-soothing, and antioxidant effects. However, absorption is low unless paired with black pepper or healthy fats.
Vitamin C (in orange) not only boosts immunity but may help your body use iron, recover faster, and fight oxidative stress.
Gut support: Both turmeric and ginger (a common addition) can help ease digestion and reduce bloating—a win for busy mornings!
5 Turmeric-Orange Drinks for Your Morning Kick
1. Sunshine Turmeric-Orange Juice
Ingredients:
1 cup fresh orange juice (about 2 oranges)
½ tsp freshly grated turmeric (or ¼ tsp ground turmeric)
½ tsp freshly grated ginger (optional)
Pinch of black pepper
1 tsp honey or agave (optional)
How to Make:
In a glass, combine orange juice, turmeric, ginger, and black pepper.
Stir vigorously. Add honey to balance tartness, if desired.
Serve chilled with a slice of orange.
Tip: If you prefer pulp-free, strain before serving.
2. Golden Citrus Smoothie Bowl
Ingredients:
1 cup orange segments (peeled and de-seeded)
1 banana (frozen for creaminess)
½ cup frozen mango or pineapple chunks
¼ tsp ground turmeric
½ cup coconut water or almond milk
Toppings: chia seeds, shredded coconut, berries
How to Make:
Blend fruit, turmeric, and coconut water until thick and smooth.
Pour into a bowl; decorate with toppings.
Enjoy with a spoon as a refreshing breakfast.
Tip: Add a scoop of protein powder or nut butter for a more filling option.
3. Turmeric-Orange Iced Latte
Ingredients:
½ cup fresh orange juice
1 cup cold brew coffee or black tea
¼ tsp ground turmeric
½ cup almond or oat milk
1 drop vanilla extract
Pinch of black pepper
How to Make:
Mix orange juice, cold brew, turmeric, and vanilla in a shaker or jar.
Add almond milk and black pepper; shake with ice.
Pour into a tall glass and sip slowly.
Tip: Use coconut milk for a richer, creamier twist.
Always add black pepper: Even just a pinch helps your body absorb curcumin from turmeric.
Fresh root vs. powder: Fresh turmeric root gives a brighter, slightly floral flavor, while powder is earthier and convenient. Both work.
Mind the stains: Turmeric stains easily—use a glass container and wipe up spills promptly.
Balance flavors: If the turmeric is too strong, increase citrus or add a splash more honey.
The Real Benefits: What Does the Science Say?
Digestive and gut support: Both turmeric and ginger are noted for easing digestion and soothing minor discomforts.
Joint and muscle wellness: Regular turmeric intake is associated with reduced inflammation and milder joint pain, especially when combined with black pepper.
Immune system boost: Vitamin C, antioxidants, and the synergy of these ingredients help your body fend off illness.
Mood and energy: Anecdotally, people report increased morning alertness and lighter moods with these zesty drinks.
Note: While the health benefits of curcumin are well documented in supplement form, the amounts found in daily drinks are modest but can add up over time as part of a balanced diet.
What’s Trending: Market Insights & New Innovations
Turmeric-orange blends are now available as ready-to-drink (RTD) beverages in stores, sometimes mixed with ginger, mint, or other functional botanicals.
Turmeric coffee (“golden latte”) and wellness shots are trending, often fortified with enhanced curcumin for better absorption.
Consumers are moving towards low-sugar, vegan, and preservative-free options—you can easily tailor these recipes at home for your needs.
In Asia-Pacific and India, turmeric-based beverage sales are rapidly growing, reflecting a shift towards holistic health.
📝 Loved this post? Here are more Masala Monk guides you’ll love:
Whether you’re looking to boost your immunity, support joint health, or just want a zesty, refreshing way to begin your morning, turmeric-orange drinks deliver flavor and functional benefits in every sip.
Try one (or all) of these recipes, experiment with your own twists, and share your favorite blends with friends and family. Remember, a little golden goodness goes a long way—especially when it tastes this good.
Ready to turn your mornings into a ritual of wellness and zing? Give these turmeric-orange drinks a try, and let the sunshine in!
Do you have a favorite variation or a tip for making turmeric-orange drinks even better? Drop a comment below, or share your recipe on social with the hashtag #CitrusZing!
FAQs: Citrus Zing – Turmeric-Orange Drinks
1. Is it safe to drink turmeric-orange juice every day? Yes, most people can safely enjoy turmeric-orange drinks daily in moderate amounts. Stick to about ¼–½ teaspoon of turmeric per serving, and consult your doctor if you have health conditions or take medications that interact with turmeric (such as blood thinners).
2. Why do I need to add black pepper to turmeric drinks? Black pepper contains piperine, which dramatically increases your body’s absorption of curcumin (the active compound in turmeric). Even a small pinch makes a big difference!
3. Can I use ground turmeric instead of fresh root? Absolutely! Both forms are healthy. Fresh root gives a more vibrant, floral flavor, while ground turmeric is more convenient and easy to store. Adjust the quantity to taste.
4. Will turmeric stain my blender or pitcher? Turmeric can stain plastic and some countertops. Use glass or stainless steel containers when possible, and wash items soon after use with warm, soapy water.
5. Can I make these drinks in advance and store them? Yes, most turmeric-orange drinks will keep well in the fridge for 1–2 days. For the freshest taste, stir or shake before serving as the spices may settle.
6. Can I skip the sweetener or make these drinks sugar-free? Definitely! Most recipes can be made with no sweetener, or you can use stevia, monk fruit, or simply let the orange’s natural sweetness shine.
7. Are turmeric-orange drinks safe for children? In small amounts, yes. Children over the age of 1 can generally enjoy these drinks, but keep turmeric amounts low (⅛ teaspoon per serving) and skip the black pepper for very young kids.
8. Do these drinks help with weight loss? Turmeric and citrus can support digestion and metabolism, but there’s no magic bullet. Pair these drinks with a balanced diet and active lifestyle for best results.
9. Can I add other spices or ingredients? Absolutely! Try ginger, cinnamon, mint, or lime for variety. Coconut water or almond milk also make great bases for smoothies or lattes.
10. What if I don’t have a juicer or blender? No problem—simply use store-bought pure orange juice, and mix the turmeric and other spices directly in a glass. Use a whisk or shaker for best results.
Polycystic Ovary Syndrome (PCOS) affects up to one in ten women of reproductive age worldwide. If you’ve been diagnosed, you know how complex and frustrating the condition can be—irregular cycles, hormonal swings, acne, stubborn weight gain, and, for many, insulin resistance.
But what if your kitchen spice rack held some powerful allies? Enter: ginger.
For centuries, ginger has been used for everything from nausea to colds. But did you know that modern research and thousands of women with PCOS are uncovering real, tangible benefits from adding ginger to your daily routine? Let’s explore the science, the stories, and exactly how you can use ginger as part of a holistic PCOS strategy.
Why Ginger? The Science
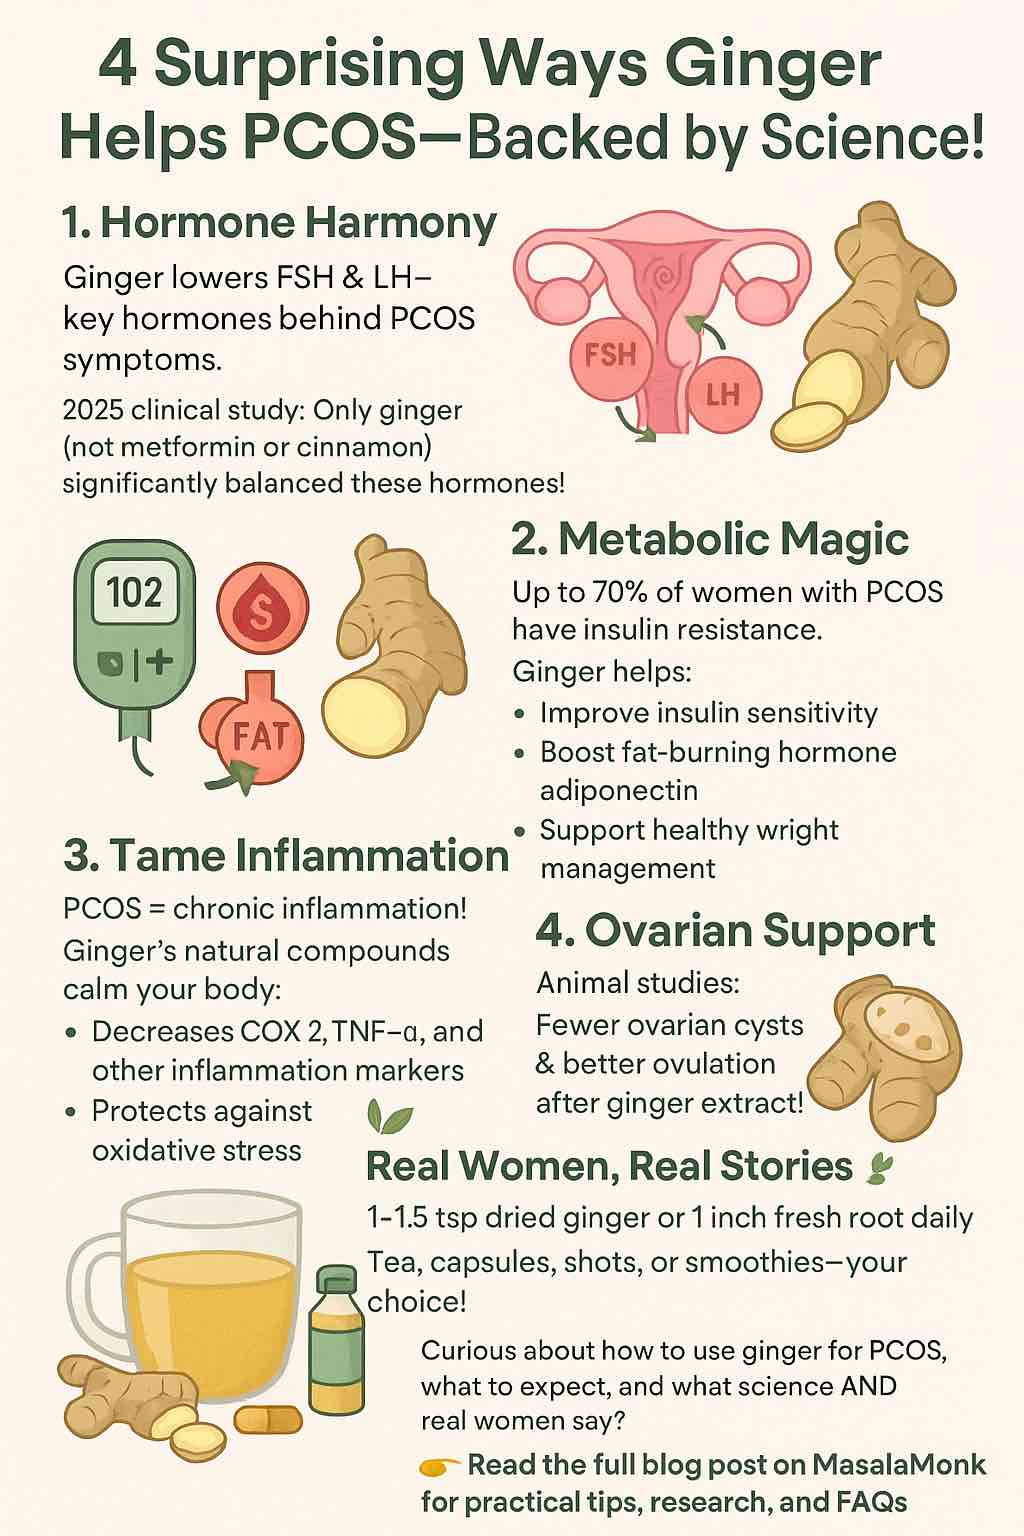
1. Hormone Harmony: How Ginger May Balance PCOS Hormones
PCOS is fundamentally a hormonal condition—characterized by imbalances like elevated androgens (testosterone), and disruptions to LH and FSH, two key pituitary hormones.
What research says: A 2025 randomized controlled trial compared ginger, cinnamon, and metformin for PCOS. Remarkably, ginger was the only supplement that significantly reduced FSH, LH, and SHBG levels—all pivotal for cycle regulation. Metformin and cinnamon, by contrast, mainly improved insulin resistance and testosterone levels, but did not impact these cycle-driving hormones to the same extent.
Translation: Ginger may help “reset” your hormonal signaling—potentially supporting more regular cycles and ovulation.
2. Metabolic Magic: Improving Insulin Sensitivity and Blood Sugar
Up to 70% of women with PCOS struggle with insulin resistance. Ginger shines here, too.
In animal studies, ginger extract improved insulin sensitivity and raised levels of adiponectin, a hormone that boosts fat burning and lowers inflammation. Human trials echo these results, with many women reporting improved fasting glucose, weight management, and even reductions in BMI after regular ginger supplementation.
How does it work? Ginger’s bioactive compounds—gingerols, shogaols—help your cells respond better to insulin and may slow down the absorption of glucose from your gut.
3. Inflammation & Oxidative Stress: Ginger’s Antioxidant Arsenal
Chronic inflammation is both a cause and consequence of PCOS, fueling everything from insulin resistance to acne and fatigue.
Ginger has been called an “anti-inflammatory powerhouse.” Its bioactive ingredients help lower key markers like COX-2, TNF-α, and CRP. Multiple reviews (including a sweeping 2024 systematic review of 65 studies) highlight ginger’s ability to lower oxidative stress and improve inflammation in PCOS.
4. Ovarian Support: Fewer Cysts, Better Ovulation
Animal studies are especially compelling: rats with PCOS given ginger extract showed fewer ovarian cysts and more healthy follicles, pointing to improved ovulation and ovarian function.
Real Women, Real Results: What the PCOS Community Says
Science is powerful, but sometimes what matters most is what real women experience in the day-to-day. Here are some highlights from women in the PCOS community:
Cycle “Kickstarts”: Many report that ginger shots or tea helped bring back their periods—sometimes after weeks or months without a cycle. Most saw results within two weeks of consistent use.
Blood Sugar Wins: Several shared that regular ginger helped curb cravings and support weight loss, especially when combined with a lower-carb or anti-inflammatory diet.
Inflammation Relief: A cup of fresh ginger tea (or a daily ginger-turmeric shot) is a comforting, soothing ritual for many—and some say it helps with pain and bloating, too.
Mild Side Effects: A small number experienced mild discomfort (e.g., leg aches with capsules), but side effects were rare.
“I boil fresh ginger root for a strong tea and sip it multiple times a day for several days. Always seems to do the trick…” – Reddit user, r/PCOS
“Ginger and cinnamon 3x a day, and I lost weight and got my sugar down…” – Reddit user, r/PCOS
How To Use Ginger for PCOS: Practical Tips
What Form?
Fresh Ginger Root: Grated in tea, smoothies, or recipes.
Powdered Ginger: Add to oatmeal, curries, or “golden milk” lattes.
Ginger Capsules: For a standardized dose—great if you don’t love the taste.
Ginger Shots: Home-made or store-bought (look for those with no added sugar).
How Much?
Most clinical studies use the equivalent of 2–3 grams of dried ginger per day (about 1–1.5 teaspoons), or one-inch piece of fresh ginger root daily.
For capsules, check labels—500 mg, 2–3x/day is common.
When & How Often?
For hormonal and metabolic benefits, consistency matters: daily use for at least 8–12 weeks is recommended in studies.
Some prefer ginger tea before meals to aid digestion and blood sugar control.
Combining Ginger with Other Approaches
Many women see the best results when ginger is part of a broader PCOS plan—including regular movement, lower-carb or anti-inflammatory eating, and if prescribed, medications like metformin.
Ginger pairs well with cinnamon, turmeric, and lemon—both for taste and for synergistic health benefits.
Are There Any Risks?
Ginger is generally very safe, but high doses can cause mild GI upset, heartburn, or interact with blood-thinning medication.
Always talk to your healthcare provider before starting a new supplement, especially if you’re on medication or pregnant.
Takeaway: Is Ginger Right for You?
If you’re looking for a natural, research-backed way to support your hormones, metabolism, and overall wellbeing with PCOS, ginger is a powerful (and tasty) ally. The latest research highlights unique hormonal effects you won’t get from metformin or cinnamon alone. And the lived experiences of real women suggest that, when used consistently and as part of a bigger plan, ginger might just help you feel a little more in control.
Try it for a few weeks: Brew a spicy-sweet tea, blend it into a morning smoothie, or add a daily capsule. Pay attention to how your body responds—and remember, PCOS is a marathon, not a sprint.
Have you tried ginger for PCOS? What’s worked for you? Share your experiences and let’s learn together.
If you have more questions or want tailored guidance for your PCOS journey, leave a comment for the community!
Frequently Asked Questions (FAQs)
1. How much ginger should I take daily for PCOS benefits?
Answer: Most studies use 2–3 grams of dried ginger per day (about 1–1.5 teaspoons of powdered ginger or a one-inch piece of fresh root). If using capsules, 500 mg two to three times daily is common. Always start with a lower dose to assess your tolerance.
2. How soon can I expect results from ginger for PCOS?
Answer: Many people report improvements in cycle regularity or inflammation within 2–4 weeks, but most clinical studies show benefits after 8–12 weeks of consistent daily use.
3. What is the best way to consume ginger for PCOS—tea, powder, or capsules?
Answer: All forms can be effective. Fresh or powdered ginger is great for teas, smoothies, or food. Capsules are convenient and offer standardized dosing, but choose high-quality, third-party tested supplements.
4. Are there any side effects or risks with ginger?
Answer: Ginger is generally safe for most people, but high doses can cause mild stomach upset, heartburn, or diarrhea. It may also interact with blood thinners. Consult your doctor if you’re pregnant, breastfeeding, or on medication.
5. Can ginger help with PCOS-related weight gain?
Answer: Research and user reports suggest ginger may support weight management by improving insulin sensitivity and reducing inflammation, which can indirectly help with weight loss as part of a healthy lifestyle.
6. Will ginger alone regulate my periods or fix my hormones?
Answer: Ginger can help support hormonal balance, but results are best when combined with a balanced diet, regular exercise, stress management, and any prescribed medications.
7. Is it safe to combine ginger with metformin or other medications?
Answer: In most cases, yes, but always check with your healthcare provider to avoid potential interactions or side effects, especially if you’re on blood-thinning or diabetes medications.
8. Can men or people without PCOS benefit from ginger’s hormonal effects?
Answer: Ginger offers general anti-inflammatory and metabolic benefits for everyone, but most hormone-balancing research is specific to women with PCOS.
9. Can I take ginger if I’m trying to conceive or undergoing fertility treatments?
Answer: Ginger may support ovulation and hormonal balance, but consult your fertility specialist before adding new supplements during preconception or fertility treatments.
10. Are there any foods or supplements that work well with ginger for PCOS?
Answer: Yes—ginger pairs well with cinnamon, turmeric, inositol, and anti-inflammatory diets (rich in veggies, healthy fats, lean proteins). Many women see the best results when ginger is one part of a comprehensive wellness plan.